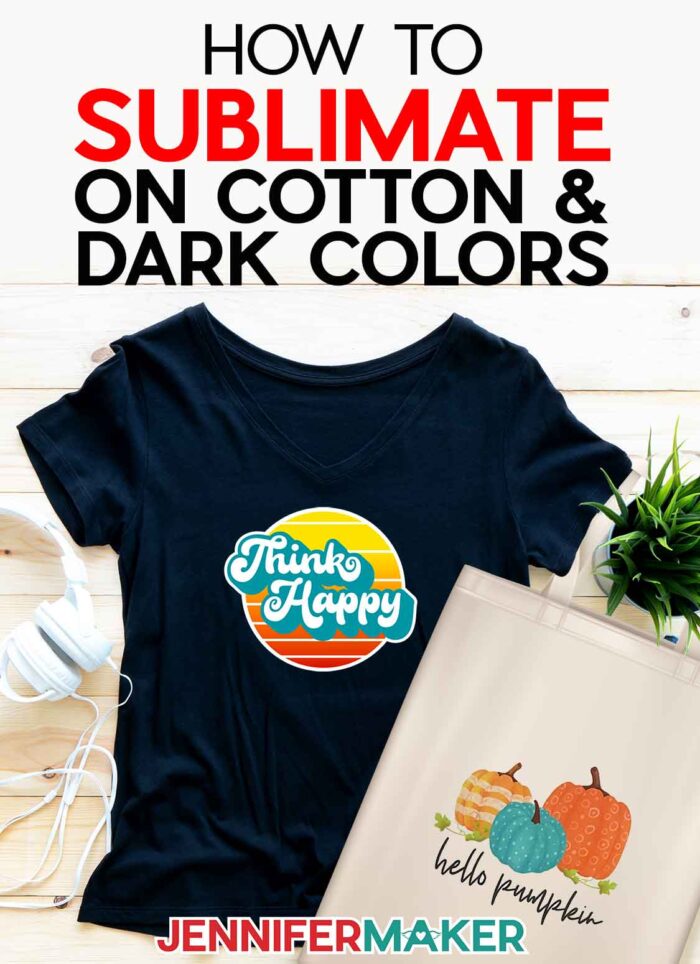
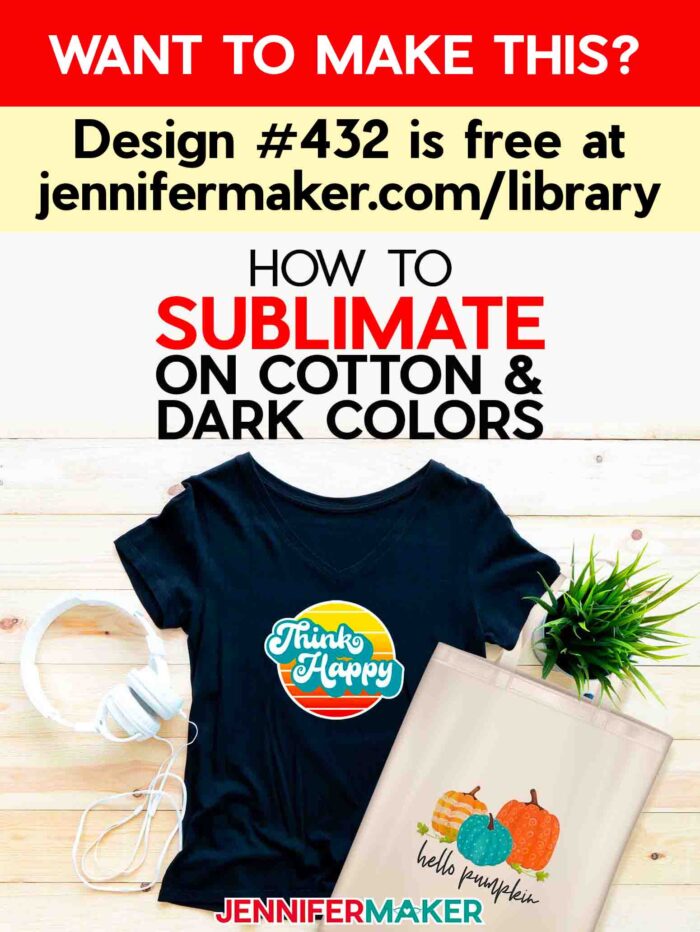
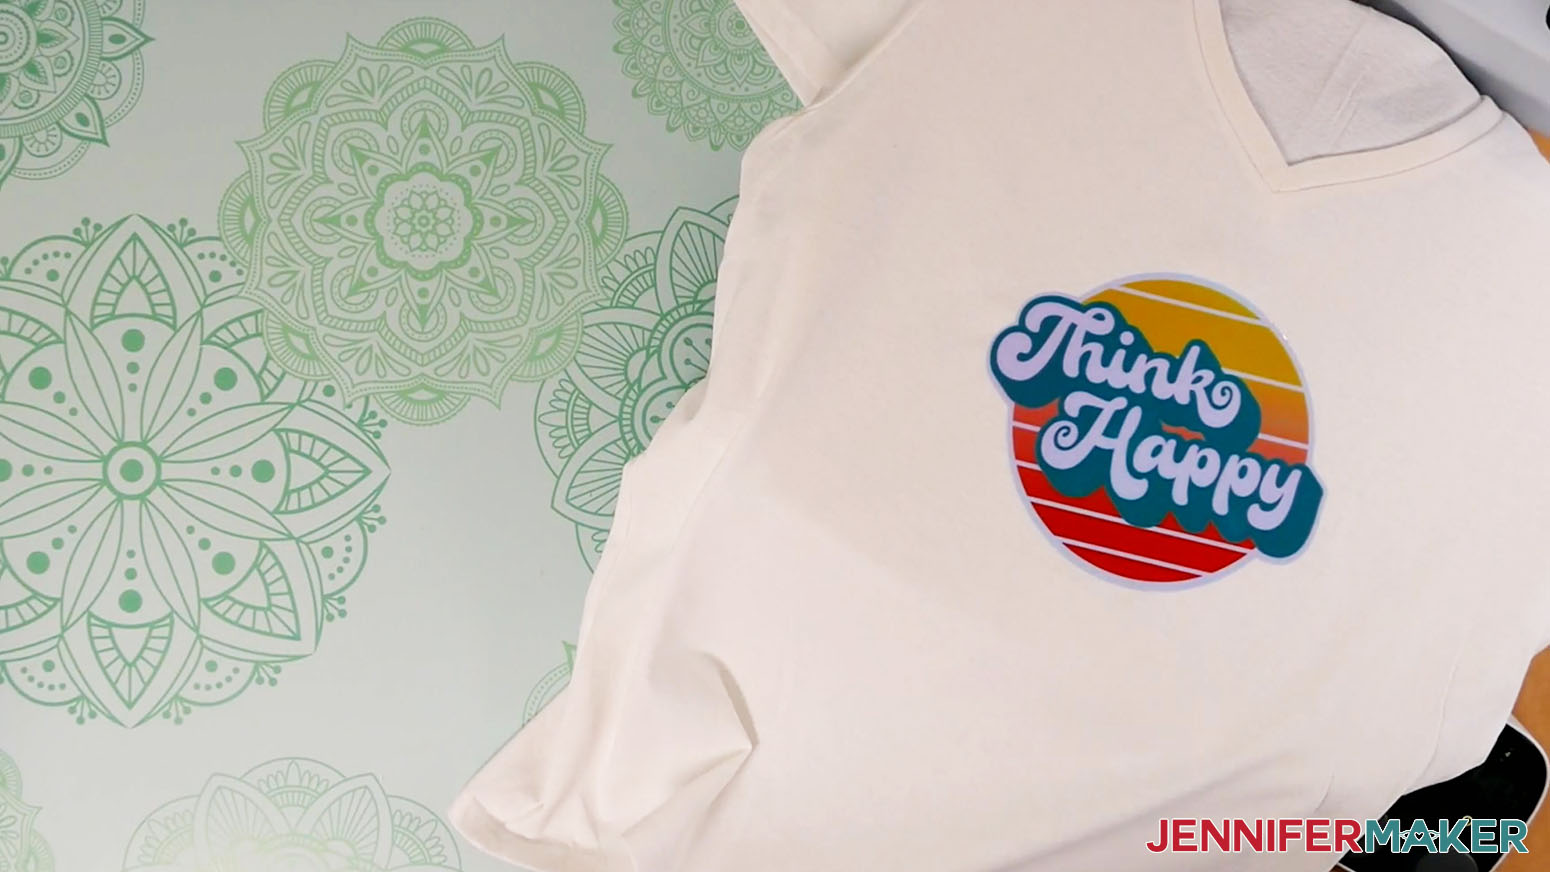
Learn how to sublimate on cotton and dark colors using different materials for fantastic results!
Sublimation creates beautiful designs, but the high polyester content it requires can limit your project options. What if you want to decorate an item with natural fibers? I definitely prefer cotton shirts over a polyester shirt! Well I’ll teach you how to sublimate on cotton! We’ll look at several different ways to use my free t-shirt designs (you can also use the other options in my resource library!) and explore the pros and cons of each cotton sublimation project. Some of the techniques have special results to make your work really glow!
UPDATE: Since I’ve shared this tutorial, I’ve done more testing and have an updated version for lasting results on cotton and dark colors. Unfortunately, while glow in the dark vinyl creates fun results as first, the sublimation ink can blur over time. I only recommend using glow in the dark vinyl as a base for sublimation if you don’t need the result to last through many washes, like for costumes. For consistent, lasting results, I primarily recommend EasySubli sublimation HTV, white glitter HTV, or Siser Holographic HTV in Rainbow Pearl, which are demonstrated in my new tutorial!
Watch my full video on how to sublimate on cotton:
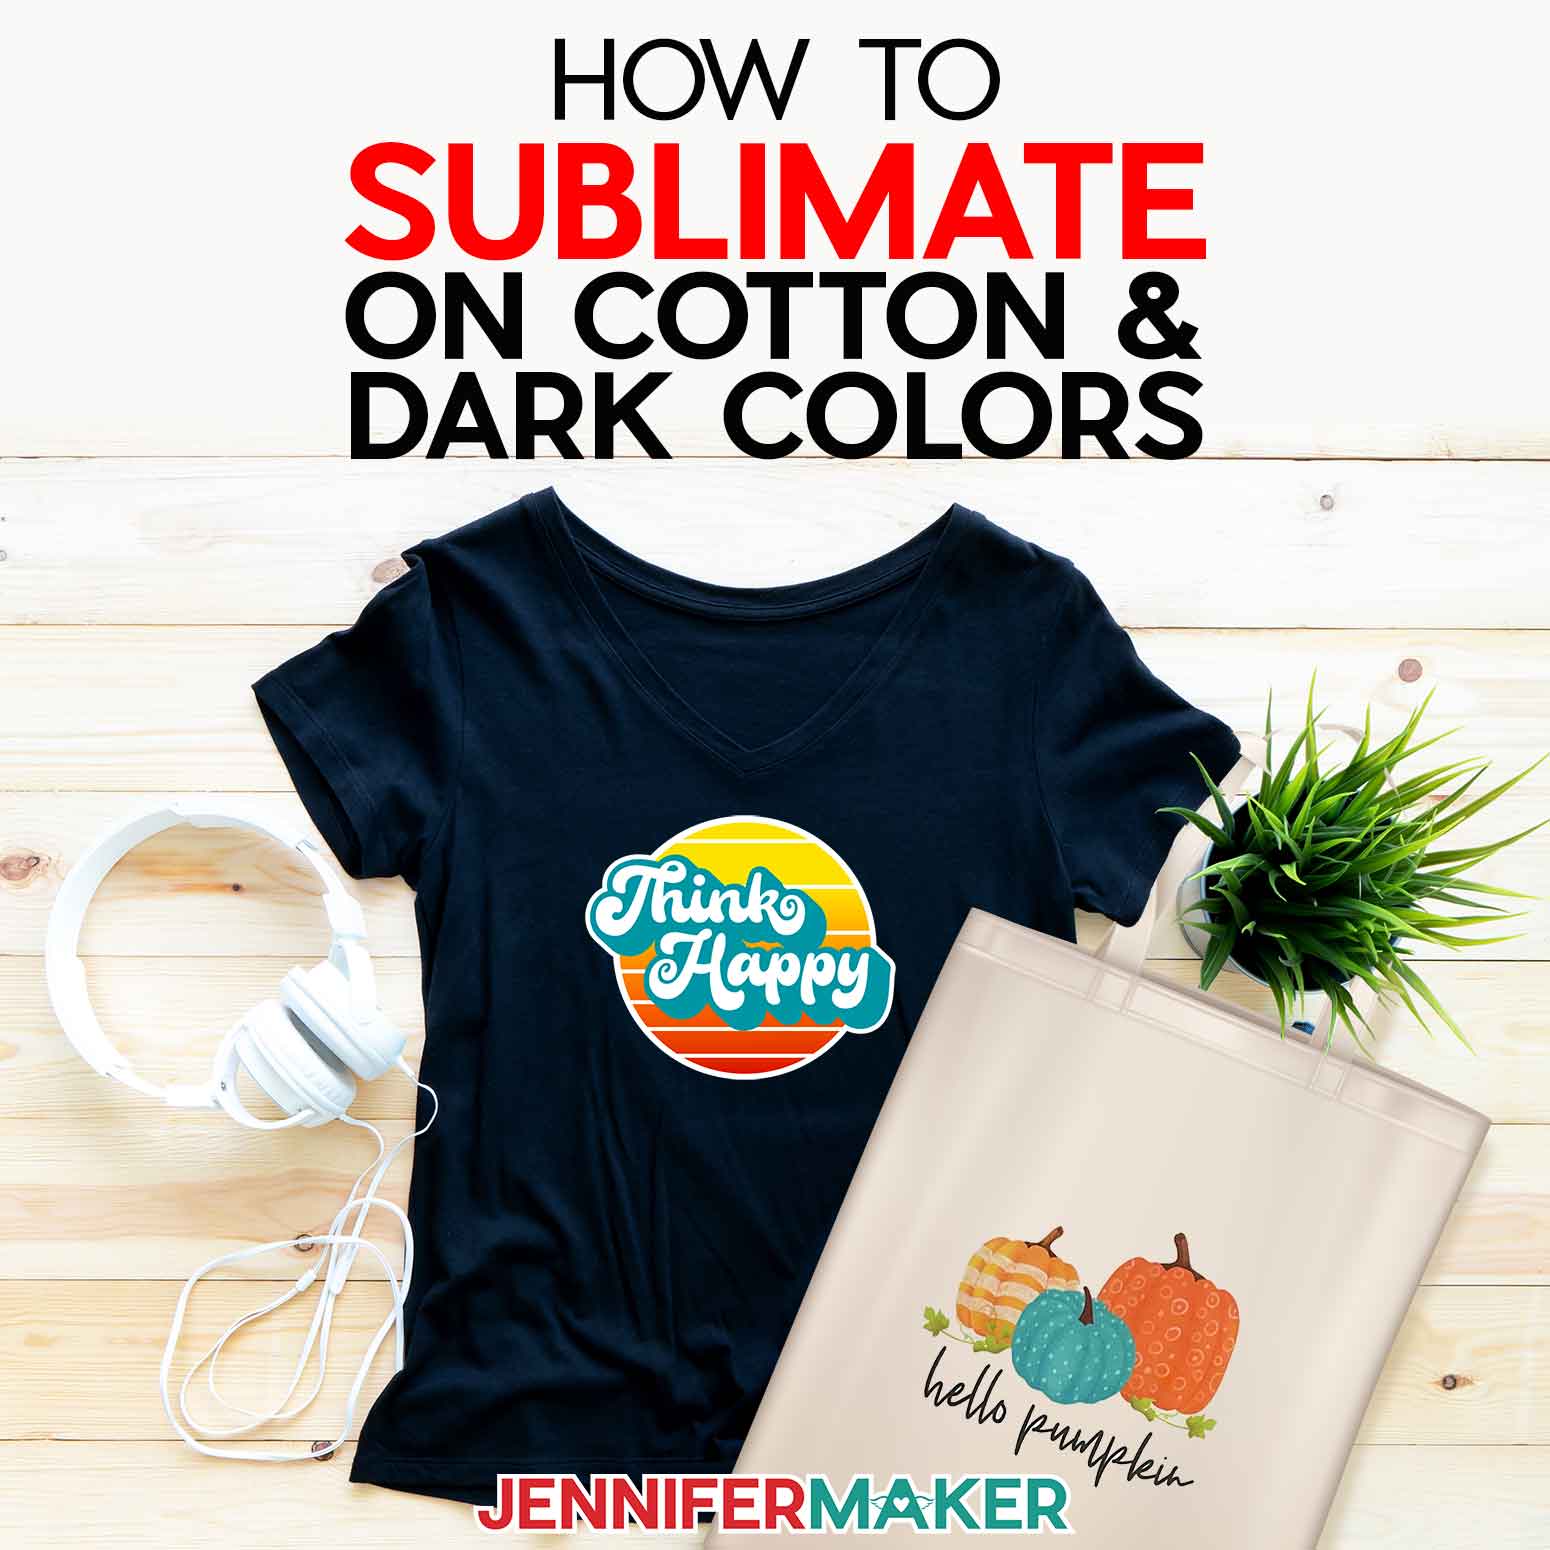

Sublimation ink creates vibrant colors and lasts for ages, but it works best on white polyester fabrics and materials. There are lots of products and garments that works with, but what if you have a cotton sublimation project? Or want to decorate a black shirt? I’ve done LOTS of testing and have LOTS of cotton sublimation project tips to share with you!
The first thing to remember is that sublimation dyes are transparent, so not only is a dark cotton sweatshirt not going to take the dye well, the fabric’s color will change the look of your design. Unless you add something to the cotton t-shirt!
Luckily, there are several vinyl-related products and even sprays to help. Depending on your shirt color and sublimation design, different approaches work better than others, but I’ll show you how I got the best results for light colors, medium, and dark shirts! I even tried Cricut’s new glow in the dark iron-on vinyl and I think you’ll love how it looks no matter the time of day!

I’ve also created a collection of sublimation transfer designs that really show off the different materials. Layering a Print then Cut using sublimation paper over heat transfer vinyl has so many opportunities! EasySubli HTV saves a few steps, so I’ll show you that, too!
If you want the least noticeable result, try the sublimation spray. It comes in a spray bottle and creates a smooth, flexible surface to receive your printed design for the cotton sublimation project. That way the cotton fabric won’t feel different with a big piece of vinyl!
Crafters with inkjet printers can get a similar, high quality result with Siser EasyColor DTV. Stay tuned to the end of the video to see how it works with cotton garments!
If you’re new to sublimation, especially how to sublimate on cotton, check out my Sublimation for Beginners tutorial!
Yes, you will need a sublimation printer. I’m using my converted Epson EcoTank ET-4760, but I cover several options in my Best Sublimation Printer to Buy in 2022 post. You’ll also need compatible ink and paper for several of the techniques. I used Hippo Ink and 8.5″ x 11″ A-SUB paper. You can learn the best materials for your needs in my Sublimation for Beginners Ultimate Guide.
And sublimation requires heat! You can use an EasyPress, traditional heat press machines, or a Cricut Autopress, which is my favorite. You usually cannot use a household iron because sublimation ink activates at 350°F (175°C) and they don’t get hot enough, even for a cotton sublimation project.
I like the Autopress the best because I don’t have to worry about pressure or opening it when it’s done. It’s the best way to multitask! You can learn more about the Cricut Autopress at my full review.
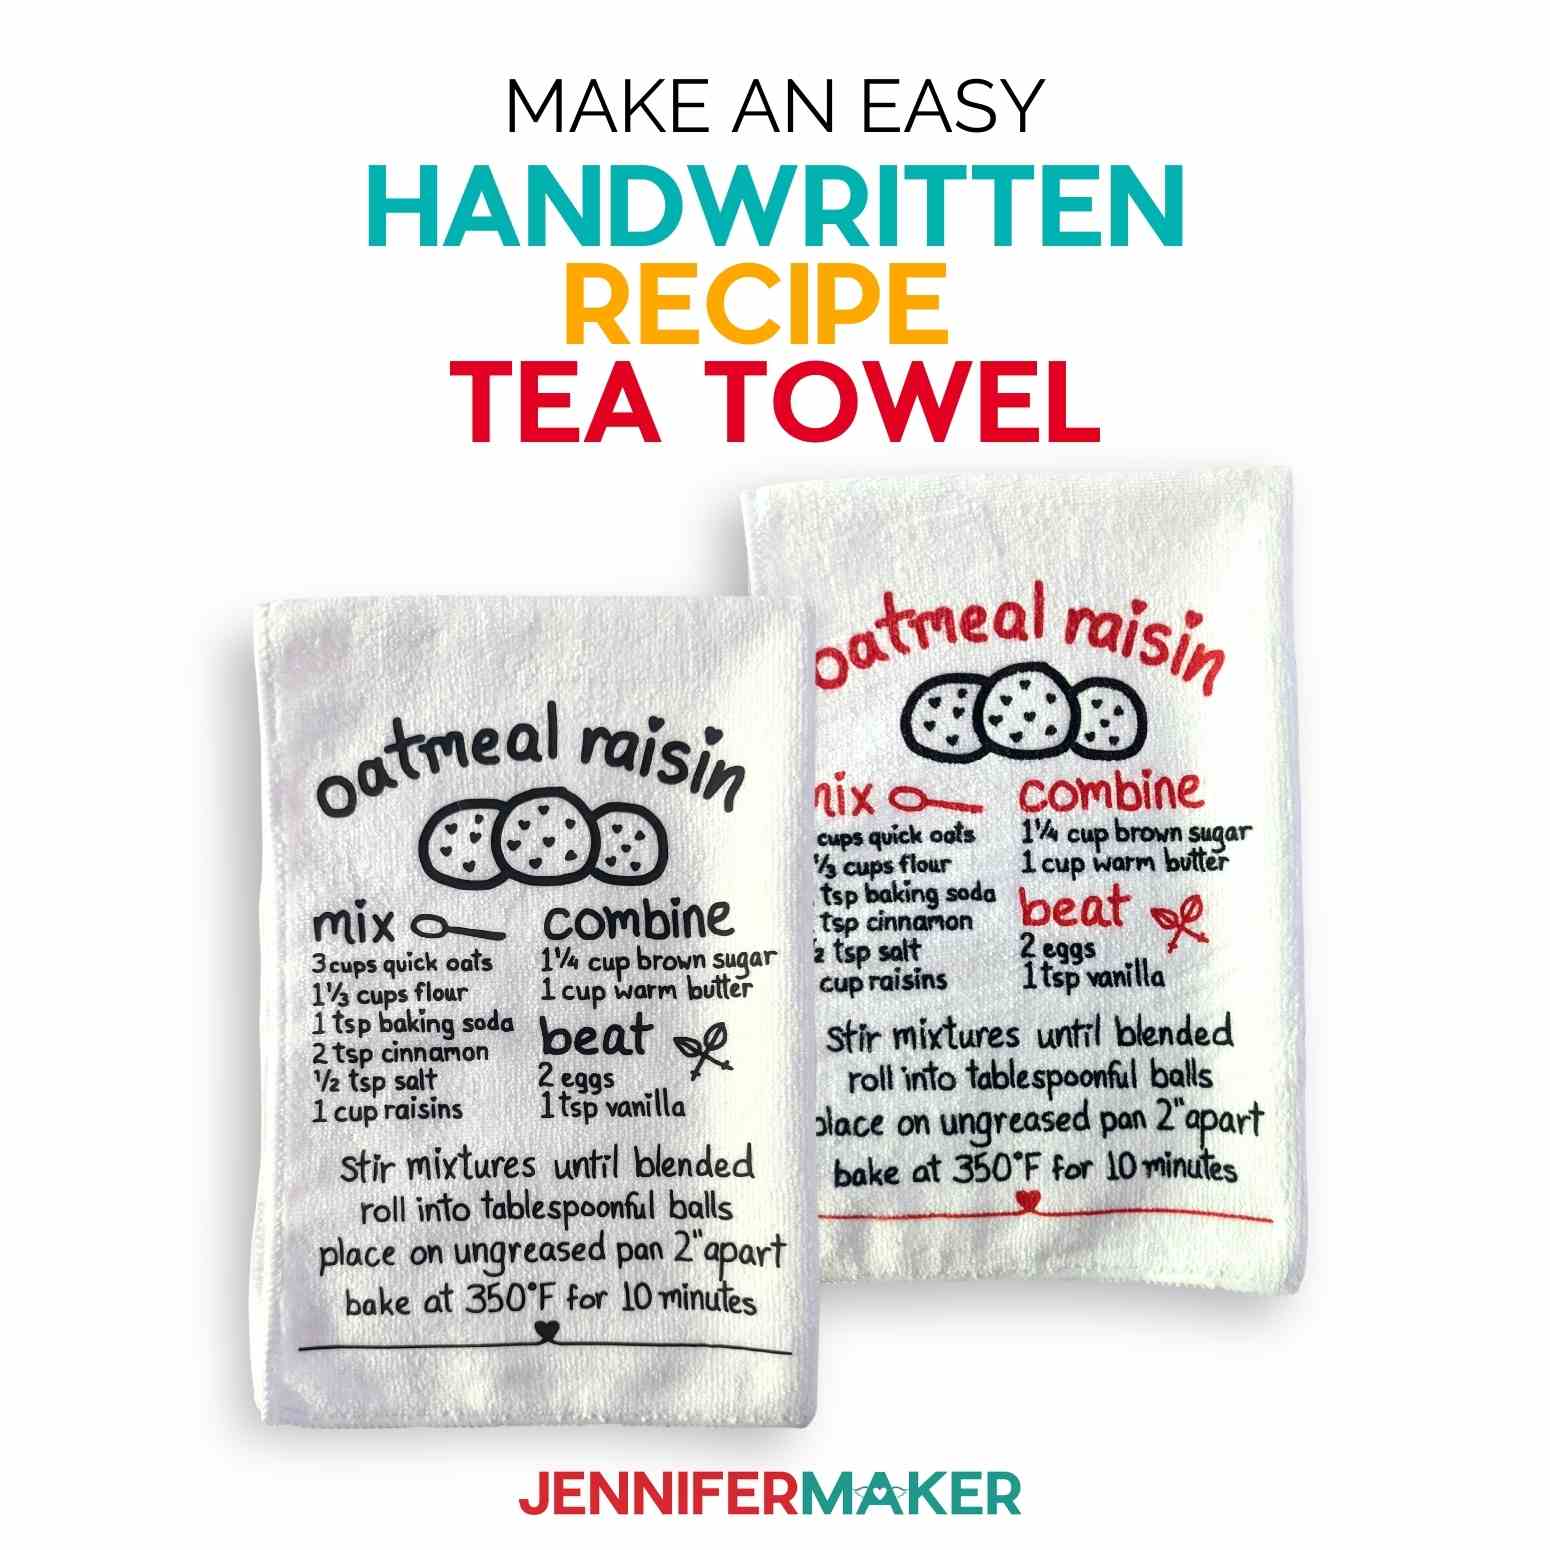
Sublimation ink turns to vapor during its processing, and can transfer to nearby surfaces. I’ll show you how to use white butcher paper and white cardstock to avoid unwanted ink transfer on your shirt and press. Heat resistant tape or Siser EasySubli Mask Transfer Tape will also help keep the design still.
And just like the ink vapor can get on paper, it can get on you! Good ventilation is important during the sublimation process. Have your windows open and a fan going to help the fumes dissipate quickly. And don’t breathe in very close to the project while it’s still warm.
I can’t wait to see how you use the new sublimation skills you’ll learn!
Ready to learn how to sublimate on cotton using my free designs and step-by-step tutorial? You’re going to love it! This post contains some affiliate links for your convenience (which means if you make a purchase after clicking a link I will earn a small commission but it won’t cost you a penny more)! Read my full disclosure policy.
Materials for Cotton Sublimation Projects and T-Shirts
View my Amazon shopping list with the exact items we used to make this project!
- A sublimation printer (I used the Epson EcoTank ET-4700 converted to sublimation printing with Hiipoo sublimation ink or an inkjet printer, which you can use with the Siser DTV (I used my HP Envy 7100 Series)
- Sublimation Paper (I used 8.5″ x 11″ A-SUB Sublimation Paper)
- Siser EasySubli HTV Sheets 8.4″ x 11″ or Siser EasyColor DTV (both need Siser EasySubli Mask Transfer Tape 8″ x 10″) -OR-
- Iron-on vinyl depending on your shirt color, like Siser Holographic HTV (I used Rainbow Pearl), Cricut Glow in the Dark Iron On, or Cricut Iron on Glitter in White -OR-
- Sublimation Spray Bottle with a Foam Roller
- T-shirts, like these 100% Cotton Black T-Shirts, 100% Cotton White T-Shirts, or 100% Cotton Orange T-Shirts
- A method to cut your materials— I used the amazing Cricut Maker 3 but you can also use the original Maker or an Explore with a Cricut Green StandardGrip Mat 12″ x 12″ for cutting and a Cricut Blue LightGrip Mat 12″ x 12″ with printer paper if you want to calibrate your Cricut machine for Print then Cut projects like these.
- A heat press like the Cricut Autopress or a Cricut EasyPress 12″ X 10″ with a pressing mat as well as heat resistant tape, white butcher paper, and white cardstock to help with sublimation
- Tools including a brayer, weeding tool, scissors, and lint roller
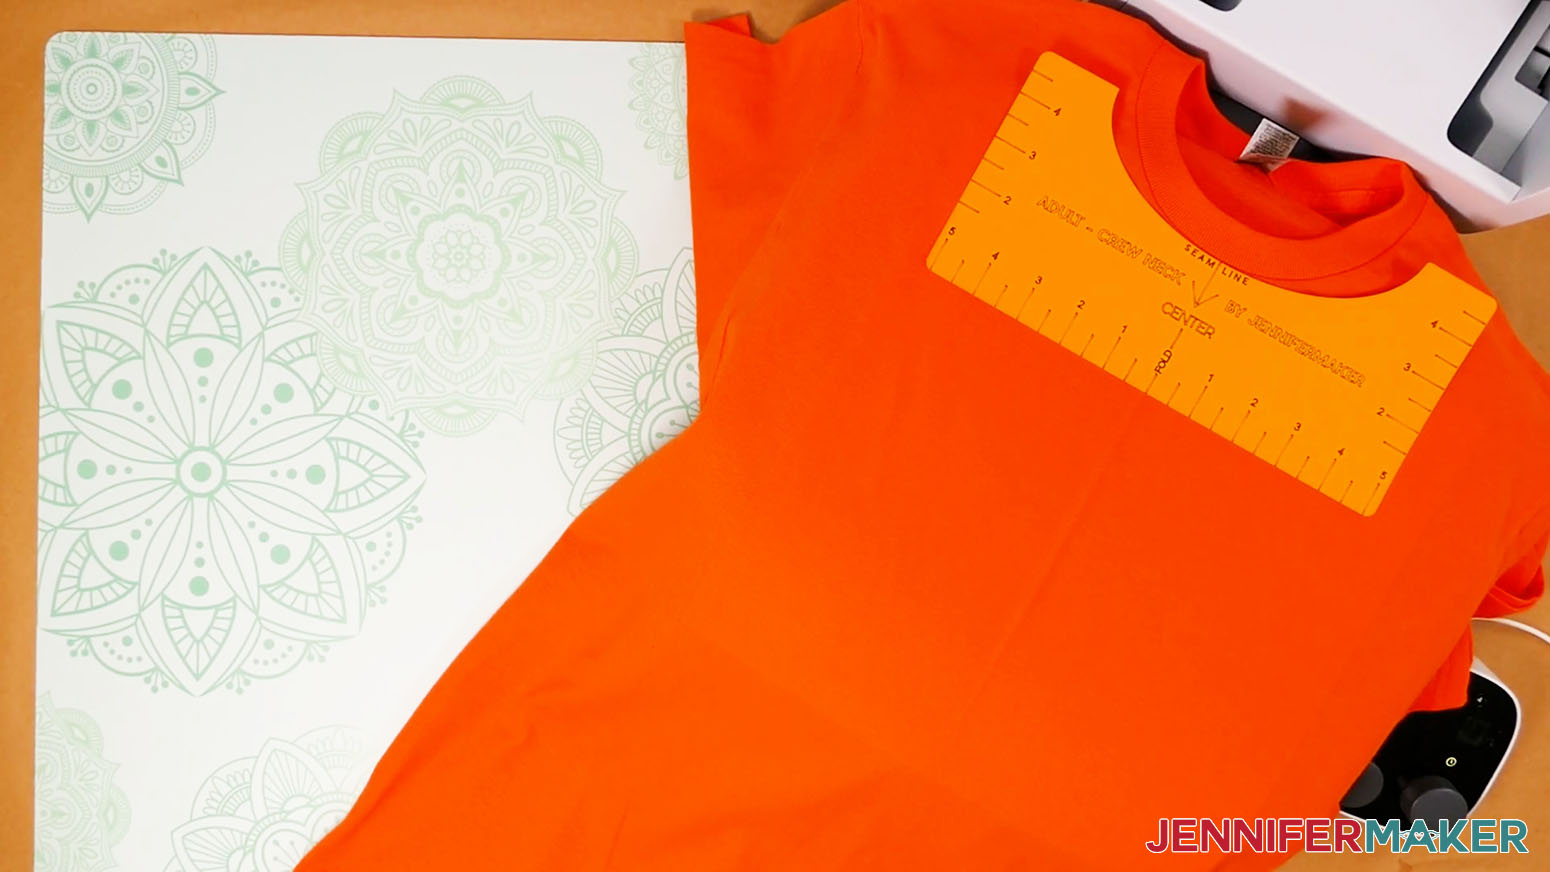
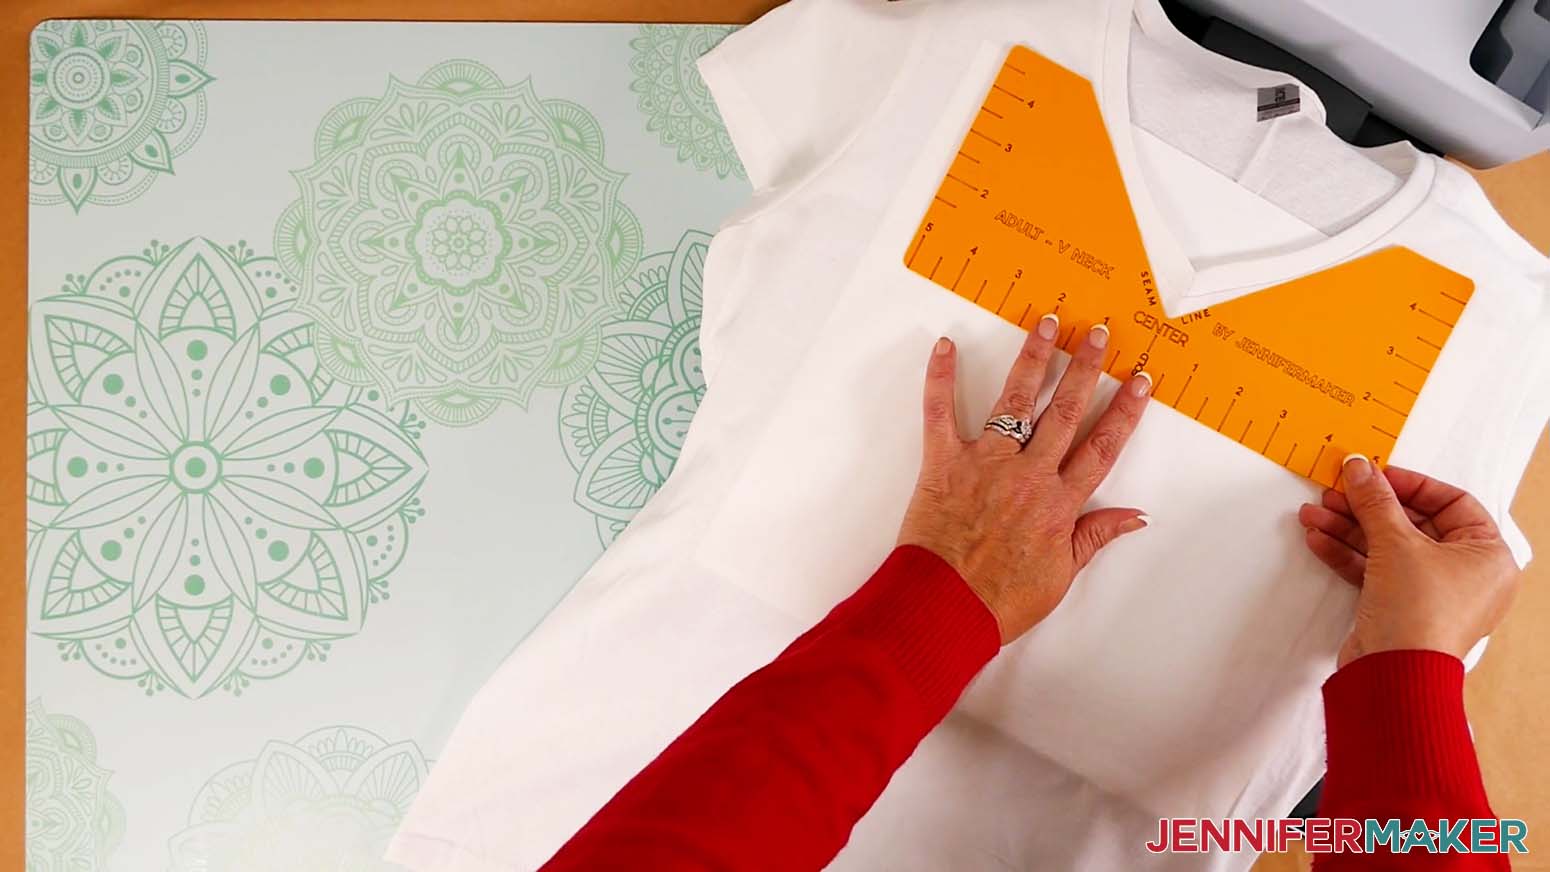
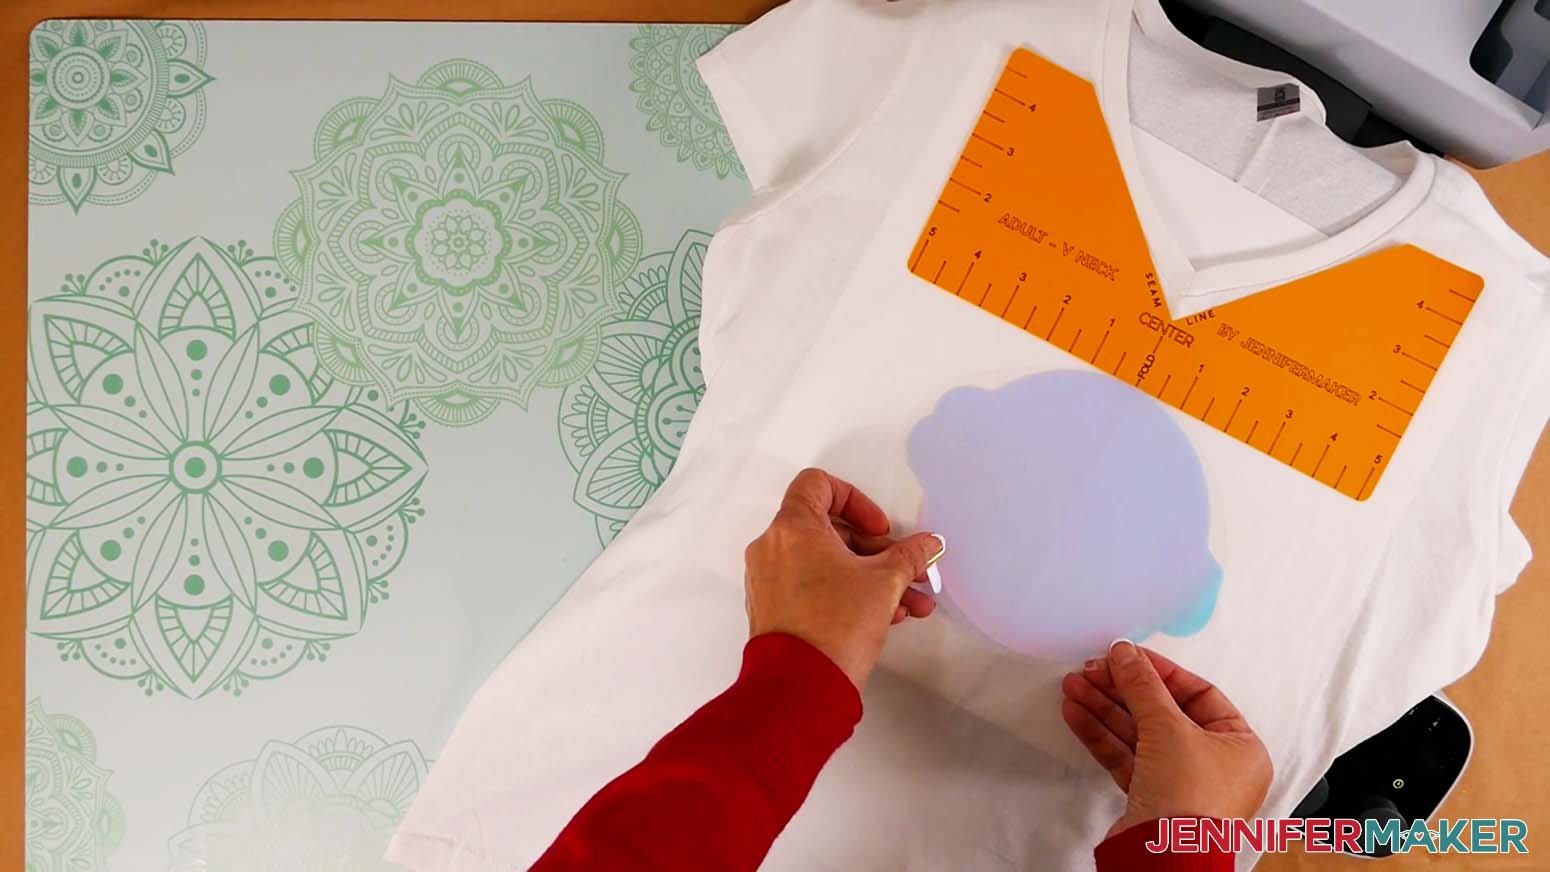
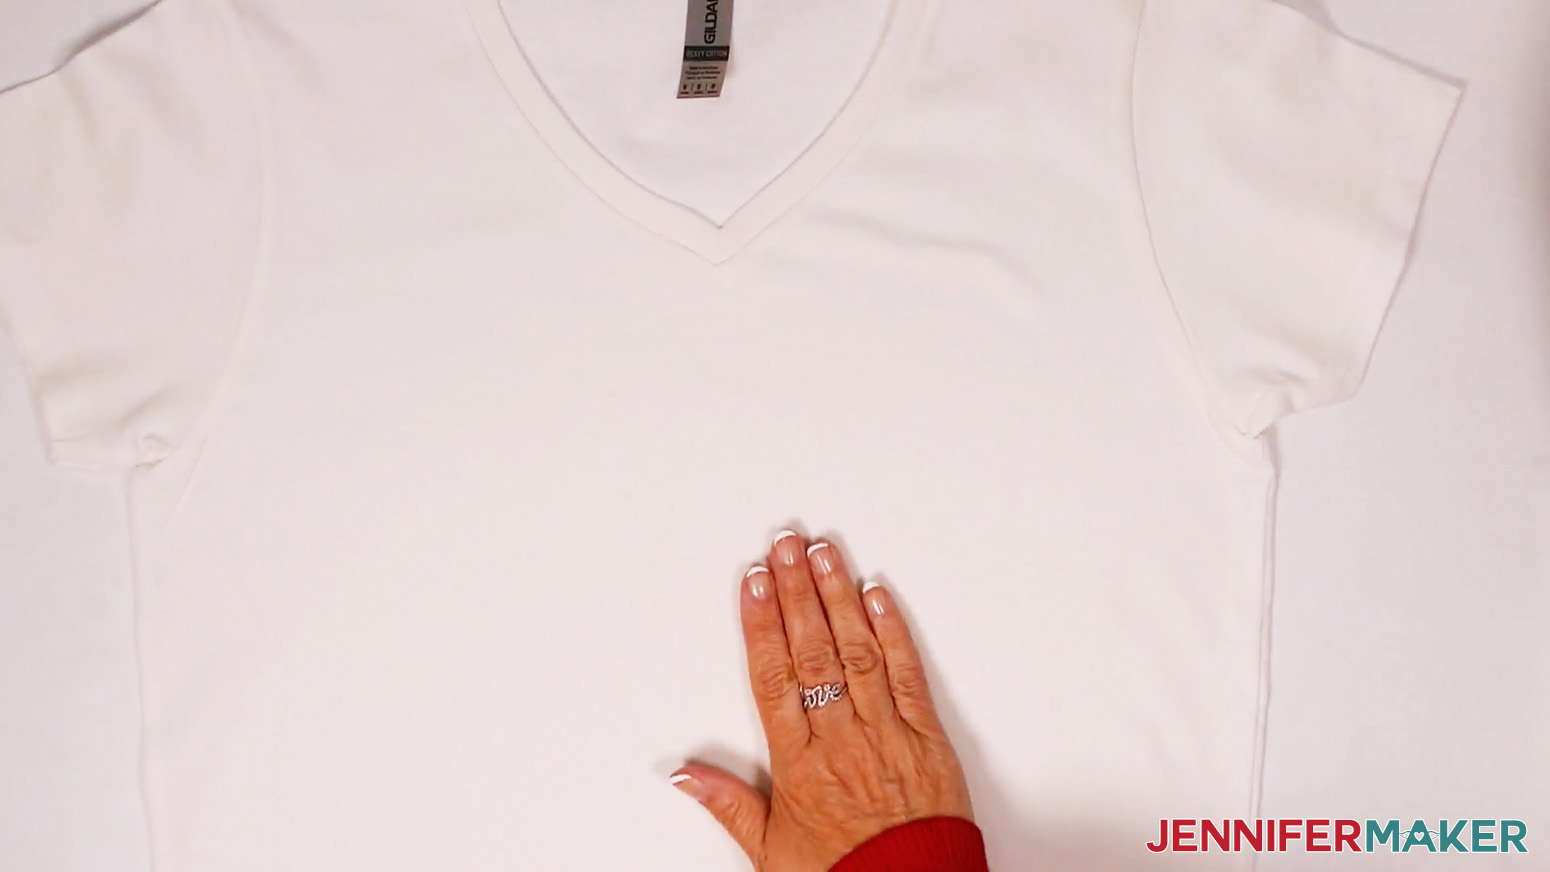
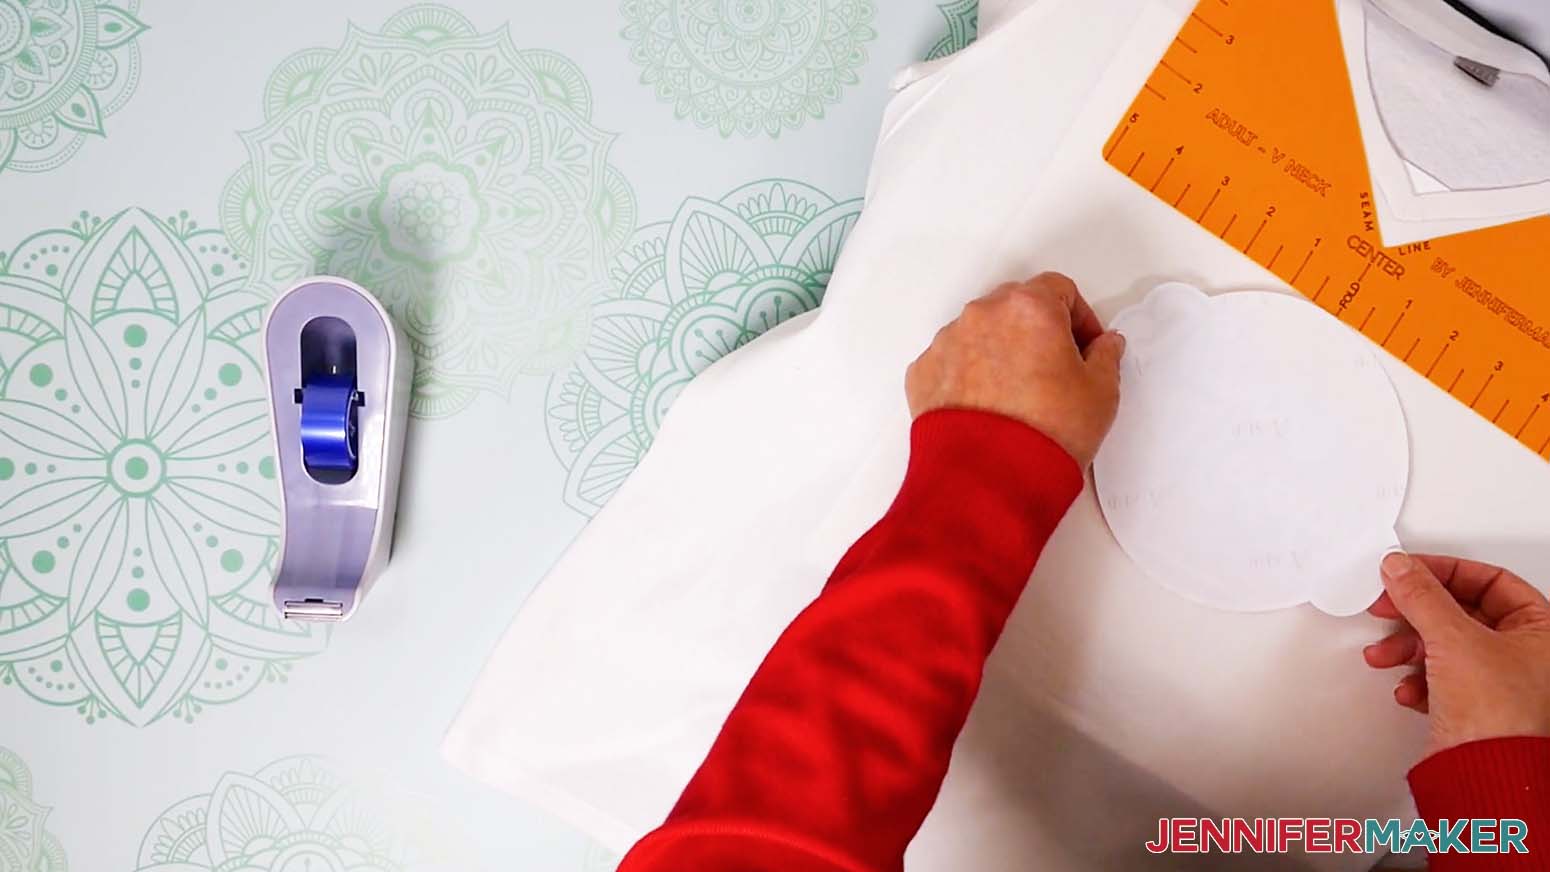
- My DIY T-Shirt Ruler Guides are optional, but really helpful for perfect placement!
- Design #432 — My free Cotton Sublimation Project t-shirt design files (available from my free resource library — get the password at the bottom of this post)
How to Sublimate on Cotton
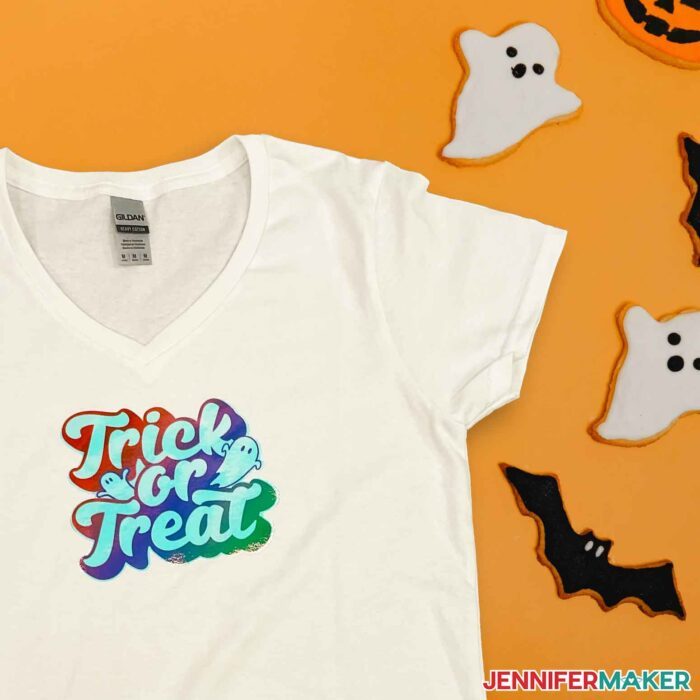
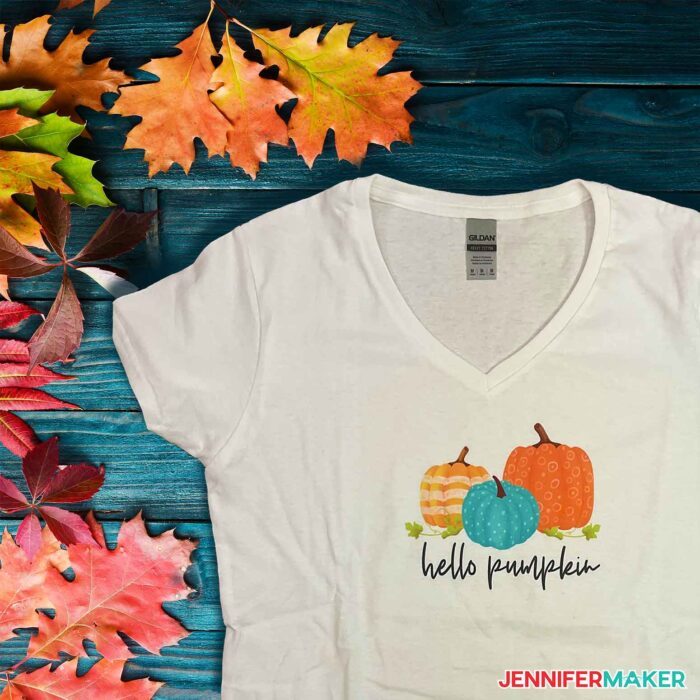
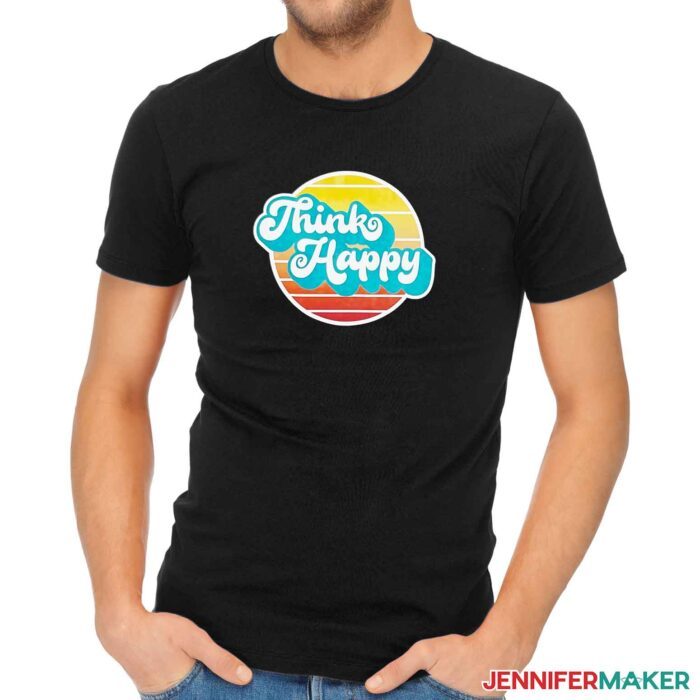
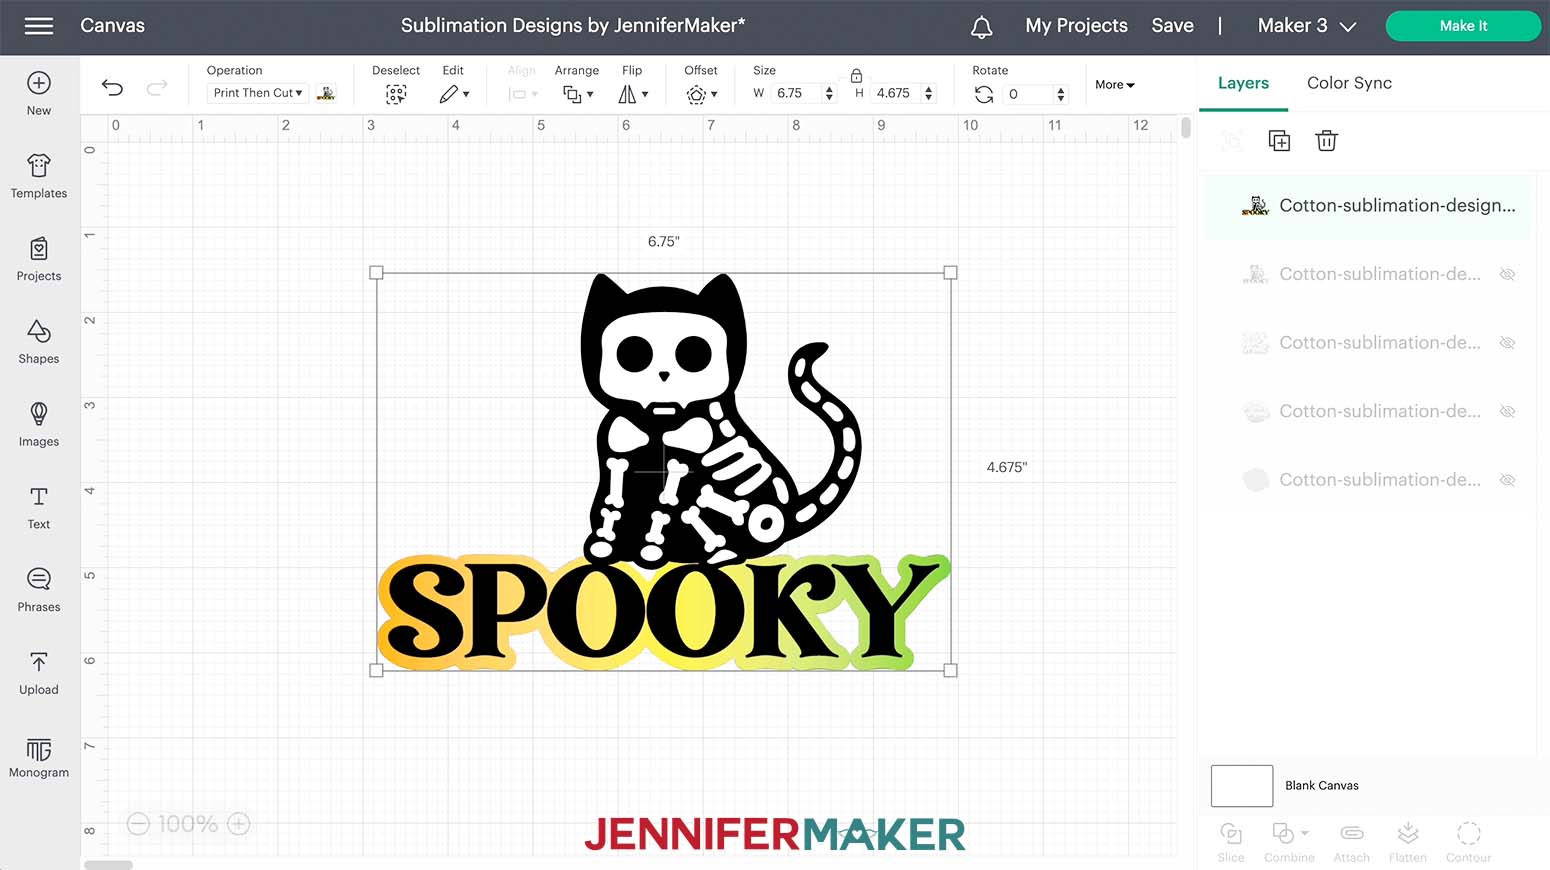
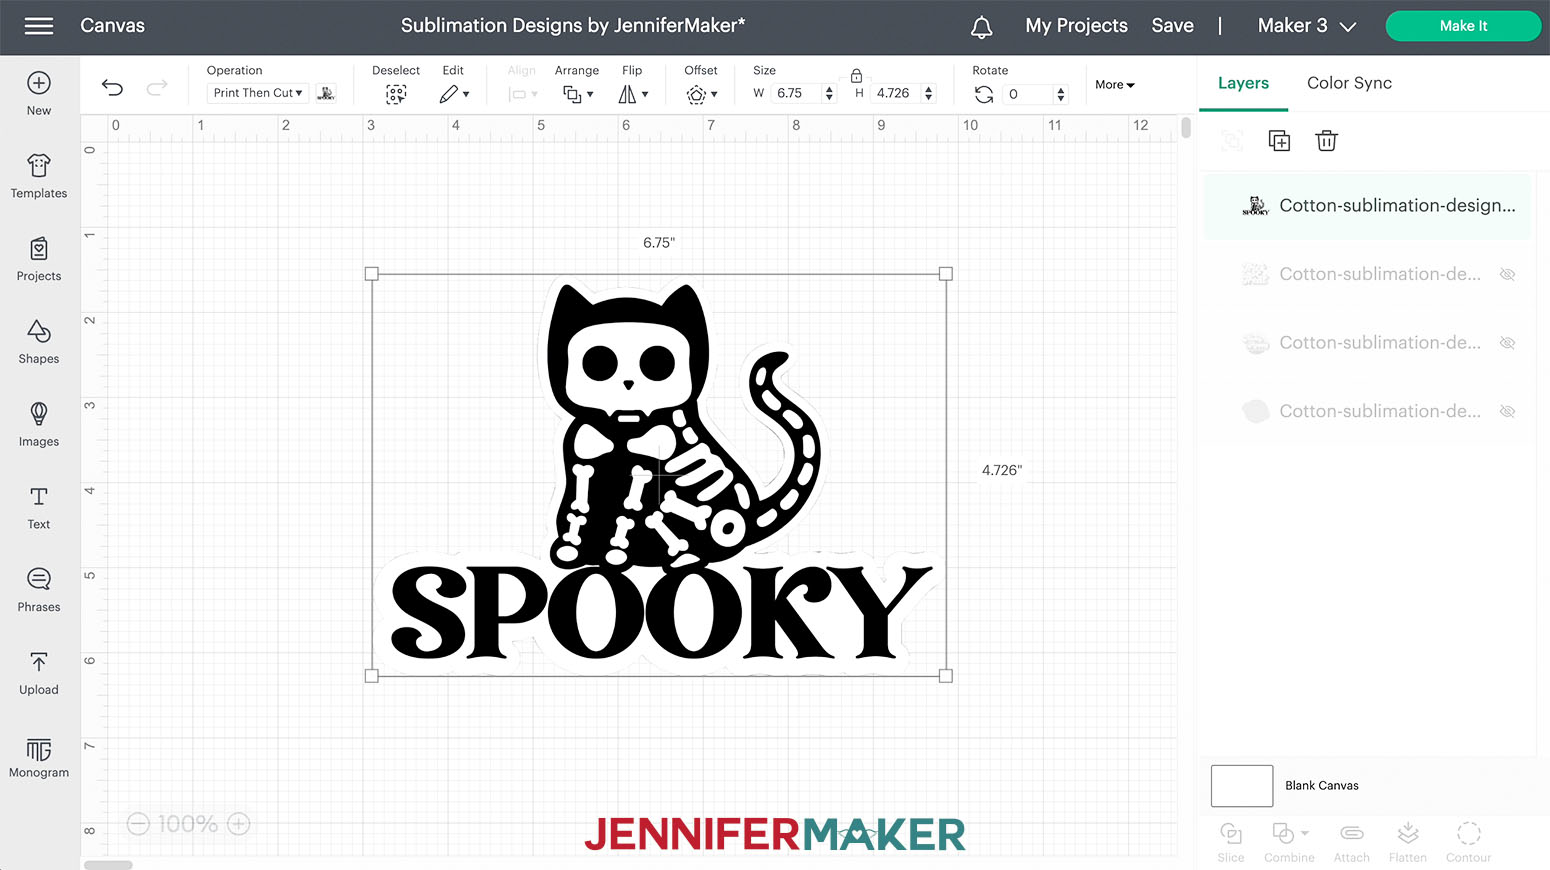
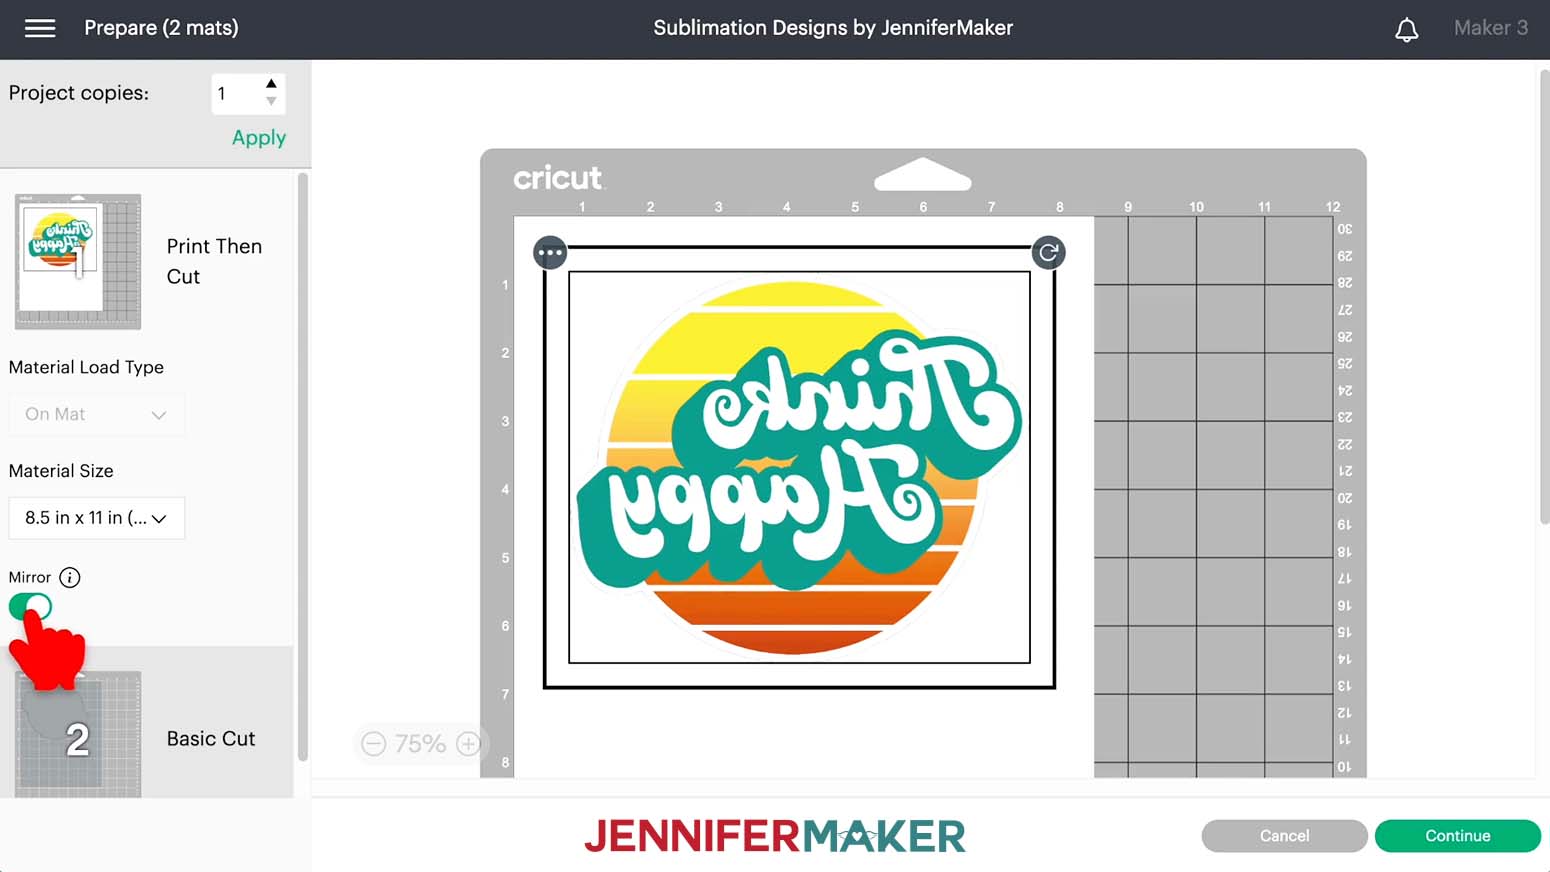
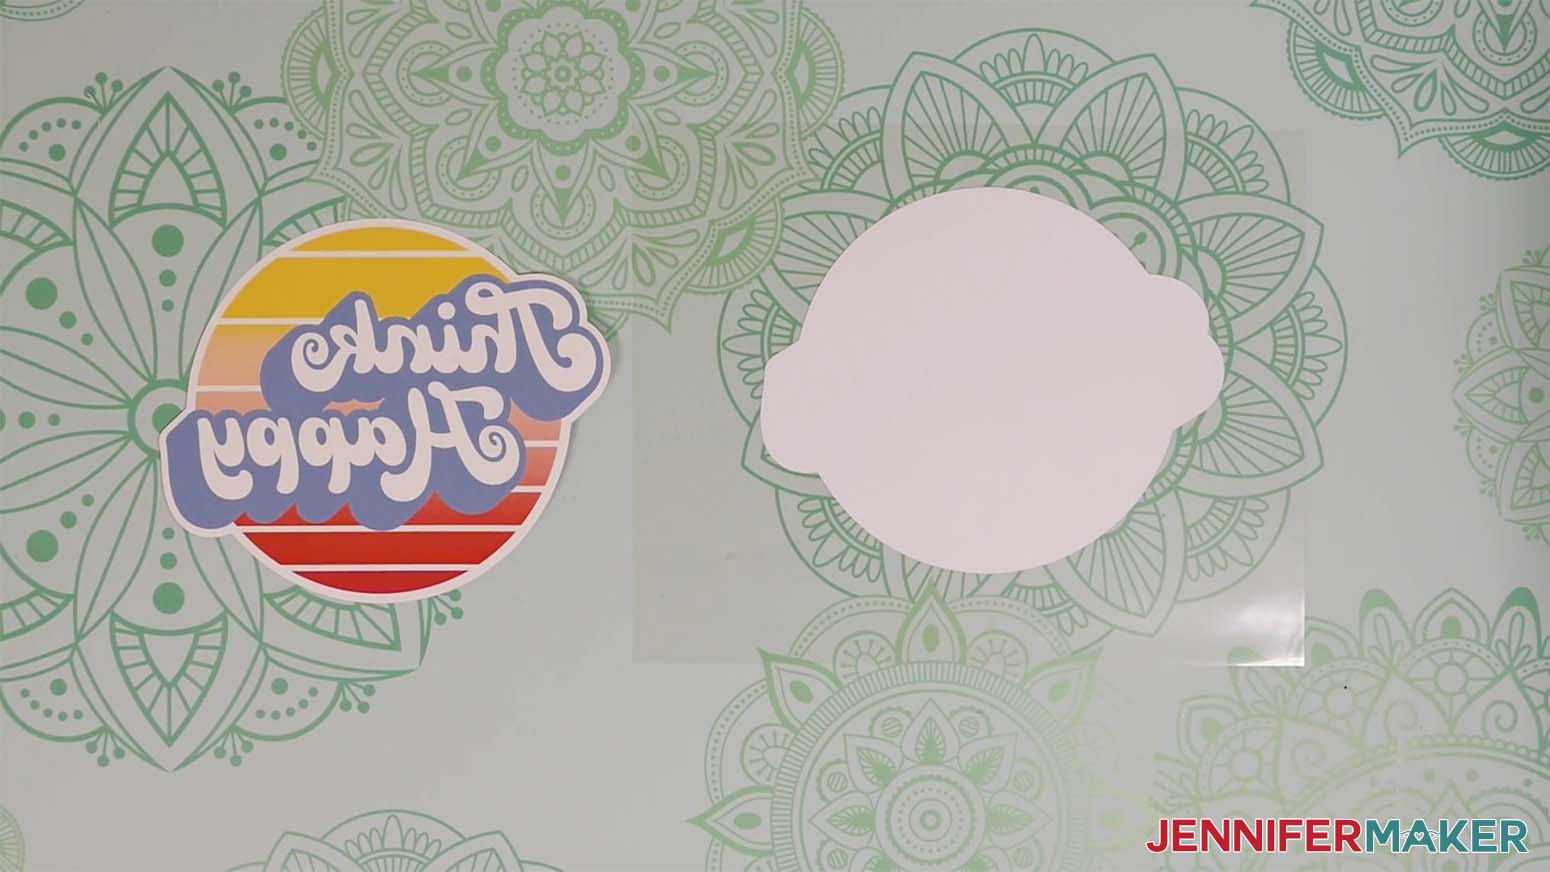
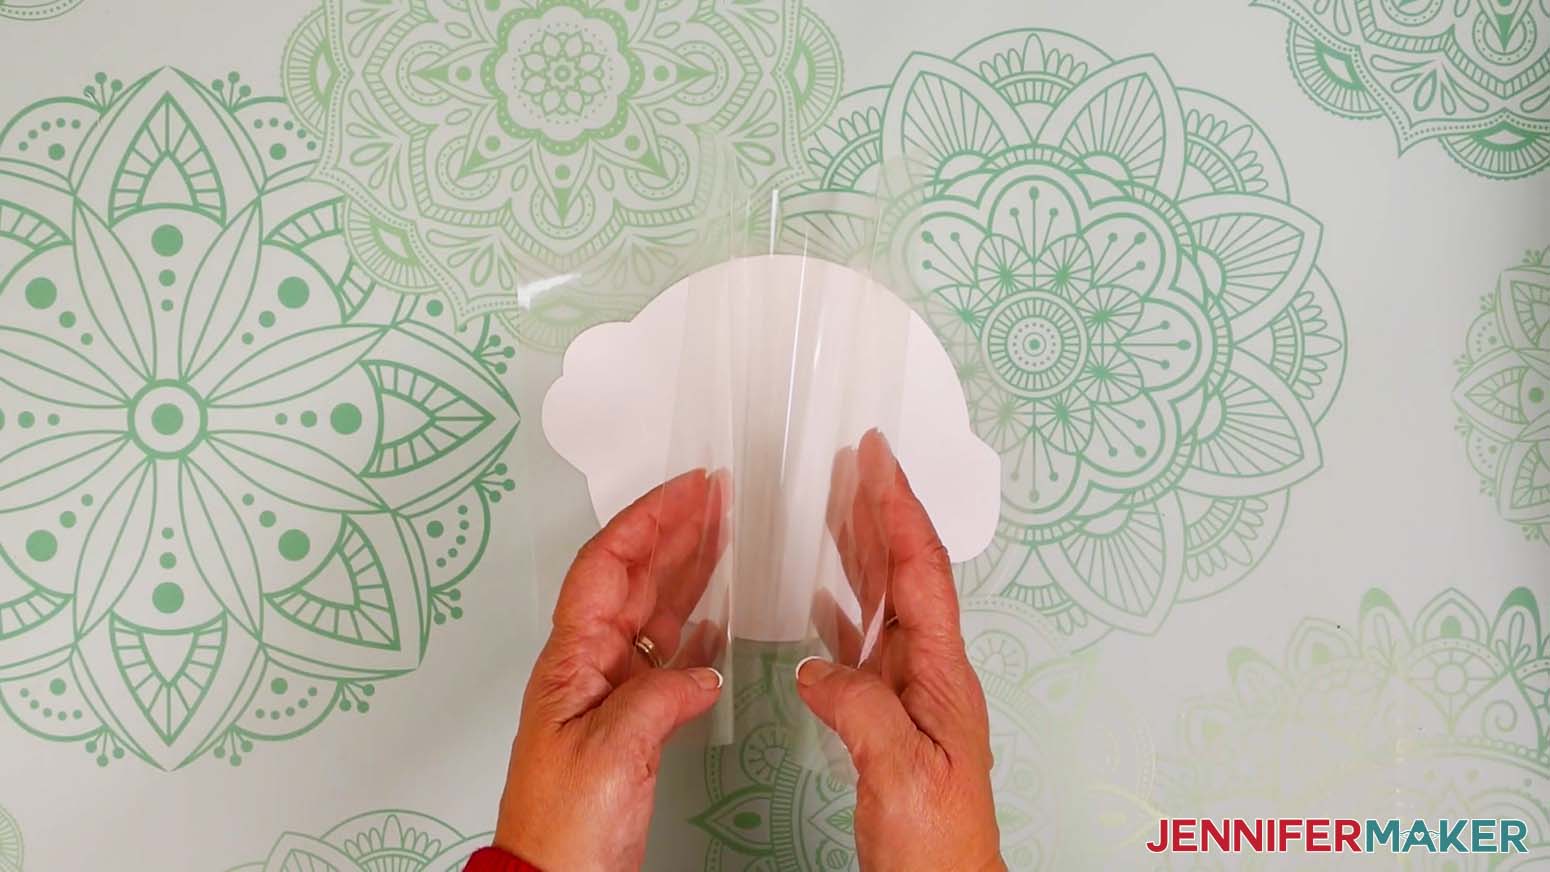
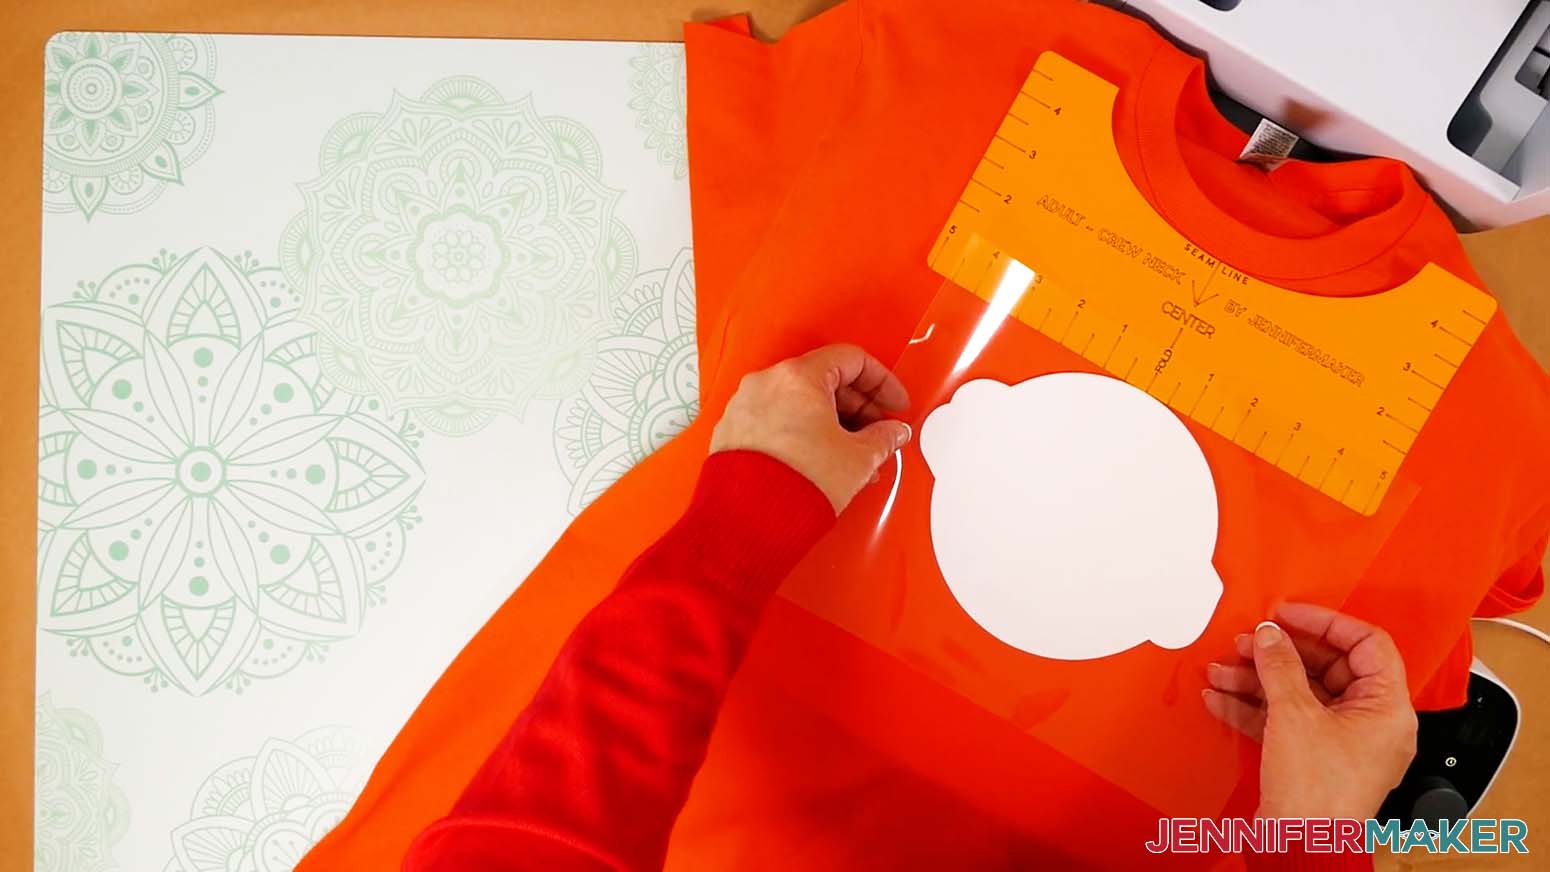
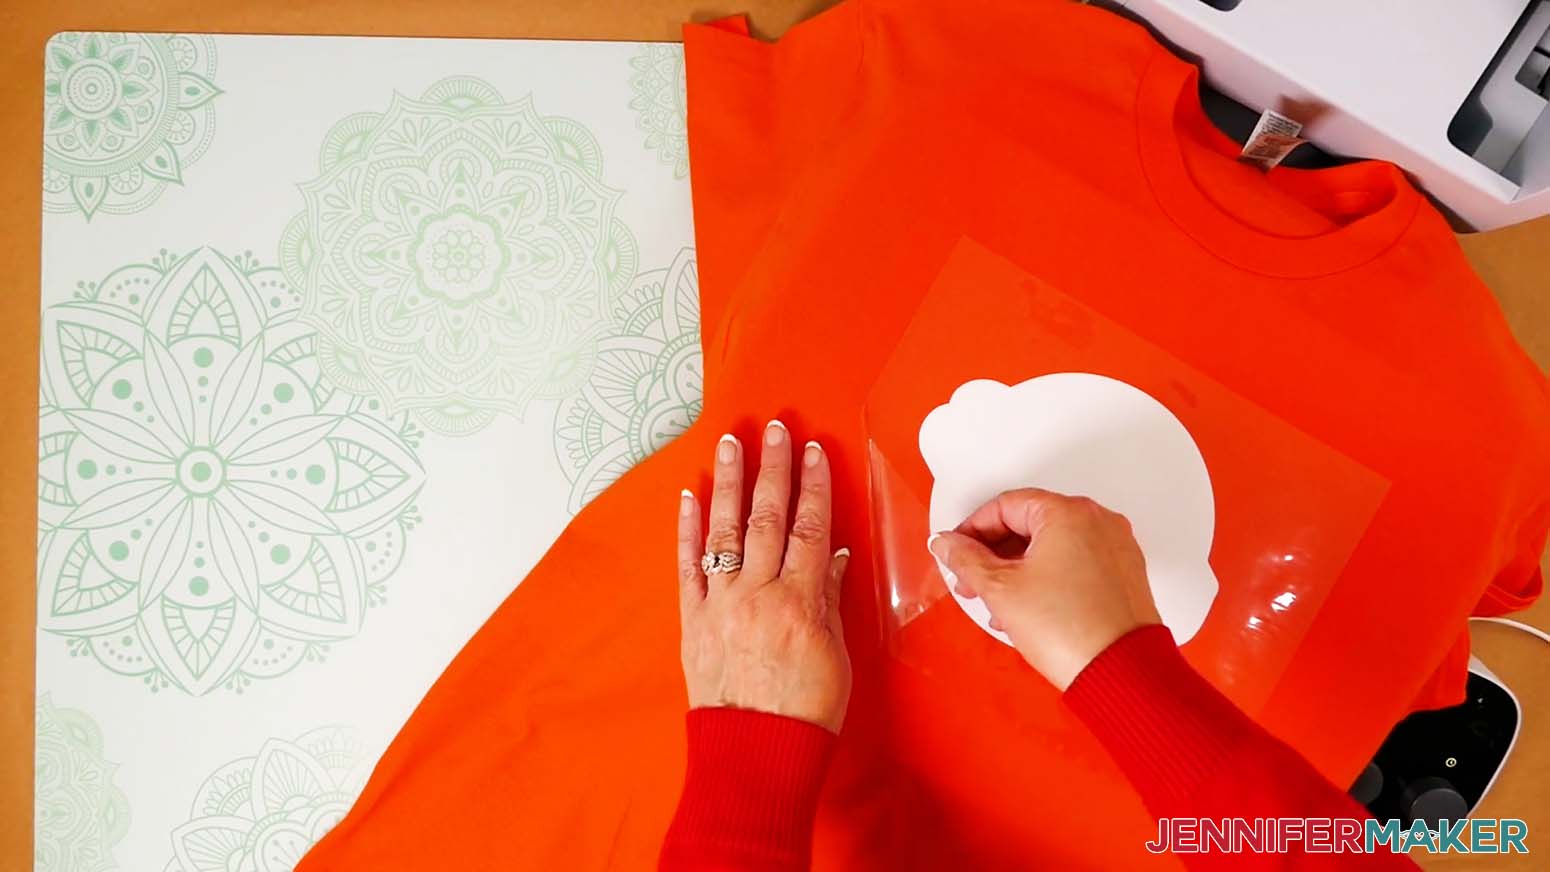
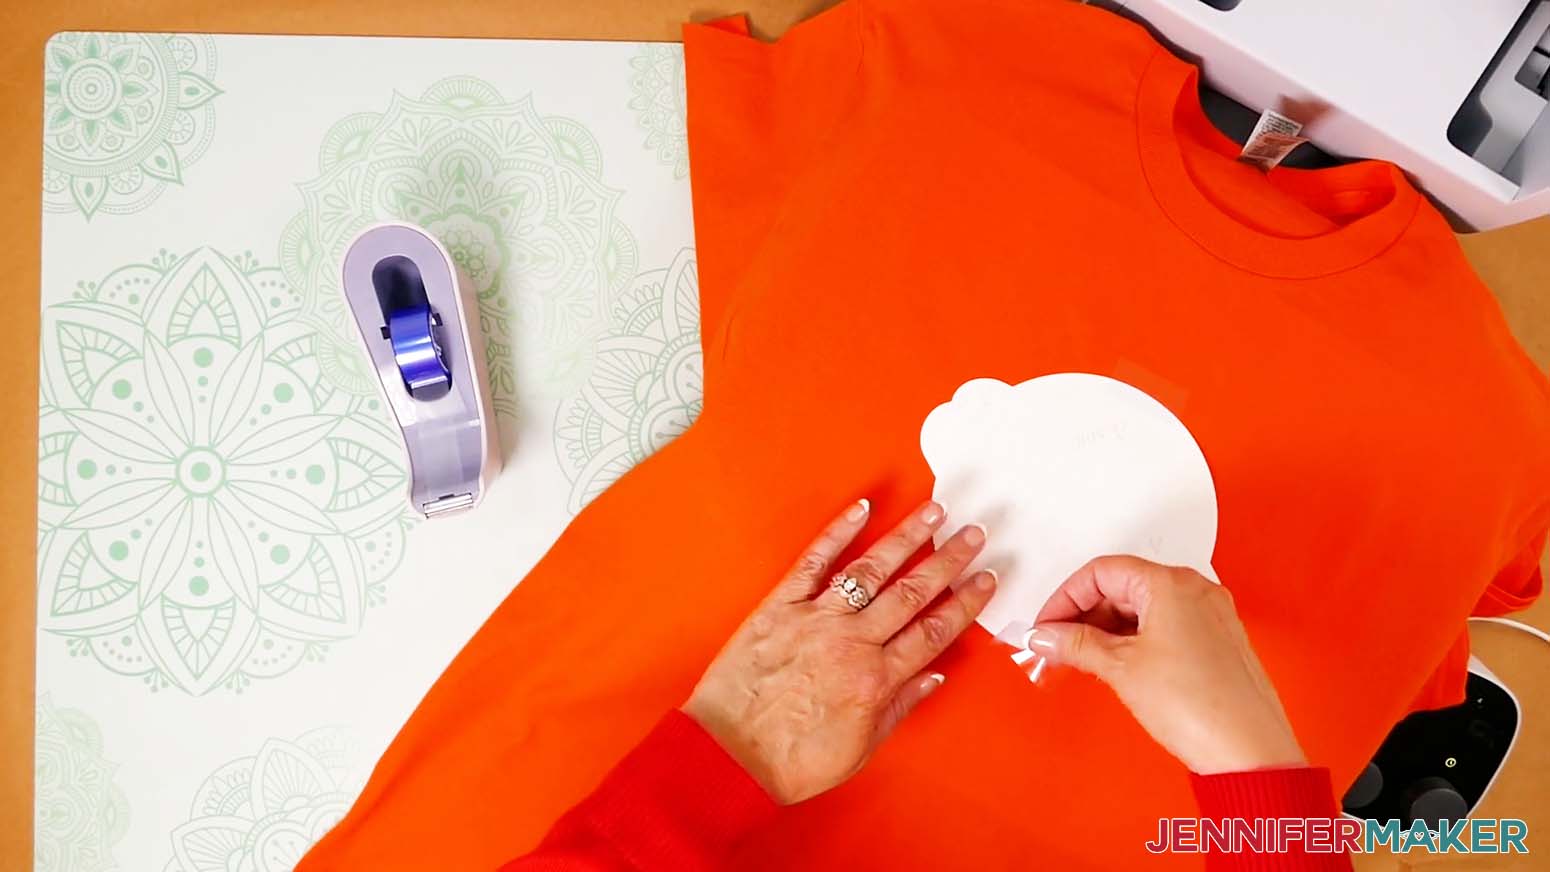
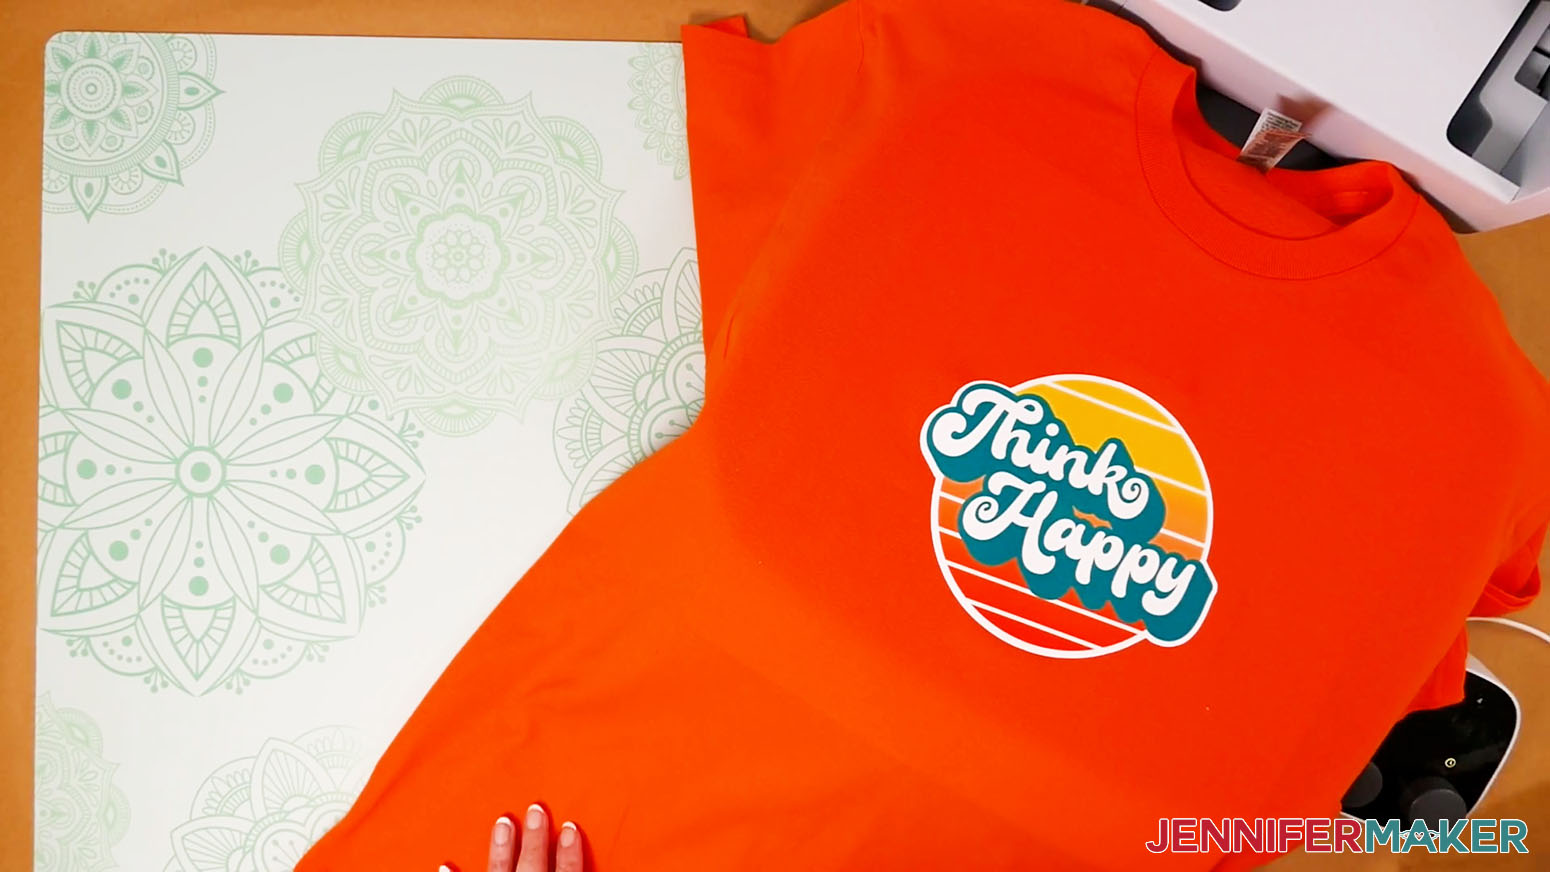
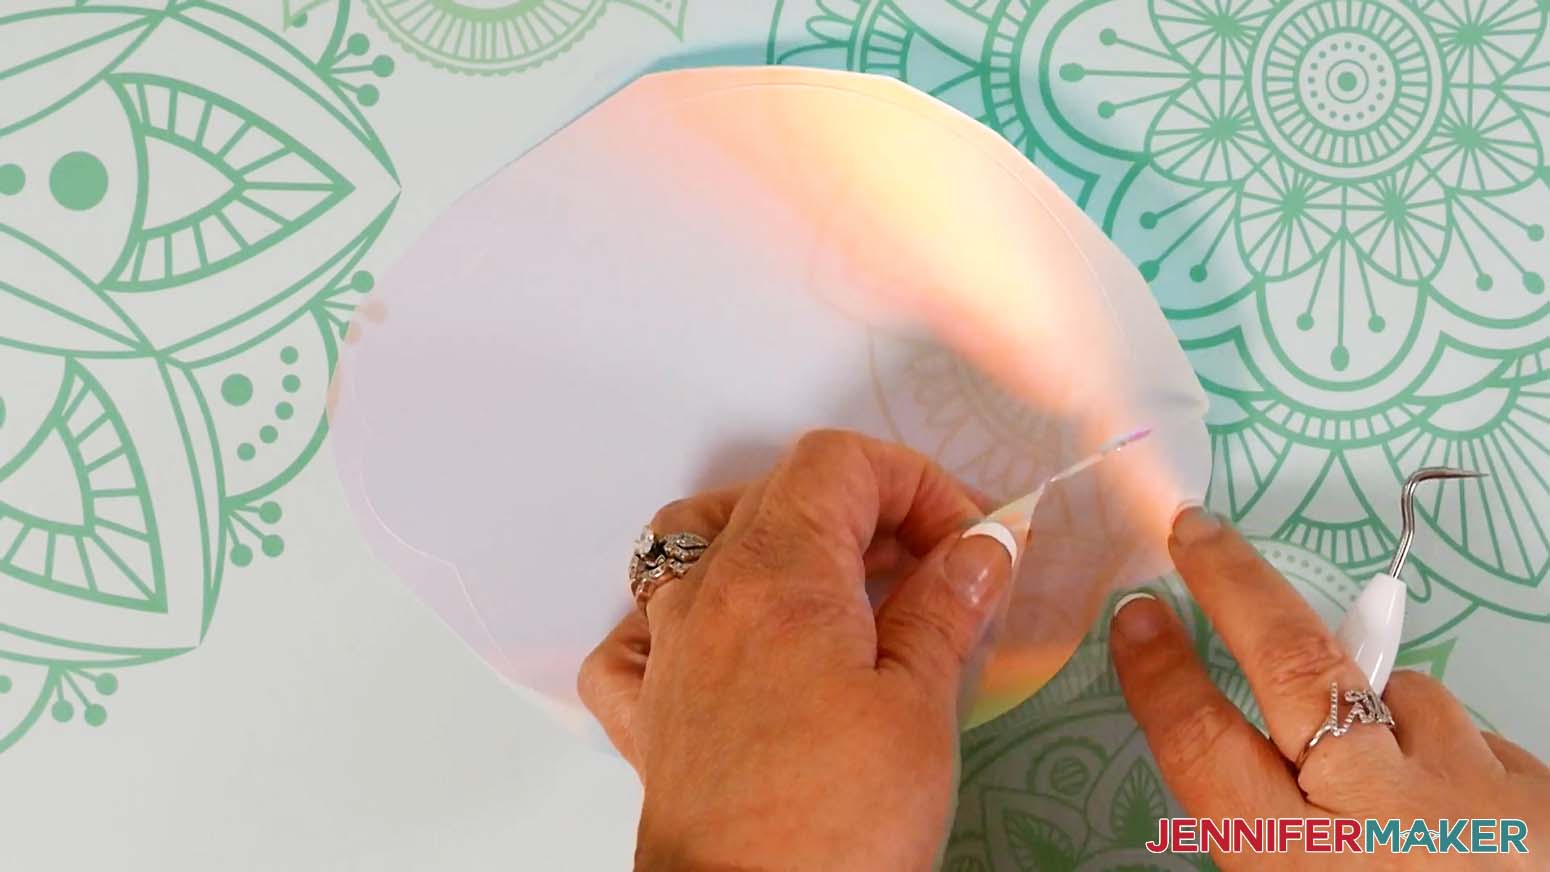
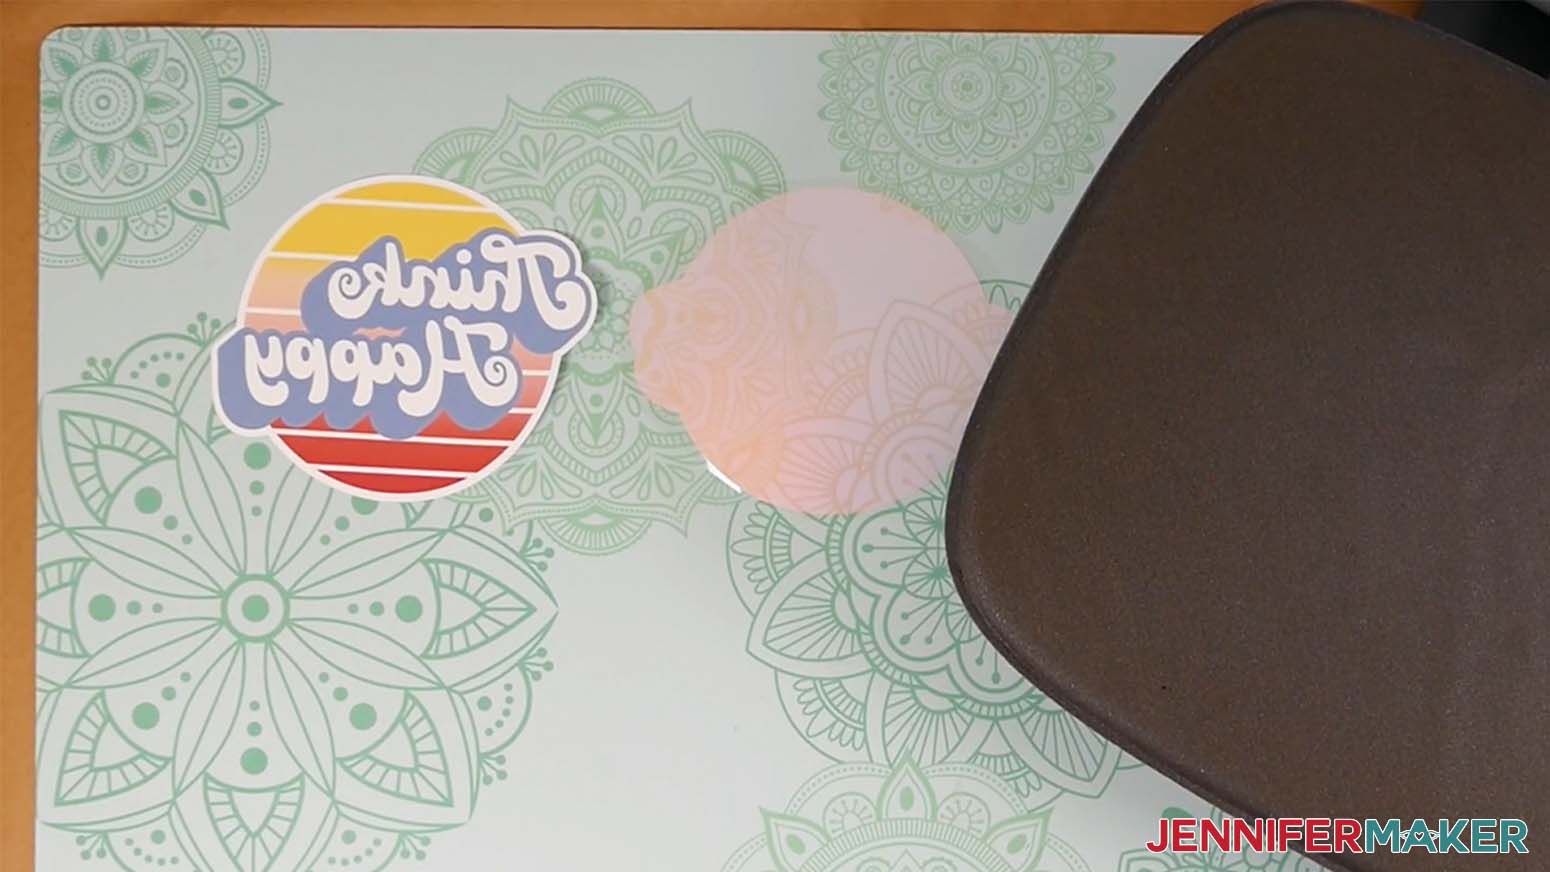
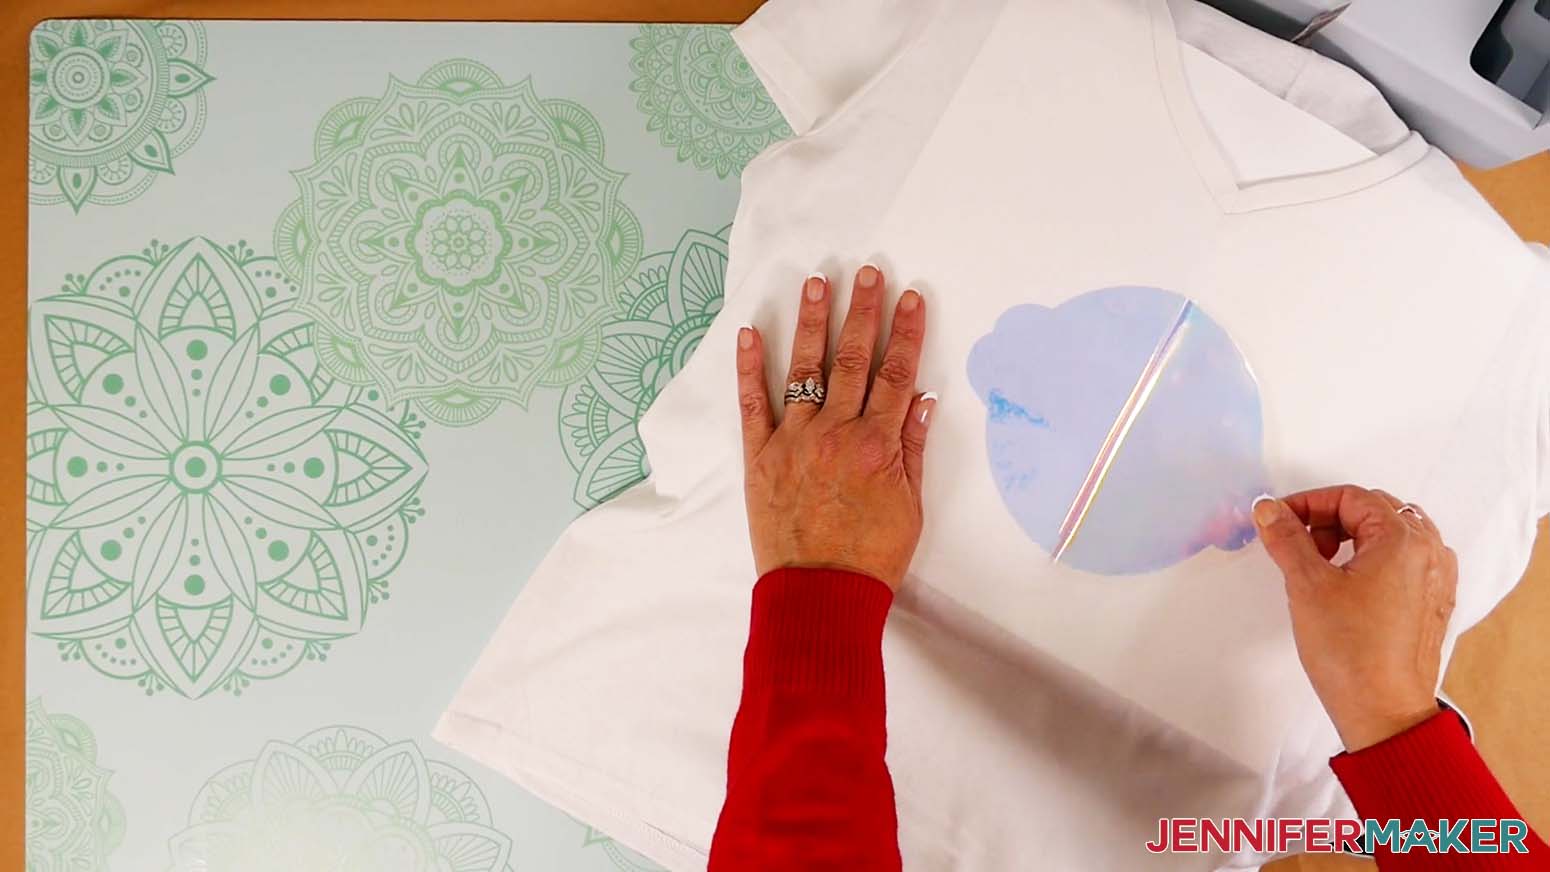
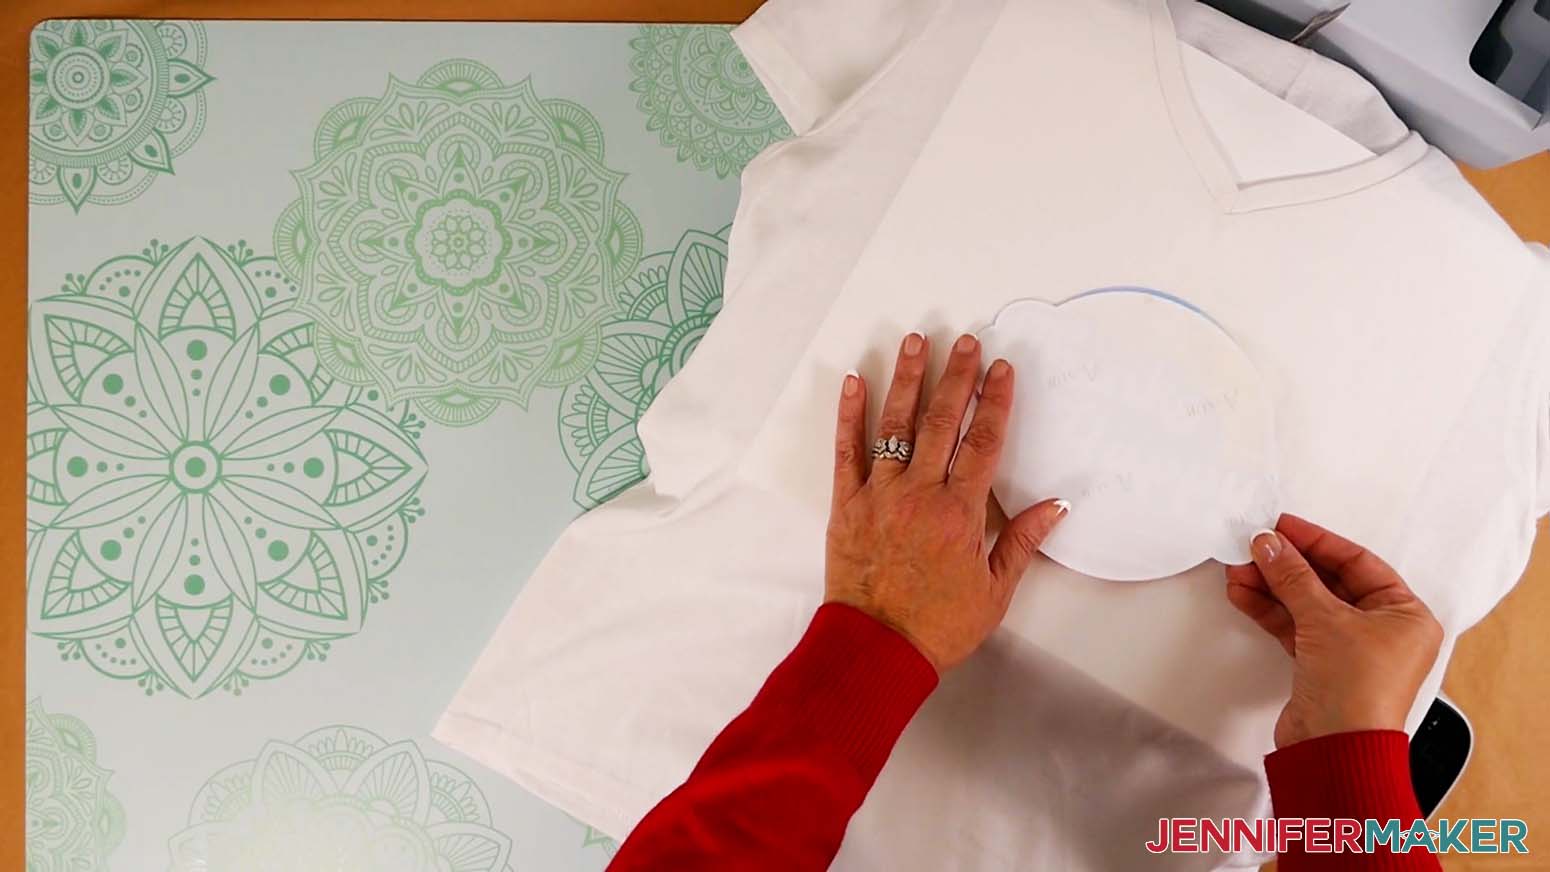
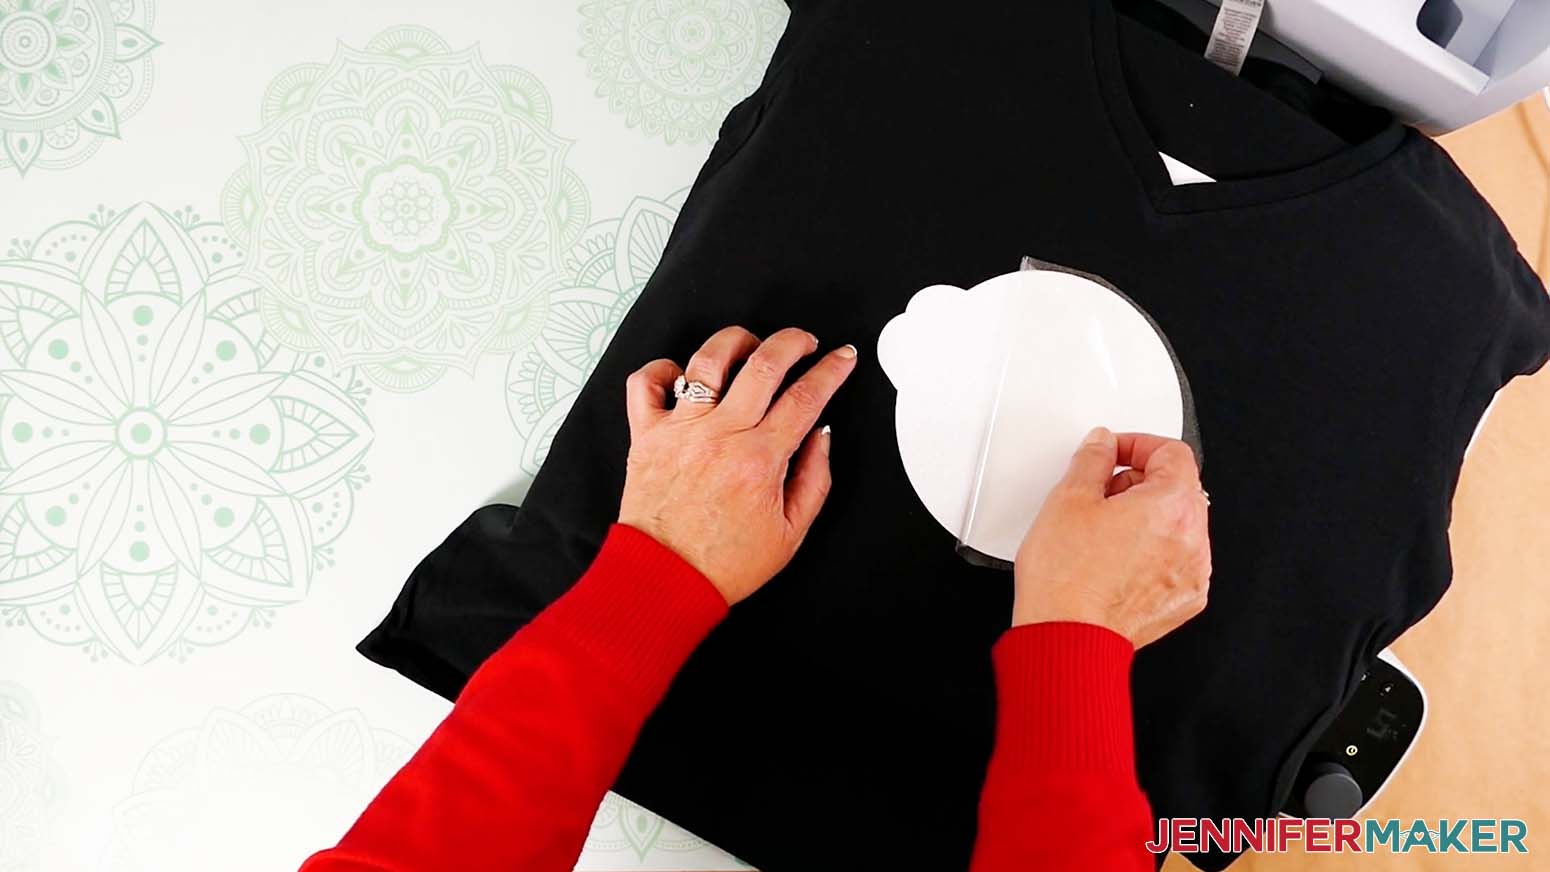
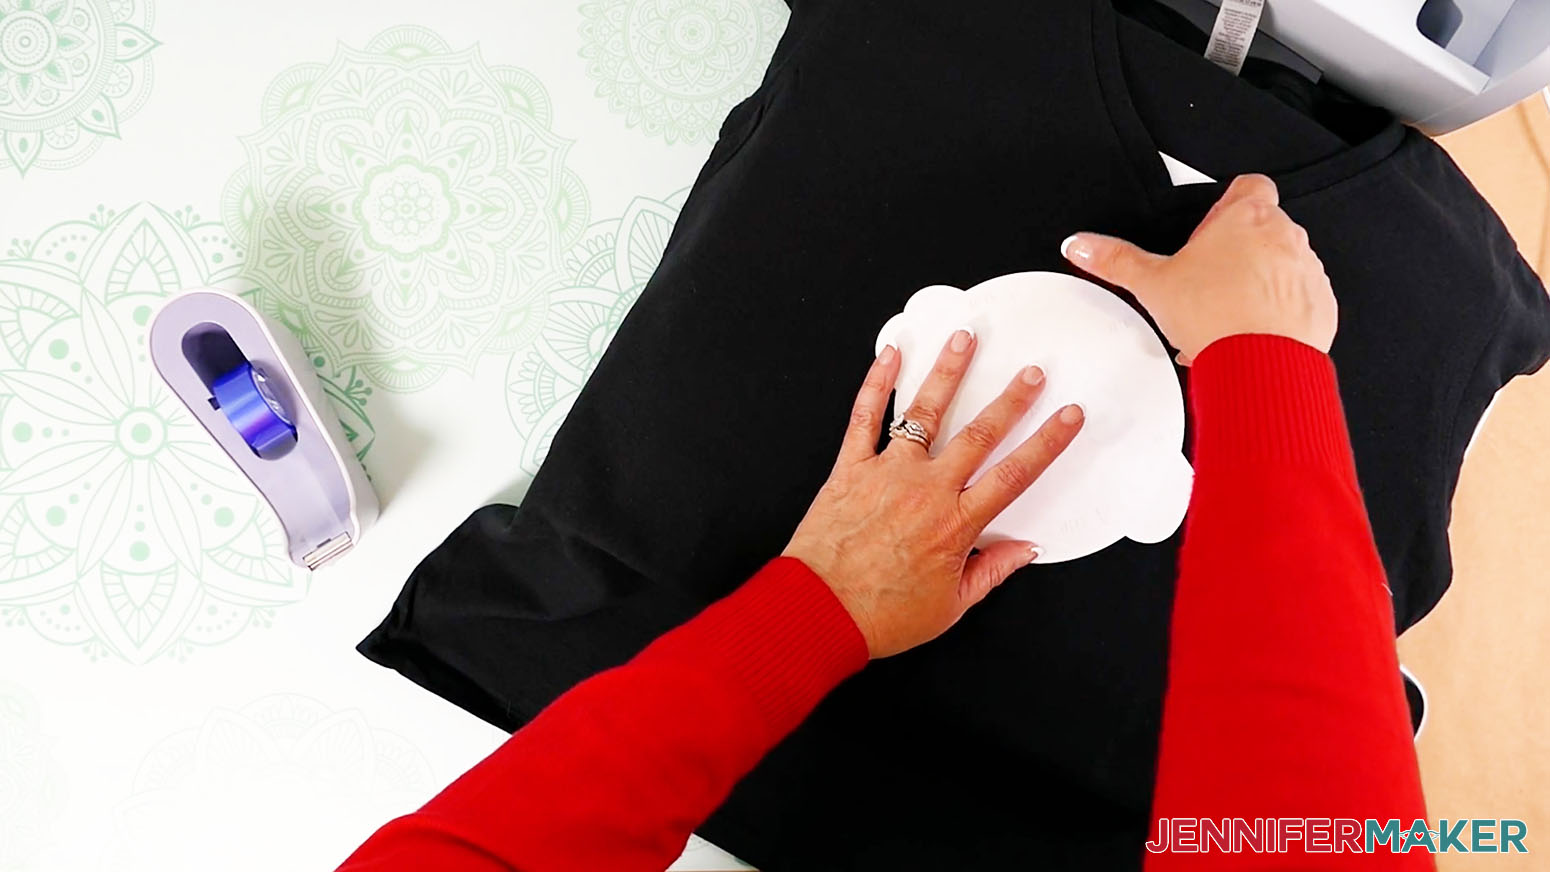
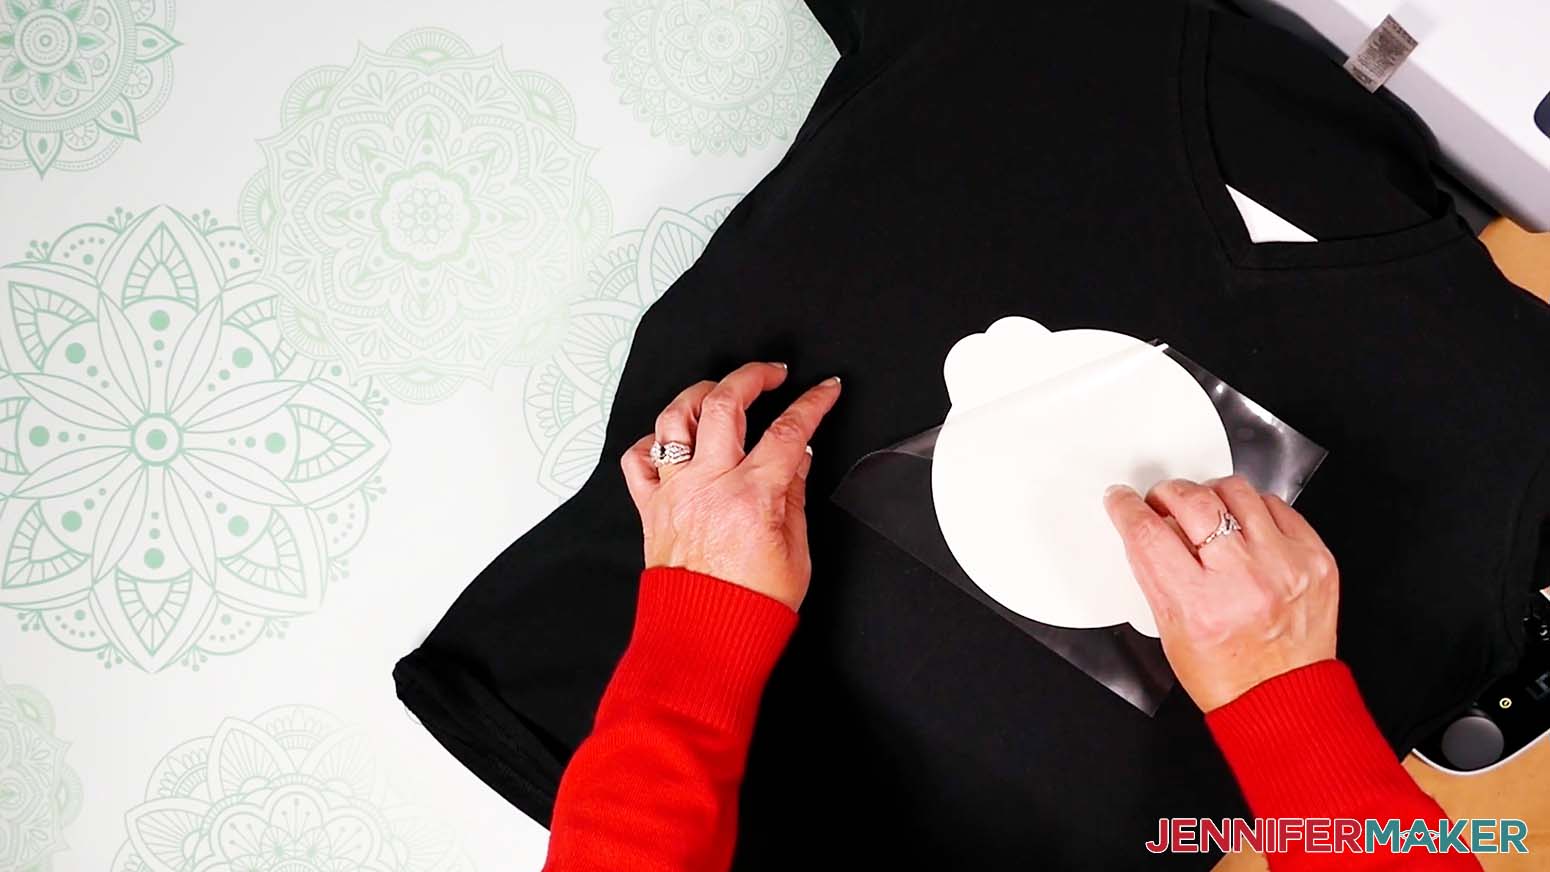
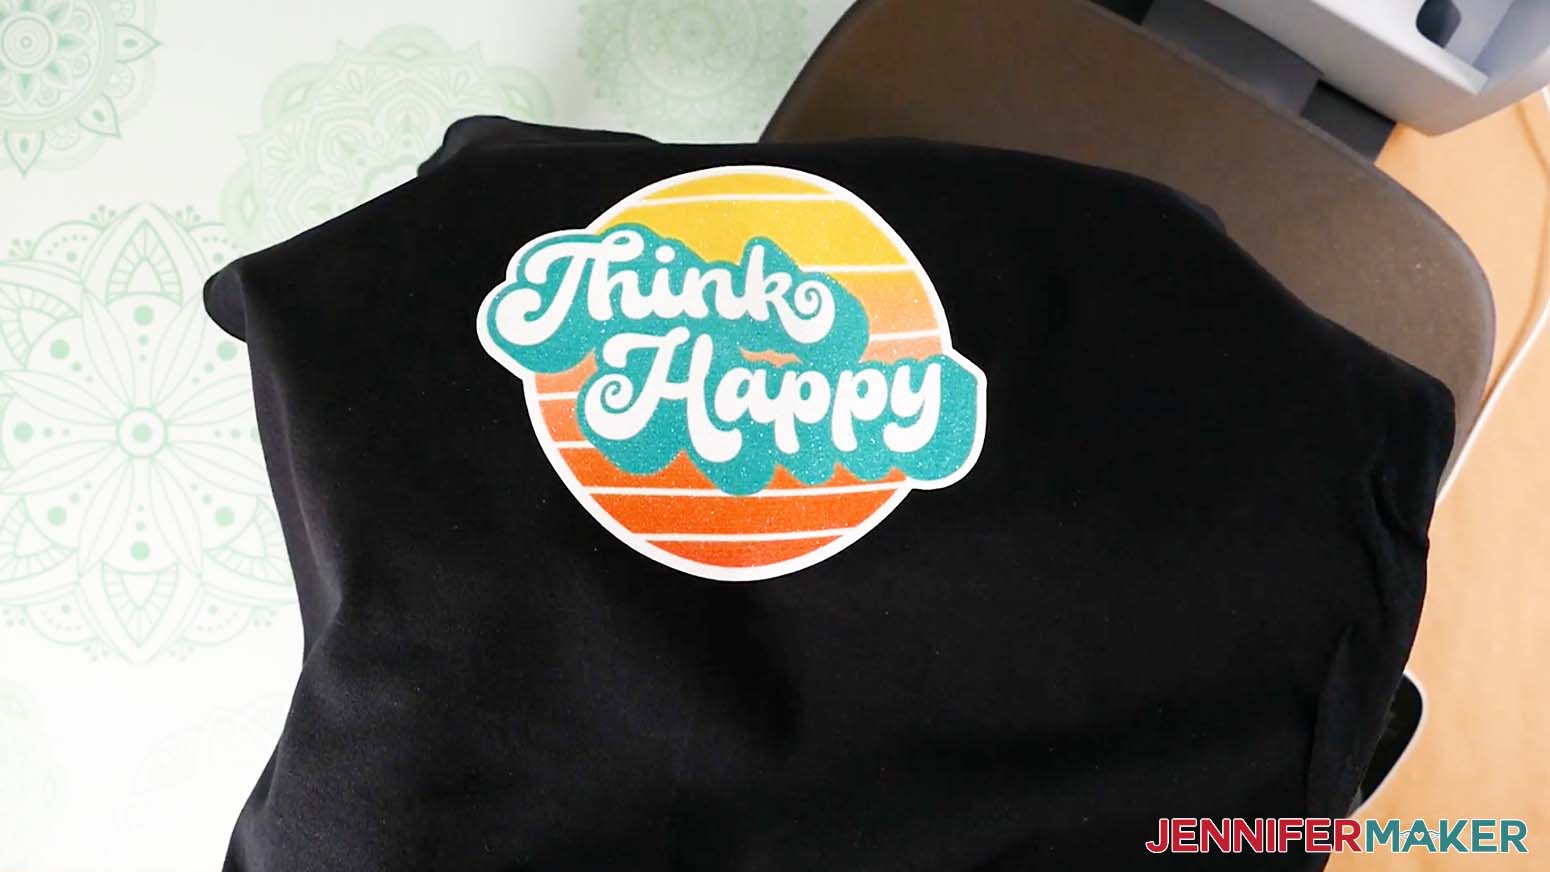
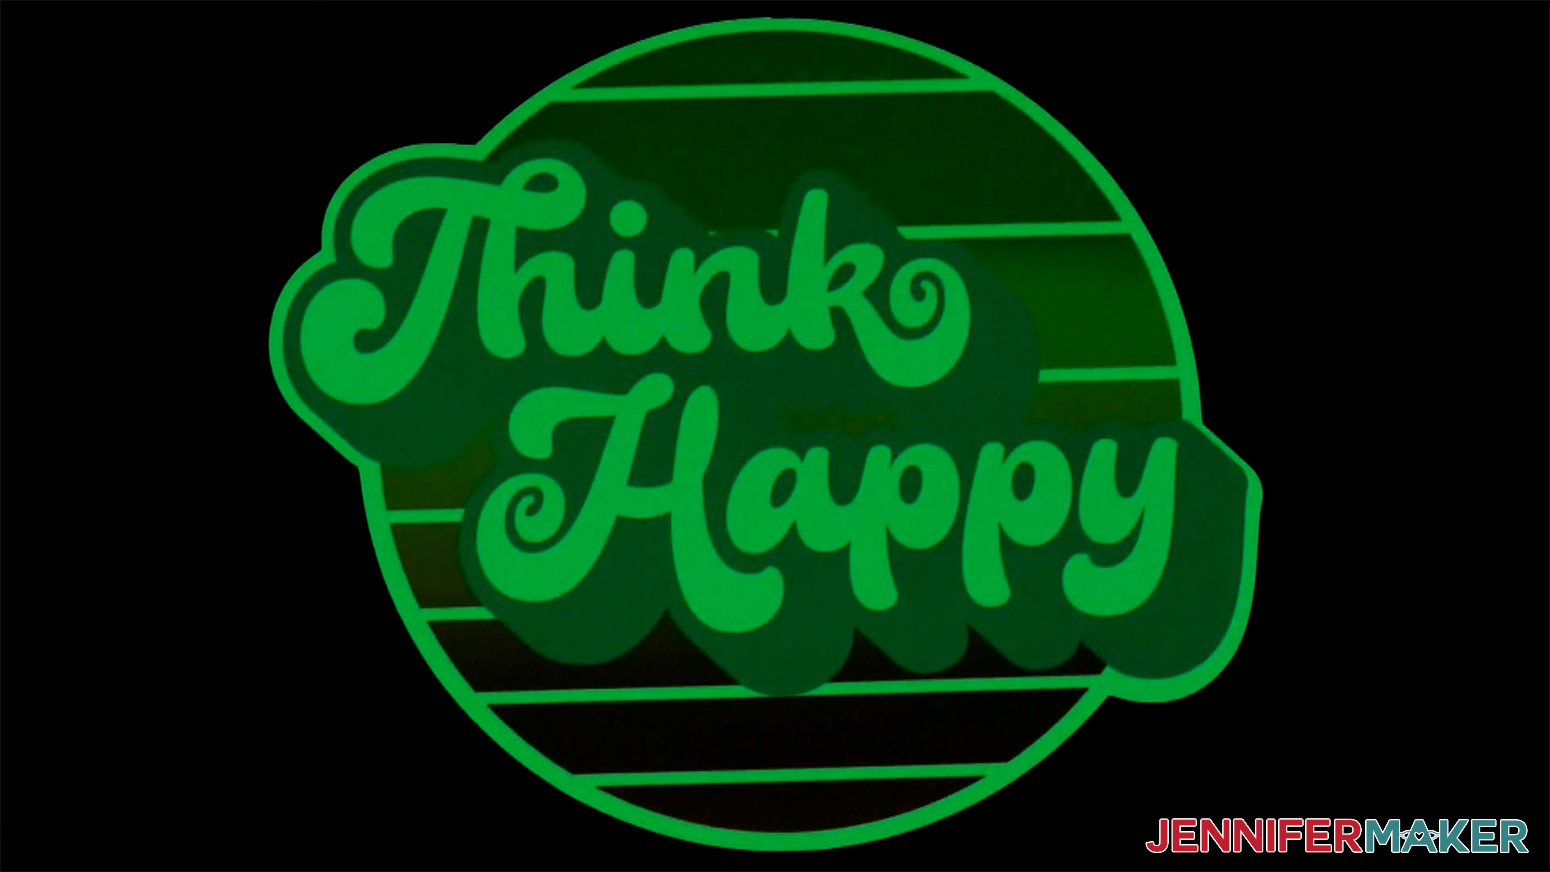
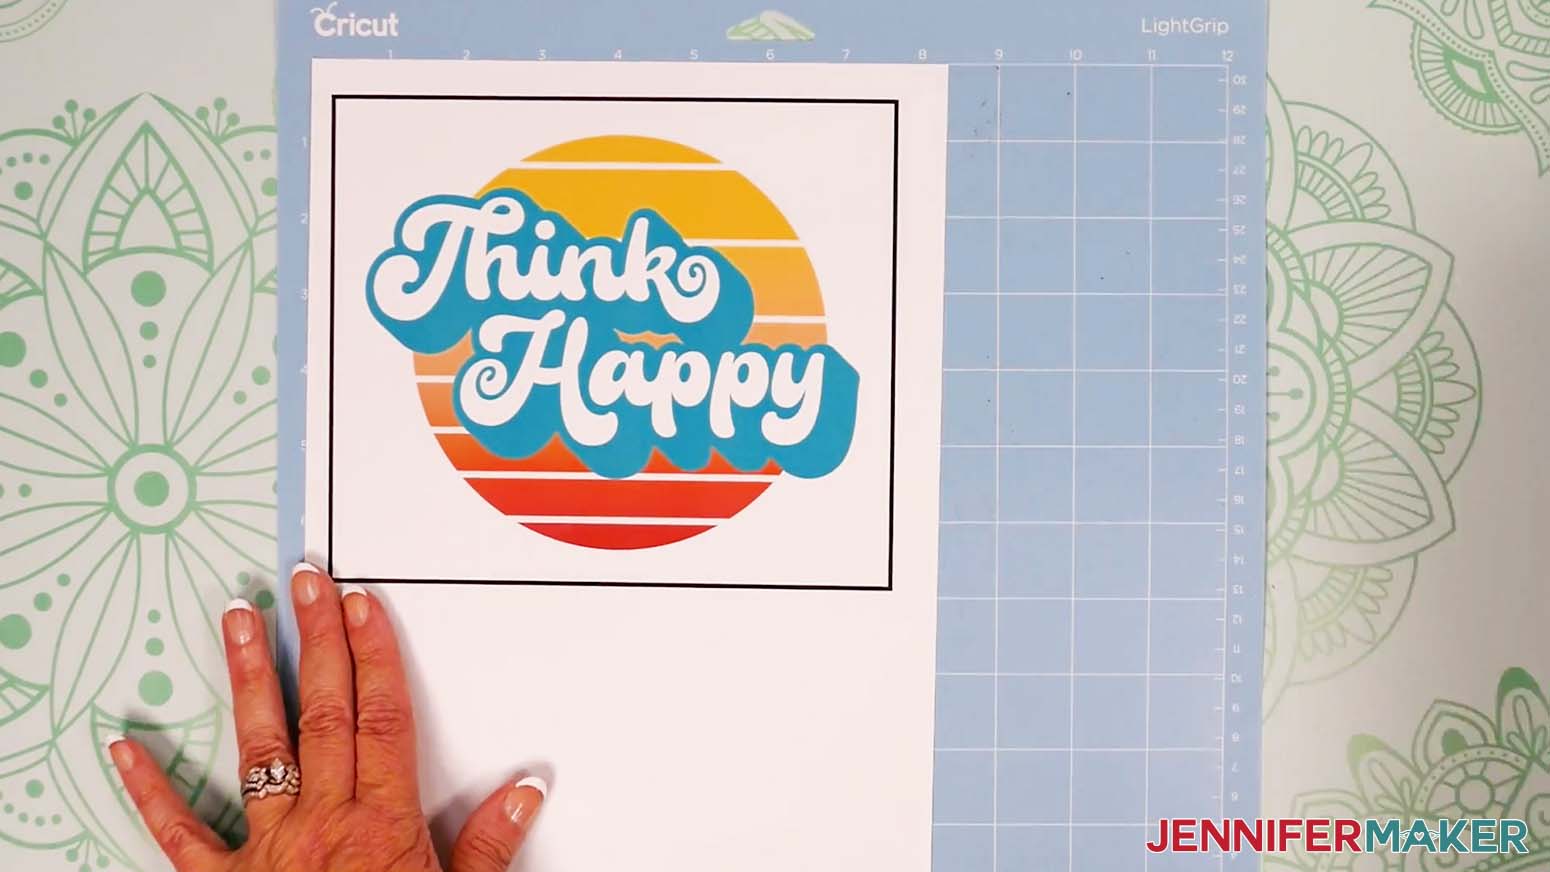
Learn several options for how to sublimate on cotton! Note: Before using your Cricut's Print then Cut feature, follow the steps in my calibration tutorial to ensure the best results! cotton-sublimation-designs-happy cotton-sublimation-designs-hello-pumpkin cotton-sublimation-designs-spooky-color cotton-sublimation-designs-spooky cotton-sublimation-designs-trick-or-treat Today, I’m going to make the "Happy" PNG design using a Cricut and different combinations of materials to share the results, but you can use these steps for any of the options in the collection. NOTE: Sublimation printing requires high-quality design files for the best results. I've used PNGs. Since we're using Cricut's Print then Cut feature, we'll upload the designs to Cricut Design Space. The software brings PNGs in very large, but it's easy to fix, I'll show you! I'll also show you how to use my handy T-Shirt ruler guides! You can download them from my free library under Design #410. They're easy to prepare, so make a set to have on hand if you'd like. If you are not sure how to upload a file to Cricut Design Space, watch this helpful video training series I made. Select "Complex" for the image type and then click "Continue" in the lower right corner. The next steps depend on the tools and materials you'd like to use! I will take you through how to sublimate with Siser EasySubli and you can find variations with other HTV materials below that. Then, we'll use sublimation spray EasySubli is HTV designed specifically to use with sublimation projects. It has a specific mask material that is like transfer tape, but it's heat-resistant, so it also keeps the vinyl in place when you tack it on. Here is what my Happy design looks like on the Canvas. Next, we need to make a second layer, which we'll cut out of the EasySubli HTV. Click "Duplicate" above the Layers Panel. Under the Operations menu's Cut options, select Basic. The shape will turn gray. Drag it below the other image in the Layers Panel to see the final result. Now your design layers are ready to cut! Then, select your first mat again and click the toggle under "Mirror" to make it green. That will print the image so it looks backward, but when we apply it to the surface face down, the end result will be correct. Click Continue in the lower right. Make sure your printer is listed. We don't need to add a bleed (extra design area to help with precise cutting) but make sure the slider next to "Use System Dialog" is green. Then click Print. Mine are Presentation Paper Matte and High Quality. Also, make sure that under Layout, "Flip Horizontally" is unchecked since we already mirrored the design. Under Color Matching, click ColorSync and select your ICC profile. Make sure the sublimation paper is in your printer correctly and print! After your design has printed, set it aside until the ink is completely dry to avoid any smears during the cutting process. On your Make Screen, set the Print then Cut mat to "Copy Paper, 32 lb" with default pressure. Remove the excess paper. Check that your Fine-Point Blade is clean and in Clamp B. For the second mat, set it to "Everyday Iron-on" with More pressure. Place the EasySubli sheet shiny side down on a green StandardGrip machine mat. Adhere it well with the brayer. Next, trim away the excess EasySubli and weed the design. Here's what the cut pieces for my EasySubli design looks like. Then, grab your EasySubli Mask. It is similar to transfer tape, but it's heat-resistant. Separate the mask from the backer. I like to bend my mask with both sides up into a “taco” shape and then apply it to the vinyl from the center out. Then use the scraper to smooth out any bubbles. Set it aside for now. Turn on your heat press and set it to the correct temperature and time. For my Autopress, that is 380° and a 10 second preheat. Lint roll your shirt to remove any debris that will interfere with the design. And since we’re working with sublimation dye, open a window and set up a fan to improve your ventilation. You don’t want to breathe in the fumes from the process! When the machine comes to temperature, fold the shirt in half the long way and press it for 10 seconds to remove moisture and create a central crease. Open the shirt and slide a piece of clean white cardstock inside to prevent ink bleed through at the design's sides. Then- if you're using one- line up the correct T-Shirt Ruler Guide's center line on the crease. Now your design will be placed in the standard spot for a t-shirt of this size and style. Use the mask to peel the EasySubli from its backer. Then, use the guide to add the vinyl to the shirt, with the mask facing up. Remove the guide and cover the whole area with clean butcher paper. Heat the design for 5 seconds to tack on the EasySubli. Remove the butcher paper and let the design cool slightly. Peel up the mask sheet while it's still warm. Next, place your print face down on top of the EasySubli and use heat resistant tape to secure it. Make sure the edges match! Place clean butcher paper on top of the whole area. Heat the design at 380° for 40 seconds. Remove the butcher paper, then let the design cool to avoid ghosting. Remove the tape and paper to reveal your design! This version also uses layers of sublimation paper and vinyl, with a few differences from the EasySubli process. Holographic vinyl is good for light colored shirts. It's a transparent material, so sublimating on black will result in not seeing the print. Follow the same Steps 1, 2, and 3 to get, upload, and prepare your Print then Cut image and a Basic Cut duplicate in Design Space. Make sure the correct machine is selected, then click "Make It" in the upper right corner. Click the "Mirror" toggle under both mats this time. Click back on the first mat, then click Continue. Follow the same steps to print and cut your layers. During printing, remember to leave "flip horizontally" unchecked since we already mirrored the design. And remember to place the Siser Holographic HTV shiny side down on a green Standard machine mat. Select Everyday Iron-on and set the pressure to More. Remove the cut pieces from the mats as before. Next, trim away the excess HTV and weed the design. Here's what the cut pieces for my holographic HTV design looks like. Turn on your heat press and set it to the correct temperature and time. For my Autopress, that is 380° and a 10 second preheat. Lint roll your shirt to remove any debris that will interfere with the design. When the machine comes to temperature, fold the shirt in half the long way and press it for 10 seconds to remove moisture and create a central crease. Open the shirt and slide a piece of clean white cardstock inside to prevent ink bleed through at the design's sides. Line up the guide like before. Use the guide to add the vinyl to the shirt, with the clear carrier facing up. Remove the guide and cover the whole area with clean butcher paper. Heat the design for 5 seconds to tack on the HTV. Remove the butcher paper and let the design cool slightly. Peel up the carrier sheet while it's still warm. Next, place your print face down on top of the HTV and use heat resistant tape to secure it. Make sure the edges match! Place clean butcher paper on top of the whole area. Heat the design at 380° for 40 seconds. Remove the butcher paper, then let the design cool to avoid ghosting. Remove the tape and paper to reveal your design! This technique also uses layers of sublimation paper and iron-on vinyl. But since white glitter vinyl is a solid material, the printed image will show up on any color surface. The steps are the same as the Holographic Vinyl process, just use the "Glitter Iron-On" material setting for the vinyl mat. And since we mirrored everything, remember to place the vinyl shiny side down. The sublimation process, temperatures, and times are the same, too! Set your heat press to 380° degrees for 10 seconds. Use a lint roller to remove any debris on your shirt. Then fold and preheat it for 10 seconds. Place white cardstock in between the front and back of the shirt to prevent ghosting. Using the T-Shirt Ruler Guide, center the glitter vinyl on the shirt with the clear carrier sheet face up. Remove the ruler and press the vinyl for 5 seconds to tack it onto the shirt. Let the vinyl cool slightly and gently peel the carrier plastic off while it is still warm. Place the sublimation print on top of the Glitter iron-on vinyl and secure it with heat resistant tape. Cover your shirt with butcher paper and press it at 380° for 40 seconds. Remove the butcher paper, then let the design cool to avoid ghosting. Remove the tape and paper to reveal your design! For a solid designs with some glow, follow the same steps for the Glitter HTV, but use the "Glow in the Dark Iron-on" setting with More pressure. Glow in the dark HTV also goes shiny side down on a green StandardGrip mat. Prepare your shirt the same way, including the crease and the protective cardstock in the middle. When you're ready to apply the vinyl, set your press to 380° for 10 seconds. Use the guide to place the vinyl with the carrier on top, then cover it with butcher paper and press. Gently peel the carrier plastic while it is still warm. Place the sublimation print face down on top of the vinyl and secure it with heat resistant tape. Cover it with butcher paper and press at 380° for 60-80 seconds. Note that this is a bit longer than the other materials. Remove the butcher paper, then let the design cool to avoid ghosting. Once it cools a bit, take off the tape and paper to reveal your design! Print then Cut your design using the same steps. Sublimation spray takes the place of the HTV, so you don't need to cut a second layer. Spray an even coat of the sublimation spray over the the t-shirt. Use the foam roller to roll over the area to spread the spray evenly. Let the shirt air dry. When the shirt is dry, use a lint roller to remove any debris. Heat the press to 380° and set the timer for a 10 second preheat. Place white cardstock in between the front and back of the shirt to prevent ghosting. Cover the shirt with white butcher paper. Preheat the shirt for 10 seconds. We won't crease it this time since the spray is already on the shirt. Using the T-Shirt Ruler Guide, place the printed image face down and secure it with heat resistant tape. Remove the guide, then cover everything with fresh butcher paper and press for 35 seconds. Take off the butcher paper, then let it cool and remove the excess paper and tape. If you have a color printer but not a sublimation printer, this technique might be for you! It's special vinyl that you can print right on. Follow Steps 1, 2, and 3 to prepare the Print then Cut image the same way in Design Space without creating the second vinyl layer. Make sure the correct machine is selected, then click "Make It" in the upper right corner. You don't need to Mirror this project. Click Continue in the lower right. The print screen for your printer will appear, but it might be hidden behind Design Space. Minimize your Cricut window to see the print settings window. Your window will look different depending on your computer and printer. Make sure your printer is listed in the window. Set the paper to plain and quality to best. The EasyColor paper has a white side and a light grey side. The white side is what you want to print on. Do not print on the grey side. Put the paper in the printer correctly. Press Print! Since the print comes out the the printer dry, you can place the print on a blue Light Grip Mat right away and use a brayer to adhere it. Cover it with a clean piece of paper for extra protection, it you like. Set the Material to "Heat Transfer (non) Cricut" and the Pressure to More. Check that your Fine-Point Blade is clean and in Clamp B. Trim the excess vinyl and weed the surrounding area. Use the taco method to place a sheet of EasySubli Mask over the design. Transfer the design to the mask with a scraper. Set your heat press to 310° and the time to 10 seconds. Lint roll your shirt to remove any debris. Crease and preheat the shirt for 10 seconds. Using the T-Shirt Ruler Guide, place the print on the shirt, with the mask on top so you can see the design. Cover the area with butcher paper and press for 15 seconds. Remove the butcher paper and peel the carrier sheet off immediately as, it's a hot peel material. To make your shirts last, wash them inside out with cold water and tumble dry. cotton-sublimation-designs-complete Typefaces: Andala, Andala Extrude, Brenson Charlotte Regular, Brenson Charlotte Shadow, Shoelace Scrawl and Transcity. Fontbundles.net Free Alternative: Goldie Rainbow, South Australia, and Transcity. Dafont.com
How to Sublimate on Cotton
Materials
Tools
Instructions
STEP 1: GET OR PREPARE A SUBLIMATION DESIGN
First, download my Sublimation on Cotton PNG design files from my free resource library- it's Design #432.
There are five design files in the folder: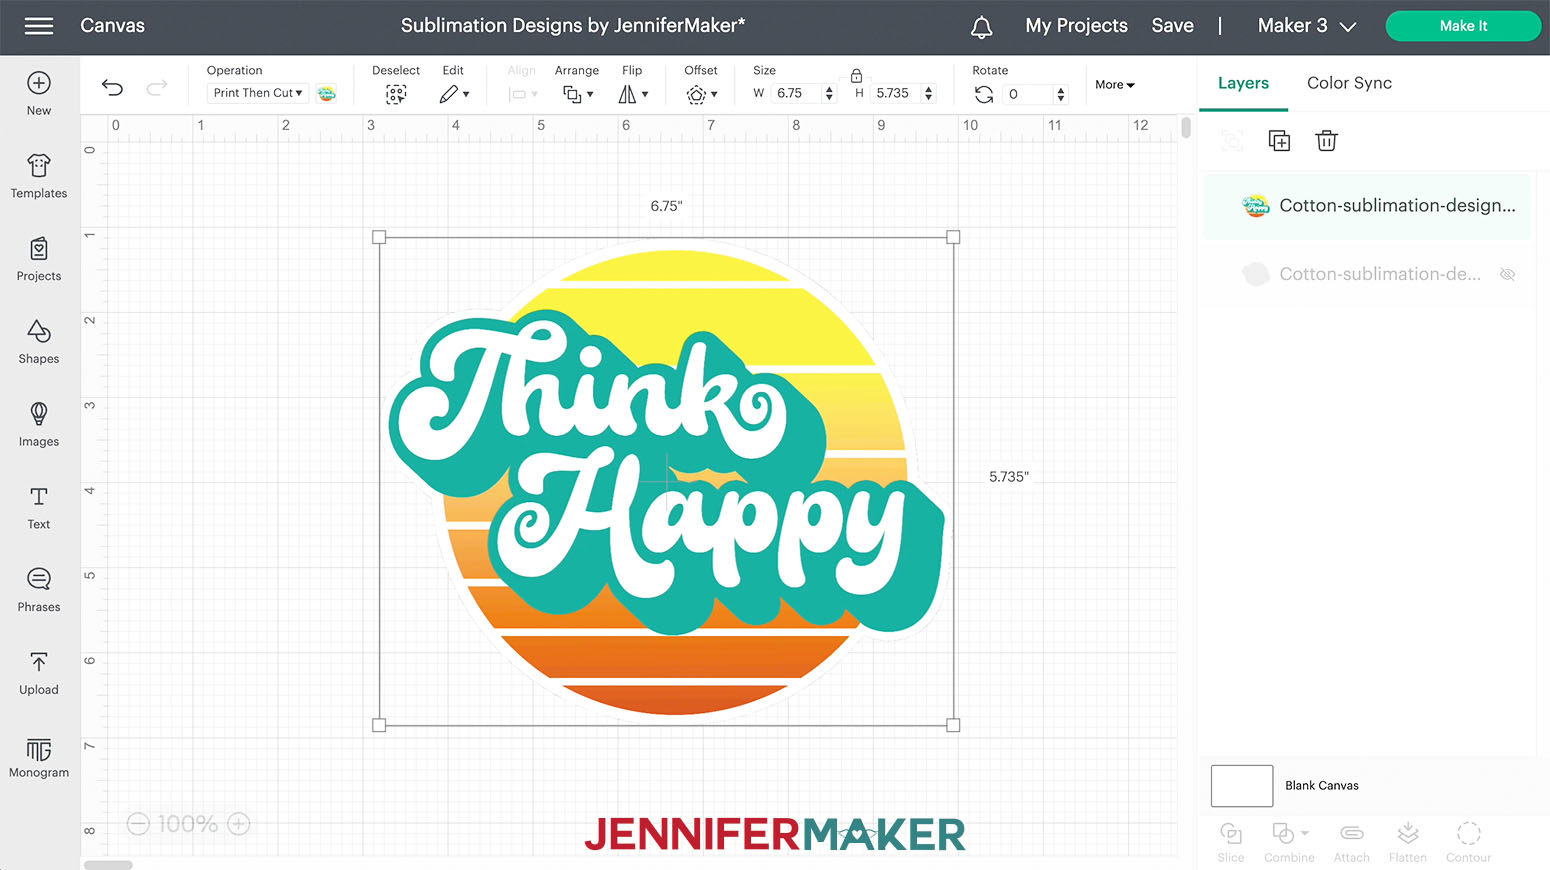

STEP 2: UPLOAD YOUR DESIGN
For PNGs, use the same upload steps until you reach a screen with the PNG on the left.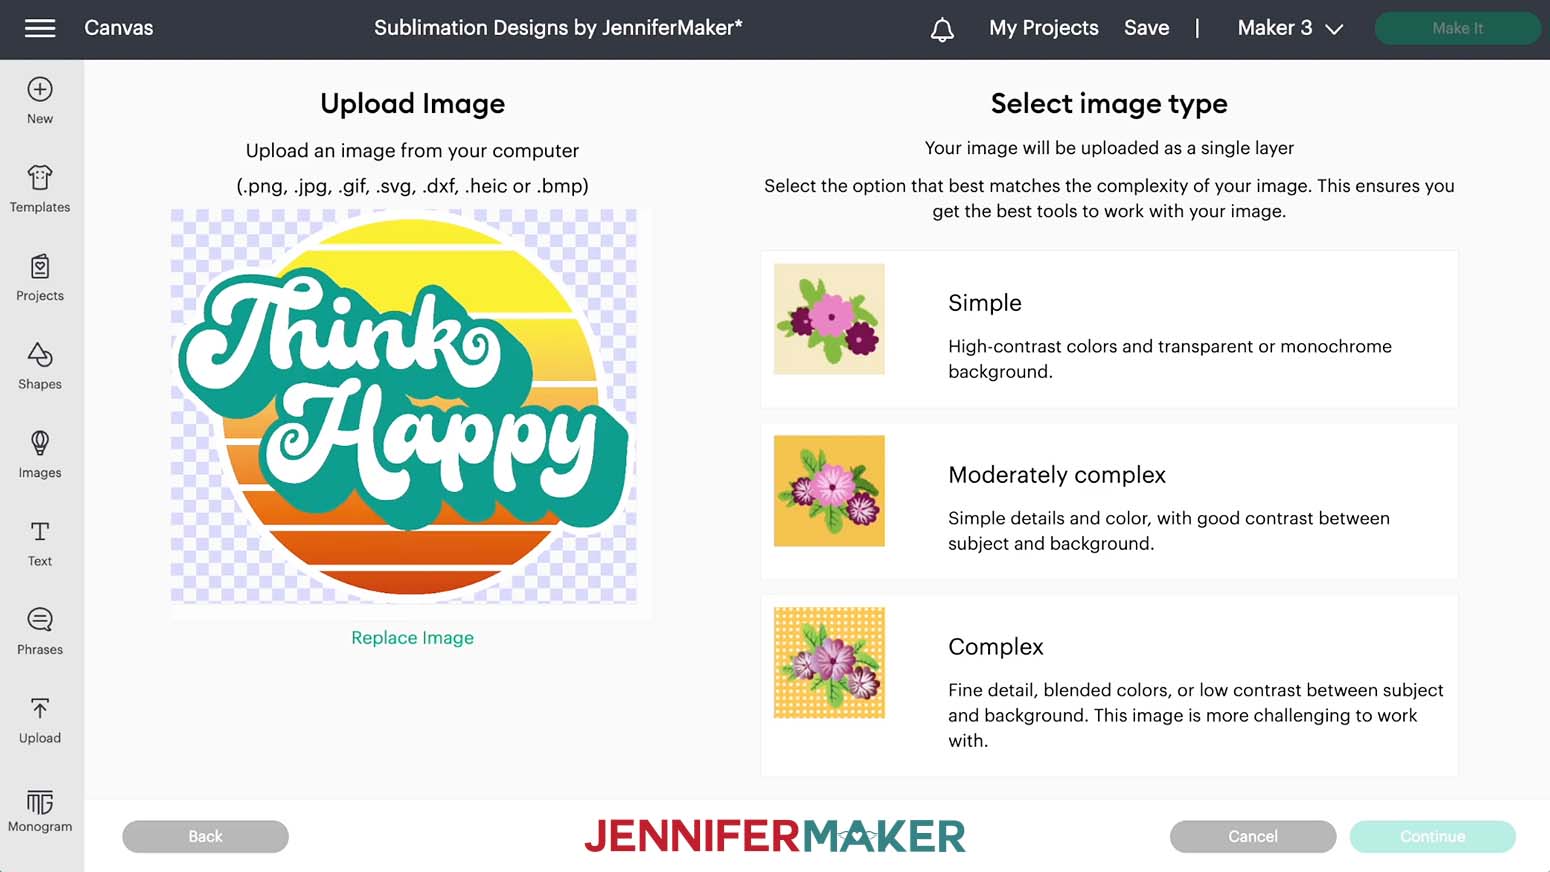
You do not need to do anything on the next screen, so click "Apply & Continue."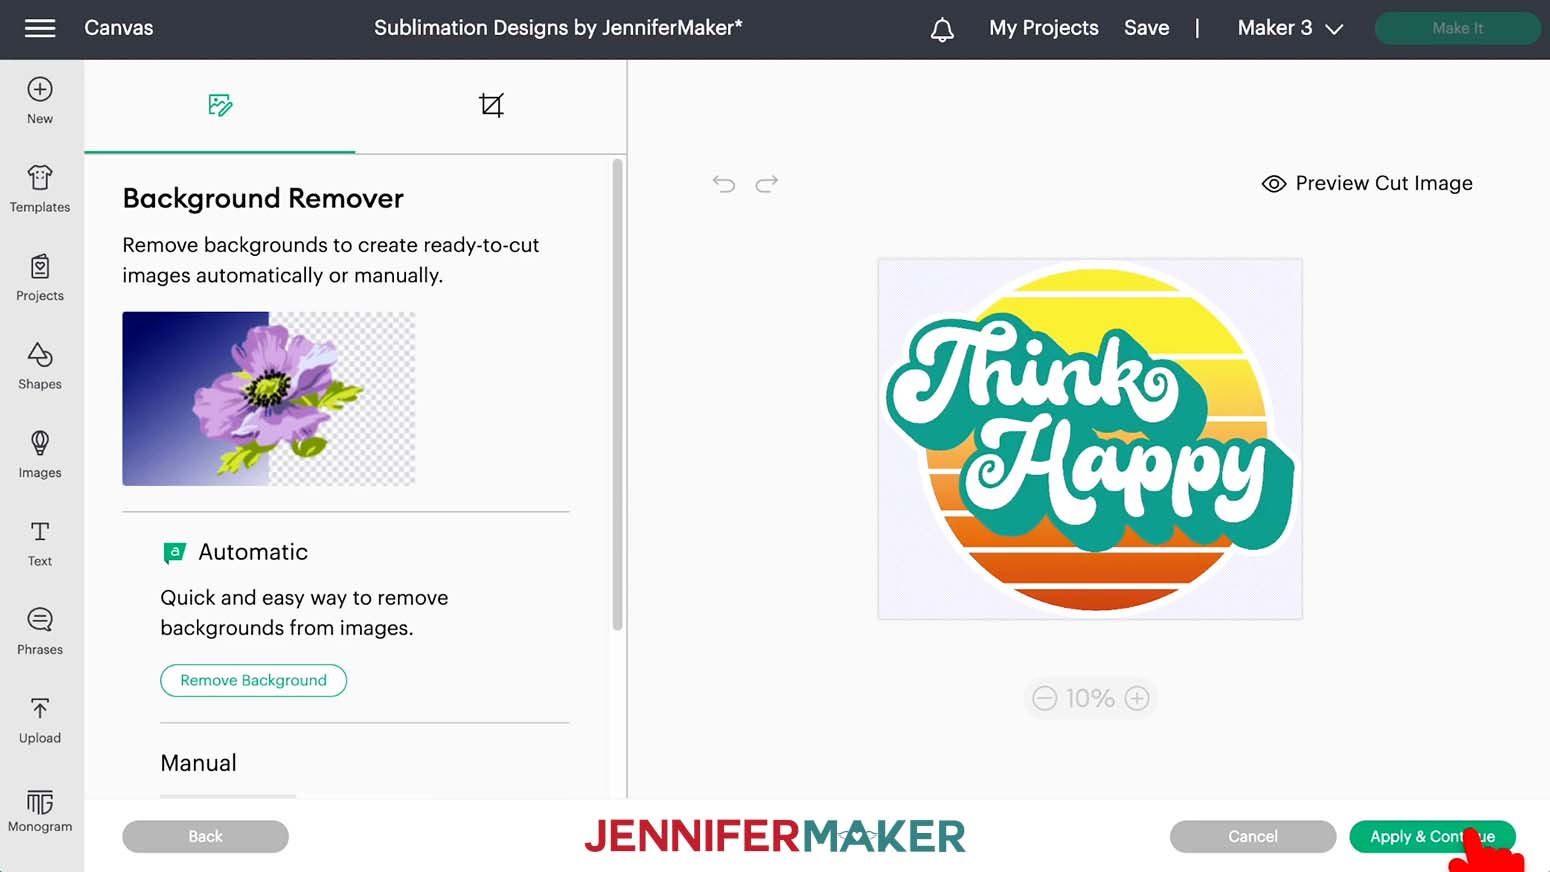
For Upload Type, select "Print Then Cut" and click "Upload."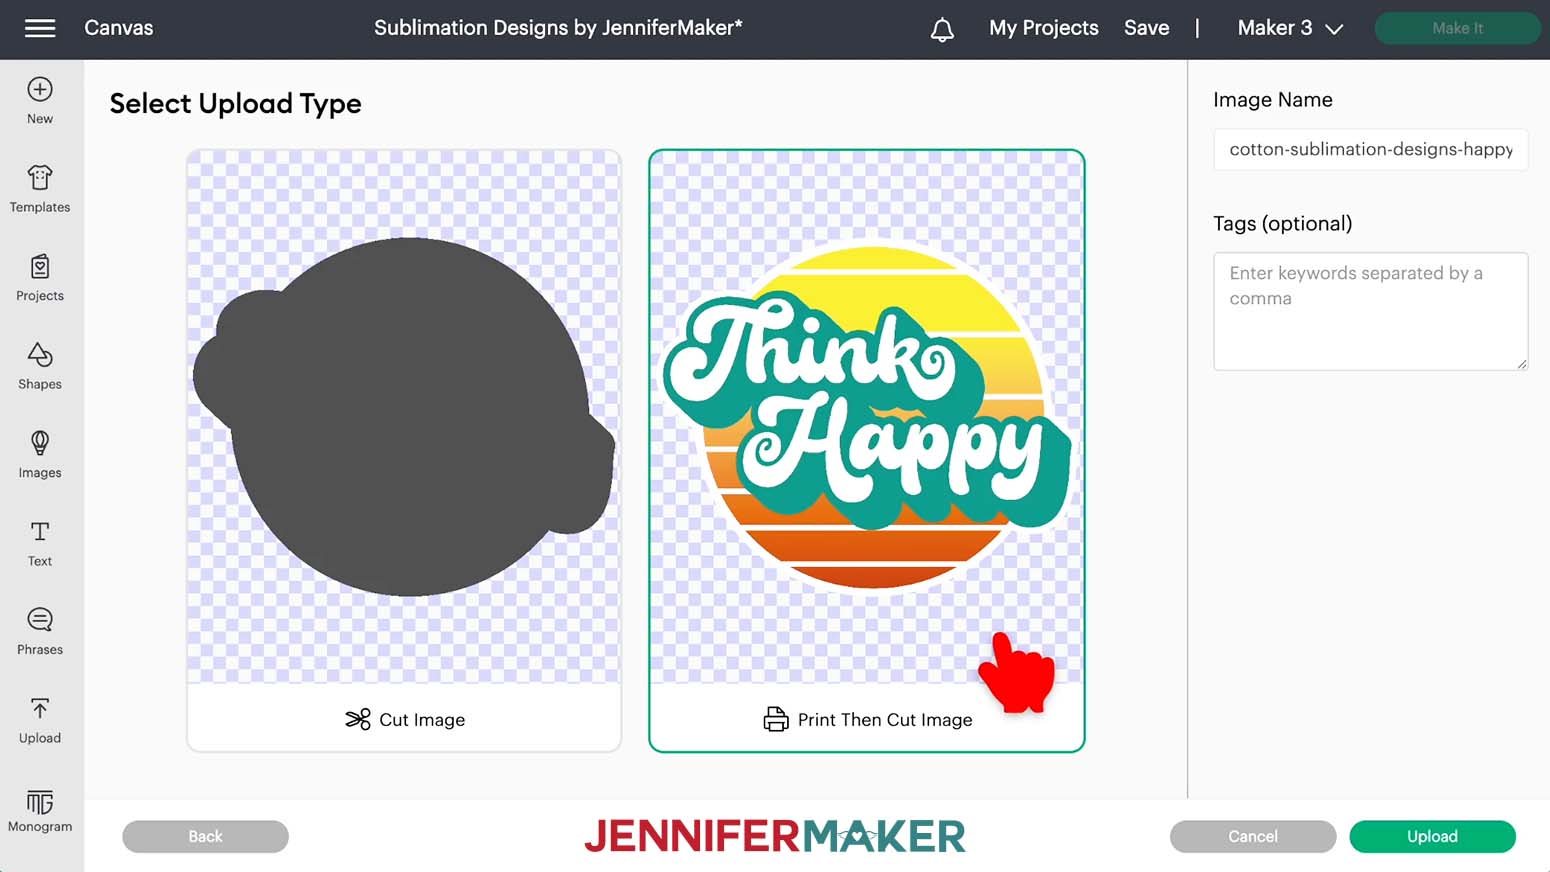
You should now see your design in your Recent Uploads. Select it and click "Add to Canvas."STEP 3: PREPARE YOUR DESIGN
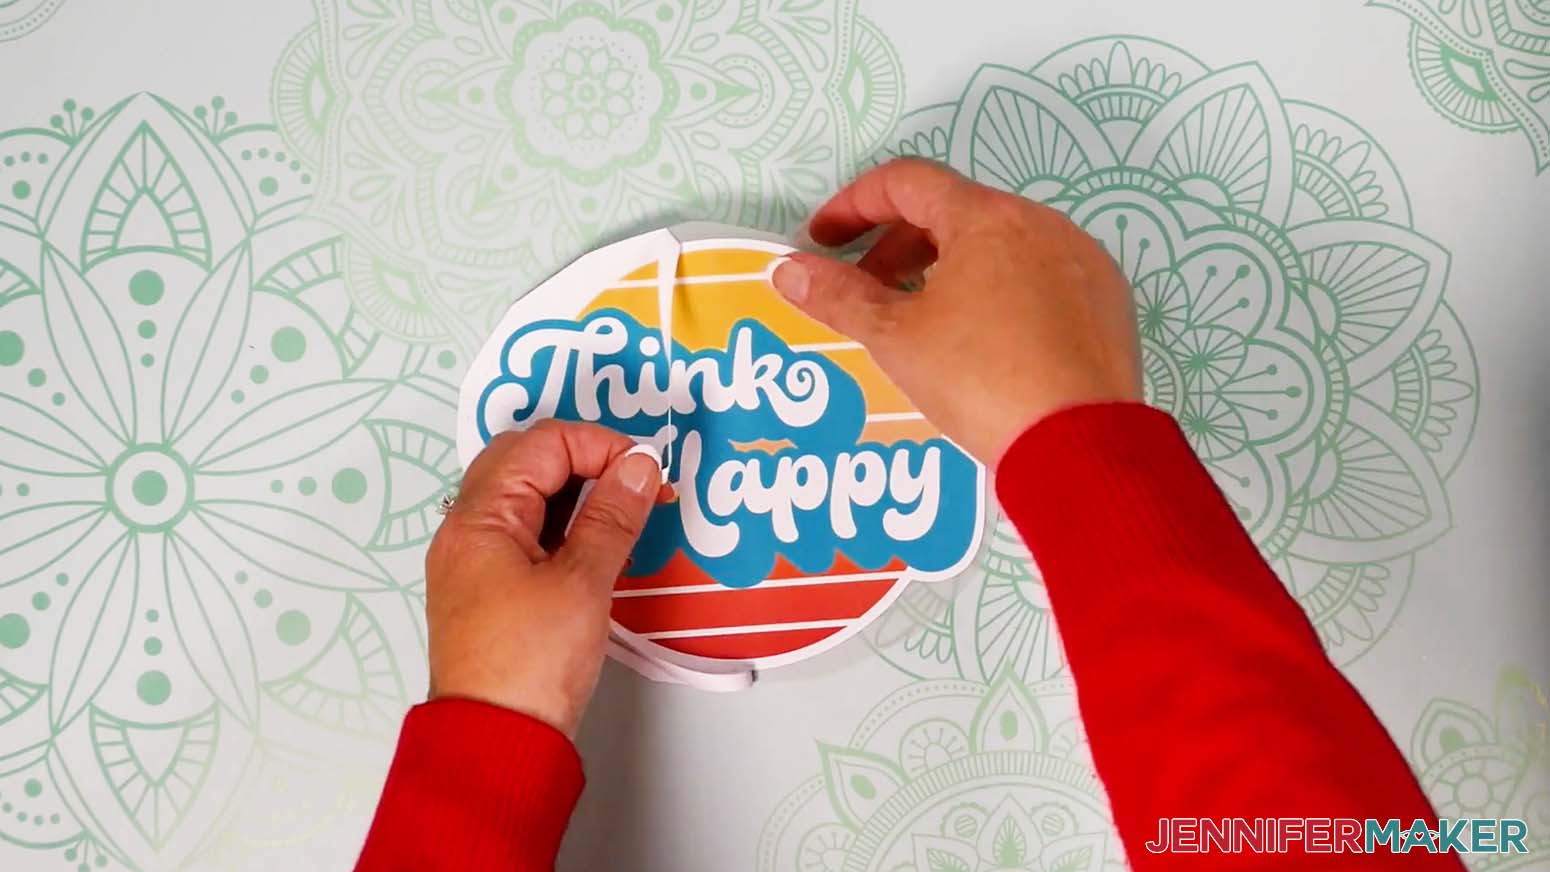
SISER EASYSUBLI HTV WITH SUBLIMATION PAPER
You can zoom out to see all of the design by clicking on the minus (-) sign on the lower left.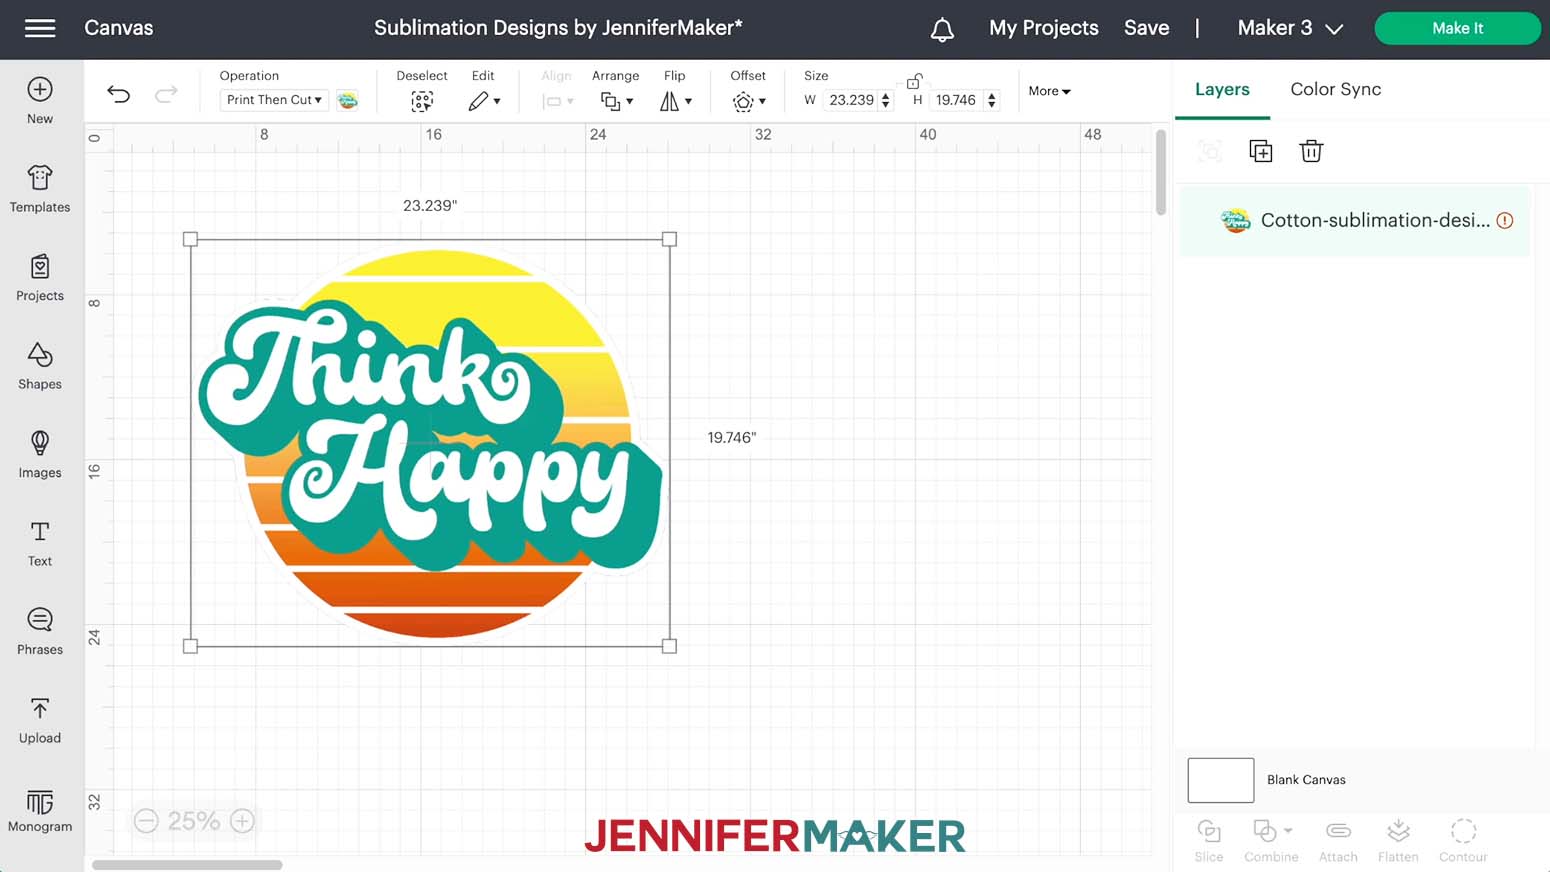
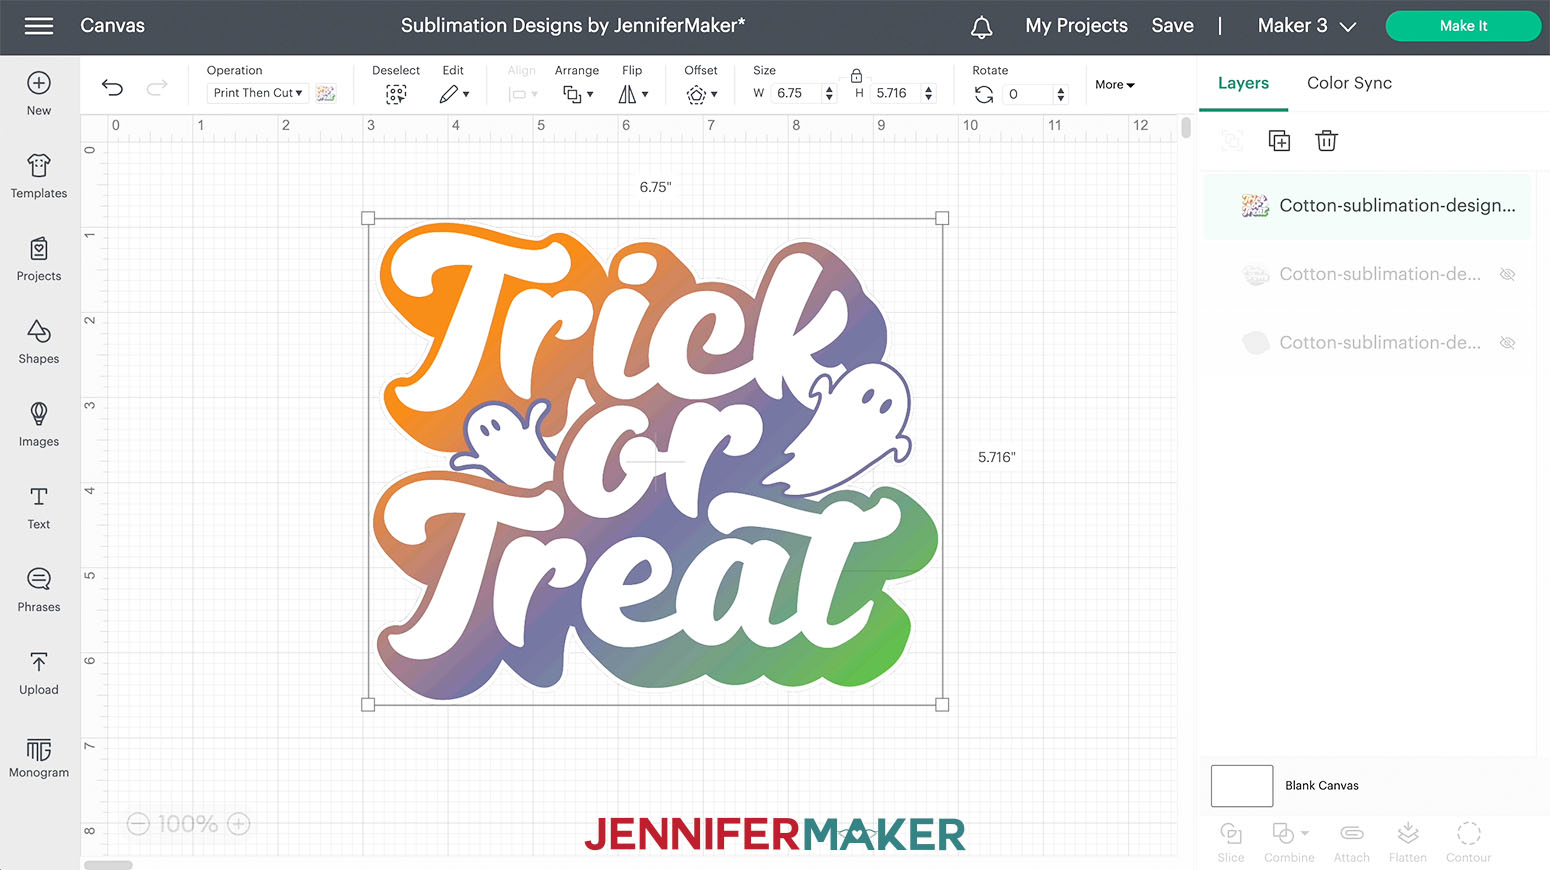
As you can see, the design is huge. That's because of the way Design Space uploads PNGs. We need to make it fit within the Print then Cut dimensions, which are 6.75" x 9.25" as of September 2022.
To resize the design, make sure the lock icon is closed at the top. Type "6.75" in the Width (W) field under Size and press Enter. This will make the height 5.73". This will be the image we print on sublimation paper.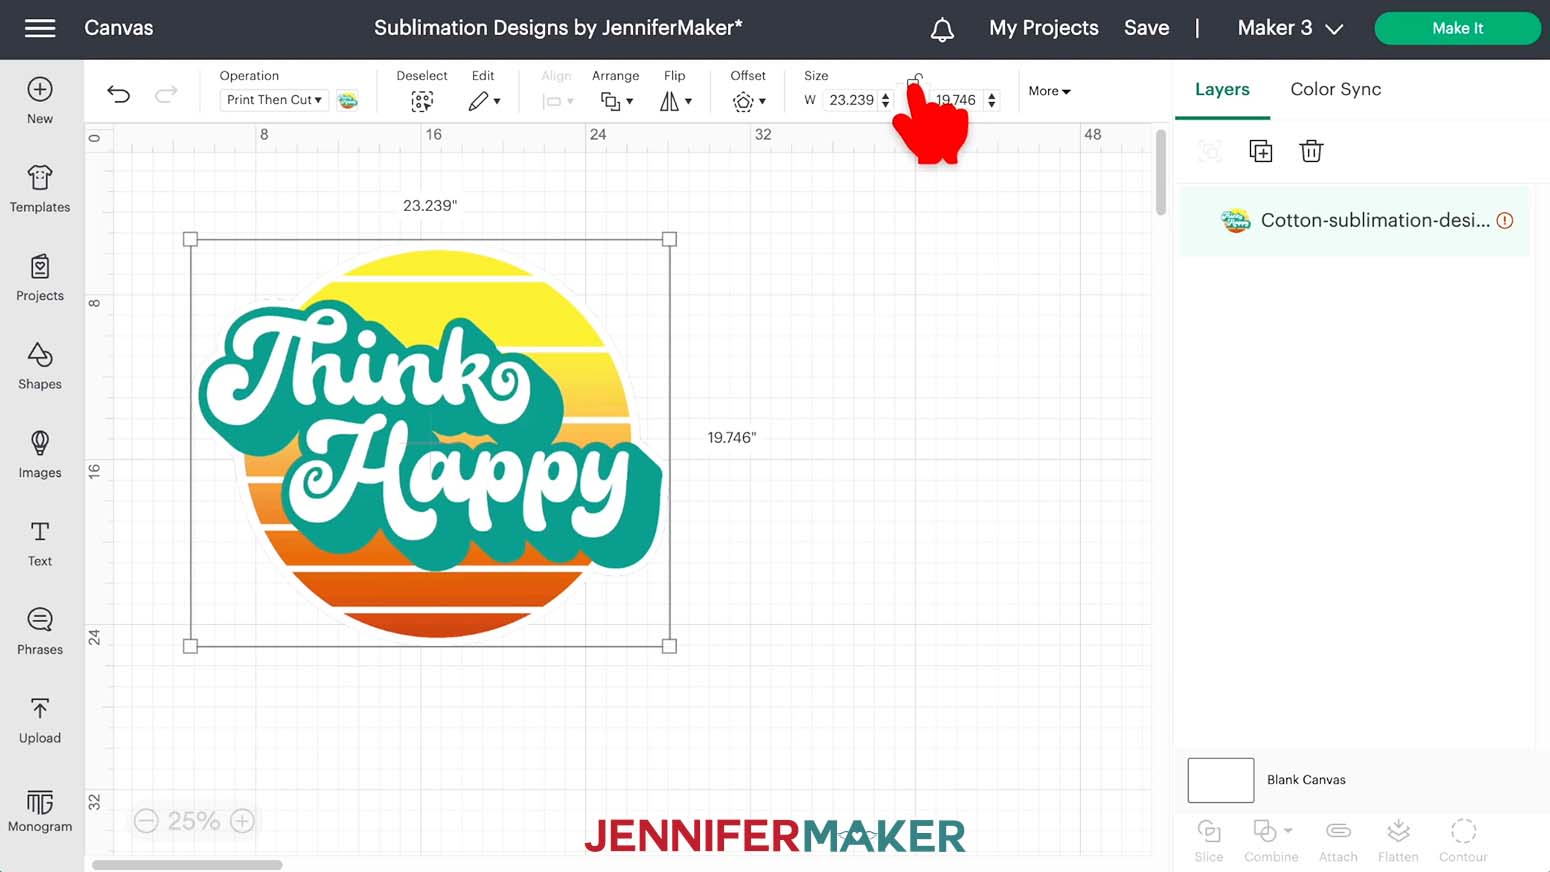
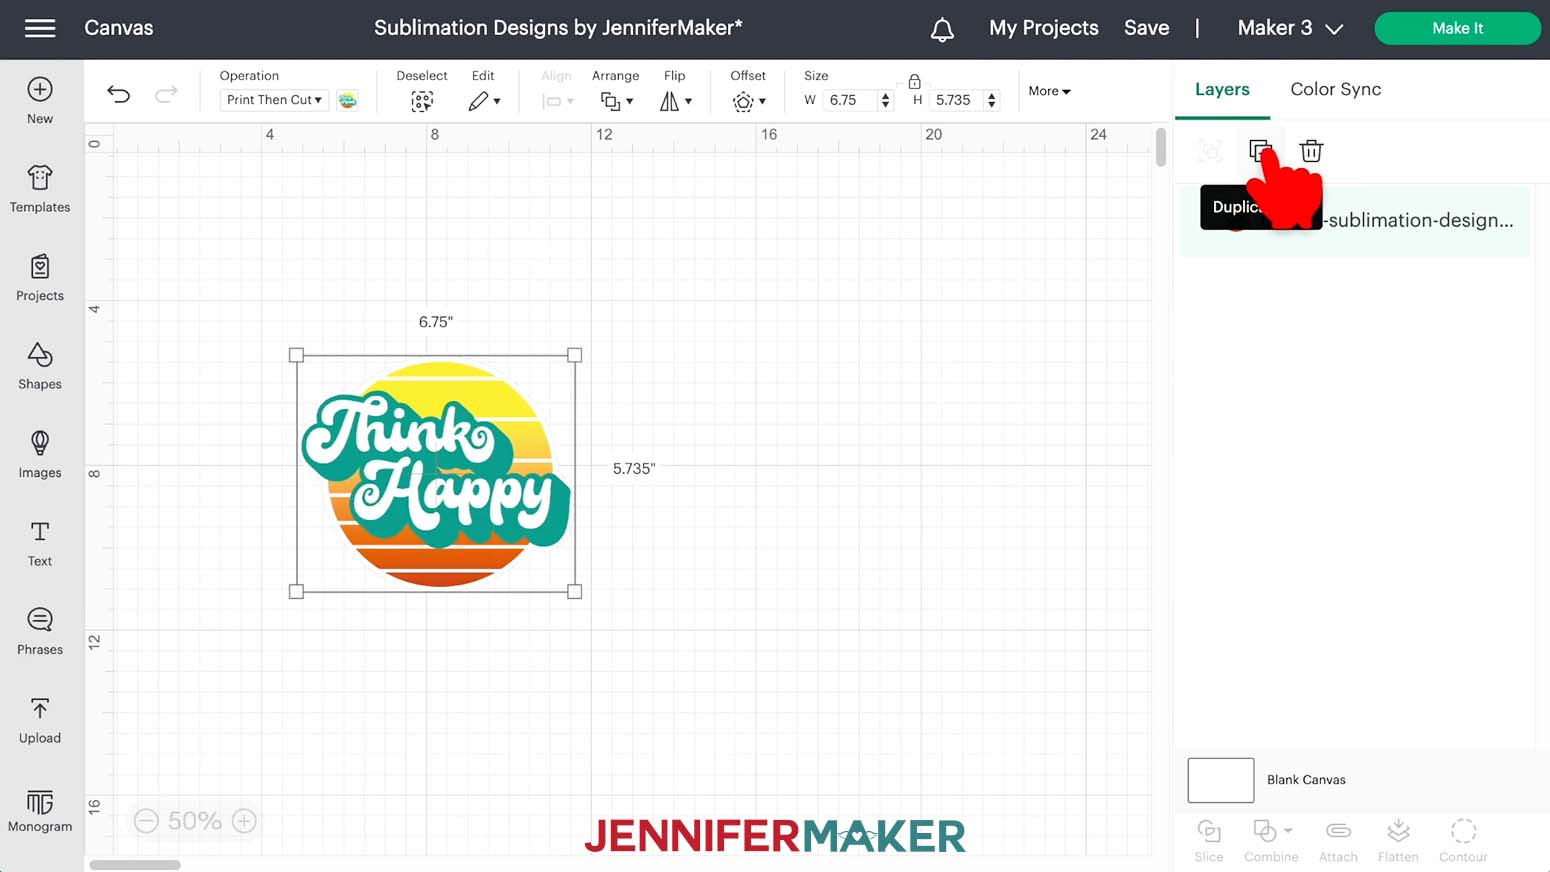
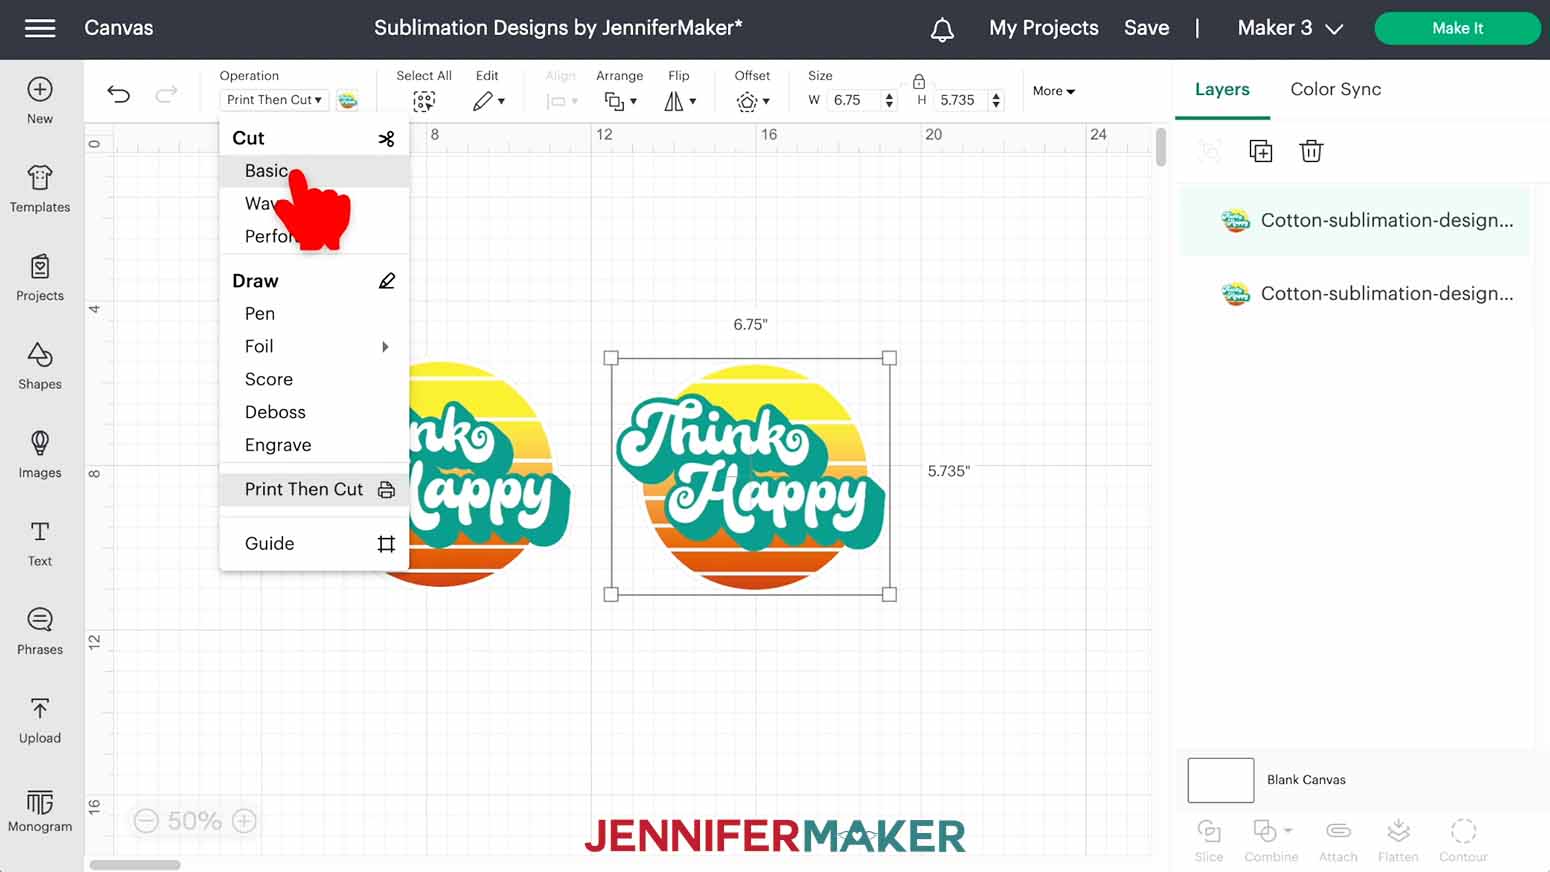
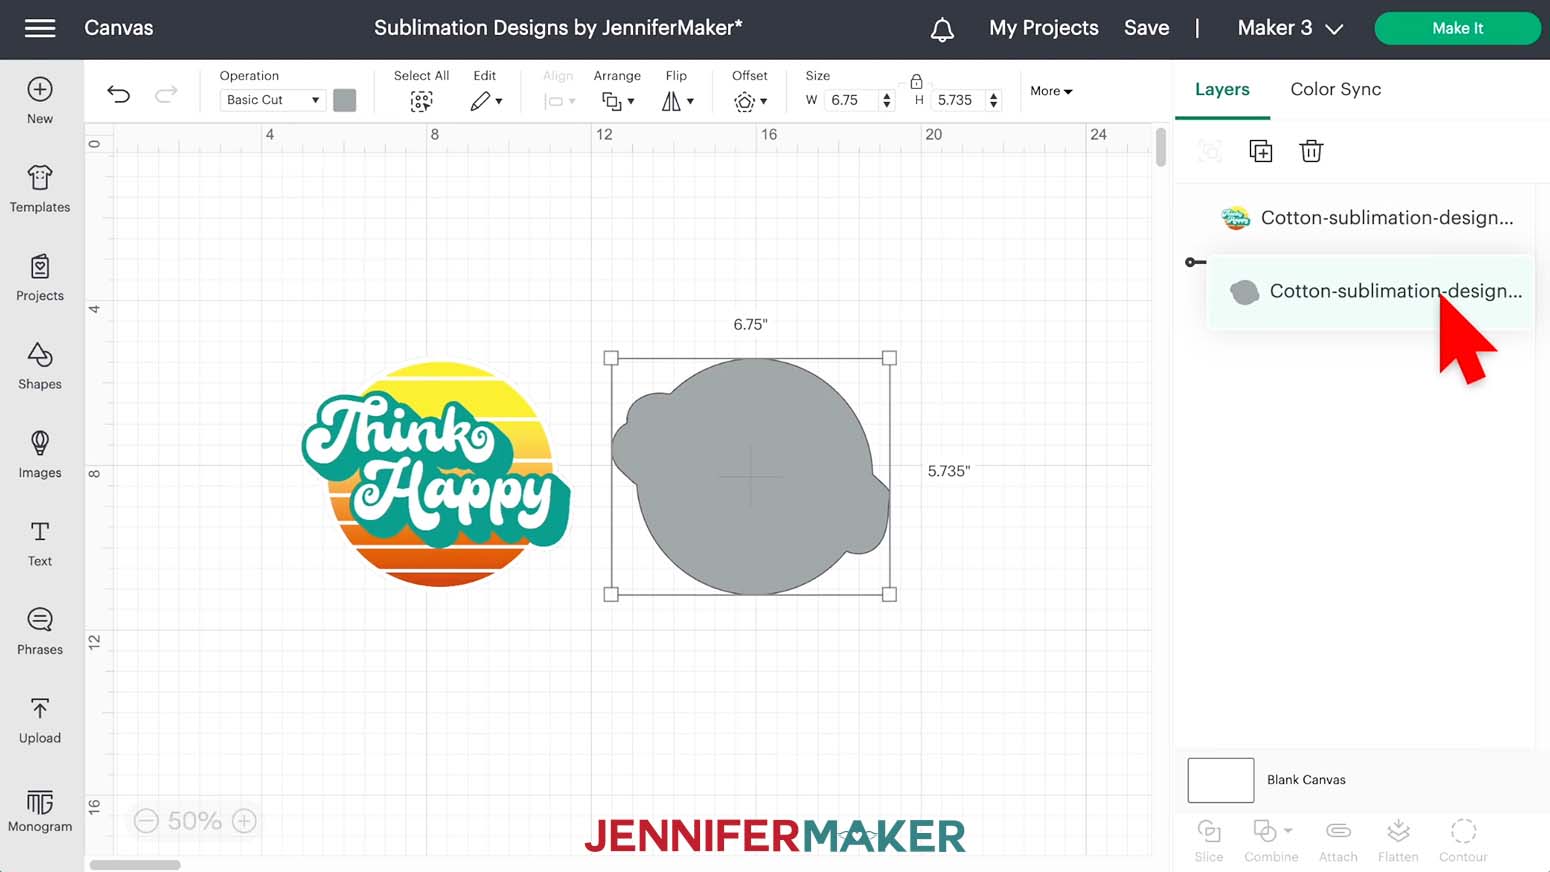
STEP 4: CUT YOUR DESIGN
Make sure the correct machine is selected, then click "Make It" in the upper right corner.
If prompted, click "On Mat" on the pop up and click Continue.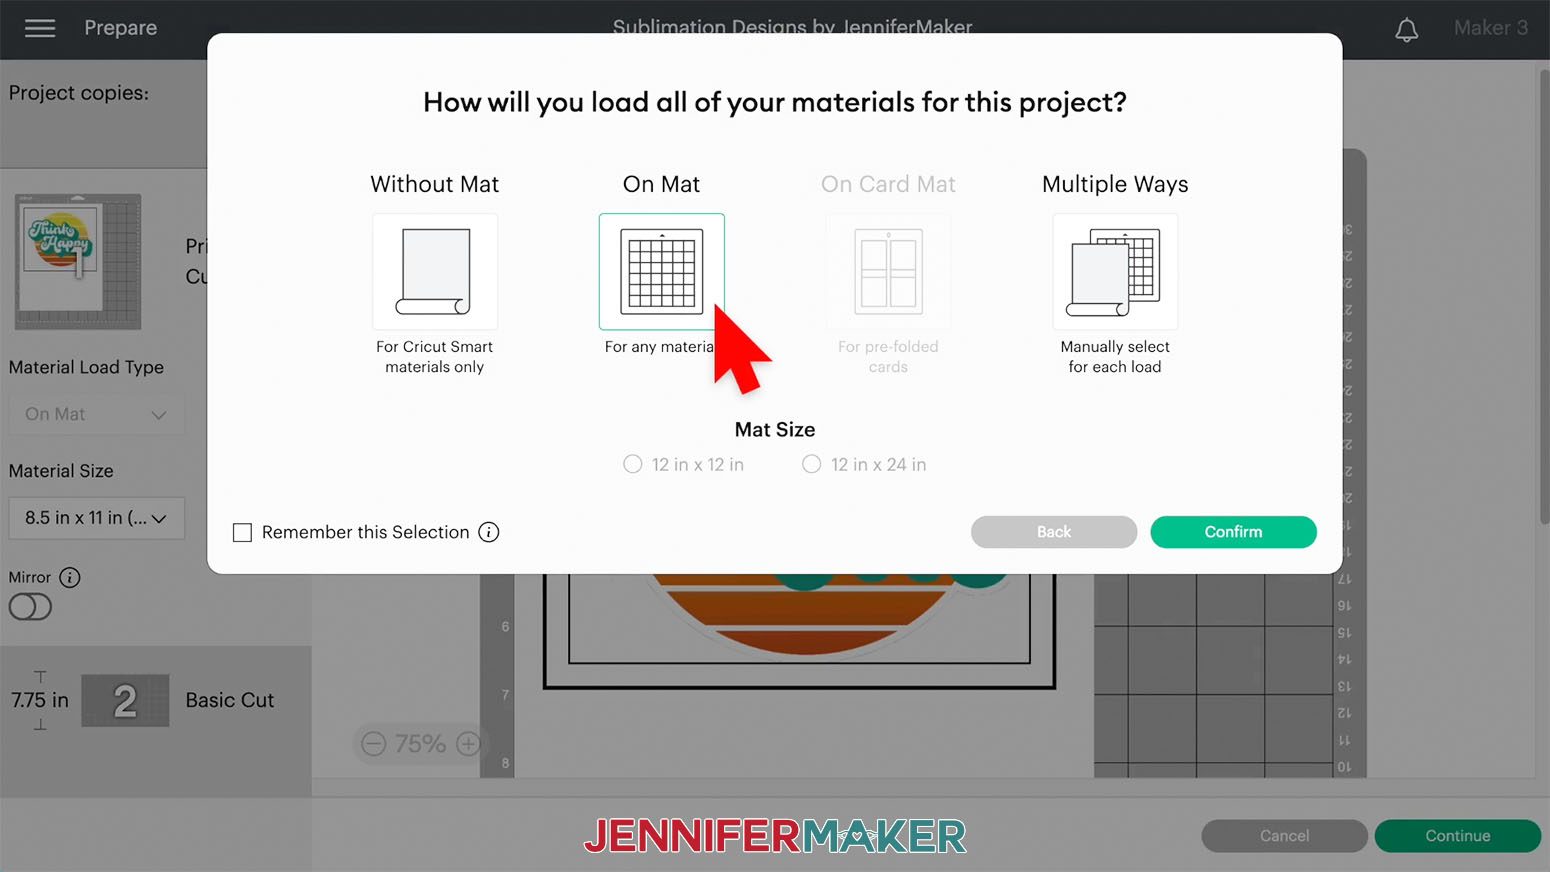
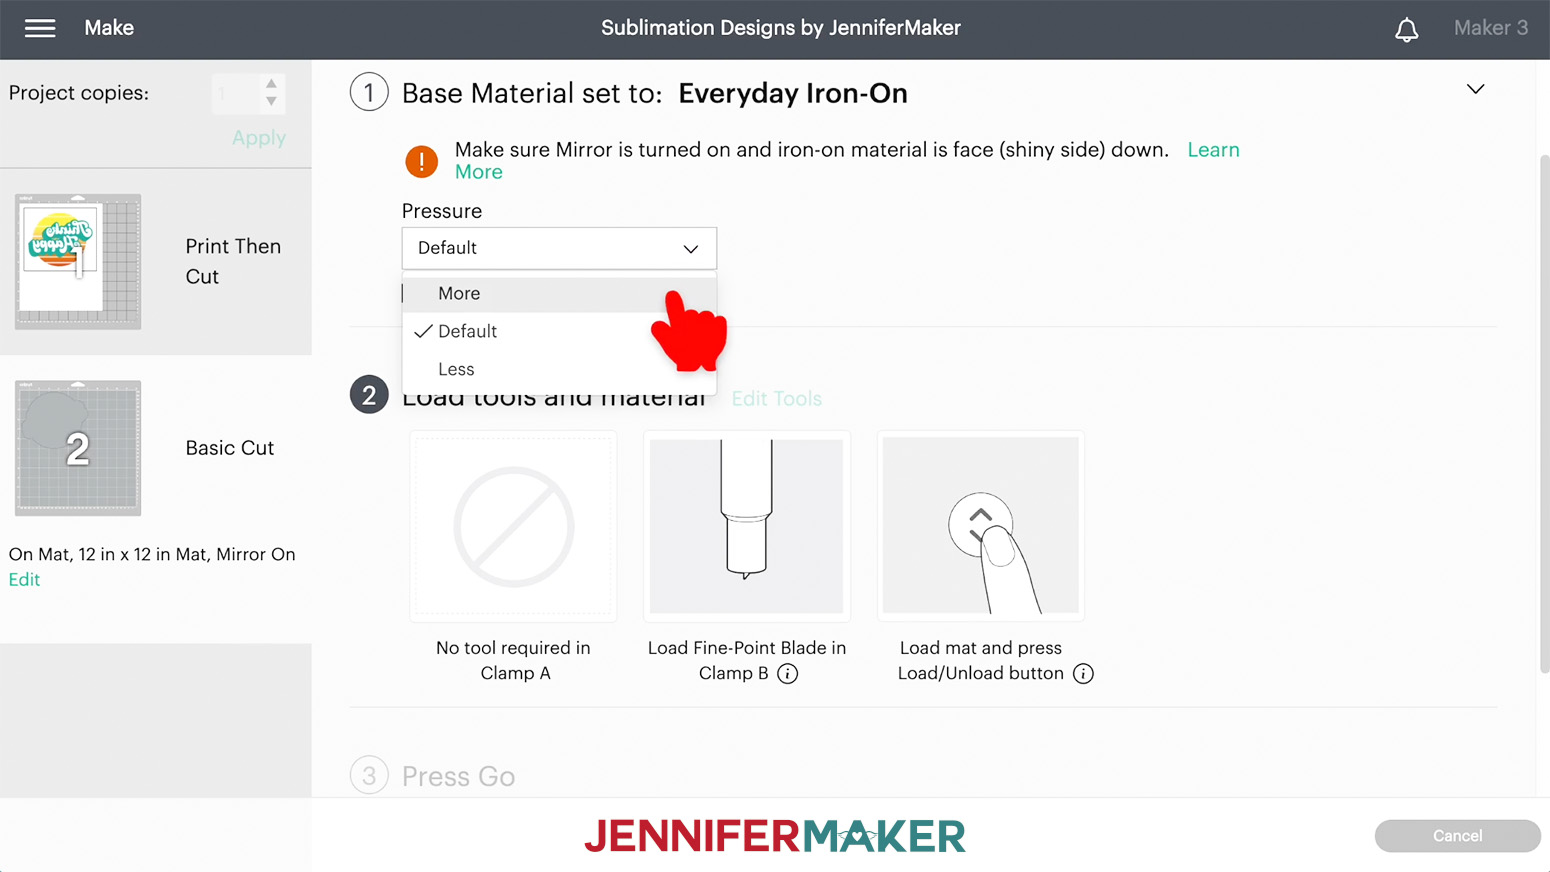
On the Prepare screen, make sure your first mat says Print Then Cut and your second mat says Basic Cut. Check that the Material Size for your first mat is 8.5" x 11" and your second mat is the size of your EasySubli. Mine is 8.4 x 11, so I'll use the same option.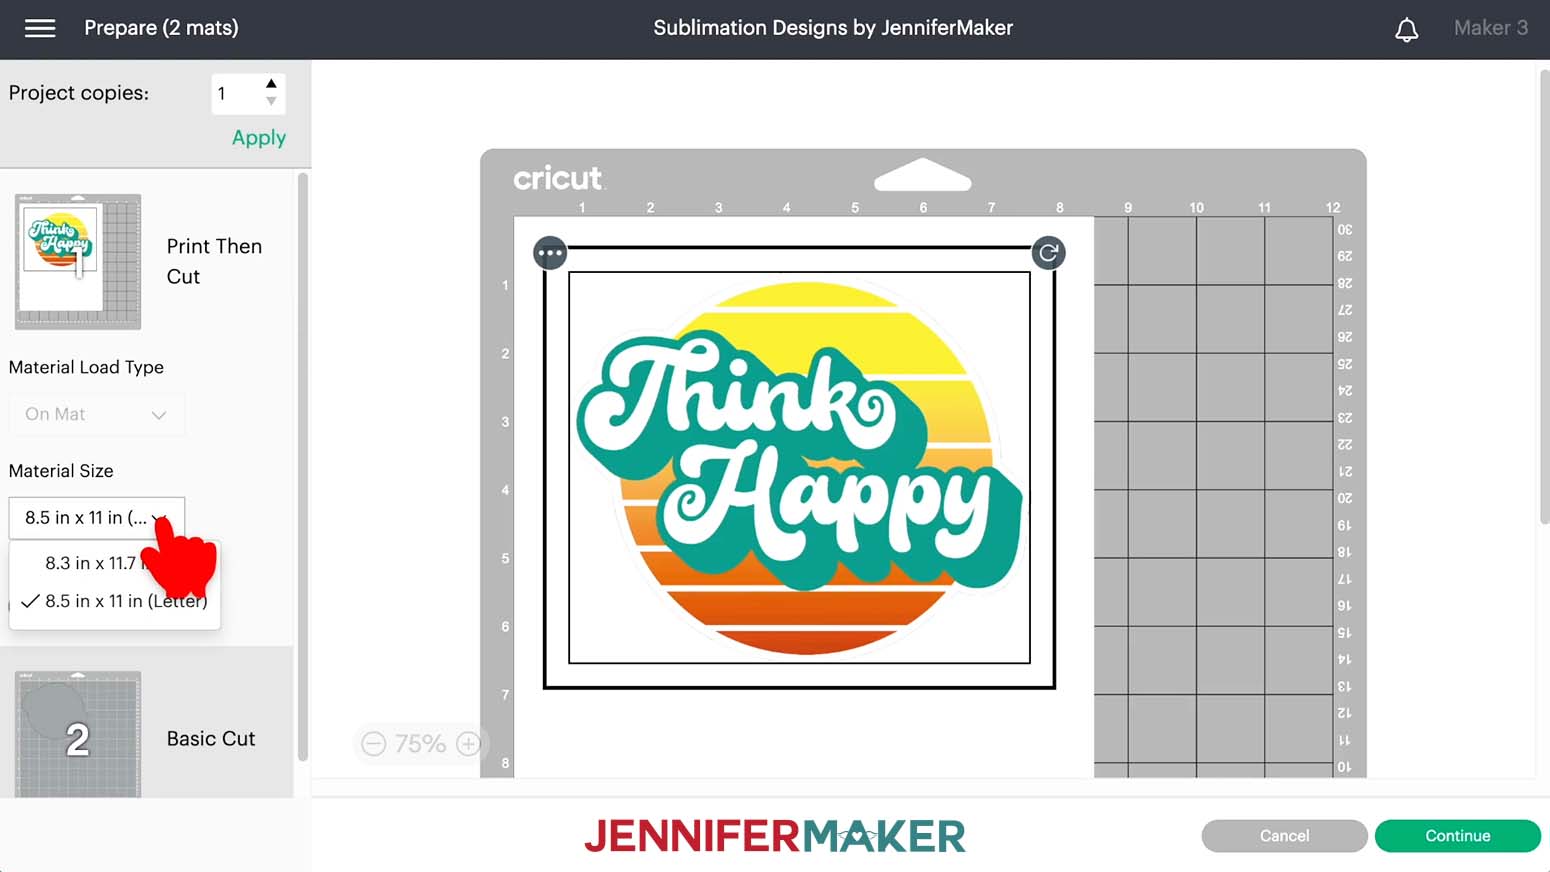
Click the green Send to Printer button to open the Print Setup window.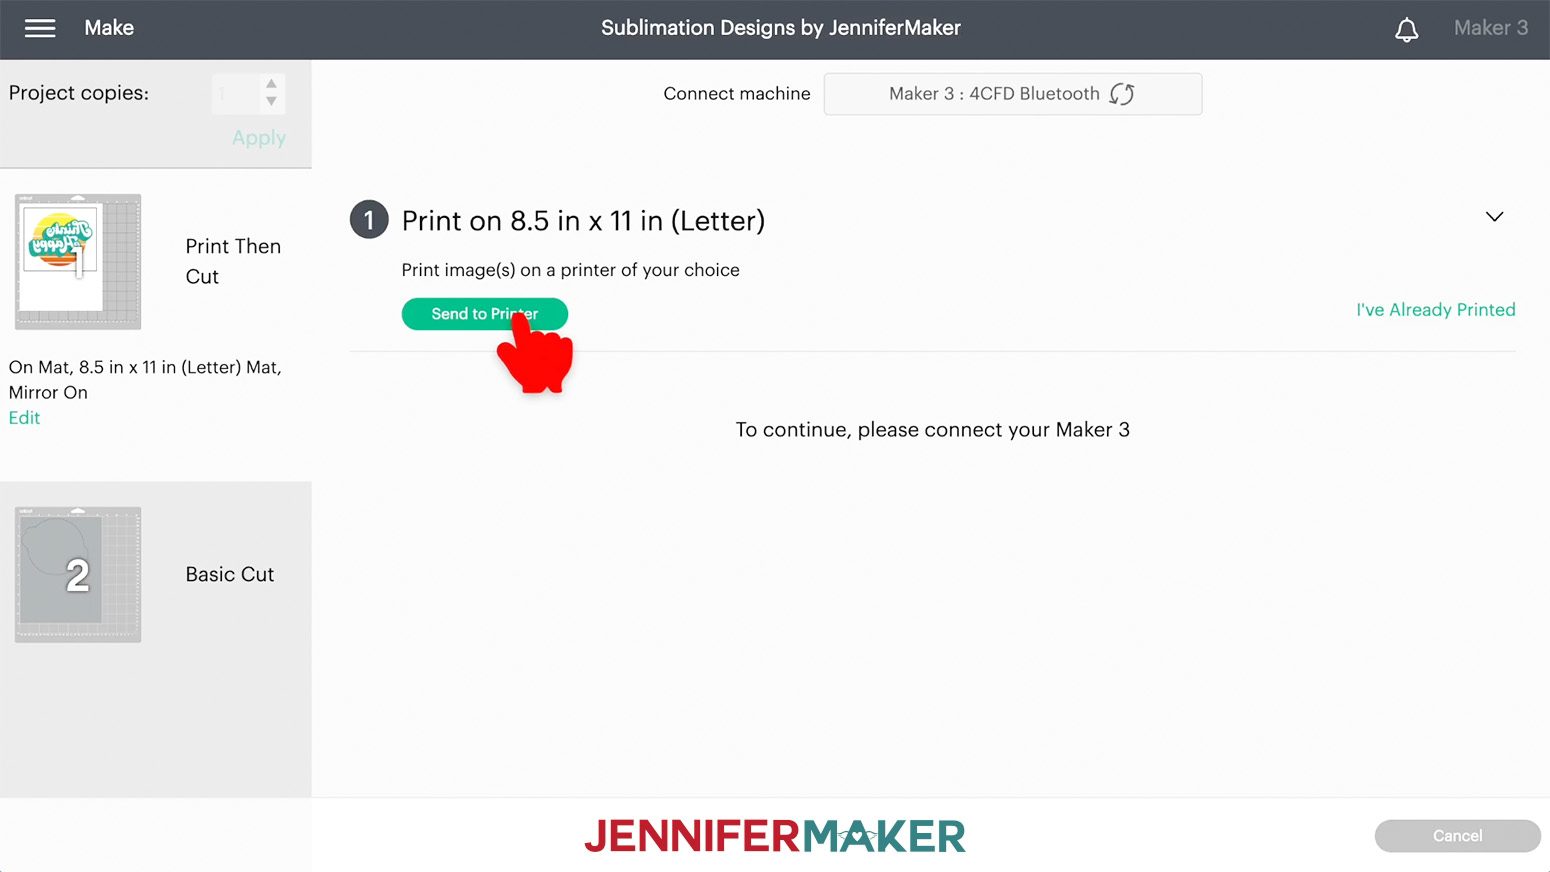
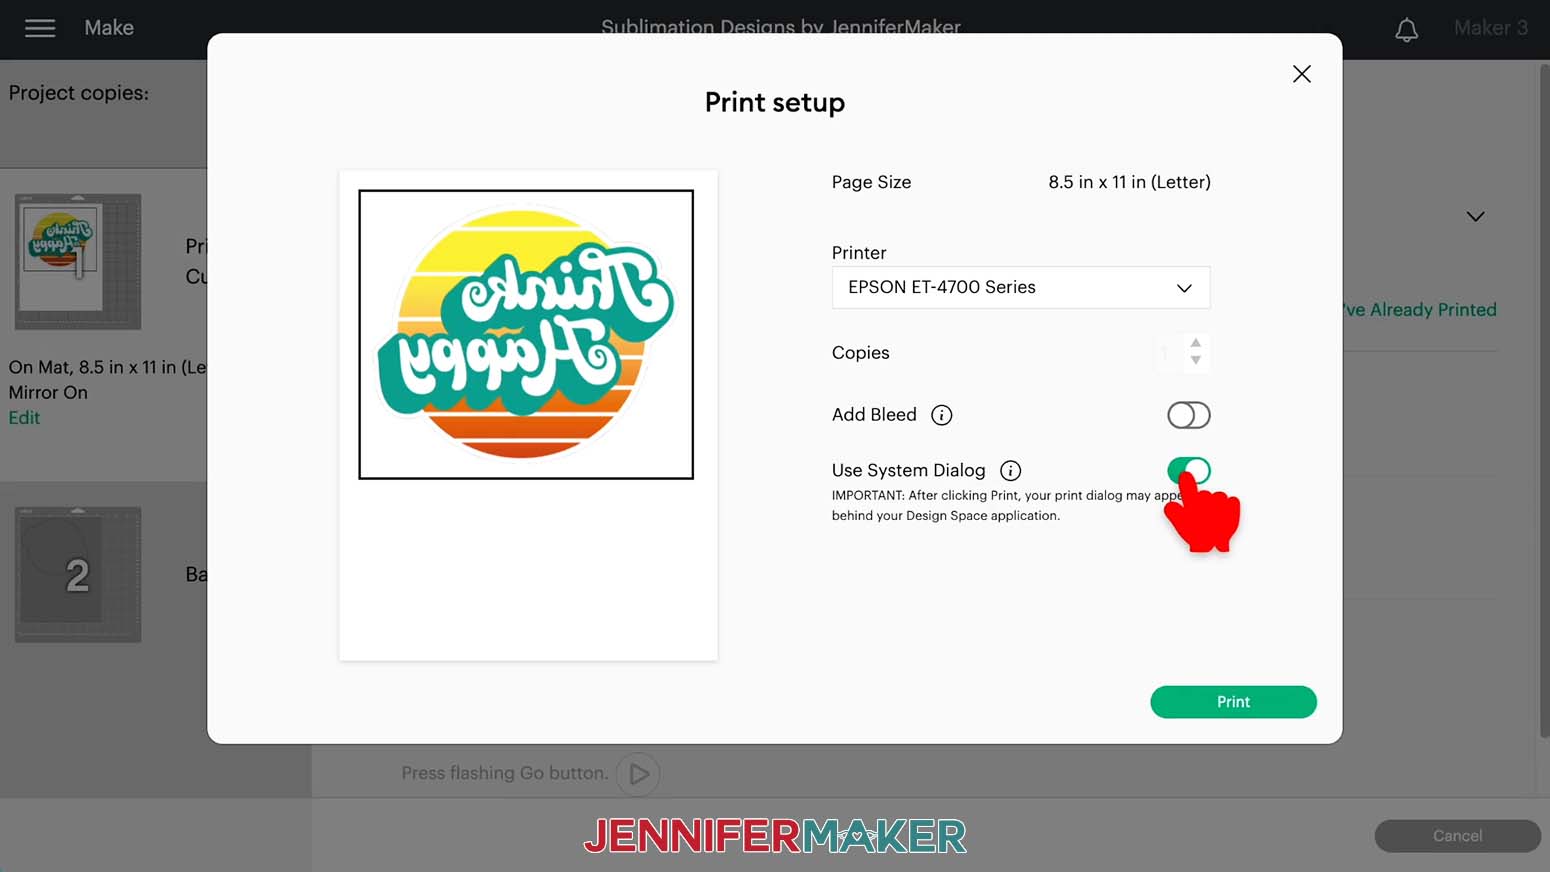
The print screen for your printer will appear, but it might be hidden behind Design Space. Minimize your Cricut window to see the print settings window.
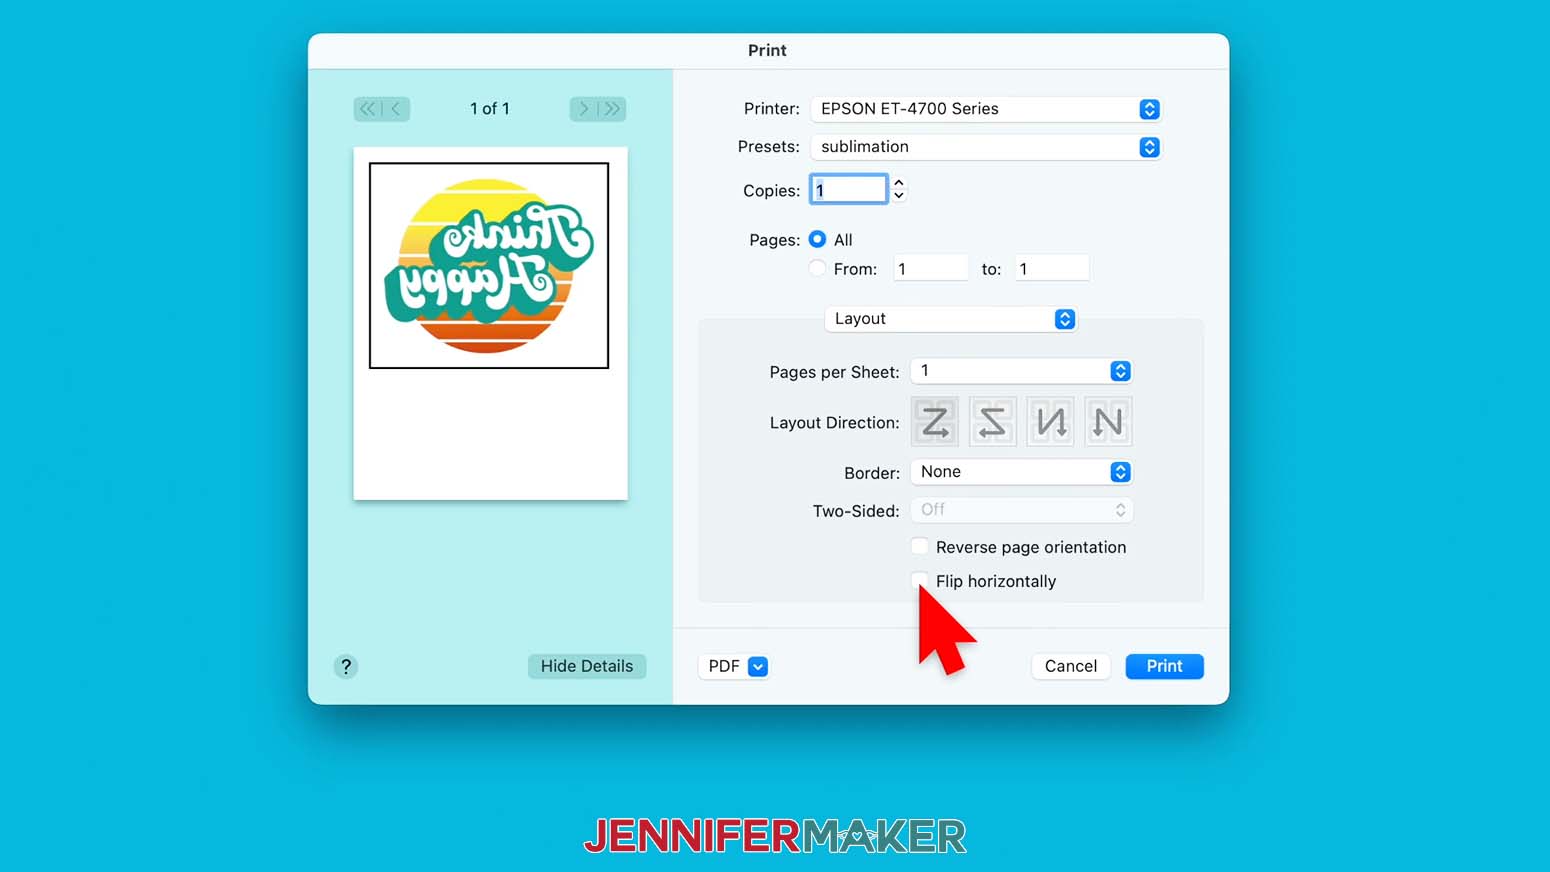
Your window will look different depending on your computer and printer. Make sure your printer is listed in the window. Set the paper and print quality to the best matte options available.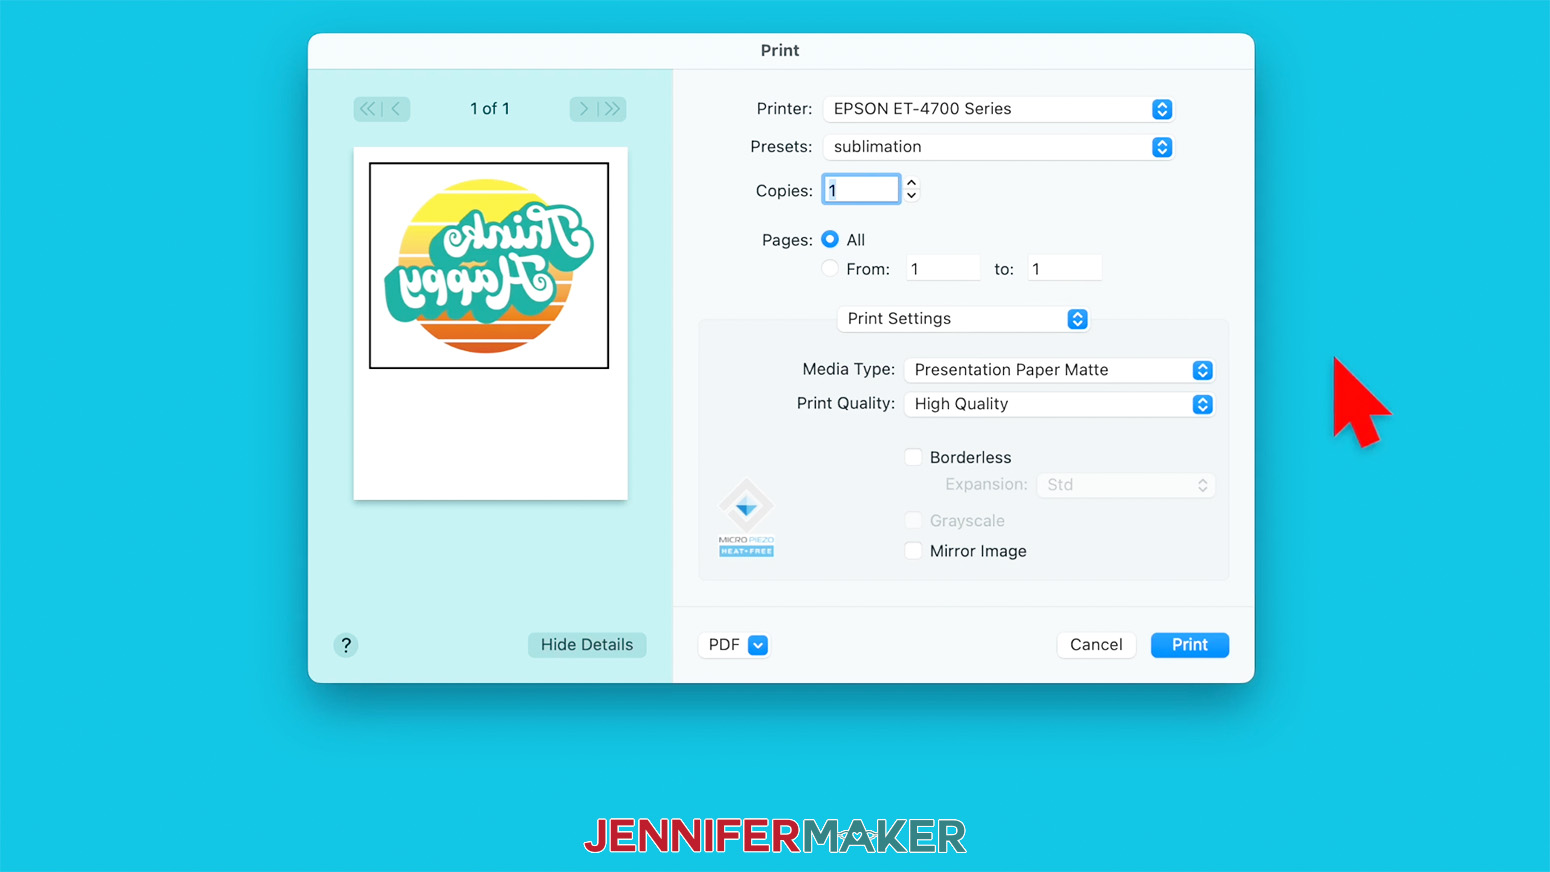

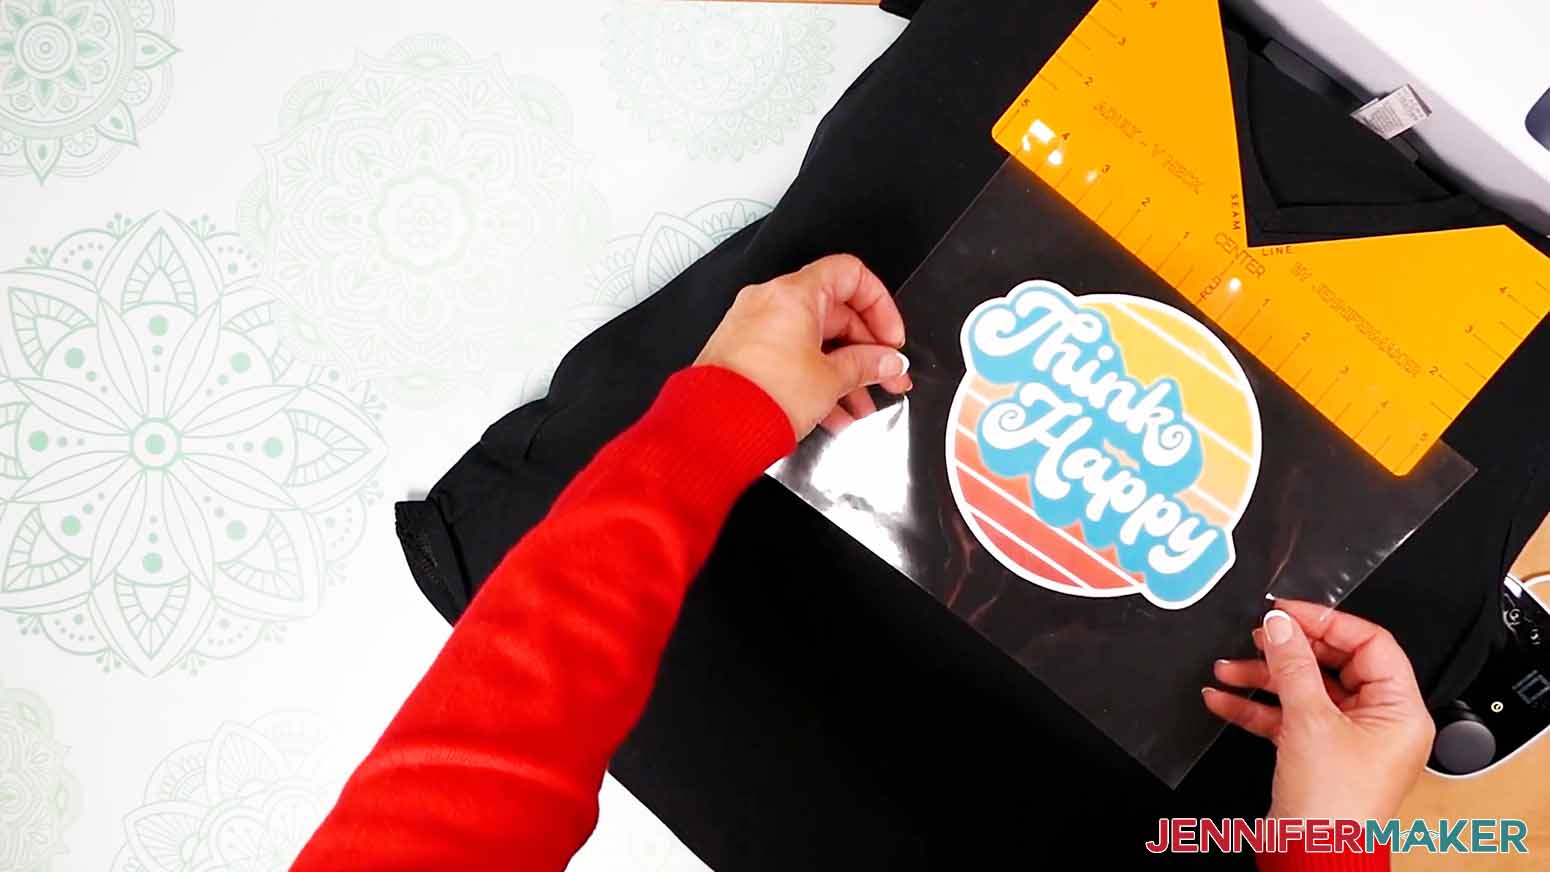
See the black box around my design? This is called a registration box and is used by your Cricut machine to tell it exactly where to cut your project.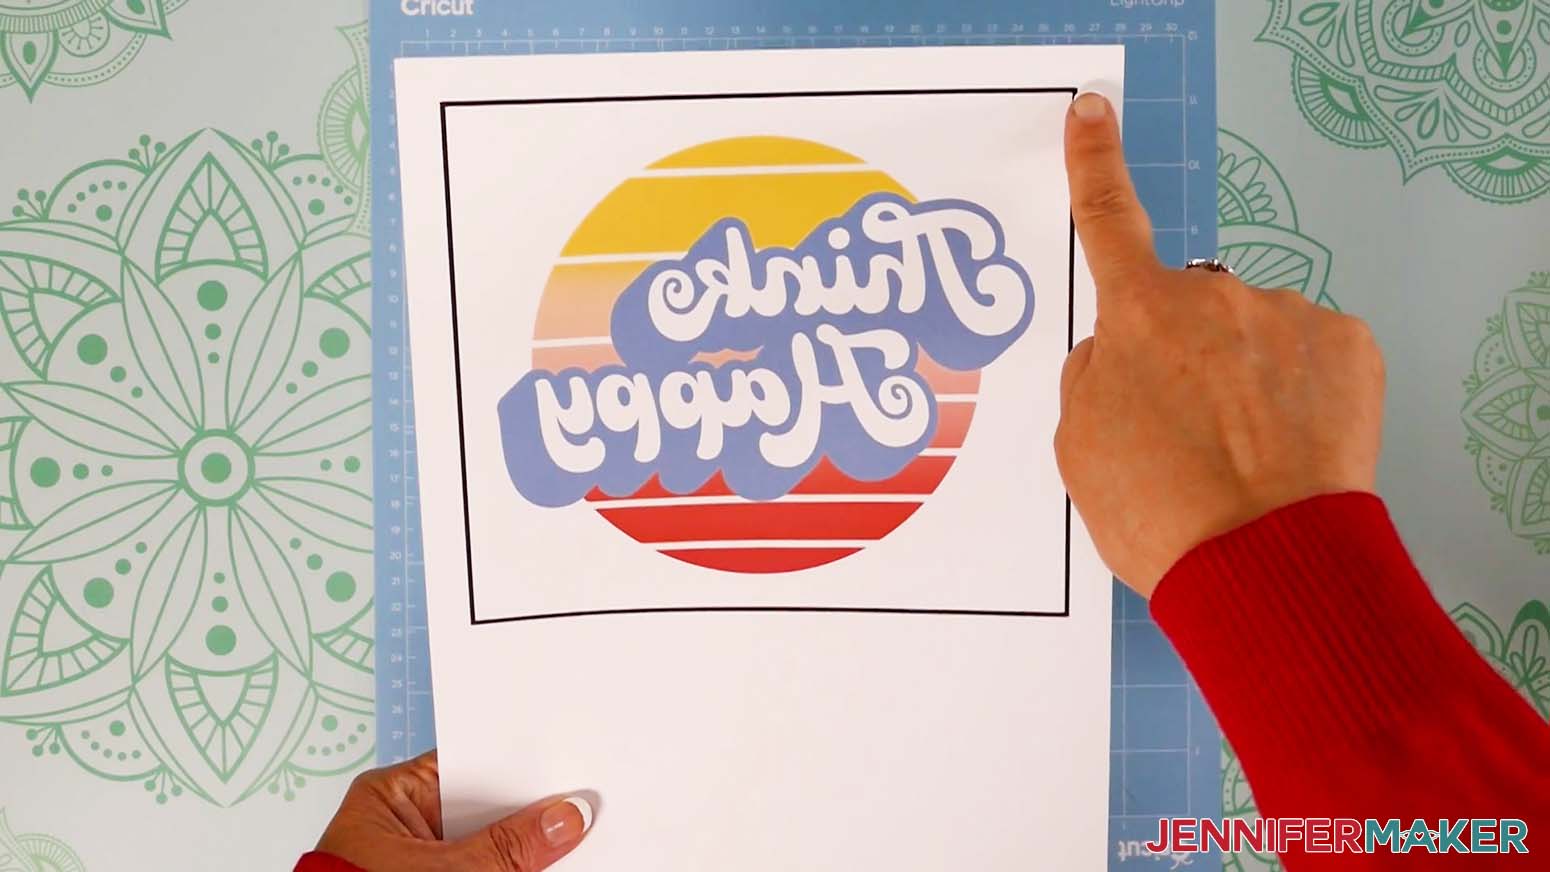
Place your printed sheet on your blue LightGrip machine mat like it is on the screen prompt. Lay a clean piece of printer paper over the top and use a brayer to adhere it well.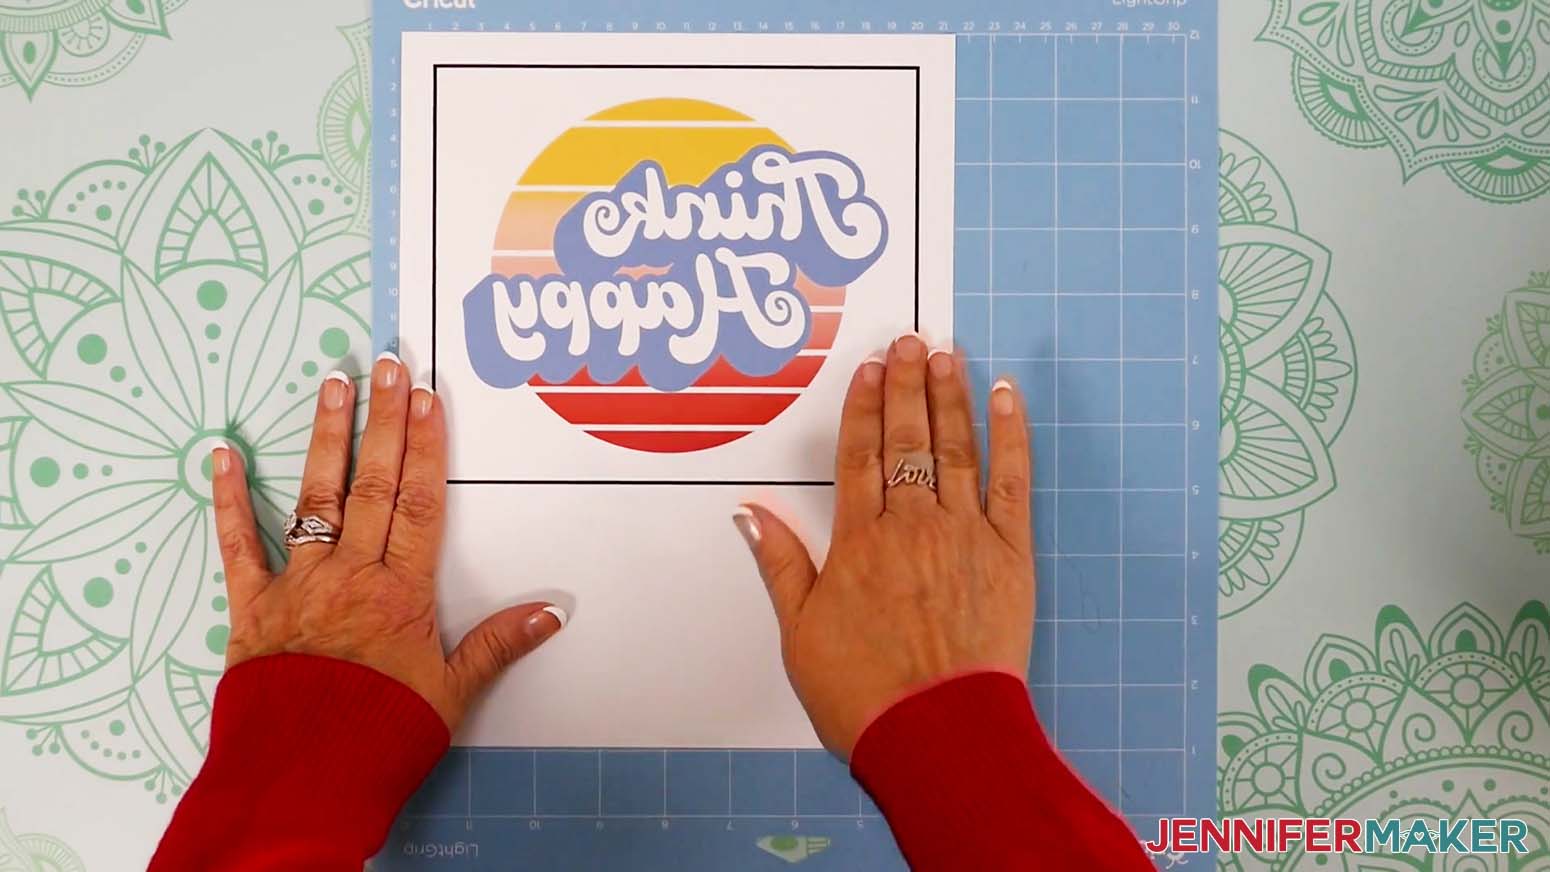
Then, load the mat with your printed sheet into the machine and press the flashing button to cut your design.
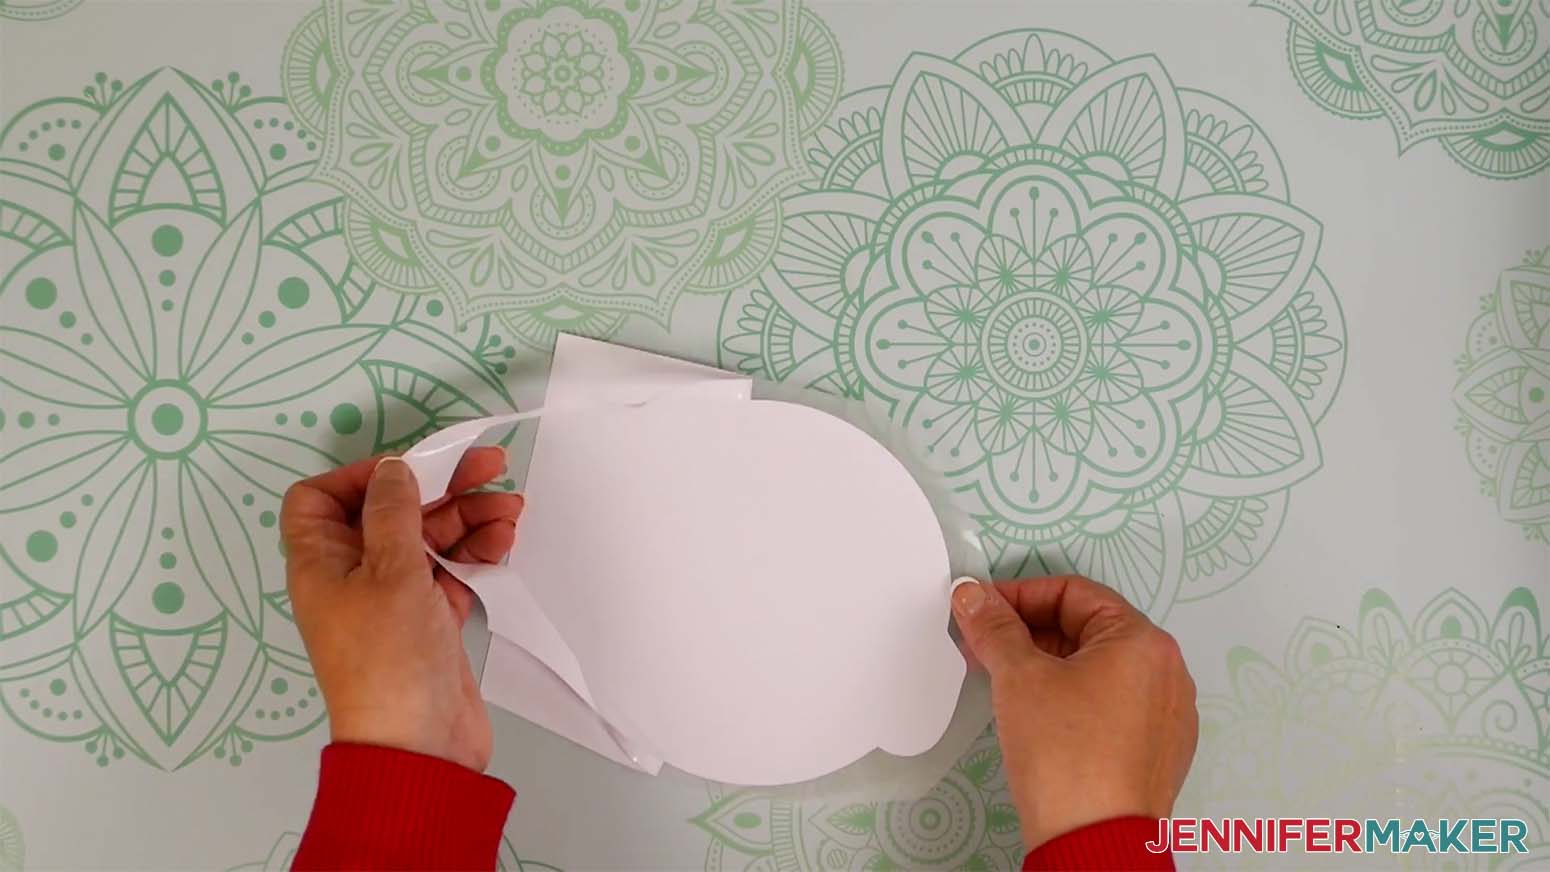
When the cut is finished, unload the mat, flip it over, and roll it back to release the paper. This helps prevent the material from curling and ripping.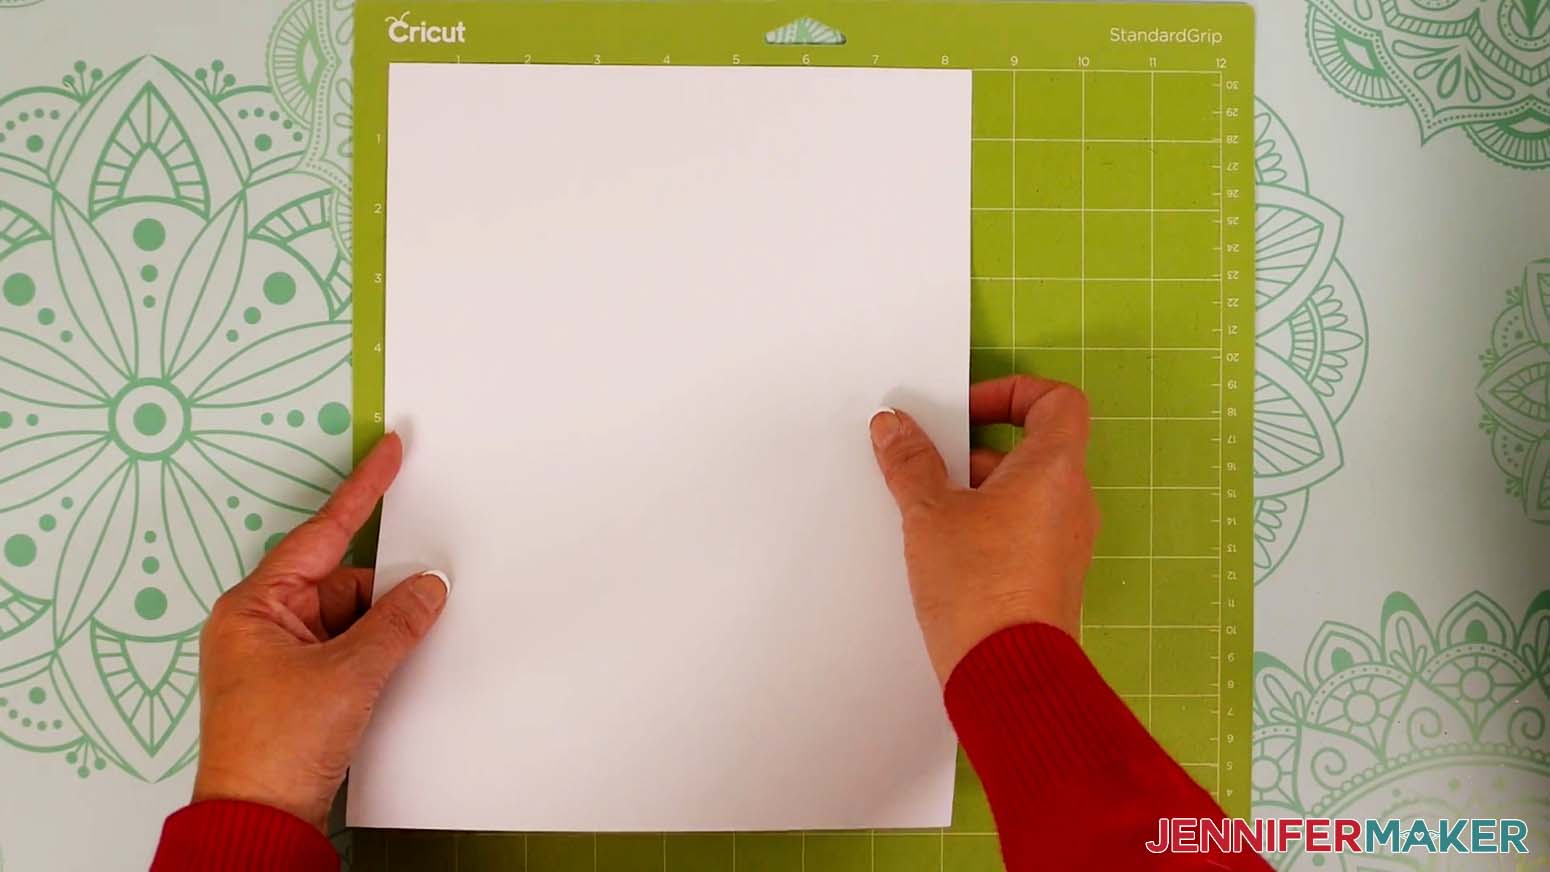
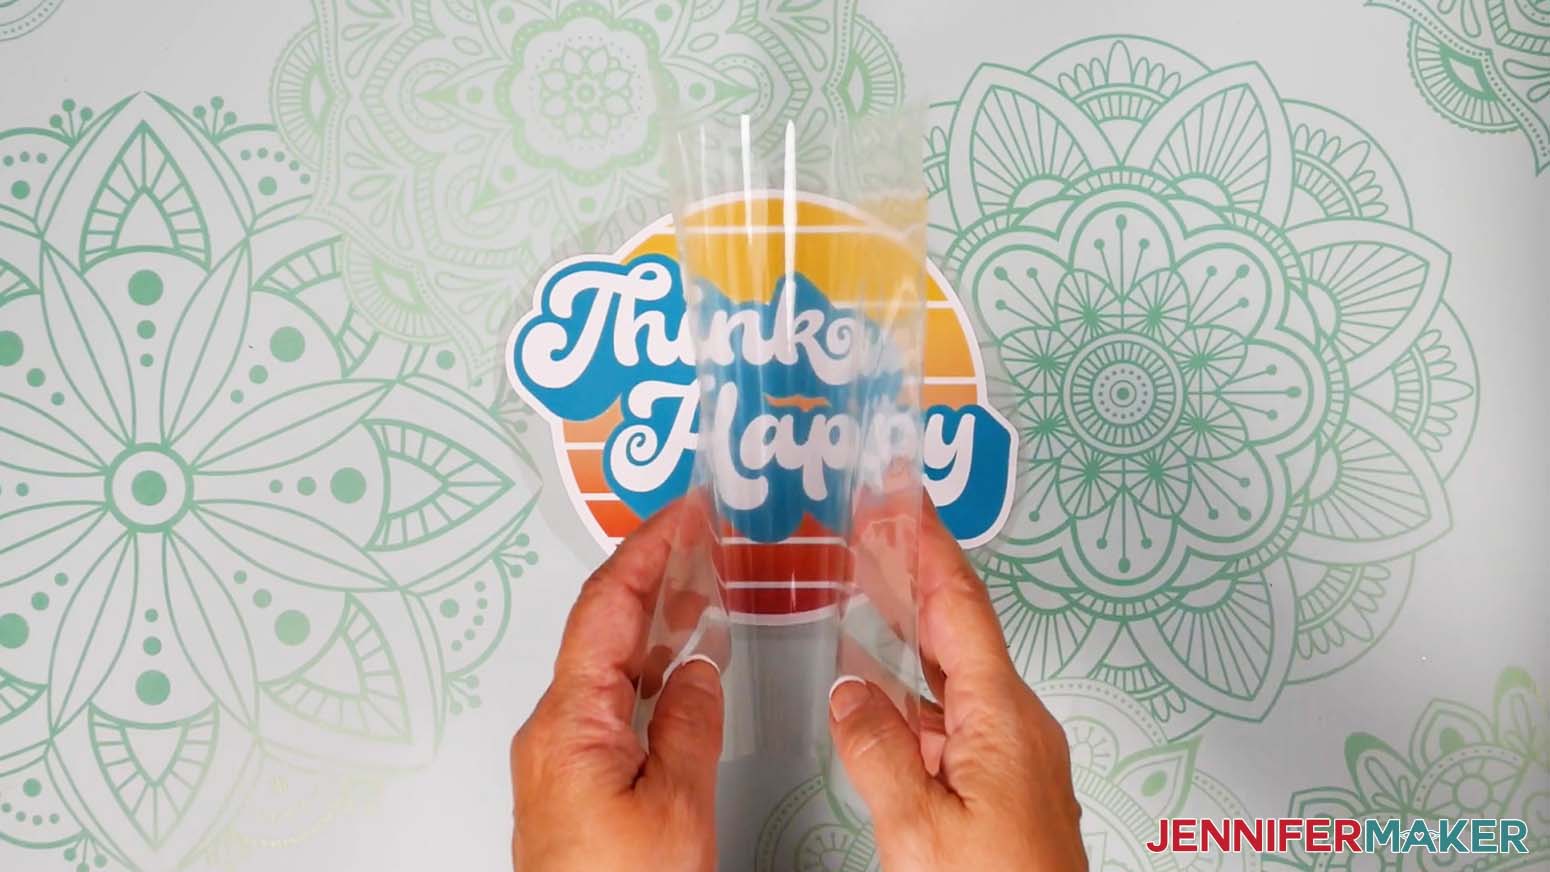
Follow the same steps as above to cut and remove your vinyl.STEP 5: SUBLIMATE YOUR DESIGN
![]()

SISER HOLOGRAPHIC HTV WITH SUBLIMATION PAPER
STEP 4: CUT YOUR DESIGN
If prompted, click "On Mat" and "12 x 12" on the pop up and click Continue.
On the Prepare screen, make sure your first mat says Print Then Cut and your second mat says Basic Cut. Check that the Material Size for your first mat is 8.5" x 11" for the sublimation paper and your second mat is the size of your Siser Holographic HTV. Mine is "12 x 12."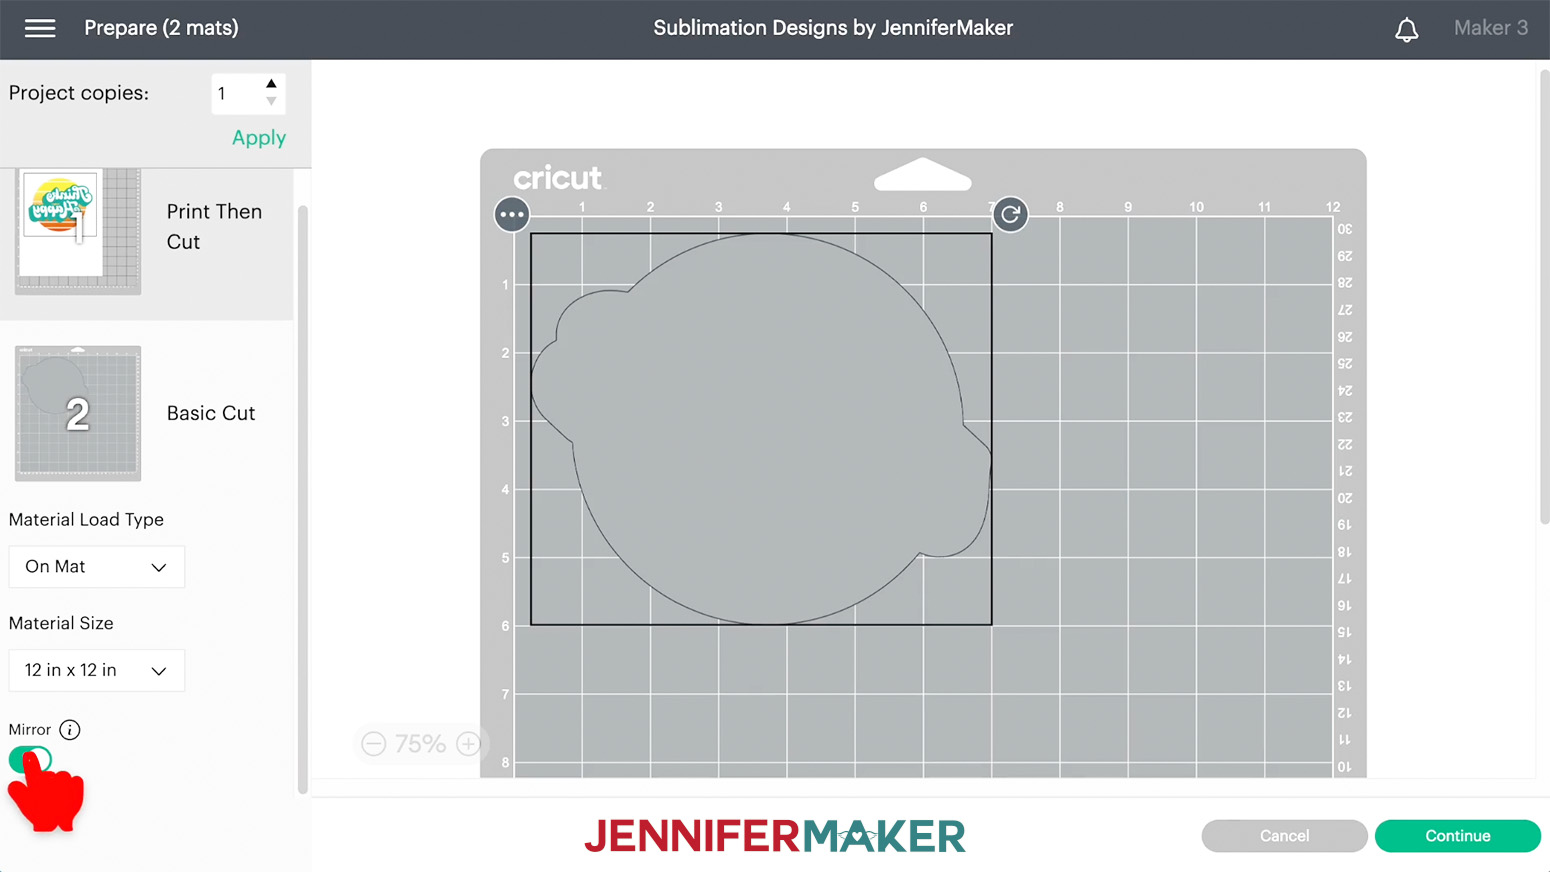
STEP 5: SUBLIMATE YOUR DESIGN
CRICUT WHITE GLITTER HTV WITH SUBLIMATION PAPER

CRICUT GLOW IN THE DARK HTV WITH SUBLIMATION PAPER
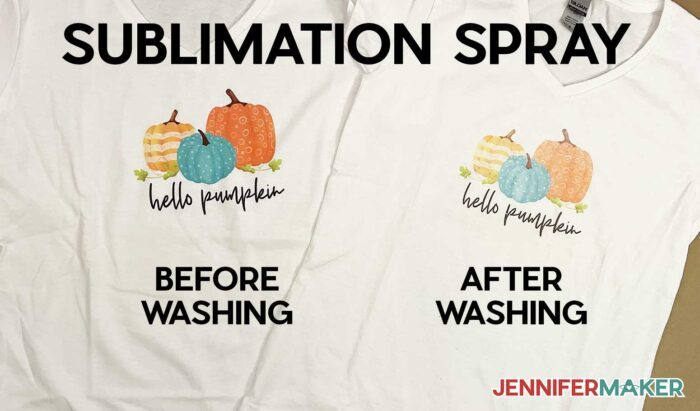
SUBLIMATION SPRAY
In a well-ventilated area, protect your surface with butcher paper and lay the shirt flat, face up.

VARIATION: SISER EASYCOLOR DTV
STEP 4: CUT YOUR DESIGN
If prompted, click "On Mat" and "12 x 12" on the pop up and click Continue.
On the Prepare screen, make sure your mat says Print Then Cut and that it is 8.5" x 11."
Click the green Send to Printer button to open the Print Setup window. Make sure your printer is listed. We don't need to add a bleed (extra design area to help with precise cutting) but make sure the slider next to "Use System Dialog" is green. Then click Print.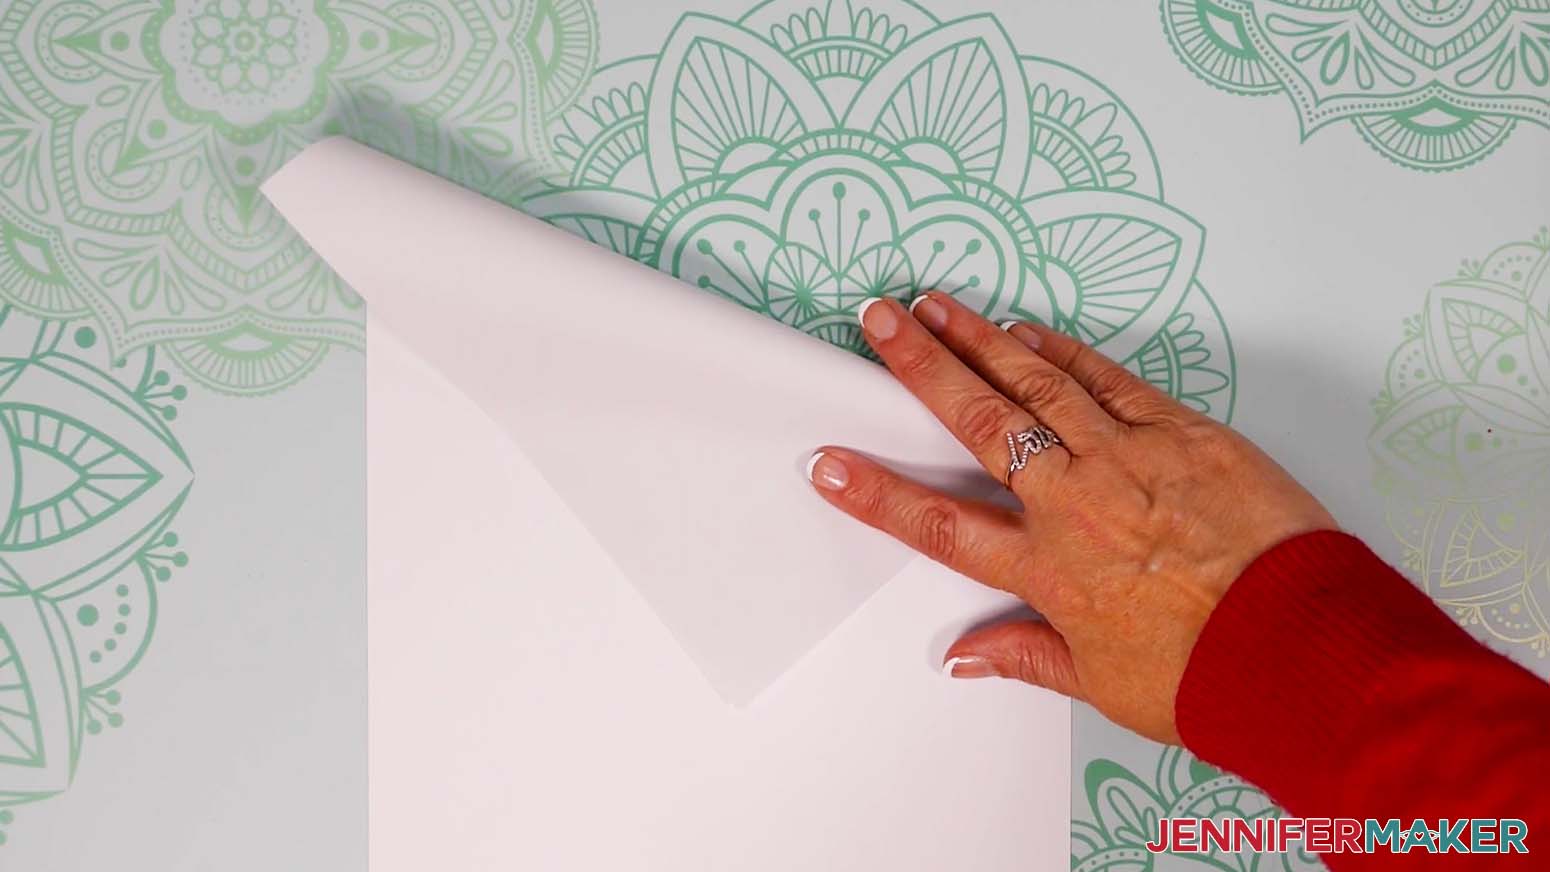
Then, load the mat with your printed sheet into the machine and press the flashing button to cut your design.
When the cut is finished, unload the mat, flip it over, and roll it back to release the paper. This helps prevent the material from curling and ripping.STEP 5: PRESS YOUR EASYCOLOR DTV DESIGN
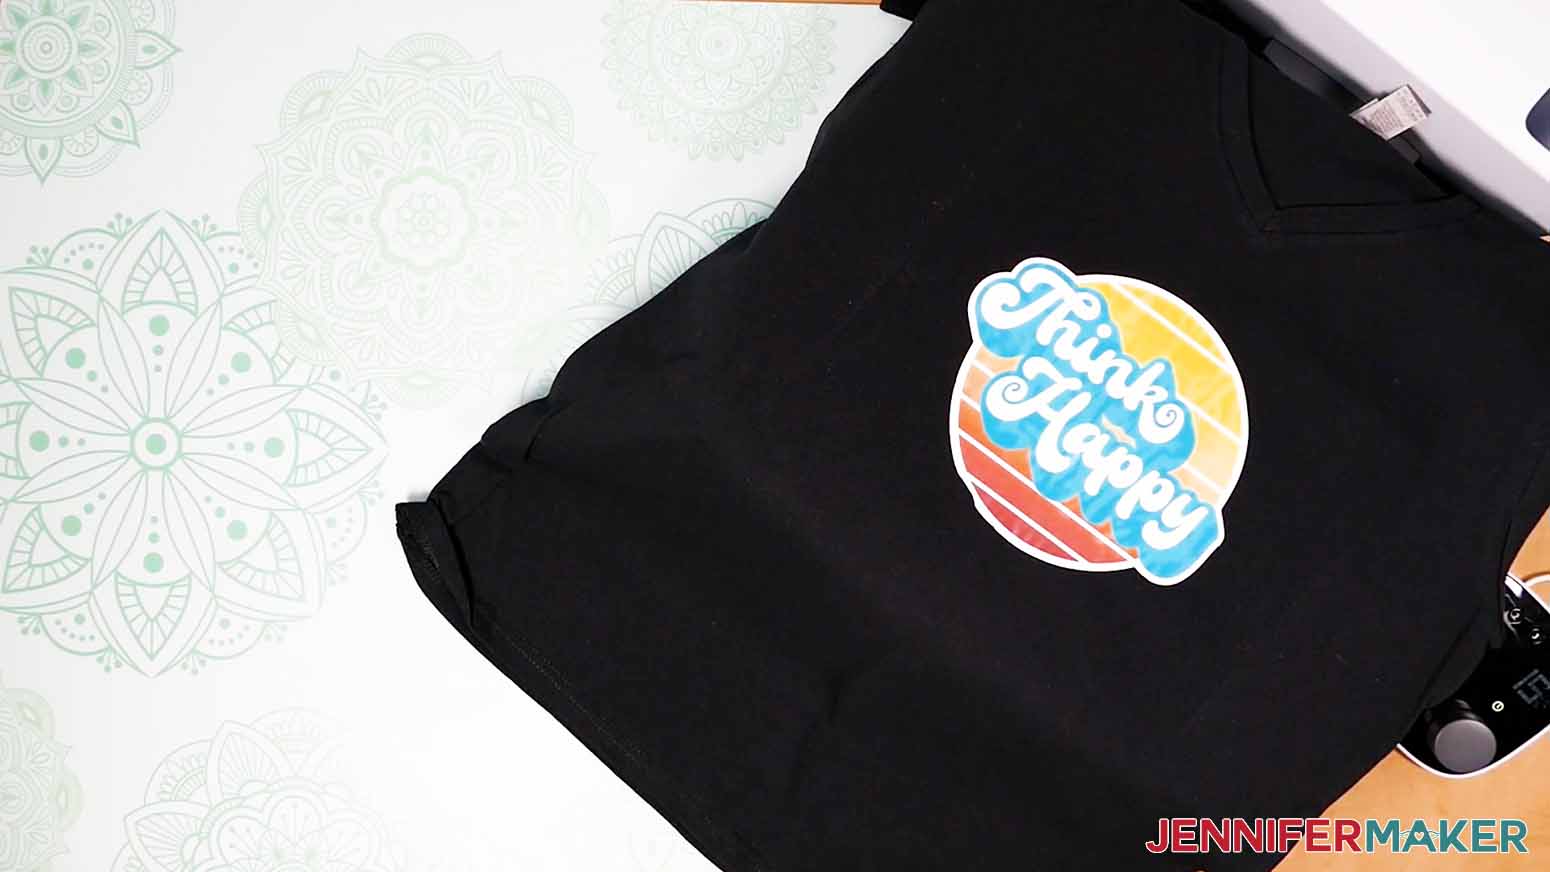
STEP 6: SHOW THEM OFF!
Notes
Questions About How to Sublimate on Cotton:
Q. What is a sublimation T-shirt?
A sublimation T-shirt is made by heating dye sublimation ink to a gaseous state, which soaks into the fabric of the shirt, then cools back down into a solid state to create a permanent design. Depending on the shirt’s material or color, it may take a few extra steps, which I cover in this tutorial on how to sublimate on cotton and dark colors.
Q. Can you sublimate on black shirts?
Yes, now you can! Just follow my tutorial to pick the approach with a solid white polyester substrate you like best!
Q. Can sublimation work on cotton?
Normally, you need at least 65% polyester to sublimate onto, and you’ll get the best results easiest with white polyester T-shirts, like ones from Cricut. You can use a poly blend shirt, but the design may not be vibrant, especially after washing. If you want to make cotton sublimation projects or decorate dark colors, it is possible if you put the sublimation print onto something else, like HTV — use the tips I’ve shared in this tutorial!
Q. What temperature do you press sublimation on cotton?
The temperature, time, and pressure depends on the cotton sublimation project materials, so check my tutorial above for guidelines!
Q. How many washes does sublimation last?
There are many variables, but if you use the right materials follow my tips, your sublimation T-shirt should last as many wash cycles as the shirt itself! One word of caution is that the sublimation spray shirt didn’t hold up well in the wash. I think that’s because it’s tough to get a consistent coating, but if you’re looking for a weathered look it came out great!
Q. Is sublimation better on cotton or polyester?
It all depends on your preferences and goals! Dye sublimation is best on polyester, but there are limited colors that will work perfectly. If you want more flexibility and don’t mind a few extra steps, try true sublimation using the materials I’ve tested.
Q. Do sublimation shirts fade?
Even the best sublimation T-shirts will eventually fade a little bit. But since the dye soaks into the polyester fibers, sublimation images will last much, much longer than HTV decorations or even screen printing. So the sublimation on cotton techniques I’ve shared WILL fade a bit over time, especially the spray, but they aren’t too bad.
Q: What kind of paper do I use?
While some people will use just regular laser paper, I really recommend you use special sublimation paper for the best and most vibrant results and ink transfer. I used A-SUB paper during my tests.
Q: What kind of ink do I use?
You must use special sublimation ink for a cotton sublimation project. I used Hiipoo Ink for these tests
Q: How do I test my sublimation prints for vibrancy and color?
Use my free subliflower design to see how your colors look! It’s Design #385 in my resource library!
Q: What else can I put my sublimation prints on?
Here are just a few of the items I’ve sublimated and some tips I’ve learned along the way:
- White Polyester T-Shirts and Colored Polyester/Cotton Shirts — look for blank shirts with a polyester count of at least 65% or higher, or the ones I used for this cotton sublimation project
- Satin ribbons – Print dimensions: .8″ wide
- Sublimation coasters, white polyester and rubber, – Print dimensions: 4″ circle
- Mason jar tumblers, 17 oz. white stainless steel – Print dimensions: 3.4″ tall by 17.8″ wide
- Glitter sublimation tumblers, 20 oz. insulated stainless steel skinny – Print dimensions: 8.07″ tall by x 8.89″ wide
- Mousepads – Print dimensions: 7.9″ tall by 9.6″ wide
- Keychains, squares, hearts, circles, rectangles
- Kitchen towels – Print dimensions: 15″ tall by 26″ wide
- Flour sack towels – Print dimensions: 28″ tall by 28″ wide
- License plate blanks – Print dimensions 6″ tall by 12″ wide
- Sequin pillow covers – Print dimensions 18″ tall by 18″ wide – sunflower
- Polyester door mats – Print dimensions 29.5″ tall by 17″ wide
- Throw Blankets – Print dimensions 7.9″ tall by 9.8″ wide (for each blank spot on the 40″ x 60″ blanket)
- Jigsaw Puzzles – Print dimensions 7.5″ tall by 9.8 inches wide
Sublimation Startup
Need a little extra help understanding how to get started with sublimation? Join Sublimation Startup for a logical, step-by-step guide to getting setup for success with sublimation! You can ask questions and feel confident that you’ll get help! The Sublimation Startup mini-course is also great for those who enjoy learning from my easy-to-understand, calm, and clear method of teaching. This is a no-fluff, no-mess, no-distraction workshop … it’s like sitting down with me in my craft room! We work in logical steps to build your understanding and confidence with sublimation, and then provide support to keep helping you as you continue on your journey! Register now!
Get my Cotton Sublimation Project T-Shirt designs (and many more) for free!
(If you do not see the signup form above, click here.)
I can’t wait to see your shirts and other cotton sublimation project ideas! Watch for more sublimation tutorials and please ask any questions you have in our Facebook group or tag me on social media with #jennifermaker.
Love,

Want to remember this? Save the How to Sublimate on Cotton and Dark Colors tutorial to your favorite Pinterest Board.