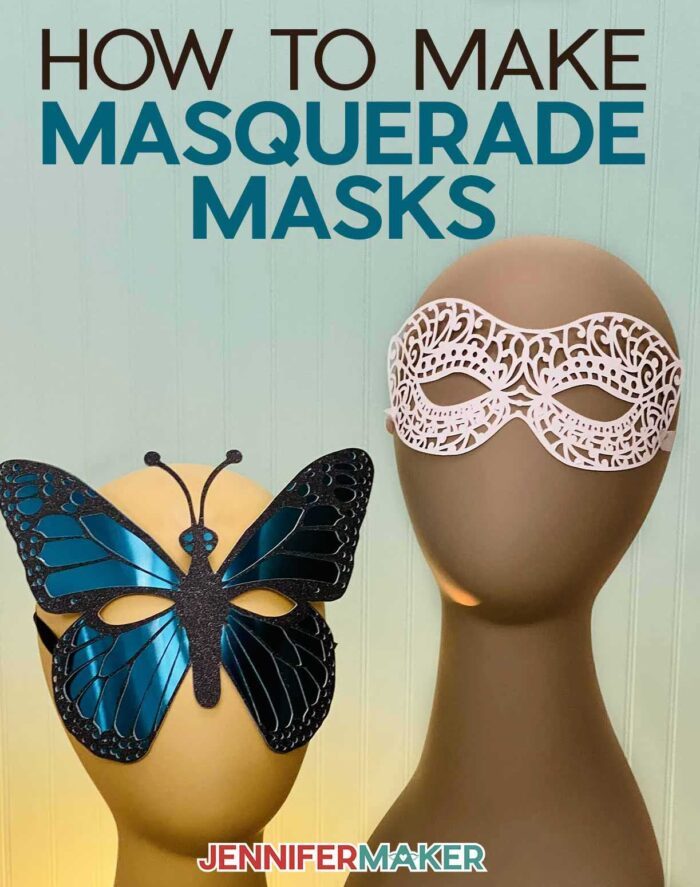
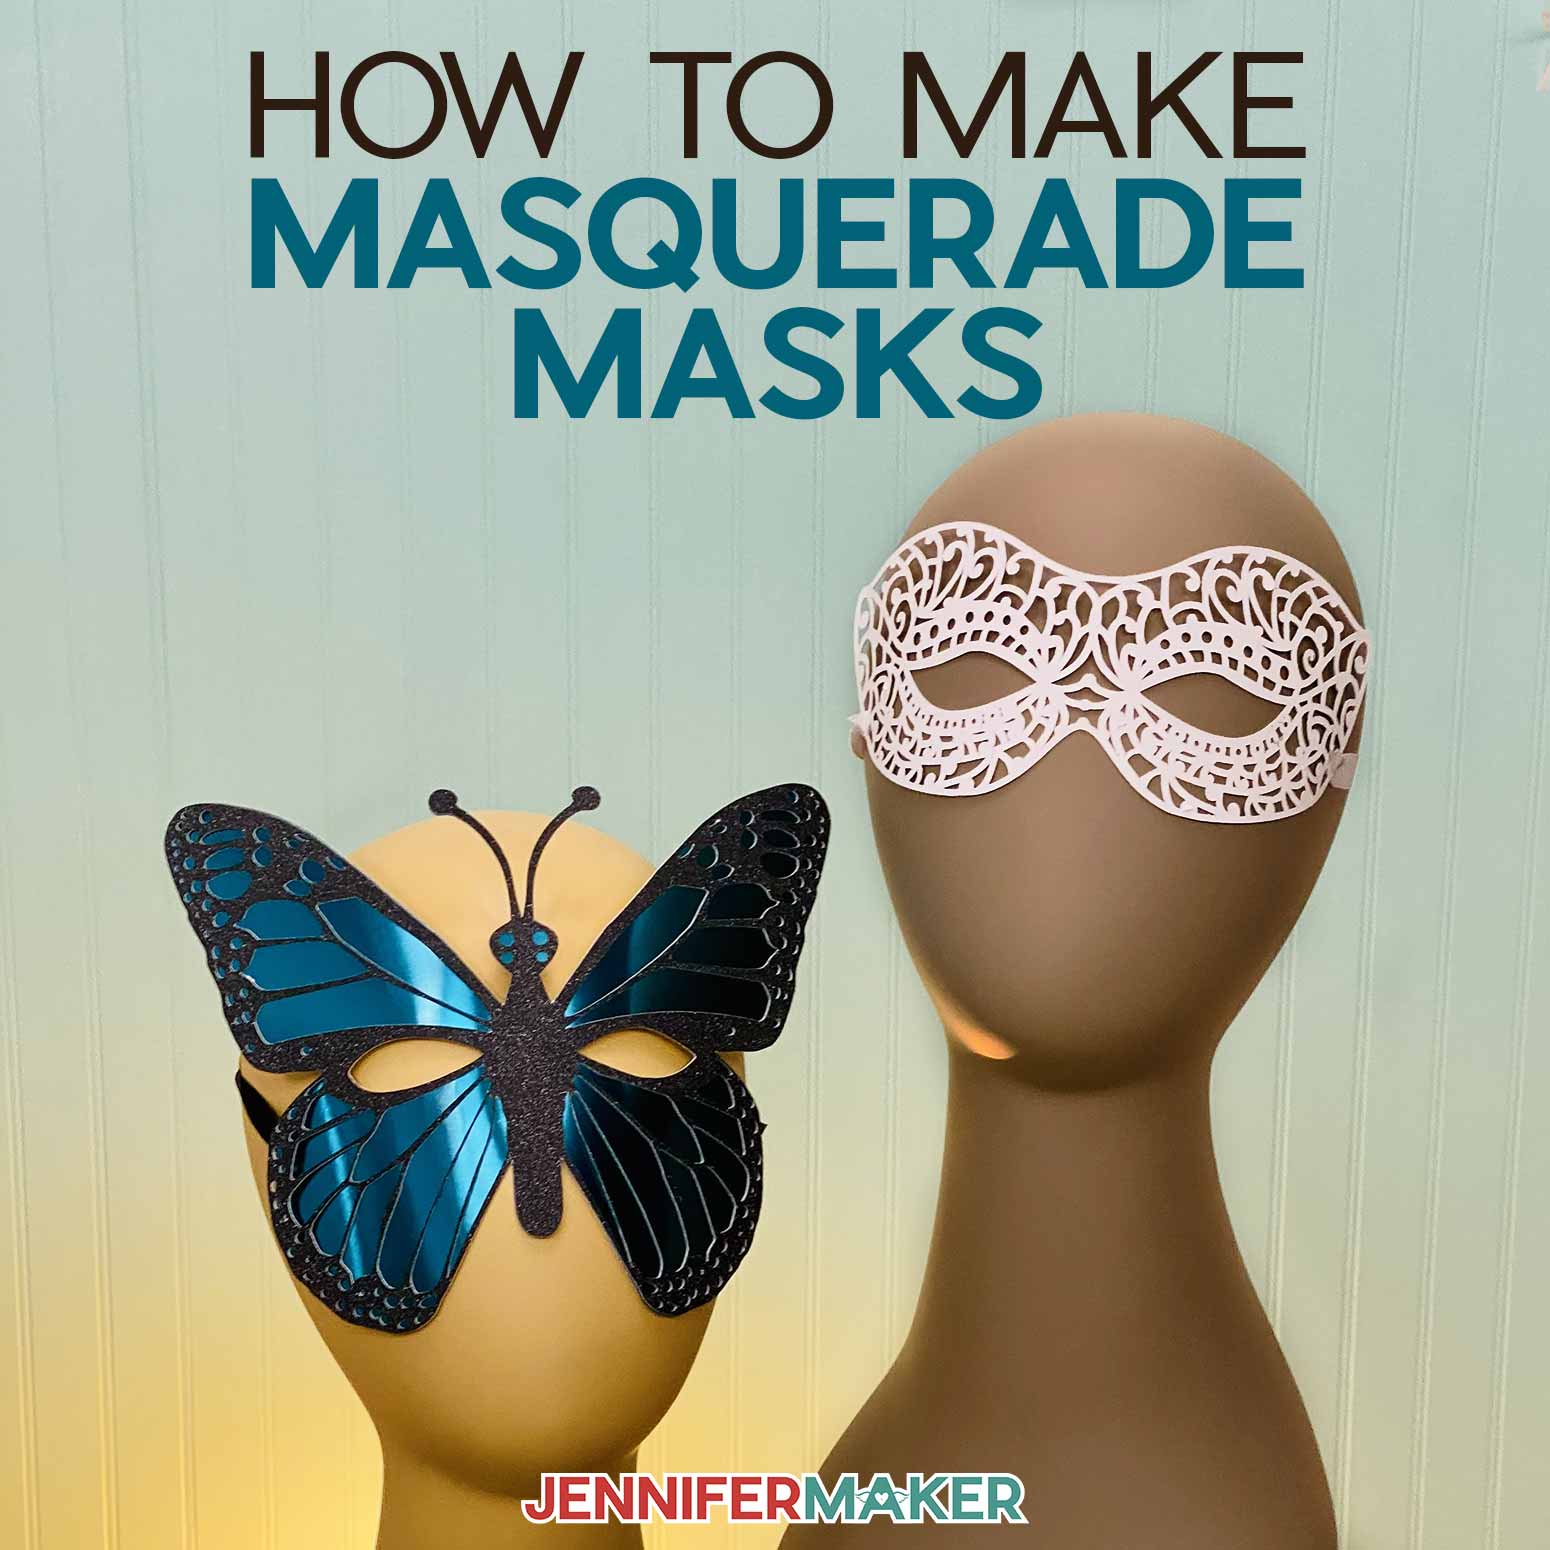
Create a DIY Masquerade Mask using my free designs and decoration ideas!
Do you need a last minute costume? Make a DIY masquerade mask you can cut with a Cricut in minutes and decorate on the way to the costume party! You can use any of my different styles and use various cardstock options, to create a look that is totally YOU! If you have time, you can even make a custom T-shirt to complement your mask!
Watch my complete step-by-step tutorial on how to make a DIY masquerade mask:

This is a Cricut Mystery Box project — it uses the black glitter cardstock that you can get in the “Festival of Lights” mystery box (affiliate link) that came out October 25, 2022. Even if the mystery box is not available when you check, you can still purchase the individual vinyls, which are all linked below in my material list. Learn more about Cricut Mystery Boxes and their contents in my Cricut Mystery Box Guide.
I love getting dressed up for Halloween parties, but sometimes you need a fast, easy costume. Enter the DIY masquerade mask collection!
My designs for paper art masks range from simple to intricate, but they all cut and come together pretty quickly. I’ve also tested them on people of all ages and they fit everyone comfortably! You can make your own mask or a whole set for the family in time for the masquerade ball!
If you’re looking to create your own masquerade mask to fit a theme — like a Mardi Gras mask or a Venetian mask — use the plain mask template and decorate it to suit. I’ll show you how to attach feathers, sequins, and a great way to add interest with glitter glue. You can add just a few details or cover the entire mask! I bet you can make a beautiful mask decorated with common household items, too!
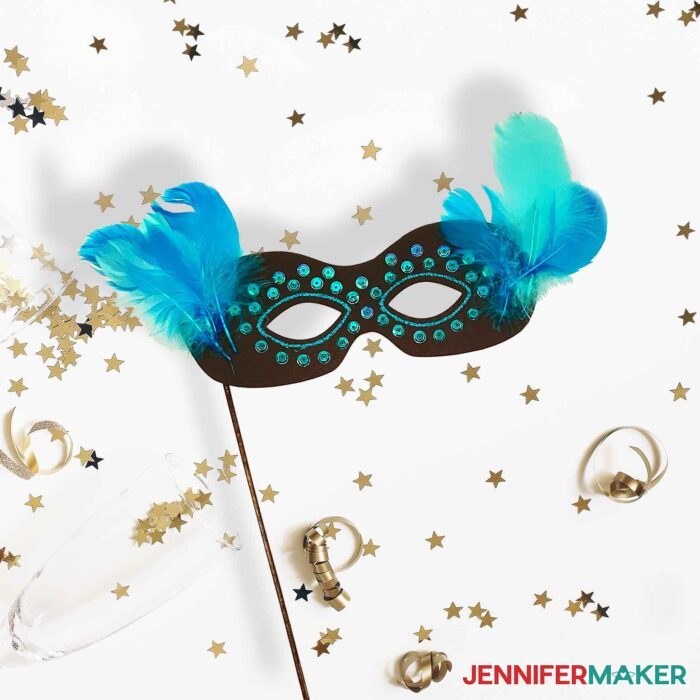
We’ll also look at different ways to keep the DIY masquerade mask in place. If you don’t like to have a mask on all the time or have glasses, try using the handheld version by hot gluing a painted dowel to the back of the mask. But if you need your hands free, I’ll show you how to evenly position ribbon on each side of the masks to tie in the back.
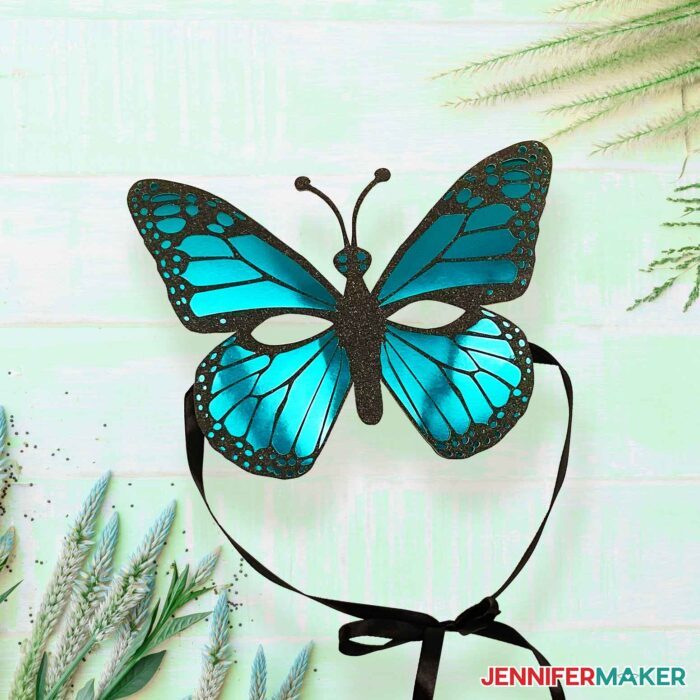
The easiest way to cut all the intricate design layers is definitely a Cricut. You’ll just need the fine-point blade, which is the original cutting tool that came with your Cricut machine, and a green StandardGrip machine mat. Most of the masks are one layer, but if you make my favorite layered butterfly mask, I’ll show you how to put it together with craft glue.
Looking for more Halloween costume ideas? Here are some from the archive!
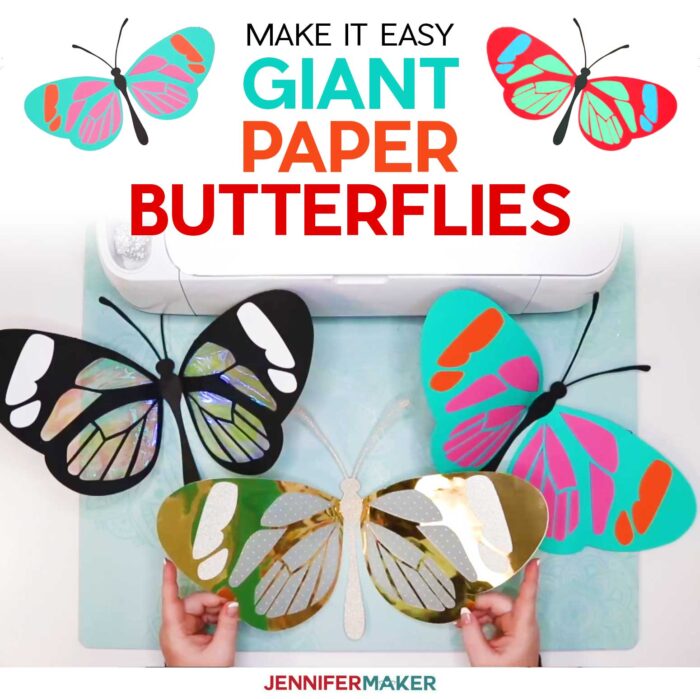
Create wings with my Giant Paper Butterfly project.
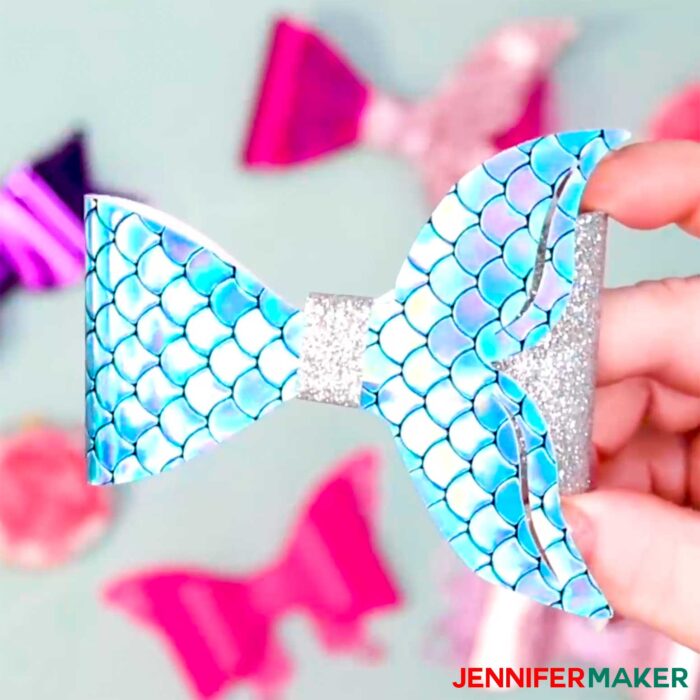
Make a decorative bow to match a mermaid costume!
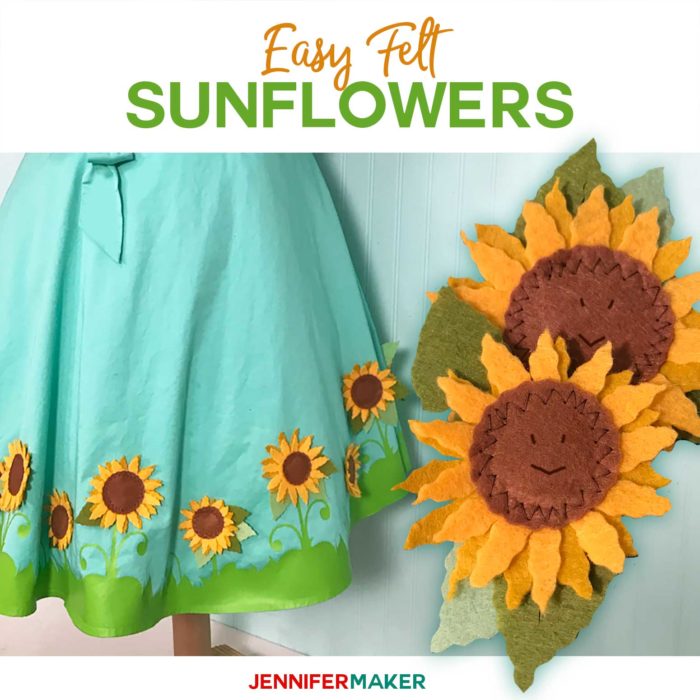
Cut some felt decorations to transform simple clothes for a masquerade party.
Ready to make tour own DIY masquerade mask? I’m super excited to show you how! This post contains some affiliate links for your convenience (which means if you make a purchase after clicking a link I will earn a small commission but it won’t cost you a penny more)! Read my full disclosure policy.
Materials to Make a DIY Masquerade Mask
View my Amazon shopping list with the exact items we used to make this project
- High-quality 65 or 80 lb paper, like 12″ x 12″ Cricut Sampler Poster Board, 8.5″ x 11″Holographic Foil Cardstock, 8.5″ x 11″ Silver Foil Cardstock, 12″ x 12″ Black Glitter Cardstock, or 12″ x 12″ Gold Glitter Cardstock and craft glue like Bearly Precision Art to keep your layers together.
- Decorations like Glitter Glue, Sequins, or Feathers and craft glue or a hot glue gun
- A way to secure the mask, like a 12″ x 1/8″ Wooden Dowel (and a few to make a drying rack if you paint it like I did with gold acrylic paint and a paintbrush) or Ribbon, at least 4′ long and scissors
- A method to cut your cardstock, I used the amazing Cricut Maker 3 with a Green StandardGrip Machine Mat 12” x 12, but you can also use the Cricut Maker, Cricut Explore 3, the Cricut Explore, or the Cricut Joy for the smaller masks
- Tools like a brayer, weeding tool, scraper, and disposable gloves and butcher paper to keep clean during decorating
- Design #434 My free SVG/PDF/DXF DIY Masquerade Mask design collection available in my free resource library – get the password by filling out the form at the bottom of this page
How to Make a DIY Masquerade Mask

DIY Masquerade Mask
Create your own DIY Masquerade Mask for Halloween or just for fun!
Materials
- Cricut Sampler Poster Board, 12" x 12"
- Holographic Foil Cardstock, 8.5" x 11"
- Silver Foil Cardstock 8.5" x 11"
- Black Glitter Cardstock 12" x 12"
- Gold Glitter Cardstock 12" x 12"
- Glitter Glue
- Sequins - Assorted Colors
- Feathers - Assorted Colors
- Wooden Dowel, 12" x 1/8" (and a few to make a drying rack) -OR-
- Ribbon, at least 4'
- Acrylic Metal Paint - I used gold
- Design #434 (My free SVG/PDF/DXF design files available in my free resource library - get the password by filling out the form at the bottom of this page)
Tools
- A method to cut your cardstock, I used the amazing Cricut Maker 3 but you can also use the Cricut Maker, Cricut Explore 3, the Cricut Explore, or the Cricut Joy for the smaller masks
- Cricut Green StandardGrip Machine Mat 12” x 12
- Weeding Tool
- Craft Glue - I used Bearly Art Precision Craft Glue
- Hot Glue Gun & Glue Sticks
- Paint Brush
- Scraper
- Brayer
- Disposable Gloves - for painting
- Butcher Paper
- Scissors (To Cut Ribbon)
Instructions
STEP 1: GET MY FREE DIY MASQUERADE MASK FILE
First, download my DIY Masquerade Mask designs from my free resource library -- it's design #434. You can cut the PDF by hand, or use the DXF with another cutting machine, but I'll show you how to prepare the SVG to cut on a Cricut.
The collection includes several options, including a customizable version I'll show you how to adjust.
I tested these mask designs on kids and adults and the sizing worked for both. If you are concerned about the size of the mask, I recommend cutting the design on a test sheet of cardstock before making your final design.
TIP: If you are not sure how to upload an SVG cut file to Cricut Design Space, watch this helpful video training series I made. If you are on an iPad or iPhone, here is how to download and upload SVG files to the Cricut Design Space app.
STEP 2: PREPARE YOUR DIY MASQUERADE MASK SVG
This is what my DIY Masquerade Mask SVG file looks like on the Canvas. Click the minus (-) in the lower left corner of your canvas to zoom out. This allows you to see all of the designs.
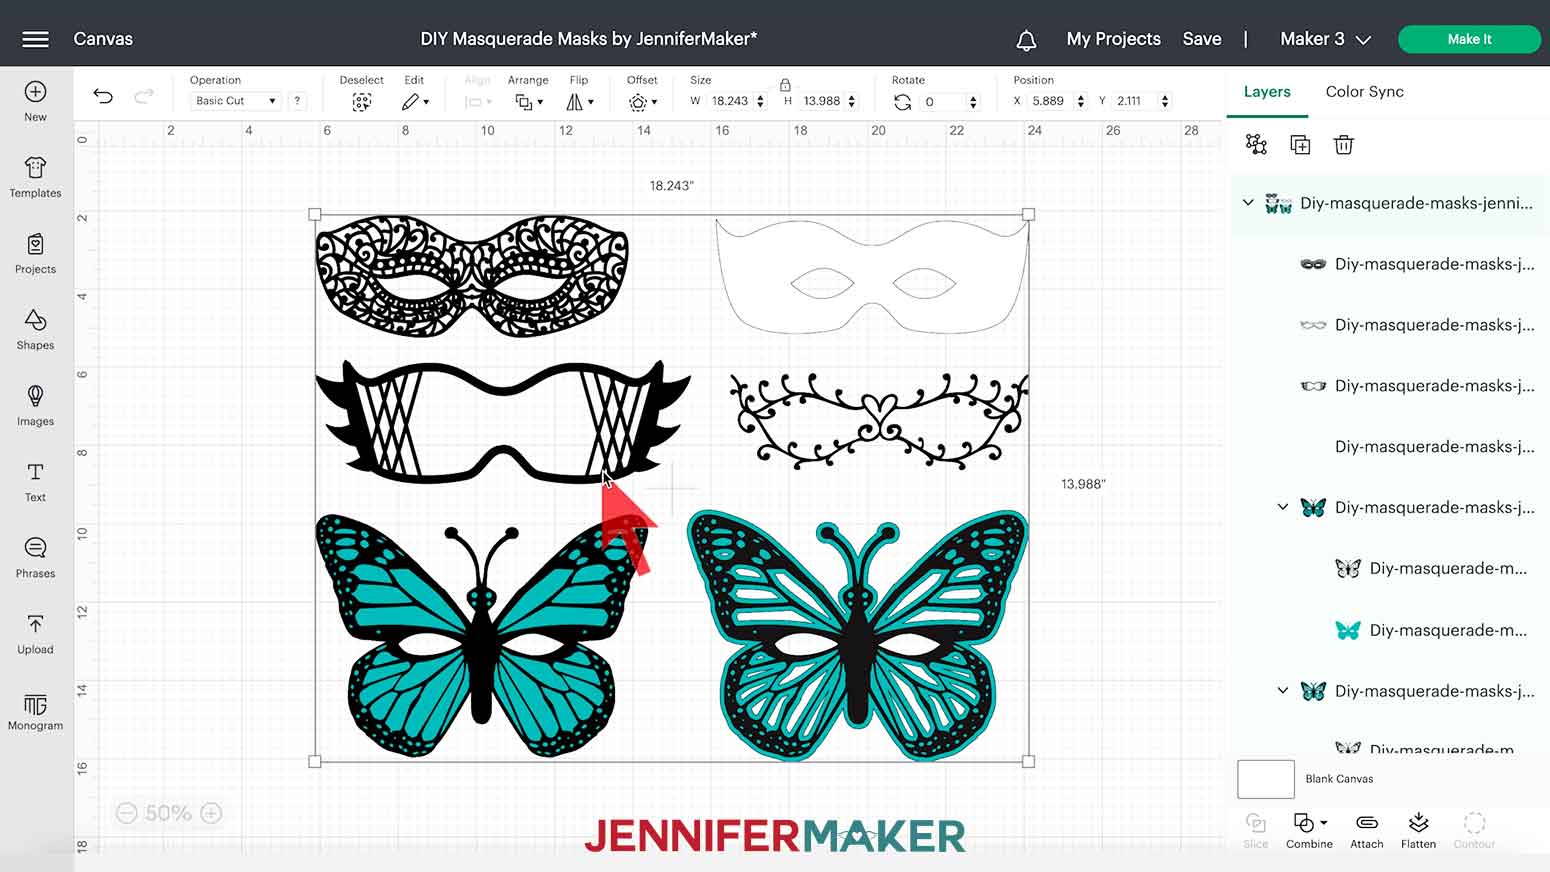
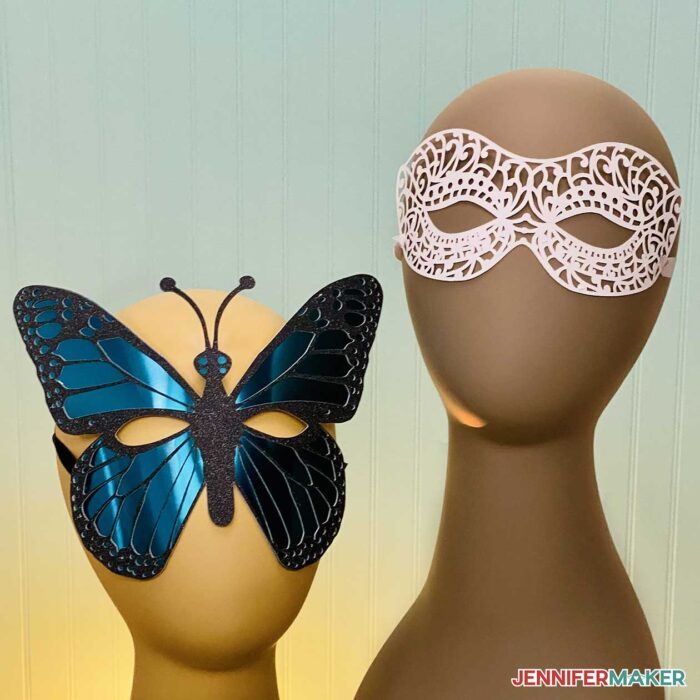
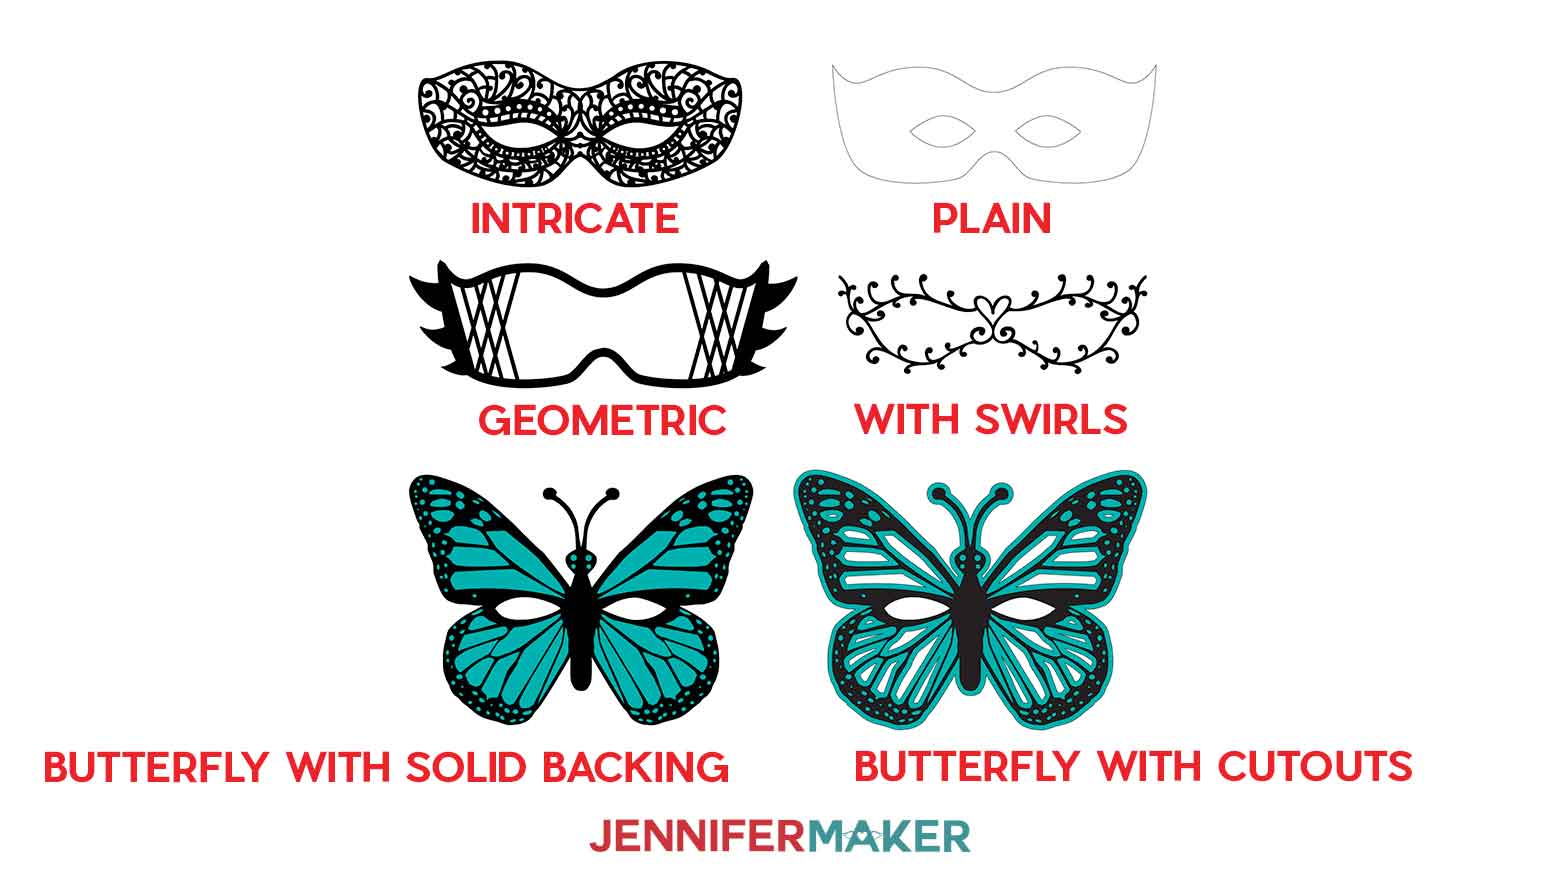
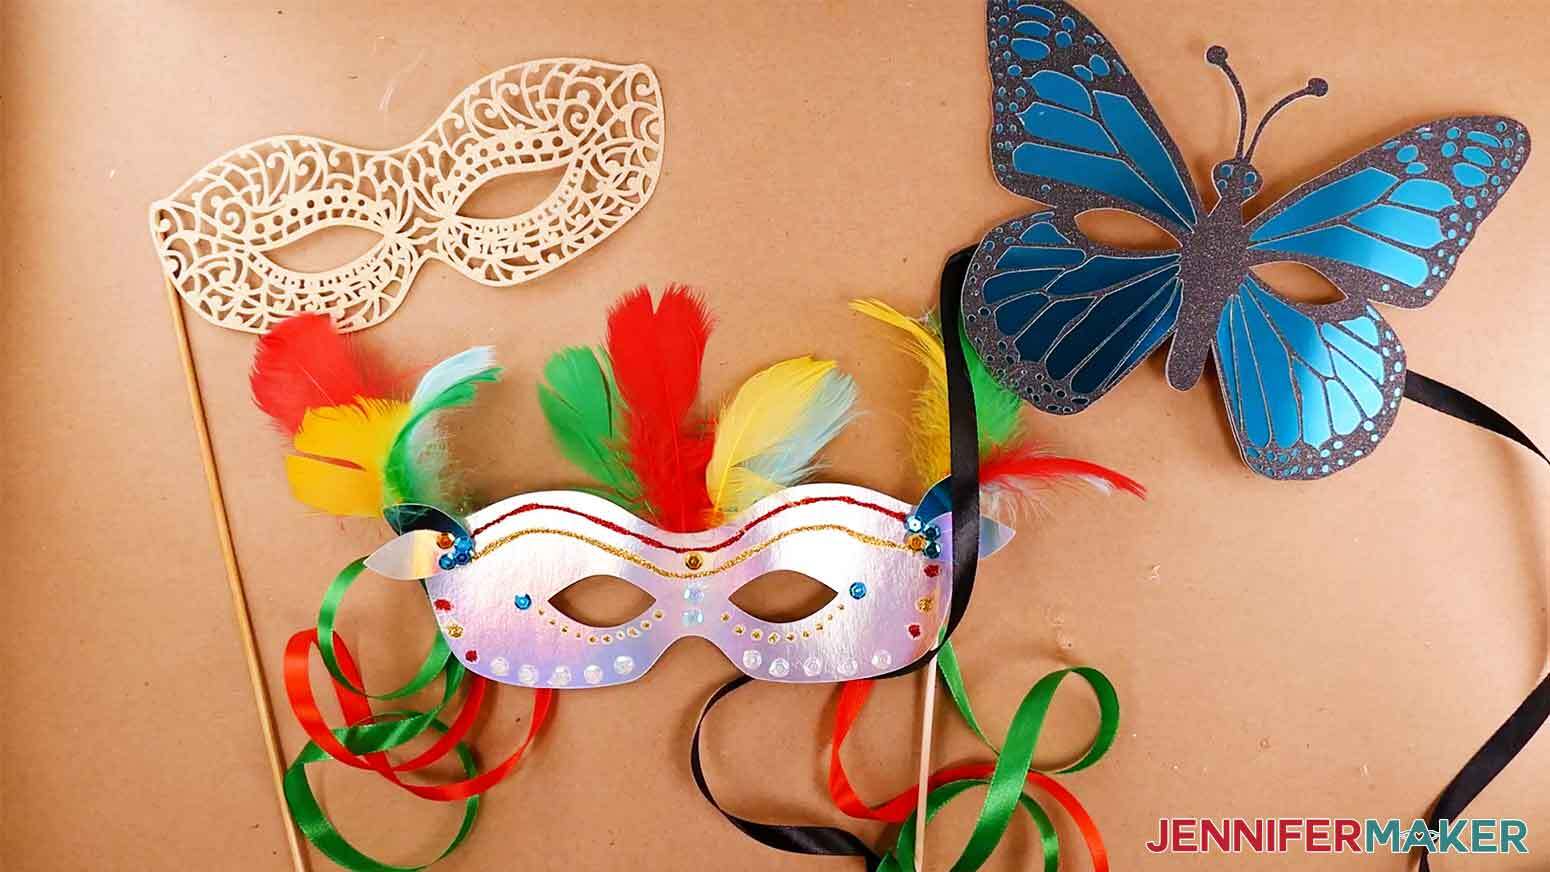
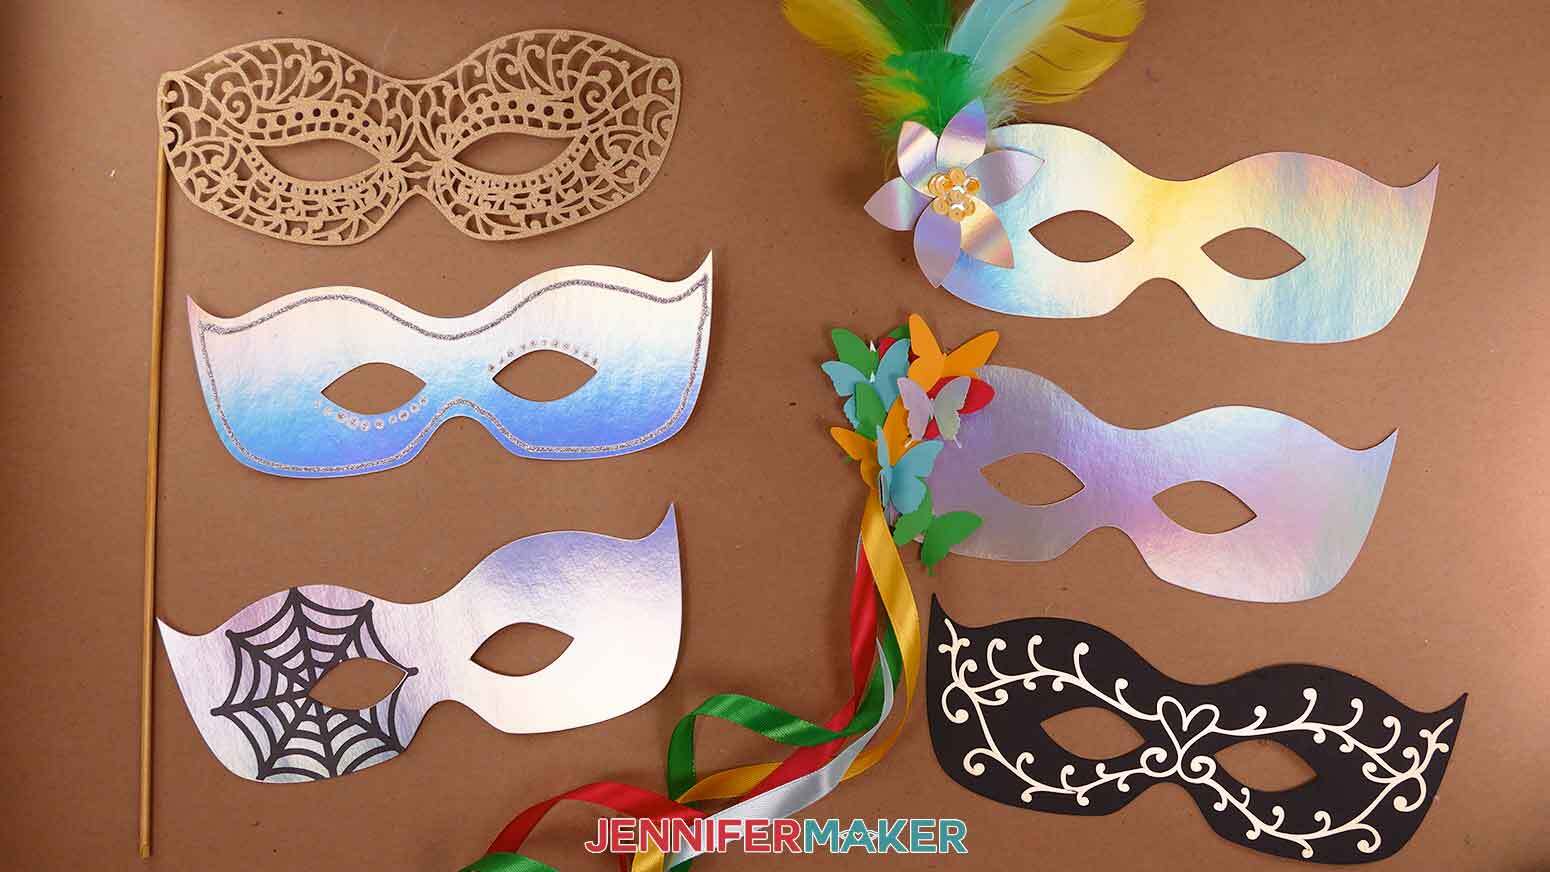
There are six different mask designs to choose from!
You can make:
- a plain mask to decorate,
- an intricate cut mask,
- a geometrical mask,
- a mask with swirls,
- a butterfly mask with cutouts,
- or a butterfly mask with a solid backing.
I'll show you how to make the intricate mask, the layered butterfly mask with a solid backing, and the plain mask for a DIY design. I will hide the rest of the designs for now.
Click Ungroup above the layers panel.
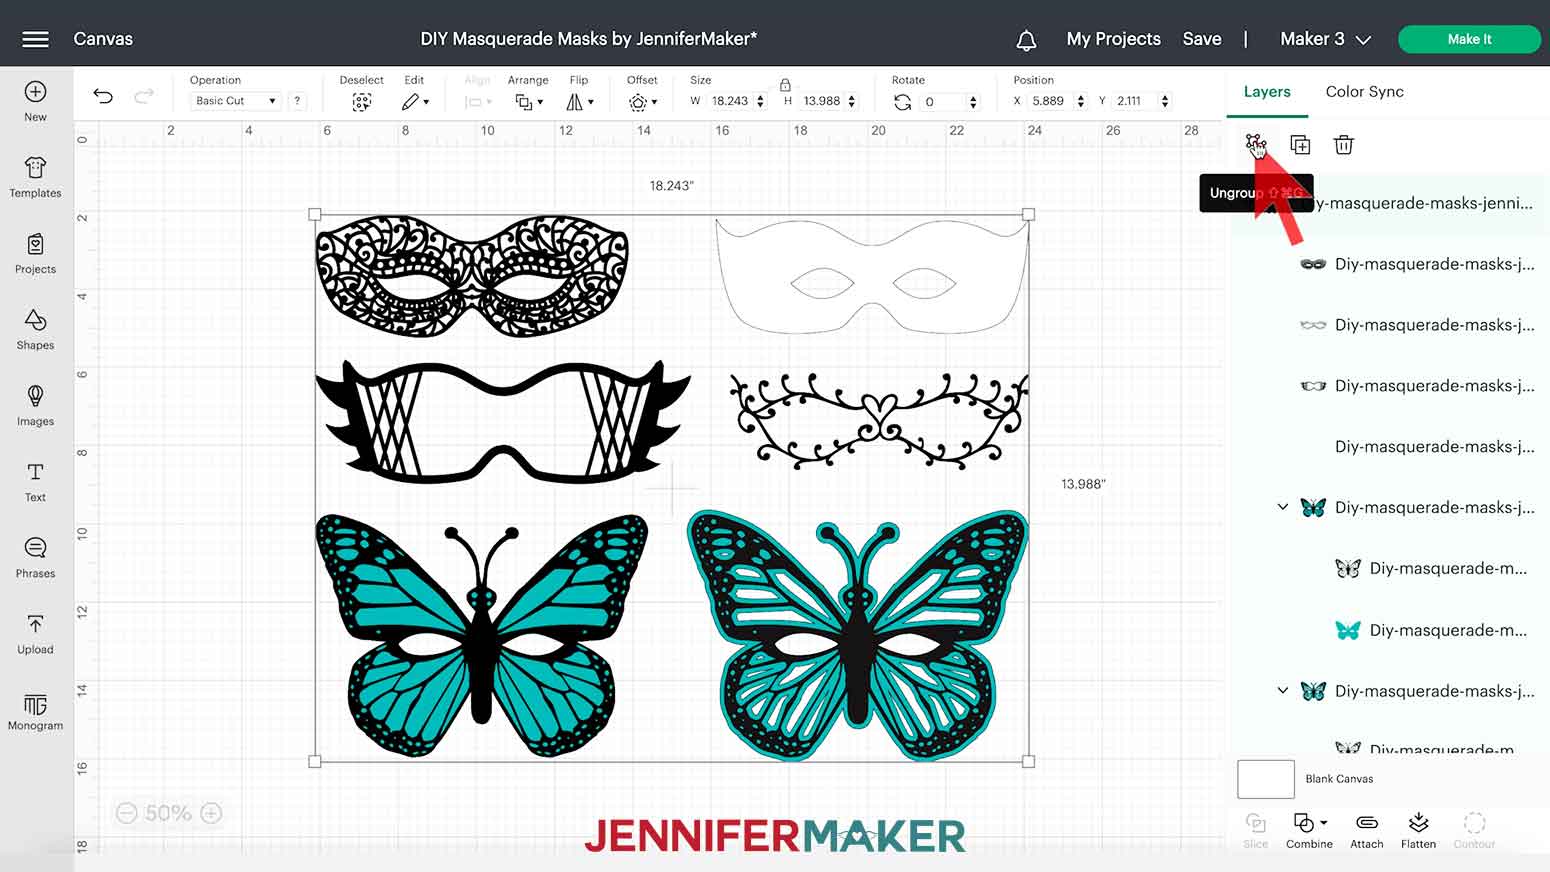
You can click the little eye icon next to each layer to hide any of the masks that you don't want to make today, or delete them. You can also right click over the design you want to delete.
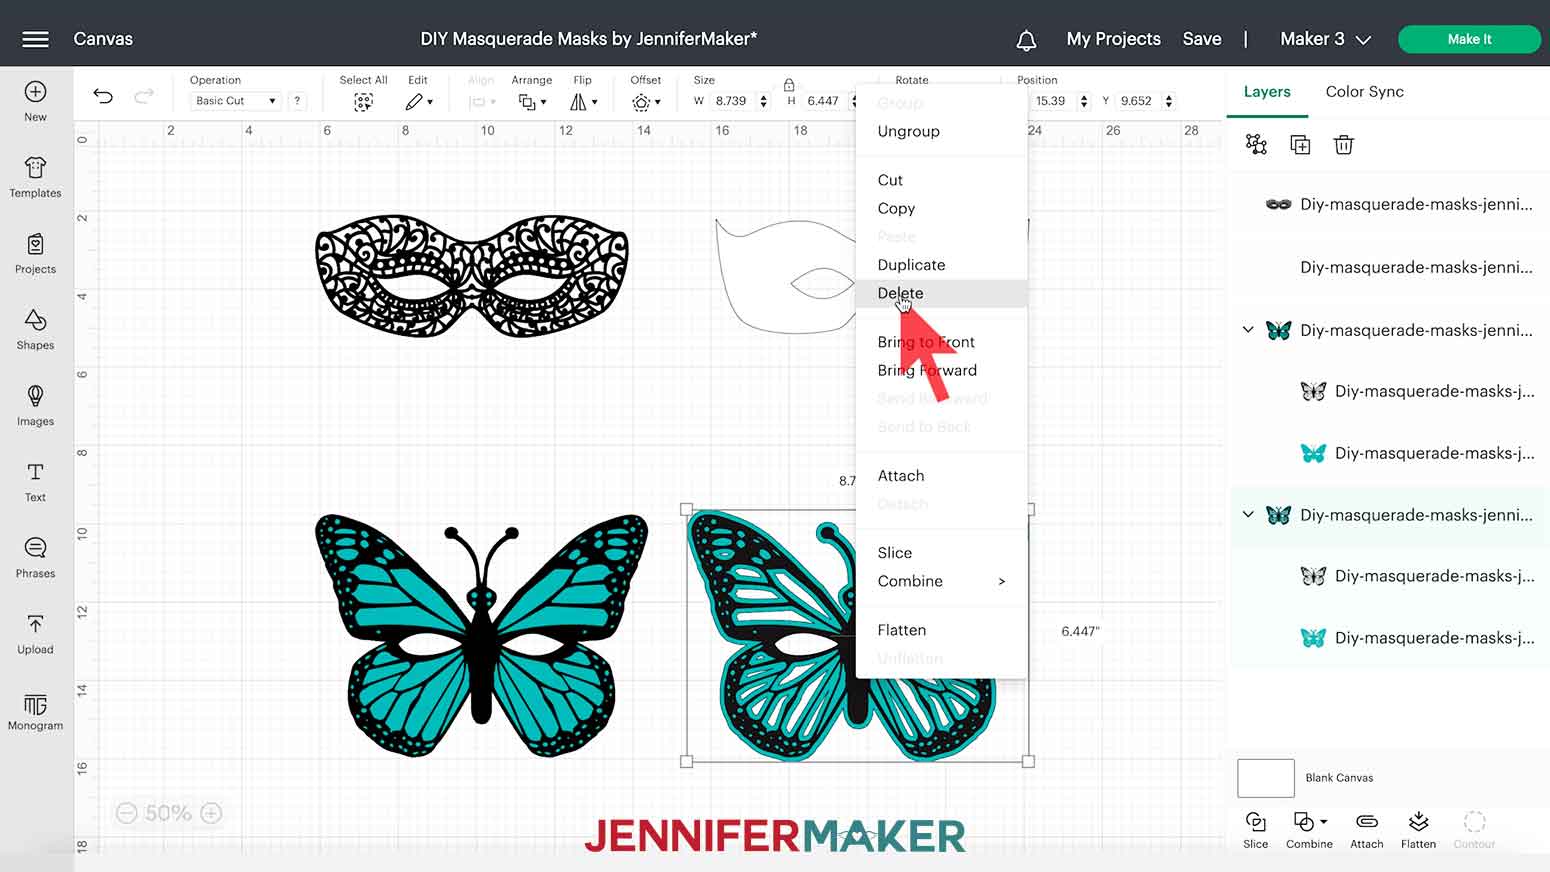
I plan to use different types and colors of cardstock for each mask, so I'll use the color box at the top to change the intricate cut design to another color.
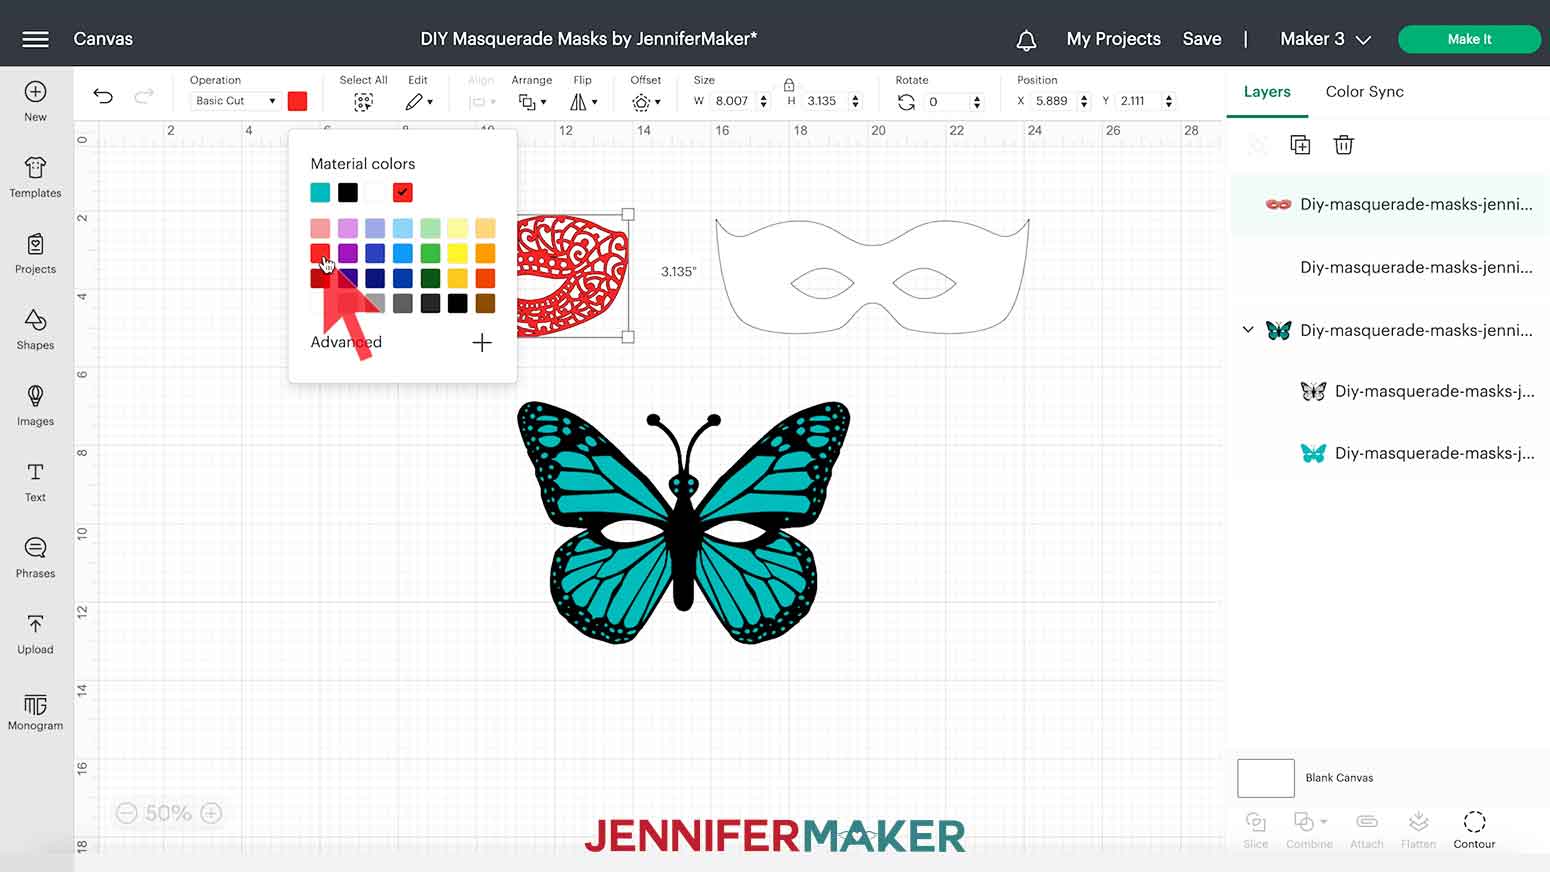
TIP: If you are changing the color of a grouped design, you can select the layer from the Layers panel without having to ungroup the design. Of course, ungrouping is fine too.
Make sure the machine you'll be using is selected in the upper right corner and click Make It.
STEP 3: CUT YOUR DIY MASQUERADE MASKS
On the Prepare screen, you will only need to change the material size if you are using something different than the default 12" x 12". I'm going to click on the plain mask and change the size to 8.5" x 11".
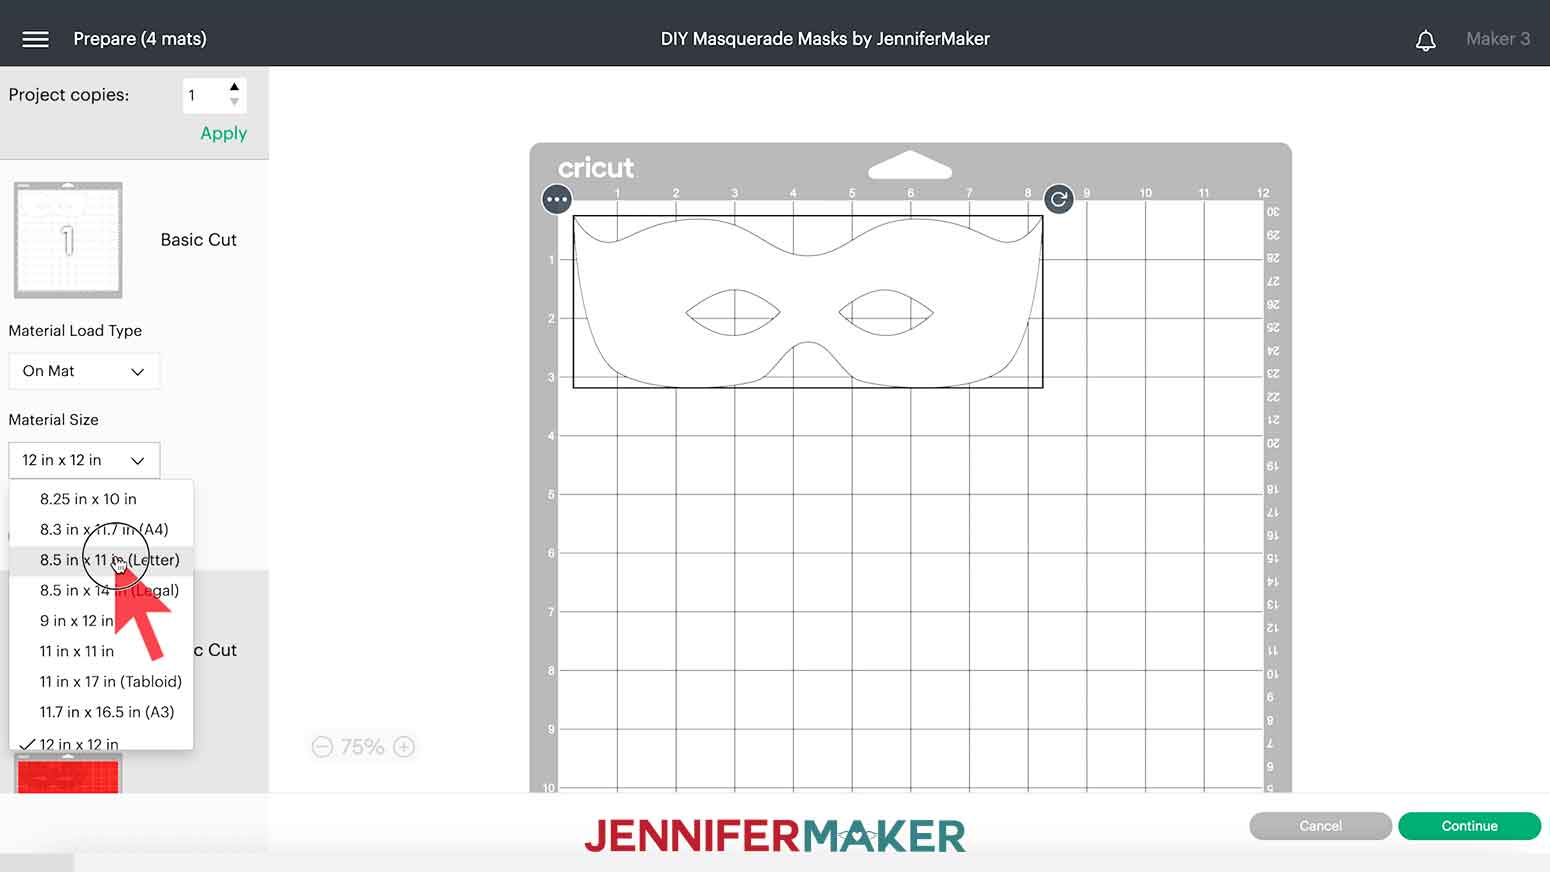
Click on any other mats that you need to change and when you're done, click back on the first mat and click Continue in the lower right corner.
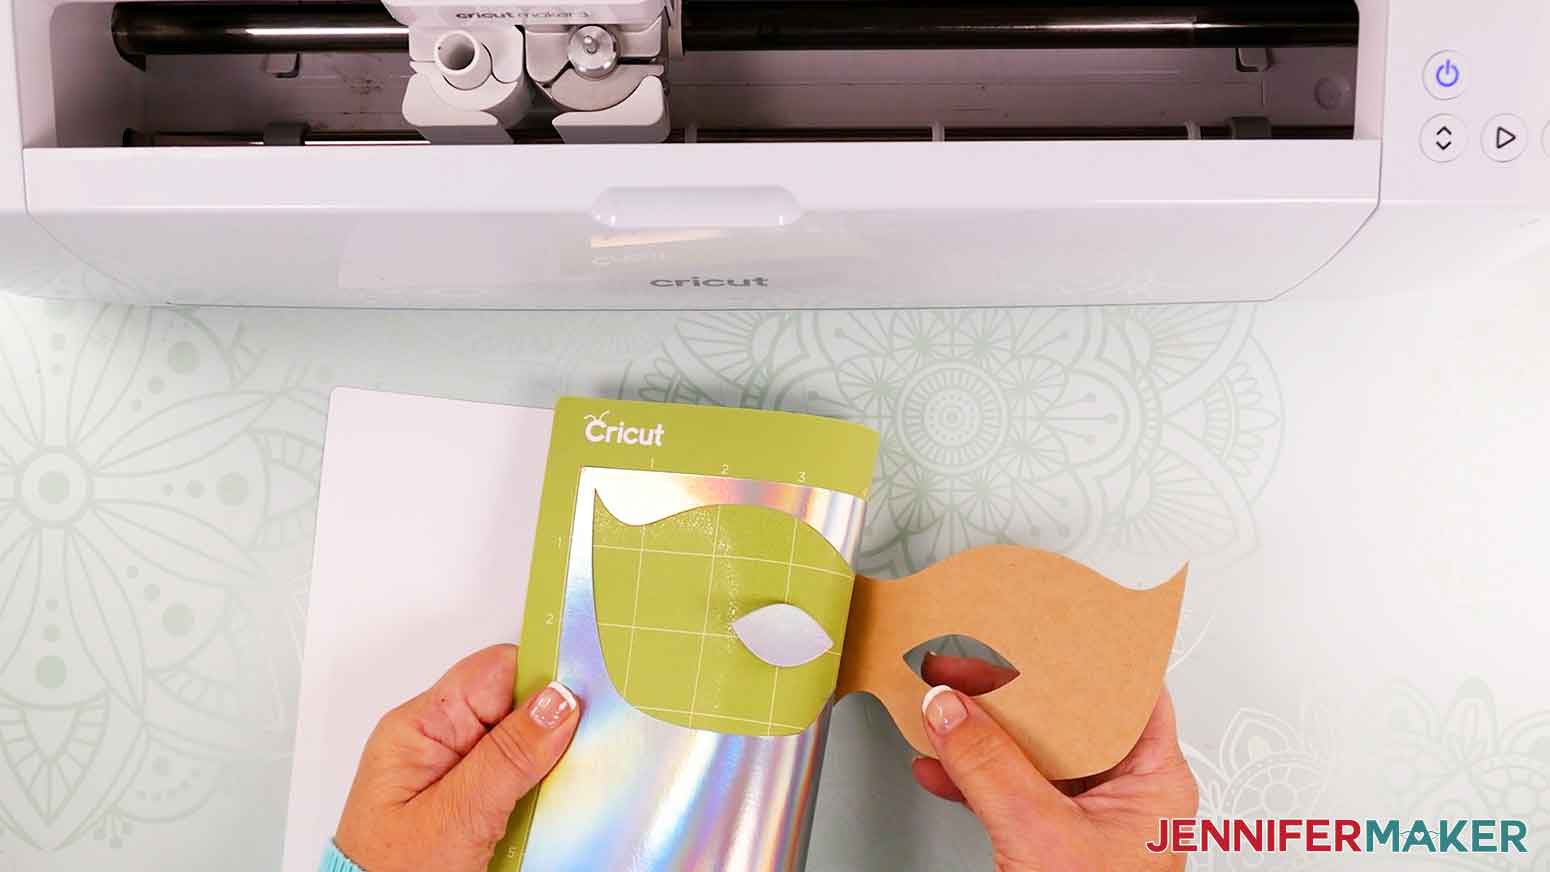
Next is the material selections. I'm going to use glitter cardstock for the intricate mask and top butterfly layer. I'm going to use holographic cardstock for the plain mask, and foil poster board for the back layer of the butterfly mask. If you don't see the material you are using displayed on your screen, click Browse All Materials to search for it and select it.
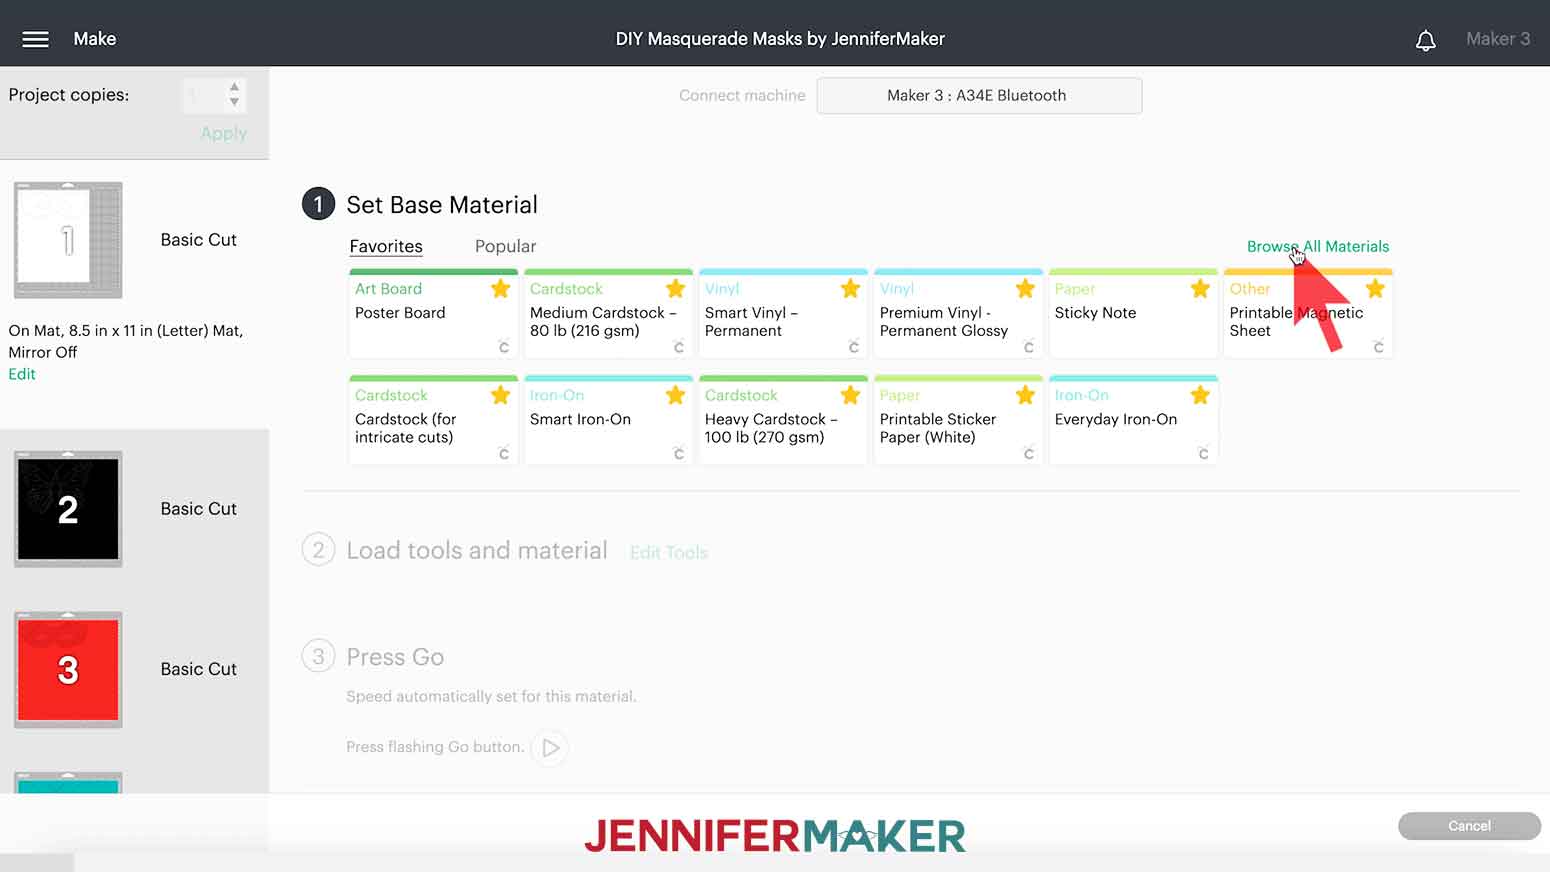
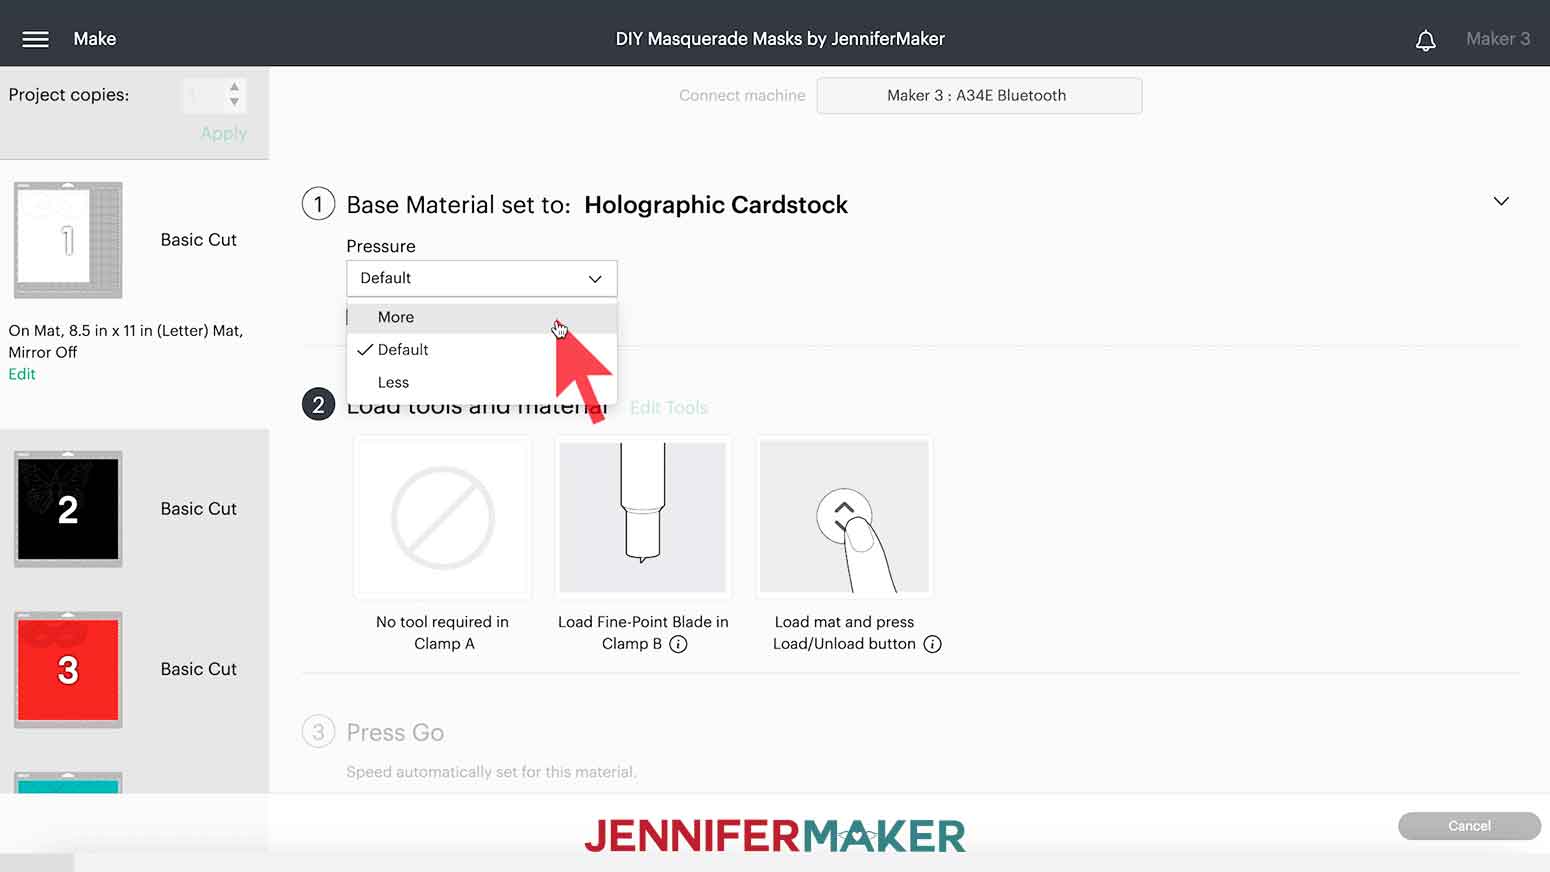
Like with most of my cuts, I recommend changing the Pressure to More.
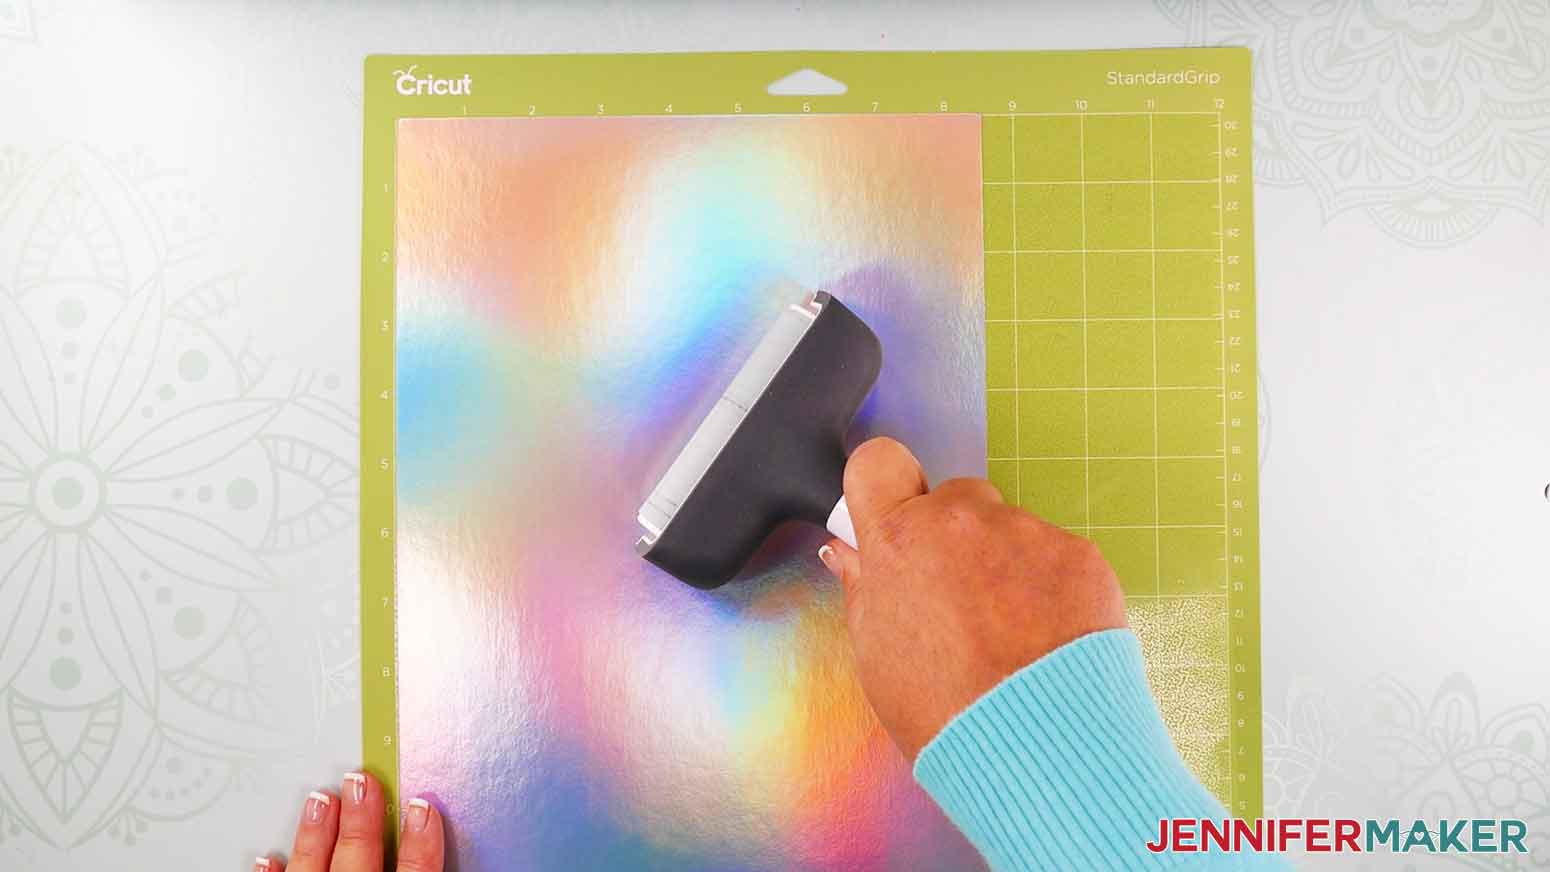
Place your first piece of cardstock face up on your cutting mat. Use a brayer to roll over the cardstock and ensure the best adhesion to the mat.
TIP: If you are using a brand new mat, you do not need to apply a lot of pressure with the brayer. It could cause your cardstock to stick and tear from the mat.
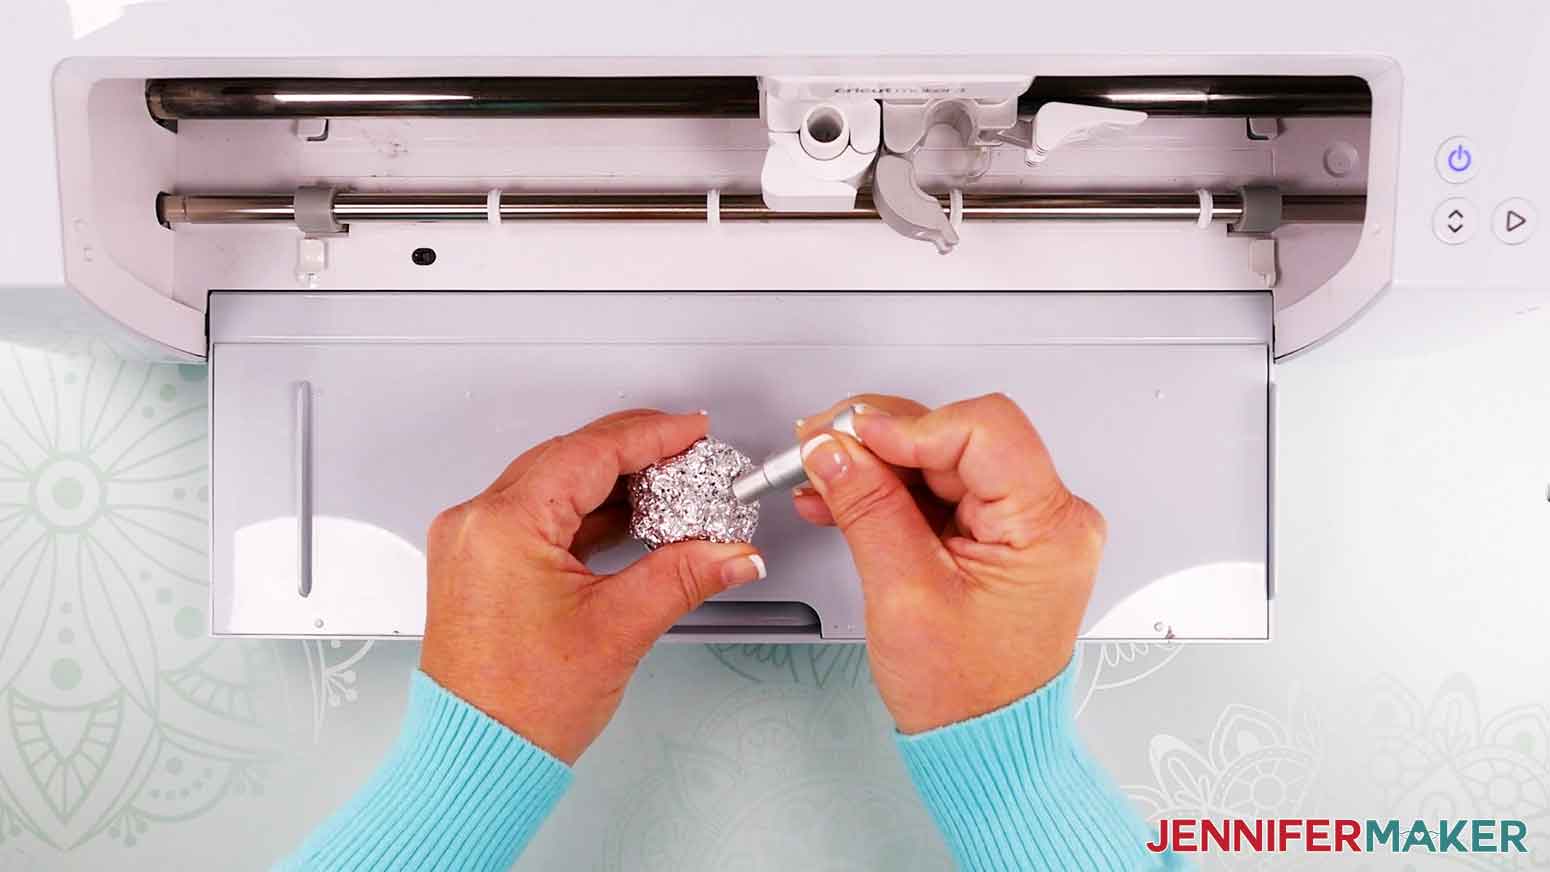
Before loading your mat, it is very important to check and clean your blade. The smallest piece of debris can ruin your mask cut. My favorite technique is to poke it in to a ball of foil. This is very important to do after each mat, especially when cutting glitter cardstock.
Place your mat into the Cricut and press the flashing arrows to load it. When the middle button begins flashing, press it to cut your designs.
When the mat is done, click the flashing arrows to unload the mat. Flip the mat over and pull it away from the cardstock. This will help prevent curling.
The scraper tool comes in handy when removing small bits from the cutting mat, especially after the intricate cut.
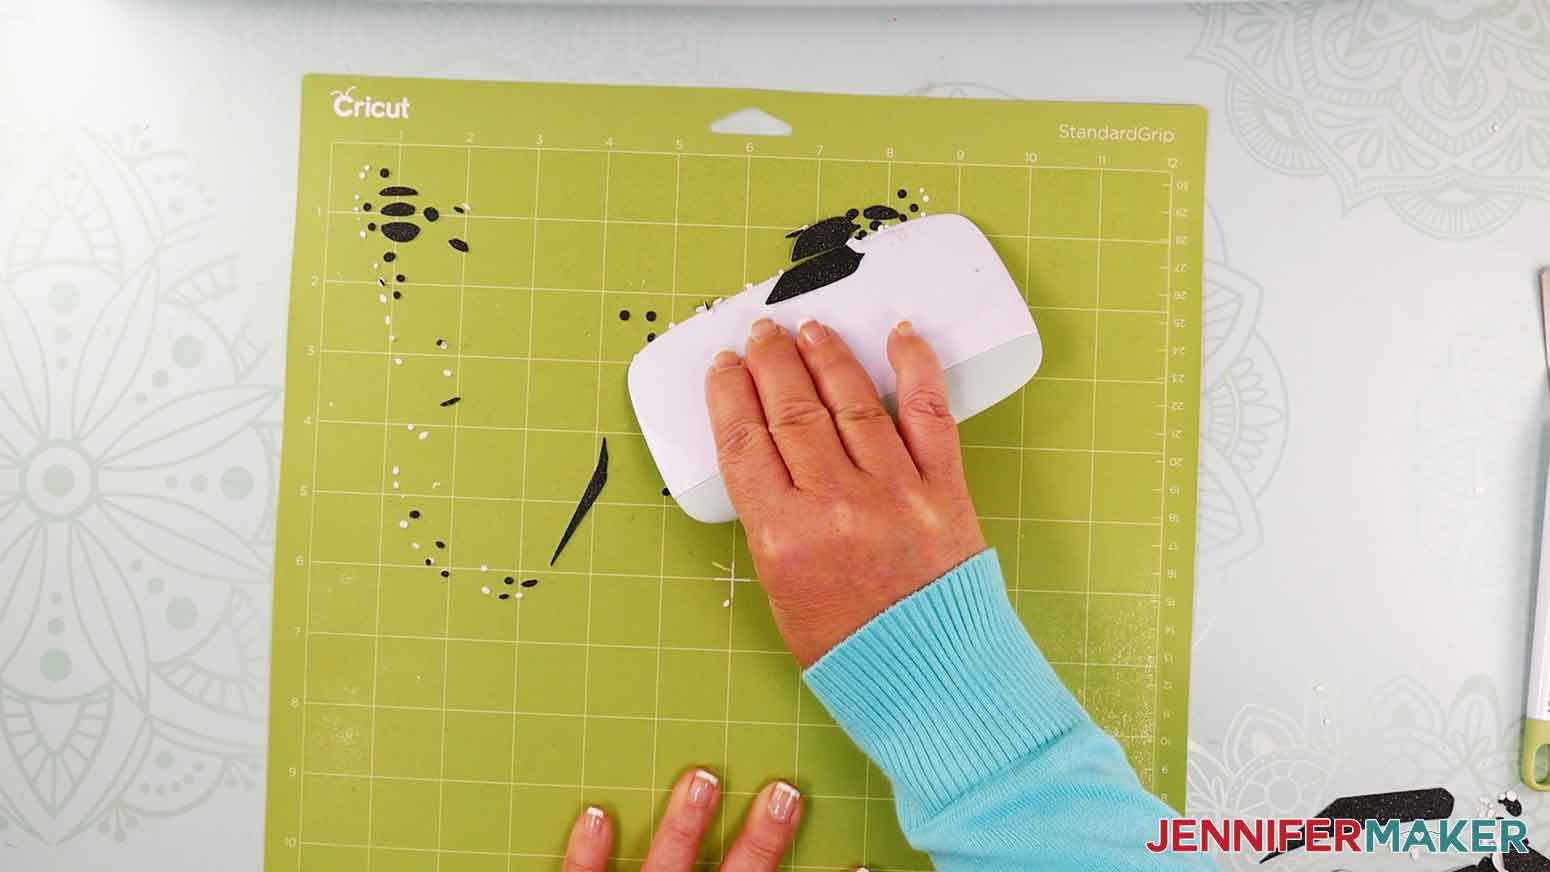
When your mat is clean, place the next piece of cardstock on the mat. Confirm your material settings in Design Space if you are using multiple materials like me. Load your mat and cut your design. Repeat this step for the rest of the mats. Don't forget to clean your blade between each mat!
STEP 4: ASSEMBLE AND DECORATE YOUR DIY MASQUERADE MASKS
There are so many fun options to embellish your DIY Masquerade Masks! I'm going to use some sequins, feathers, and glitter glue. I'm also going to add a dowel to hold one and show you how to use ribbon in case you prefer that instead.
Before you begin adding anything to your mask, place a piece of butcher paper down to protect your work surface.
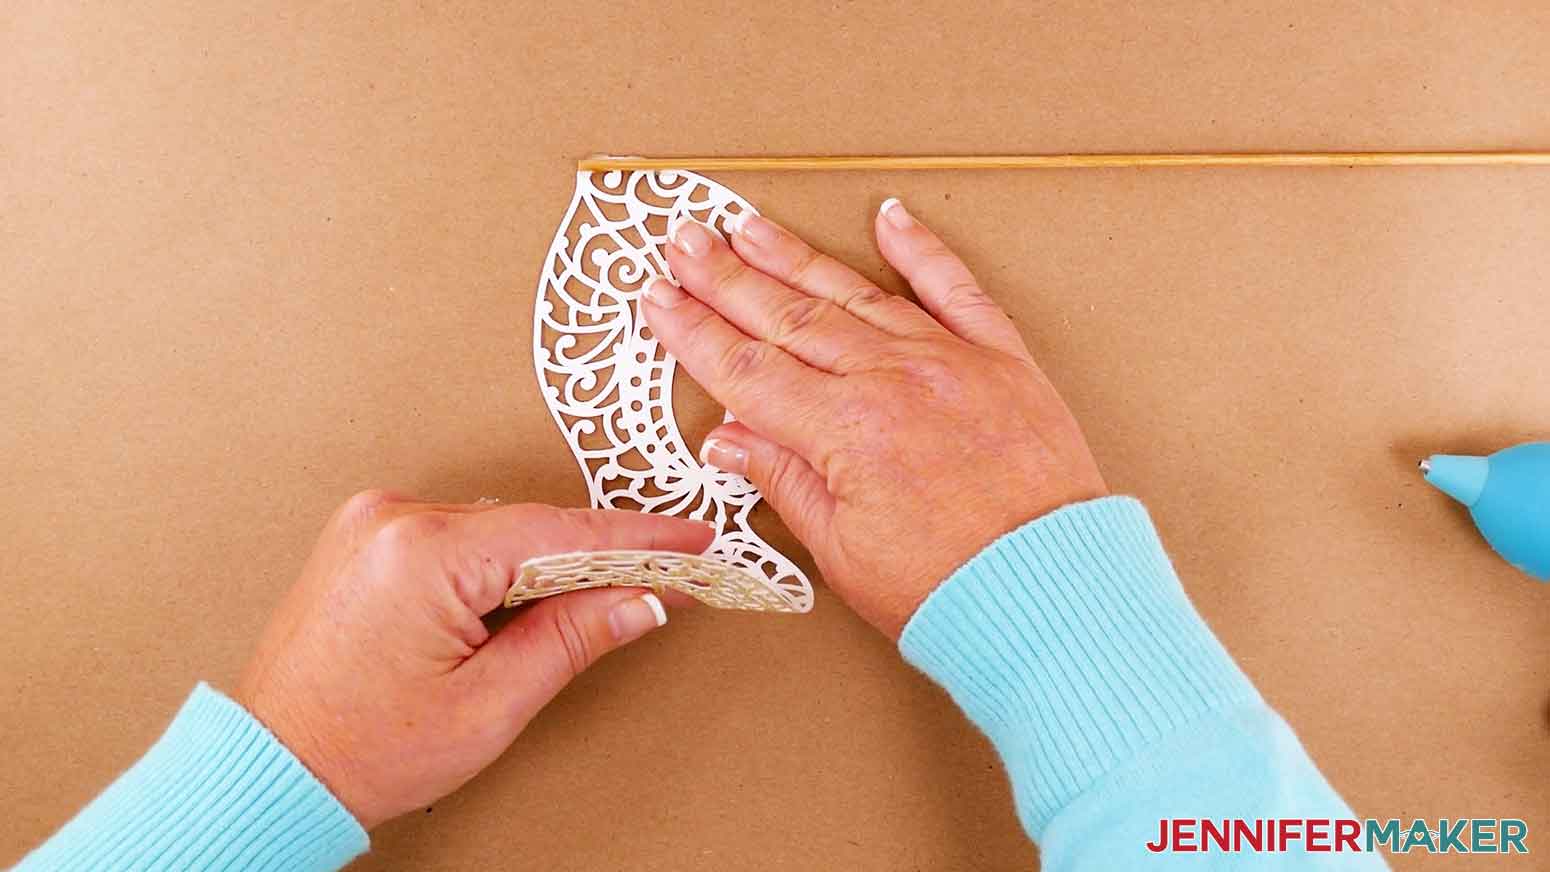
For the intricate cut mask design, I'm going to paint the dowel with acrylic metal paint. I used gold to keep with the theme.
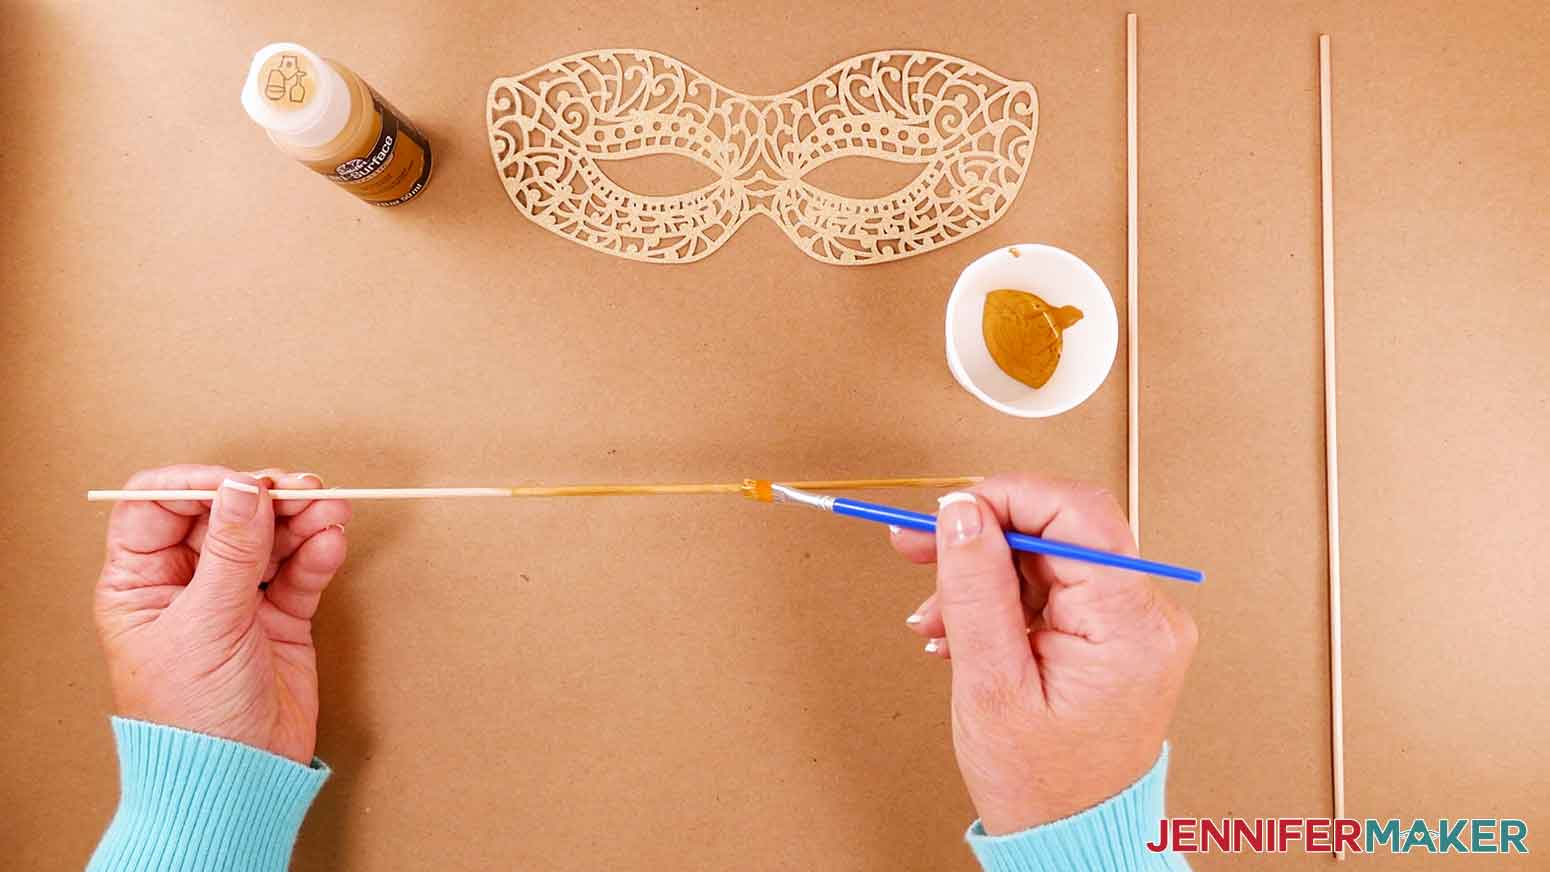
I used some extra dowels to create a drying rack for my painted dowels. Set it aside to dry. Mine was ready for attachment after about an hour. I used my hot glue gun and placed a dab of glue on the back of my back. Press the dowel into the glue.
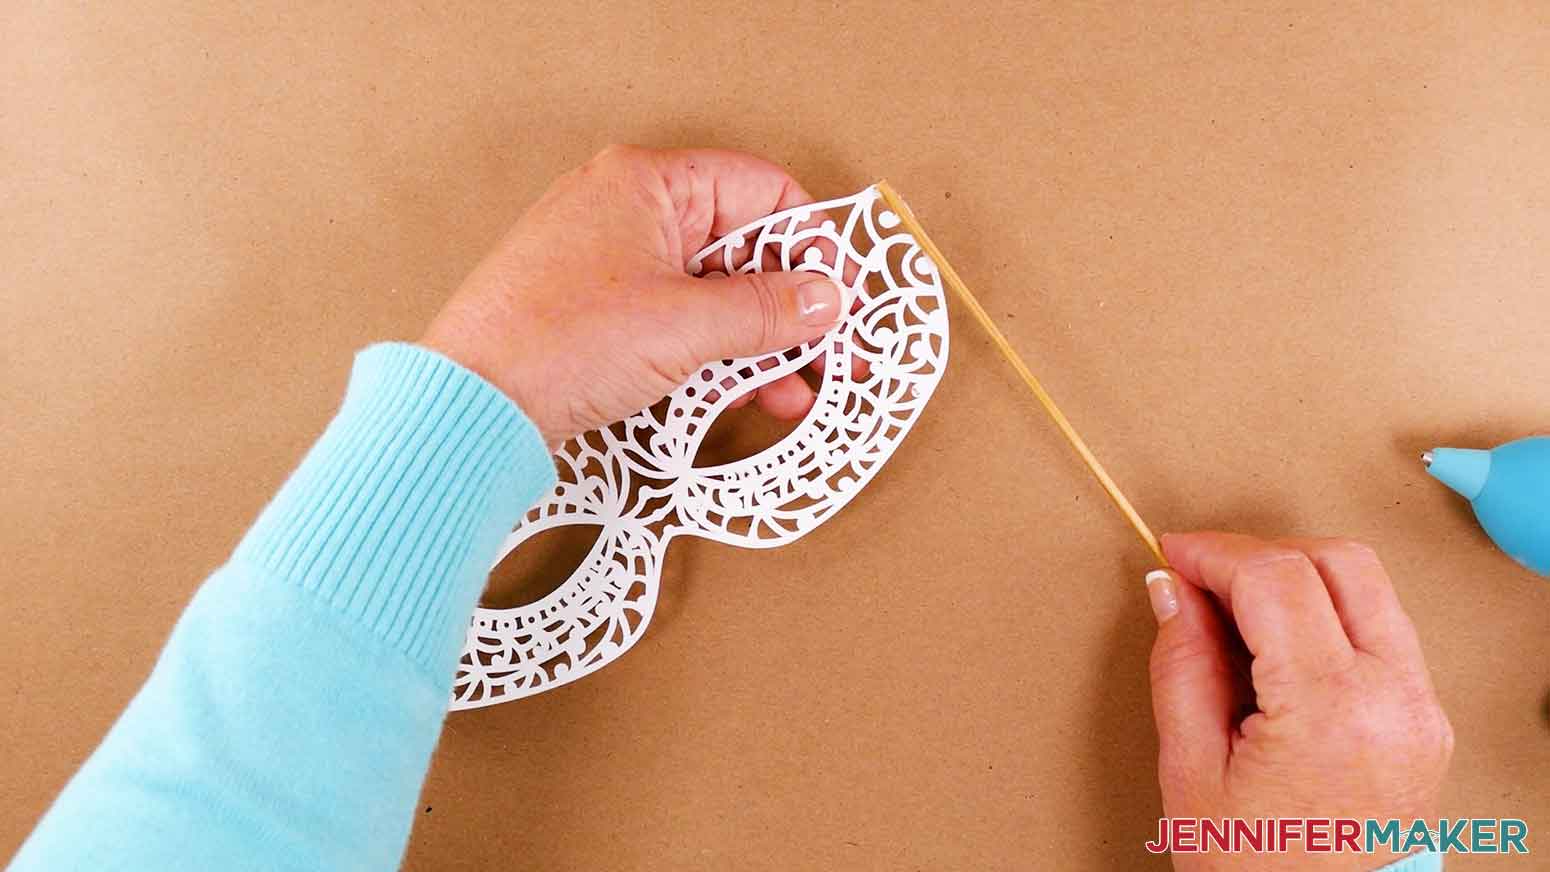
Once cool to the touch, your mask is ready to be formed. Gently bend the mask so that the nose area curves up like a rainbow. You can keep working at it until it holds the shade you're happy with
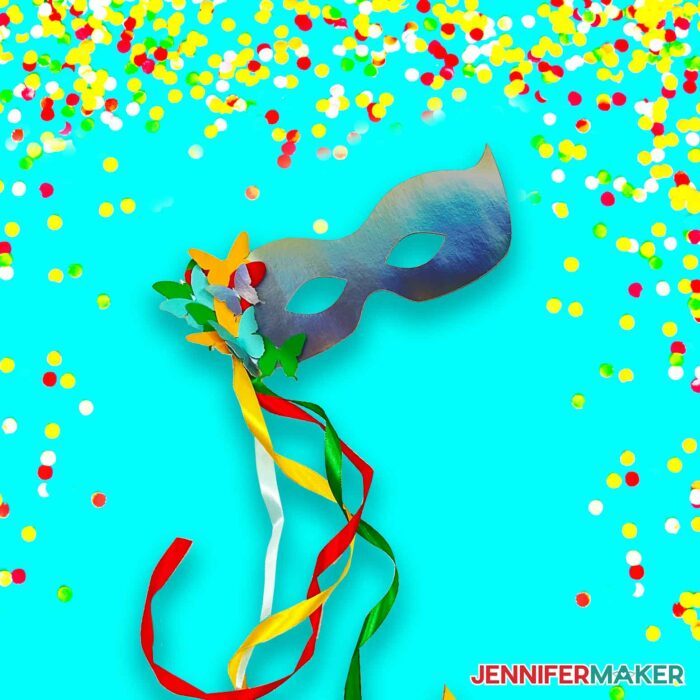
Next up, we will work on the butterfly mask. Flip over the top part and apply minimal dots of glue around the back of the butterfly. The biggest goal is to not have glue seep out when we attach it. The tiniest dots held my mask in place.
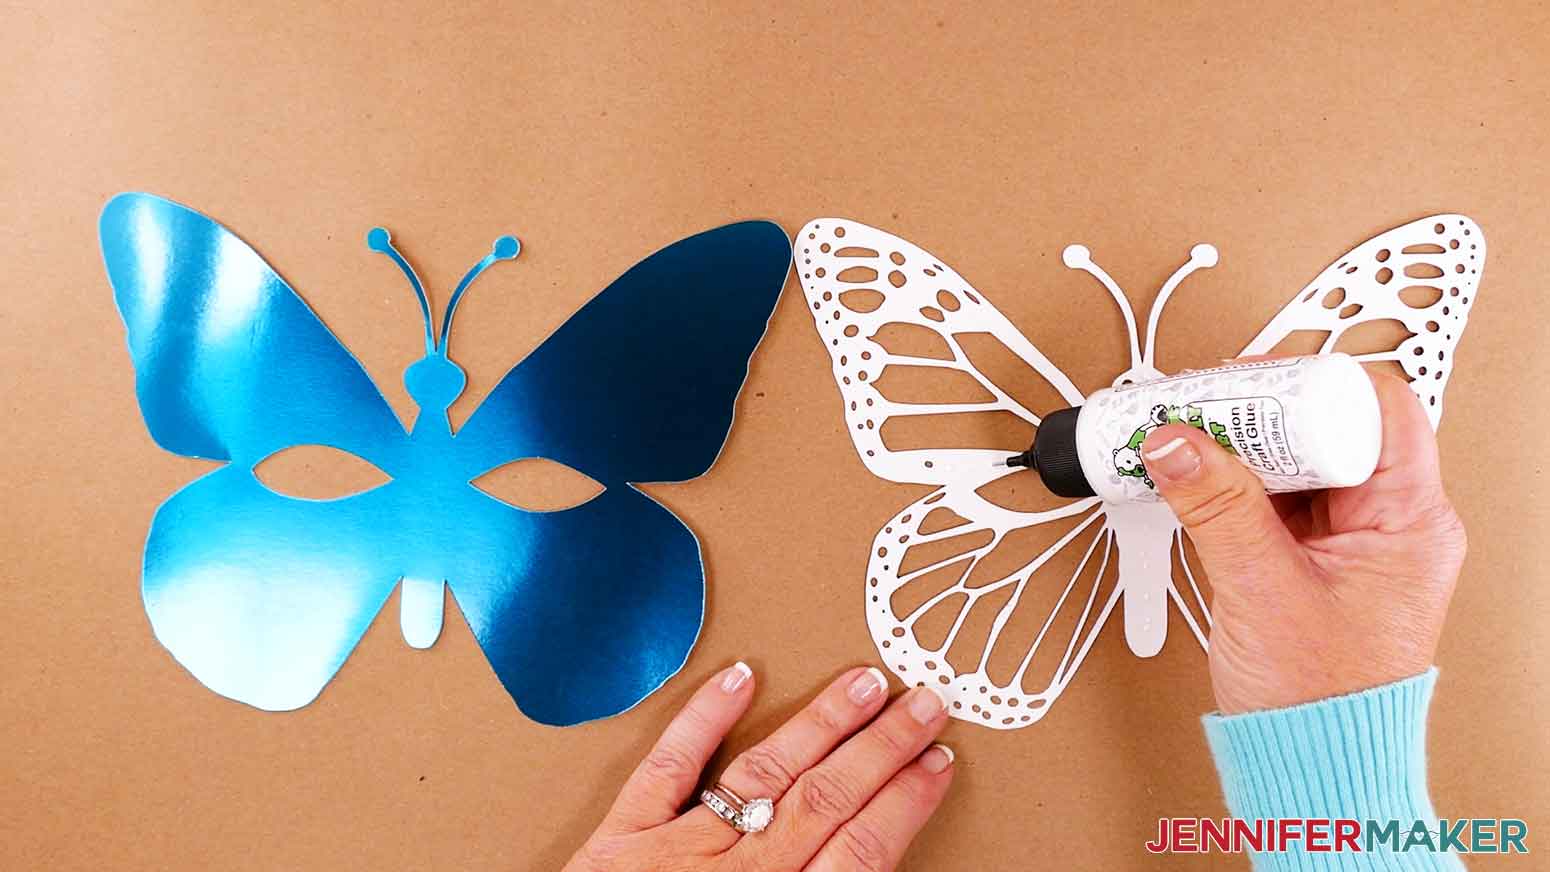
Turn over the butterfly top piece and align it over the bottom layer. Gently press it in to place and set it aside to dry.
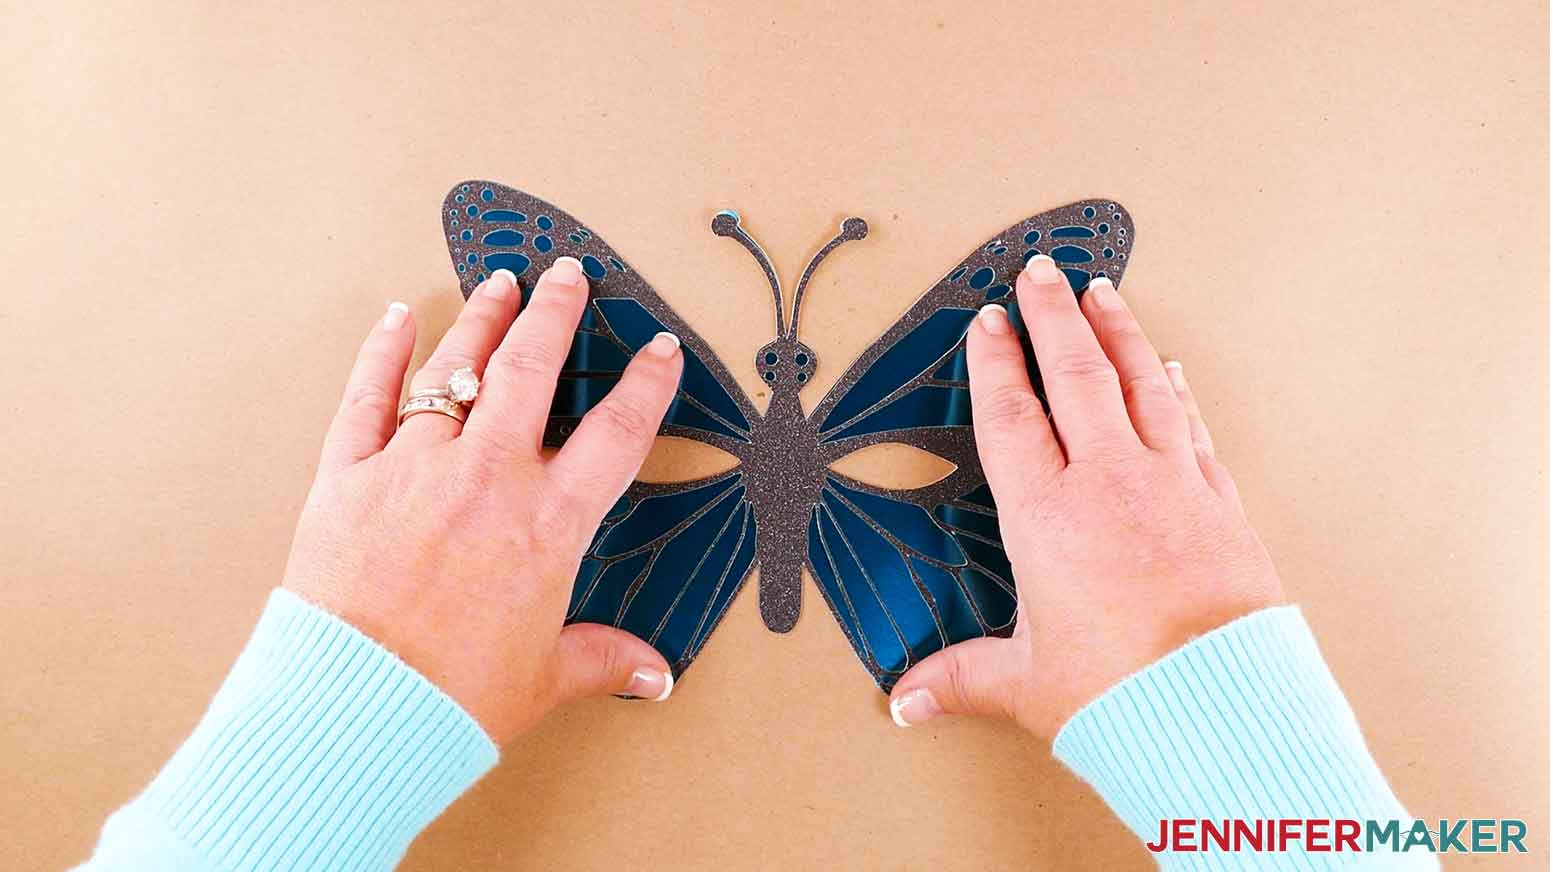
Bearly Art Glue is very fast drying. Give it about 10 minutes to be safe and then gently bend the mask to form around your face.
Lastly, we're going to attach ribbon for this one. Everyone's face is shaped differently. I think the best way to know the proper placement of your ribbon is to hold the mask to your face and press your thumbs where it feels most natural to have a ribbon. Cut your ribbon, mine are about 17" on each side, and attach one with a dab of hot glue.
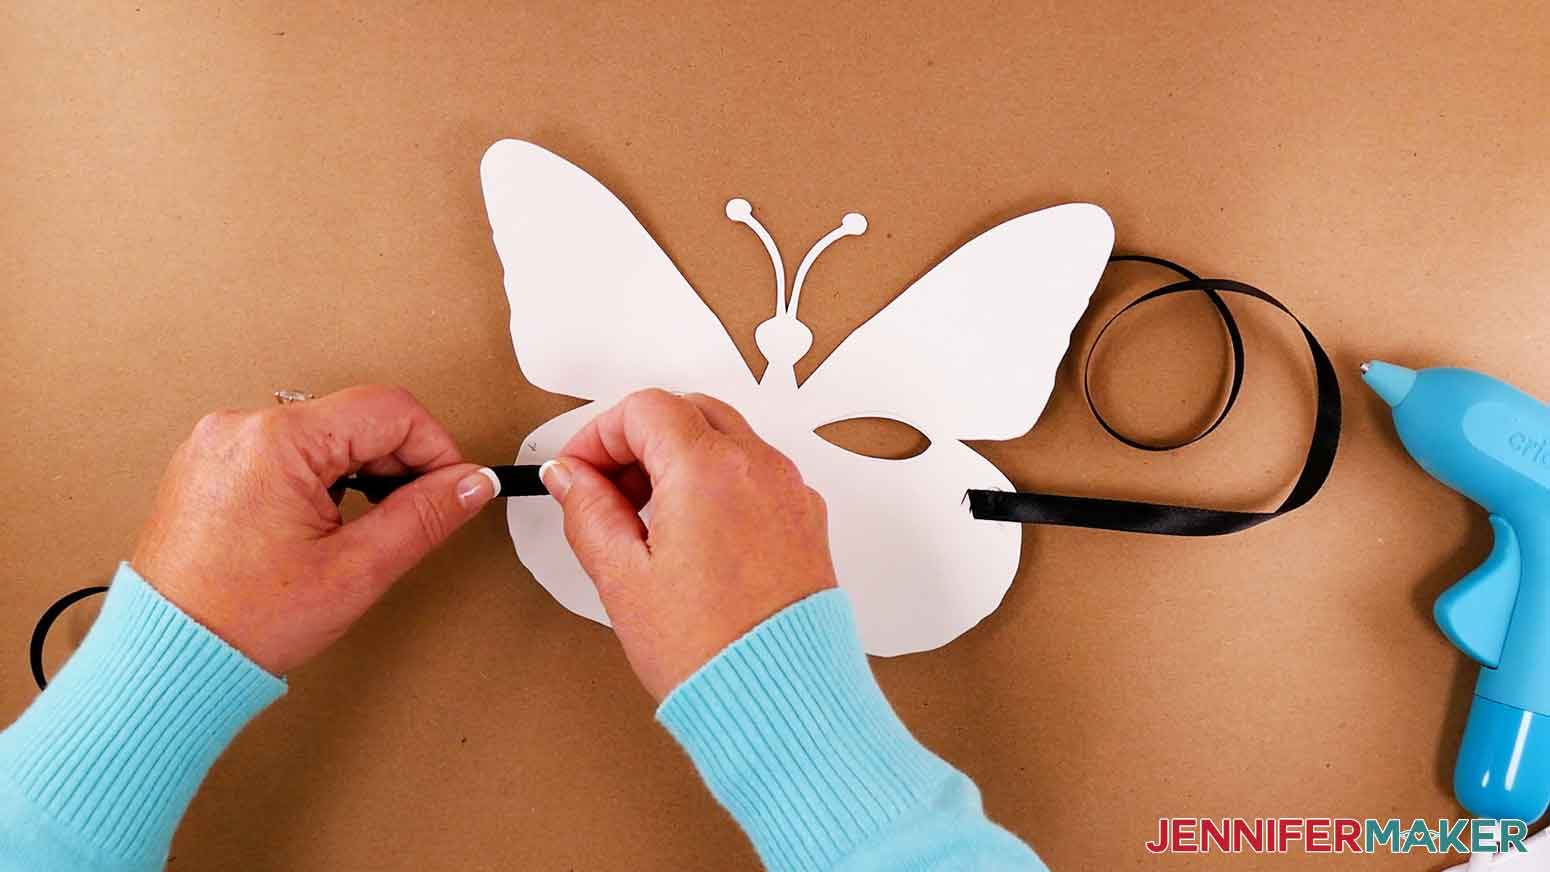
Repeat for the other side. It will look best if the ribbon is symmetrical so eyeball the placement of the first ribbon and glue the second side in place.
Lastly, I'm going to show you how fun it is to jazz up a plain mask with your own creative touch. I'll be using glitter glue, feathers, and sequins.
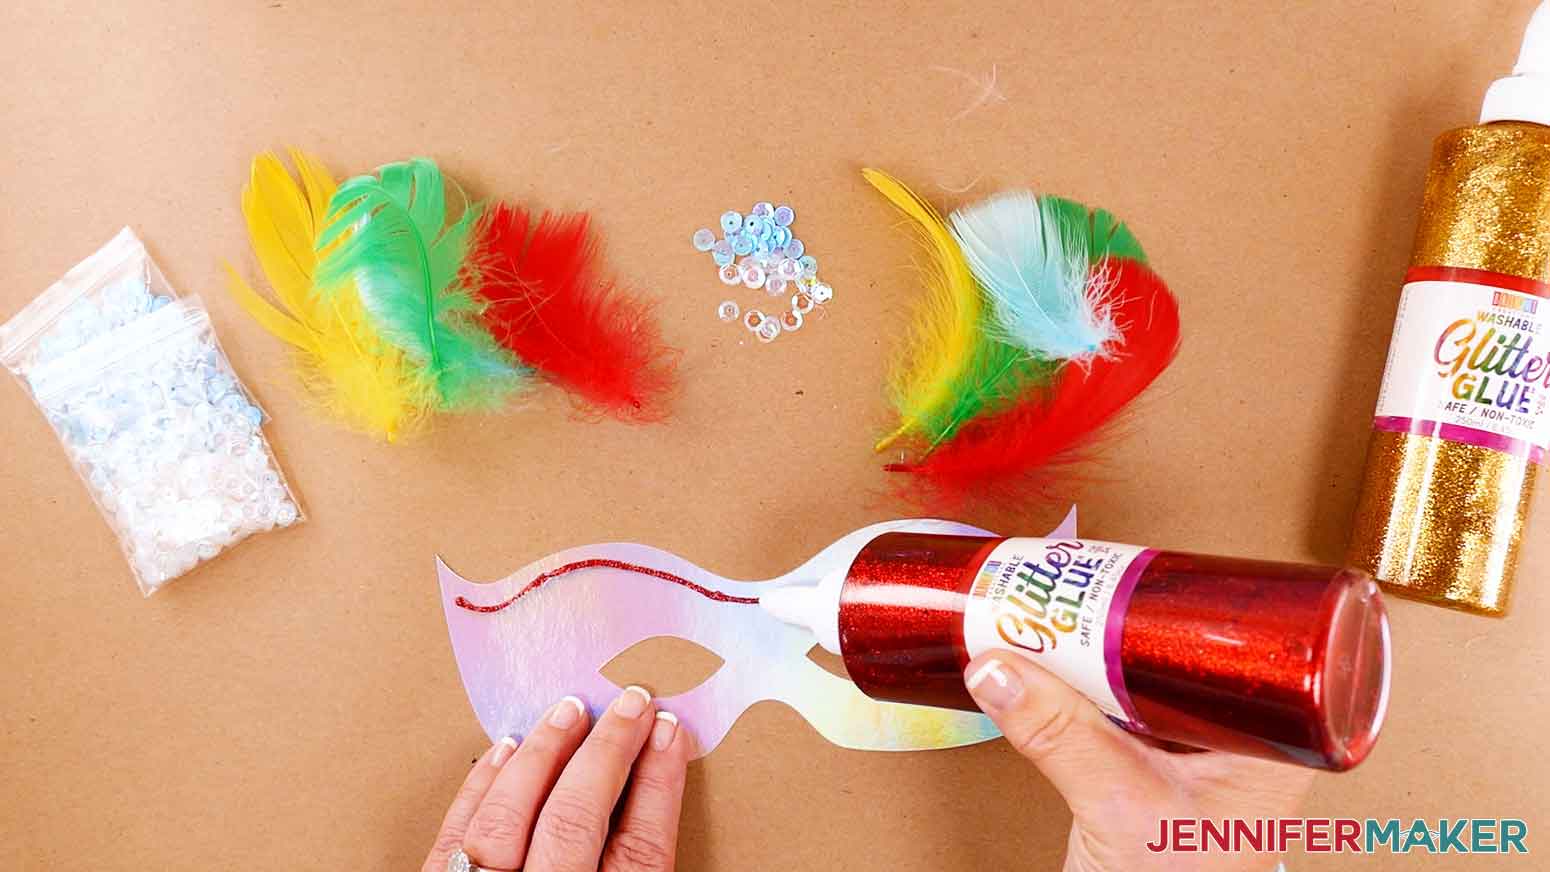
You can attach the sequins with the glitter glue or with craft glue. Drawing designs with the glitter glue is also fun!
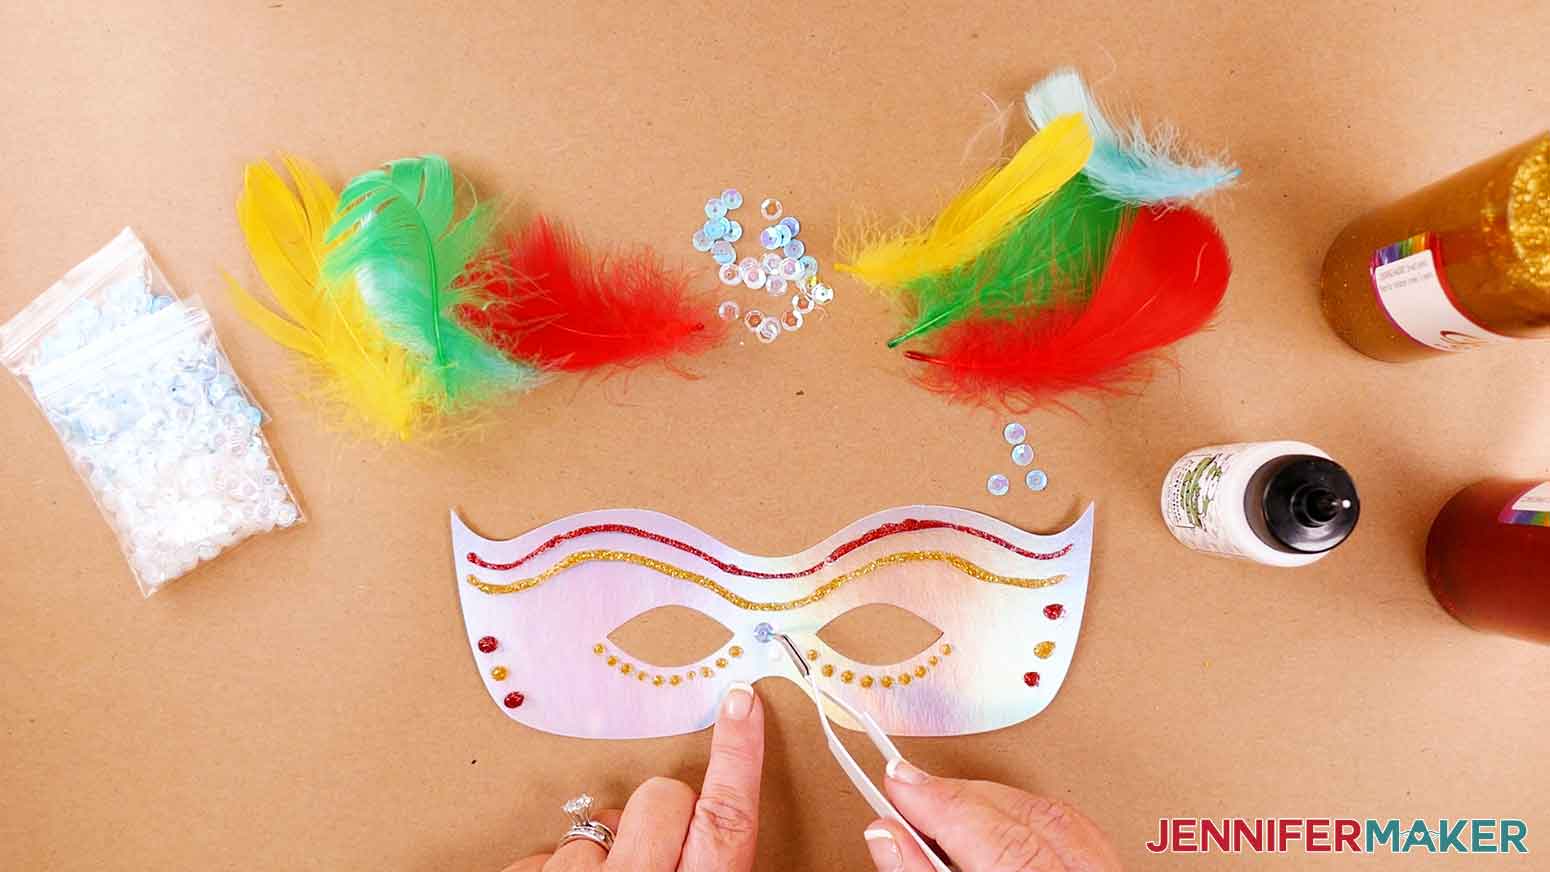
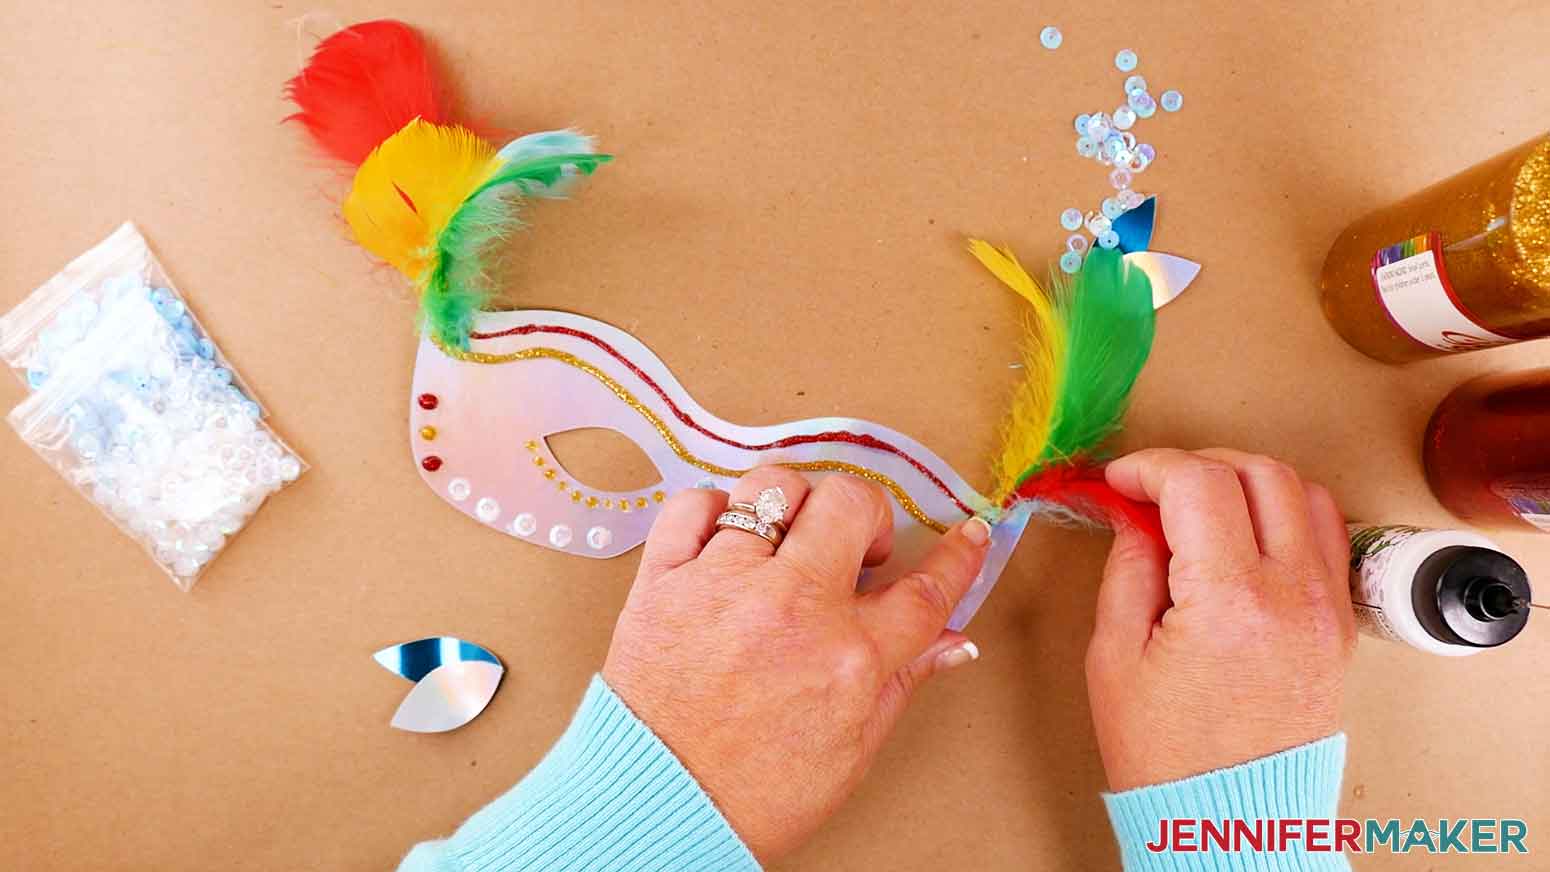
Lastly, I'm going to add some feathers to the side of the mask. I found it easiest to hold the feathers in the desired arrangement and glue them together with craft glue. Once they are dried together, glue the bunch of feathers to the mask.
STEP 5: SHOW IT OFF
There are so many fun options to create! I can't wait to see your DIY Masquerade Masks! Here are a few of my finished designs.
Notes
Mask Dimensions
Plain mask and mask with swirls: 8" wide x 2.9" tall
Intricate cut mask: 8" wide x almost 3.1" tall
Geometrical mask: 9.5" wide x 3.1" tall
Butterfly mask with cutouts: 8.7" wide x 6.4" tall
Butterfly mask with a solid backing: 8.5" wide x 6.2" tall
Answers to Your Questions About DIY Masquerade Mask SVGs
Q. How do you make a simple masquerade mask?
The first thing is to find a DIY masquerade mask in my collection that you like. Then, cut the SVG using a cutting machine, or print the PDF file to cut with a utility knife. Assemble the layers if needed, add a ribbon or handle to keep it on your face, and add any decorations you like!
Q: What do you need for a masquerade mask?
You can really use any 65 lb or higher cardstock, adhesives, and a dowel or ribbon to keep your mask in place.
Q: My cardstock keeps ripping on the intricate cuts. What can I do?
Be sure you’re using a clean and sticky machine mat, good-quality cardstock, and a clean blade. See my Cricut Cutting Problems post for all the tips I use to get a clean, accurate cut every time.
Q. How do you fit a masquerade mask over your glasses?
You can either make the handheld version with a dowel and hold it in front of your glasses, or carefully secure the mask with ribbon right over your glasses.
Q. How do you make a full face mask out of paper?
My butterfly mask covers most of my face, but you can add more decorations to get fuller coverage. Or, make a larger SVG in Design Space using one of my free files as a starting point. Just don’t move the eye holes, they’re in a good spot for most people!
Get my free download of the DIY Masquerade Mask SVG cut files here:
If you make a DIY masquerade mask, I’d love to see it! Please share your paper cut light box tutorial results in my Cricut Crafters & Makers group where you’ll find hundreds of thousands of crafters like you, sharing their tips, projects, and inspiration.
By the way, you’re free to use my free digital files to create physical items to sell — I just ask that you share that you used one of my designs on your listing or with your product.
Love,

Want to remember this? Save this DIY Masquerade Mask Tutorial to your favorite Pinterest Board