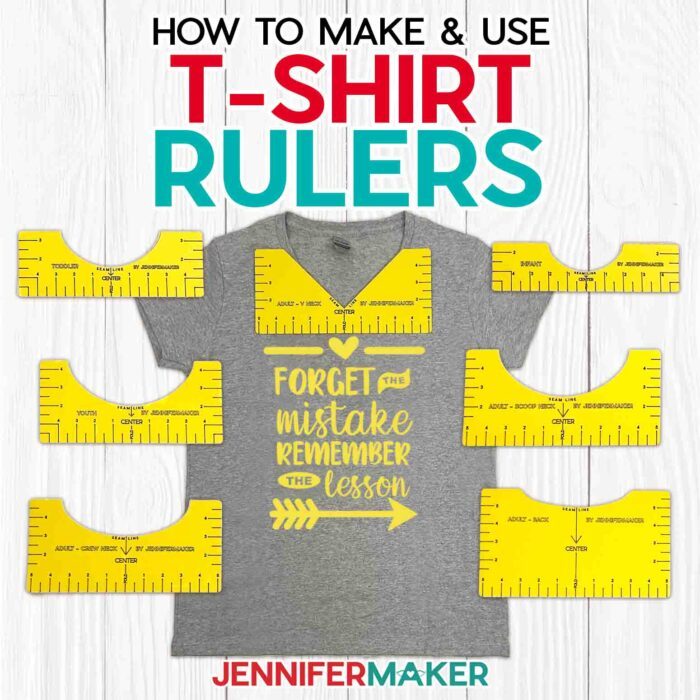
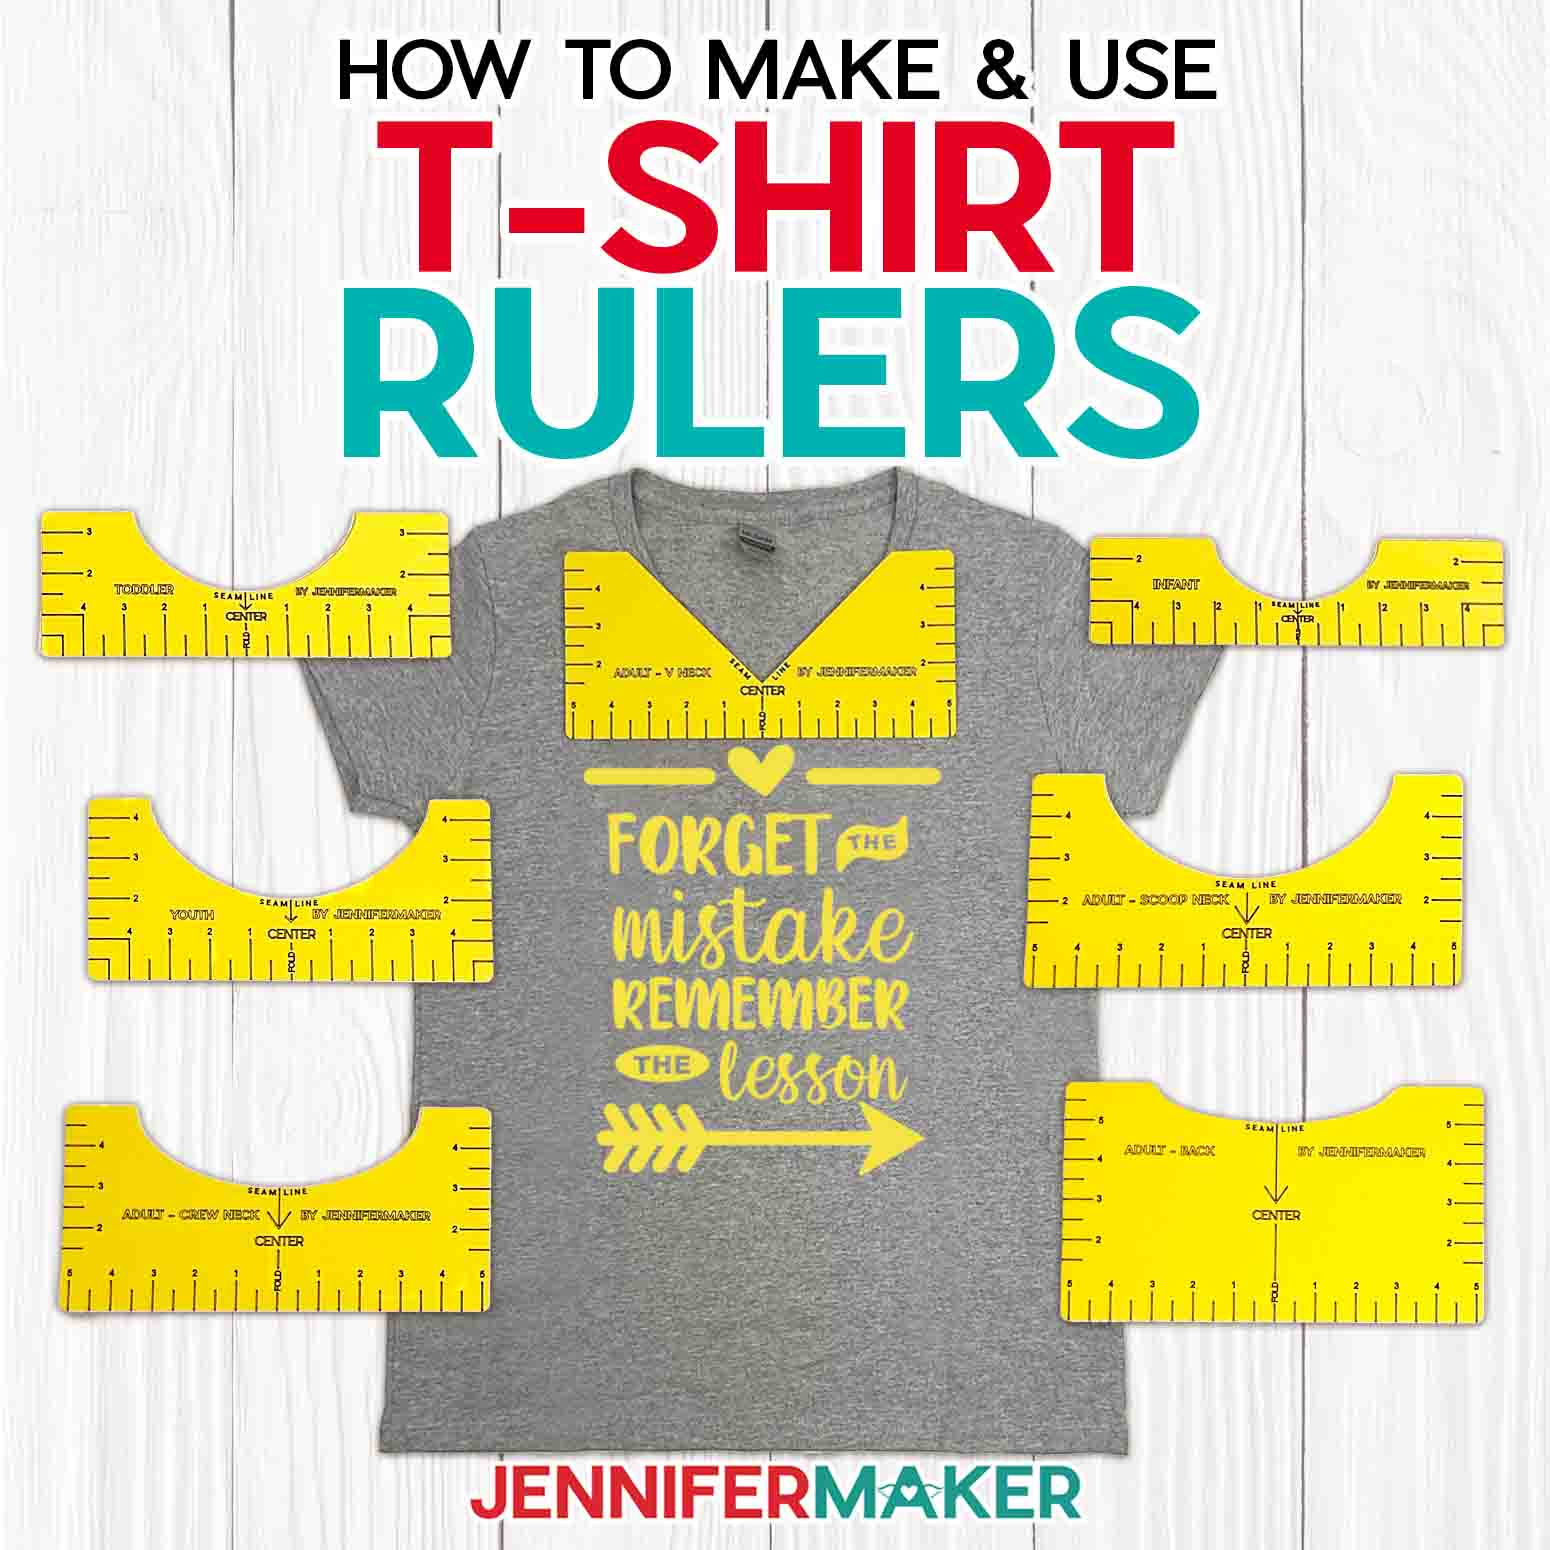
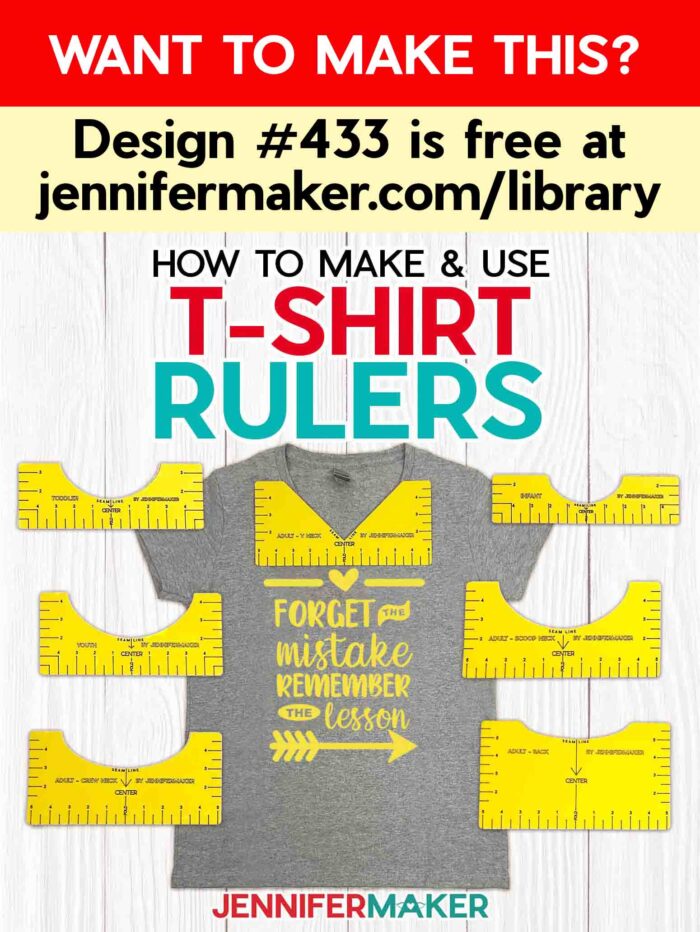
Make a free T-shirt ruler guide collection to get the right design placement every time!
Custom T-shirts are so much fun to make, but how do you get the design placed perfectly? Too high or too low and they just don’t look right! Not to worry, you can make your own T-shirt ruler guide for any kind of shirt from infant to adult! After all, making your own tools and project accessories is one of the best parts of being a Cricut crafter! I’ll show you how to make them out of either cardstock or plastic (wait til you see what we’re using!) and how to use them with my free cut designs. Your new T-shirt rulers will work for any of my custom T-shirt projects, I’ll share my favorites down below!
Watch my step-by-step tutorial on how to make and use a T-shirt ruler guide set:

Correct placement can be the difference between success and sadness for T-shirt projects! If you get it wrong, the design might be hard to read or uncomfortable to wear. Not to fear, you can make the perfect T-shirt alignment tool using your Cricut! I’ll show you how to use my free SVGs to make a t-shirt ruler guide out of cardstock or plastic.
Which should you make? It depends on your different needs!
If you make the paper version in premium quality cardstock like the kind in my material list, it will hold up for many uses. It might be easier to use if you have vision trouble since we’ll draw the markings on top using a Cricut pen before cutting it on a StandardGrip mat.
But if you might need to see the fabric’s surface during alignment — like if you’re using a patterned shirt — or plan to make A LOT of shirts, the chopping mat version is easier to make than you might think and extremely durable. It actually just takes a fine-point blade and StrongGrip mat!
Once you’ve made a guide tool, how do you use it?
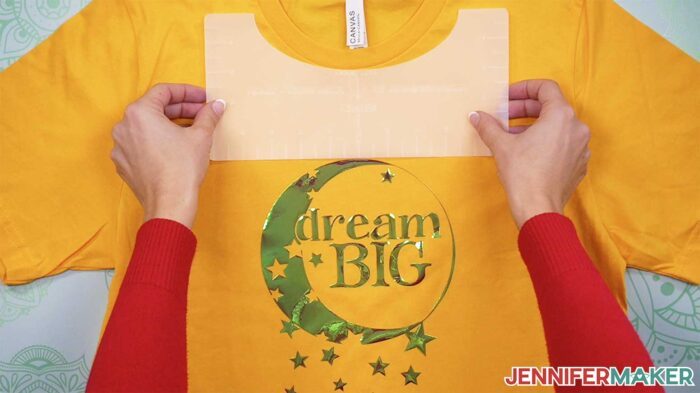
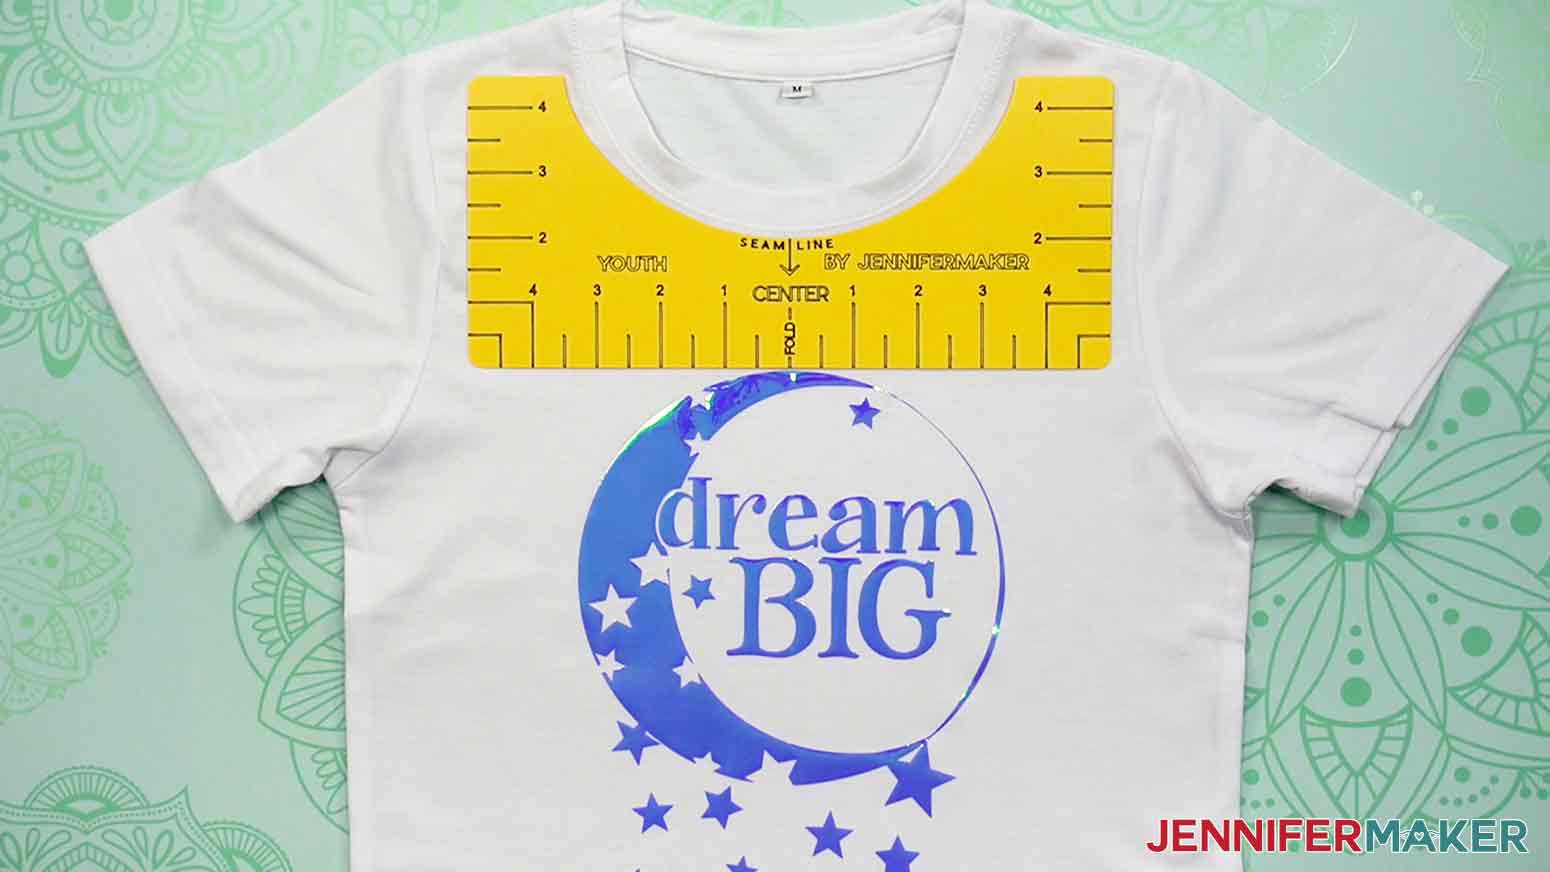
Place your T-shirt ruler on your vertically creased T-shirt. You don’t want it on the edge of the collar of the t-shirt, but on the seam. Then, place the top of the similarly creased design right at the bottom of the ruler (though sometimes it goes higher or lower, I’ll show you in the video!). This is extra helpful if your design doesn’t have a uniform top edge. You’ll get consistent alignment on multiple shirts using my t-shirt ruler guide collection!
My example shirts use one layer, but for extra help on vinyl alignment in a more than one piece design, check out my tutorial on How to Layer Vinyl.
Ready to make some perfect projects with my t-shirt ruler guide tutorial? I’m super excited to show you how! This post contains some affiliate links for your convenience (which means if you make a purchase after clicking a link I will earn a small commission but it won’t cost you a penny more)! Read my full disclosure policy.
Materials for to Make a T-shirt Ruler Guide Set and Designs
View my Amazon shopping list with the exact items we used to make this project.
To make a cardstock T-shirt alignment ruler, you will need:
- 110 lb, 8.5″ x 11″ Cardstock in a color that will stand out on shirts and a fine-tip pen. I used yellow cardstock and a black fine-point pen on a 12″ x 12″ StandardGrip Machine Mat.
To make the plastic guides, you will need:
- 11″ x 14″ Dollar Tree chopping mats, which you can purchase from the Dollar Tree website or on Amazon – depending on the rulers you are cutting, you can fit two to three guides on each piece of plastic using a 12″ x 12″ StrongGrip Machine Mat.
And for either version, I used:
- A way to cut your T-shirt rulers and vinyl. I used the amazing Cricut Maker 3 but you can also use the original Maker or an Explore series machine with the Fine-Point Blade
- Standard tools such as a measuring tape, scissors, weeding tool, and brayer.
To make the custom t-shirts, you’ll also need:
- A shirt of your preference – I tried several with good results including an Adult Unisex crew neck, a Cotton Ladies V-Neck, a Youth T-Shirt, baby onesies, and a sweatshirt
- Iron-on vinyl – I used Cricut Everday Iron-On in yellow, and Holographic Iron-On in red and cobalt.
- An appropriate heat press – I used my EasyPress 2, but you can use another Cricut heat press, or a home iron. Have a towel or pressing mat and a lint roller ready, too.
- Design #433 (My free T-shirt ruler guide SVG/PDF/DXF design files and example decals available in my free resource library – get the password by filling out the form at the bottom of this page)
How to Make a T-shirt Ruler Guide and Custom Shirts
DIY T-Shirt Ruler Guide
With my T-shirt ruler guide collection, learn how to make and use T-shirt rulers with cardstock and Dollar Tree chopping mats for the perfect decal allignment!
Materials
- Dollar Tree Chopping Mats (2-pack) -OR-
- Dollar Tree Chopping Mats from Amazon
- Yellow Cardstock (110 lb, 8.5" x 11"Colored Cardstock)
- Adult Unisex Crew-Neck T-Shirt (Dark Gray Heather - Size Medium)
- Cotton Ladies V-Neck T Shirt (Grey, Size Medium)
- Hanes Men's Sweatshirt (Grey, Size Medium)
- Cotton Youth T-Shirt (Green, Size Medium)
- Cricut Everyday Iron On (12” x 2ft - Yellow)
- Cricut Holographic Iron On Vinyl (12" x 24" - Cobalt)
- Cricut Holographic Iron On Vinyl (12" x 24" - Red)
- Design #433 (My free SVG/PDF/DXF design files available in my free resource library - get the password by filling out the form at the bottom of this page)
Tools
- A way to cut your T-shirt rulers and vinyl. I used the amazing Cricut Maker 3 but you can also use the original Maker or an Explore series machine with the Fine-Point Blade
- An appropriate heat press – I used my Cricut EasyPress 2
- Cricut Green StandardGrip Machine Mat (12"x12")
- Cricut Purple StrongGrip Machine Mat (12"x12")
- Cricut EasyPress Mat (I am using the 16"x20" for this project)
- Cricut Fine Point Pen
- Cricut Tools, Weeding Kit
- Brayer
- Lint Roller
- Flexible Tape Measure
Instructions
STEP 1: GET MY FREE DESIGN FILES
First, download my T-Shirt Ruler Guide SVG/DXF/PDF files from my free resource library. It's Design #433. Just go to the red bar at the top and look for Libraries, then either click Get a Password (if you don't yet have one) or click Enter the Library. You can find the pattern by searching the page for design 433 and then click it to download.
The download folder includes PDFs to cut by hand, and DXF or SVG files for use with a cutting machine. I'll show you how to use the SVGs with a Cricut.
In the SVG folder, you will find an SVG for each individual T-shirt ruler size, and a file containing the FREE decal SVGs I will use to demonstrate the rulers in action! I'll show you how to cut and draw the rulers using cardstock, and how to cut and "engrave" the rulers using Dollar Tree chopping mats. I will then teach you how to use the rulers to achieve the perfect placement of your decal on a variety of T-shirt sizes, including an adult v-neck T-shirt, a youth-size T-shirt, and an adult hoodie.
Upload the SVG files to Cricut Design Space and add them to your Canvas.
TIP: If you're not sure how to upload an SVG cut file to Cricut design space, watch this helpful video training series I made. If you are on an iPad or iPhone, here is how to download and upload SVG files to the Cricut design space app.
STEP 2: PREPARE THE RULER DESIGNS
First we'll start with the Heavyweight Cardstock Version
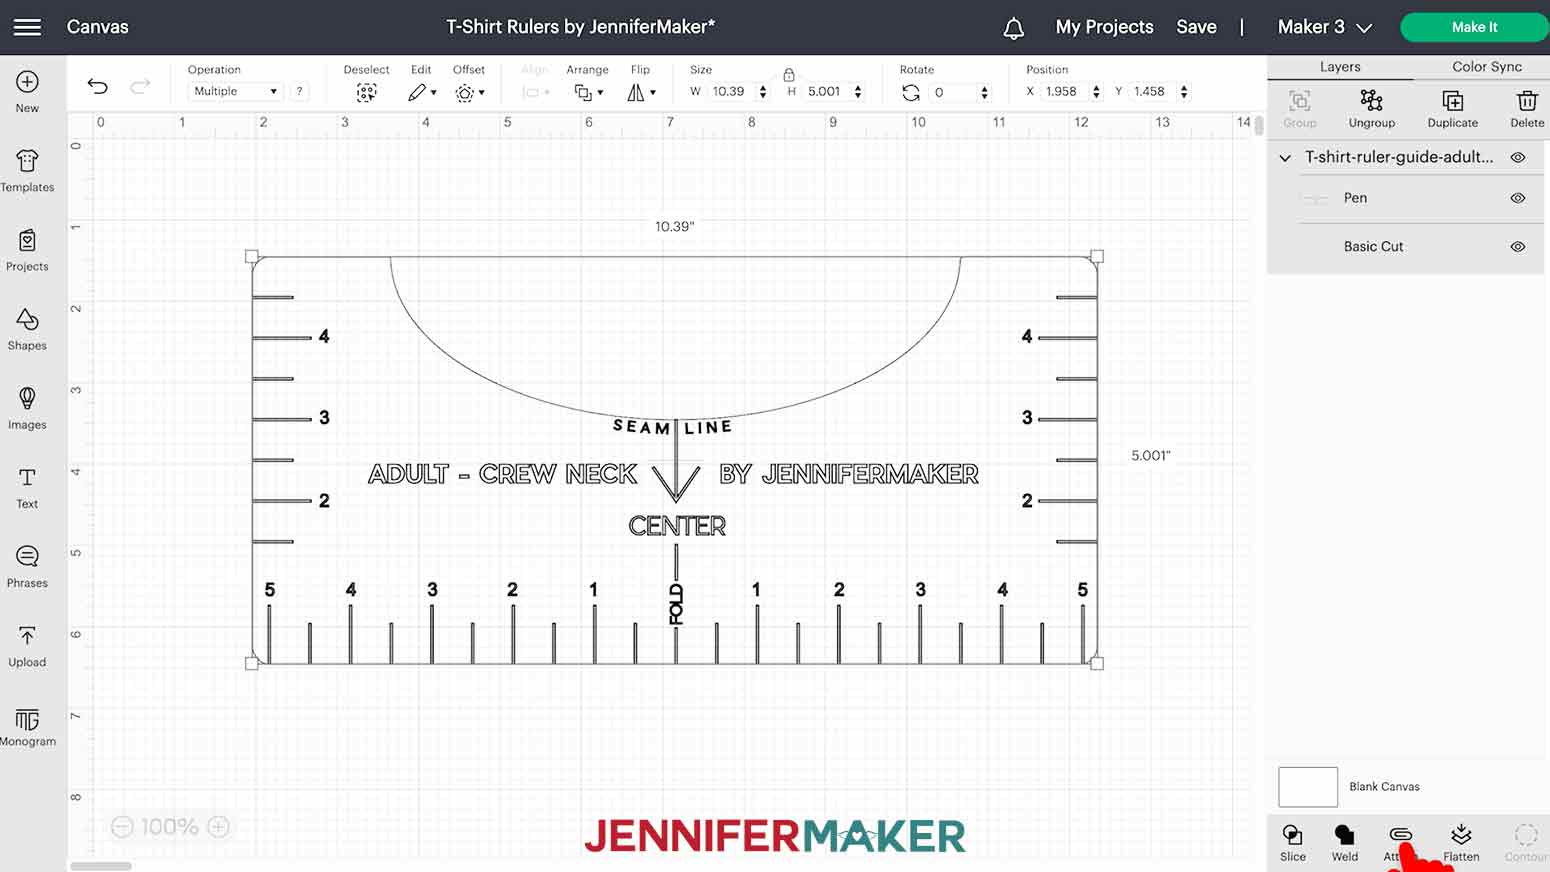
This is what my T-shirt Adult Crew-Neck cardstock ruler looks like on my Canvas.
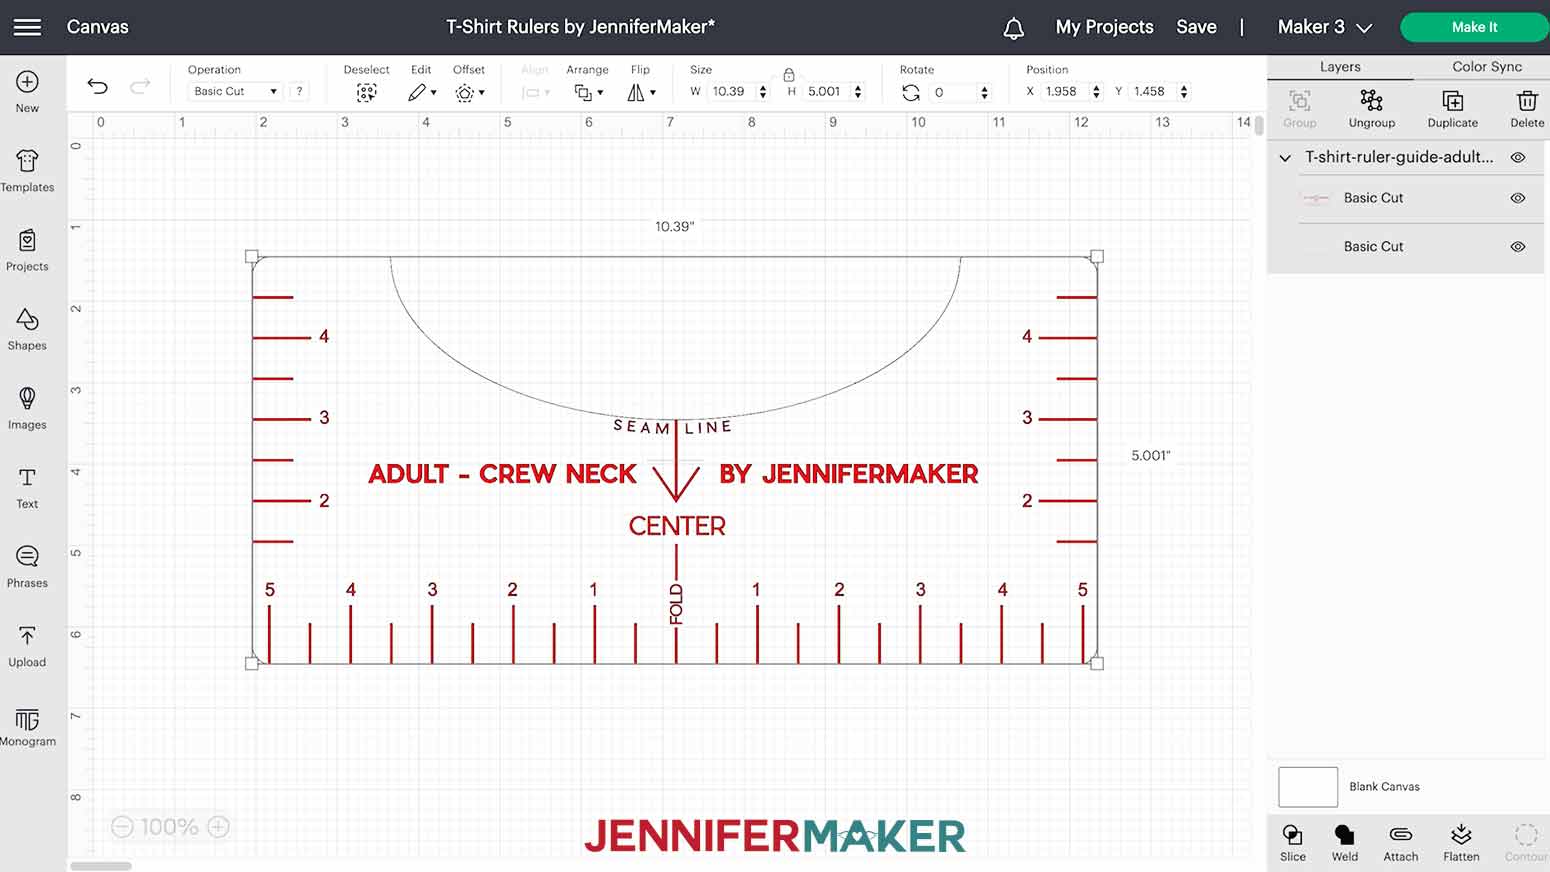
NOTE: The T-shirt rulers are already sized correctly so you do not have to worry about re-sizing. The Adult rulers should be approx. 5" H x 10.39"W, and the Youth/Toddler/Infant rulers should be 10" W x 4.5" H.
Each ruler is separated into two layers:
- the solid white ruler shape
- and the top markings.
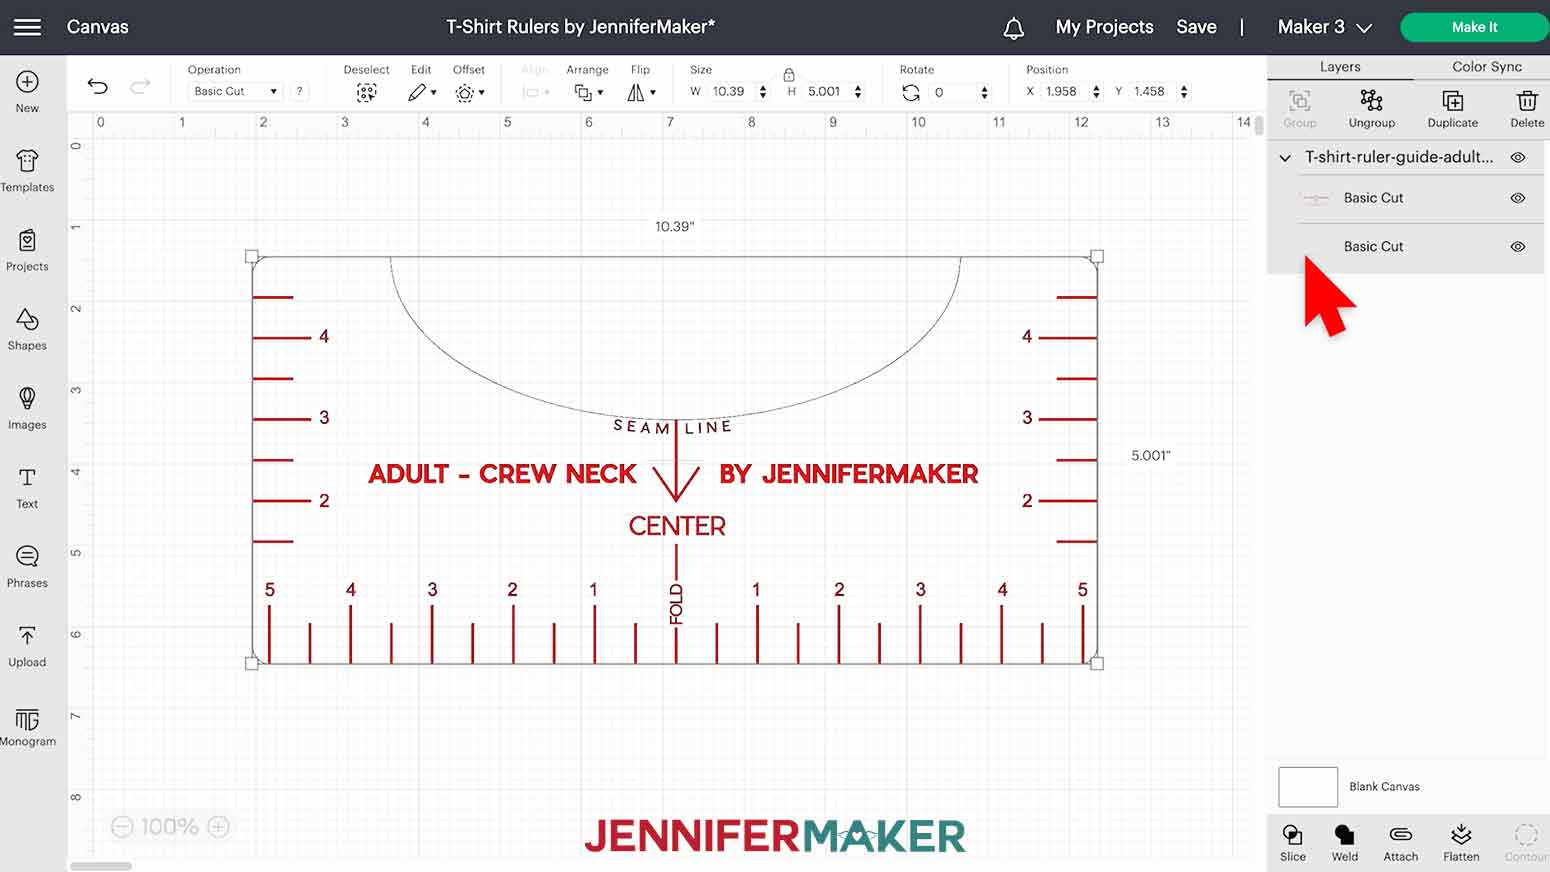
For the cardstock version, the markings will be drawn on. To adjust the marks, select the layer in the Layers Panel. Then, click the drop-down menu under "Operation" and select "Pen."

Finally, click the color box next to the drop-down to select your pen size and color. I'm using my Cricut 0.4 Fine Point pen in black, so my settings are correct.

The solid ruler outline layer should stay set to "Basic Cut". Drag a bounding box over the ruler and click "Attach" below the Layers Panel to keep the layers together during cutting.
Your cardstock ruler is ready to cut!
Next we'll prepare the Plastic Version
To make the ruler on Dollar Tree chopping boards, I'll start with the same SVG on my Canvas.
Remember, each ruler is separated into two layers:
- the solid white ruler shape
- and the top markings.
We don't need to change any operations, because I'm going to use the fine-point blade to "engrave" the markings and cut the ruler shape at the same time, but only want the markings to be surface deep. I found it easier to double up on the ruler outline cut rather than fiddling with pressure settings, multiple cuts, and cuts turning out misaligned.
Your plastic ruler is ready to cut!
STEP 3: CUT THE RULERS
Cardstock Rulers
Make sure you select the right machine and click "Make It."
If prompted, click "On Mat," "12 in x 12 in," and "Continue."
On the Prepare screen, change the Material Size to 8.5" x 11" if you're using the same cardstock as me.
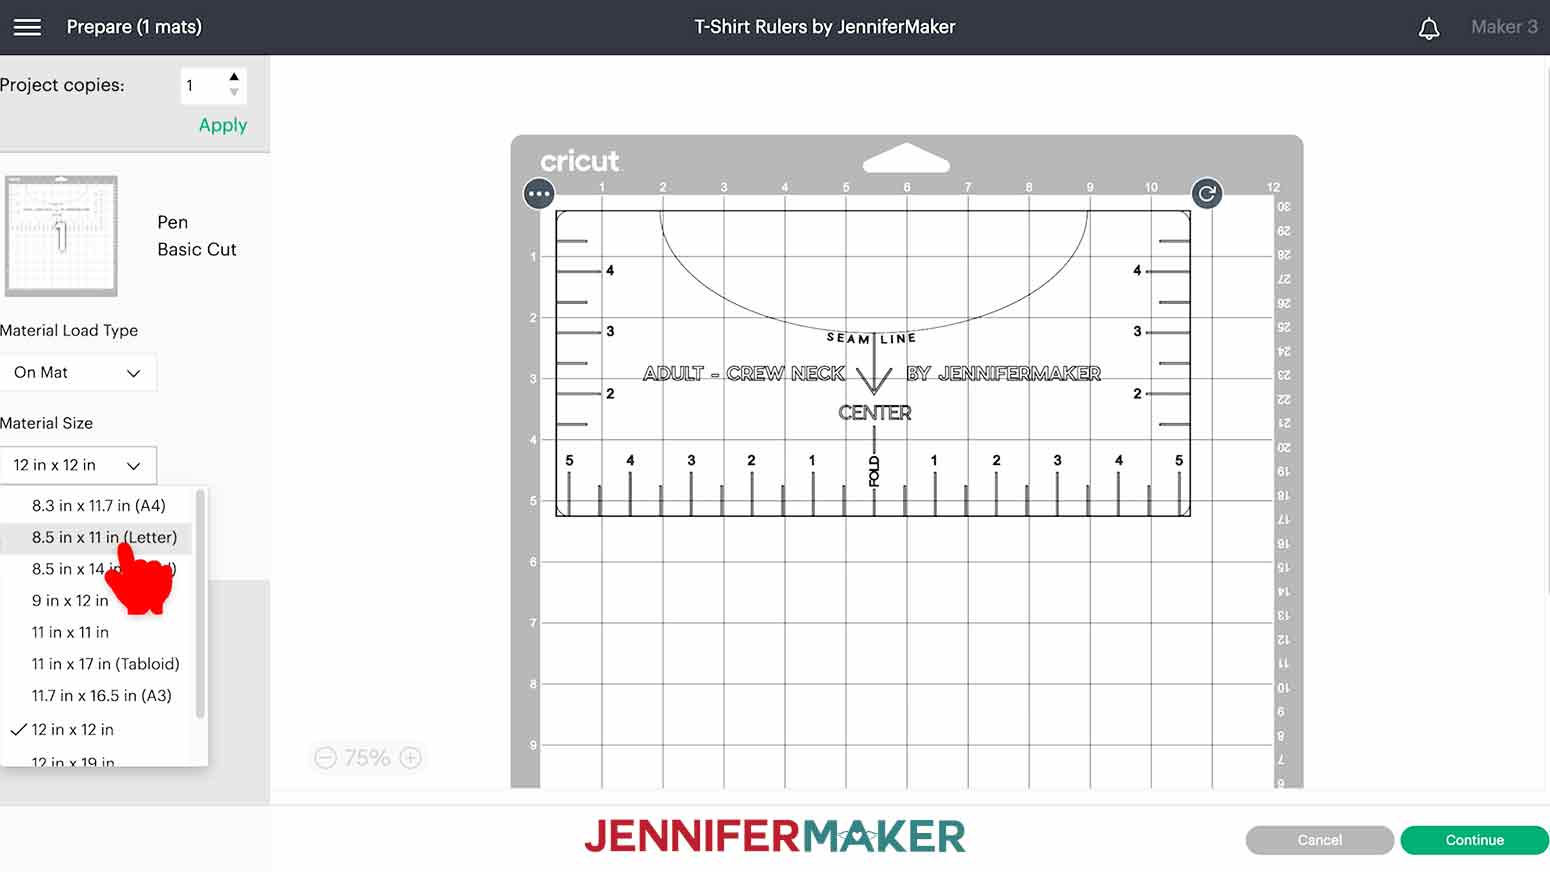
Click "Continue."
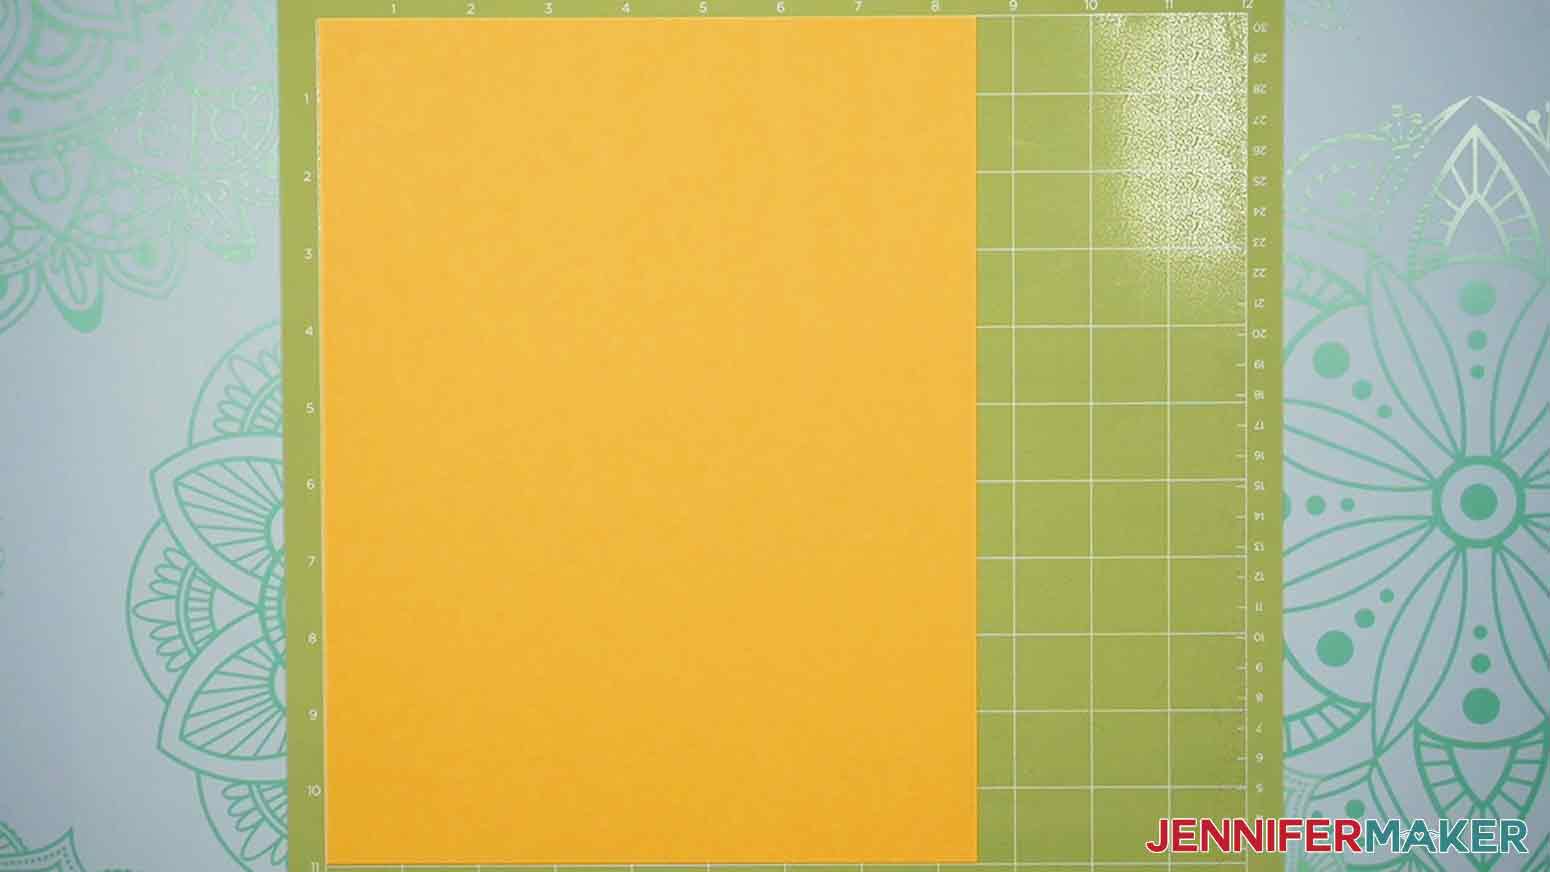
I'm using yellow heavyweight cardstock because the contrast works well on all colors of shirts. But you can use any color cardstock you'd like or have on hand,
I used the "Heavy Cardstock" setting for all my mats. To find it, click "Browse All Materials" and type "cardstock" in the search bar. Then select the result, click "Apply," and leave the Pressure at "Default."
Place your cardstock on a Green StandardGrip Machine Mat and use a brayer to make sure it's fully adhered. Check that your Fine-Point Blade is clean and in Clamp B. Check that your Fine-Point Blade is clean and in Clamp B. Scribble your pen on some scrap paper to make sure it’s flowing well, then put it in Clamp A. Then, load the mat into the machine and press the "Go" button.
The Cricut will draw the markings first, then make both cut passes.
If you run into any issues cutting your cardstock, check out my Cricut Tips & Tricks for Cleaner Cuts.
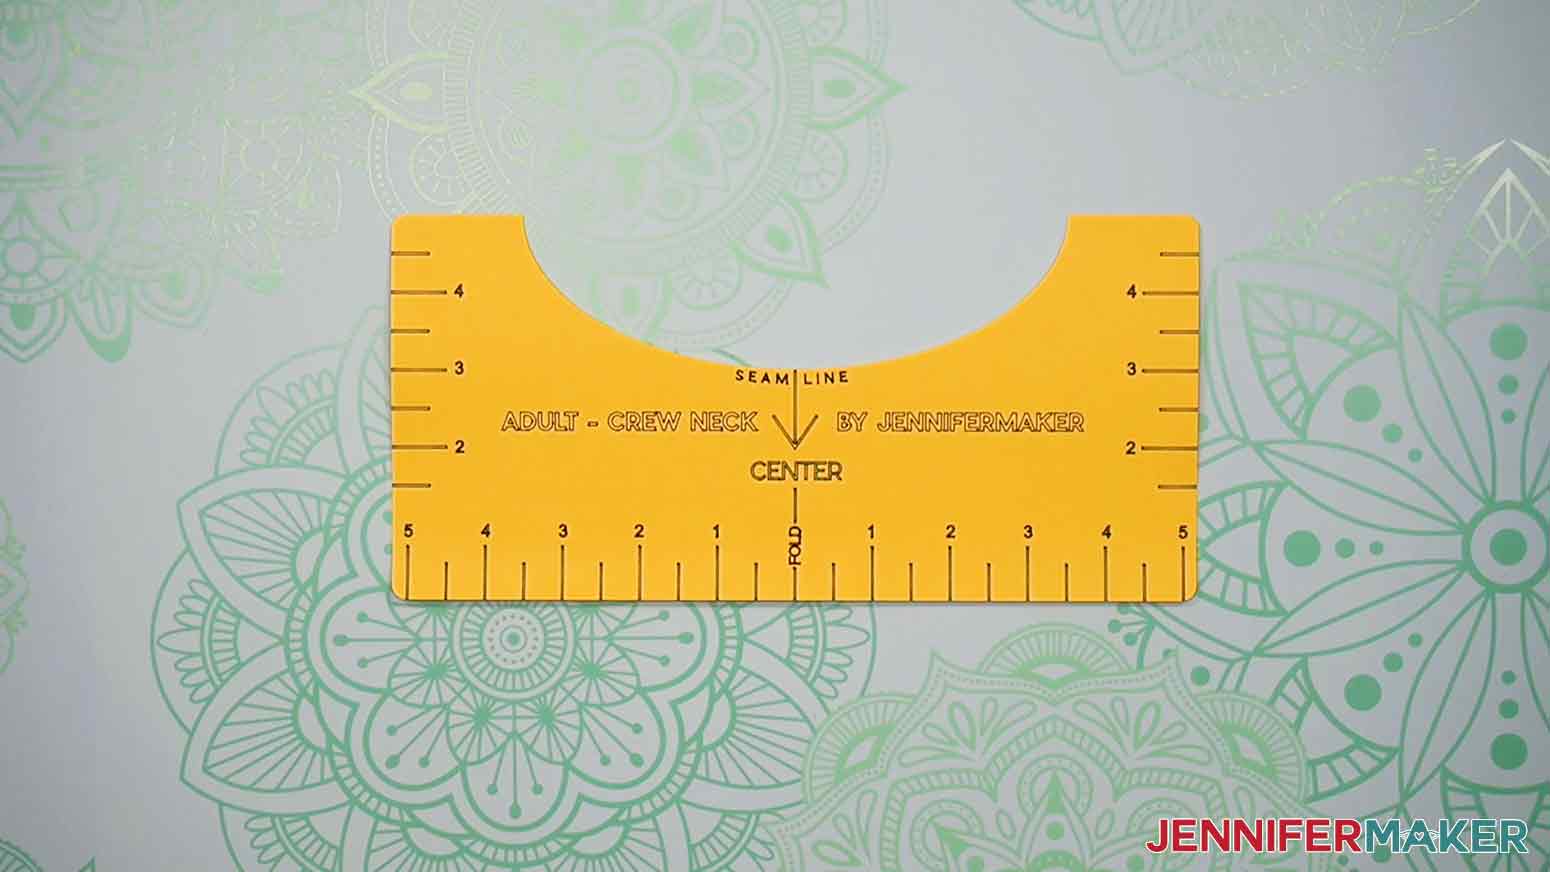
When the cut is finished, unload the mat, flip it over, and roll it back to release the cardstock. This helps prevent the material from curling and ripping.
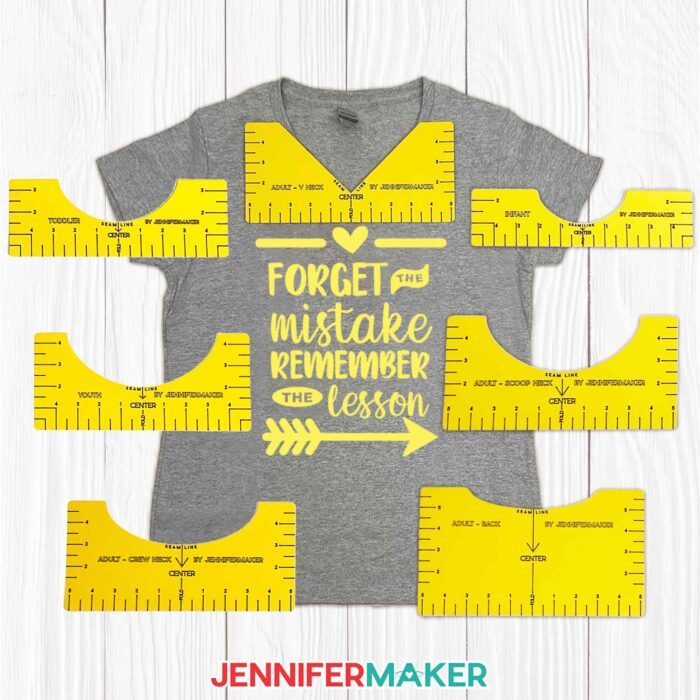
Here’s how a completed cardstock T-shirt ruler looks!
Plastic Rulers
Make sure you select the right machine and click "Make It."
If prompted, click "On Mat," "12 in x 12 in," and "Continue."
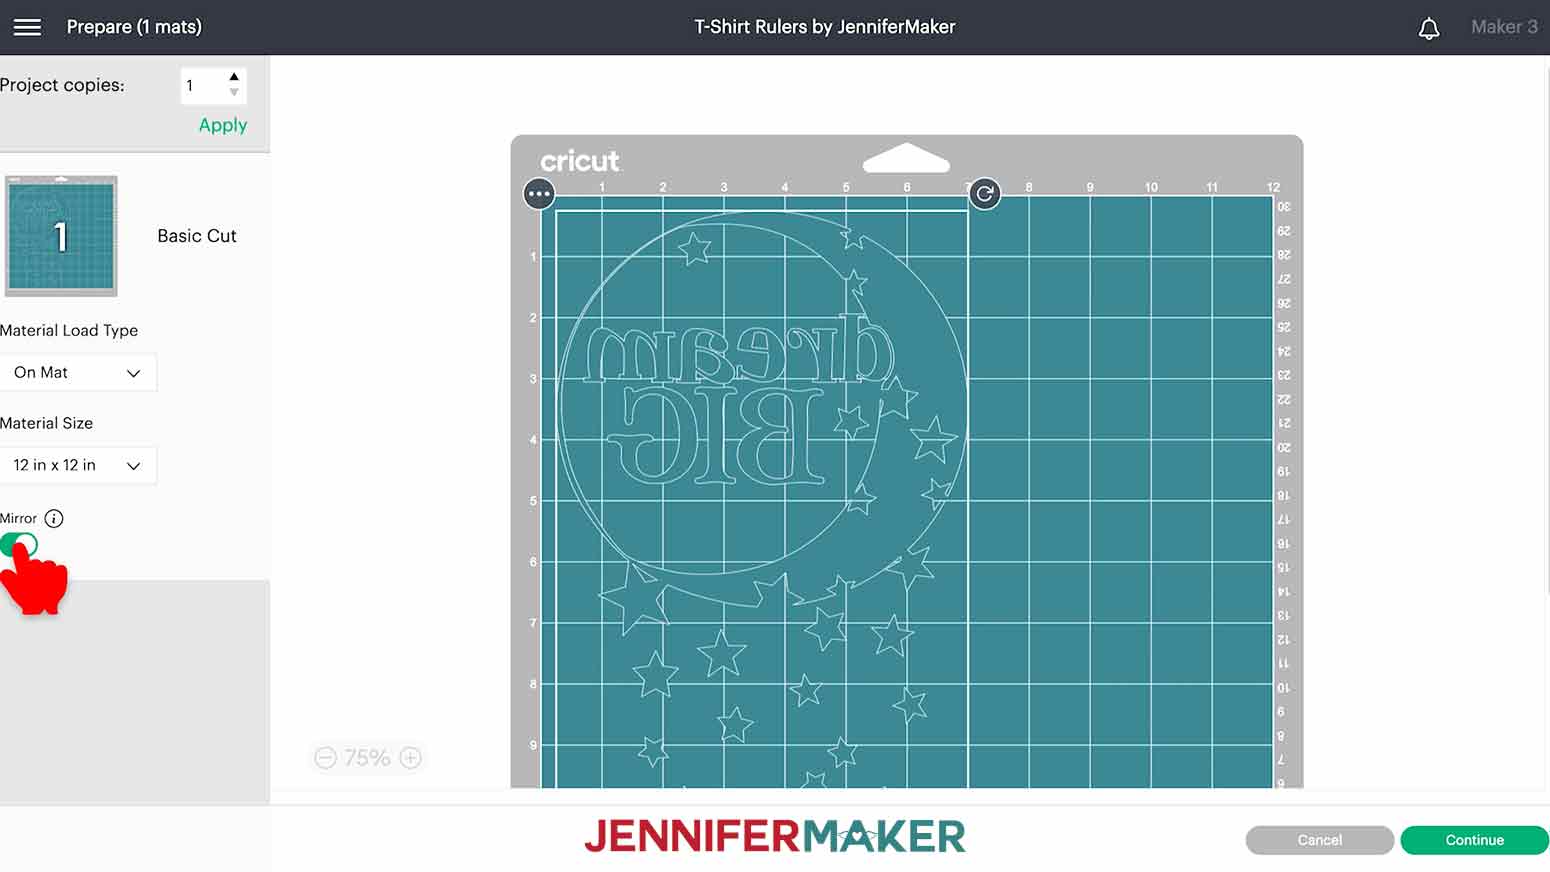
The chopping mats are 11" x 14" but I’m going to place them on 12" x 12" mats with the excess hanging off the edge. So on the Prepare screen, leave the Material Size at 12" x 12", but make sure the ruler shape doesn’t go past the 11" mark to the right, since there won’t be material to cut over there.
Then, click “Mirror” so the “engraved” texture will be on the underside of the ruler and legible when it’s on the shirt.
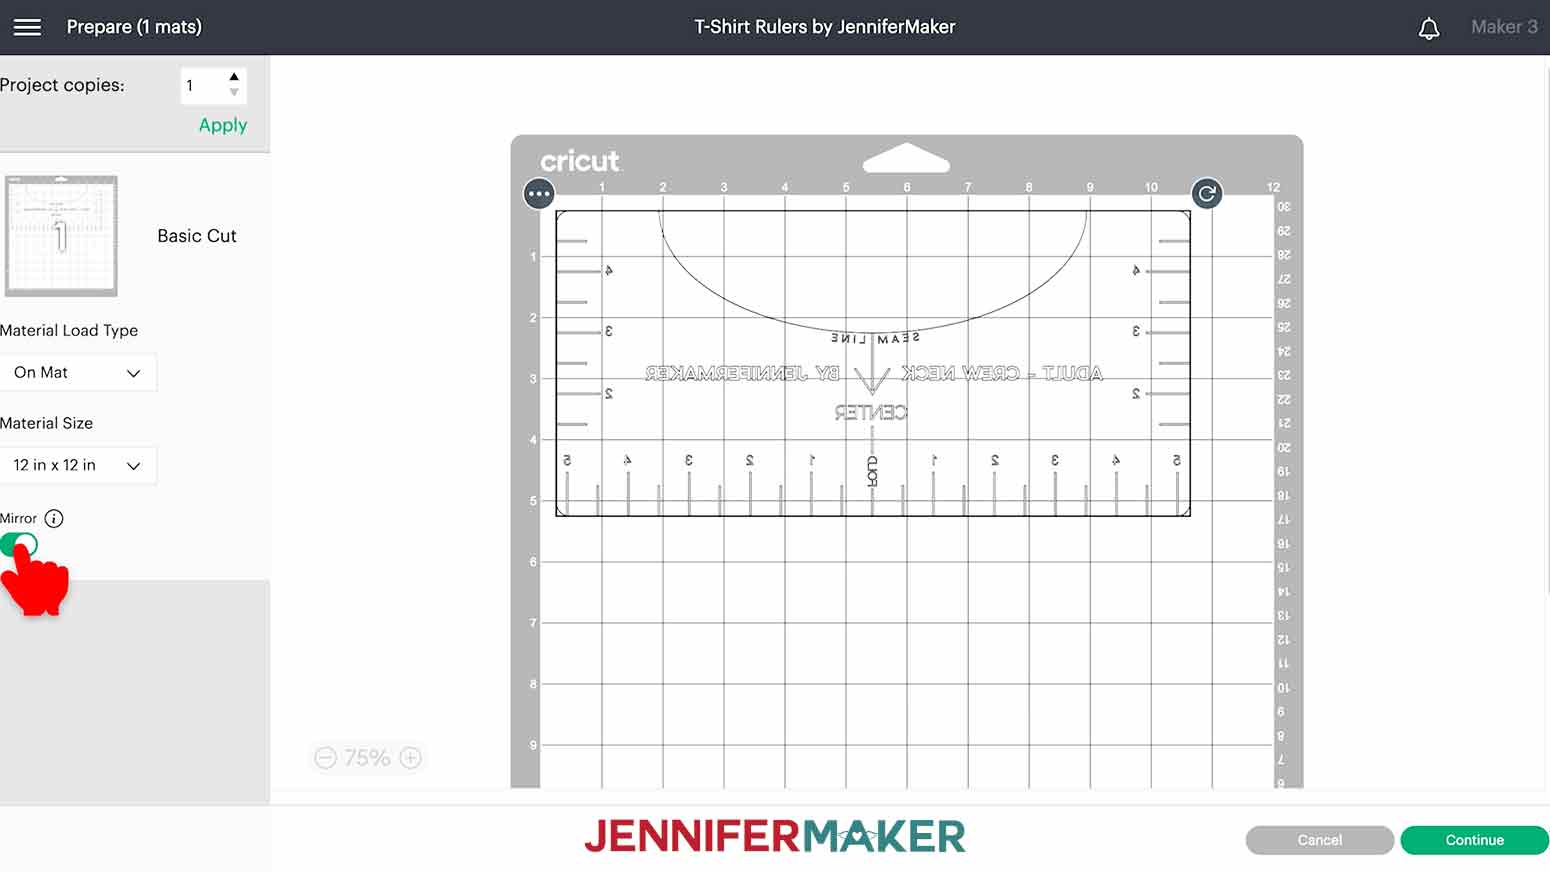
Click Continue.
Under "Set Base Material" click on "Browse All Materials" and type “Acetate” in the search window, then choose the result and click “Done.”
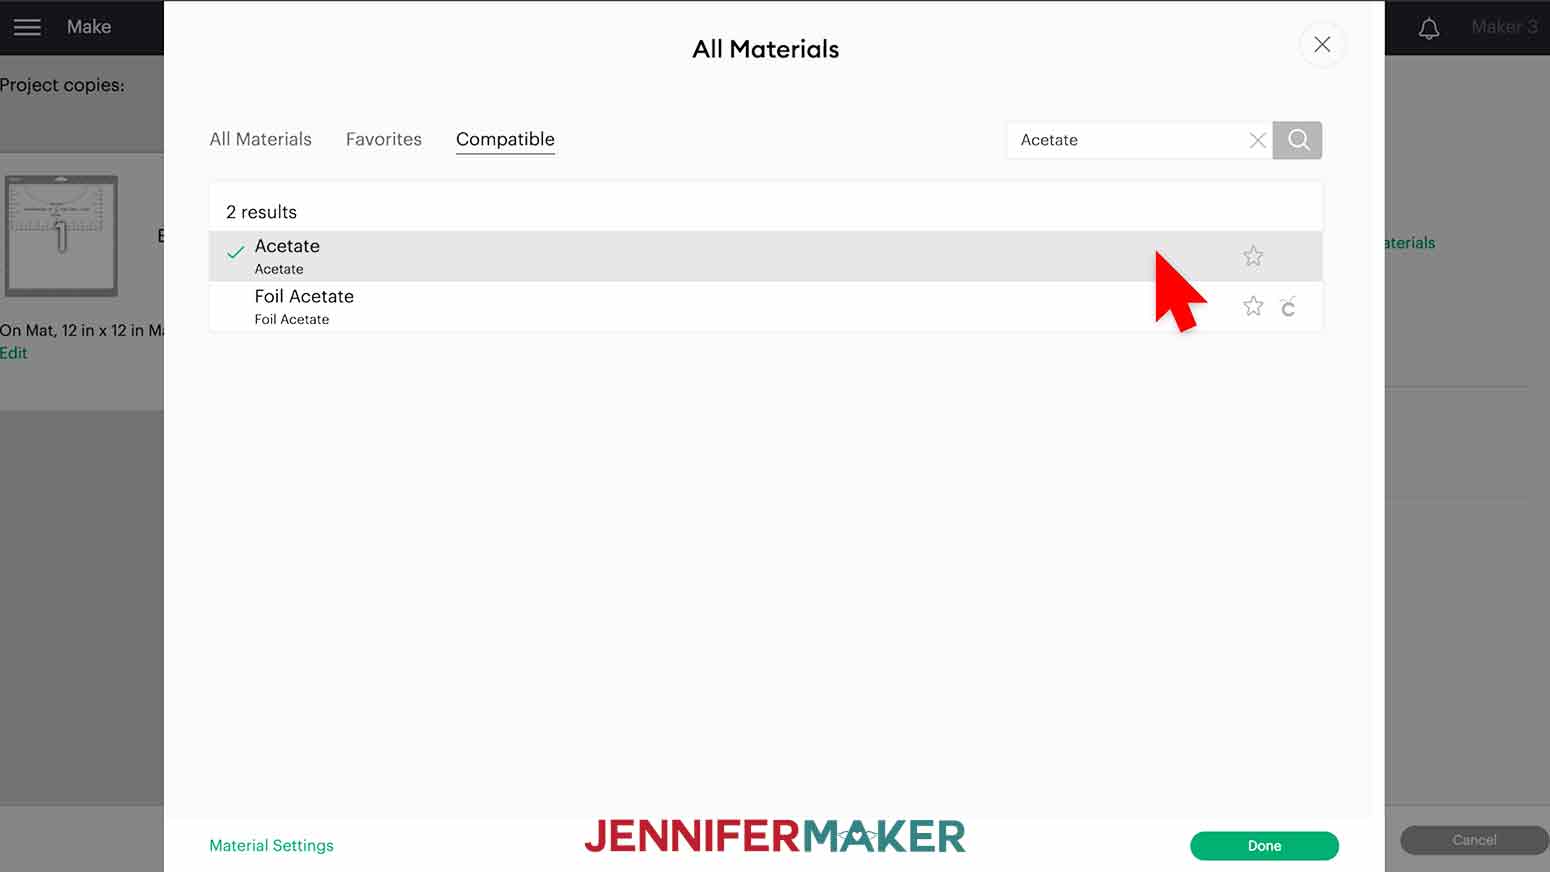
Leave the Pressure at "Default."
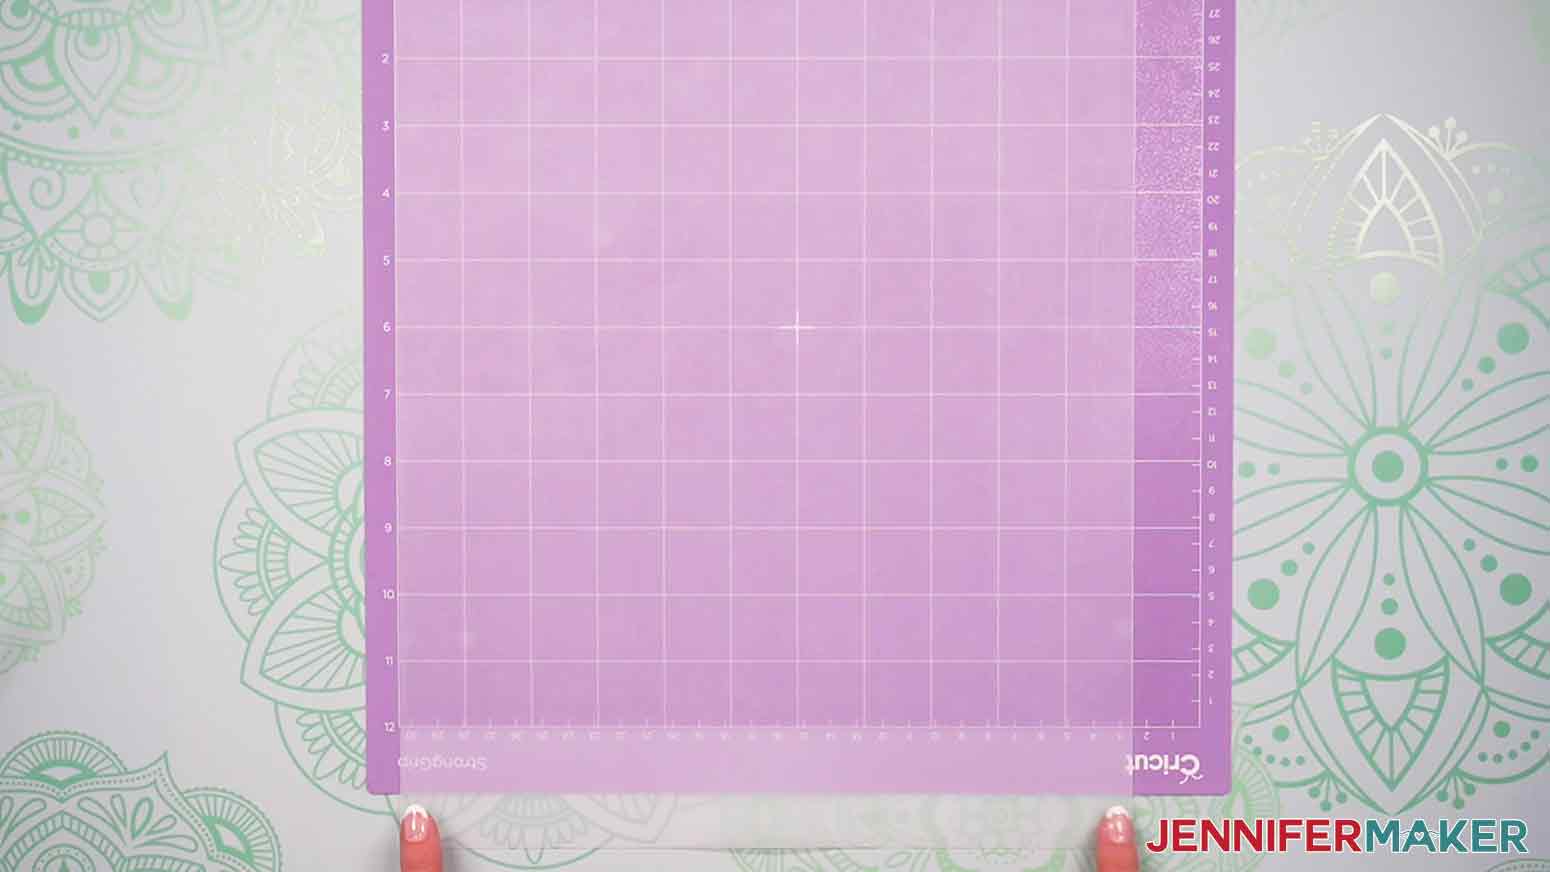
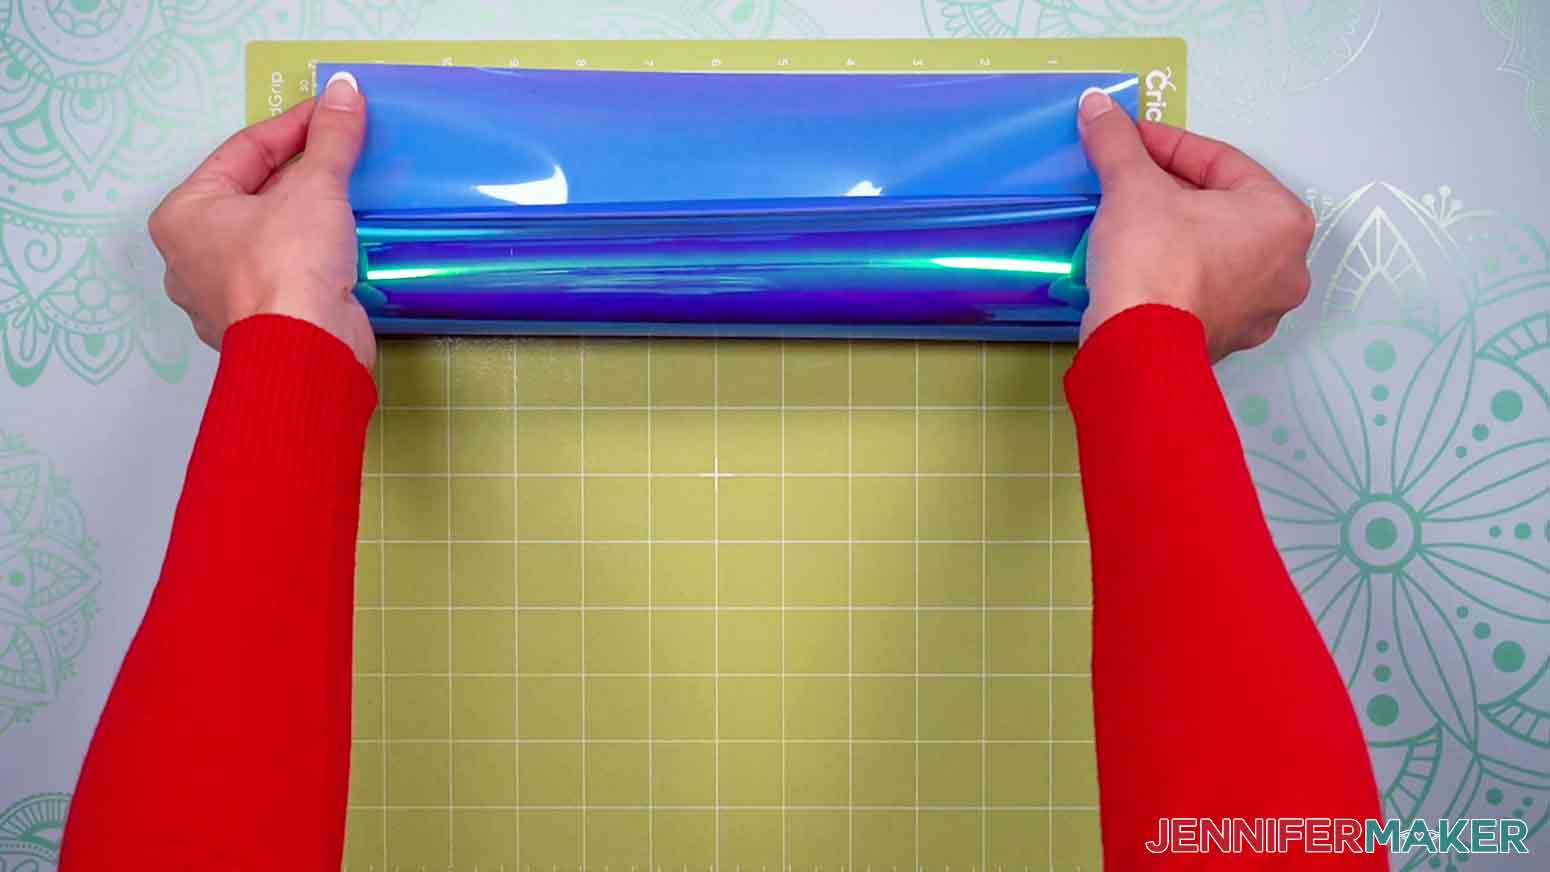
It's a bit hard to tell, but there is a smooth side and a rough side to the mats. Since I want the "engraved" texture to be on the underside of my ruler, I'll feel for the smooth side and place the smooth side down on my purple StrongGrip Machine Mat and use a brayer to make sure it's fully adhered. The excess will hang off the end but that won't hurt anything.
Check that your Fine-Point Blade is clean and in Clamp B. Then, load the mat into the machine and press the "Go" button.
When the cut is finished, don't remove the mat! First, gently lift up a corner to make sure the ruler's shape is completely cut out. If not, press the "Go" button to repeat the cut process. It should go all the way through now.
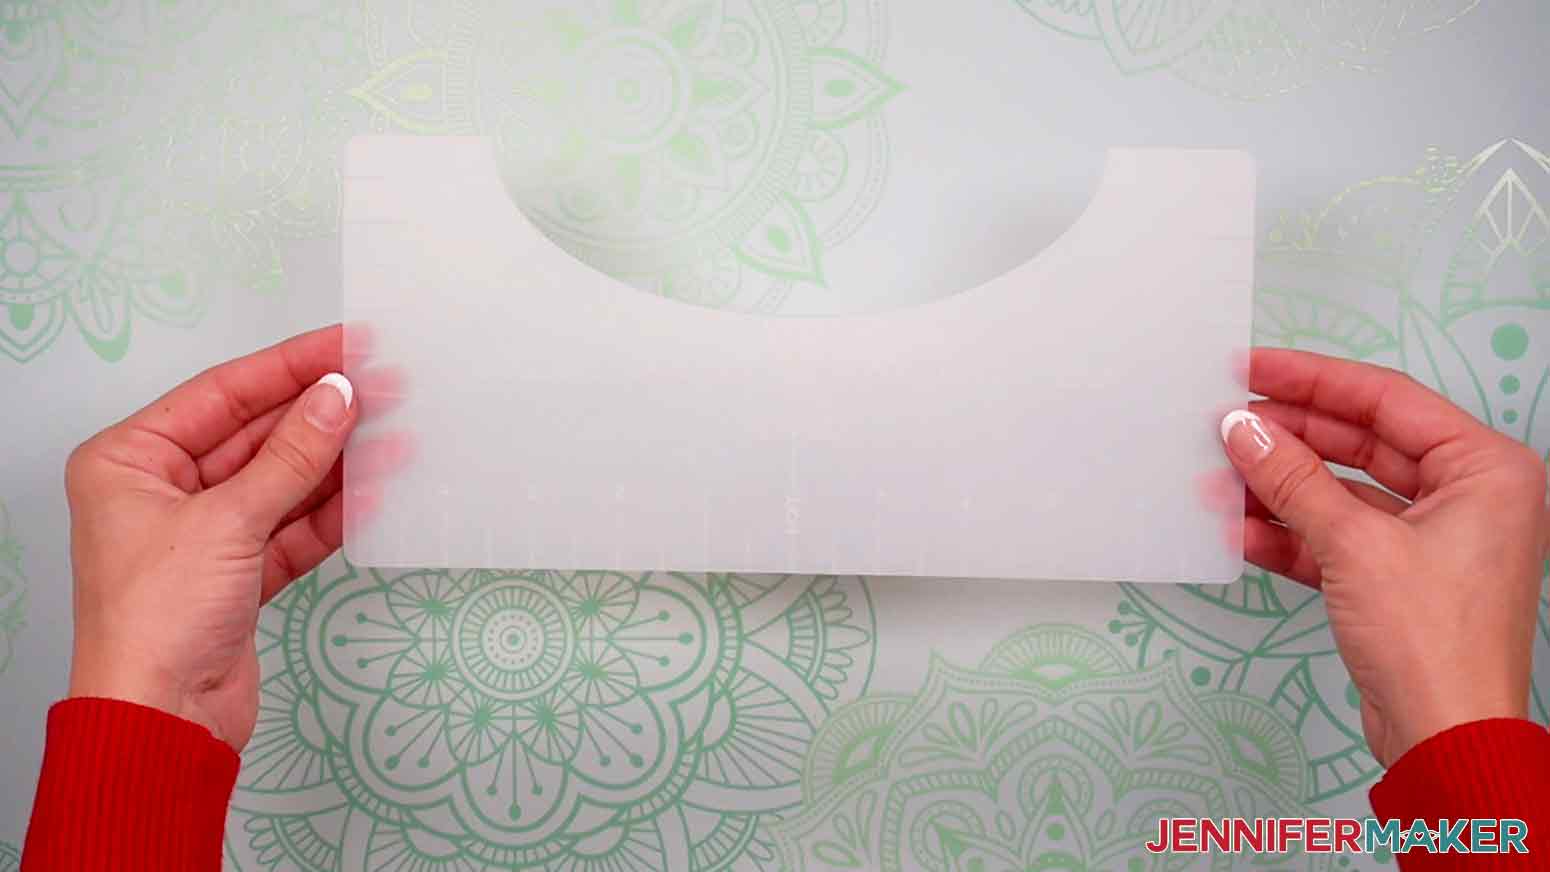
When it looks good, unload the mat, flip it over, and roll it back to release the chopping mat.
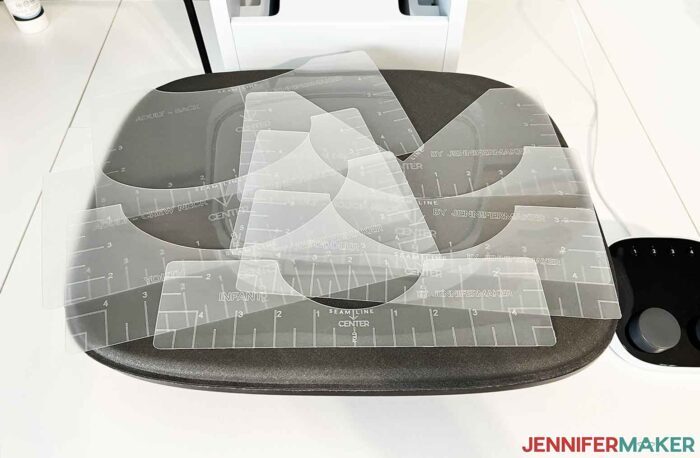
Here’s how the completed plastic ruler looks!
STEP 4: CUT A VINYL DESIGN TO USE WITH YOUR RULER
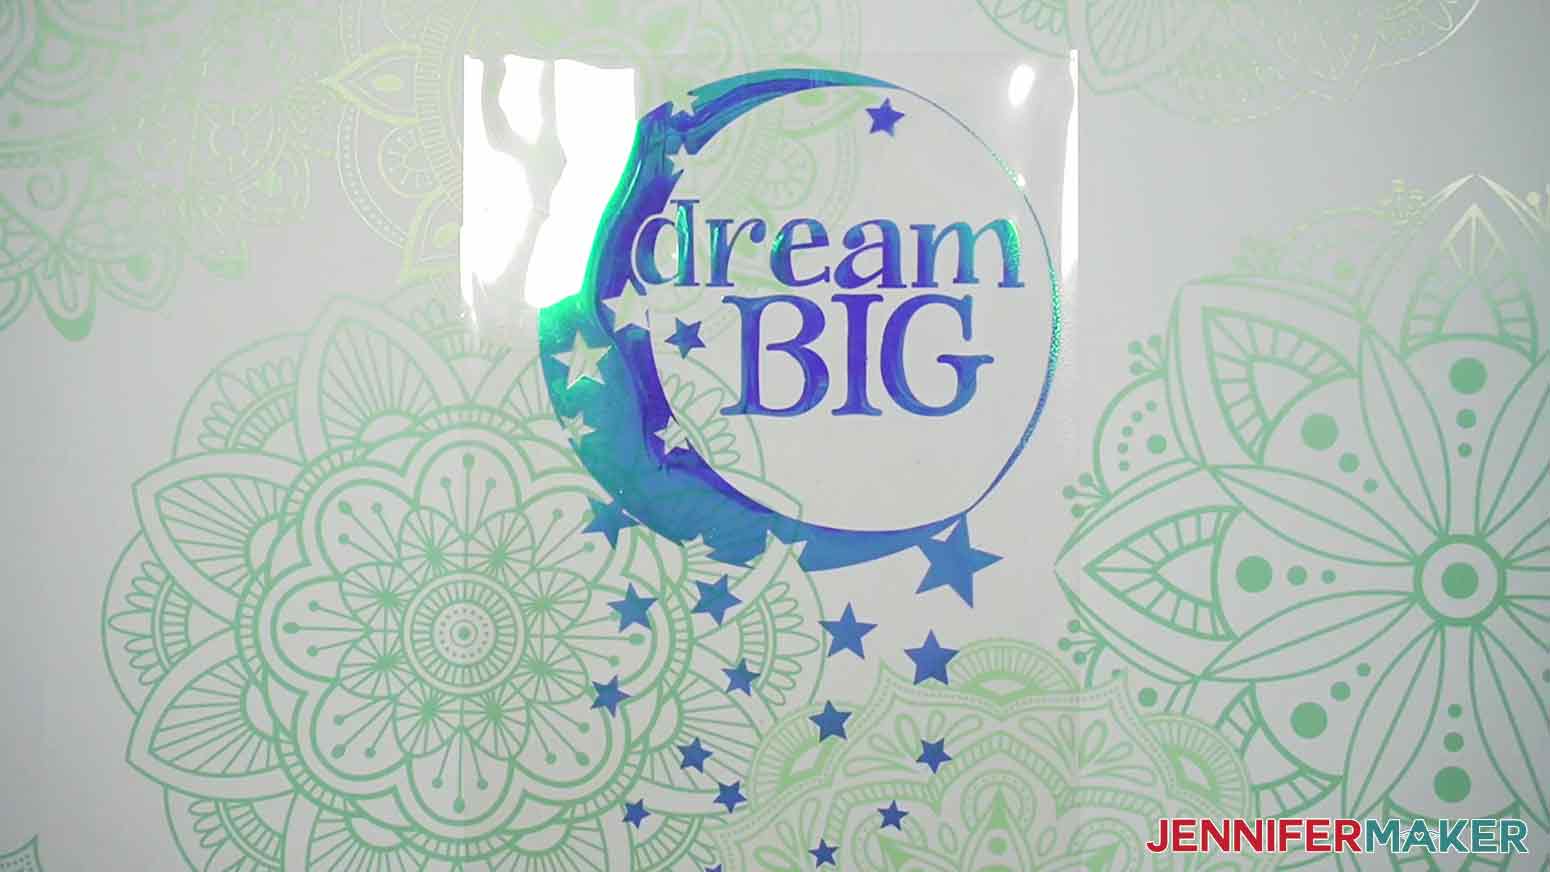
Next, prepare your T-shirt decal. I'm using my "Dream Big" design with Cricut Holographic Iron-on Vinyl in Cobalt. You can find this free design in the T-shirt ruler guide folder you've already downloaded. The design is already sized appropriately for a women's size medium crew-neck T-shirt, so I won't adjust it.
TIP: Here are some reference images for maximum design sizes for different shirts.
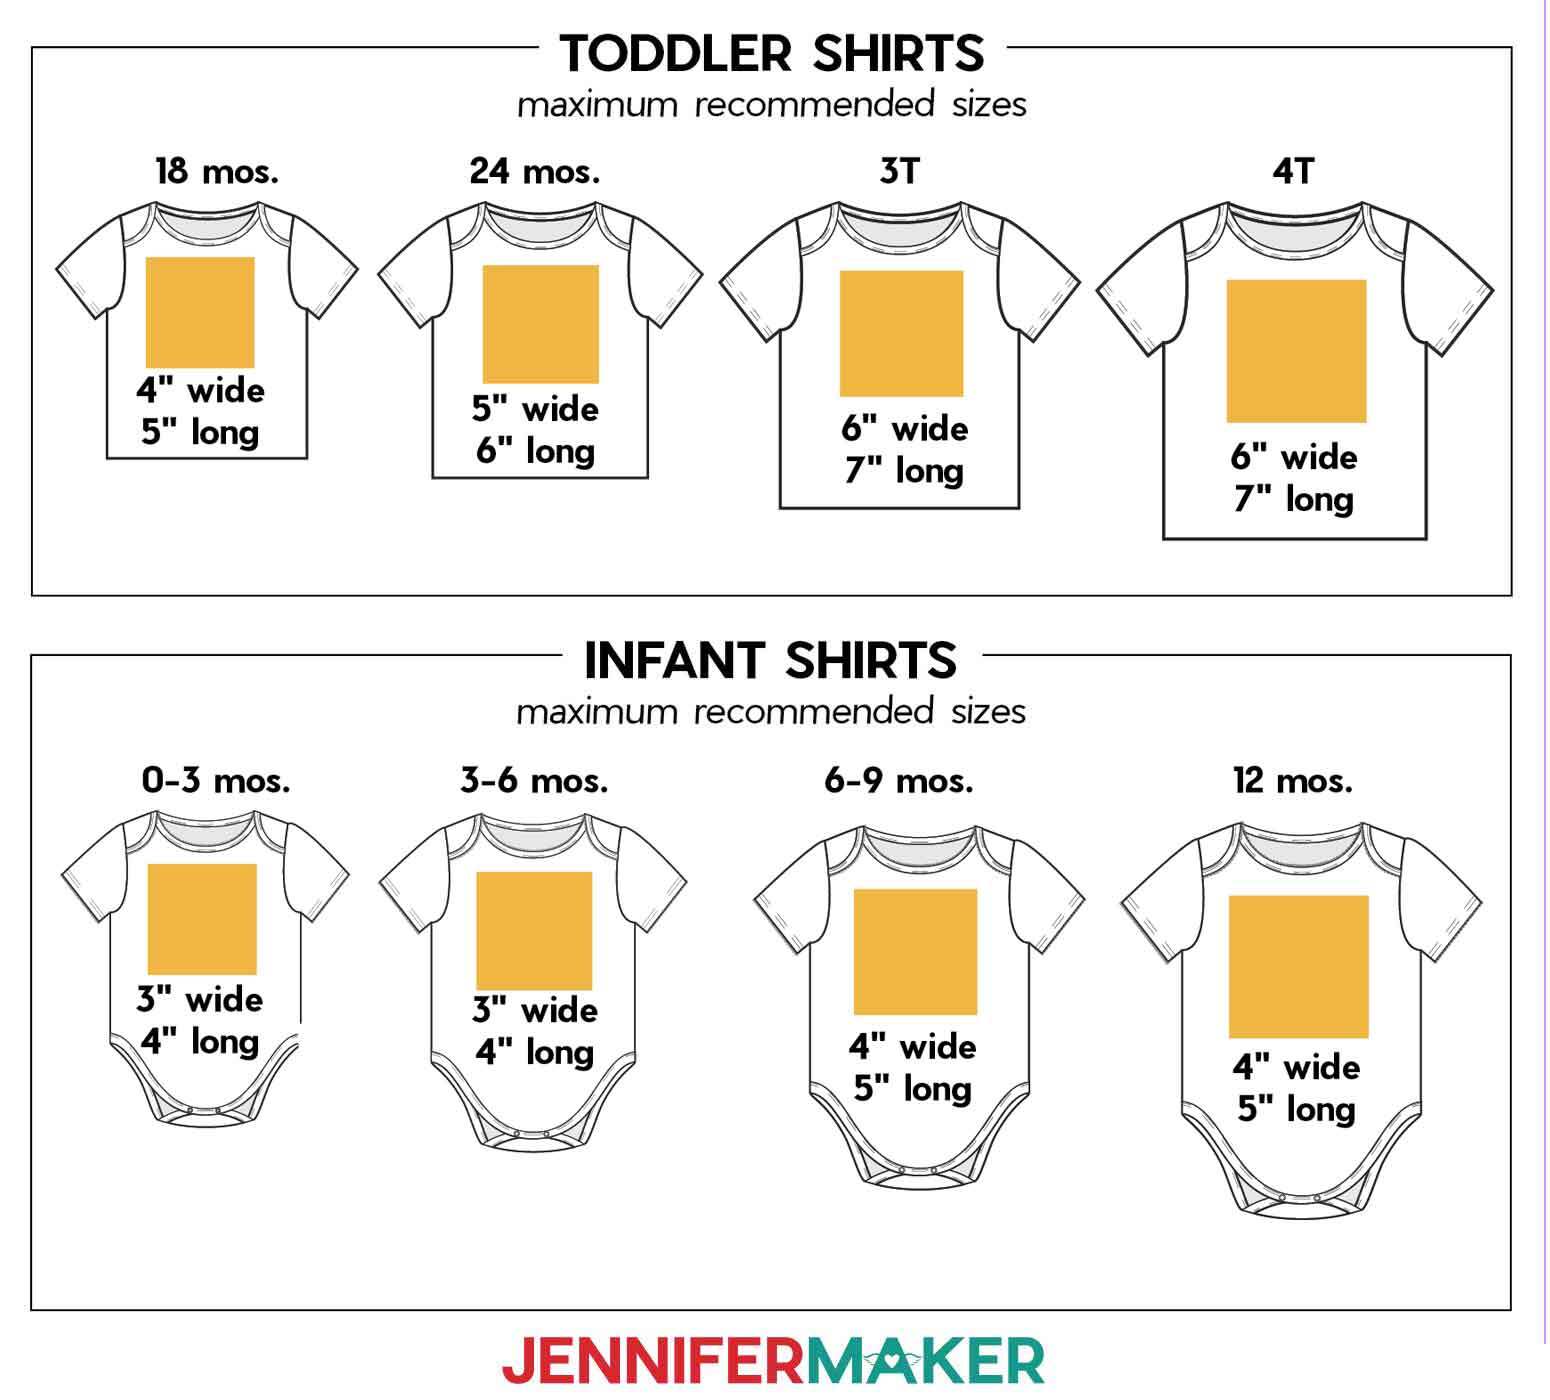
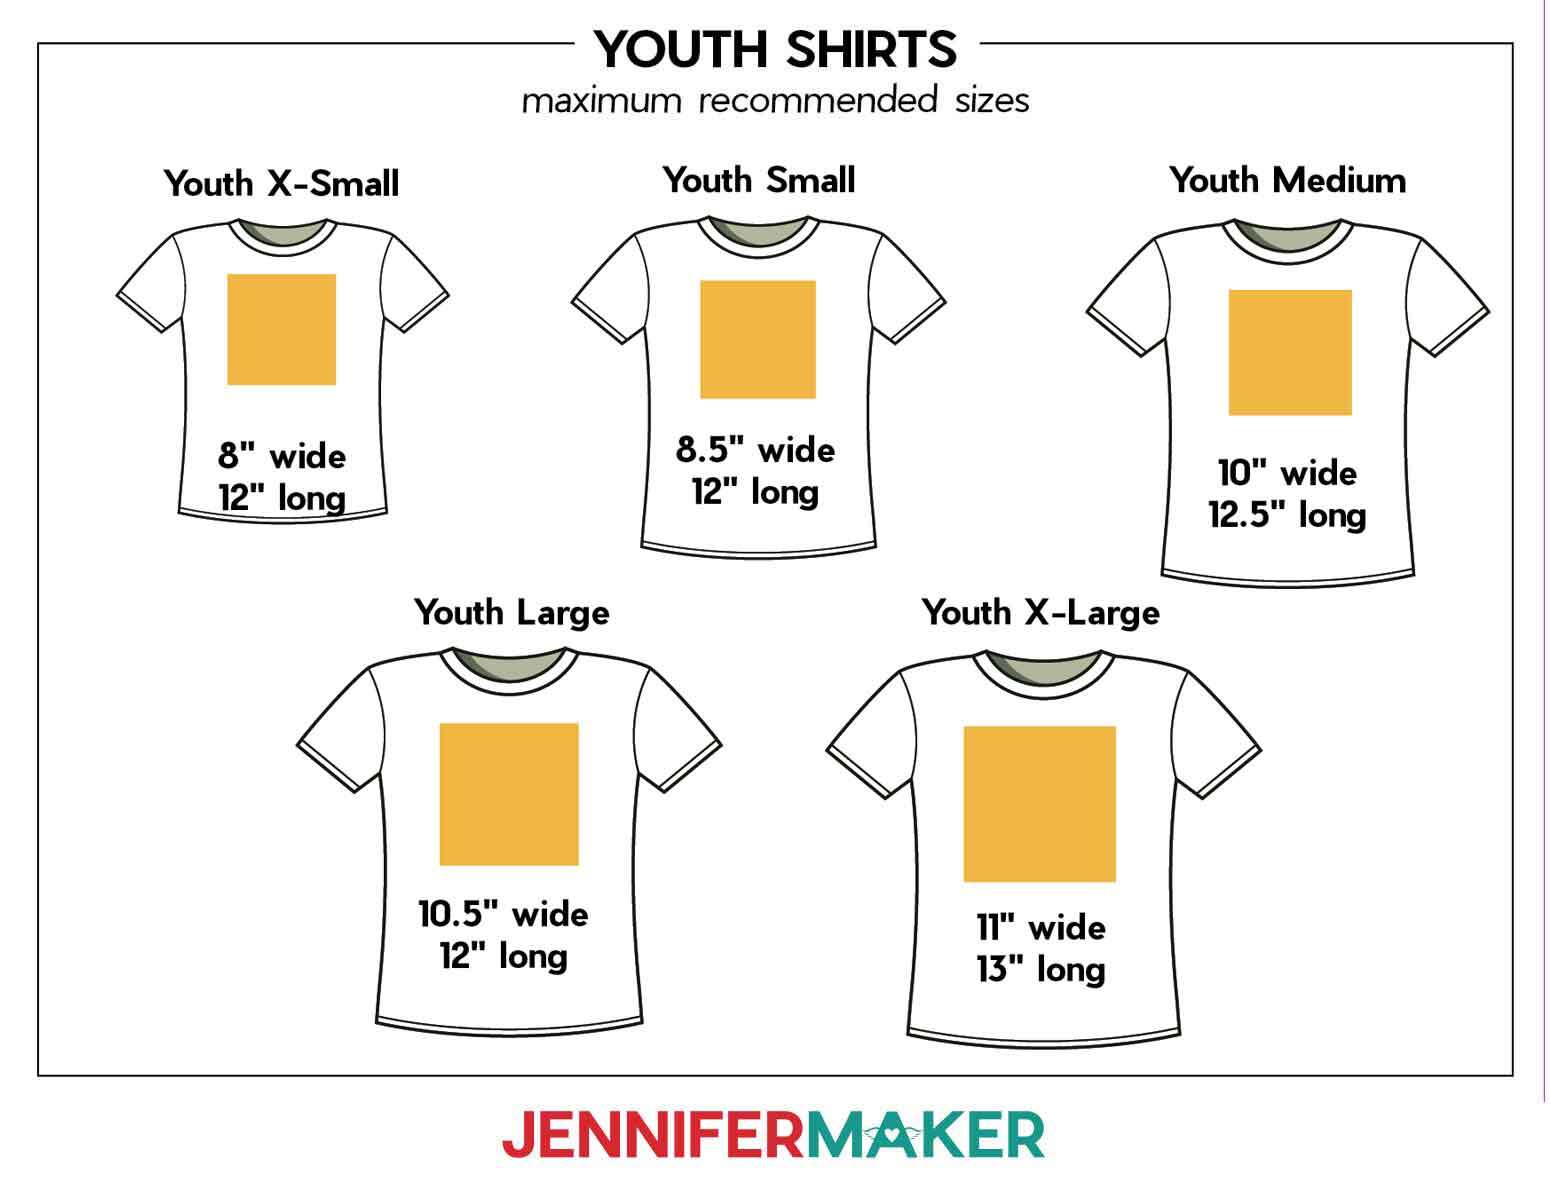
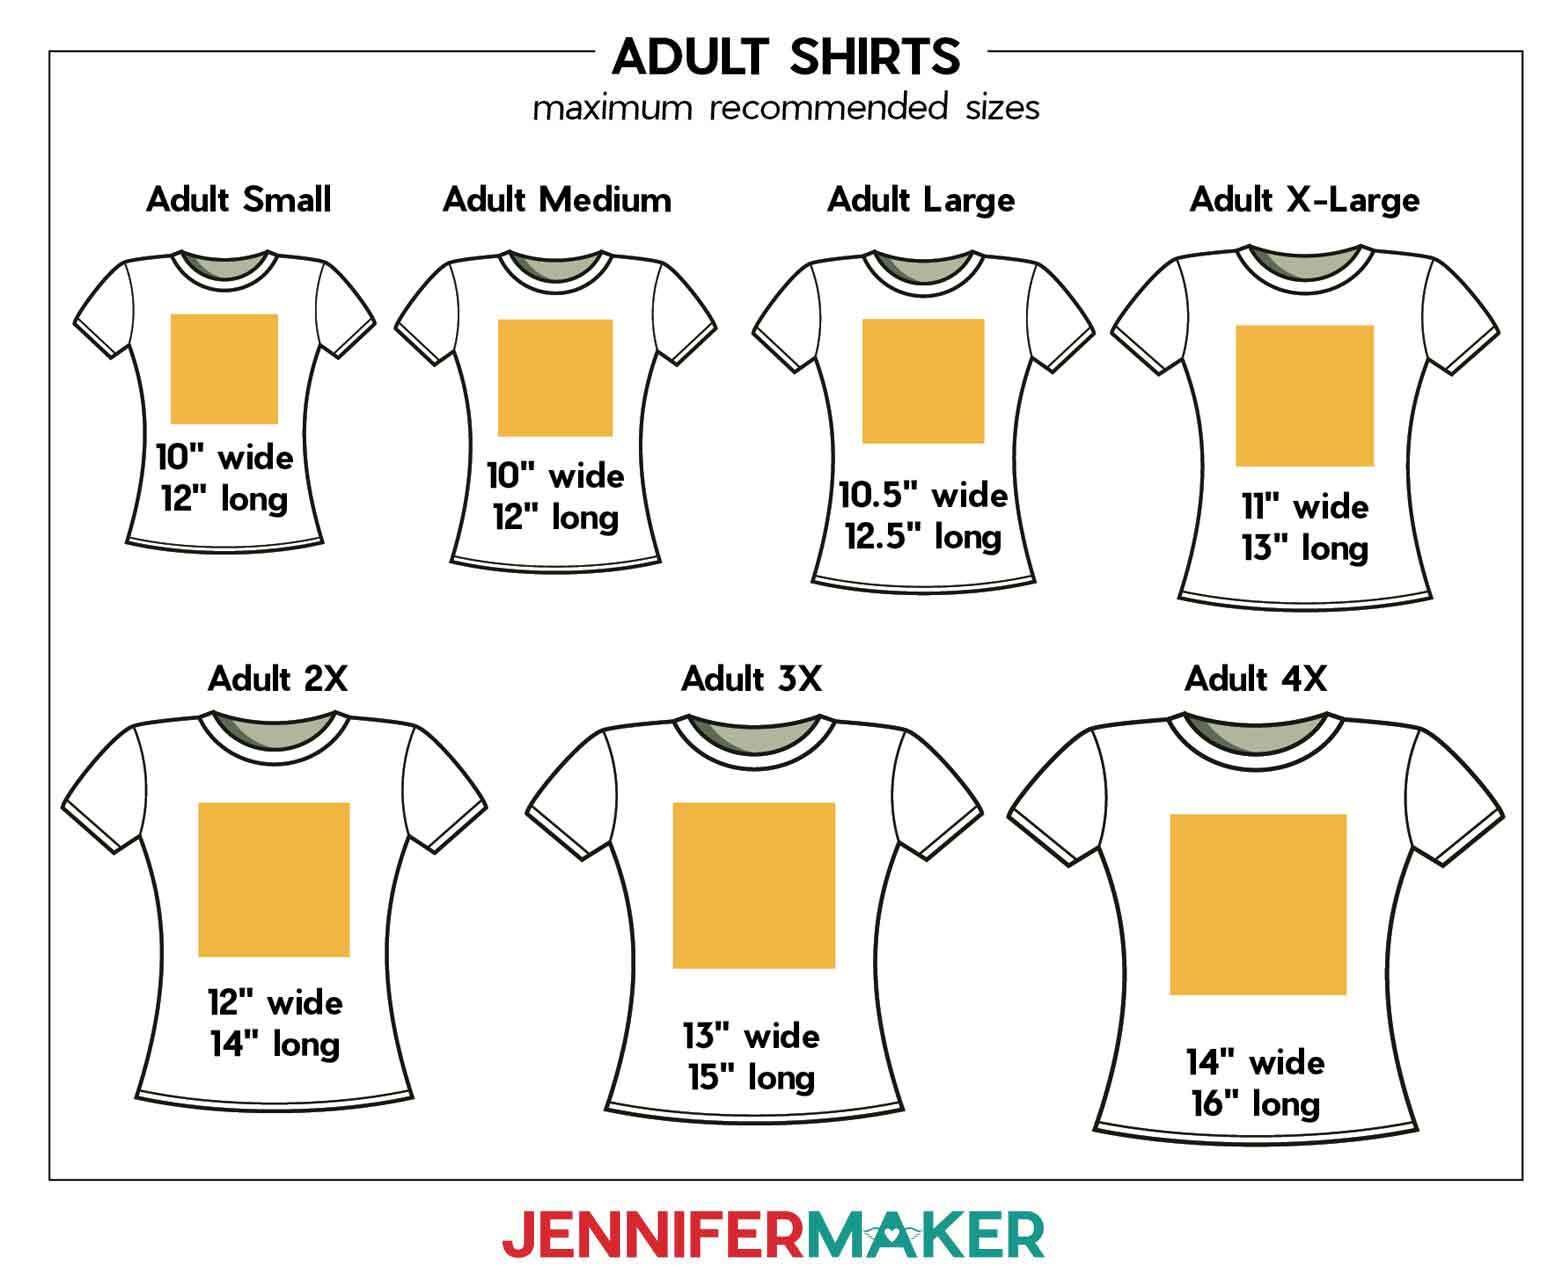
Of course, you can always go a bit smaller than this, but this is the typical sizing of shirt decals that we’re all used to seeing. If you go too much smaller, your decal will be hard to see and hard to weed.
These fun designs are nearly ready to apply to any compatible blank. It's a good idea to separate the designs to make customizing and cutting easier. If you need help preparing your decal, check out my Easy Iron-On T-Shirts Tutorial for tips on cutting and weeding iron-on vinyl.
On the Prepare screen, remember to click "Mirror" like usual for iron-on.
Cut the vinyl using the "Holographic Vinyl" setting with "More" Pressure, shiny side down on a green StandardGrip machine mat.
Remove the vinyl from the mat, then trim the excess vinyl and weed the areas around the design.
STEP 5: ADD THE DESIGN TO YOUR T-SHIRT USING A RULER GUIDE
Here's how my decal looks cut and weeded with the Adult Crew Neck I'm going to decorate. I'll show you how both the cardstock and plastic rulers look in use.
Next, if you are using a Cricut EasyPress, refer to the Cricut EasyPress Interactive Quick Reference Guide for how to prep your material and machine, how to apply the design, and how to care for the finished product. This takes the guesswork out of the process! You can follow my steps with an EasyPress 2 as guidelines.
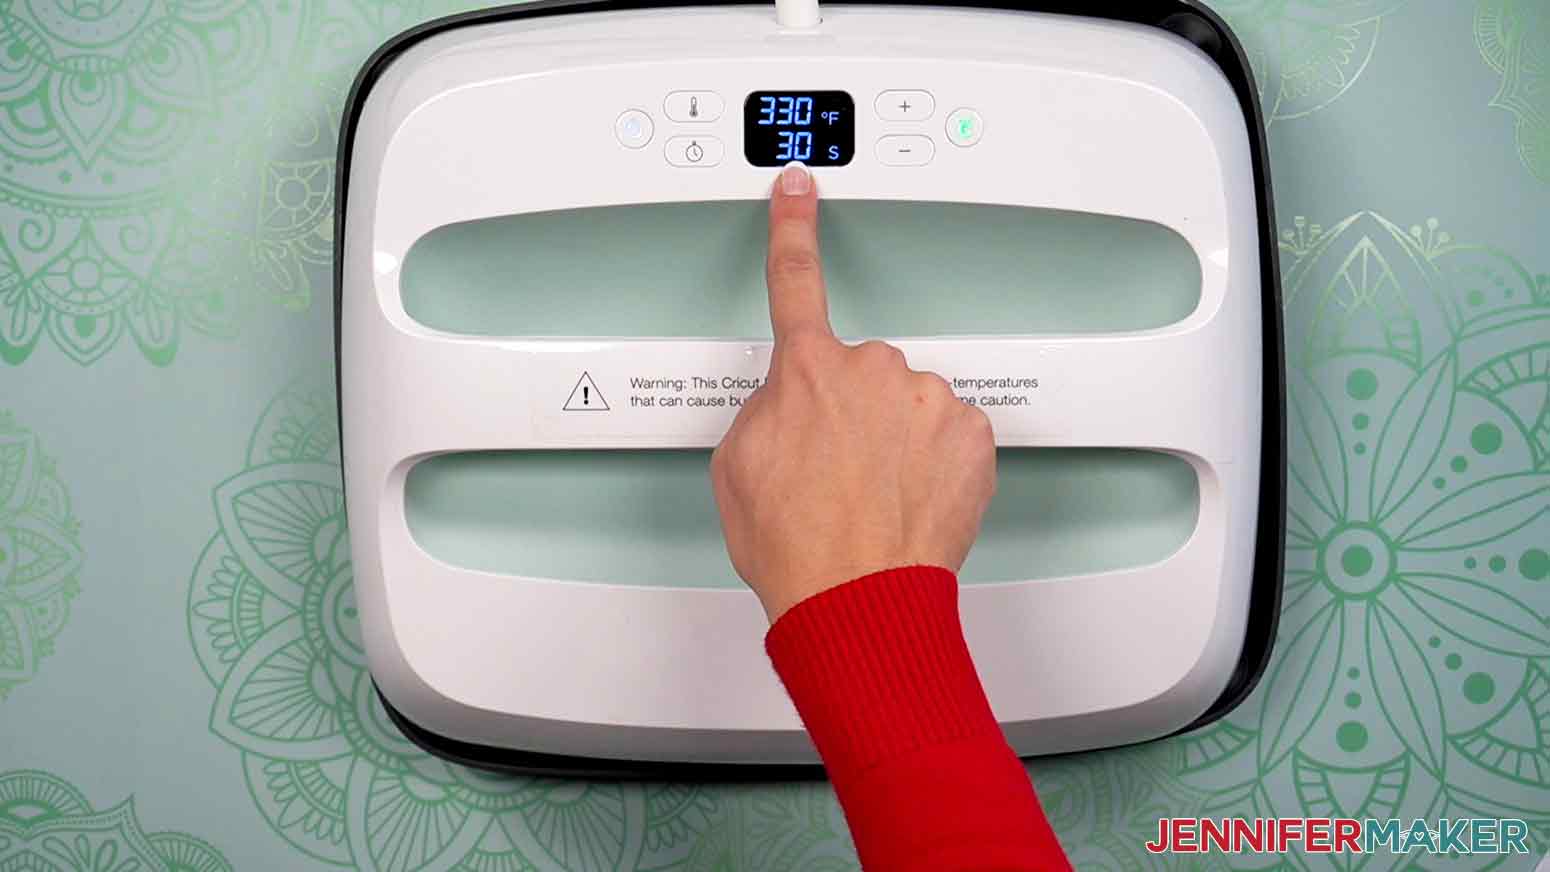
Preheat your EasyPress or iron to the proper temperature. The guide calls for me to set my EasyPress 2 to 330°F. If you are using an iron and cotton t-shirt, set it to the cotton setting. If your shirt is something other than cotton, you may need a different setting for your material.
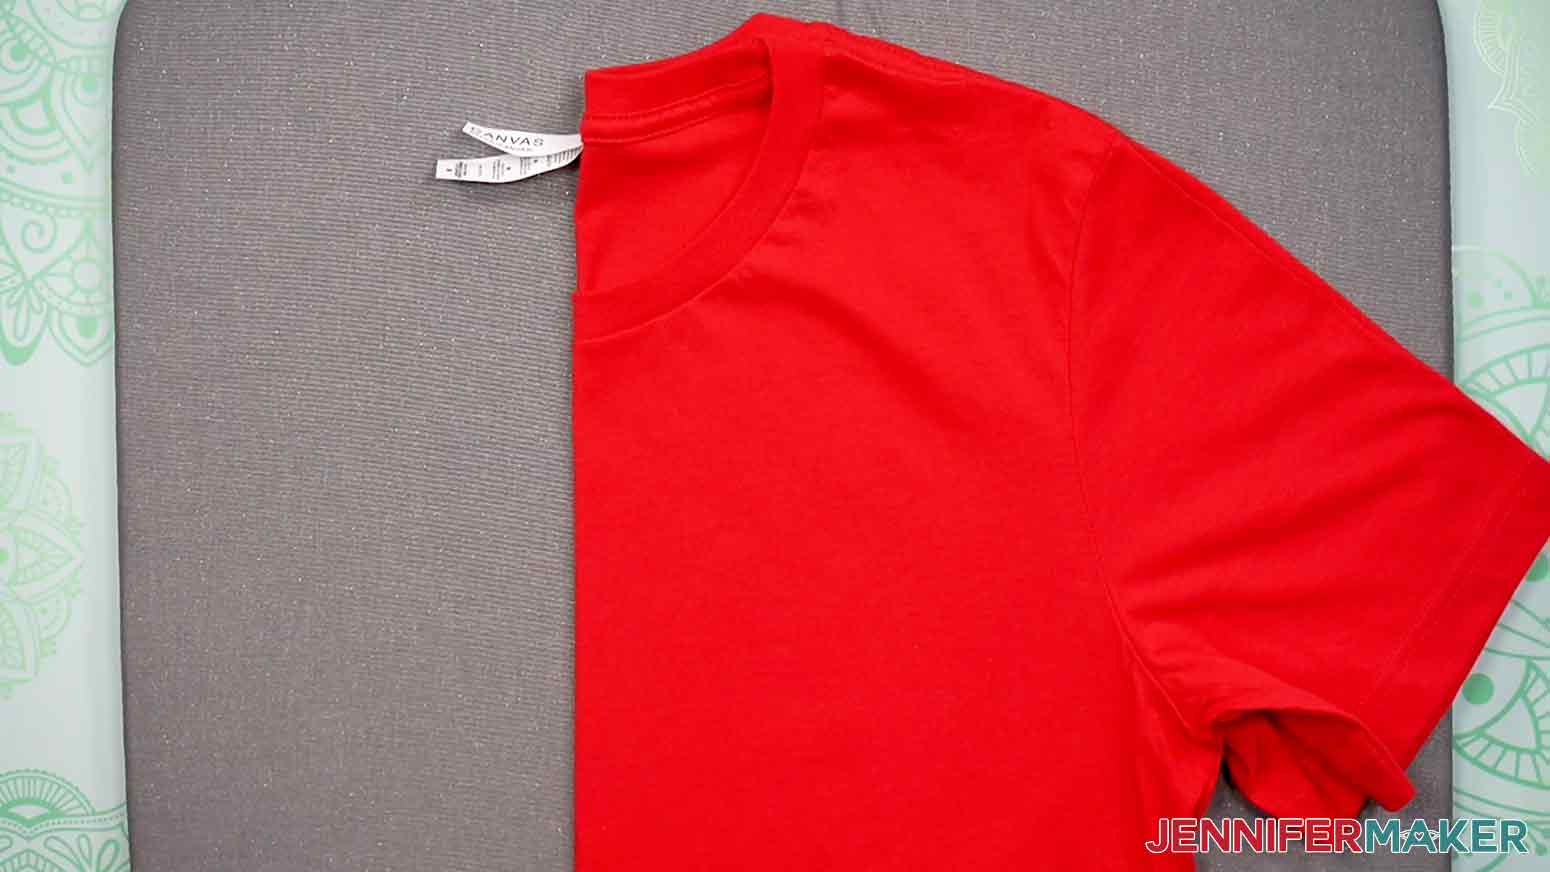
Place your t-shirt face up on a Cricut EasyPress Mat or folded towel to protect your work surface. Use a lint roller to clean any stray lint or fuzz from the area of your shirt where you plan to adhere the vinyl.
Find the vertical center of your shirt. The simplest way to do this is to fold your shirt in half by matching up your sleeves.
Use your EasyPress or iron to put a little crease on the center fold. When you open your shirt you’ll know exactly where the center is. Now you can just line up the center of the ruler with the crease to get perfect placement!
TIP: Putting a crease in your shirt like this also serves to pre-heat the material. It won’t impact the final design at all.
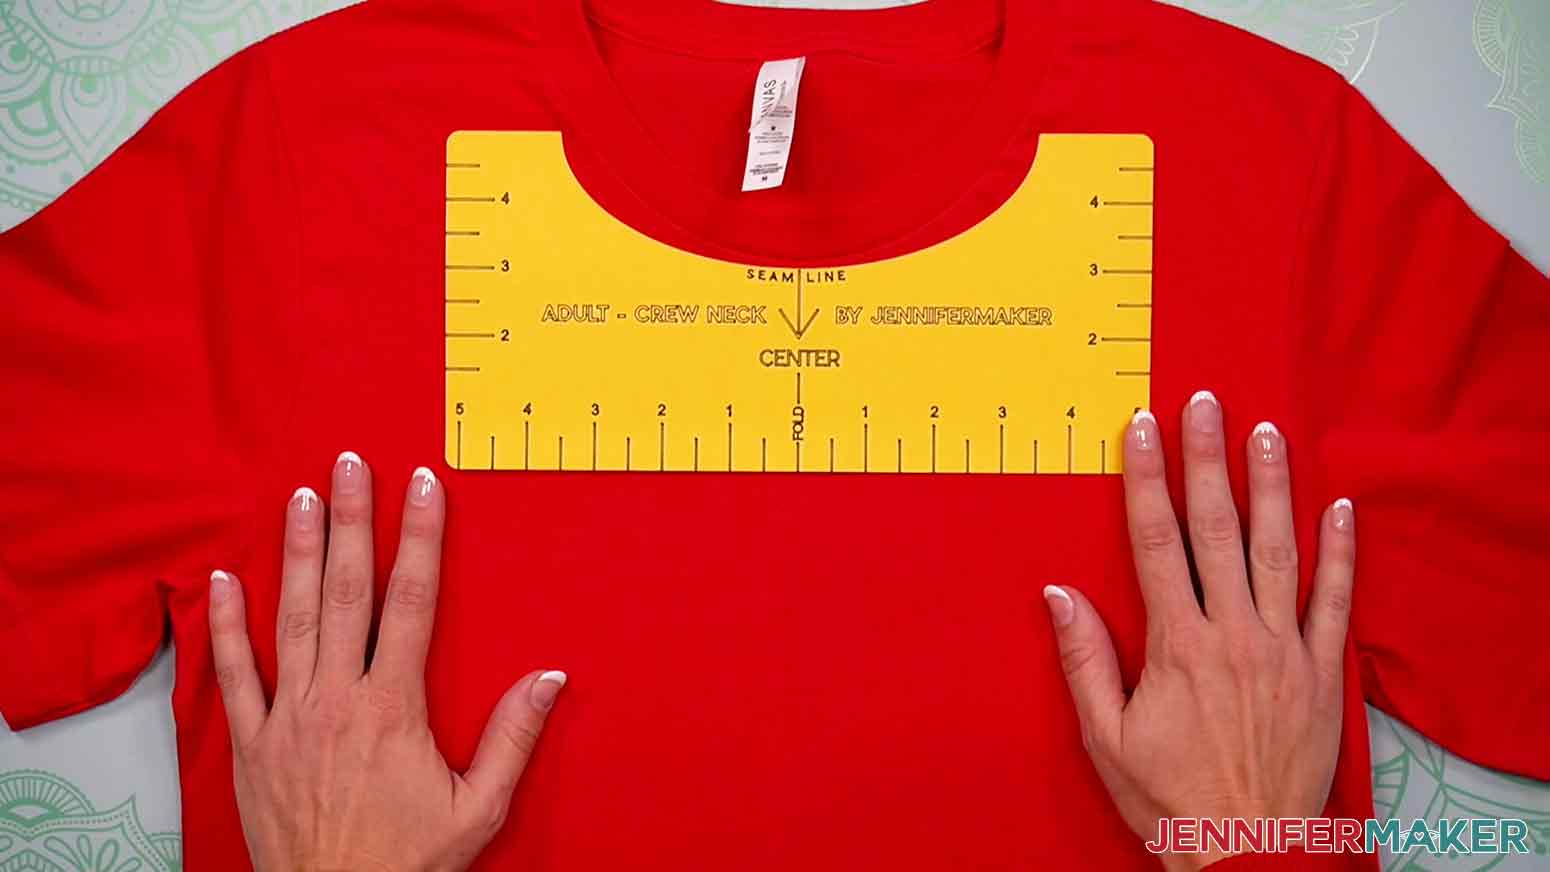
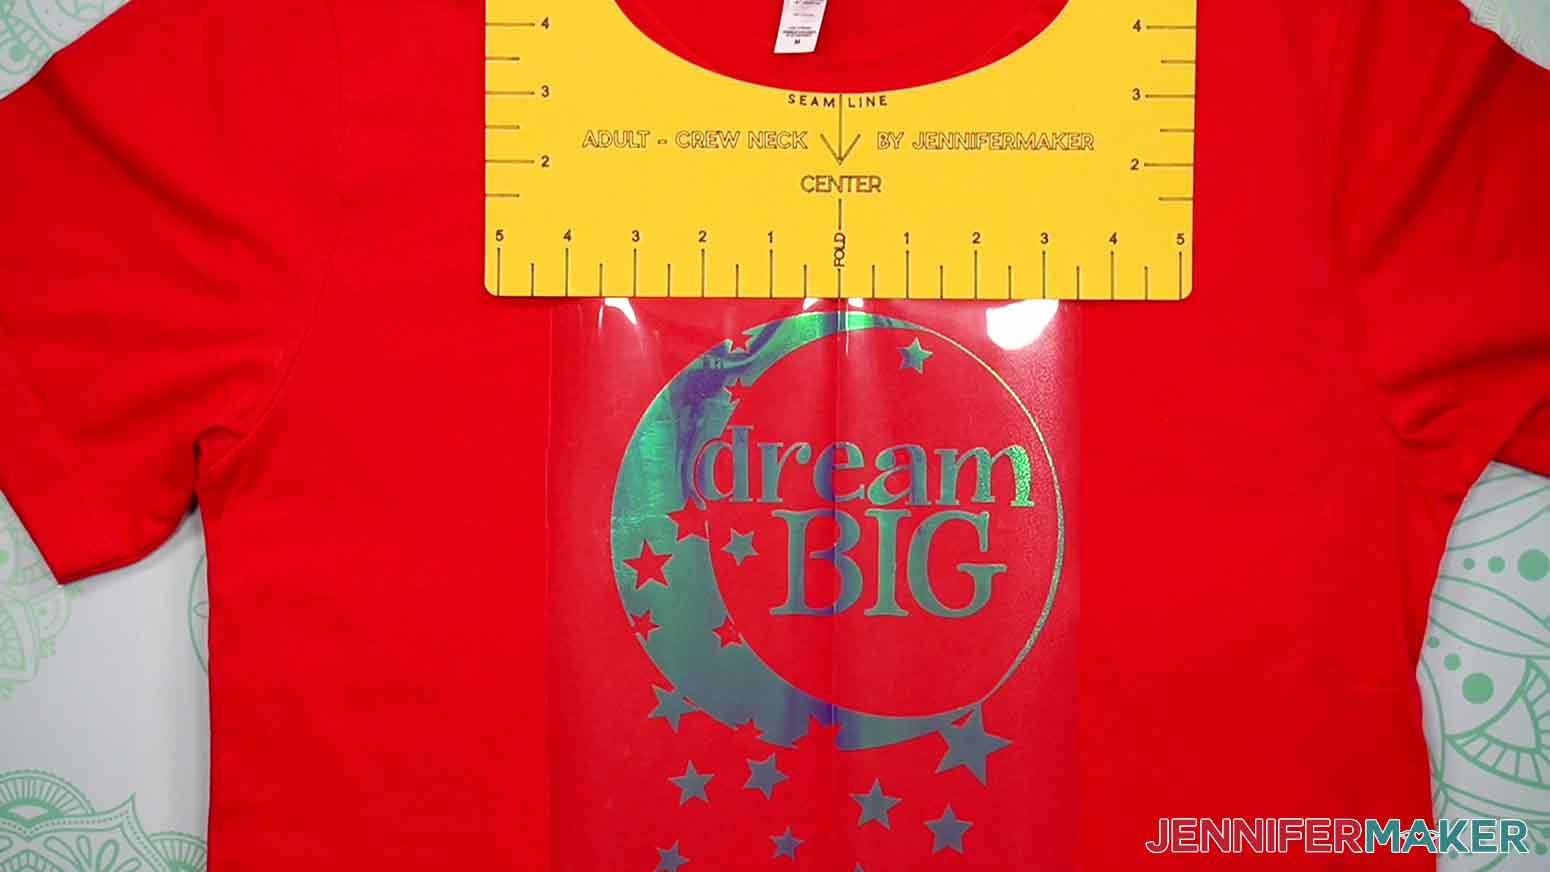
Place your T-shirt ruler up against the collar seam of your T-shirt. You don’t want it on the edge of your collar, but rather just below the seam.
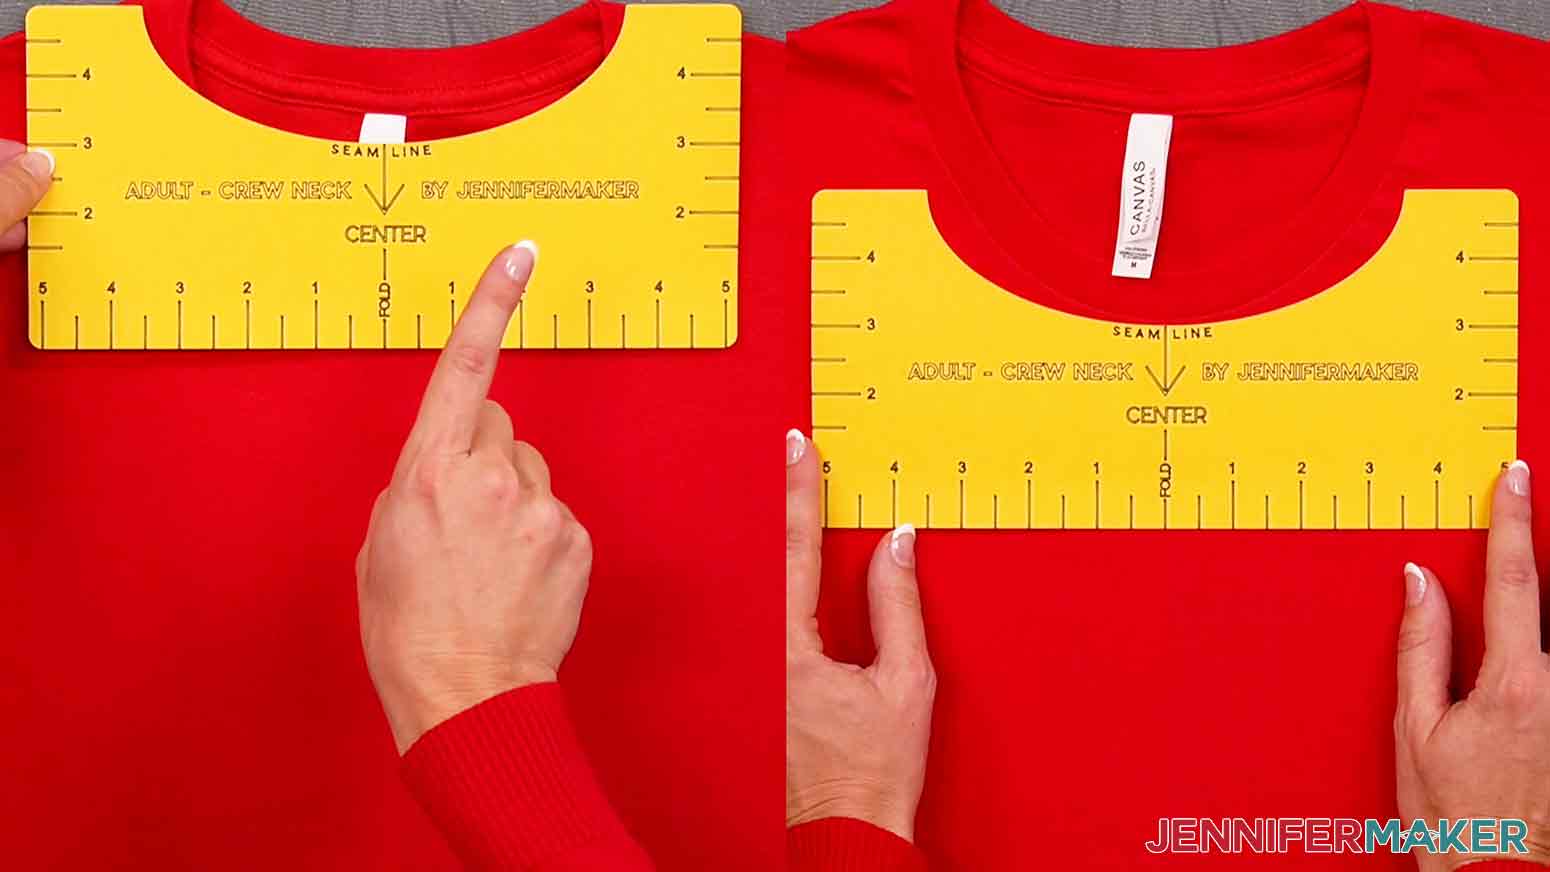
Now, don’t worry if the curve of your T-shirt ruler does not exactly match the curve of your seam. There may be a little extra space. So long as it is centered, it does not matter.
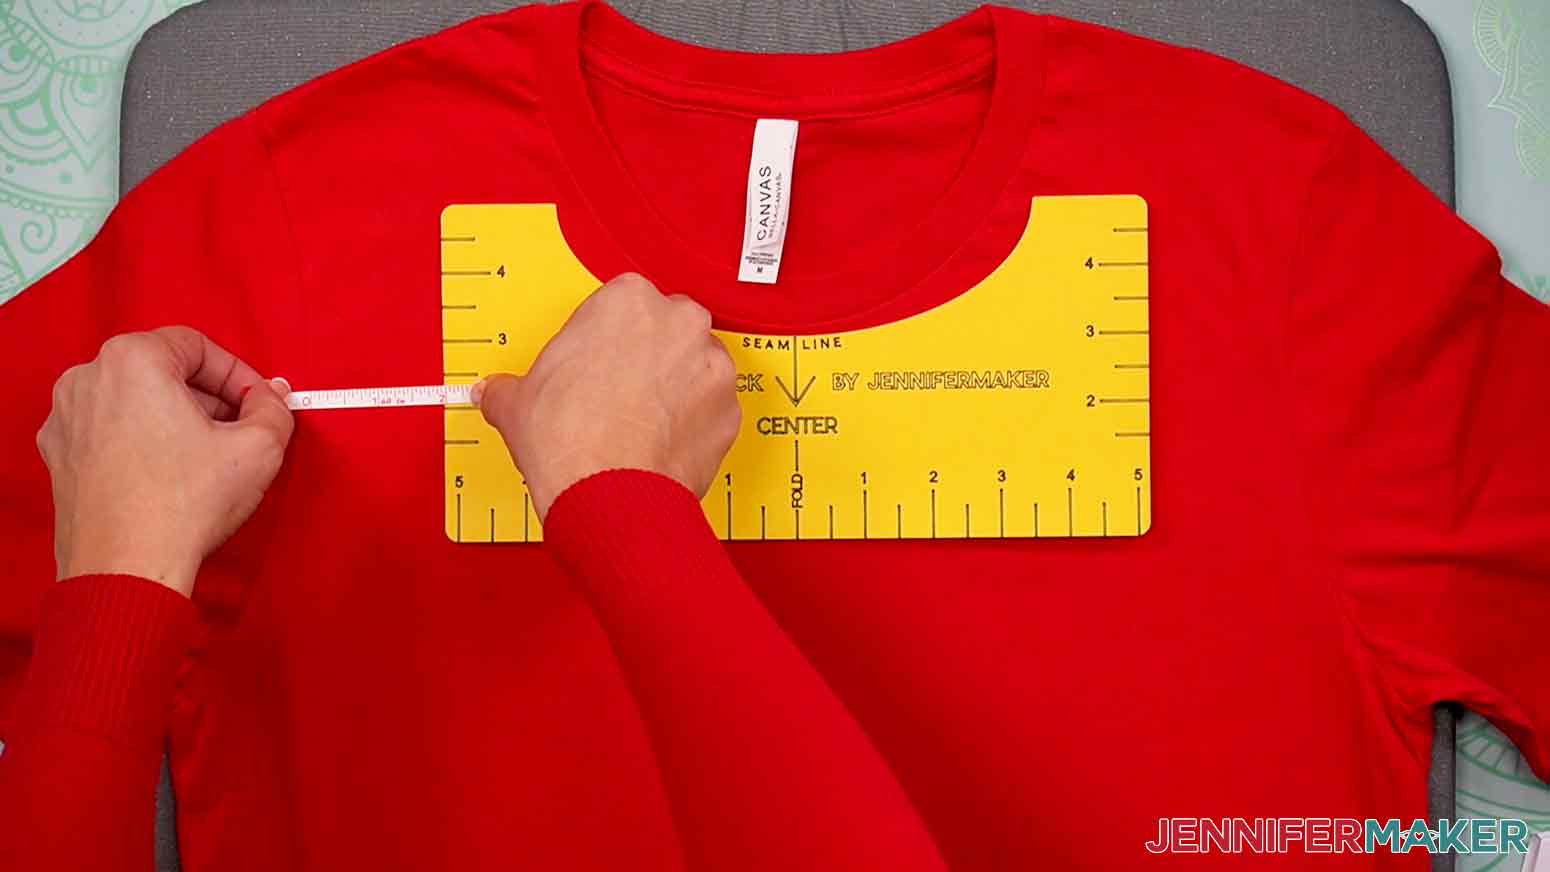
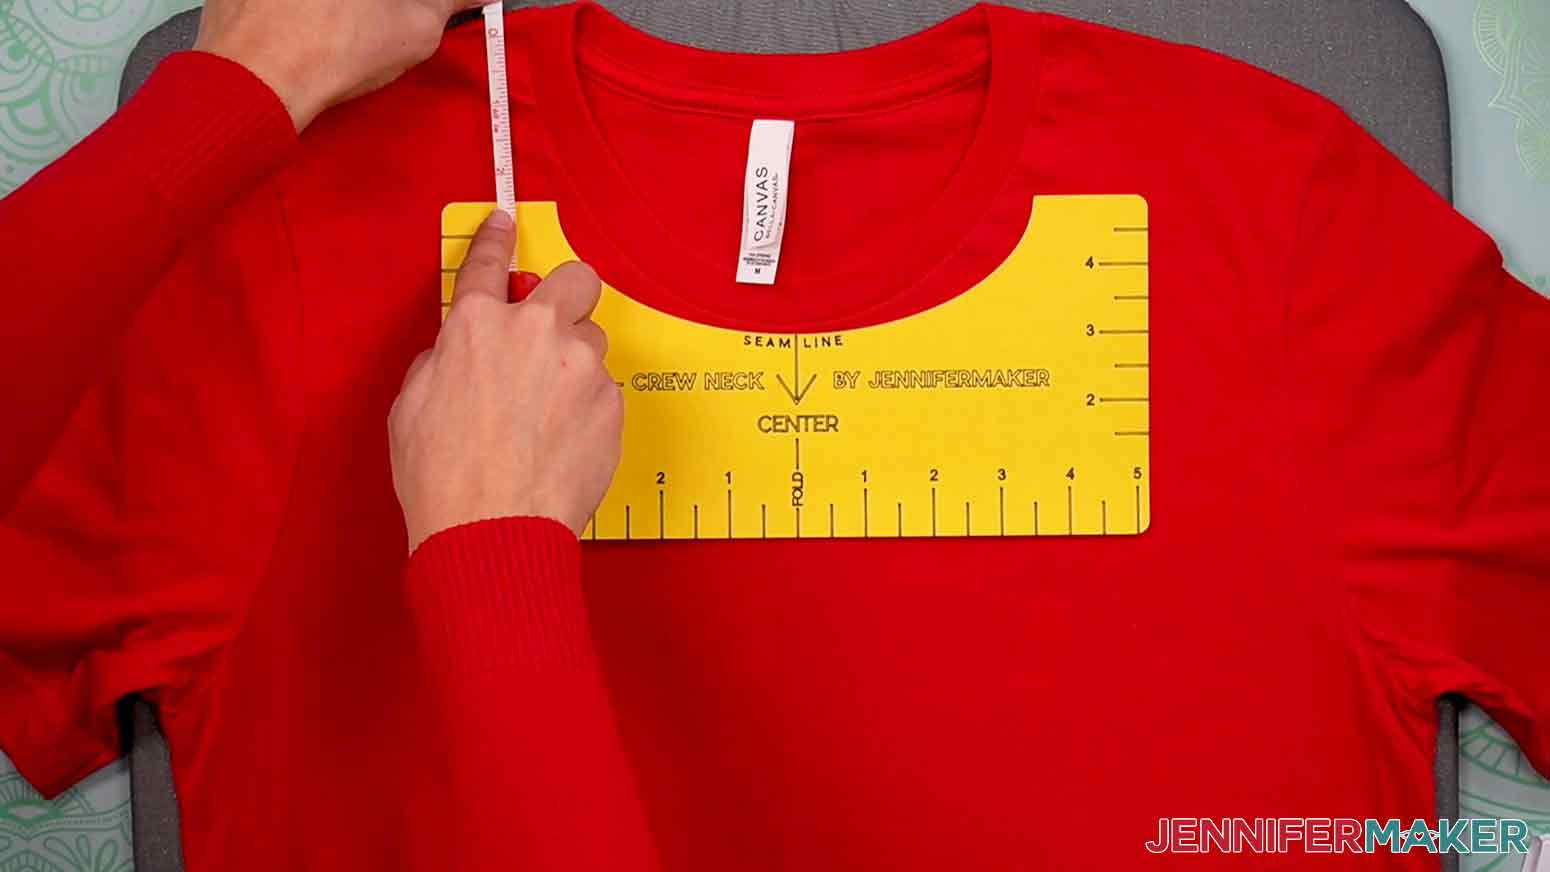
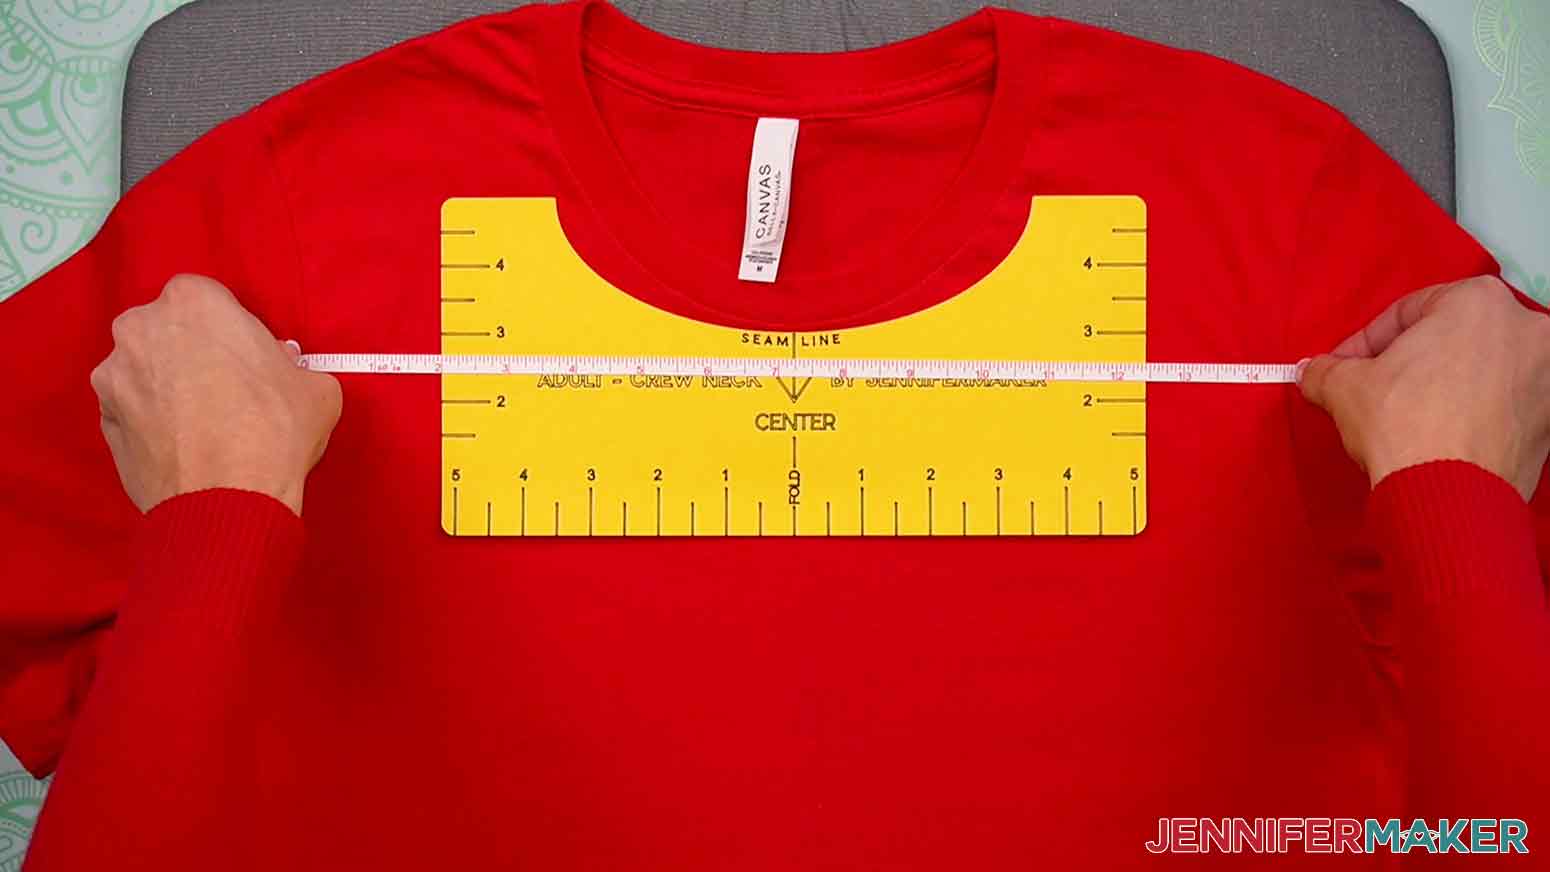
If we measure with a measuring tape, you’ll see that it’s exactly in the center of the shirt.
Fold the non-sticky sides of your decal in half vertically against each other (it won’t hurt your design) to make a center crease.
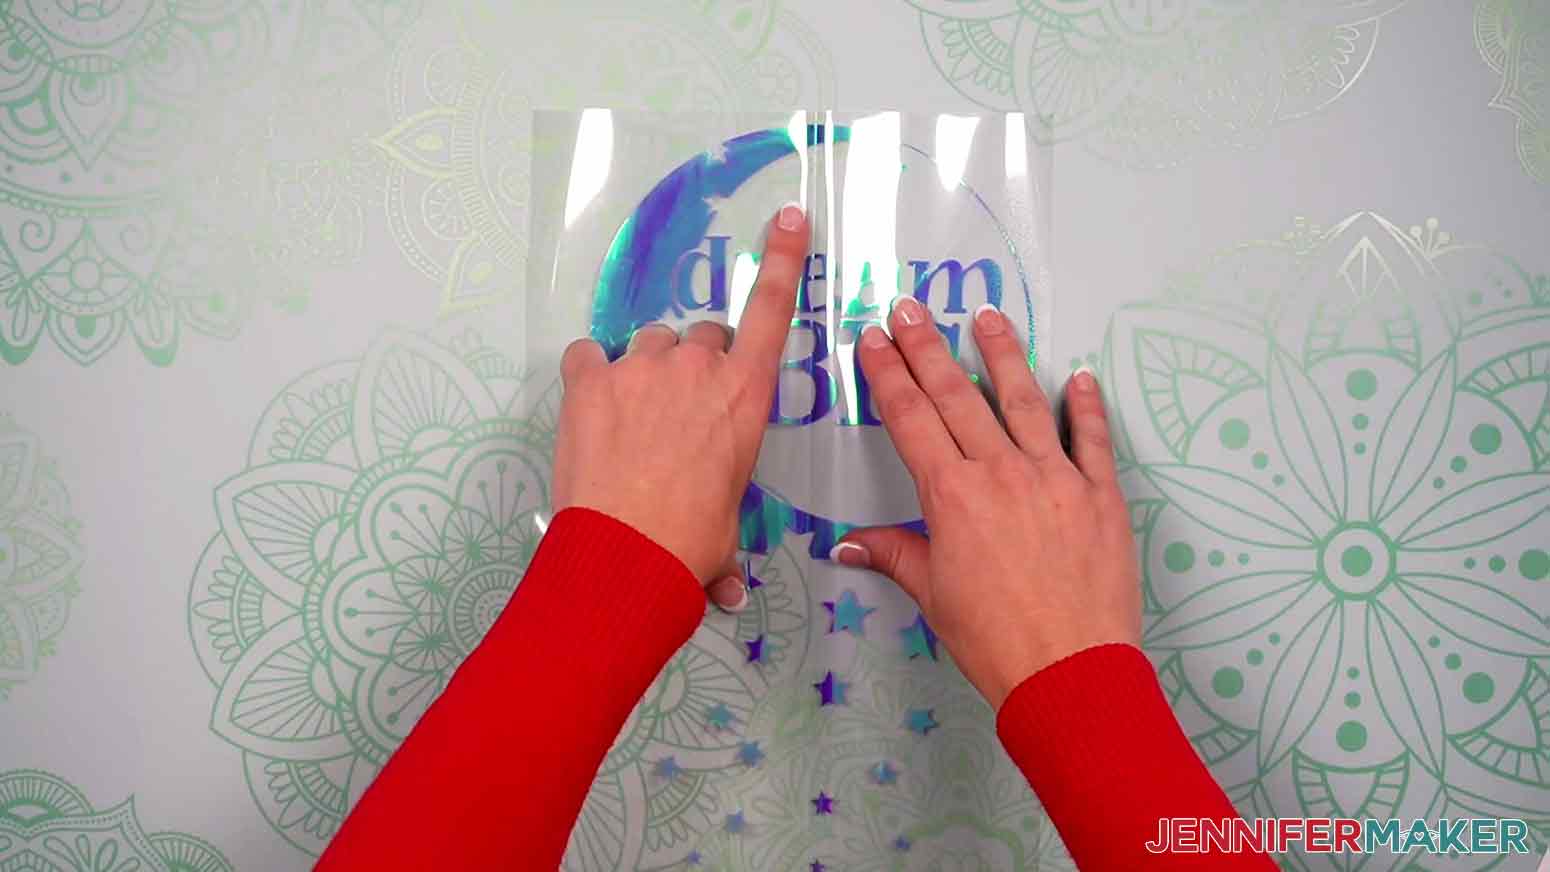
Open it up and align the creases in the vinyl to the creases in your shirt. Also align the top of the design with the bootom of the ruler. For a crew neck, the design should start about 3" from the neck seam, which you can measure using the side rulers.
NOTE: I also eyeball it at this point to ensure this is where I want it to go. It is fine to change it if you want, especially if you're working with an irregularly-shaped design that might look more balanced not quite on center.
Once you're happy with the placement, press down with your hands on the liner so it sticks to the shirt and it doesn’t move around.
Remove the ruler, being careful not to shift the design. Your T-shirt and decal are now perfectly aligned!
Set your EasyPress to 330°F and press the design for 30 seconds using firm pressure.
Remember, place the vinyl against the t-shirt so the shiny carrier sheet is between the design and your EasyPress or iron.
You should be able to cover this entire decal in one press with the EasyPress 2. If you are using a home iron or alternate heat source, you may need to press in sections to get the entire decal. You just want to make sure all parts of the decal have been pressed for 30 seconds.

Then, flip your shirt over and press the back for another 15 seconds. Wait until the vinyl is cool to the touch before removing the plastic, mine took about 5 minutes.
Done!
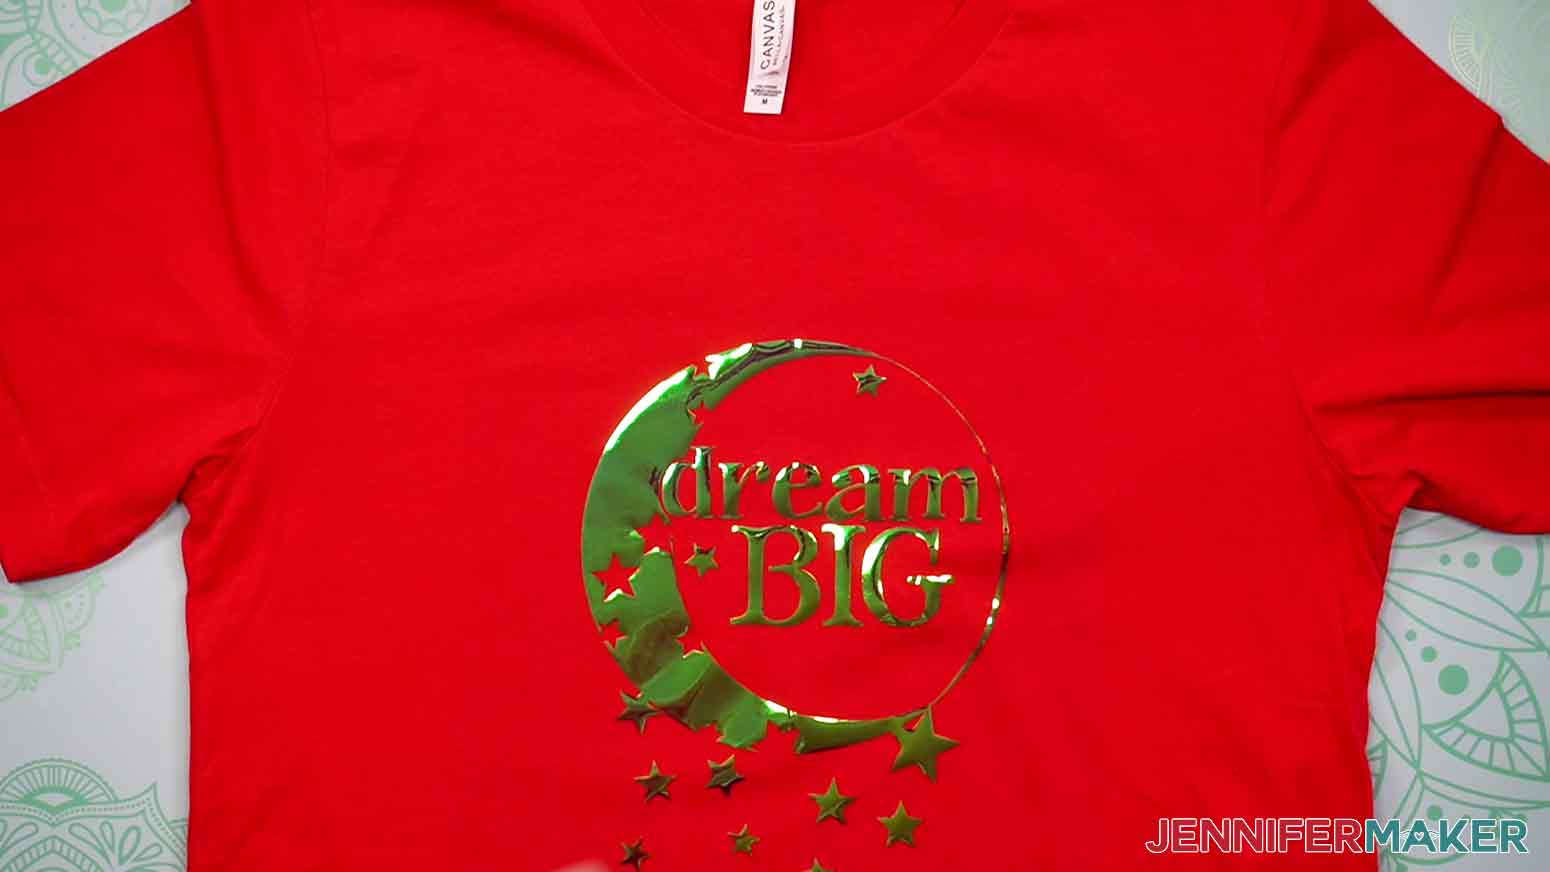
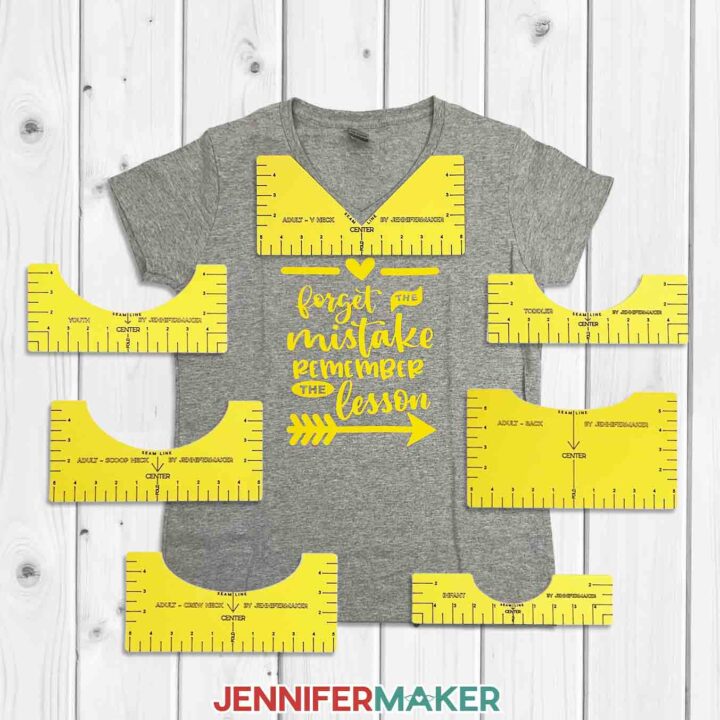
Here's how the rest of the rulers in a mix of cardstock and plastic look placed on appropriate clothing with a decal in place:
Here’s the Adult Crew Neck t-shirt with the plastic guide in comparison to the cardstock one.
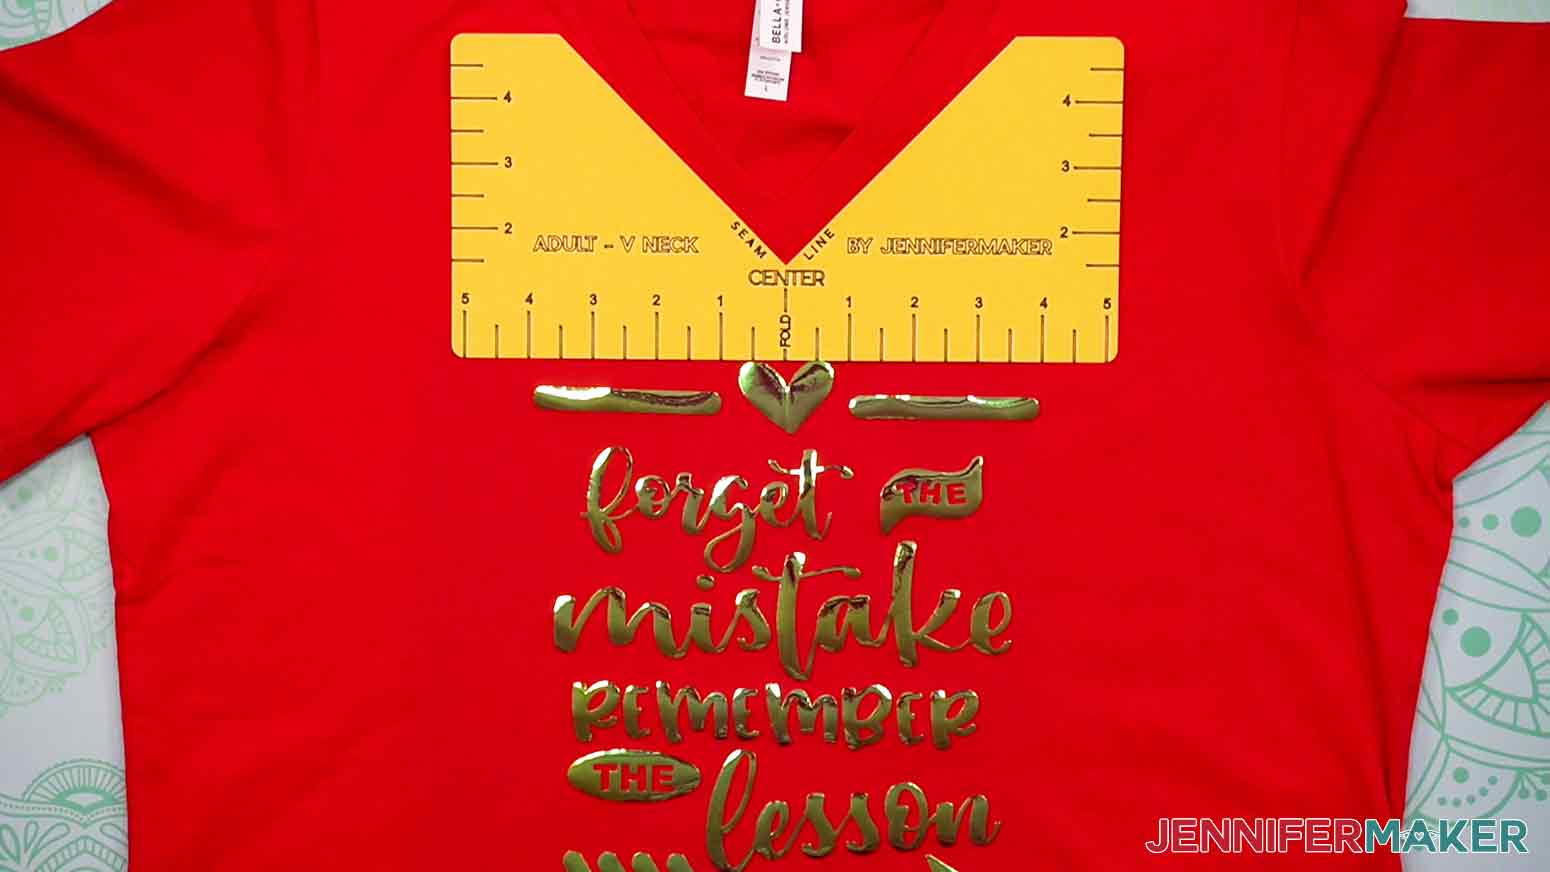
Here’s the Adult V-Neck shirt, which has a totally different top edge shape. For v-necks, the design should start about an inch from the seam. Feel free to adjust the T-shirt ruler placement to suit your shirt and design, however, as some v-necks have a deeper v than others.
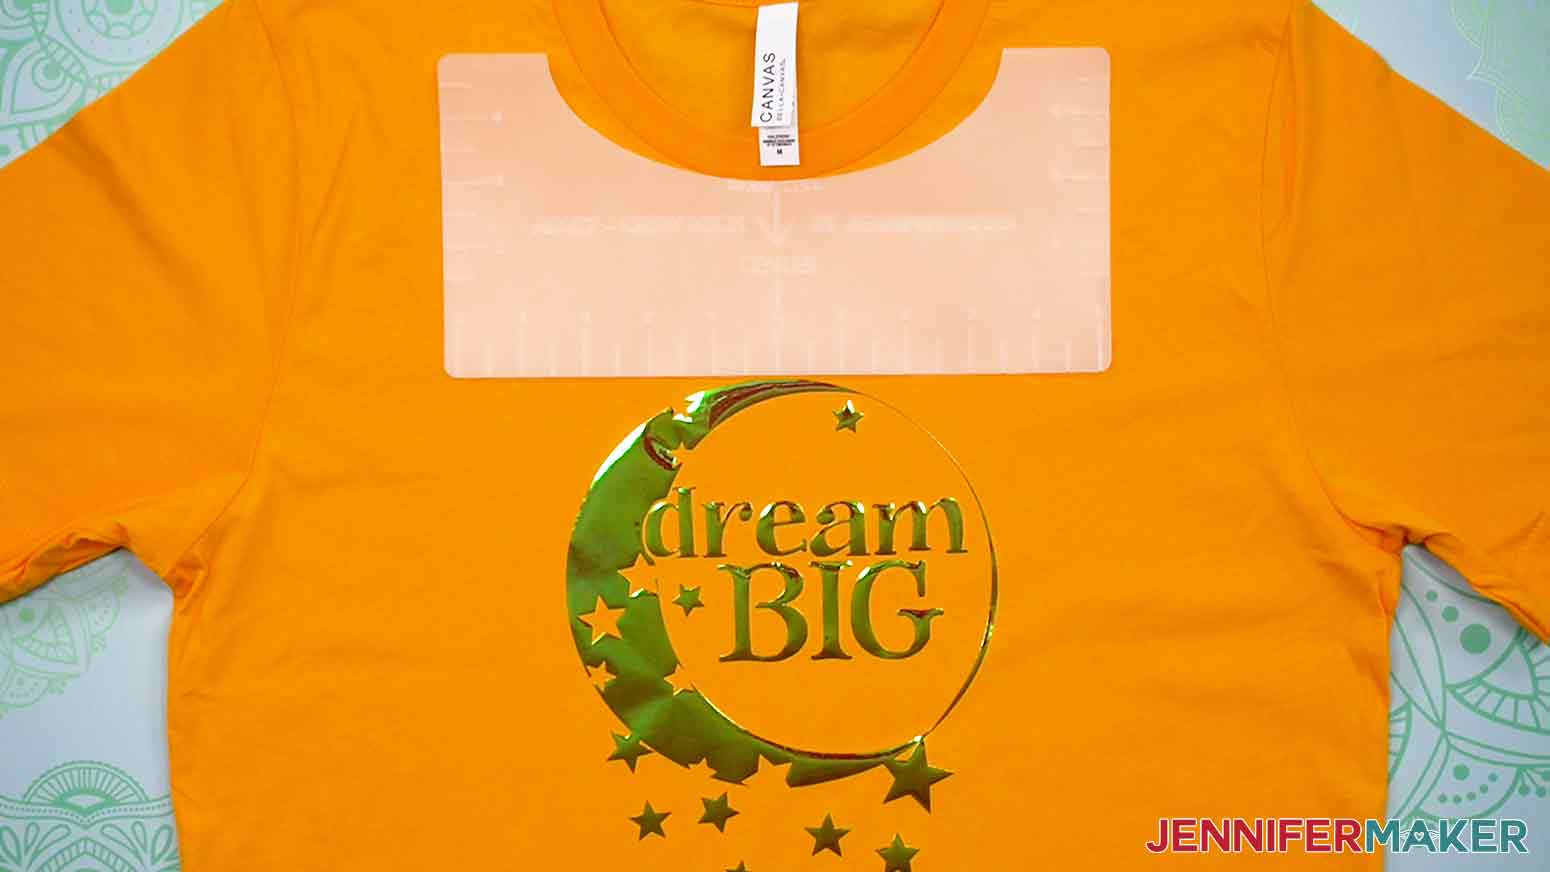
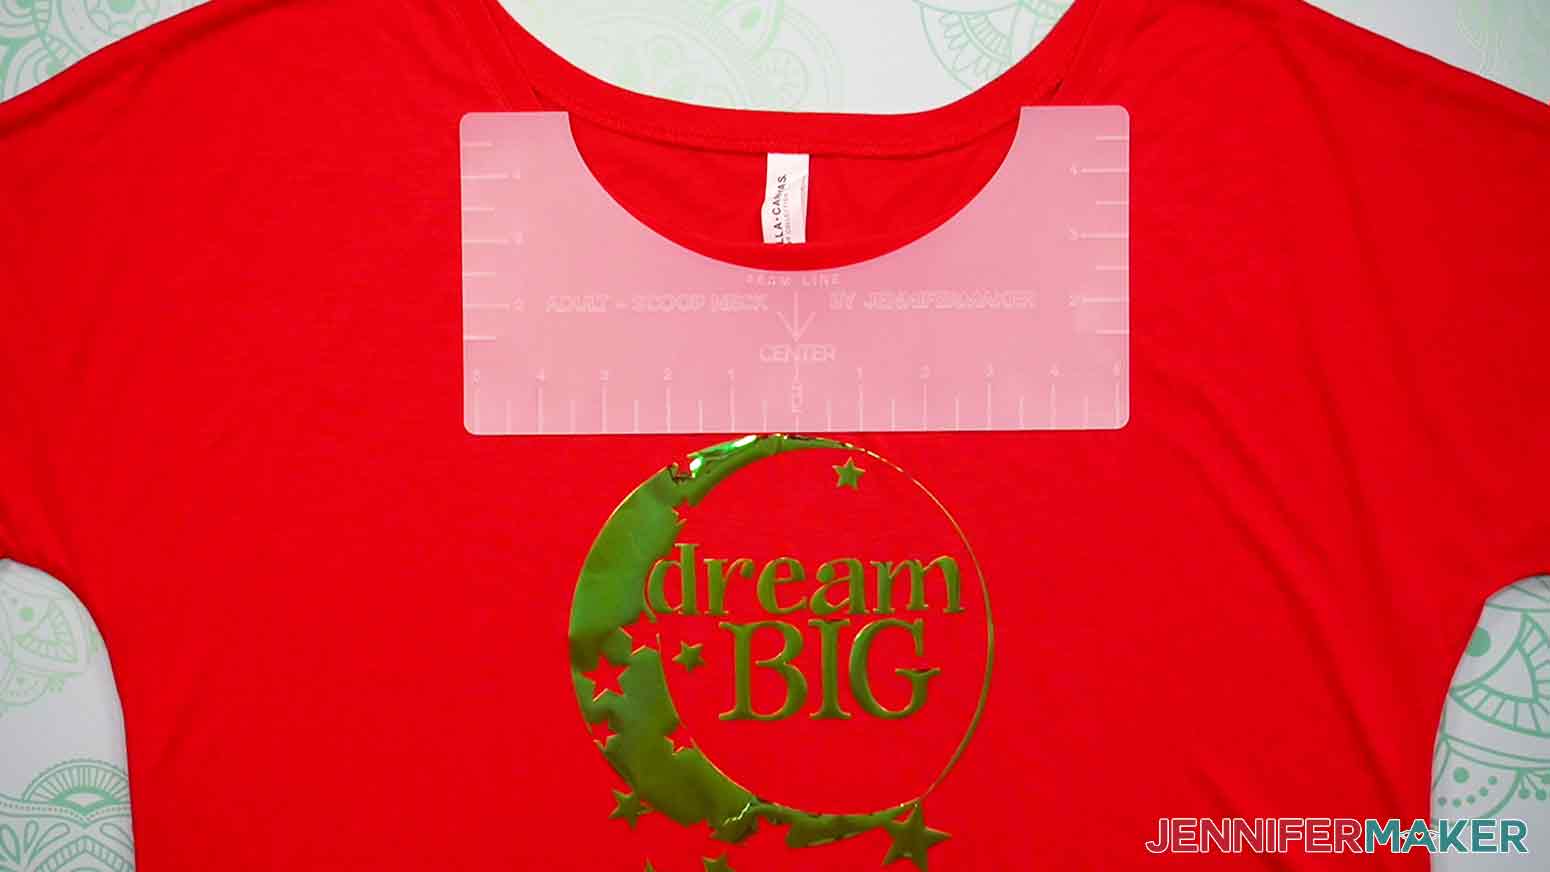
Here’s the Adult scoop neck shirt, which has a wider curve than the crew neck version.
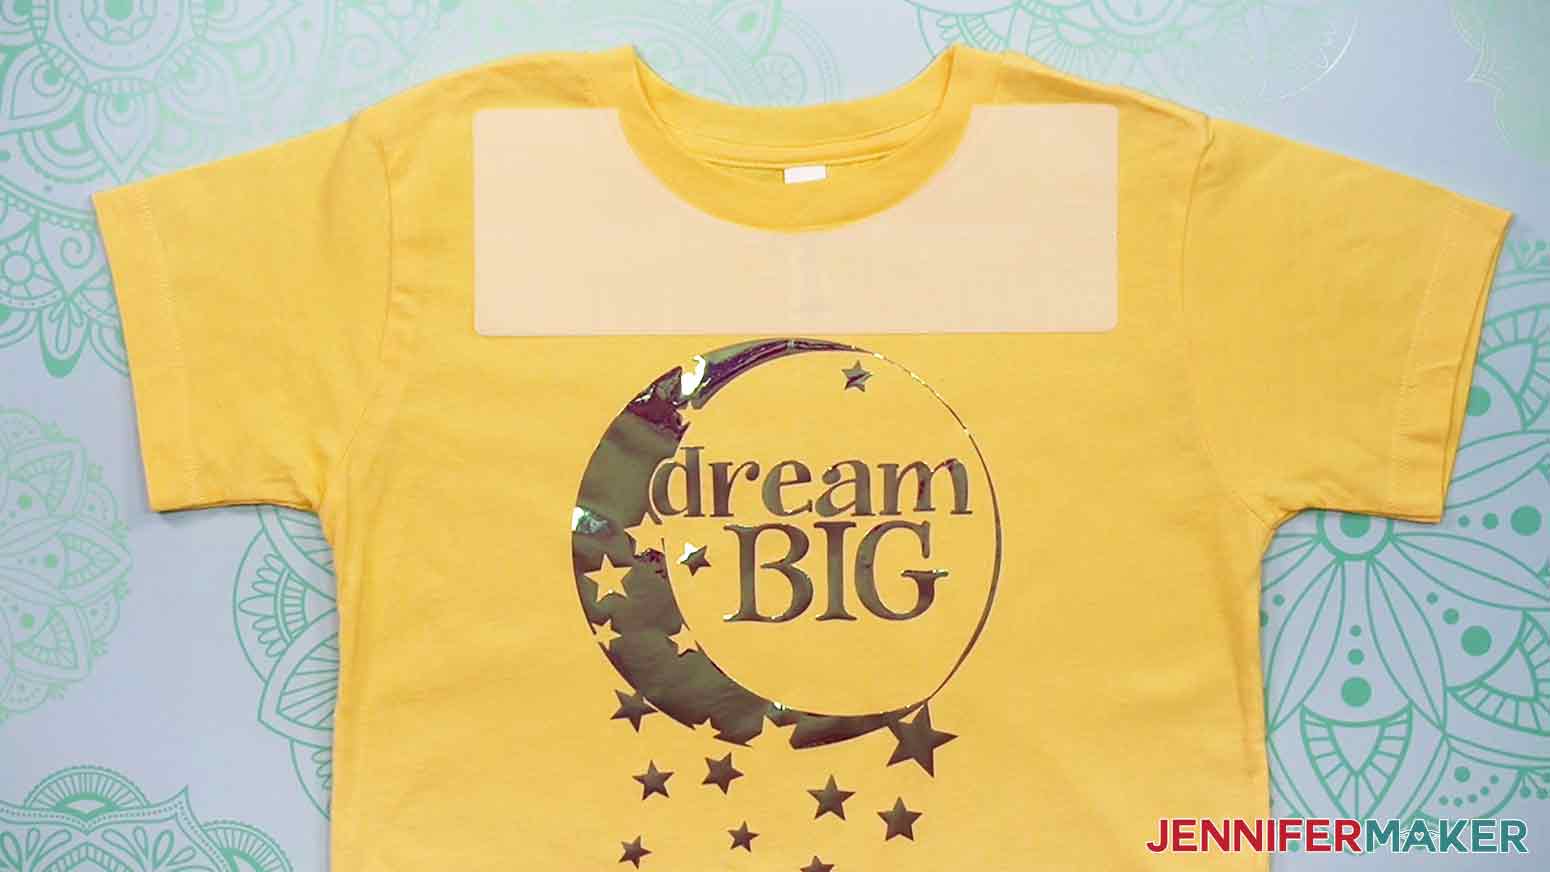
Here’s a Youth crew neck t-shirt with the Youth T-shirt ruler.
Here’s a Toddler crew t-shirt with the Toddler T-shirt ruler.
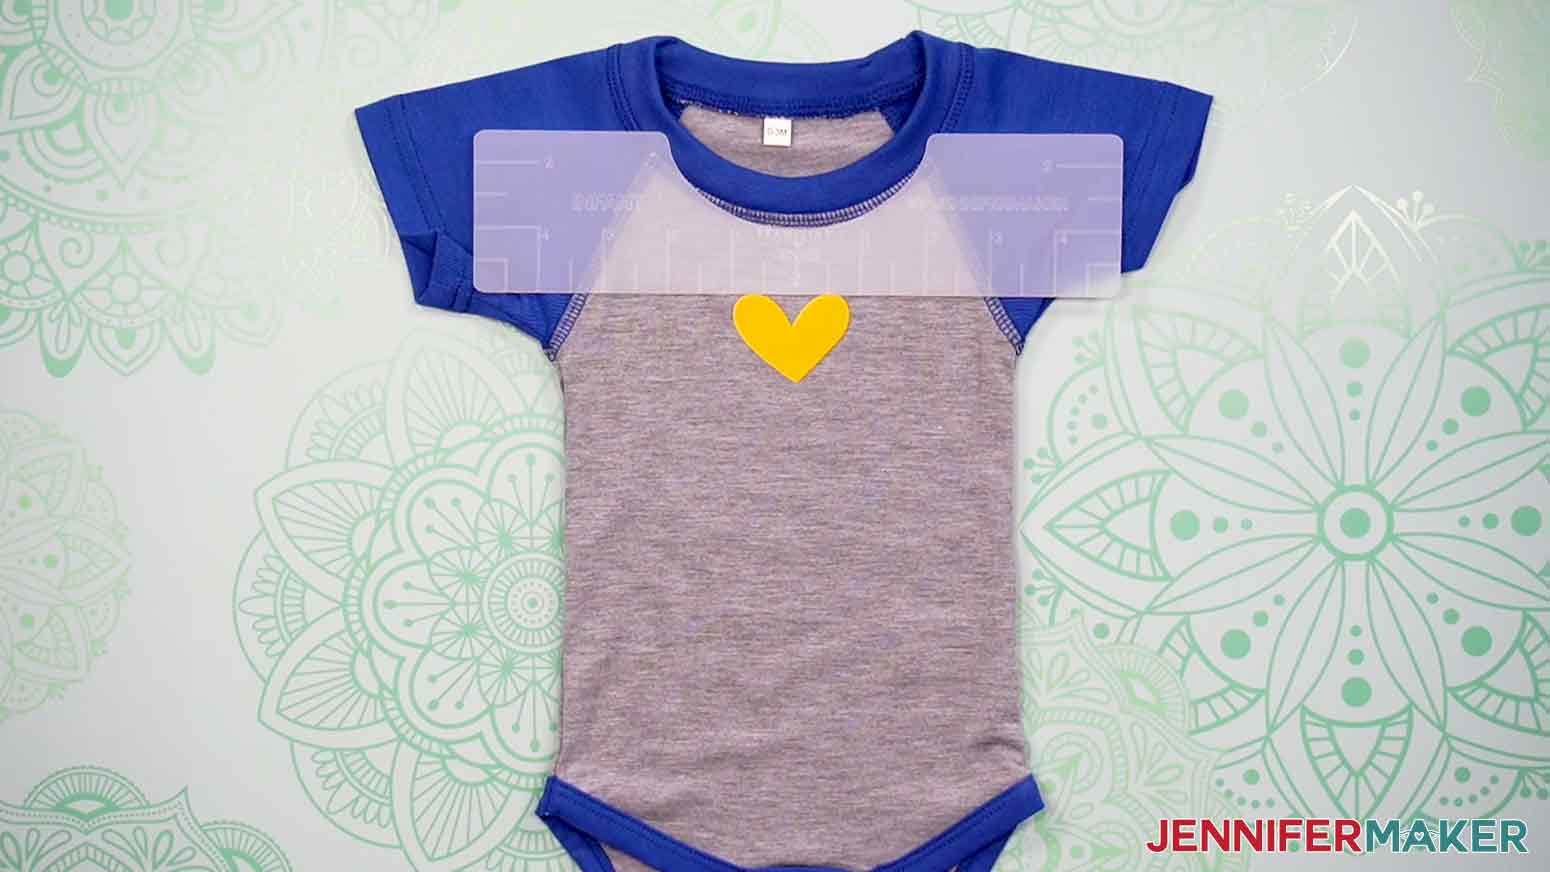
Here is an Infant onesie with the Infant T-shirt ruler
BONUS: HOODIE BACK PLACEMENT
I'm also going to show you the placement of a large decal on the back of a hoodie using your new t-shirt rulers! Hoodie placements are tricky because there really isn't a standard for alignment measurements on them, which is why I do not have a rspecific hoodie ruler. I have included a few tips on where to place your decal on a hoodie below.
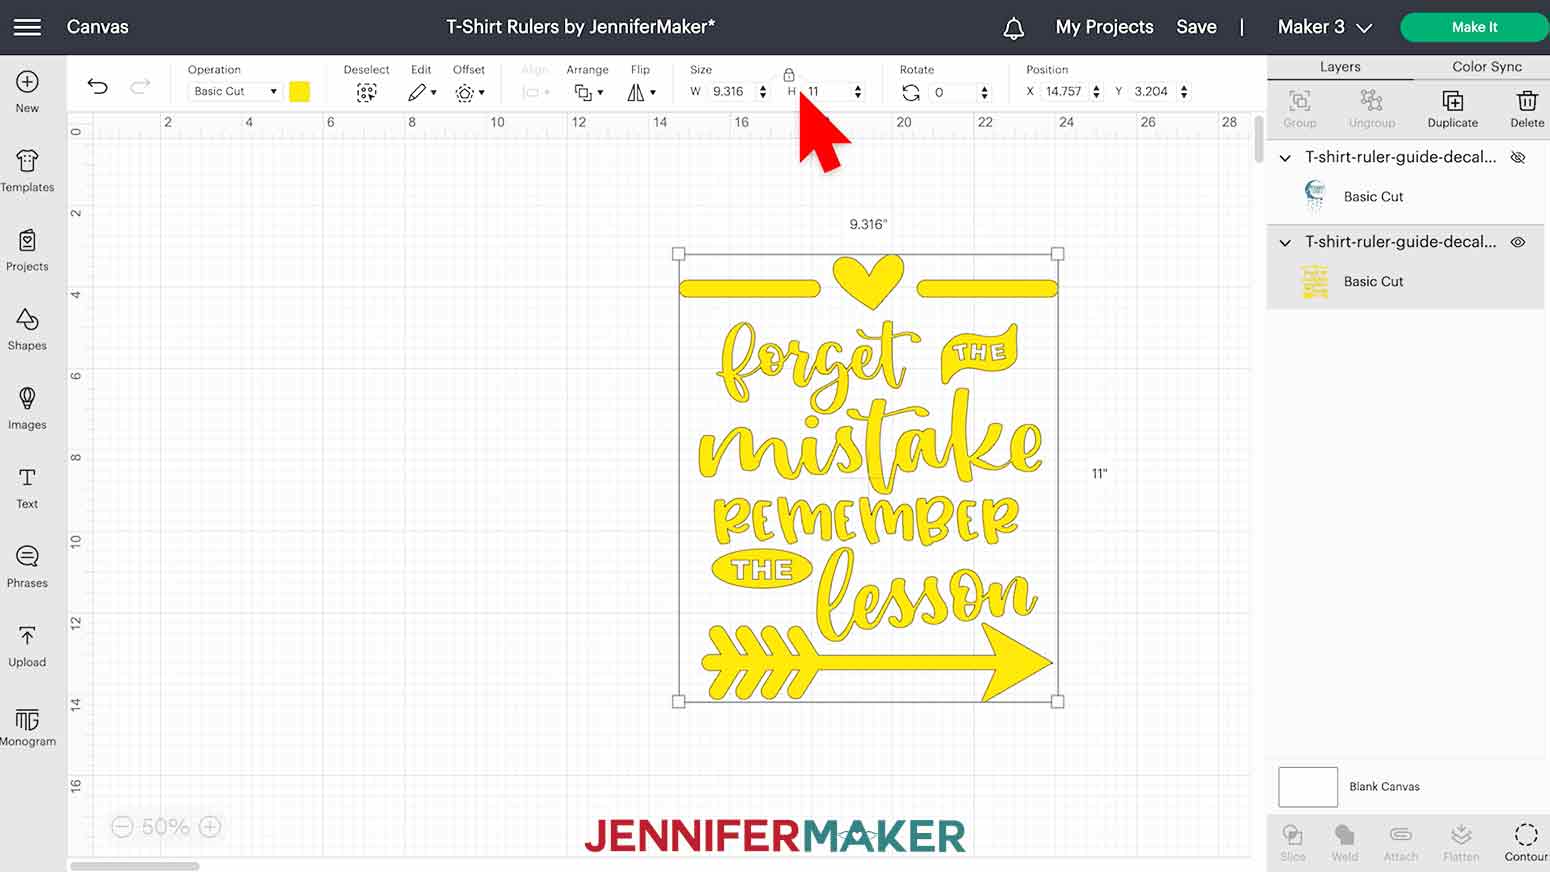
I'll show you with Adult medium sweatshirt from my material list and the "Remember the Lesson" design from the download folder. I re-sized my decal to 9.75" x 11.5" before cutting because I wanted it to be fairly large.
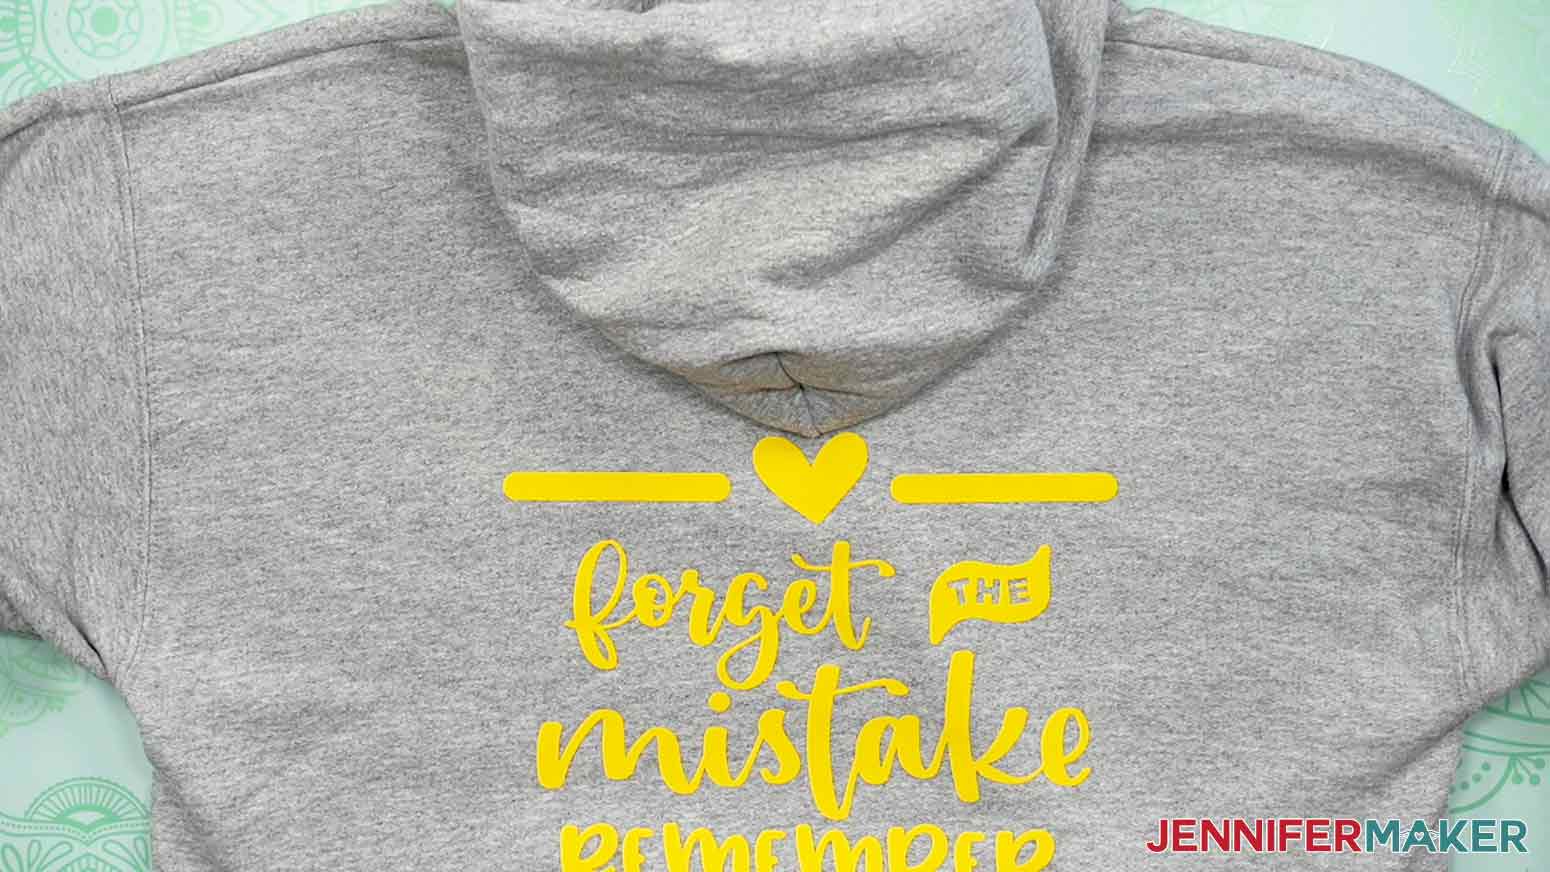
A general rule of thumb is to align the top of the design right around where the tip of the hood lays so that none (or very little) of the design is hidden.
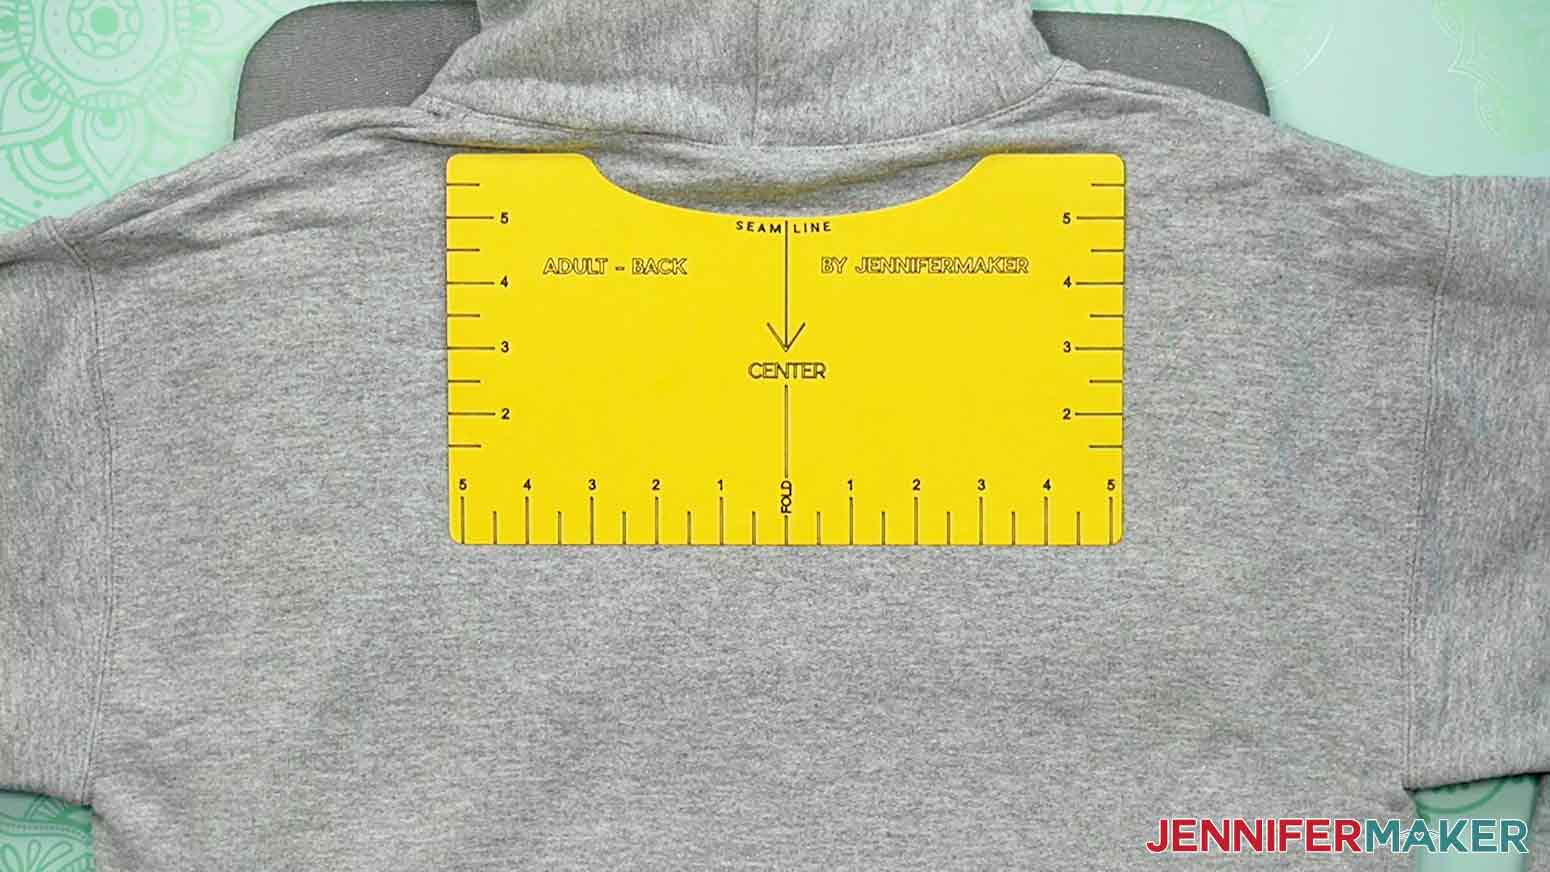
For this particular decal and hoodie, my Adult-Back t-shirt ruler is almost a perfect fit if we use the bottom edge.
Lay the hoodie flat face down with the hood up, then align the Adult-Back ruler under the neck seam of the hoodie.
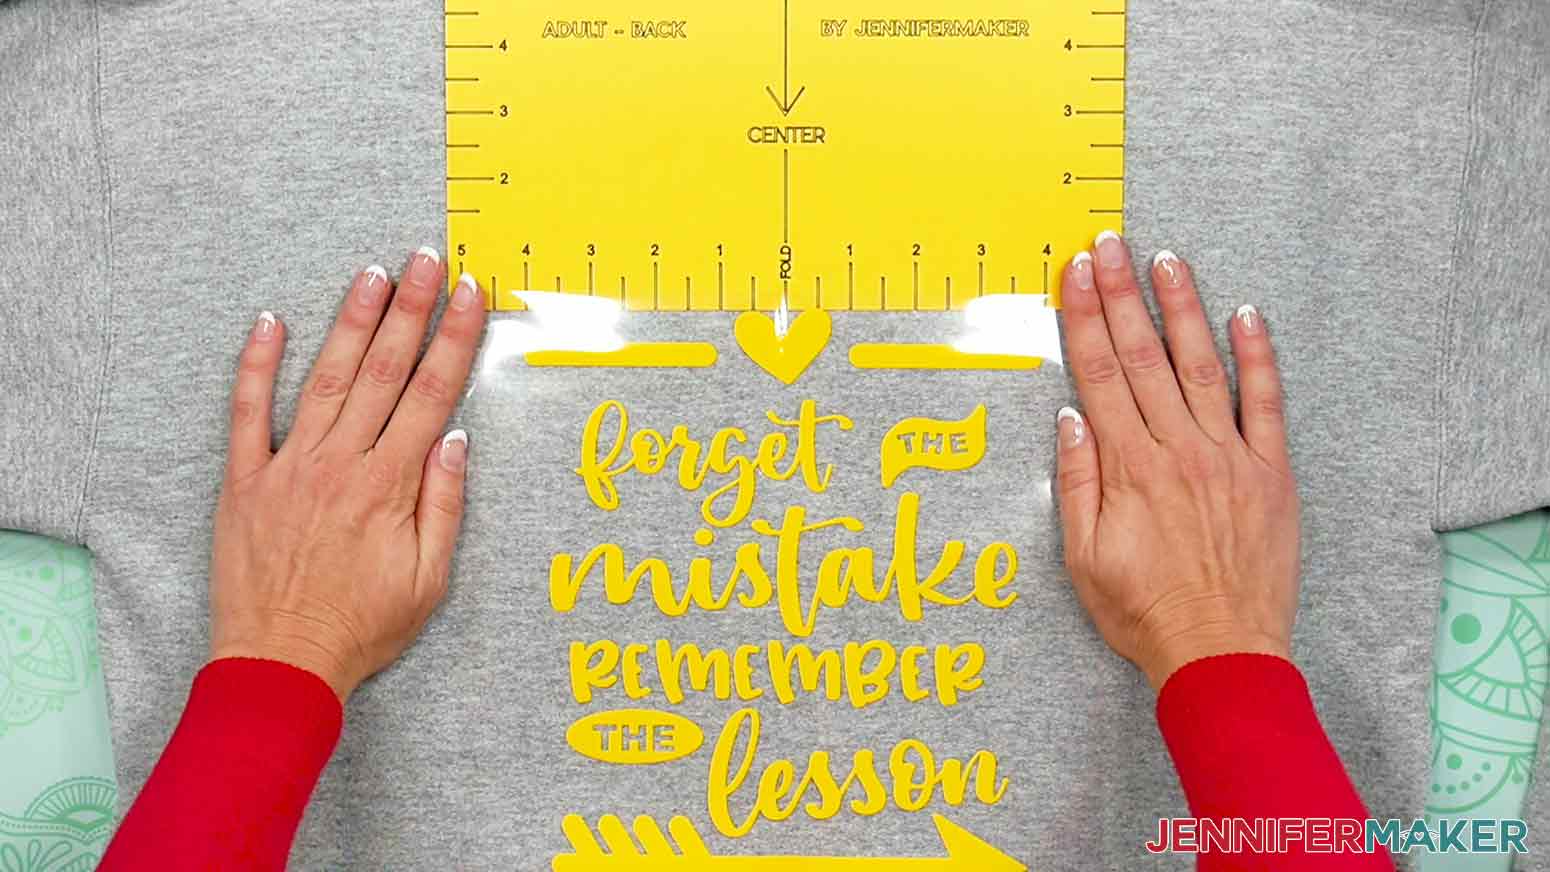
Bring the hoodie down to see if it will cover too much of the design. If so, gently bring the ruler down to a better position, but keep it centered and straight.
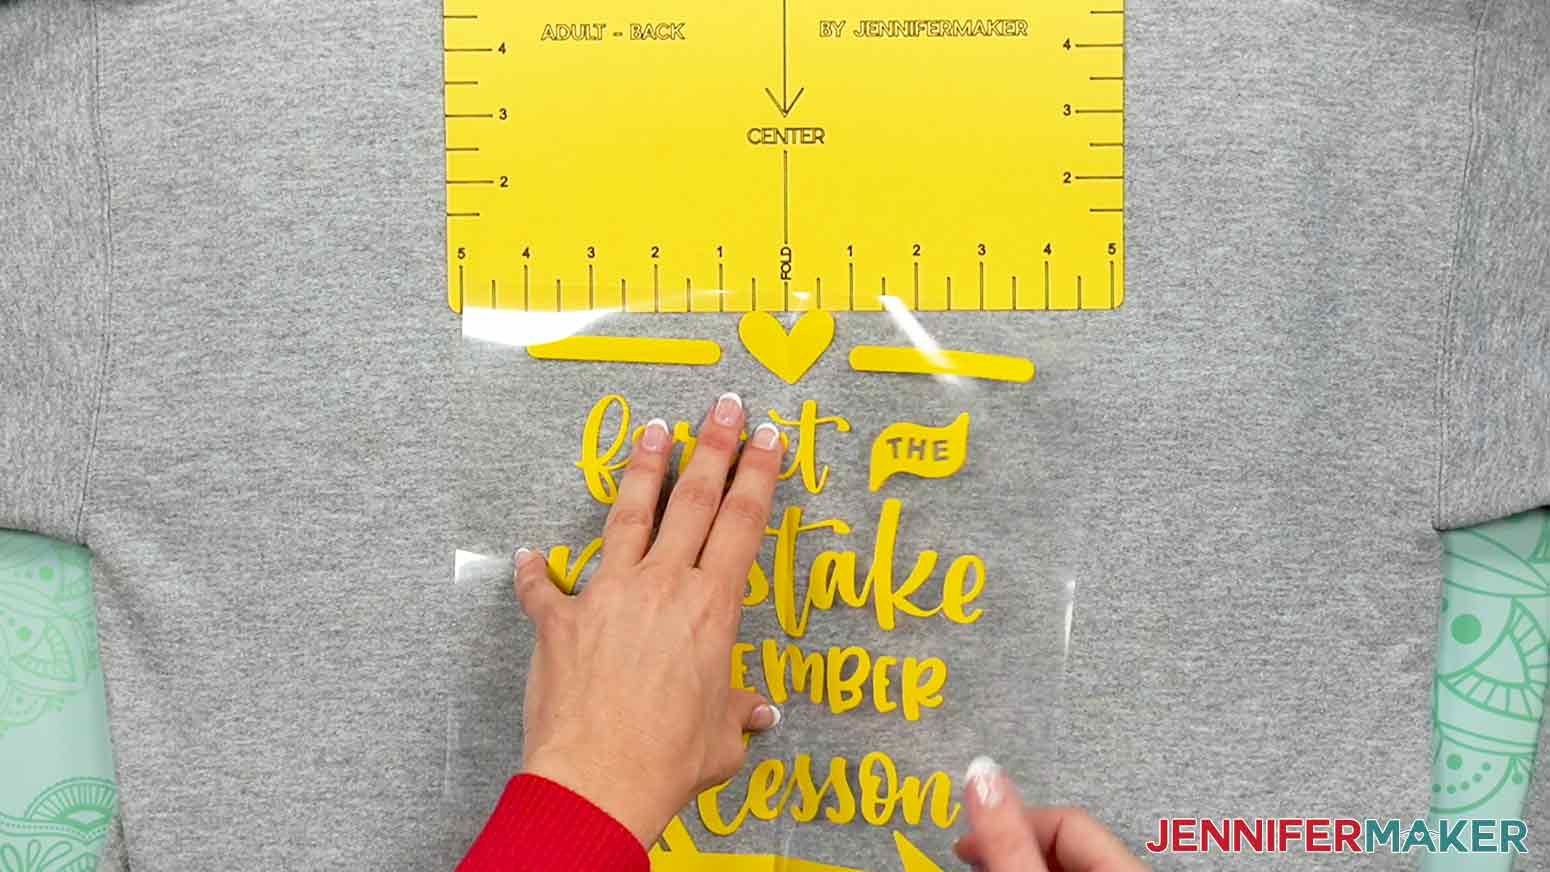
This placed the top of my decal right under the tip of the hood when it's down. Perfect!
STEP 6: SHOW IT OFF!
Try on your new shirt or hoodie and admire how amazing you look!
For the longest-lasting designs, wash your shirts inside out in cold water.
Answers to Your Questions About Making a T-Shirt Ruler Guide
Q. How do you use a shirt ruler guide?
With the shirt face up and smooth, place the guide you made from my T-shirt ruler SVG at the neck seam and use it to place you design.
Q. What size is a T-shirt ruler?
My rulers come in slightly different sizes depending on the garment you’re decorating, but they can all be cut from an 8.5″ x 11″ piece of paper. If you use the PDF, make sure that the ruler print size is at 100% to avoid making your ruler tool too big or too small.
Q. How do you find the center of a shirt?
Lay the shirt flat and smooth out any wrinkles. Then, pick up one sleeve and the lower edge on that side. Bring them over to match the other side so the edges all line up. Smooth out any wrinkles and press the crease with your hand or a heat source and you’ll have the center top to bottom when you unfold it.
Q. How far down should a design be on a shirt?
For a crew neck, you can put the design two to three inches from the collar. For a v-neck, start about an inch below the collar.
Q. How big should a graphic be on a shirt?
The best size really depends on the garment and design, but I have handy references for the maximum recommended sizes in the printable tutorial.
Q. How do I decorate a Cricut shirt?
Heat transfer vinyl designs are great for custom t-shirts. If you want to create really detailed projects, check out my Sublimation T-shirt tutorial. If you really want to branch out, try screen printing for a totally different look. Just remember to pick materials that will show up on your shirt color!
Get my free download of T-shirt ruler guide SVG cut files and free designs here:
If you make a project using a T-shirt ruler guide, I’d love to see it! Please share your projects in my Cricut Crafters & Makers group where you’ll find hundreds of thousands of crafters like you, sharing their tips, projects, and inspiration.
By the way, you’re free to use my free SVG files to create physical items to sell — I just ask that you share that you used one of my designs on your listing or with your product. I wish you luck with your projects and T-shirt business!
Love,

Want to remember this? Save this T-shirt Ruler Guide to your favorite Pinterest Board!