Learn how to make Canva templates to save time, materials, and frustration!
The first time I sat down to design a card for a friend’s birthday, I thought it would be quick and easy. But a couple of hours later, I was still adjusting margins and realigning text, and feeling unable to get it just right. It was one of those crafting moments where I realized I’d made things way harder than they needed to be. That’s why learning how to make Canva templates is a game-changer for cards, tumbler projects, organization tools, and so many more common tasks. Instead of starting over from scratch every single time, making a template lets me set up my layout once and then simply reuse it with new words, images, or colors whenever I need. No more wasted time tinkering with the same details over and over. Instead, I have a smooth, streamlined design plan that leaves me with more time to actually enjoy the crafting part. Now, let me show you how you can benefit from templates, too!
See the full step-by-step video tutorial on how to make Canva templates:

When you learn to create your own templates in Canva, it feels like you’re unlocking a secret that only professional designers know. But they’re great for beginners! You don’t need a Canva Pro account to use templates, either! Everything can be set up with a free Canva account right on the Canva website. It’s just about knowing how to plan your template design, using the right Canva features, and keeping your design elements in place so they’re ready for future use. That’s the beauty of working smarter instead of harder! Once you’ve built your own Canva templates, you’ll save a lot of time while still ending up with professional-looking designs.
For this project, I focused on three specific needs that come up for many crafters. Each one uses the same basic approach of starting with a custom size, setting guides and safe zones, and then layering in design elements so you can make changes later without redoing the hard parts.
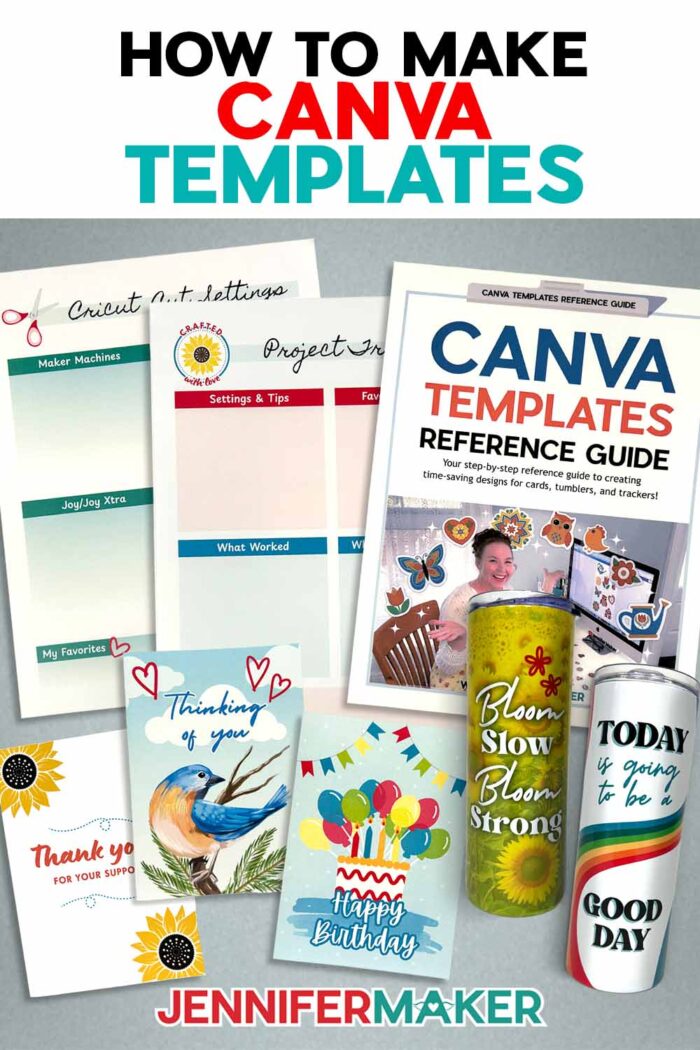
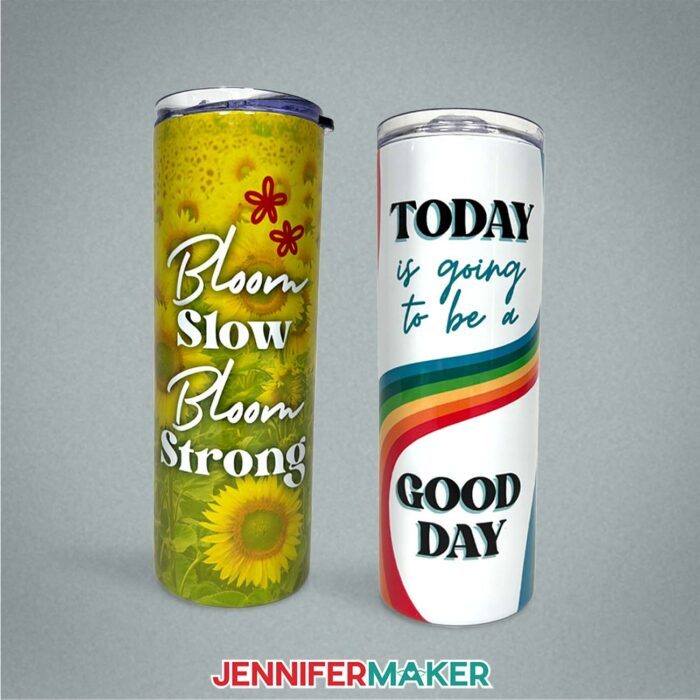
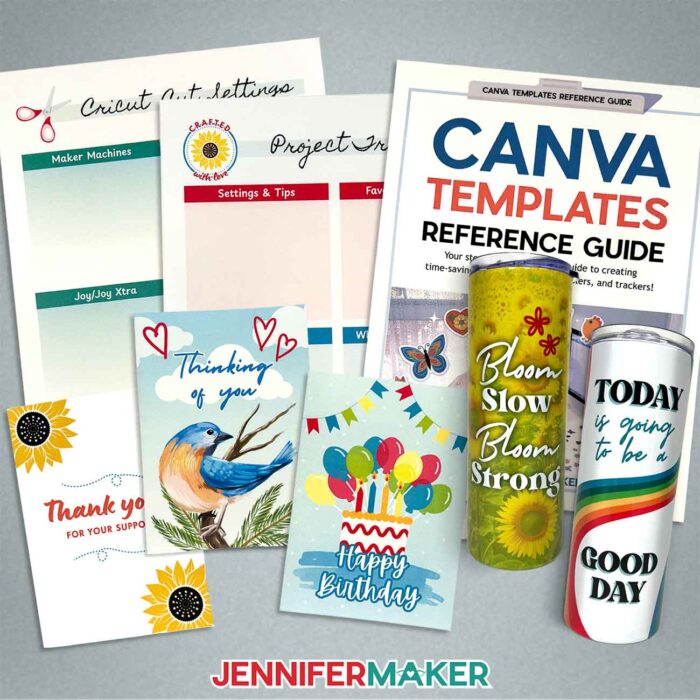
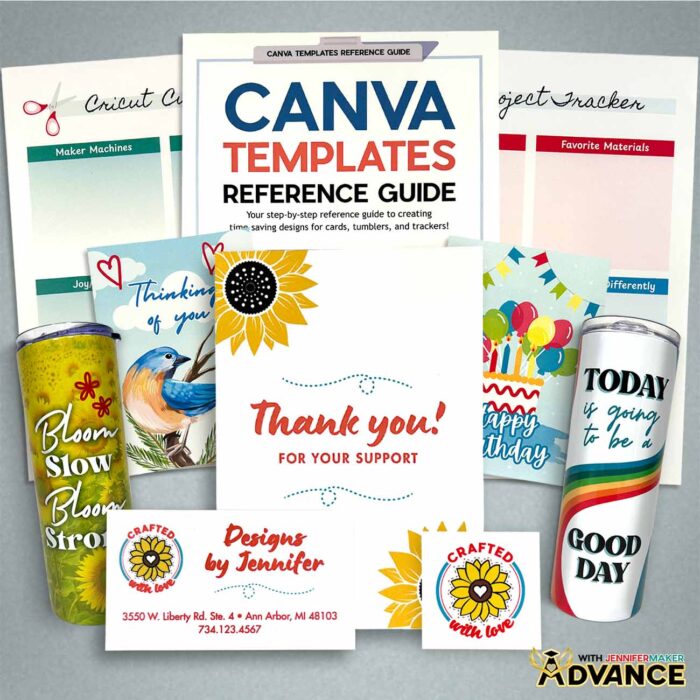
I’ve included three projects so you can practice your new skills! There’s the classic folded greeting card, a trendy 20-ounce skinny tumbler wrap, and a project tracking sheet because staying organized is just as important as creating beautiful things. And every time you open a template, you’re just a click away from a new custom template that already has the foundation set up.
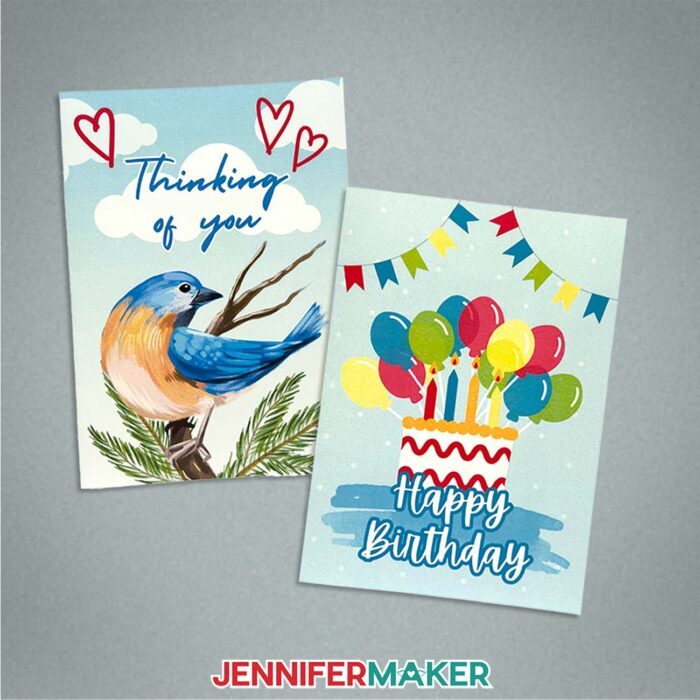
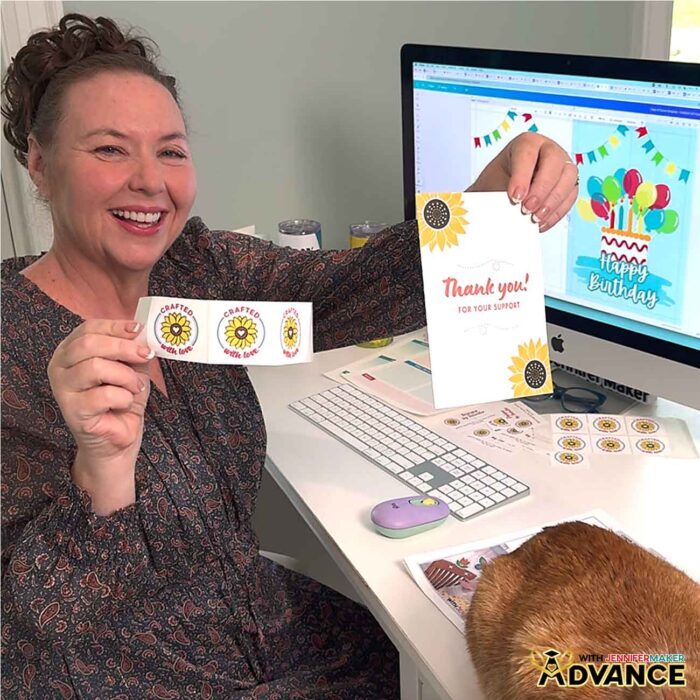
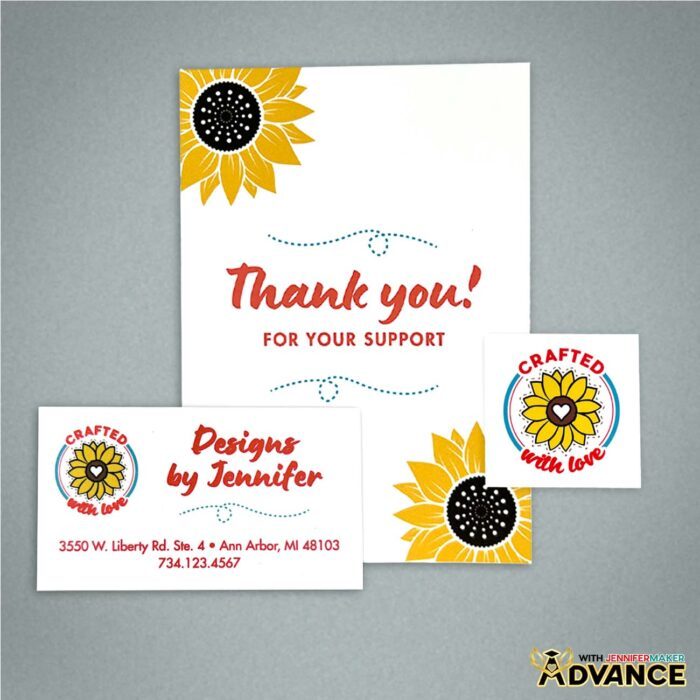
For the card, I’ll show you how to set up all the fold guides, margins, and labels so you know exactly where to place decorative elements and where your card folds. It may sound technical, but once you’ve got it set, you can reuse this template for every future design you dream up. I even uploaded my own “Crafted With Love” logo to add a personal touch that now appears automatically on every card I make with this template. I included it for you in my free download. When it’s time to make a card, all you’ll need to do is duplicate the template, delete the labels, then change the background colors, add free elements, and type a sentiment to match the occasion. It’s a great way to speed up what used to feel like a chore!
The tumbler template is another game-changer. We’ll start by measuring the circumference and height of the tumbler, then adding a little overlap for the seam to make sure your wraps work perfectly without gaps. By marking off a safe area, we’ll create a place where text and focal images will always stay visible without rotating the cup.
This kind of foresight means your designs look polished and intentional! You can swap out backgrounds, try out different color palettes, and drop in your own images without worrying about alignment. For anyone who has ever struggled with uneven seams or cut-off designs, this is one of those Canva tools that can revamp your process for the better.
The printable tracking sheet might be my favorite though, because it goes beyond decoration and into the realm of organization, which I absolutely love.
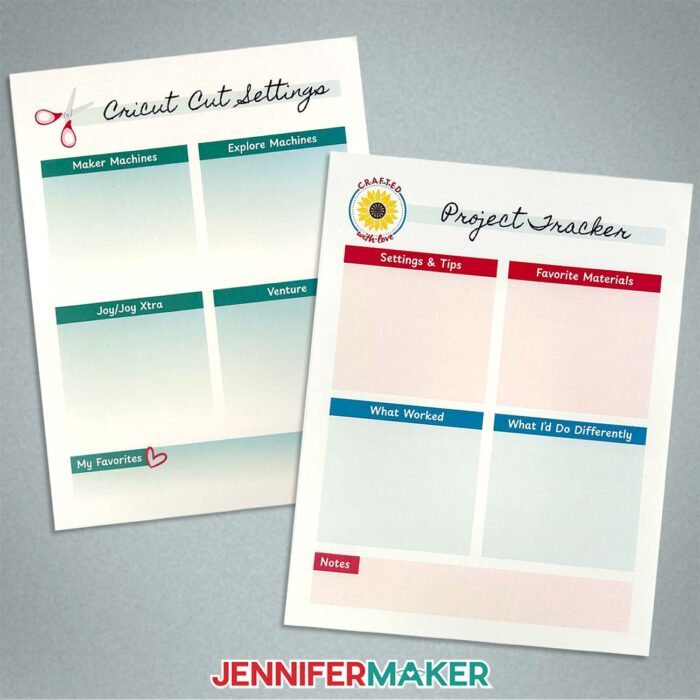
Using a custom size in Canva of 8.5″ by 11″ to match the size of the letter paper I’ll use, I’ll show you how to set up margin guides, title bars, section boxes, and placeholders that can be duplicated and reused for any specific project you’re working on. It’s fast design at its best, leaving you with a professional-looking layout that feels tailor-made for your needs.
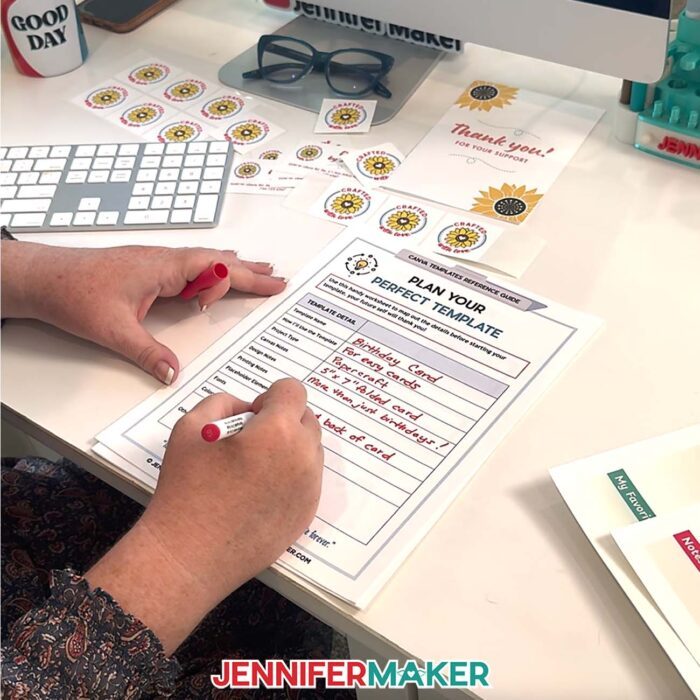
Once you’ve got the hang of creating these templates, it’s time to start designing your own! Inside my free download folder, you’ll find a Plan Your Perfect Template sheet to help keep you organized while you create. Instead of guessing sizes or trying to remember where you put those fold lines last time, you just jot it all down right here: measurements, margins, even the design elements you want to include. Then, when you sit down in Canva, everything’s ready to go!
And if you’re tired of fiddling with margins or resizing shapes every time you start fresh with a new project, you’ll love the Canva Templates Reference Guide. It’s another part of the free download for this project, and it’s like having Canva cheat codes by your side with recommended sizes, setup reminders, and smart tips.

What I love most about working with Canva templates is how flexible they are. Canva users of every level can take advantage of this design tool, whether you’re just starting out or you’ve been crafting for years.
Would you like to design your own coordinating set of Canva templates? I have a workshop just for you in my ADVANCE program. Inside the workshop, I’ll show you how to turn a single design into a whole coordinated kit of templates with matching colors, styles, and layouts!
You’ll learn how to adapt one template theme across different sizes, build a color palette that works every time, and customize Canva features to fit your specific needs. It’s the next step for Canva users who want professional-looking designs without spending a lot of time, and it’s exclusive to my Advance members. Learn more about ADVANCE with JenniferMaker here!
Of course, Canva offers countless free elements that make experimenting fun and simple. You can upgrade to a Canva Pro account if you want more fonts, stock photos, or advanced features, but it’s not necessary! With just the free Canva account, you can put together high-quality designs that rival what professional designers create.
For me, the best part is knowing I can sit down, open the Canva website, and within minutes have a design ready for printing, sublimation, or sharing online. No more second-guessing sizes or wasting paper because the margins were off. Since we’re already investing the time once in setting up templates, now every future project can benefit!
Once you’ve got your foundation in place, you’ll wonder how you ever managed without it. The fun part is seeing just how far you can take it. Add your own images, switch up background colors, play with all of the neat Canva features, and watch your projects evolve into professional-looking designs that feel completely your own!
Let me show you how to make Canva templates! This post contains some affiliate links for your convenience (which means if you make a purchase after clicking a link I will earn a small commission but it won’t cost you a penny more, there is no additional cost)! Read my full disclosure policy.
Materials to Make Projects with Canva Templates
View my Amazon shopping list with the exact items I used for the example projects.
- A Free Canva account
- One (1) 20 oz Straight Side Skinny Sublimation Tumbler
- One (1) Sheet of 8.5″ x 11″ A-SUB 105g Sublimation Paper (for the tumbler)
- One (1) Sheet of 8.5” x 11” Matte Photo Paper (for the tracking sheet or the card) -OR-
- One (1) Sheet of 8.5″ x 11″ 65 lb. White Cardstock (for the card or the tracking sheet)
- 5” x 7” A7 Envelopes (optional for the card)
- Color Inkjet Printer (for the tracking sheet and the card)
- Sublimation Printer – I used a converted Epson EcoTank ET-2800
- Inkjet Printer (for the tumbler)
- Sublimation Ink (for the tumbler)
- Sublimation-Specific Convection Oven (for the tumbler)
- Oven Thermometer (for use with the convection oven)
- Silicone Mat (for use with the convection oven)
- Fan (for ventilation during sublimation)
- Heat-Resistant Gloves (for sublimation)
- Heat-Resistant Tape (for sublimation)
- Heat Shrink Wrap Sleeves (if your tumblers don’t come with them)
- Heat Gun (for use with the shrink wrap sleeves)
- Looped Tape Measure (for the tumbler)
- Cooling Rack (for the tumbler)
- Isopropyl Alcohol -AND-
- Lint-Free Cloth (for cleaning the tumbler)
- Scraper
- Scissors
- Paper Trimmer
How to Make Canva Templates!

How to Make Canva Templates
Learn how to make Canva templates for cards, tumblers, and project tracking sheets!
Materials
- One (1) 20 oz Straight Side Skinny Sublimation Tumbler
- One (1) Sheet of 8.5" x 11" A-SUB 105g Sublimation Paper (for the tumbler)
- One (1) Sheet of 8.5” x 11” Matte Photo Paper (for the tracking sheet or the card) -OR-
- One (1) Sheet of 8.5" x 11" 65 lb. White Cardstock (for the card or the tracking sheet)
- 5” x 7” A7 Envelopes (optional for the card)
- Design #761 (My free Canva Template Planning Worksheet is available in my free resource library - get the password by filling out the form at the bottom of this page)
Tools
- A Free Canva account
- Color Inkjet Printer (for the tracking sheet and the card)
- Sublimation Printer – I used a converted Epson EcoTank ET-2800 Inkjet Printer (for the tumbler)
- Sublimation Ink (for the tumbler)
- Sublimation-Specific Convection Oven (for the tumbler)
- Oven Thermometer (for use with the convection oven)
- Silicone Mat (for use with the convection oven)
- Fan (for ventilation during sublimation)
- Heat-Resistant Gloves (for sublimation)
- Heat-Resistant Tape (for sublimation)
- Heat Shrink Wrap Sleeves (if your tumblers don’t come with them)
- Heat Gun (for use with the shrink wrap sleeves)
- Looped Tape Measure (for the tumbler)
- Cooling Rack (for the tumbler)
- Isopropyl Alcohol -AND-
- Lint-Free Cloth (for cleaning the tumbler)
- Scraper
- Scissors
- Paper Trimmer
Instructions
STEP 1: GET MY FREE CANVA TEMPLATE PLANNING WORKSHEET
First, download my free Canva Template Planning Worksheet from my free library – look for Design #761. Alternatively, you can use the Save This Project form near the top of this post and the download link will be emailed to you.
In the zip folder, you’ll find my Canva Templates Reference Guide PDF with tips and tricks to help you create reusable templates. It even includes a handy worksheet where you can write down your template’s details.
Plus, there’s a “Crafted With Love” PNG you are welcome to use! I’ll show you how to use it to mark the back of a card and as the focus on a sublimation tumbler, but you can use it any way you like for personal projects.
TIP: If you’re not sure how to unzip the download file, go to jennifermaker.com/svgs to learn how. The process is similar for PDF and PNG files.
STEP 2: CREATE YOUR TEMPLATE IN CANVA
EXAMPLE 1: CREATE A FOLDOVER CARD TEMPLATE IN CANVA
CREATE YOUR 5” x 7” FOLDOVER CARD TEMPLATE
- To get started, open your computer’s browser and go to jennifermaker.com/canva.
NOTE: If you’re new to Canva, check out my Canva for Beginners tutorial. - Either sign in to your account or follow the prompts on the screen to sign up for a free account.
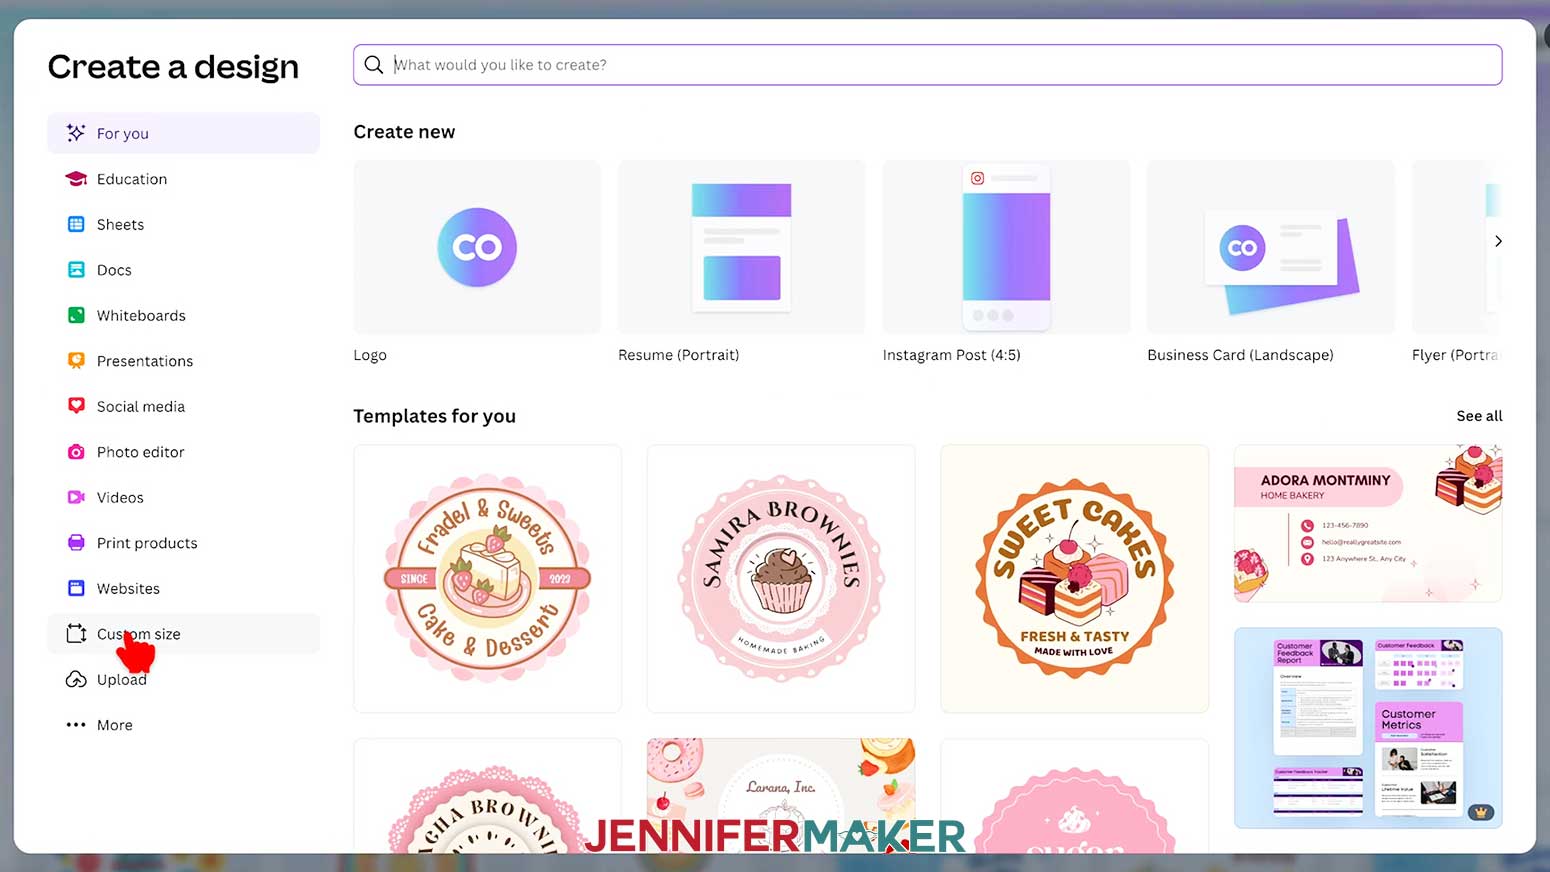
NOTE: Canva does offer paid subscriptions with more tools and elements, but I’ll show you how to do everything with the free account. - On the Canva Home screen, click the “Create a design” button.
TIP: Depending on your view, the button may just say “Create.” - Click “Custom size” to set the dimensions of your canvas.

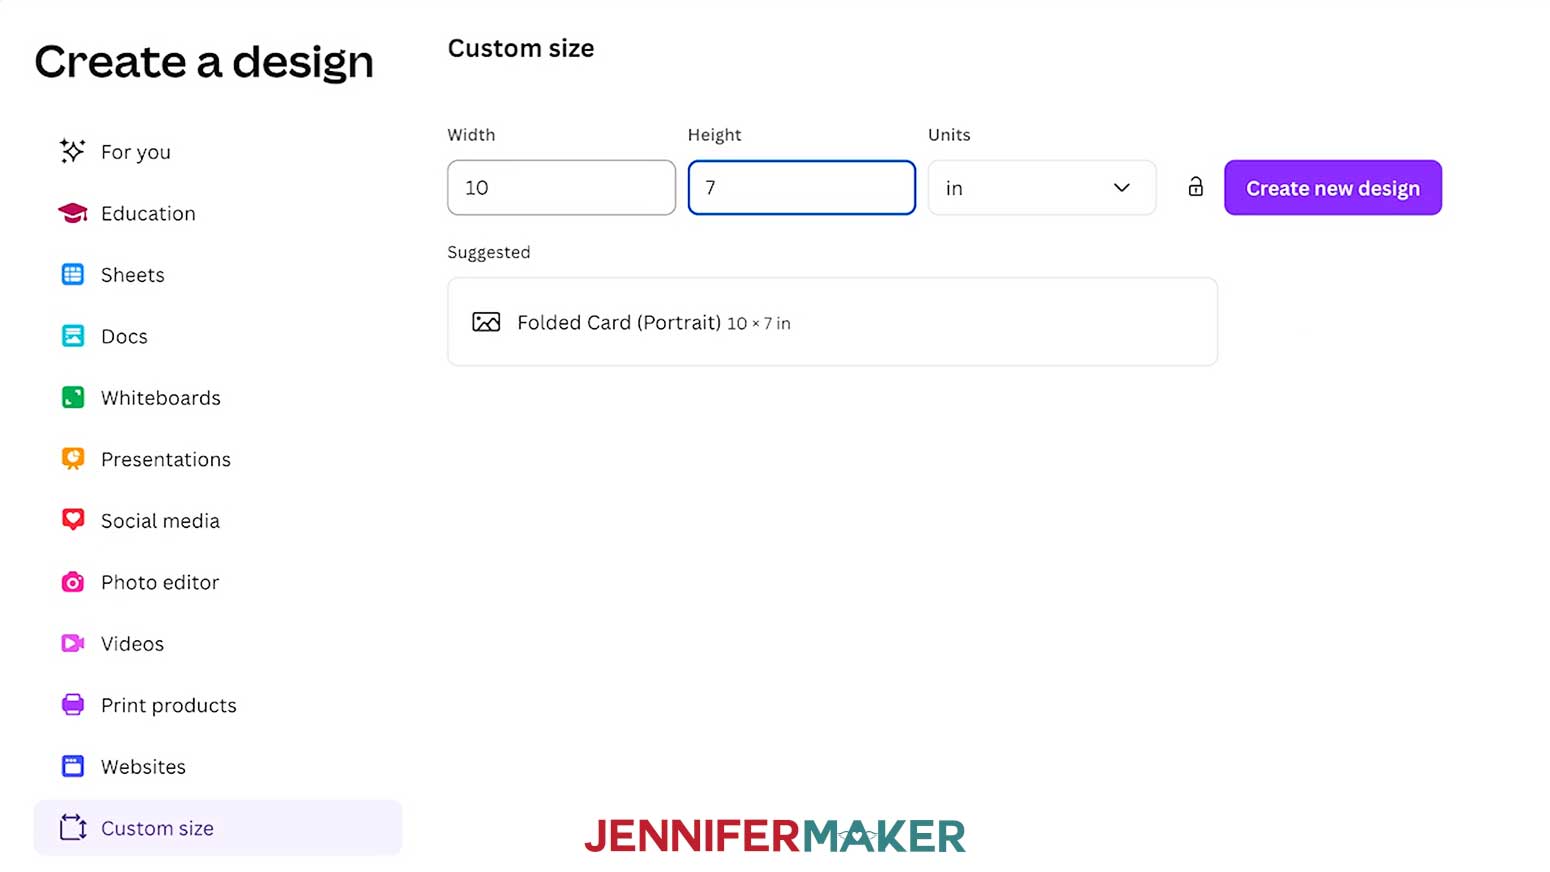
- In the “Units” box, click the dropdown menu and select “in” for inches.
- To find the dimensions for a 5” x 7” portrait card template, first multiply your card’s width by two so it’s the correct size when folded in half. Enter that value in the “Width” field.
NOTE: I’ll enter "10" in the “Width” field. - Then enter the card’s height in the “Height” field.
NOTE: I’ll enter "7” in the “Height” field. - Then click “Create new design.”
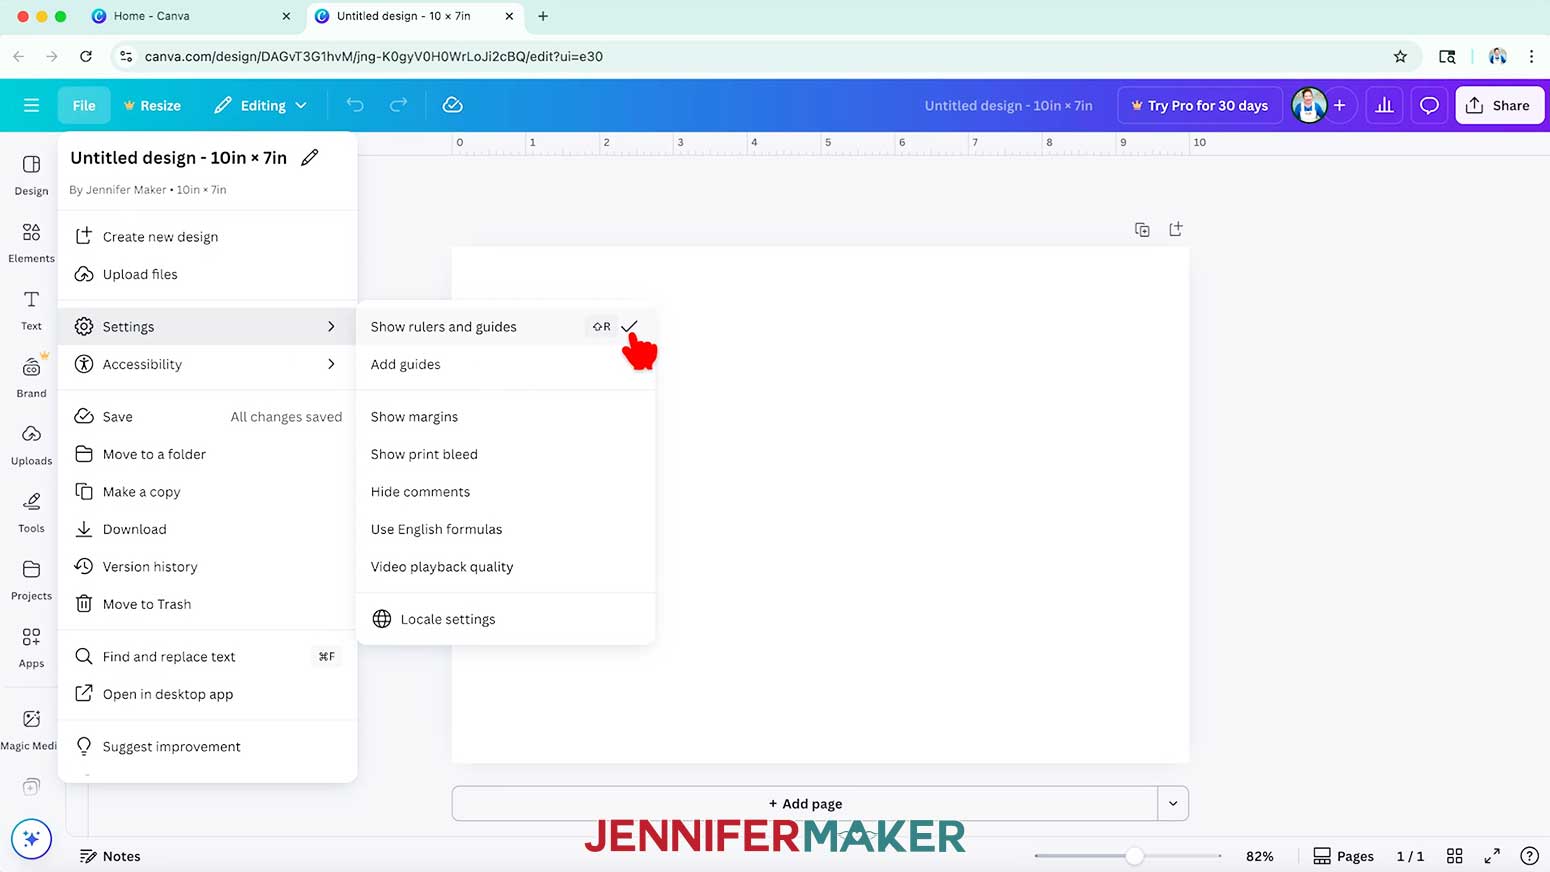
- Click on “File,” hover over “Settings,” and make sure “Show rulers and guides” has a checkmark beside it.
- Then click on “File,” hover over “Settings,” and make sure “Show print bleed” has a checkmark, too.
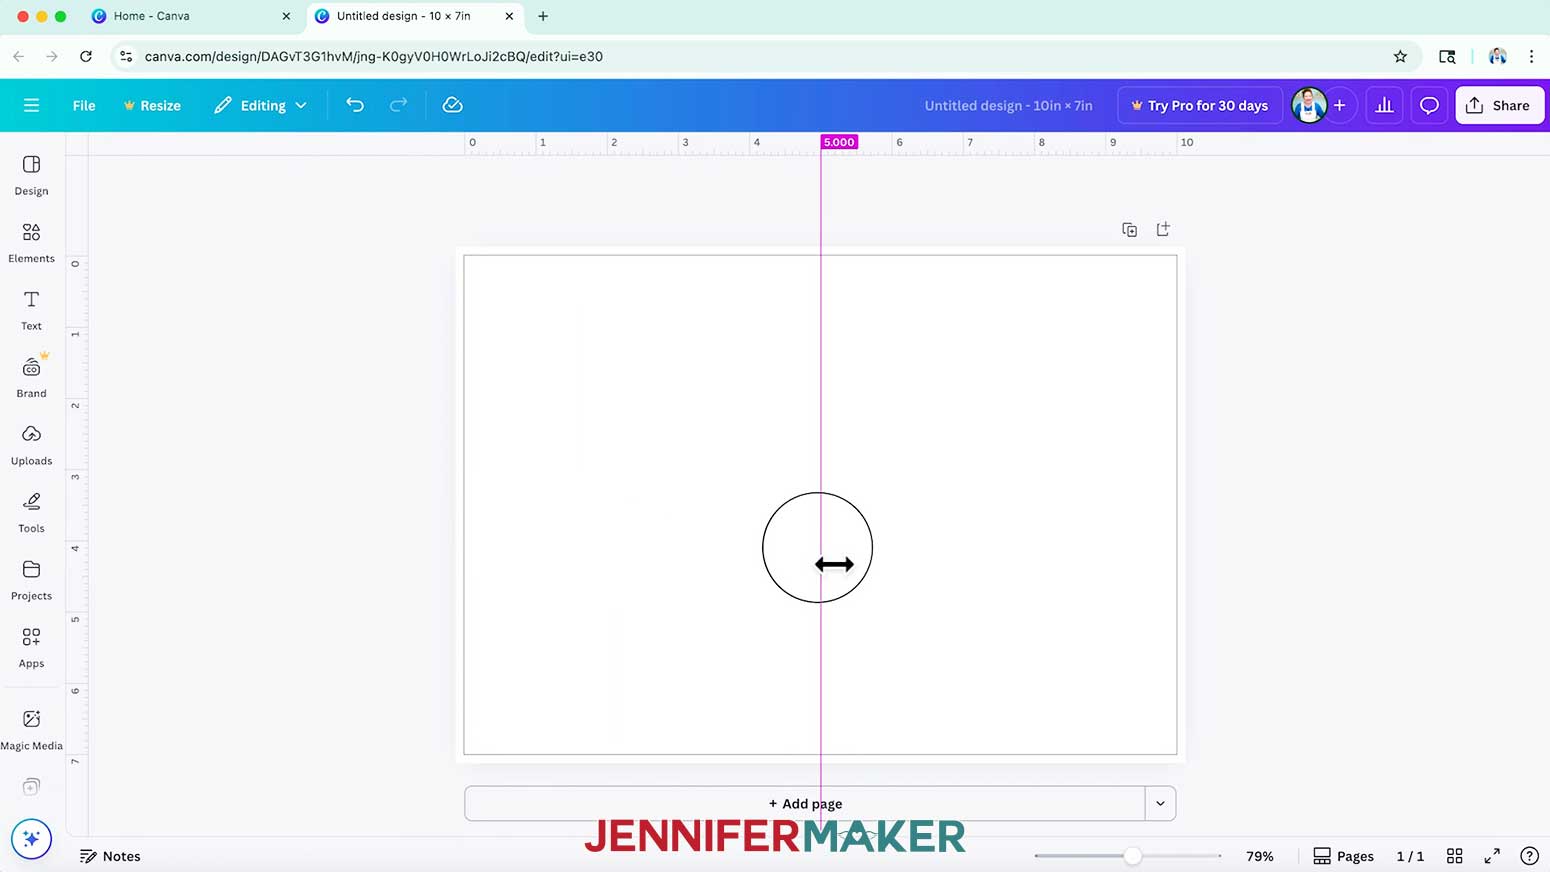
NOTE: This adds a ⅛” bleed area for extra ink around your canvas to prevent white edges when trimming your card after printing. - To add guides to help plan designs, click and drag from the left ruler until the purple measure box reads 5” (or the purple guide turns pink and snaps in the center) to set your card’s fold guide.
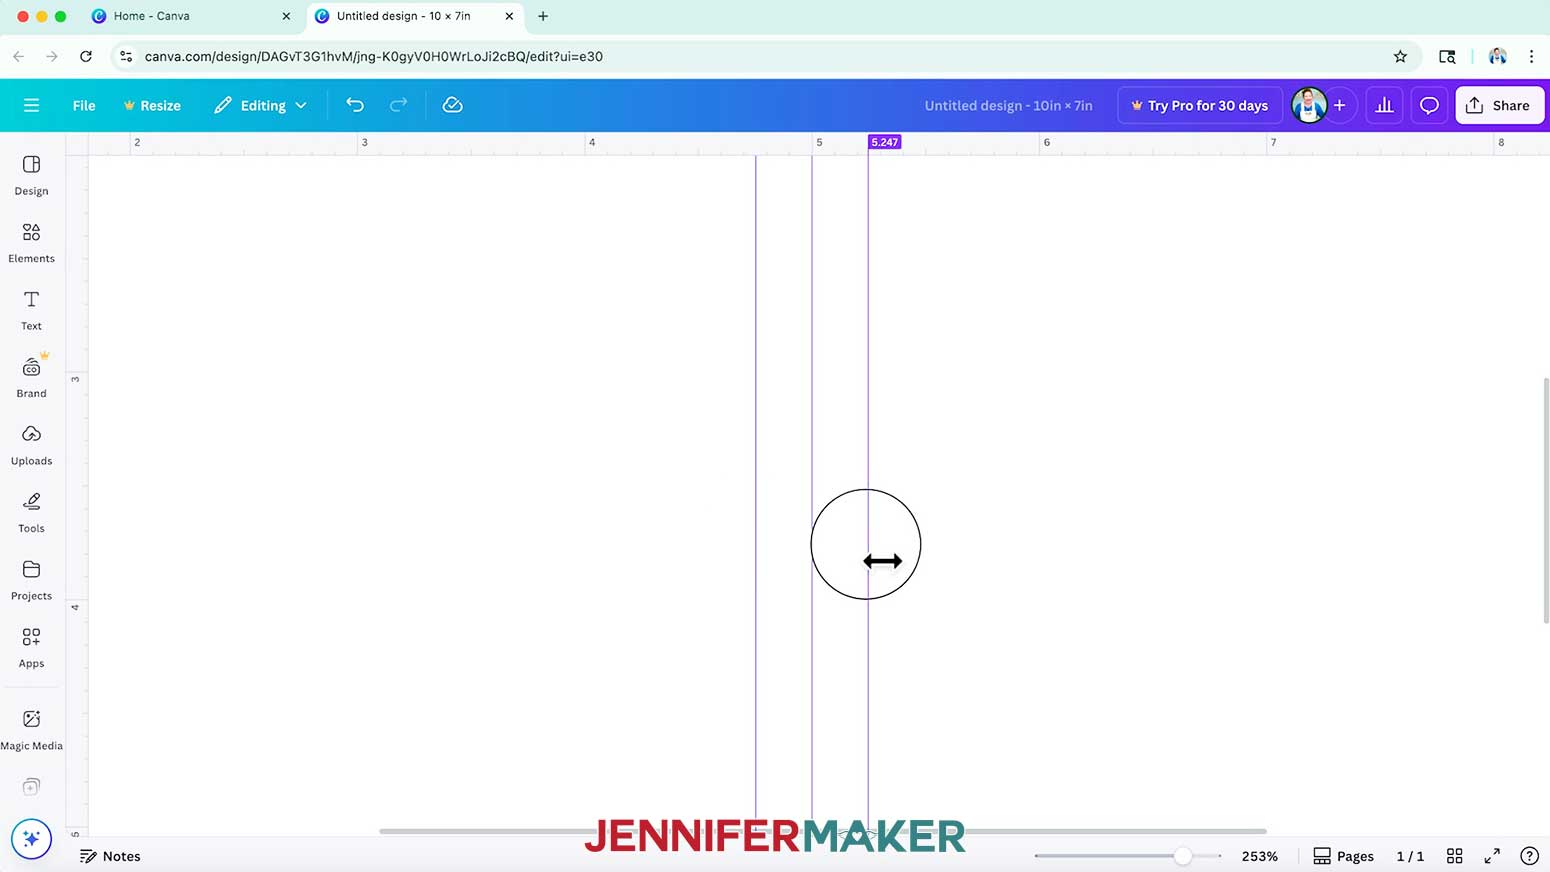
- Use the same process to set guides a quarter inch from both sides of your fold guide, at 4.75” and 5.25” from the left ruler (these ones won’t turn pink and snap in place), to keep important parts of your design away from the fold.
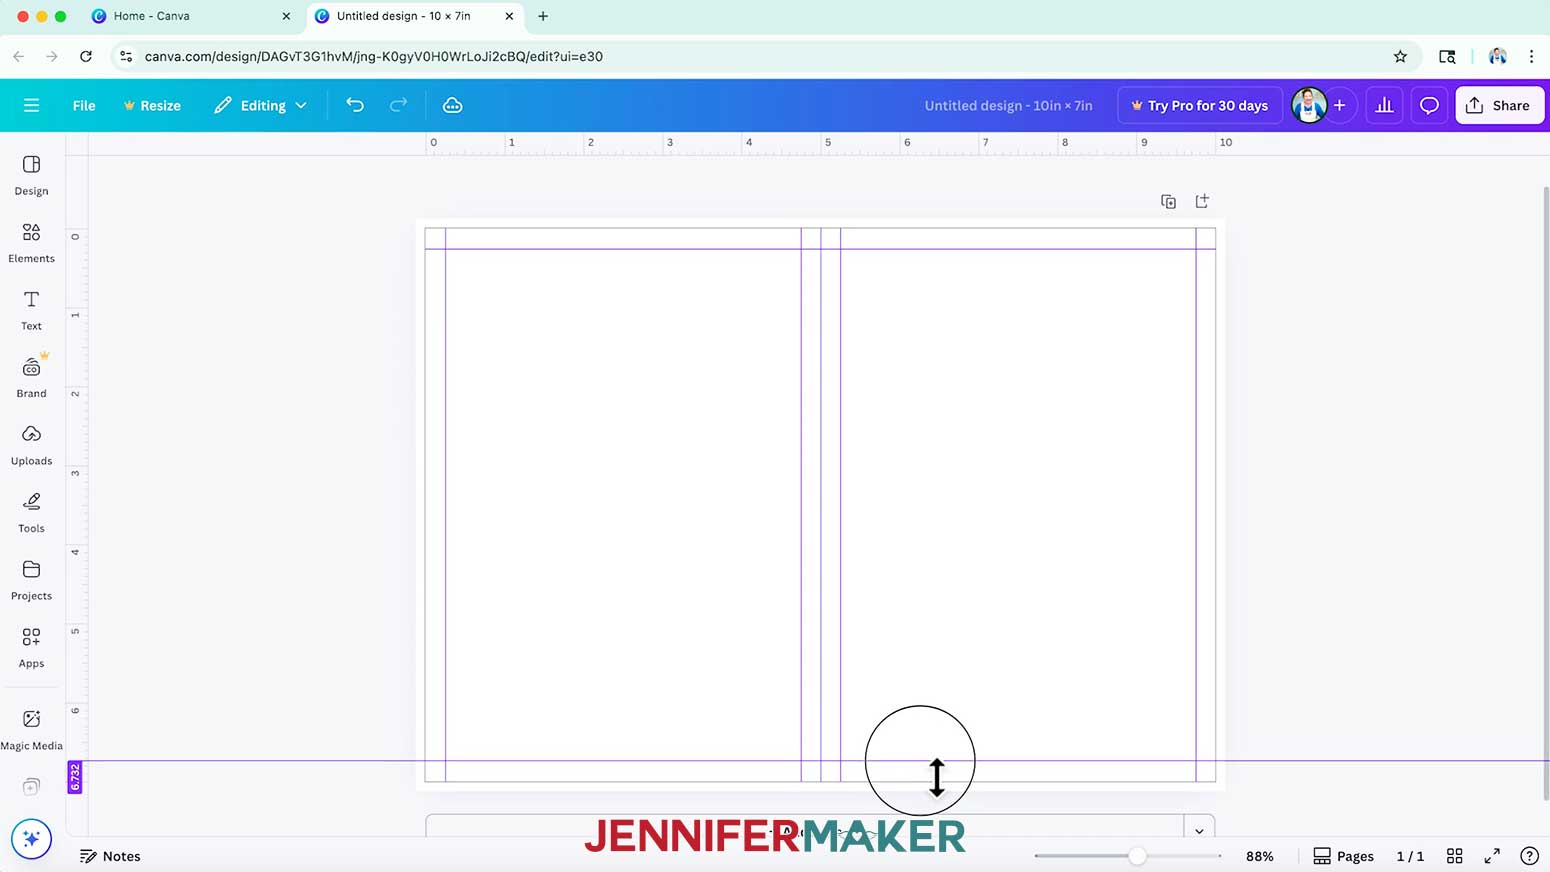
TIP: It can be difficult to get exact measurements for guides in Canva, so just do your best to place each guide close to the right spot. Zooming in helps! - Set quarter-inch guides around your canvas to keep important parts of your design away from the edges. They should be at or close to 0.25” and 9.75” from the left ruler, and 0.25” and 6.75” from the top ruler.
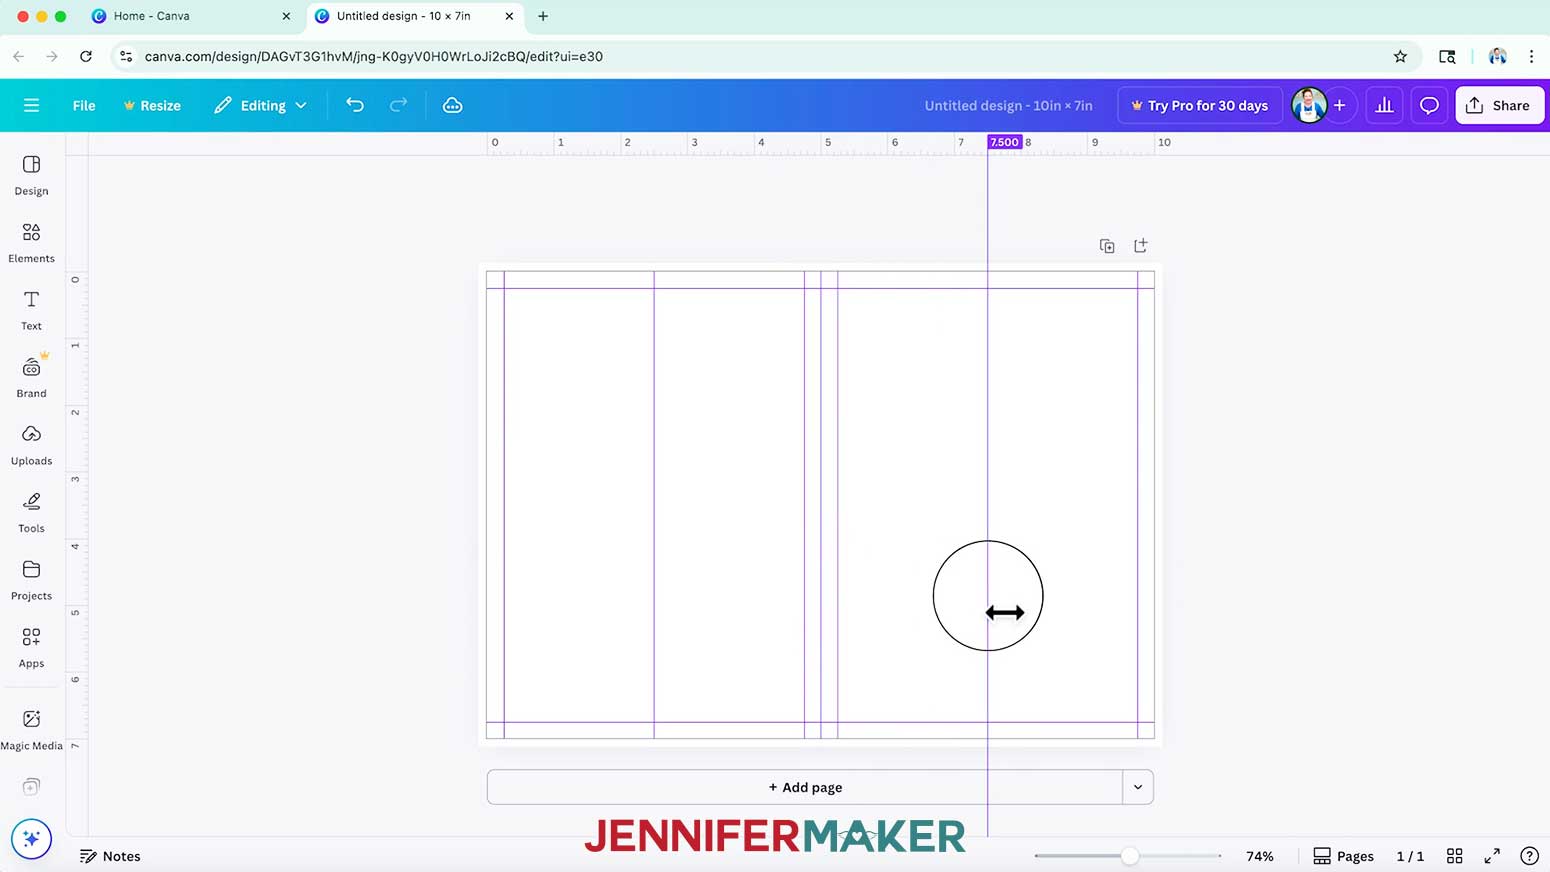
- Set vertical center guides for both sides of the card, at 2.5” and 7.5” from the left ruler, to easily center items on the card’s front and back sides.
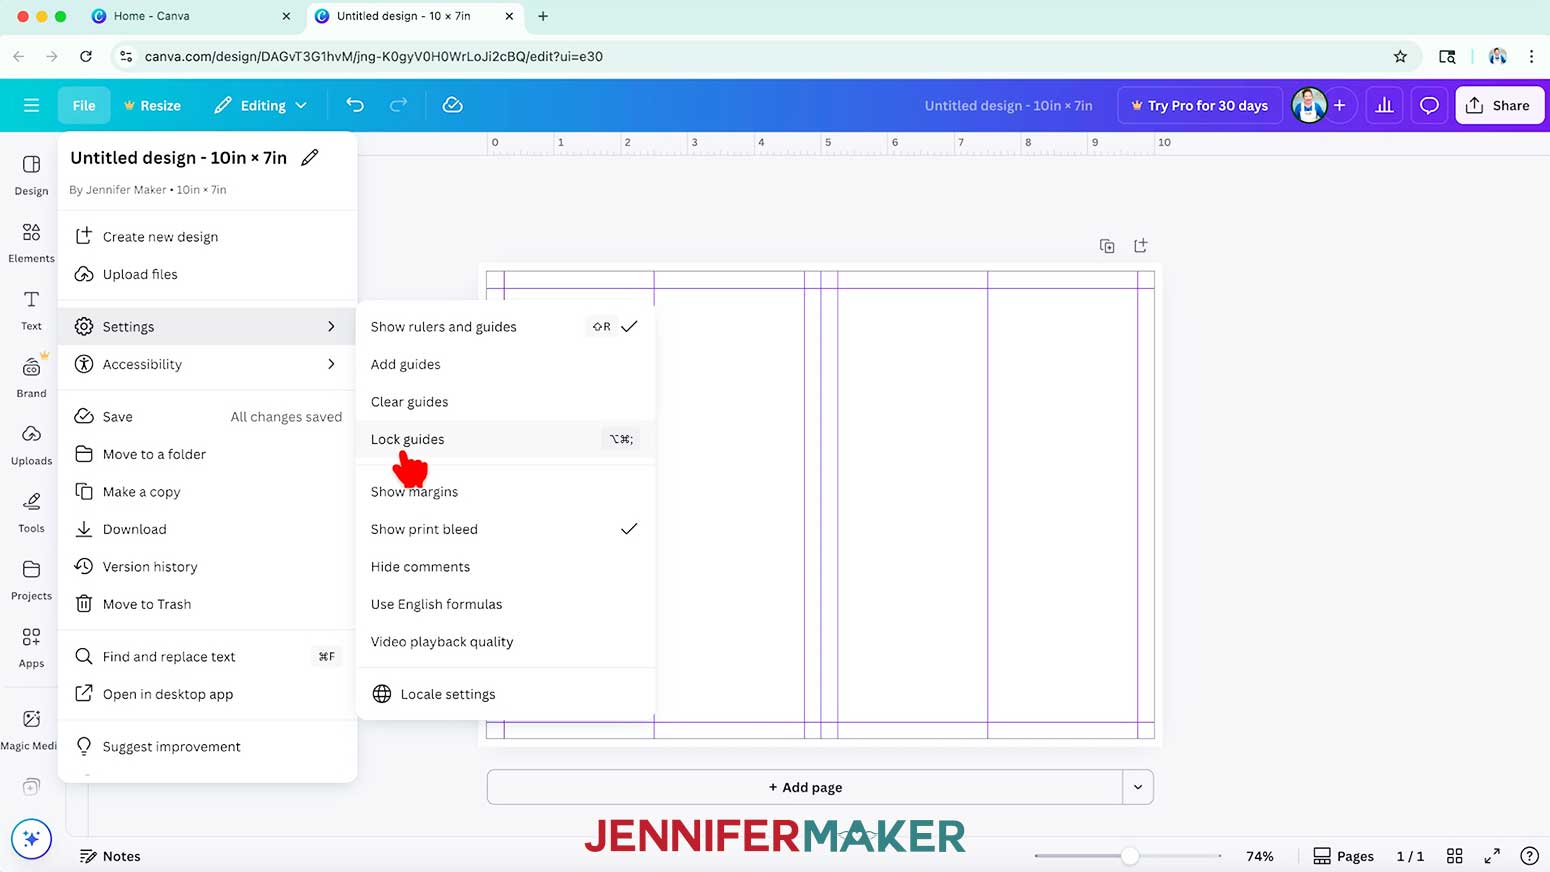
- Once your guides are in place, go to “File,” hover over “Settings,” and select “Lock guides” to avoid shifting them by accident.
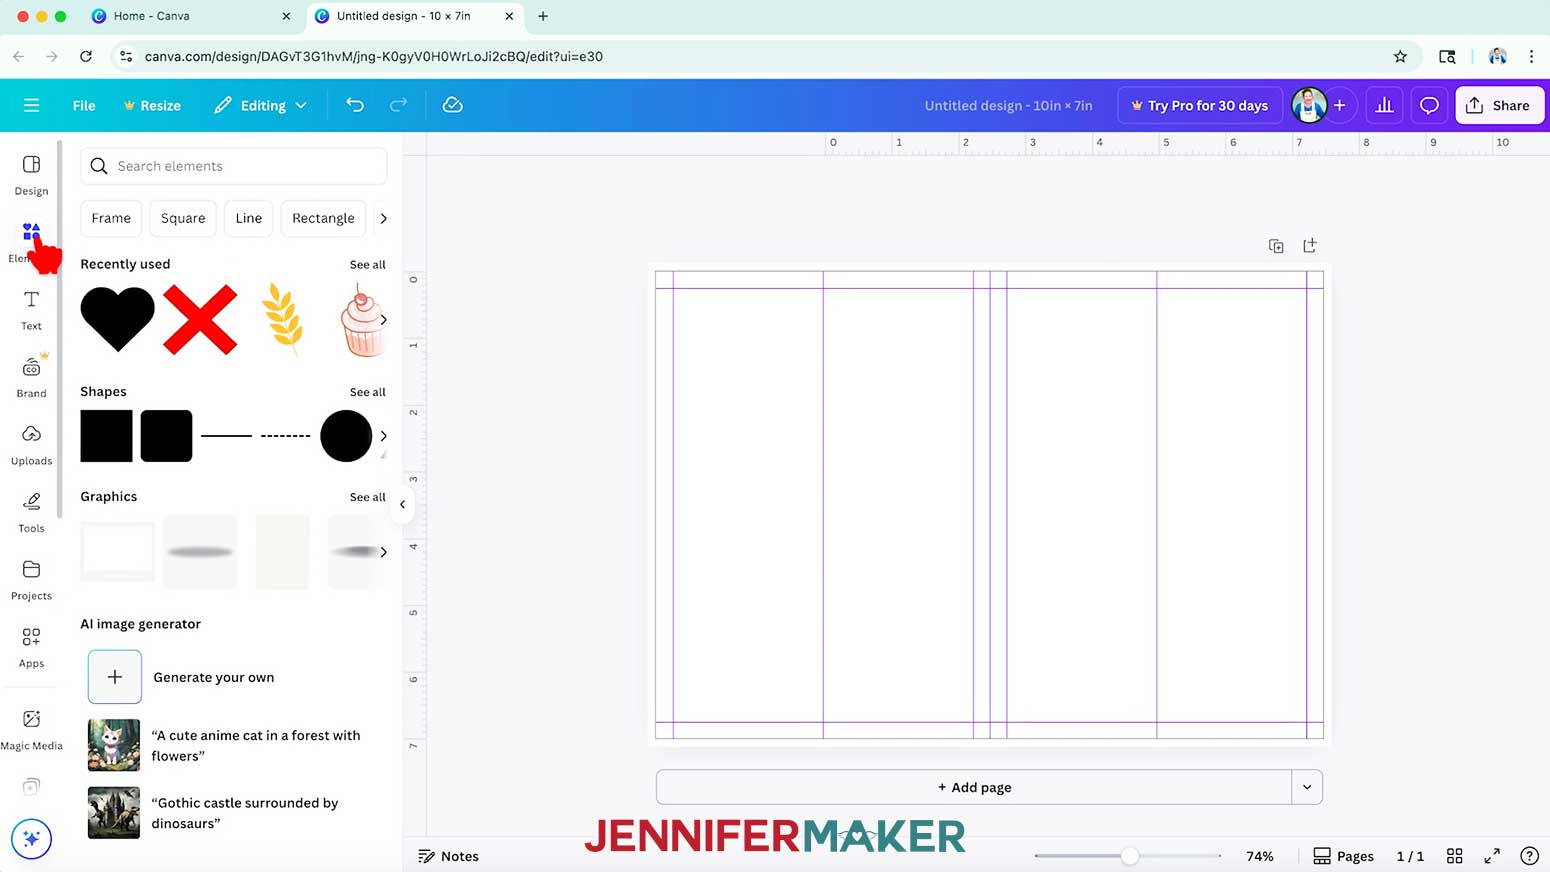
- Visible references can help you remember important information when you use this template later on. To add a black line where your fold will be, click on “Elements” to browse Canva’s image collection.
NOTE: Items with a crown are Canva Pro items. You’ll need to purchase them individually or sign up for a paid membership to download images using these elements. - Then click on “See all” beside “Shapes” to see line and shape options.
- Click the free solid line element to add it to your canvas.
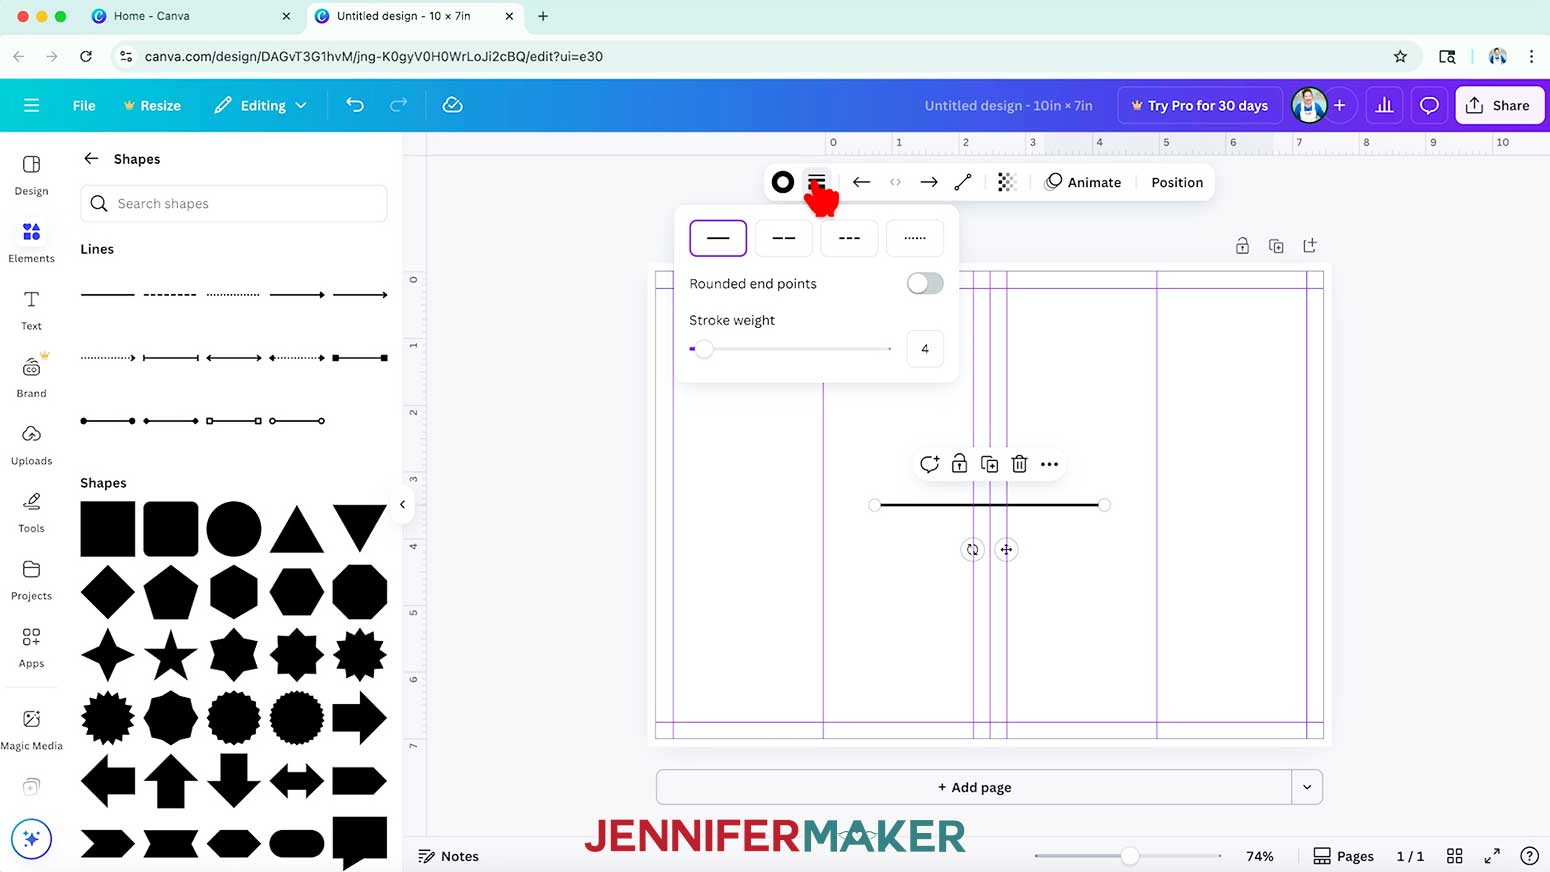
- Select the line and click the “Stroke Style” icon to change how the line looks, and adjust the “Stroke weight” to change the line’s thickness.
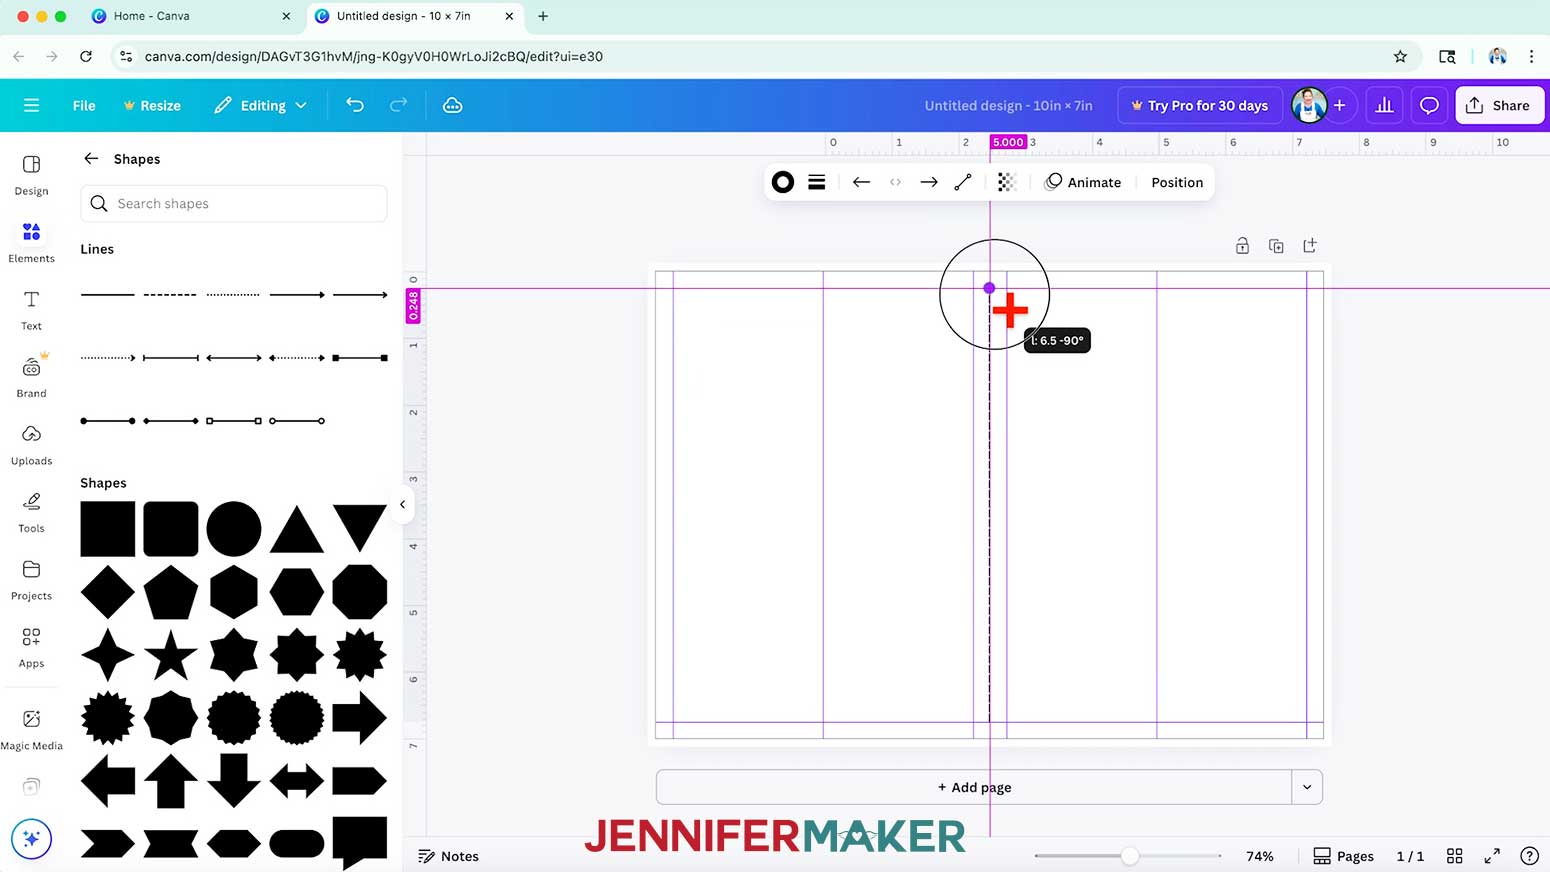
NOTE: I’ll choose the long dashed lines style option and set the stroke weight to 2. - Click and drag the curved Rotate arrows that appear outside the element to rotate it 90 degrees, so it's vertical.
- Drag the vertical line over your card’s fold line to snap it to the guide.
- Then drag the handles on both ends of the line to resize it to the same height as your card.
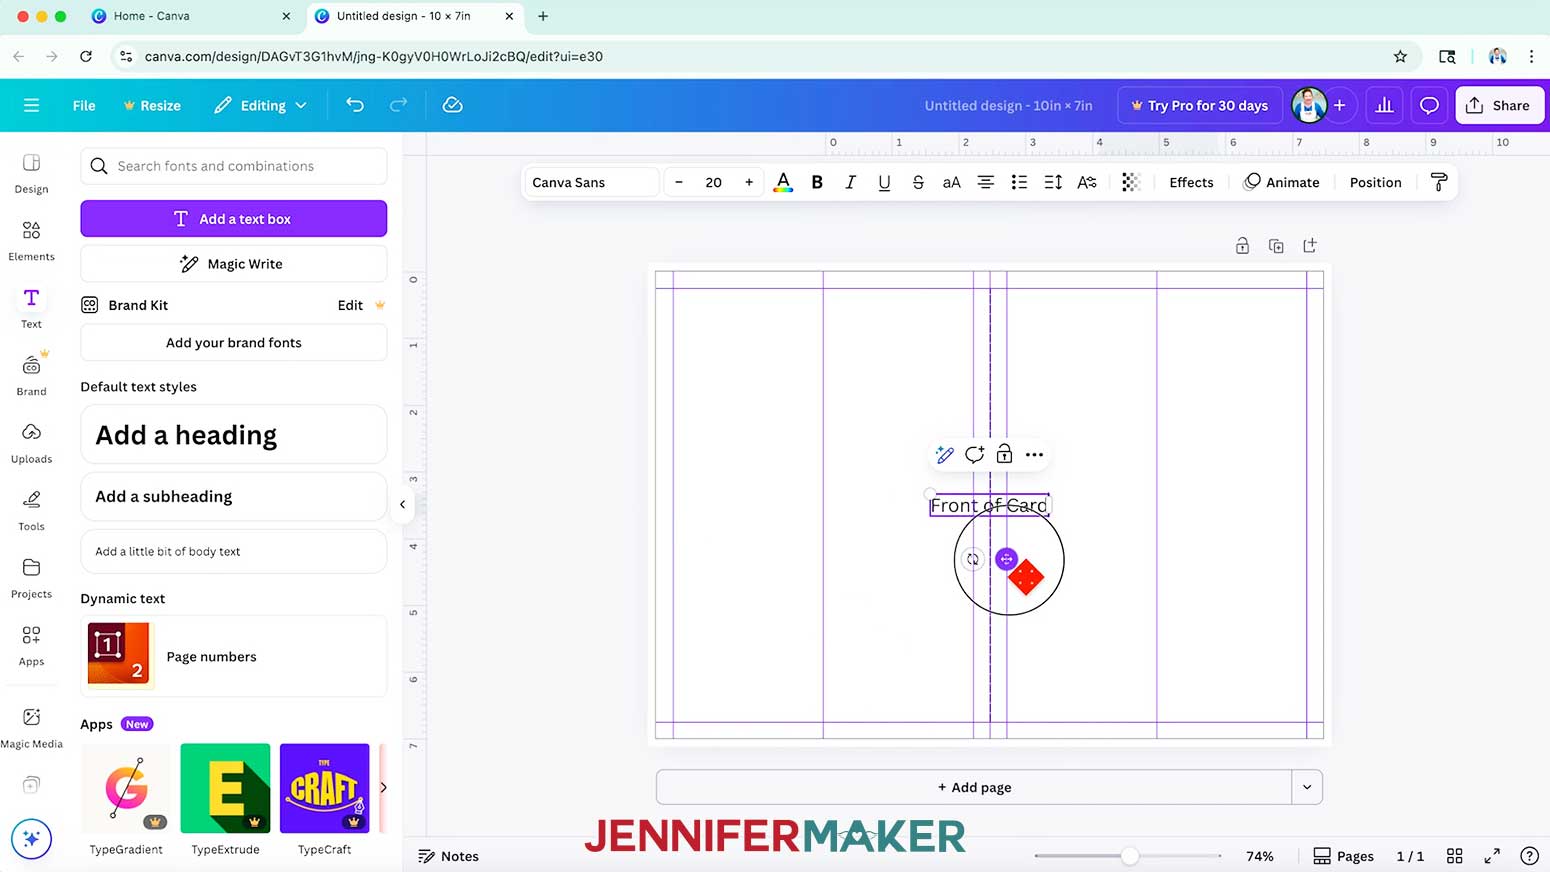
TIP: Click the “Position” button to check the line’s height after resizing to make sure it’s the same as the card. - To add a label to help you remember a section’s purpose, click the “Text” icon in the side panel, then click “Add a text box.”
- Type the label’s text in the box.
TIP: To change text on the Canvas, double-click the text box and press the "Delete" or "Backspace" button on your keyboard. Then, type your new desired text in the box.
NOTE: I’ll type “Front of Card.” - Use the corner Resize handles to adjust the text box’s size as needed.
- Then click and drag the text box to move the label to the appropriate section.
NOTE: I’ll place mine on the card's right side. - To create more labels easily, select the original label and click the “Duplicate” icon in the toolbar above it to create a copy.
- Change the label copy’s text, then move the label into the appropriate section.
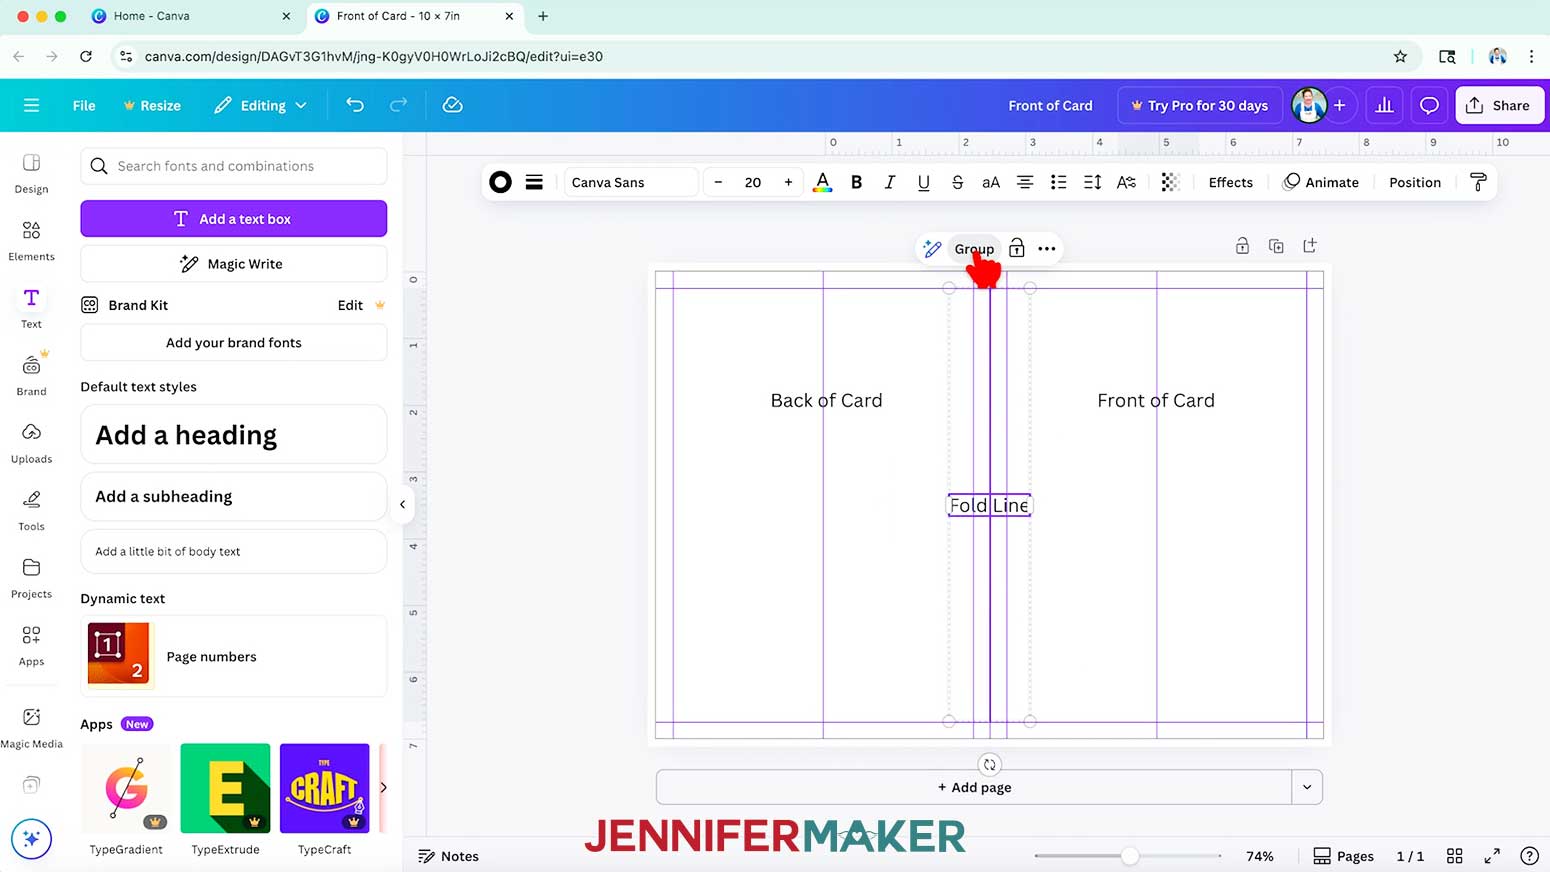
NOTE: I’ll duplicate my first label, change the text to “Back of Card,” and place it on the card’s left side. I’ll also create a “Fold Line” label and place it on the card’s fold line. - To connect a label and a visible element, like the fold line and its label, drag a selection box over both elements and click the “Group” icon to keep them together.
NOTE: This saves time when using the template to create a design later. - To add an image to your template, such as a logo, you can search for Canva elements or use a file from your computer. To use a file from your computer, click on “Uploads” in the side panel, then “Upload files.”
- Select your file and click “Open.”
NOTE: I’ll select the “Crafted With Love” PNG in my design files. - In the Uploads Panel, click the image to add it to your canvas.
- Use the corner Resize handles to adjust the image’s size as desired.
- Then position the image as desired, using the template guides to help with placement.
NOTE: I’ll center my design just above the bottom margin guide on the back of the card. - Click the filename field at the top and replace the current name with your own so you can find your template easily later.
TIP: I recommend including a brief description of your project, the project’s dimensions, and the word “Template” in your title.
NOTE: I’ll change mine to “Foldover 5” x 7” Card Template by JenniferMaker.” - Your card template is ready to use and can be found in your Canva Projects folder whenever you need it!


HOW TO USE YOUR CARD TEMPLATE
NOTE: With a free Canva account, you can’t create a shareable template link. To keep your original file intact and reusable, avoid editing it directly. Instead, make a copy each time you want to use the template. This is the safest way to preserve your template design for future projects.
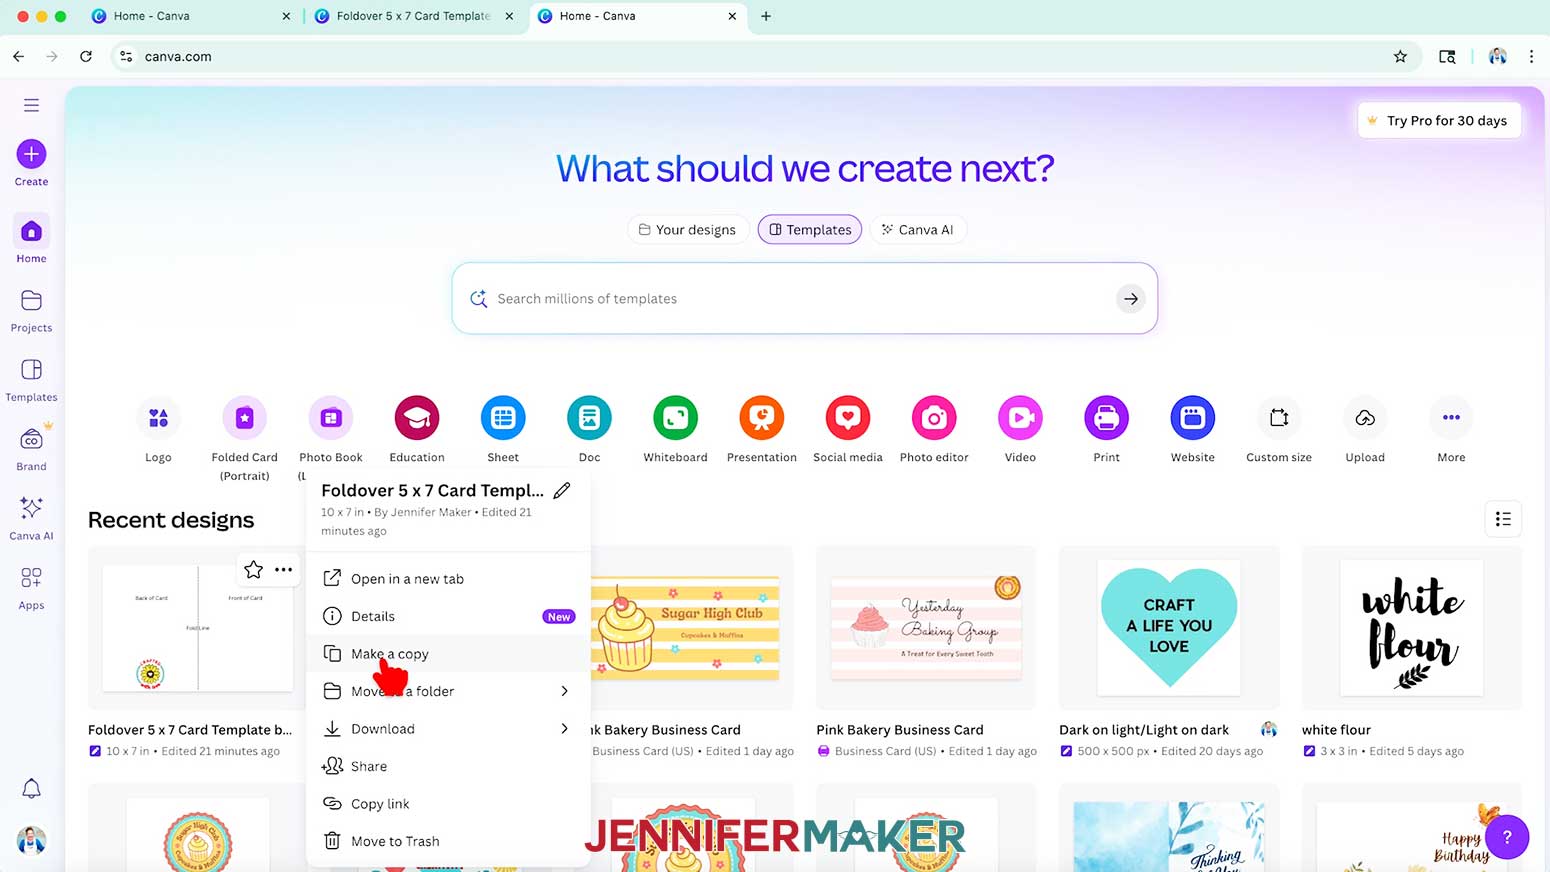
- When you want to use your template, go to your Canva home screen and find it in your Projects tab, or look under "Recent designs."
- Click the three dots in the top right corner, and choose “Make a copy” from the menu.
- Click the copy to open an editable version of your template in a new tab.
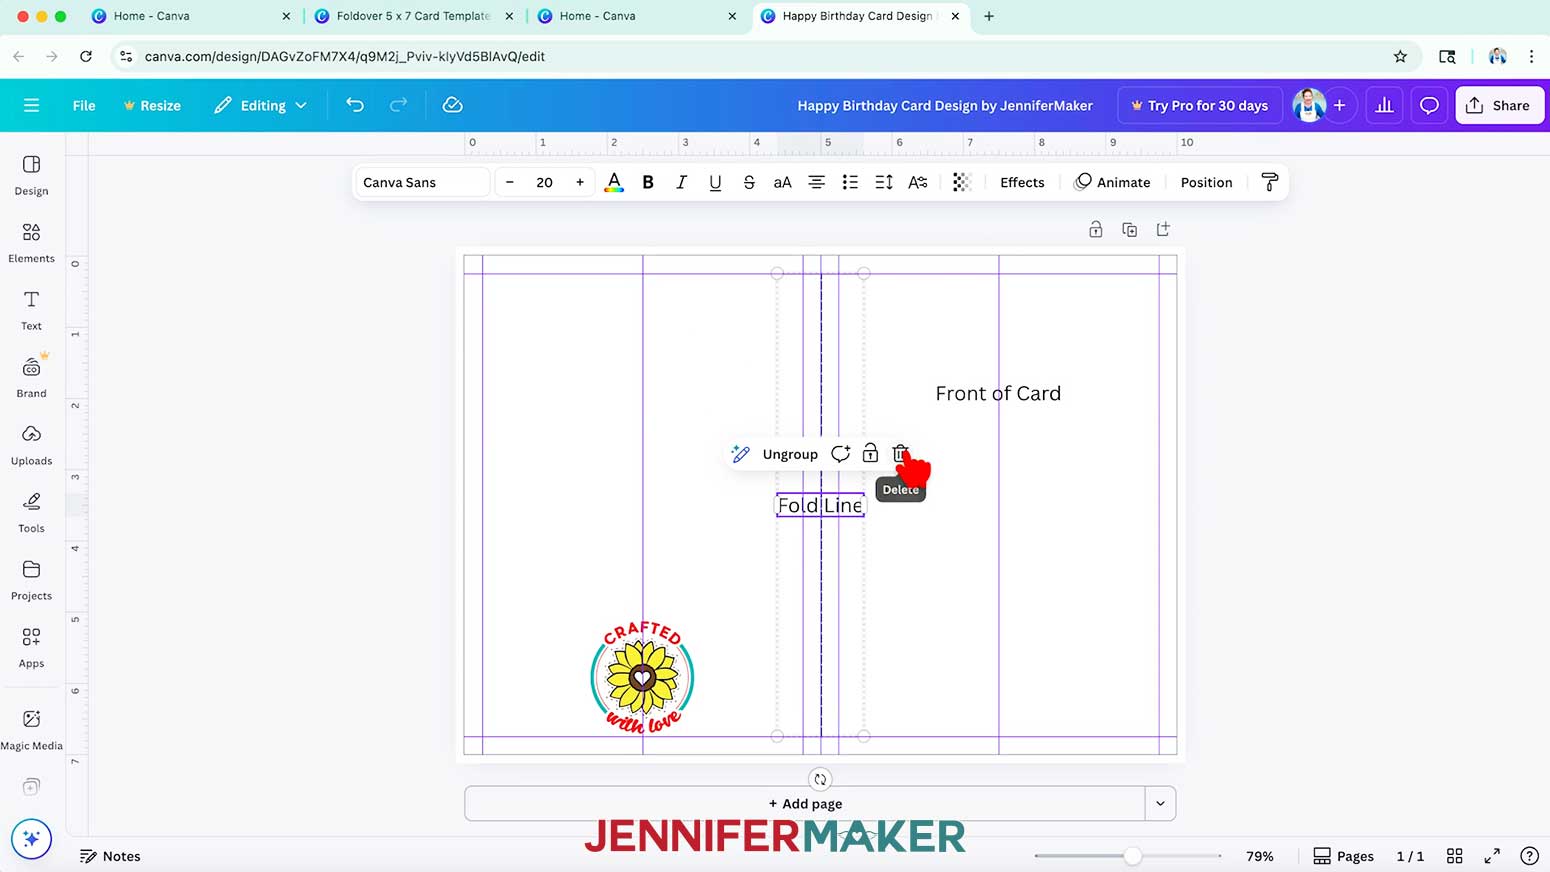
NOTE: The copy will have the words “Copy of” at the beginning of the template name. - Click the filename field at the top and replace the template name with a new project name.
NOTE: I’ll change mine to “Happy Birthday Card Design by JenniferMaker.” - Select the “Fold Line” label and click the “Trash” icon to delete it.
- Delete the “Back of Card” and “Front of Card” labels, too.
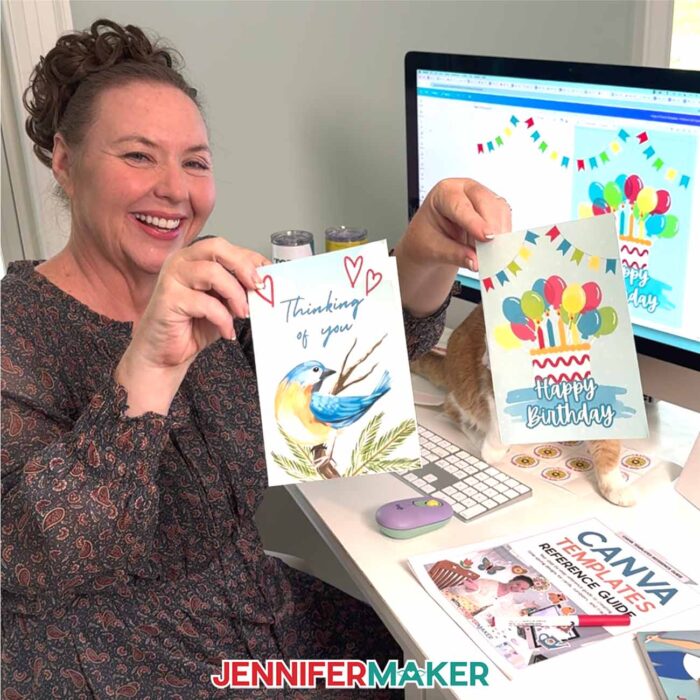
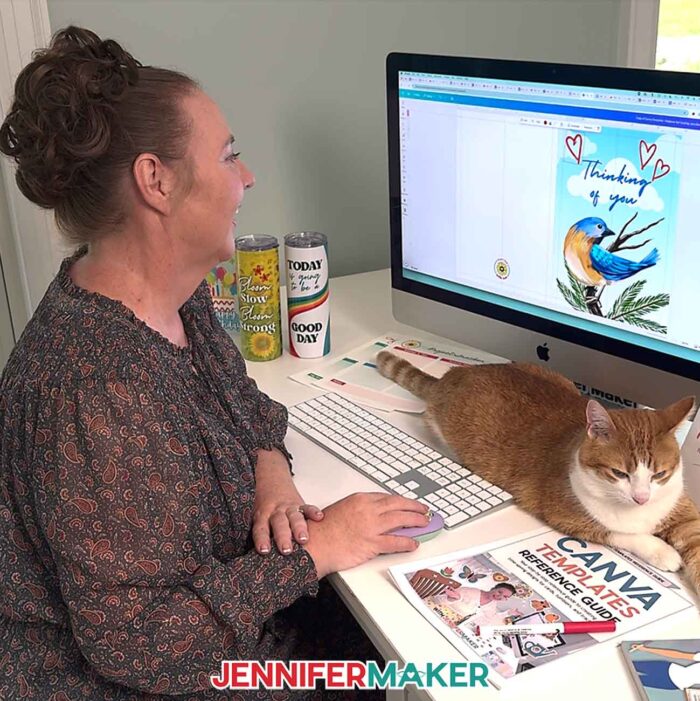
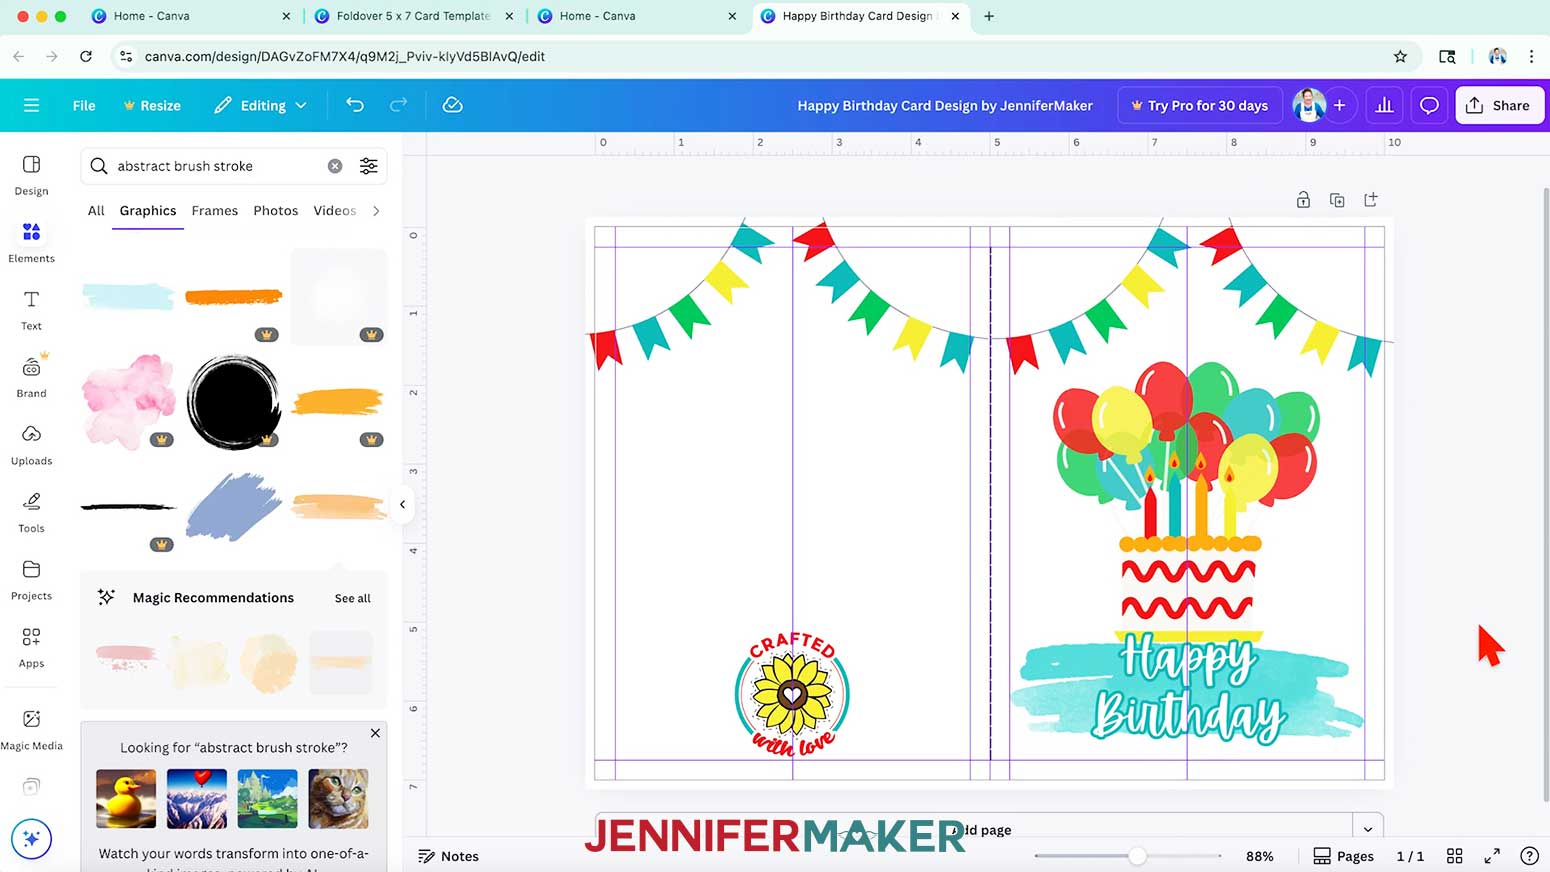
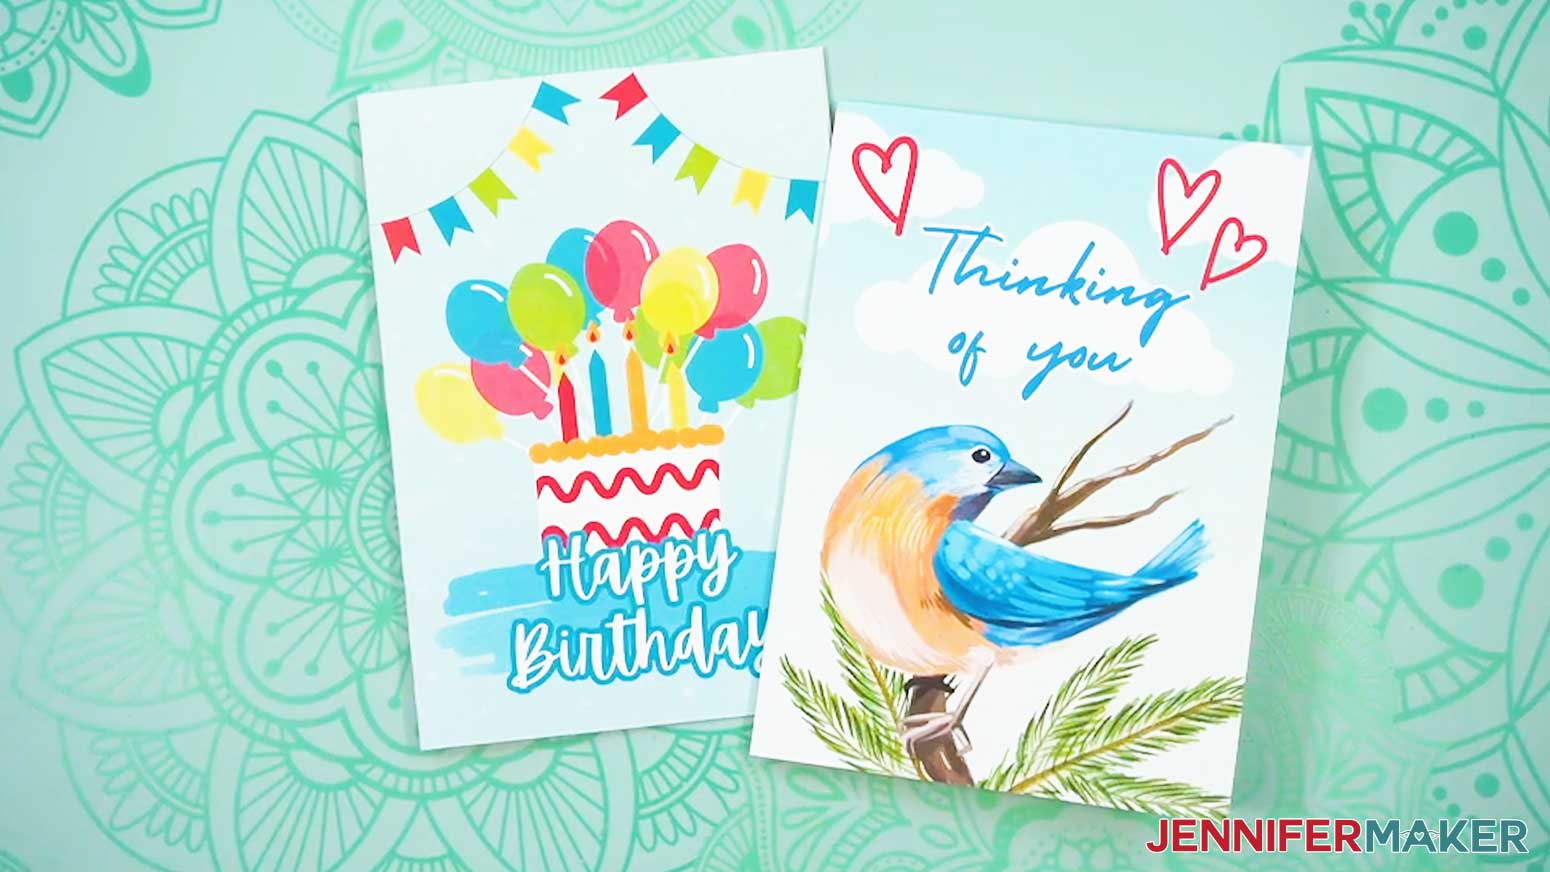
- Then use free Canva tools to add text and graphics to design the front of your card.
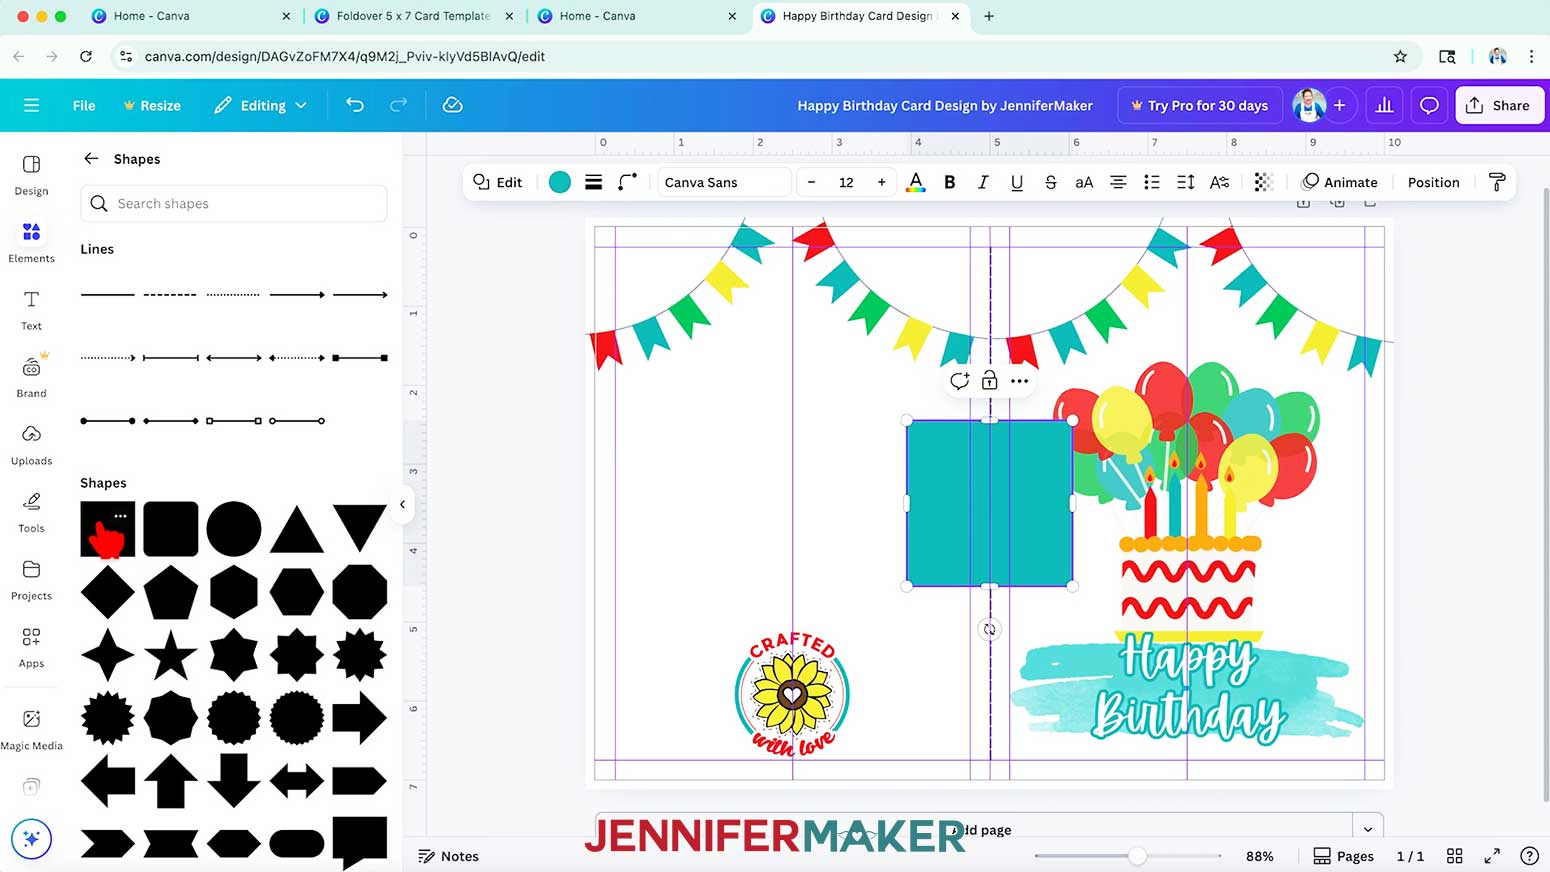
NOTE: I’ll create a “Happy Birthday” design with balloons, banners, and other birthday-themed graphics. You can see a quick overview of how I designed this card in the project video! - To add a background color to your card, click on “Elements,” browse to “Shapes,” and select a free square shape to add it to your canvas.
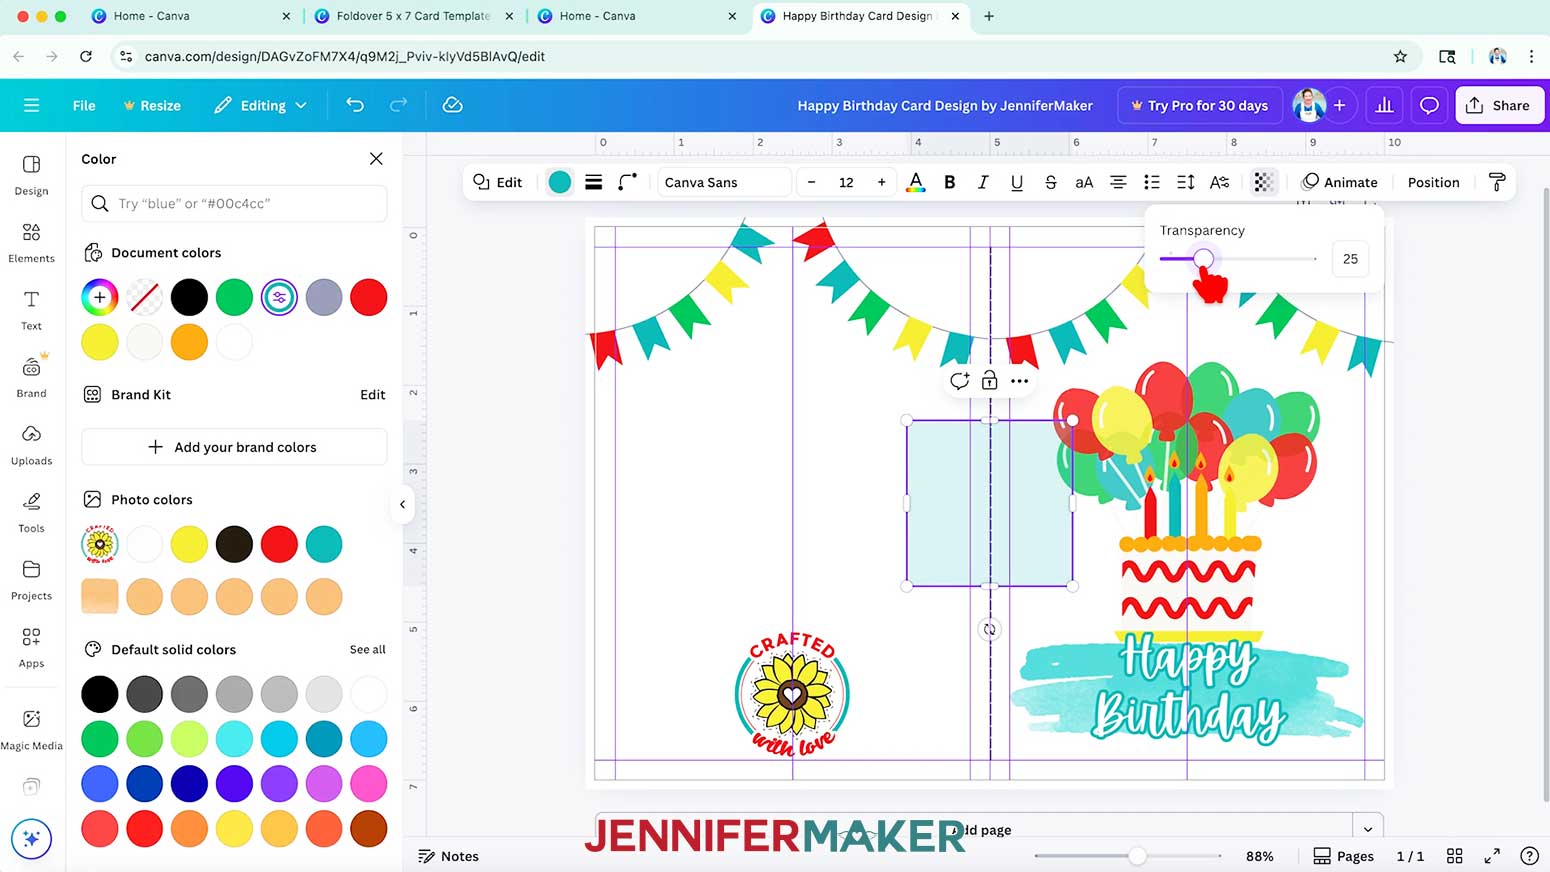
- Select the element and use the color swatch in the top bar to change its color as desired.
- Then click the “Transparency” button and adjust the slider to lighten the color.
NOTE: I’ll set mine to 25. - Place the shape on the side of the card where you want to apply the background, and position it so one side is flush with the fold line.
- Then use the shape’s handles to adjust its size so it fills up the entire area of the card where you want the background, including the bleed area.
TIP: It’s okay if the shape extends past the canvas, as long as it doesn’t extend beyond the fold line.
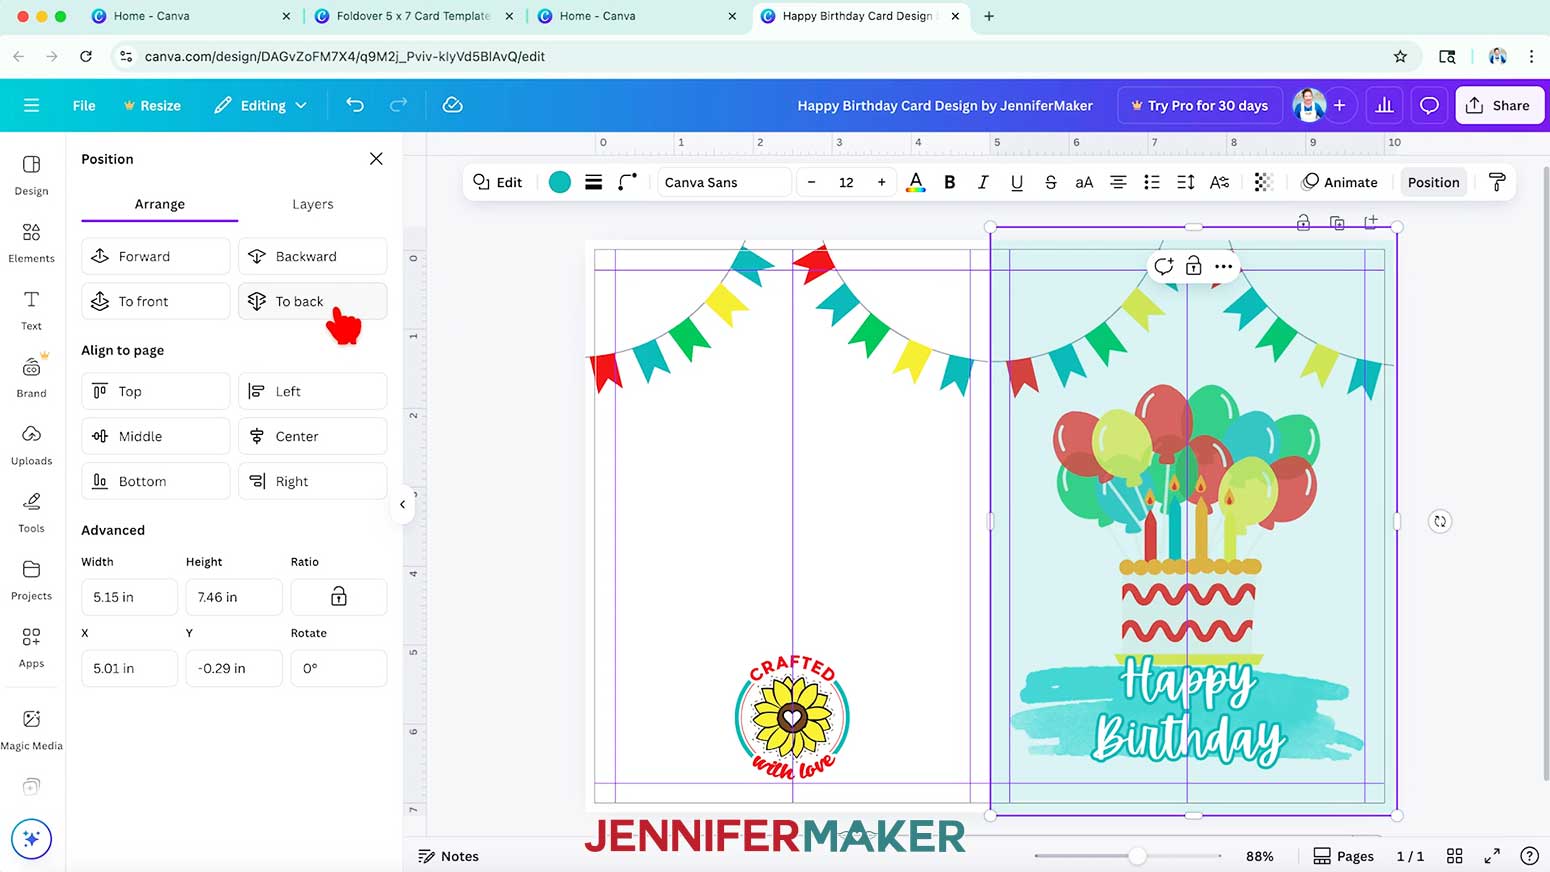
NOTE: I’ll fill up the entire right side of my card. - Then click the “Position” button in the top bar. Under the "Arrange" tab, select “To back” so the background is behind all of your elements.
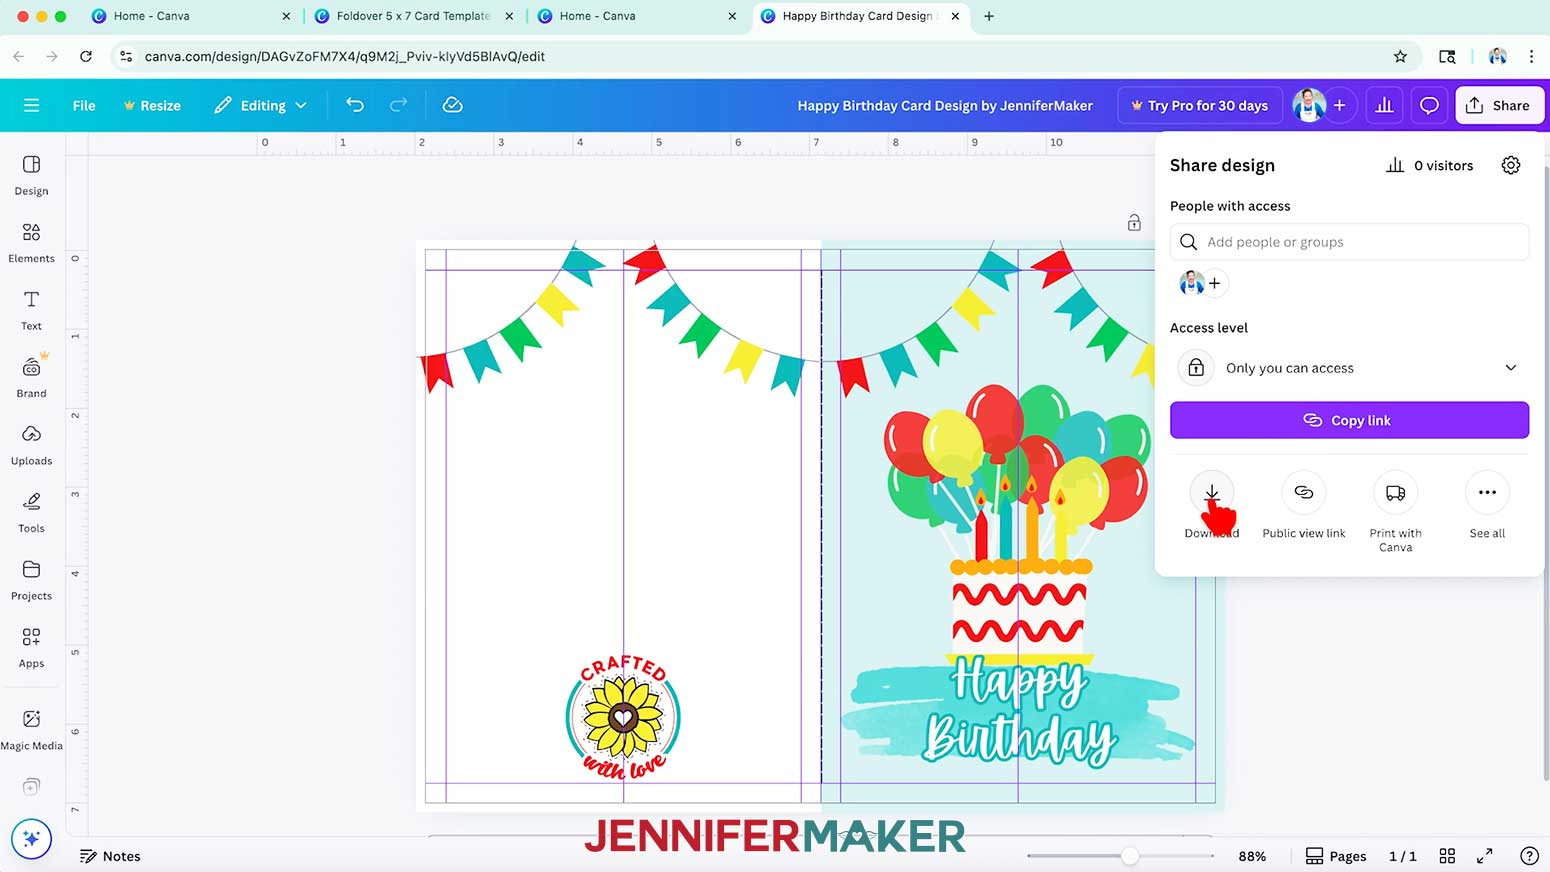
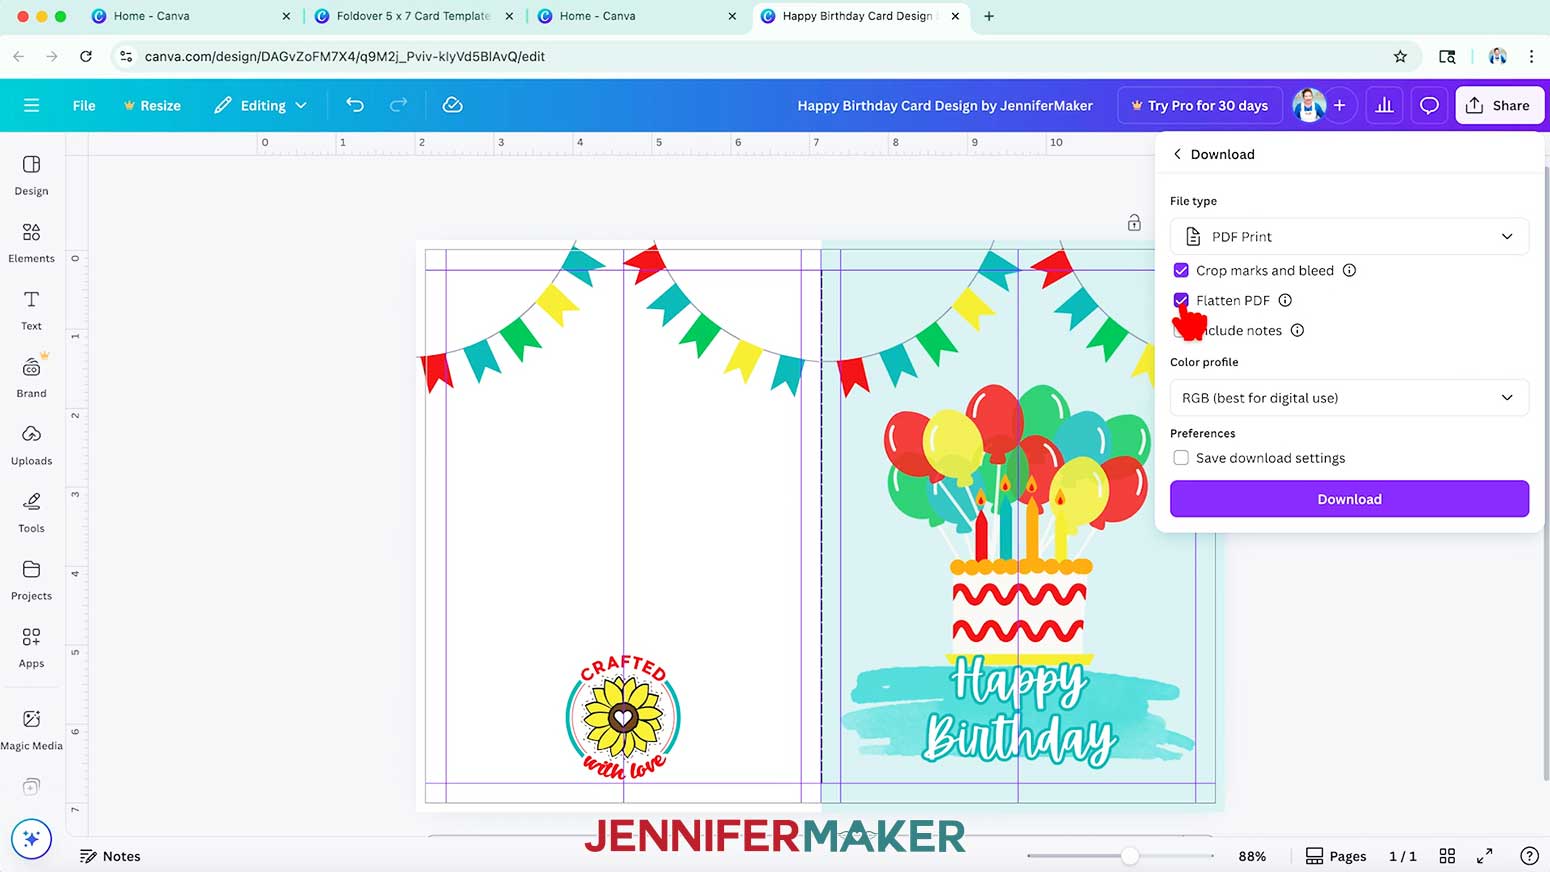
- To use the design, click “Share” in the top menu.
- Then select “Download.”
- Set the “File type” to "PDF Print."
- Make sure the “Crop marks and bleed” and “Flatten PDF” boxes are selected.
NOTE: Crop marks make your card easier to trim by providing guidelines, while adding a bleed prevents white spots at the edge of your card. Flattening preserves image quality by combining all the layers into a single layer, so your card looks amazing! - Click “Download” to save the image to your computer.
- To print and cut the card, follow the steps from my How to Make Cards in Canva tutorial.
- Your card is ready!
EXAMPLE 2: CREATE A 20 OZ SKINNY TUMBLER TEMPLATE IN CANVA
CREATE YOUR TUMBLER TEMPLATE
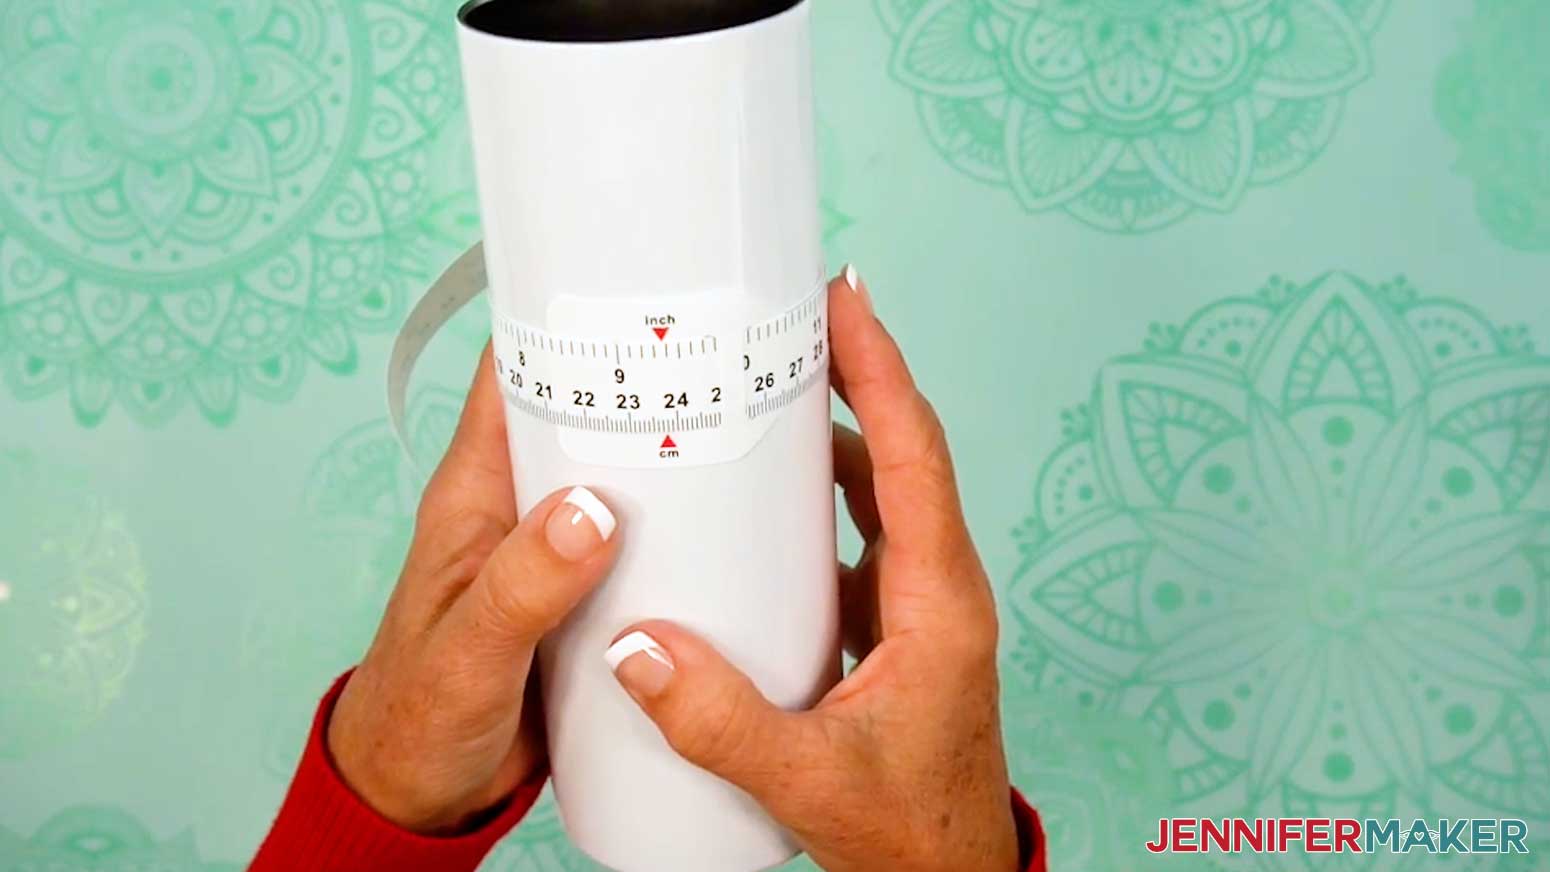
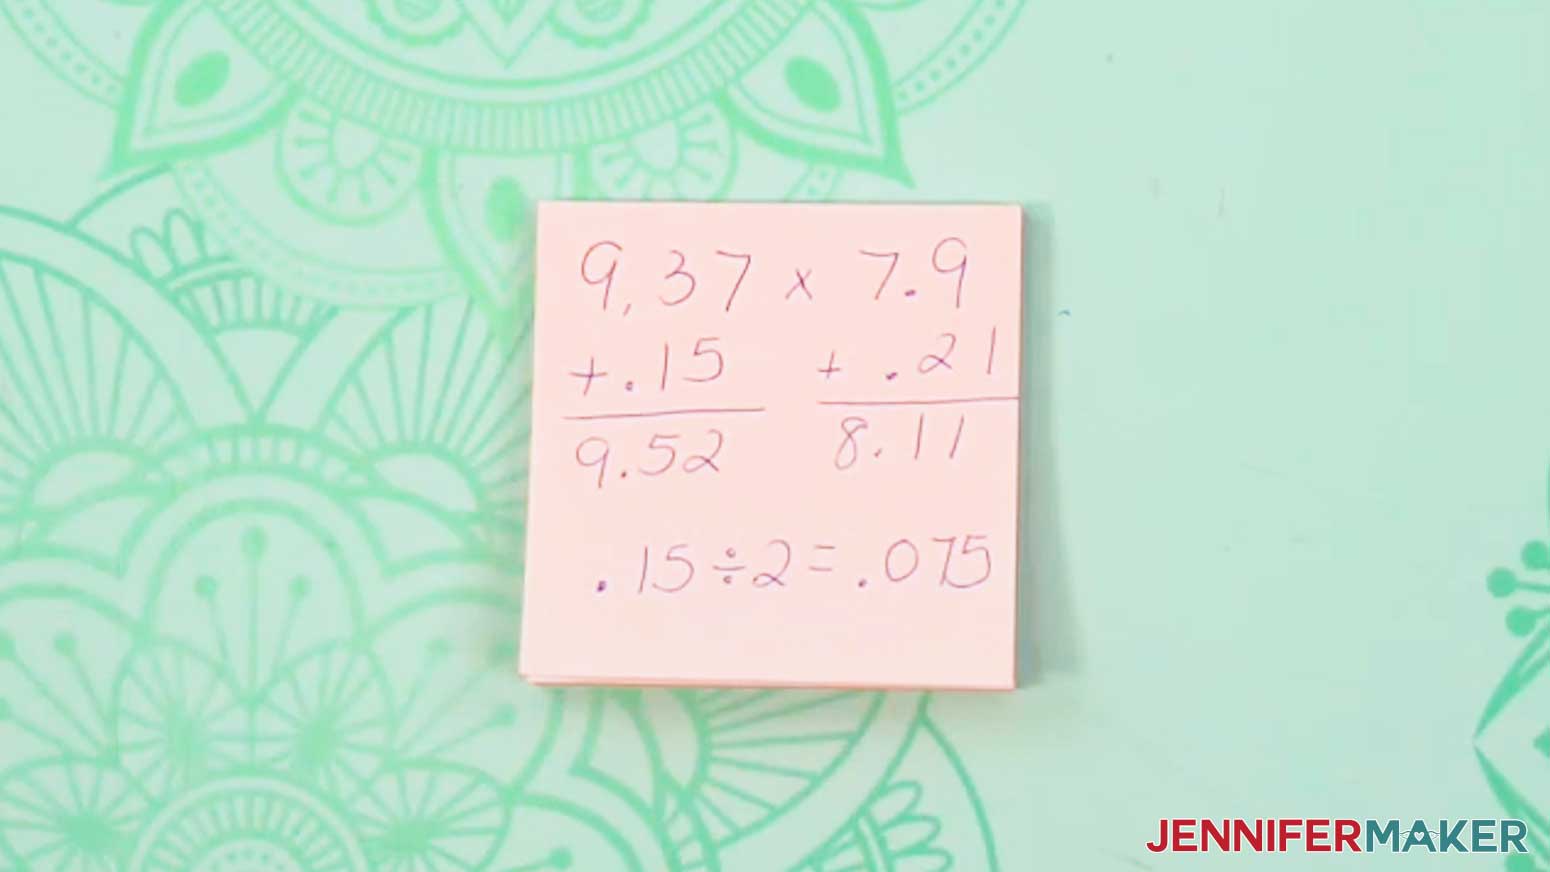
- Use a looped measuring tape to find your tumbler’s circumference to get your template’s width. Record your measurement on a piece of scrap paper.
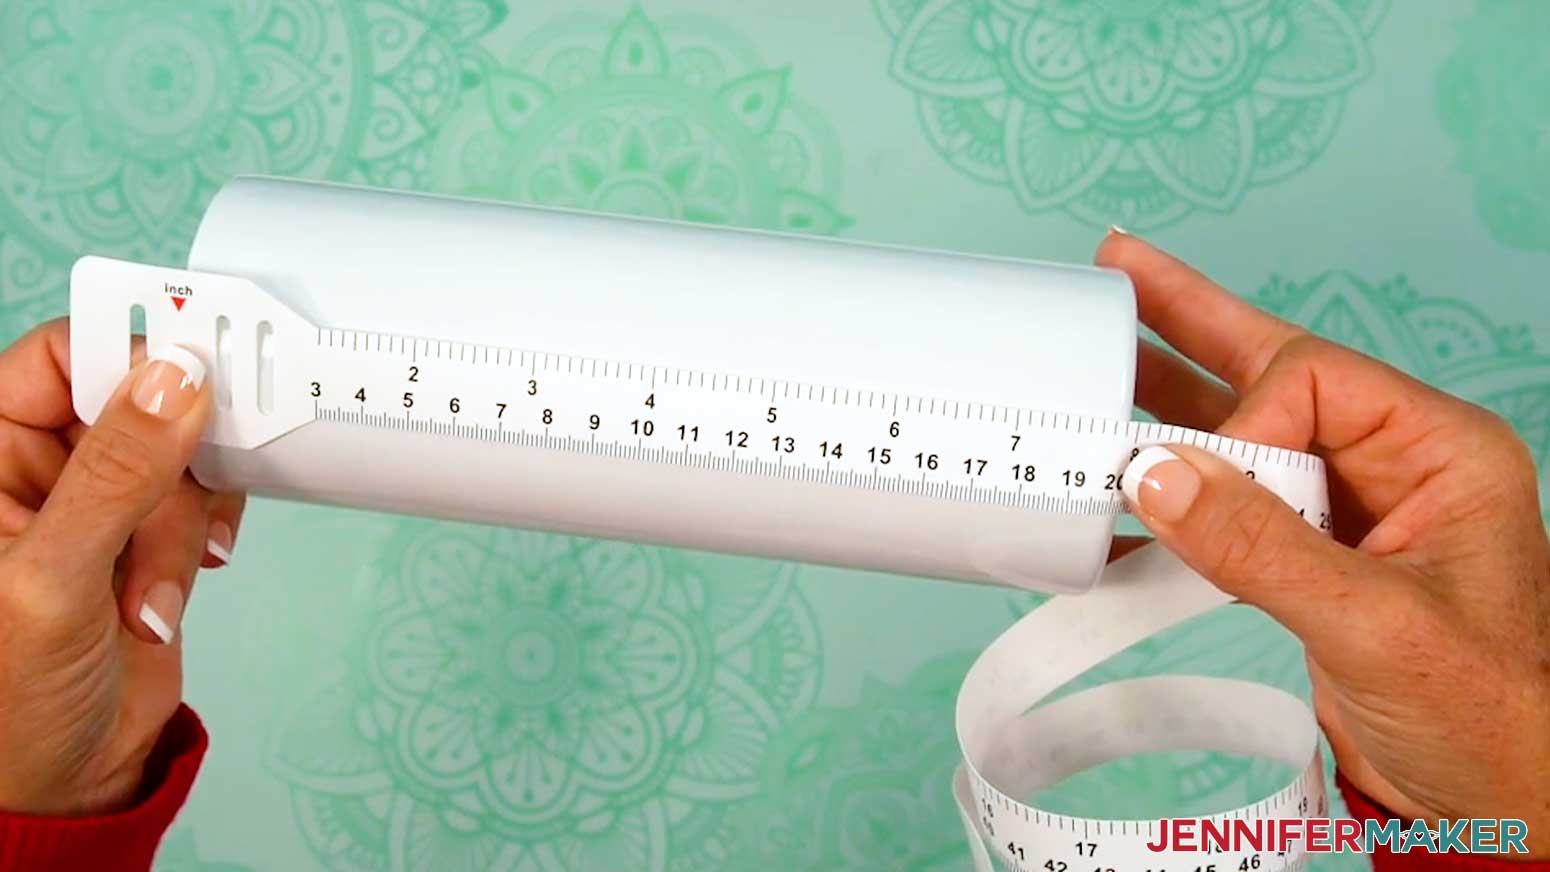
NOTE: I’ll use a 20 oz. skinny tumbler, which is 9.37” wide. - Then measure the tumbler’s height to see how tall the template should be. Record this measurement, as well.
TIP: If your tumbler is tapered at the top and bottom, only measure the straight edge.
NOTE: The height of my 20 oz. skinny tumbler is 7.9”. - Open your computer’s browser and go to jennifermaker.com/canva.
- Either sign in to your account or follow the prompts on the screen to sign up for a free account.
- On the Canva Home screen, click the “Create a design” button.
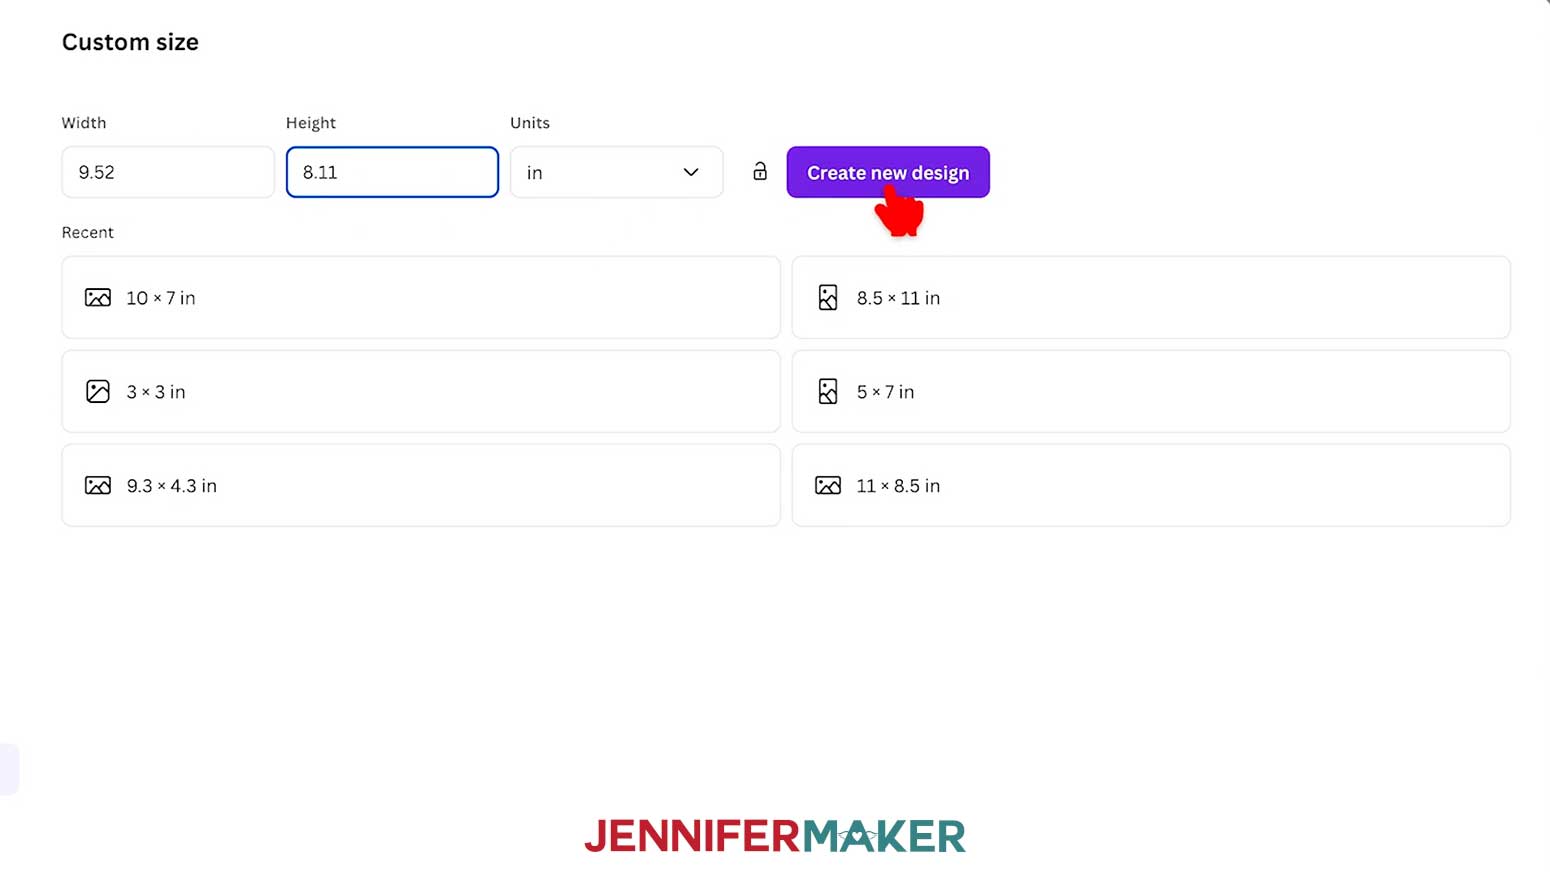
TIP: Depending on your view, the button may just say “Create.” - Click “Custom size” to set the dimensions of your canvas.
- In the “Units” box, click the dropdown menu and select “in” for inches.
- In the “Width” field, enter the measured width of your tumbler plus 0.15” to make sure your seam overlaps.
NOTE: I’ll enter 9.52” in the “Width” field. - In the “Height” field, enter the measured height of your tumbler plus 0.21” to make sure your print hangs over the top and bottom edge for full coverage.
NOTE: I’ll enter 8.11” in the “Height” field. - Then click “Create new design.”
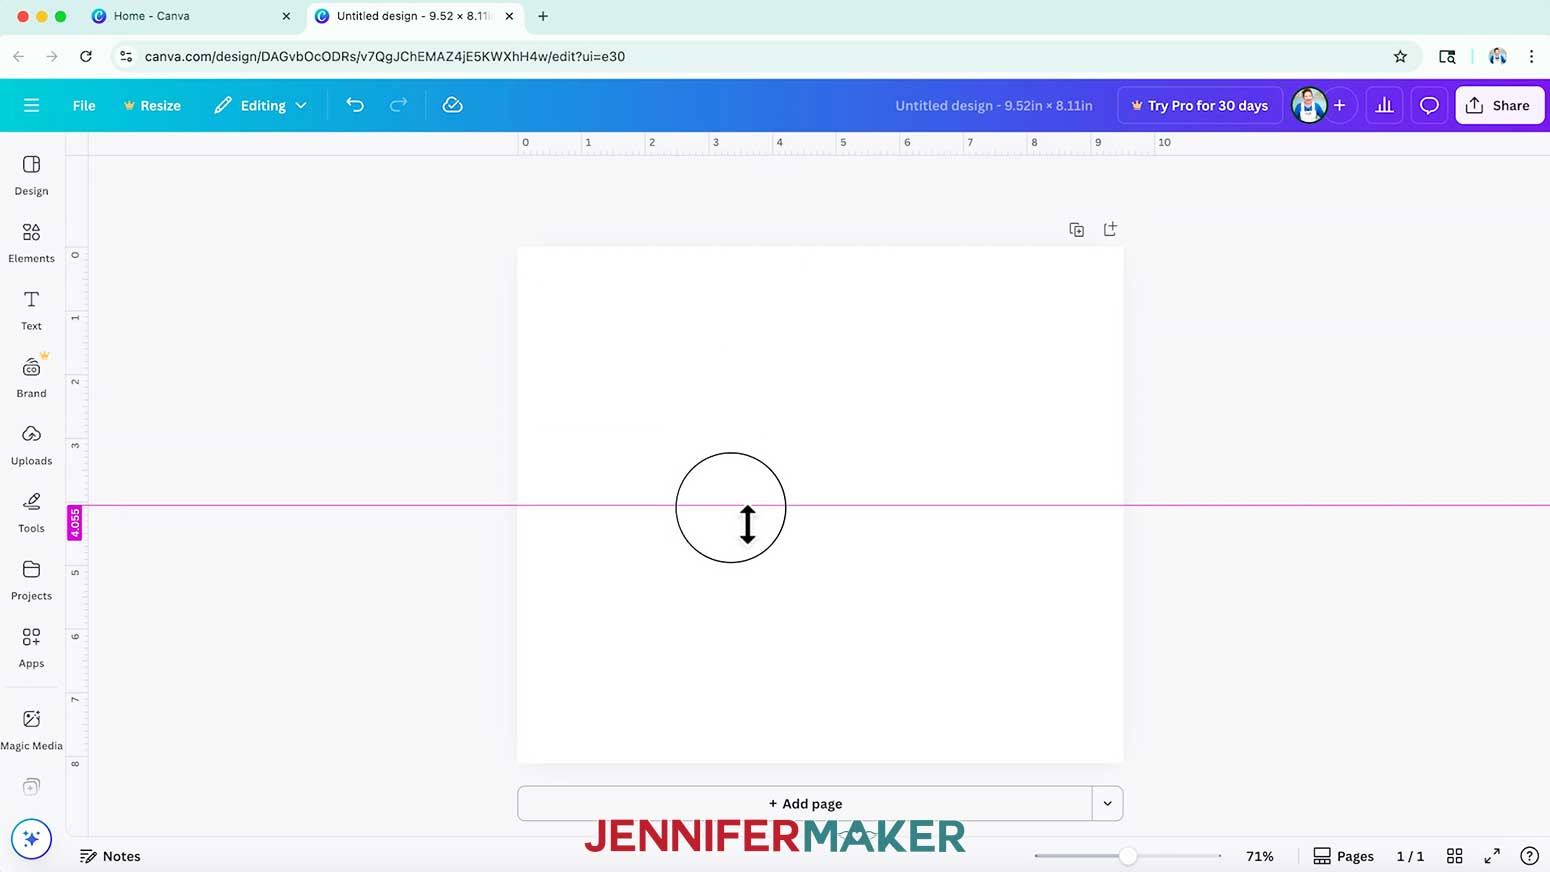
- Click on “File,” hover over “Settings,” and make sure “Show rulers and guides” is selected.
- To create a center horizontal guide for your template to help position design elements, click and drag down from the top ruler until the line turns pink in the center of your canvas.
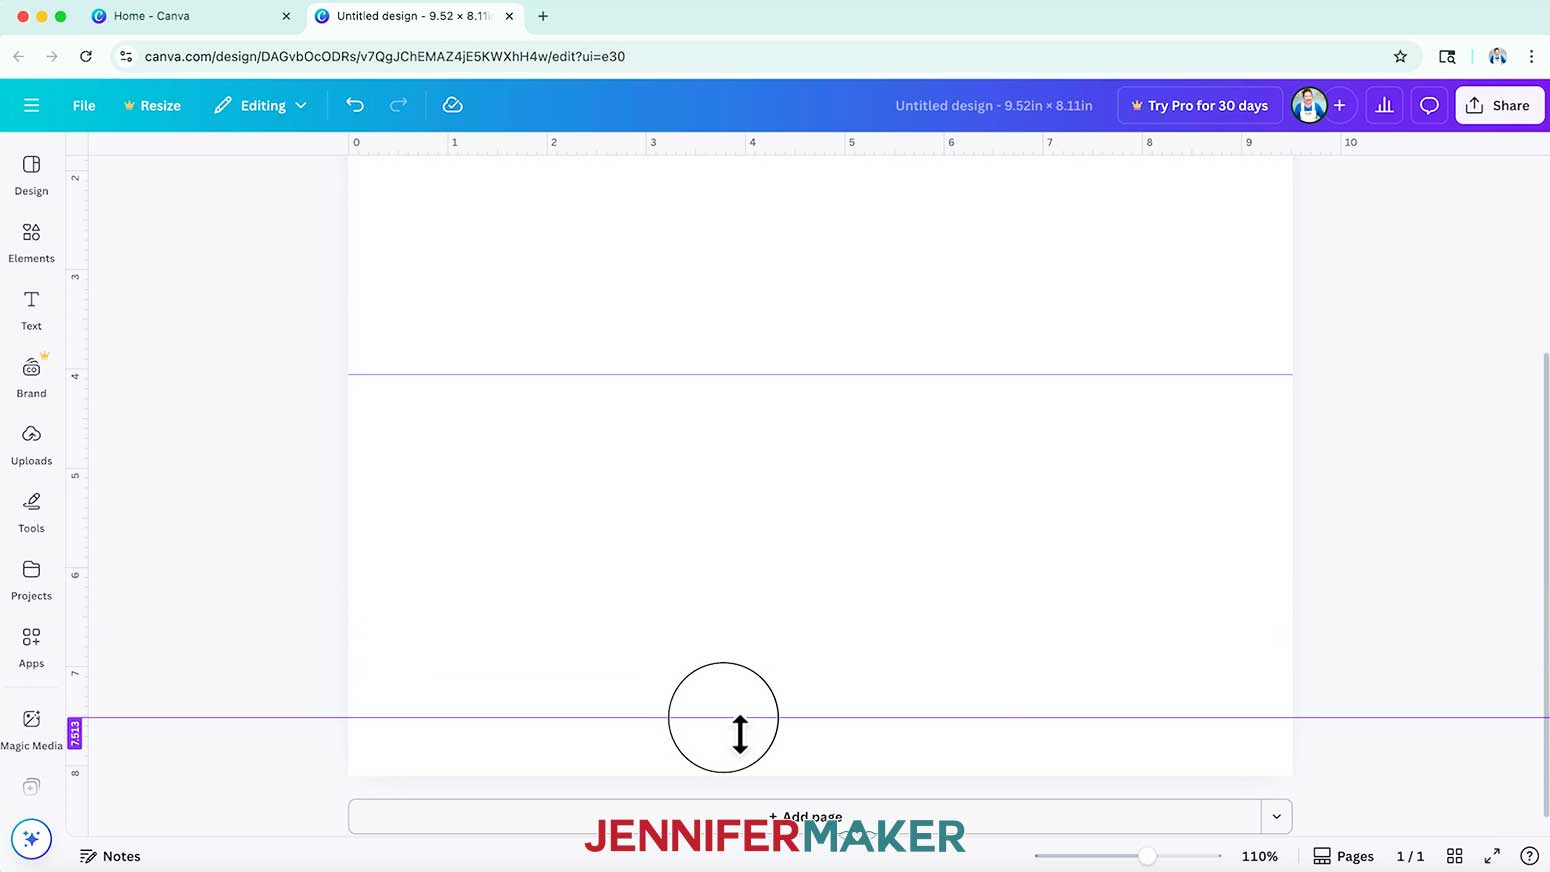
- Then click and drag from the top ruler to place guides at 0.6” and 7.51” for the top and bottom edge margins to keep your elements safe from the edges.
- To create guides for your seam overlap, first take the extra value you added to your design’s width in Step 8 and divide it by two.
NOTE: I increased my width by 0.15”, so I’ll divide that by two to get 0.075”. - Click and drag from the left ruler to place guides at those measurements from the left and right edges of your canvas.
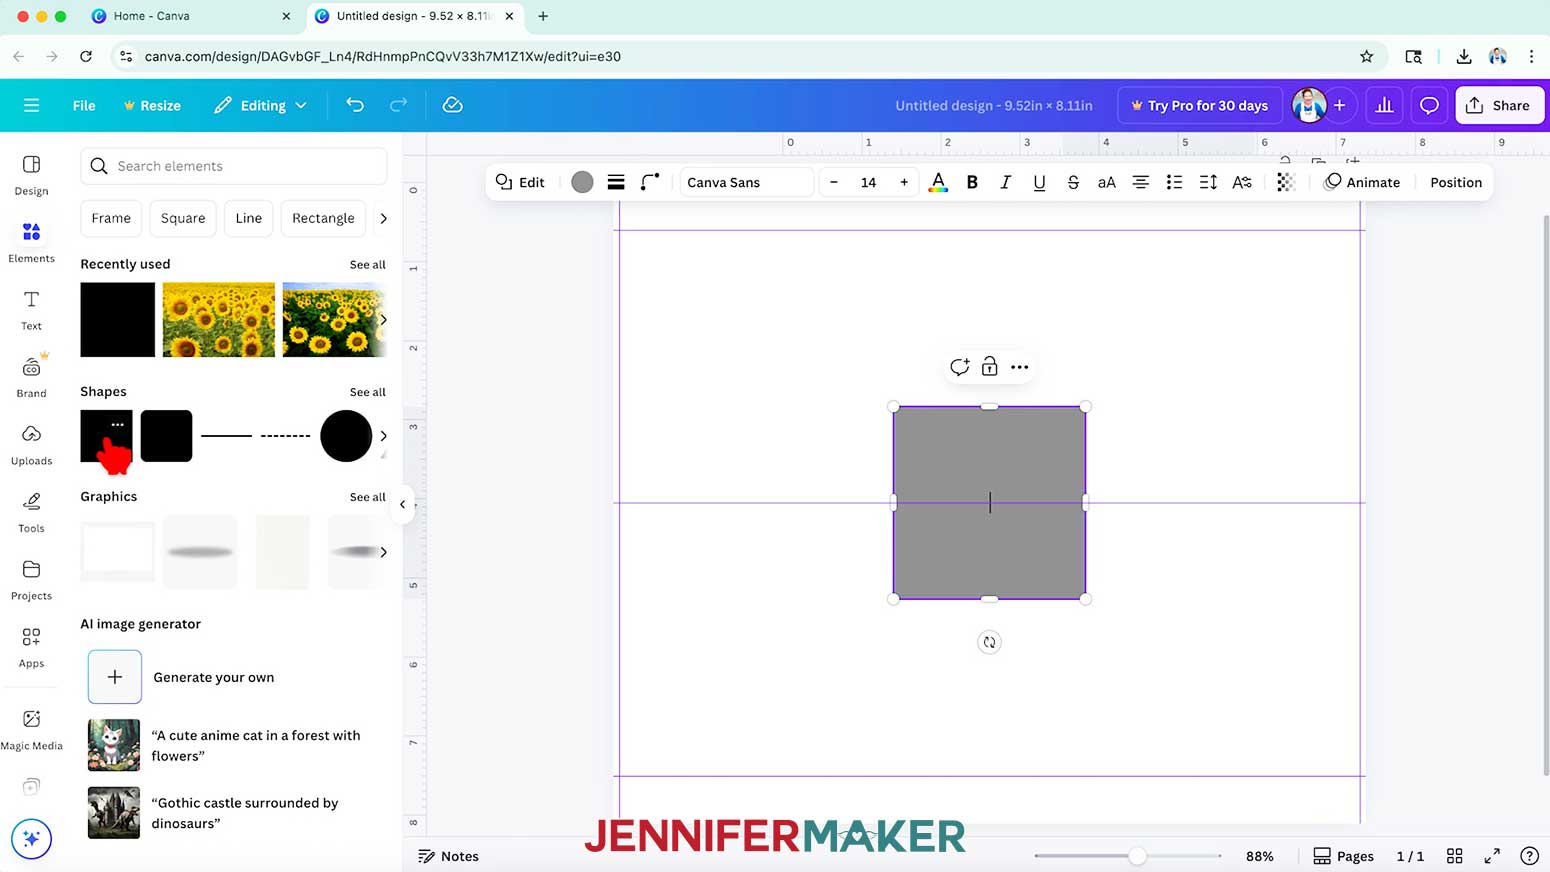
NOTE: After doing some simple math, I figured out that I’ll need to place my left guide at 0.075” and my right guide at 9.445”. - To create a safe zone for text or main elements to make sure they’re visible without having to rotate your tumbler, first click on “Elements,” browse to “Shapes,” and click a free Square to add it to your canvas.
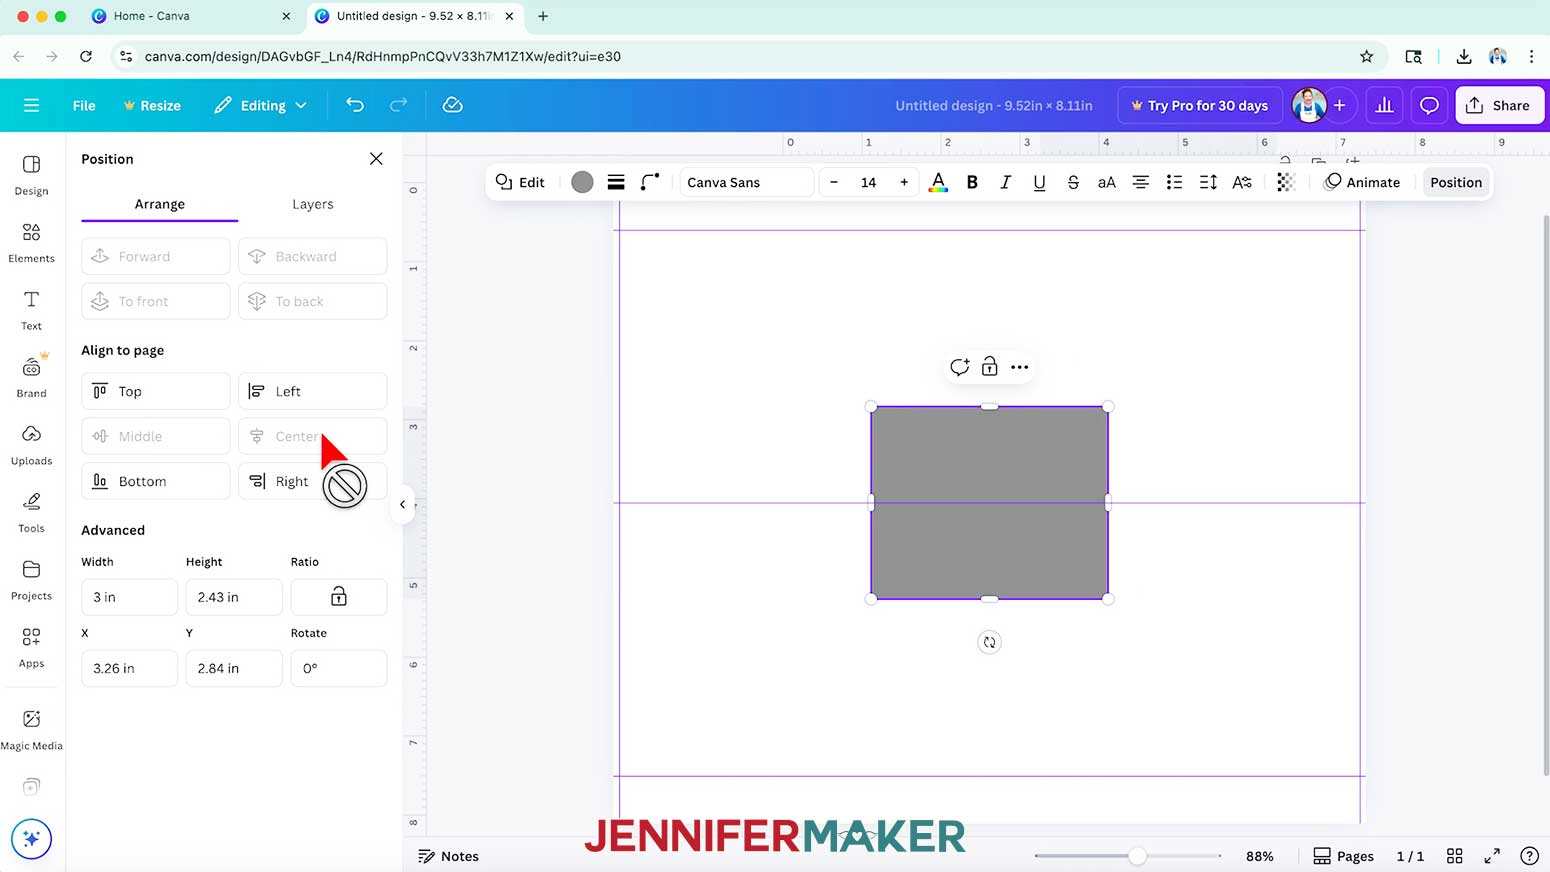
- Select the square and click the “Position” button in the Edit bar above it.
- Under the "Arrange" tab in the "Advanced" section, enter “3” in the “Width” field, which is the maximum visible text width for a 20 oz. skinny tumbler.
- Then click “Middle” and “Center” under the “Align to page” section to center it on your template.
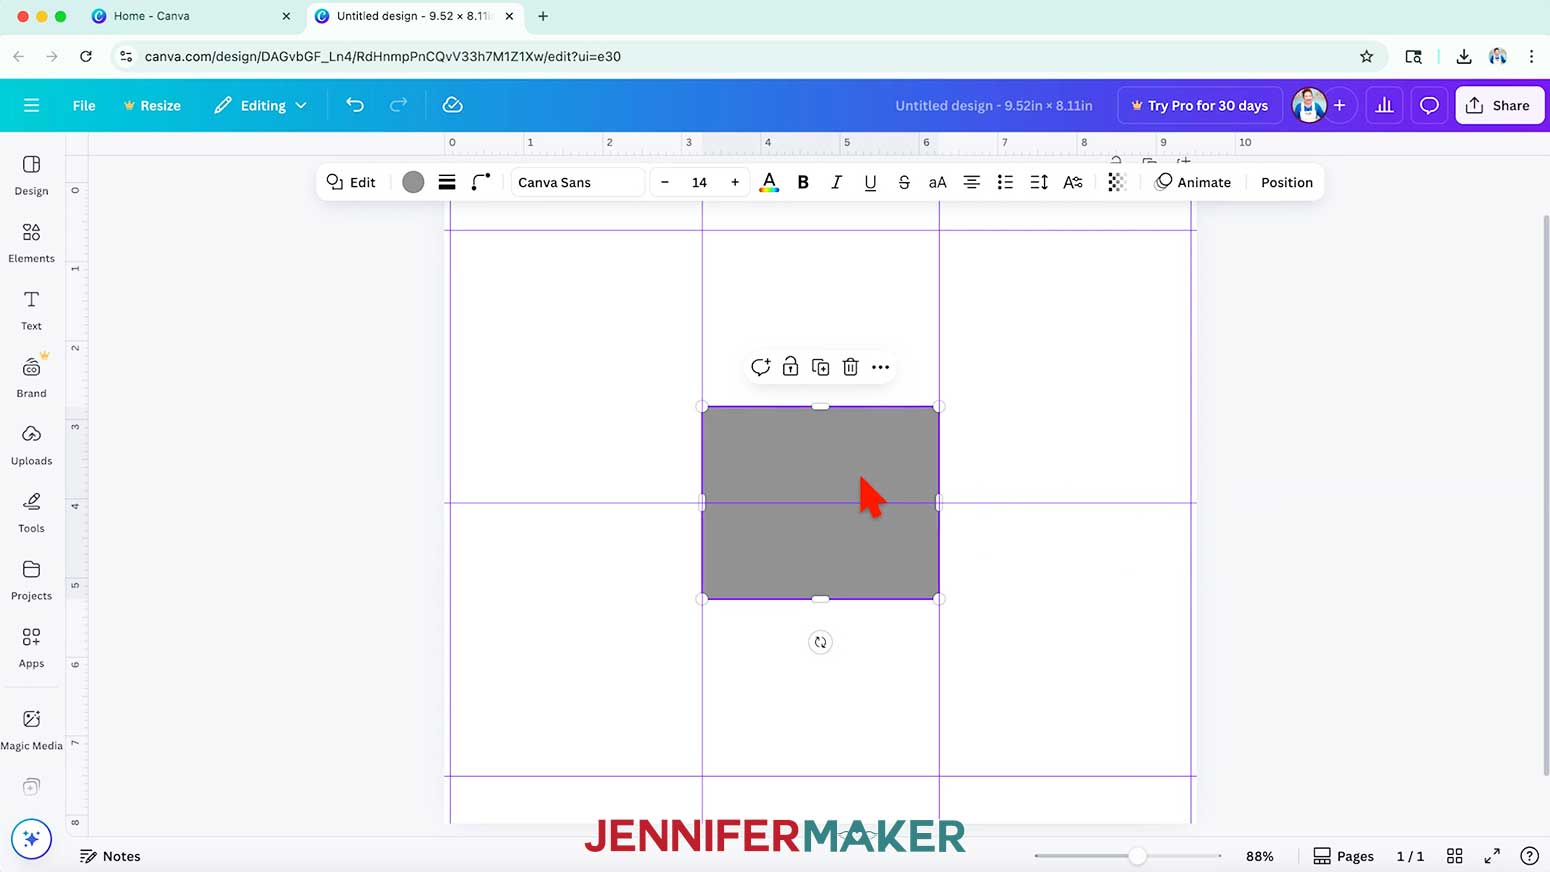
- Click and drag from the left ruler until the pink guideline snaps into alignment with the left side of the square.
- Then click and drag from the left ruler again until the pink line snaps to the right side of the square.
- Select the square and click the “Trash” icon above it to delete it. And now you have a center vertical panel marking the safe area for your tumbler's text.
- Once your guides are in place, go to “File,” hover over “Settings,” and select “Lock guides” to avoid shifting them by accident.
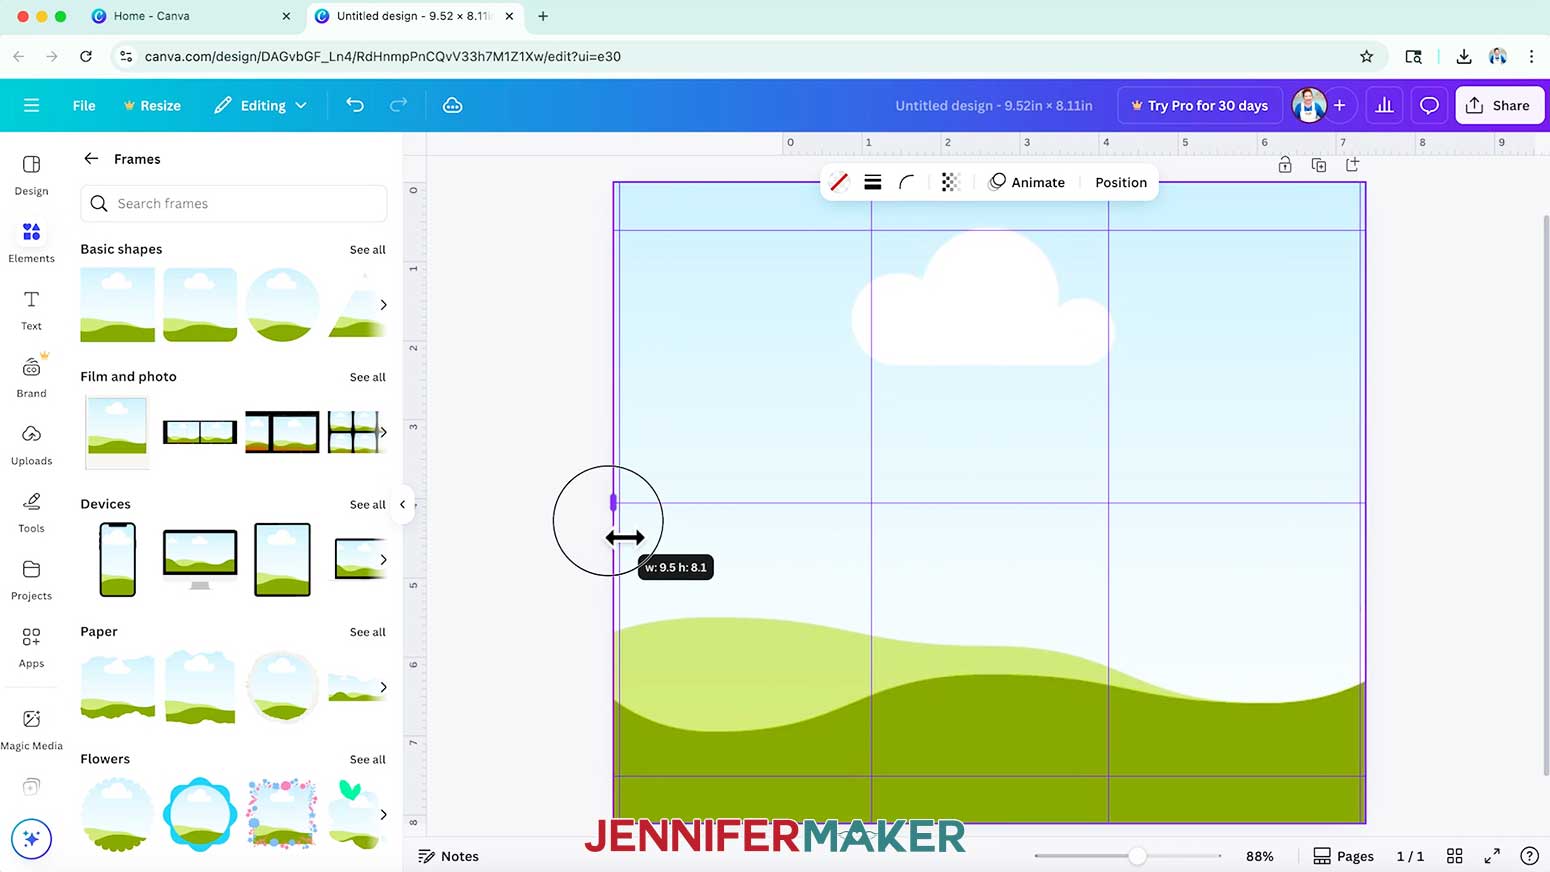
- To make a tumbler template for a design with a full image background, click on “Elements” and scroll to the “Frames” section.
- Click on the standard square frame to add it to your canvas.
- Drag the edges of the frame so it fills up your entire canvas.
NOTE: This will allow you to place an image into the template and have it automatically fill the background area. - Follow Steps 23-28 of the “CREATE YOUR 5” x 7” FOLDOVER CARD TEMPLATE” section to create section labels for your template.
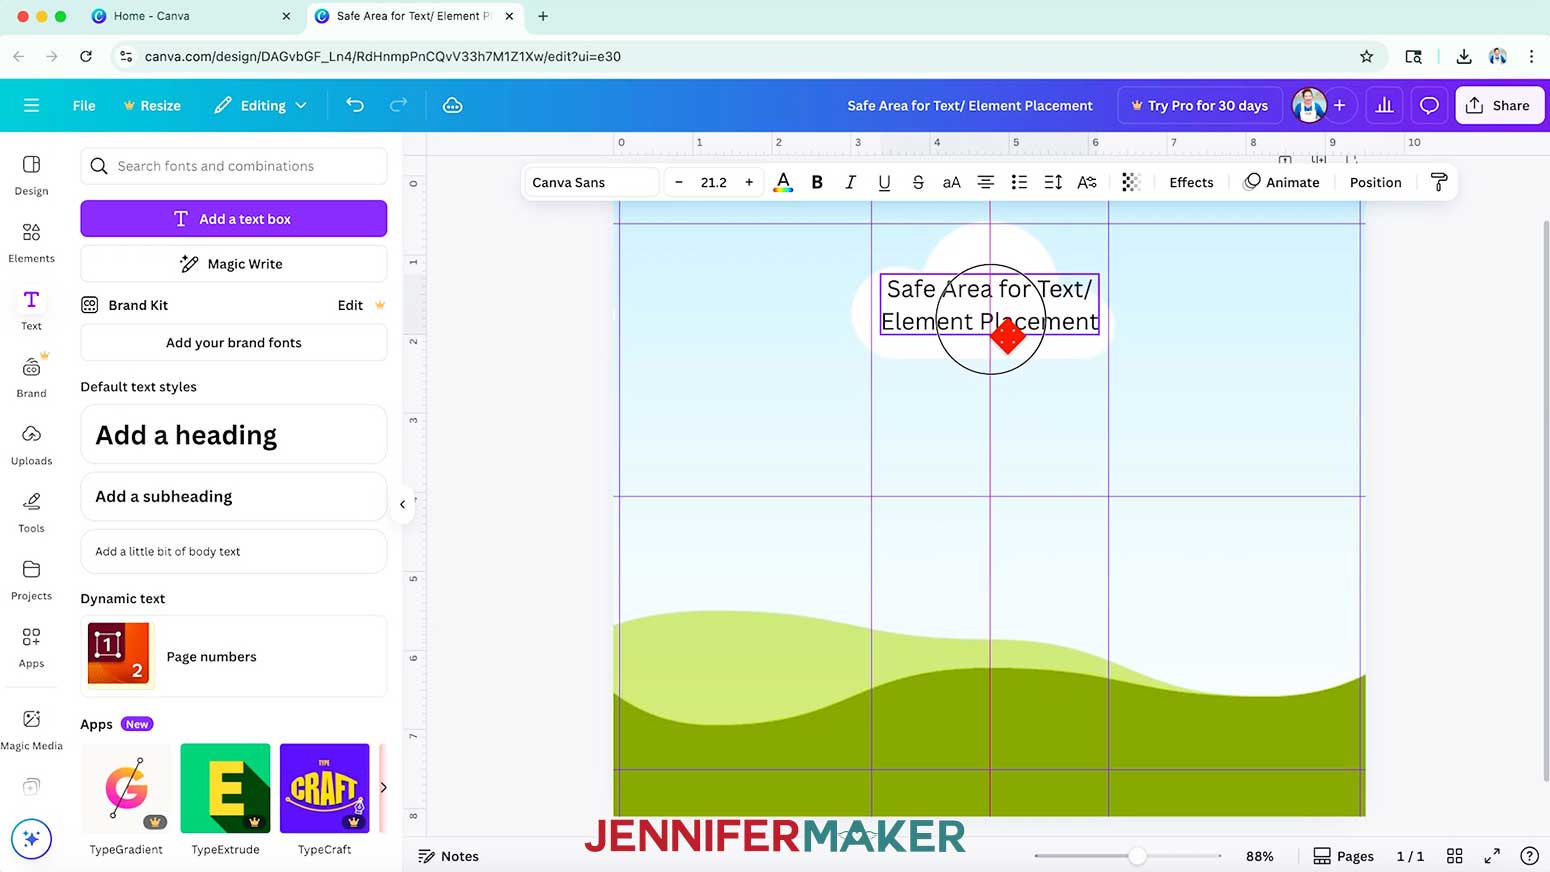
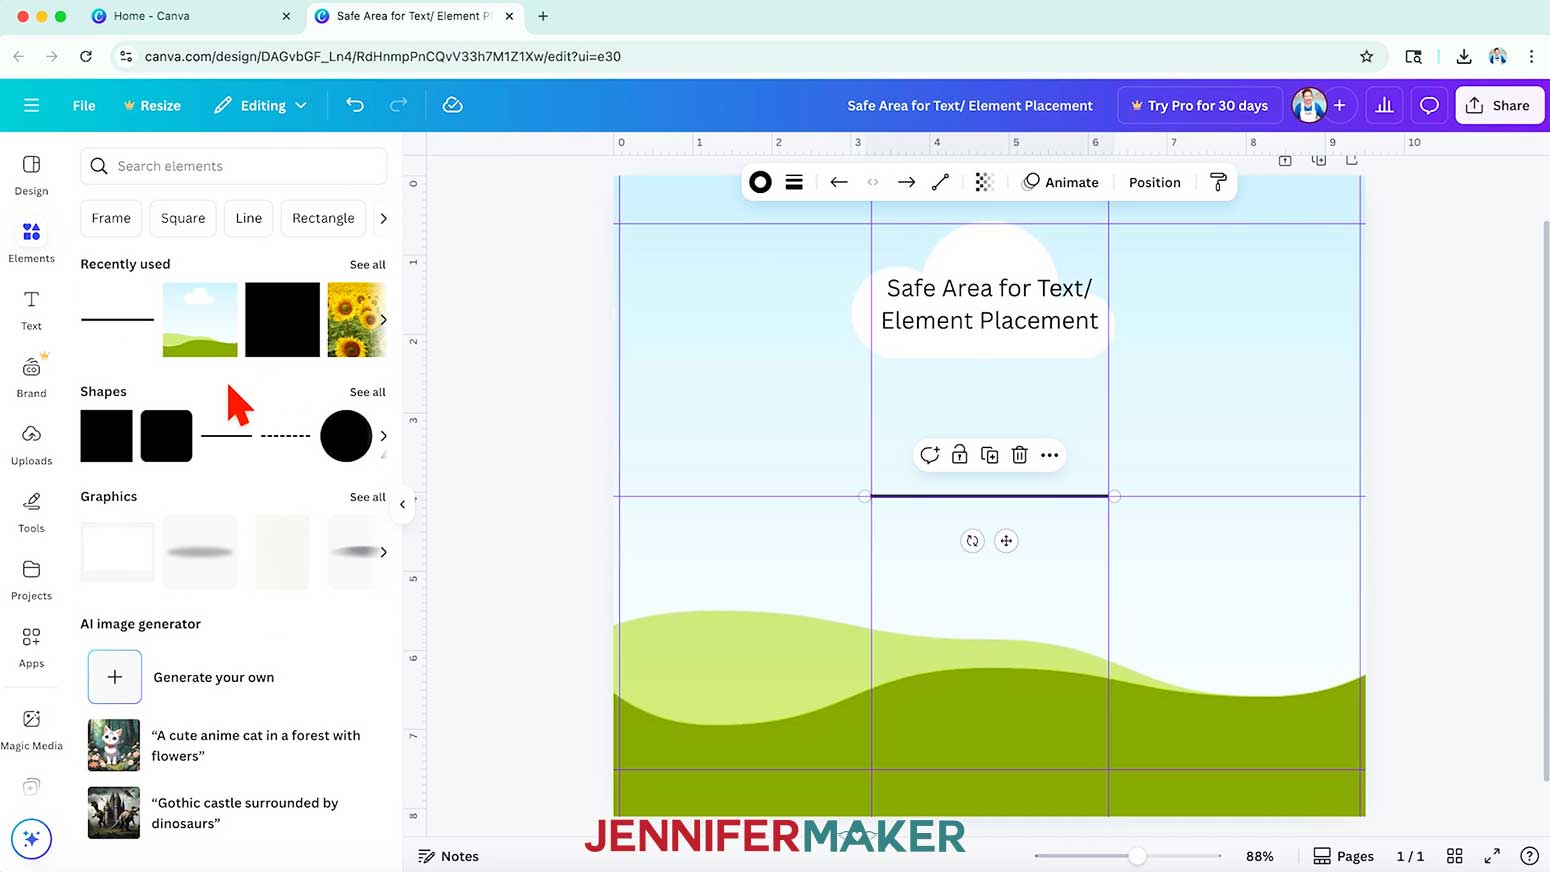
NOTE: I’ll create a label that says “Safe Area for Text/Element Placement” and place it in the center panel below the top margin. - Follow Steps 16-19 from the “CREATE YOUR 5” x 7” FOLDOVER CARD TEMPLATE” section to add a line to your design.
NOTE: I’ll keep my line solid and at the default weight for my tumbler template. - Position the line below your label.
- Then drag the handles on both ends of the line to resize it to the same width as the section you want to label.
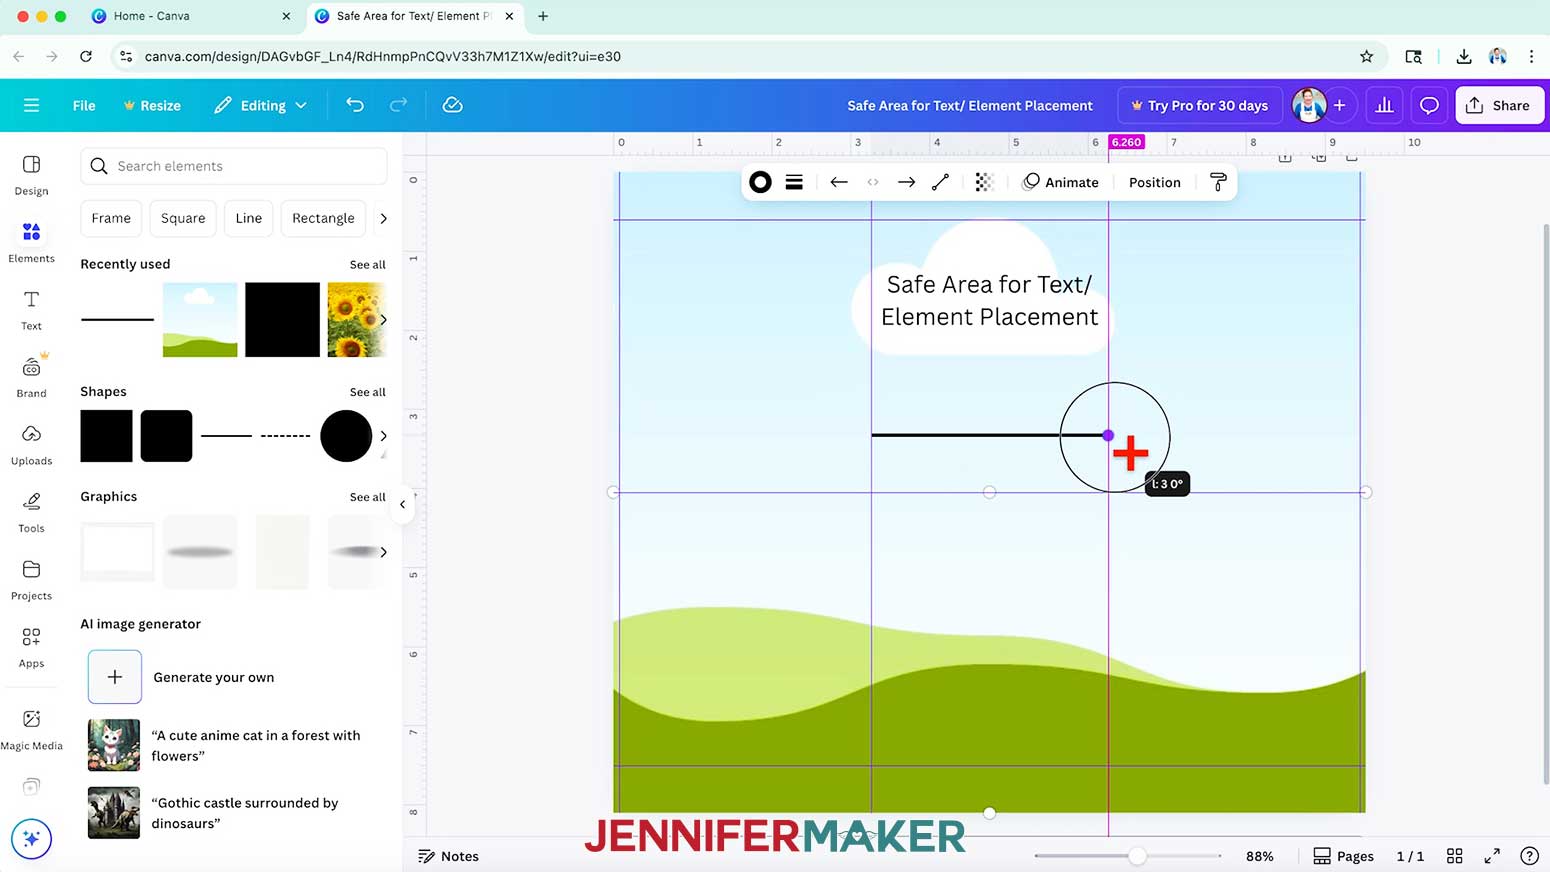
TIP: Click the “Position” button to check the line’s width after resizing to make sure it’s the same. - Click the left arrow “Line start” icon in the top bar and choose an arrow style to add an arrow to the left end of your line.
- Then click the right arrow “Line end” icon and choose the same arrow style for the right end of your line.
- Drag a selection box over both the text box and the arrow element, then click the “Group” icon to keep them together.
- Click the filename field at the top and replace the current name with your own so you can find your template easily later.
NOTE: I’ll change mine to “20 oz. Skinny Tumbler Template by JenniferMaker.” - Your tumbler template is ready to use and can be found in your Canva Projects folder whenever you need it!
HOW TO USE YOUR TUMBLER TEMPLATE
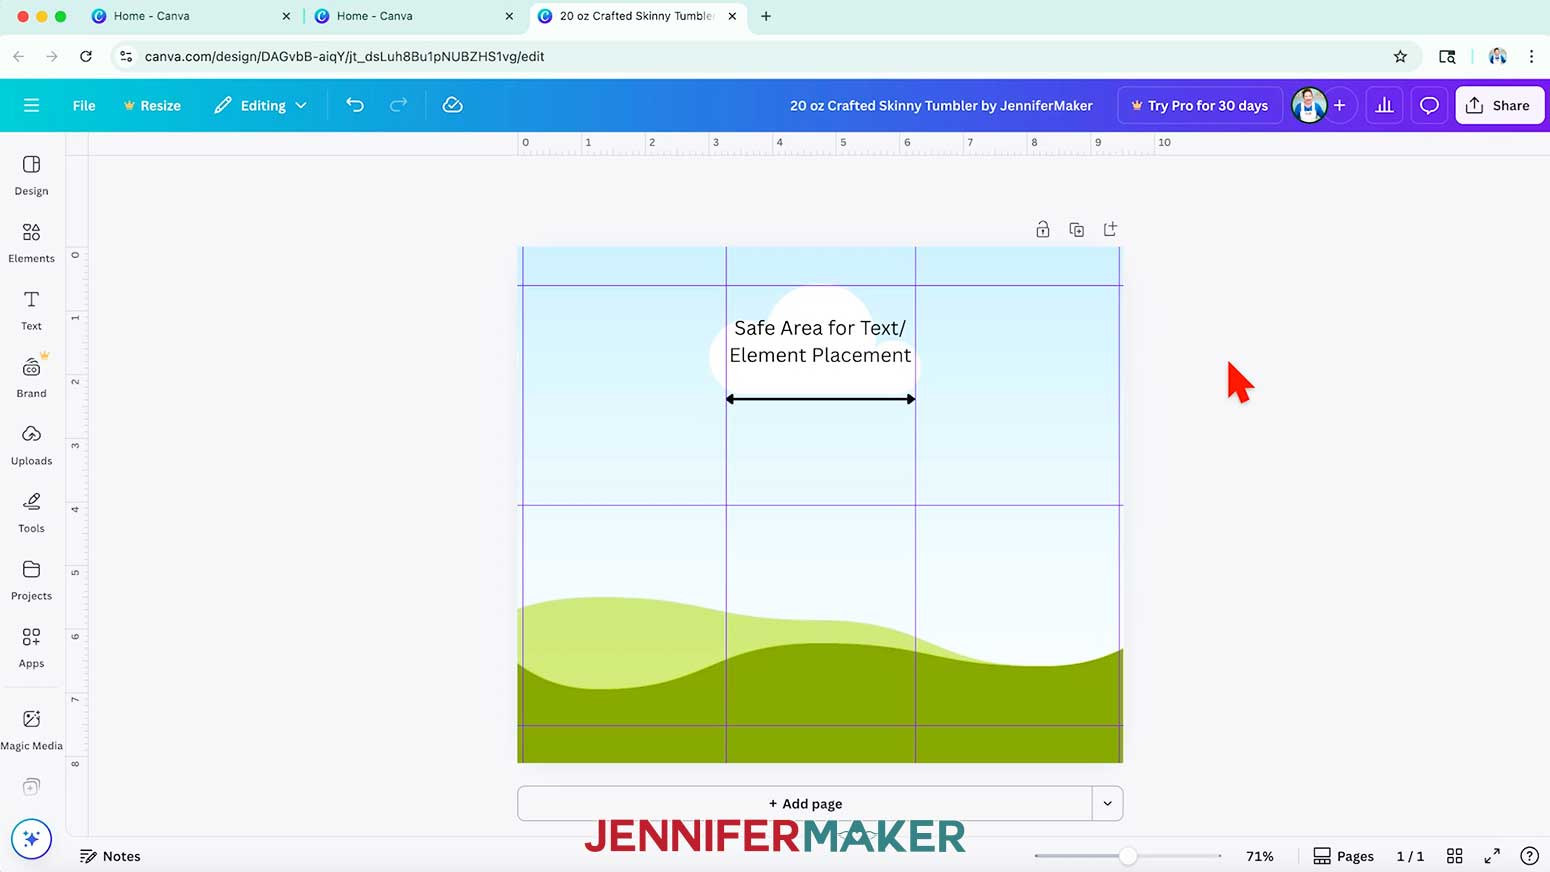
- Follow Steps 1-4 from the “HOW TO USE YOUR CARD TEMPLATE” section to open a copy of your tumbler template and give it a new project name.
NOTE: I’ll change mine to “20 oz Crafted Skinny Tumbler by JenniferMaker.” - To add a background to your design, click on “Elements” to browse Canva’s image collection.
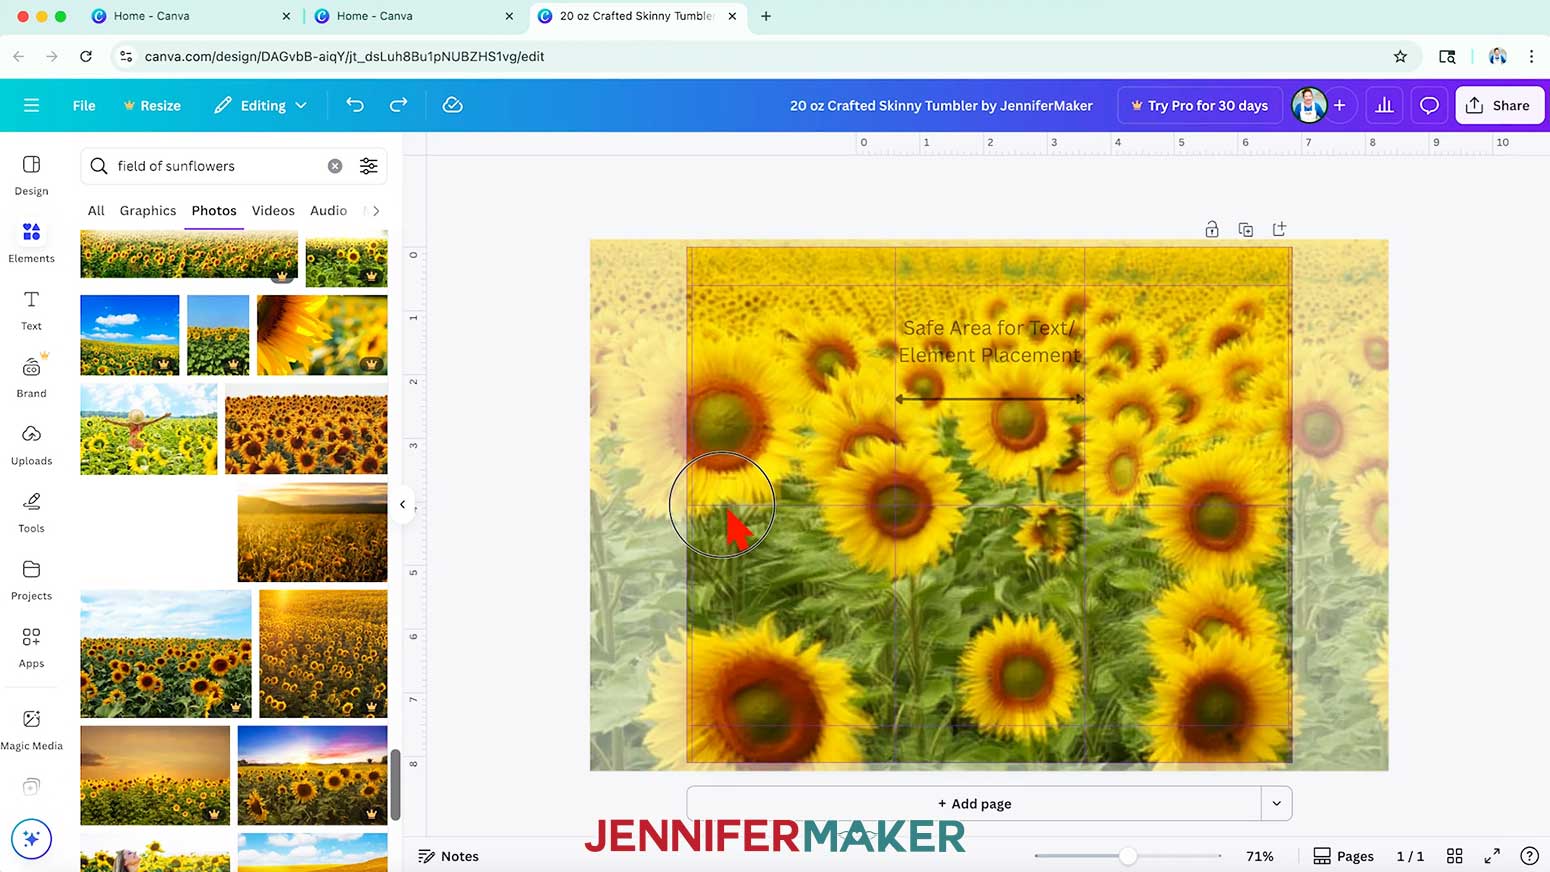
TIP: I recommend browsing the Photos section as you’ll find more usable images there. - To find an image that fits a specific design you have in mind, type a related phrase in the “Search” bar.
NOTE: I’ll search for “field of sunflowers.” - When you find a background image you like, drag and drop it into the template’s background frame so it fills the canvas.
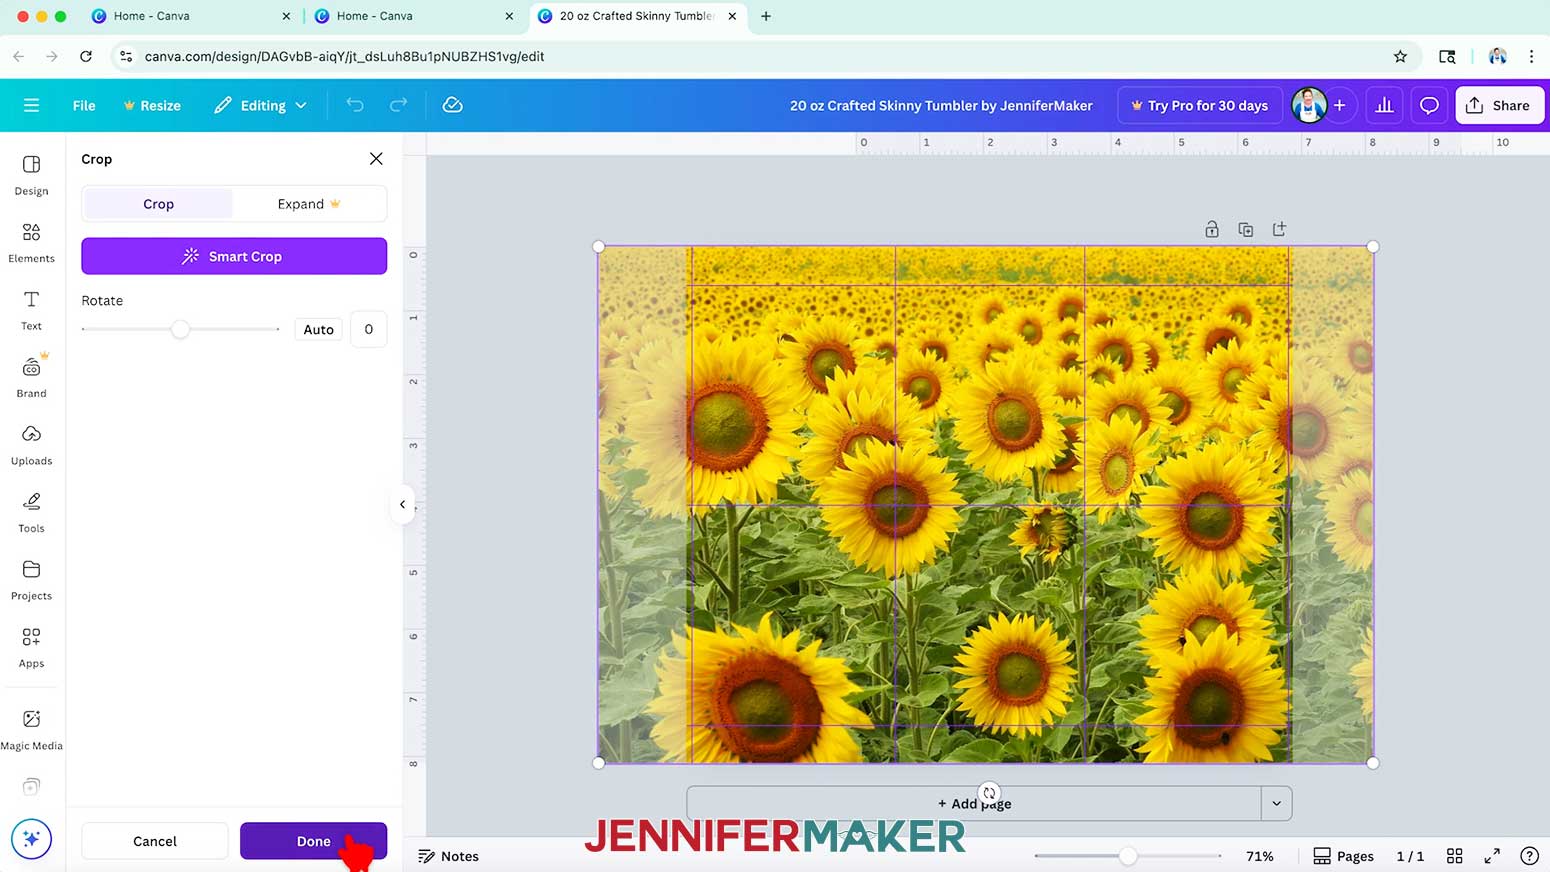
- To change the size or position of your background image so its interesting elements are inside the template, double-click on the Frame to bring up the “Crop” menu.
- Use the handles to resize your image as desired, then drag the photo into position.
- When you are satisfied with your background image’s size and positioning, click “Done” to apply the changes and go back to the template.
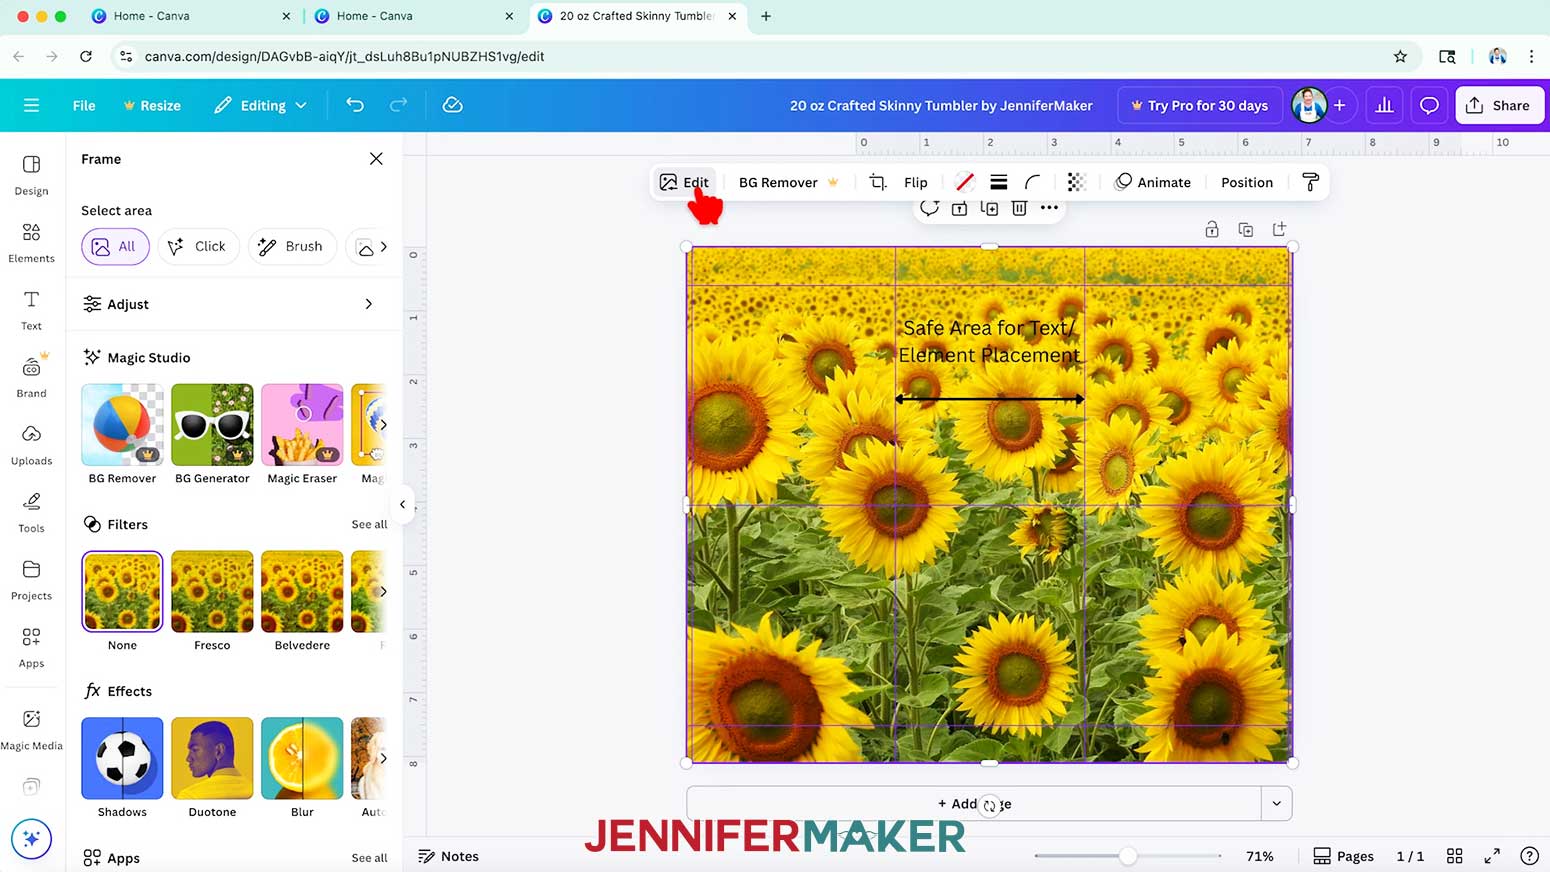
- If your background image’s colors look too dark or washed out, select the image on your canvas and click “Edit.”
- Find the “Filters” section and click “See all” to open all available filter options, then click a filter you like to apply it to your image.
NOTE: I’ll use the “X-Pro +” filter to brighten up and increase the saturation of my sunflowers. - Use the “Intensity” slider to adjust how much the filter affects your image.
NOTE: I’ll keep the intensity all the way up for mine. - To add a logo or other image to your design, follow Steps 30-34 from the “CREATE YOUR 5” x 7” FOLDOVER CARD TEMPLATE” section to upload and place the element.
TIP: If you want to use a file you’ve previously uploaded, look for it in the Uploads panel so you don’t have to upload it again!
NOTE: I’ll add the “Crafted With Love” PNG I uploaded for my foldover card template. - Adjust the final size and position of your design to make sure it is horizontally centered and fits within the Safe Area.
- Select the grouped “Safe Area” label and arrow, and click the “Trash” icon to delete them.
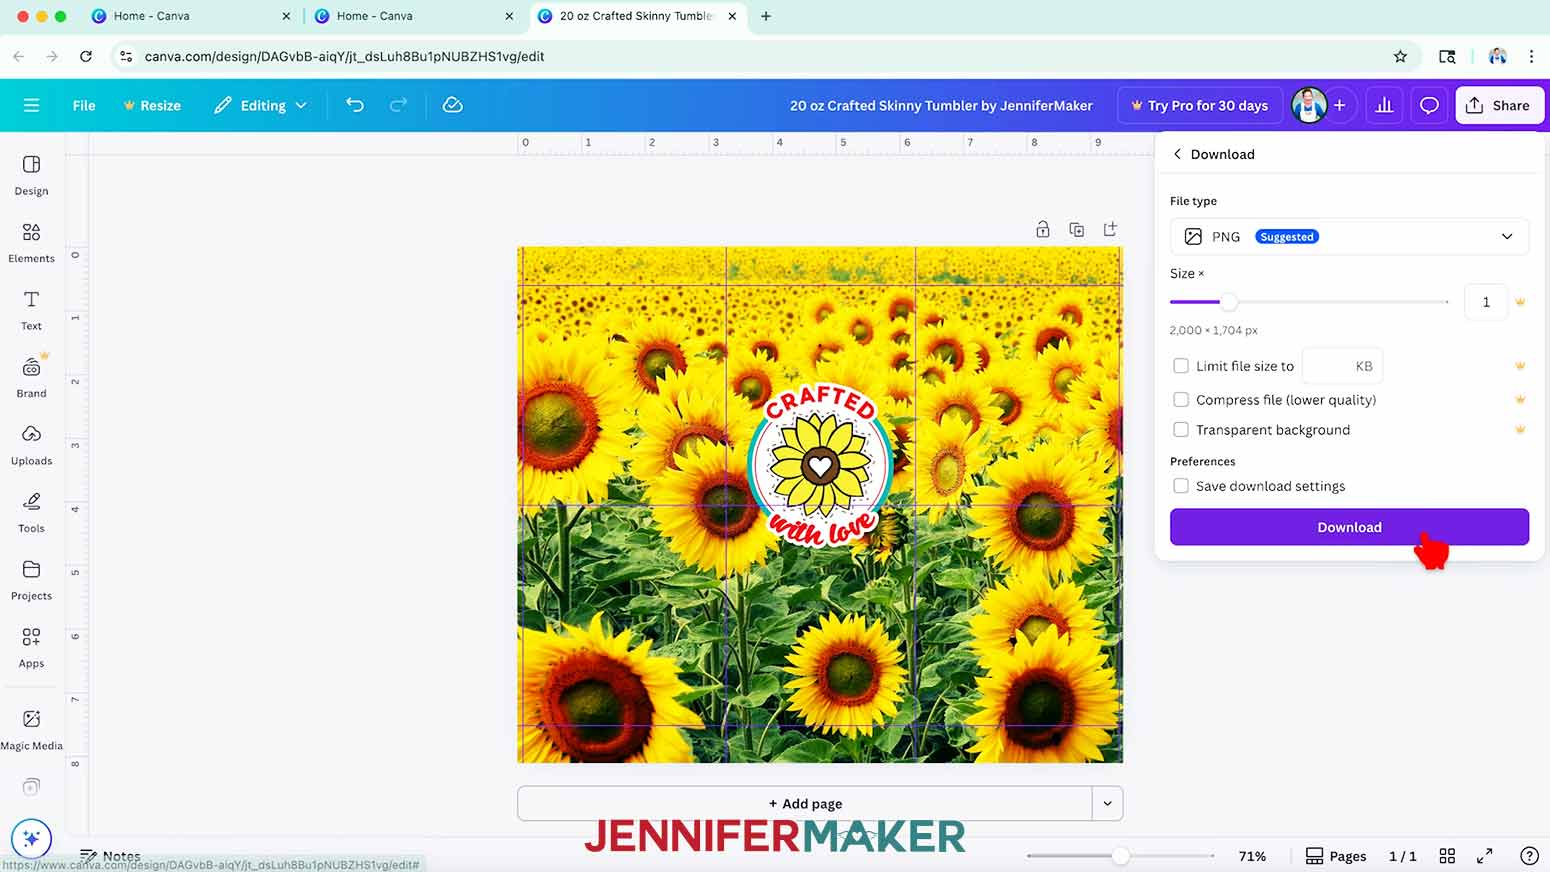
- To use the design, click “Share” in the top menu.
- Then select “Download.”
- To print the design in Google Docs, make sure the file type is set to PNG.
- Click “Download” to save the image to your computer.
- To print the design and sublimate your tumbler, follow the steps from my Sublimation Tumblers tutorial.
- Your tumbler is ready!
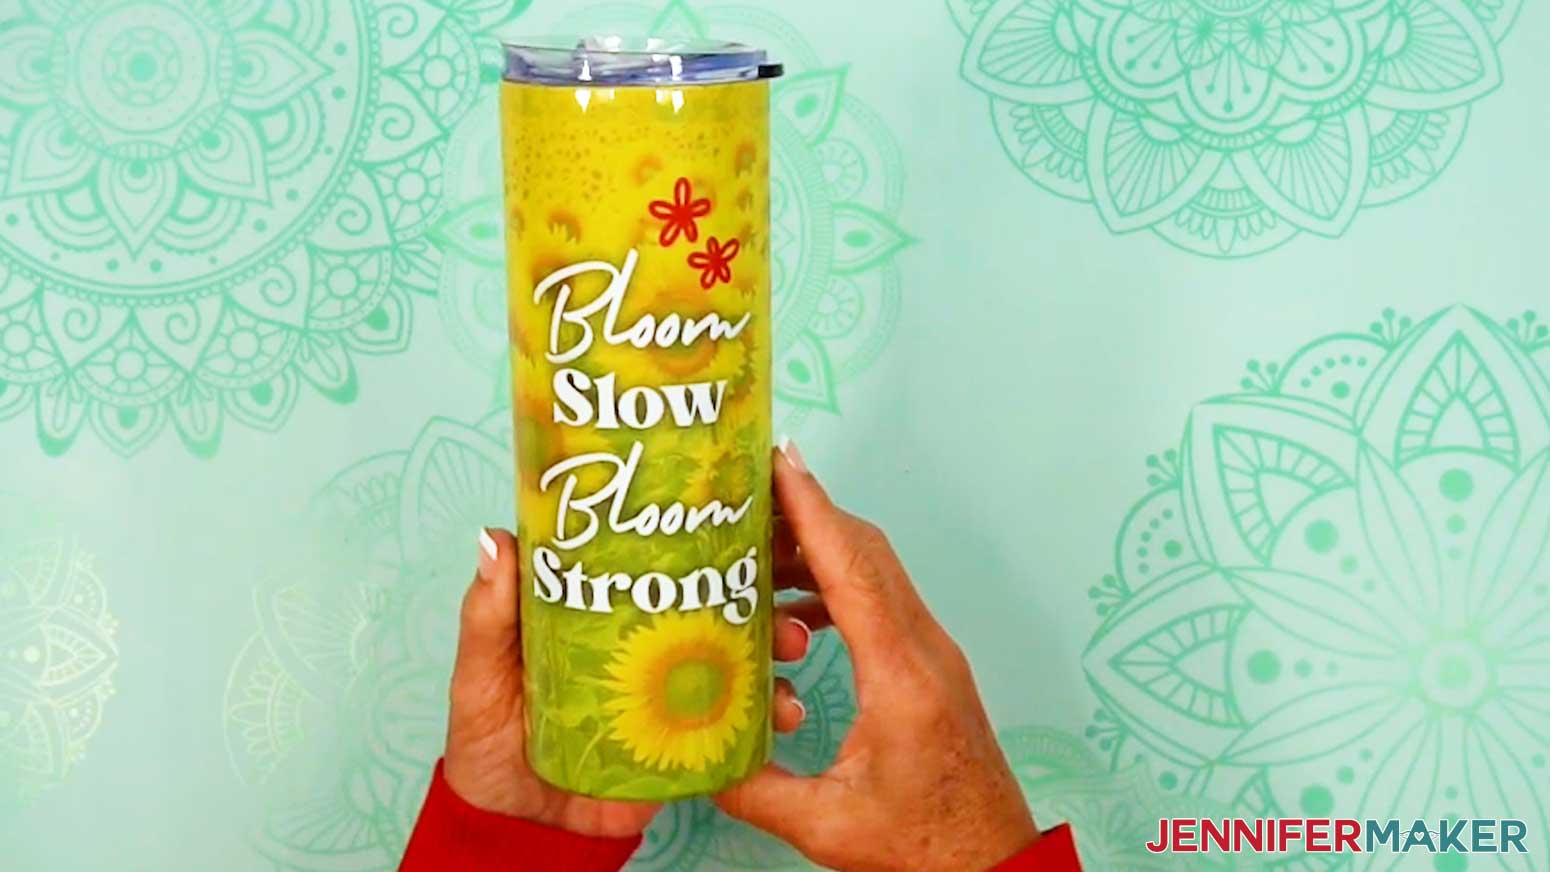
NOTE: I used the same template and design process above to make this beautiful tumbler below, but I used text in place of the logo! Using the guidelines to make sure all of the text was visible was very helpful, especially since the text lines are different widths!

EXAMPLE 3: CREATE A PROJECT DETAILS TRACKING SHEET TEMPLATE IN CANVA
CREATE YOUR 8.5" x 11" TRACKING SHEET TEMPLATE
- Follow Steps 1-10 from the “CREATE YOUR 5” x 7” FOLDOVER CARD TEMPLATE” section using your tracking sheet’s dimensions to set up your canvas.
NOTE: I’ll enter "8.5" in the “Width” field and "11" in the “Height” field to create a letter-sized tracking sheet. - Set half-inch guidelines around your canvas to keep important parts of your design away from the edges, at or close to 0.5” and 8” from the left ruler, and 0.5” and 10.5” from the top ruler.
- Once your guides are in place, go to “File,” hover over “Settings,” and select “Lock guides” to avoid shifting them by accident.
- To add a placeholder for a logo or image, click on “Elements,” scroll down to “Frames” and click your desired frame shape to select it.
NOTE: I’ll add a basic free square frame. - Use the corner Resize handles to adjust the frame’s size as needed, then position your frame as desired.
NOTE: I’ll resize mine down to 1.4” square and align it in the top left corner where the margin guides meet. - Follow Steps 23-26 from the “CREATE YOUR 5” x 7” FOLDOVER CARD TEMPLATE” section to create a label for the logo placeholder frame.
NOTE: I’ll create a text box with the words “Place Logo Here” on multiple lines, with bold and uppercase formatting. - Drag a selection box around both the text box and the frame and click the “Group” button so you can move both objects together.
- Next, add a label with placeholder text for your project’s title.
NOTE: I’ll create a text box with the words, “Type Title Here” on a single line, using the “Homemade Apple” typeface at size 36. - To add a decorative bar behind your text, click on “Elements,” scroll down to the “Shapes” section, and click a free square shape to add it to your canvas.
- Select the square on your canvas, and use the color swatch in the top bar to change it to black.
- Use the corner and side Resize handles to make the shape look like a thin rectangle slightly smaller than your text’s height.
NOTE: I’ll make mine 0.45” tall. - Then click the “Transparency” button in the top bar and use the slider to change the value so it's easier to read the text on the bar.
NOTE: I'll change my Transparency to 12. - Drag a selection box around the title’s text box and the bar, then click the “Group” button to keep the two elements together.
- Then click the “Position” button in the Edit bar, switch to the “Layers” tab, and drag the title bar layer behind the logo placeholder layer.
- Adjust the bar’s positioning as needed.
NOTE: I’ll snap mine to the logo placeholder’s horizontal center. - To create sections for project details, select the grey title bar shape and click the “Duplicate” button to make a copy of it.
- Select the copy and click the “Position” button.
- Under the "Arrange" tab in the “Advanced” section, enter "3.62" in the “Width” field and "3.38” in the “Height” field to make it into a box shape.
- Duplicate the box three times, then position the four squares evenly on your page within the margin guides.
TIP: Use the pink guides to help line up your boxes. Mine snapped into place with a 0.25” margin around the boxes. - To add a details section at the bottom of your template, duplicate one of the boxes.
- Drag the copy’s left and right handles out to the margins to form a rectangle.
- Position the rectangle flush with the template’s bottom margin guideline.
- Then drag the rectangle’s top edge down until it snaps into place with the same buffer amounts as the other elements, which are noted in pink ovals.
- To create a section heading, duplicate the title bar.
- Position the title bar copy in the top left corner of the first square, then drag its right side handle so the shape is flush with the box’s right side.
- Click the “Transparency” button and adjust the value to 100 so the bar is solid black.
- Then duplicate the title text and change the copy’s text to “Type Heading Here.”
- Change the font settings as desired.
NOTE: I’ll select the “Playpen Sans” typeface in SemiBold, change the text size to 18, and set the color to white. - Center the heading text inside the heading bar, then snap the text box’s left and right sides to the bar’s left and right sides.
NOTE: If you can’t see your text, click the “Position” button, switch to the “Layers” tab, and drag the heading text layer on top of the heading bar layer. - Select the heading text and the heading bar, then click the “Group” button to keep them together.
- Duplicate the group with the heading elements four times, then place the groups in the remaining box sections.
- Next, click on the canvas, then click the “Position” button and switch to the “Layers” tab.
- Move the logo placeholder and title placeholder to the top of the Layers list.
- To keep an element in place in your template, select it and click the “Lock” icon above it.
NOTE: I’ll lock each of my grey boxes in place. - Click the filename field at the top and replace the current name with your own so you can find your project easily later.
NOTE: I’ll change mine to “8.5” x 11” Tracking Sheet Template by JenniferMaker.” - Your tracking sheet template is ready to use and can be found in your Canva Projects folder whenever you need it!
HOW TO USE YOUR TRACKING SHEET TEMPLATE
- Follow Steps 1-4 from the “HOW TO USE YOUR CARD TEMPLATE” section to open a copy of your tracking sheet template and give it a new project name.
NOTE: I’ll change my filename to “8.5” x 11” Project Tracker by JenniferMaker.” - Click the “Type Title Here” text box and enter a title for your project tracking sheet.
TIP: Triple-click the text box to highlight all of the text inside the box.
NOTE: I’ll type in “Project Tracker.” - Repeat step 2 to replace the heading text in each section of your tracking sheet.
NOTE: I’ll name my sections “Settings & Tips,” “Favorite Materials,” “What Worked,” “What I’d Do Differently,” and “Notes.” - If you’d like to resize a section heading, select the text box first and use the side handles to resize it.
NOTE: I’ll slide the right side of my “Notes” textbox to the left so only a little space remains on both sides of the text. - Then select the black bar and use its side handles to resize it to match your text box.
- To add a logo or other image to your design, follow Steps 30-34 from the “CREATE YOUR 5” x 7” FOLDOVER CARD TEMPLATE” section to upload the element.
NOTE: I’ll use the “Crafted with Love” PNG logo I uploaded for my foldover card template. - Delete the placeholder text, then drag the image into the placeholder frame to fill it.
- If you need to adjust the image’s placement in the frame, double-click the image to open the Crop Panel, then resize and reposition the image as needed.
- If the frame cuts off part of your image, you can click the image in the Uploads panel to add it to your canvas instead. Then, resize and position the image over the placeholder frame and delete the frame and its label.
- If you need to reposition the title text and bar, select their group and click the “Unlock” button, then position as needed.
- To change the color of your title bar, select it, click the “Unlock” button if needed, and then click the color swatch in the top bar to choose a new color.
NOTE: Your color will appear lighter if you applied a transparency to the bar. - Do the same to change the color of the heading bars and section boxes as desired.
- To use the design, click “Share” in the top menu.
- Then select “Download.”
- Set the "File type" to "PDF Print."
- Make sure the box next to “Flatten PDF” is selected.
NOTE: Flattening a PDF in Canva combines all your layers into one flat image. This helps to preserve your design’s appearance for printing. - Click “Download” to save the image to your computer.
- Open your file in Adobe Acrobat to print your project.
NOTE: If you need help printing your project from Adobe Acrobat, check out my How to Make Cards in Canva tutorial for instructions! - Your project tracker is ready!
STEP 3: SHOW IT OFF
Now you know how to make Canva templates so you can easily make multiple projects of the same type!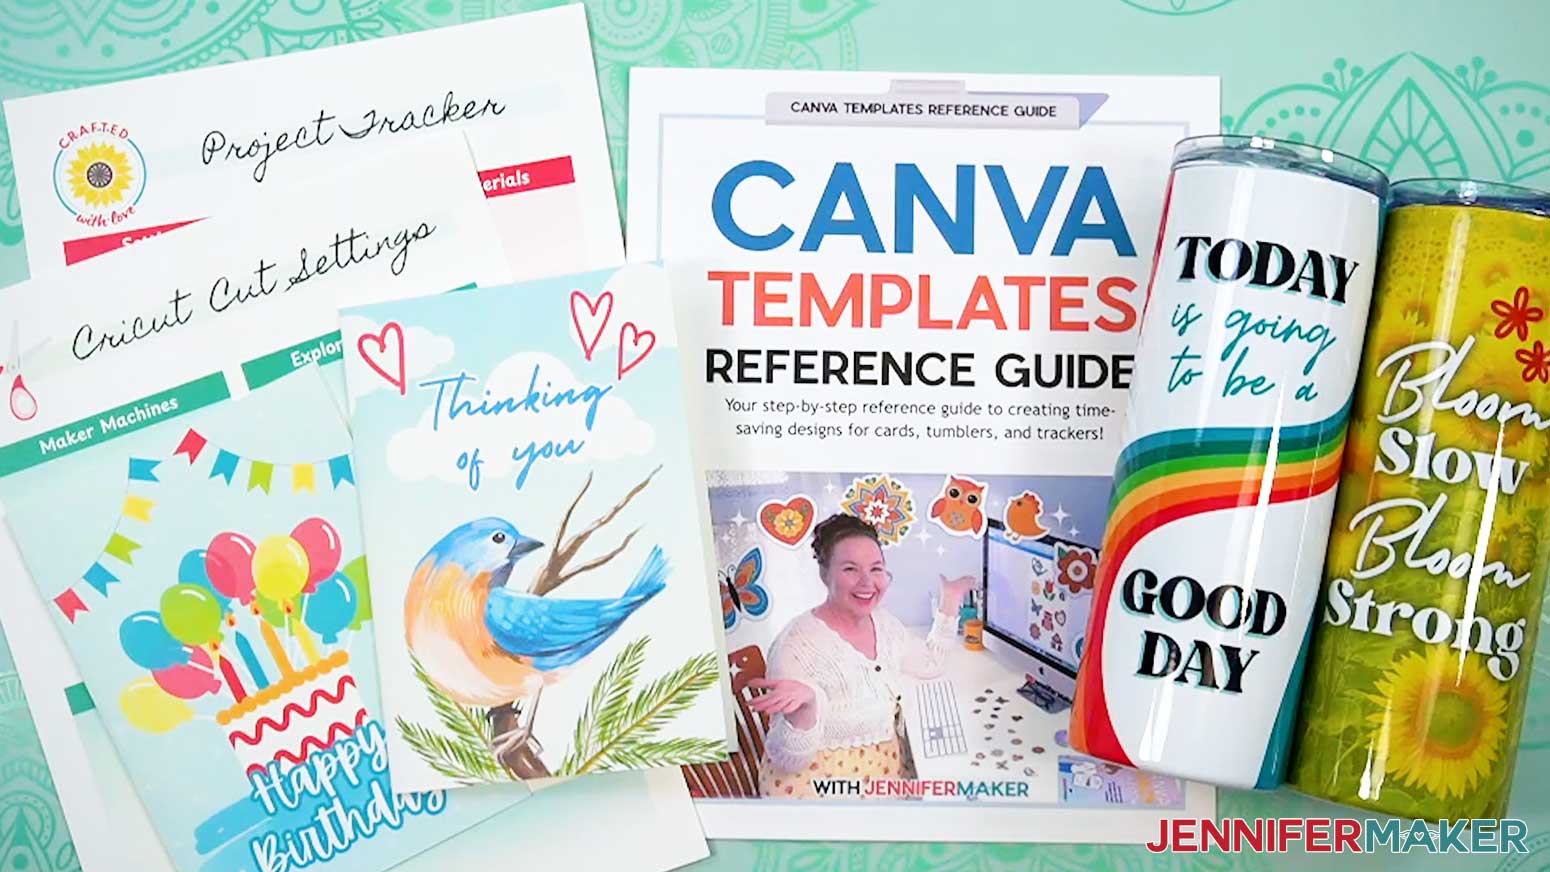
Notes
Finished Project Sizes
Card: 5" W x 7" H folded
20 oz Tumbler: 9.37" circumference x 7.9" H
Project Tracker: 8.5" W x 11" H
Free Canva Fonts Used
Lumios Brush
Playpen Sans, SemiBold
Answers to Your Questions About How to Make Canva Templates
Q: I want to design a set of coordinating Canva templates. How do I do that?
A: You can learn how to design a custom set of coordinating Canva templates and get the rulers and guides cheat sheet in my ADVANCE program. Learn more about ADVANCE here!
Q: How can I create my own template in Canva?
A: It’s easier than you think! Start with a custom size for your project, then add rulers, guides, and bleed lines so your design is set up correctly. In my “How to Make Canva Templates” tutorial, I show you how to create reusable templates for cards, tumblers, and tracking sheets. Once your layout is set, just duplicate the file whenever you need a new design. It’s super fast, fun, and consistent!
Q: Can you tell me how to create Canva templates and sell them?
A: This tutorial teaches how to design a polished template with free elements or your own images. My Advance workshop shows you how to create coordinated kits that look professional and market-ready. Sellers often offer “editable templates” that buyers can open in their Canva account and use for their own projects. For information on selling Canva templates and other designs through Canva’s website, go to Canva’s Contributor program page.
NOTE: At the time of this blog post, Canva is not accepting new sign-ups for their Contributor program. For now, I recommend researching alternate platforms for selling Canva templates online.
Q: Can you share tips on how to make your Canva design better?
A: Absolutely! Always start by setting guides and margins so your design elements line up neatly. Use a consistent color palette and font pairings for a professional-looking design, and don’t forget to take advantage of free elements for fast design accents. For even more step-by-step tricks, check out my Canva Coach Playbook. It’s got tons of easy-to-follow visuals and tips that Canva users of any level can use to improve their projects.
Q: What are some Canva hacks?
A: Some of my favorite Canva hacks include turning on rulers and guides for perfect alignment, using the “Position” tool to center or layer design elements instantly, and saving a custom template so you don’t have to start over each time. I share lots more in this tutorial and in the Canva Coach Playbook. It’s full of clever shortcuts and my best tips for making your designs look polished without spending a lot of time.
Q: Can you show me how to make a design for a cup on Canva?
A: Yes! In this tutorial, I walk you through creating a reusable skinny tumbler wrap template. You’ll learn how to measure your cup, set a custom size in Canva, add guides for seams and safe areas, and drop in your background colors or own images. Once it’s saved as a PNG, it’s ready to print and use for sublimation.
Q: How can I learn more about sublimation?
A: I’ve created lots of sublimation tutorials, from tumblers to charcuterie boards to umbrellas, that walk you through designing, printing, and pressing for vibrant results. If you want all my best troubleshooting tips and techniques in one place, grab a copy of my Sublimation Cookbook. It’s packed with easy-to-follow instructions, fixes for common issues, and step-by-step guidance to help you create high-quality sublimation projects with confidence.
Get my free template reference guide & “Crafted with Love” logo PNG!
(If you do not see the signup form above, click here.)
I love seeing what you make with my tutorials and how you customize them! Please share a photo of the projects you made with your Canva templates in our Facebook group or tag me on social media with #jennifermaker.
Love,

Want to remember this? Save this How to Make Canva Templates tutorial to your favorite Pinterest Board!