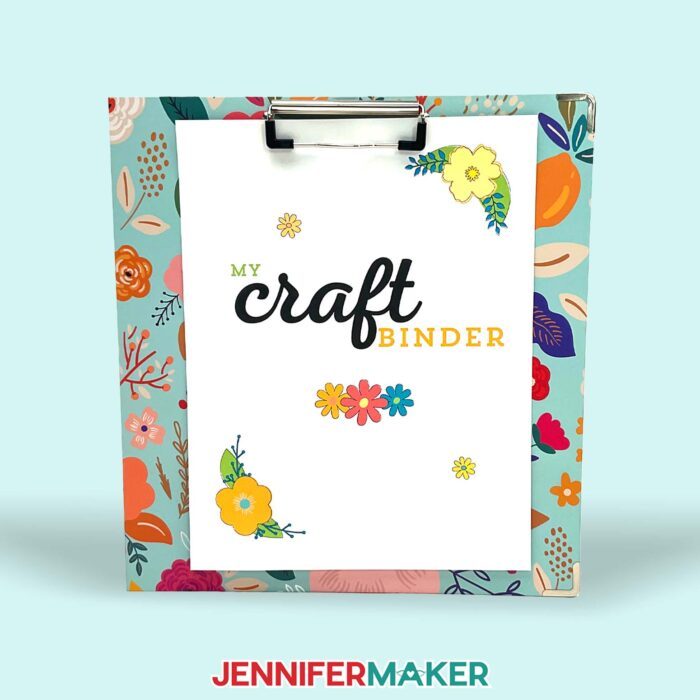
Learn how to print and use a craft inventory binder!
What if I told you that one of my favorite crafting tools was one that I made myself? And it helps me save time, money, and impulsive spending? It sounds like magic, but it’s way simpler than that!
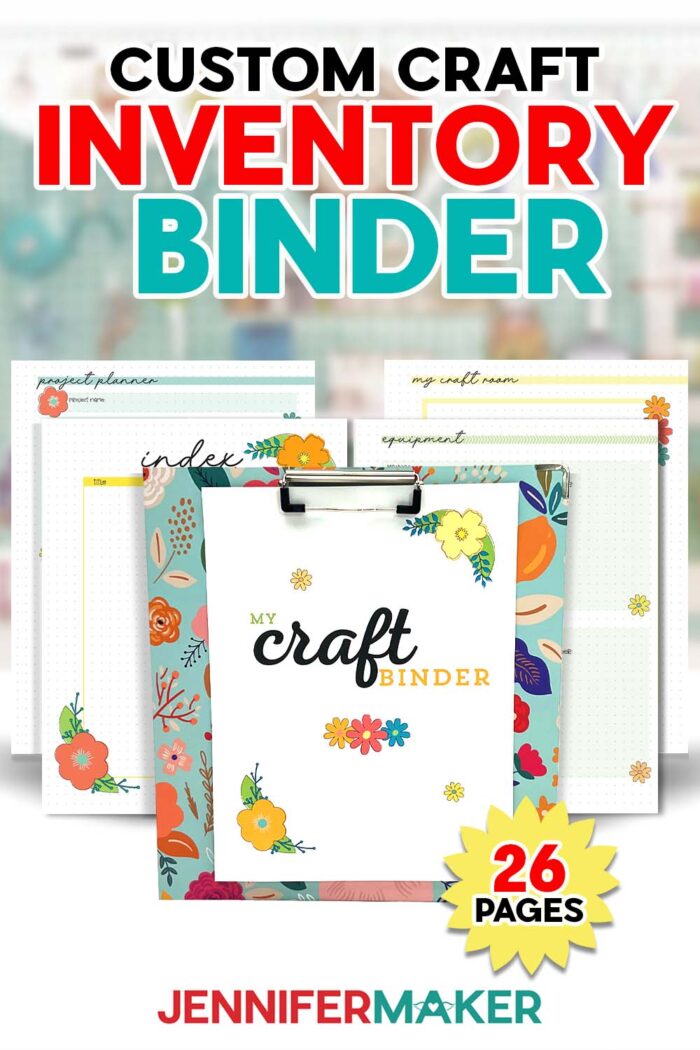
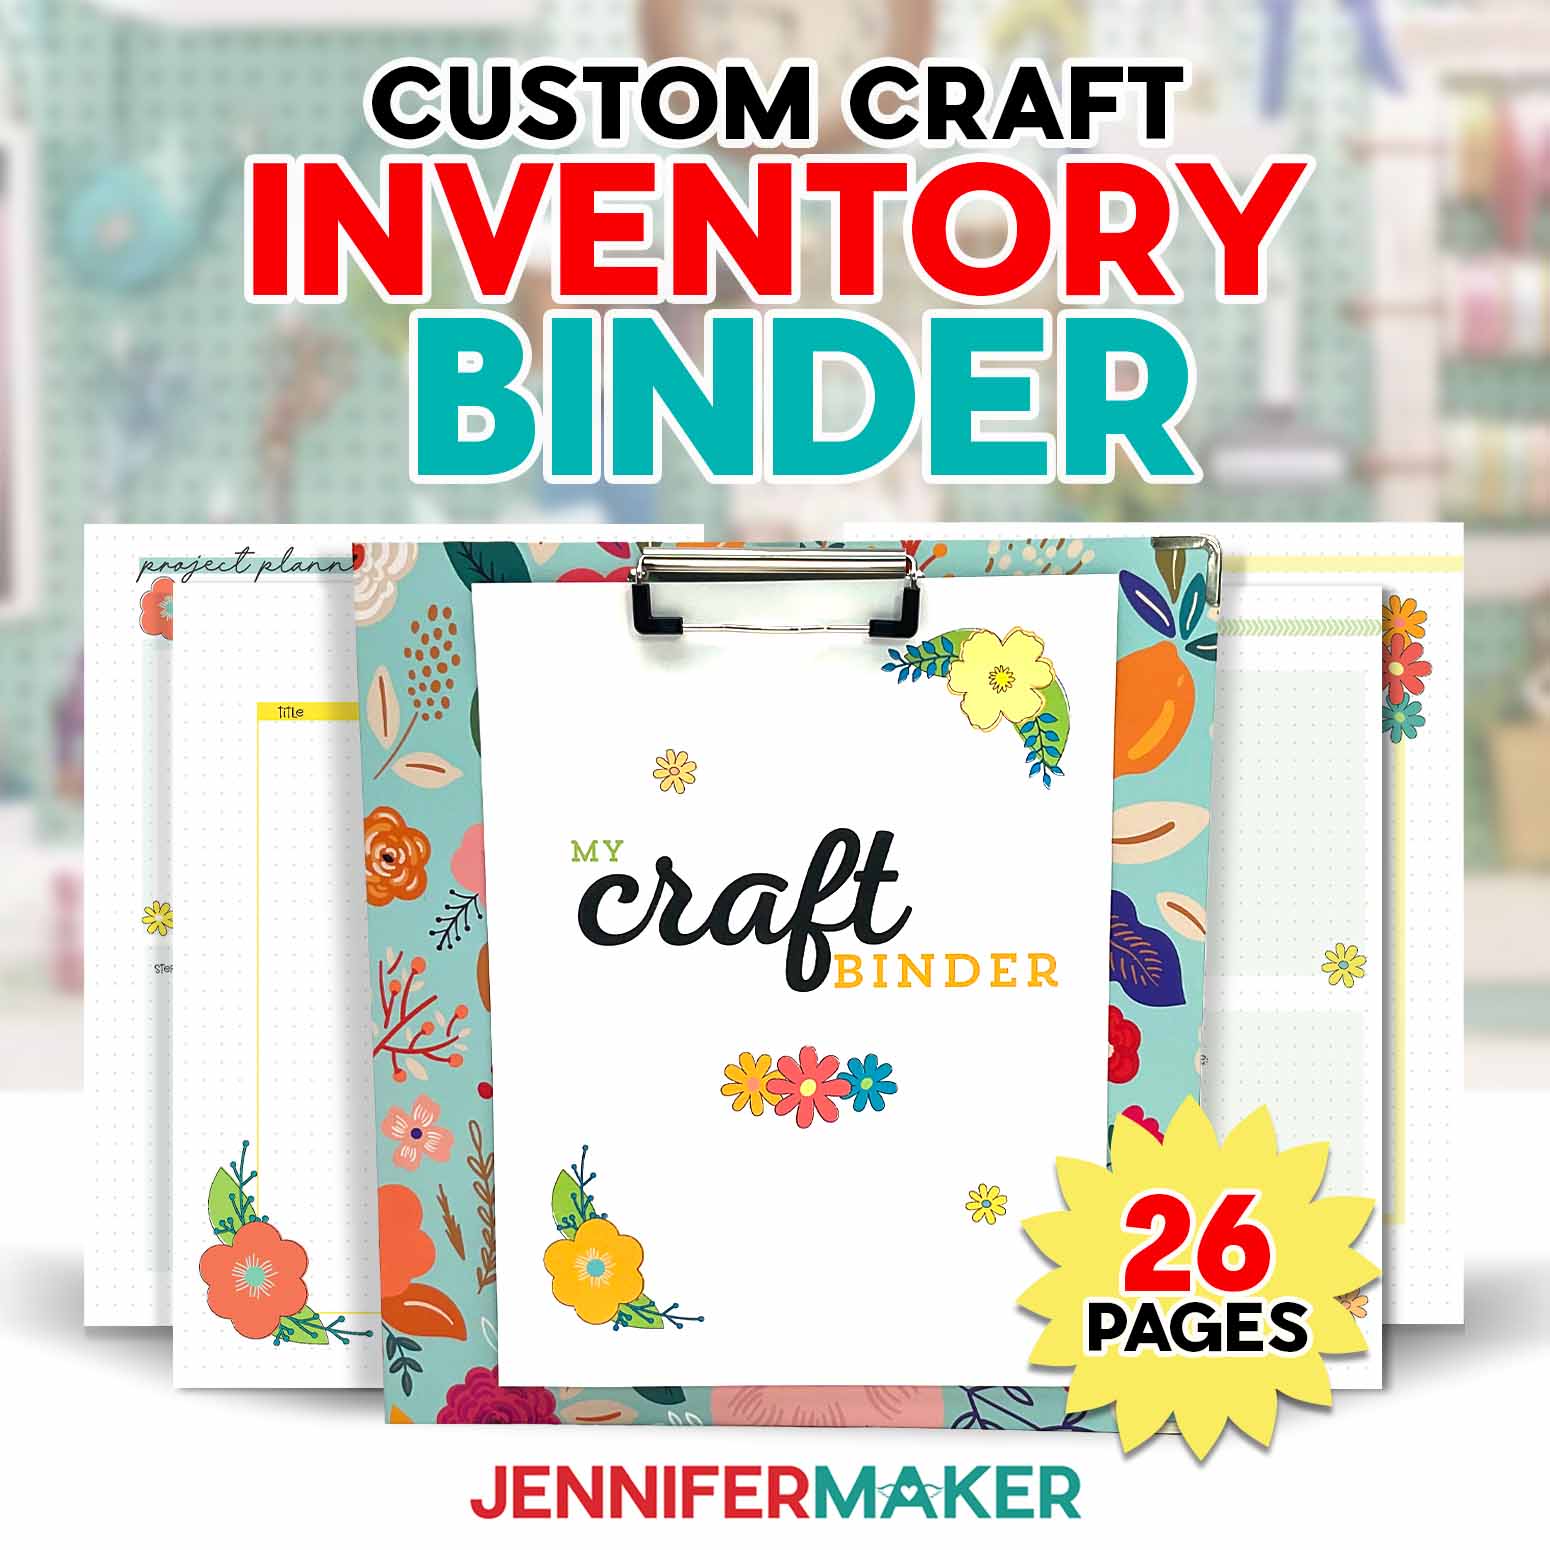
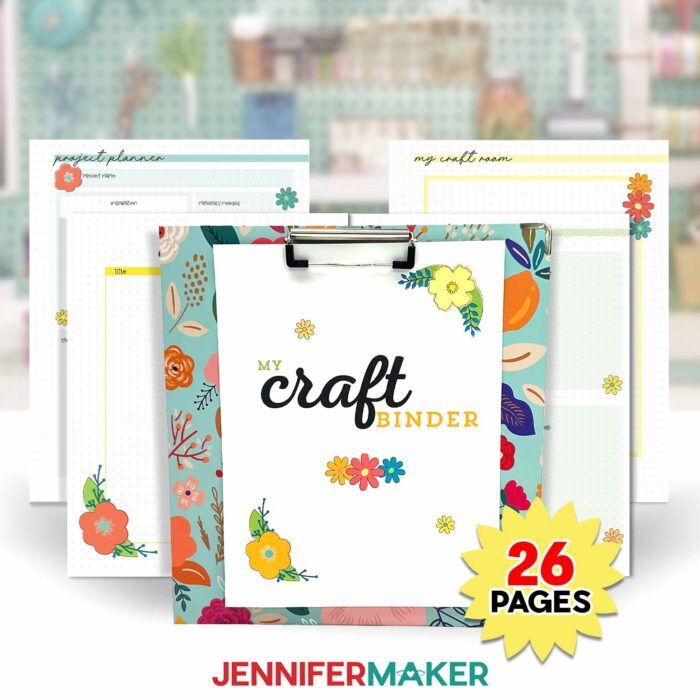
With more than 20 free printable pages, my Craft Inventory Binder keeps my craft room inventory, equipment info, and project plans organized and within reach. There’s even a section to swatch each of your materials to make building color palettes fun and easy! My Craft Inventory Binder is a pretty planning powerhouse — and way more fun than a Google Doc! Want to make your own? I’ll show you how to print my files using Adobe Acrobat Reader, a free PDF printing tool.
Watch the full step-by-step video tutorial on how to make and use a Craft Inventory Binder:

In my tutorial video, I walk you through a visual tour of my personal craft inventory binder, how I use it, and how I organize it. Then I show you how to print and bind your own!
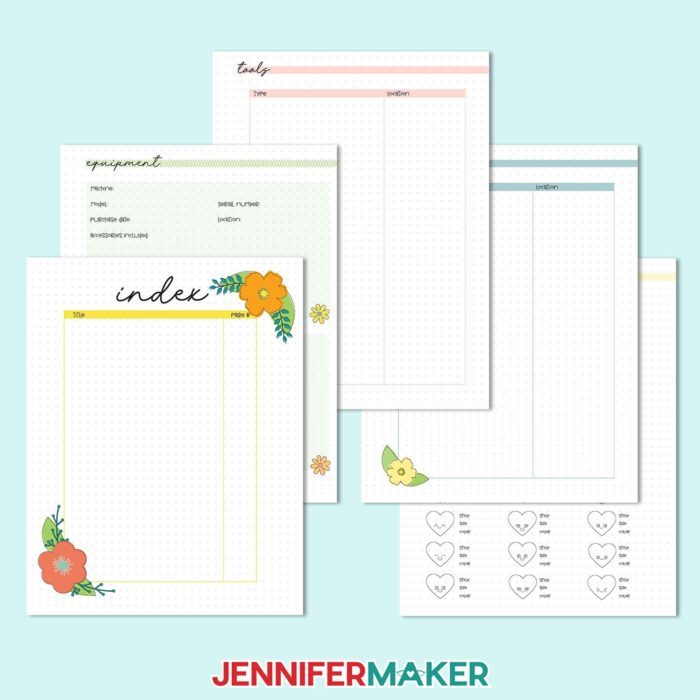
First is the Index, but I recommend waiting to fill it out until your binder is fully set up. Don’t set it up too early – instead, ask yourself “how do I want to organize my information?” Then lay out your binder, use it for a few weeks, and then adjust to your liking before you fill out the index page. Every crafter is different and you likely won’t use every page of the binder, but for some pages you might realize you need multiple copies!
Next is the Equipment section, which includes spots to record the model and serial number, as well as a maintenance log and a place to keep track of your account details. I added a pocket for warranty cards and user manuals to mine, too. Check my materials list below to find the pockets I used.
Then we have a Tools page where I keep track of what tools I have, what I use them for, and where I keep them. I also keep notes on what I like and don’t like about the tool, which helps me declutter when it’s time to refresh and reorganize my craft room.
The Supplies page is what helps me keep track of what materials I like to use, what I have on hand, and where they’re kept. This is especially helpful for tracking down all of the different supplies I might need for a mixed-media project! No more last-minute craft store runs!
Next is a page for you to plan out your craft room, crafting table, or even just the shelf or box where you keep your supplies and tools. Sometimes, something can be right in front of me and my eyes just don’t see it! Creating a visual guide helps me navigate my crafting space easily and efficiently so there’s less time searching and more time making! You don’t have to be good at drawing – it does NOT have to be perfect. You can also use it to plan a craft room setup.
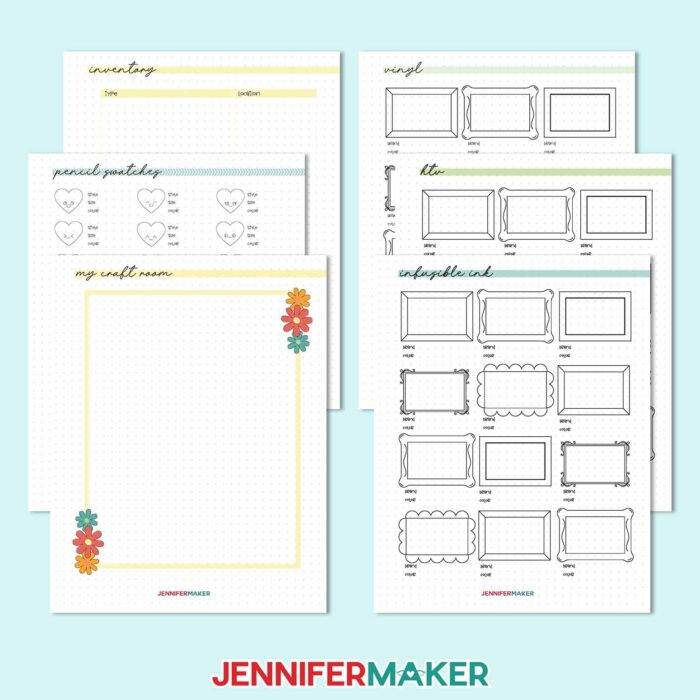
The Inventory sheet is for you to track your most commonly used materials and how much or how many of them you have on hand. This isn’t just a list of what you have, but also where you keep them. Reference this page before shopping for new materials!
After that is my favorite part: The Swatch pages! I’ve included pages to track swatches of your materials so you can easily reference their color, pattern, texture, or other characteristics and pick the perfect one for your craft — or build a whole new color palette! There are swatch pages for vinyl, colored pencils, paint, markers, cardstock, washi tape, and more. Get creative and swatch your ink pads and stamp sets, watercolor pencils, sublimation paint, or anything else you can think of! Remember to print multiple pages if you have many types of that material so you can track them all. When it’s complete, you’ll have a mini album of all your materials for quick and easy reference and planning.
Fun tip: Another way to use your Craft Binder is to store your homemade sticker collection in transparent card sleeves! Then they’re always ready whenever you may need one.
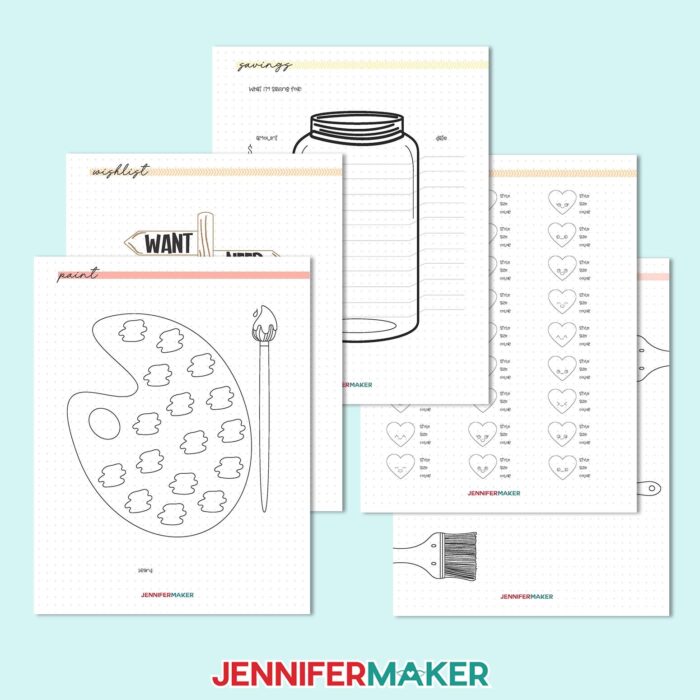
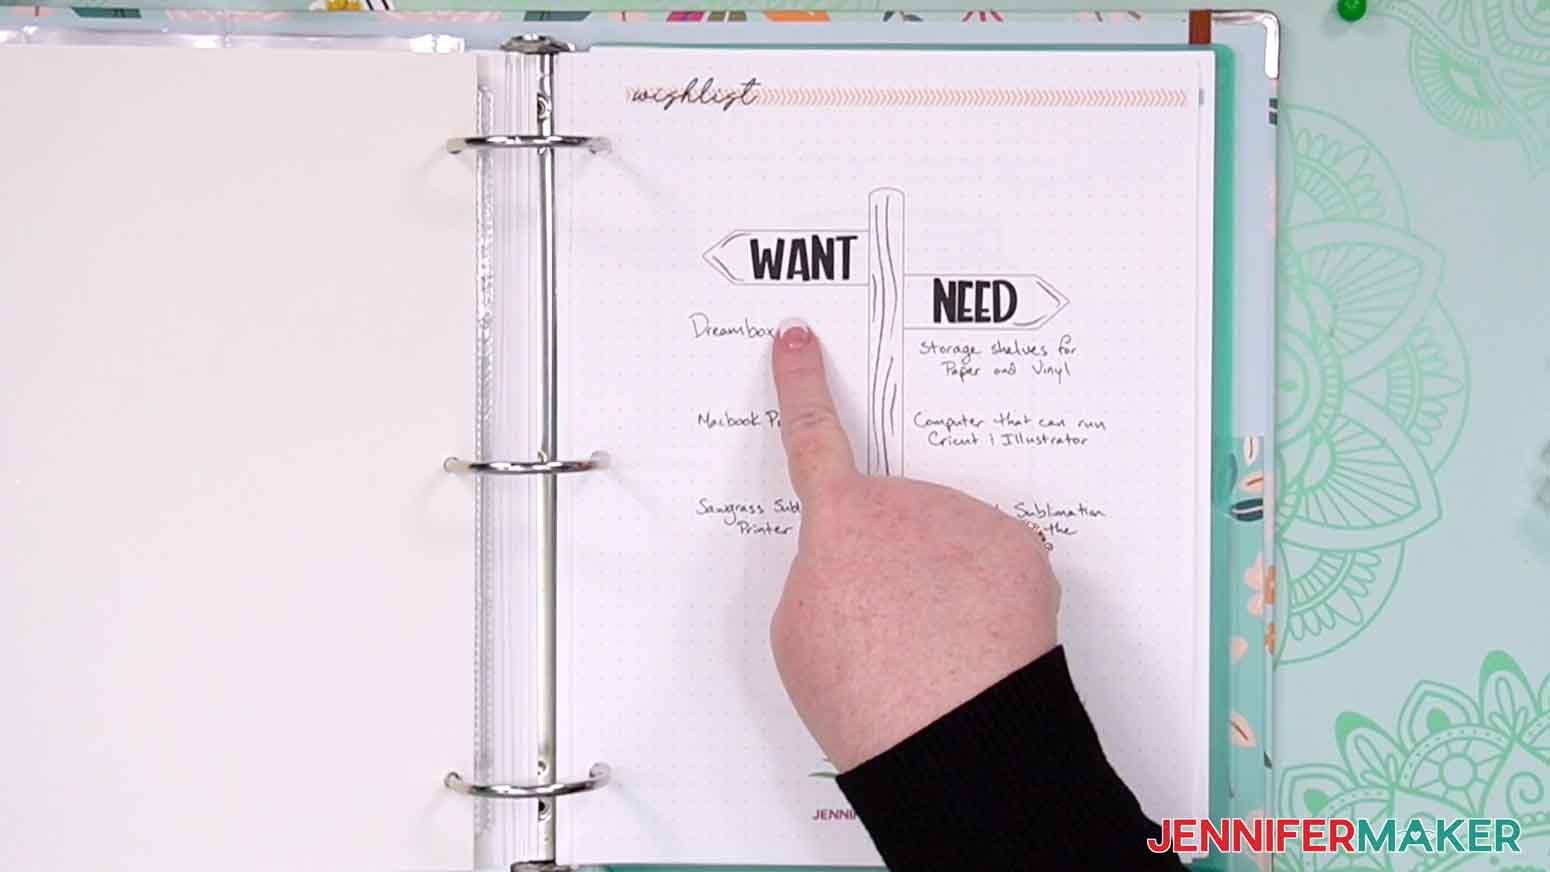
I’ve included a Wishlist page for you to keep track of your “Wants” and “Needs” in your craft stash. Hint: If something stays on the “Wants” side of my wish list for long enough, I move it to the “Needs” side.
And once it hits the “Needs” side – it goes on my Savings page! That’s where I plan and track my savings towards that new piece of equipment or materials for an exciting new technique. I find that saving towards a purchase really takes commitment and mindfulness, so it helps me cut down on impulsive spending and use my crafting budget wisely! It also gives me time to look for deals and get the best price. Be sure to watch the tutorial video to see how I filled out my Savings page!
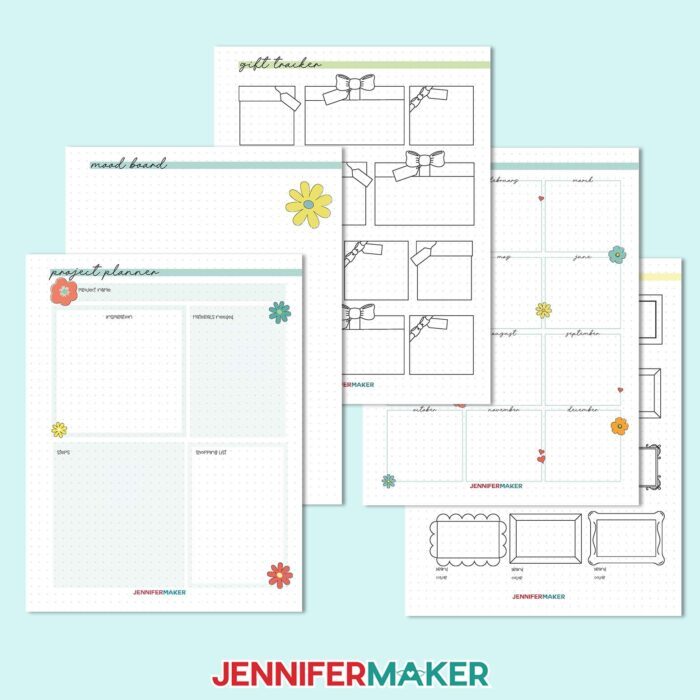
The Mood Board page is one of my other favorites in the binder. Why? Because it’s where you can dream! I filled my mood board with ideas, inspiration, and things that make me smile. When I need a kickstart in designing a new project, I can use those materials, drawings, or color palettes as a jumping off point for new crafts and designs.
Have you ever had a project idea that you were really excited about, but you weren’t sure where to start? The Project Planner section of your binder is the perfect place to map out all of those ideas and logistics. It’s super helpful for keeping track of the details and plans for different craft projects you’re planning at the same time. Use it to formulate your plan, figure out the materials you need, and write a shopping list. Compare the materials you’ll need to your inventory sheet to avoid digging through your craft stash!
Planning ahead always helps me stay on top of important dates and deadlines, but it doesn’t work if I don’t write things down. My next page can help with that. It’s a Birthday tracker, and you can use it to help you get birthday cards, gifts, and decorations crafted ahead of the event. Life can get busy, and sometimes we forget things we think we won’t – so write everyone down, and reference it often!
Speaking of giving homemade gifts, the next page is a Gift tracker. Use it to track which gifts you’re making and gifting for each special person in your life. Just write their name on the tag, then list their gifts in the box. You can also use it to track and plan batch-made gifts, or even just make sure you don’t repeat gifts in years to come.
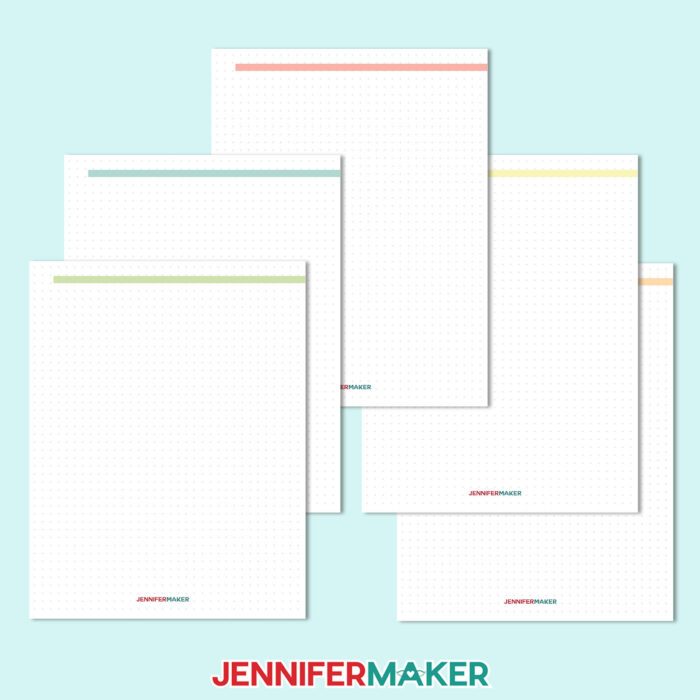
Finally, I have a few color-coded blank sheets at the end that you can use for whatever you like! I use mine to stash extra inspiration, ideas, and notes that don’t quite fit anywhere else.
The binder files are of course available as a digital download that you can use on your computer, but I prefer to print mine because it just feels more personal! Plus, I really love to use the swatches section.
If you want to print the whole binder at once, use the file called “printable-craft-organizer.” You can also pick and choose which pages you print by selecting them inside the “Individual Pages” file. I use the free Adobe Acrobat Reader program to open and print my PDF files. Check the tutorial for more info on how to get a perfect printout of your Craft Inventory Binder pages!
I used a three-hole punch to make holes in my pages, then put them into a cute three-ring binder. Now I have a handy Craft Inventory Binder that will help me stay organized, save money, and keep me focused on creating!
My Craft Inventory Planner is great for personal use, but you can also use it as a part of your creative or craft business! Want more info on how to start a craft business? Check out my Maker Marketplace Workbook which explores starting and running a handmade crafts business, from the very beginning why, when, what, who, how, and where. You’ll also learn how to price and market your crafts!
Let me show you how to make a craft inventory binder! This post contains some affiliate links for your convenience (which means if you make a purchase after clicking a link I will earn a small commission but it won’t cost you a penny more, there is no additional cost)! Read my full disclosure policy.
Materials to Make A Craft Inventory Binder
View my Amazon shopping list for the exact items I used!
- Several sheets of 8.5” x 11” white printer paper
- 2” 3-Ring Binder
- Several 8.5” x 11” trading card binder pockets (optional)
- Several 8.5” x 11” binder pockets (optional)
- Color Printer – I used my Epson EcoTank ET-2800
- Three-hole punch
How to Make a Craft Inventory Binder!

Craft Inventory Binder
Learn how to make your own craft inventory binder!
Materials
- Several sheets of 8.5” x 11” white printer paper
- 2” 3-Ring Binder
- Several 8.5” x 11” trading card binder pockets (optional)
- Several 8.5” x 11” binder pockets (optional)
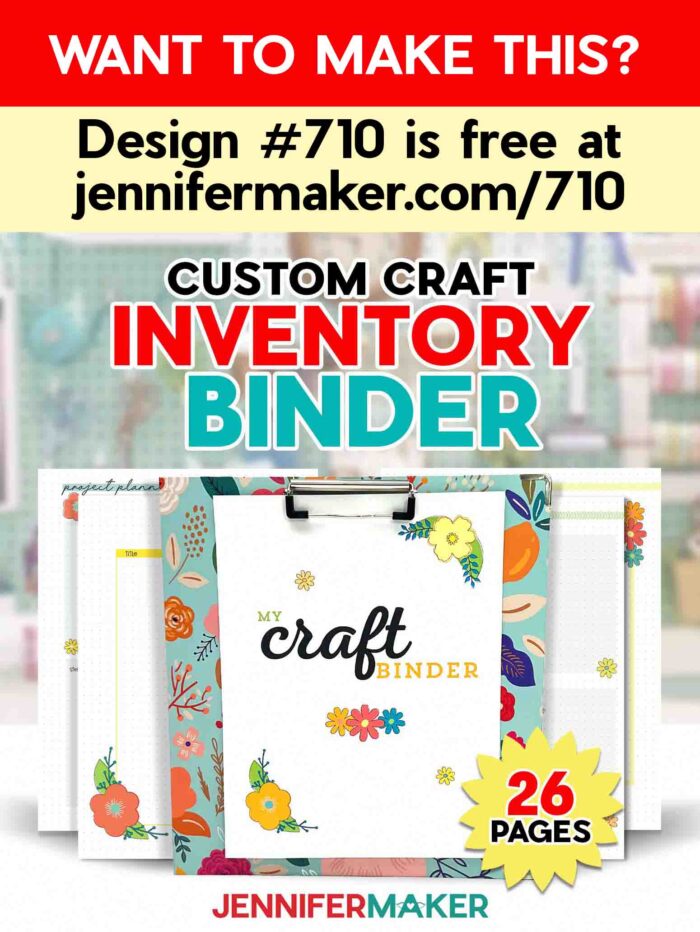
- Design #710 (My free PDF design files are available in my free resource library - get the password by filling out the form at the bottom of this page)]
Tools
- Color Printer - I used my Epson EcoTank 2800
- Three-hole punch
Instructions
STEP 1: GET MY FREE CRAFT INVENTORY BINDER PAGES
First, download my Craft Inventory Binder sheets from my free library – look for Design #710. Alternatively, you can use the Save This Project form near the top of this post and the design link will be emailed to you.
The PDF folder has a file with all of the pages called “craft-organizer,” but you can also pick and choose one type at a time using the individual sheet files.
TIP: If you’re not sure how to unzip, go to jennifermaker.com/svgs to learn how since the process will work for this download type.
STEP 2: REVIEW THE CRAFT INVENTORY BINDER PAGES
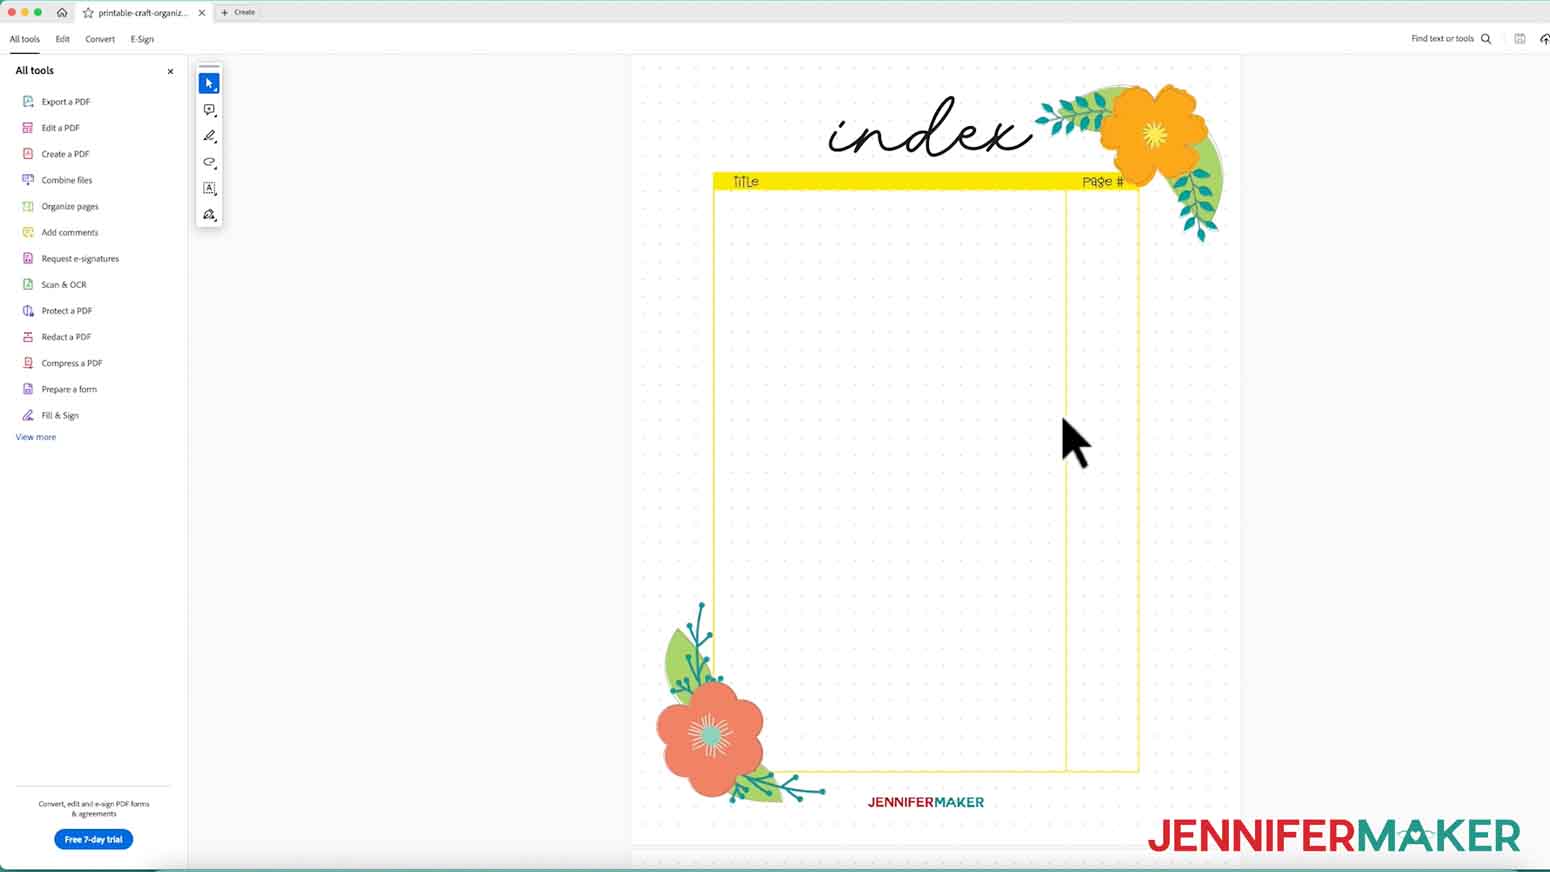
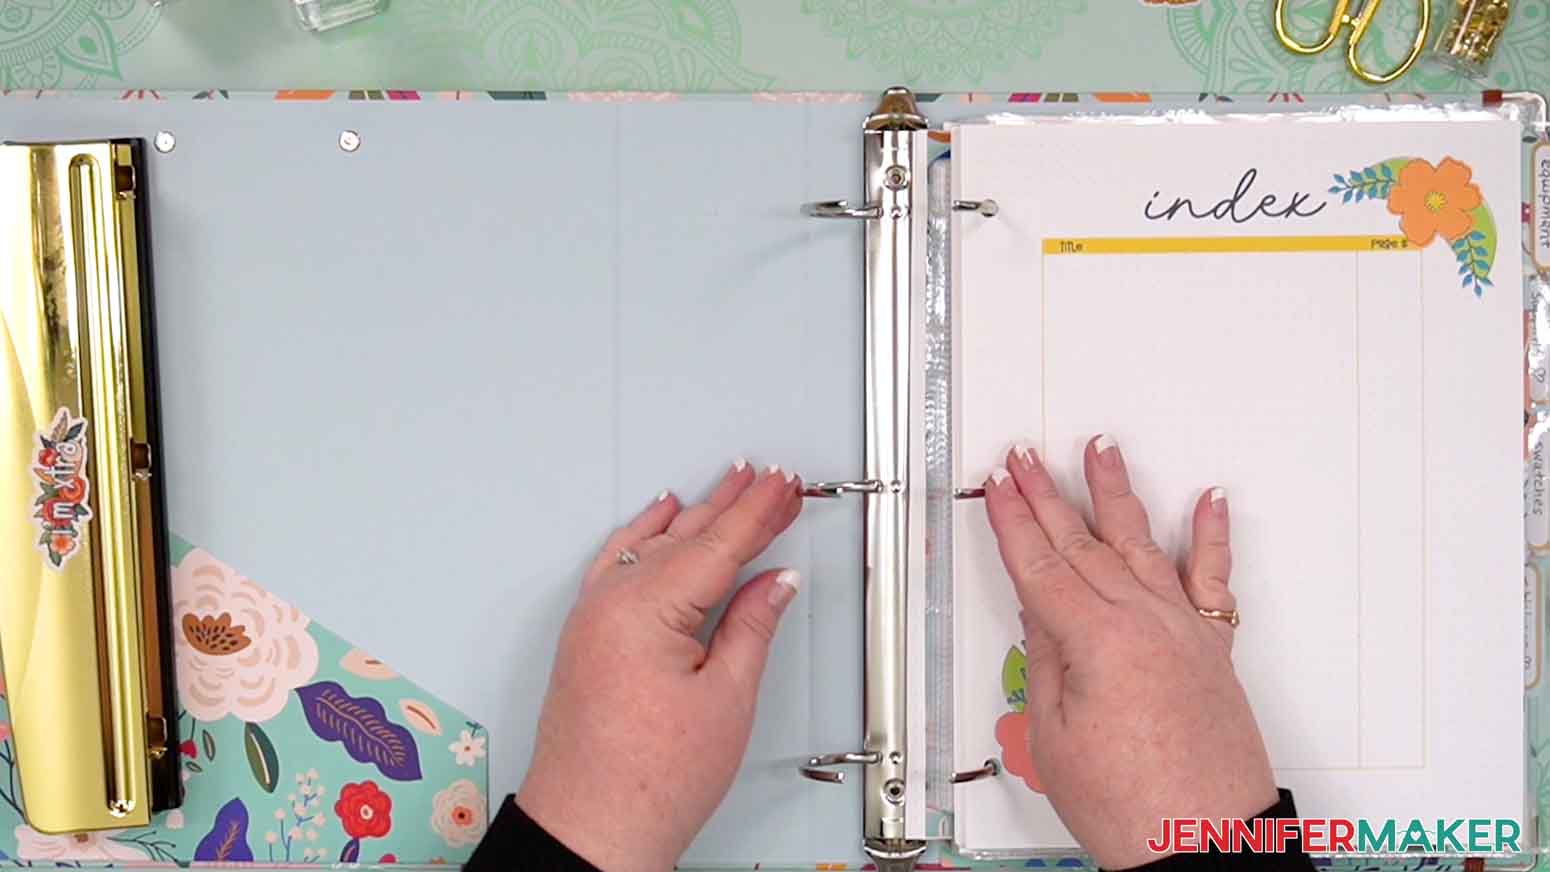
Index
The index is the most important page because it helps you find things in the binder. But it might take you a while to fill in because you’ll want to plan out your sections first! Ask yourself, “How do I want to organize my information?” as a start, then look through the pages and decide which types you need. Once you have a collection that you want to try, add the details in the Index, but consider using pencil until you get it settled!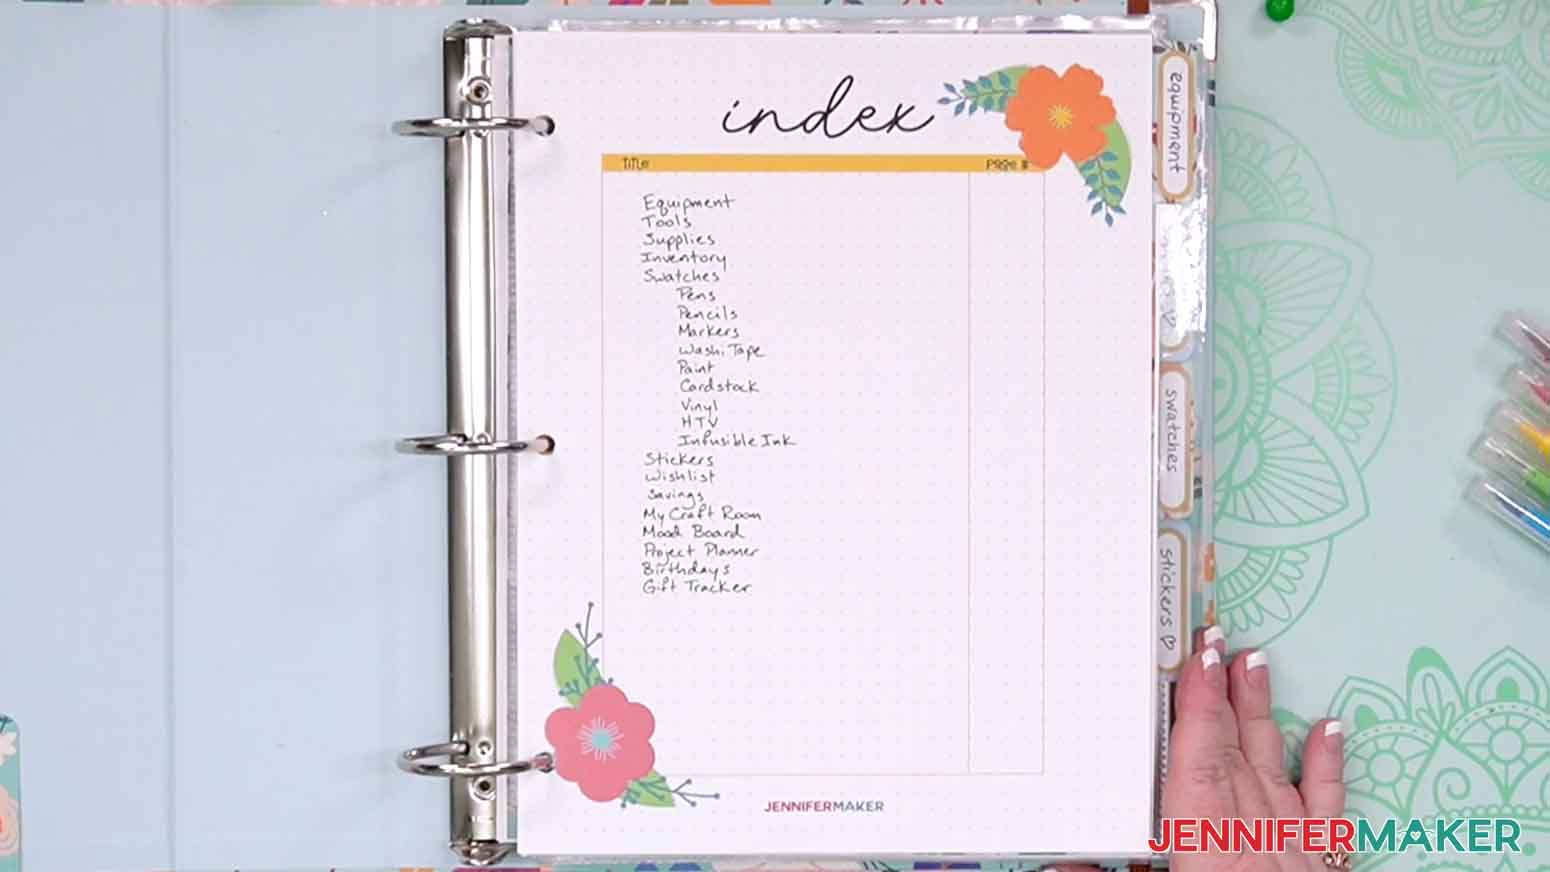
Equipment
Items like cutting machines and printers have a lot of details to keep track of, so you can note them on this detailed sheet. Find and record the serial number if possible because they help with warranties, troubleshooting, and maintenance.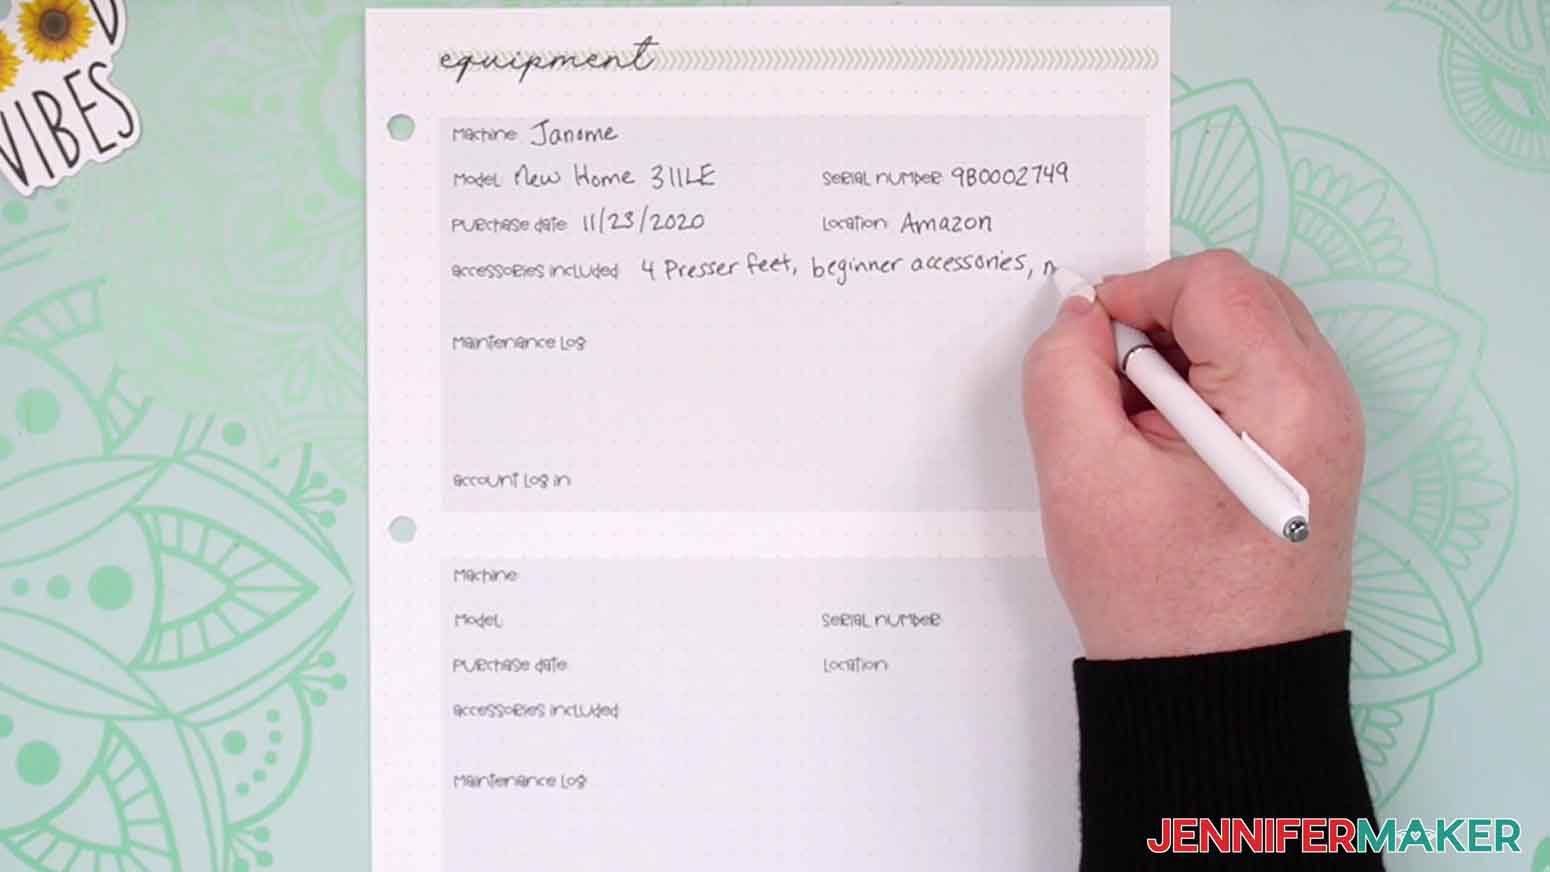
Tools
I record any hand tools I have and where I keep them on this page. That saves time instead of searching all over when I need something. I also add notes on my favorites, or if there’s an item I’m not using often that could be gifted or donated.
Supplies
I track where I keep supplies here so it’s easier to find them when it’s craft time. Plus, knowing where everything goes makes it easier to clean up at the end of a project.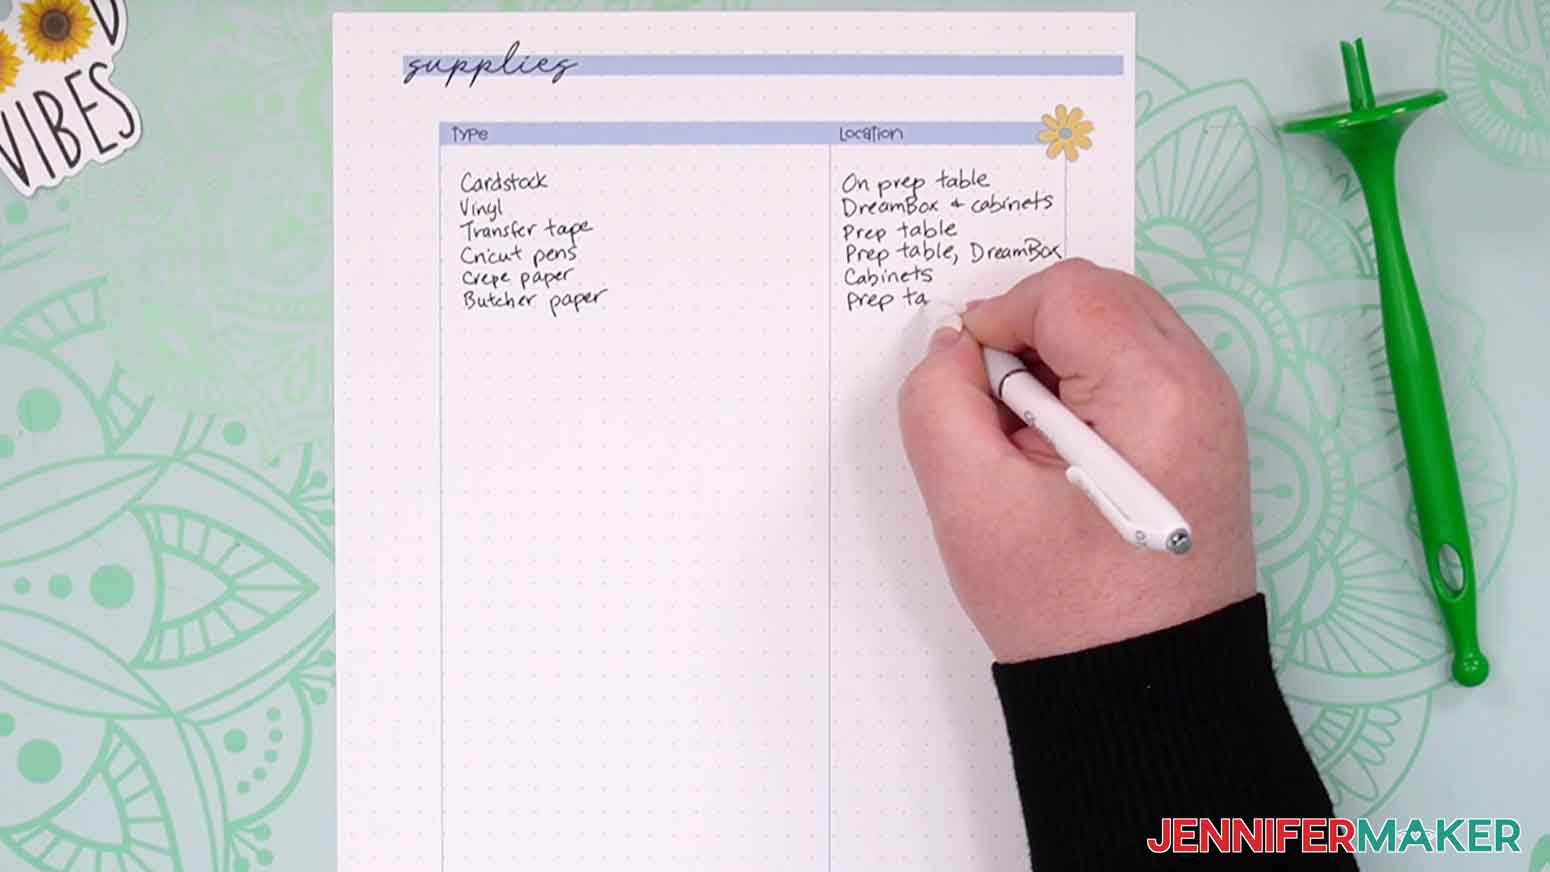
Map
This sheet says it’s for a room, but you can also use it to plan out a shelf or even a portable bin, wherever you keep you crafting supplies!
Inventory
This sheet is an overview of what you have and where you’re keeping it, so fill this in once you’ve completed your planning sheets.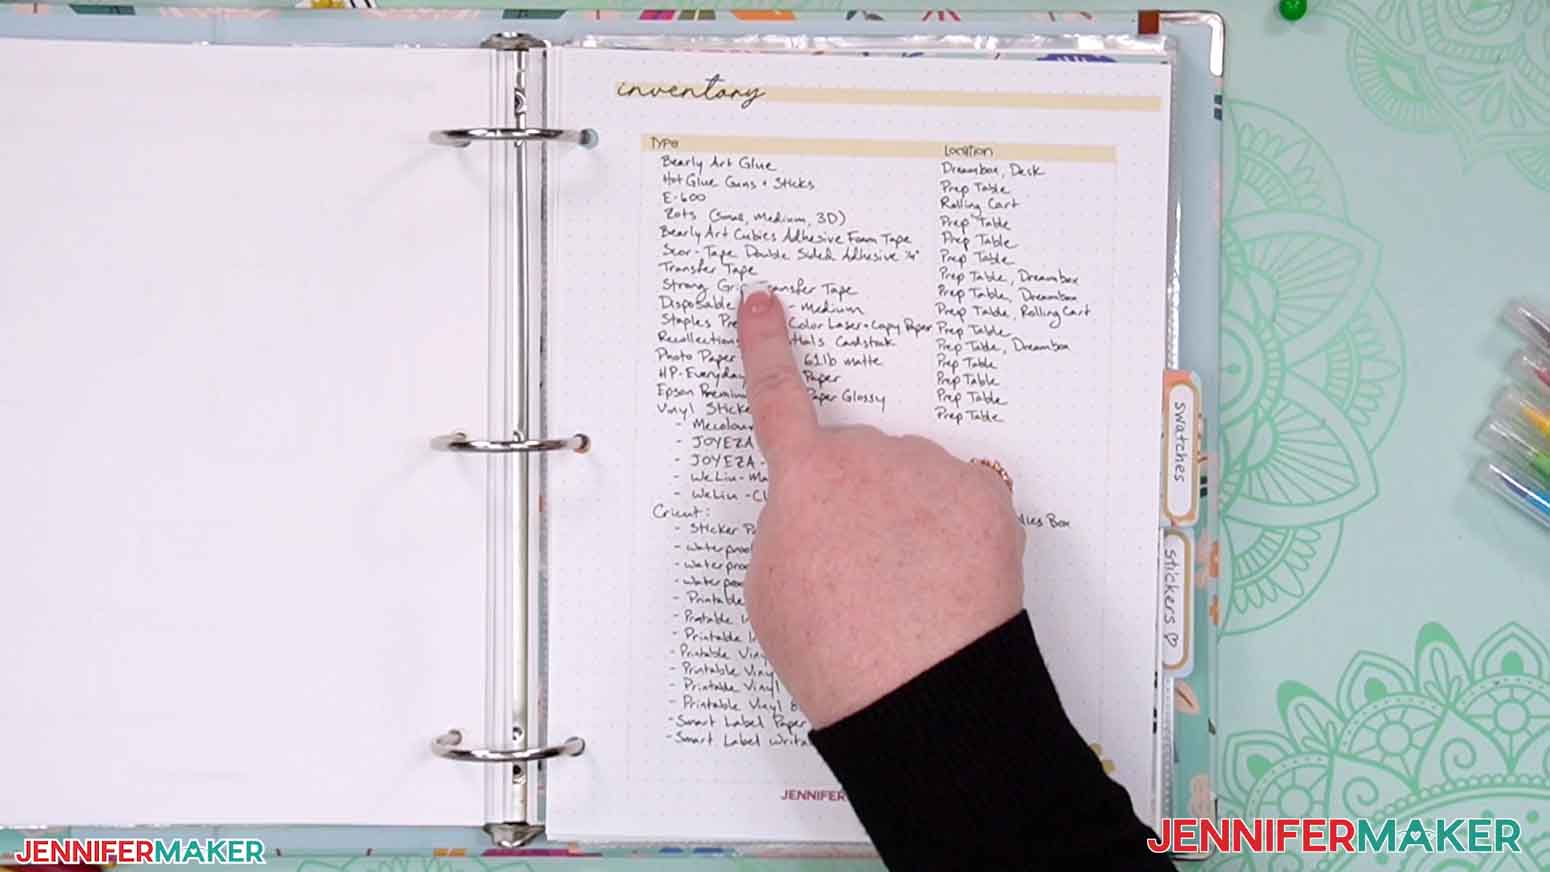
Swatch Sheets (Pens, Markers, Pencils)
Use a different swatch sheet for each set of drawing supplies (or go by color) and record the style, size, and color of each item. Then, color in the heart as an example. Swatch sheets can help you avoid buying duplicates and make picking your best option without opening them all up.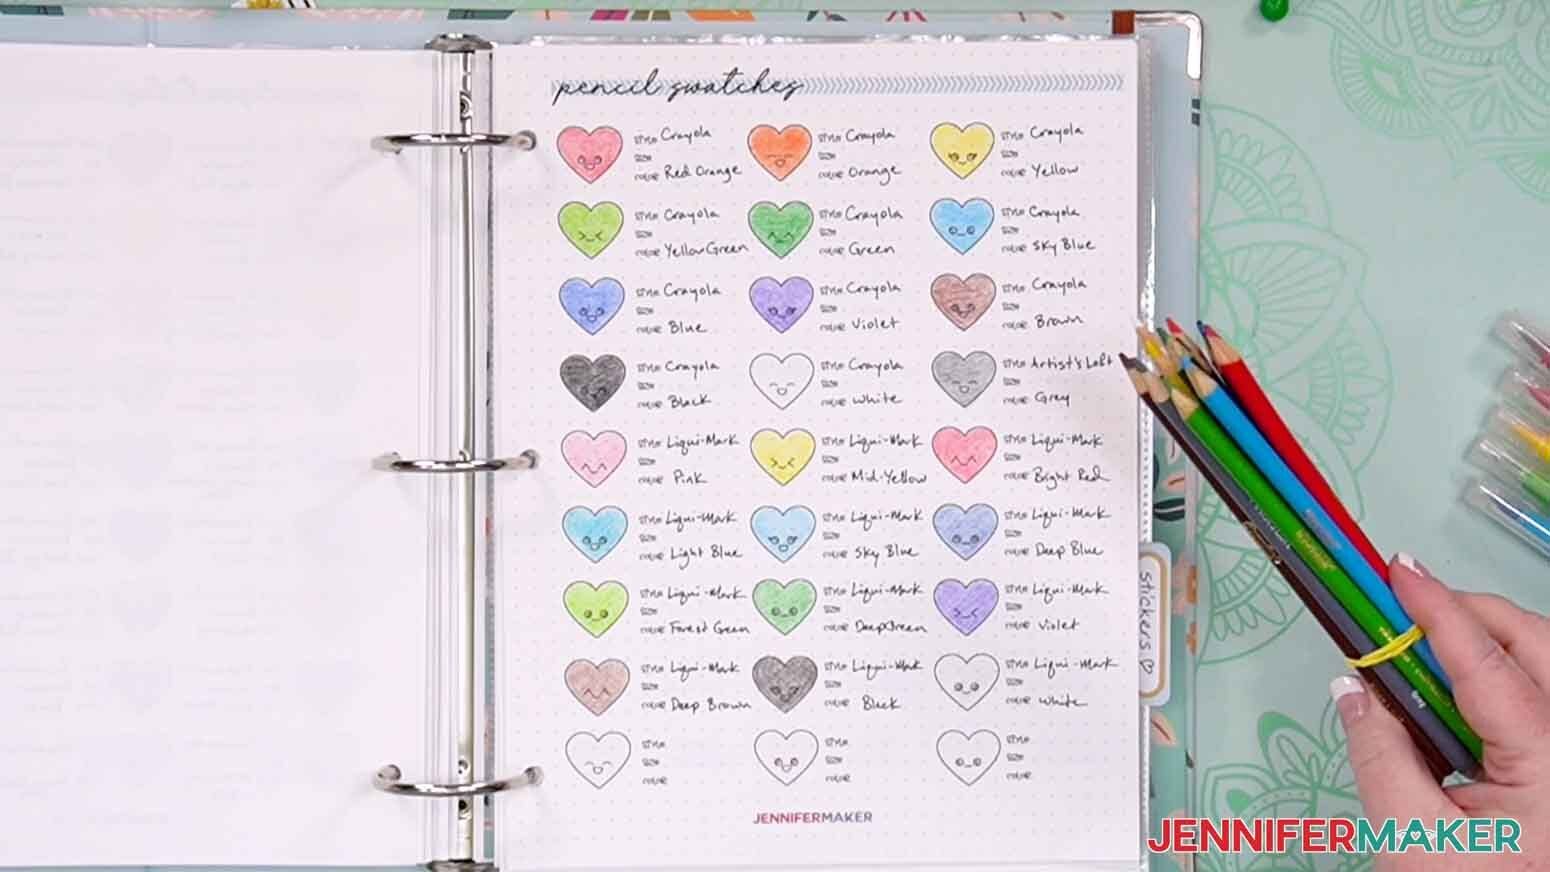
Washi Tape Swatches
Add a small strip to the paint brush so you can keep track of what you have and your favorites!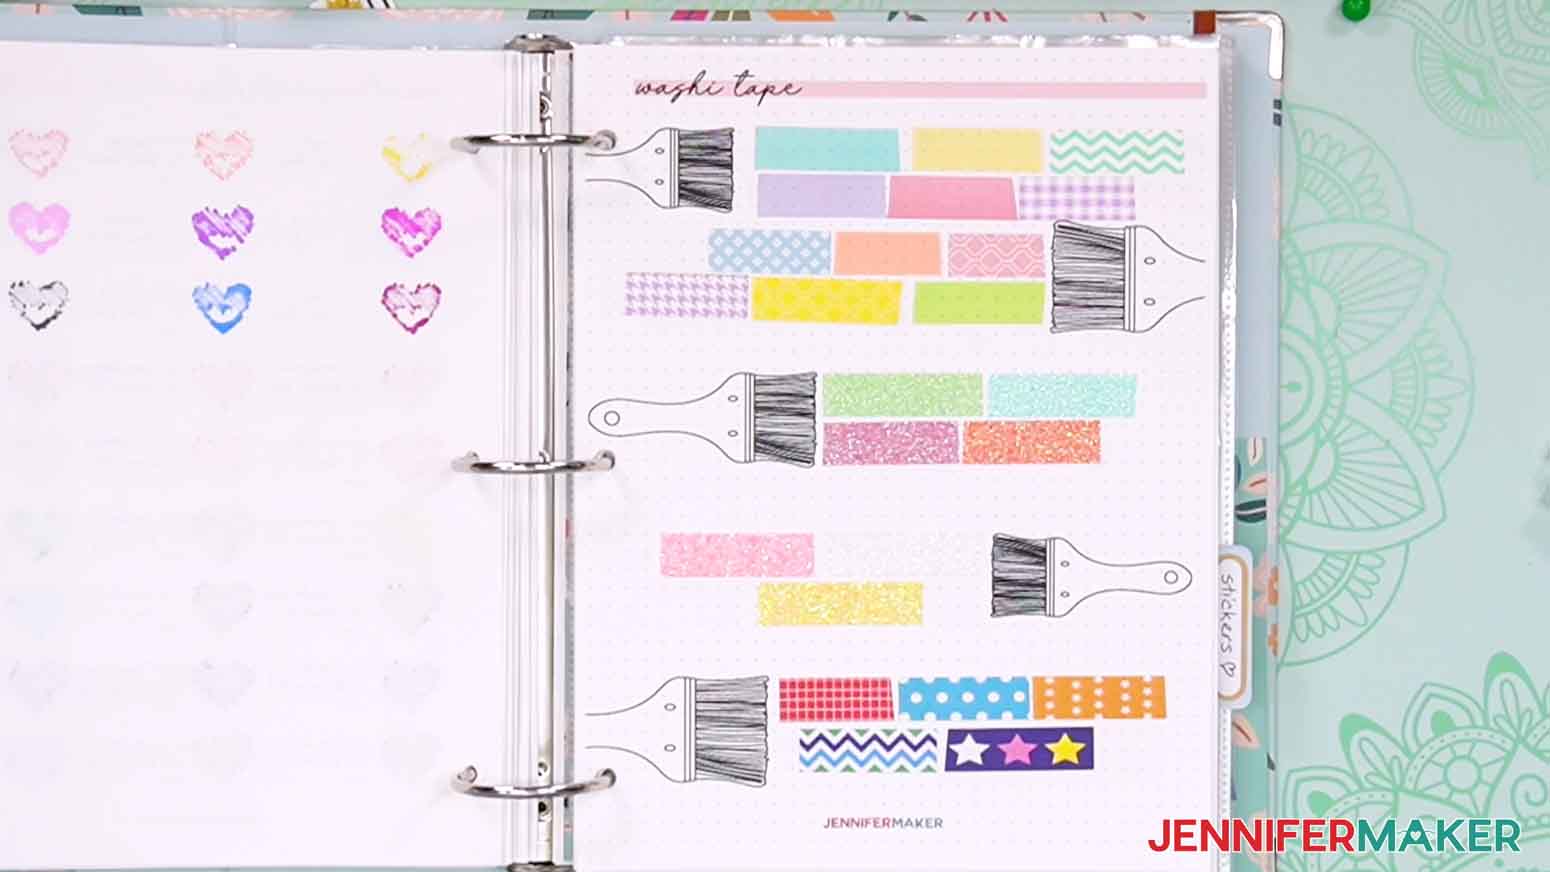
Material Swatches (Adhesive vinyl, HTV, Infusible Ink transfer sheets)
Cut pieces of each material and stick or tape them in the frames for a quick reference instead of opening up all the rolls and packs. Record the type and brand to make sure you use the correct process for each one!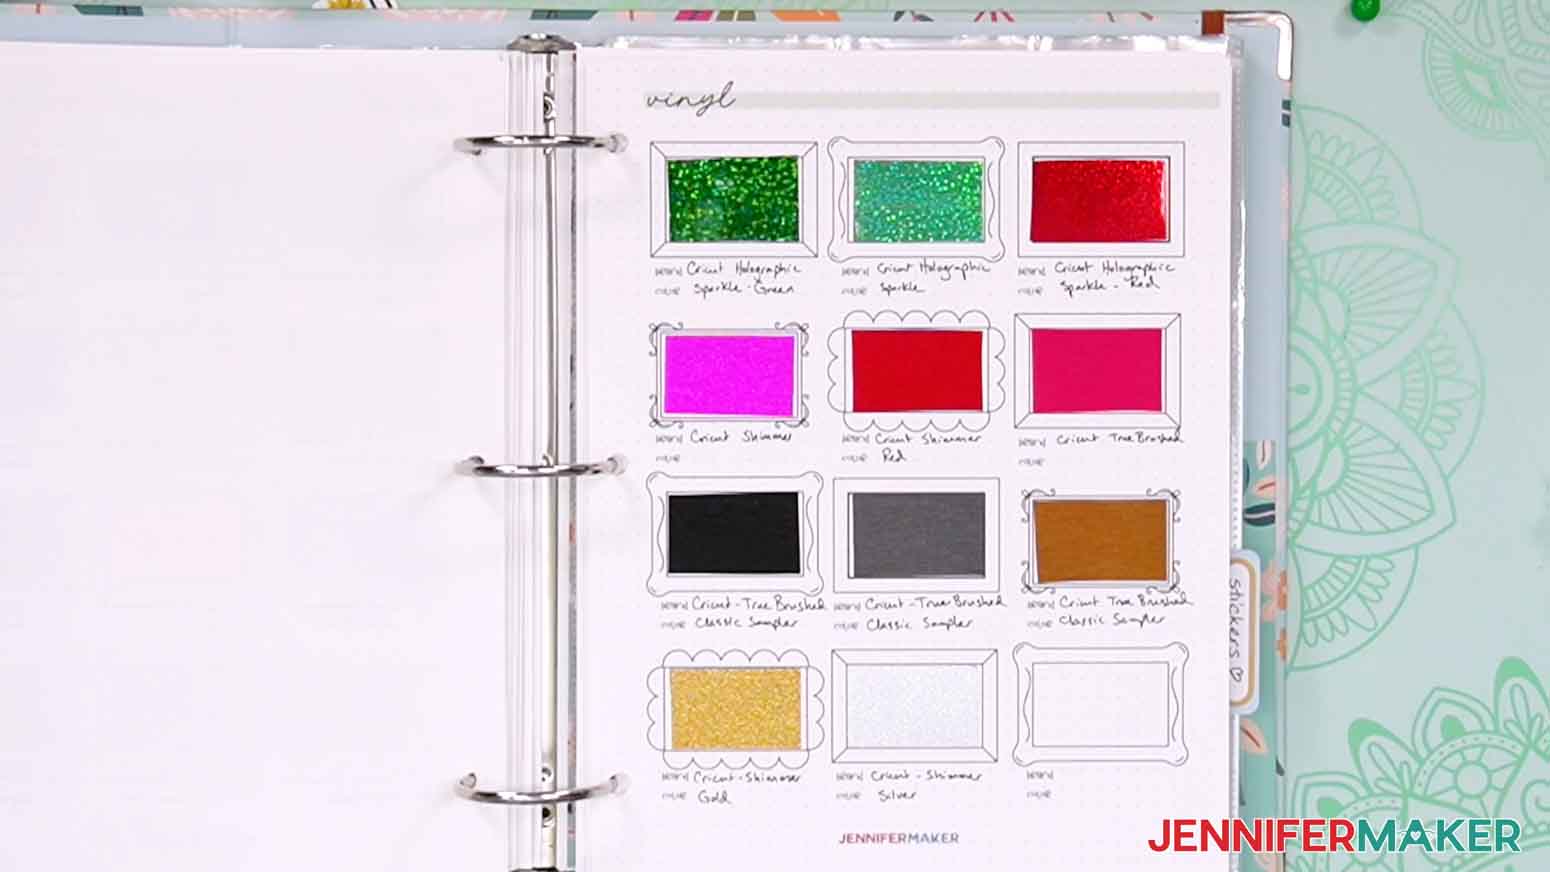
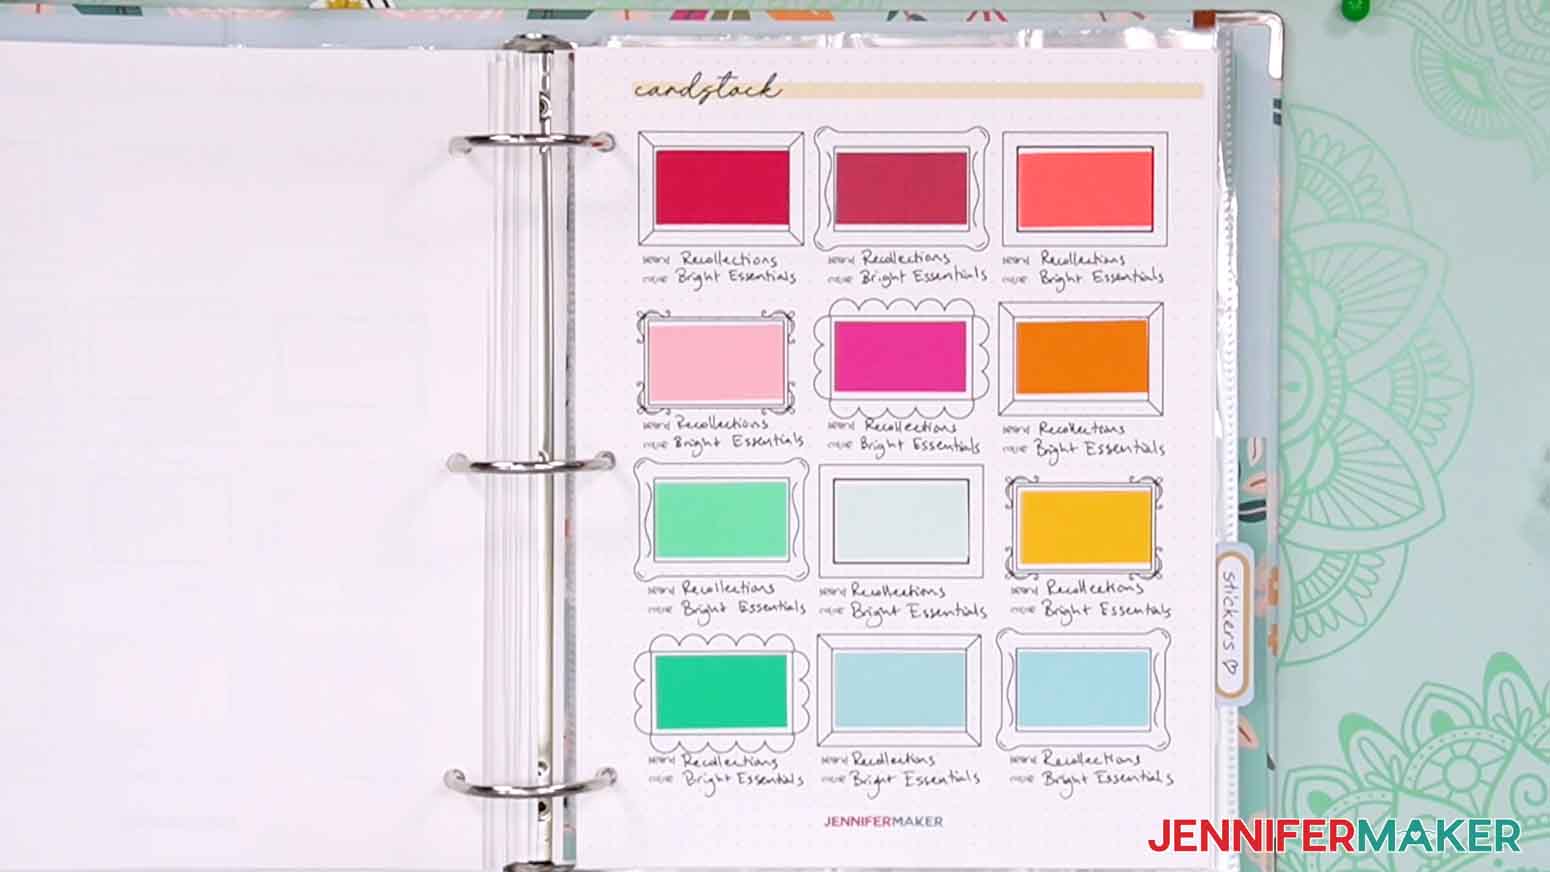
Cardstock Swatches
Cut and tape in samples of your cardstock stash using the cute frames. Record the brand, best cut settings, and where you got it in case you want to get more. This is a good way to keep track of and compare a lot of similar papers, too!
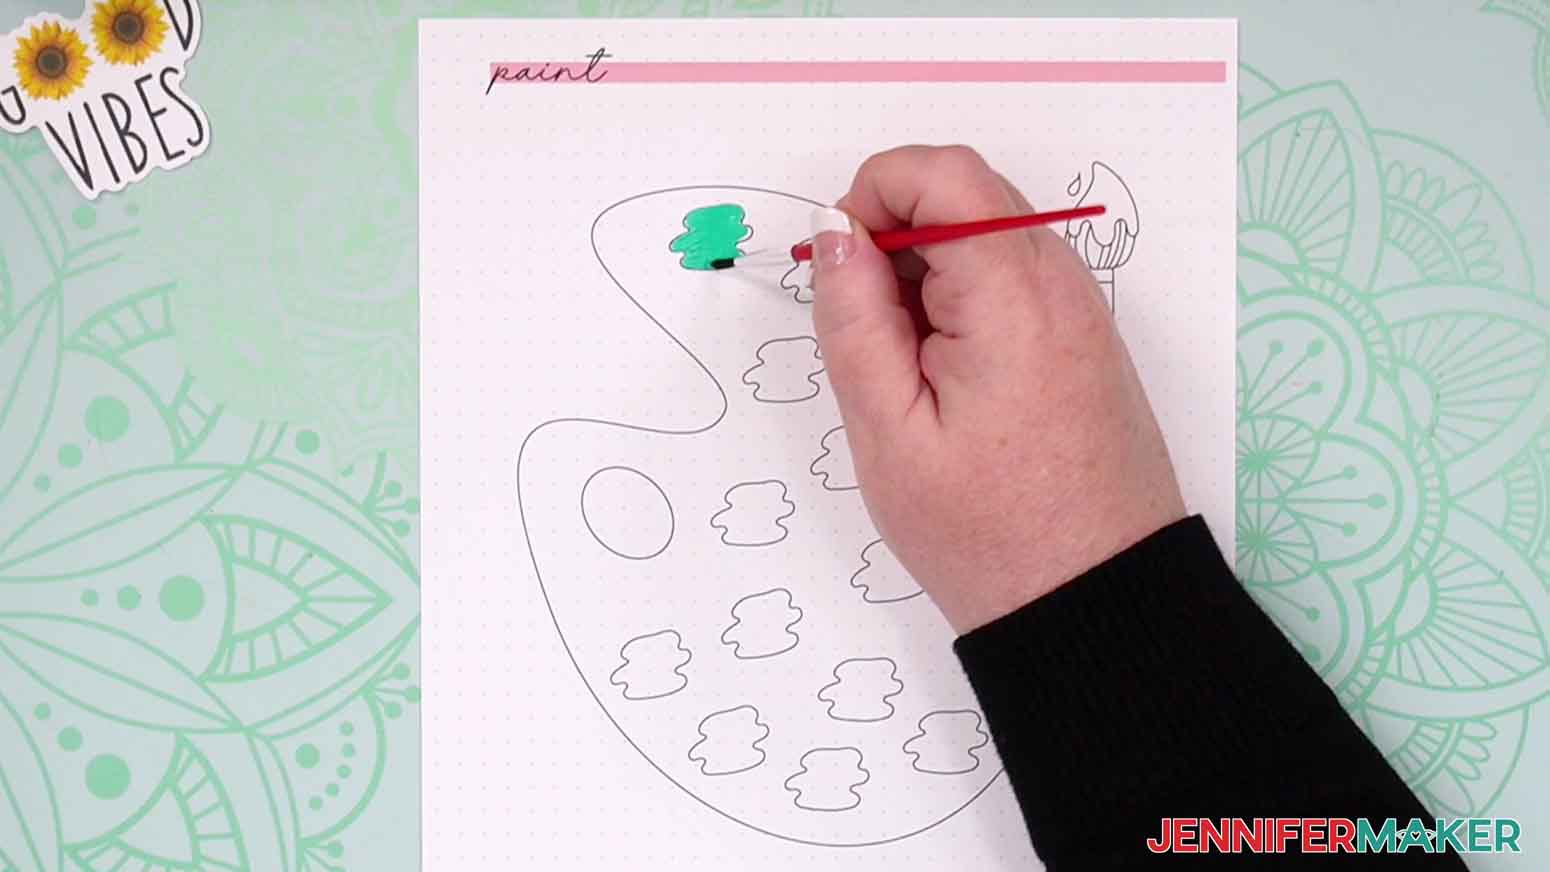
Paint
Fill in the spots on the palette and add notes on the brand, medium, and color.
Stickers
Not sure where to put them yet? Save them in trading card pockets!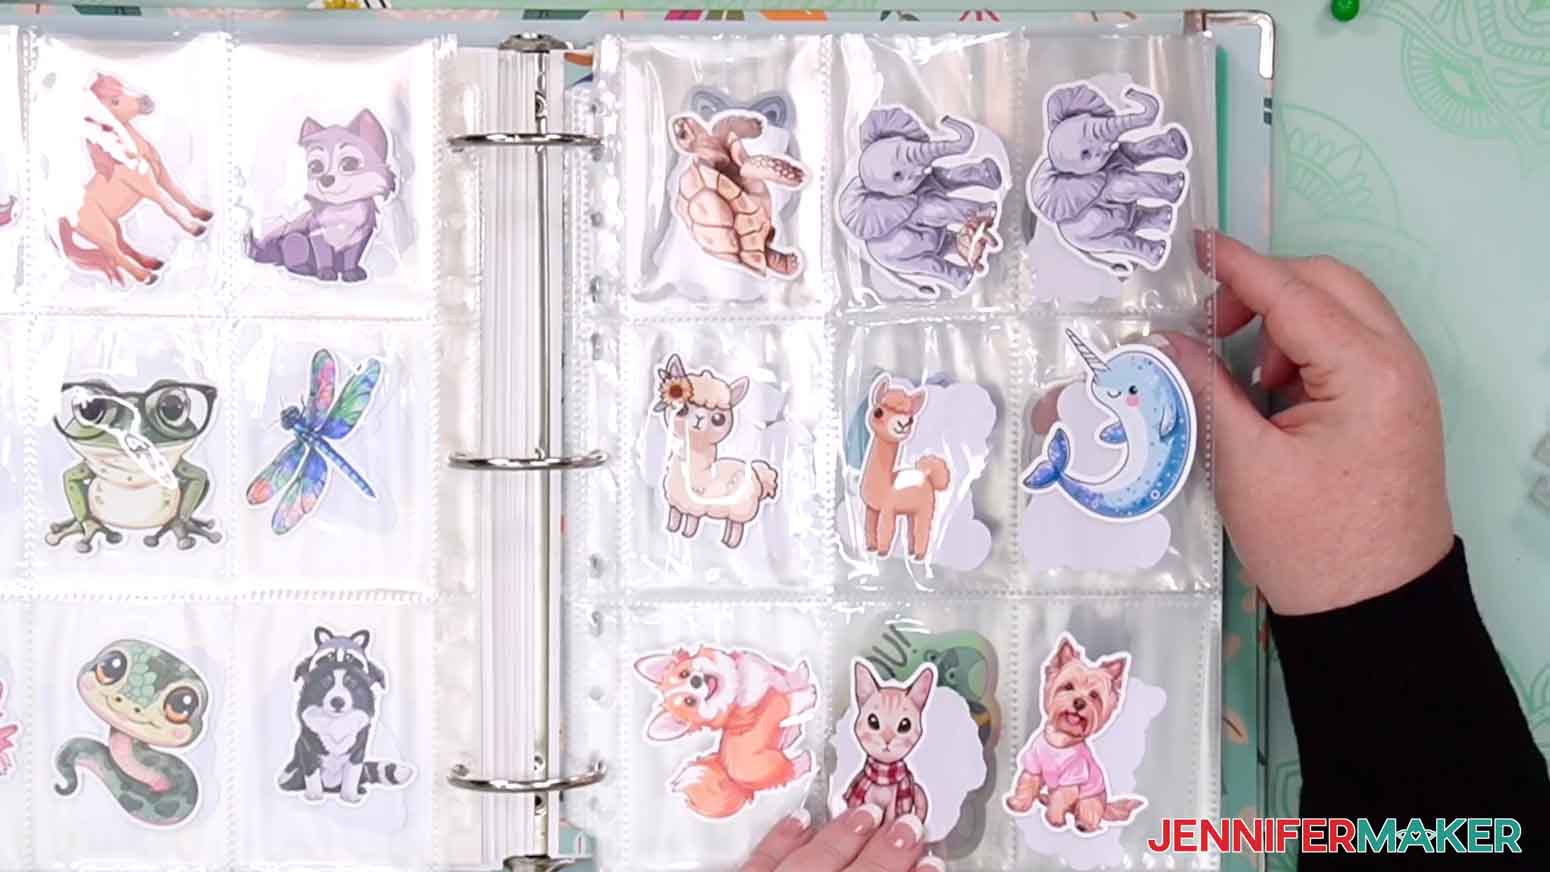
Wishlist
Use this sheet to help with responsible spending! Next time you think of a material or tool you want that doesn’t have an immediate use (especially if it’s not quite in your budget or you’re low on space) write it under “Wants” and add a note about why you want it. If it comes up again, add some more notes to see if the item really makes sense to add to your space. If it comes up a third time and you’re confident you will use the item, consider moving it to “Needs” and start a “Savings Tracker” sheet.
Savings Tracker
Once something gets to “Needs,” print a Savings Sheet and put the goal at the top. Estimate how much money you’ll need to purchase the item, and write that at the top amount line. Dates are motivating, so add a timeline to save a certain amount of money each week or month toward the full amount, but be realistic. Color in the sections when you actively set the money aside, and celebrate your well-thought-out purchase when you’re ready!
![]()
Mood Board
Think big when you’re dreaming up a project, or save inspiration for when the time is right.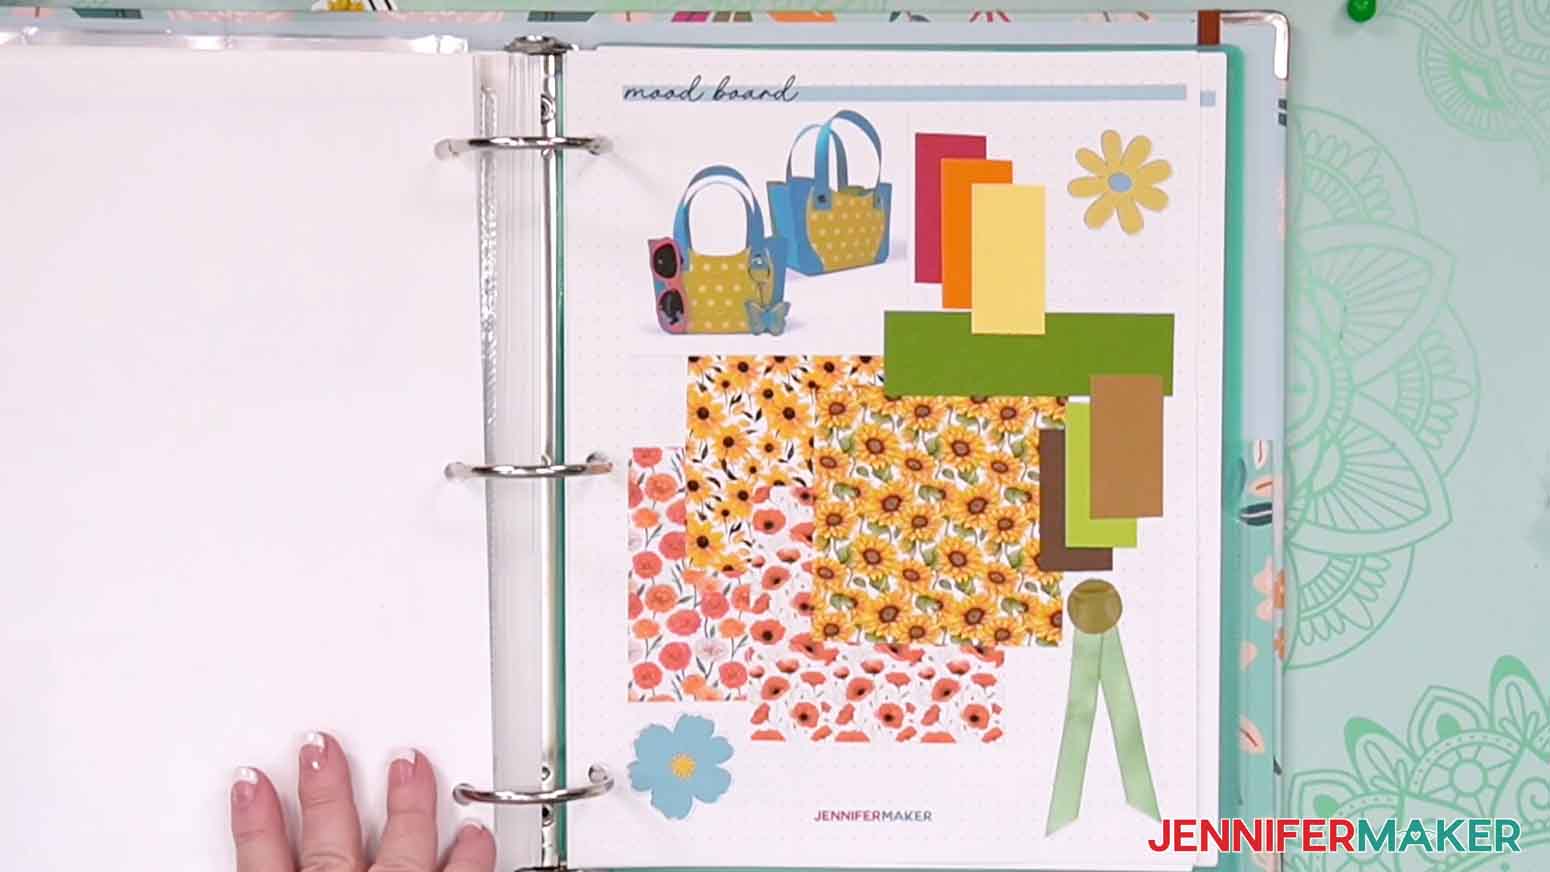
Project Planner
Put it all together by noting your inspiration, the steps you anticipate using, the materials you want to use, and anything you might need to pick up for your next project.
Birthdays
Keep track of your loved ones’ birthdays to plan ahead and never miss a chance to send a handmade card or gift.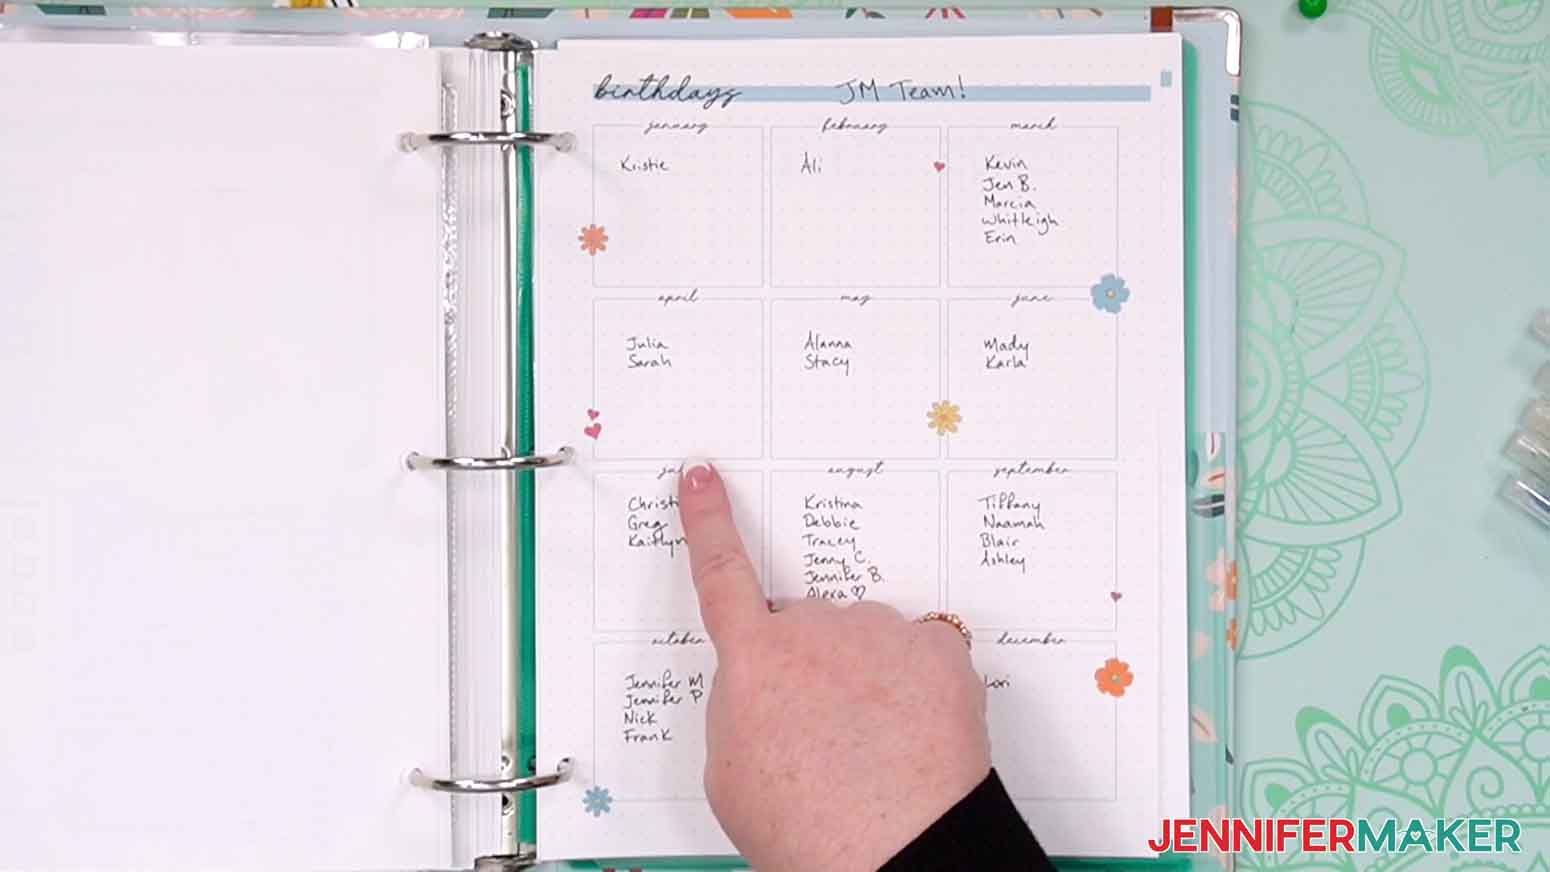
Gift Tracker
Add your loved one’s name to a box and note gift ideas as you think of them. Each year, note what you made for or gave them to avoid duplicating next time.![]()
Blank Sheets
Use these however you like by adding titles and details as needed.
STEP 3: PRINT YOUR CRAFT INVENTORY BINDER
- Download and open the free version of Adobe Acrobat Reader from jennifermaker.com/acrobat.
- In the top menu, click “File” and “Open.”

- Find the PDF you want to print and open it.
NOTE: You can select one of the individual sheets, but I will use the full set in the “craft-organizer” PDF. - When the PDF opens in the window, make sure it’s the one you want to use.
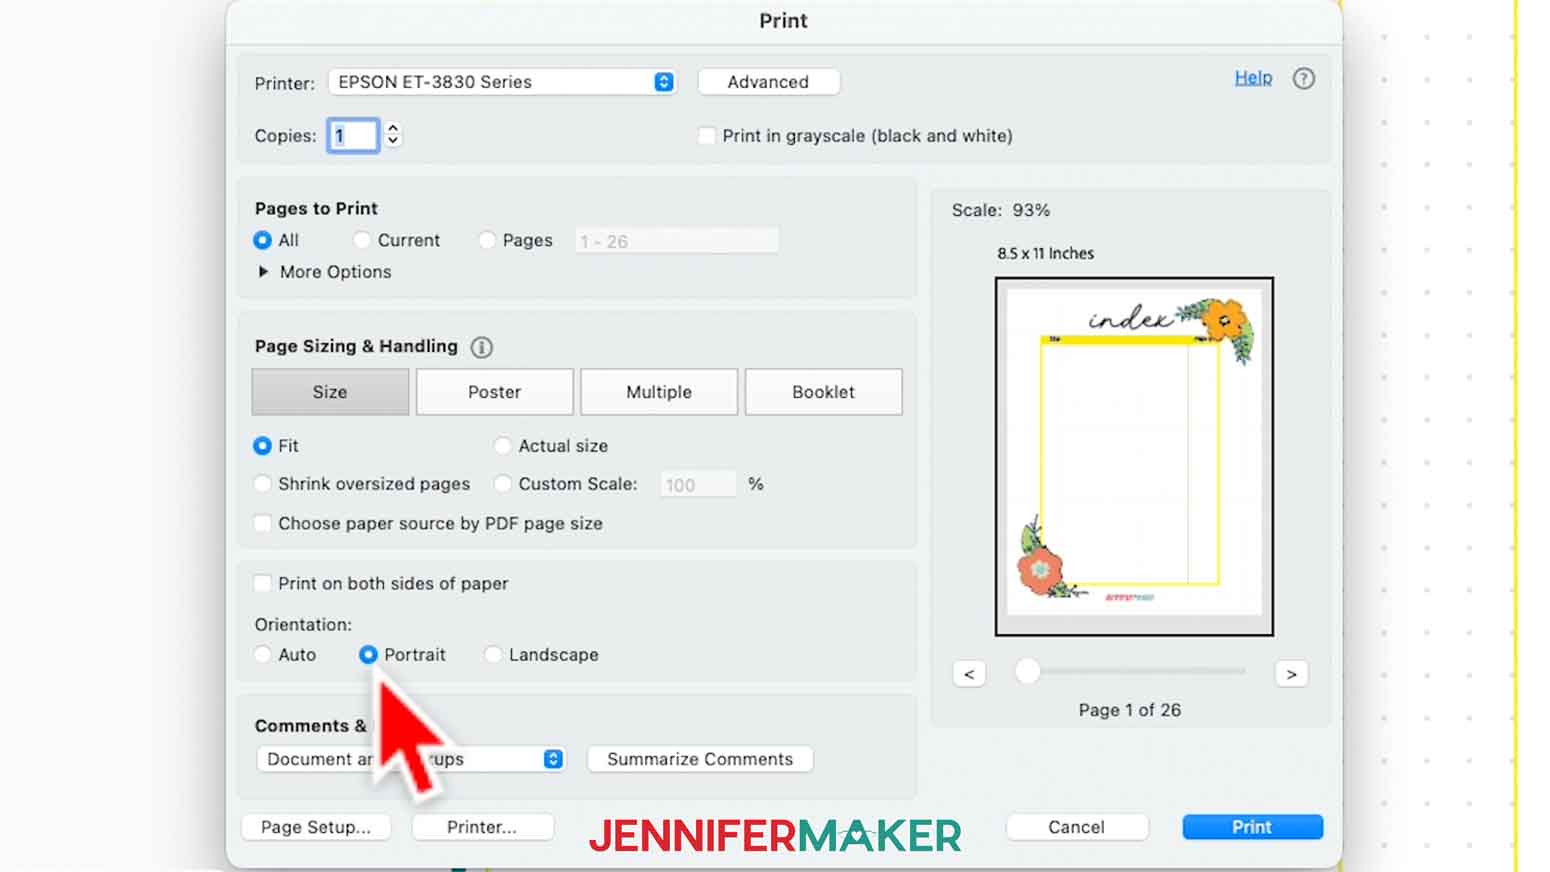
- Click “File” and select “Print.”
- Your screen might look different, but select your printer in the drop-down menu.
- Select color or black and white printing depending on your preference
- If you want to print more than one of the PDF, change the “Copies” field to the amount you want.
- Under “Size,” select “Fit” so the files will fit your paper.
- Use one-sided printing so your written notes won’t bleed through to the back sheets.
- Load 8.5” x 11” printer paper in your printer.
- Click “Print.”
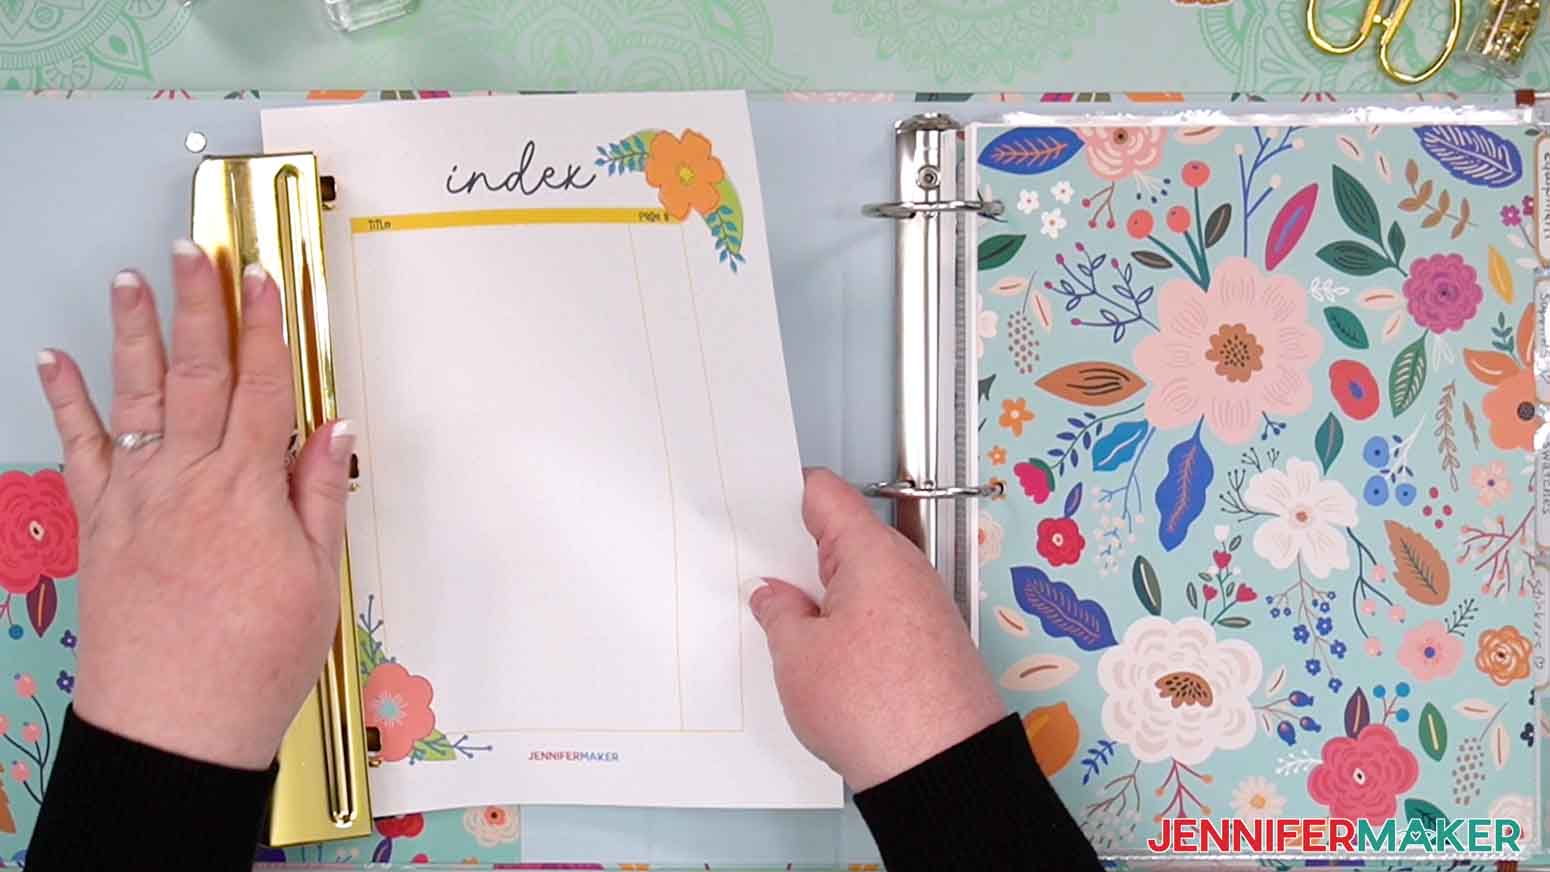
STEP 4: ASSEMBLE YOUR CRAFT INVENTORY BINDER
- Stack the sheets in the correct orientation
- With the stack facing up, slide the long left edge into the 3-hole punch
- Press down on the top to punch through the papers.
- Open the binder’s rings and add the sheets.
- Close the rings and start your inventorying!
STEP 5: SHOW IT OFF
Here is my finished crafting inventory binder!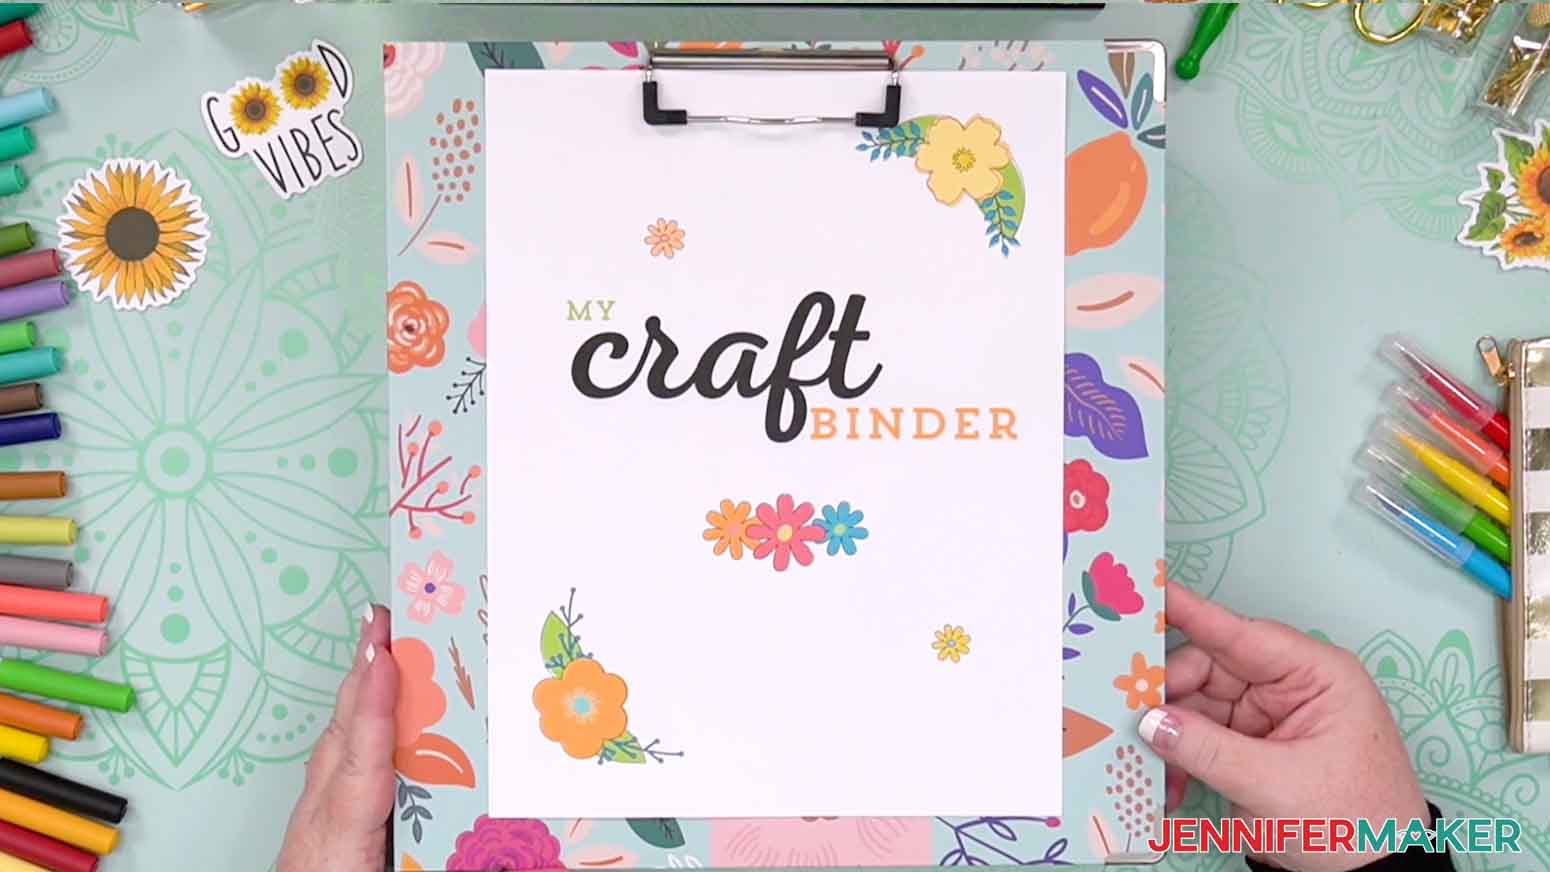
Answers to Your Questions About Making a Craft Inventory Binder
Q: I want to customize my craft inventory binder. How do I do that?
A: You can learn how to personalize your craft inventory binder with my Canva template in my ADVANCE program. Learn more about ADVANCE here!
Q: What is it called when you keep track of supplies?
A: This is called keeping an “inventory.” Keeping an inventory in your own binder of the numbers, amounts, types, colors, etc. of your supplies is a useful way to stay organized and accountable for your purchases!
Q: How do I organize a lot of craft supplies?
A: My Craft Inventory Binder is a great place to start! Dig out all of your craft supplies, put them in categories, then start writing them down. Once you get organized on paper, it will be much easier to get organized in your craft room! Need more support? Check out my 30-Day Craft Room Organization Challenge!
Q: Where can I find the supplies and tools to make a craft inventory binder?
A: A craft inventory binder can be made with just a few simple supplies and tools you may already have in your office or crafting stash. I like to shop on Amazon for their free shipping with my Amazon Prime membership (just make sure to look for sellers with 5-star reviews). You can also find most, if not all of the supplies and tools at your local office supply or craft store.
Get my free PDF files to make a craft inventory binder!
(If you do not see the signup form above, click here.)
I love seeing what you make with my designs and how you use them! Please share a photo of your craft inventory binder in our Facebook group or tag me on social media with #jennifermaker.
Love,

Want to remember this? Save this Craft Inventory Binder project to your favorite Pinterest Board!