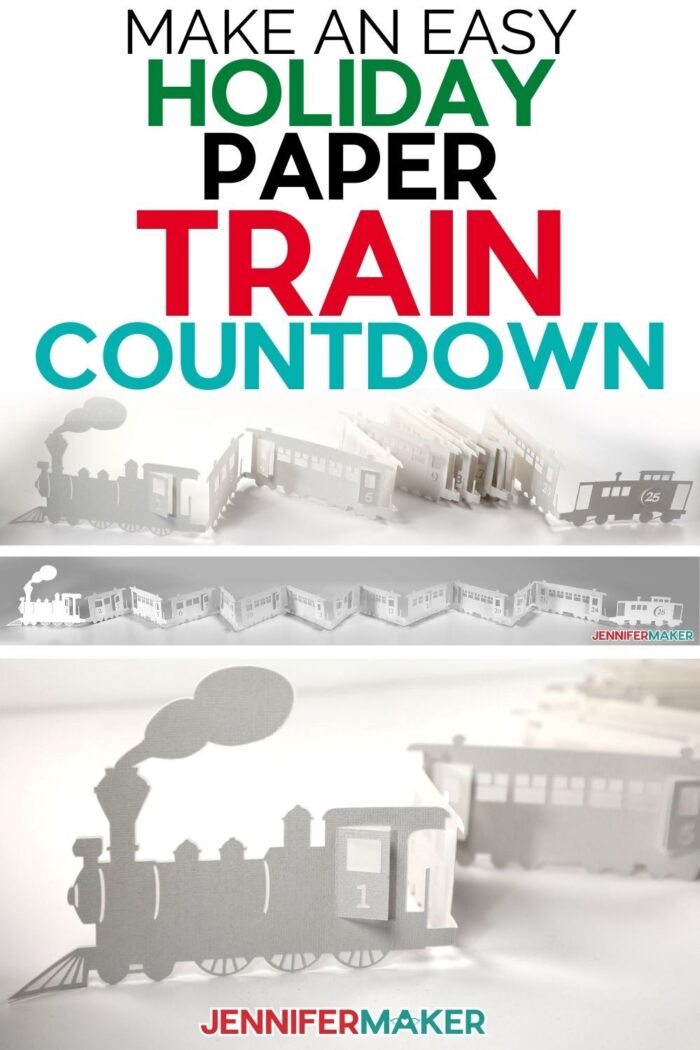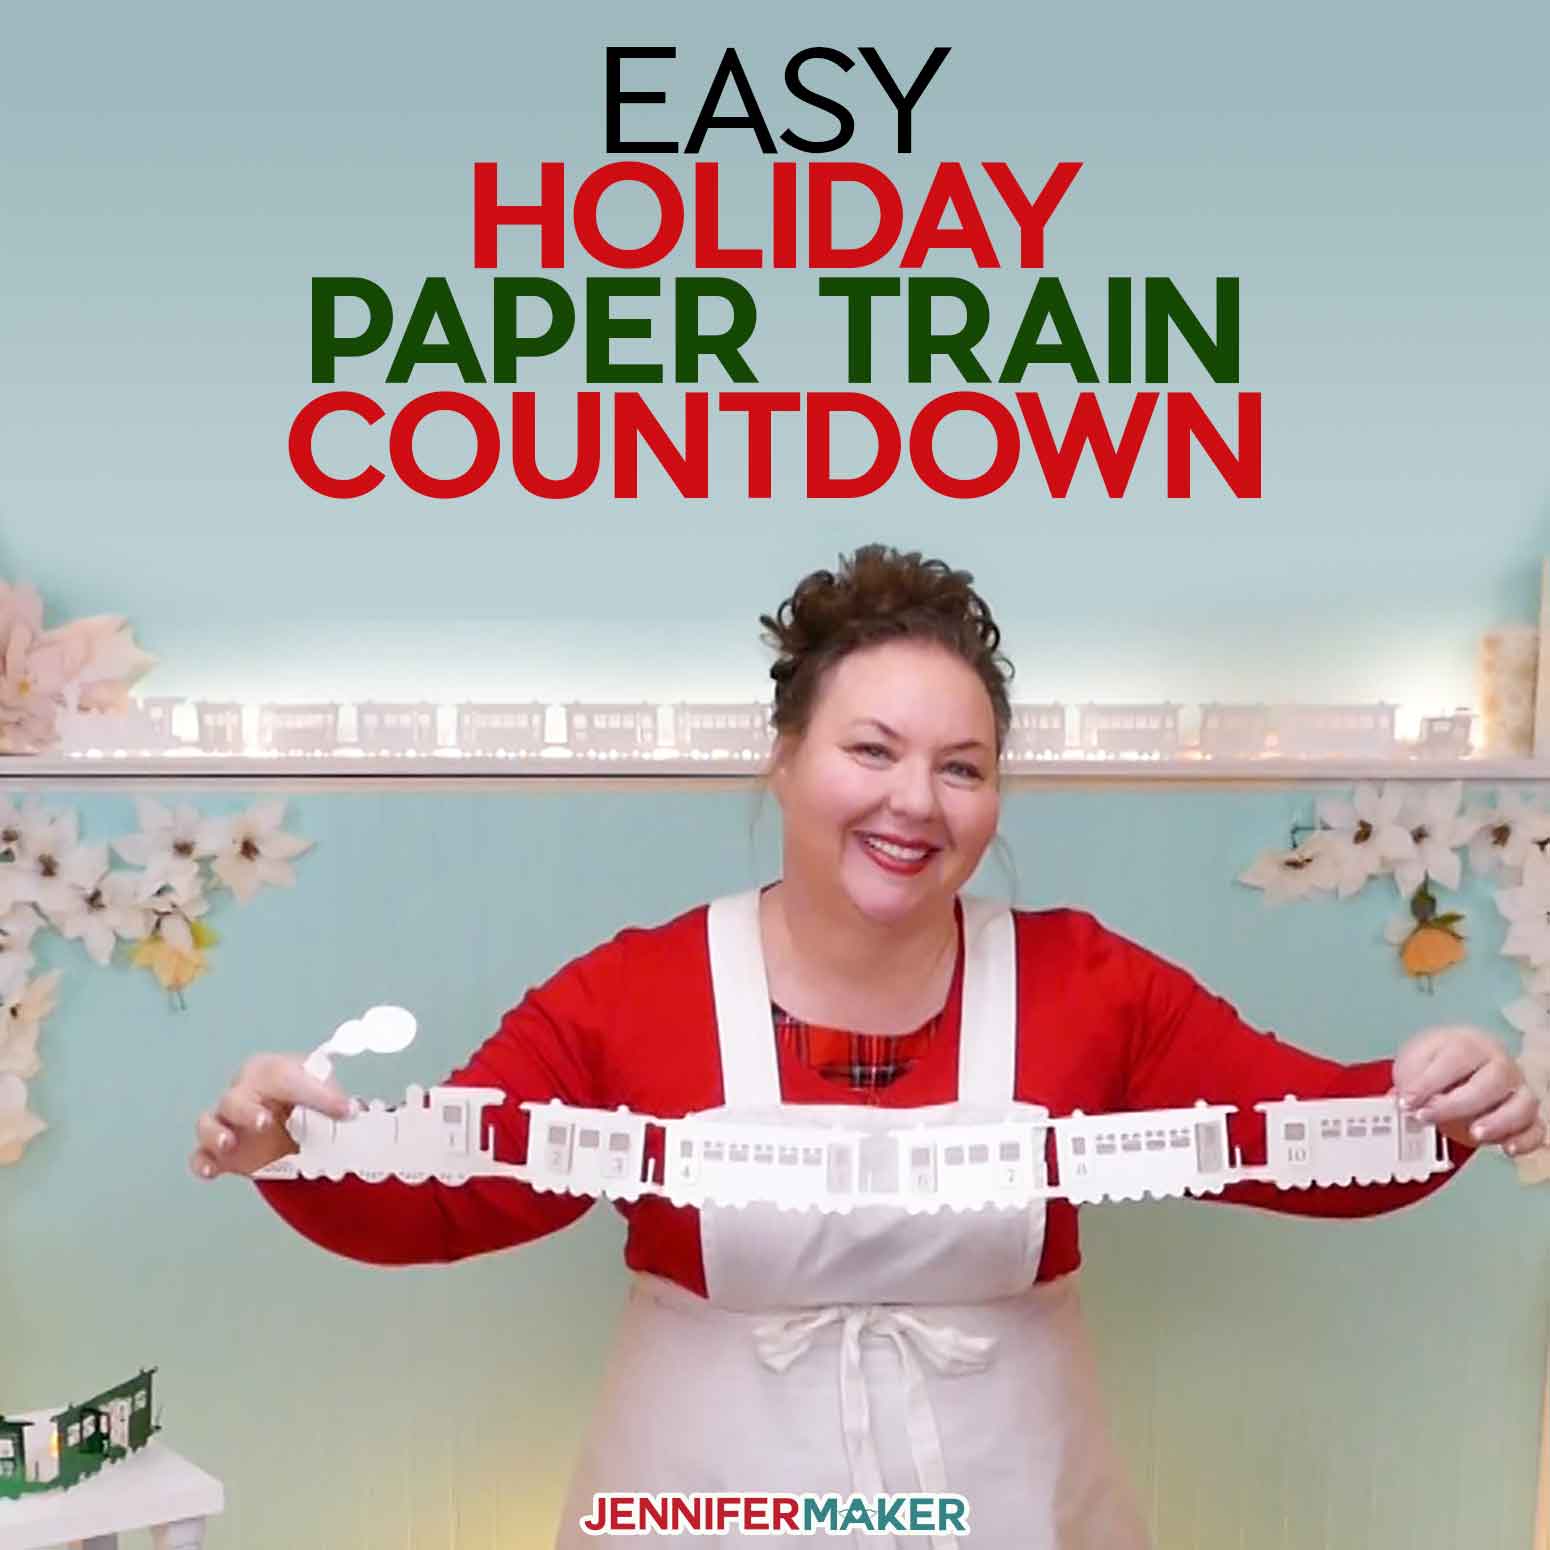
Dress up a mantel or window sill with this easy-to-make holiday paper train that counts down to Christmas!
Counting down the days to Christmas is one of my favorite holiday traditions. And every year I try to come up with a new, fun way to keep the excitement going! Last year I showed you how to make this really cool Santa Countdown sign where you can use chalk markers to count down the days until Christmas. This year I thought it would be fun to make something simple but also interactive that will add a festive touch to any holiday decor, and I’m delighted to introduce the Holiday Paper Train!
Watch the step-by-step video tutorial for this fun holiday project:

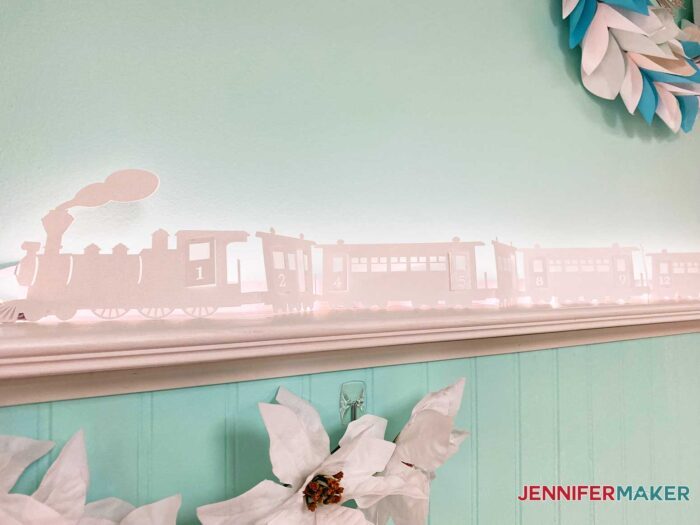
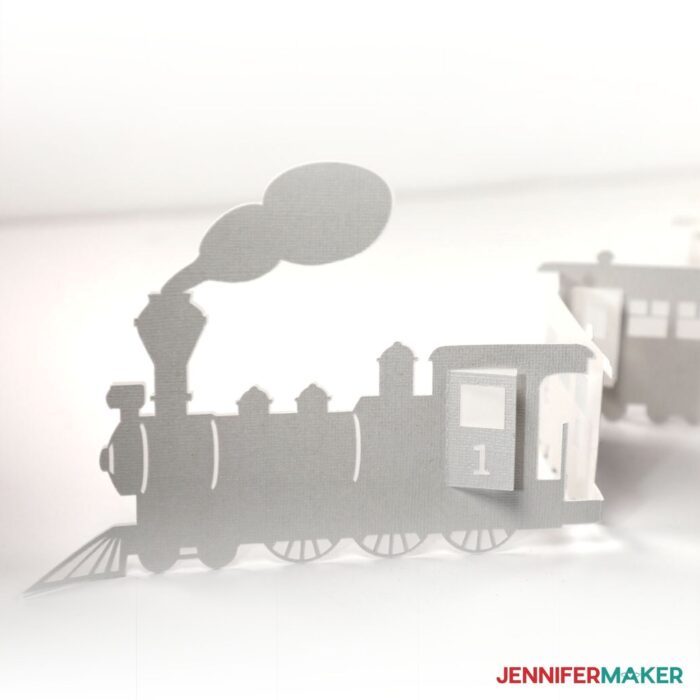
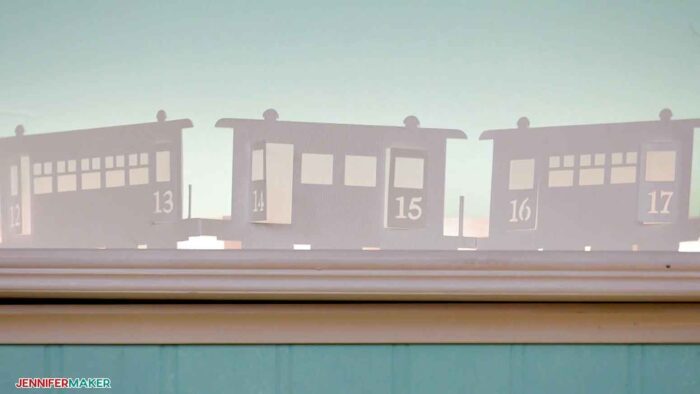
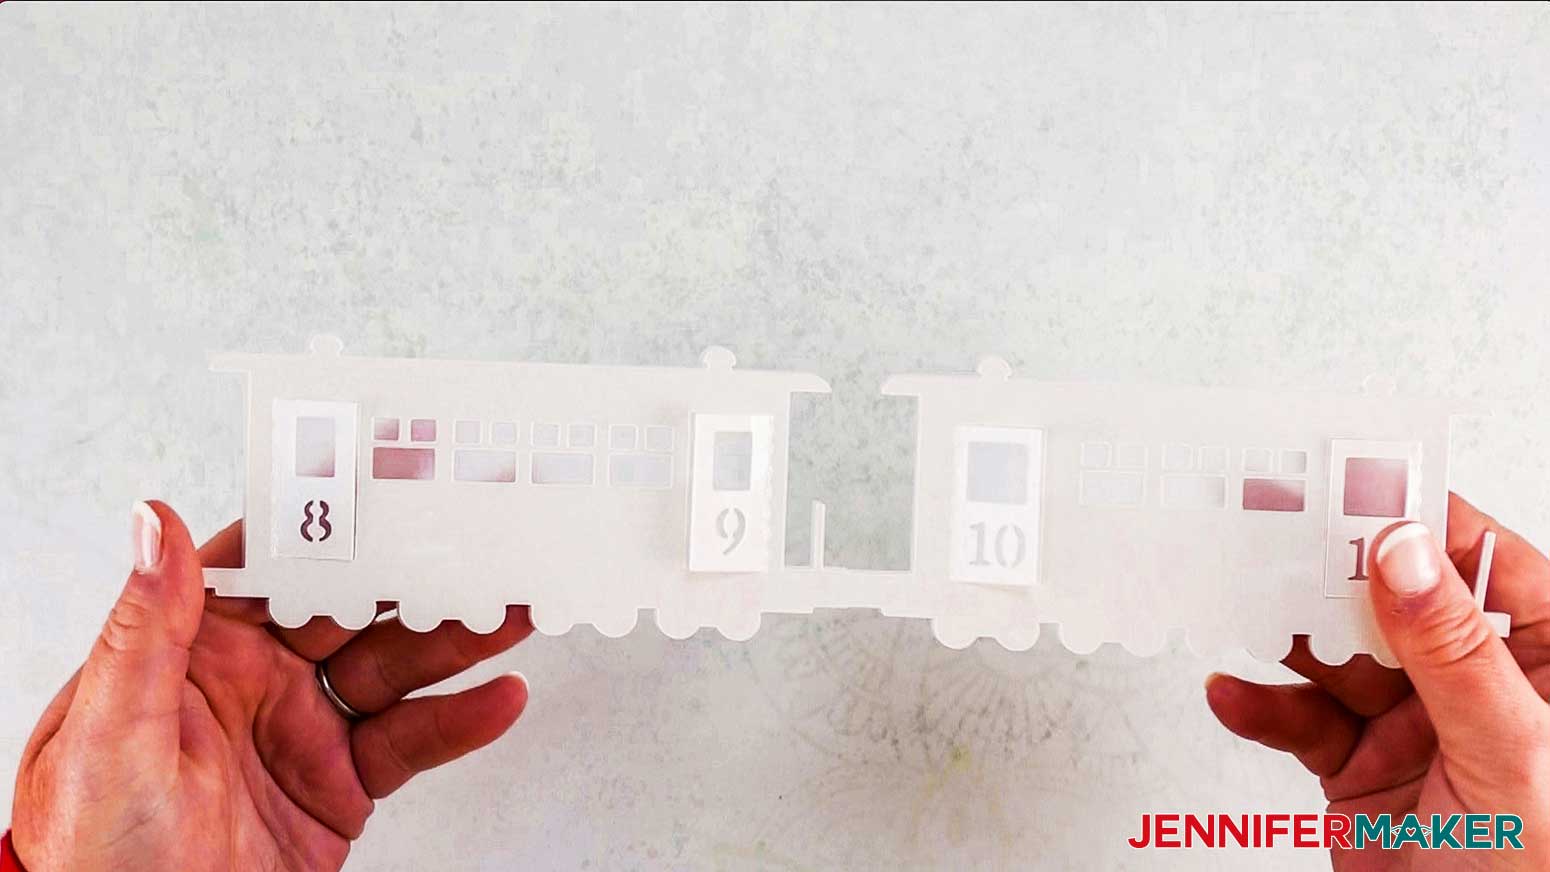
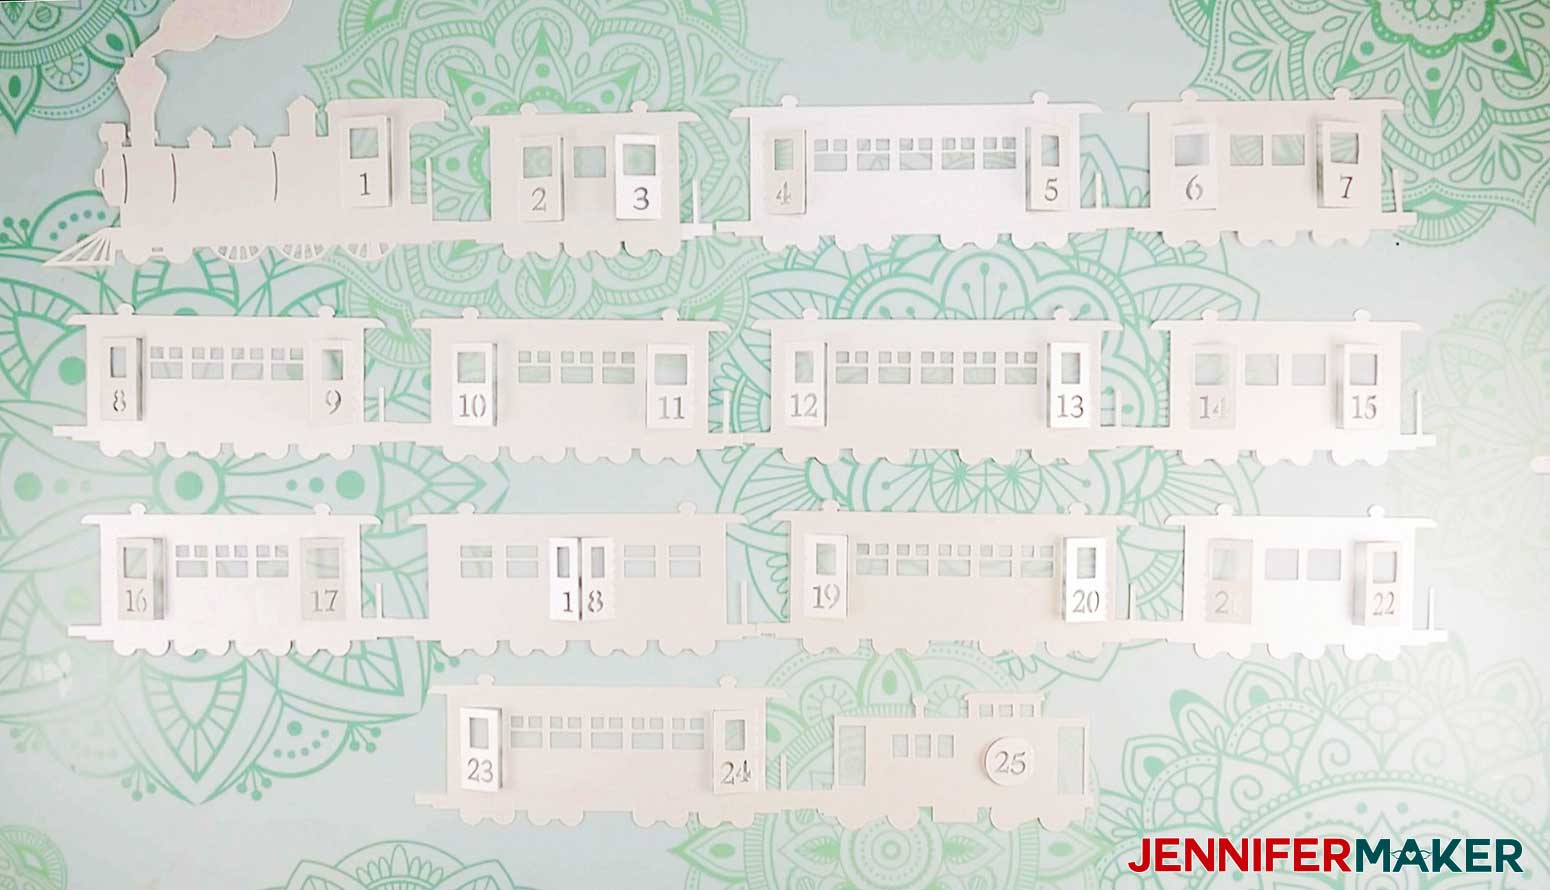
This holiday paper train is an easy, beginner project that everyone can make with basic materials! To countdown, just open the doors on each train car in sequence. Each door has dashed lines on the hinge line to make them easier to open. I just love how it turned out!
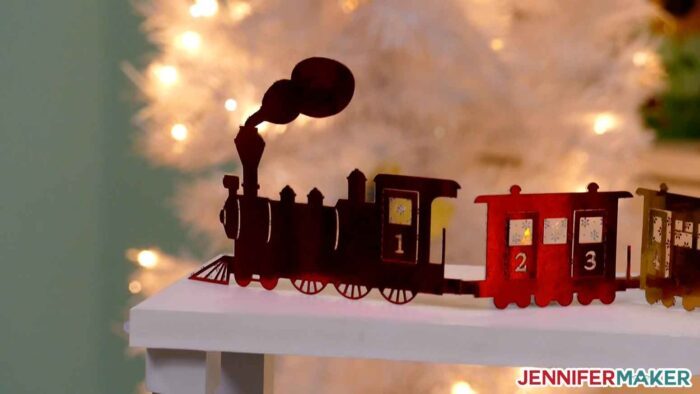
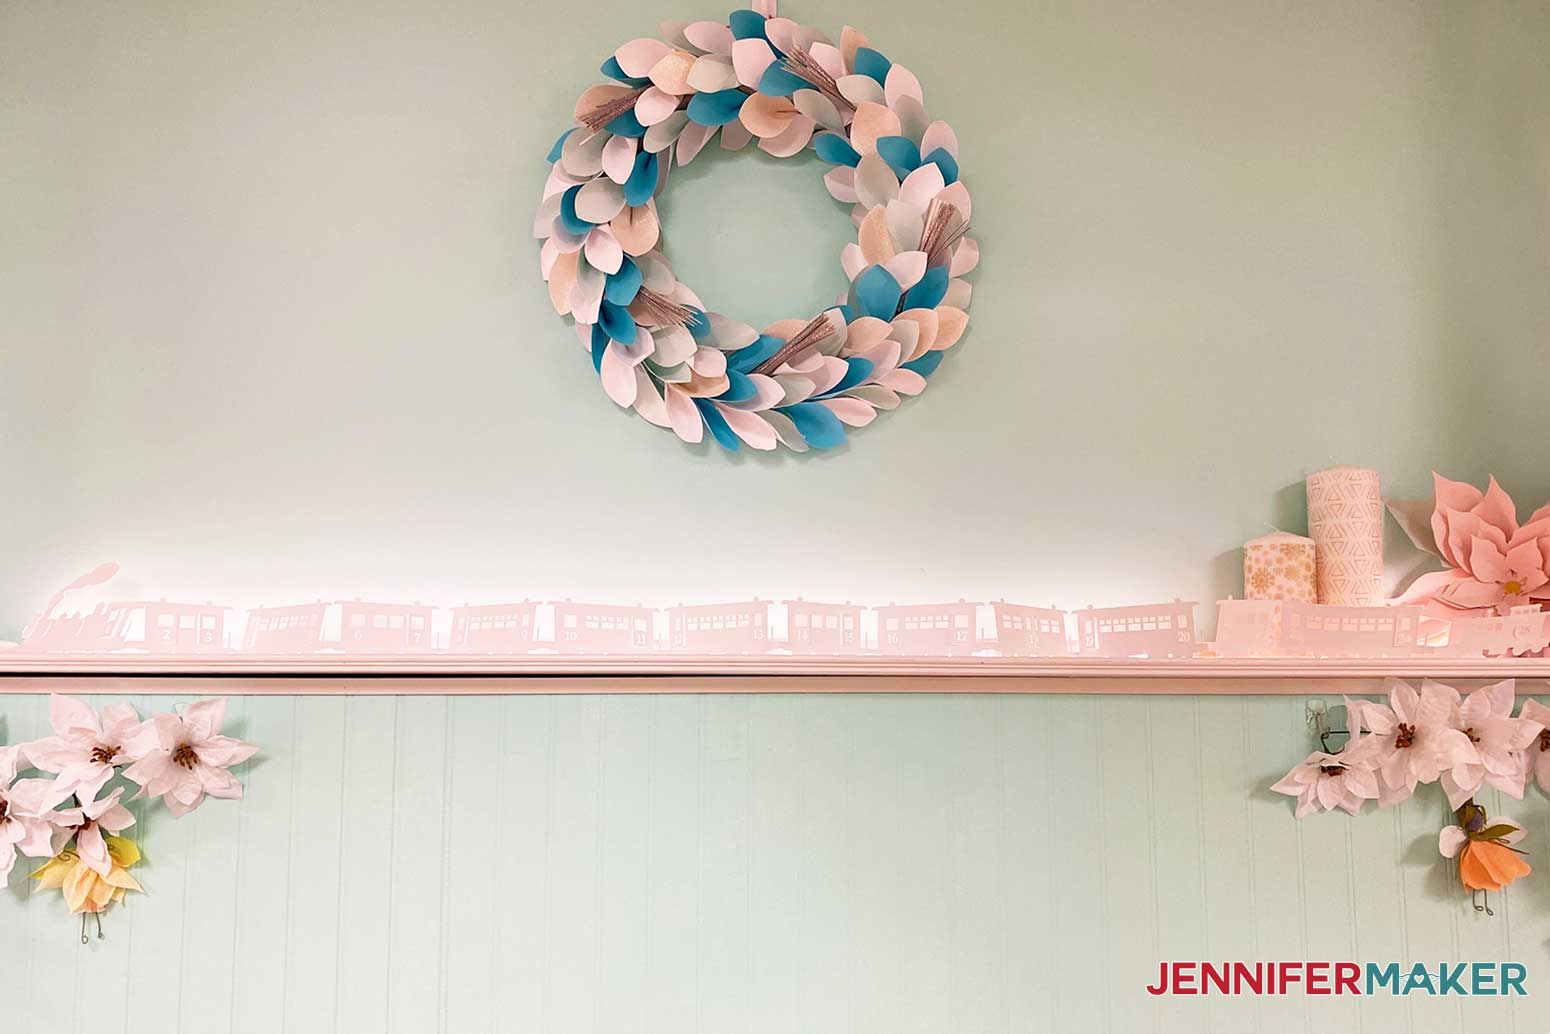
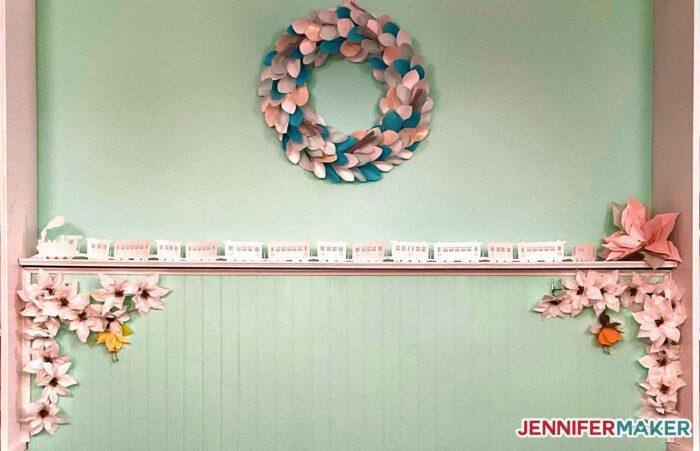
And although this project might seem like it has intricate cuts, I’ve done all the hard work for you…wait until you see how much fun it is to put it all together! Here is my holiday paper train on my mantle in my craft room.
The most important thing you need to make my holiday train is really good quality card stock. Weight is less important than quality. I can’t stress how important it is to make sure you start with good quality paper, otherwise there’s a good chance you will be faced with some issues with the intricate cuts involved with this project.
I also used vellum to line the backside of my train. This step is optional, but it adds a nice touch by softening the look and giving a beautiful glow to any LED tea lights you might place behind your paper train. If you don’t have vellum, you can use wax paper or 20 lb. copy paper instead.
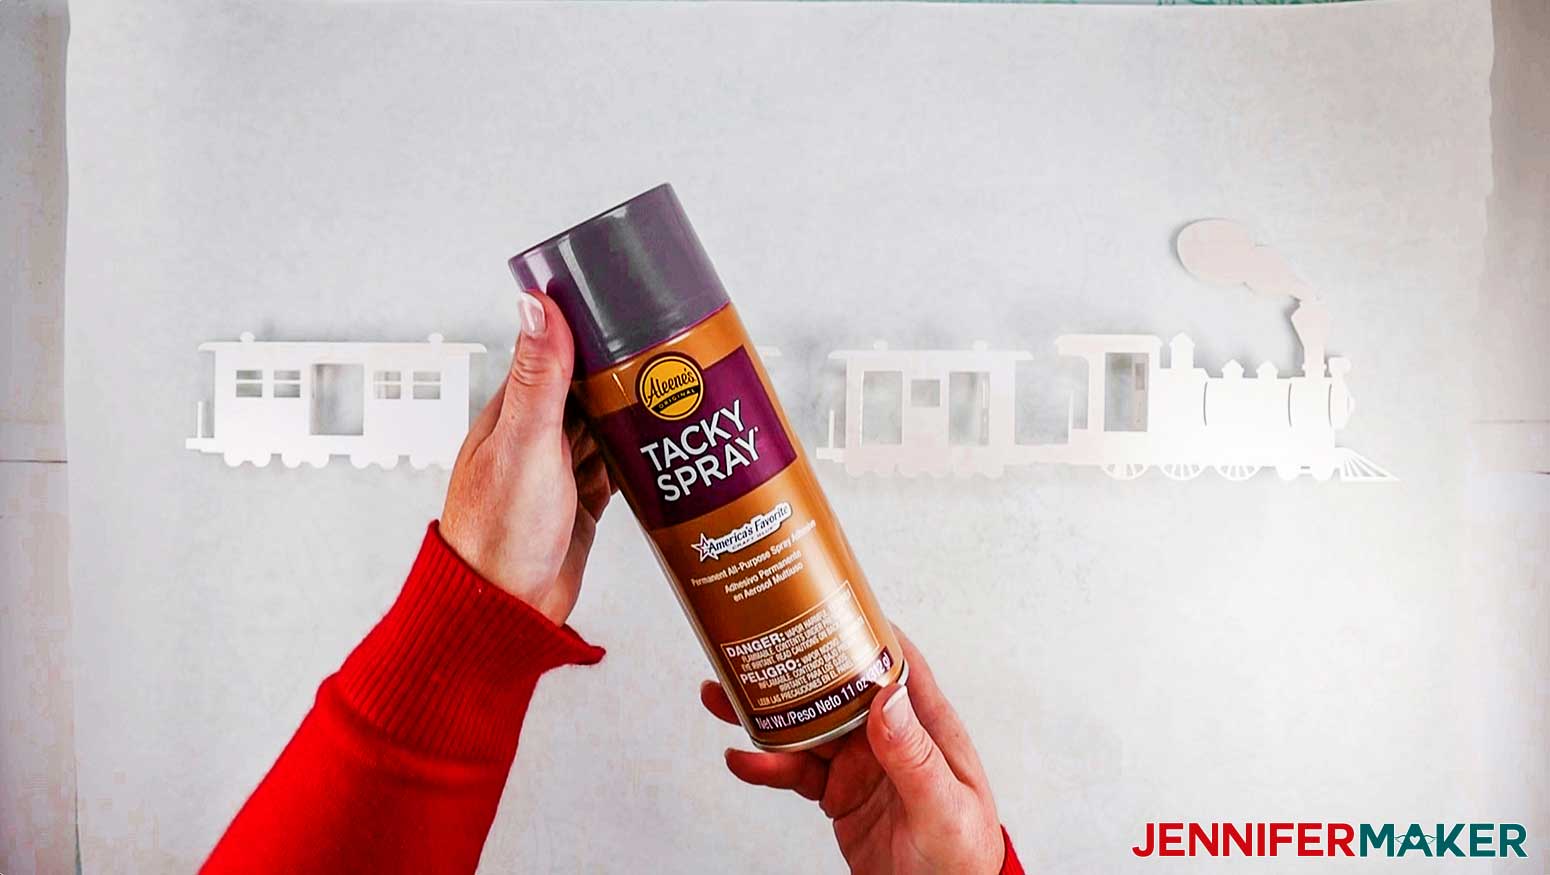
If you are using vellum you will also want some tacky spray to keep it in place. You can also use glue or double-sided tape.
Of course we’ll need our Cricut Cutting machine, I’m using the Cricut Maker 3, but you can use any machine, including the Cricut Joy for this project. We’ll also need a cutting mat, scraper and weeding tool.
You do NOT need a scoring tool for this project — we used cut dashes instead of scores, and they are built into the design!
Let me show you how easy it is to make this beautiful holiday paper train countdown project with my free SVGs! This post contains some affiliate links for your convenience (which means if you make a purchase after clicking a link I will earn a small commission but it won’t cost you a penny more)! Read my full disclosure policy.
Materials to Make a Holiday Paper Train Countdown
View my Amazon shopping list with the exact items we used to make this project
- 65-110 lb. Cardstock (two 12 x 12 inch sheets)
- (Optional) Vellum (two 12 x 12 inch sheets to diffuse any light you put behind the train) — you can also use wax paper or 20 lb. copy paper
- (Optional) Tacky spray — used to attach the diffusing layer
- (Optional) Tacky Glue (here’s another alternative glue that works — used to glue train cars together
- (Optional) Disposable Gloves (to protect your hands from adhesive when spraying)
- (Optional) LED tealights (to illuminate your train from behind)
- A way to cut your cardstock – I used the Cricut Maker 3 but you can also use the Cricut Joy, original Cricut Maker, or any of the Explore Series machines, or just cut by hand with scissors or a craft knife
- Blue Light Grip machine mat
- XL Scraper
- Weeding Tool
- Design #345 – My free holiday paper train SVG/DXF/PDF design files are available in my free resource library – get the password by filling out the form at the bottom of this page
How to Make Your Own Holiday Paper Train Countdown
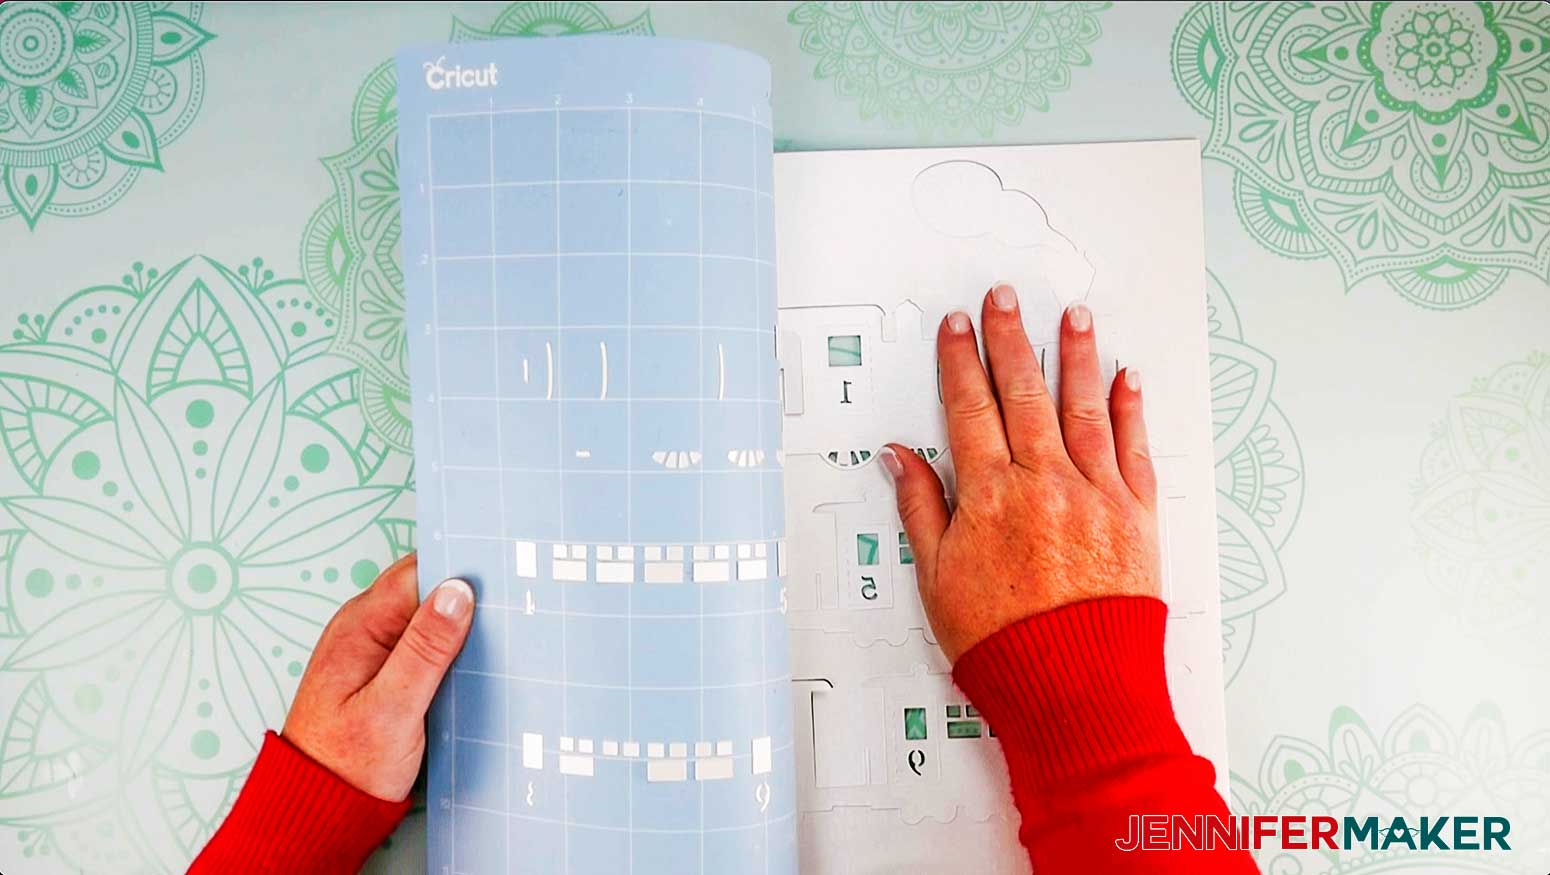
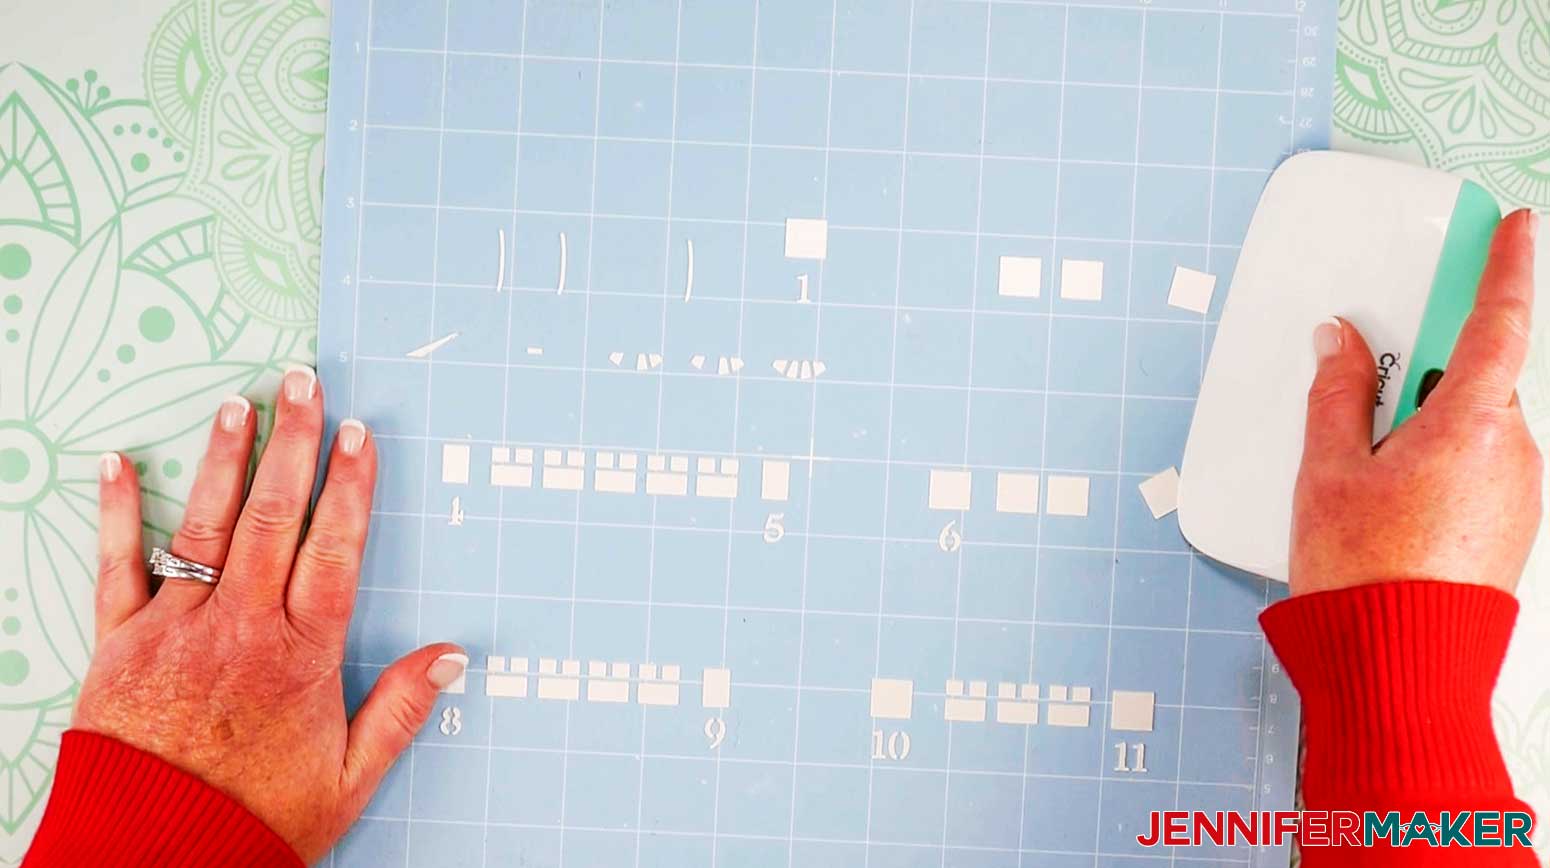
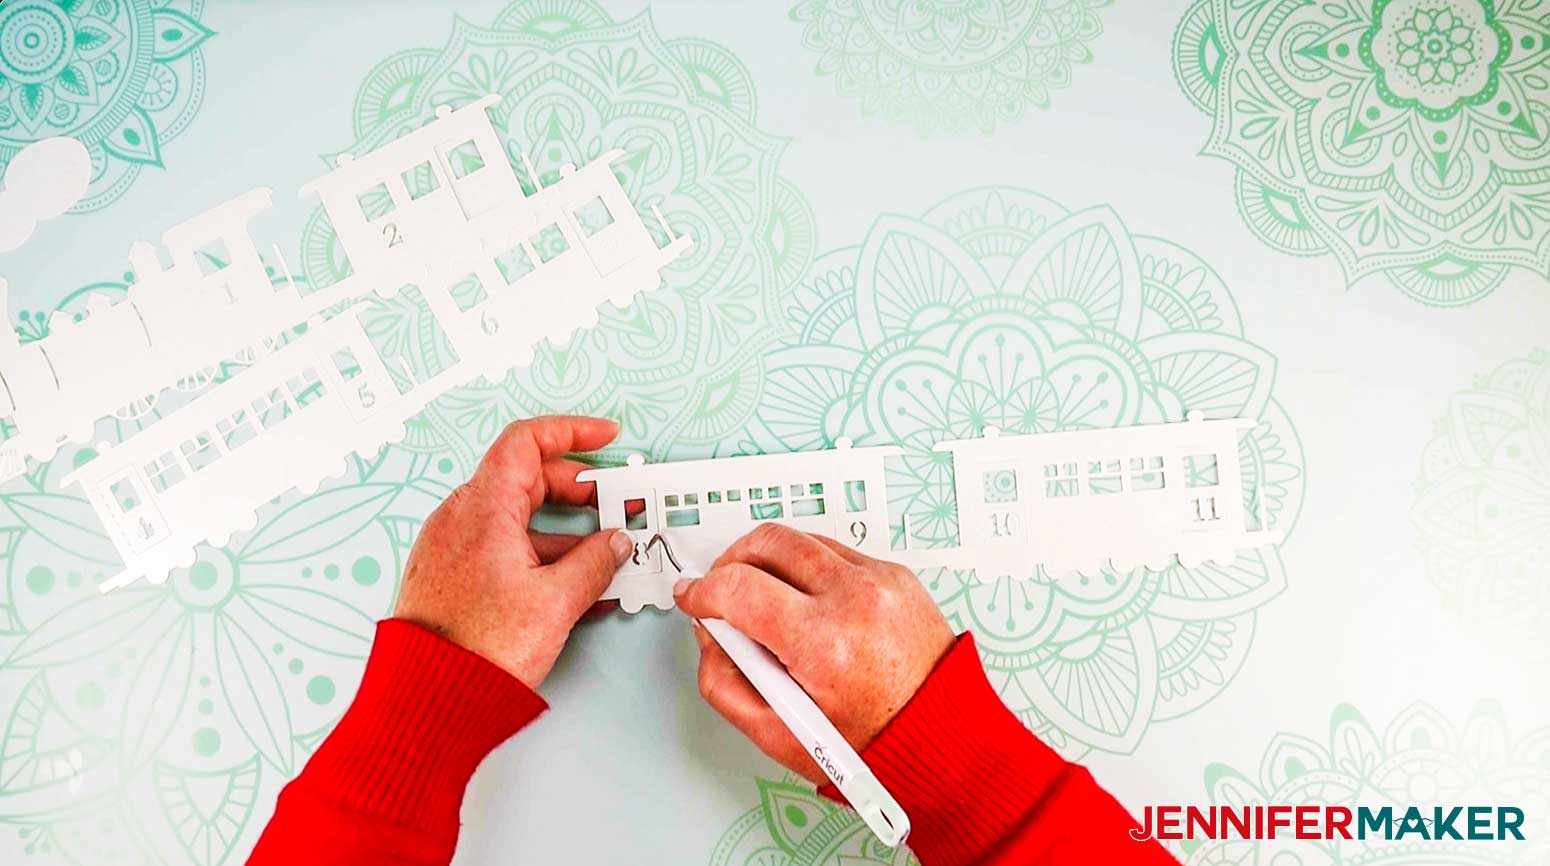
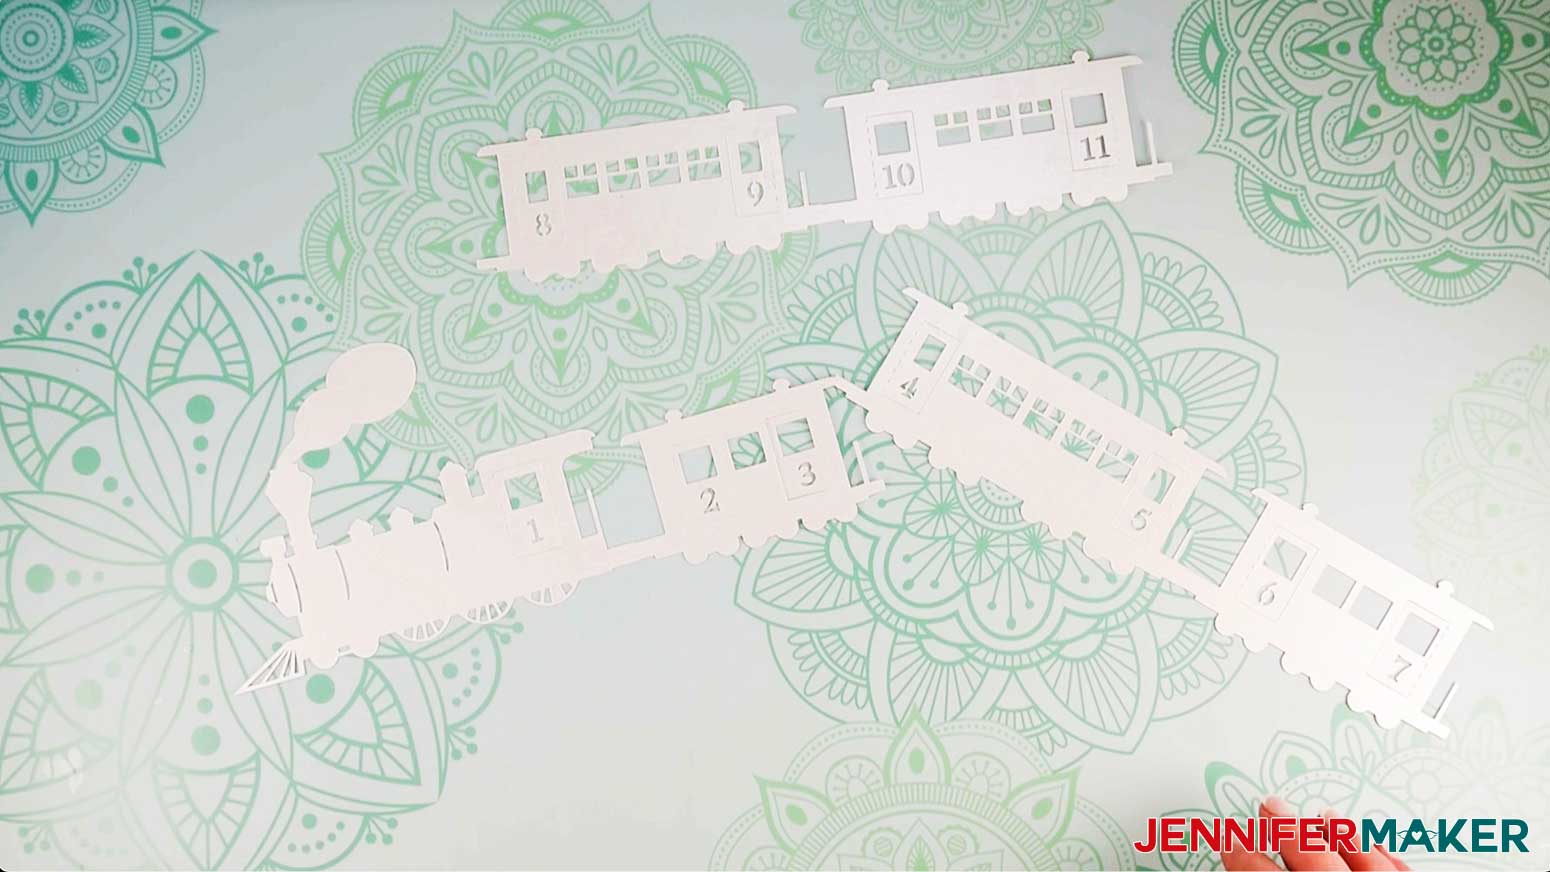
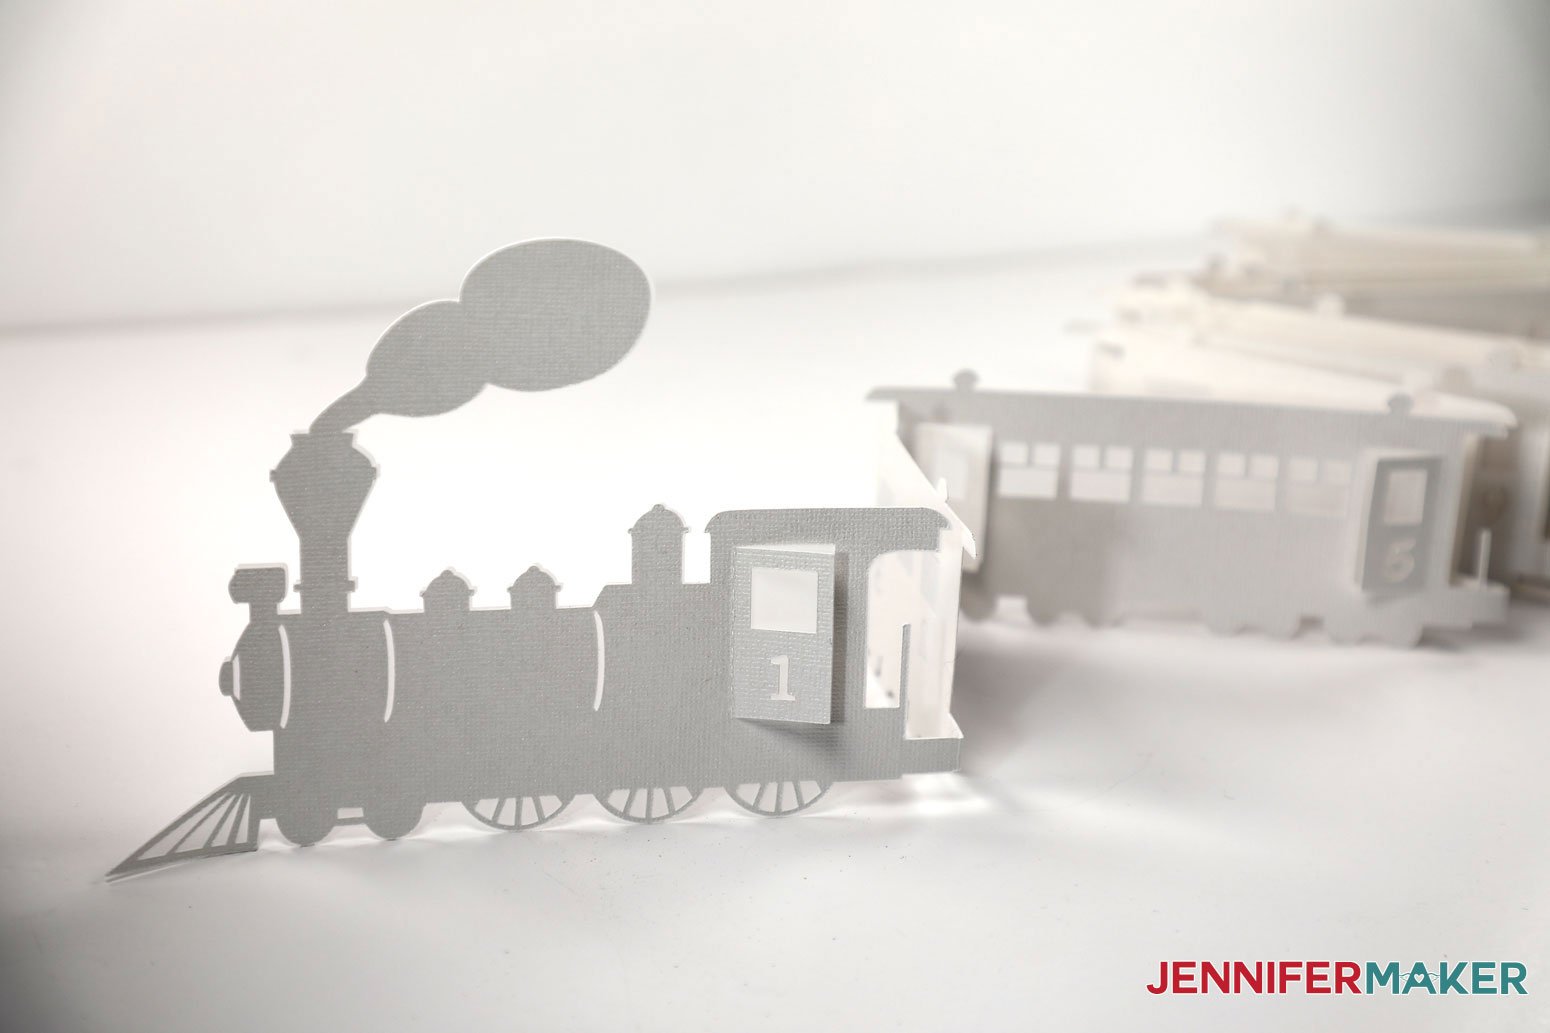
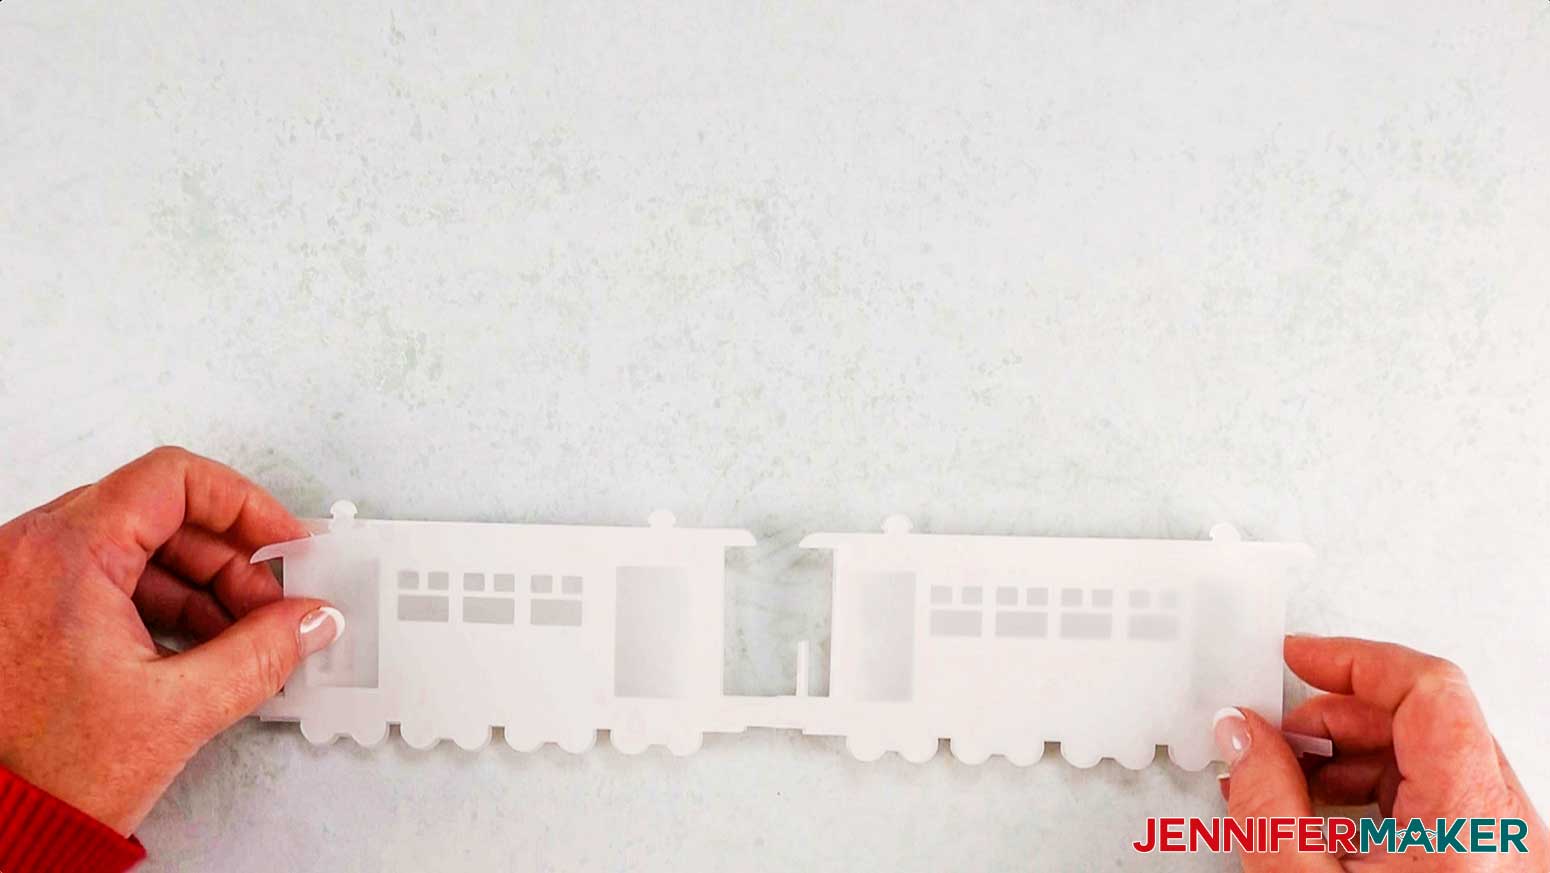
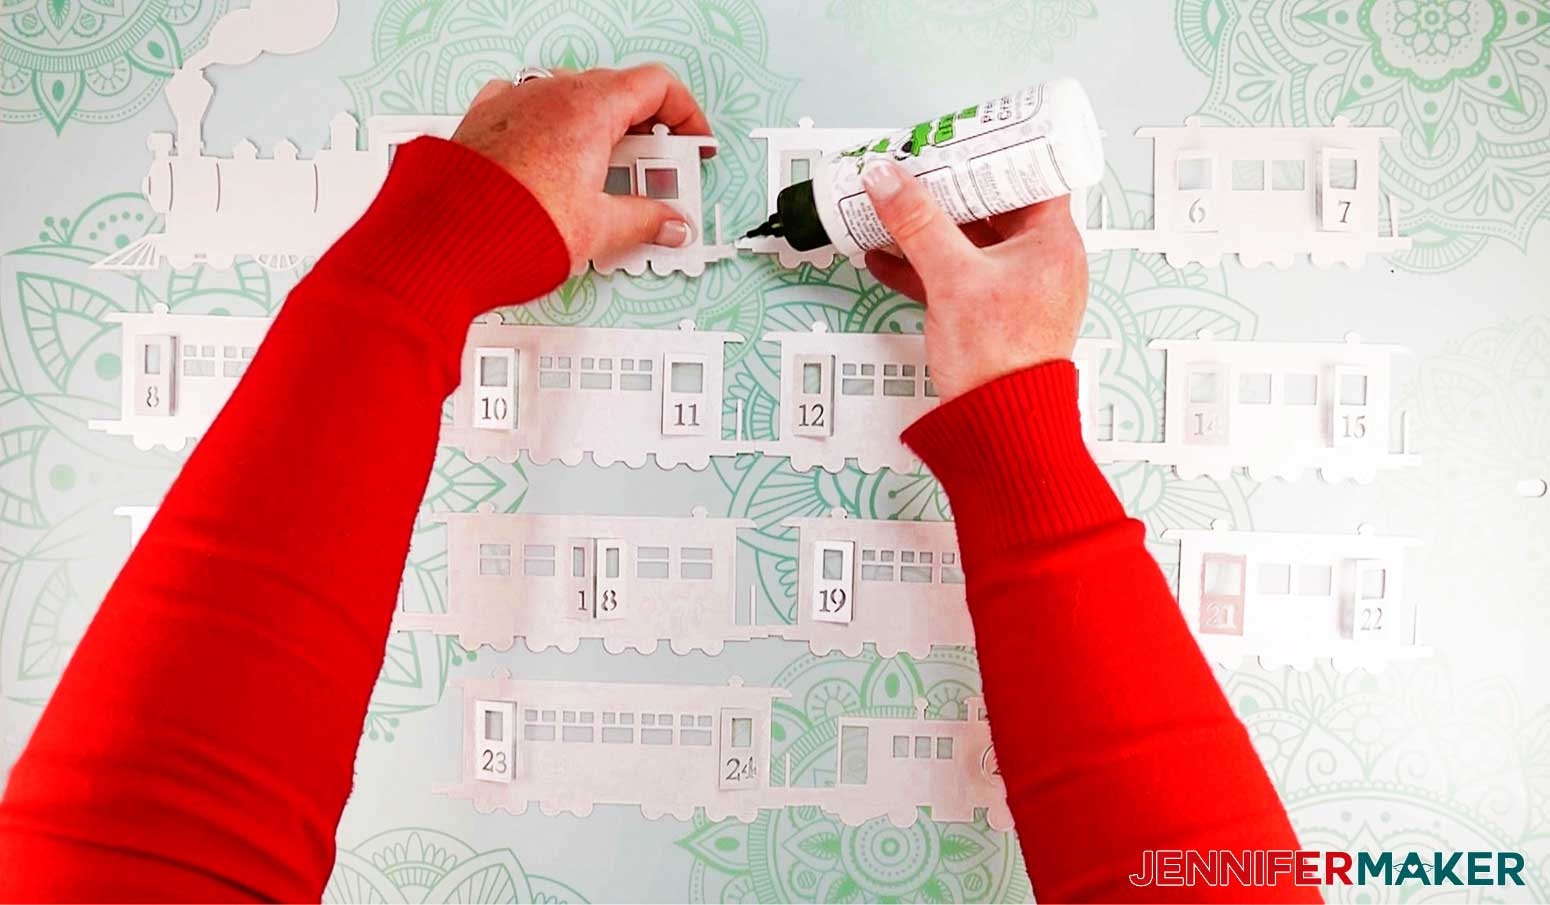
Dress up a mantel or window sill with this easy-to-make holiday countdown train. Add LED tea lights behind to make it glow! Start by downloading my Holiday Paper Train Countdown design from my free resource library. Look for Design #345 (get the password to the library in the form at the bottom of this post). The ZIP file contains SVG files for cutting on a Cricut or another cutting machine, DXF files, and printable PDFs for cutting by hand. There are two SVGs -- one is set up for cutting on a standard 12 x 12 inch mat, and a separate one is ready for cutting on a smaller Joy mat. STEP 2: CUT THE HOLIDAY PAPER TRAIN COUNTDOWN DESIGN You can zoom out to see the whole design by clicking on the "minus" sign next to the magnifying glass on the bottom left. You will see there are "two" trains: the one on the top has numbers for the countdown and door and window cutouts, while the one on the bottom is solid. The bottom part is optional and designed to be cut from vellum, wax paper or copy paper. TIP: If you are not sure how to upload an SVG cut file to Cricut Design Space, watch this helpful video training series I made. If you are on an iPad or iPhone, here is how to download and upload SVG files to the Cricut Design Space app. Once the file is uploaded, you really don’t have to do anything. No scoring or ungrouping is needed. It’s all ready for you to cut! If you’re cutting just the train layers and not the back layers, you can hide those layers by clicking on the eye icon next to each layer. Otherwise, just click “Make It.” TIP: If you run into any issues cutting with your Cricut I've got your covered. Check out my blog post, "Cricut Cutting Problems, Tips for Cleaner Cuts." TIP: I used Default Pressure to cut all my layers. I recommend trying this setting first because too much pressure may rip your paper in all the small, detailed areas. If your train is not cut out all the way after the first pass, do NOT unload your mat. Just press the “Start” button again and let your Cricut recut your layer. Once your Holiday Paper Train Countdown is cut, unload your mat, flip the mat over onto your work surface, and gently peel the mat away from the cut cardstock. This will minimize curling and ripping. Do be mindful of the doors and numbers, as they could tear if you remove it too quickly. If they DO tear off, just reattach them with some tape. But you should be fine if you take your time. After you’ve removed your cardstock from your cutting mat, use a Cricut scraper to quickly remove all the little pieces stuck to it. If you’re lucky (and your cutting mat is sticky enough), most of the little cutout pieces will stay on your cutting mat. If they do not, you’ll need to poke the little pieces out with a weeding tool. Pay attention to all the little windows, spokes of the wheels and the numbers on the doors This is what the pieces look like after they are weeded. If you’re in the mood, you can cut the two extra layers from a diffusing paper (such as vellum, wax paper or copy paper). These layers go behind the Holiday Paper Train and help soften any lights placed behind the train, such as LED tea lights. Here’s one version of the Holiday Paper Train Countdown with vellum behind the train. Place your material on the Blue LightGrip cutting mat, load it into your machine and press go. Once the cut is finished, unload your mat. Flip the mat and bend it back and take your time removing the vellum, copy paper or wax paper to prevent rips or tears. Again, there’s a chance it won’t cut all the way through in some spots, so take your time pulling it apart. TIP: Keep your train backs on your cutting mat and remove them one by one so you know exactly which train section it goes to! Remember, as always, safety first! I recommend wearing protective gloves, a mask and eye protection whenever you are working with any type of household or industrial chemicals. Also, it’s important to make sure you are in a well-ventilated area. And when in doubt, always make sure to follow all of the safety precautions on the product label to avoid any possible issues. I sprayed mine outside. Make sure to open the doors on all of your train carriages, place each section front side DOWN and spray the back of the train. Then close the doors again and attach the diffusing layers — doing it this way prevents adhesive from getting on the backs of the doors and keeping them from opening later on. I think it works best if you close the doors before you attach the backs, but you can do it either way! These are all the train sections once the vellum is attached. You may want to add a dab of glue or adhesive between train sections to keep them together and make one long, connected train. To do this, lay out all your sections in order. Then put a piece of tape or small dab of tacky glue on the end of one coupling piece. Layer the next section on top and pinch them together until the glue sets. You’re all done — put your Holiday Paper Train Countdown somewhere where you can see it. I put mine on my mantel. There are seven separate train sections. I recommend placing a battery-operated LED tea light behind each section for a nice glow. Here’s a closer look at my Holiday Paper Train Countdown with tea lights behind it! To countdown, just open the doors on each train car in sequence. Each door has dashed lines on the hinge line to make them easier to open. The assembled train is four to five feet long and three inches tall (five inches at the tallest point on the engine). As an Amazon Associate and member of other affiliate programs, I earn from qualifying purchases.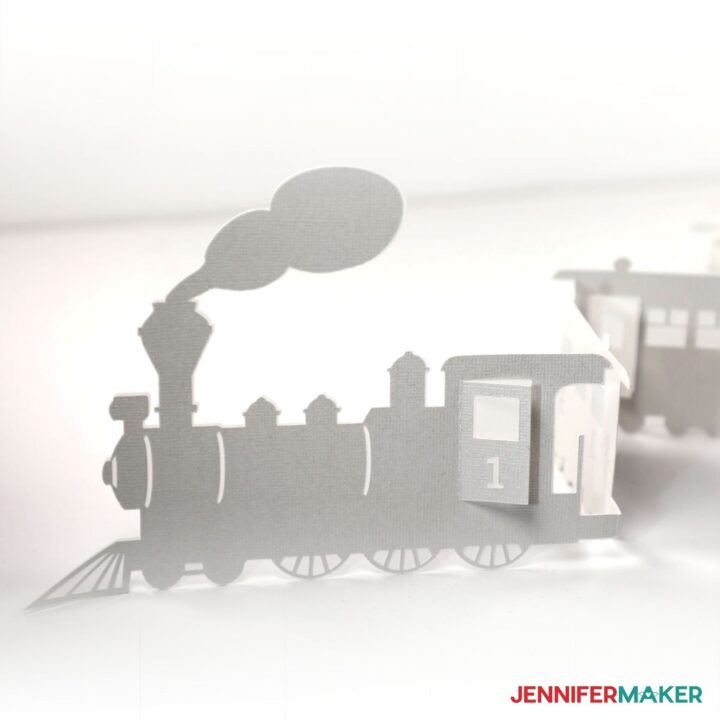
Holiday Paper Train
Materials
Tools
Instructions
STEP 1: GET MY FREE HOLIDAY PAPER TRAIN COUNTDOWN DESIGN
Next, upzip and upload the SVG to Cricut Design Space. This is what my Holiday Paper Train file looks like when uploaded to Design Space.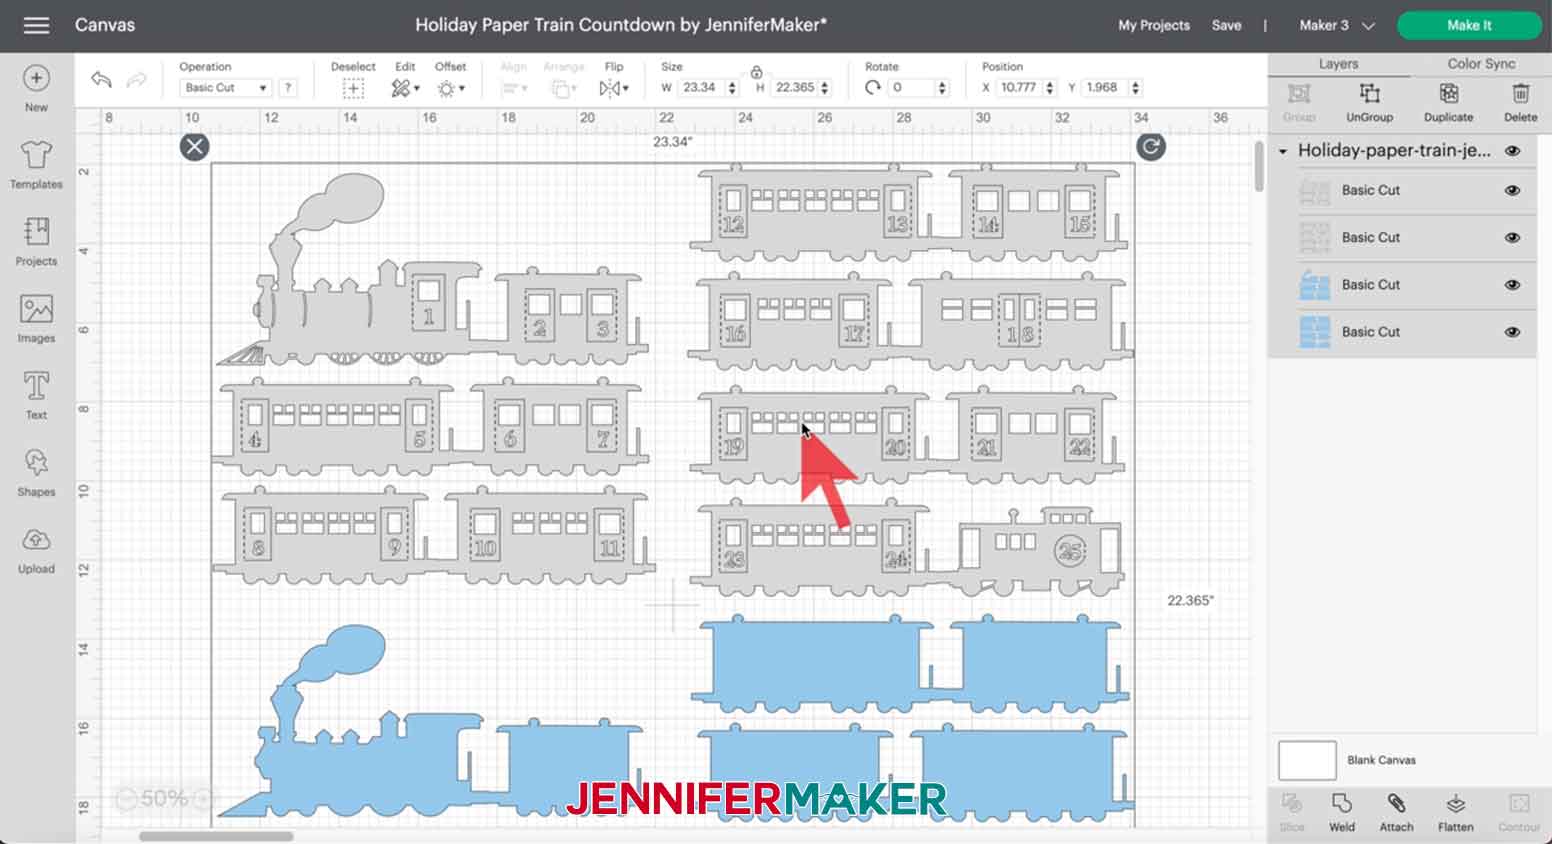
For the first two mats, select your base material – I selected "Heavy Cardstock – 100 lb." I recommend you use a really good quality paper to cut this, as there are a lot of little cuts and you may run into problems getting clean cuts with bad quality cardstock.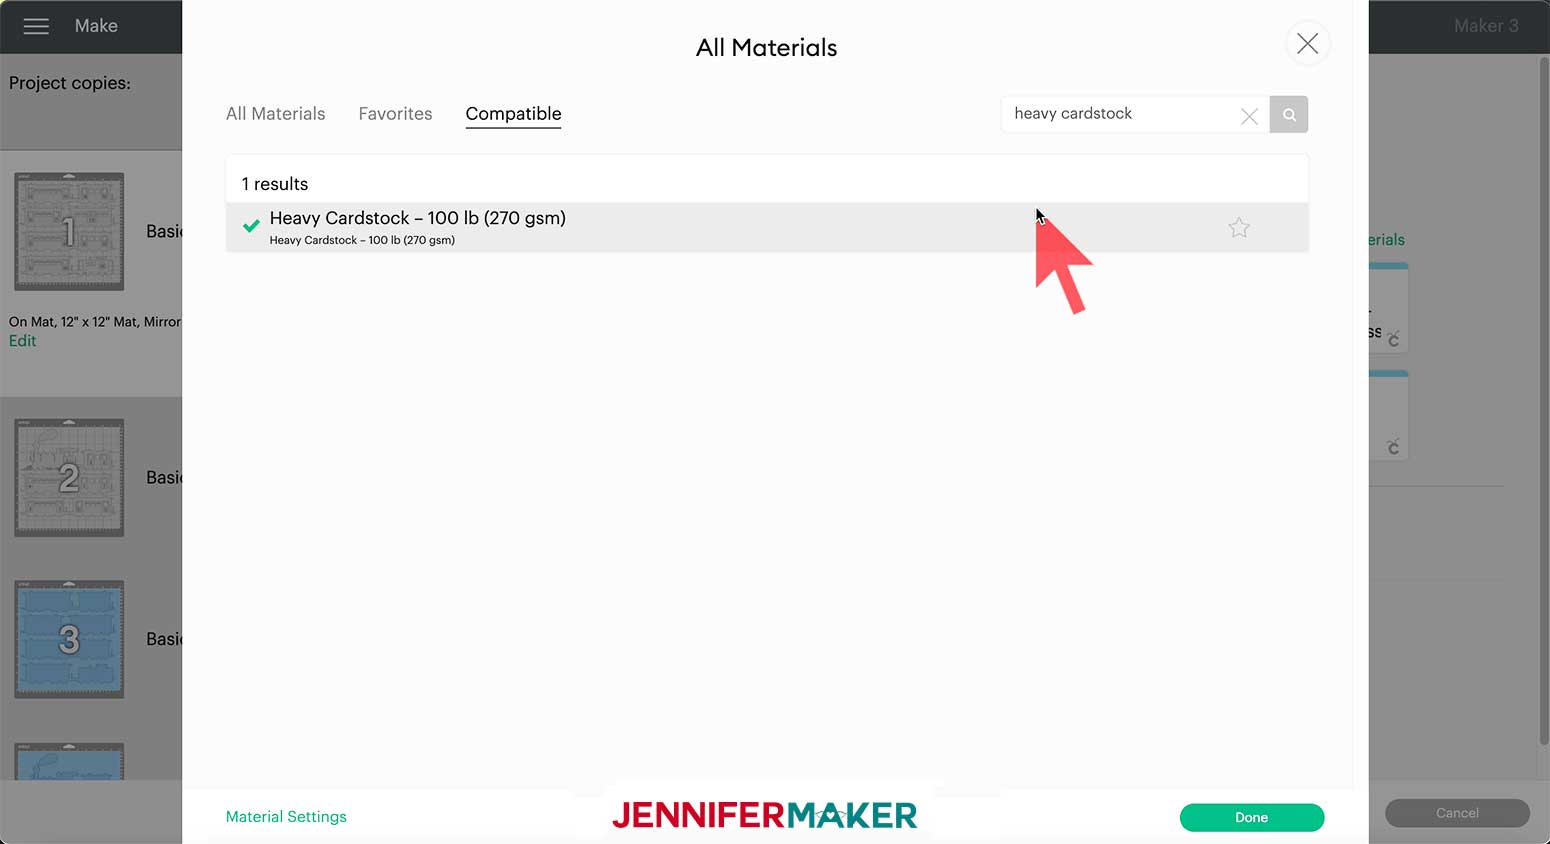
If you are cutting the background layers, set the base material for those mats to "Vellum," "Wax Paper" or "Copy Paper" to match the material you are using. TIP: I cut my diffused background layers from vellum, but I had to play with the settings a little bit. On my Maker I used the "Vellum" setting, but on my Maker 3 I used the "Wax Paper" setting because the "Vellum" setting tore my vellum sheets.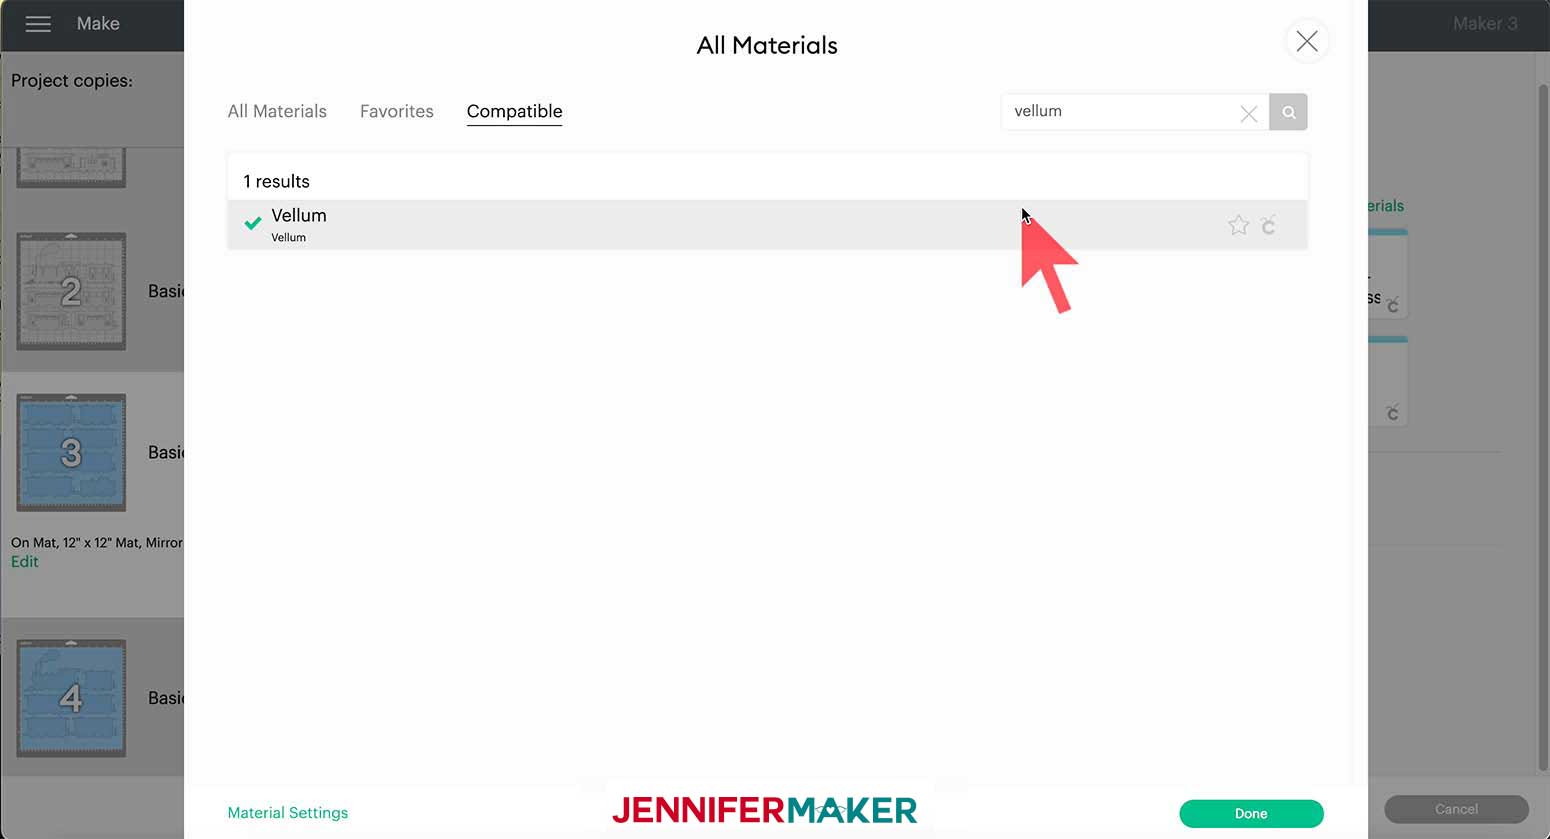
It will take about 30 minutes to cut all the train layers.STEP 3: WEED THE HOLIDAY PAPER TRAIN COUNTDOWN

STEP 4: (OPTIONAL) CUT AND GLUE DIFFUSING LAYERS
If you choose to add the backing, just attach it to the Holiday Paper Train cardstock layer. You can use tacky spray or glue.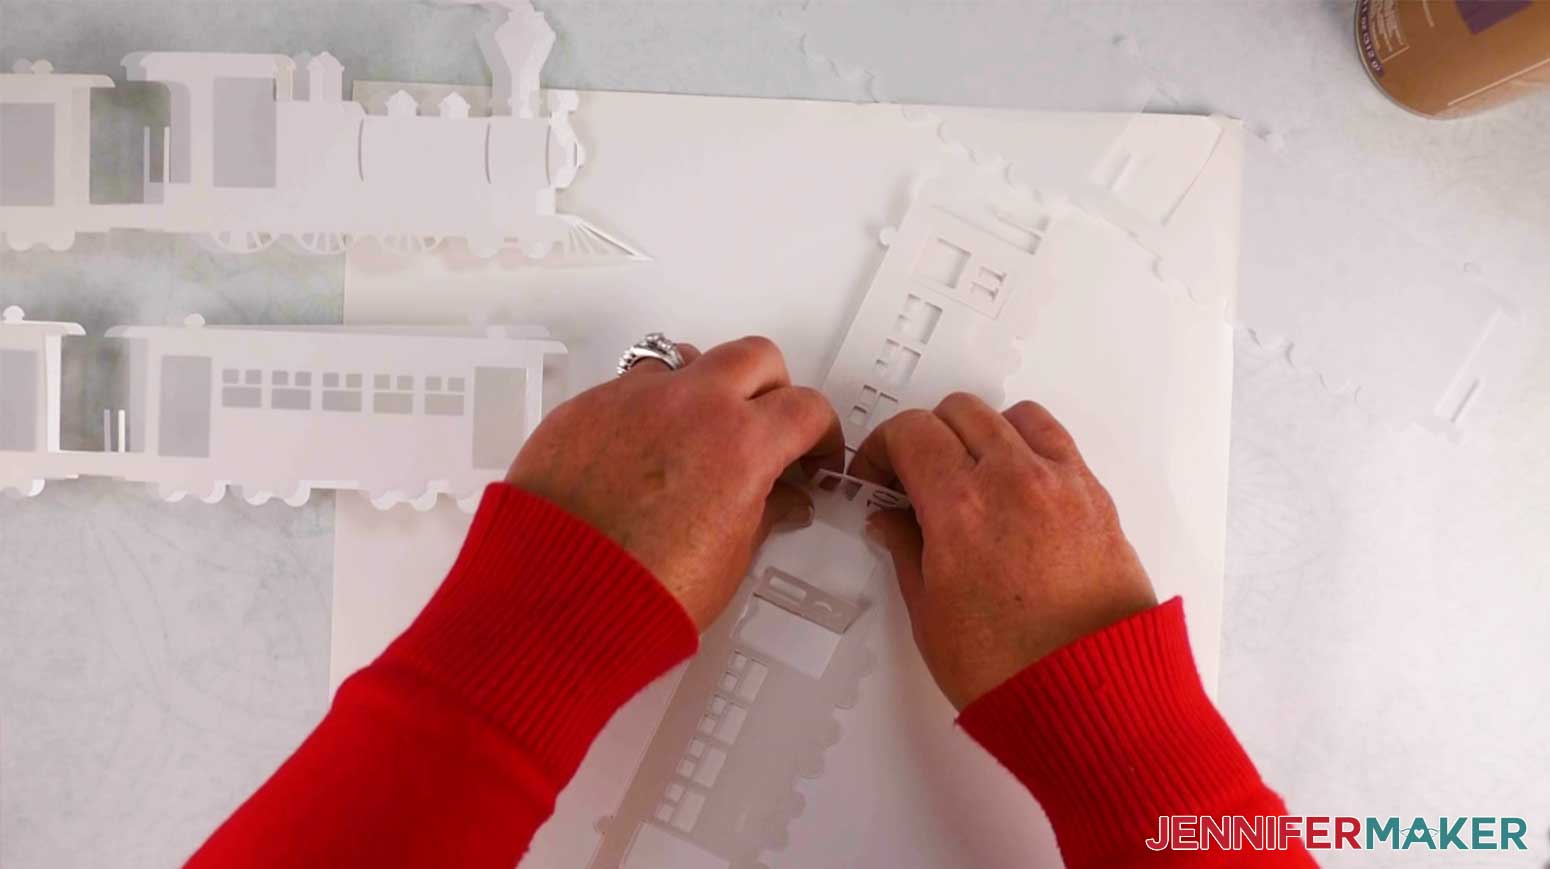
STEP 5: FOLD YOUR HOLIDAY PAPER TRAIN COUNTDOWN
Now, just fold the Holiday Paper Train Countdown — car by car — in the center of each narrow coupling. I folded mine up like an accordion.
STEP 6: DISPLAY YOUR PAPER HOLIDAY TRAIN COUNTDOWN

TIP: You will need about four to five feet of space to fully show your Holiday Paper Train Countdown. If you don’t have that much space, you don’t need to glue the sections together — you can simply fold the coupling between the two cars of each section and place the sections in groupings, such as along multiple window sills. Notes
Recommended Products

Answers to Your Questions About How to Make a Holiday Paper Train Countdown
Q: What kind of paper do I use to make the holiday paper train?
You can really use any 65 lb-105 lb. cardstock — it’s your choice what color and texture you want to use. You can also use Cricut Foil Kraft Board. The most important thing is that it be a good quality cardstock.
Q: How do I get clean cuts on my holiday paper train?
Use good quality cardstock, make sure your blade is clean, and use a stick mat. Learn more about solutions to cutting problems in my Cricut Cutting Problems guide.
Q: What can I use instead of vellum?
Try wax paper or inexpensive 20 lb. cardstock. You can also use a patterned acetate. Or nothing at all — it’s your choice!
Get my free SVG files to create a beautiful Holiday Paper Train Countdown
I love seeing what you make with my designs and how you use them! Please share a photo of your Holiday Paper Train Countdown project in our Facebook group or tag me on social media with #jennifermaker.
Love,

Want to remember this? Save this Holiday Paper Train Countdown Tutorial to your favorite Pinterest Board!