

Learn how to make this Christmas Tree Advent Calendar to countdown to the big day!
Family gatherings. Holiday songs. Special treats. These are just some of my favorite things at the holidays. But you know why I REALLY love the holiday season? It’s because I have more opportunities to give presents to those I love. And this year, I’m including my blog and all of my lovely readers in this gift giving extravaganza. Beginning December 1st, 2017, I am embarking on a project called MAKE IT MERRY: 25 Days of Maker Projects. That means each day I will have a new project for you here on the blog—it’s a virtual advent calendar. And to get us started, I’ve offer this super cute and easy-to-make Christmas Tree Advent Calendar.
Watch the full and UPDATED step-by-step video tutorial on making a Christmas tree advent calendar:

The inspiration for this calendar came from my love of Christmas trees (I’ve had one up in my craft room for over a month now!). But I can’t take credit for the original idea for this design. I spotted something similar on Pinterest over on a French scrapbooking blog, which inspired me to design what you see here. It is completely created from scratch, with nothing more than a little photo to go on. It took about 10 tries to get all those angles right! But the end result for you is an easy to cut and fold project. It only takes a couple of hours to make.
The free pattern for this Christmas Tree Advent Calendar is in my free resource library (it’s design #64) and it’s available in SVG and DXF for those with cutting machines, and PDF for those who want to cut it out by hand. Get the password to my resource library by filling out the form at the bottom of this post!
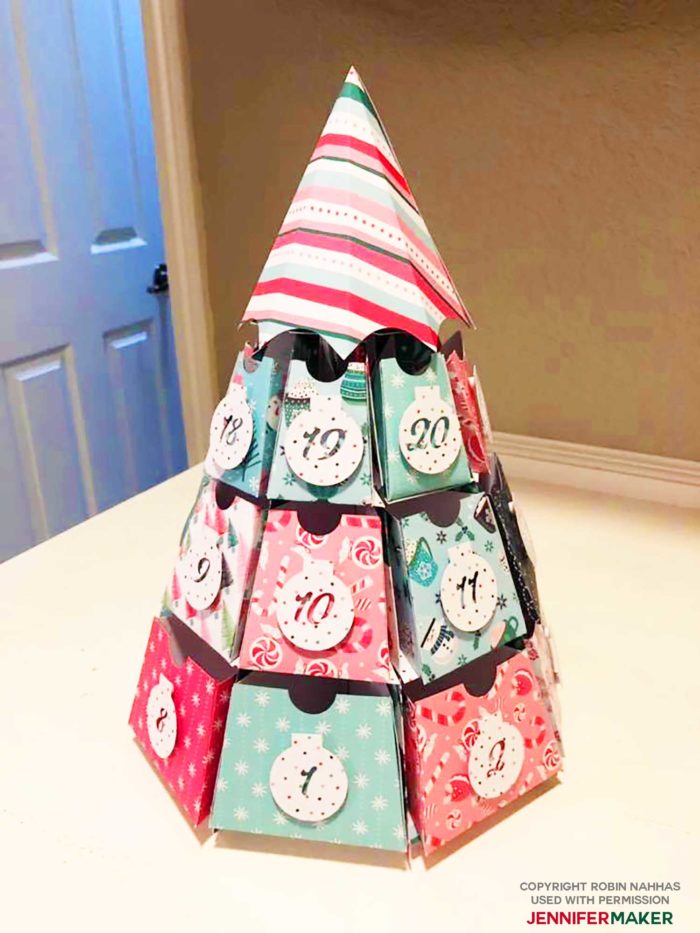
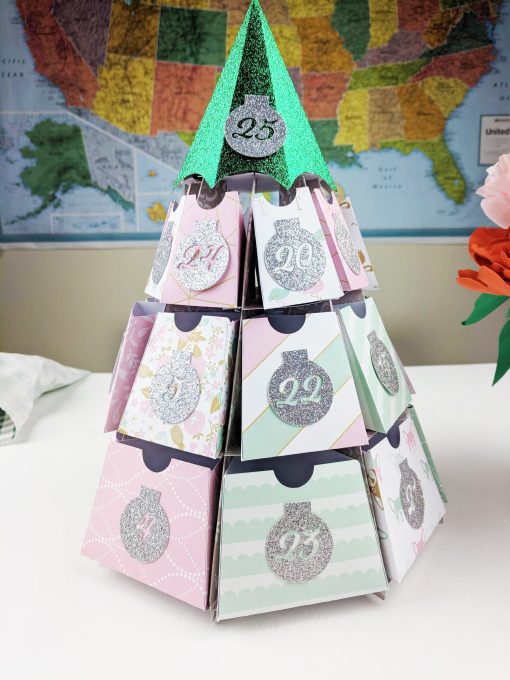
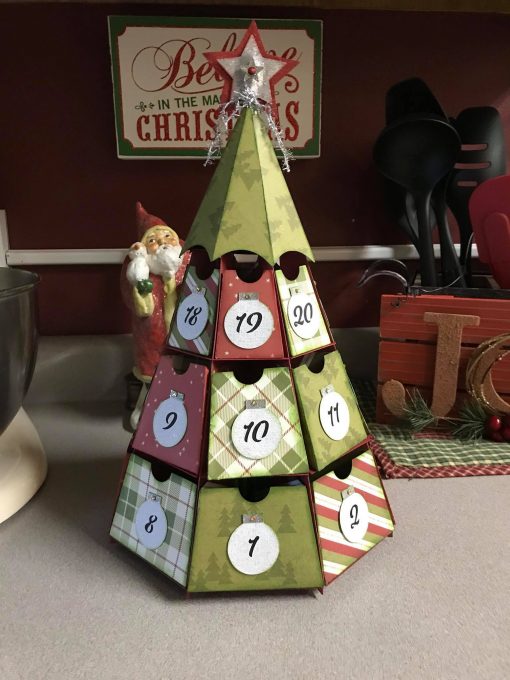
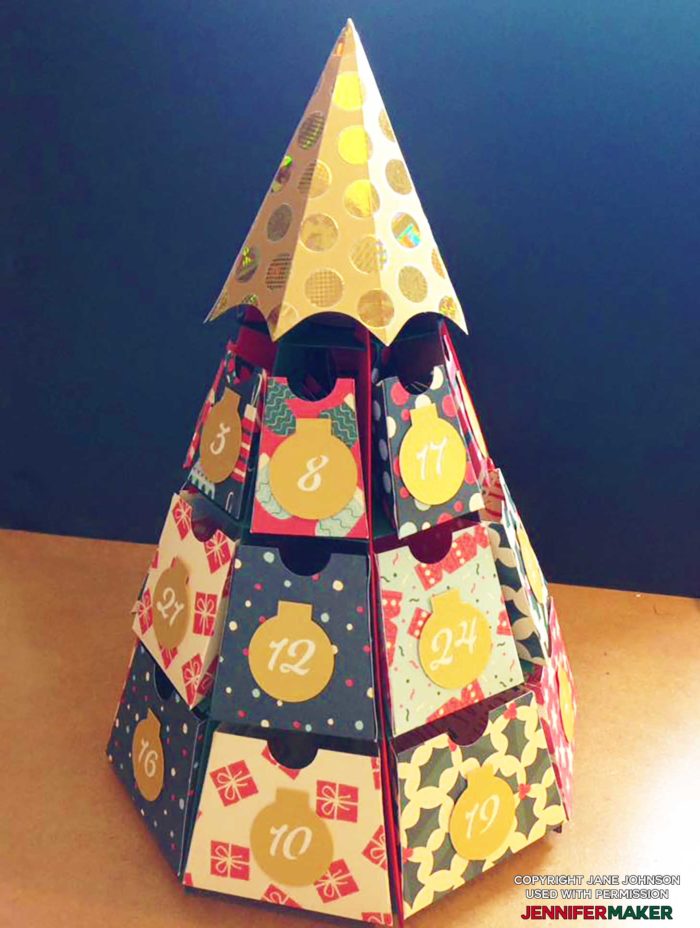
If you make this Christmas Tree advent calendar, please let me know! Share a photo with me at [email protected] or share it over in our Facebook group. Here are some Christmas Tree advent calendars made with my pattern by my readers:
This sweet candy-colored Christmas Tree calendar was made by reader Robin Nahhas as her VERY FIRST PROJECT with her new Cricut (after she made the tutorial project)!
Here is a pretty pastel advent calendar made by reader Amy at Amygonnacraft.com
And check out this festive version by Barb Schafer, who did a lovely job on her Christmas Tree Advent Calendar:
And here is a lovely gold, blue, and red version made by reader Jane Johnson:
I’m so excited to show this fun and easy advent calendar to you! This post contains some affiliate links (which means if you make a purchase after clicking a link I will earn a small commission but it won’t cost you a penny more)! Read my full disclosure policy.
Christmas Tree Advent Calendar Materials
View my Amazon shopping list for the exact items I used!
- 18 sheets of 12″ x 12″ patterned or holiday-colored cardstock (80 lb. or higher, preferably) or Kraft board (the cardstock I used is no longer for sale, but here is a good one that would work well!) (alternative #1, alternative #2)
- Craft Glue (I used Bearly Art Precision Craft Glue)
- (Optional) Masking tape
- (Optional) 1 self-adhesive magnetic sheet (about 4″ x 6″, no more than 5mm thick)
- Things to put in the treat boxes, like candy or little toys
- A way to cut out your pieces (I use this!)
- (Optional) Scoring stylus or scoring wheel tool (if you don’t have one, use the “perforated” version of my pattern file)
- Design #659 (updated version) – My free pattern/files (available in my free resource library—get the password by filling out the form at the bottom of this page)

How to Assemble the Christmas Tree Advent Calendar
Learn how to make a Christmas Tree Advent Calendar with fun magnetic drawers! First, download my Christmas Tree Advent Calendar files from my free library – look for Design #659. Alternatively, you can use the Save This Project form near the top of this post and the design link will be emailed to you. In the SVG folder, you’ll find “score” and “no-score” versions of my design to cut on a cutting machine. There is also a DXF folder with cut files, and a PDF folder with versions you can print and cut by hand. Upload the SVG file you need to Design Space to get started. I’ll demonstrate with the “score” design because it creates a smoother result. TIP: If you’re not sure how to upload, go to jennifermaker.com/svgs to learn how to unzip and upload SVG files. Your Christmas Tree Advent Calendar is finished! Place your Advent items in the boxes (don’t forget to lift the tree topper to place a gift on the very top shelf!) and enjoy sharing a gift every day of the holidays! Assembled Size: 8.5" W x 13" H x 8.5" D Typeface: Tingler Script / Free Alternative: Timberly
Christmas Tree Advent Calendar
Materials
Tools
Instructions
STEP 1: GET MY CHRISTMAS TREE ADVENT CALENDAR DESIGNS
STEP 2: PREPARE AND CUT YOUR CALENDAR DESIGN
CRICUT DESIGN SPACE
NOTE: I’ll pick the “score” version.
NOTE: If your project uploads differently than is shown on this page (with the layers stacked on top of each other vs spread out), this is intentional to make sure your design does not change sizes on you. If you prefer to use the unstacked version of the design files, upload one of the files in the "Unstacked" folder and then make sure your layers match these dimensions:
The eight triangle-shaped pieces will be the tree’s vertical support walls, the four octagons will be the horizontal base pieces the drawers will sit on, the green fan-shaped piece is the Christmas tree topper, and the twenty-five ornaments are the number tabs for the drawers.
There are also sixteen small squares, sixteen medium squares, and sixteen large squares for the magnet cutouts.
The remaining pieces will be the drawers: eight small boxes, eight medium boxes, and eight large boxes, for a total of 24 drawers.


CUTTING
NOTE: The magnet pieces will be cut from material that is 4” x 6”, so be sure to change the Material Size setting to match this for your gray mat.
TIP: If you want to combine mats to save time and materials, follow the instructions in my Easter Egg Lantern tutorial.
NOTE: After you set the material for a mat color, you can check the box next to “Remember Material Settings” to save time between mats. 

TIP: Put your holiday patterned paper with your chosen pattern FACE DOWN—this way your paper will get scored on the back, making it easier to fold in the proper way with your chosen pattern face out.
TIP: If you click the “Remember Material Settings” box after changing the tool from the Scoring Wheel to the Scoring Stylus, it will remember your tool selections, as well. Even so, always check that your material and tool settings are correct between mats.
NOTE: If you’re using the no-score version, you won’t see the scoring tool prompts.
TIP: Use the spatula to help lift delicate parts, and your weeding tool to poke out small bits of cardstock that may have been left behind. If you have any issues with your cuts, go to jennifermaker.com/cleaner-cuts. 
NOTE: Refer to the Design Space screen if you’re not sure about some pieces’ orientation.
STEP 3: ASSEMBLE YOUR CHRISTMAS TREE ADVENT CALENDAR
CHRISTMAS TREE SIDES AND BASE ASSEMBLY
NOTE: You'll want to line up the four slots along the sides as best as you can.
TIP: Placing the edge of a large scraper along the crease line can help with this. 
TIP: The precision tip on a bottle of Bearly Art glue works really well!
TIP: Make sure everything is slid in all the way.


DRAWER ASSEMBLY


TIP: I found it easiest to glue the front two tabs, then glue the back tab.
NOTE: You will have twenty-five numbers but only twenty-four drawers. The 25th ornament goes in the very top space, under the tree topper (perhaps for a special surprise!).
TIP: You can add the ornaments in order or mix them up depending on your preference.
TIP: If the magnets seem to repel or do not want to go on straight, turn one magnet 180° so the two magnets line up when stuck together. 
TIP: Use a weeding tool if the backing doesn’t come off easily.


TREE TOPPER ASSEMBLY


STEP 4: SHOW IT OFF


Notes
Get my free template and cut files for the Christmas Tree Advent Calendar
Love,

Want to remember this? Save the Christmas Tree Advent Calendar to your favorite Pinterest board!

More gifts for you in my MAKE IT MERRY: 25 Days of Maker Projects Christmas:


Wow, thank you for creating and sharing these 25 Days Gifts for us. Your designs are beautiful.
You’re welcome, Deb!!
I love your advent tree, however, it says it needs a password, which is supposed to be found at the bottom of this page. I do not see it, and most likely I am just plain blind in one eye and can’t see out of the other. LOL Could you possibly help me out?
Thank you!
Hi, Karla! You sign up to get the password in email. There are two signup forms — one right above my signature near the bottom of the post, and another at the very bottom of the post (scroll all the way down) with a green background. Let me know if you still cannot find them. 🙂
Hi Jennifer! I’m obsessed with your site, love all the ideas! I just downloaded the file for the advent calendar (planning on creating a Spiderman and Batman version for my sons!) and had a question about the file. At the bottom of the file, the octagonal horizontal supports look like they should be cut out, but there’s no color selected, so should they be scored? I’m guessing no, but wanted to make sure. Thanks for this awesome file!
Thank you so much!!! Your creations are truly inspiring. Looking forward to Christmas crafting.
Thank you, AnnaMaria!
Do you just use the scoring stylus for this project? I have to go buy one so I need to know what to get 🙂
I used the scoring stylus, yes.
What type of glue did you use, specifically? I used my usual glue runner and they ALL came undone!! UGH!
Thank you!!
In my photos I can see that I am using Scotch Permanent Tacky Glue.
Hi Jennifer, thanks for the lovely advent calendar that I have just finished. If I select all the pieces on the mat and reduce in size (my granddaughter wants a smaller one for University) would it still work please?
Regards maureen
Hi, Maureen! Yes, if you reduce the size of all the pieces on the canvas at the same time, you should have no problem getting it to work. 🙂
You are amazing!! DIYs that WORK and work well! Thank you! And did I imagine it or did I see a cricut cover/tool stroage someplace? I can’t find it. Can you help?
Thank you so much, Susie! And yes, I have a Cricut cover + tool storage pattern at Cricut Maker Mat 🙂
I can’t find the svg file. After I extract everything, an svg file is not listed. What am I doing wrong?
Sometimes it will show up as a “Chrome HTML” file. If you see that, upload it.
I keep trying to make it but I get to that part & it says I have something to large for a 12×24 mat. What am I doing wrong??
Be sure you ungroup first. 🙂
My Girls loved making these.. Thank you so much for the file and tutorial..
what font are you using for the numbers? its so handy to have the middles attached, and if its available I’d love to use it for other projects
Hi, Tylinn! I’m using a font called Milkshake.
I have downloaded the file and now it will not load into design space. What am I doing wrong? I am very frustrated with this already
Hi, Jennie! Did you try to upload the zip file by accident? You need to upload the SVG, not the ZIP. If you’re not sure how to do that, these videos will help: https://jennifermaker.com/svgs
Hi Jennifer. I love your advent tree and am trying to make it for my grandsons. I’ve uploaded it to Design Space (using and Explore Air 2) but when I change cut lines to score I am not getting the attach prompt. While I have located your assembly video, I know I saw a more detailed video of this project in which you go over how to upload this tree file and convert to score lines but I am unable to find it now. HELP!!
I did a video for the Halloween version of this project over at https://youtu.be/ZMFoIWK2_LI — perhaps that will help you? Basically if you can’t attach, it means you have probably have things in groups still. Make sure everything is ungrouped, then try to attach. 🙂 Alternatively, use the version without score lines, then you don’t have to worry about it!
I’ve uploaded the Scored version of the Advent Tree and the size is by what your instructions say but when I click Make it, it says its to big and to use a bigger mat or resize. Also it is grouped, do I need to ungroup. I don’t have a larger mat than the 12 x 12 size. Will it still work? Help!!!
Hi Linda! This is a super simple fix! After you hit “Make It,” look through your mats on the left-hand side and click on the drop-down box of those that are showing 12″x24″ and change to what you will probably find to be 12″x19″, this will allow you to use your 12″x12″ cutting mats.
I desperately want to make the advent tree> I want to print the template so I can cut out by hand, but I can’t figure out how to do that.
Hi Wendy! You will still need to download the file and once you do, look for the PDF document, this is the file you will want to print.
So glad you loved it!
I love the beautiful advent calendar. Thank you so much for this. I am going to run out to get pretty Christmas paper to make some for all my nieces. I am having to flat pack them to go in the mail so I edited your boxes to flat pack. I linked to a blog post so that others can enjoy.
That’s wonderful!