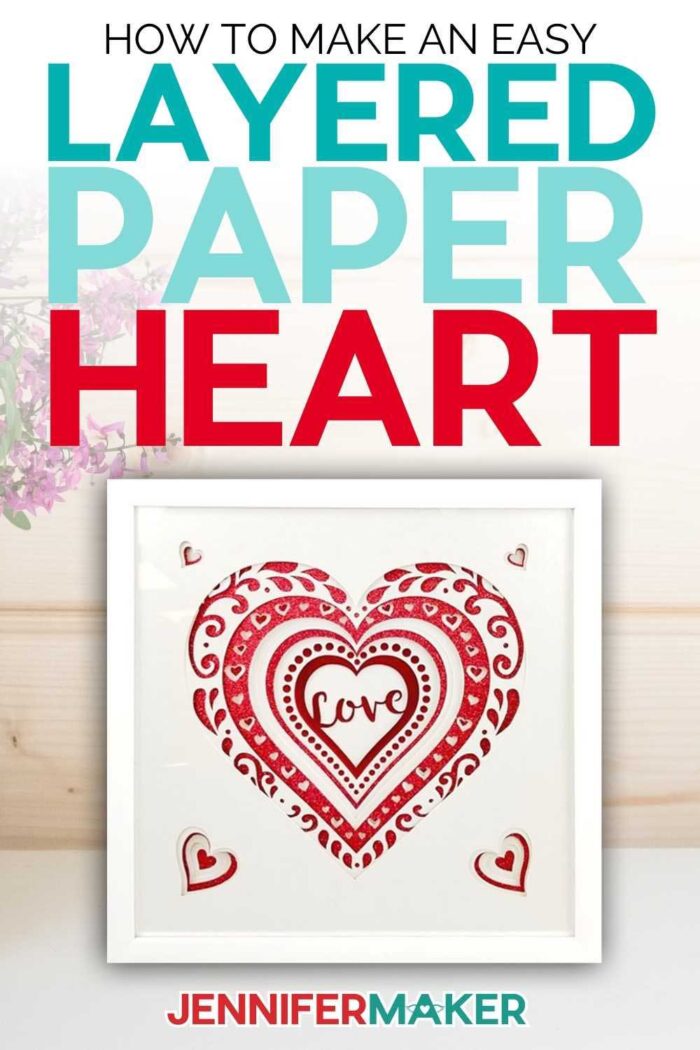
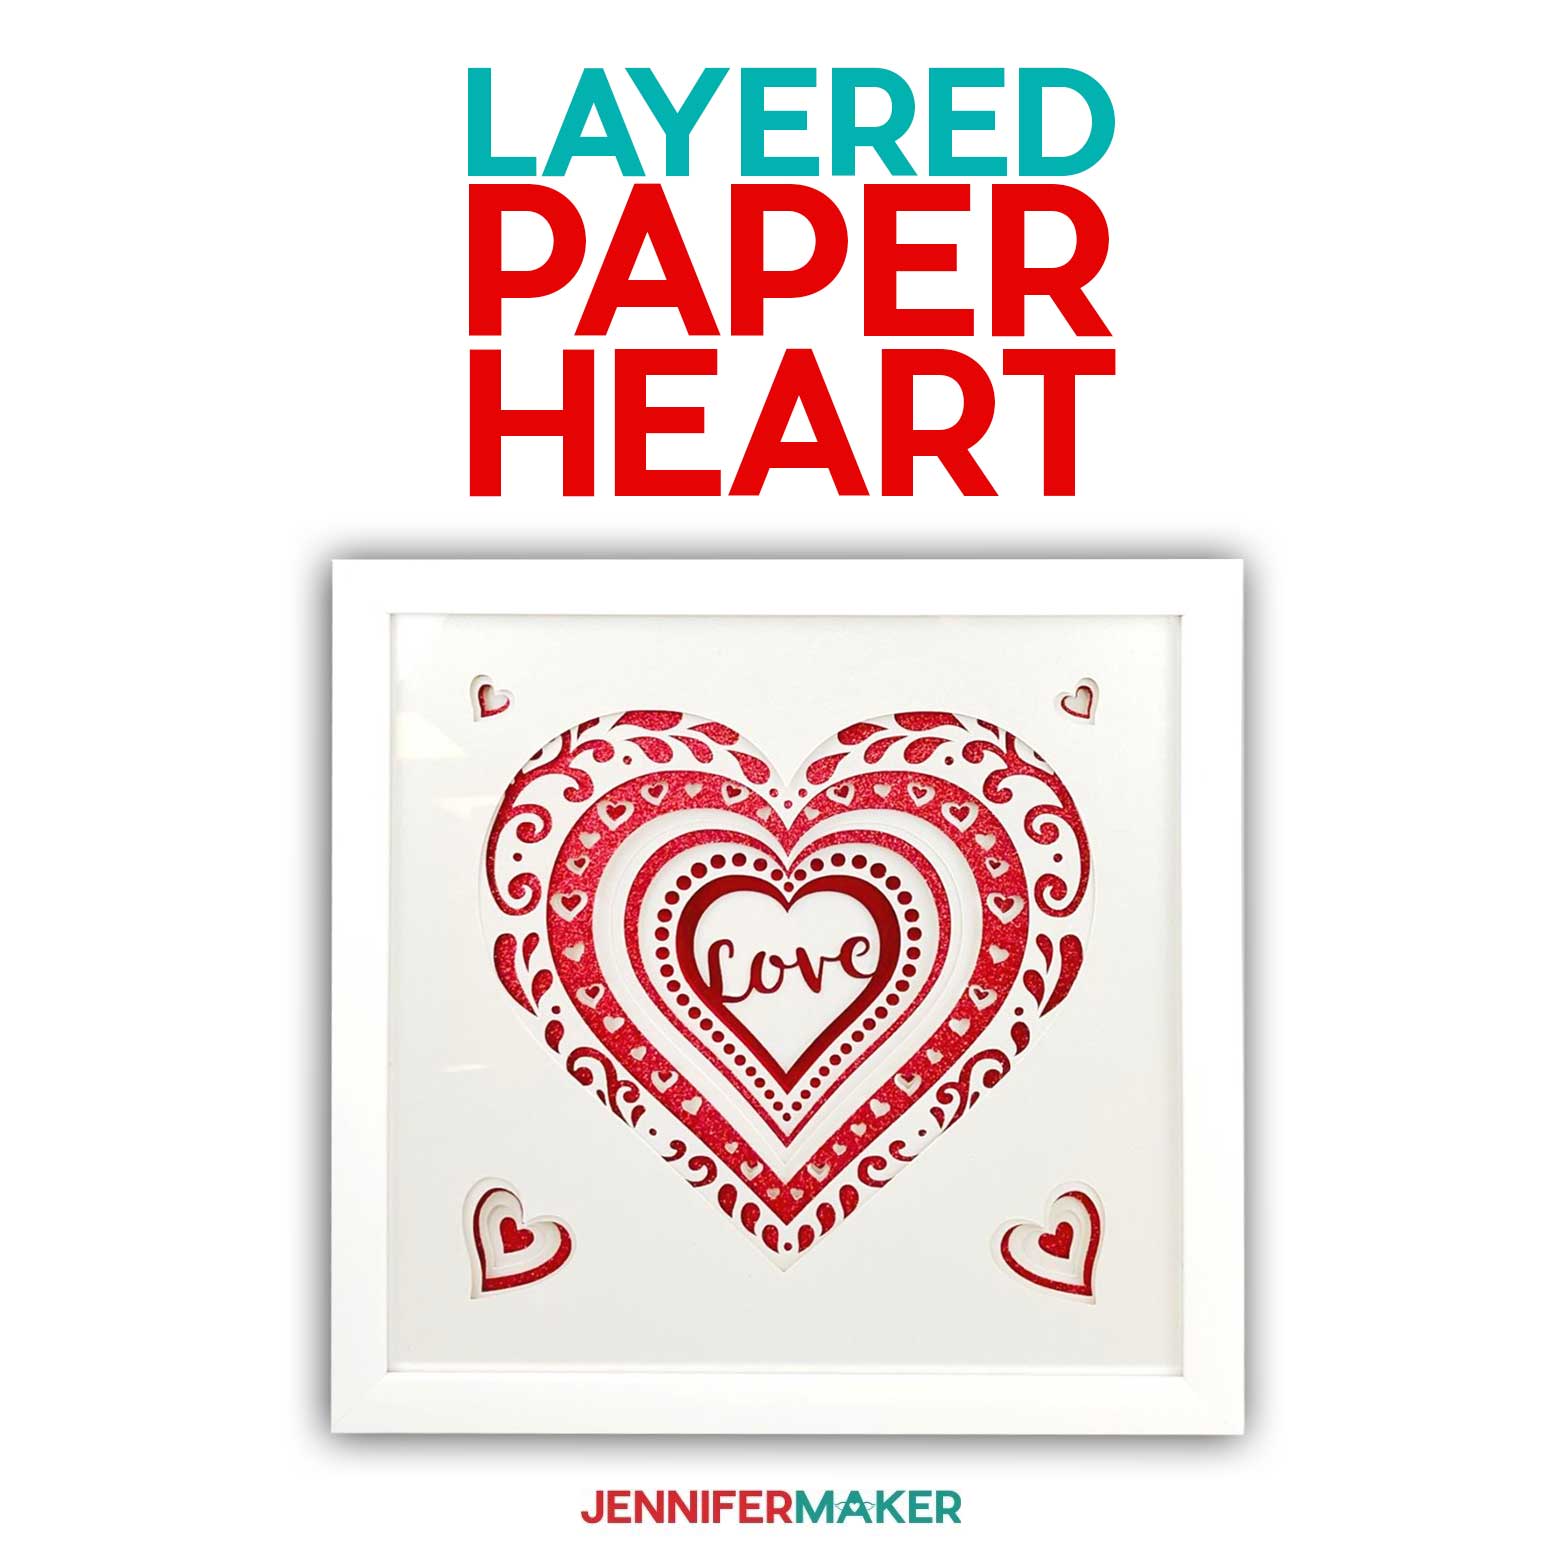
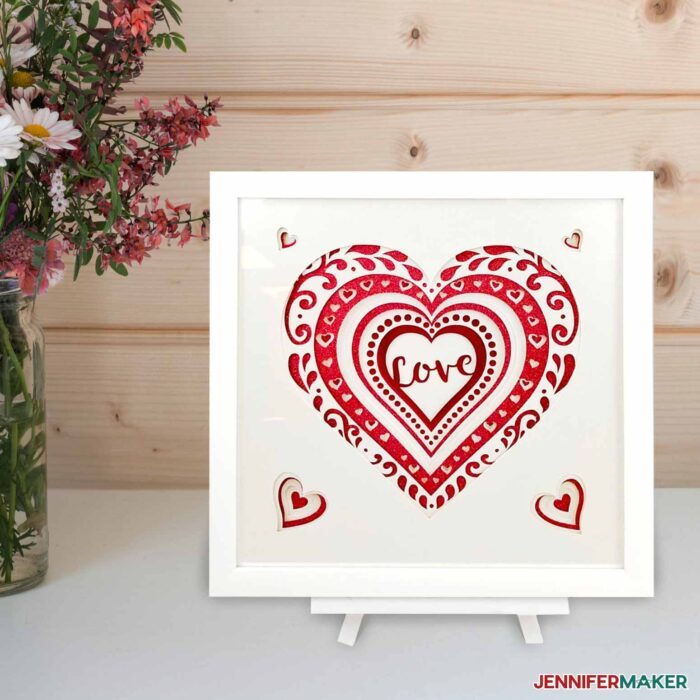
Learn how to make a gorgeous heart layered SVG shadow box with perfectly aligned cardstock layers.
3D Layered paper designs are one of my favorite papercraft projects to make. I’ve designed and freely shared dozens of layered paper designs over the years. BUT it can be tricky cutting the intricate designs and getting all the layers to line up just right. Which can turn what you thought would be a beautiful layered design into a frustrating mess. But I’m going to let you in on a little secret. I have a surefire way to get all the layers to line up just right so you get the perfect layer alignment every time! And to teach you how to do this, I’ve designed a beautiful heart layered SVG for you to make!
Watch the full step-by-step tutorial video on how to cut and align the layers of this layered heart design!

Something I really love about 3D layered designs is that they don’t require a lot of materials. You usually only need some good-quality cardstock and a way to attach your layers together. Plus, my “secret tool” for aligning your layers. So let’s go over each step one by one for this project so I can show you how it goes together effortlessly.
First, I used a variety of good-quality 12″ x 12″ cardstock for this layered heart design. Specifically, a few sheets of pearlescent white cardstock (which has a really pretty sheen to it!), a few sheets of glitter cardstock, and a pretty reflective or mirror cardstock. But you can use ANY cardstock as long as it’s of good quality so that it cuts well. Check out my materials list below to see exactly what I recommend.
Now, to attach your card stock layers together and give it that three dimensional look, I used adhesive foam squares. They’re easy to use as they are already sticky on both sides and give your layers lift!
My secret trick for aligning the layers is easy — just use a frame or shadowbox as you place each layer!! I demonstrate how this works in our video and explain it in the tutorial below. I used a 12″ by 12″ shadow box and my design fit perfectly.
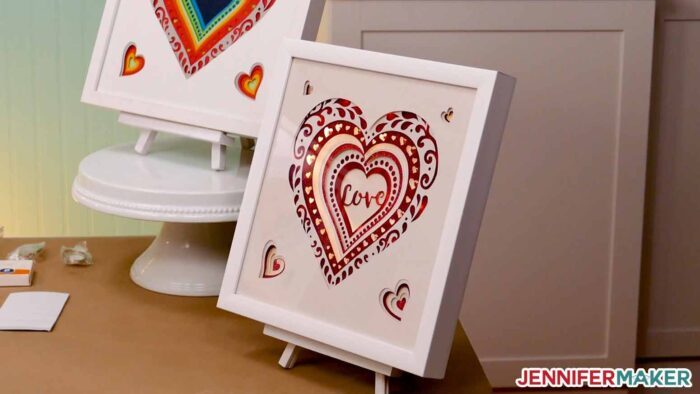
Many 3D layered designs are simply layered cardstock, but you CAN add a little light to your design for added depth and interest. I included a couple strings of fairy lights to my 3D layered heart design to give it a pretty glow, but this is completely optional.
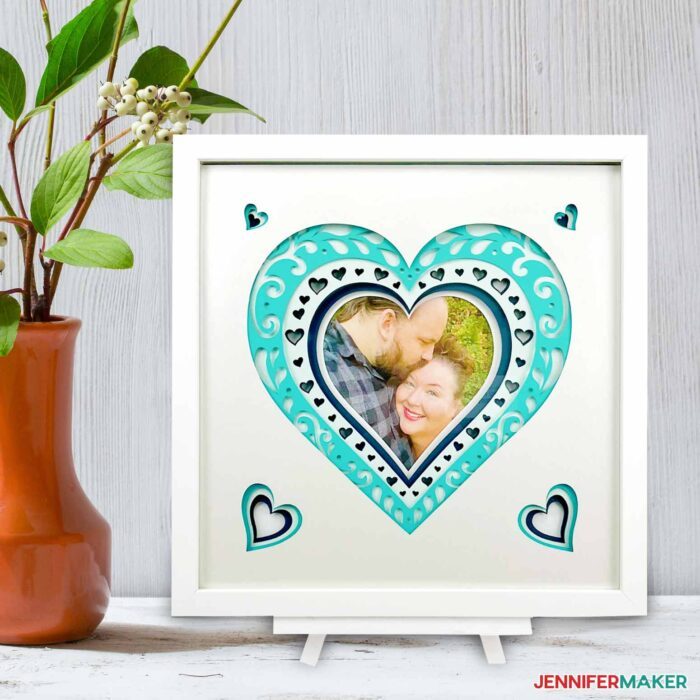
Something else you can do with this design is to add a picture in the middle and turn into a photo frame. If you do add a photo, just make sure your image is at least 5″ by 6″ so that it fills the whole heart.
To get the lovely intricate cuts of this layered project, I used a cutting machine — specifically my Cricut Maker 3. All you need is a fine-point blade and blue or green machine mat. Of course, you can also use the original Maker or any of the Explore series of machines. I also found an extra-large scraping tool helpful for removing the little bits of card stock left behind after the cuts.
So that’s really all you need! Now, let me show you where to get this beautiful layered heart design, and then I’ll teach you how to cut and align it perfectly.
Ready to make this gorgeous layered heart SVG? You’re going to love this! This post contains some affiliate links for your convenience (which means if you make a purchase after clicking a link I will earn a small commission but it won’t cost you a penny more)! Read my full disclosure policy.
Materials to Make a Heart Layered SVG Shadow Box
View my Amazon shopping list with the exact items we used to make this project!
- Nine (9) sheets of 12″ x 12″ 65-80 lb cardstock of your choice — I used six sheets of pearlescent white, two sheets of red glitter, and one sheet of red reflective (here is an alternative to the pearlescent white cardstock I used if you need it)
- One (1) Shadow Box — I used a 12″ x 12″ shadow box
- Double-sided Adhesive 3D Foam Squares
- (Optional) Fairy Lights (Two (2) 3′ strands) and Transparent Tape
- (Optional) Photograph at least 5″ x 6″
- A method to cut your cardstock — I used the amazing Cricut Maker 3 but you can also use the Cricut Maker, Explore 3, or cut by hand
- Cricut Green StandardGrip Machine Mat, 12″ x 12″
- (Optional) XL Scraper
- (Optional) Isopropyl Alcohol, 70% or higher and lint-free cloth or coffee filter (to clean your shadow box glass)
- (Optional) Tingler font or Timberly font (free alternative)
- Design #372 – My free SVG design files (available in my free resource library—get the password by filling out the form at the bottom of this page)

How to Make a Layered Heart Design in a Shadow Box
Layered Heart Design
Light up your walls with this personalized heart layered SVG shadow box!
Materials
- One (1) Shadow Box — I used a 12" x 12" but you can use a different size and adjust the design
- Six (6) sheets 12" x 12" 65lb Cardstock — I used White
- Two (2) sheets 12" x 12" Glitter Cardstock
- One (1) sheet 12" x 12" Reflective Cardstock
- Double-sided Adhesive 3D Foam Squares
- Transparent Tape
- Two (2) 3' Strands of Fairy Lights
- (Optional) Printed Photograph at least 5" x 6"
- Design #372 (My free SVG/PDF/DXF design files are available in my free resource library - get the password by filling out the form at the bottom of this page)
Tools
- A method to cut your cardstock — I used the amazing Cricut Maker 3 but you can also use the Cricut Maker, an Explore family machine, or cut by hand
- Cricut Green StandardGrip Cutting Mat, 12" x 12"
- Cricut XL Scraper
- Isopropyl Rubbing Alcohol, 70% or higher
- Coffee Filter or Lint-Free Rag
- (Optional) Tingler font
- (Optional) Timberly font (free alternative)
Instructions
STEP 1: GET MY FREE HEART LAYERED SVG FILE
First, download my free Heart Layered SVG/DXF/PDF, Design #372 from my free resource library.
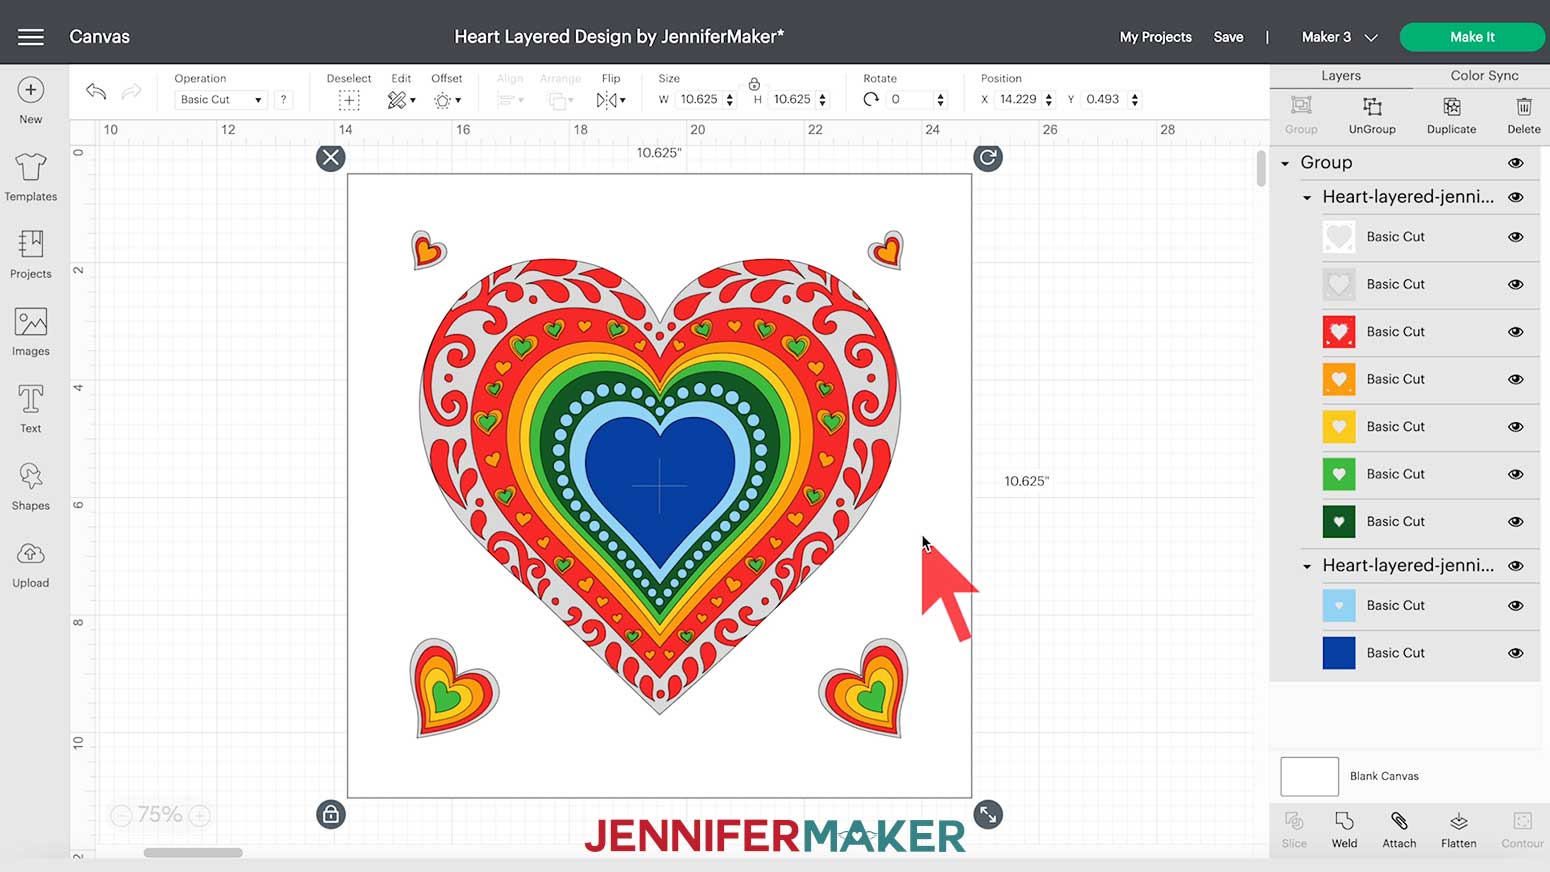
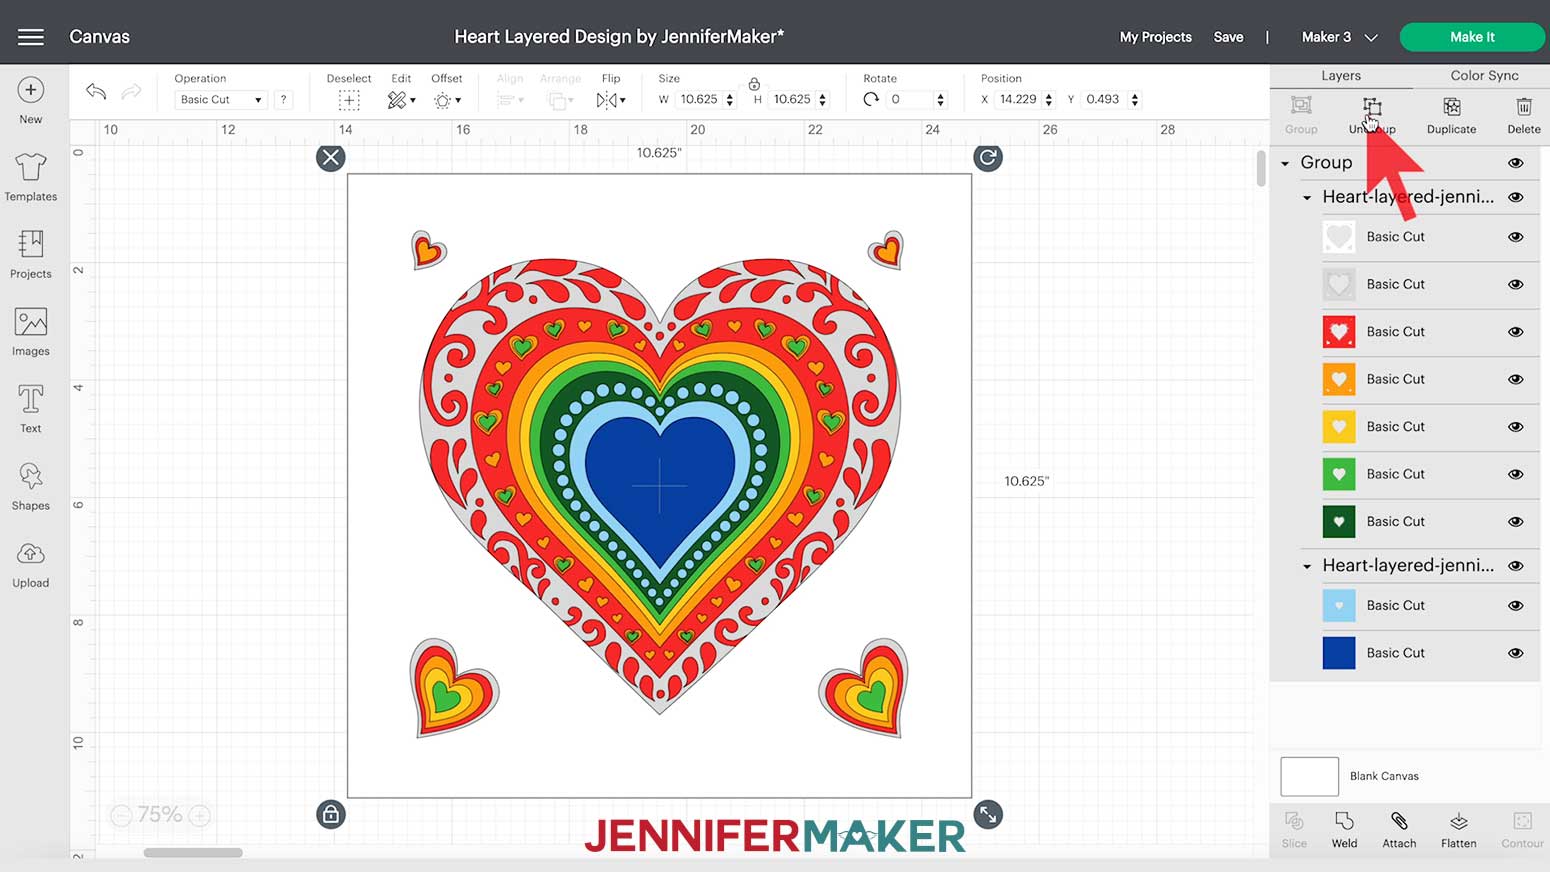
This is what the heart layered SVG cut file looks like uploaded in Design Space. You can zoom out to see the whole design by clicking on the minus (-) sign on the lower left.
If you're not sure how to upload an SVG cut file to Cricut Design Space, watch this helpful video SVGs Made Simple training series I made.
If you're on an iPhone or iPad, here's how to download and upload SVG files to the Cricut Design Space app.
This design fits perfectly in a 12" x 12" shadow box using eight or nine sheets of 12" x 12" cardstock, depending on which background you'd like to make.
STEP 2: PERSONALIZE YOUR LAYERED HEART DESIGN
I will show you how to assemble this heart layered shadowbox with a custom word or name in the background. You will need nine sheets of cardstock to make the personalized version.
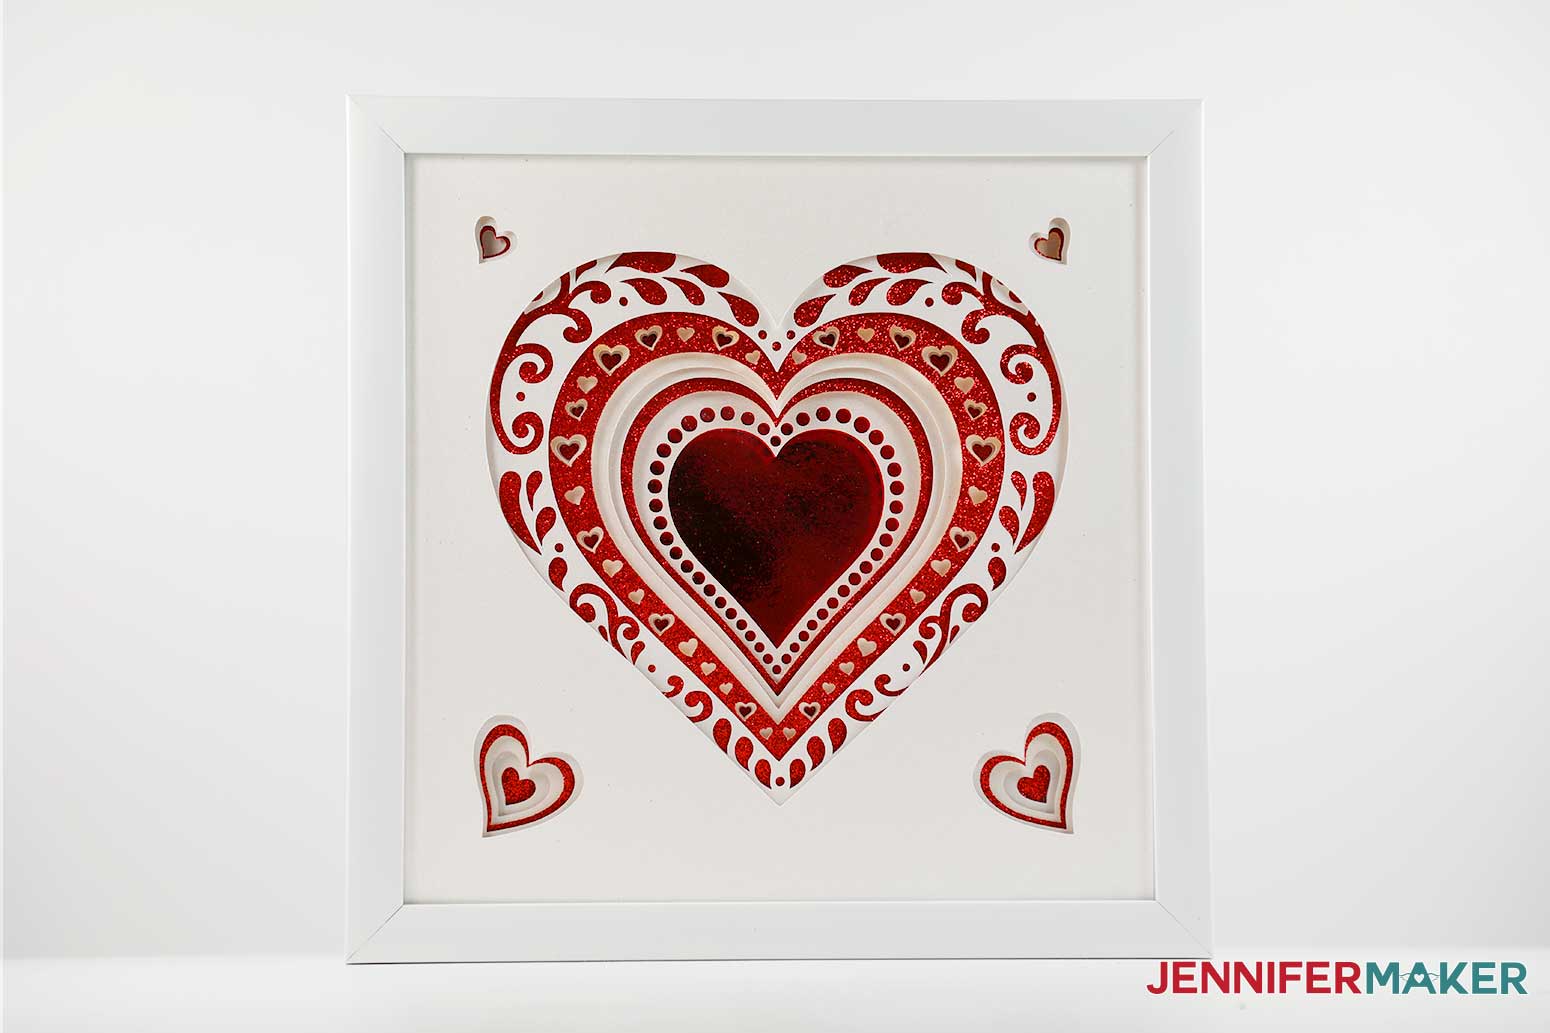
You will cut a total of eight layers if you are making the frame with a solid heart or photo background like these.

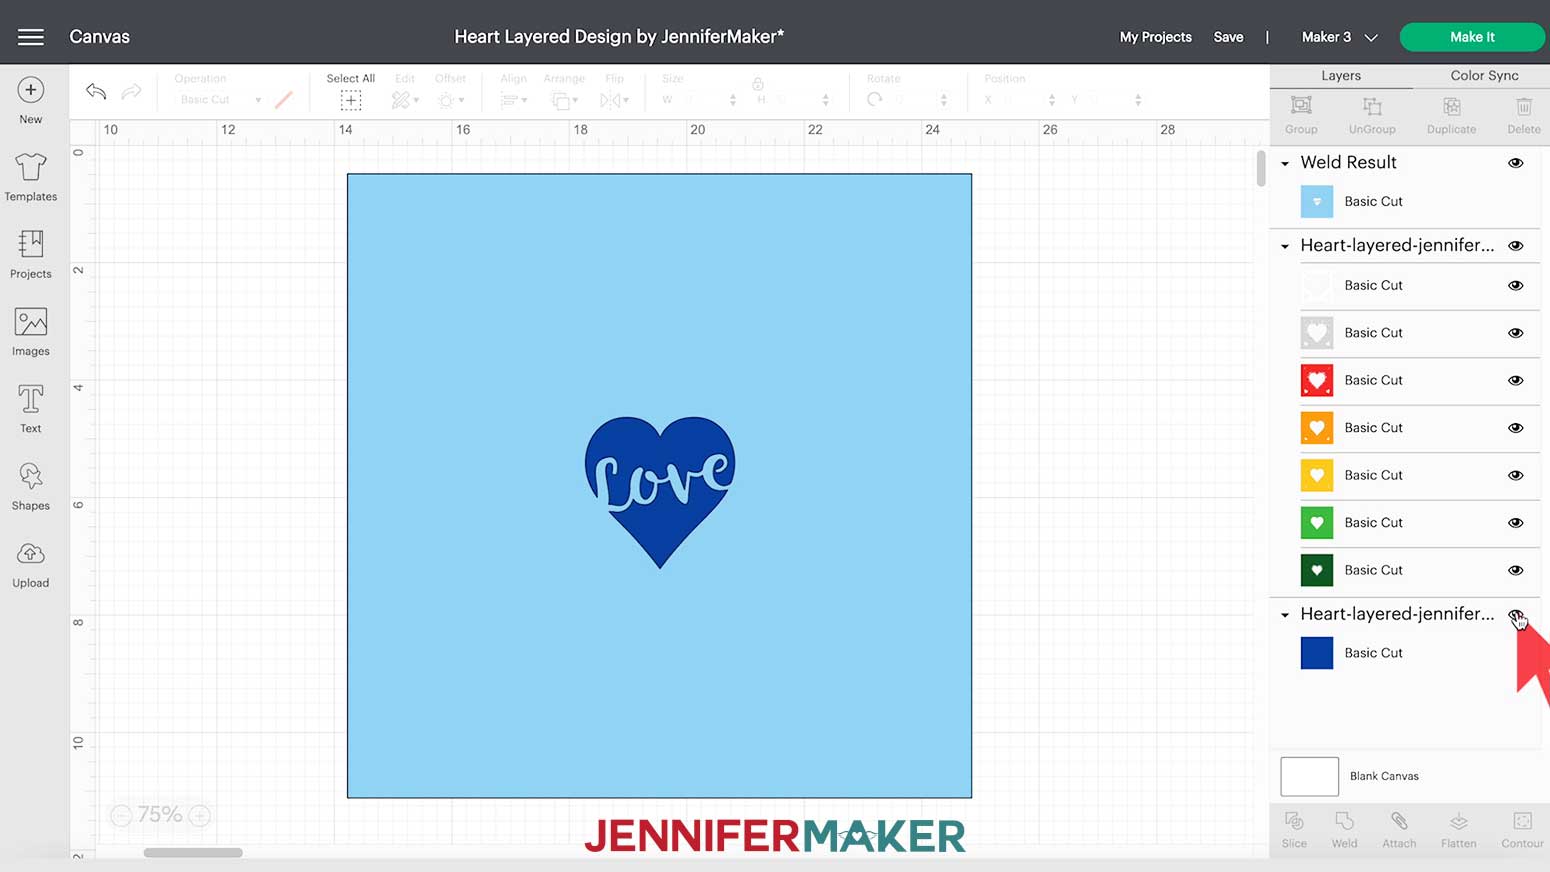
To cut this solid or photo background version, you just need to hide one layer. Once the file is uploaded, hide the second to last layer colored SKY BLUE. To do that, simply click on the eye icon next to the sky blue layer in the Layers Panel on the right. Now, this easy version is all ready for you to cut!
You can cut these layers by hand with the printable PDF, or cut them on a cutting machine with the compatible cut files. Let me show you how to cut these on a Cricut cutting machine using the SVG files.
Again, I'm going to show you how to add a name or word to the design. If that is the one you want to create, make sure that you "unhide" the sky blue layer we hid earlier by clicking on the eye icon next to that layer in the Layers Panel.
The layers are already set up to cut at the right size (10.625" x 10.625") to fit in a 12" x 12" Tasse Verre shadow box, which is the one I'm using for this project.
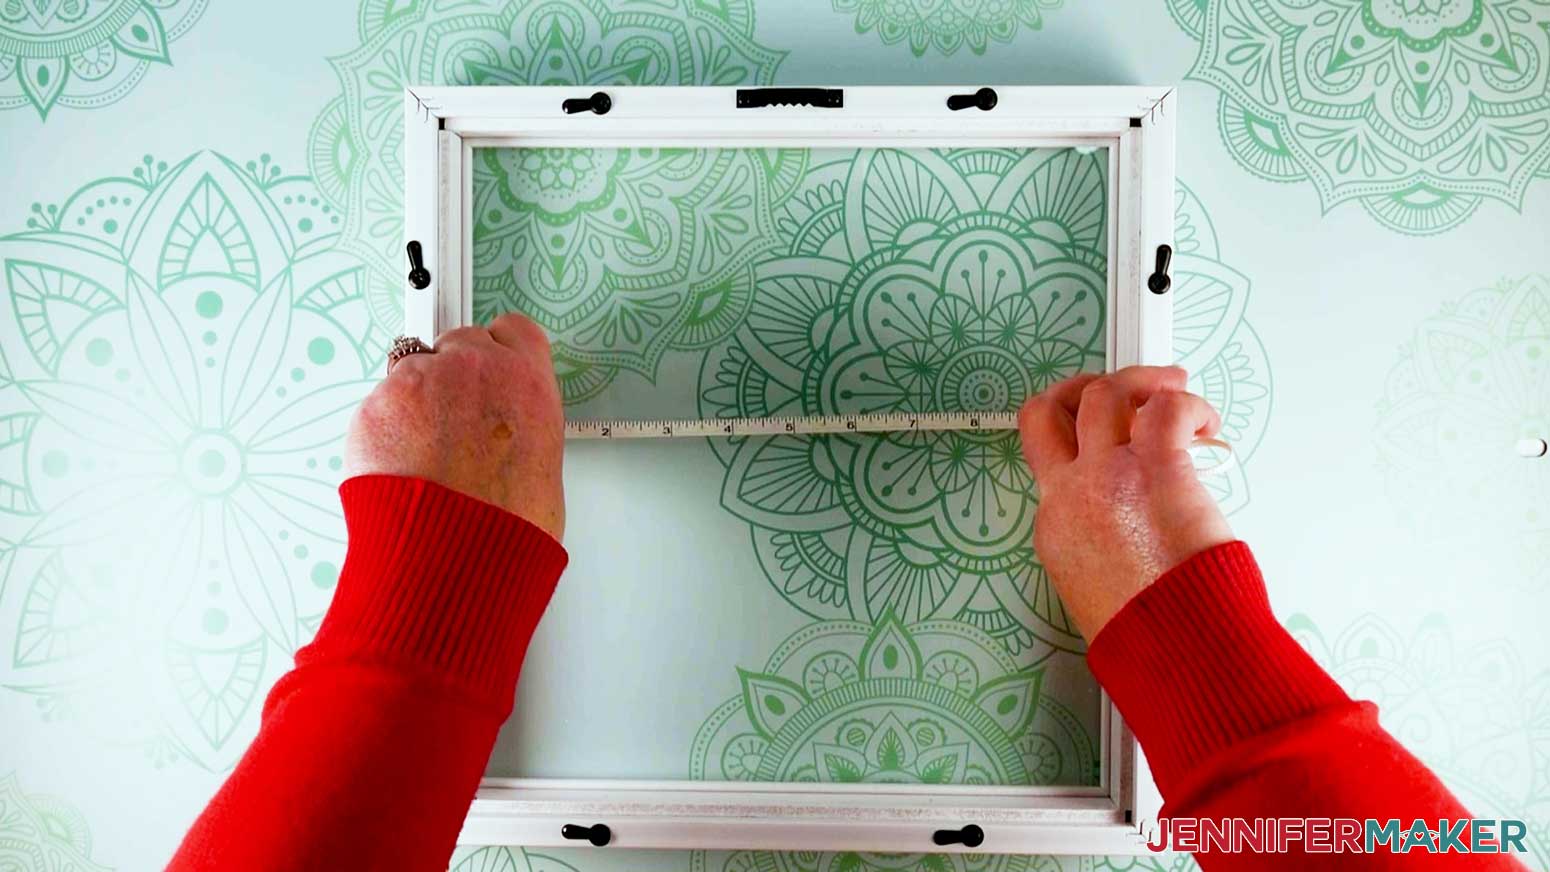
BUT, if you are using a different shadowbox, make sure to measure the inside of the display area to ensure your design shows through the glass as intended. To do this, measure both the INSIDE width and height of the frame. You want the cardstock to fill the space without gaps, but I recommend reducing your final measurements by 1/8" (0.125") to allow for some wiggle room. Shrinking the design's width and height by 1/8" allows a 1/16" gap on all sides, which is just about perfect.
To change the size of the layers in Design Space, click on the design on the Canvas and then click and drag the Resize handle on the bottom right corner until everything is the size you want.
![]()
You can also change the measurements in the "Size" boxes at the top of the Canvas. In order to maintain the correct proportions, make sure the padlock remains locked, otherwise the design will become distorted. Change the Height ("H") to the dimension you decided is best for your frame. The width ("W") will automatically change.

Now, let me show you how to customize the bottom layers with a personalized word or name. So first, while everything is selected, click “UnGroup” at the top of the Layers Panel. This allows you to now individually modify each group of Layers.
The Layers are separated into two groups. Hide the first group at the top of the Layers Panel by clicking on the eye icon next to the group's name.
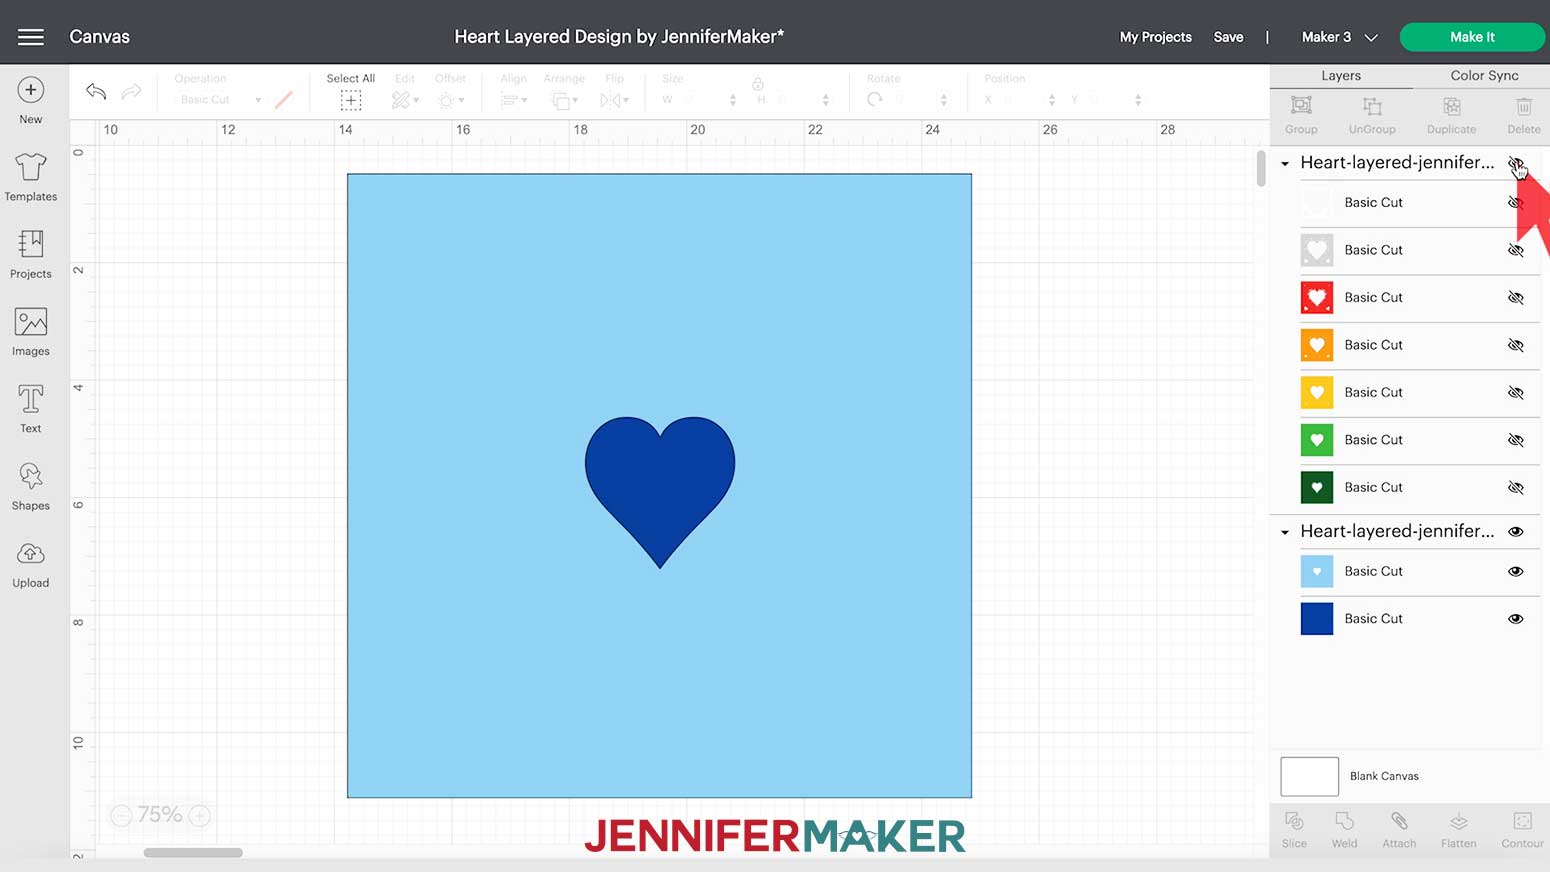
Also hide the bottom DARK BLUE Layer.
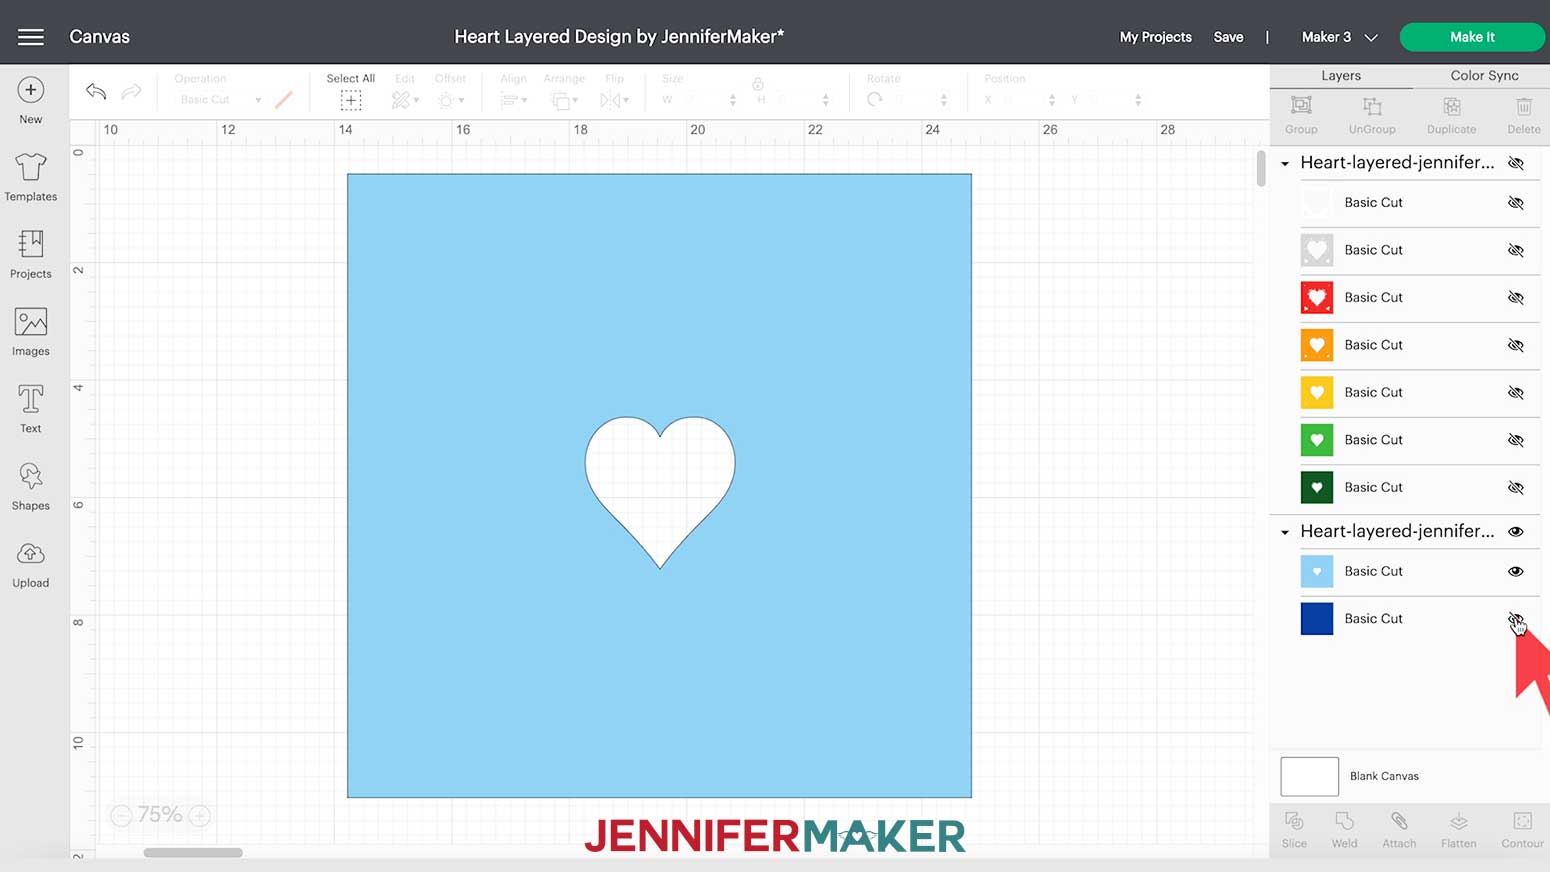
Everything except the second to last Layer in SKY BLUE should be hidden. This Layer in SKY BLUE is the one to which we will add our custom text.
Select the "Text" tool in the Tools Panel on the left side of the Canvas. A box that says "Add text here" appears. I'm going to type “Love” in the box, but you can type anything you want.

To change the font, keep your text selected and click on the drop down arrow in the “Font” box on the left side in the top menu bar. A window will come up with a list of fonts.
You will see both your computer ("System") fonts and those in available in Design Space.
TIP: If you are not a Cricut Access subscriber and do not want to worry about paying for a Cricut font, you can click on "System" at the top of the window to only use the fonts installed on your computer.
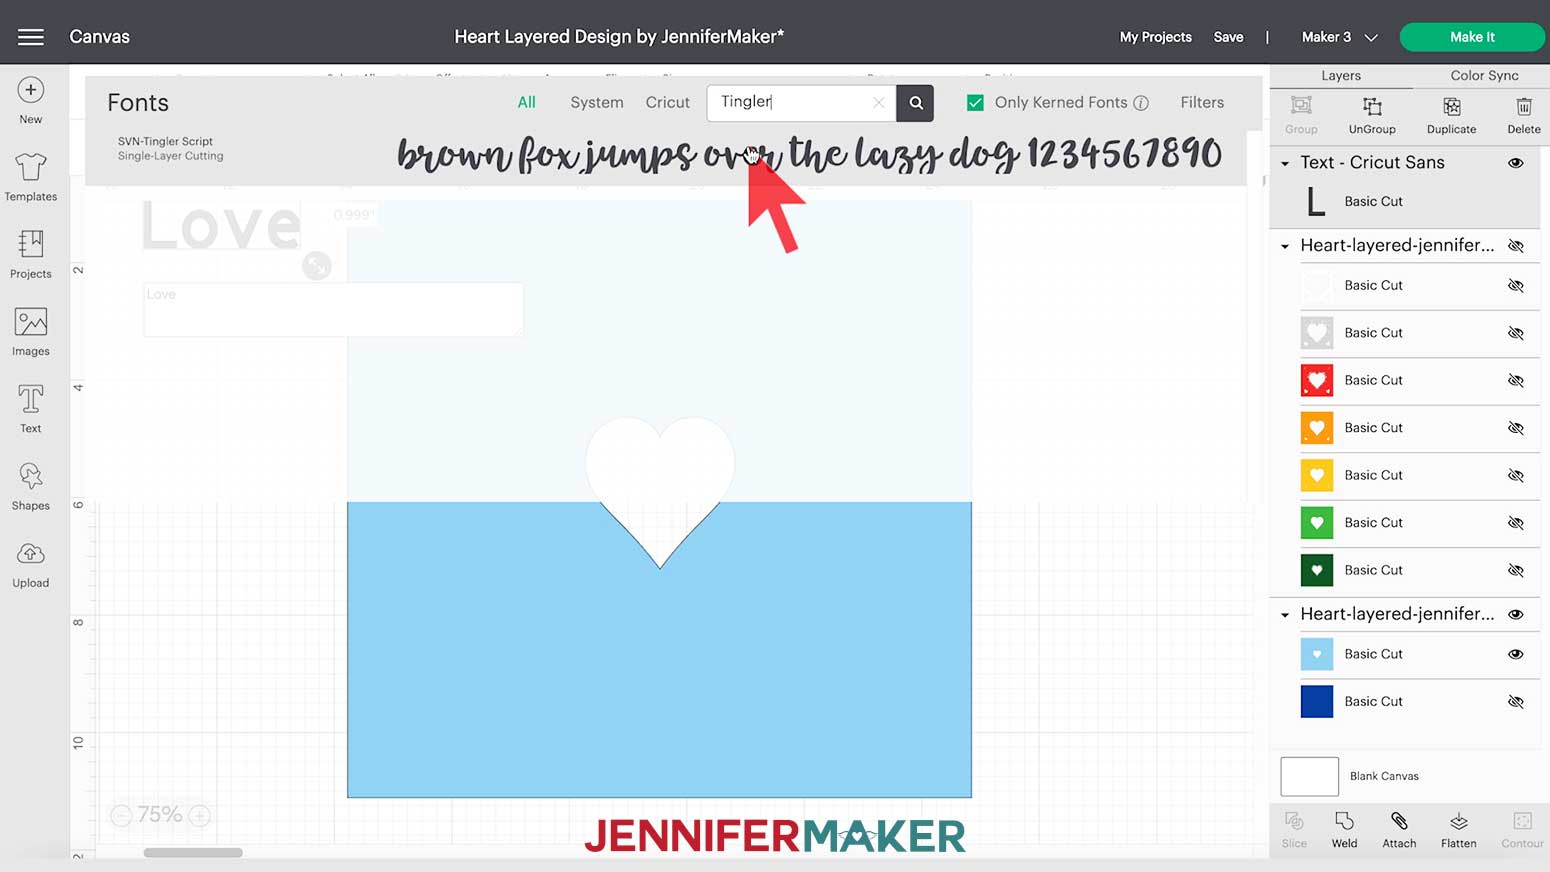
In the "System" fonts, I am going to find Tingler Script, which is a font I purchased on FontBundles.net. In my supply list, I also provided a free alternative font (Timberly) that you can download and install on your computer.
If you'd like to add your own font to Cricut Design Space, my blog post, How to Upload Fonts to Cricut Design Space, will walk you through the steps.
You can either scroll through the font options until you find Tingler Script — or your other font of choice — or you can type "Tingler" in the font search box to go directly to it. Click on the font to change the Text. Sometimes this takes a second, so be patient!
NOTE: Make sure all of the letters and dots of your word connect with one another so that the shape can be cut out of your paper and remain in one piece.
Since we want our word to be part of the heart-shaped hole on the SKY BLUE layer, we need to size, position, and combine our layers carefully to create some overlap.
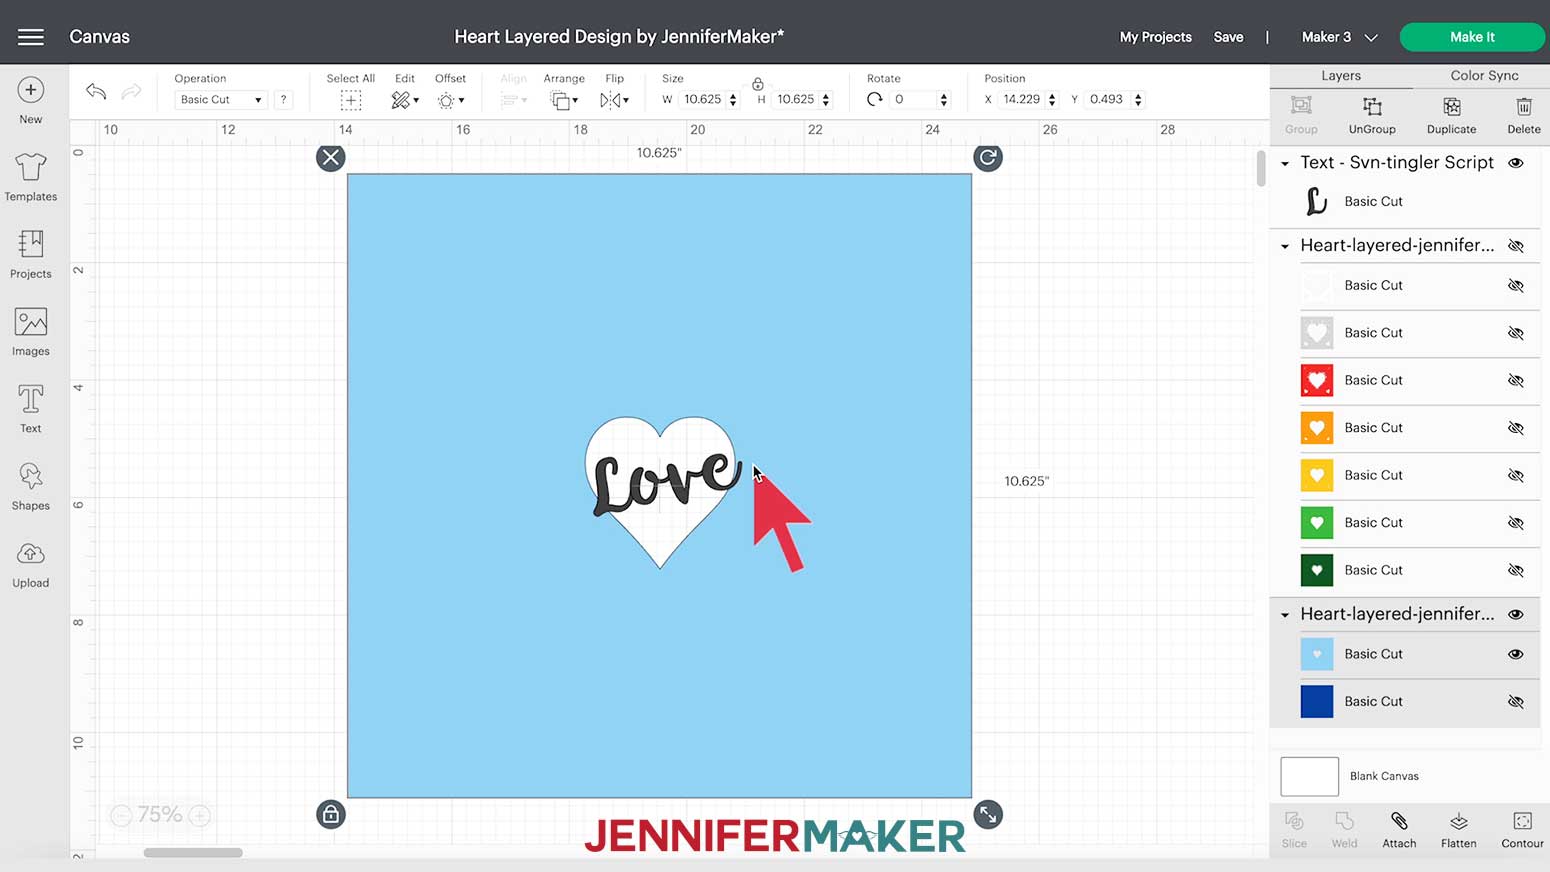
Click and drag the text box on the Canvas until you have it aligned inside the heart cut out of the SKY BLUE layer.
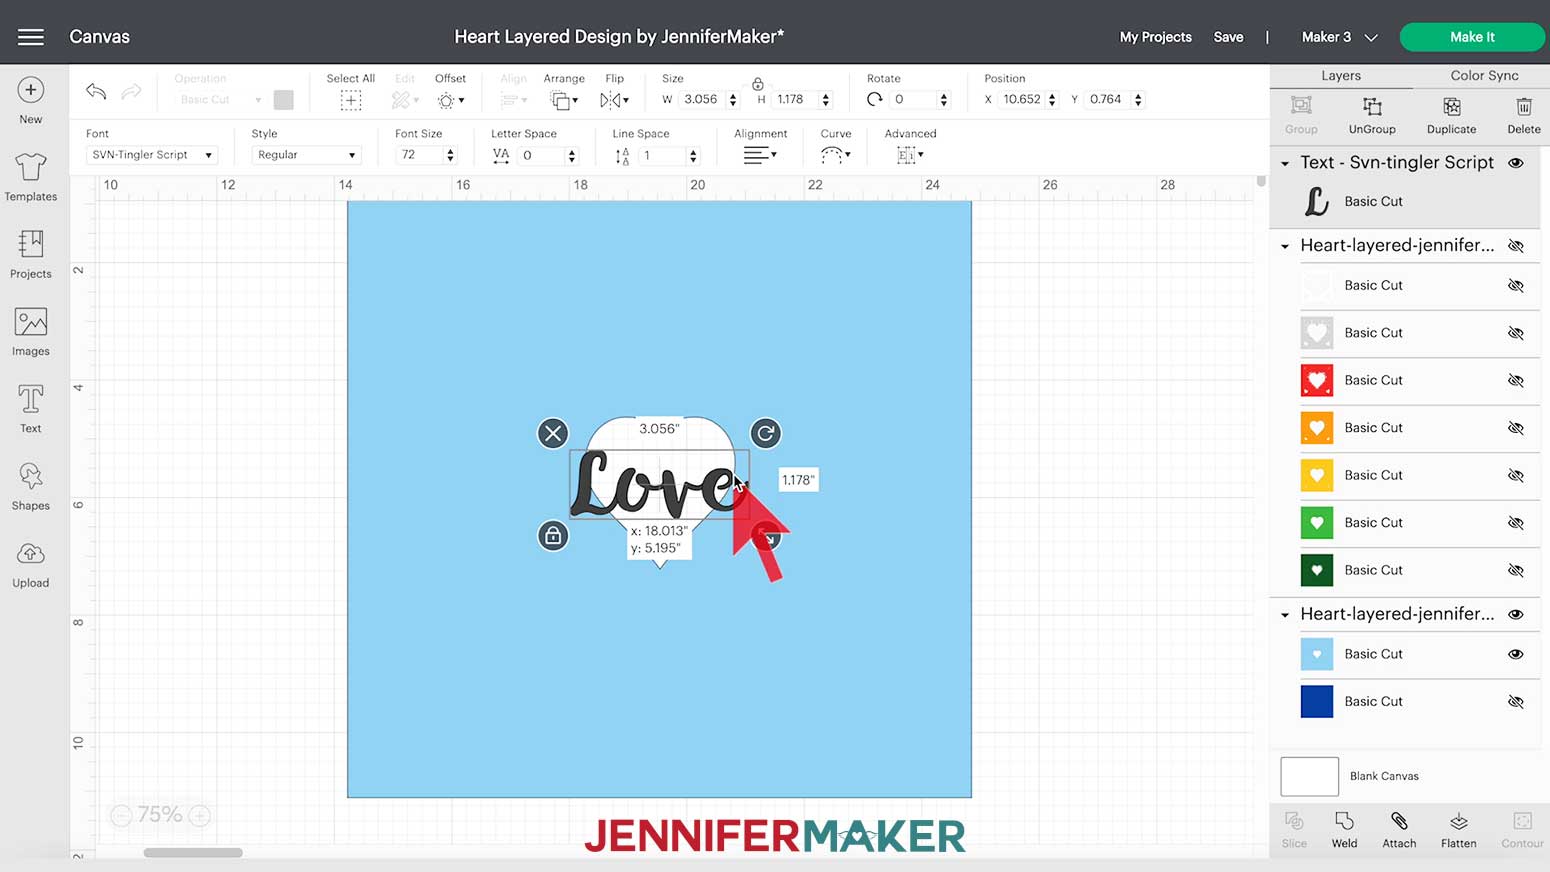
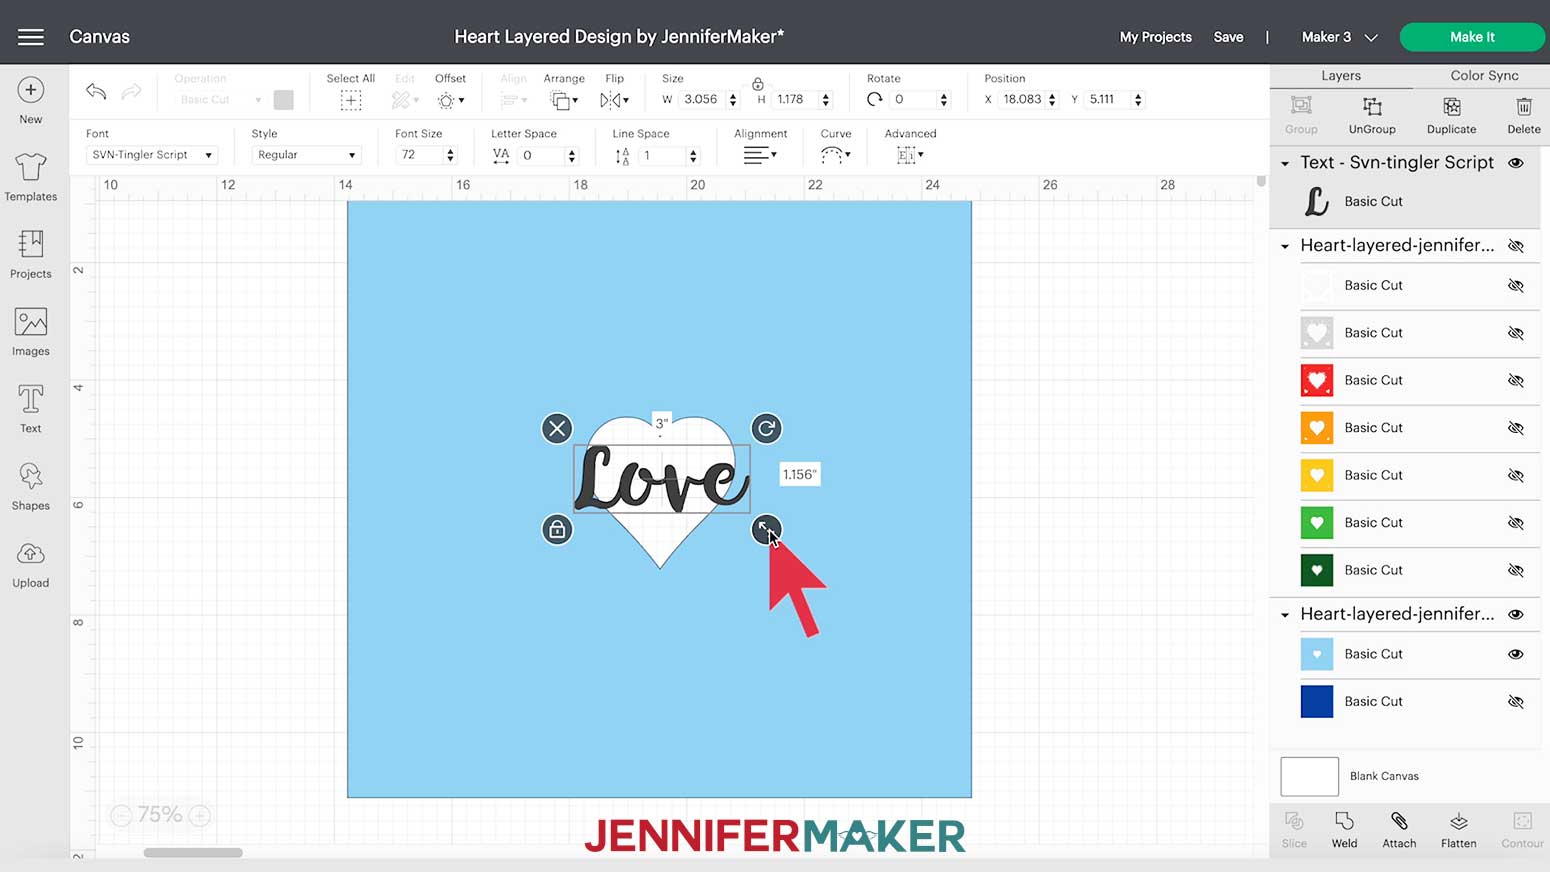
Change the text size by clicking and dragging the "Resize" double arrow on the bottom right corner of the text box on the Canvas until your word's left and right edges slightly cover the blue.
TIP: You can also change the text size by entering a specific number under "Font Size" in the top menu bar. I changed "Love" to Size "62" to fit it in my heart. Double-click in the box and enter the size you want.
Now, rotate the text by clicking and dragging the "Rotate" handle (rounded arrow) on the upper right corner of the text box. Or, you can change the number in the "Rotate" box in the top menu bar to move the text by degrees. I typed in "350" to just slightly rotate my text.
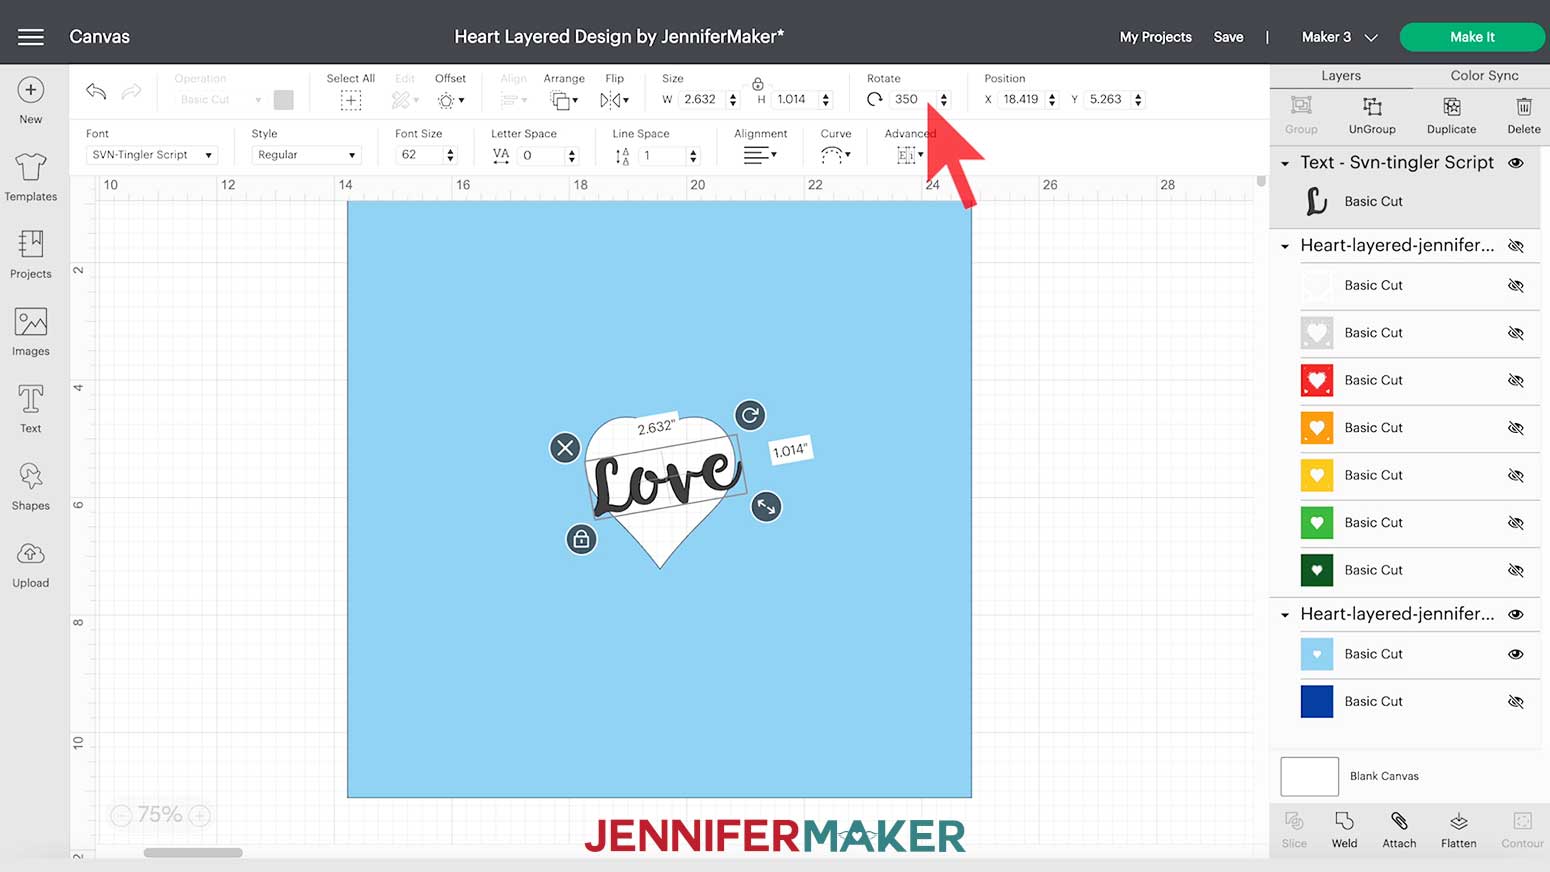
I positioned the word "Love" in the center of the heart and made sure just a little bit of the "L" and "E" overlapped the heart edges. Keep adjusting your text's size and location until you’re happy with the placement.
IMPORTANT: Make sure the text overlaps the edge of the heart on both sides so your design stays in one piece after it's cut!
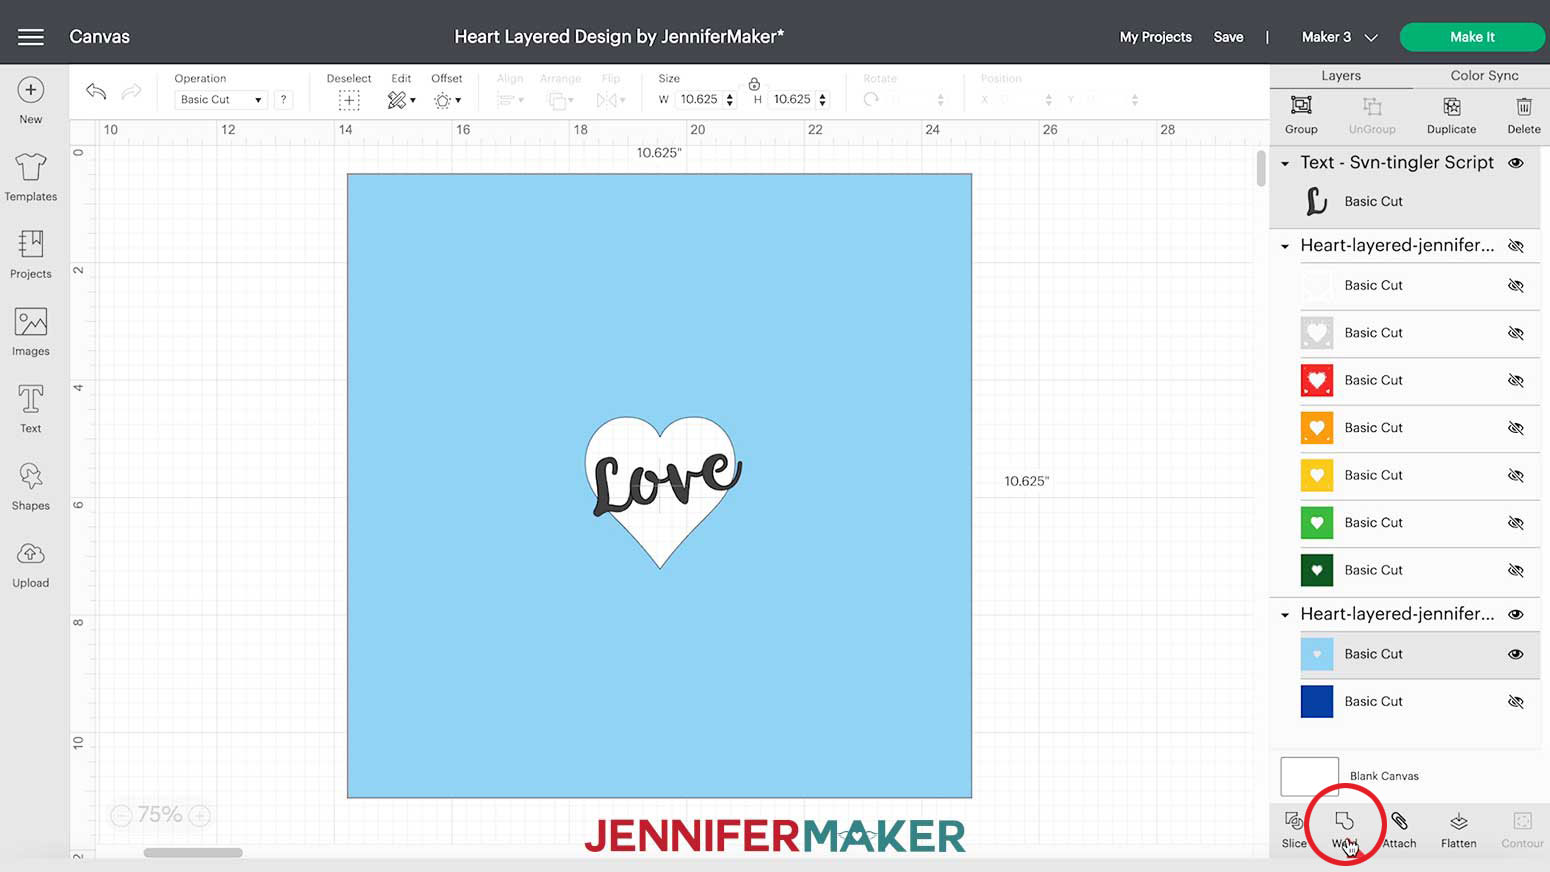
Now, select the SKY BLUE Layer and your text by holding down the Shift key while clicking on both in the Layers Panel on the right side of the Canvas.
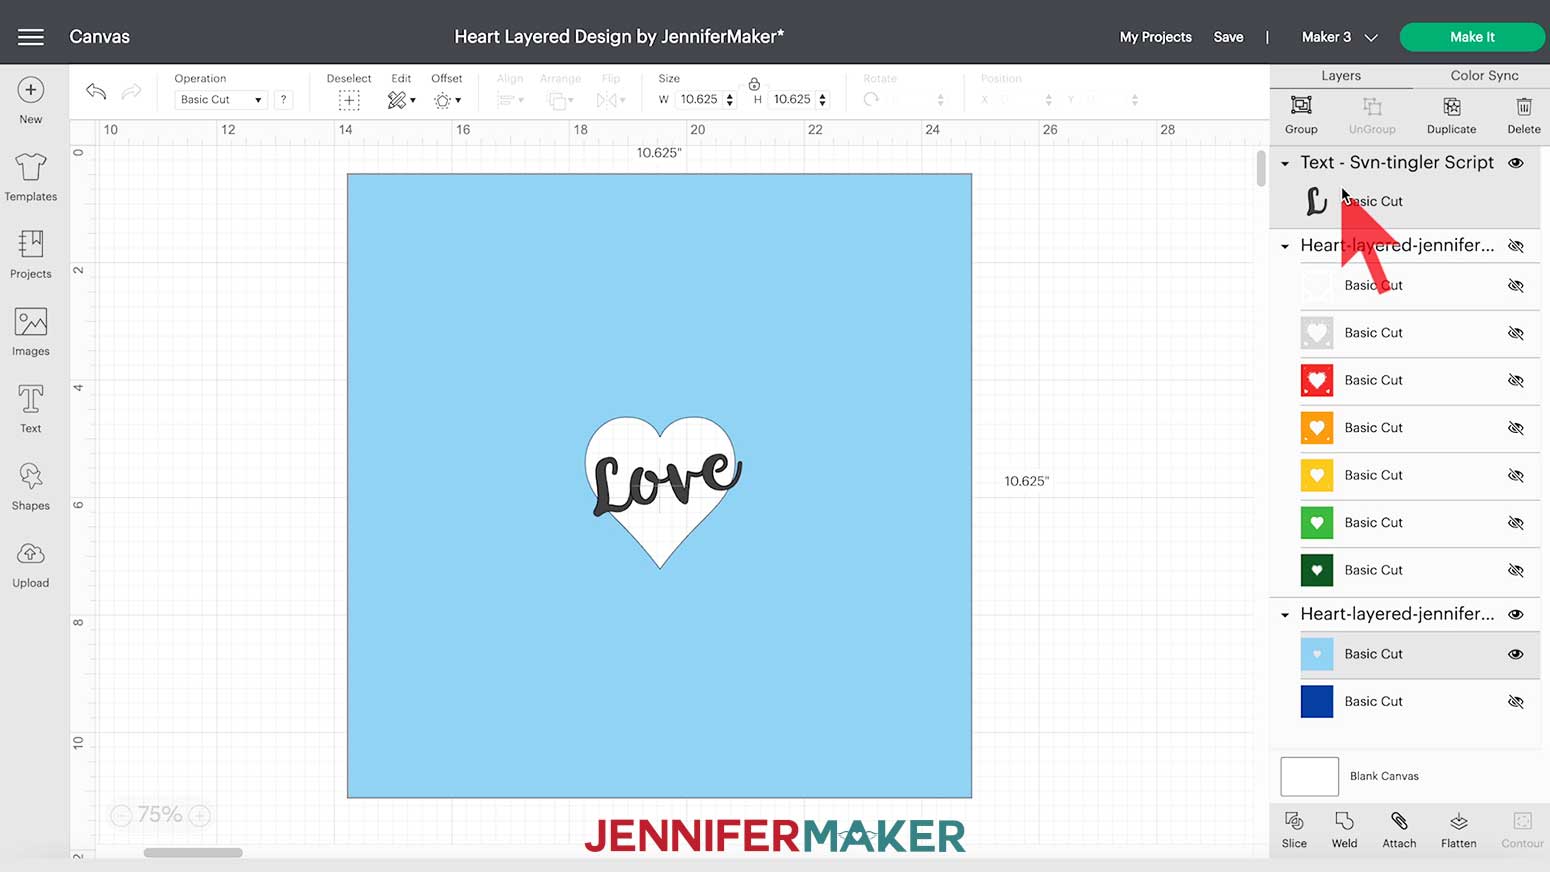
Click "Weld" at the bottom of the Layers Panel. By welding these two layers, the text will be merged with the SKY BLUE template layer. The resulting Layer will be SKY BLUE.
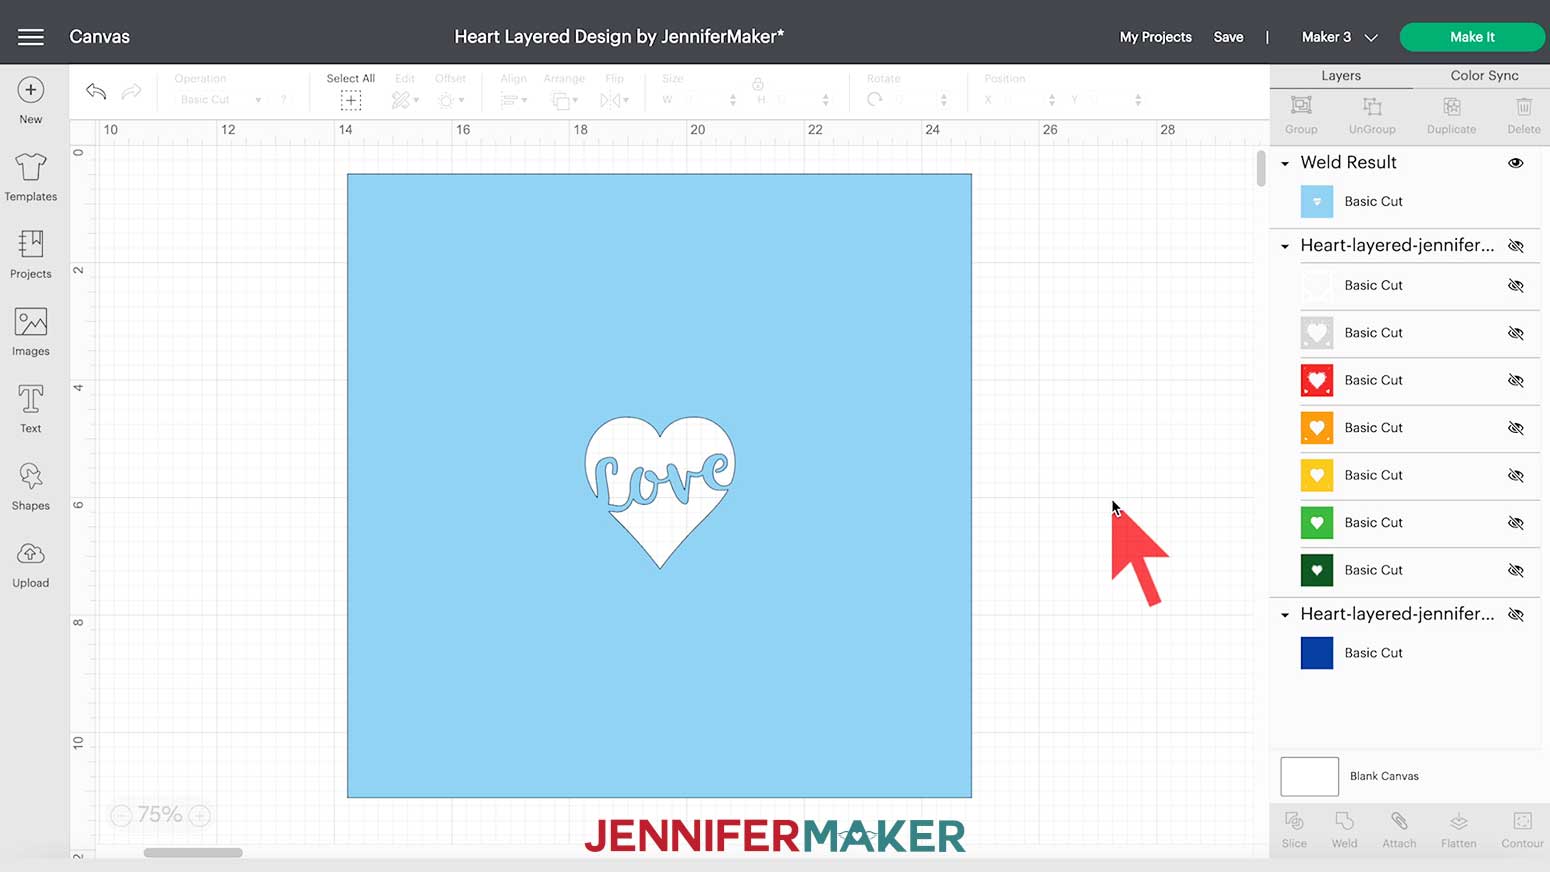
Now, unhide everything we hid earlier by clicking on the eye icons for the first group and also the DARK BLUE Layer in the Layers Panel. Make sure every layer is visible. You might not see everything on the Canvas since the layers overlap, but if you look in the Layers Panel, you will notice that all the eye icons are visible and not crossed out.
TIP: If you feel more comfortable seeing everything, click on the SKY BLUE Layer in the Layers Panel, then in the top menu click “Arrange” and then click “Move Backward.” Now you should see the entire design. Your custom design is ready to cut!
STEP 3: CUT THE HEART LAYERED SVG
These are the heart layers I cut, and the materials I used to make the custom "Love" frame. The mats are already color-coded to cut in order from the top layer to the bottom. This is the order we'll be following.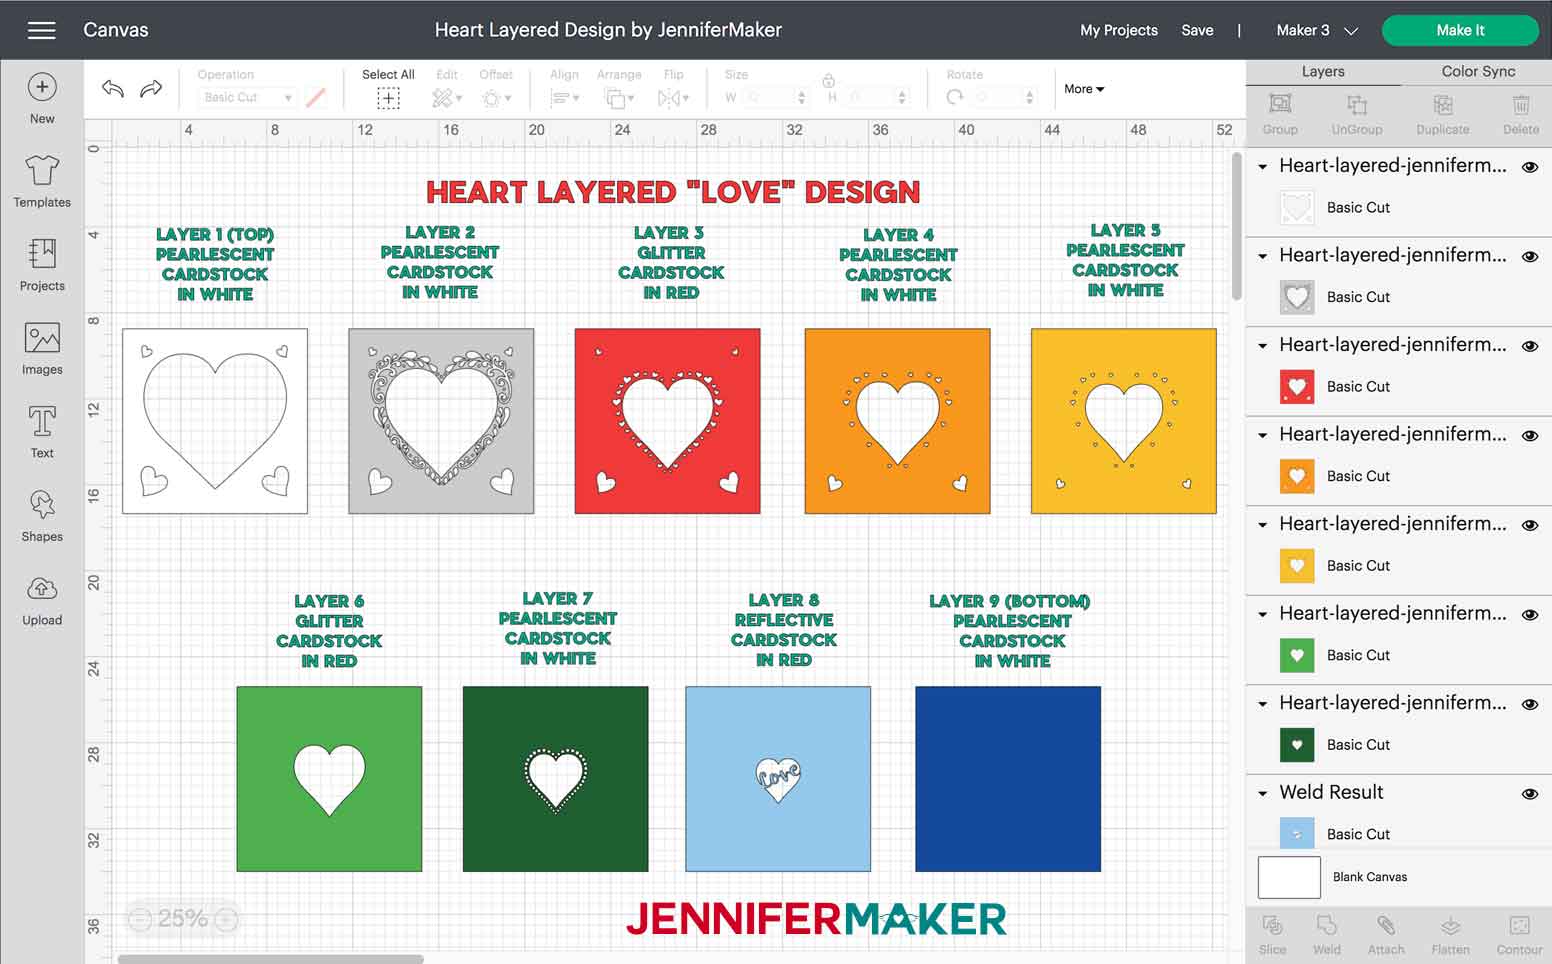
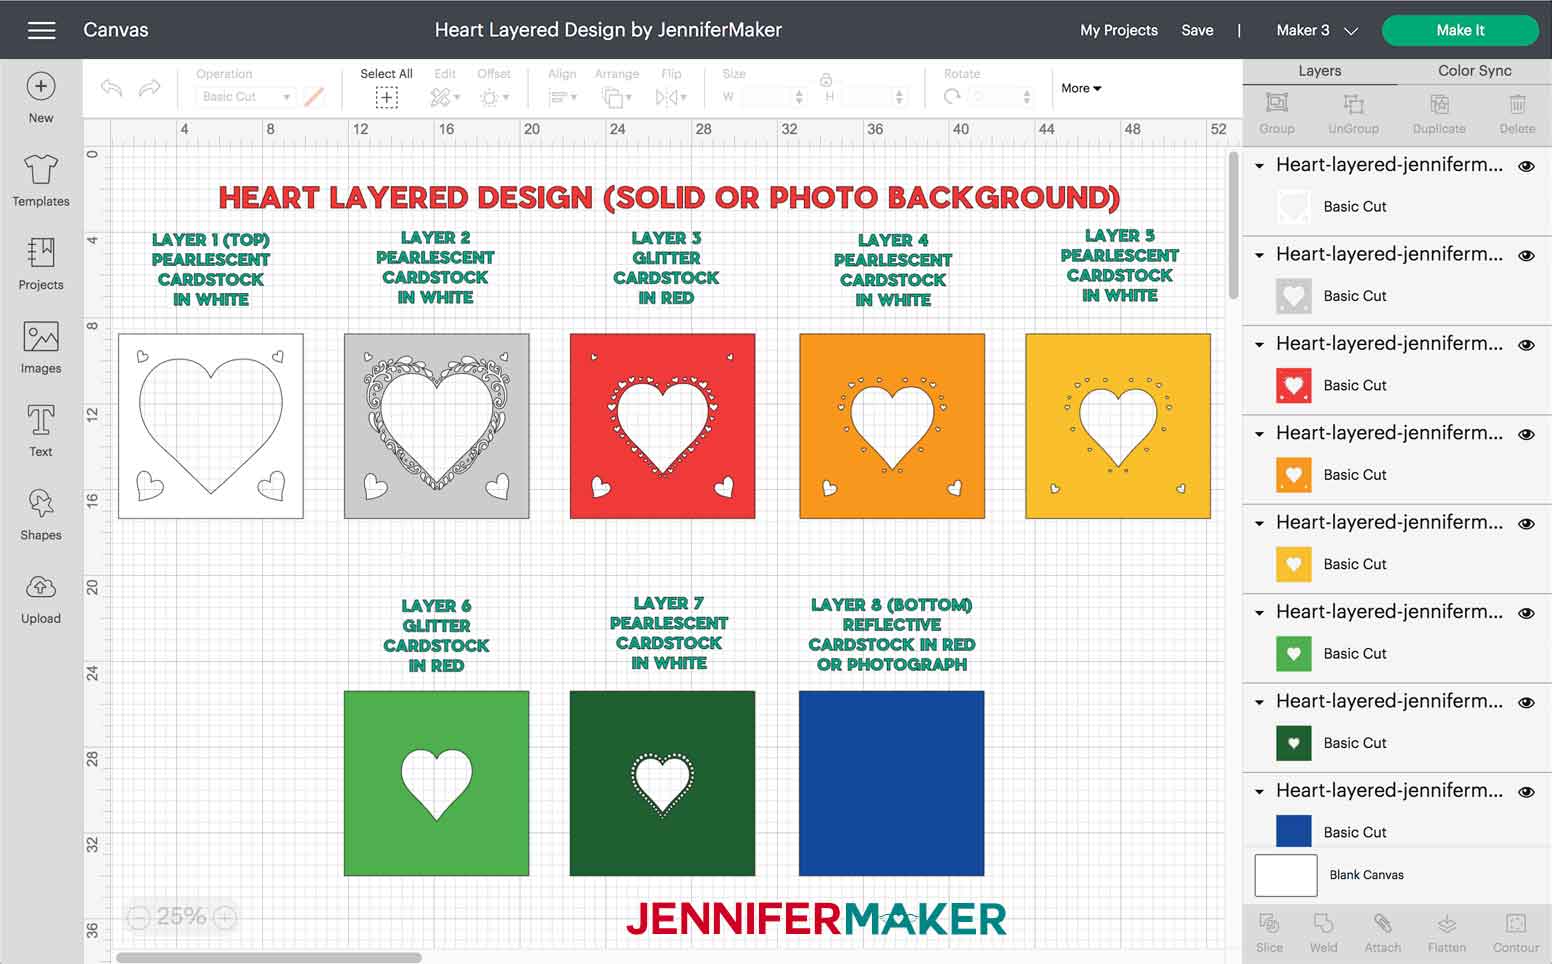
And for reference, these are the layers and materials I used to cut the version with the solid or photo background.
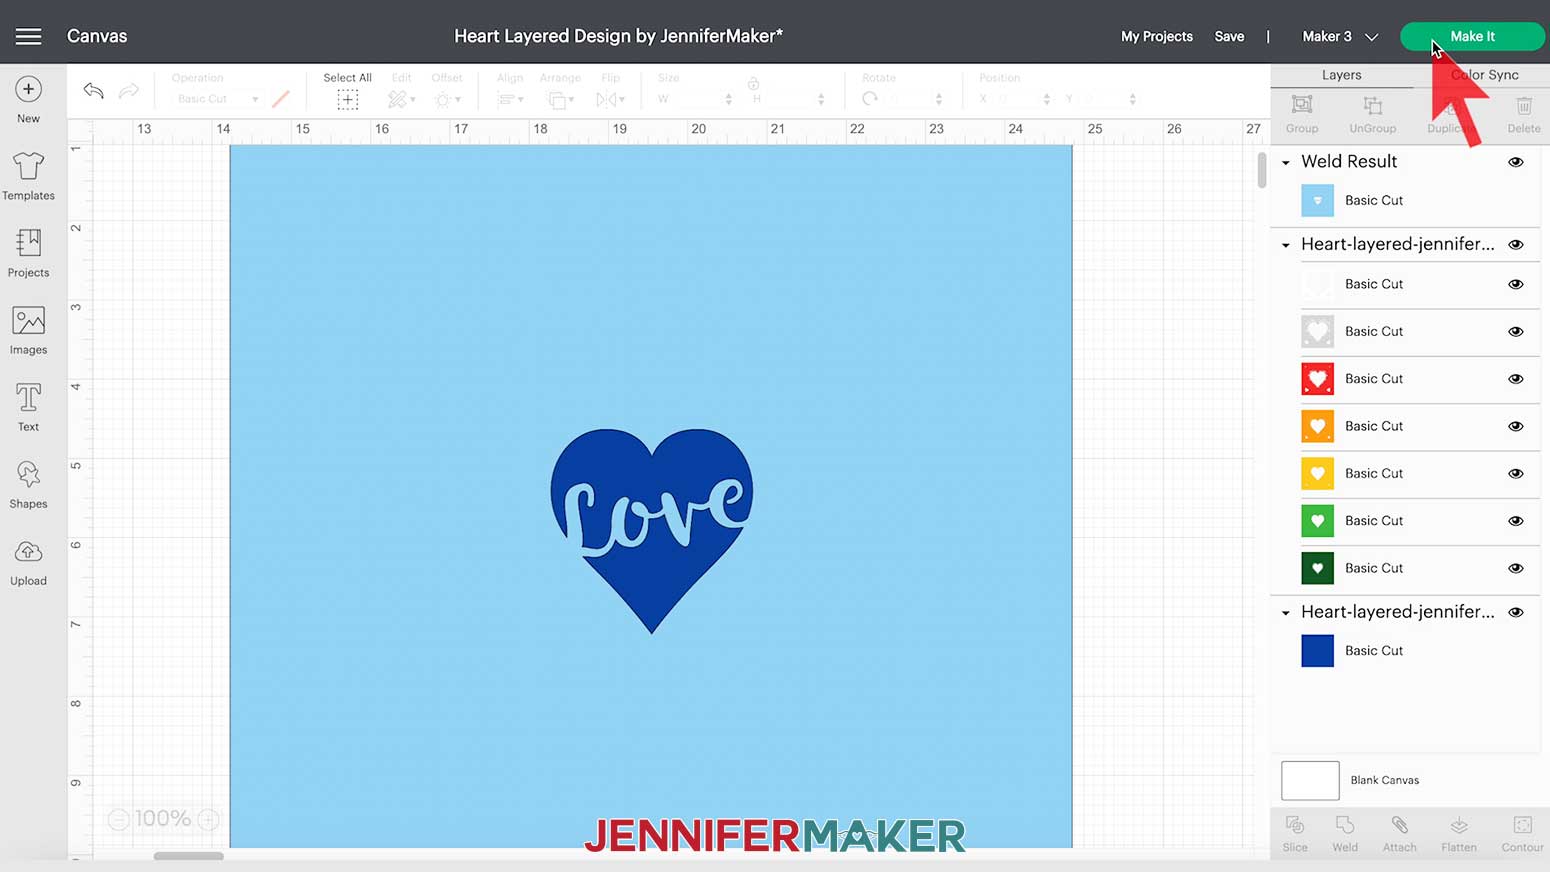
Click "Make It."
If you are using a Maker 3 or Explore 3, you will be asked if you will be cutting your designs without a mat, with a mat, or multiple ways. Select "On Mat" and click "Continue."

You don't need to change anything on the mats, so click "Continue" again. You will be prompted to select your material settings and place your material for each layer on your machine mat. I used Pearlescent Cardstock on a Green StandardGrip Mat for Mat 1 (the top layer).
For the material settings, I selected "Light Cardstock - 65 lb (176 gsm)" with "More" pressure. I always select "More" pressure to ensure the best cut. However, not all machines cut the same way, so I always recommend making a test cut when using a new material.
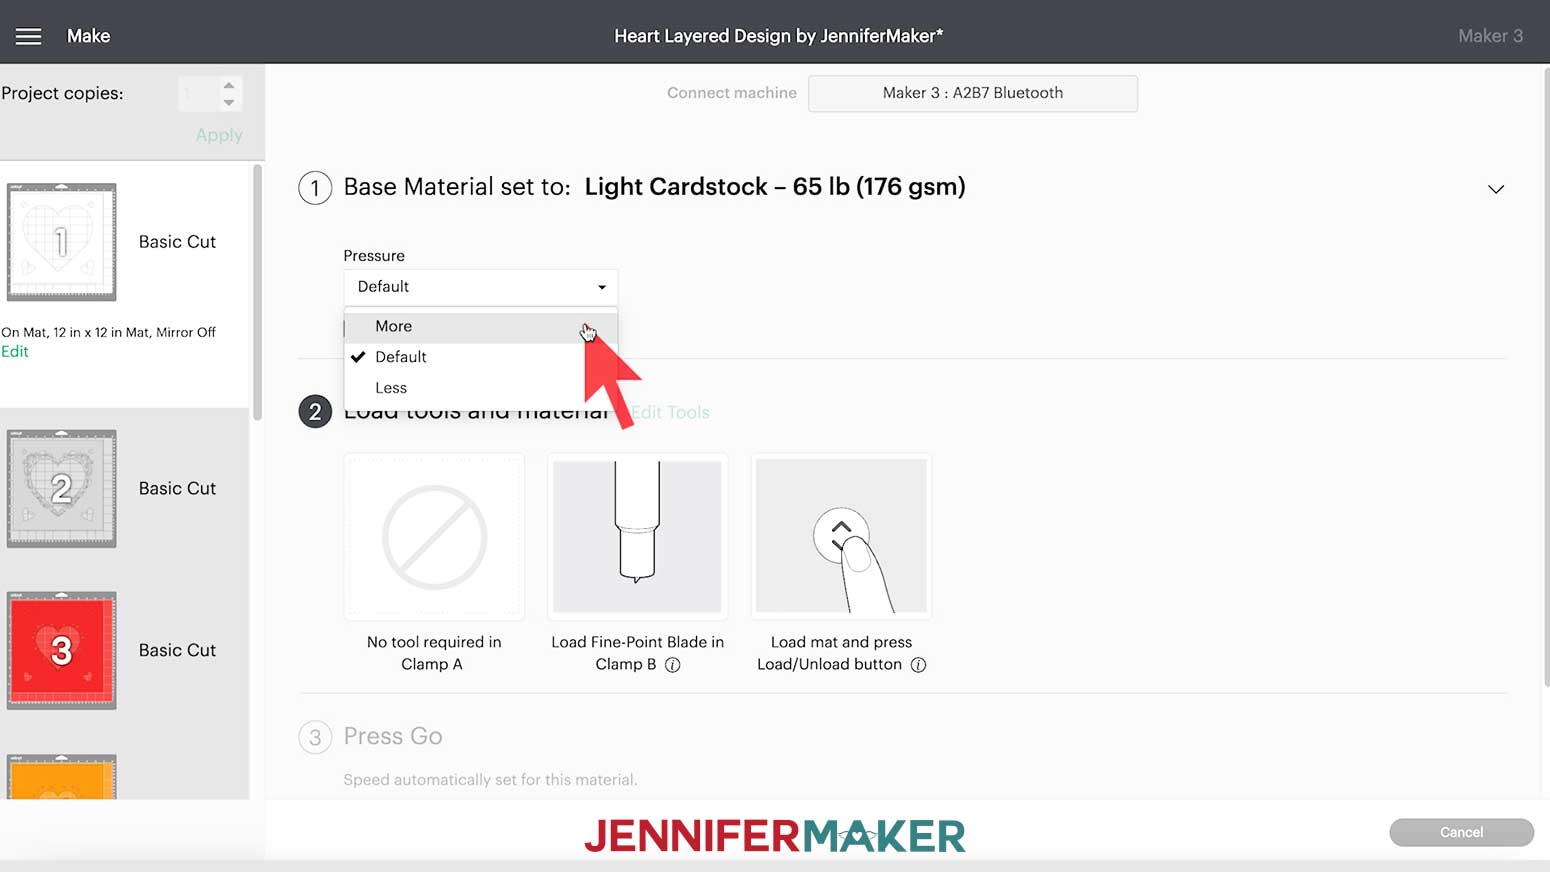
You will notice I didn’t check the box underneath, “Remember Material Settings.” That’s because I’m using different types of cardstock for my heart layers and that means I will need to select the right cut setting for each material.
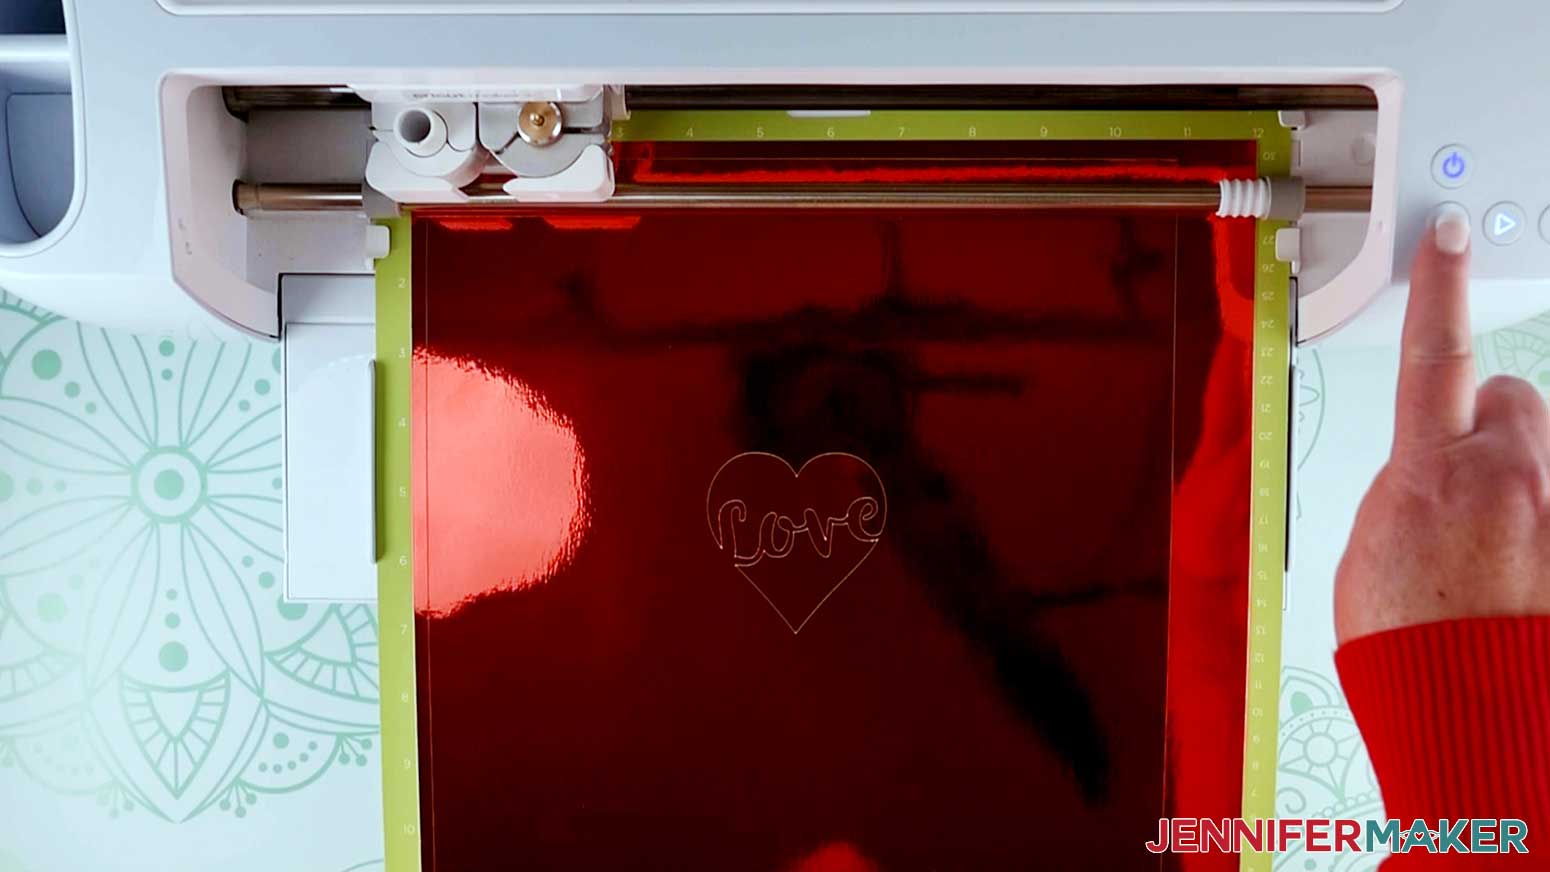
Make sure the Fine-Point Blade is loaded in Clamp B, then load your mat into your machine and press the "Go" button.
When Mat 1 is done cutting, check to make sure the cardstock is cut all the way through BEFORE unloading the mat. If it needs to be cut again, simply press the "Go" button and your machine will recut it. If it cut properly the first time, press the "Unload" button on your machine.
TIP: If you have any issues cutting, check out my Cutting Problems Guide. It contains all the tips I use to get clean cuts consistently.
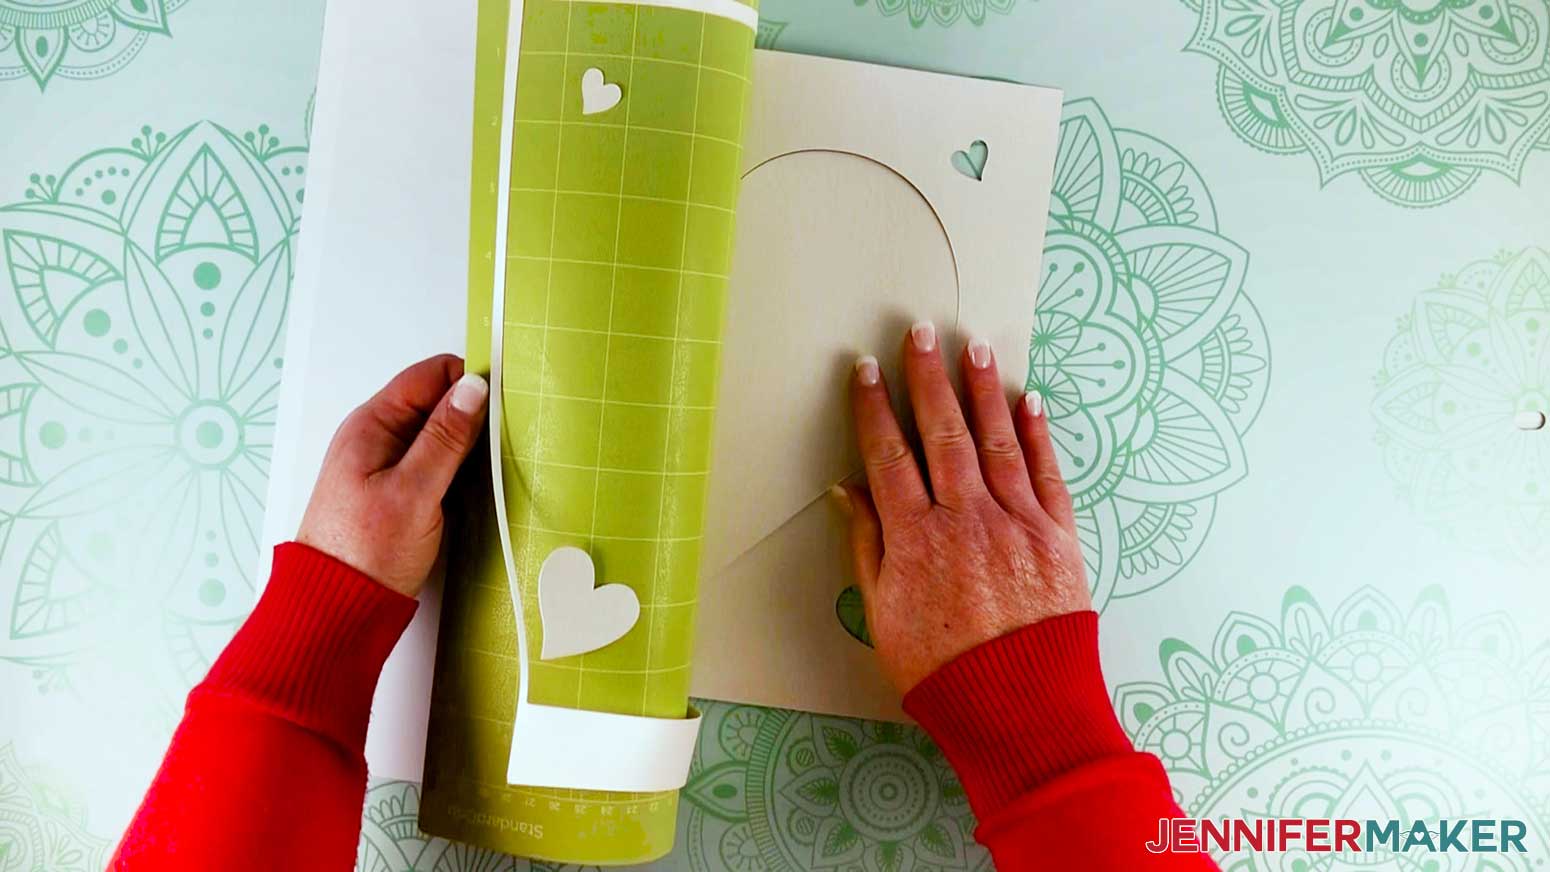
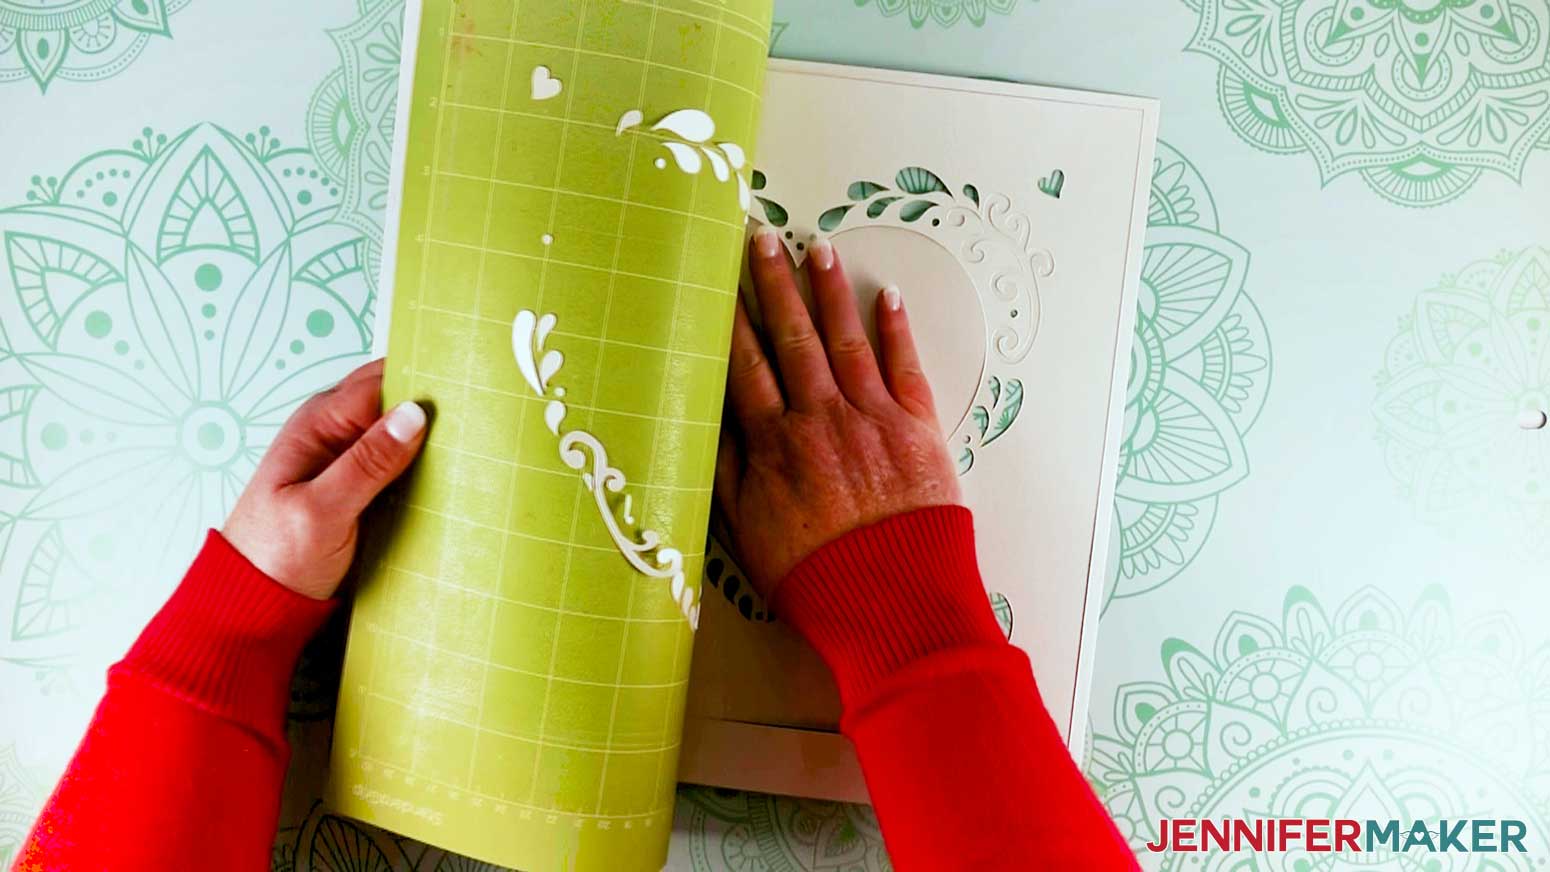
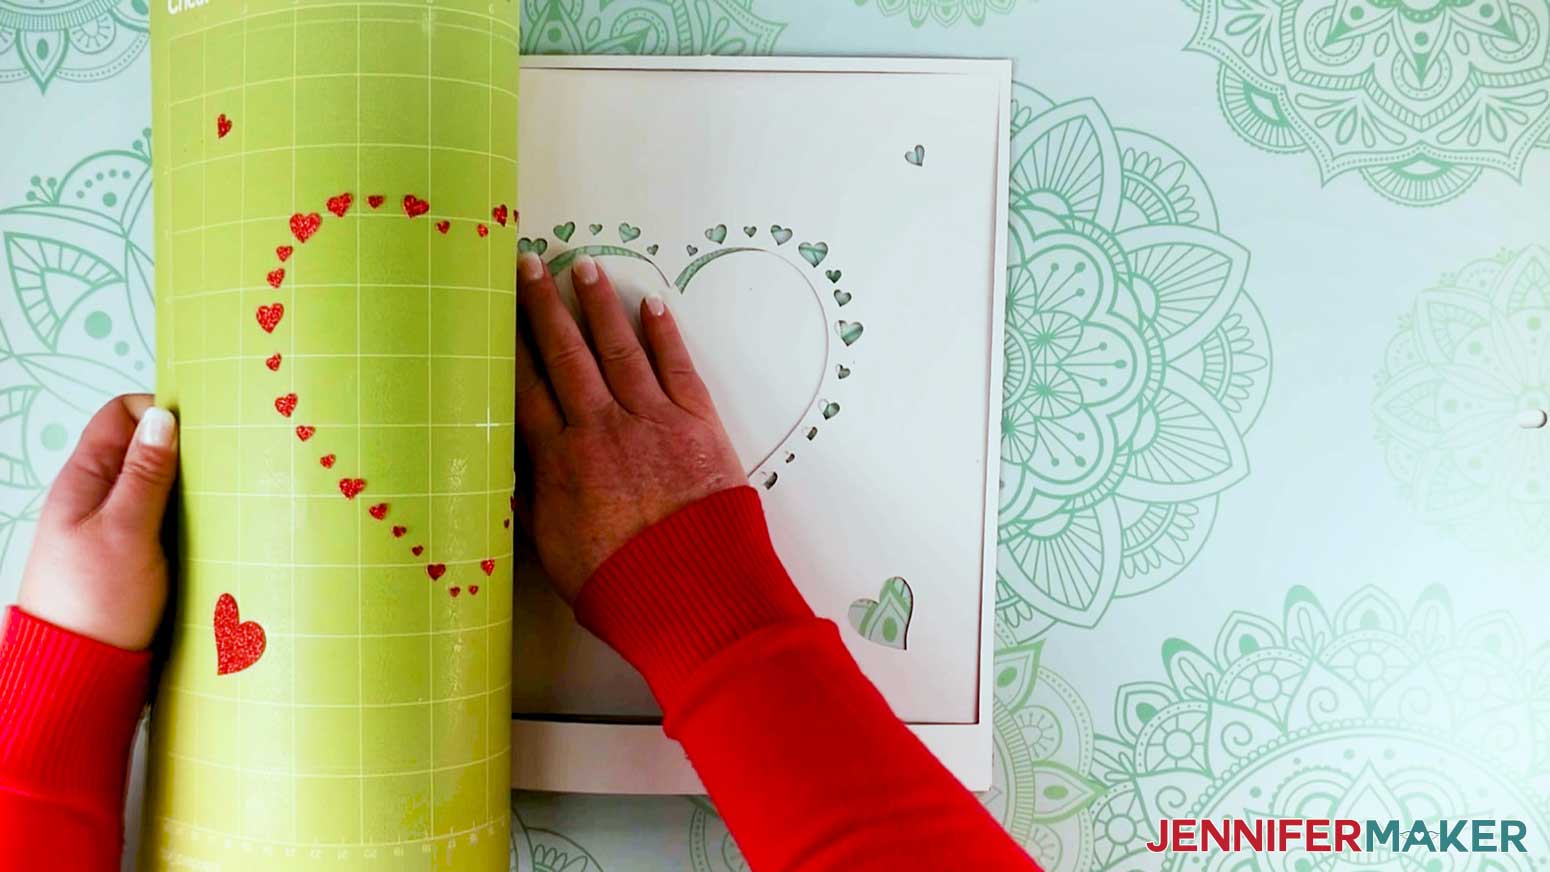
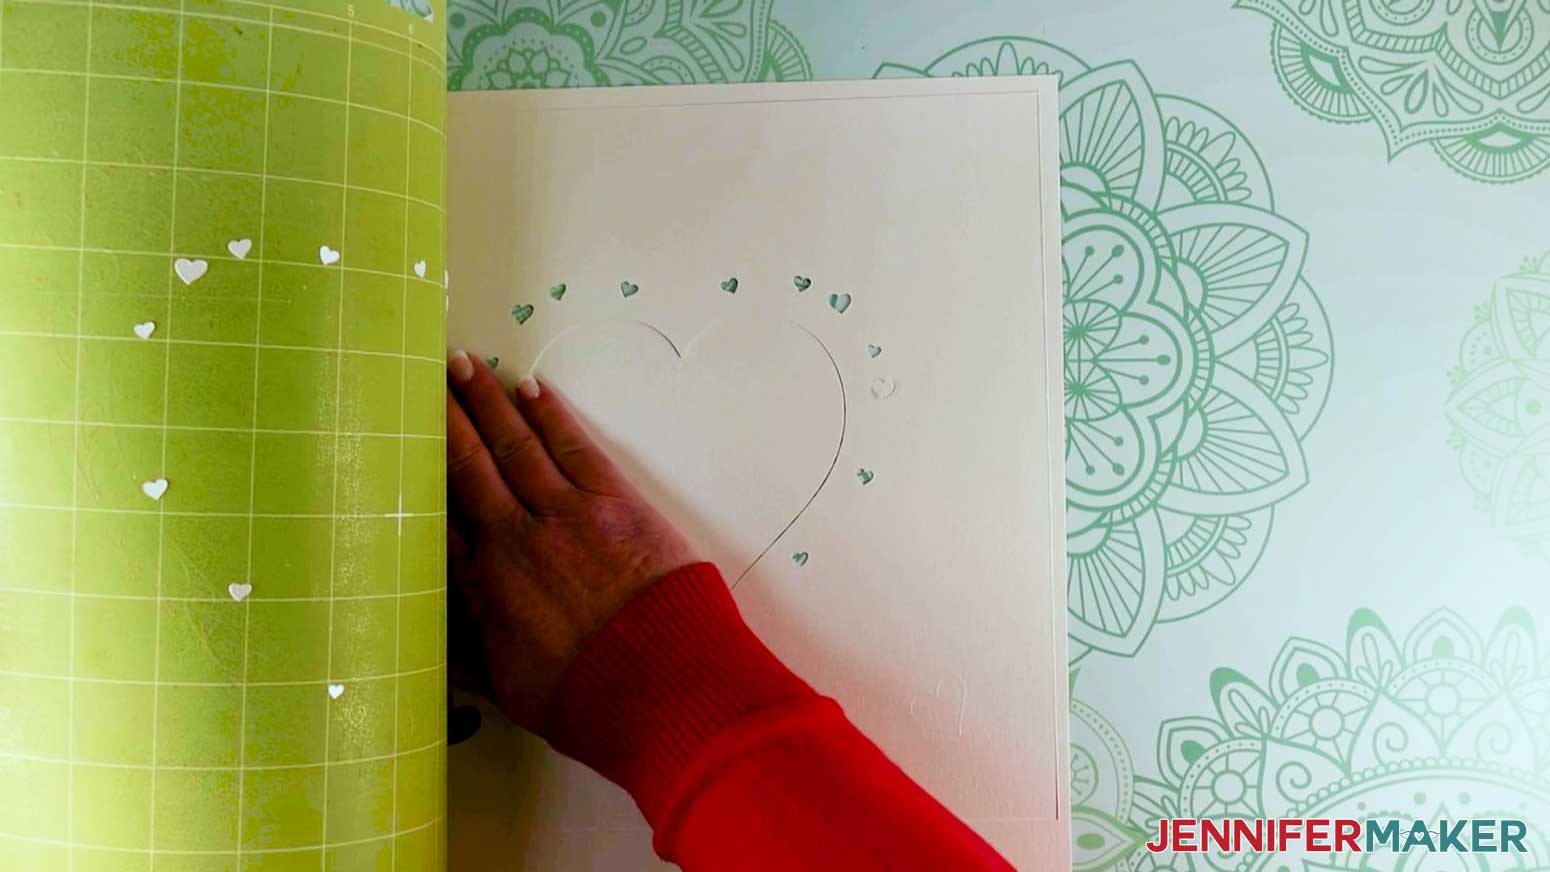
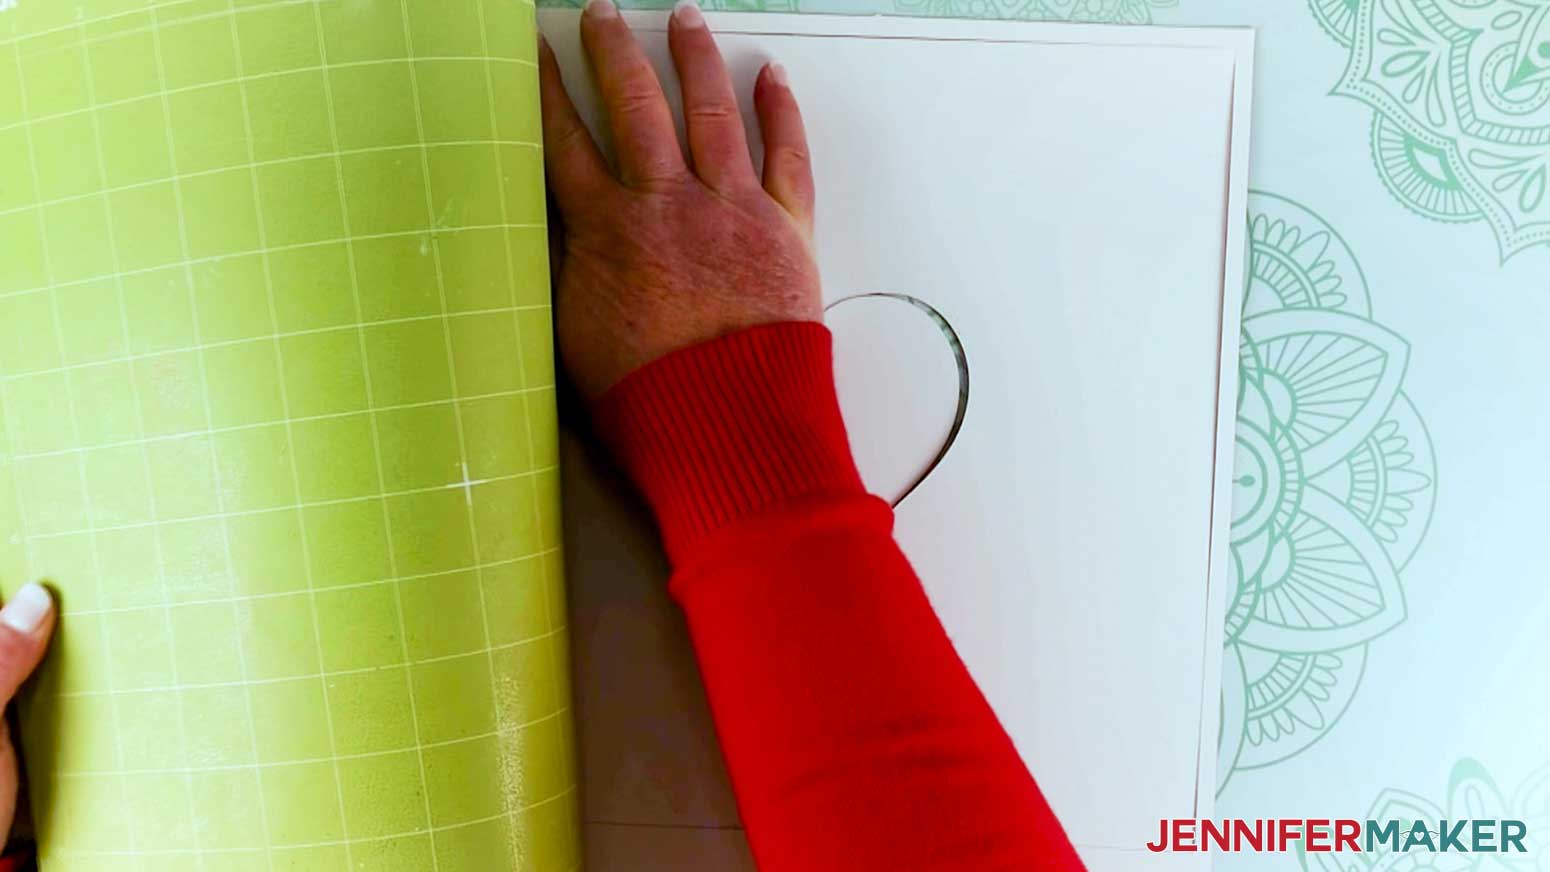
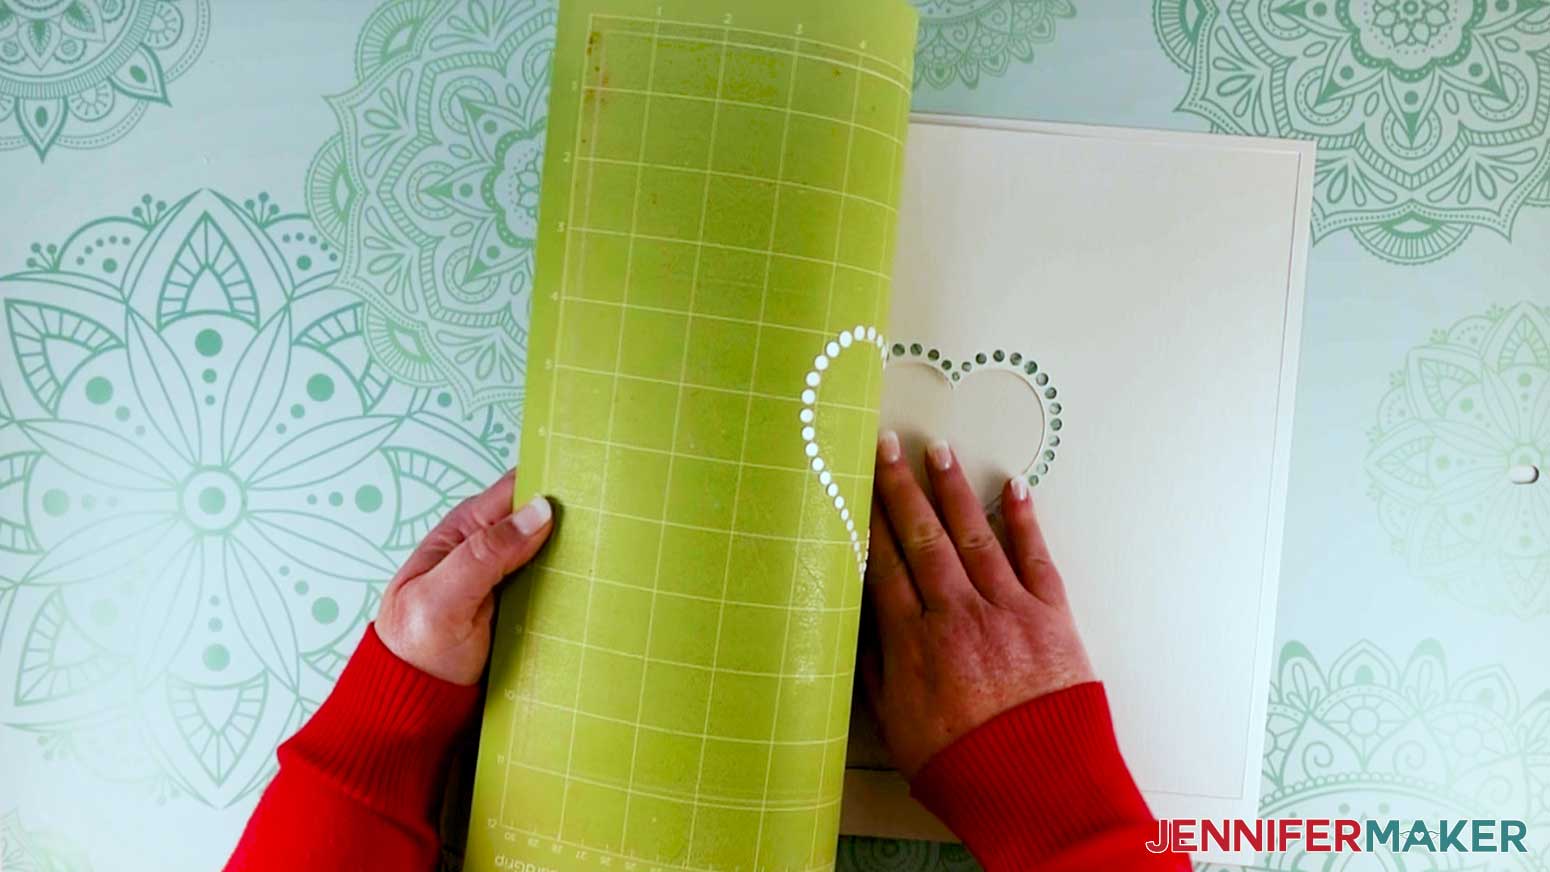
Carefully remove the cardstock from the mat. To do this, flip over the mat and gently release the card stock from the mat. This helps prevent the cardstock from curling or ripping.
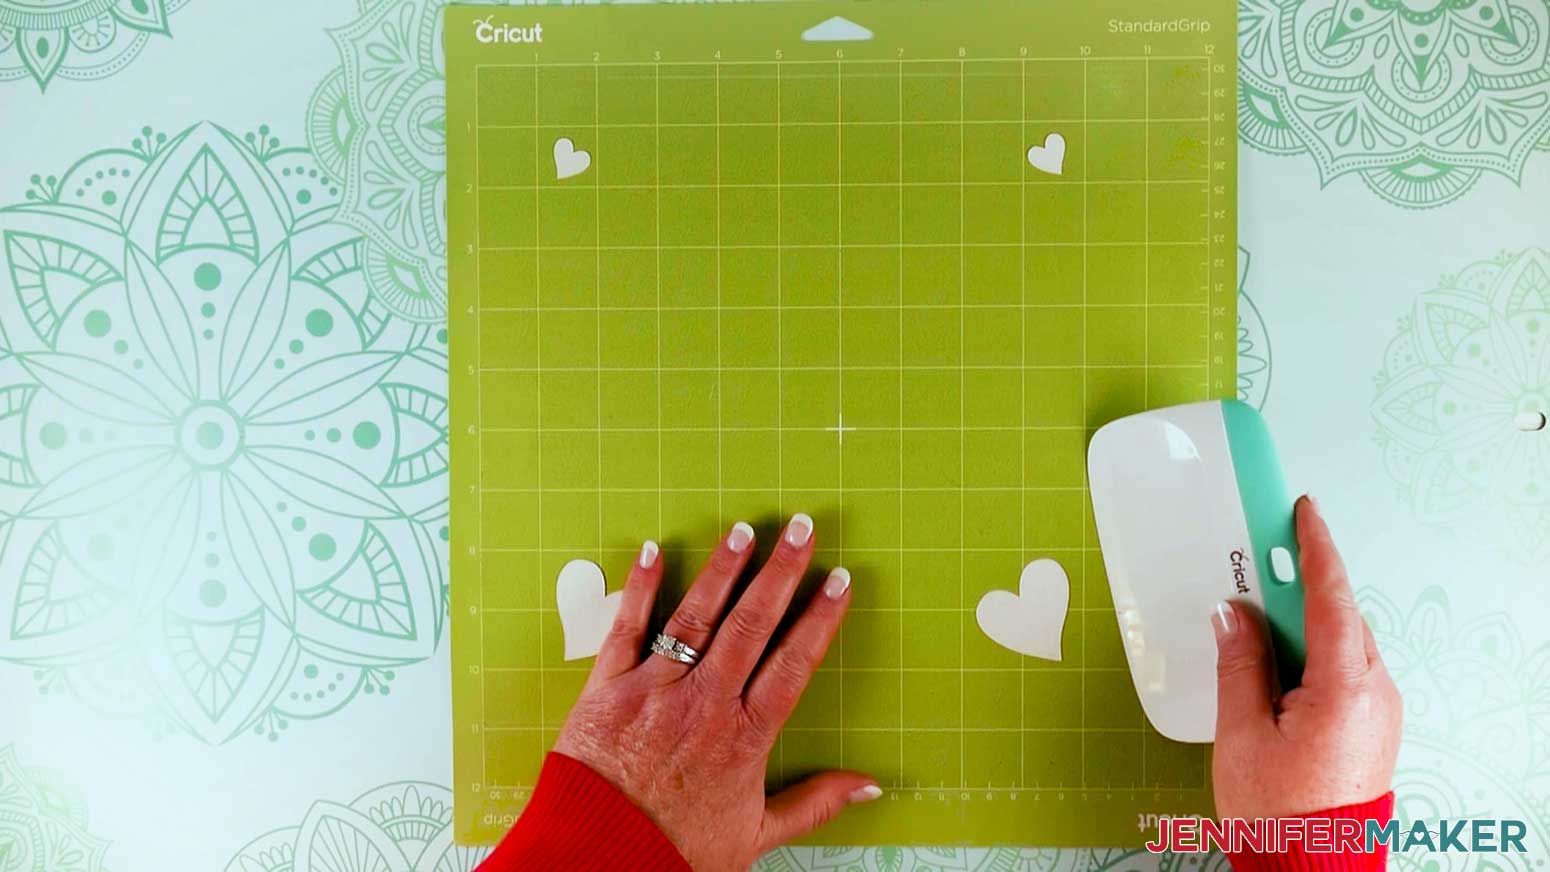
As you cut your layers, each design will leave behind cut-out pieces on your mat. I used my Cricut XL Scraper tool to easily pry those pieces off.
After your first mat is done, you will be prompted to load the second mat. For Mat 2, I placed another sheet of Pearlescent Cardstock on a Green StandardGrip Mat. In Material Settings, I selected "Light Cardstock - 65 lb (176 gsm)" with "More" pressure again. Your Fine-Point Blade should already be loaded, so load your mat and press "Go."
TIP: All machines cut differently so you may need to adjust your material settings, especially for intricate cuts like this one.
Now, prepare your mat with the material you want to use for Mat 3. I placed a sheet of Glitter Cardstock in red on my Green StandardGrip Mat and loaded it into my machine. In Material Settings I selected "Glitter Cardstock" with "More" pressure and then pressed "Go."
TIP: You can also select "Heavy Cardstock - 100 lb" with "More" pressure.
For Mats 4 and 5, I loaded Pearlescent Cardstock again and selected "Light Cardstock - 65 lb (176 gsm)" as the base material with "More" pressure. Click "Go."

When prompted to load materials and tools for Mat 6, I placed a piece of Glitter Cardstock in red on a Green StandardGrip machine mat. In Material Settings I selected "Glitter Cardstock" with "More" pressure and then pressed "Go."
TIP: You can also select "Heavy Cardstock - 100 lb" with "More" pressure.
For Mat 7 I loaded Pearlescent Cardstock again and used the same settings I mentioned earlier.
I used Reflective Cardstock in red for Mat 8, which is the custom "Love" layer. In Material Settings I selected "Holographic Cardstock" with "More" pressure and then pressed "Go."
TIP: You can also select "Heavy Cardstock - 100 lb" with "More" pressure.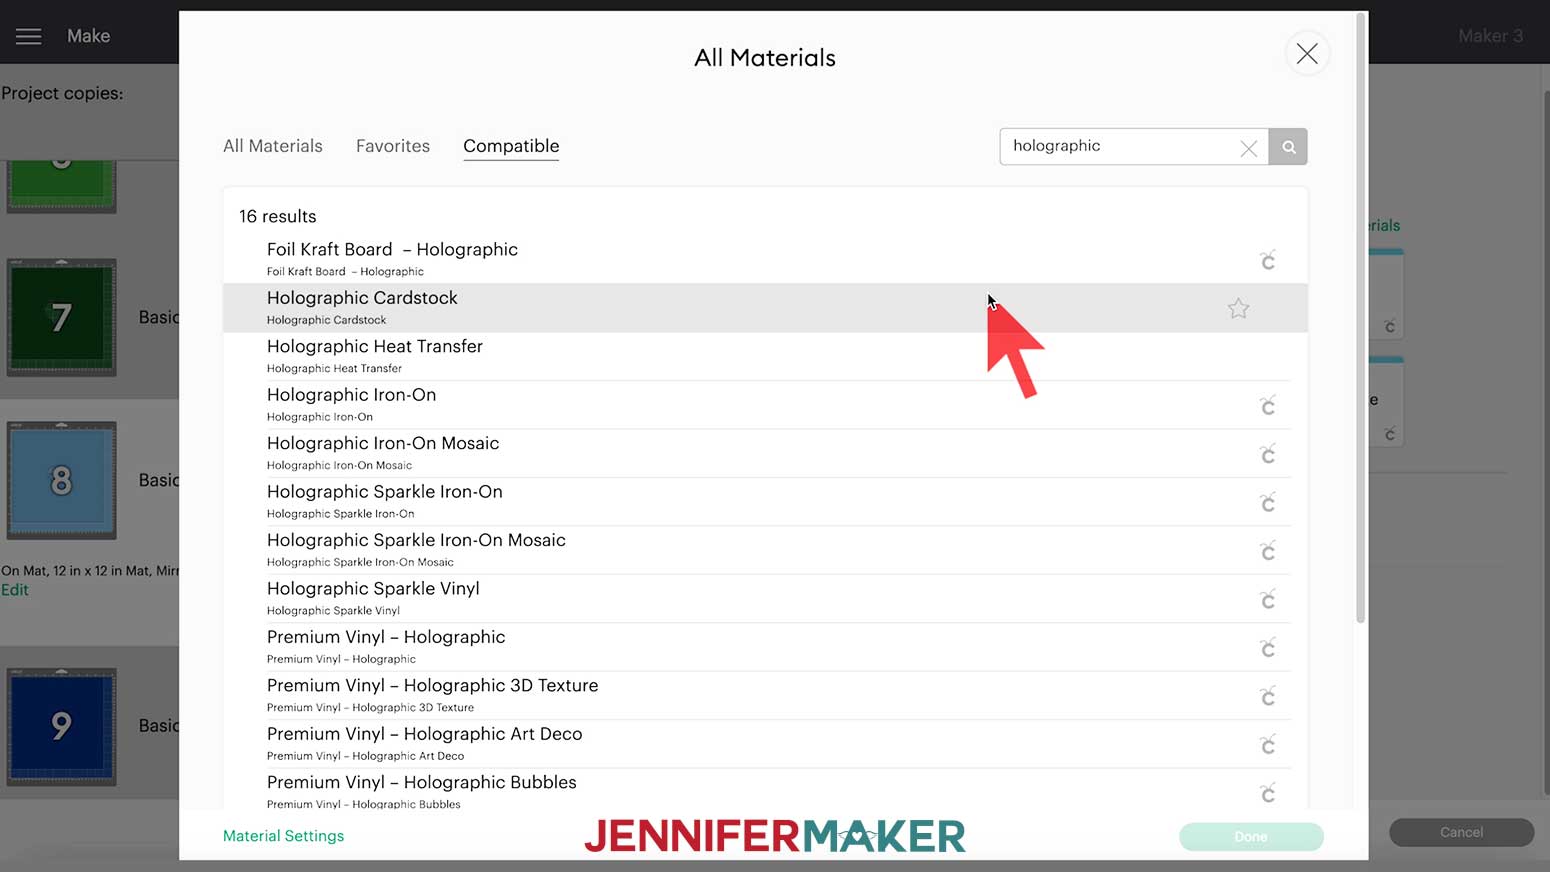
For Mat 9, the final base layer, I loaded Pearlescent Cardstock in white. In Material Settings I selected "Light Cardstock - 65 lb (176 gsm)" with "More" pressure and then pressed "Go."

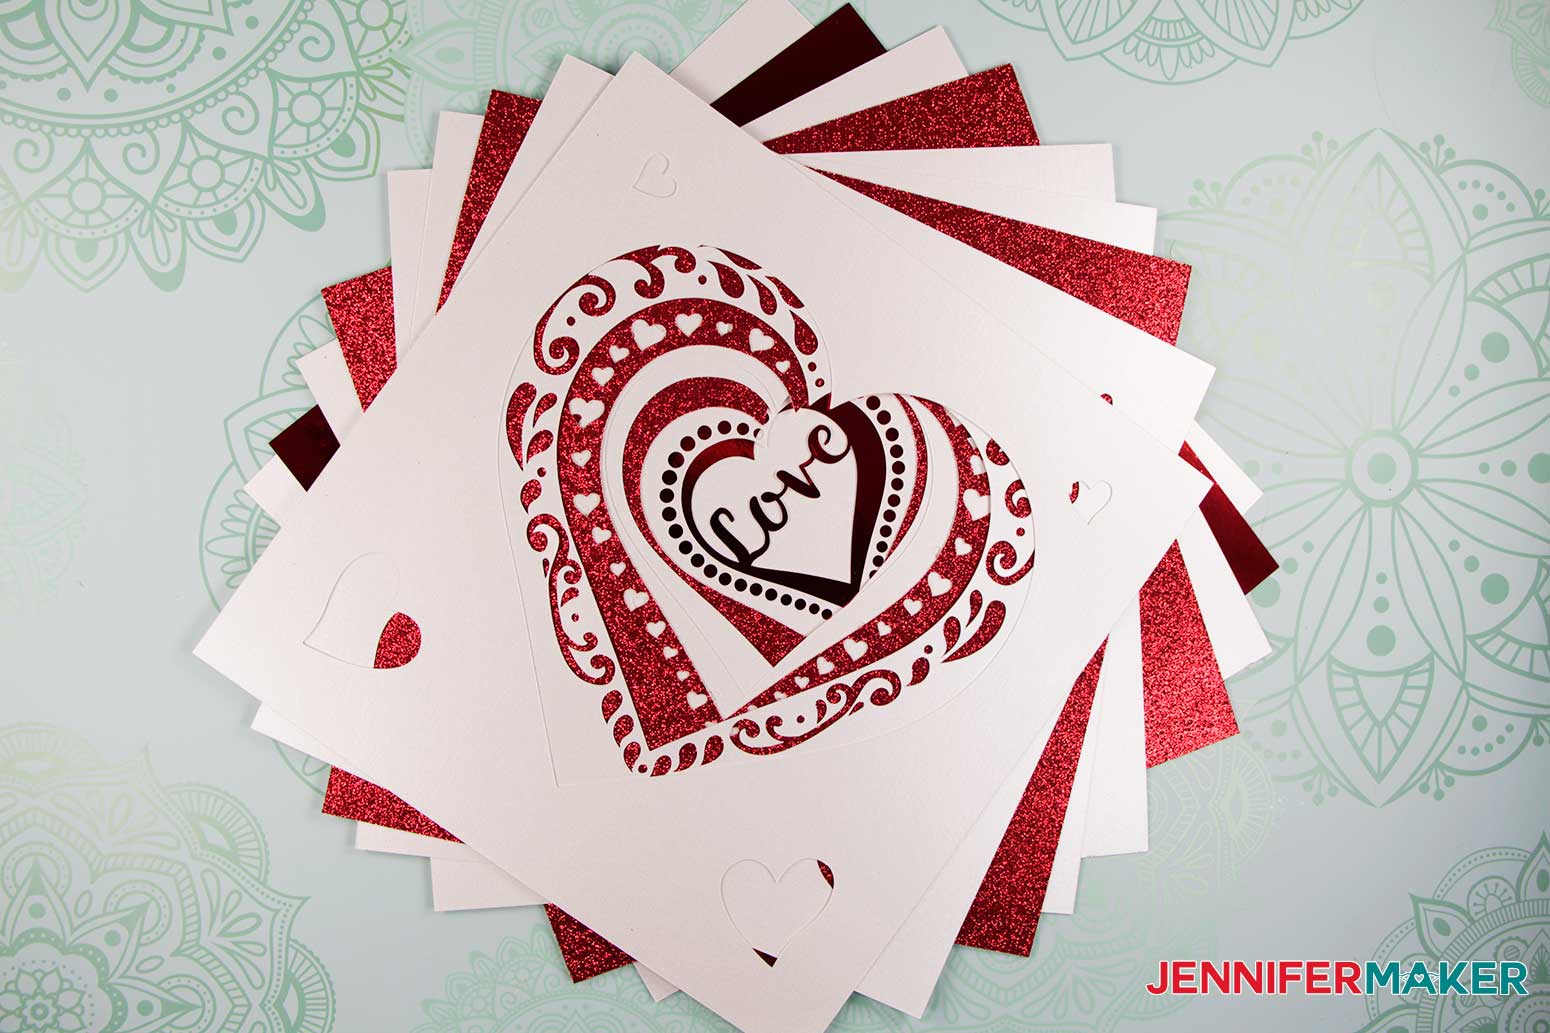
These are all the cardstock layers you'll have when you’re done cutting.
STEP 4: ASSEMBLE THE HEART LAYERS IN THE FRAME
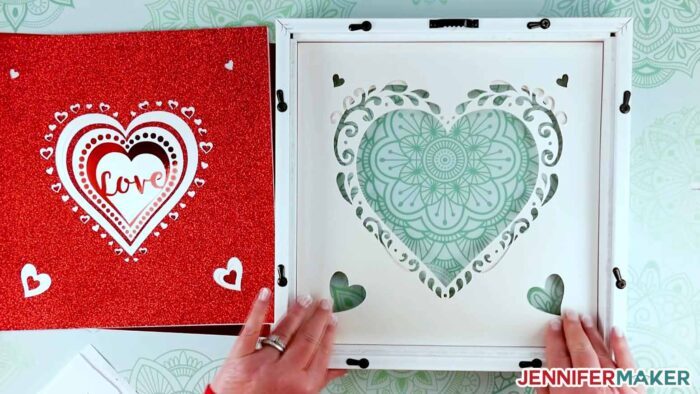
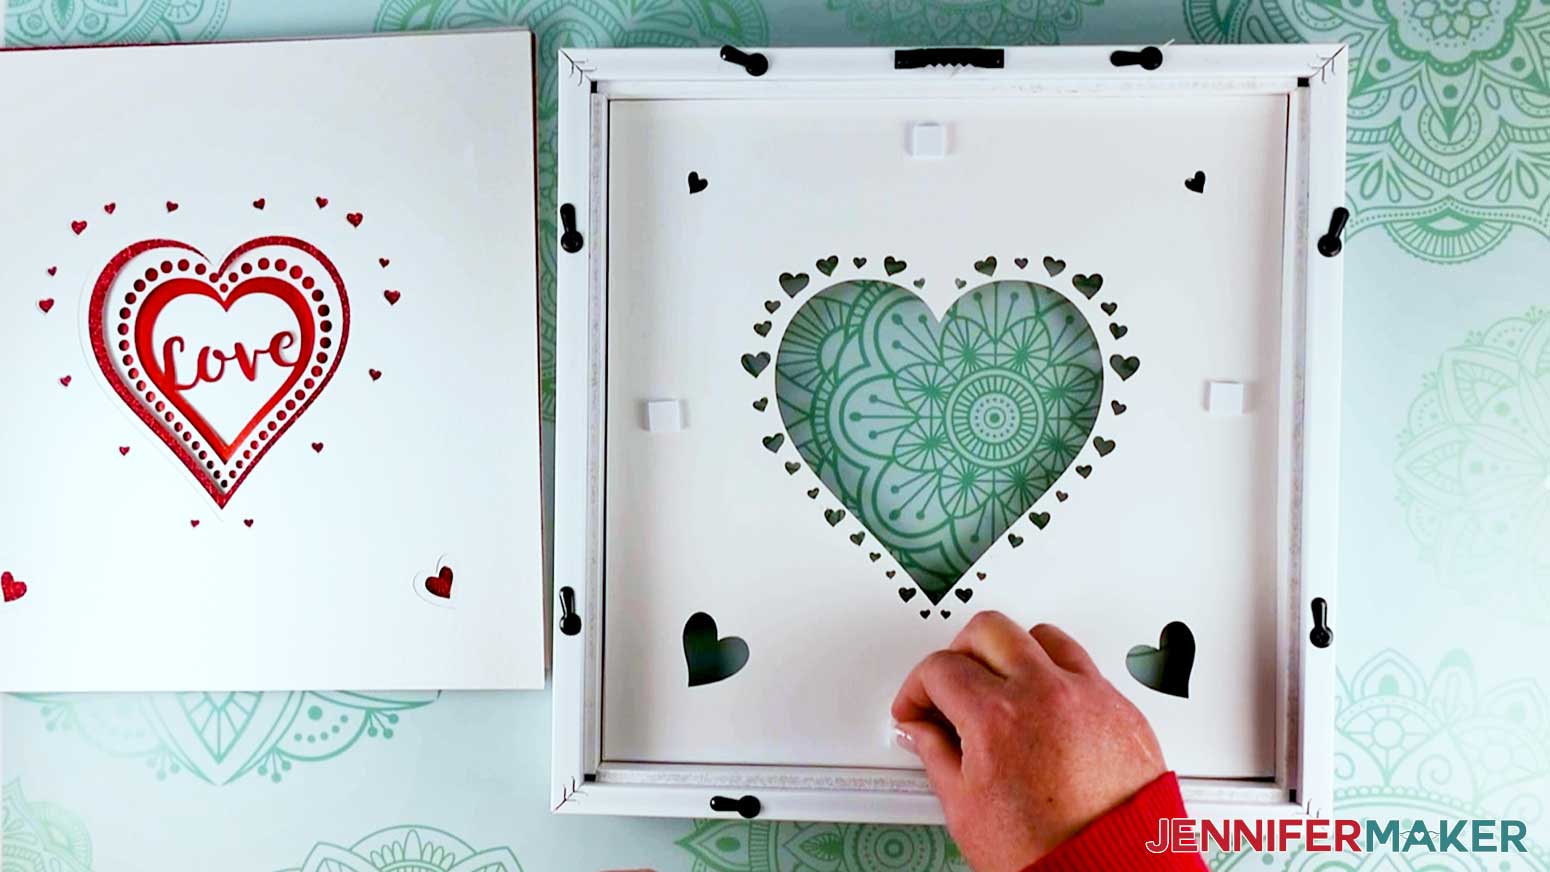
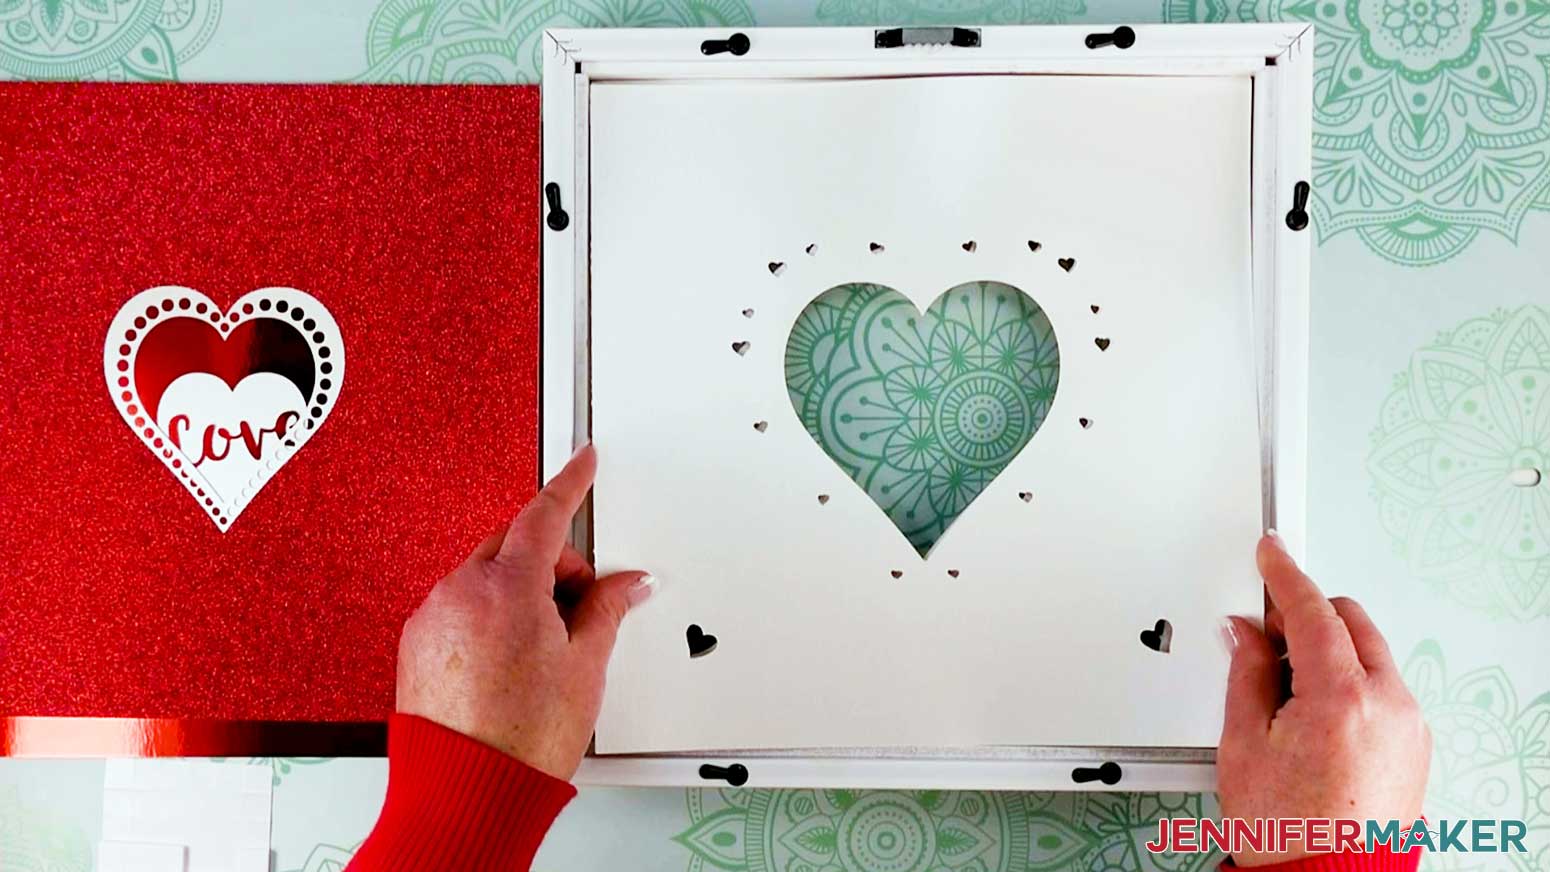
Now I'm going to show you how to assemble the heart layered shadow box. A foolproof way to make sure all the layers fit together perfectly is by assembling them INSIDE the frame.
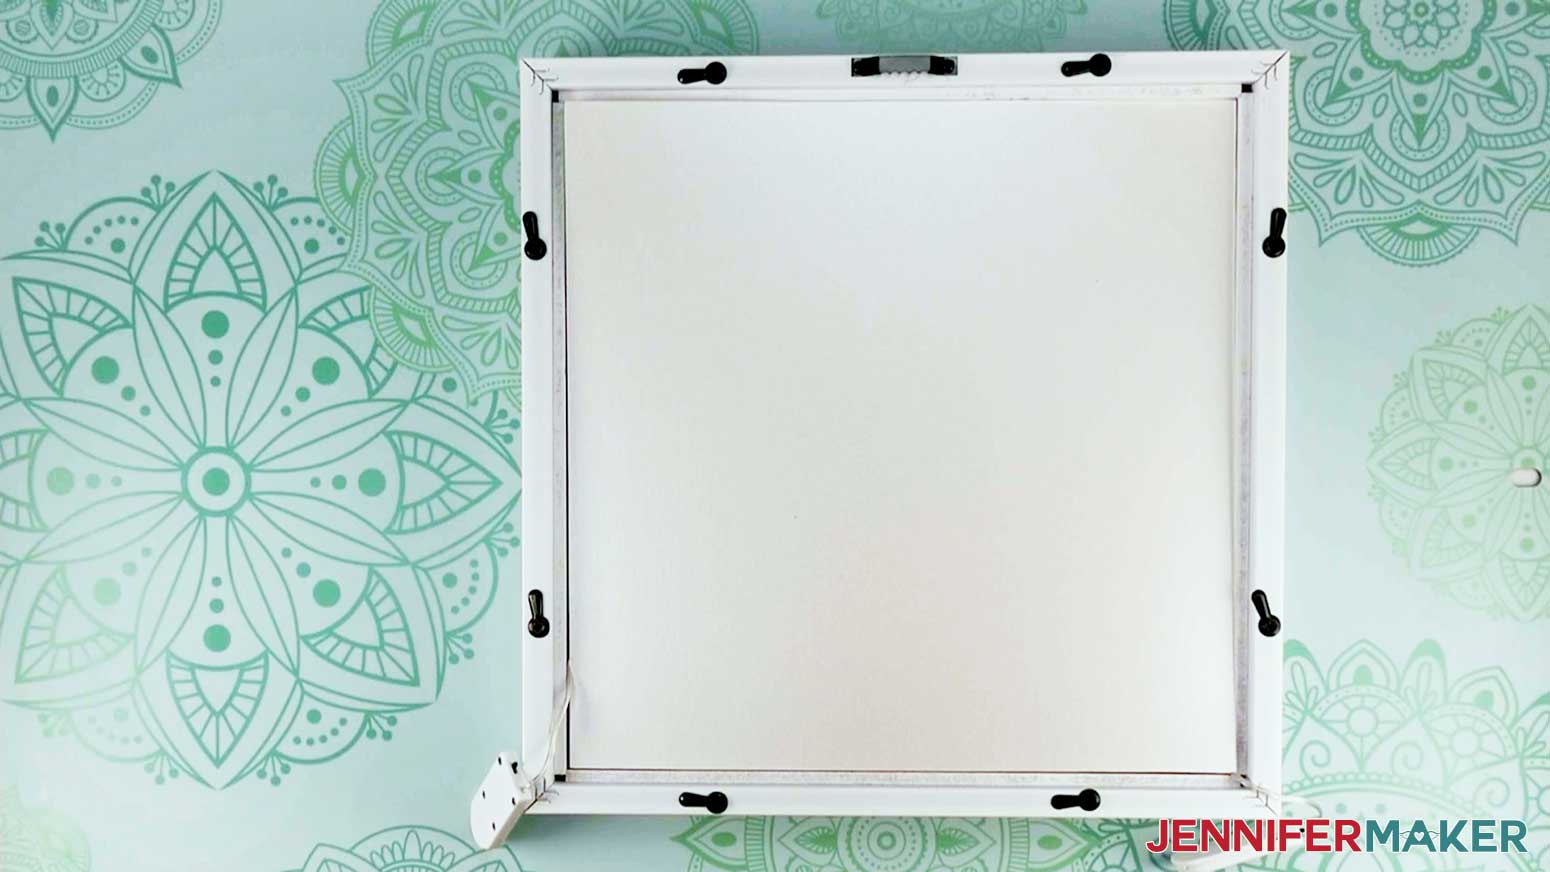
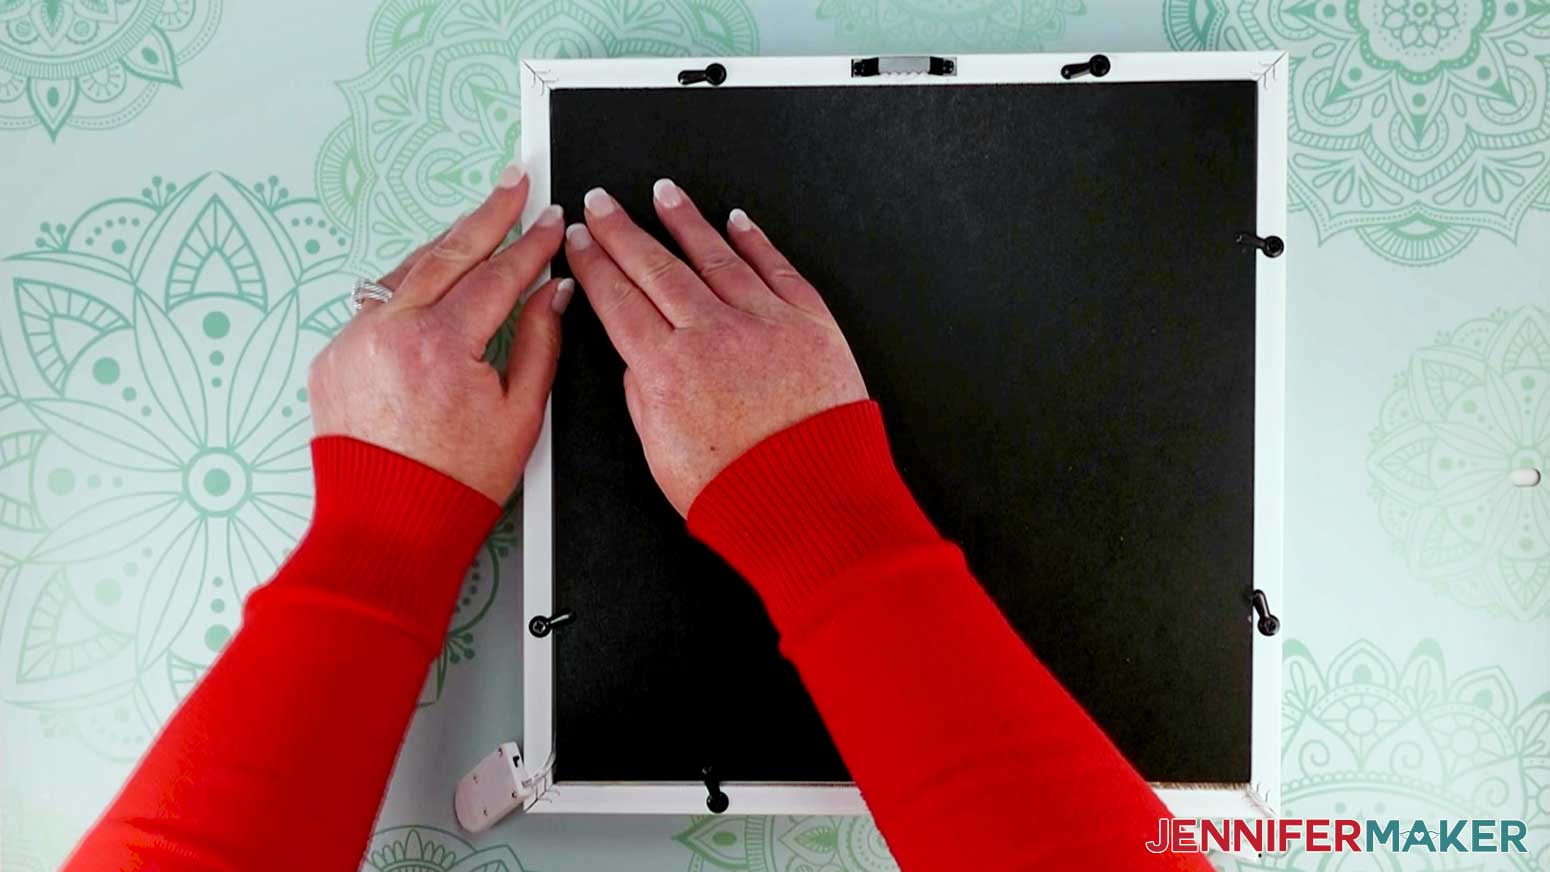
So first, let's prepare the frame.
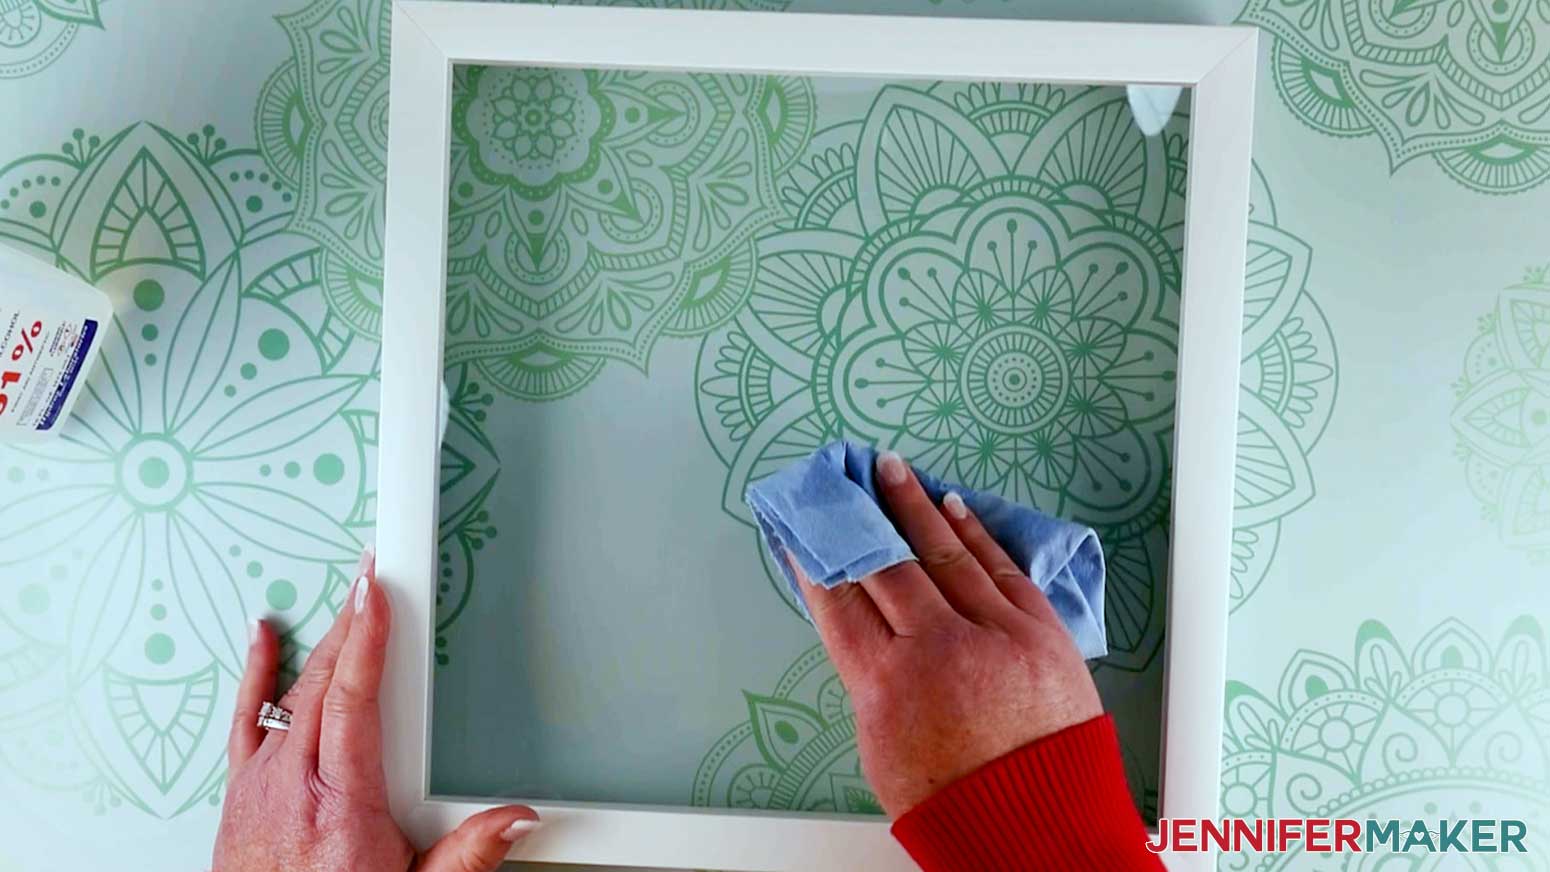
Remove the backer board of the frame. Using a lint-free towel or coffee filter, clean the inside and outside of the glass with isopropyl rubbing alcohol. This will remove any oil or dirt and get the surface as clean as possible.
Now let's assemble all the layers! Stack all the layers from top to bottom. Make sure they are in the correct order, and refer to the chart at the beginning of Step 3 if you're not sure.
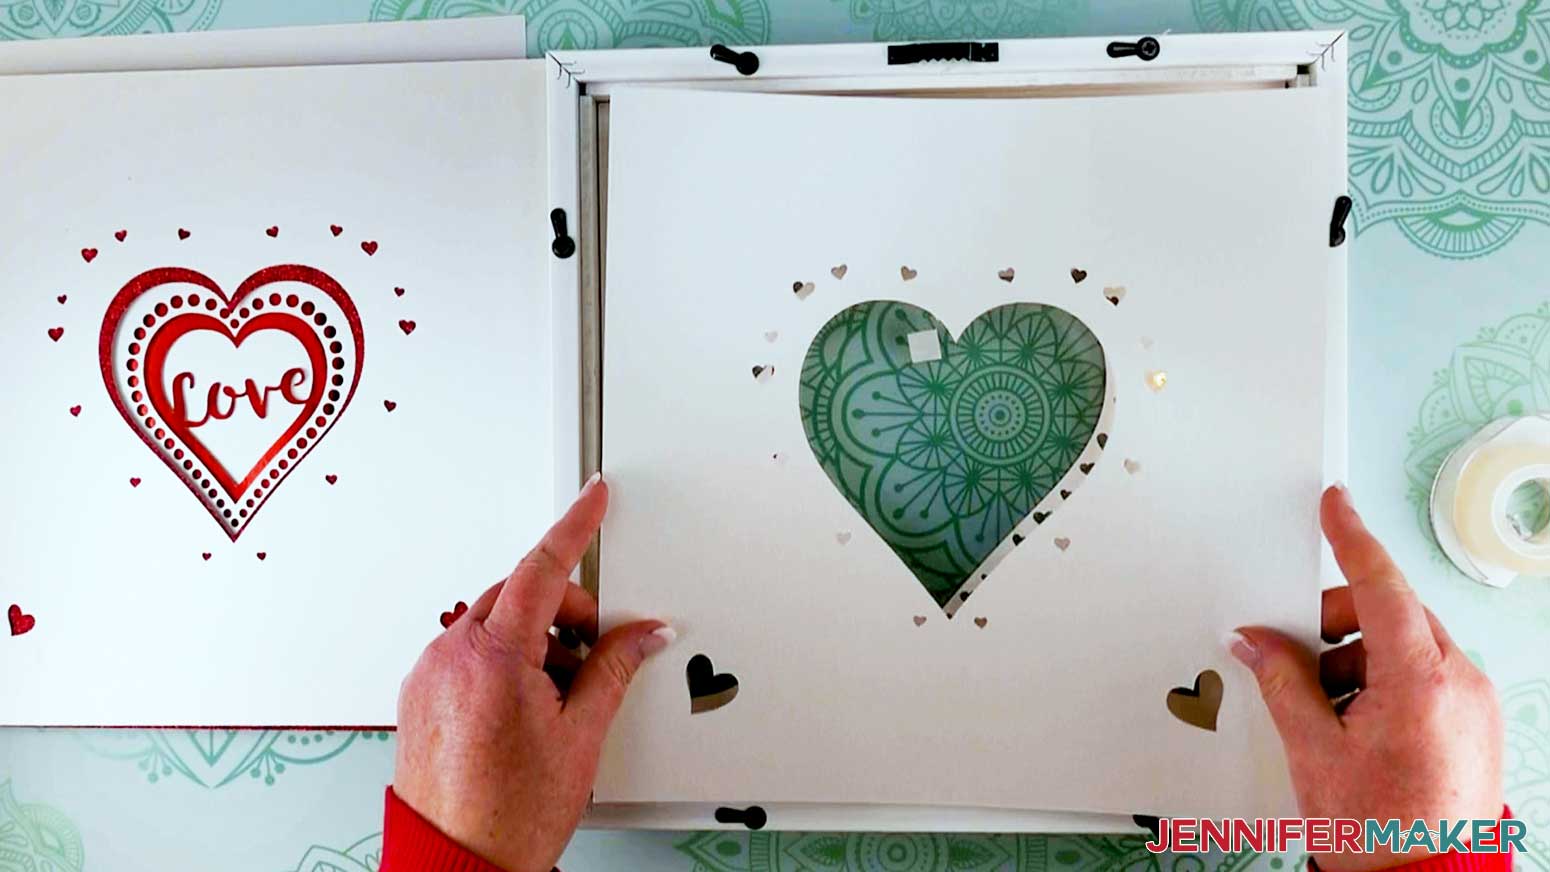
NOTE: To make the frame with a photo, follow these directions until you have attached Layer 7. Place adhesive foam pieces at the corners of your photograph, then lightly place the it face down on the back of Layer 7. Carefully check the front view of your shadow box to ensure your photograph is visible through the heart shape and adjust as needed. Then, pick up the main directions to add the second set of fairy lights if you want them. Finally, and secure your bottom layer (your Layer 8, but Layer 9 in the instructions) as directed.
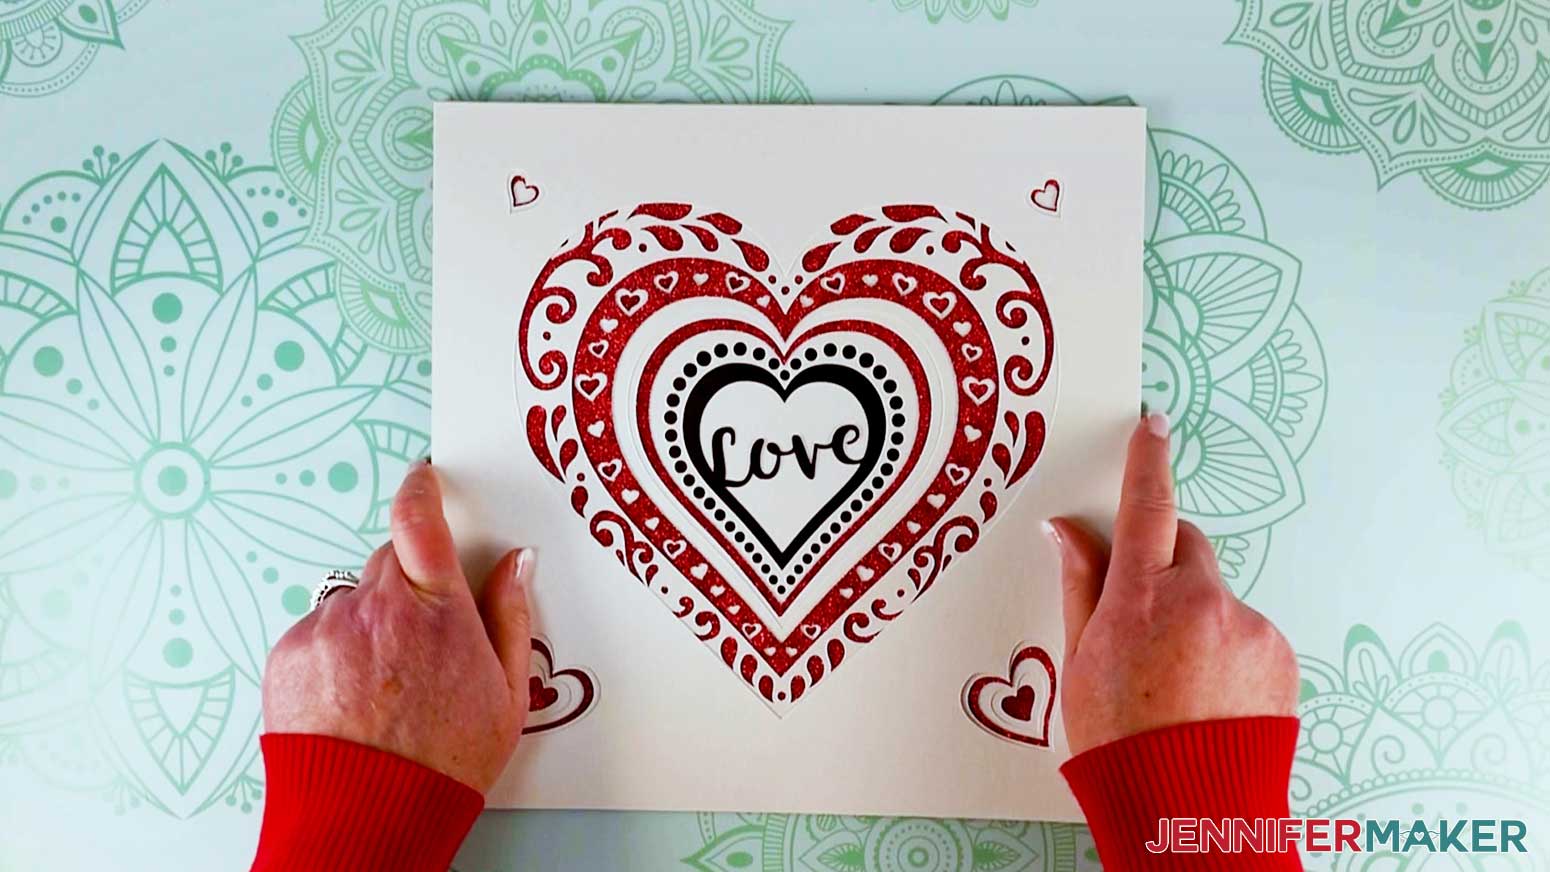
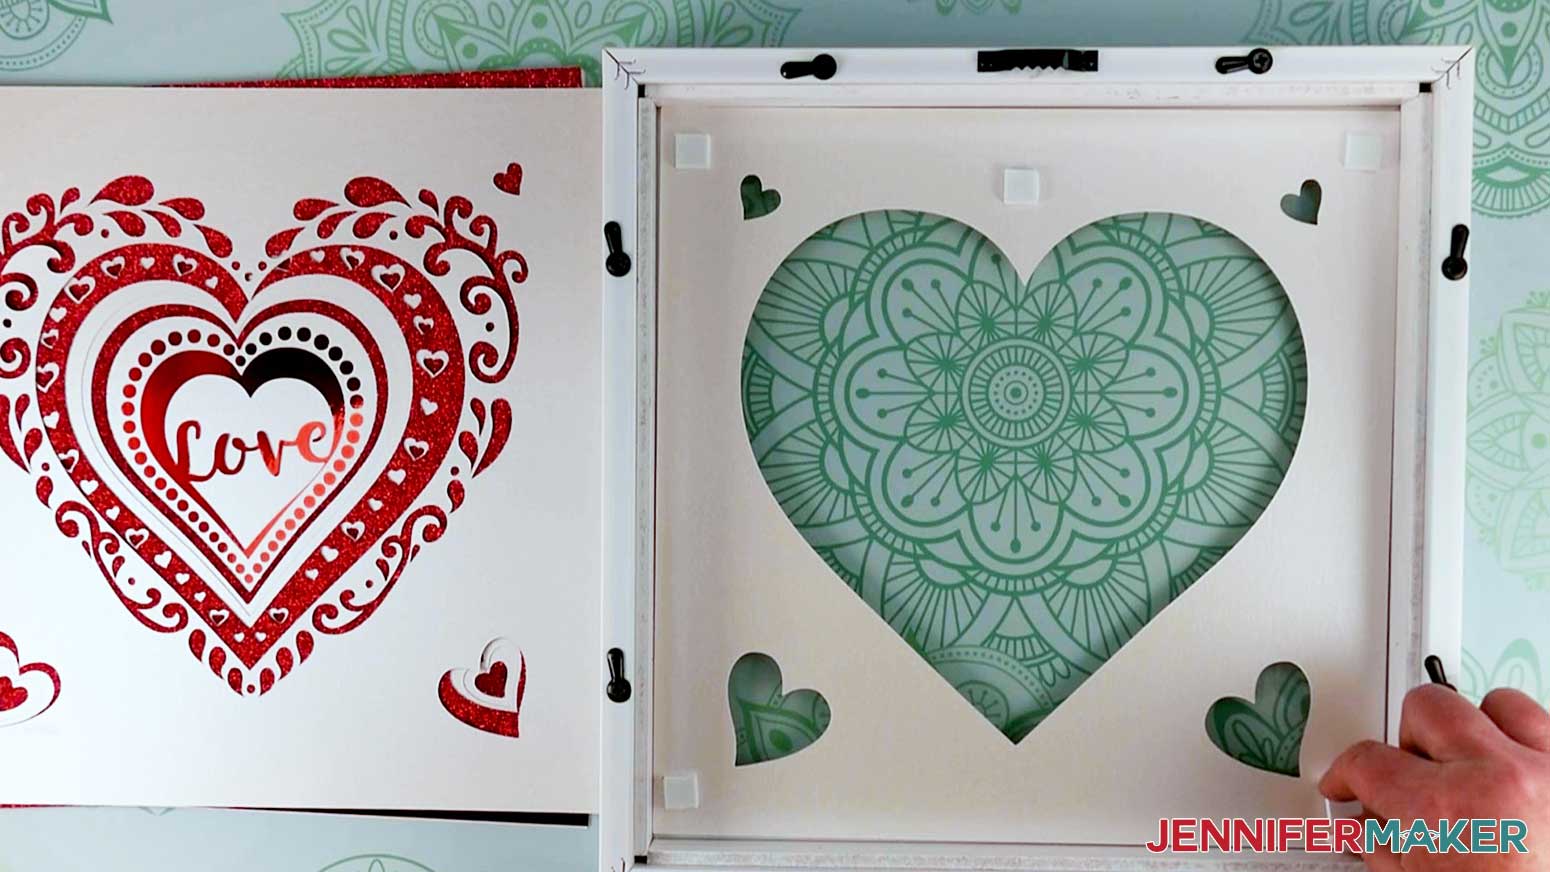
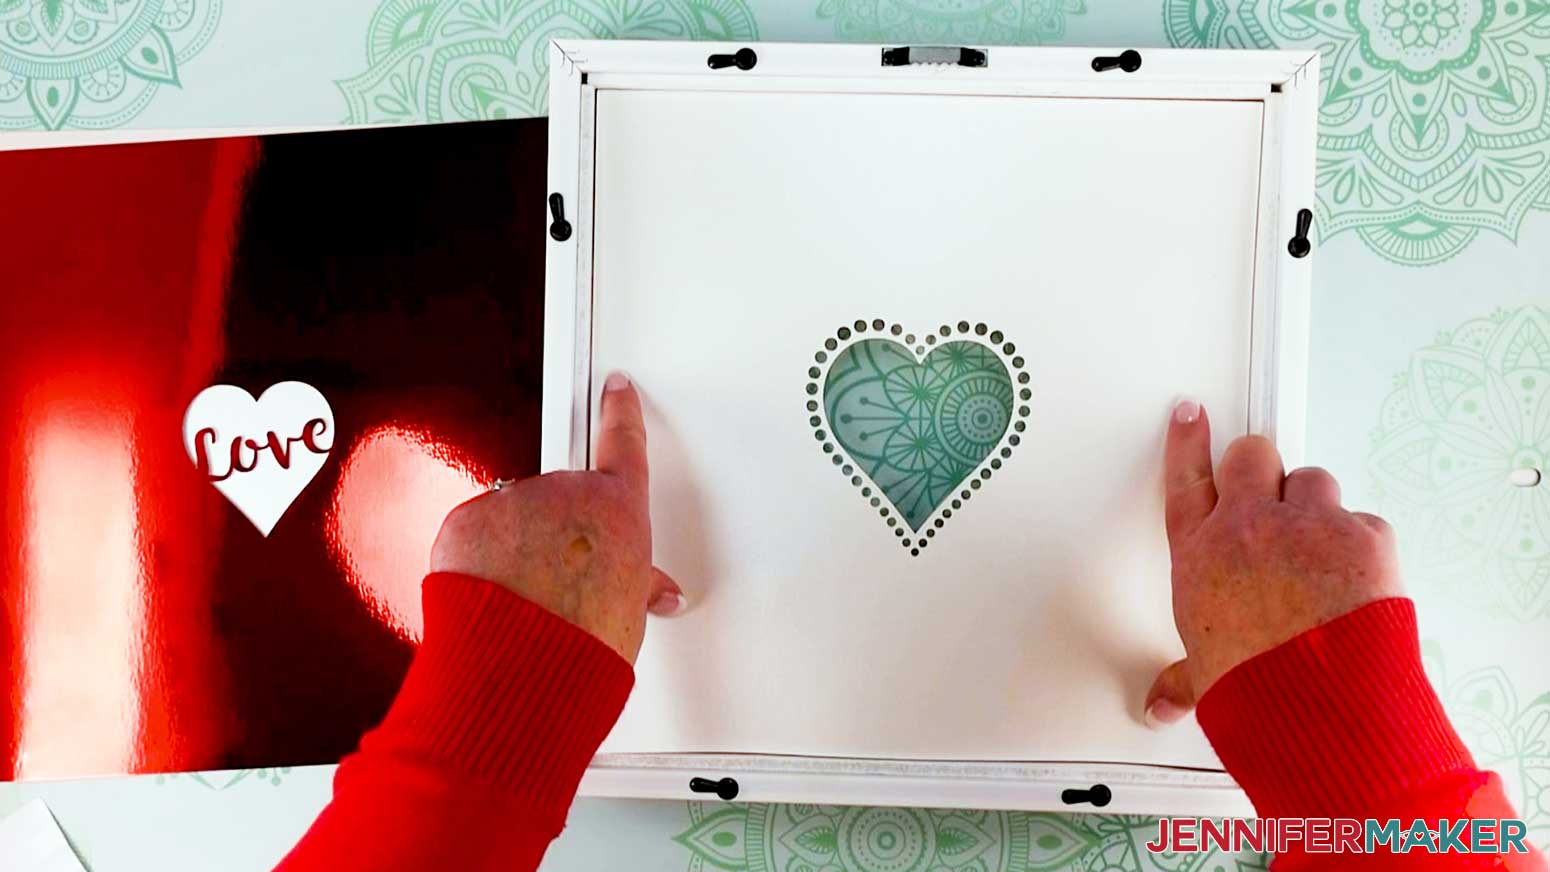
To start, I placed Layer 1 (the top layer) face DOWN against the glass inside the frame so the backside is facing upward toward me.
TIP: Take note of where the hanger on the back is positioned, and make sure that each layer will be stacked and aligned correctly when you hang the shadow box.
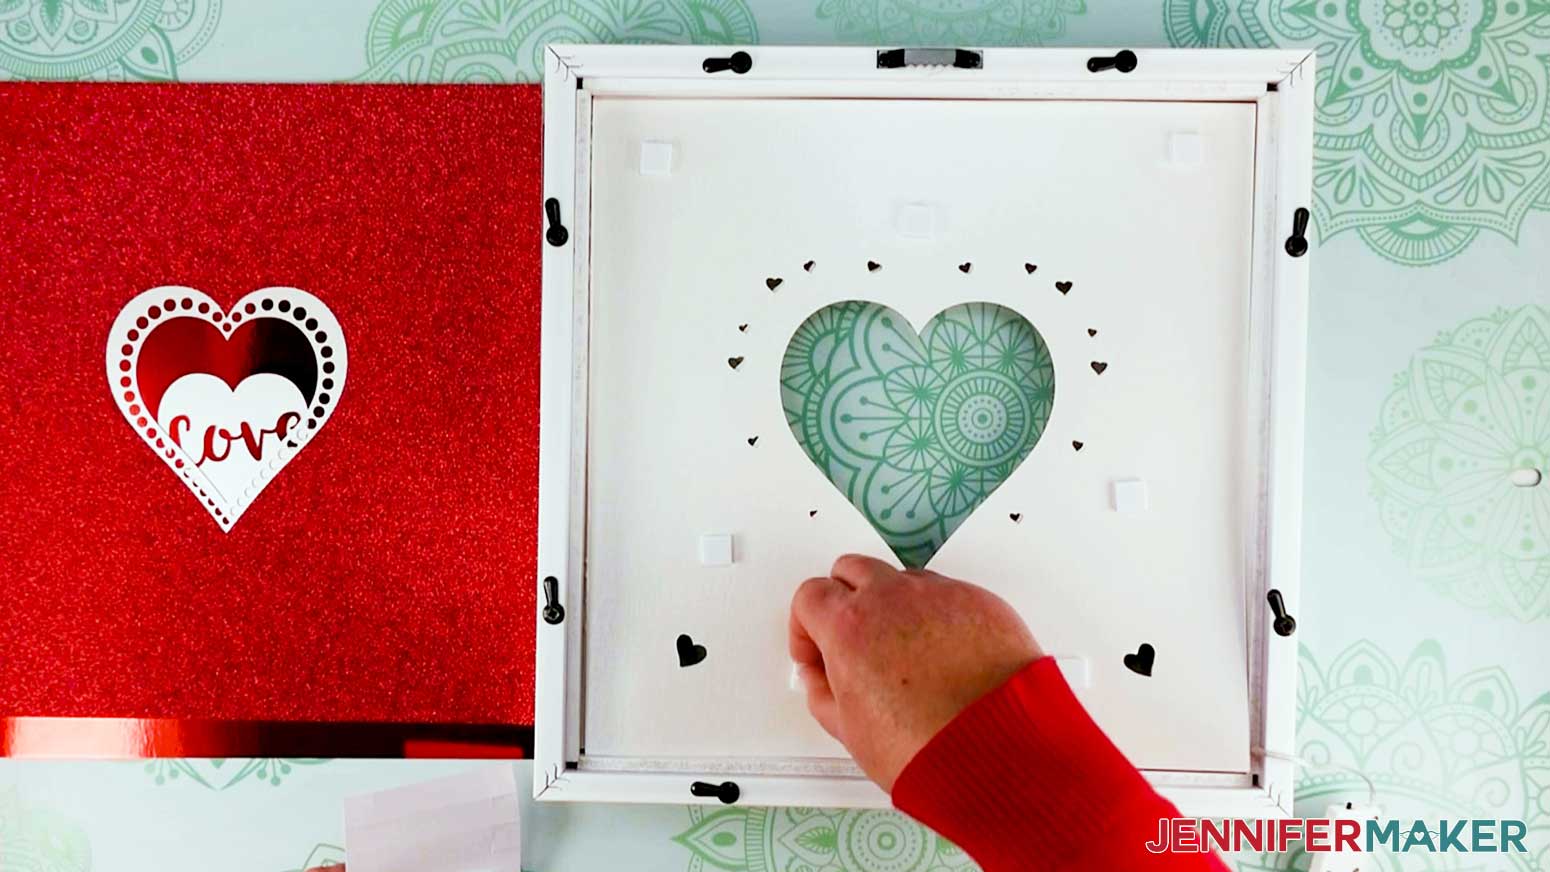
Now apply the adhesive to the back of Layer 1. You'll be applying double-sided foam adhesive to the BACKSIDE of each layer one at a time as you assemble them in the frame.
I used 3D foam adhesive that was precut into squares, but if yours is in strips you can cut them with scissors to fit as needed.
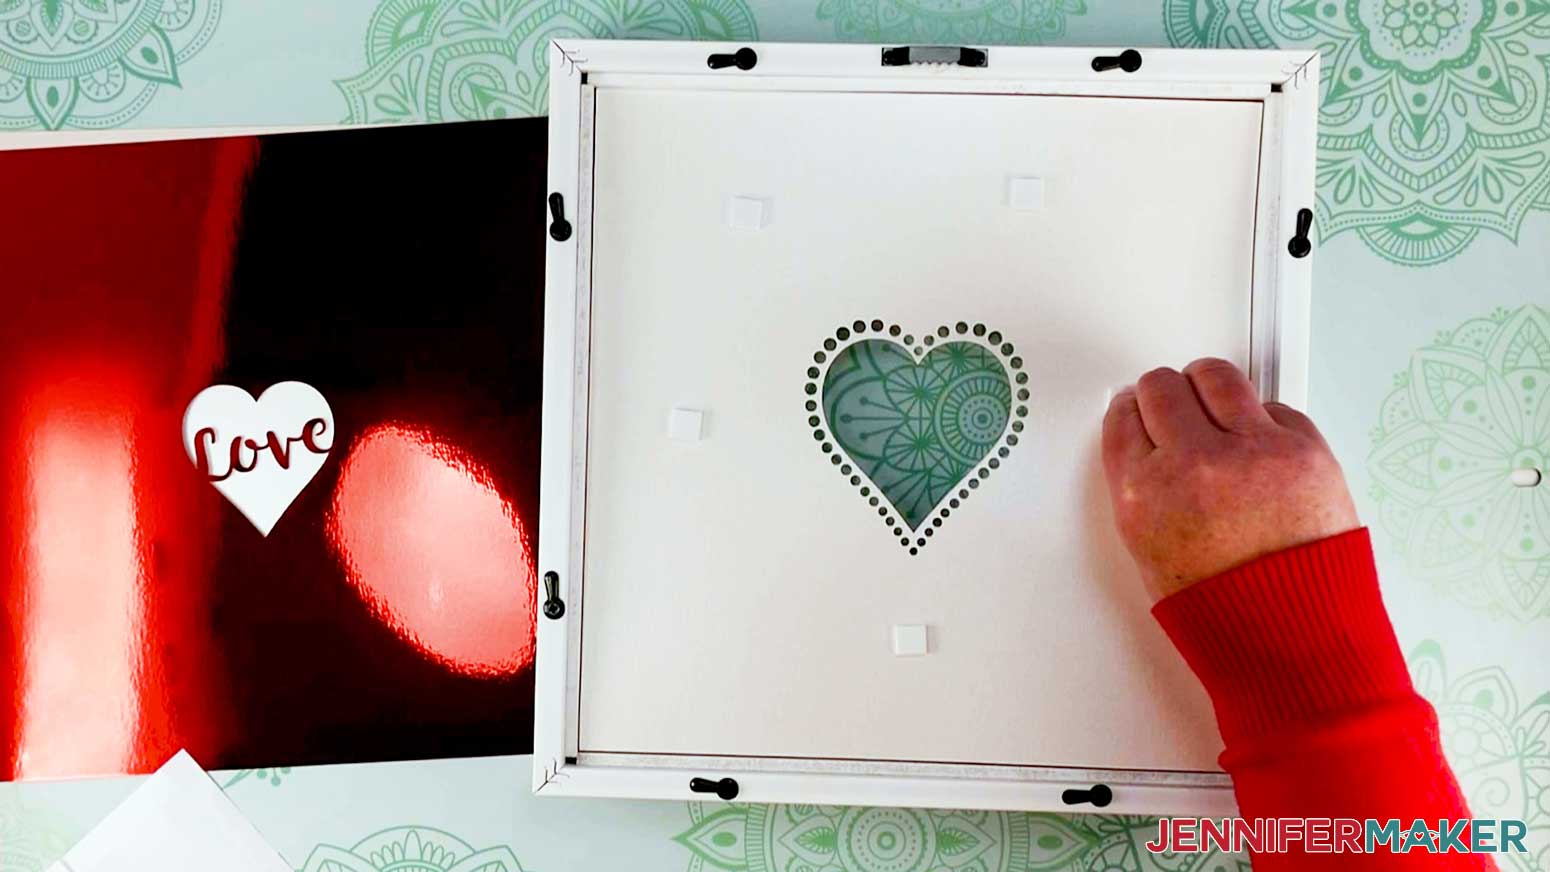
This is how I applied the adhesive foam to Layer 1 (the top layer). Remove the paper backing so the sticky adhesive is exposed.
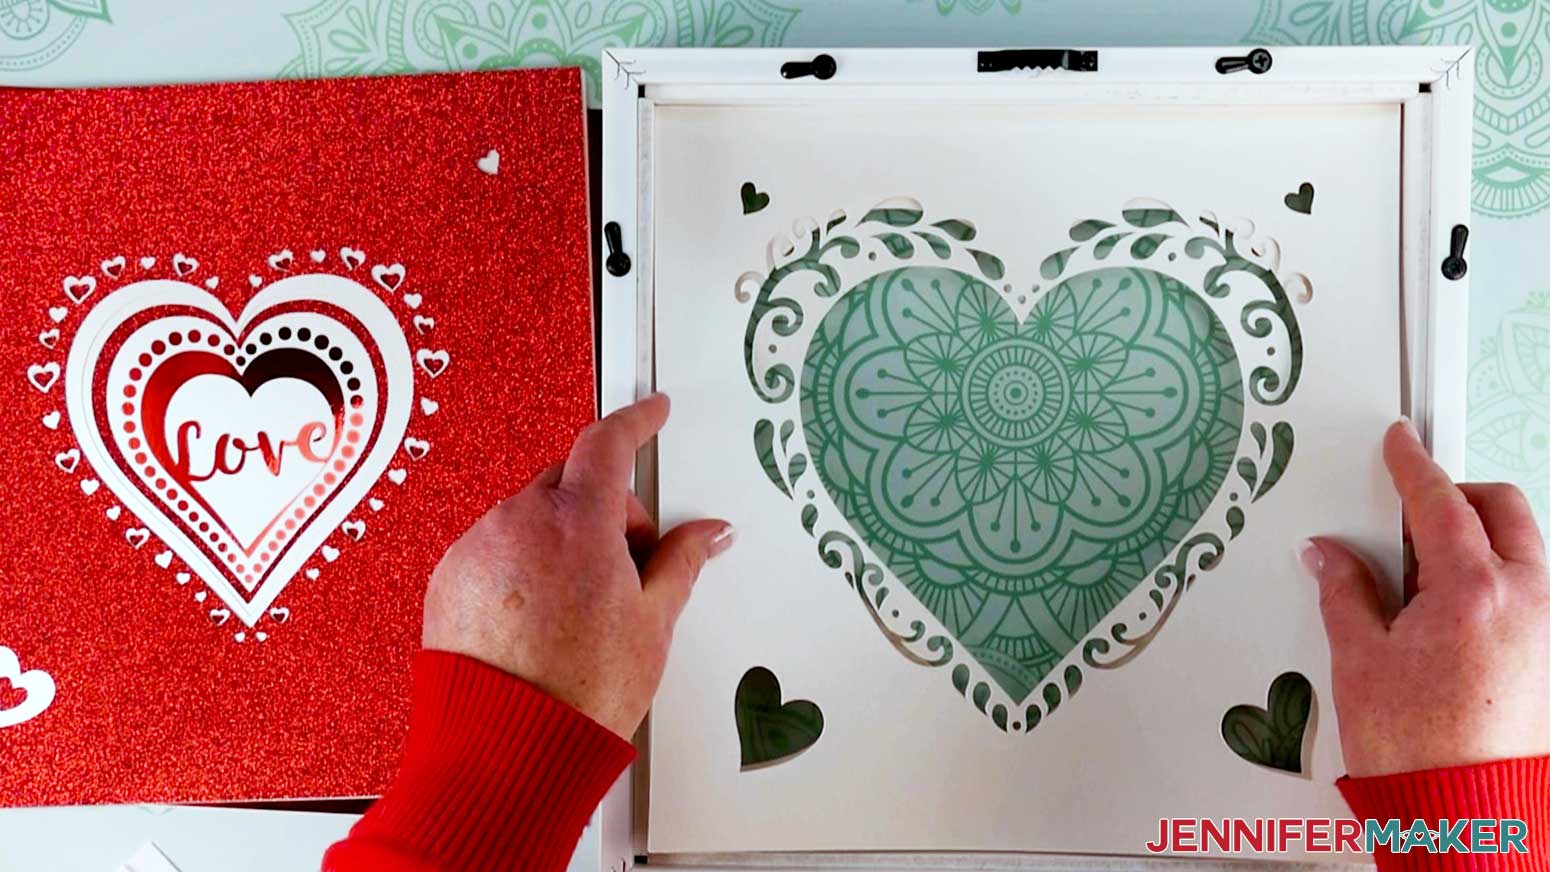
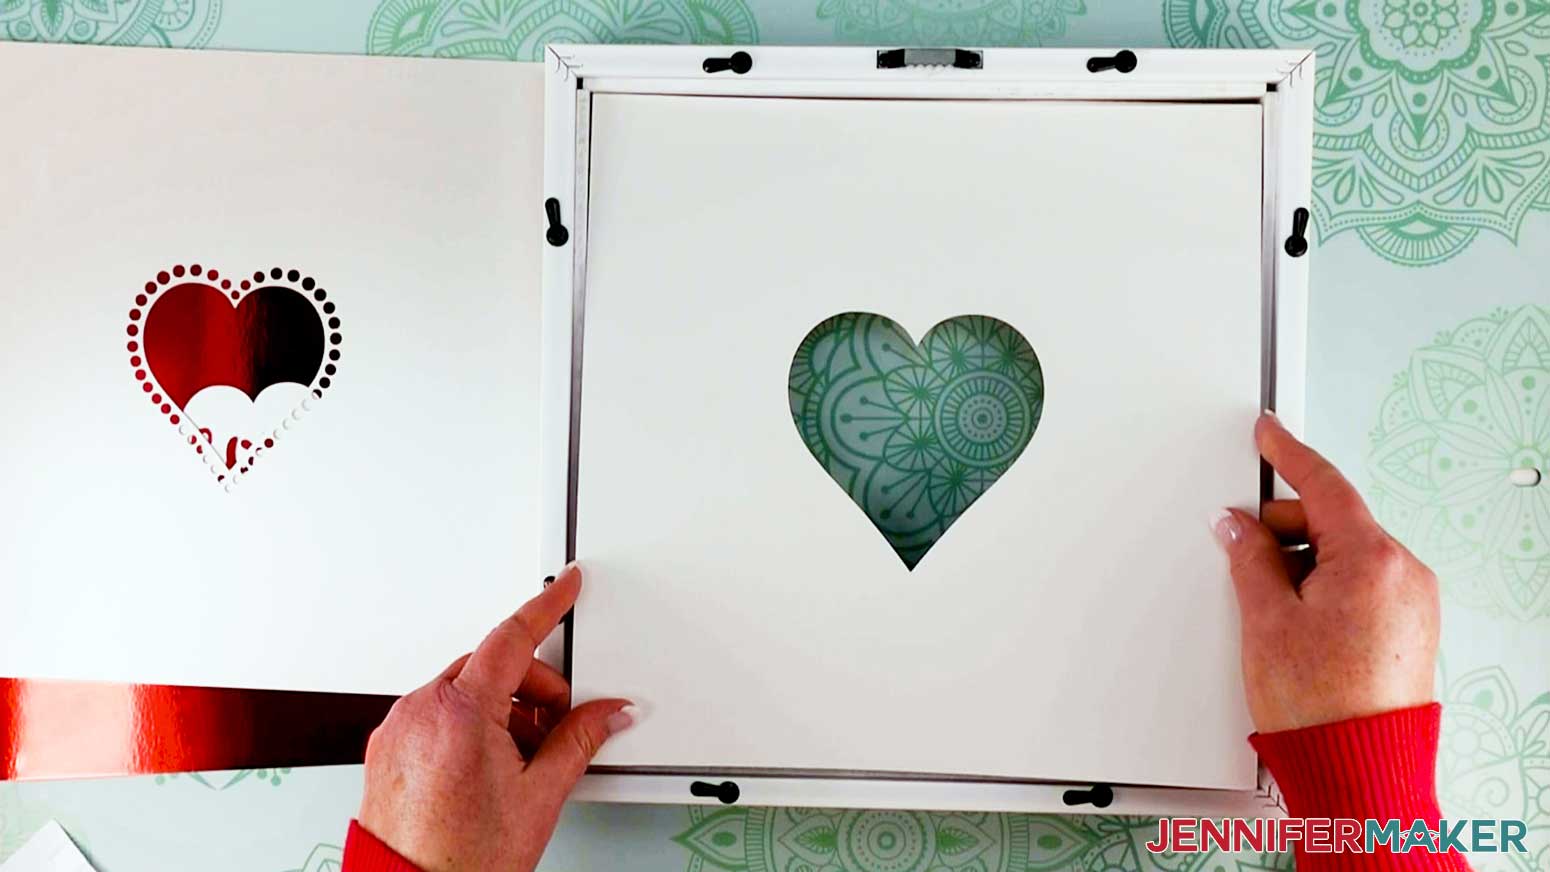
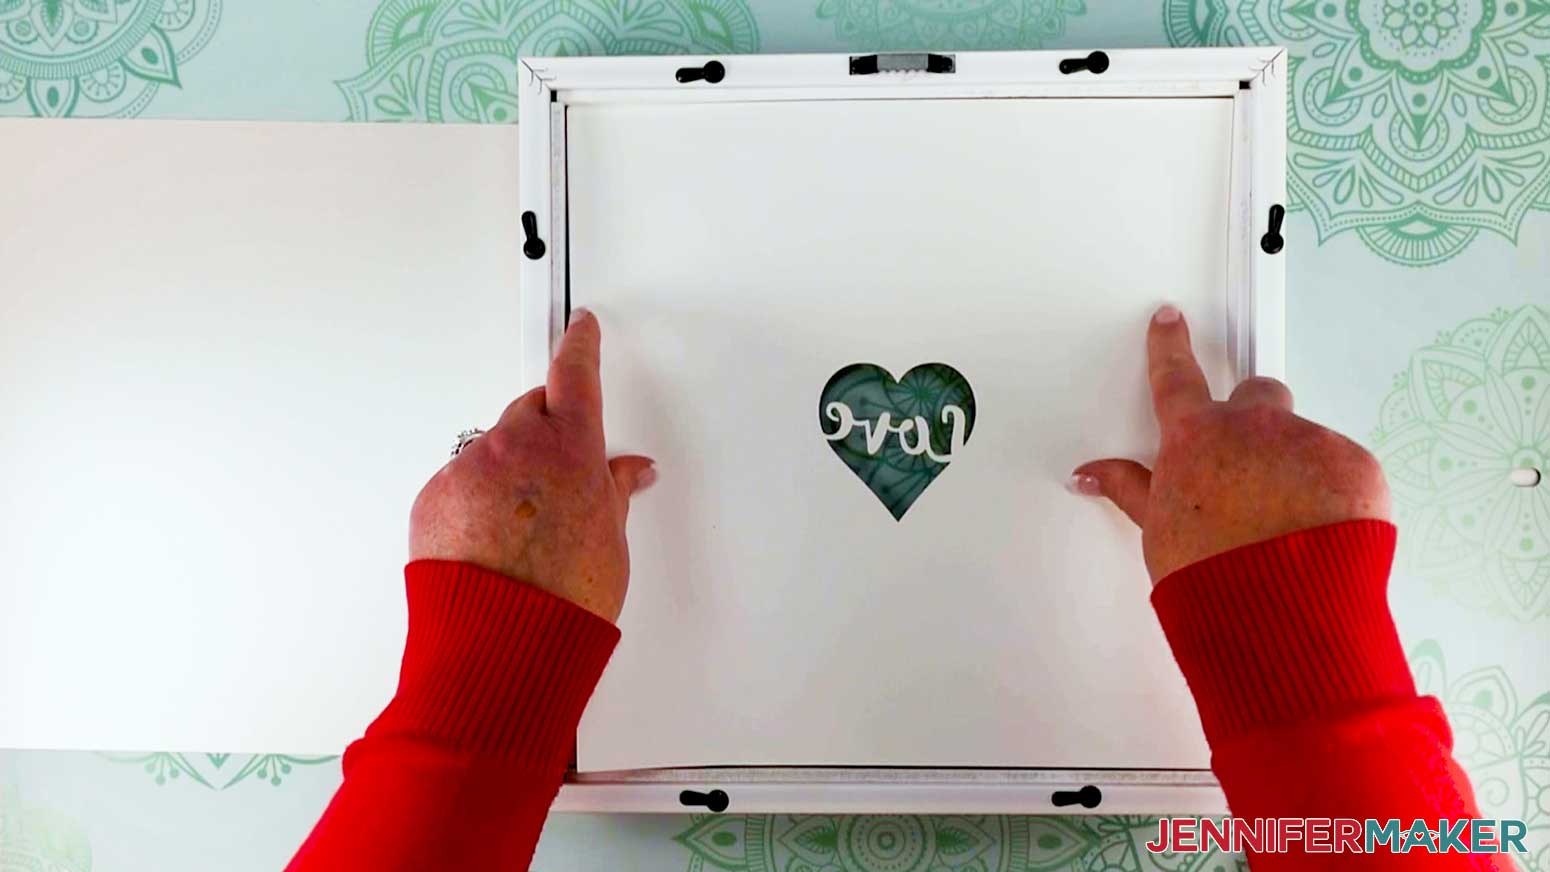
Center and place Layer 2 face DOWN on top of the first layer inside the frame.
As you place the layers on one another, lay them down lightly so you can adjust your placement if needed, then gently press them down to adhere them to the underlying layer. To get the best result, it's important to make sure the layers are lined up as straight as possible, so take your time and use the frame's corners to keep everything aligned.
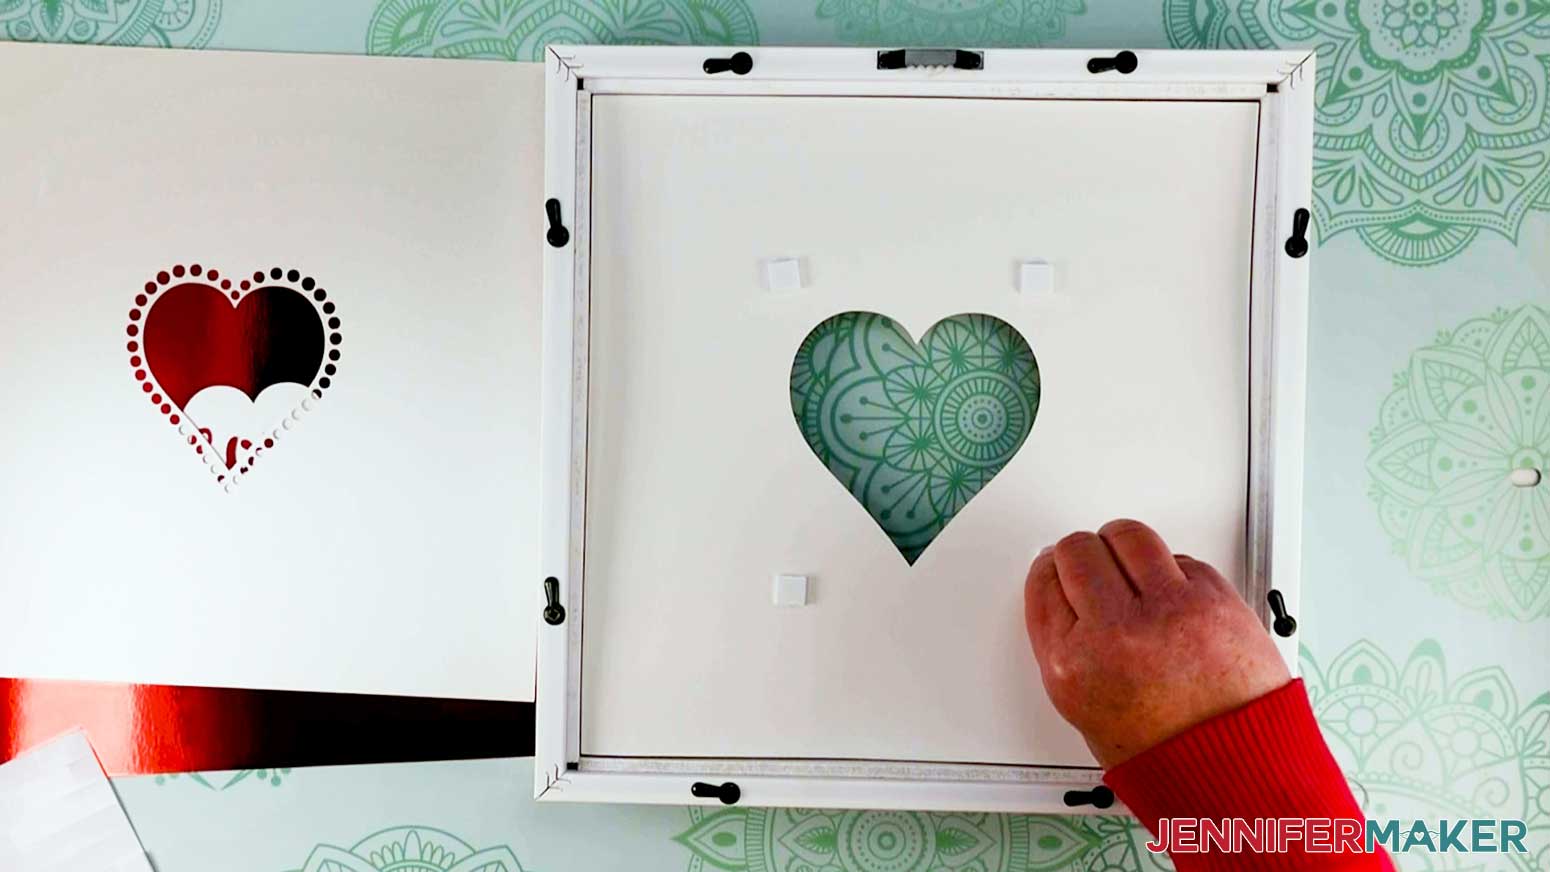
Add adhesive foam to the back of Layer 2 and remove the paper backing.
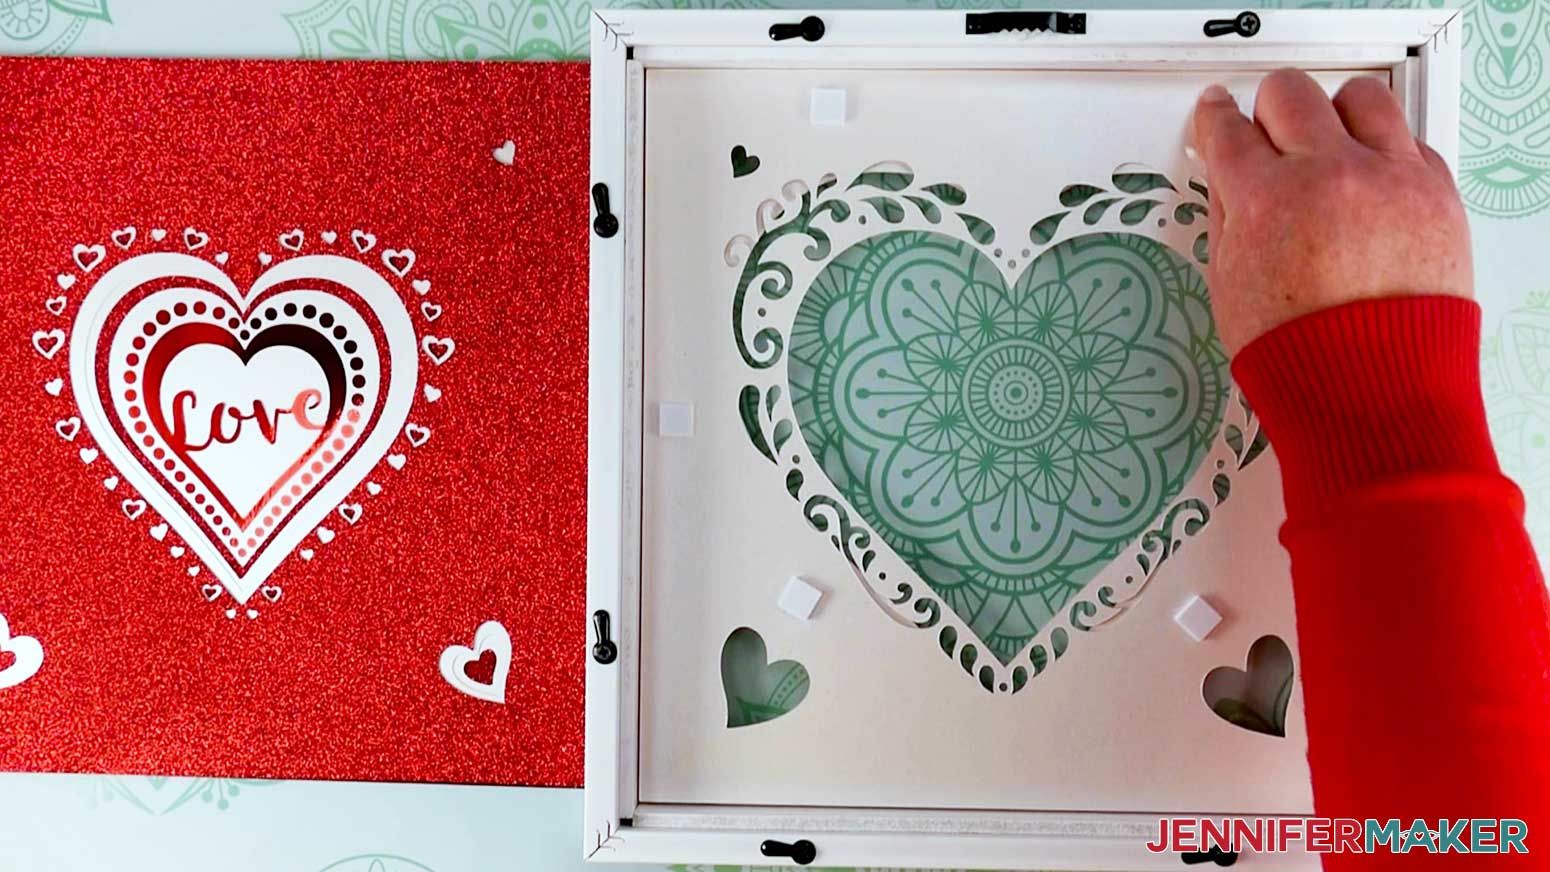
Align and place glitter Layer 3 on top of Layer 2.

Add adhesive foam to the back of glitter Layer 3.
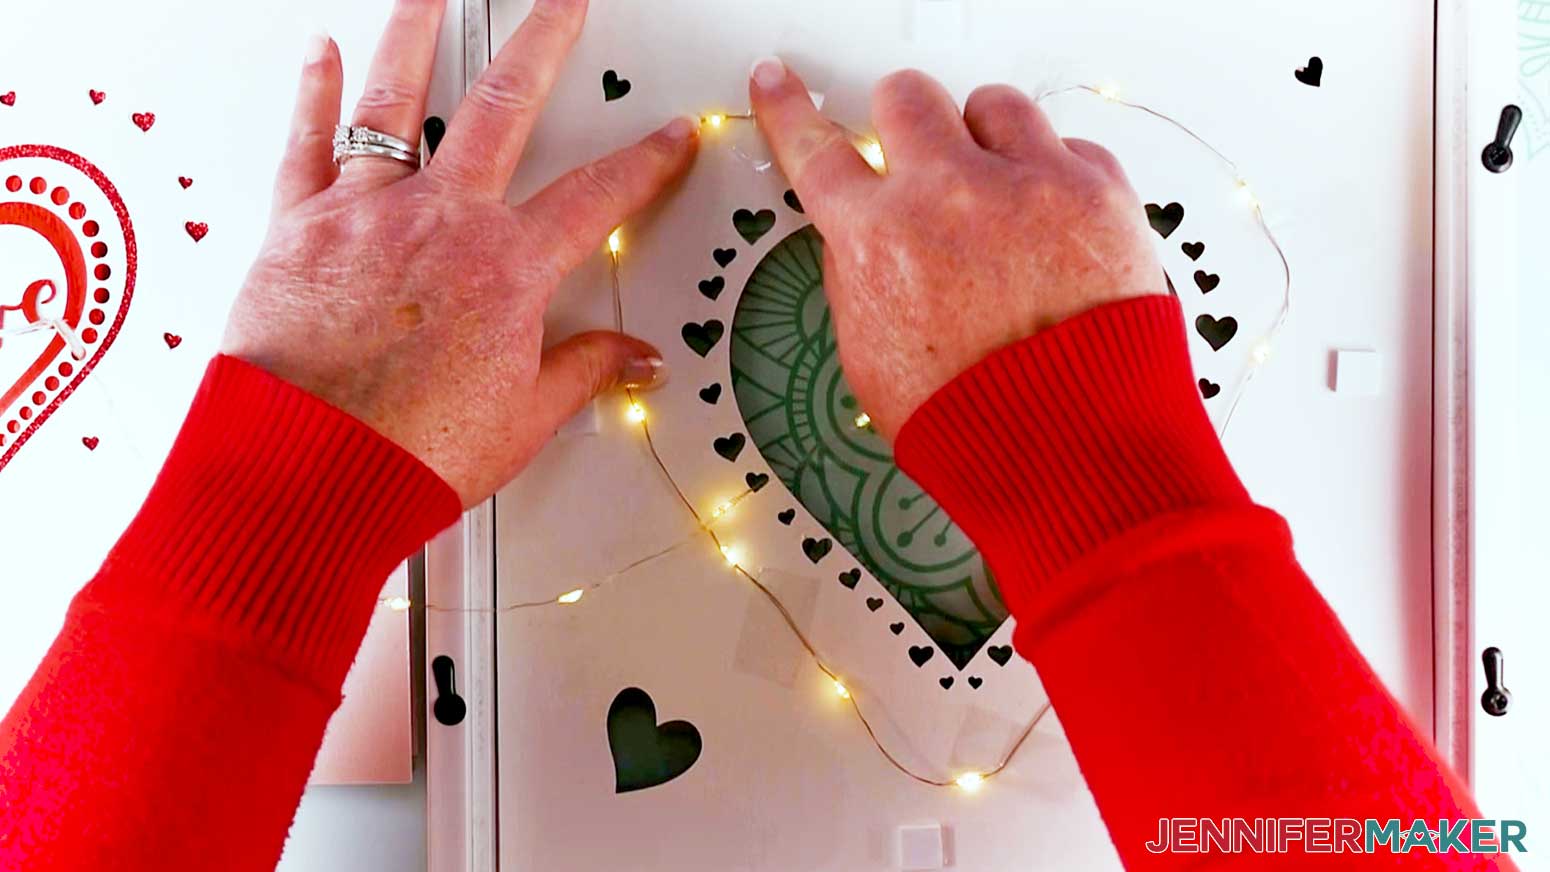
Before attaching Layer 4 to Layer 3, let's add some fairy lights! String out a light strand until it is straight. Shape it around the heart on the backside of Layer 3 and secure the wires in place with transparent tape.
Make sure the lights are as evenly spaced as possible and not crossing over any cutouts. Leave a little bit of the end and the battery pack loose so you can adhere it to the outside back of the frame later. I draped the end over the edge of the frame so it didn't get stacked into the layers.
Remove the paper backing from the adhesive and place Layer 4 on top of Layer 3.
Continue placing the layers one on top of the other. Refer to the SVG file in Cricut Design Space or my chart in Step 3 for the order. Below, you'll see how I placed the foam adhesive on Layer 4.
Place Layer 5 on top of Layer 4.
And here is Layer 5 with the adhesive on the back.
Place Layer 6 on top Layer 5.
Here is Layer 6 with the adhesive on the back.
Place Layer 7 on top Layer 6.
Here is Layer 7 with the adhesive on the back.
Place Layer 8 on top Layer 7.
Now add adhesive to the back of Layer 8.

Before attaching Layer 9 to Layer 8, let's add some more fairy lights! Tape another strand to the underside of Layer 8 and secure the wires in place around the heart with transparent tape just like you did before, making sure to leave the battery pack hanging out from an edge.

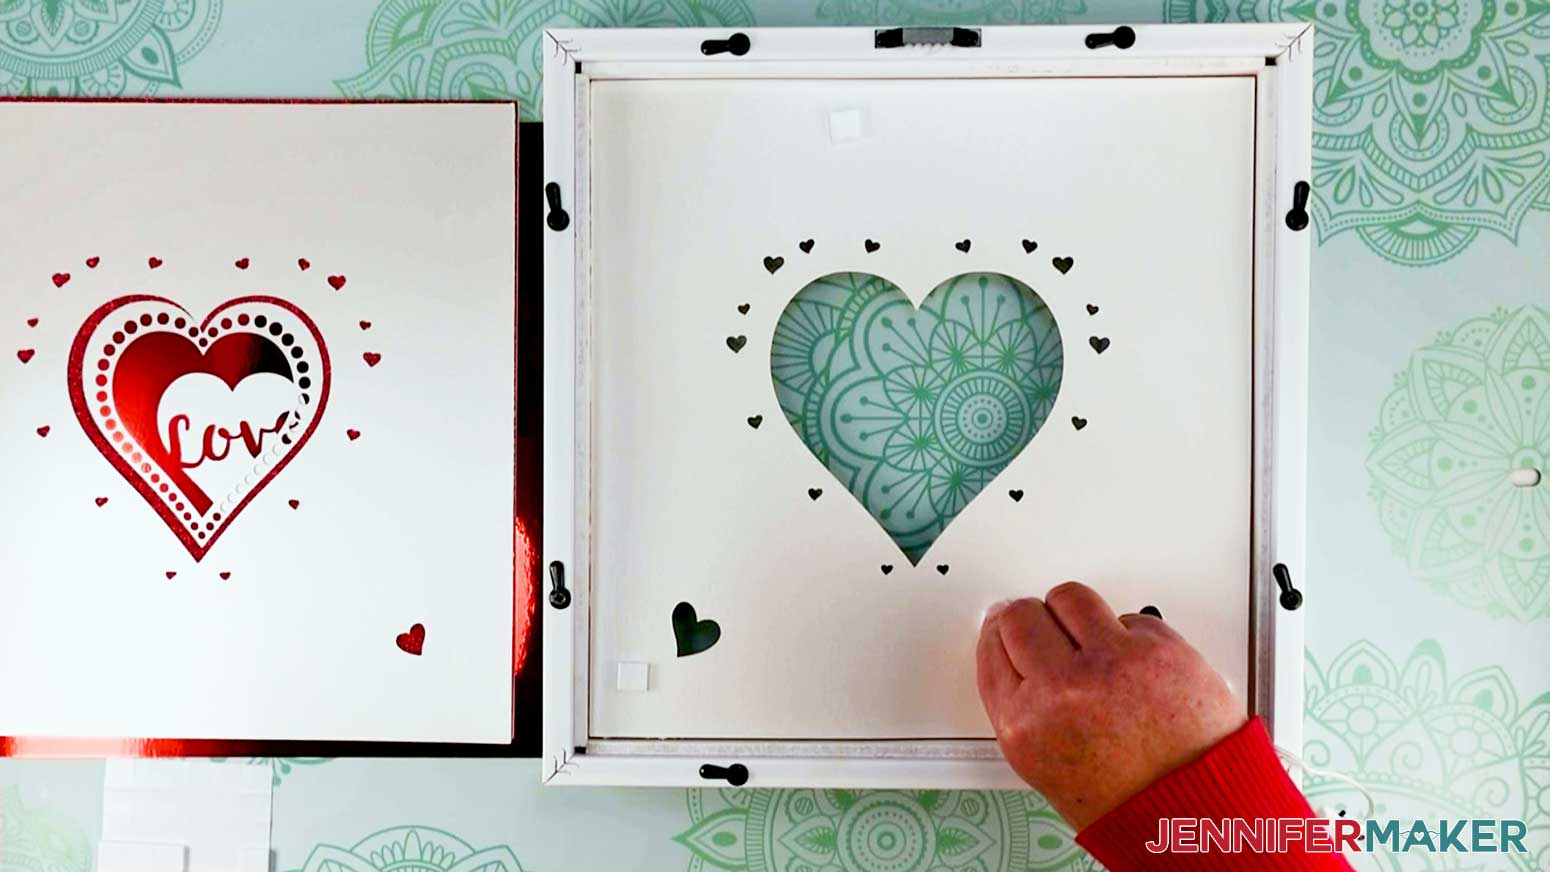
Remove the adhesive paper backing and place Layer 9 (the bottom layer) face DOWN on top Layer 8 to complete the design.

Now our heart layers are complete!
Make sure the two battery packs for the fairy lights are hanging freely over the side of the frame.
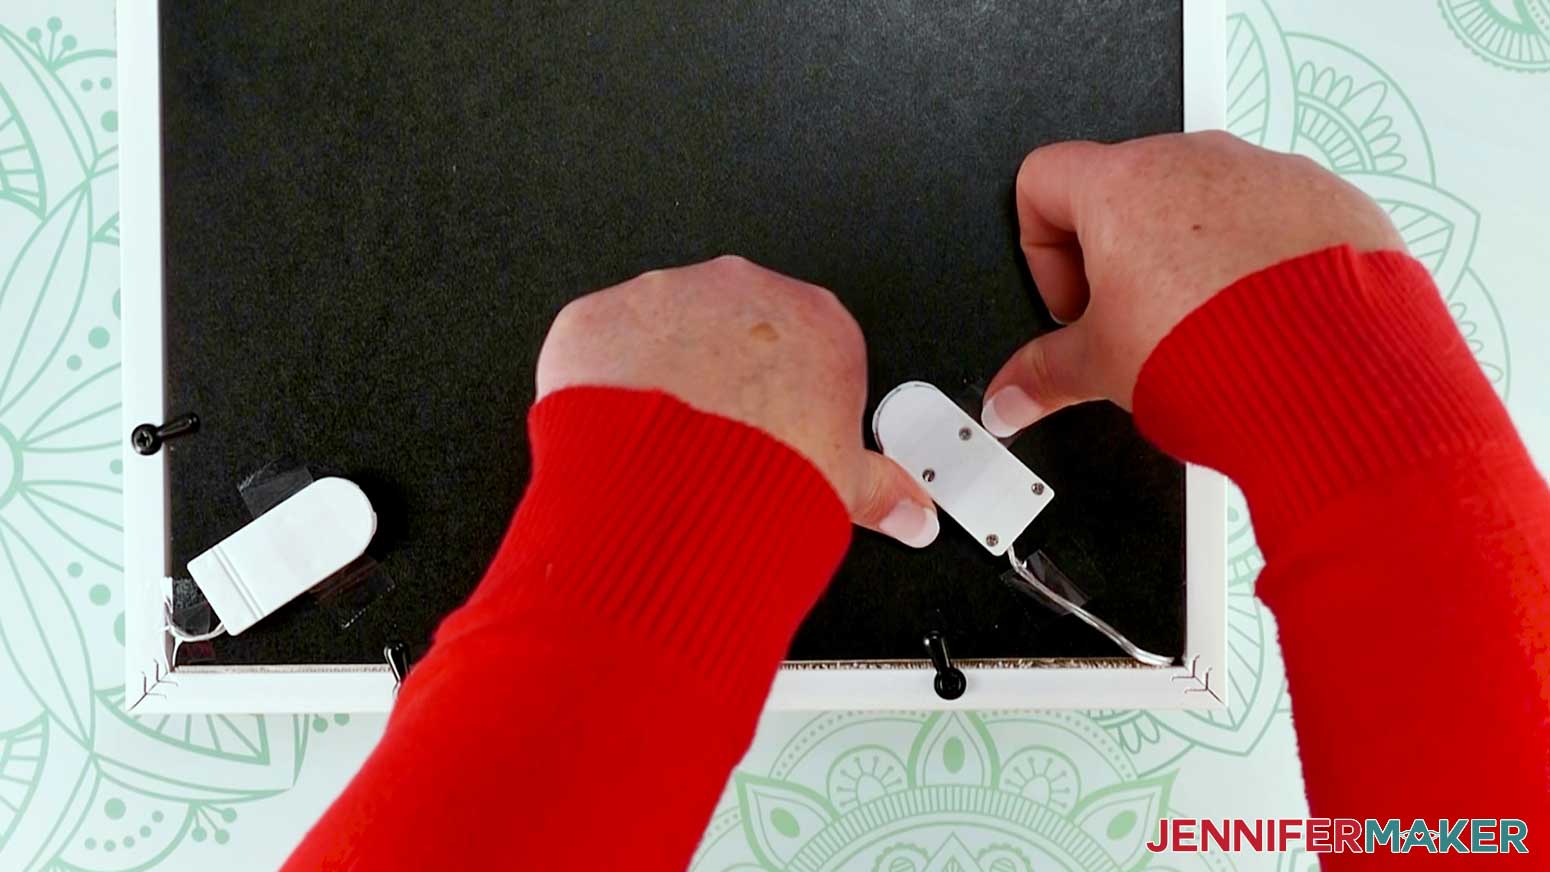
Close up the back of the frame by placing the backer board in place and closing the tabs.
Use transparent tape to secure the battery packs to the back of the frame. Or, if you will be hanging the frame on a wall, you can tape the battery packs to an inconspicuous side or the bottom of the frame.
TIP: If your shadow box is deep, you may have some extra space inside that needs to be padded before putting the backer board into place and closing it up. Just add layers of foam core cut slightly smaller than the inside of your frame to fill up the empty space so the cardstock layers do not slide around.
STEP 5: SHOW IT OFF
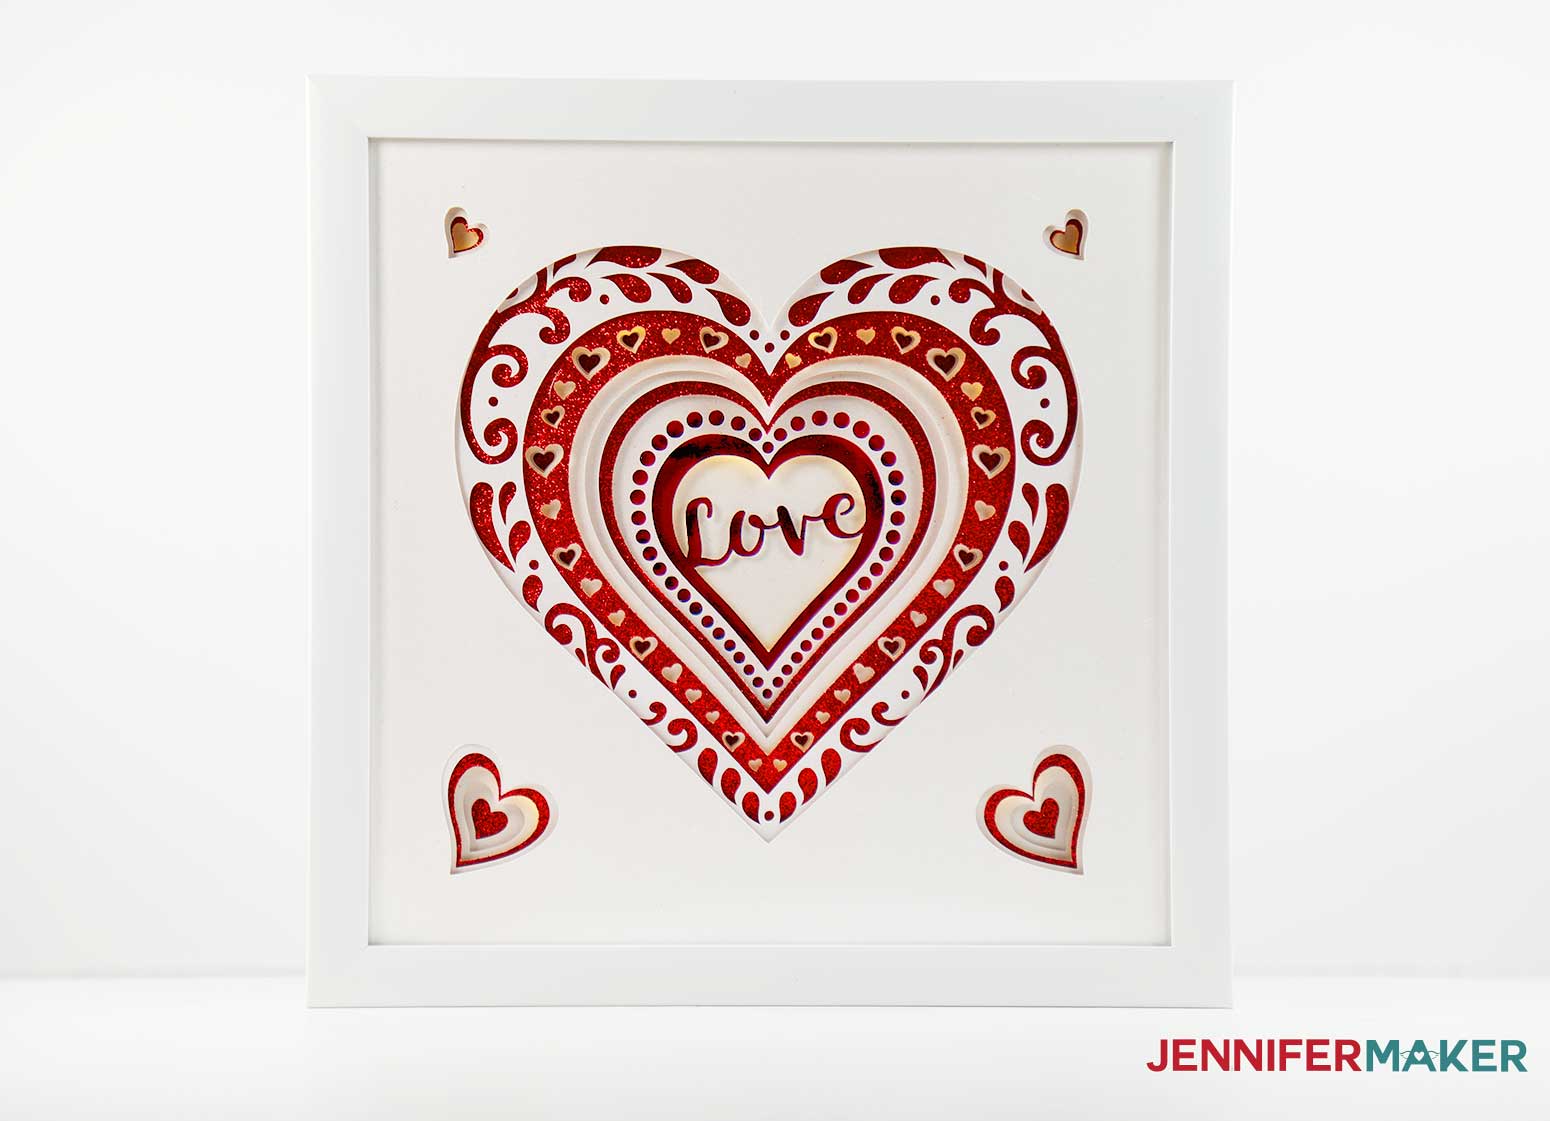
Remove the plastic battery protector sheets, flip the switches, hang your frame on a wall, and admire as it glows!
This is how all my finished heart frames turned out. This would make a perfect gift for Valentine's Day, an anniversary, or even a wedding!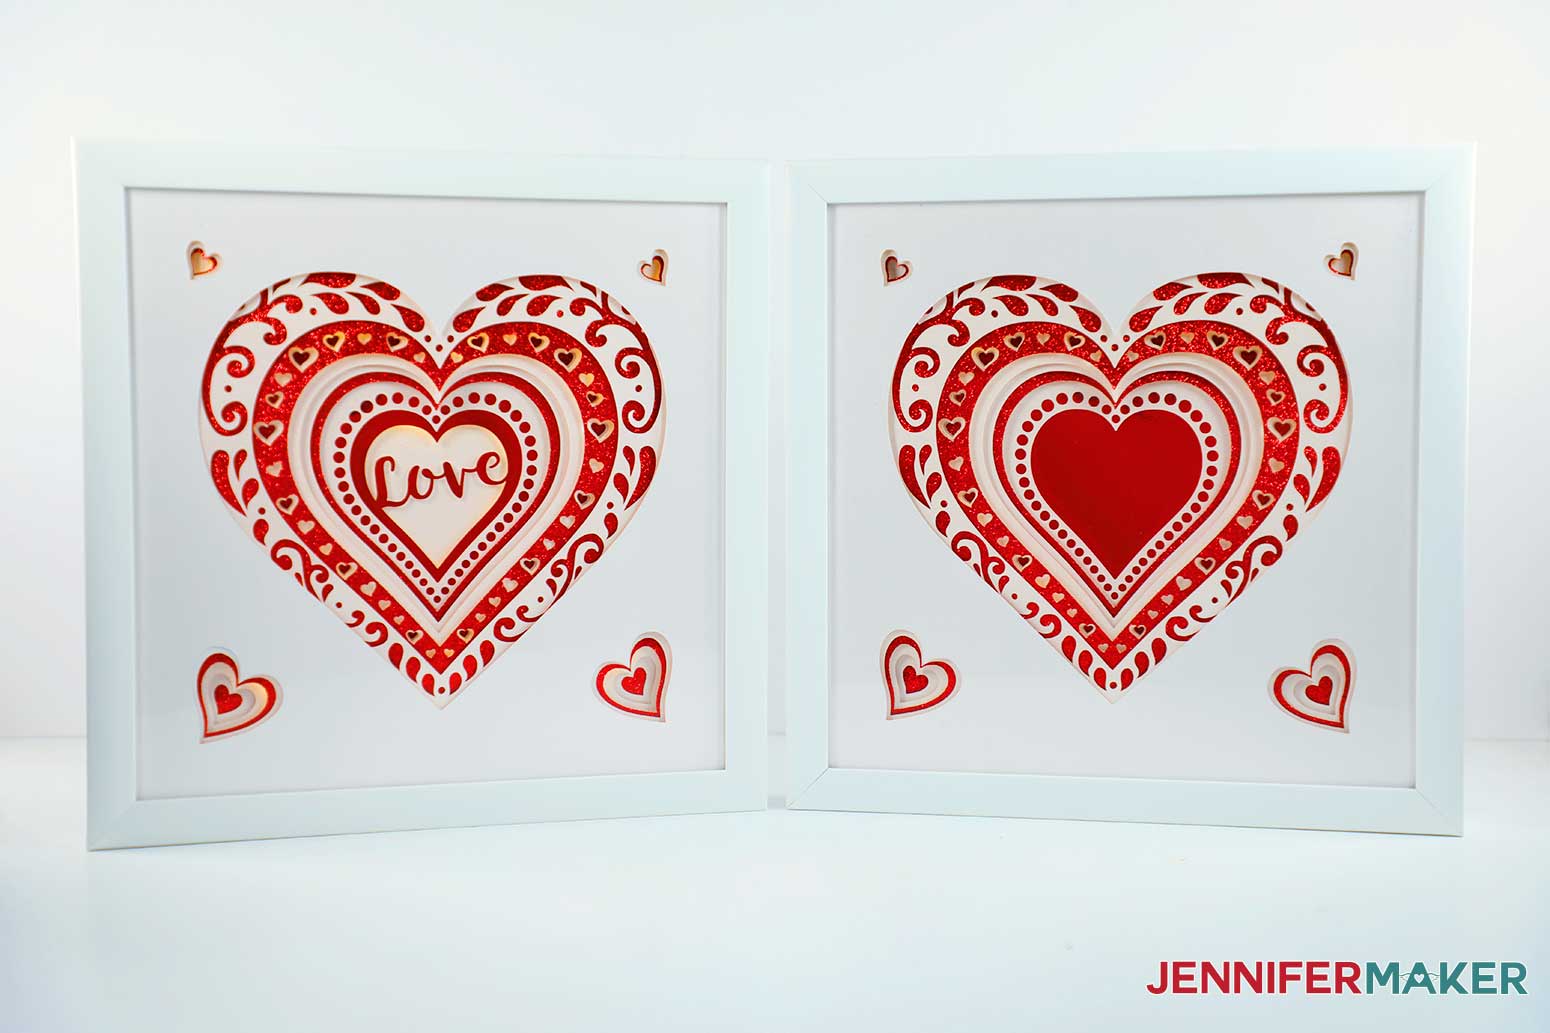
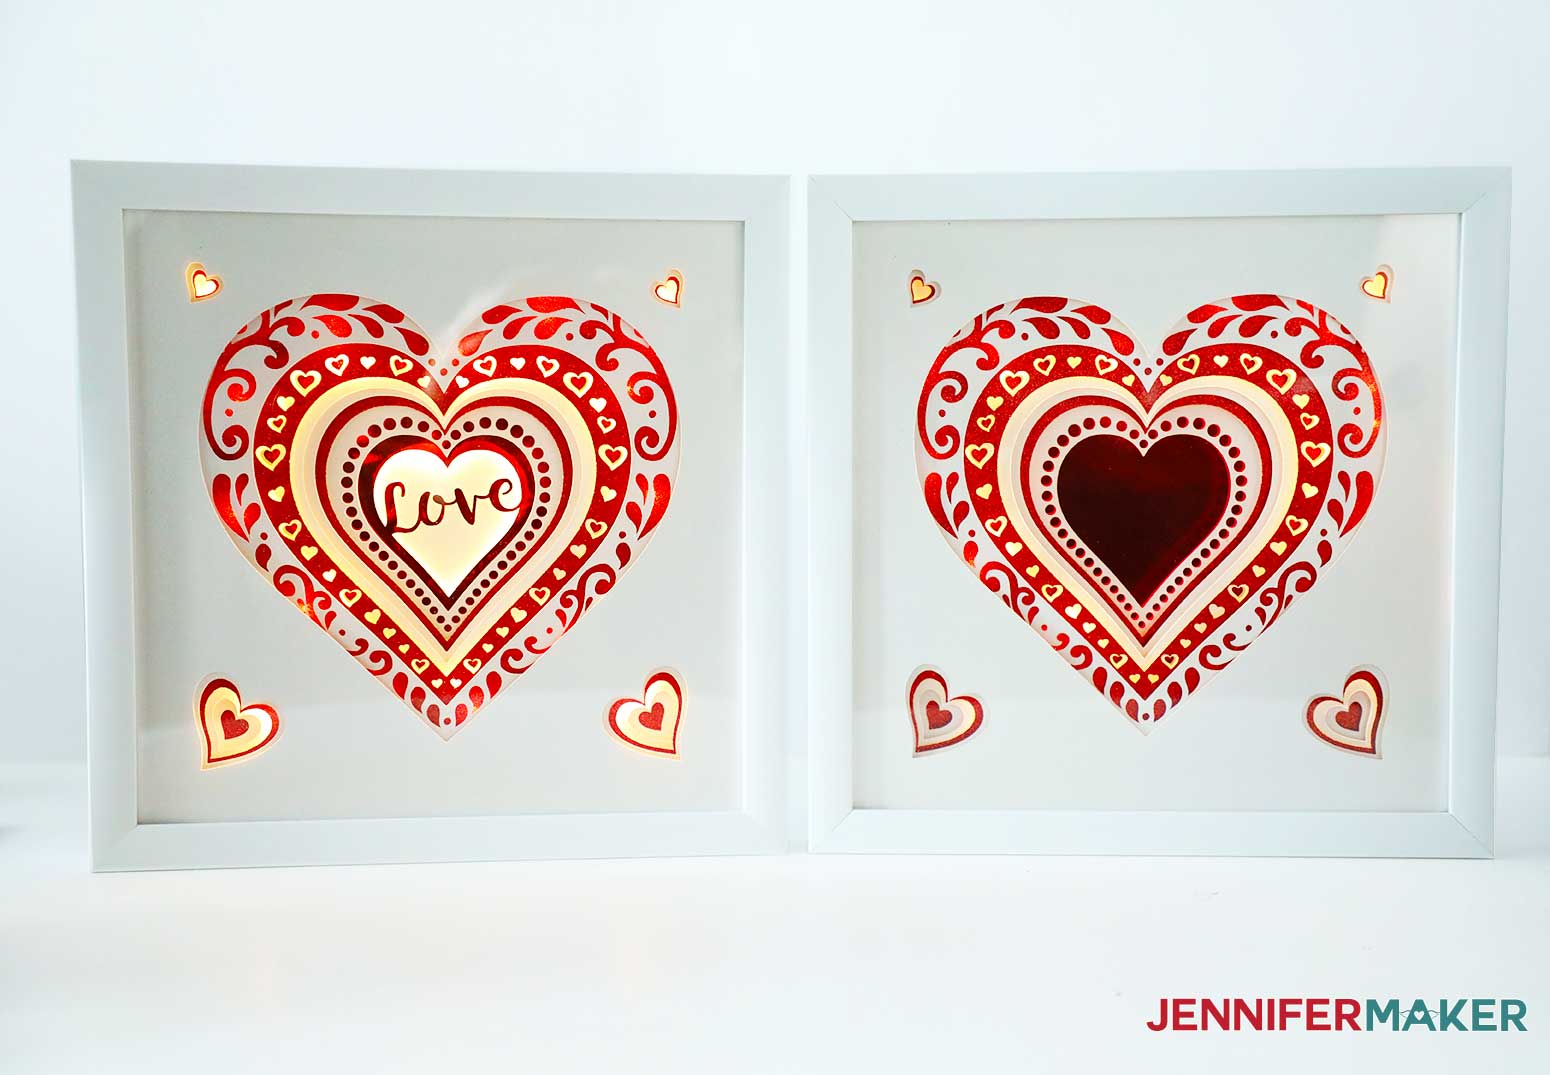
Here they are with the fairy lights turned on. Didn't they turn out great?
Notes
The final size of the heart layered shadow box is 12" x 12".
I used Tingler Script font to customize my design.
Free alternative: Timberly
Recommended Products
As an Amazon Associate and member of other affiliate programs, I earn from qualifying purchases.

Questions About Cutting and Aligning Cardstock in the Heart Layered SVG
Get my free SVG files for the Heart Layered SVG!
I’d love to see your layered heart designs! If you make a shadow box or anything else with this design, please share a photo in our Facebook group, email it to me at [email protected], or tag me on social media with #jennifermaker.
Love,

Want to remember this? Save the How to Layered Heart SVG Design Tutorial to your favorite Pinterest Board