Learn how to make a birthday card pop up project with a 3D hot air balloon!
Making 3D projects from flat cardstock is more math than magic, but it sure feels mysterious! With carefully placed cuts, creases, and glue, you can make homemade cards pop! My birthday card pop up is a really fun way to learn several paper engineering techniques. It takes time, so try my simple greeting card designs if you need a quicker option. One of these 3D birthday cards and my vinyl balloon birthday bouquet would go perfectly together!
See the full step-by-step video tutorial on how to make a pop up birthday card on my Youtube channel!

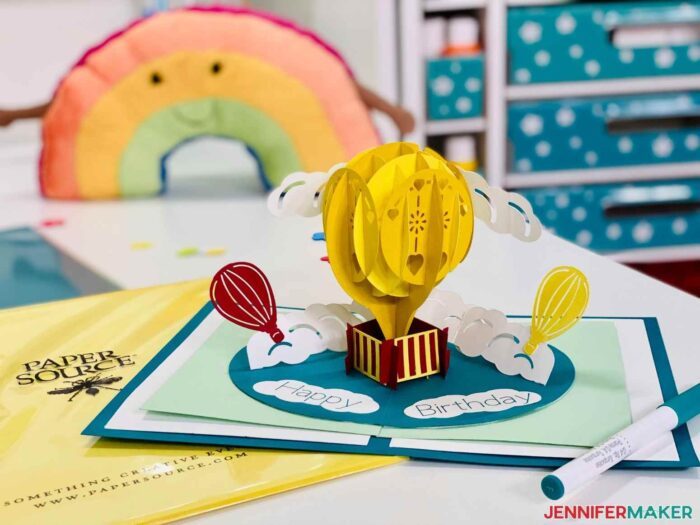
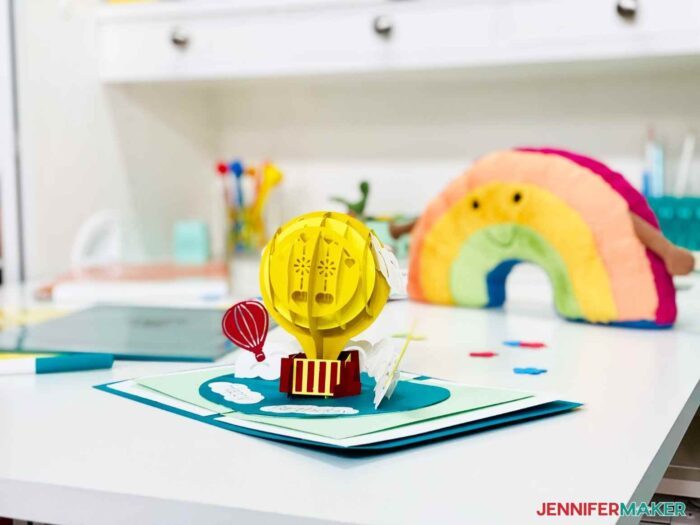
I love working with pop up designs because the creases and tabs always impress me with their strength and action. The balloon really looks ready to take off!
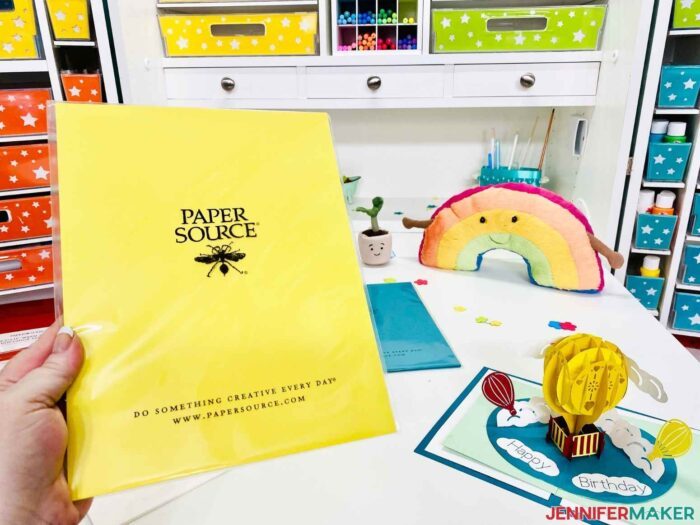
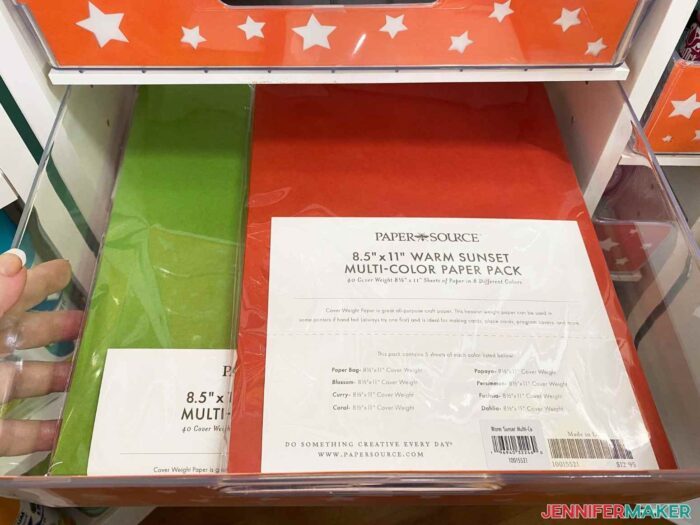
I tested several material and cut settings using 8.5″ x 11″ 80 lb Paper Source cardstock. The paper is a bit heavier that the cardstock I usually use, so I’ll share my recommendations for the best results. Paper Source cardstock is really top notch — it’s solid core, acid free, archival quality, pH neutral, and comes in packs of 10 sheets or in larger bulk packs. You can get their smooth-textured paper in colors you won’t find anywhere else, including colors like blossom, coral, papaya, persimmon, poppy, curry, sunshine, chartreuse, mint, clover, sage, bluebell, pool, peacock, night, beet, fig, aubergine, plum, cement, gravel, slate, paper bag, chocolate, opal, quartz, and savoy! Love those names! You can have so much fun coming up with your own color combination.
The birthday card pop up design cuts easily on my Cricut Maker 3, but also work well on original Maker or Cricut Explore machines. I used a Cricut Fine Point Blade in the tutorial, but I’ve also designed a version using scores for each folded line. You’ll need a Scoring Stylus or Single Scoring Wheel to work with that file version. I’ll also show you how to add a custom message using Cricut’s Fine Point Pens. While my example is a happy birthday card, you can change the note to celebrate any special occasion.
A 12″ x 12″ Cricut StandardGrip machine mat, good-quality craft glue, a brayer, and a spatula will make this birthday card pop up a breeze.
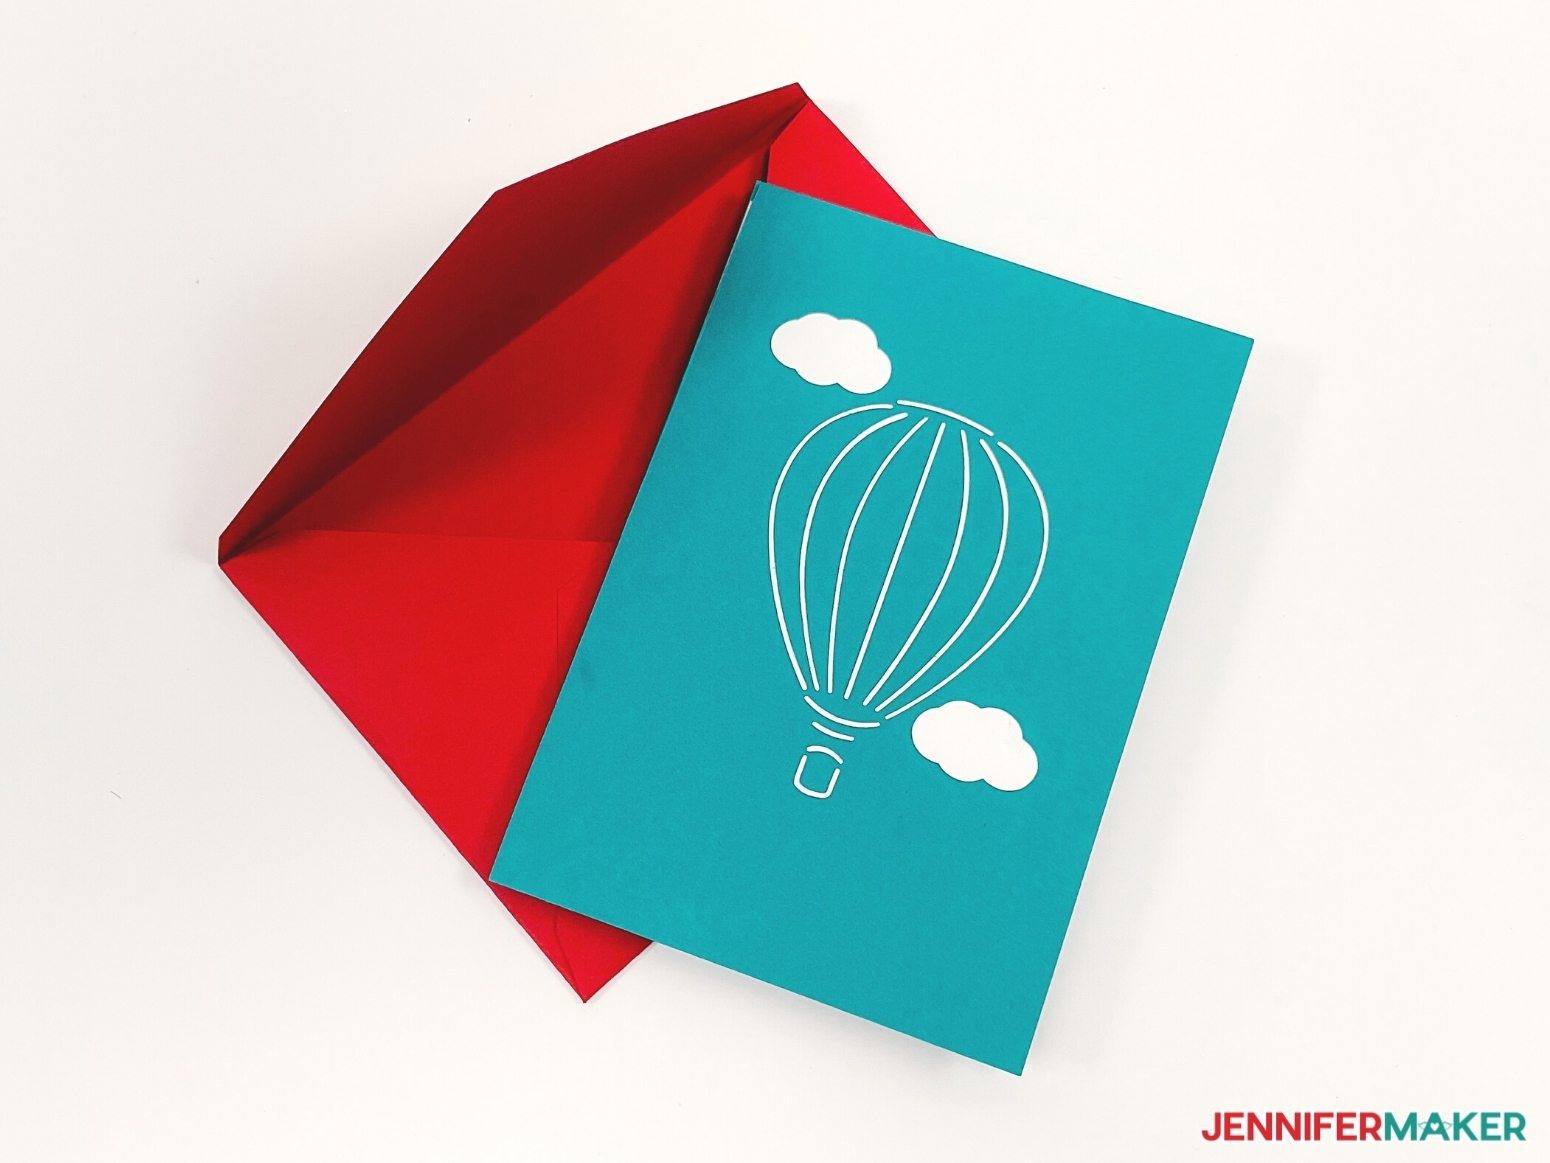
And yes, you can mail this handmade birthday card! It is a bit under 5″ x 7″ when folded, which is a normal card size. I’ve included an envelope designed to fit it perfectly! It’s a simple envelope sized to cut on 8.5″ x 11″ cardstock, so you can make it using the same material as your card.
Want to try some more birthday card pop up designs? I have lots of free card templates for you!
- Pop Up Birthday Cake Card
- Easy Butterfly Pop Up Card
- Rainbow Heart Card
- Pop Up Game Controller and Gift Card Holder
Ready to make your own birthday card pop up design? This post contains some affiliate links for your convenience (which means if you make a purchase after clicking a link I will earn a small commission but it won’t cost you a penny more)! Read my full disclosure policy.
Materials & Tools to Make a Birthday Card Pop Up Design
View my Amazon shopping list with the exact items we used to make this project!
- I originally used cardstock from Paper Source in different colors, but it is now out of stock. This pack of Recollections 12″ x 12″ cardstock is a good alternative.
- A method to cut your paper, I used the amazing Cricut Maker 3 but you can also use the Cricut Maker, Cricut Explore 3, or the Cricut Explore — you can use the standard fine point blade for this project
- Cricut Green StandardGrip Machine Mat 12” x 12
- Cricut Fine Point Pen .4 – I used Black
- Craft Glue – I used Bearly Art Precision
- Brayer
- Spatula – optional to help lift delicate pieces off of the mat
- Scoring Stylus or Single Scoring Wheel – if you want to use the score version of the files
- Design #402 (My free SVG/PDF/DXF design files available in my free resource library – get the password by filling out the form at the bottom of this page)
How to Make a Birthday Card Pop Up Design
Learn to make a birthday card pop up design! First, download my Birthday Card Pop Up SVG/DXF/PDF files from my free resource library. It's Design #402. In the SVG folder, there are files for the card and envelope that use either dashed cut lines or score lines for the creases. You can use whichever version you prefer. I’m going to show you the score tool version of the card. If you want to make the envelope, cut your preferred version and assemble it following my envelope tutorial. This project has a lot of pieces, so I added a printable reference sheet for you in the PDF folder! Upload the design file to Cricut Design Space and add it to your Canvas. If you are not sure how to upload an SVG cut file to Cricut Design Space, watch this helpful video training series I made. If you are on an iPad or iPhone, here is how to download and upload SVG files to the Cricut Design Space app. Take a C and slide the bottom slit to match an inner top cut on balloon center piece B. Once they are in place, make sure all your pieces are straight and lined up where you'd like them to sit for the finished look. Cut and assemble the included envelope and you have the perfect gift! Font: Cricut Sans Size: 5" x 7"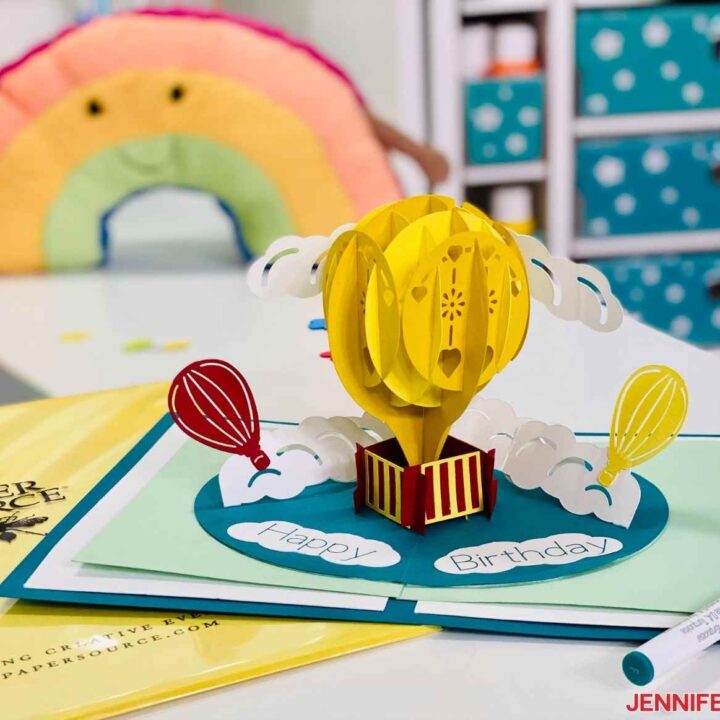
Birthday Card Pop Up
Materials
Tools
Instructions
STEP 1: GET MY FREE DESIGN FILEs
STEP 2: PREPARE THE FILE
Here is how my Birthday Card Pop Up file looks on the Canvas. You can zoom out to see all of the design by clicking on the minus (-) sign on the lower left. 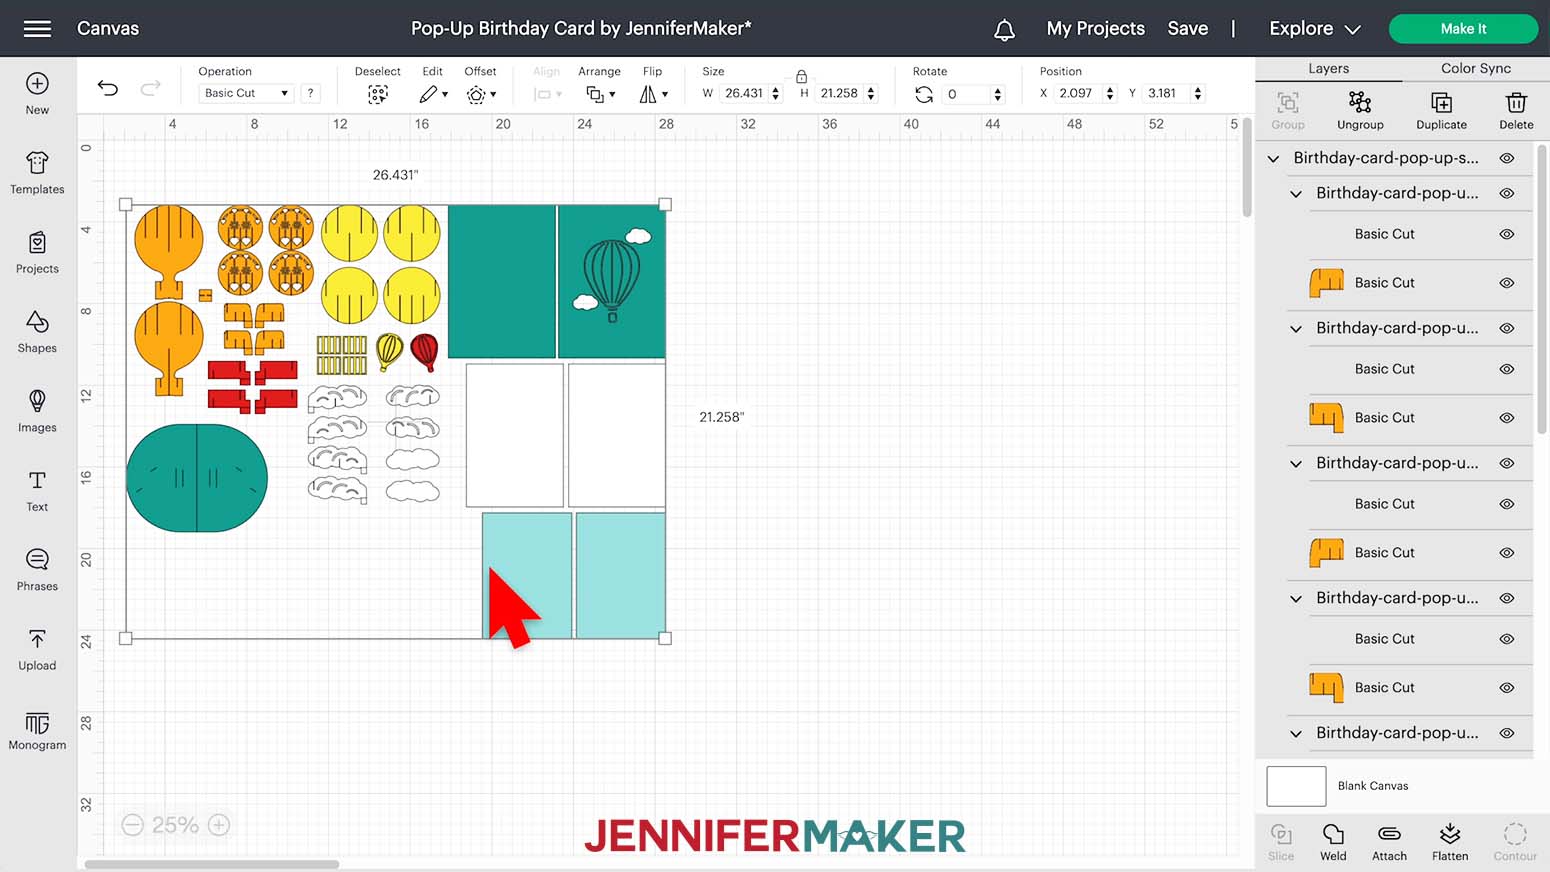
The file is almost ready to cut.
First, click "UnGroup" above the Layers Panel.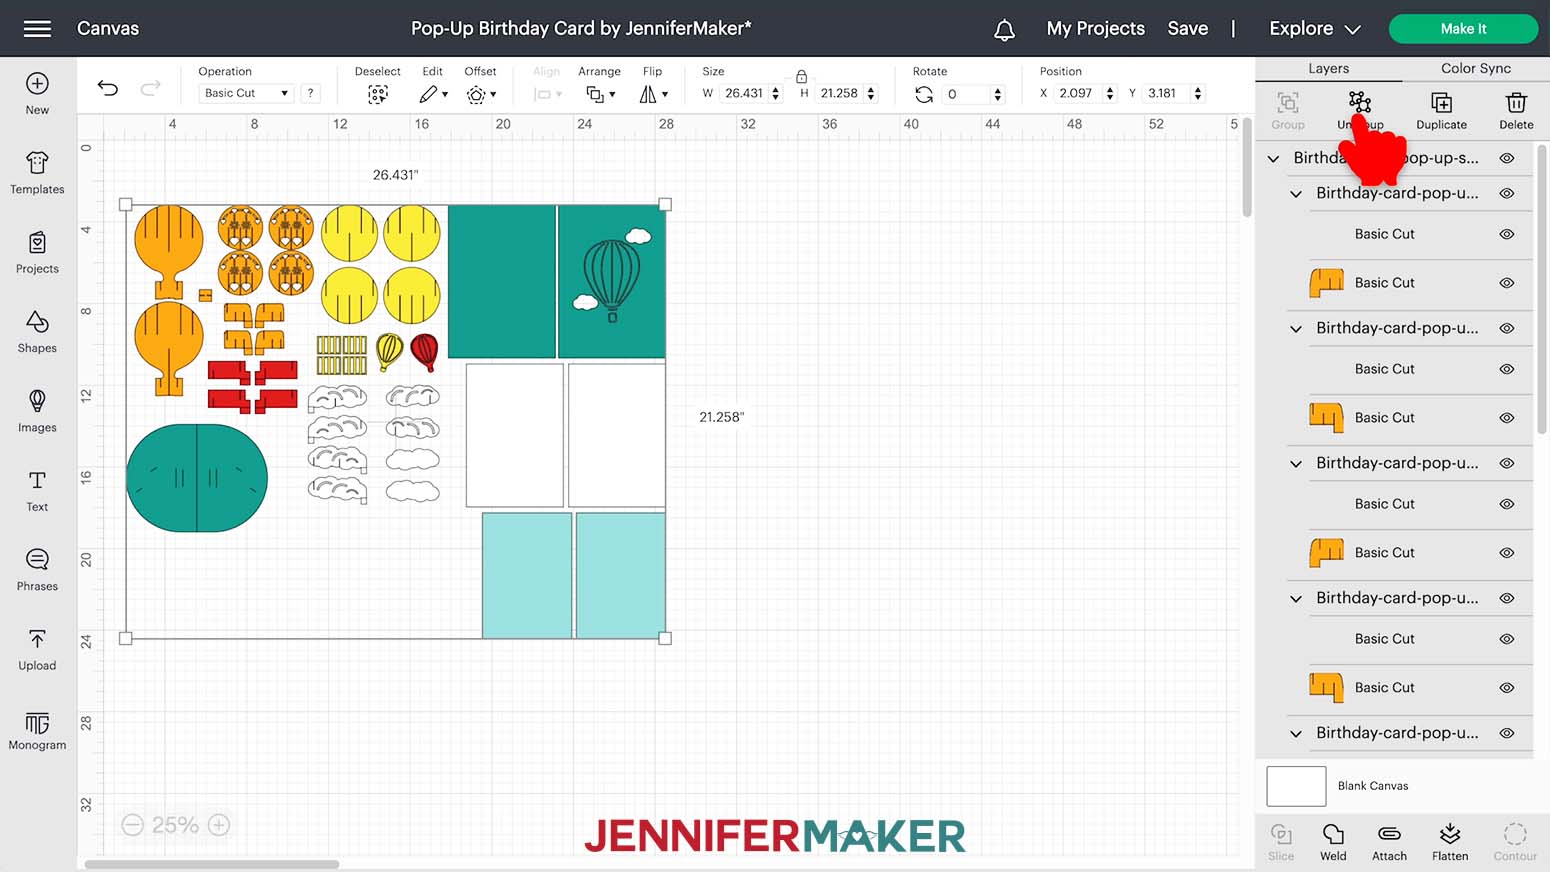
Next, we need to adjust the lines that should be scores. There are thirteen in this design.
Click the top object in the Layers Panel. It just looks like a line, but we want it to be made with a score tool. With the layer selected, click the menu under Operation and select Score. Then, hold Shift and click the layer it’s grouped with. Click Attach to keep the score line with that cut piece.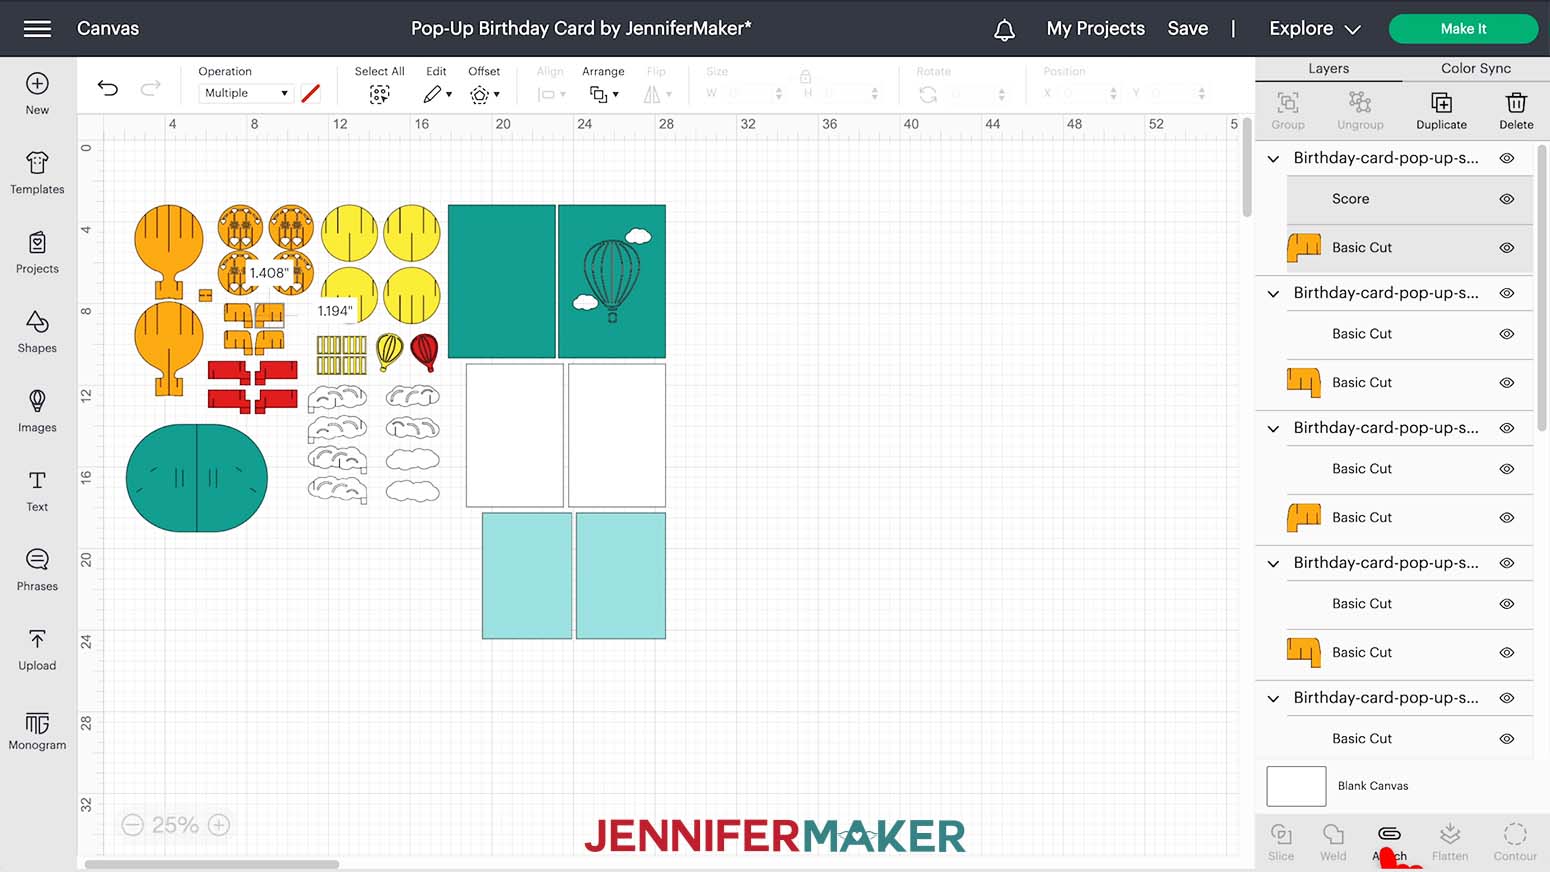
Another way is to scroll through the Layers Panel changing the intended score lines one by one. Then, either click on the cut shape or drag a bounding box over each shape and its score line on the Canvas to select both and click Attach. You can use whichever approach you prefer. When you attach layers, they might jump to the top of the Layers Panel, so make sure to check that you got all of them by scrolling down!
If you'd like to have the Cricut write a short message on the inside clouds, we'll add that now.
Click the Text icon to the left of the Canvas and type "Happy" in the text box. Change the Style to "Writing" and the Operation to "Pen" so you'll know what it will look like. 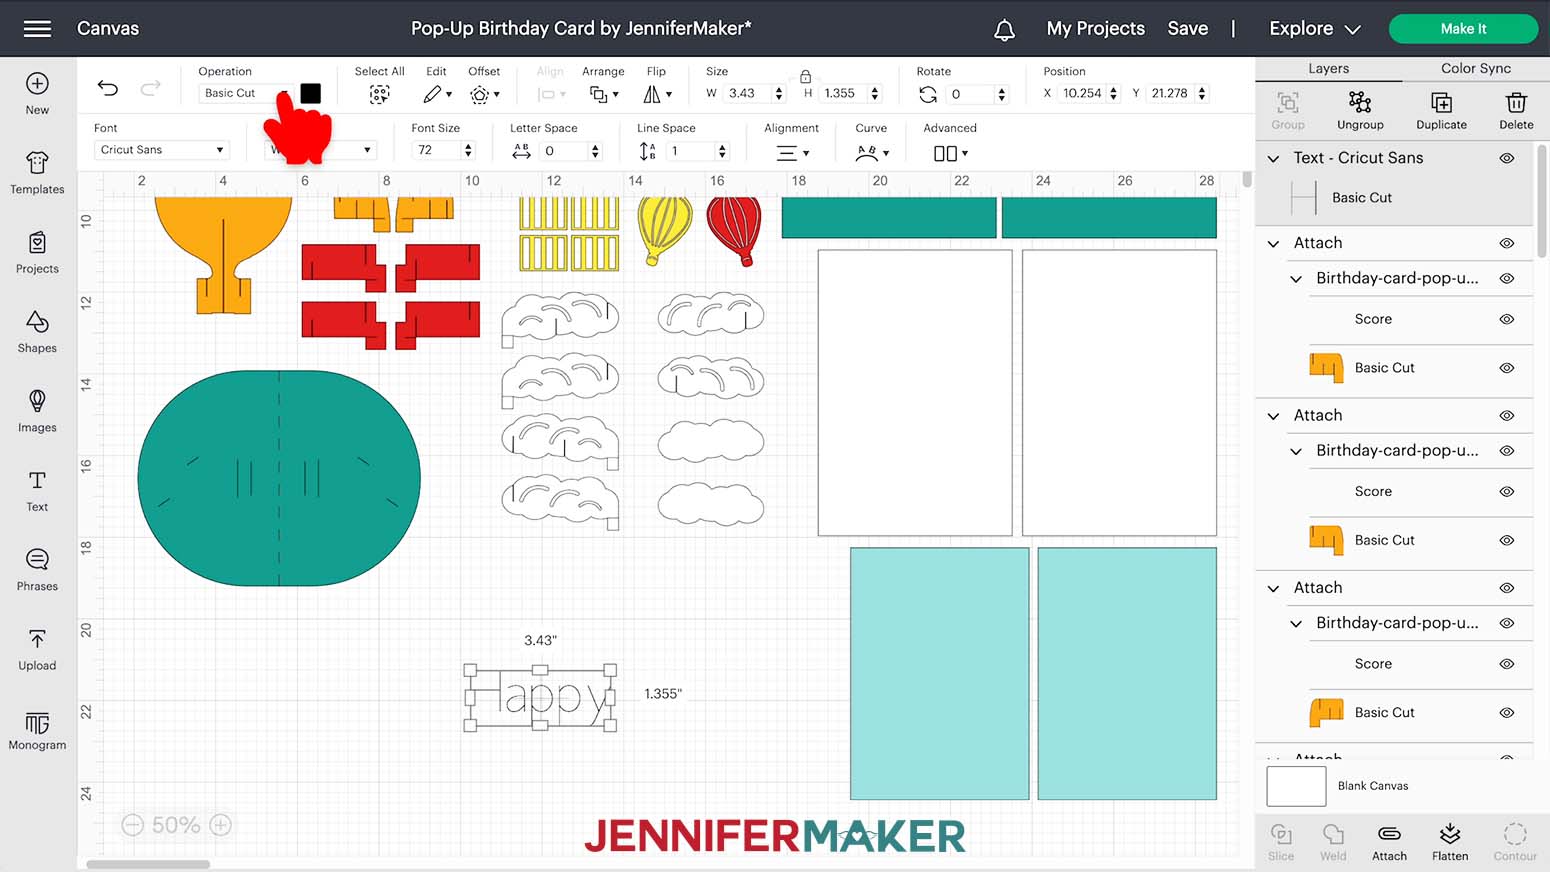
I want to use the Cricut Sans font so won’t change it from the default. Drag the text over one of the plain clouds.
Make sure the top lock icon is closed and click and drag a corner of the bounding box until the word fits in the cloud. 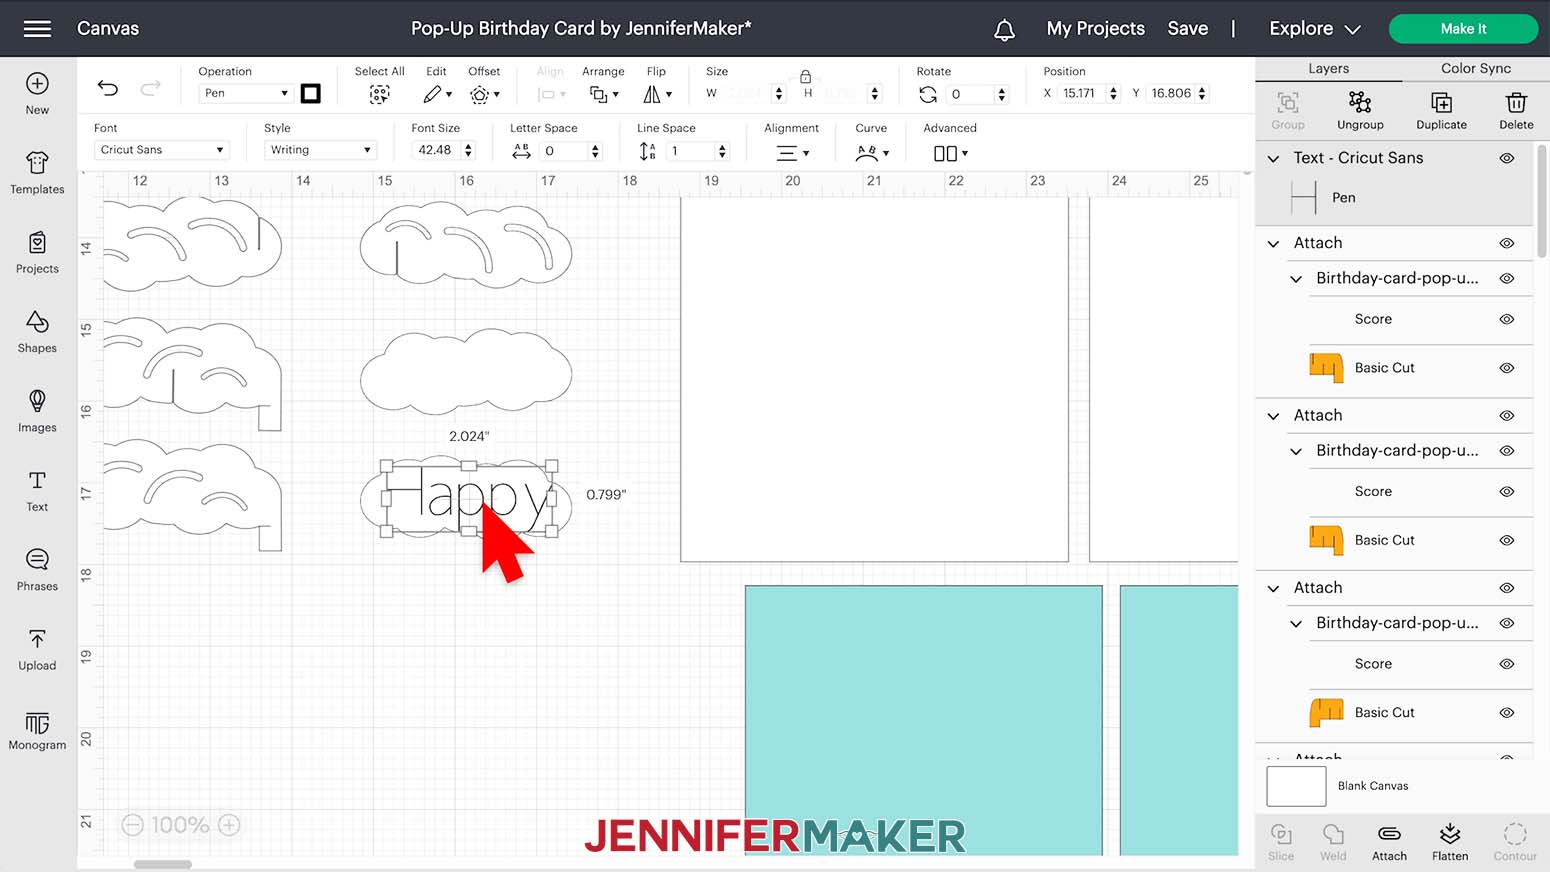
Right click the text box and select "Duplicate" to make a copy. Double click it and type in "Birthday" then click and drag it over the second cloud and resize it to fit.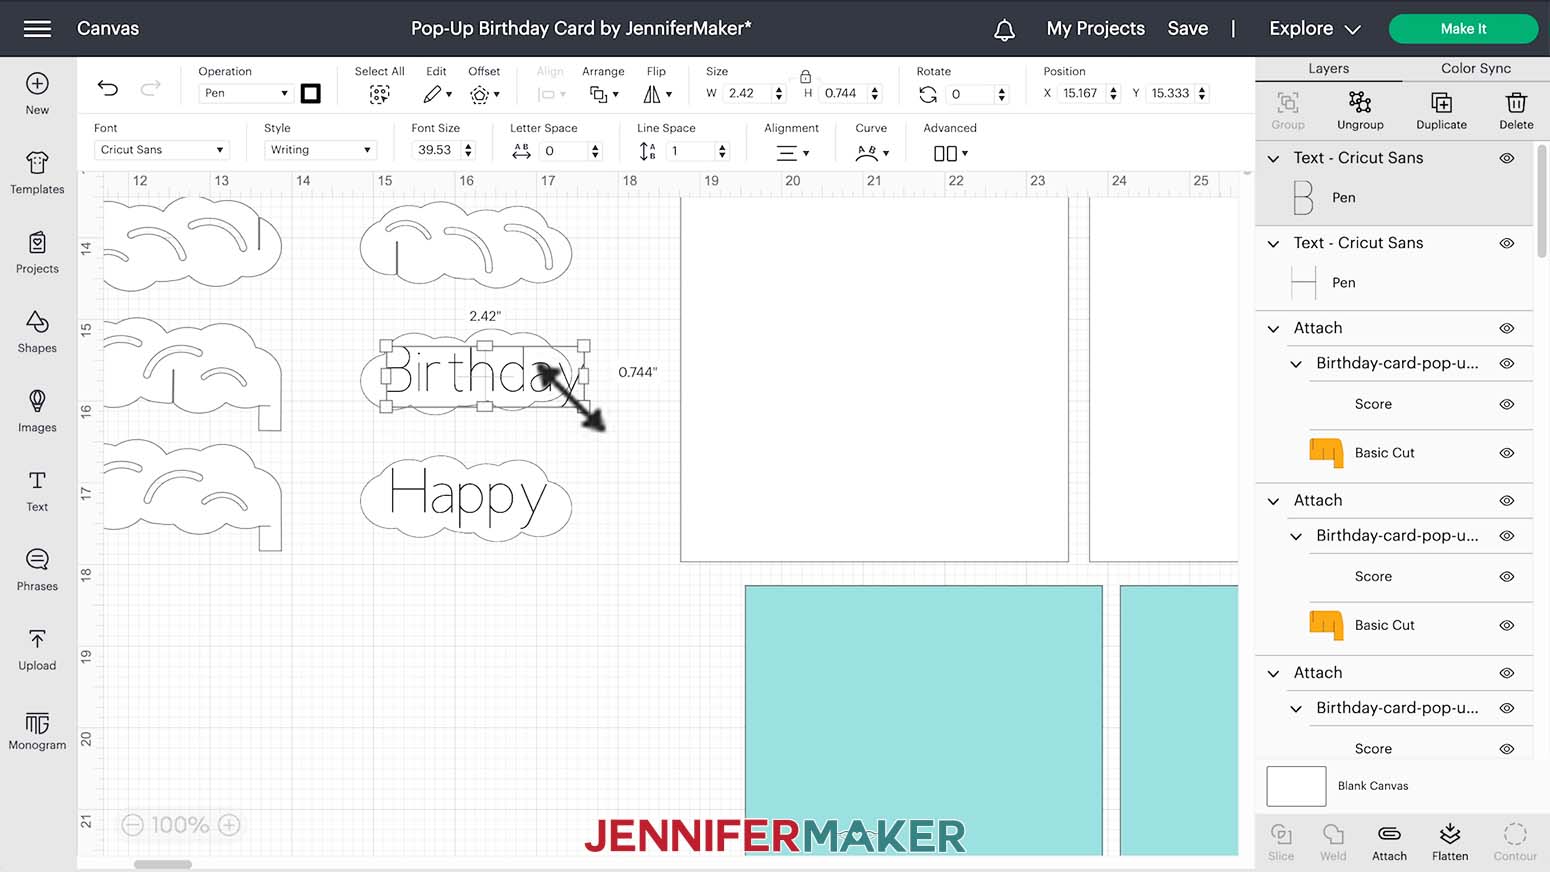
Drag a bounding box over both text boxes and the clouds then click Attach.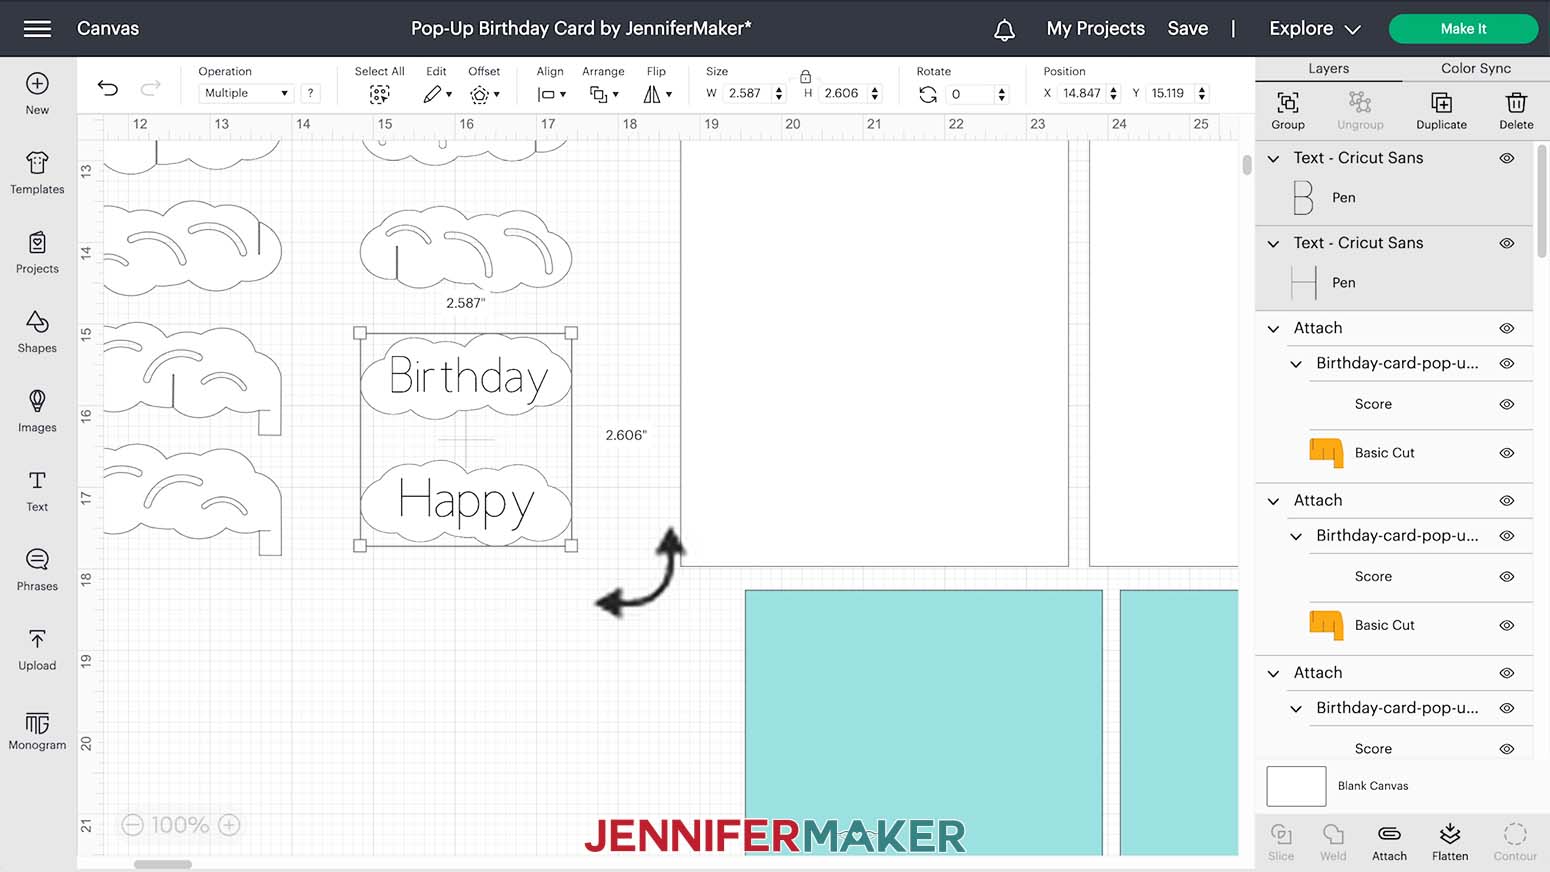
And if you’d like to change the colors on any of the pieces that haven’t been attached, just select them and use the color box next to Operation. Keep in mind, this might change the amount of paper you need for each color, but it’s a fun way to personalize the project! I’m going to keep mine as it is.
Make sure the correct machine is selected and click Make It!
STEP 3: CUT THE BIRTHDAY POP UP
If prompted, select On Mat and 12" x 12" for your load type.
On the Prepare screen, set the "Material Size" for each color to reflect your materials. I'm using 8.5" x 11" for everything.
Click back on the first mat and then Continue.
On the Make screen, set your mats to "Medium Cardstock" with "More" Pressure.
Different cardstock can cut better with different material and pressure settings, so a test cut is always helpful. Some of the paper I tested worked better with the heavy cardstock setting while others did best with the intricate cuts option!
If you’re using the same cardstock for each mat, check the box next to Remember Material Settings to save time.
My first mat has score and pen lines, so the tools are different than usual. If you’re making the score version like me, Design Space will prompt you to put the tool in clamp B. You can choose between the scoring wheel and scoring stylus by clicking edit tools. Add the tool on your machine.
And if you’re adding a message, there will also be a prompt to put your pen in clamp A.
Add the first mat's material to a StandardGrip Machine Mat and adhere it well with a brayer.
Load the first mat into your Cricut and press the flashing button to begin drawing and scoring. When the first steps are complete, don’t unload the mat. Follow the prompt to swap in your fine-point blade and press the flashing button again to cut the pieces. Then, unload the mat. Flip your design over and gently peel the mat away from your material. You can use a spatula if delicate pieces get stuck.
Follow the prompts to load the correct cardstock and tool as needed for the rest of the mats.
STEP 4: ASSEMBLE THE BIRTHDAY CARD POP UP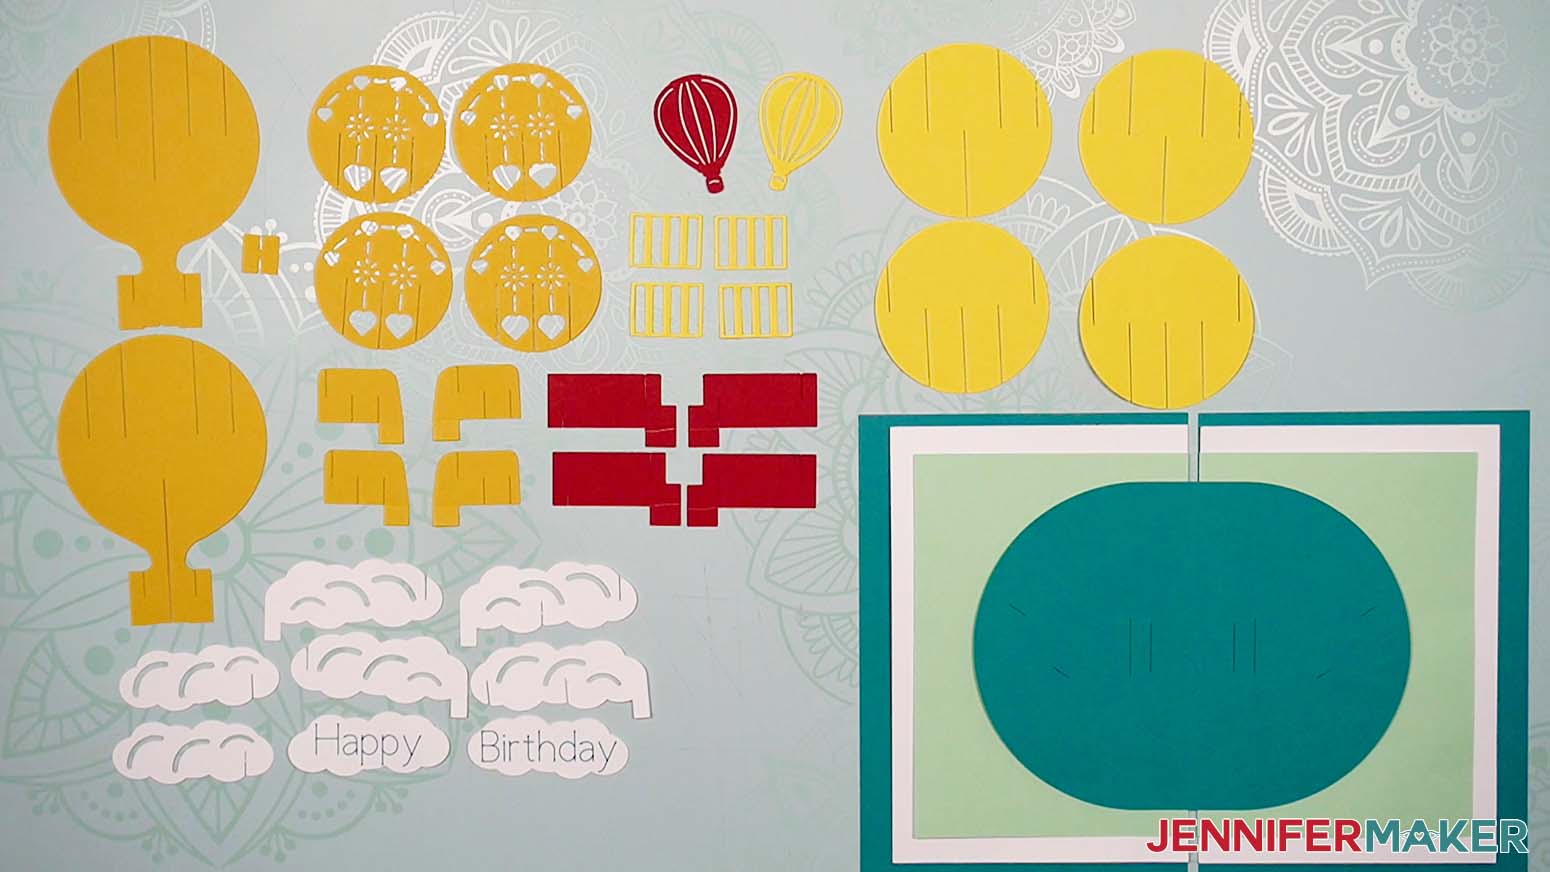
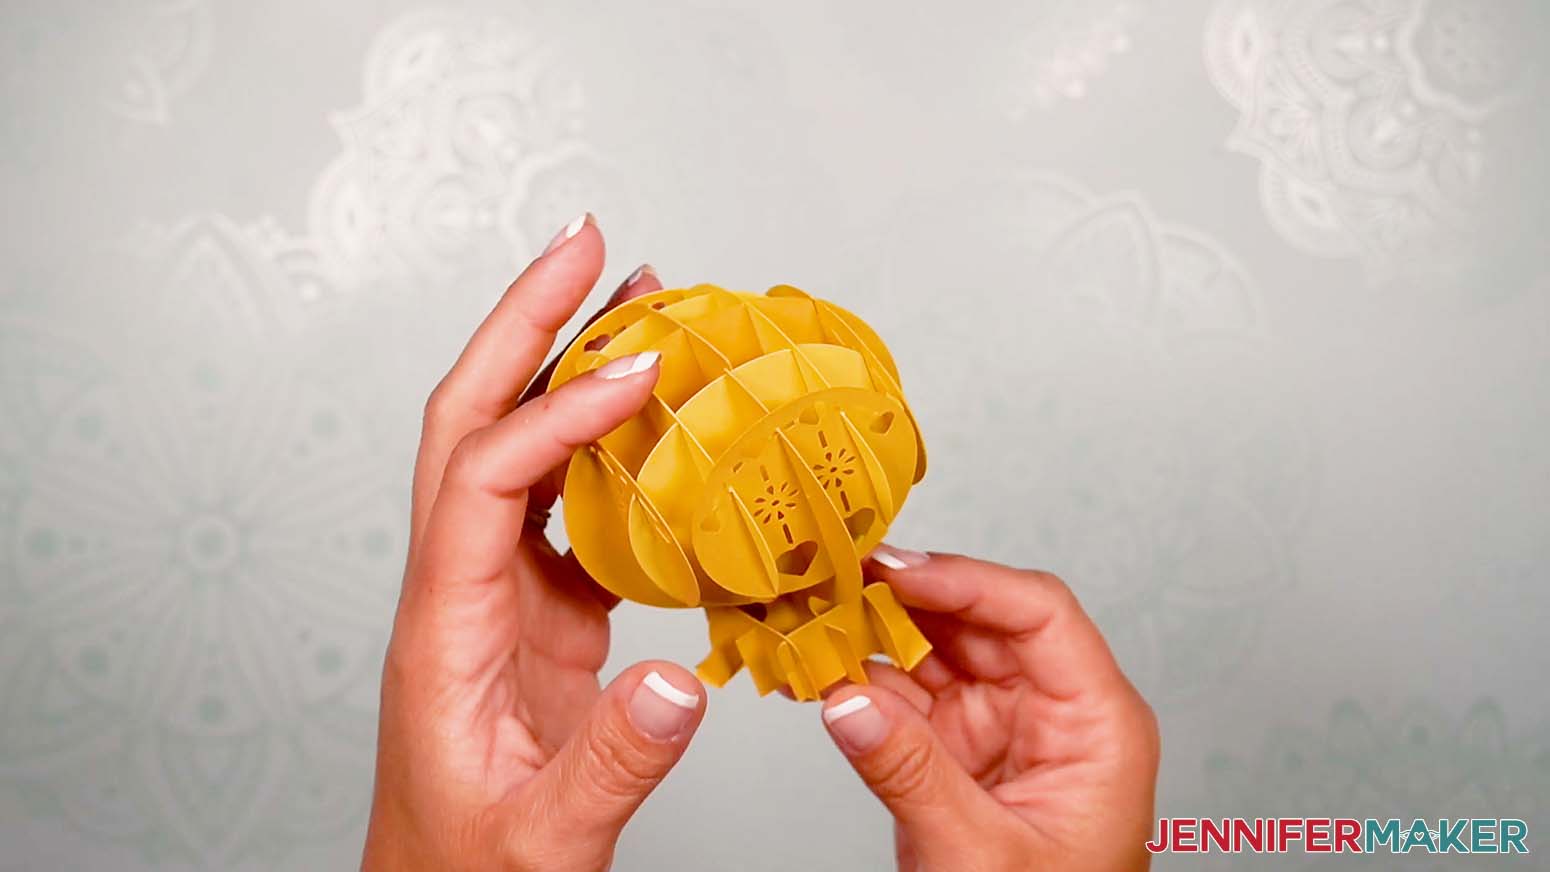
Most of the balloon pieces have slits, which we'll use to slide them together.
First, locate the large balloon center pieces. Piece B has a slit at the bottom and A has one at the top. Line up the slits and gently slide the pieces together.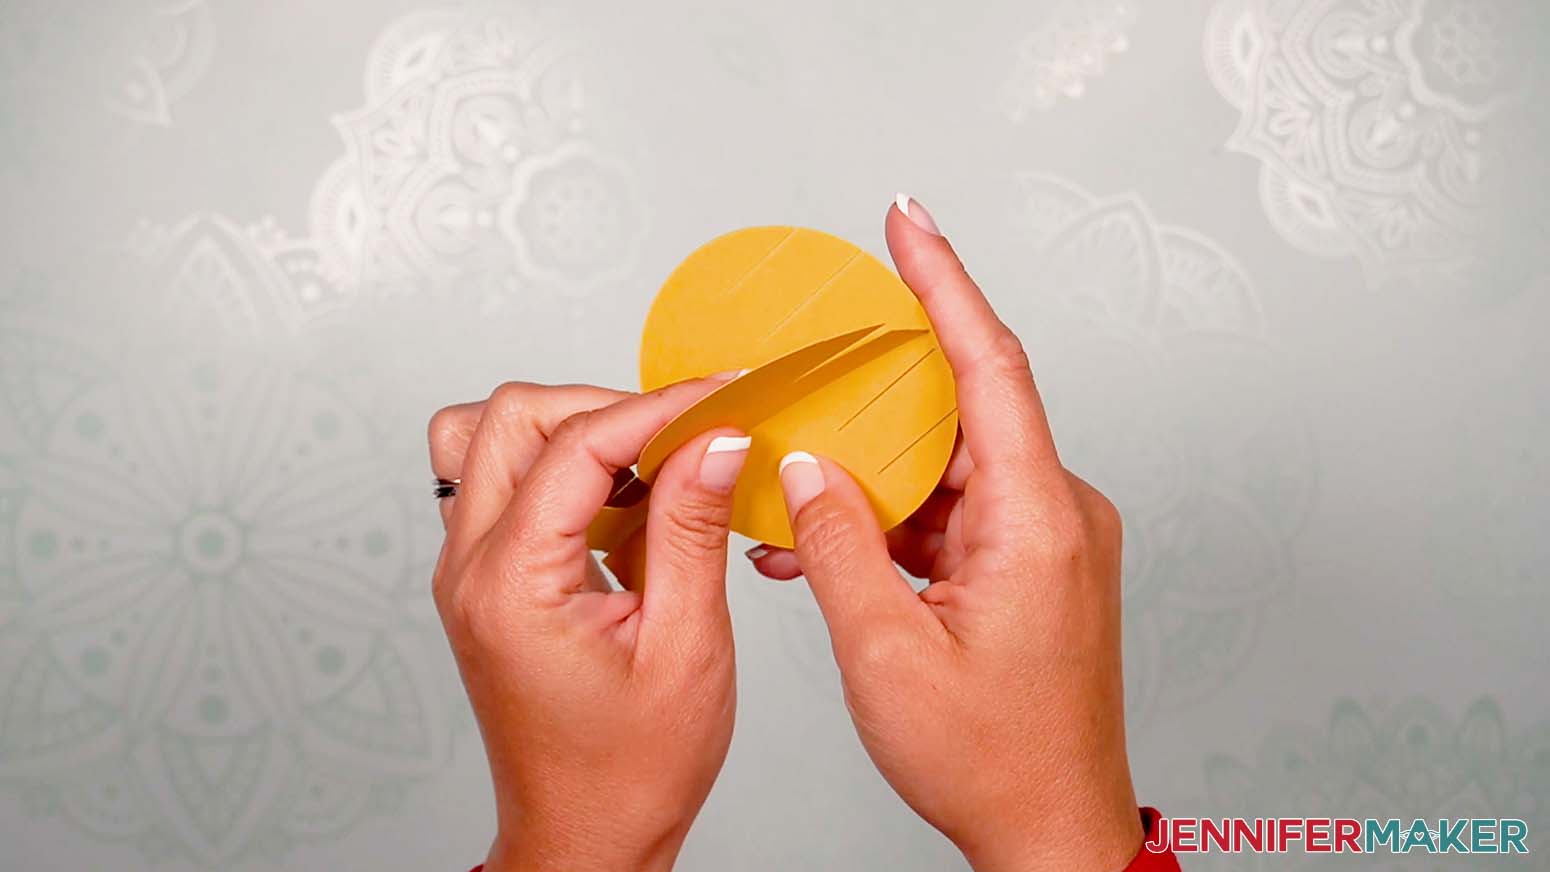
When the bottoms of the slits meet each other, the top and bottom edges of the balloons should be aligned.
The bottom piece with the slit will be a little floppy, so grab the H-shaped support piece. Add dots of glue to the top and bottom of each vertical line.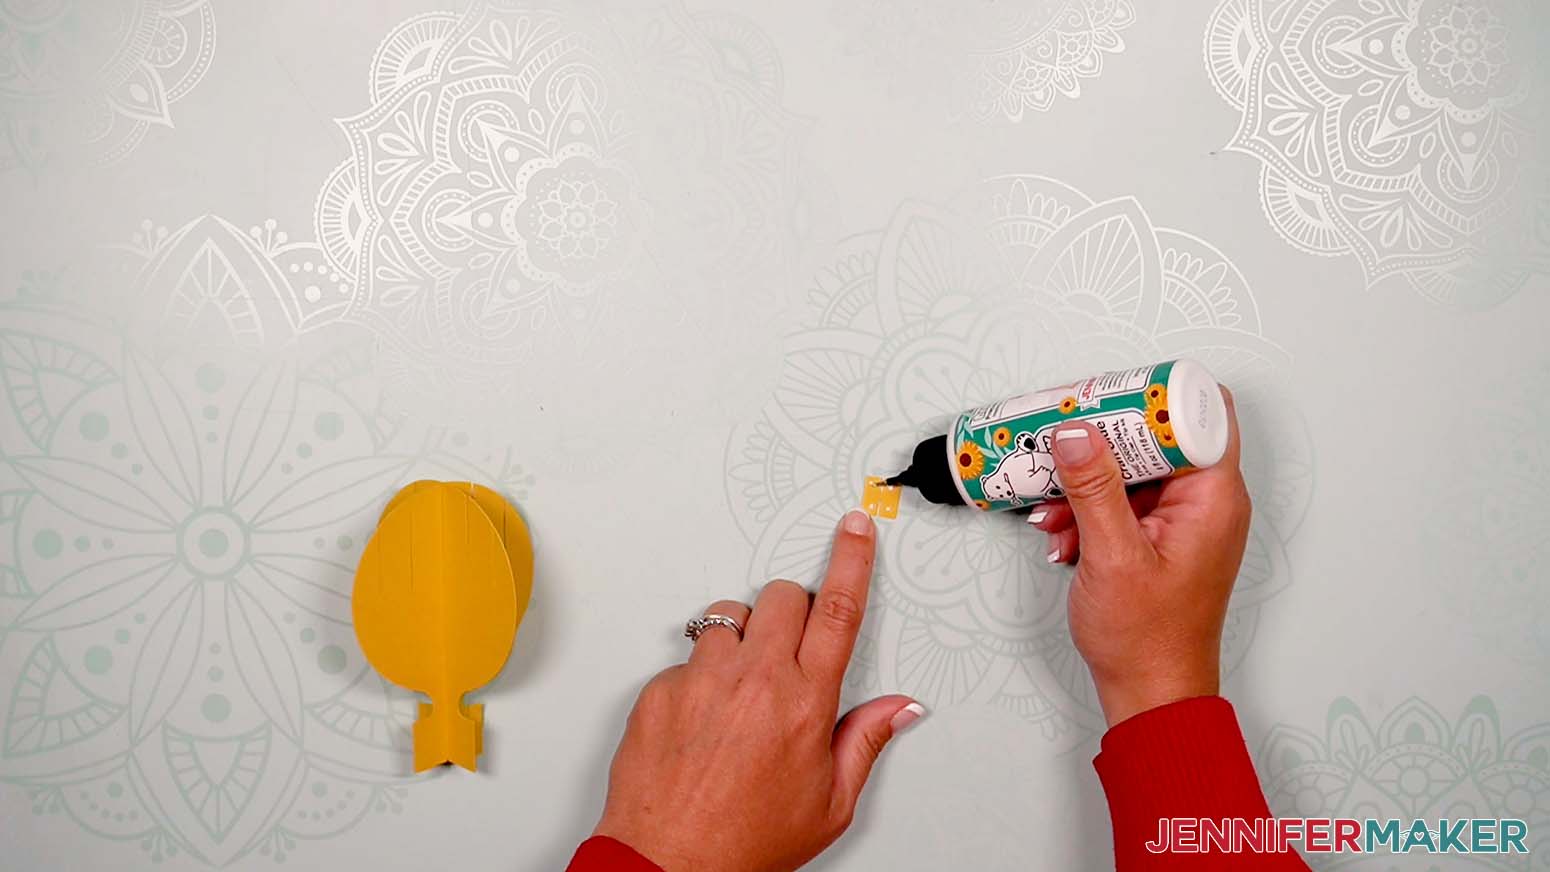
Hold the balloon pieces in your left hand so the split parts of piece A are horizontal.
Place one slit of the H support on to the top cross part of piece A with the glue facing toward you. Make sure it's flush with the bottom of the balloon assembly.
Lightly press the glued section to piece B, which will start to stabilize the floppy parts.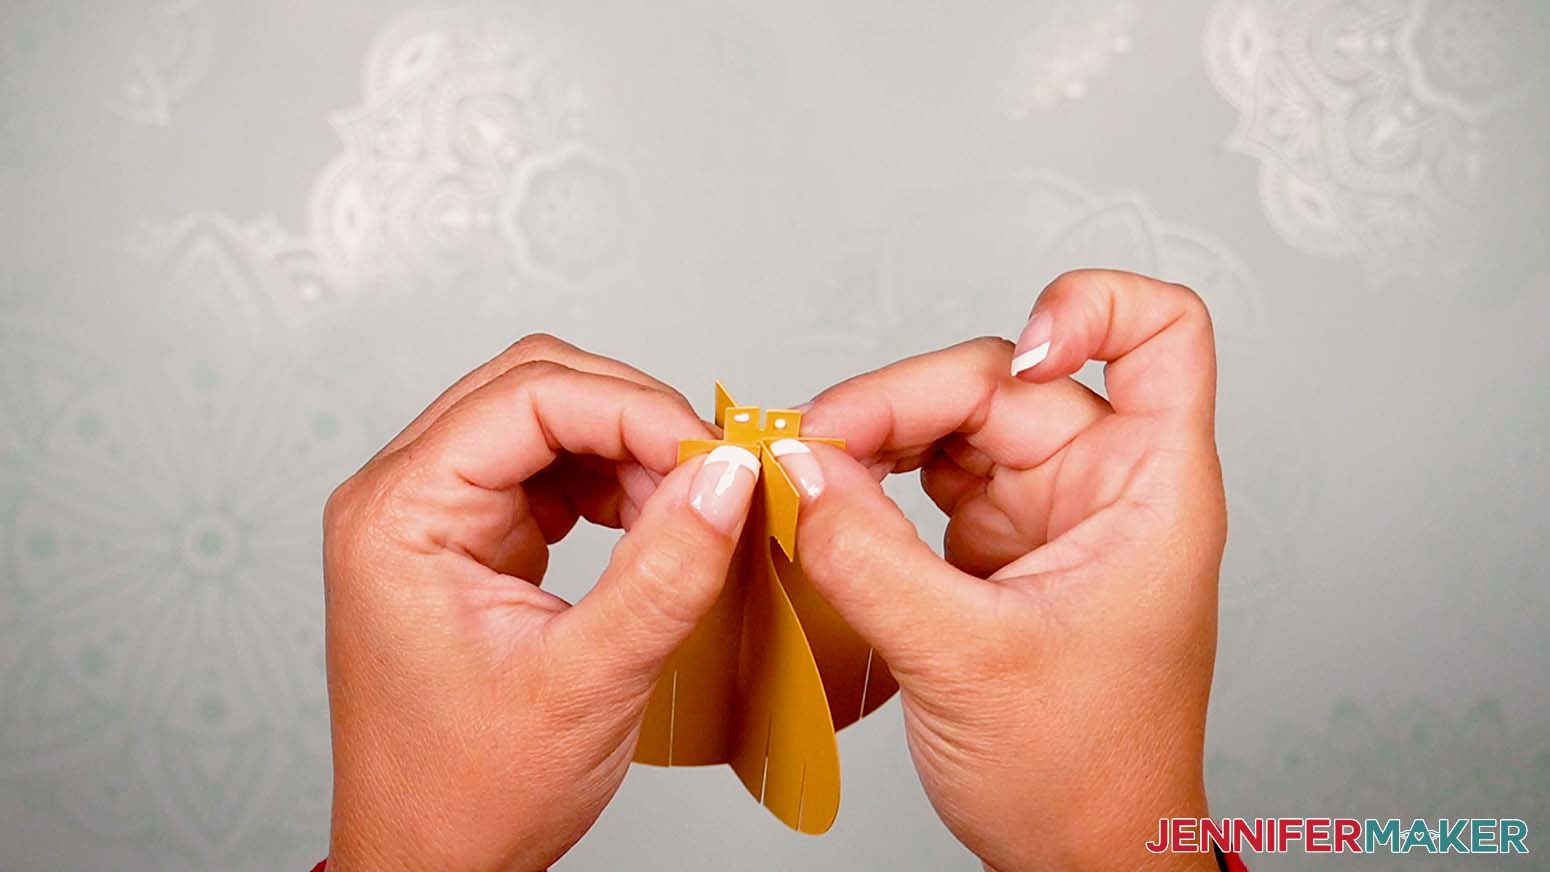
Then carefully fold down the top H tabs to meet the other side of piece B. Now the bottom will stay still!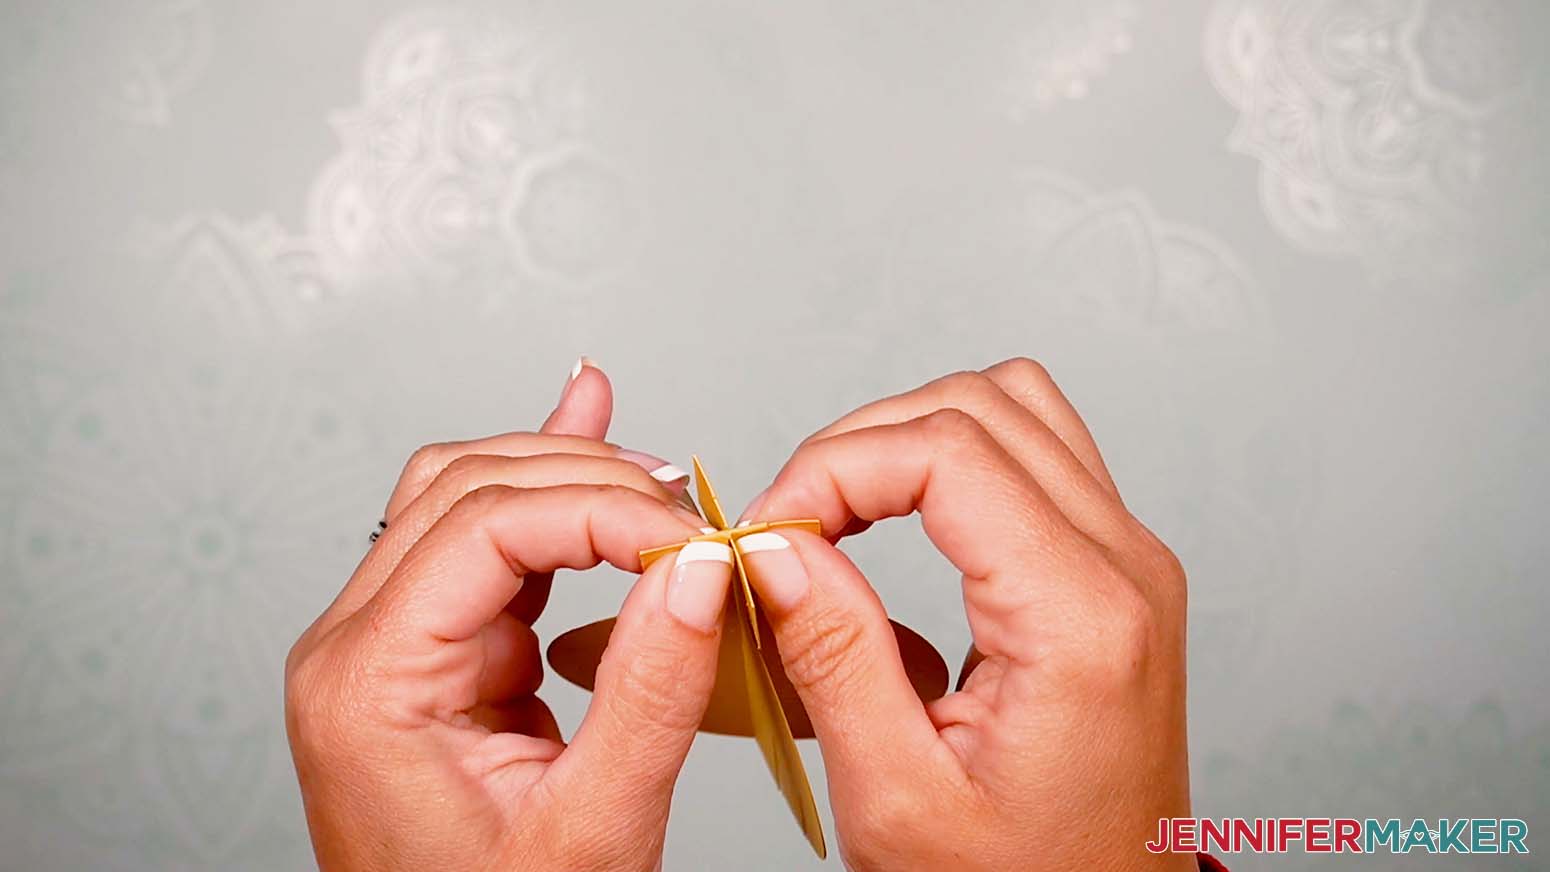
Once the glue sets, stand the balloon up.
Now we can add the base. Grab your F and G pieces. Slide the lower slit of an F piece into the top cut in a G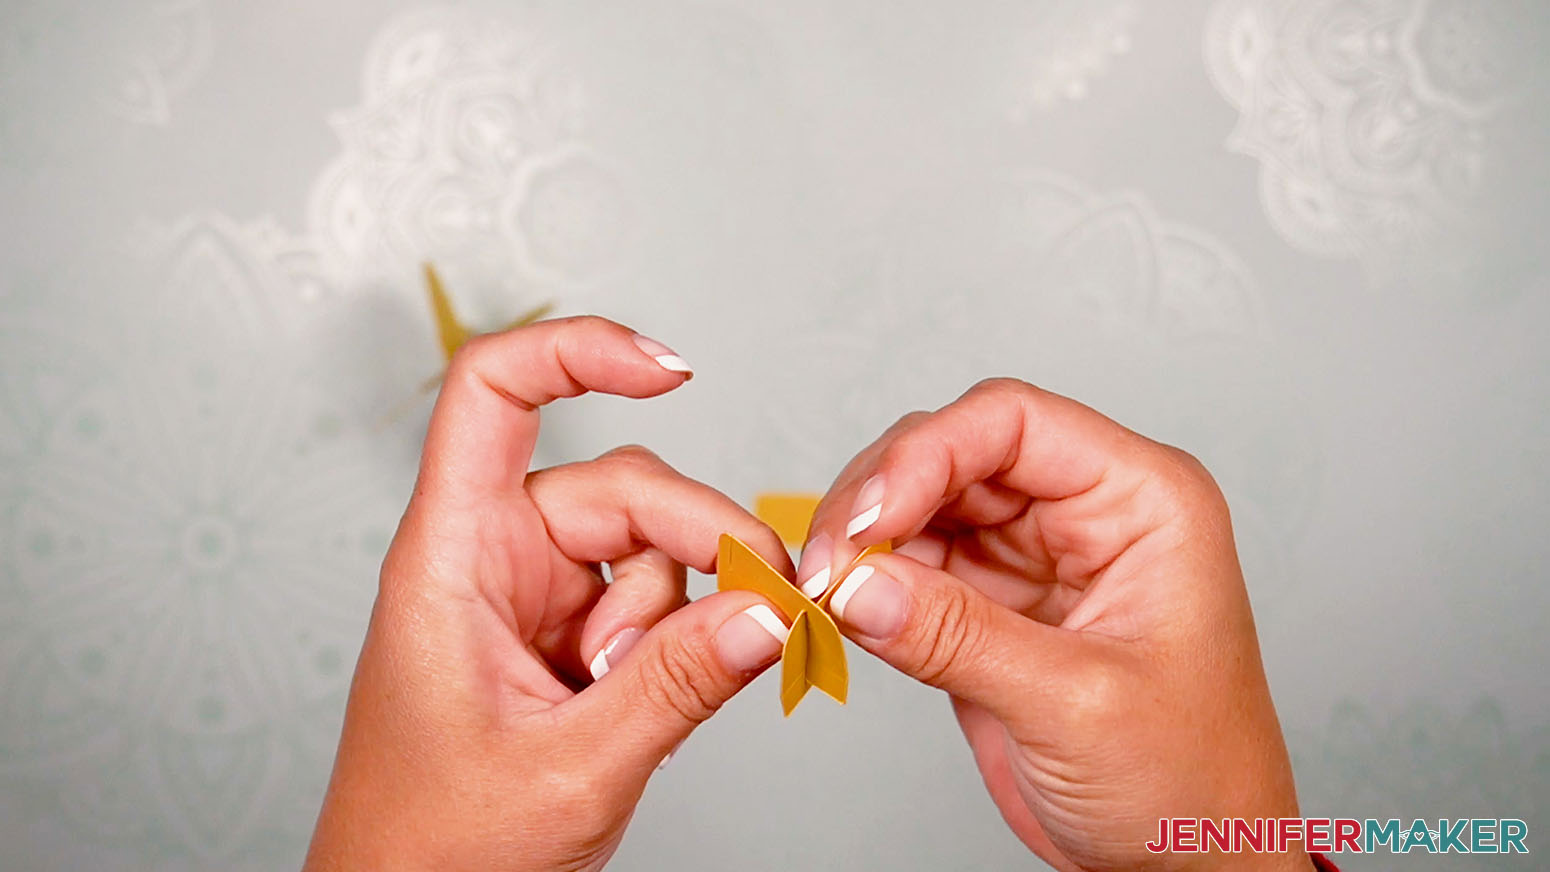
When they’re properly seated, they’ll be able to collapse flat open or closed.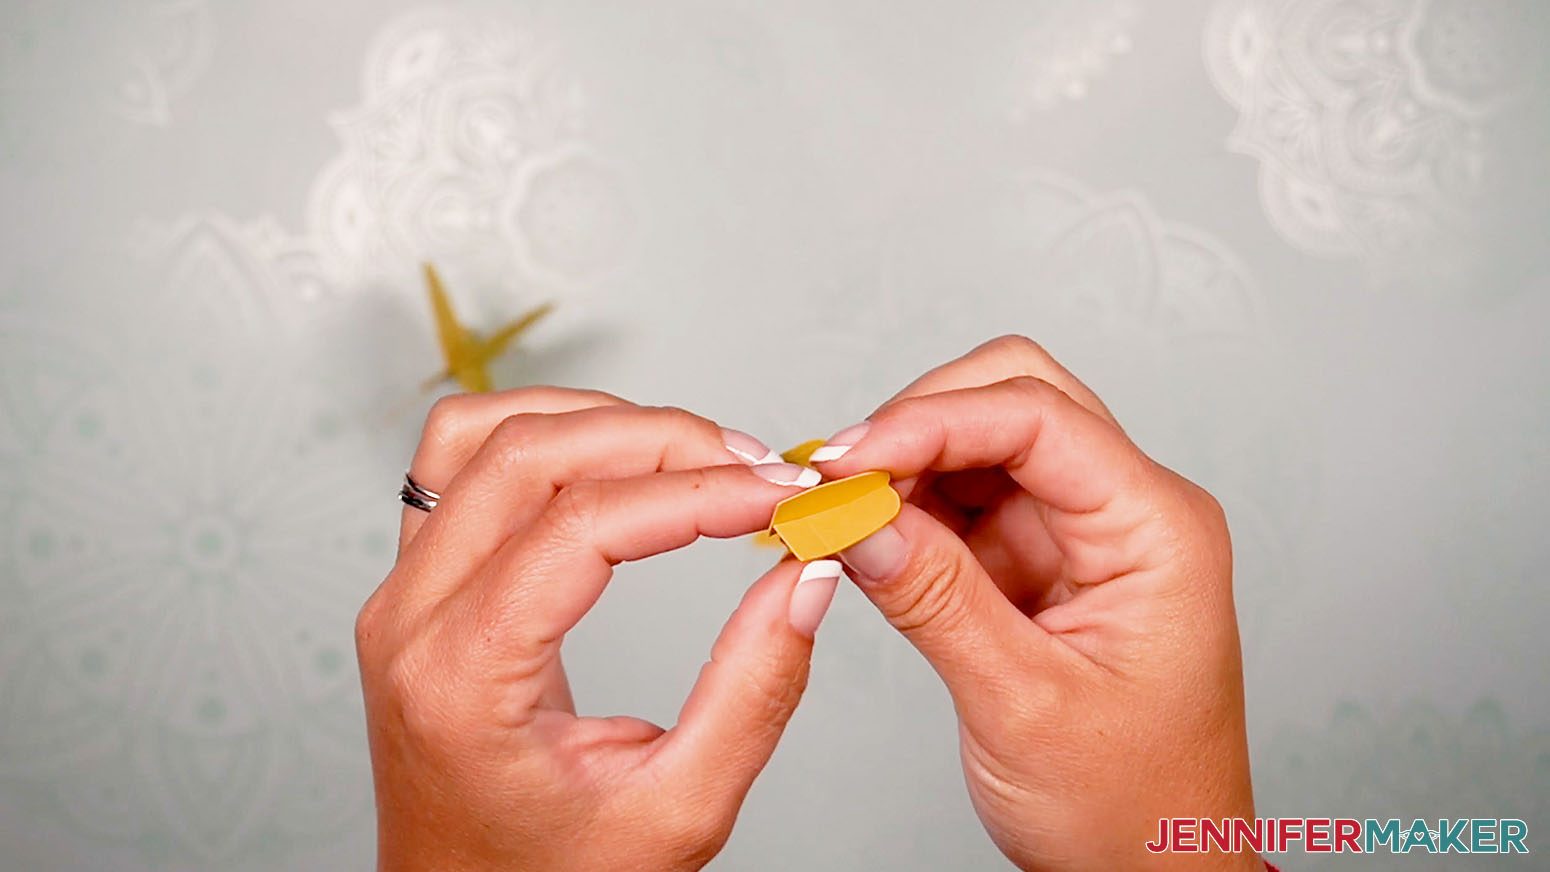
Repeat with the other set. The pairs should now look identical. Press them both open with the slotted overlapping pieces facing up.
Slide the edges together using the top slit on one pair and the bottom cut on the other.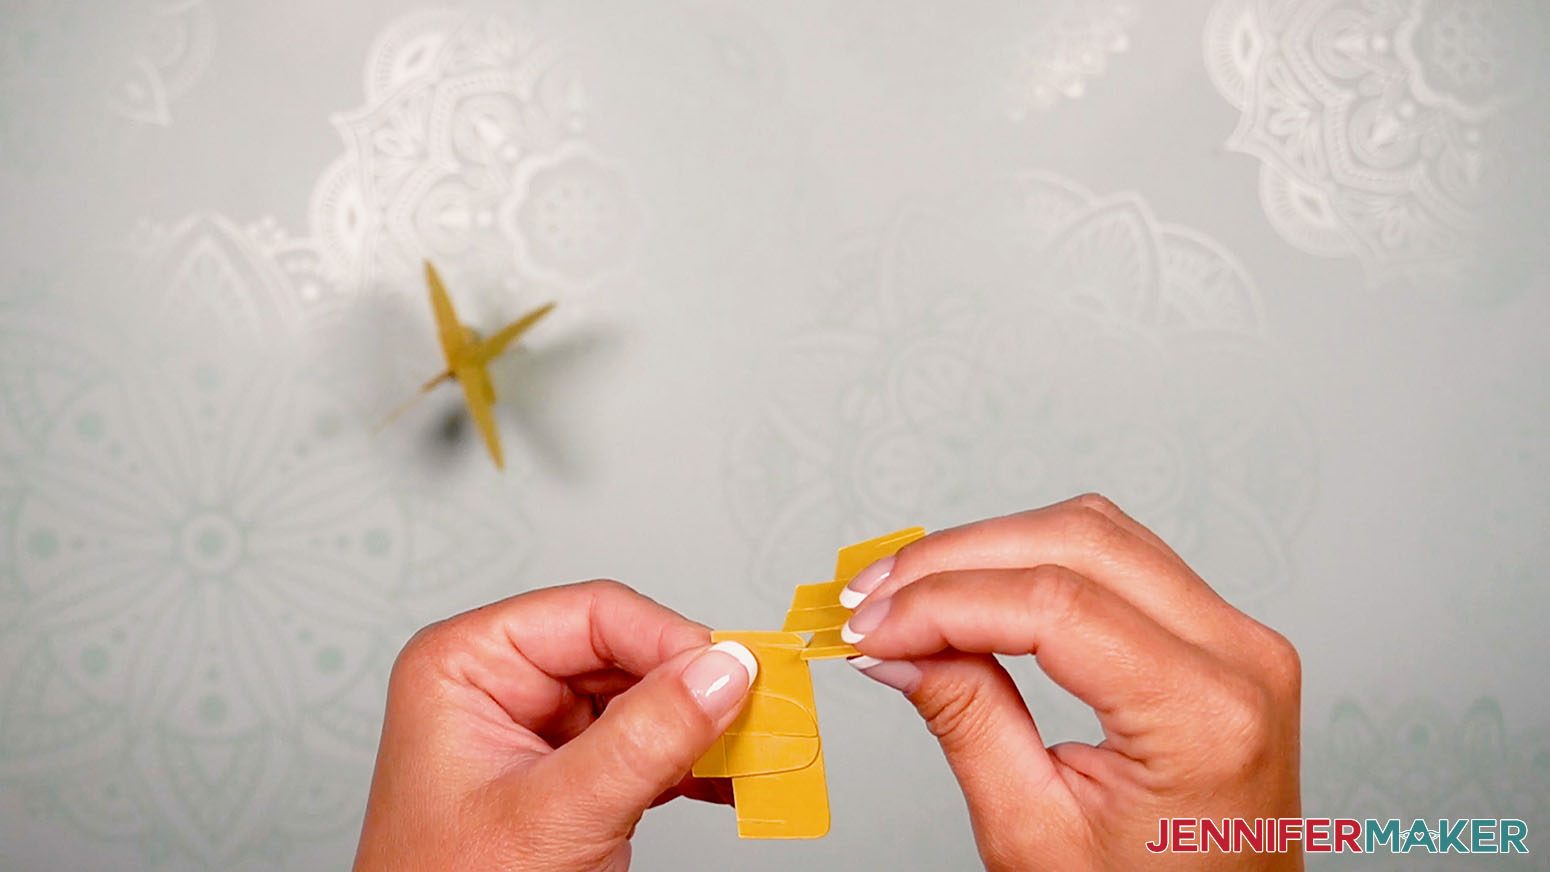
Collapse the pieces so they match up. Fold each pair of tabs down to the exterior sides.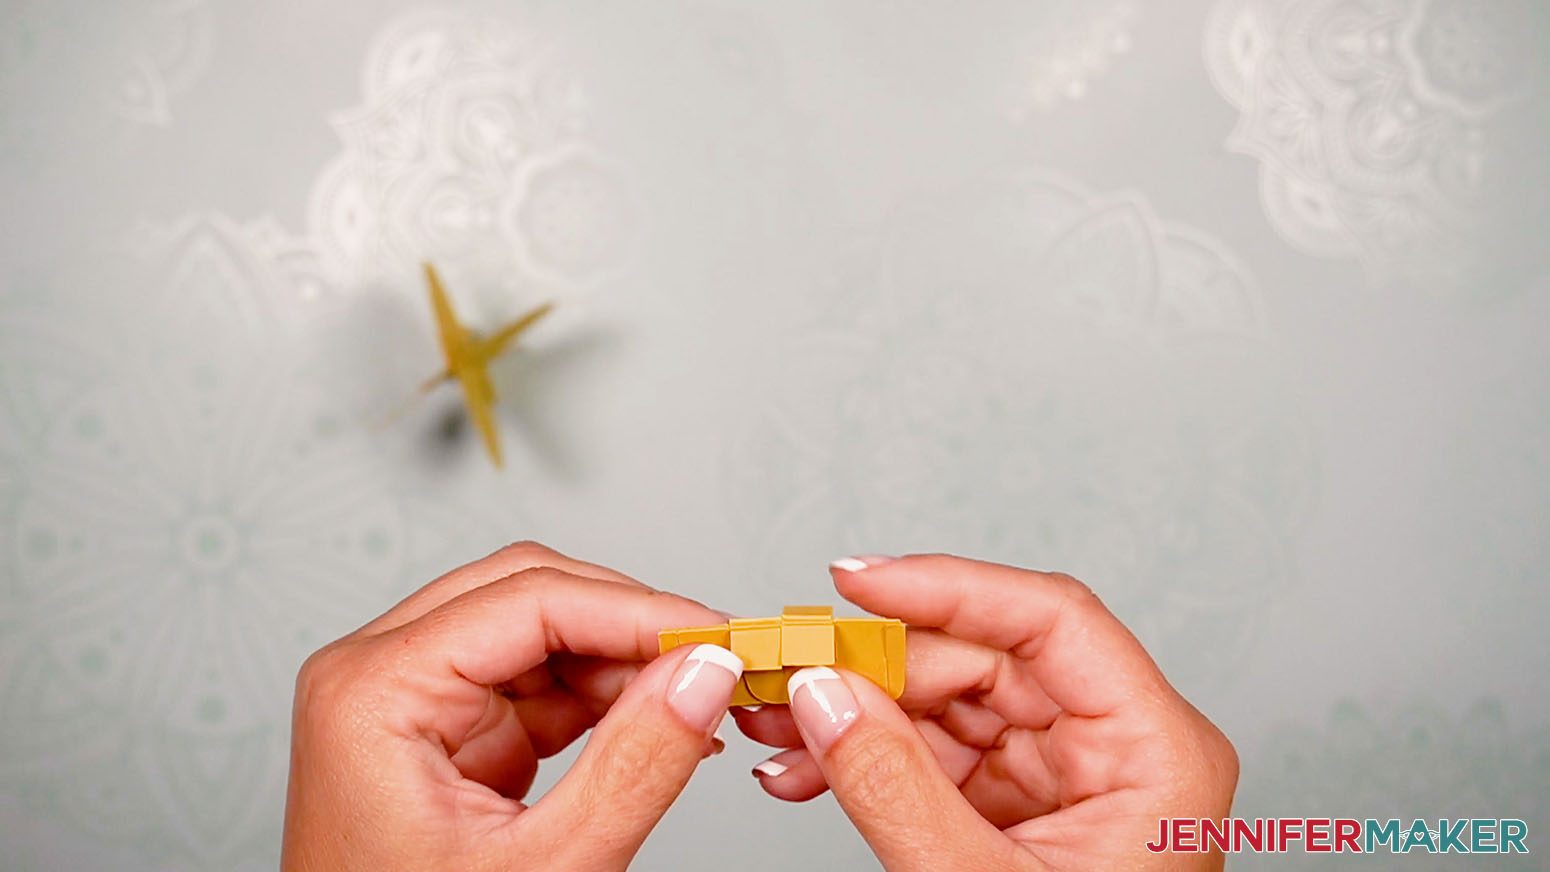
Unfold the support base assembly so it is long with unattached sides.
Hold the assembled balloon so you can see the slits on top of the lower parts.
Take one free edge of the support base assembly and slide one of the bottom slits into the balloon cut. Make sure the crossed base pieces face away from the balloon.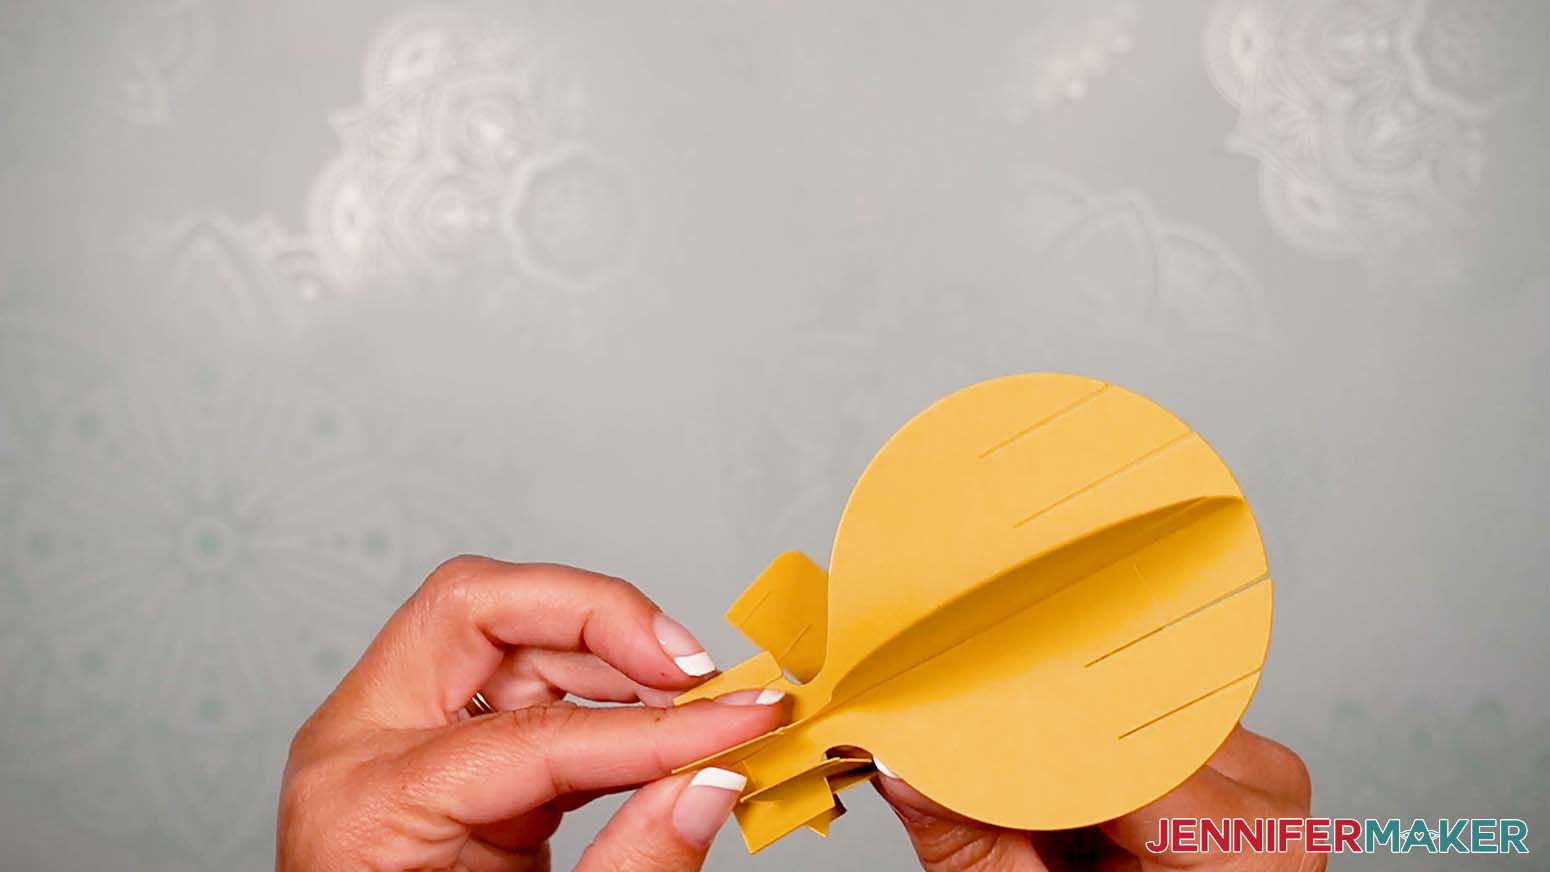
Continue wrapping the support base assembly around the balloon bottom and joining the slits. This is fiddly, so take your time to avoid weakening or tearing the paper.
When you get back to the beginning, join the last two slits to complete the base. 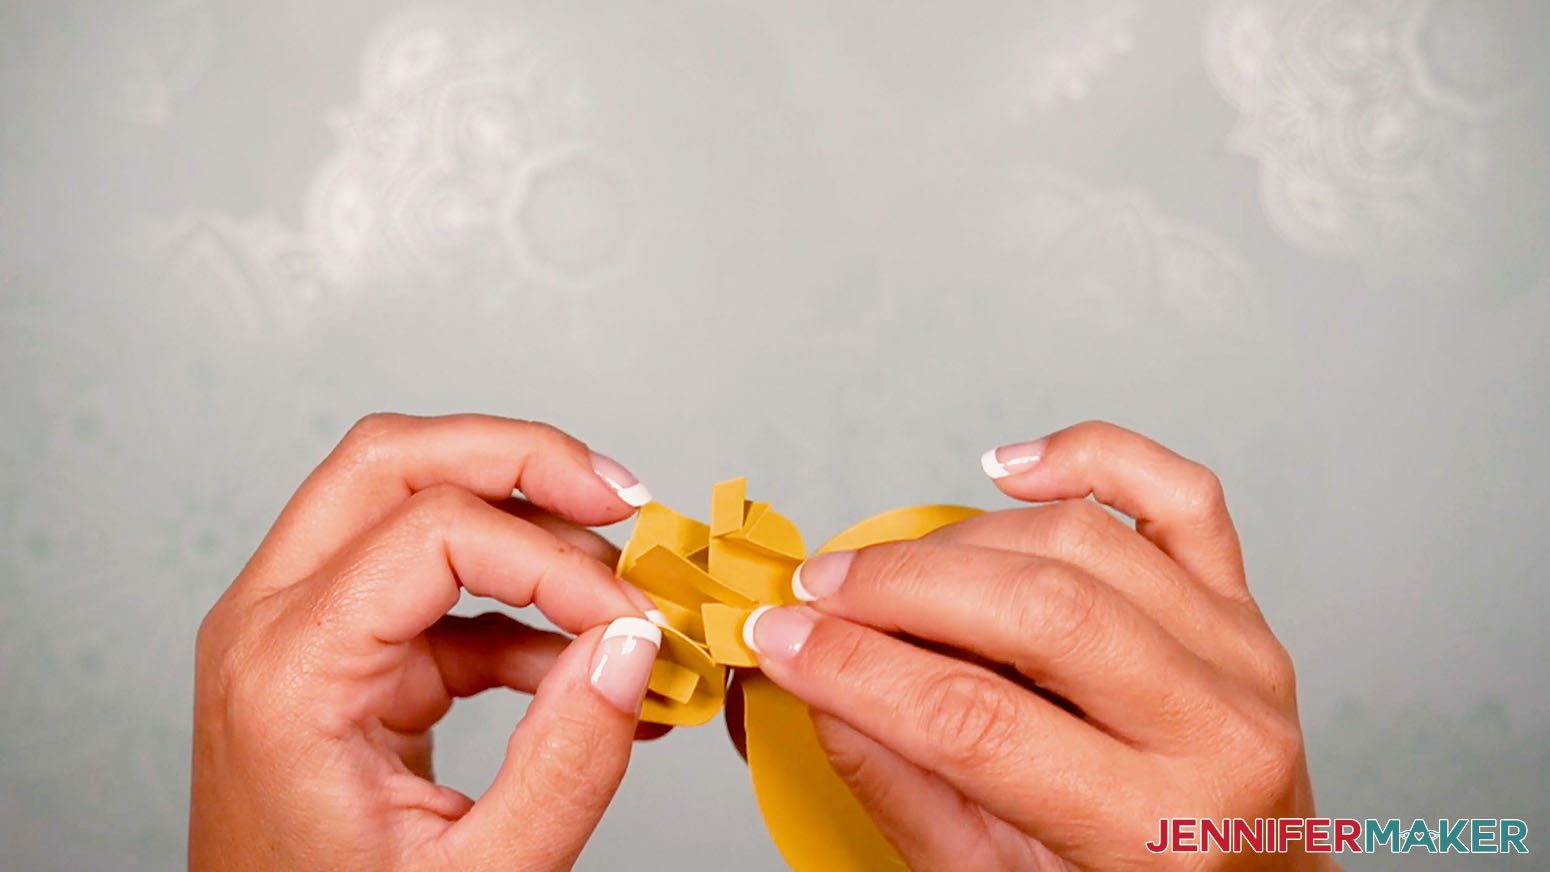
Make everything flush and carefully collapse the balloon in both directions to make sure it’s all in place. 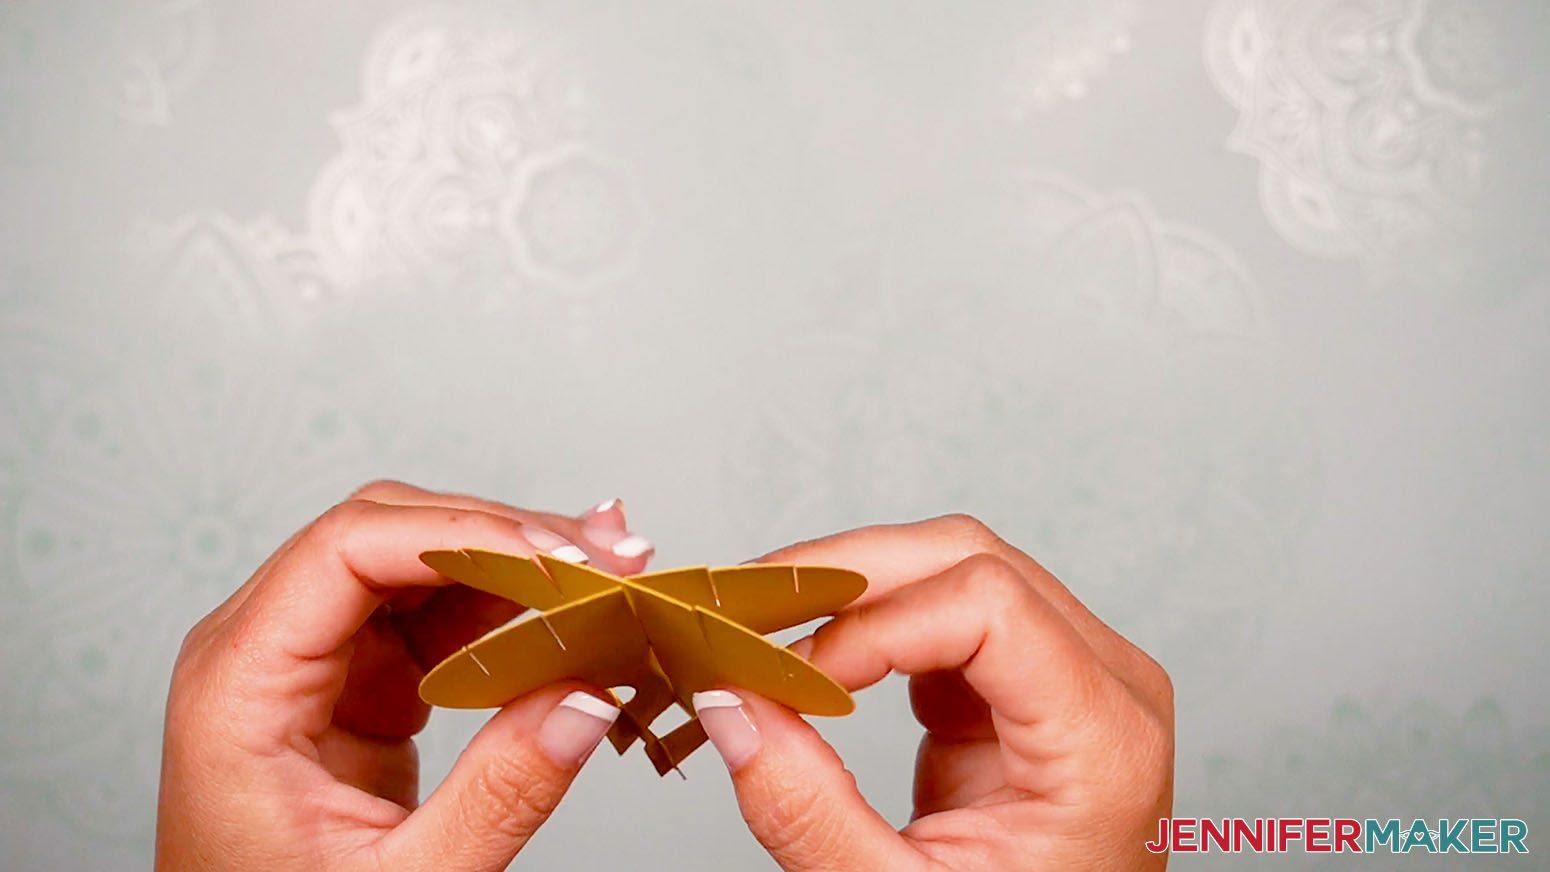
Also, the folded tabs should overlap each other and point out from the balloon.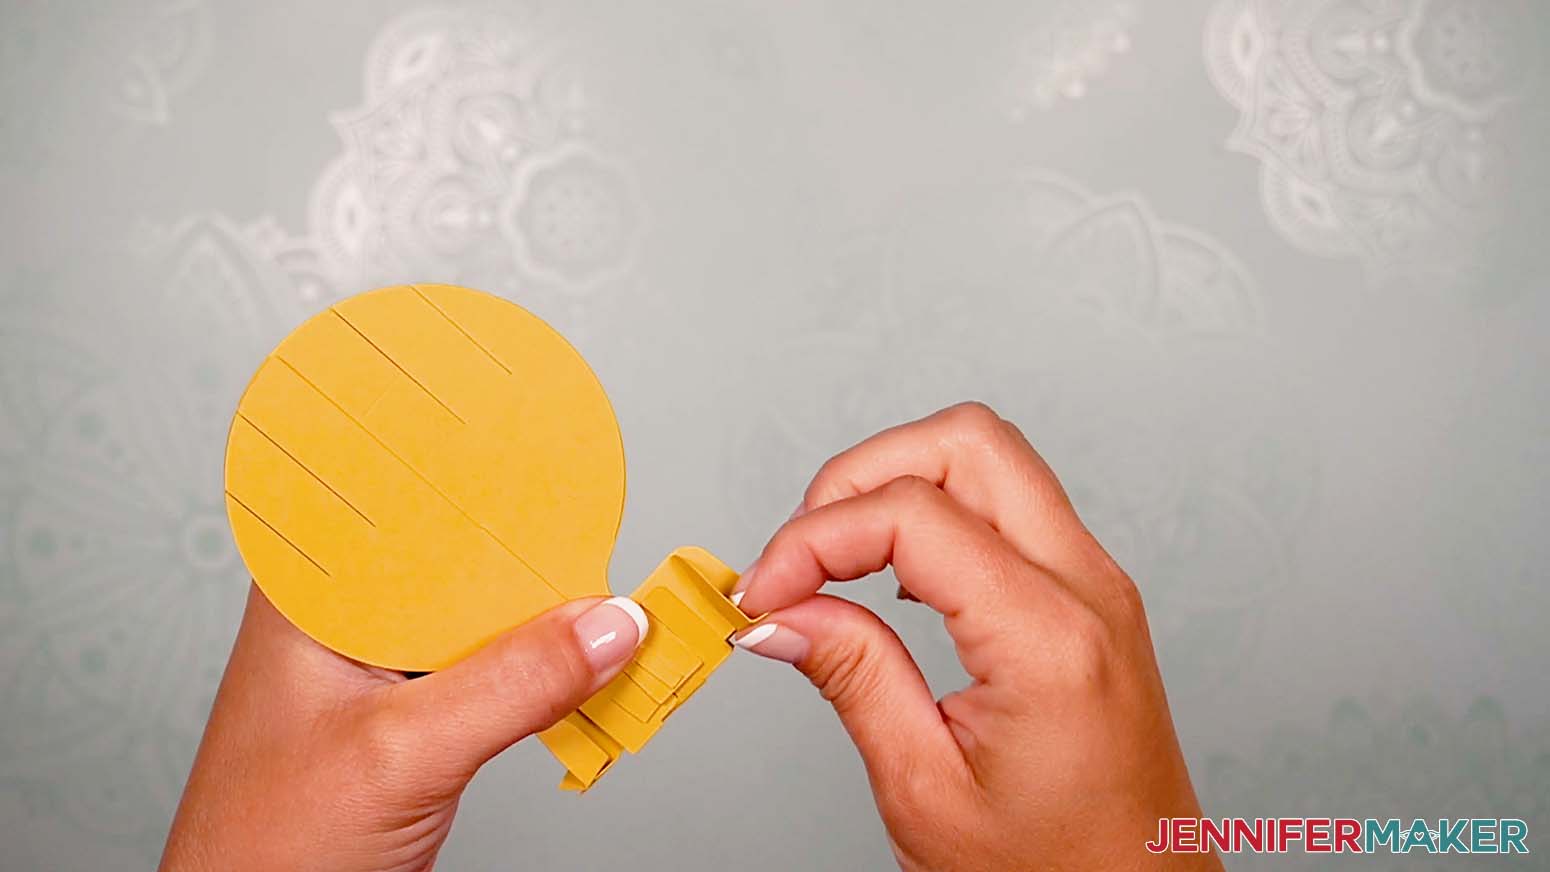
Now we'll add the round pieces to build out the balloon. Those are the C’s and D’s.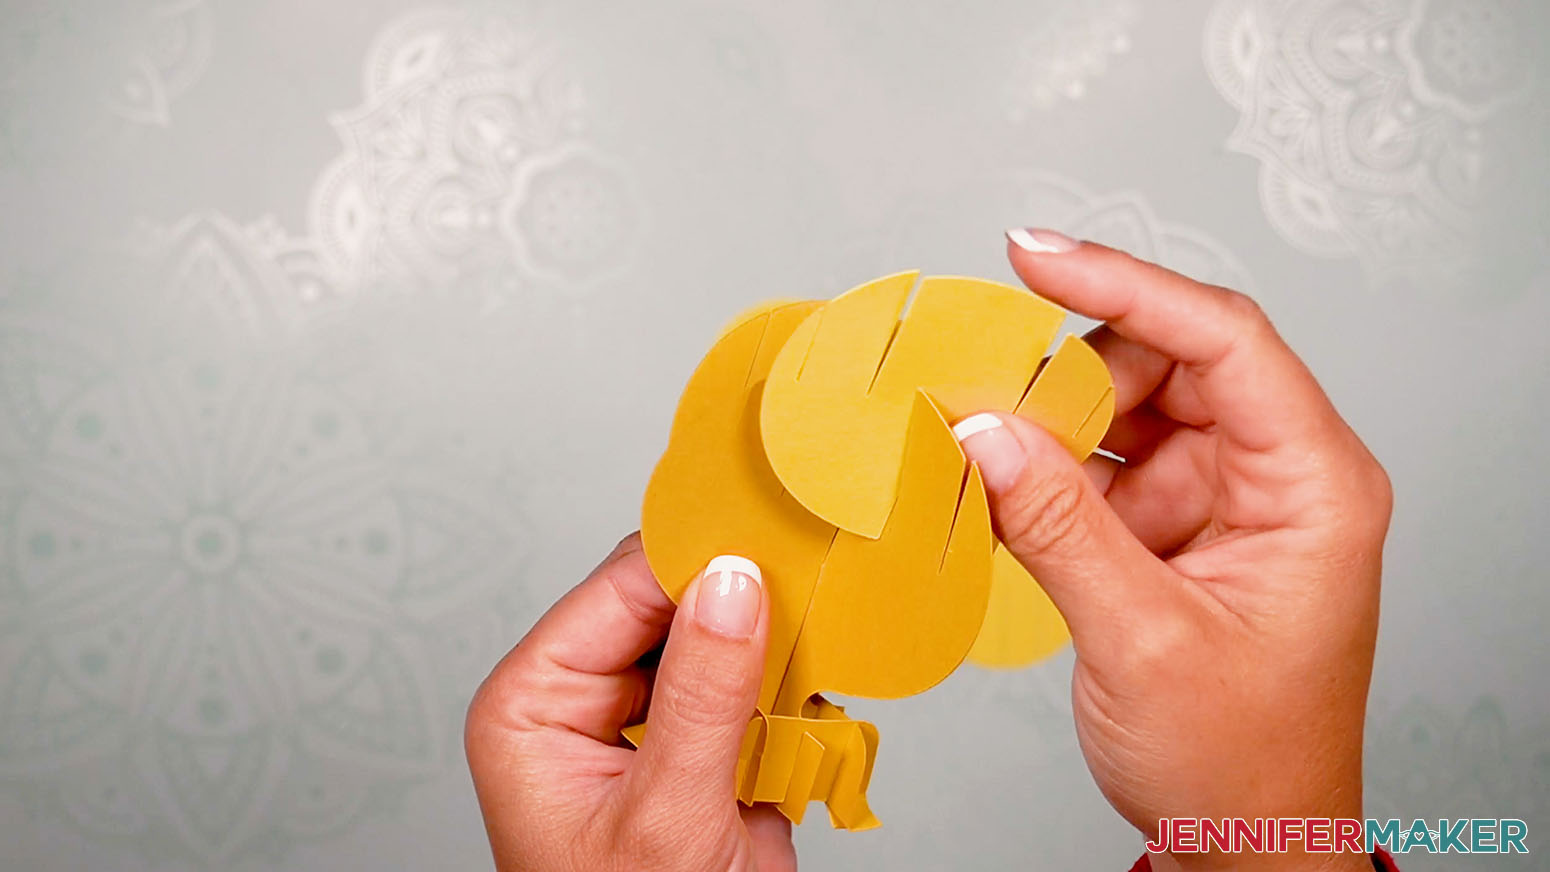
Add the other C on the other half of B.
The D’s will slide down on to A, bridging it with the two C pieces on each side. 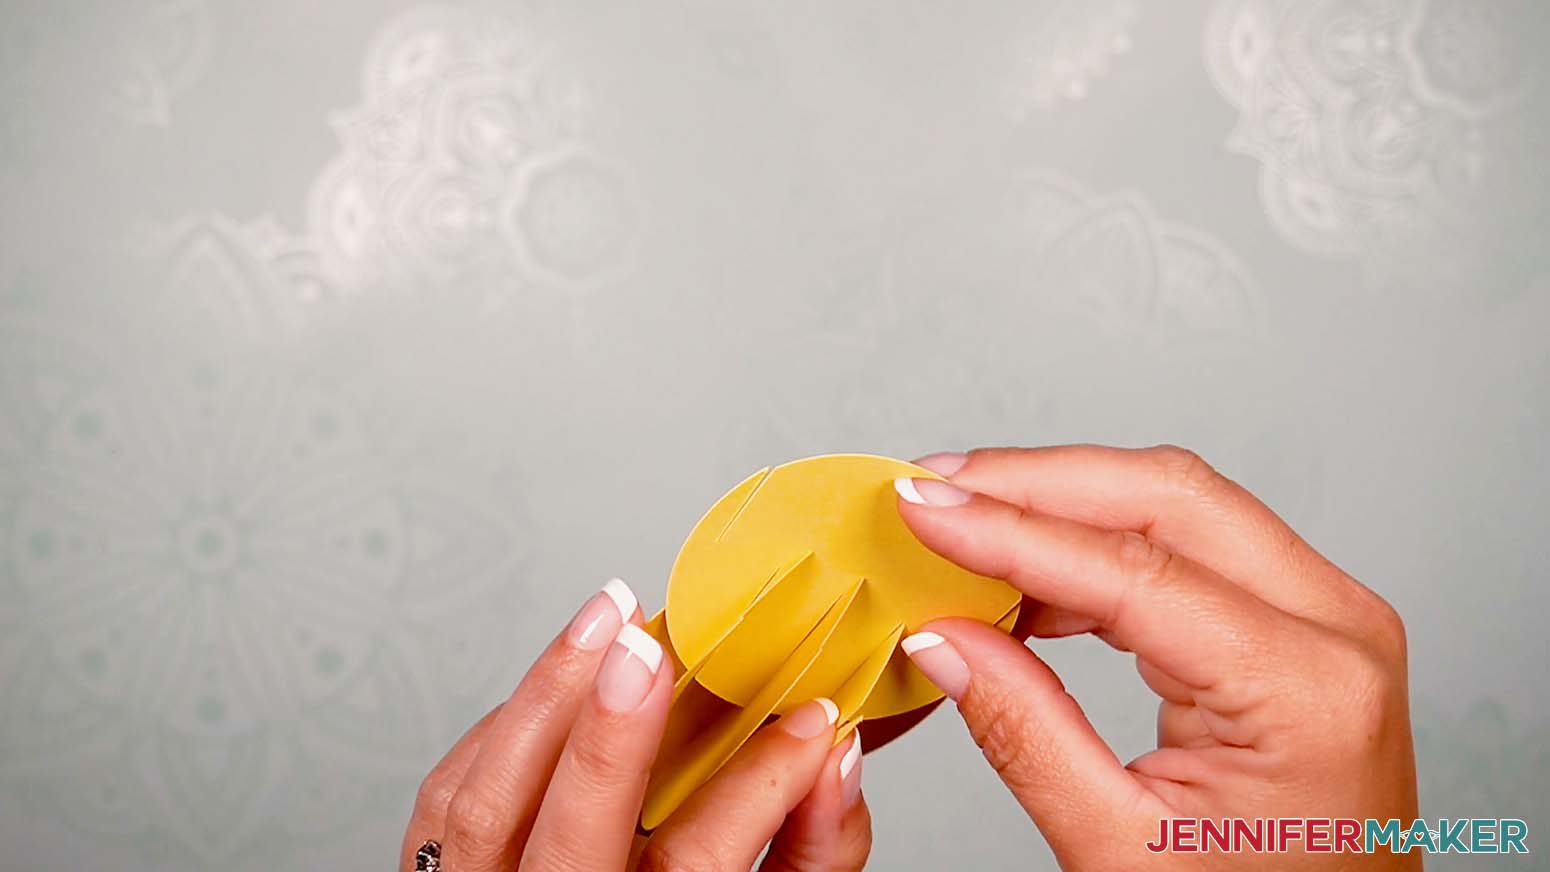
Lining these all up can take patience, so take your time. If something isn't sliding into place, make sure the other pieces haven't shifted out of place. Try to keep the pieces of paper straight and the slits positioned correctly.
When you are done placing the middle circles on the four sides, make sure they are all at the correct height to create the round look of the balloon.
Looking down from the top, you'll start to see a series of "boxes" as the balloon pieces begin to nestle together.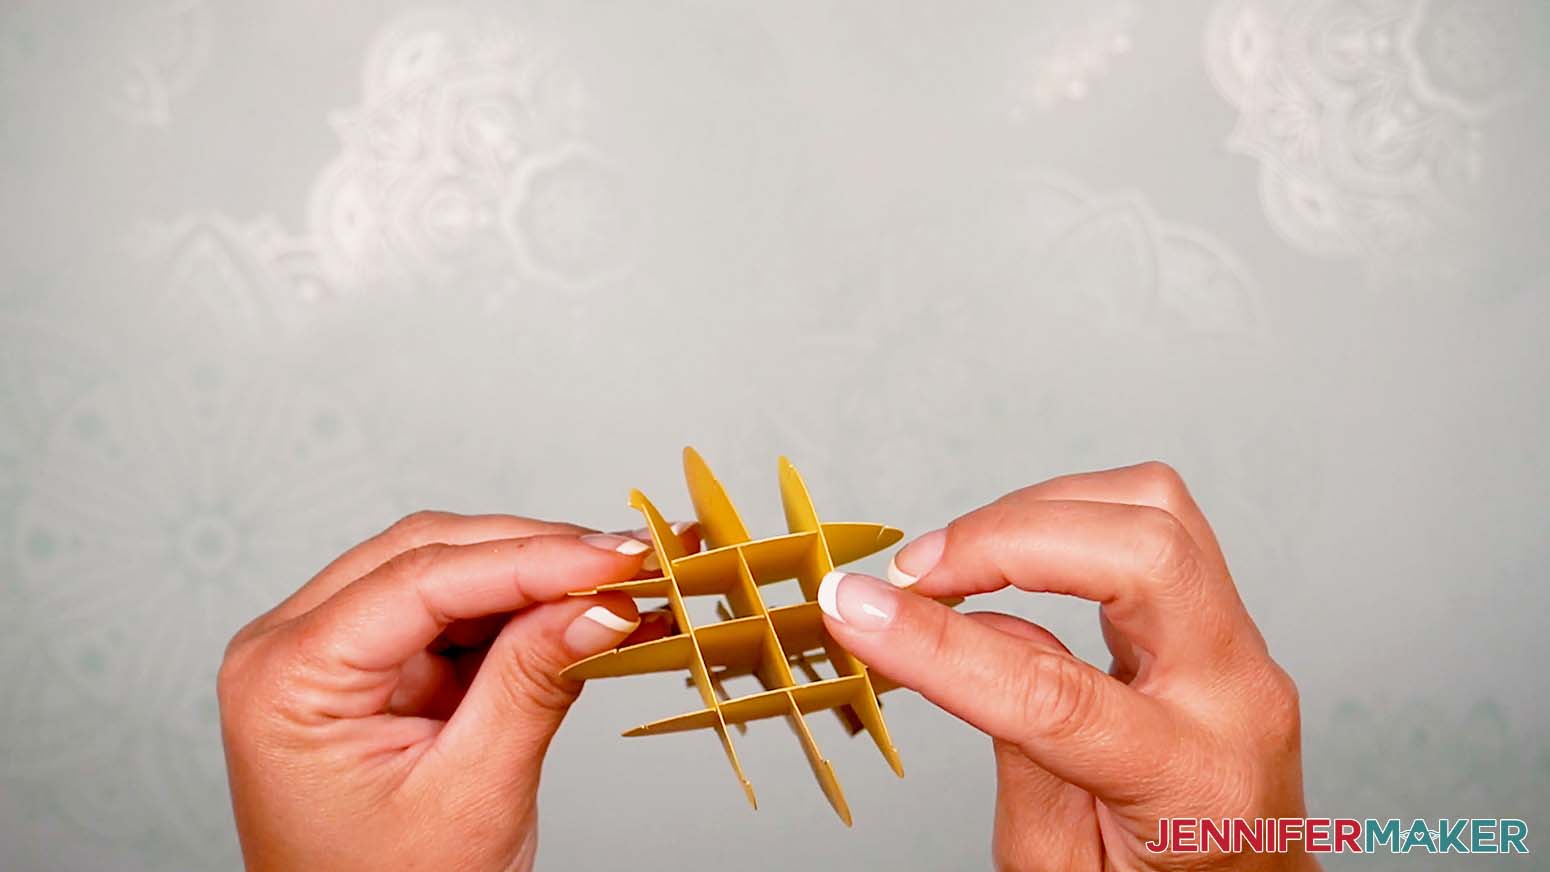
The four outside circle E’s with shapes slide into place from the top down onto the outer slits of the middle circles.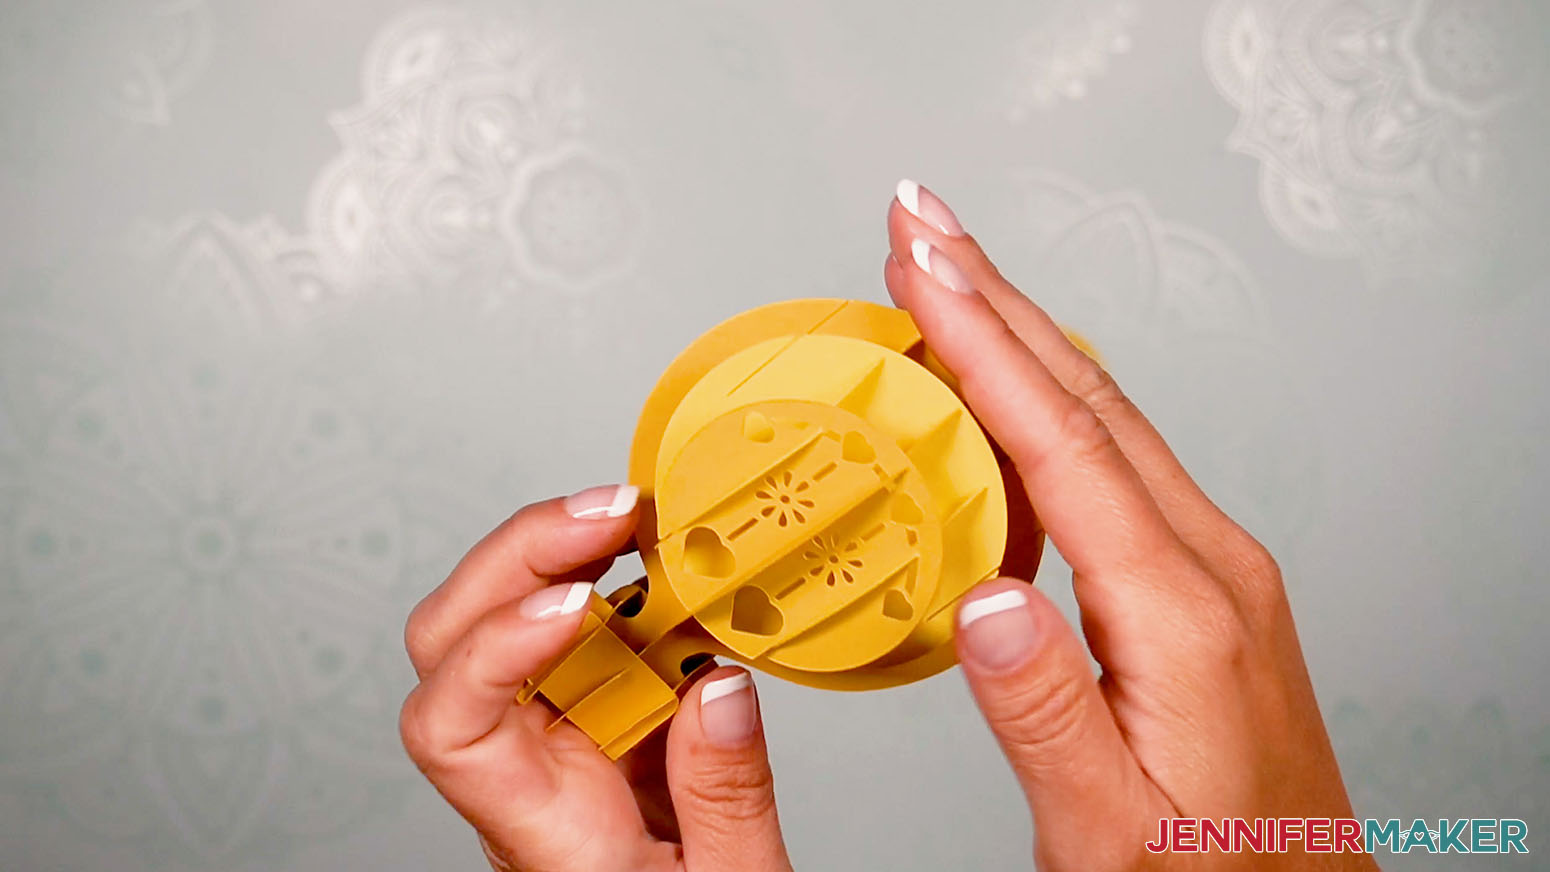
Grab the basket base J’s and K's and place them face up in the orientation of the reference sheet.
Add glue to the backs of the basket decorations and glue one to the center of each basket base. Let them dry well.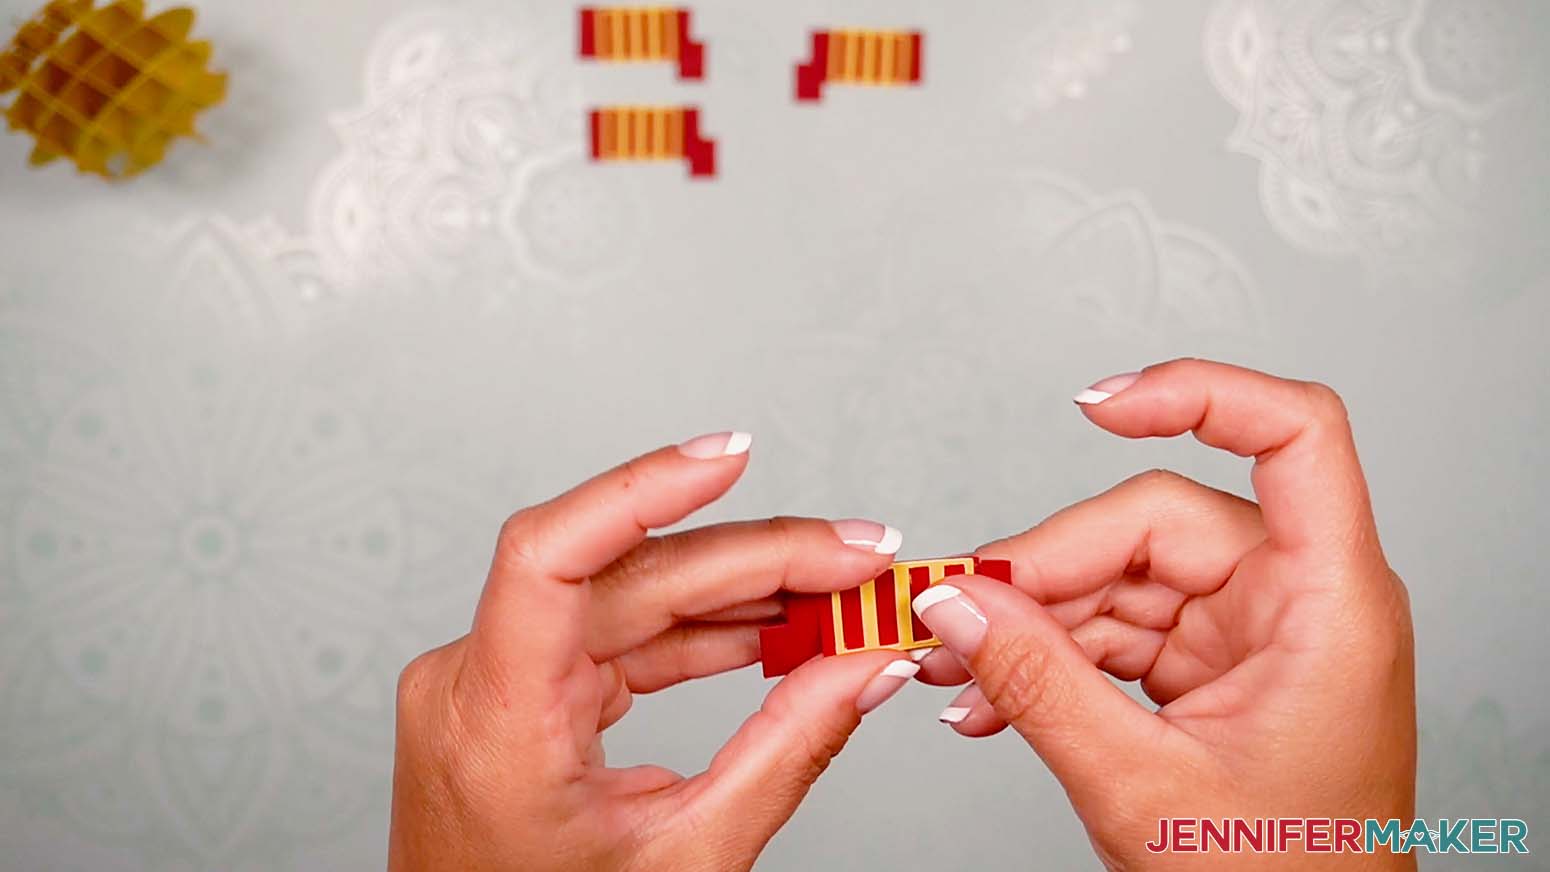
Now take the oval sky piece and crease the score line so that the curved ends meet. Orient it so the slits cut in the base that are furthest out from the center are at the top.
Collapse the balloon and slide the tabs of the balloon support base on one side into the sky’s left vertical slit closest to the center line.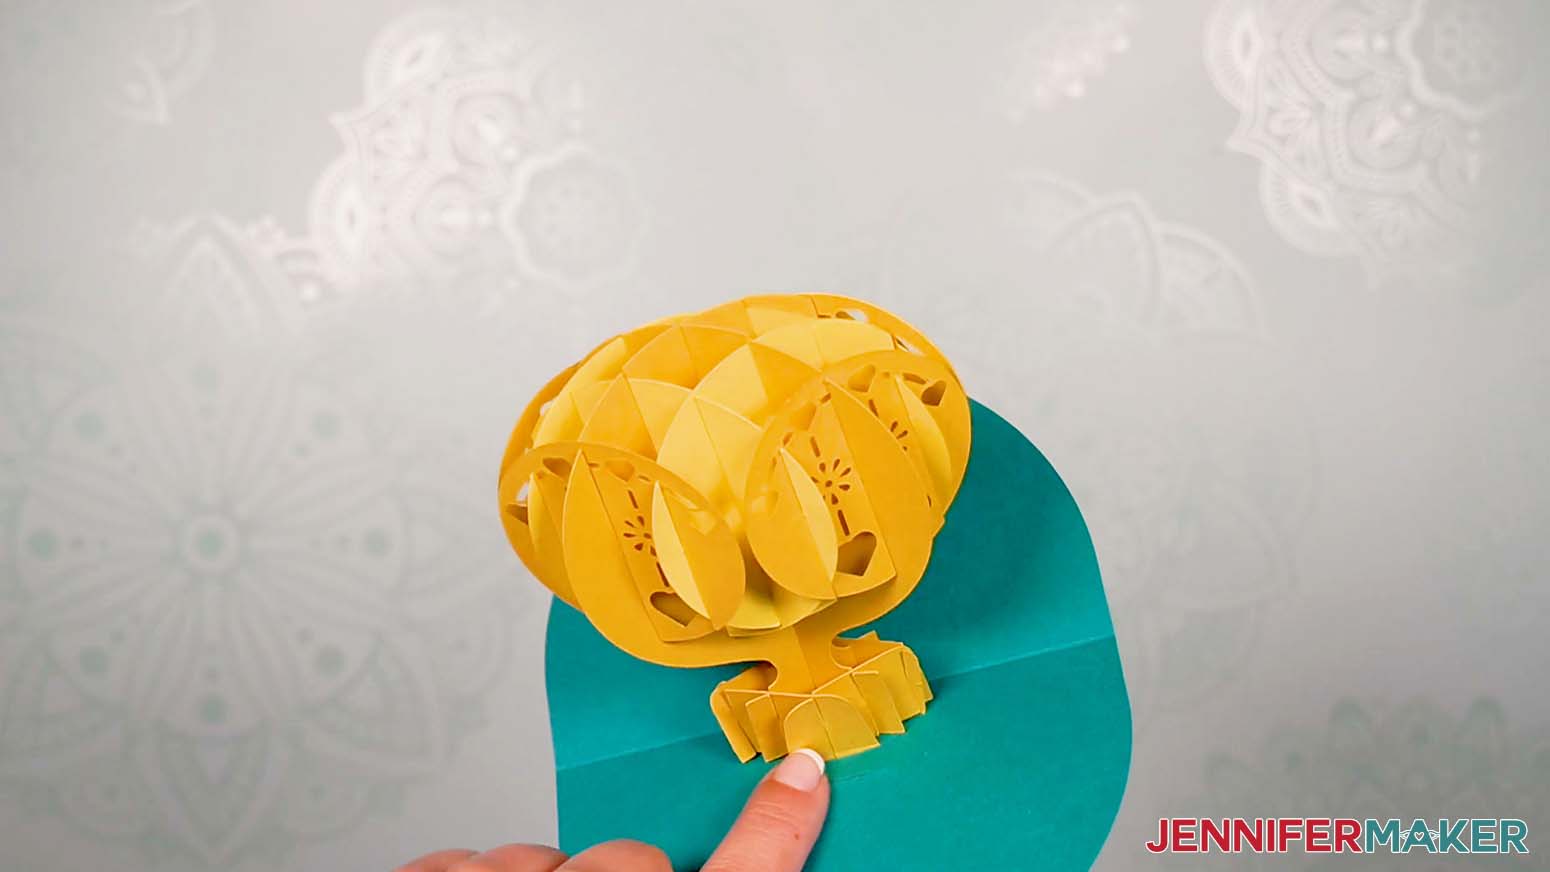
Pull the tabs through and glue them down to the underside of the sky.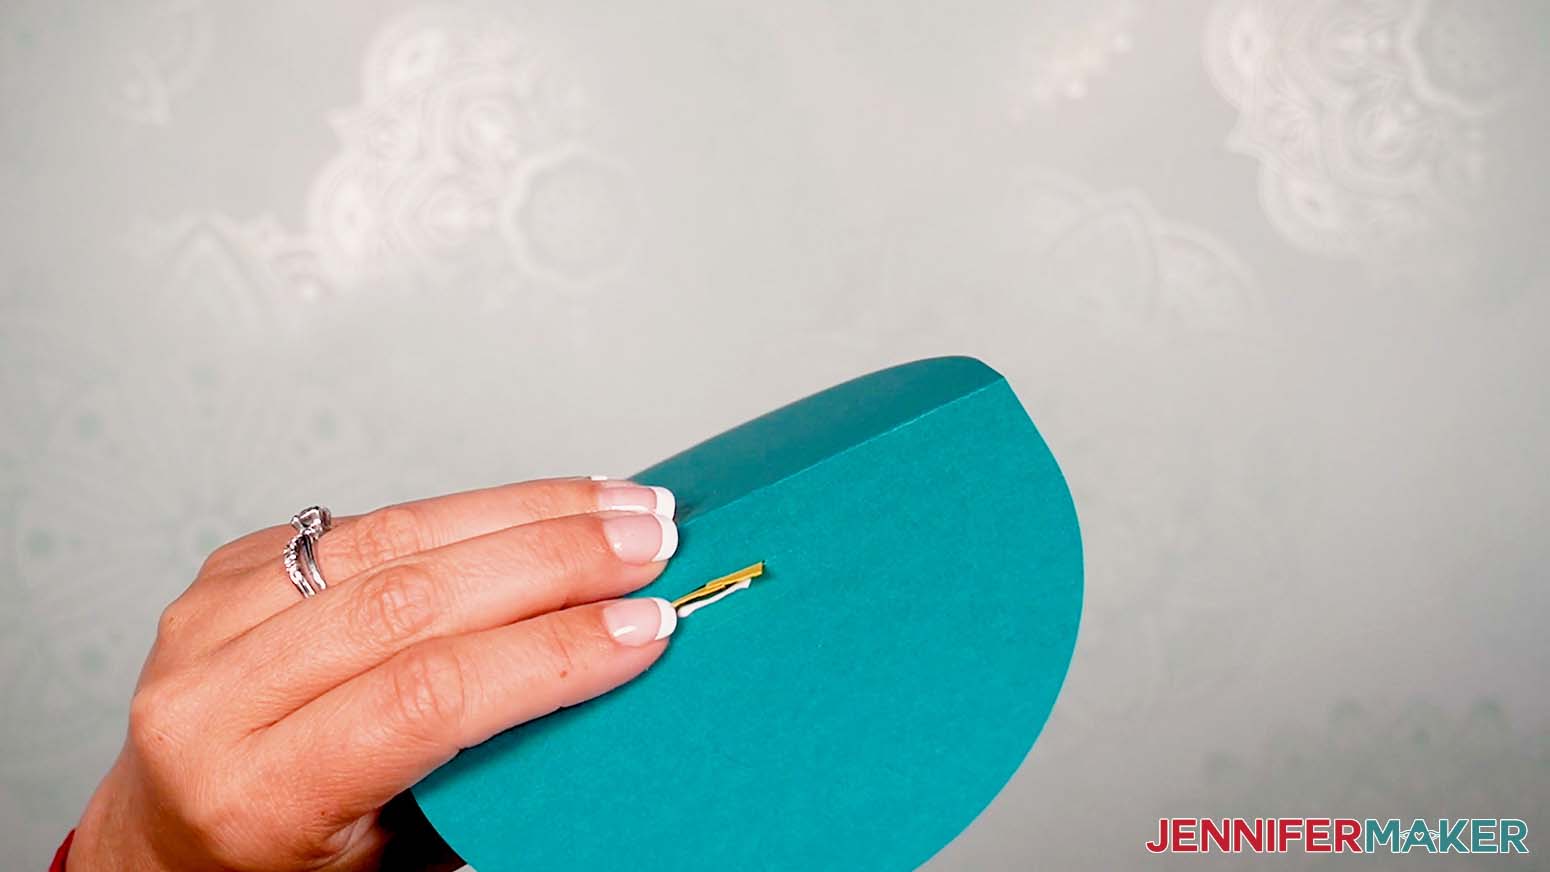
Repeat on the right side as well.
Make sure it can close.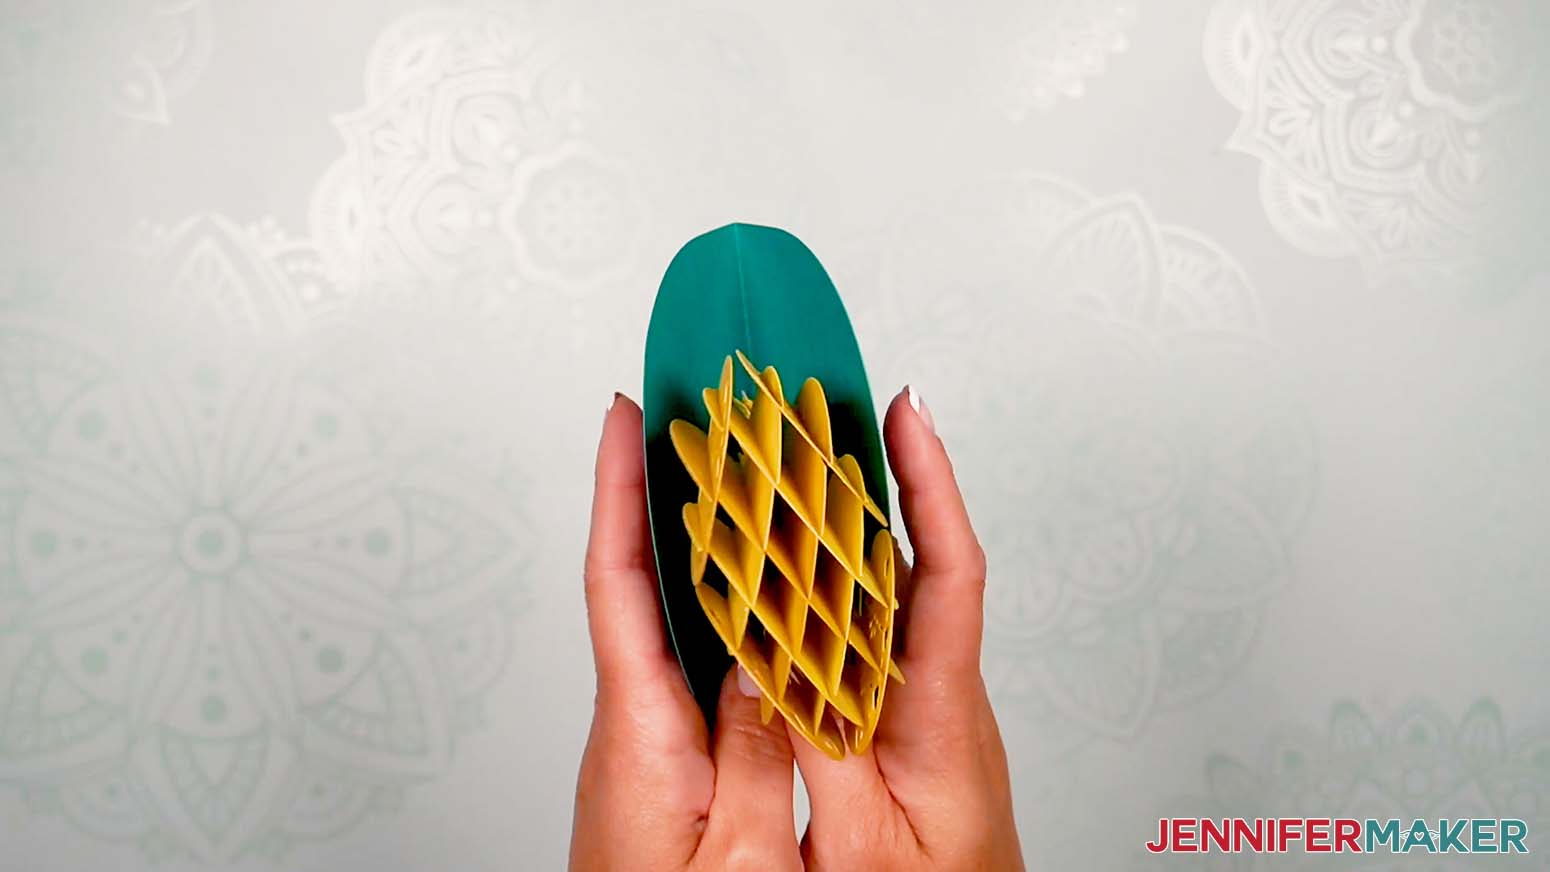
Now carefully open the sky piece back up to make sure your balloon opens correctly. The cardstock is stiff, so you may have to give the balloon gentle pressure on the sides to open fully. Once it opens smoothly, set it aside.
Assemble the decorated basket side pieces just like you did for the balloon support base. Don't forget to fold the tabs!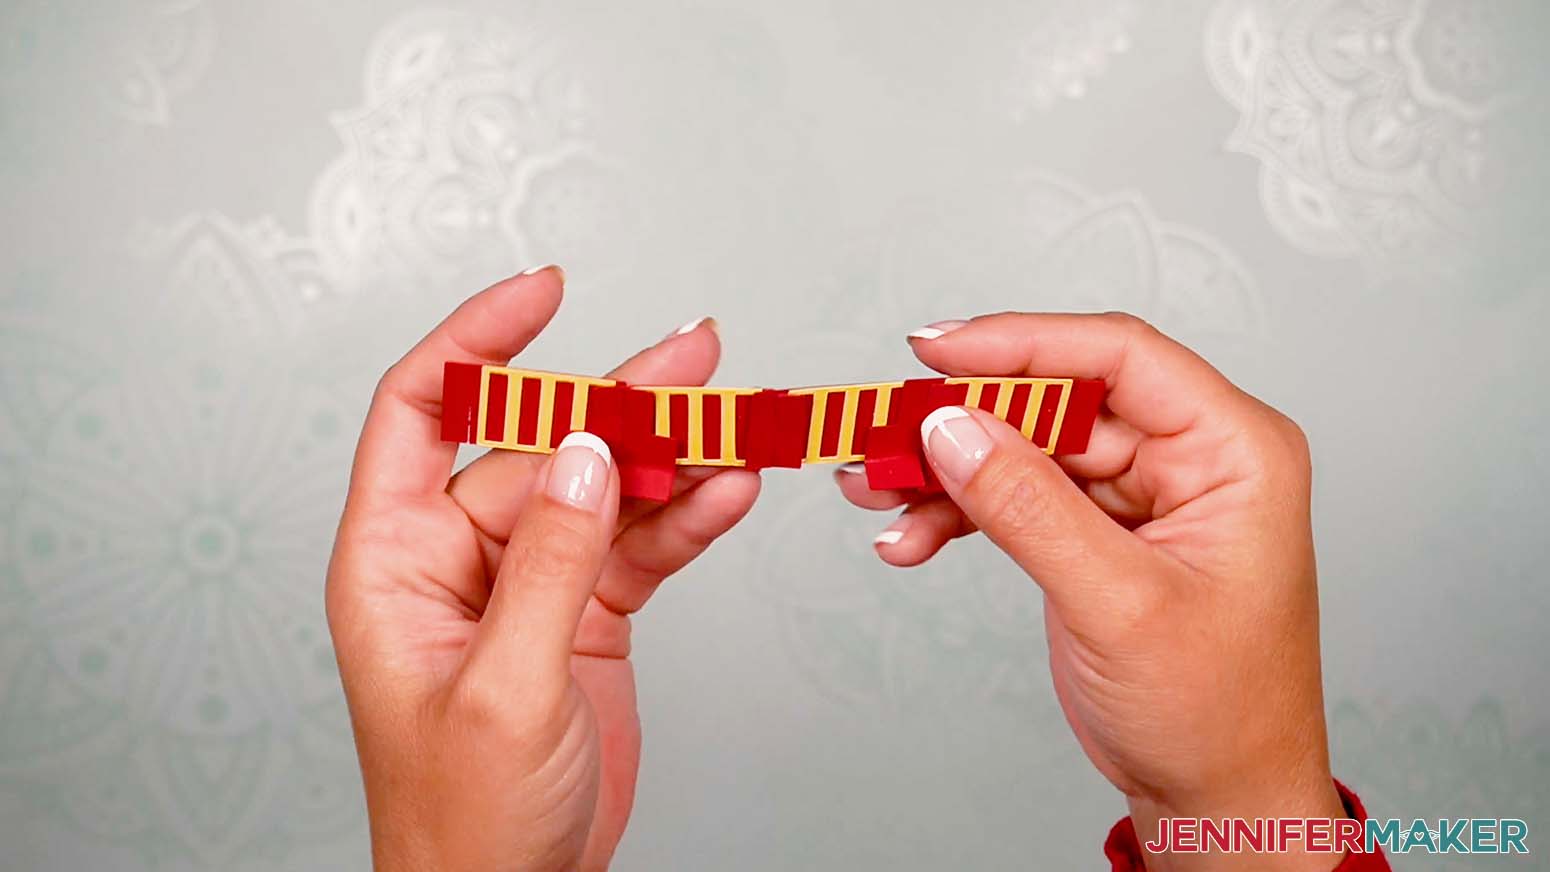
Wrap it around the support assembly in the same way, and secure the last slots. Make sure the folded tabs face the second set of vertical cuts on the sky.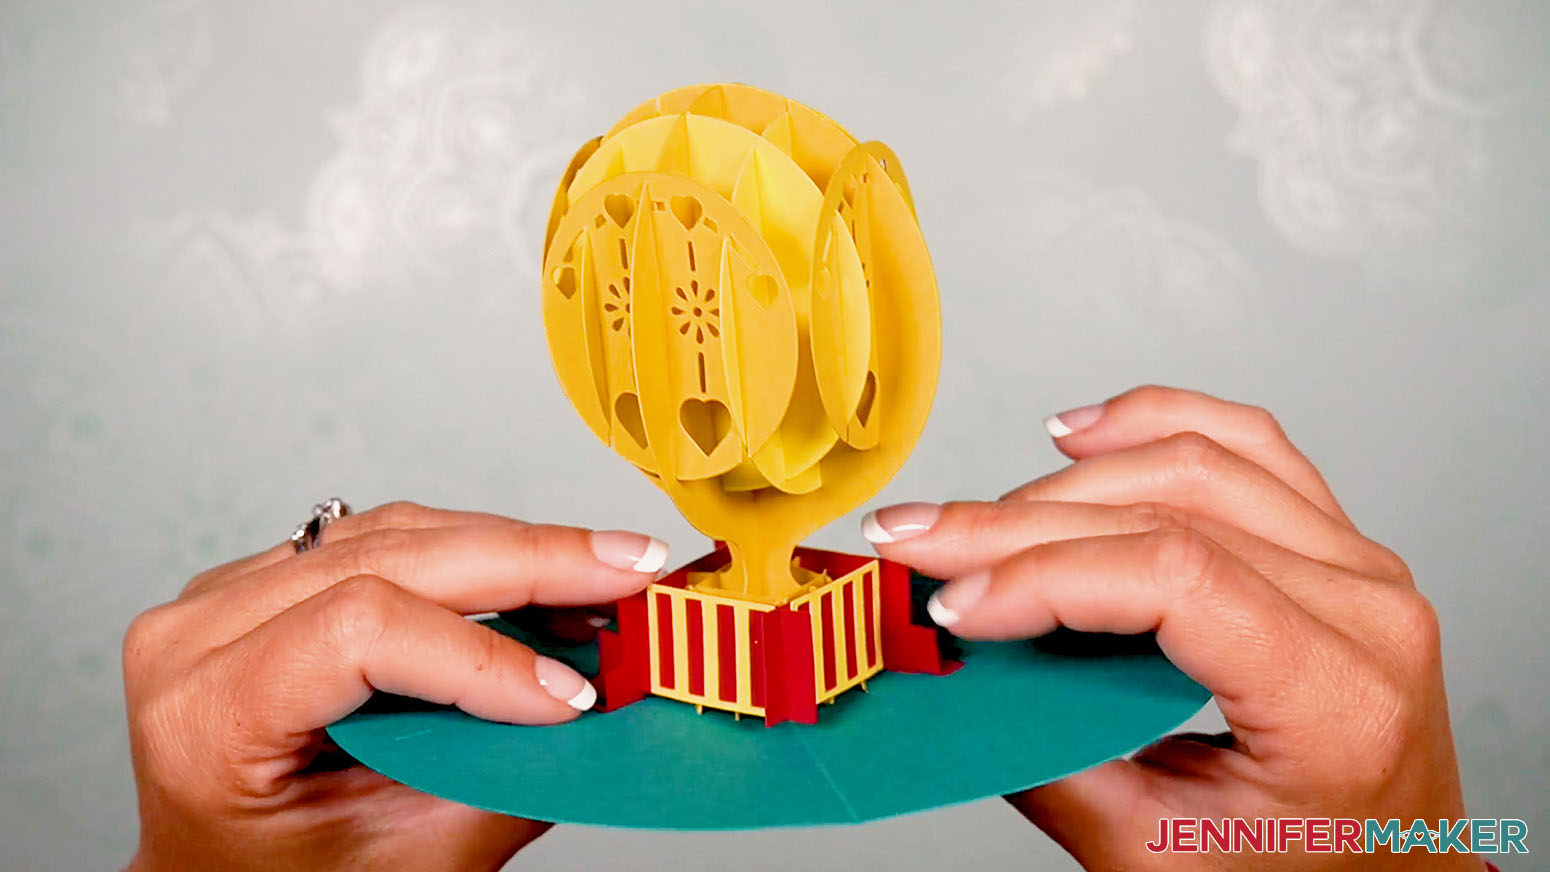
Insert the folded tabs on one side into the vertical slit and glue them to the back of the sky.
Repeat on the other side. Make sure to pull the tabs snug before gluing.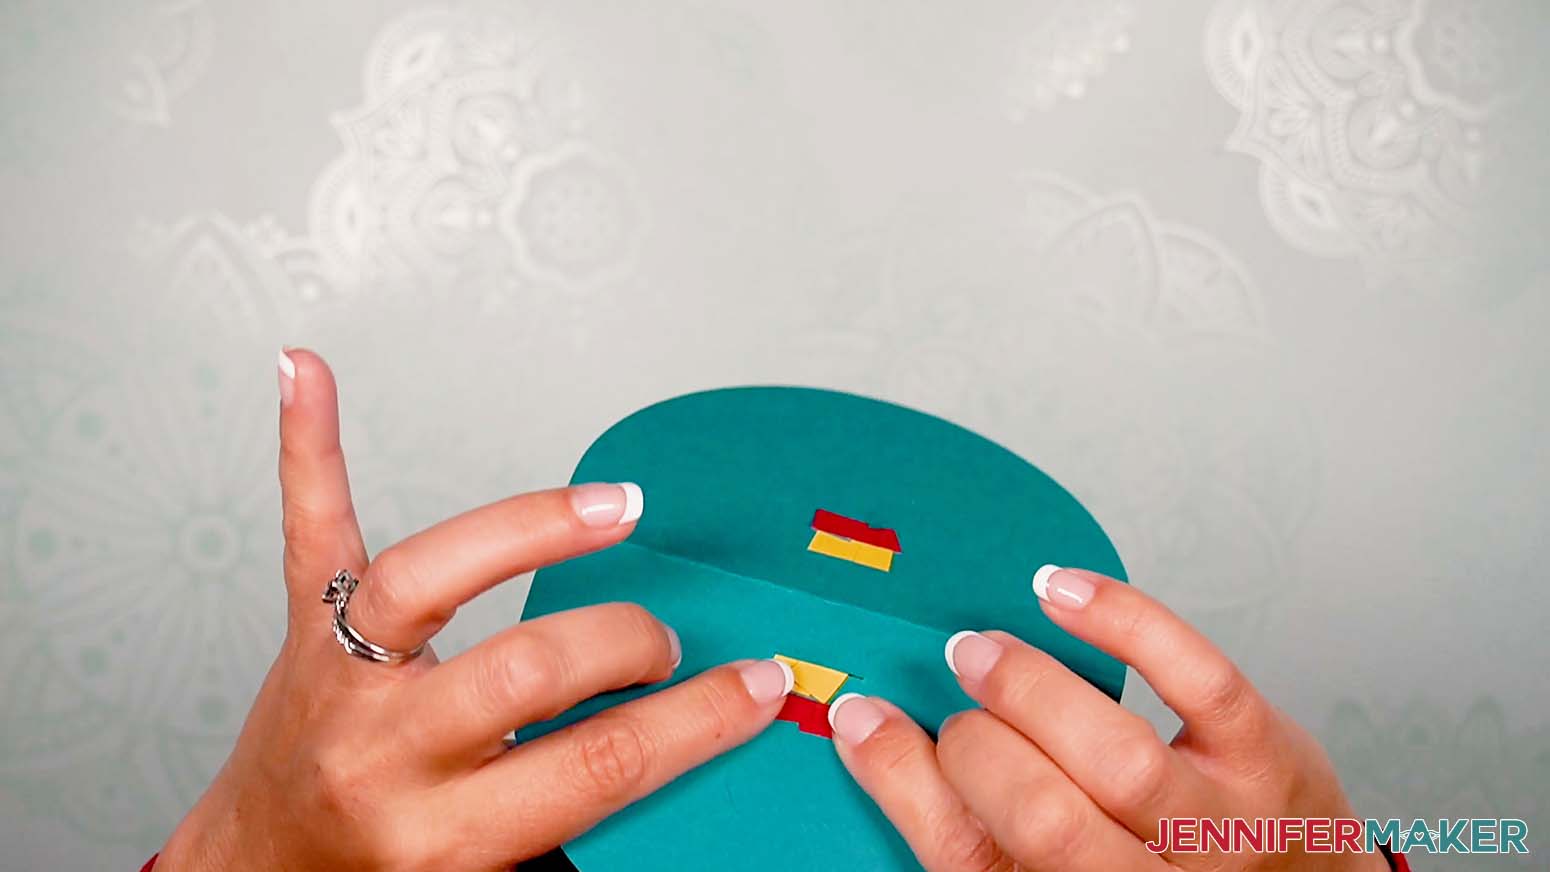
Grab your cloud pieces. Slide the lower slit on M on to the top slit in N.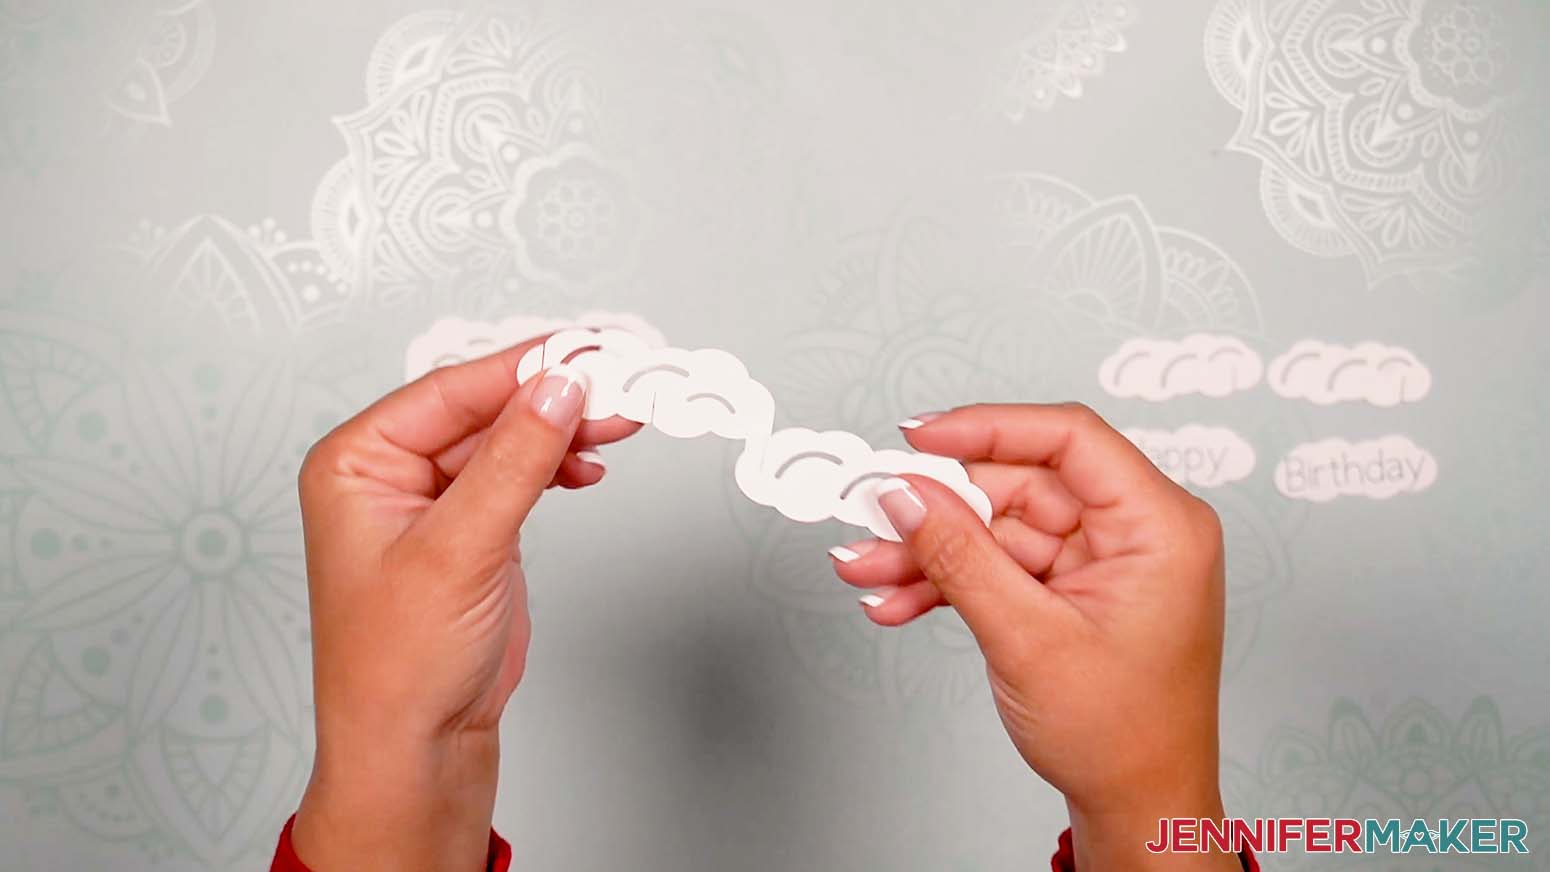
Repeat for O and P.
Hold the assembled cloud pairs with the tabs at either end. Join the central slits.
Fold the tabs to the back, then insert one into each of the diagonal sky cuts starting on the left.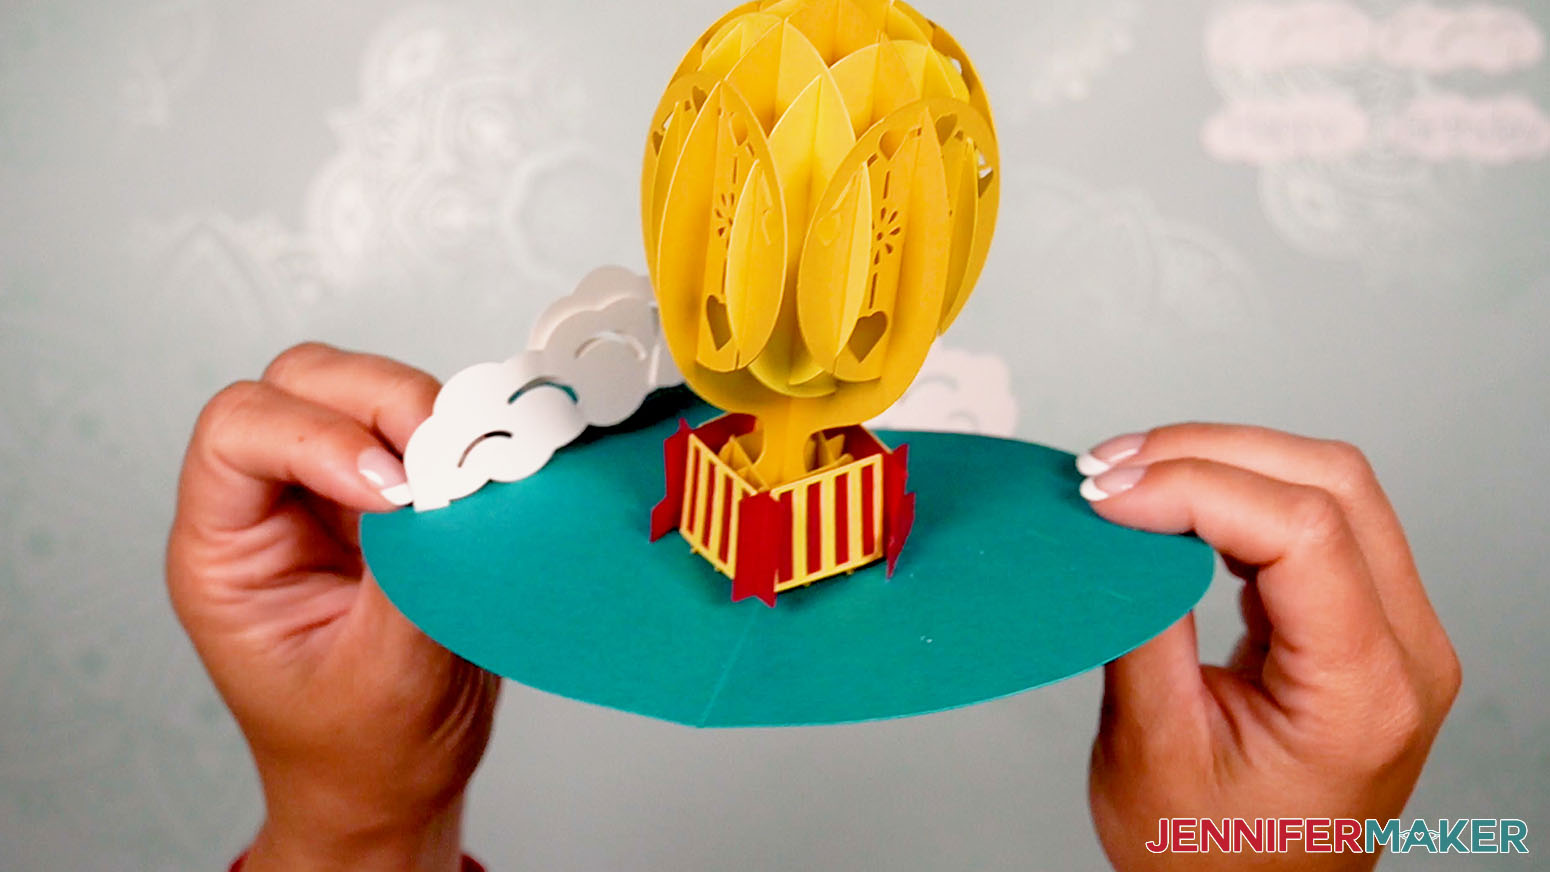
Make sure the tabs are all visible on the bottom and glue them in place.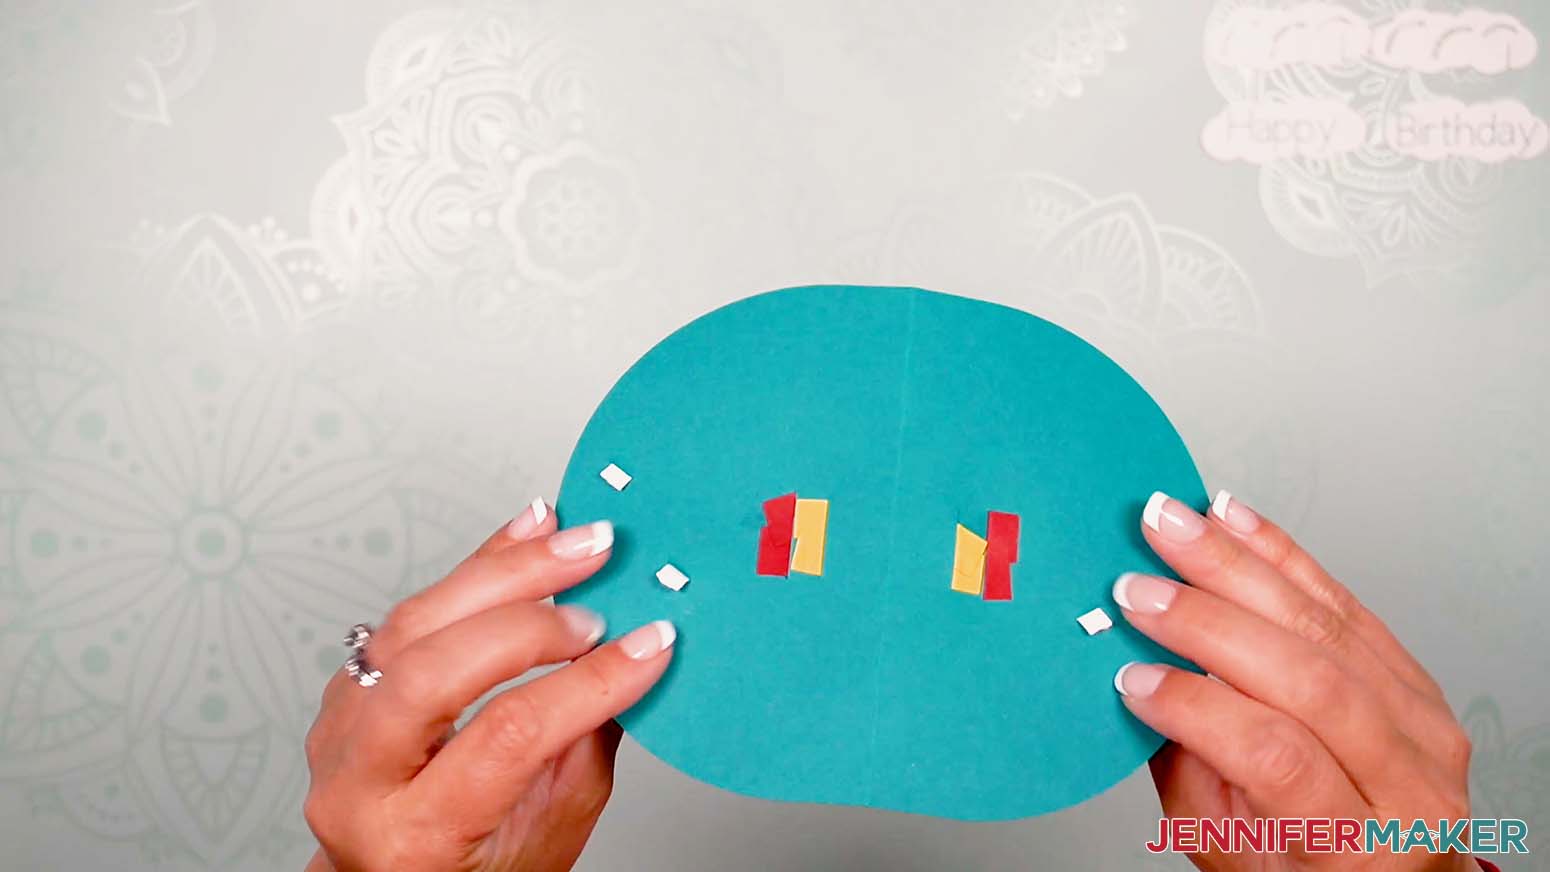
Open the sky and balloon back up. Glue down the clouds with the text in the front of the balloon piece.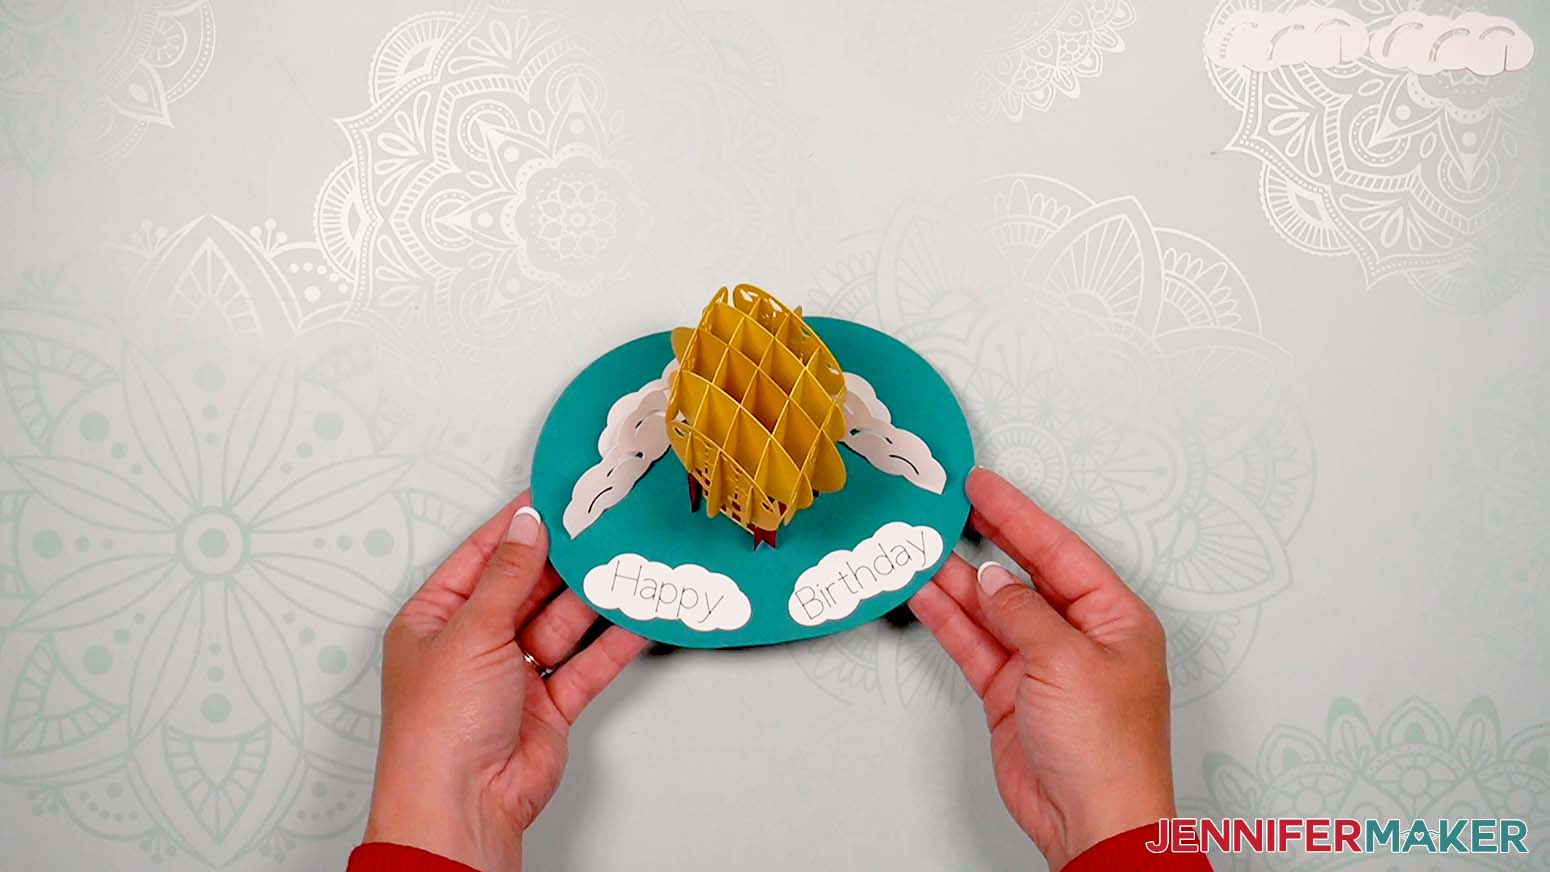
Add the two L floating clouds to the back and sides of the balloon, one on each side. Place a bit of glue on each cloud’s slit and slide one on to the far edges of the balloon assemblies where they meet the outside circles. 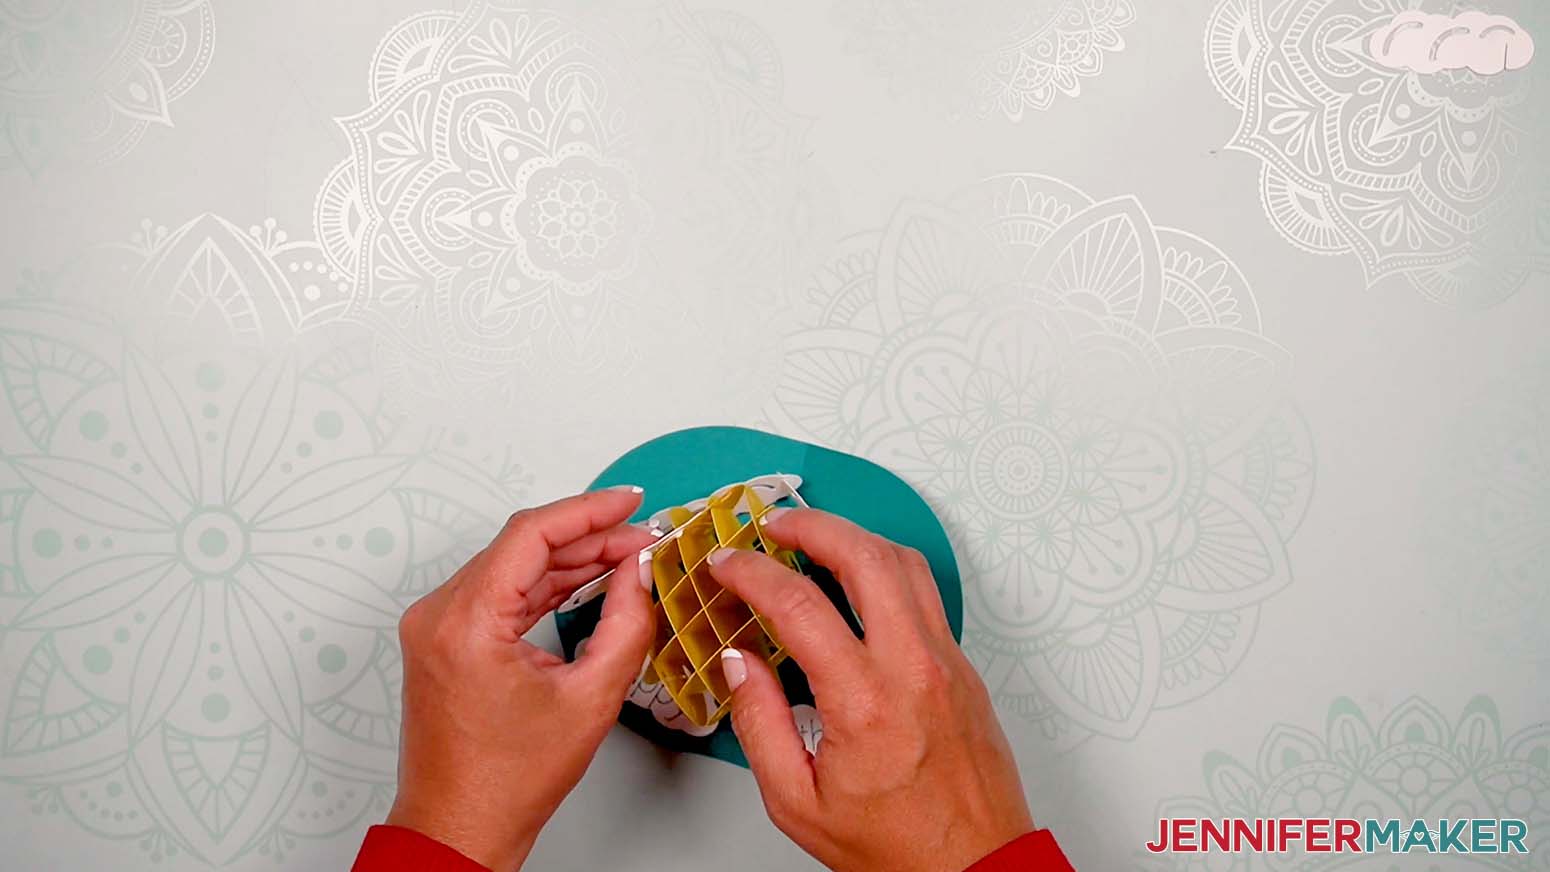
Glue a small balloon to the outer pop up cloud on each side.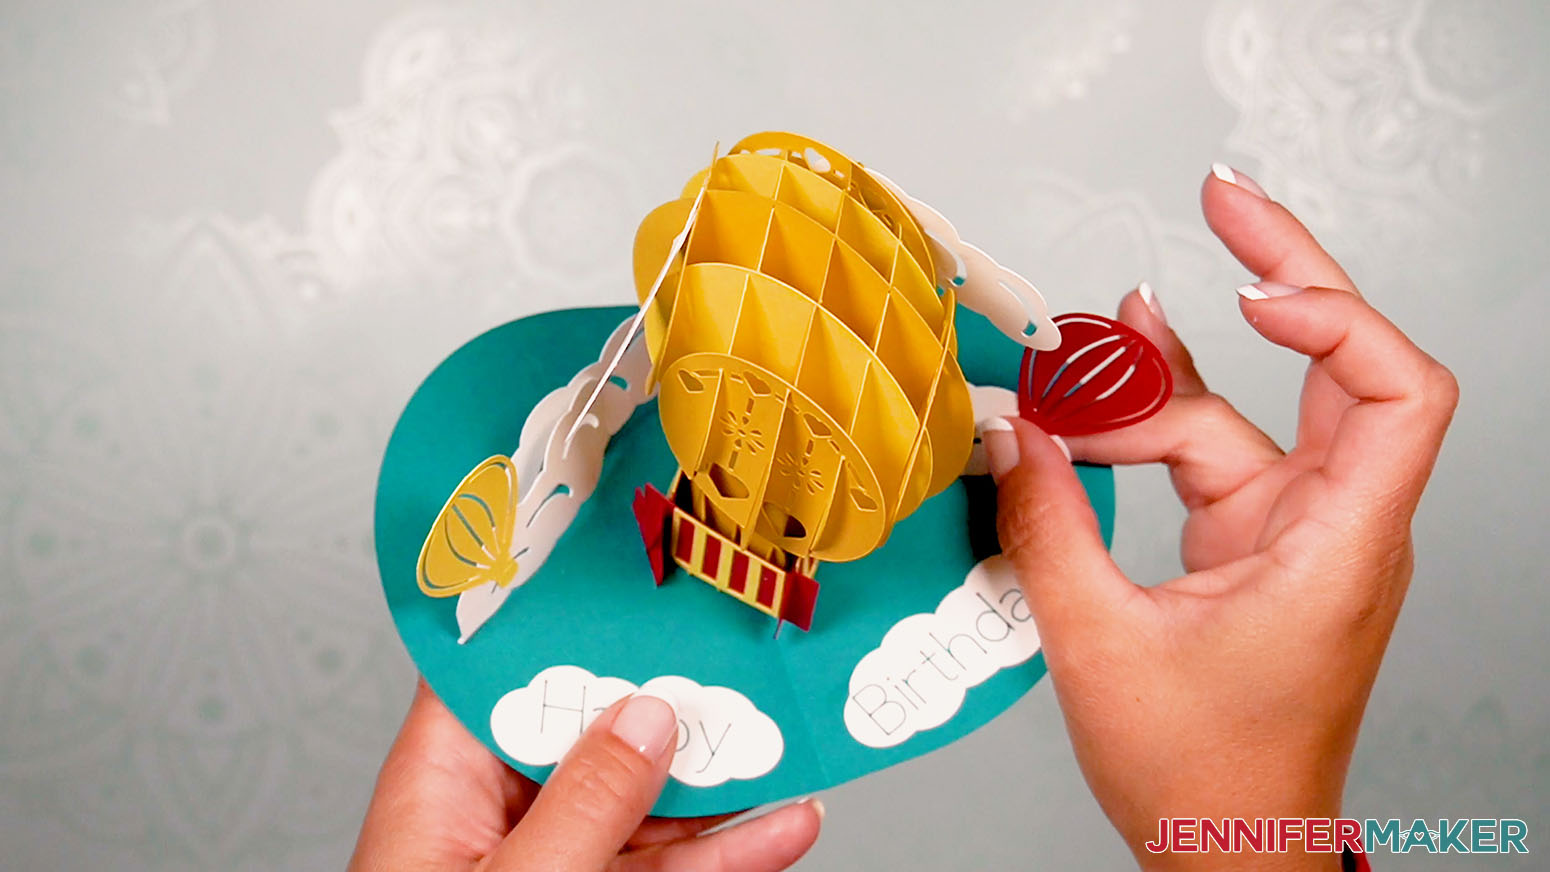
Make sure the balloon still collapses and pops up reliably and adjust anything if needed.
Grab the card pieces T through W.
You can use either side of the front hot air balloon piece as the front of the card. Pick the orientation you prefer and place it face down. Add glue around the design and lightly on the inner parts of the balloon.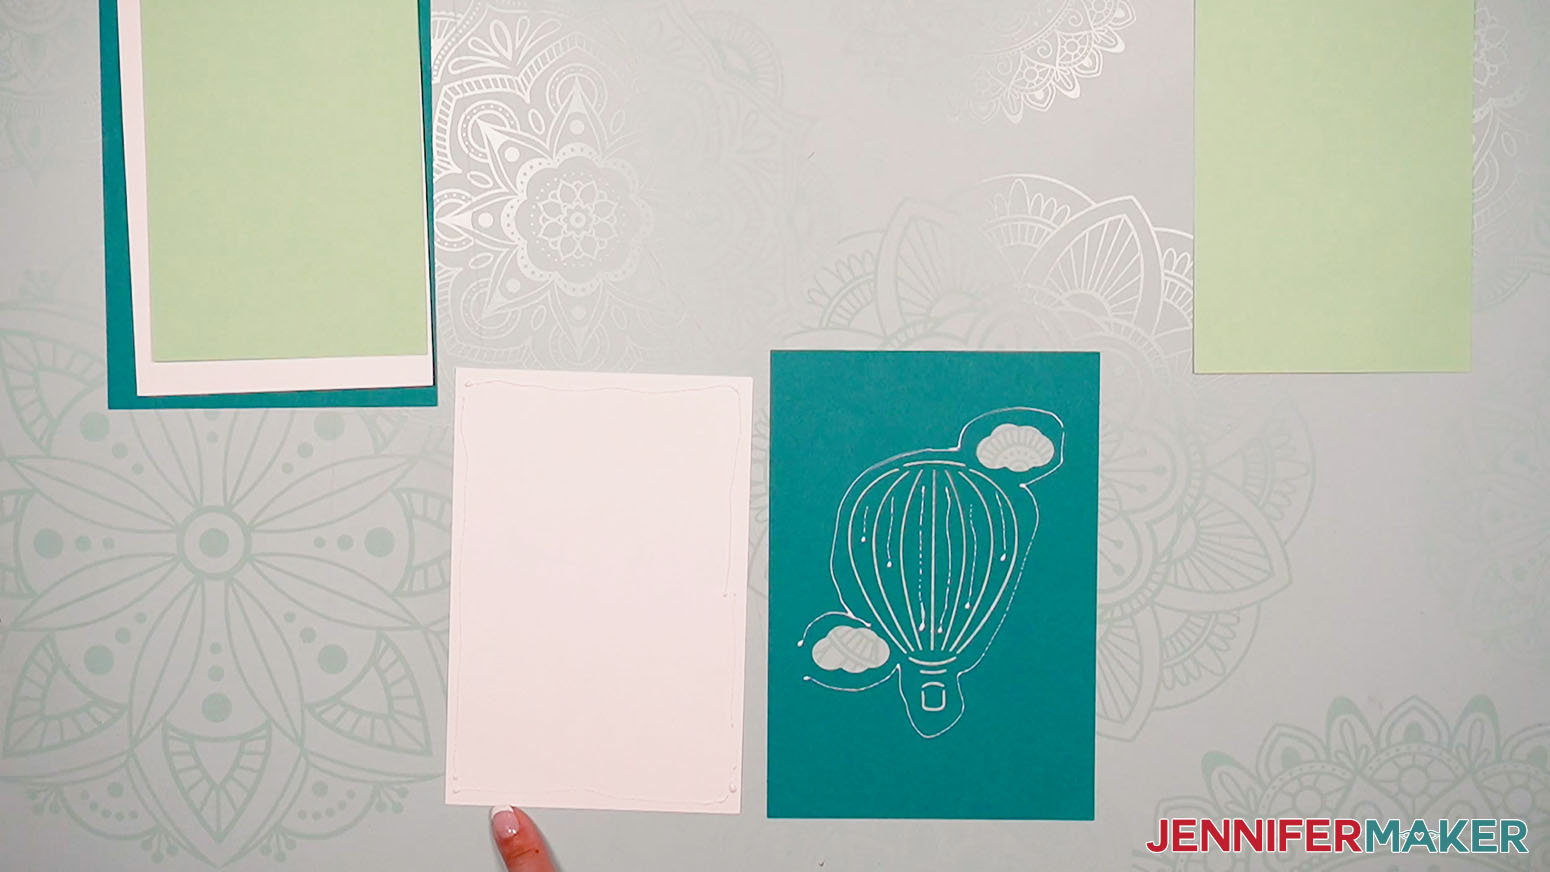
Then add glue around the edges of a V piece on the back.
Flip over the V piece and place it on top of the front cover. Line up the right edges and center them vertically.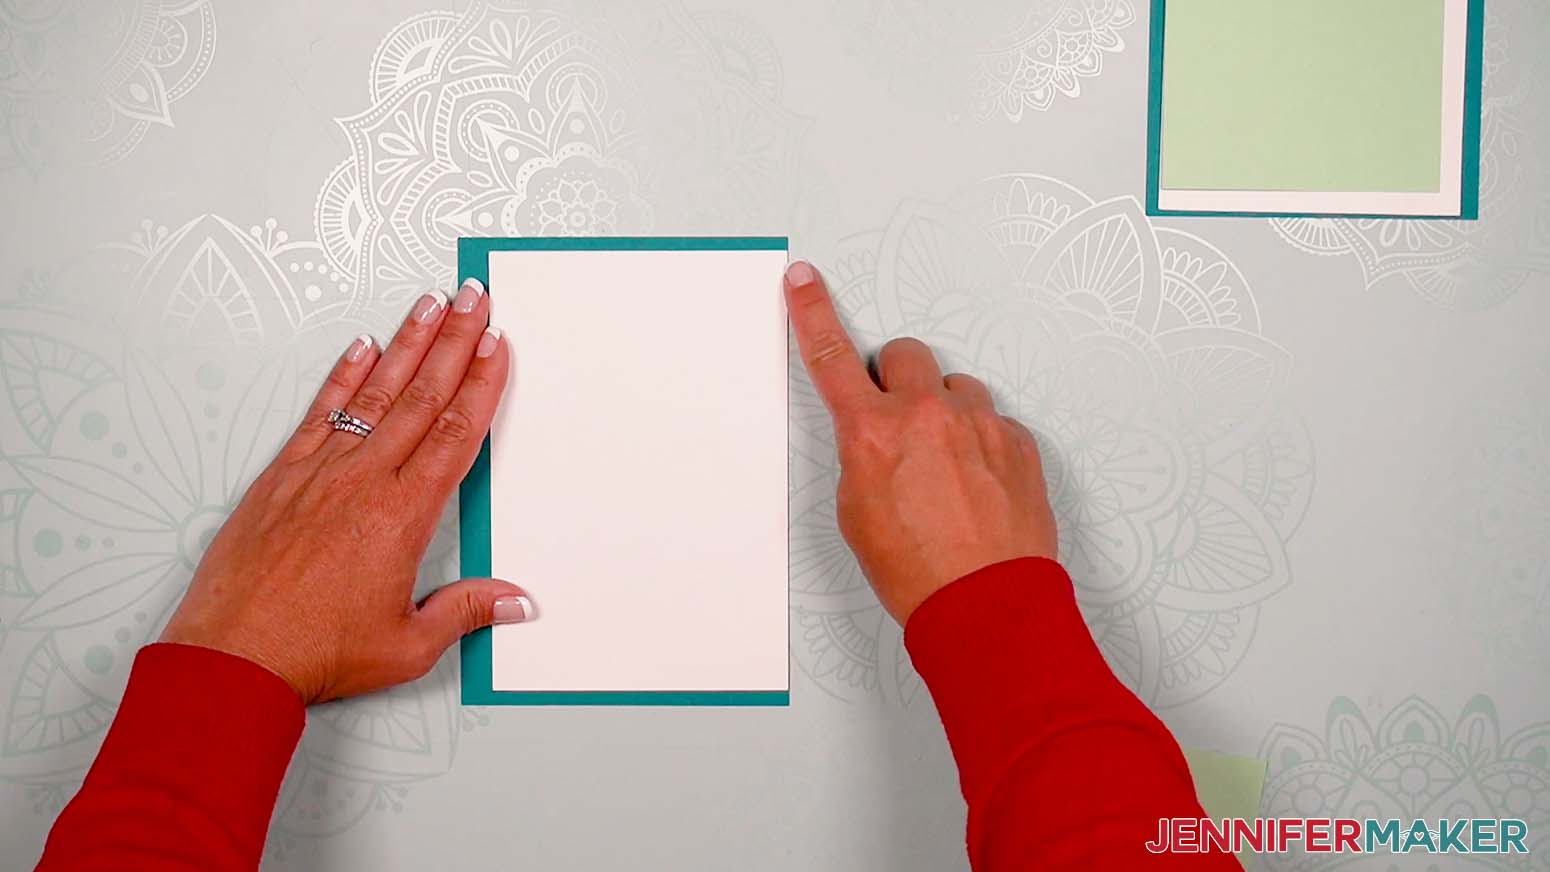
Add piece W on top, using the same alignment.
Then make the back cover in the same order. Align the left edges for the back, though, and place it close to the front to make sure the colored pieces will be even across the fold.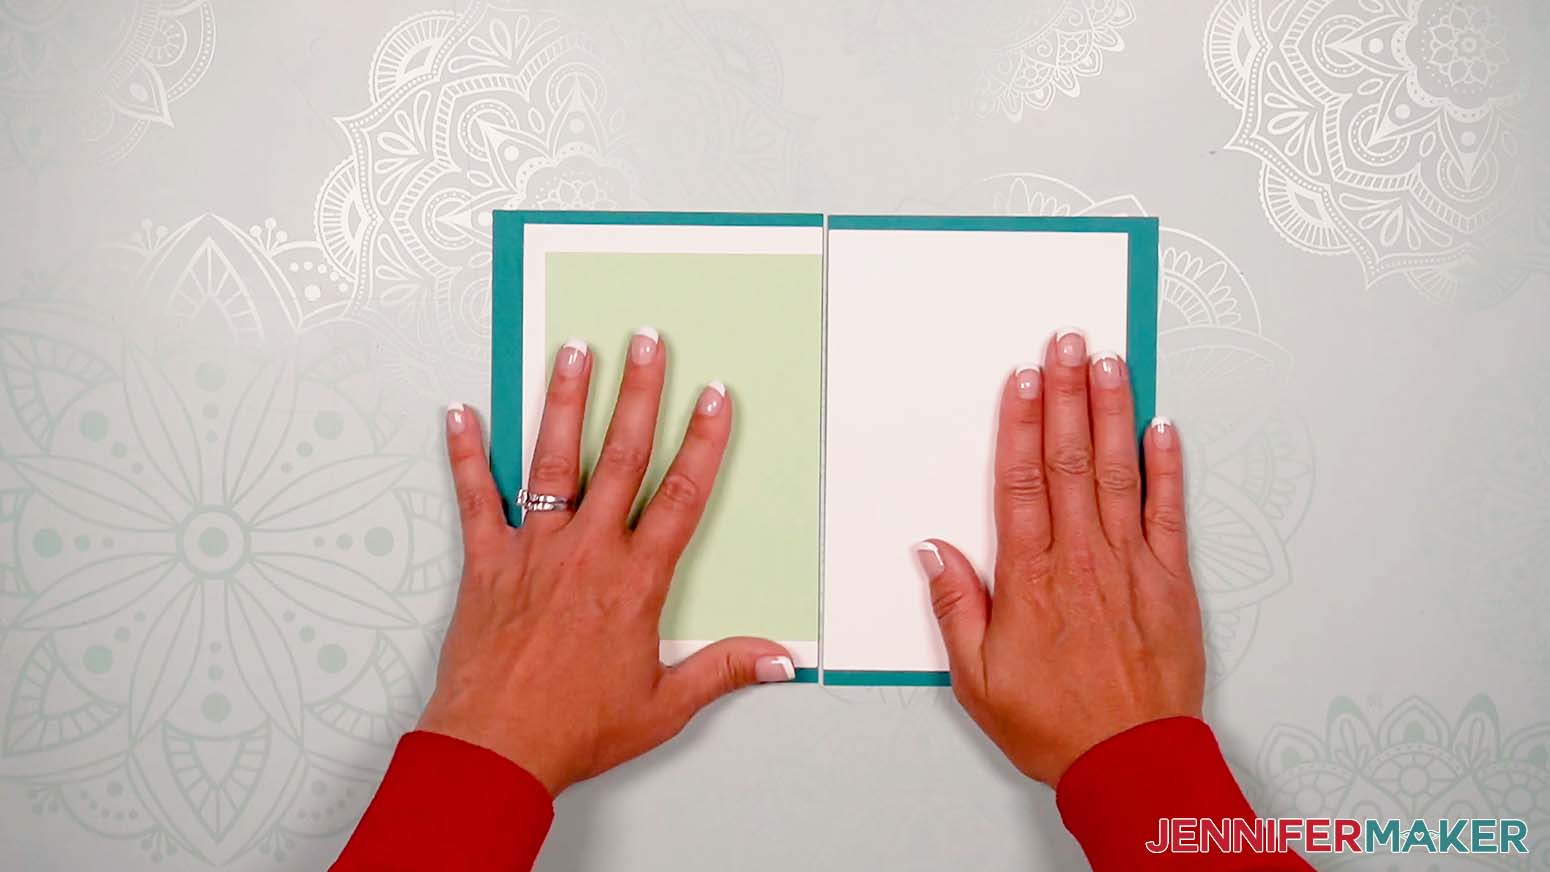
Once the cover assemblies have dried, place your balloon structure on top, lining up the crease in the sky where the covers join. Make sure everything will fit and close, then add glue to the back of the sky that will attach to the inner front cover.
Press it in place, making sure the sky fold is about an eighth of an inch beyond the cover’s edge. That will help it fold and shift smoothly. You can get a clearer view from the front.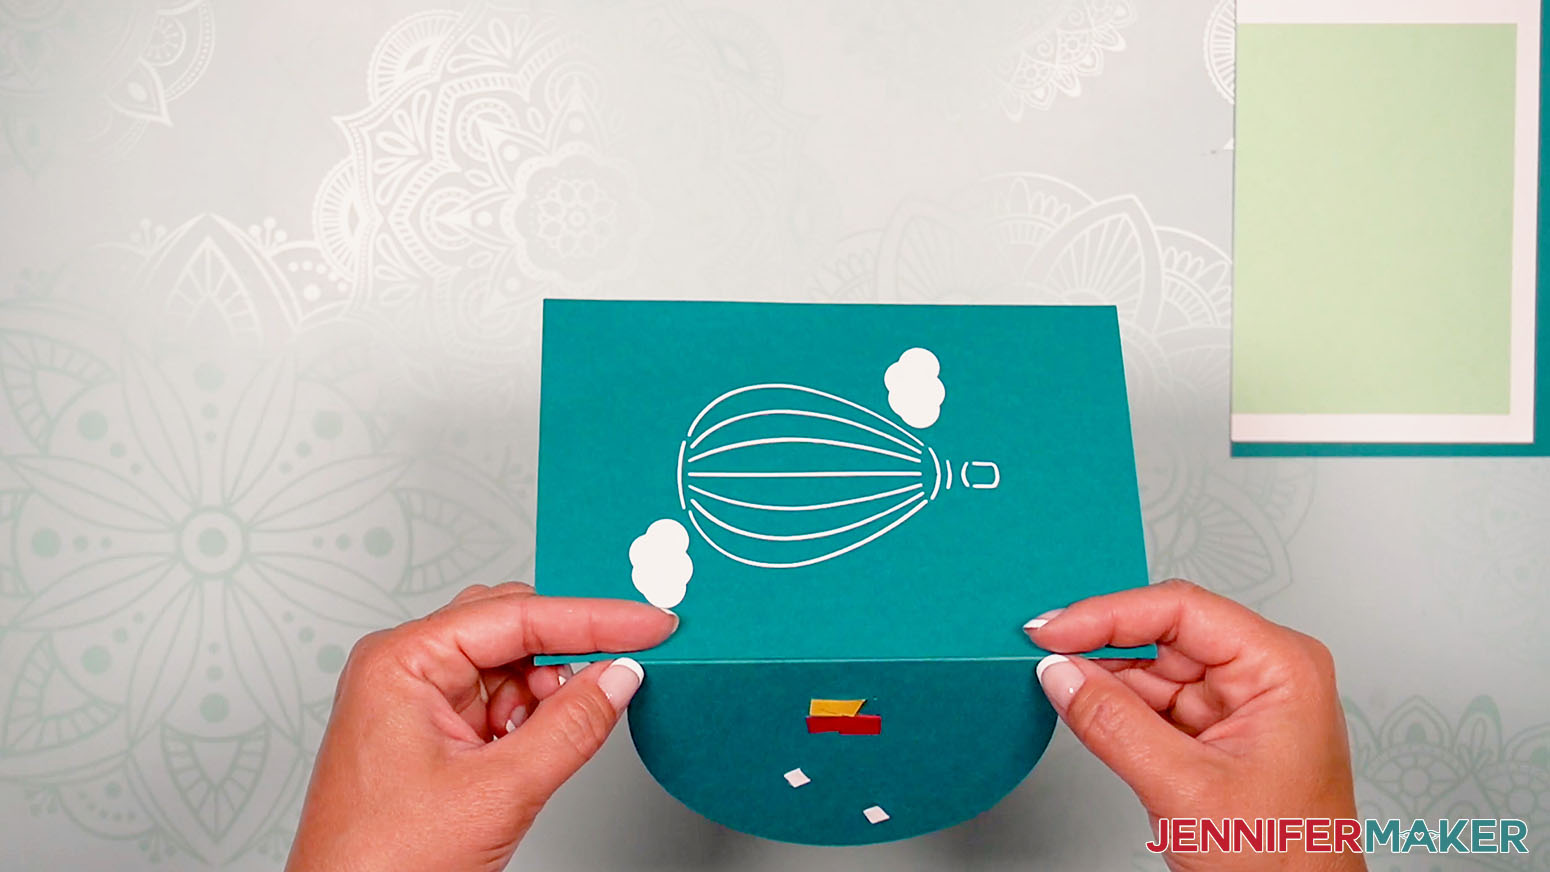
Place glue on the bottom of the other half of the sky piece. Line the back cover up with the front at the center cut. 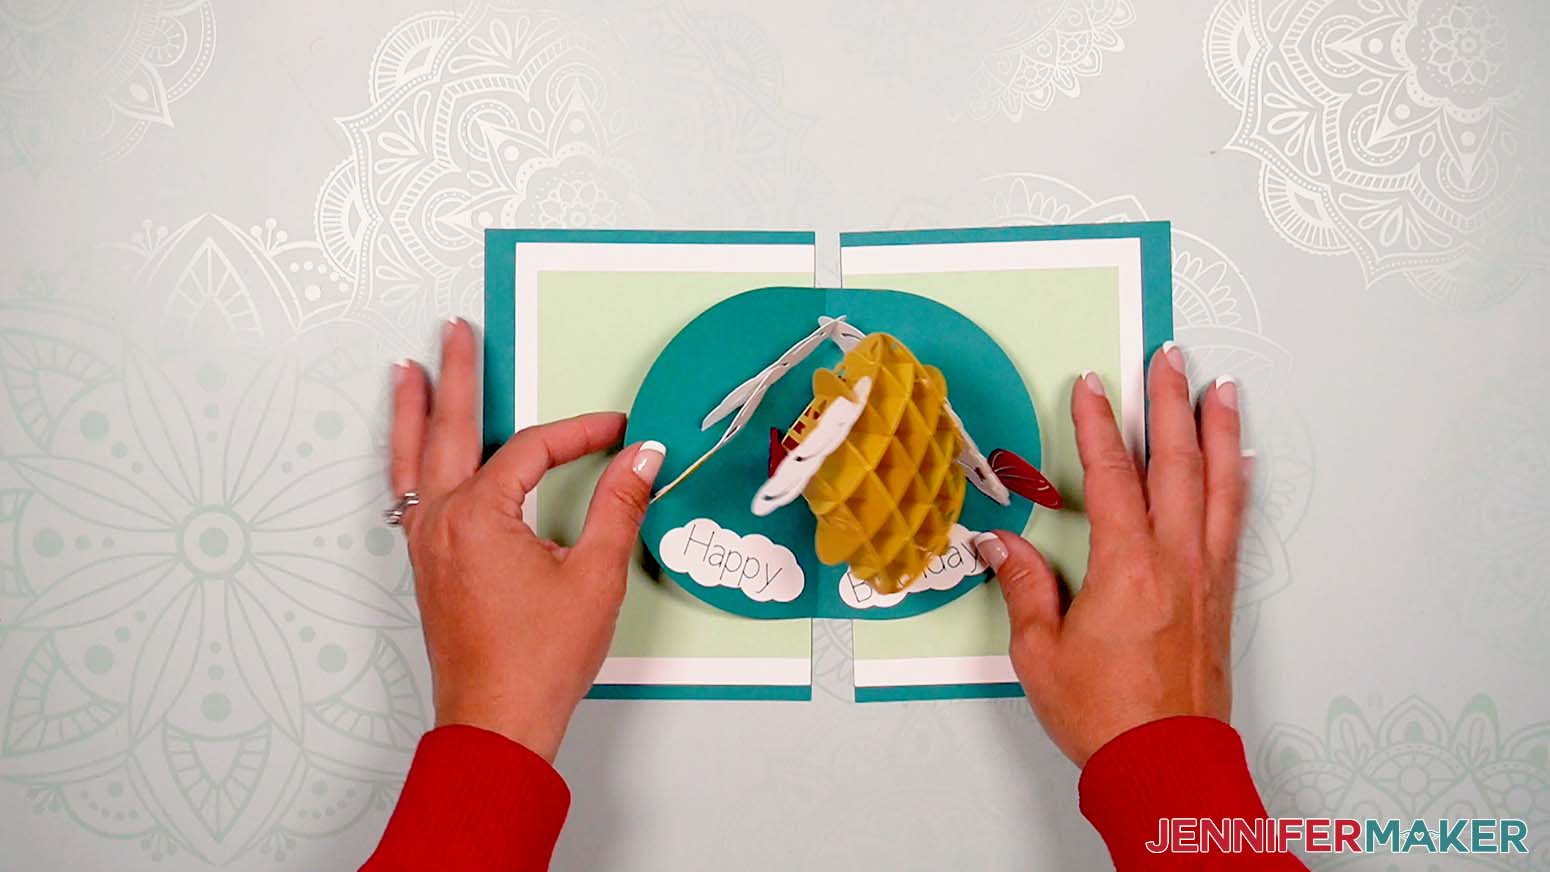
Carefully bring it up to meet the glue.
Press everything in place until it dries. Make sure it opens and closes smoothly and you’re all set!
STEP 5: SHOW IT OFF!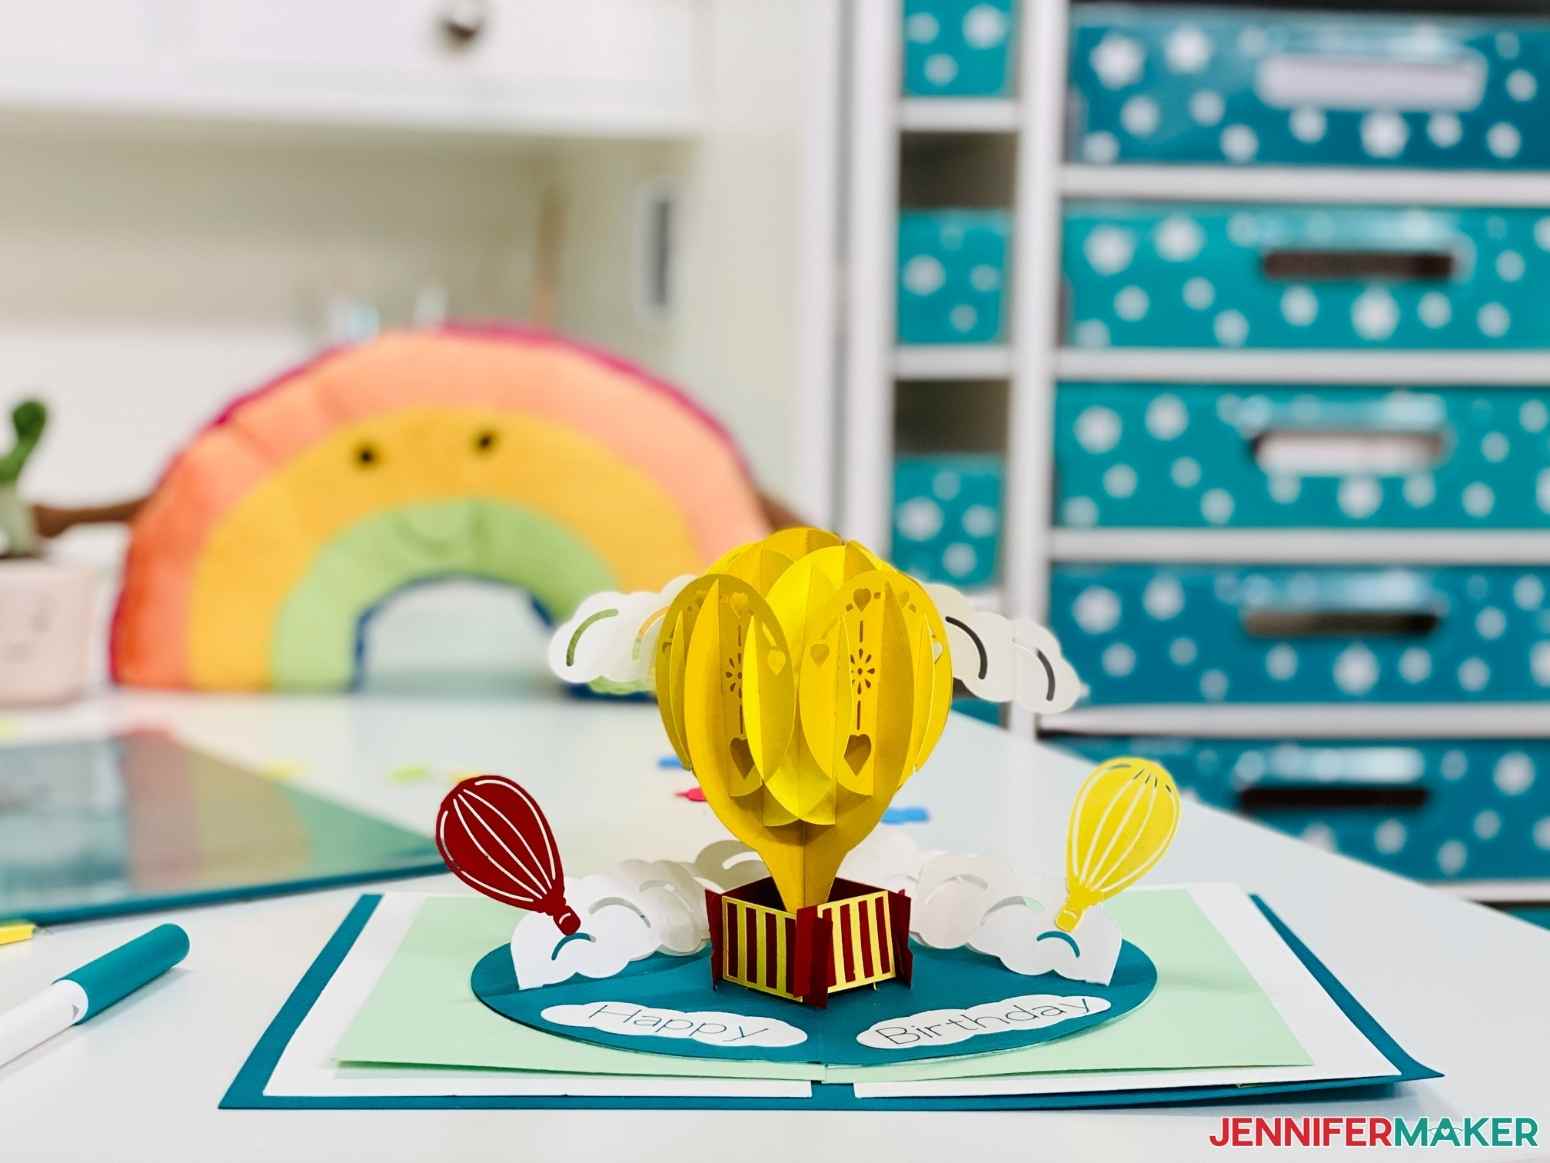
Notes
Answers to Your Questions on How to Make a Birthday Card Pop Up Design
Q: Can you make pop-up cards with a Cricut?
You can use any Cricut to make handmade cards with pop up elements, but this design is too large for a Cricut Joy. You will use the fine-point blade to cut out the shapes and add crease lines, then assemble the pieces and glue the tabs together!
Q. What do I need for Cricut card making?
All you really need is some card stock, a blade, your cutting machine, glue, and a mat.
Q. How do you make a pop up birthday card?
You can make a handmade card with a pop up design easily by following my tutorial.

Q. Will these cards cost more postage to mail?
Depending on your handmade pop up card’s dimensions, thickness, and weight, it may cost more than an average card. I recommend measuring and weighing it and then checking with your mail service just in case.
Q. How do you use Cricut pens to make cards?
The Cricut Pens make writing on the inside of cards easy! By attaching the message to a cut layer, the Cricut will write your note in the correct spot. If you want to add a handwritten message, ballpoint pens work well on cardstock, just make sure the ink is flowing first on a scrap of paper.
Get my free SVG files to make a Birthday Card Pop Up Design
I’d love to see YOUR birthday card pop up projects made with this tutorial! Please share a photo in our Facebook group or tag me on social media with #jennifermaker.
Love,

Want to remember this? Save this tutorial on making a Birthday Card Pop Up to your favorite Pinterest Board!