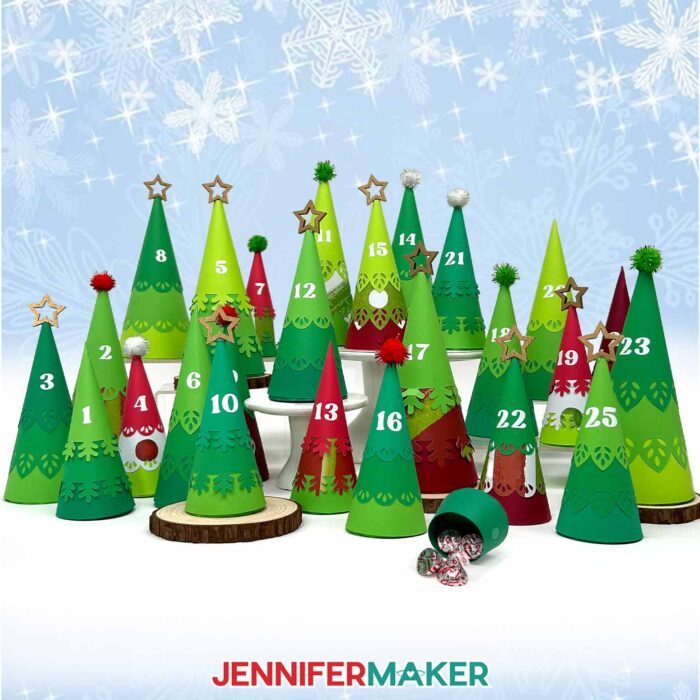
Learn how to make a cute and easy minimalist tree Advent calendar with cardstock cone trees!
Each year, as the Christmas season rolls around, I find myself in countdown mode. Isn’t it fun to have something special to mark the days from December 1st to Christmas Day? One year, I used a store-bought calendar with tiny drawers, but it didn’t feel very personal. It was cute, but lacked that handmade touch I love. That’s when I realized there had to be a better way to create a meaningful Christmas countdown that matched my style, and it was up to me to make it! I’ve made many countdown projects since then, but this minimalist tree Advent calendar, is one of my favorites!
See the full step-by-step video tutorial on how to make a minimalist cone tree Advent calendar:

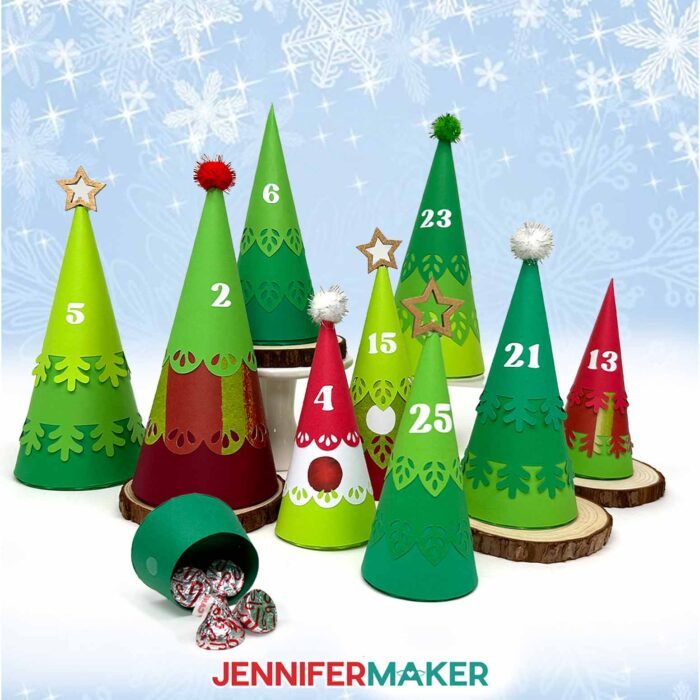
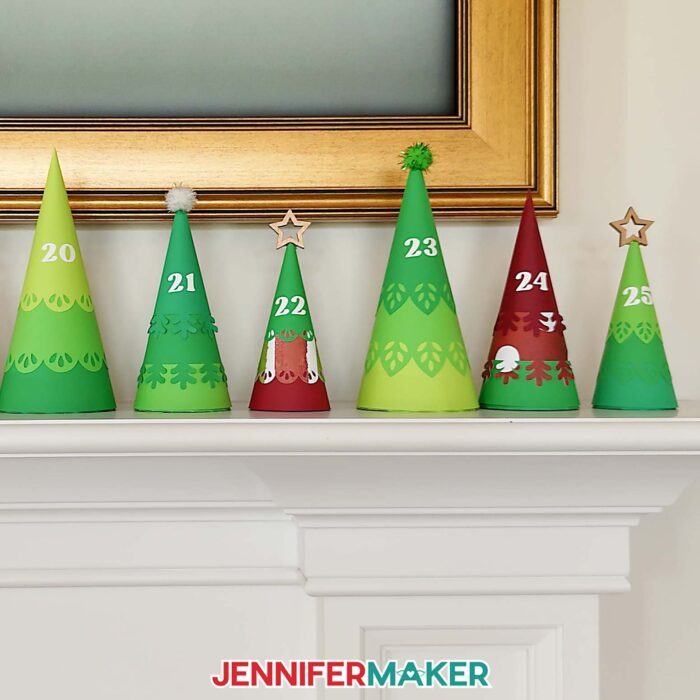
These sweet cone-shaped trees open to reveal daily surprises like some tiny treats, a little note, or anything small that you can dream up. And best of all? They double as festive Christmas decor! This isn’t just a project, it’s a fun way to get into the holiday spirit, and a beautiful piece of home decor you’ll be proud to display year after year.

The process to make this DIY Advent calendar is surprisingly simple, and it all starts with the free cut files available in my library. With just some medium-weight cardstock, permanent vinyl, craft glue, a Cricut machine, and a bit of patience, you can make a full set of 25 trees.

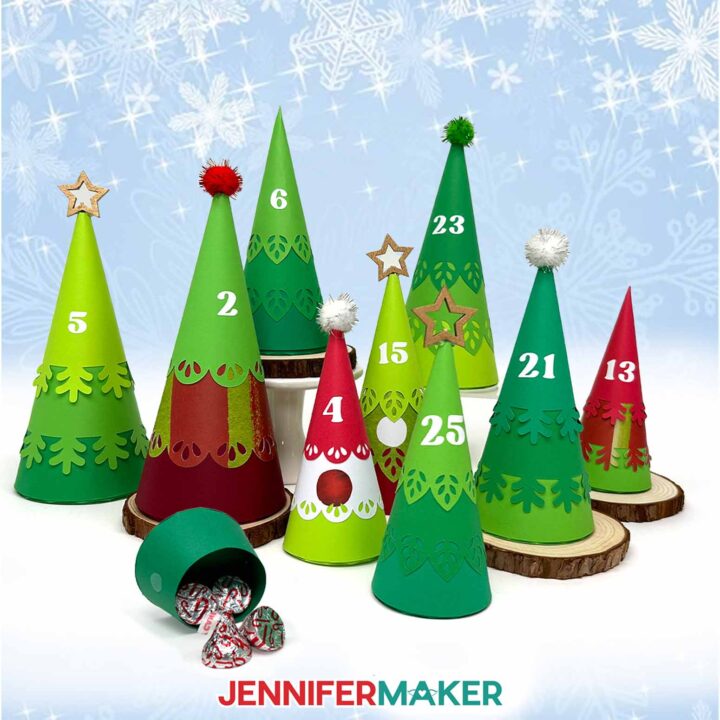
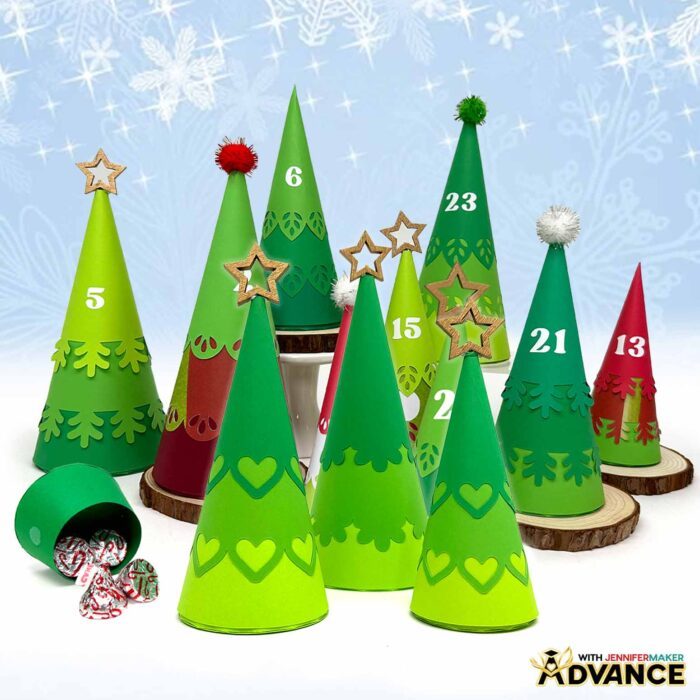
They come in three different styles (lace, pine, and leaf designs) and three sizes (small, medium, and large). You can choose a curved or pointed top, depending on whether you want to add a topper like a pom pom or a star, or keep things minimal. You can even skip the additional layers and just make a solid cone to keep it extra easy! And with the help of a handy printable planning sheet, you’ll have all your tree designs, colors, and toppers mapped out before you even start cutting.
That planning sheet makes a huge difference, especially when you’re crafting multiple trees. It’s so easy to lose track of what piece or which paper goes with which design, and the guide keeps everything organized. You can mix and match cardstock and patterns to suit your aesthetic, and use a coordinated color scheme across your Christmas Advent calendar. And if you want to get your family members involved, this makes a wonderful group project, where each person can design trees of their own!

Once you upload the SVGs into Cricut Design Space, I walk you through how to prepare your minimalist tree Advent calendar, like how to change the colors to match your supplies, and how to set and attach the score lines if you’re using the “score” version. If you don’t have a scoring stylus or scoring wheel, you can use the “no-score” version that uses your standard Fine-Point blade and dashed lines for easy folding. And if you don’t have a cutting machine yet, I’ve got printable PDFs so you can cut your pieces by hand.
I share tips in the video tutorial for how to combine mats to save materials, rotate pieces for better placement, and adjust your settings to get cleaner cuts … all the things that take a project from frustrating to fabulous!

But assembly is where the real magic happens. Each tree has three layers that curl into cones using a bone folder or pen. I’ll walk you through how to glue the seams together, stack them, and perch the full tree on a small gift box base. For a clever removable design, I use hook and loop dots (also known as Velcro) so you can take the tree off the base and reuse it again next year.

And if you want to decorate the tops, you can glue stars, pom poms, or any other embellishment you like. The vinyl numbers get added last with transfer tape. I’ll show you exactly how to do it gently in the video tutorial.
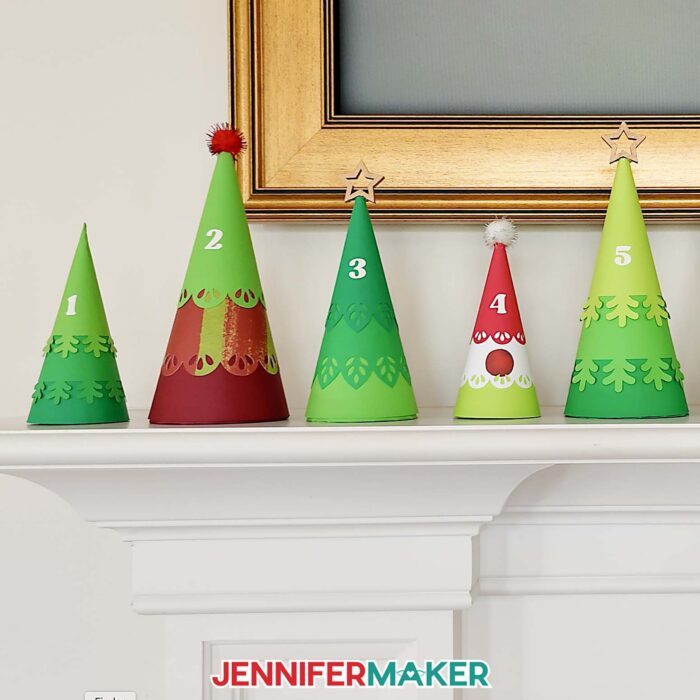
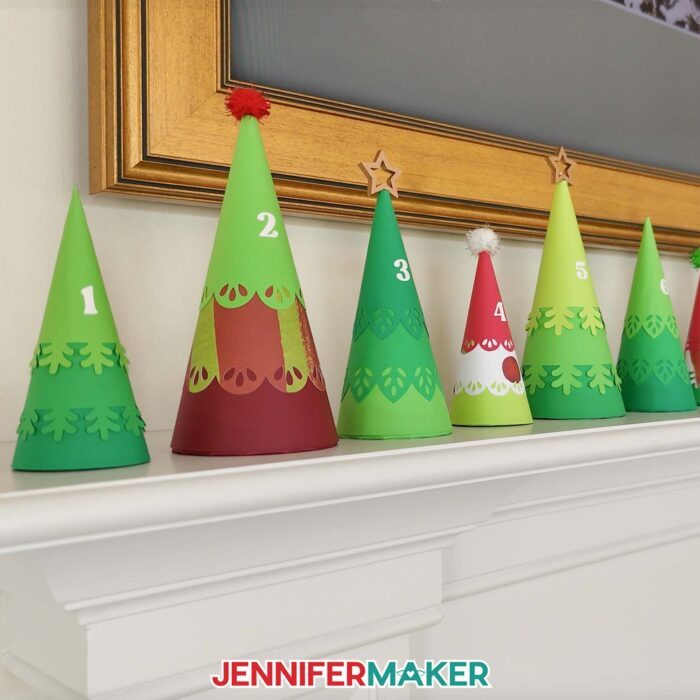
Once your minimalist tree Advent calendar is finished, it’s time to fill it up and put it on display. You can tuck a different item inside each tree, like a little note, some candy, a small trinket, or even a clue in a scavenger hunt. It’s such a sweet way to count down the days to Christmas, and it adds a warm, handmade touch to your holiday season. Display your Advent trees on a fireplace mantel, nestle them among books on a shelf, or turn them into an interactive holiday centerpiece. However you use them, they make beautiful, functional Christmas decor that brings a little magic to every December morning.
Want to take your Advent calendar to the next level? Inside ADVANCE with JenniferMaker, I’ll show you how to design your own custom tree edges using Cricut Design Space — so you can create a truly one-of-a-kind Christmas countdown. You’ll also get access to exclusive tools, workshops, and support to help you personalize every tree and make this project even more special. Join us in Advance and craft something unforgettable! Learn more about ADVANCE with JenniferMaker here!

Let’s make something you’ll love waking up to every day, and a project worth bringing out again next Christmas! If you’re feeling inspired, be sure to watch the full video tutorial where I show you every step, from uploading the files to cutting and assembling the trees. And when you open your first tree on December 1st, just know I’ll be thinking of you, smiling, and cheering you on as I open my own little tree!
Let me show you how to make a minimalist tree Advent calendar! This post contains some affiliate links for your convenience (which means if you make a purchase after clicking a link I will earn a small commission but it won’t cost you a penny more, there is no additional cost)! Read my full disclosure policy.
Materials to Make a Cone Tree Advent Calendar
View my Amazon shopping list with the exact items I used.
- About Sixty (60) Sheets of 8.5″ x 11″ 65 lb. Cardstock (any colors) – I used a Recollections “Feathered Greens” Pack (alternative 1, alternative 2) -AND-
- Recollections “Shades of Red” Pack (alternative 1, alternative 2)-AND-
- Whaline 11.8″ x 11.8″ Christmas Pattern Cardstock
- Permanent Vinyl (I used White Cricut Value Vinyl)
- Twenty-Five (25) Pom Poms (optional for tops of trees)
- Twenty-Five (25) Star Bamboo Picks (optional for tops of trees)
- FIfty (50) Sets of 3/8″ Clear Hook and Loop Dots (optional to attach the tree to the top of the base)
- A way to cut your materials – I’m using the Cricut Maker 4, but you can use any Maker series machine, an Explore series machine, the Venture, the Joy Xtra, or the Joy for small trees
- Cricut Green StandardGrip Machine Mat 12″ x 12″
- Scoring Stylus (optional for files with score lines) -OR-
- Single Scoring Wheel (optional for files with score lines)
- Brayer
- Spatula
- Scraper
- Weeding Tool
- Reverse-Action Tweezers -AND-
- Clothes Pins (optional for holding pieces while gluing)
- Scissors
- Craft Glue (I used Bearly Art Precision Craft Glue)
- Hot Glue Gun and Glue Sticks (optional for attaching the pom poms and stars)
- Silicone Finger Protectors (optional for use with hot glue)
- Wire Cutters (optional for cutting bamboo picks)
- Cricut Pen (optional for curving cardstock before gluing) -OR-
- Bone Folder (optional before curving cardstock before gluing)
- Pencil (optional for marking vinyl placement) -AND-
- Measuring Tape or Ruler
- Scraper Tool

How to Make a Minimalist Tree Advent Calendar!
Minimalist Tree Advent Calendar
Learn how to make a cute and easy minimalist tree advent calendar with cardstock cone trees!
Materials
- About Sixty (60) Sheets of 8.5” x 11” 65 lb. Cardstock (any colors) - I used Recollections Feathered Greens -OR-
- 12" x 12" 65 lb. Green Palette Cardstock -AND-
- Recollections 8.5" x 11" 65 lb. Shades of Red Cardstock -OR-
- 12" x 12" 65 lb. Red Palette Cardstock -OR-
- 12" x 12" 65 lb. Cardstock (in various colors) -AND-
- Whaline 11.8" x 11.8" Christmas Pattern Cardstock
- Permanent Vinyl (I used White Cricut Value Vinyl)
- StandardGrip Transfer Tape
- Twenty-Five (25) 2cm Pom Poms (optional for tops of trees) -OR-
- Twenty-Five (25) Star Bamboo Picks (optional for tops of trees)
- Fifty (50) Sets of 3/8" Clear Hook and Loop Dots (optional to attach the tree top to the base)
- Design #771 (My free SVG/PDF/DXF design files are available in my free resource library - get the password by filling out the form at the bottom of this page)
Tools
- A way to cut your materials - I’m using the Cricut Maker 4, but you can use any Maker series machine, an Explore series machine, the Venture, the Joy Xtra, or the Joy for the small trees
- Cricut Green StandardGrip Machine Mat 12" x 12"
- Brayer
- Spatula
- Scraper
- Weeding Tool
- Reverse-Action Tweezers -AND-
- Clothes Pins (optional for holding pieces while gluing)
- Scissors
- Craft Glue (I used Bearly Art Precision Glue)
- Hot Glue Gun and Glue Sticks (optional for attaching the pom poms and stars)
- Silicone Finger Protectors (optional for use with hot glue)
- Scoring Stylus (optional for files with score lines) -OR-
- Single Scoring Wheel (optional for files with score lines)
- Wire Cutters (optional for cutting bamboo picks)
- Cricut Pen or Other Cylindrical Object (optional for curving cardstock before gluing) -OR-
- Bone Folder (optional for curving cardstock before gluing)
- Pencil (optional for marking vinyl placement) -AND-
- Measuring Tape or Ruler
Instructions
STEP 1: GET MY FREE MINIMALIST TREE ADVENT CALENDAR DESIGNS
First, download my Minimalist Tree Advent Calendar files from my free library – look for Design #771. Alternatively, you can use the Save This Project form near the top of this post and the design link will be emailed to you.
In the SVG folder, you’ll find “score” and “no-score” versions of my “small,” “medium,” and “large” tree designs to cut on a cutting machine. The “score” versions require a Scoring Stylus or Single Scoring Wheel to create smooth lines for folding and alignment. If you don’t have a scoring tool, or if you prefer dashed cut lines, you can use the “no-score” versions instead. You’ll find a “numbers” SVG file for creating vinyl decals in this folder, as well.
Inside the PDF folder, you’ll find a planning sheet to help keep track of all your tree design choices, as well as versions of my designs that you can print and cut by hand. There is also a DXF folder with cut files for use with other cutting machines.
TIP: If you’re not sure how to upload, go to jennifermaker.com/svgs to learn how to unzip and upload SVG files.
STEP 2: PREPARE AND CUT YOUR MINIMALIST TREE ADVENT CALENDAR
CRICUT DESIGN SPACE
- In Cricut Design Space, open a blank Canvas.NOTE: If you’re new to using Cricut Design Space, go to cricutkickoff.com for my introductory tutorial on Design Space basics.
- Click “Upload” and then “Upload Image.”
- Click “Browse.”
- Select the tree SVG file of your choice. NOTE: I’ll pick the “score” version of the 7.5” tall “large” tree design.

- Click “Open,” and then “Continue.”
- Click “Upload” to add the design to your Canvas.
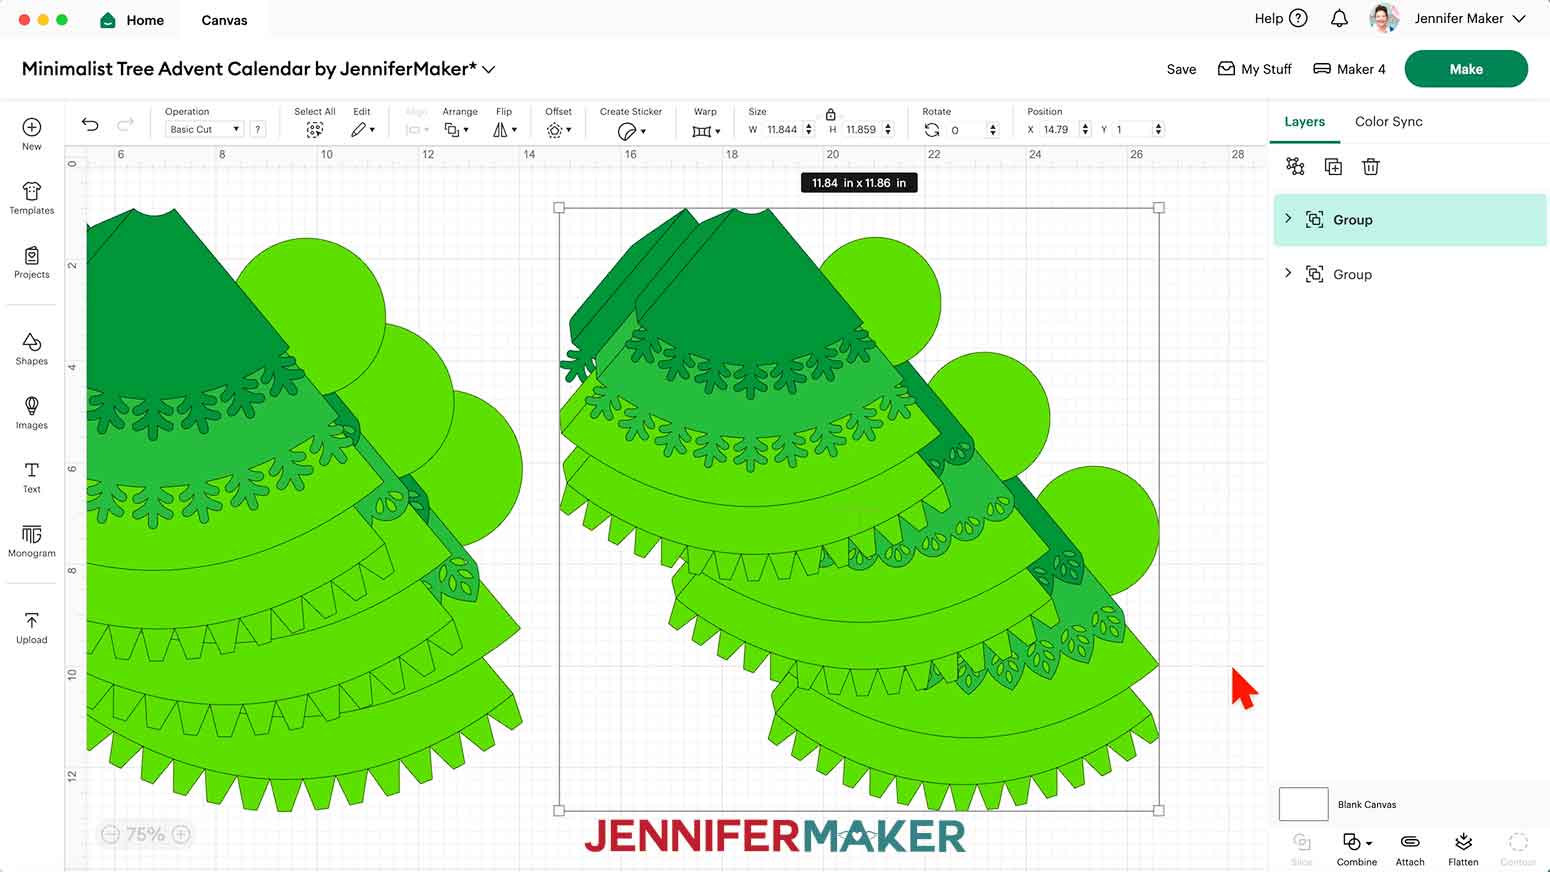
- Repeat Steps 2-6 to add any other tree designs you want to use, and drag them into empty areas on the Canvas.NOTE: I’ll add the “score” versions of the 6.5” tall “medium” and 5.5” tall “small” trees, as well.
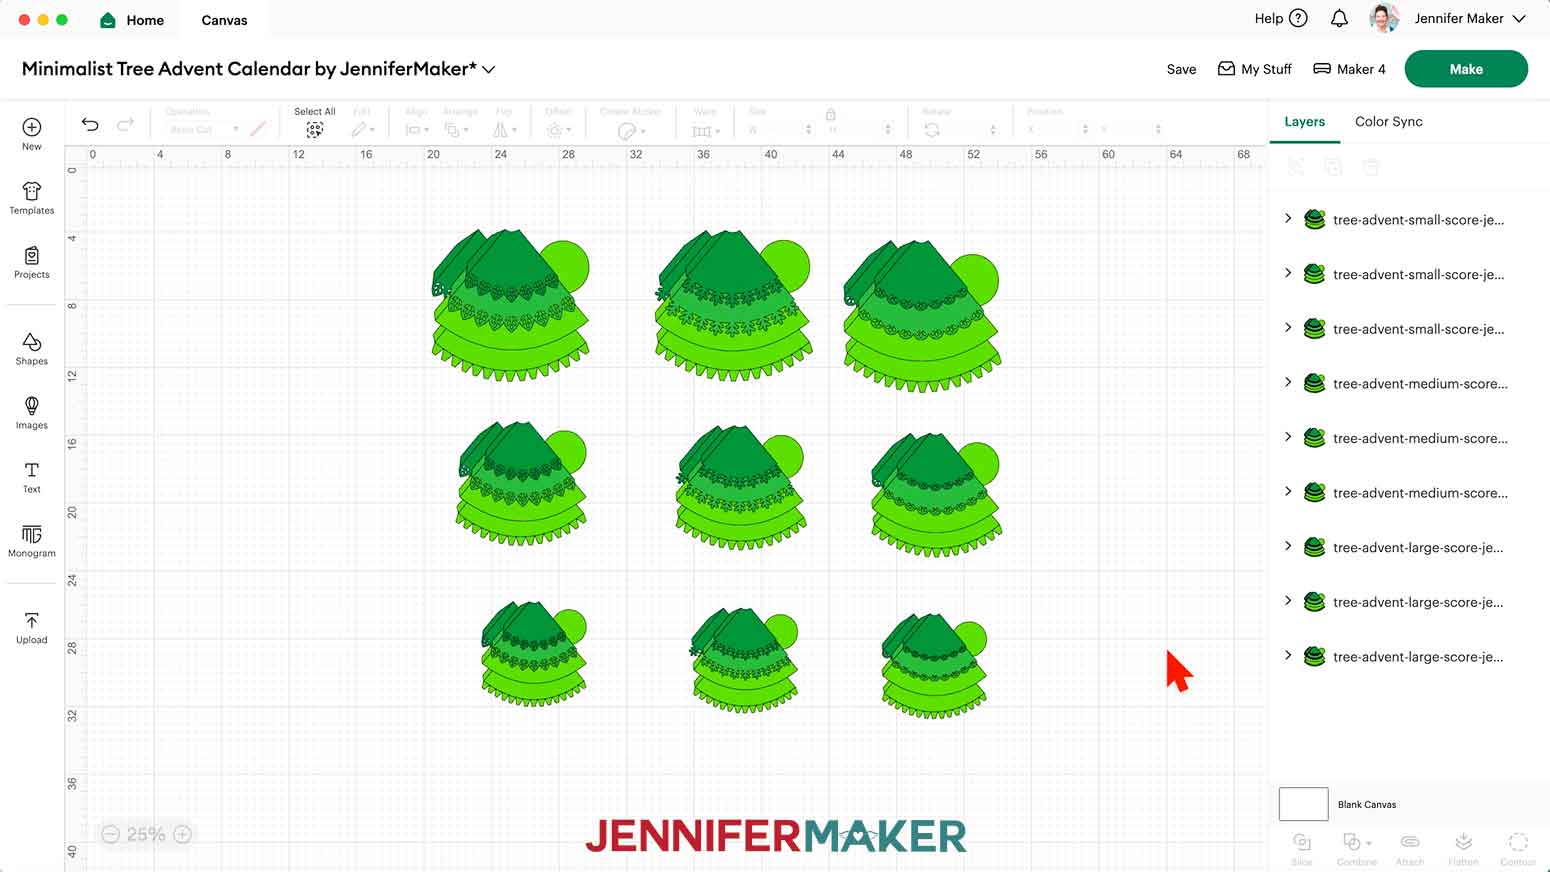
- Click the minus (-) icon in the lower left corner to zoom out, then spread the designs out to see everything on your canvas.NOTE: Each tree SVG has three designs. Each design has a curved top piece, a pointed top piece, a middle piece, a bottom piece, a circle gift box base, and a gift box side panel.
- Click “Save” and give your project a name.
- Ungroup and spread out the pieces for each design. You’ll have nine designs in total if you’re using all three sizes.
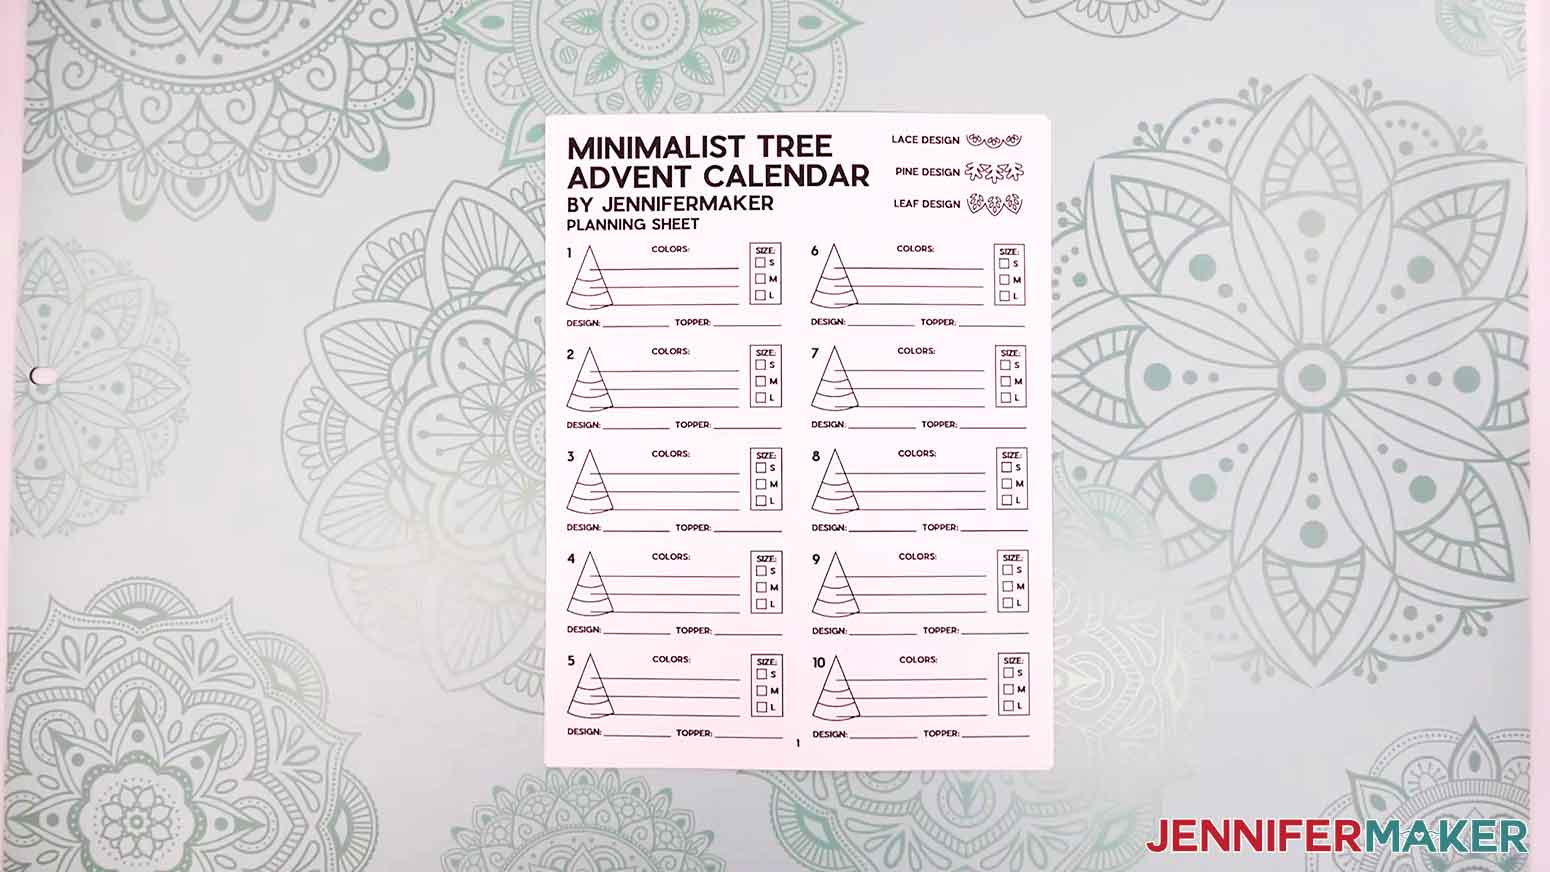
- This project has lots of possible size, design, color, and tree topper combinations. To plan out your trees to match your supplies, open the planning sheet in the PDF folder and print it.
- Check the box beside the size you want for each tree (small, medium, or large).
- Fill in which edge design your tree will use (lace, pine, or leaf).
- Write down which topper you’ll use (star, pom pom, or pointed for no topper).
- Use the provided lines to write down which cardstock color or pattern you’ll use for each tree’s three tiers. TIP: Note which color you’ll use in Cricut Design Space for each cardstock color or pattern, too!
- Use as many of the spaces as you need to plan your tree project! You can refer back to this sheet at any point during design and assembly.TIP: To see a couple examples of how I move from planning to designing my trees in Cricut Design Space, be sure to watch the tutorial video!
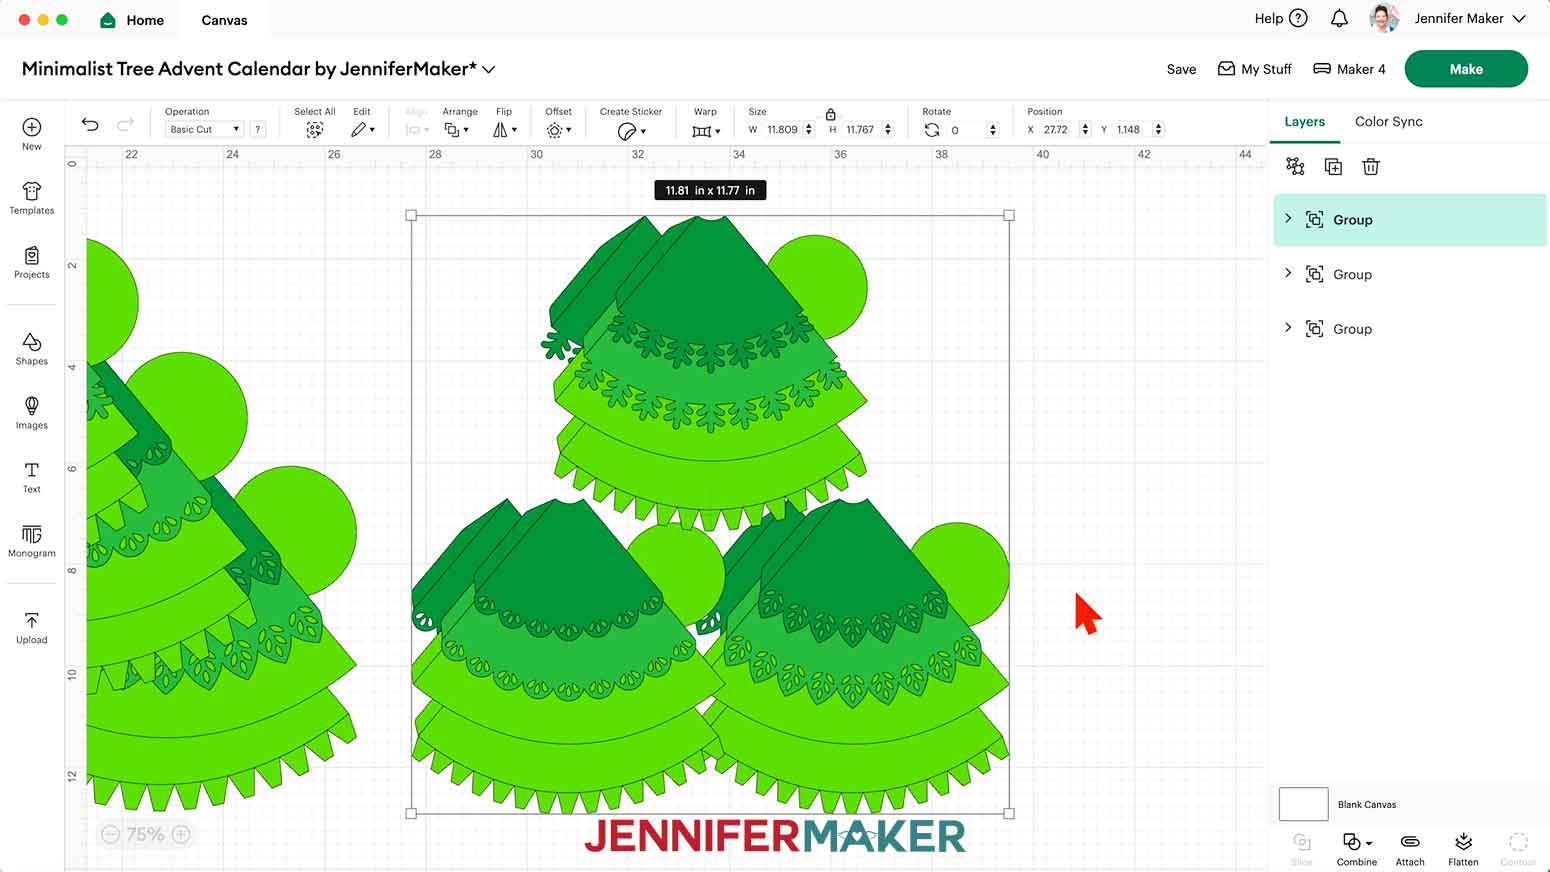
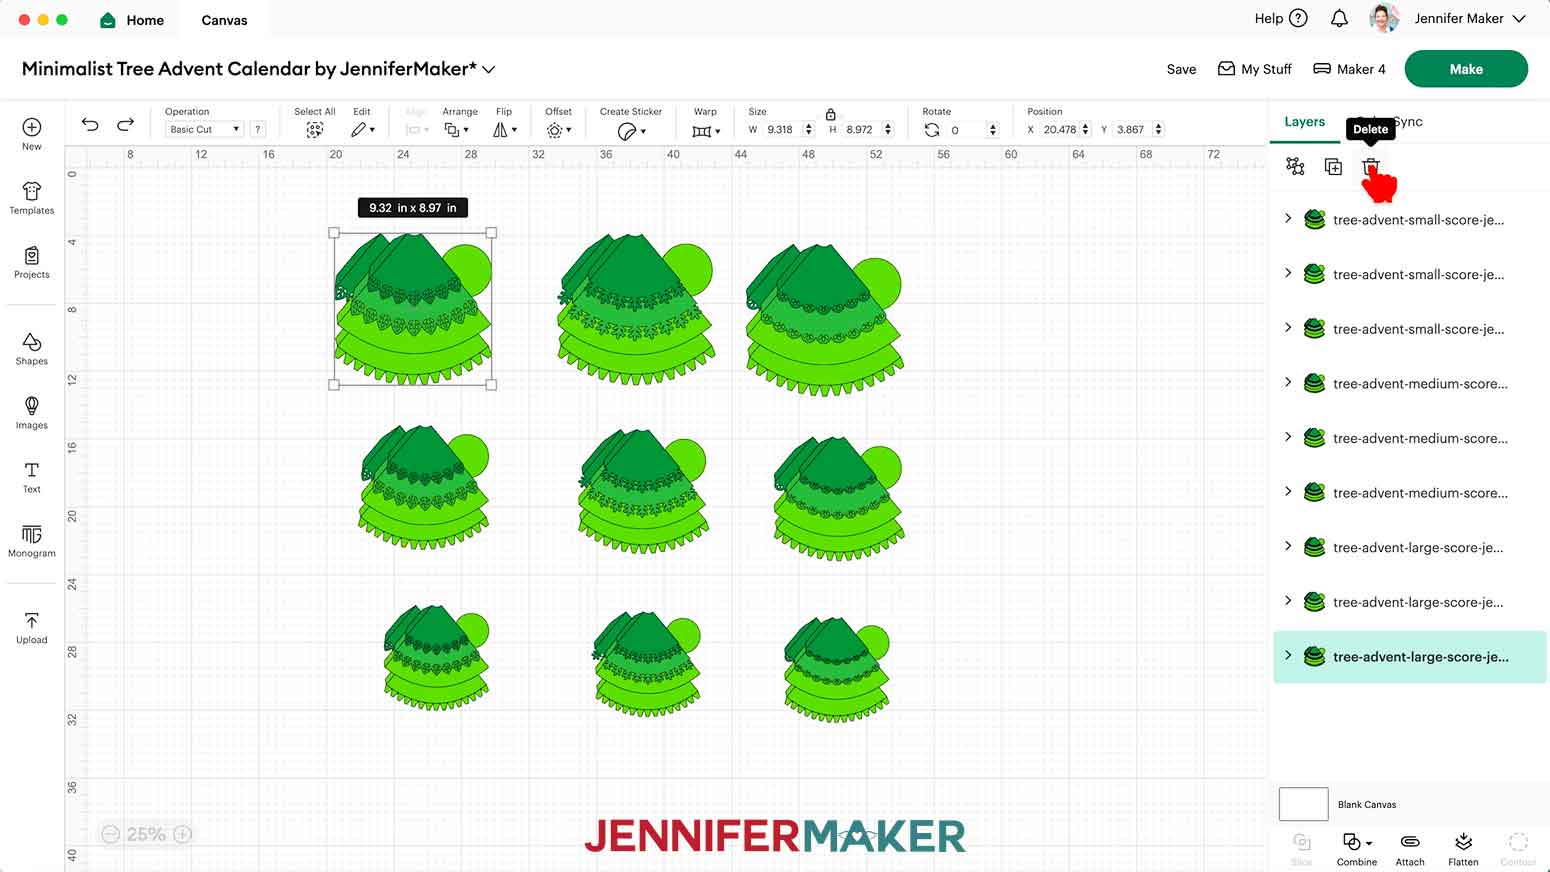
- On your Design Space Canvas, select any of the tree designs you don’t plan to use and click the “Trash” icon to delete them.NOTE: I’ll keep all of the designs for my advent calendar.
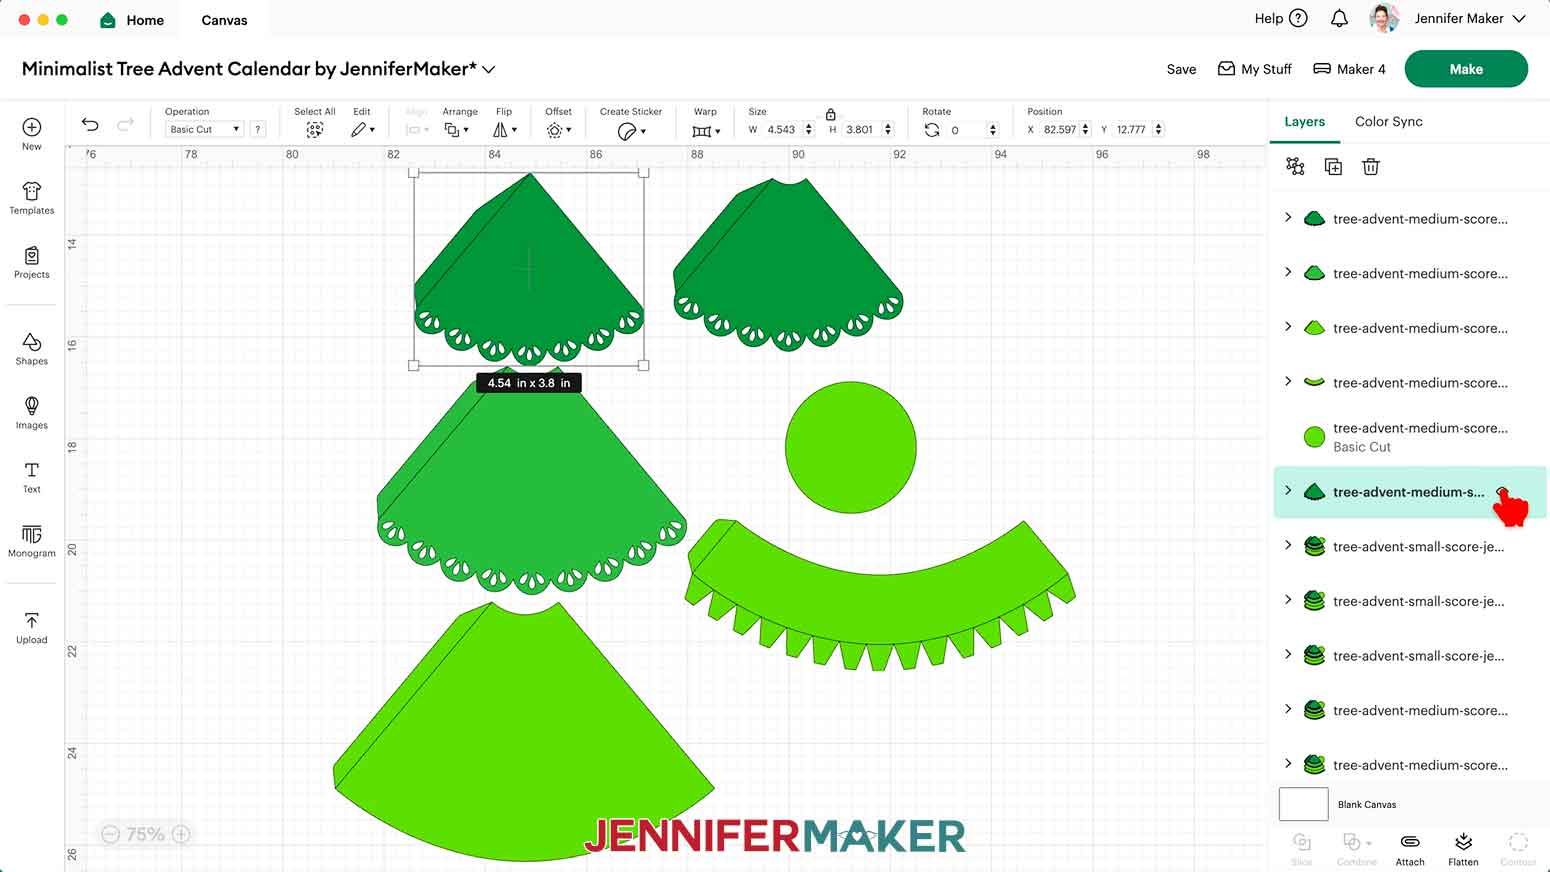
- Select the tree design that matches the first tree on your planning sheet to highlight it in the Layers Panel, then click the “Duplicate” button to create a copy of it.
- Move the copy to a free space on your Canvas.
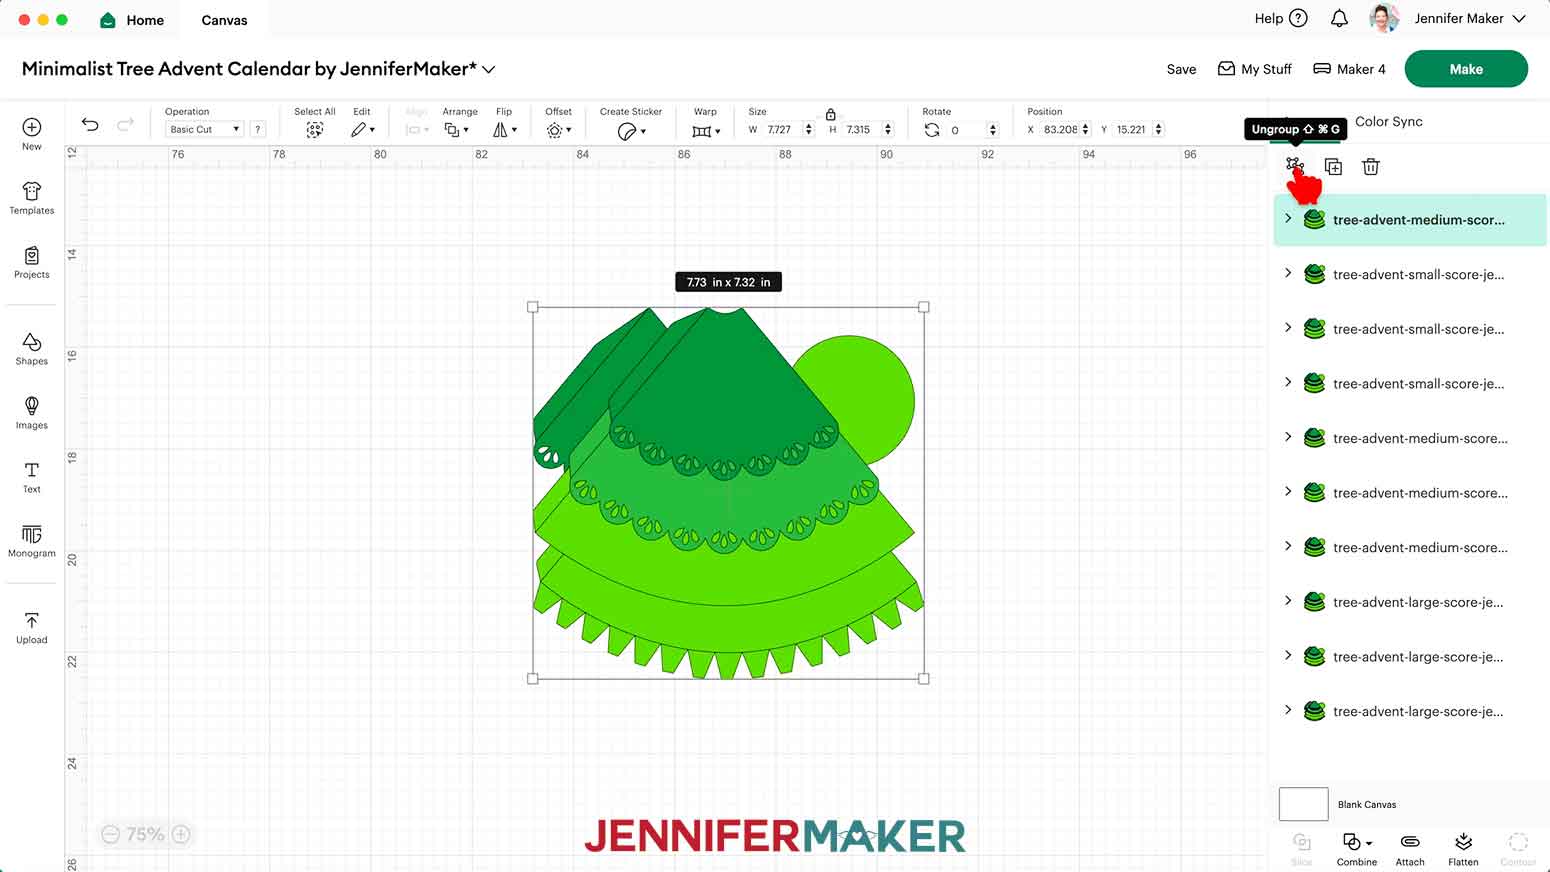
- Then click the “Ungroup” button to see the tree’s six layers in the Layers Panel.
- If you want a topper on the tree, select the group with the pointed top piece and click the “Eye” icon in the Layers Panel to hide it. OR, if you don’t want a topper, select the group with the curved top piece and click the “Eye” icon in the Layers Panel to hide it instead.NOTE: Hiding instead of deleting the unused top layer will allow you to easily switch toppers if making another tree with the same design.
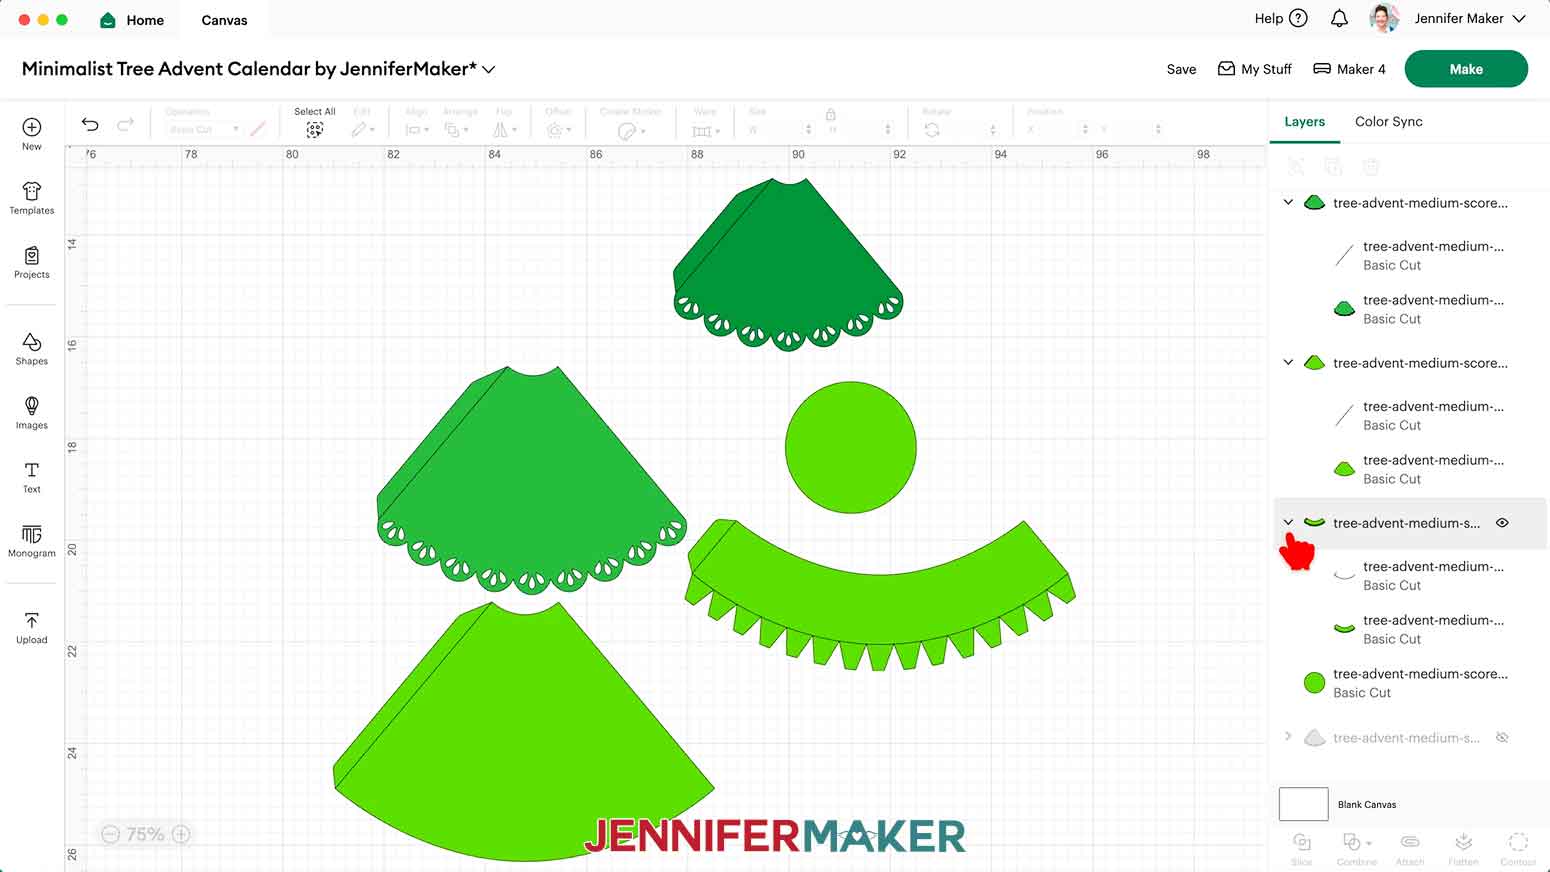
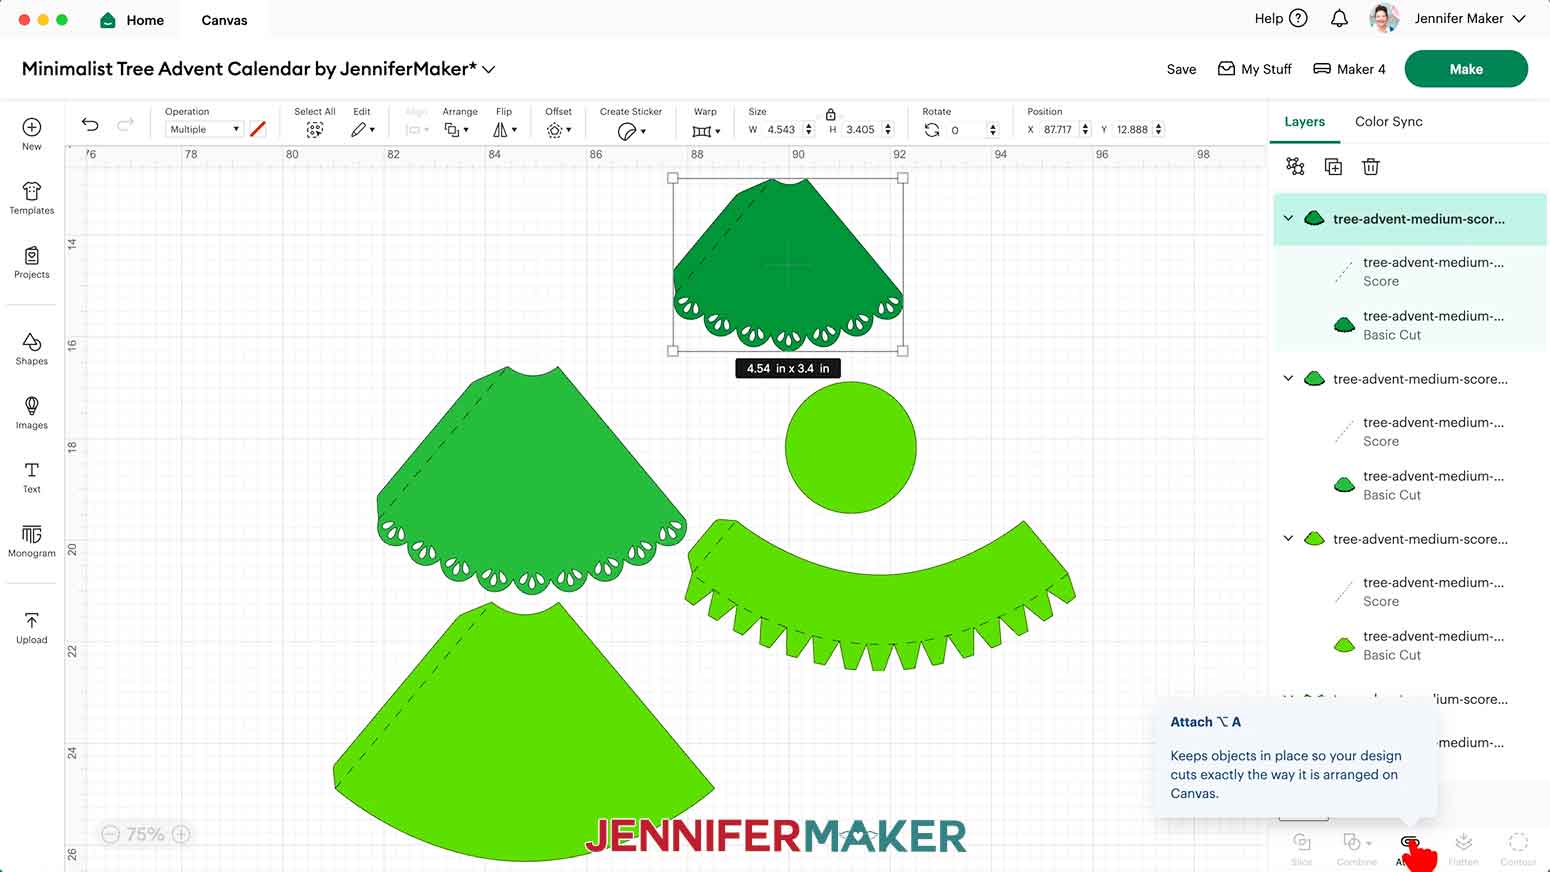
- If you’re using the “score” files, five of the layers are still grouped, as indicated by the small arrow beside them in the Layers Panel.NOTE: We need to adjust these groups to make sure the score lines are drawn onto the cardstock pieces correctly.
- Click the small arrows to expand all five groups and show their layers.
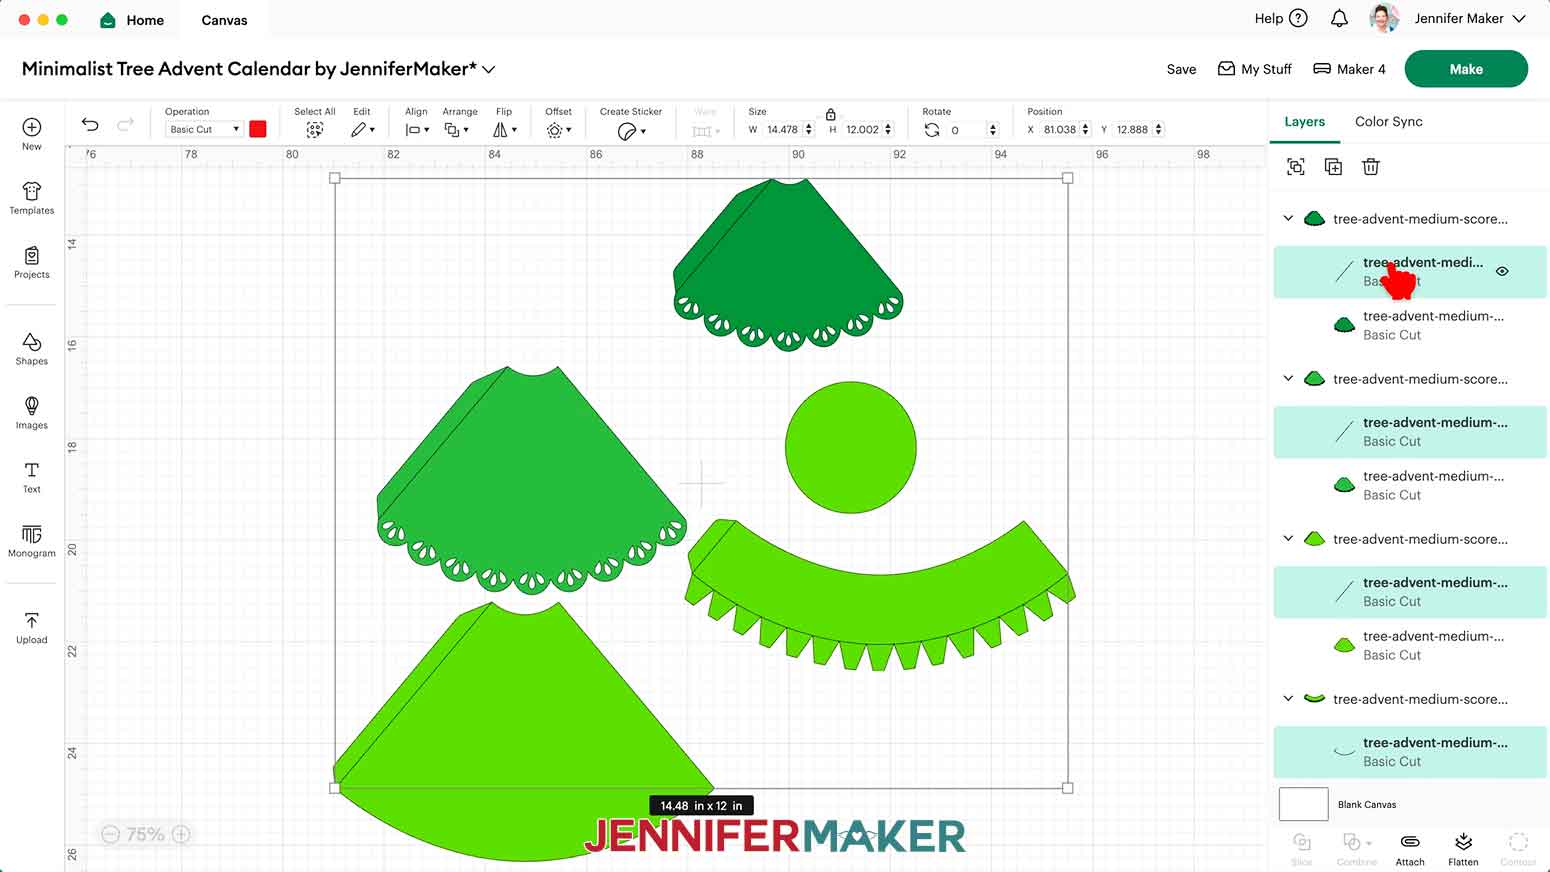
- Select the first group’s top layer with just lines. Then hold down the “Shift” key on your keyboard and click the top layer in each of the remaining groups to select all the layers with just lines at once.
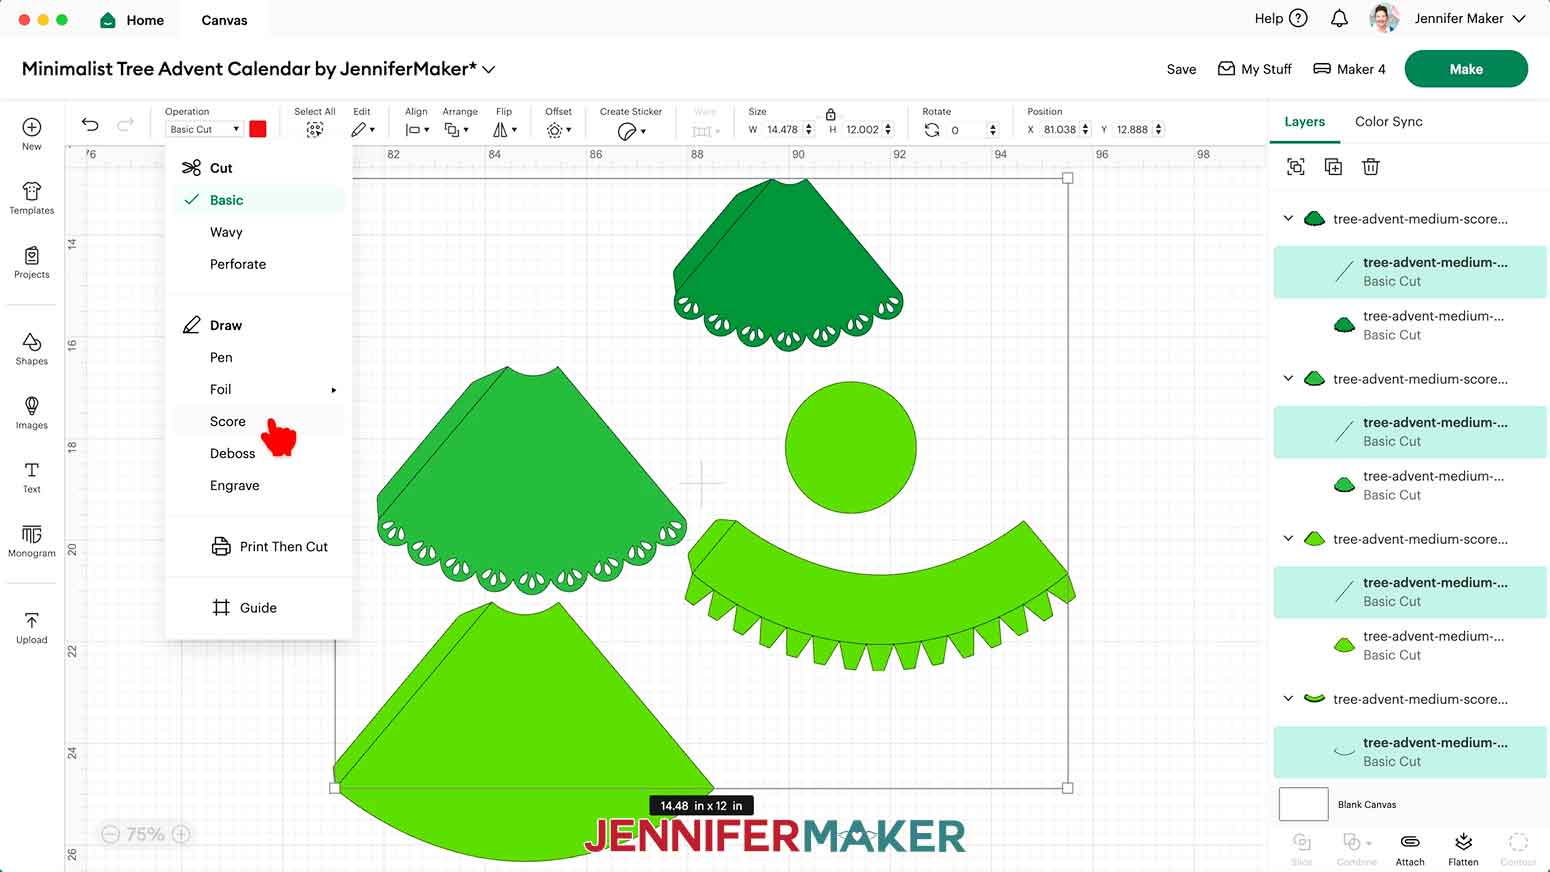
- Click the dropdown under “Operation” and select “Score” so the Cricut knows to make the crease lines where each piece will be folded.
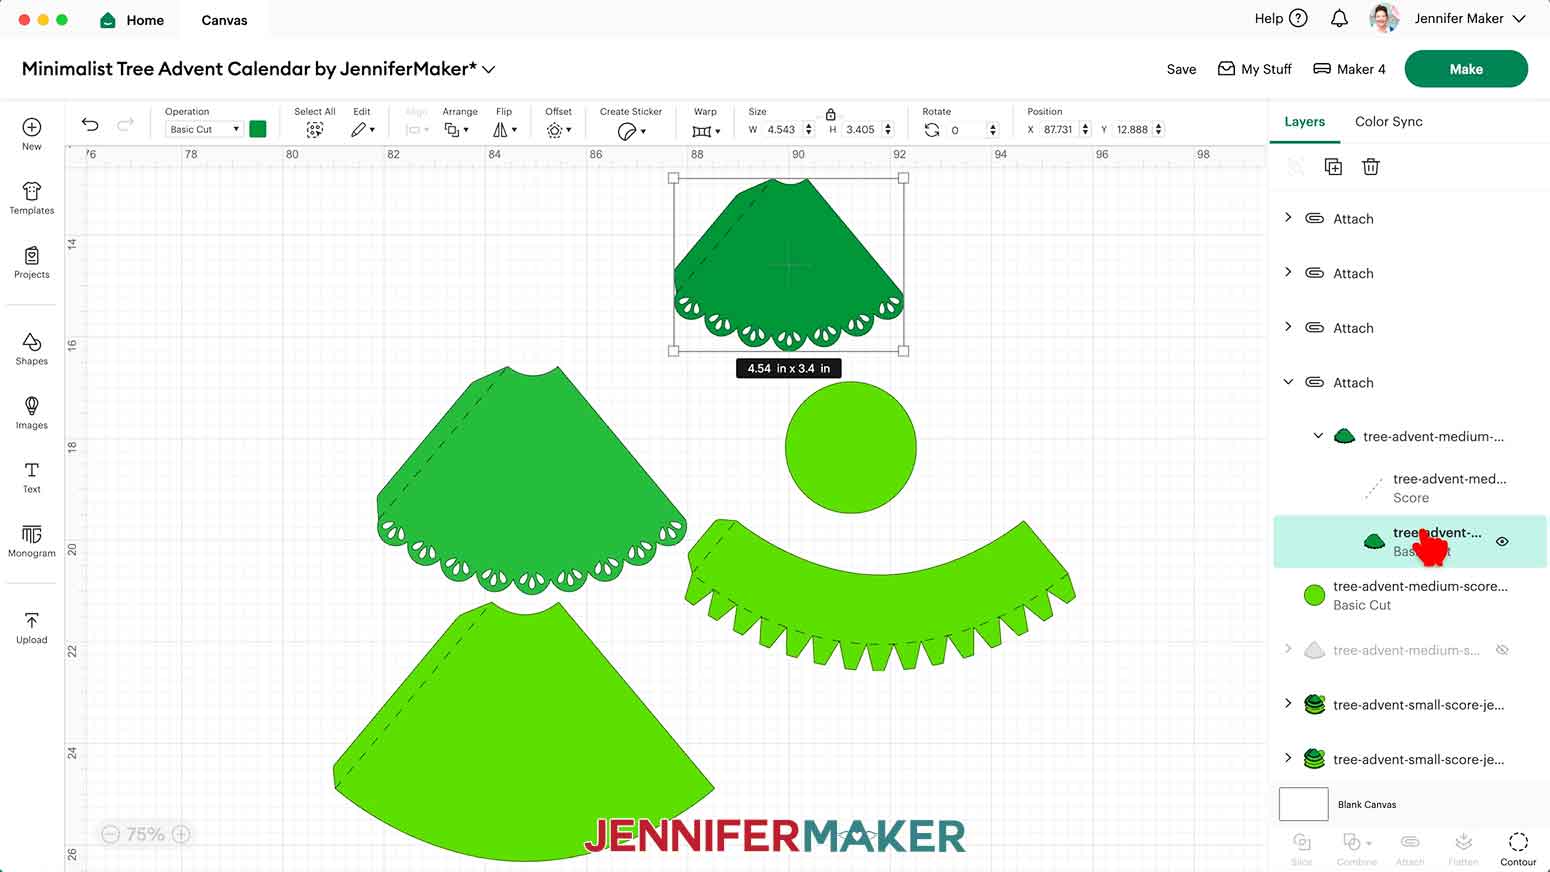
- Click the first group’s top layer with the arrow to select both layers, then click “Attach” to keep the crease lines with their cut shape. Attach the remaining score lines to their cut shapes the same way.
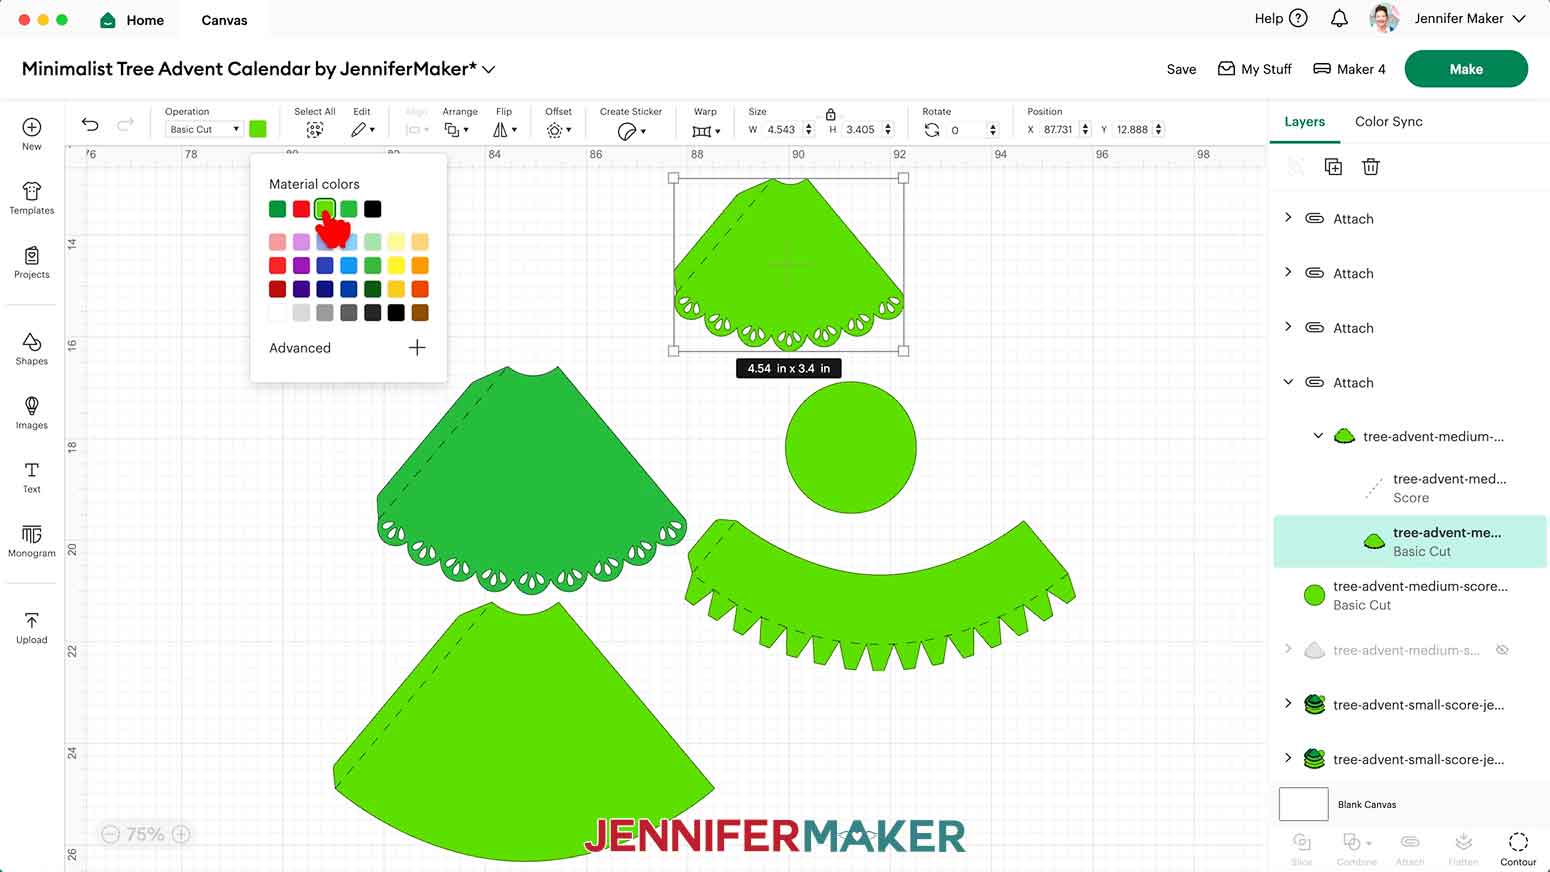
- To change the color of a tree’s piece to match the cardstock you’ll cut it from, select it on your Canvas to highlight it in the Layers Panel. Click the arrow beside it to expand the layers and select just the Basic Cut shape, if needed.
- Then click the Color Box next to “Operation” and choose a new option.
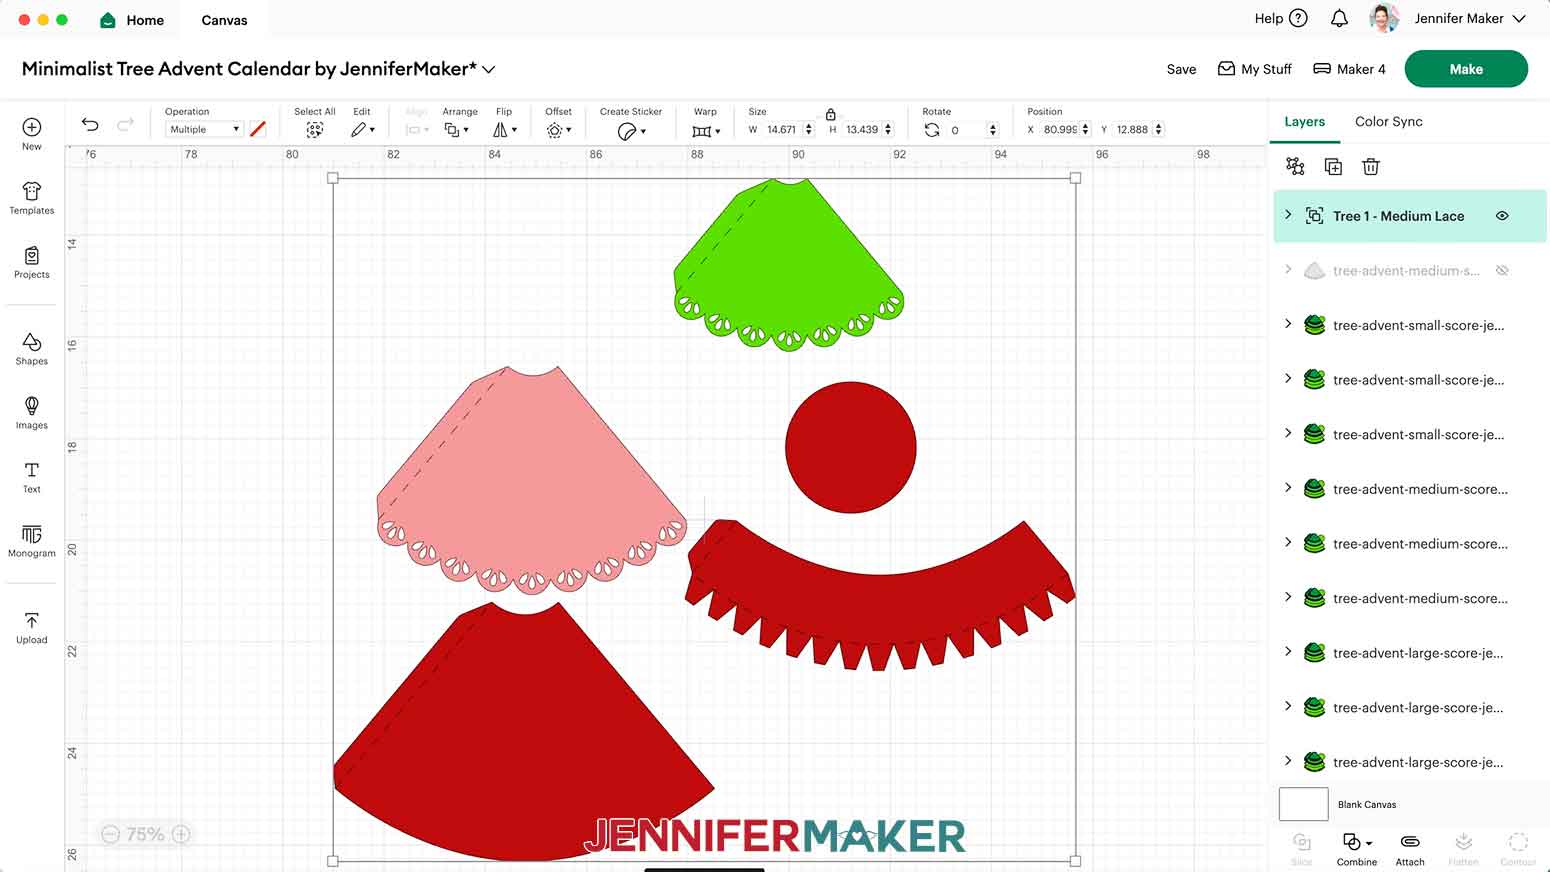
- Follow Steps 18-28 to continue designing trees according to your planning sheet.NOTE: You can work on a few at a time instead of all 25 at once to make it easier to keep track of pieces.
- Or, to create a copy of a tree design you want to use again, drag a bounding box over all its pieces on the Canvas, then click the “Duplicate” button.TIP: Remember, if you’re duplicating a tree you’ve already edited, you can click the “Eye” icon in the Layers Panel to change which top piece is showing.
- When you’re finished designing your trees, hide or delete any extra trees you don’t want to cut.
- If you want to add vinyl numbers to your tree, follow Steps 2-6 to add the "numbers" SVG to your Canvas.NOTE: If your numbers are the same color as one of your tree pieces, use the Color Box to change them to a different color so they don’t cut on the same mat as your cardstock.
- Your project is ready to cut!

CUTTING
- Make sure the correct machine is selected in the top right.
- Click “Make.”
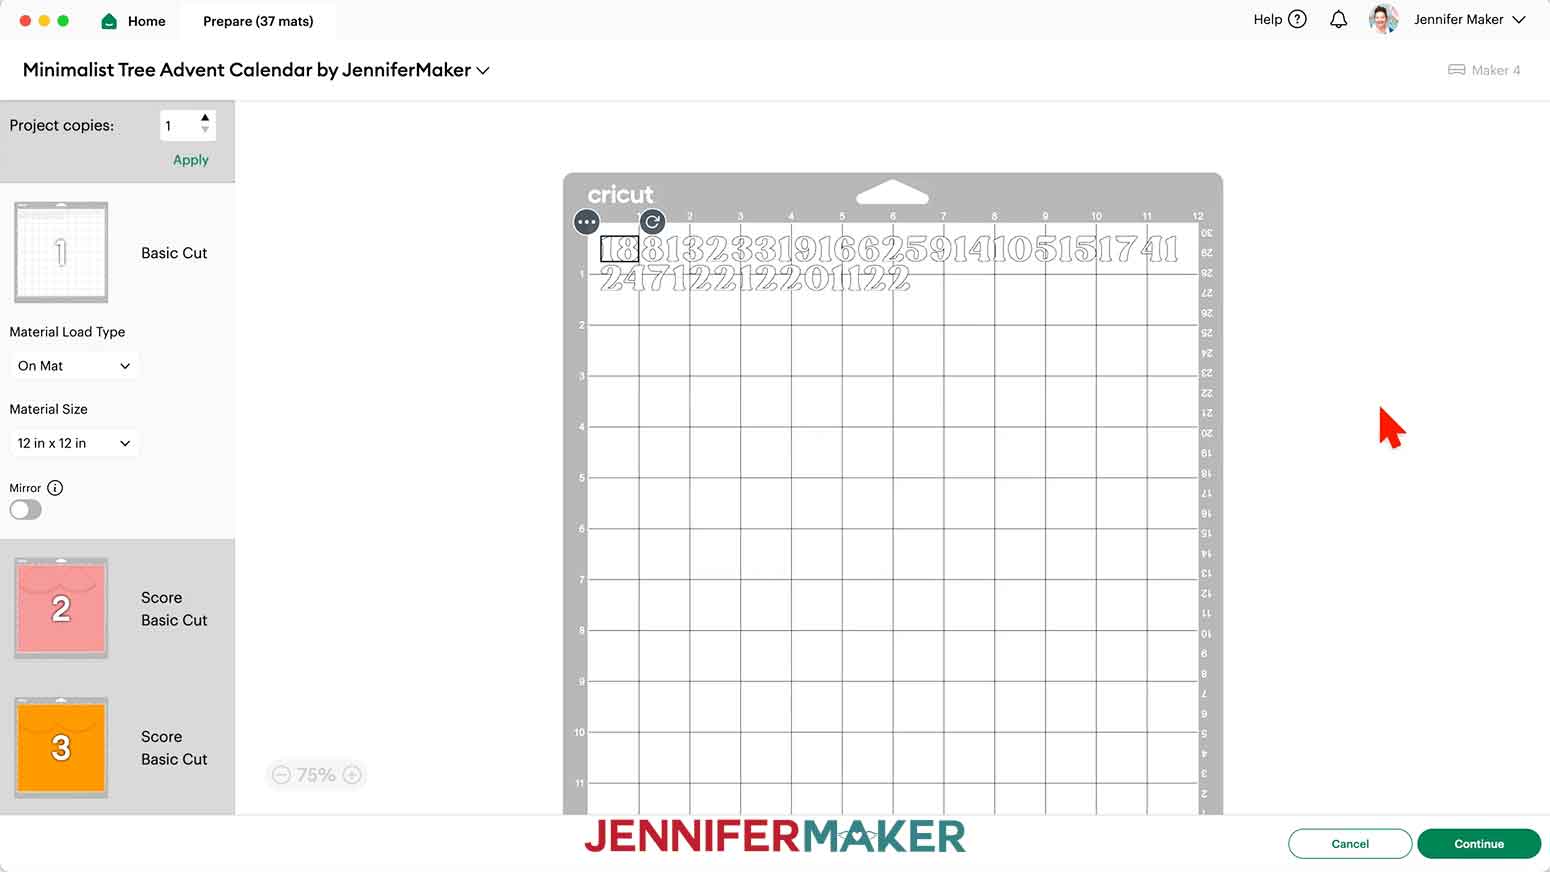
- On the Prepare screen, make sure the correct Material Size is selected for your materials. NOTE: I’ll use 8.5” x 11” for my regular cardstock mats and 12” x 12” for my patterned cardstock mats. I’ll use 12” x 12” for my vinyl numbers mat and cut my vinyl down to size.
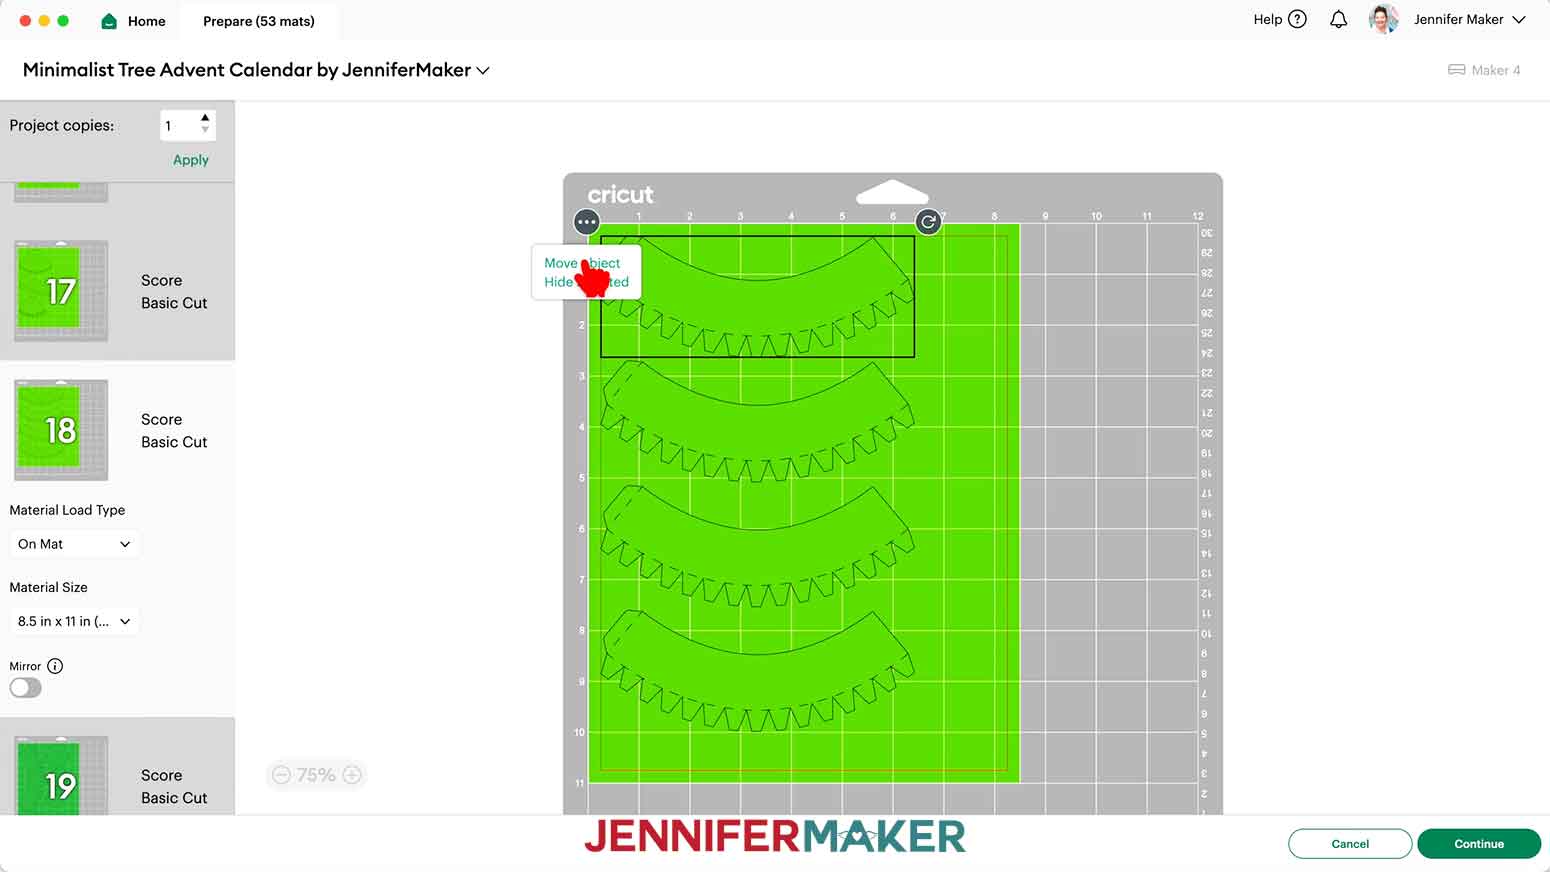
- You can combine mats of the same color to save time and materials. Select a piece you want to move, then click the icon with three dots and select “Move object.”
- In the “Move object” window, select a different mat of the same color with available space to reassign the object to that mat.
- Click “Confirm” to move the object to the chosen mat.
- If needed, drag the relocated object to an empty space on the mat.TIP: Sometimes objects overlap when moving them to a different mat. If you don't see the moved object, try dragging and repositioning objects until you find the one you’ve added to the mat.
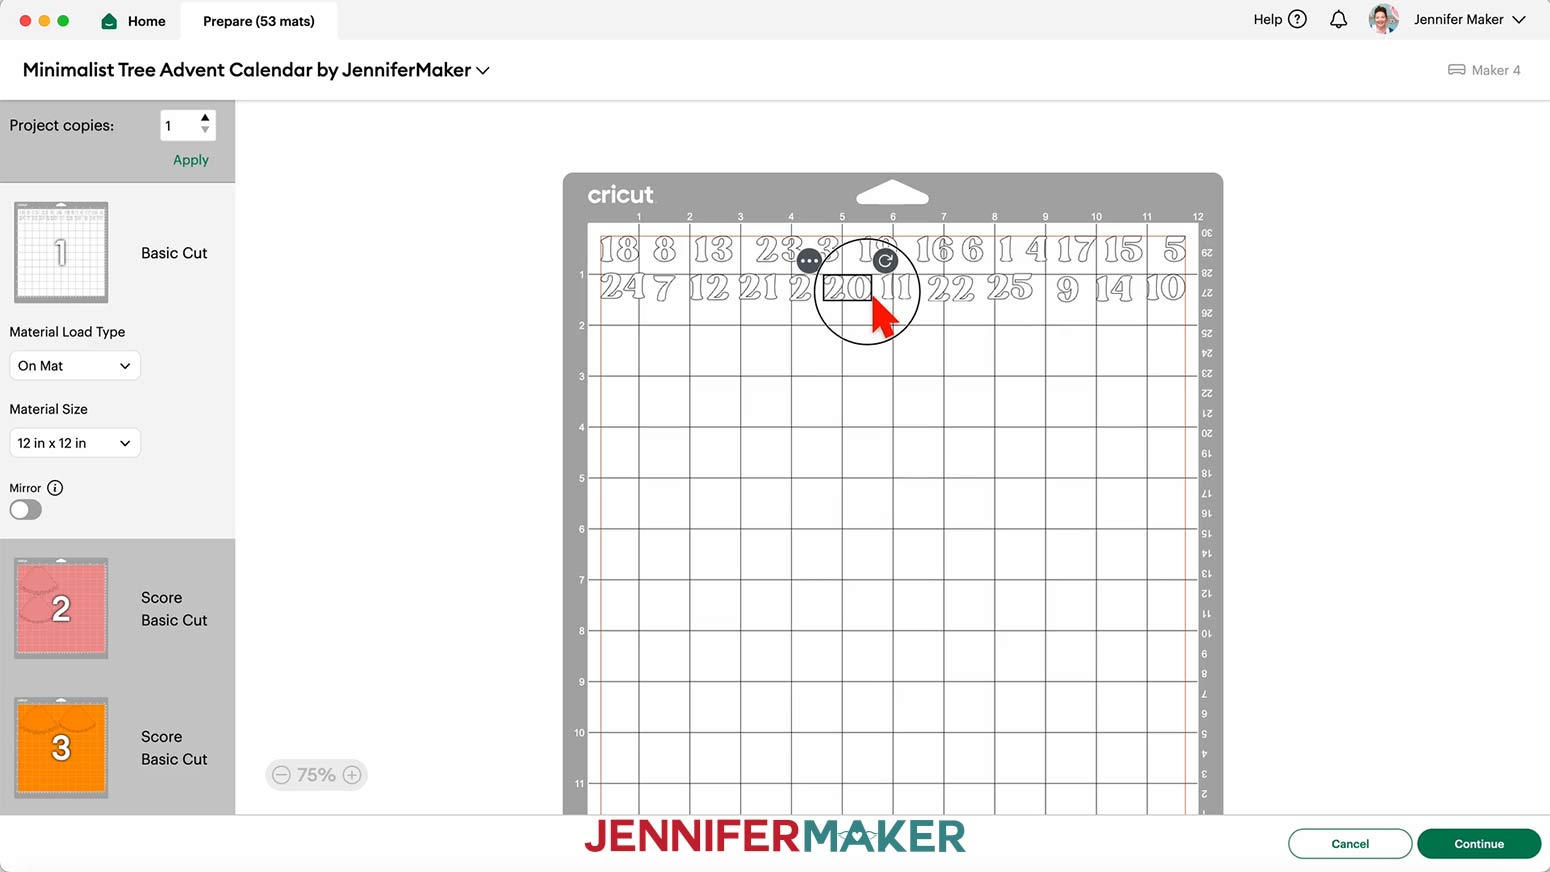
- To rotate an image on a mat, click on it to select it, then use the rotation handle to adjust its orientation.
- If you are using patterned cardstock that has words or an obvious “up” direction, make sure any pieces being cut from that material are oriented to their default upright position.
- Click the mat that has your numbers and drag the number objects apart so you have room to trim them into separate pieces.
- Select the first mat so it loads first on the next screen and click “Continue.”
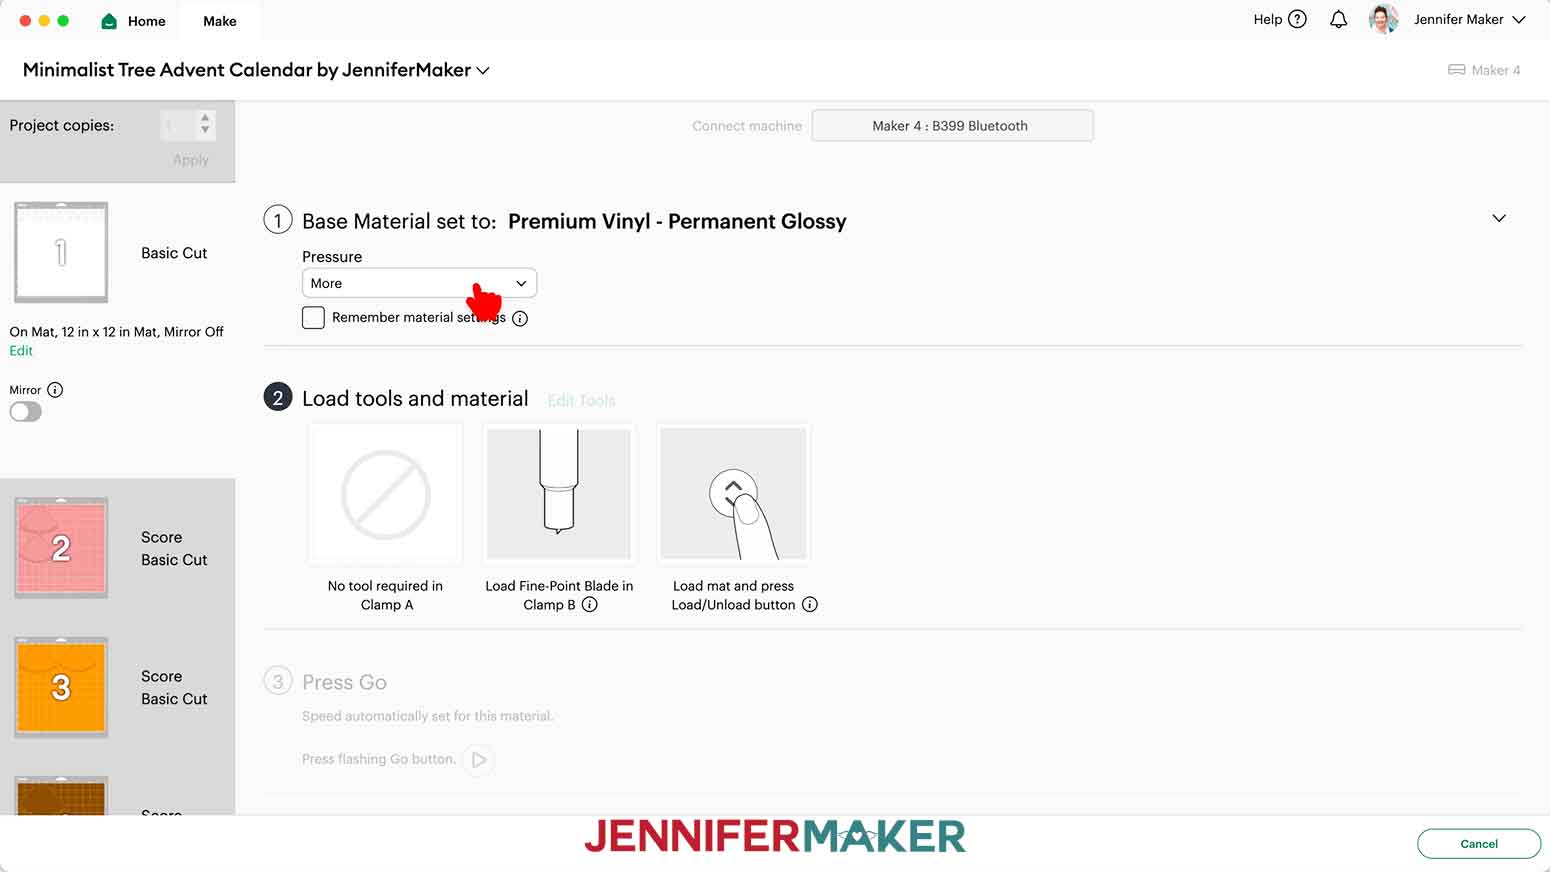
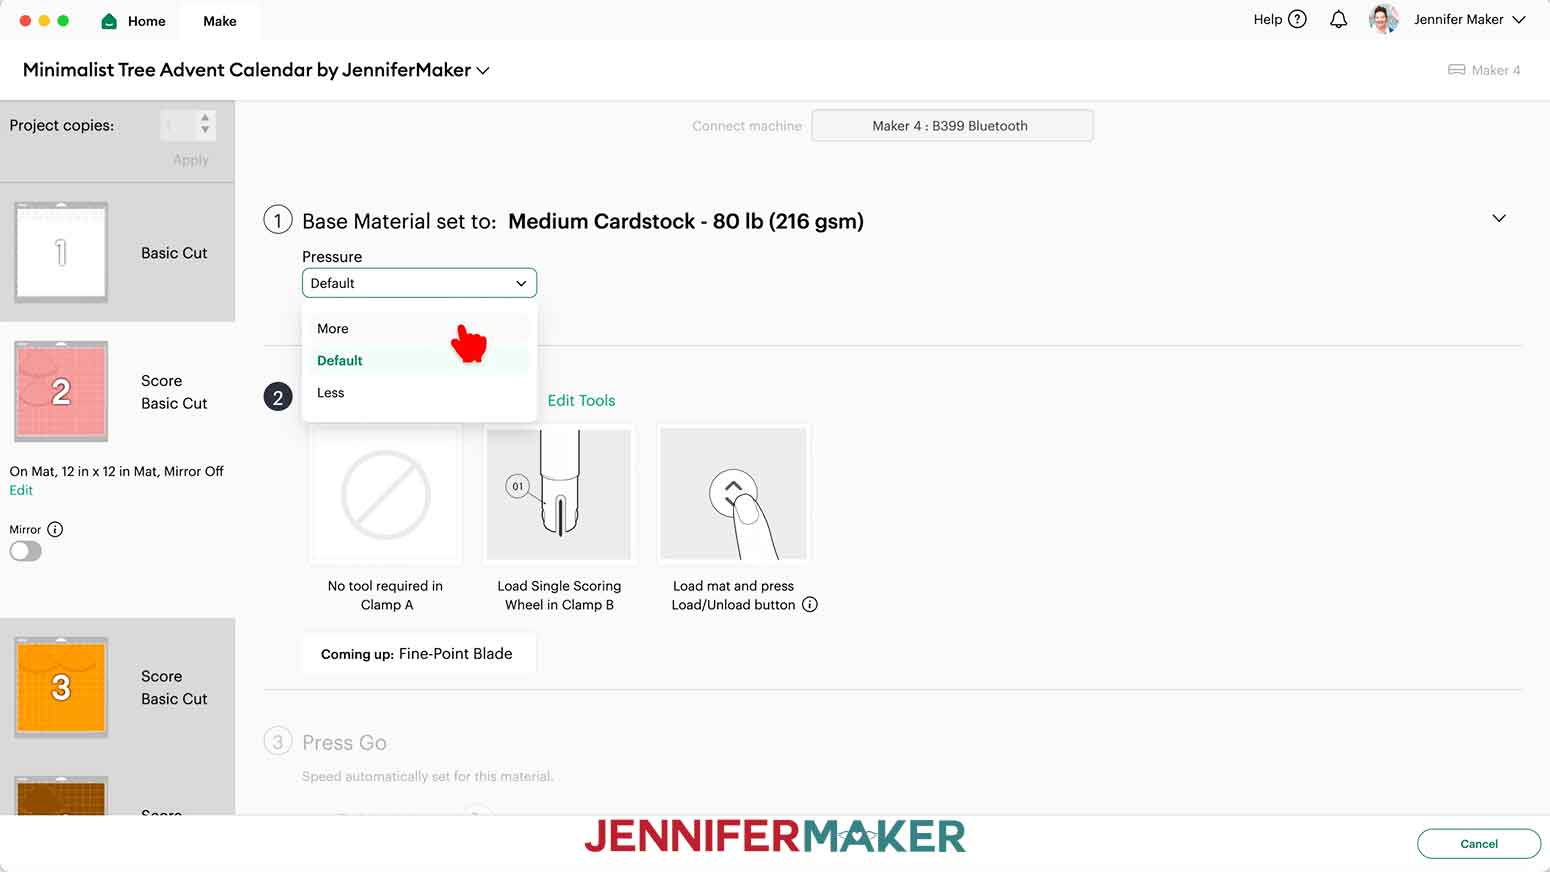
- On the Make screen, set the Base Material for your first mat. Mine has the vinyl numbers. I used the “Premium Vinyl - Permanent Glossy” material setting with “More” pressure.NOTE: I don’t recommend cutting your decals from glitter or metallic vinyl since using StrongGrip transfer tape to apply them can damage the cardstock.TIP: Changing the Pressure to “More” results in a cleaner cut.
- Use a paper trimmer or scissors to trim your vinyl to cover the design area shown on the screen plus an inch or so of buffer.TIP: You can save smaller pieces of vinyl for other projects.
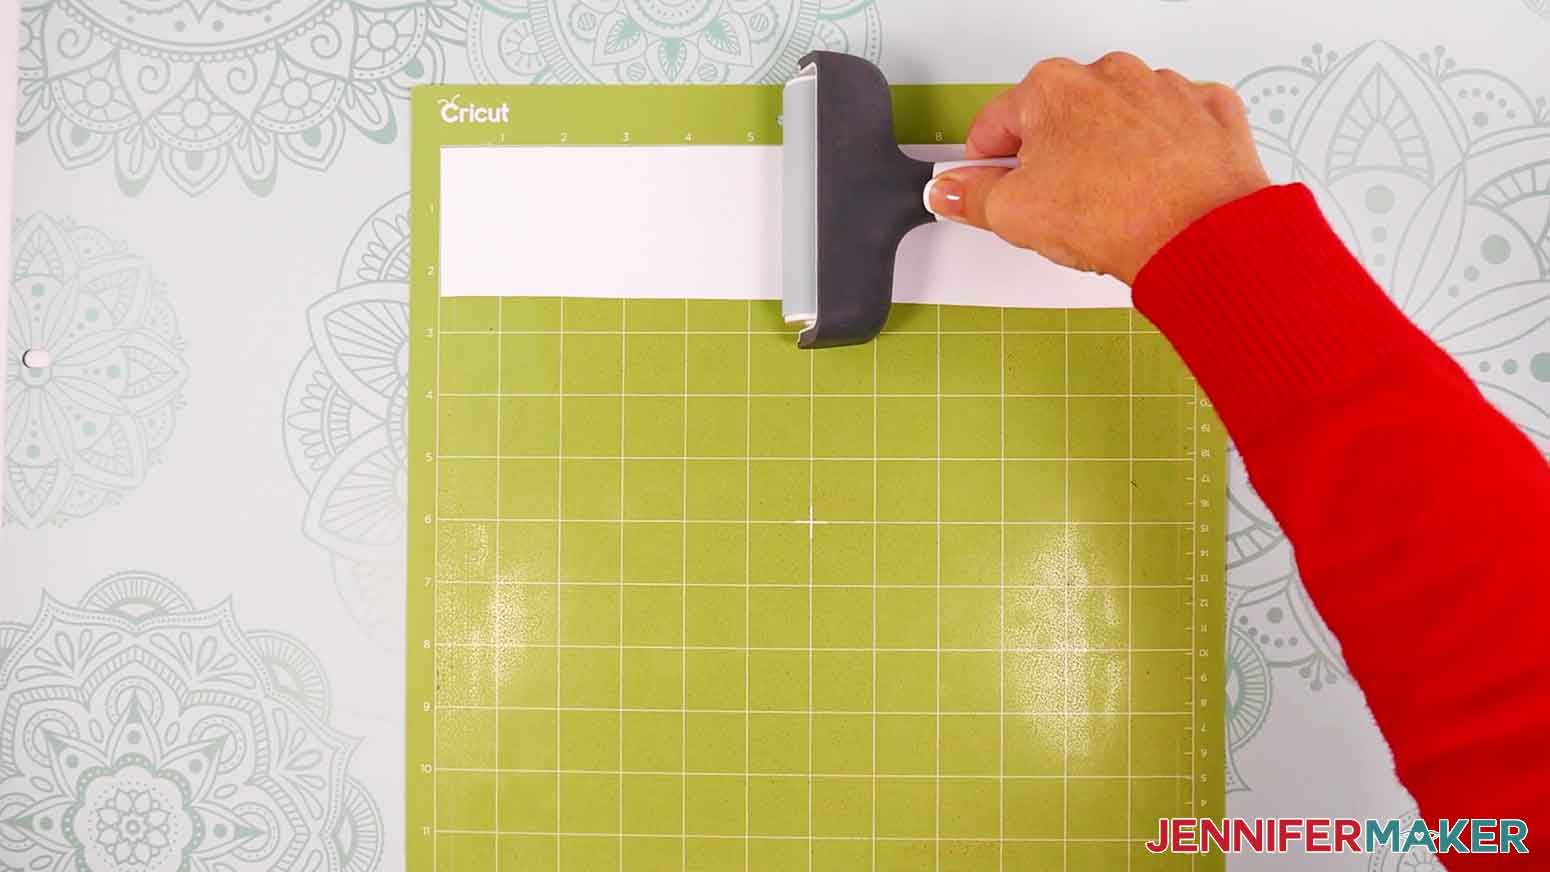
- Place your vinyl pretty side up on a green StandardGrip machine mat so it covers the design area on your screen.
- Use a brayer to make sure it’s fully adhered.
- Check that your Premium Fine-Point Blade is clean and in the clamp.
- Press the flashing “Load/Unload” button to load the prepared mat into your Cricut.
- Press the flashing middle button to begin cutting.
- When it has finished cutting, don’t unload the mat right away. Gently lift a corner of the material to make sure the cuts went all the way through. If not, press the middle button again to make a second pass of cuts in the same spots.NOTE: For vinyl, cuts should go all the way through the material, but not the carrier sheet.
- When the cuts are complete, unload the mat, flip it over onto your work surface, and roll it back to release the vinyl.TIP: If you have any issues with your cuts, go to jennifermaker.com/cleaner-cuts.
- When you get to your cardstock mats, don’t forget to change the material settings. I used the “Medium Cardstock - 80 lb (216 gsm)” material setting with “More” pressure for all my cardstock mats.NOTE: After you set the material for a mat color, you can check the box next to “Remember Material Settings” to save time between mats.
- For mats with score lines, follow the screen prompts to load your tools in the order indicated. NOTE: I’ll click “Edit Tools” and select the Scoring Stylus so I can load both the scoring tool and my blade at the same time. You can also use a Scoring Wheel.
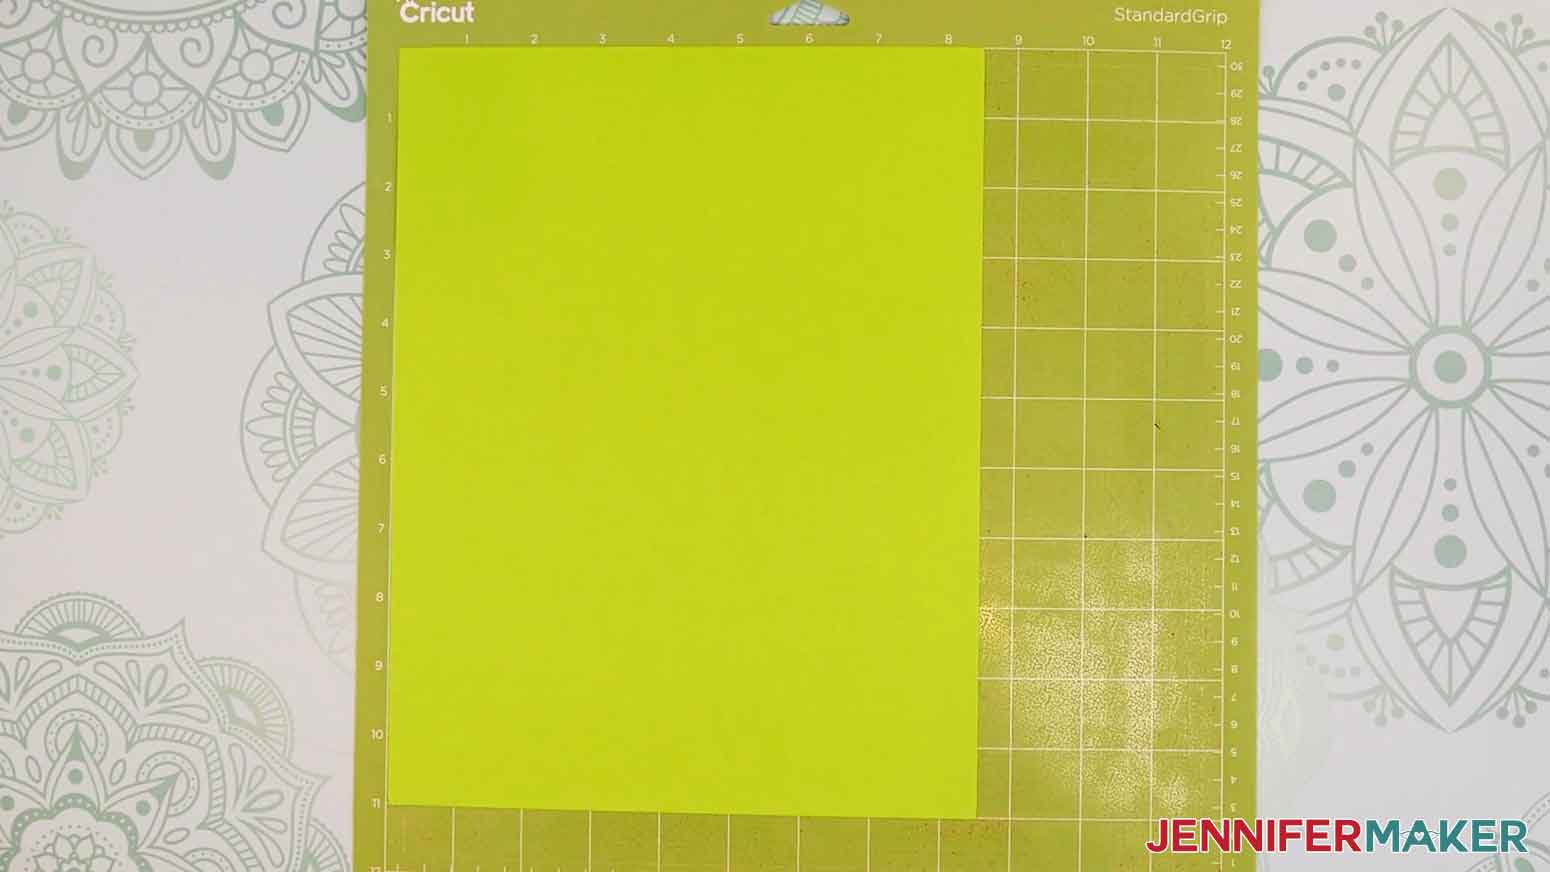
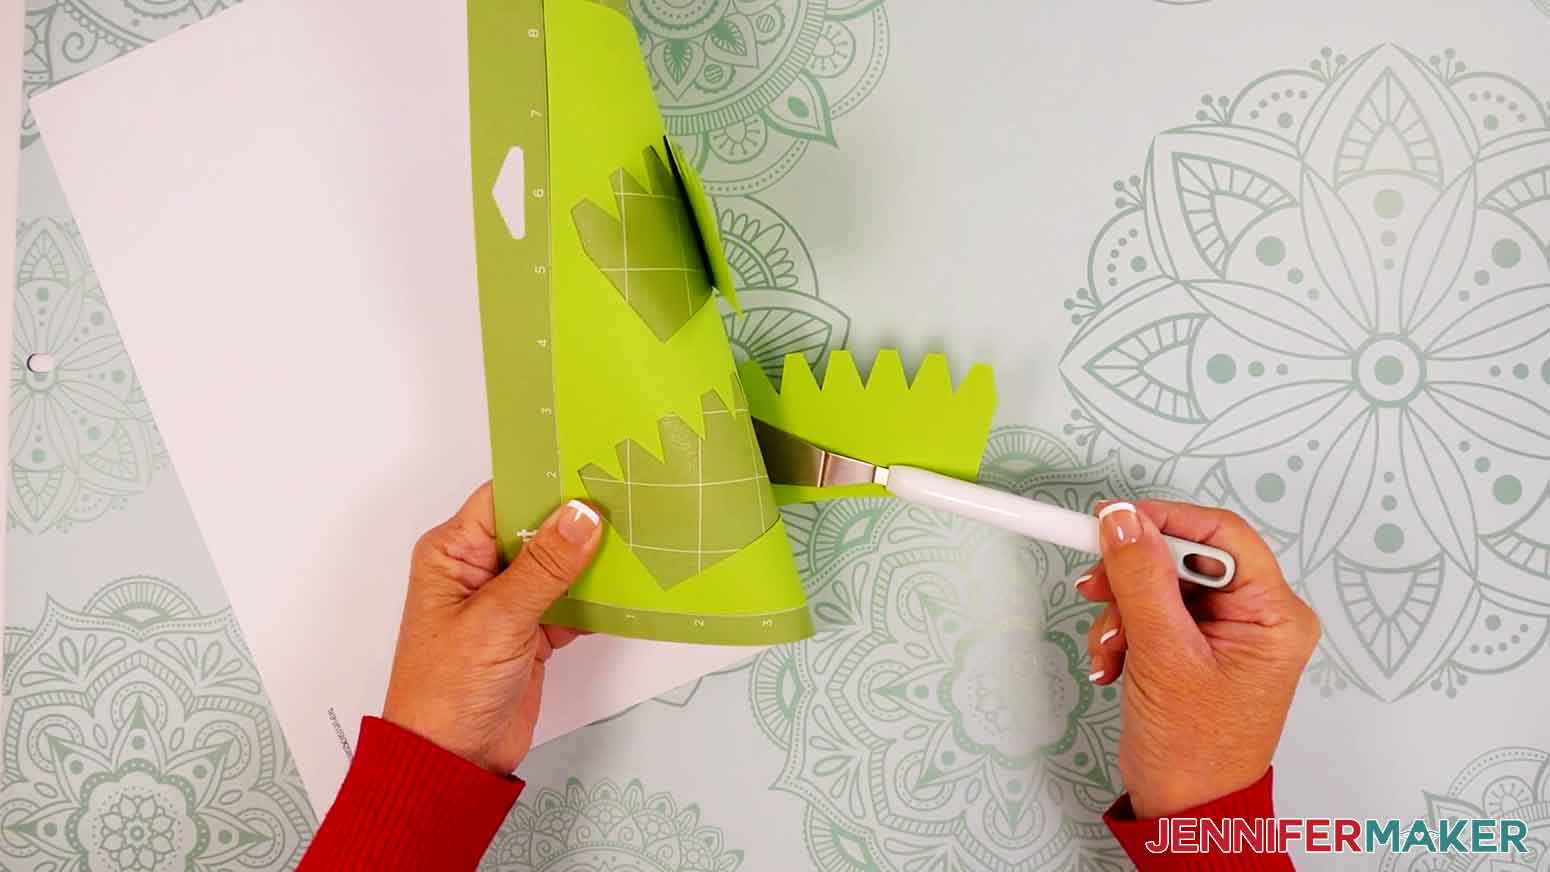
- Place your cardstock face up on a green StandardGrip machine mat.
- Repeat Steps 15-20 to cut your cardstock mats.
- Use the spatula to help lift delicate parts, and your weeding tool to poke out small bits of cardstock that may have been left behind.
- Use a scraper tool to remove the small bits left on your mat after you remove the cut pieces.
- Your cardstock pieces are ready for assembly!
 NOTE: After you set the material for a mat color, you can check the box next to “Remember Material Settings” to save time between mats.
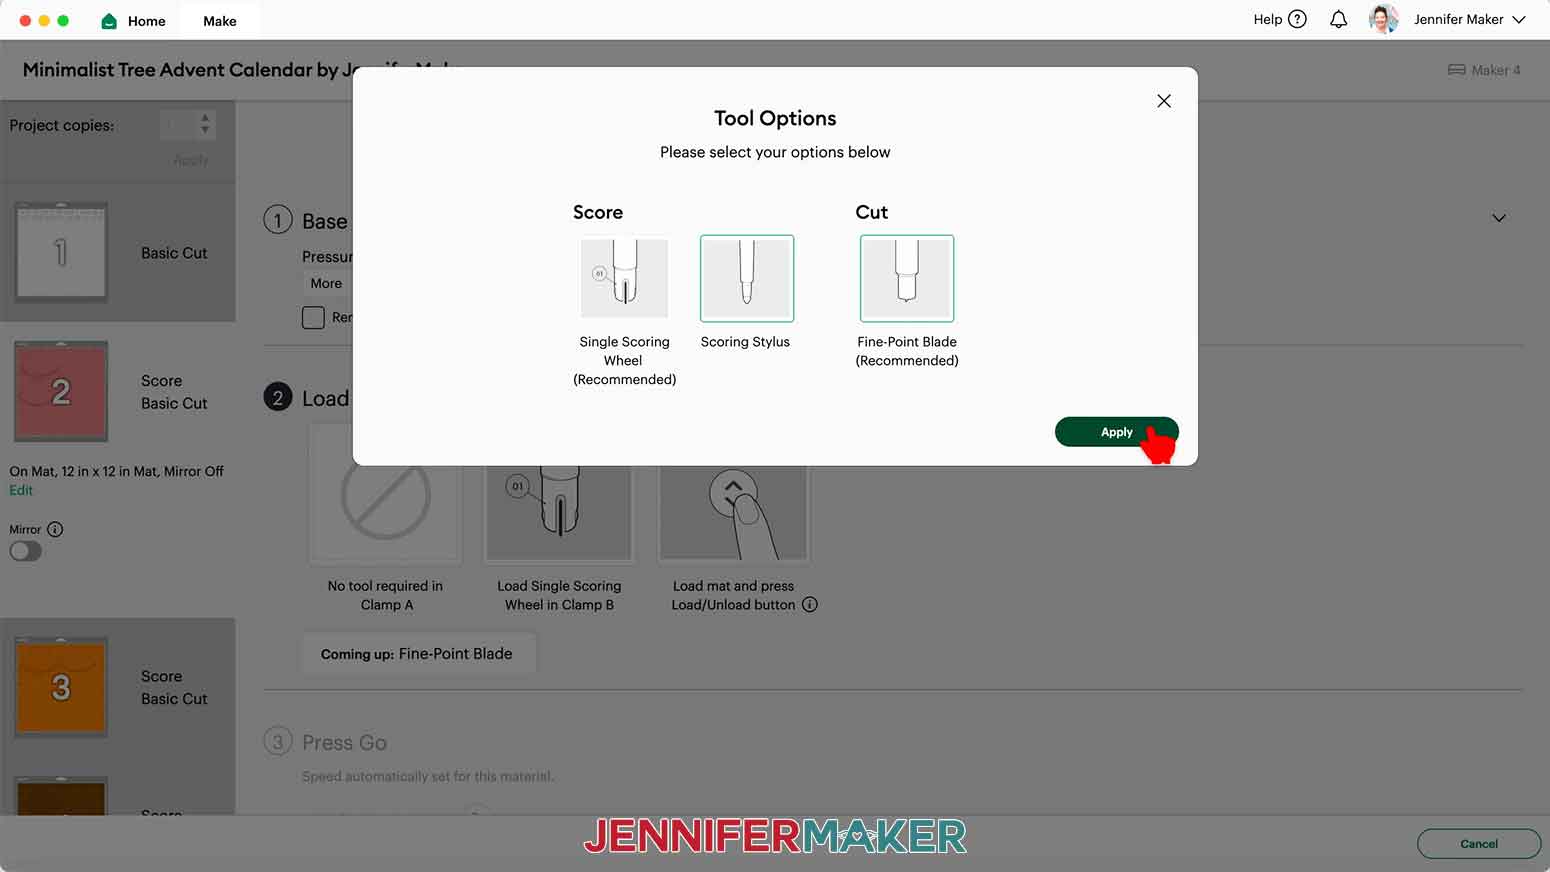
WEEDING YOUR VINYL NUMBERS
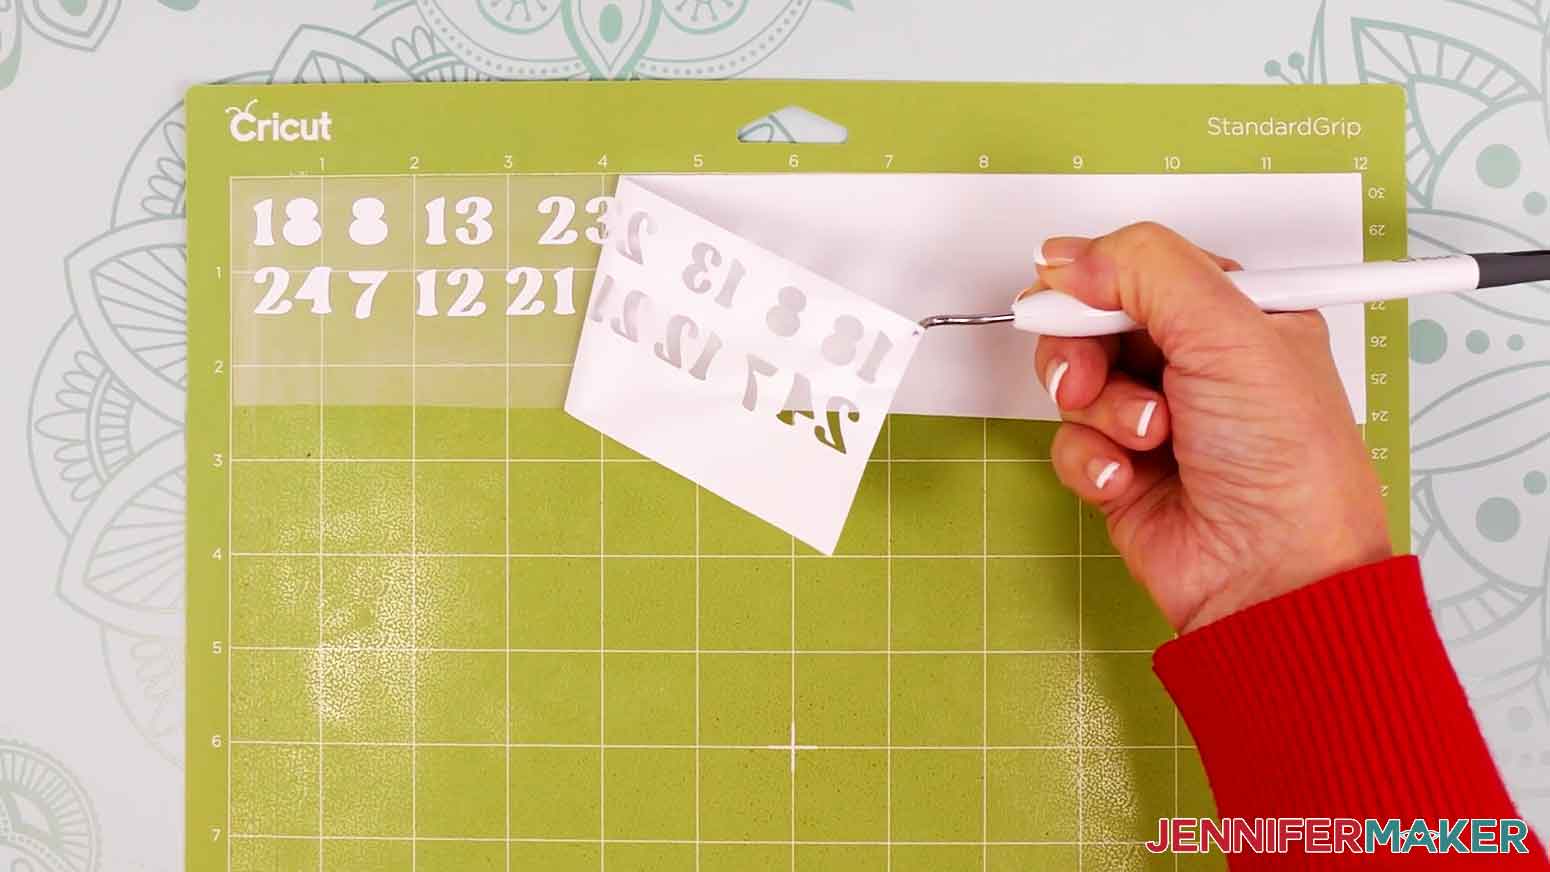
- It can be easier to weed vinyl, especially small, detailed designs, while it is adhered to the machine mat, so place your vinyl numbers face up on a machine mat.
- I like to work from larger to smaller sections during weeding, so use your weeding tool to carefully peel away the extra background vinyl.
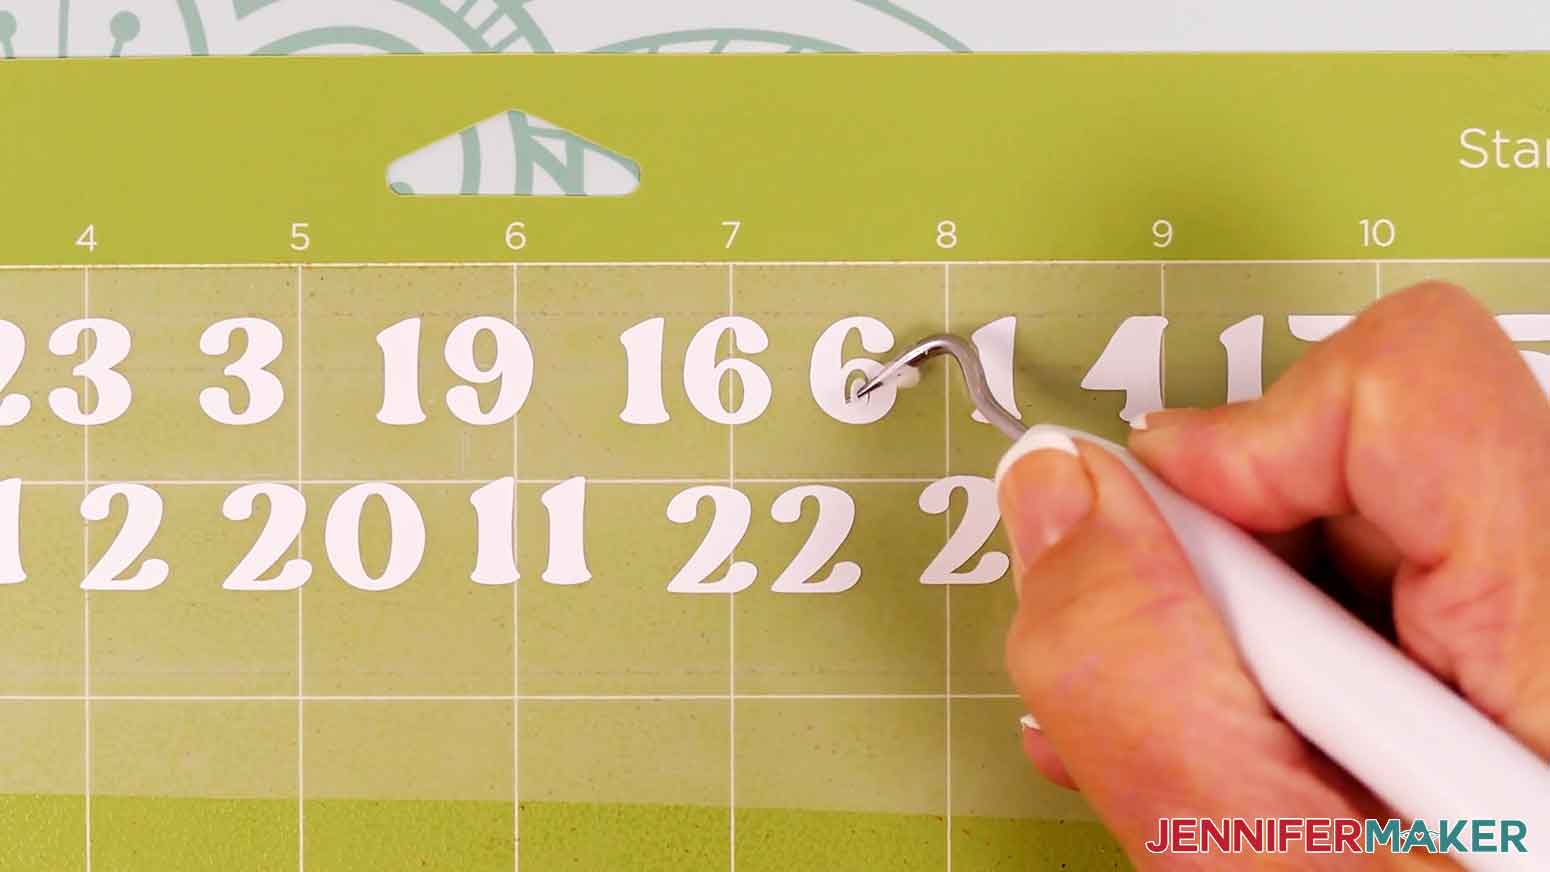
- Then poke your weeding tool into small sections of the design you want to remove – such as the insides of numbers – and gently lift the tool away from the design to weed them out.TIP: Make sure you do not pull up any pieces you want to keep! If they come up, gently pat them back in place and try again. Refer back to the Design Space screen if you’re not sure which pieces to remove.
- Continue to weed until all that is left is the vinyl for each of your number decals. Then flip over your mat and roll it back to release the vinyl at the corners and remove it.
- Use scissors to cut each of the numbers into its own square.
- Your vinyl numbers are ready for assembly!
 TIP: Make sure you do not pull up any pieces you want to keep! If they come up, gently pat them back in place and try again. Refer back to the Design Space screen if you’re not sure which pieces to remove.
STEP 3: ASSEMBLE YOUR MINIMALIST TREE ADVENT CALENDAR
- Lay out each tree’s cut pieces face up in organized piles. For each tree, you should have: - A small curved top piece OR a small pointed top piece - A curved middle piece - A large curved bottom piece - A circular box base- A box side with tabs- A vinyl numberTIP: Refer to your PDF planning sheet to help organize your pieces.
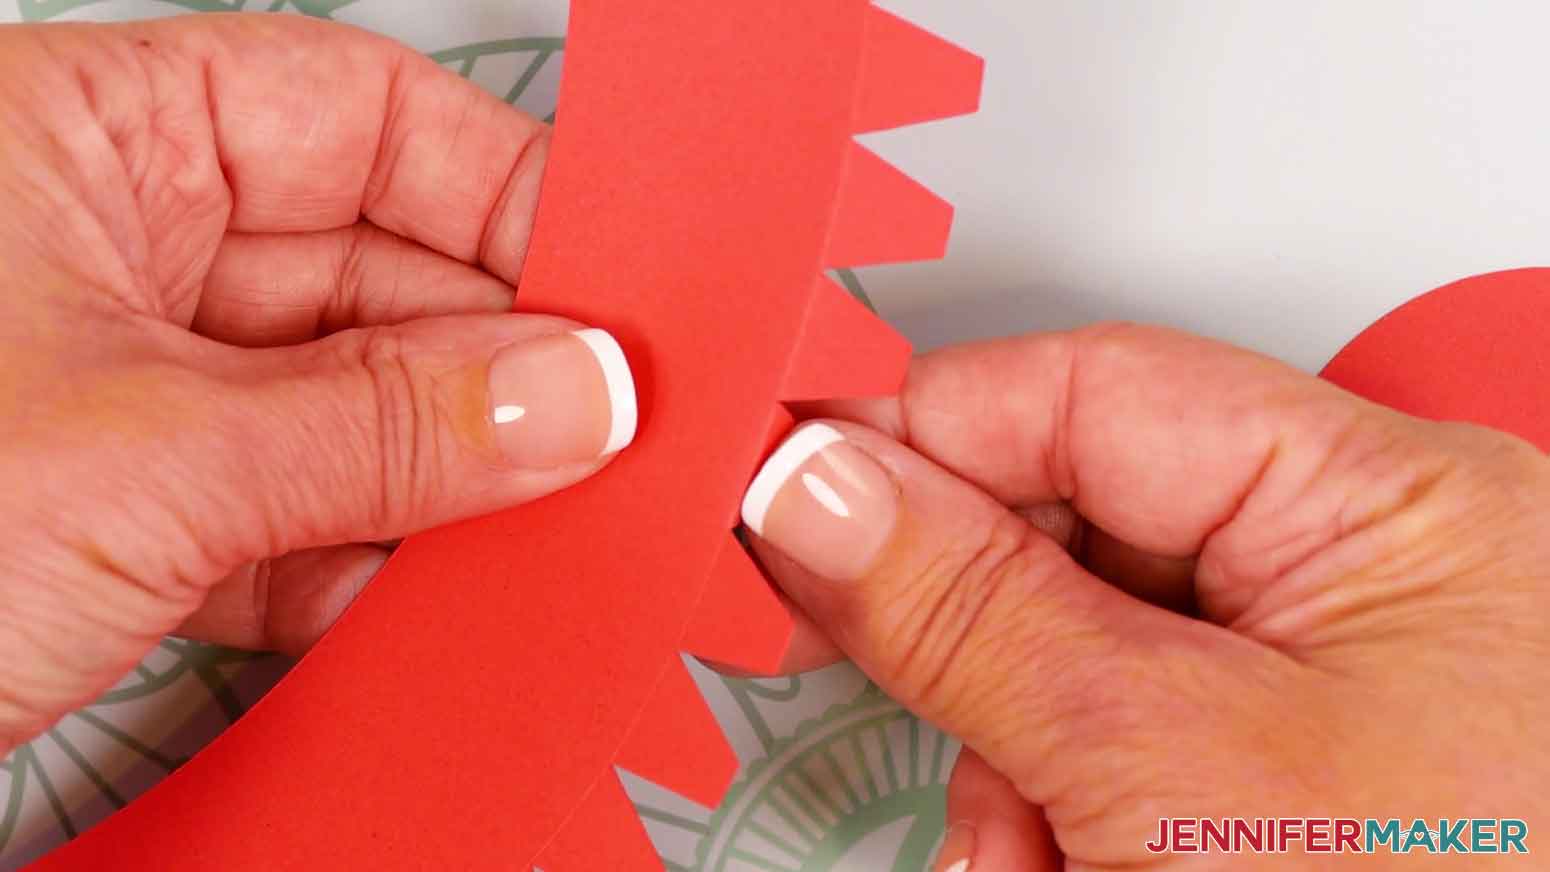
- To assemble a tree’s gift box, fold back the side panel’s small bottom tabs, leaving the side tab unfolded.TIP: Use the scraper tool to sharpen the creases.
- Add a little craft glue to the outside of the side panel’s first two tabs.
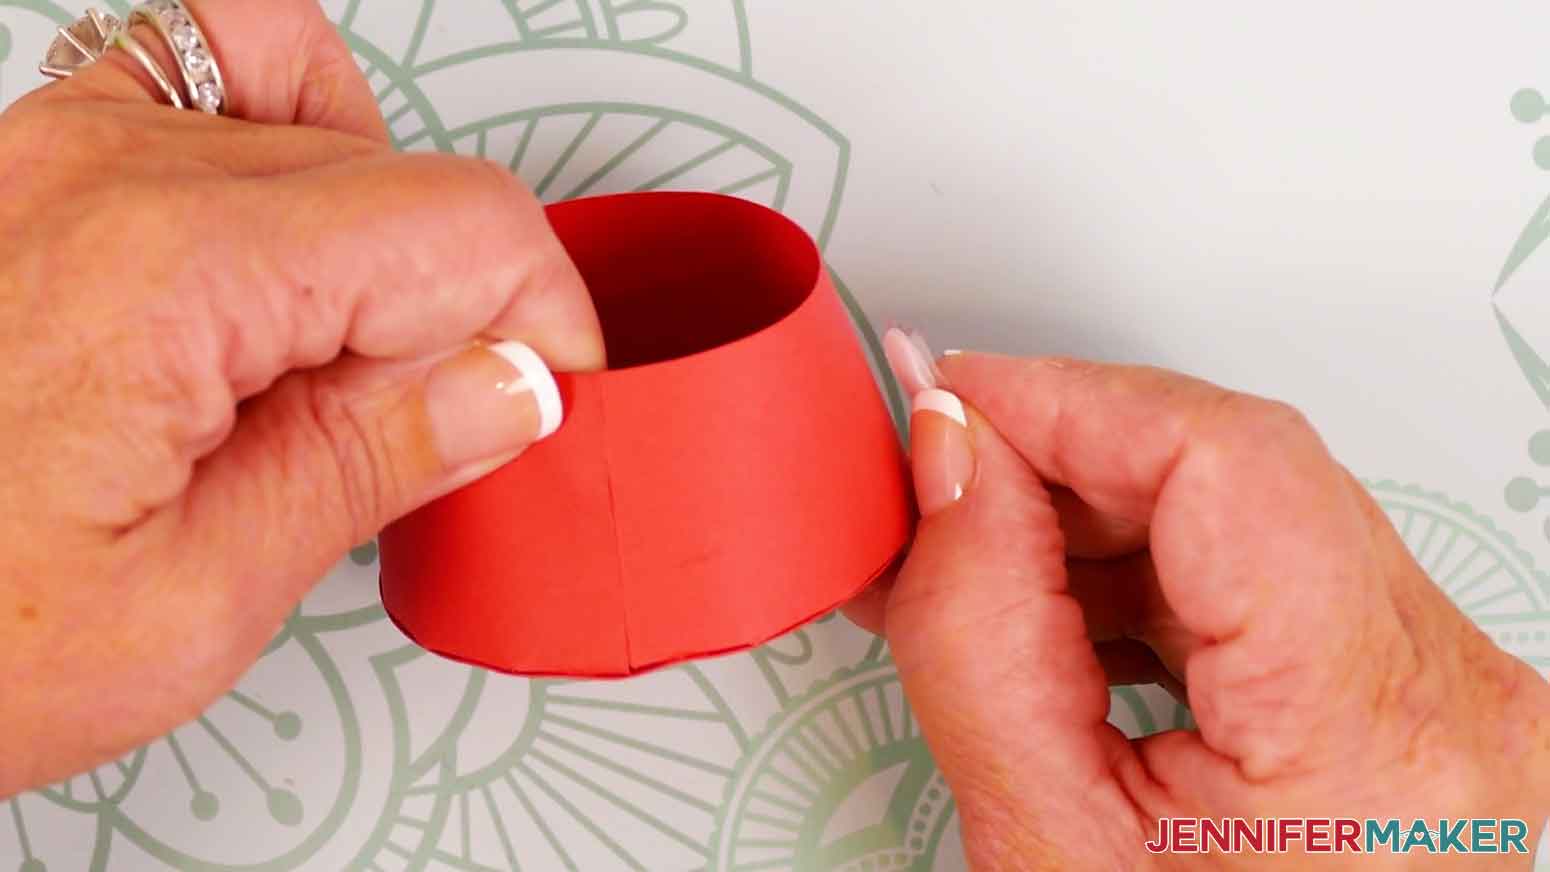
- Line up the two glued tabs on the circle base, keeping the crease lines flush along the curved outer perimeter.
- Press in place and hold for several seconds to adhere the tabs to the base.
- Continue adhering the rest of the tabs two at a time along the bottom’s outside edge, making sure the tabs are firmly attached before moving on to the next pair.TIP: It might be easier to add glue if you hold the pieces upside down.
- When you get to the base’s final tab, add craft glue to the bottom tab and the outside of the panel’s side tab.
- Slide in the final tab and line up the panel’s edge flush with the side tab’s crease line, then press and hold to adhere both tabs.
- Your gift box is ready! Set it aside for now.
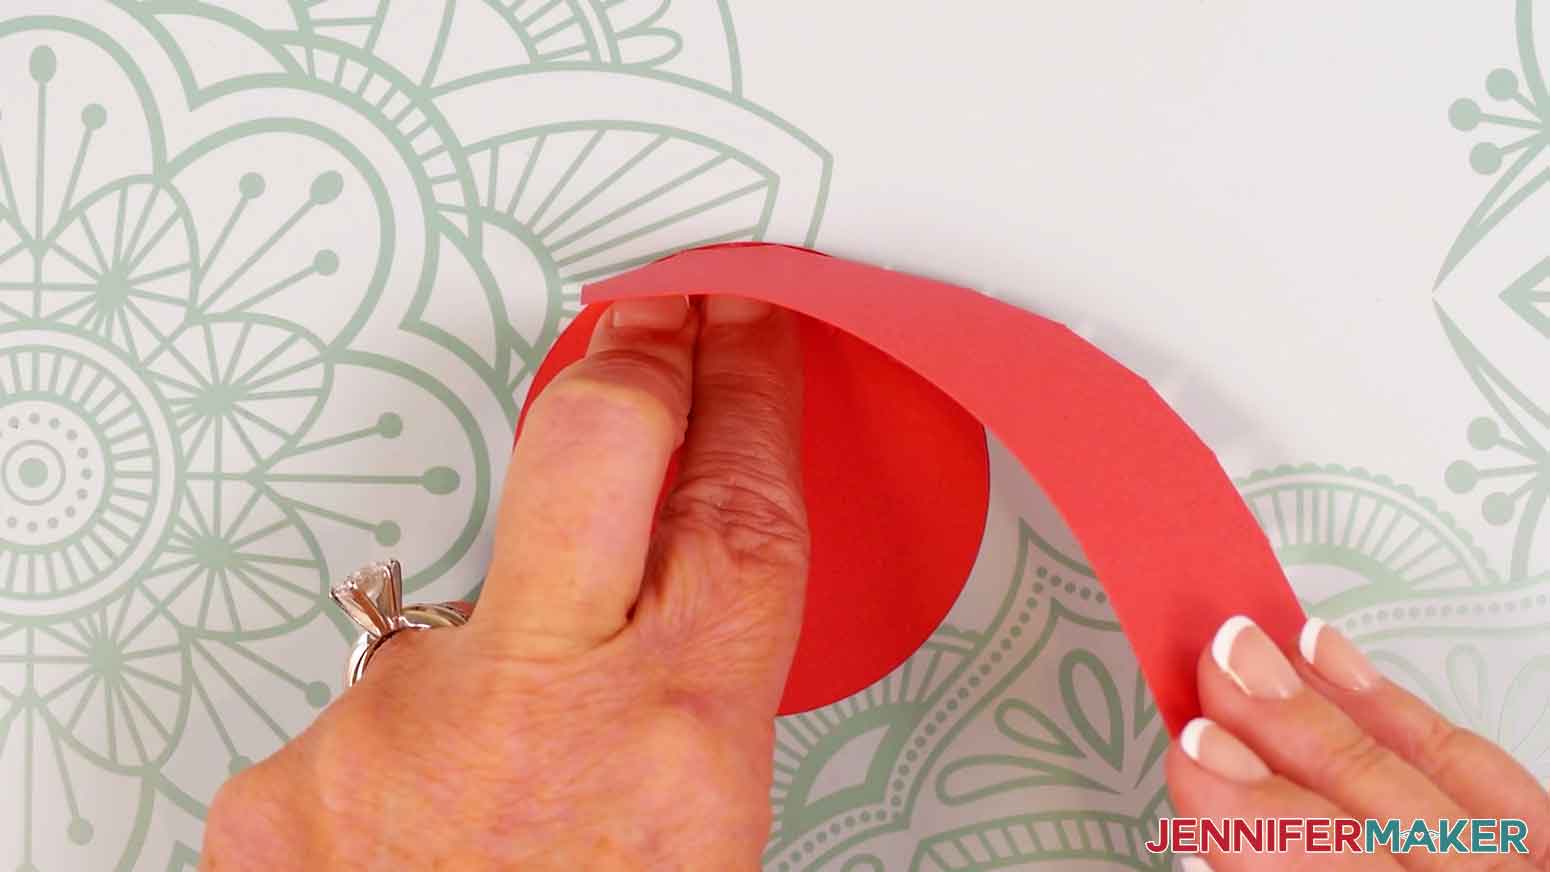
- Lay the tree’s top piece face down (or score line side down).
- Use a curling tool (like a Cricut pen or a bone folder) to roll the tree piece’s edges inward to form a cone shape.
- If your tree’s top is curved, skip to Step 18.
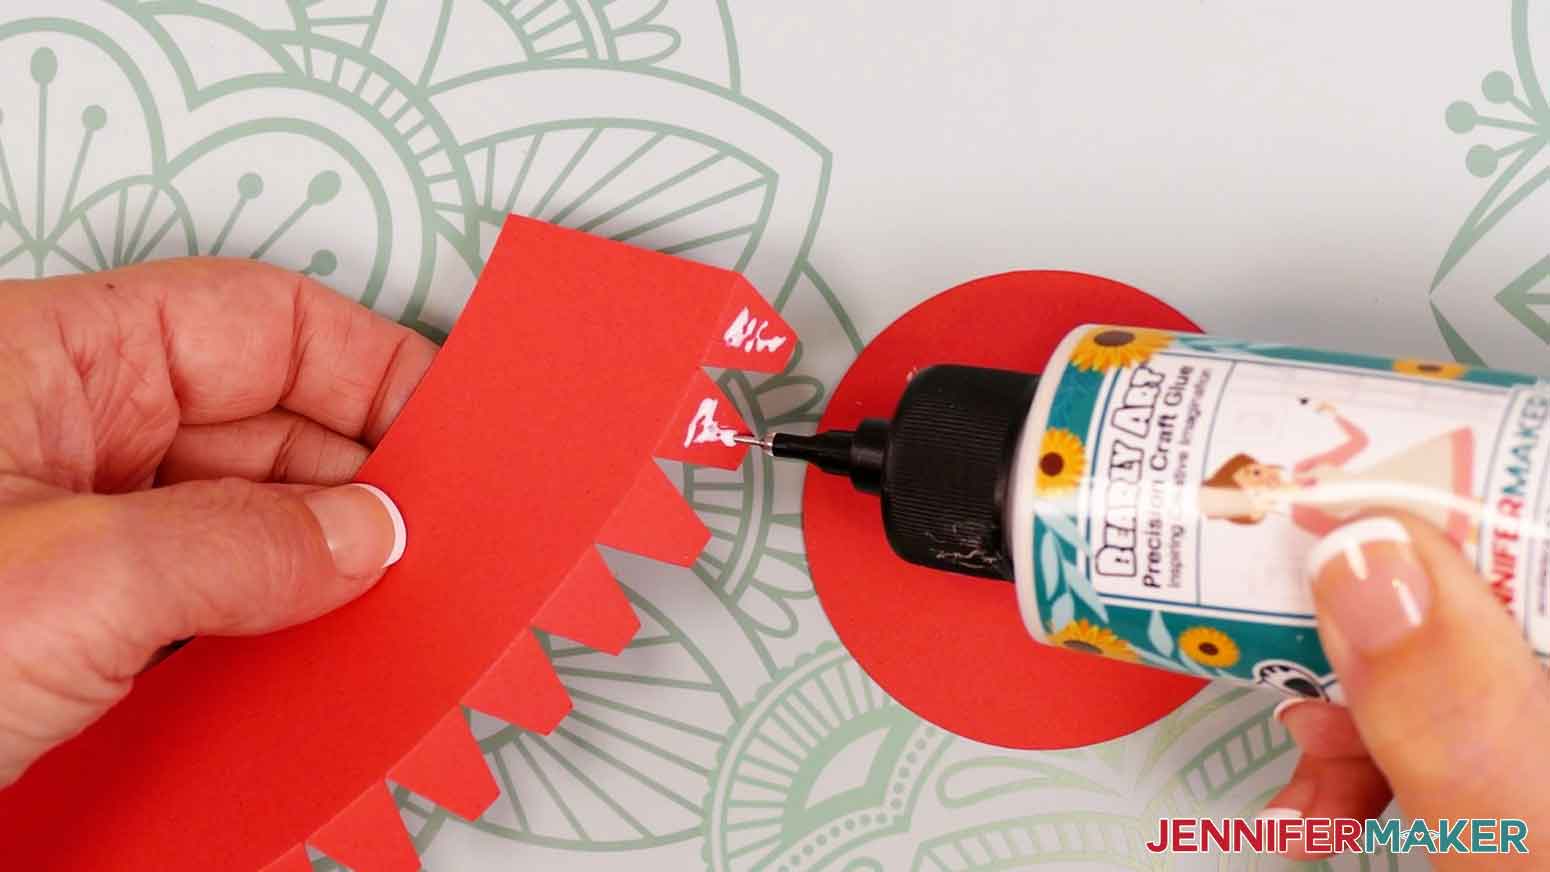
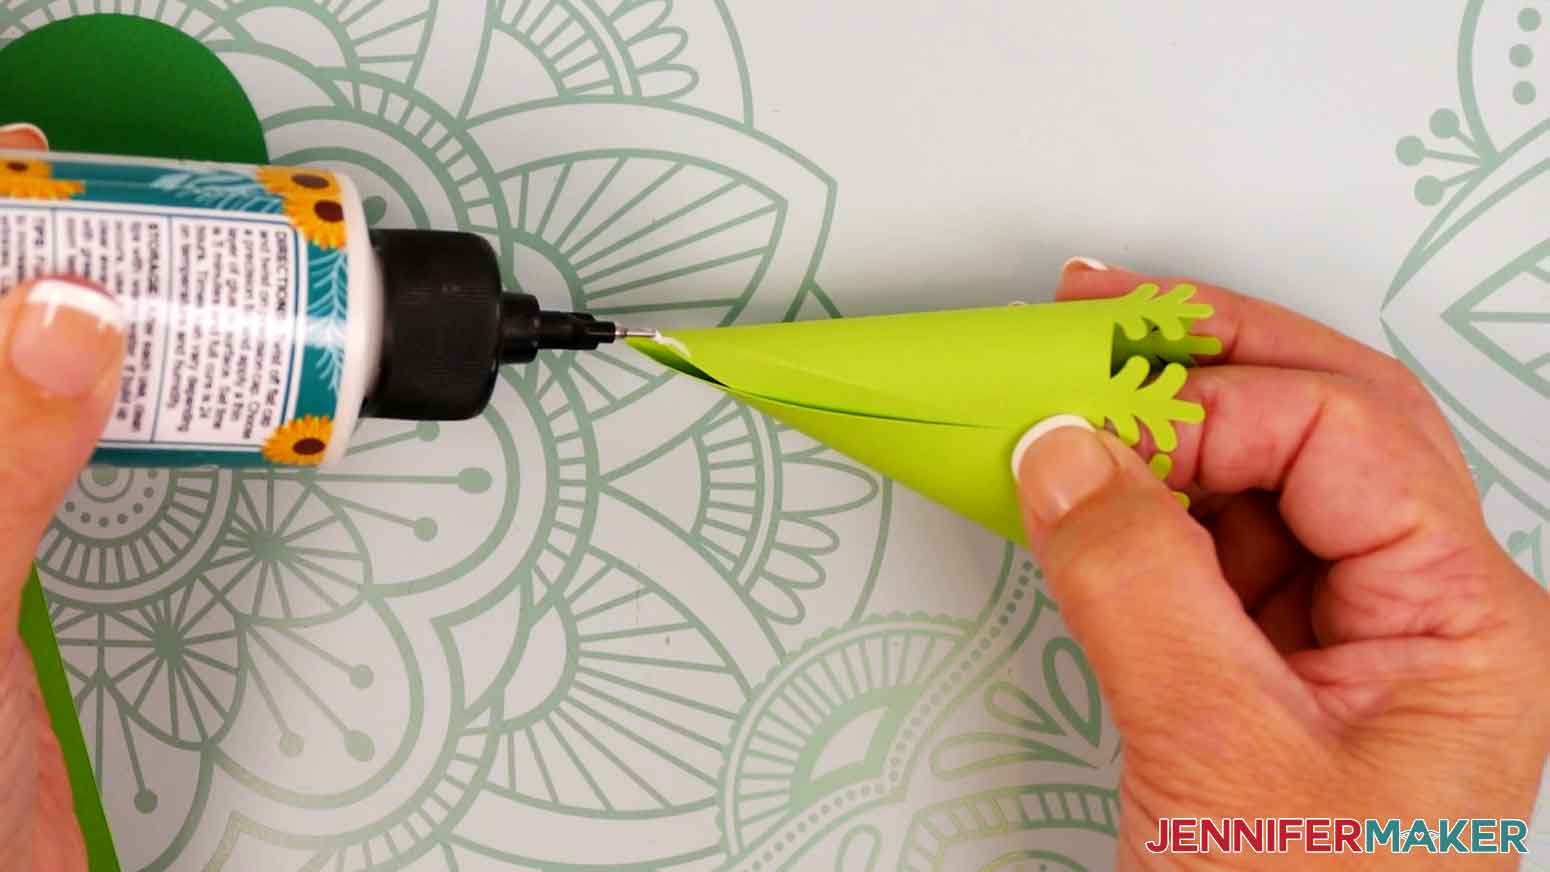
- If the tree’s top is pointed, align the piece’s straight edge along the crease line on the outside of the cardstock, and use your fingers to hold the bottom half in place.TIP: It may take a bit of encouragement to shape the cardstock around the point, so be patient and use your curling tools as needed to help out!
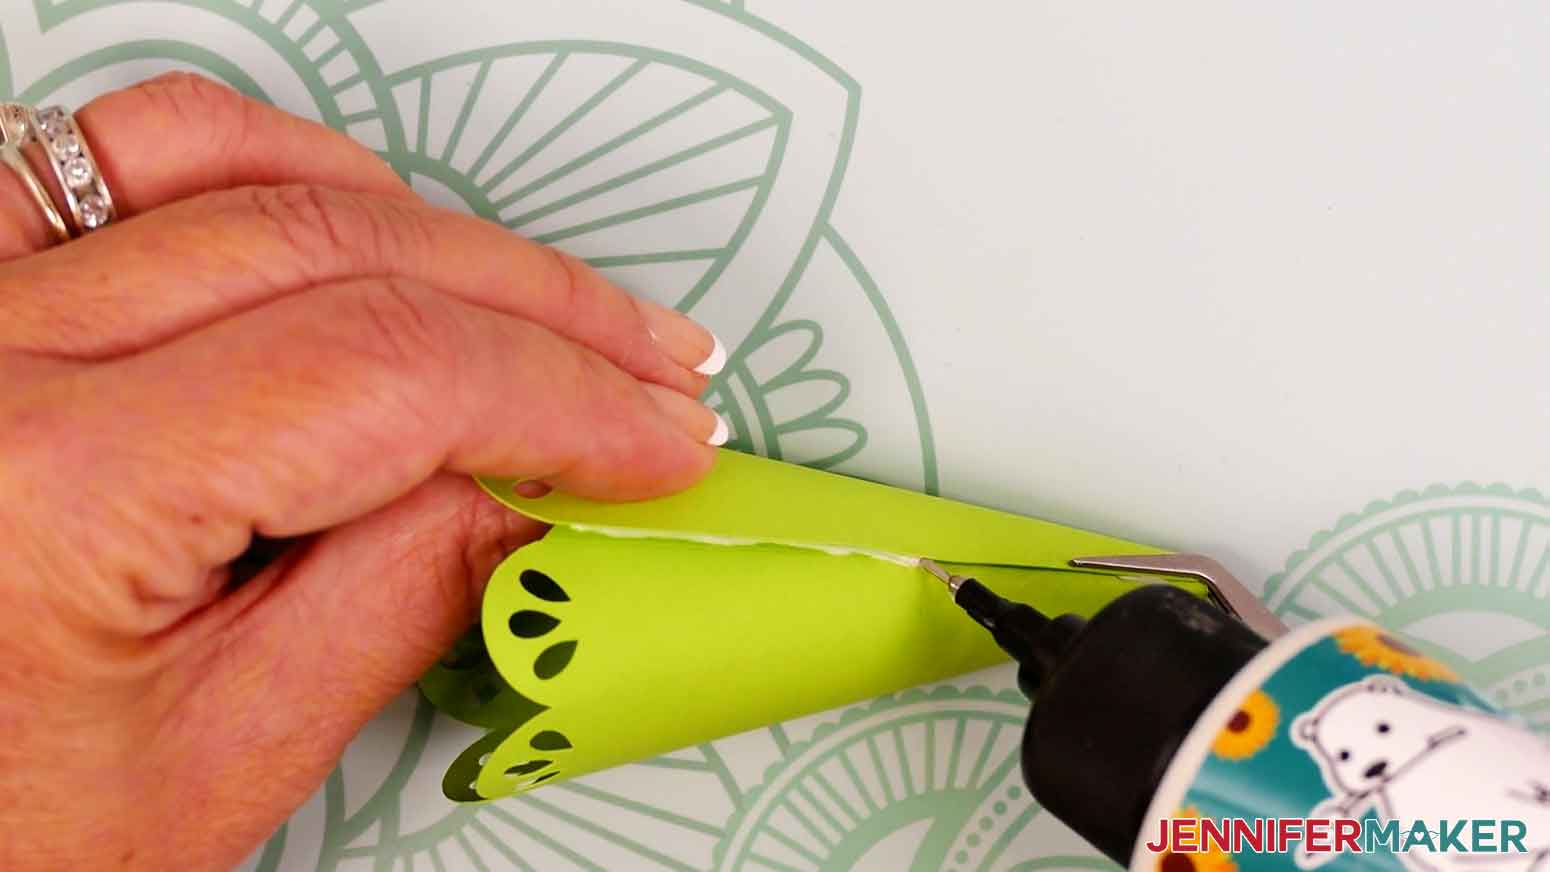
- Add a small amount of craft glue where the cardstock overlaps on the top half of the tree piece. The precision tip on the Bearly Art glue works great for this!
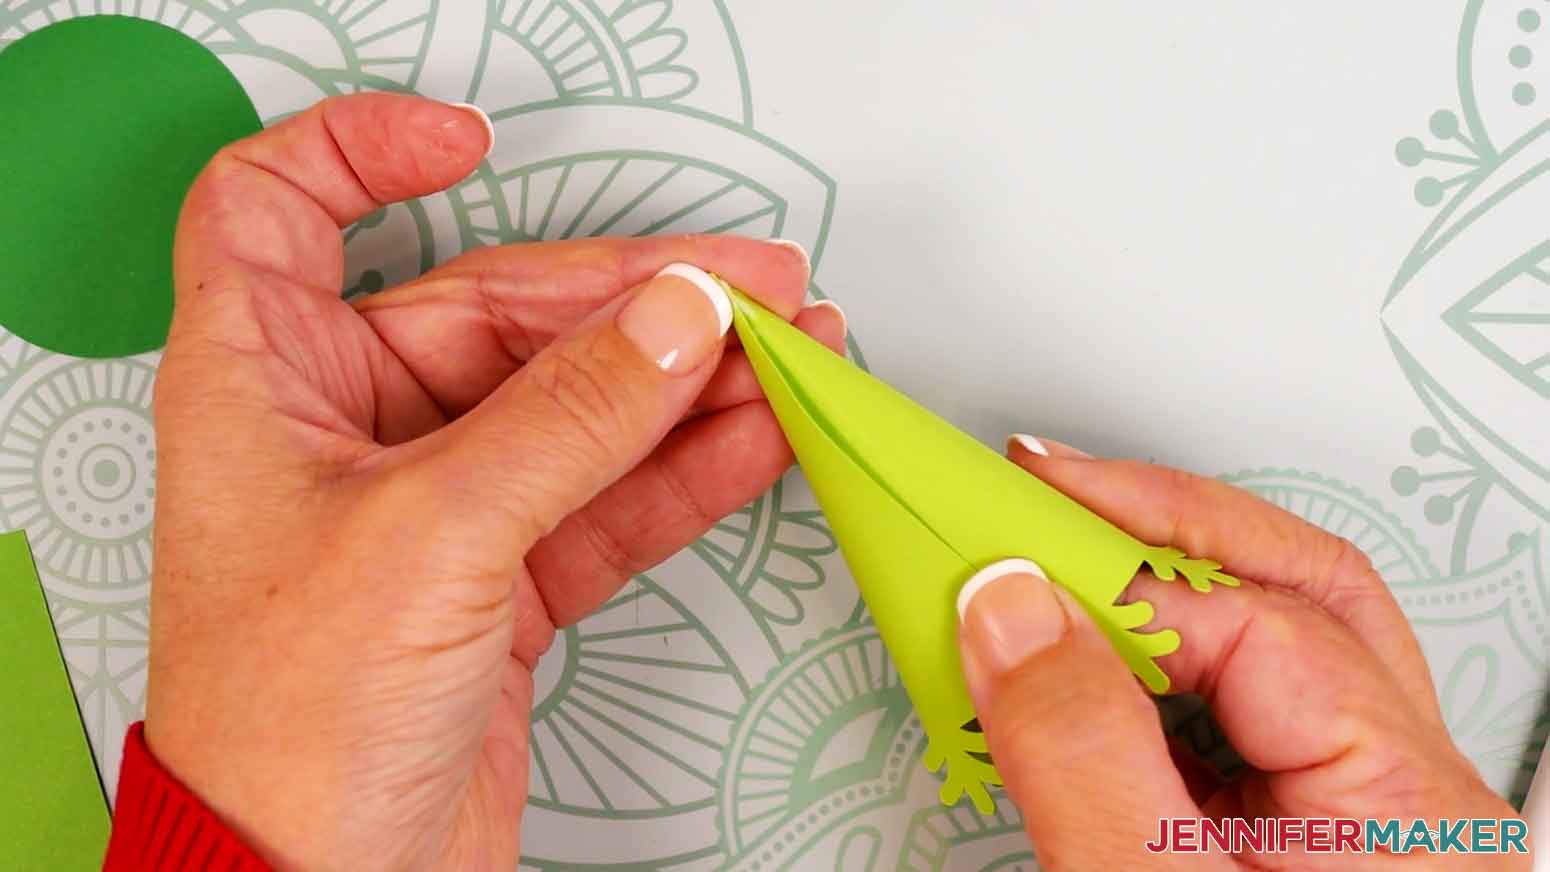
- Use your fingers to curl the piece’s edge around the tip to align it with the crease line, then press and hold the cardstock together.
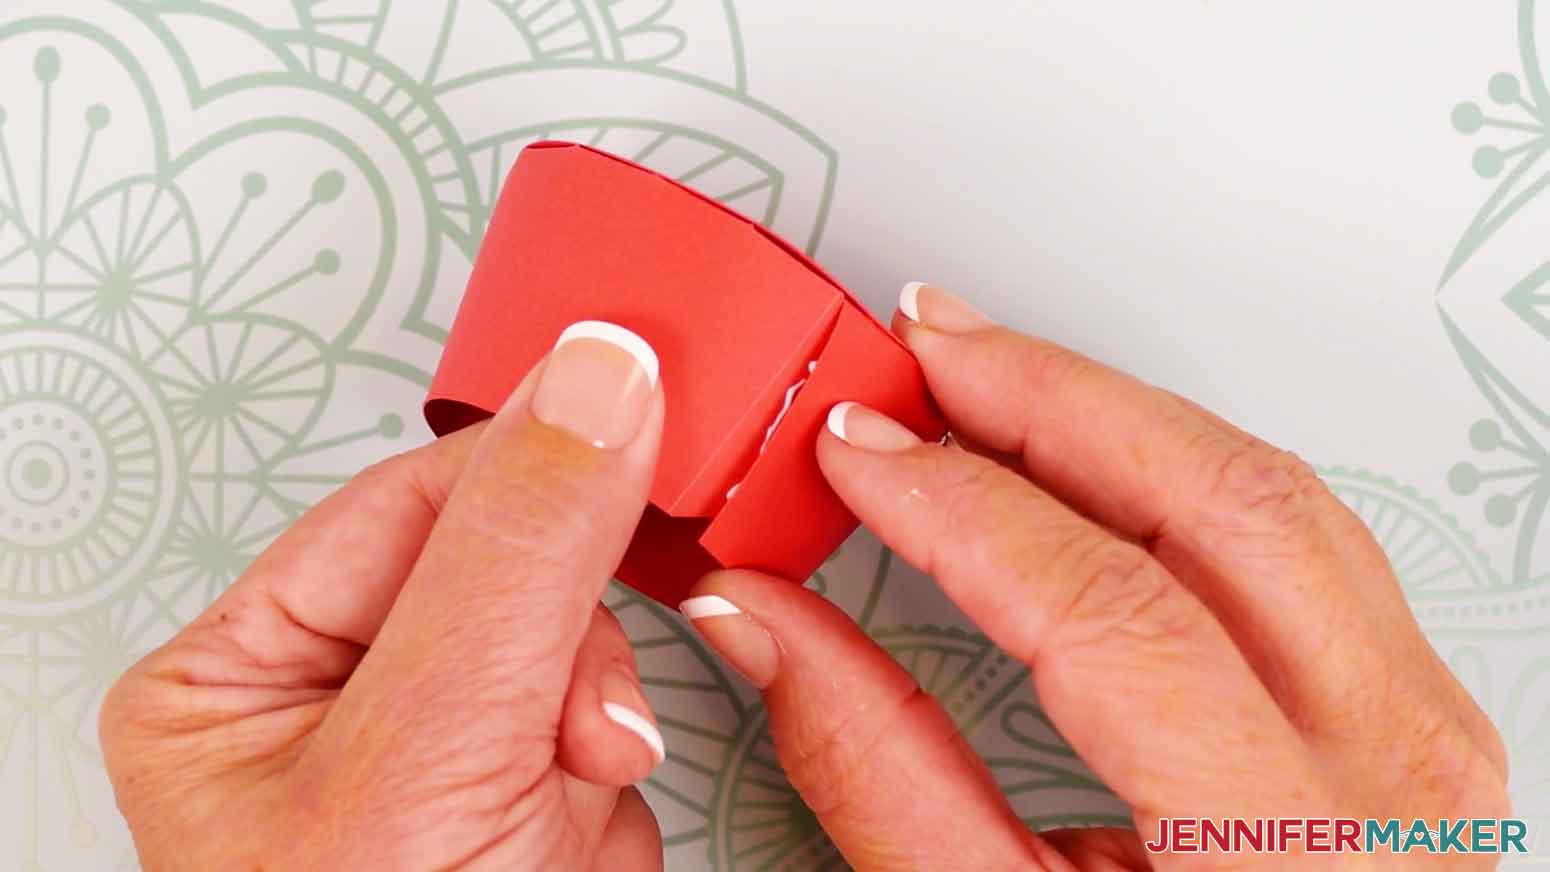
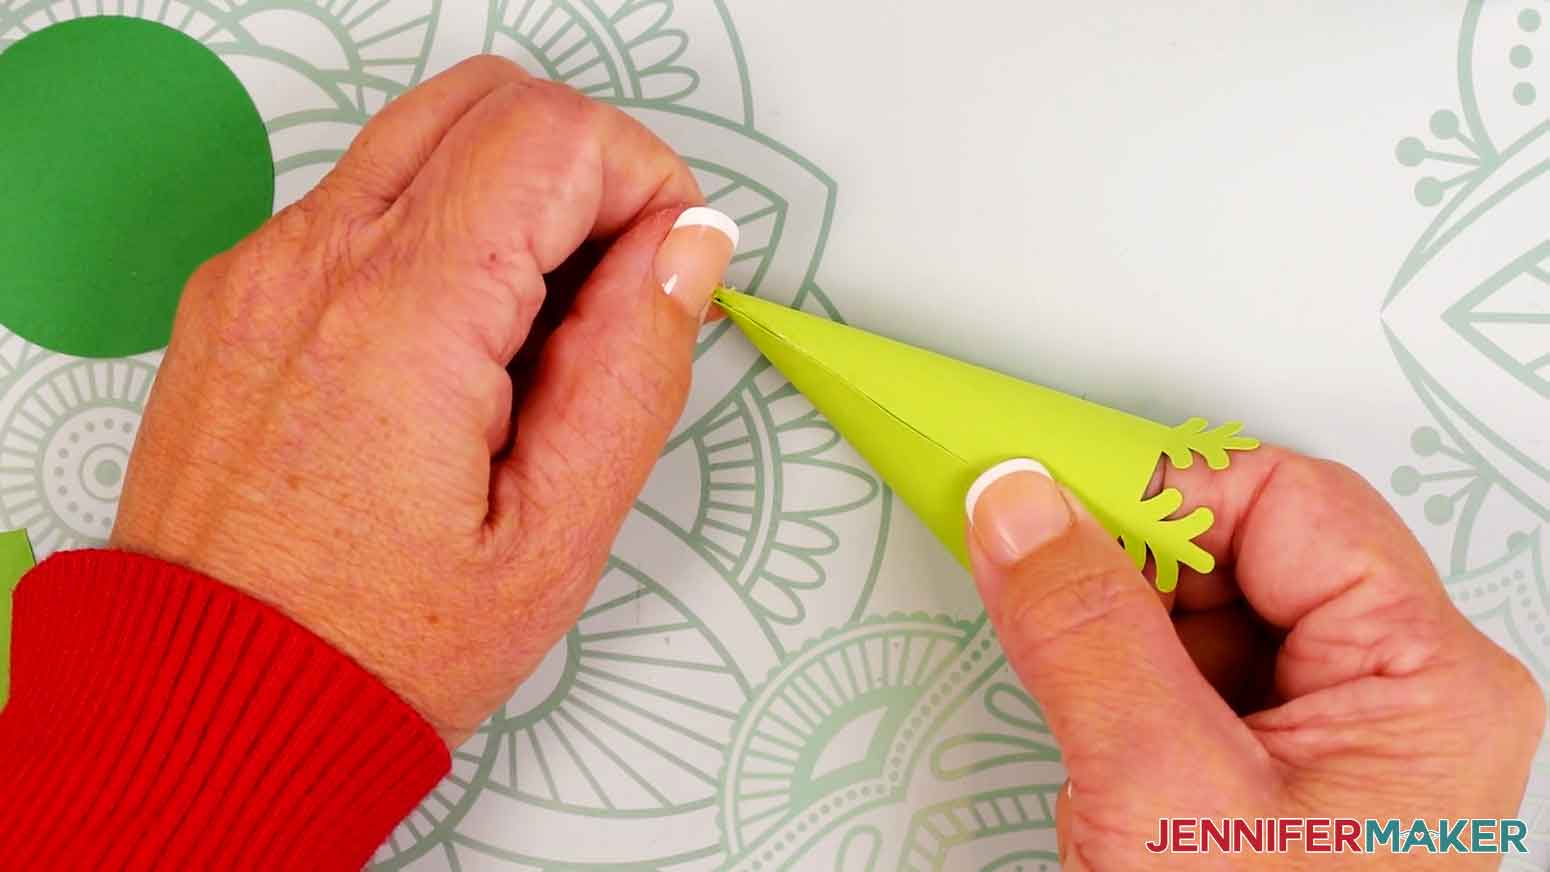
- Then add craft glue where the cardstock overlaps on the piece’s bottom half, keeping the edge aligned with the crease line.
- Use your fingers to press and hold the bottom half in place until the glue dries.
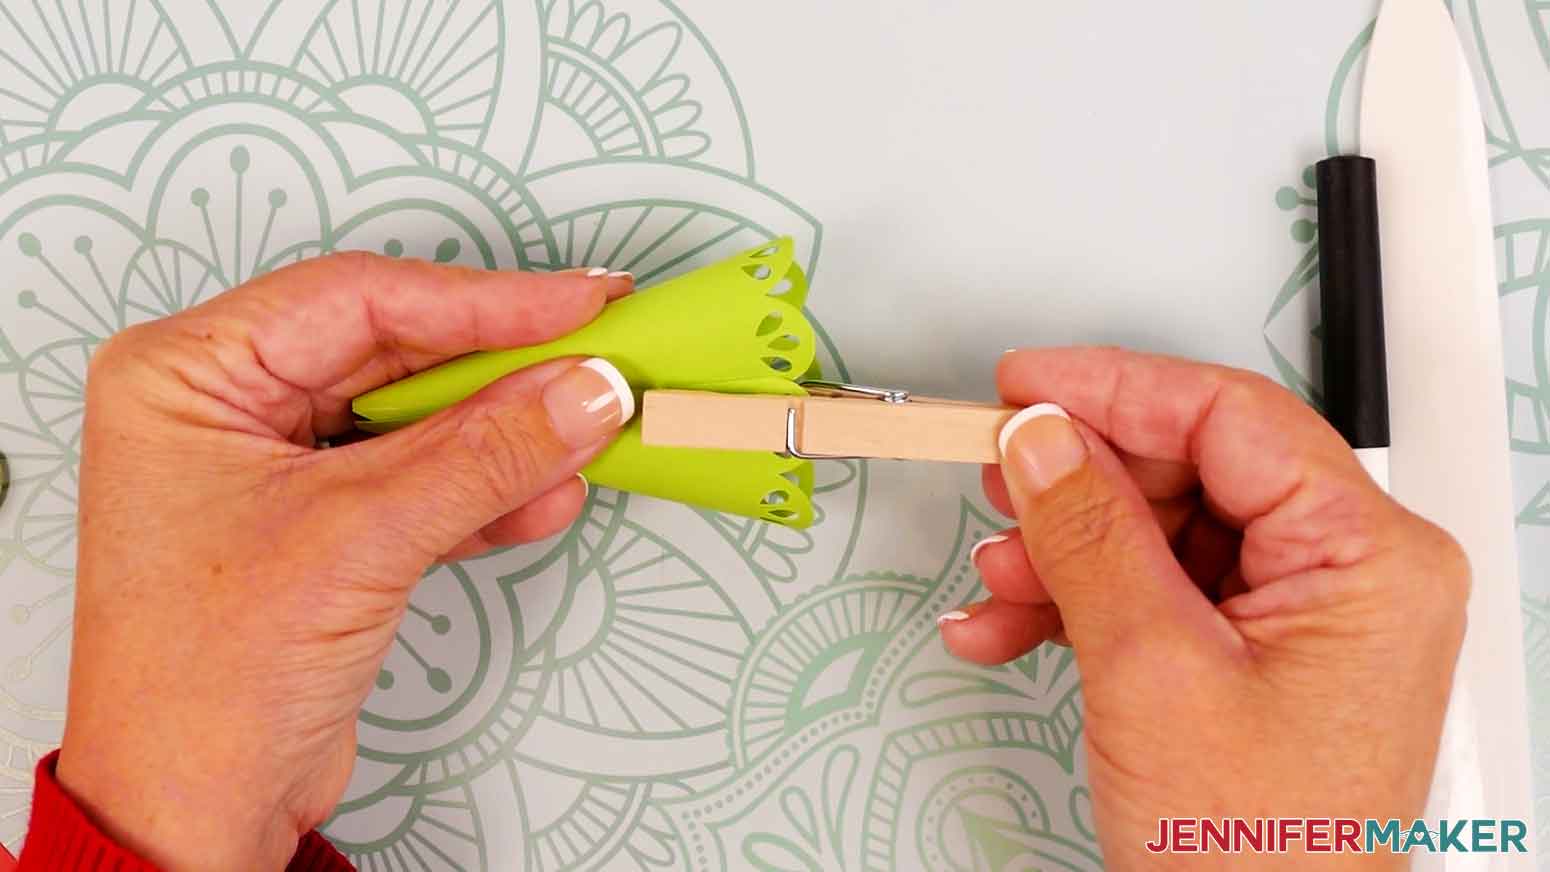
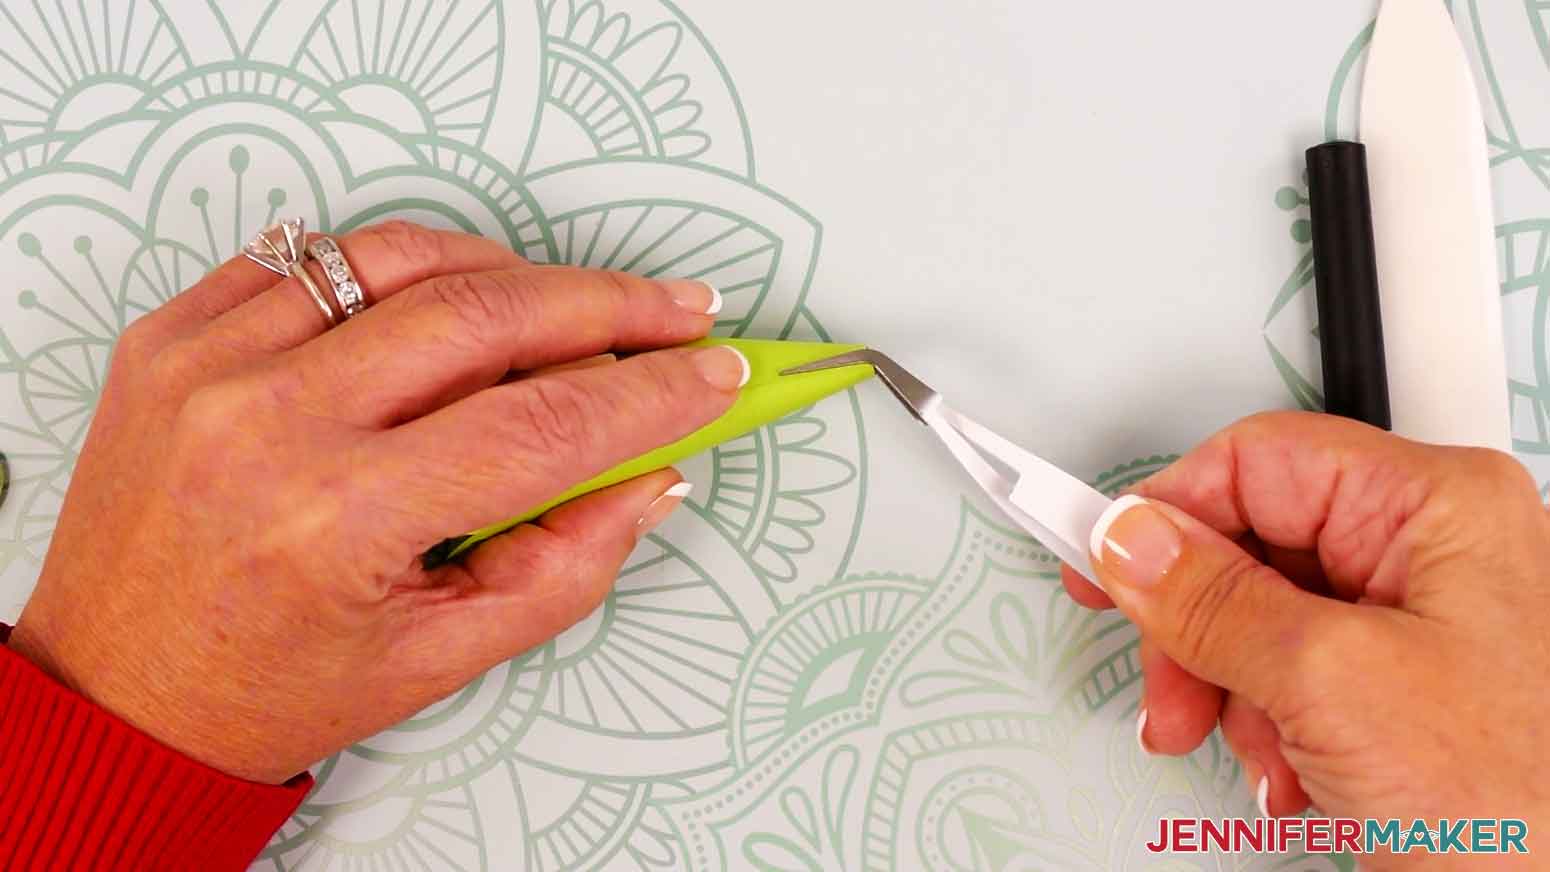
- For each curved tree piece (including curved top pieces), align the piece’s straight edge along the crease line on the outside of the cardstock, and use a clothespin to hold the bottom half in place.
- Add a small amount of craft glue where the cardstock overlaps on the top half of the tree piece.
- Use your fingers to press the cardstock together, keeping the edge aligned with the crease line.
- Use your reverse-action tweezers to pinch and hold the tip together until the glue dries on the top half.
- Remove the clothespin from the bottom half and add craft glue where the cardstock overlaps, keeping the edge aligned with the crease line.
- Use your fingers to press and hold the bottom half in place until the glue dries.
- Remove your reverse-action tweezers and set aside the piece.
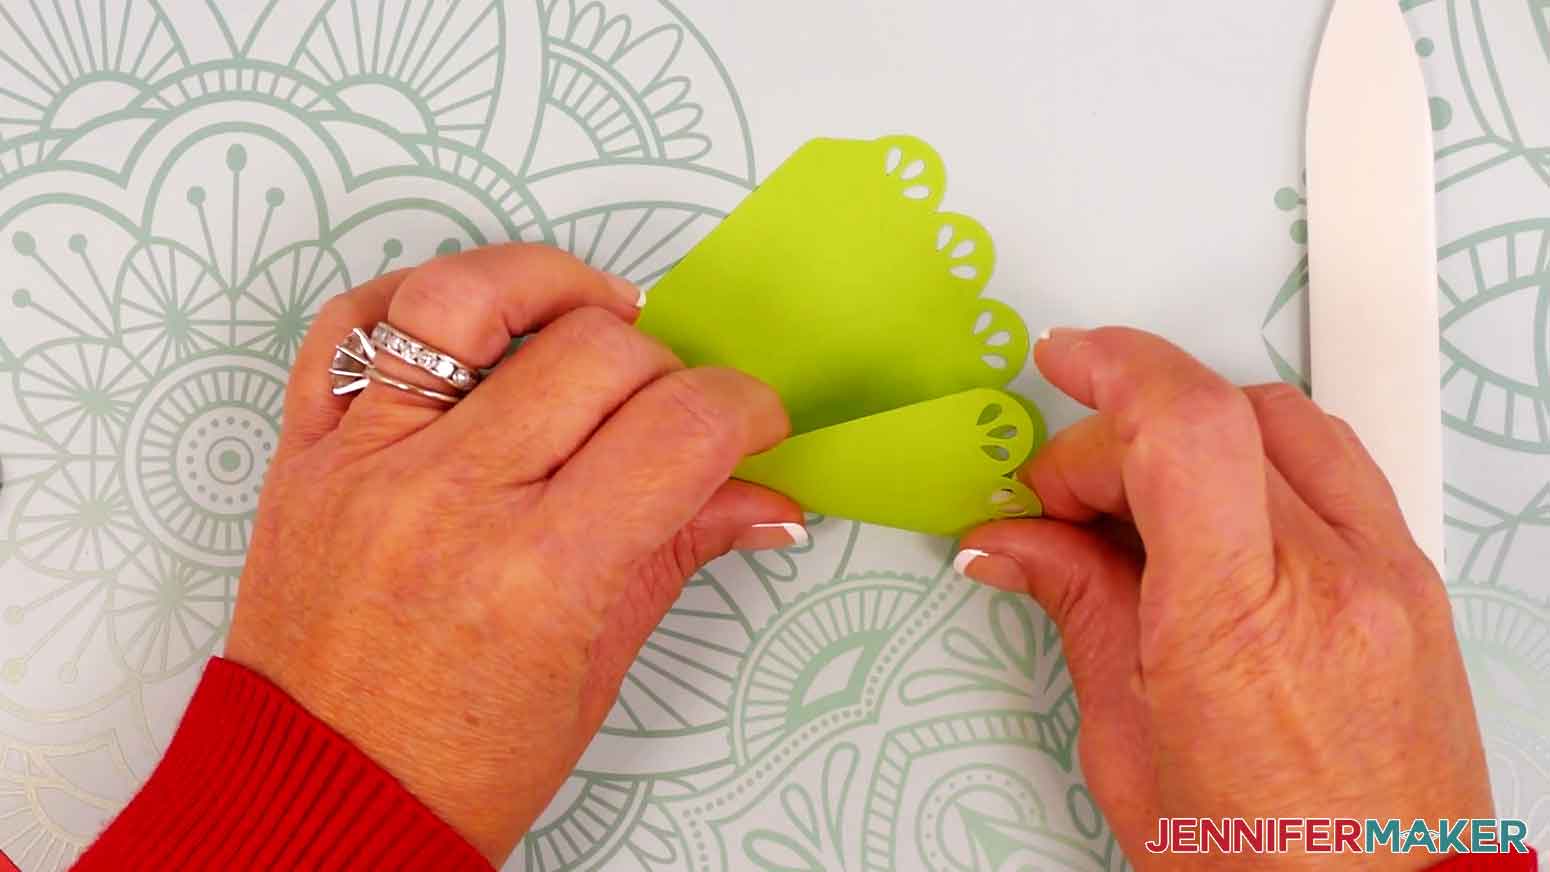
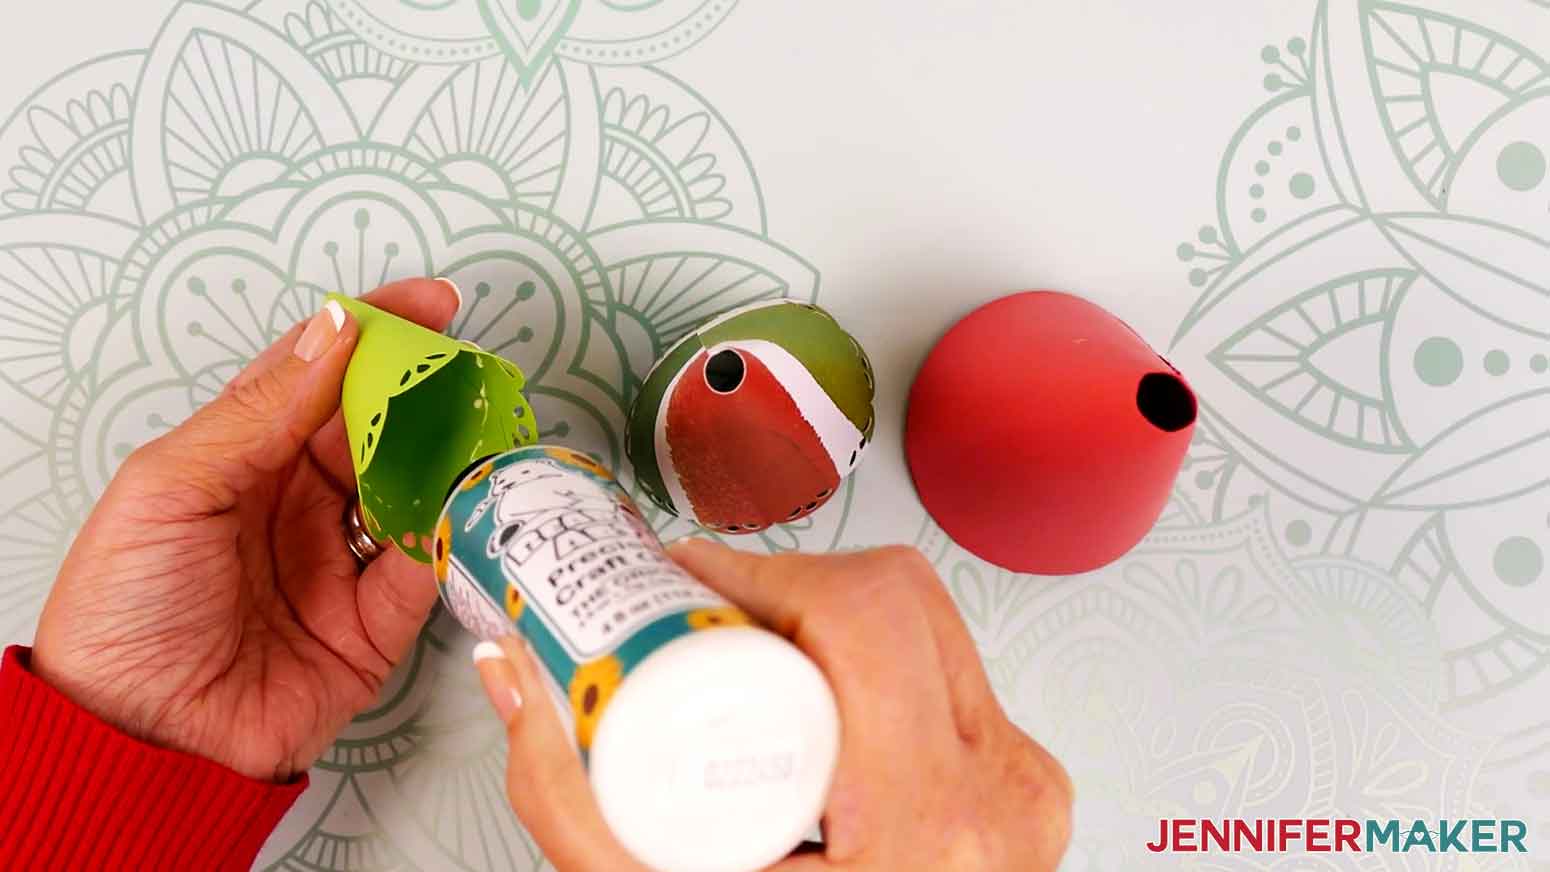
- Once your tree’s pieces are shaped and secured, place the bottom piece on top of the gift box, then stack the middle piece on top of the bottom, followed by the top piece to make sure everything fits together.
- Remove the top piece and add a line of craft glue around the inside, about half an inch from the cutout design, then place it back on the tree stack.TIP: Align the pieces along the seam at the back of the tree.
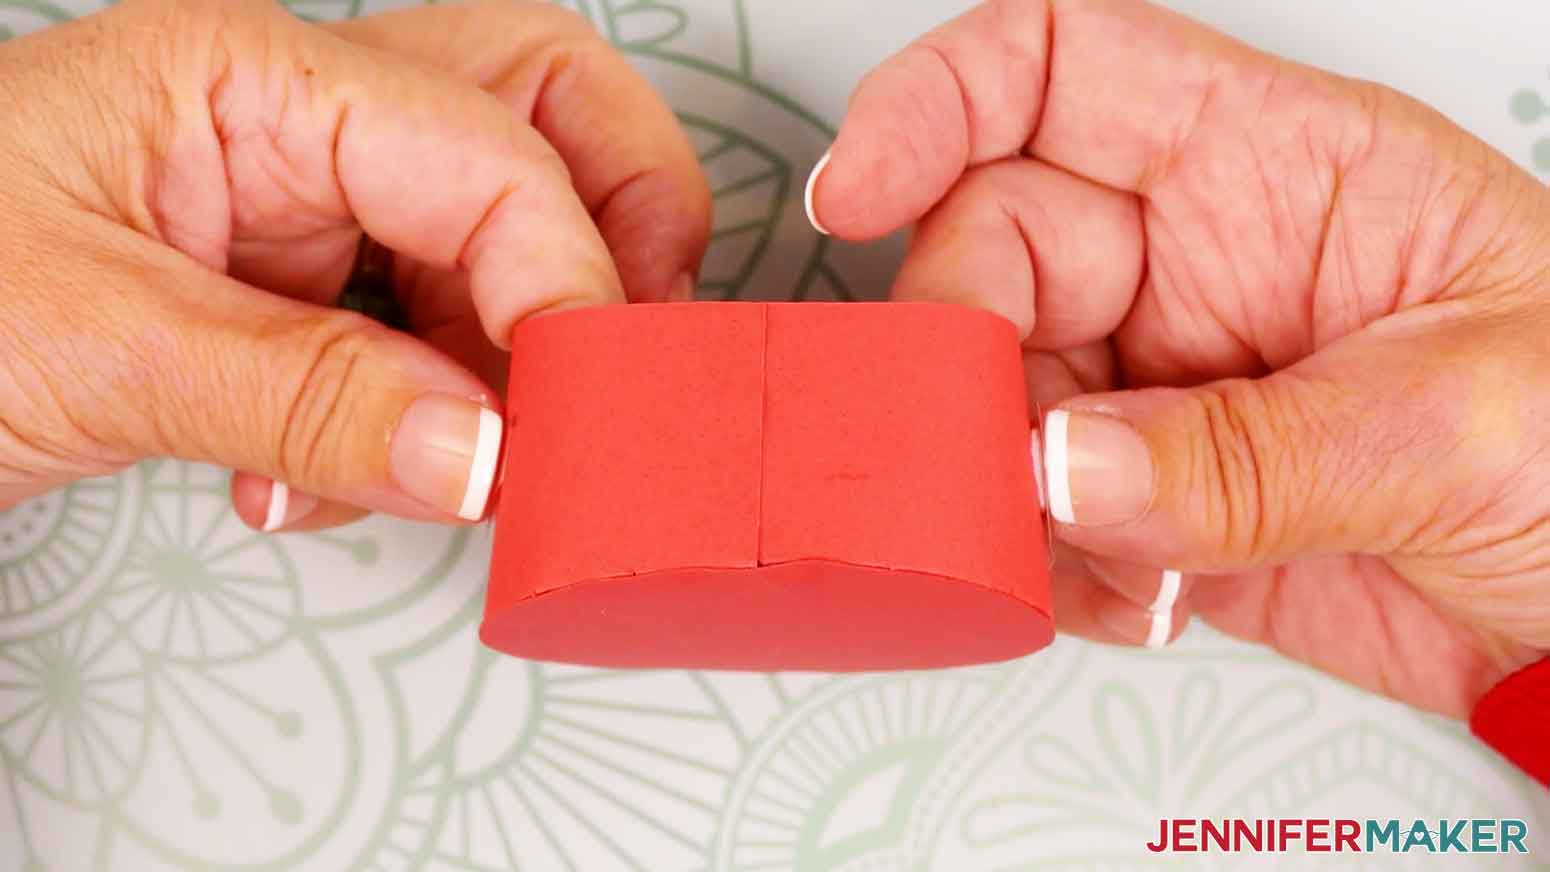
- Cup the tree with your hand and gently push downward to adhere the glued pieces well.
- Repeat Steps 26-27 to secure the middle tree piece (with the top attached) to the bottom tree piece.
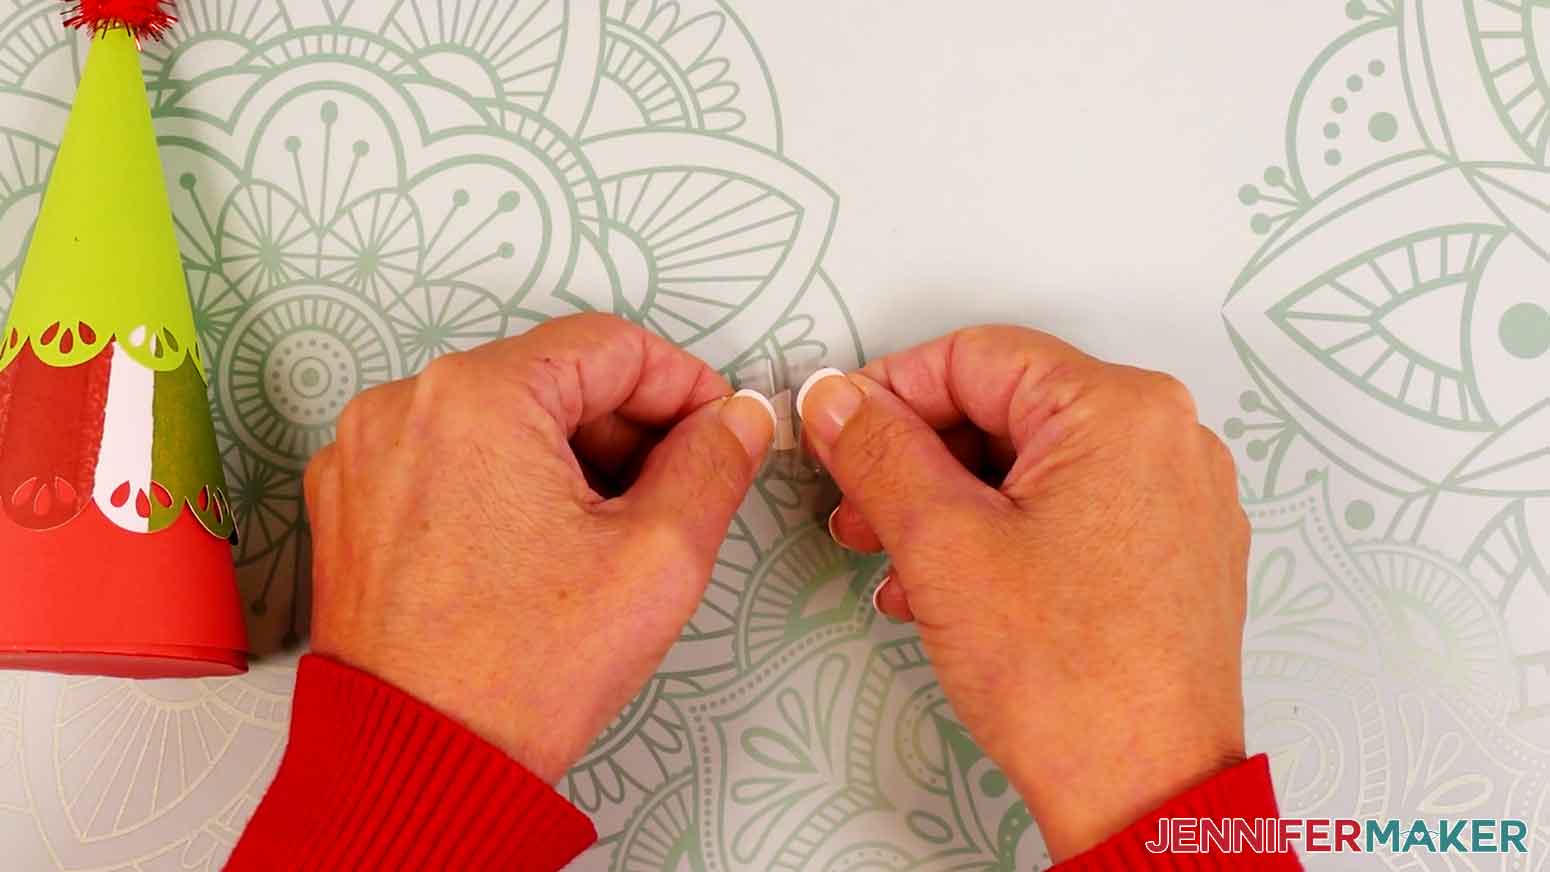
- Fasten together a set of hook and loop dots. Make sure you have both a smooth loop piece and a rough, scratchy hook piece.
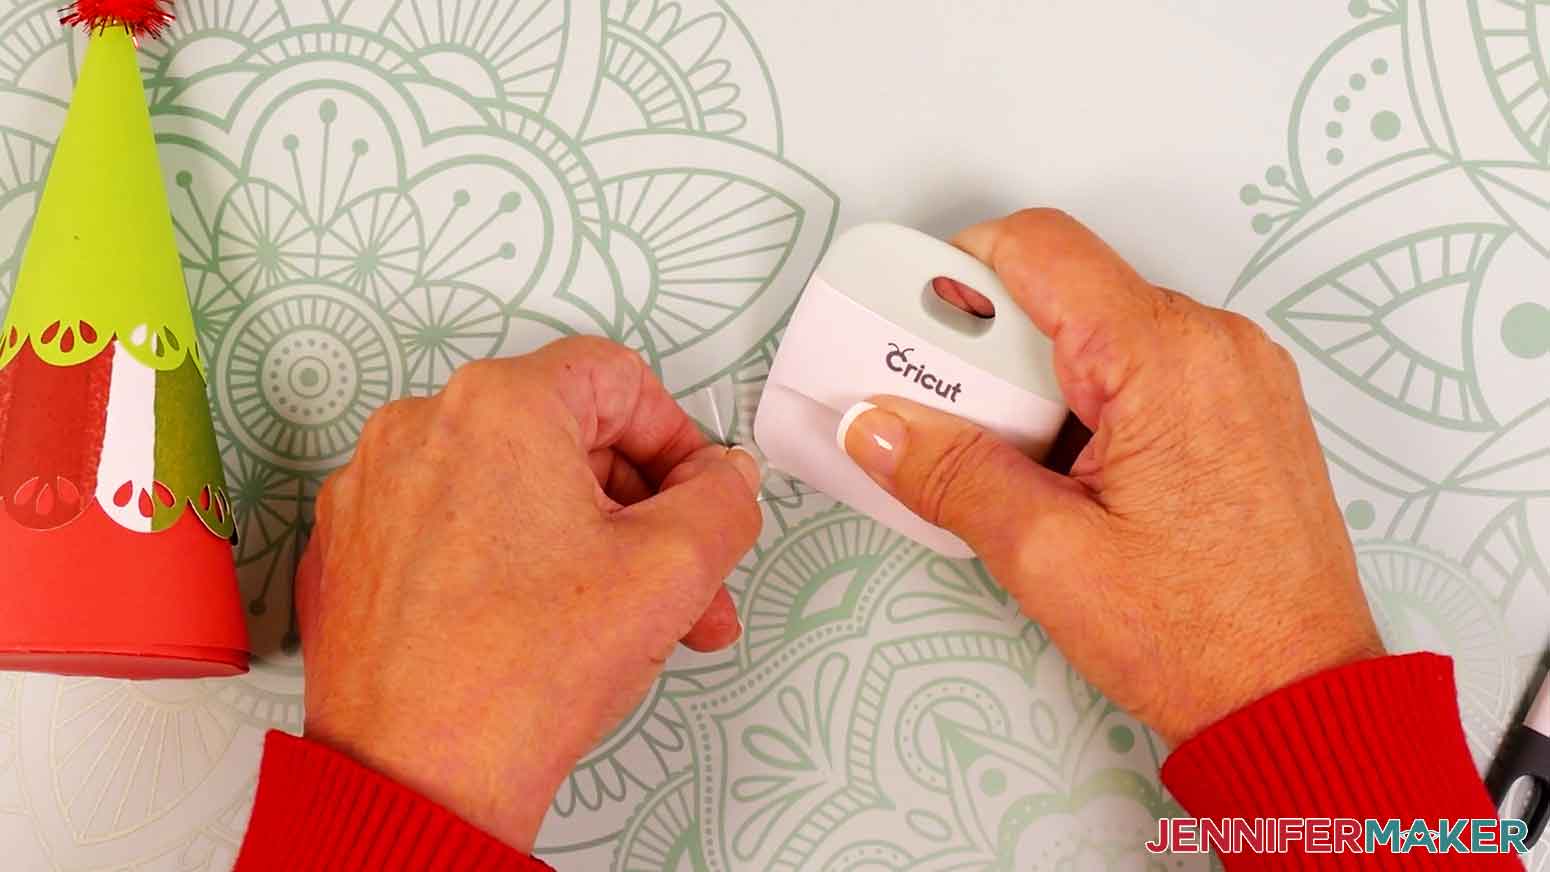
- Peel the backing off one side of the hook and loop dot set and adhere it to the gift box’s outer side.NOTE: I like to position the seam at the back and place the hook and loop dots on the left and right sides.
- Repeat Steps 29-30 to adhere a second hook and loop dot set on the opposite side of the base.
- Peel the backing off both sets so the sticky sides are exposed.
- Take the assembled tree pieces, line up the tree’s seam with the seam on the box, lower the tree onto the box, and firmly press the sides to adhere the hook and loop dots to the tree’s inside.
- Carefully separate the tree and the gift box, and make sure one half of each hook and loop dot set is attached inside the tree. Then pinch each of the hook and loop dot pieces securely to the tree and gift box cardstock.NOTE: If one or both of your hook and loop dot halves didn’t attach to the inside of the tree, just place the tree back onto the gift box and try again, making sure to thoroughly press against the tree’s sides where the dots are attached.
- Place the assembled tree back on the gift box base and make sure the hook and loop dots attach to each other.


 NOTE: If one or both of your hook and loop dot halves didn’t attach to the inside of the tree, just place the tree back onto the gift box and try again, making sure to thoroughly press against the tree’s sides where the dots are attached.
ATTACH THE TREE TOPPER
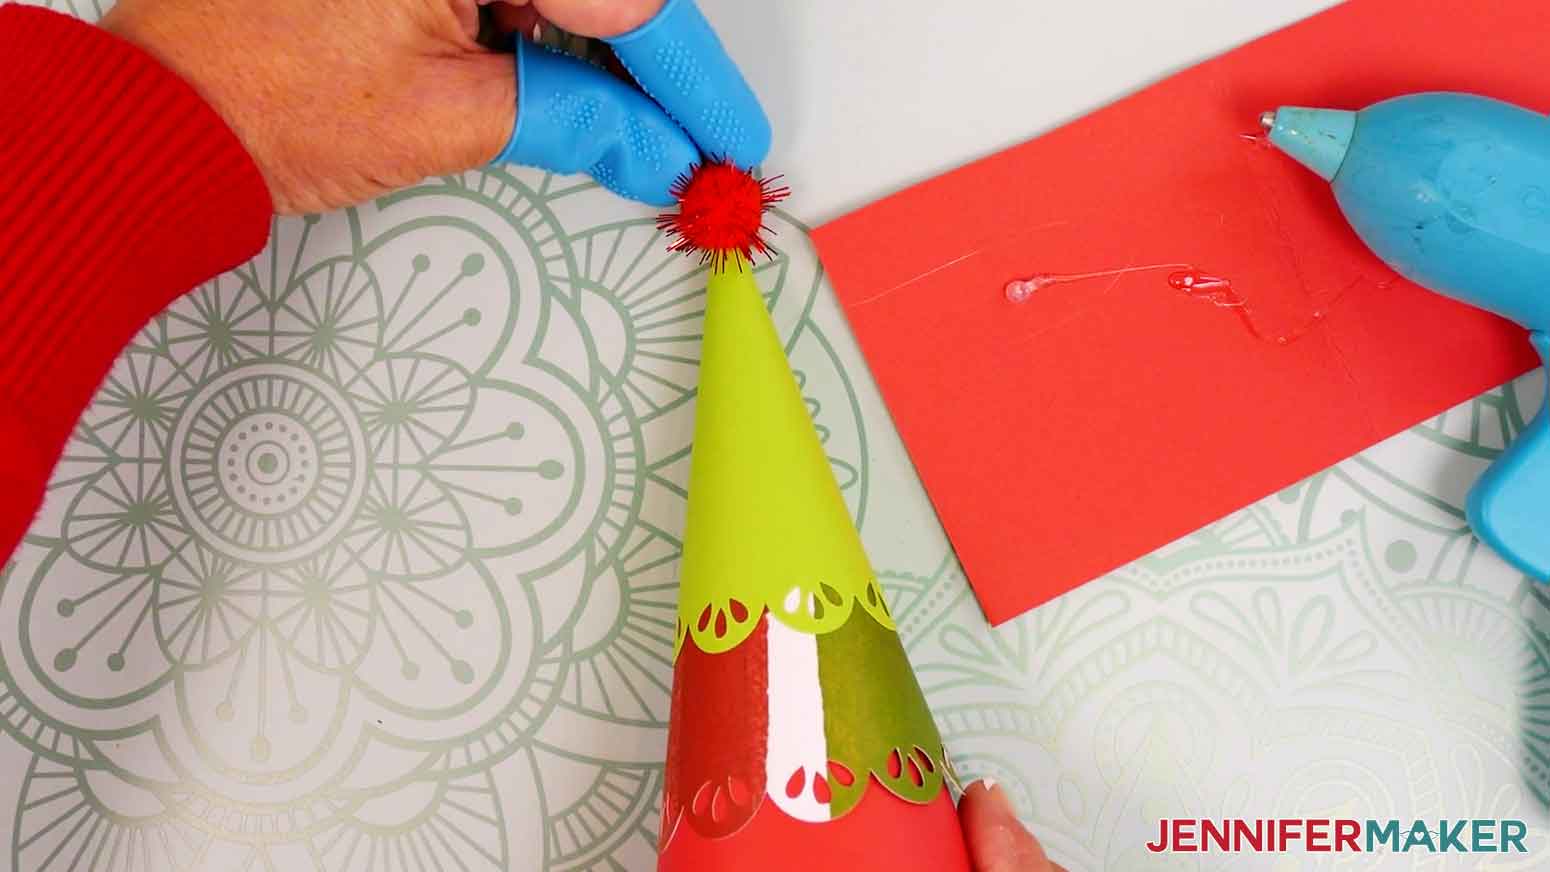
- To add a topper decoration to a tree with a curved top, turn on your hot glue gun and keep your finger protectors nearby to help protect from burns.
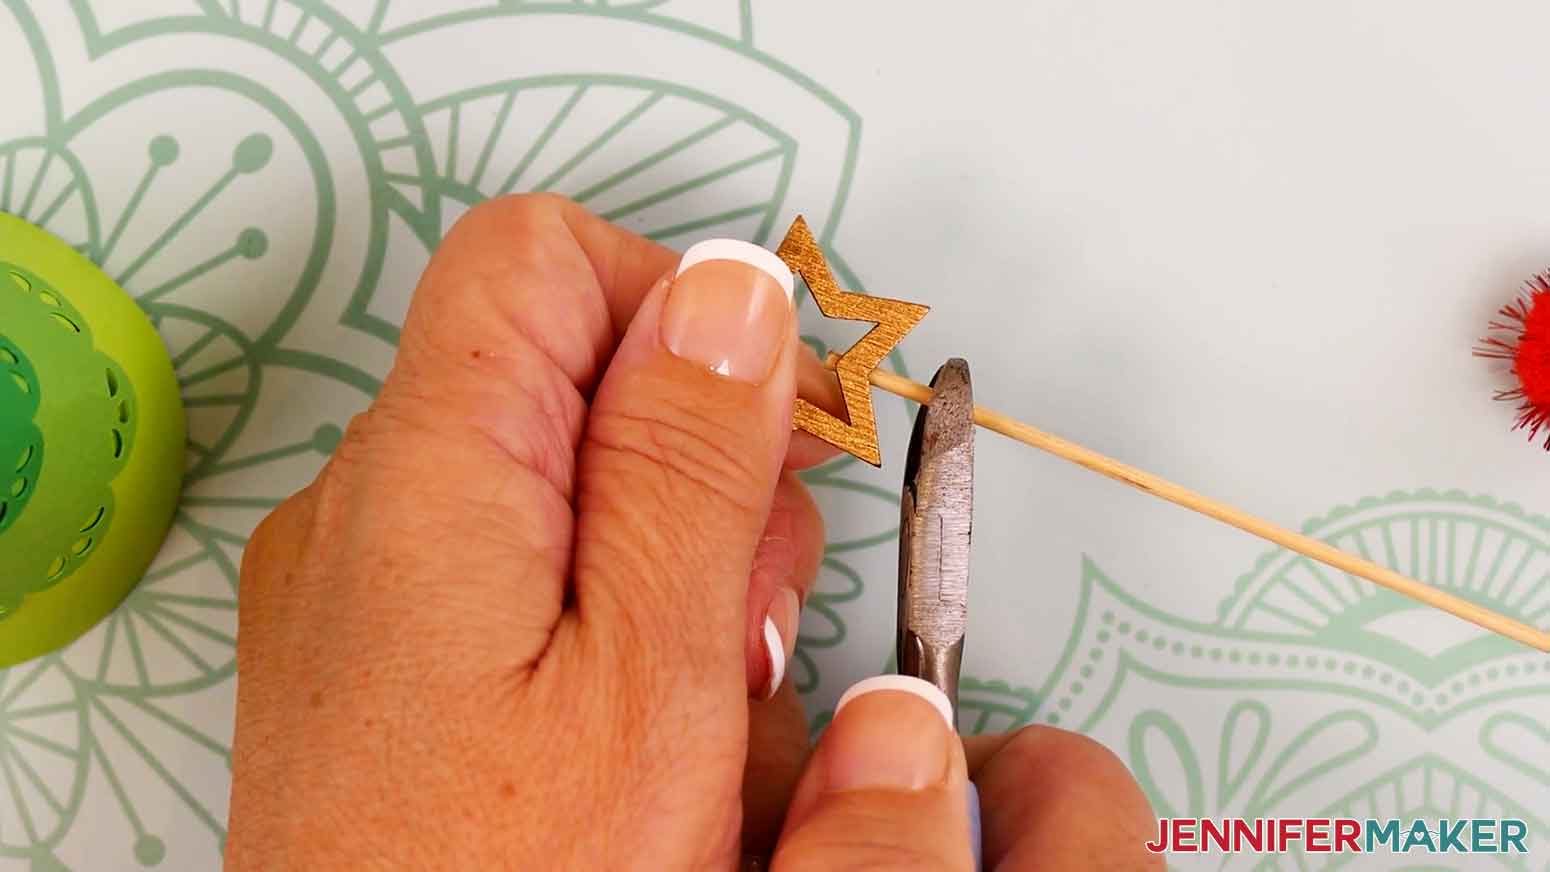
- For the bamboo star pick, use wire cutters to trim away the attached stick, leaving about half an inch intact.
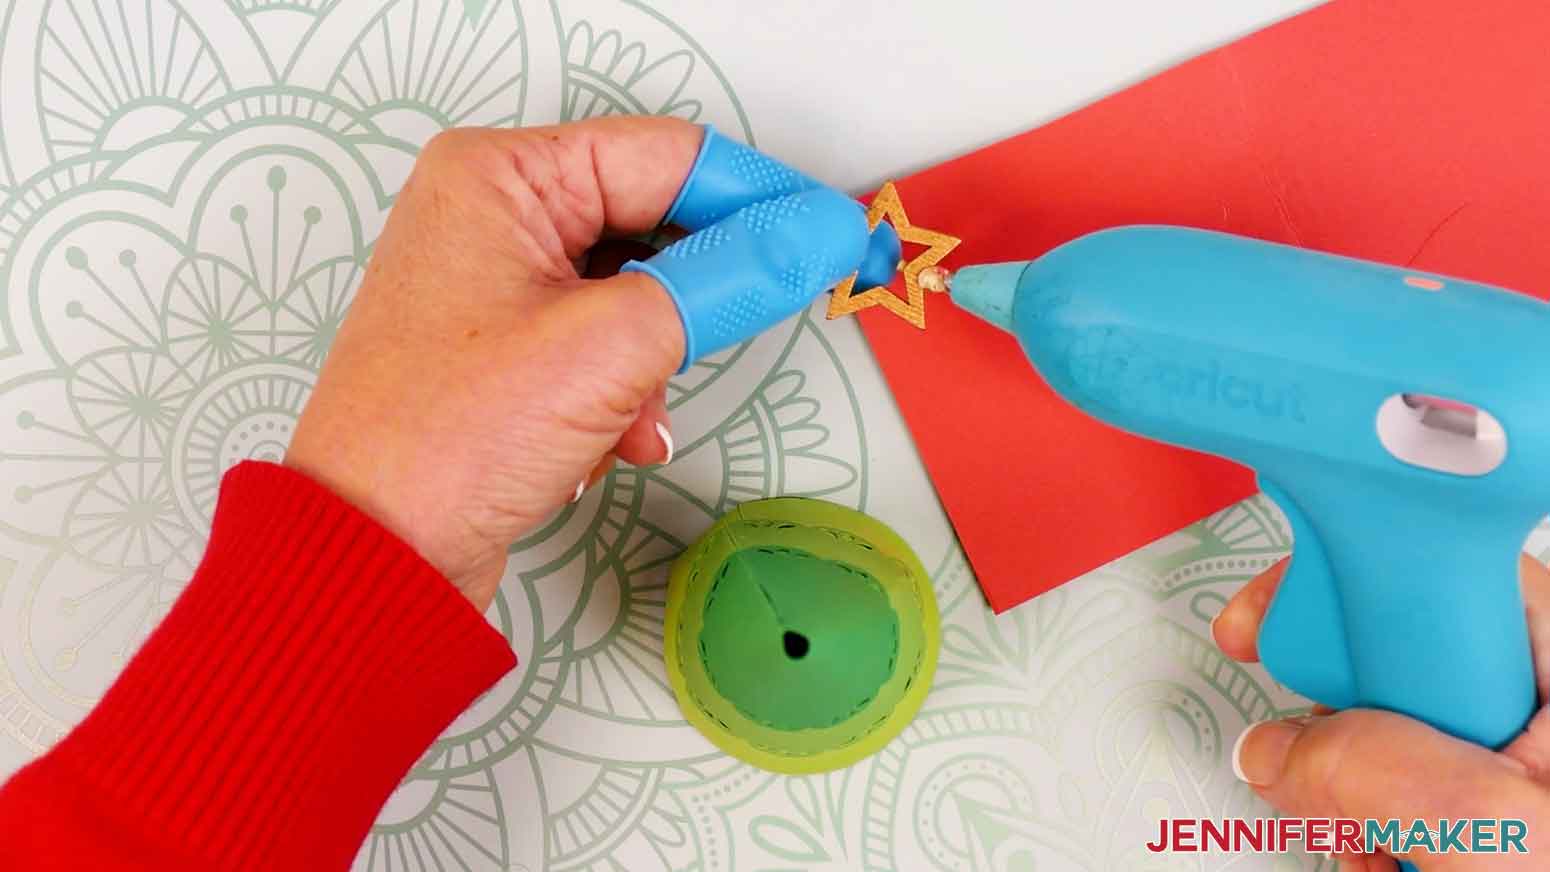
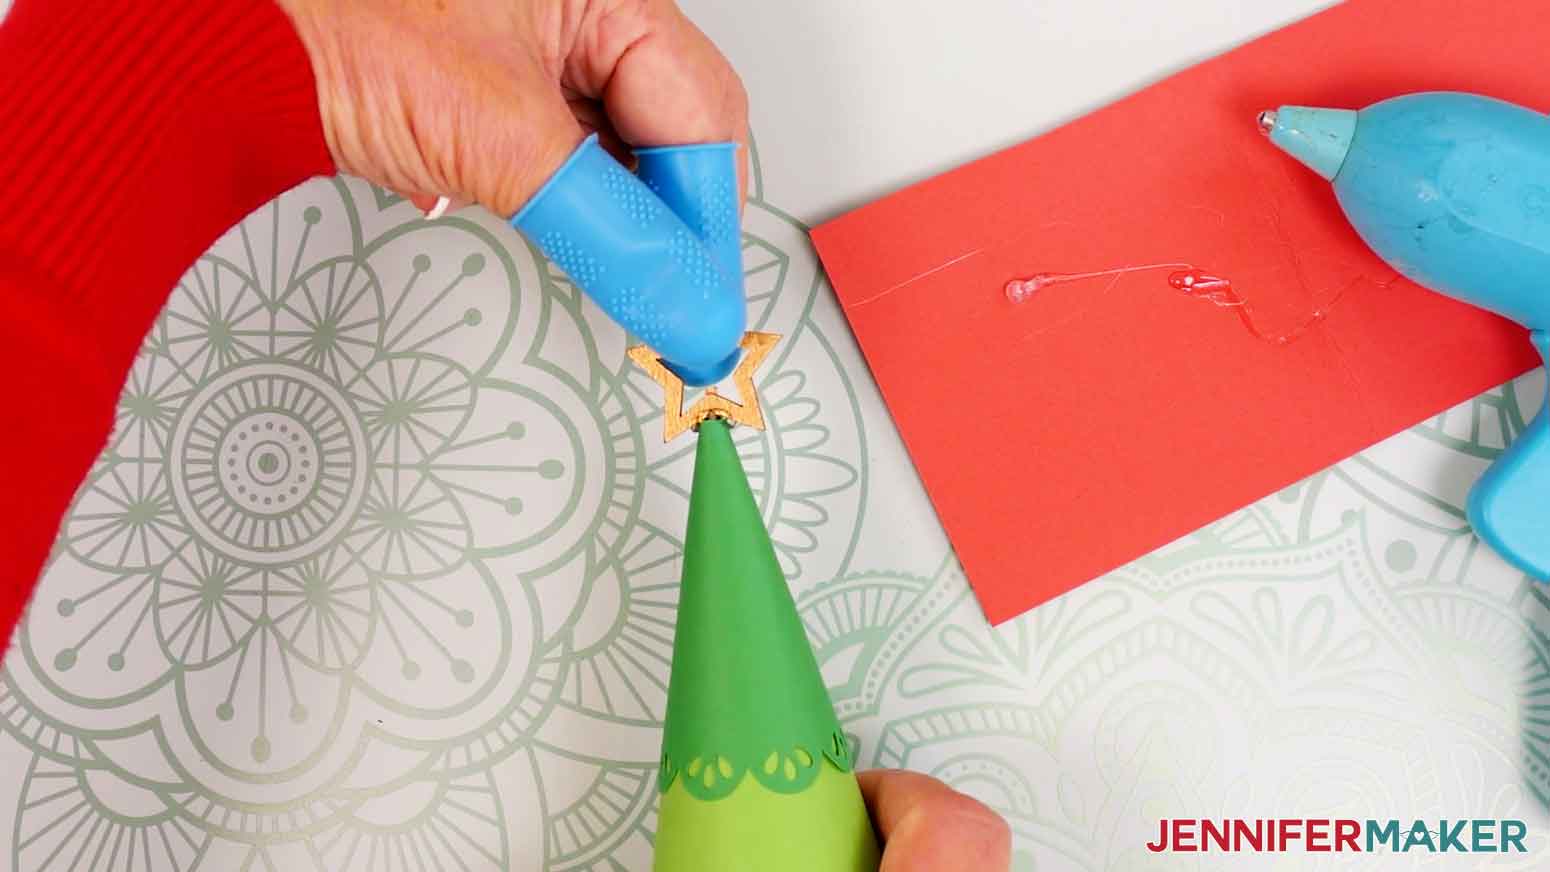
- Hold the star between your protected fingers and add hot glue around the stick at the base of the star.
- Lower the stick down into the center of the tree, position the star so it faces forward (perpendicular to the seam in the back), then press and hold the star in place until the glue sets.
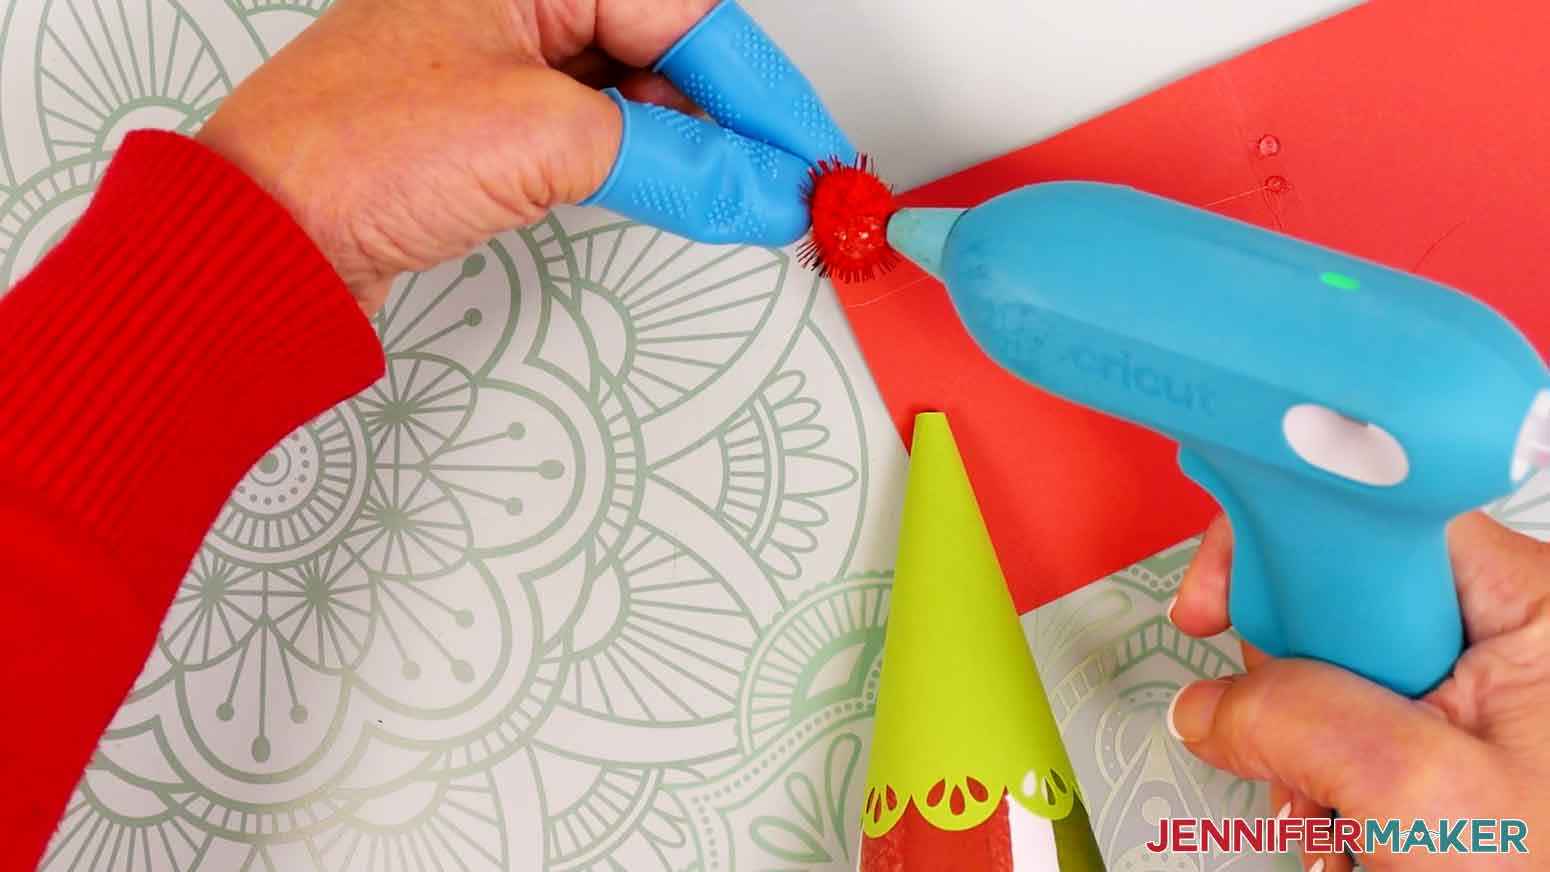
- To add a pom pom decoration, position it on top of the tree as desired, then hold it by the sides between your protected fingers.
- Flip the pom pom over and add a dab of hot glue to the bottom.TIP: Add enough glue to cover the tree top’s hole to make sure it sticks.
- Then press and hold the pom pom’s glued bottom to the top of the tree until the glue dries.
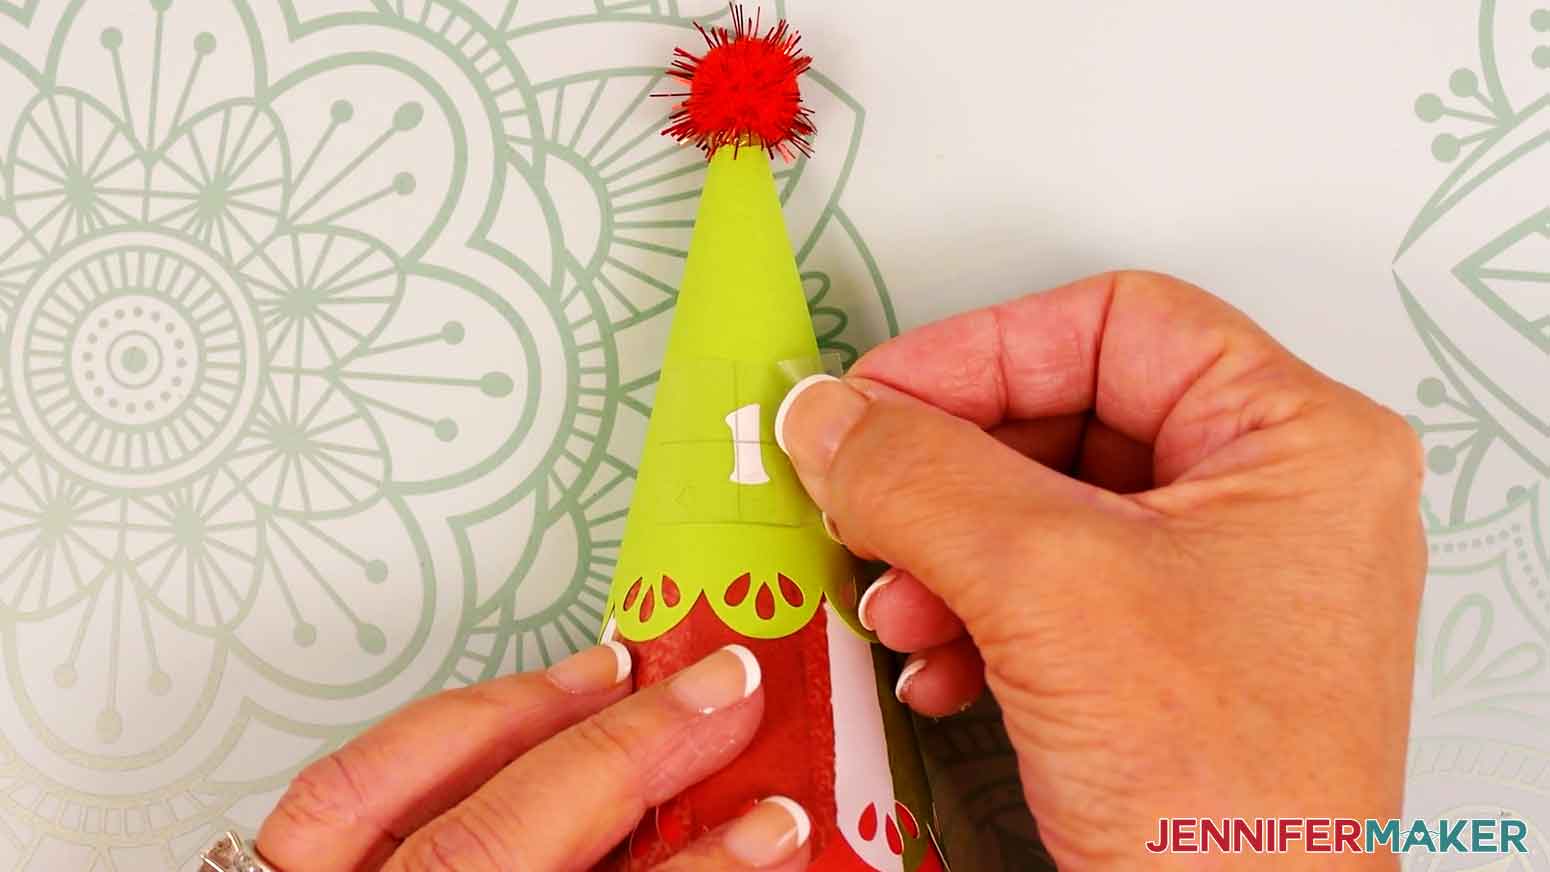
ATTACH THE VINYL NUMBERS
- To add vinyl numbers to the top layer of a tree, find the front of the tree (opposite the seam) and use a ruler and pencil to measure and leave a very small mark where you want the numbers to go.NOTE: I like to align the bottom of my numbers along these measurements:- For the small tree: 0.5” above the top of the design cutouts.- For the medium tree: 0.625” above the top of the design cutouts.- For the large tree: 0.75” - 1” above the top of the design cutouts.TIP: If you aligned the seams at the back of your tree, you should have a single design cutout section in front that you can use to help center your number decal.
- Cut a piece of StandardGrip transfer tape just larger than the vinyl decal.
- Lay the decal vinyl side up on your work surface.
- Remove the backing from the transfer tape, then pat your fingers on its adhesive side to lessen its stickiness and prevent damage to your cardstock.TIP: You can also stick the transfer tape to a cloth or your clothing and peel it back up several times to lessen the stickiness.
- Hold your transfer tape in the shape of a “taco,” sticky side down, then center the bottom of the “taco” onto the middle of the decal.
- Smooth the transfer tape over the decal from the center outward and burnish it down using the scraper tool.
- Flip your vinyl over and burnish the other side, then gently peel away the vinyl’s carrier sheet.TIP: If any pieces of the decal cling to the carrier sheet instead of transferring to the tape, lay the sheet back down, burnish the area with your scraper, and carefully try again.
- Hold your transfer tape sticky side down and lightly center the decal on the front of your tree, keeping the bottom aligned with the mark you made.
- Once the decal is in place, use your fingernail to burnish it firmly onto the tree, starting in the center of the design and working your way out.
- Starting in a corner, slowly and carefully peel the transfer tape away from the cardstock, burnishing down any vinyl that lifts from the surface as you go.TIP: It can be helpful to pull your transfer tape parallel to the cardstock while peeling it away.
- Use your pencil’s eraser to remove the placement mark if it’s still visible.
- Your tree is ready!
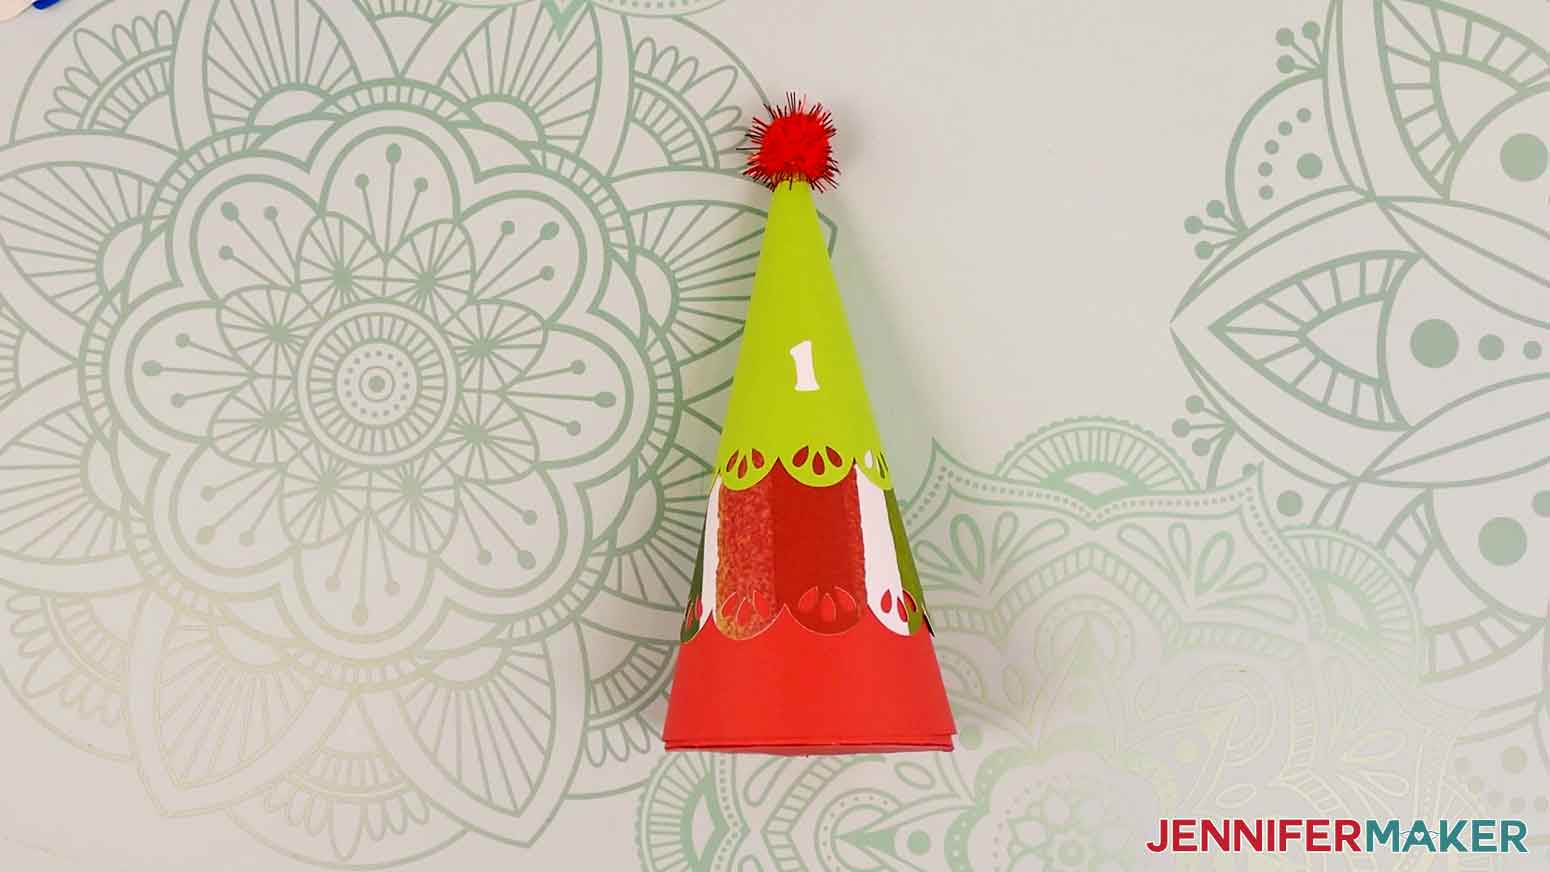
STEP 4: SHOW IT OFF
You now have 25 cone-shaped gift boxes for your Minimalist Tree Advent Calendar!
Notes
Finished Sizes:
Large Tree: Approximately 7.5”H x 3.25”W x 3.25”D
Medium Tree: Approximately 6.5”H x 2.625”W x 2.625”D
Small Tree: Approximately 5.5”H x 2.125”W x 2.125”D
Typeface Used: Margin, Free Alternative: Margin (for personal use only)
Answers to Your Questions About Making a Cone Tree Advent Calendar
Q: I want my tree tiers to have custom designs along the edges. How do I do that?
A: You can learn how to design custom tree edges in my ADVANCE program. Learn more about ADVANCE here!
Q: What are Christmas advent calendars?
A: An Advent calendar is a calendar, typically with little drawers, pouches, or compartments, used to count the days of Advent in anticipation of Christmas. Each spot holds a treat or a small present that is opened by the owner every day from December 1st to 25th!
Q: How many days are in an advent calendar?
A: My Advent calendars are always 25 days. I know some cultures and families prefer to have 24 days. If you fall into the 24 camp, you can cut just that number of trees.
Q: Twenty-five trees is a lot! How do I keep track of all the designs I want to make?
A: The design files for my Tree Advent Calendar come with a handy planning sheet to help you keep things organized! It keeps your colors, sizes, and topper ideas all in one place so you don’t accidentally cut the wrong pieces or waste materials. Be sure to print it out and keep it close by while you design and assemble your trees!
Q: Do my trees have to be minimalist, too, or can I add more decorations to them?
A: I designed this Advent calendar with a minimalist look because I know how busy we all get around the holidays! If you have extra time and want to decorate your trees even more, please feel free to do so. I bet stickers, mini plastic lights, or fake snow would all make your Advent calendar look even more amazing! Just remember to share a picture with me so I can see how fantastic your trees turn out.
Q: Do I have to make all 25 trees in one sitting?
A: Nope! One of the reasons why I designed this Advent calendar with individual trees is so you can easily break up the work into chunks without stopping in the middle of assembling a complex piece. If you only have time for a few trees a day, that’s perfectly okay! In fact, you don’t have even have to make all 25 trees like I did. If you have a shorter countdown in mind, you can make just as many trees as you need. This design is completely flexible!
Q: What kind of cardstock works best for these cone trees?
A: I used regular 65 lb. cardstock for my Tree Advent Calendar because the paper is easier to roll than some heavier types of cardstock, especially at the tips of the trees. Specialty cardstock, like metallic or foil cardstock, can be prone to crinkling while coaxing it into certain shapes. Glitter cardstock would be pretty, but also might be a bit difficult to roll. I’d stick with plain or patterned cardstock on the lighter side for best results.
Q: What else can I use as a tree topper besides stars and pom poms?
A: You can use whatever you like to top your tree as long as it’s lightweight and you have a way to secure it! I picked the gold star cocktail picks because the bamboo is light enough to keep from crushing the tree or causing it to topple over, and because the stick is easy to insert at the treetop and secure with hot glue. Similar dessert picks might also work well!
Q: What can I put inside the base of my trees?
A: All of the trees are big enough for a small surprise like a piece of candy, a miniature toy, or even some cash! Just make sure whatever you put inside isn’t too heavy or else the hook and loop fasteners won’t hold!
Get my free SVG/DXF/PDF designs and PDF Tree Planning Guide!
(If you do not see the signup form above, click here.)
I love seeing what you make with my tutorials and how you customize them! Please share a photo of your Advent trees in our Facebook group or tag me on social media with #jennifermaker.
Love,

Want to remember this? Save this Minimalist Tree Advent Calendar tutorial to your favorite Pinterest Board!