
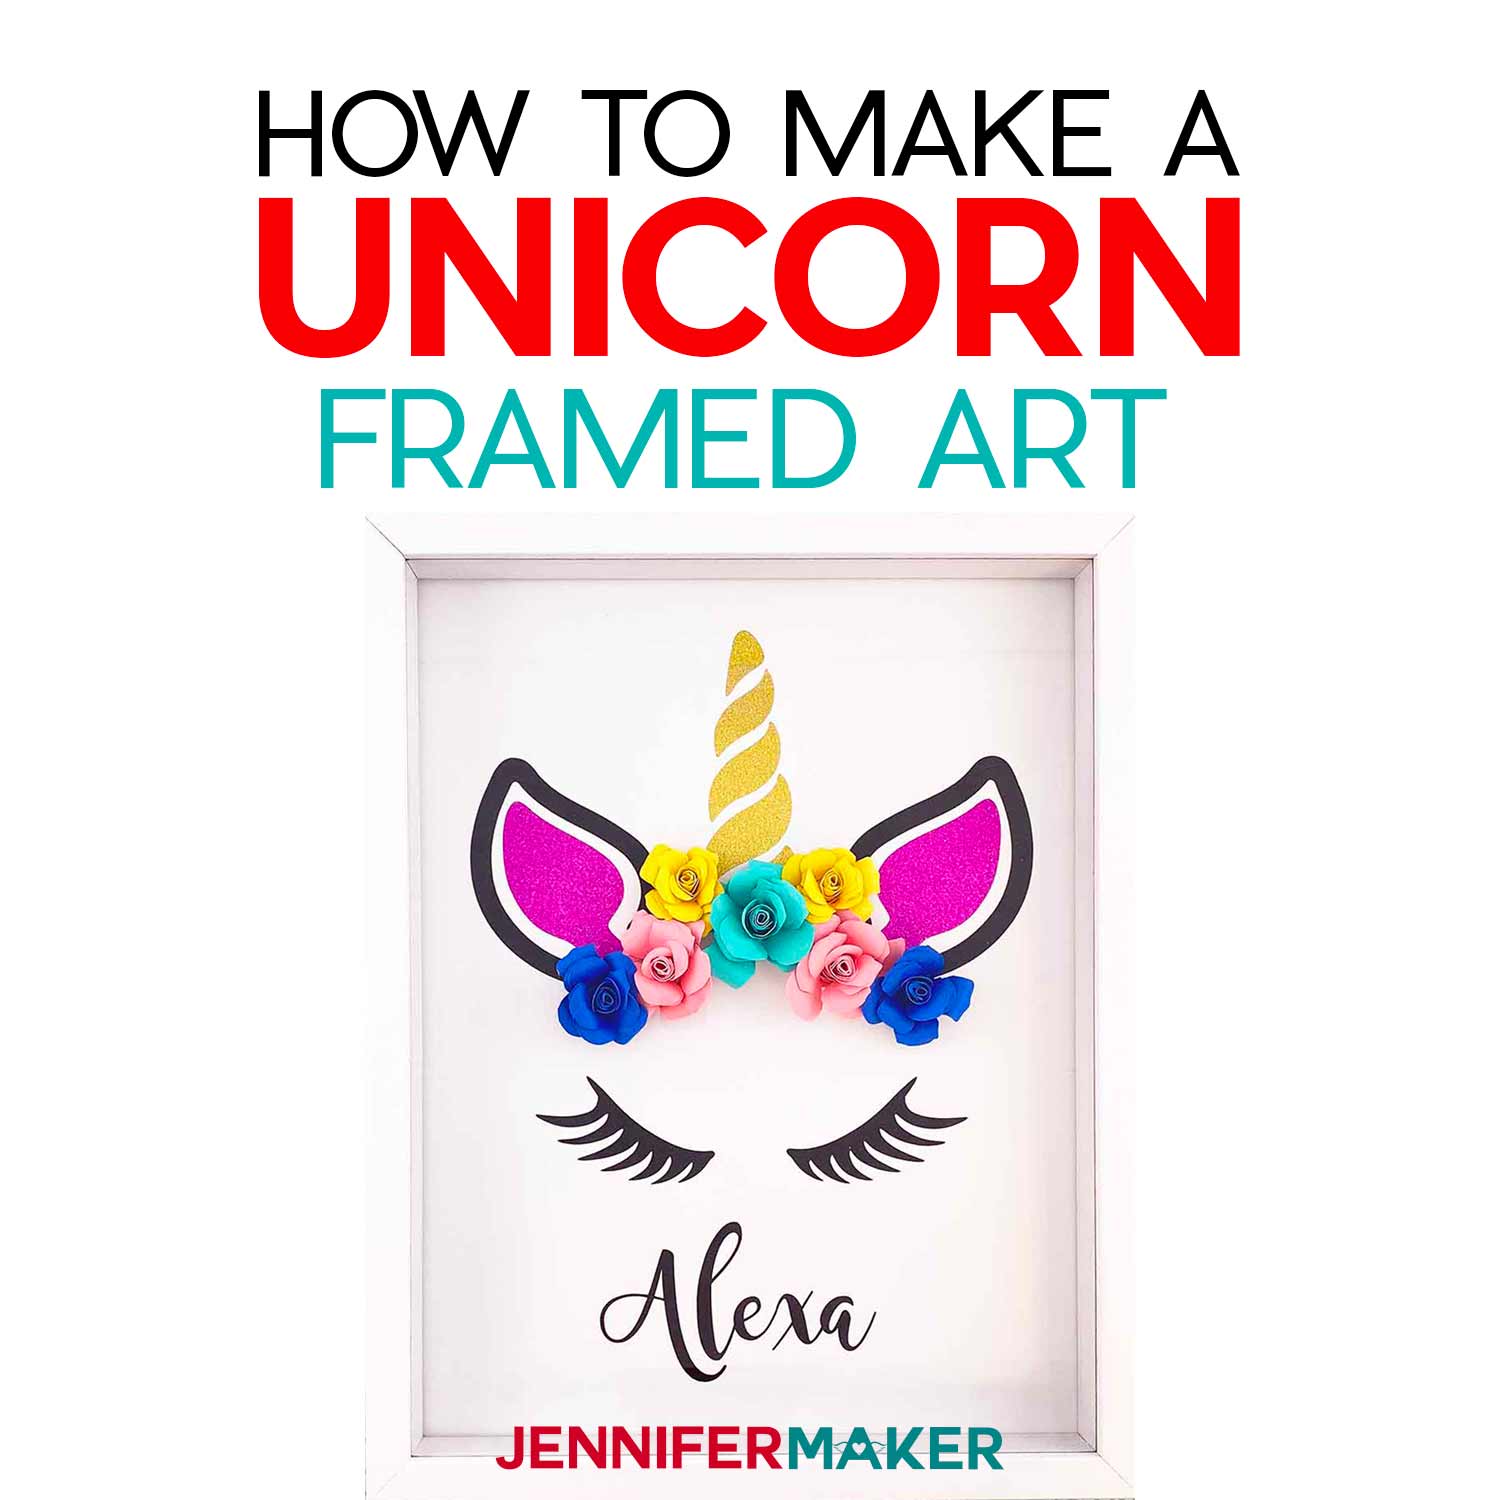
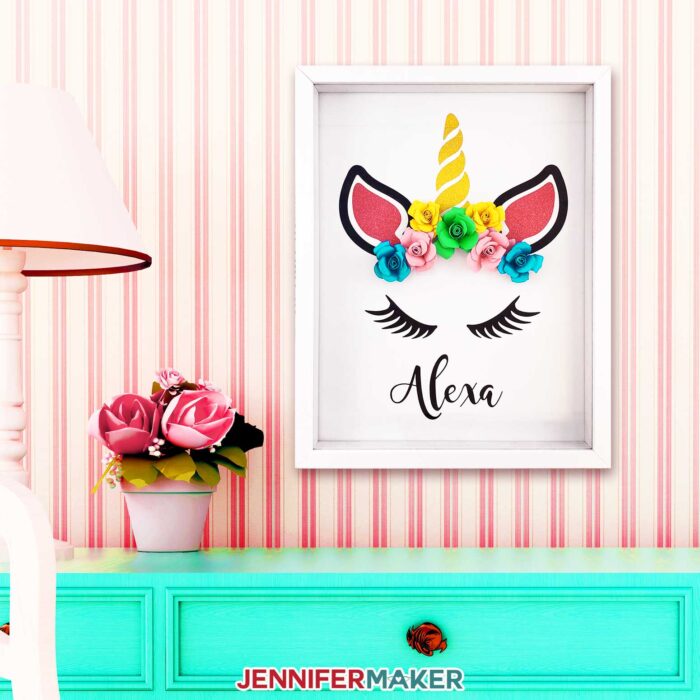
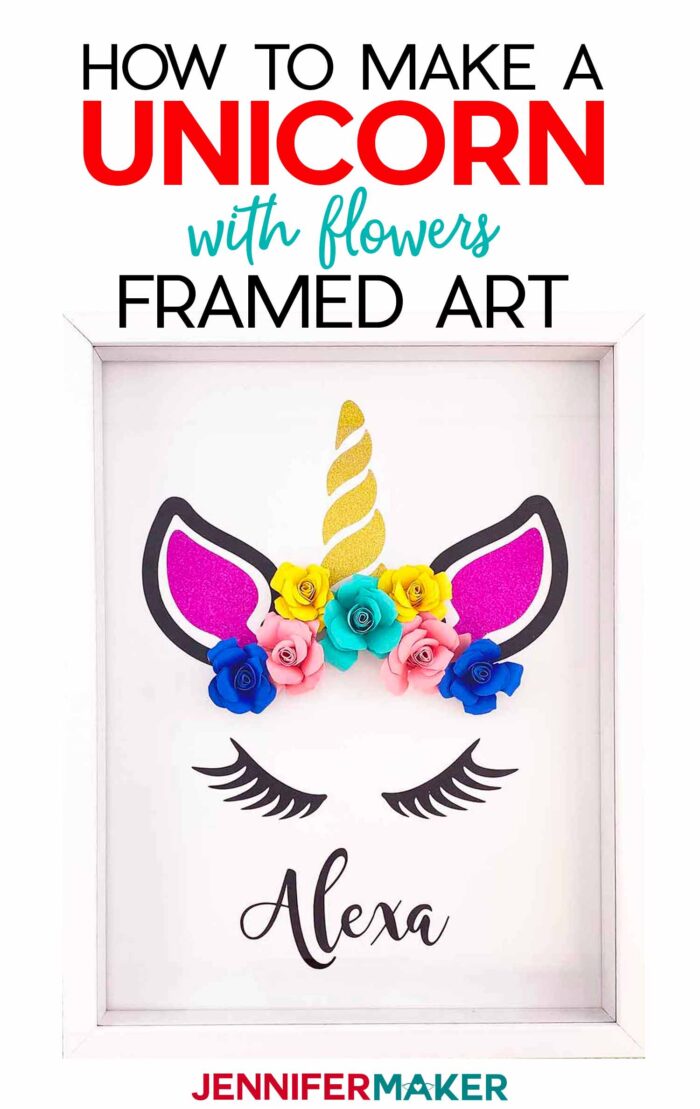
Learn how to make this unicorn shadow box with paper flowers flowers into amazing framed art. Such a cute and easy decoration for a room!
Intrigued by paper flowers but just not sure what to make with them? I’ve got the project for you! This framed unicorn showcases paper flowers beautifully, and looks super cute to boot. Personalize it with a name and you’ve got a wonderful piece of decor or a lovely gift. If you know someone who loves unicorns, this is a perfect gift idea. This project is a great decoration to brighten up and add a splash of color to a bedroom, playroom, or office. This has glitter, flowers, personalization and it’s easy! So for Day 20 of The Great Maker 25-Day Gift-Away Challenge, I am showing you how to make this personalized Unicorn with Flowers Framed Art!
See exactly how to make this personalized unicorn shadow box with paper flowers in my tutorial video (or keep scrolling if you prefer a printable step-by-step photo tutorial):

 What is The Great Maker 25-Day Gift-Away? This is an annual tradition here at JenniferMaker! Every day for the first 25 days of December we gift you with a brand new project, design, tutorial, and video. On top of that, we host a giveaway with 25 prizes. Some of the amazing prizes are Cricut cutting machines, sewing machines, gift cards, and beautiful print editions of our popular Cricut Coach Playbook. You can even earn bonus entries for sharing photos of the daily projects! Click here to learn more about The Great Maker 25-Day Gift-Away!
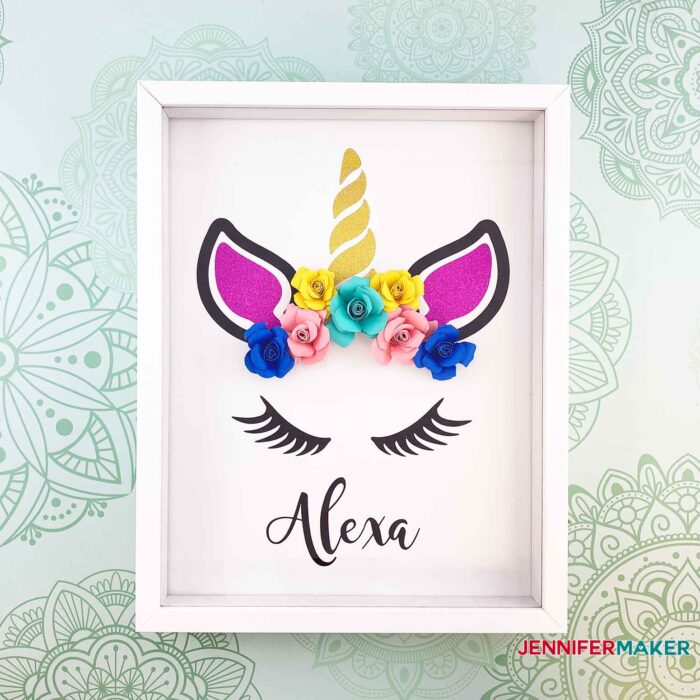
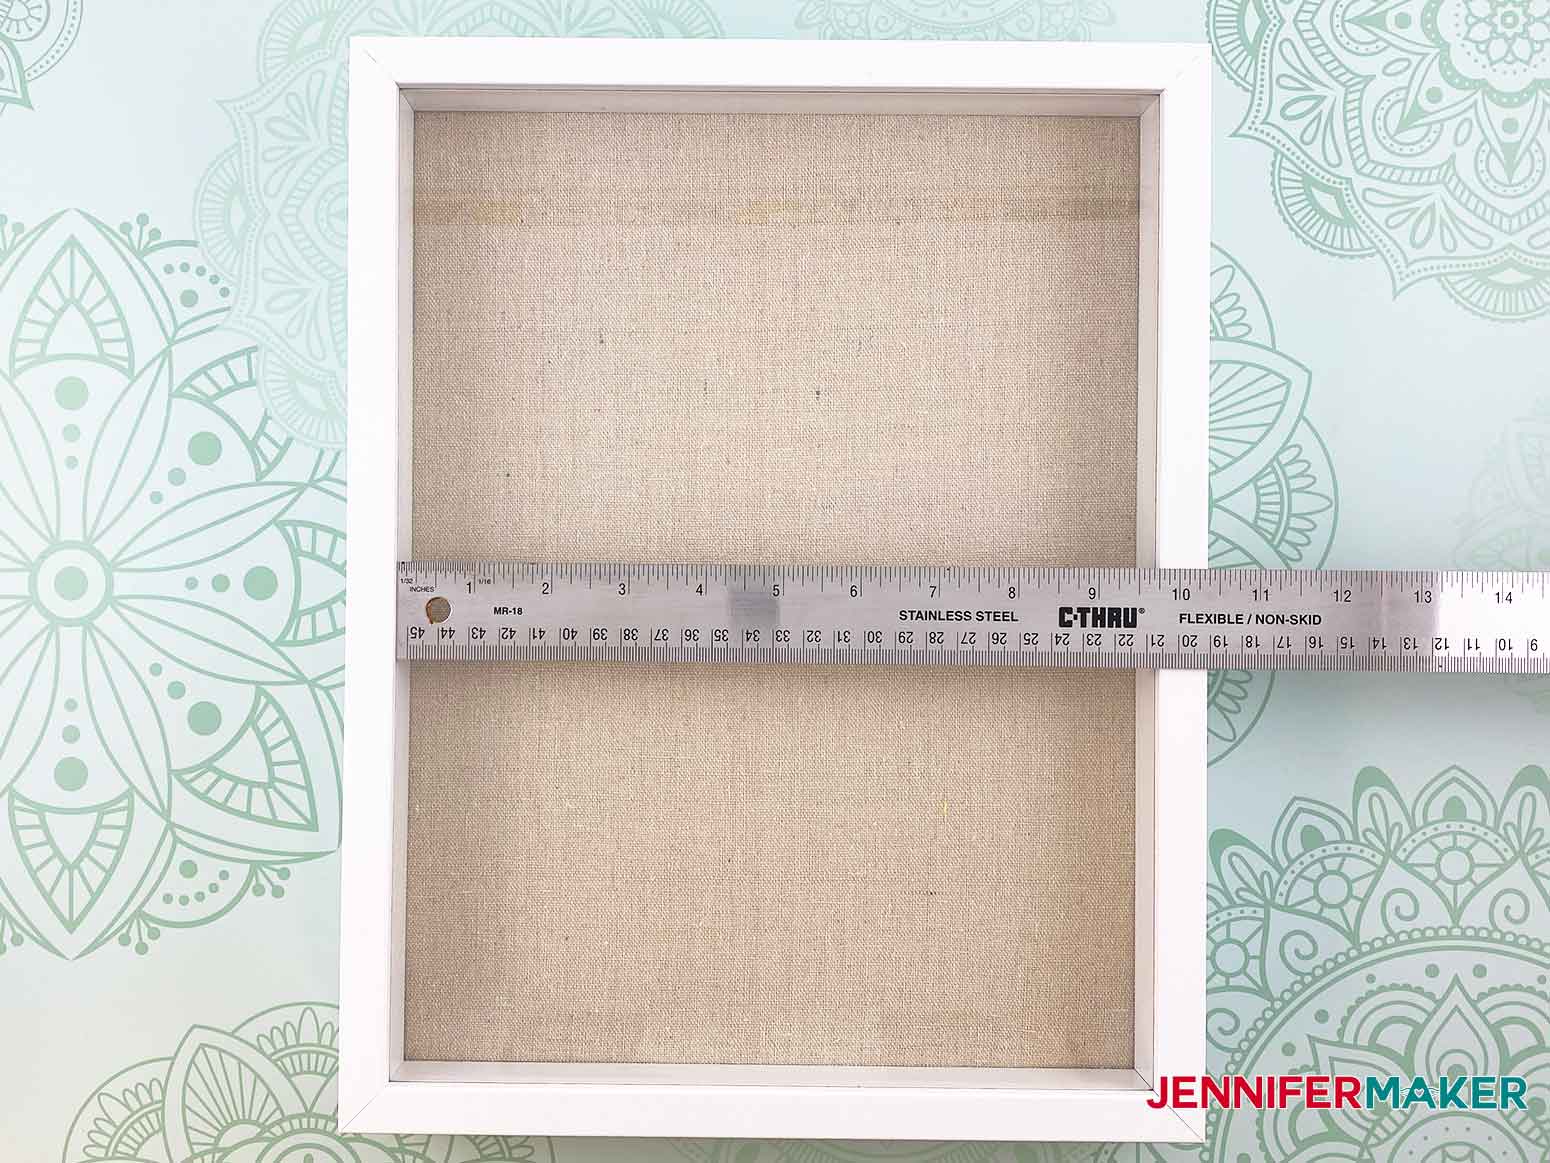
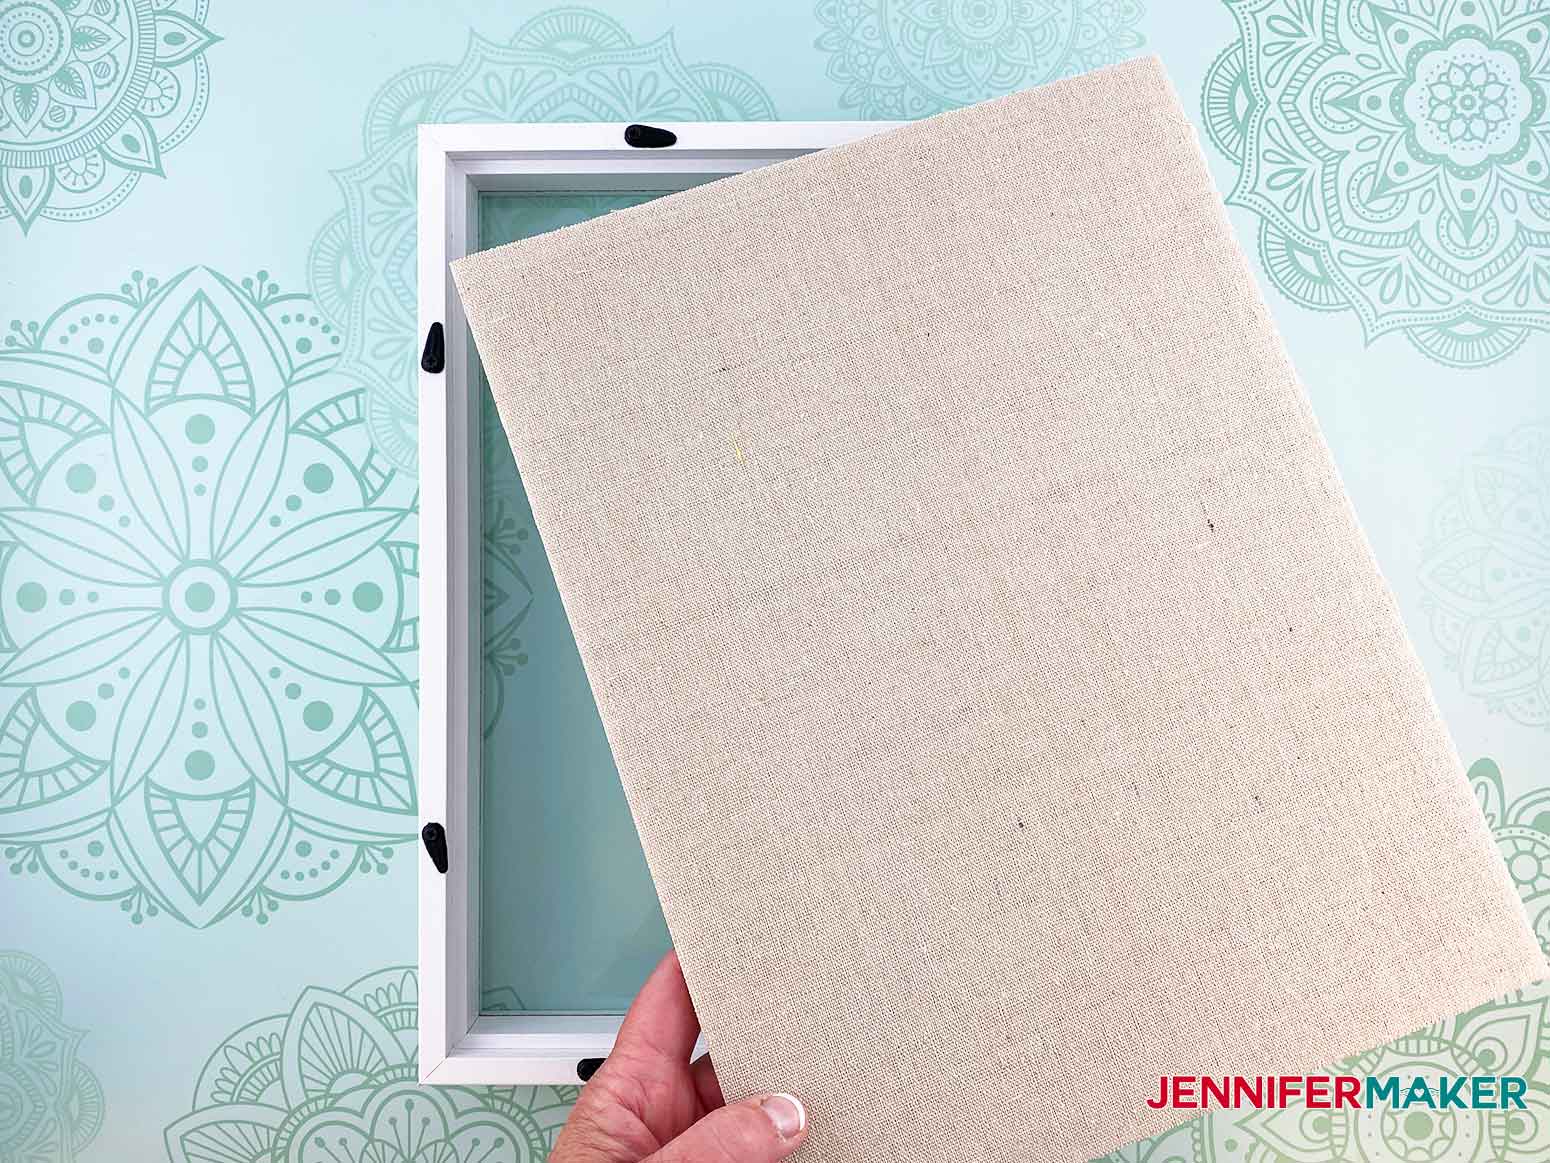
To make this project, you need a shadow box, which is a frame that is deep enough for you to put the flowers into without being squished. The one I am using is eleven by fourteen inches, and I’ll put the link to it below this video.
To make the paper flowers, you need 65lb. or 80lb. solid core cardstock in whatever colors you want. You’ll also need a glue gun and glue sticks, and I also recommend finger protectors to avoid getting burned.
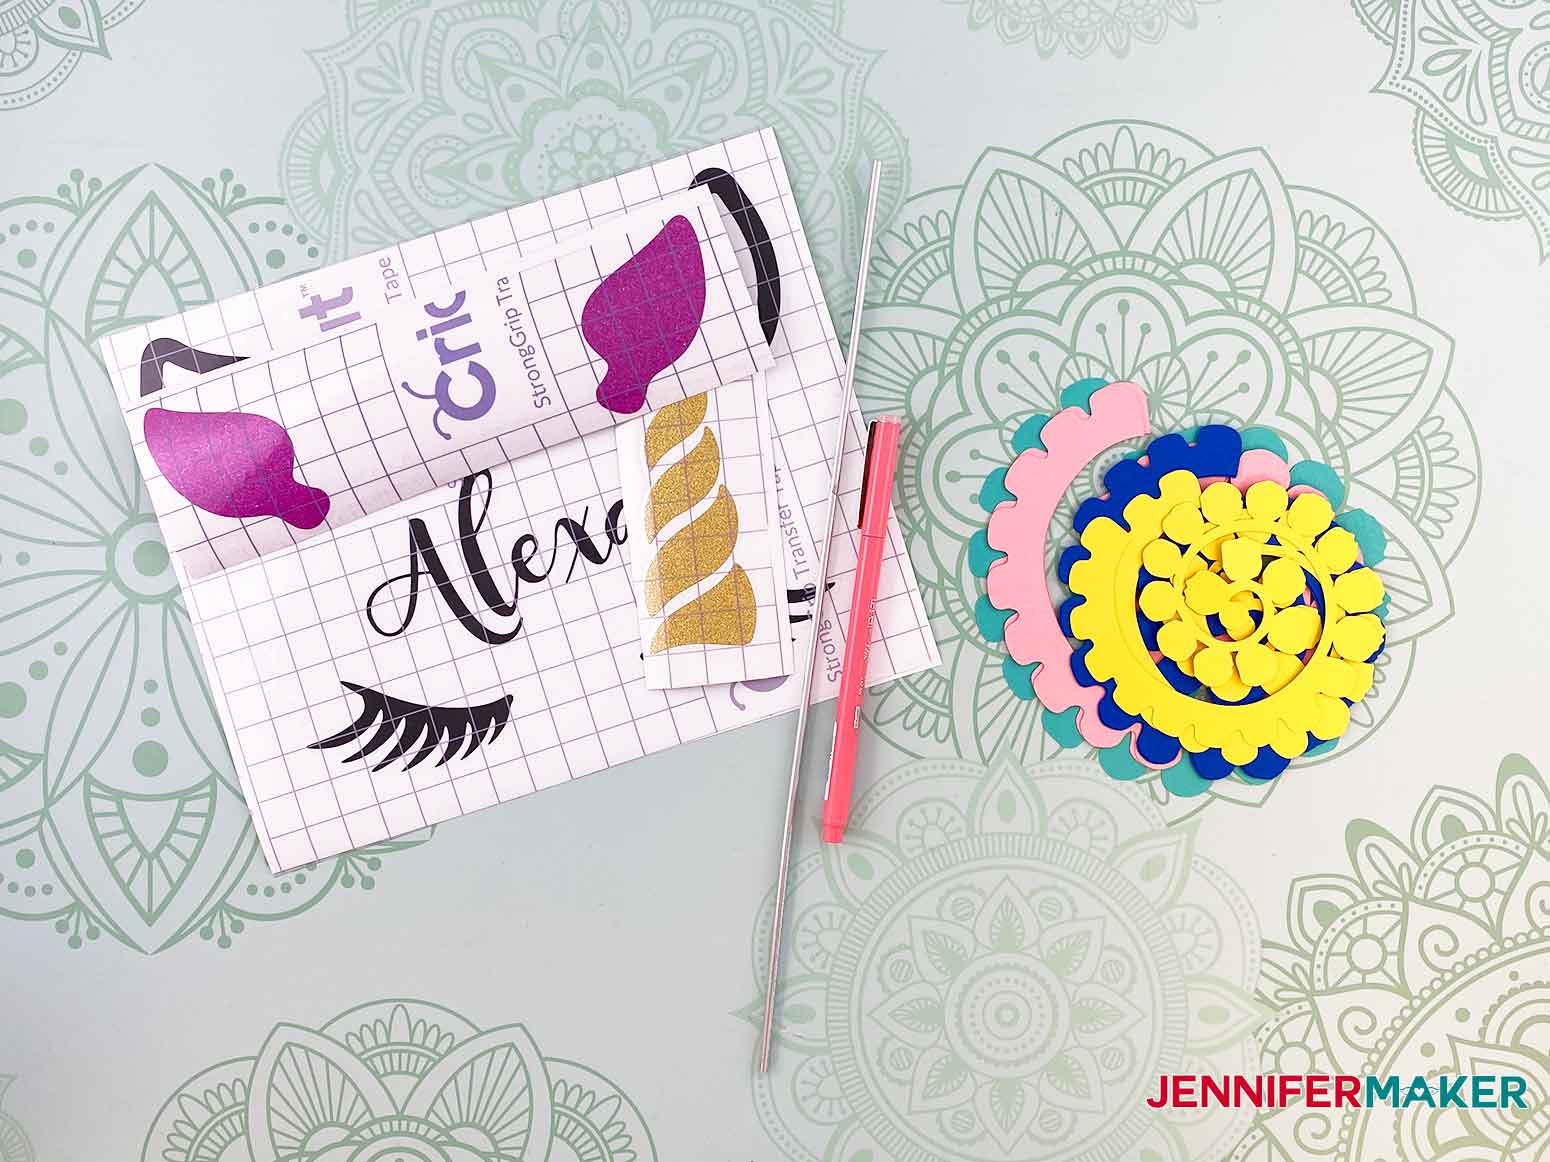
The unicorn design inside the shadow box is made with permanent vinyl in a variety of colors. So you’ll also want some transfer tape and a weeding tool.
Finally, you just need a sheet of foamcore to apply your vinyl and paper flowers to — this also becomes the backing of your shadowbox.
So let me show you where to get my paper flower and unicorn designs, and then how to make the flowers and use them to create this personalized shadowbox.This post contains some affiliate links for your convenience (which means if you make a purchase after clicking a link I will earn a small commission but it won’t cost you a penny more)! Read my full disclosure policy.
Materials to Make a Framed Unicorn with Paper Flowers
View my Amazon shopping list with the exact items we used to make this project!
- Shadow Box Frame (11″ x 14″)
- Cricut Shimmer Vinyl in Black
- Cricut Shimmer Vinyl in Fuschia
- Cricut Glitter Vinyl in Gold
- Cricut StrongGrip Transfer Tape
- Cricut Disturbia Cardstock Sampler
- One Piece of Foam Core (size of frame)
- Cricut Standard Grip Cutting Mat
- Hot Glue Gun and Hot Glue Sticks
- Finger caps (to protect your fingers from the hot glue)
- Quilling Tool
- Scissors
- Weeding Tool
- Painter’s Tape
- Ruler
- A way to cut your paper (I used the Cricut Maker cutting machine but they can also be cut on a Cricut Explore)
- Design #271 – My free SVG design files (available in my free resource library—get the password by filling out the form at the bottom of this page)
How to Make a Personalized Unicorn with Flowers Framed Art
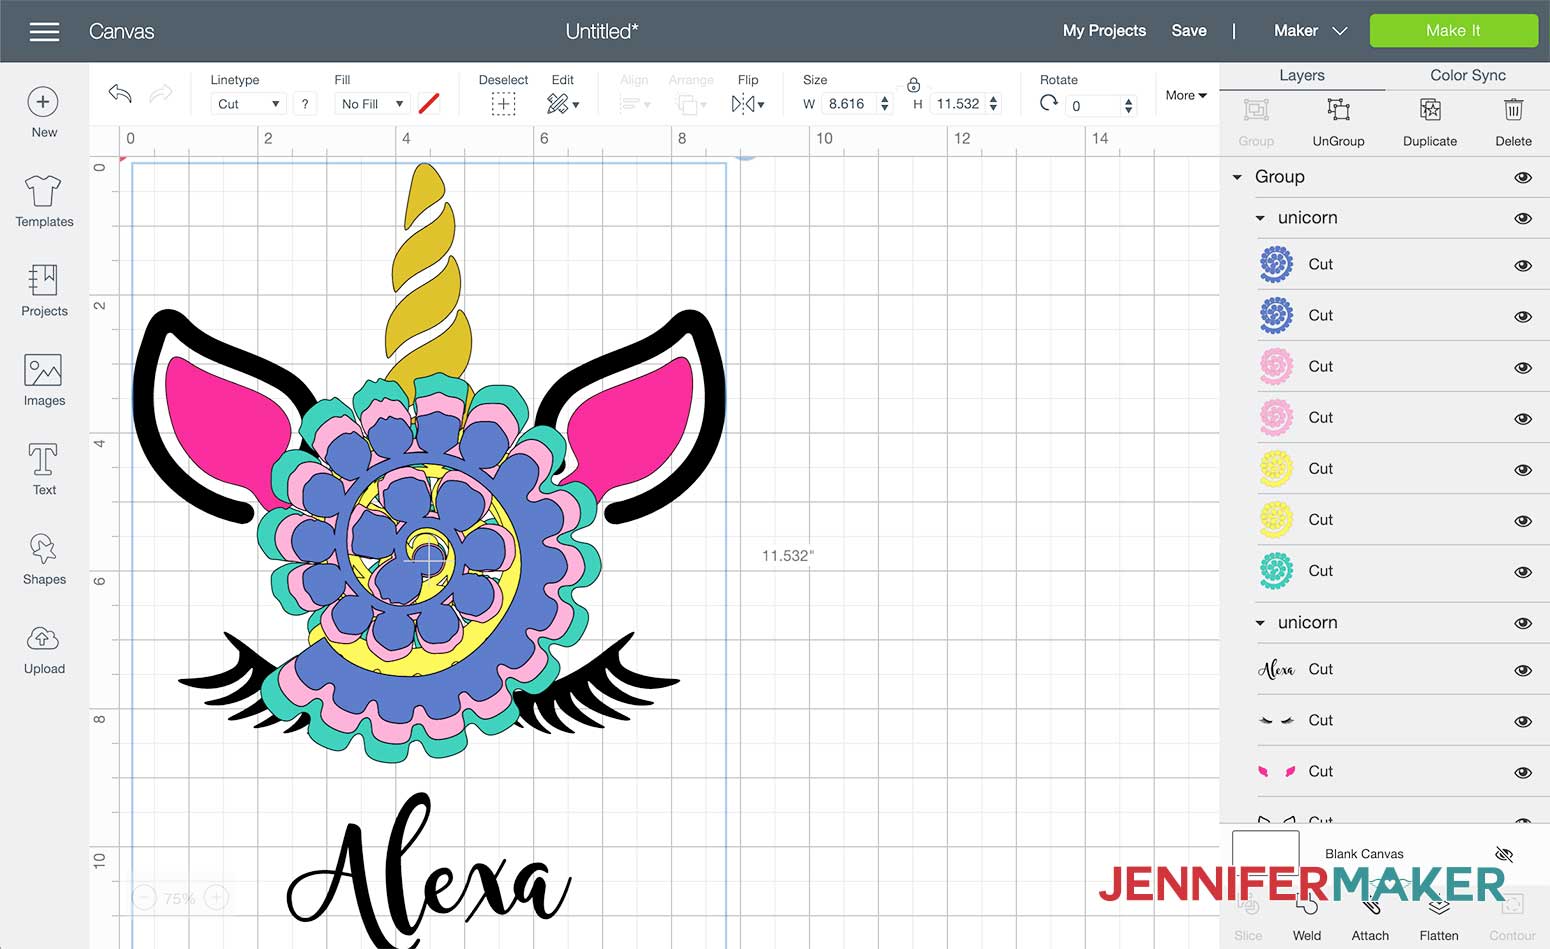
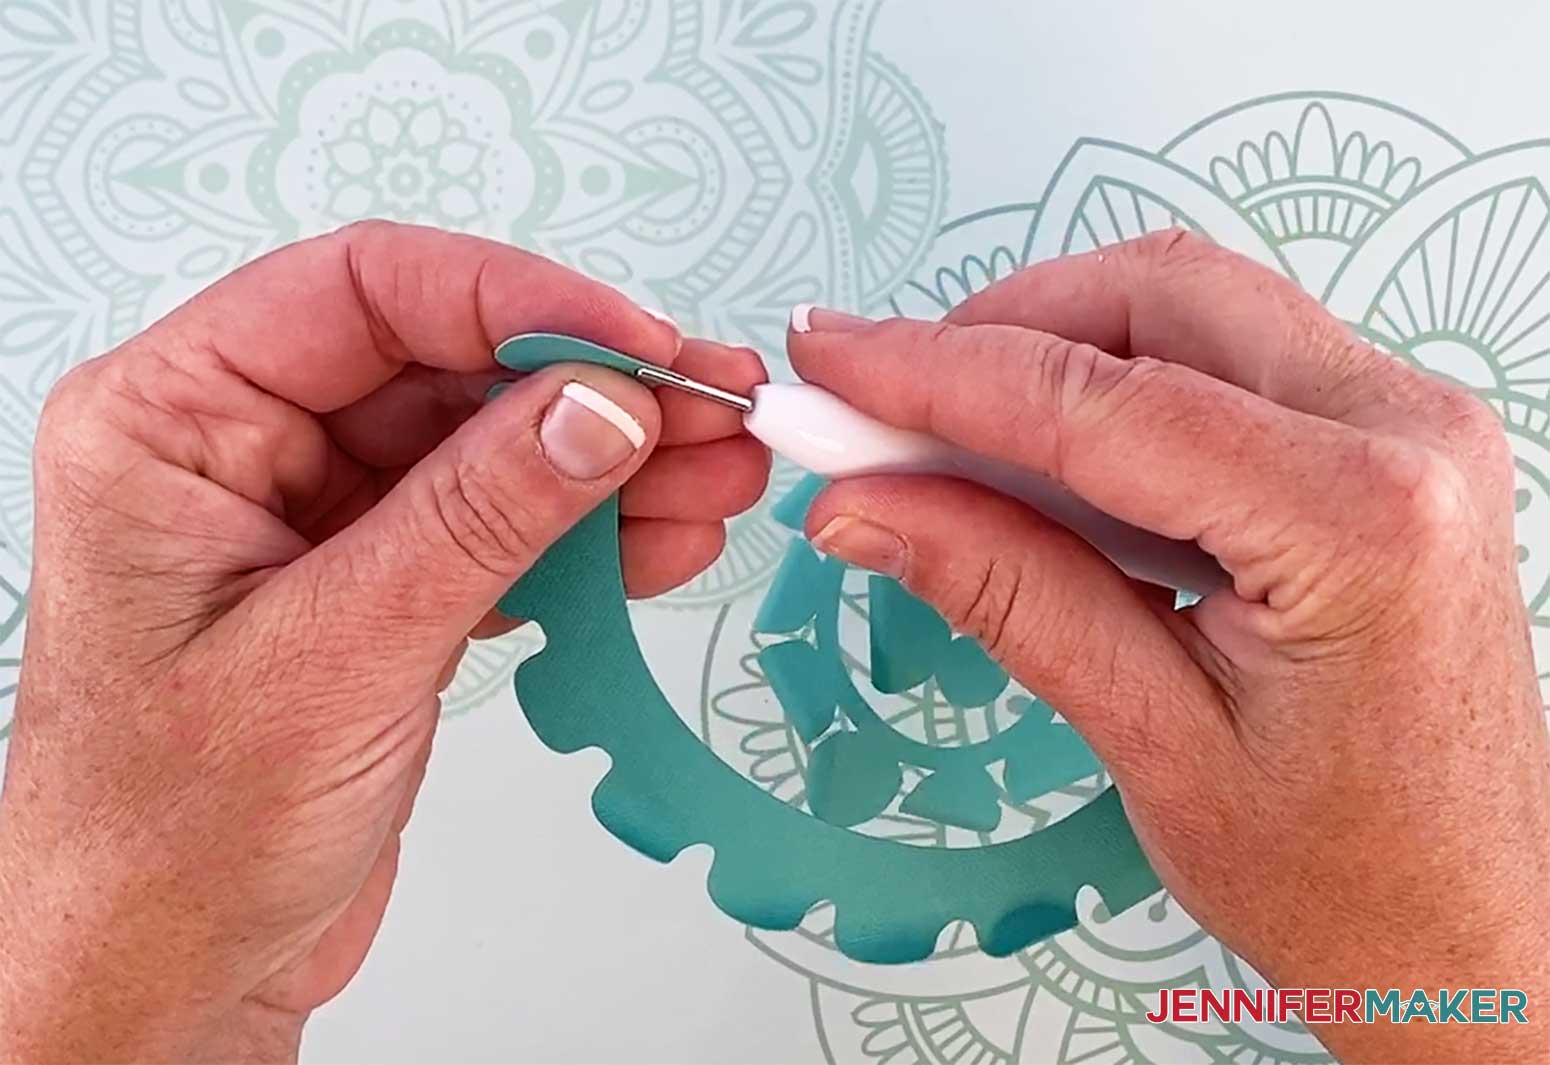
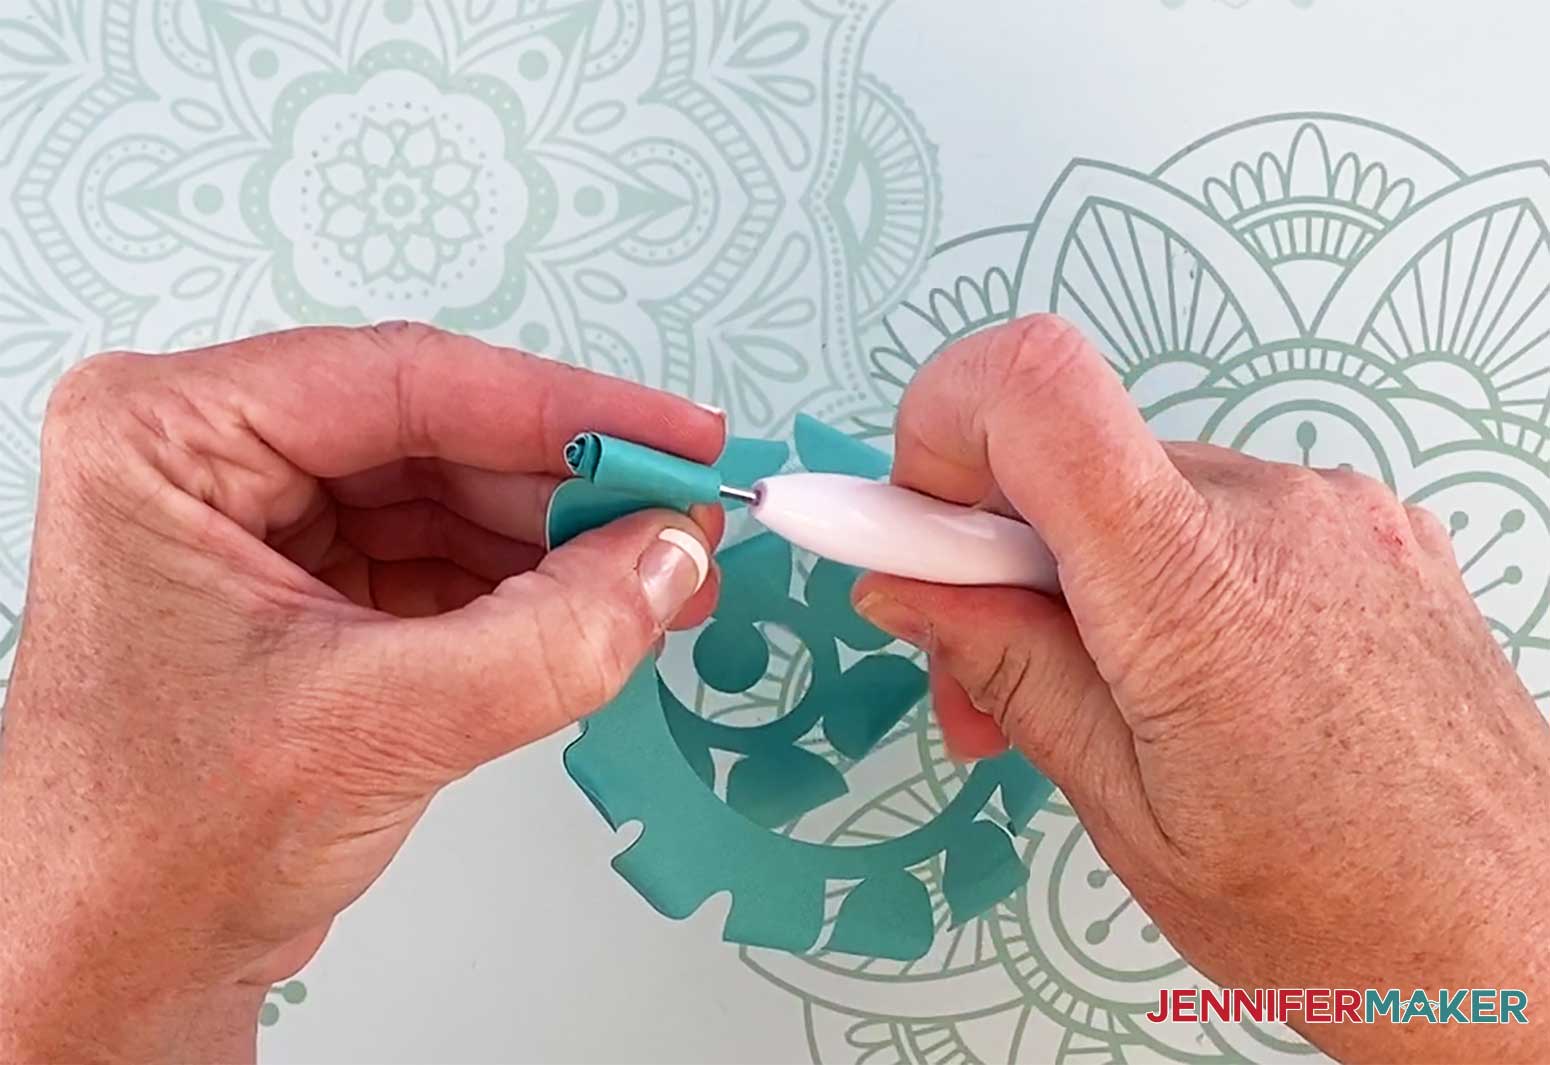
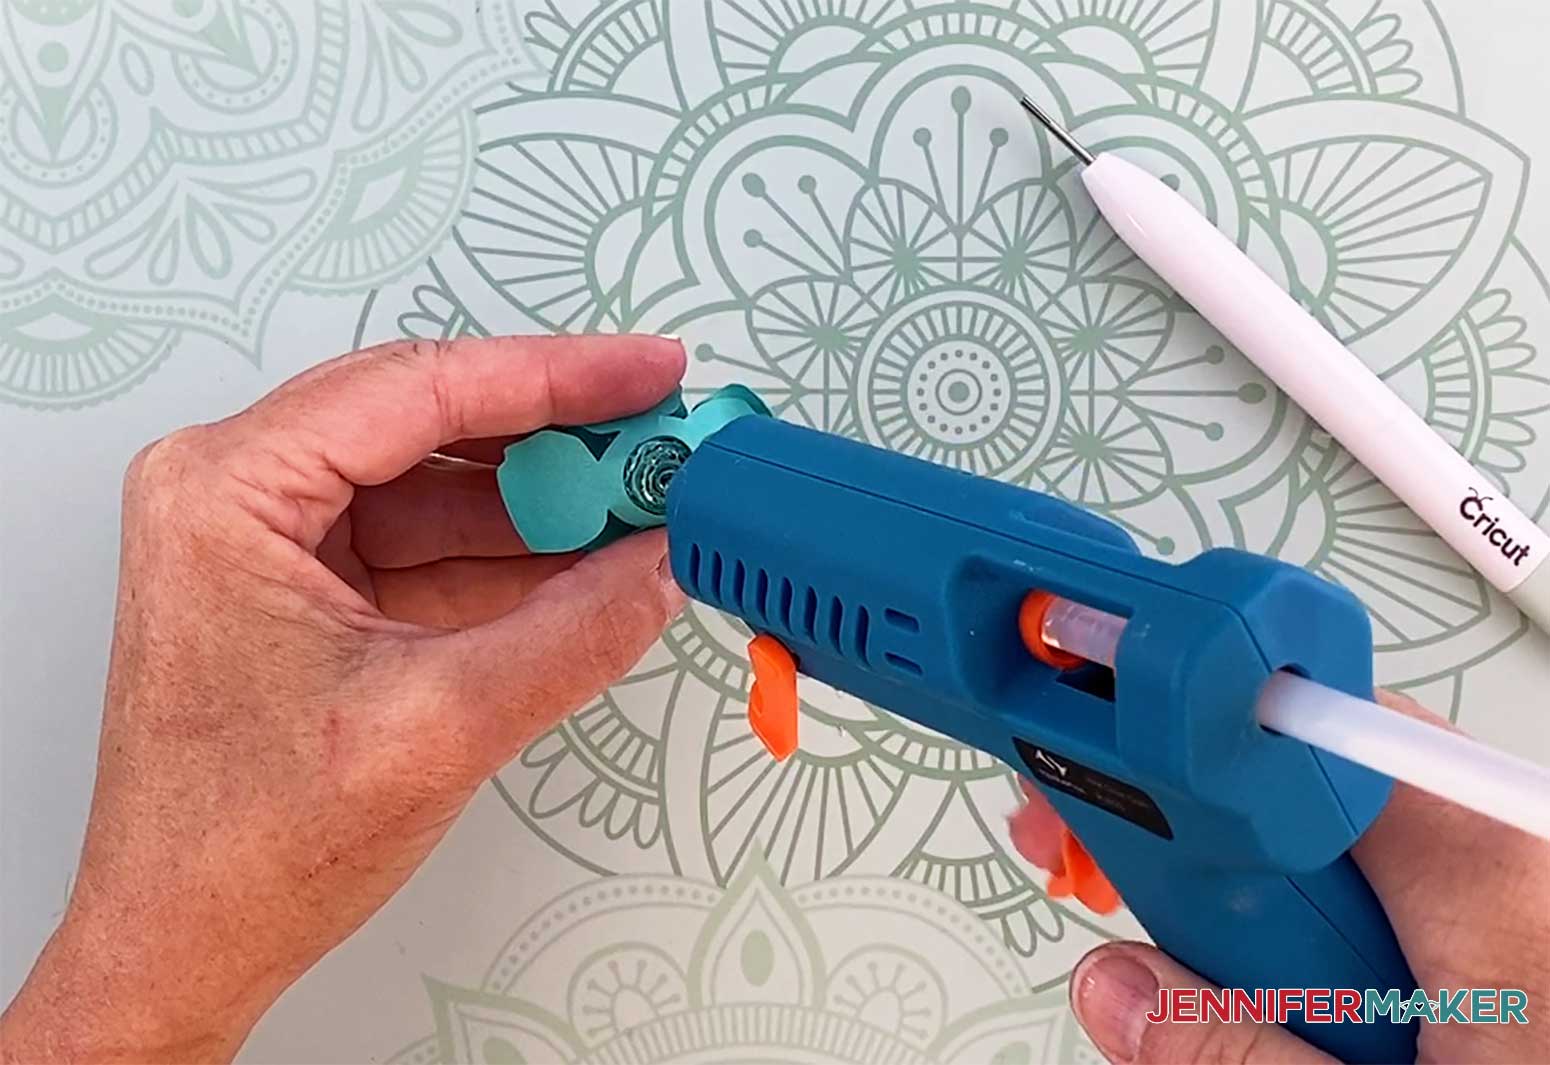
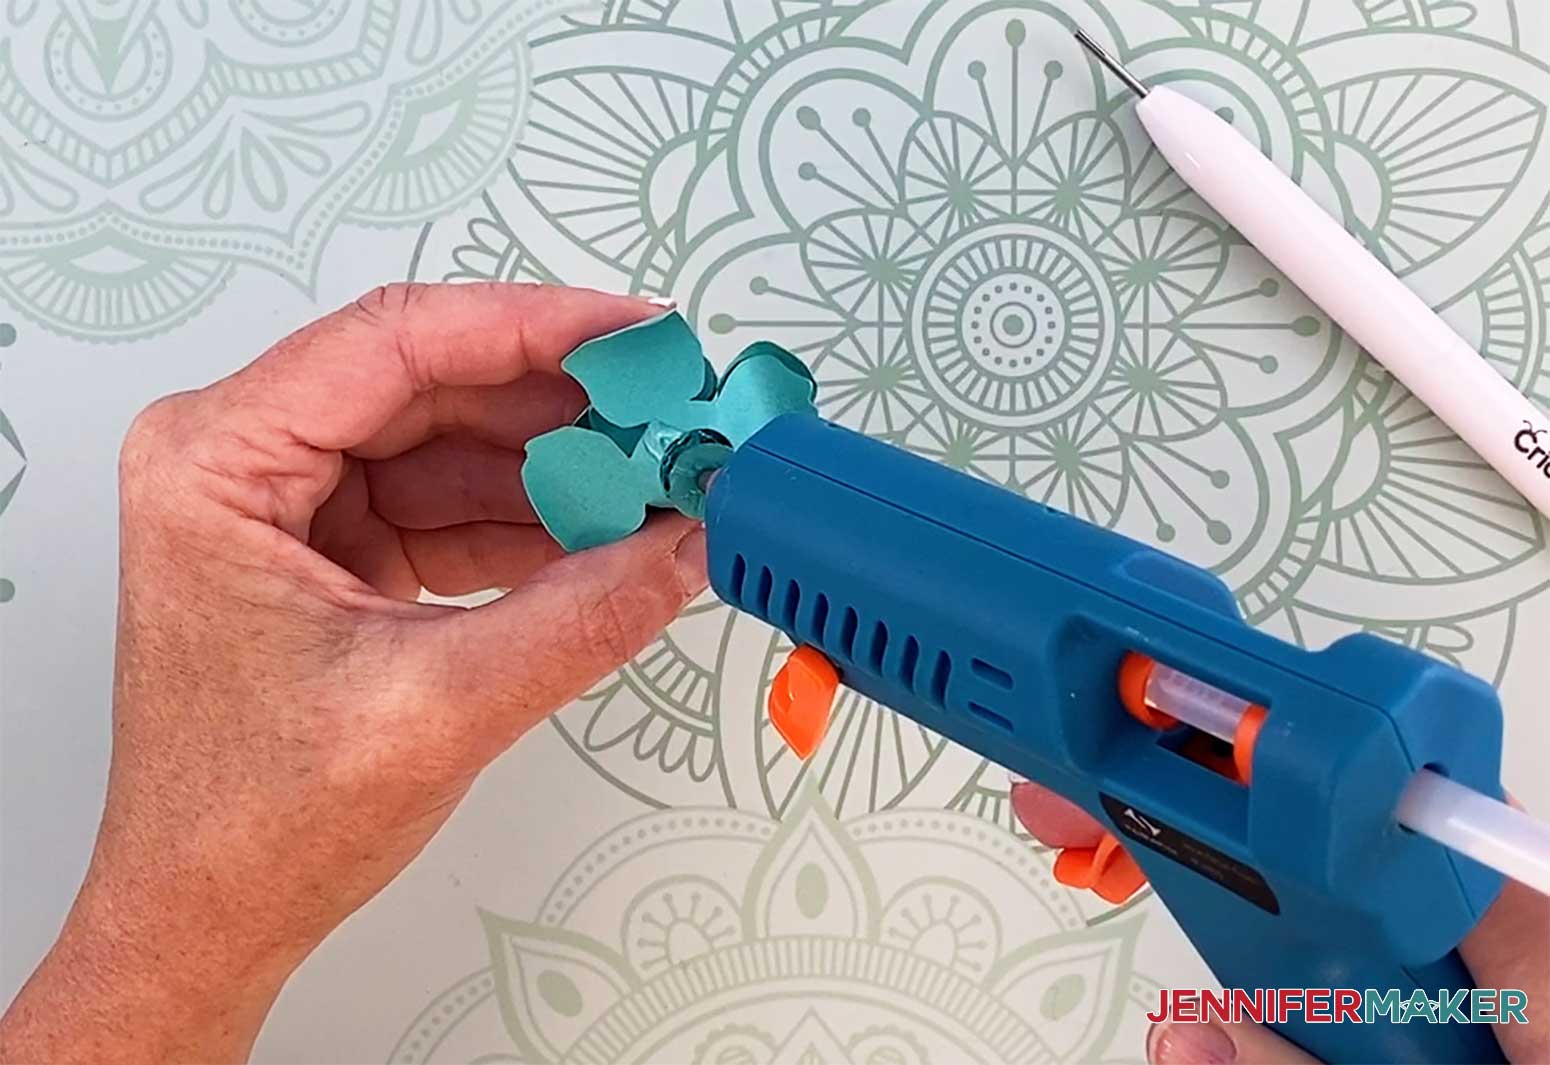
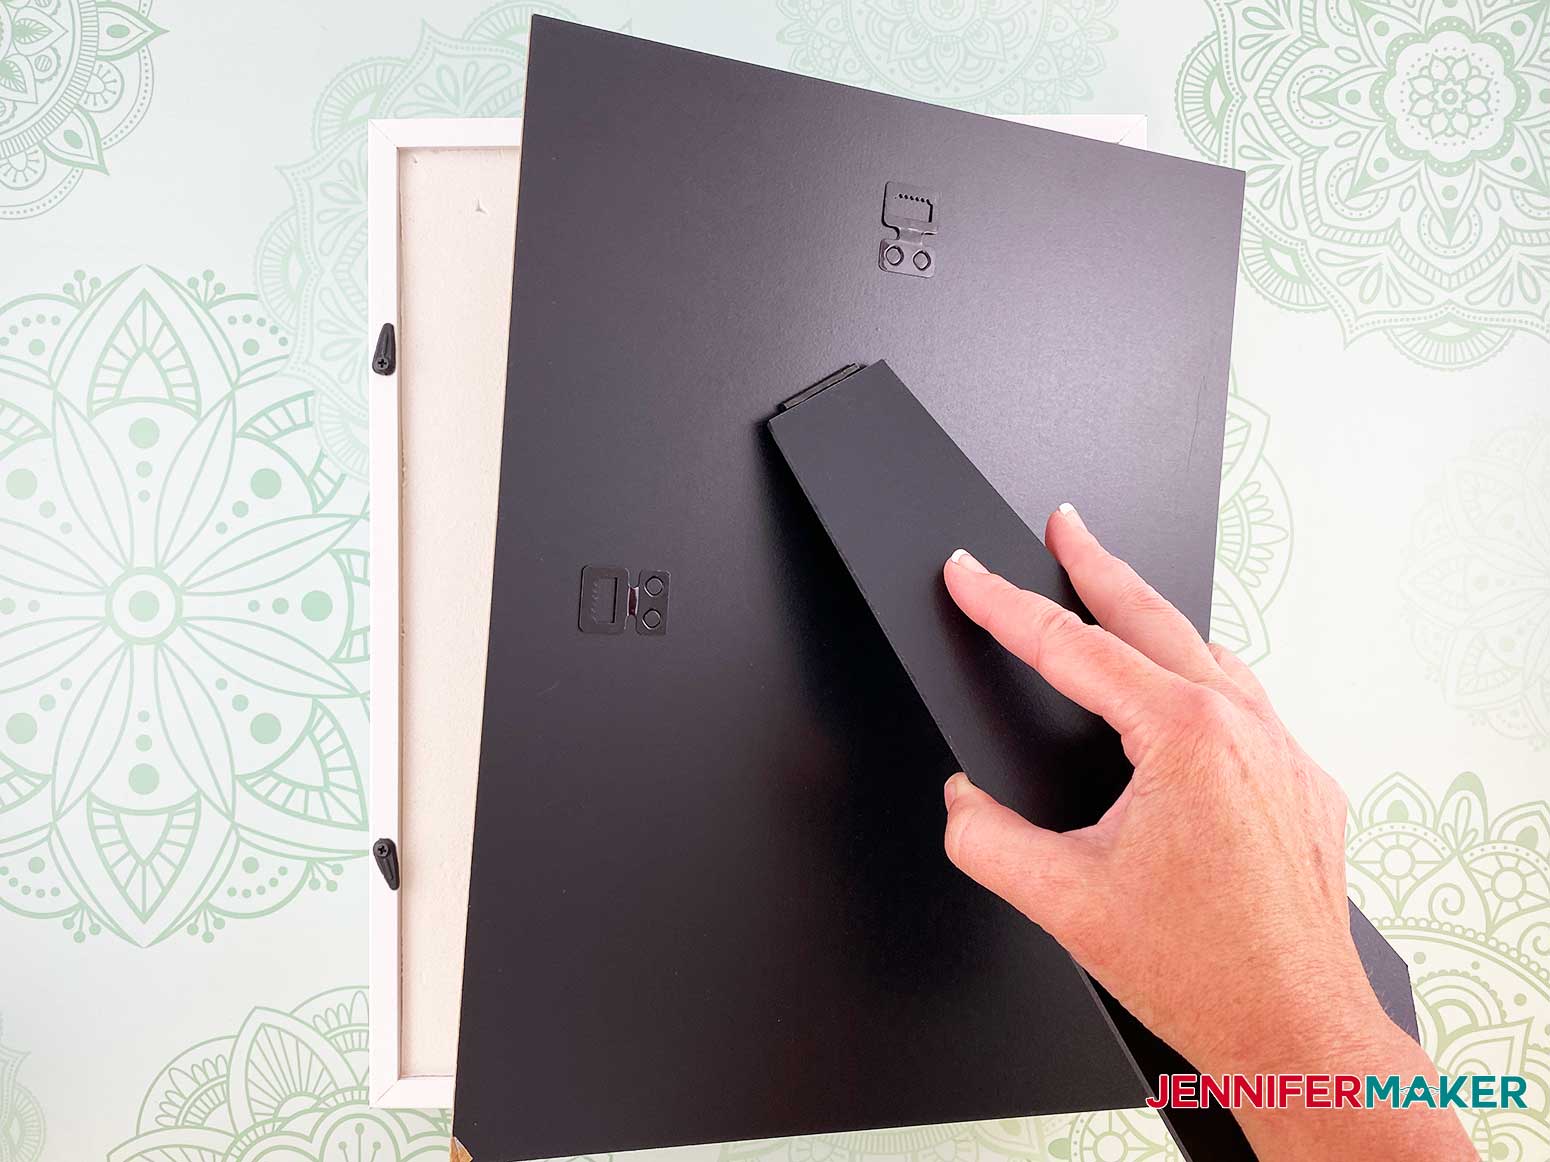
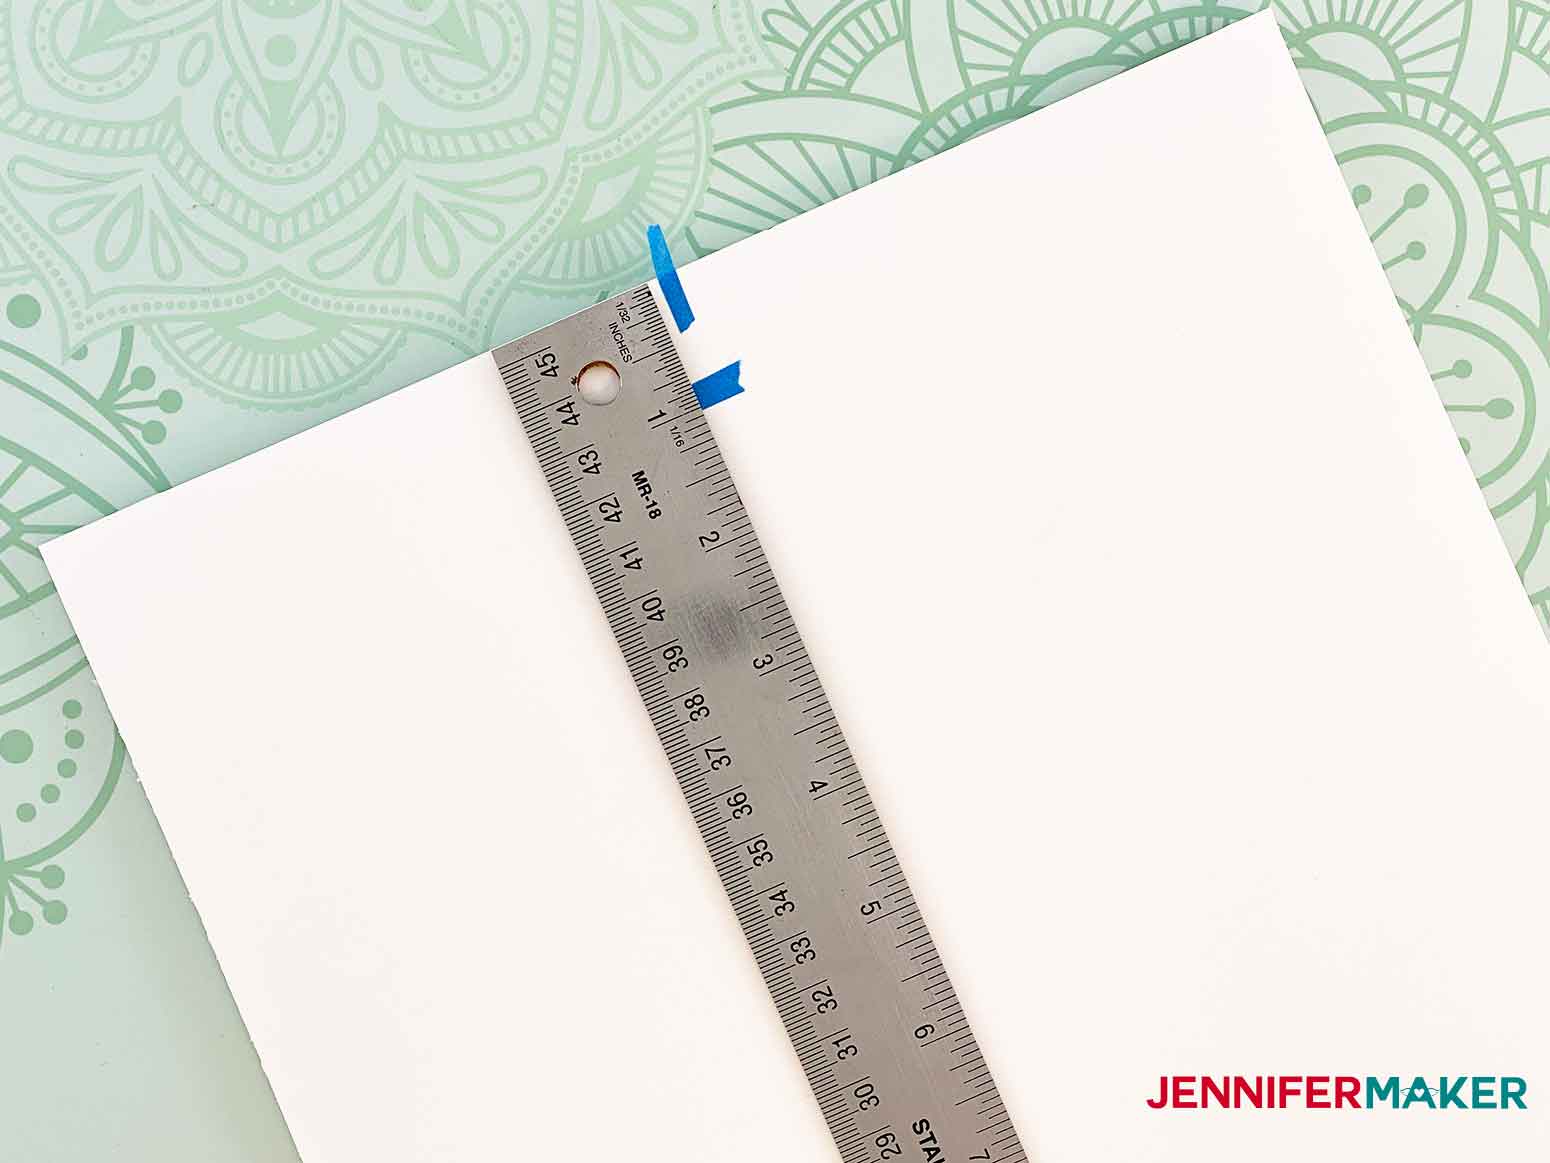
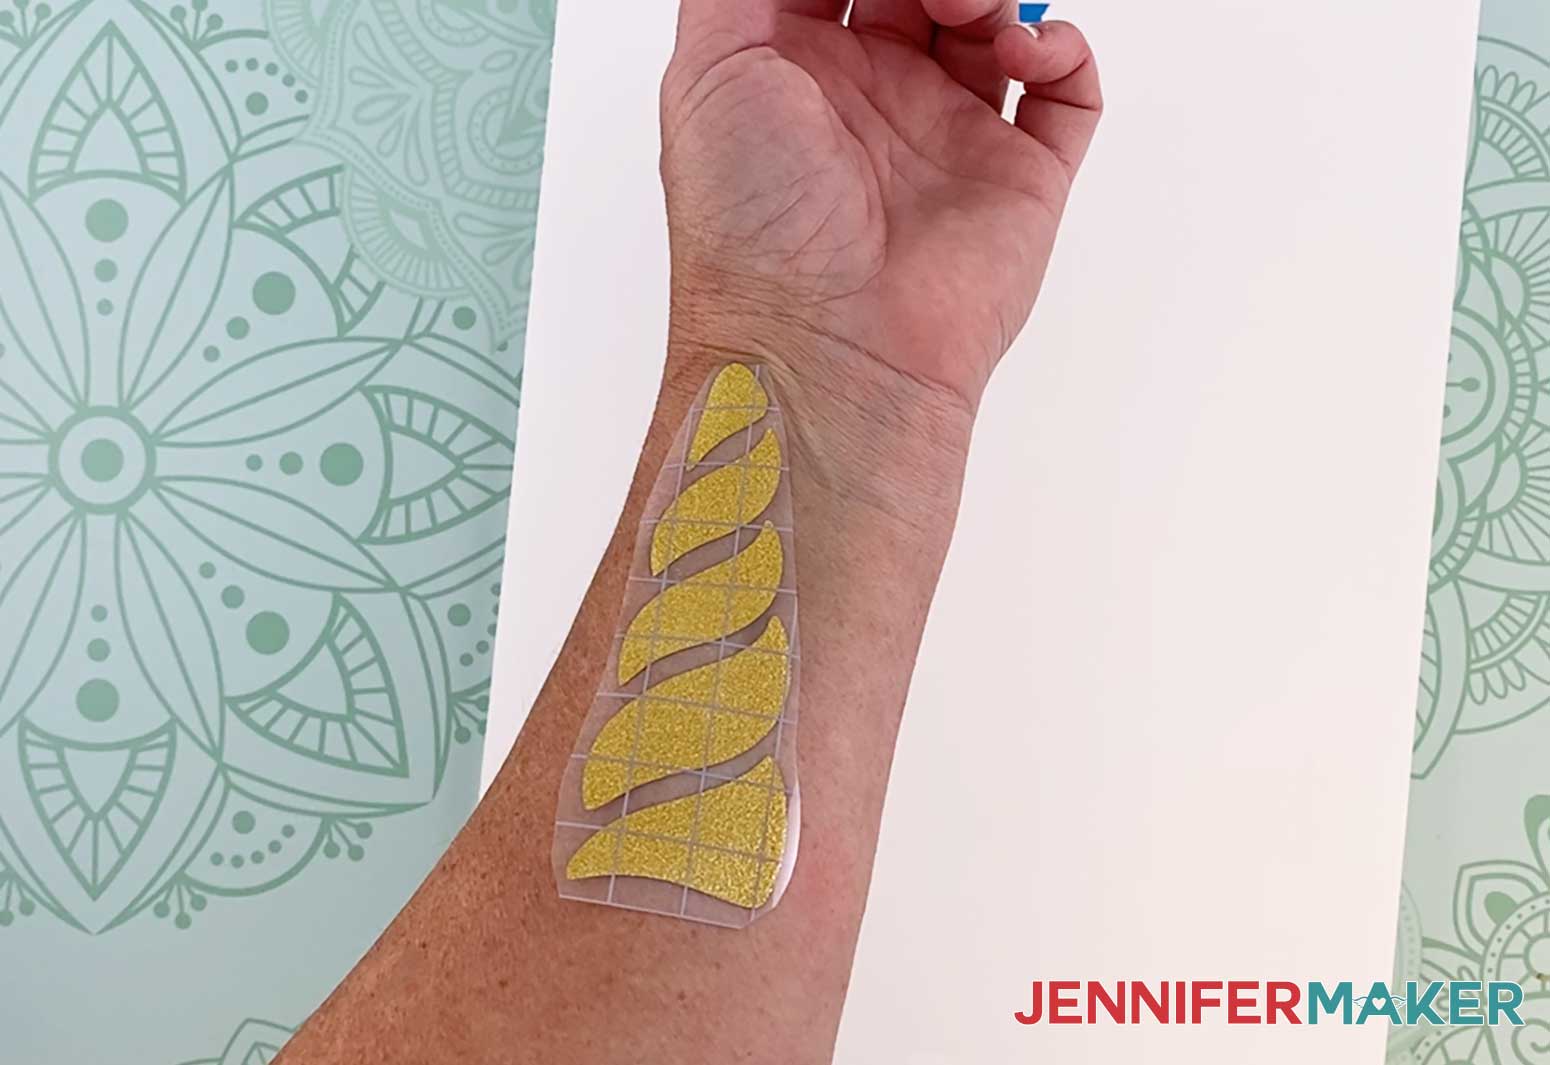
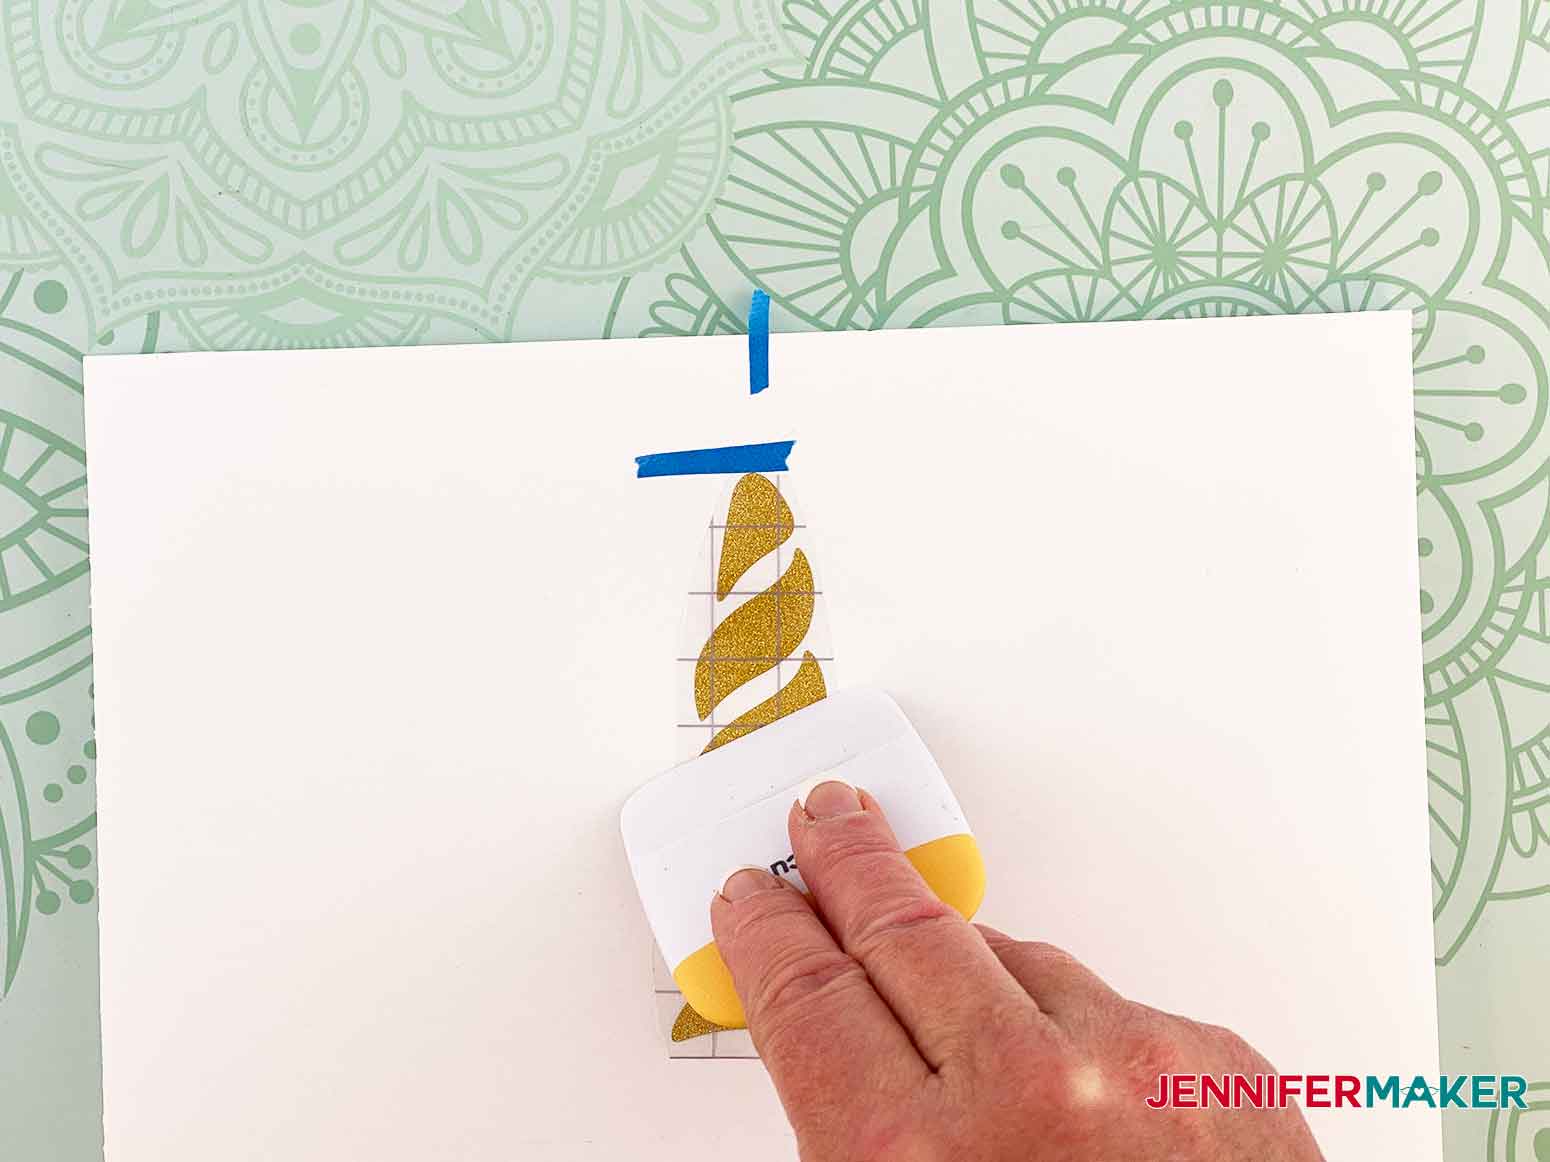
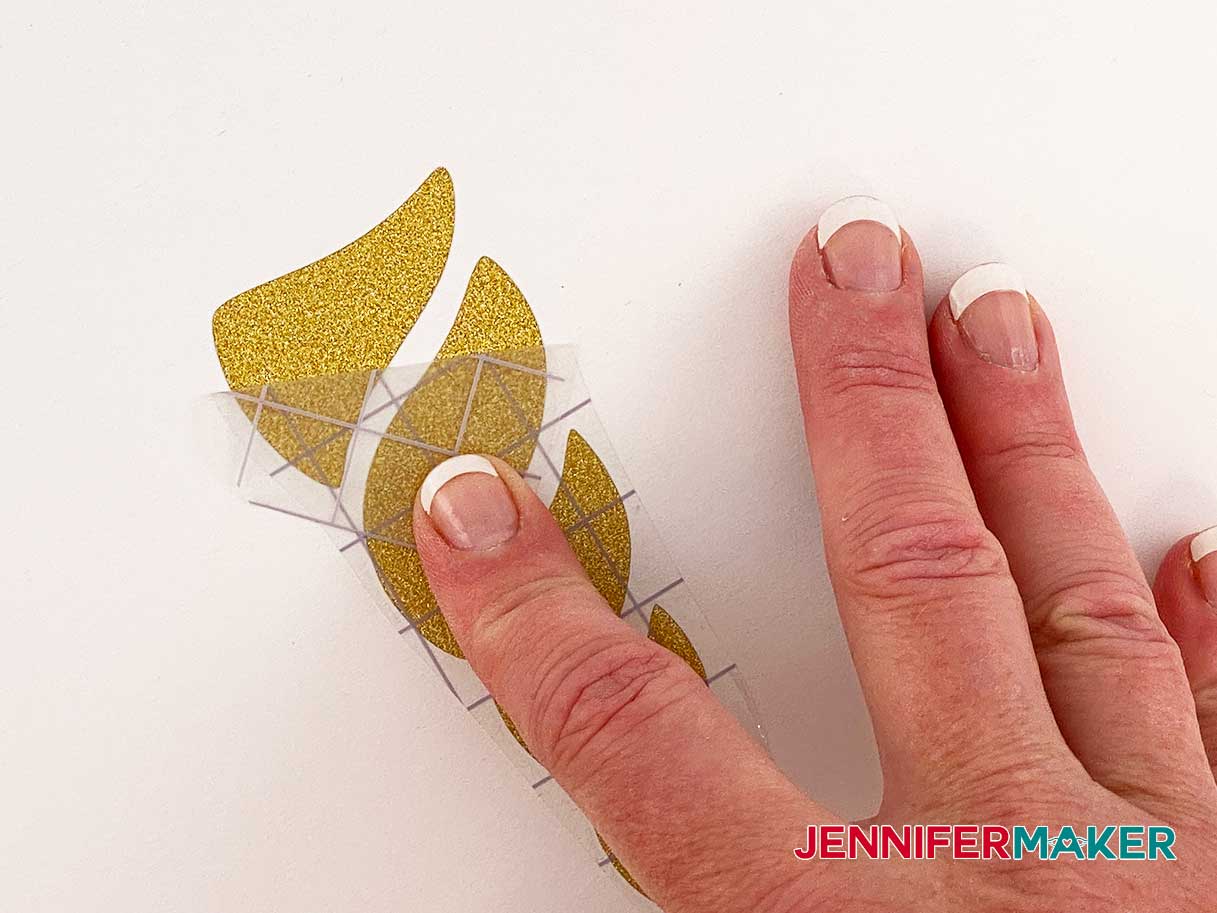
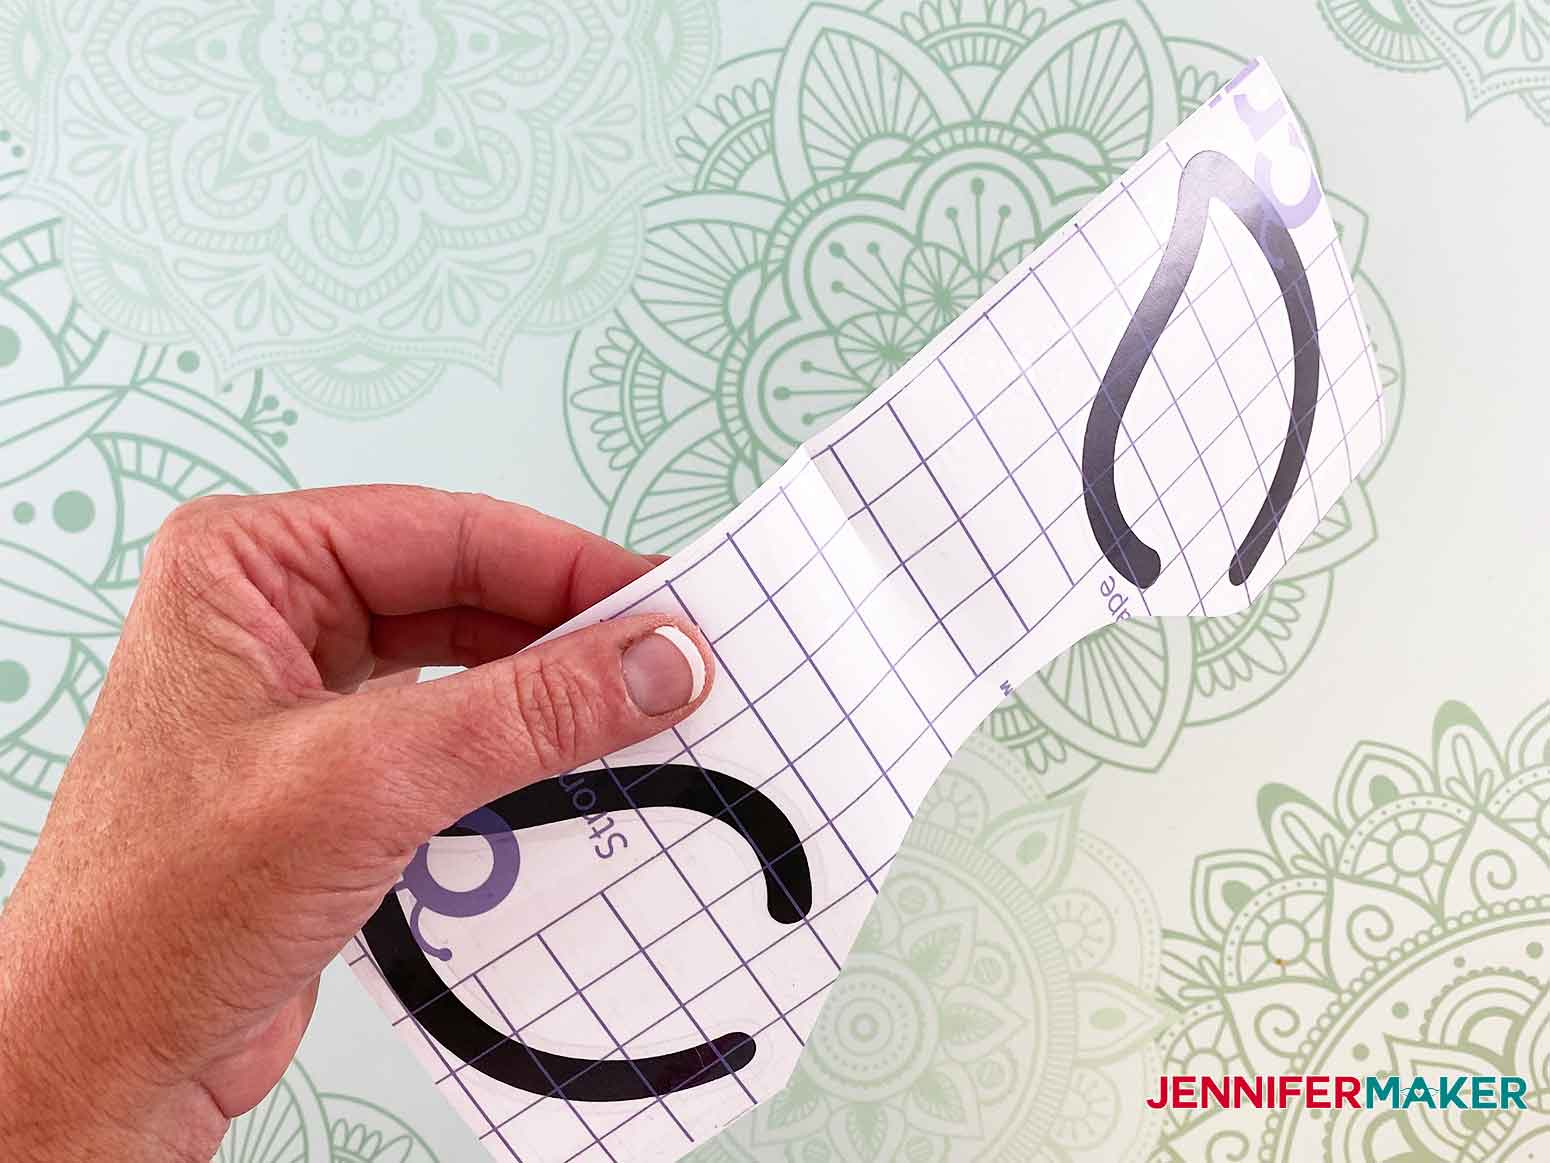
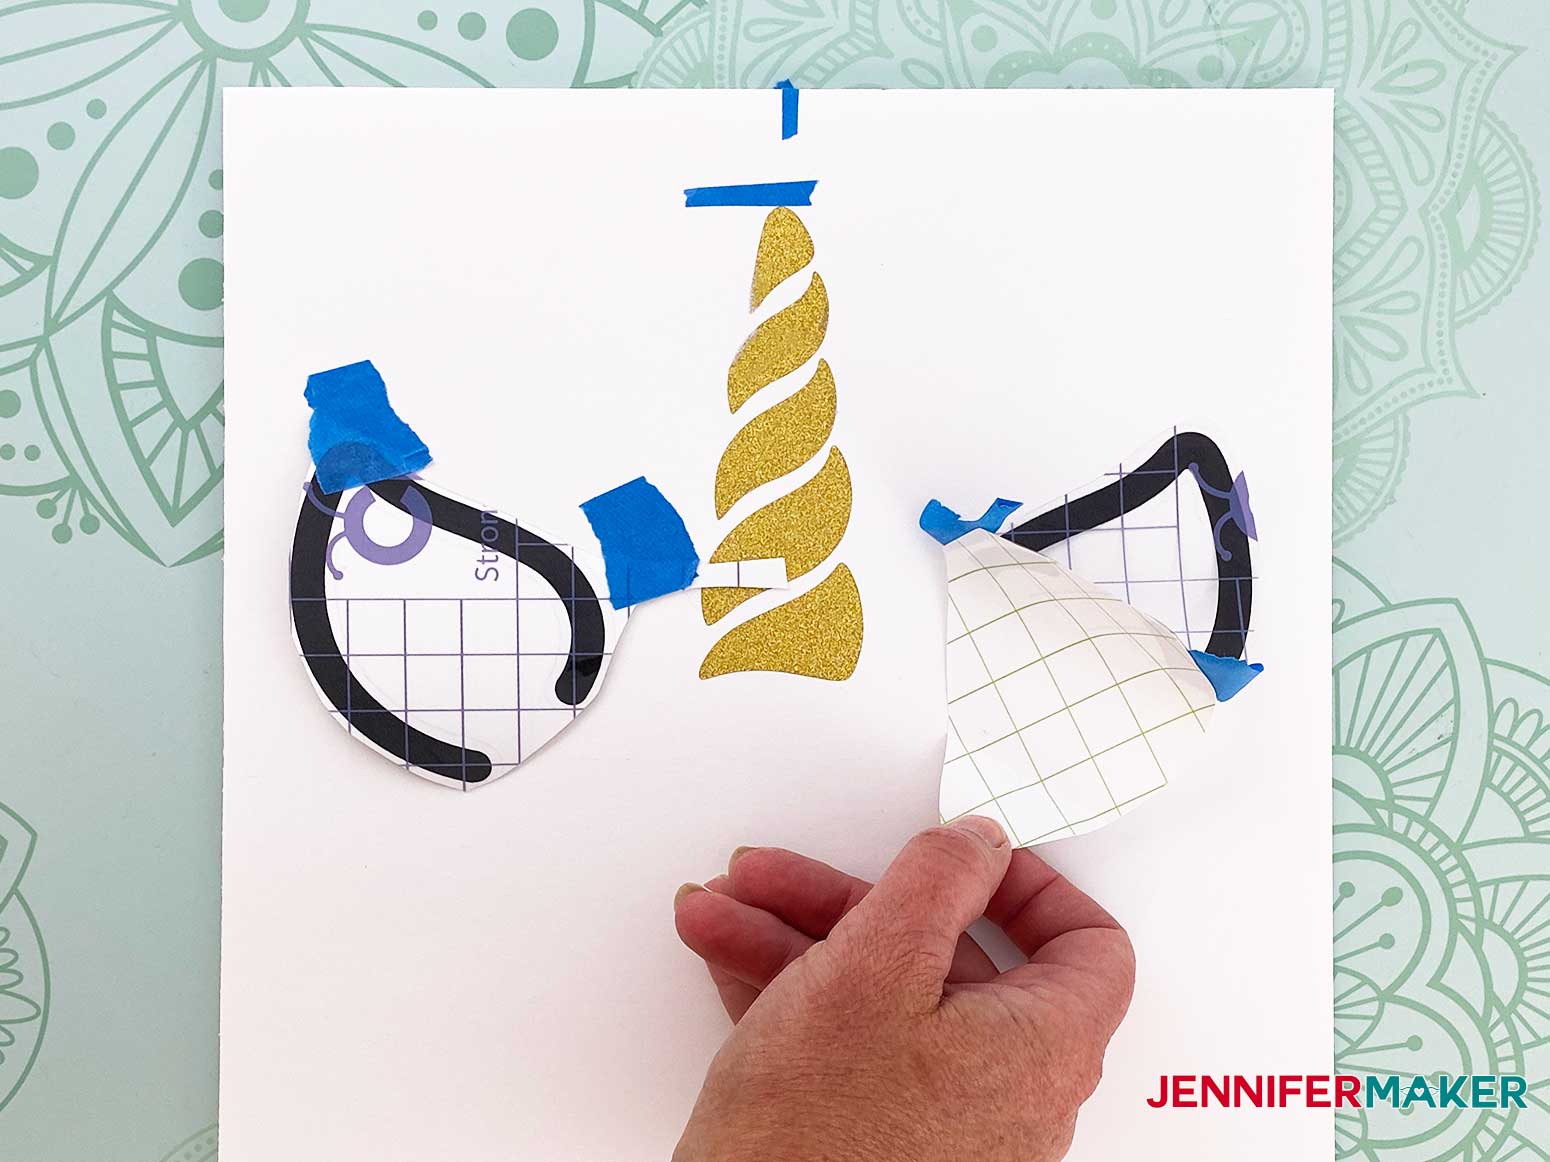
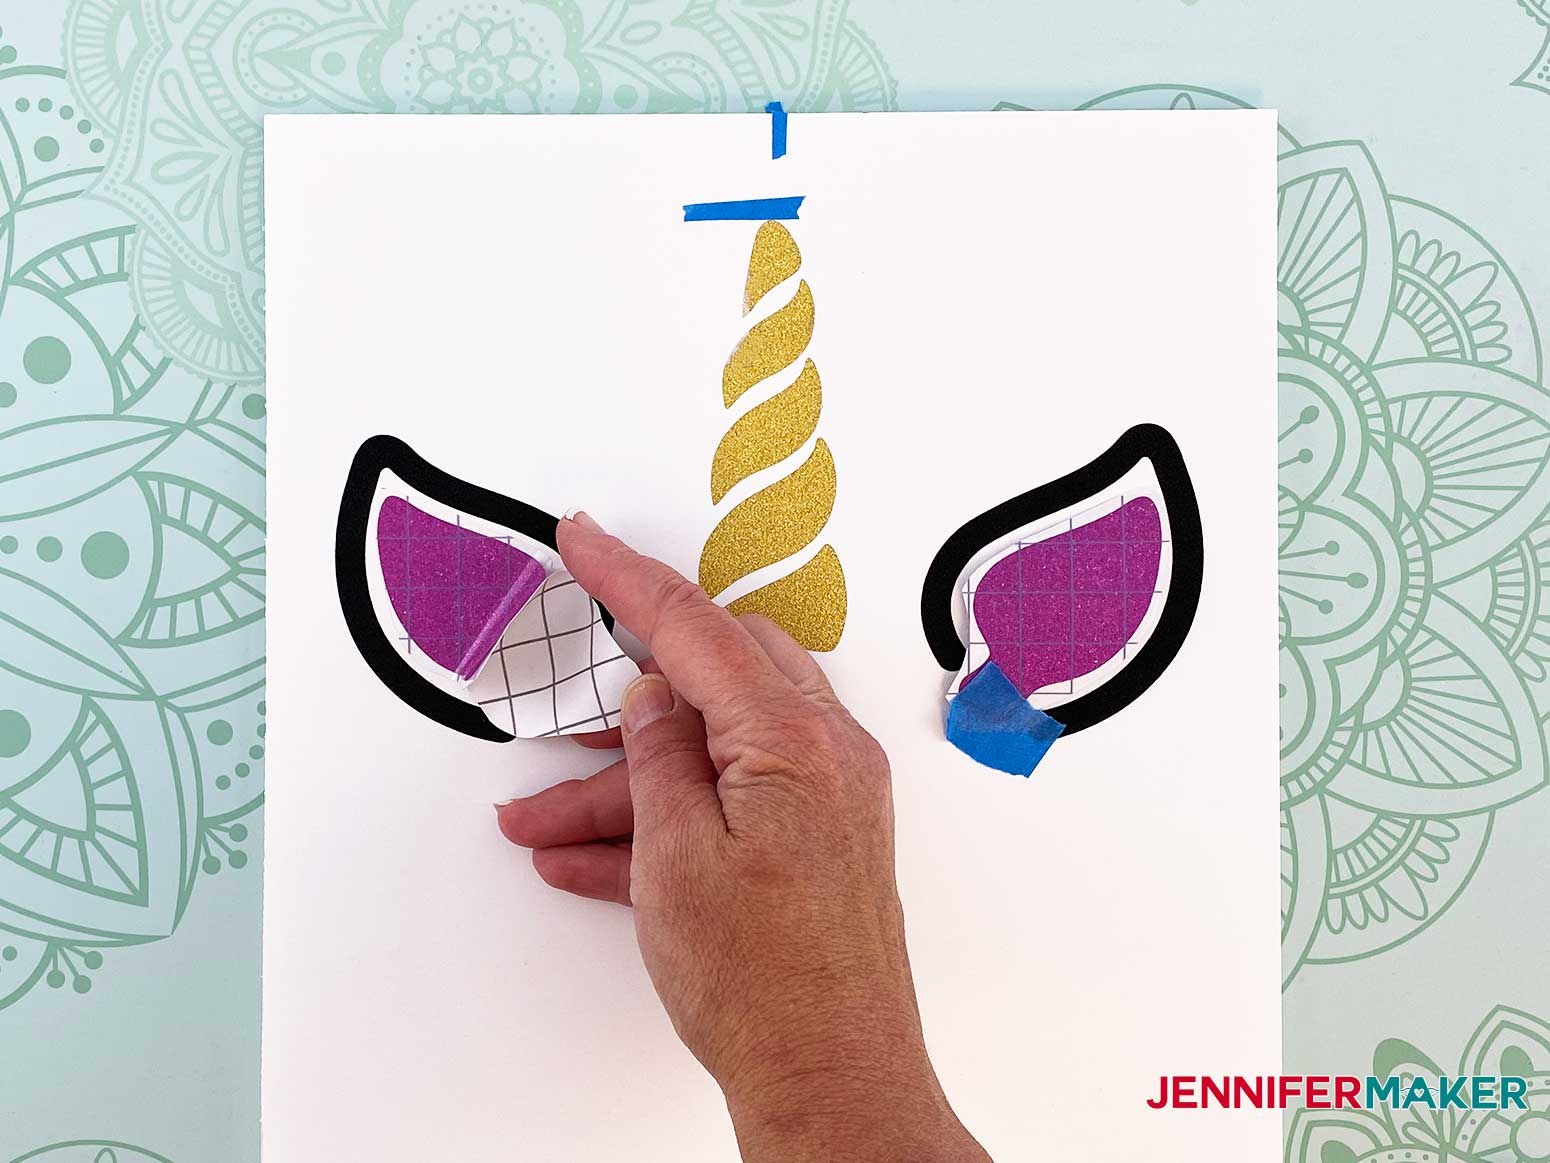
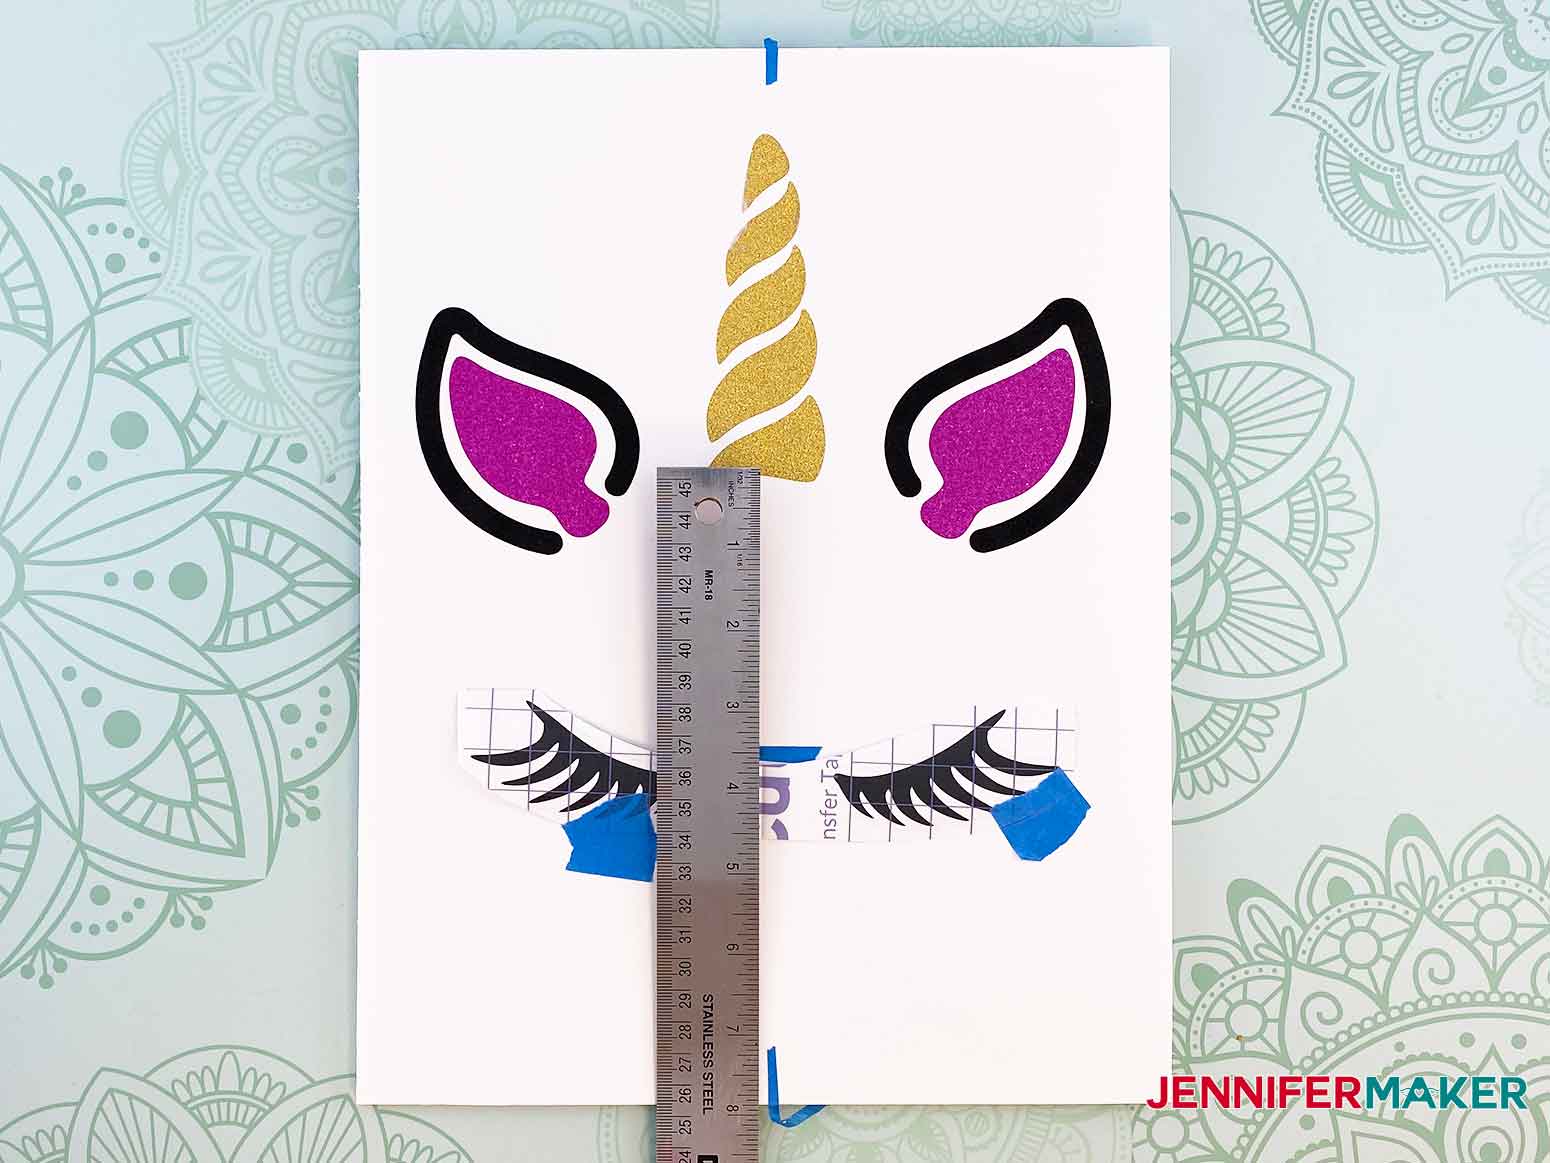
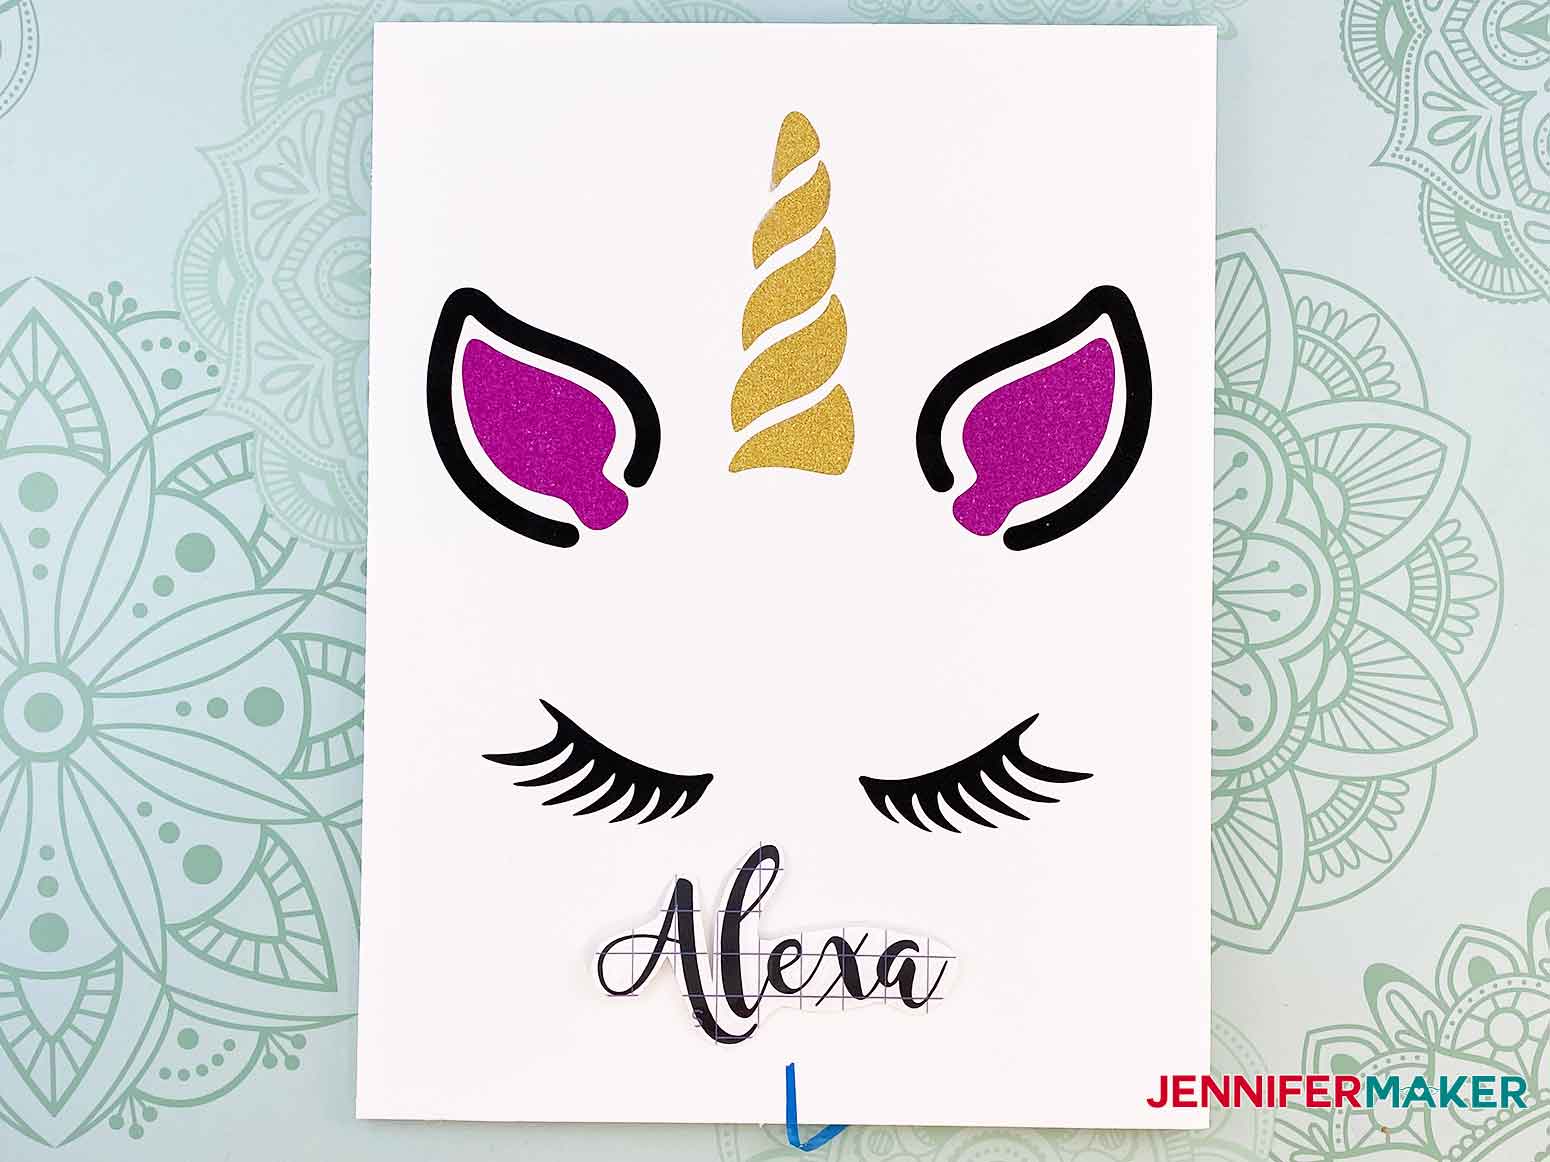
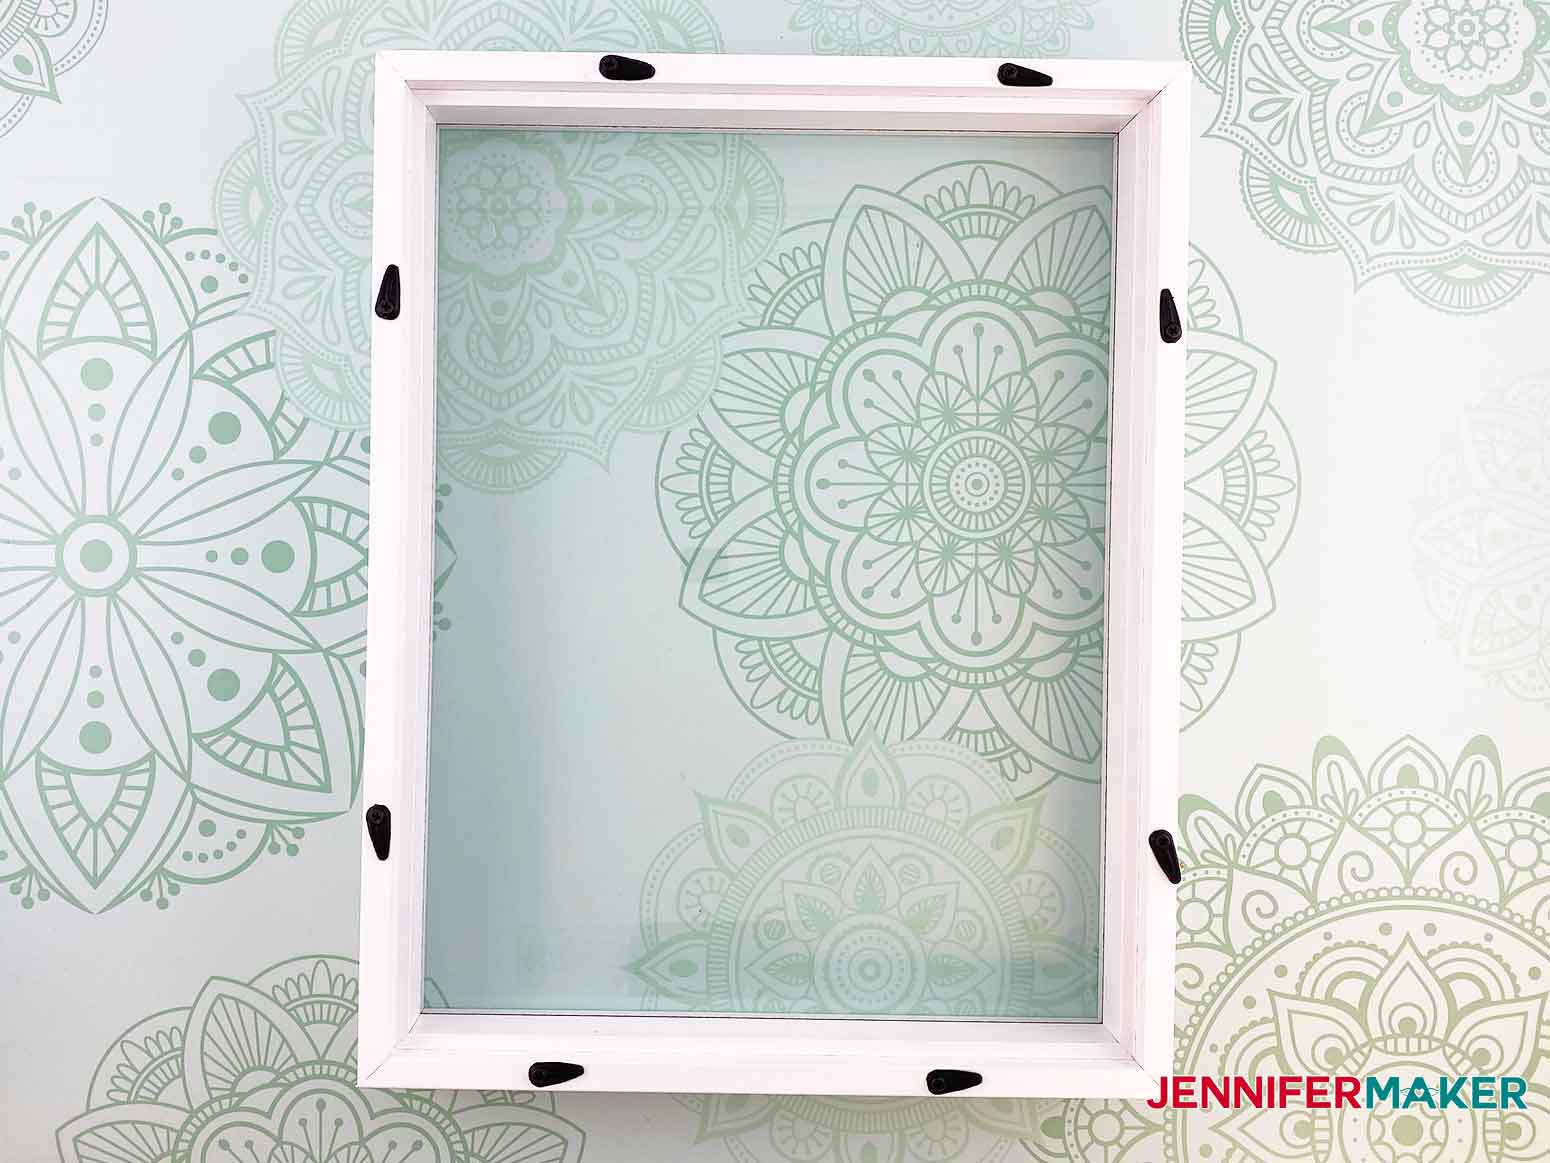
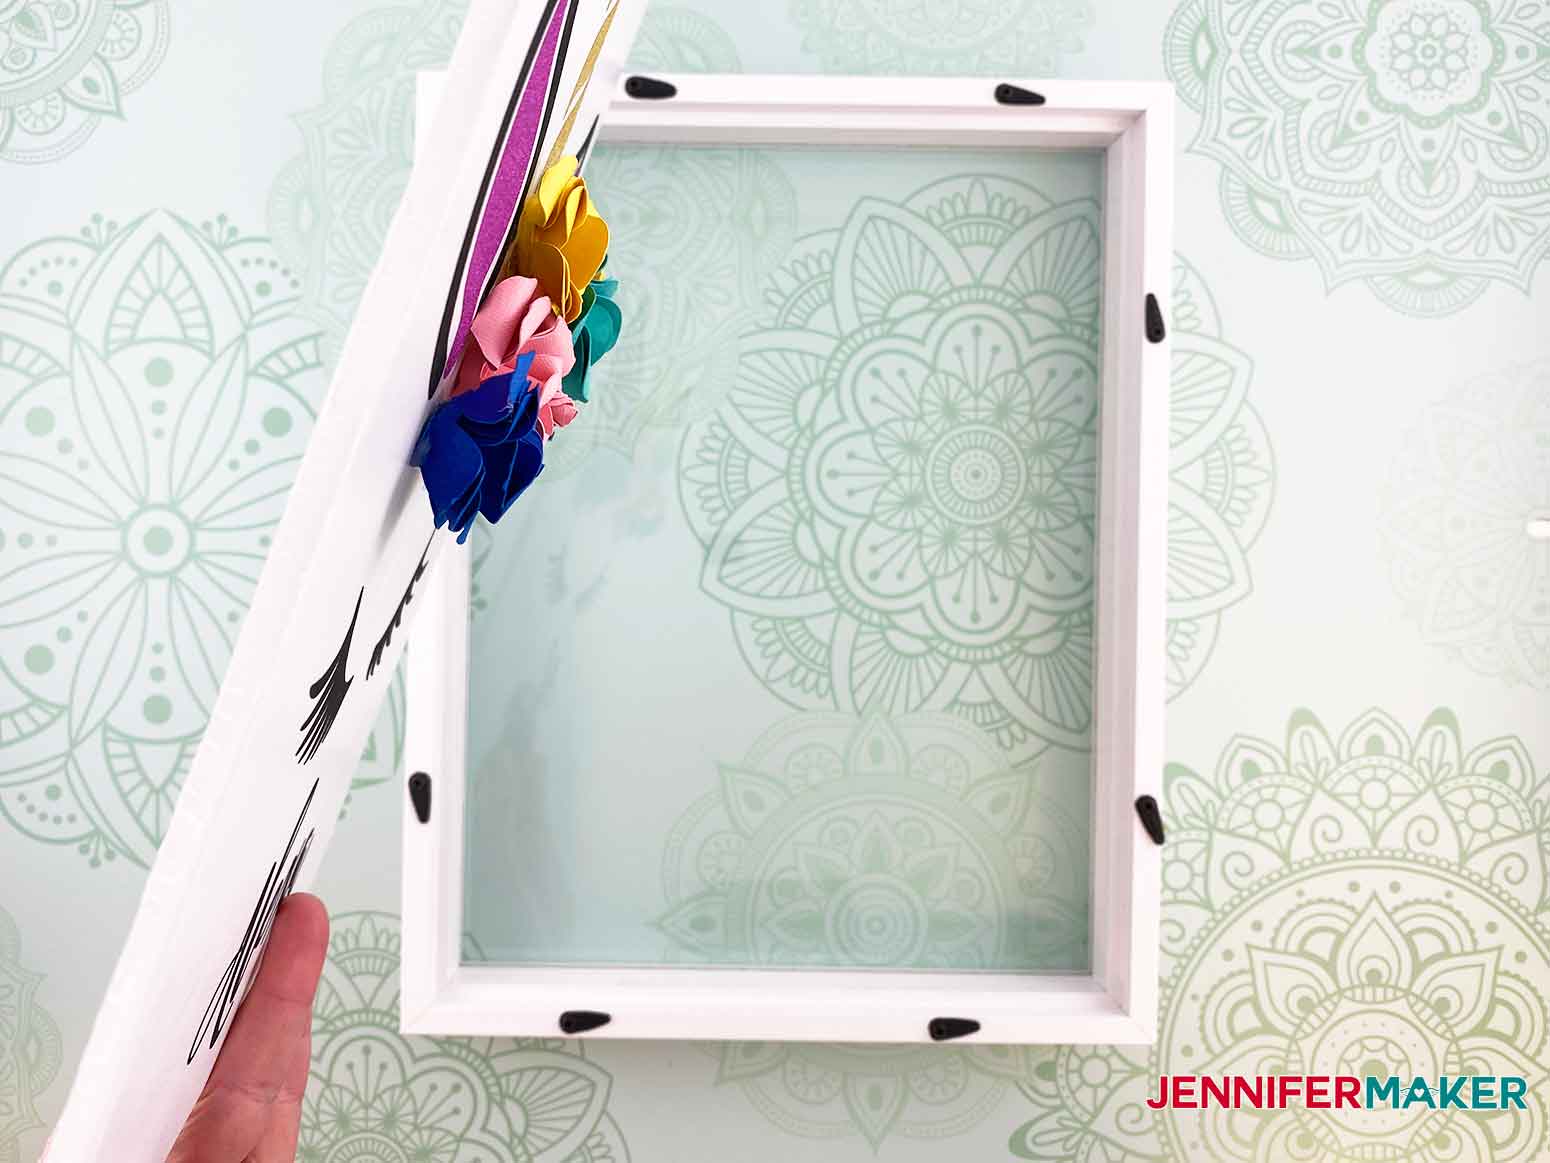
Learn how to make the cutest personalized framed art with a unicorn with paper flowers! First, download Design #271 which is my free personalized Unicorn With Flowers Framed Art SVG/DXF/PDF from my free resource library (get the password to the library in the form at the bottom of this post). If you're going to cut it on your cutting machine, upload the file to your design software. This is what the personalized Unicorn Frame SVG file looks like in Cricut Design Space. Tip: If you're not sure how to upload an SVG cut file to Cricut Design Space, watch this helpful video training series I made. If you're on an iPhone or iPad, here's how to download and upload SVG files to the Cricut Design Space app. Before cutting the design, you will want to measure the width and height of your frame and adjust the size of the design if needed. If you are using the same frame listed in my project supplies you do not need to make any size adjustments. When cutting the design, I used the glitter vinyl material setting for the black, gold, and pink vinyl cuts. Make sure to change the material selection before cutting the vinyl and the cardstock. Weed your vinyl pieces and use Cricut StrongGrip Transfer Tape. Cut all your vinyl pieces as close to the edges as possible. Gather your cut out rose pieces and a pen or cylindrical rod. Take a pen or cylindrical rod and begin to roll the rose petals over the rod to curl them. You can also do this step after the flower is rolled if you prefer. Once your petals are curled, put the loose end of your flower pattern in the slot in the tip of your quilling tool and being rolling toward you. If you do not have a quilling tool, you can use long-nose pliers or tweezers. You can also make your own DIY quilling tool. Continue rolling your paper, keeping the bottom edges aligned with one another as best you can. Once the rose if rolled the way you like, add glue on the bottom of the rolled rose. Fold the circular tab over the glue. I used the tip of my hot glue gun to hold the tab over the glue. No one wants burnt fingers. Repeat this process to assemble all the roses. You do not have to use hot glue, it was just what I preferred to use for this project. Open the back of your frame and remove the foam insert. Next, cut your piece of foam core to the same size as this insert. Find the center of your foam core and measure approximately one inch from the top. This is where we will place the top of the unicorn horn. IMPORTANT! Before laying down any of the vinyl pieces it is very important to cut as close to the design as possible to reduct the amount of transfer tape that will touch the foam core. Next you will want to repeatedly slap each piece of vinyl on your skin (or a cloth) prior to laying it on the foam core. This is so the transfer tape does not rip your foam core. Lay the unicorn horn down and use a scraper over the vinyl. Avoid scraping the transfer tape as much as possible. Slowly and carefully remove the transfer tape from the unicorn horn. Fold the vinyl in half for the ears to find the center point. Align the ears just below the unicorn horn. Remember to remove the tackiness of the transfer tape before laying the vinyl on the foam core. Slowly peel back the backing of the vinyl and add the ears. Carefully remove the transfer tape from the ears. Eyeball placement of the pink inner part of the ear. Remove the backing and transfer tape from the vinyl. Measure approximately 3 1/2" from the bottom of the unicorn horn for placement of the eyelashes. Again, cut as close to the design as possible, remove the tackiness of the vinyl and apply to your foam core board. The last piece of vinyl to add is the name. I eyeballed the placement of Alexa and applied it to my foam core board for the personalized unicorn frame. Once you have all the vinyl applied its time to add the roses. You can add them any way you want or refer to my finished design for placement. I used hot glue to place the roses on the foam core board. Clean the glass of your frame. Add your foamcore board in the frame, put the frame back on and you have finished your personalized unicorn frame. This is what my finished personalized unicorn frame looks like. I’d love to see your personalized unicorn frame project! If you make one, please share a photo in our Facebook group, email it to me at [email protected], or tag me on social media with #jennifermaker. The font Magnolia Sky was used for Alexa in this project. Special thanks to the JenniferMaker Design Fairy Team, specifically Design Fairy Caitlin, for helping me design and assemble this awesome design.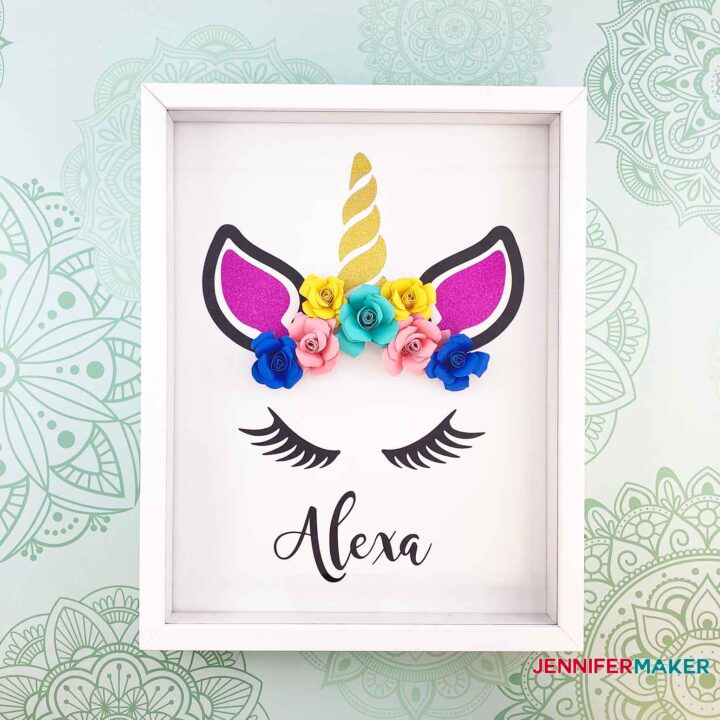
Unicorn with Flowers Framed Art
Materials
Tools
Instructions
STEP 1: GET MY FREE PERSONALIZED UNICORN WITH FLOWERS FRAMED ART SVG FILE
STEP 2: CUT THE DESIGN
STEP 3: ASSEMBLE THE UNICORN FRAME


STEP 4: SHOW IT OFF
Notes
FONTS USED IN THIS DESIGN
ACKNOWLEDGMENTS
Answers to Your Questions About your Unicorn with Flowers Framed Art
Q: Can I cut this on the Joy?
Yes, you can cut this on the Joy!
Q: I would love to make this, but only have grandsons……
A: What makes a unicorn for girls only? All genders enjoy and appreciate unicorns. We must not assume that males would not enjoy unicorns or flowers. It is not fair to them. If you have grandchildren that are not into unicorns, put an image from my resource library they would love into a shadow box instead. Consider the individual over the gender. 🙂
Q: Can this project be on Canvas?
Absolutely! This would look wonderful on a canvas!
Get my free SVG files to make your Unicorn with Flowers Framed Art
I’d love to see your unicorns with paper flowers and shadowboxes. Please share a photo in our Facebook group or tag me on social media with #jennifermaker.
See all of the projects, tutorials, and free designs in The Great Maker 25-Day Gift-Away Challenge!
Love,

Want to remember this? Save this Unicorn with Flowers Framed Art tutorial to your favorite Pinterest Board!

I would love to make this but how do I change the name?
You will just delete the text box with Alexa in it and add your own text box! The font used is Magnolia Sky!
Hi Jennifer, I am new at this and would like to make this with an 8×10 frame, what would you suggest the resized unicorn template be?
Hi Jennifer! I would take a square from the shapes menu and size it to your frame and then resize the SVG based on that and how you want it to look.
Hi Jennifer,
I love everything you do and you are so helpful with the detailed directions and free files! Thanks you.
Could I make this w removable vinyl? I have about 75 rolls of vinyl but no permanent glitter! 😩 I also found at Michael’s 11×14 canvas board which allows me to use the shadow box and get the 3-D look I wanted. I bought the foam board and when I found the canvas board I was super excited!
I look forward to hearing from you.
Hi Phyllis! You absolutely could use removable vinyl, it may just start to peel off sooner than permanent vinyl would.