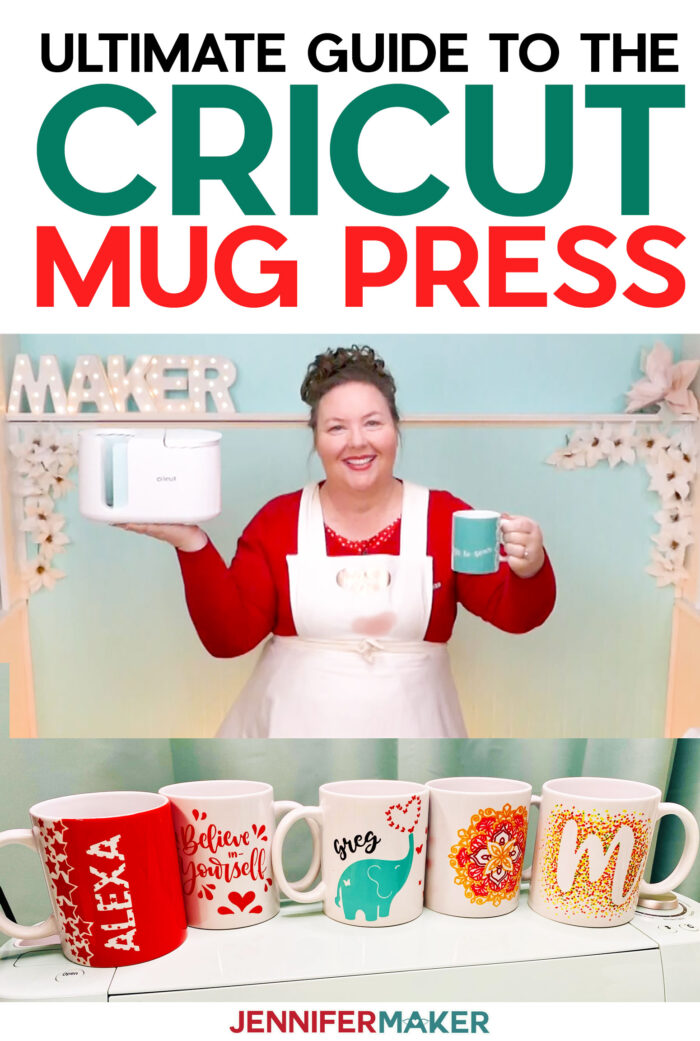
Get everything you need to know in one place about the new Cricut Mug Press to make amazing dishwasher and microwave-safe mugs with these reviews, videos, tutorials, and designs!
The Cricut Mug Press makes dishwasher- and microwave-safe mugs with just one touch— it takes the temperature of your mug and your room, and determines the right settings FOR you! No trying to figure out how long to press something, or what temperature setting to use. Plus it has patented zone heating for a consistent mug design mug from top to finish, something I’ve not seen anywhere else. It also has a number of safety features, including auto-off for peace of mind. The Cricut Mug Press is compact, cool, and cute. Read on for my review.
UPDATE: The new Cricut Mug Press is now available to buy online in the Cricut shop at my affiliate link: Get the Cricut Mug Press here at the Cricut Shop! You can get just the mug press itself, or try to grab one of the bundles with mugs and Infusible ink … I imagine the bundles are going to be VERY popular and go quickly! The only discounts available on the mug press itself are for Cricut Access subscribers (this is a great time to sign up), but you can use my Cricut discount code if you order any other supplies and materials over $50 … plus get FREE shipping! You can get my latest Cricut discount code here!
Get Started With Your Cricut Mug Press
Once you have your Cricut Mug Press, I am here to help you get it set up, do your first mug press, and make ALL THE MUGS! In fact, I now have over 100 completely free mug designs for you to download from my library. Plus more coming … because I’m totally digging the mug press and literally cannot stop designing and pressing mugs. I am enjoying the mug press more than I thought I would, mostly because I’m finding it so easy to use … so why stop?
Here’s a list of every Cricut Mug Press tutorial, video, and design I have to help you get up and running:
Cricut Mug Press Tutorials
- Cricut Mug Press: The Ultimate Guide to Infusible Ink Mugs <– start here!
- Best Mug Press: Cricut Mug Press vs. Traditional Mug Press & Wraps <– how they compare
- Layered Infusible Ink Mugs: Customize These Cute Animals <– how to get multi-colored mugs
- How to Make Easy Infusible Ink Pen Mugs <– step-by-step tutorial on using pens and markers
- Freehand Artwork Mugs with Infusible Ink Markers <– put your own artwork on a mug!
- Sublimation Blanks that Work in the Cricut Mug Press <– more than just Cricut mugs!
Cricut Mug Press Videos:
- Cricut Mug Press: First Look
- Cricut Mug Press Setup & First Press
- Cricut Mug Press Playtest
- Mug Press Showdown
- Layered Infusible Ink Mugs
- Freehand Artwork Mugs
Cricut Mug Press Designs:
- Mandala Monogram Pen Art for Mugs SVG
- Mug Pen Art for Infusible Ink SVG/DXF/PDF
- Cute Animal Mugs for Layered Infusible Ink SVG/DXF/PDF
- Mug Decal Collection SVG/DXF/PDF
- Handlettered Quote Decals for Mugs SVG/DXF/PDF
- Fancy Wrap Mug Designs SVG/DXF/PDF
- “I Need Coffee” Funny Face Mug Decals SVG/DXF/PDF
- Dot Monograms and Shapes + Blank Template for Drawing SVG/DXF/PDF
- Flowers and Bees Layered Infusible Ink Desgisn SVG/DXF/PDF
My Review of the Cricut Mug Press
I’ve now had my Cricut Mug Press for several weeks. Cricut sent me a mug press in advance so I could review it, but my opinions are my own. Setup was very easy — I had it up and running in less than five minutes. And my first mug was pressed just 10 minutes later without any issues. In fact, all of the three dozen or so mugs I’ve made since getting the Cricut Mug Press have been exceedingly simple and turned out flawless. I’ve only had one bad mug, and that was when I accidentally taped my design on upside down … so totally my own fault.
Here’s what I think: The Cricut Mug Press is an innovative and easy mug press that creates the MOST adorable and fun dishwasher- and microwave-safe mugs. It’s very easy, reliable, and takes up hardly any space. I think it’s a BIG winner, and I just can’t stop making mugs with it.
The only real drawback I have are its limitations on mug size and shape — I’d like to see it do larger and different size mugs. But I don’t want them enough to resort to other measures, so it’s just a wish, not a need. And honestly, it does 11 to 16 oz mugs without any manual adjustment, which is more than I can say for other mug presses, so mostly I’m grateful to have this tool at all … because before this, I wasn’t making mugs despite having access to the equipment. And that’s what makes this mug press a gamechanger for me — when it’s so easy I actually use it, it’s a million times better than another tool that I never or rarely use.
Answers to Your Questions about the Cricut Mug Press:
Here are helpful answers to questions about getting and using the Cricut Mug Press:
Q: When can I buy a Cricut Mug Press?
On Thursday, March 11, 2021 at 12:01 am ET, you can buy the Cricut Mug Press in the Cricut shop, Amazon, Michaels, Joann, Target, HSN, Hobby Lobby, and Walmart on that date.
Q: What kind of mug can I use for my Cricut Mug Press project?
Your mug must have a poly coating and straight walls. It is important to look for sublimation (poly-coated) mugs. Other mugs will not work. The Cricut Mug Press accommodates mugs in sizes from 11 oz. – 16 oz without any manual adjustment.
Q: Do I have to only use Cricut mugs?
You will need to use straight-walled, sublimation compatible drinkware. Cricut has tested their mugs and verified that they work the best, but you can use other brands. Check out my guide to other sublimation mugs and drinkware that fit in your Cricut Mug Press.
Q: Do I need to use a white mug?
For the best, most vibrant, results we suggest that you use a white mug for your Infusible Ink project, as the ink is transparent.
Q: Are mugs made in the Cricut Mug Press safe for use in the microwave and dishwasher?
Yes, they are totally safe in the dishwasher and microwave immediately after they’re cooled enough for you to handle — there is no cure time!
Q: Can I use vinyl with my Cricut mug project?
Since there is a chance the material can transfer to the heat plate, using vinyl is not recommended. You can always put an additional vinyl design on your mug AFTER you are done pressing your mug in the Cricut Mug Press, though! Just be aware that if you add vinyl to a mug, it will not be microwave safe and you may need to seal it if you want to put it in a dishwasher.
Q: Where can I use the Cricut Mug Press?
You can use it anywhere you have good ventilation, so near an open window or with a fan going. Put your Cricut Mug Press on a heat resistant surface, such as an EasyPress pad, to avoid damaging anything underneath.
Q: How do I center my image on my mug?
The trick I use is to keep the handle facing me and then wrap the design starting from the opposite side of the handle, keeping the wrap straight. If it doesn’t start to stick evenly, you can take it off and try again.
Q: When I turned my Cricut Mug Press on, it smelled funny. Is it going to keep doing this?
The first time you use the mug press it may have a smell, but it should go away after you use it — that’s what happened for me!
Q: How long do I need to let my mug cool?
You need to wait 15-30 minutes to let the mug cool down after coming out of the Cricut Mug Press before touching and removing the liner. The handle will stay cool to the touch, but the cup itself will be hot, so don’t touch.
Q: Can I adjust the temperature setting on my Cricut Mug Press?
No, the machine does not allow you to change the temperature settings. But you also do not need to worry about it, because the Cricut Mug Press is doing that for you — it takes the temperature of the mug and the ambient room to determine the correct temperature and pressure settings. This is a SMART mug press.
Q: How close to the handle can my mug design be?
Your design can wrap to ½ inch from the handle. If your design is closer than ½ inch to the handle, the design cannot be heated thoroughly enough to transfer properly and you’ll see fading or discoloration. All of my free mug designs are set up so that they are not within that safety zone of the handle.
Q: Can I use Cricut Infusible Ink Pens and Markers?
Yes, totally — they make beautiful mugs! When you make a design with pens or markers, use three layers of butcher paper or copy paper on top of your design to protect your machine from ink bleeding through the paper. Check out my tutorial on using the Infusible Ink pens in your Cricut and my tutorial on freehand artwork with the Infusible Ink markers.
Q: Can I use regular pens and markers?
No, you will need to use Infusible Ink Pens and Markers. They have a special chemical composition that turns to a gas under high heat and becomes a part of the mug itself! A regular pen or marker won’t be able to do that.
Q: Can I use my iPad/iPhone/Android?
For the initial set-up of the Cricut Mug Press, you will need to have a computer or laptop. If you don’t have one of your own, just use a friend or family member’s to setup your Cricut Mug Press through Cricut Design Space. After that is done, you can use an iPhone, iPad, or Android device to design great new mugs and you do NOT need to plug your Cricut Mug Press into your computer again (aside from any future firmware updates necessary).
Q: Do I have to use small Cricut Mug Press Infusible Ink transfer sheets, or can I use the large Infusible Ink transfer sheets I already have?
No, you can cut the sheets you already have down to size and they will work just fine! Just remember to mirror your image!!
Q: When I cut my Infusible Ink for my mugs, the template doesn’t cut through the liner like yours does in your tutorials. How do I fix this?
Go the menu with three lines in the upper left corner, select Manage Custom Materials, find the Infusible Ink Transfer Sheet settings, and change your pressure to 268.
Q: Can I use any kind of tape?
No, you have to use only heat-resistant tape. If you use regular tape, it will melt adhesive onto your design and mug press, so don’t do that.
Q: How long does this pressing process take with the Cricut Mug Press?
It depends on the temperature of your room and your mug, but it should take somewhere around 5-6 minutes or so. Your Cricut Mug Press will automatically determine the press time for you, so you don’t have to worry about timing anything.
Q: Why do I have blue dots or specks of color on my mug?
The blue dots are dust! It is very important to get the mug absolutely free of dust, which you do by using a lint roller on the mug right before you press it. You’ll also want to make sure that when you weed the Infusible Ink sheet that no little stray little dots of ink accidentally fall onto the sections that should be clear. So always check both your liner and your mug before you press the design.
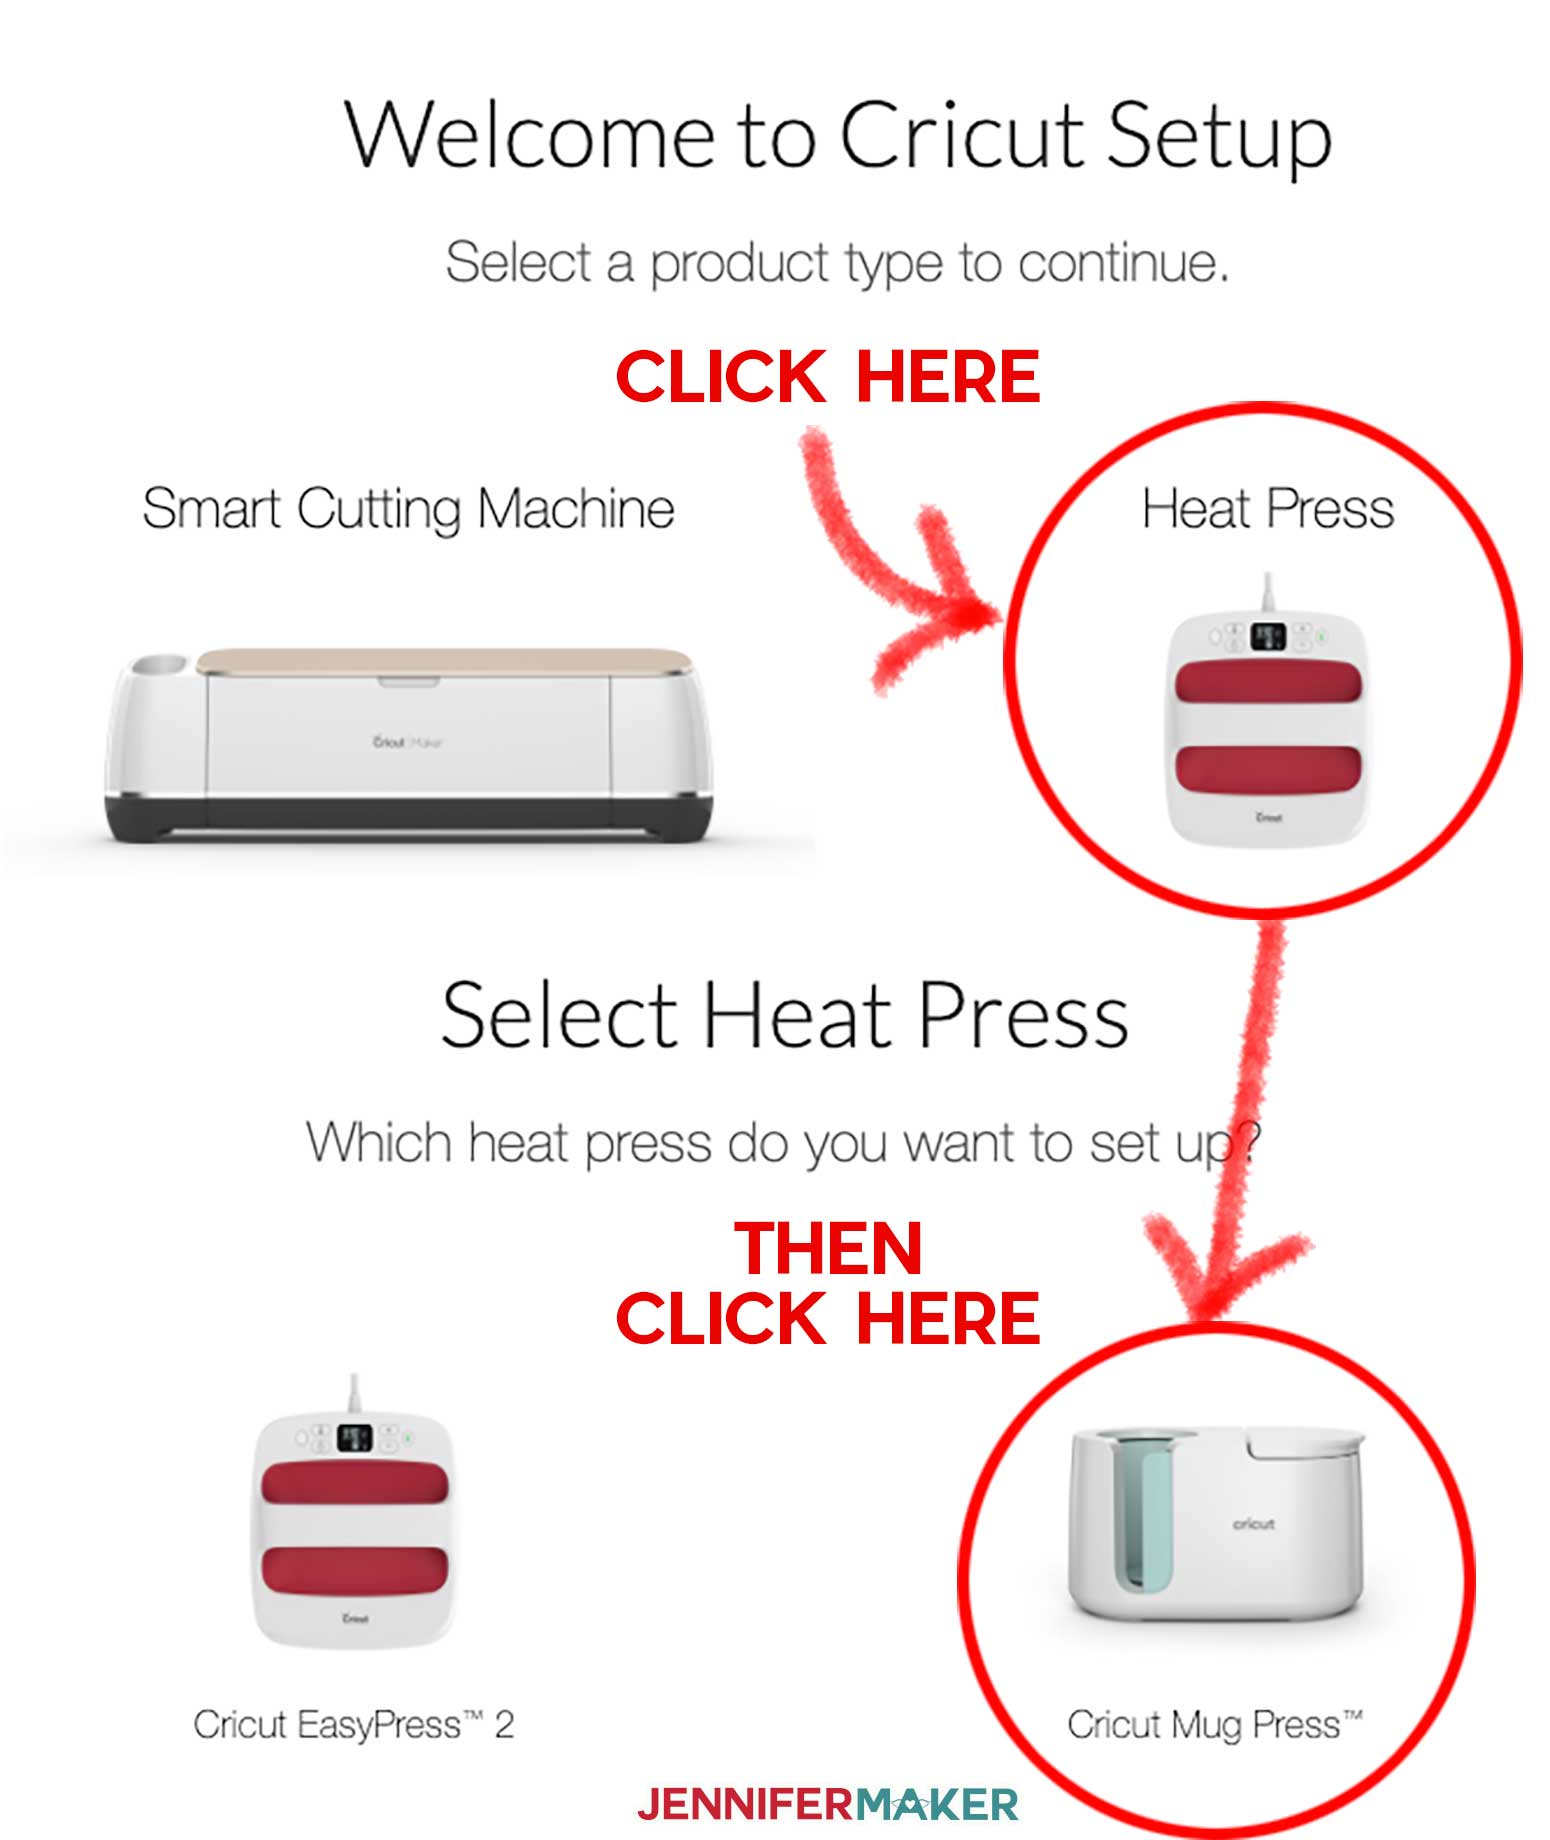
Q: I can’t find where I am supposed to set up this machine in Cricut Design Space! All I see are “Machine” and “Easy Press”!
Cricut Mug Press setup is located under the Heat Press picture.

How to Setup the Cricut Mug Press
Infusible Ink Mug with Fancy Edge Wrap
Make a beautiful and personalized mug with the Cricut Mug Press and my fancy wrap design, which features top-to-bottom ink coverage for a vivid, shiny look!
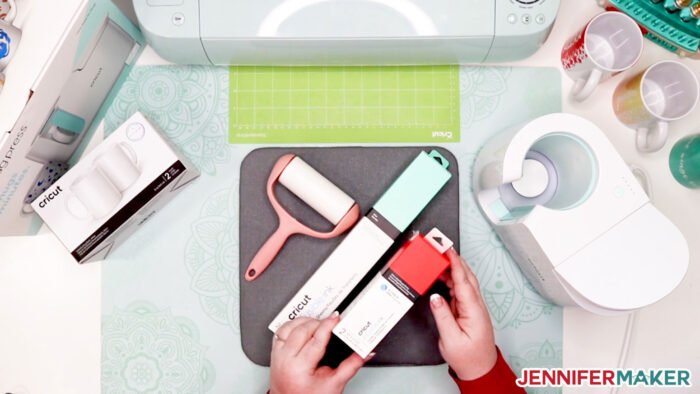
Materials
Tools
Instructions
STEP 1: SETUP YOUR CRICUT MUG PRESS
If you've already done this, skip to step 2.
To setup your Cricut Mug Press, position yourself within two feet (24 inches) of your computer as you'll need to connect the Mug Press to your computer. (Yes, you need to have a desktop or laptop running Cricut Design Space to setup your Mug Press — if you don't have a computer of your own, do this at a friend or family's computer initially.) You cannot skip activation, as the press will not power on without it.
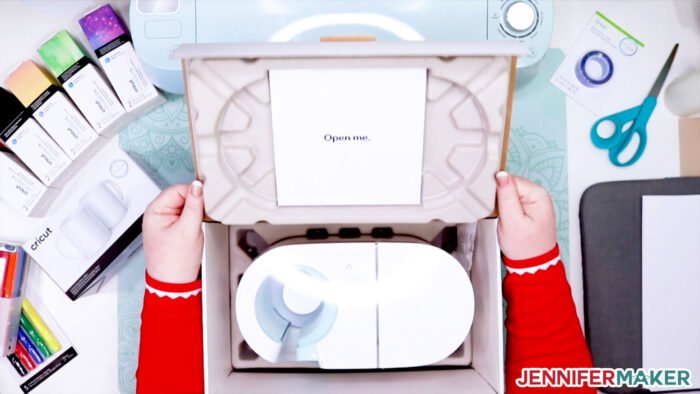
Open the box and pull out the Cricut Mug Press, power cord, and USB setup cord.
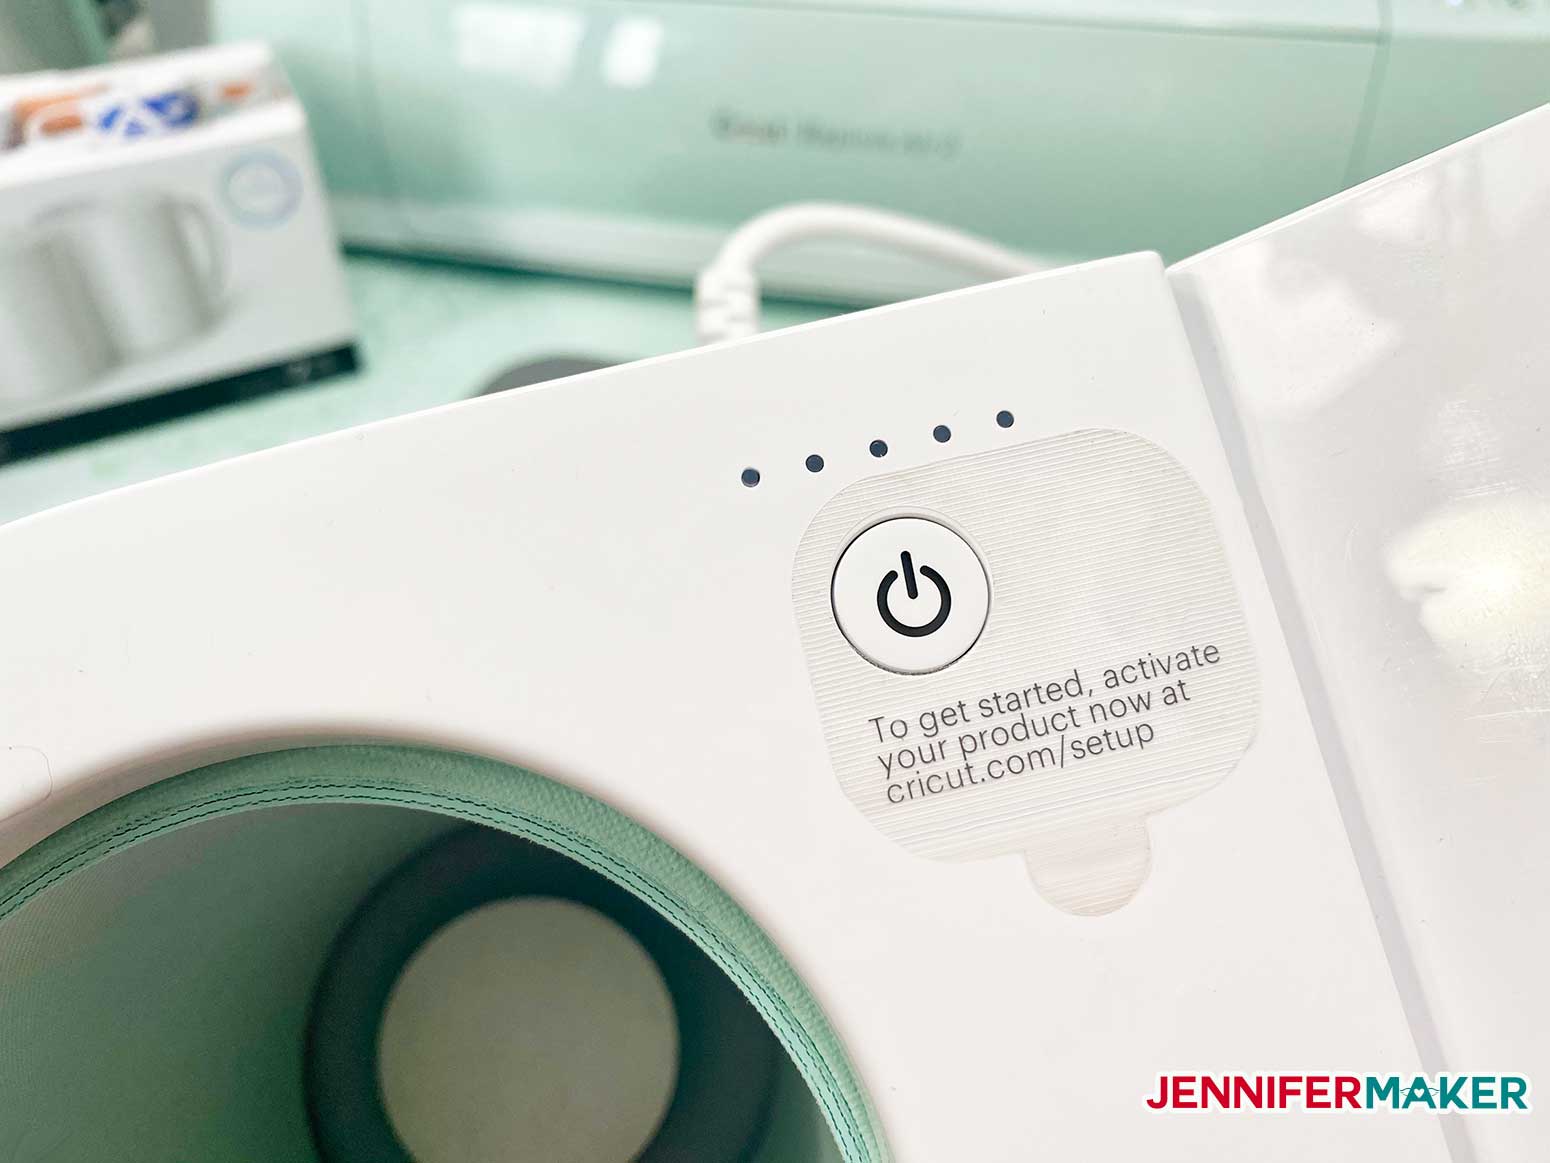
Carefully remove the plastic and note that there's a sticker on the power button — it tells you to get started and activate your product, go to cricut.com/setup
If you already have Cricut Design Space downloaded on your computer, going to cricut.com/setup will take you to Design Space and open the New Machine Setup. But you can also just open Design Space, click on the icon with three lines in the upper left corner, choose New Machine Setup.
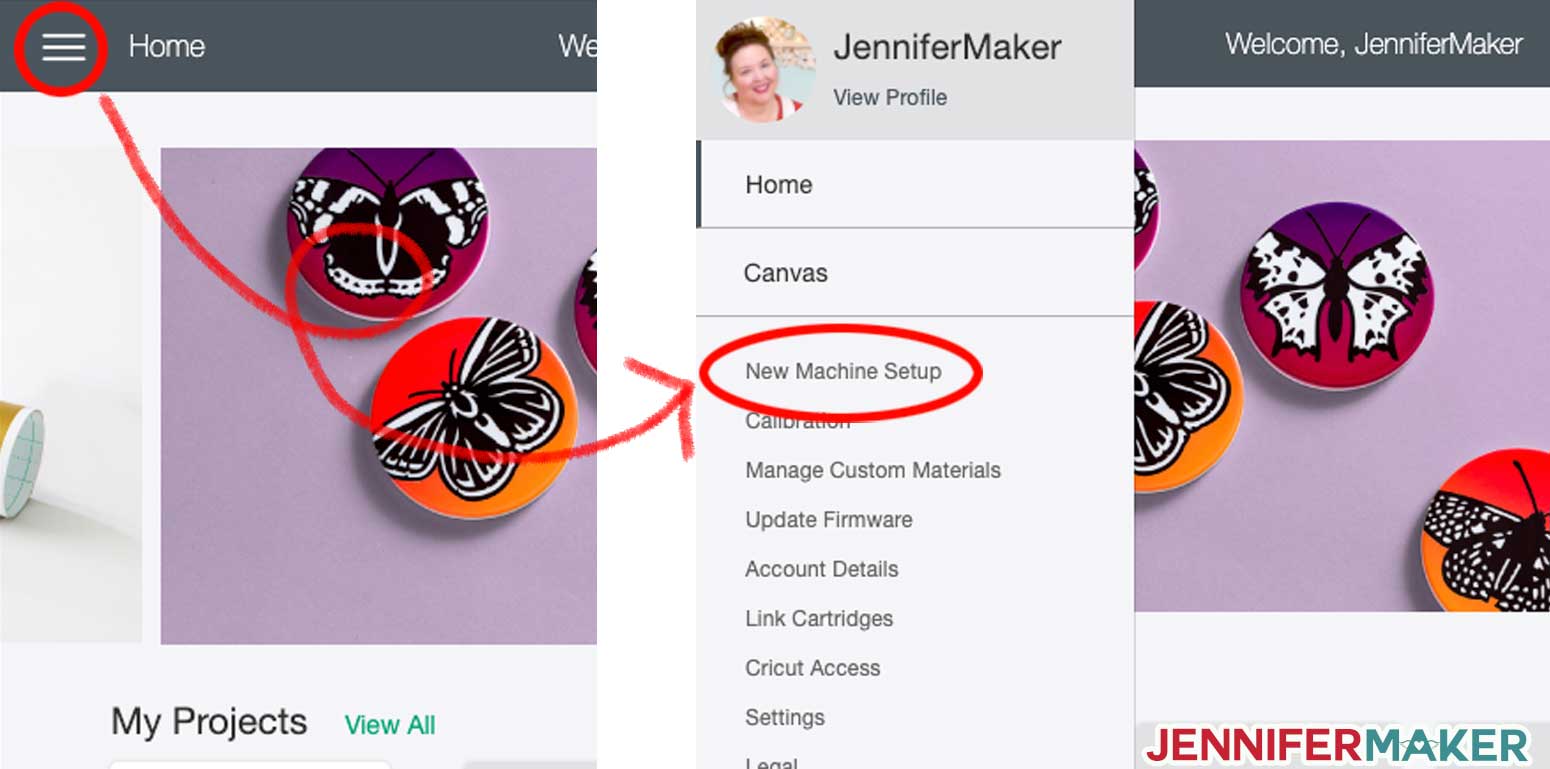
In New Machine Setup, click on Heat Press, then click Cricut Mug Press.
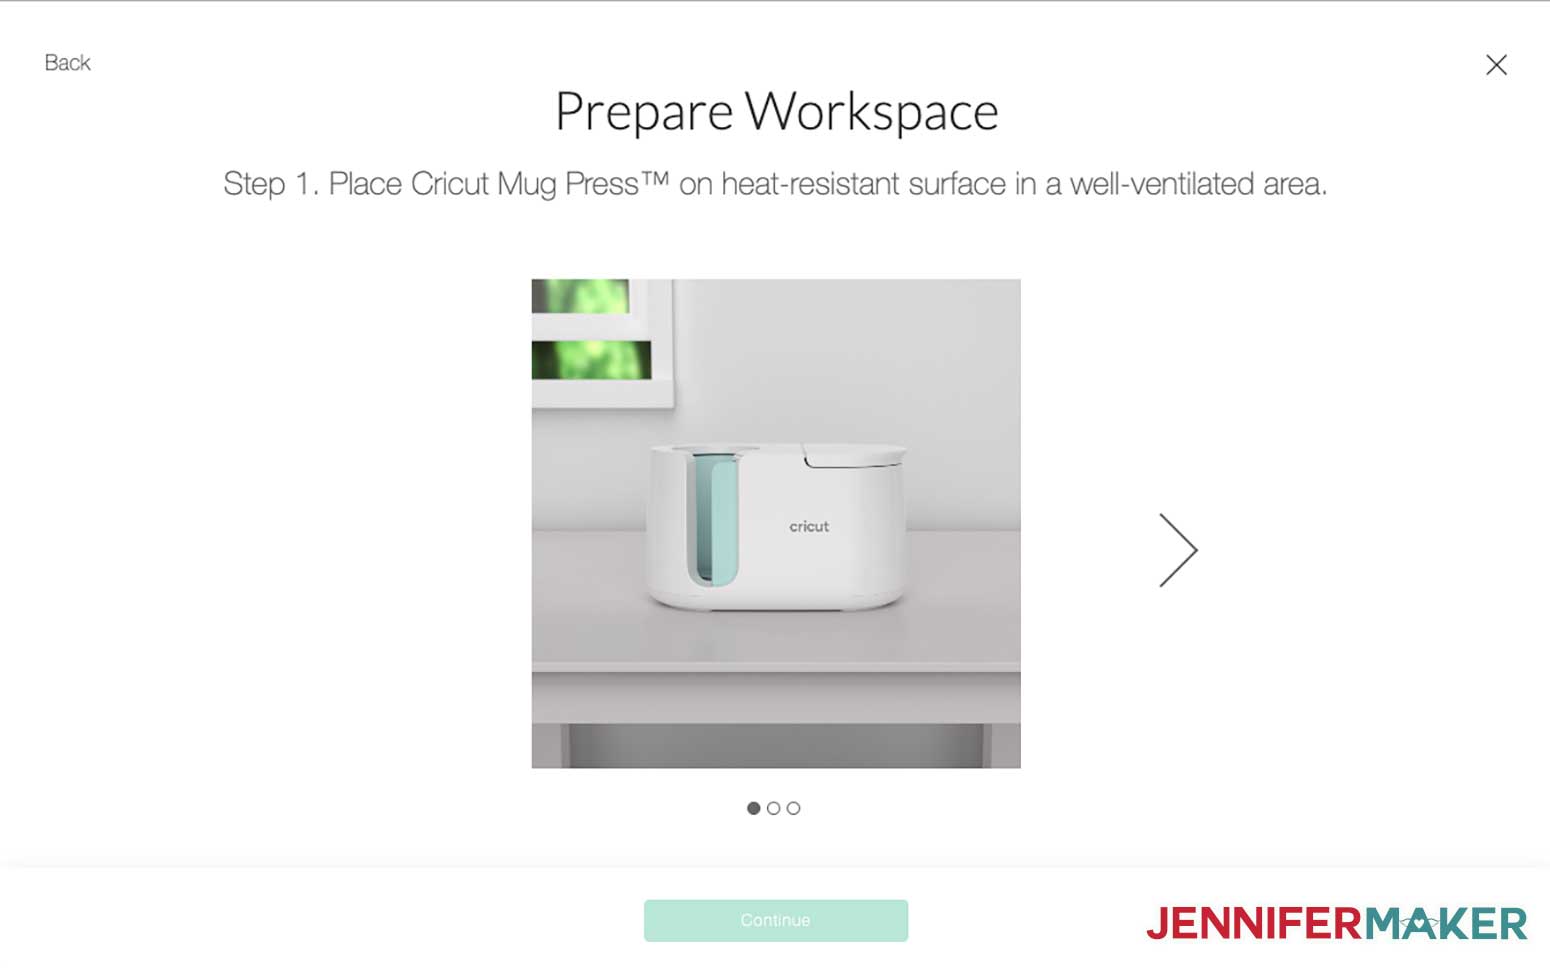
Follow the directions onscreen to activate your Cricut Mug Press. Step 1 is to place the mug press on a heat-resistant surface in a well-ventilated area — so turn on the fan or work near an open window. If you're using a self-healing cutting mat like I am, that's fine for the initial setup as most cutting mats like this are heat resistant, but extended heat exposure will decrease the mat's lifespan and weaken its bonds. I recommend you use a Cricut EasyPress mat instead, which you'll see me using later — the 12" x 12" size fits the Cricut Mug Press with extra room for cooling mugs.
When you're ready, click the right arrow.
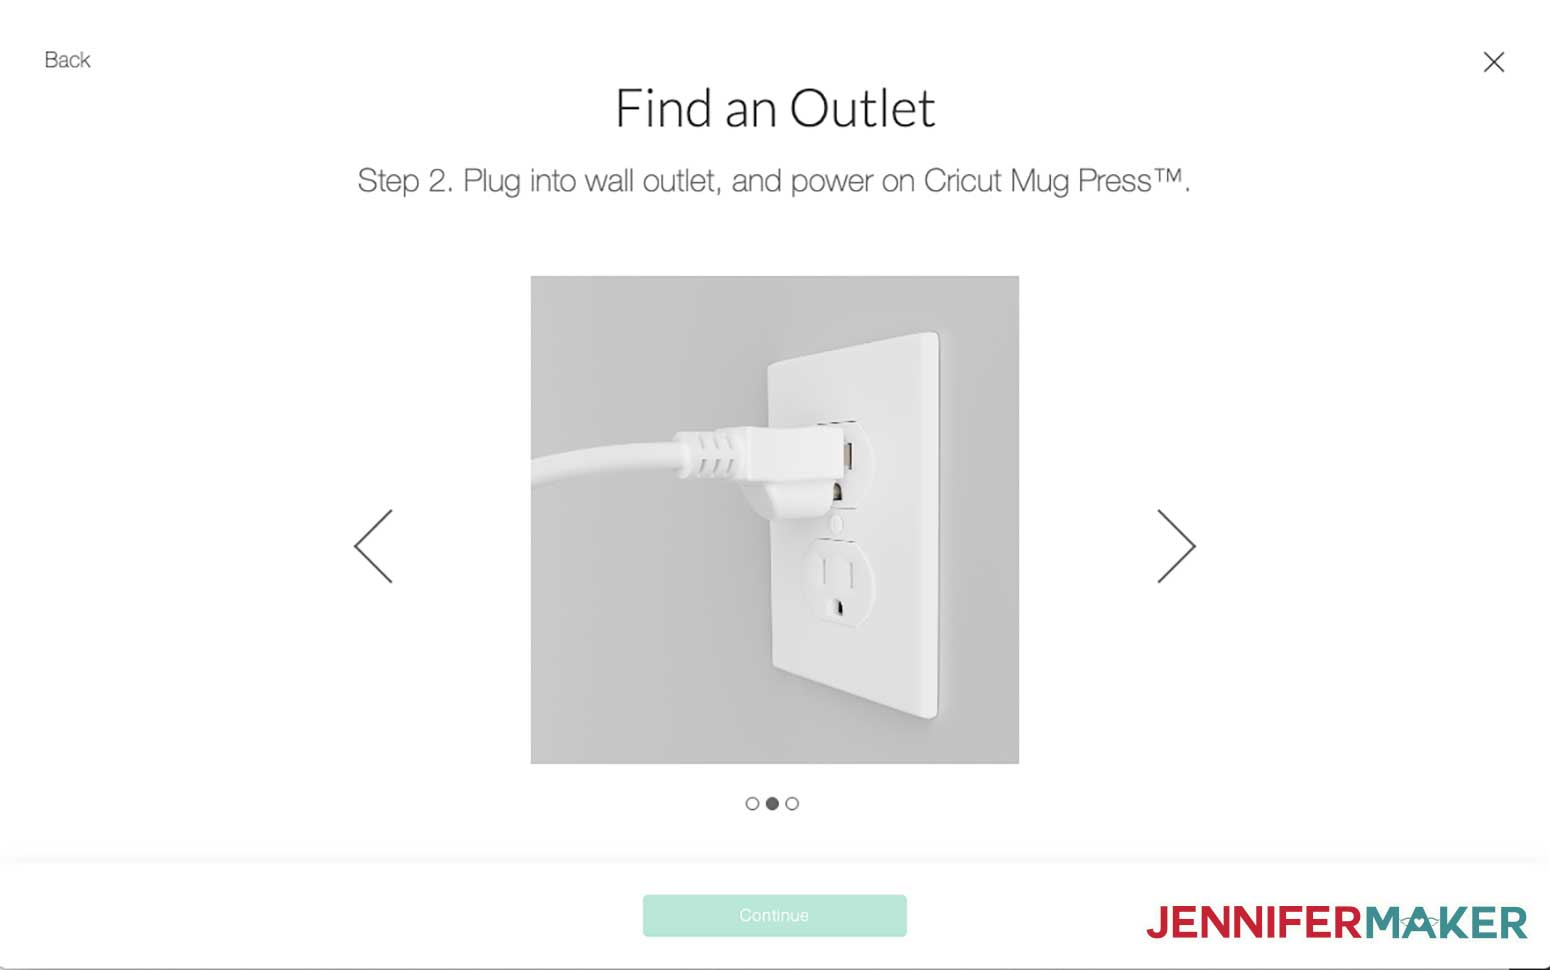
Step 2 of the Cricut Mug Press setup is to plug your Cricut into a wall outlet and power on the Cricut Mug Press. The power button will turn orange when it is heating up. The heat plate may give off a smell when you first use it, which will likely dissipate with time, so don't worry!
When you're ready, click the right arrow.
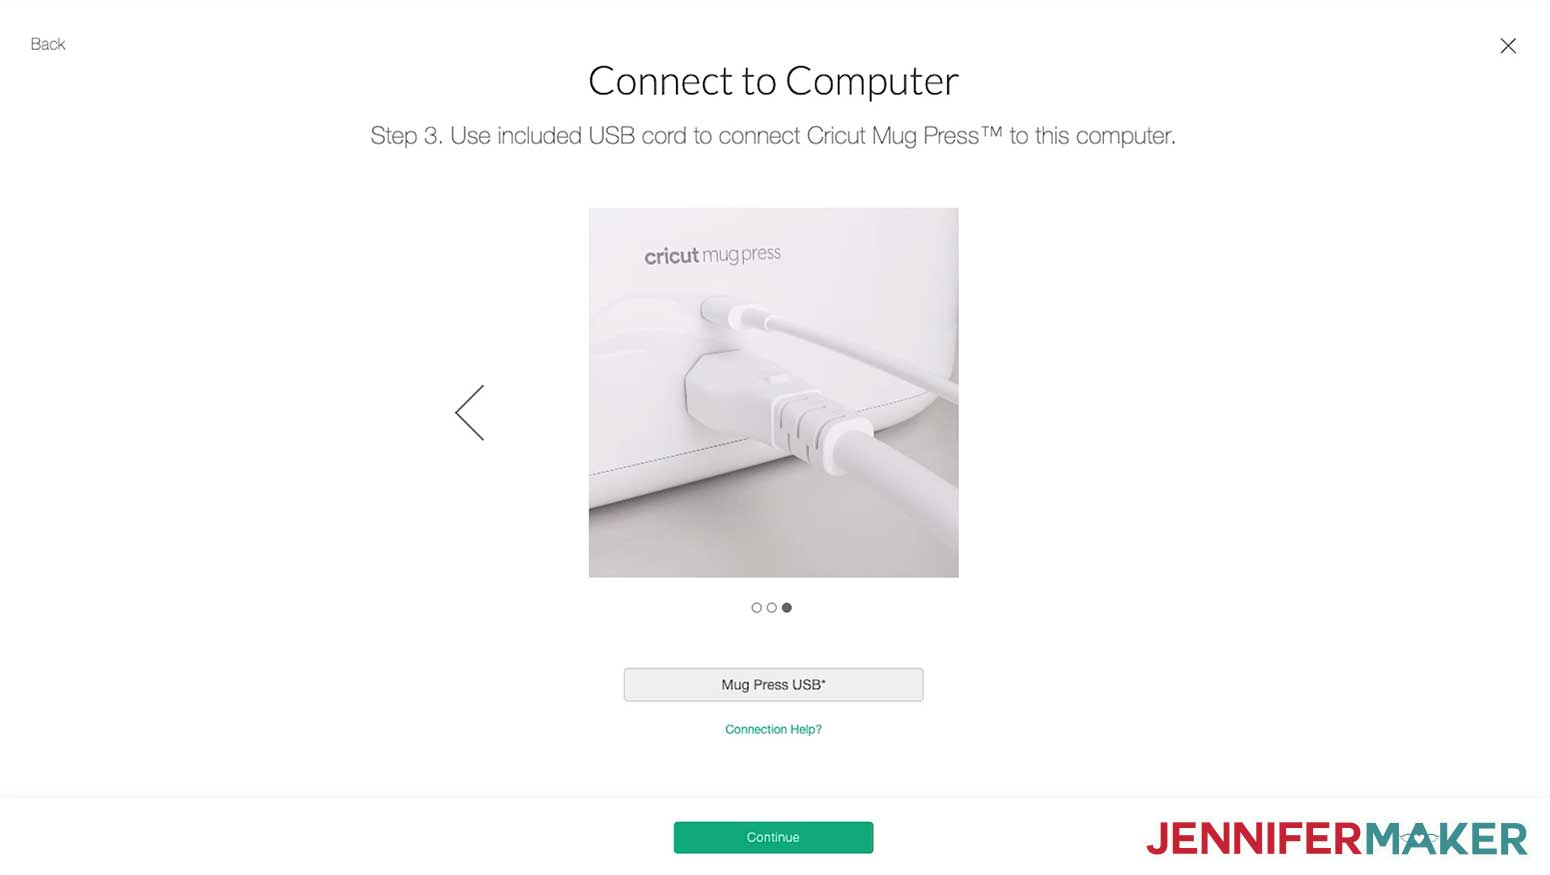
Step 3 of the Cricut Mug Press setup is to plug the USB cord into the back of your Cricut mug press, then connect the USB cord to your computer. Do not try to connect it to your Cricut Maker' machines USB port as that will NOT work — it needs to go into a desktop or laptop computer. If you have a laptop without a USB port, you can buy an inexpensive USB C hub adapter to use. Note that the setup cord is only 24 inches long, so if you can't get within two feet of your computer, use a USB extension cord to get more reach (this is what I did).
When ready, click the Continue button, which will only become available once Cricut Design Space detects that you've connected the Cricut Mug Press.
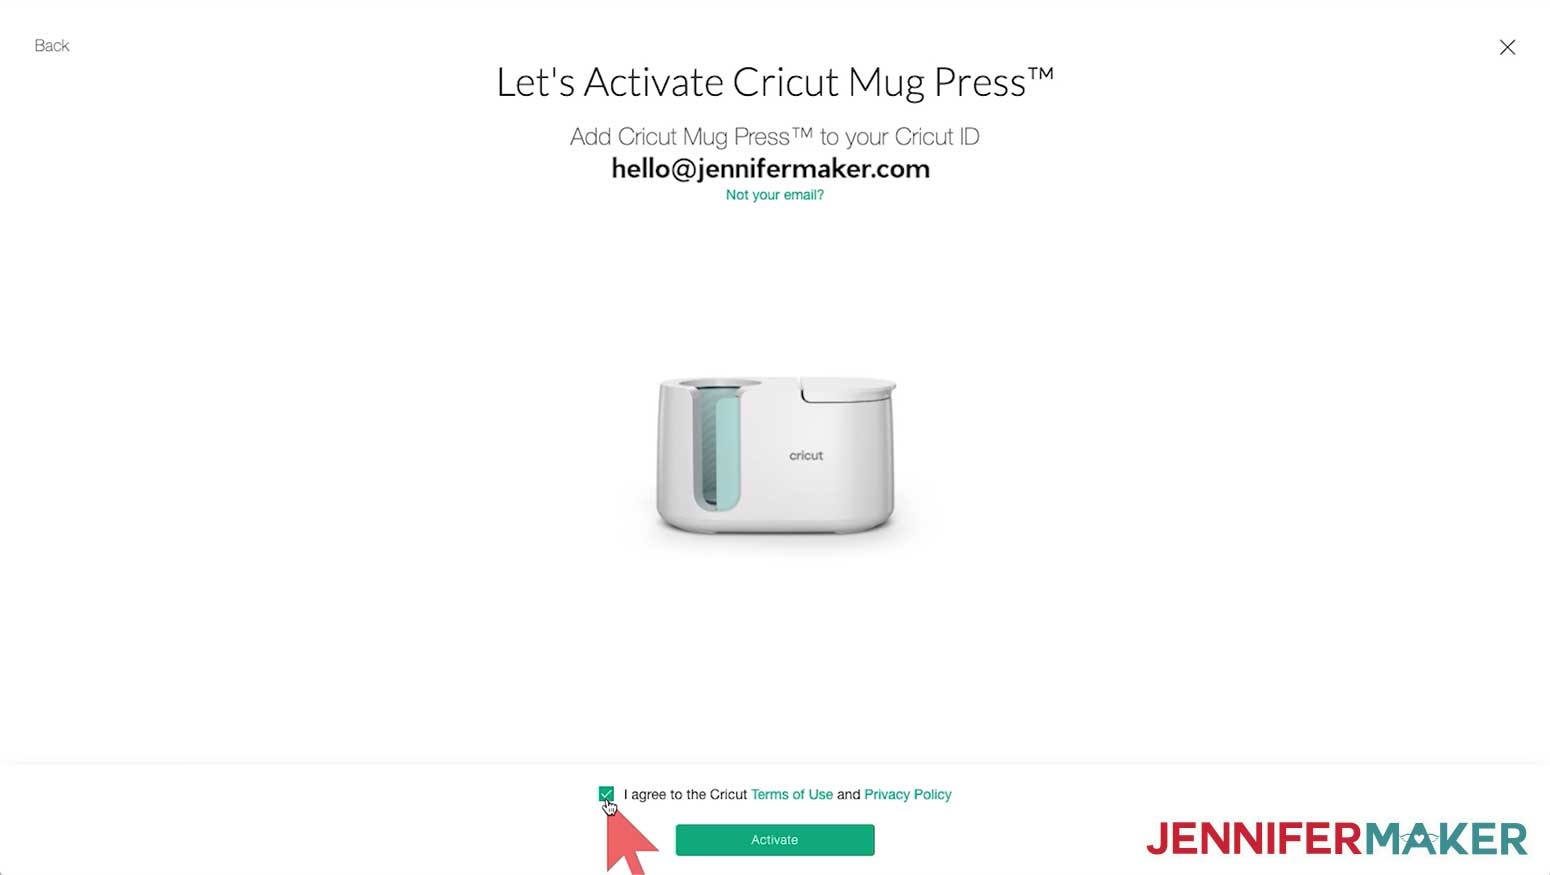
Once you've connected the Cricut mug press to your computer via USB, you're asked to add the Cricut Mug Press to your Cricut ID. Verify that this is the right email and account, then agree to the terms of service and click Activate.
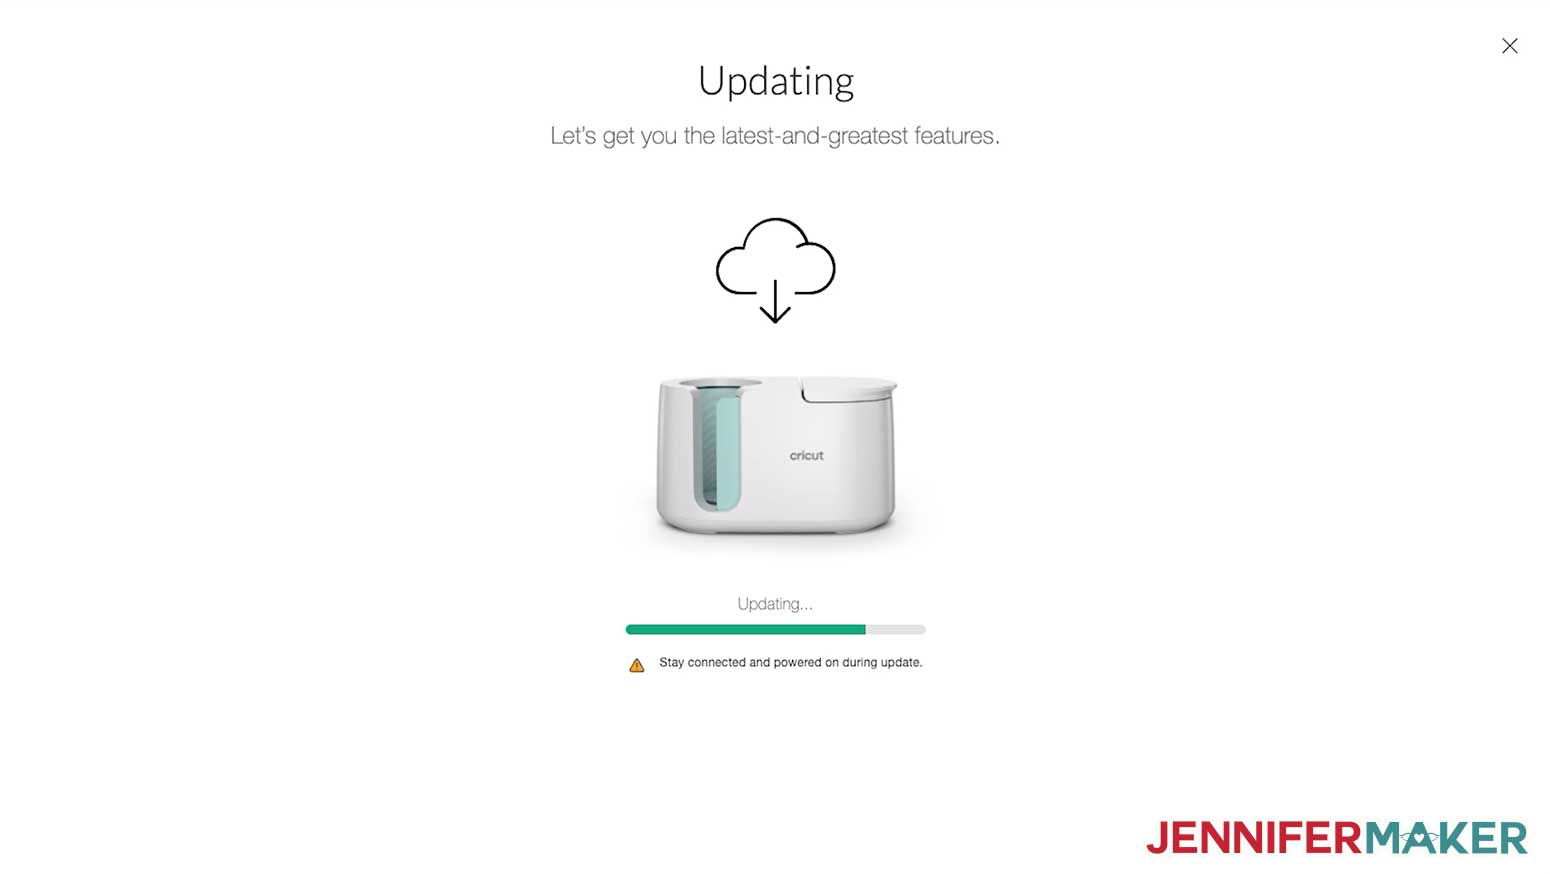
Cricut will do a firmware update and make sure all settings are up-to-date. This is important, as so much of the hard work is done by the mug press as it figures out the heat and pressure settings FOR you.
When the update is done, you're ready to go! From this point on, you can use the mug press without connecting it to your computer, so remove the USB cable and keep it safe in case Cricut asks you to do a firmware update again.
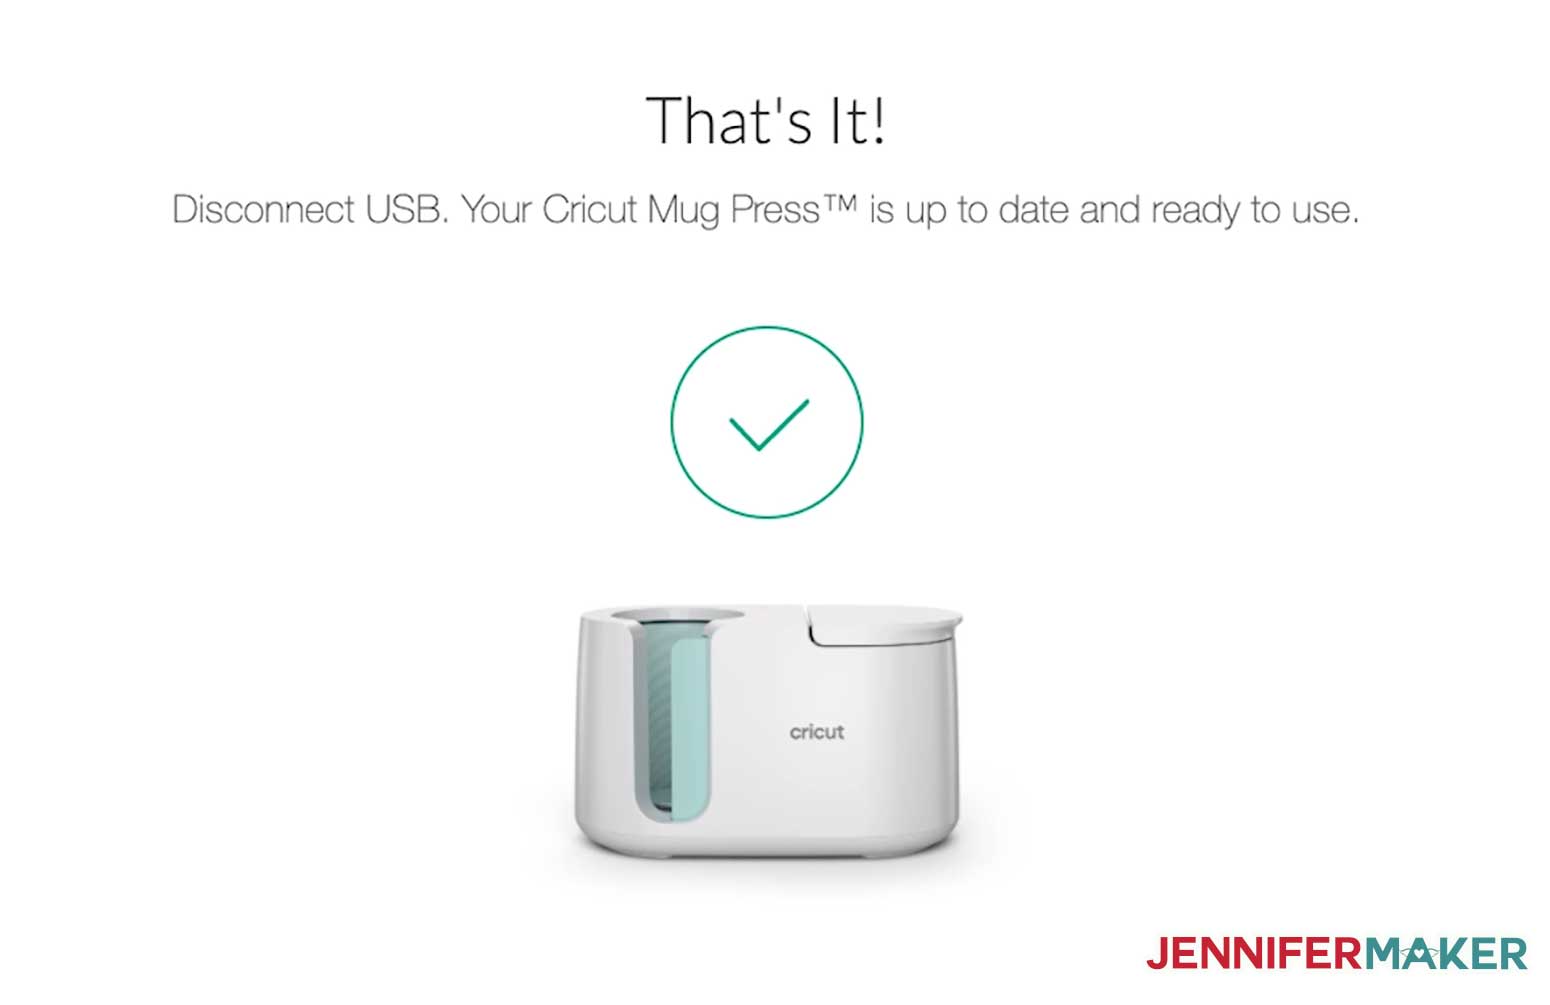
By this time, your Cricut Mug Press is likely all heated up — it will beep at you and the power button will turn green when it is ready to go!
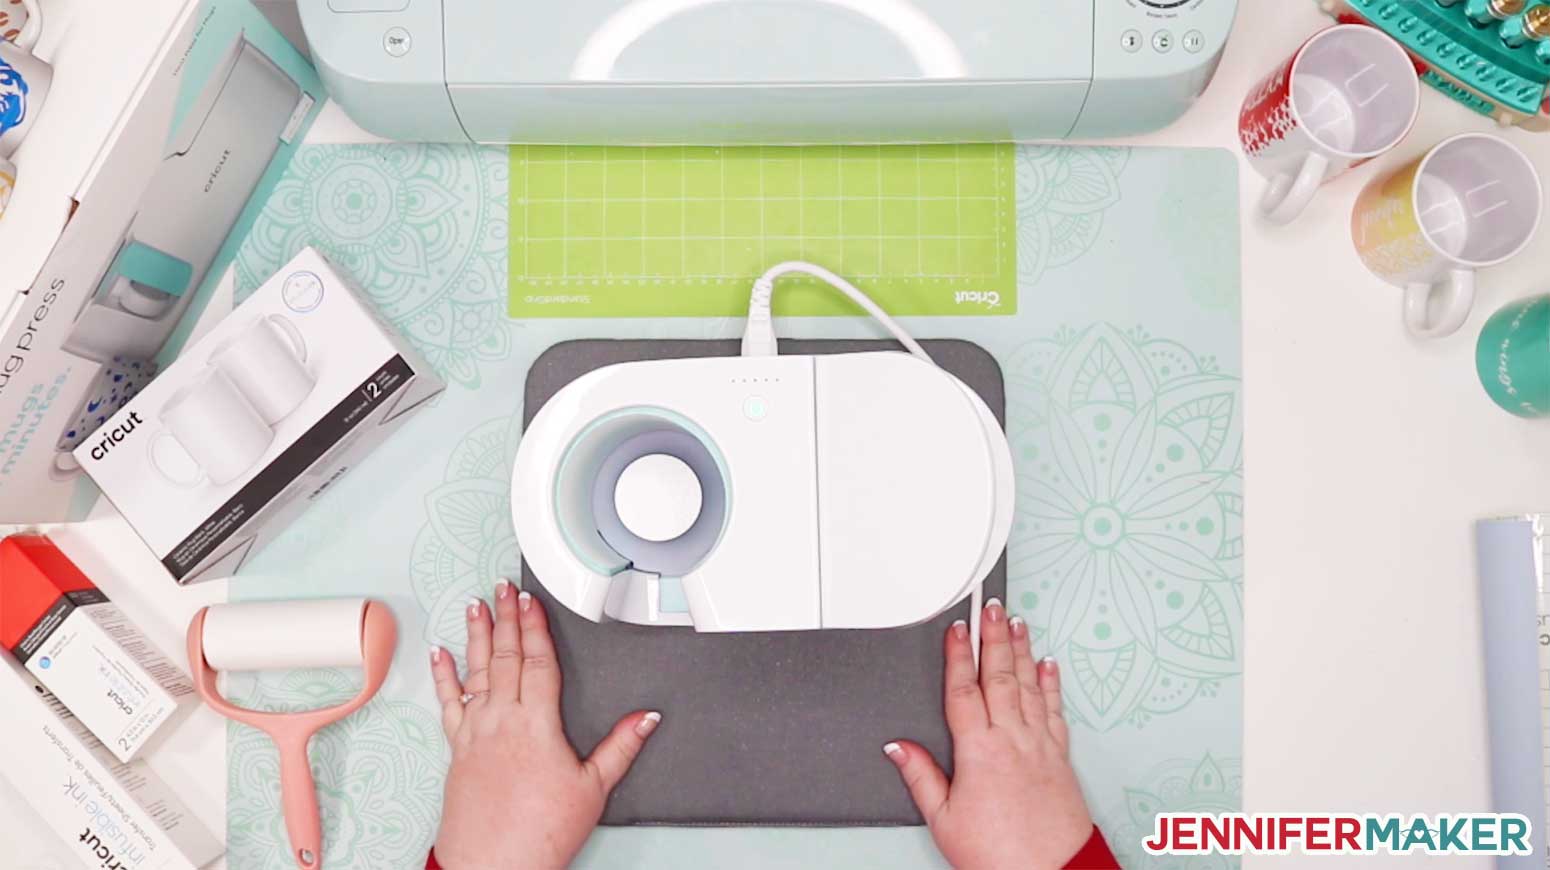
Tip: Put your Cricut Mug Press on a 12" x 12" EasyPress mat — not only does this provide heat resistance wherever you are, but it will give you room to cool off mugs and it makes it easy to slide your mug press out of the way while you cut your mug design. If you don't have a pressing mat like this, you can just use a folded bath towel.
STEP 2: DESIGN A PERSONALIZED MUG
Now you need a cute design to personalize for your mug! You'll find a "Mug Design Setup" under Projects if you want to start from scratch, as well as pre-made mug designs under Images, but I want to make this super simple for you by creating an easy and beautiful design that shows off the awesomeness of the Cricut Mug Press.
So I designed several mug wraps perfect for personalization that you can download from my free resource library. The “Fancy Wraps" I used for these mugs are design #288. You can find the patterns by searching the page for the design number and then click it to download the SVG cut file.
Open Cricut Design Space and upload the SVG file. If you’re not sure how to upload a SVG cut file to Cricut Design Space, watch this helpful video training series I made for you.
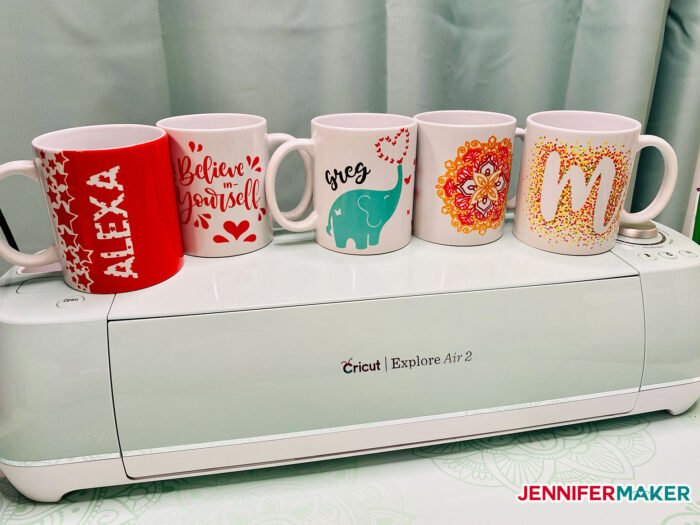
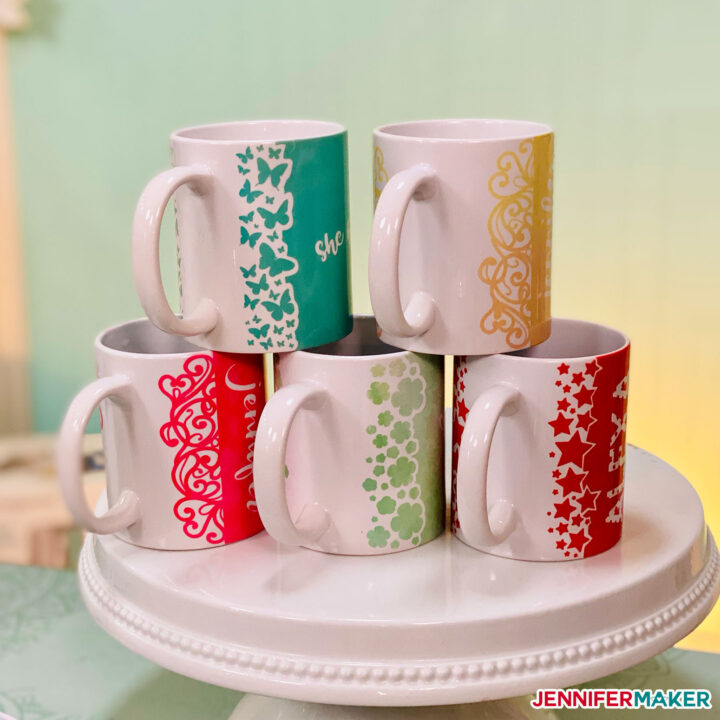
Inside the folder are six different mug wrap designs, all of which match some of my most popular projects — butterflies (which matches the butterfly heart canvas), hearts (which matches my paper heart tree canvas), flowers (which matches the flower dress canvas), stars (which matches my star lanterns), filigree (which matches my filigree cards and favor boxes), and a blank wrap. For this tutorial, I'll show you how to personalize the butterfly wrap, but just know that they will all work the same way.

Here's what the "mug-wrap-butterflies-jennifermaker-SVG" file looks like in Design Space when you upload it.
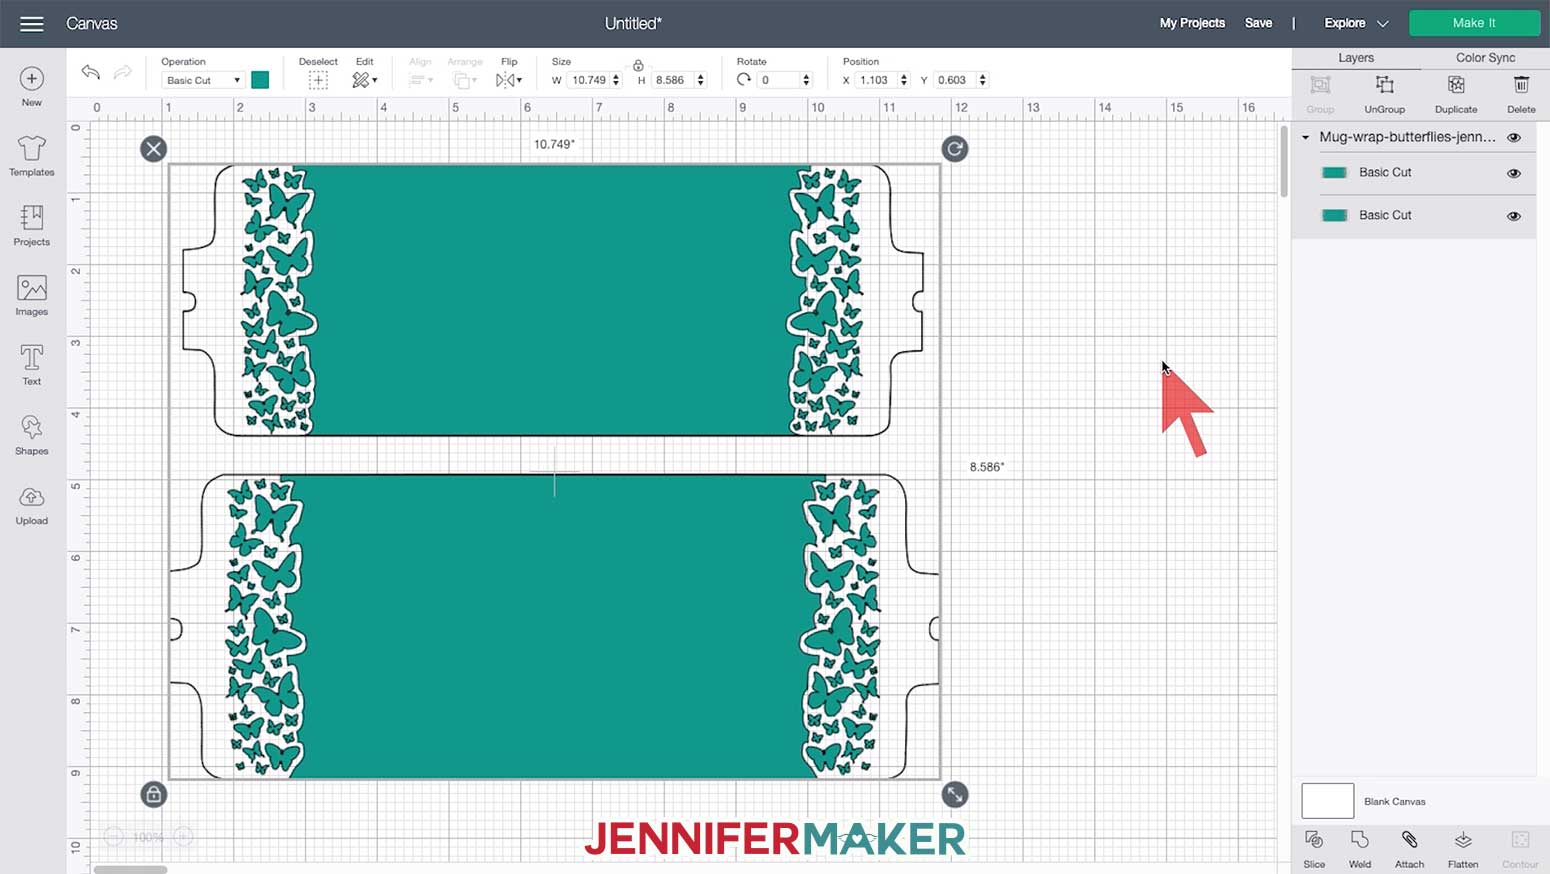
There are TWO sizes of mug designs in all of my files — the smaller one on top is for the 12 oz. mug, while the larger one on the bottom is for the 15 oz. mug. Hide or delete the size you do not need by selecting the layer and clicking the eye icon (to hide it) or the trash can icon (to delete it).
At this point, this design alone makes for a pretty mug and you can go ahead and cut this out as is — just skip to step 3. But if you'd like to PERSONALIZE your design, you can add text, images, or both. Let me show you how to add text and a small image.
Click on Text on the left and type a word, name or phrase. Then click the font menu at the top and choose a font you like. I'm choosing a font called Tingler because it's both a beautiful script font and a stencil font, which will make weeding super easy.
Note that the letters are not touching yet, which we want for a pretty look and easier weeding. To change this, click on the dropdown menu below Letter Space at the top of the screen and reduce letter spacing until all letters are touching and look good.
Reposition and resize the text on your mug wrap until you're happy.
If you want to add more text with the same sizing and letter spacing, right click on the layer and choose Duplicate, then move the new text line into position, double-click it, and add your new words.
You can resize both text layers by selecting both (hold down the Shift key as you click on each layer) and use the resize button in the lower
Now I want my text to lift and dip like the flight of a butterfly, so I'm going to curve each of these two layers separately. To do this, I click on the first text layer, then click on Curve at the top and slide the diameter over to the right to make it curve up. Then select the second text layer, click on Curve again, and slide the diameter over to the left to make it curve down. Adjust as necessary until you are happy with the results. Isn't this pretty?
Now we need to cut these words out of the mug wrap itself. To do this, first weld the text layers together. Next, select both the weld layer and the mug layer -- which should just be two layers -- and click Slice. This removes the text from the mug wrap. Just delete the sliced out words until you are left with just the mug wrap, like this:
If you'd like to add an image, click on Images and search for something like a butterfly. You can click on Ownership and choose Free to only see free images. When you find one, click it to add it to your Canvas.
Now just position, resize, and rotate until you think it looks good. When you're happy, click on the image and your mug wrap to select both, then click Slice again. Delete the extra sliced layers until you have just ONE layer remaining -- your mug wrap with the image sliced out.
Ta da! A beautiful and personalized mug design!
STEP 3: CUT OUT YOUR INFUSIBLE INK
Once you have your mug design, click on Make It in the upper right corner.
On the Prepare screen, be SURE to MIRROR your design. All Infusible Ink designs for the Cricut Mug Press should be mirrored. Just click the toggle on the left side until it turns green, then click Continue.
Now set your material. Click on Browse All Materials and search for Infusible Ink. I also recommend more pressure to be sure it cuts through the Infusible Ink transfer sheet.
You can use the full size Infusible Ink transfer sheets, or the smaller Infusible Ink transfer sheets that are already sized for the Cricut Mug Press. I'm going to use a scrap of Infusible Ink I have leftover from another project. Mugs make for great scrap buster projects because they don't often require a lot of Infusible Ink.
Place your Infusible Ink matte color side UP (which means shiny carrier sheet side down) on your cutting mat. Make sure the fine-point blade is loaded into the Cricut.
Note: I recommend you wash and dry your hands immediately before handling Infusible Ink to avoid transferring any oils to the surface.
Load your mat and press the flashing button to begin cutting. The butterfly wrap takes about 8 minutes to cut.
When you are done cutting, unload the mat, flip the mat over onto your work surface, and peel the mat away from the Infusible Ink carefully. I've designed my mug wraps so that the outside template will cut out of the larger Infusible Ink transfer sheet — this makes it super easy to apply to your mug later on.
Note: If for any reason it doesn't cut all the way through the outside as mine does, you can either trim it later with scissors or next time you cut increase your pressure in your Custom Material Settings. (I have my Infusible Ink Transfer Sheet material settings on 268 pressure and it works like a champ.)
STEP 4: WEED YOUR INFUSIBLE INK DESIGN
Once you cut out your Infusible Ink, you want to weed it, which means to remove all the extra bits that you don’t want to transfer to your mug. To get started, roll and gently bend the transfer sheet up and down until the edges of the design begin to lift from the carrier sheet.
Now you can just weed the extra bits away with your fingers. You are welcome to also use a weeding tool, but I find it works best if I just bend the sheet away from me slightly and pull it right up with my fingers. I designed this mug wrap so it would be super easy to weed, because I am not a big fan of weeding! I kept large areas connected so you could peel them off in one fell swoop.
I was able to weed this design in about 3 minutes.
Once you've finished weeding, flip your design over so you can see how it will appear once it is on your mug and look for any missing bits you forgot to weed. Also check for any tiny bits that may be stuck somewhere but do not belong ... like a little dot from a letter.
STEP 5: WRAP YOUR DESIGN AROUND YOUR MUG
Now it's time to wrap your design onto your mug!
Begin by cleaning the surface of your mug with a lint roller. This removes any dirt or dust and get the surface as clean as possible, and makes sure the Infusible Ink transfers cleanly and vividly.
To get the design on straight and centered. position the mug with the handle pointing at you, just like this.
Now position the wrap behind the mug, with the matter color side facing the mug and the bottom of the sheet touching your work surface, and center it on the mug.
Slowly wrap the design around the mug, watching how much you have on each side as you do so to keep it centered. Keep the design touching the work surface to keep it straight.
Your goal is to stretch the design tightly across the mug. It's also important that your design be at least a 1/2 inch away from the handle -- if you go beyond that, you may see fading at the edge of your design. Feel free to reposition it until it is right.
When it looks good, press down on the sticky carrier sheet to adhere it to the mug's surface. If your carrier sheet doesn't seem to want to stick very well, you can add some heat resistant tape just under the handle to bridge the two sides, but avoid putting the tape over any place where you see Infusible Ink.
And that's it! Your design is wrapped around your mug and it's time to press it! You do NOT need to cover your design with butcher paper if you're just using Infusible Ink transfer sheets!
STEP 6: PRESS THE MUG WITH THE CRICUT MUG PRESS
With the Cricut Mug Press powered on and the power button green (which indicates it is ready), hold your wrapped mug by the handle and place it in the heating chamber.
Note: If your Cricut Mug Press does not power on, this means you haven't activated it yet — review step 1.
Pay attention to where the mug handle is and make sure the heat plate appears to be covering all of your design. I usually move my handle a bit to the left rather than center it.
Now close the clamp on the top of the Cricut Mug Press and check that the heat plates are completely covering your design. If not, immediately open the clamp, reposition the mug (you'll probably want to rotate the handle a bit to the left), and close the clamp again.
Closing the clamp starts the pressing process. There is no other button to push or settings to worry about. The Cricut Mug Press takes the temperature of your mug and the ambient temperature of your room, and determines the correct settings for you. The little lights on the top of the Cricut Mug Press indicate the progress of your press — an average mug takes about six minutes to press.
When the Cricut Mug Press is finished, it will beep at you. Lift up on the clamp to release it and pull the mug out by the handle, which will NOT be hot. Be careful not to touch the heat plate with the back of your fingers or touch any other part of the mug, as it will be quite hot.
Immediately place your mug on a heat-resistant surface to cool. I place my mug on the same mat I am using for my mug press itself as it's right there and super convenient.
Allow the mug to cool down before you remove the transfer sheet. This takes anywhere from 15 to 30 minutes.
STEP 7: SHOW IT OFF
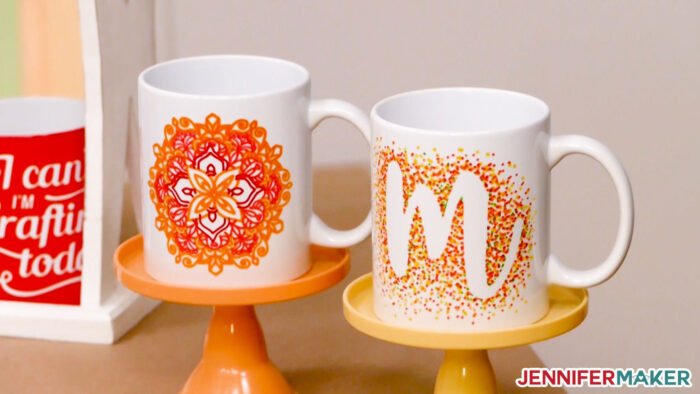
When the mug is cool enough to handle, pull off an end of the transfer sheet under the handle and unwrap your beautiful mug! The color is gorgeous from top to bottom, vivid and consistent.
And that's all there is to this! Once you've used your Cricut Mug Press for the first time, you'll see how simple it is to make consistently beautiful mugs in minutes. I know I was amazed at how great it looked on my first try. The Cricut Mug Press is easy, which is really good because easy means we're more likely to use it when we need it and be happy with the results!
Notes
If you want to make other types of mug designs with your Cricut Mug Press, I have tutorials on those as well! I teach you how to apply a simple decal design, how to layer Infusible Ink for a multi-color design, how to draw a design in your Cricut with an Infusible Ink marker or pen, and how to draw a design freehand.
If you go for a smaller design on your mug, one that does not have full coverage like this fancy wrap design, I recommend you trim the Infusible Ink liner as close to your design as possible to minimize the transfer of anything you don't want like dust.
Recommended Products
As an Amazon Associate and member of other affiliate programs, I earn from qualifying purchases.

Get my free SVG files to make Cricut Mug Press projects
I’d love to see your Cricut mugs! I know you’ll come up with some amazing ideas on how to use the Cricut Mug Press. Please share your ideas and photos in our Facebook group or tag me on social media with #jennifermaker.
Love,

Want to remember this? Save this Cricut Mug Press Ultimate Guide to your favorite Pinterest Board!