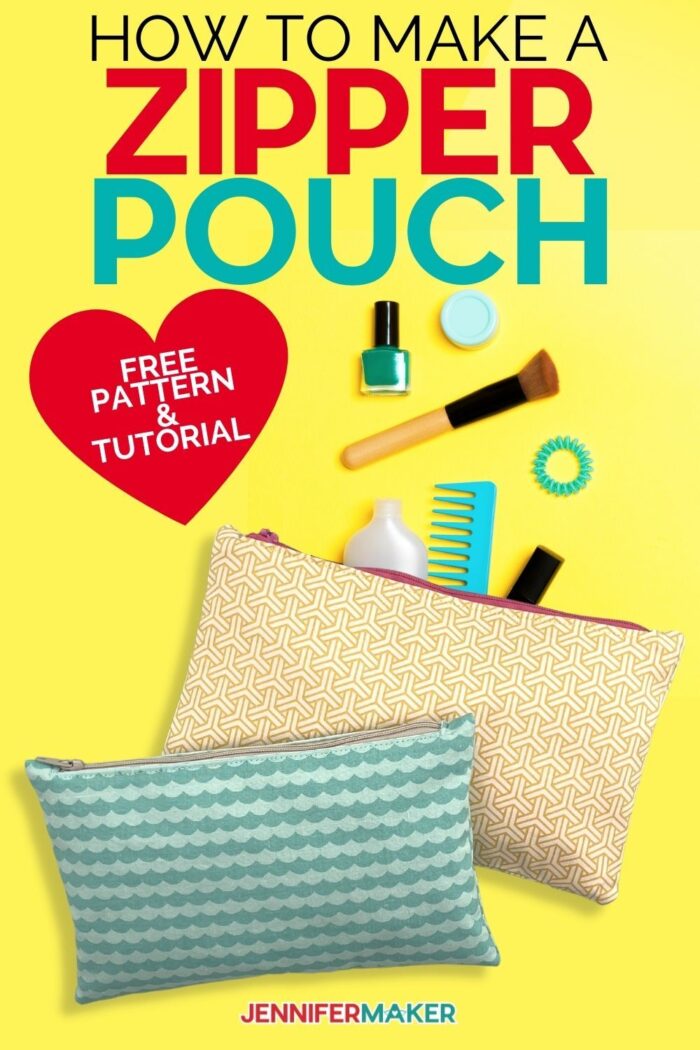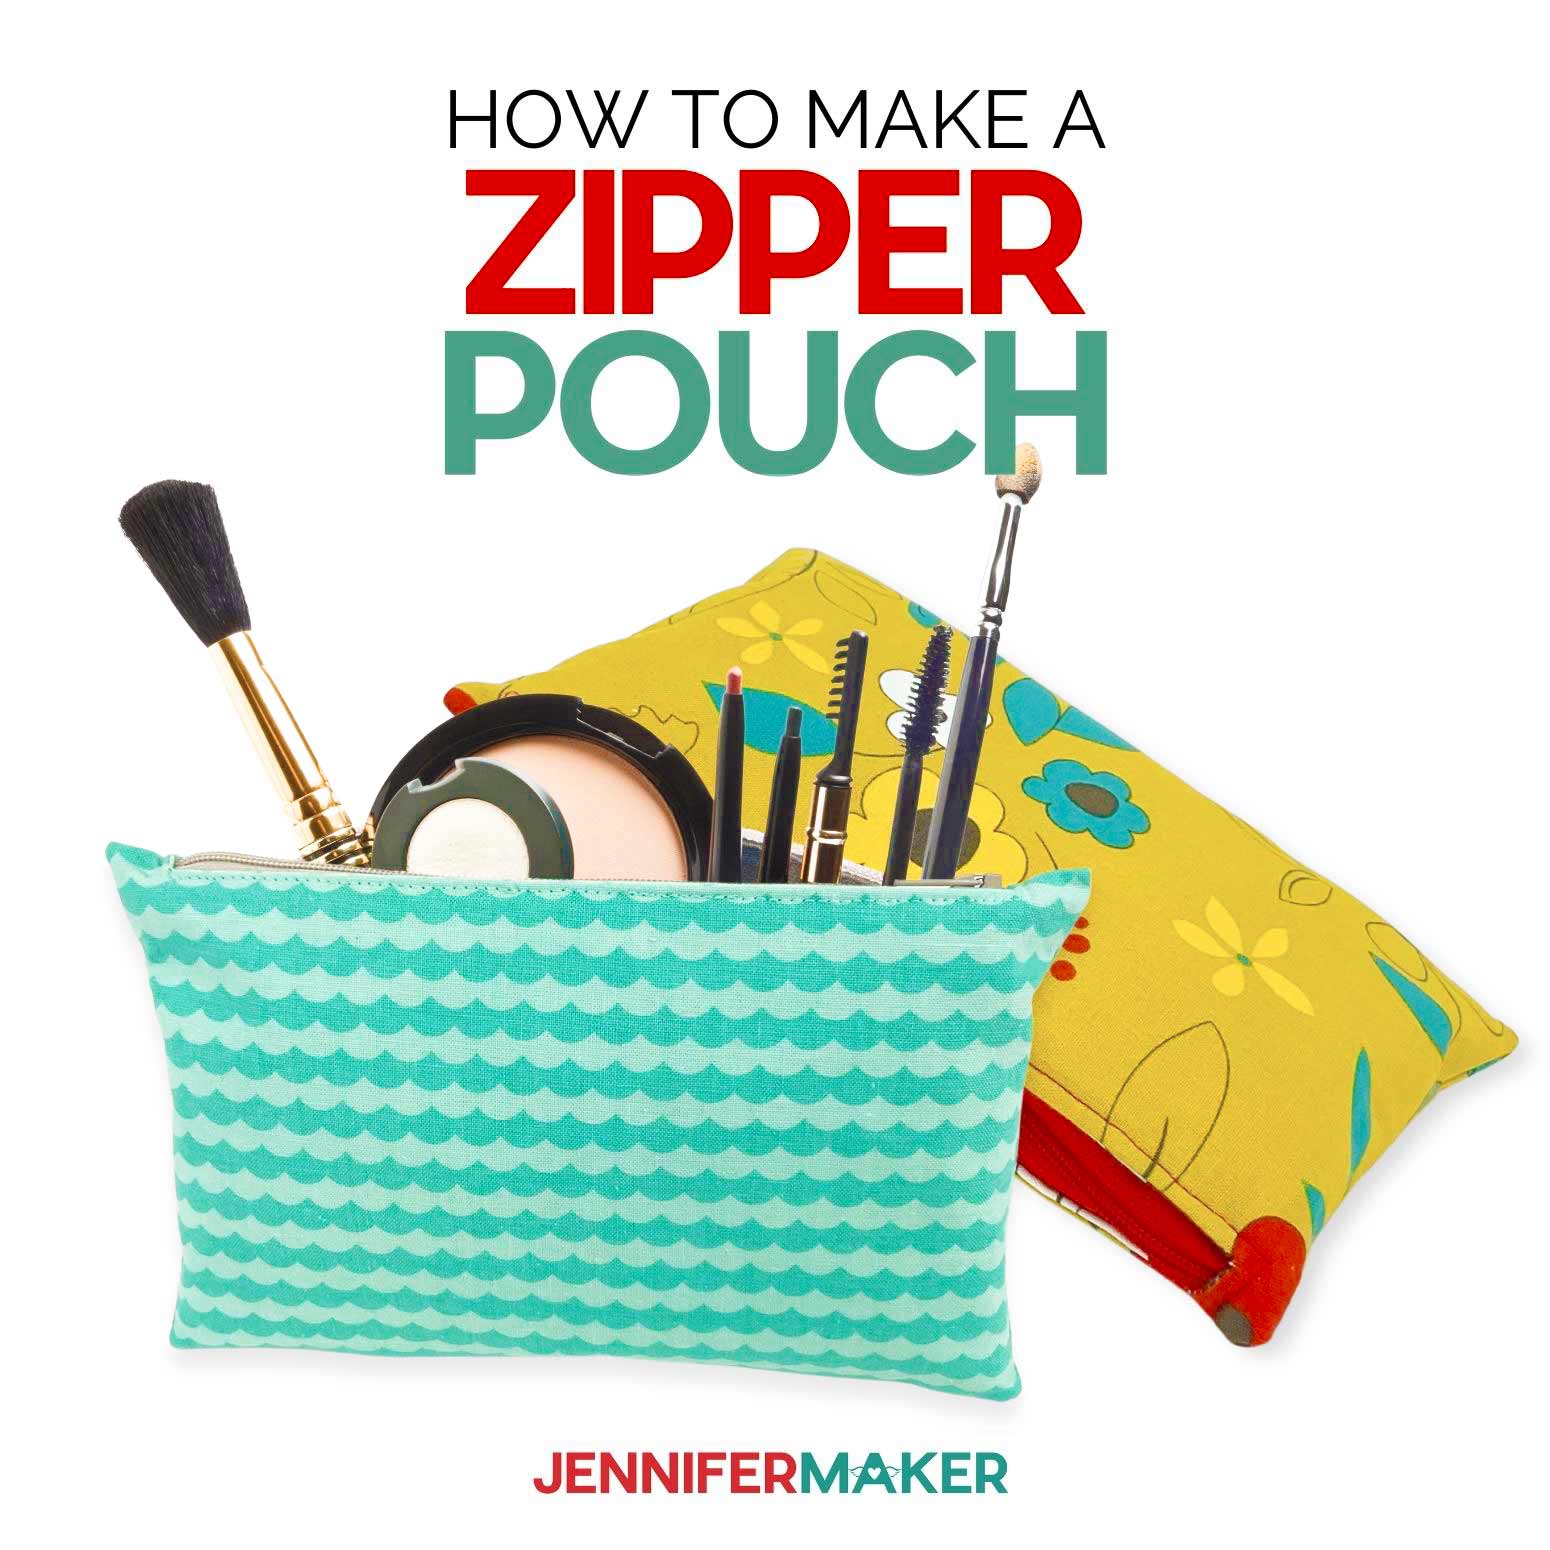
Learn how to make a DIY zipper pouch with a lining the super easy way!
We all know I love crafting and everything DIY. But I must confess, I have another love, I love to sew! There’s just something about making something from start to finish that makes me really happy. I feel very accomplished and it’s just really awesome to make something from a piece of fabric. I’m not sure how to explain it, but if you know, you know and if you don’t, hopefully this DIY zipper pouch project will give you that feeling!
Watch the beginner-friendly step-by-step tutorial video on how to make a zipper pouch:

Every time I talk about making a sewing project, I get a lot of comments about how intimidating sewing can be. But, it doesn’t have to be. Sewing is an art that definitely takes practice to perfect but you can start with easier, smaller, sewing projects such as this DIY zipper pouch to start getting the hang of it.
Sewing on a zipper might sound like a difficult task to accomplish, but I’m going to break it down into easy, bite-sized steps so you are sure to really understand how it’s done and feel confident that you can do it.
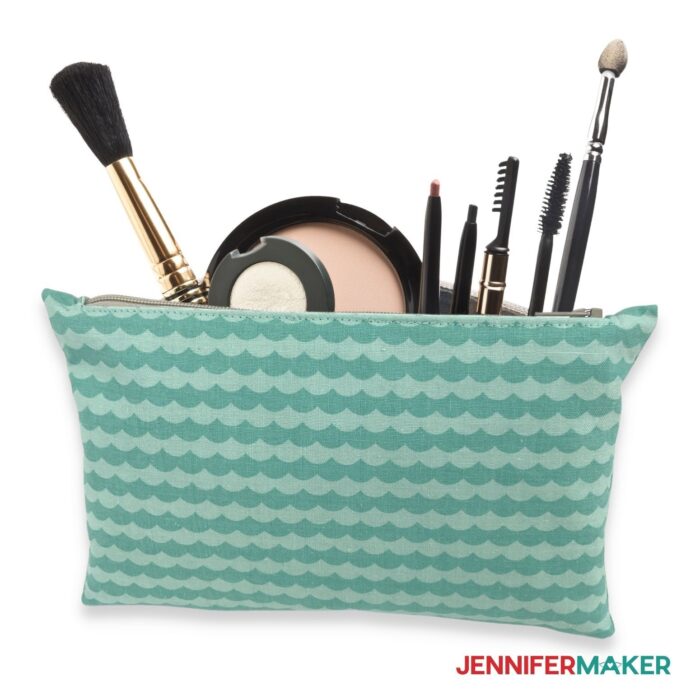
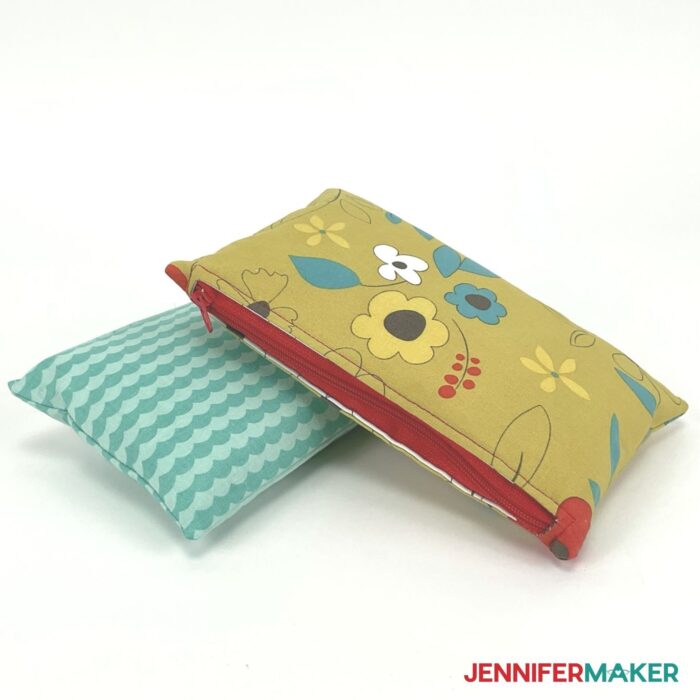
I’m going to show you how to make two different size zippered pouches with lining like these!

To make this DIY zipper pouch we will need some pretty fabric. Finding your favorite patterns will probably be one of the most fun parts of this project! This is where you can get creative and mix and match your patterns and colors and make something that’s really unique to you.
We’ll also need a zipper. The size of the zipper is really important here as it determines the width of your pouch. I’m using a nine inch nylon zipper for mine.
I’m also going to use some heat and bond fusible interfacing to add some structure to my fabric.

Of course we will need a sewing machine and I always get LOTS of questions when it comes to where I got my sewing machine and the labels from. You can find the link to it in my supply list down below. I just love my Janome! Not only is the color so pretty, it’s also great for beginners as well as those who have more experience with sewing.
I’m also going to use my Cricut Maker 3, along with my pink fabric mat, my EasyPress and Heat pad. Let’s not forget the fabric shears and my Cricut Washable Fabric Marker that makes life so much easier!
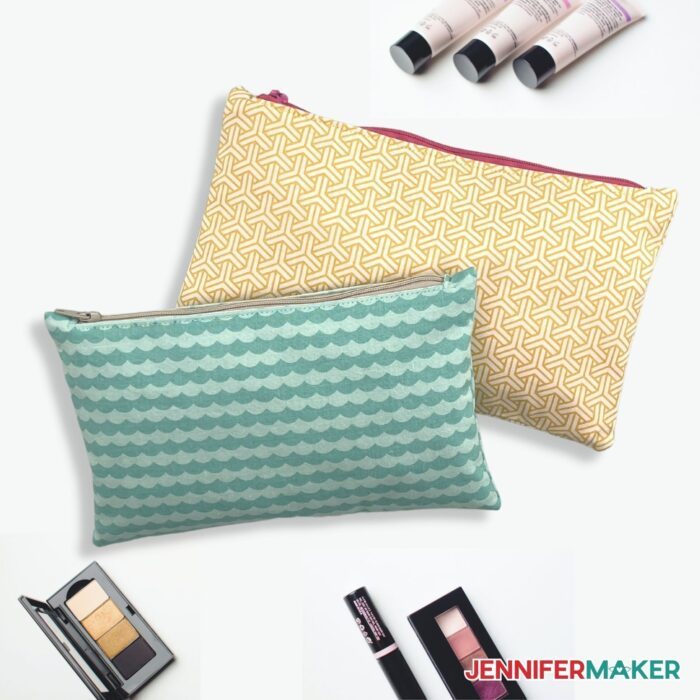
These pouches are great for so many things! Holding pens and pencils, cosmetics, toiletries, air pods, and so much more. You can even use them as a mini-purse INSIDE your bigger purse to hold your keys, phone or wallet so that they are no longer lost inside or hard to find.
I have even made some for gifts and added personalization with iron-on vinyl and everyone always loves the fact that it was made by me! Personalized gifts are the way to go in my opinion.
Let me show you how easy it is to make this DIY Zipper Pouch project with my free SVGs! This post contains some affiliate links for your convenience (which means if you make a purchase after clicking a link I will earn a small commission but it won’t cost you a penny more)! Read my full disclosure policy.
Materials to Make a DIY Zipper Pouch
View my Amazon shopping list with the exact items we used to make this project
- Cotton or Cotton-Blend Fabric (Two 12″ x 12″ Pieces)
- All-Purpose Sewing Thread
- Nylon Coil Zipper (One 9″)
- Heat n Bond Fusible Interfacing (Two 12″ x 12″ Pieces)
- A method to cut your fabric: I used the Cricut Maker 3, but you can use the Cricut Maker and Explore Series machines
- Sewing Machine and Machine Needle
- Straight Pins
- Cricut Pink FabricGrip Cutting Mat, 12″ x 12″
- Cricut EasyPress Heat Press 12″ x 10″ (or Standard Iron)
- Cricut EasyPress Mini (or standard iron)
- Cricut EasyPress Heat Mat, 12″ x 12″
- Fabric Shears (or Rotary Cutter)
- Ruler
- Washable Fabric Marker
- Brayer
- (Optional) Dritz Fray Check
- Design #352 – My free Easy Zipper Pouch pattern (available in my free resource library – get the password by filling out the form at the bottom of this page)
How to Make a Zipper Pouch the Easy Way!
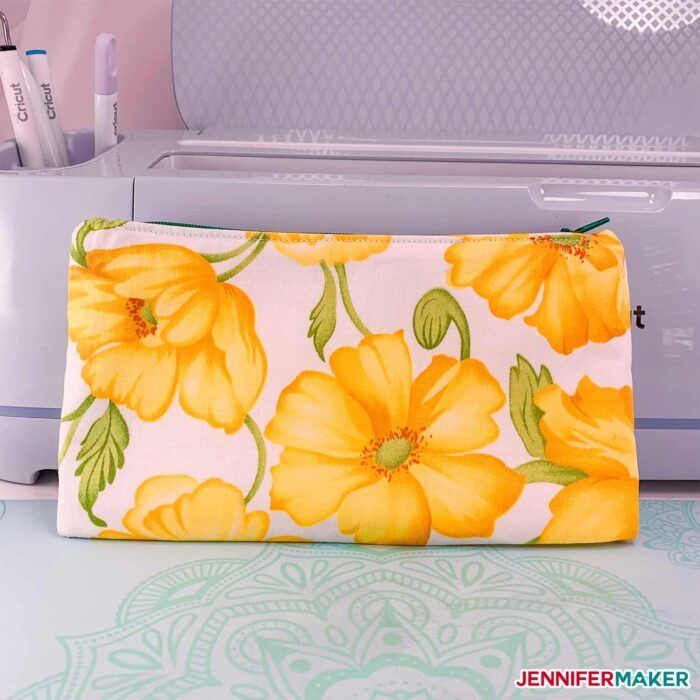
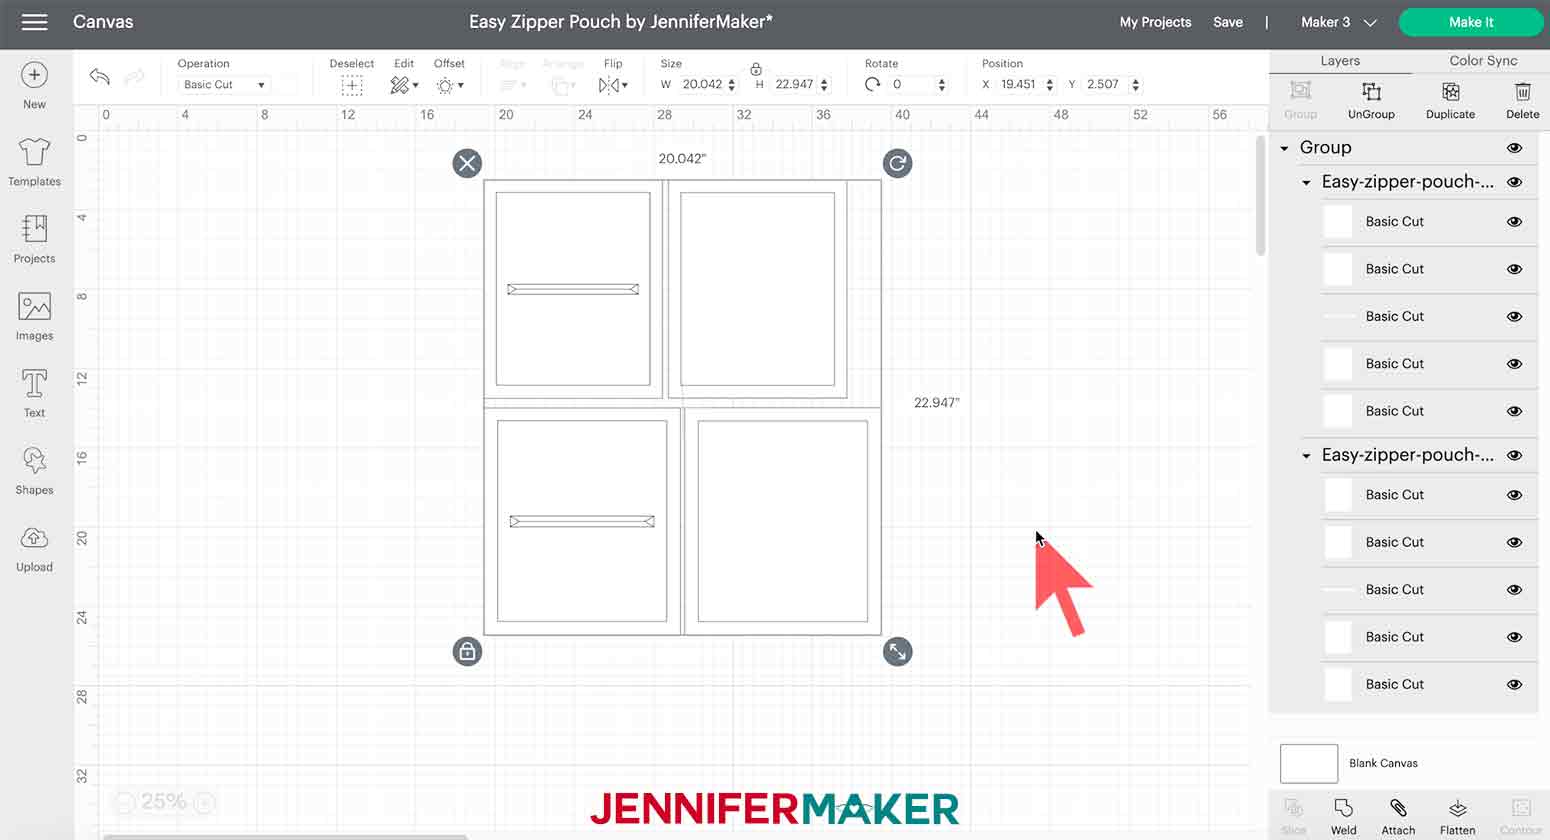
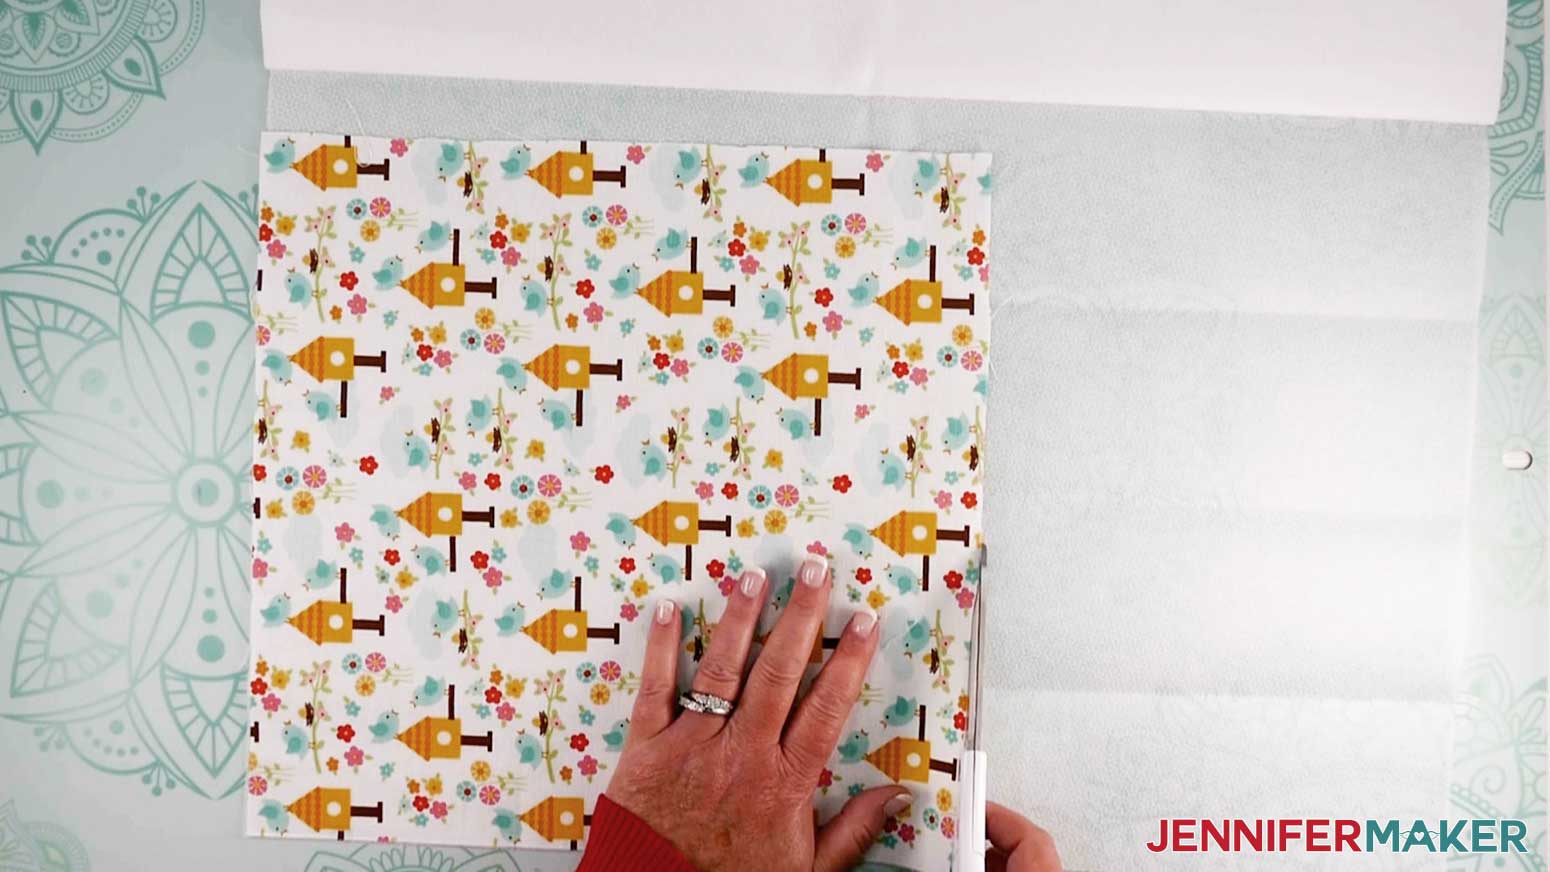
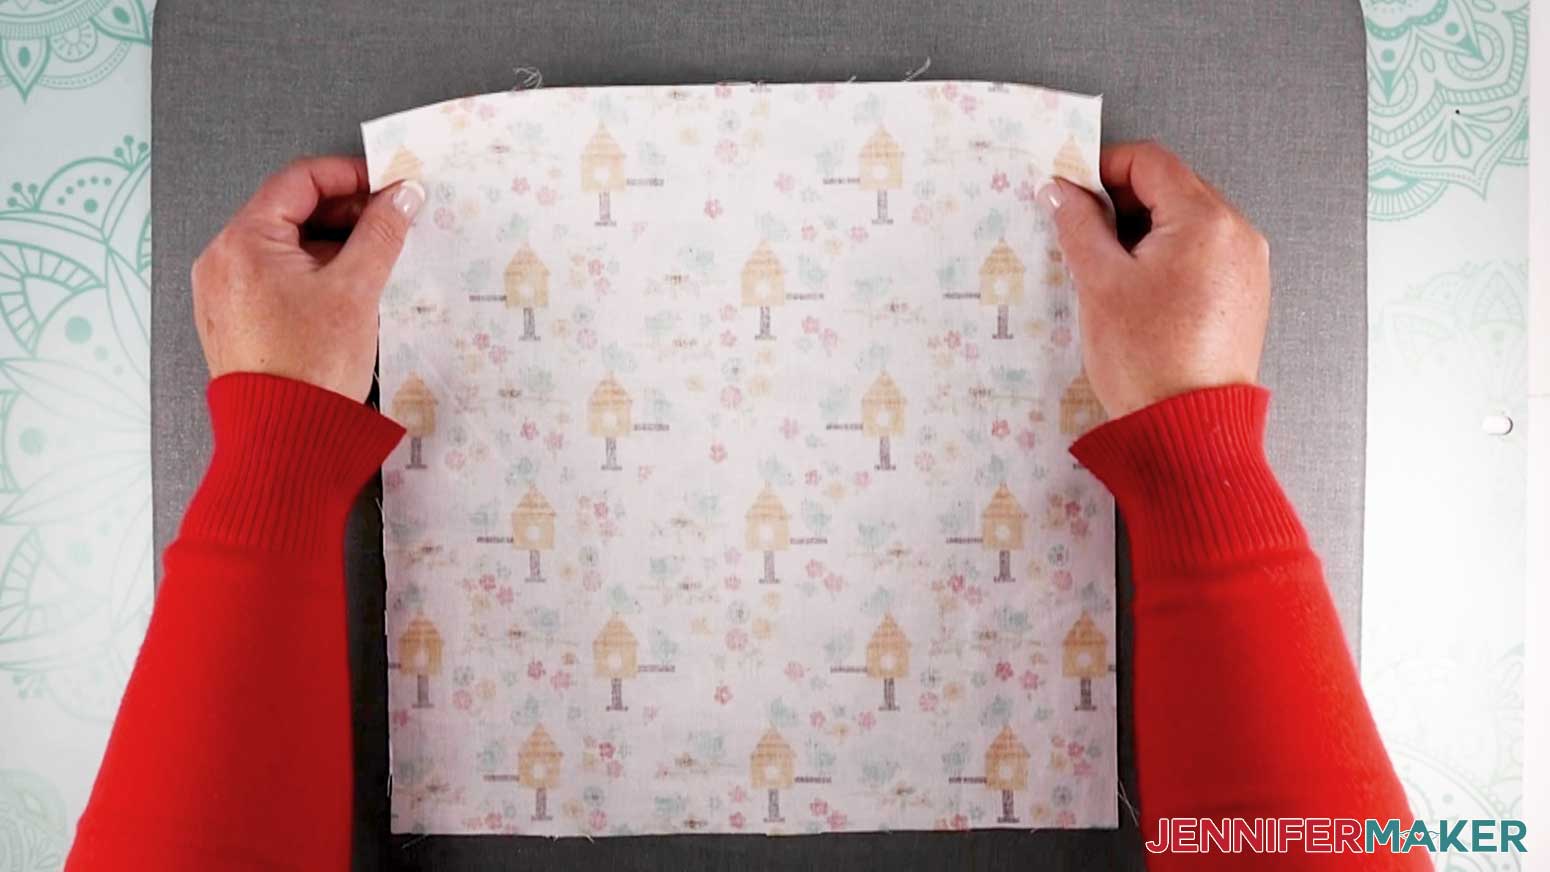
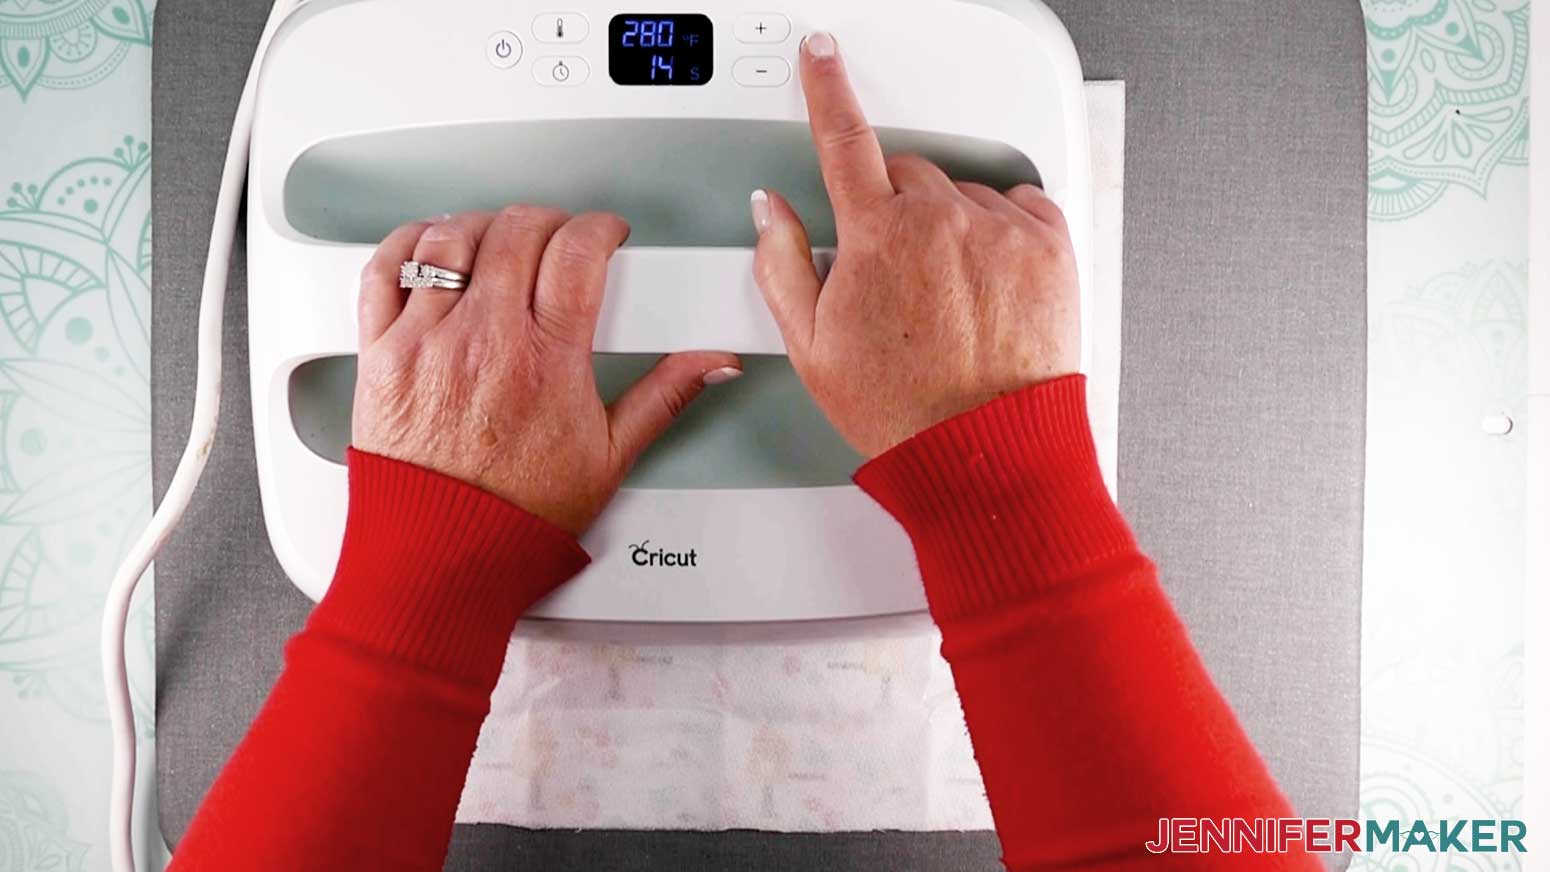
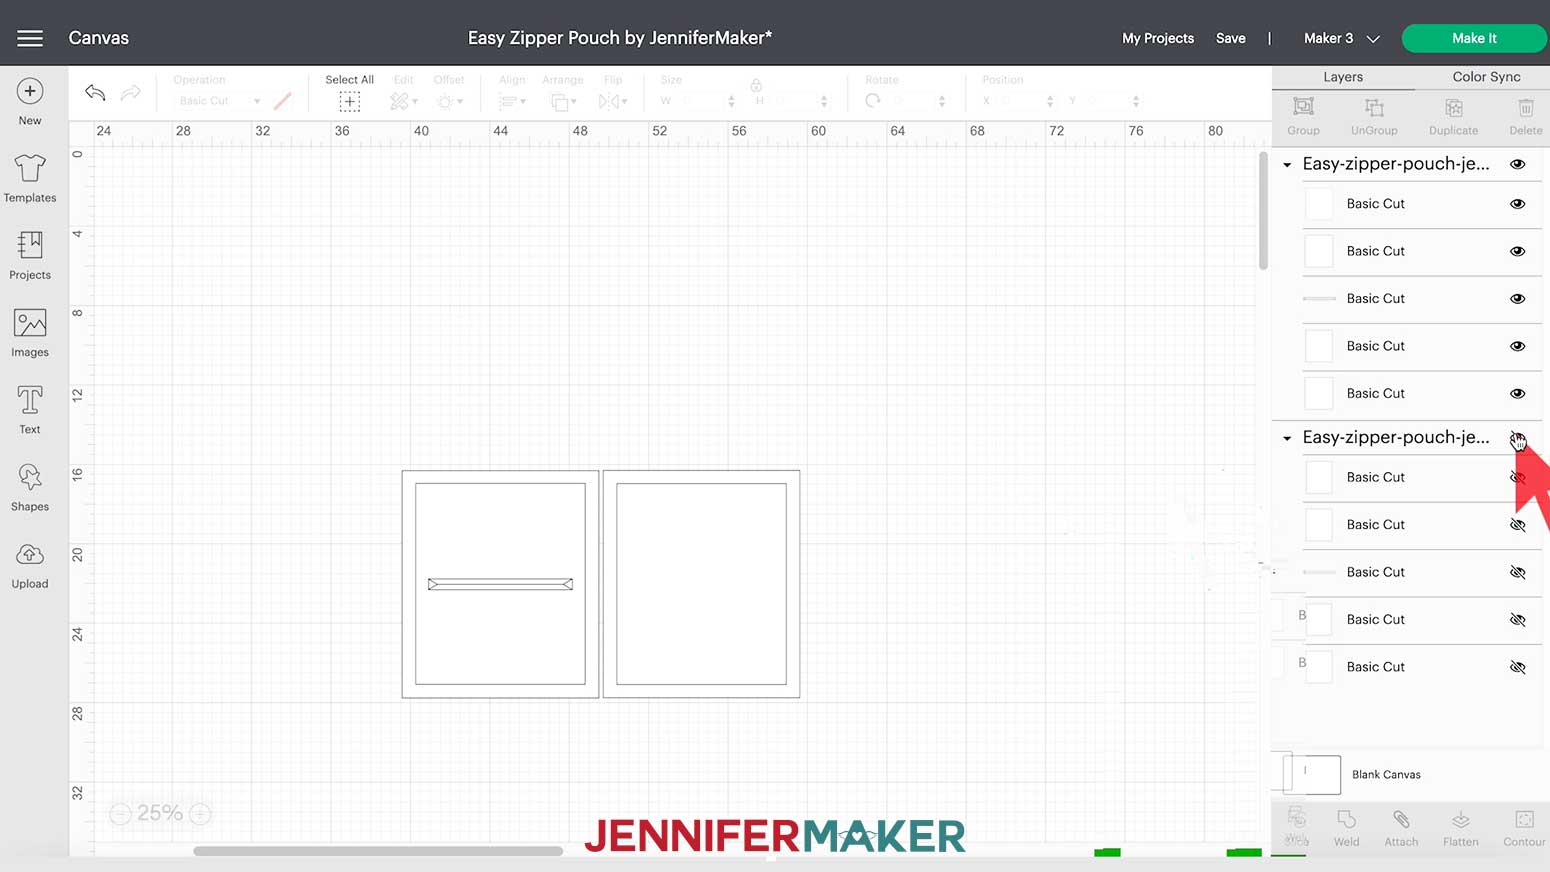
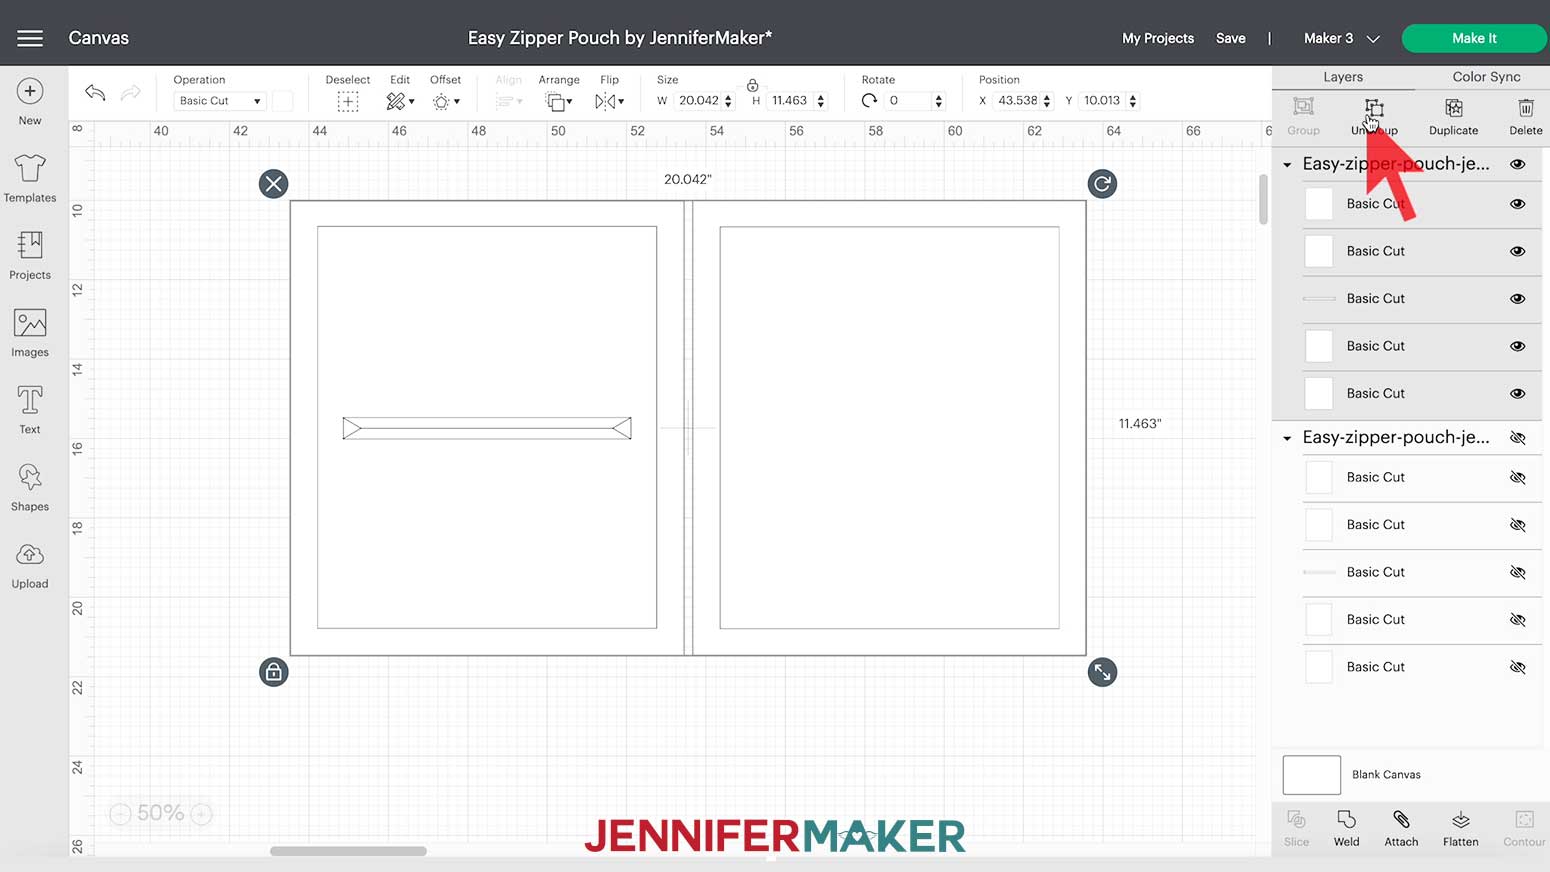
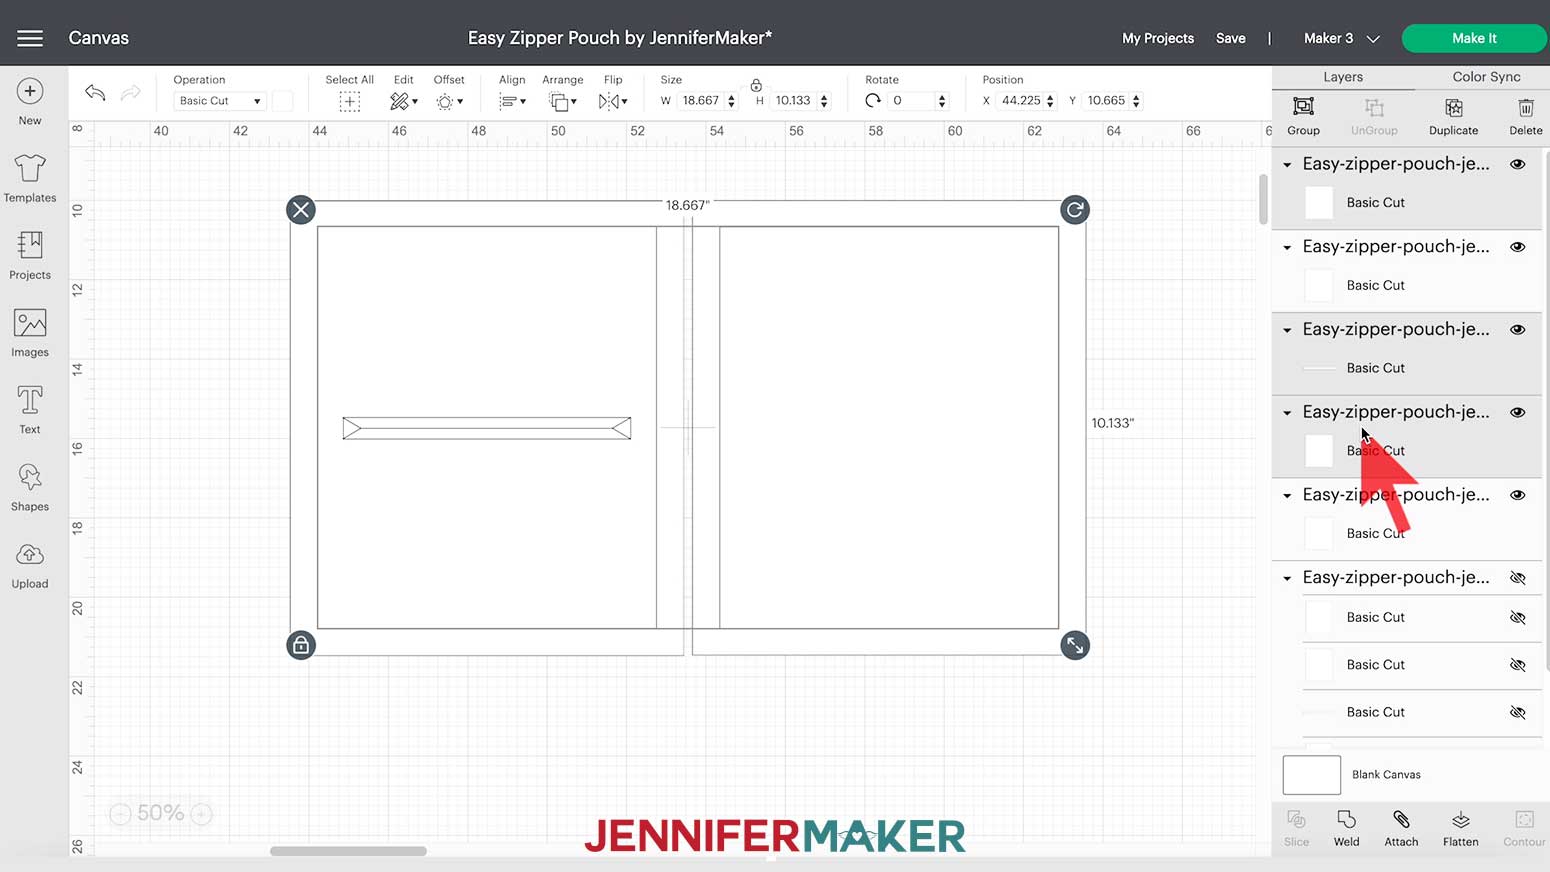
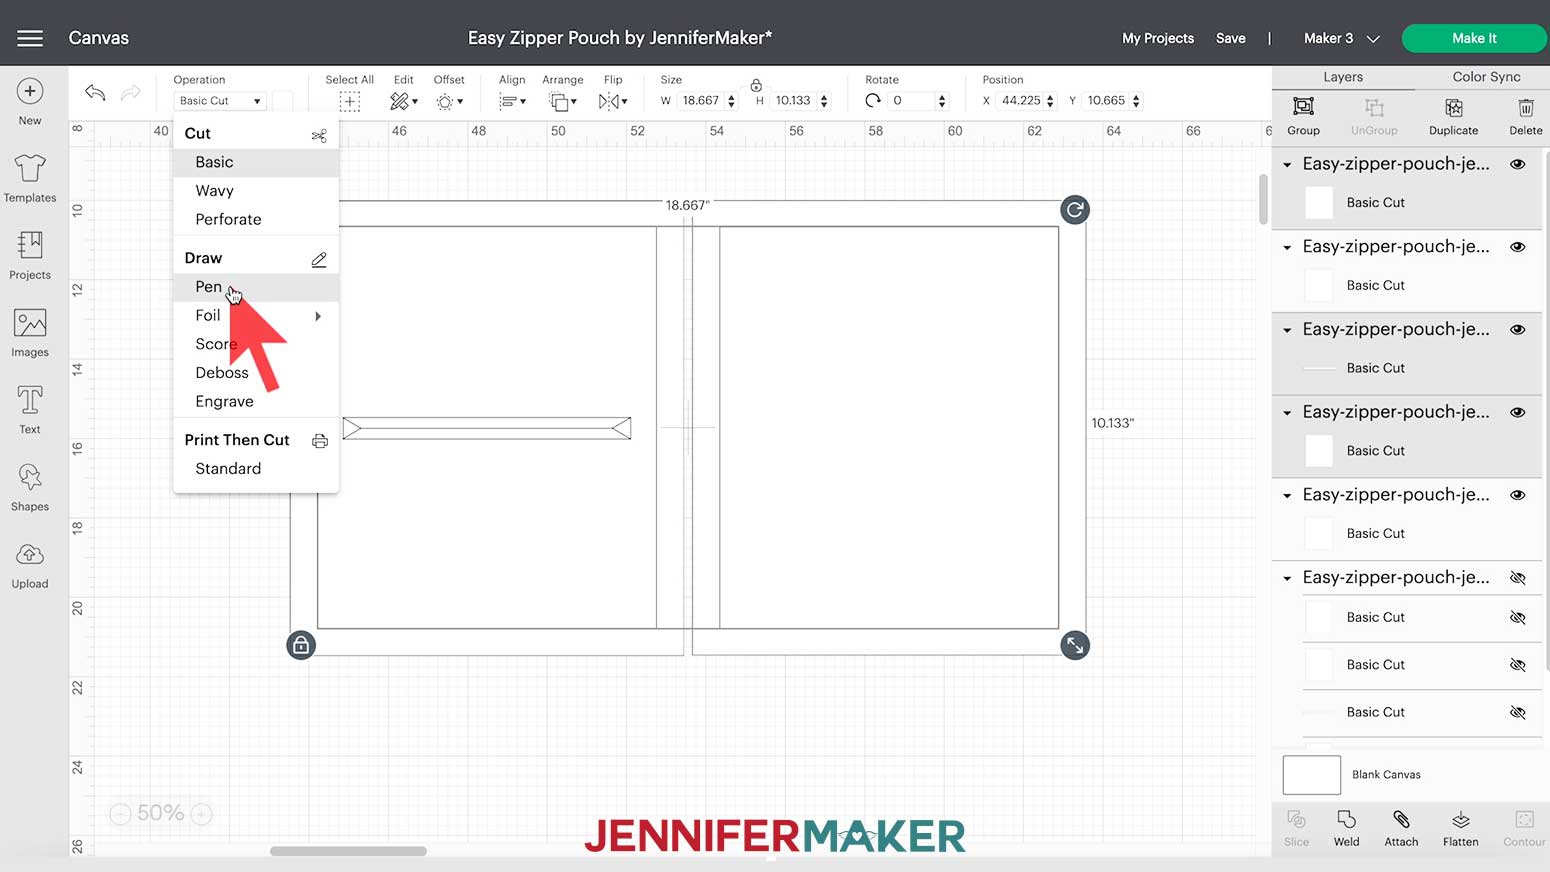
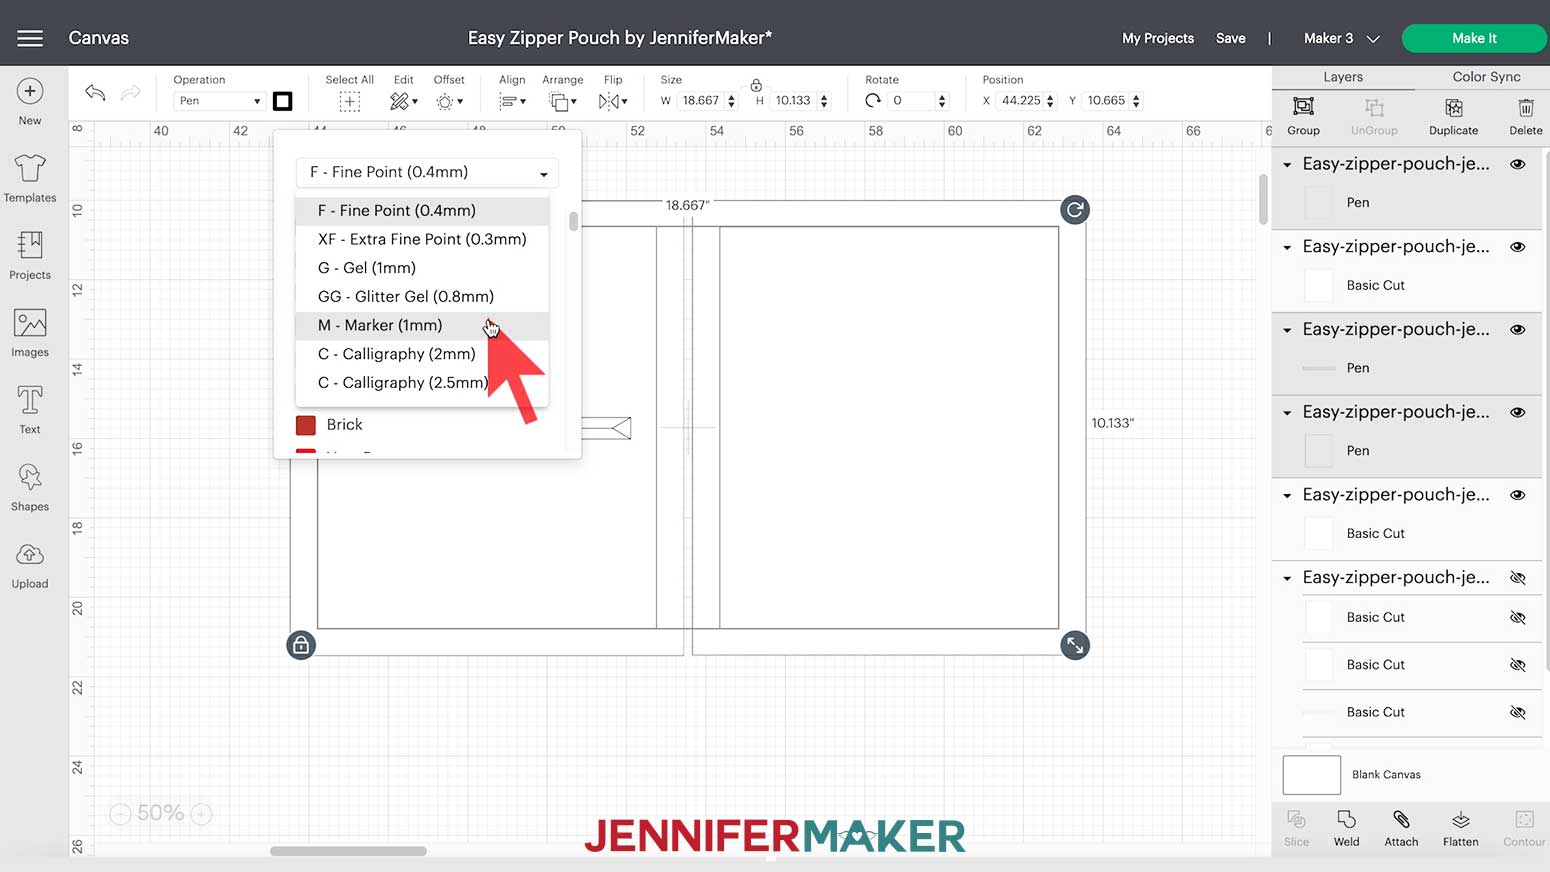
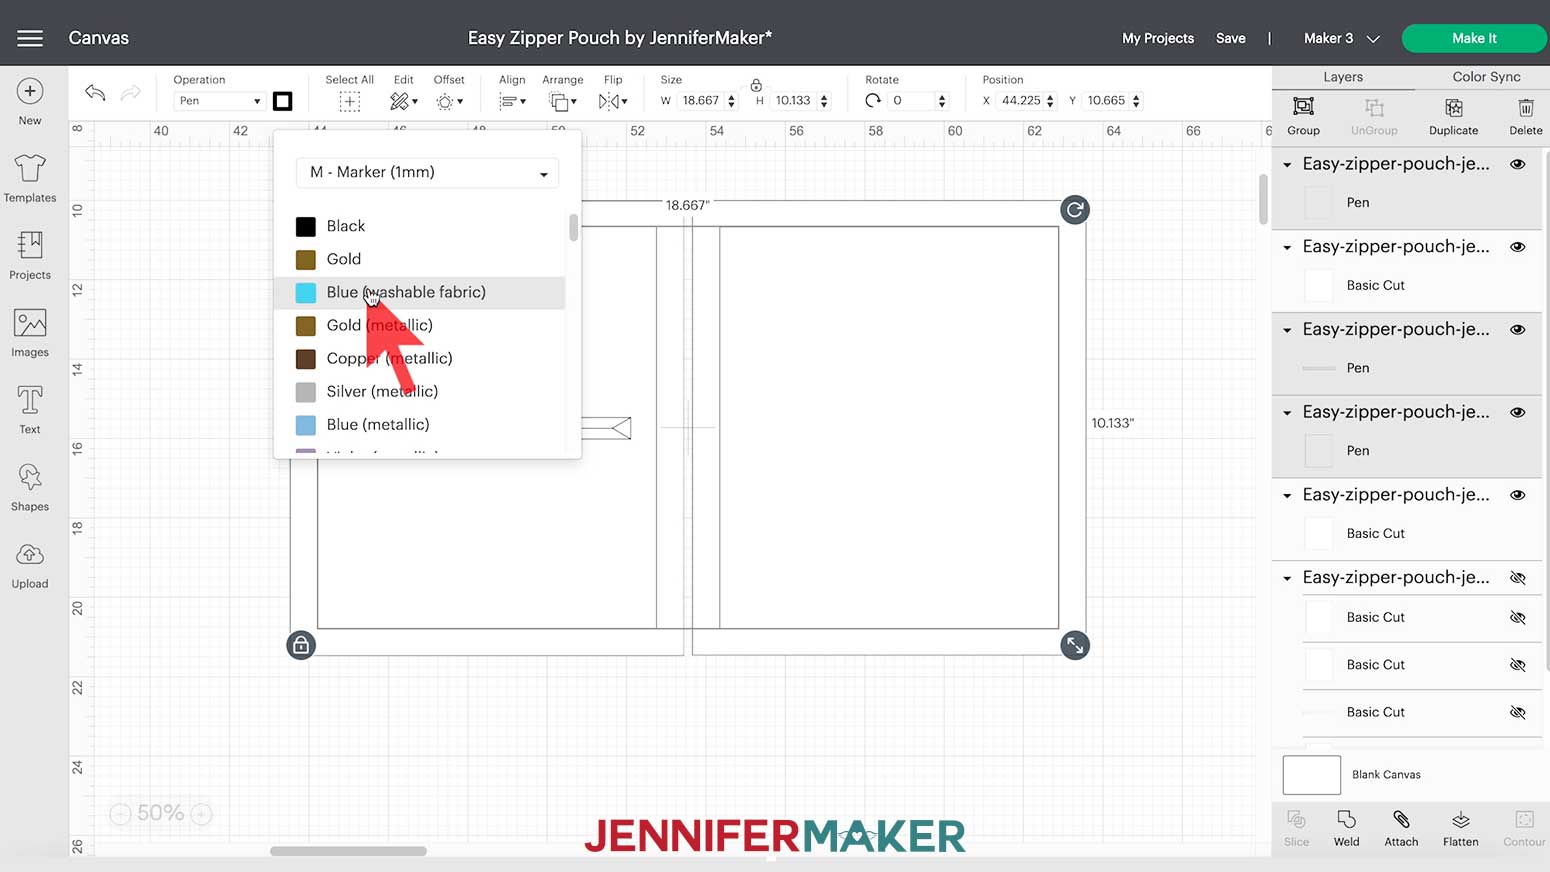
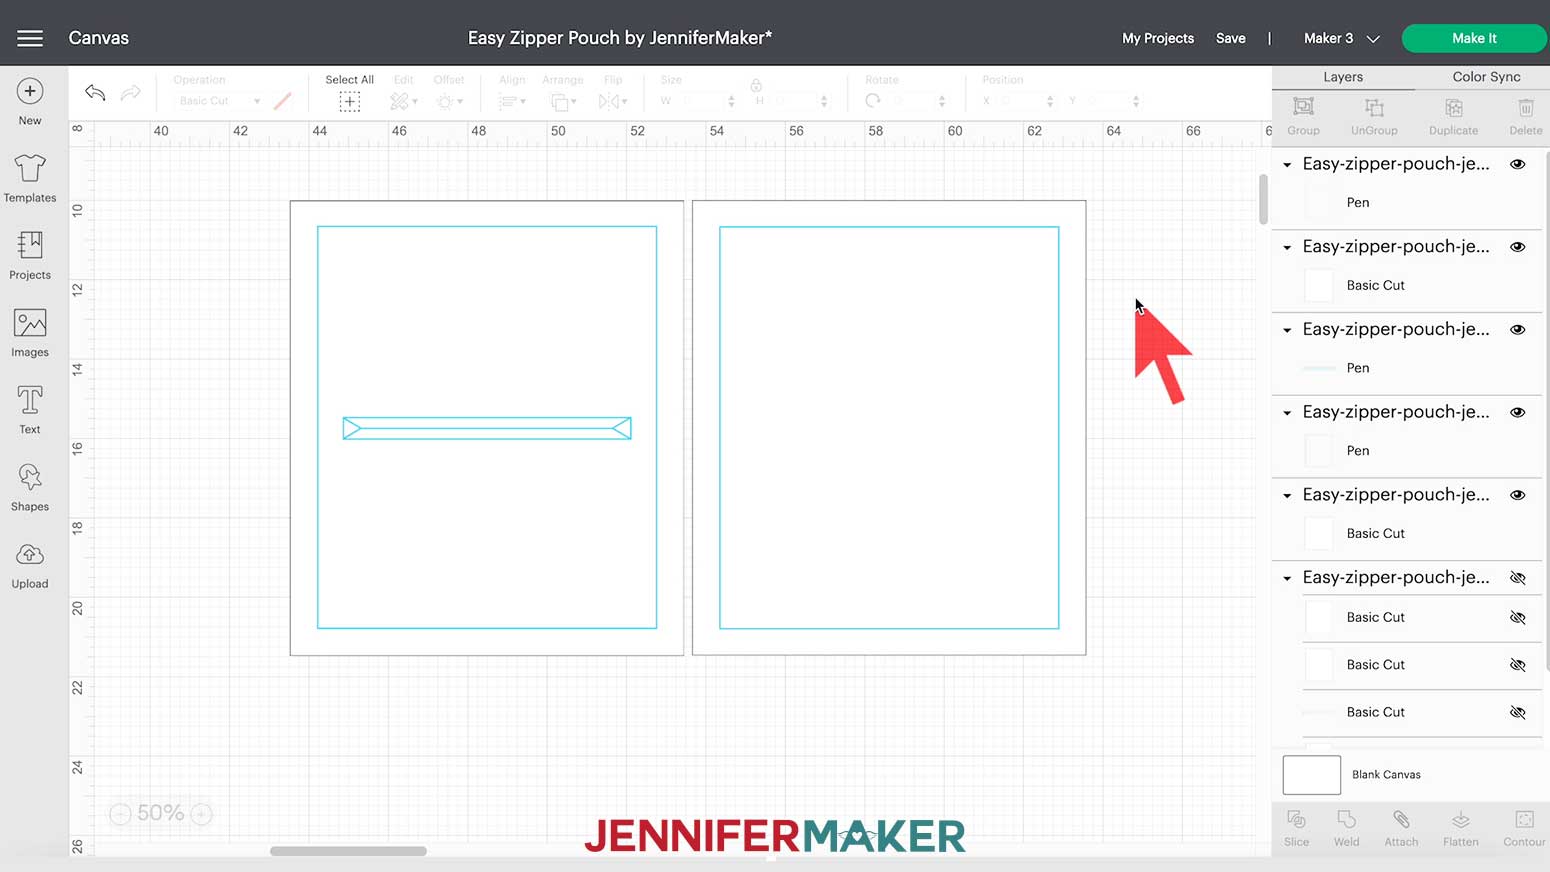
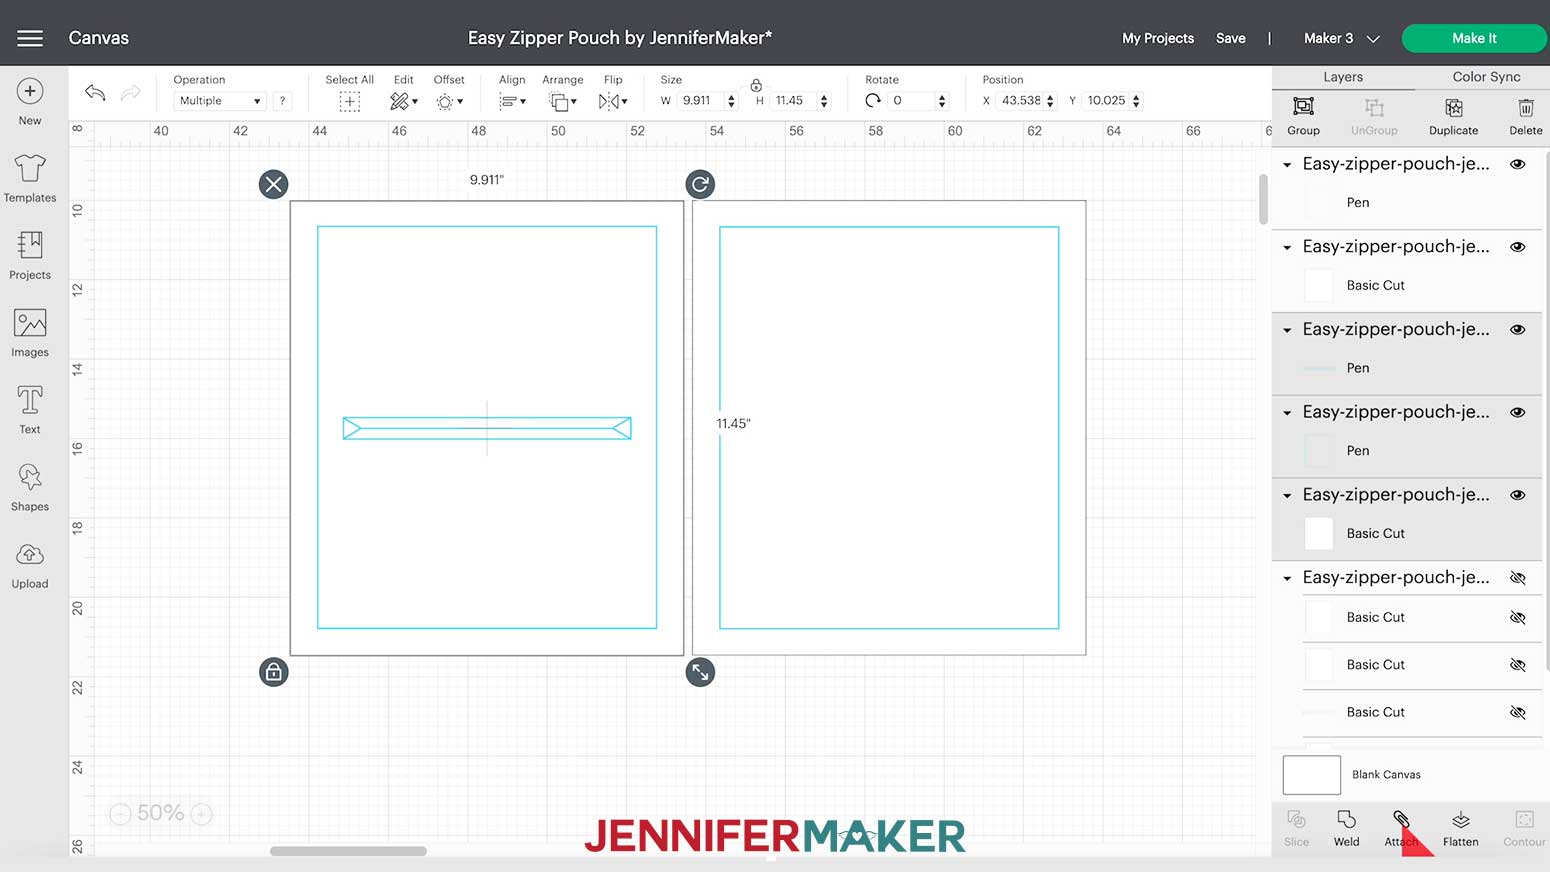
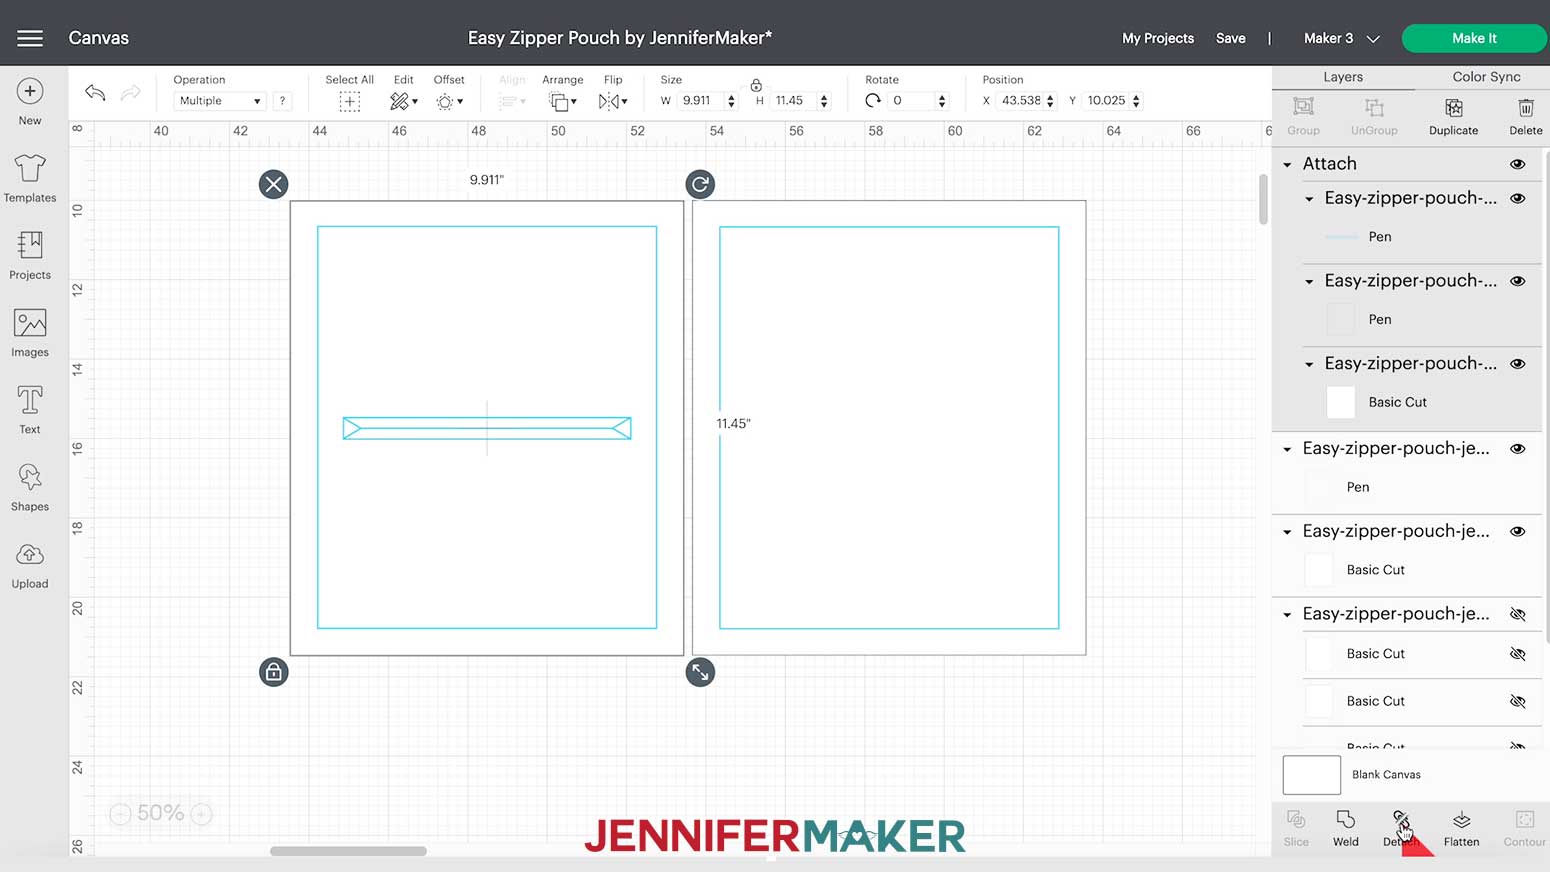
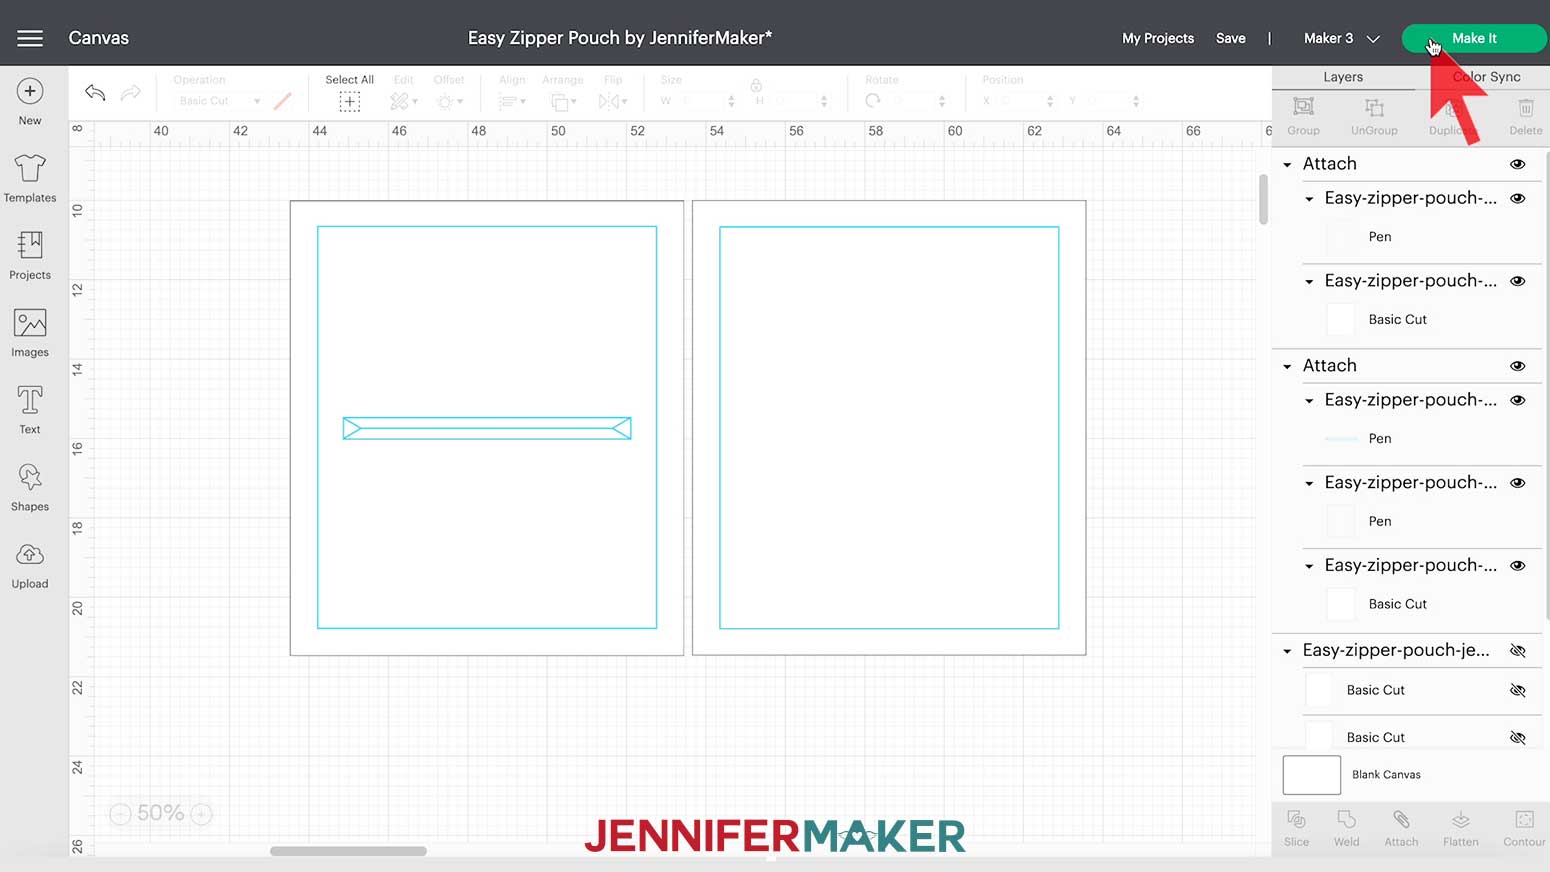
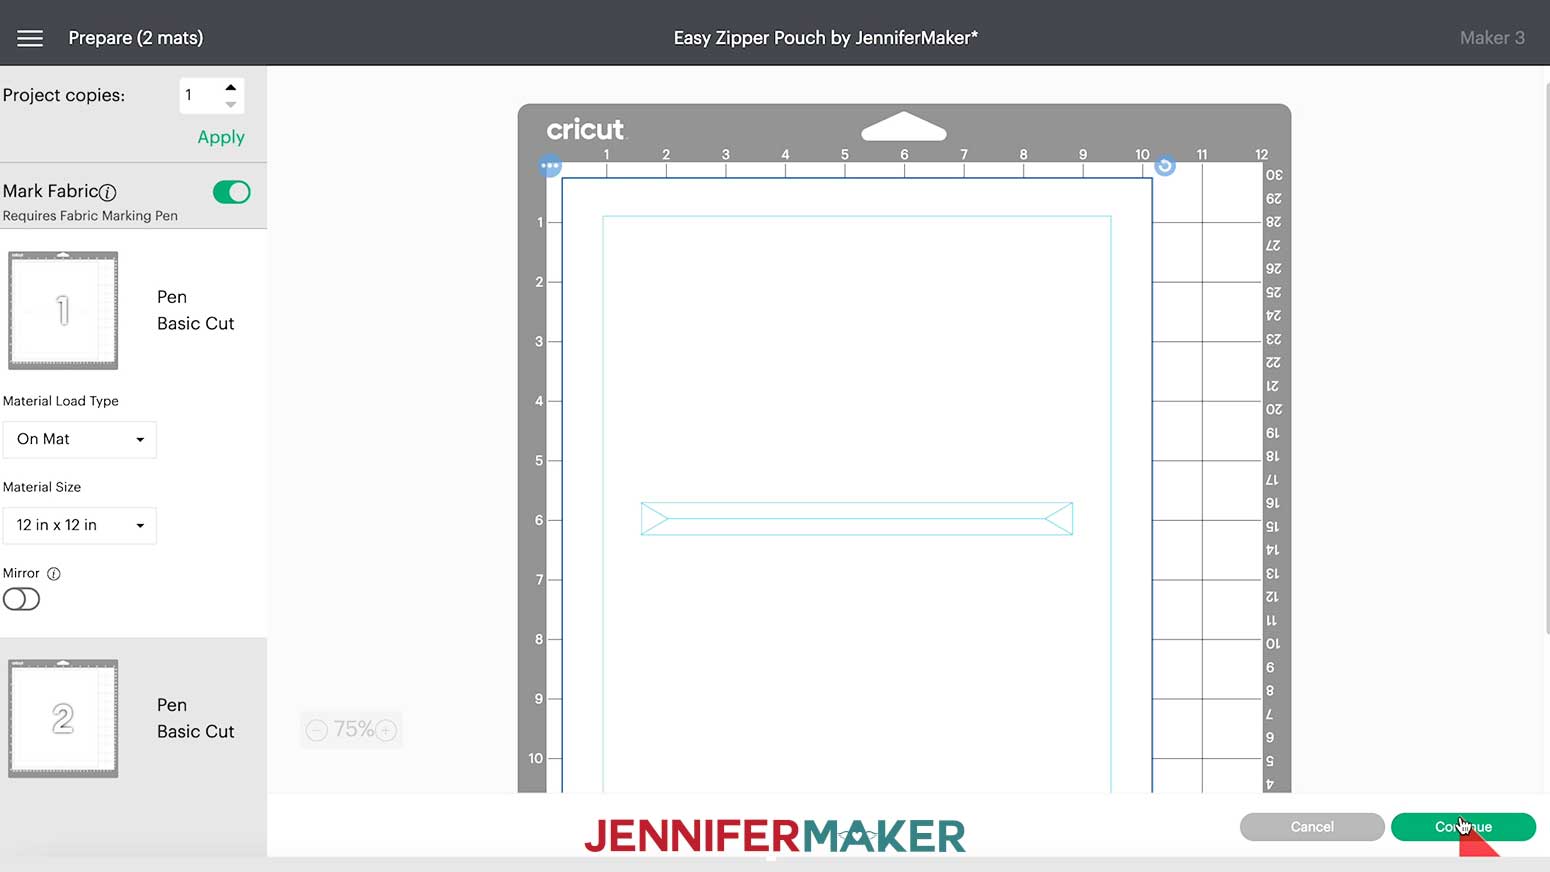
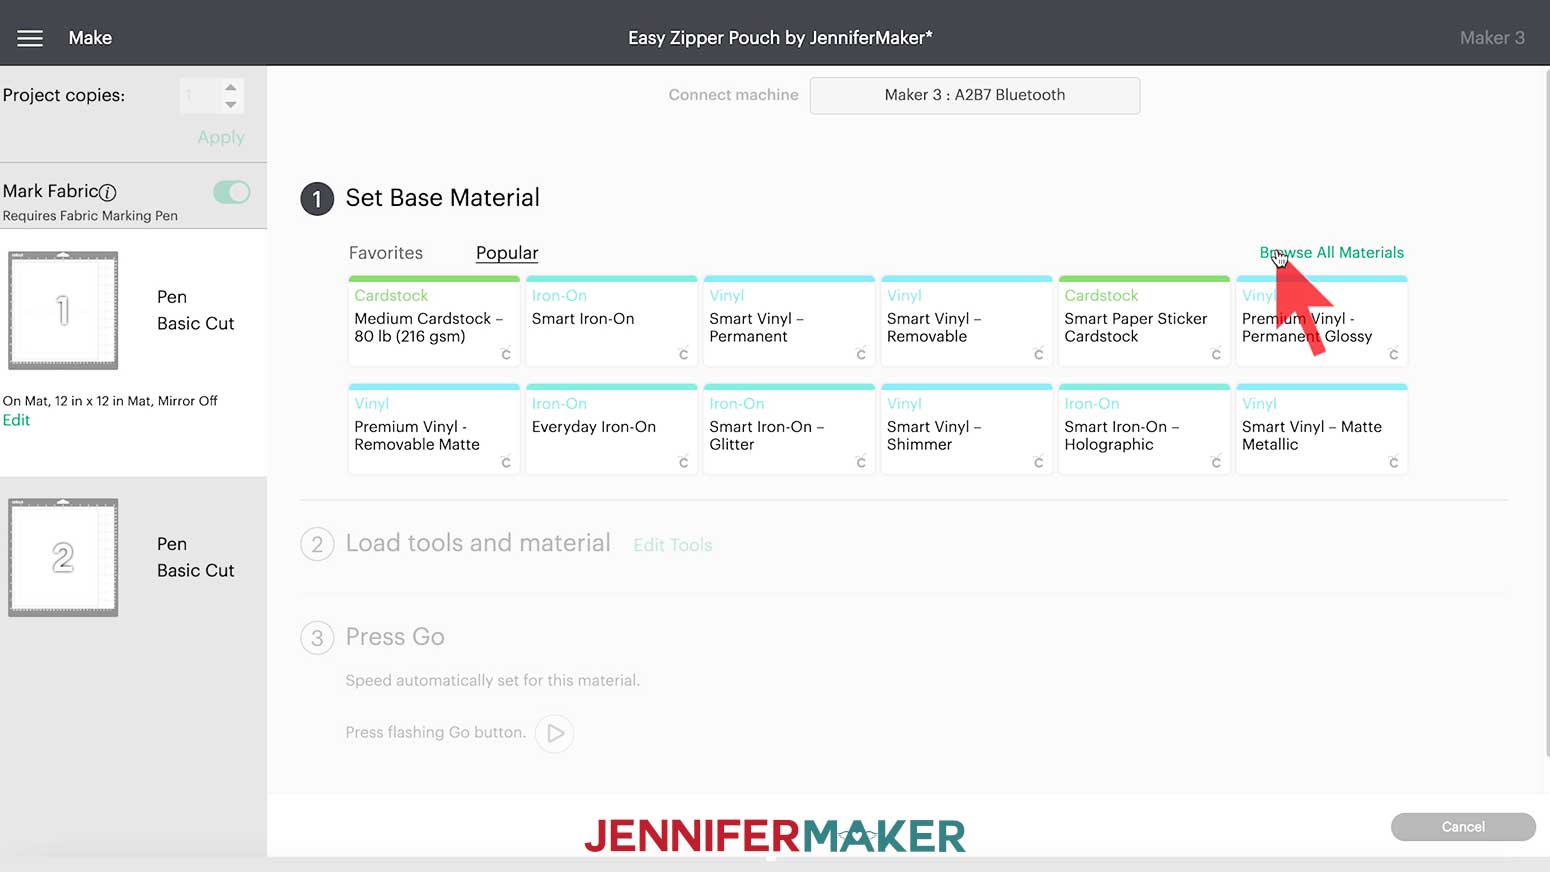
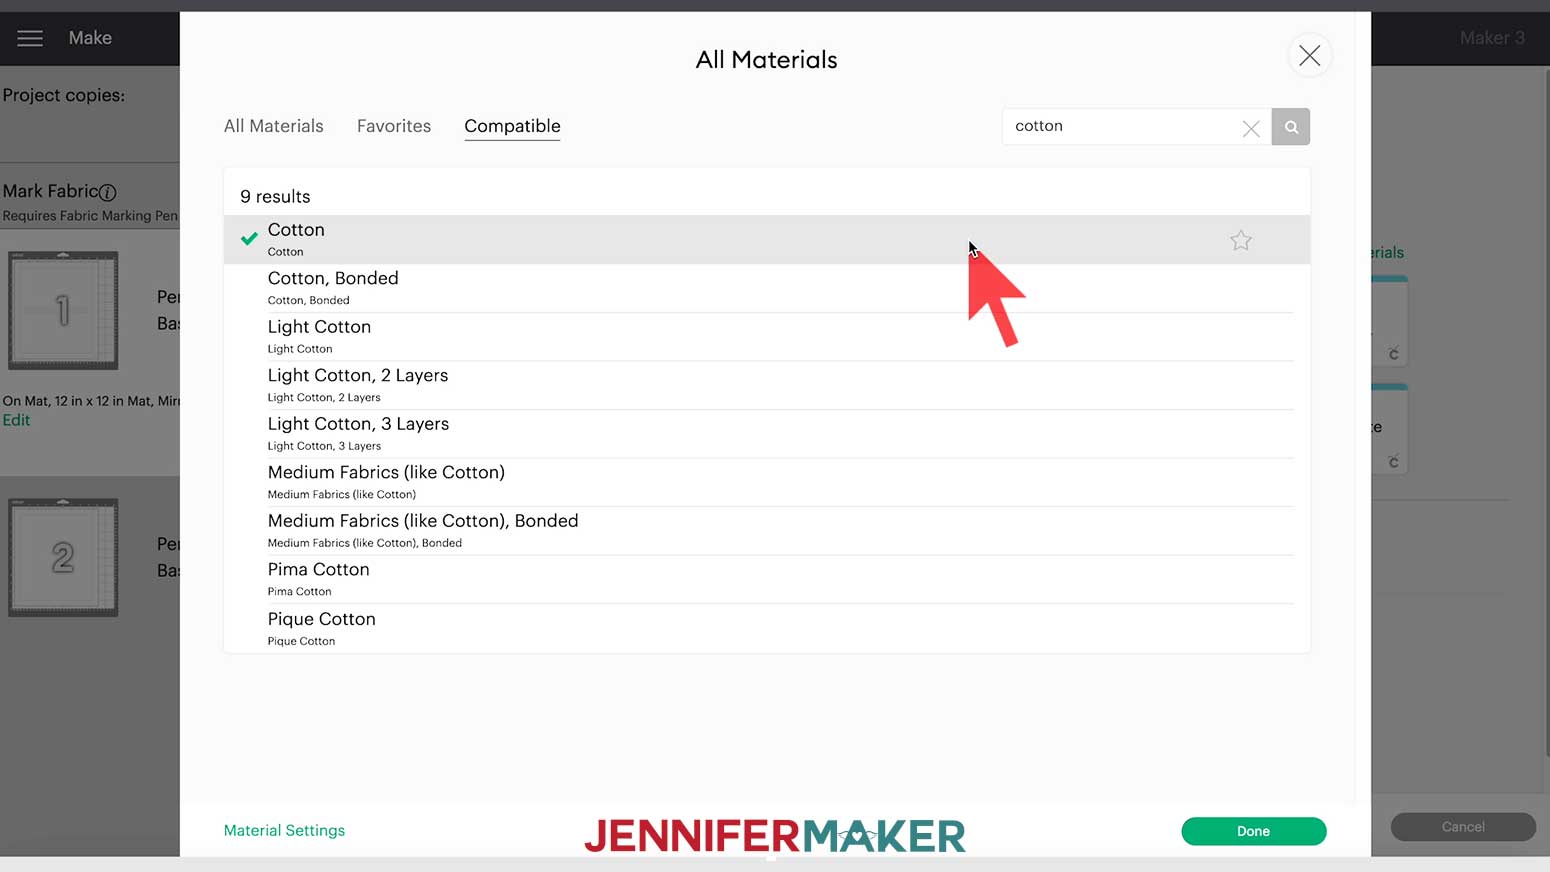
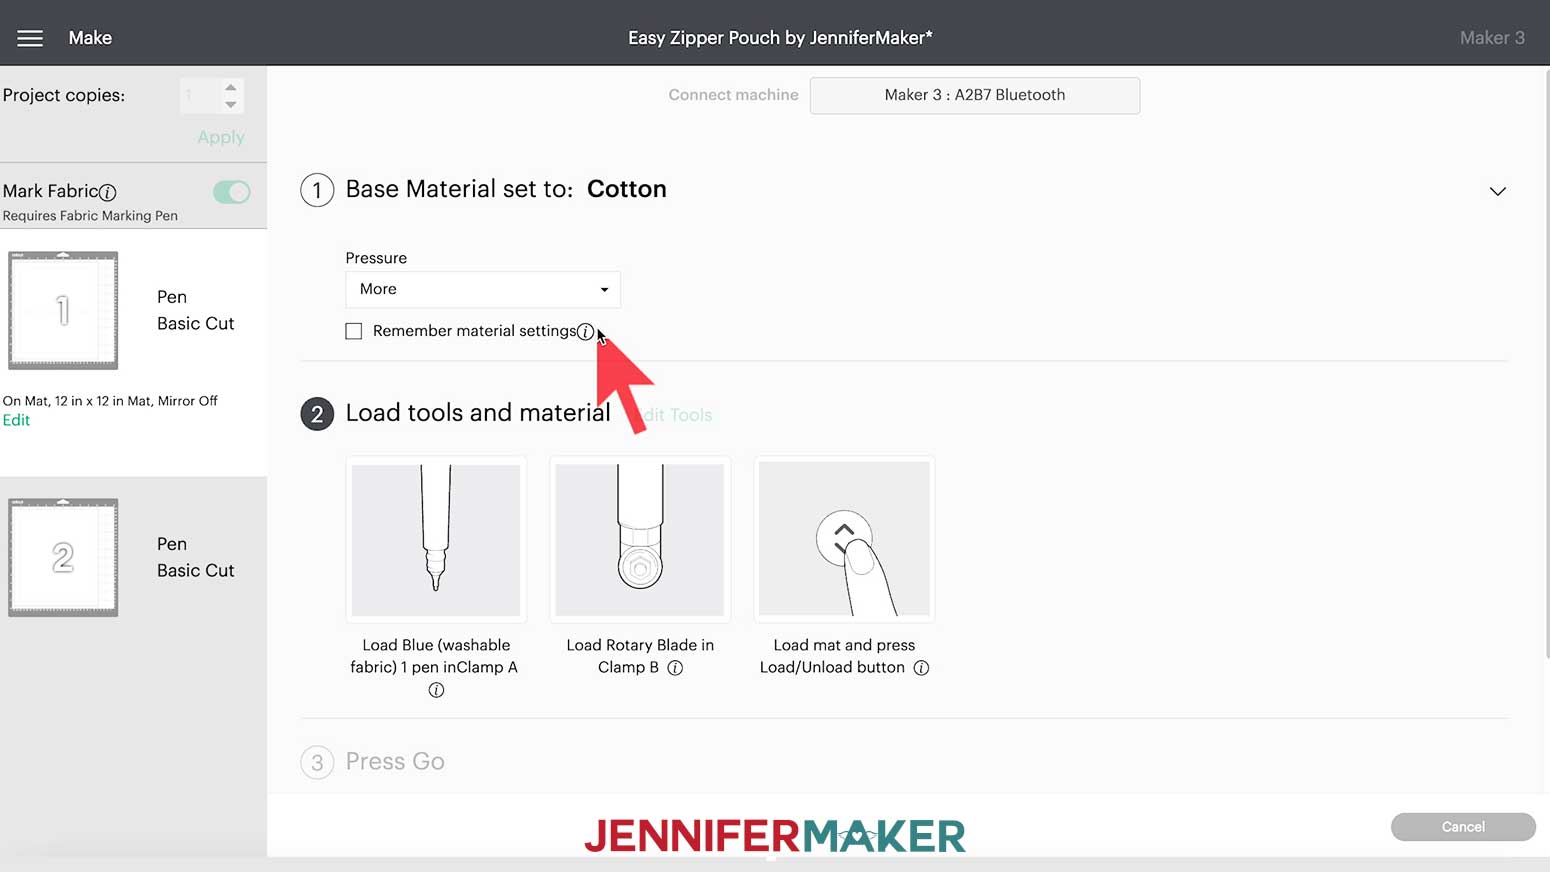
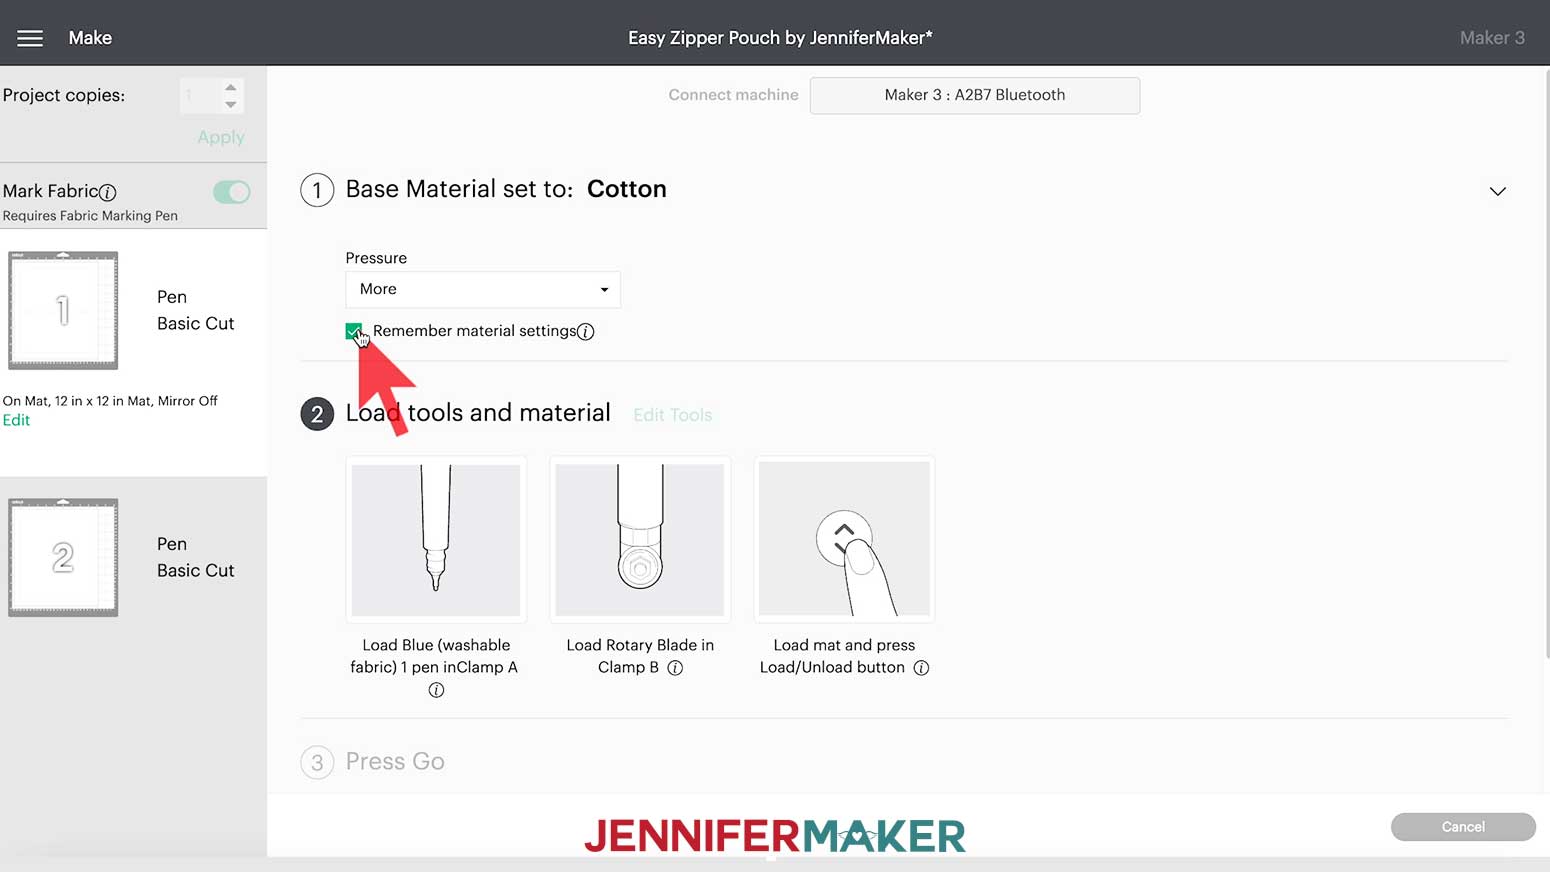
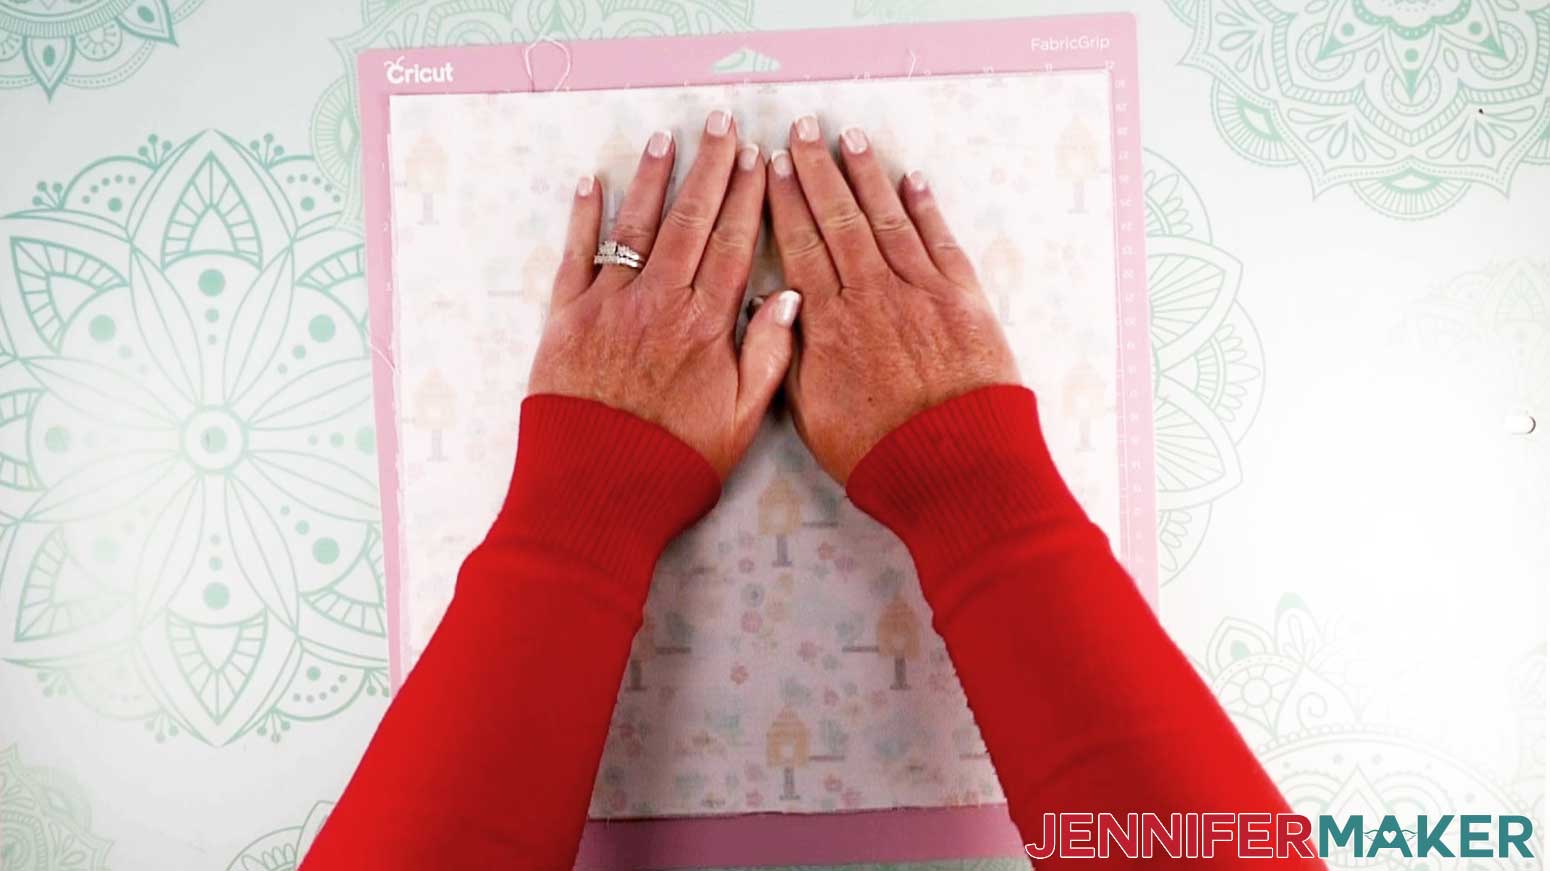
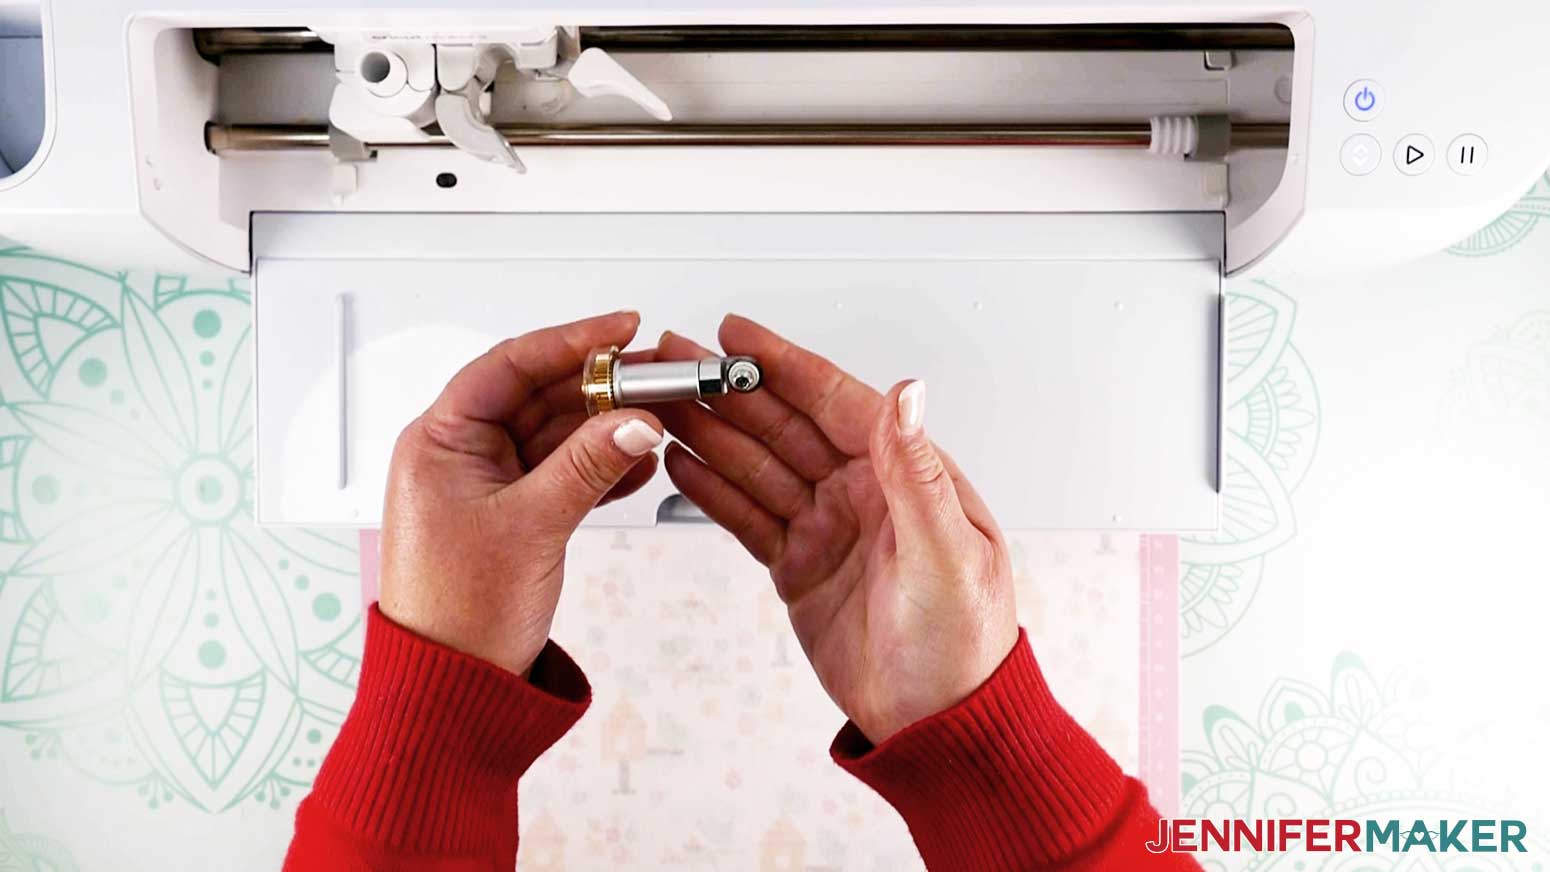
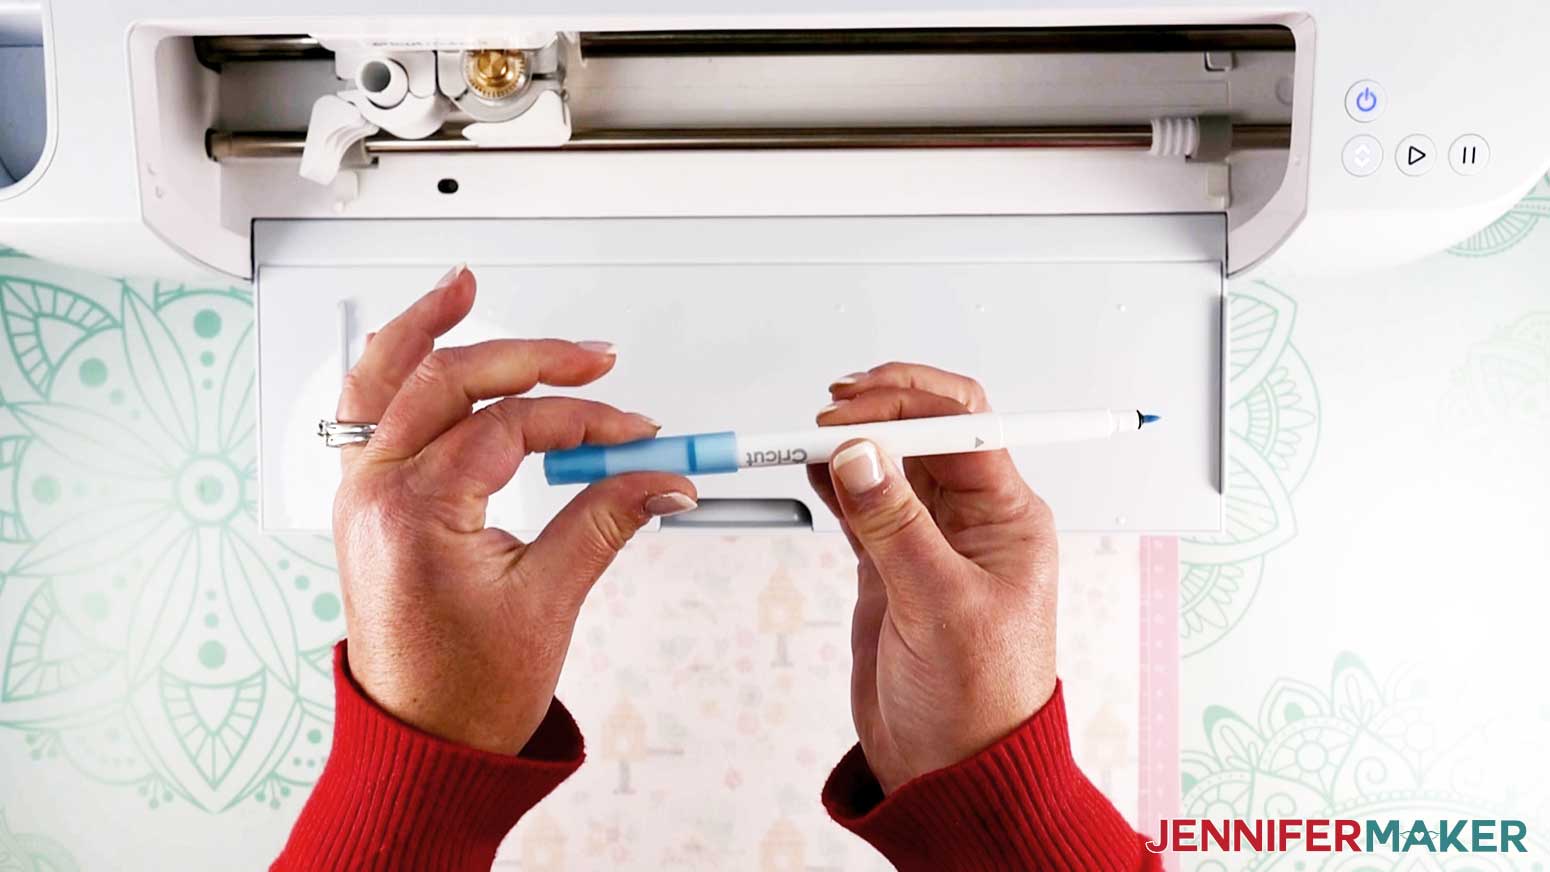
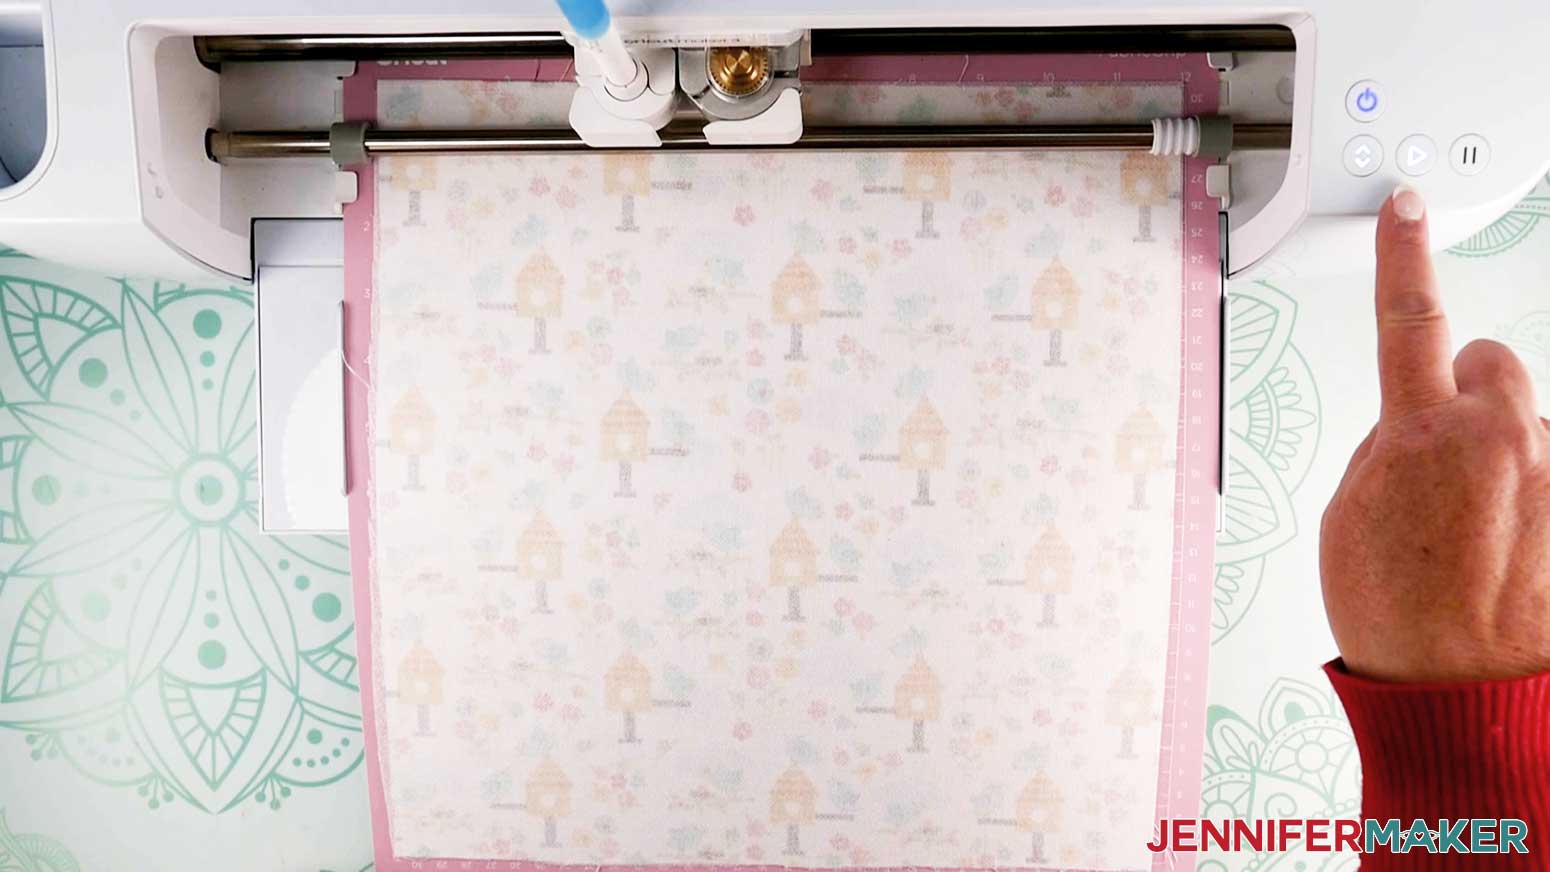
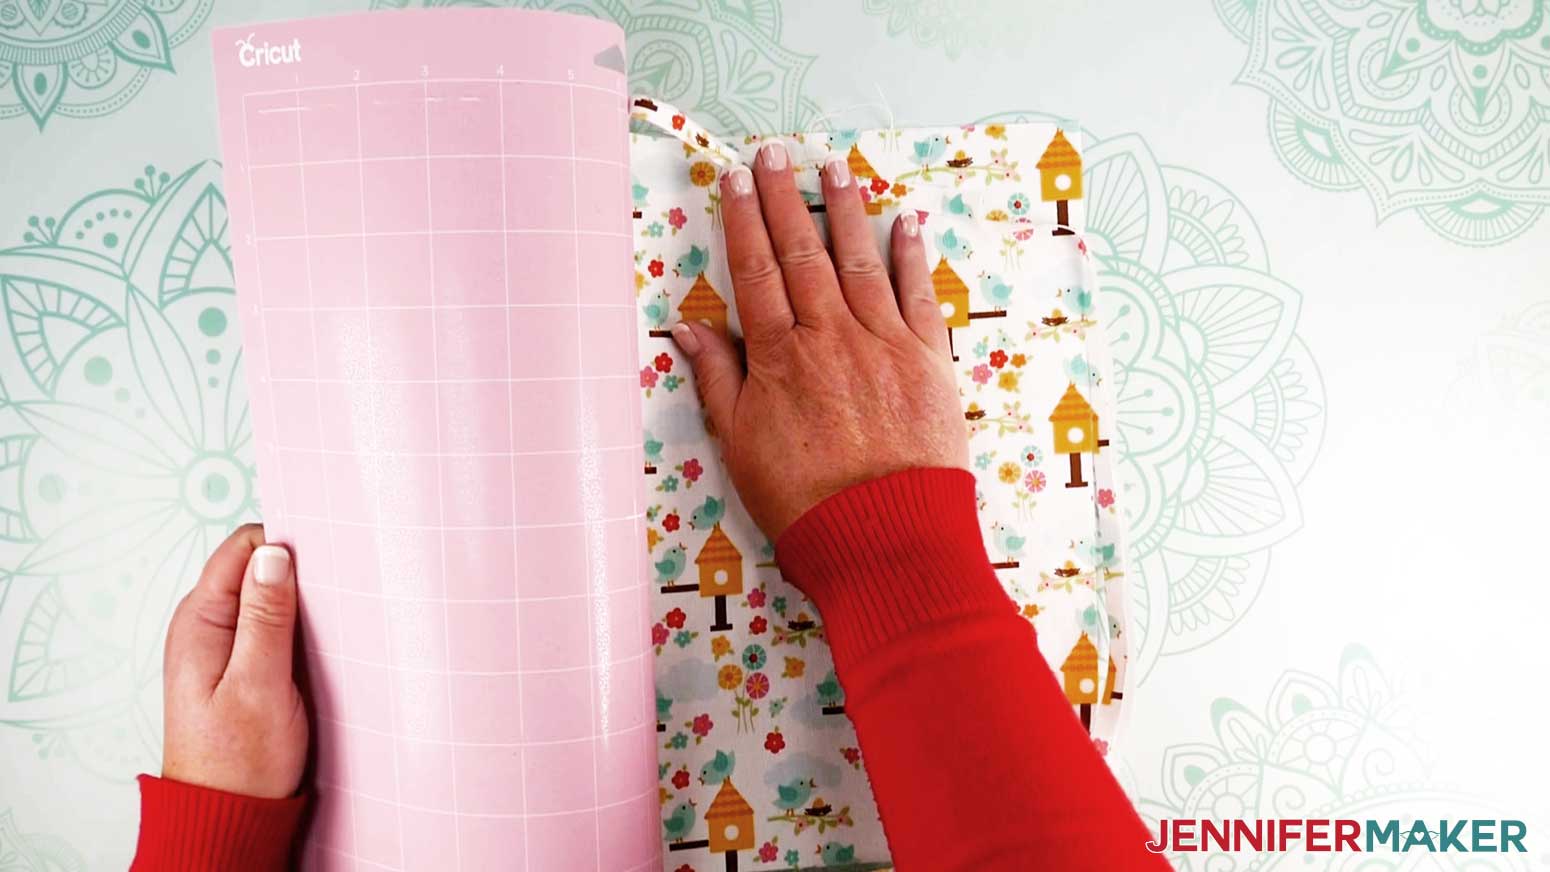
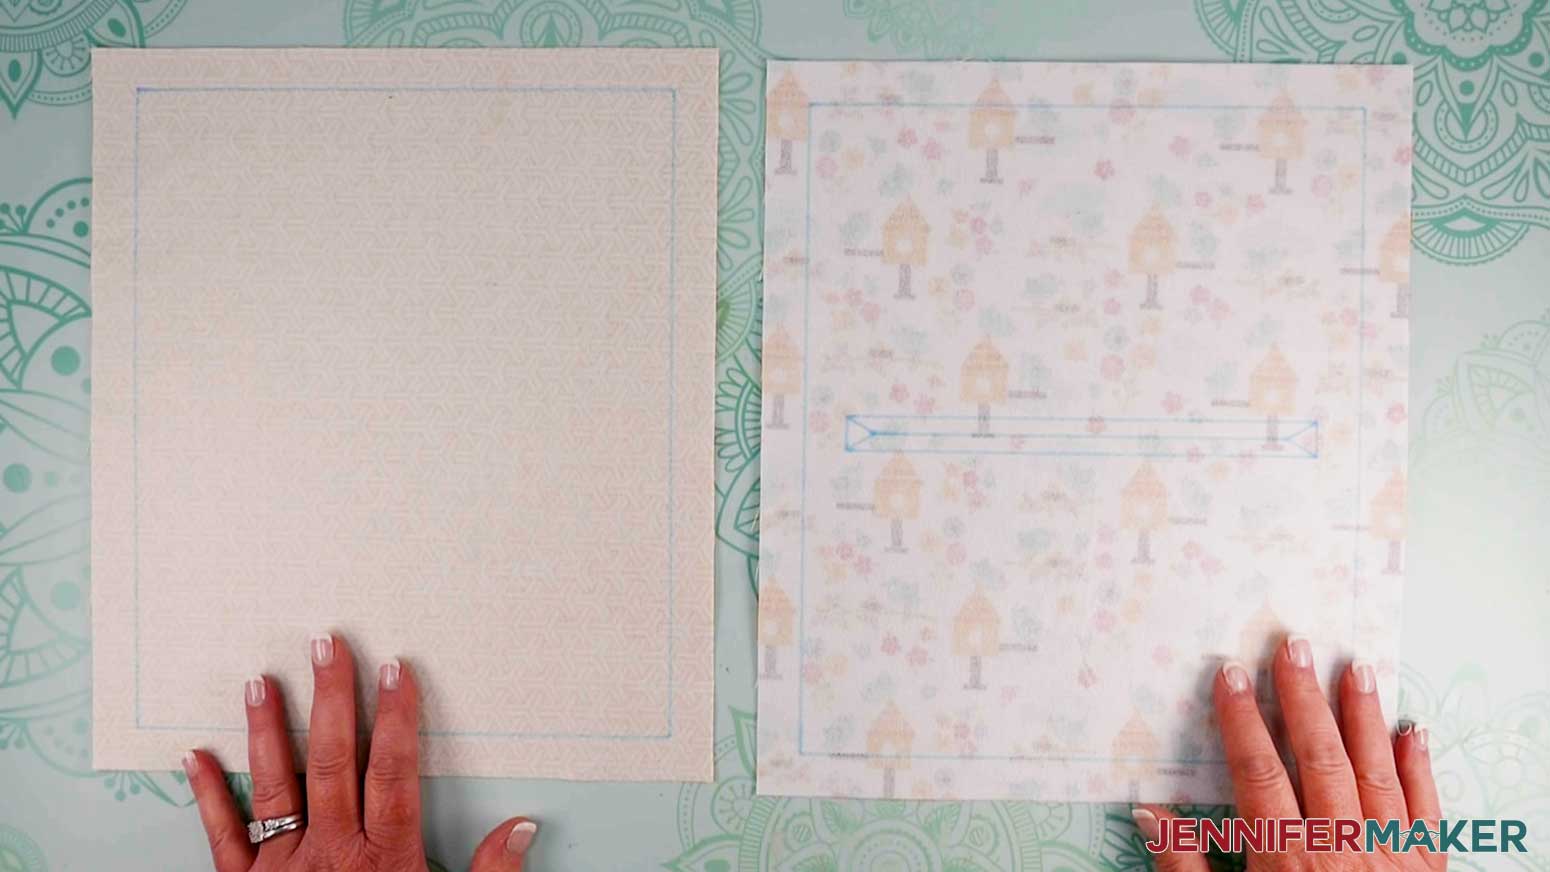
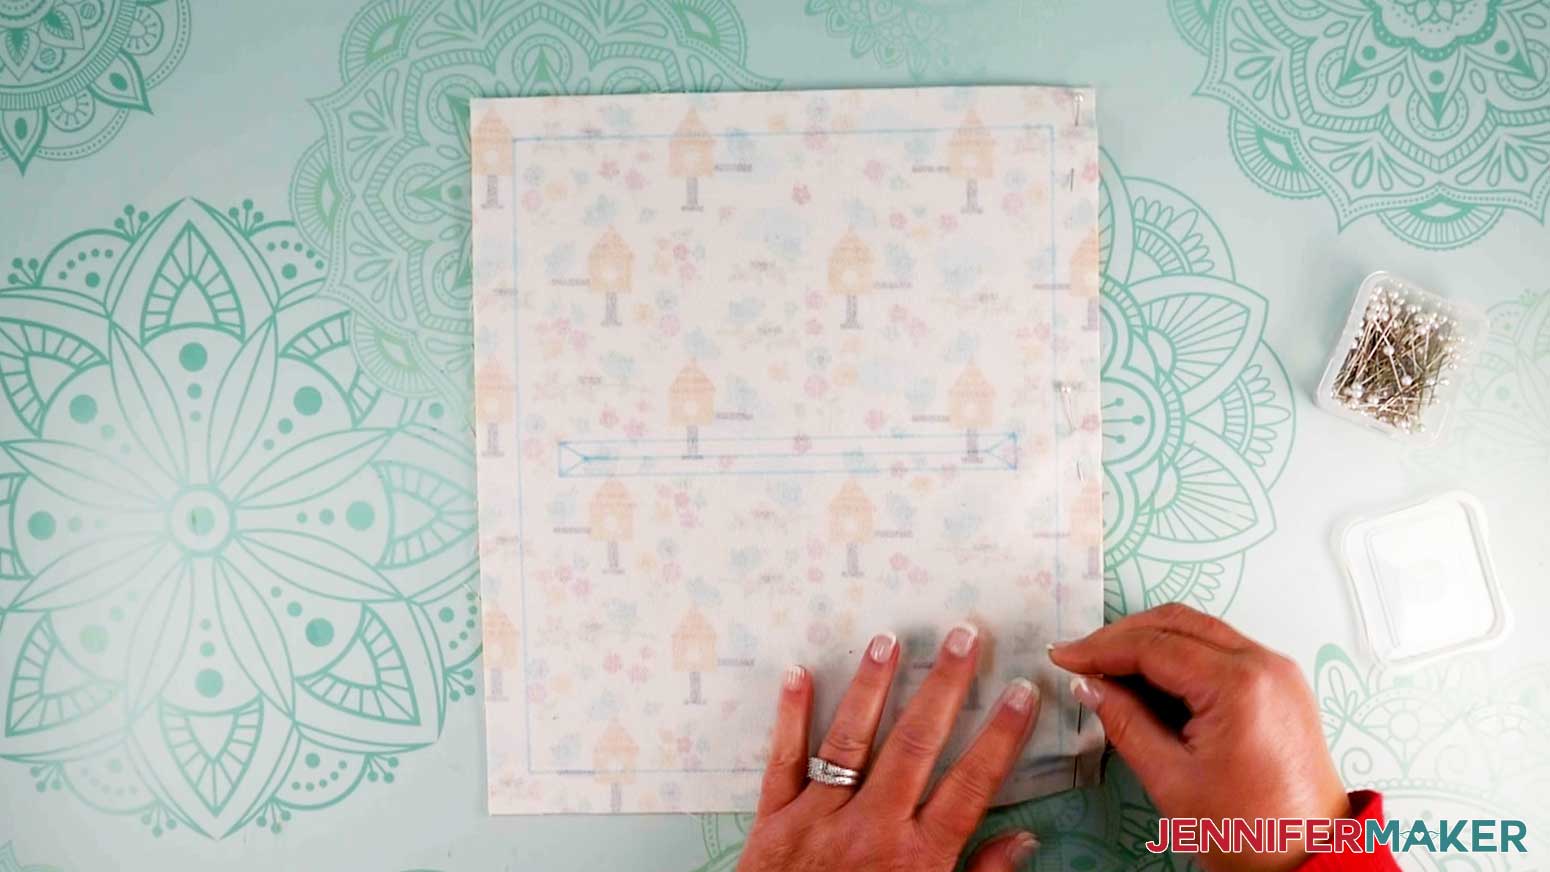
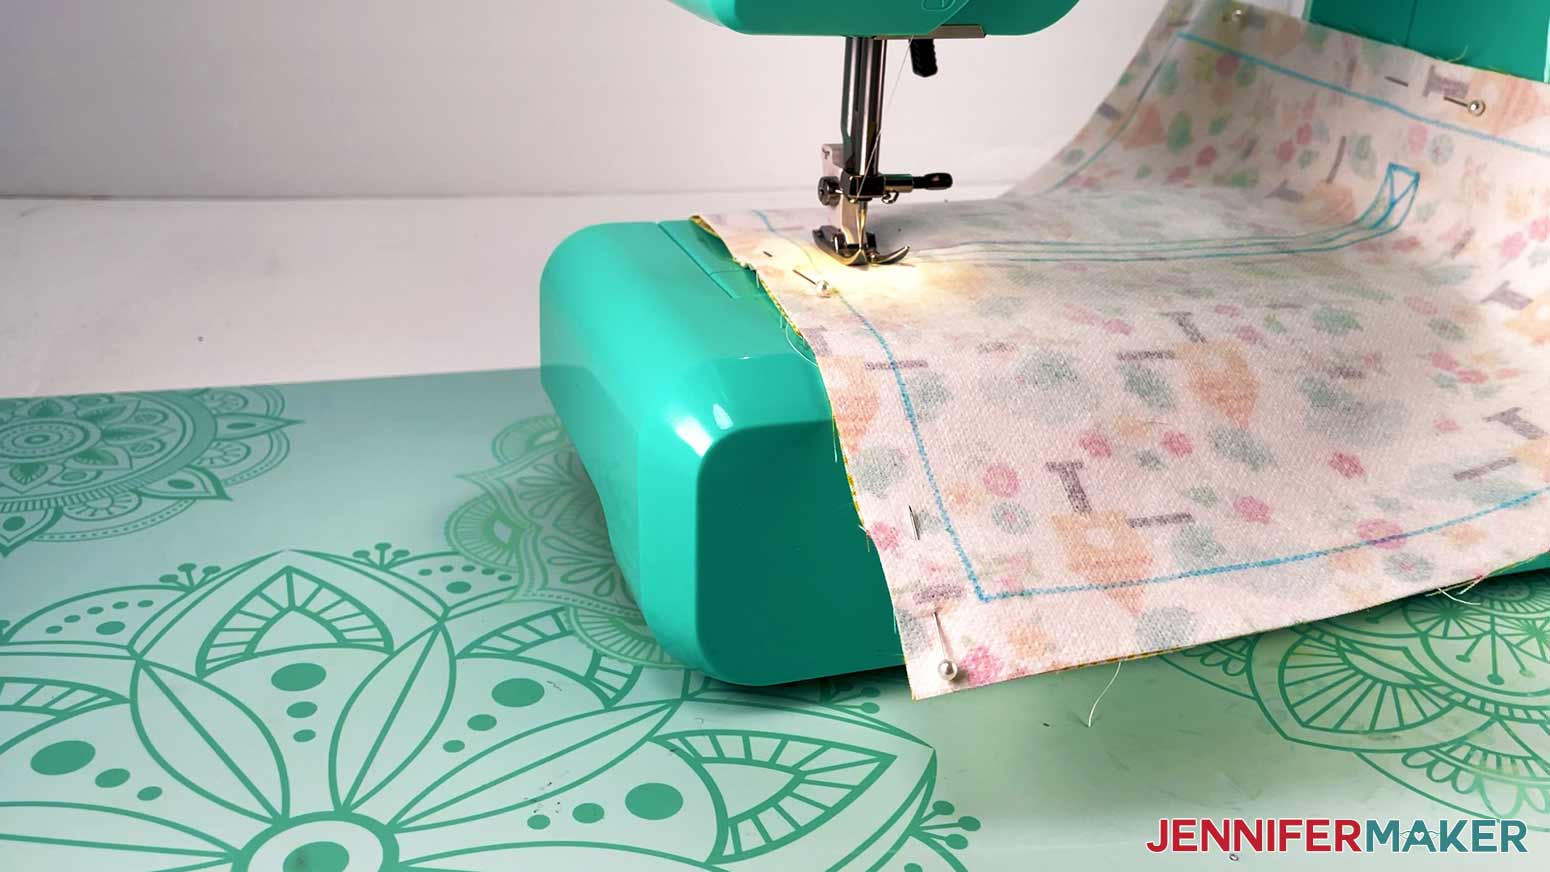
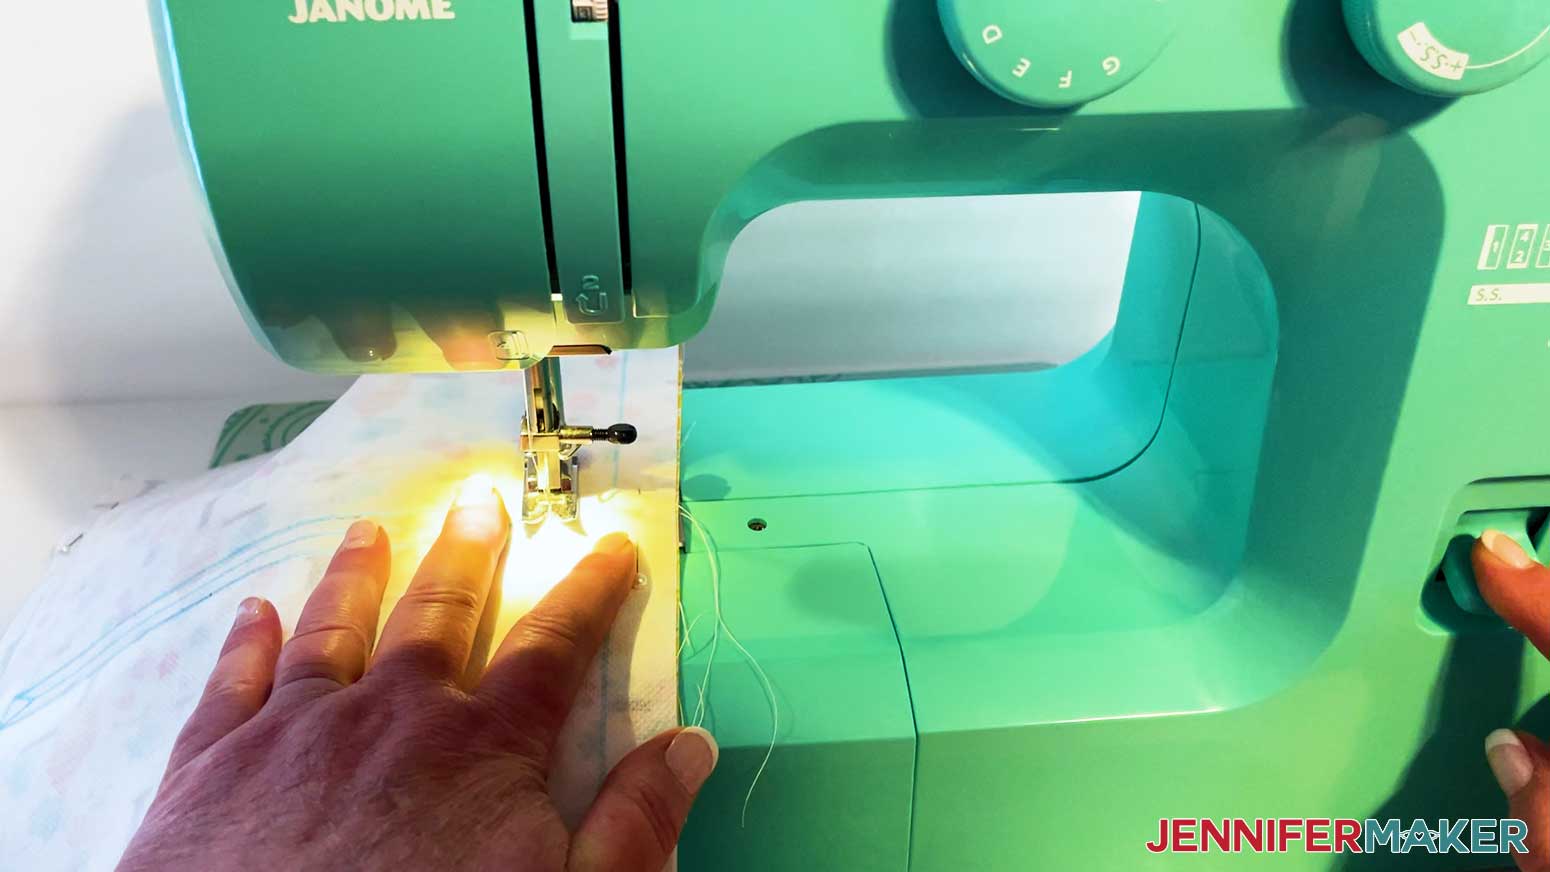
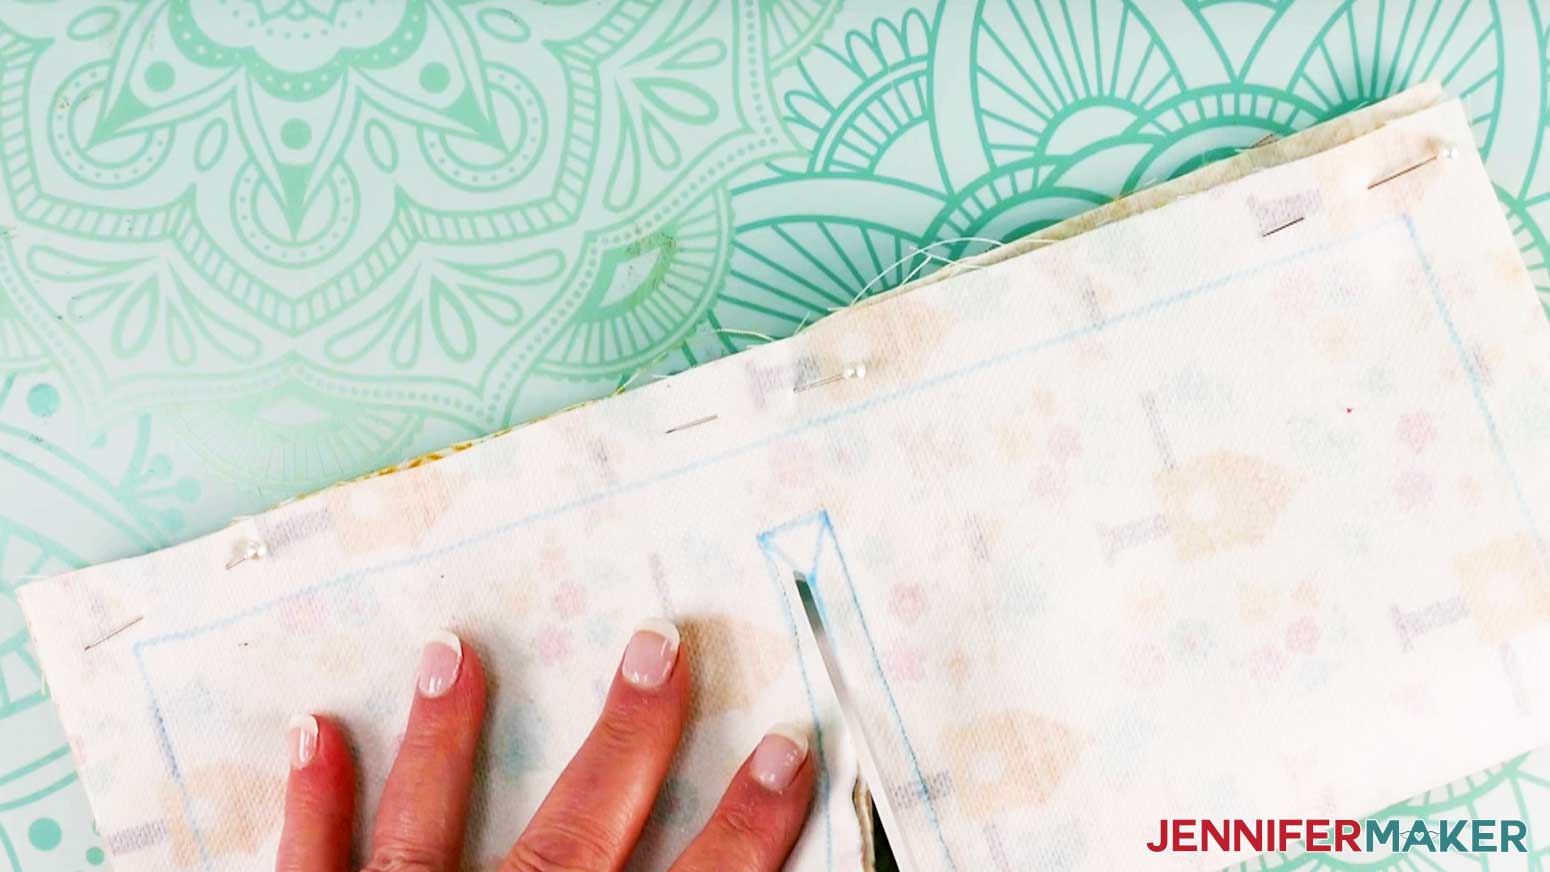
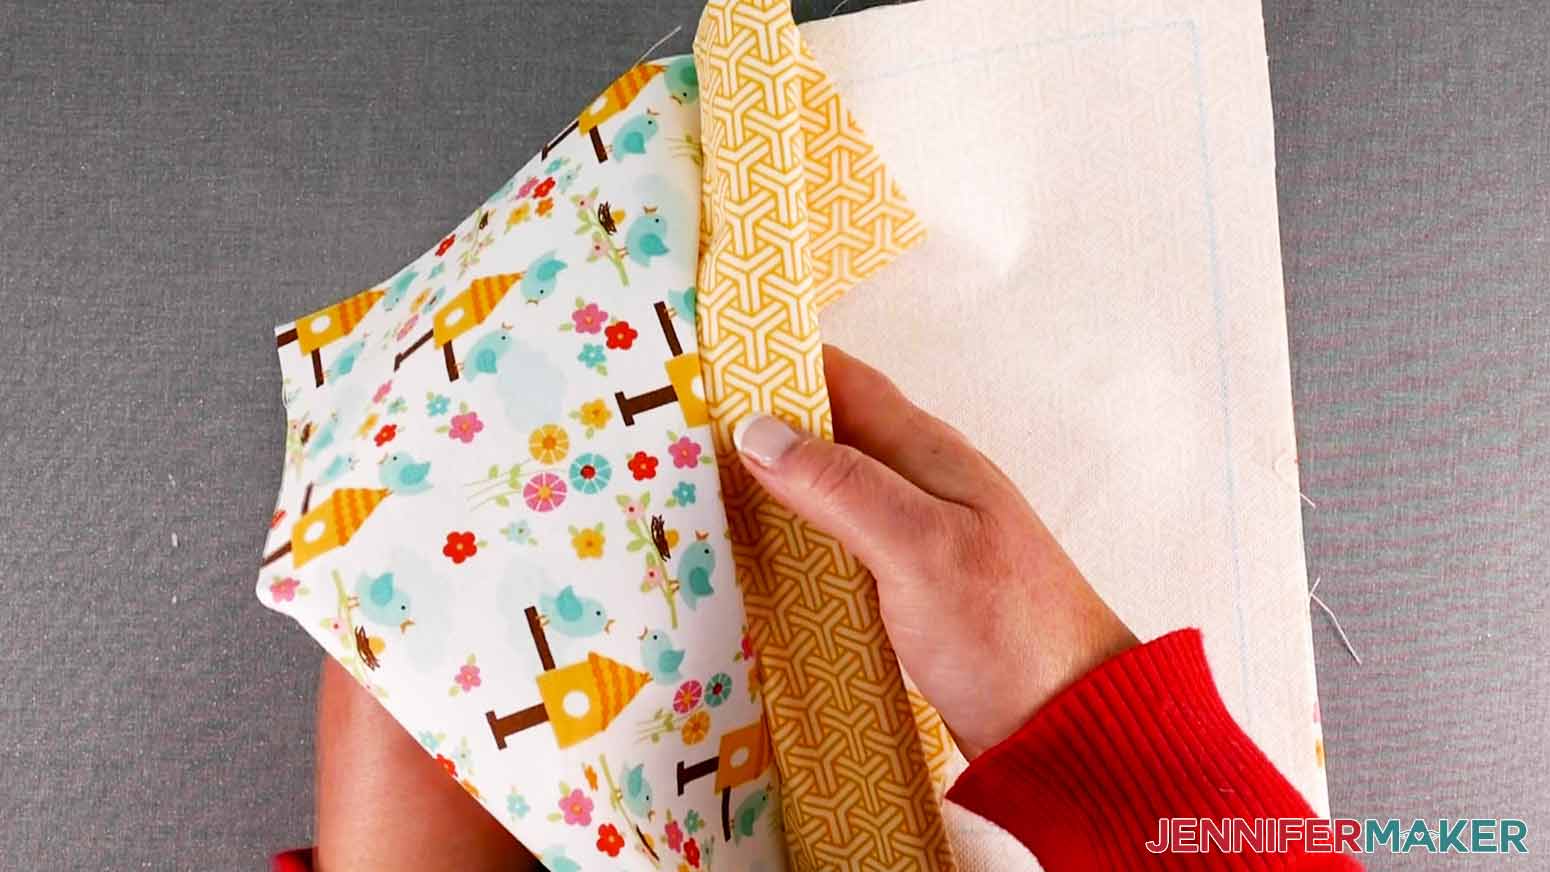
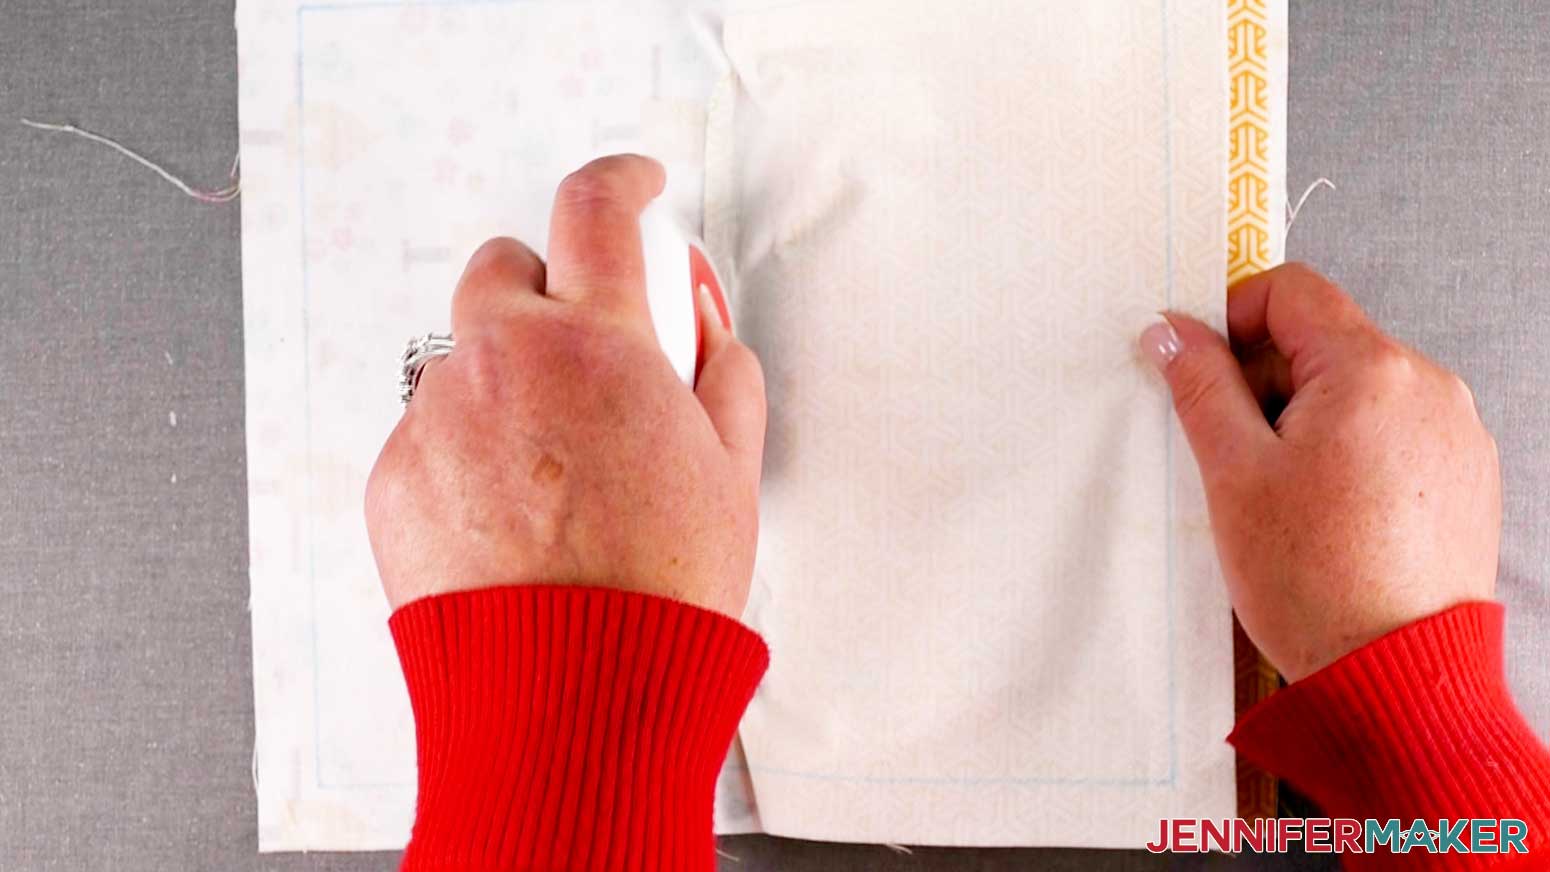
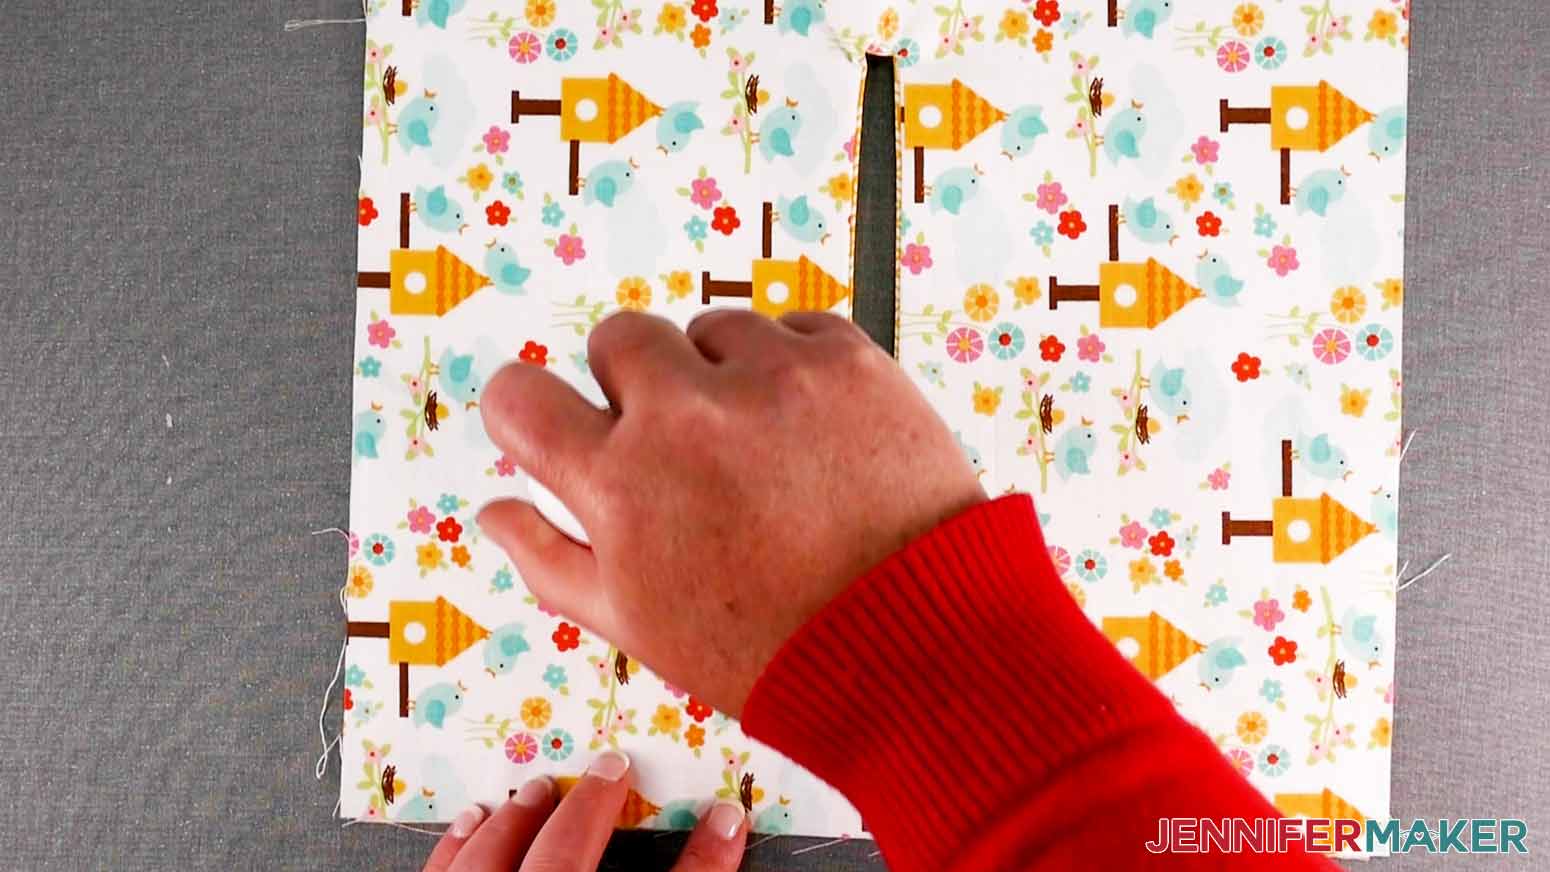
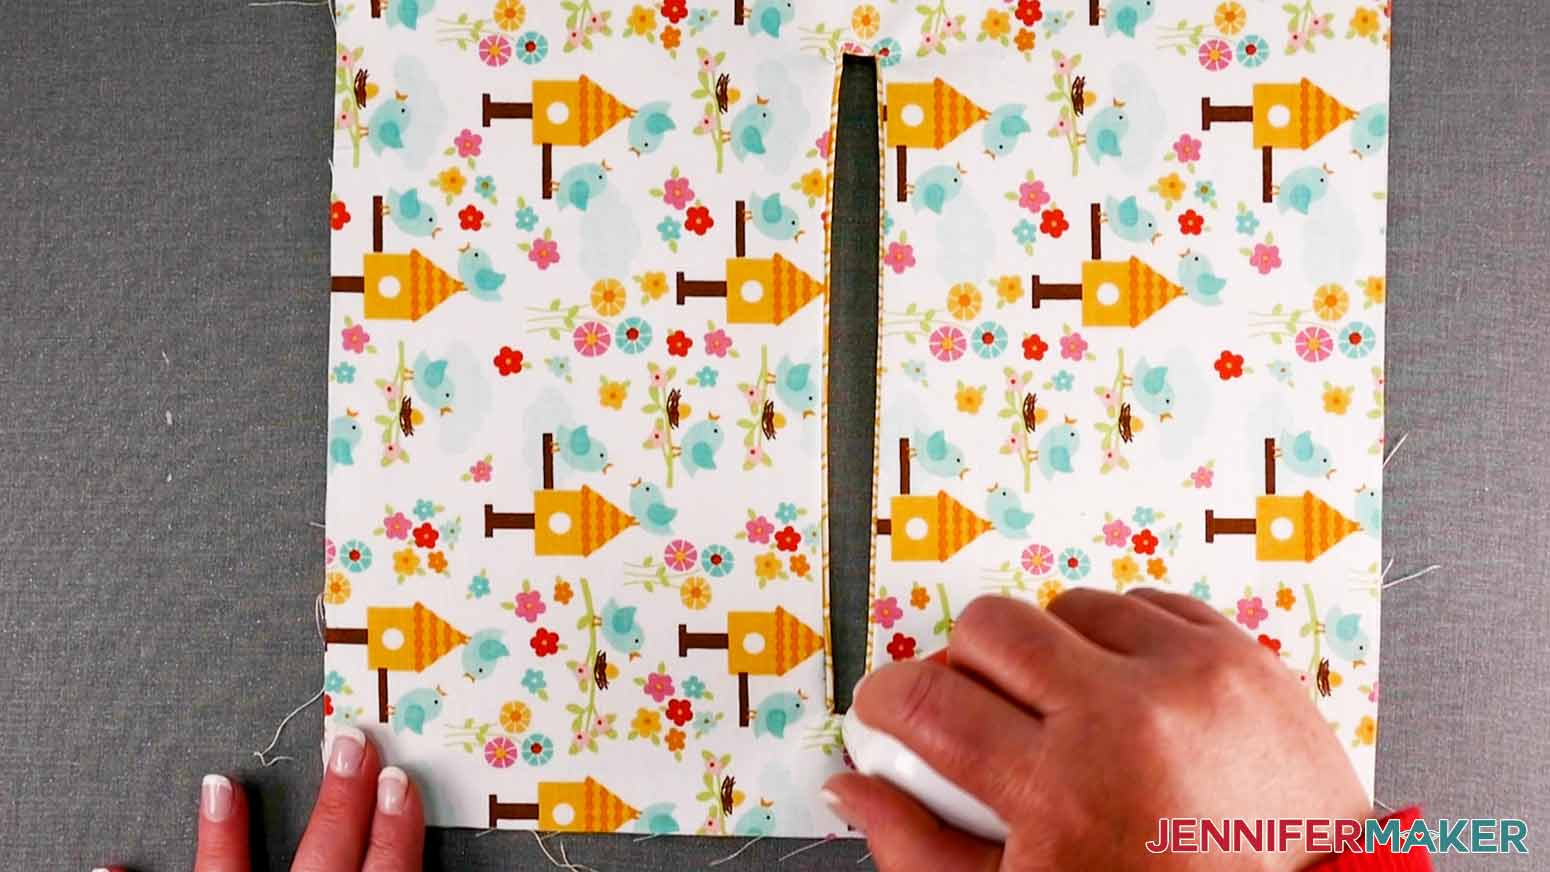
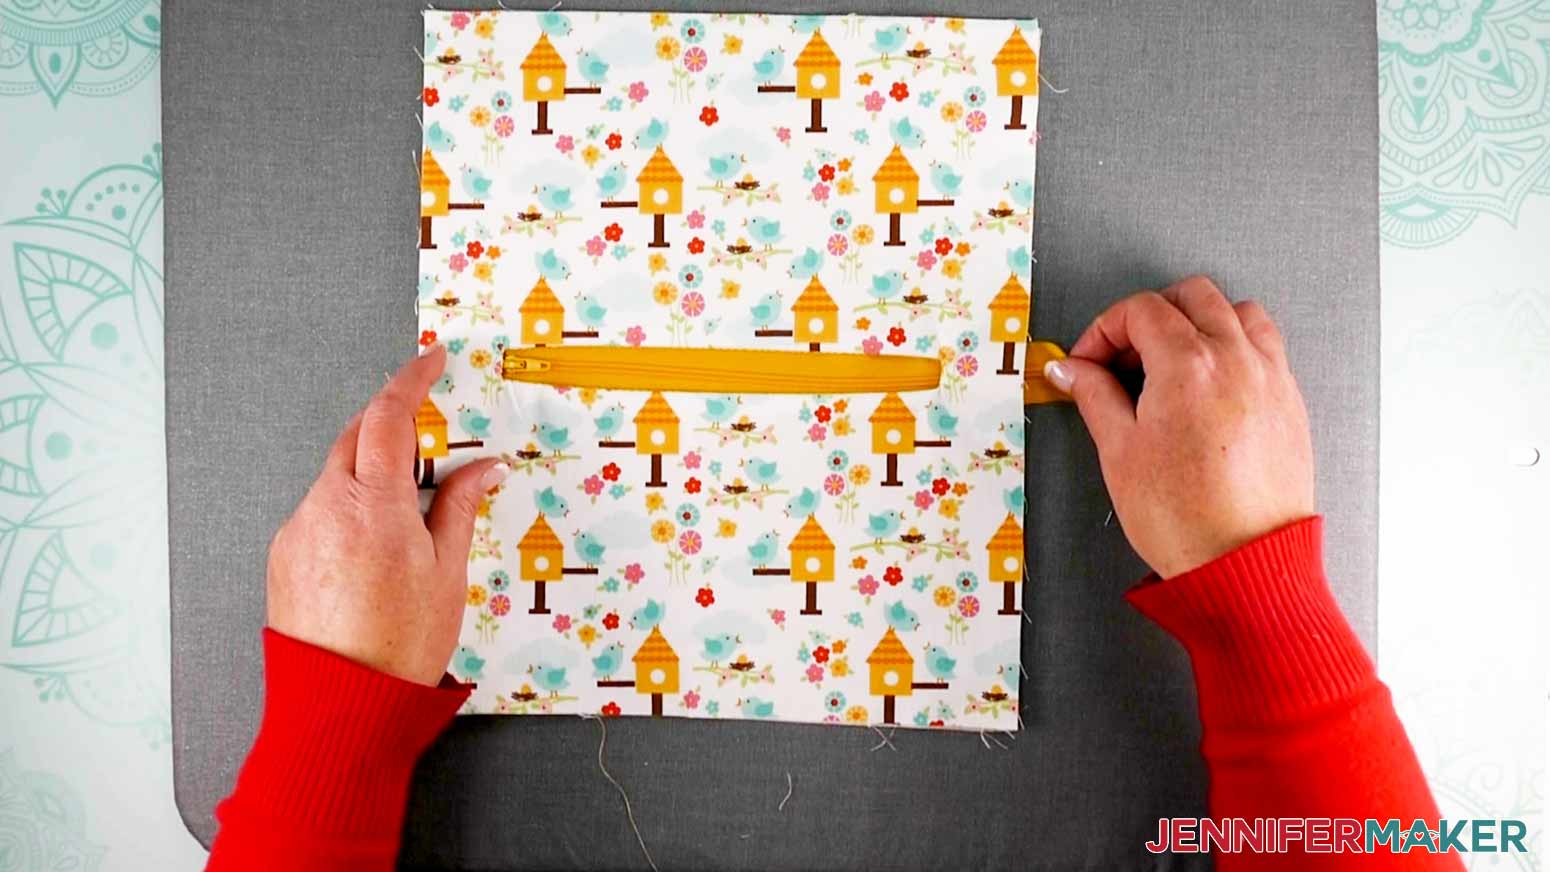
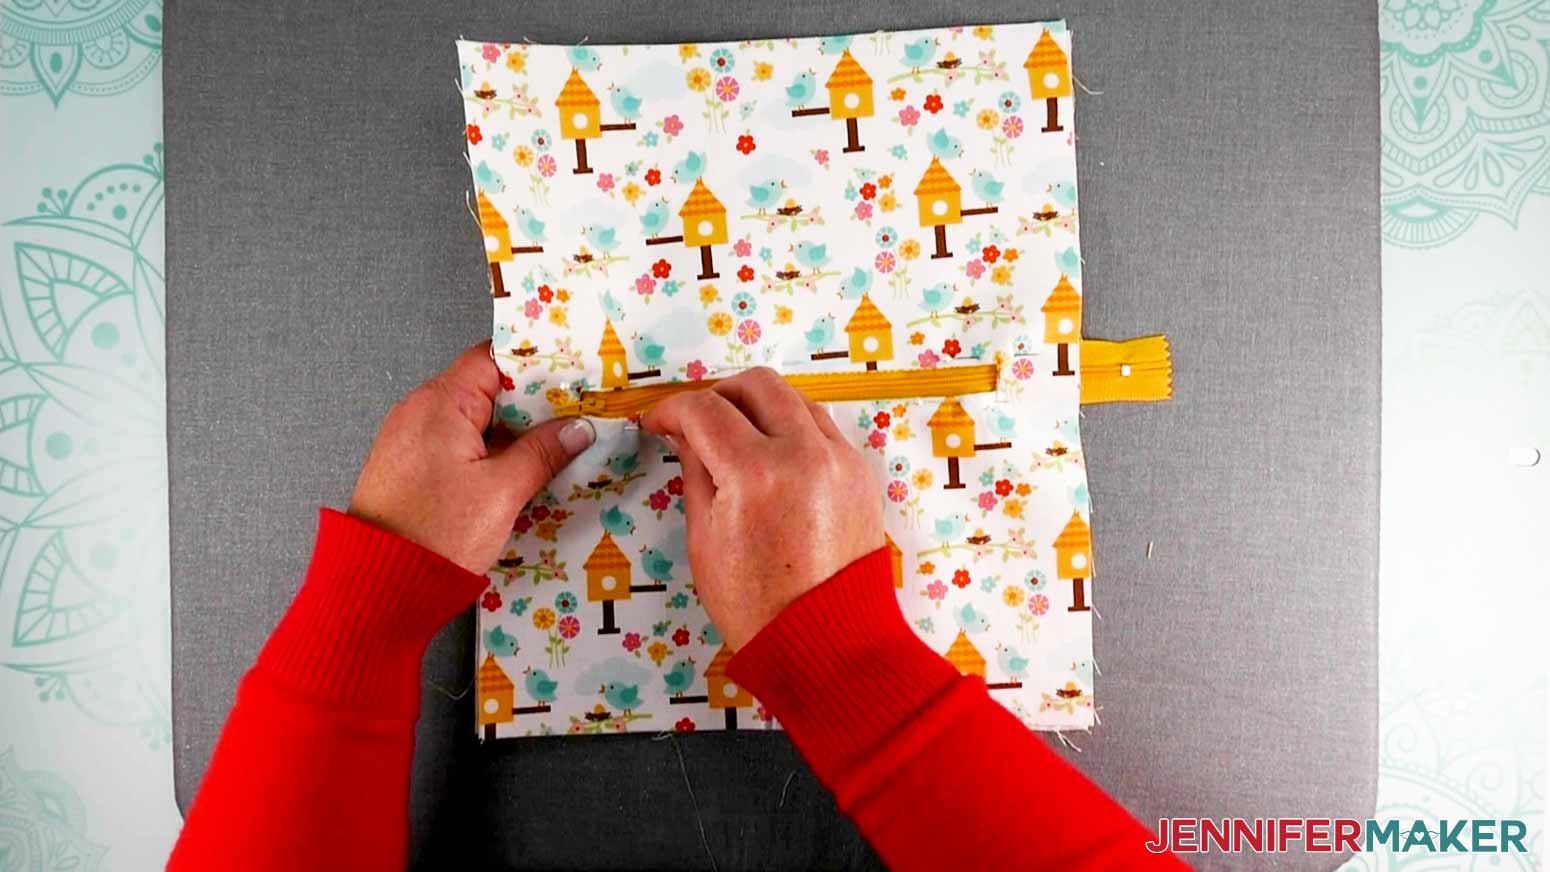
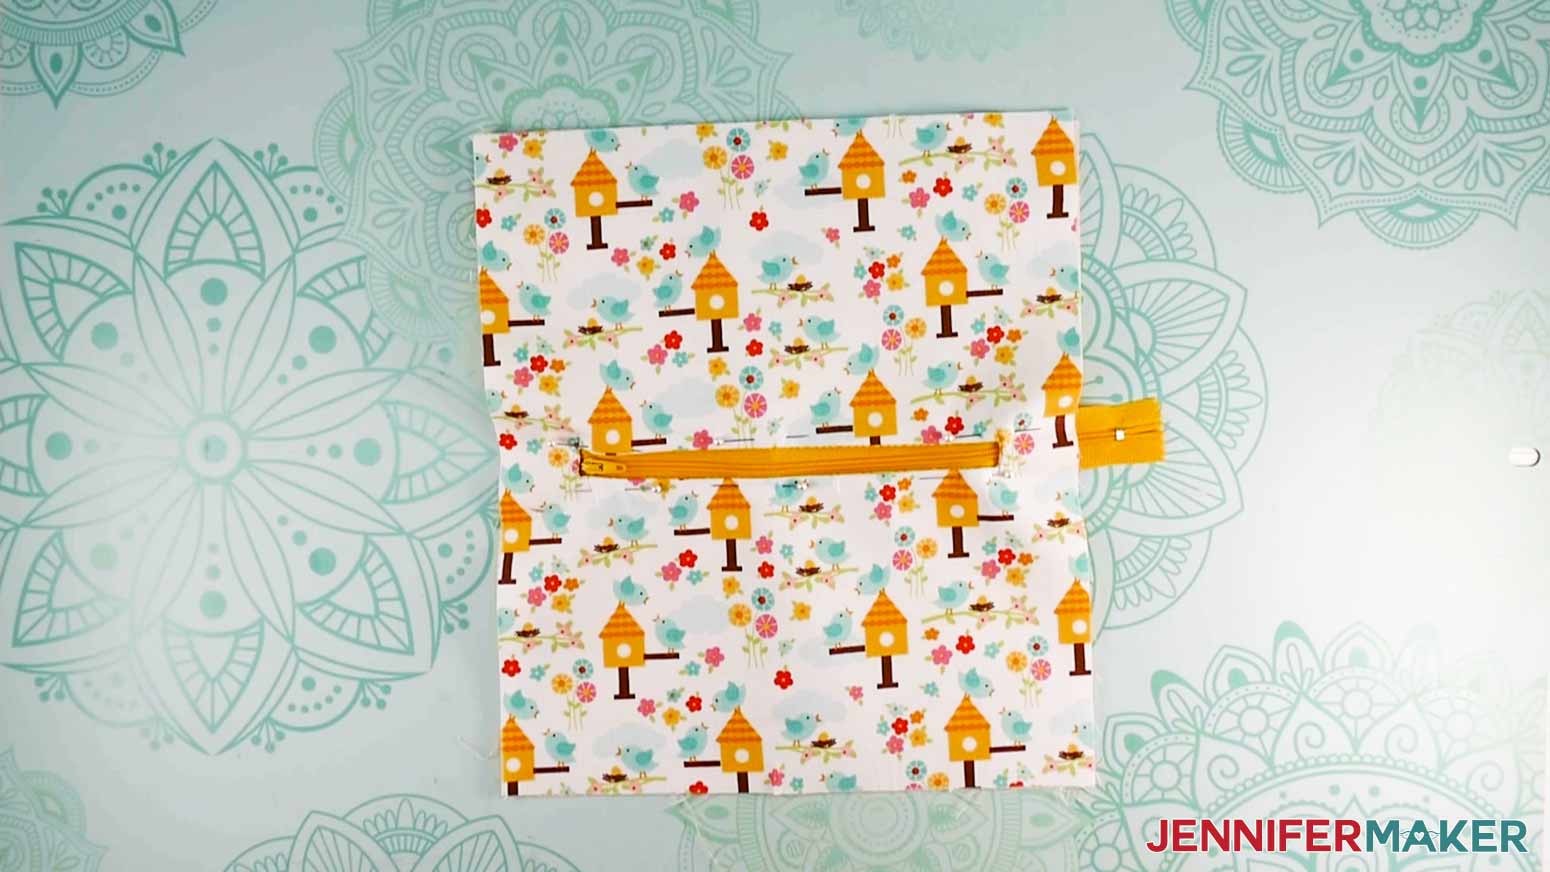
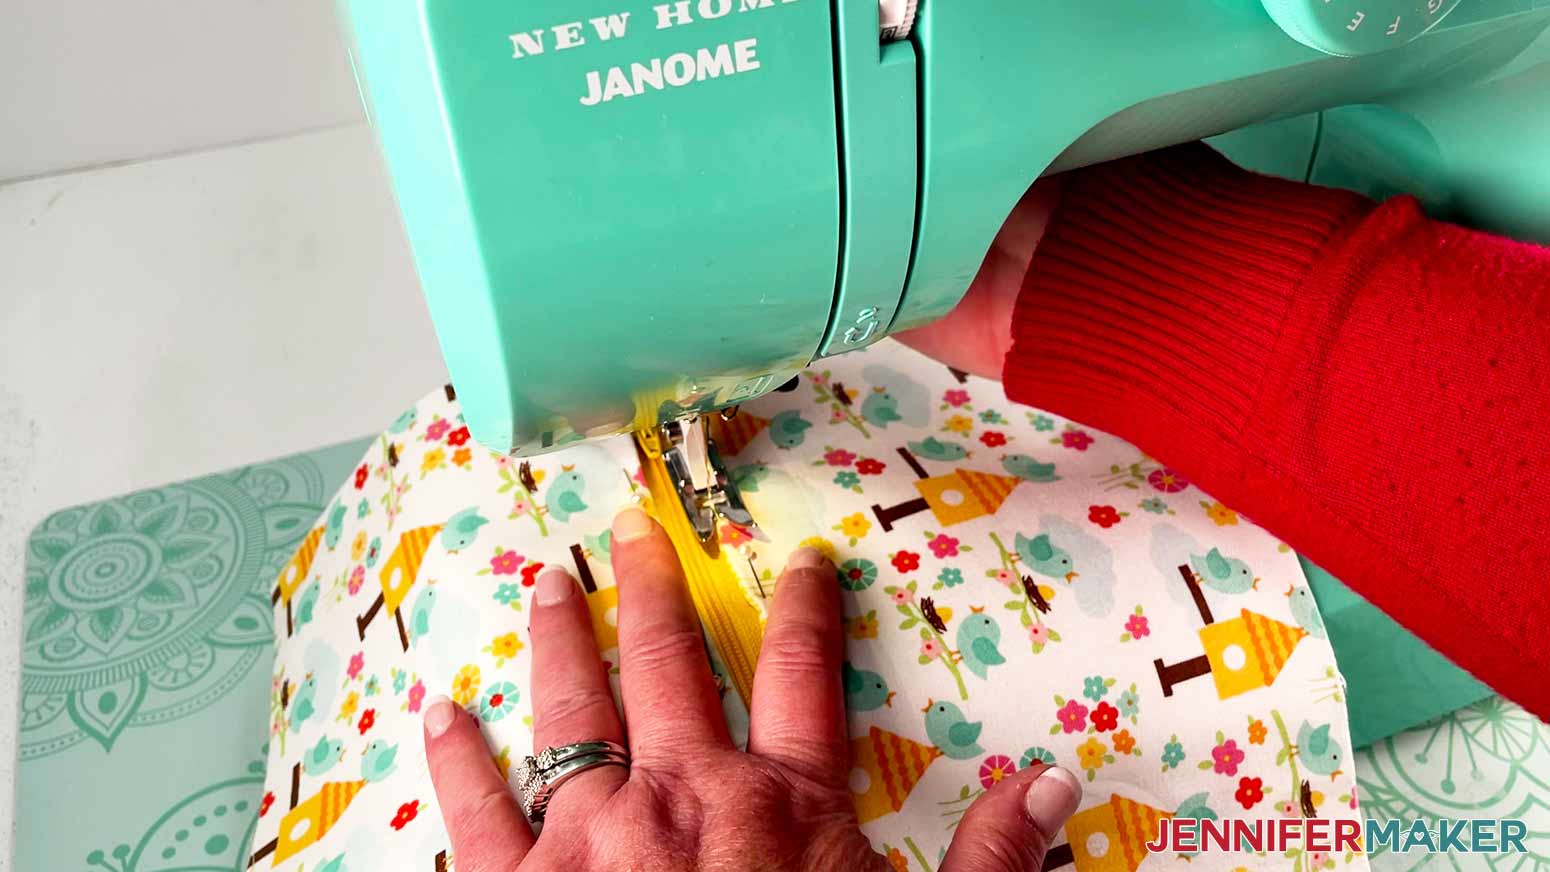
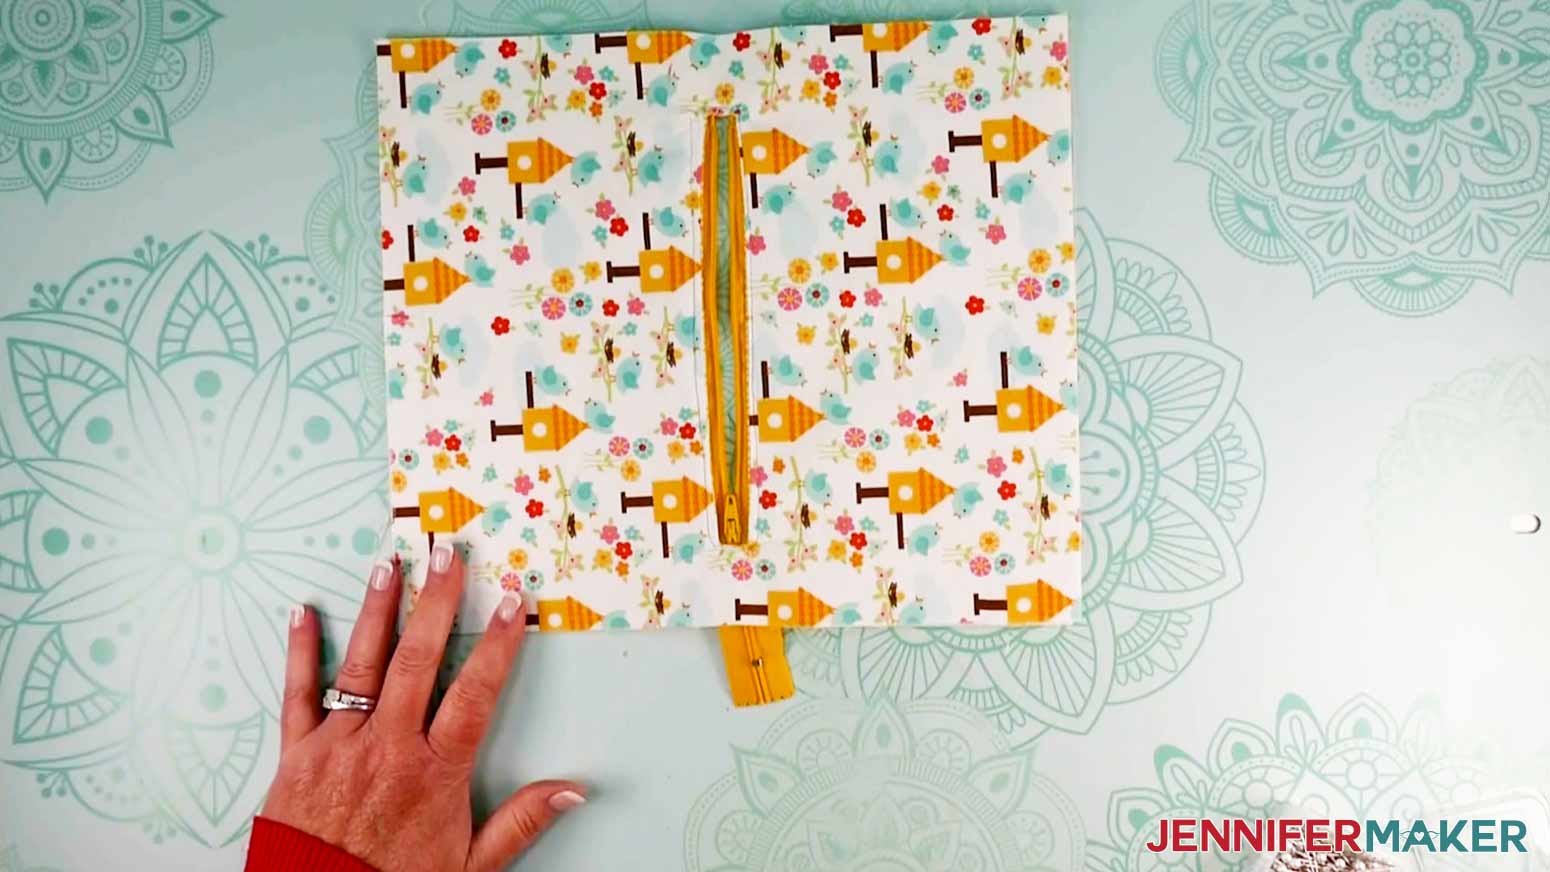
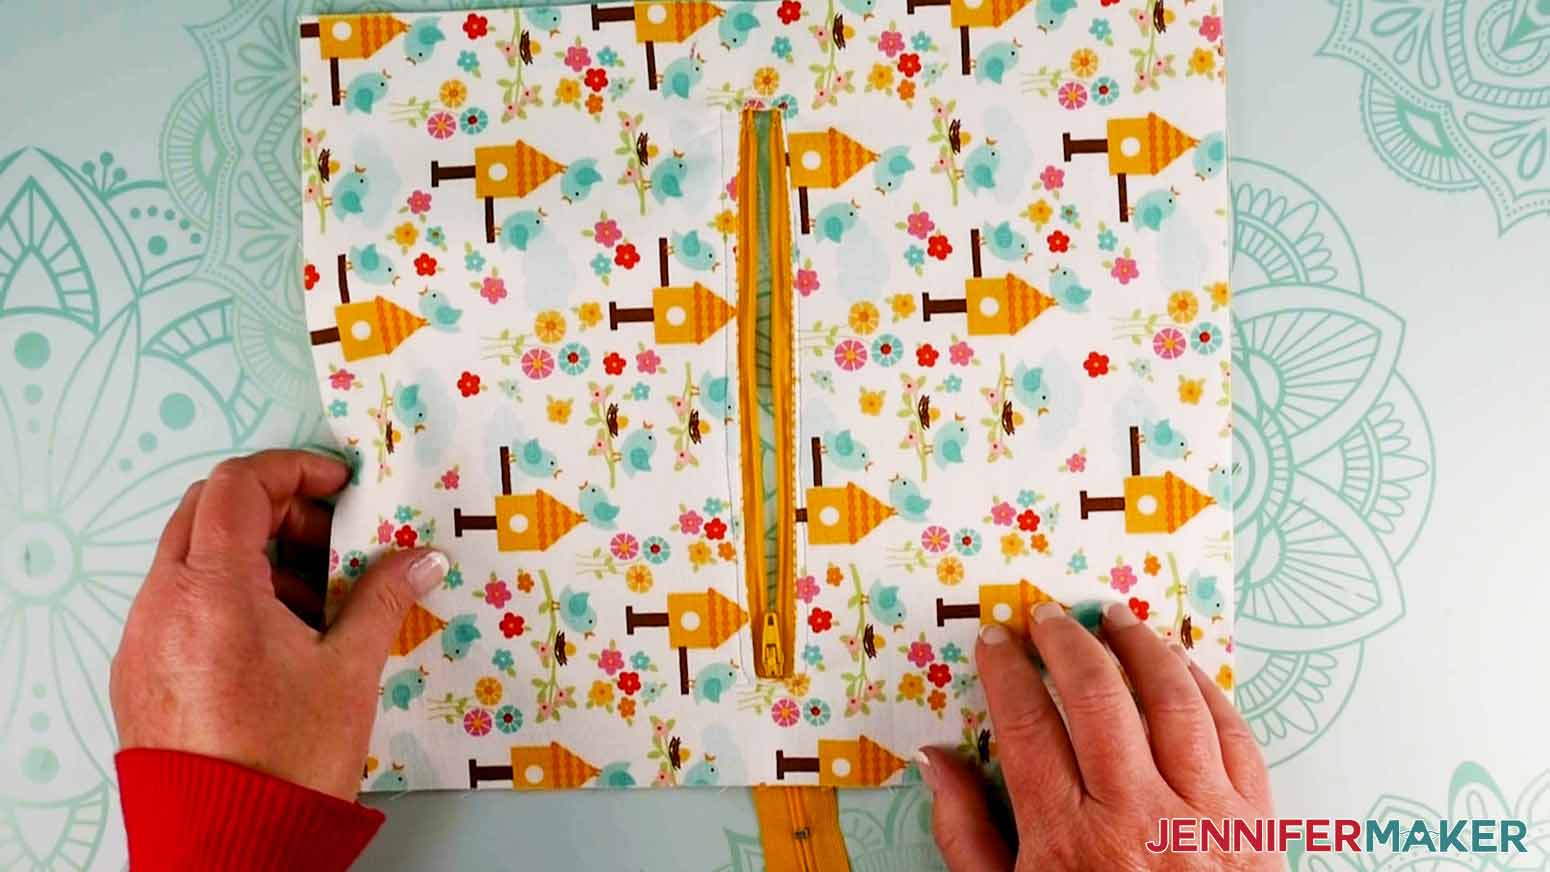
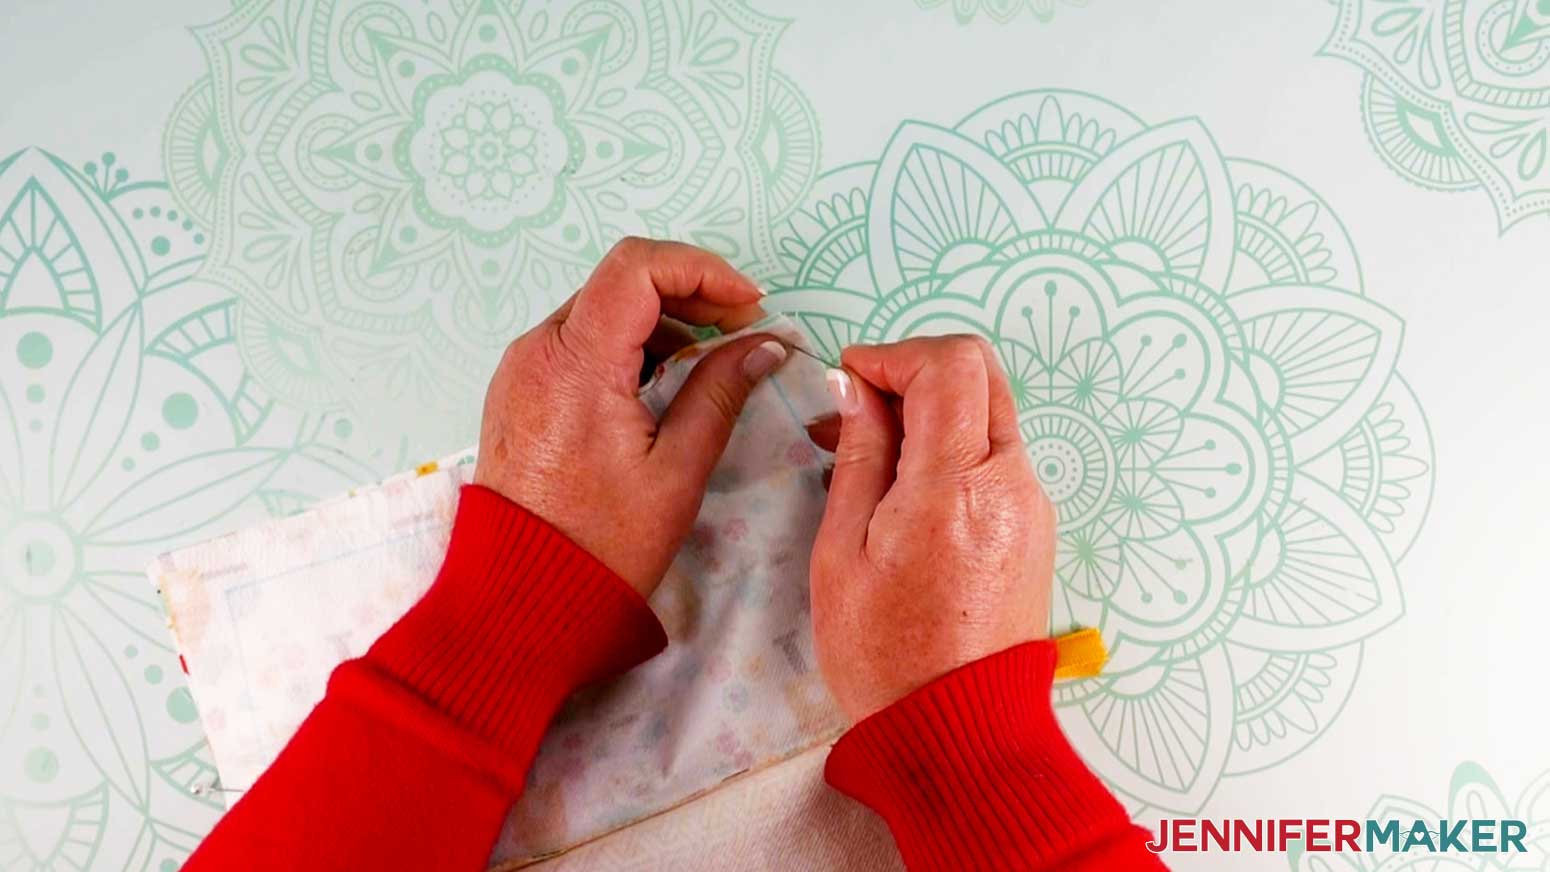
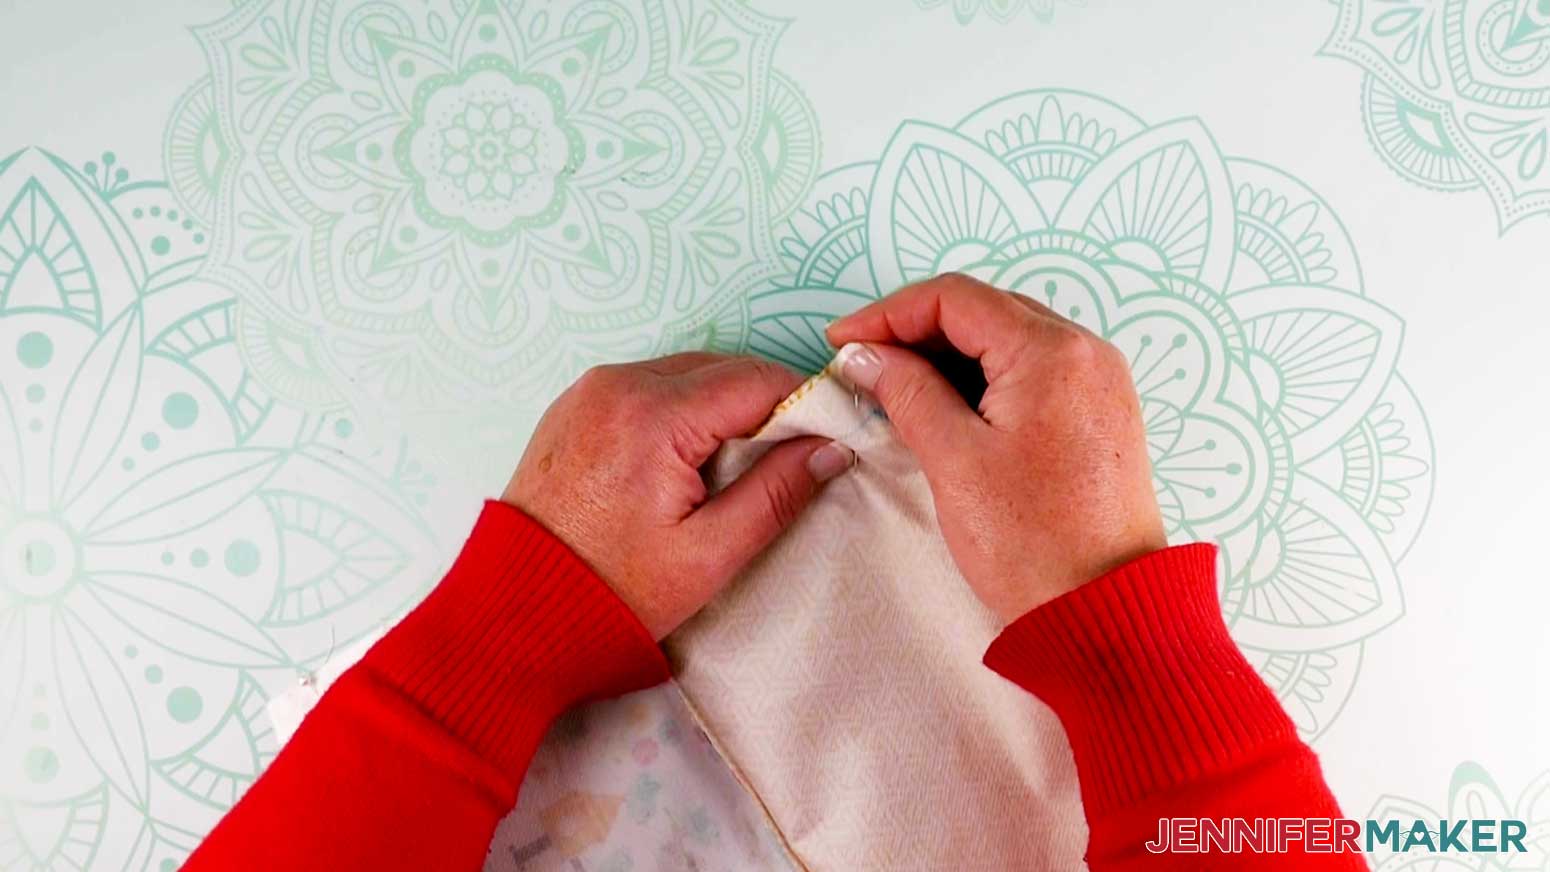
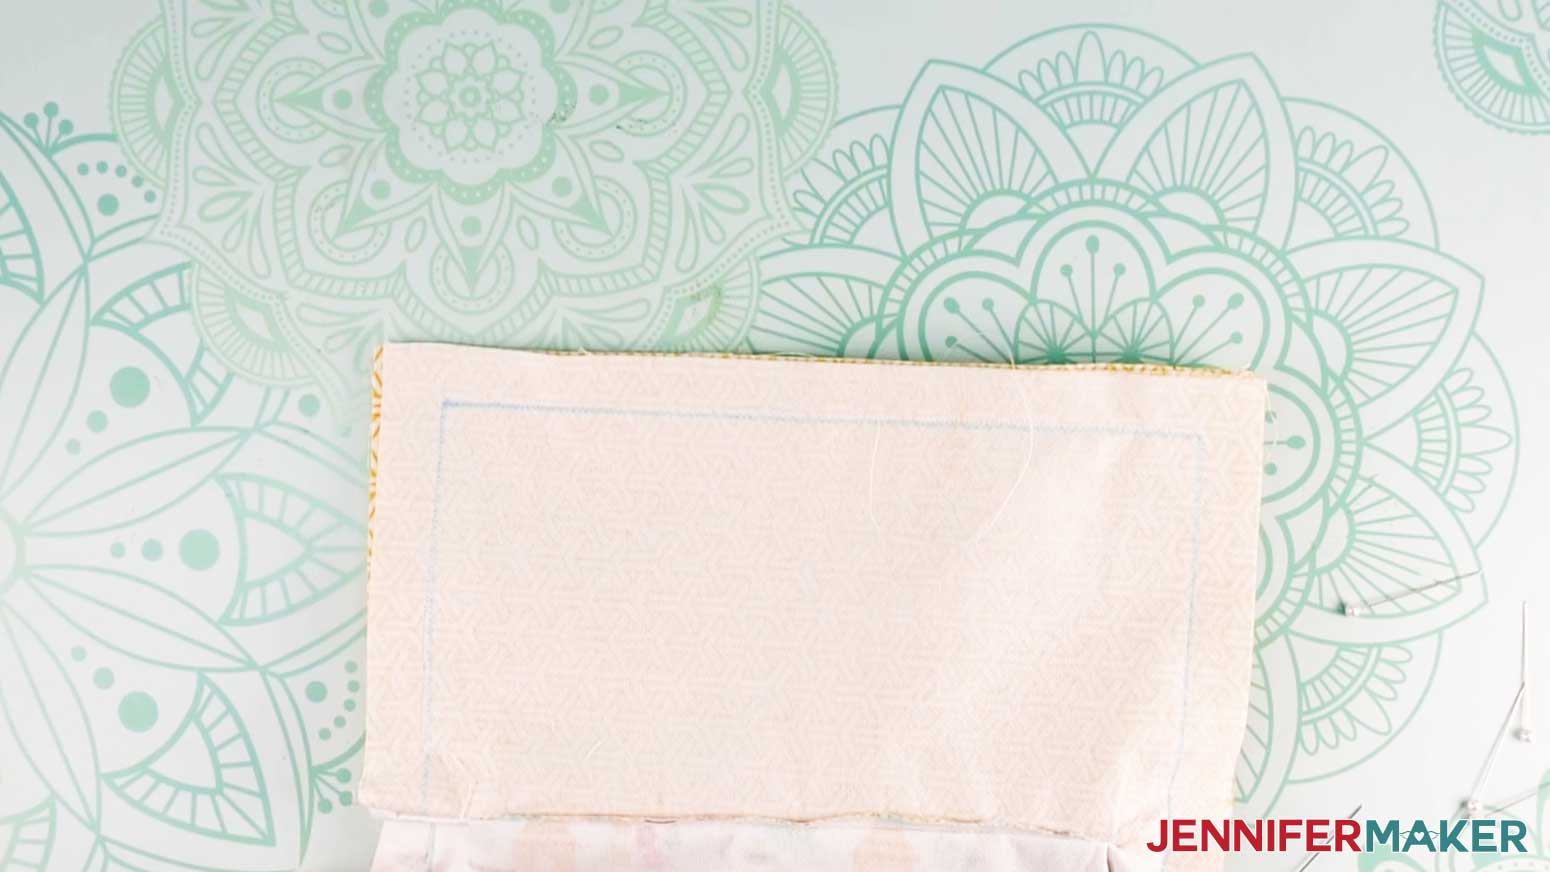
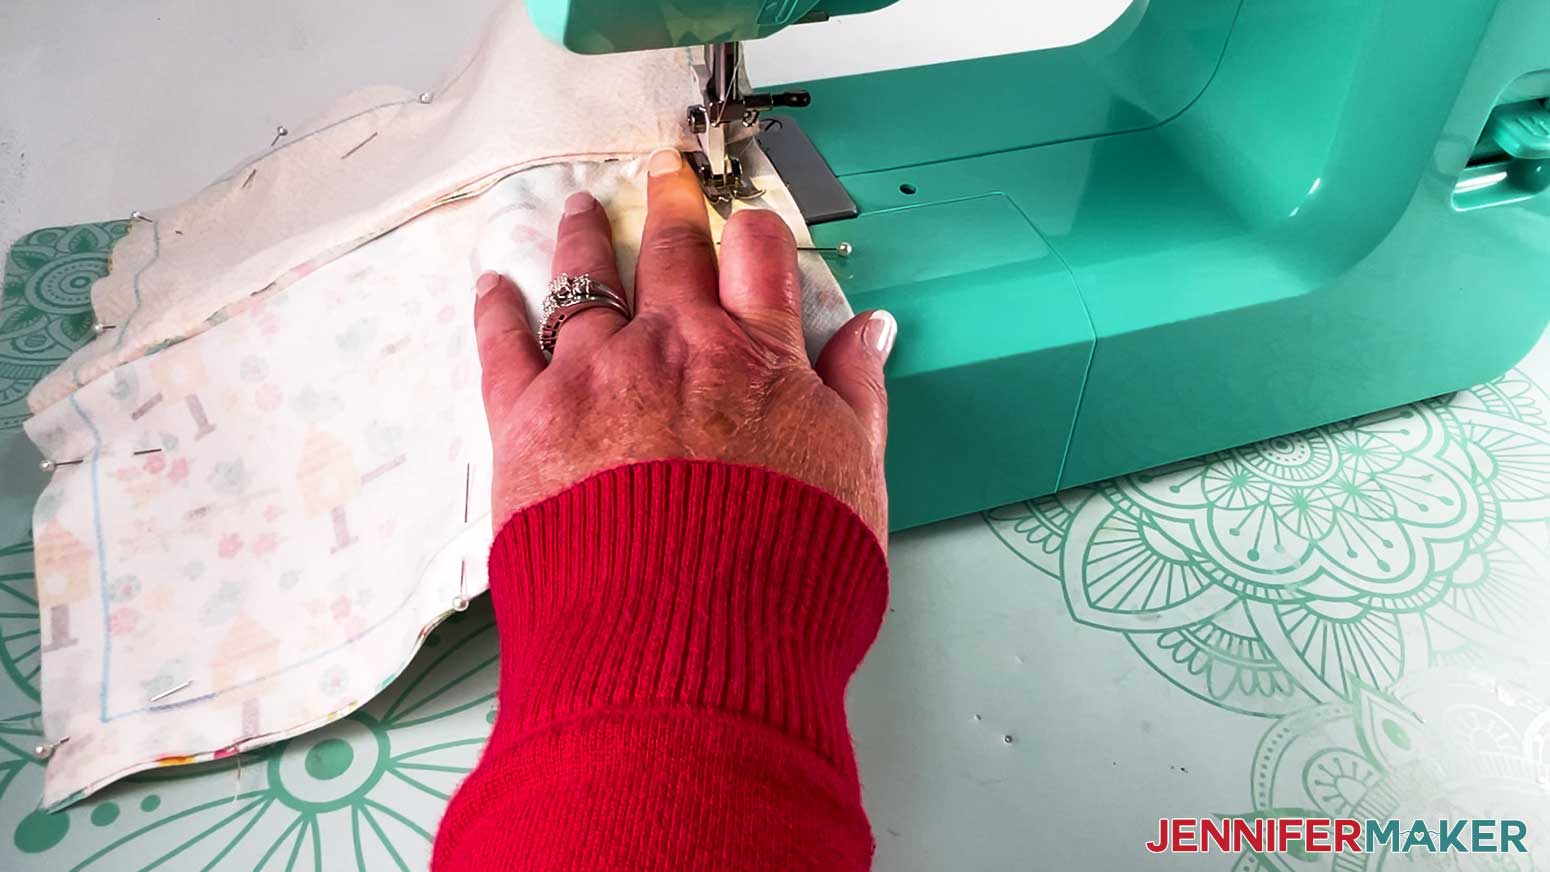
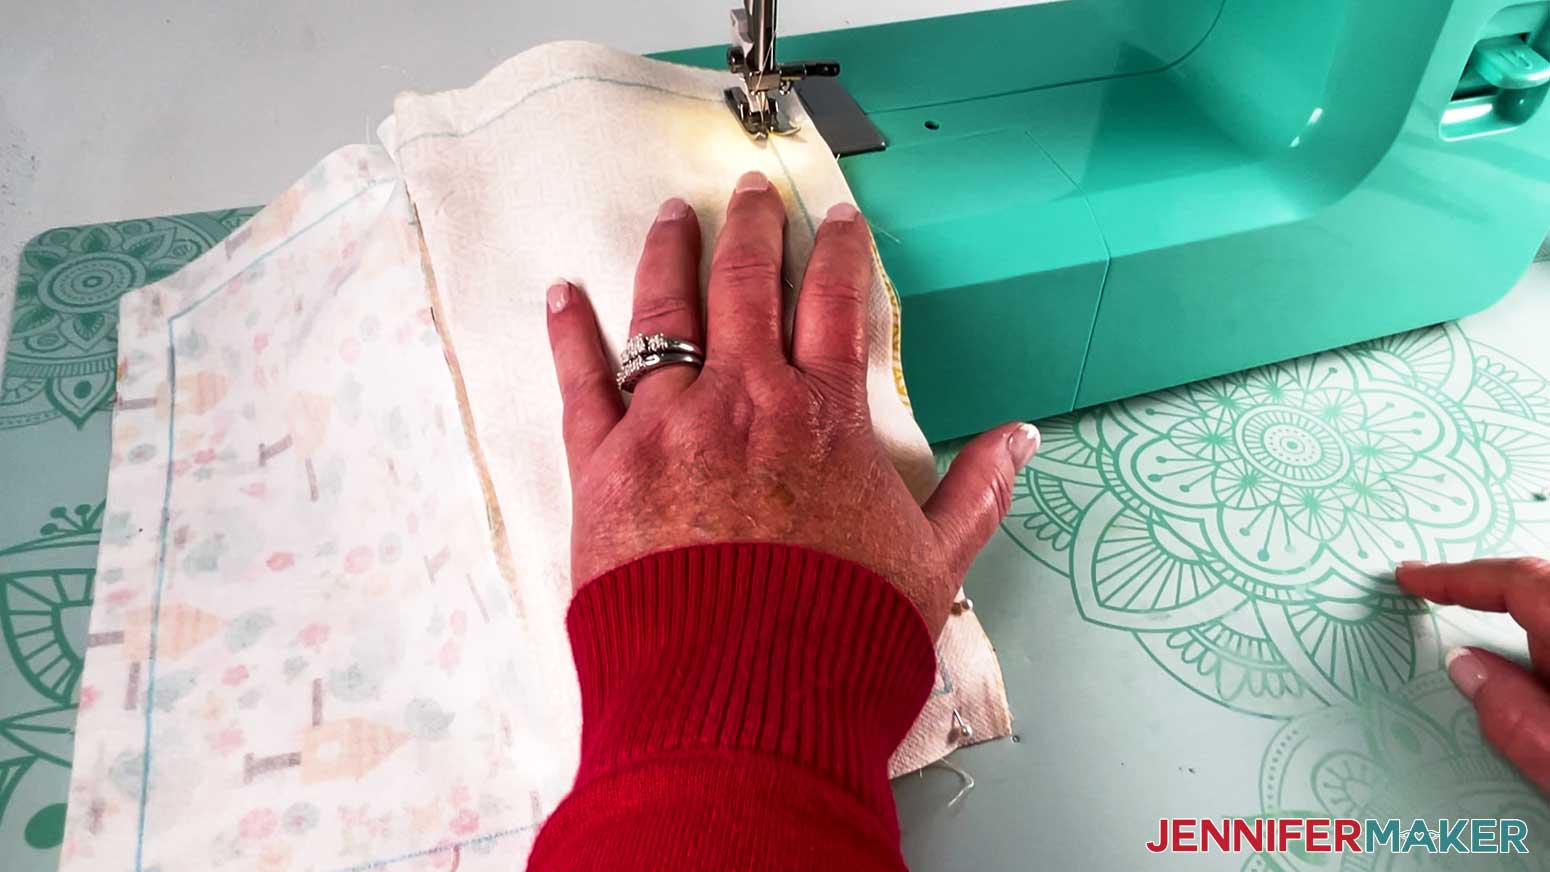
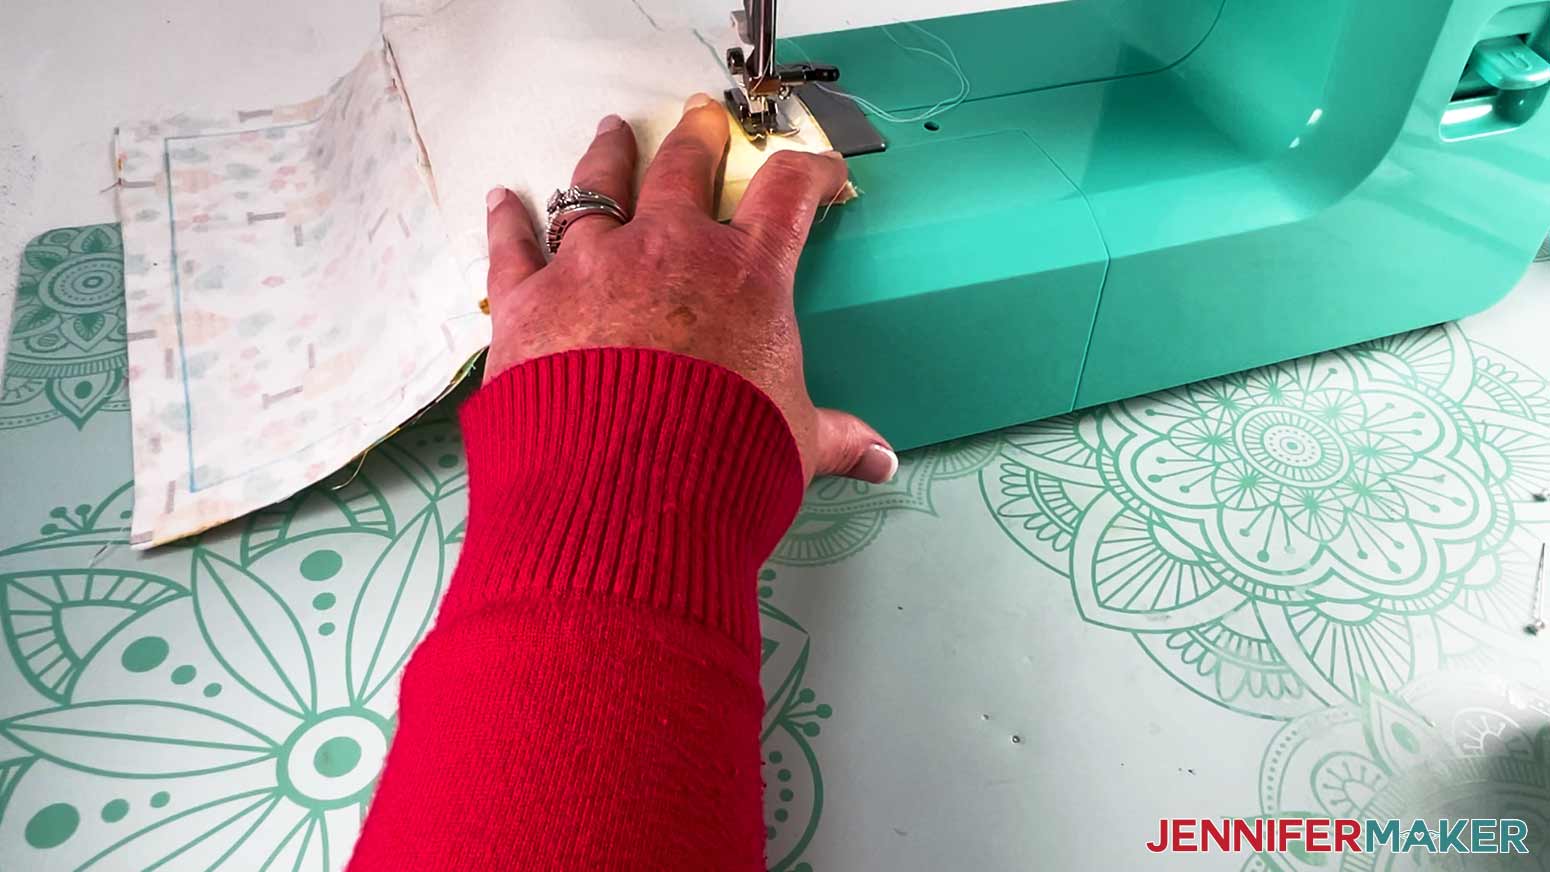
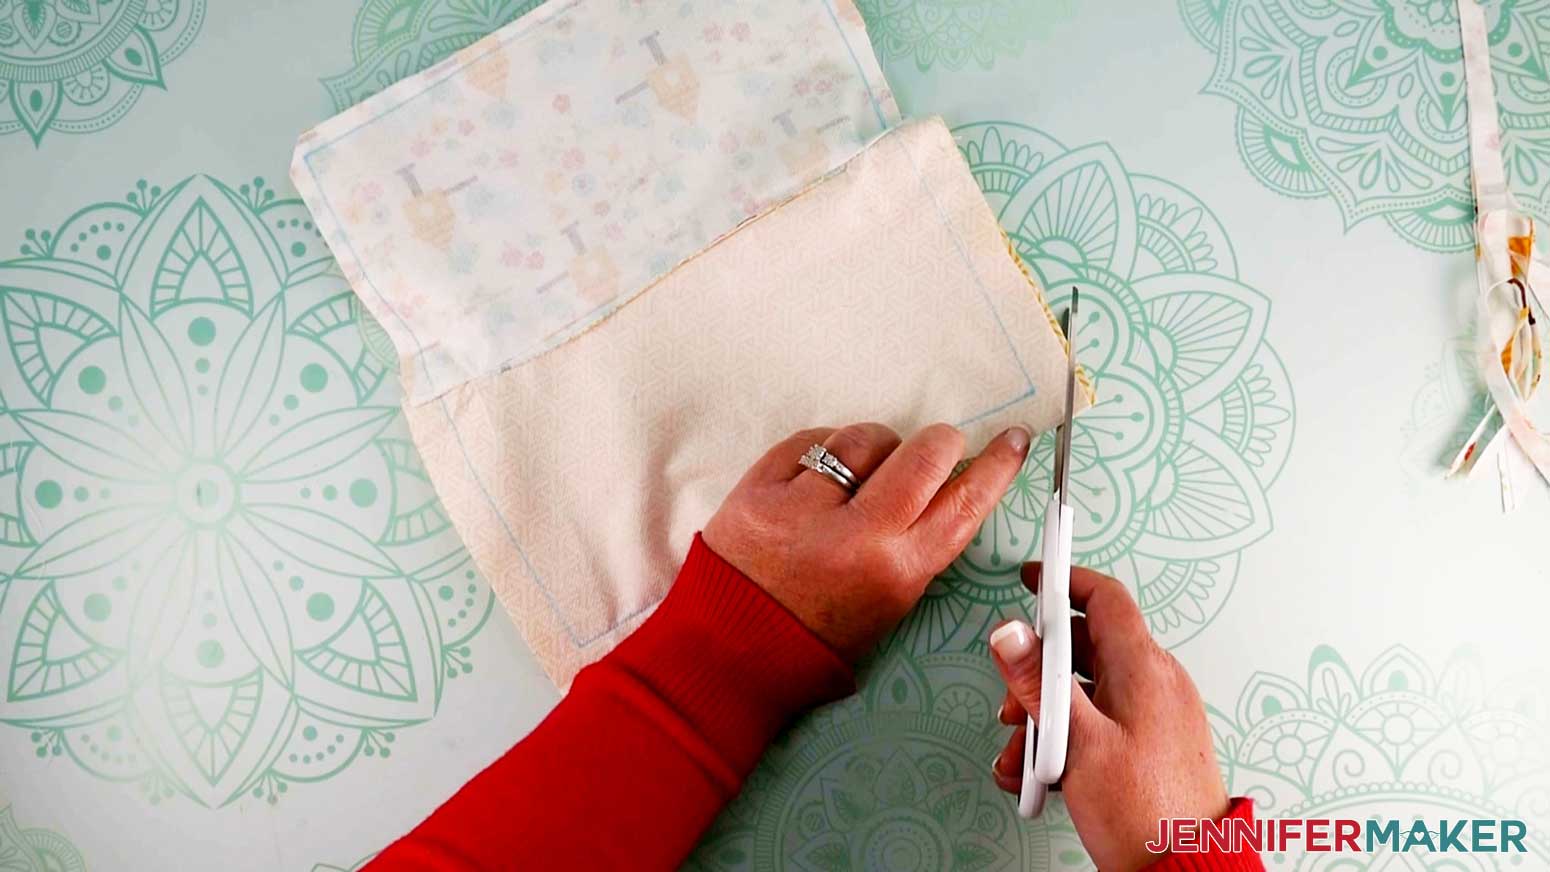
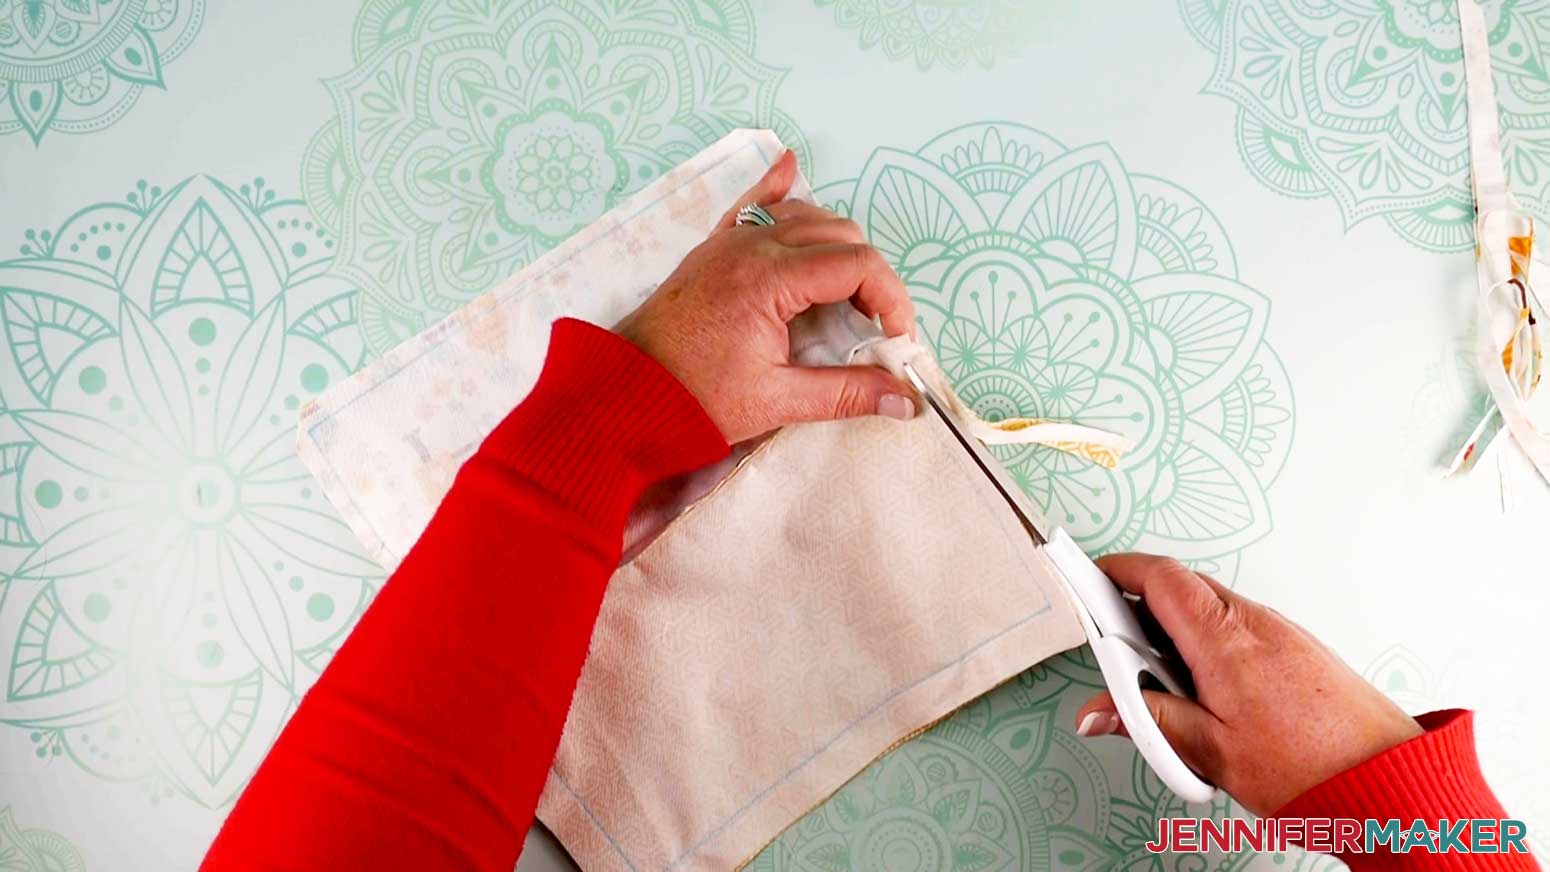
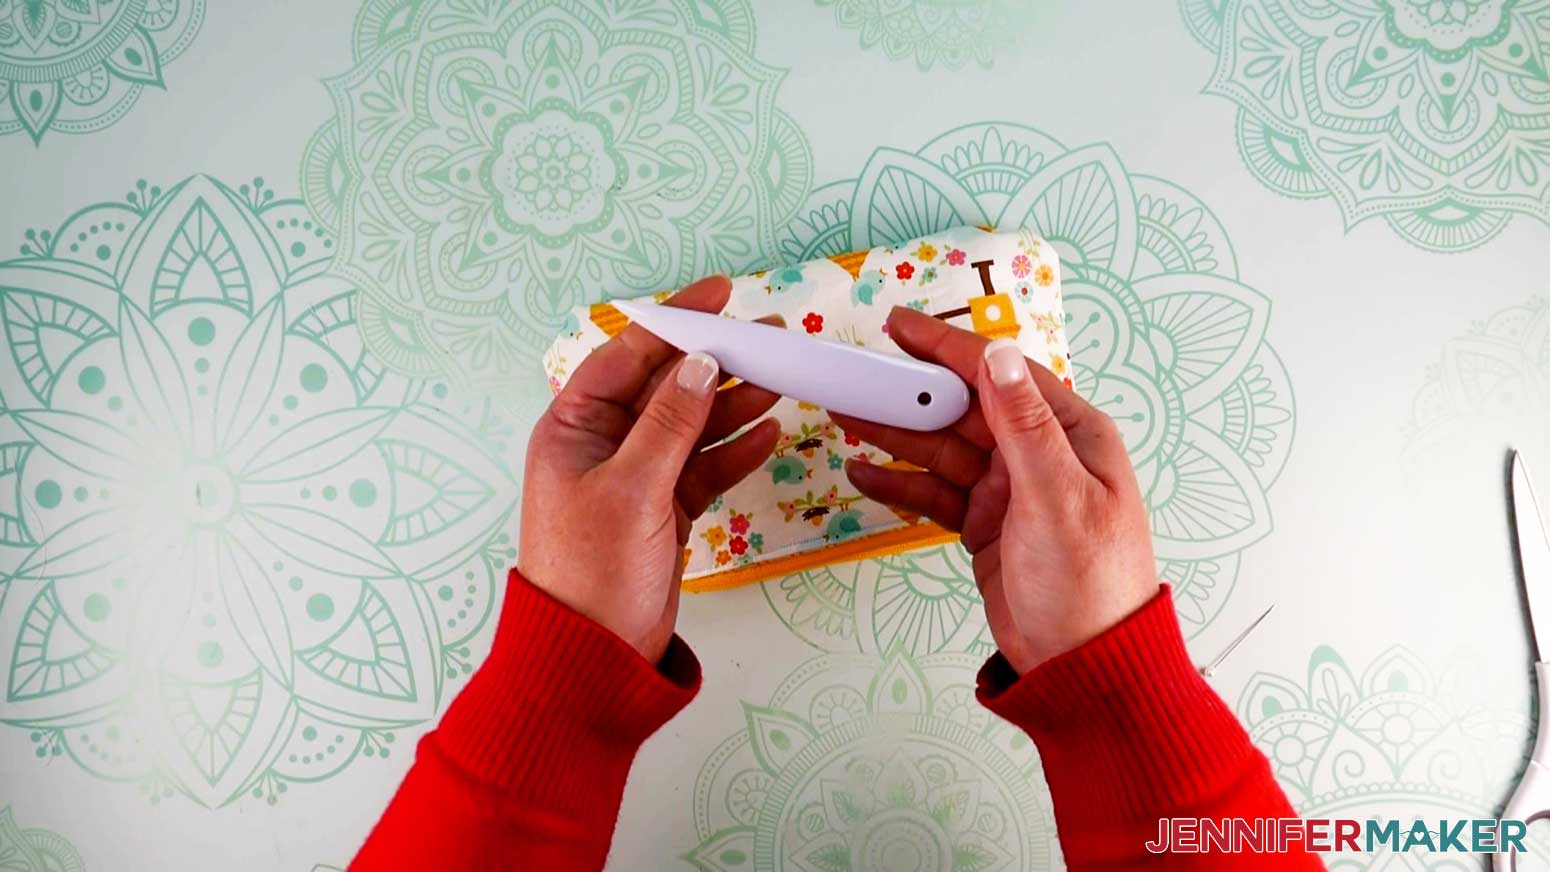
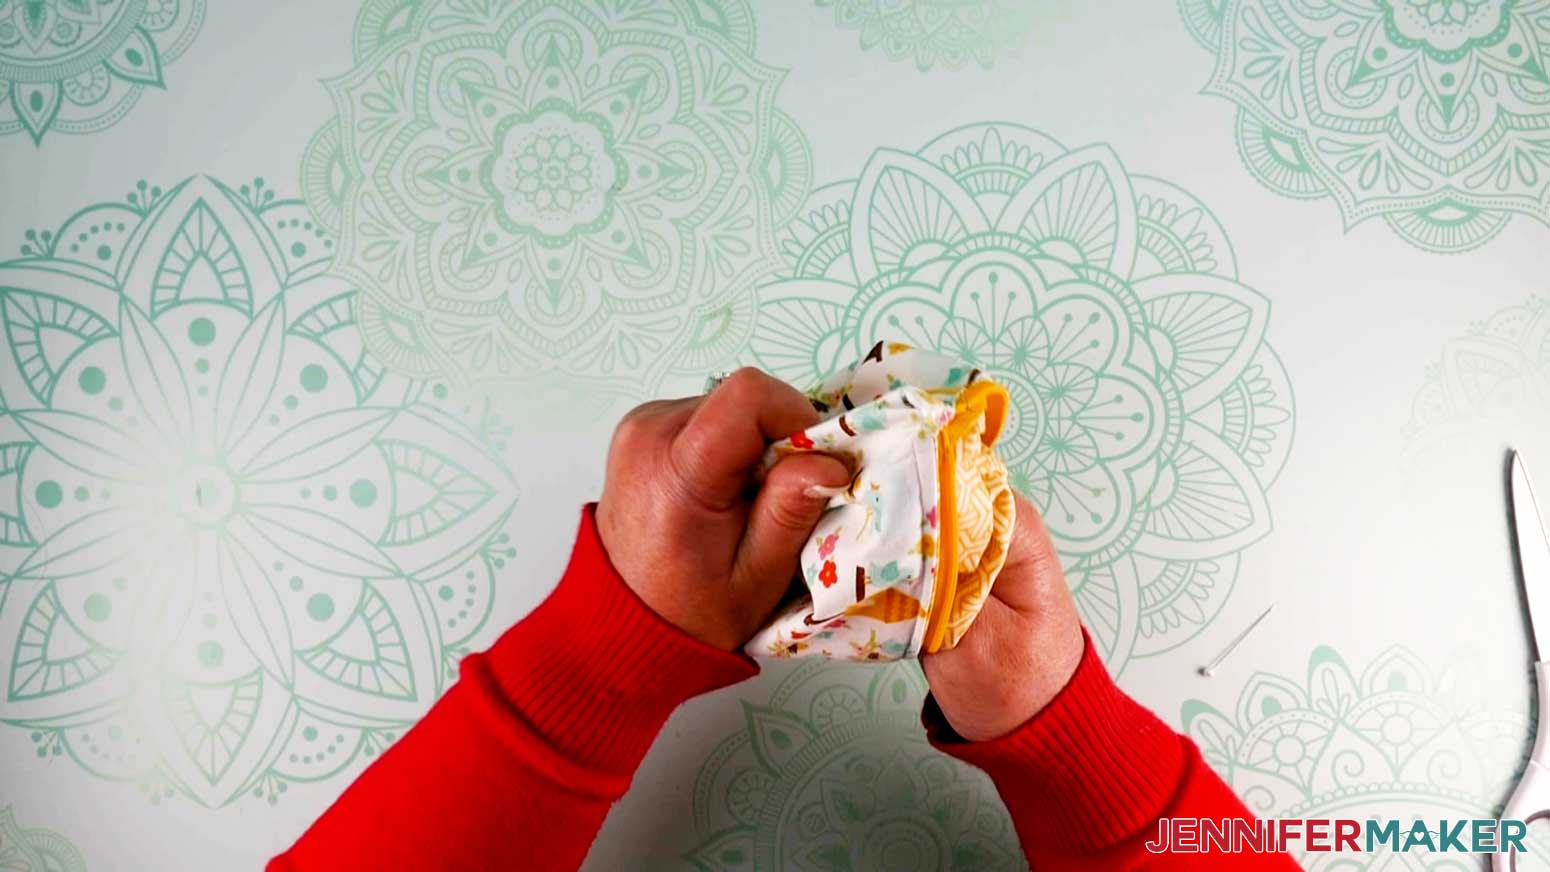
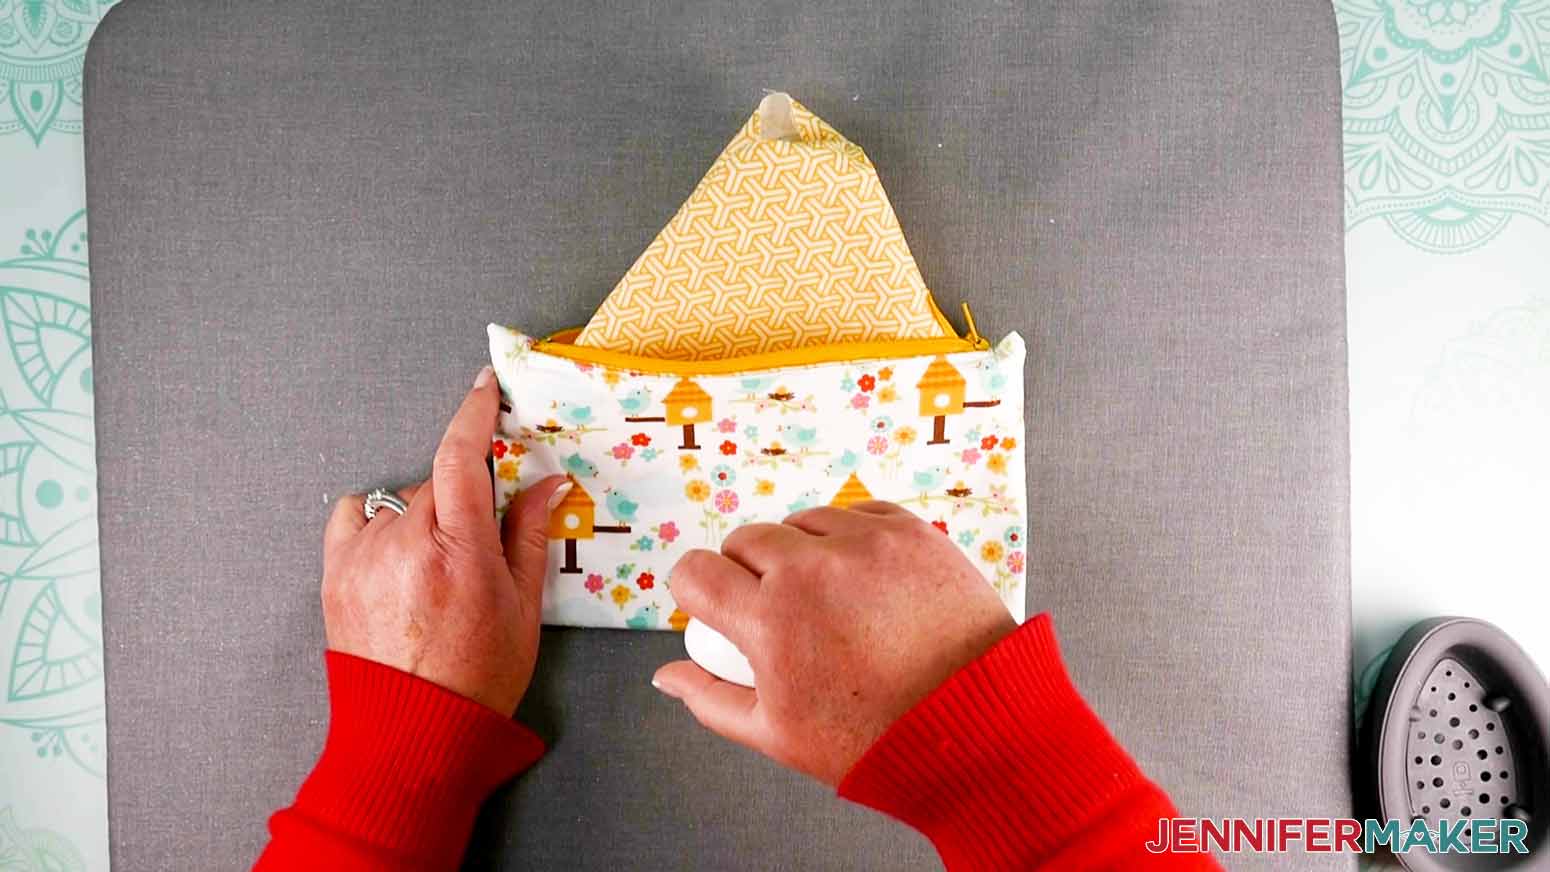
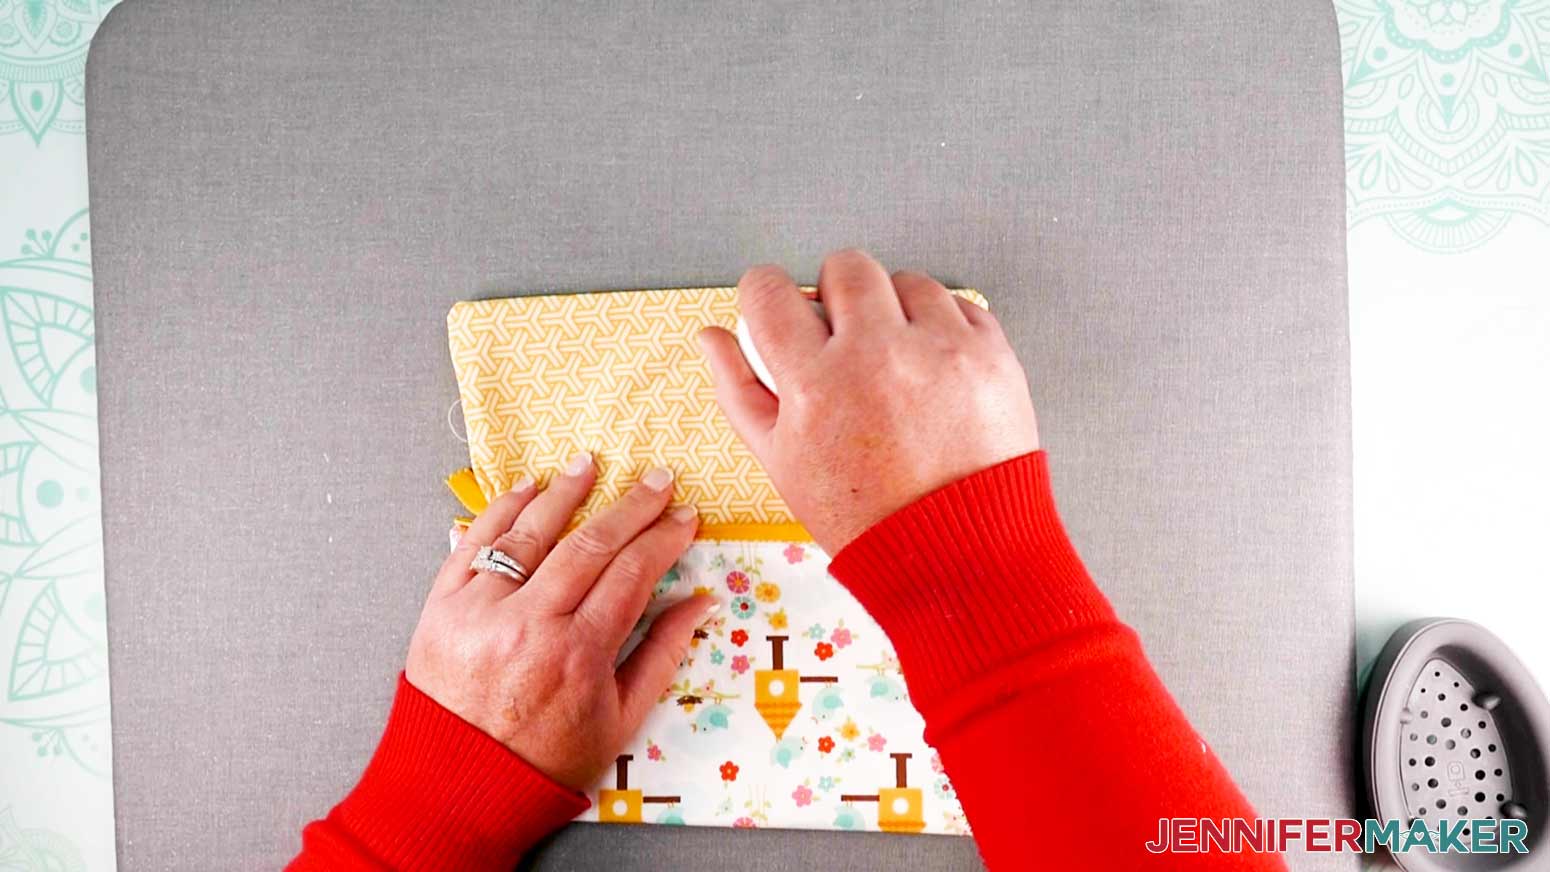
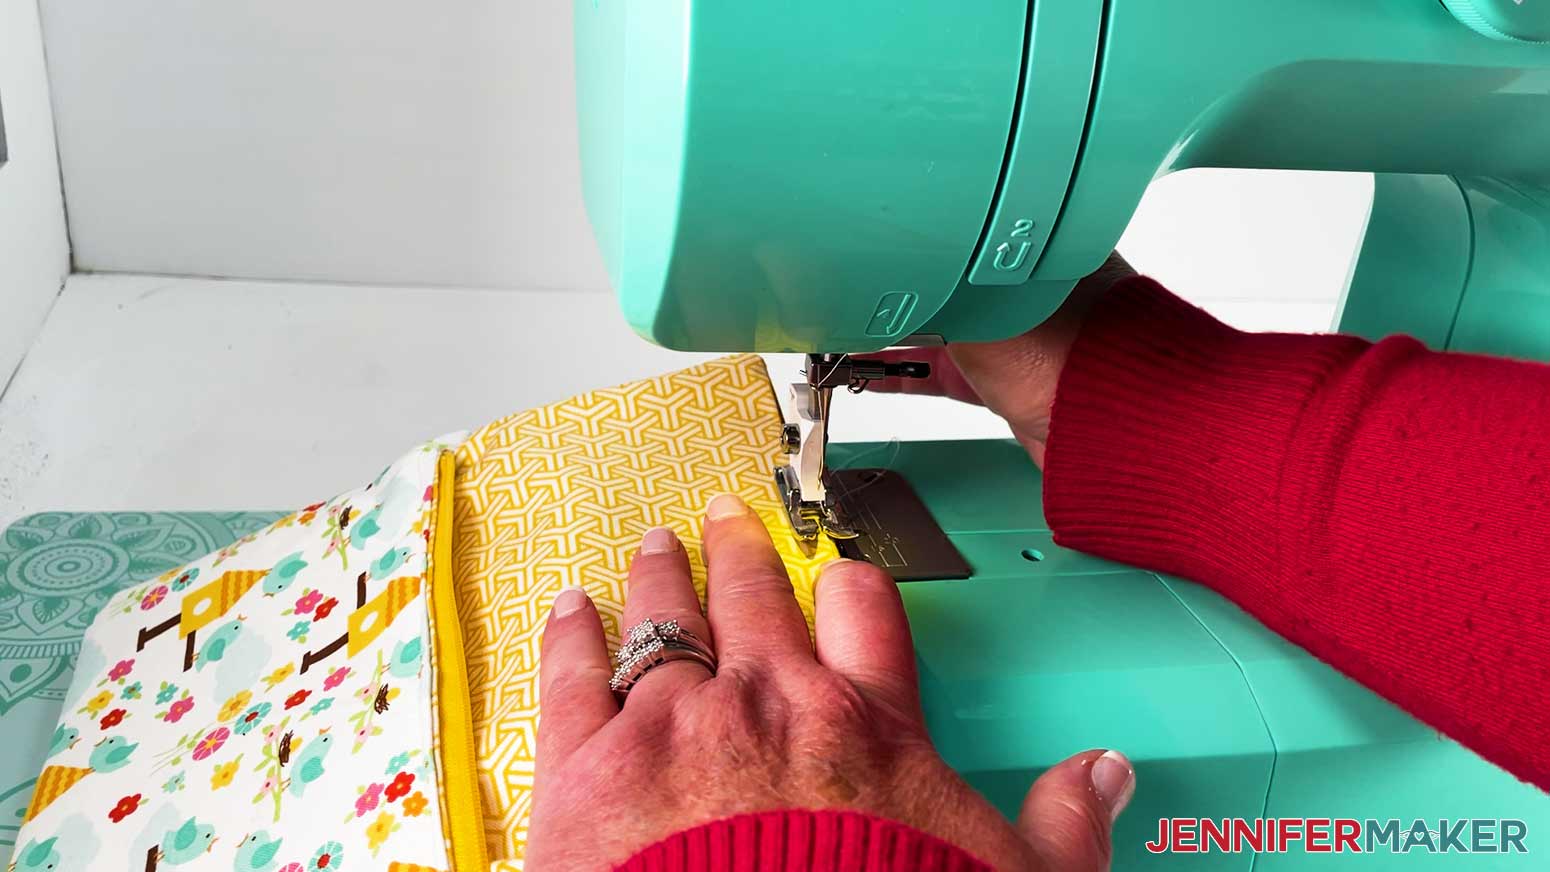
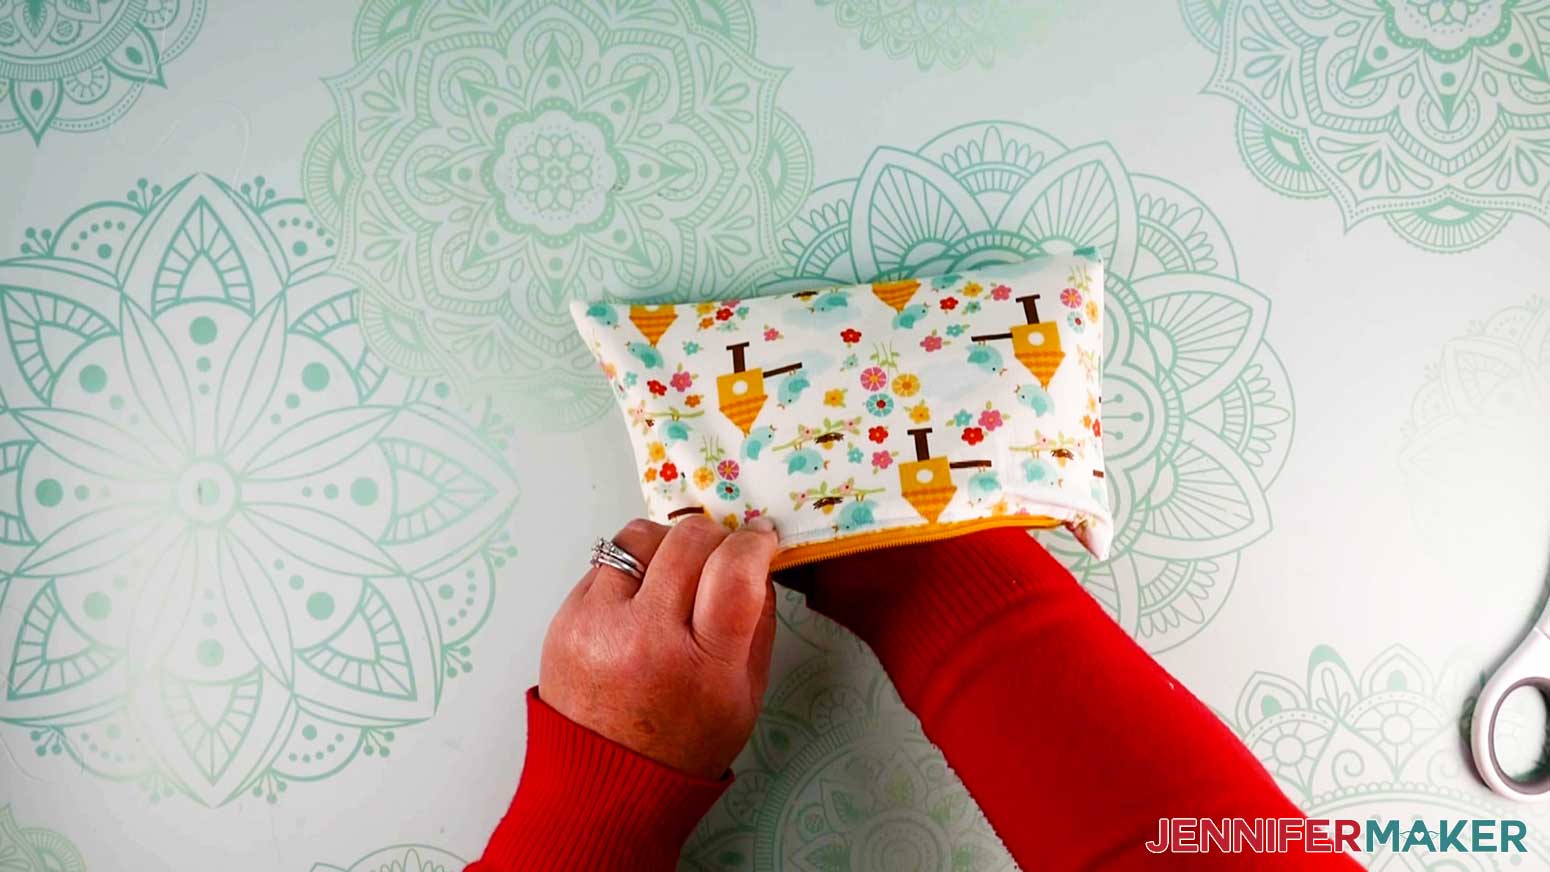
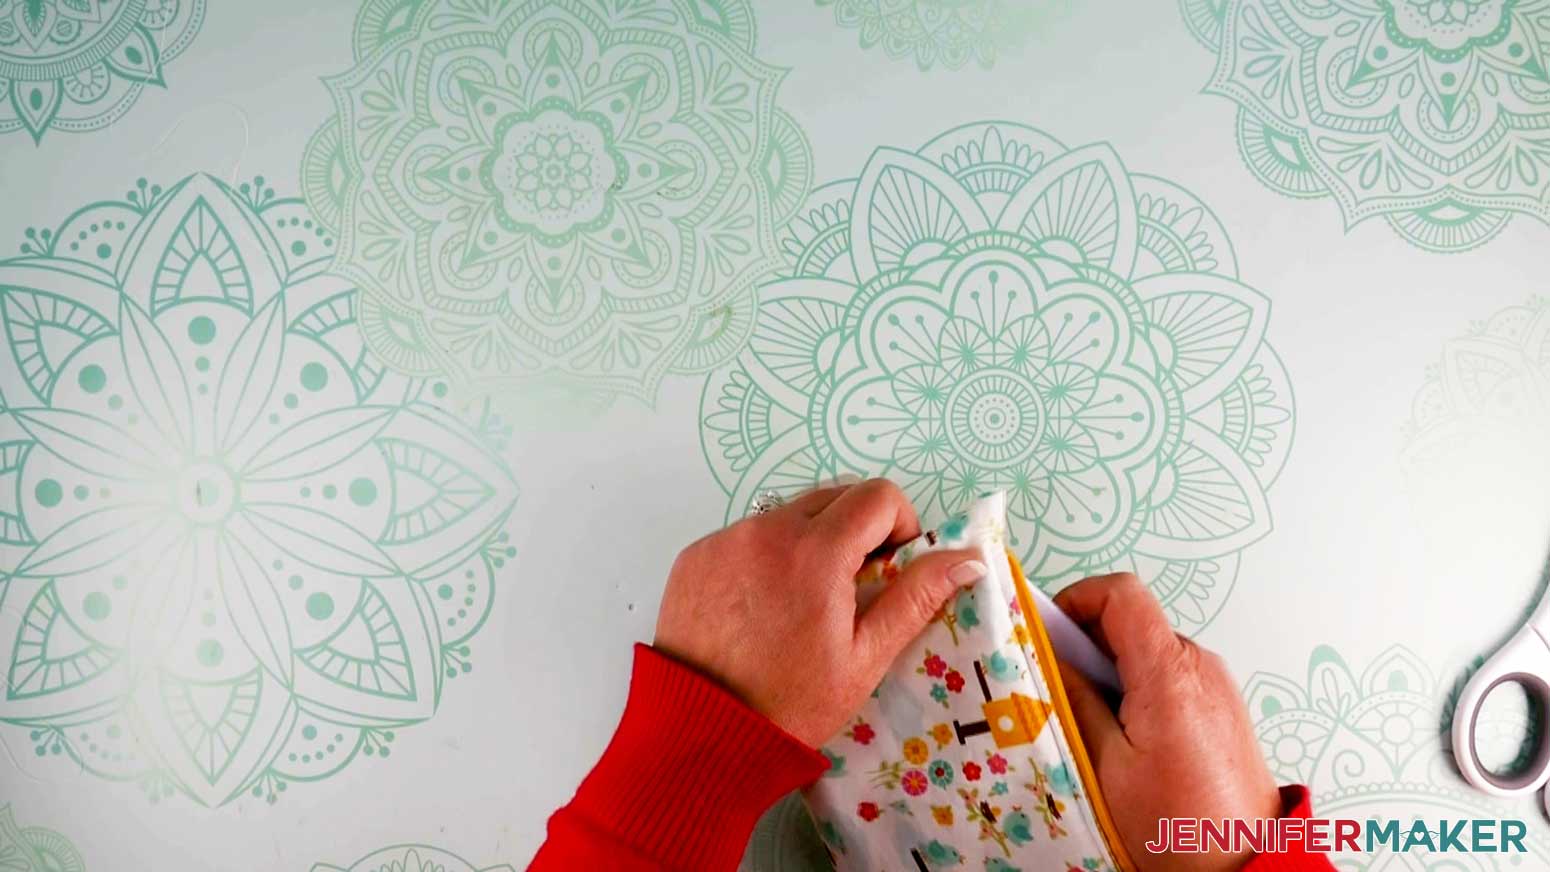
I am going to show you how to make an easy zipper pouch that is also lined. First, download Design #355 which is my free Easy Zipper Pouch SVG/DXF/PDF from my free resource library. This is what my Easy Zipper Pouch SVG file looks like in Cricut Design Space. Once the SVG is uploaded, zoom out to see the whole design by clicking on the minus (-) sign next to the magnifying glass in the lower left. Tip: If you're not sure how to upload an SVG cut file to Cricut Design Space, watch this helpful video training series I made. If you're on an iPhone or iPad, here's how to download and upload SVG files to the Cricut Design Space app. PREPARE THE FABRIC You will need two pieces of fabric to make my Easy Zipper Pouch. One piece of fabric for the outside of the pouch and the second piece of fabric for the inside liner of the pouch. Heat your EasyPress to 280 degrees and set the timer to 15 seconds. If needed, iron each piece of your fabric using the EasyPress so there are no wrinkles or creases. You do not need to start the timer when ironing your fabric. Having a flat piece of fabric is important when we add the fusible interfacing later. Heating the fusible interfacing to wrinkled fabric is likely to keep the wrinkles in the fabric. TIP: Different materials call for different heat settings, if you ever have a question about what heat settings go with the material you are using, refer to the Cricut EasyPress Heat Guide. Cut each piece of fabric to 12" x 12". You will also need two pieces of fusible interfacing cut to 12" x 12". The fusible interfacing is used to give the fabric stability. TIP: Lay a piece of your 12" x 12" cut fabric on top the fusible interfacing and cut around the edges of the fabric. NOTE: If you do not have an EasyPress, heat your standard iron so that it is on the wool setting. Lay a piece of fabric on your EasyPress mat face down. When I mention the face of the fabric, I am referring to the pretty printed side of the fabric. Place a piece of your fusible interfacing on top of the fabric. Make sure the rough side (or shiny side depending on the fusible interfacing you are using) of the fusible interfacing is face down on the wrong side/back side of the fabric. The rough side of the fusible interfacing has adhesive that sticks to the fabric when heated. Using fusible interfacing on the fabric gives the fabric some firmness. Make sure that you have heated every area of the fabric at 280 degrees for 15 seconds. After you've heated your fusible interfacing to the fabric set it aside to cool. Heat the next piece of fusible interfacing to the fabric. When the fabric has cooled, check to ensure the fusible interfacing is adhered to the fabric. If you see any areas lifting, reheat that section. Flip the pieces over so the fabric is face up. Make sure there are no wrinkles in the fabric. CUT THE DESIGN I have created two different sized Easy Zipper Pouches for you to choose from. The finished measurements for the smaller Easy Zipper Pouch is 7.5" x 5". The larger size measures 8.5" x 5". If you don’t want to make both sizes, you can hide the size you do not want to make. Click ungroup at the top of the layers panel on the right side of the canvas and then click the eye icon in the layers panel for the design you do not want to make. I am going to make the large Easy Zipper Pouch so I am hiding the smaller-sized design. We need to change some of the layers to tell our machine to use the Washable Fabric Marker. To do this, first click the design and select "Ungroup" above the layers panel on the right side of your canvas. Select the inner rectangle in both pieces and the skinny center rectangle in the left piece in the layers panel by holding shift and clicking on the layers. You should have these three pieces selected. Under Operation, in the upper left side of your canvas, change Basic Cut to Pen from the drop down menu. Directly to the right of the operation menu is a square. This is used to select the pen type and select a color for our pen. Click the square. At the top of the menu, change "F - Fine Point (0.4mm)" to "M - Marker (1mm)." Now scroll down and select the third color which is "Blue (Washable Fabric)." Your design should now show these objects colored in blue. Now we want to attach the pen layers to the two large rectangle pieces. Take your mouse and click and drag to select the pen layers and the cut layer for the left rectangle shape. Now click "Attach," at the bottom of the layers panel. Repeat this process for the right rectangle. You should now have two separate attach groups in your layers panel on the right side of your canvas. We are now ready to cut our fabric. Click "Make It" to begin the cutting process. If you are using a Maker 3 or Explore 3 machine, you will be prompted to select how you will load your materials for this project. Select "On Mat" and click "Done." I have two mats with pen and basic cut. Make sure that the pen lines are on the large rectangles and not off to the side or on a different mat. If they are you will need to go back and follow the directions above to attach them. Click "Continue" in the lower right corner of the screen. We are now going to select our material for the project. Click "Browse All Materials" on the right side of Set Base Material. Type "cotton" in the search bar and then select "Cotton" for your material then click "Done." I always recommend selecting "More" for my Pressure to ensure a nice clean cut. If you are using the same type of fabric for the inside and outside of your Easy Zipper Pouch, check the box before "Remember Material Settings" so you won't be prompted to select your base material again after the first mat cuts. Take your first piece of fabric and apply it to a 12" x 12" Pink FabricGrip Machine Mat. It does not matter which piece of fabric you cut first. Apply fabric pieces to the mat so the fusible interfacing is facing up. Use a brayer (optional) to help adhere the fabric to the mat. Load your Rotary Blade into Clamp B of the machine and your Washable Fabric Pen into clamp A. For cutting on an Explore Series machine, insert your Fine-Point Blade. TIP: Make sure to place your pen cap on the end of your pen so you don't misplace it When the load/unload button begins blinking, insert your mat into the machine and press the button to load your mat. Press the go button, located to the right of the load/unload button, when it begins to blink to begin cutting. When the cut is finished, unload the mat and carefully remove your fabric to prevent the edges from fraying. If you have any part of the fabric that didn't cut through, do not pull on the fabric to remove it. This can cause a snag in your fabric. Instead, take your fabric shears and cut on the machine cutting line to release it. Load your next piece of fabric with the interfacing facing up and continue the cutting. Unload the mat and remove the fabric like we just did. Make sure to remove your pen and replace the cap. I always store mine cap side down to keep the ink from drying out. This is what my cut fabric looks like. Take your two pieces of fabric and place them on top of each other with the fusible interfacing facing out. The face (pretty/right side) of your fabric pieces should be facing each other. Use straight pins on the long side of the fabric to piece them together. We are now going to sew around the rectangle in the center of the fabric. Do not sew on the lines in the middle of the rectangle. Take your sewn fabric and use your fabric shears to cut down the center line and then to the corners. Do not cut through your stitch at the corners but cut close to your stitch. Take one side of the fabric and flip it through the center we just cut through so the right sides of the fabric are now facing out. We are now going to use an EasyPress Mini or a household iron to press the fabric so that we have nice seams around the center. Open one side of the two pieces of fabric and press the seam flat. Then fold the center seam so the right side of the fabric is facing out and press. Repeat to press the opposite side of the center. When you are finished you will have four nice seams in the center and the right side of your fabric will be facing out on both sides. Take your closed 9" zipper and place it under the center opening. If your zipper is not flat, iron if necessary. You want your zipper centered and the zipper pull to be up against the left side of the opening. Take a straight pin and pin the fabric to the zipper in the middle. Add a second pin to the opposite side. Continue adding pins to the left and the right sides of the zipper. Return to your sewing machine and sew around the edge of the opening. I like to start in the middle. You want your stitch to be close to the seam. My stitch is approximately 1/8" away from the seam. You don't want to stitch much further away because we need to grab the zipper below. NOTE: I want to point out that we are using a nylon zipper, which means you can sew right over it. Just take your time. For this reason, you do not want to use a metal zipper for this project. This is what my sewn-in zipper looks like. Turn your fabric over to make sure you have no stitches outside of the zipper tape. If you do, use a seam ripper to remove the stitch and stitch again. Open the zipper of your Easy Zipper Pouch. Take the two ends of the outer fabric and pin them together around the edges. The right sides of the fabric will be facing in. Now take the two pieces of fabric for the lining and pin them together around the edges. Make sure to tuck the tail of your zipper toward the inside of the lining so you do not end up sewing over it when you sew the seams. For the fabric lining, make sure to leave an opening at the bottom almost as big as the width of your hand. We won't be sewing this part so we can turn the fabric right sides out after sewing. Begin sewing the outer fabric around the edges on the washable fabric marker line. The seam allowance is 5/8". Next sew the two sides of the fabric lining. Remember we want to leave an opening at the bottom. When you have finished sewing both sides of the fabric, use your fabric shears to trim off the corners of the fabric. Do not cut through the stitch. Trim off the sides and the bottom of the outer fabric. Trim the sides of the fabric lining but do not trim the bottom of the fabric. Reach through the opening of the lining and pull the fabric through so you have the right sides of the lining and the outer fabric facing out with the zipper in the middle. Use a spatula tool or a seam turning tool to form the seams and corners. Use your household iron to press the sides and bottom of the outer fabric. Then press the bottom of the lining. Use your sewing matching to stitch the bottom of the lining. Stitch close to the edge of the fabric as we did in sewing the zipper. I used an 1/8" seam allowance. You can also stitch from one end of the fabric bottom to the other. Push the lining of your Easy Zipper Pouch so it is inside the outer fabric. Use a spatula tool or seam turning tool to form the corners on each side of the zipper. Press your Easy Zipper Pouch, if necessary. Here is what my finished pouches look like. These pouches are great for many uses such as, holding pens and pencils, cosmetics, toiletries, and so much more. I have even made some for gifts and added personalization with iron-on vinyl. Your Easy Zipper Pouch is machine washable when using machine washable fabric. If you used cotton fabric, wash on warm and tumble dry with low heat or air dry. The finished measurements for the smaller Easy Zipper Pouch is 7.5" x 5". The larger size measures 8.5" x 5".
DIY Zipper Pouch
Materials
Tools
Instructions
STEP 1: GET MY FREE EASY ZIPPER POUCH FILE
STEP 2: CUT THE EASY ZIPPER POUCH DESIGN

STEP 3: ASSEMBLE THE EASY ZIPPER POUCH

STEP FOUR: SHOW IT OFF
Notes
Answers to Your Questions About How to Make a Zipper Pouch Project
Q: Can I cut these zipper pouches by hand instead of by Cricut?
Yes! Skip to step two of the tutorial if you prefer cutting by hand. You are always welcome to cut any of my projects by hand and a cutting machine is not necessary.
Q: Will these DIY zipper pouches have form and stability?
Definitely! We used fusible interfacing in order to give the fabric more stability.
Q: Can I resize my zipper pouch?
I have created two different sized easy Zipper Pouches for you to choose from. The smaller Easy Zipper Pouch measures 7.5×5″. The larger size measures 8.5×5″.
Q: My cuts aren’t coming out clean on my Cricut, what am I doing wrong?
I always recommend selecting “More” for my Pressure to ensure a nice clean cut. Make sure to check your mat for stickiness and your blade to ensure theres no debris on it. Remember to unload your mat and carefully remove your fabric to prevent the edges from fraying. If you have any part of the fabric that didn’t cut through, do not pull on the fabric to remove it. This can cause a snag in your fabric. Instead, take your fabric shears and cut on the machine cutting line to release it
Get my free SVG files to create beautiful DIY Zipper Pouch
I love seeing what you make with my designs and how you use them! Please share a photo of your DIY Zipper Pouch project in our Facebook group or tag me on social media with #jennifermaker.
Love,

Want to remember this? Save this How to Make a Zipper Pouch Tutorial to your favorite Pinterest Board!