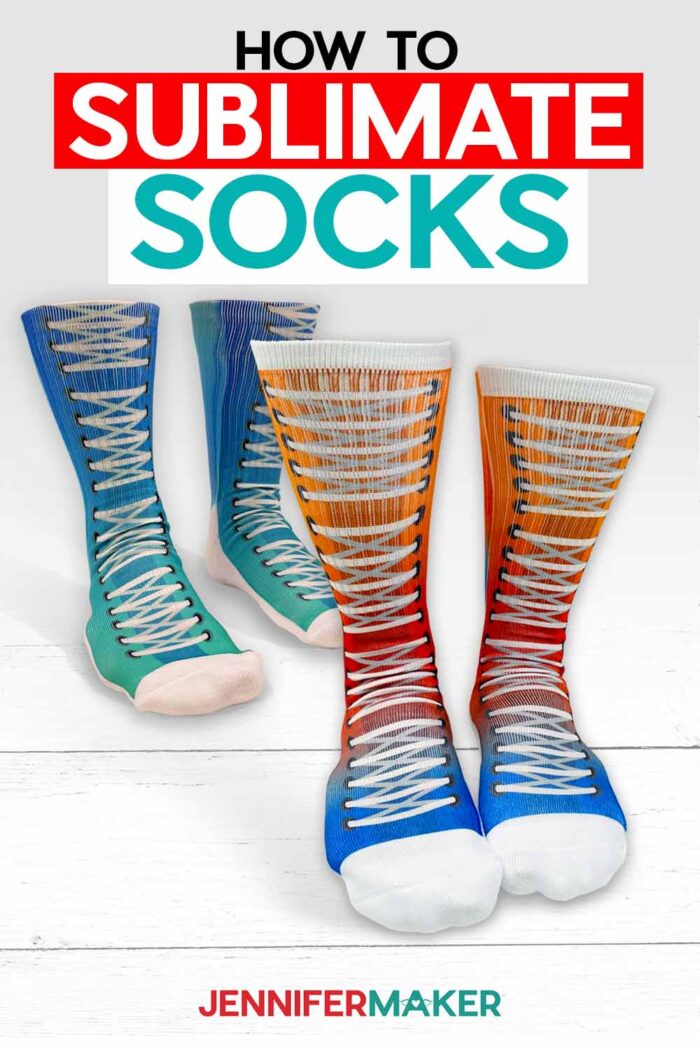
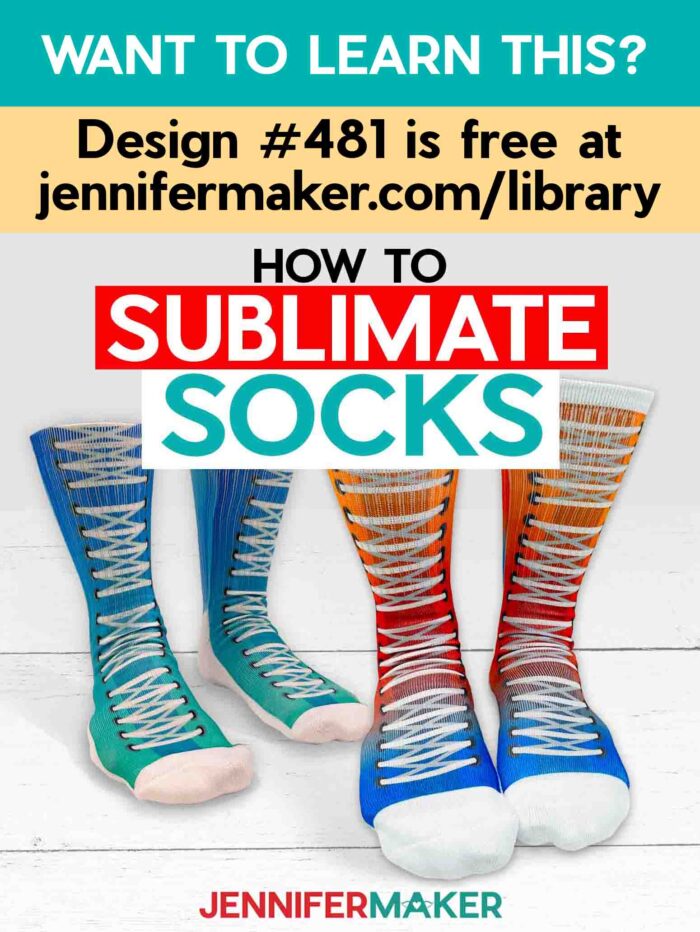
Create custom sublimation socks with free designs!
Socks get a lot of wear (especially fun ones!) but there is a fantastic way to decorate them: sublimation! By dyeing sublimation socks, the fibers themselves get dyed, so the fabric is fine with stretching, fitting in shoes, and lots of washes! There are a few special tools and tips that make all the difference, though. I’ll share them and my fun free sock designs for both ankle and athletic styles, including some double-sided versions!
Watch my complete step-by-step tutorial on making sublimation socks!


I love cute socks that make a fashion statement! Sublimation is a great way to make colorful socks since the inks actually dye the fibers, resulting in vibrant colors that won’t fade or peel over time. As long as you pick a good sock for your project!
There are so many sock options available, how do you pick the best one for your sublimation designs? I tested ankle socks and tube socks with different material content and price points to help you decide. Some are sold as blank sublimation socks while others came right from the dollar store. You can see all the results in my video, along with helpful tips to get the best results. And I’ll show you how to prepare my free flip flip and high top designs to make your first sublimation socks!
Now, I don’t recommend decorating the entire sock. Have you noticed that the bottom of your socks wear out faster than the top? Dye sublimation lasts about as long as the fibers, so adding a design to the bottom will wear out faster than the top of the sock. So, I just didn’t add sublimation designs to the bottom of mine. Of course, you can decorate the bottom of the sock if you’d like! Especially if they’re house socks that won’t get as much wear in shoes.
And I’ll even show you how to blend the seams on your sublimation socks to decorate the front and back!
To decorate a pair of socks, you’ll need a sublimation printer with compatible ink and paper, and scissors or a paper cutter.
I’ll show you how to adjust the different designs in free Google software and prepare them for printing with Adobe Acrobat — also free!
When you’re working with recognizable images like feet or shoelaces, creating a crisp result is important. Preheating your socks on jigs removes moisture and wrinkles (avoiding bumps and bleeds) and using a lint roller will remove any debris standing between you and a beautiful transfer.
Securing the designs in place with heat resistant tape keeps them still, and letting them cool for a few minutes afterward allows the ink to settle in place. Moving the project or transfer sheet when they’re still very warm can jostle the ink, creating a ghostly, smudged look.
Remember, sublimation requires high temperatures. You’ll need a heat source that can get up to about 400° Fahrenheit or 205° Celsius. I like to use an EasyPress with a mat, or an Autopress, so I’ll share how I used both for different socks. And as the ink sublimates it can spread! So have your white cardstock and white butcher paper ready to catch any extra ink before it dyes your tools. Keep a window open and a fan running to dissipate the fumes, too.

Once you’ve seen the steps to make a pair, you can design your own sock styles in no time! Custom socks make a great gift for family members or friends, so get creative and have fun!
Interested in this project but not sure sublimation is for you? Check out my list of 21 Things I Wish I Knew Before I Started Sublimation!
Ready to make sublimation socks? I’m super excited to show you how! This post contains some affiliate links for your convenience (which means if you make a purchase after clicking a link I will earn a small commission but it won’t cost you a penny more)! Read my full disclosure policy.
Materials to Make Sublimation Socks
- Athletic-length Socks to Sublimate – I used Silky Socks Blank Streetwear Socks (alternative) and ones by NC Hoisery -OR-
- Ankle Socks to Sublimate – I used ones by Hanes (61% polyester/39% cotton) from Dollar Tree and 100% polyester socks from Five Below, but these are an option, too
- Sublimation Paper – I used 8.5″ x 11″ A-SUB Sublimation Paper, 125g
- Heat Resistant Tape
- Aluminum Sock Jigs
- Sublimation Printer or Printer Converted for Sublimation with compatible ink
- Adobe Acrobat Reader
- A Free Google Account
- Heat Press – I used my Easy Press and Cricut Autopress so you can see how both work
- Scissors
- Ruler
- Pencil
- White Butcher Paper and White Cardstock to protect all surfaces
- Pressing Mat – I used my Cricut EasyPress Mat
- A paper trimmer
- Lint roller
- Fan
- Design #481 – My free sublimation design files available in my free resource library – get the password by filling out the form at the bottom of this page
How to Sublimate Socks
We will try out different brands of sublimation socks, including one from Dollar Tree to compare and contrast quality, value, and overall end result.
Materials
- Athletic Socks to Sublimate (I used Silky Socks Blank Streetwear Socks) -OR-
- Tall Blank White Sublimation Socks - in Athletic length -OR-
- White ankle socks from a discount store (I stopped at my local Dollar Tree and Five Below) These Hanes No-Show socks are an option if you aren't near a discount store -OR-
- Silky Socks No-Show Sock Blanks
- Sublimation Paper - I used 8.5" x 11" A-SUB Sublimation Paper 125g
- Heat Resistant Tape
- 12" x 12" White Cardstock
- White Butcher Paper (to protect all surfaces)
- Pencil
- Design #481 (My free sublimation design files are available in my free resource library – get the password by filling out the form at the bottom of this page)
Tools
- Sublimation Printer or Printer Converted for Sublimation
- Cricut Ruler
- Aluminum Sock Jigs
- Heat Press - I used my Easy Press and Autopress, but you can also use a traditional press
- Cricut Scissors
- Pressing Mat (I used my Cricut EasyPress Mat)
- A paper trimmer (I used Cricut Portable Trimmer)
- Lint roller
- Adobe Acrobat Reader
- A Free Google Account
- Fan
Instructions
STEP 1: GET OR PREPARE A SUBLIMATION DESIGN
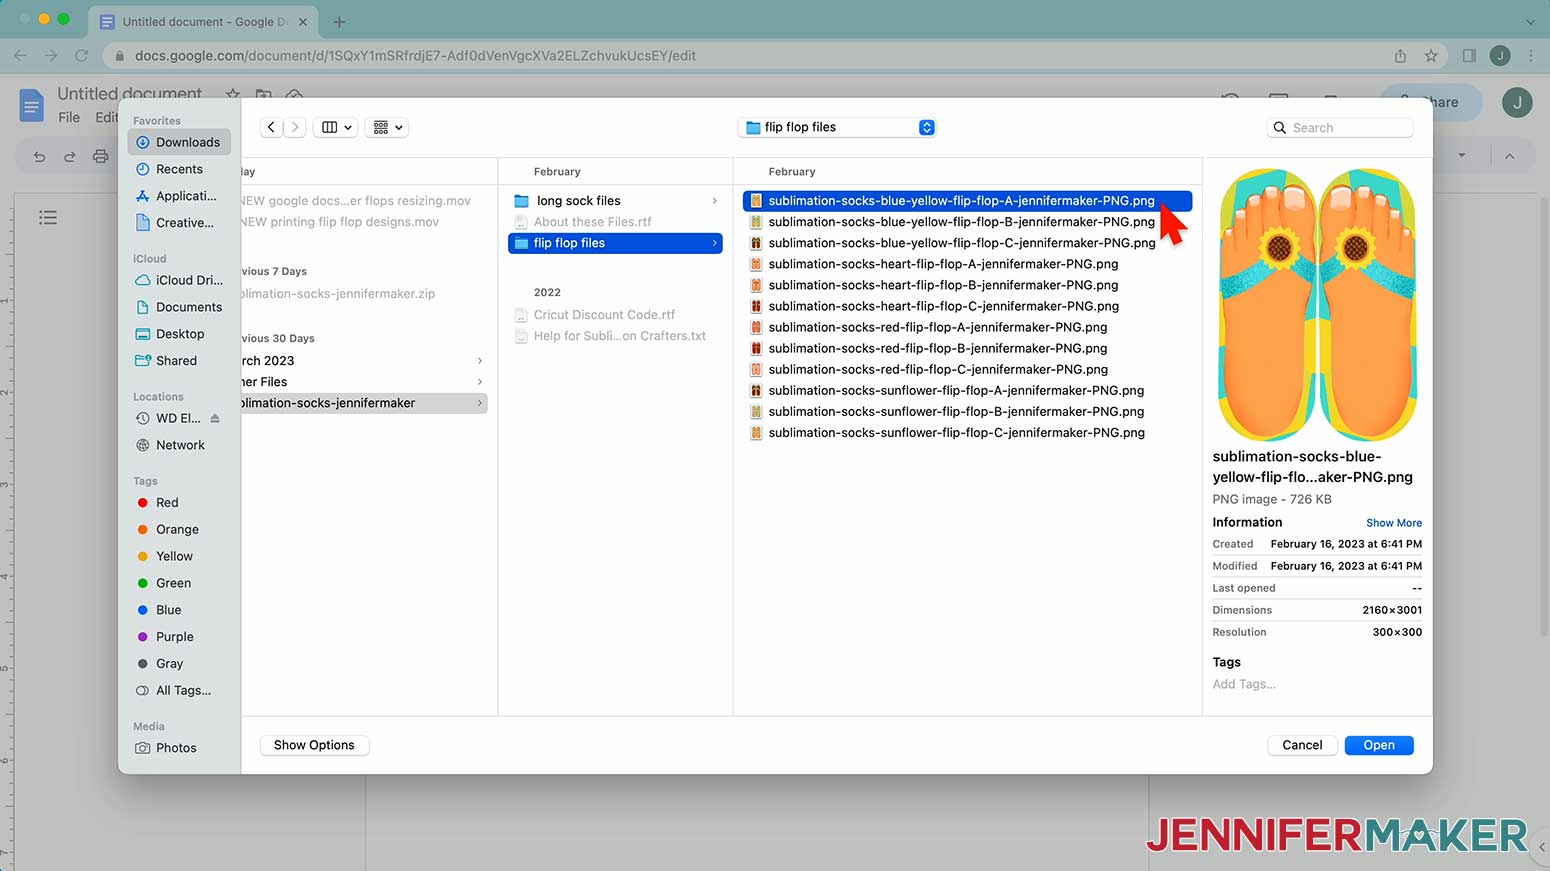
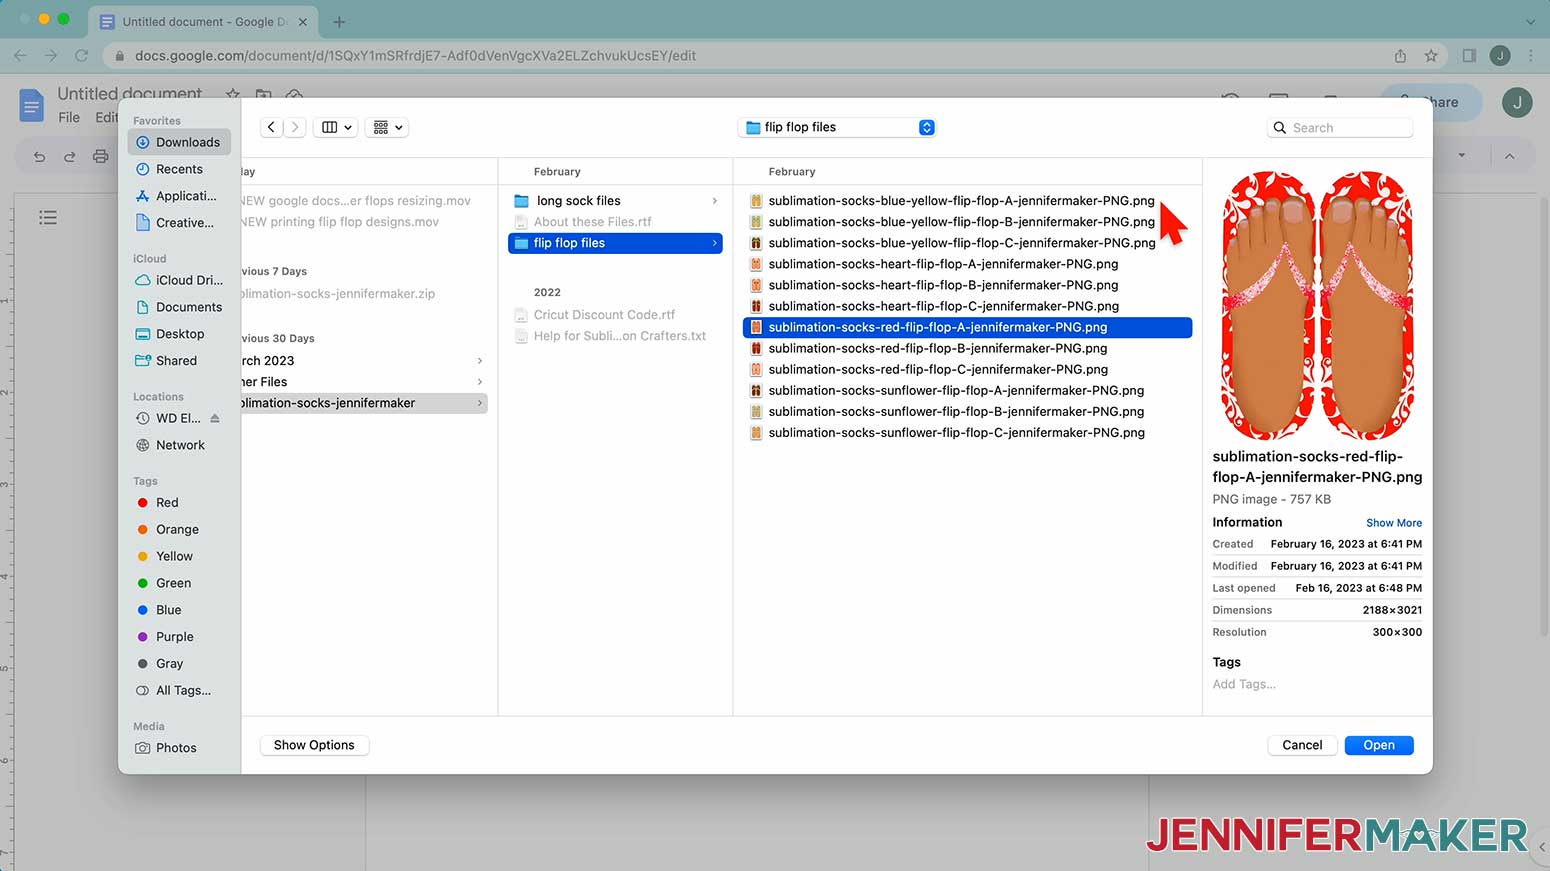
You can use my Sublimation Socks design files from my resource library, Design #474.
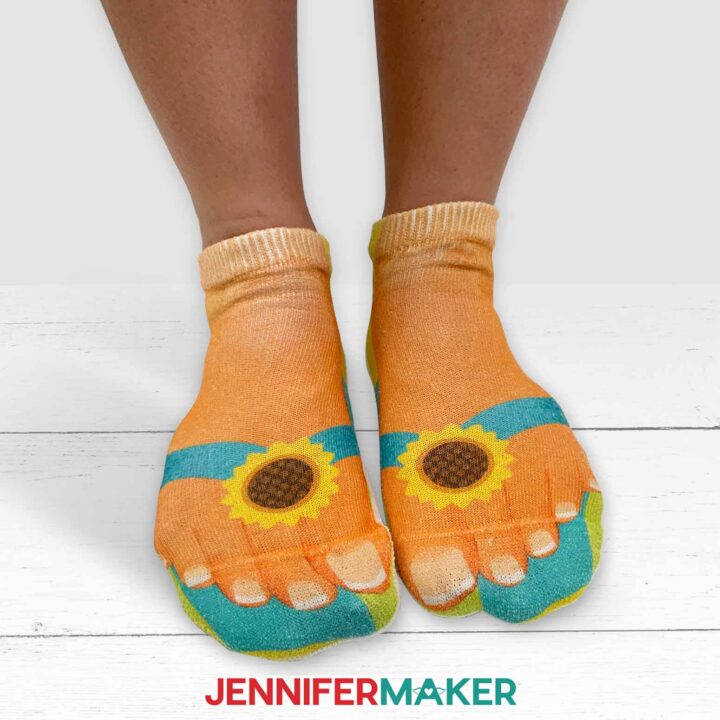
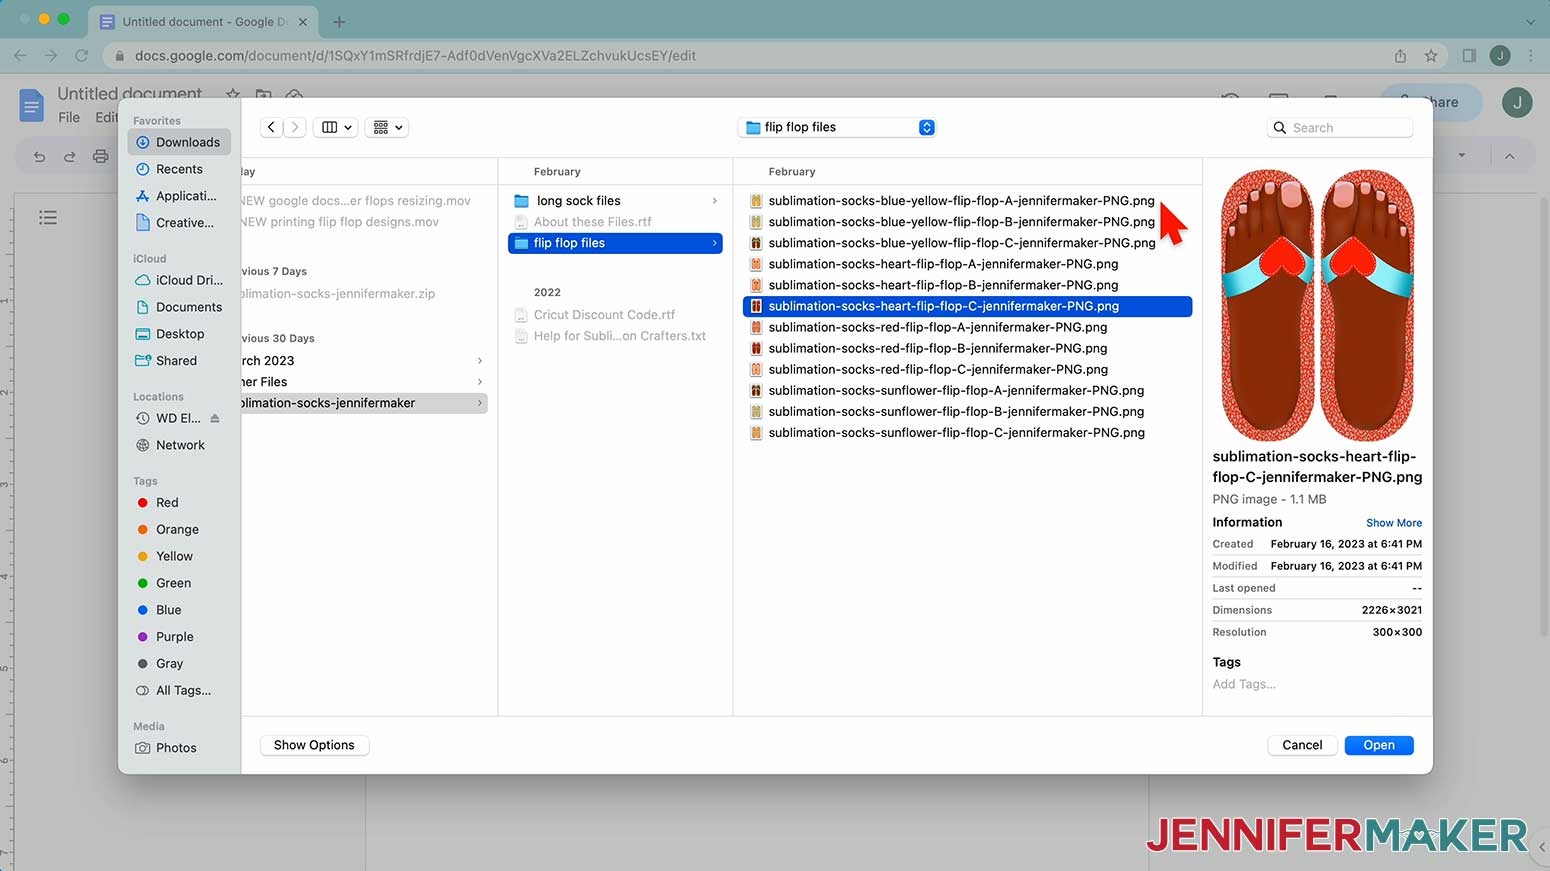
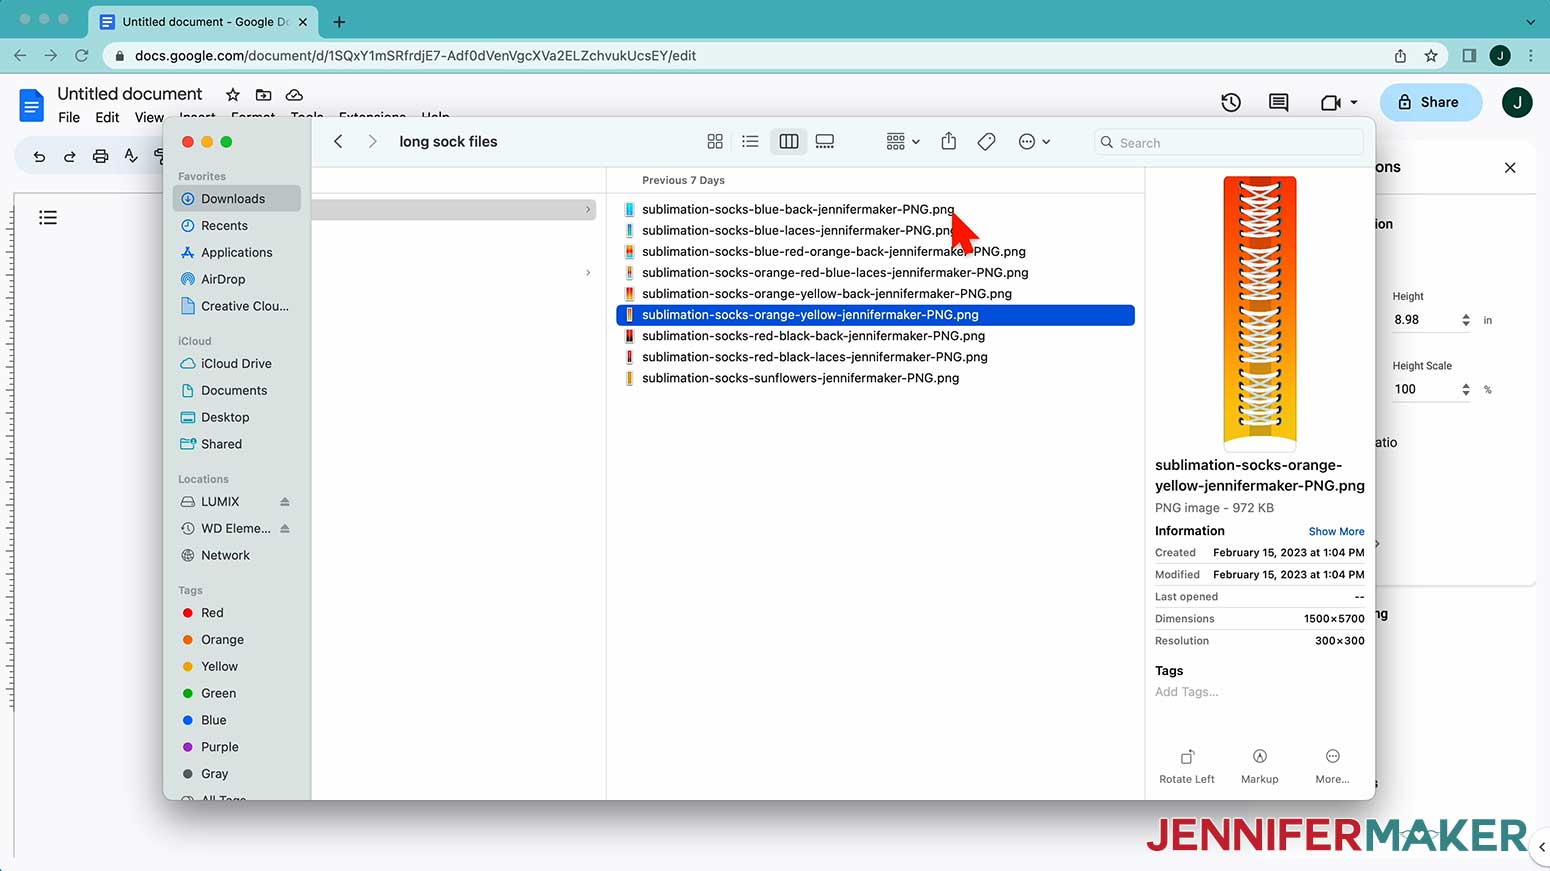
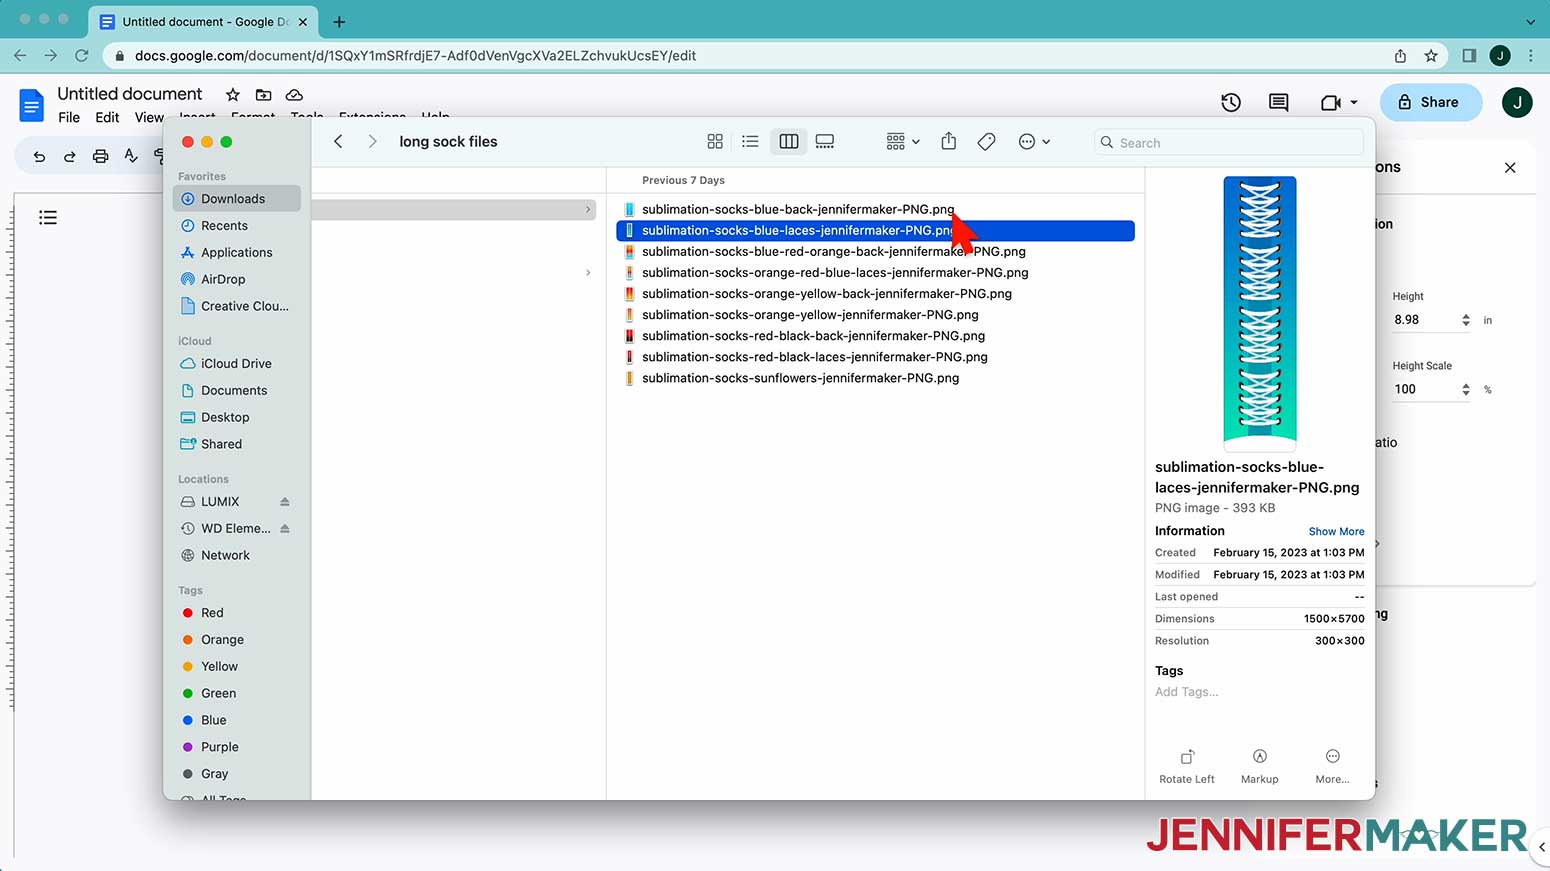
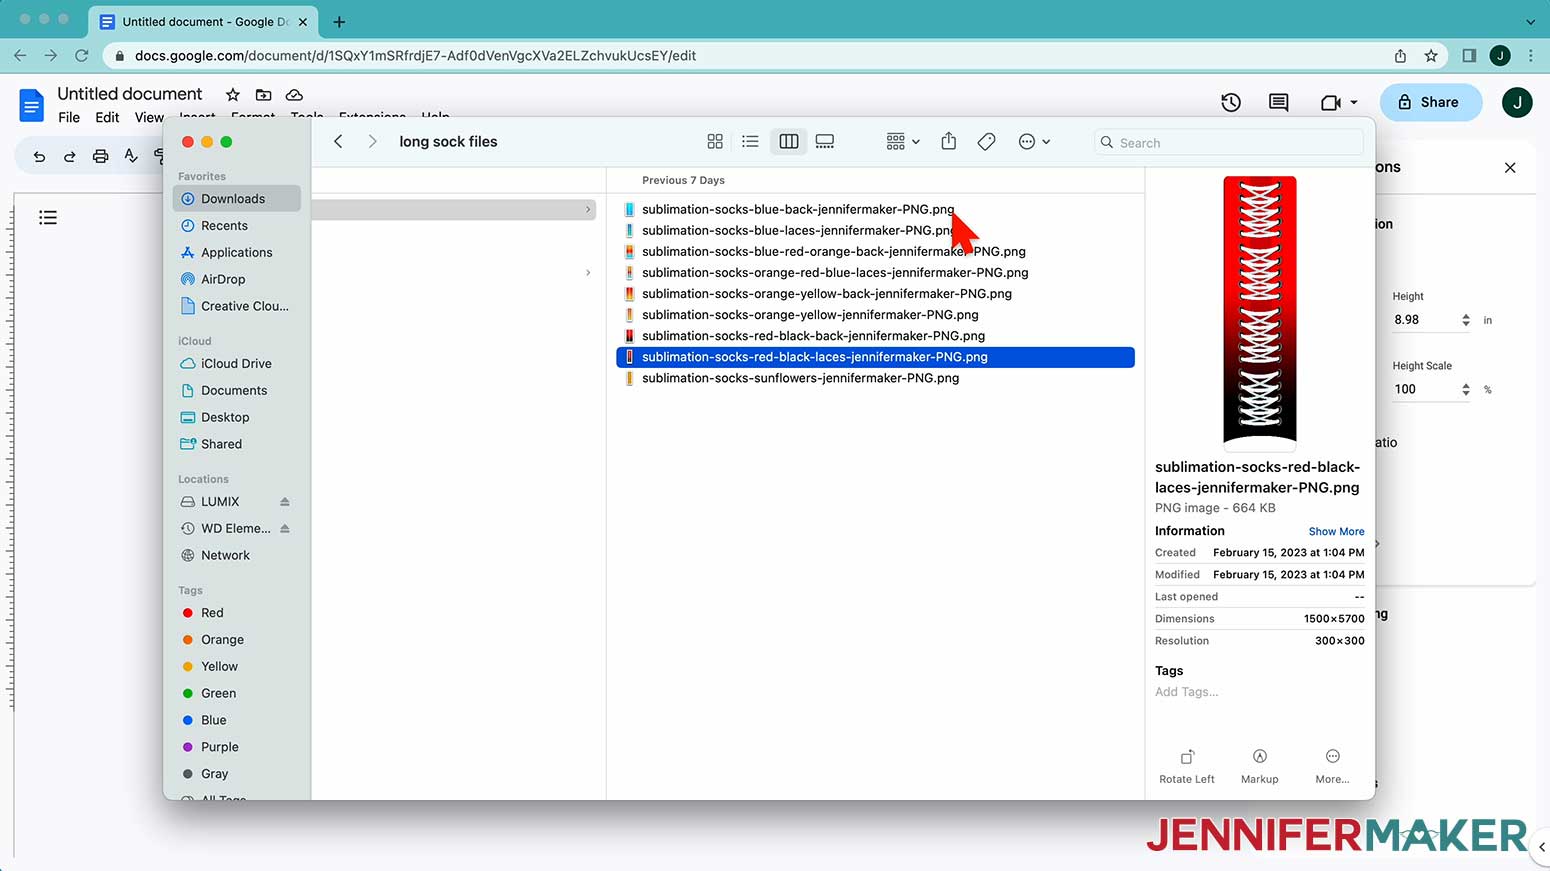
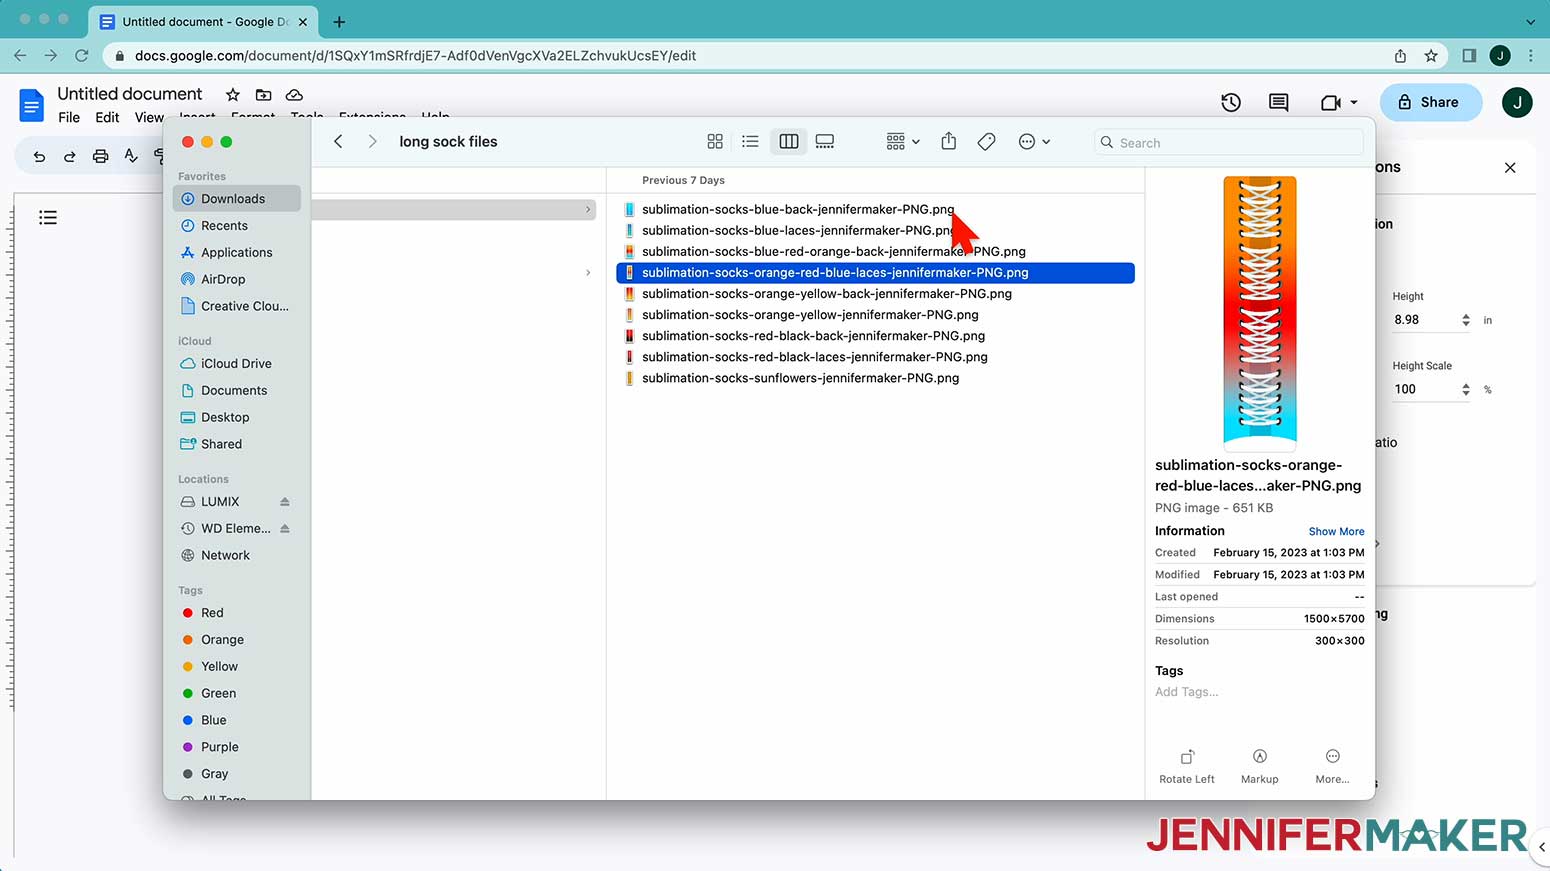
Download the files and pick your design. There are PNG designs for ankle, and taller socks.
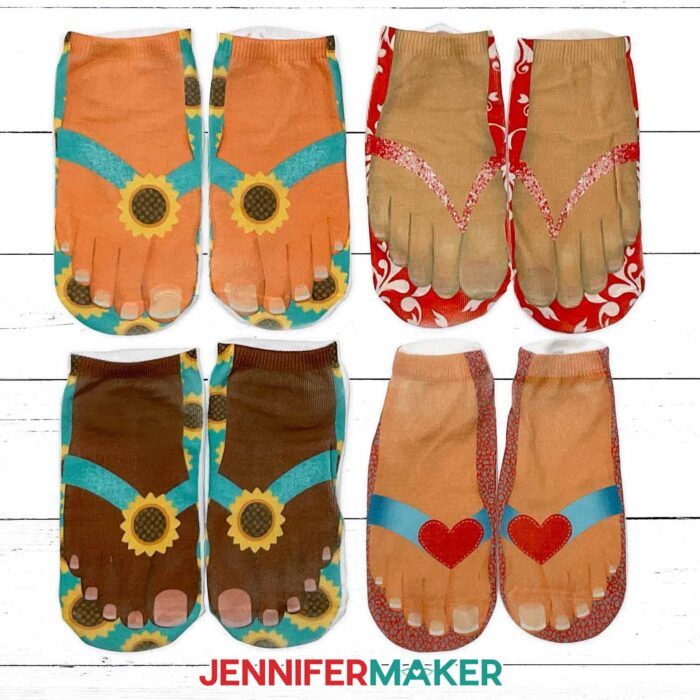
From fun flip flops in several styles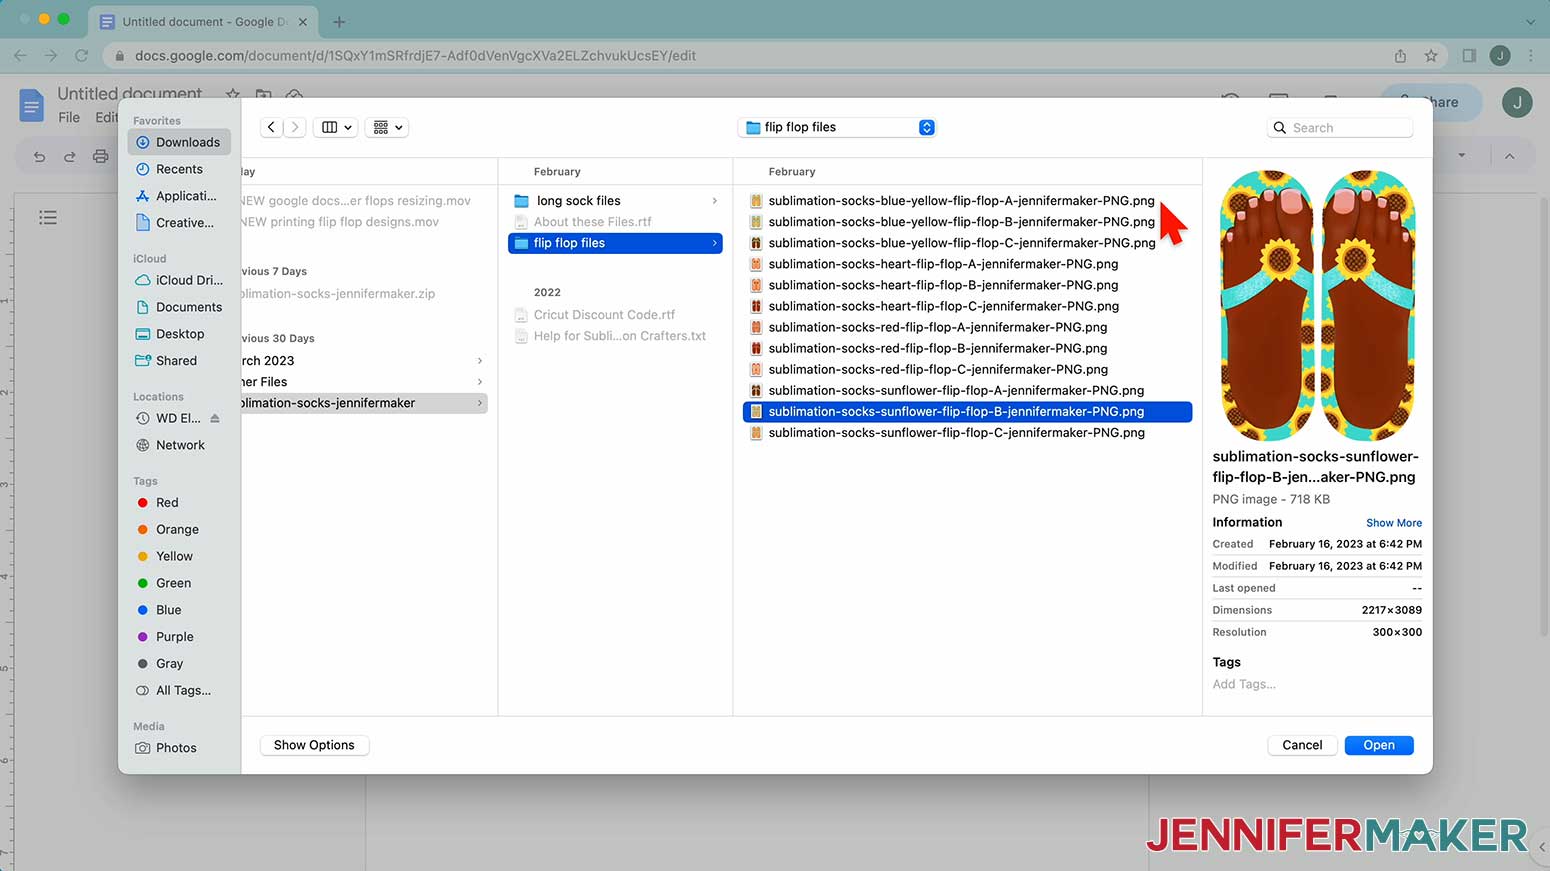
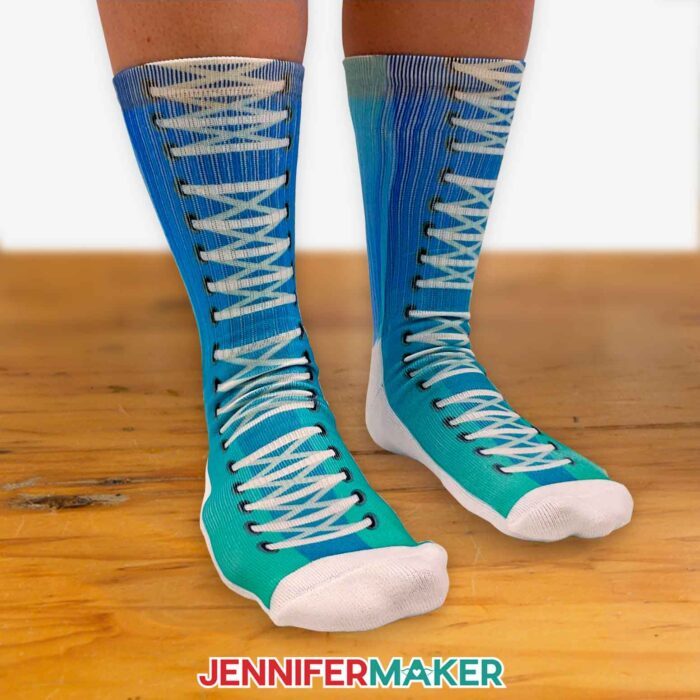
To athletic and taller length “high tops” in various colors
Open Google Docs in the Google Chrome web browser on your computer. You can also download and open the Google Docs app, but be aware that you won’t be able to install or access any printer profiles from a mobile device, and you’re also limited in features, so I do not recommend it on a mobile device. (Note: You will need a free Google account to use the free Google Docs and Google Drawing software.)
With Google Docs open, click on "Blank" in the upper left corner to open a new document.
Go to the "File" menu and select "Page Setup". Change your margins to “0” and change your Paper Size to match your sublimation paper size. Mine is 8.5" x 11".
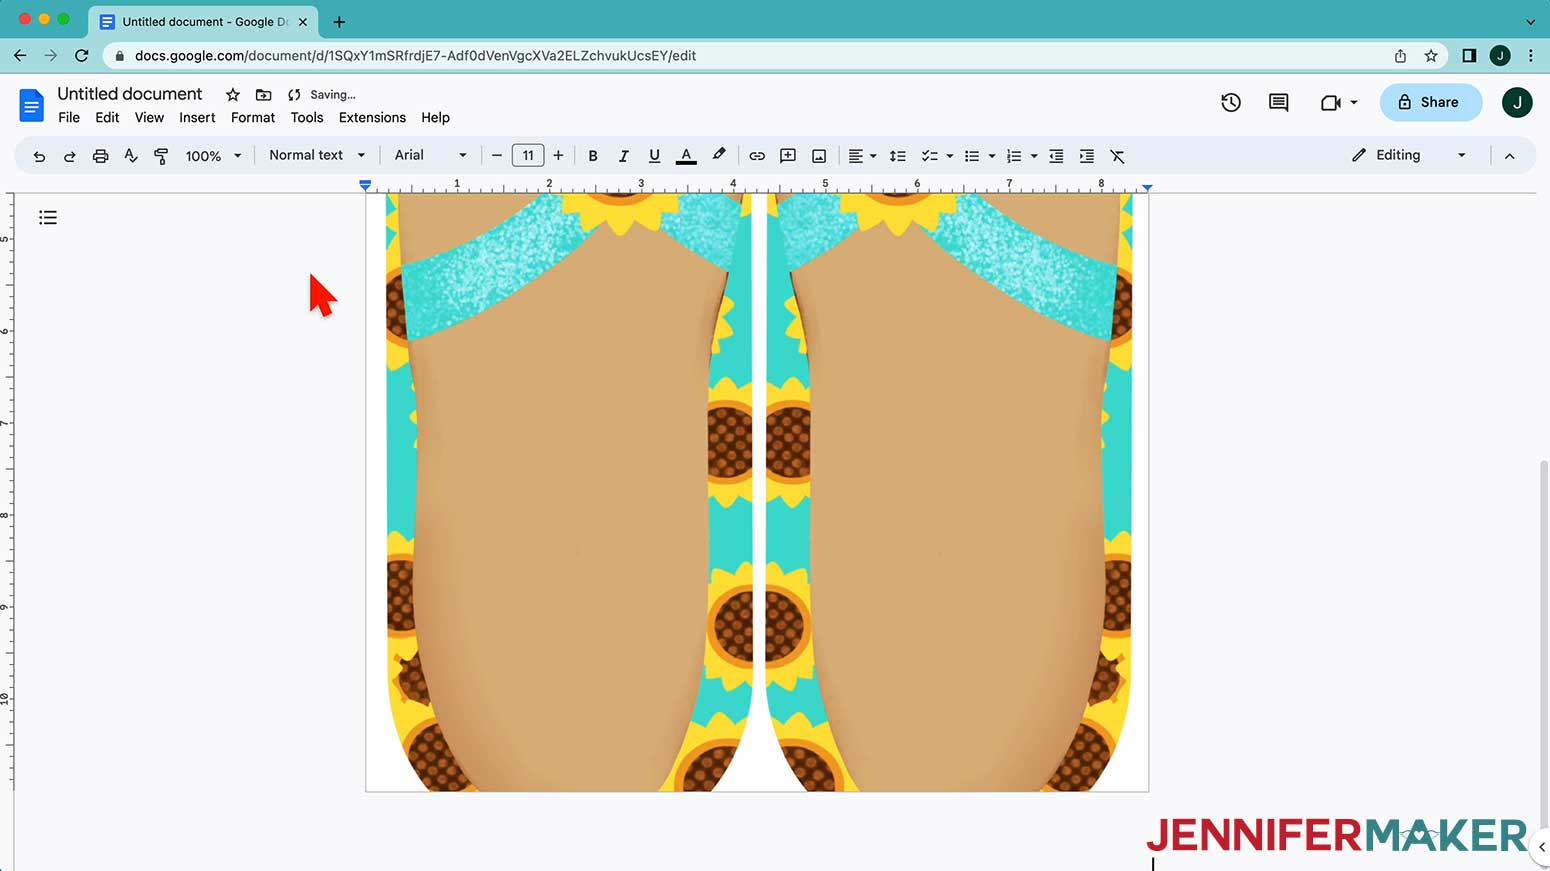
Go to the "Insert" menu, select "Image", and select "Upload from Computer". Locate the sublimation design you want to use (hint: it’s probably in your Downloads folder), and click "Open". I’m using the sunflower flip flop design in the lighter skin tone for an ankle sock. To make a design for a larger sock, see the extra steps under Variation.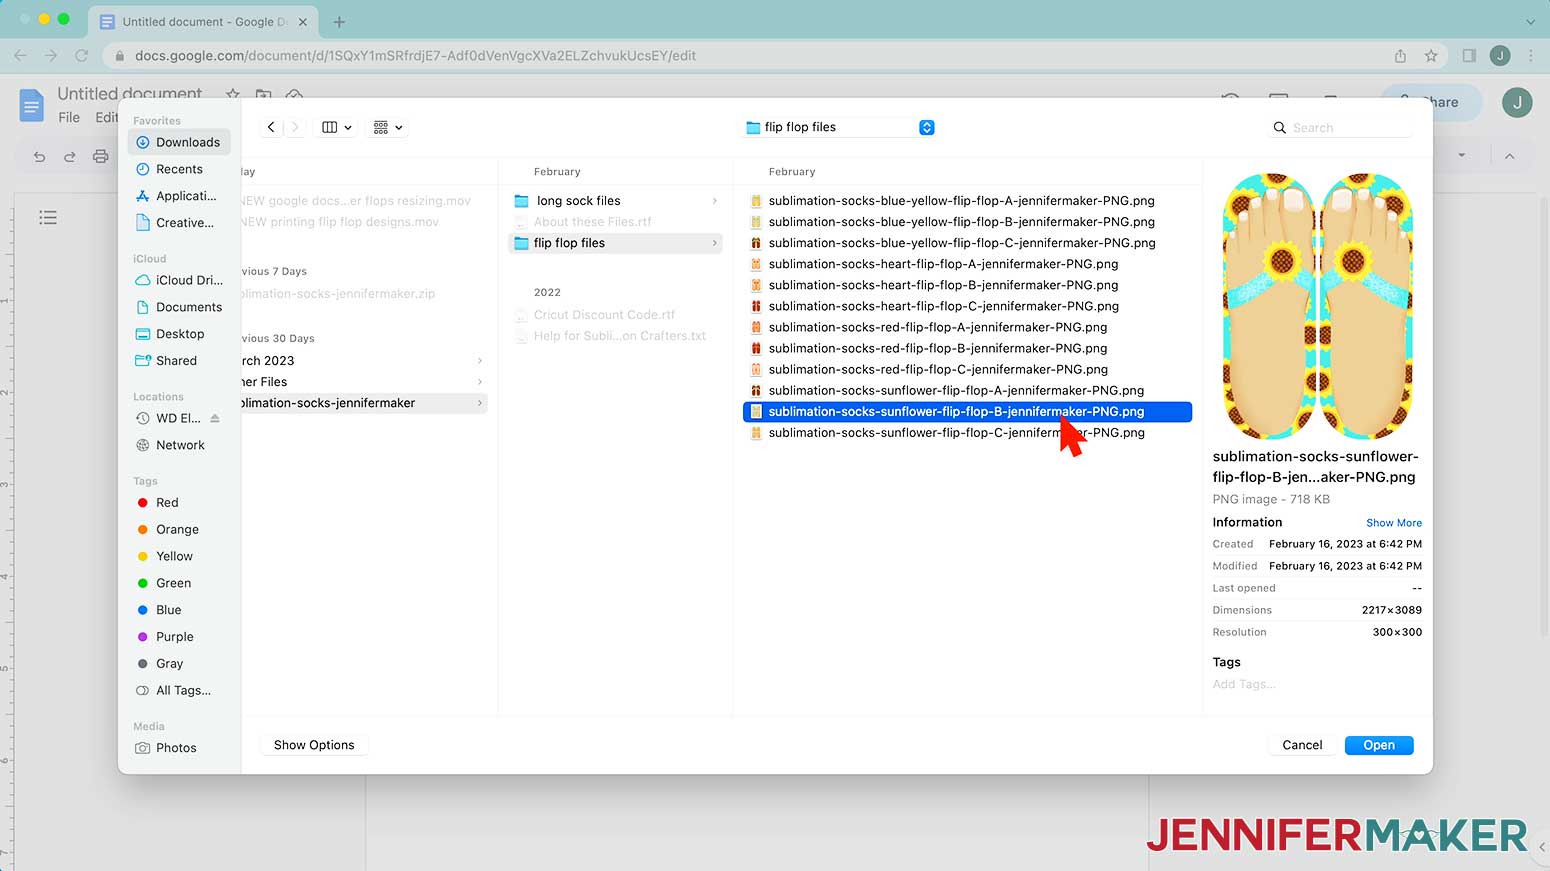
The image will appear and fill your page — it will not necessarily come in at the size originally designed. We need to get the size just right for the sock.
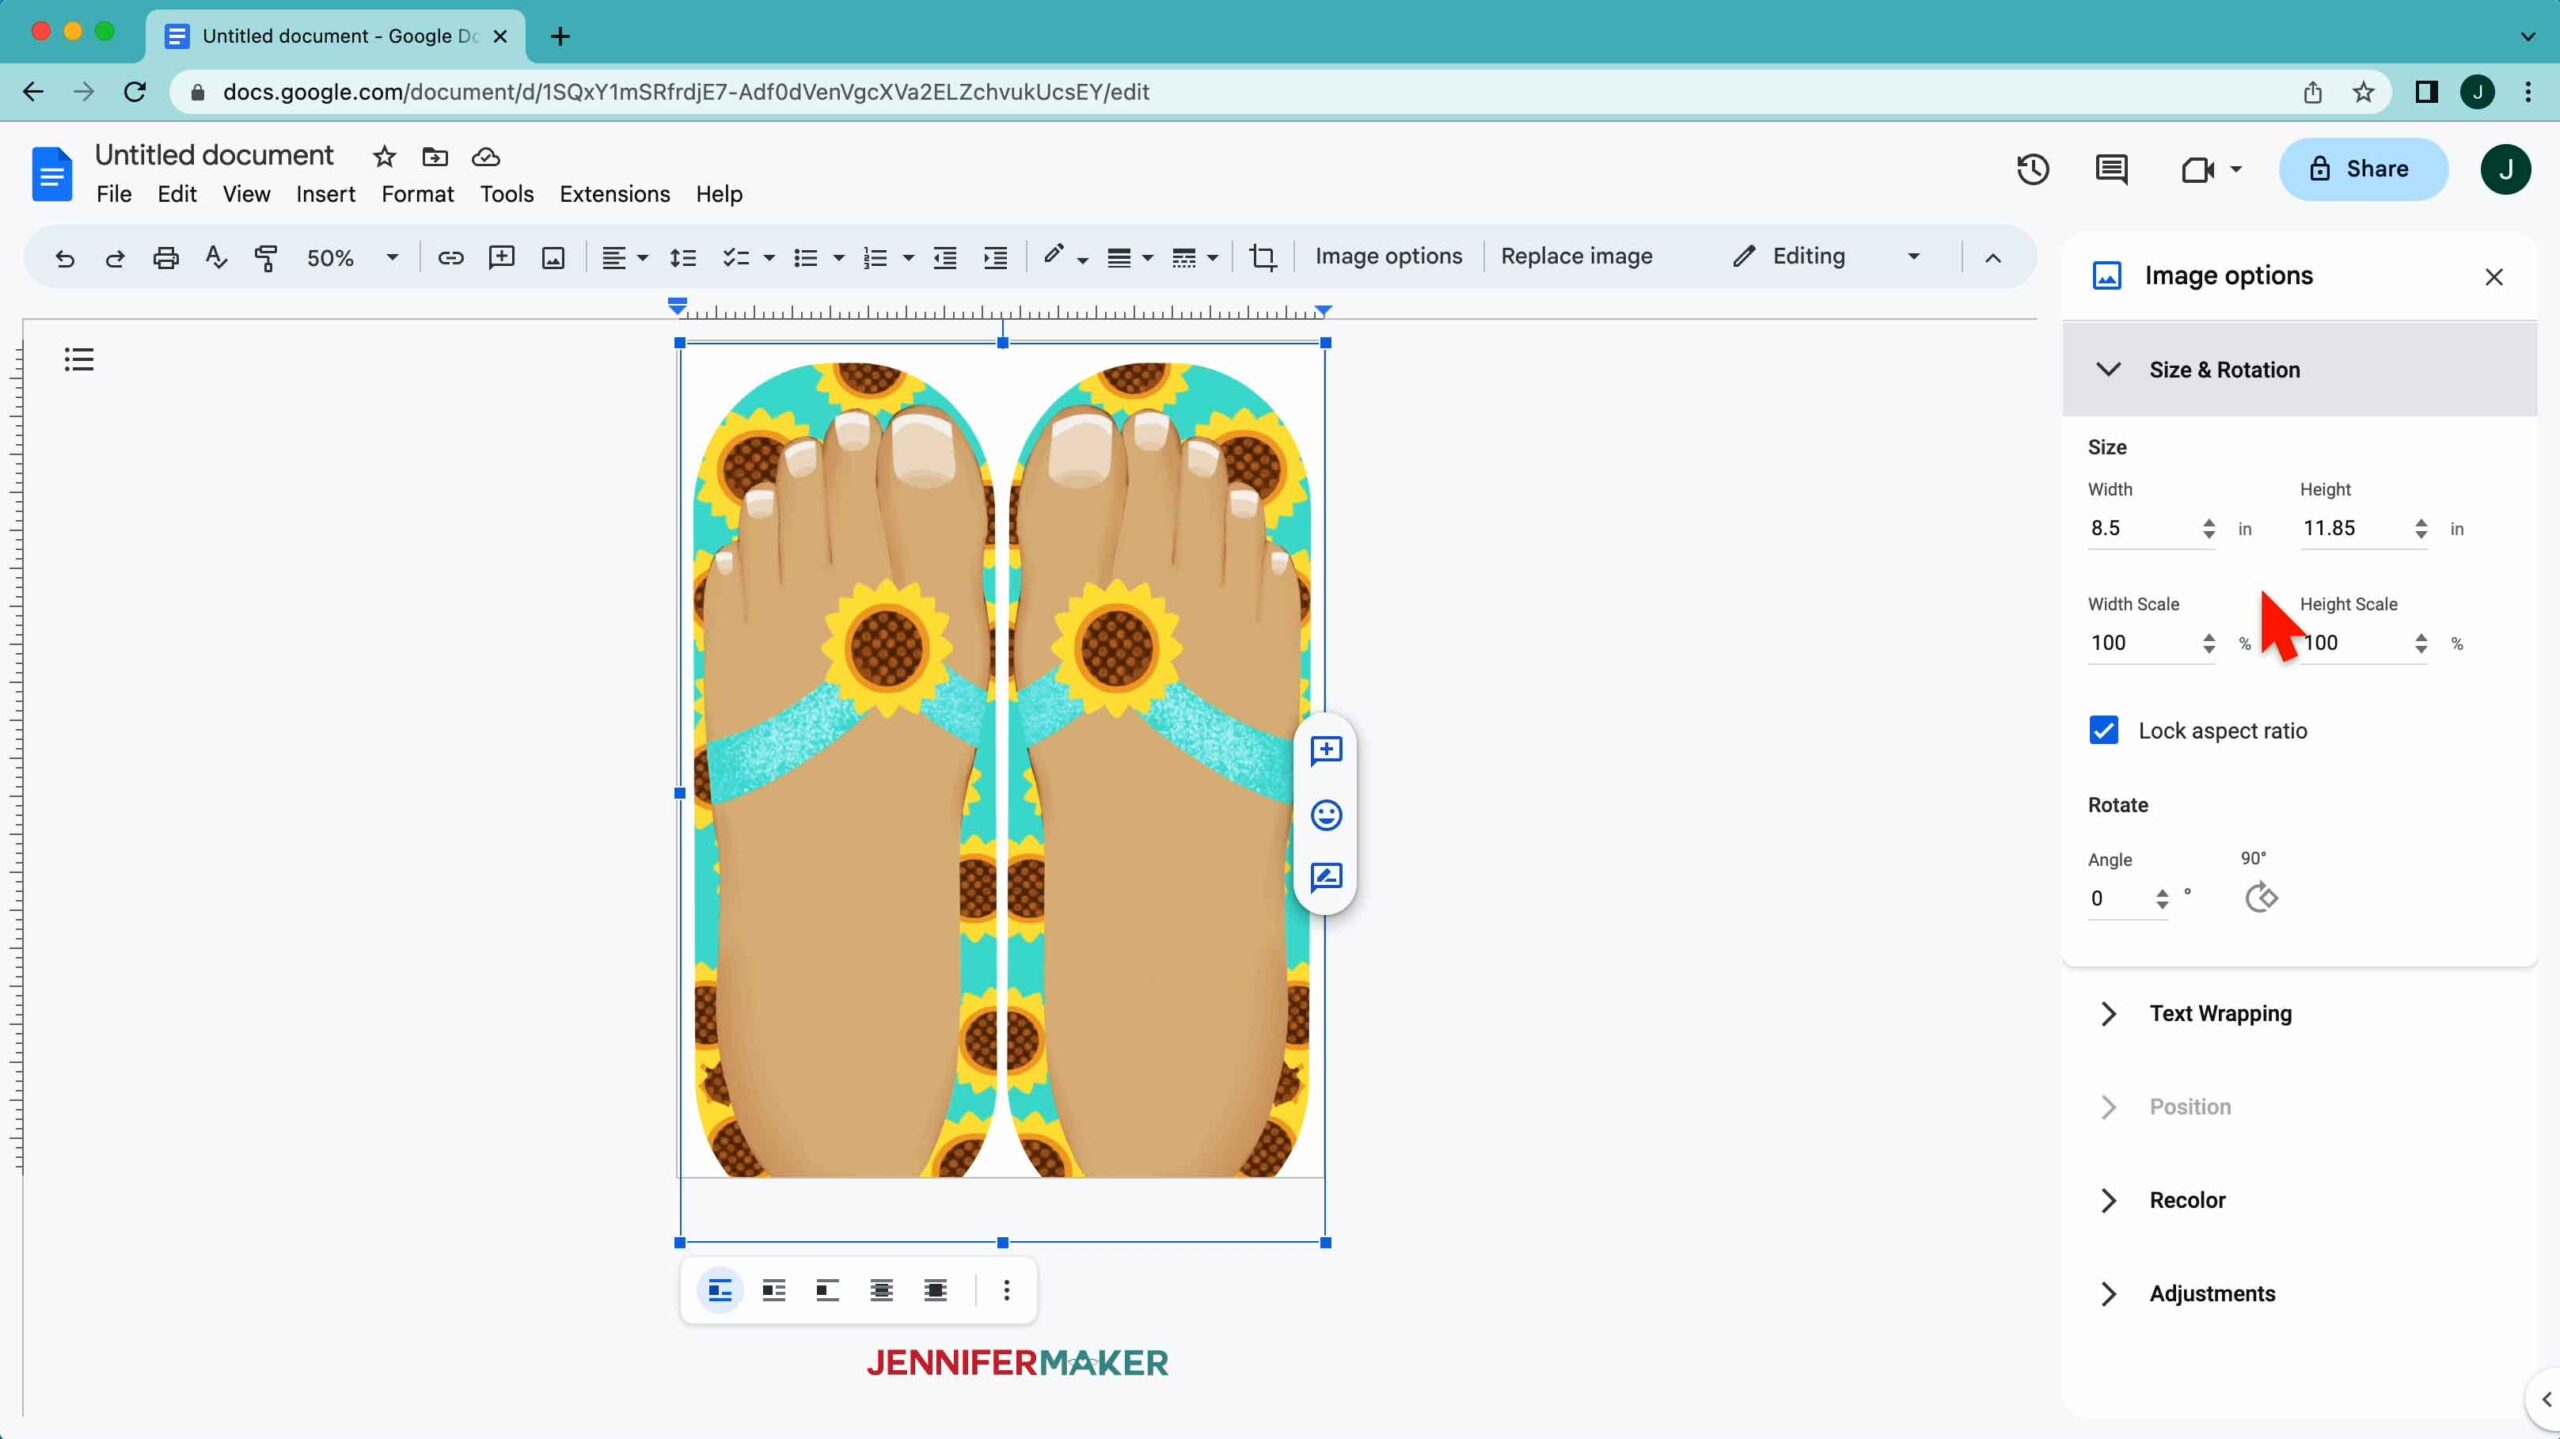
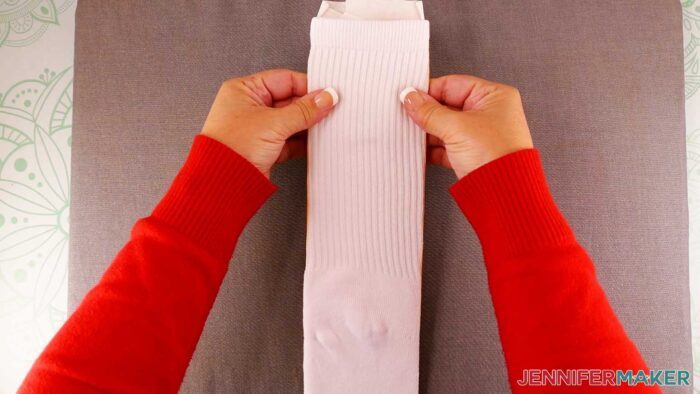
Put the sock on the jig, line up the toe and heel of the sock on the jig so that when worn, the design will be on top. Then measure its length and width. Yours may be different, but my ankle sock is about 3.25” wide and 10” long. The design will go from the toe to below the cuff, and that’s about 9”.
To resize the image, right-click the image, select "Image Options," make sure the "Lock aspect ratio" box is checked, and change the Width or Height field.
Adjust the image on your page by selecting it, then click on the second icon from the left in the menu below it, which means “Wrap Text”.
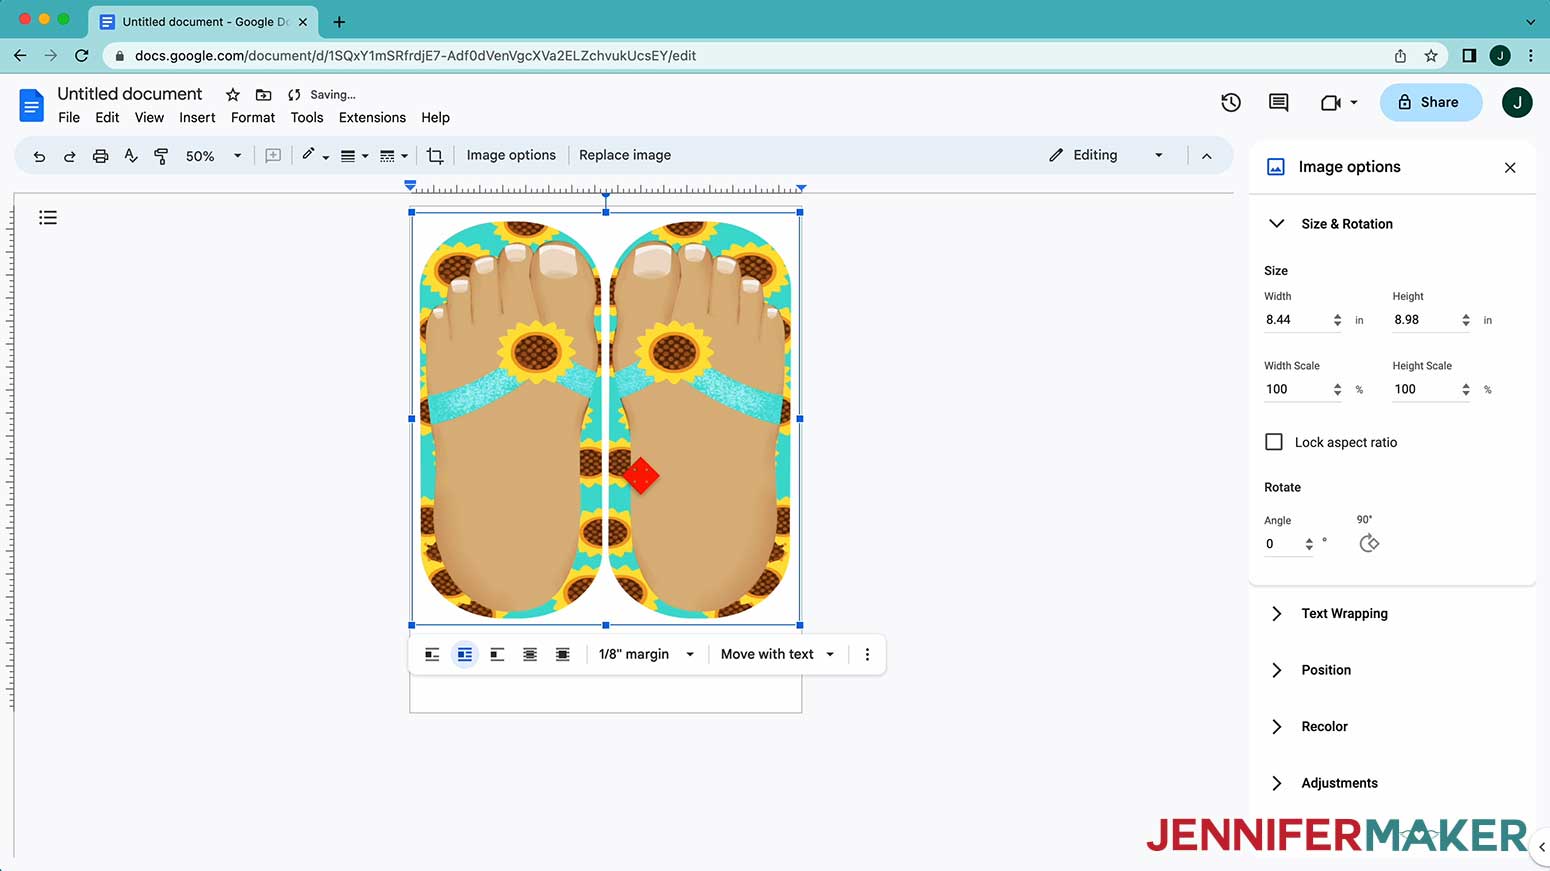
Now, you can click and drag the image anywhere on your page. I recommend putting your design in the center of your page, as that ensures it won’t get cut off at the edges and you have plenty of space for cutting/tearing its edges if needed.
Once the size is correct, click the Printer icon on the upper left of the page.
STEP 2: PRINT THE TRANSFER
Print the design following my earlier Sublimation Design Printing tutorial and the correct steps for your printer and project.
STEP 3: PREPARE THE PRINT AND SOCK BLANKS FOR SUBLIMATION
After the ink is dry, remove the page from your printer. Don't worry if the ink doesn't look very dark, sublimation ink isn't like regular ink. It will be more vibrant on the project. Cut each flip flop from the page carefully trimming around the edges, and set them aside.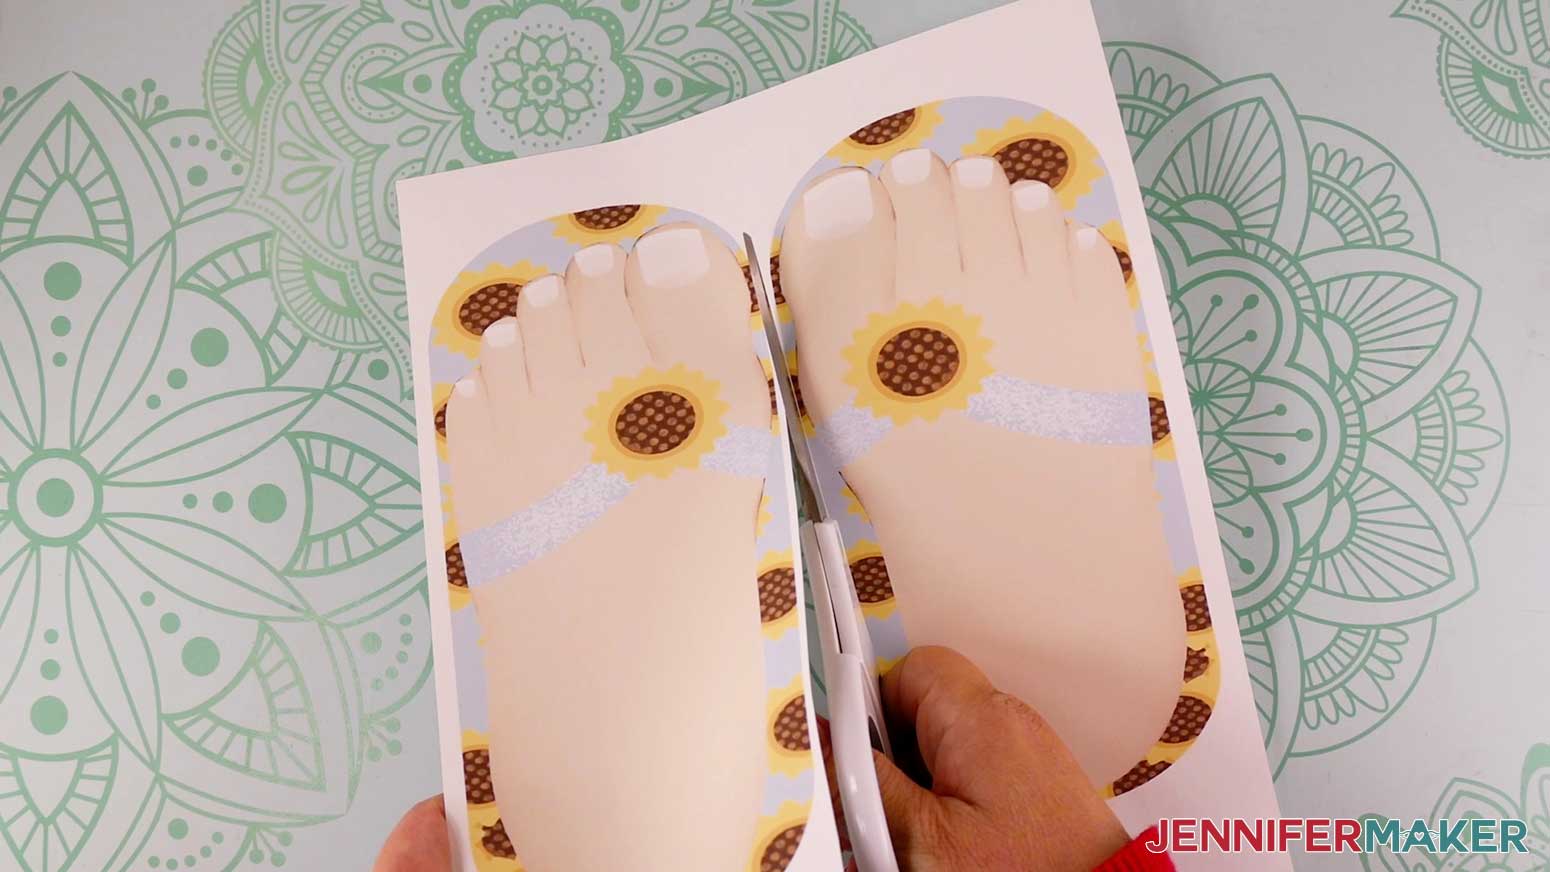
Set the temperature of your press to 385° F (196° C) and the time to 10 seconds. I am using my EasyPress 2 but you can use a larger press if you’d like.
These settings worked for my ankle socks, but check the Cricut Heat Guide to verify the details for your materials and tools.
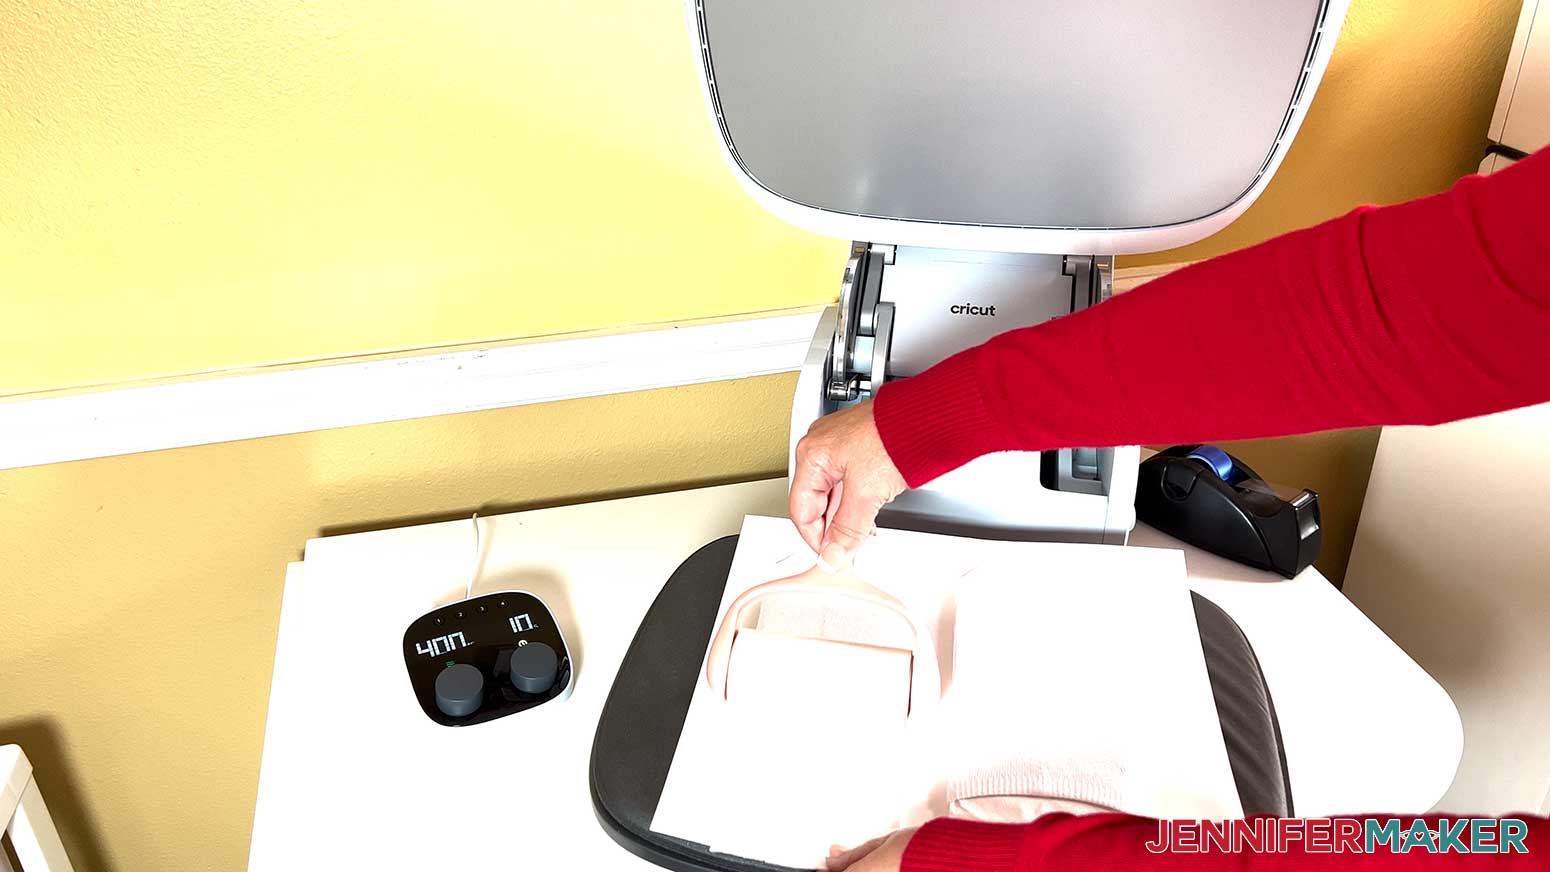
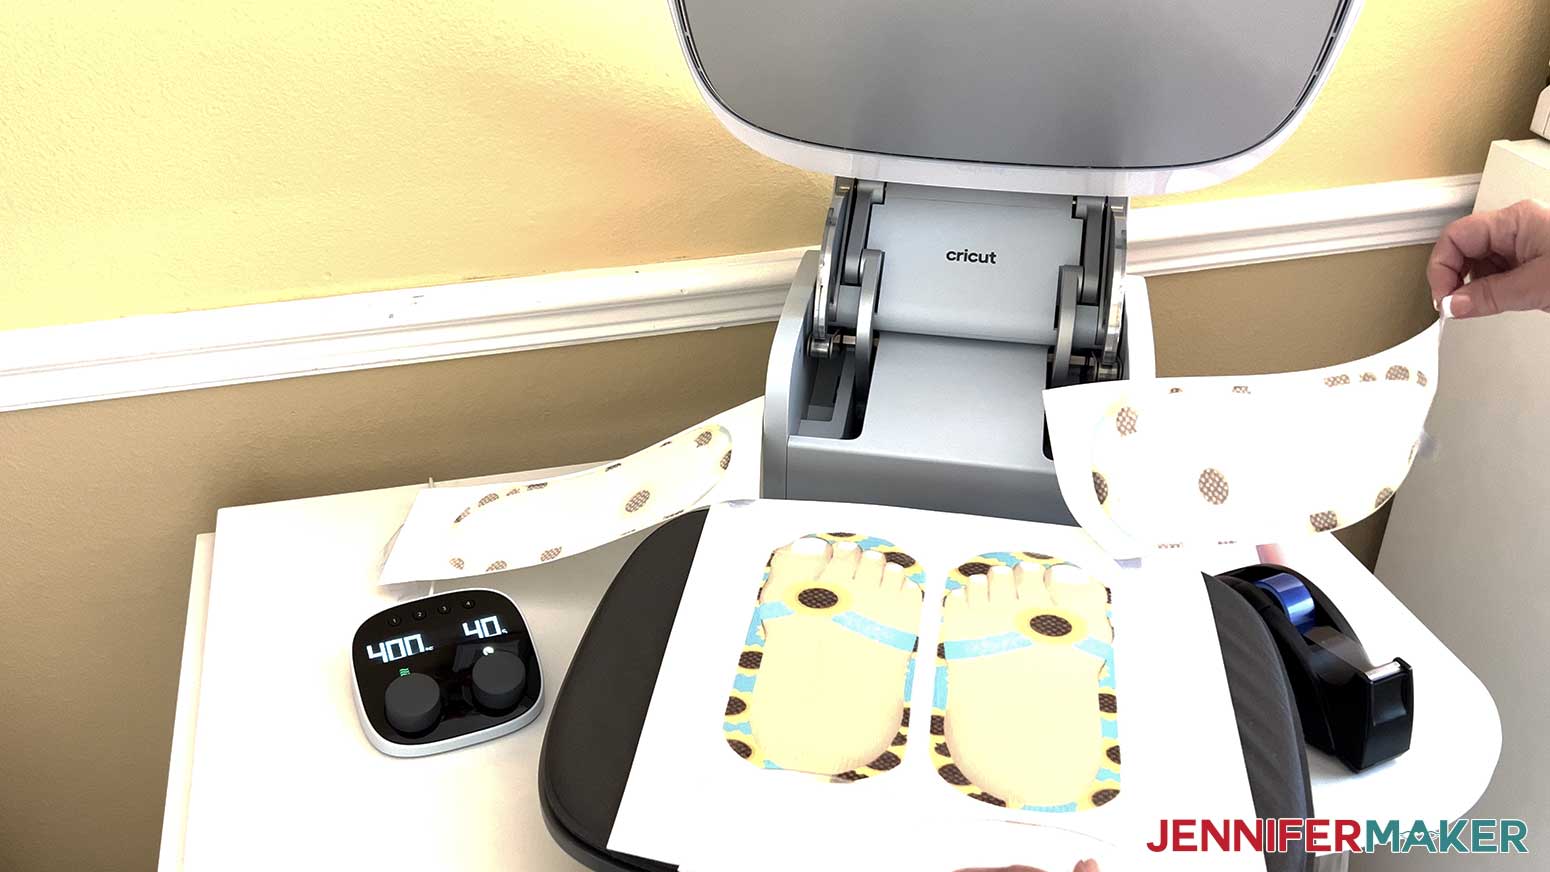
Place each sock on a jig so the top of the sock is flat and the toe is lined up with the end.
Preheat your sock blanks on the jig for 10 seconds and use a lint roller to remove any extra strings or dust.
STEP 4: SUBLIMATE ON THE SOCKS
NOTE: Before you start, open a window or set up a fan to improve your ventilation. Since we’re heating up sublimation dye, you don’t want to breathe in any of the fumes!
Set your heat press to 385° F (196° C) and time to 40 seconds.
Place a clean white page of cardstock on the pressing surface to protect it.
To prevent ink blowout on the sock jig, I'm going to wrap the jig with a sheet of butcher paper and use a piece of heat-resistant tape and secure the paper to itself on the back. Ensure the sock is secure on the jig and place it on the cardstock.
Having the jig in place not only stops ink from bleeding through to the other side but also helps keep tension on the fabric for a better result.
Use a lint roller to remove dust or debris from the surface of the sock.
Place the sock top side up on the cardstock, and lay the sublimated design, printed side down, over the sock. Line up the toes on the design with the toe of the sock. The design, when properly sized, should cover the entire top of the sock just to the edge.
Use a few pieces of heat-resistant tape to secure the transfer in place. I found it easier to tape the design over the sock and to the cardstock below it.
Cover the transfer and jig with a sheet of white butcher paper and press for 40 seconds.
When the time is up, you can remove the butcher paper. To prevent ghosting, leave the print to cool for a couple of minutes to let the sublimation process complete. After it has cooled, remove the tape and paper.
Once the sock and jig are cool remove the decorated sock, and repeat with the other sock.
VARIATION: ATHLETIC OR LONGER-LENGTH SOCKS
The PNGs for the longer socks won’t fit on one page, so there’s a bit more preparation. I’ll show you how with the orange high-top design with a tall sock. This design also has a front and a back, so there are two files to use. We’ll prepare the front with the laces first.
Since the PNG for the high-top socks can be used on either the left or right foot, we'll need to print out two copies each of a matching laces and back design.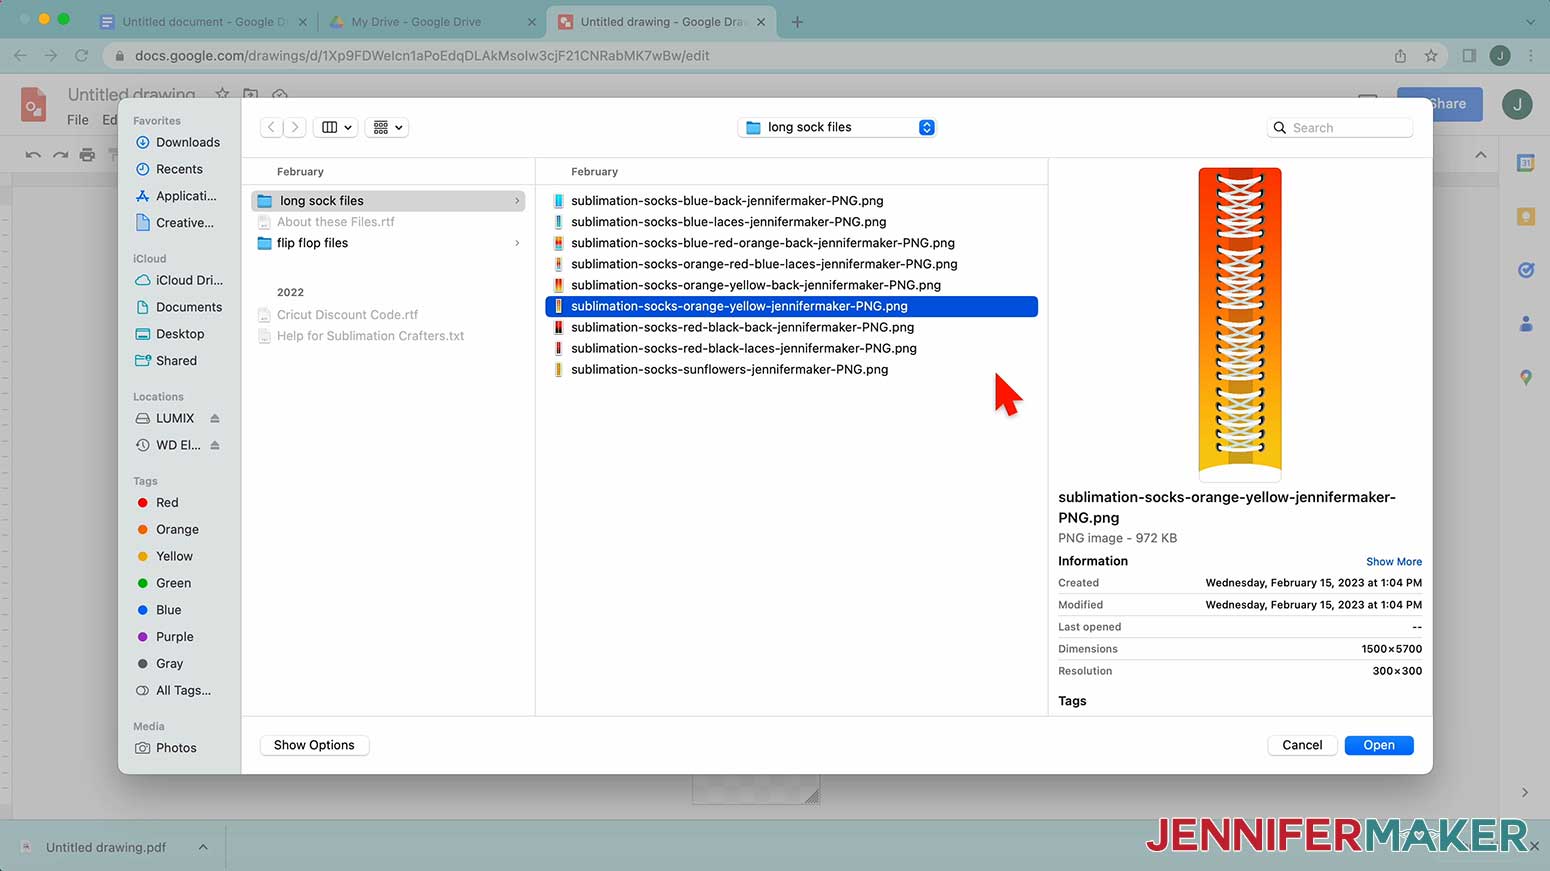
We need the dimensions of our sock, so put one on a jig, keeping the sock straight and lining up the seam of the toe with the end of the jig. Measure the height and width. Yours might be different, but the front of my tall sock is 3.25" wide and 18" tall.
Open Google Drive and in the upper left corner click on New. Go to More and select Google Drawings.
With Google Drawing open, go to the "File" menu and select "Page Setup". Under the dropdown, select Custom and adjust the page size to be a bit wider than your sock and sock jig since the design will wrap around a bit to blend the seams. I’ll make the page 3.4” wide and 18” tall. Click “Apply.”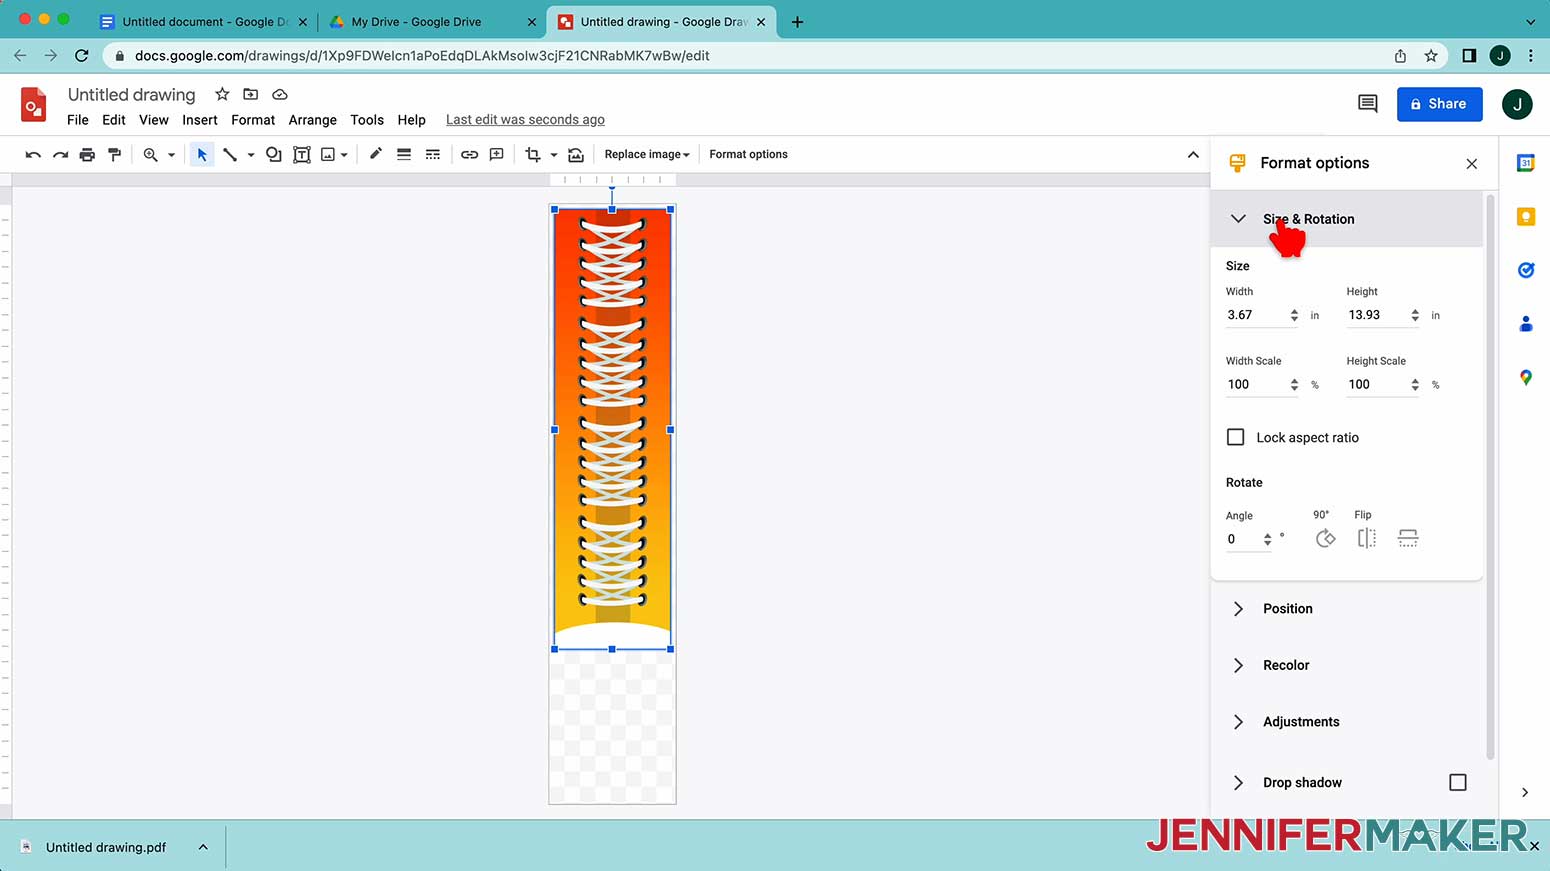
Go to the "Insert" menu, select "Image", and select "Upload from Computer". Locate the sublimation design you want to use and click "Open". I’ll start with the orange high-top design for the front of the sock.
The image will appear and fill your page — it will not necessarily come in at the size originally designed. With the image on the screen use the bounding box and pull from the edges of the image to resize it. You can make the image smaller or larger based on your sock jig, and it's flexible enough that the ratio isn't super important. You can also use the Format Options under the Format tab, Size & Rotation to adjust the width and height of the sock design. 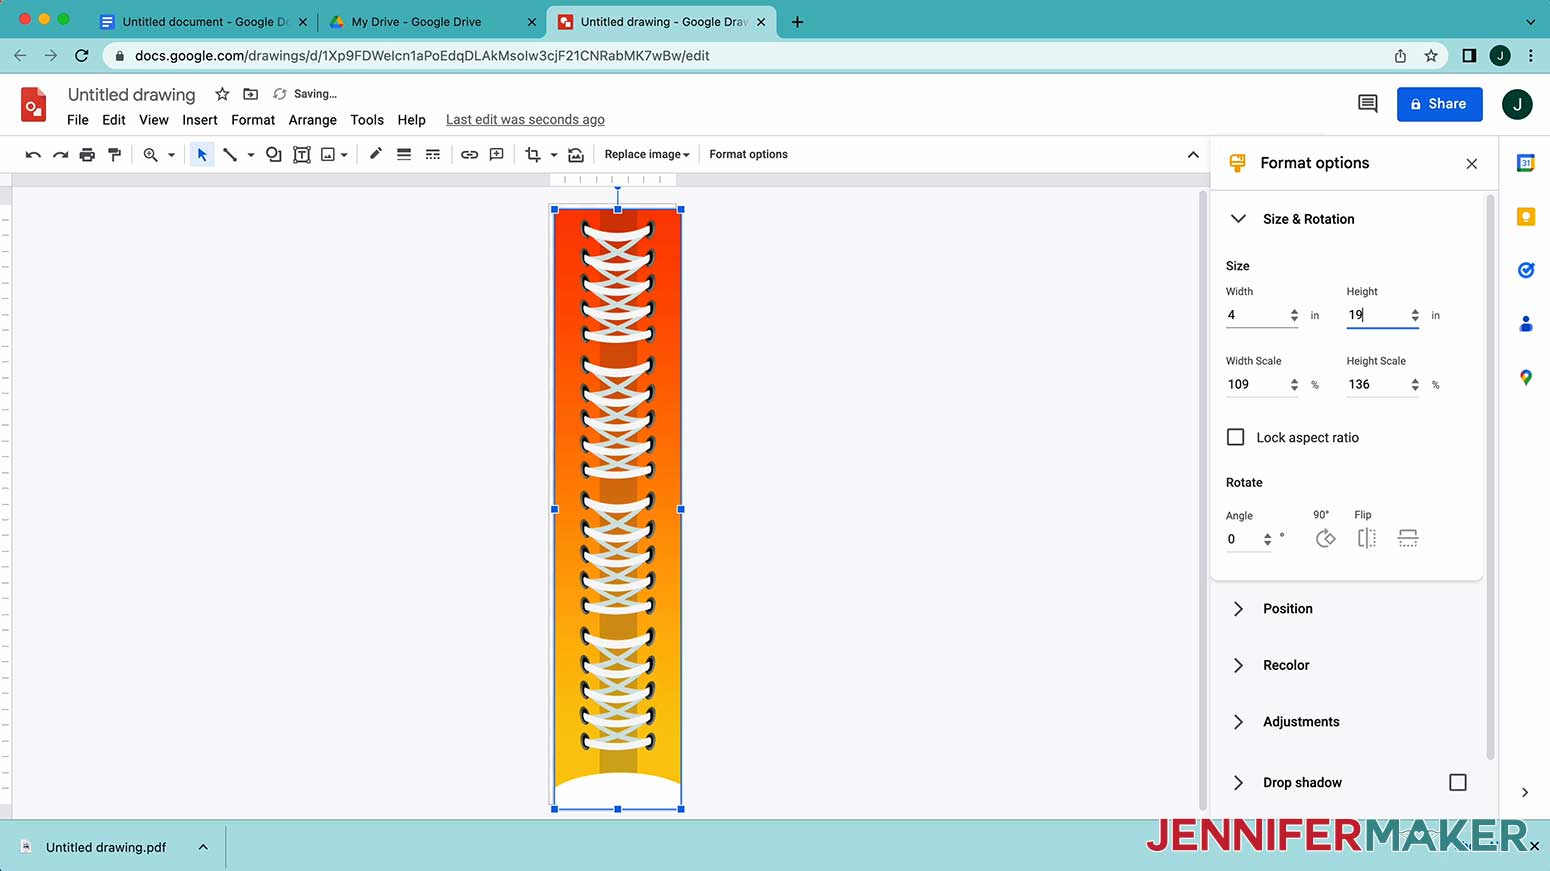
Once the size is correct, click File, Download, then PDF Document.
Saving the file as a PDF will allow us to import it into Adobe Acrobat to print in pieces we can tile together to fit the sock.
Rename and Save the file.
Since I'm not sublimating on the bottom of the sock, the design on the back is shorter than the front. With the sock on the jig, measure from the top edge of the sock to the heel. Mine is about 7”.
Use the same steps to create a PDF in Google Drawings with the back design sized for your dimensions. Again, round up the width a bit so it can wrap around the sides. I made mine 3.4” wide and 7” tall.
To prepare and print your designs with the free version of Adobe Acrobat Reader, as shown in our previous tutorial How to Sublimate Large Designs
Once installed, select Open under the File Menu and select the design for the front of the sock. Click on the Printer Icon on the upper left side of the page. 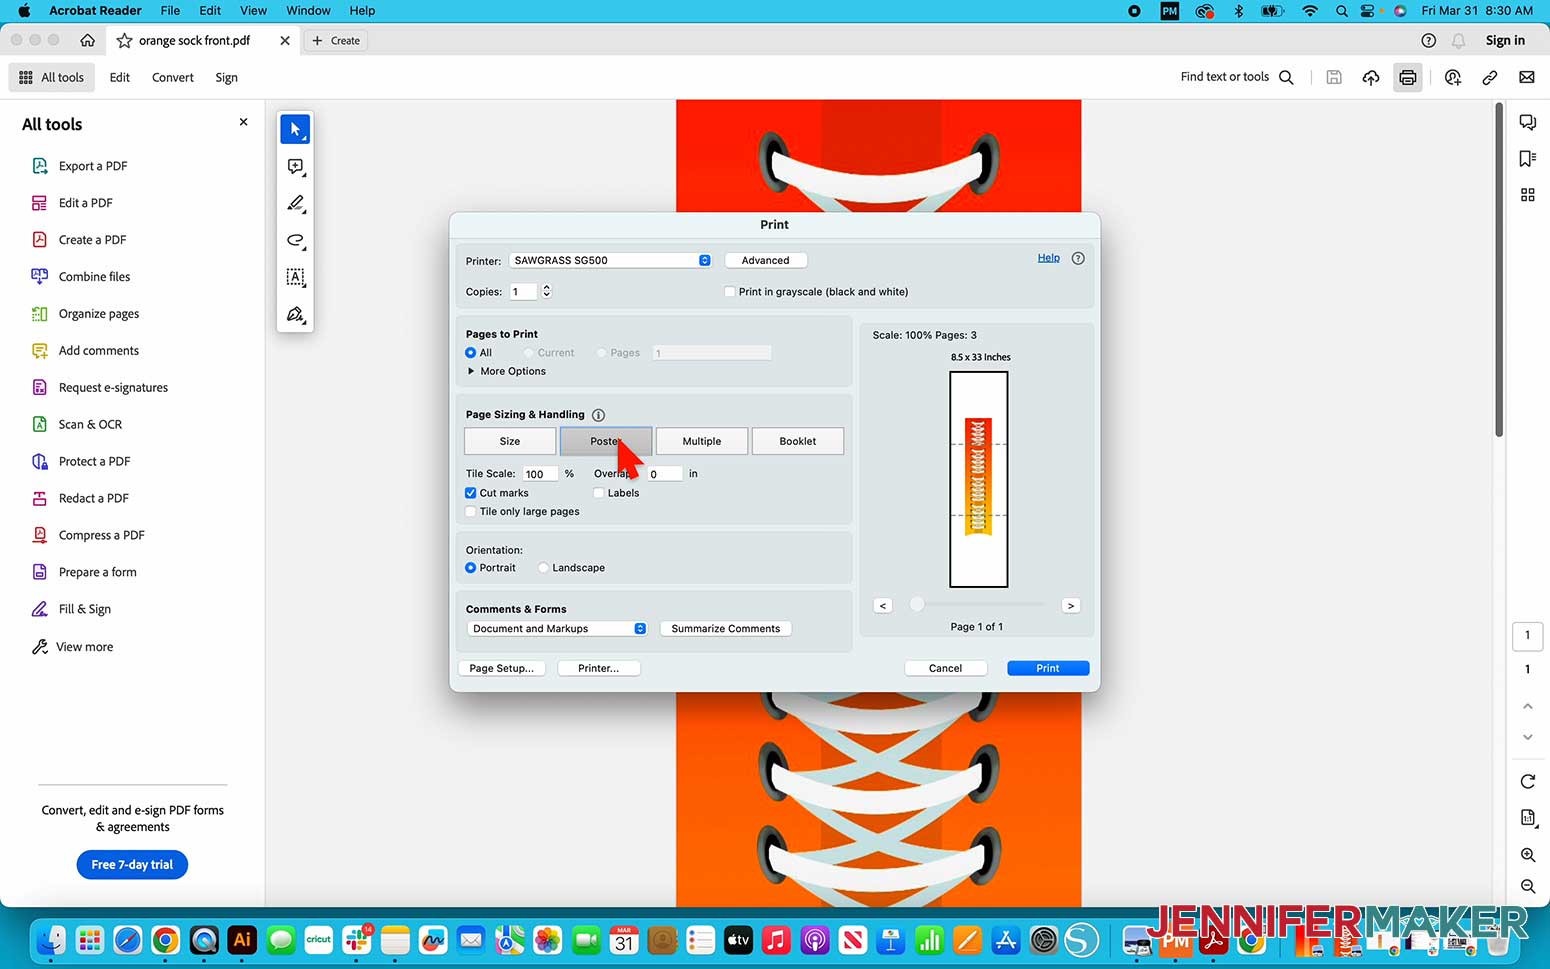
Your window might look different, but use my settings as guidelines.
In the print dialog box, be sure that your sublimation printer is selected and then click on the Poster tab. This will allow us to print the full length of the sock in sections on two sheets of paper. Set “Overlap” to .”02” and turn on Cut Marks, then change Orientation to Portrait. Next click on Printer on the bottom left.
Be sure that the media and quality are set to Photo Matte and Best.
Next click on Advanced next to where your printer is listed. Under Color Profile select your printer's ICC profile and click OK.
Make sure your sublimation paper is loaded correctly in your printer.
Click Print to send one copy, then click print again to make the second for the other sock. Once the pages are printed and the ink is dry, use a paper trimmer to trim the extra paper off the designs’ seam edges. Feed the paper into the trimmer until you see the cut marks, and trim the paper along that edge. Use heat-resistant tape to join the sheets together, being careful not to cover any ink. Cut or tear off any excess paper. 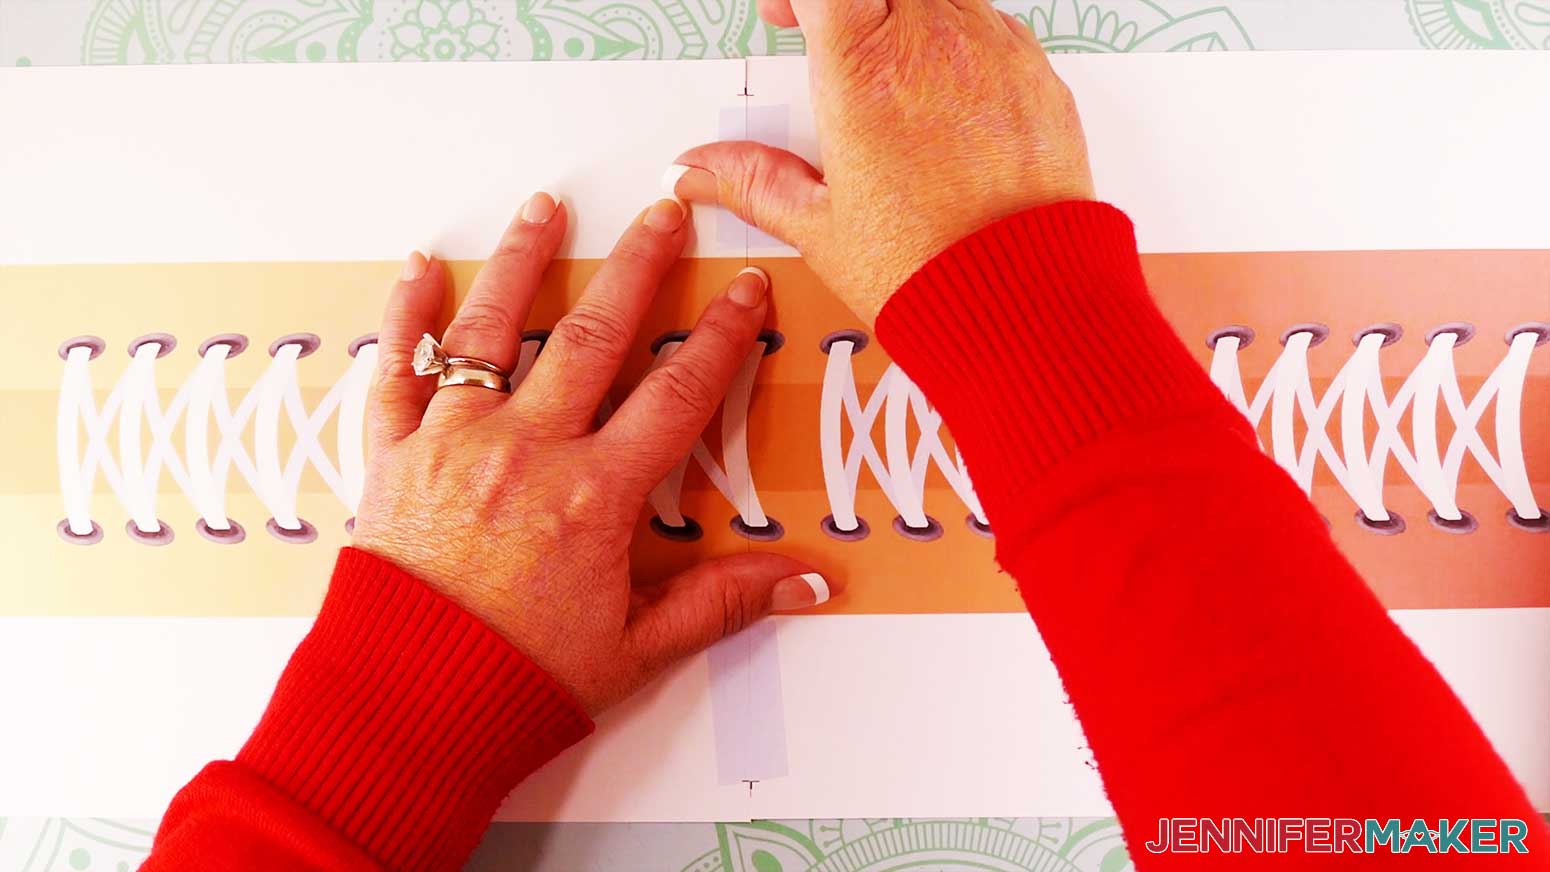
Since these are larger designs, you can press them either all at once with a large heat press or in sections with a smaller one.
Set the temperature of your press to 385° F (196° C) and time to 10 seconds.
These settings worked for my athletic socks, but check the Cricut Heat Guide to verify the details for your materials and tools.
Place a heat-resistant mat on a flat surface.
Preheat your sock blanks on the heat pad for 10 seconds heel side down. You can do it in sections, just make sure they each get the full amount of ››time. Then use a lint roller to remove any extra strings or dust.
Put a clean white page of cardstock on the pressing surface to protect it.
To prevent ink blowout on the sock jig, I'm going to wrap the jig with a sheet of butcher paper and use a piece of heat-resistant tape and secure the paper to itself on the back.
Insert a jig into the sock, line the paper up printed side down, over the top of the sock lining up the side of the design with the side of the sock. Use a few pieces of heat-resistant tape to secure the transfer in place. Cover the transfer and jig with a sheet of butcher paper.
If you’re using a large heat press, use these steps to press the full design all at once.
If you’re using a smaller press, beginning on the bottom half of the sock jig, press the design for 40 seconds.
TIP: Use a pencil to make a line on the butcher paper along the upper edge of the EasyPress so you know where to begin the next press.
When the time is up, lift the EasyPress straight up and press the next section of the sock. Don’t forget to reset your timer.
If you’re using a smaller press, it might require more sections. Remove the butcher paper and allow the sock and jig to cool - this is very important as the sock jig will be very hot for a few minutes and can burn your fingers.
Remove the tape and sublimated sheet and discard.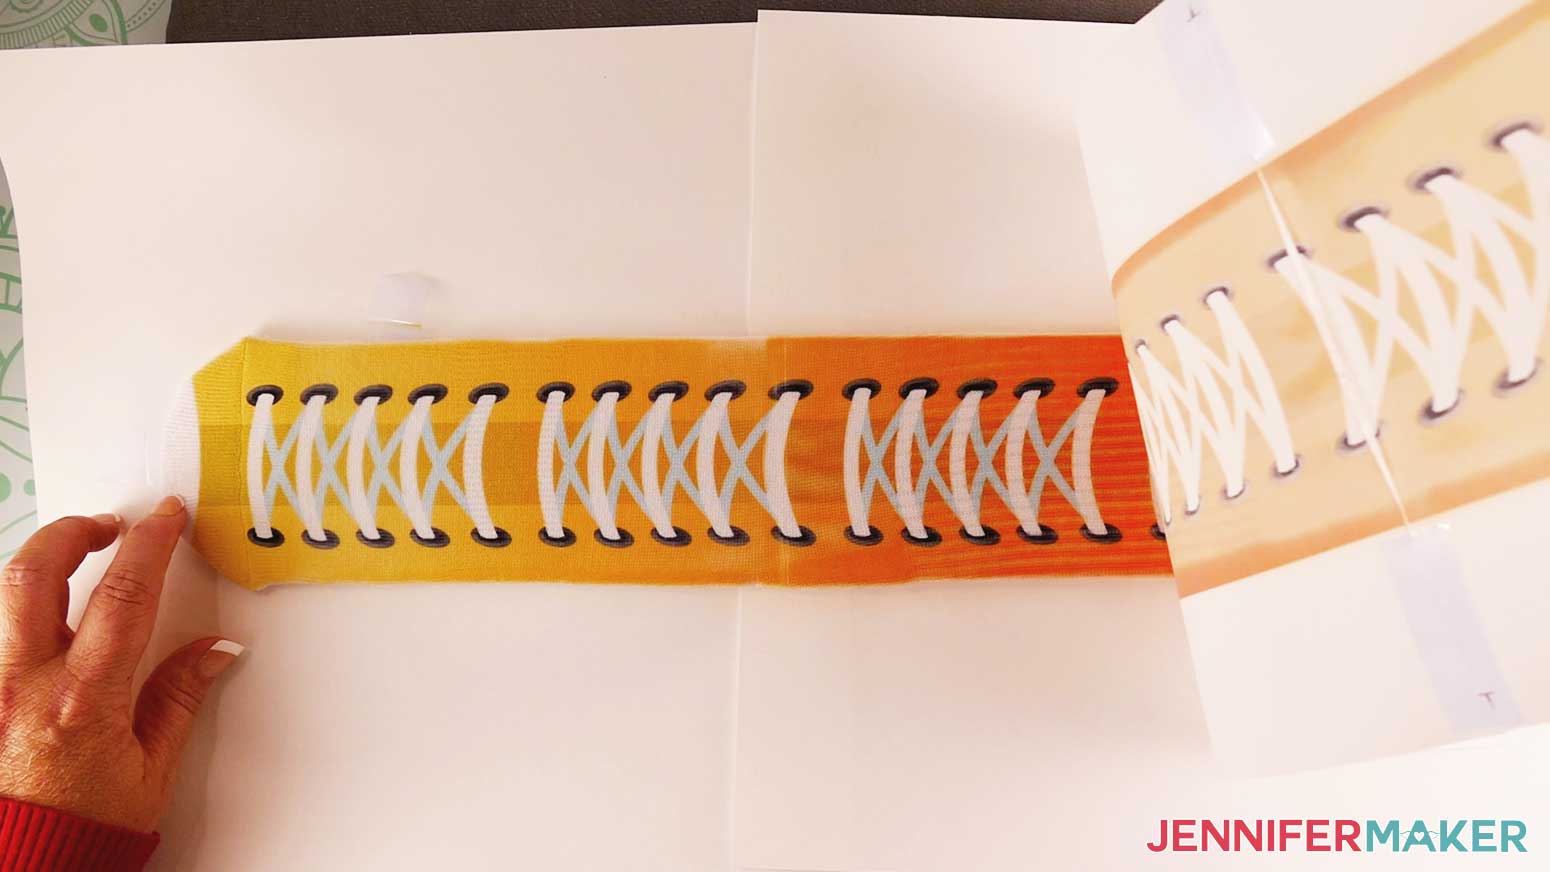
Since there is a design on both the front and the back, flip the jig and just barely roll the printed sock fabric over the edge of the jig until you see a small strip of color on either side of the sock. This helps to blend to the seam on the sock and make it less noticeable.
Place the sock printed side down on a clean sheet of cardstock and tape the design to the back upper part of the sock, the design will cover from the top of the sock to just above the heel. Cover with another sheet of butcher paper and press the back of the sock at the same temp and time as the front.
When the time is up, remove the butcher paper and allow the sock and jig to cool.
STEP 5: SHOW IT OFF!
Here are how the different brands and styles compared.
I found the SilkySocks to be thicker than the white sublimation blank socks, however, they both performed well, holding their color through washing and drying. The SilkySocks also have more cushioning than the other brand.
After pressing and testing the ankle socks I found that the 100% polyester socks from Five Below held color better overall and were softer, however, they seem to be sized smaller.
The Hanes ankle socks I purchased at Dollar Tree were not as soft, but they kept their size and shape throughout washing and drying. The colors did fade slightly, but they are a cotton/polyester blend, so it is expected.
Answers to Your Questions About Making Sublimation Socks
Q: Can you sublimate on socks?
A: Yes! You can add designs to sublimation sock blanks very easily. Sublimation is a great choice for socks, because the ink is heat activated, meaning it won’t run or fade due to moisture.
Q: What is the best way to sublimate socks?
A: After some testing, I found that using the right jigs was the key to easy sublimation socks.
Q: What material are sublimation socks?
A: Most sublimation socks are 100% polyester.
Q: Can you sublimate on cotton socks?
A: You can, but the designs will not transfer well because sublimation inks are designed to work with polyester.
Q: Can I heat press on socks?
A: Yes, you can use iron-on vinyl, Infusible Ink products, and sublimation inks on socks.
Q. Do I have to use a Cricut machine?
A: No! These sublimation socks don’t require a Cricut at all!
Q: Can you use a Cricut for sublimation?
A: While a Cricut cutting machine doesn’t have the capability to create a physical sublimation design, you can use the Print then Cut feature to create the file in Cricut Design Space and control a sublimation printer for sublimation printing!
Q: Where can I find high quality images to create sublimation designs in Cricut Design Space?
A: In addition to my free resource library (a great option!), check out Cricut Design Space, Adobe Photoshop, Design Bundles, Silhouette Studio software, Creative Fabrica, Creative Market, Font Bundles, and other online marketplaces for photos.
Q: What kind of paper do I use for sublimation?
A: While some people will use just regular laser paper, I really recommend you use special sublimation paper for vibrant color, good results and ink transfer. I used A-SUB paper during my tests.
Q: What kind of ink do I use for sublimation?
A: You must use special ink to do sublimation projects.
Q: How do I test my sublimation prints for vibrancy and color?
A: Use my free subliflower design to see how your colors look on the special paper! It’s Design #385 in my resource library!
Q: How do I learn sublimation for beginners?
A: Join Sublimation Startup for a logical, step-by-step guide to getting setup for success with sublimation! You can ask questions and feel confident that you’ll get help! The Sublimation Startup mini-course is also great for those who enjoy learning from our easy-to-understand, calm, and clear method of teaching. This is a no-fluff, no-mess, no-distraction workshop … it’s like sitting down in my craft room to learn directly from me! We work in logical steps to build your understanding and confidence with sublimation, and then provide support to keep helping you as you continue on your journey! Register now!
Q: Can I use a sublimation printer for regular prints, too?
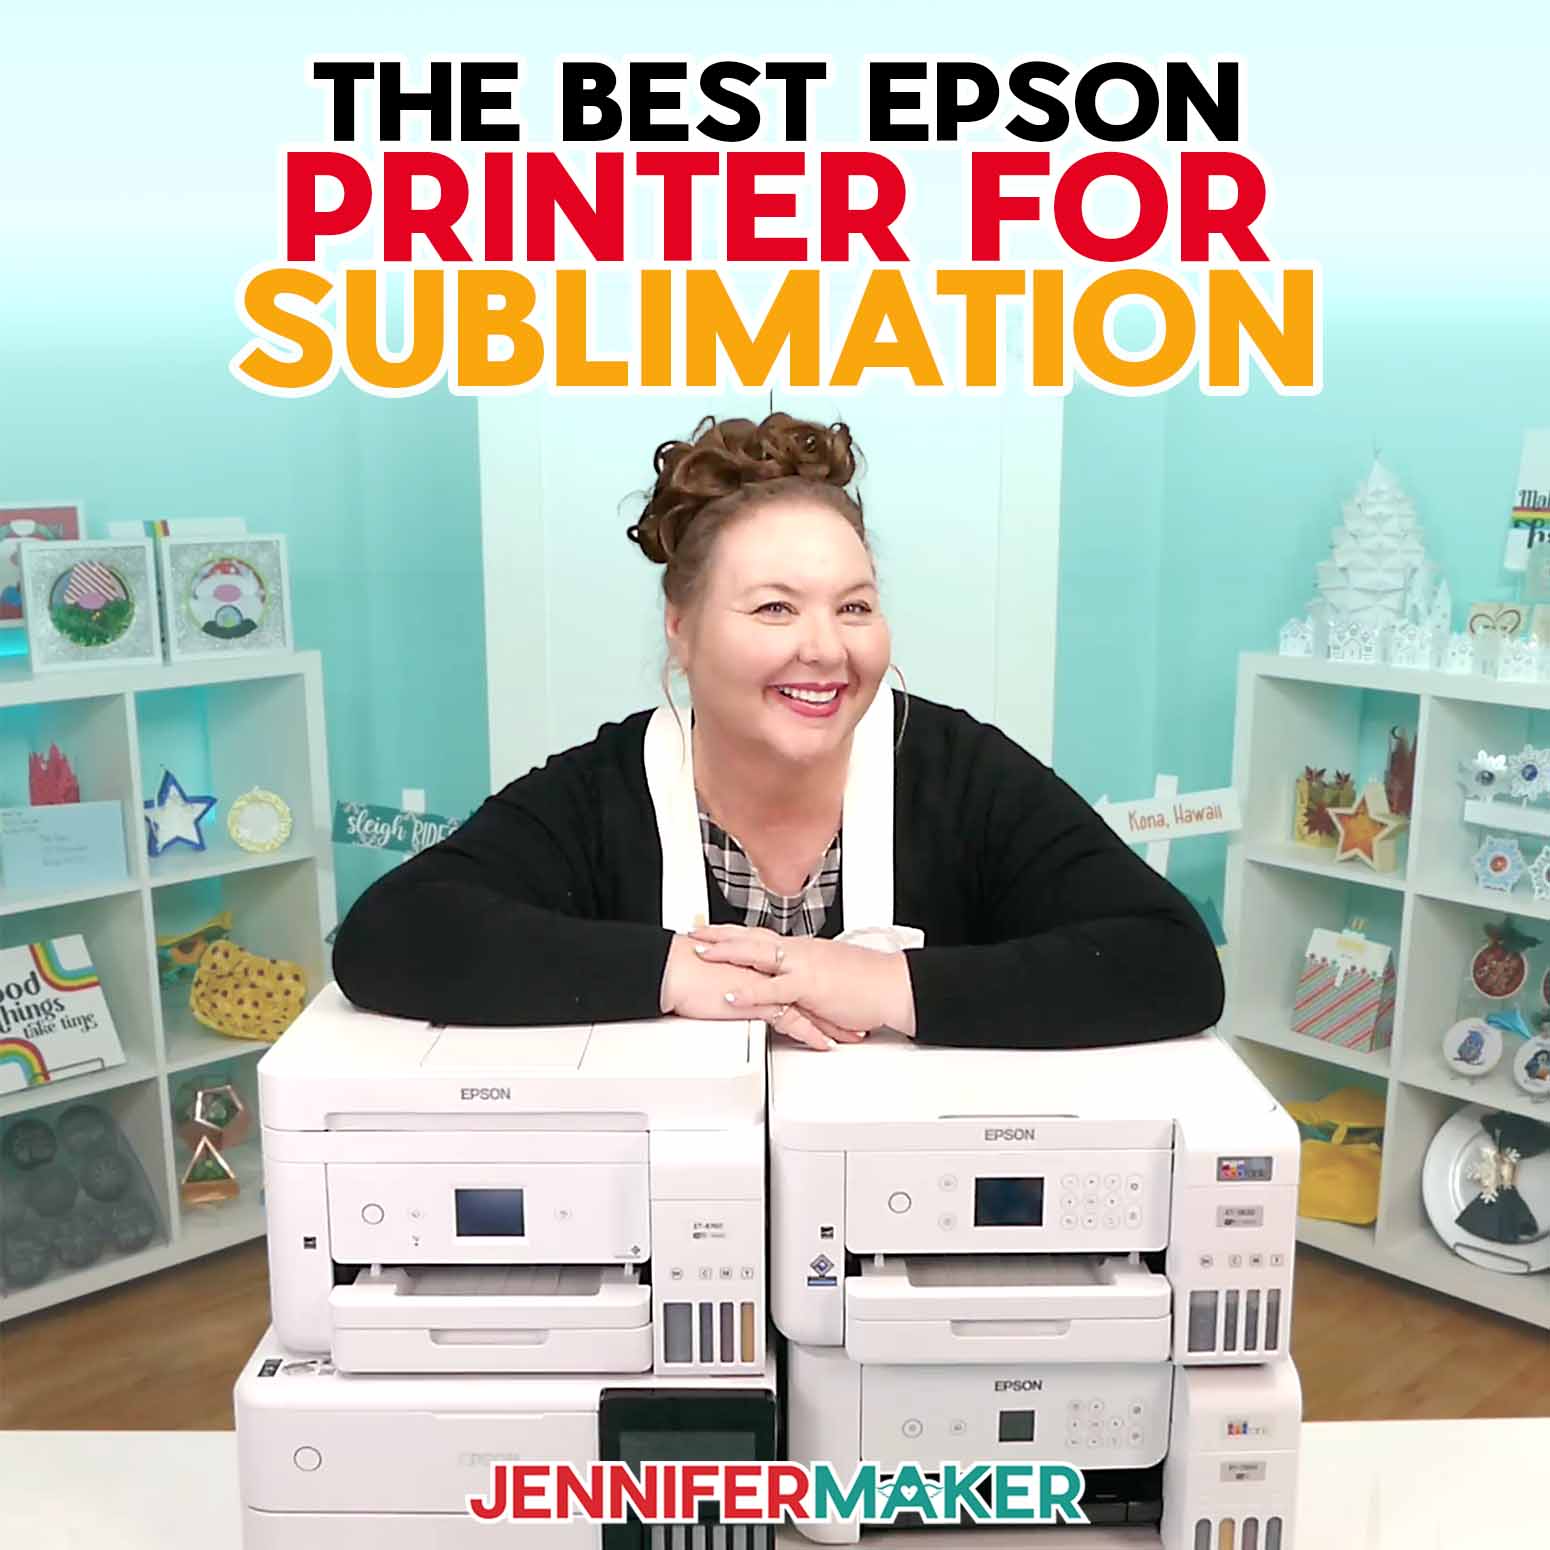
A: No, a high-quality sublimation printer (whether purpose-built or converted) only prints in sublimation ink. And you cannot really switch a converted printer back to being an inkjet printer without a LOT of effort and wasted ink. An Epson Ecotank printer is an inexpensive option to convert, but see my reviews to pick the best sublimation printer for your goals!
Get my free download of the Sock Sublimation designs here:
(If you do not see the signup form above, click here.)
Please share your sublimation socks and ask your questions in my Sublimation Made Easy Facebook group where you’ll find over 100,000 sublimation crafters like you, sharing their tips, projects, and inspiration.
Love,