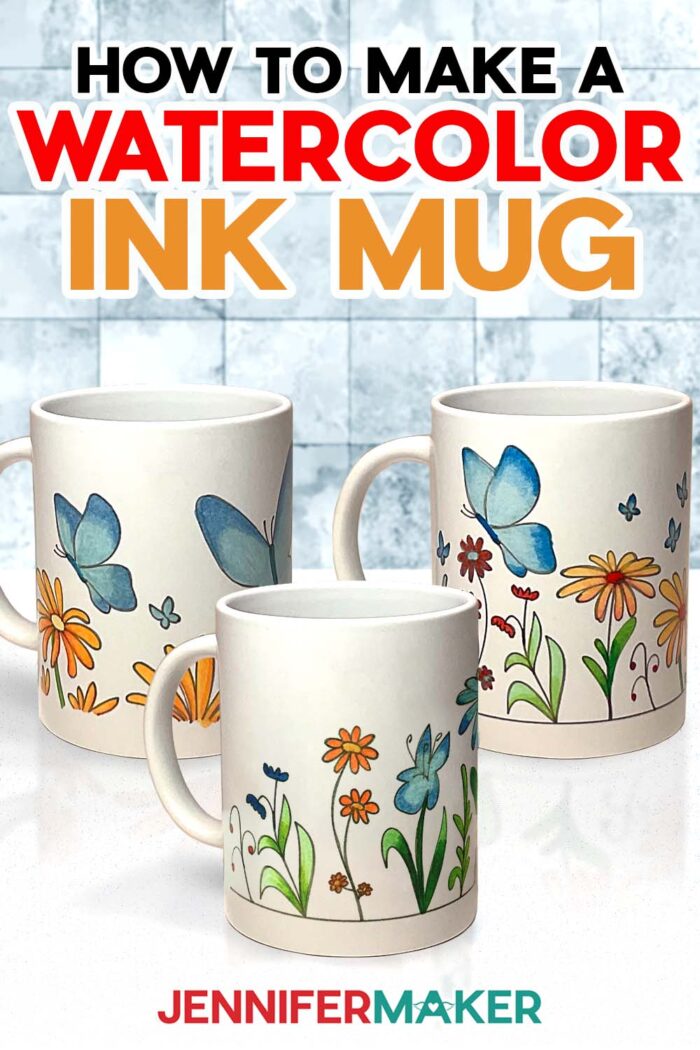
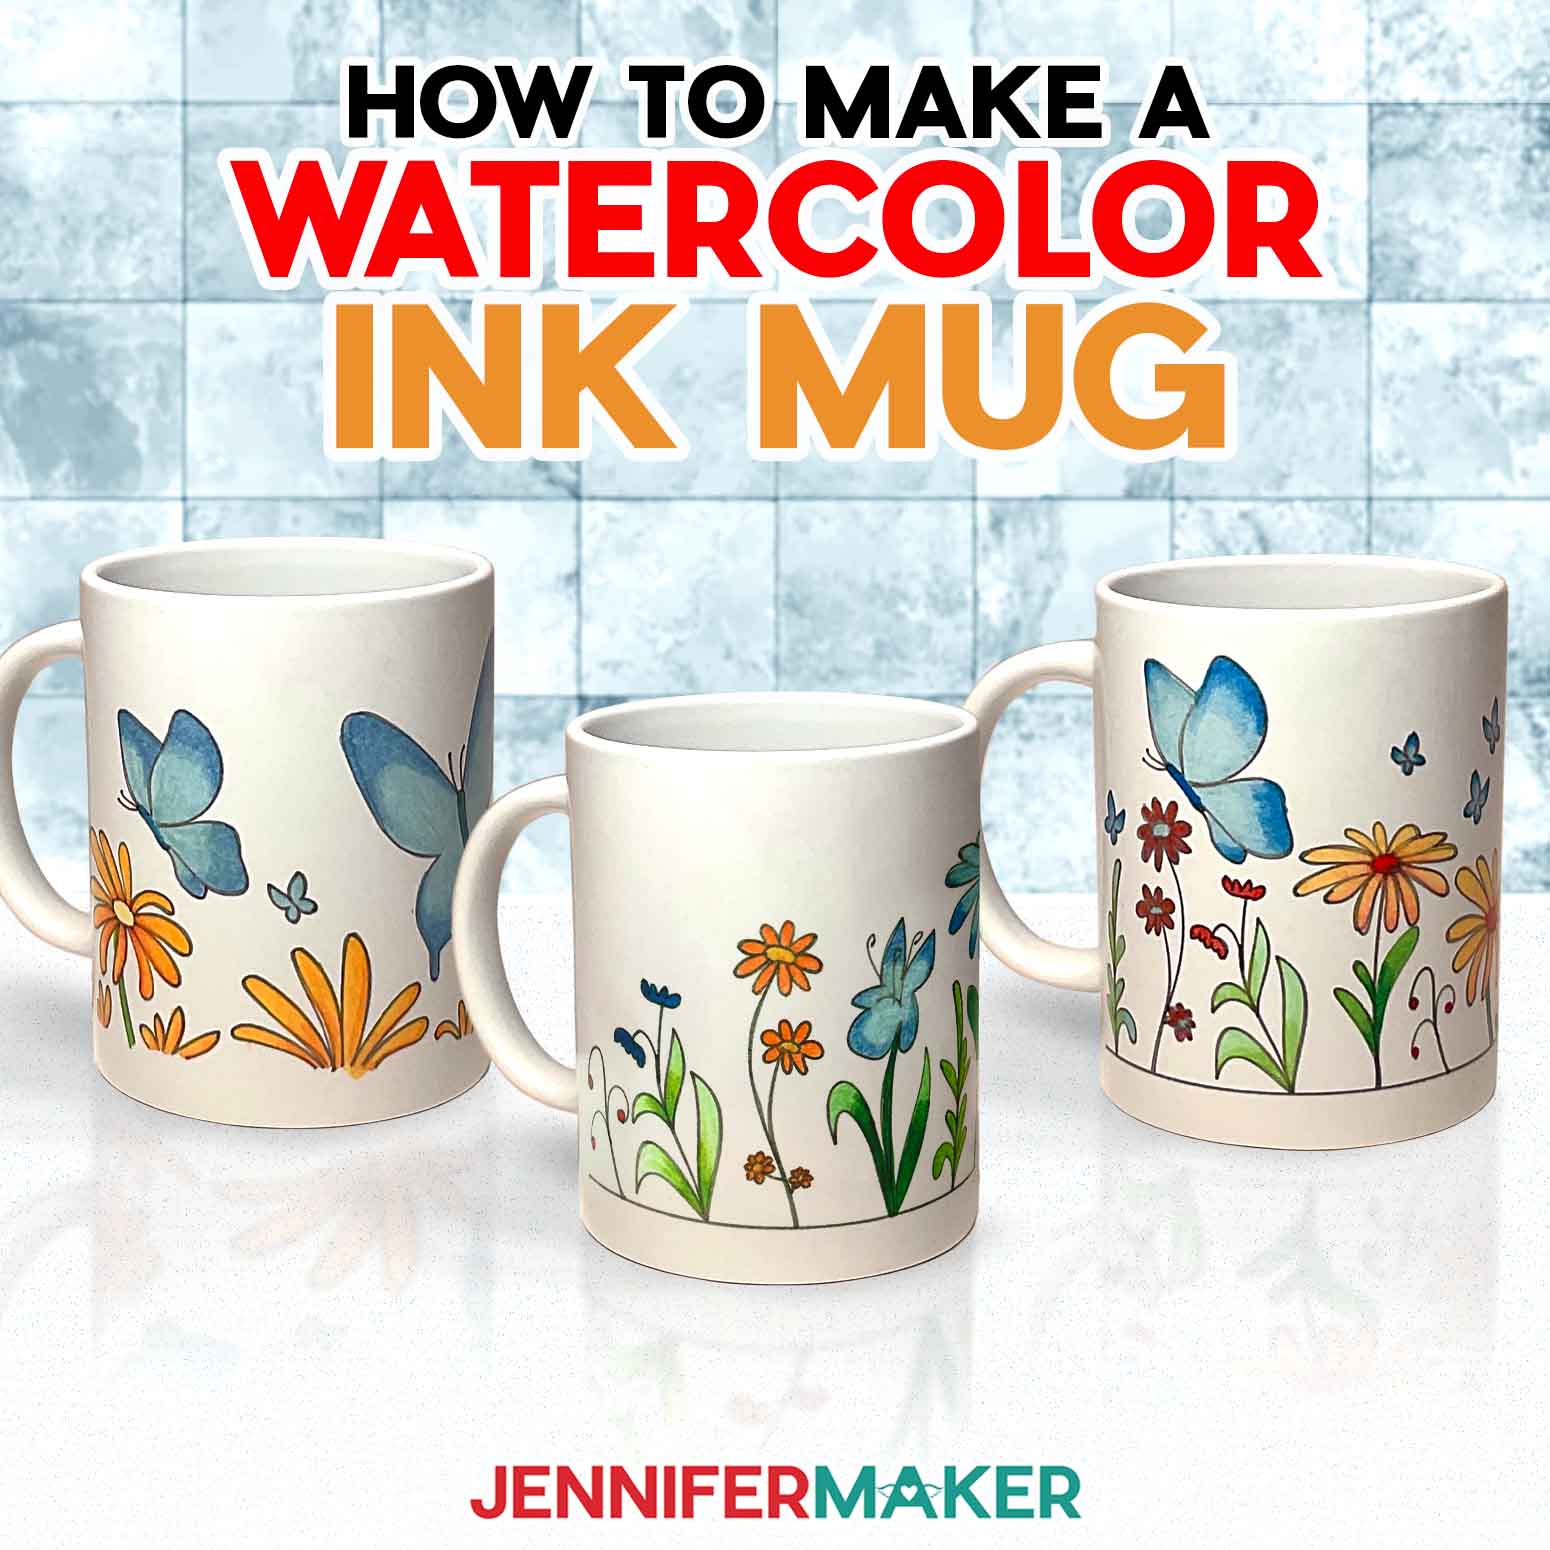
Learn how to make a watercolor ink mug!
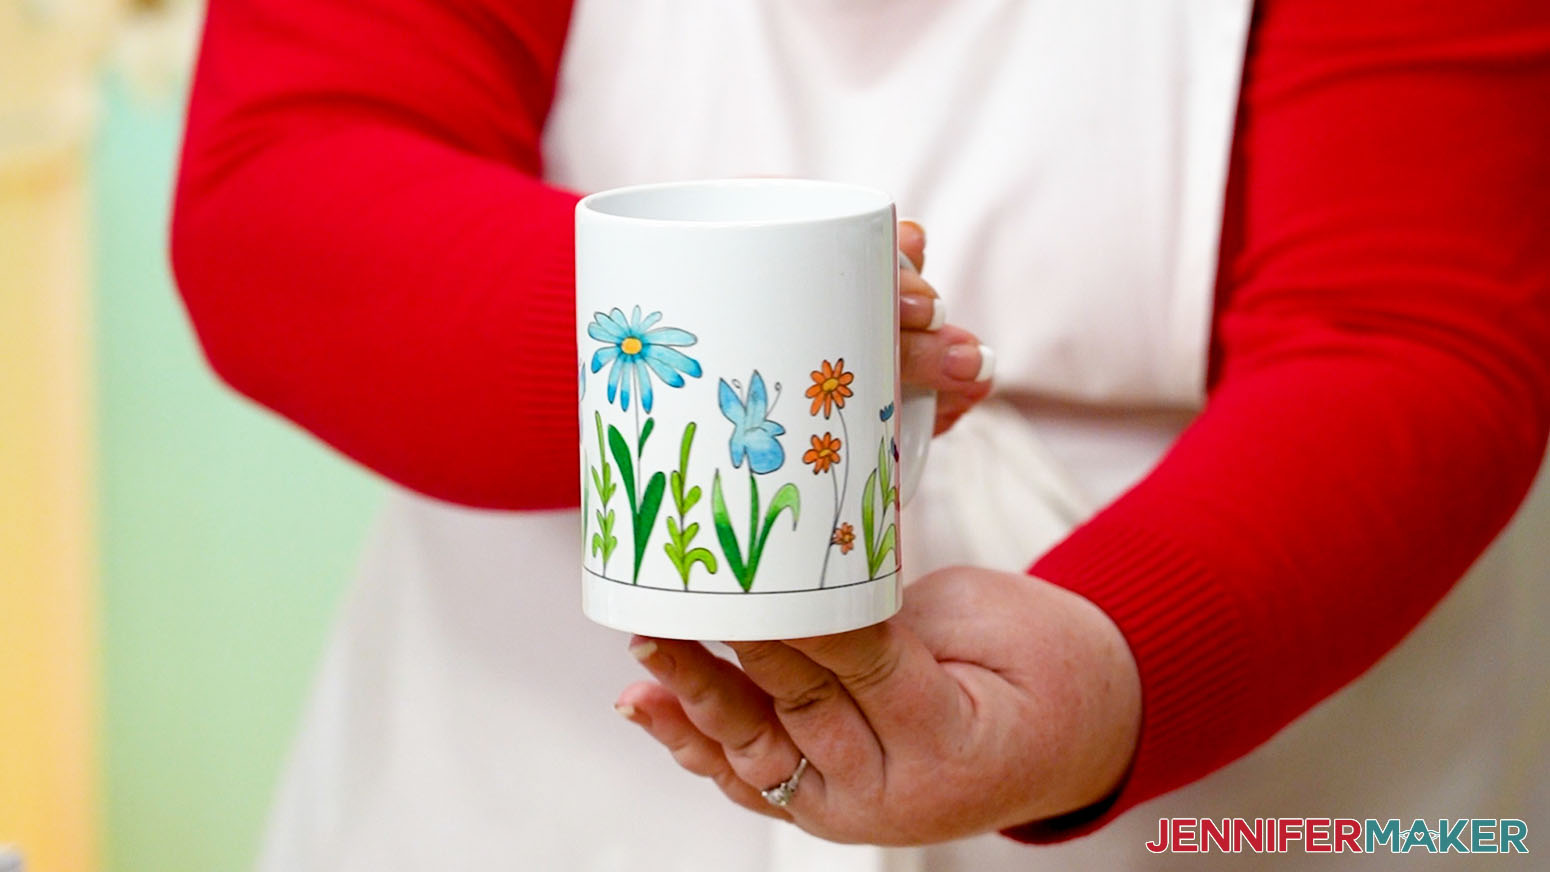
I love finding new ways to use craft supplies, don’t you? A lot of us have Infusible Ink pens and markers, and they’re fun, but I wondered if we could use them in slightly different ways? I’ve seen some beautiful watercolor ink mug designs, but sometimes I want an easier method than brushes and water. After some experimentation, I found that you can use watercolor paper to add texture to your transfer using the Cricut Mug Press! Even better, the Cricut will draw my free designs for you, so they’re like a coloring book you can fill in by hand! They’re perfect for a morning coffee or as a gift using my Cricut Mug Boxes!

This easy project only requires a few supplies! You’ll need a thin Cricut Infusible pen for the machine to draw the outline. I used the .3 mm black pen. You can experiment with other kinds and colors, but the fine tip worked well with my delicate design. You’ll also use the Infusible Ink markers to color in the design. While there are freehand markers available, I used the set that works with my machine. The colors are just as vibrant! Just remember, you must use Infusible Ink markers and pens — Sharpies and other non-sublimation ink pens and markers will not work. I’ll show you how to blend the markers to create gradients almost like high quality sublimation printing!

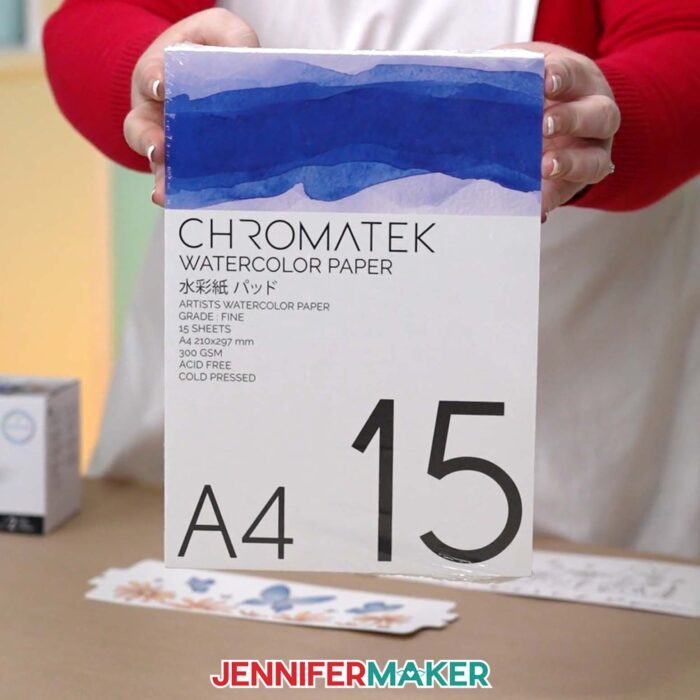
You also need some white watercolor paper to draw your design on. I used A4 size paper, which is a little larger than letter-size printer paper. You don’t need the highest quality paper, but a thick option with a textured surface worked well for me.
I’ll show you how to prepare and create the watercolor ink mug wrap with a Cricut Maker 3, but you can use any machine capable of holding a pen in its clamp, which is all of them (Explore, Maker, Venture, Joy Xtra, and Joy). A green StandardGrip machine mat, a fine point blade, and heat-resistant tape are also needed for this project, along with the tools and materials listed below.

Cricut sells mugs specifically to work with Infusible Ink, and that’s what I’m using. My free design files include wrap templates for both the 12 oz. and 15 oz. Cricut mugs. You can use another ceramic mug with the same dimensions, just make sure it’s white and sublimation-ready, meaning it has a polymer coating the inks can dye.
To transfer your Infusible Ink pen and marker designs onto the mugs, I’ll show you how to use the Cricut Mug Press. This is my favorite way to sublimate mugs because it does all the work for you!

And if you have the Cricut Joy or Cricut Joy Xtra, you can also make these watercolor ink mug projects! Just make sure you have the correct pens for your machine and a green StandardGrip machine mat that is long enough.

Ready to learn how to make a watercolor ink mug? This post contains some affiliate links for your convenience (which means if you make a purchase after clicking a link I will earn a small commission but it won’t cost you a penny more)! Read my privacy policy and full disclosure policy.
Materials And Tools to Make a Watercolor Ink Mug
See my Amazon shopping list with exactly what I used!
- Cricut Infusible Ink Pens (for outline)
- Cricut Infusible Ink Markers (for coloring)
- A4 Watercolor Paper
- One (1) Cricut Infusible Ink Compatible Mug, 12 oz (you can also use non-Cricut sublimation mugs) -OR-
- One (1) Cricut Infusible Ink Compatible Mug, 15 oz (alternative)(you can also use non-Cricut sublimation mugs)
- A way to draw and cut your designs – I’m using the Cricut Maker 3, but you can also use the Maker, Explore series machines, Venture, or Joy series machine
- Cricut Green StandardGrip Machine Mat 12″ x 12″
- Cricut Mug Press
- Heat Resistant Pad
- Heat Resistant Tape
- Lint roller
- Fan (for ventilation)
- Brayer
- Spatula
- Scraper
- Design #595 My free SVG/PDF/DXF design files are available in my free resource library – get the password by filling out the form at the bottom of this page

How To Make A Watercolor Ink Mug!

Watercolor Ink Mug
Learn how to use Infusible Ink pens and markers to make watercolor ink mugs!
Materials
- Cricut Infusible Ink Pens (for outline)
- Cricut Infusible Ink Markers (for coloring)
- A4 Watercolor Paper
- One (1) Cricut Infusible Ink Compatible Mug, 12 oz (you can also use non-Cricut sublimation mugs) -OR-
- One (1) Cricut Infusible Ink Compatible Mug, 15 oz (you can also use non-Cricut sublimation mugs)
- Design #595 (My free SVG/DXF/PDF design files are available in my free resource library – get the password by filling out the form at the bottom of this page)
Tools
- A way to draw and cut your images - I’m using the Cricut Maker 3, but you could also use the Cricut Maker, an Explore Series Machine, the Cricut Joy, the Cricut Joy Xtra, or the Cricut Venture.
- Cricut Mug Press
- Heat Resistant Pad
- Heat Resistant Tape
- Cricut Green StandardGrip Machine Mat 12" x 12"
- Brayer
- Lint roller
- Fan (for ventilation)
Instructions
STEP 1: GET MY FREE WATERCOLOR INK MUG DESIGNS
First, download my Watercolor Ink Mug designs at JenniferMaker.com/595. You can either download right from that link by saving the project, or download from my entire free design collection -- to find it, look for Libraries in the red bar at the top, then click either Get a Password, if you don't yet have one, or click Enter the Library. Search the page for design number 595 and click the link to download the designs.
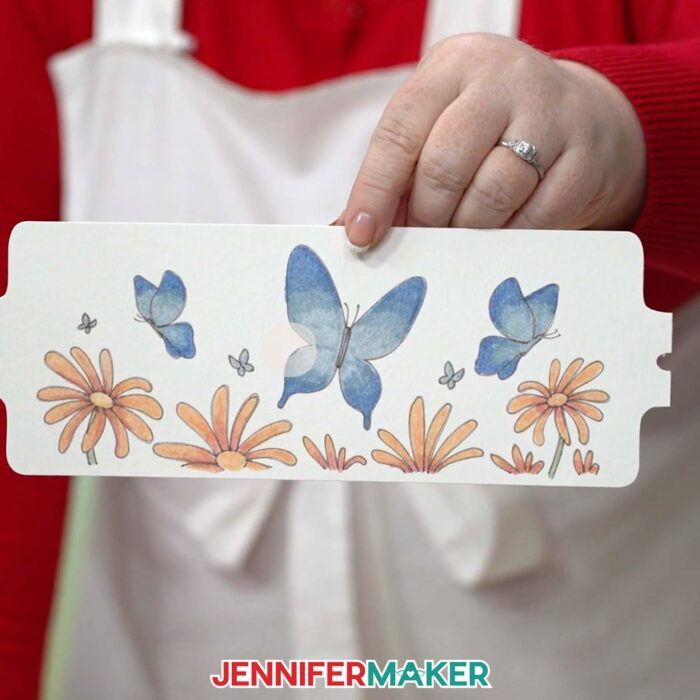
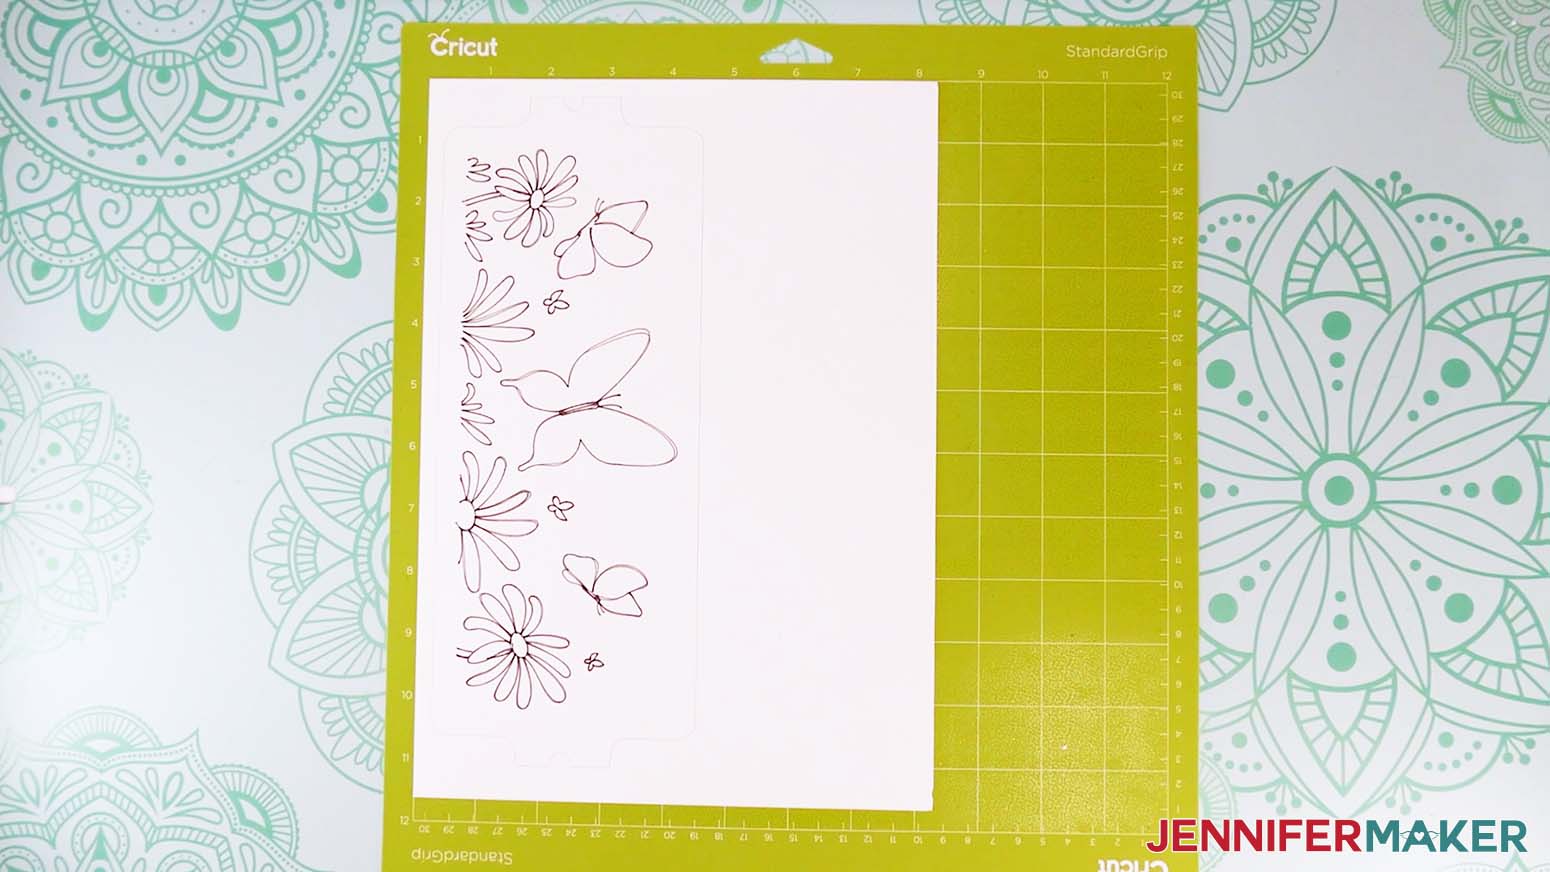
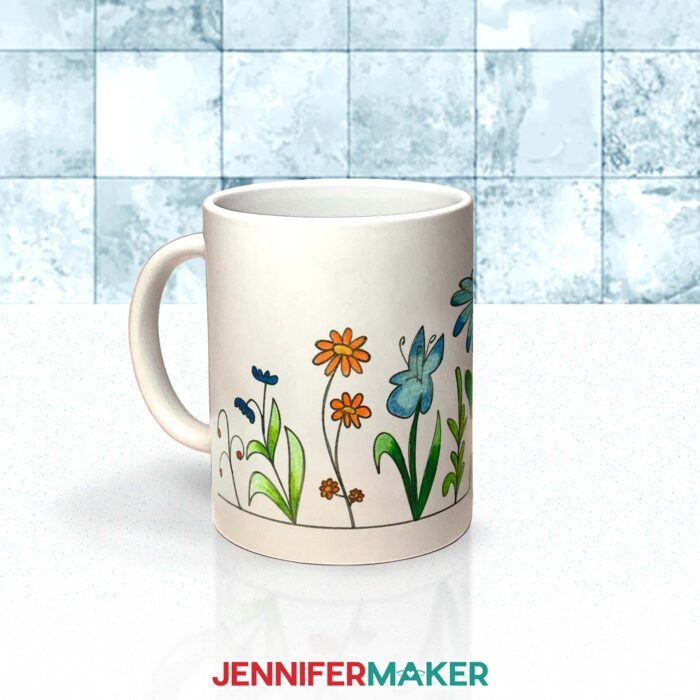
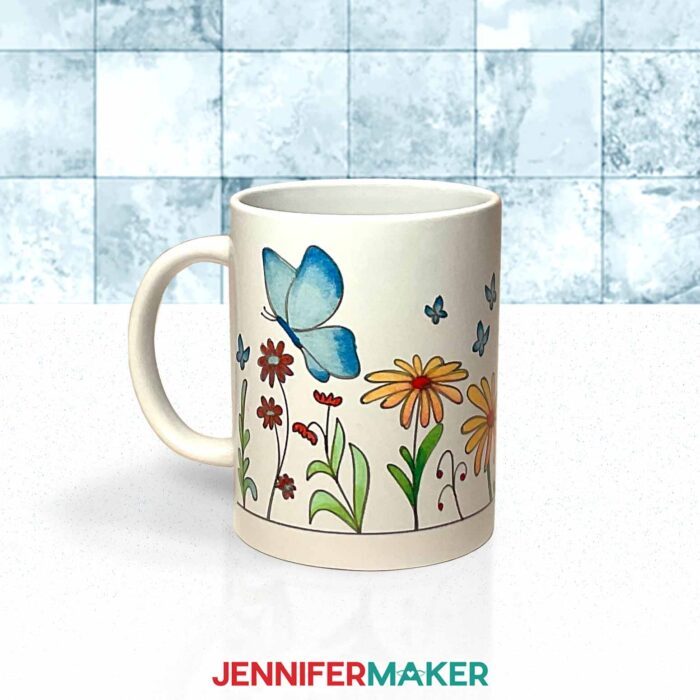
There are two designs, one with butterflies and the other with flowers. In the SVG folder, both designs include templates that fit the 12 oz. or 15 oz. Cricut Infusible Ink mugs.
In this tutorial, I will show you how to prepare and assemble the 15 oz. butterfly design on a 15 oz. mug.
TIP: If you’re not sure how to upload, go to jennifermaker.com/svgs to learn how to unzip and upload SVG files.
STEP 2: PREPARE YOUR WATERCOLOR INK MUG DESIGN
CRICUT DESIGN SPACE
- Open Cricut Design Space and click “New Project.”
- Click “Upload” and then “Upload Image.”
- Click “Browse.”
- Select the “SVG” file you want to use. I’ll demonstrate with the butterflies template, but the steps are the same for the other design and either size.
- On the Prepare to Upload screen, it will say “Cut image” with the design preview.
- Click “Upload.”
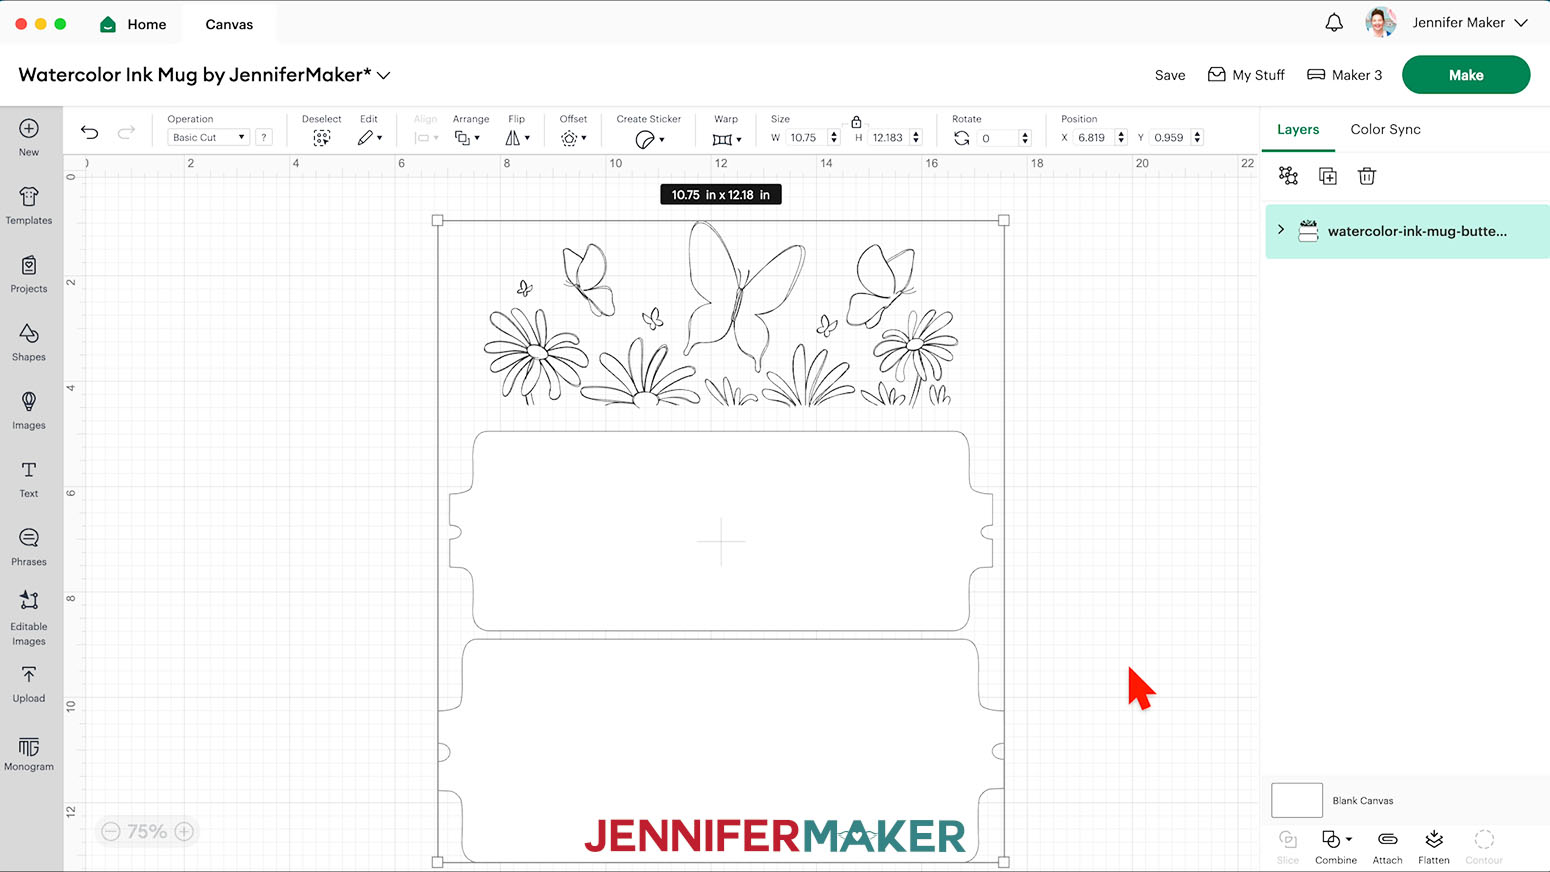
- Find the design in Recent Uploads and add it to the Canvas.
- On the Canvas, the design will be visible with the 12 oz. template below it, and then the slightly larger 15 oz. template.

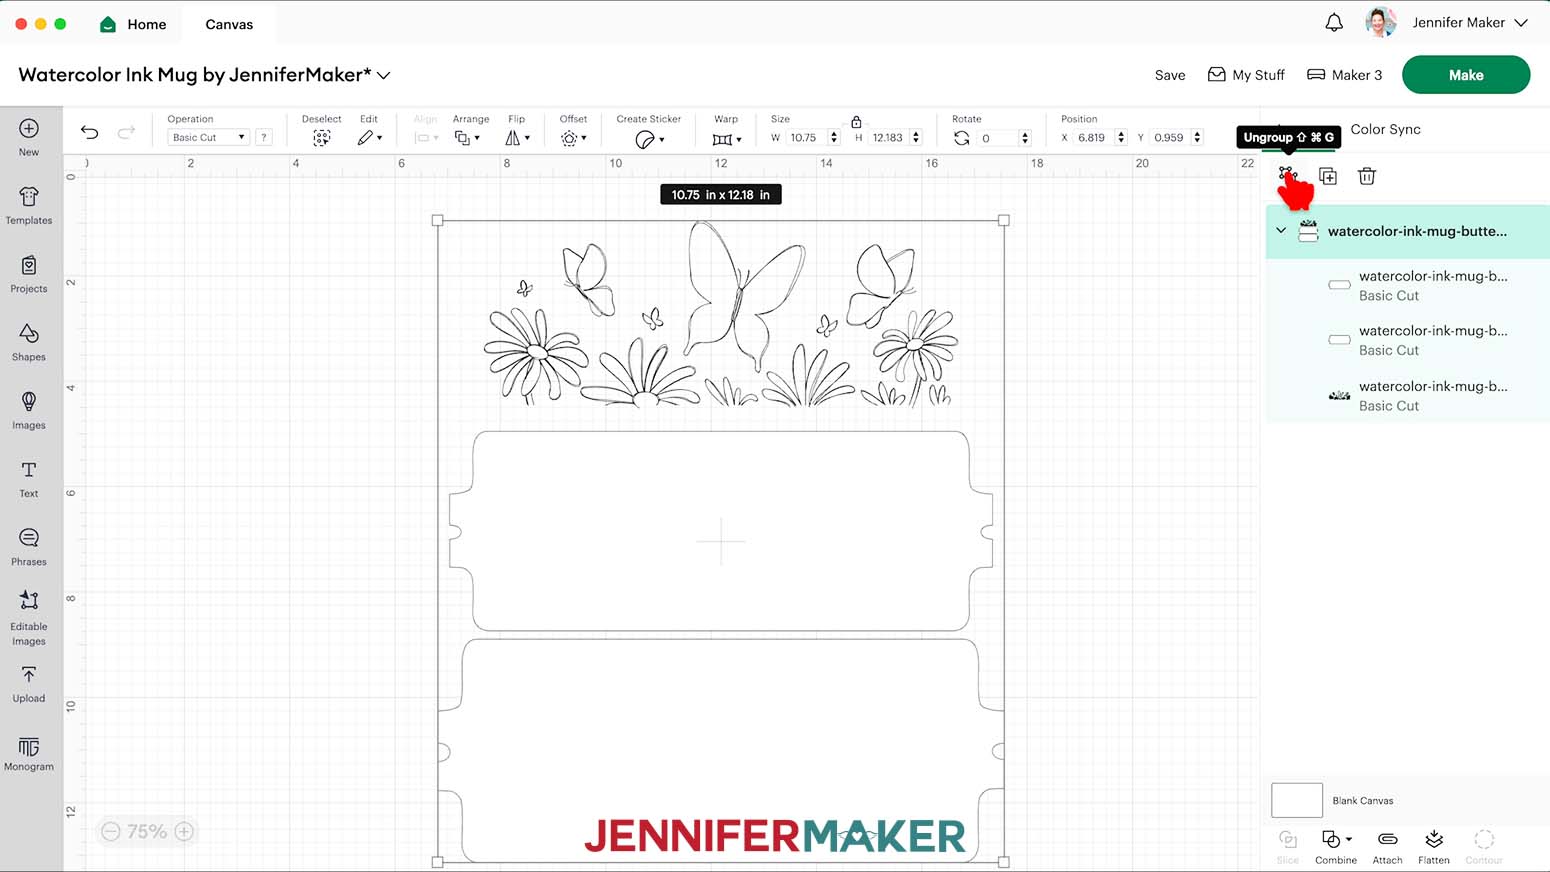
- Ungroup the design so the design and templates are on separate layers.
- Delete the template for the mug you don’t want to use.
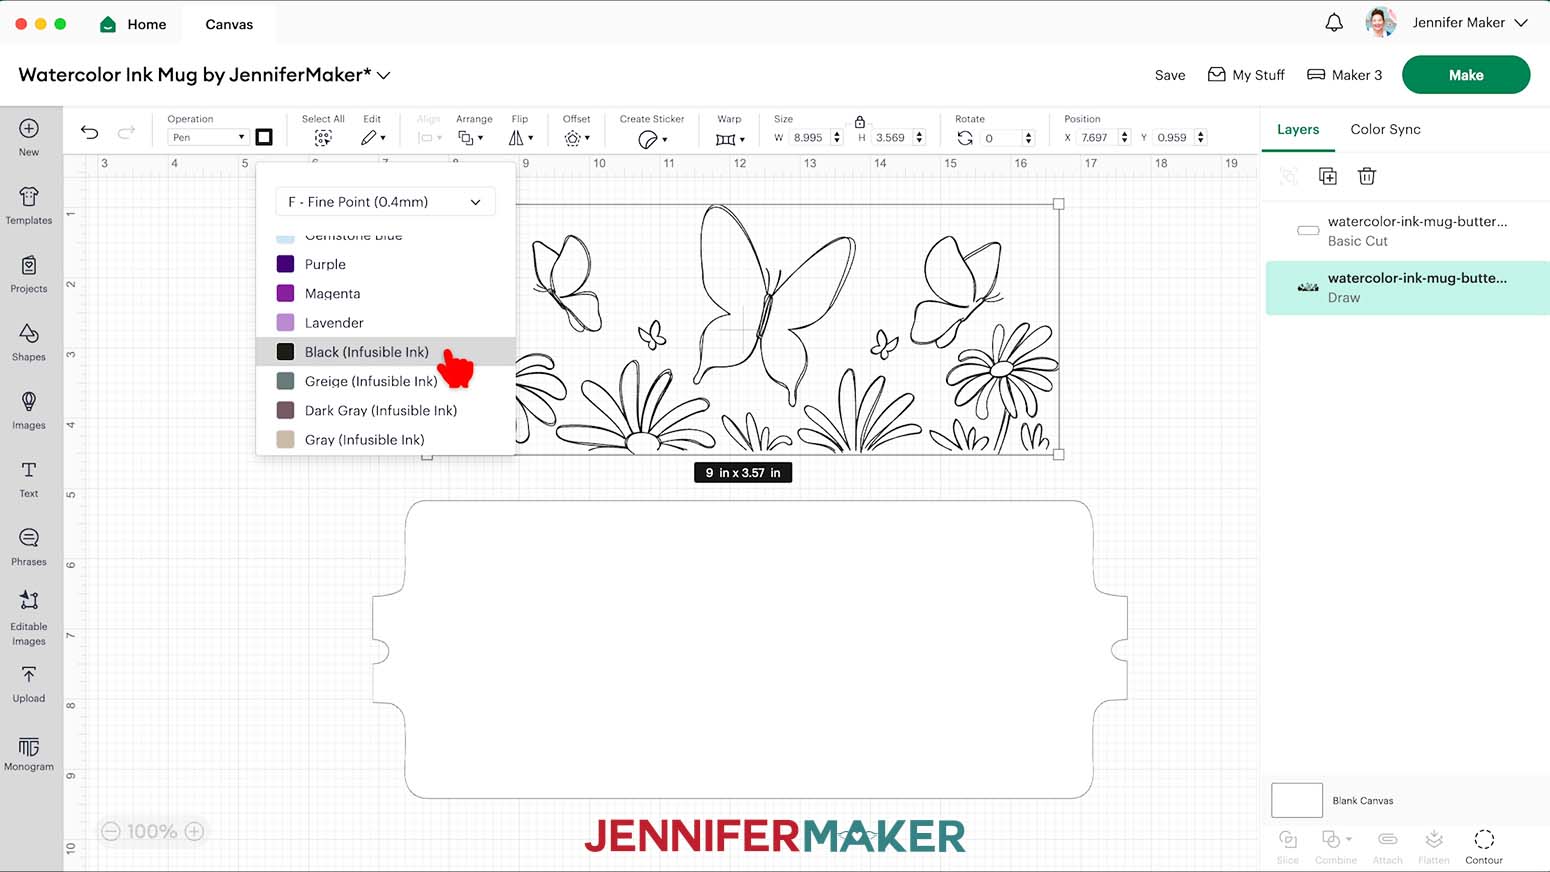
- With the design Layer selected, in the Operation menu, select “Pen.”
- Click on the color swatch next to the Operation menu to open the Pen dropdown.
- Select “F - Fine Point (0.4mm)” and then select the color pen of your choosing, making sure to select a color with “Infusible Ink” in the name. I’ll use black to draw the outline.
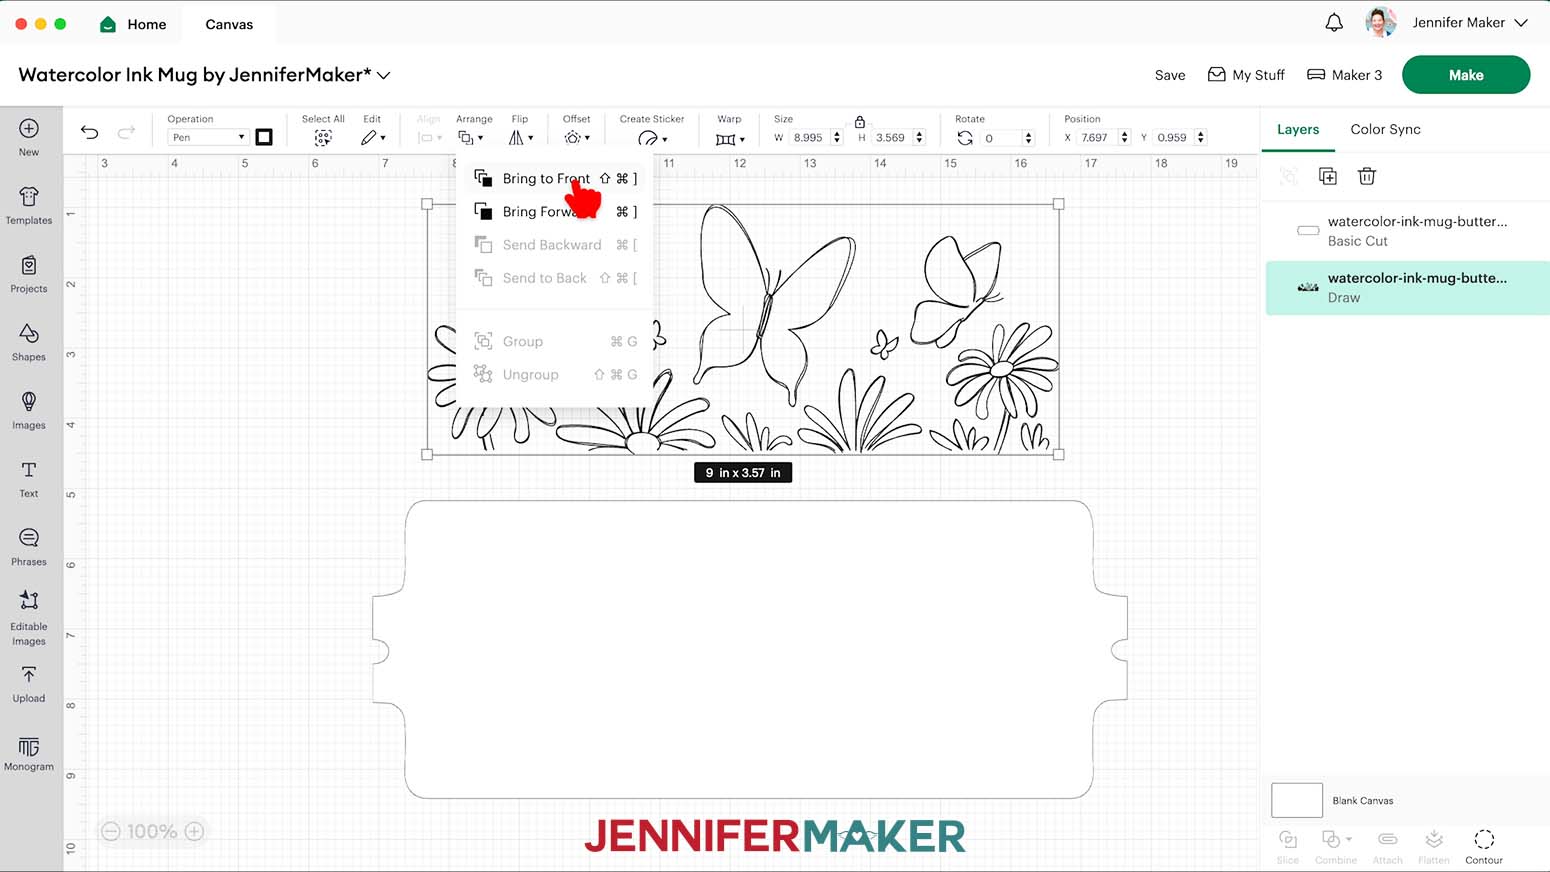
- With the design still selected click “Arrange” and “Bring to Front” to move it above the template Layer.
- Leave the template Layer as a “Basic Cut” Operation.
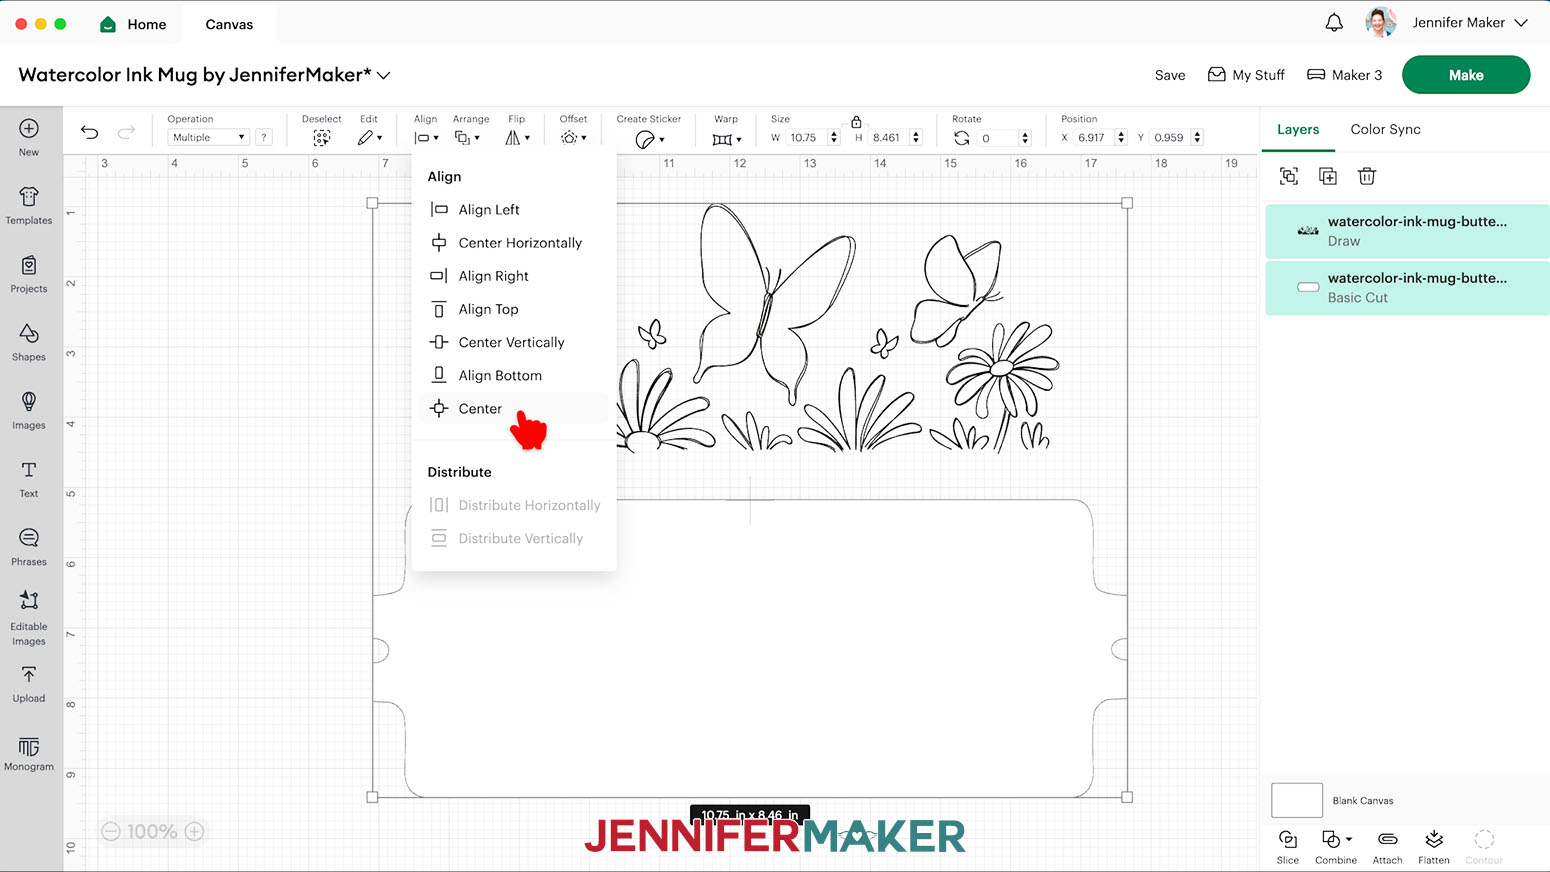
NOTE: Other mug sublimation projects that use thinner paper include extra template shapes to cut from buffer paper to protect the inks from high heat. The watercolor paper is thick enough that you only need the one layer. - Hold Shift and select both the illustration and its template.
- Click “Align” and select “Center” to move the design to the middle of the template.
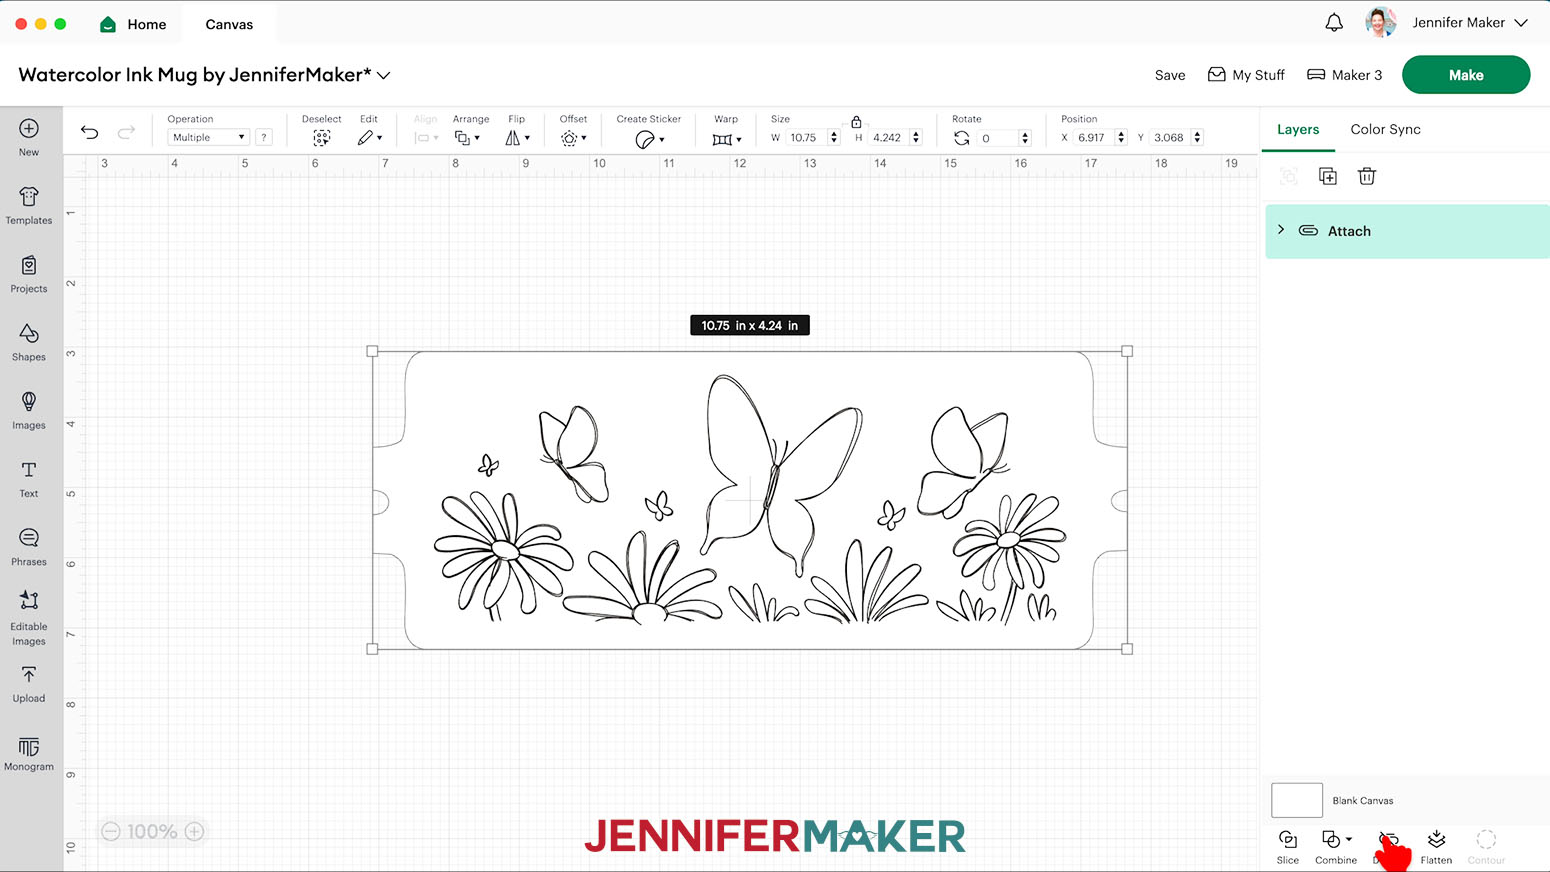
- Click “Attach.”
- Your layers are ready to draw and cut!
- Make sure the correct machine is selected in the top right.
- Click “Make.”
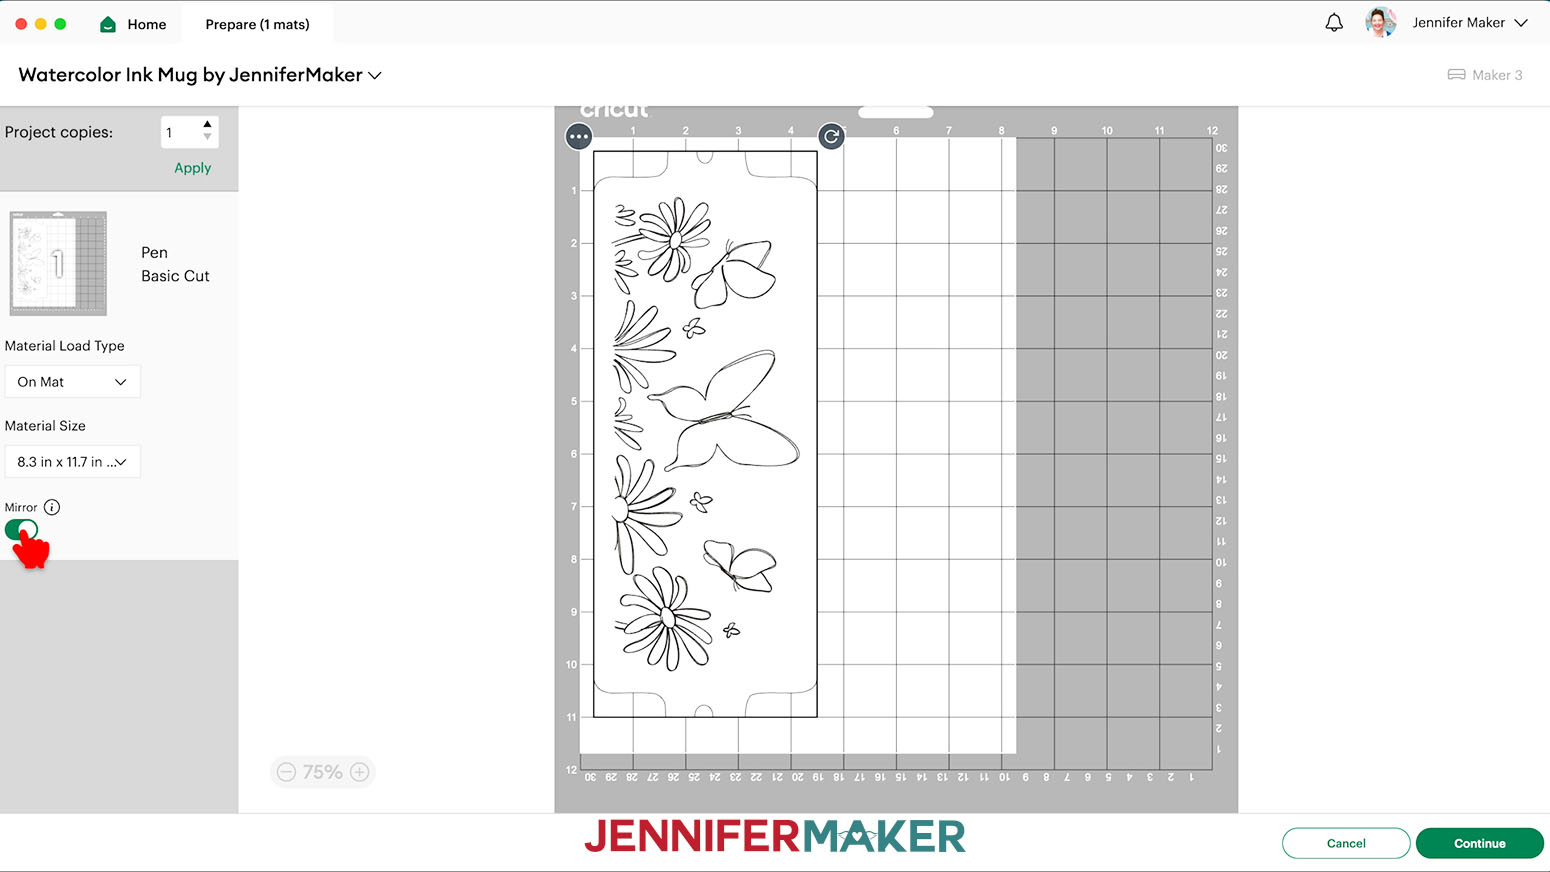
- On the Prepare Screen, select the Material Size that fits your paper. I’m using “8.3 in x 11.7 in. (A4)” watercolor paper.
- Toggle on “Mirror” since we’ll use heat to apply the design.
- Click “Continue.”
DRAWING/CUTTING
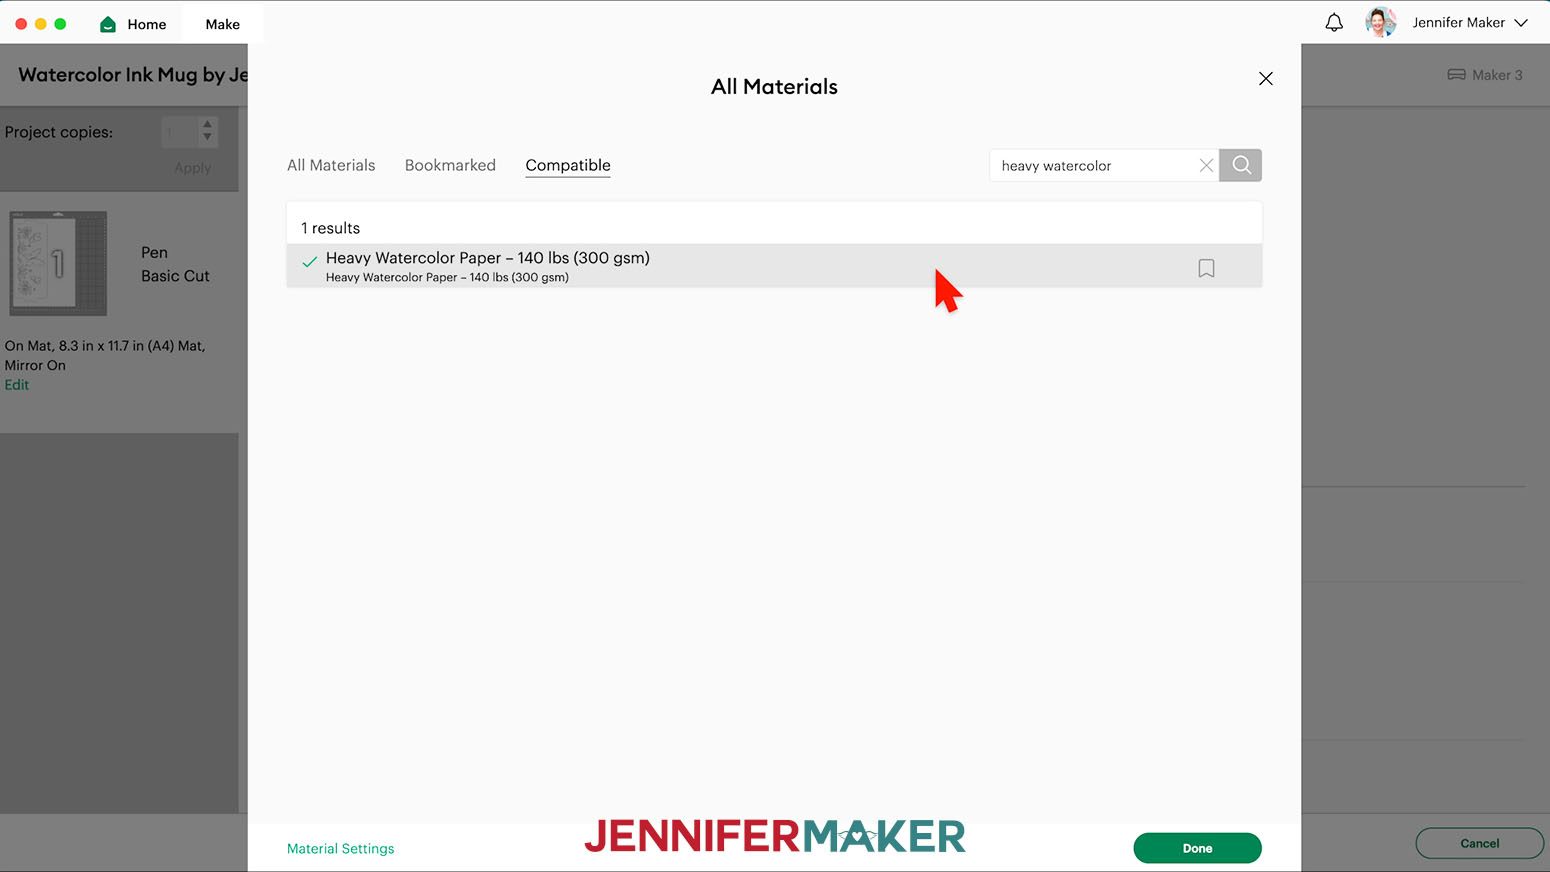
- On the Make Screen, search for and set your Base Material as “Heavy Watercolor Paper 140 lbs (300 gsm).”
- Change the Pressure to “More” for a cleaner cut.
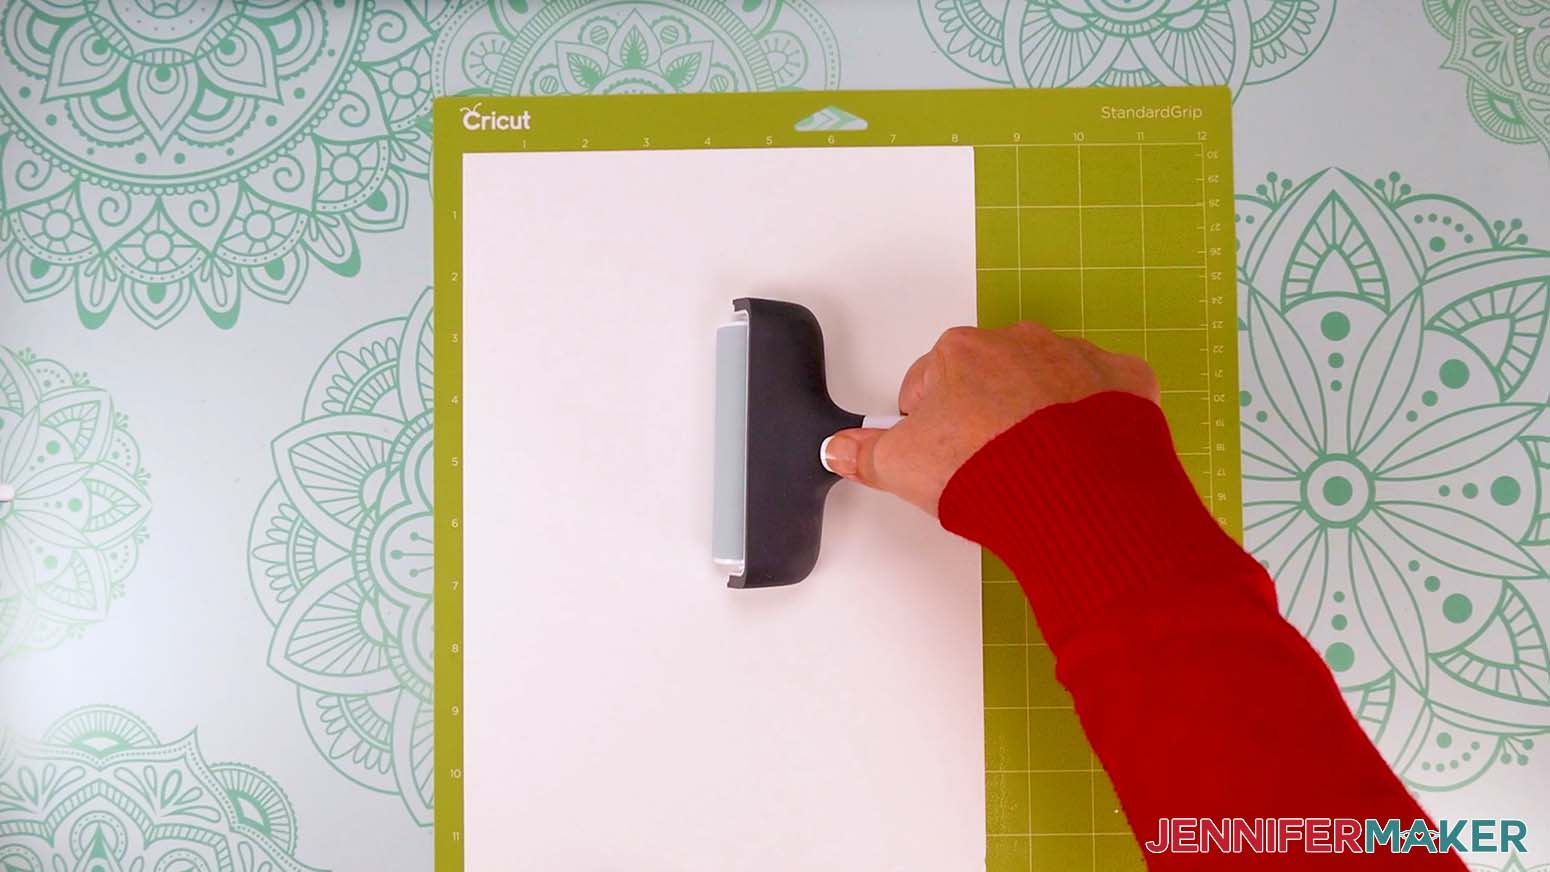
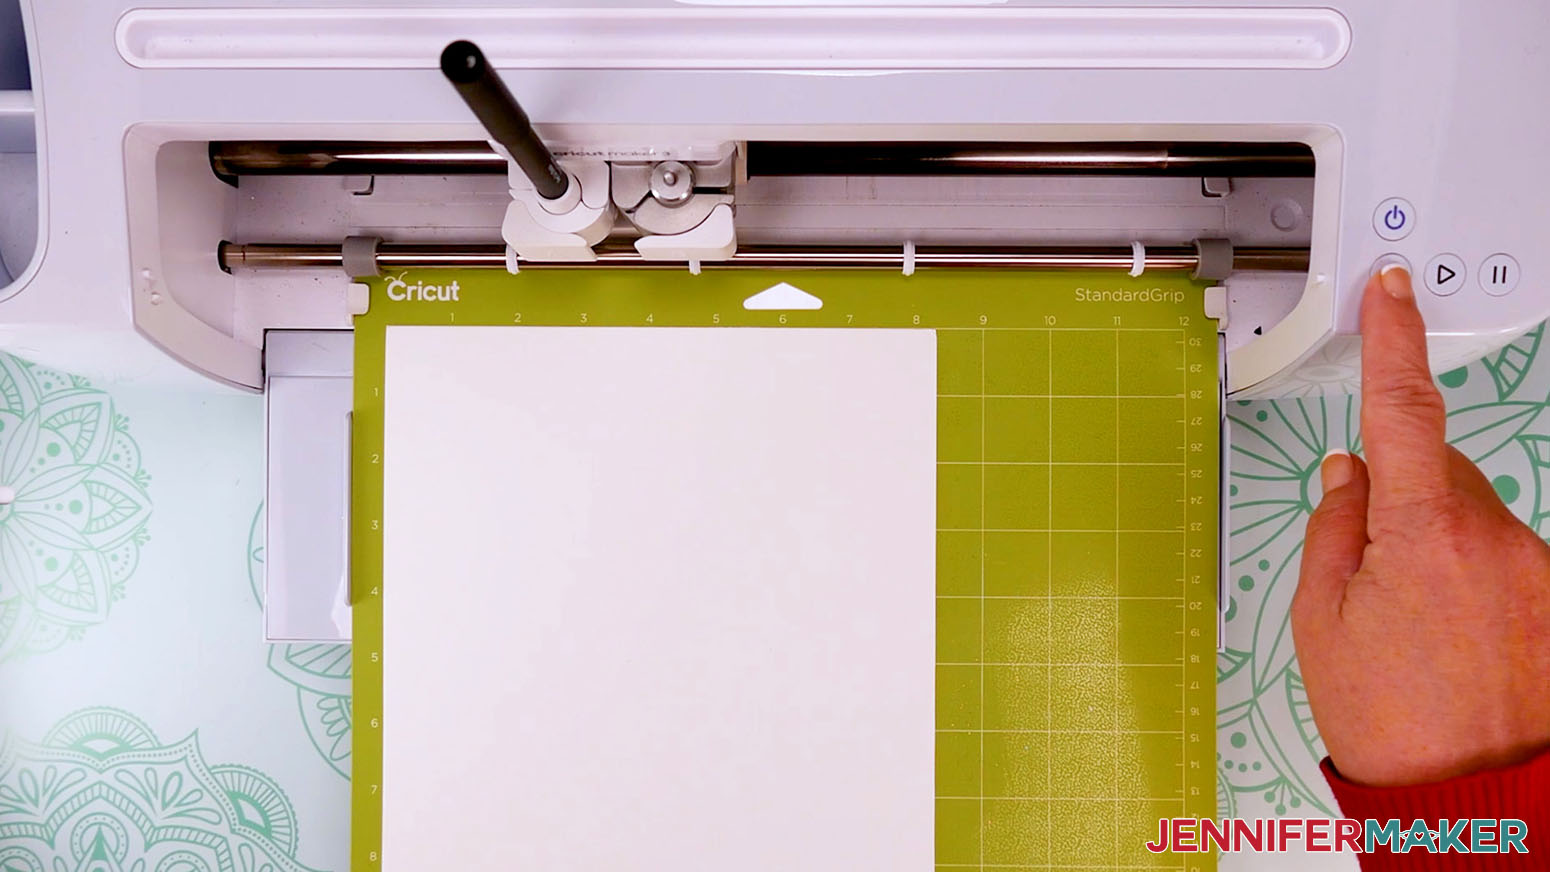
- Adhere a sheet of watercolor paper face up on a Green StandardGrip machine mat so the orientation matches the screen preview,
- Use a brayer to ensure it is completely attached.
- Make sure your Fine Point Blade is clean and loaded in the clamp.
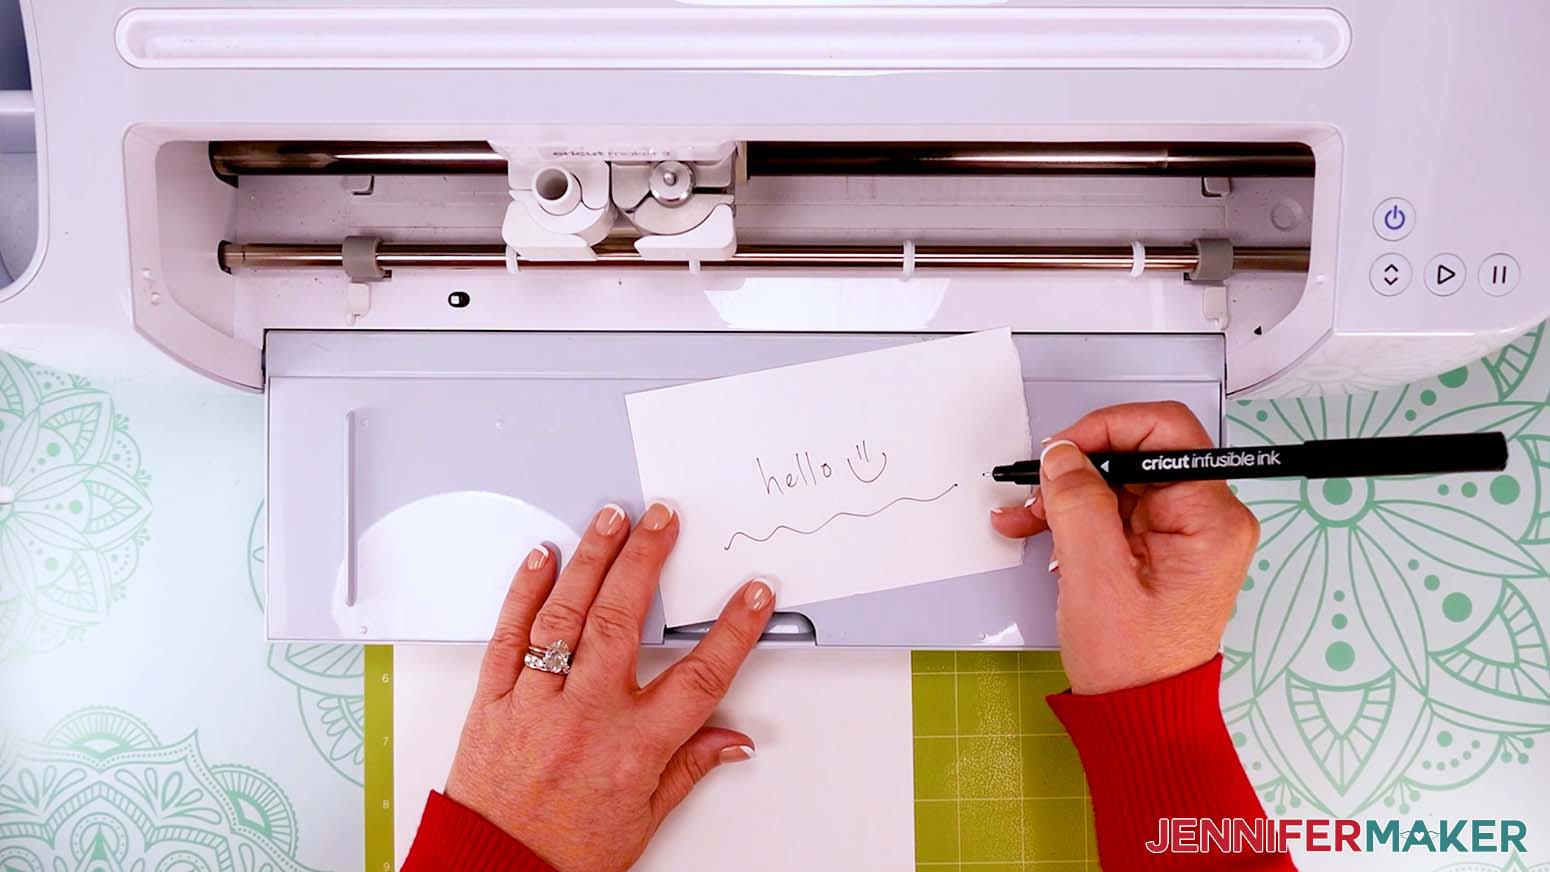
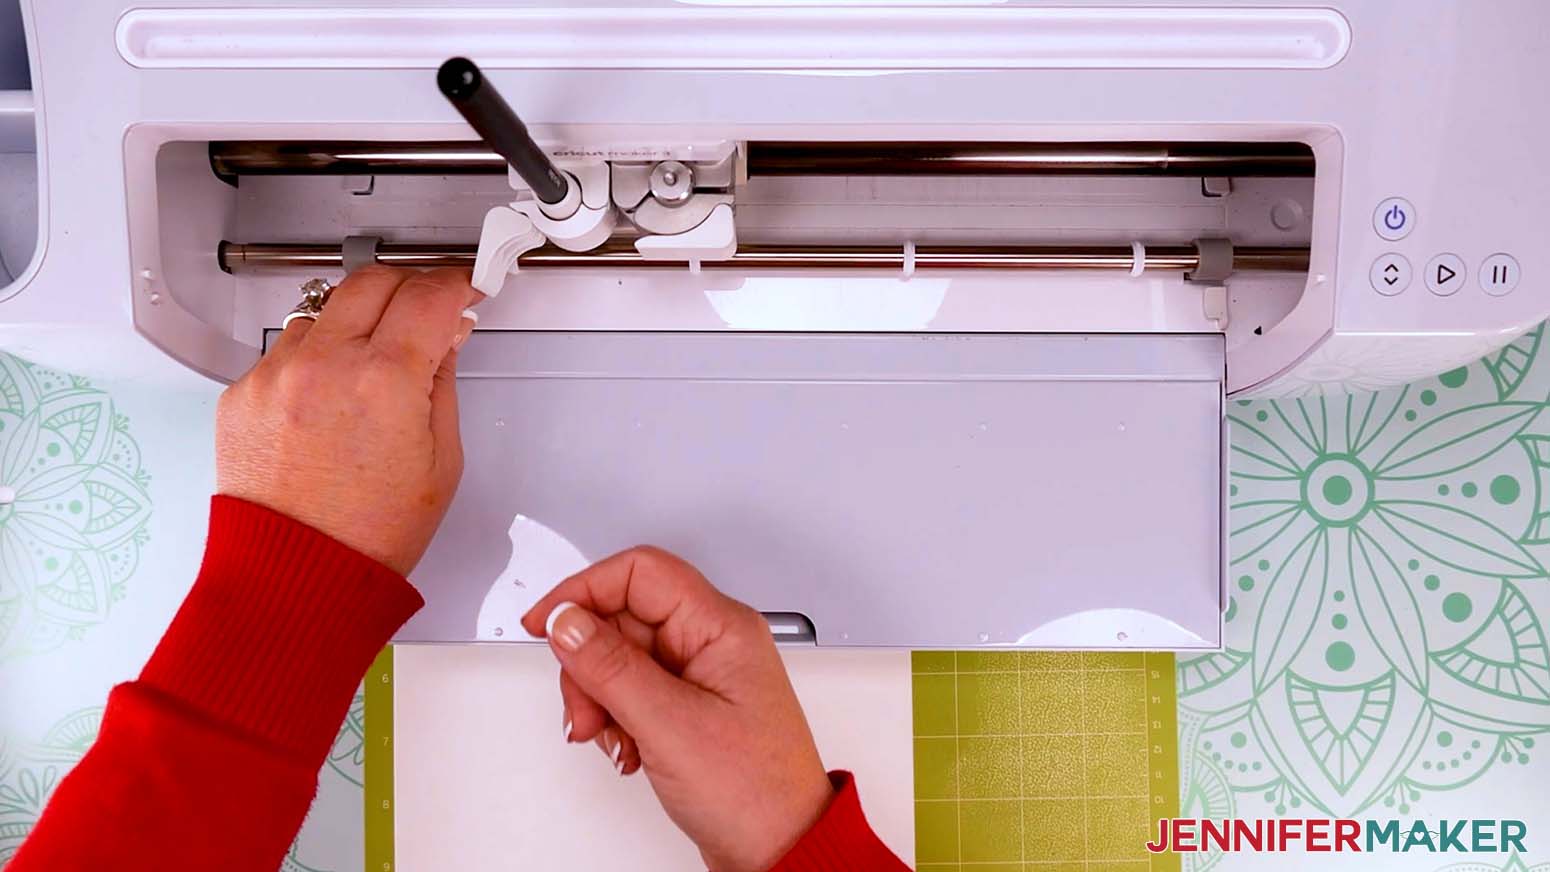
- Take off the cap of your black Infusible Ink pen and put it on the end of the pen to avoid losing it.
- Then test the pen on scrap paper to make sure it’s flowing well.
- Put it in the clamp as prompted.
- Load your mat and press the flashing button to begin cutting.
- When it has finished drawing and cutting, unload the mat, flip it over, and carefully peel it away from the paper.
STEP 3: COLOR YOUR WATERCOLOR INK MUG DESIGN
- Place design face up on your work surface.
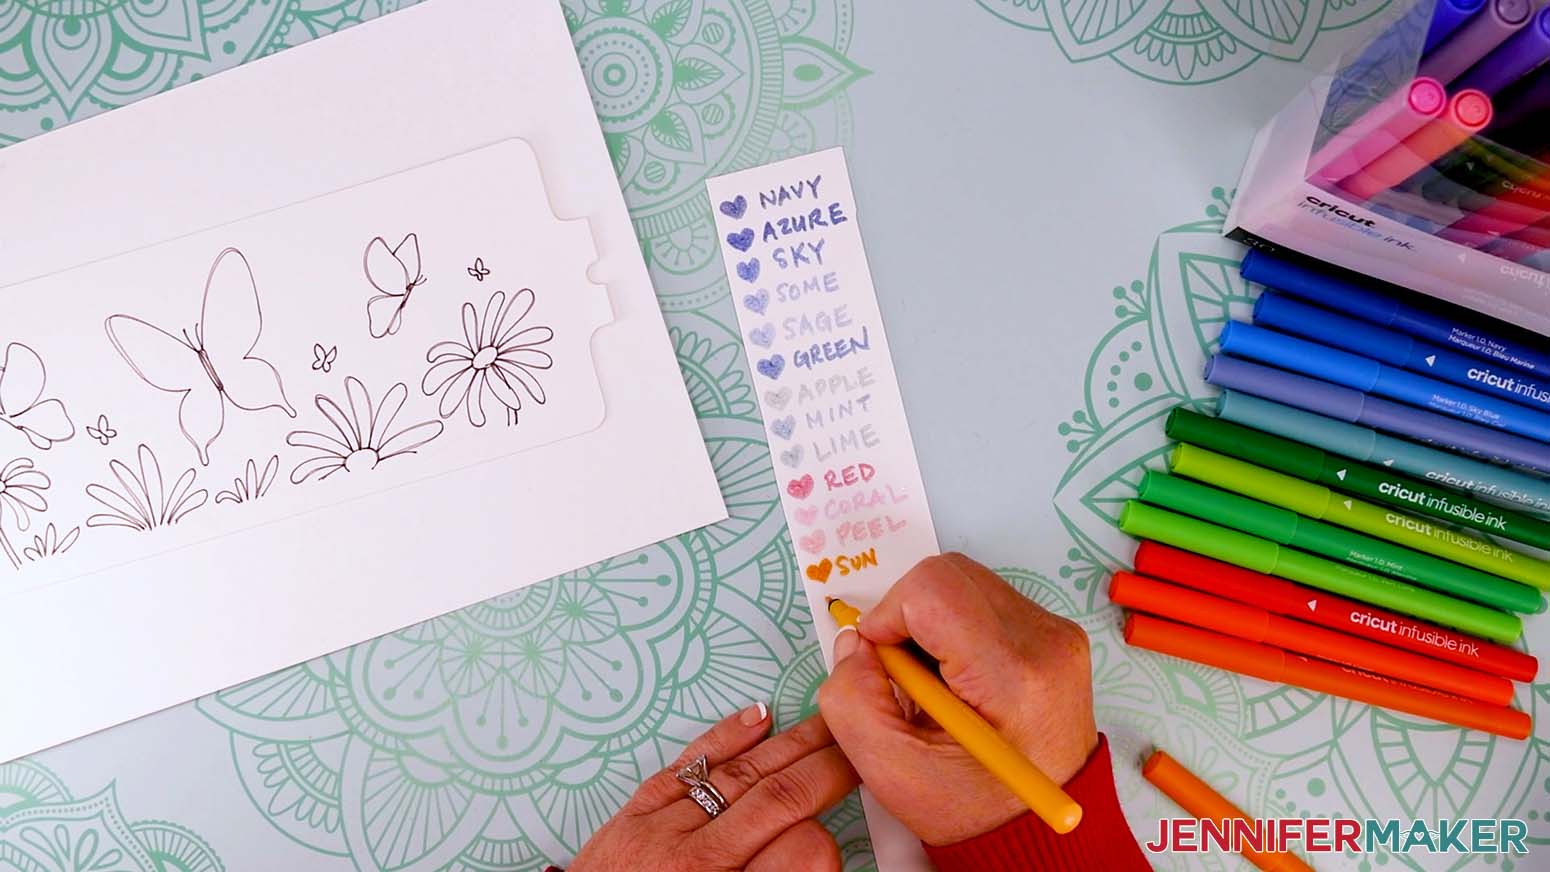
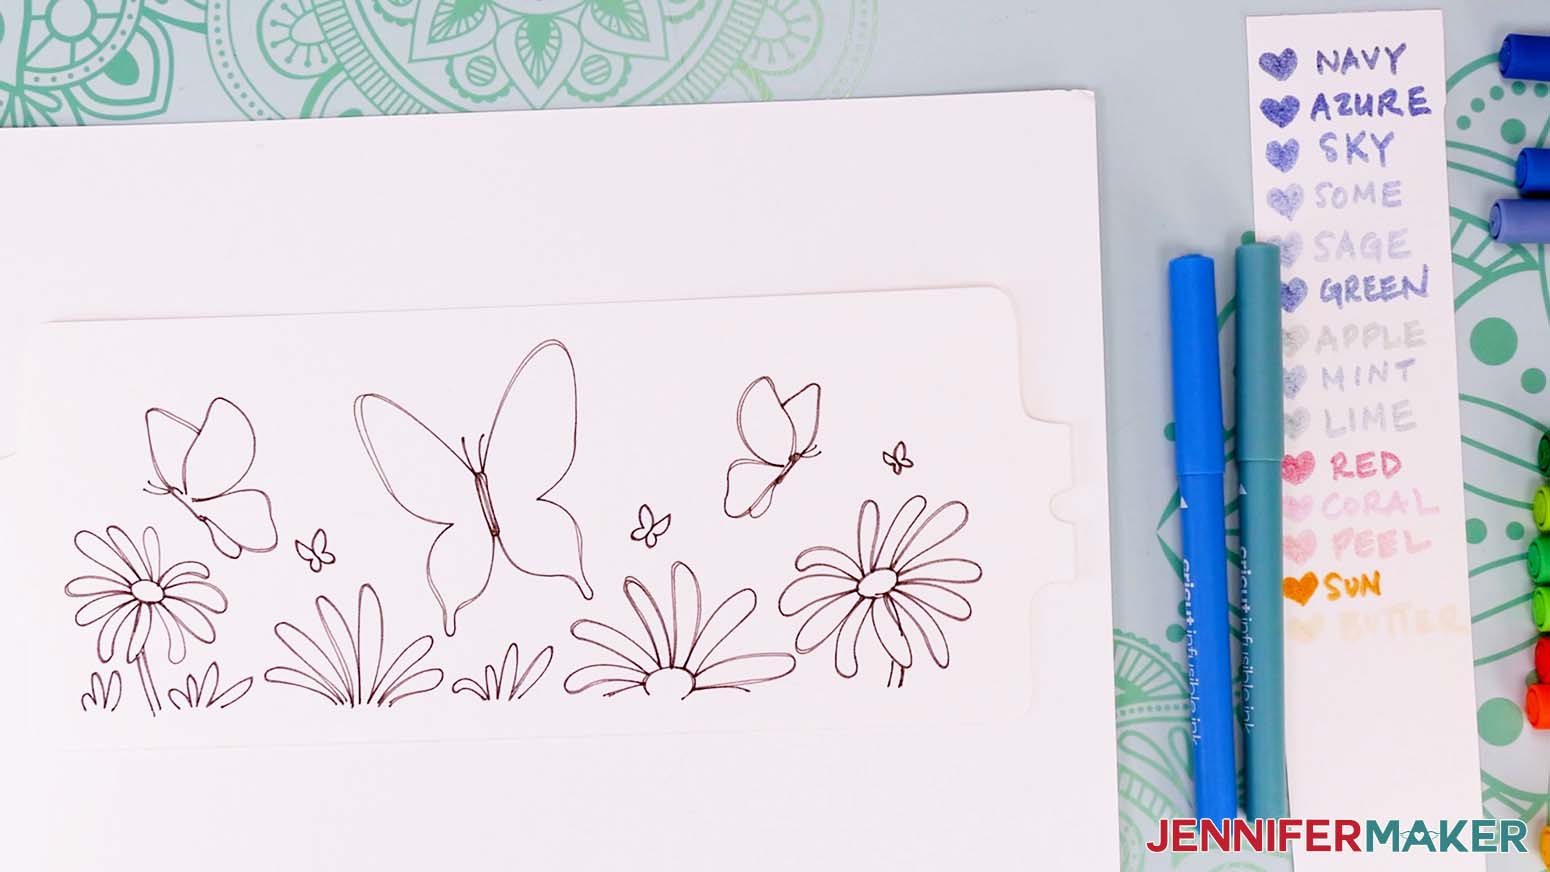
TIP: The watercolor paper is pretty thick, but you can put scrap paper underneath to protect your table in case any ink bleeds through. - Take a scrap of the watercolor paper and draw a little shape for each marker, then write its name next to it.
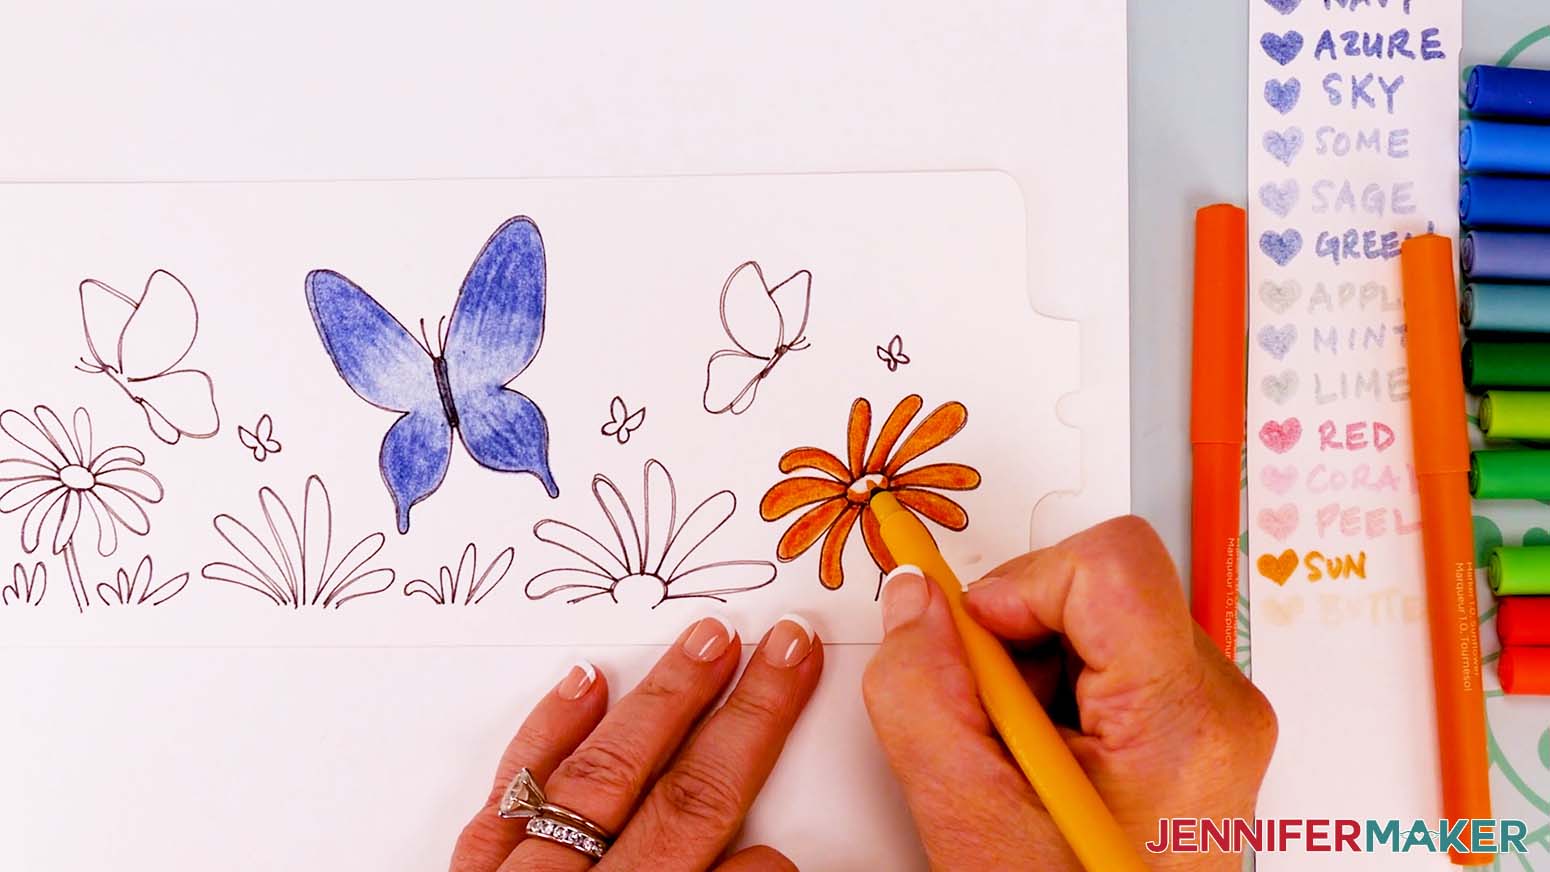
NOTE: This helps make sure the inks are all flowing well, and shows you what each color looks like on the paper, which doesn’t necessarily match the plastic casing. - Pick the first element you want to color and the markers you’ll use. I’ll color a large butterfly with Sky Blue at the wings’ edges and Sage, which is a lighter blue, inside.
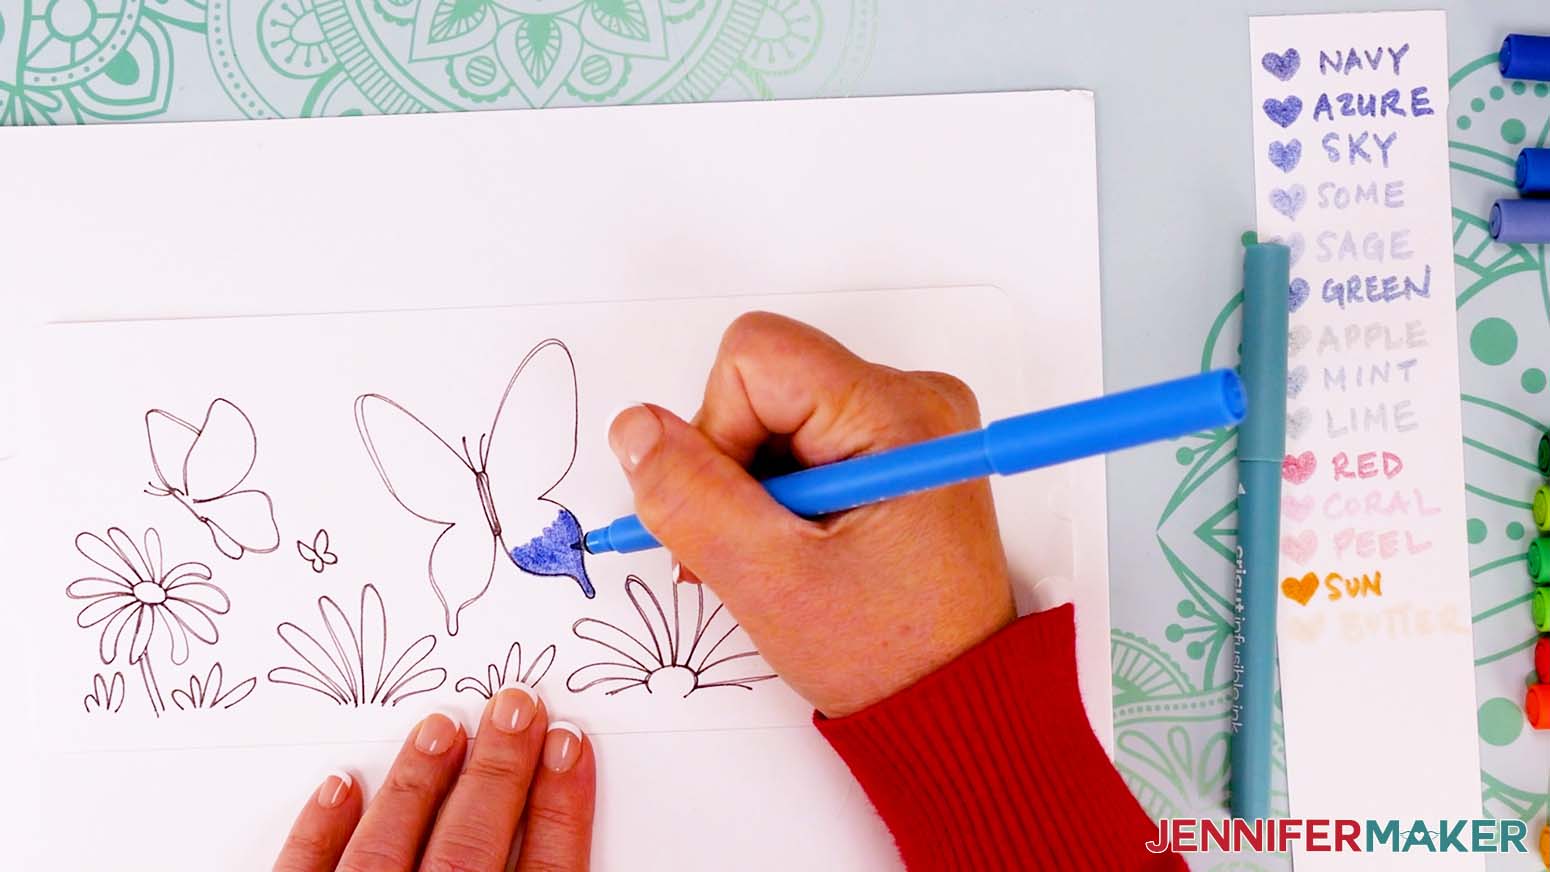
You want to work pretty quickly and complete a shape before the inks dry to get even results. - Starting with the darker ink, color the first section – like along one wing’s edge – just like a coloring book. You can add quite a bit of ink to the paper without damaging the texture, which will impact the final look on the mug.
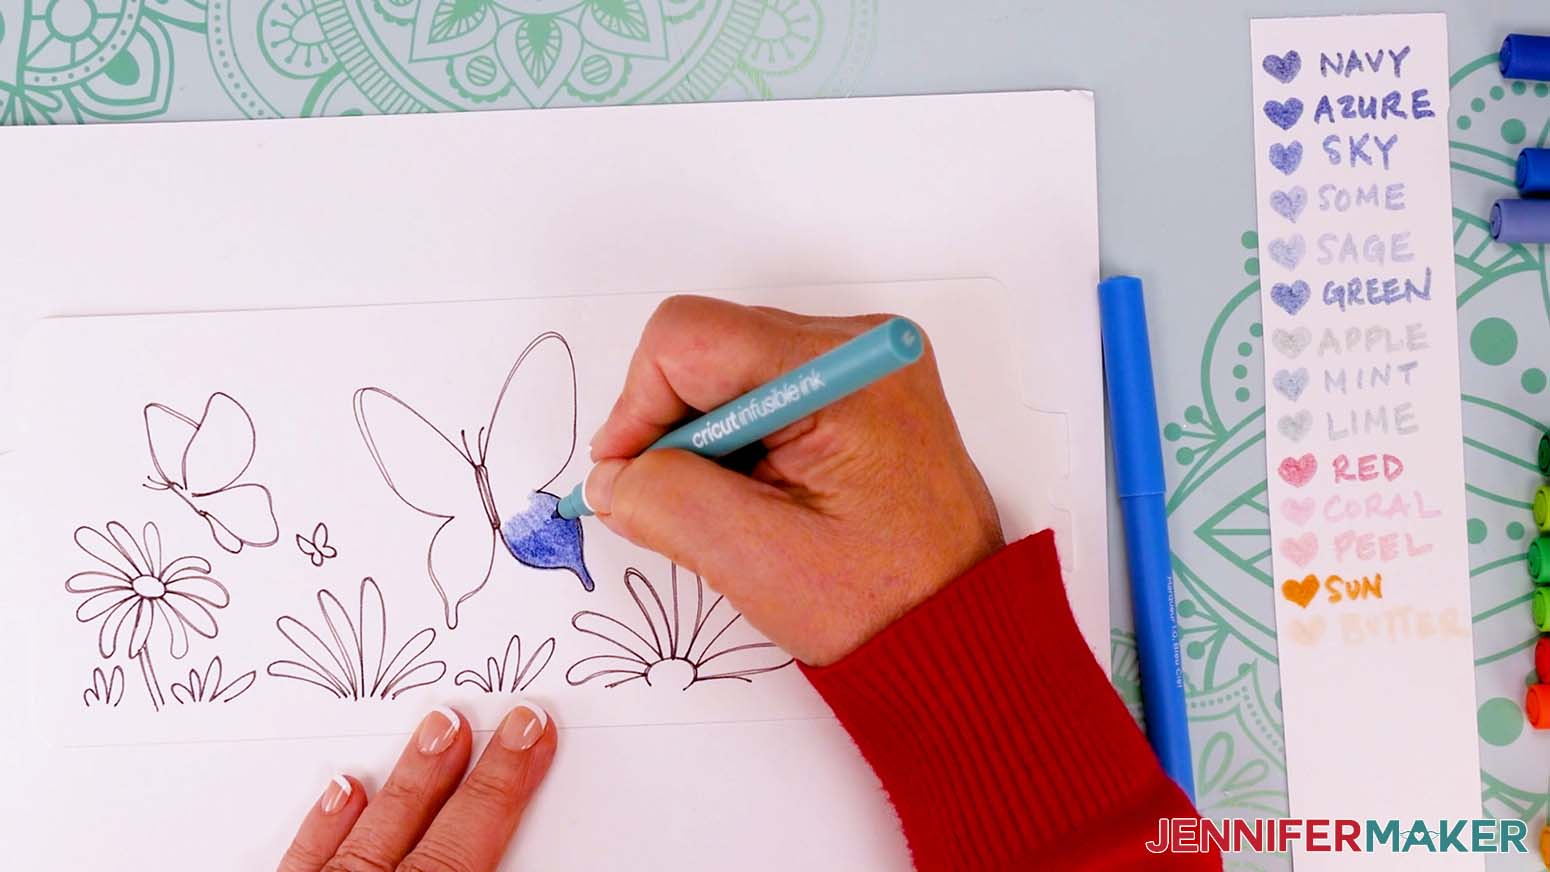
TIP: You can color over the black outlines some. It may pick up some of the black color, but the slight differences make the end result look more handmade, like a true watercolor painting. - While the color is still wet, use the next color to overlap some of the first and keep coloring the section, like moving to where the wing’s halves meet.
TIP: You can use the lighter color to slightly pull the darker color into the new area, helping to blend the markers. - Before moving to another section, go back over the dark color with the light to help blend them and make sure you don’t have white spots.
- Continue coloring the shape in sections, blending the colors when you want to. It’s ok if you go outside the lines a little, that’s normal with watercolor painting and handmade items.
- You can use the same technique on the flowers. I used Orange Peel as the dark color on the petals and Sunflower to fill them in.
- For the flowers’ middles, I used Sunflower as the darker color and Butterscotch to fill it in.
- I used "Green" and "Lime" together, as well as "Green Apple" and "Lime" for the greenery.
- Let the mug wrap sit to dry completely, which might take a few minutes.

STEP 4: SUBLIMATE YOUR WATERCOLOR INK MUG
- Place a heat resistant pad on your table.
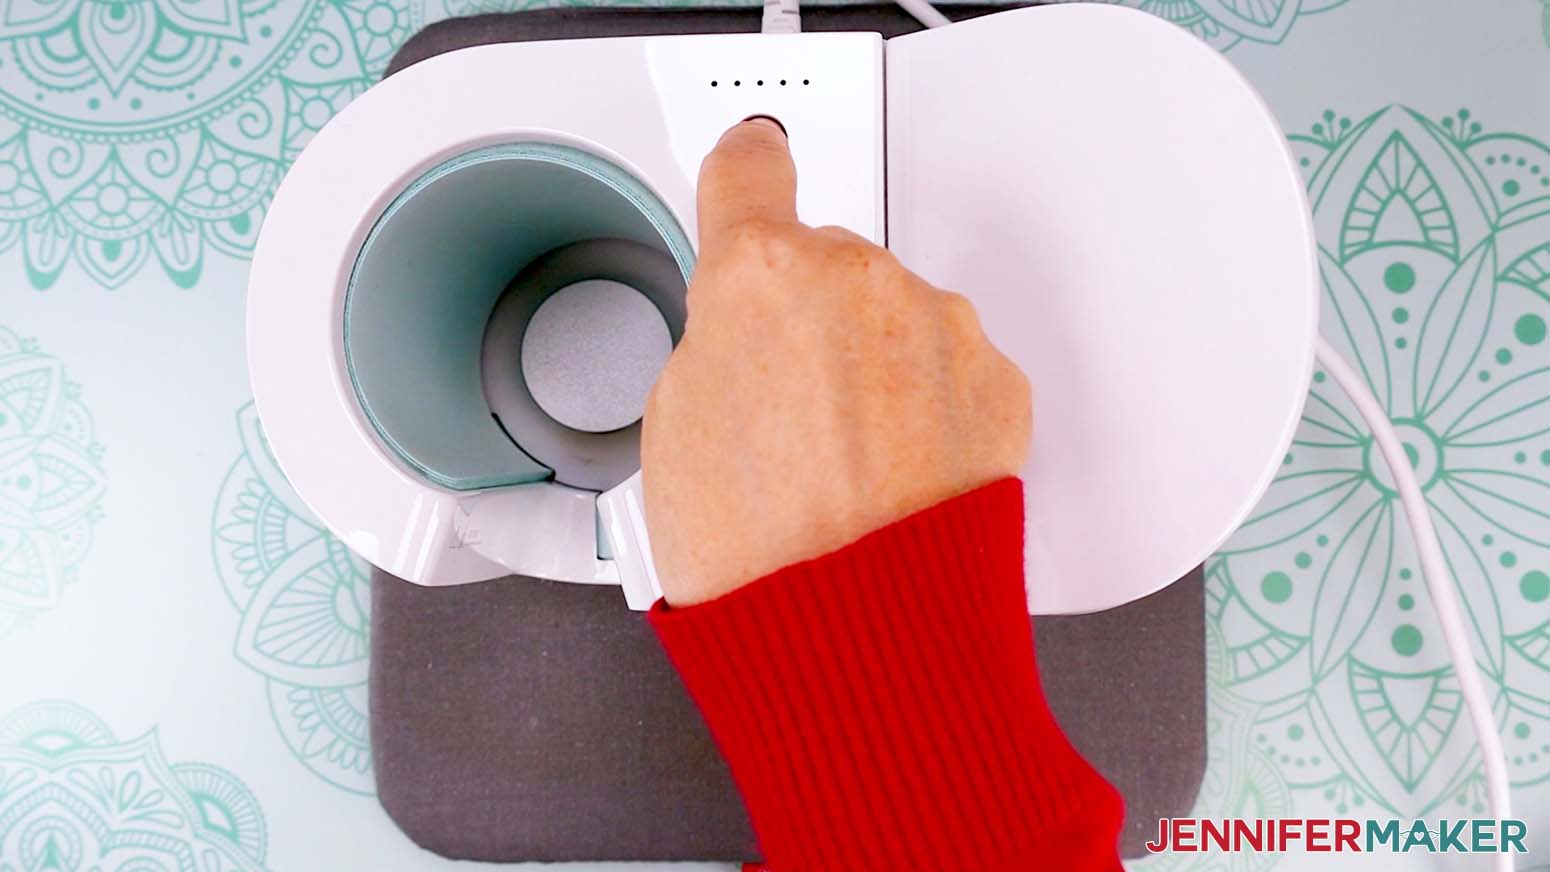
- Set the Cricut Mug Press on top of the pad and plug it in.
- Press the power button to turn it on.
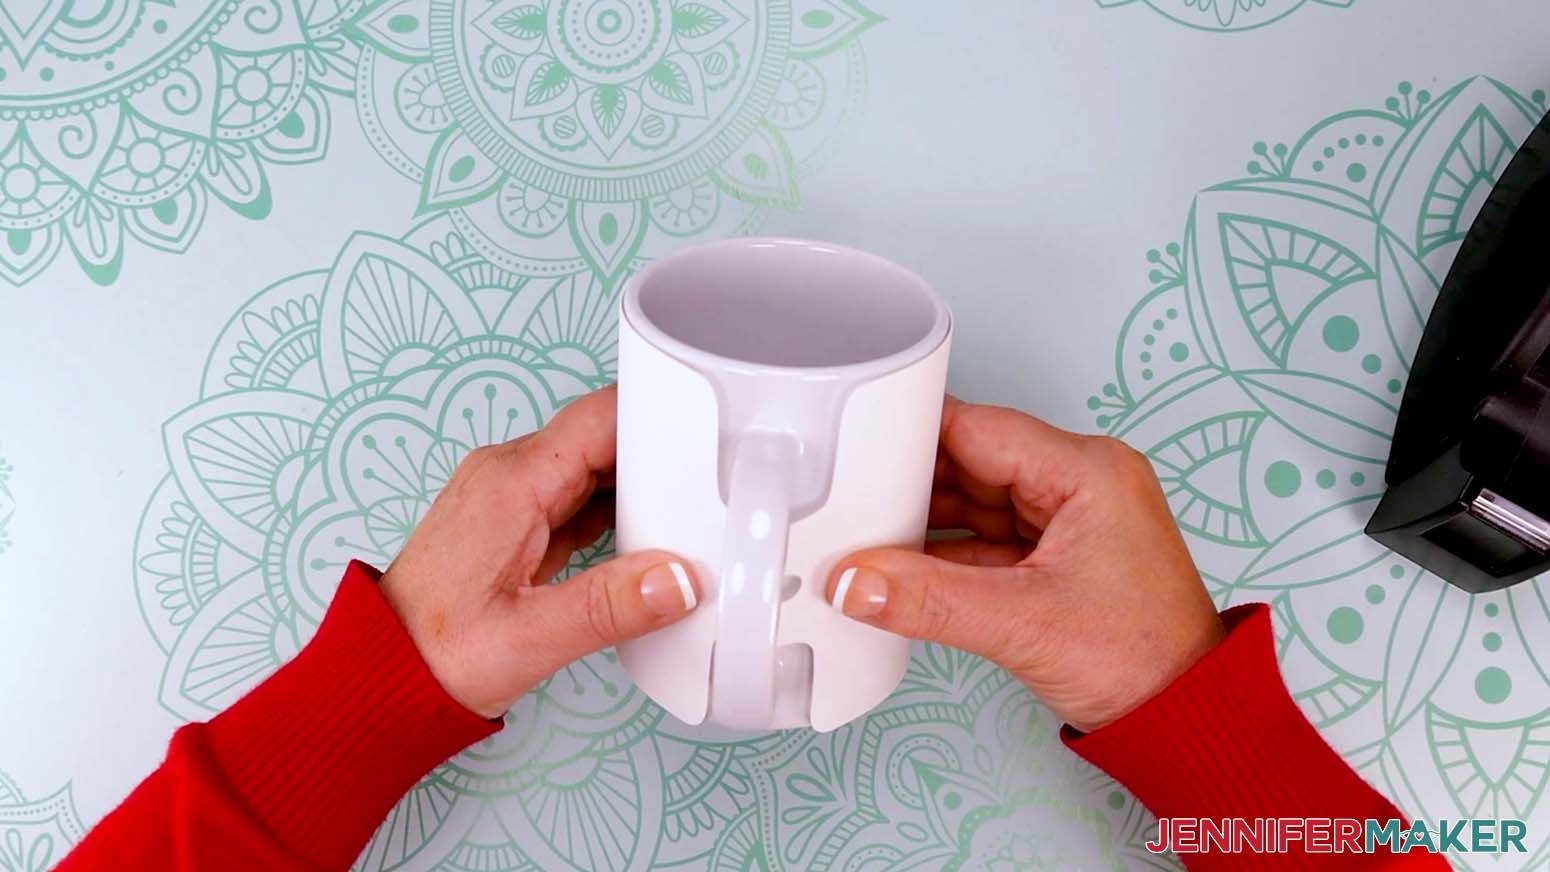
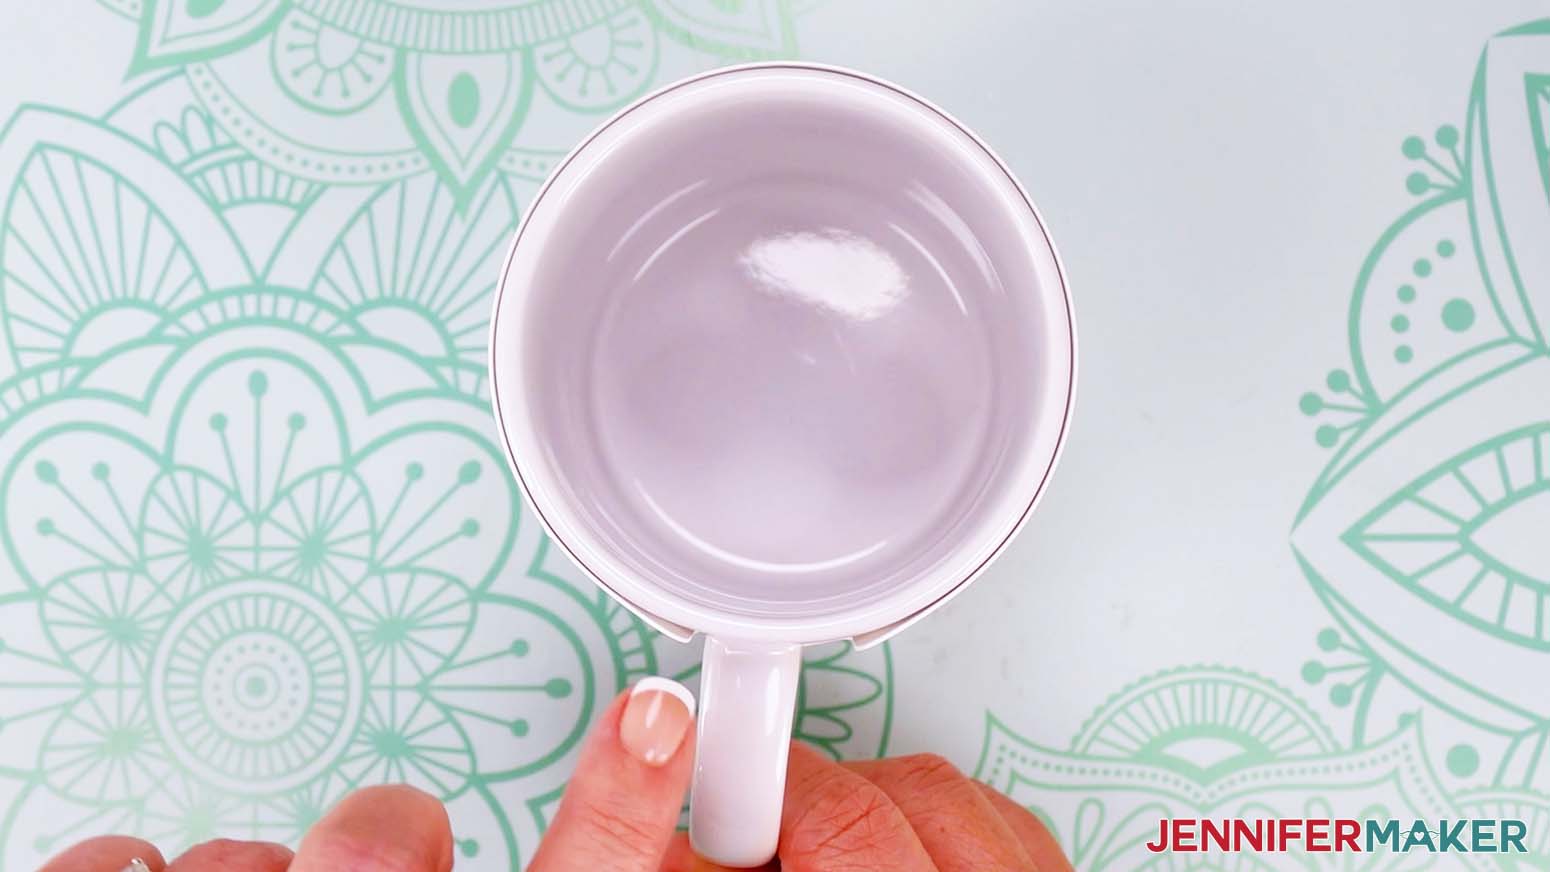
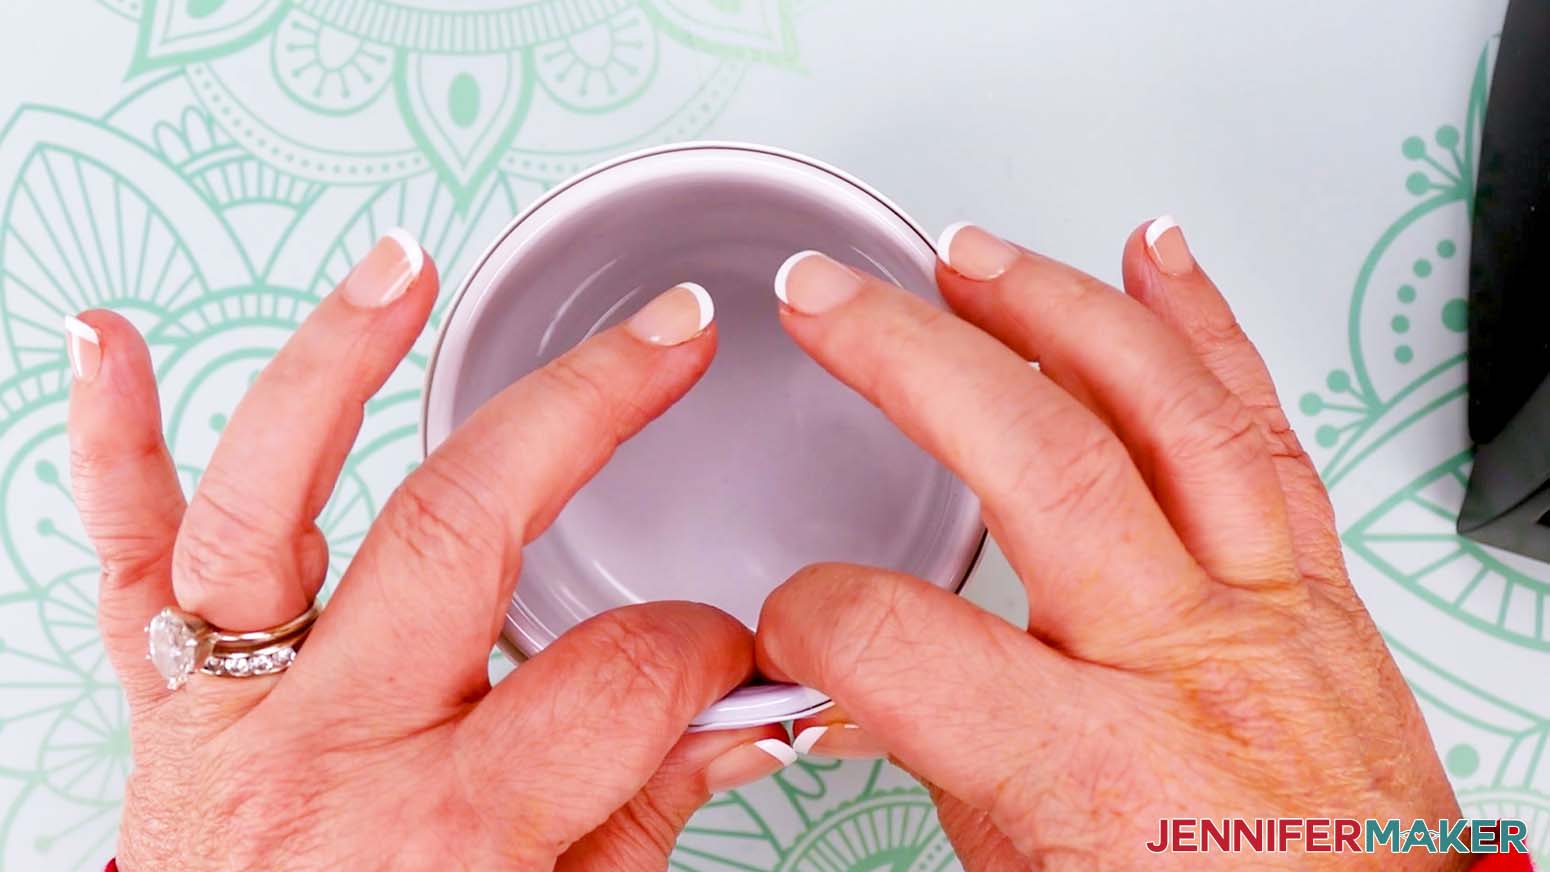
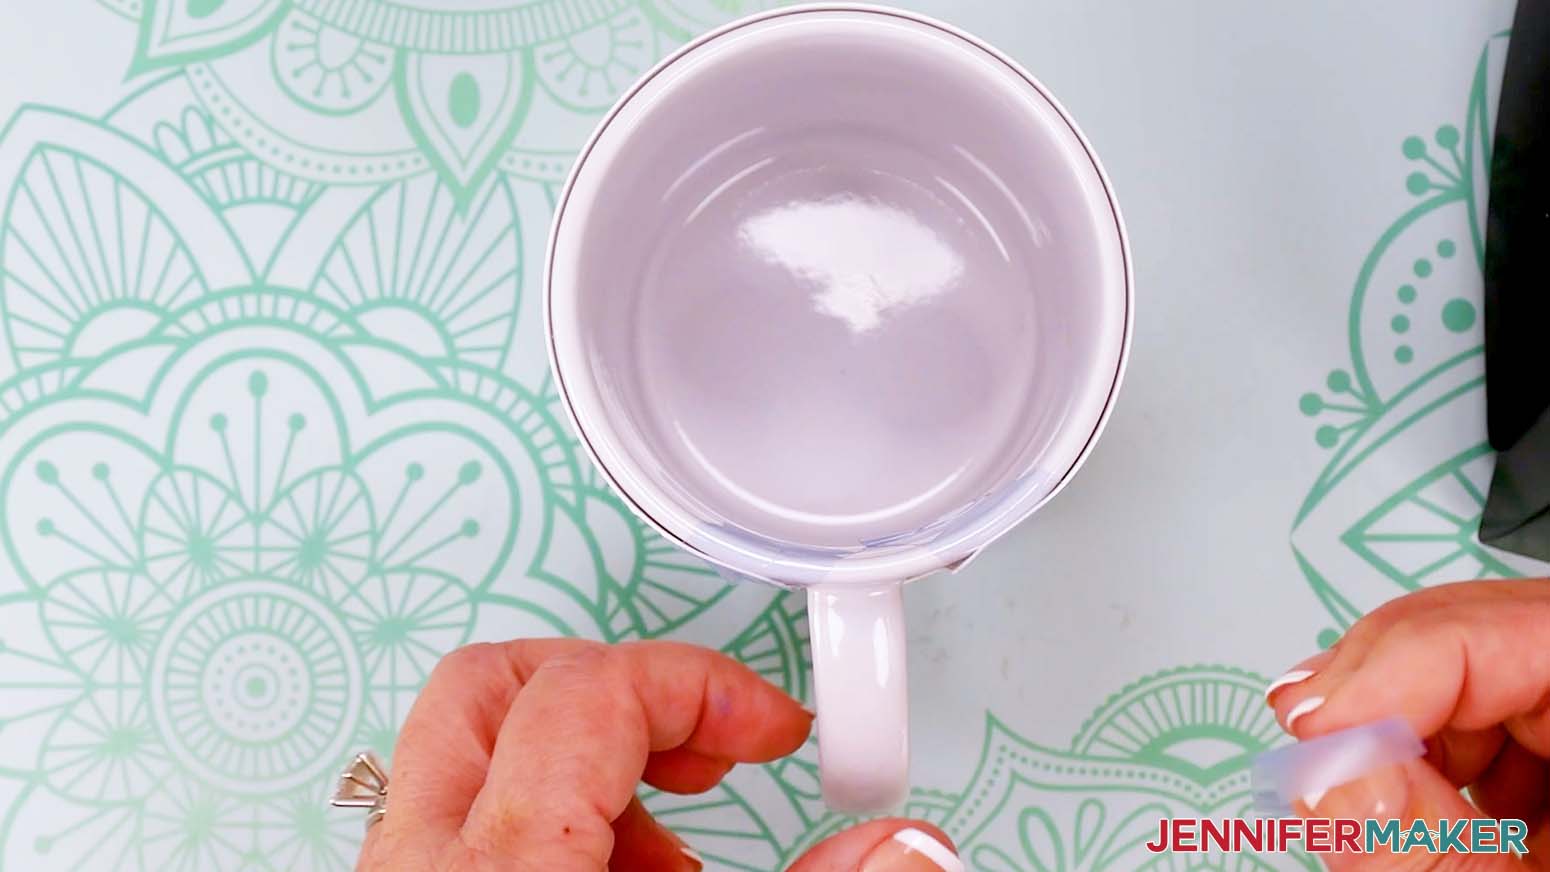
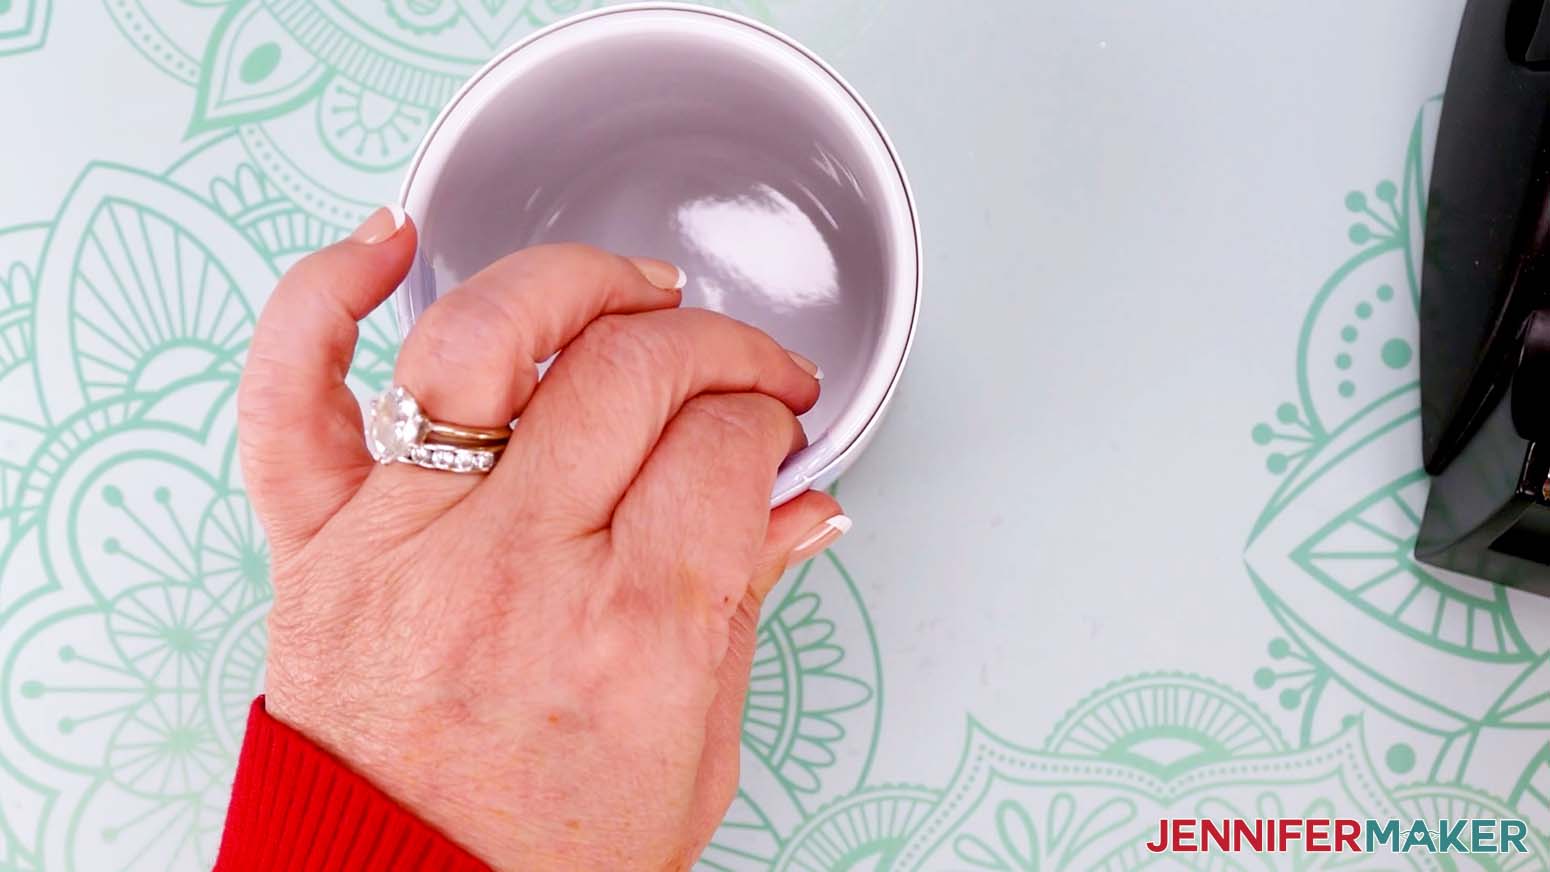
- While the press warms up, take a lint roller and roll it around the surface of your mug to clean off any lint that can interfere with the transfer.
- Make sure the inks are completely dry on the paper.
NOTE: When positioning the wrap on the mug, damp ink can smudge onto the surface. Even if they’re tiny, the marks can become more pronounced after the pressing. - Watercolor paper is thicker than normal printer or sublimation paper, so taking some extra time to tape the design very tightly around the mug creates a better transfer and creates the detail we want from the paper’s texture.
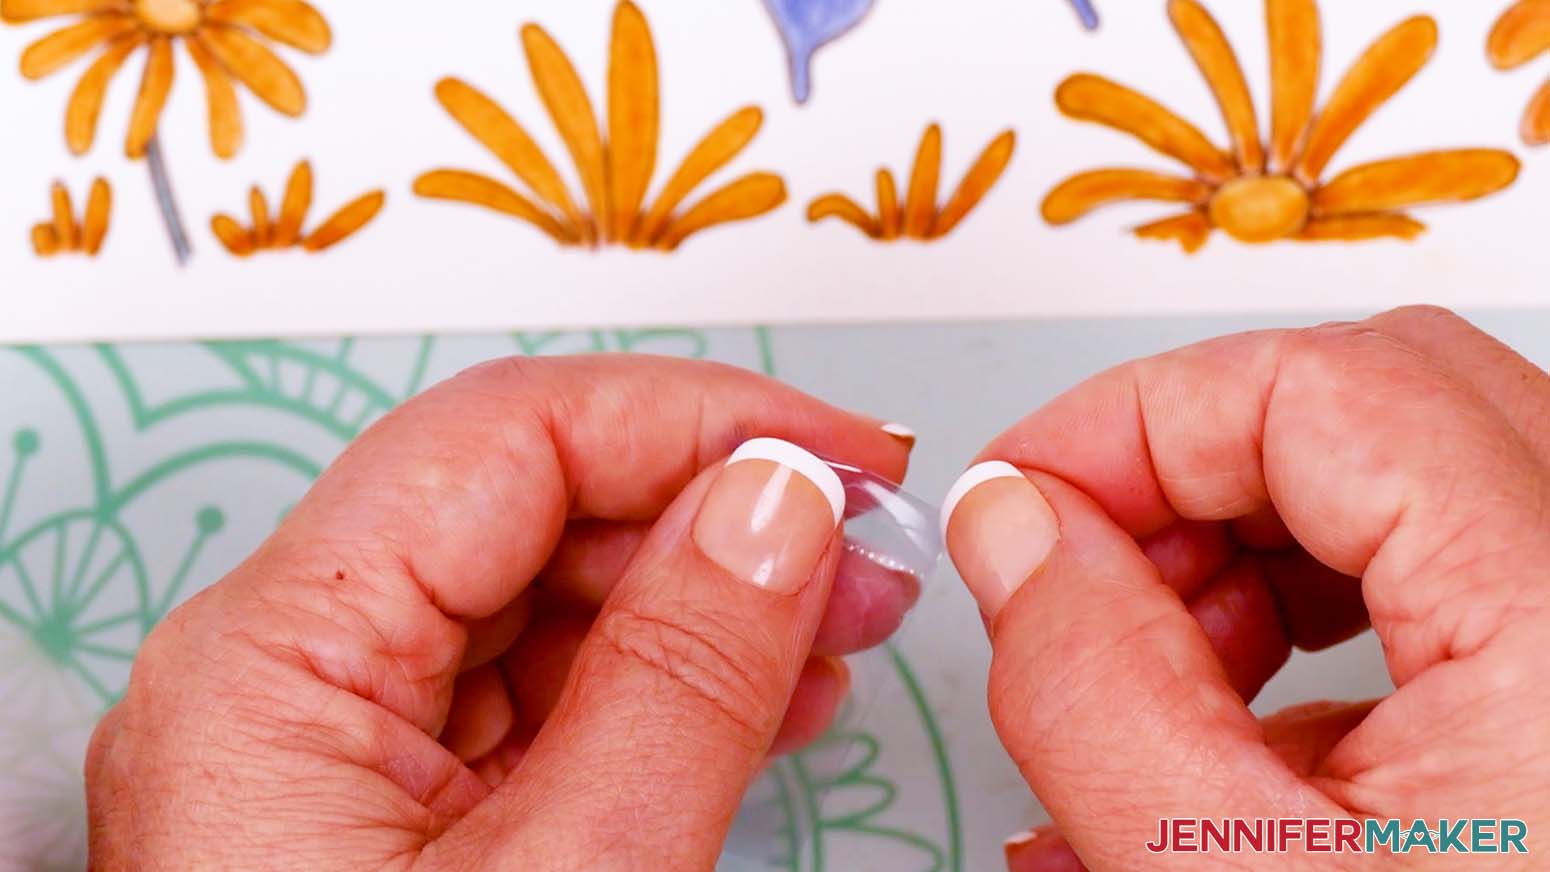
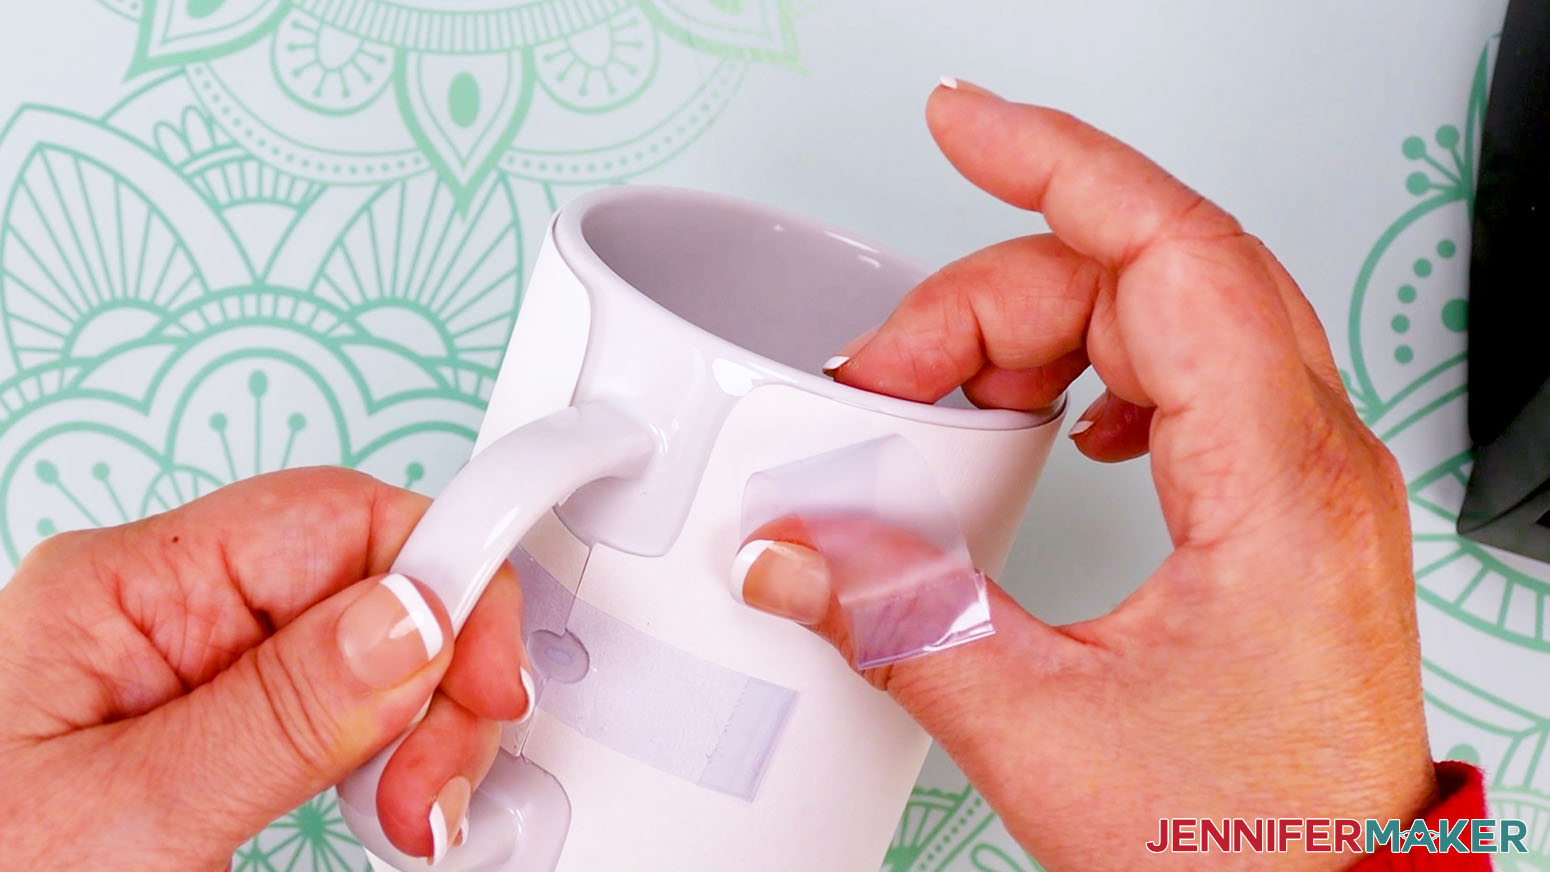
- Take a piece of heat transfer tape and fold one end over onto itself to make a tab that isn’t sticky, which makes removing the paper easier later.
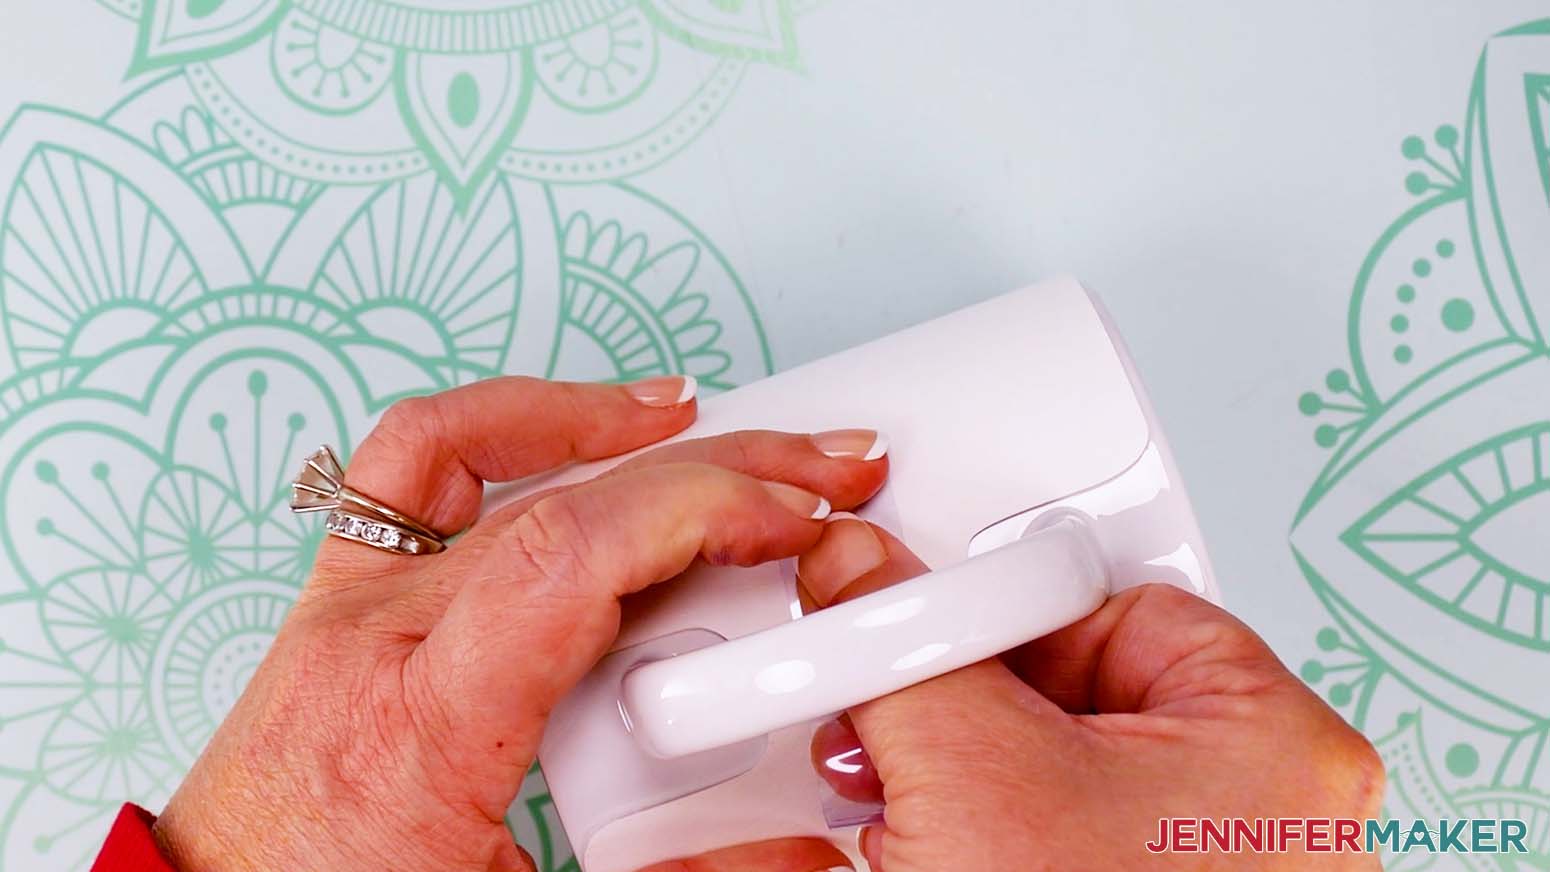
- With the drawing facing up and toward the mug and oriented correctly, wrap the design tightly around the mug with the ends coming together under the handle.
- While holding the paper tight, attach the tape’s plain end to one paper end under the handle.
- Bring the ends under the handle together as much as you can (there will still be a gap of uncovered mug, that’s ok) so the paper is flush against the surface and the uncovered areas at the top and bottom are even.
- Secure the other end of the tape to the free design edge.
- Press the tape down very well on both paper ends and the mug in between.
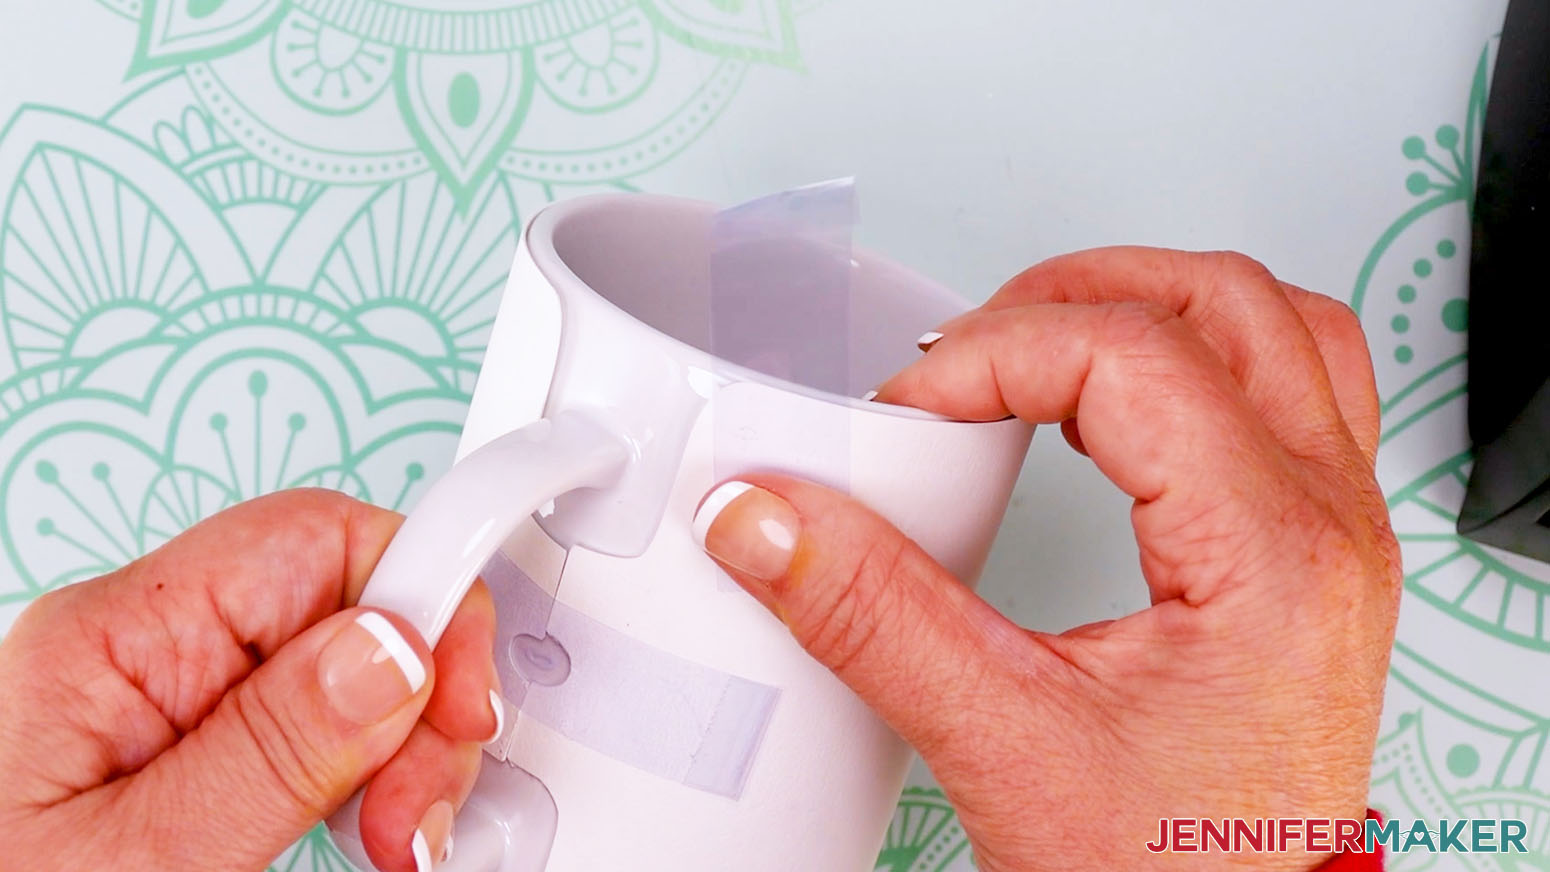
- Check if the thicker paper is allowing the edges near the handle to lift away from the mug.
NOTE: The thick paper might lift a little on the shaped ends, and any gaps can let the ink escape when the heat turns it into a gas. - If they are, make another tabbed tape piece, and attach the free end diagonally to the corner so the tab can reach either inside or the bottom of the mug, but don’t press it down yet.
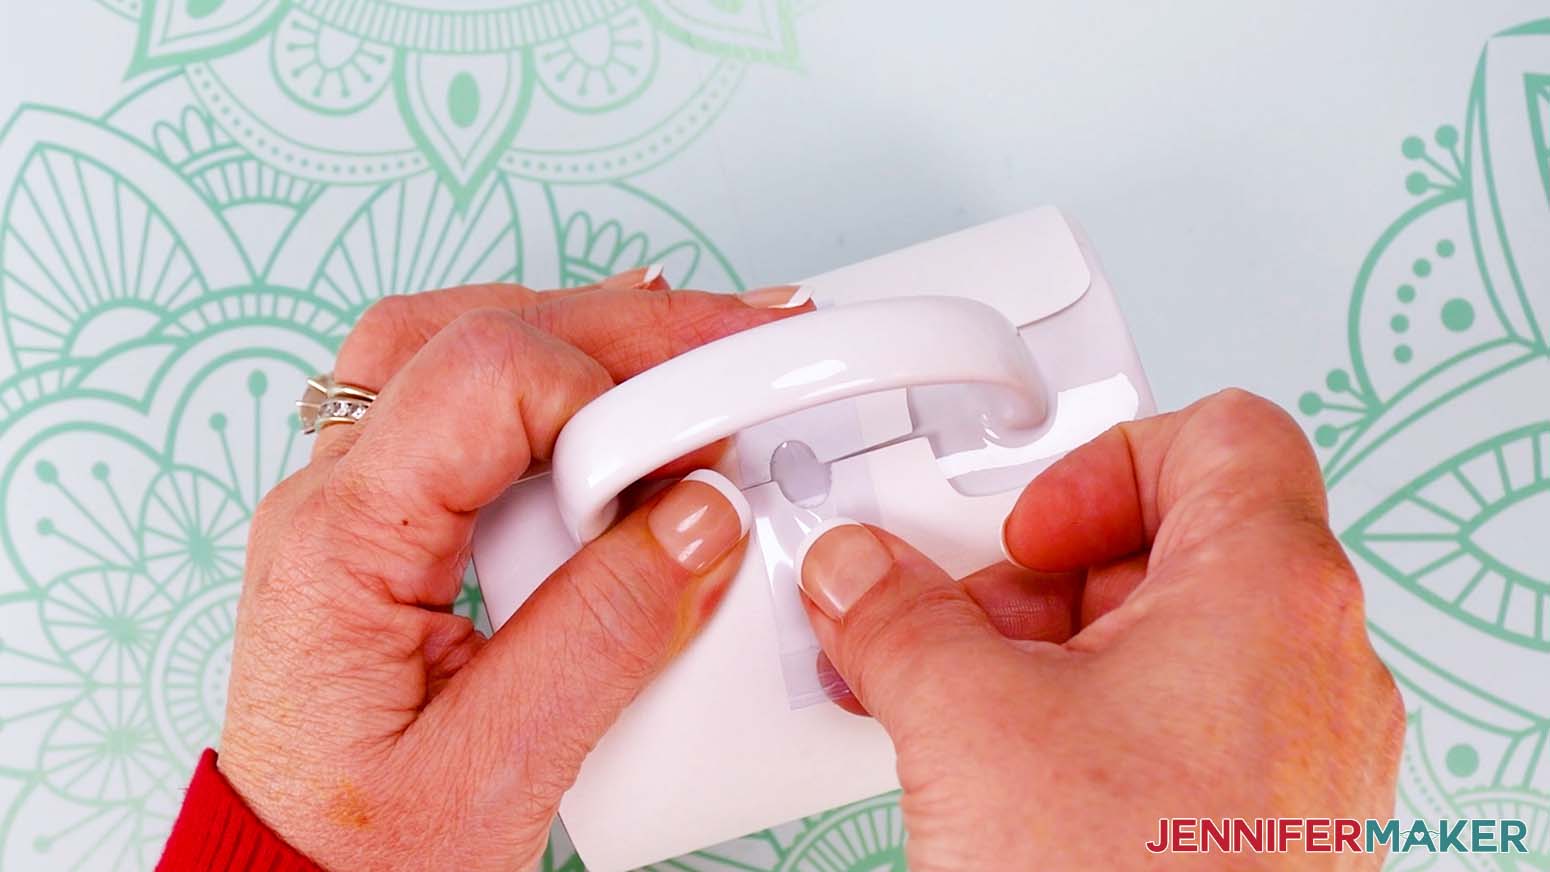
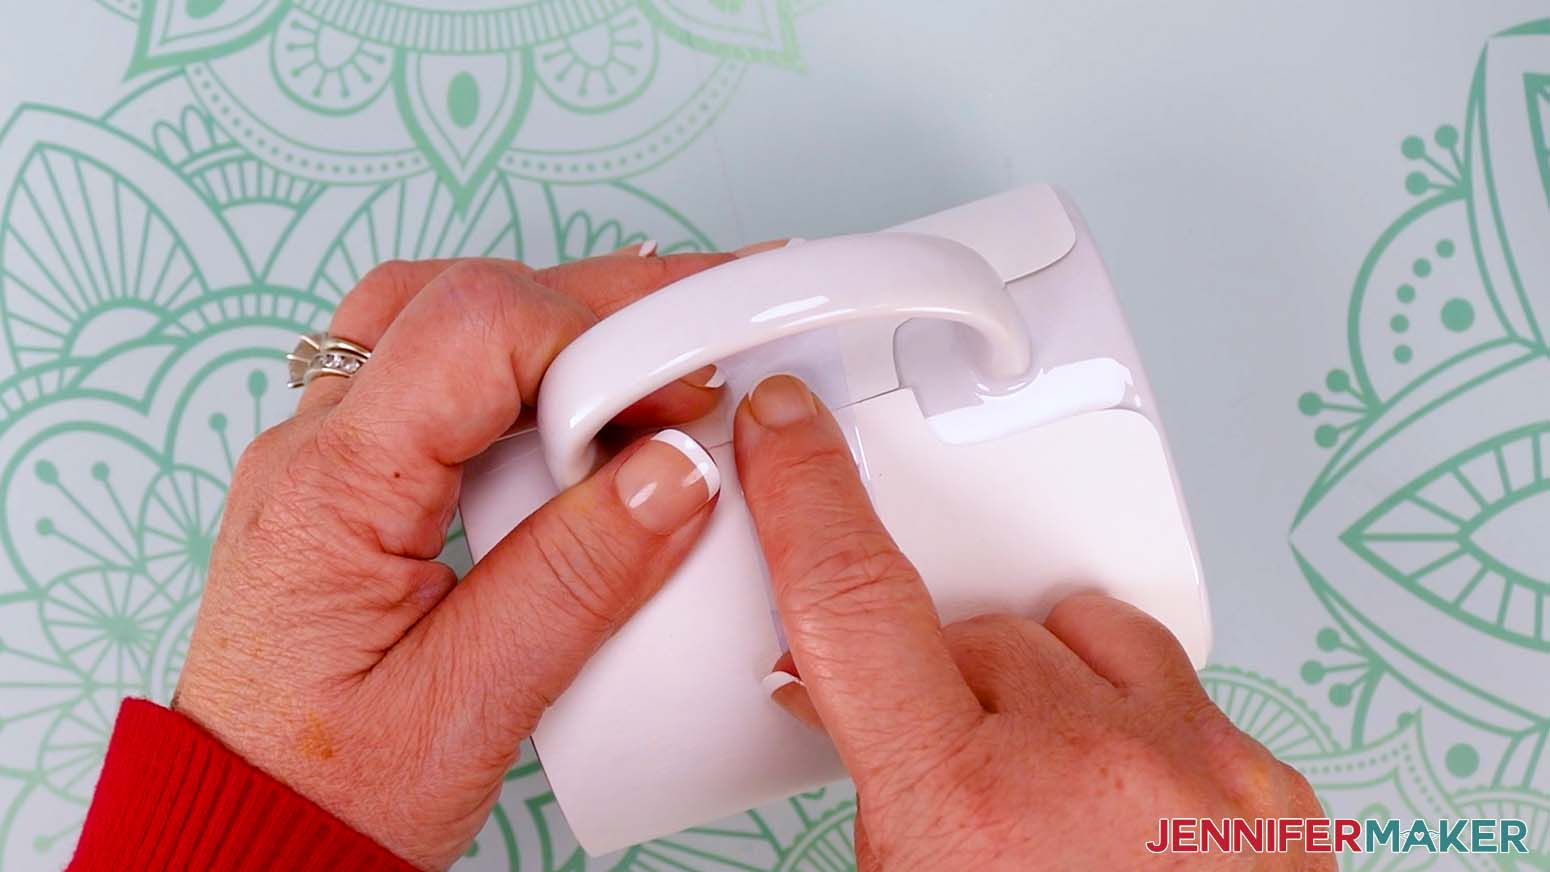
- Use one thumb to press the paper tightly to the mug, then move your thumb along the tape to make sure the lifted paper is smooth.
- Secure the tape to the mug.
- Use Steps 14-16 to secure the other three corners.
- Look closely along the top and bottom edges of the paper and check for gaps between it and the mug.
- If you see any, add more tape pieces using Steps 14-16 to make sure the entire design is tight against the mug.
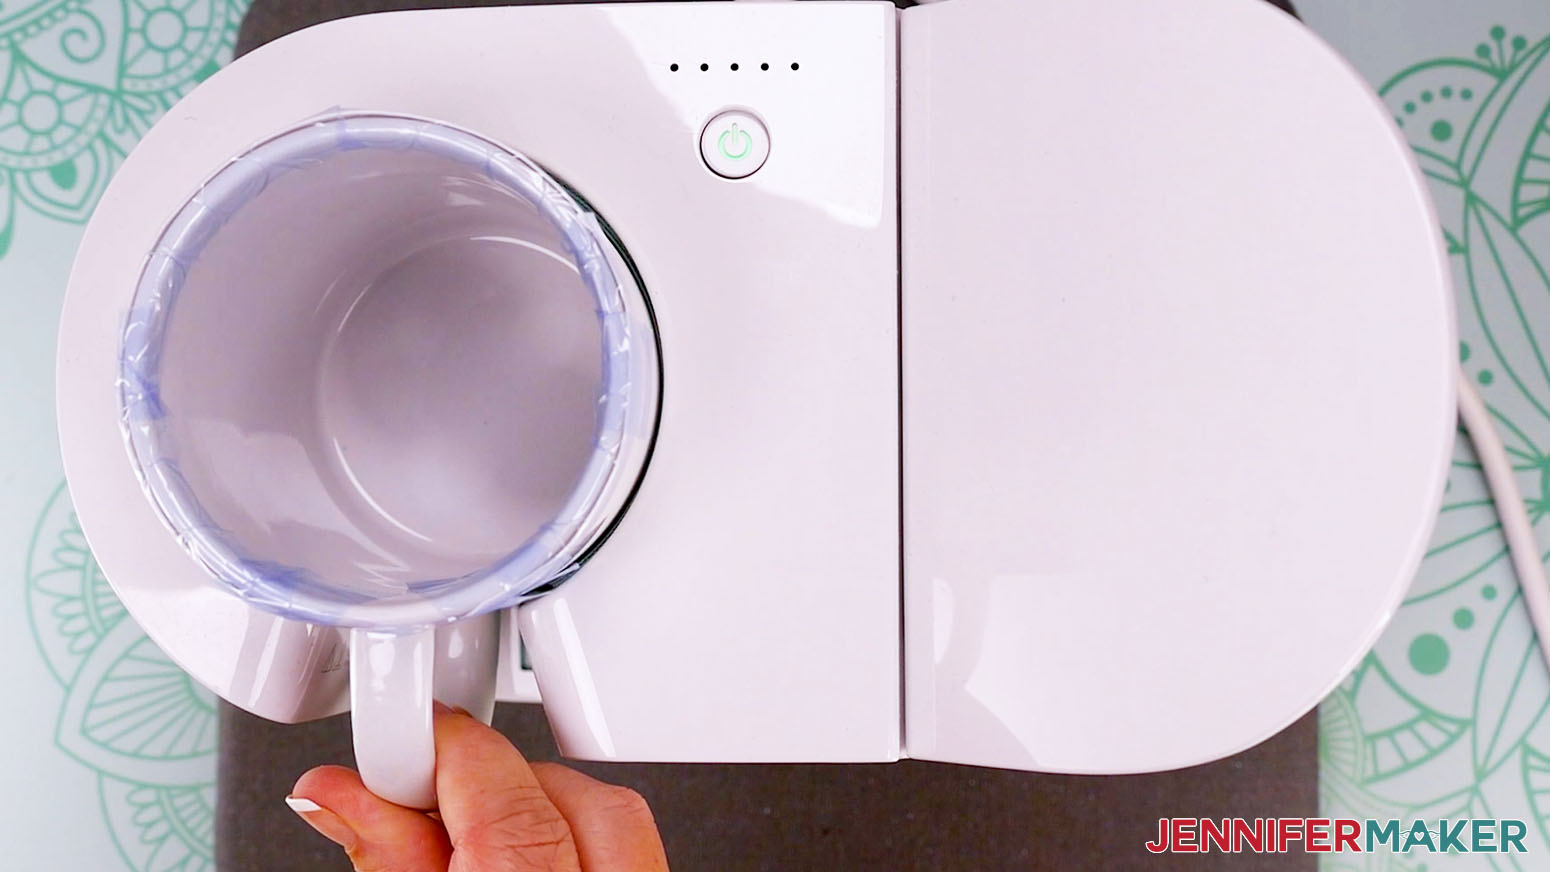
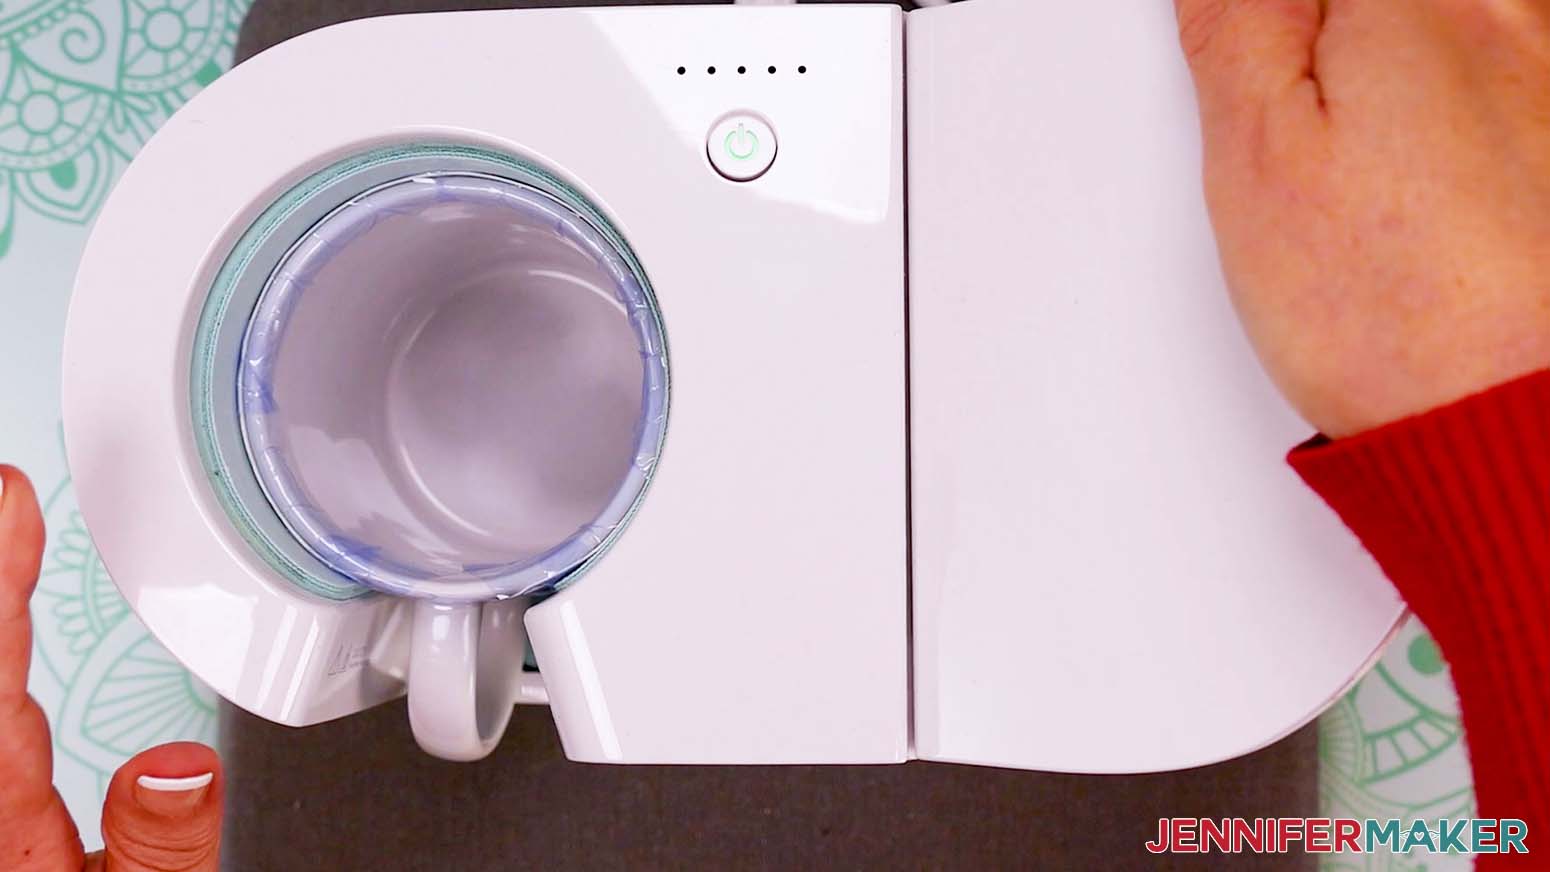
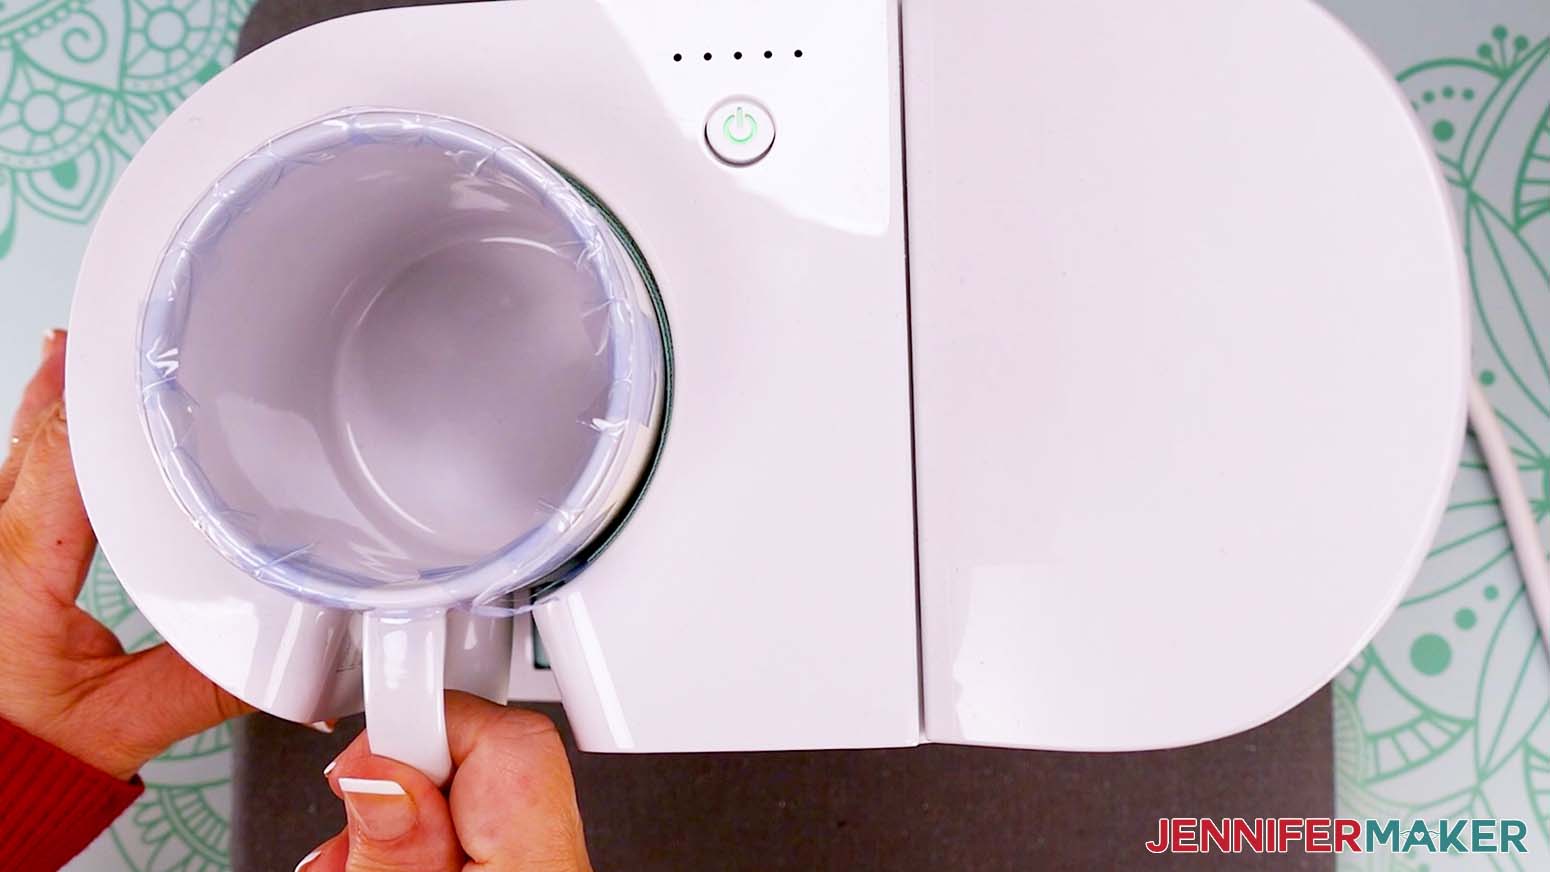
- With the Cricut Mug Press’s power button green, hold your wrapped mug by the handle and place it in the heating chamber, with the opening at the top.
- Pay attention to where the mug handle is and make sure the heat plate appears to be covering all of your design.
TIP: I usually move my handle a bit to the left rather than center it. - Close the clamp on the top of the Cricut Mug Press and check that the heat plate is still covering your design. If not, immediately open the clamp, reposition the mug, and close the clamp again.
TIP: Closing the clamp starts the pressing process. There is no other button to push or settings to worry about. The Cricut Mug Press takes the temperature of your mug and the ambient temperature of your room, and determines the correct settings for you. The little lights on top of the Press indicate the progress — an average mug takes about six minutes to press. - When the Cricut Mug Press is finished, it will beep at you.
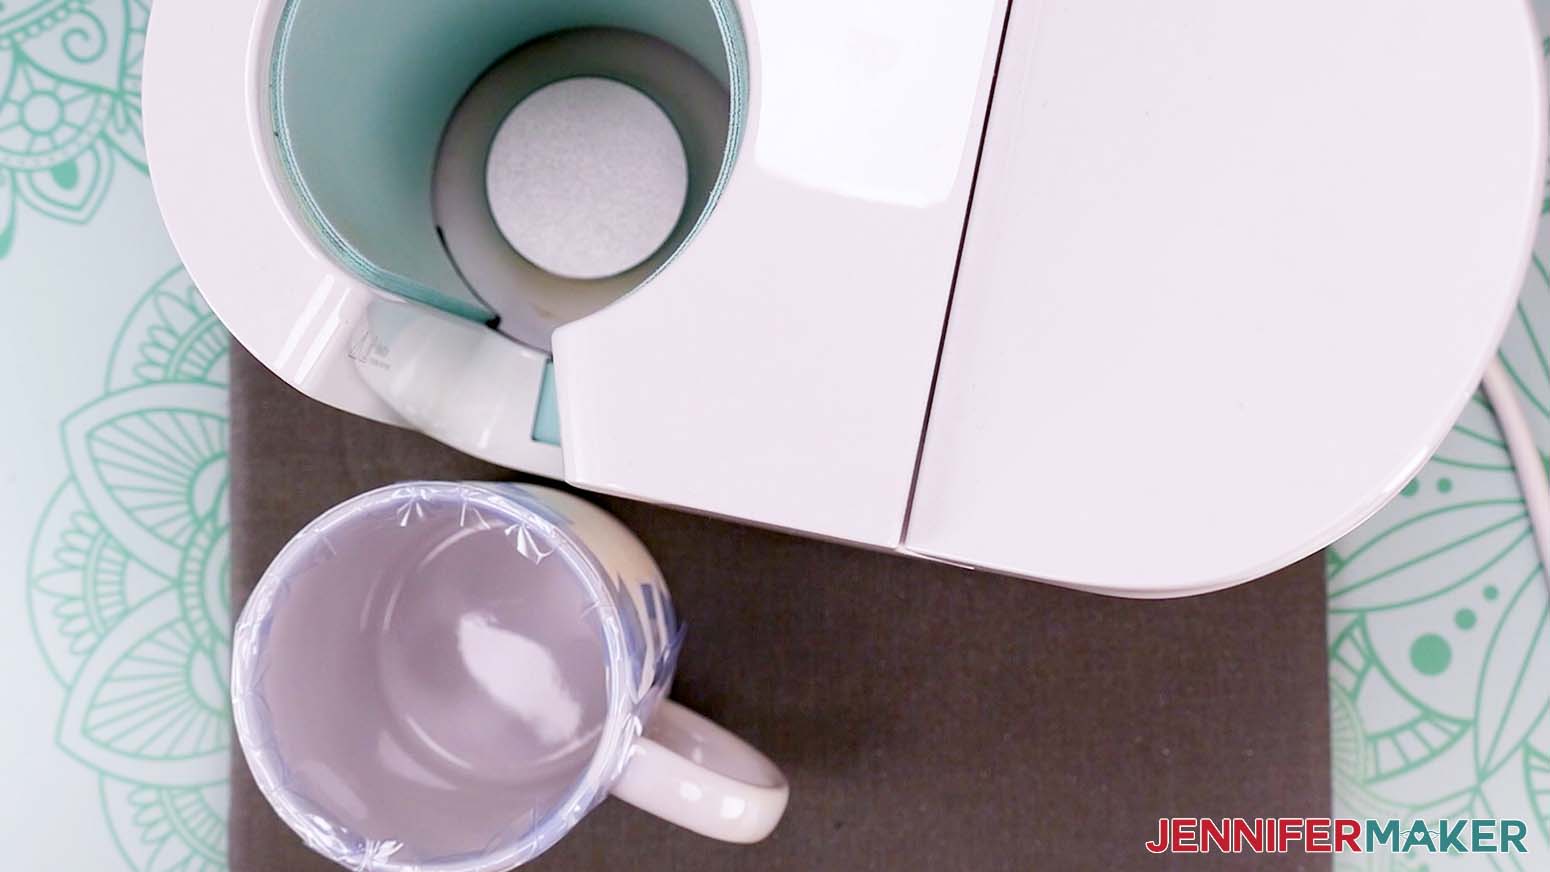
- Lift up on the clamp to release it and pull the mug out by the handle, which will NOT be hot.
NOTE: Be careful not to touch the heat plate with the back of your fingers or touch any other part of the mug, as it WILL be quite hot. - Immediately place your mug on a heat-resistant surface to cool.
TIP: I place my mug on the same mat I am using for the mug press itself. - Allow the mug to cool down for 15 to 30 minutes.
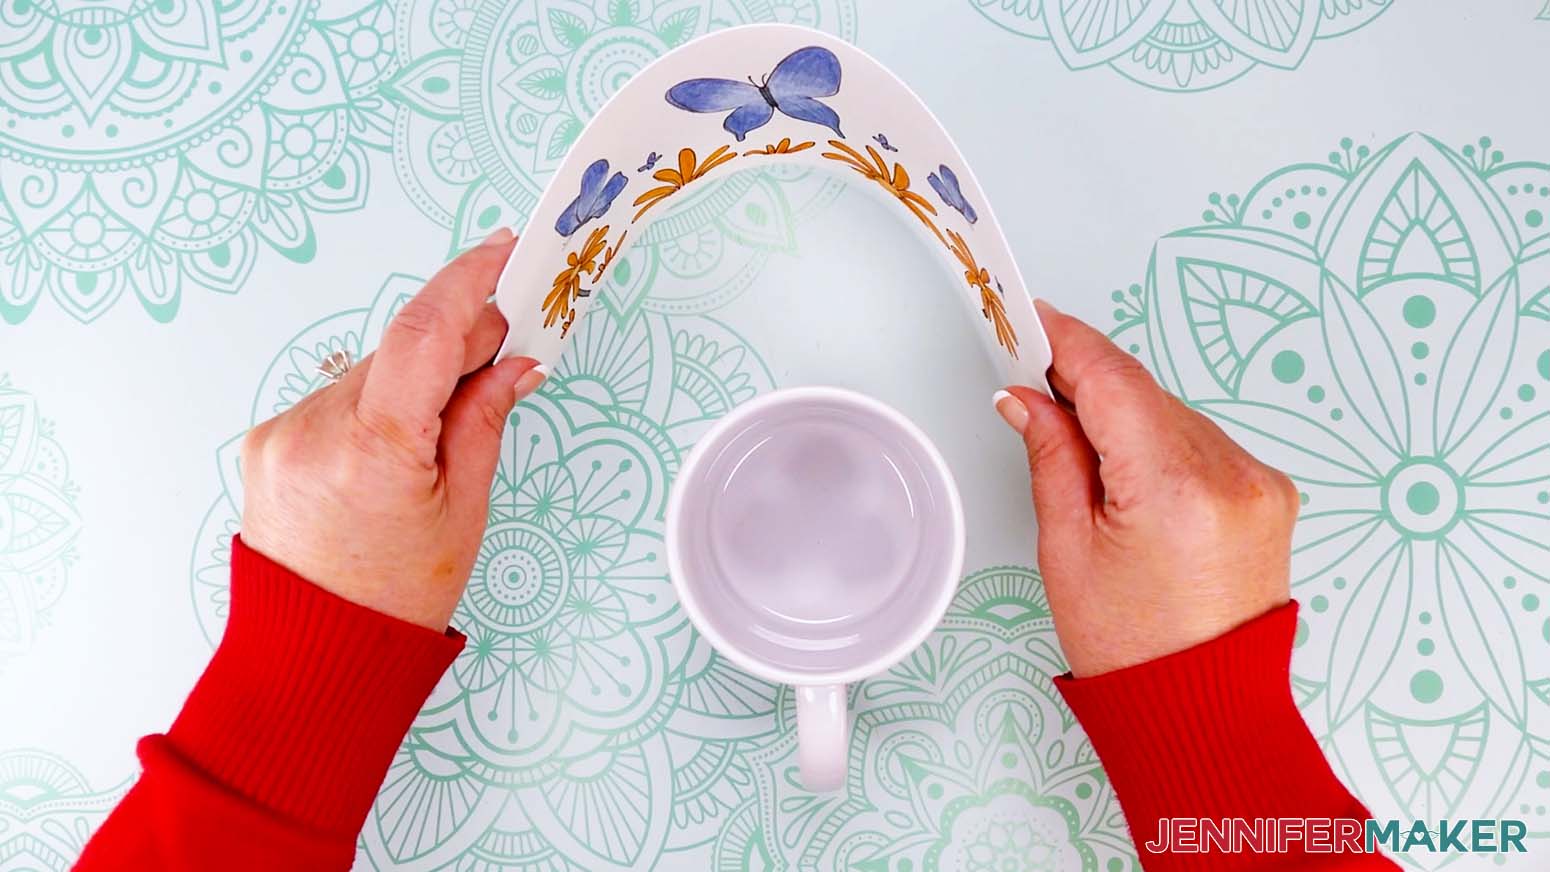
- When the mug is cool enough to handle, remove the tape from under the handle and unwrap your beautiful mug!
IMPORTANT: Infusible Ink is a form of sublimation, so remember to open a window or turn on a fan to help with ventilation!

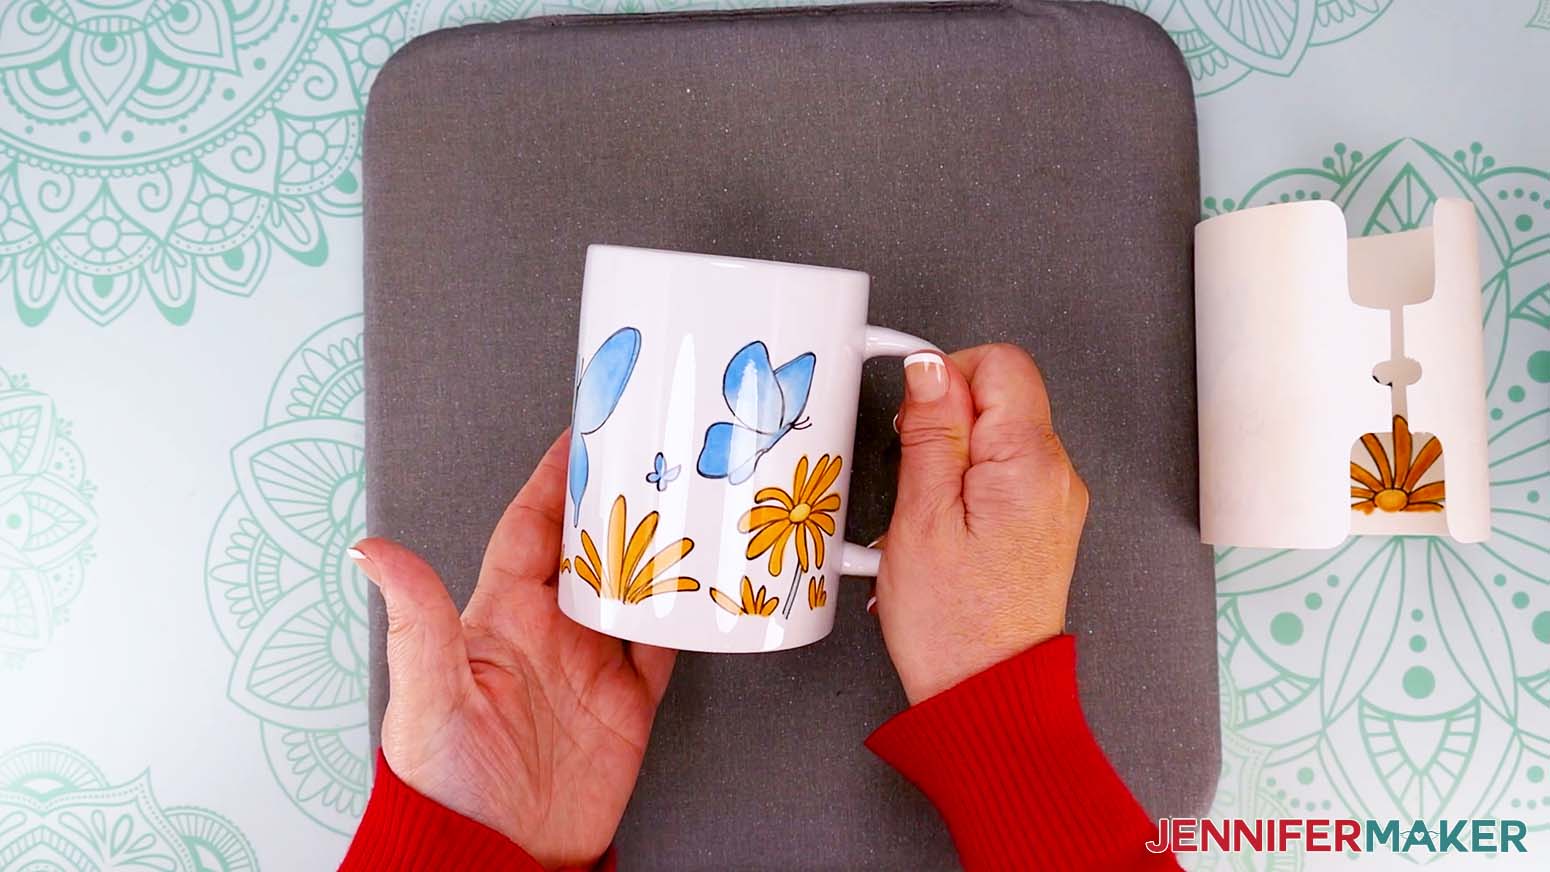
STEP 5: SHOW IT OFF!
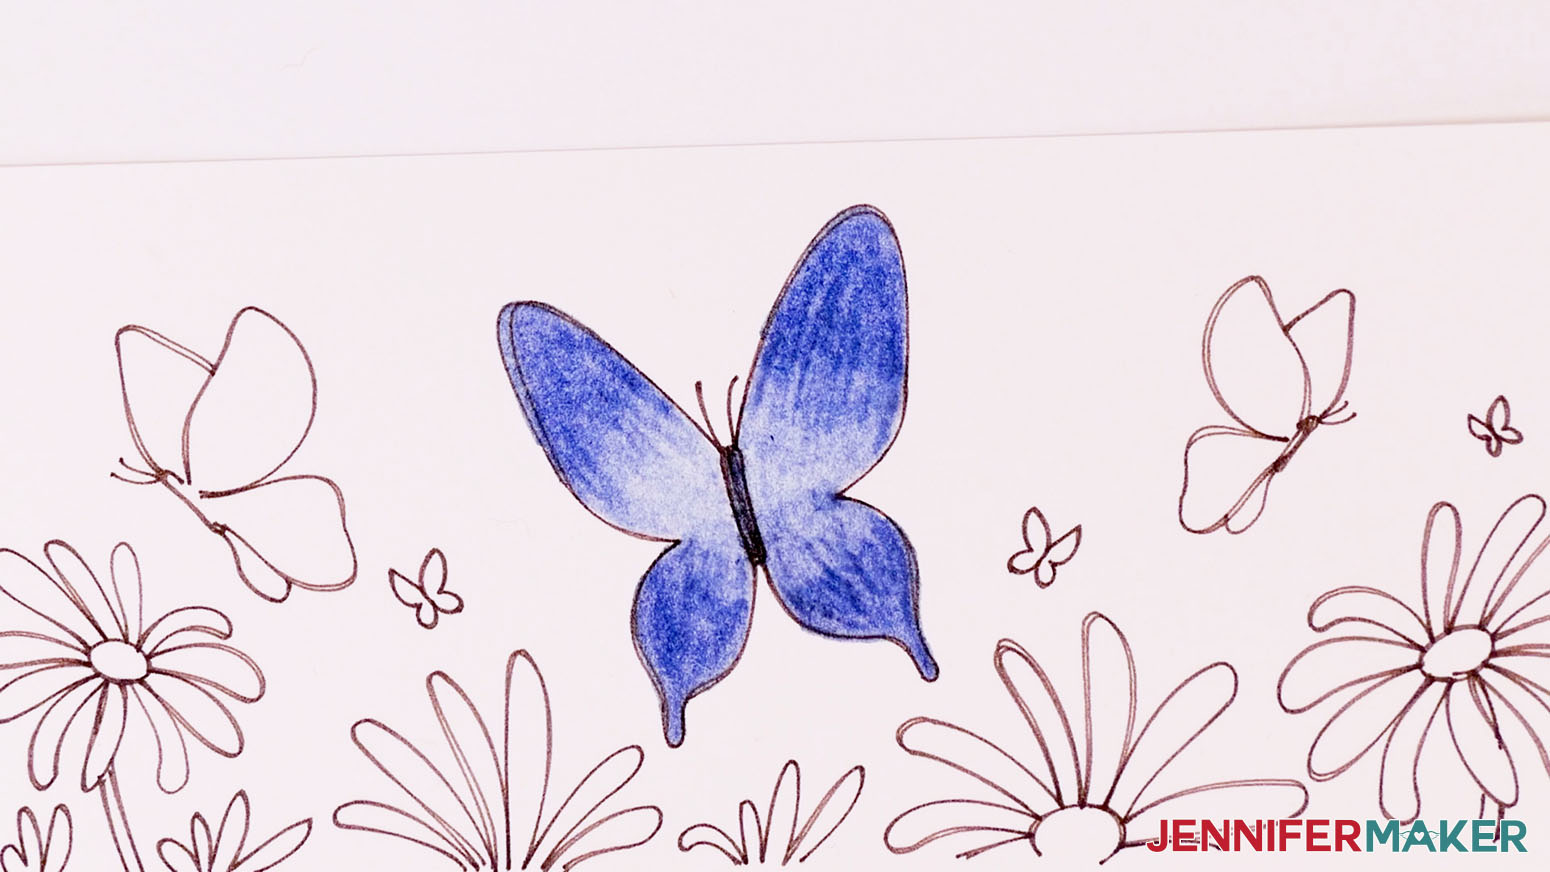
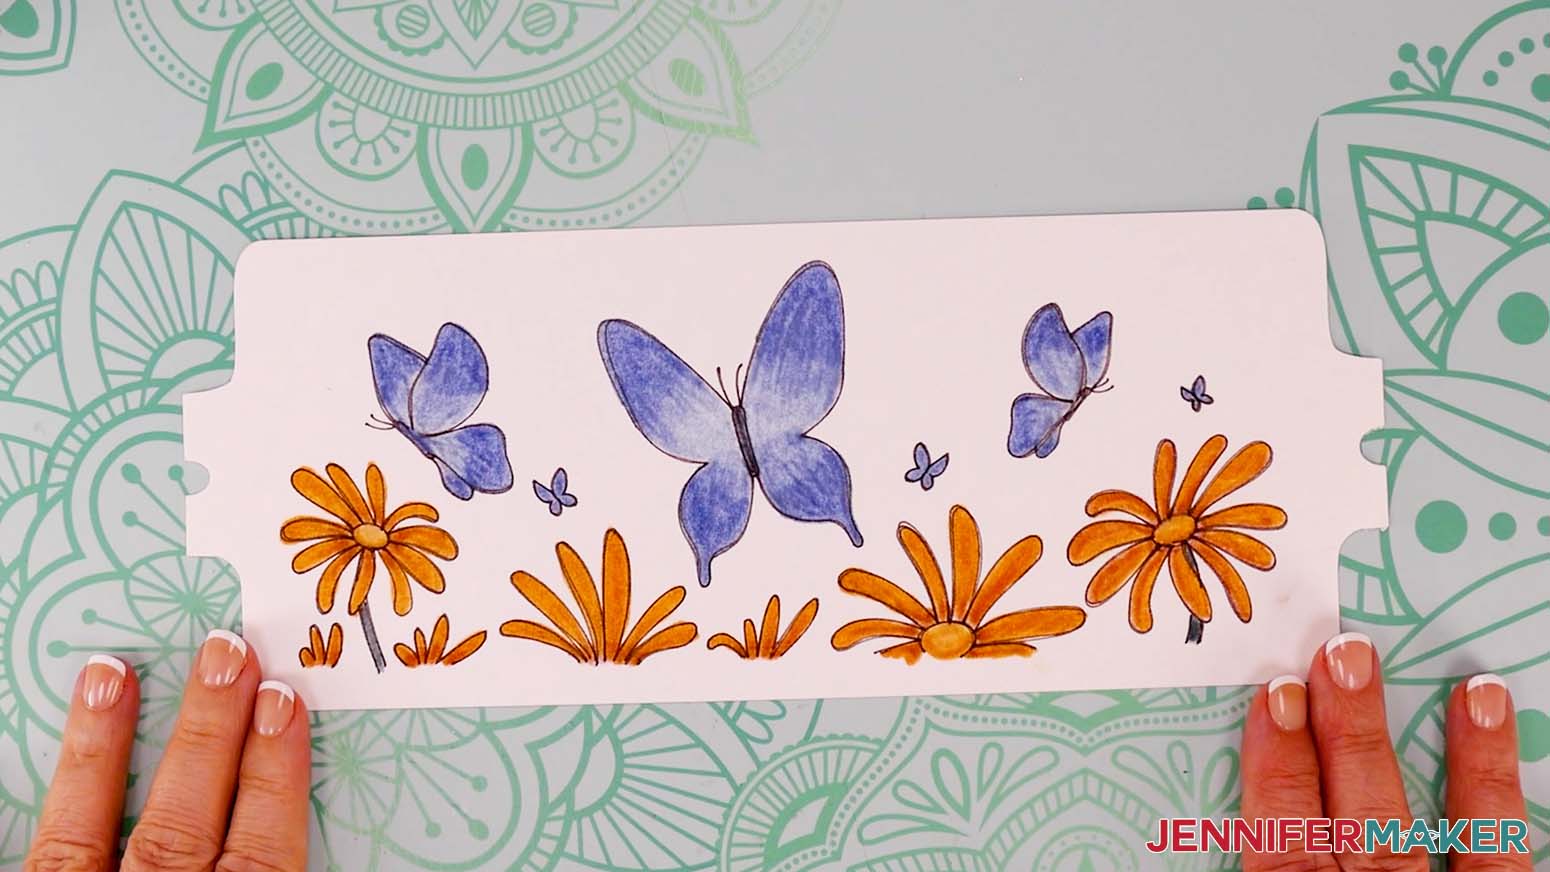
Here is what my watercolor ink mug designs look like completed!
Notes
12 oz. mug wrap: 10.31” x 3.79”
15 oz. mug wrap: 10.75” x 3.4.24”
Care: Safe in the dishwasher and microwave immediately after they’re cooled enough for you to handle.
Answers to Your Questions About How to Make A Watercolor Ink Mug
Q: What kind of paper should I use for a watercolor ink mug?
A: I tested copy paper, laser paper, and watercolor paper on my premium ceramic coffee mugs and the watercolor paper was the best way to add a beautiful design to the mug.
Q: Do you have any other designs I can make with Infusible Ink pens and markers?
A: Yes! I have simple mug designs to make with Infusible Ink pens or markers, bag and T-shirt projects, and a tutorial on creating freehand designs!
Q: Do you have any other mug projects I can make?
A: I love making custom mugs for coffee or hot chocolate (custom items like mugs are always an appreciated gift for a true hot beverage lover!), so I have lots of ideas! Try a layered Infusible Ink transfer sheet mug, learn which is the best vinyl for a custom mug, and explore dozens of other easy mug projects!
Q: Can I use regular pens and markers?
A: No, you will need to use Infusible Ink Pens and Markers. They have a special chemical composition that turns into a gas under high heat and becomes a part of the mug itself! Yes, they’re actually a way to do sublimation without a special printer! A regular pen or marker won’t be able to do that.
Q: What kind of mug can I use for my Infusible Ink pen mugs?
A: Your mug must have a polymer coating and straight walls (a classic shape!). It is important to look for sublimation (poly-coated) mugs. Other mugs will not work. The Cricut Mug Press accommodates mugs in sizes from 11 oz. – 16 oz without any manual adjustment. It’s one of my favorite pieces of art equipment!
Q: Do I have to only use Cricut mugs?
A: You will need to use straight-walled, sublimation-compatible drinkware. Cricut has tested their mugs and verified that they work the best, but you can use other brands. My wraps are the perfect size for Cricut mugs. If you order mugs online, check the processing time and delivery times to make sure the estimated delivery date works for your project. Keep in mind, carrier transit time can take longer than you think. Make sure the mugs are in original condition and sublimation appropriate. Make sure they don’t have very large handles that won’t work with the Cricut Mug Press unless you plan to use another heat source. Keep an eye out for sales on mugs and the other regular priced items you’ll need!
Q: Do I need to use a white mug?
A: For the best, most vibrant, results we suggest that you use a white ceramic mug for your Infusible Ink project, as the ink is transparent. If you sublimate onto a non-white mug, the base color will impact the design. Be sure to check the original packaging to verify the mug is sublimation-ready.

Q: Are Infusible Ink pen mugs made in the Cricut Mug Press dishwasher and microwave safe?
A: Yes, they are dishwasher machine washable and microwave safe immediately after they’re cooled enough for you to handle — there is no cure time! And since the dye becomes part of the material, it won’t impact mugs’ high-gloss finishes!
Q: Where can I find more watercolor ink mug designs?
A: You can use outlined images that fit the size of a 12 or 15 oz mug dimensions from my free resource library. Or, look around online for other artists to support! Many independent artists are offering downloadable designs you can purchase. The Etsy app is the perfect place to start searching for art mug ideas. Once you find an artist you like, check their contact page to see if they have a mailing list. That’s the best way to hear about new product alerts, exclusive offers, sale items, or special offers on all the files and types of goods they sell.
Q: Where can I use the Cricut Mug Press?
A: You can use it anywhere you have good ventilation, so near an open window or with a fan going. Put your Cricut Mug Press on a heat-resistant surface, such as an EasyPress pad, to avoid damaging your work surface.
Q: How long do I need to let my Infusible Ink pen mugs cool?
A: You need to wait the same amount of time as for other mug press designs — allow 15-30 minutes to let the mug cool down after coming out of the Cricut Mug Press before touching and removing the paper. The handle will stay cool to the touch, but the cup itself will be hot, so don’t touch it.
Q: Can I use any tape to hold down my Infusible Ink pen mug design?
A: No, you have to use only heat-resistant tape. If you use regular tape, it will melt adhesive onto your design and mug press, so don’t do that.
Q: How long does this pressing process take with the Cricut Mug Press?
A: It depends on the temperature of your room and your mug, but it should take somewhere around 5-6 minutes or so. Your Cricut Mug Press will automatically determine your press time, so you don’t have to worry about it.
Q: Why do I have blue dots or specks of color on my mug?
A: Those blue dots are dust that was on the mug before you applied the design. That’s why you must clean the surface with a lint roller. If you have a few dots or missing parts in the wraparound design, save the mug for yourself or a close friend who won’t mind. They hold tasty beverages just as well as a perfect watercolor ink mug!
Get my free files to make a watercolor ink mug
I’d love to see YOUR watercolor ink mug! Please share a photo in our Facebook group or on social media and tag me with #jennifermaker.
Love,

Want to remember this? Save this tutorial on How to Make a Watercolor Ink Mug to your favorite Pinterest Board!