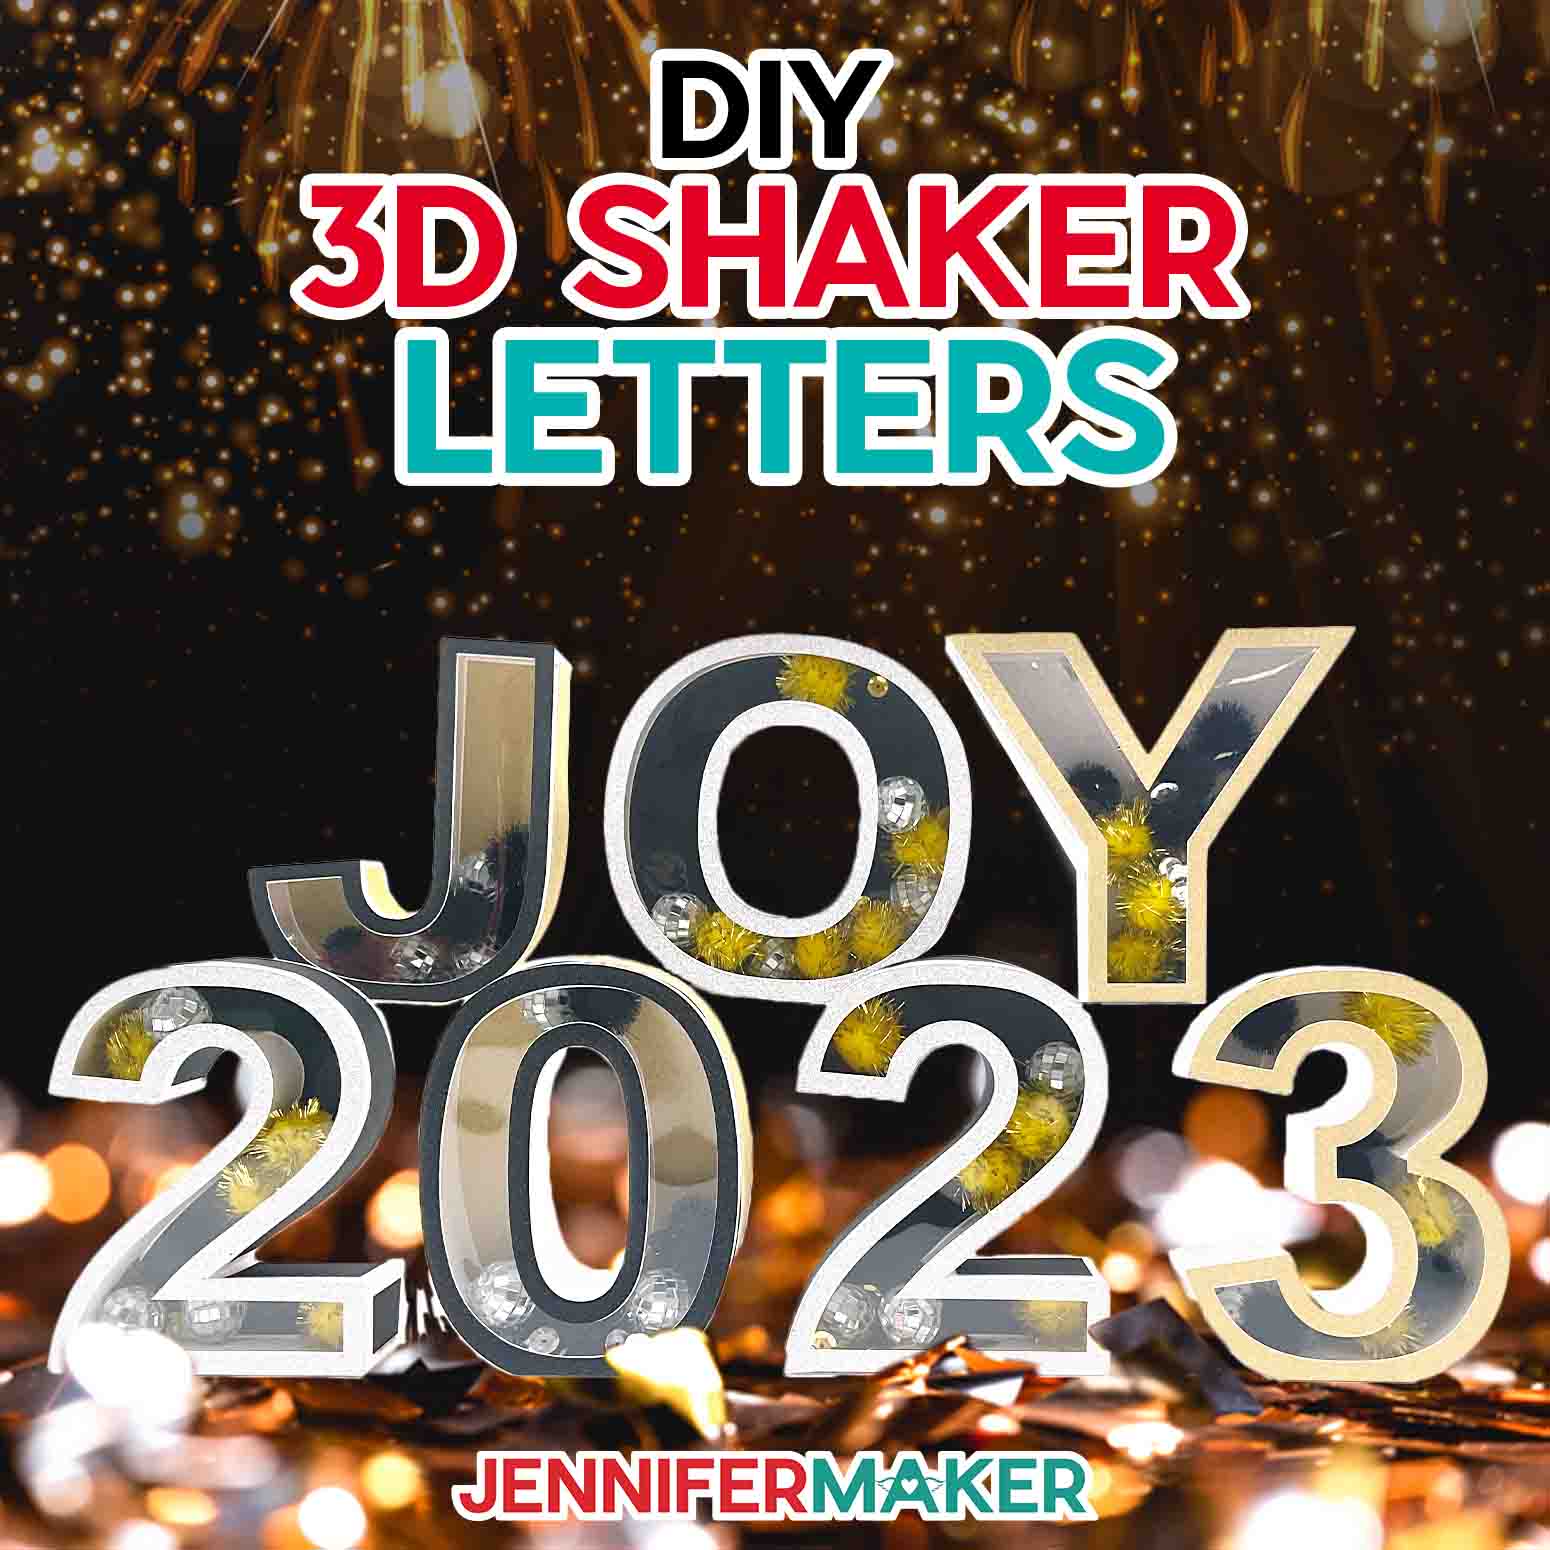
Learn how to make 3D letters with shaker elements!
Our 3D paper letters have been such a hit, it’s time to shake them up! I’ve updated a few letters and numbers with acetate windows, so you can make 3D letters with shaker decorations! I’ll show you how to put them together, including how to use the tab symbols to get the attachments right. The steps are similar to the original boxes, so tune in for tips on the original tutorial or the floral version, too! And watch out for my recommendations on what worked (and didn’t) to go inside!
Watch my step-by-step video tutorial on how to make 3D letters with shaker elements:

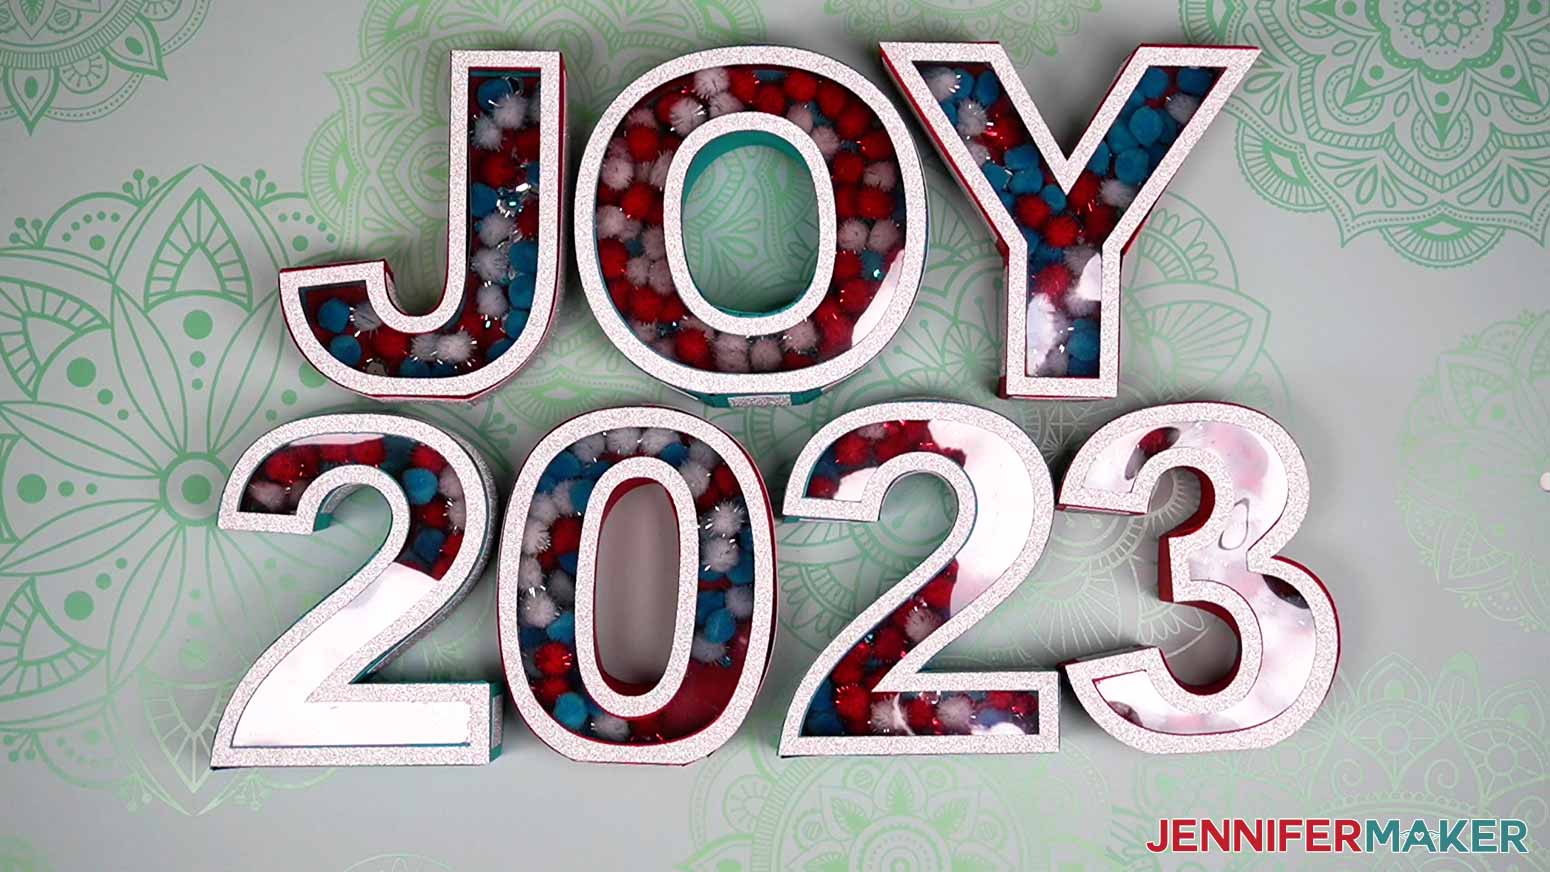
In this video, I’ll show you how to prepare, cut, and assemble the designs to create “JOY 2023” in 3D letters with shaker pieces. While the design celebrates the new year, it also features straight lines, curves, and counters — those holes in letters and numbers. You can use the assembly techniques to help put the normal 3D letters together!

This tutorial is a variation of my 3D Paper Letters and Numbers collection. The 3D designs take some time and patience as you learn their process, so watch the video first and take your time.

The digital file for each letter or number includes four sets of pieces. Some are very similar, since the pieces fit snugly. I suggest that you make a test version using papers that you can easily tell apart for each part. It’s also important to always know which surface of your paper is meant to be visible so that you bend and glue your tabs correctly. If possible, learn the process using papers that have different colors or textures on each side to help you tell everything apart. Writing yourself notes can help, too!

Each 3D letter with shaker pieces is made up of:
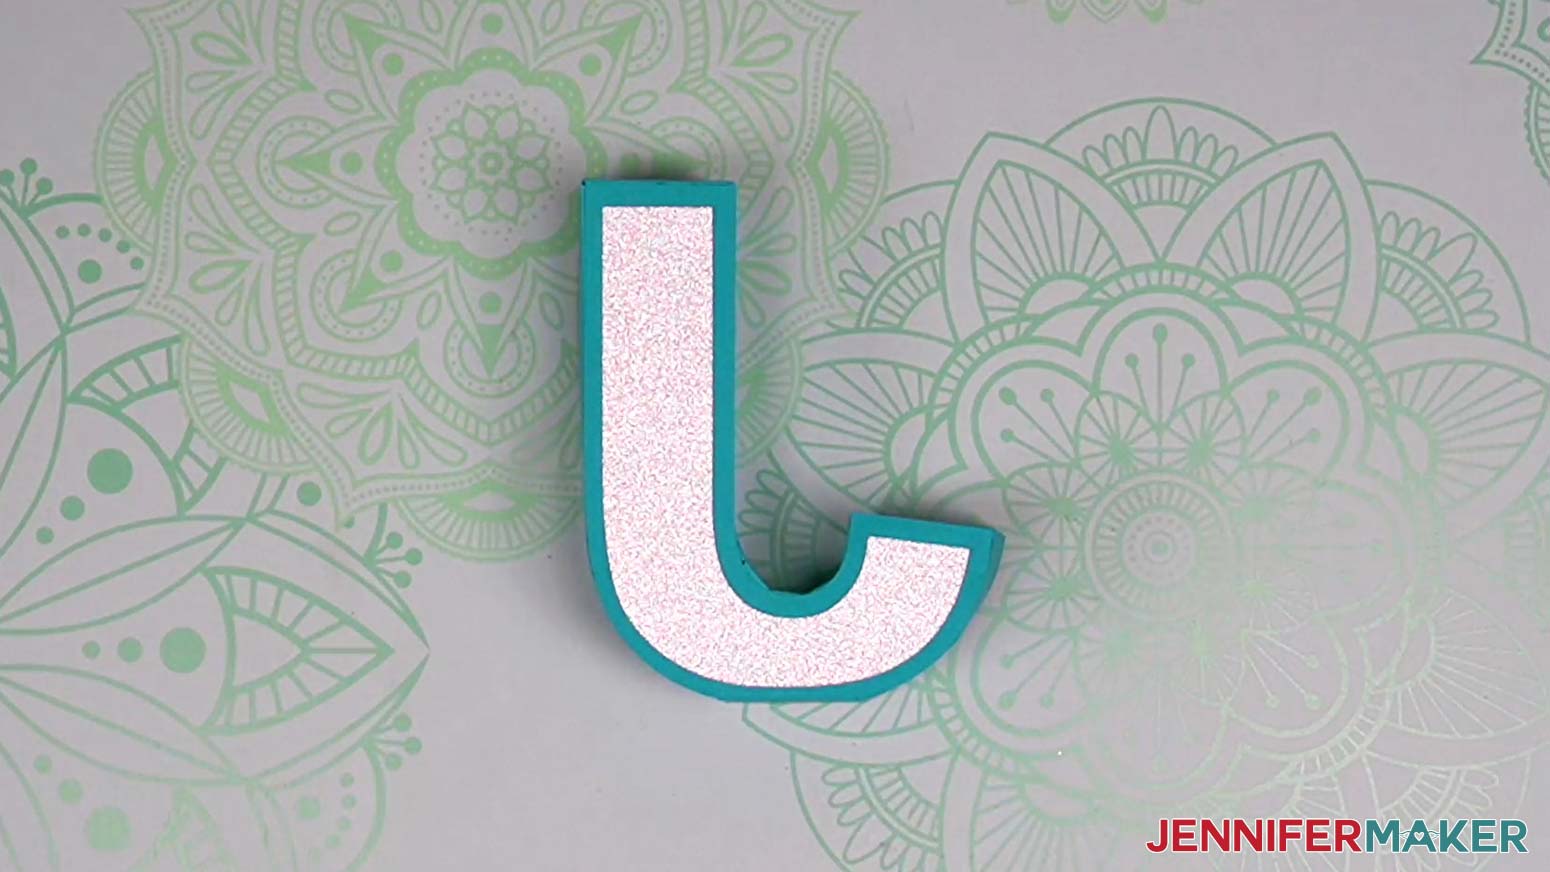
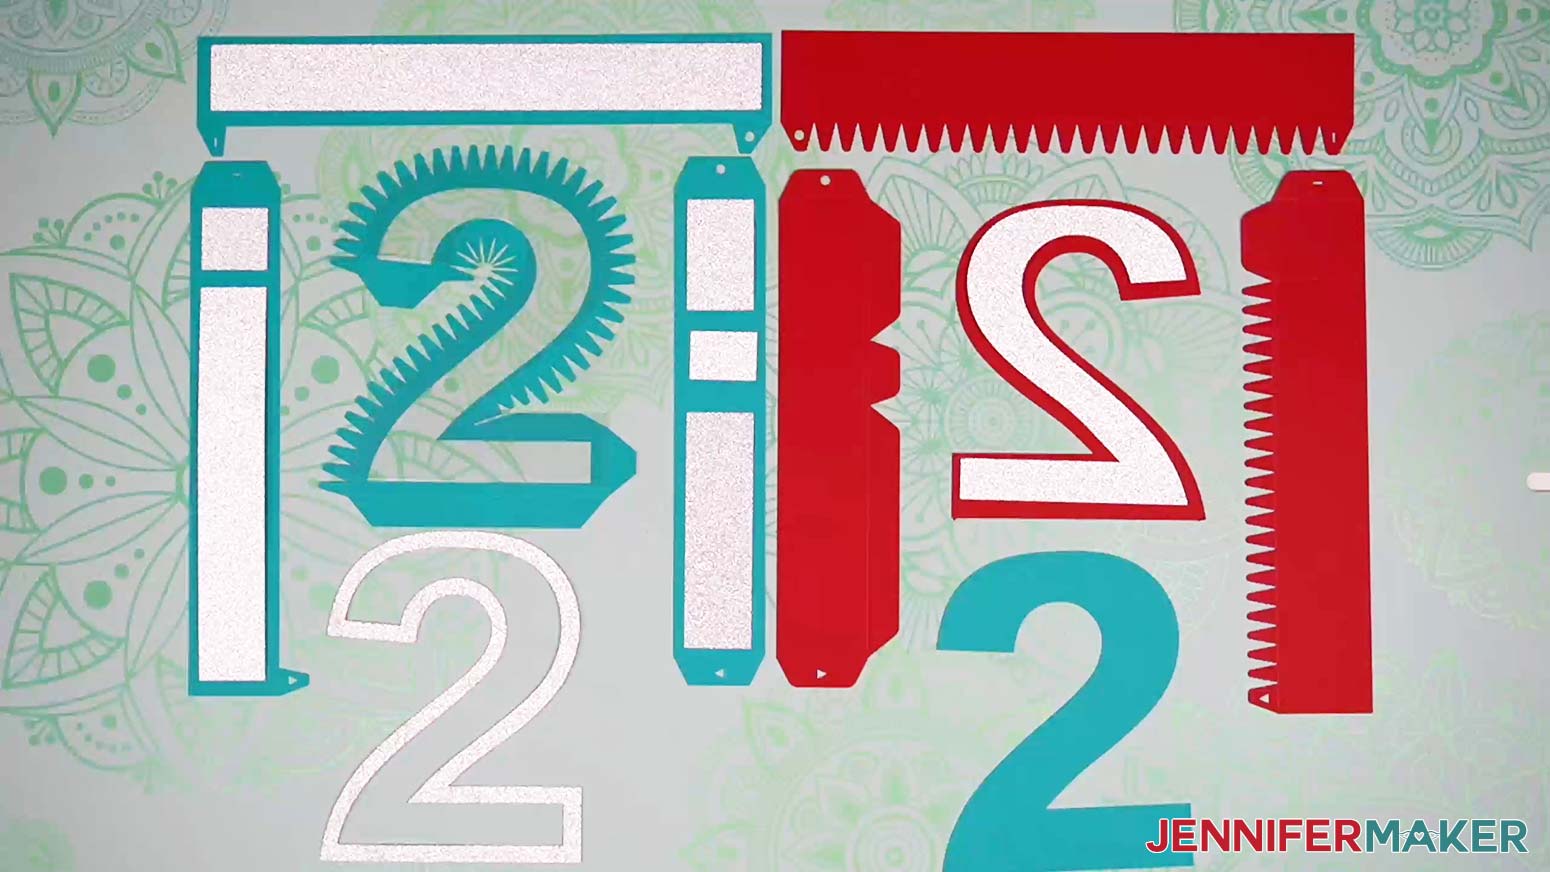
- The box top and window, made of a cutout of the letter with tabs around the edges, a cutout of the letter for the acetate window, and separate side strips. The box top tabs have sharp corners to help you identify them. These pieces are either red or teal in the design file. The acetate window piece is light gray.
- The box bottom, including a cutout of the letter that is smaller than the one for the box top and tabbed side pieces that are slightly thinner than those for the top. The box bottom tabs have rounded corners to help you identify them. These pieces are a different color (either red or teal) than the top pieces in the design file.
- Accent pieces for the outside, including the smallest cutout of the letter and a collection of rectangles you will glue to the sides of the letters. These pieces are medium gray in the design file.
- An accent piece for the inside, which is a slightly smaller cutout of the letter than the box bottom cutout. This piece will be either red or teal and will match the color of the box top pieces in the SVG file.
These 3D Paper Letters take some time, but you’ll learn so much from making them! First, we’ll review how to add score lines to cardstock using a Scoring Stylus, Cricut Single Scoring Wheel, or dashed cut lines in Cricut Design Space. You can use your preferred scoring tool. Since we’re building 3D paper projects, making our creases in the right spots is important.
I’ll also share my go-to glue for cardstock, which is easy to apply precisely and won’t make your paper wrinkle. Especially helpful for tabs around the acetate window!
And, I’ll discuss the real fun: the shaker options. I’ll show you the perfect size to pick for items and some to avoid.
Since we want to create sturdy 3D letters with shaker windows, you’ll need good-quality cardstock. I’m using 65 lb cardstock in a variety of fun colors, but feel free to coordinate your colors with your own personal style, decor, or occasion. You can use solid cardstock or maybe a pattern for contrast. Clear acetate cuts nicely for the window.

I’m going to show you how to cut your letters with a Cricut Cutting machine using a Fine-Point Blade and StandardGrip Machine mat. For the creases, you can use the Fine-Point Blade, but ‘ll explain how to use a Single Scoring Wheel or a Scoring Stylus. I’ve included file versions for both! A scraper and brayer are also good tools to have on hand.
Ready to make your 3D letters with shaker pieces for New Years? I’m super excited to show you how! This post contains some affiliate links for your convenience (which means if you make a purchase after clicking a link I will earn a small commission but it won’t cost you a penny more)! Read my full disclosure policy.
Materials to Make 3D Letters With Shaker Decorations
View my Amazon shopping list with the exact items we used to make this project!
- Two to Four (2-4) Sheets of 8.5″ x 11″ or 12″ x 12″ 65 lb. Solid Core Cardstock (depends on the letter or number)
- One (1) Sheet of 8.5″ x 11″ or 12″ x 12″ Acetate (for the shaker window)
- One or Two (1-2) Sheets of 8.5″ x 11″ or 12″ x 12″ Glitter Cardstock (for the accent pieces, depends on the letter or number)
- Several 0.5″ – 1″ Pom Poms (to place inside letter or number as a shaker element)
- Several 5mm – 10mm Sequins (to place inside letter or number as a shaker element)
- Several Mini Disco Balls (1″ or less in diameter) — optional, to place inside letter or number as a shaker element
- One (1) 3.3′ Strand of LED Fairy Lights (optional, to place inside letter or number instead of shaker elements)
- 1 1/4” Washers (optional, to help letters stand up)
- A method to cut your material — I used the Cricut Maker 3, but you can use any of the Cricut Maker or Explore machines with the standard Fine-Point Blade.
- Cricut Green StandardGrip Machine Mat 12″ x 12″
- Brayer
- Spatula
- Scraper
- Good Craft Glue – I used Bearly Art Precision Glue, which is perfect for those small tabs.
- Cricut Single Scoring Wheel and Housing (for Cricut Maker Series Machines) or Scoring Stylus (for Explores or Makers) to create creases using the Score Line file versions, or a Cricut Fine-Point Blade for the No Score Line files.
- 3D Foam Dots or Tape (for securing your top and bottom pieces together)
- Medium 3/8″ Zots Glue Dots (optional, for adhering the fairy lights and/or washer to your letter)
- Scissors (optional, to cut the strings off your disco ball shaker pieces)
- Scotch Tape (optional, to tape down the tabs on the top piece so it’s easier to slide onto the bottom piece)
- Tweezers (optional, to help adhere foam dots)
- Plastic Bags (optional, to keep your pieces organized) -AND-
- Post-it Notes and a Pen (optional, to keep your pieces organized)
- Isopropyl Alcohol (optional, to clean your acetate window) -AND-
- Microfiber Cloth (optional, to clean your acetate window)
- Design #463 – My free SVG/PDF/DXF design files available in my free resource library – get the password by filling out the form at the bottom of this page
How to Make 3D Letters With Shaker Windows
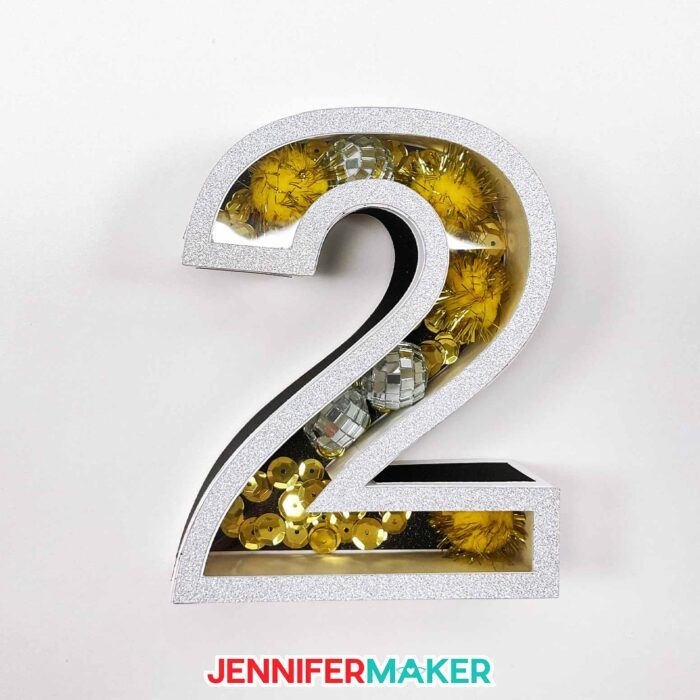
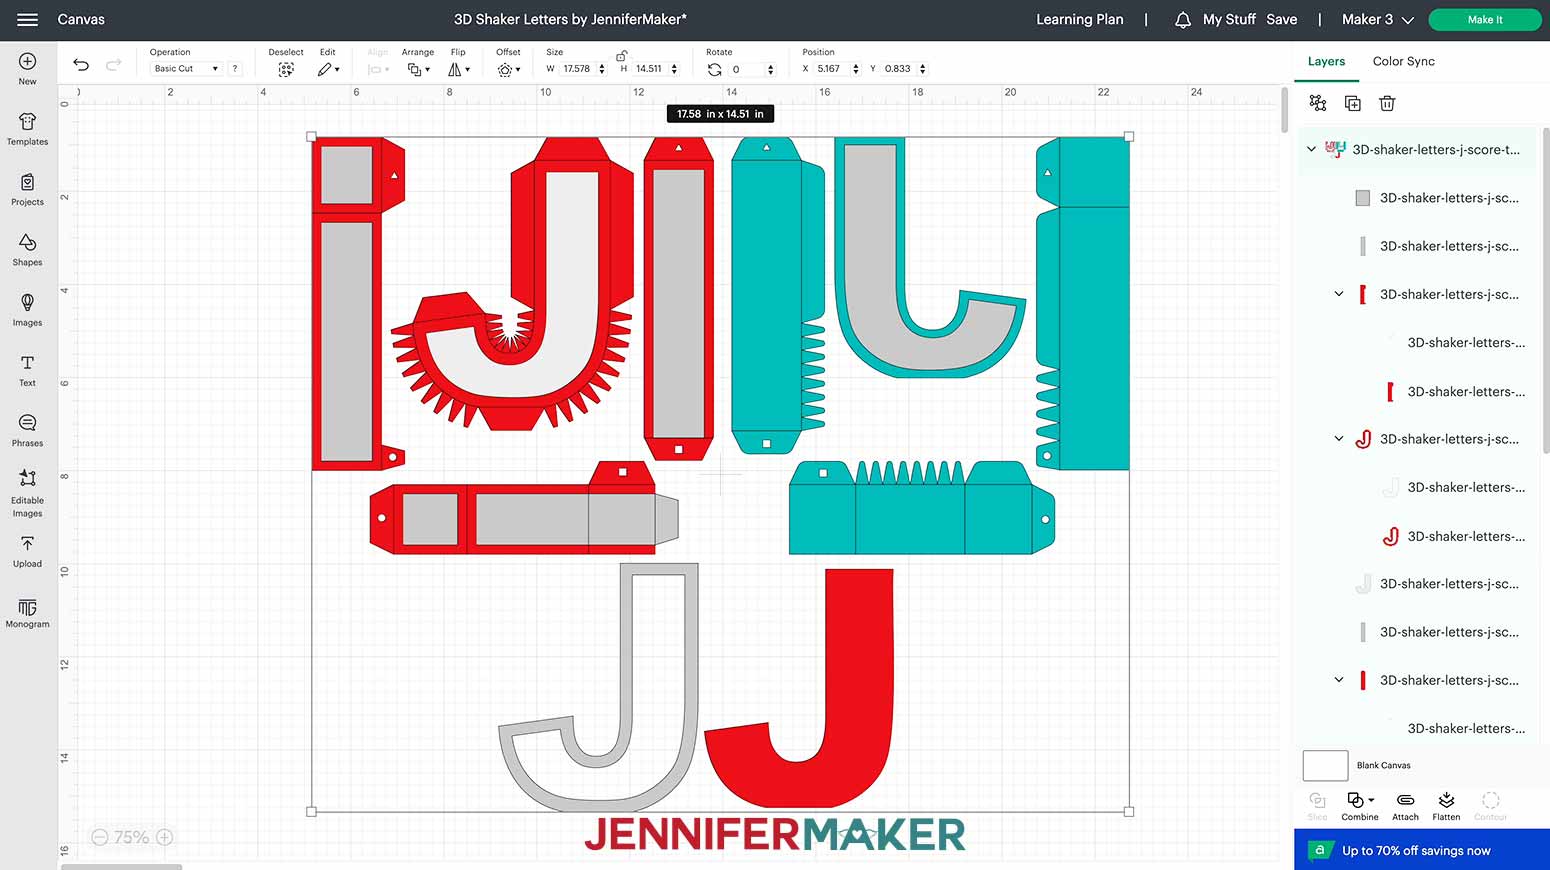
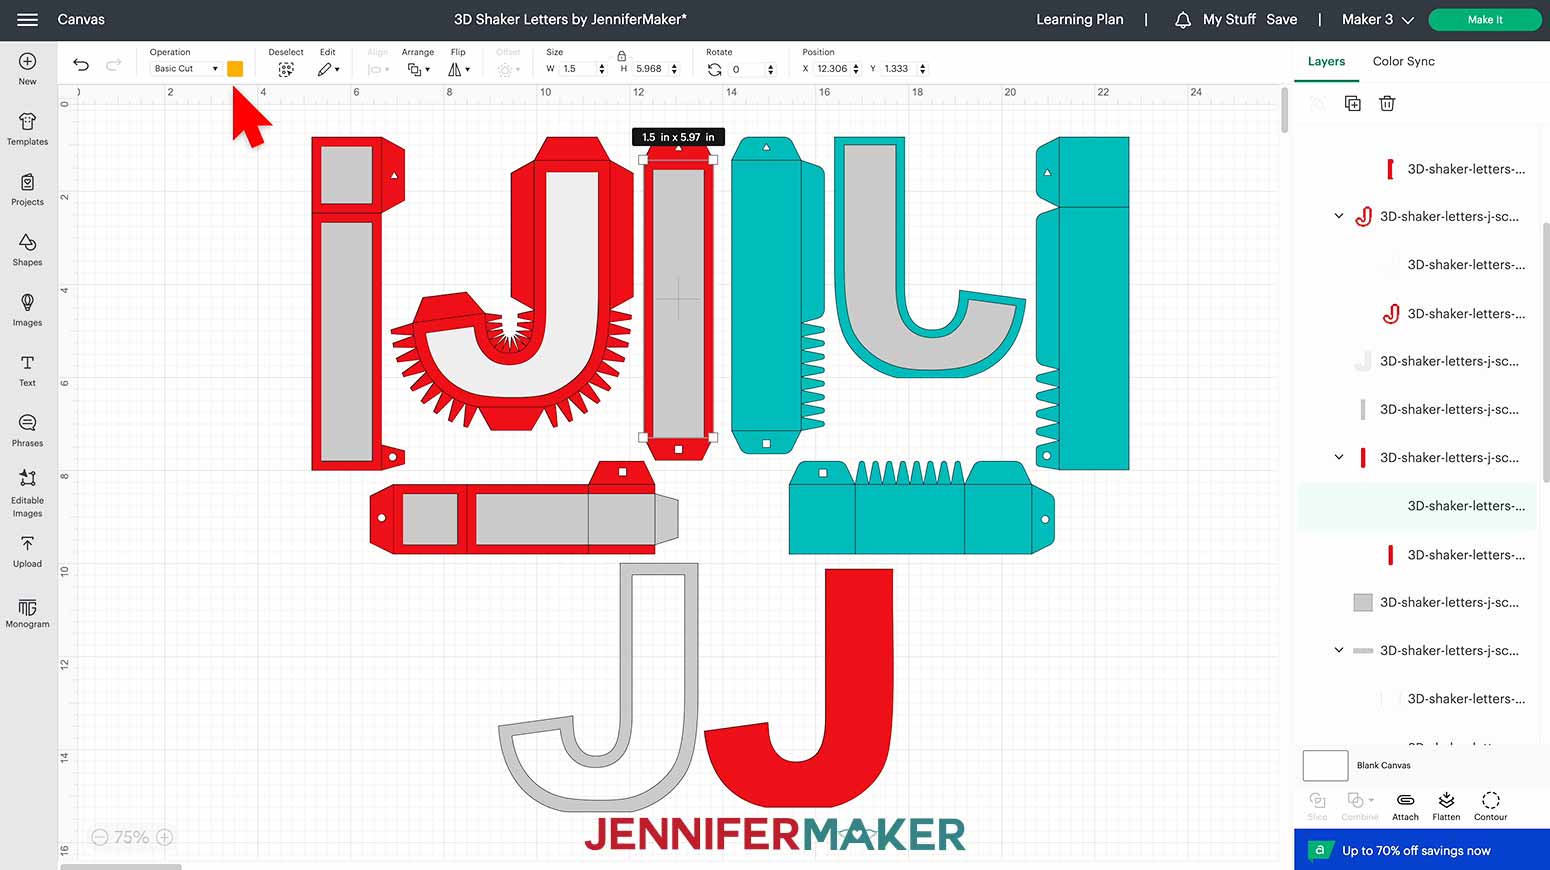
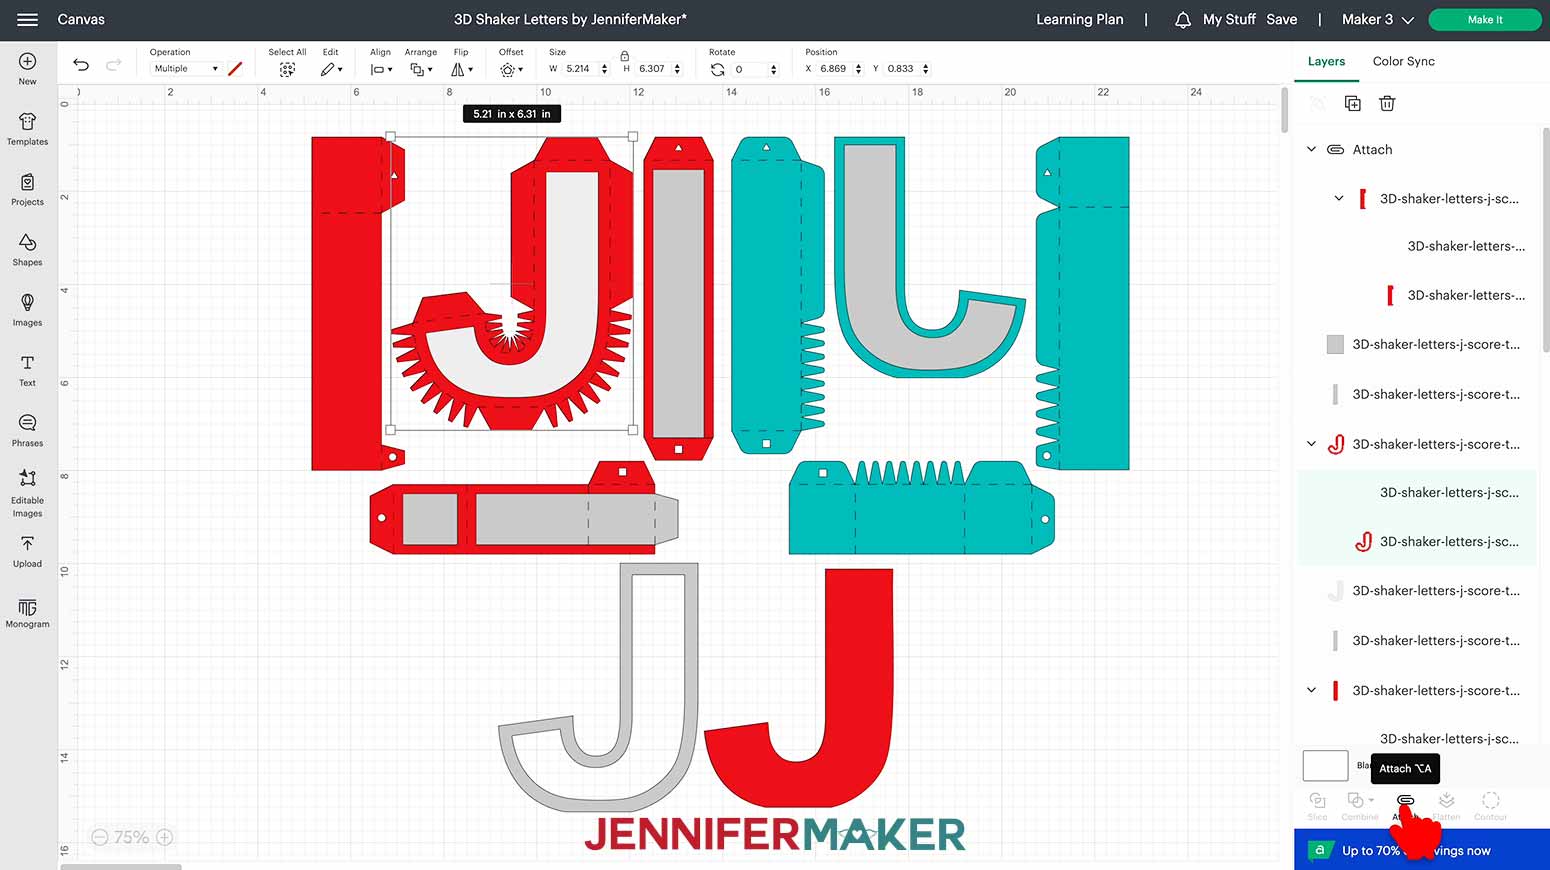
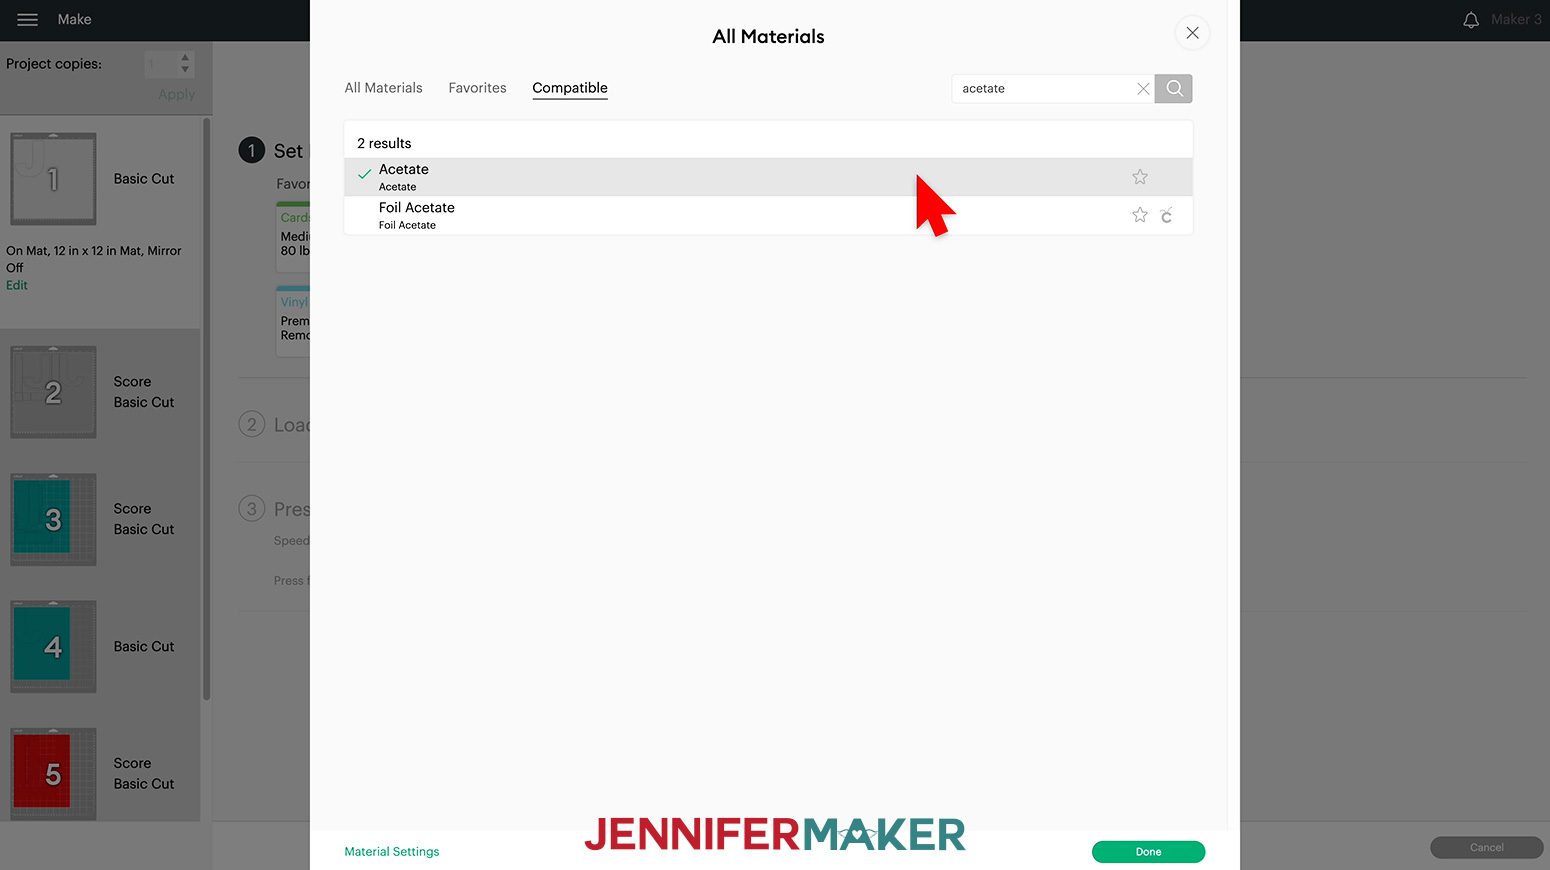
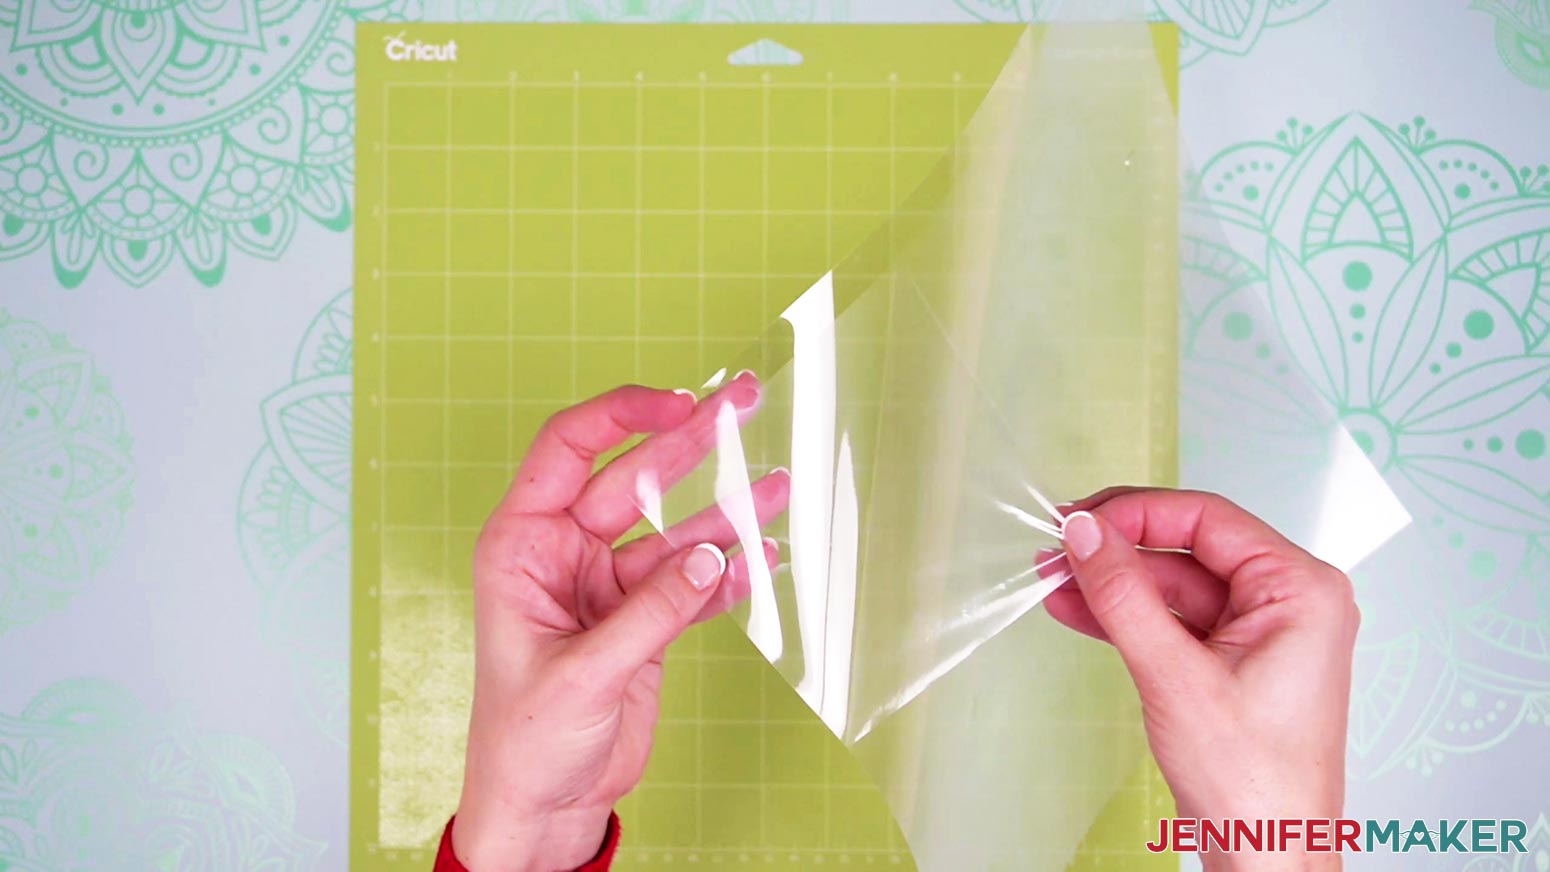
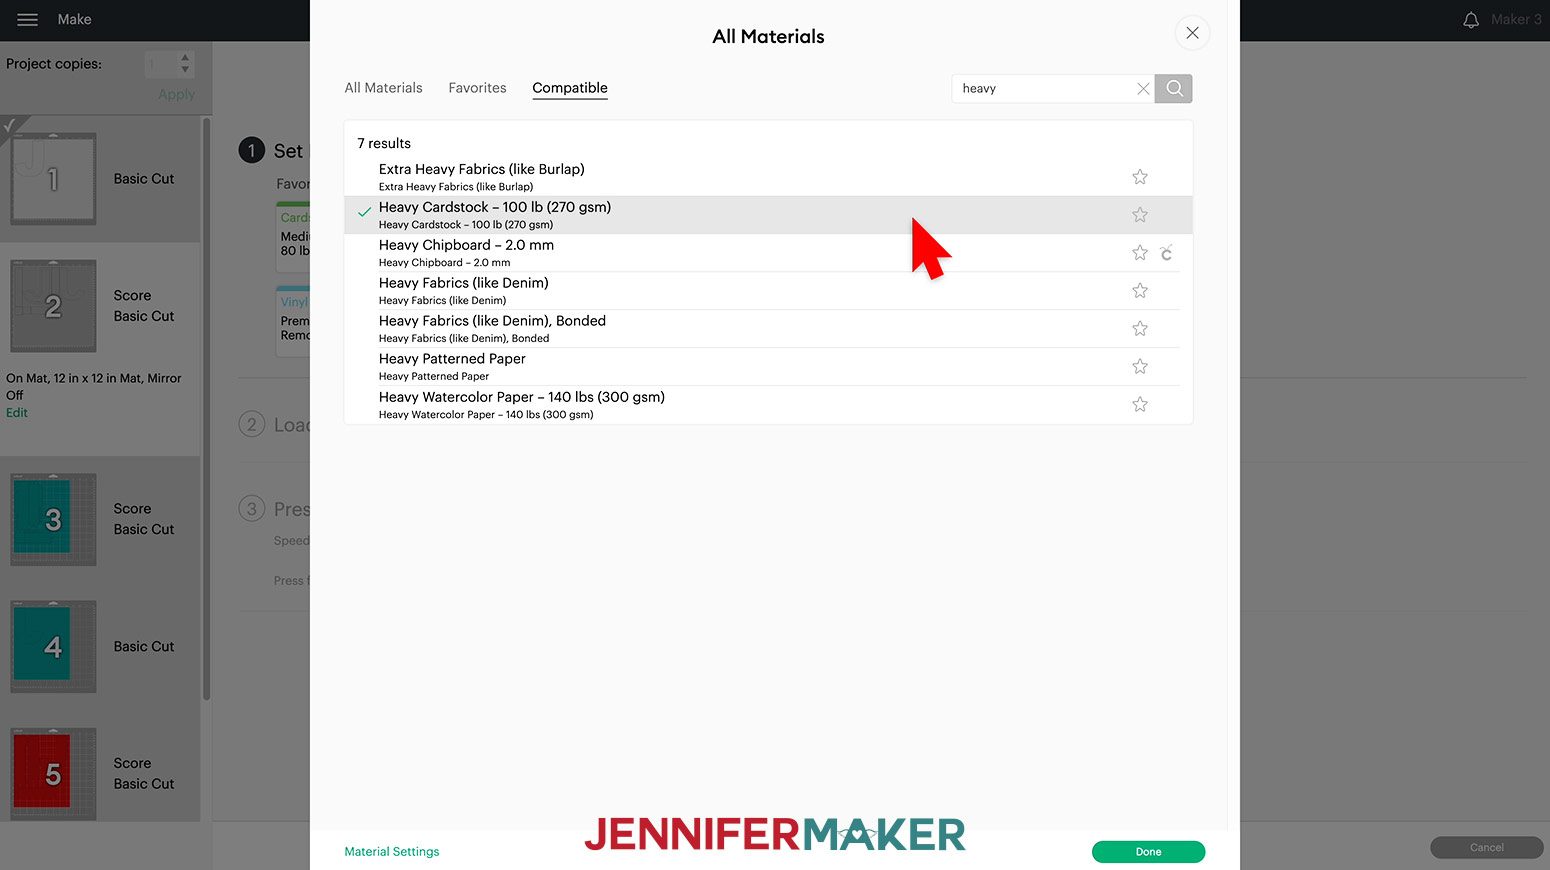
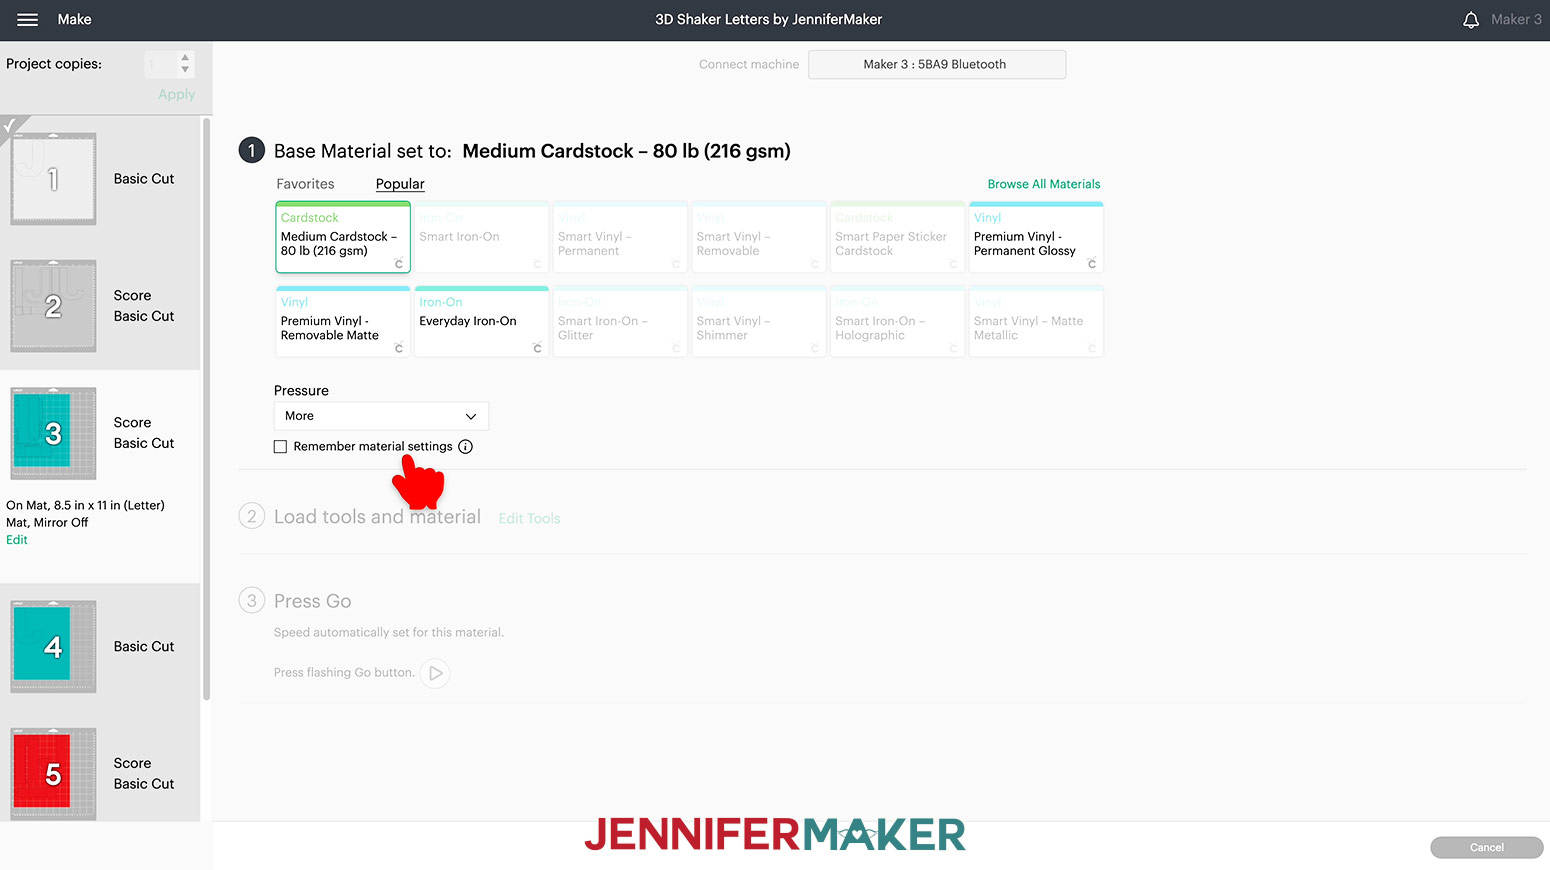
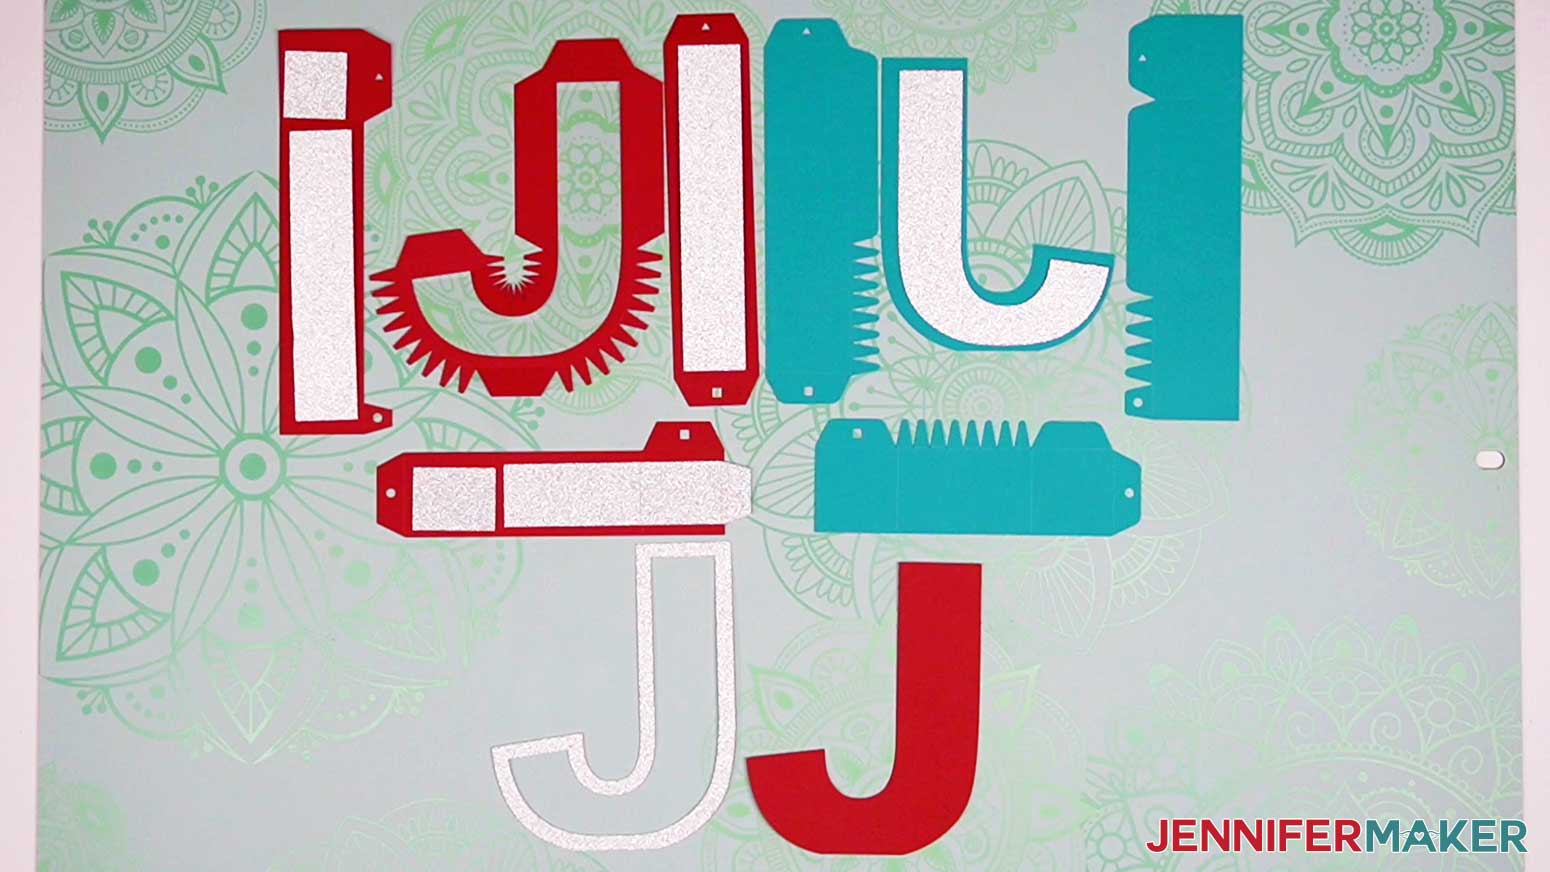
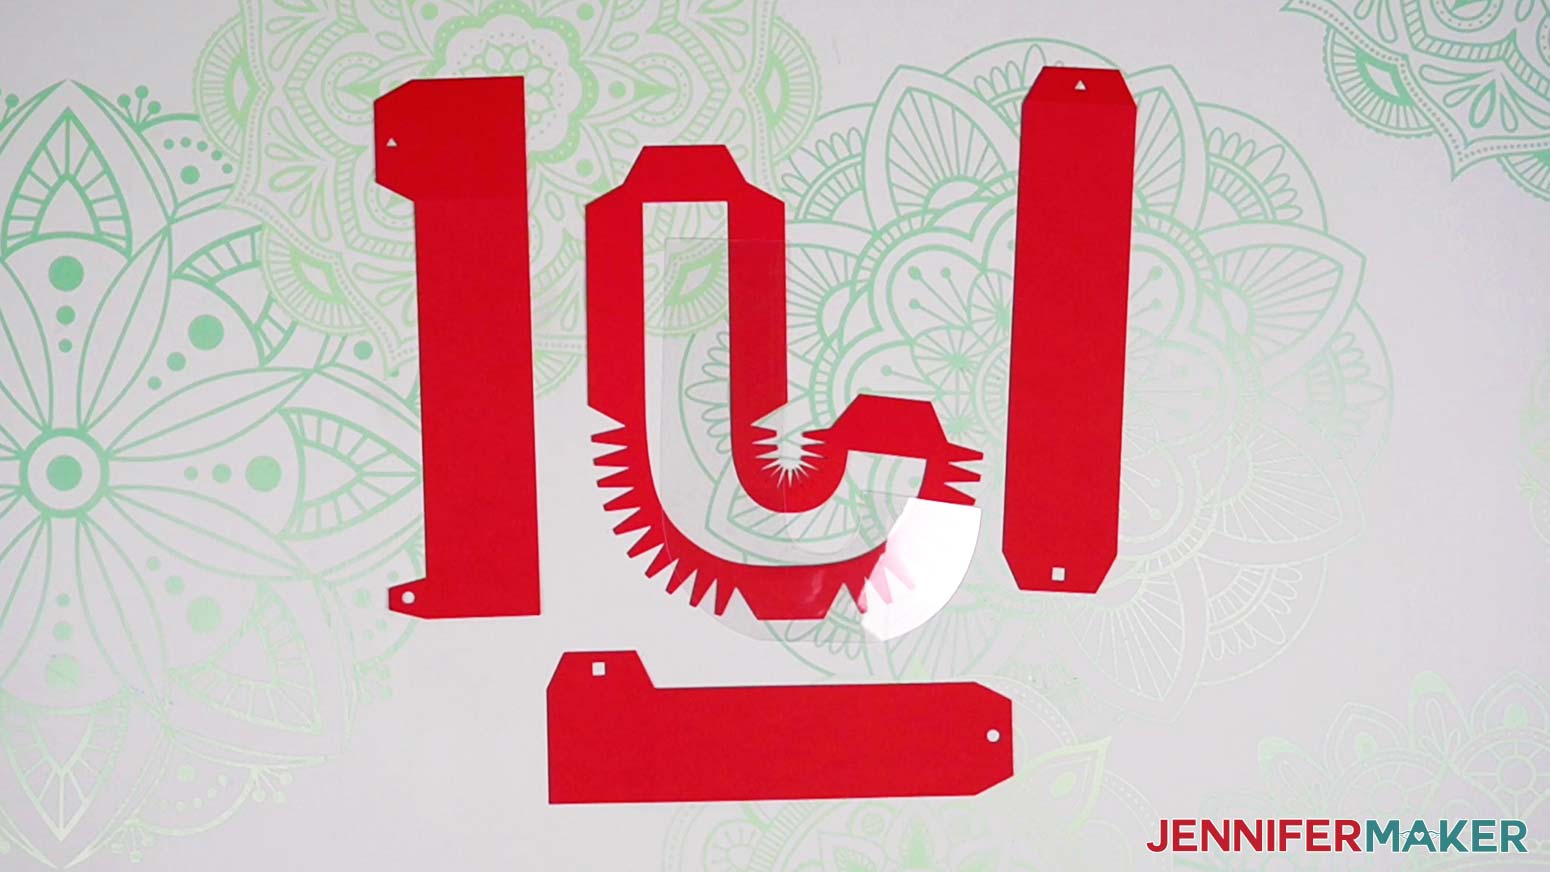
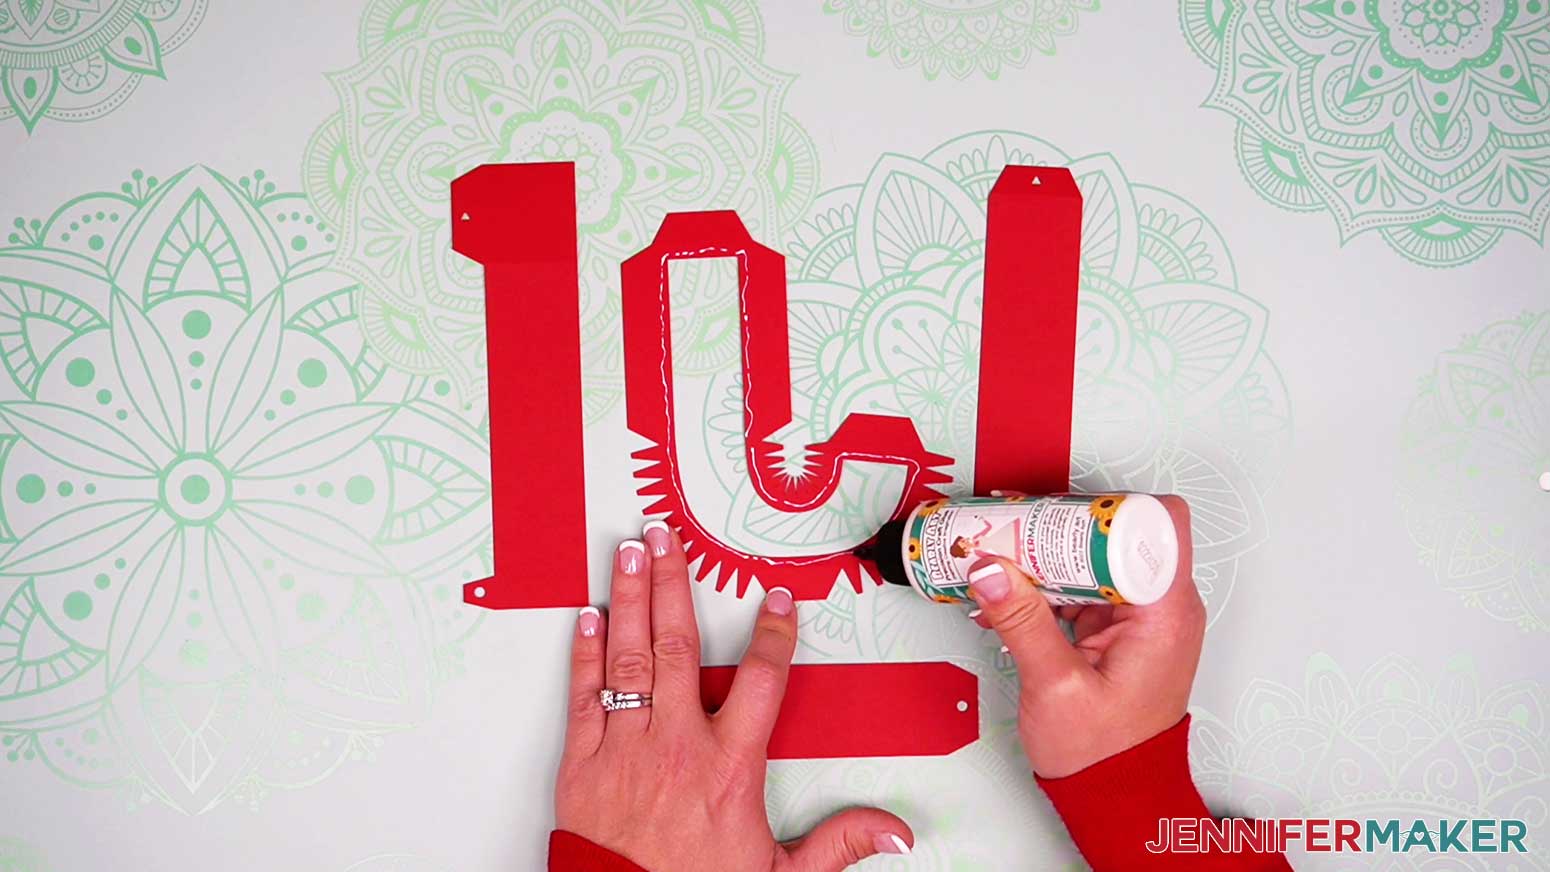
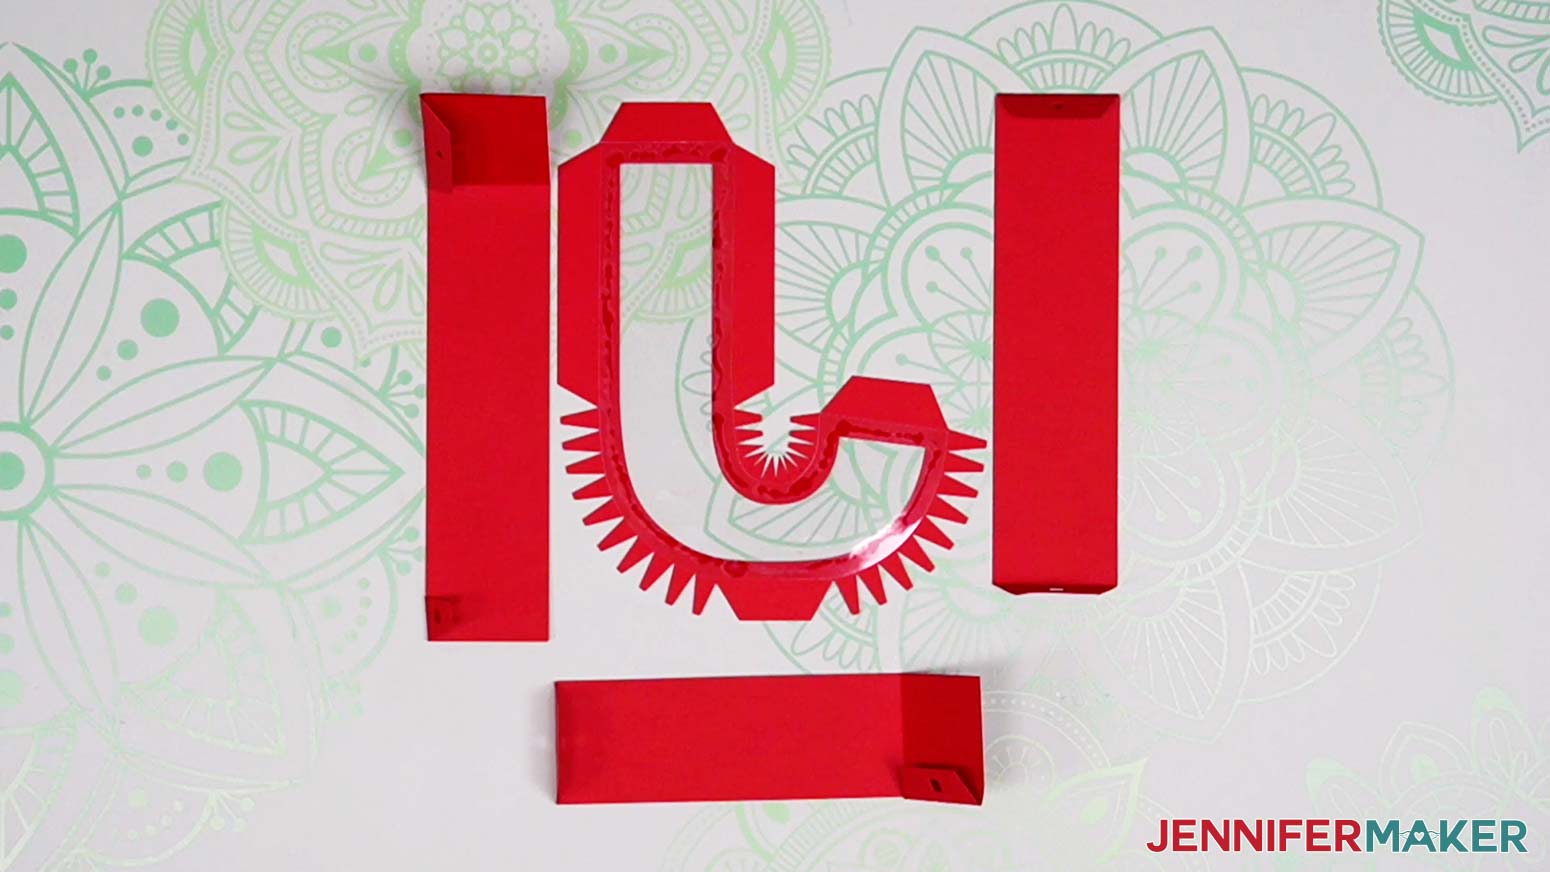
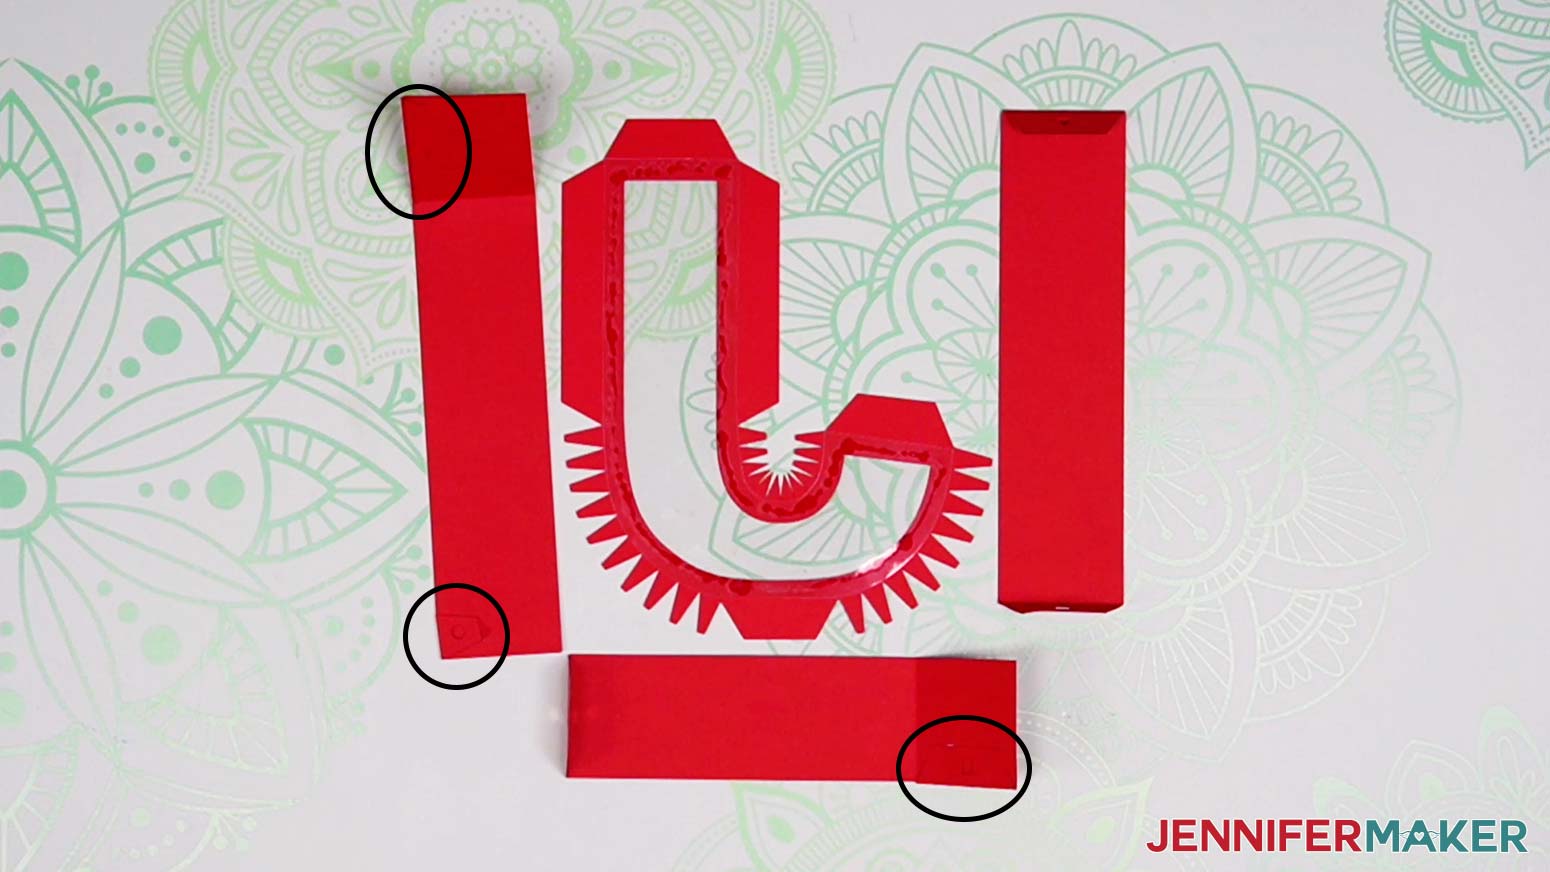
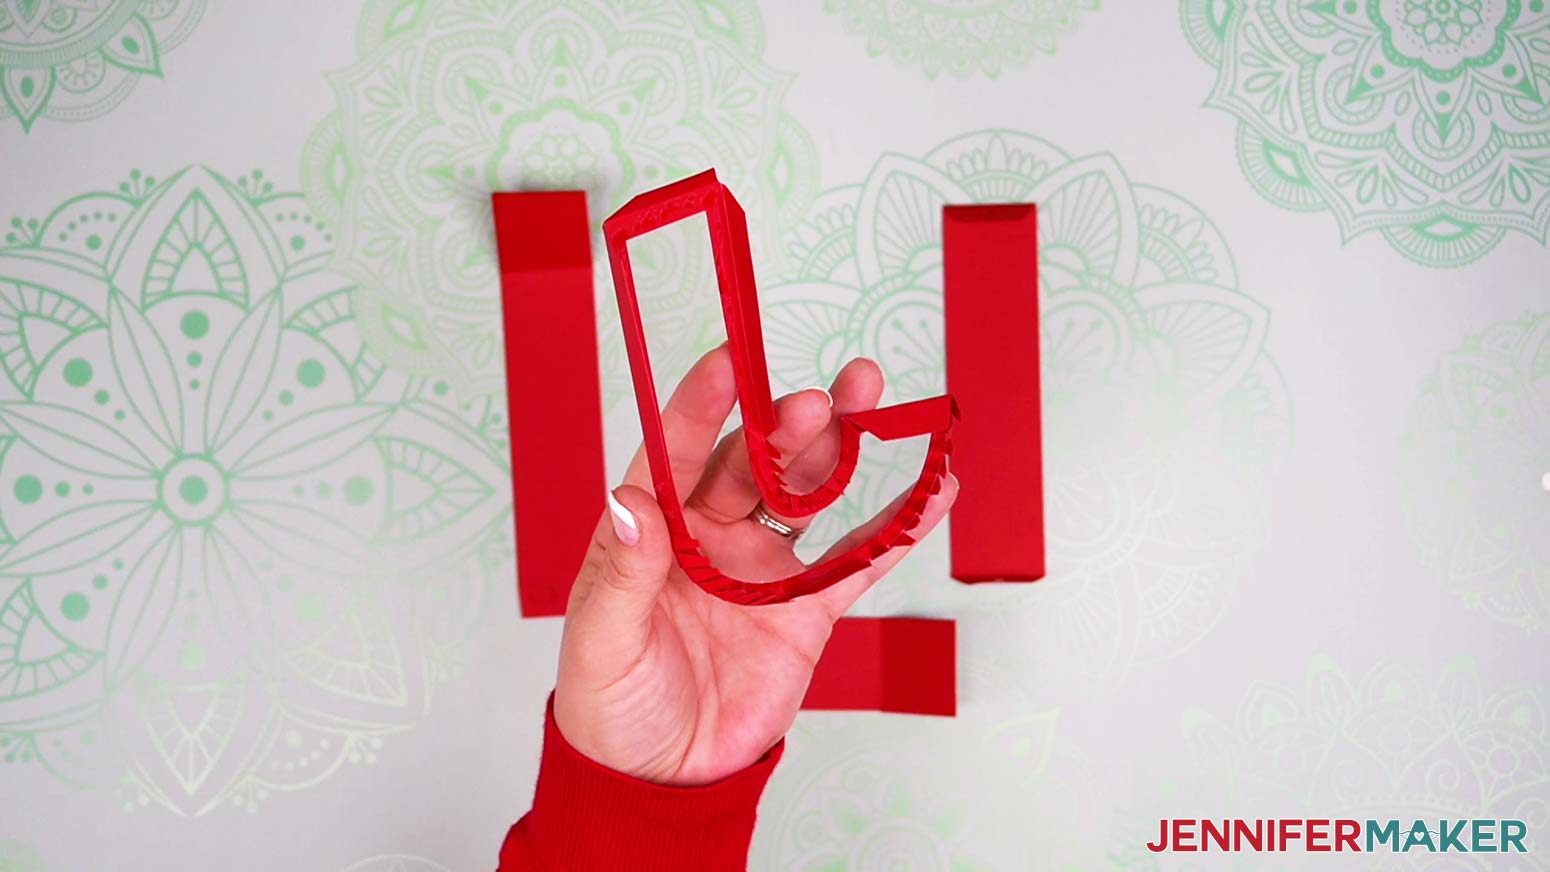
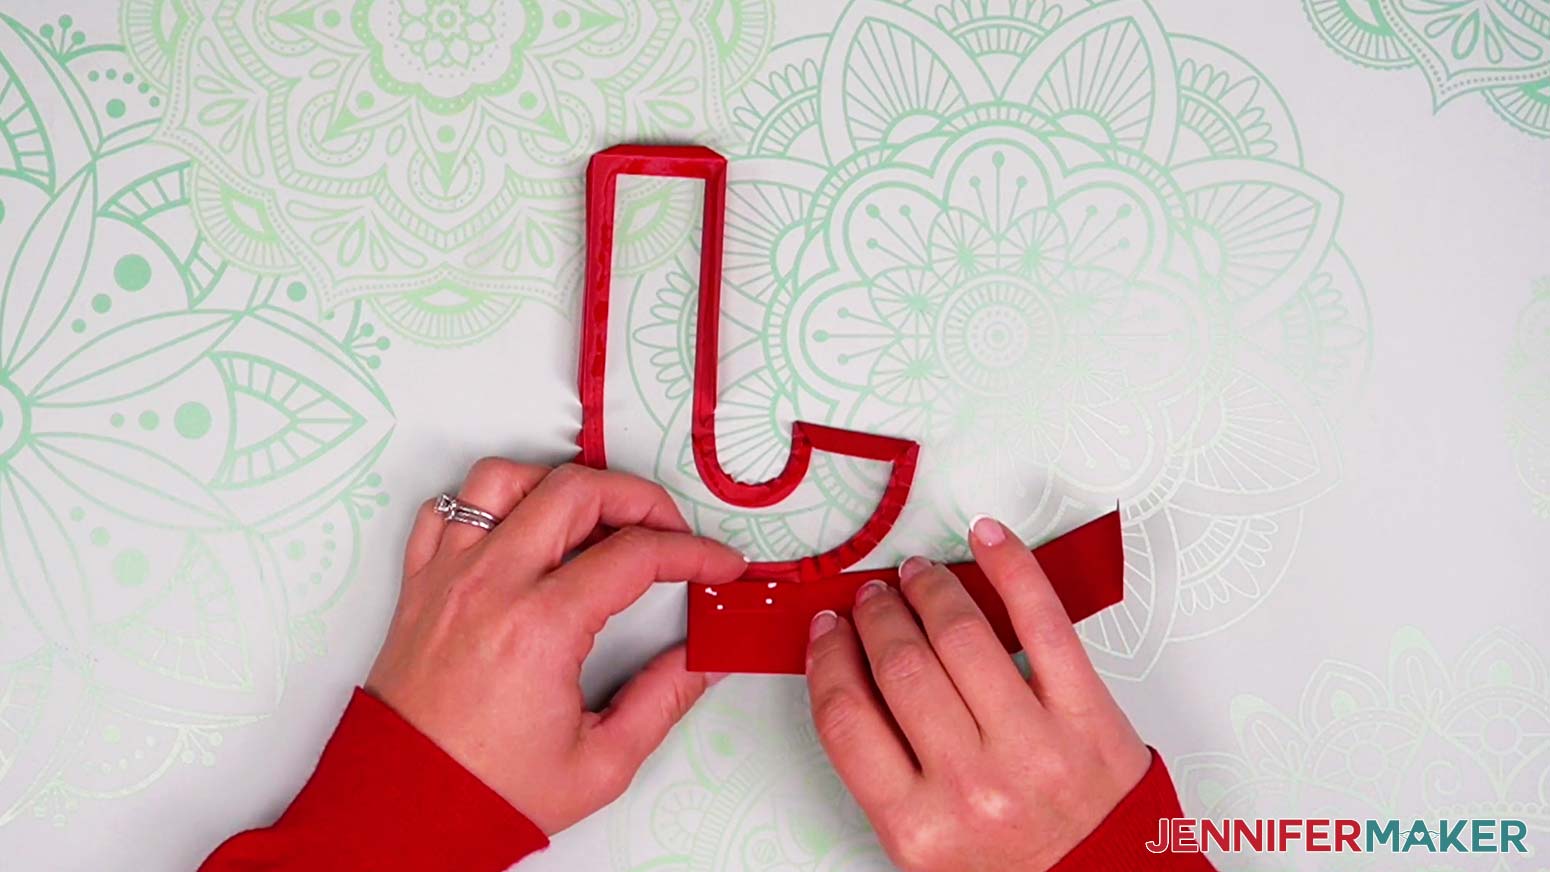
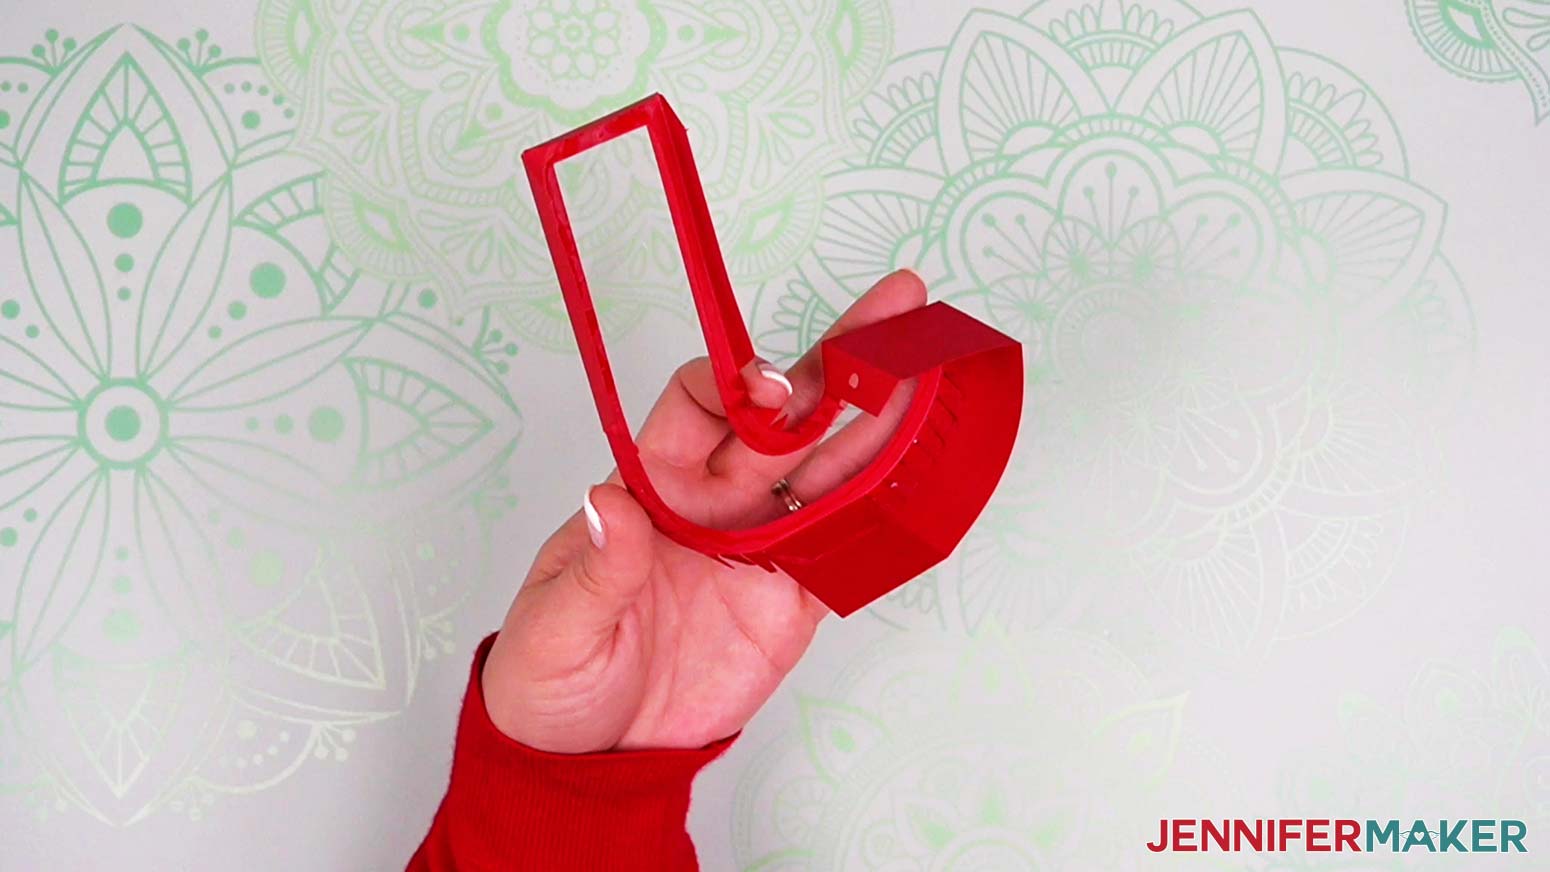
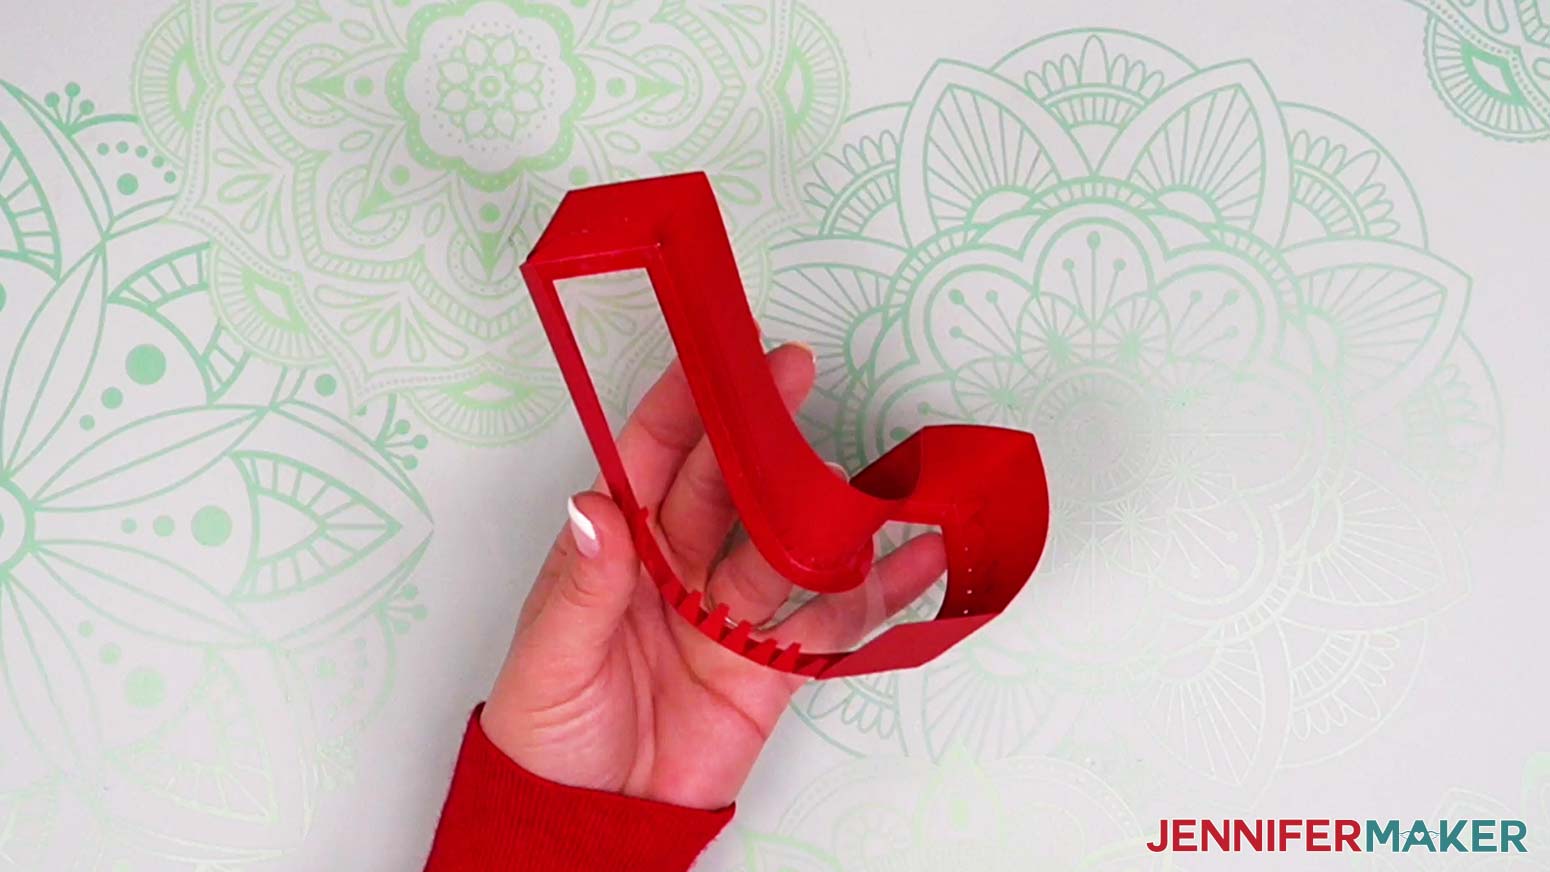
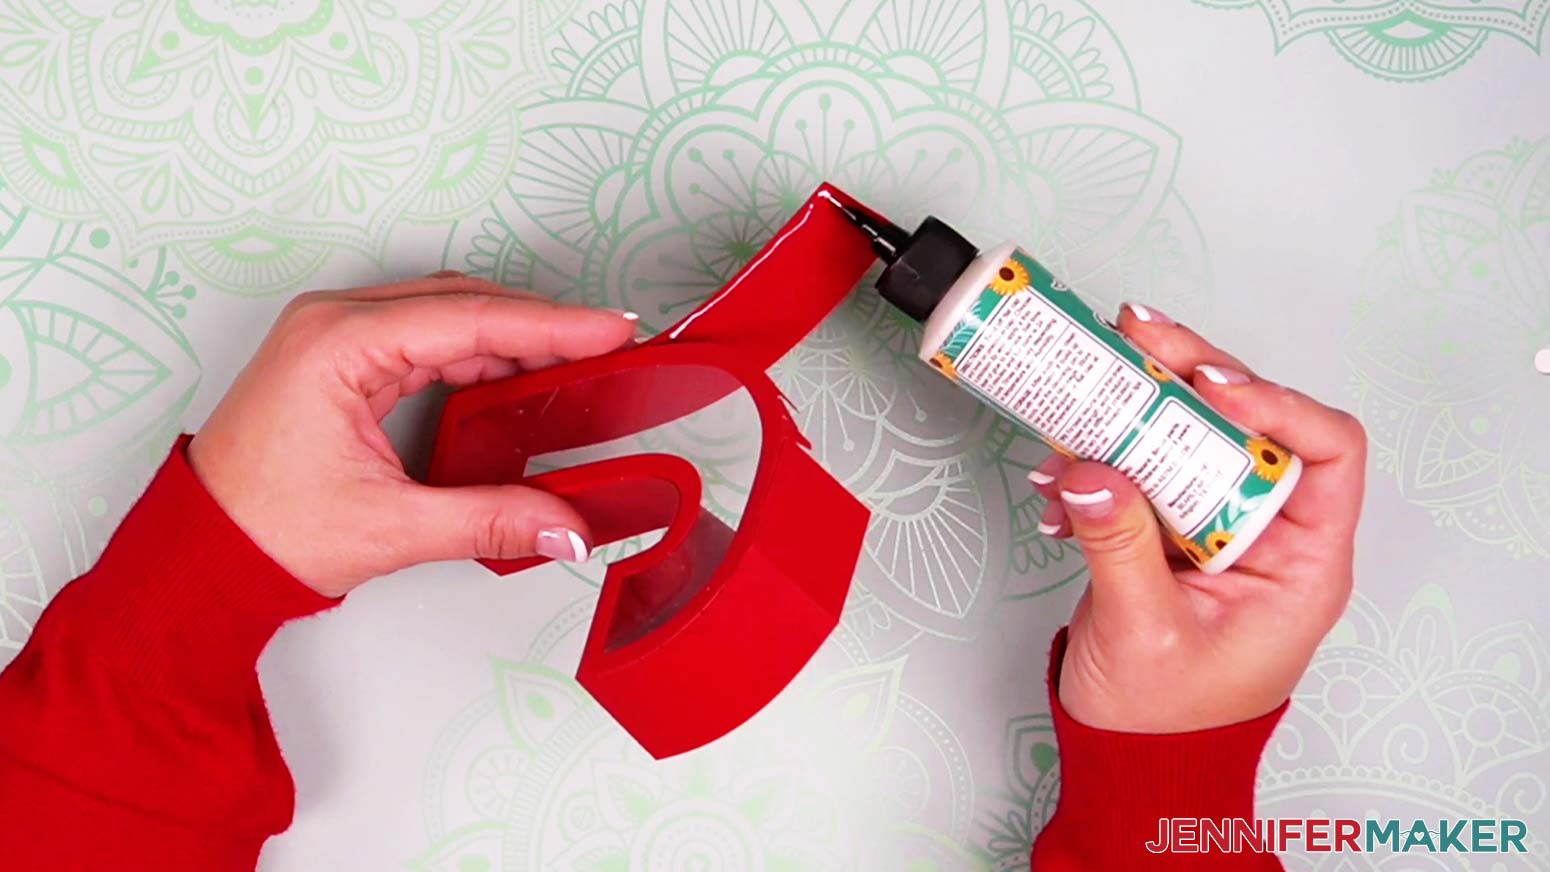
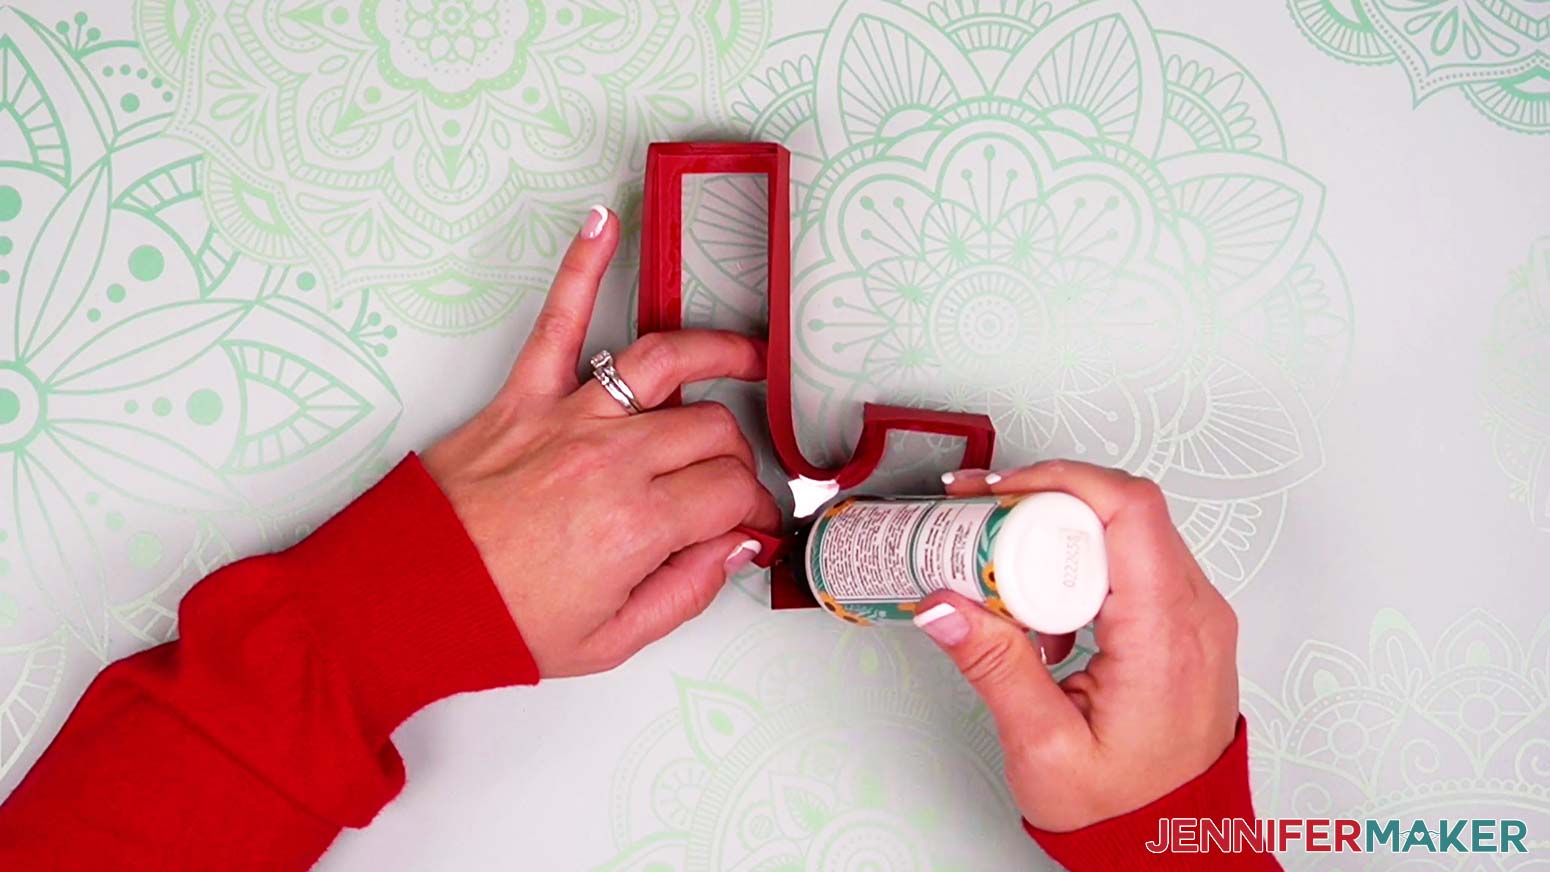
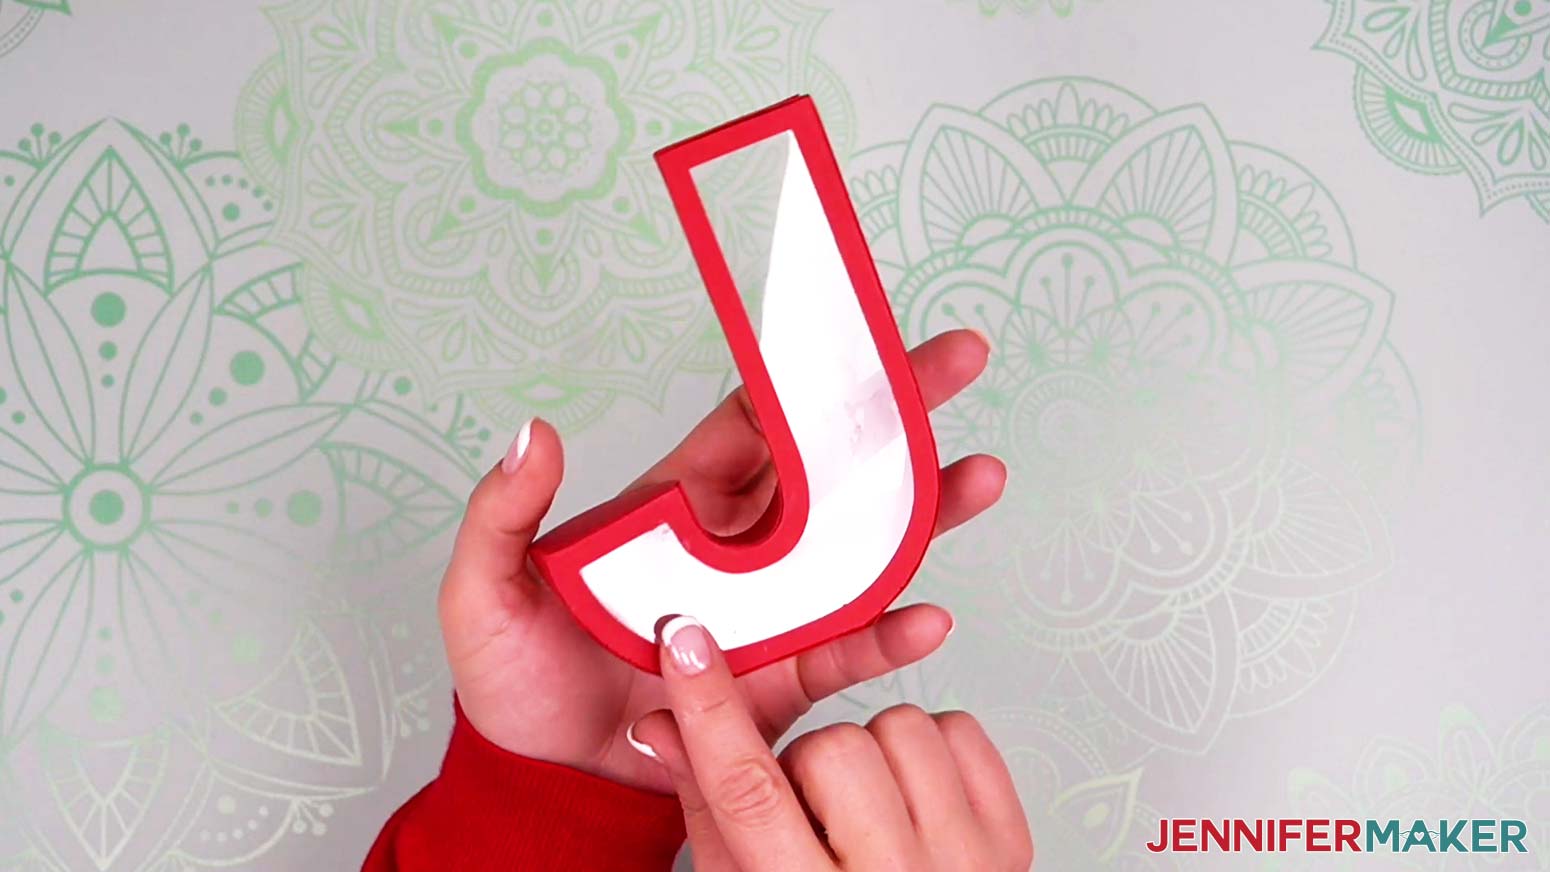
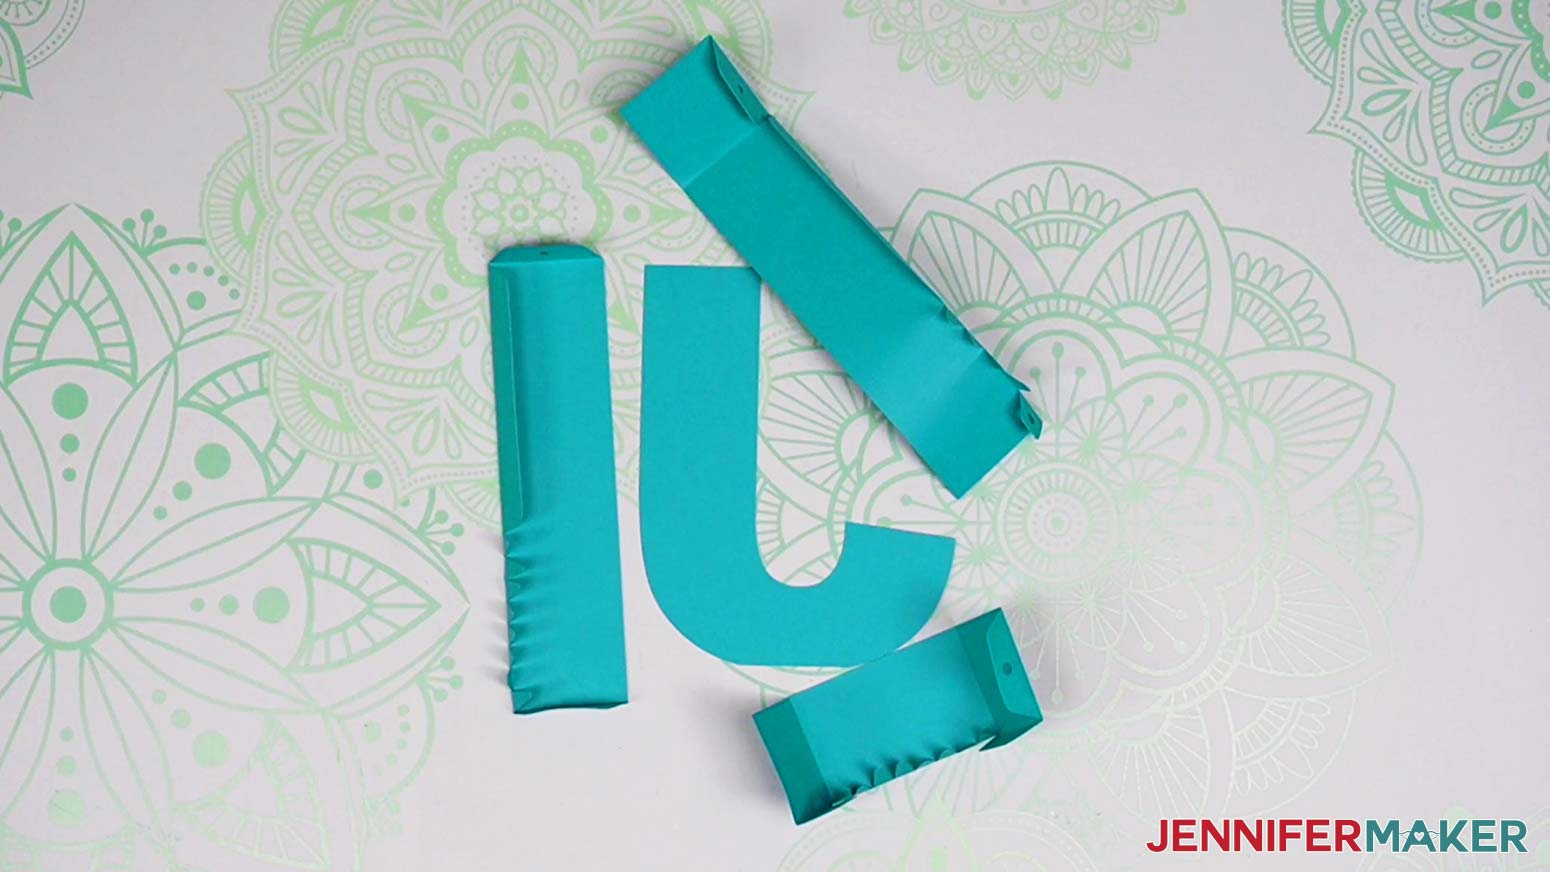
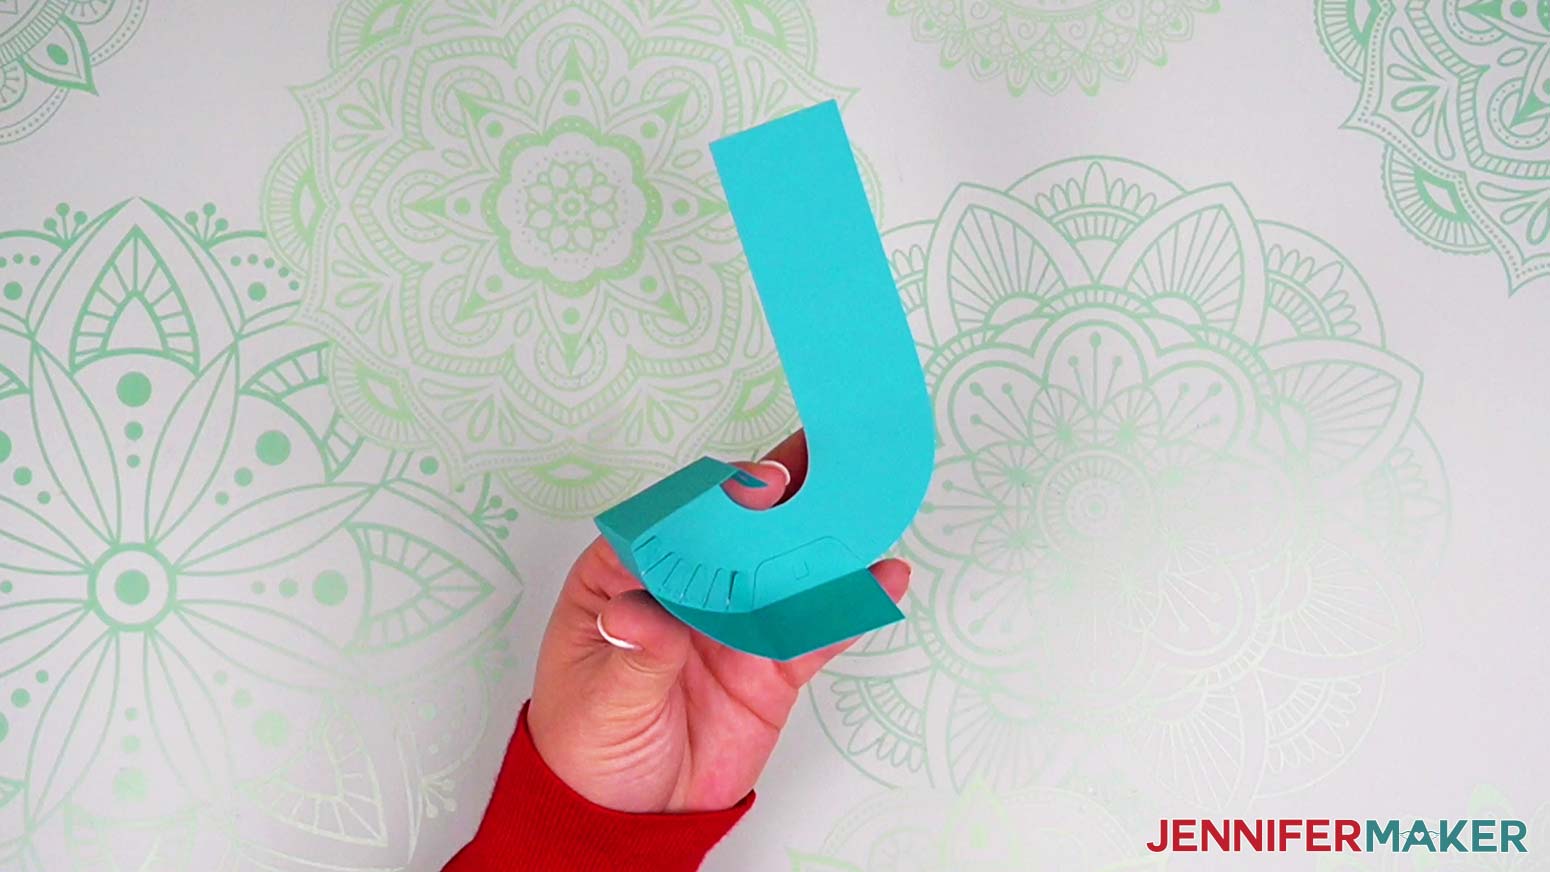
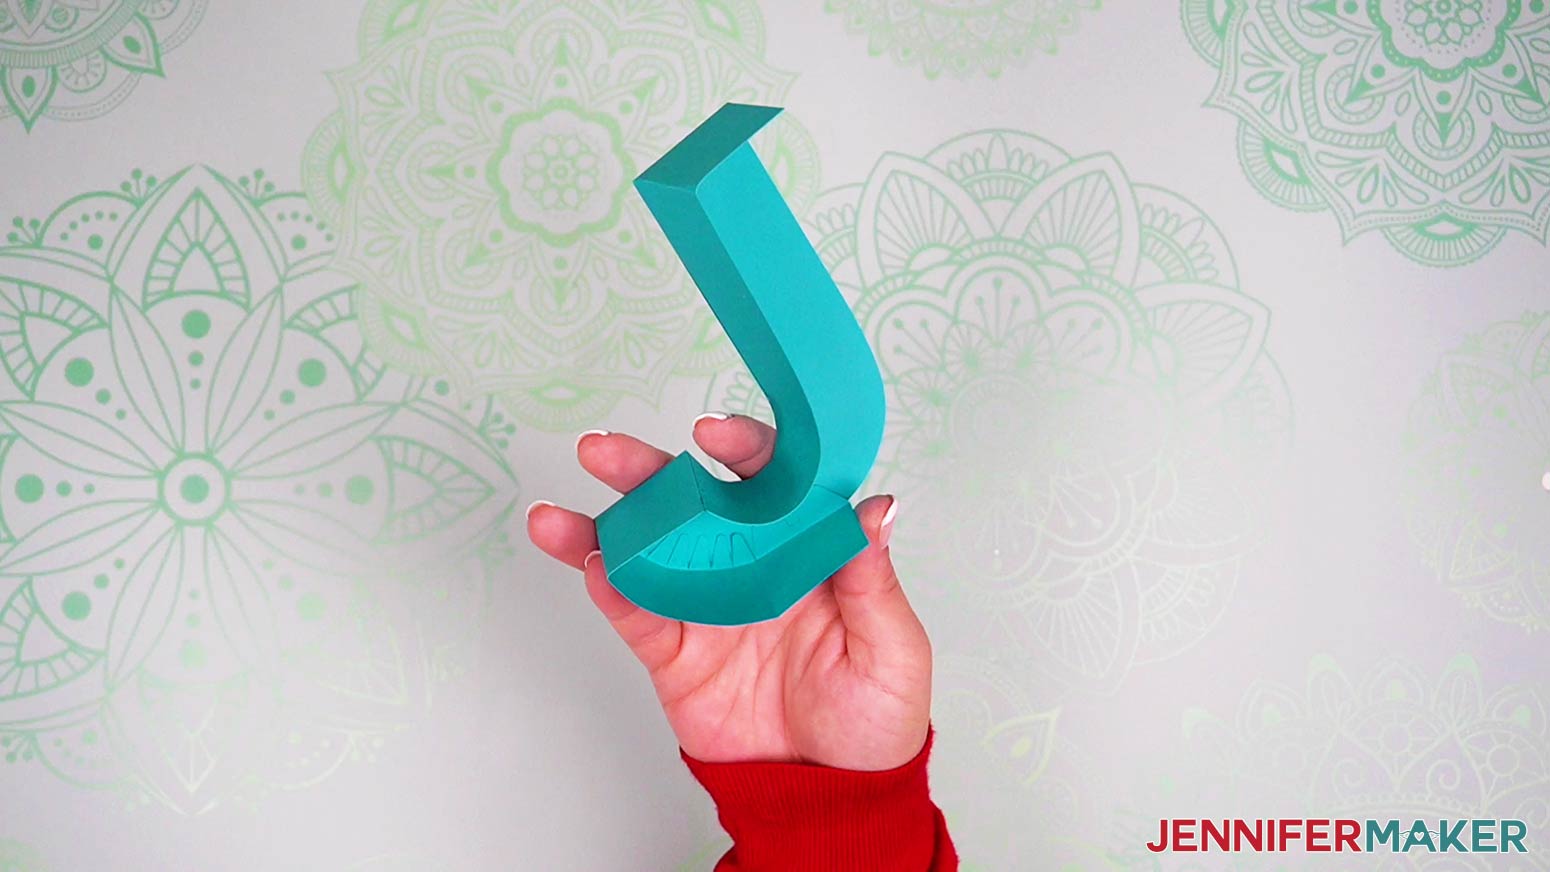
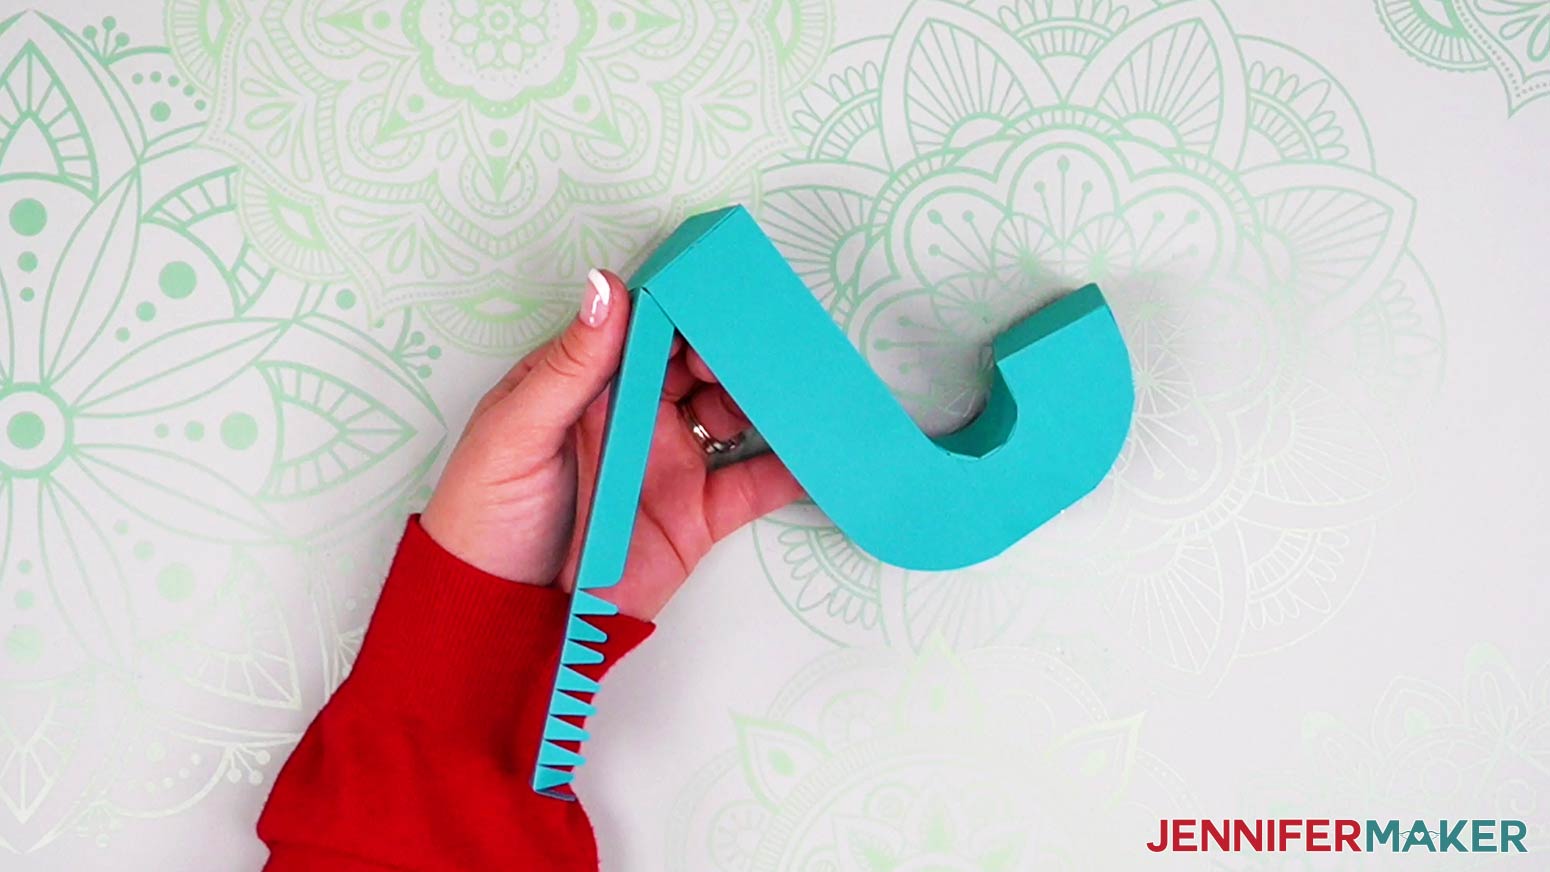
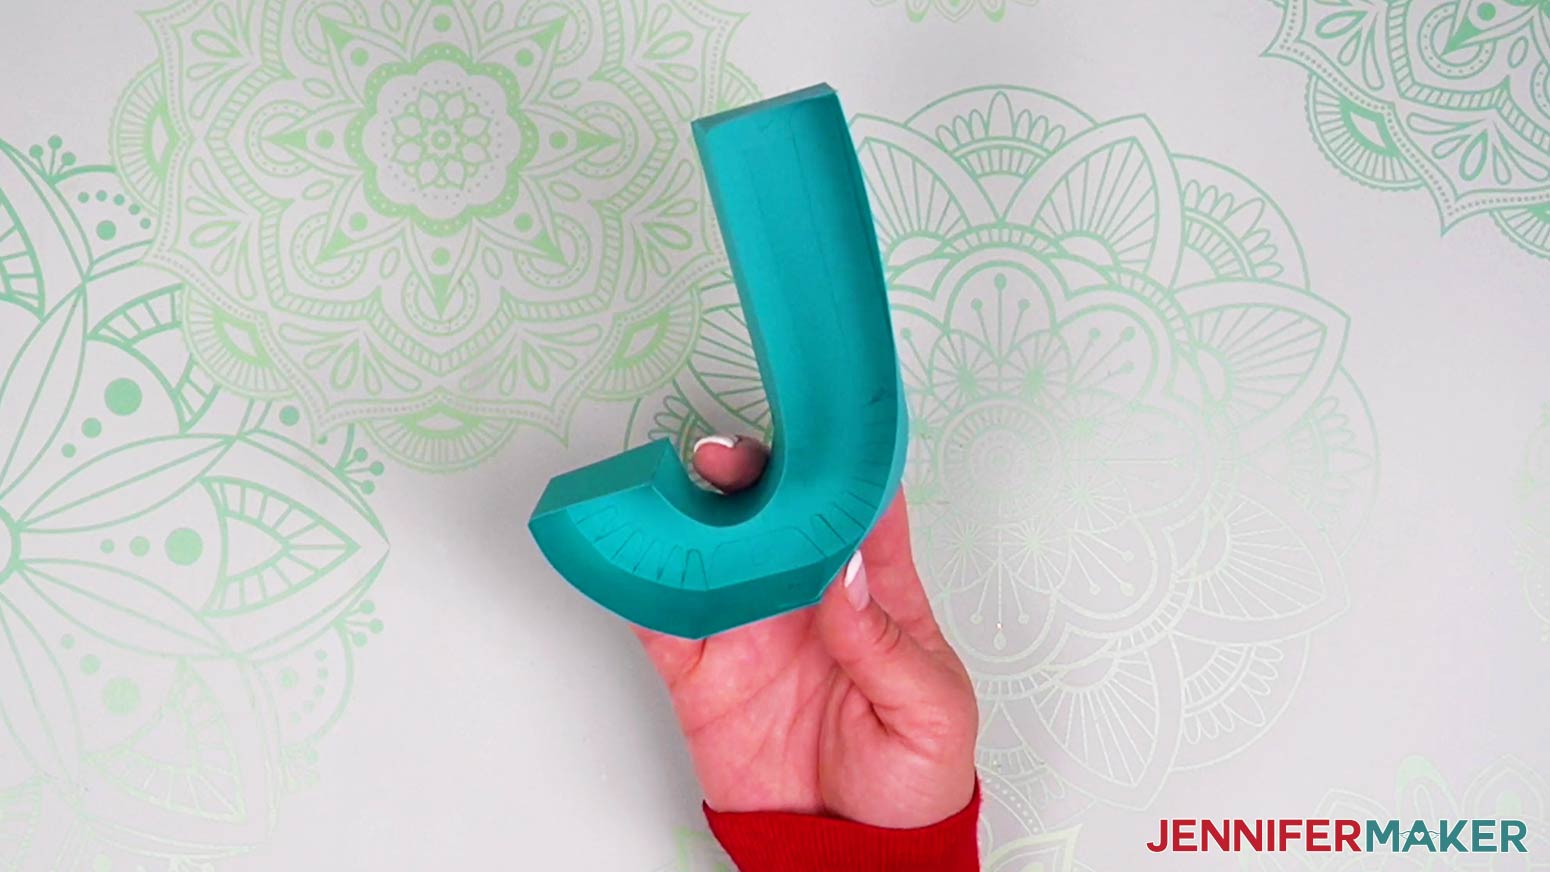
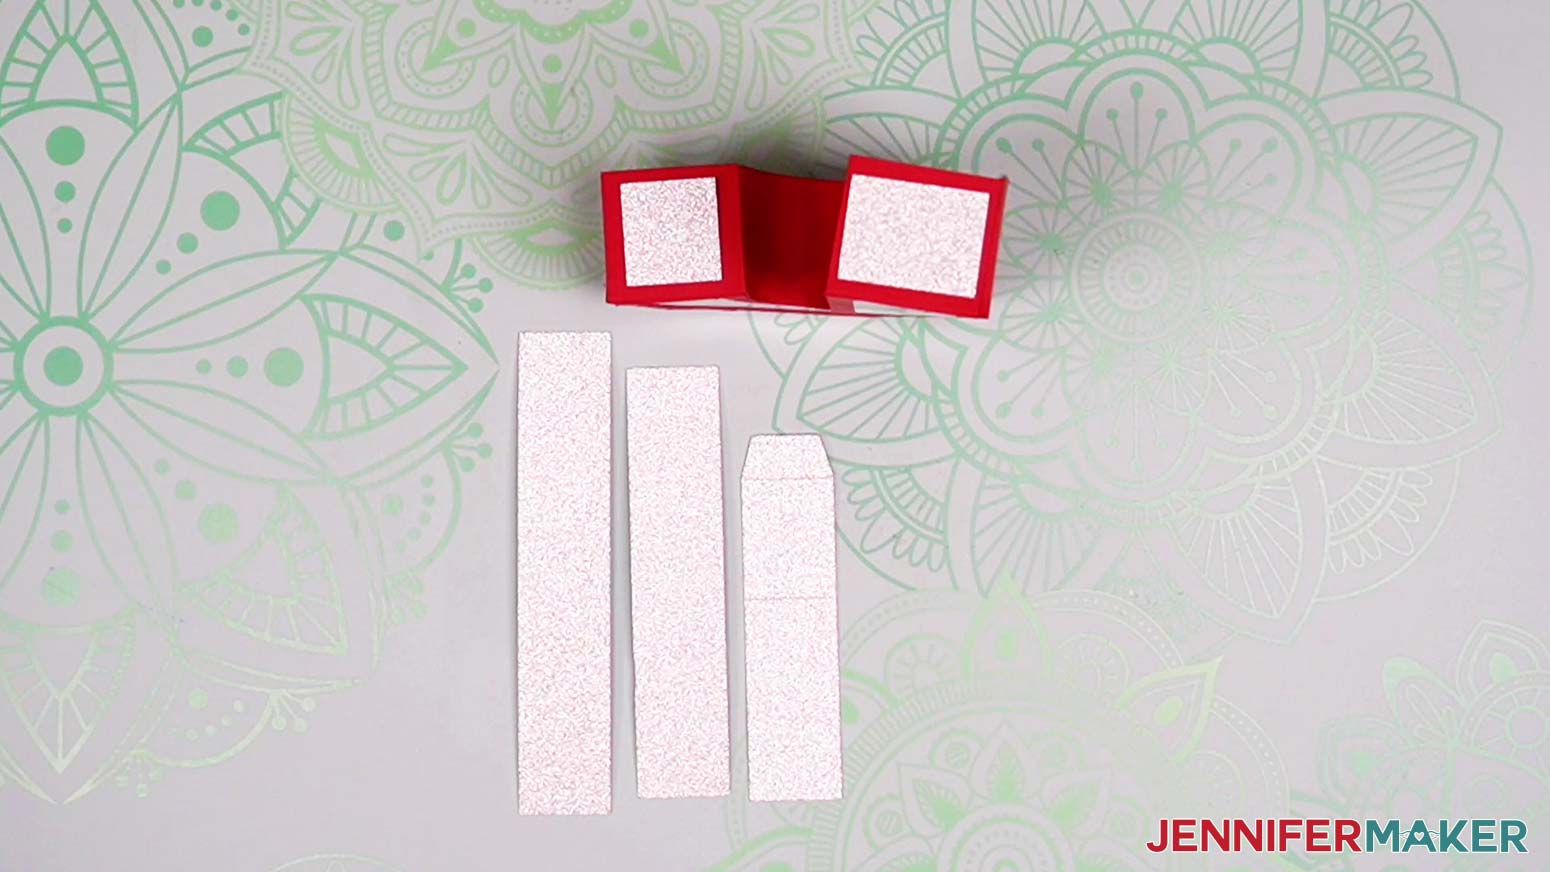
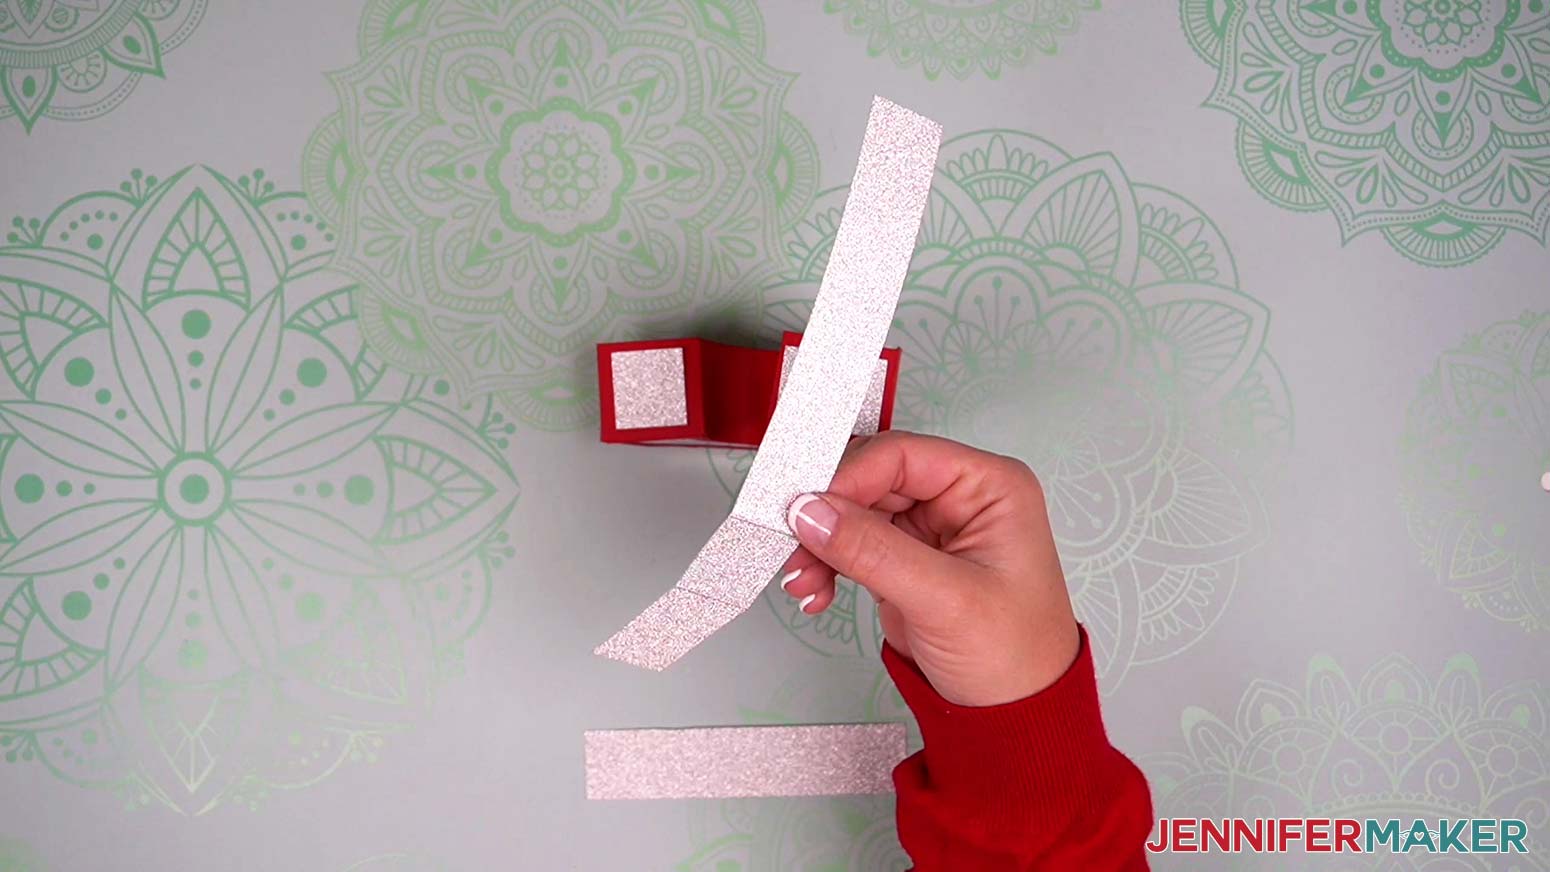
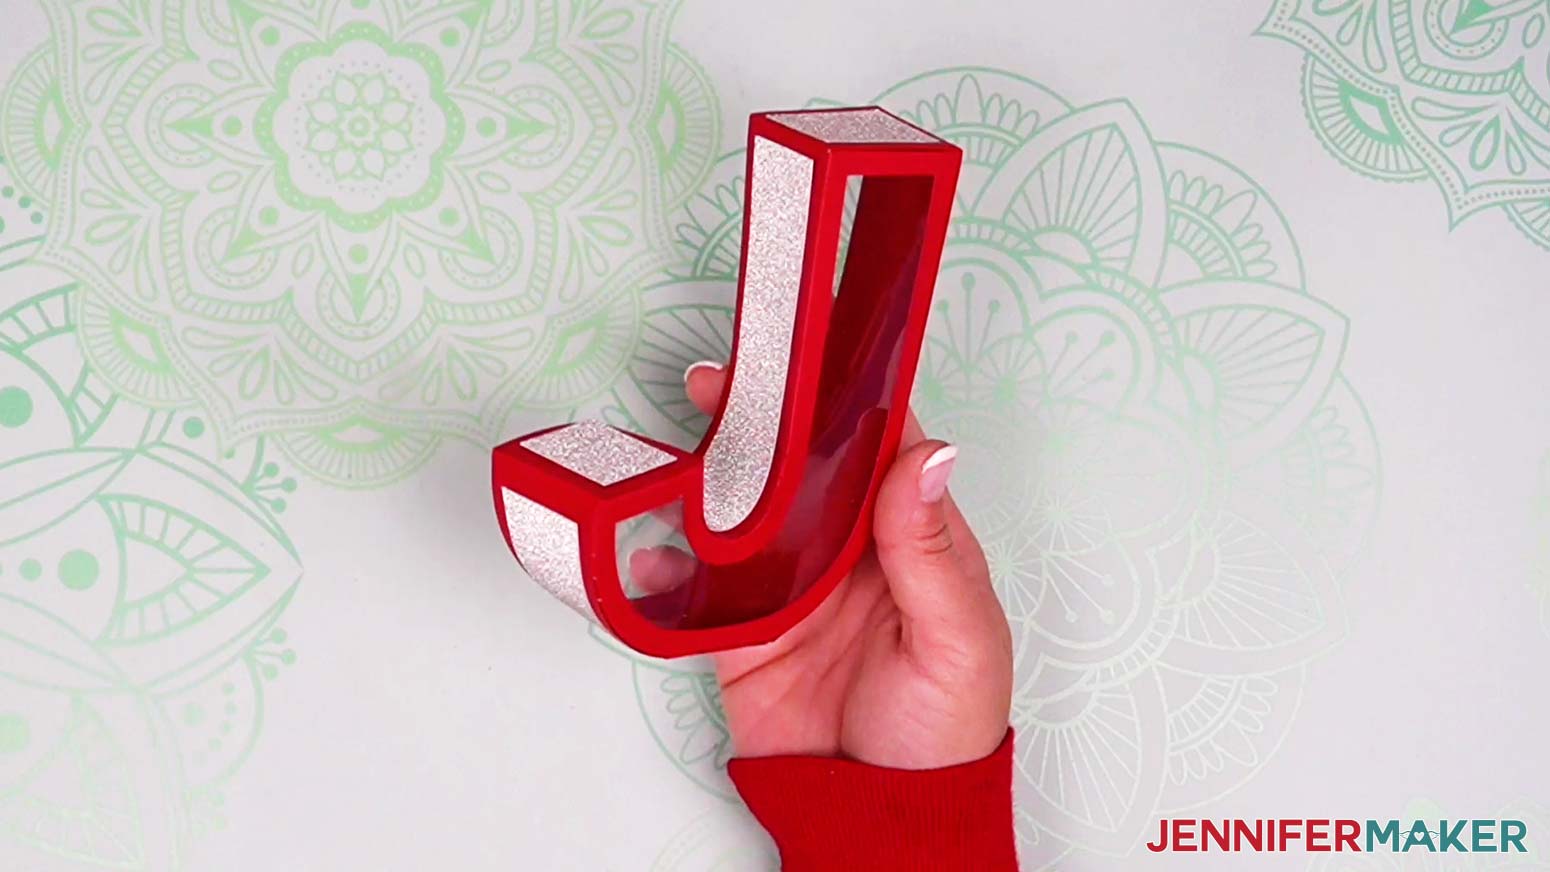
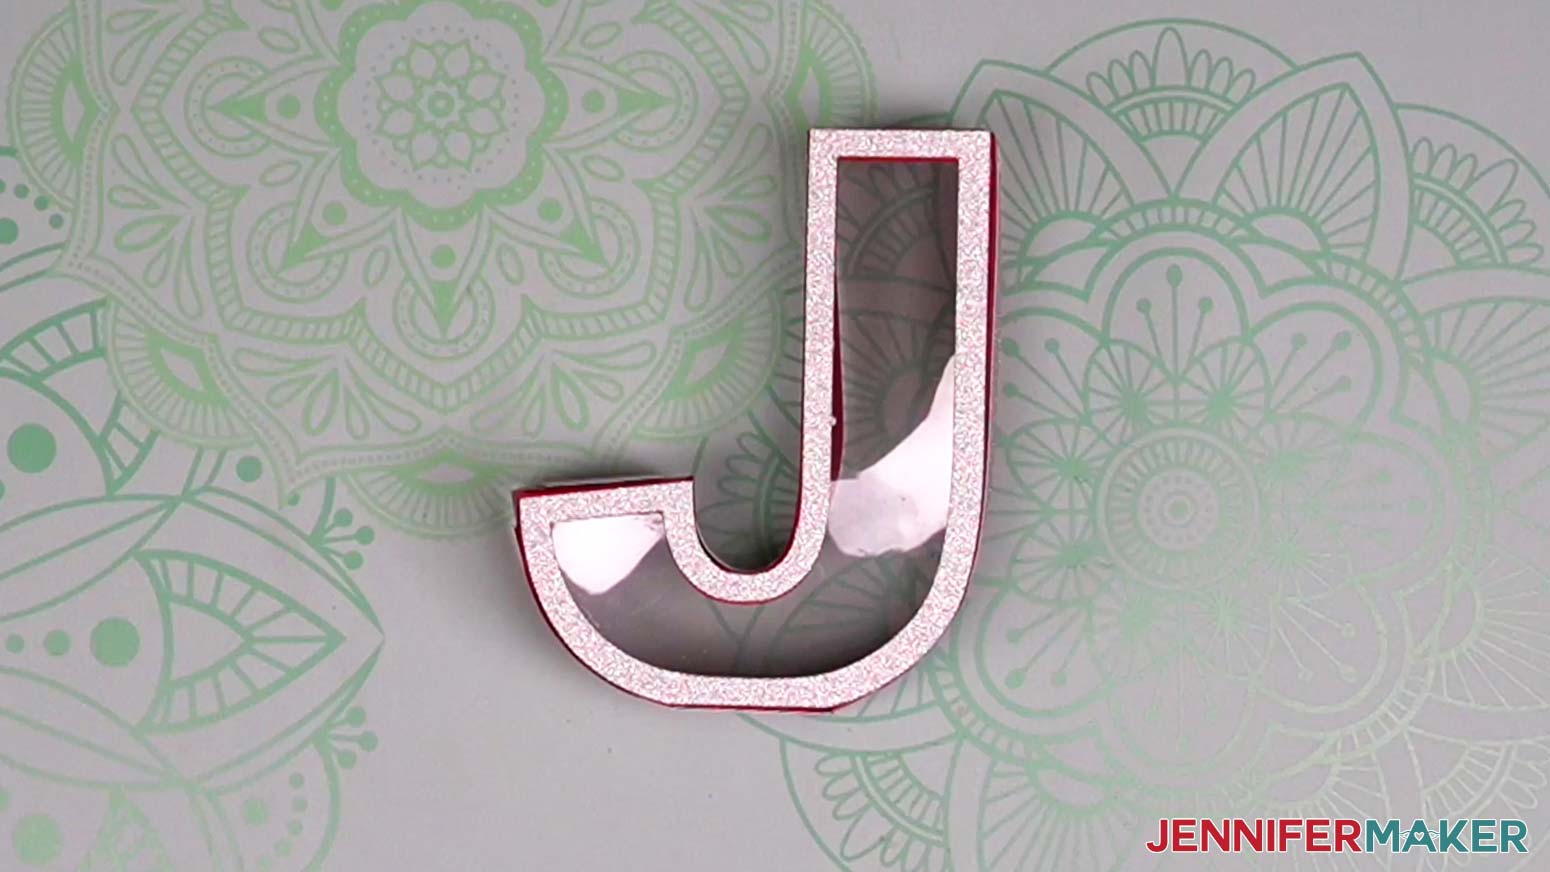
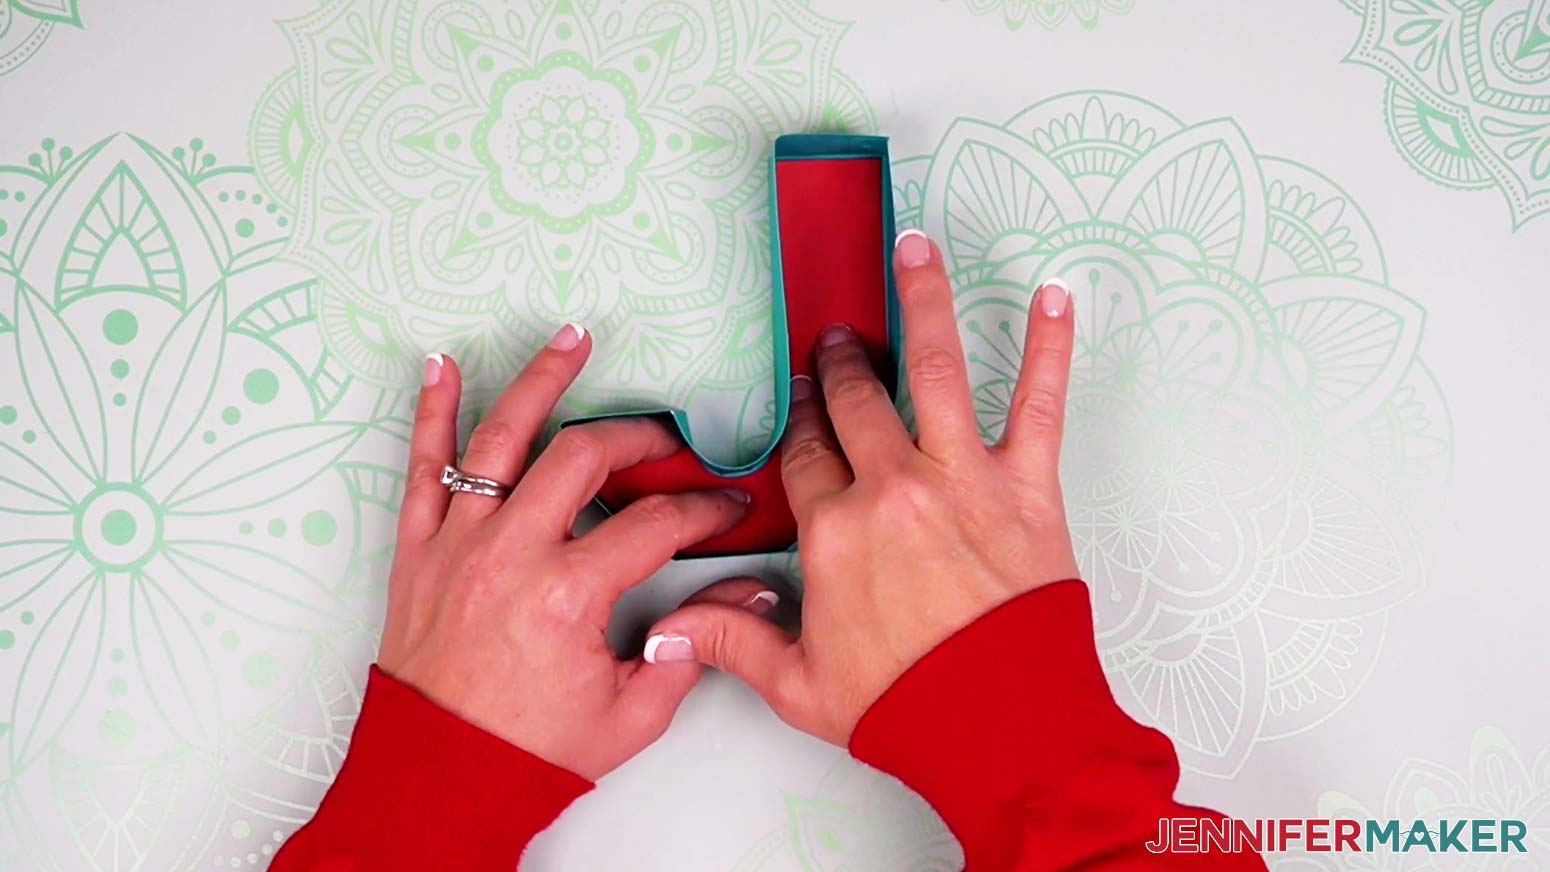
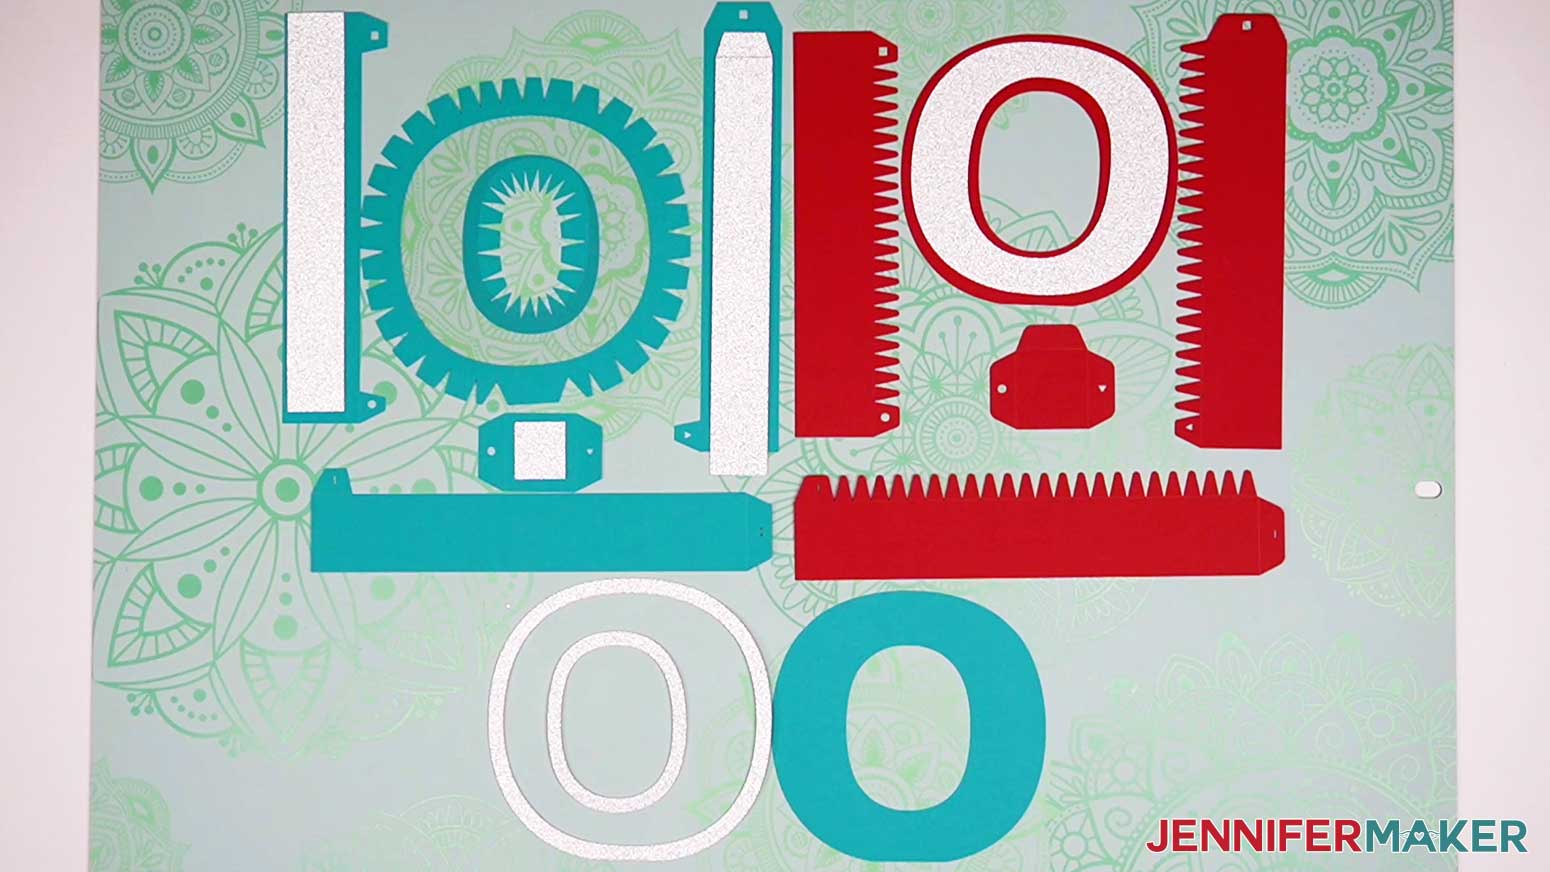
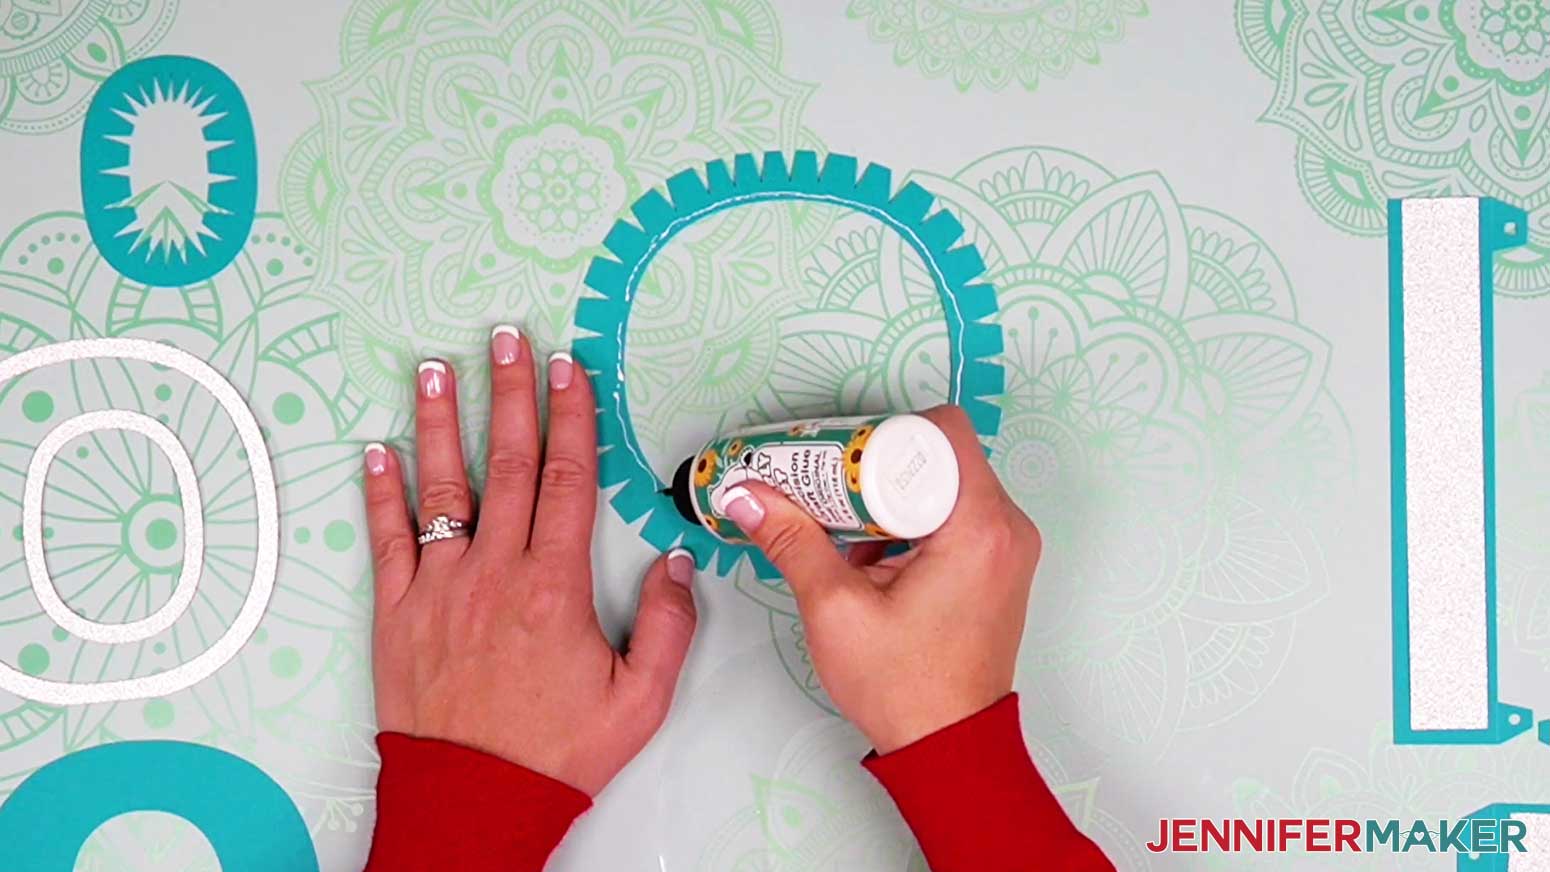
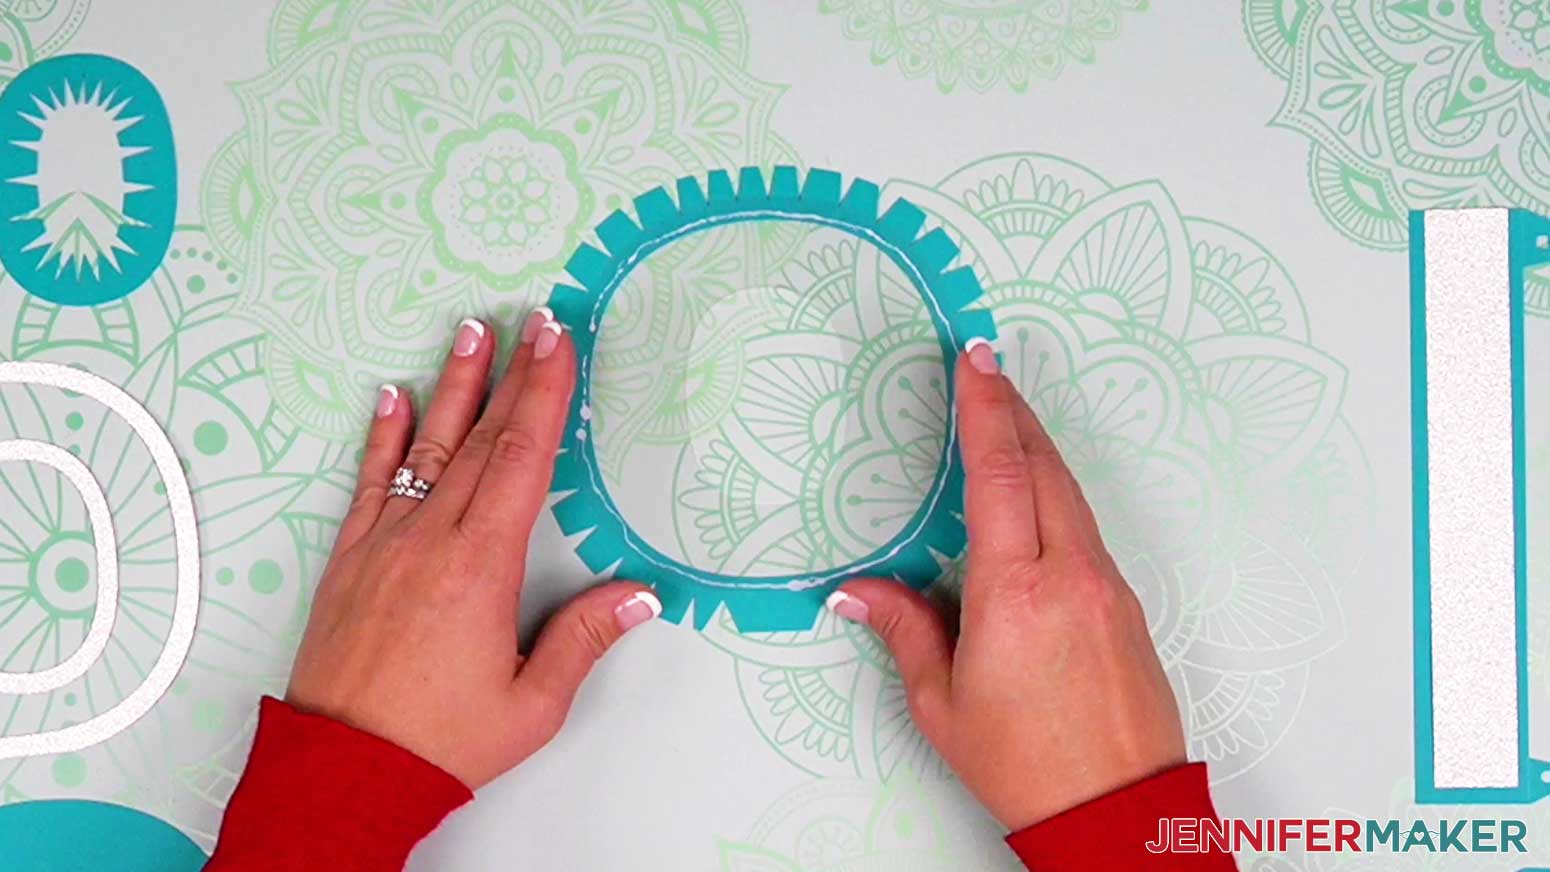
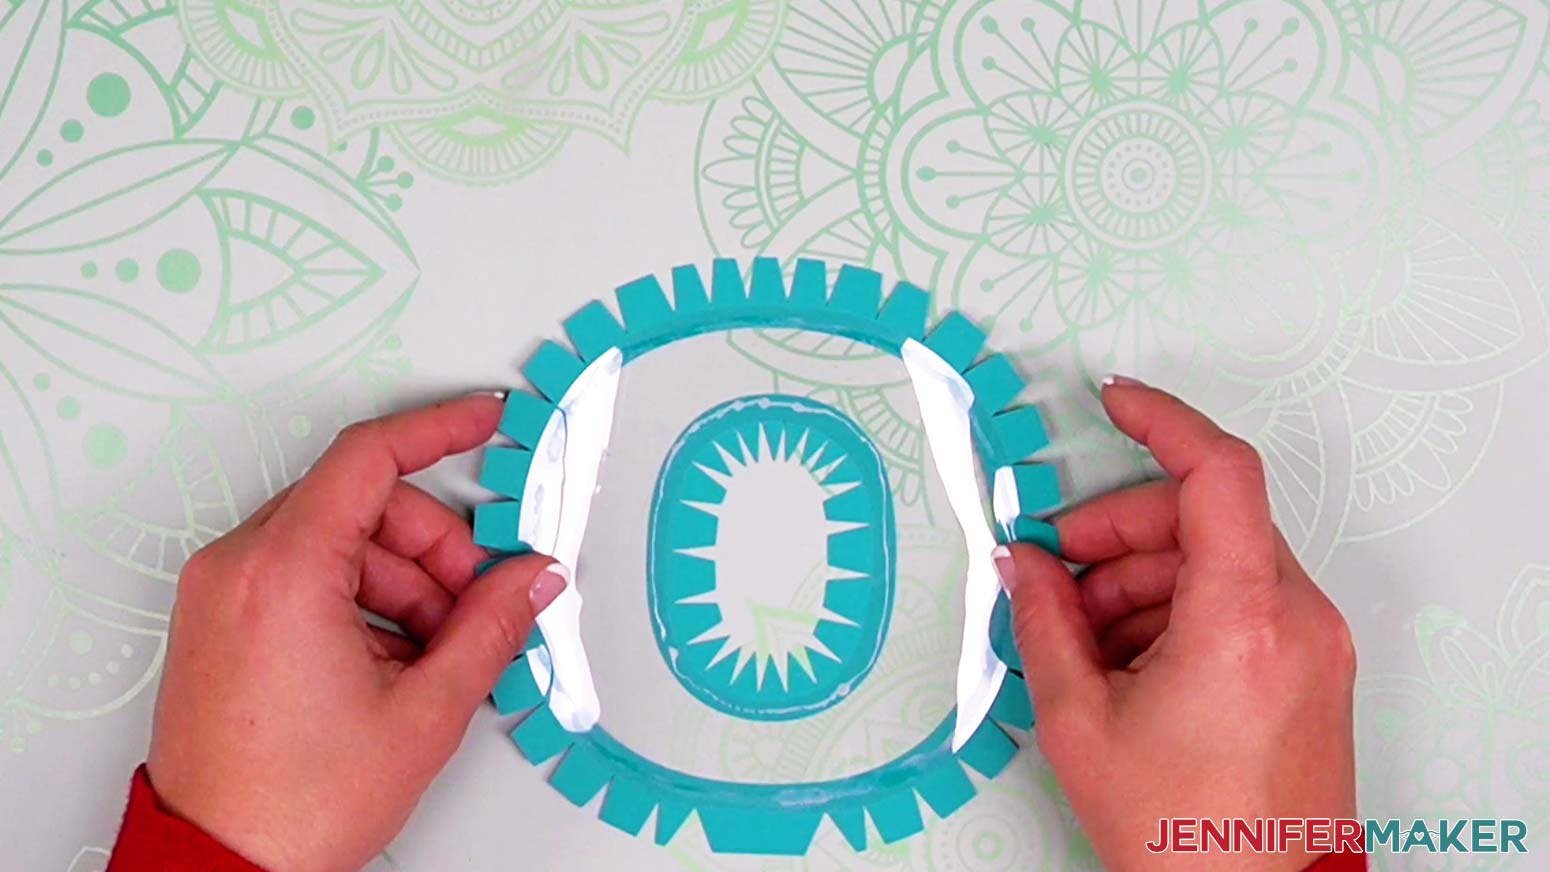
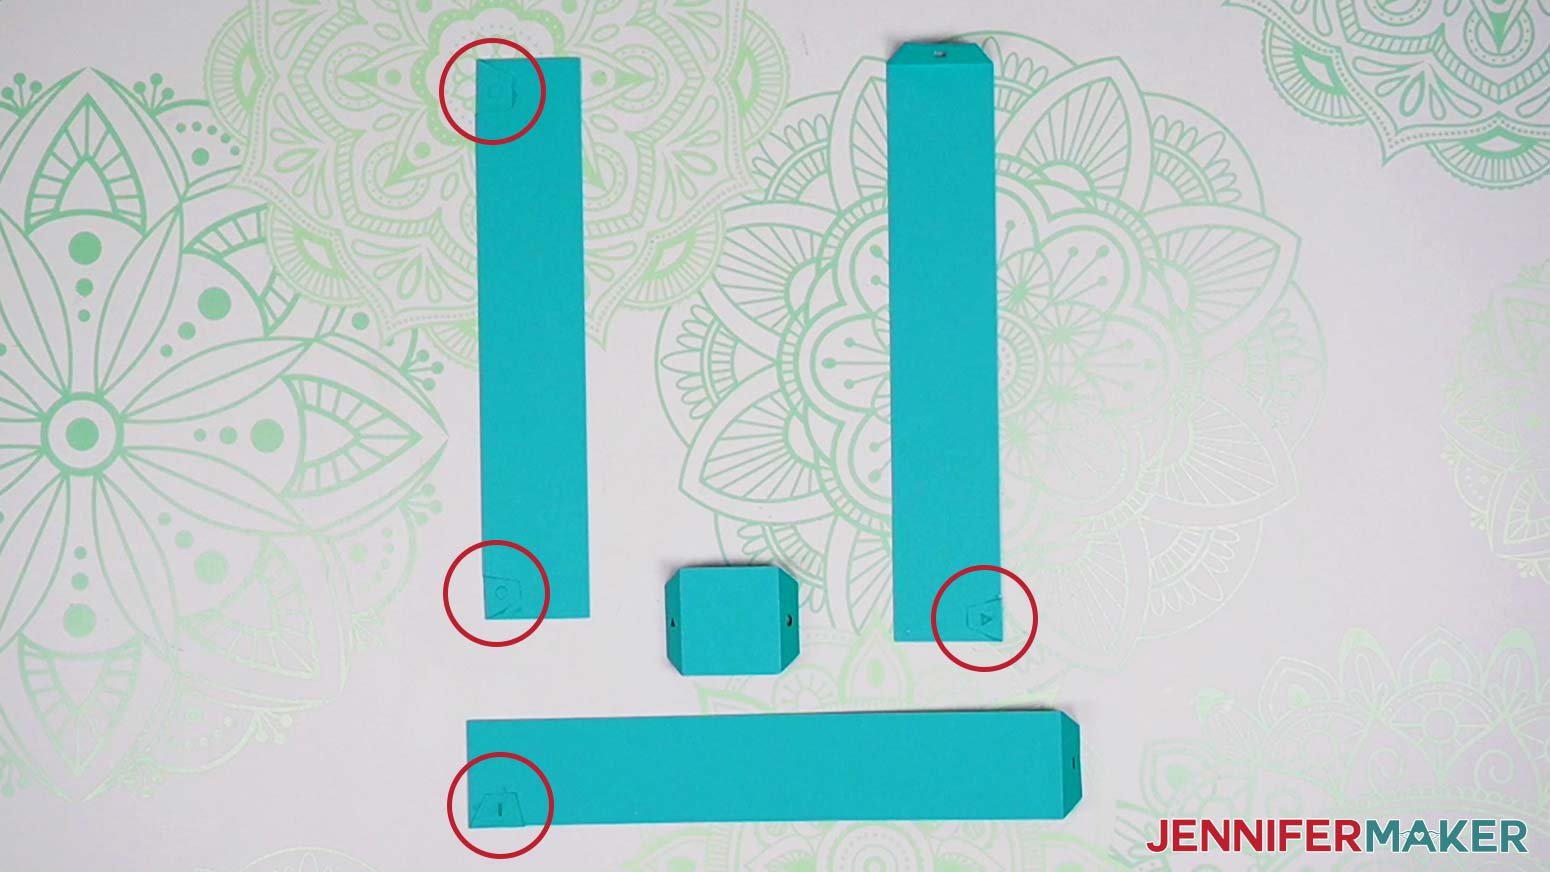
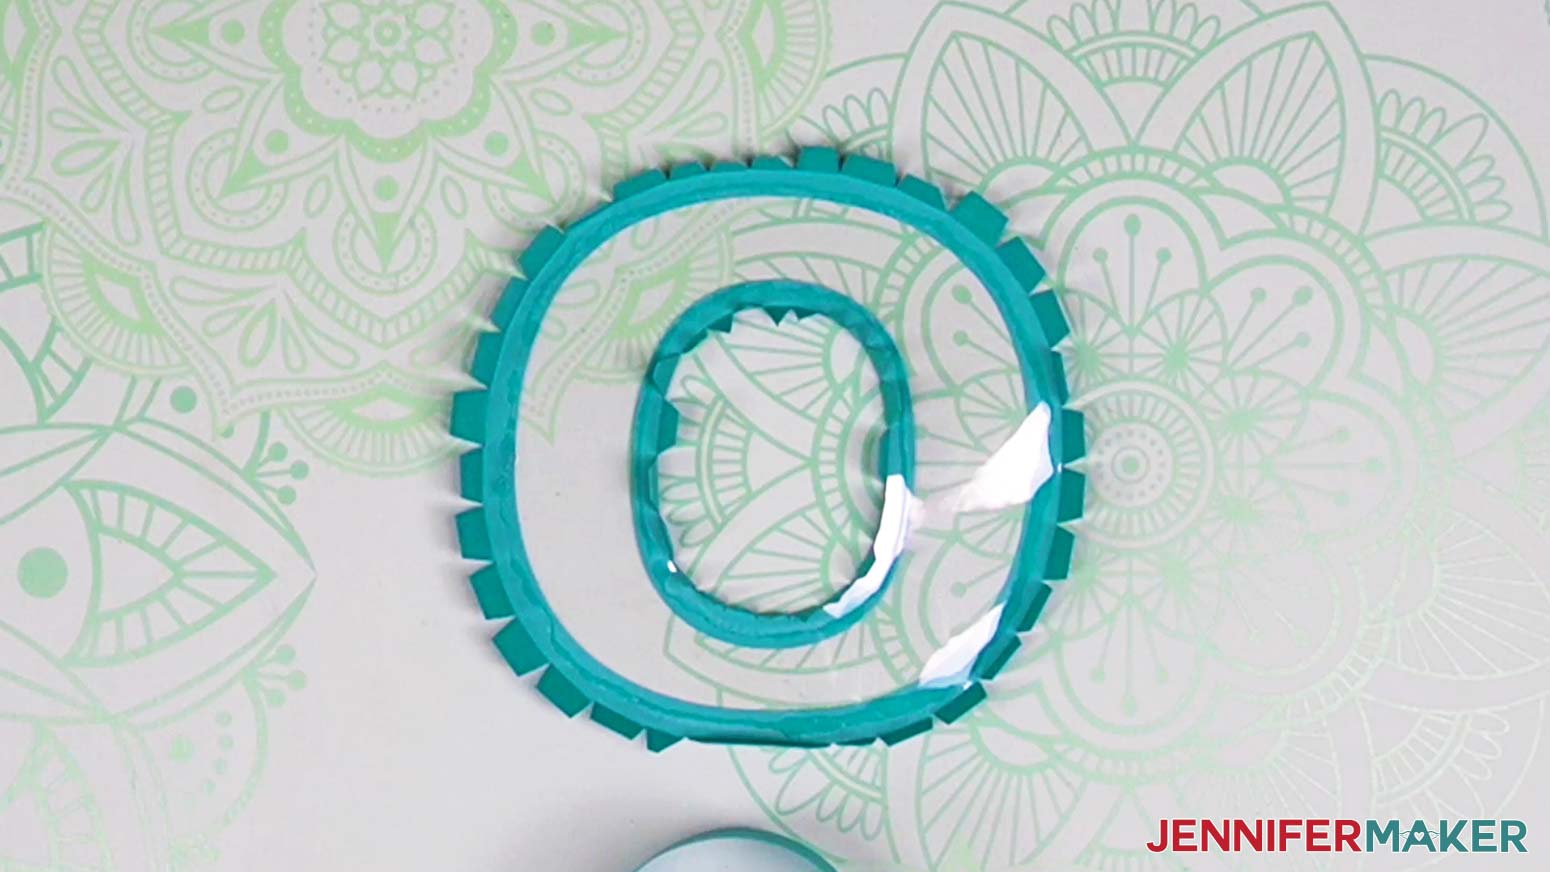
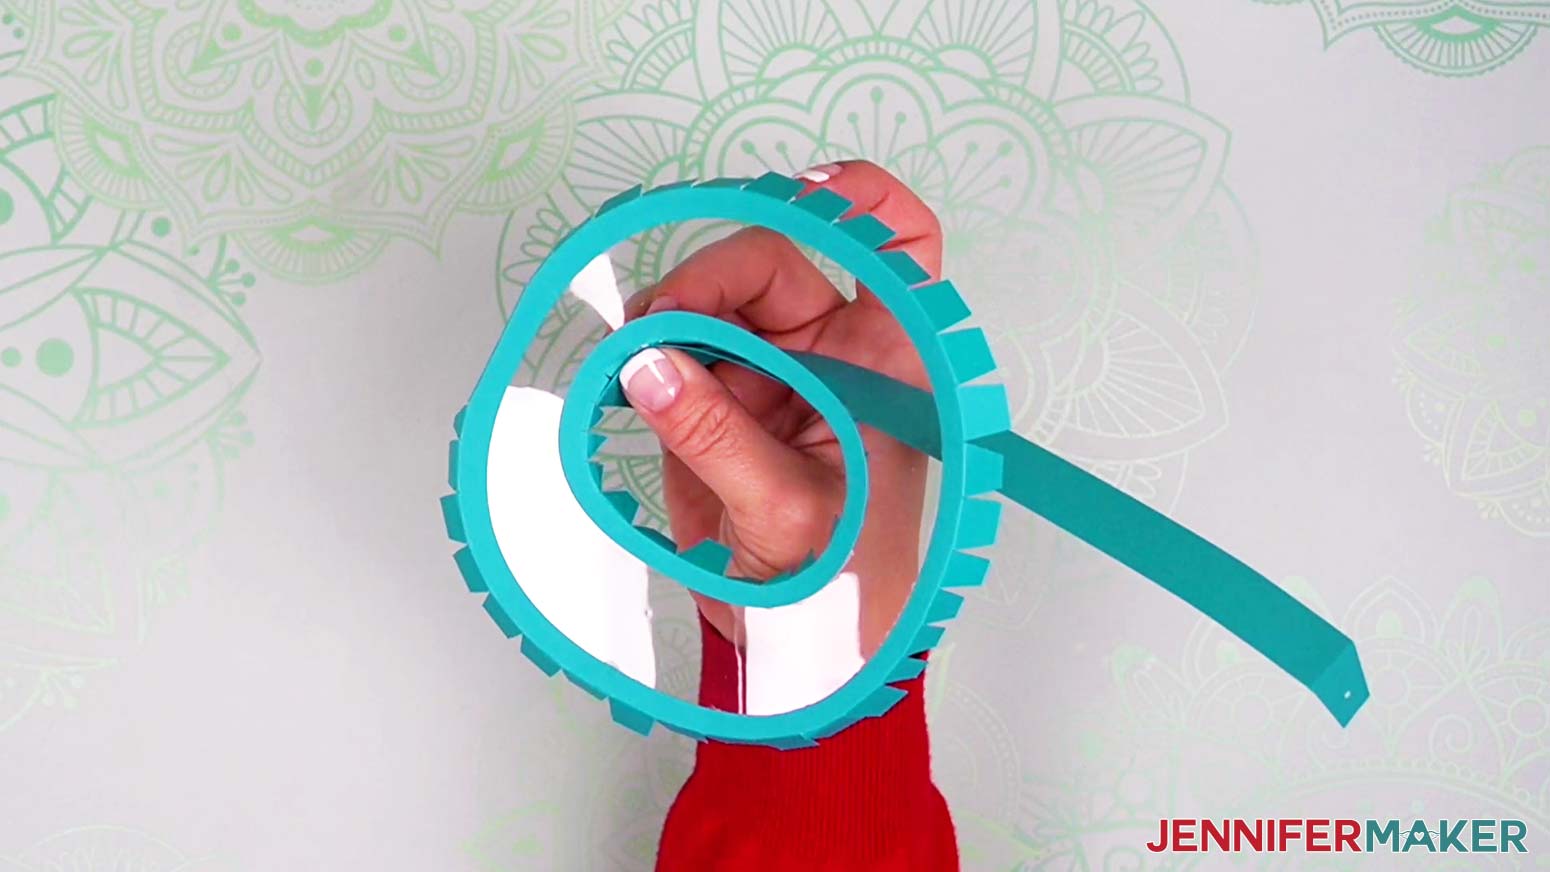
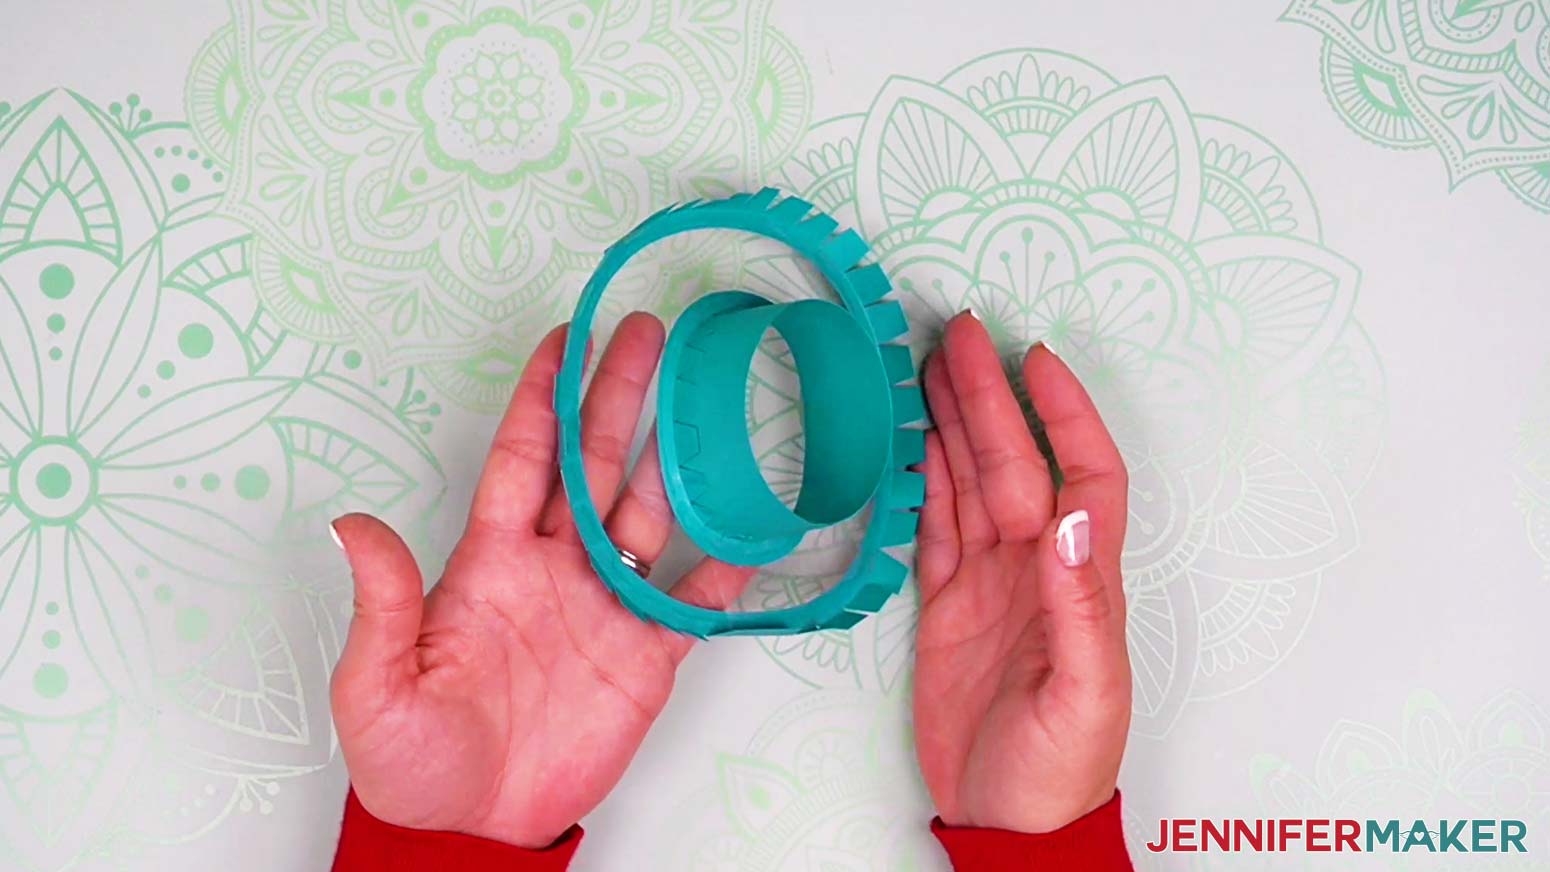
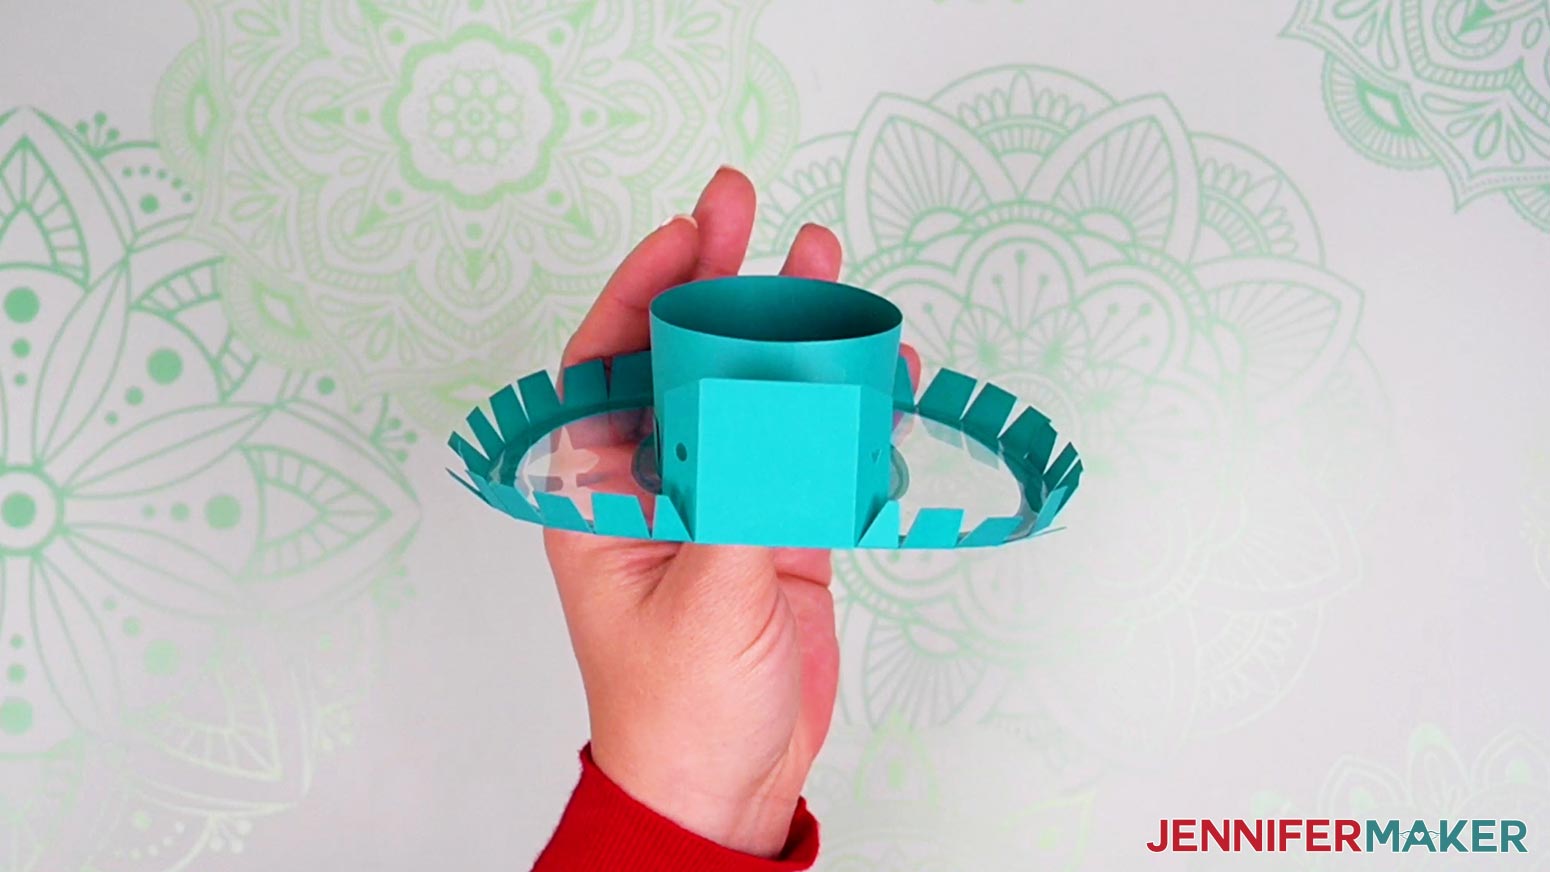
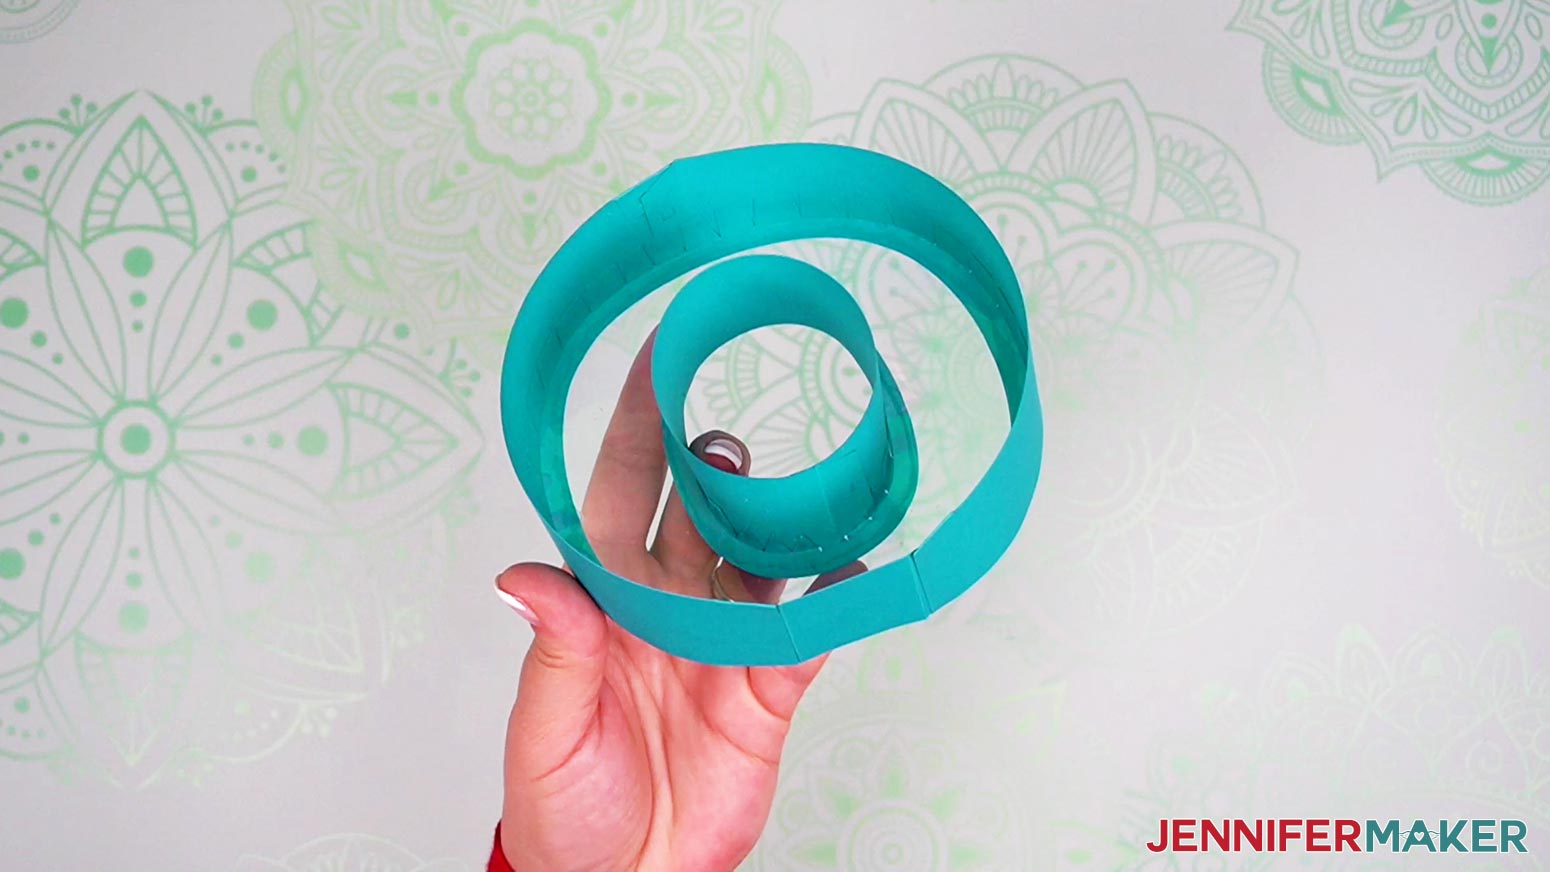
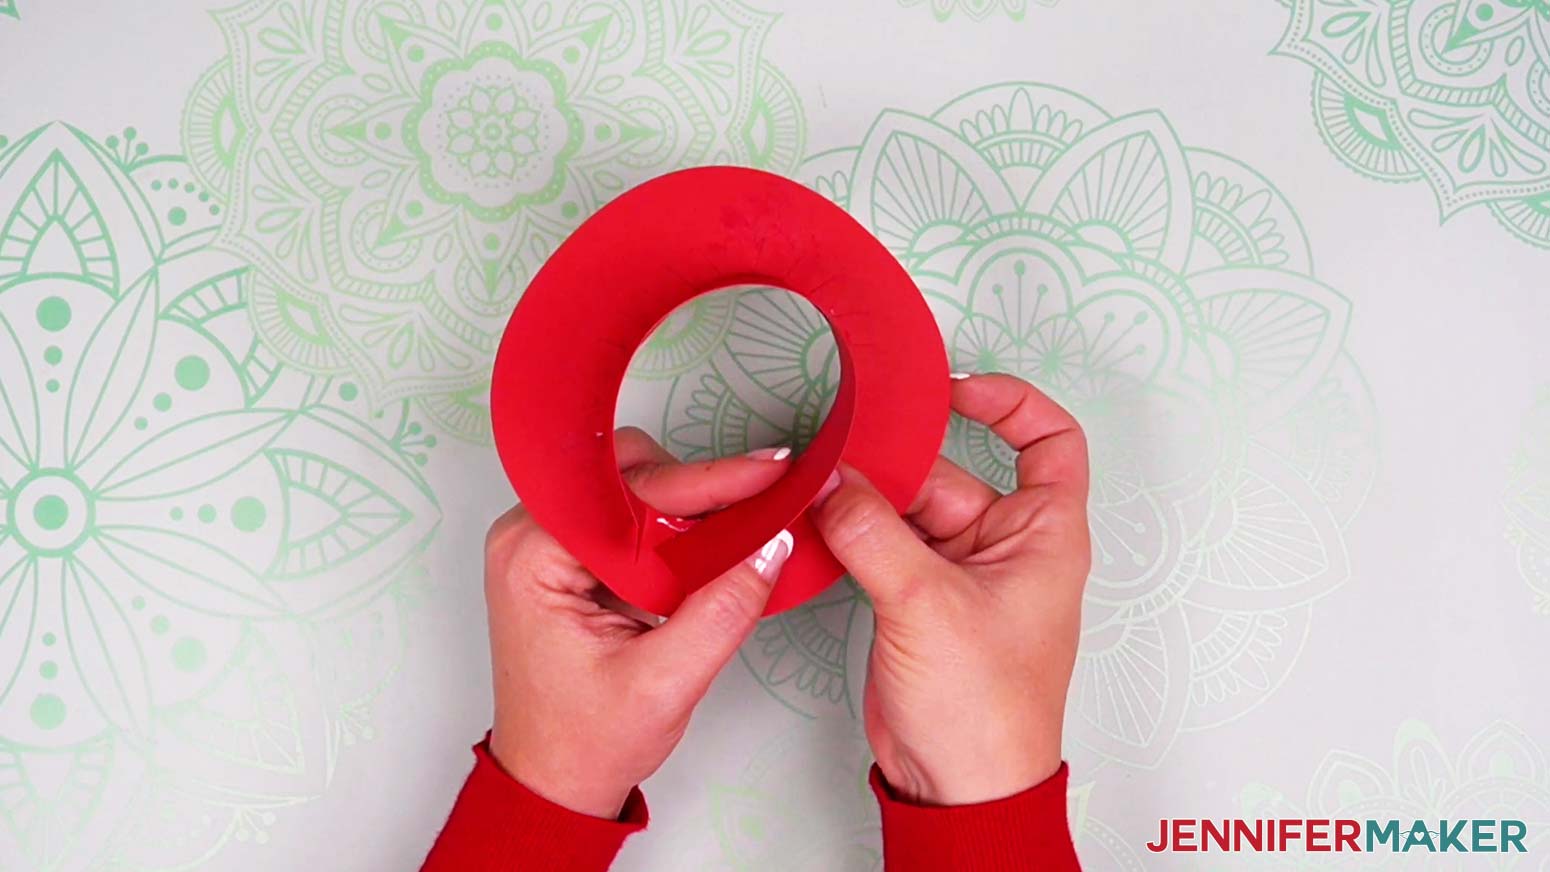
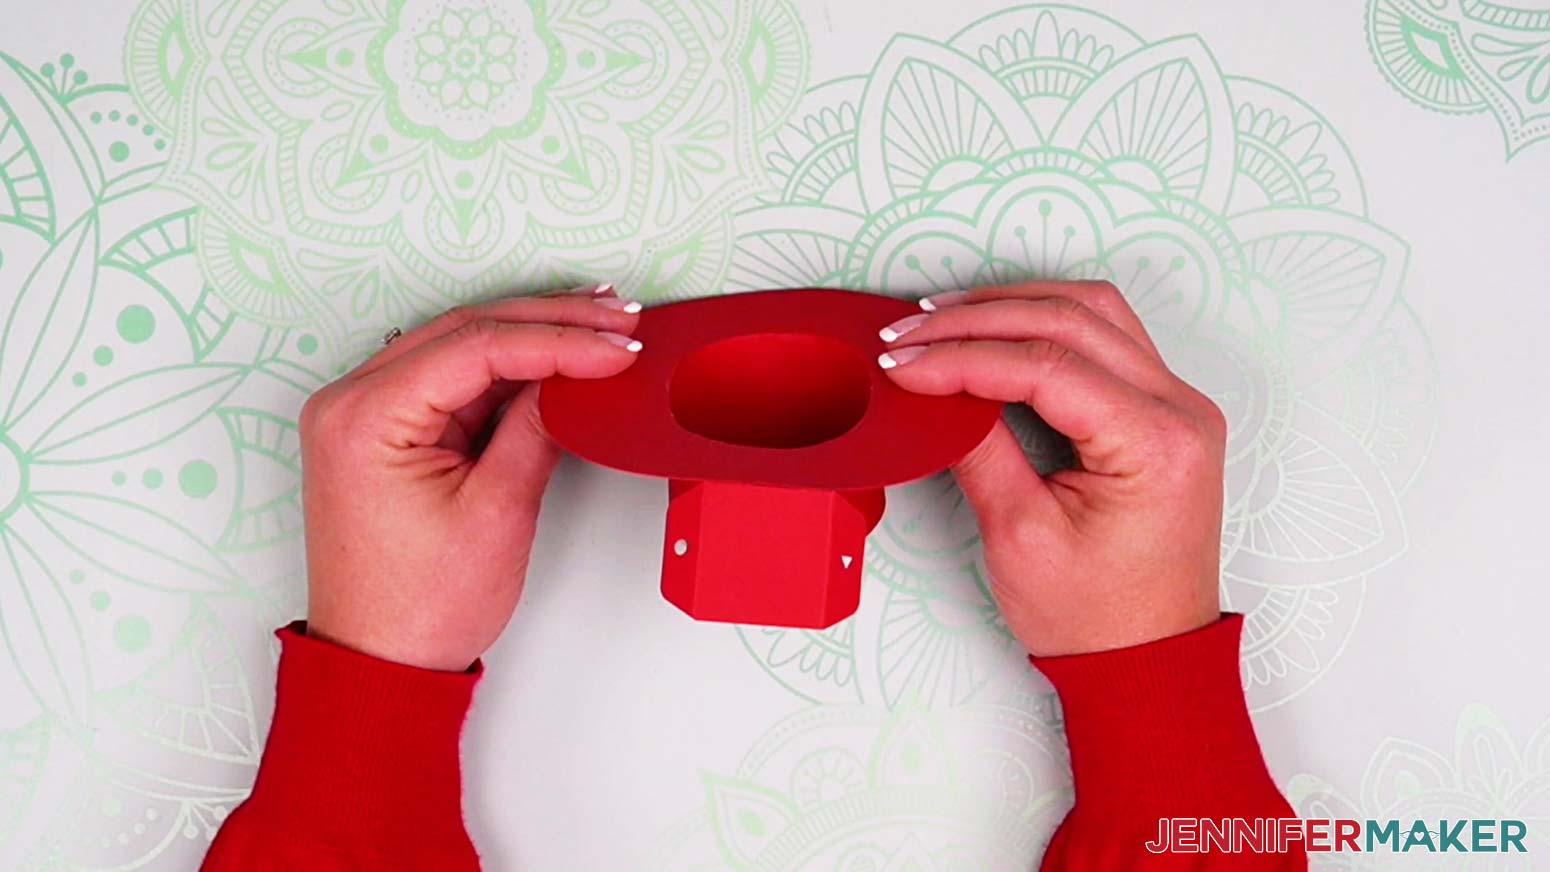
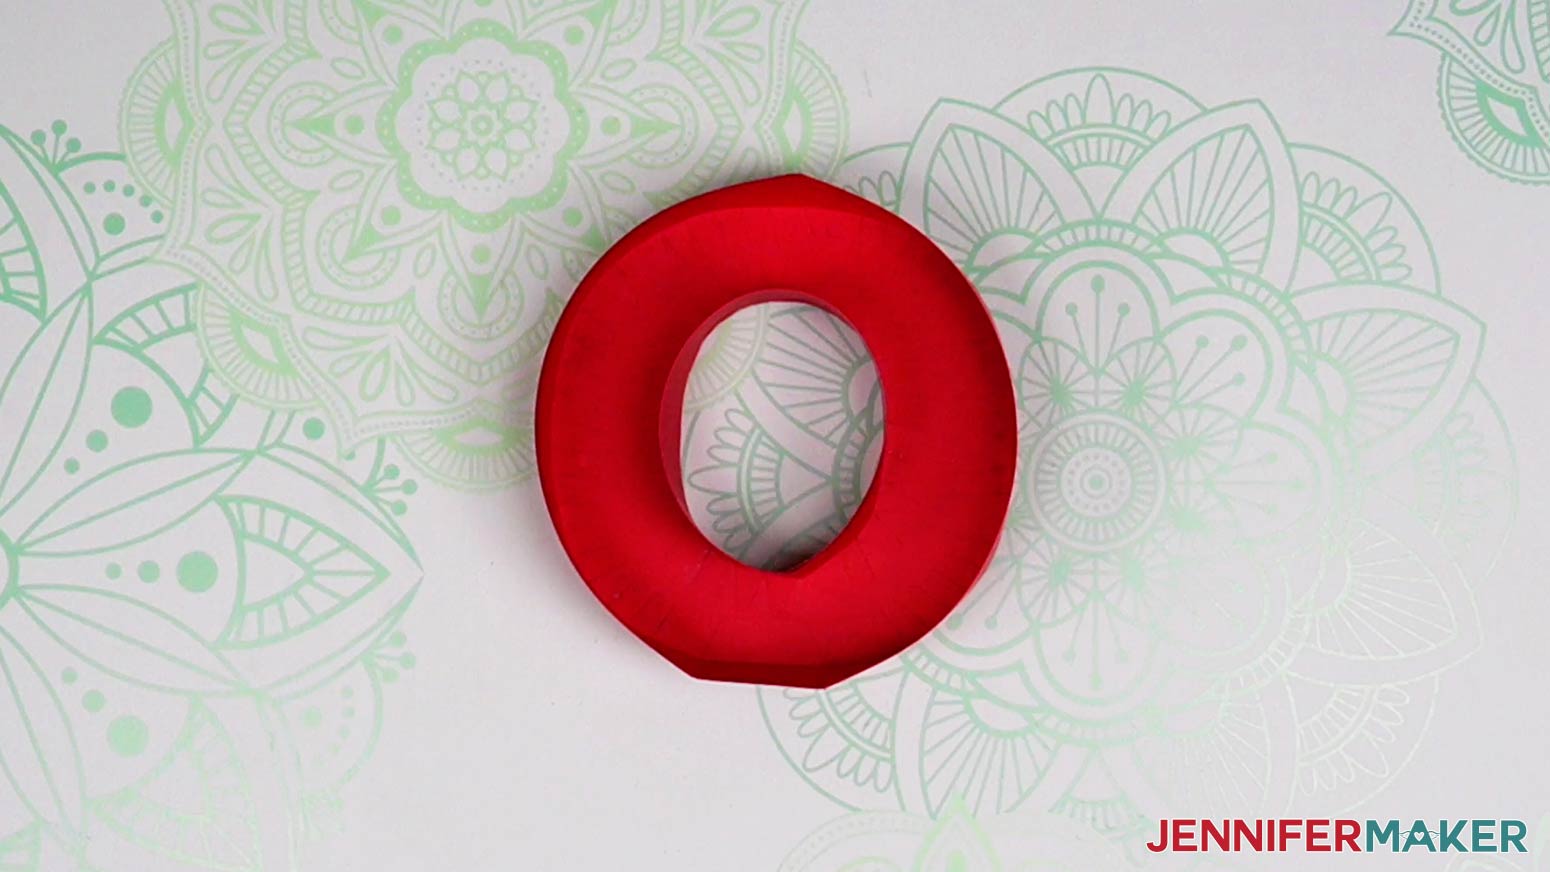
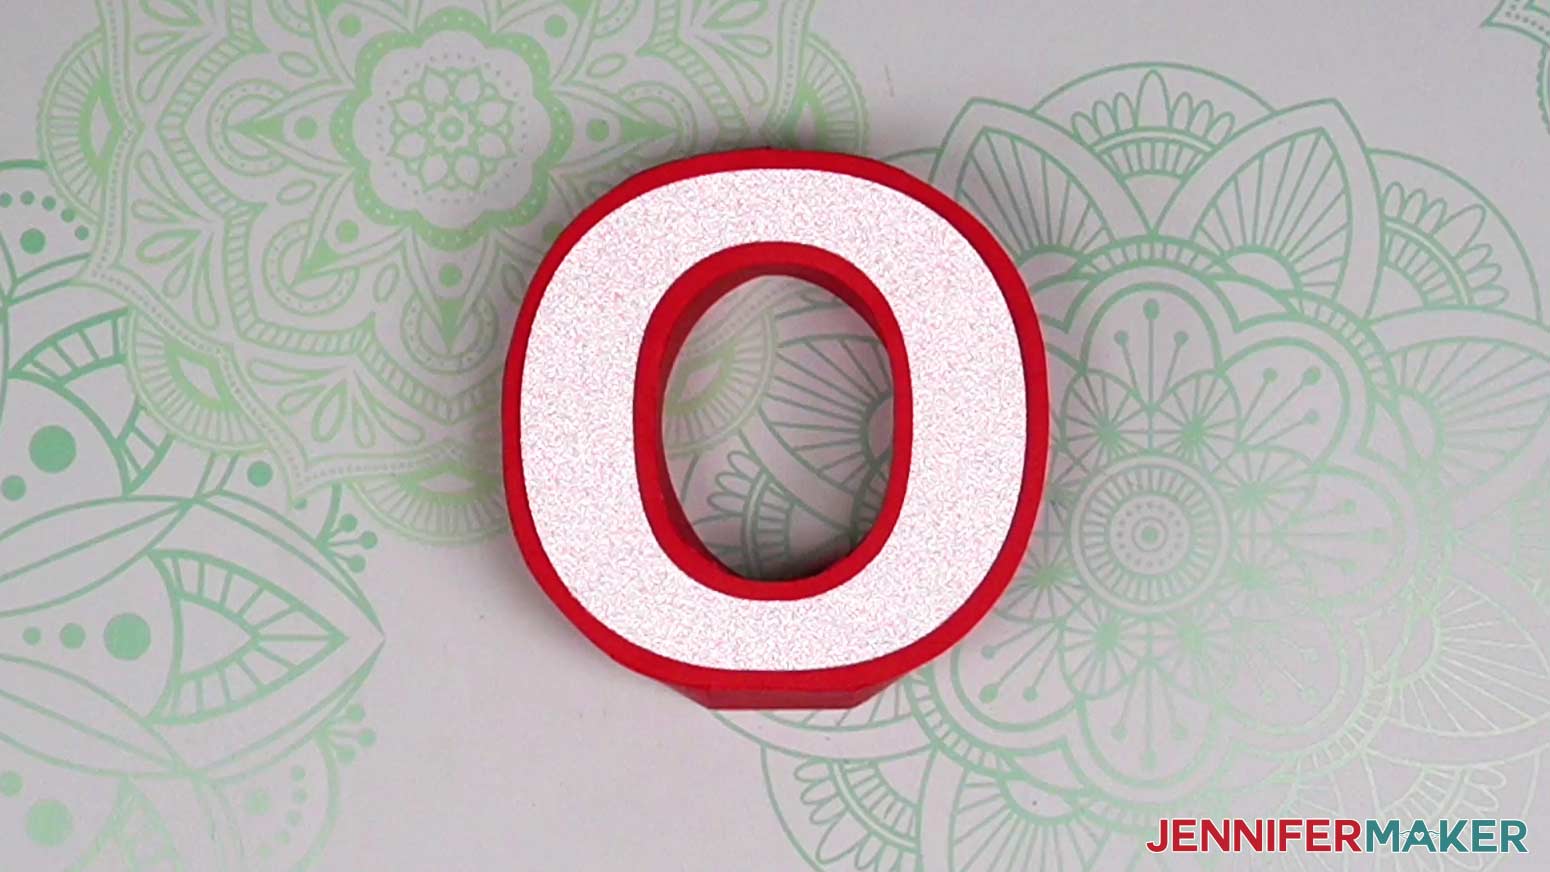
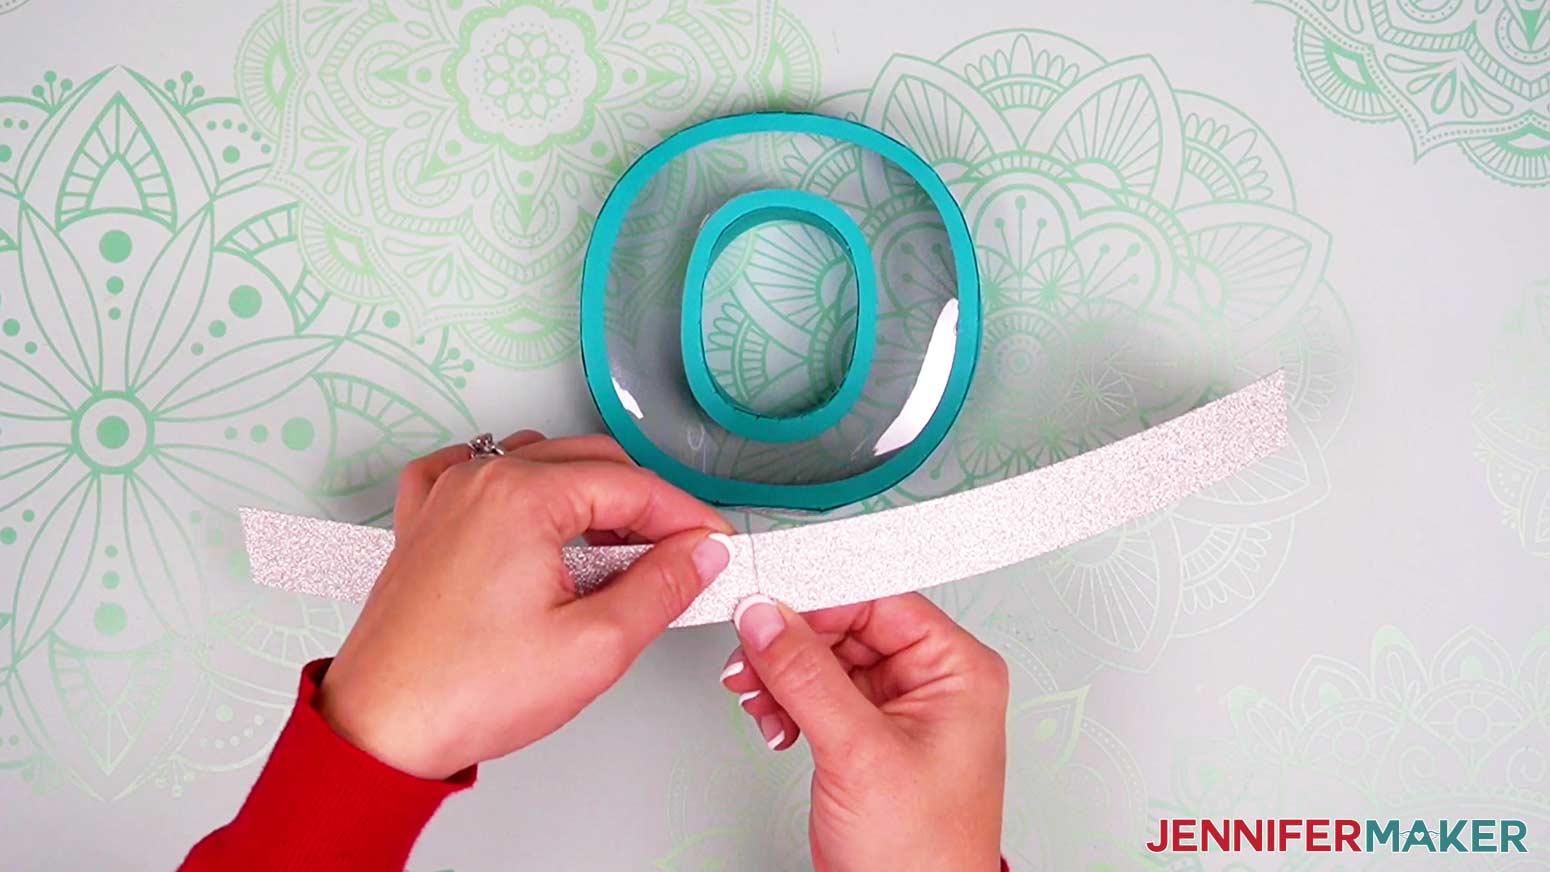
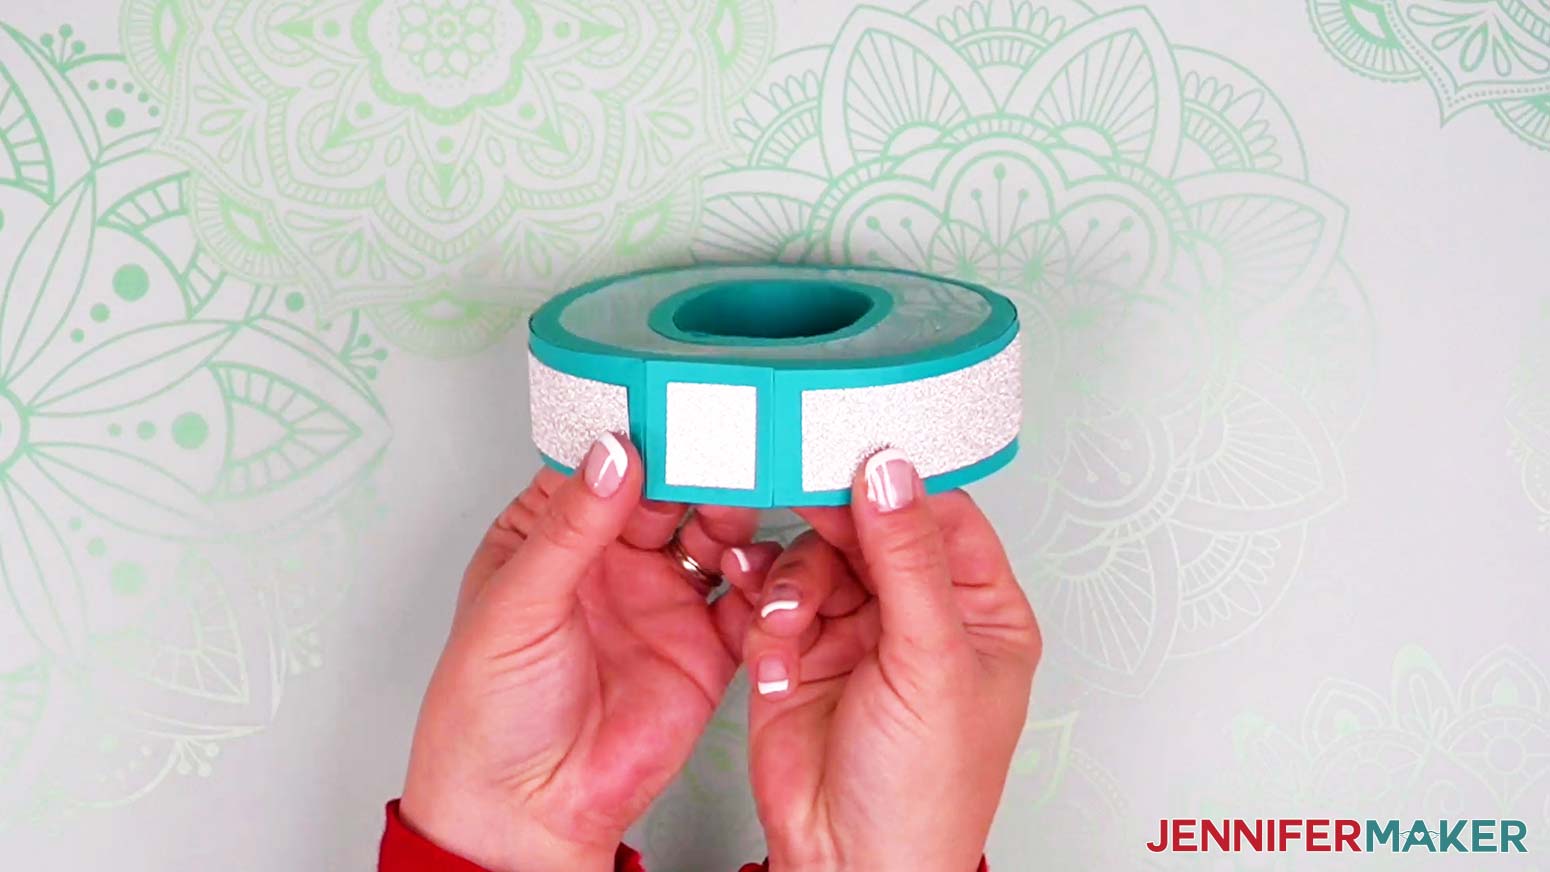
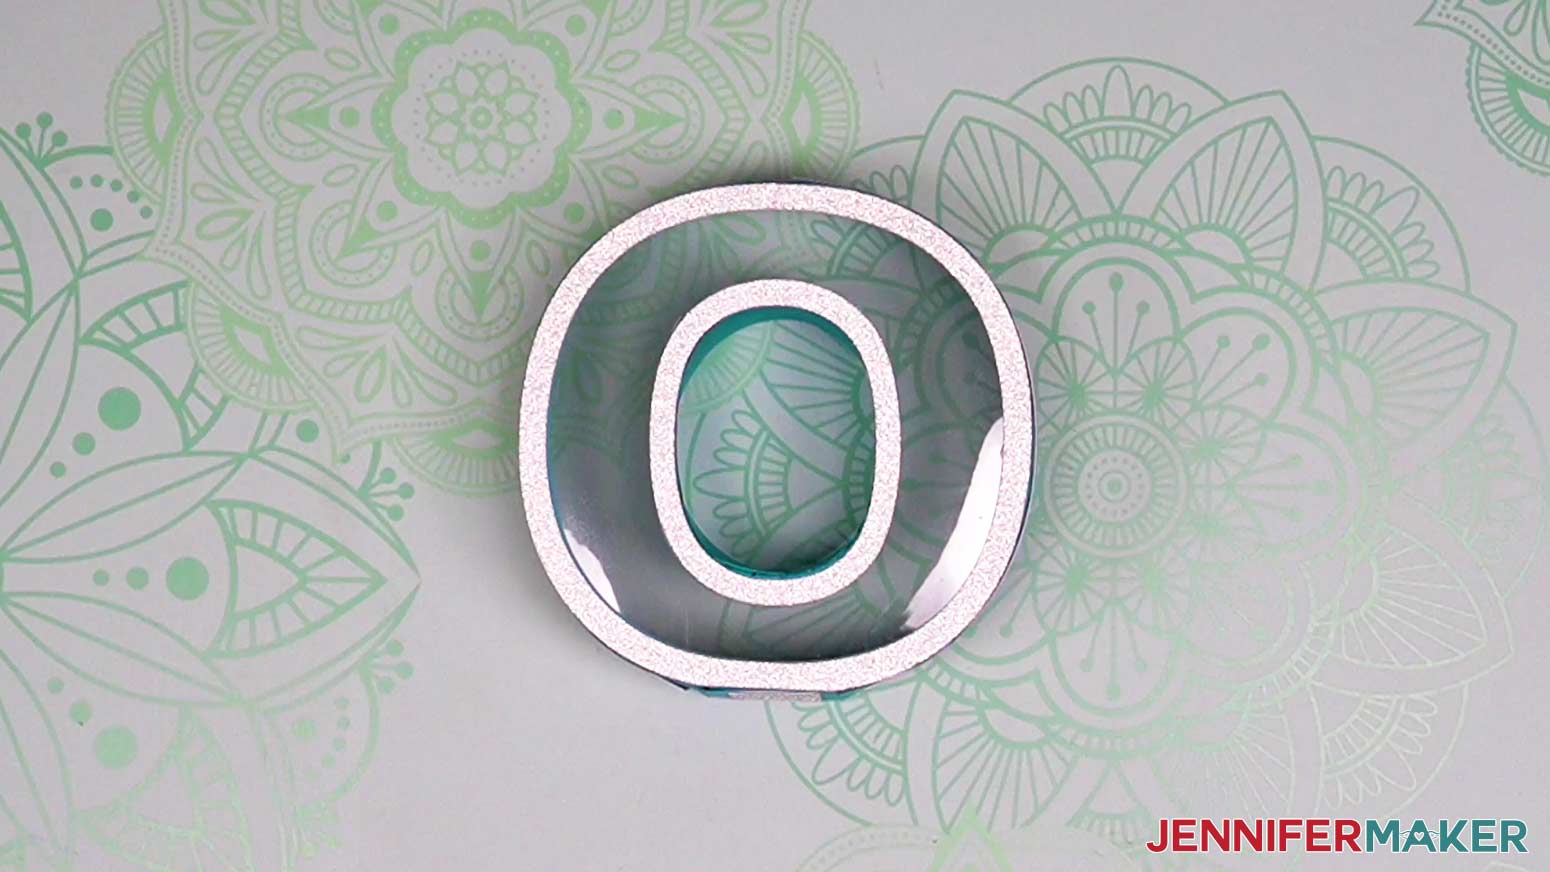
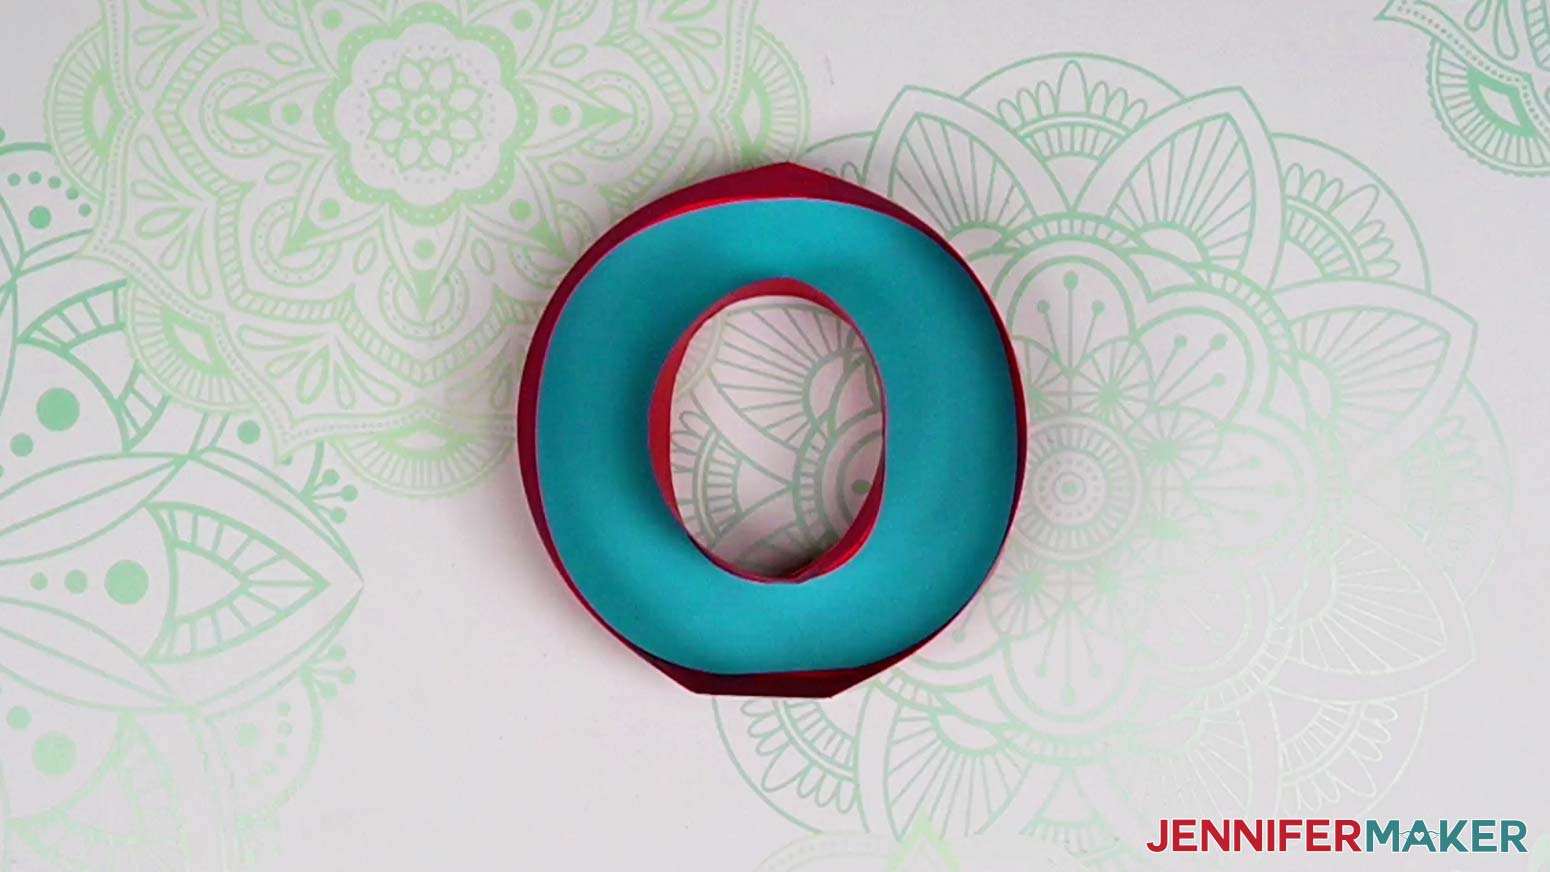
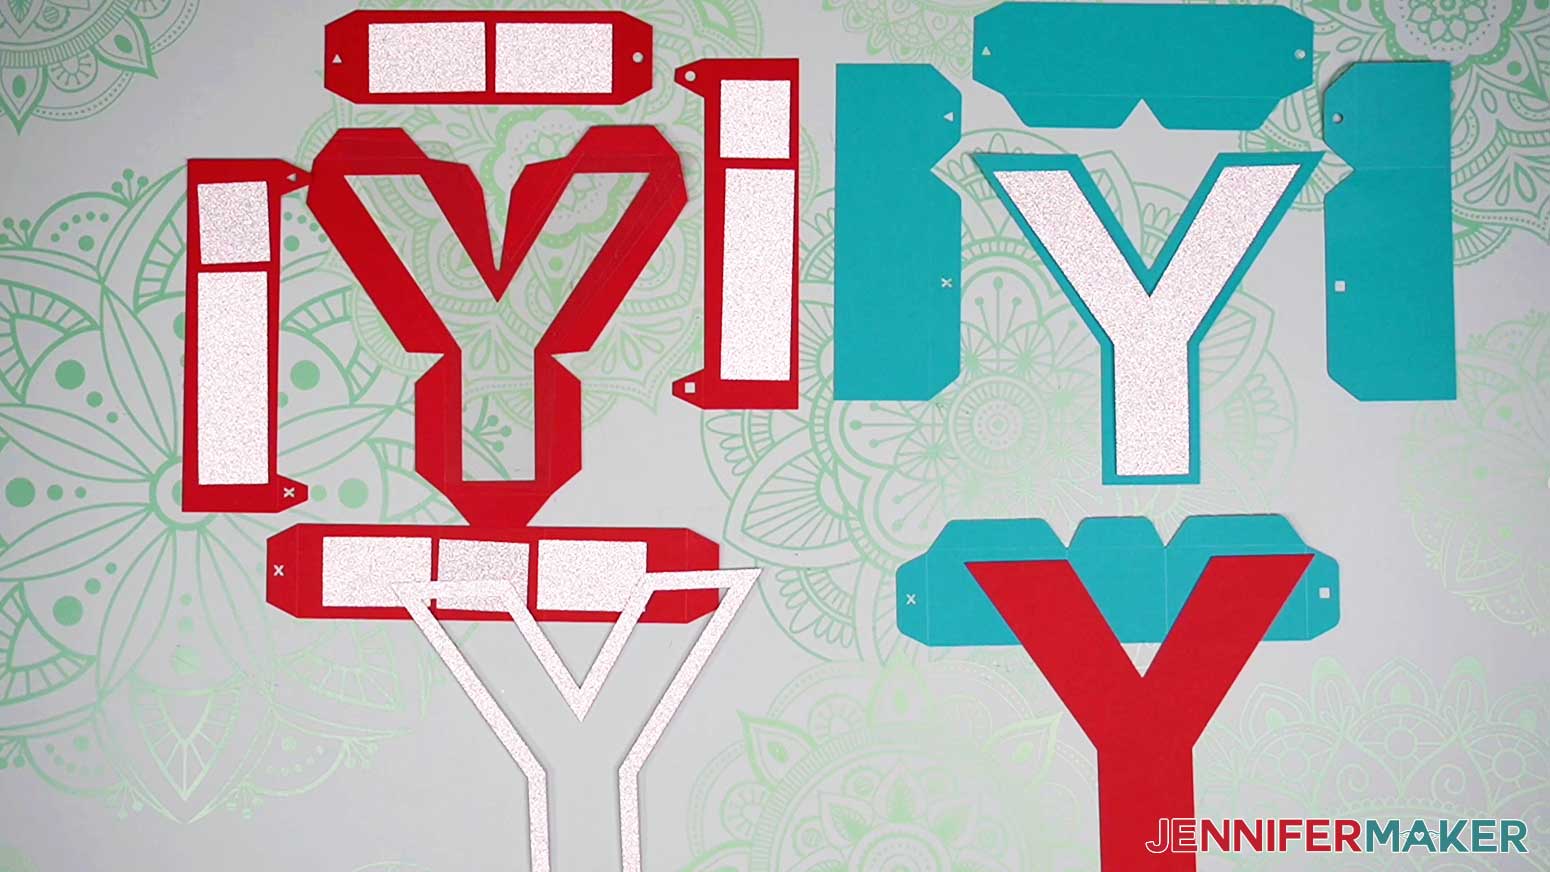
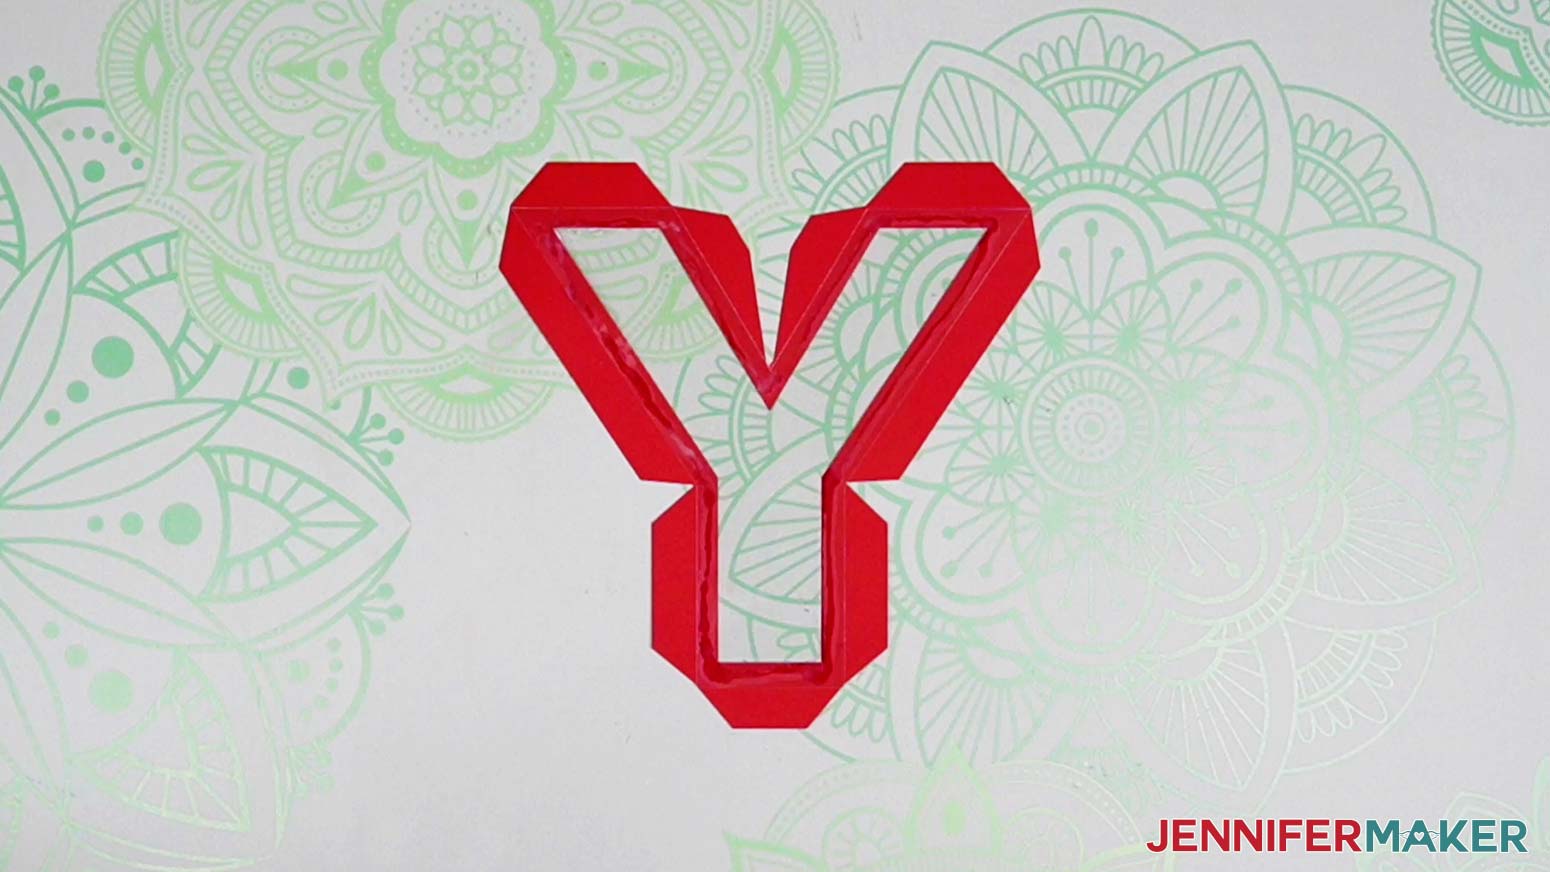
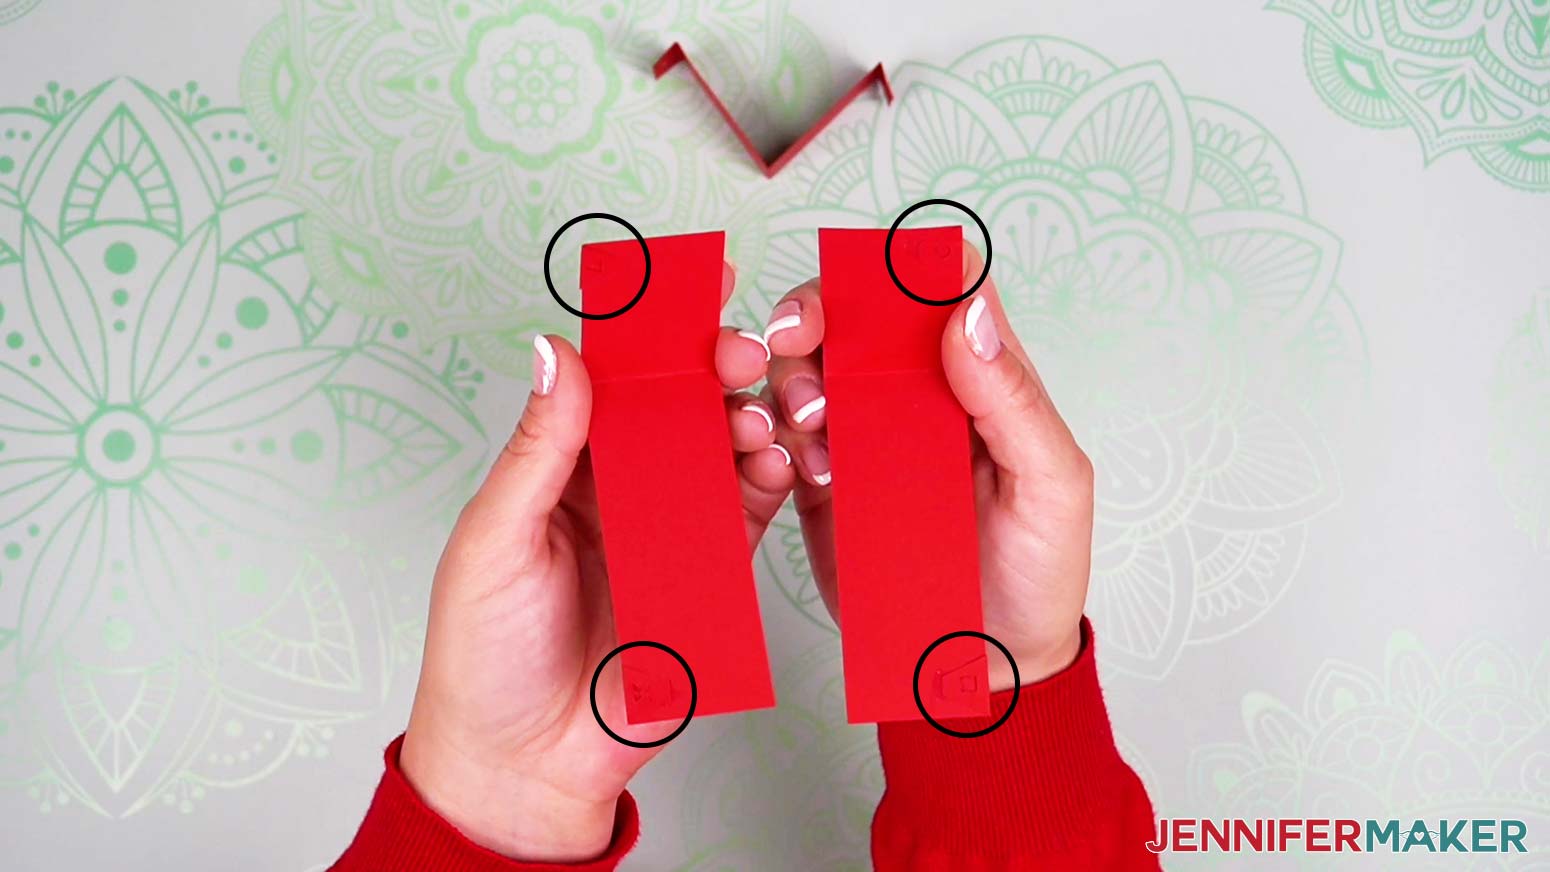
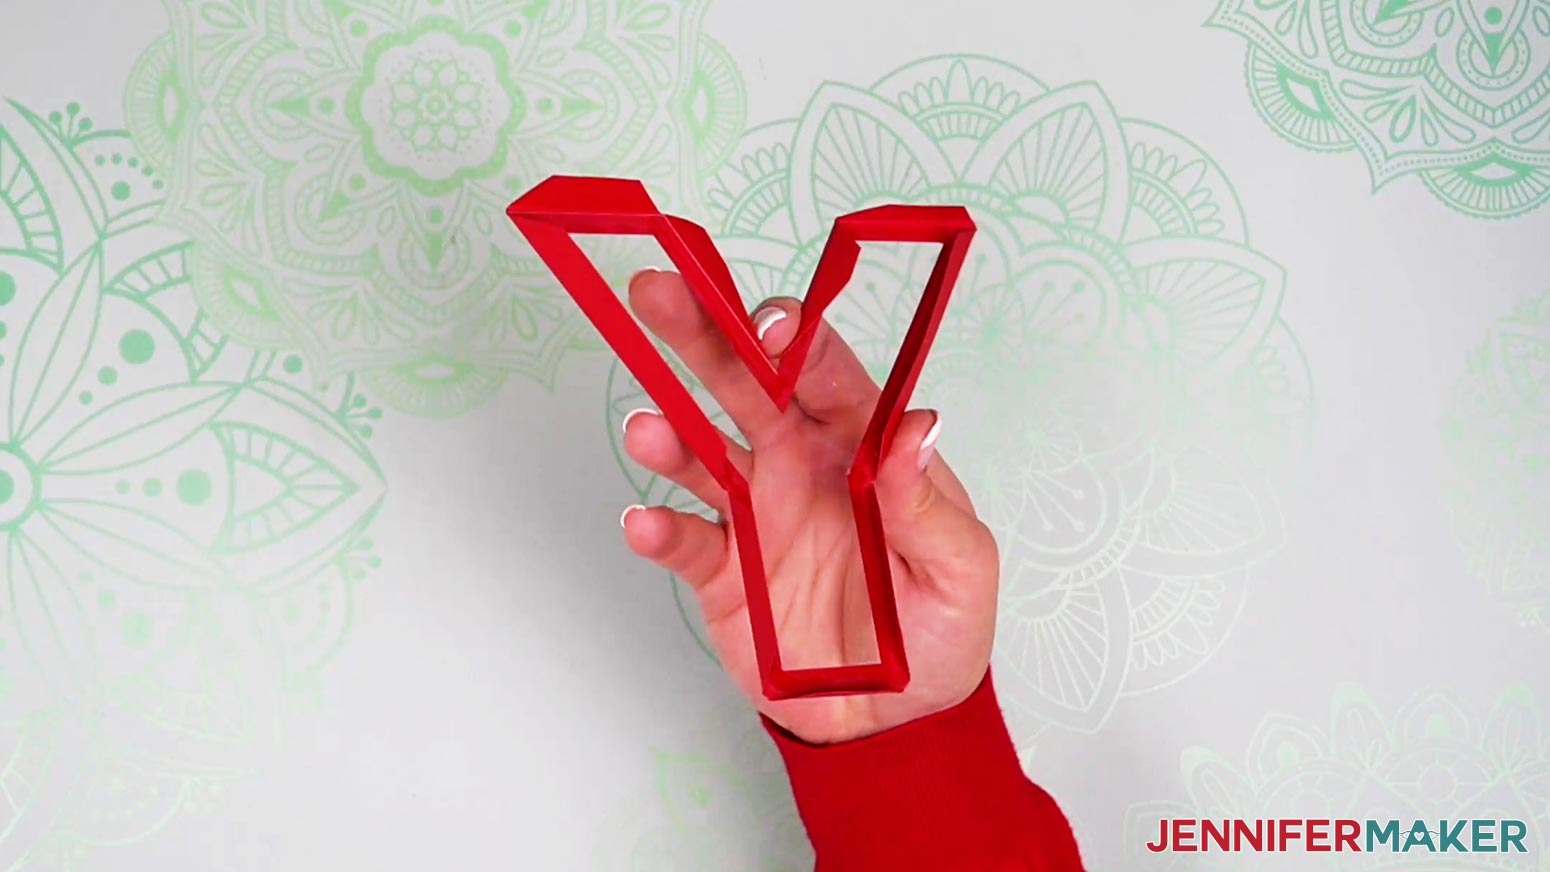
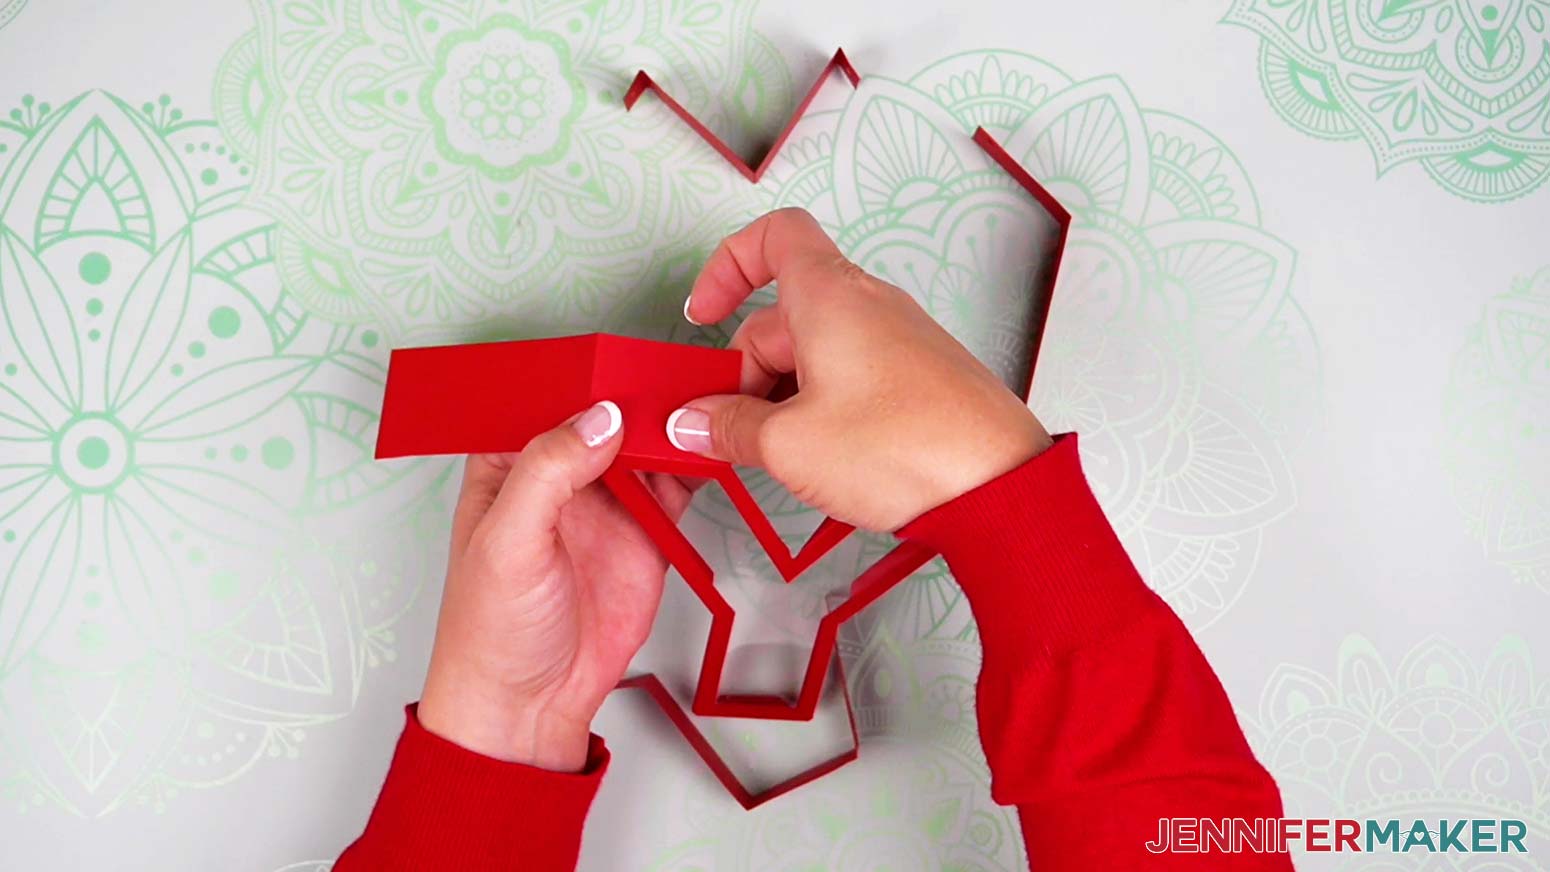
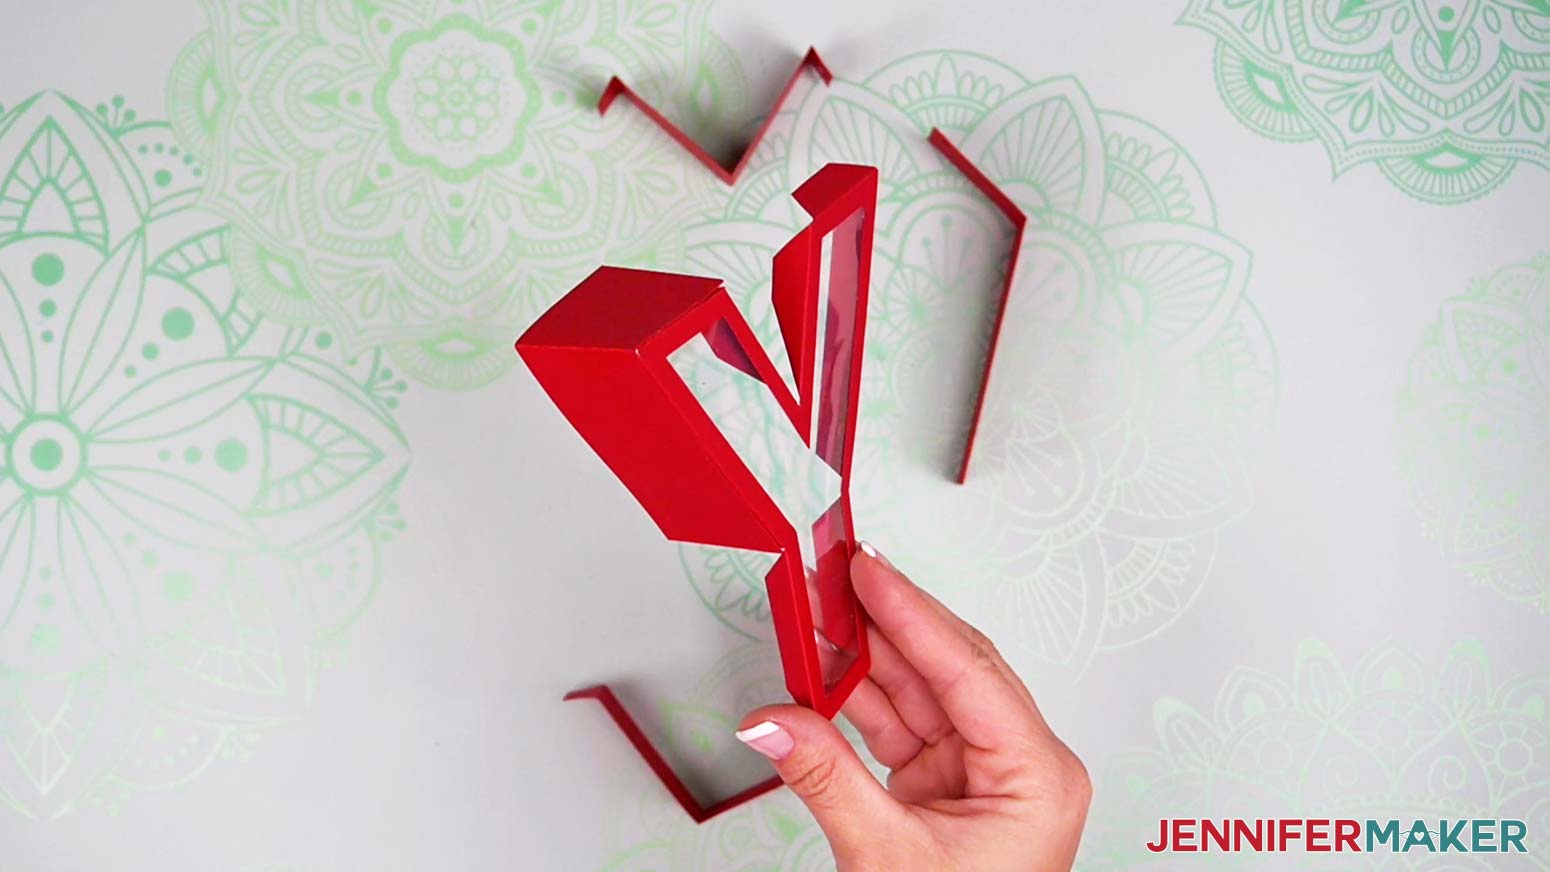
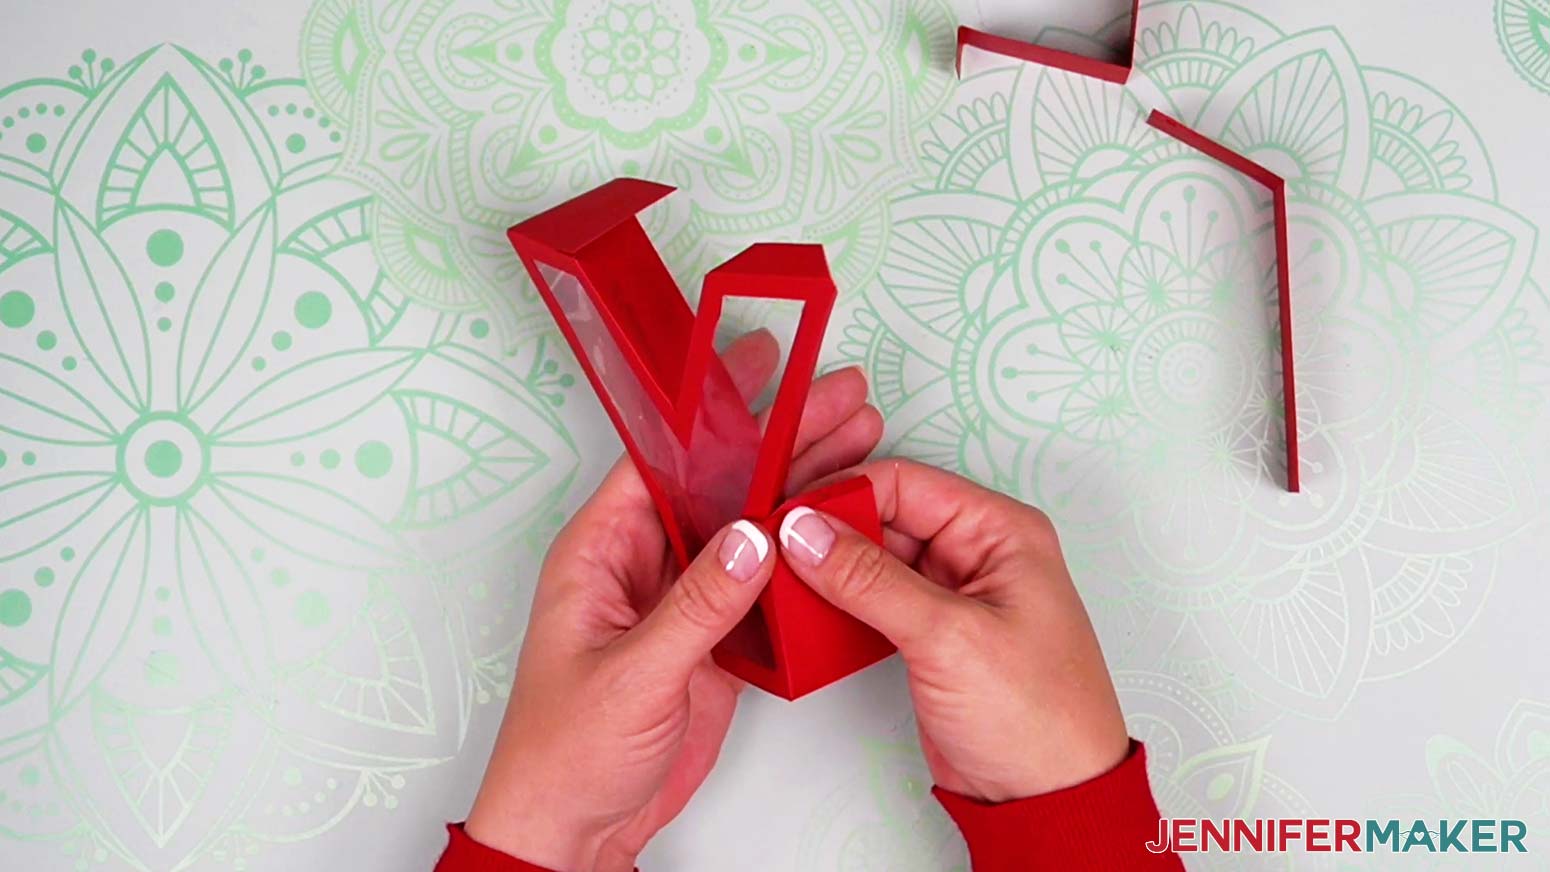
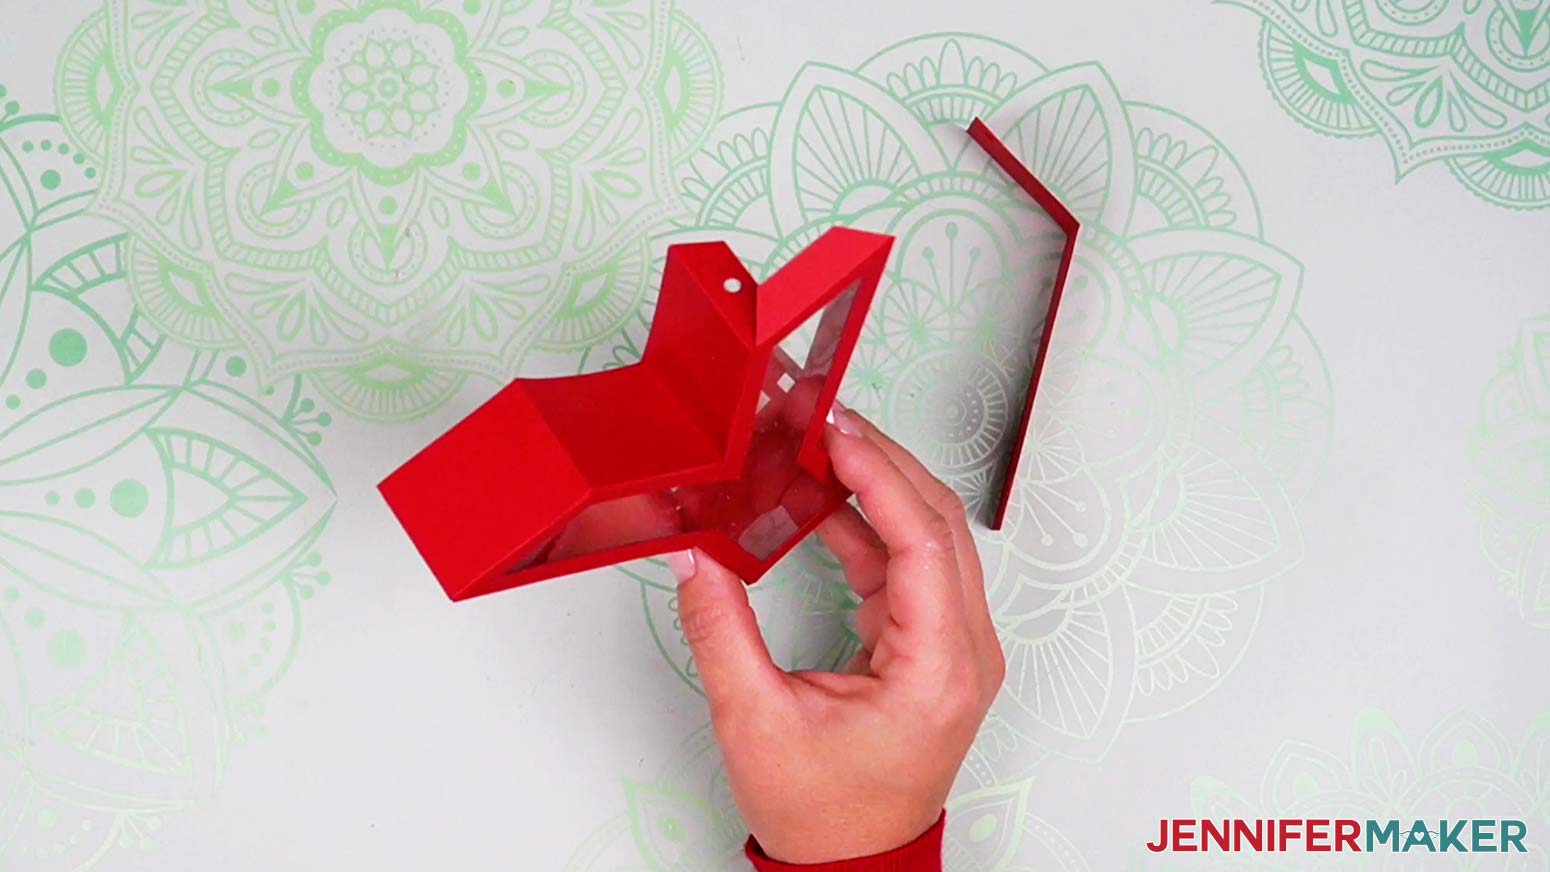
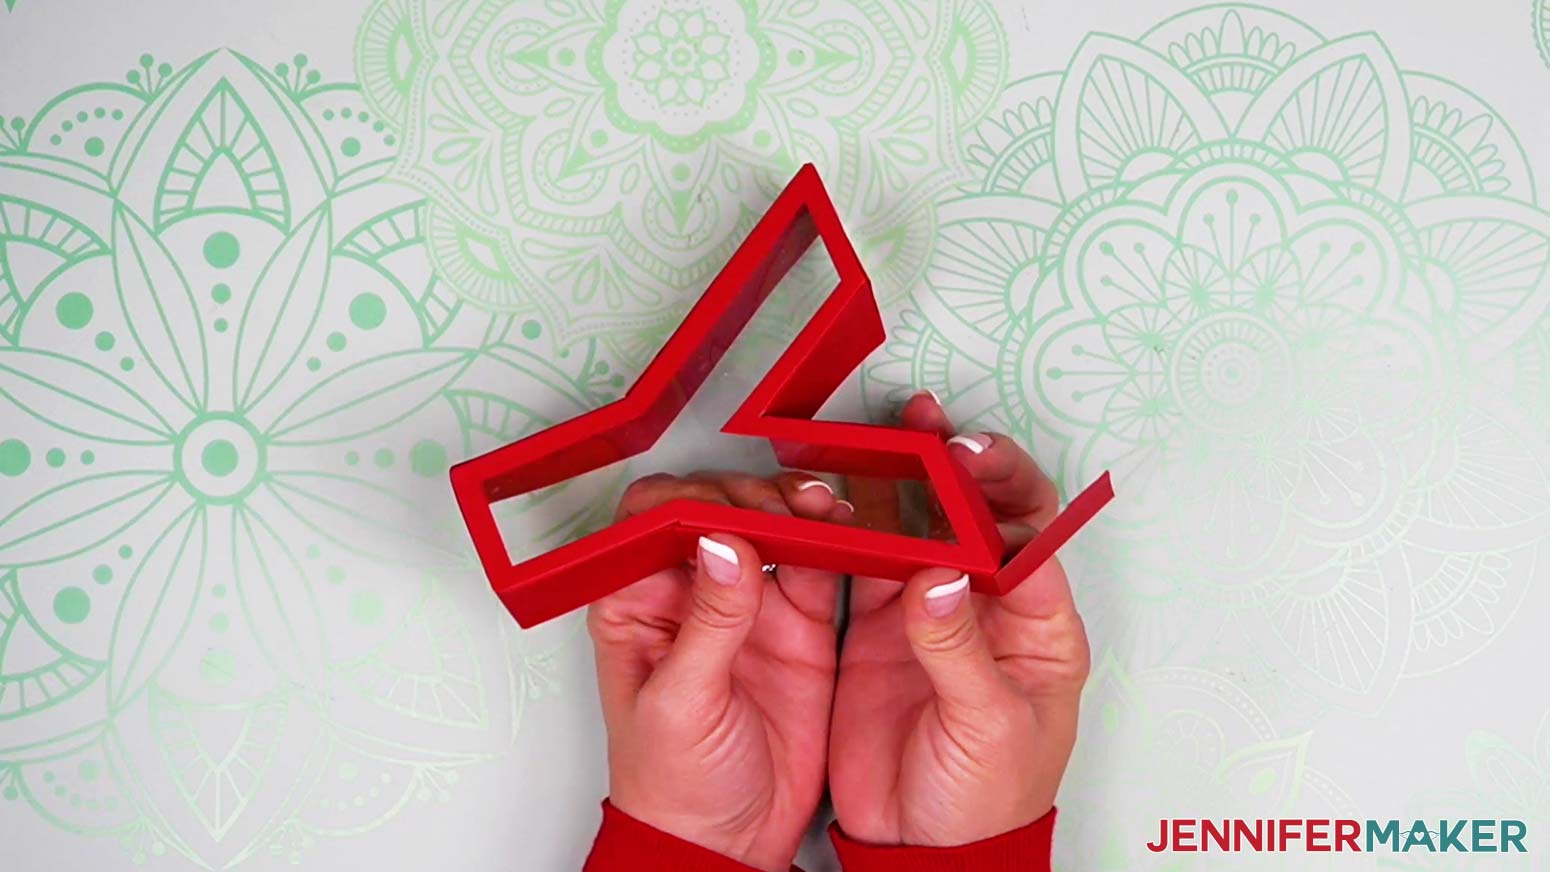
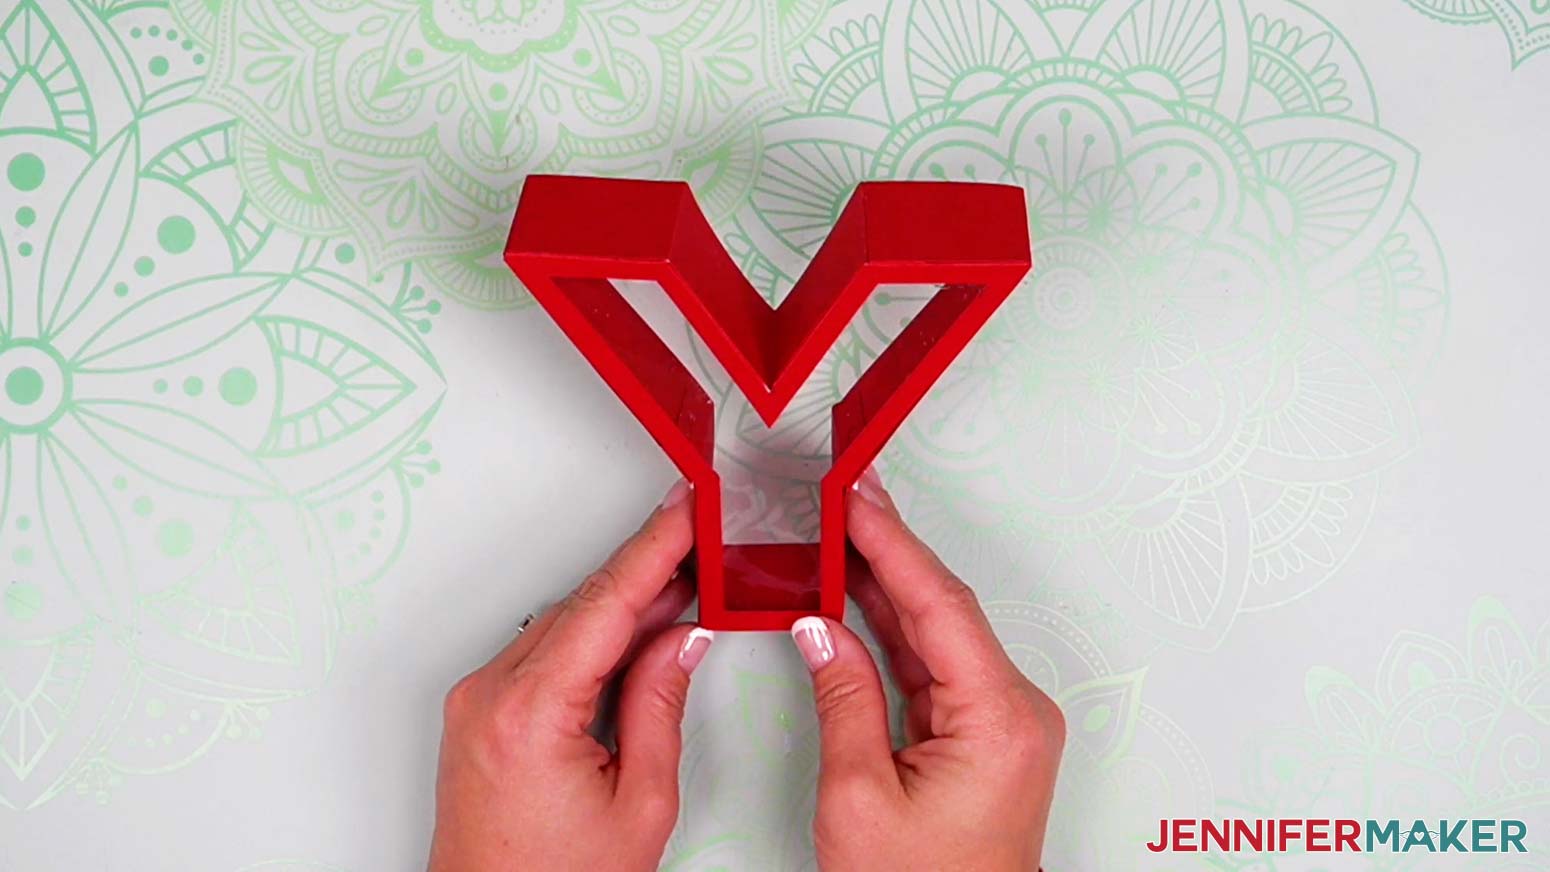
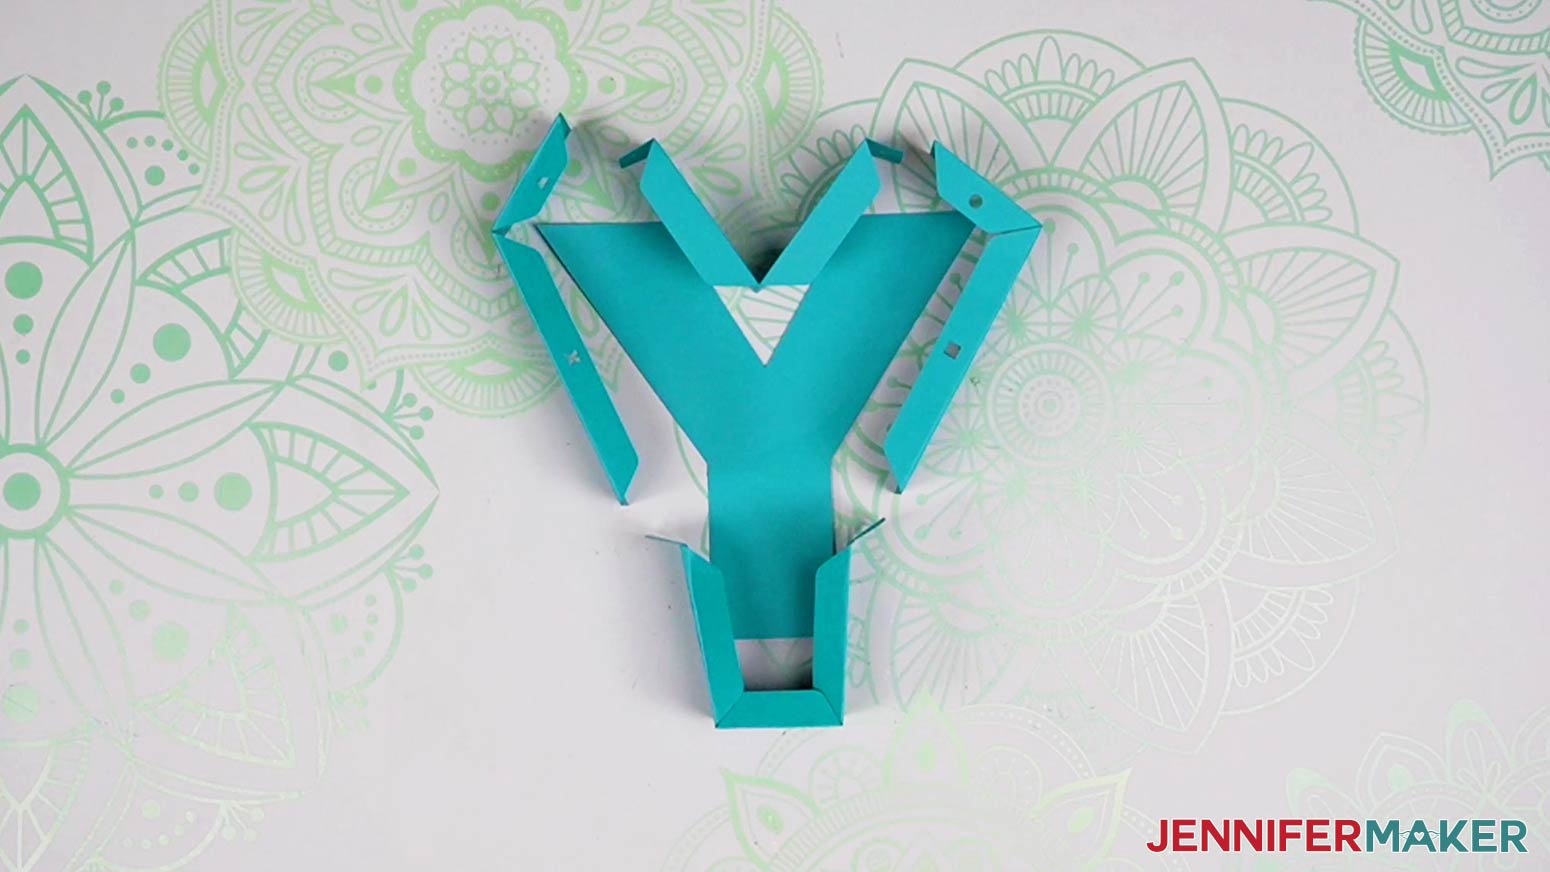
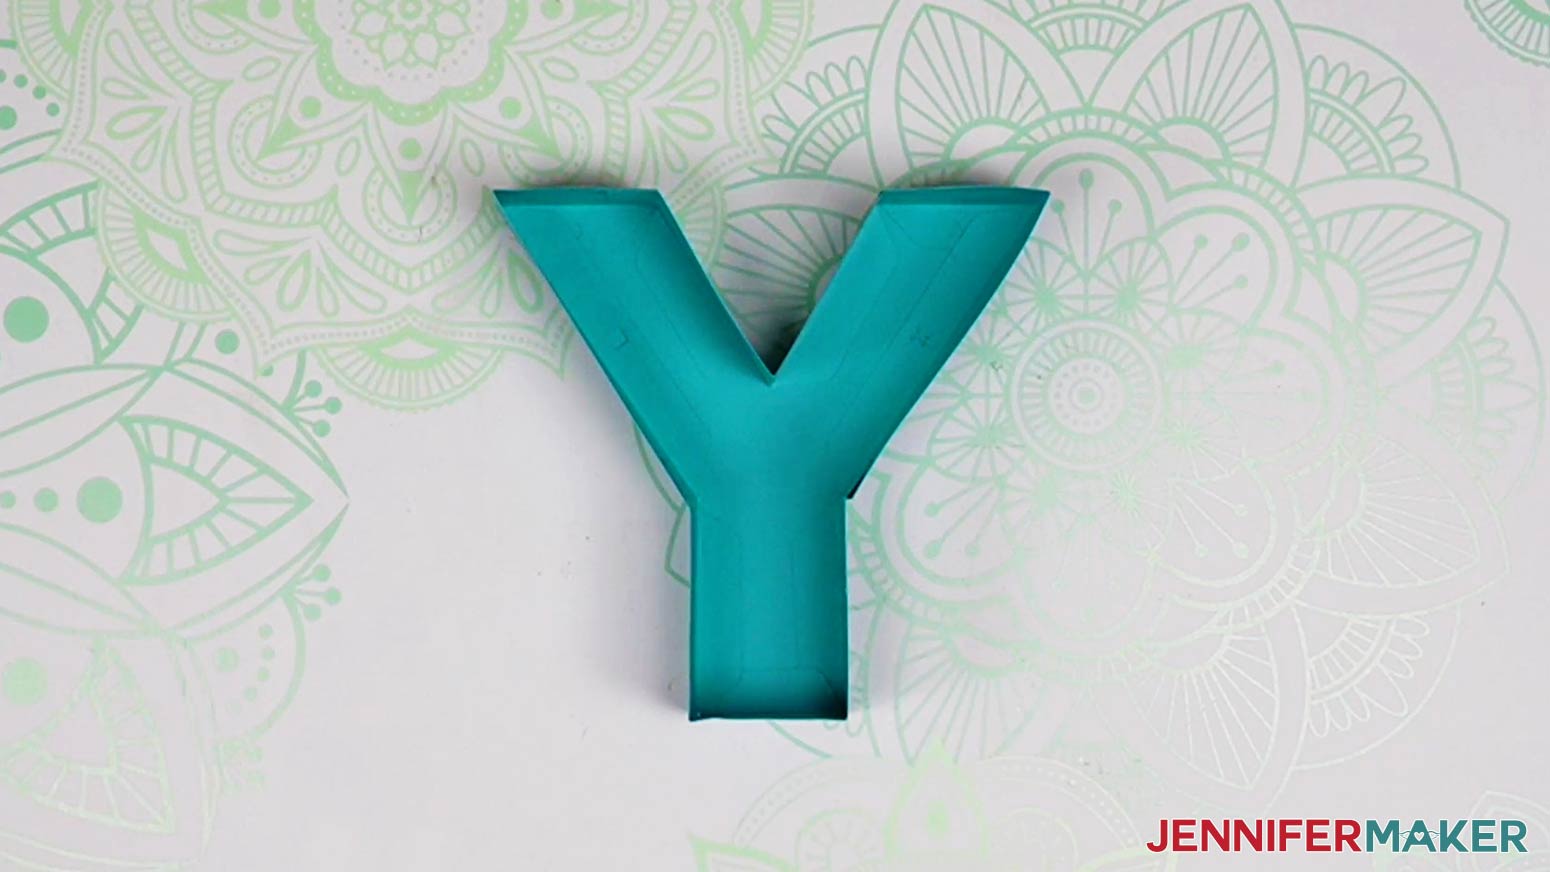
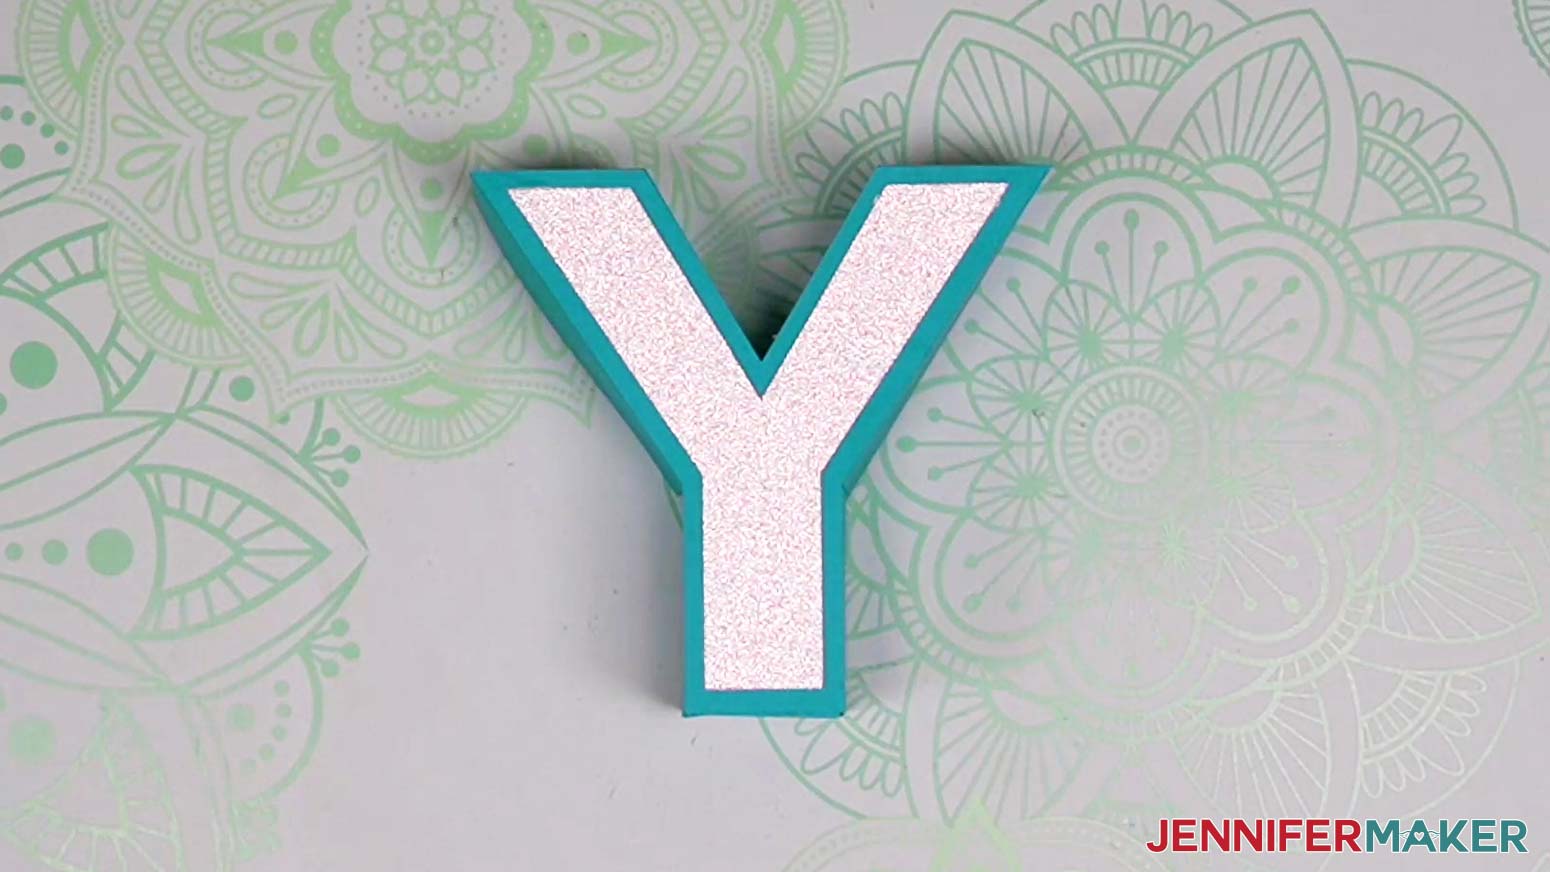
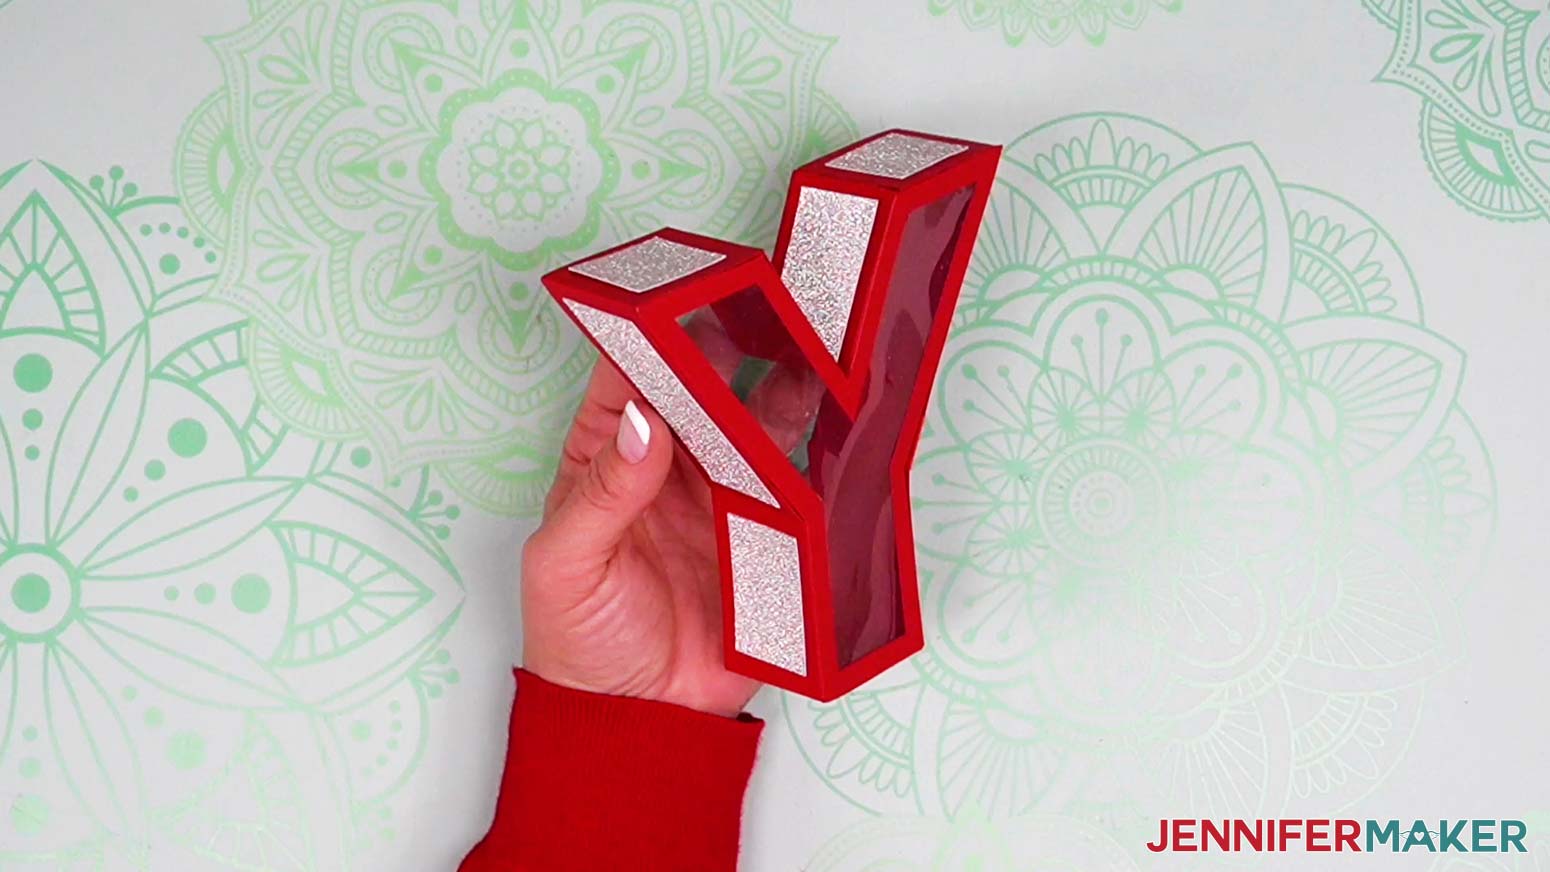
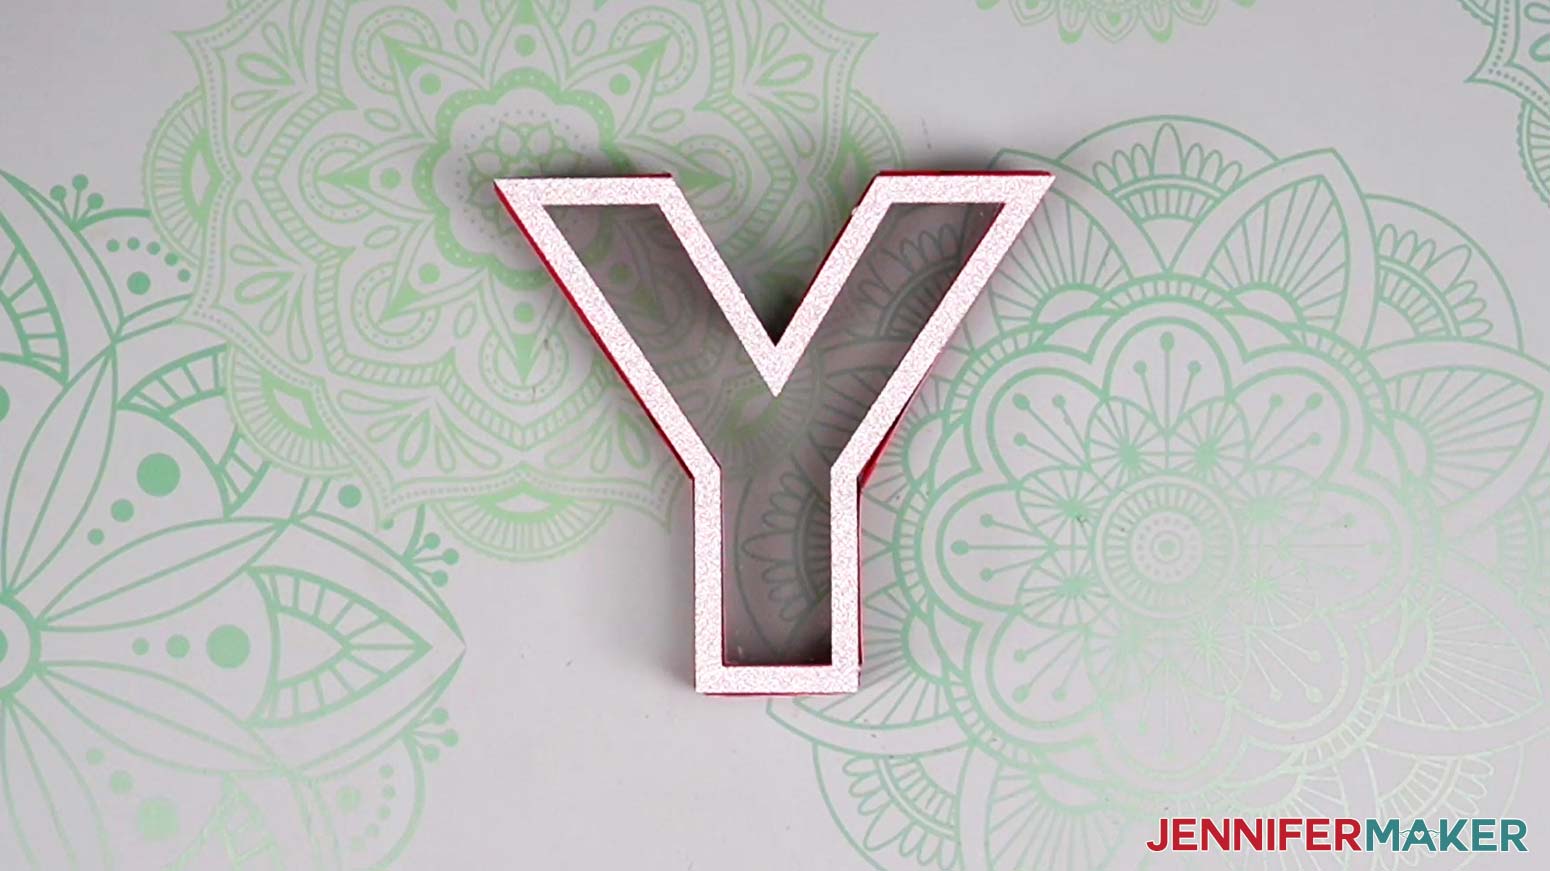
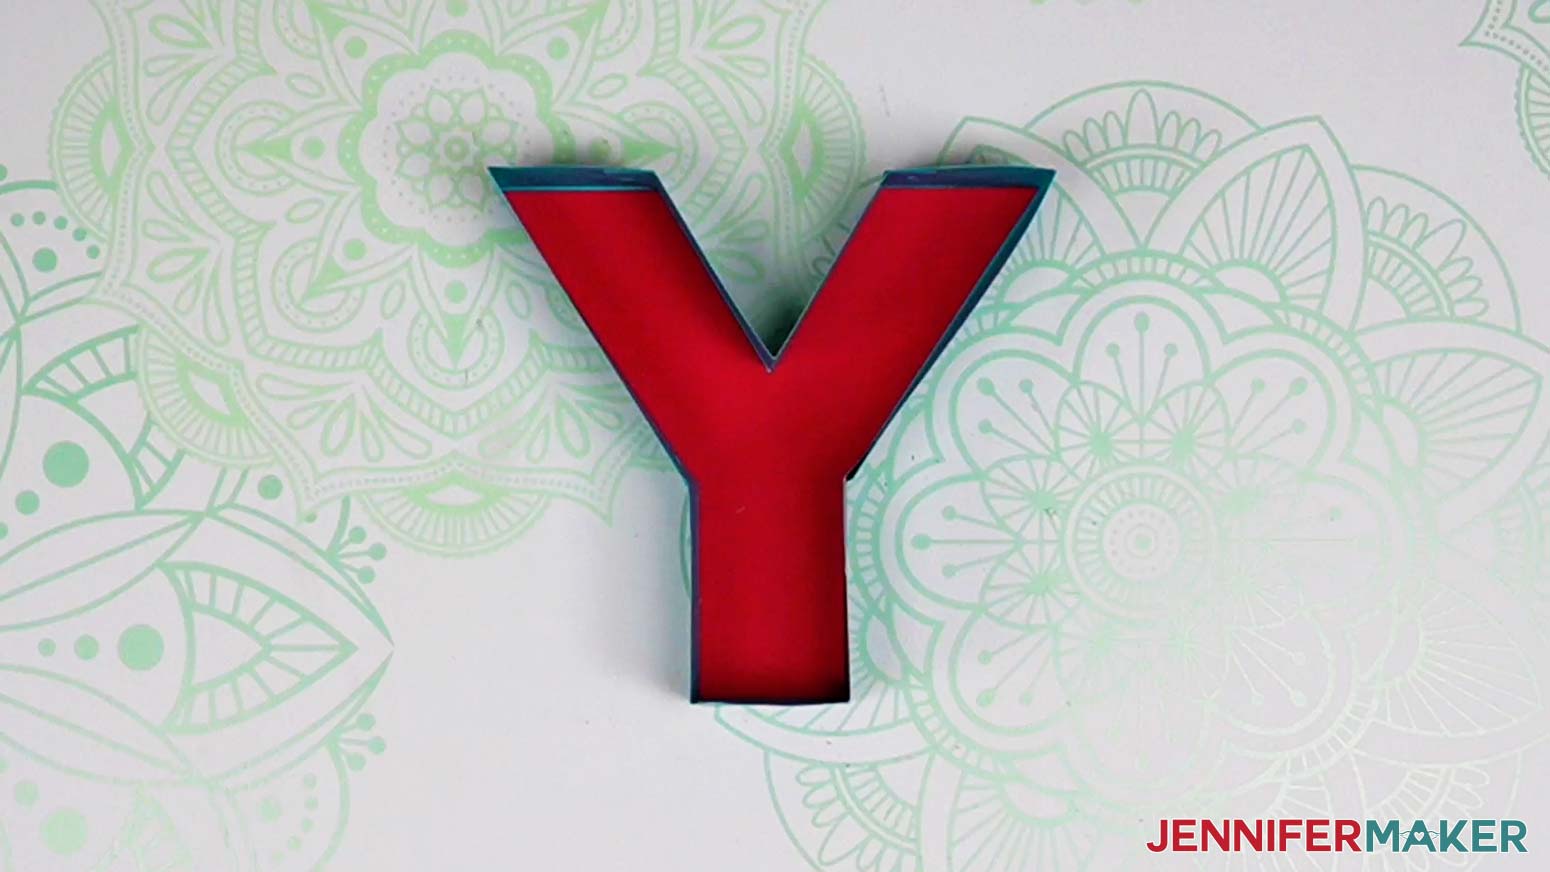
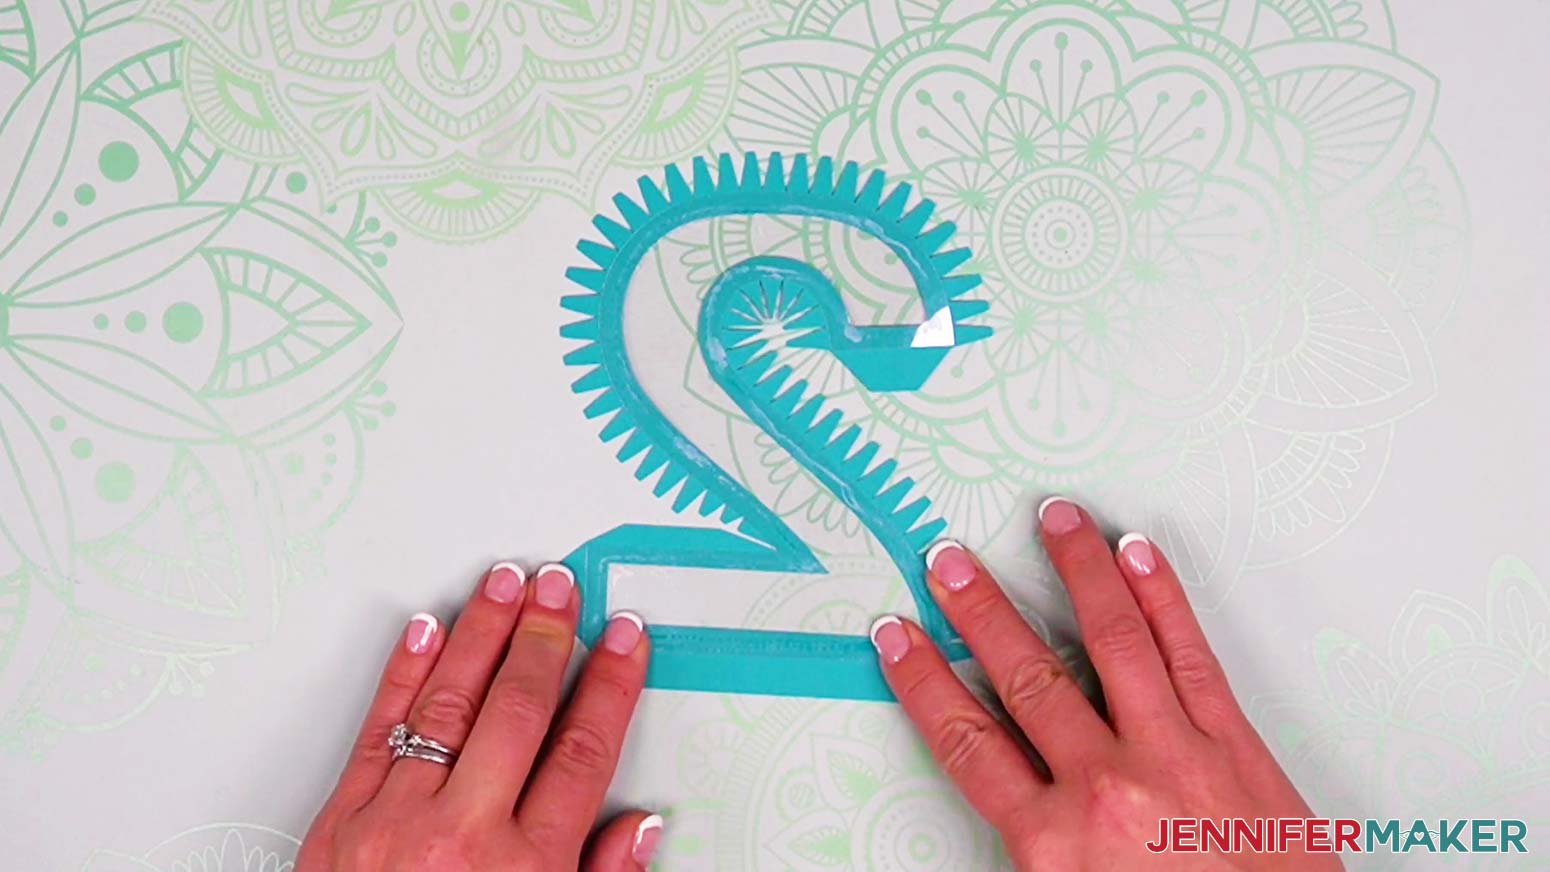
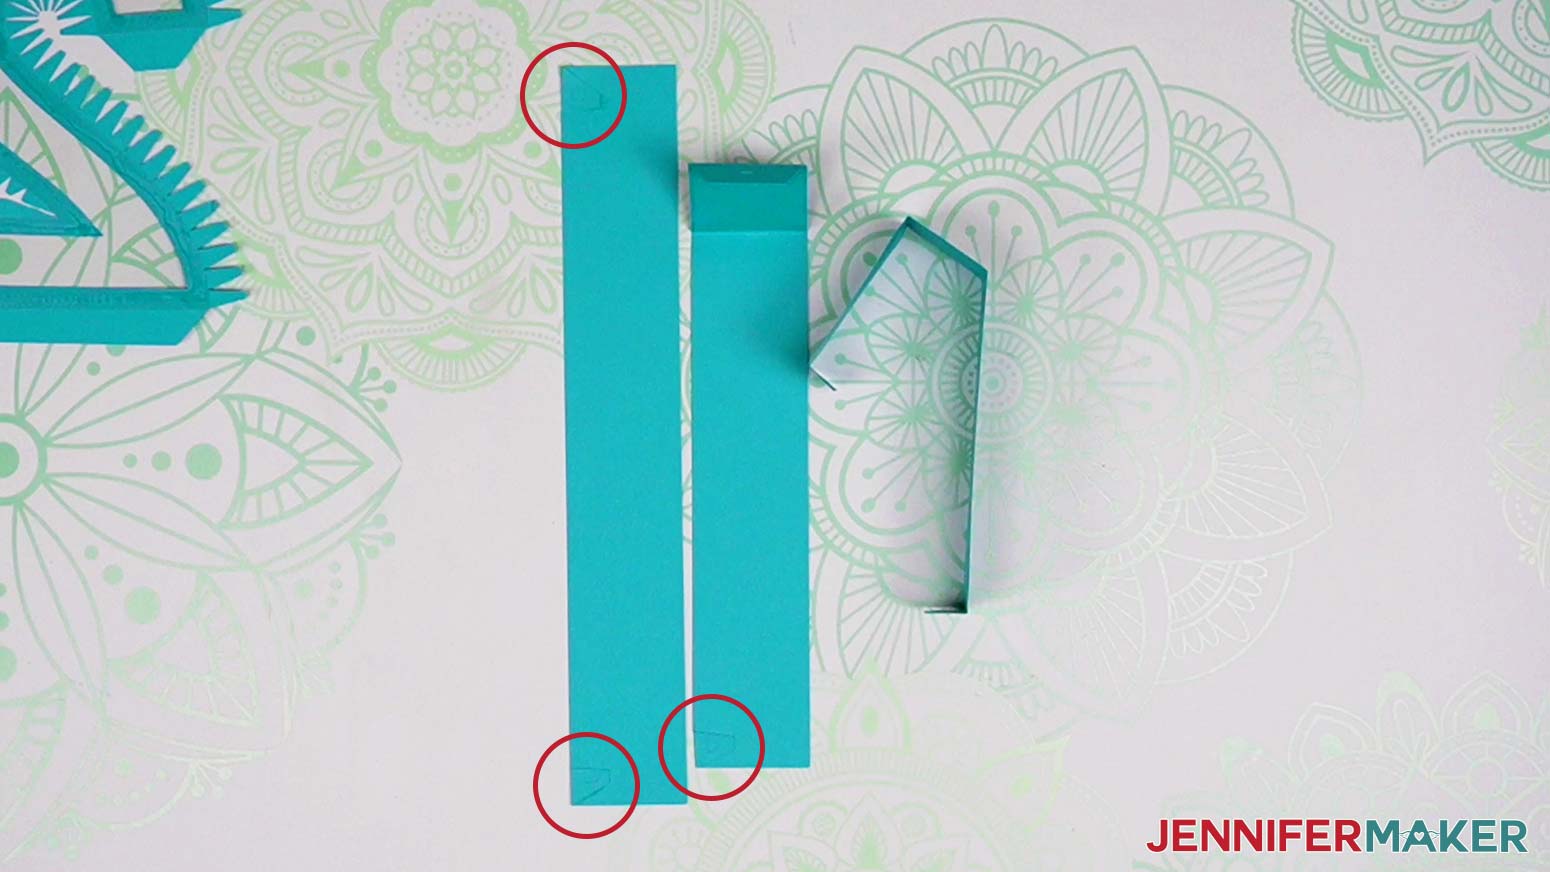
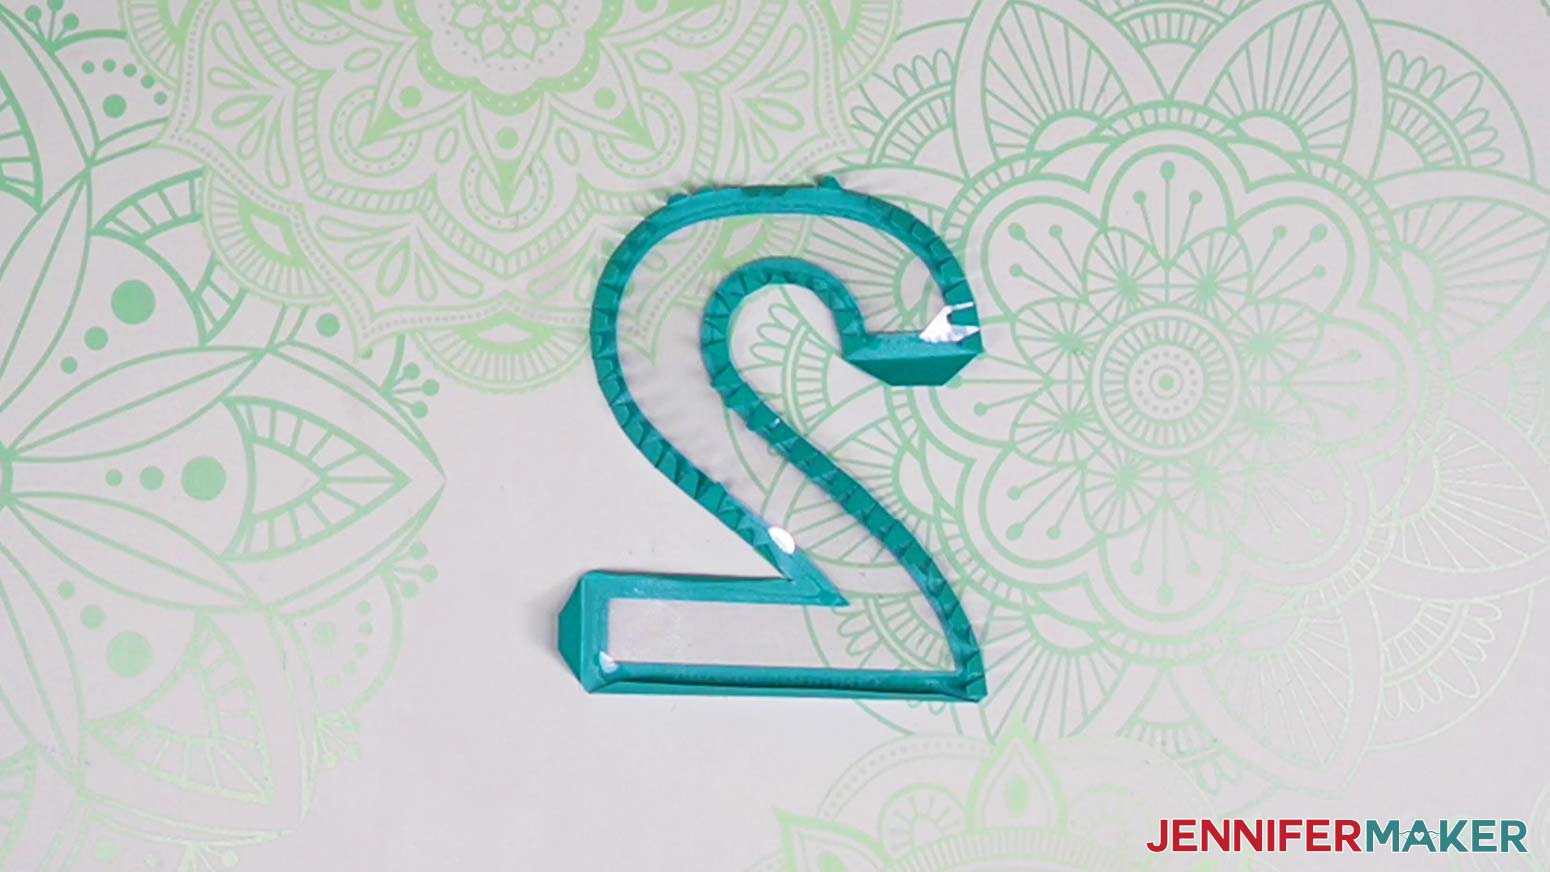
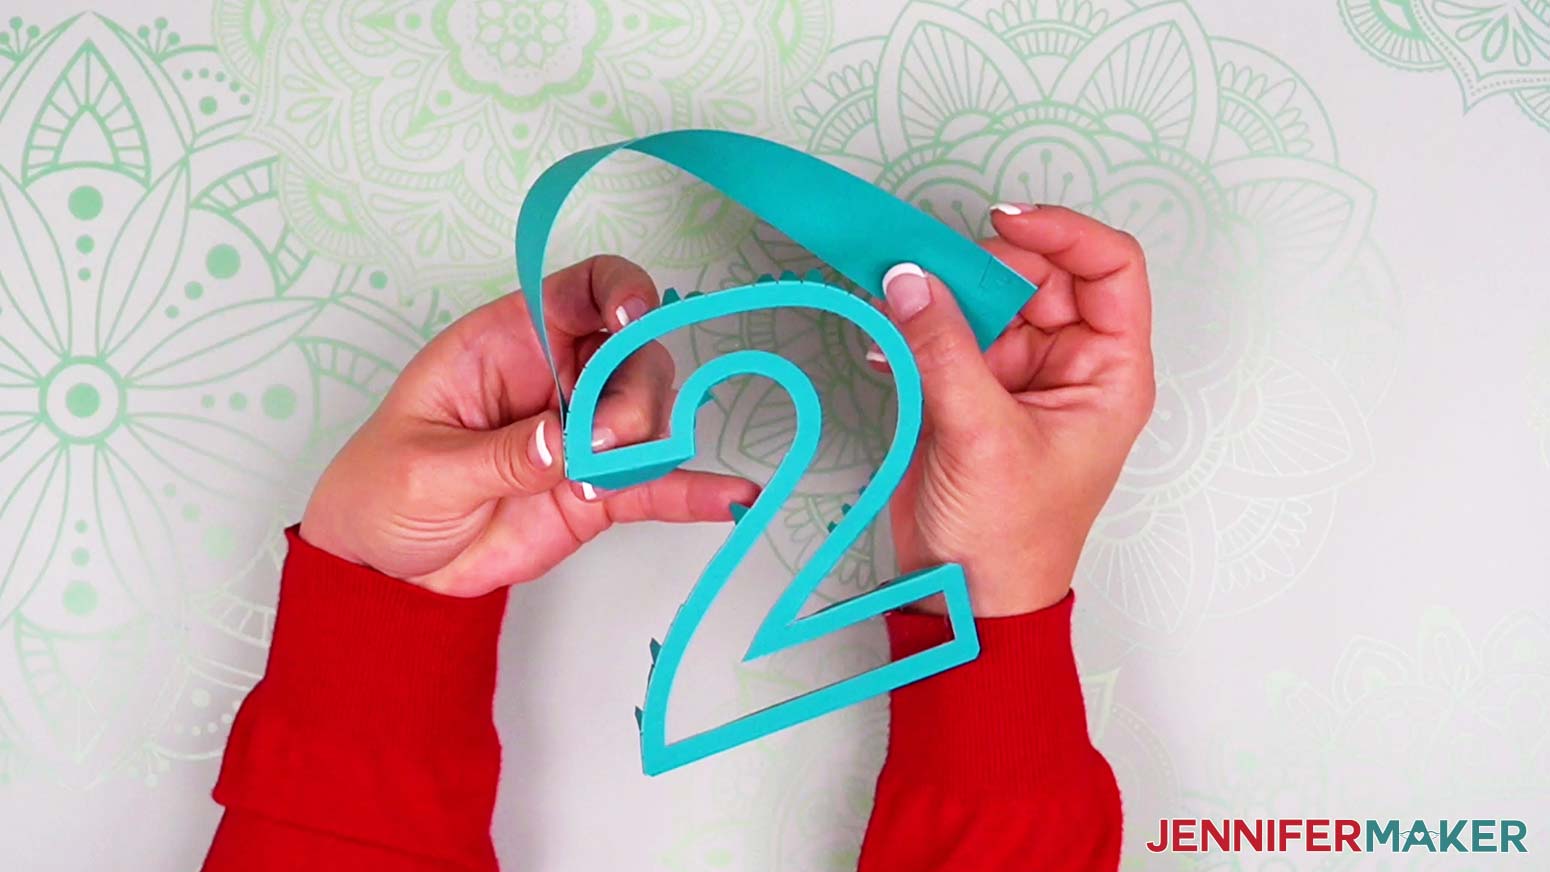
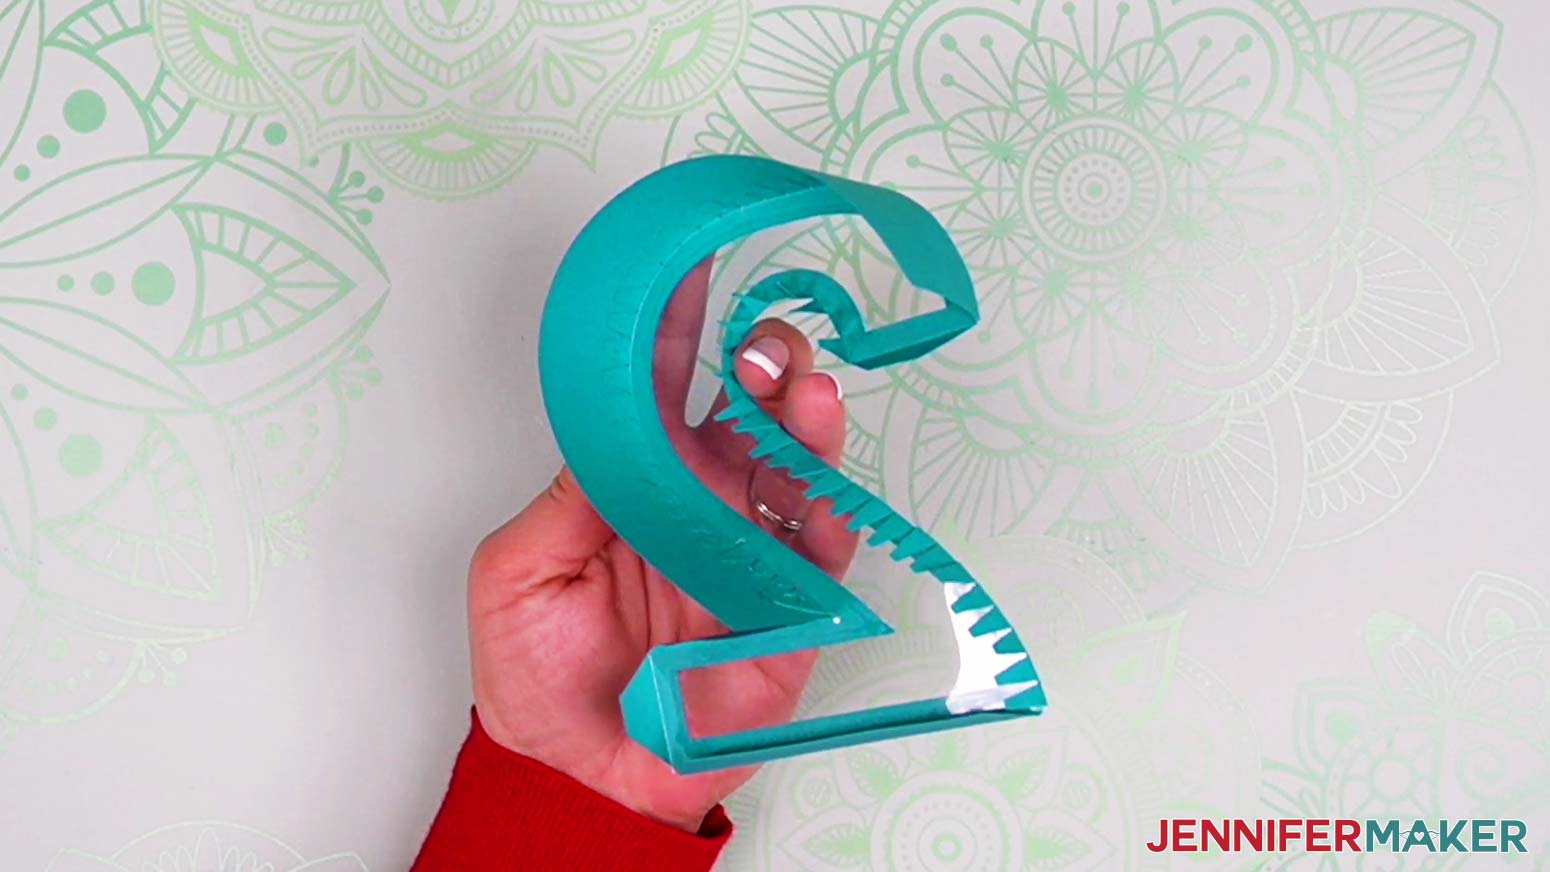
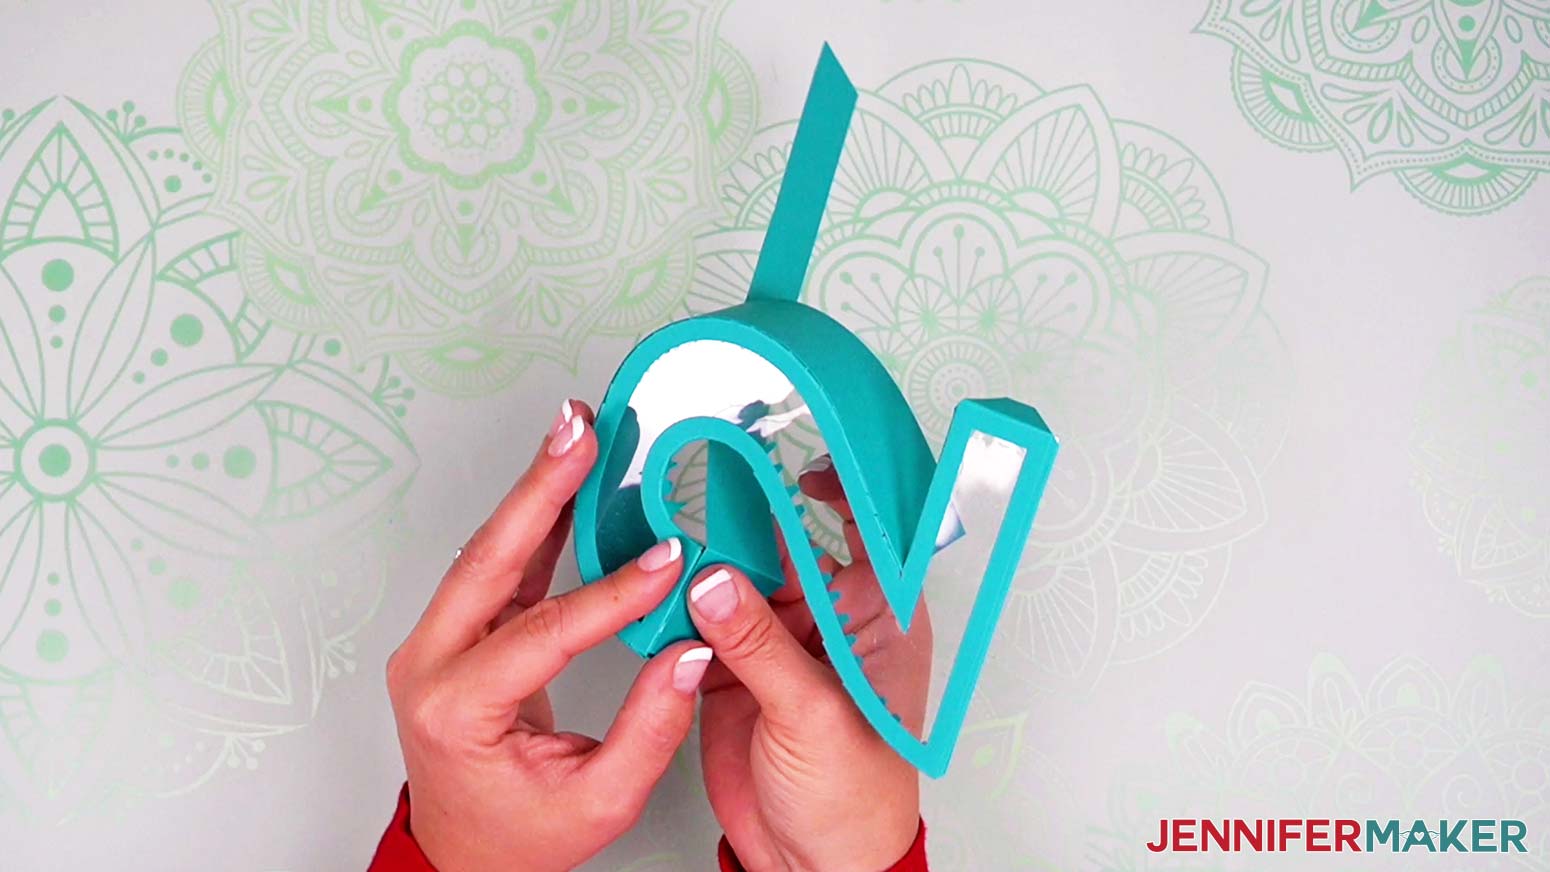
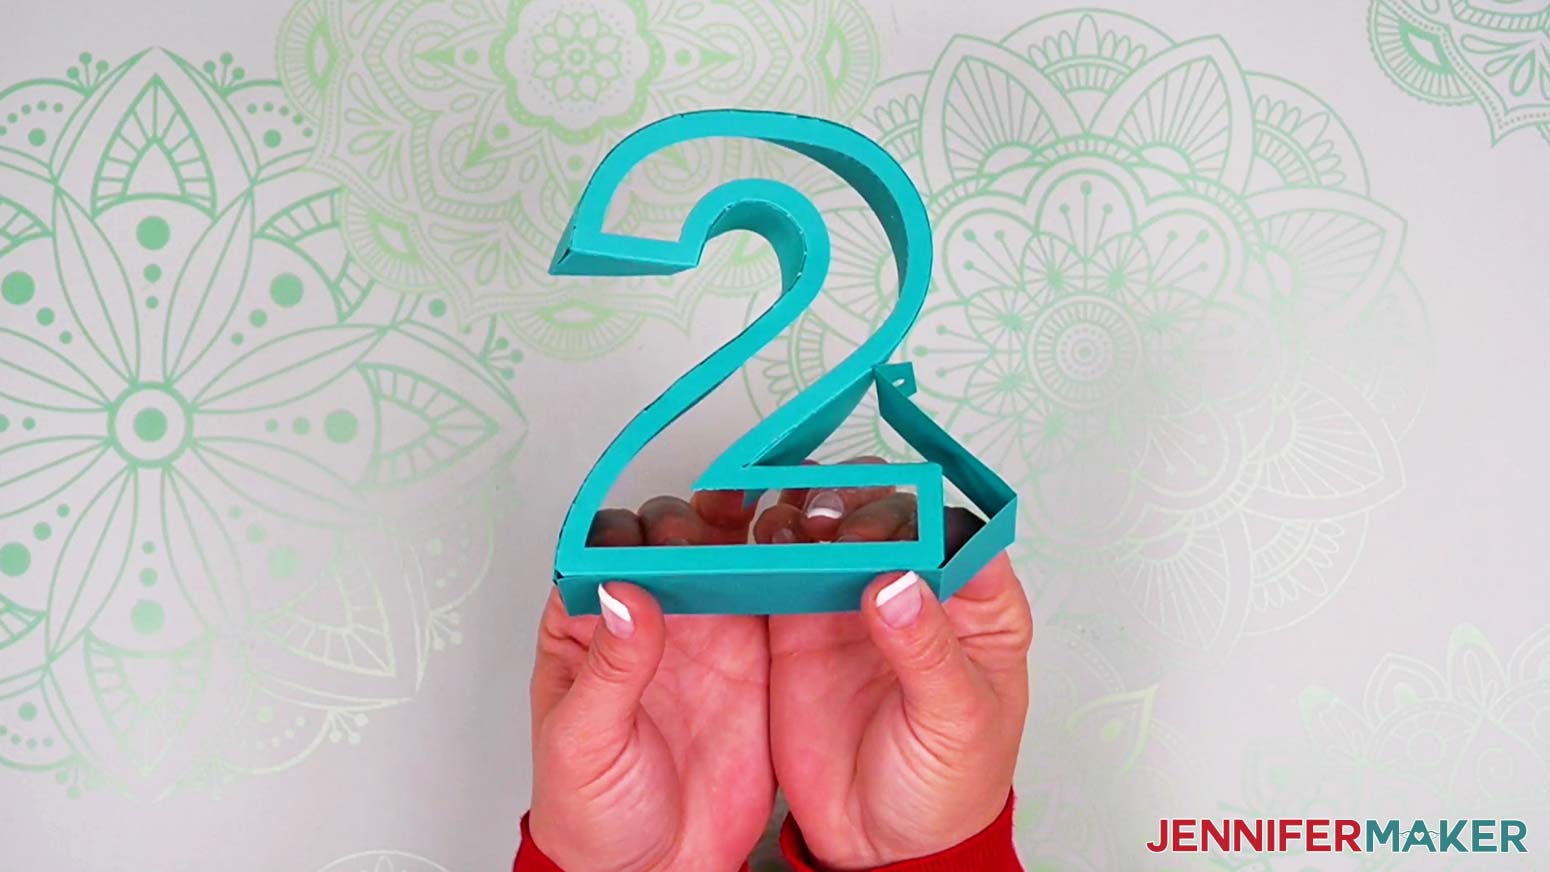
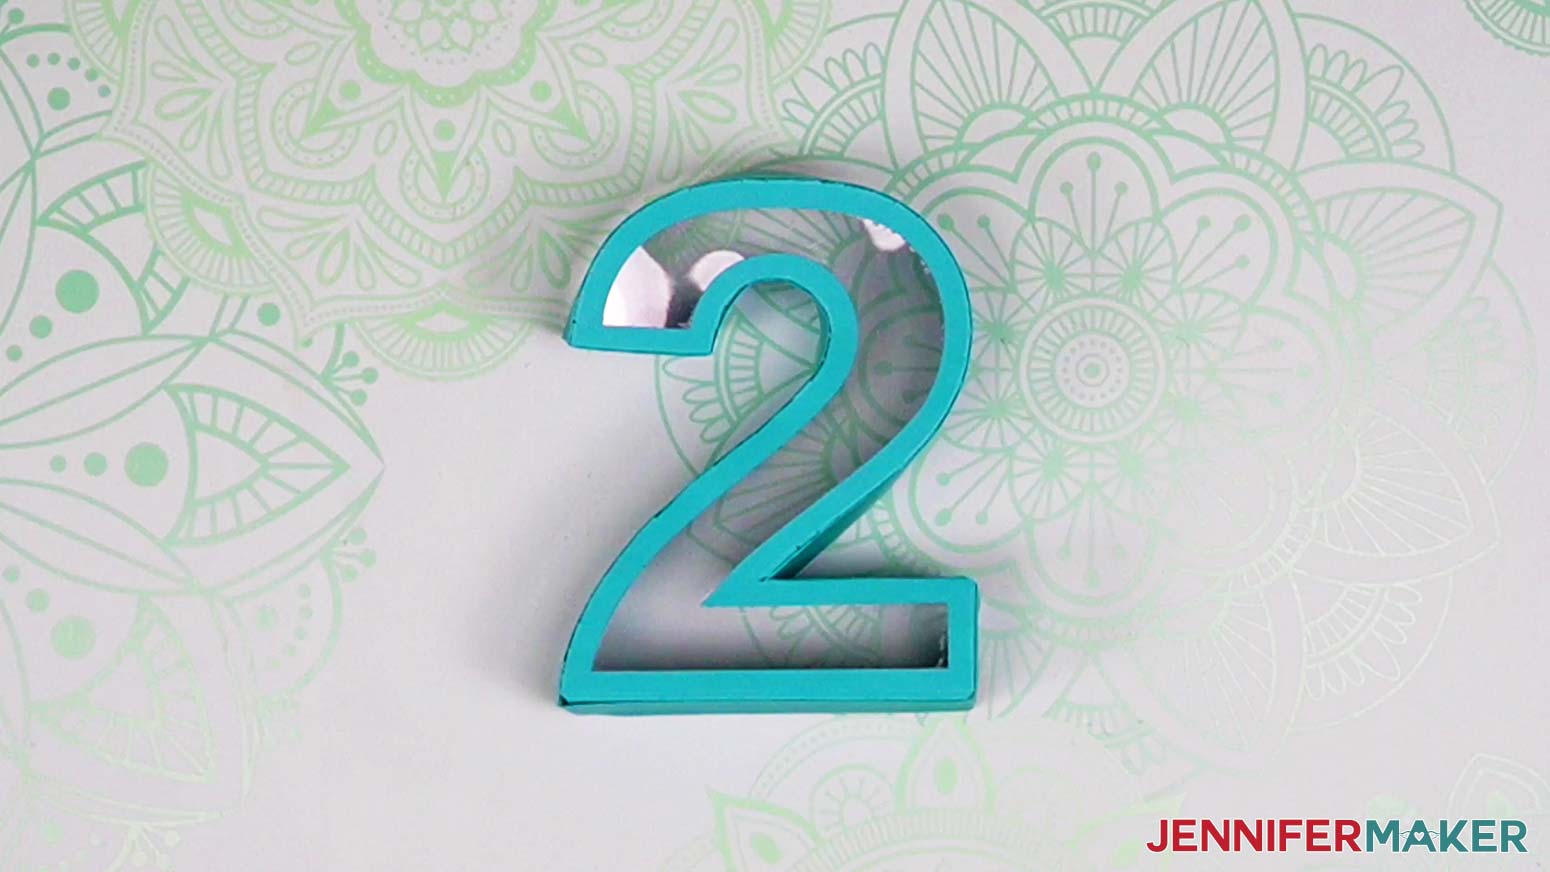
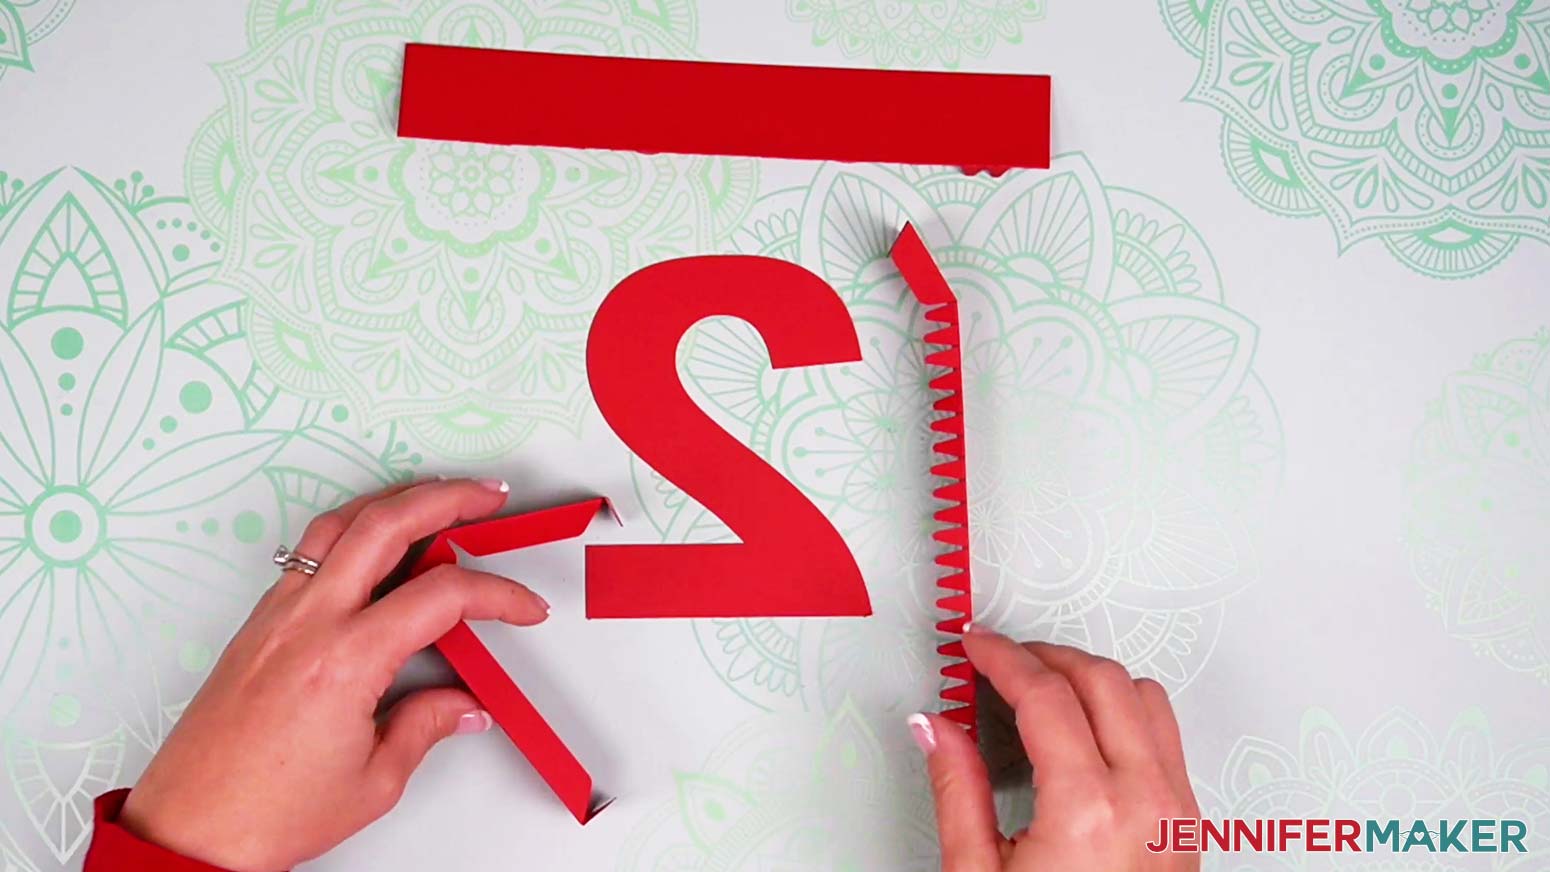
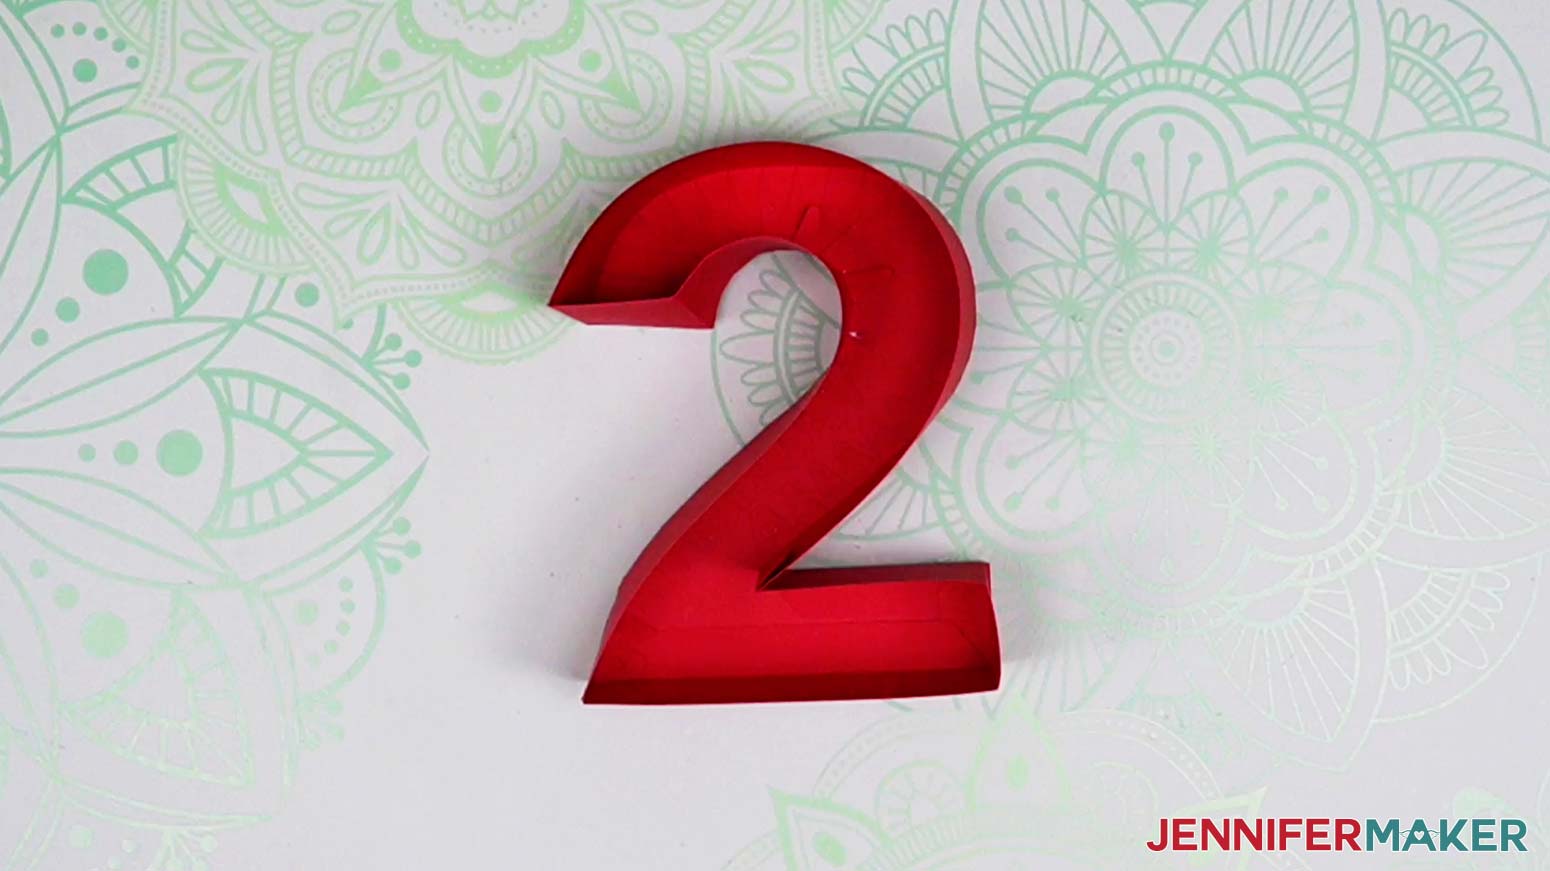
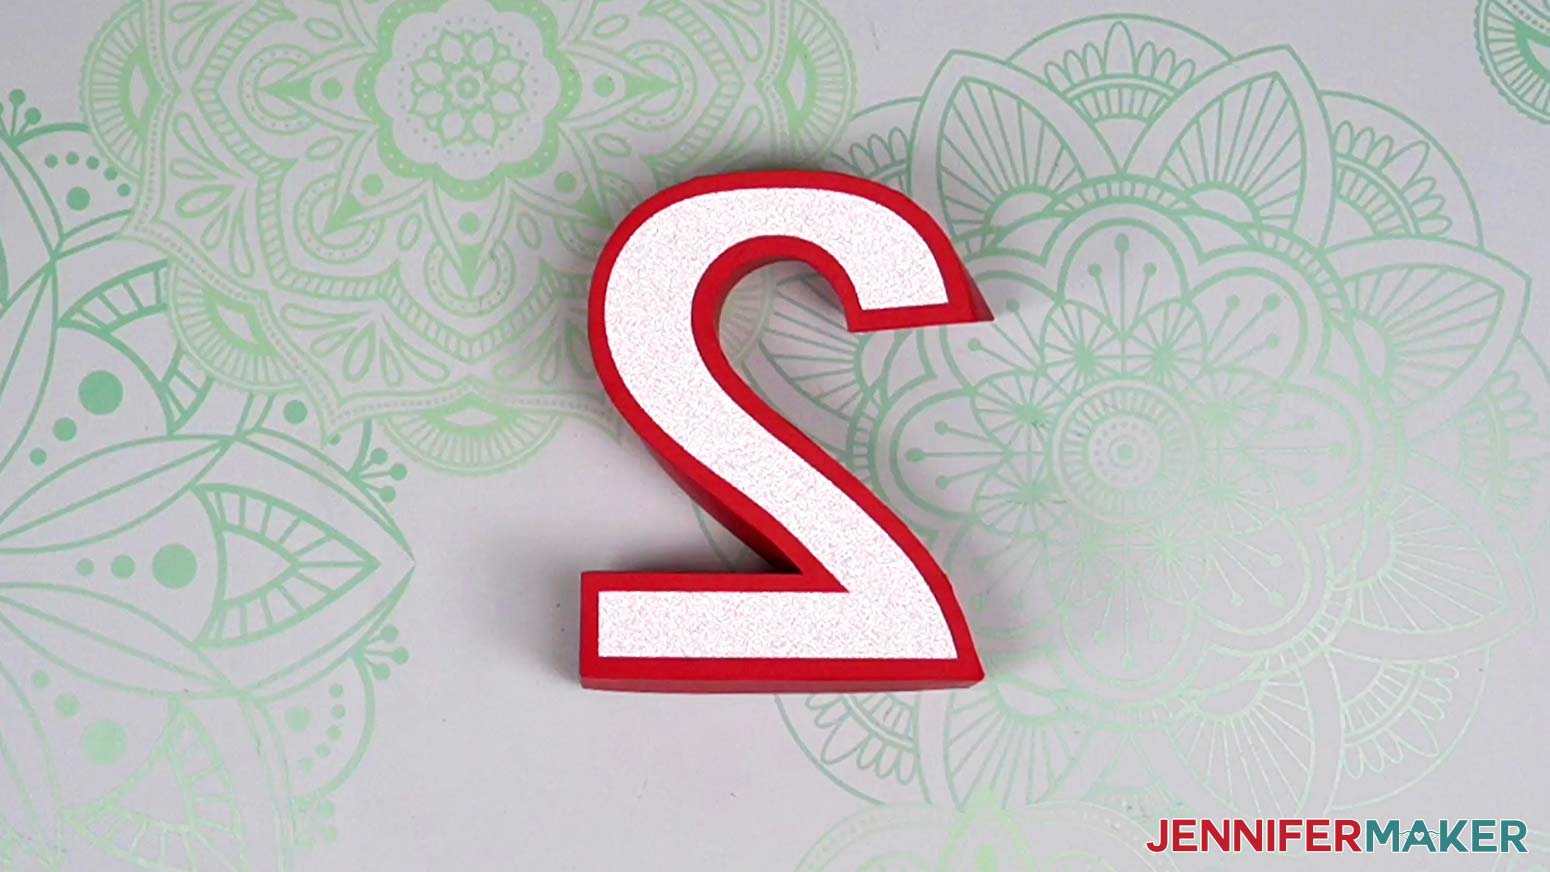
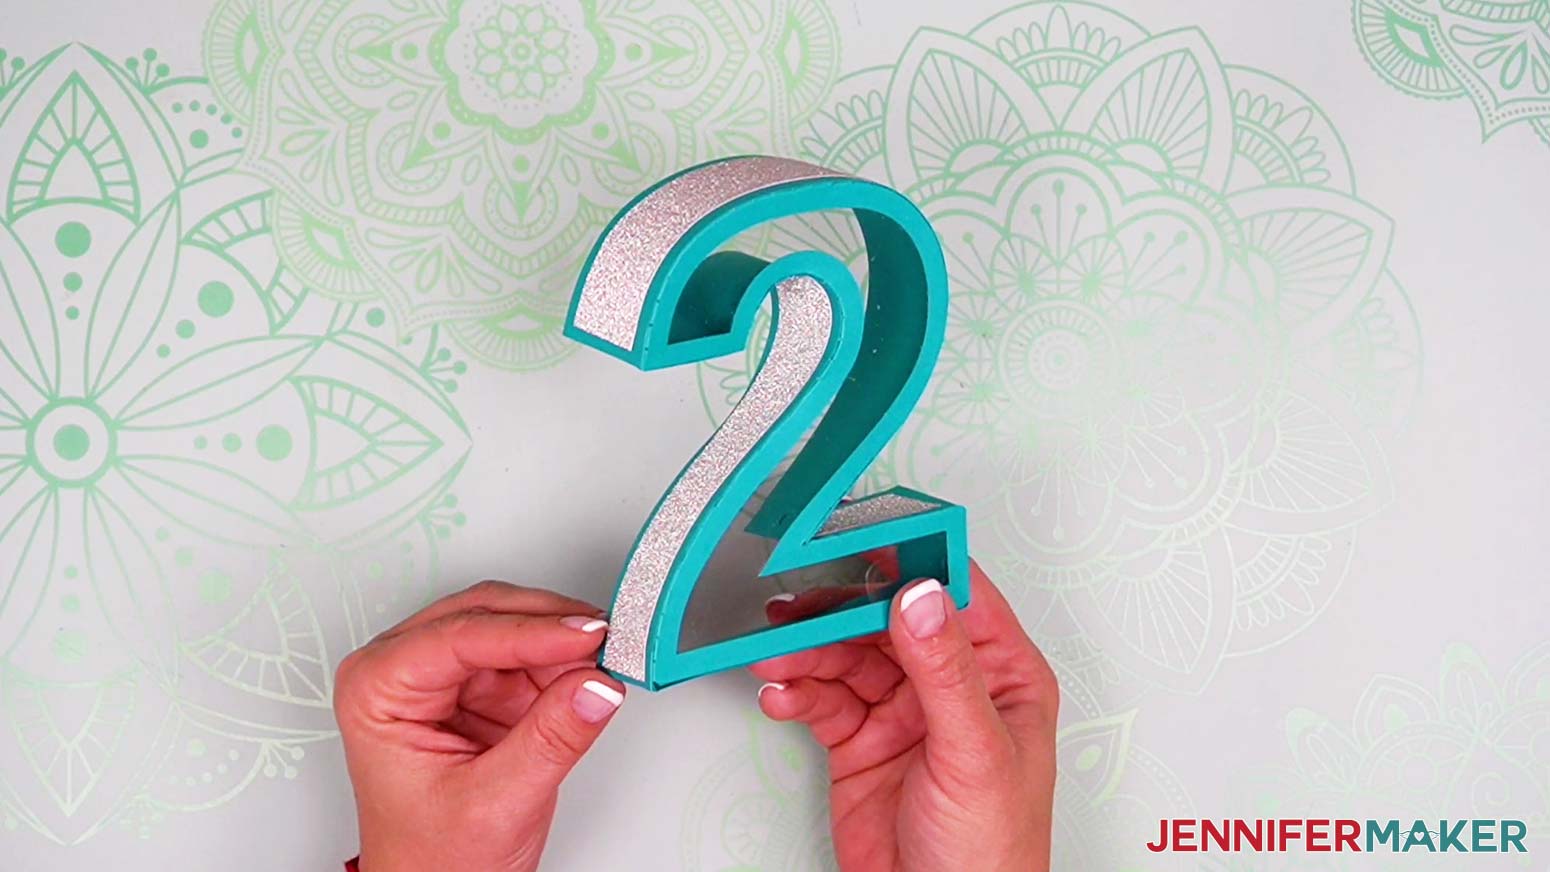
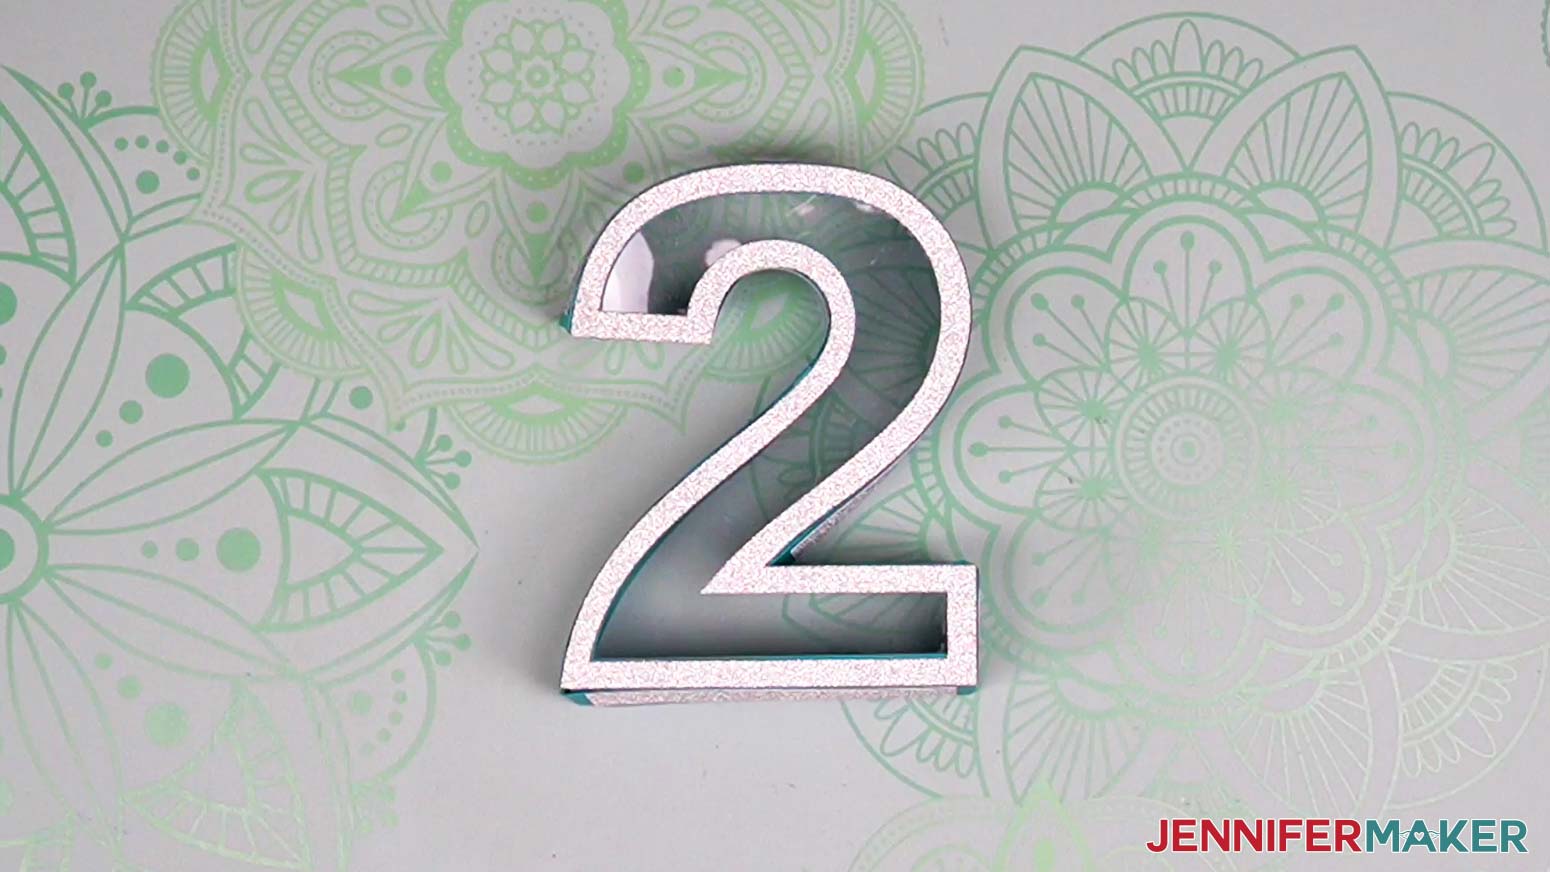
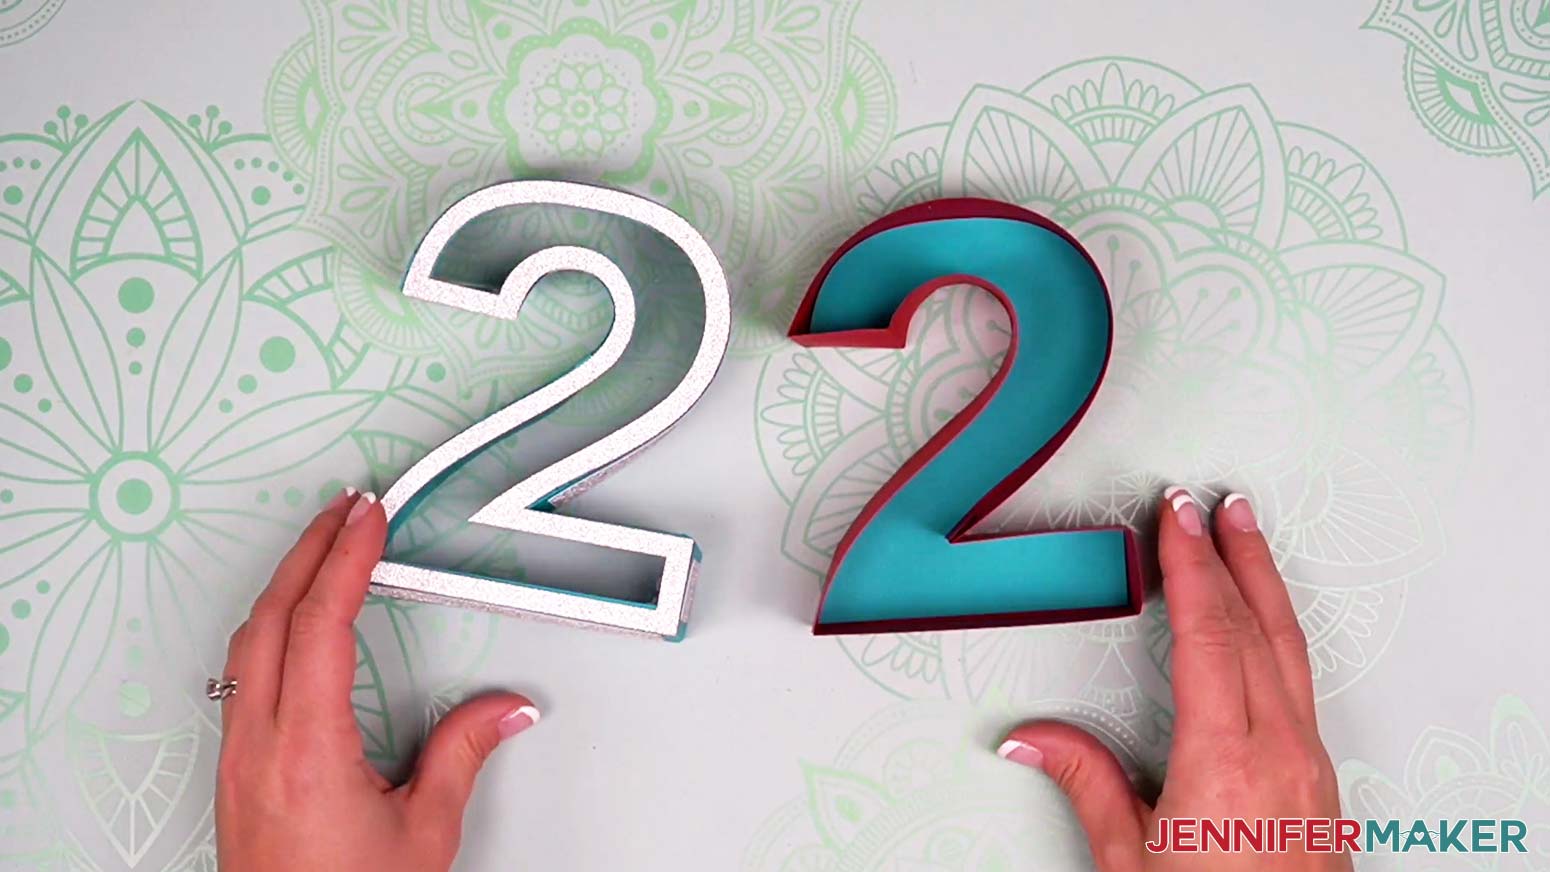
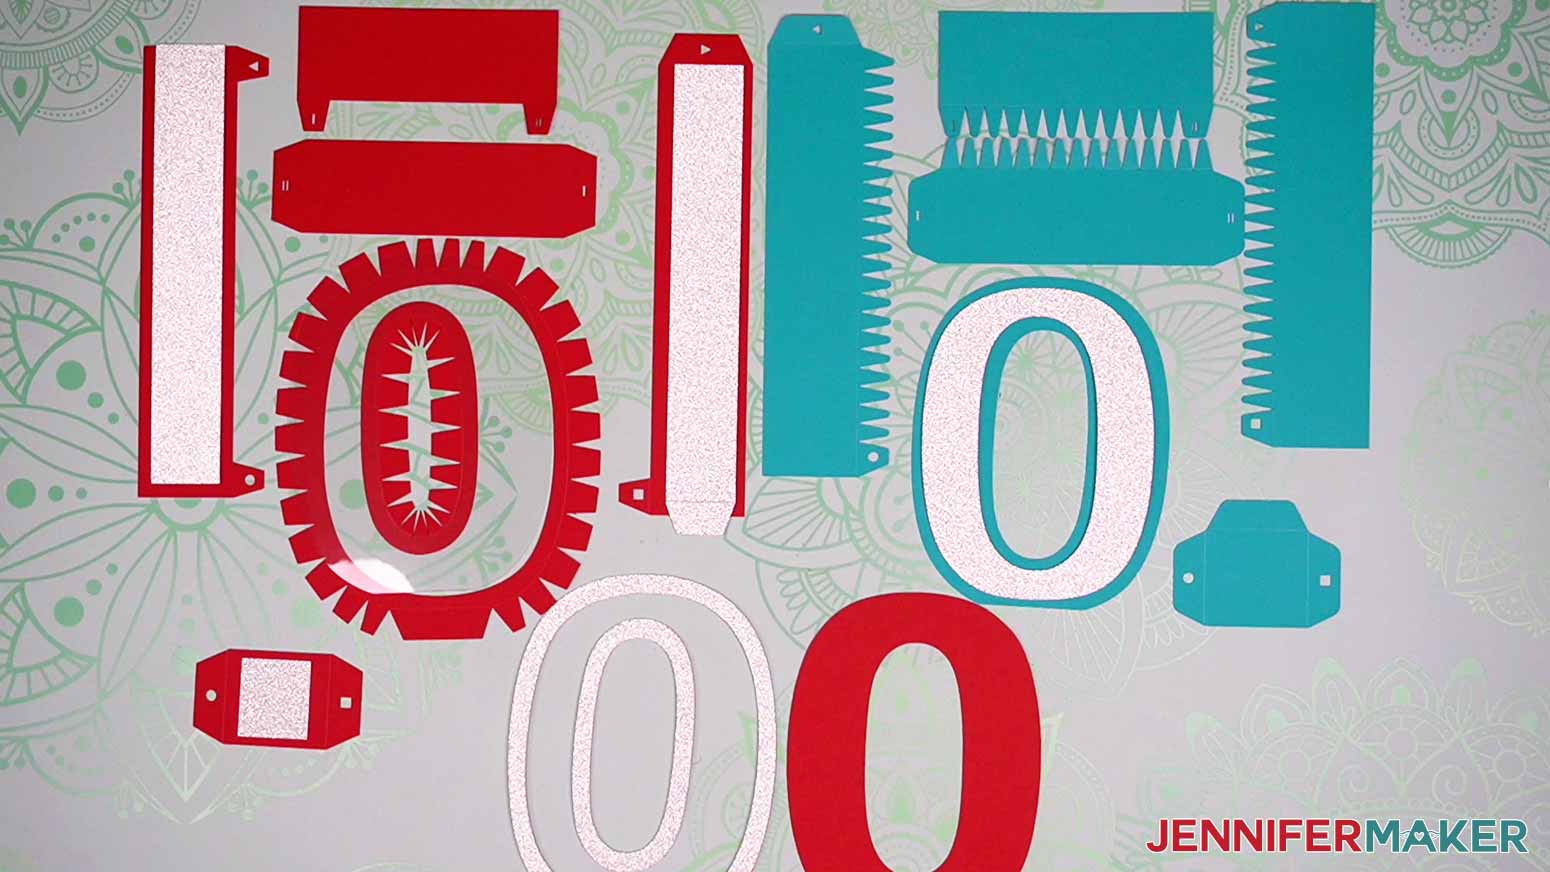
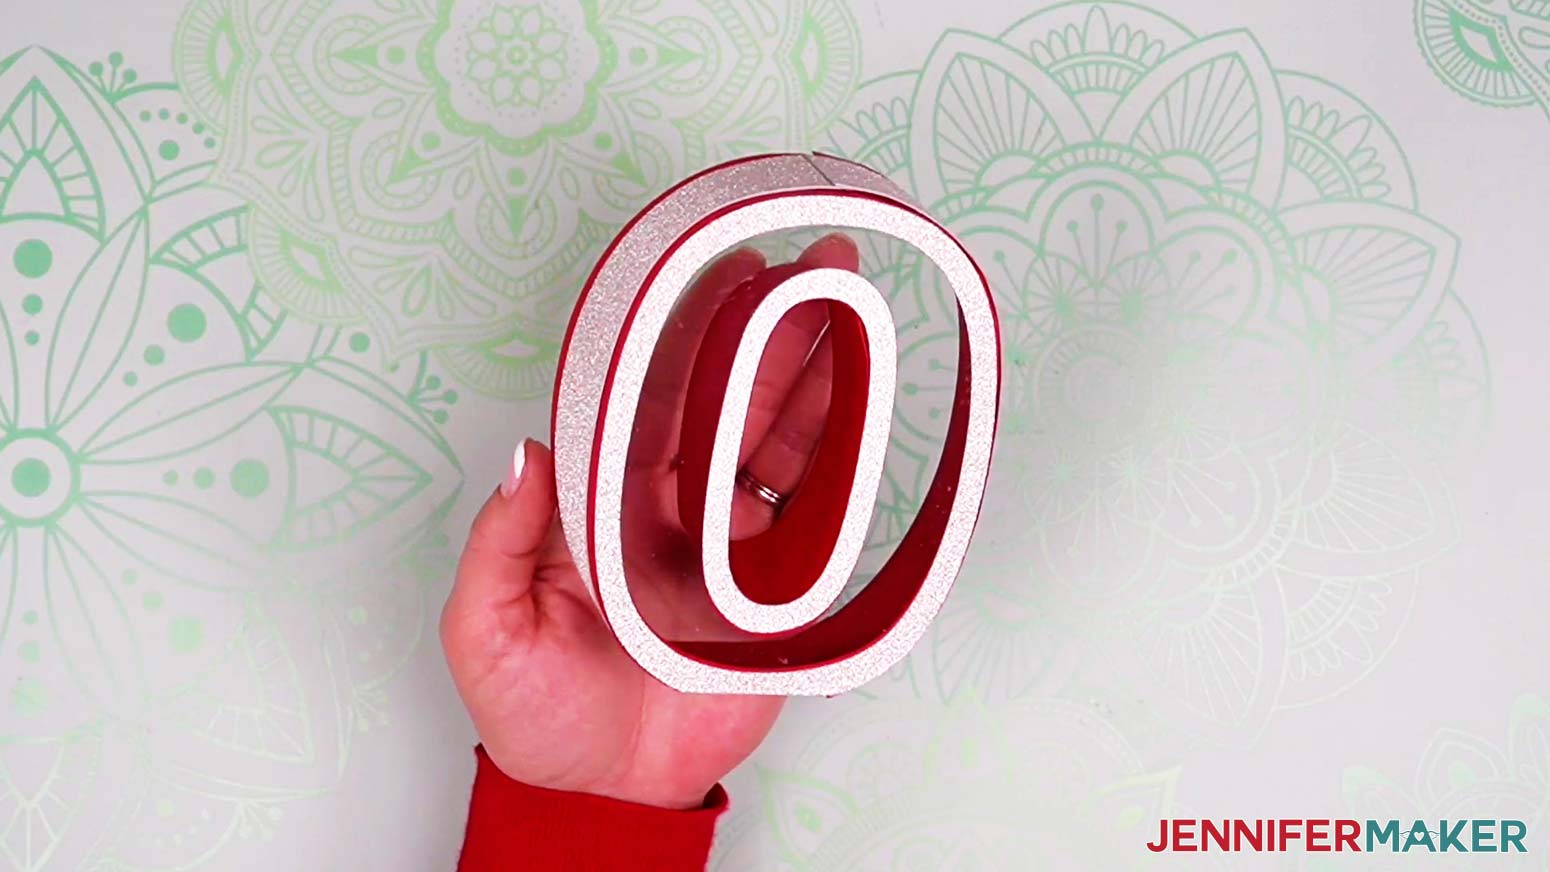
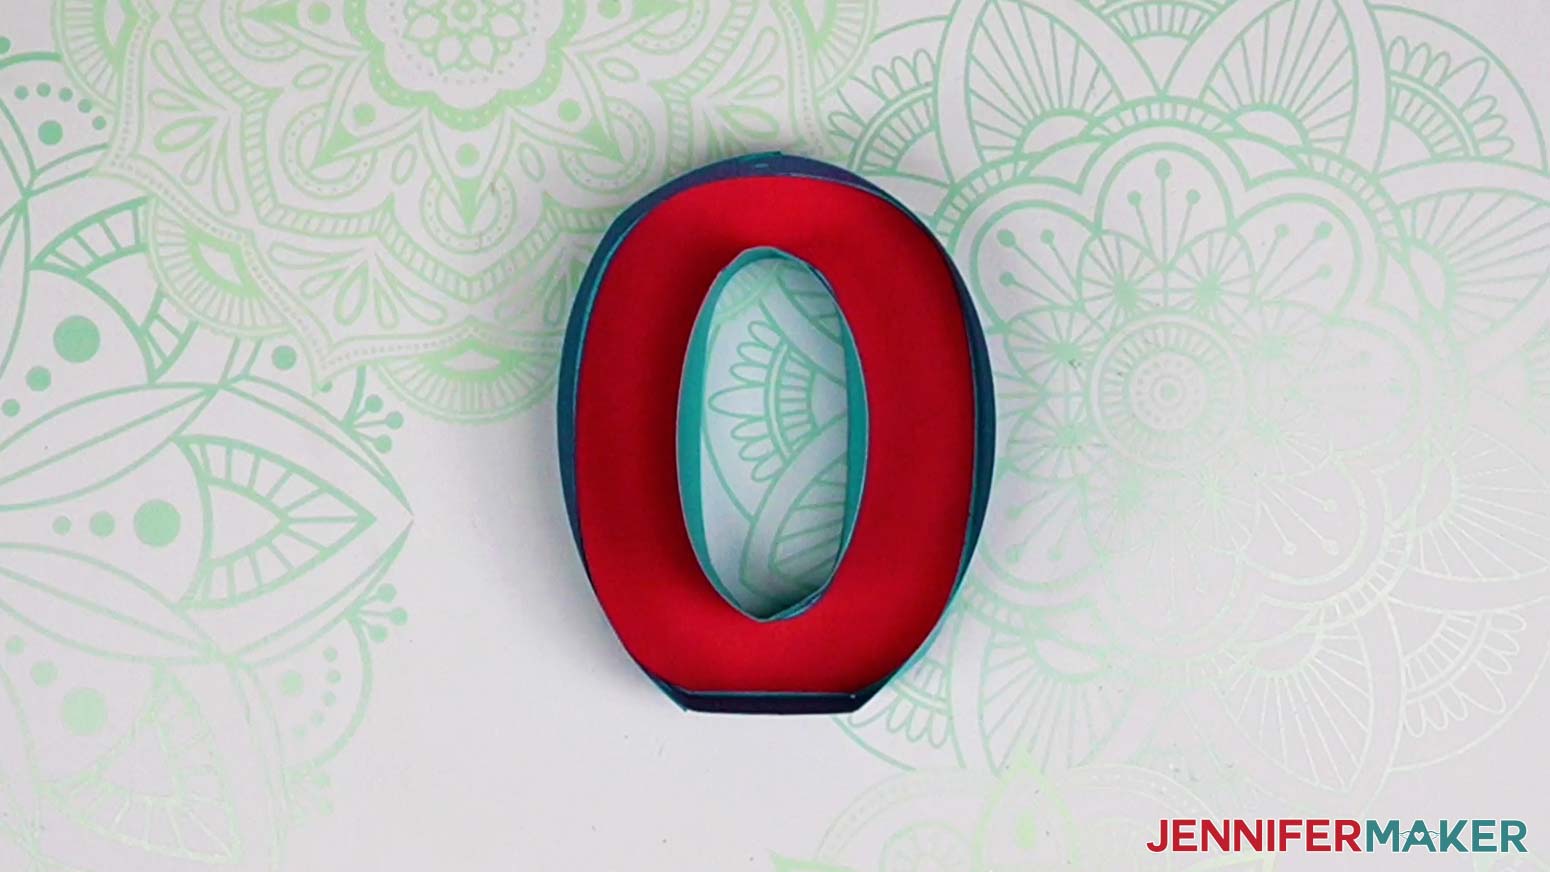
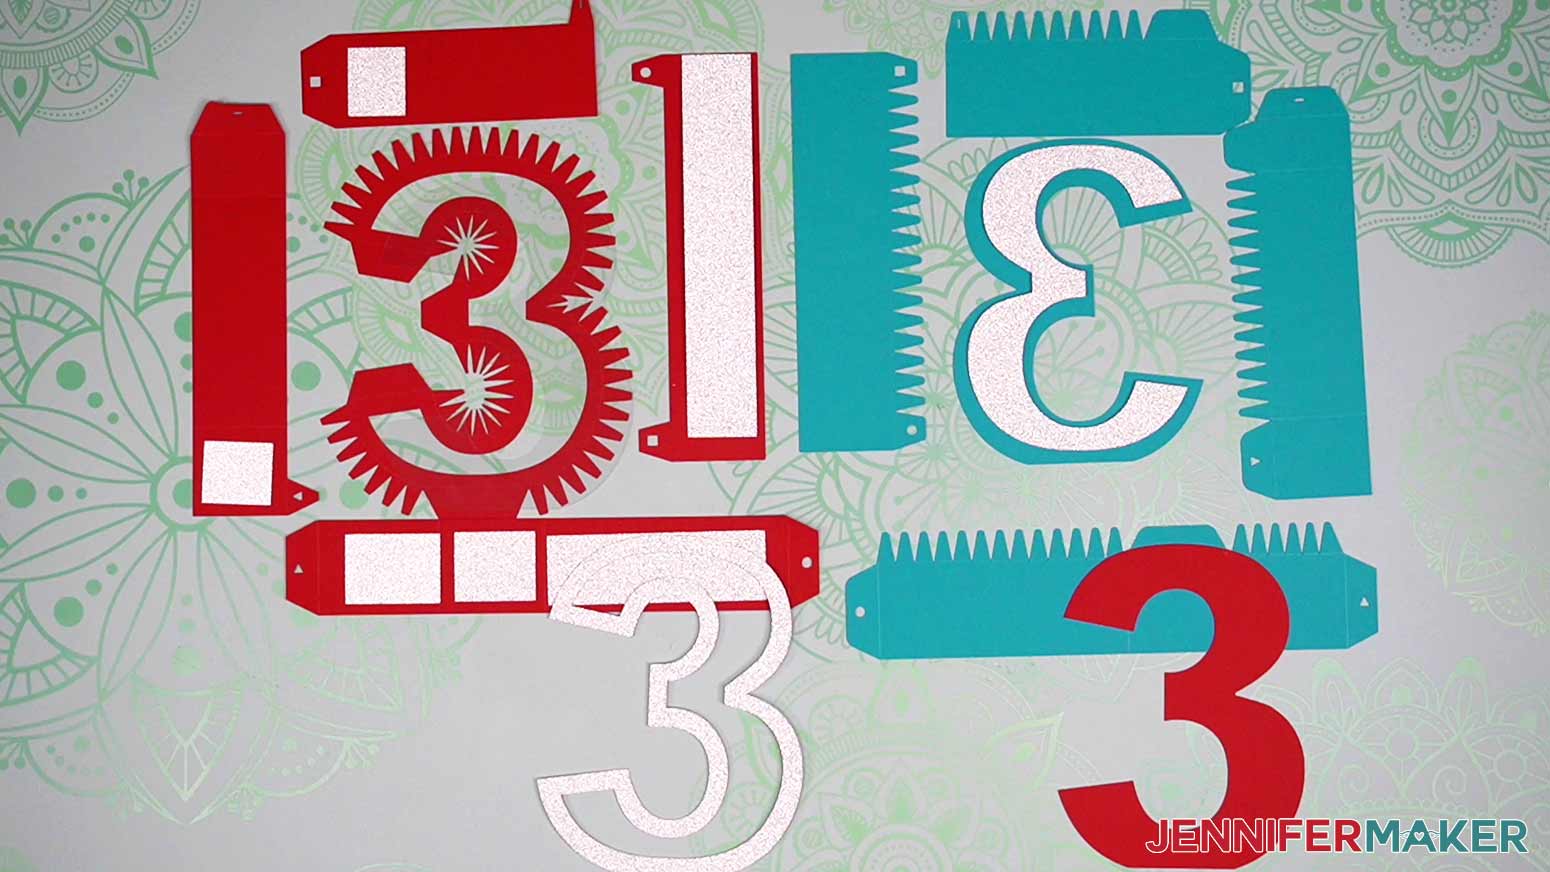
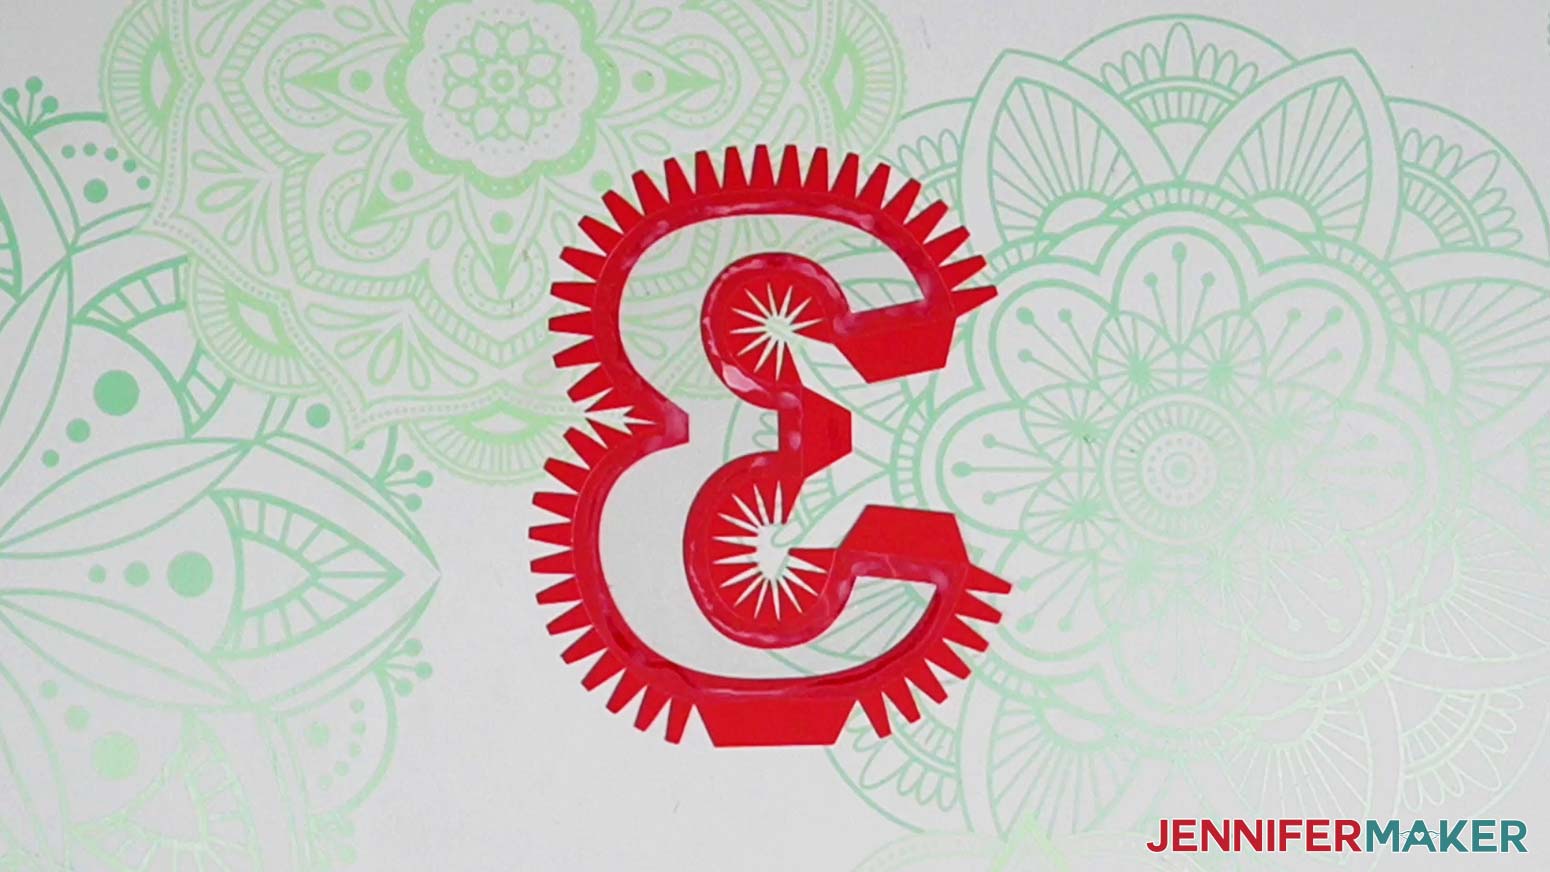
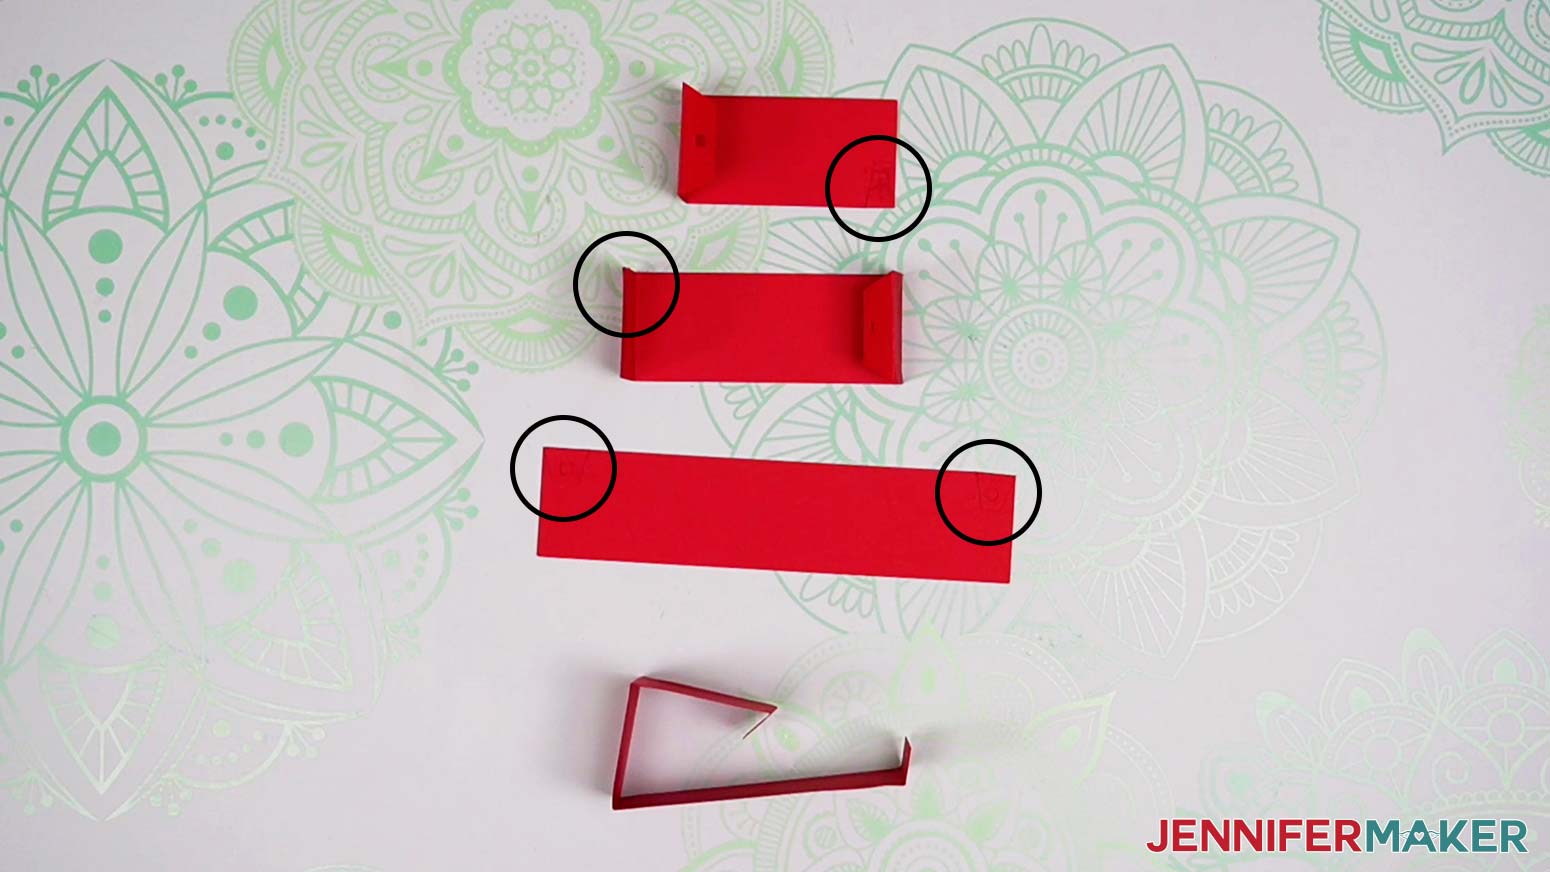
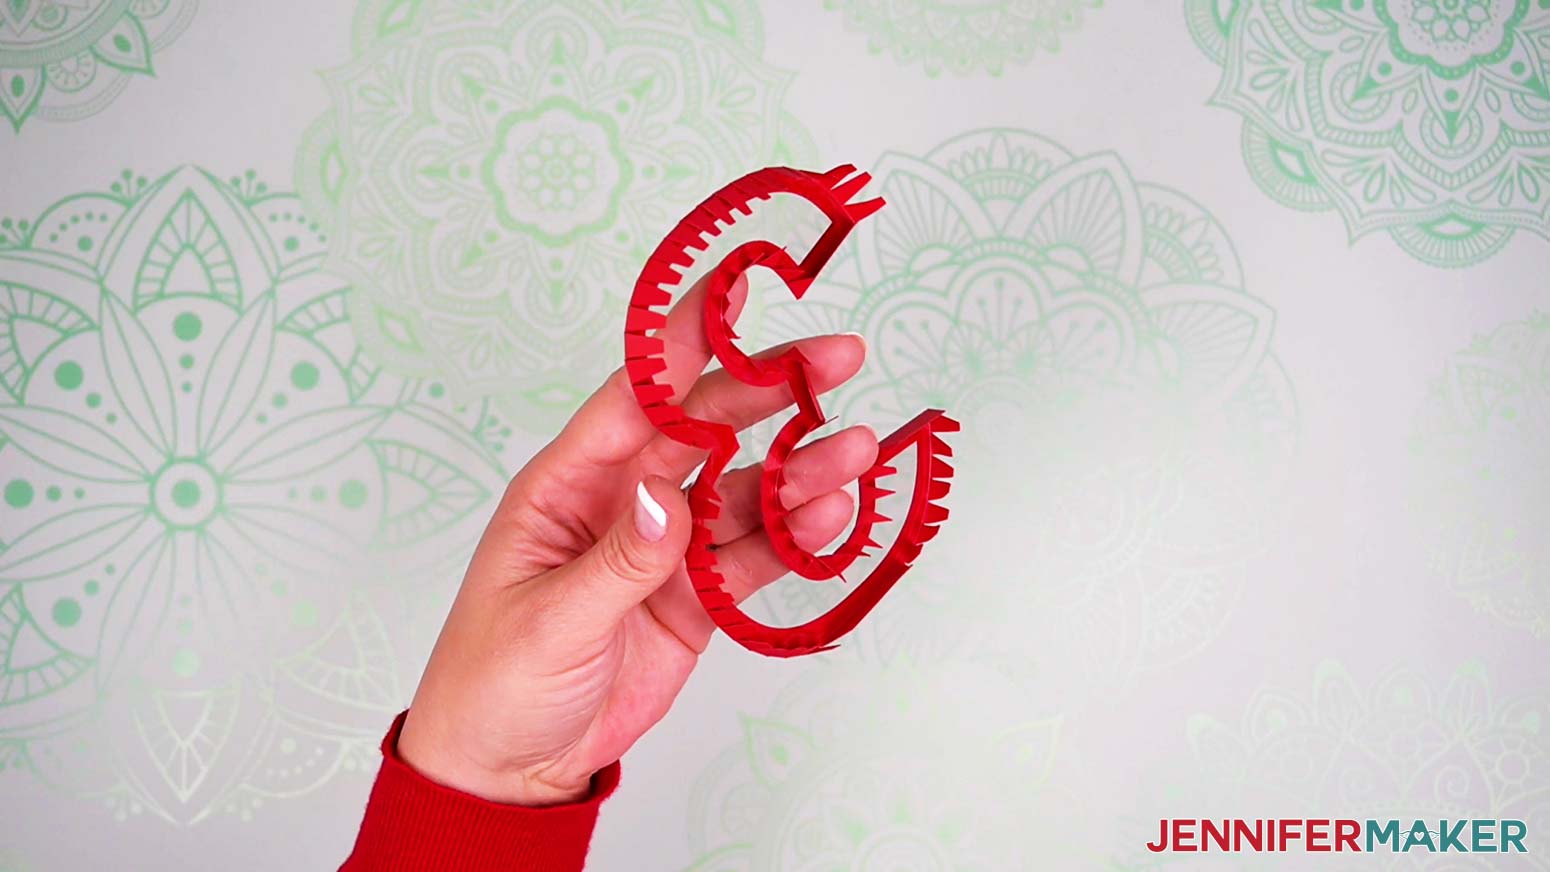
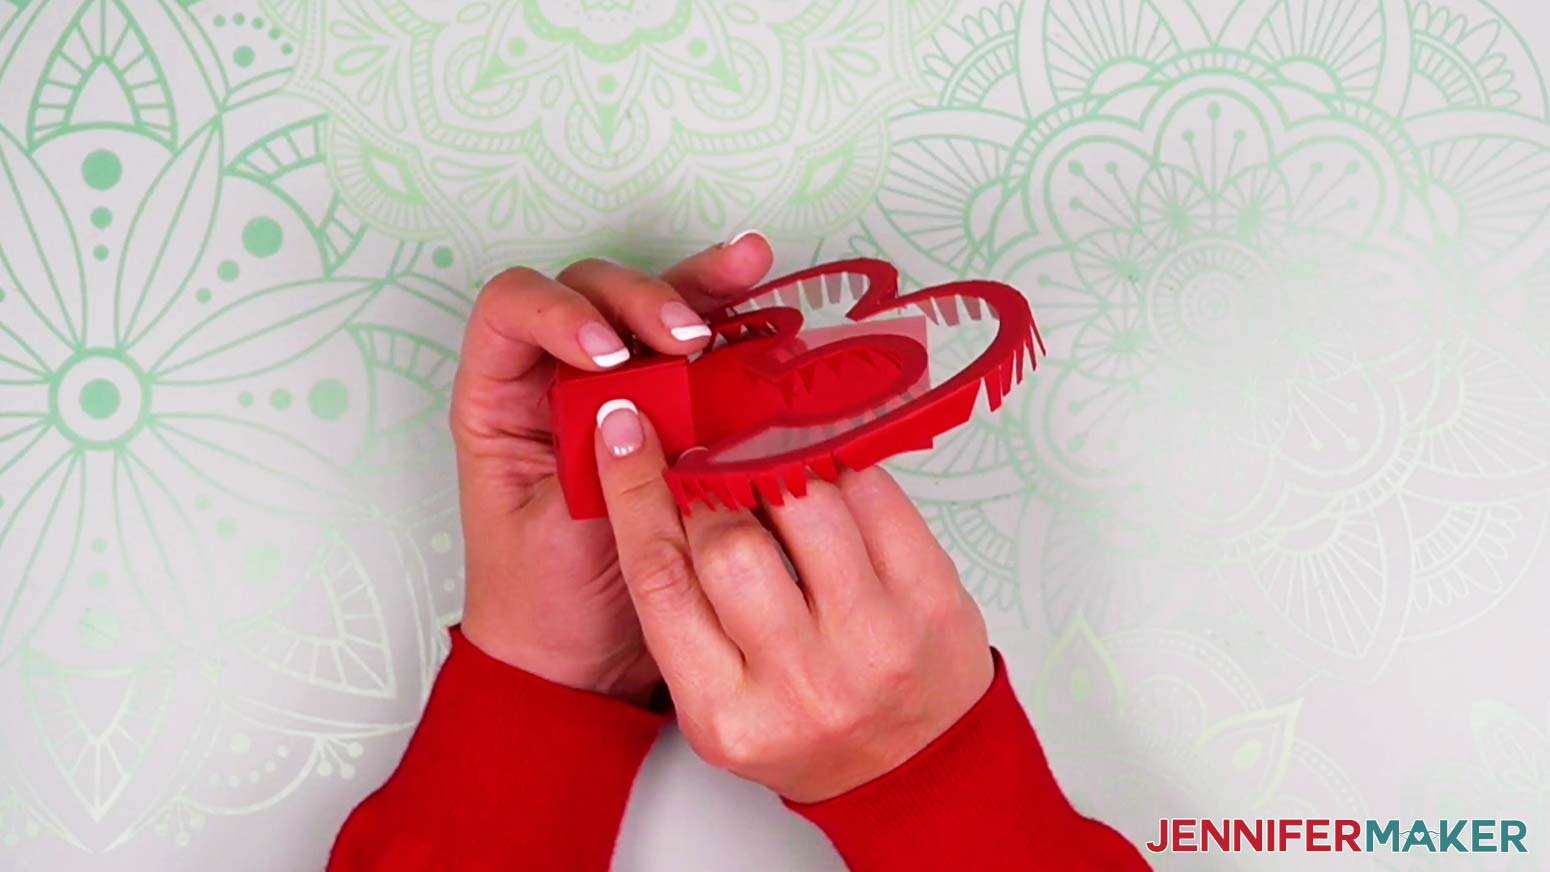
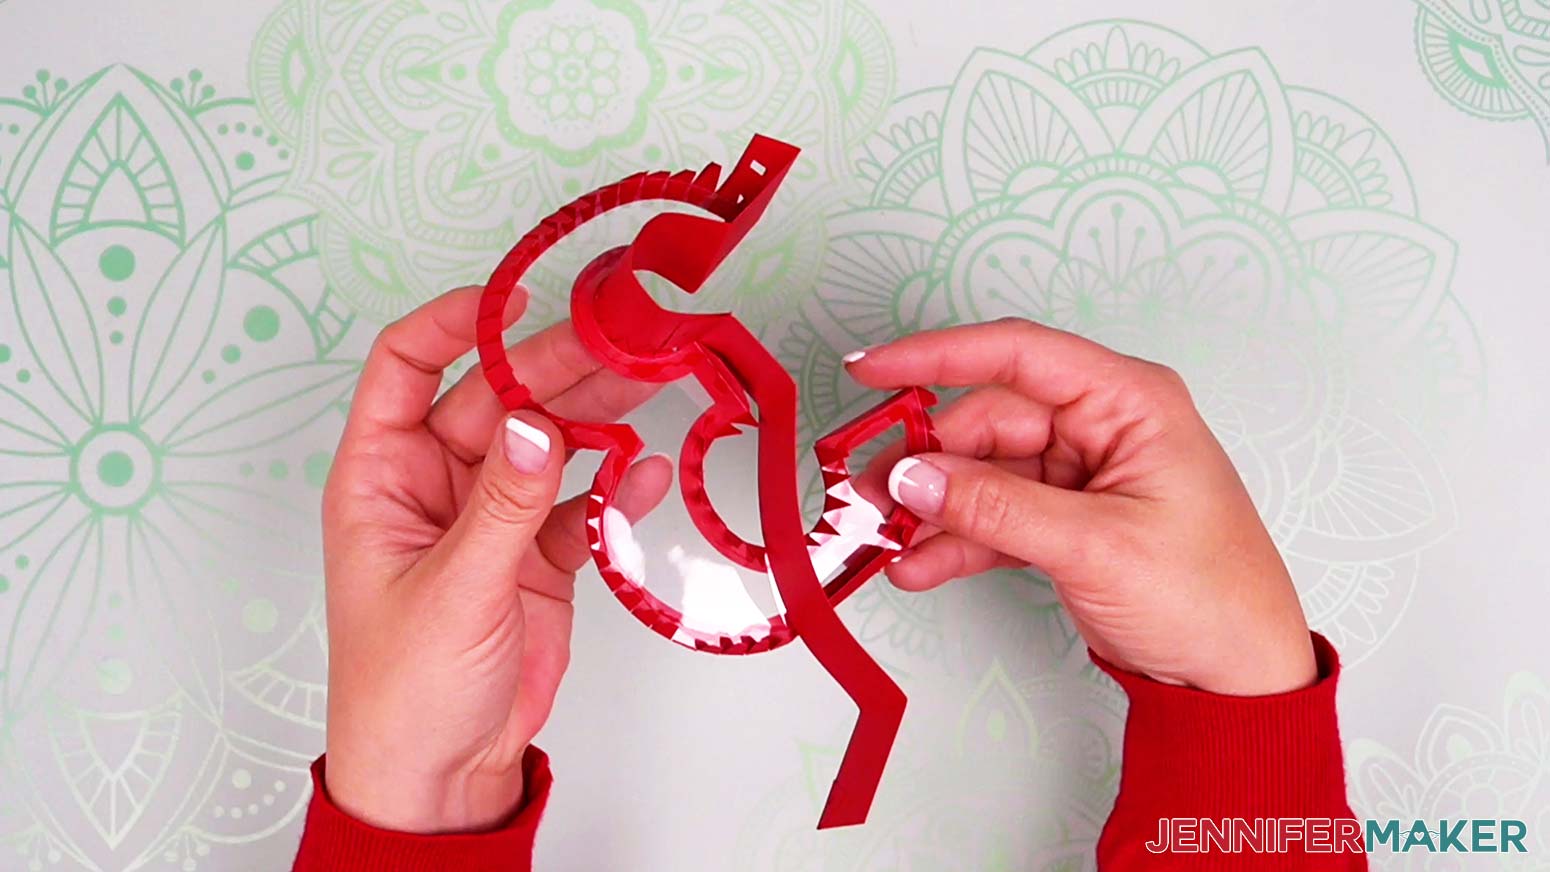
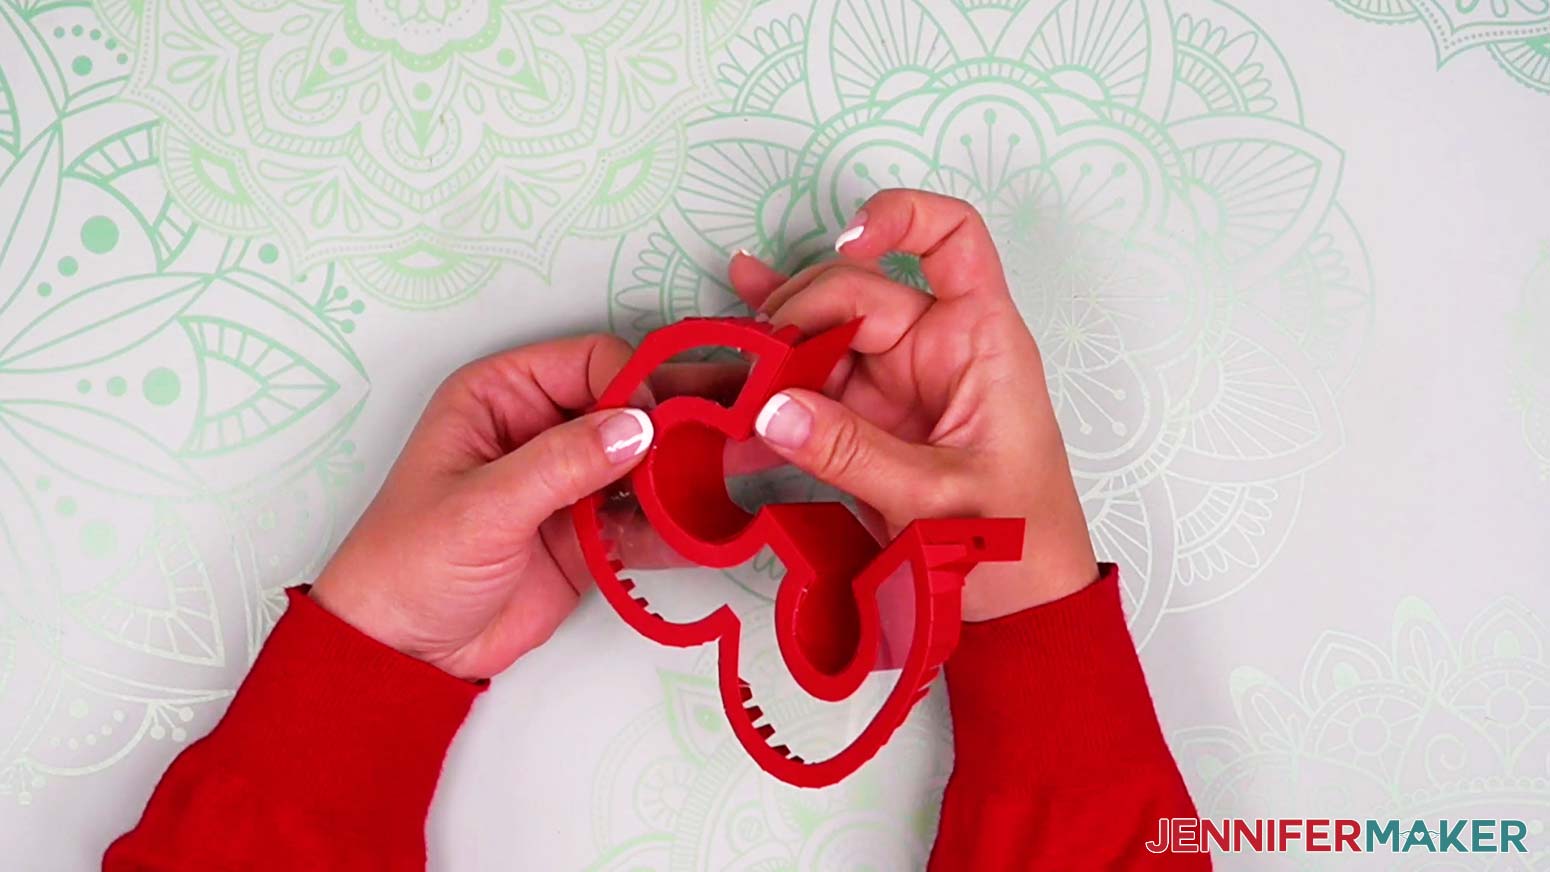
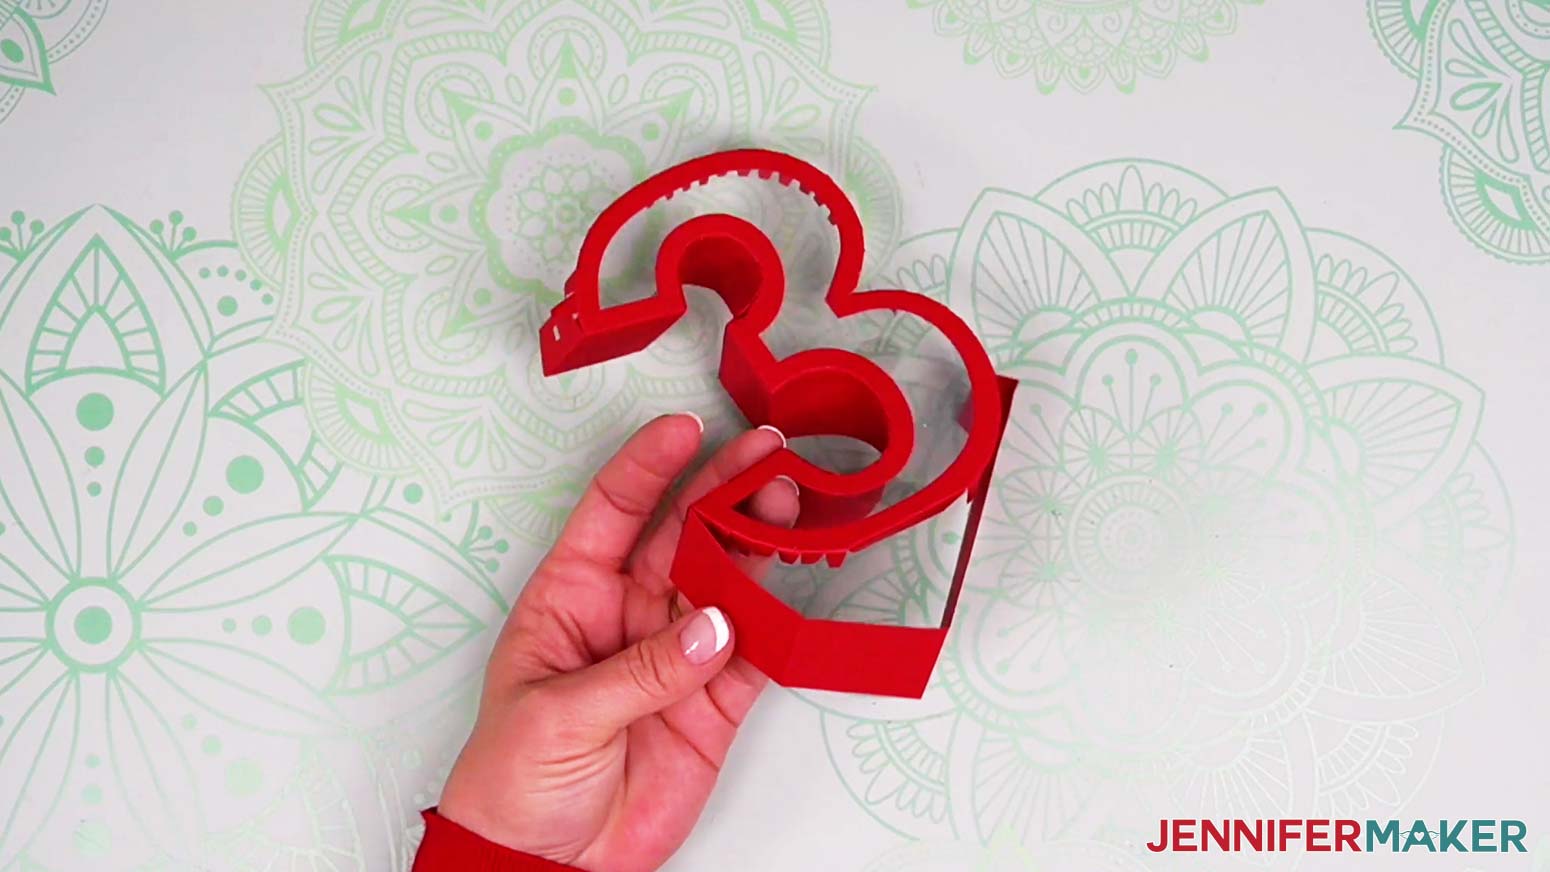
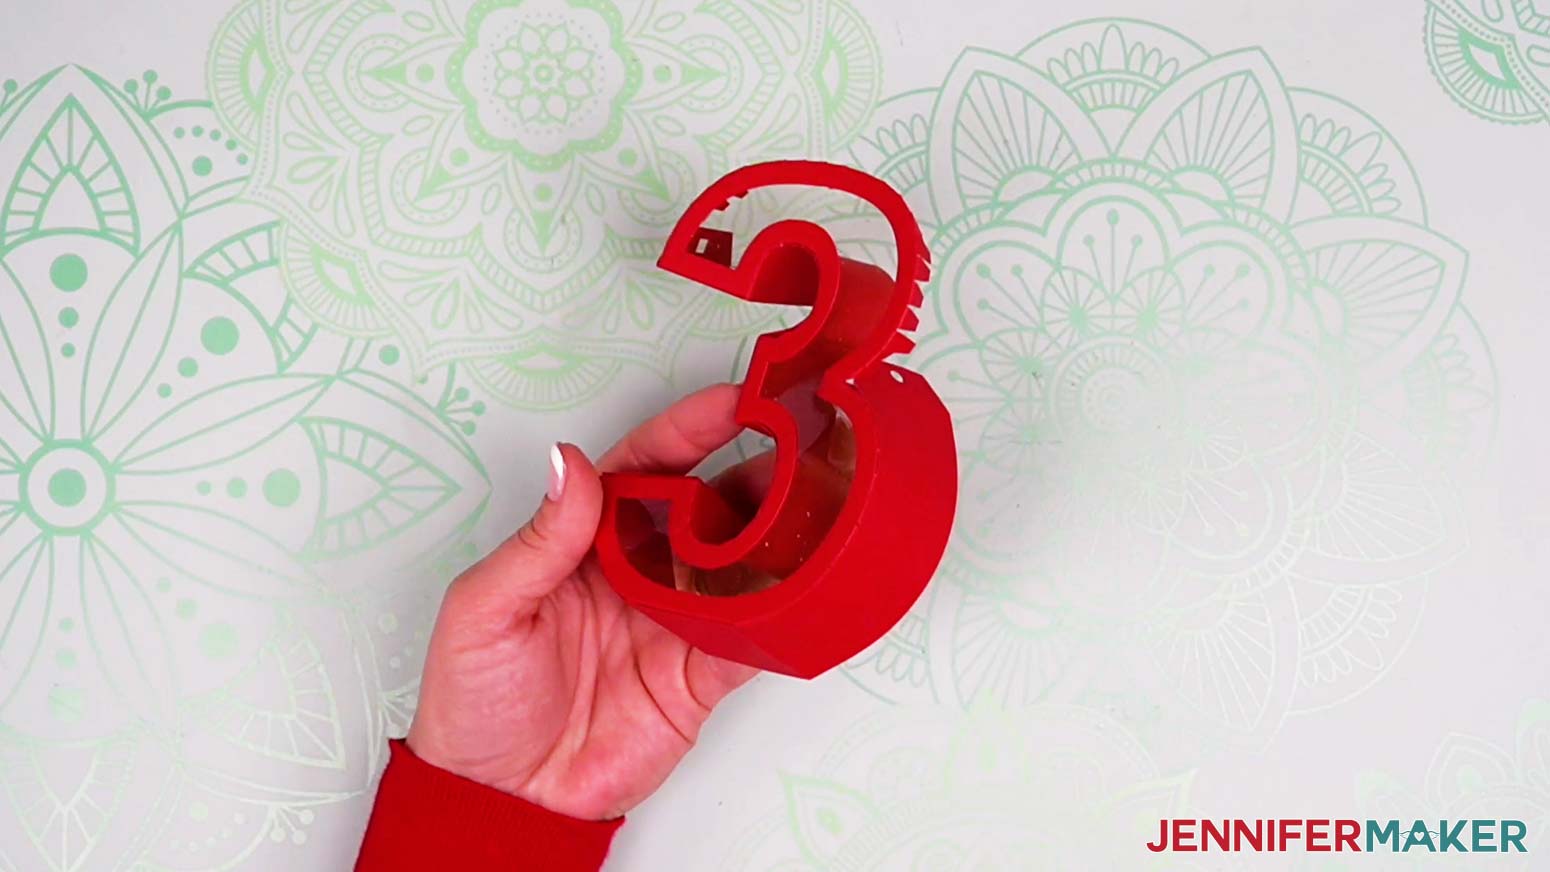
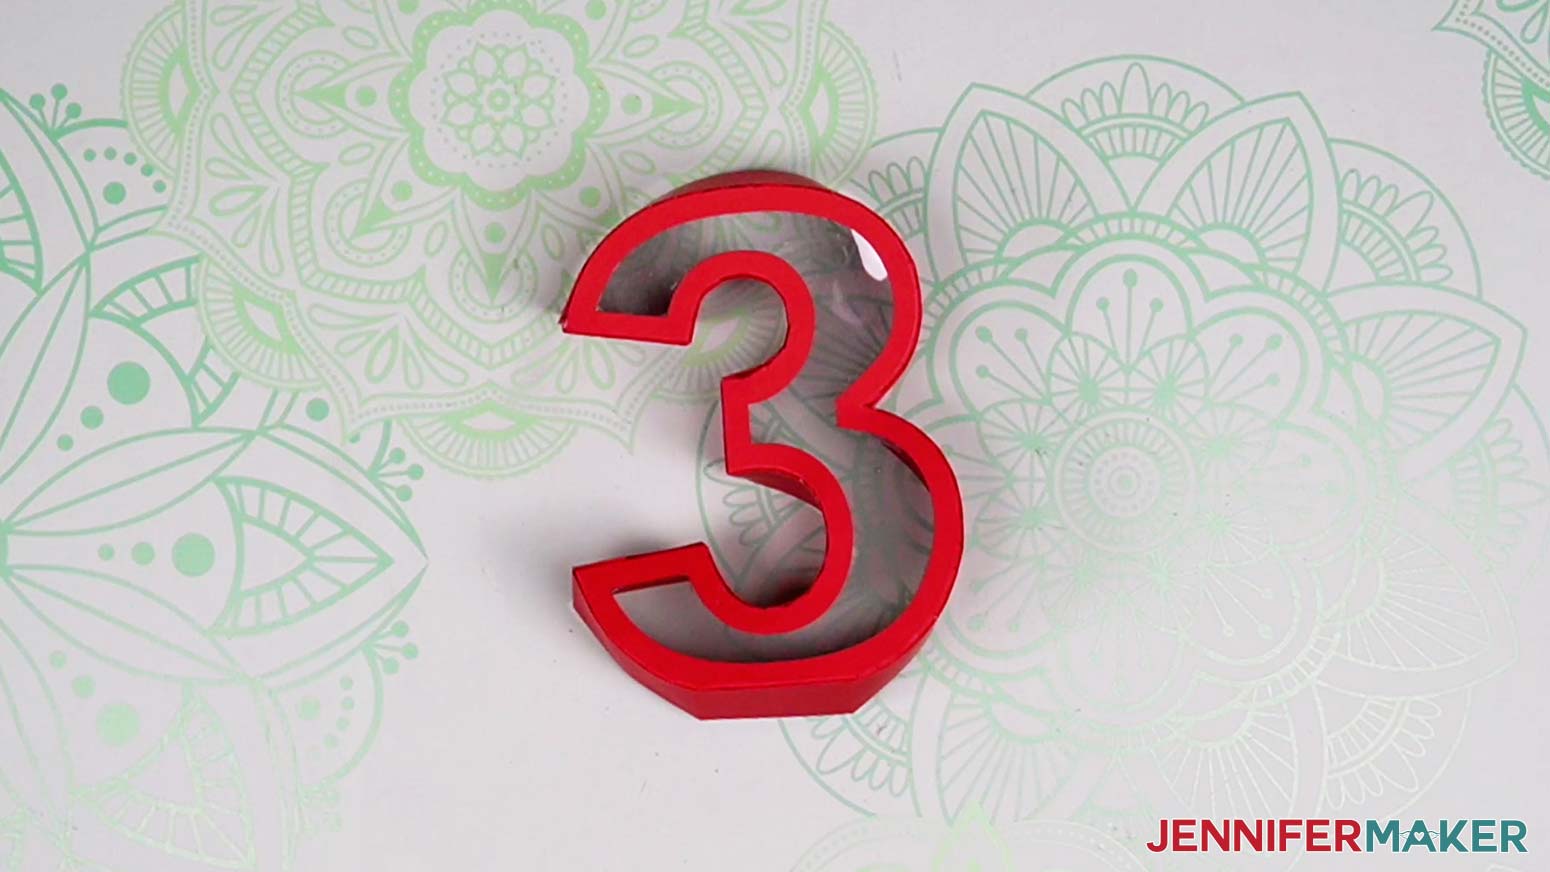
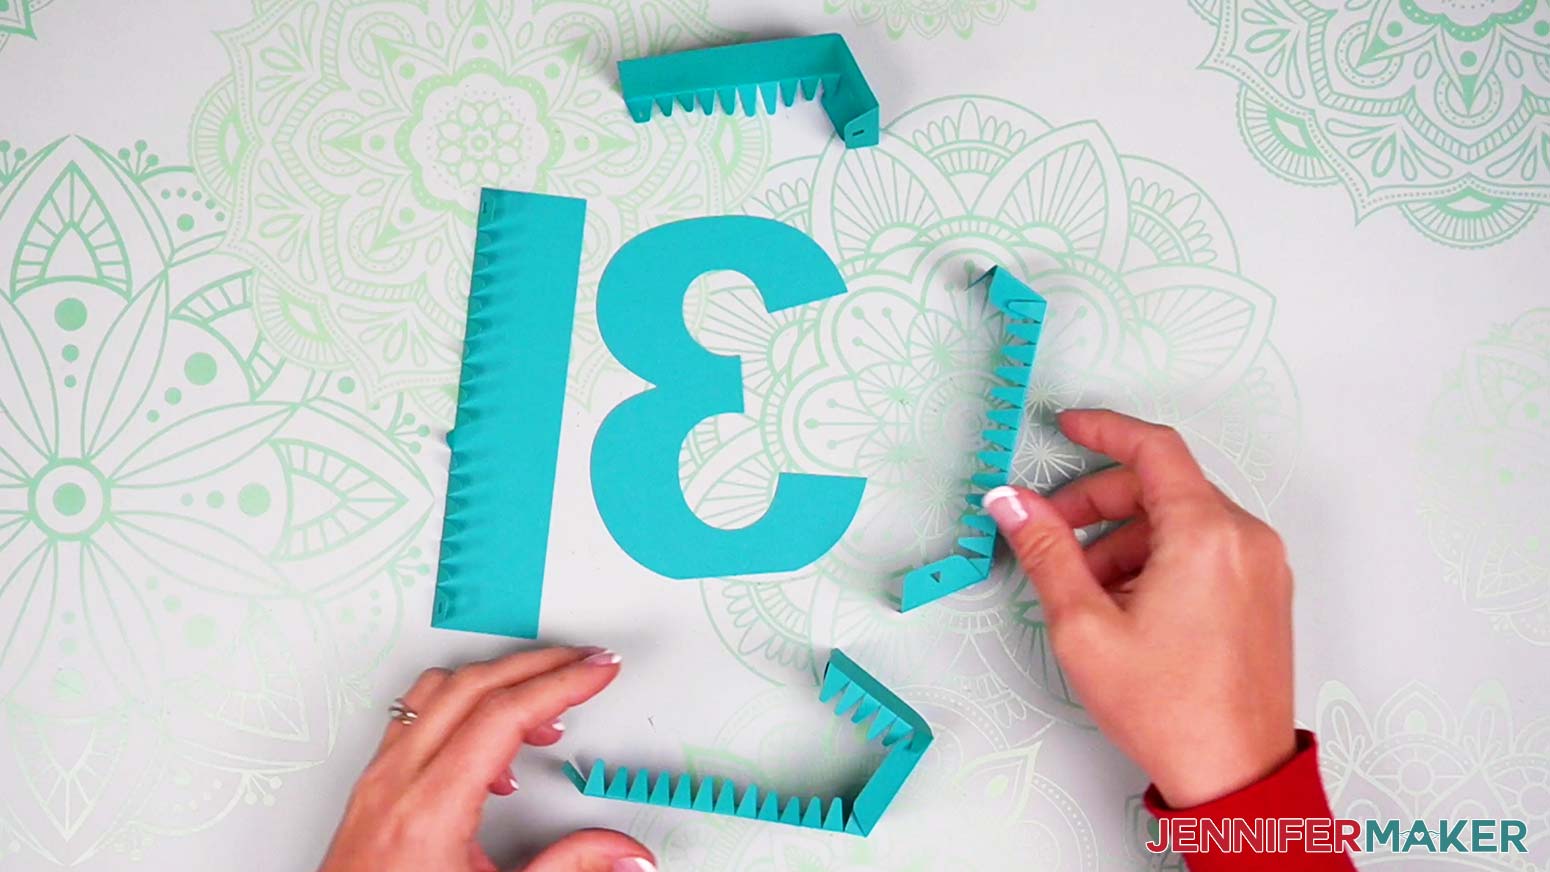
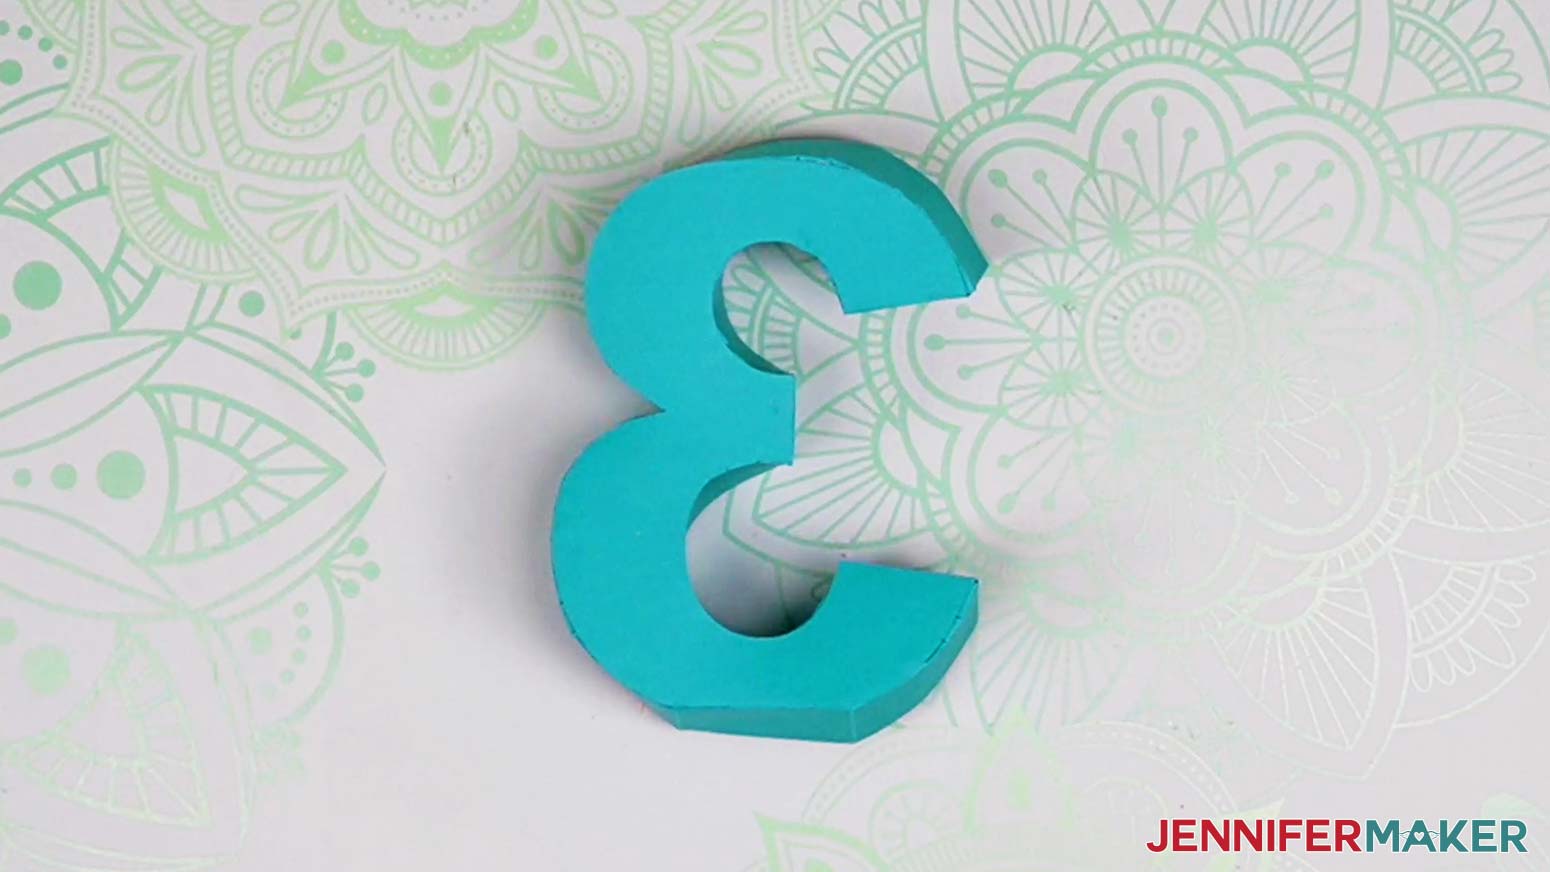
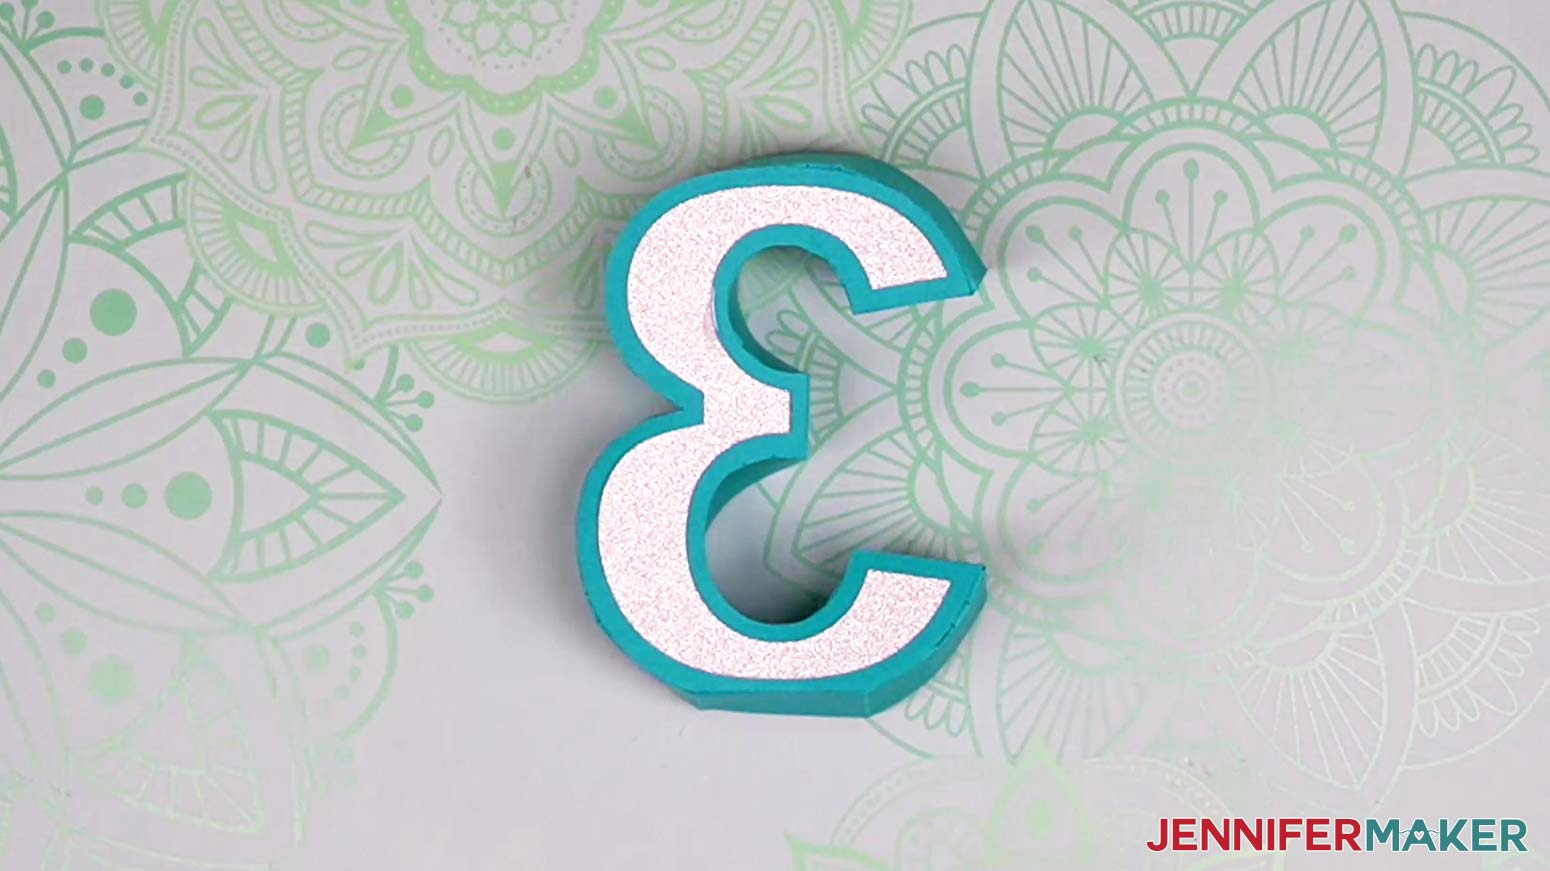
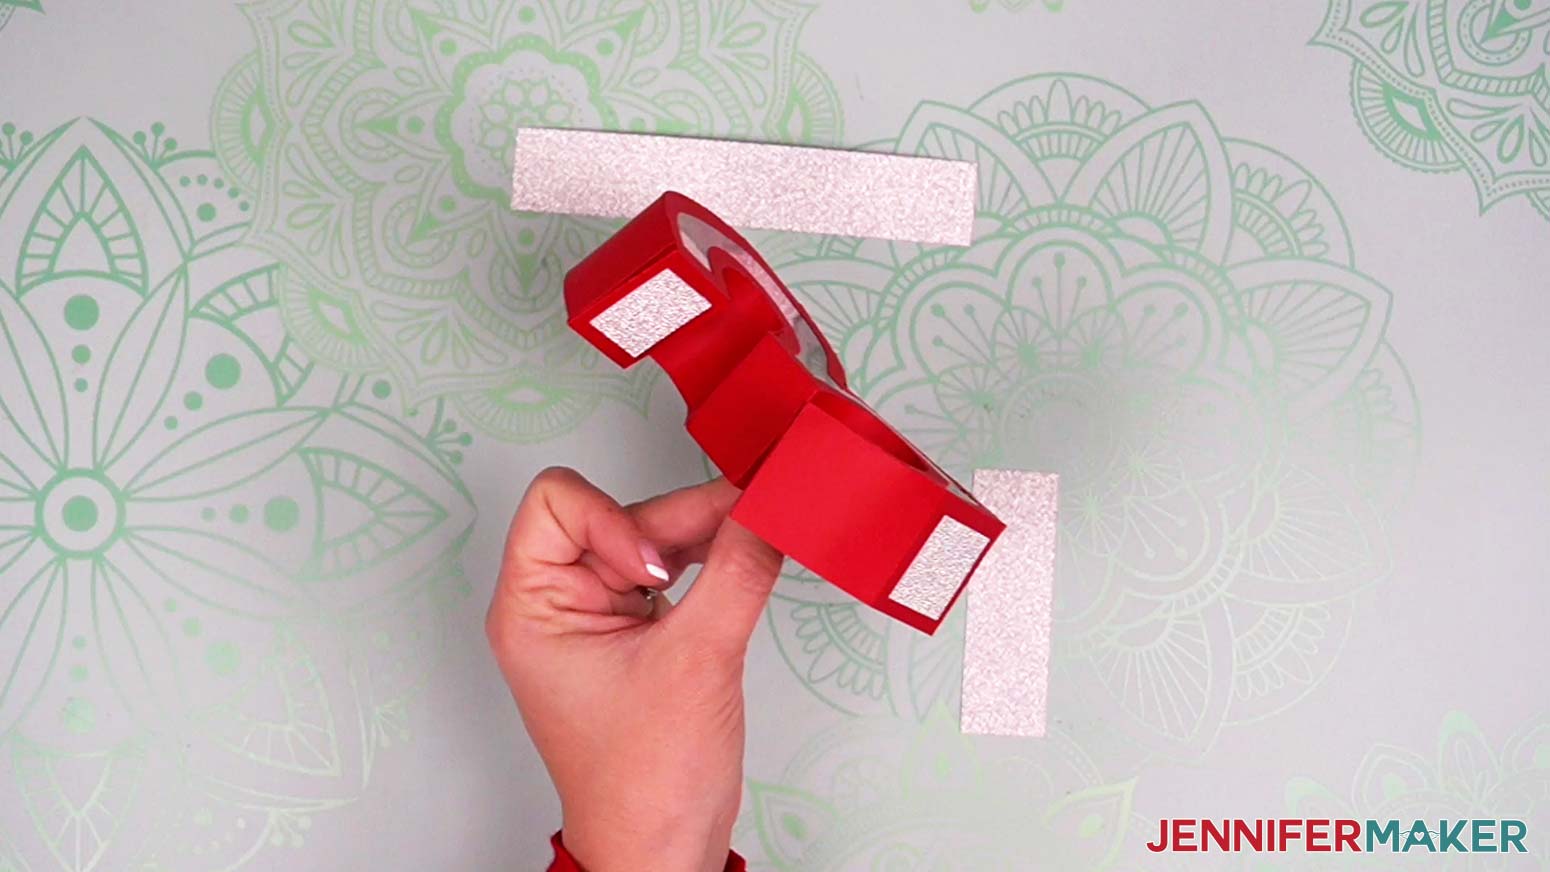
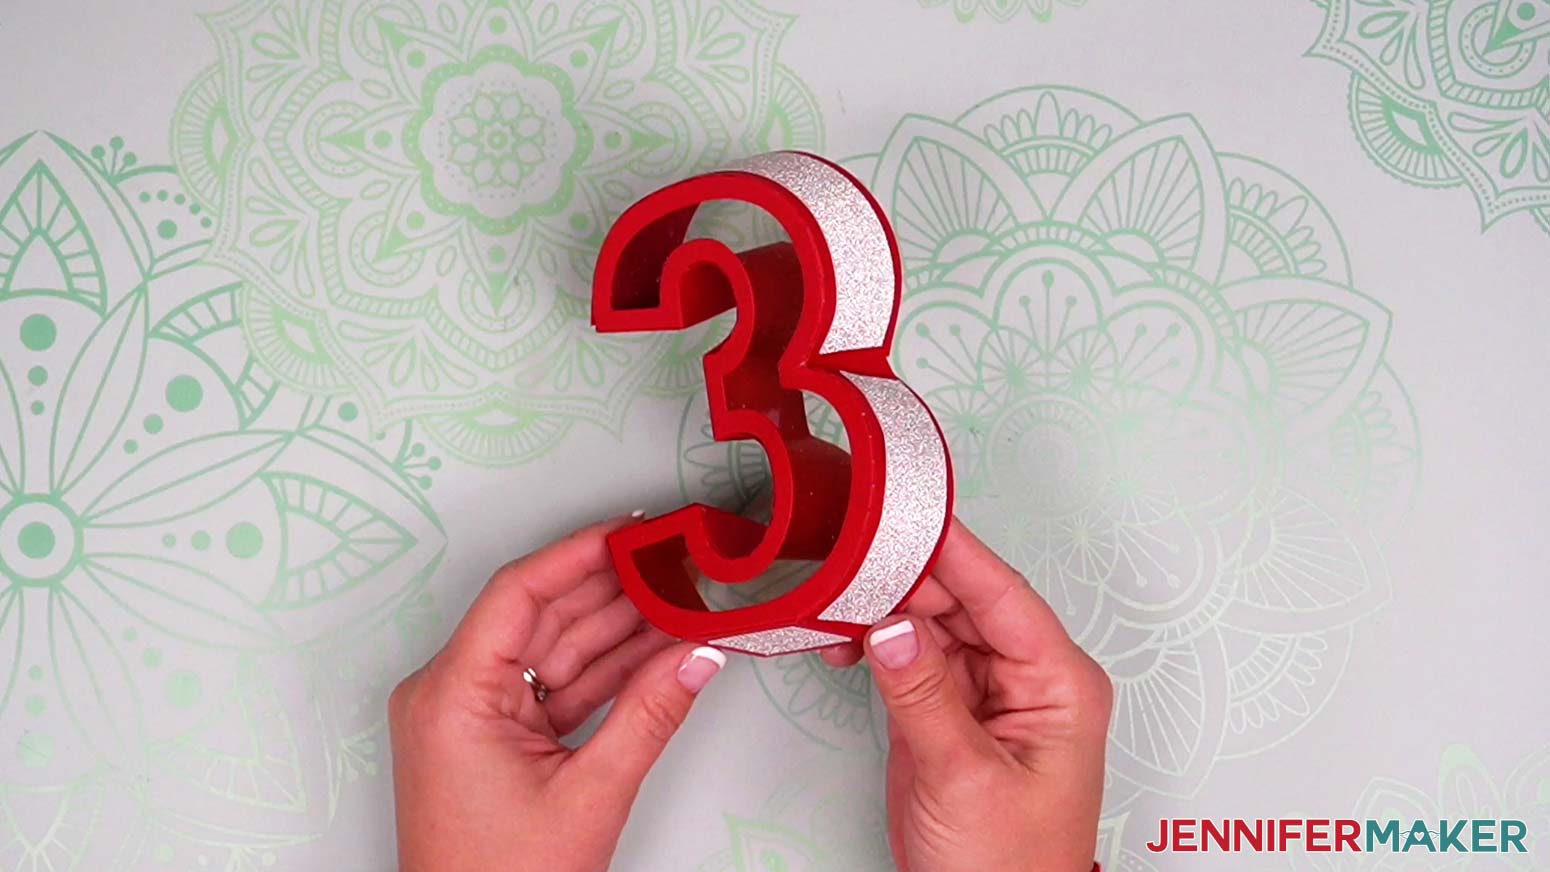
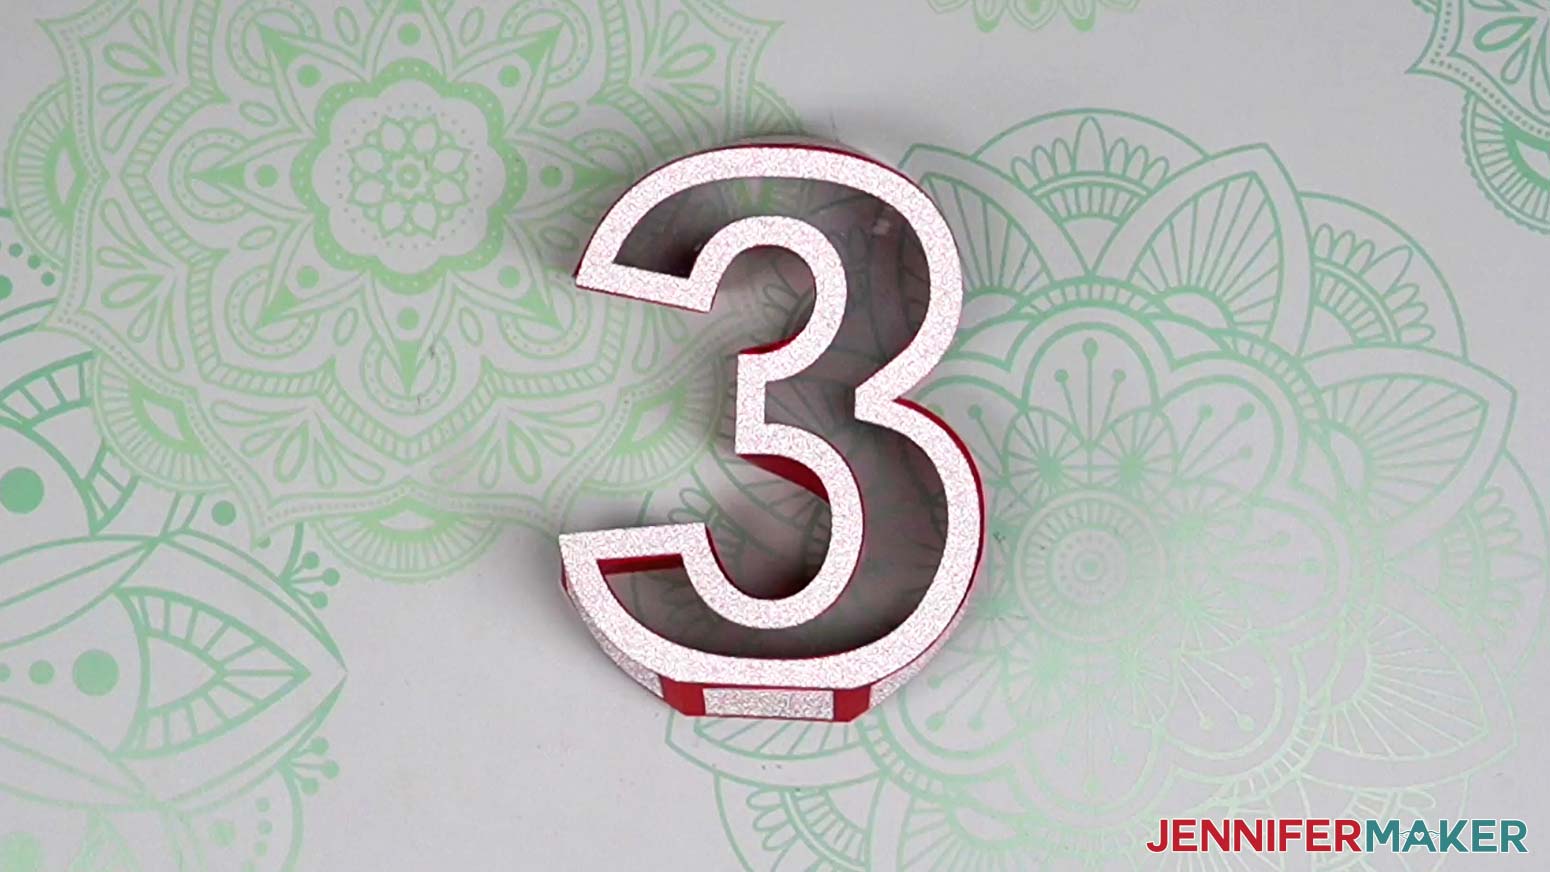
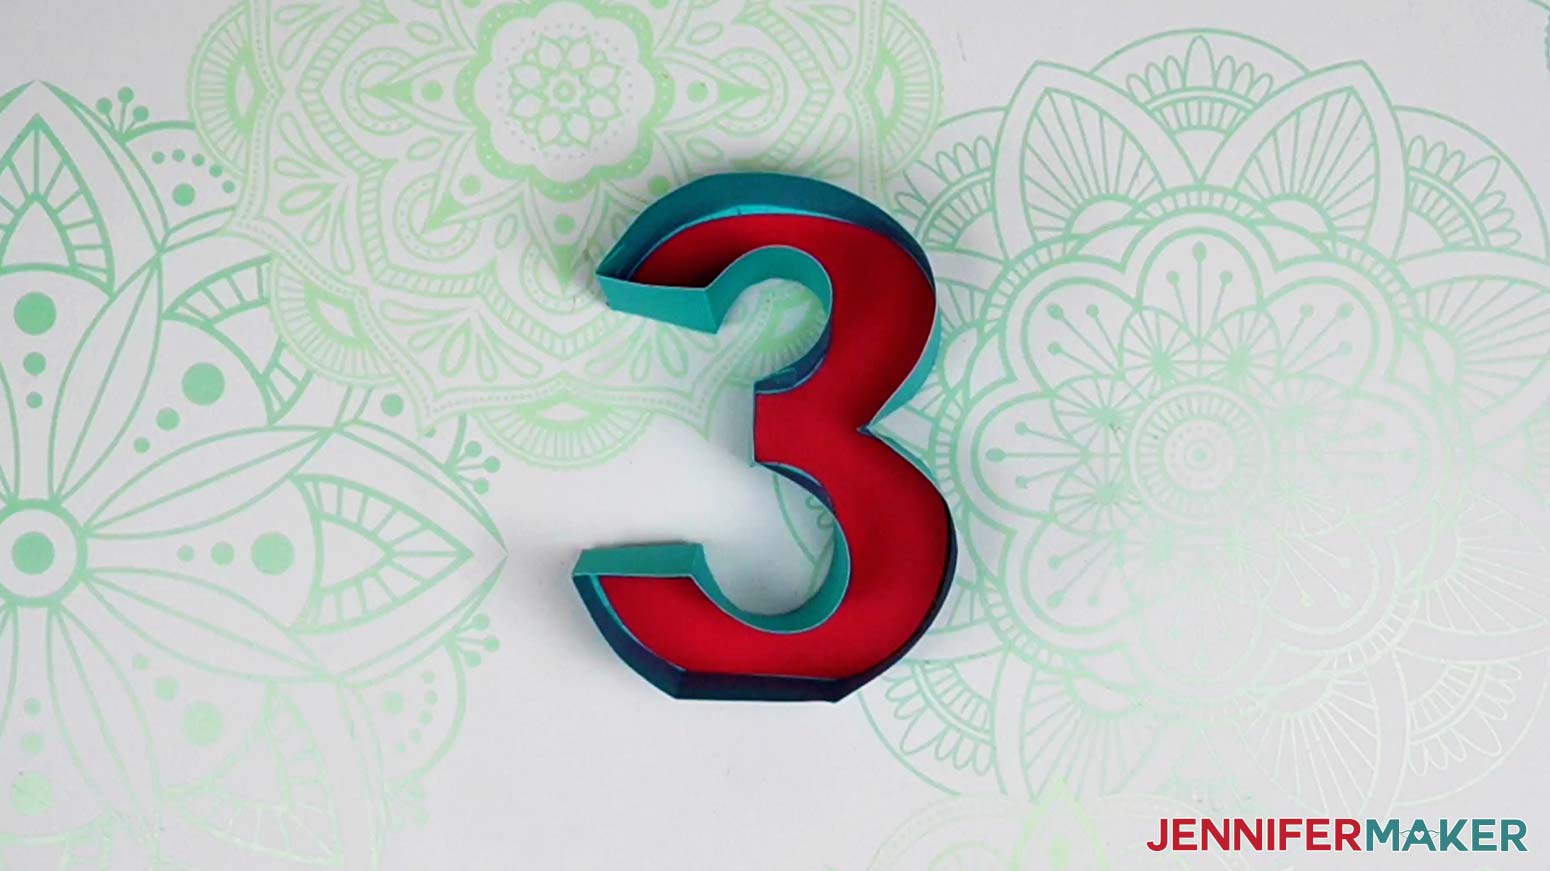
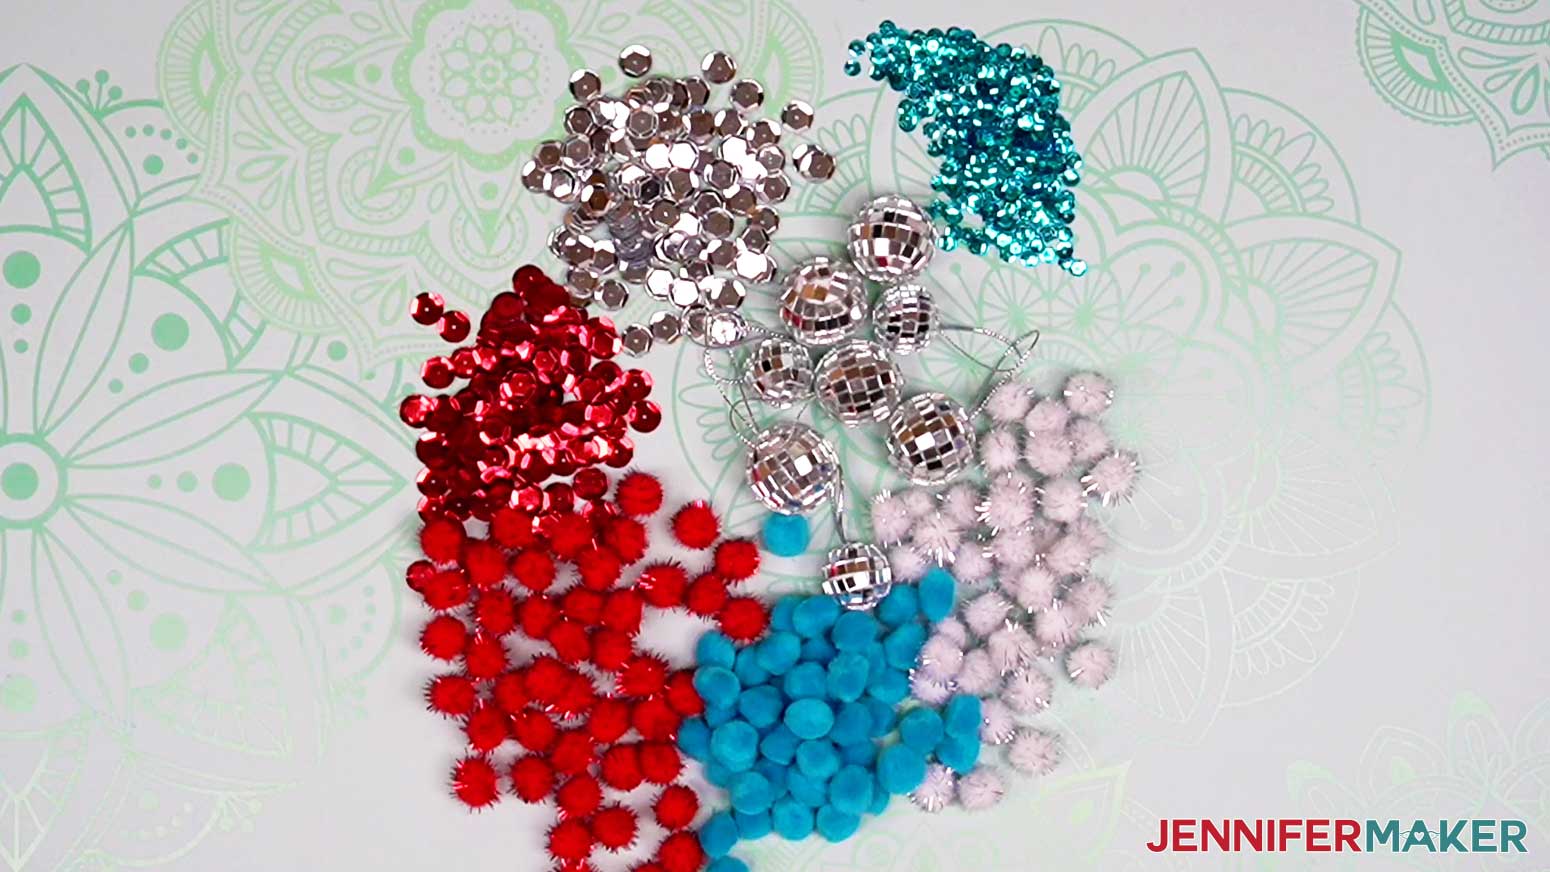
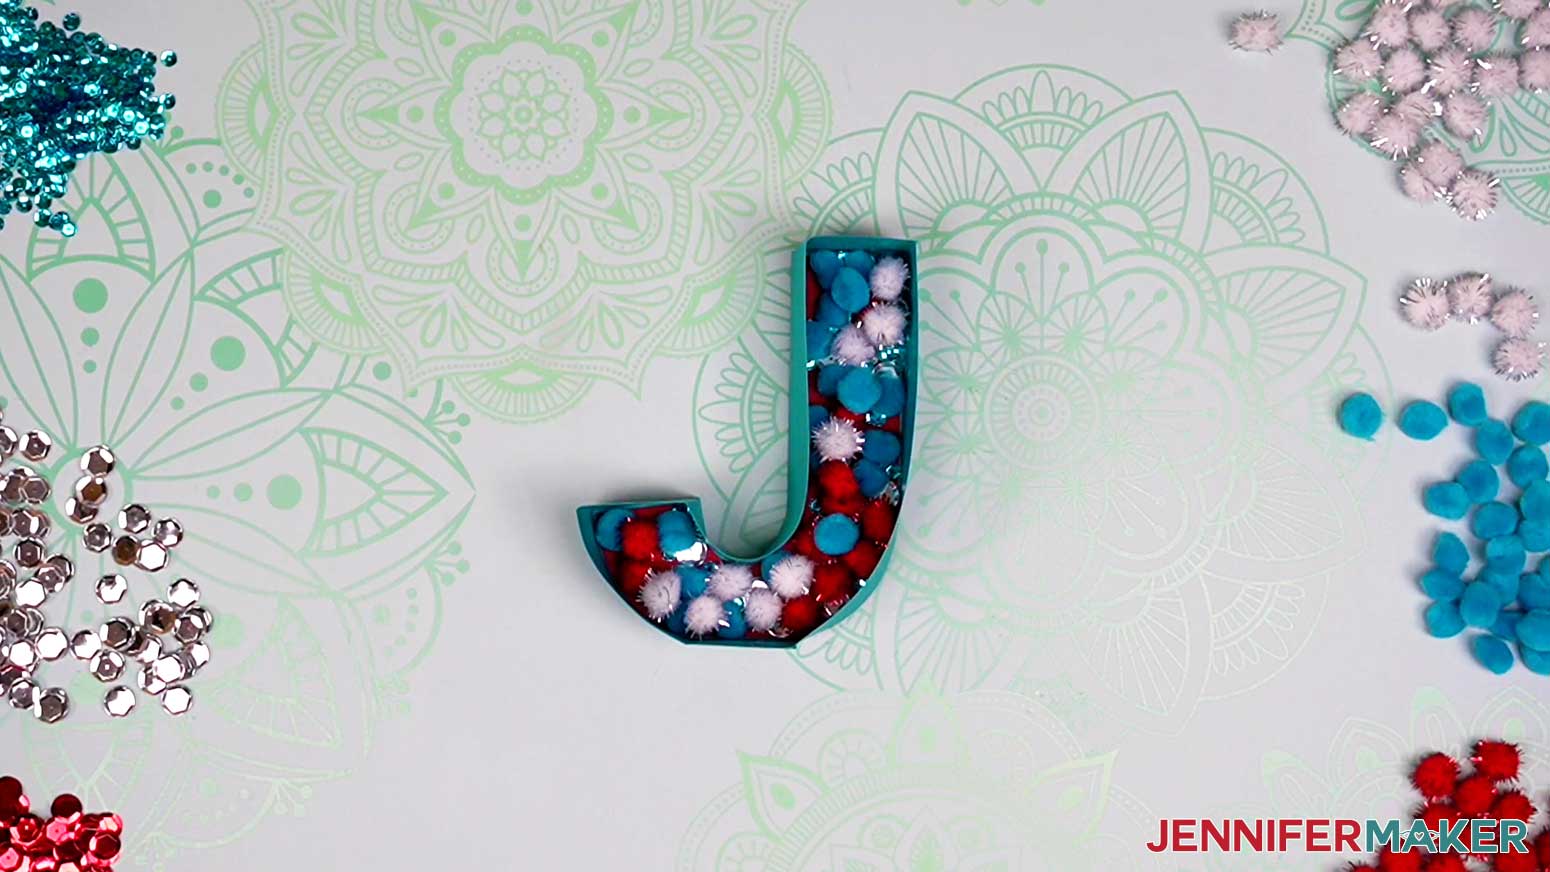
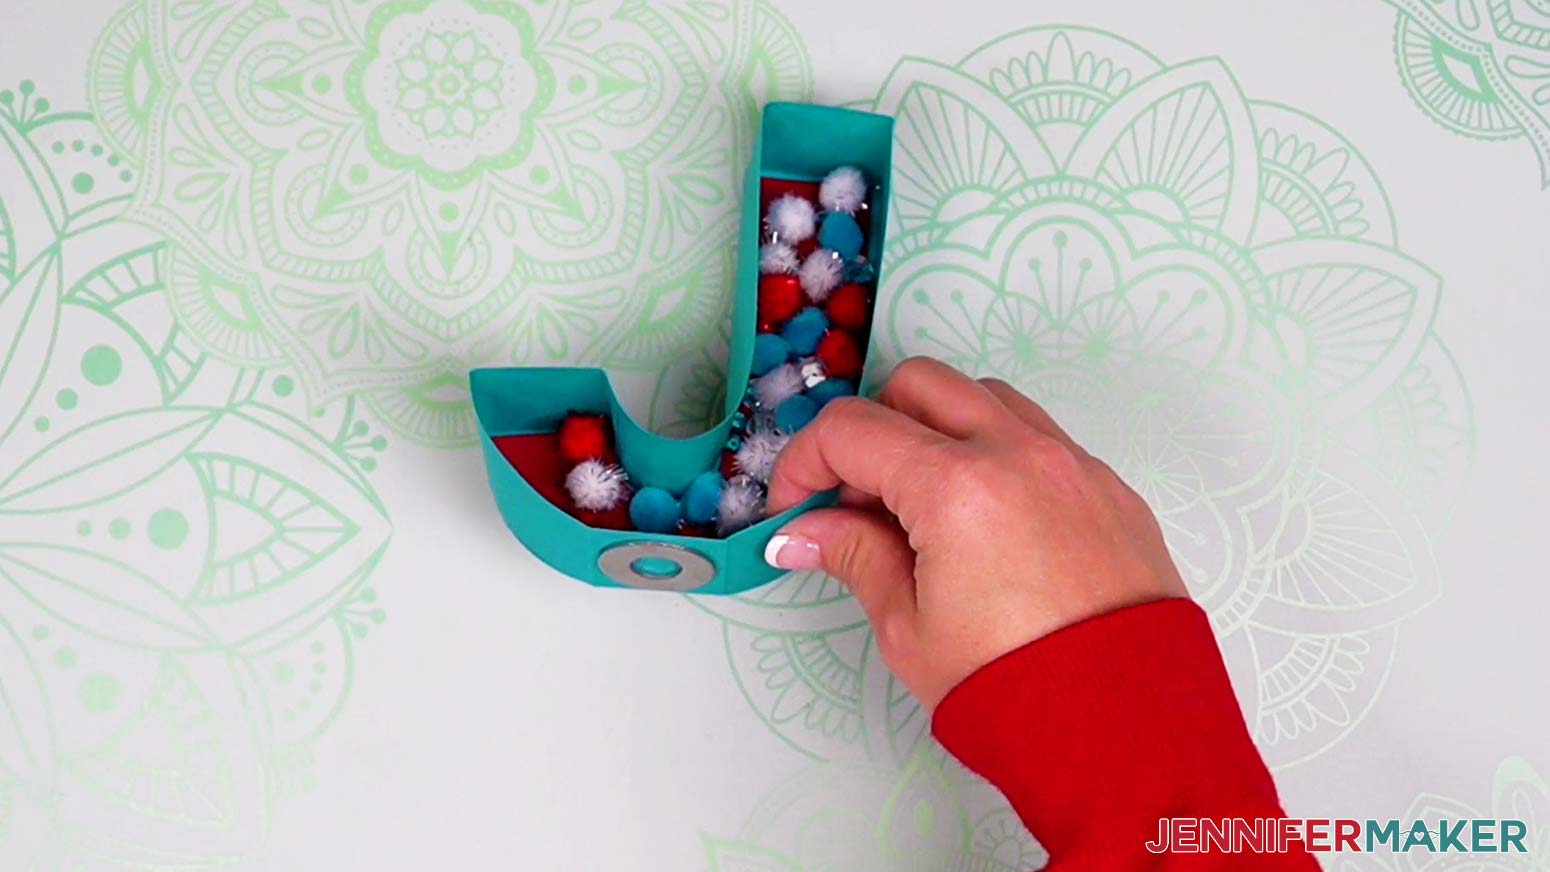
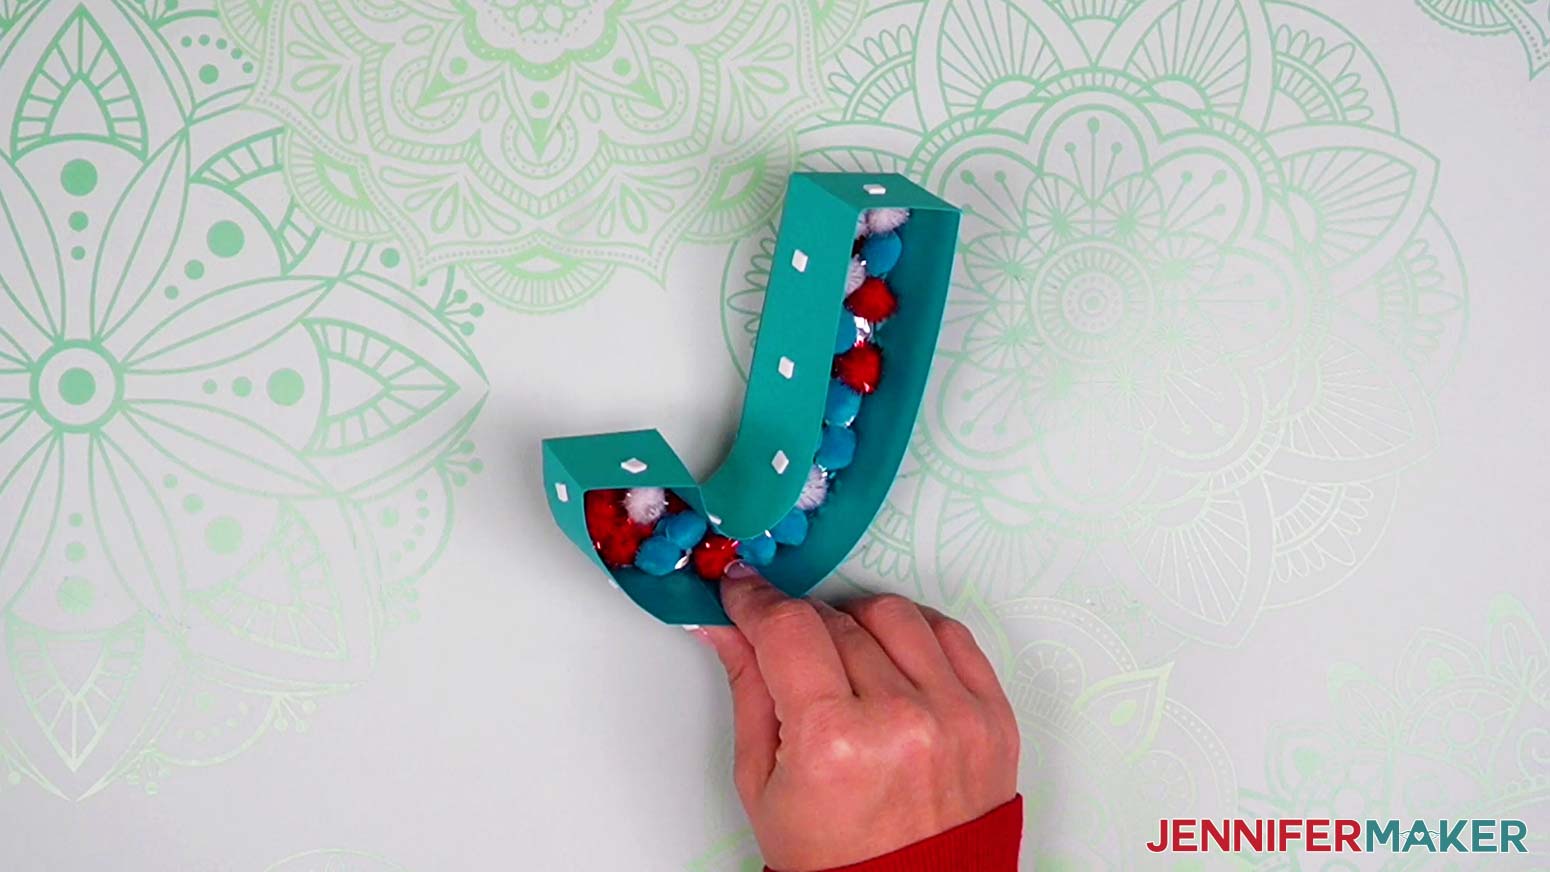
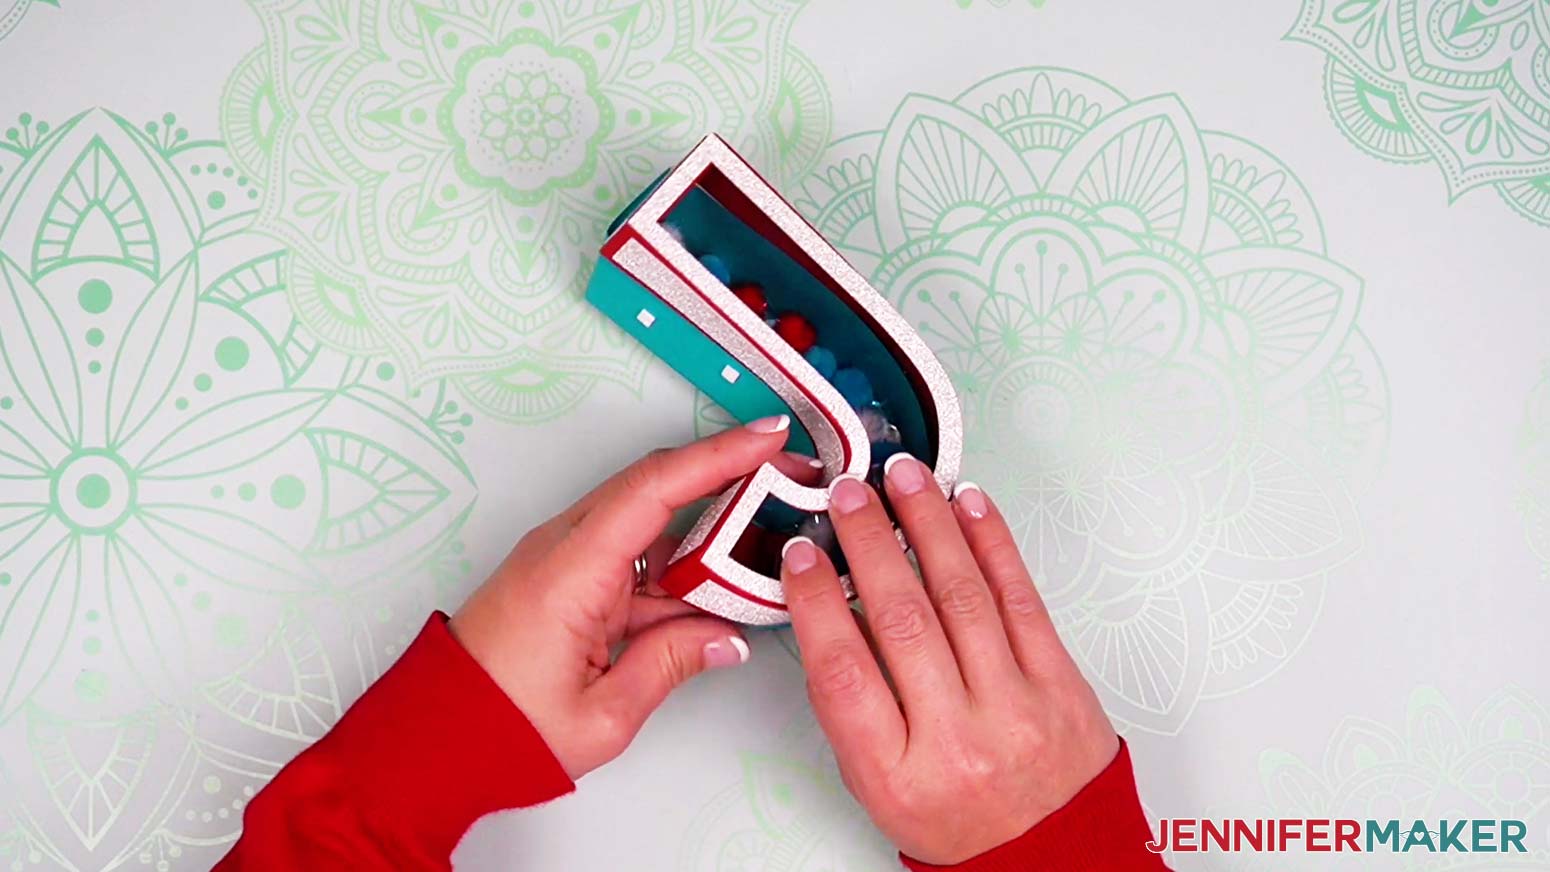
Learn how to make fun 3D letters with shaker pieces inside to celebrate the new year! This tutorial is a variation of my 3D Paper Letters and Numbers collection. The 3D designs take some time and patience as you learn their process, so please review these tips to save time later! The download folder includes files for the letters J, O, and Y, and the numbers 2, 0, and 3 to spell “JOY 2023”. One set of files uses a scoring tool while the other does not. Each letter or number file includes four sets of pieces. Some are very similar, since the boxes fit snugly. I suggest that you make a test version using papers that you can easily tell apart for each part. It’s also important to always know which surface of your paper is meant to be visible so that you bend and glue your tabs correctly. If possible, learn the process using papers that have different colors or textures on each side to help you tell everything apart. Writing yourself notes can help, too! Each 3D Shaker Letter is made up of: You’ll notice that there are small shapes cut out of some letter’s tabs. We’ll use these to glue the correct pieces together in Step 4. I’ll explain the process then. NOTE: Depending on how you want to decorate and use the final letters, you may not need the accent layers. If so, just hide the unneeded layers by clicking on the eye icons in the Layers Panel before cutting. That way, you can save time and materials. First, download my free 3D Letters with Shaker SVG/DXF/PDF files from my free resource library. It's Design #463. There are six different files that you can use to make the word “JOY” and the year “2023” for the new year! I have included a version that you can cut using a scoring tool and one where no scoring tool is necessary. For this demonstration, I’m making the designs that require a scoring tool, which are the files in the “Score Tool or Stylus” SVG folder. NOTE: If you do not have a scoring tool, select the letters from the "No Score Tool Needed" folder. These files include a dashed cut line, which your machine can create with the standard Cricut Fine-Point Blade. Then, you will simply crease along the cuts. Upload the files you need to Design Space. TIP: If you’re not sure how to upload an SVG cut file to Cricut Design Space, watch this helpful video training series I made. If you're on an iPhone or iPad, here's how to download and upload SVG files to the Cricut Design Space app. Since this project is very customizable and takes some planning, think about your goal before starting to cut. I'm going to make the letters and numbers in red and teal with silver accents, and I’ll include red, teal, and silver pom poms and sequins for the shaker elements inside. I recommend preparing and cutting your letters one at a time so you can keep the pieces straight. After you cut out J, clear the Canvas by selecting everything and hitting “Delete.” Repeat for O, Y, 2, 0, and 3 using the same steps. TIP: If you make any adjustments to the letter that you want to revisit or use again, save it as a project with a different name. Add the first letter to your Canvas in Cricut Design Space. You can zoom out to see all of the design by clicking on the minus (-) sign on the lower left. Here is what the J file looks like on my Canvas. NOTE: I’ve arranged the pieces in the files so they’re positioned in the approximate places that they will attach to the letter. When assembling your letters later, refer back to the design on your Canvas to help you figure out which piece goes where. If you're making the “score” version of the design like I am, you will need to convert and attach the score lines before cutting. Notice that in the Layers Panel, there are several layers that are grouped together. The top layer in each of those groups is our Score layer. It consists of faint lines that are colored orange to distinguish them from the red, teal, and gray cut pieces. For the J, there are eight Score layers. Start by clicking the “Ungroup” button at the top of the Layers Panel (the two stacked squares on the very left). Then, click off of the design to deselect everything. Hold down your Shift key while clicking on each of the intended Score layers in the Layers Panel. Make sure the color swatch in your top menu panel is orange. If it’s not, you may have accidentally selected another layer. Just click off of the design and try again. TIP: I found it easiest to select my Score layers starting at the bottom of the Layers Panel. Just look for the layers that are grouped with their corresponding Cut layer. With the correct layers selected, change the Operation at the top from "Basic Cut" to "Score." The lines are now dashed to indicate the machine will score instead of cut them. To attach the score lines to their appropriate cut layers, hold down your Shift key while selecting a Score layer and the Cut layer directly below it in the Layers Panel. Then, click "Attach" at the bottom of the Layers Panel. The newly-attached layers will jump to the top of the Layers Panel. Repeat for the other Cut and Score layer pairs. If you miss attaching a Score layer, you will know as soon as you go to cut your letter because it will be on its own white mat on the Prepare screen. Just repeat the above step to fix it! NOTE: If you want to see the gray accent pieces back on top, hold down your Shift key and select all of the red and teal pieces on the Canvas. Then, at the top of the Canvas, click the drop-down by "Arrange" and select "Send to Back." Remember, I suggest only cutting one letter at a time to avoid mixing up your pieces. With your first letter prepared on the Canvas, make sure the correct machine is listed and click “Make It” in the upper right corner. If prompted, select “On Mat,” “12 in x 12 in,” and “Confirm.” This will only show if you are using a Maker 3 or Explore 3 machine. On the Prepare screen, review your mats. If you see any issues, cancel the cut and return to the Canvas to try again. For my project, I’m going to use one color of 65 lb. cardstock for the top box sections, another color for the bottom box sections, acetate for the window, and glitter cardstock for the accents. Cutting them separately will help me keep everything straight. Yours may look different depending on which elements and colors you want to use. If you’re using 8.5” x 11” cardstock for the top and bottom pieces like I am, you’ll need to change the Material Size for your red and teal mats to “8.5 in x 11 in (Letter)” size before continuing. When you’re done, scroll up and select the first mat again. Then click “Continue” in the bottom right. TIP: You may be able to combine some mats to save time and materials. My DIY Lollipop Holders tutorial will show you how! On the next screen, select your material settings. My first mat is the acetate window piece. I’ll use the “Acetate” setting for this one. To find it, go to “Browse All Materials” and search for "acetate." Select it and then click “Done.” Change the pressure to "More" for a cleaner cut. Make sure your Fine-Point Blade is clean and in Clamp B. NOTE: If you’re making the “score” version of the design like I am, you will need to load either the scoring stylus in Clamp A or scoring wheel in Clamp B for the mats with Score layers. Follow the on-screen prompts to load your tools in the correct order for the appropriate mats. Depending on the brand, acetate comes with protective coverings on one or both sides. When preparing to cut, remove only the side that will be placed face up on your green StandardGrip machine mat. Leave the covering on the side that will be placed directly on your mat to help reduce scratches and sticky residue. Use a brayer to make sure the acetate is fully adhered. Load the mat into your machine, then press the flashing “Start” button to begin cutting. TIP: Before unloading your mat, check to make sure the piece cut all the way through. If it didn’t, press the “Start” button to cut it again. Once the cut is complete, unload your mat, flip the mat over on your work surface and roll it back to help release the material. Then, peel off the protective covering from the back of your piece of acetate. If necessary, use a scraper tool to remove any pieces left on the mat. My second mat is the accent pieces. Since the glitter cardstock I’m using for these is so thick, I found that the “Heavy Cardstock – 100 lb (270 gsm)” setting with “More” pressure gave me the best results. Before unloading your mat, check to make sure the pieces cut all the way through. If they didn’t, press the "Start" button to cut them again. Follow the steps above to cut and remove your pieces from the mat. For my remaining mats (the top and bottom box pieces), I’ll select the “Medium Cardstock — 80 lb (216 gsm)” setting with “More” pressure. If you’re using the same weight of cardstock for the rest of your mats, and the “Remember material settings” box is available, click it to save time. Follow the steps above to cut and remove your remaining pieces from the mat. IMPORTANT: Keep the pieces for the top of the box and the pieces for the bottom of the box in separate stacks for each letter. Plastic storage bags and Post-its are also handy to keep pieces organized. Repeat these steps for your other letters and numbers, using the same settings and methods. Assembly Notes Remember, the box top pieces have sharp corners for the tabs. The top (front-facing or “right” side) of each piece is the side that has score lines. You will never attach pieces to each other on the side that will be visible from the exterior. The tabs will be folded at a 90 degree angle and glued to the back or sides of the letter shape you are building. The tabs will not be visible from the outside. Here’s a tip on curves: If you glue the wedge tabs close to each other or even overlapping, the curve will get tighter. If you leave more space between the wedges, the curve will be gentler. You’ll continue adding tabbed pieces until you complete each side of each letter. I’ve used small cutout shapes on some tabs and side pieces to help you select the next piece to add. You can see some of them in the J pieces here. Assemble the Letter J Start by taking the acetate piece and the red pieces for the top of the J box and placing them face down on your work surface so you can’t see the score lines. First, we’ll glue the acetate window to the inside of the J-shaped piece with tabs around its edges. Apply a thin line of glue around the very inside edge of the J, being careful to avoid the tabs. Carefully place the acetate piece down on top of the glue, aligning the outside edge of the acetate with the corners of the tabs. Try to keep the acetate from overlapping the tabs too much, as we’ll need to be able to fold the tabs up around the acetate after the glue dries. Set that piece aside for now. While you’re waiting for the glue to dry, fold each of your remaining rectangular red pieces on the scored lines. Some of these pieces have tabs that are only there to indicate where to attach the piece to the body. We will fold these tabs over and glue them down before attaching that piece to the J body. To locate these, look for the tabs connected to the longer sides of each rectangle -- for the J, there are three of them (one at each end of the left side piece with triangle and circle-shaped cutouts, and one on the bottom piece with a square cutout). Glue those three tabs down. Now we can go back to our body piece and fold all the tabs around the outside edges. Use your acetate window as your guide and fold each tab up around it, making sure the tabs are folded toward the side you glued earlier. We’re now ready to add our side pieces to create the 3D shape of our letter! The smaller piece with three folded sections will go on the bottom of the J. Line up the section with the glued square tab at the slightly flat section on the bottom of the J. Place glue on the body piece’s bottom tab and line that up with the edge of the bottom piece. When you're looking at your attached pieces from the back, a circle tab will be on the right. Attach the remaining sections of your bottom piece, starting with the curved part on the right side of the J, gluing a few tabs at a time. Make sure you’re gluing the tabs so they’re facing the INSIDE of the letter. Once you’ve made your way around the curve, attach the straight tab at the top. Take the piece with a glued circle tab on one end and a glued triangle tab on the other. Glue the free tab with the circle to the end with the circle tab glued down, and then work your way up the right side and over the top of the J, gluing a few tabs at a time. When you get to the top of the J, add the next piece using the triangle tabs and keep going around the left side. TIP: You may want to add a bit of glue directly to the side piece and press the tabs in place, instead of just adding glue to the tabs. If you don’t mind a little extra glue on the inside of the box, this way might be a bit easier. Just do what works best for you! Glue the square tab at the bottom and the box top is done! TIP: If your acetate window has fingerprints, dried glue, or dust on it, you can gently wipe it with some rubbing alcohol and a microfiber cloth to clean it right up. For the box bottom, the tabs, which are rounded, are on the side pieces instead of the body piece. All the bottom box pieces are teal. There’s also no acetate window for the bottom, so assembly is much easier! Start by folding along all the scored lines. Make sure to fold all the tabs away from the side with the score marks. NOTE: The outside of the J will be backwards because it will be on the back of your completed letter. Make sure to glue your tabs to the INSIDE of the letter (the side with the J facing forward). Just like with the J top, the smaller piece with three folded sections will go on the bottom of the J. Line up the section with the square tab at the slightly flat section on the bottom of the J. Place glue on that tab and line it up with the edge of the J’s bottom. When the outside of the letter is facing you, a circle tab will be on the right. Attach the remaining sections of your bottom piece, starting with the curved part on the right side of the J, gluing a few tabs at a time. Once you’ve made your way around the curve, attach the straight tab at the top. Take the piece with a circle tab on one end and a triangle tab on the other. Glue the larger tab with the circle to the end with the smaller circle tab, and then work your way up the side and over the top of the J, gluing a few tabs at a time. When you get to the top of the J, add the next piece using the triangle tabs and keep going around the outside. Glue the square tab at the bottom and the box bottom is done! Now for the J accents. The smaller letter-shaped accent is easy to glue on the back. Just make sure you leave the same amount of space around all the edges. For the outer edges, glue the two small accent rectangles to the two top flat sections. Take the longest rectangle piece and the small rectangle piece with a score line and a tab. Fold along the score line and use the tab to glue the two pieces together. The spot where they join will go at the bottom right edge of the box where it won’t be easily visible. Glue the long accent along the outer edge. Then, take the remaining rectangle piece and glue it to the left side. TIP: You may need to gently roll the glitter cardstock before gluing to help it fit into the tight space. Next, glue the J-shaped border piece to the front of the box. Apply glue to the back of the accent piece and then place it down onto the box, making sure the edges are lined up just right, and then press down to adhere it. Finally, take your last letter-shaped piece (it will be red) and apply glue to the back of it. Then, carefully slide it down inside the bottom of the letter to cover up the tabs. It may be a tight fit, but you can press down on one section at a time to get it all inside the box. Once the piece is flush against the bottom, press down to adhere it. You’re done with the J! Assemble the Letter O Next, let’s make the letter O. Here are what my cut pieces for the O look like. Take the acetate piece and the teal pieces for the top of the O box and place them face down on your work surface so you can’t see the score lines. Make sure the flatter sections on the largest O-shaped piece and the acetate piece are at the bottom. First, we’ll glue the acetate window to the two O-shaped pieces with tabs around their edges. Apply a thin line of glue around the very inside edge of the largest O-shaped piece, being careful to avoid the tabs. Carefully place the acetate piece down on top of the glue, aligning the outside edge of the acetate with the corners of the tabs. Try to keep the acetate from overlapping the tabs too much, as we’ll need to be able to fold the tabs up around the acetate after the glue dries. Next, apply another thin line of glue around the outside edge of the smallest O-shaped piece. Place the acetate piece on top of the glue, aligning the inside edge of the acetate with the corners of the inner piece’s tabs. While you’re waiting for the glue to dry, fold each of your remaining rectangular teal pieces on the scored lines. TIP: You don’t actually have to fold the two larger tabs at the end of the long pieces because they will be going around the curved edges of the inside and outside of the O. Some of these pieces have tabs that are only there to indicate where to attach the piece to the body. We will fold these tabs over and glue them down before attaching that piece to the O body. To locate these, look for the small tabs located on the longer sides of each rectangle -- for the O, there are four of them (one at each end of the left side piece with square and circle-shaped cutouts, one on the right side piece with a triangle cutout, and one on the counter piece with a slit cutout). Glue those four tabs down. Now we can go back to our body piece and fold all the tabs around the inside and outside edges. Use your acetate window as your guide and fold each tab up around it, making sure the tabs are folded toward the side you glued earlier. We’re now ready to add our side pieces to create the 3D shape of our letter! Let’s start with the counter, which is the long piece with slit symbols at both ends. I like to have the counter’s edges meet at the bottom, but it doesn’t have a set beginning. Glue a few of the inner tabs on the body piece to the counter piece, lining them up along the edge. Make sure you’re gluing the tabs so they’re facing the INSIDE of the letter. Then, you can either glue a few tabs at a time, or add a bit of glue directly to the counter and press them in place. If you don’t mind a little extra glue on the inside of the box, the second way might be a bit easier. Just do what works best for you! Keep gluing the tabs to the counter’s edge until you meet the beginning. Glue the adjacent tabs together to complete the counter. Now for the outer edge. The small piece with two unglued tabs will line up at the slightly flat section at the bottom of the O. Place glue on the body piece’s bottom tab and line that up with the flat edge of that small piece. When it’s correctly positioned, a circle tab will be on the left and a triangle tab will be on the right when looking at the letter from the back. Take the piece with a glued circle tab on one end and a glued square tab on the other. Glue the free tab with the circle to the end with the circle tab glued down, and then work your way around the edge just like the other curves. When you get to the top, add the next piece using the square tabs and keep going around the curve. This is another spot you might want to add glue directly to the side piece instead of just the tabs. Glue the triangle tab at the bottom and the box top is done! For the box bottom, the tabs, which are rounded, are on the side pieces instead of the body piece. All the bottom box pieces are red. There’s also no acetate window for the bottom, so assembly is much easier! Start by folding along all the scored lines. Make sure to fold all the tabs away from the side with the score marks. Place the O-shaped piece on your work space with the flatter section at the bottom, just like we did with the top. Again we’ll start with the counter, which is the long piece with lots of wedges and slit symbols at both ends. Glue the small slit tab and a few nearby wedges to the letter, lining them up along the edge. Then, you can either glue a few tabs at a time, or add a bit of glue directly to the letter and press them in place. Keep gluing the counter’s wedges along the edge until you meet the beginning. Glue the adjacent tabs together to complete the counter. Now for the outer edge. Flip your assembled piece over so the counter is against your work surface and is supporting the back O-shaped piece. The small side piece with three tabs will line up at the slightly flat section at the bottom of the O. Place glue on its blank tab and line that up with the flat edge. A circle tab will be on the left and a triangle tab on the right. Take the piece with a circle tab on one end and a square tab on the other. Glue the adjacent circle tabs and then work your way around the edge just like the other curves. When you get to the top, add the next piece using the square tabs and keep going around the curve. Glue the adjacent triangle tabs at the bottom, and the box bottom is done! Now for the O accents. The smaller letter-shaped accent is easy to glue on the back. Just make sure you line up its flat section with the flat section on the box. For the outer edge, glue the accent rectangle to the bottom flat section. Then, take the two matching long accents, one of which has a tab. Use the tab to glue the two pieces together. The spot where they join will go at the top edge of the box where it won’t be easily visible. Glue the long accent along the outer edge. Next, glue the two O-shaped border pieces to the front of the box, one on the inside edge of the O and one on the outside. One at a time, apply glue to the back of the accent piece and then place it down onto the box, making sure the edges are lined up just right, and then press down to adhere it. Finally, take your last letter-shaped piece (it will be teal) and apply glue to the back of it. Then, carefully slide it down inside the bottom of the letter to cover up the tabs. It may be a tight fit, but you can press down on one section at a time to get it all inside the box. Once the piece is flush against the bottom, press down to adhere it. You’re done with the O! Assemble the Letter Y Here are what my cut pieces for the Y look like. Start by taking the acetate piece and the red pieces for the top of the Y box and placing them face down on your work surface so you can’t see the score lines. First, we’ll glue the acetate window to the inside of the Y-shaped piece with tabs around its edges. Apply a thin line of glue around the very inside edge of the Y, being careful to avoid the tabs. Carefully place the acetate piece down on top of the glue, aligning the outside edge of the acetate with the corners of the tabs. Try to keep the acetate from overlapping the tabs too much, as we’ll need to be able to fold the tabs up around the acetate after the glue dries. While you’re waiting for the glue to dry, fold each of your remaining rectangular red pieces on the scored lines. Some of these pieces have tabs that are only there to indicate where to attach the piece to the body. We will fold these tabs over and glue them down before attaching that piece to the Y body. To locate these, look for the tabs connected to the longer sides of each rectangle -- for the Y, there are four of them (one at each end of the left side piece with X and triangle-shaped cutouts, and one at each end of the right side piece with circle and square-shaped cutouts). Glue those four tabs down. Now we can go back to our body piece and fold all the tabs around the outside edges. Use your acetate window as your guide and fold each tab up around it, making sure the tabs are folded toward the side you glued earlier. We’re now ready to add our side pieces to create the 3D shape of our letter! Since there are no curves on the Y, you can start with any piece. I started at the top left by attaching the section with the glued triangle tab to the top of the letter. Place glue on the body piece’s top left tab and line that up with the edge of your side piece. When it’s correctly positioned, the section with the glued X tab will come down the left side of the Y on the outside. Add glue to the body piece’s outside left tab and attach the remaining section to the Y. Next, take the piece with three folded sections and glue the tab with the X cutout to the section you just attached to the Y. The remaining sections of that piece will wrap around the bottom of the Y. Add glue to the body piece’s tabs, one at a time, to attach those sections from left to right. I attached the top part of the Y (the section that makes a “V” shape) next. Find the piece with a triangle tab on one end and a circle tab on the other. Add glue to the triangle tab and attach it to the top left piece. Add glue to the two tabs on the Y’s body, one at a time, and attach the top piece to them. The last step for the top of the Y is to attach the right side piece with glued circle and square tabs. Add glue to the tab on the right side of the Y, as well as the adjacent tab with a square cutout. Attach the end with the glued square tab. Finally, add glue to the top right tab on the Y’s body and the adjacent tab with a circle cutout. Attach the last section of the side piece, and the top of the Y is done! For the box bottom, the tabs, which are rounded, are on the side pieces instead of the body piece. All the bottom box pieces are teal. There’s also no acetate window for the bottom. Start by folding along all the scored lines. Glue the pieces in the same order as you did for the top of the Y. The symbol cutouts are all located in the same areas. Remember to glue the tabs to the INSIDE of your letter so you can’t see them when the box is closed. When you’re finished, the bottom of your box should look similar to mine. Now for the Y accents. The smaller letter-shaped accent is easy to glue on the back. Just make sure you leave the same amount of space around all the edges. There are several pieces for the outer Y edges. Laying them all on your work surface around the edges of your letter in their approximate locations before gluing anything will help make sure you get them all in their correct spots. I glued everything from smallest to largest. Glue the smallest piece to the bottom of the Y. Glue the two matching rectangles, which are just a bit larger, to the two top flat sections. Glue the next two matching rectangles to the inner “V” section of the Y. Glue the next two matching pieces to the shorter sides of the Y. Finally, glue the two largest rectangles to the angled sides. Next, glue the Y-shaped border piece to the front of the box. Apply glue to the back of the accent piece and then place it down onto the box, making sure the edges are lined up just right. Press down to adhere it. Finally, take your last letter-shaped piece (it will be red) and apply glue to the back of it. Then, carefully slide it down inside the bottom of the letter to cover up the tabs. It may be a tight fit, but you can press down on one section at a time to get it all inside the box. Once the piece is flush against the bottom, press down to adhere it. You’re done with the Y! Assemble the Number 2 (Repeat for Second 2) Here are what my cut pieces for the 2 look like. Start by taking the acetate piece and the teal pieces for the top of the 2 box and placing them face down on your work surface so you can’t see the score lines. Note that the 2 will be backwards when it’s face down. First, we’ll glue the acetate window to the inside of the 2-shaped piece with tabs around its edges. Apply a thin line of glue around the very inside edge of the teal 2 piece, being careful to avoid the tabs. Carefully place the acetate piece down on top of the glue, aligning the outside edge of the acetate with the corners of the tabs. Try to keep the acetate from overlapping the tabs too much, as we’ll need to be able to fold the tabs up around the acetate after the glue dries. Set that piece aside for now. While you’re waiting for the glue to dry, fold each of your remaining rectangular teal pieces on the scored lines. Some of these pieces have tabs that are only there to indicate where to attach the piece to the body. We will fold these tabs over and glue them down before attaching that piece to the 2 body. To locate these, look for the tabs connected to the longer sides of each rectangle -- for the 2, there are three of them (one at each end of the top piece with slit and circle-shaped cutouts, and one on the left side piece with a triangle cutout). Glue those three tabs down. Now we can go back to our body piece and fold all the tabs around the outside edges. Use your acetate window as your guide and fold each tab up around it, making sure the tabs are folded toward the side you glued earlier. We’re now ready to add our side pieces to create the 3D shape of our number! Flip the 2 over so it’s facing forward. The piece with the two glued tabs and no folds in the center will go along the top of our number. Apply glue to a few tabs on the top left section of the 2. Line up the end with the glued slit tab at the edge of the 2 and press against the tabs until the glue is dry. When the piece is correctly positioned, the glued circle tab will be on the right, facing the tabs on the 2. Attach the rest of the top piece, gluing a few tabs at a time. Make sure you’re gluing the tabs so they’re facing the INSIDE of the number. You can also add a bit of glue directly to the top piece and press the tabs in place. Use whichever method is easier for you! Take the piece with a slit tab on one end and a glued triangle tab on the other. Glue the free tab with the slit to the end of your top piece with the slit tab glued down. Add glue to the adjacent flat section’s tab and attach the small section of the side piece. Then, apply glue to a few tabs at a time to attach the remaining section to the inner curve of the 2. Go slowly and wait for the glue to dry on the current tabs before moving on to the next ones. The last piece you will attach to the top of the 2 is the one with three folded sections, a circle tab at one end, and a triangle tab at the other. Attach the triangle tab at the bottom of the 2. Attach the remaining sections, one by one, by adding glue to the tabs on the 2’s body, starting at the bottom. When you get to the other end of the piece, add glue to the circle tab and fold it underneath the curved piece on the side of the 2 to attach it. You’re done with the box top! For the box bottom, the tabs, which are rounded, are on the side pieces instead of the body piece. All the bottom box pieces are red. There’s also no acetate window for the bottom, so assembly is much easier! Start by folding along all the scored lines. Make sure to fold all the tabs away from the side with the score marks. NOTE: The bottom 2 will be backwards on your work surface because the outside will be on the back of your completed number. Make sure to glue your tabs to the INSIDE of the letter (the side with the 2 facing forward). Glue the pieces in the same order as you did for the top of the 2. The symbol cutouts are all located in the same areas. When you’re finished, the bottom of your box should look similar to mine. Now for the 2’s accents. The smaller number-shaped accent is easy to glue on the back. Just make sure you leave the same amount of space around all the edges. For the outer edges, start by gluing the smallest rectangle to the flat section on the right side of the 2. The second smallest rectangle will go on the small flat section at the top of the 2. Of the four remaining rectangles, the second smallest one will go on the very bottom of the 2, and the smallest will go on the remaining flat section. The two largest rectangles will wrap around the curves of the 2. TIP: When adding the curved accents, it helps to gently roll the glitter cardstock pieces in your hands in the direction you want them to curve before adding glue. This will make it easier to attach the pieces right where you want them on the number. Next, glue the 2-shaped border piece to the front of the box. Apply glue to the back of the accent piece and then place it down onto the box, making sure the edges are lined up just right. Press down to adhere it. Finally, take your last number-shaped piece (it will be teal) and apply glue to the back of it. Carefully slide it down inside the bottom of the number to cover up the tabs. It may be a tight fit, but you can press down on one section at a time to get it all inside the box. Once the piece is flush against the bottom, press down to adhere it. You’re done with the 2! Assemble the Number 0 Since the 0 and the O have very similar shapes, the 0 is assembled exactly the same way as the O, with a few minor differences: Here are what my cut pieces for the 0 look like. And here is what the 0 looks like after putting it all together! Assemble the Number 3 The last number we’ll assemble is the 3. Here are what my cut pieces look like. Start by taking the acetate piece and the red pieces for the top of the 3 box and placing them face down, just like we did for the other letters. Note that the 3 will be backwards when it’s face down. First, we’ll glue the acetate window to the inside of the 3-shaped piece with tabs around its edges. Apply a thin line of glue around the very inside edge of the red 3 piece, being careful to avoid the tabs. Carefully place the acetate piece down on top of the glue, aligning the outside edge of the acetate with the corners of the tabs. Try to keep the acetate from overlapping the tabs too much. Set that piece aside for now. While you’re waiting for the glue to dry, fold each of your remaining rectangular red pieces on the scored lines. Some of these pieces have tabs that are only there to indicate where to attach the piece to the body. We will fold these tabs over and glue them down before attaching that piece to the 3’s body. To locate these, look for the tabs connected to the longer sides of each rectangle -- for the 3, there are four of them (one at each end of the top piece with square and circle-shaped cutouts, one with a slit cutout on the piece with two folded sections, and one with a triangle cutout on the piece with three folded sections located on the left edge of the Canvas). Glue those four tabs down. Now we can go back to our body piece and fold all the tabs around the outside edges, using the acetate window as our guide, just like we did with the other letters. We’re now ready to add our side pieces to create the 3D shape of our number! Flip the 3 over so it’s facing forward. The piece with two folded sections will go along the top inner curve of the 3. Apply glue to the tab at the top flat section of the 3. Line up the end with the square tab at the edge of the 3 and press against the tab until the glue dries. When the piece is correctly positioned, the remaining section will be facing toward the right, with the glued slit tab at the end. Apply glue to a few of the inner tabs at a time to attach the long section around the inside of the curve. Make sure you’re gluing the tabs so they’re facing the INSIDE of the number. You can also add a bit of glue directly to the side piece and press the tabs in place. Use whichever method is easier for you! Take the piece with three folded sections, a glued triangle tab at one end, and a slit tab at the other. Attach the end with the slit tab to the middle flat section of the 3. Make sure to glue the slit tab to the inside of the 3. Glue the long section around the bottom inner curve of the 3, a few tabs at a time, just like we did with the other curve. When you get to the end, glue the remaining short section to the adjacent flat part of the 3. Take the second piece with three folded sections and glue the triangle tab to the piece you just attached. Apply glue to a few tabs at a time to attach the first section of that piece to the bottom left curve of the 3. When you get to the end, attach the middle section to the flat bottom of the 3. Work your way around the bottom right curve of the 3 in the same way. Go slowly and wait for the glue to dry on the current tabs before moving on to the next ones. When you get to the end, you’ll fold the circle tab at that end outward so it’s correctly positioned for the next piece. Finally, take the remaining rectangular red piece and attach the end with the glued circle tab first. Attach the piece around the top curve of the 3, a few tabs at a time, until you reach the end with the square tab. Glue that tab in place on the inside, and you’re done with the top of the 3! For the box bottom, the tabs, which are rounded, are on the side pieces instead of the body piece. All the bottom box pieces are teal. There’s also no acetate window for the bottom. Start by folding along all the scored lines. Make sure to fold all the tabs away from the side with the score marks. NOTE: The bottom 3 will be backwards on your work surface because the outside will be on the back of your completed number. Make sure to glue your tabs to the INSIDE of the letter (the side with the 3 facing forward). Glue the pieces in the same order as you did for the top of the 3. The symbol cutouts are all located in the same areas. When you’re finished, the bottom of your box should look similar to mine. Now for the 3’s accents. The smaller number-shaped accent is easy to glue on the back. Just make sure you leave the same amount of space around all the edges. For the outer edges, start by finding the three smallest rectangles. One will go on the bottom, and the other two will go on the flat sections on the left side of the 3. The center flat section will not have an accent piece. Compare the sizes of your accent pieces to the sizes of each flat section before gluing. When you have them in the right spots, there will be an equal amount of space around all sides of the accent. The placement of the remaining three rectangles is easier to figure out. The smallest one will go on the bottom left curve, the largest one will go on the top curve, and the last one will go on the bottom right curve. TIP: When adding the curved accents, it helps to gently roll the glitter cardstock pieces in your hands in the direction you want them to curve before adding glue. This will make it easier to attach the pieces right where you want them on the number. Next, glue the 3-shaped border piece to the front of the box. Apply glue to the back of the accent piece and then place it down onto the box, making sure the edges are lined up just right. Then press down to adhere it. Finally, take your last number-shaped piece (it will be red) and apply glue to the back of it. Then, carefully slide it down inside the bottom of the number to cover up the tabs inside. Once the piece is flush against the bottom, press down to adhere it. You’re done with the 3! Now for the fun part -- adding the shaker pieces! I’m going to demonstrate the process with the letter J. You can do the same thing with the rest of your letters and numbers. First, gather several sequins that are at least 5mm in diameter (the larger ones work better for this), several pom poms that are no larger than 1” in diameter (the 0.5” size worked perfect for me), and any other ornaments or items you want to include inside your shaker letter. Just make sure any items you use are no larger than 1” in diameter. Otherwise, they won’t be able to easily move around and shake inside the letter. The small disco balls from my materials list and paper confetti pieces are some other great shaker options. NOTE: One thing you should avoid using in these shaker letters is glitter. It tends to stick to the acetate due to the static it creates, and it also likes to “escape” around the outside edges of the box pieces. Place your chosen shaker elements inside the bottom of your letter, making sure you have enough to completely cover the bottom when the letter is lying flat. Close up your box and shake it to make sure you’re happy with the amount of items inside. If you want to change anything, just open up the box and add or remove pieces before attaching the top and bottom together. TIP: If you have trouble with the inner tabs catching when sliding your top letter piece onto the bottom, just cover the tabs with some Scotch tape. You won’t see the tape inside your letter once it’s assembled, and it will make putting the two pieces together much easier! Once you’ve added all your shaker pieces to the box, you can attach a washer to the bottom of your letter to make sure it’s nice and stable when displayed. This step is optional for most letters, as they will stand on their own. However, if your letter is top heavy or has trouble sitting flat (like the J), I recommend adding at least one washer. I added washers to the bottom of all my letters for extra stabilization. Just open up your box and use one or two glue dots, some tape, or a small amount of glue to adhere the washer to the bottom of your letter along the outside edge of your bottom piece. Now we need to close up our letter so the top doesn’t accidentally slide off and spill shaker pieces everywhere! Place several 3D foam dots or strips around the outside perimeter of your bottom piece. Make sure you use 3D dots or tape instead of a flat adhesive or glue -- we need it to fill the width of the gap between the top and bottom letter pieces when they’re placed together. Remove the backing from your foam pieces and then carefully slide the top letter piece down onto the bottom. This may take a few tries, as the foam adhesive will catch the sides of the letter as you’re lowering it down. Just go slowly and work on a section at a time until you get the entire top piece flush against the bottom. Once your two pieces are nice and snug and aligned how you’d like, press along the sides where you placed your foam dots or tape to make sure they’re well adhered to both pieces. You’re done! This is what my finished “JOY 2023” letters and numbers look like. Aren’t they awesome? Now you can display your letters on a shelf to admire them from afar or on a desk or table where you can pick them up and shake them every once in a while for fun! Another fun way to fill your shaker letter is with fairy lights! You can line the inside of your letter with the lights by attaching them with medium-sized glue dots placed every few inches. If you decide to use fairy lights, it’s best to leave out any other shaker elements, as they can get stuck to the lights and/or glue dots. Finished Dimensions for Single Letter: Approximately 5.5" tall by 1.5" deep, width varies by letter
3D Letters with Shaker
Materials
Tools
Instructions
Before You Begin
STEP 1: GET MY FREE 3D LETTERS WITH SHAKER DESIGNS
STEP 2: PREPARE YOUR 3D LETTERS WITH SHAKER FILES FOR CUTTING
STEP 3: CUT THE 3D PAPER LETTERS

STEP 4: ASSEMBLE THE 3D LETTERS WITH SHAKERS


STEP 5: ADD THE SHAKER ELEMENTS

STEP 6: SHOW IT OFF!
Notes
Answers to Your Questions About 3D Letters With Shaker Windows
Q: How do you make a 3D Cricut letter?
You can use my free design collection to make 3D letters with a Cricut.
What is a 3D alphabet?
Q. Do I have to use a Cricut machine?
A: No! We always include several versions of each digital pattern. If you have a Silhouette Cameo, which uses Silhouette Studio, you can use the DXF cut files in Silhouette Basic Edition. If you have upgraded to Silhouette Designer Edition, Designer Edition Plus, or Business, you can use the SVG cut files. If you don’t have a cutting machine, you can print and then cut out my digital download PDF files, too and then use scissors or a craft knife to cut out your pieces. The ZIP file in my resource library includes these file types and more!
Q. Are your free SVGs just for personal use or also commercial use?
A: Yes, you can sell completed projects using these digital downloads with the correct license for the digital files. If you use them, please share photos with us! We love supporting small businesses!
Q: How can you make hanging letters?
A: Fortunately, these letter boxes are very light when they’re empty. Depending on your setting, you could probably use poster putty, or poke a small hole to place one on a wall hook or display wire.
Q: How do you make 3D stuff out of paper?
A: There are many techniques for 3D papercraft projects, but this letter set uses creases, little tabs, and glue for an easy approach.
Q: What is the best paper to use for this project?
A: We used 65 lb cardstock to make the side tabs easy to crease, but 80 lb cardstock will also work well when using a Cricut. We also used glitter cardstock for some accents, which is usually 80 lb or 110 lb.
Q: Do you have printable letters?
A: Yes, you can print the PDF files I’ve included and cut them by hand with a craft knife and cutting mat. Printable PDFs are available for all the letters, numbers, and symbols!
Q: What should I put in my 3D letter shakers?
A: I added pompoms, mini ornaments, lights, and big sequins!

Get my free SVG files for a New Year 3D letters with shaker decoration!
Now, I’d love to see your 3D letters with shaker windows projects and the decorations you use! If you make a box, wall decor, or anything else with these designs, please share a photo in our Facebook group, email it to me at [email protected], or tag me on social media with #jennifermaker.
Love,

Want to remember this? Save the 3D Letters With Shaker Decorations tutorial to your favorite Pinterest Board.