Check out my favorite TikTok Cricut hacks!
I love learning from other crafters, and TikTok videos are one of the best ways to connect with others for new ideas! I’ve gathered some of my favorite TikTok Cricut hacks for you to try. There are great tips on everything from organization to money-saving supplies, so I’m sure you’ll find at least one new thing to try! And I hope you’ll join me and all our other Cricut friends on TikTok — my name is @jennifer.maker on TikTok!
Watch the full video on TikTok Cricut hacks:

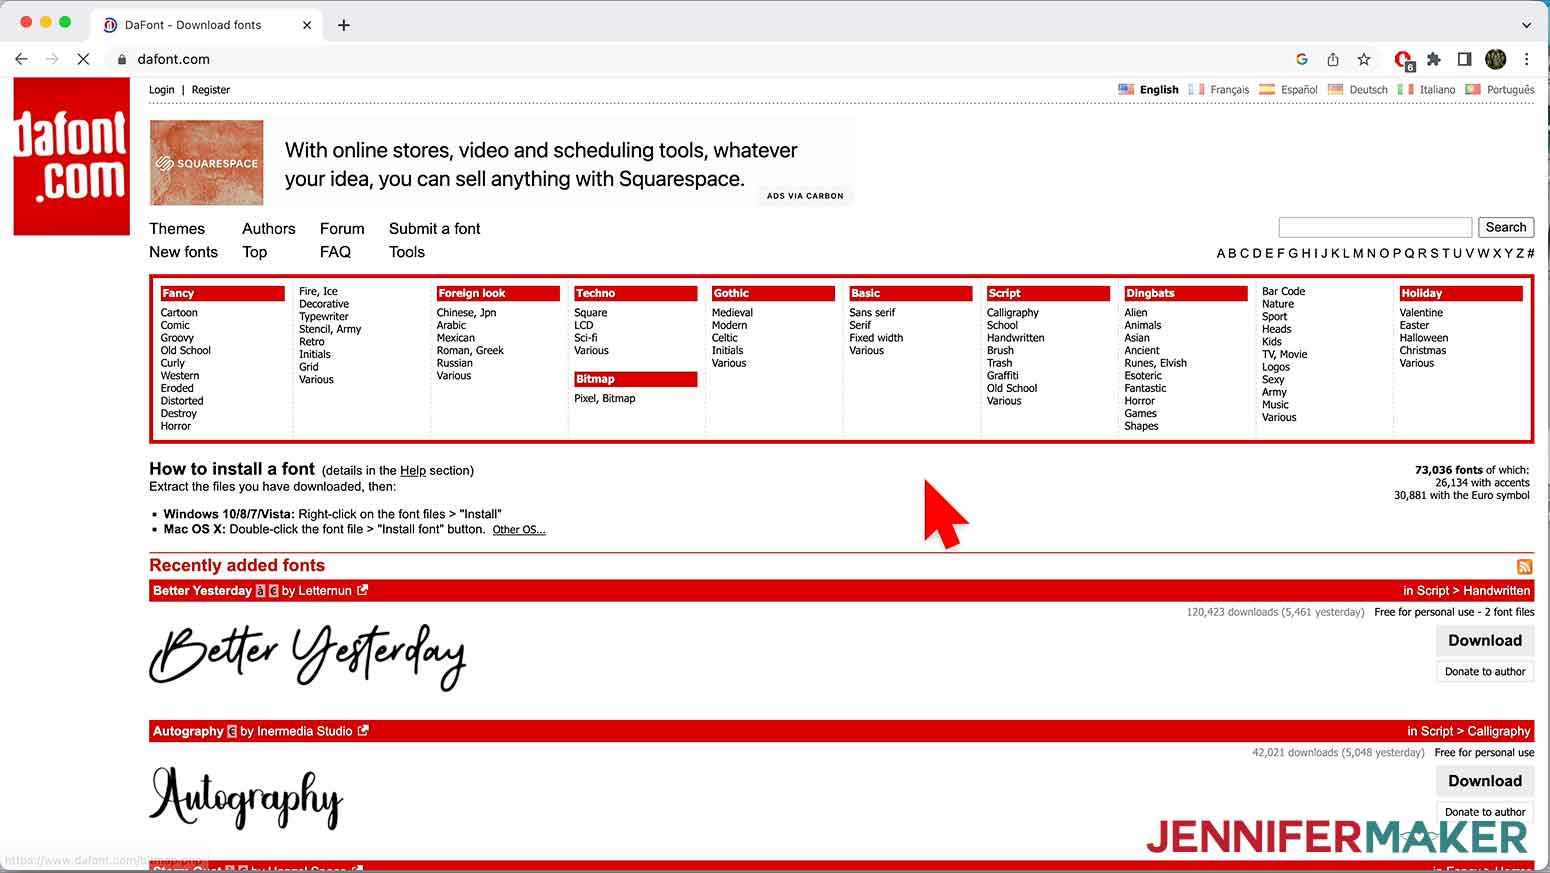
Get Free Fonts From Dafont.com – a TikTok tip from @kalisue__vinyl
Looking for a new free font for a fun project? Check out one of my favorite sites, dafont.com. You can browse, search, and filter fonts to find the best one for any personal use project. Want a sneak peek at what the design will look like? Just type in your text and the site will show you! Then just download the file and you’re ready to go!
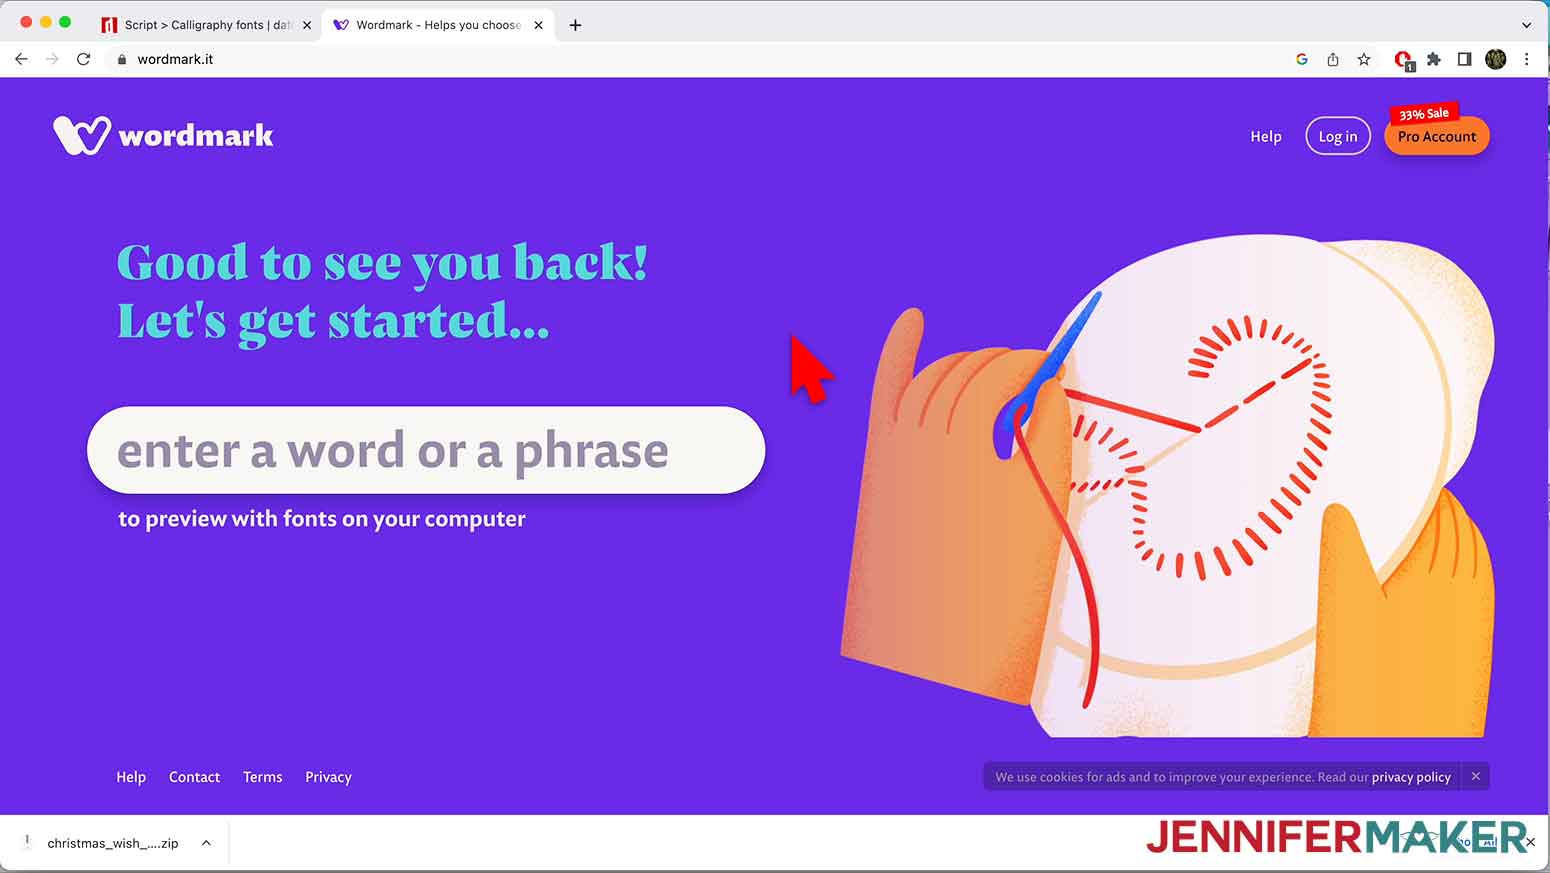
See Font Options in Wordmark.it – a TikTok tip from @shaynavohs3
Need help comparing font options for a design? Try the Wordmark website! Type in your text and it will show you what it looks like in all the fonts on your computer! See several that you like? Select your top choices and click “Filter Selected Fonts” to see your narrowed down fonts next to each other.
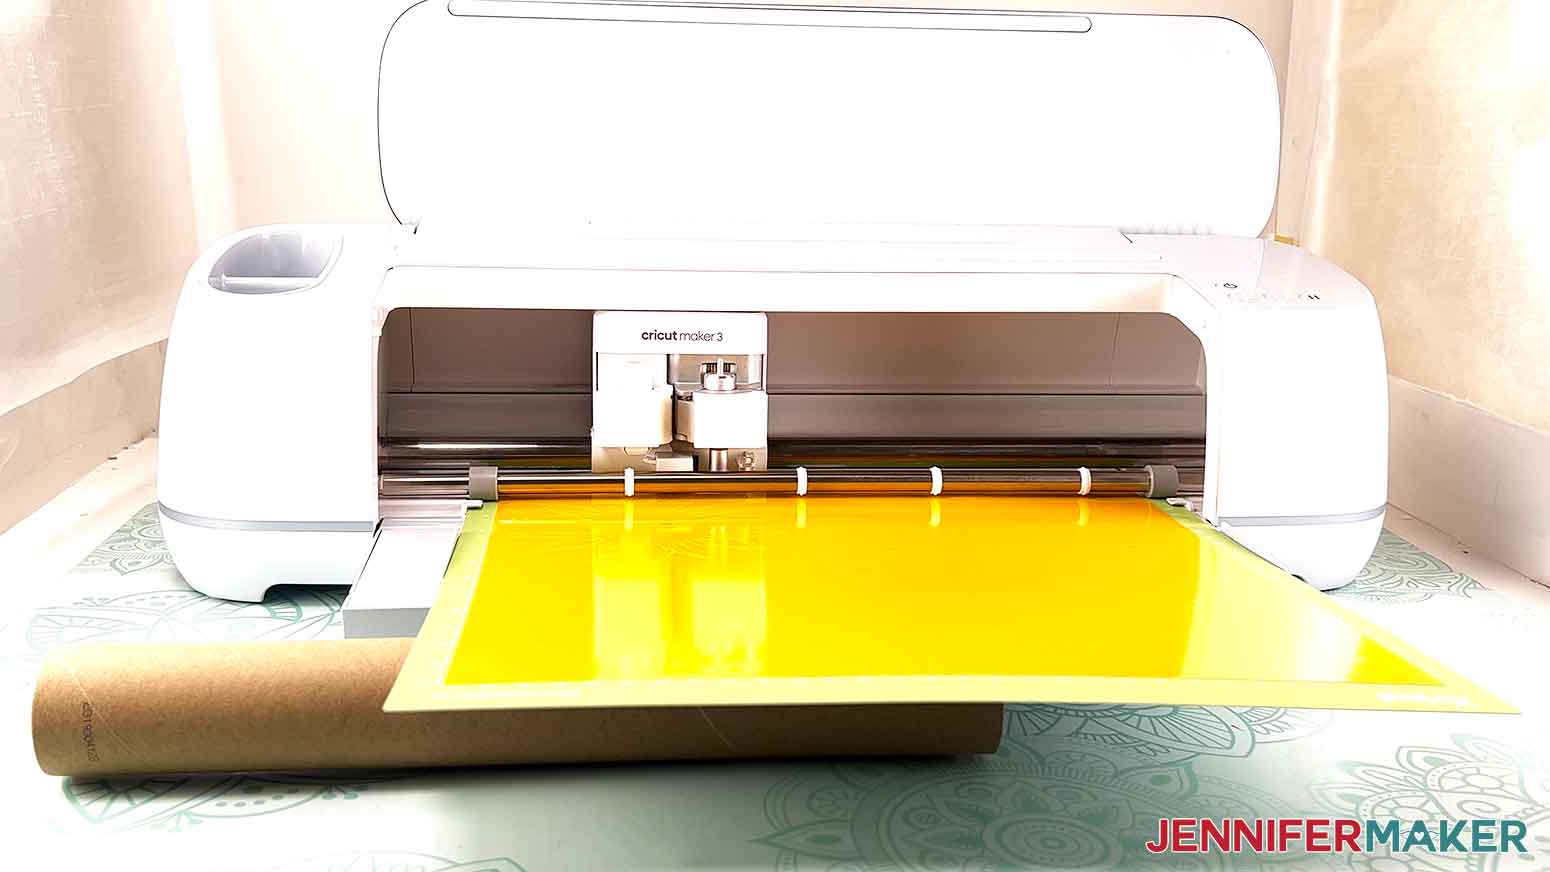
Use a Vinyl Roll to Support Mats While Cutting – a TikTok tip from @wishingstarwarehouse
Does your machine mat bend while you’re cutting designs with your Cricut? That can mess up your designs! Take the cardboard tube from a vinyl roll and place it under the mat’s edge, and then that way your mat can roll off in and out of the machine with more support to stay flat! Your mats will last longer and your cuts will come out much better! And an empty vinyl roll doesn’t take much space.
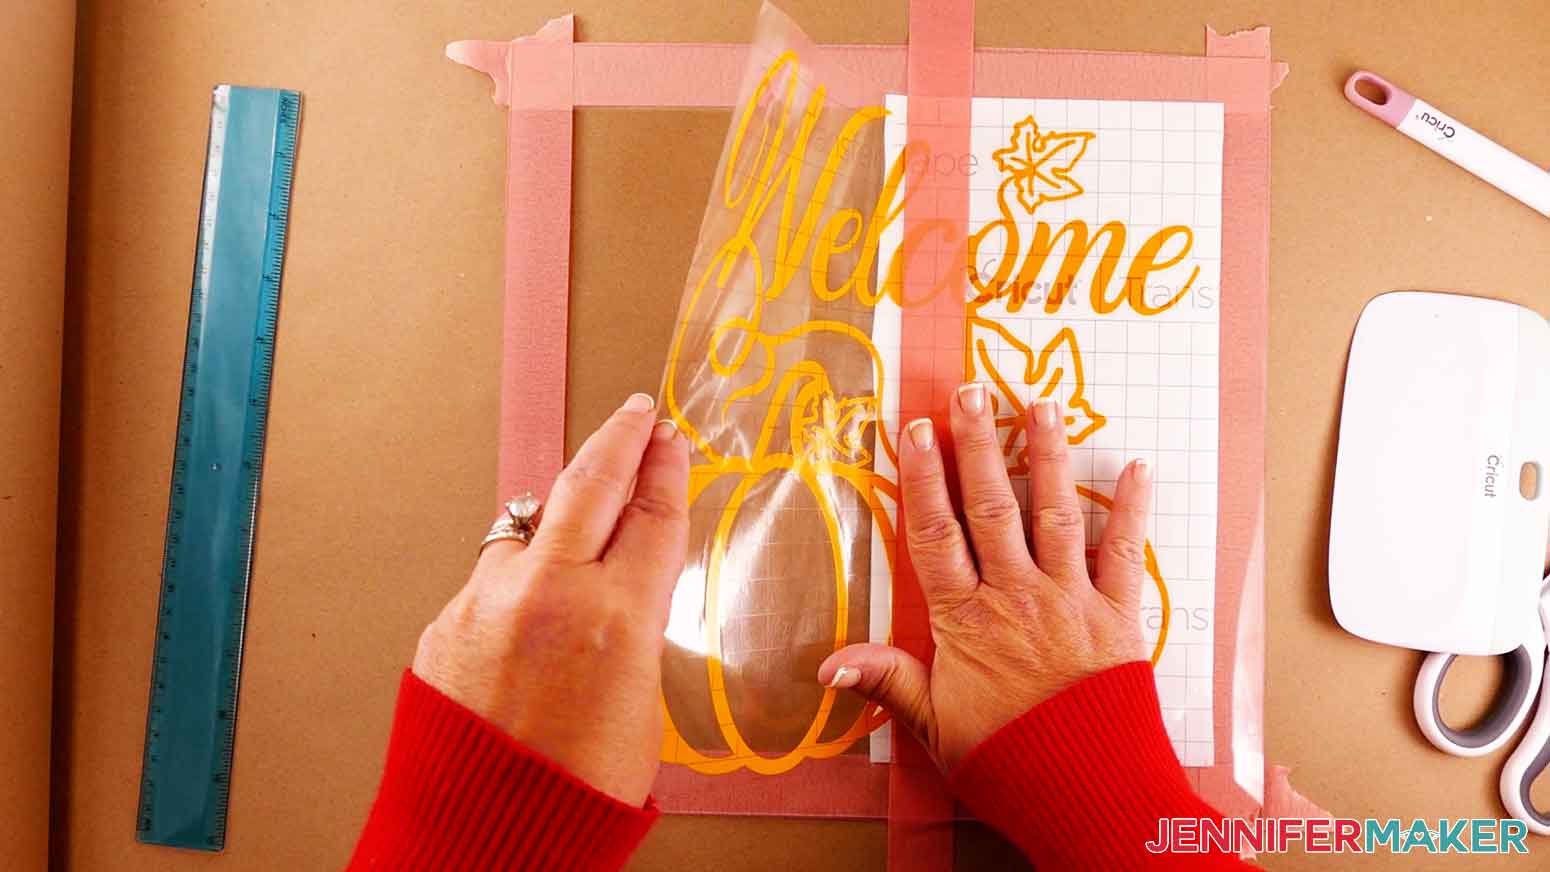
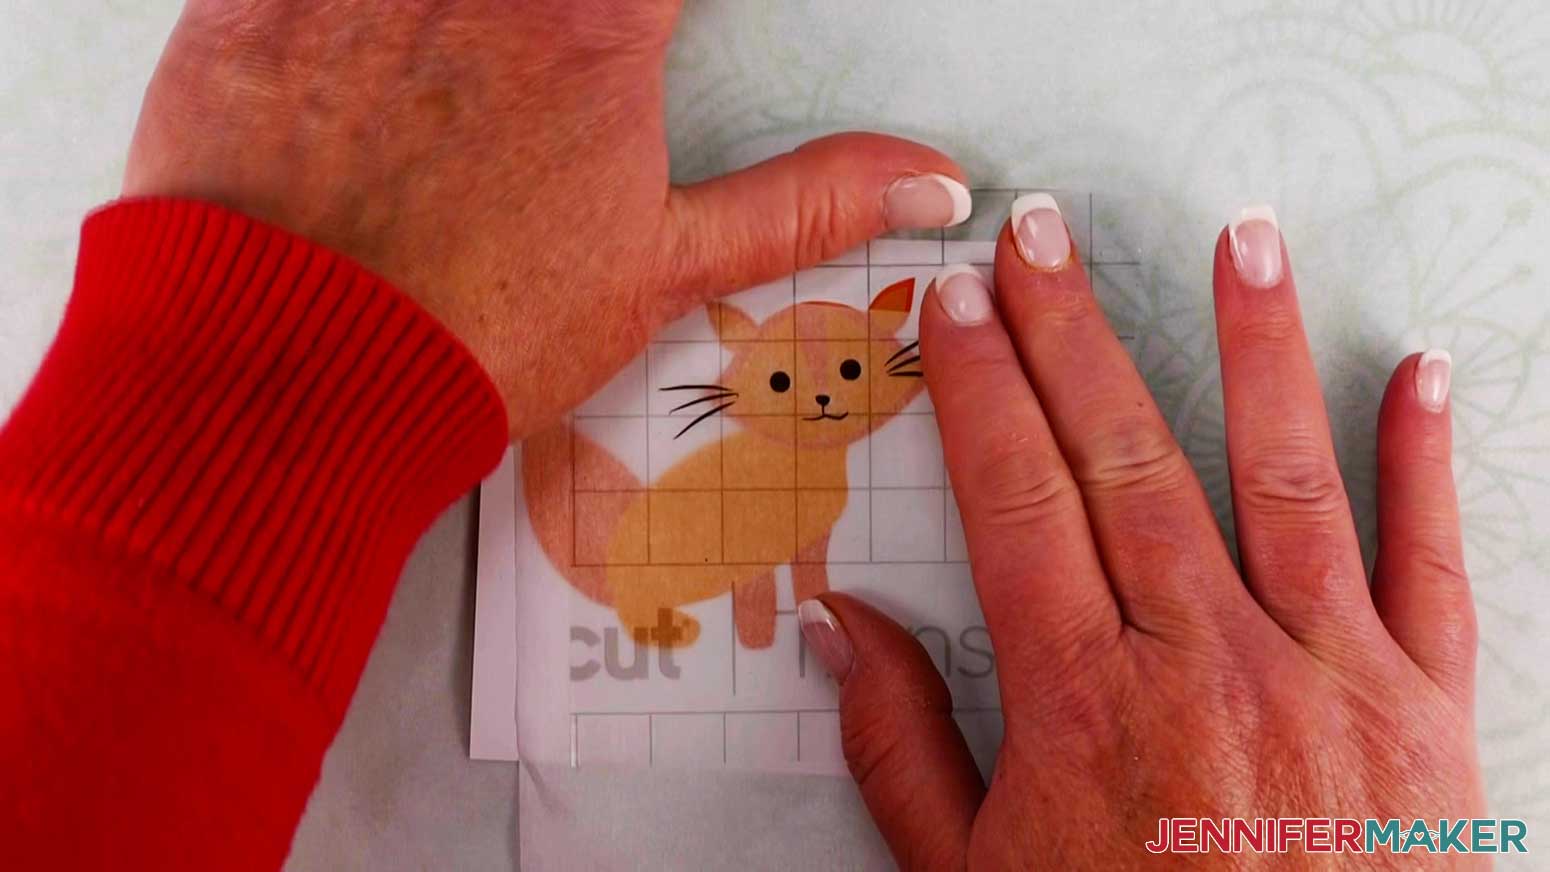
Use the Hinge Method for Large Decals – a TikTok tip from @karley.hall
Struggling to apply large adhesive vinyl designs to a blank surface? Try the hinge method, especially for large projects.
Cover your weeded design with transfer tape and place it on the item.
Put a piece of painter’s tape across the middle of the design and stick it to the edges of the blank.
Lift one half of the vinyl up on the transfer tape, away from the backing. Use scissors to cut away the backing.
Lay the design back down on the blank and use a scraper tool to burnish the vinyl.
Remove the painter’s tape, then lift the other half of the design. Peel away the backing and press the rest of the decal to the blank.
Burnish the second area and remove the transfer tape.
All done with perfect placement and much less stress!
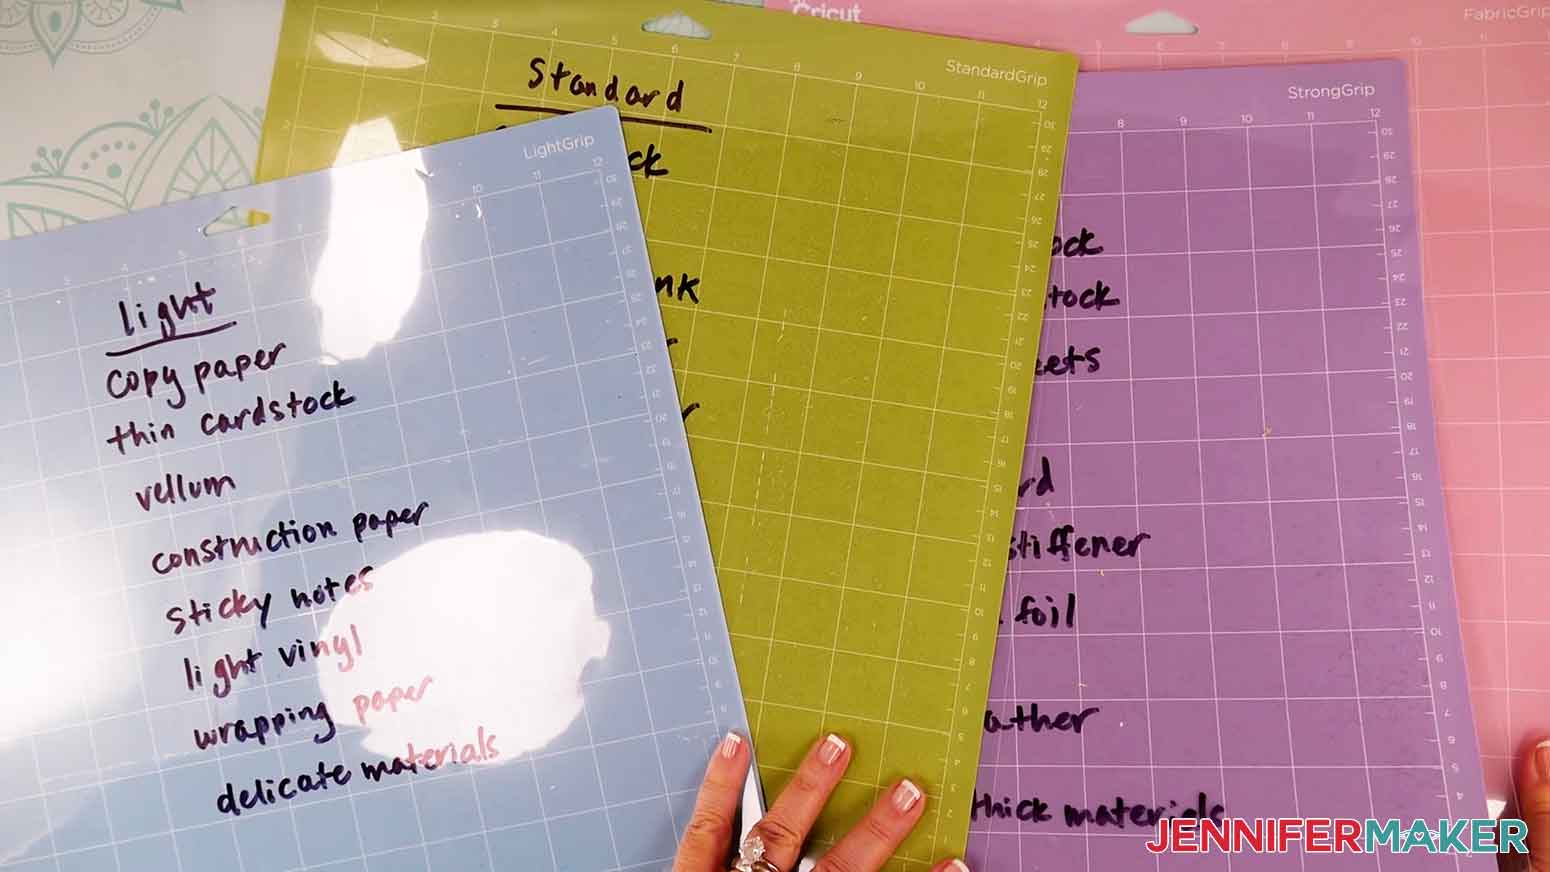
Label Your Mat Covers – a TikTok tip from @jchcreations
Keep your machine mats straight and help them last longer with labels! With the cover on the mat, write the materials you should use with each type in permanent marker.
Blue LightGrip mats work best with copy paper, thin cardstock, vellum, construction paper, sticky notes, light vinyl, wrapping paper, and other delicate materials.
Green StandardGrip mats work with cardstock, vinyl, infusible ink, pattern paper, textured paper, washi paper, and lots of similar things.
Purple StrongGrip mats are best for glitter cardstock, thick cardstock, magnet sheets, chip & poster board, fabric with stiffener, aluminum foil, foam, faux leather, suede, and other thick materials.
And the pink FabricGrip mat works for fabric, bonded fabric, crepe paper, burlap, and felt!
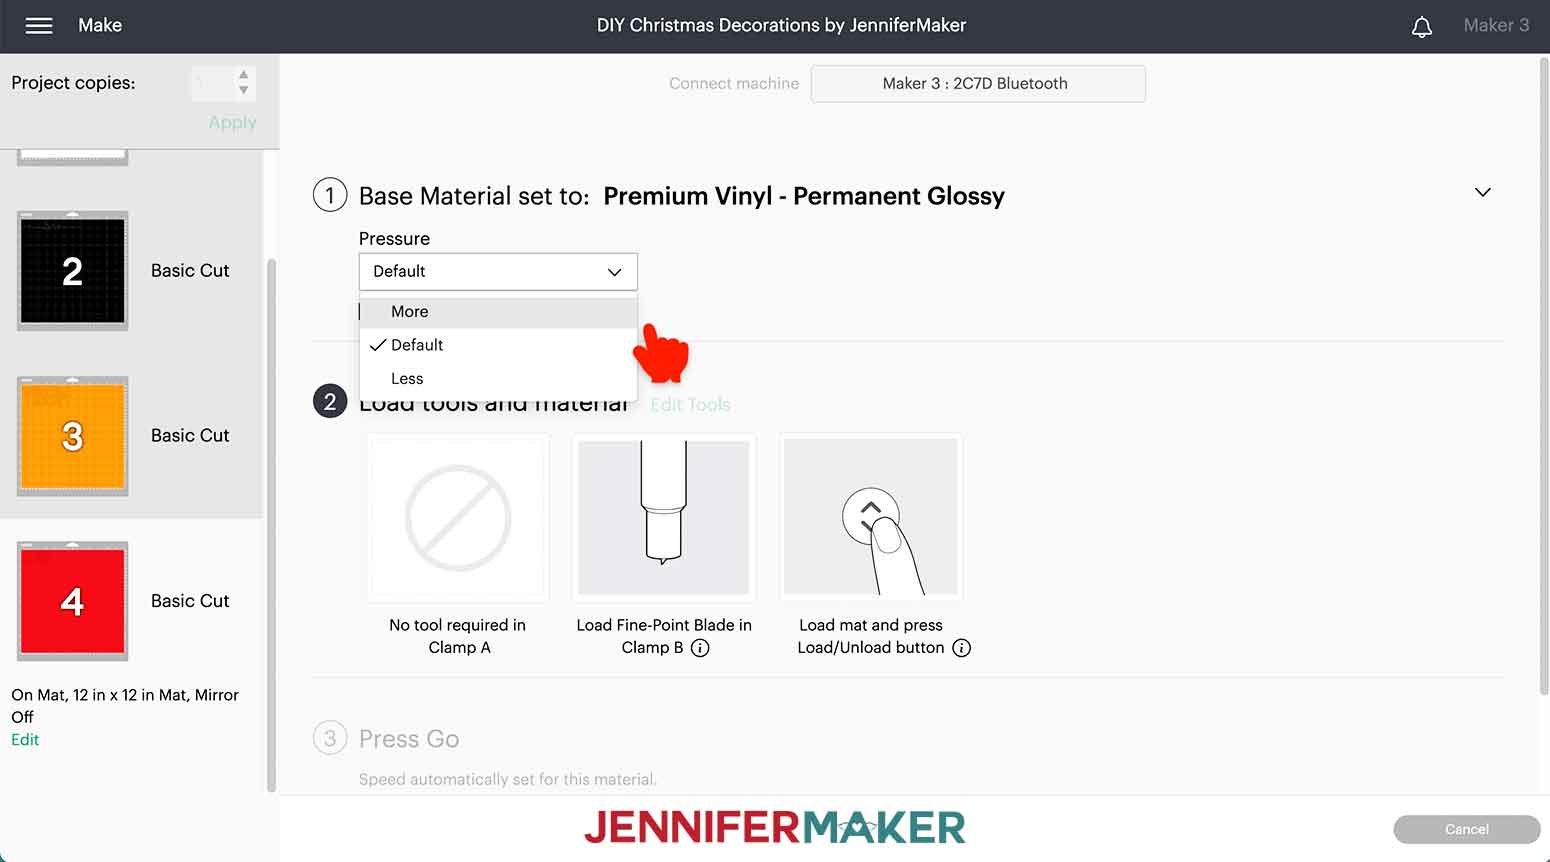
Cut Vinyl With More Pressure for Easier Weeding – a TikTok tip from @LuckyLittlePennyCrafts
Different brands of vinyl can behave totally differently on a Cricut. But, applying more pressure to the cut usually has the most successful results! In Design Space, after selecting the material, click the dropdown under “Pressure” and select “More.” If you’re using an Explore Air 2, turn the dial to Custom so that you can set your material and pressure settings in Design Space. This is probably my favorite hack and I use it almost every time.
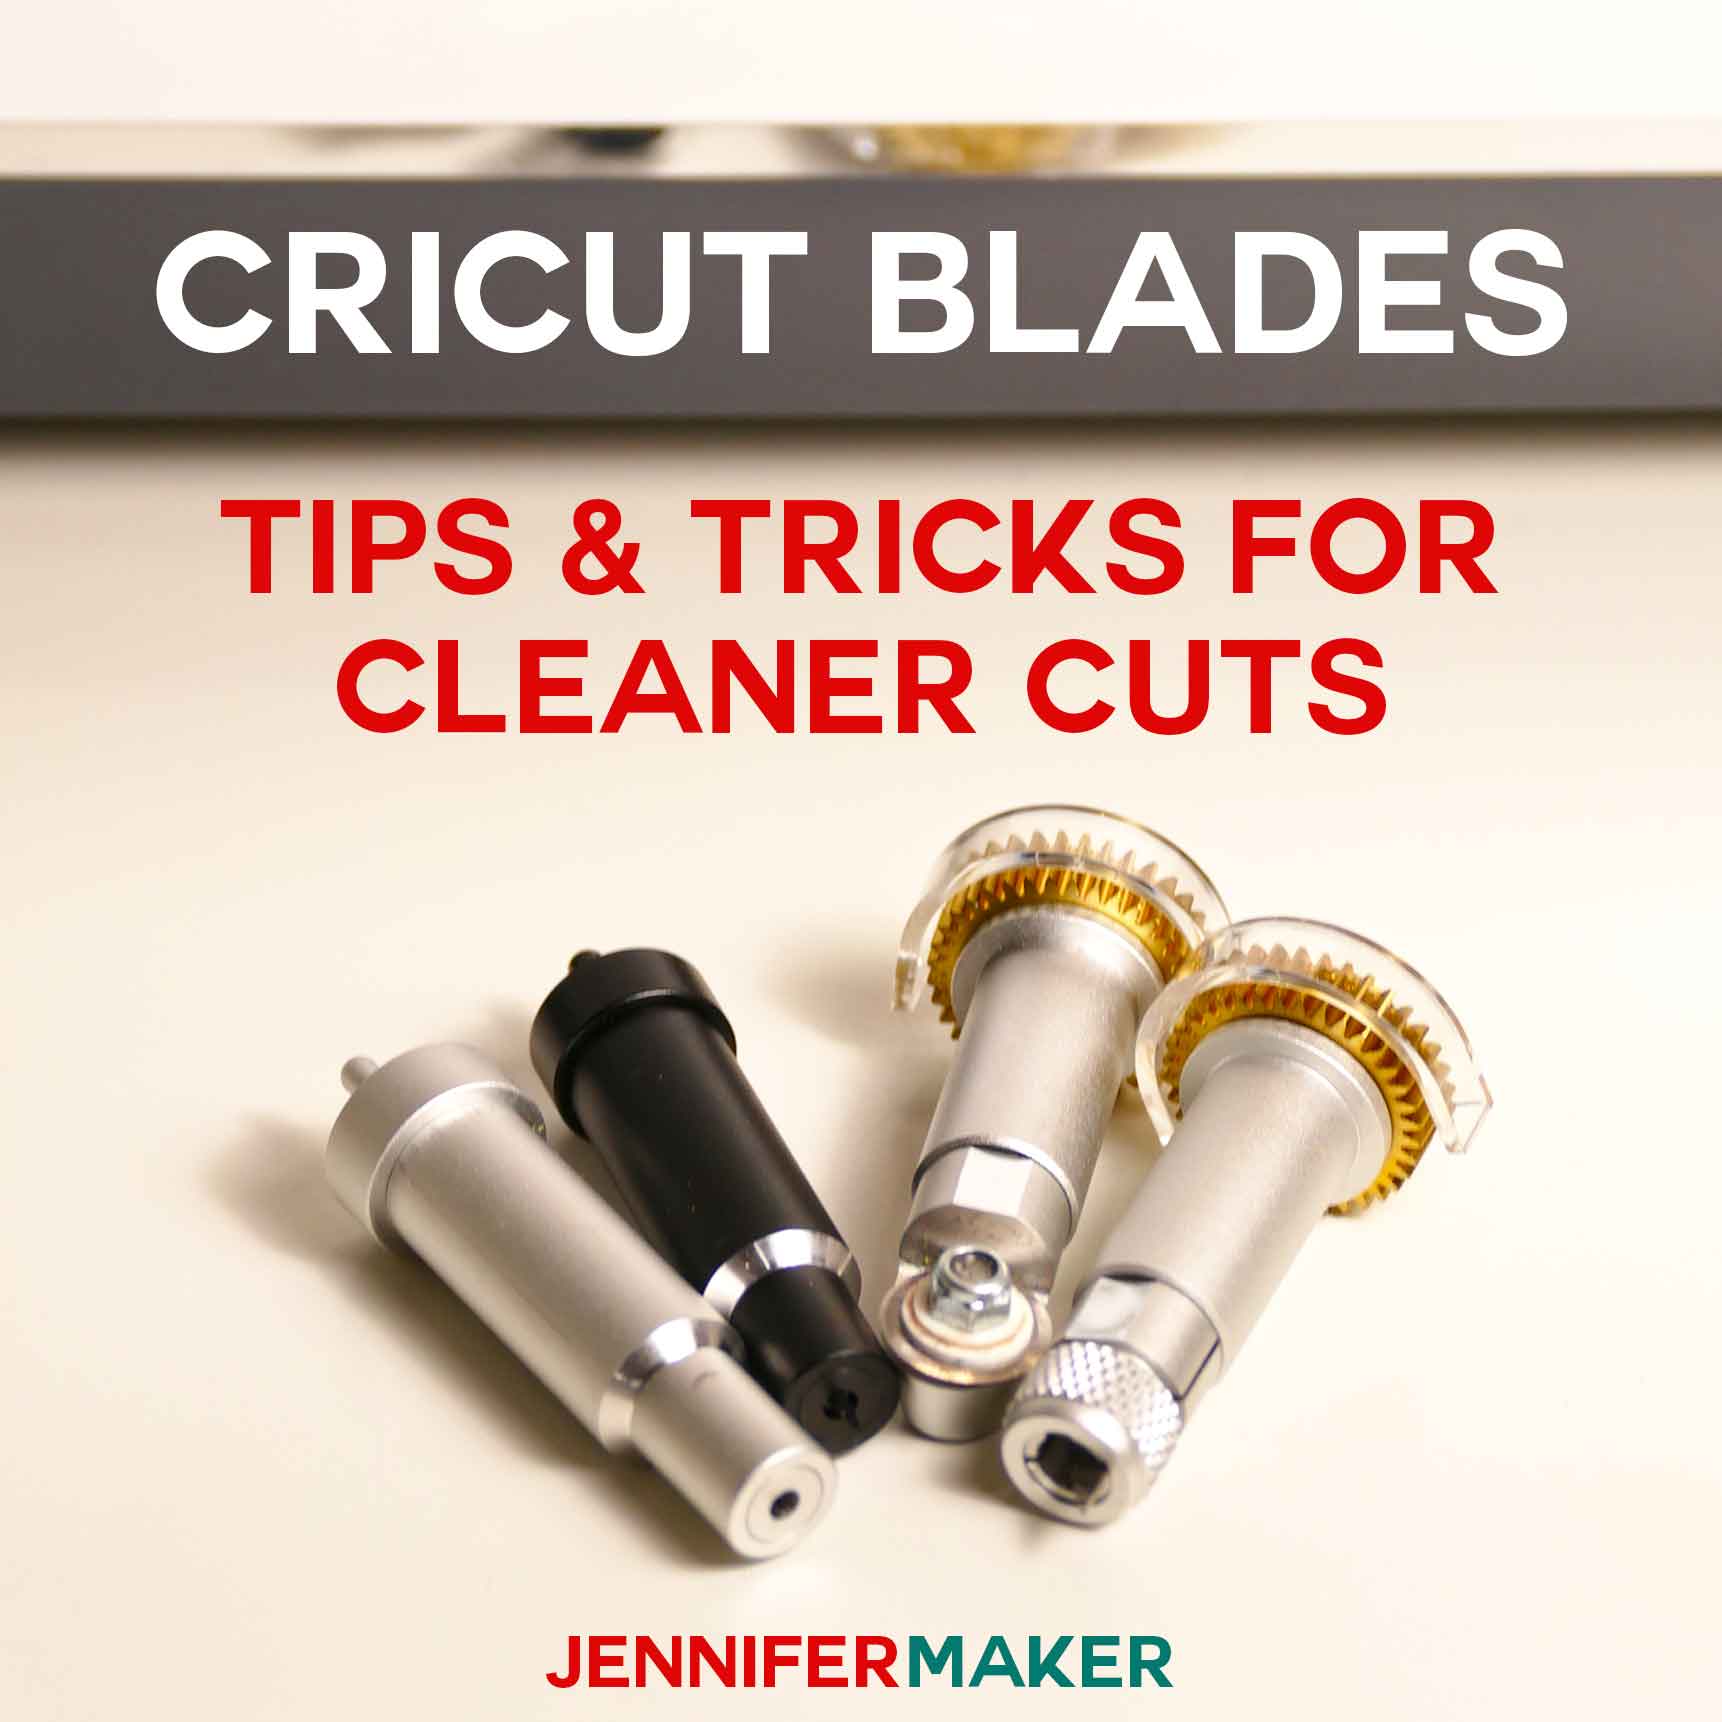
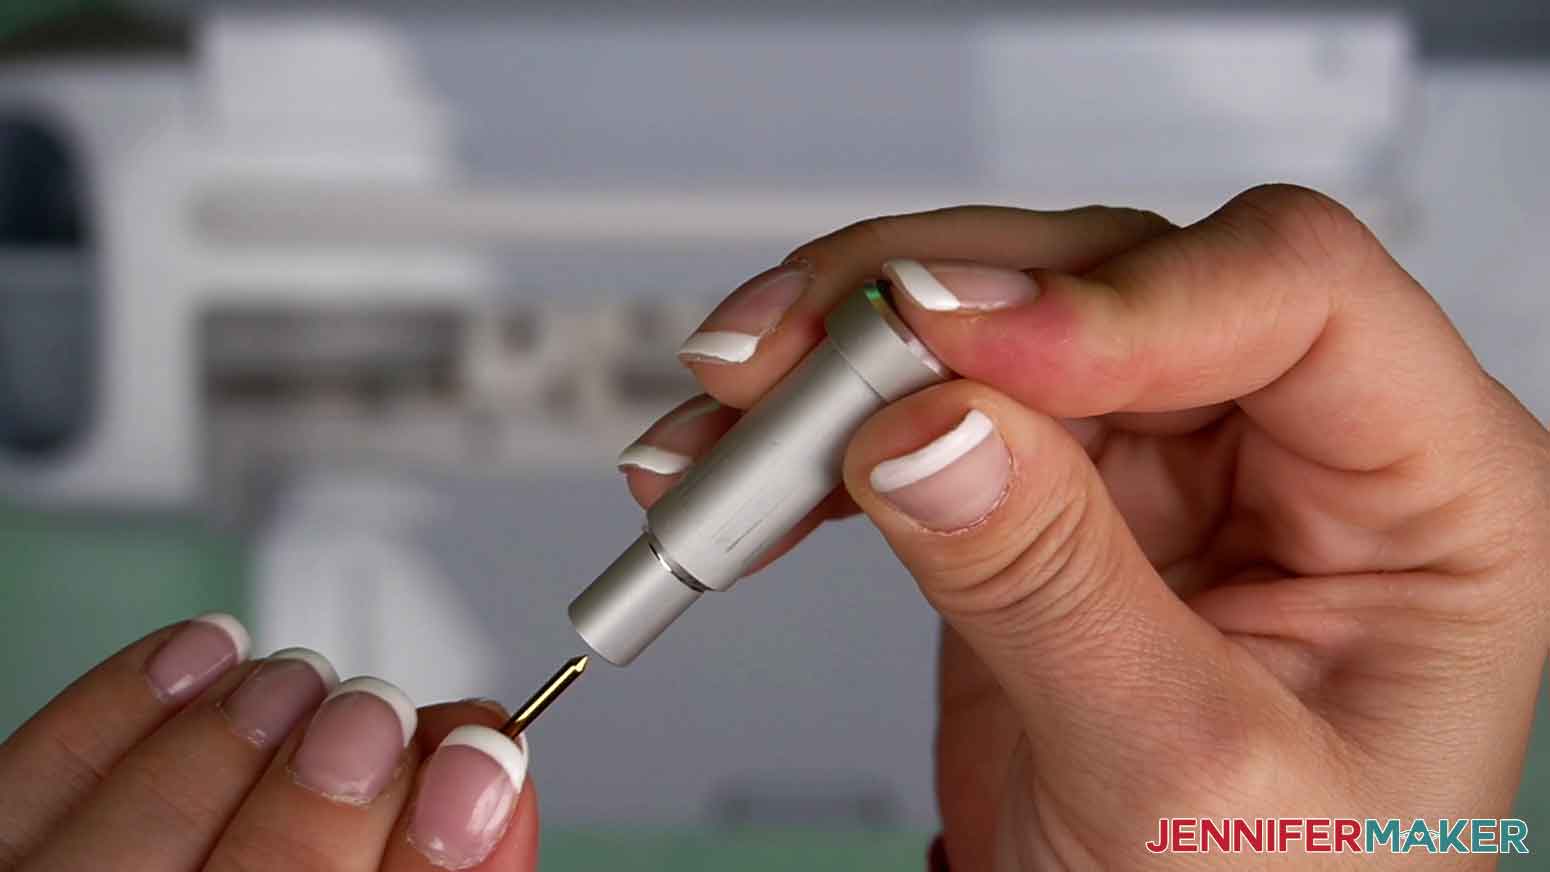
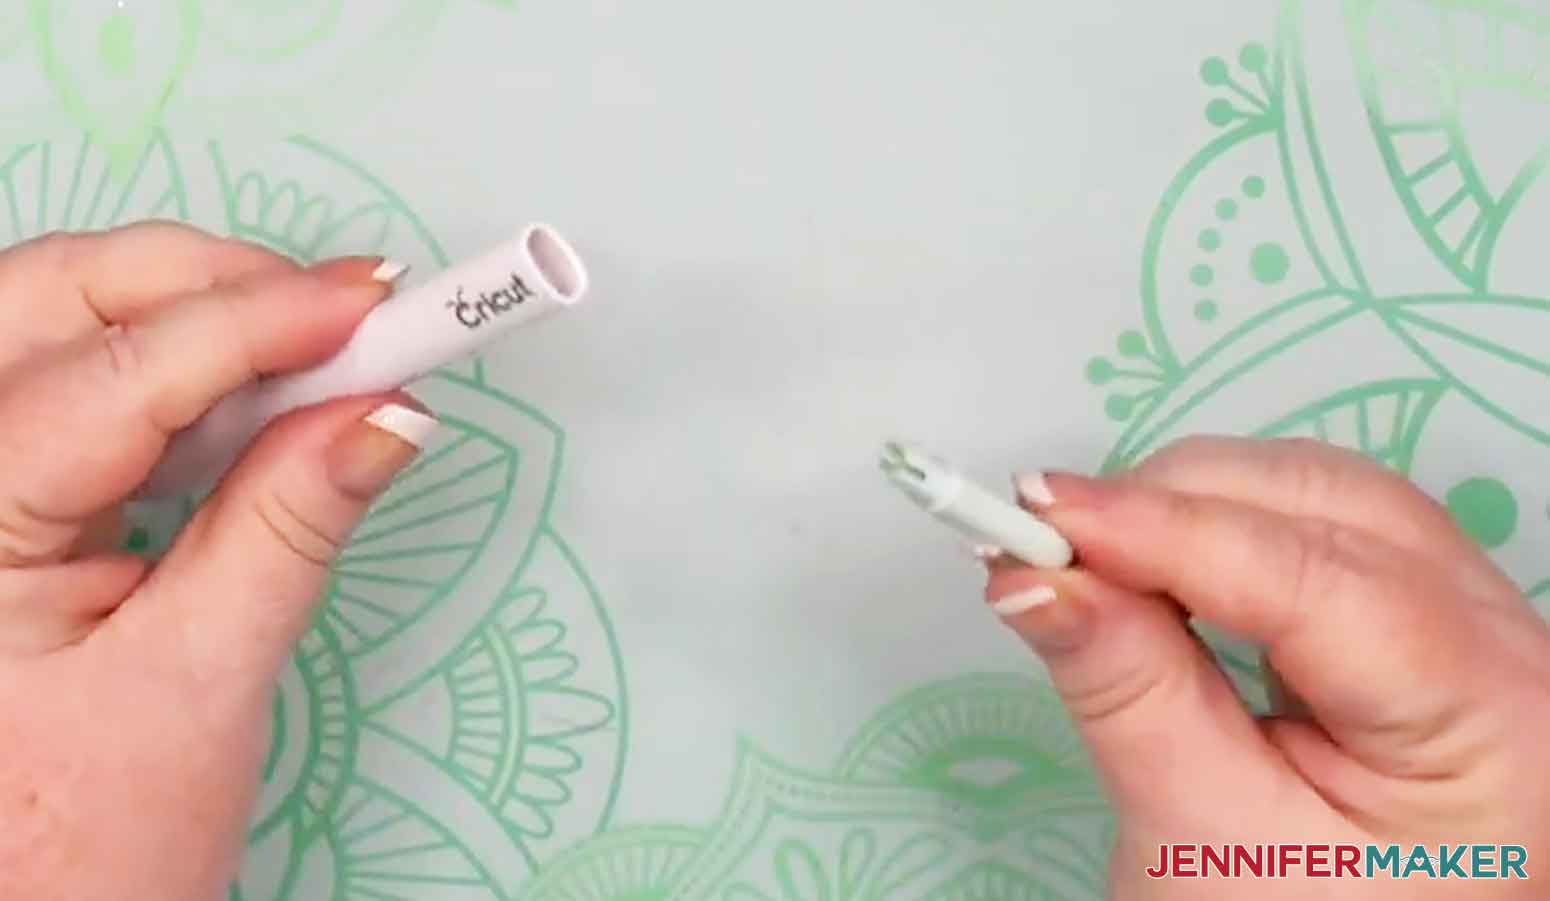
How to Remove/Replace Blade When You Need To! – a TikTok tip from @Cricut
Every once in a while, your blade can get a knick in it and no amount of cleaning will help it. If this happens, you can replace the blade in the housing.
To do this, press the plunger at the top of the housing and carefully pull the blade out from the bottom.
Remove the plastic cover from the new blade and insert the shaft into the housing. A magnet inside the housing holds the new blade in place.
Release the plunger and your new blade is ready for action! You can place the small plastic cover over the old blade tip to safely discard it.
Put Your Mat Covers Back On Easily – a TikTok tip from @rosierosesignage
The Cricut machine mat covers are thin, so they can flop around while you’re trying to put them back in place. And it’s important to cover the entire sticky area to keep the mats effective! No worries, just place the cutting mat upright in the tablet holder section on the Cricut. Align the mat cover on the mat’s top edge and the rest falls right into place with perfect alignment!
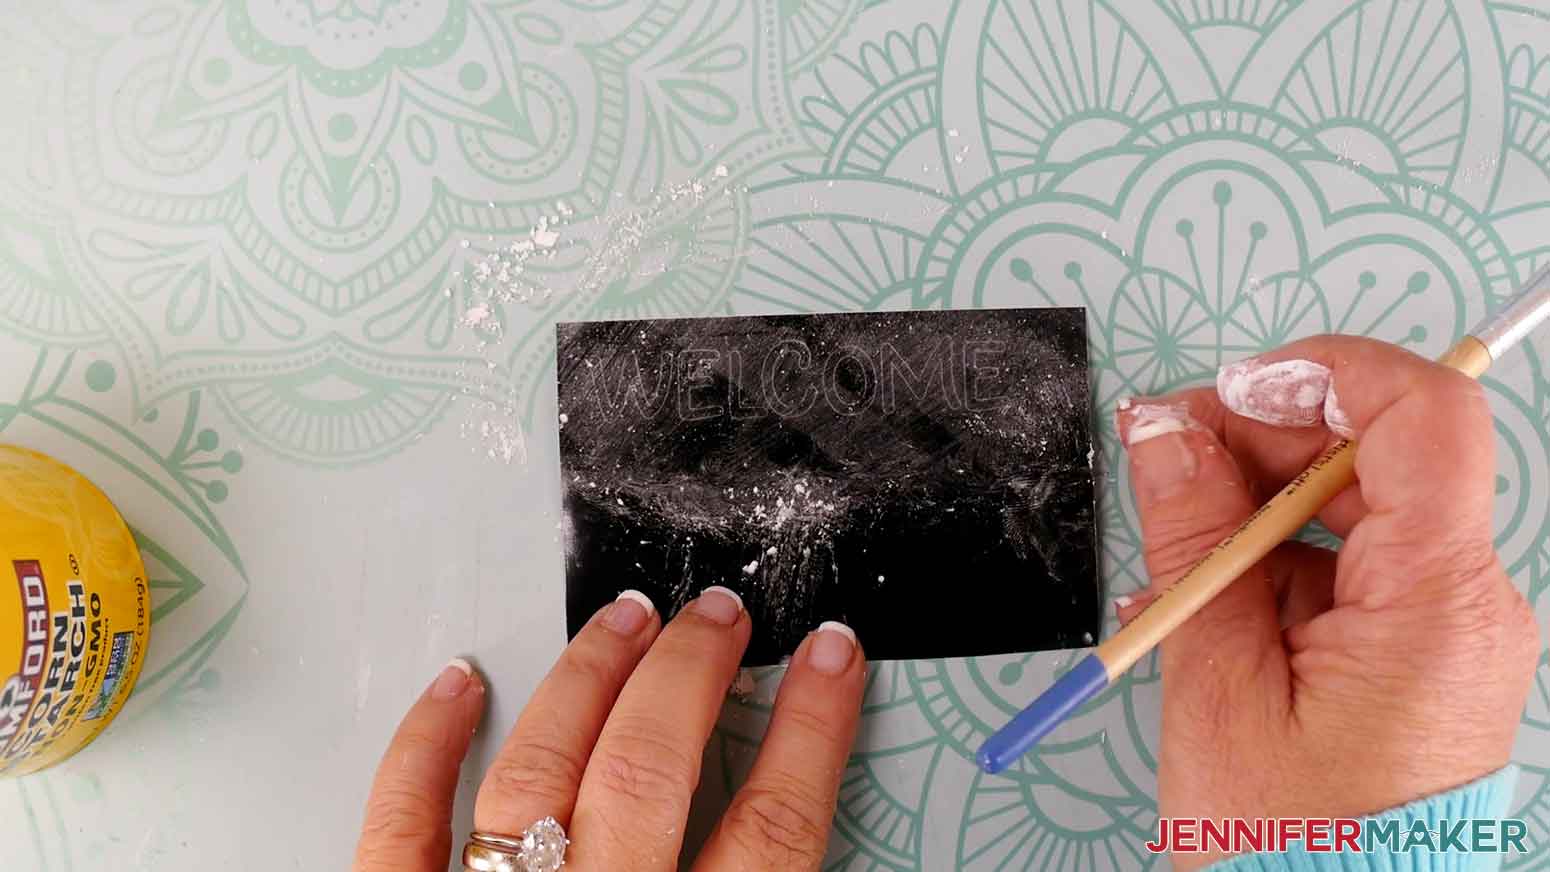
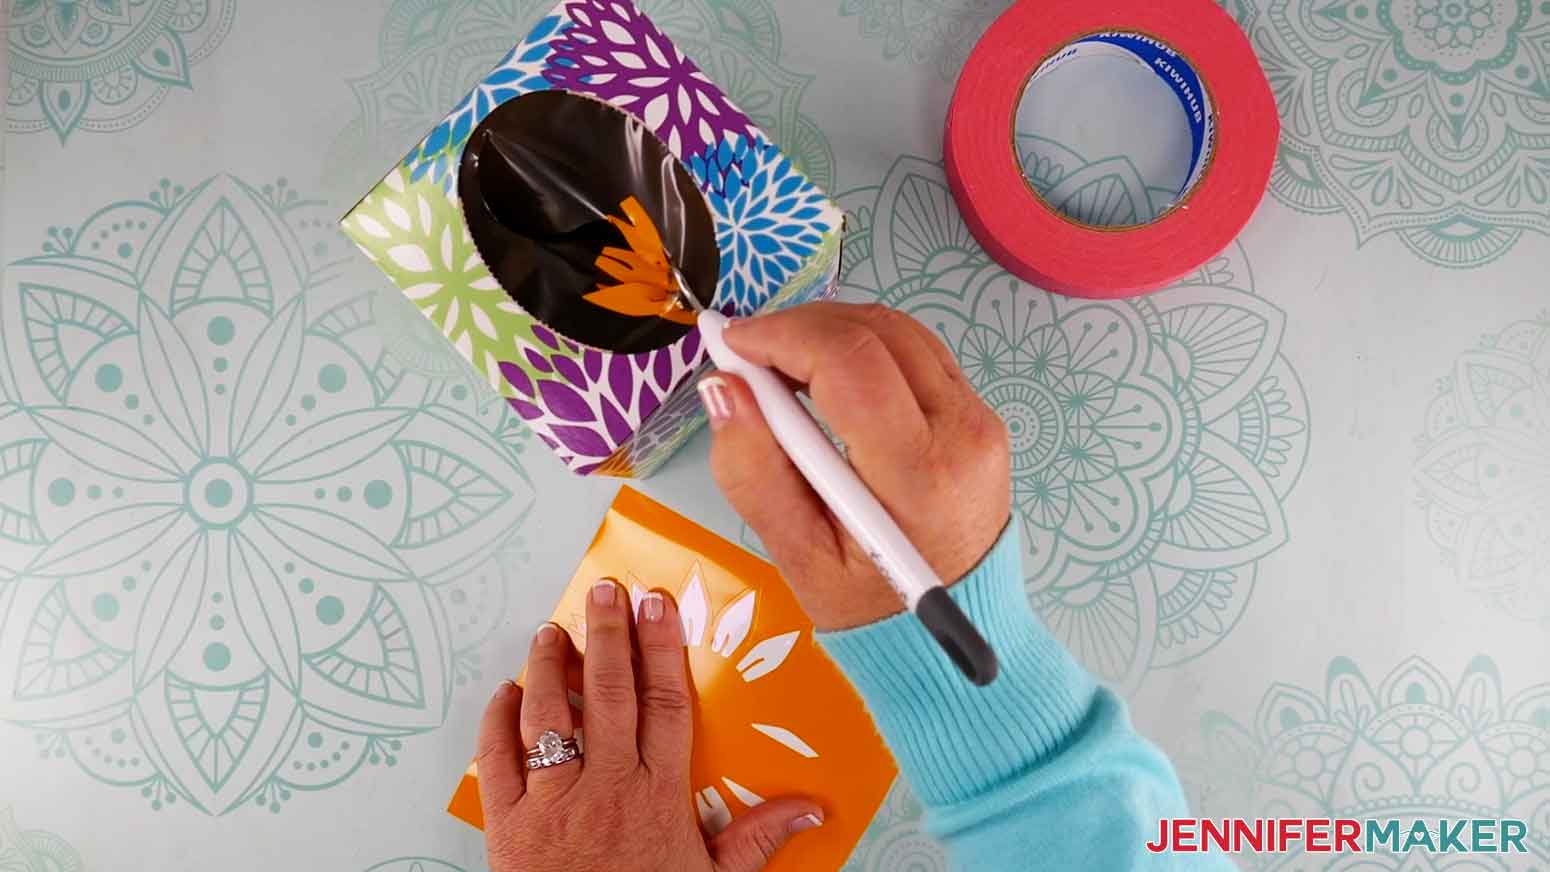
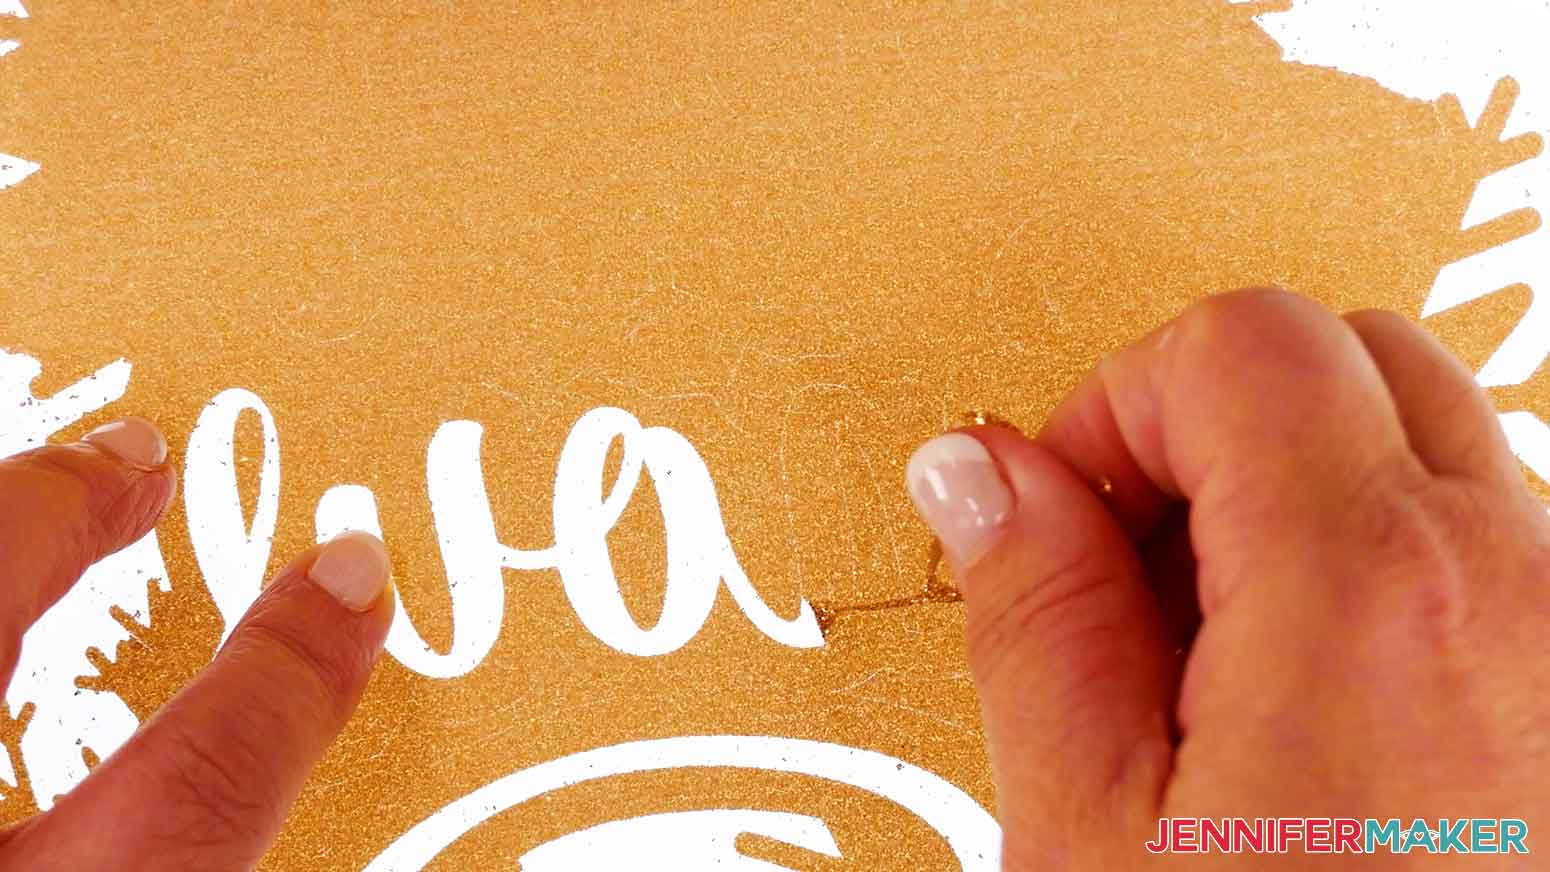
Reveal Cut Lines with Powder – a TikTok tip from @wishingstarwarehouse
Not sure what to weed on a dark vinyl project? The cut lines can really blend in! Sprinkle a little baby powder or cornstarch on your vinyl, then brush it in with a makeup brush. Dollar Tree supplies totally work for this! The light powder settles in the cut lines, making them more visible so you can weed better and faster! When you’re done, the powder wipes right off!
Catch Weeded Vinyl With Painter’s Tape – a TikTok tip from @izzyscreations2012
Roll a piece of painter’s tape (or a sheet from a lint roller) in a circle with the sticky side facing out. Stick it to your work area and use it to capture each bit of vinyl stuck to your weeding tool. When it’s covered, just roll it up and toss the whole mess with not much work!
Use Household Containers to Round Up Weeded Vinyl – a TikTok tip from @mecraftypants
If the painter’s tape trick doesn’t work for you, grab a container with a lip like something from snacks, old Lysol containers, a Kleenex box, or a nail polish holder. When you’re ready to wipe off your weeding tool, run the tip over the container’s edge to knock the bits off right into it!
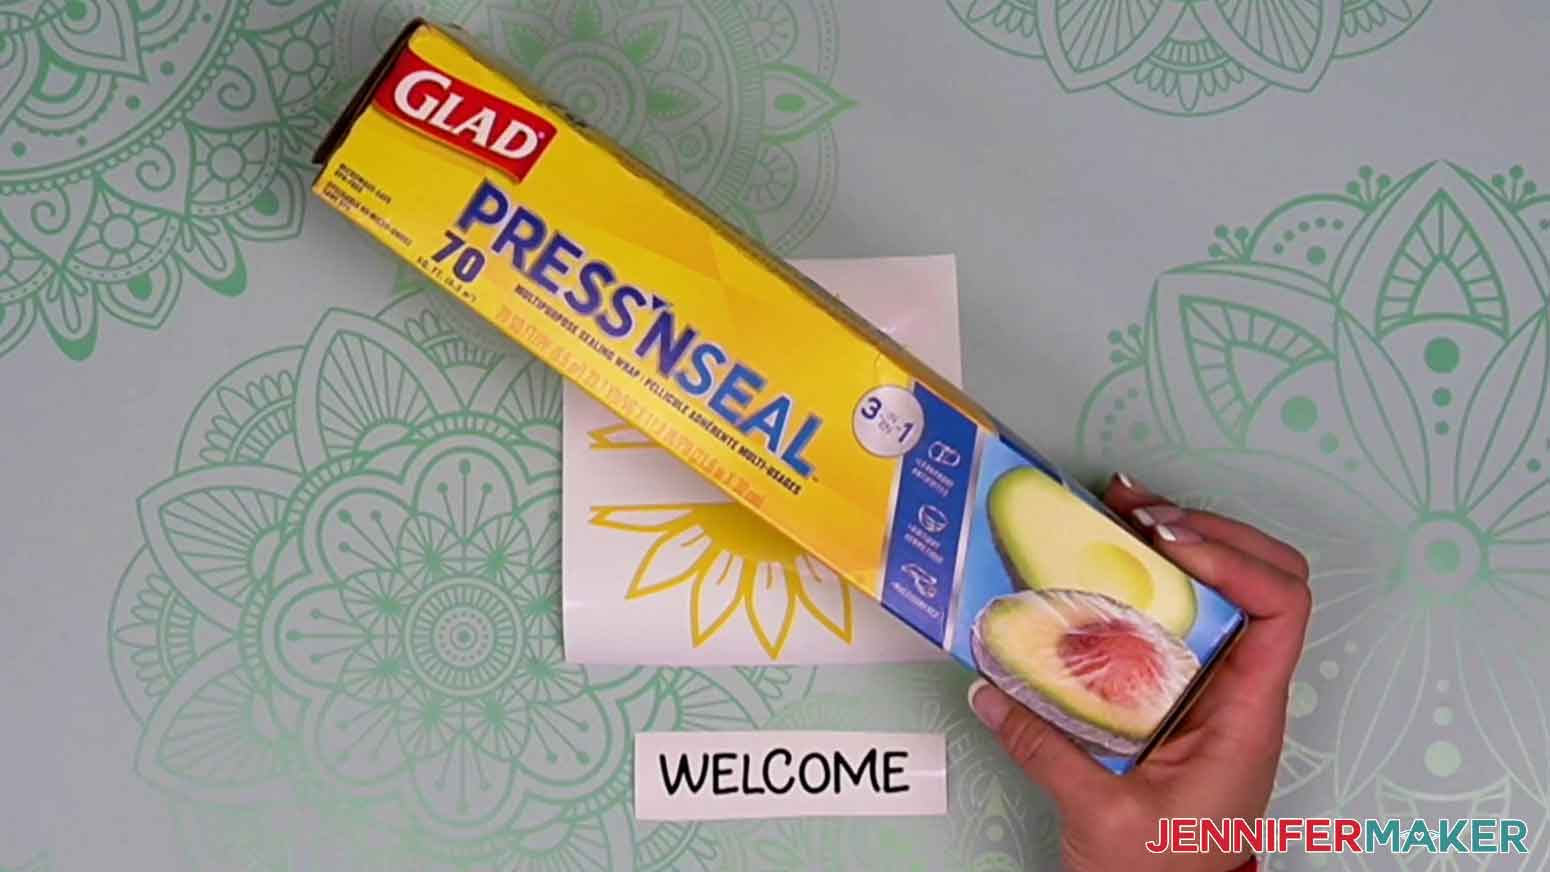
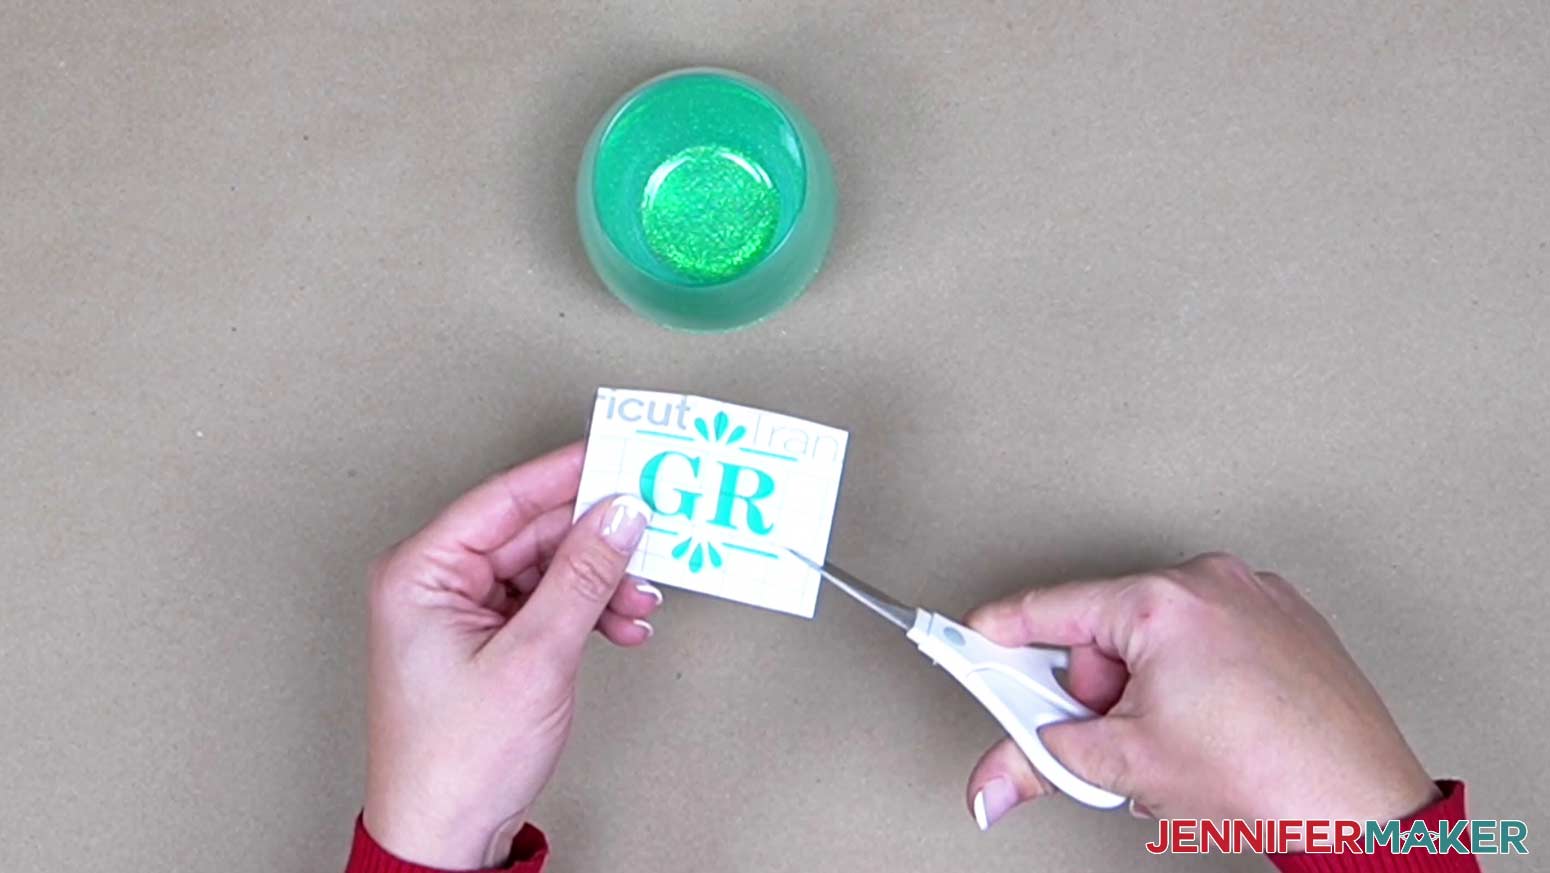
Use Press n Seal for Transfer Tape – a TikTok tip from @juniperpointdesignco
Want to spend less on transfer tape without getting frustrated by bad materials? Cut a piece of Press ’N Seal slightly larger than your weeded adhesive vinyl design. Use a scraper to adhere the Press ’N Seal to the design’s top surface. Gently peel away the backing and the vinyl will be totally transferred to the clear material. Use it just like transfer tape to apply the vinyl design to your blank surface.
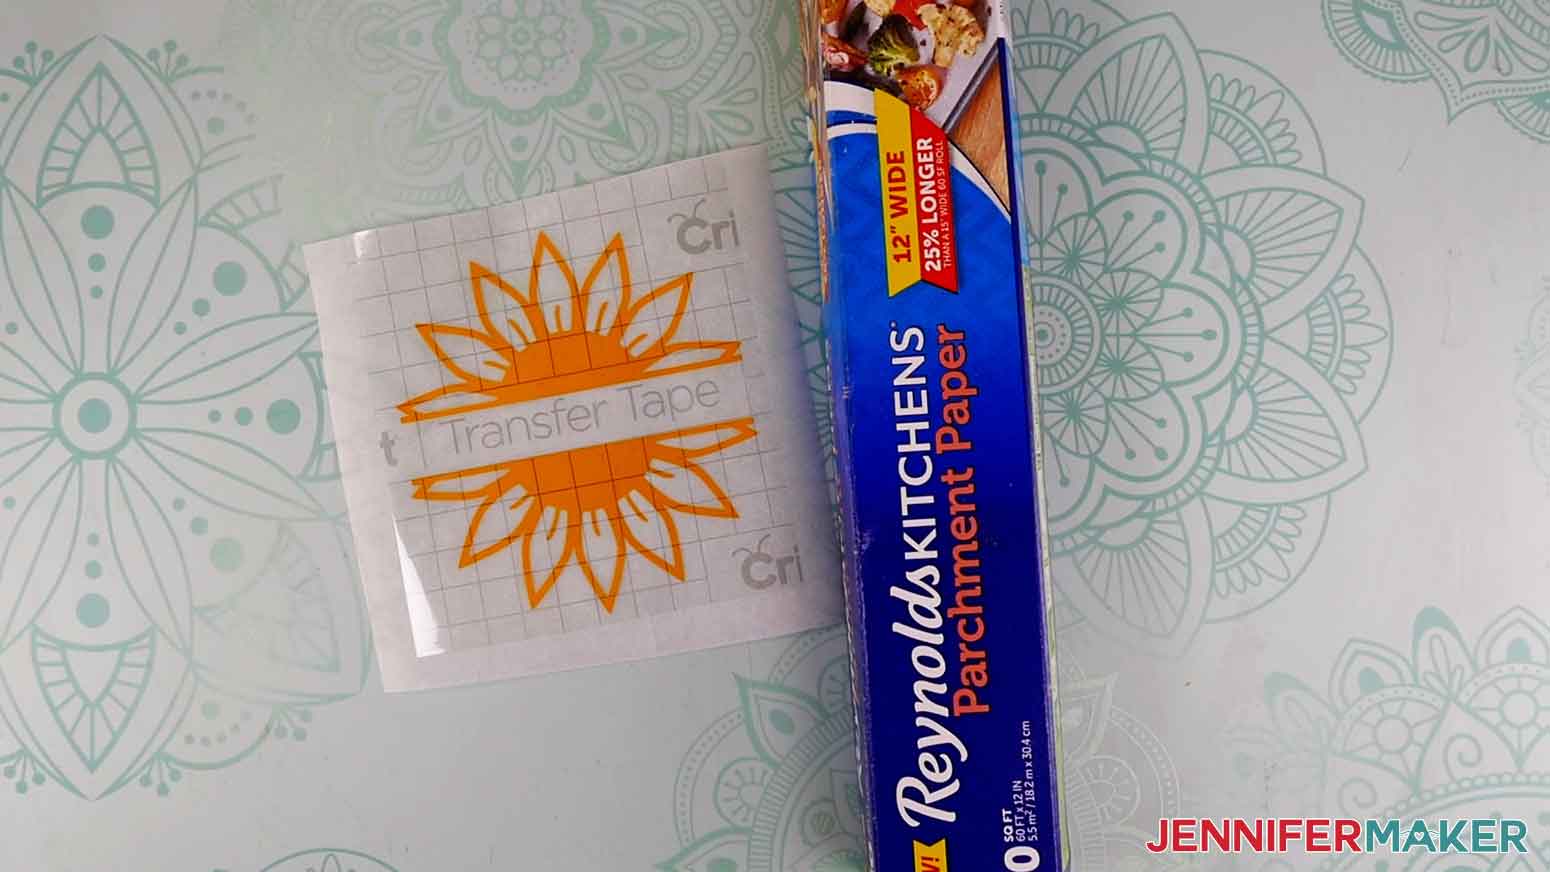
Protect Weeded Vinyl Designs With Parchment Paper – a TikTok tip from @timber.and.vine.co
Interrupted before you can apply a vinyl design, or need to keep it safe during travel? Don’t let lint and dirt ruin your work by sticking to the transfer tape!
Cut a piece of parchment paper slightly larger than the tape. Lay it on top to totally cover the sticky area. It will stay in place, but peel off easily later! You can keep both adhesive and iron-on vinyl clean this way.
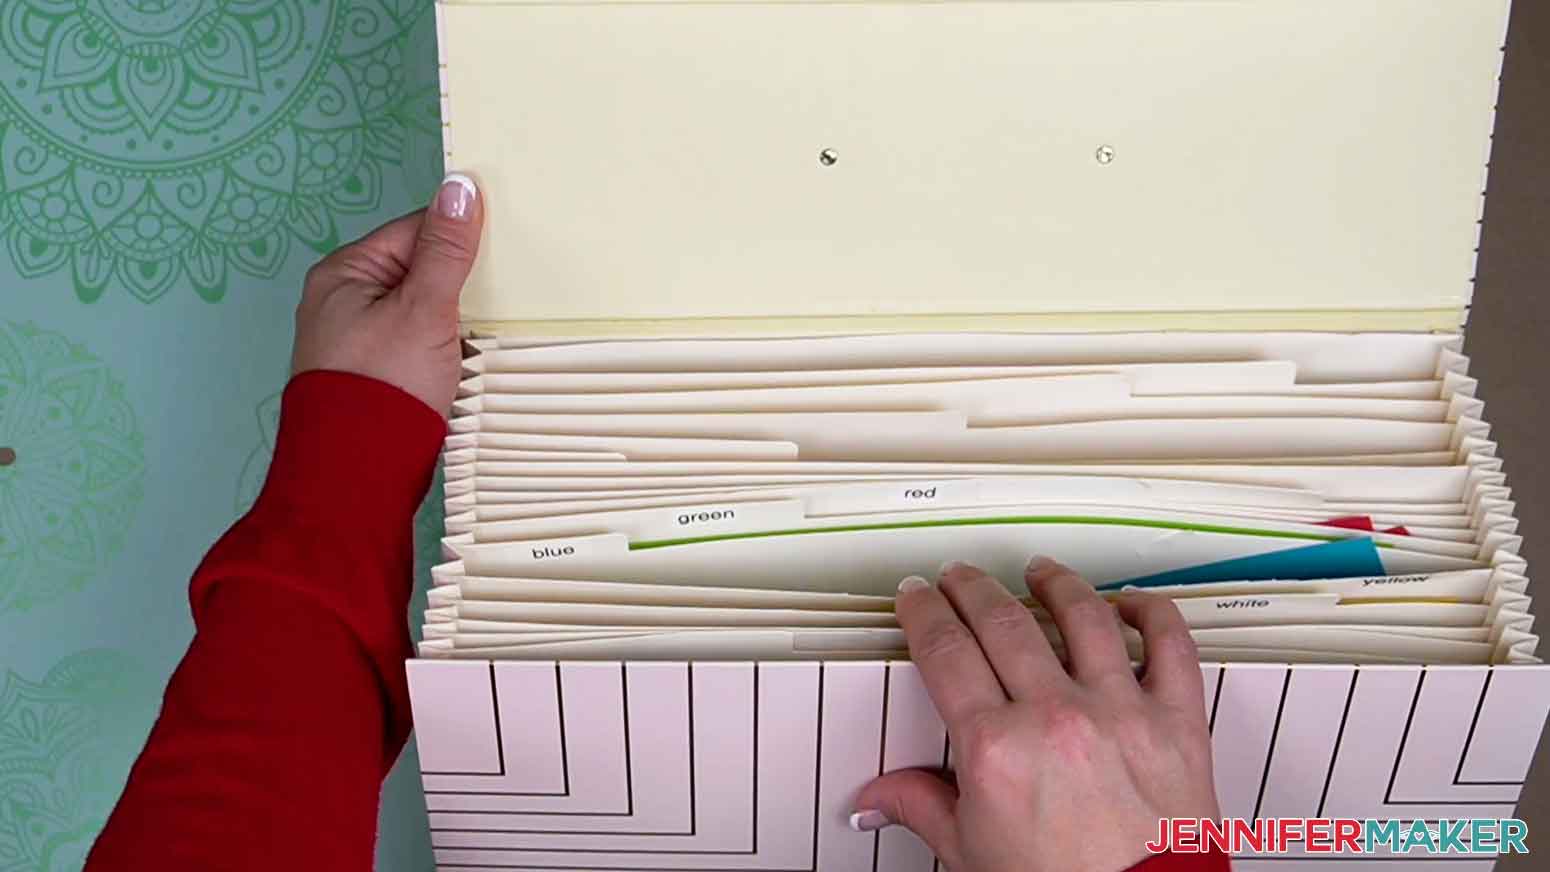
Store Your Scraps In an Organizer – a TikTok tip from @diyholic
Overwhelmed by scraps still big enough for a future project? Store them by color in a file organizer! You can add labels to keep track of what you have on hand and find the perfect piece in a pinch!
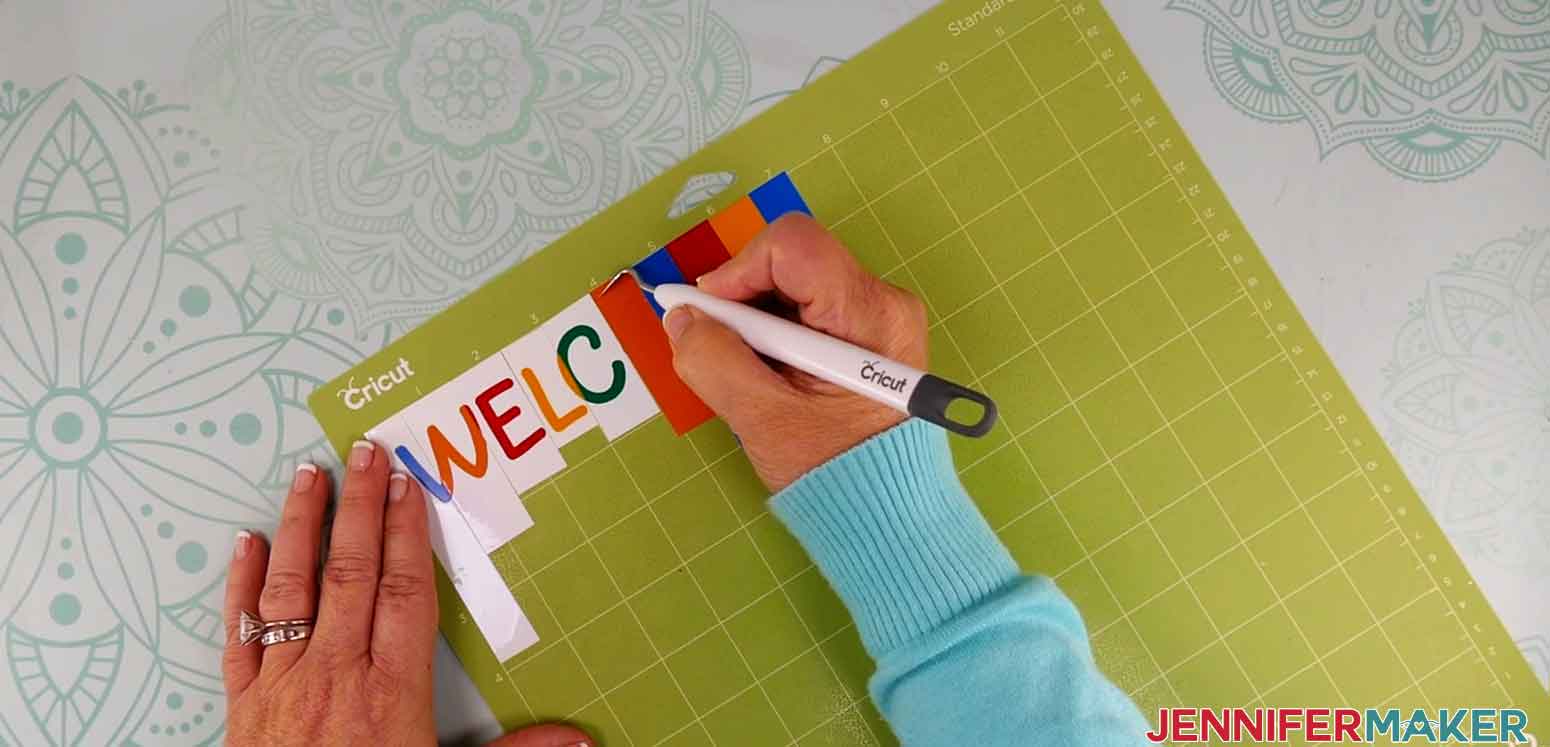
Create Multi-Colored Vinyl Designs With Scraps – a TikTok tip from @wishingstarwarehouse
Turn vinyl scraps into custom material! Just trim them to have even edges–the paper trimmer helps a lot–then place them all on a machine mat with the edges butted up to make a nearly seamless surface. The orientation doesn’t matter, just make sure it covers the whole design area. Then cut it like normal and enjoy! It’s a great way to use up small pieces.
Weed the Right Lines With a Light Pad – a TikTok tip from @jchcreations
Struggling to see the cut lines on a vinyl design? Let the light shine through by putting the project on a light pad, like the Cricut BrightPad. The light will show more in the cut areas and you’ll be able to see the full design more clearly. No more squinty or weeding the wrong piece!
Use Transfer Tape to Protect Mats From Messy Materials – a TikTok tip from @angieholdenmakes
Materials like felt, fleece, and leather can leave a fuzzy mess on Cricut cutting mats. But you can add a buffer! Place a piece of transfer tape’s sticky side on the back of the material. Then place the tape side down on the mat’s adhesive surface. The fuzz will stick to the transfer tape and extend the life of the cutting mat!
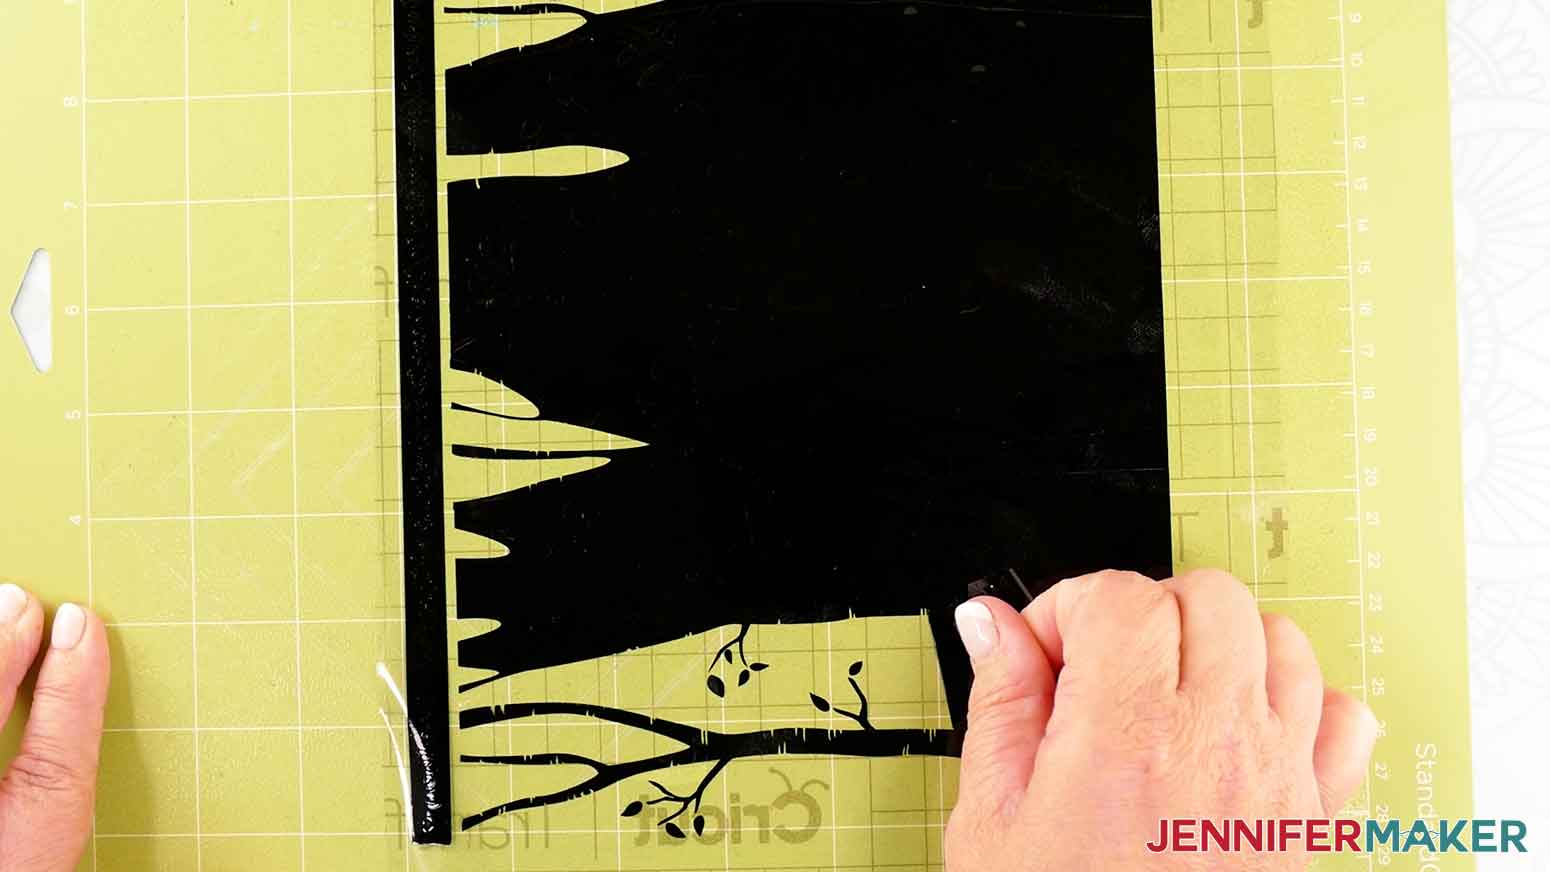
Save Stubborn Vinyl With Reverse Weeding – a TikTok tip from @jchcreations
Struggling to weed intricate adhesive vinyl designs? Try reverse weeding! Place a piece of transfer tape on top of the cut design and burnish it so you can move the vinyl from its backing to the clear material. Then weed the unneeded area! The sticky transfer tape holds on to small parts of the design better! It’s the best way to weed small text.
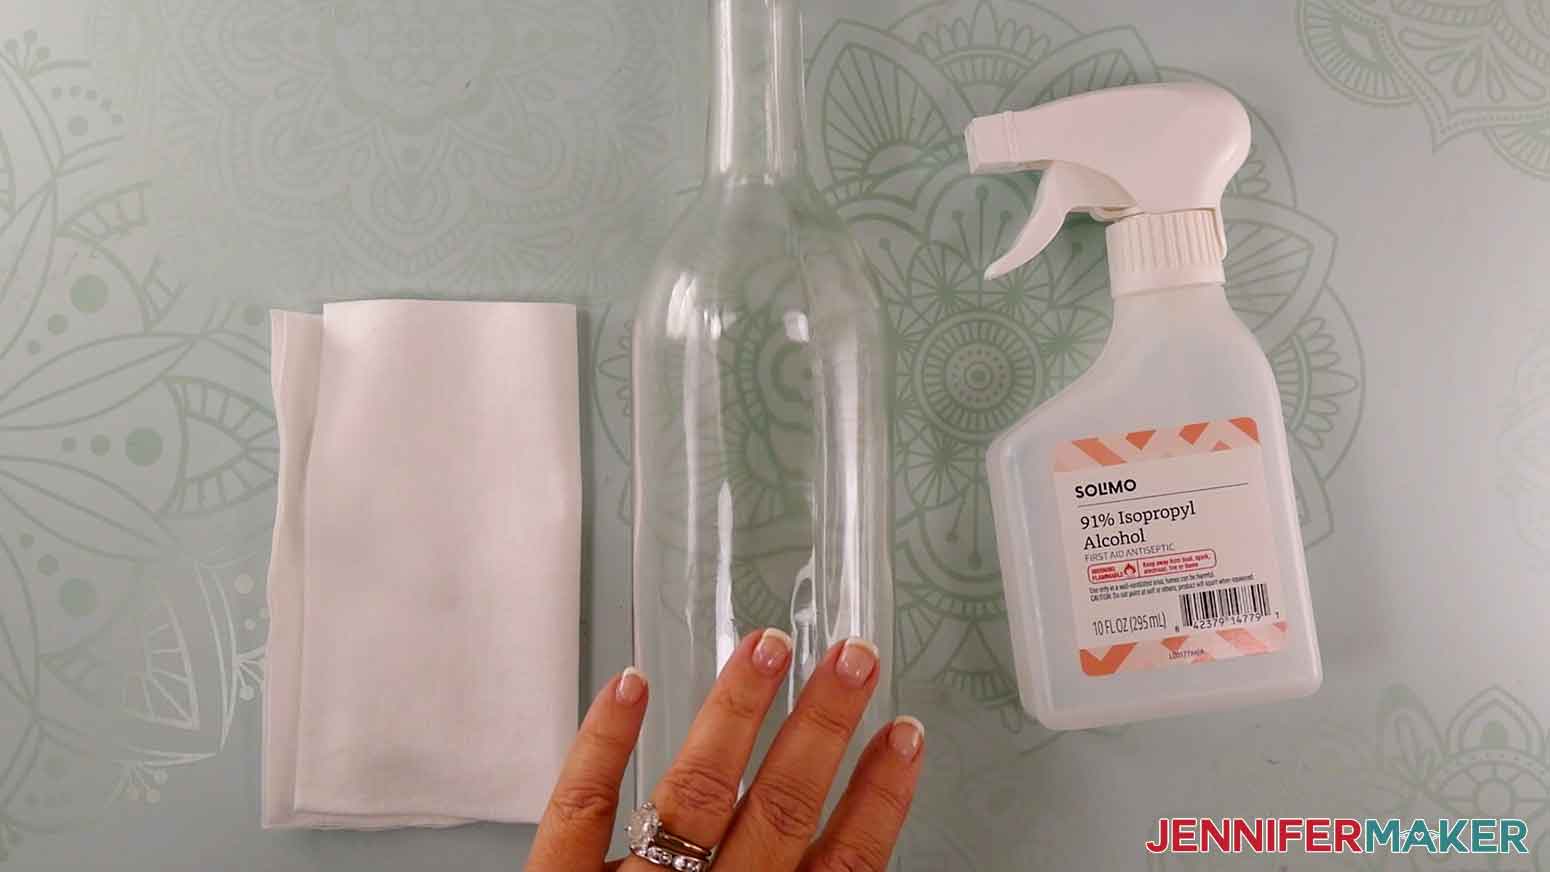
Prepare Surfaces For Adhesive Vinyl With Rubbing Alcohol – a TikTok tip from @homesweetpink
Non-porous blank surfaces may have oils, dust, or small debris on them that will mess your vinyl application. Apply rubbing alcohol to a lint-free cloth and wipe the entire design area to remove anything in the way. Your vinyl will go on smoothly and last ages!
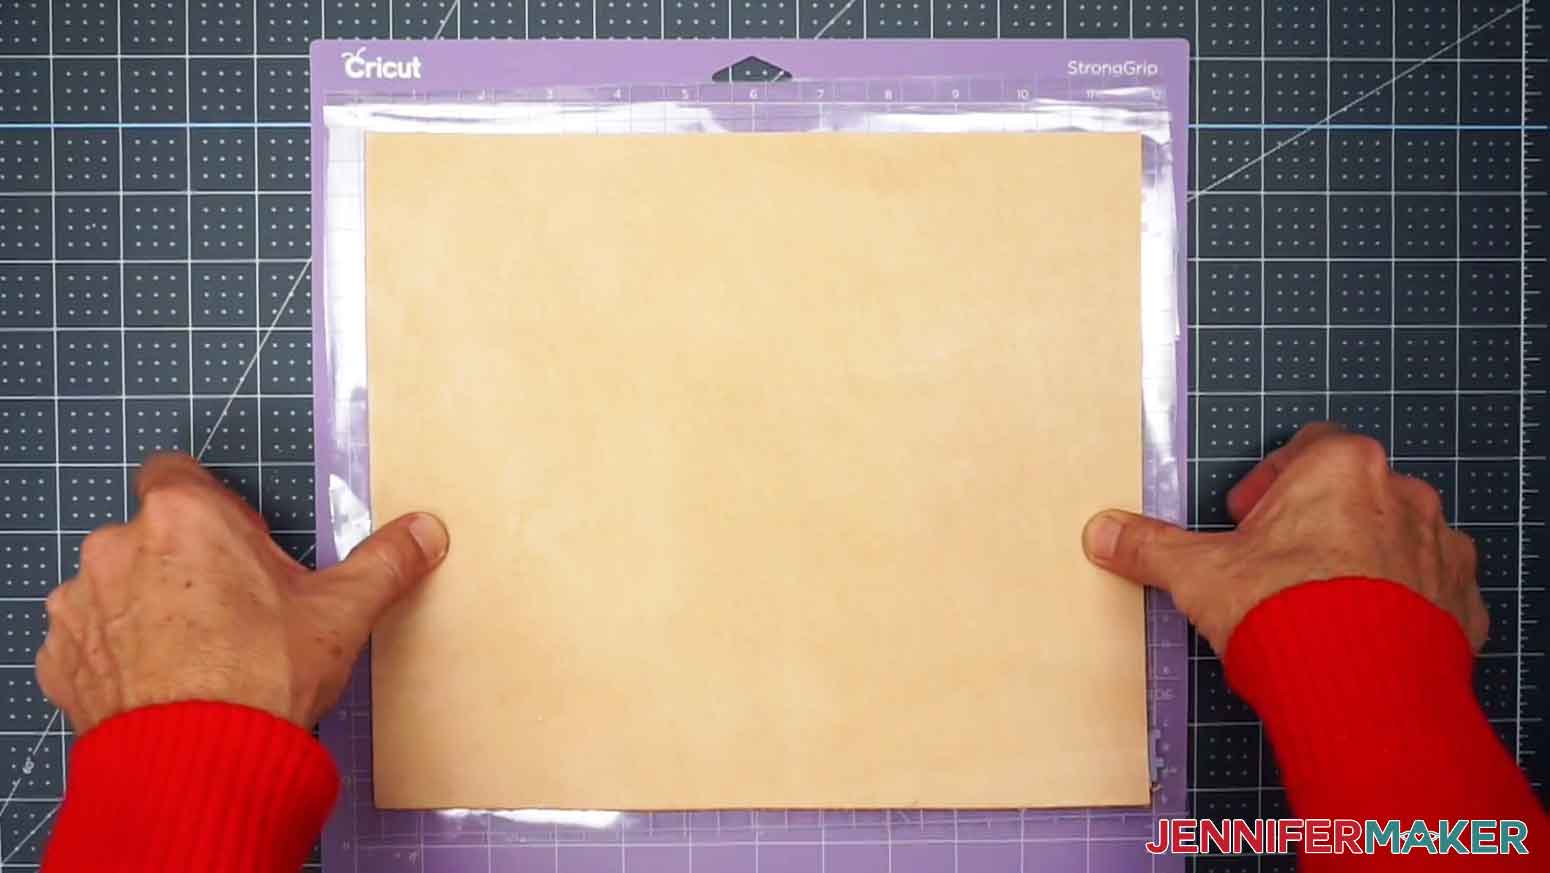
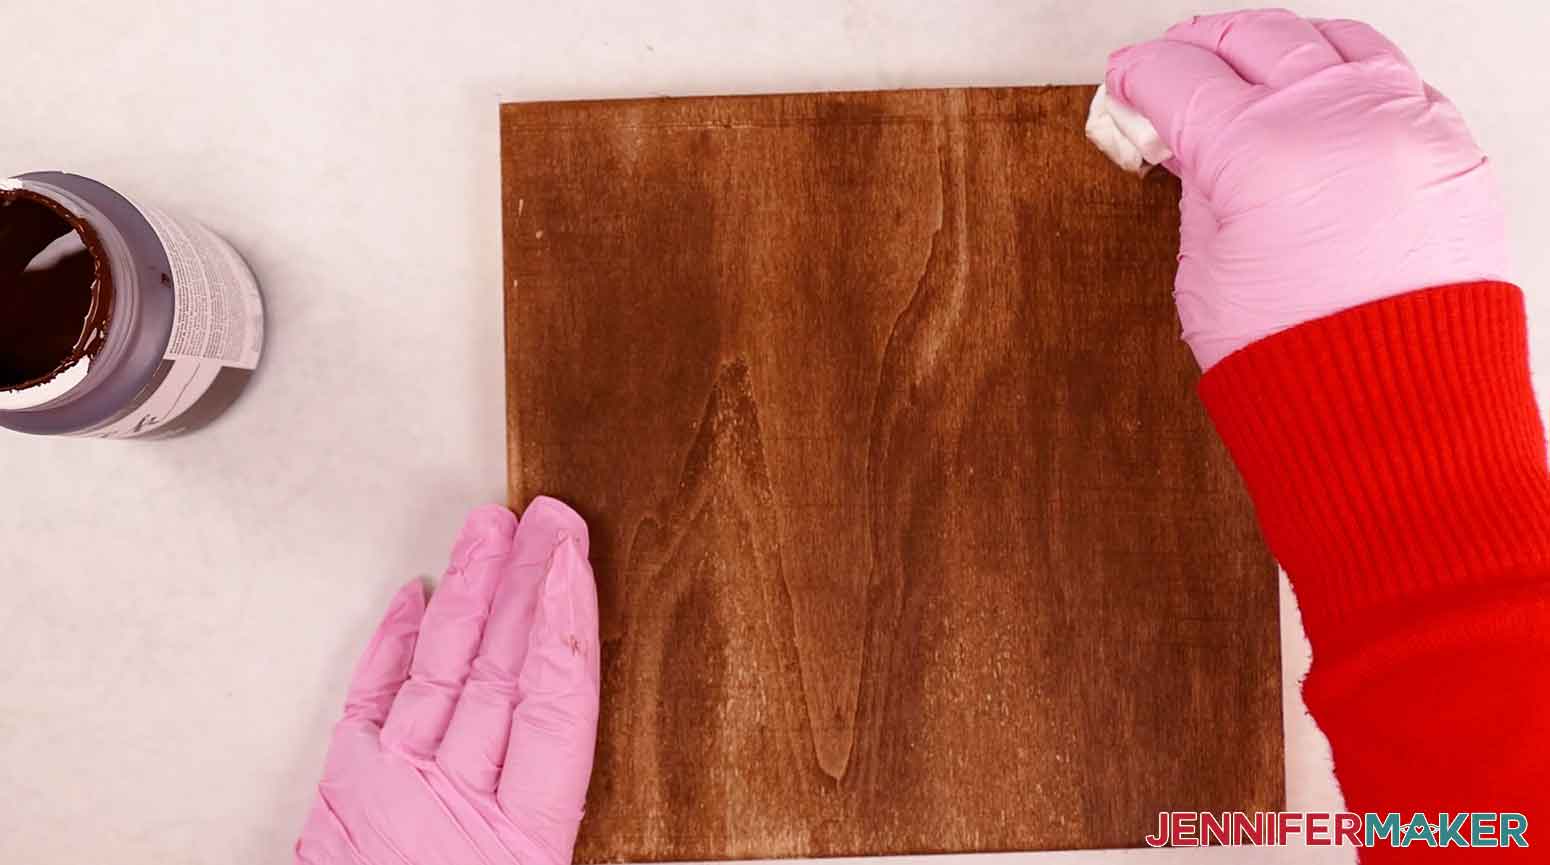
Get An Easy Faux Wood Stain With Baby Wipes – a TikTok tip from @kelly_designs
Get a stained look on wood blanks fast and easy with acrylic paint! Cover your work area with butcher paper. Apply a small dab of chalk paint to a baby wipe and rub it into a sanded or smooth piece of unfinished wood. The more paint you apply, the darker the stained look. Damp paper towels can work in place of a baby wipe, too!
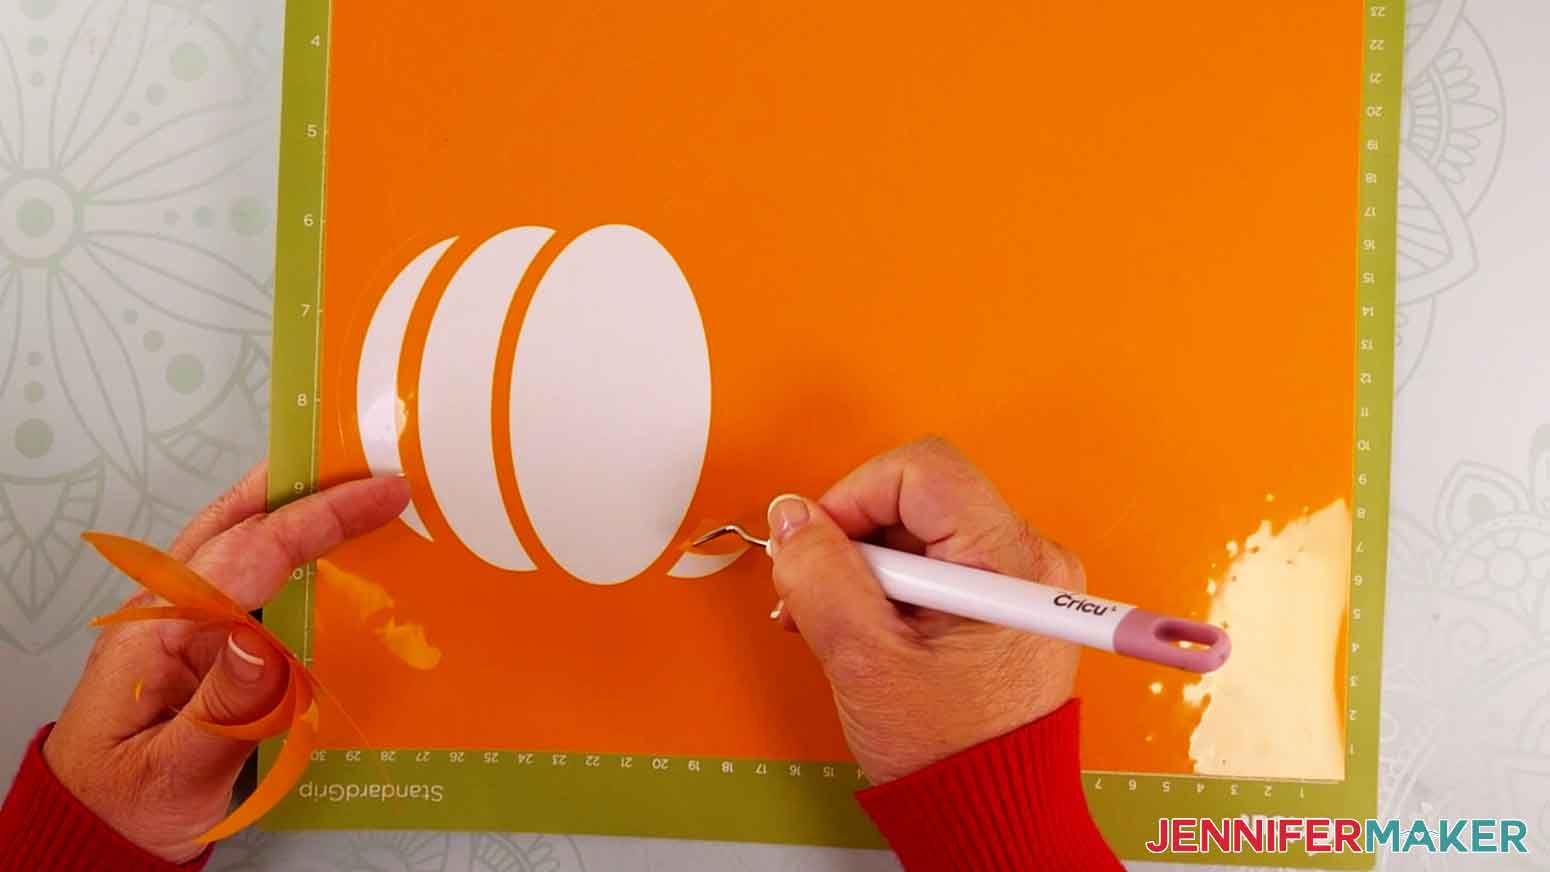
Weed Easier On A Mat – a TikTok tip from @angieholdenmakes
Weeding not going wonderfully? Instead of taking your vinyl off the mat right after cutting, leave it until you’re done weeding. The mat holds it in place while you lift and remove all of the small bits. Plus, you have an extra hand since you don’t have to hold the vinyl in place!
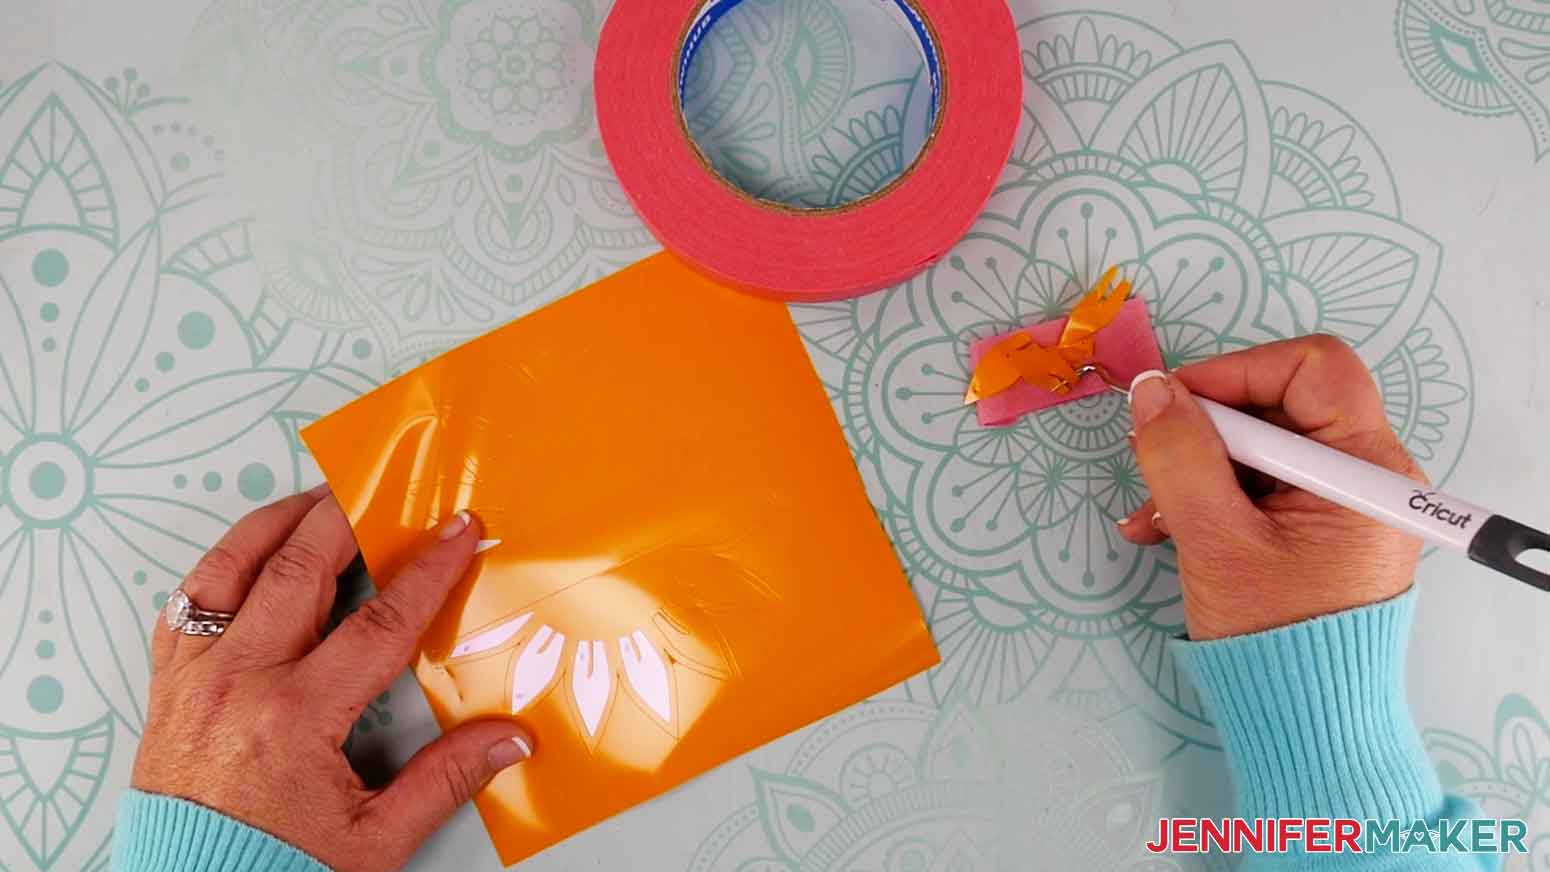
Decorate Curved Surfaces Withe Flat Vinyl Designs Easier – a TikTok tip from @millie_girl_merch
Before you apply a weeded vinyl design to a curved surface, here’s a handy tip: cut small slits around the outside edge of the transfer tape. This way, the transfer tape and vinyl can bend around the item and curve to the surface, preventing bubbles and creases!
Use Your Weeding Tool Cap To Capture Vinyl Bits – a TikTok tip from @blue82designs
Even simple tools have surprises. Did you know your weeding tool is hiding a container for extra vinyl pieces? I love that little tool! When you pull off the cap, there are slits on the sides. Just slide the tip of the weeding tool through them to knock off and contain tiny pieces of sticky vinyl as you remove them!
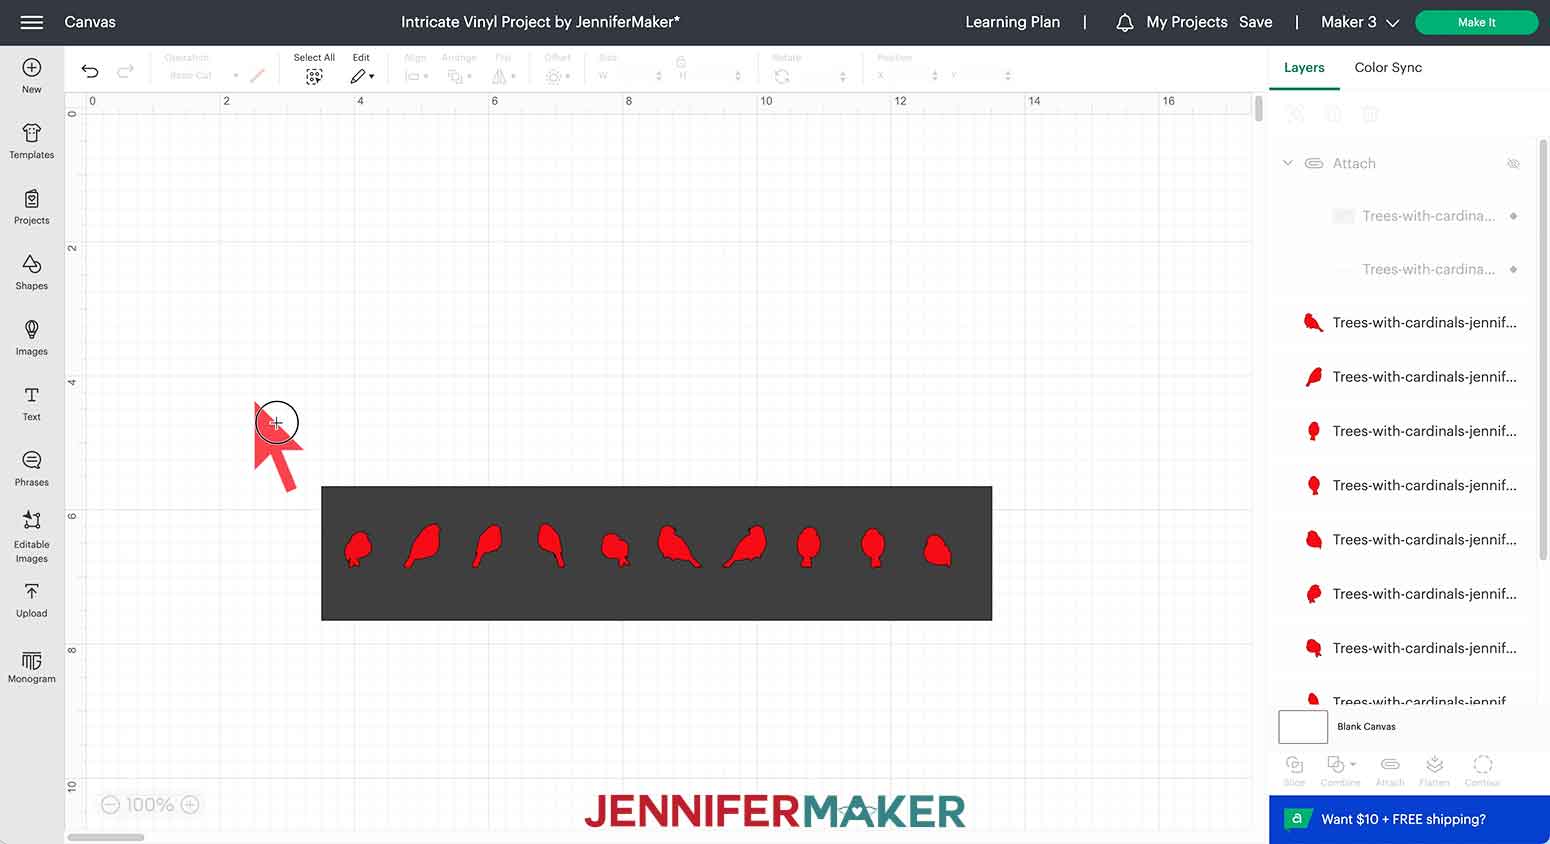
Save Time and Material With a Weeding Box – a TikTok tip from @jchcreations
Before you cut a vinyl design, add an extra cut line around it. In Design Space, you can use a free shape and resize it to fit around the image.
Use the Arrange menu to Send it to the Back so the design is visible. Make sure the shape is big enough to go around the design with some extra space. Use “Attach” to keep them together during cutting, and now you have a smooth cut line to start from!
Perfectly Align Vinyl Layers With Parchment Paper – a TikTok tip from @rhinestoneworld
Adhesive vinyl layers not lining up? Next time, weed all the layers and transfer the bottom one to the project. Cut parchment paper a bit larger than the design. Put the next vinyl layer on transfer tape, then place the parchment on top, leaving a bit of the sticky area at the top.
Align the vinyl over the bottom layer. You can see through the parchment for perfect placement! Press the transfer tape to the bottom layer, then gently remove the parchment paper to adhere the vinyl layers together. Repeat for additional layers. This is one of the most popular hacks around!
I hope you love my favorite TikTok Cricut hacks! This post contains some affiliate links for your convenience (which means if you make a purchase after clicking a link I will earn a small commission but it won’t cost you a penny more)! Read my full disclosure policy.
Materials for TikTok Cricut Hacks
View my Amazon shopping list with the exact items we used testing the best Cricut hacks!
- Press ‘N Seal
- Cricut Permanent Vinyl – Assorted Colors
- Cricut StandardGrip Transfer Tape
- Parchment Paper
- Painter’s Tape
- File Organizer
- Corn Starch -OR- Baby Powder and a makeup brush
- Rubbing Alcohol
- Lint-free Cloth
- Chalk Paint – Java
- Baby Wipes
- Permanent Marker
- A method to cut your vinyl, I used the amazing Cricut Maker 3 but you can also use the Cricut Maker, Cricut Explore 3, the Cricut Explore, or the Cricut Joy
- Cricut Machine Mats 12” x 12 – Assorted
- Cricut Basic Tool Set – Weeding Tool, Scissors, Scraper
- Cricut Trimmer
- Cricut Premium Fine-Point Blade Replacement
- Cricut BrightPad Go
- Design #464 My free SVG/PDF/DXF design files available in my free resource library – get the password by filling out the form at the bottom of this page
25 TikTok Cricut Hacks to Try
Learn 25 TikTok tips to make Cricut crafting easier! dafont.com is well known website with free fonts for personal use. You can browse through font categories and preview a word or phrase before downloading a font. Wordmark is a great website that will allow you to preview any word or phrase in all of the installed fonts on your computer. See several that you like? Click each font once and when you’ve selected all that you want to compare, click “Filter Selected Fonts” to see your choices next to each other. Long mats hang off the machine at an angle. Place a vinyl roll underneath the mat to help support the mat. This works great for applying large adhesive vinyl designs to a blank surface. Weed the design and apply transfer tape over the design. Align the vinyl decal over the blank. Apply a piece of painter’s tape across the middle of the design and stick it to the edges of the blank. You may need to trim any excess backing area if the blank surface is completely covered so the tape has a place to stick. Pull one section of vinyl up and pull away the backing. Use scissors to cut away the backing. Gently place it on to the blank to adhere. Use a scraper tool to burnish the vinyl. Remove the painter’s tape and then lift the other section of vinyl. Remove the backing and press the rest of the decal to the blank. Burnish the second area and remove the transfer tape. Use a permanent marker to label the mat cover for each type of cutting mat for easy reference on which mat to use for which material. LightGrip Mat (blue): copy paper, thin cardstock, vellum, construction paper, sticky notes, light vinyl, wrapping paper StandardGrip Mat (green): cardstock, vinyl, infusible ink, pattern paper, textured paper, washi paper StrongGrip Mat (purple): glitter cardstock, thick cardstock, magnet sheets, chip & poster board, fabric with stiffener, aluminum foil, foam, faux leather, suade FabricGrip Mat (pink): fabric, bonded fabric, crepe paper, burlap, felt Different brands of vinyl are made differently. Applying more pressure to the cut usually has the most successful results! In Design Space, after selecting the material, click the dropdown under “Pressure” and select “More.” If using an Explore Air 2, use the Custom setting on the dial so that you can set your material and pressure setting in Design Space. The tip of the blade is replaceable and can be removed without replacing the whole housing unit! Press the plunger at the top of the housing and carefully pull the blade out from the bottom of the housing unit. Remove the plastic cover from the new blade and insert the shaft of the new blade into the housing. There is a magnet inside the housing that will hold the new blade in place. Release the plunger and your new blade is ready for action! You can place the small plastic cover over the old blade tip to safely store or discard. Place a cutting mat upright in the tablet holder section of the Cricut. Align the mat cover over the mat and press together for perfect alignment. Cut lines on black or dark vinyl can be hard to see. To make the lines more visible, sprinkle a little baby powder or corn starch on your vinyl, then brush it in with a small paint brush or makeup brush (both of which you can get at the dollar store inexpensively). The powder goes right into the cut lines making them appear for you so you can weed better and faster! The powder wipes right off when you’re finished. Roll a piece of painter’s tape in a circle with the sticky side facing out. Stick it to your work area and use it to capture bits of vinyl stuck to your weeding tool. Use items around your house to help catch those weeding bits when working with adhesive or iron-on vinyl. The top sections of each of these containers help grab the vinyl bits from the weeding tool. Some examples include empty tissue boxes, kids snack containers, empty disinfecting wipe containers, and/or nail polish holders! Cut a piece of Press ’N Seal slightly larger than a weeded design on permanent or removable adhesive vinyl. Use a scraper to adhere the Press ’N Seal to the design. Gently peel away the vinyl backing. Apply vinyl design to blank surface. Sometimes we may need to cut and weed a design at a different time from when we’re ready to apply it to a blank surface. Or, perhaps we want to mail or give it to someone without weeding tools. How can the design be best protected from debris? Parchment paper! Cut a piece of parchment paper slightly larger than the design and place it against the weeded area. This works for iron-on vinyl and for adhesive vinyl with transfer tape. Use a file organizer to keep track of vinyl and/or cardstock scraps. Use the tabs to label by color and type of material. This is the perfect use for scraps of vinyl! Layer strips of vinyl for a multicolors design. The vinyl can be horizontal, vertical, or diagonal. The two important things to remember are that scraps cover the whole design area on the cutting mat and that the edges are touching for a seamless design. The Cricut Trimmer is a great tool for getting straight cut lines. Light pads, like the Cricut BrightPad can make weeding vinyl so much easier. Place the vinyl over the light pad to help see the cut lines for weeding the vinyl. Materials like felt, fleece, and leather can leave a fuzzy mess on the cutting mat. Place a piece of transfer tape against the back of the material and place the transfer tape on the mat. The fuzz will stick to the transfer tape and extend the life of the cutting mat! Place a piece of transfer tape over a design cut on adhesive vinyl. Use a scraper to adhere the transfer tape to the vinyl. Remove the backing of the vinyl. With the sticky side facing up, use a weeding tool to remove the excess vinyl. Non-porous blank surfaces may have oils, dust or small debris on the surface. Apply rubbing alcohol to a lint-free cloth and wipe the entire design area for the best results for a long-lasting result! Safely get a stained look on wood blanks using acrylic paint! Cover your work area with butcher paper. Apply a small dab of chalk paint to a baby wiped and rub it into a sanded or smooth piece of unfinished wood. The more paint you apply, the darker the stained look. Damp paper towels can work in place of a baby wipe. Keep cut adhesive vinyl design on the cutting mat. Use a weeding tool to remove all of the excess vinyl from the design. Keeping the vinyl on the mat helps hold it in place while you remove and lift all of the small bits. It frees up your extra hand since you don’t have to hold the vinyl in place. Before you apply the vinyl to a curved surface, cut small slits around the outside edge of the transfer tape. This allows the transfer tape and vinyl to bend around the glass and curve to the surface, preventing bubbles and creasing. Remove the cap of the weeding tool. Use the slits on the inside of the cap to insert the tip of the weeding tool to remove small sticky bits of vinyl stuck on the tool. Click the Shapes icon on the left and select a Square from the Free area to add it to your Canvas. With the lock icon at the top open so the square can become a rectangle, click and drag a corner of the shape so it covers the cardinals. Use the Arrange menu to Send to Back so the design is visible. Adjust the rectangle so there is a bit of space all around the design. Drag a bounding box around both the design and the rectangle, then click "Attach" to keep them together during cutting. This tip is for perfecting layered adhesive vinyl. Weed all of the layers in the design. Apply layers from the bottom to the top. Place a piece of transfer tape over the second to bottom layer. Remove the backing. Place a piece of parchment paper over the vinyl area but leave one area of transfer tape exposed. Align the vinyl over the bottom layer. You can see through the parchment for perfect placement. Press the transfer tape to the bottom layer and gently remove the parchment paper to adhere the vinyl layers together. Repeat for additional layers. 25 TikTok Tips
Materials
Tools
Instructions
1. DAFONT.COM
2. WORDMARK.IT
3. VINYL ROLL TO SUPPORT LONG MATS WHILE CUTTING
4. HINGE METHOD FOR LARGE VINYL DECALS
5. LABEL MAT COVERS
6. CUT VINYL WITH MORE PRESSURE FOR BETTER CUT RESULTS
7. HOW TO REMOVE AND REPLACE CRICUT BLADES
8. USE TABLET HOLDER TO ALIGN MAT WITH COVER

9. CORN STARCH/BABY POWDER TO SEE CUT LINES
10. PAINTER'S TAPE TO CATCH WEEDED BITS
11. HOUSEHOLD CONTAINERS FOR WEEDING CONTAINERS
12. PRESS 'N SEAL
13. PARCHMENT PAPER TO PROTECT WEEDED DESIGNS
14. COLOR ORGANIZER FOR SCRAPS
15. MULTI-COLORED VINYL DESIGN WITH SCRAPS
16. LIGHT PAD FOR WEEDING
17. TRANSFER TAPE TO PROTECT MATS FROM MESSY MATERIALS
18. REVERSE WEEDING
19. RUBBING ALCOHOL BEFORE ADHESIVE VINYL
20. FAUX STAIN ON UNFINISHED WOOD
21. WEED ON MAT
22. CUT SLITS AROUND VINYL TO APPLY ON CURVED SURFACES
23. USE WEEDING TOOL CAP FOR VINYL BITS
24. WEEDING BOX
25. PARCHMENT PAPER FOR LAYERING VINYL
Answers to Your Questions About TikTok Cricut Hacks
Q: What cool things can you make with a Cricut?
A: One of my favorite Cricut projects is engraving. The process always gets rave results!
Q: What is the easiest thing to make on a Cricut?
A: Simple papercraft projects and cards are a great way to get started with your Cricut. And you can practice with scrap cardstock, so it you make a mistake it’s no big deal!
Q: What is the fastest way to make money with a Cricut?
A: I have a great list of items to make and sell with a Cricut. You can start a small business for a pretty reasonable price!
Q. Do I have to use a Cricut?
A: No! My capable design staff and I always include several versions of each digital item. If you have a Silhouette Cameo, which uses Silhouette Studio, you can use the DXF cut files in Silhouette Basic Edition. If you have upgraded to Silhouette Designer Edition, Designer Edition Plus, or Business, you can use the SVG cut files. If you don’t have a cutting machine, you can print and then cut out my digital download PDF files, too and then use scissors or a craft knife to cut out your pieces. The ZIP file in my resource library includes these file types and more!
Q. Are your free SVGs just for personal use or also commercial use?
A: Yes, you can sell completed projects using these designs with the fitting license. Do not sell the digital files. If you use them, please share photos with us! We love supporting small businesses!
Q: What is Merry Maker Mingle?
A: Each day in December leading to Christmas, I present you with a brand new “gift” — a project to craft, make, or do. You can make these projects on a Cricut cutting machine or by hand if you don’t have one. Most of our Merry Maker Mingle projects will come with a fun video with yours truly, a step-by-step printable photo tutorial, and a free pattern/SVG cut file. Sign up to get daily updates and prizes!
Get my free SVG file to try out the TikTok Cricut Hacks!
I love seeing what you make with my designs and how you use them! Please share a photo of anything you make using these TikTok Cricut hacks in our Facebook group or tag me on social media with #jennifermaker.
Love,

Want to remember this? Save my 25 TikTok Cricut Hacks to your favorite Pinterest Board!