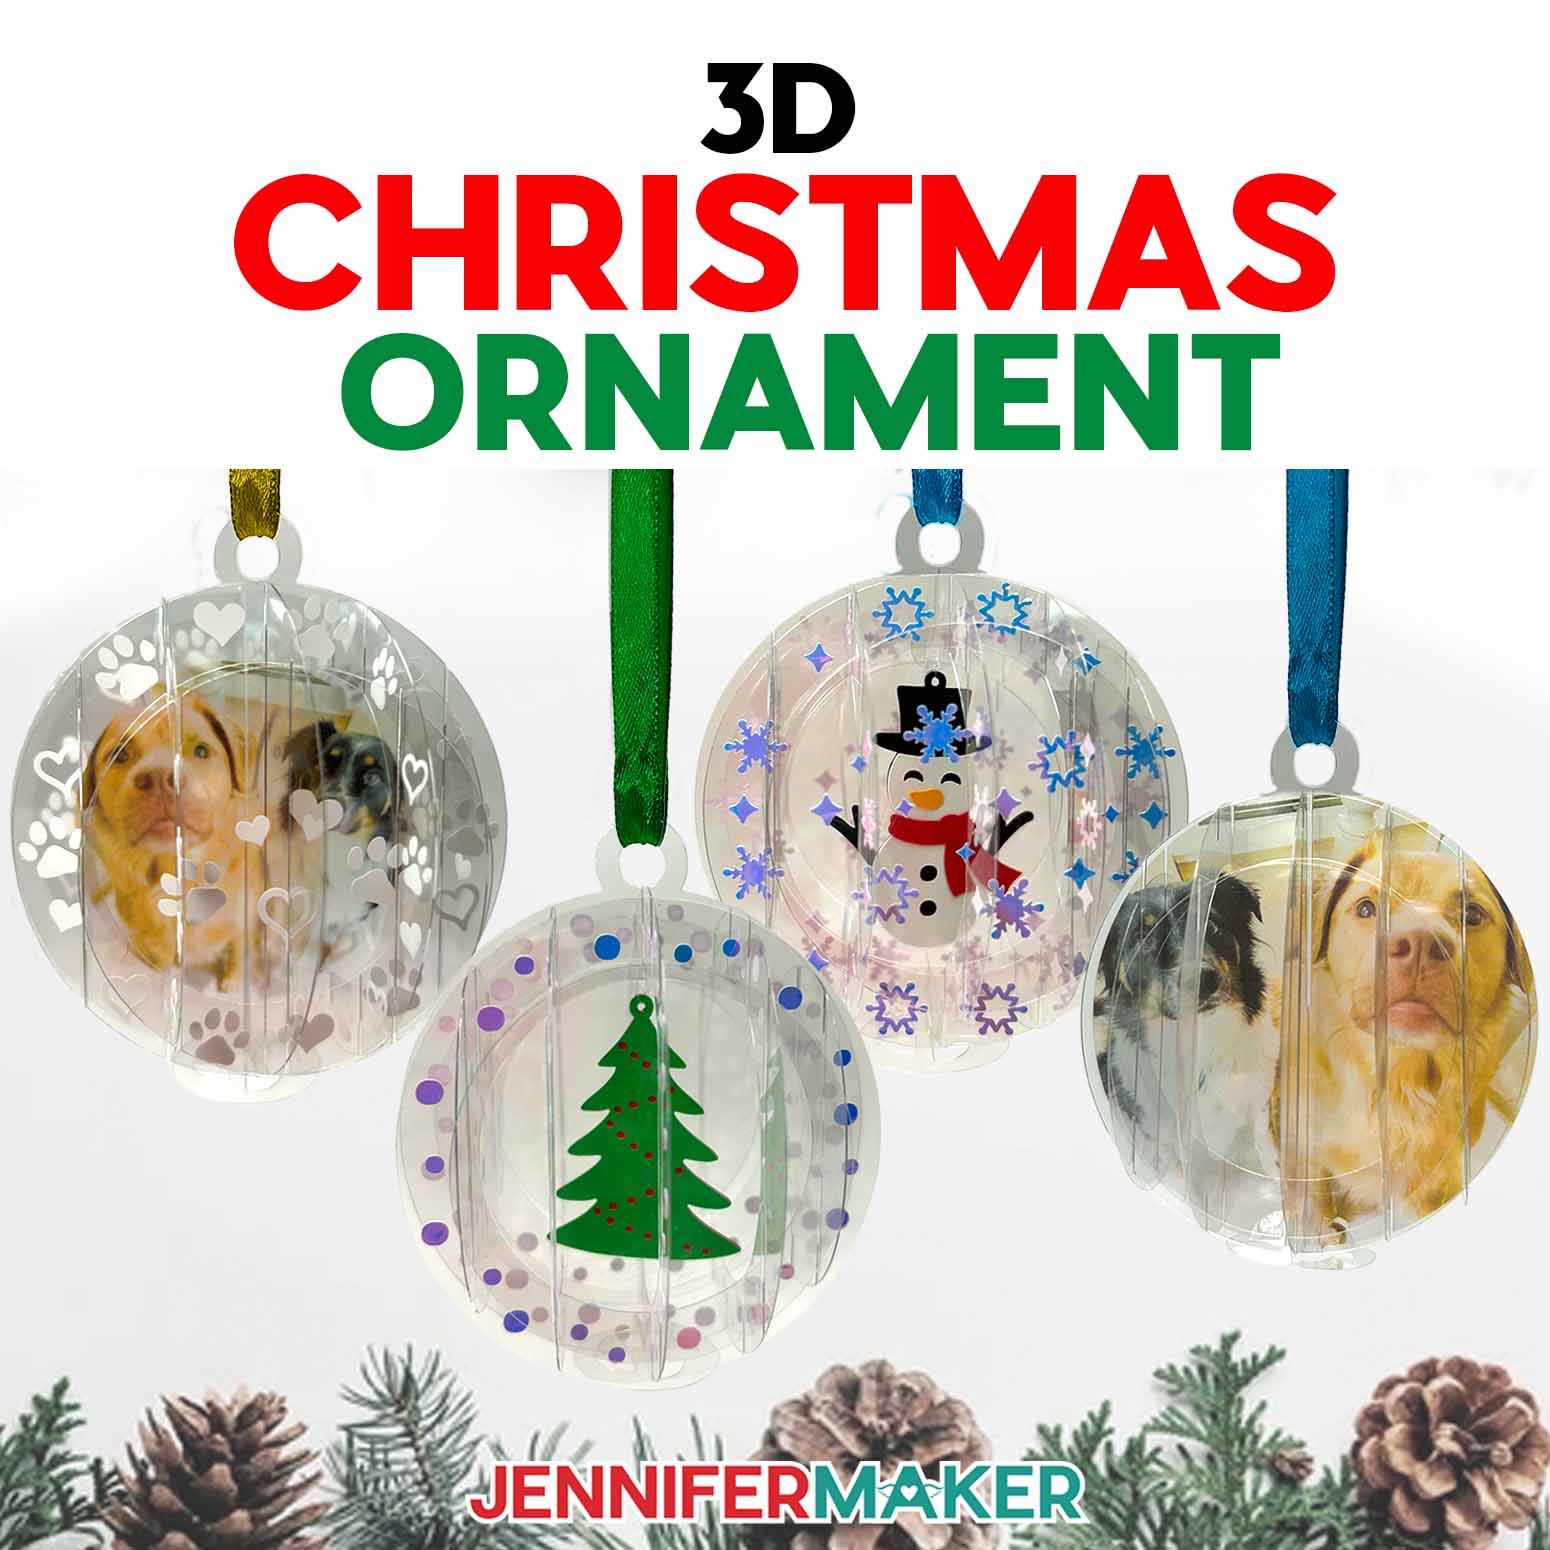
Learn to make a 3D Christmas Ornament with a Cricut!
Every year when I unpack my holiday bins, there’s one box I open extra carefully … the one filled with handmade keepsakes. Some have lost most of their glitter and are a little lopsided, but each and every one of them carries a story. This year, I wanted to add something new to that treasured collection. Something that would shimmer and sparkle right alongside my favorites. That’s how my 3D Christmas ornament was born. It’s a magical, light weight design that looks like it came straight from Santa’s workshop, but is actually made right at home with a Cricut, a few sheets of acetate, vinyl, and cardstock.
See the full step-by-step video tutorial on how to make a 3D Christmas ornament:

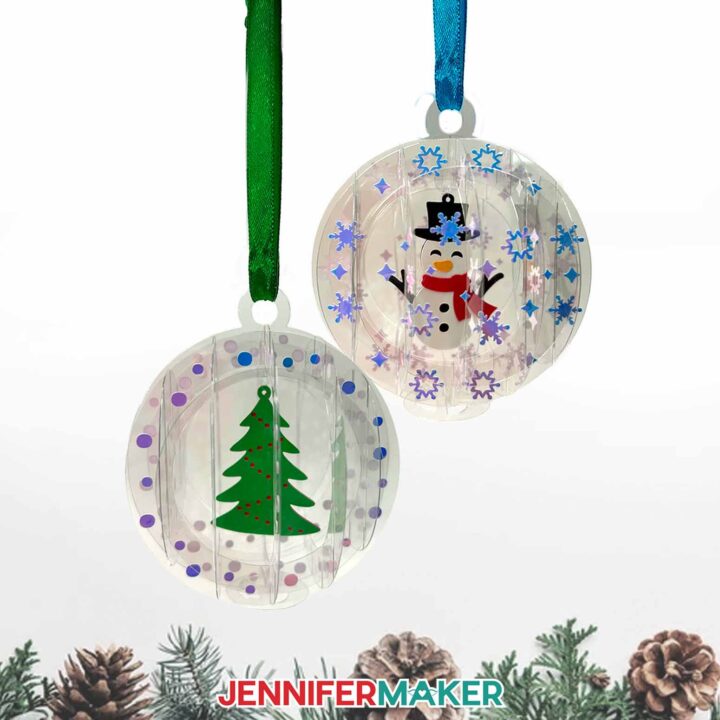
There’s just something so satisfying about watching these little treasures come together. Each one feels a little like a snowglobe ornament with a twist: tiny floating scenes that dance in the festive glow of your Christmas tree. You can make a cheerful snowman tucked inside the ornament, or a classic holiday tree design. They’re the perfect addition to your own set of Christmas decorations, or a heartfelt handmade gift for someone special. And because each piece is so light, they won’t weigh down your branches, even on the most delicate boughs.

The materials are simple and easy to find. I used clear acetate (.007″ thick) for the structure, adhesive holographic vinyl for sparkle, then 65 lb. cardstock and a little nylon cord for the inner details. The combination gives you that beautiful see-through dimension. You don’t need any fancy tools beyond your Cricut machine. a brayer to keep things smooth, and a few others you’ll find in my materials list below. And if you’ve never worked with acetate before, don’t worry. I walk you through every single step in the step-by-step photo instructions below and in the full video tutorial.

This is such a fun project to make on a cozy weekend afternoon, especially when you’ve got a mug of cocoa nearby, some tea lights aglow, and carols playing in the background. You can even create an entire coordinating set of Christmas decorations to fill your tree. If you’re like me, you’ll start with one, then realize halfway through that your holiday display could use a few more!

What I love most is that these Christmas ornaments are as pretty as they are practical. The acetate keeps them durable, meaning they’ll last from year to year if stored properly. Plus, they can pack flat if you want to mail them! Just leave off the stabilization piece (piece K in the reference sheet), then slip one into a greeting card for a sweet surprise, or tuck it into a gift box as an extra little keepsake.

And don’t worry if you’re new to using acetate and vinyl together. My step-by-step instructions and the full video tutorial will walk you through every part of the process, from downloading the free design files to cutting, weeding, and assembling the ornament. You’ll learn how to keep the layers aligned, how to get clean vinyl transfers without bubbles, and how to build up the pieces so your ornament keeps its perfect shape. It’s easier than it looks, and the results are absolutely stunning.

If you want to take this project a step further, join me in ADVANCE with JenniferMaker, where I’ll show you how to create your own photo version of the ornament. It’s a beautiful way to showcase special memories and add a personal touch to your holiday display! There’s no better way to capture the joy of the season than by crafting something that sparkles in the lights and carries a bit of your own creativity. Learn more about ADVANCE with JenniferMaker here!

If you’ve ever dreamed of having the largest collection of handmade ornaments on your tree this year, this project is a perfect start!
Imagine the moment you hang your finished ornament on the tree, step back, and see it sparkle among the lights. These ornaments are such a wonderful way to bring the festive spirit into your home — they shimmer, shine, and make every branch feel a little more magical. It’s the kind of small joy that reminds you why we love crafting during the holiday season.

So gather your supplies, clear a little space on your crafting table, and join me in making your own 3D Christmas ornament. You’ll find the free design files, detailed step by step photo instructions below, and the full video tutorial waiting for you above. Let’s fill your Christmas tree with handmade magic and create something you’ll treasure year after year!
Let me show you how to make a 3D Christmas ornament! This post contains some affiliate links for your convenience (which means if you make a purchase after clicking a link I will earn a small commission but it won’t cost you a penny more, there is no additional cost)! Read my full disclosure policy.
Materials to Make a 3D Christmas Ornament
View my Amazon shopping list with the exact items I used.
- One (1) Sheet of 12″ x 12″ Clear .007″ thick Acetate -OR-
- Two (2) Sheets of 8.5″ x 11″ Colored Acetate
- Two to Four (2-4) Sheets of 8.5″ x 11″ 65 lb. Cardstock (in various colors)
- Permanent Vinyl – I used Cricut Blue Holographic Vinyl -AND-
- Cricut StandardGrip Transfer Tape
- A way to cut your materials – I’m using the Cricut Maker 4, but you can also use a Cricut Maker series machine, a Cricut Explore series machine, the Cricut Venture, the Cricut Joy Xtra, or the Cricut Joy
- Cricut Green StandardGrip Machine Mat 12″ x 12″
- 3-4″ of Clear Nylon Cord (for hanging the tree or snowman decoration inside the ornament)
- 10″ of Ribbon (for hanging ornament)
- Craft Glue (I used Bearly Art Precision Craft Glue) -AND-
- Paper Towel (for wiping away glue)
- Small 3/16″ Zots Glue Dots
- Scissors
- Brayer
- Scraper
- Spatula
- Weeding Tool
- Tweezers
- Optional: Paper Trimmer (for Cricut Joy users)
- Isopropyl Alcohol -AND-
- Lint-Free Cloth (optional for cleaning fingerprints off of acetate)

How to Make a 3D Christmas Ornament!
3D Christmas Ornament
Learn to make a 3D Christmas Ornament out of acetate with a Cricut!
Materials
- Two to Four (2-4) Sheets of 8.5" x 11" 65 lb. Cardstock
- One (1) Sheet of 12" x 12" Clear Acetate -OR-
- Two (2) Sheets of 8.5" x 11" Colored Acetate
- Permanent Vinyl - I used Cricut Blue Holographic Vinyl
- Cricut StandardGrip Transfer Tape
- 3" to 4" of Clear Nylon Cord (for hanging tree or snowman decoration inside ornament)
- 10" of Ribbon (for hanging ornament)
- Paper Towel (optional for wiping away glue)
- Design #775 (My free SVG/PDF/DXF design files are available in my free resource library - get the password by filling out the form at the bottom of this page)
Tools
- A way to cut your materials - I’m using the Cricut Maker 4, but you can also use a Cricut Maker Series machine, a Cricut Explore Series machine, the Cricut Venture, the Cricut Joy Xtra, or the Cricut Joy.
- Cricut Green StandardGrip Machine Mat 12" x 12"
- Cricut Purple StrongGrip Machine Mat 12" x 12" (optional for acetate)
- Brayer
- Scraper
- Spatula
- Weeding Tool
- Tweezers
- Scissors
- Craft Glue (I used Bearly Art Precision Craft Glue)
- Small 3/16” Zots Glue Dots
- Isopropyl Alcohol -AND-
- Lint-Free Cloth (optional for cleaning fingerprints off of acetate)
- Paper Trimmer (optional for Cricut Joy users)
Instructions
STEP 1: GET MY FREE 3D CHRISTMAS ORNAMENT DESIGN FILES
First, download my free 3D Christmas ornament designs from my free library – look for Design #775. Alternatively, you can use the Save This Project form near the top of this post and the design link will be emailed to you.
TIP: If you’re not sure how to upload, go to jennifermaker.com/svgs to learn how to unzip and upload SVG files.
Inside the SVG folder, you’ll see two 3D ornament designs, a snowman and a tree. In the PDF folder, there’s also a handy reference PDF to help keep your acetate pieces organized during assembly.
For this tutorial, I’ll show you how to make the snowman ornament using my Cricut Maker 4, but you can follow the same steps to make the tree ornament.
STEP 2: PREPARE & CUT YOUR 3D CHRISTMAS ORNAMENT DESIGN
NOTE: I recommend printing the Acetate Piece Reference Sheet PDF to help you stay organized as you cut your pieces and assemble your ornament. CRICUT DESIGN SPACE
- In Cricut Design Space on a blank Canvas, click “Upload.”
- Click “Upload Image.”
- Click “Browse.”
- Find and select the SVG of your choice from the main SVG folder. NOTE: I’ll demonstrate with the snowman design.
- Click “Open” and then “Continue.”
- Click “Upload” to add the design to your Canvas.

- Click “Save” and give your project a name.
- Your design is ready to cut!

CUTTING
- Select your machine at the top right, then click “Make.”
- If prompted, click "On Mat," choose your mat size, and click “Confirm.”
- On the Prepare screen, make sure the correct Material Size is selected for each of your mats. On the vinyl mat(s), drag the designs apart so it’s clear where to trim them with scissors after the vinyl is cut.NOTE: Some of my cardstock is 8.5” x 11”, so I changed the Material Sizes for those mats.
- Click back onto the first mat, then click “Continue.”
- On the Make screen, choose the settings that correspond to each of your mats. I used the following settings:For the 65 lb. cardstock: “Medium Cardstock - 80 lb (216 gsm)” setting with “More” PressureFor the acetate: “Foil Acetate” setting with “More” PressureNOTE: Cricut Design Space has an “Acetate” setting, but I found that the “Foil Acetate” setting provided a little more pressure, which resulted in cleaner cuts of the Bearly Art brand acetate I used.For the holographic permanent vinyl: “Holographic Vinyl” setting with “More” Pressure
- Peel the protective film from one side of the acetate.
- Place your acetate, unprotected side up, onto a new, very sticky green StandardGrip machine mat, or a purple StrongGrip machine mat.NOTE: Leaving the film on the back protects the acetate from sticky residue and scratches.
- Use a clean brayer to adhere it well.
- Check that your Fine-Point Blade is clean and in the clamp.
- Load your mat into your Cricut and press the flashing middle button to begin cutting.
- Before unloading the mat, gently lift part of the material to see if the cut went through the material (but not the carrier sheet if you’re cutting vinyl). If not, press the middle button to cut the design in the same spot again if needed.
- Once the material is cut all the way through, unload the mat, flip it over onto your work surface, and roll it back to release the material. NOTE: If you have any issues with your cuts, check out my Tips & Tricks for Cleaner Cuts tutorial.
 For the acetate: “Foil Acetate” setting with “More” PressureNOTE: Cricut Design Space has an “Acetate” setting, but I found that the “Foil Acetate” setting provided a little more pressure, which resulted in cleaner cuts of the Bearly Art brand acetate I used.
 For the holographic permanent vinyl: “Holographic Vinyl” setting with “More” Pressure


STEP 3: PREPARE YOUR VINYL AND ACETATE 3D ORNAMENT PIECES
NOTE: I used blue acetate to show you how to put the ornament together, because the details are easier to see in photographs and on video, but you can use any color you like. I prefer making 3D ornaments with clear acetate.
- Peel the protective film off the other side of the cut acetate pieces. TIP: Use a weeding tool to gently lift the film at the very edge of the piece. You can also use the weeding tool to check which side the film is on if it’s hard to tell. Just be careful not to scratch the acetate.
- Use a soft cloth and a little isopropyl alcohol to gently clean the acetate pieces of fingerprints and residue from the protective film. TIP: I laid the cloth on my work surface and cleaned each piece on top of it to avoid scratching them.NOTE: You will probably get more fingerprints on the acetate as you assemble the ornament, but this will help minimize them.
- Grab or open your Acetate Piece Reference Sheet PDF.
- Match each piece of acetate with its corresponding piece on the reference sheet. You should have 11 acetate pieces: - one large piece with the slits on the outside and a small loop in the inside cutout (Piece A)- one large piece with slits on the inside and a hanging loop on the outside (Piece B)- two medium-sized pieces with slits on the outside (Pieces C and D)- two medium-sized pieces with slits on the inside (Pieces E and F)- two small pieces with solid middles and slits on the outside (Pieces G and H)- two small pieces with three long slits on the inside (Pieces I and J)- one tiny stabilization piece (Piece K)
- There are also eight holographic vinyl pieces to coordinate with the first eight acetate pieces, A through H.
- For each decal, use a weeding tool to carefully peel away the extra background vinyl, leaving the star and snowflake shapes on the carrier sheet. TIP: It can be easier to weed vinyl, especially small, detailed designs, while it is adhered to the machine mat. It can also be easier to reverse weed detailed designs, like the circular snow pieces in the “tree” design.NOTE: The carrier sheet on holographic vinyl is especially slippery, and the vinyl may become detached from the backer, so take care when weeding.
- Remove the centers of any snowflakes by poking your weeding tool into the center and gently lifting it away from the design.TIP: Make sure you do not pull up any pieces you want to keep! If they come up, gently pat them back in place and try again.
- When you’re finished weeding, flip the mat over onto your work surface, and roll it back to release the vinyl.
- Use scissors to cut apart each holographic vinyl piece, making sure to keep each piece’s letter at the top left connected to the rest of the design.
- Stack the weeded vinyl pieces in order, Pieces A through H, with A on top.
- Grab your vinyl Piece A and your acetate Piece A.
- Double-check that the pieces are in the right orientation, with the vinyl piece’s letter on the top left and the acetate piece matching the orientation on the reference sheet.
- Cut a piece of StandardGrip transfer tape that is slightly larger than your vinyl decal.
- Remove the backing from the transfer tape.
- Stick and unstick the transfer tape to a piece of fabric a few times to make it a bit less sticky and easier to remove from the acetate once the vinyl is transferred.
- Hold your transfer tape in the shape of a “taco,” sticky-side down, then put the bottom of the “taco” onto the middle of the vinyl decal.
- Smooth the transfer tape over the decal from the center outward and burnish it down using the scraper tool.
- Flip the decal over and burnish it with the scraper tool from the back.
- Gently peel off the backing from the vinyl.TIP: If any vinyl lifts up from the transfer tape, lay the backing back down and burnish again.
- With the letter in the top left corner of the decal, place the decal sticky-side down onto the acetate, positioning the stars and snowflakes between the slits in the acetate. TIP: It’s very important that the vinyl does not cover any of the slits. Gently lift the decal to try again if the vinyl isn’t aligned correctly.NOTE: The letter is just a guide, and won’t be transferred to the acetate.
- Using your scraper, burnish the vinyl onto the acetate from the center of the vinyl outward.
- Carefully peel off the transfer tape and set it aside, sticky-side up, so you can use it again.TIP: If any vinyl doesn’t adhere to the acetate, lay the transfer tape back down and burnish again.
- Once the vinyl is attached to its acetate piece, make sure to keep your assembled pieces organized and in order for later. TIP: I printed the reference sheet and organized the pieces on top to keep track of them.
- Repeat steps 16-23 to apply your other vinyl pieces to their matching acetate pieces, using the same piece of transfer tape. NOTE: When you get to Pieces C and D, the pieces are interchangeable – meaning either vinyl piece can go on either acetate piece. The same applies to Pieces E and F.
- When you get to pieces G and H, position the vinyl design in the center of the solid area. TIP: If the transfer tape loses too much of its adhesiveness, repeat steps 13-15 above to prepare a new piece before trying again.


 TIP: Make sure you do not pull up any pieces you want to keep! If they come up, gently pat them back in place and try again.


 TIP: If any vinyl lifts up from the transfer tape, lay the backing back down and burnish again.
 NOTE: The letter is just a guide, and won’t be transferred to the acetate.
 TIP: If the transfer tape loses too much of its adhesiveness, repeat steps 13-15 above to prepare a new piece before trying again.
STEP 4: ASSEMBLE THE 3D CHRISTMAS ORNAMENT
ASSEMBLE THE LAYERED CARDSTOCK FOCAL POINTNOTE: I’m going to show you how to assemble the snowman, but you can follow the same steps to assemble the tree.
- If you made the snowman design, you’ll have seven snowman pieces: A black piece, two white snowman pieces, two scarves, and two tiny noses. Don’t lose them!
- Place the black piece on your work surface, and grab one white snowman piece.
- Apply craft glue to the back of the white snowman piece, avoiding the cutouts.
- Turn the white snowman piece glue-side down and adhere it to the black snowman piece, aligning the edges. TIP: If any glue seeps out from between the cardstock layers, wipe it away quickly with your finger.
- Turn the assembled snowman piece white-side down.
- Grab the second white snowman piece and repeat steps 3-4 to attach it to the black side of the assembled snowman.
- One of the snowman’s eyes is lower than the other. Grab one of the scarf pieces. Orient it so the tails are on the same side as the low eye.
- Apply craft glue to the back of the scarf piece, avoiding the outer area of the scarf tail that won’t attach directly to the snowman.
- Turn the scarf piece glue-side down and adhere it to the “neck” of the snowman.
- Grab one of the carrot nose pieces and orient it so the point is facing the opposite direction as the scarf tails, toward the higher eye.
- Apply a tiny amount of craft glue to the back of the carrot nose.TIP: Tweezers can be helpful for positioning tiny pieces like the carrot nose.
- Turn the carrot nose glue-side down and adhere it to the snowman’s face.
- Once dry, turn the snowman over to the empty white side.
- Repeat steps 7-12 to decorate the second side of the snowman.

 TIP: If any glue seeps out from between the cardstock layers, wipe it away quickly with your finger.


ASSEMBLE THE ORNAMENT
- Cut 3-4” of nylon cord.
- Grab the snowman and acetate Piece A, and align the loop at the top of the snowman’s hat with the loop on the inside of acetate Piece A. It does not matter which loop is on top.
- String the nylon cord through the aligned loops.
- Tie a double knot in the nylon cord close to the material. Don’t tie it so tight that the material breaks or tears - the snowman should be able to freely dangle inside the ornament.
- Trim the excess from the ends of the nylon cord.
- Grab acetate Piece B.
- Slot the top and bottom middle slits on Piece A into the top and bottom middle slits on Piece B.
- Grab acetate Piece K (the tiny stabilizer piece).
- Fold each tab back in the same direction.
- Tear off a sheet of four small glue dots.
- Press one glue dot onto the face of each bent tab. They might look a little messy, but that’s okay.
- Bend the tabs back up into a 90-degree angle.
- Hold assembled pieces A and B in an “X” shape, with the top pointing up.
- Move Piece K into place so the small circle’s center is aligned with the point where pieces A and B cross each other. Each of the tabs on Piece K should be parallel to and facing a side of the “X.” NOTE: The glue dots may stick prematurely to the sides of the X, but you can wiggle the pieces into place if they’re attached.
- Press each tab with a glue dot into its corresponding side of the "X."
- The ornament should now stay in an “X” shape, and you should be able to place it onto your work surface so it stands upright.
- Grab Piece C and insert its top and bottom center slits into one of the sets of slits closest to the center on Piece B. Piece C should now be parallel to Piece A. TIP: When adding each acetate piece to the ornament, face the front of the holographic vinyl in the same two directions for maximum shine!NOTE: The acetate can be curved quite a bit without creasing, so don’t be afraid to bend it to get it into place.
- Grab Piece D and insert its top and bottom center slits into the other set of slits closest to the center on Piece B, so Piece D is parallel to Piece A.
- Grab Piece E and insert its top and bottom center slits into one of the sets of slits closest to the center on Piece A.
- Insert Piece E’s next top slit into the next available top slit on Piece C. Do the same thing with the next available top slit on Piece D.
- Insert Piece E’s next bottom slits into the next available bottom slits on Pieces C and D.
- Grab Piece F and repeat steps 19-21 to add it to the ornament.
- There are four open sides on the ornament. Two sides have slits on the outside parts of the pieces, and the other two have slits on the inside parts of the pieces. Find a side where the slits are on the inside.
- Grab Piece G (or H – they’re interchangeable) and, with the holographic side of the decal facing out, slide its top middle slit through the middle slot on that side of the ornament.
- Push the piece upward as far as it will go, then slide the bottom middle slit into place.
- Slide Piece G’s (or Piece H’s) left and right slits into the outer slits on the ornament’s adjacent pieces on that side.
- Repeat steps 23-26 with Piece H (or Piece G).
- There are two open sides left on the ornament. Grab Piece I (or J – they’re interchangeable) and slide its middle slot over the top and bottom center slits on one side of the ornament.
- Slide the two outer slots on Piece I (or J) onto the top and bottom slits of the adjacent ornament side pieces.
- Repeat steps 28-29 with Piece J (or I) on the last open side of the ornament.
- Check if your ornament feels wobbly or doesn’t look like a perfect grid of pieces. If any slits slipped out, slide them back into place.
- Cut a piece of ribbon or twine about 10” long.
- Tie the ends of the ribbon together in a knot with about 1” excess on each tail.
- Slide the looped end of the ribbon through the hole on the top of the ornament.
- Slide the knotted end of the ribbon through the looped end on the ornament, then pull it tight.
- Your 3D acetate and vinyl ornament is ready to hang!


 NOTE: The glue dots may stick prematurely to the sides of the X, but you can wiggle the pieces into place if they’re attached.
 TIP: When adding each acetate piece to the ornament, face the front of the holographic vinyl in the same two directions for maximum shine!NOTE: The acetate can be curved quite a bit without creasing, so don’t be afraid to bend it to get it into place.


STEP 5: SHOW IT OFF!
Here's what my finished 3D Christmas Ornament with a layered cardstock snowman looks like!
Notes
Finished ornament size: 3.5" x 3.5" Care instructions: Gently wipe the ornament clean with a lint-free cloth as needed.
Answers to Your Questions About Making 3D Acetate Ornaments
Q: I want to design a 3D Christmas ornament with a photo. How do I do that?
A: You can learn how to design a custom 3D Christmas ornament with a photo and get the assembly cheat sheet in my ADVANCE program. Learn more about ADVANCE here!

Q: Can I make this project with any Cricut machine?
A: Yes! You can make the 3D Christmas ornament with a Cricut Maker, Explore, Venture, Joy Xtra, or even the Cricut Joy. Just be sure to trim your acetate and cardstock to fit your machine’s mat size.
Q: What cut settings work best for acetate?
A: On the acetate in my materials list, I recommend using the “Foil Acetate” setting with “More” pressure for a clean cut. Always peel the protective film off one side before placing it on your mat, and use a brayer to smooth it down firmly.
Q: My vinyl didn’t stick well to the acetate. What did I do wrong?
A: That can happen if your transfer tape is too sticky! Try pressing the tape on your hand or a clean shirt a few times before using it. This removes some tack and helps the vinyl release more easily onto the acetate.
Q: How do I keep my acetate from cracking or bending while assembling?
A: Acetate curves more than you might think, but go slow and gentle. If you feel resistance, stop and check that your slots are lined up correctly. Never force a piece into place. Small adjustments are everything.
Q: Can I make these ornaments by hand without a Cricut?
A: Yes! While the Cricut gives you perfect precision, you can print the included PDF template and carefully cut the shapes by hand with a craft knife or scissors. It’s a bit more time-consuming, but still doable.
Q: Can I mail these ornaments as gifts?
A: Absolutely! One of the best things about these Christmas ornaments is that they fold flat for easy mailing. Just leave off the stabilization piece (piece K), then tuck the flat ornament inside a greeting card or a small gift box to surprise someone you love.
Q: Can I personalize my ornament?
A: Definitely! You can change the colors of acetate, vinyl, and cardstock, and even use cardstock with different finishes like glitter or foil. If you’d like to make a 3D photo ornament, I show how to do that in the ADVANCE with JenniferMaker workshop!
Q: What’s the best way to store a 3D Christmas ornament after the holidays?
A: To keep your ornaments looking their best, store them flat or in a sturdy container between layers of tissue paper. They’re really lightweight, so store them near the top of the box to keep their shape intact.
Get my free 3D Christmas ornament design files!
(If you do not see the signup form above, click here.)
I love seeing what you make with my tutorials and how you customize them! Please share a photo of your 3D Christmas ornament in our Facebook group or tag me on social media with #jennifermaker.
Love,

Want to remember this? Save this How to Make a 3D Christmas Ornament tutorial to your favorite Pinterest Board!