

 My family loves to wrap presents early and put them under the Christmas tree. It increases the anticipation and just gets us all in the holiday spirit. More often than not, we don’t put gift tags on until the night before so that the presents can stay secret and mysterious. But I’ve designed a gift tag that keeps the giver/recipient names a secret until Christmas AND provides a ton of fun! It’s a tear-away reveal gift tag, and it’s your gift for Day 5 of the MAKE IT MERRY: 25 Days of Maker Projects Christmas.
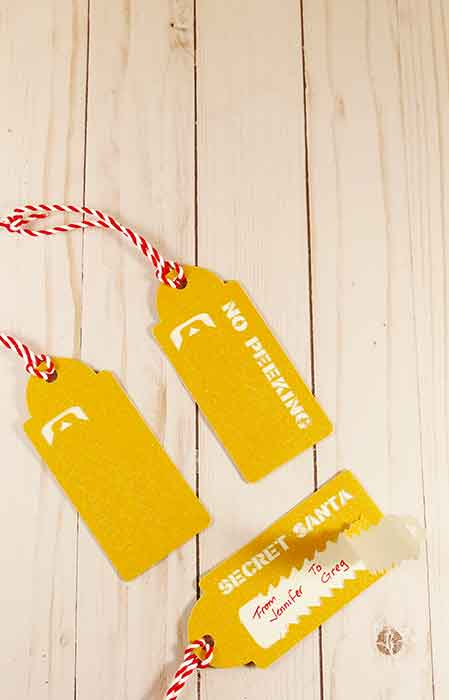
And just to be absolute sure that the tag prevented peeking, I put my daughter on the task to test it. She tried to see inside. She tried holding it up to the light. She even tried shining her iPhone light down into it. She could NOT see the name written inside the tag. NO PEEKING! She says, “it’s pretty cool.” High praise indeed from a 13-year-old.
And the thing I love about this gift tag is how easy it is to cut and make. No score lines, no fiddling. Just cut, write, glue/tape, and fold. And I’ll show you exactly where to glue or tape so your message inside the tag can’t be seen, too!
And when gift-giving time comes, it’s super easy (and fun) to tear open the strip on the tags to see who gets the gift.
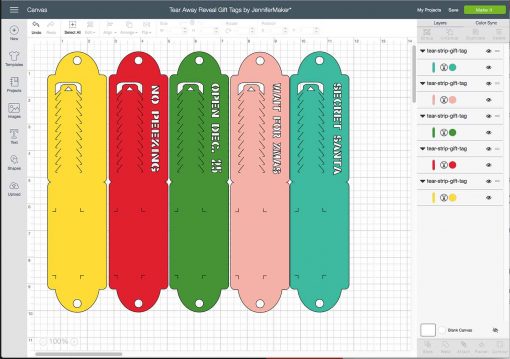
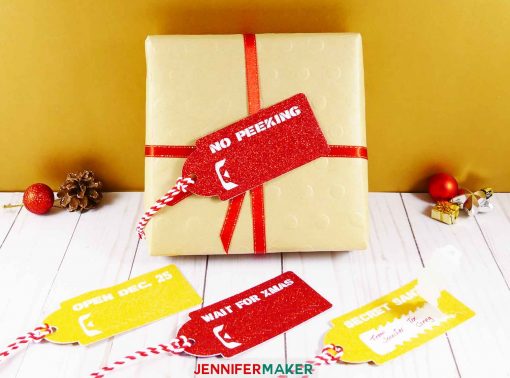
I’ve included five tear-away reveal gift tag designs—four have words (“No Peeking,” “Open Dec. 25,” “Wait for Xmas.” and “Secret Santa”) and the fifth is blank. You could easily put your own saying on that blank one if you wanted, too!
Let me show you how to make these awesome gift tags! This post contains some affiliate links for your convenience (which means if you make a purchase after clicking a link I will earn a small commission but it won’t cost you a penny more)! Read my full disclosure policy.
Materials for the Tear-Away Reveal Gift Tags
- 65 lb. or heavier 12″ x 12″ cardstock (I recommend a sheet that has a color or design on one side, and just white on the other side—I used this stack)
- Glue or narrow (1/4-inch wide) double-stick tape (I used this tape)
- A way to cut the tag (I used a Cricut)
- Design #69 – My free SVG cut file (available in my free resource library—get the password at the bottom of this post)
How to Assemble the Tear-Away Reveal Gift Tags
First, cut out the tags. This is a project you really need a cutting machine like a Cricut for because you need to get those tear-away lines perfect and the Cricut can do that. The good news is that you can just uploading to Cricut Design Space and go. There’s no ungrouping or score line setup needed.
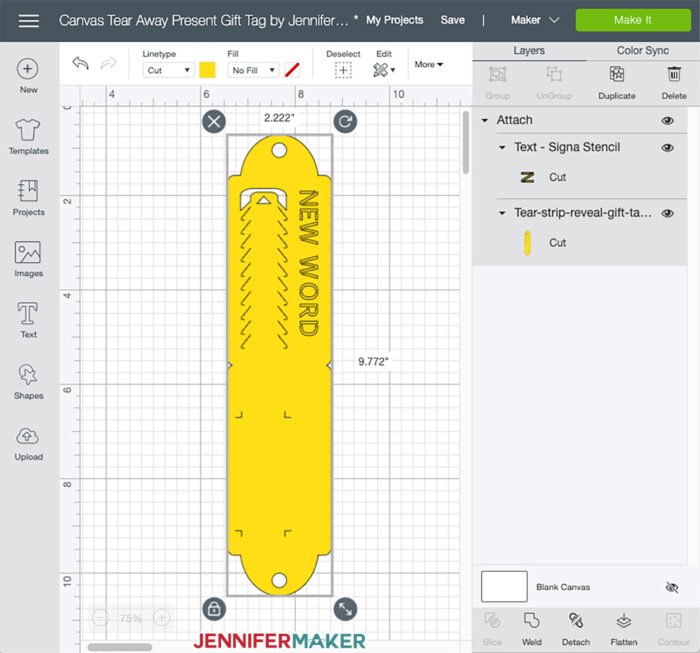
If you want to put your own word on the blank tag provided in the file, it’s really easy! First, ungroup all the tags by clicking on Ungroup. Now just click on Text to type a new word, choose a stencil font such as Signa Stencil (in Design Space) or Stencilia (free at dafont.com) and resize/rotate it until it’s in position on the tag the way you want. Now select both the tag layer and the text layer, and click ATTACH. Ta da! (Do not try to slice — it will cause some of the lines to disappear.)
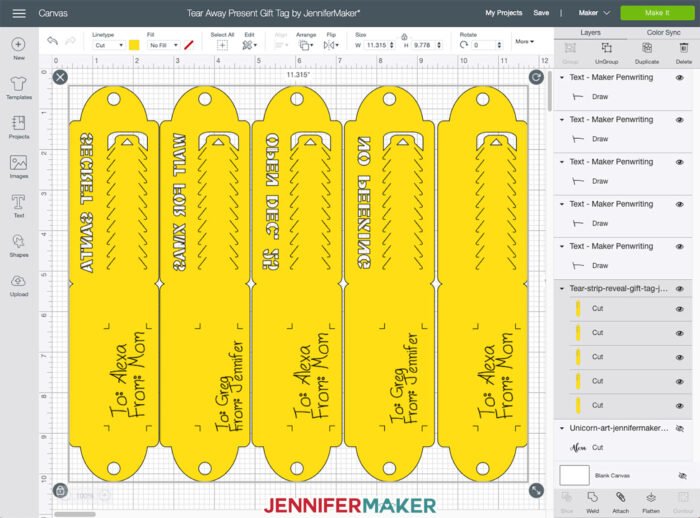
Tip: If you want your Cricut to write the names for you, just select all of the tags and click on Flip at the top of the screen, then choose “Flip Horizontal.” Now click Text and type your names, then resize and rotate so they are in between the four L-shaped cuts at the bottom, like this:
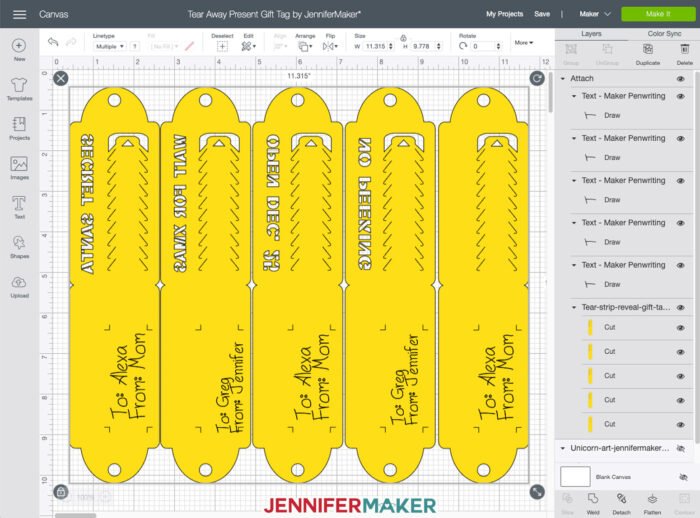
Now attach every cut layer to the gift tag layers, like this:
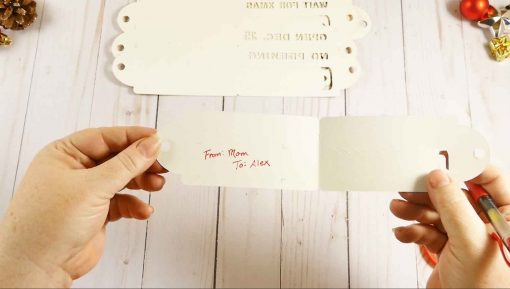
Now click Make It and then click Continue, but when you place your cardstock on your mat to cut it, make sure you put it pretty side down and load in a pen. If you do it like this, your pen will write on the “inside” of your tag and you can just fold them over to hide the writing and tape/glue them up like I explain below.
Once your tags are cut out, fold the tag in half.

Now locate the four L-shaped cuts on the non-tear away side of the tag. These are guides to indicate to you where to write. Stay inside these lines and your words cannot be seen.
To keep the tag closed, glue or tape the three edges, as well as the space between the words and the top of the tearaway strip. Just avoid getting tape or glue on the tear away strip itself.

And that’s it! Tie a ribbon or string through the hole at the top and attach to the appropriate present.

Tip: To help you keep track (and still keep your presents a secret), color code your gift tags. For example, Greg’s presents will have all the red tags and Alexa’s will have all the blue tags.
Get my free template and cut files for the Tear-Away Reveal Gift Tags
If you make these tear-away reveal gift tags, I’d love to see! Share a photo with me at [email protected] or tag me on social media with #jennifermaker.
See all of projects in the MAKE IT MERRY: 25 Days of Maker Projects Christmas! If you want to be notified of when there is a new gift ready to open on my blog, just fill out this form!
Love,

Want to remember this? Save the Tear Away Reveal Gift Tags to your favorite Pinterest board!


Such a cool idea, I loved it
Super cute file. Thank you for sharing. I cant get these to cut without tearing. I have tried both blue & green mats. Regular cut and intricate cut setting on my explorer air 2. No luck. Tried for feedback on the fb group and no response. What might I be doing wrong? Thank you
What kind of paper are you using? I used card stock from Hobby Lobby and used a blue mat. Set my Cricut Explore 2 to cardstock setting and default pressure. Mine didn’t tear at all. Are they tearing when you try to remove from the mat? Do you turn the mat upside-down and remove like Jennifer suggests?
Hi Cathie! I would do test cuts with the paper you are using on various settings by trying to cut out a 1-inch diameter circle till you get the right setting.
Love this project. I did it valentine’s Day and it was great. I am also think about doing this for bridle and baby showers. Keep up the good work. There is a puzzle folder that I want to try but having trouble downloading to the circut it said not a folder when trying. Maybe you can help.
Hi Kim! Make sure you unzip your folder and are just selecting the SVG file. You can’t upload entire folders to Design Space.
I found the template and would like to make the No Peeking tags for my family on gifts that I am giving to them. The template that you provided (Thank you) has several. I am going to have to watch your video again. Thank you so much for the gifts you give!
I cant get the download to open for me
Hi Angie! Once it downloads, search for the file on your computer, right-click on it and select your “Extract All” option. This will create a new file for you that you will access during the upload process.
i used foil poster board and i down size it to 5 inch and the cut out the the letters was not successful
Hi Rita! That might be a bit too small for that type of paper.
First you are so talented!!! I am very new to this cricut world and when I download the SVG file and upload it I can’t get the item to allow me to draw and cut on the same mat. When I uploaded the file to the write of the template it only shows cut and I try to ungroup and everything in between and I am so confused. Can you tell me what I am doing wrong? Have a Merry Christmas
Hi there! If you are trying to add your own custom name you will want to create your name or saying, placing on the tag where you want it, select both the tag and the font, and choose to attach.