
 Christmas trees are often personal expressions of a family, sometimes even family histories. We’re about to put up our big family Christmas tree this year and I wanted the crowning achievement on top—the star—to express my love of papercrafting. So for Day 4 of my MAKE IT MERRY: 25 Days of Maker Projects Christmas, I designed a glorious 3D paper star. But it’s not just any star—it’s a Moravian star.
Want to save this project? Enter your email below and we’ll send the project straight to your inbox.
A Moravian star is an illuminated star popular in Germany, where they are known as Herrnhuter Stern. My ancesters are German and I have a particular interest in exploring my heritage through German crafts like this.
One of my readers, Laurie T., wrote to me with more information on the Moravian Star. She says, “It originated as a math project at a Moravian Boys school in Niesky, Germany, and soon after became a commercial endeavor out of the ‘mother community’ of Moravians in Herrnhut. The church originated with the ministry of Jan Hus in the regions of Moravia and Bohemia which are now part of the Czech Republic. After several hundred years of persecution, in 1722 a remnant of the followers of Hus were invited to live at the estate of Nicholas von Zinzendorf in Germany. Hence the denomination has a mostly German heritage. I have been a member of this denomination for 15 years and am fortunate to live very near to Bethlehem and Nazareth, Pennsylvania, where many many homes have stars hanging on their front porches. Traditionally, the stars are only lighted during the Advent Season.” Thank you, Laurie!
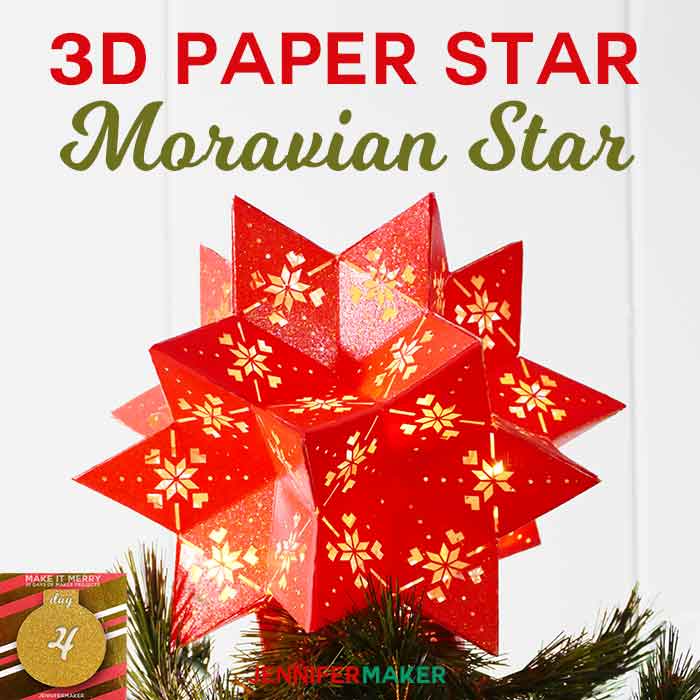
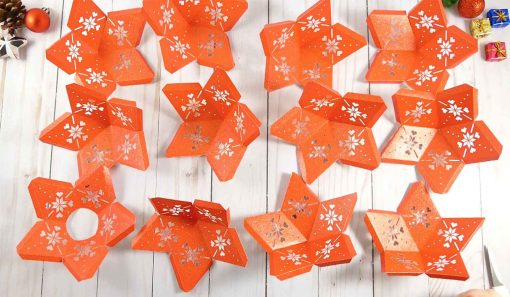
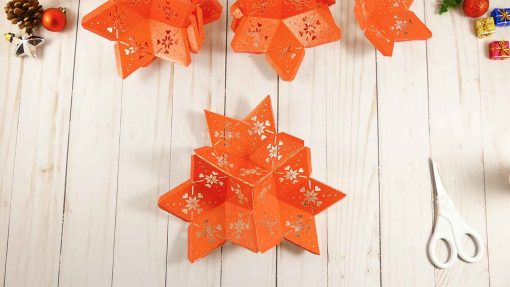
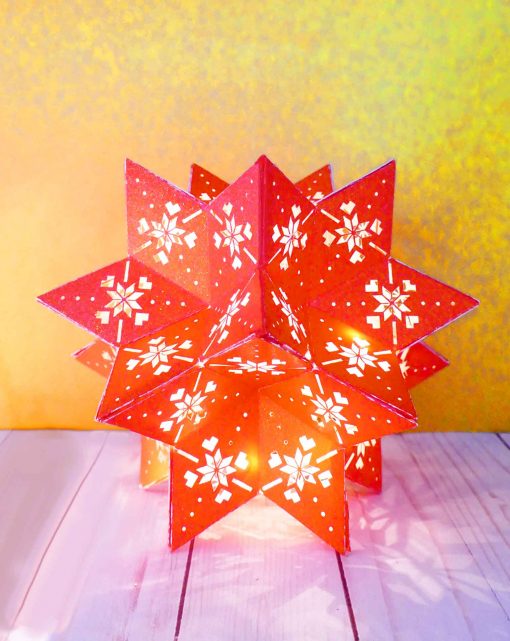
Designing this star was not an easy feat. Actual math was involved, guys! Who says you don’t use math after school? But now that it’s done and crowning my tree, it was all worth it. My Moravian star has 20 points and is formed from 12 five-point stars put together. It’s actually pretty amazing! Even my 13-year-old is impressed. It took quite a bit of trial and error not only to make it, but to find the best way to put it together. But look how beautiful it turned out!

The inside is hollow, so I put some LED Christmas lights inside. The light shines through the cut outs and really makes them stand out. I am SO pleased with how this turned out. I’d love to teach you how to make one, too!
Note: I made alternate versions for you! There are three different patterns—one is solid (no cut outs), one has a star & heart cut-out pattern (shown in my photos), and one has a Christmas tree cut-out pattern. The solid version will cut out faster and is a little less finicky to put together.
By the way, if you made my Christmas Tree Advent Calendar, you can create a version of this star to put atop it. Just choose the solid version and scale it down so that all 12 stars fit on one piece of 12″ x 12″ paper.
This post contains some affiliate links for your convenience (which means if you make a purchase after clicking a link I will earn a small commission but it won’t cost you a penny more)! Read my full disclosure policy.
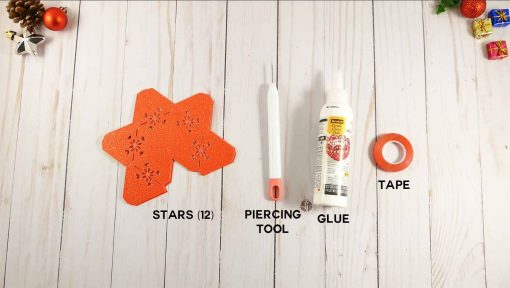
DIY 3D Paper Star Materials
- 3 sheets of 12″ x 12″ 65lb. or heavier cardstock (I used red/gold glitter paper, which was finicky. If you use a solid-core paper, it’ll be easier and you won’t see the crease lines)
- Tacky glue or double-sided tape strips (I had to use the tape for the glitter paper, as the glue didn’t like to stick to it)
- A piercing tool or something pointy like a weeding tool (to poke out the little paper bits that get cut out but don’t fall out or come out on their own)
- A way to cut out the stars (I used my Cricut)
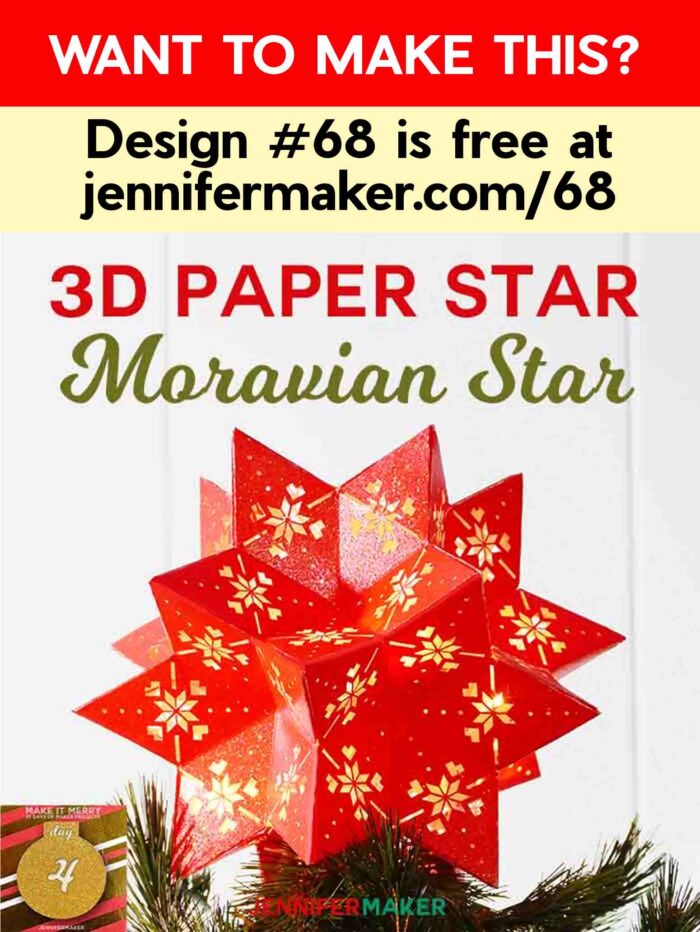
- Design #68 – My free pattern (available in my free resource library—get the password at the bottom of this email)
How to Assemble a 3D Paper Star (20-Point Moravian Star)
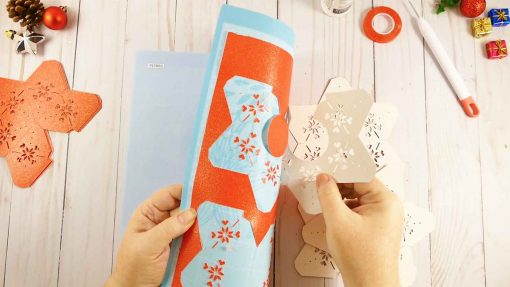
Cut out all of your stars. You should have 11 regular stars and one star with a hole in the middle, so 12 stars in total. If you upload the included SVG cut file to Cricut Design Space, you must change the score layers from Cut to Score, and attach the score layer to the appropriate cut layer. (Note: When first uploaded, all yellow layers are the Score layers, and they will look odd until you change them to Score.) The image below shows what your file should look like after you’ve changed the layers to Score and attached them.

Note that when you take your stars off the mat, most of the little bits will stay behind on the mat. Those that don’t can be poked out with the piercing tool (or a toothpick if you don’t have a piercing tool).
Fold your stars along the score lines. The big score lines (between the points of the stars) get folded in, while the score lines beside each tab (alongside the points) get folded out.
This is what each star should look like when it is folded.
Now attach the open end of the star to itself using glue or tape. It’ll go faster if you use glue, but tape was the only thing that worked for this glitter paper, so I had to use that. When you are done, your stars are concave.
Do this for all 12 stars.
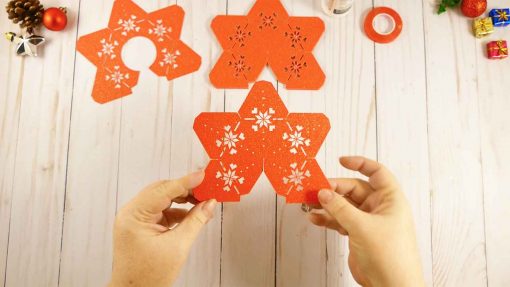
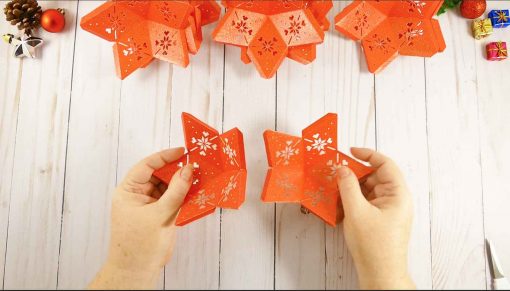
Now it’s time to attach all 12 of these stars together. This is the hardest part, so be patient—the result is worth it. It took me about 1.5 hours to do this with tape, and about 1 hour to do it with glue. To begin, start by tape two stars together so that their points and sides are touching, just as shown in the photos below.
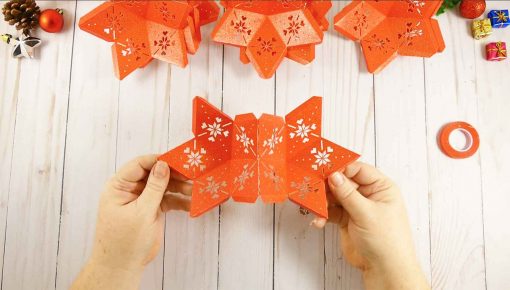
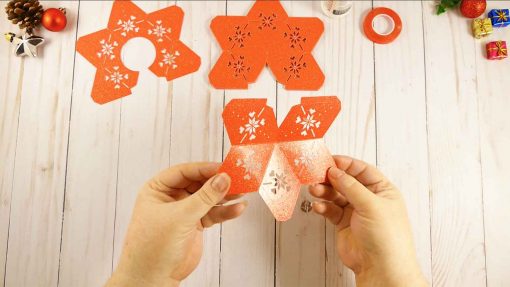
Now attach a third star so that its point touches two points formed by the first two stars. Every point is three-sided. This is important to remember. Do not make any four-pointed stars or your star won’t go together properly.

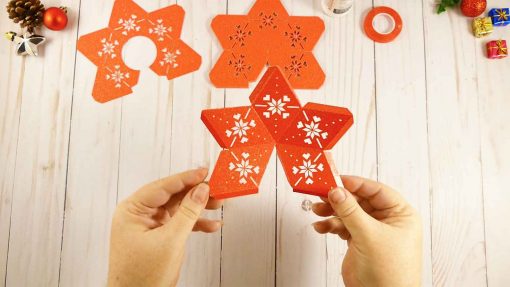
To complete this point, just close up the bottom two stars.
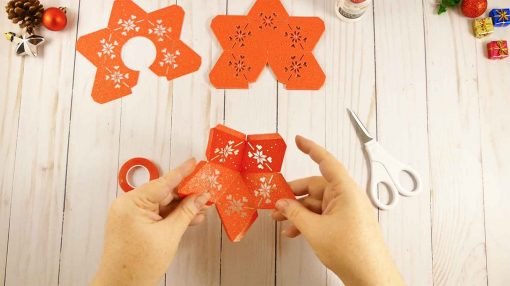
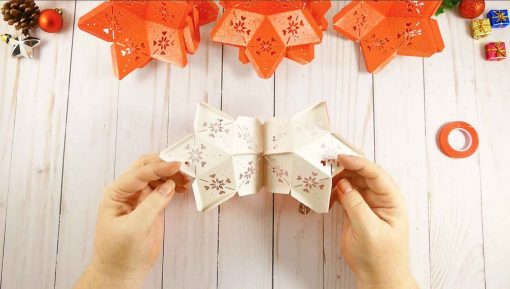
Set this aside and repeat three more times, so you have four of these assembled. Now simply attach the four assembled units together to create the 3d paper star. The key is to remember that every point has only three sides. So long as you do this, and keep making the three-sided points, your star will come together just right.


Get my free template and cut files for the 3D Paper Star
If you make this 3d paper star, I’d love to see it! Share a photo with me at [email protected] or tag me on social media with #jennifermaker.
Also, be sure to visit tomorrow to open the Day 5 gift of my MAKE IT MERRY: 25 Days of Maker Projects Christmas! If you want to be notified of when there is a new gift ready to open on my blog, just fill out this form!
Love,

Want to remember this? Save the 3D Paper Star to your favorite Pinterest board!


Wow! I made this and it is absolutely stunning! I do recommend doing a solid one first to help you gain confidence as that is what I did. I did the full cutout one in a creamy pearl paper and gave to my sister for her birthday and she was thrilled. Just put a battery op tealite or votive under it where the hole is for putting on the tree. I thought it might look OK like this but it looked INCREDIBLE!!!! Especially if you want to give outside of the holidays. I’m not everyone has an “All Seasons” tree up like I do. 🙂
Thank you Jennifer for this file….I will be making more of these
Oh my goodness what a pickle I am in. I have my 4 lots of 3, but for the life of me I cannot figure out how they fit together. I have stuck, unstuck, restuck and it never seems to be right. Tempted to screw it all up and file it in the bin, but I know it fits together somehow, lol
Hi Lisa! This is always the trickest steps and probably one of the harder projects on my blog. Just take your time and just go step by step. I know you can do this!
Hi Jennifer! I hope you can give me some guidance, because I absolutely love your designs, projects, and tutorials. but unfortunately on all of the projects I’ve made so far the image does not cut out completely along the edges, the machine cuts more of a slashed line instead. It makes it impossible to cut out anything with intricate designs. I use SCAL5 and have not experienced issue with any other SVG files I’ve downloaded. I even tried to change the blade without any luck! Please send help. Thank you