

Spiral Betty photo designs have exploded in popularity! These eye catching spiral designs are fun to make and easier than you might think! Learn all about how you can make your own with this easy step by step tutorial.
I always spend some time every day in my Cricut group because I love to see what projects people are making. These intriguing spiral designs definitely caught my eye and I learned they’re called a Spiral Betty. I know the idea of taking a picture and turning it into a piece of art is always a popular topic in my group and I have shown how to put a photo on a candle and how to make your own photo puzzles. A Spiral Betty is a fun way to use your photos in crafting! This is an excellent project for any level of crafter because Spiral Betty designs are easy to make and will not take a significant amount of time from beginning to end. I am excited to show you how to make Spiral Betty designs in a simple step by step tutorial with an updated video!
Watch the full step-by-step video tutorial on making a Spiral Betty:

First, what is a Spiral Betty design? This is a really fun concept where you convert an image into a single spiral line. The line is made up variable widths, not dissimilar from the grooves in a vinyl record, and this variation creates the image when the spiral is viewed as a whole. And because a Spiral Betty design is a single line, that means you can weed these designs much easier than other projects … at least usually!
The first thing you will need to do is choose an image that works for a Spiral Betty design. After a lot of experimenting, I have discovered you need a simple high contrast image without a lot of small detail otherwise it will not translate well into a Spiral Betty. Close ups of faces (human or animal) have worked the best for me. If you choose something too busy, the images will not look clear and crisp. Your image also needs to fit well within the circle shape. If you want to practice, I’ve included simple images to use with the tool as well as their finished versions!
Once you have your image, you need to upload your photo to the Spiral Betty website. Don’t worry, this step is actually very easy, even if you are not tech savvy. Once you upload it, you can resize it and move it around until you have your image centered the way you want and then hit the check mark. Then the magic happens! After you are happy with your design, you will save your design as a jpeg and then upload it to Design Space. I’ll show you how to clean it up in this tutorial.
A white canvas with an intricate sunflower cut vinyl design made with Sprial Betty.
Note: The Spiral Betty online app is free for non-commercial use. If you’d like to use the spiral designs you make commercially, you can purchase a 1-year crafters license to sell your designs to individual consumers, or simply a per-image download that you can resell or share anyway you like. Please support the site creator!
Once you have a Spiral Betty design, what do you do with it? Most people seem most interested in cutting the designs from vinyl, so that’s what we’ll do in this tutorial, but just know that you could also print it or cut it from paper. I used black vinyl to put it on a white canvas and I really like the color contrast with the black and white. You can either use permanent vinyl with StandardGrip transfer tape, or iron-on vinyl and a heat source.
It can be difficult to stick the lines to a canvas. If you have a lot of trouble, you can prep the canvas ahead of time with permanent spray adhesive and let it dry completely. This will help the vinyl stick to the canvas, but the spray can yellow over time if it’s in the sunlight.
I used my Cricut cutting machine to cut the vinyl along with the fine point blade and standard grip mat. After it is cut, go very slow with the weeding because one of the most common mistakes is people weeding the wrong part of their Spiral Betty! Make sure you start with the outside piece!
I think a Spiral Betty design makes an incredibly unique gift idea for anyone and can be applied to many different mediums! Besides canvas, you can put these on a shirt, a tote bag, or any surface large enough to hold your design!
Let me show you how to make a spiral betty design! This post contains some affiliate links for your convenience (which means if you make a purchase after clicking a link I will earn a small commission but it won’t cost you a penny more)! Read my full disclosure policy.
Materials to Make a Spiral Betty Vinyl Design on a Stretched Canvas
View my Amazon shopping list with the exact items we used to make this project!
- Premium Permanent Adhesive Vinyl (I used black) -or- iron-on vinyl
- Cricut Standard Grip Transfer Tape (only used with the permanent adhesive vinyl)
- Spray Adhesive (for Permanent Vinyl)
- Canvas (I used a 12″ x 12″ white canvas)
- Cricut EasyPress
- Heat safe pressing mat
- Spiral Betty website (use this to spiralize your image)
- Green Standard Grip Cutting Mat
- Brayer
- Weeding tool
- Scraper tool
- Scissors
- Measuring Tape
- A way to cut your vinyl for the stencil (I used the amazing Cricut cutting machine!)
How to Make a Spiral Betty Project with Iron-On or Permanent Vinyl

Spiral Betty Tutorial
Learn how to make amazing vinyl-on-canvas wall art with my easy Spiral Betty tutorial!
Materials
Tools
Instructions
STEP 1: GET MY FREE SPIRAL BETTY DESIGNS
First, download my Spiral Betty design files from my free library – look for Design #686. Alternatively, you can use the Save This Project form near the top of this post and the design link will be emailed to you.
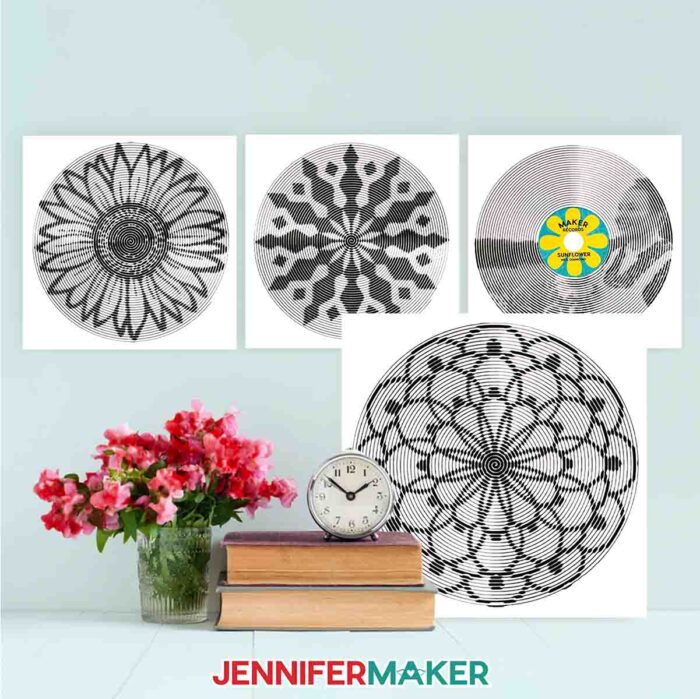
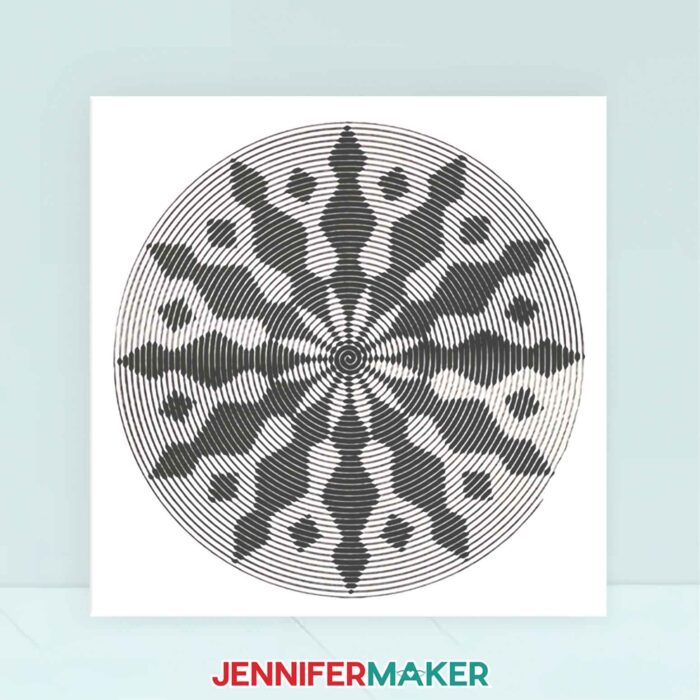
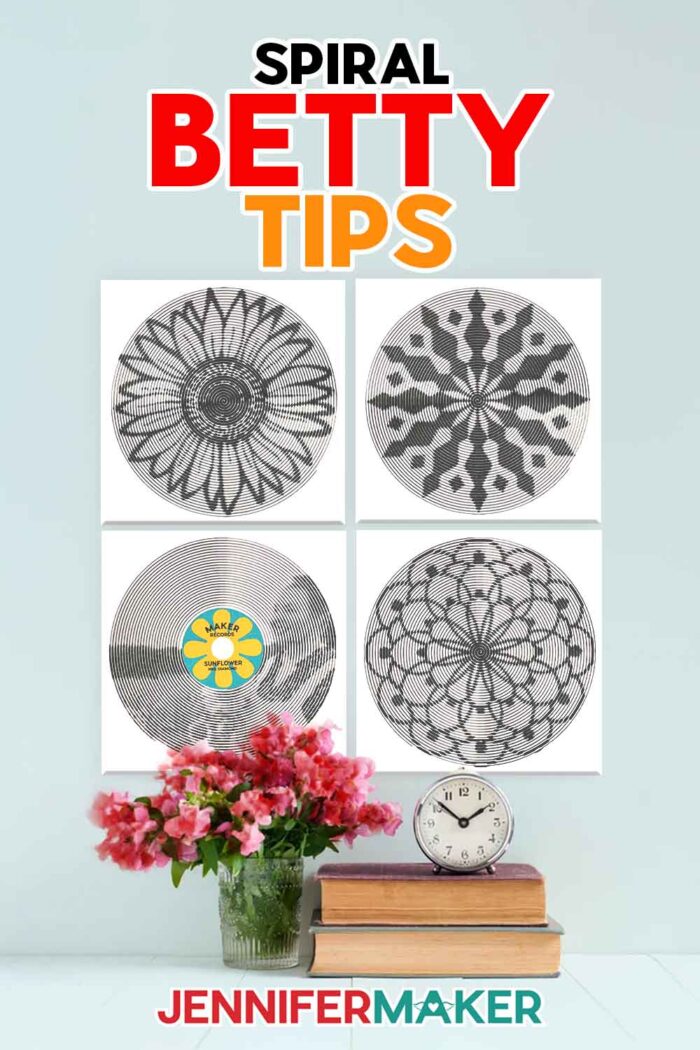
In the SVG folder, you’ll find three already made for you designs: a mandala, a snowflake, and a sunflower. There is also a DXF folder with cut files, and a PDF folder with versions you can print and cut by hand.
I’ll show you how to create a spiralized photo using special software online, as well as how to cut and apply your spiral photo to canvas.
TIP: If you’re not sure how to upload, go to jennifermaker.com/svgs to learn how to unzip and upload SVG files.
STEP 2: CHOOSE AN IMAGE FOR YOUR SPIRAL BETTY
You can use any of the designs I’ve provided to create your Spiral Betty. You can also choose one of your favorite photos for your design. Here are a few tips for choosing a photo that will work well with the Spiral Betty website:
- A simple photo works better than a busy photo. Straightforward, line drawing images are easier to recognize in spiral form than complex ones.
- The higher contrast, the better. This helps the Spiral Betty software choose which areas to emphasize.
- Subject matter counts! Look carefully at your photo. If the subject of the photo is too close in color to its surroundings, the Spiral Betty won’t look as good.
STEP 3: UPLOAD YOUR IMAGE TO THE SPIRAL BETTY WEBSITE
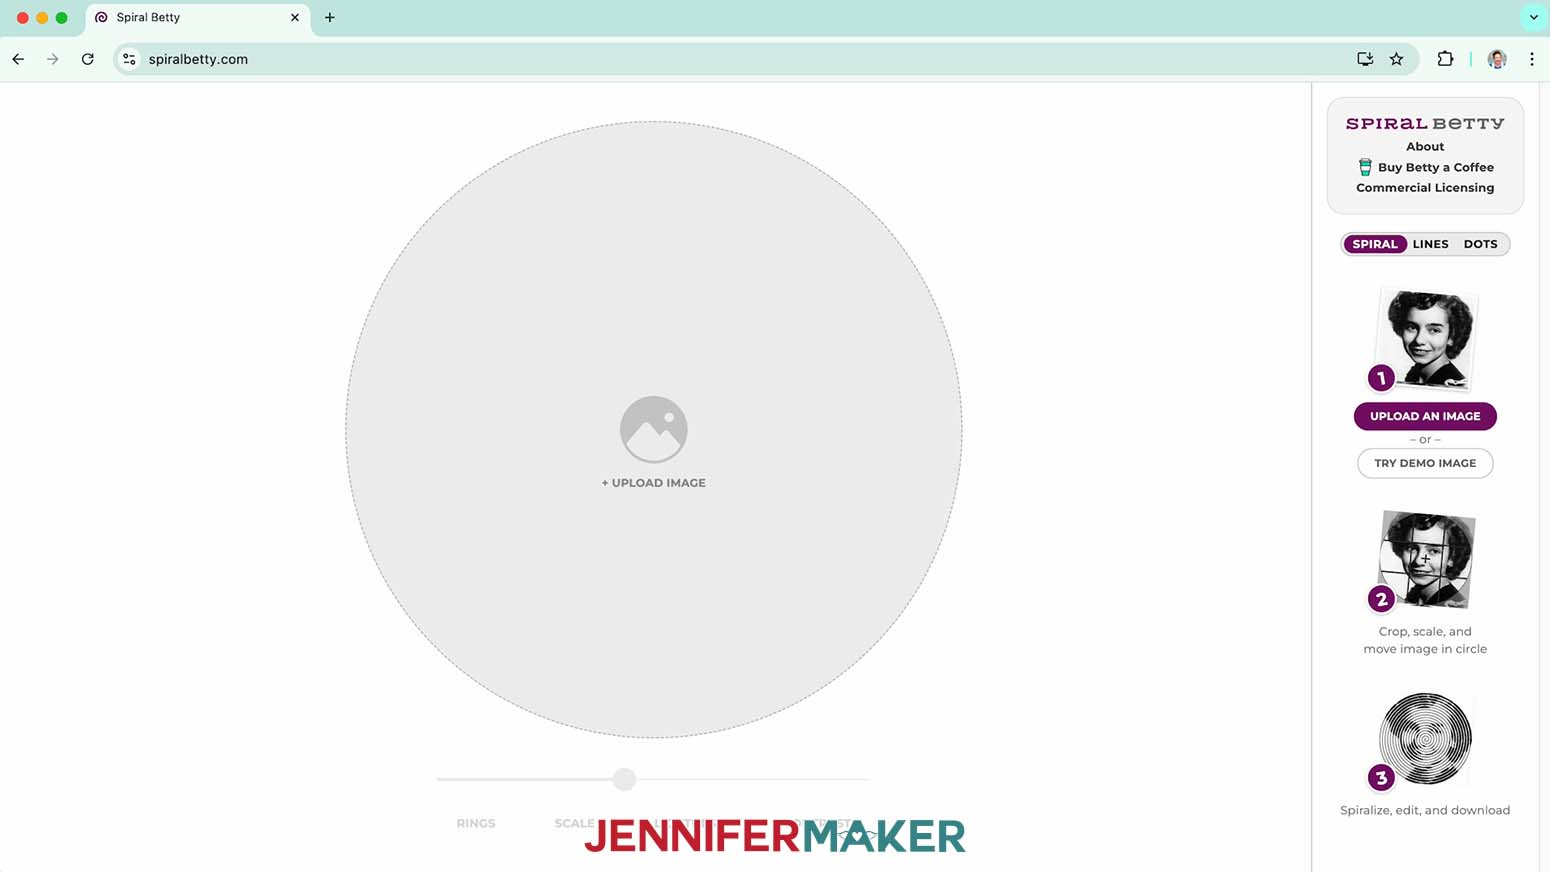
- Open the SpiralBetty.com website in your computer’s web browser.

- Click the “Upload An Image” button.
- Select the image you want to use. You can upload most image filetypes, including PNG, JPG, and even SVG files.
TIP: You can also drag and drop your image right onto your browser page where it says “Upload Image.”
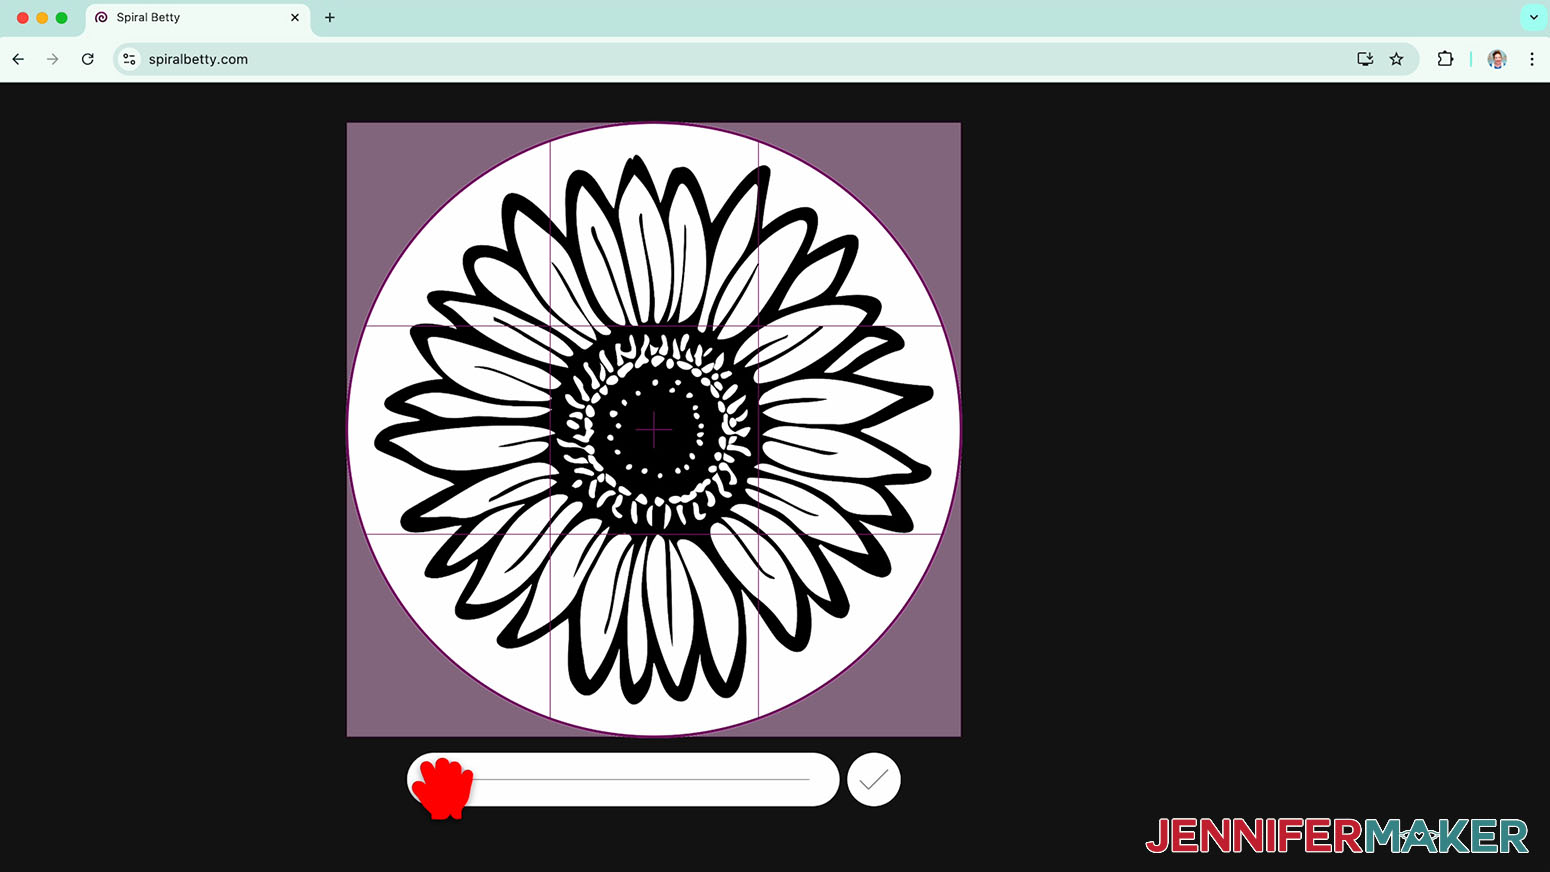
NOTE: I’ll demonstrate with my “sunflower” to create a simple design first, and then show you how to use the software’s settings to create a Spiral Betty from a more complicated personal photo. - Once your file is uploaded, drag the slider under the image preview to zoom in or out so the subject is sized the way you want it. Then drag the photo to choose which part should be in your spiral image.
TIP: Be careful not to drag your cursor outside the slider area–this can apply your settings before you’re ready! - Click on the check icon to the right of the slider to automatically spiralize your image.
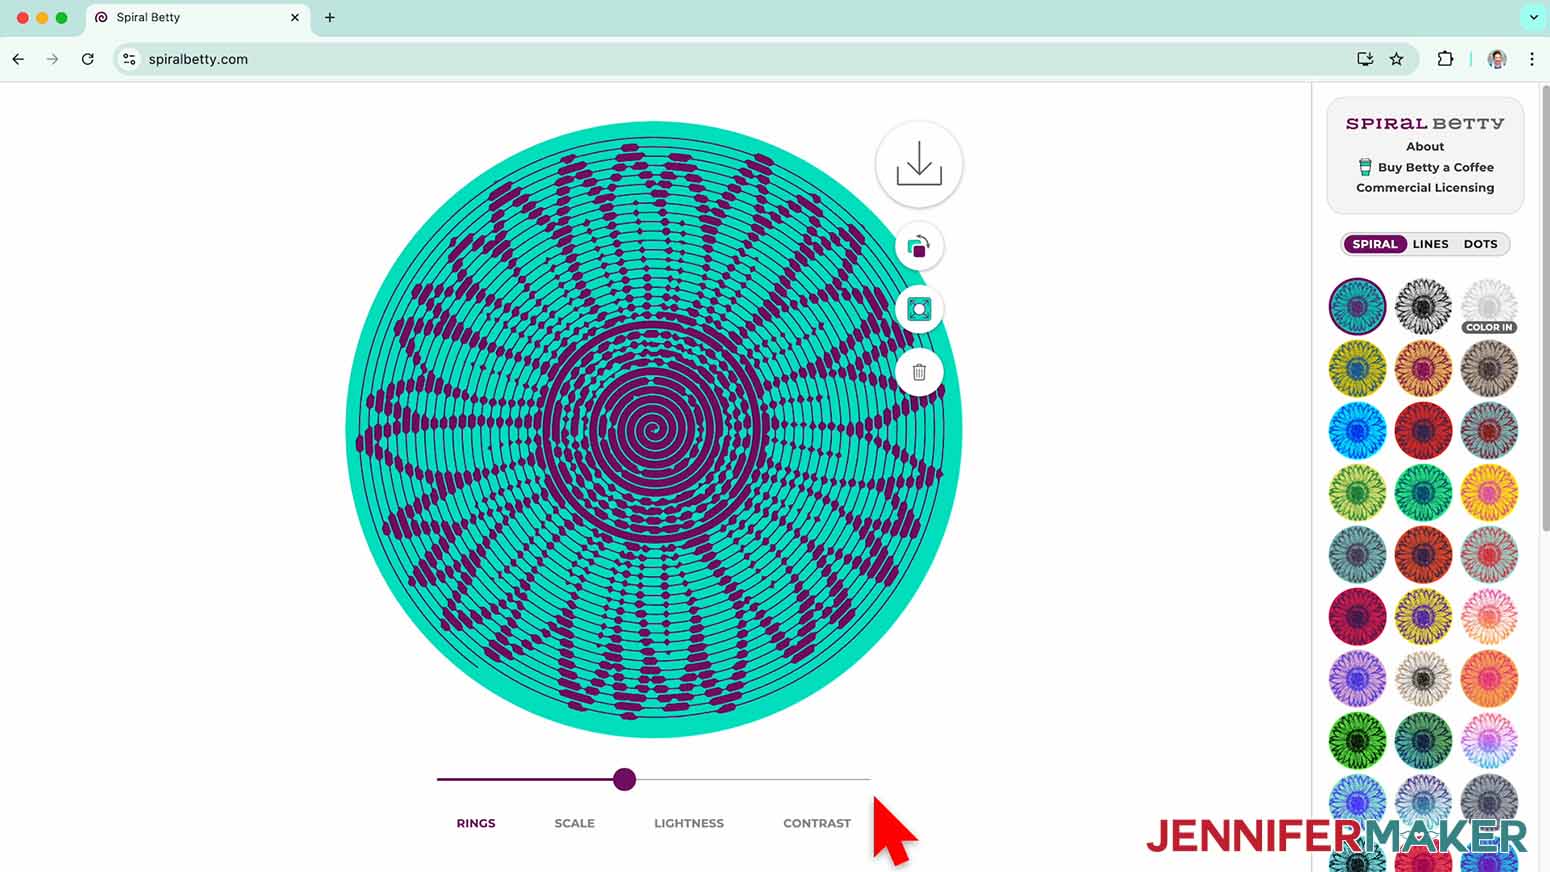
- Select one of the color options to the right (or bottom, depending on your screen size) to help visualize your project.
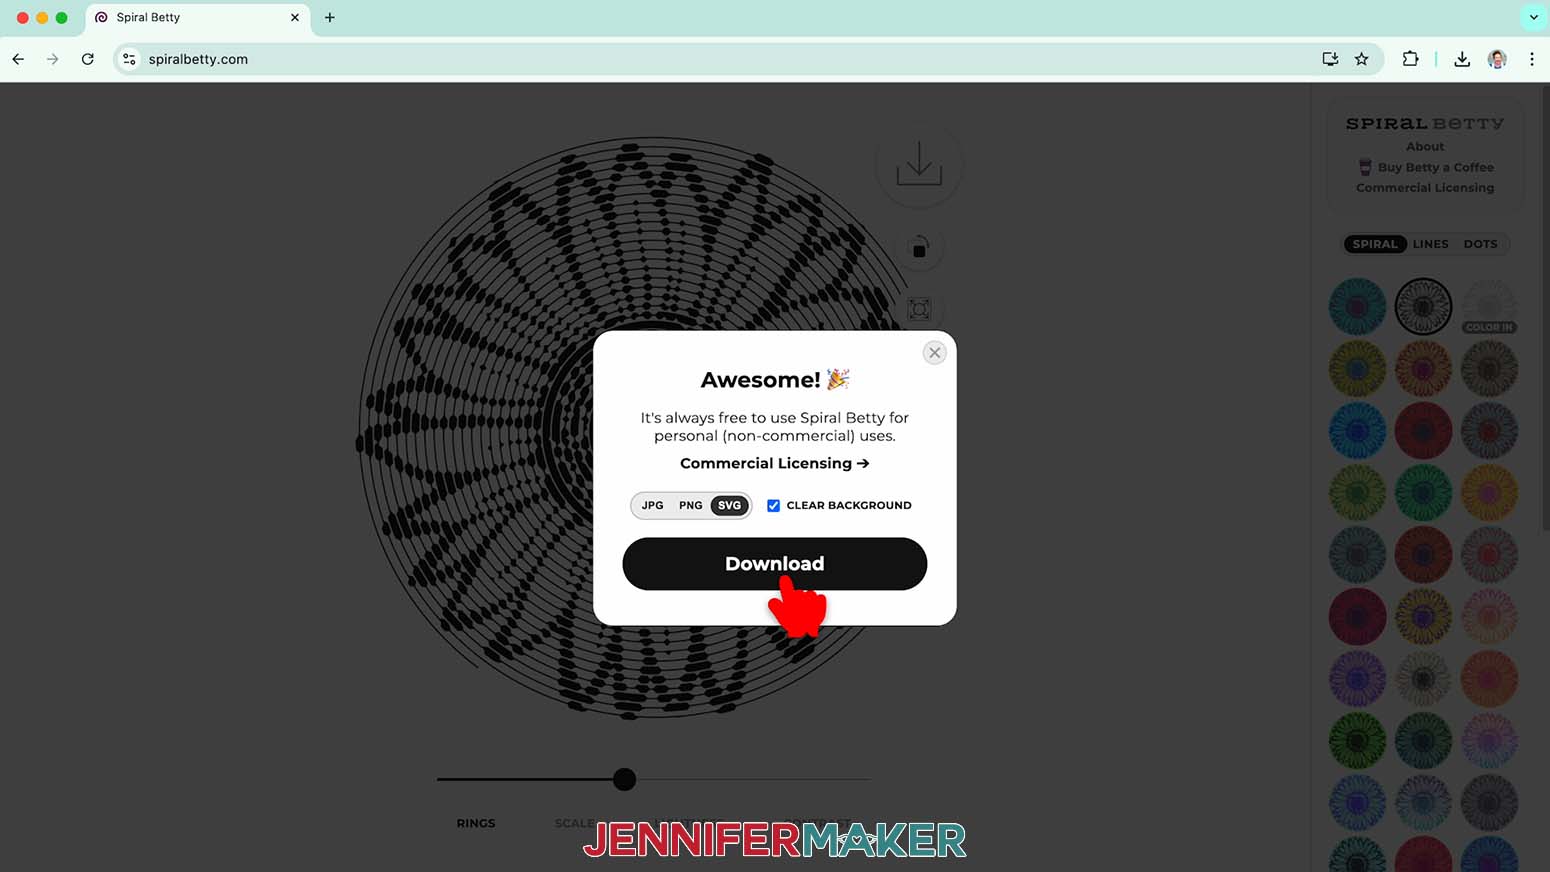
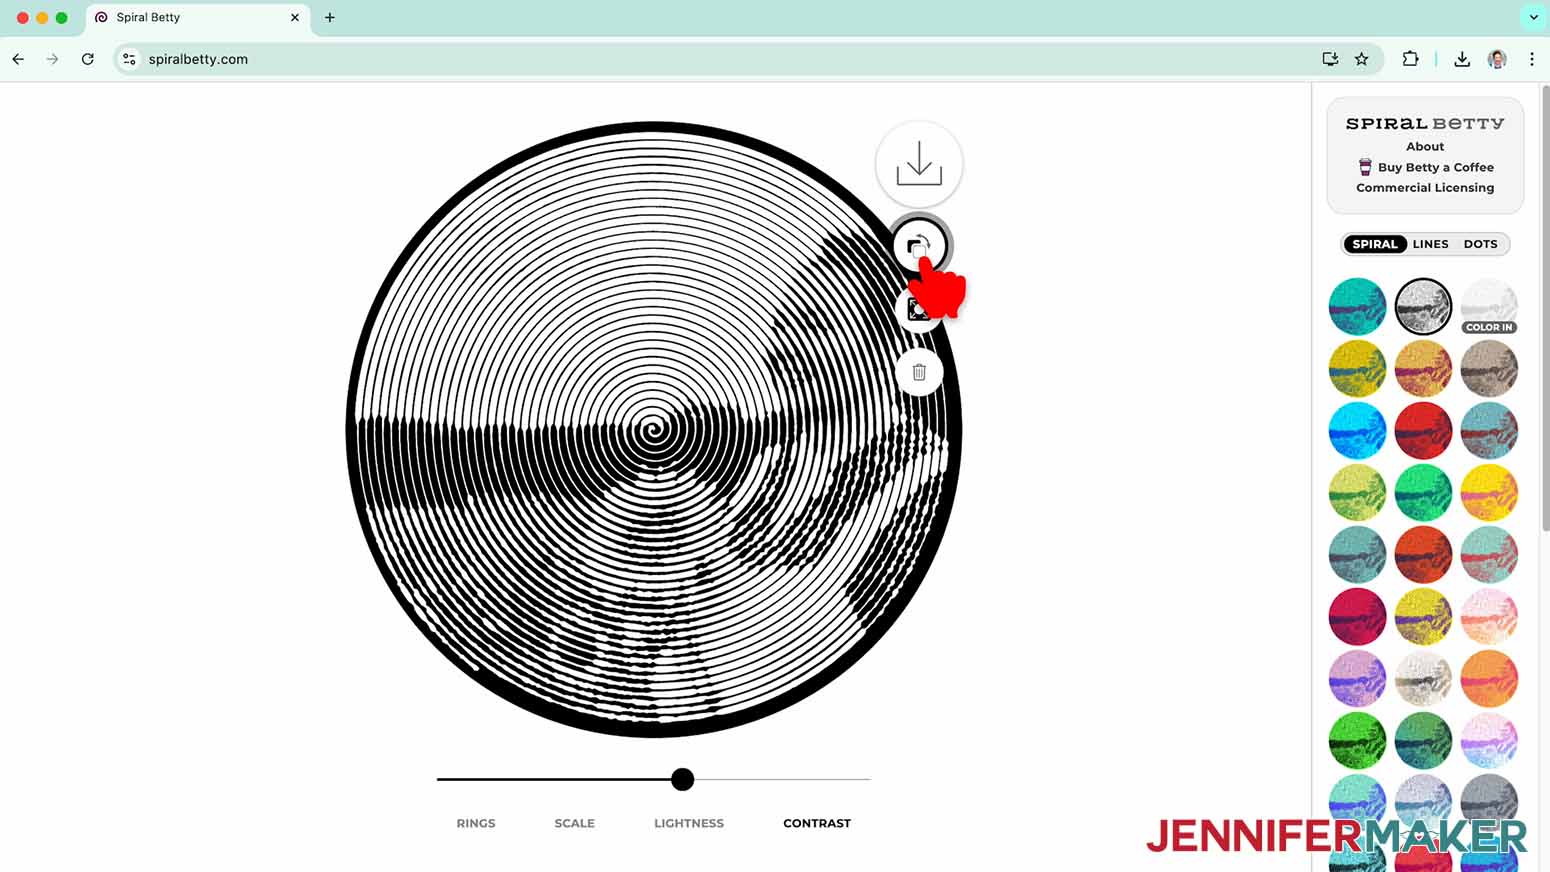
NOTE: Since I’m using black vinyl on white canvas, I’ll click the black and white option. - Next, click the down arrow to the right of the preview window to open the download options.
NOTE: Your image is free to download, but you can click the “Buy Betty a Coffee” button in the top right corner to leave a tip if you like.
NOTE: If you plan to sell or share your images, please purchase a license from SpiralBetty at https://buymeacoffee.com/shalanah/extras. - Click on “SVG” to save your image and check the box next to “Clear Background” to remove the background from your image.
- Click the “Download” button to save your Spiral Betty image.
- To use a personal photo, reset the website by clicking the “Trash Can” icon, then follow Steps 1-6 to add your photo and choose a color layout for your Spiral Betty image.
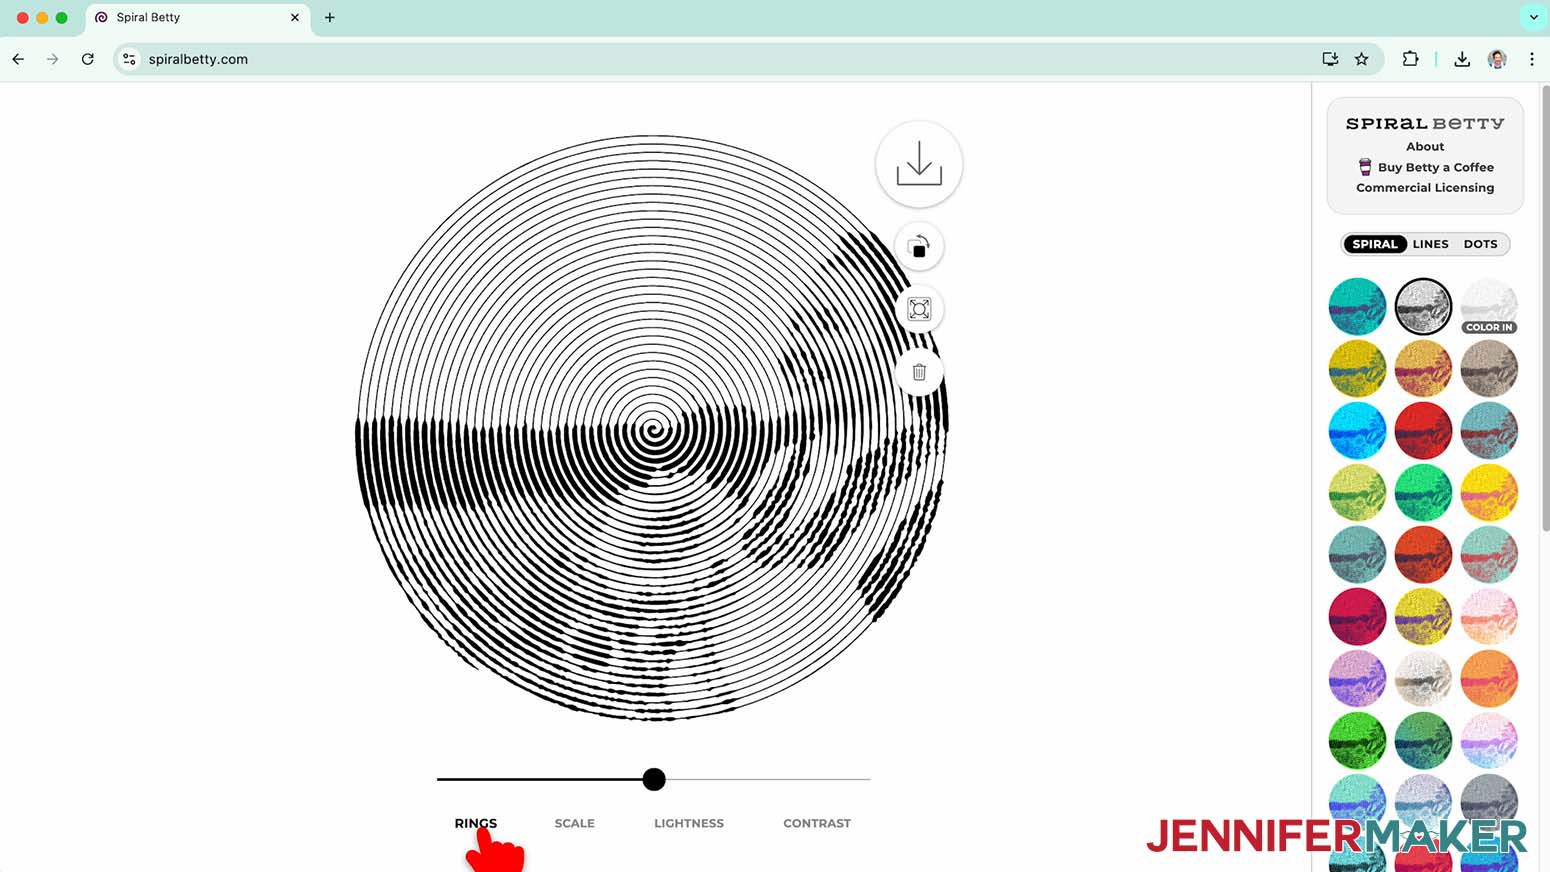
- Below your image upload there are four settings options: “Rings,” “Scale,” “Lightness,” and “Contrast.”
- Click on the “Rings” section and drag the slider to adjust the density of your rings. Drag the slider to the left for thicker rings with more space between them, but a less defined image. Drag the slider to the right for finer rings and a more detailed image.
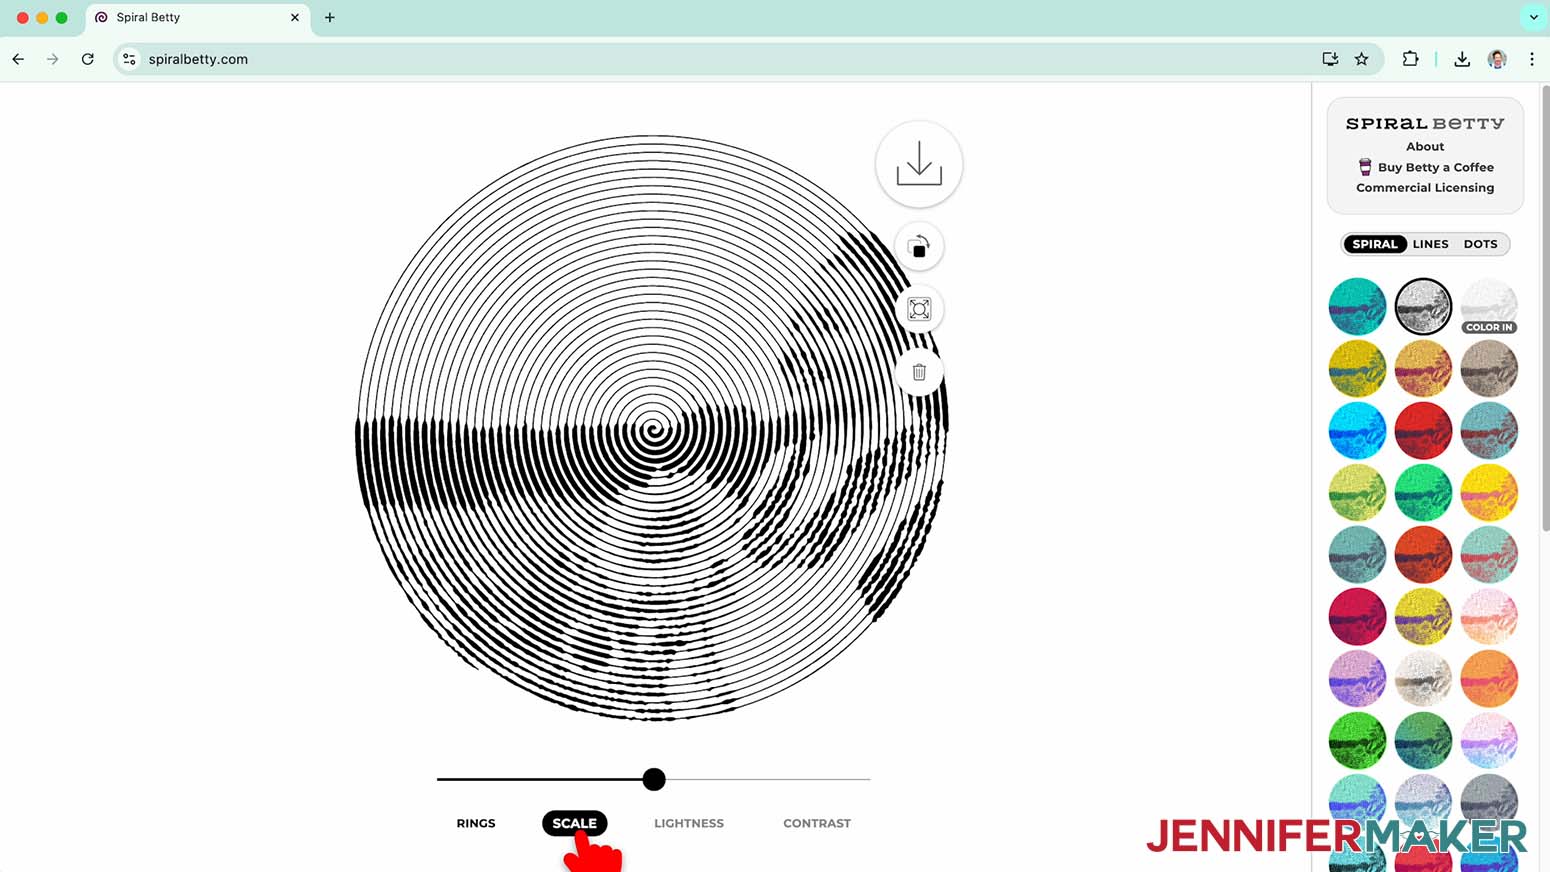
NOTE: I’ll use the default setting as I find it has the best balance between thickness and definition for this project. - In the “Scale” section, use the slider to change the zoom level of your photo. Sliding to the right zooms in, while sliding to the left zooms out.
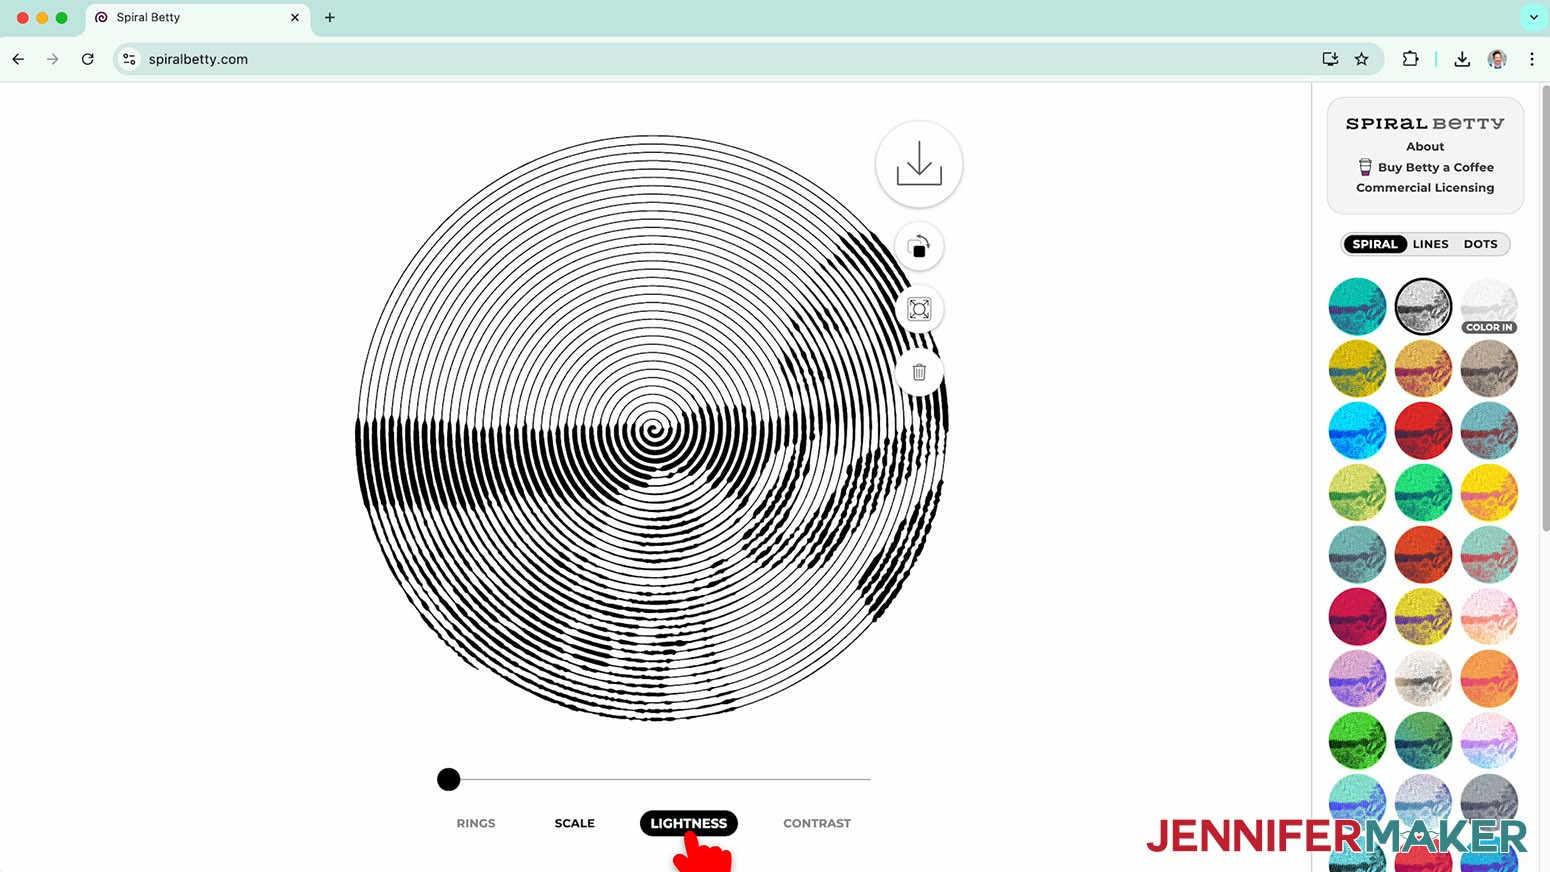
- In the “Lightness” section, use the slider to control the amount of white space between the details in your spiralized photo. This setting can help add definition to your photo’s details.
- In the “Contrast” section, use the slider to make your detailed areas bolder and pull more into focus.
- You can also click the image from any of the sections to crop your photo and adjust the scale or focus on a different area of your photo.
- If you’d like for your line and white space to switch places, click the button with two colored squares and the curved arrow to invert the color options.
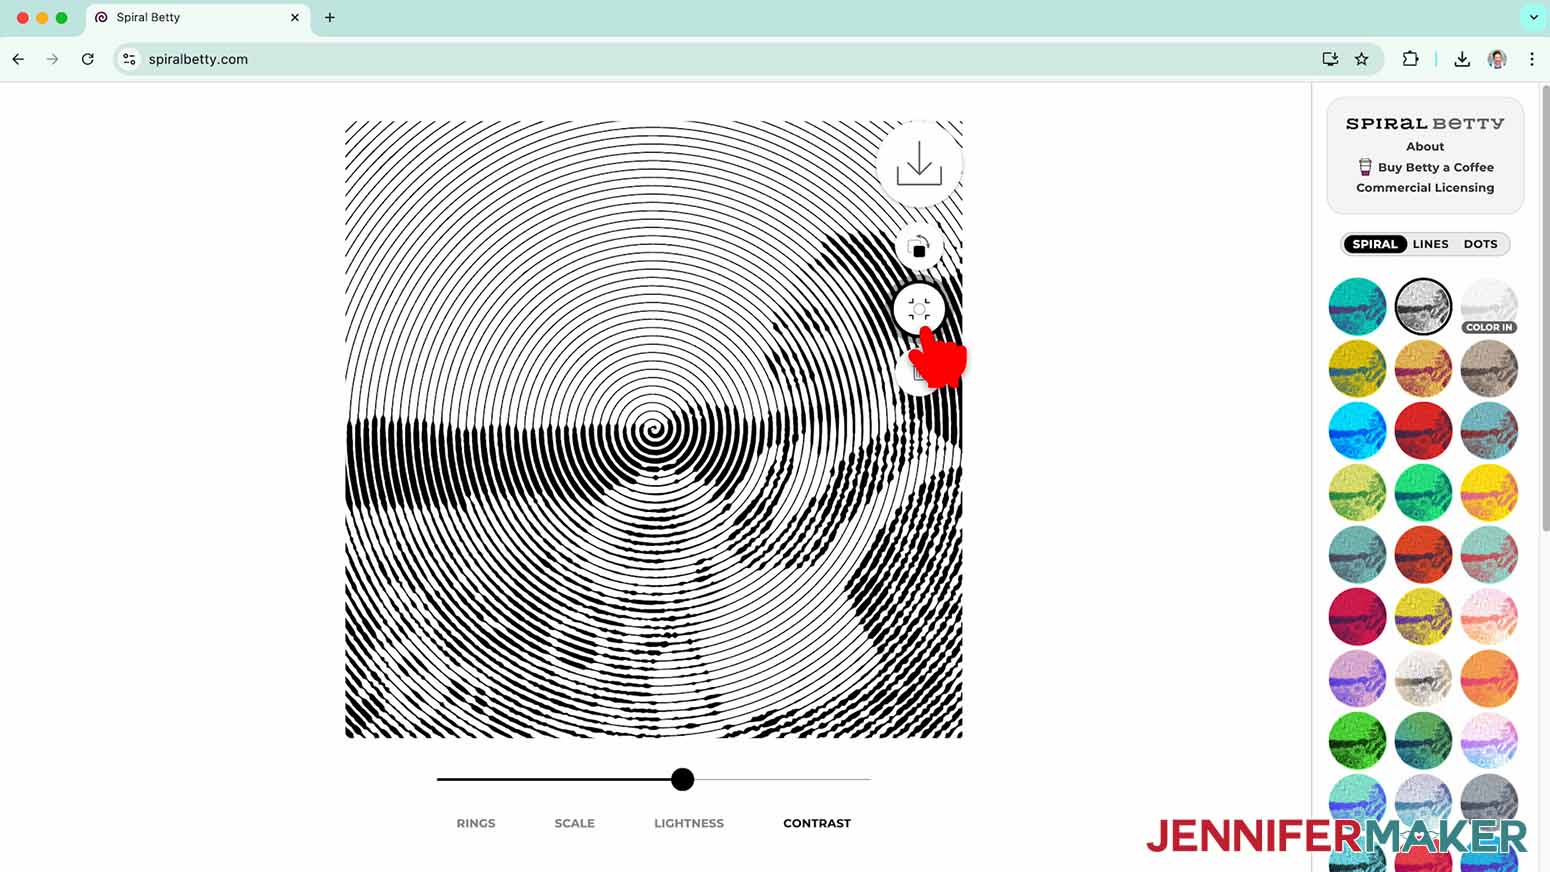
- To switch between the default circular shape and a square shape that takes up the full design area, click the button with the arrows pointing outward at the corner.
- Once you are happy with your design, follow Steps 7-9 to download the Spiral Betty image of your personal photo.


STEP 4: PREPARE AND CUT YOUR SPIRAL BETTY IMAGE
CRICUT DESIGN SPACE
- In Cricut Design Space, open a blank Canvas.
NOTE: If you’re new to using Cricut Design Space, go to cricutkickoff.com for my introductory tutorial on Design Space basics. - Click “Upload” and then “Upload Image.”
- Click “Browse.”
- Select your downloaded Spiral Betty SVG file.
- Click “Open,” and then “Continue.”
- Click “Upload” to add the design to your Canvas.
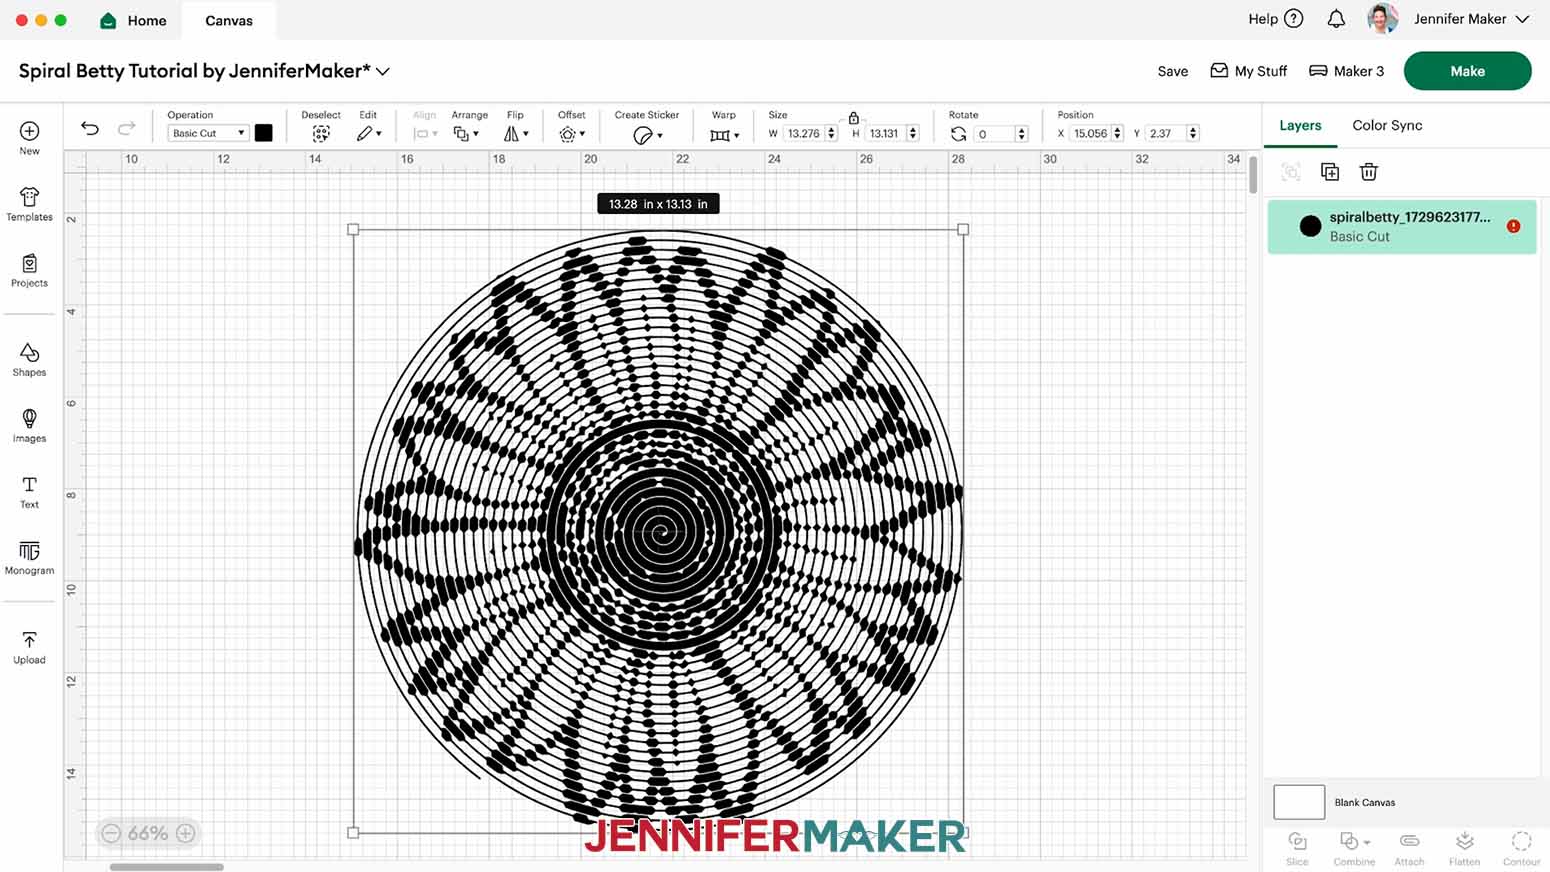
- Click the minus (-) icon in the lower left corner to zoom out and see your entire spiralized image.
- Click “Save” and give your project a name.
- Select your image. With the “Lock” icon closed to maintain proportions, adjust the “Width (W)” field in the Size Menu to fit the image onto your canvas.
NOTE: I’ll enter 10 in the “Width” field so my design will fit on my 12” x 12” canvas with a 1” margin. Design Space will automatically adjust the number in the “Height (H)” field.
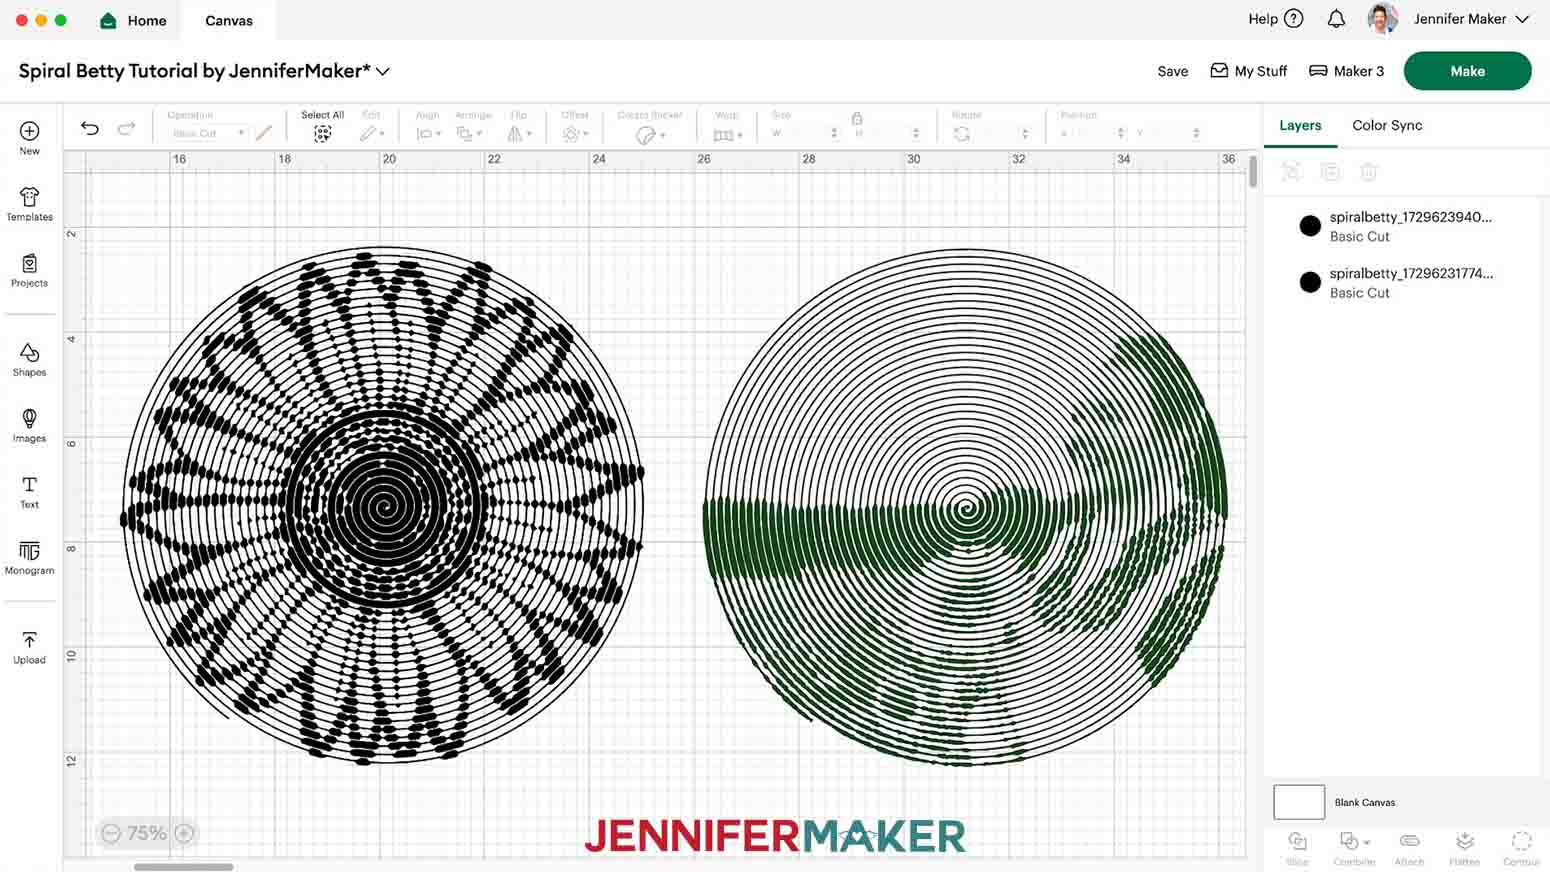
NOTE: You can follow these same steps to prepare your spiral personal photo, as well. - Your project is ready to cut!
CUTTING
- Make sure the correct machine is selected in the top right.
- Click “Make.”
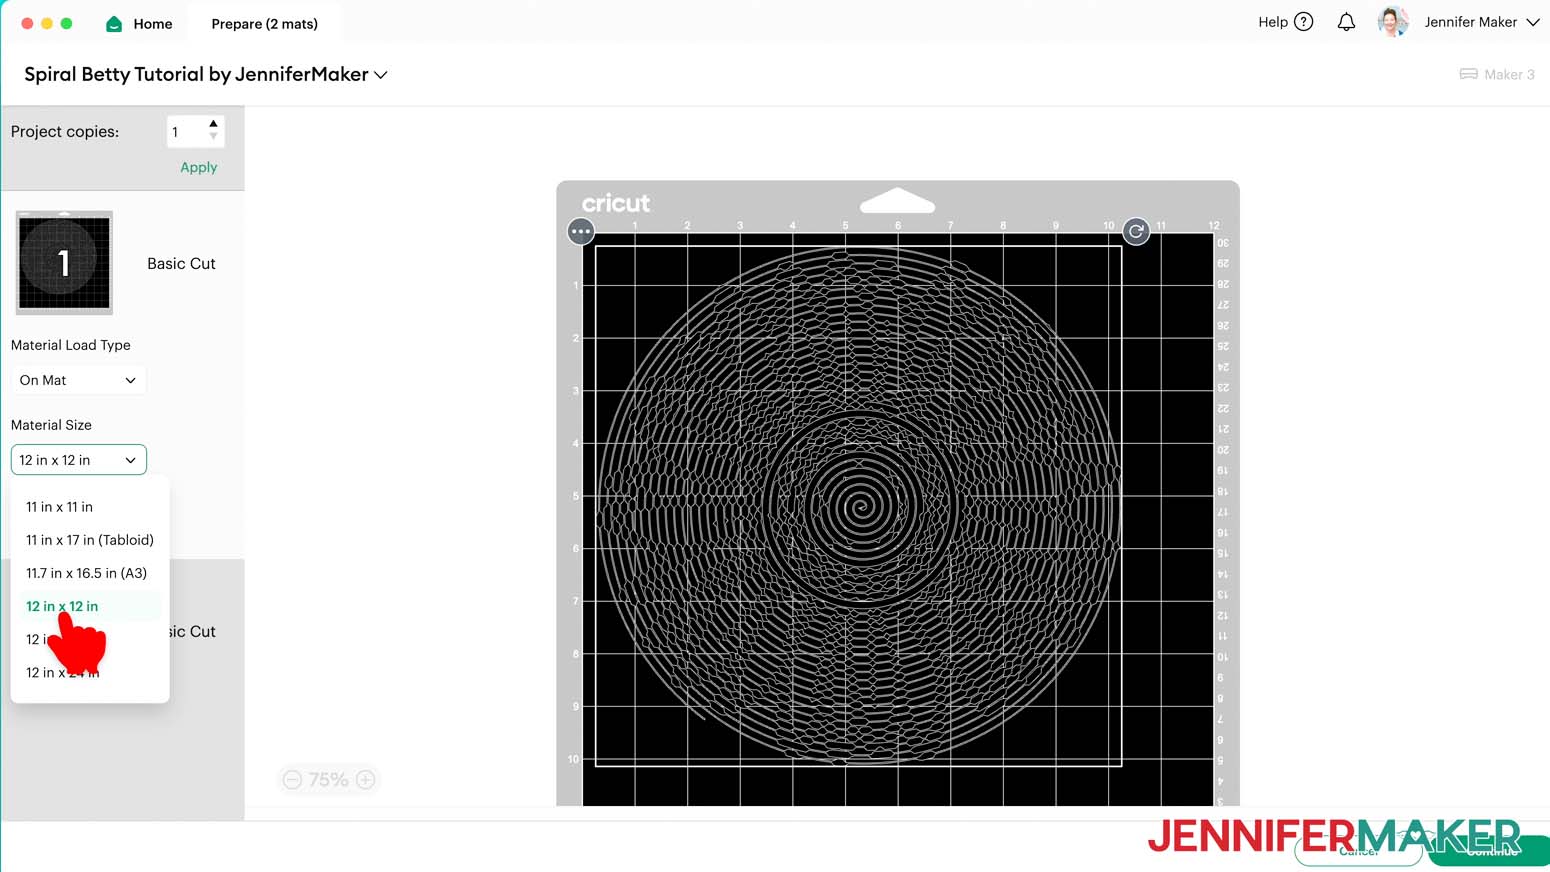
- On the Prepare screen, make sure the correct Material Size is selected for your mat.
NOTE: I’ll use the “12 in x 12 in” option. - If you’re cutting your spiral image from (iron-on) heat transfer vinyl (HTV), toggle on “Mirror” since heat transfer vinyl is cut from the back side of the material.
- Click “Continue.”
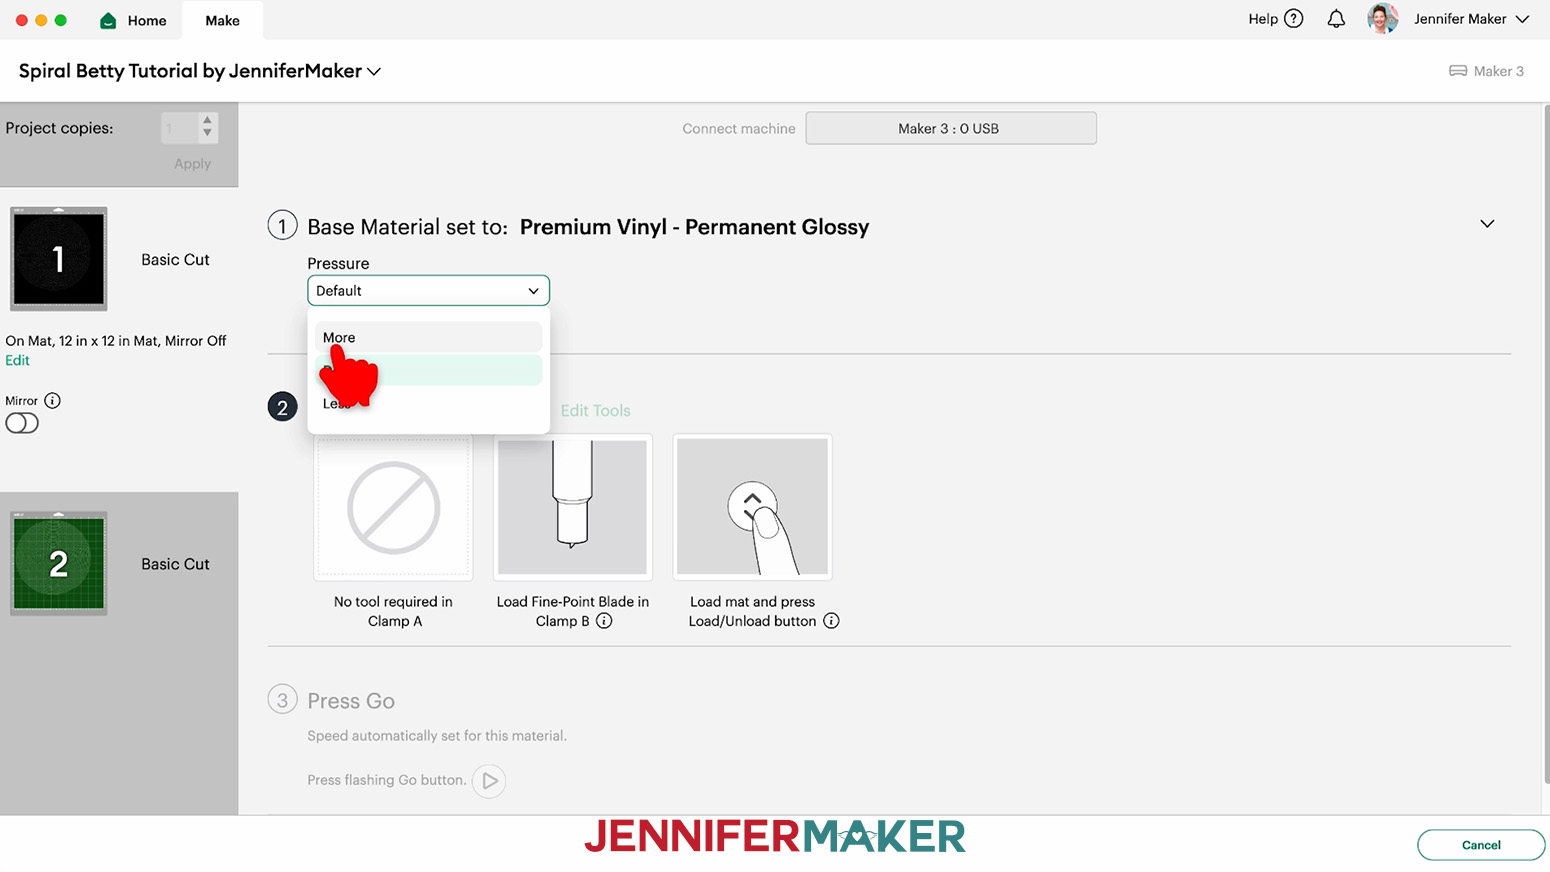
- On the Make screen, set the Base Material for your mat.
For my sunflower Spiral Betty, I’m using the “Premium Vinyl - Permanent Glossy” setting with “More” pressure.
NOTE: If you don’t see “Premium Vinyl - Permanent Glossy” in your list, click on “Browse All Materials,” type in “Glossy” and select “Premium Vinyl - Permanent Glossy.”
For my personal photo Spiral Betty, I’m using the “Everyday Iron-On” setting with “More” pressure.
NOTE: I don’t recommend using permanent vinyl for personal photo Spiral Betty images because the fine details are difficult to cut, weed, and apply.
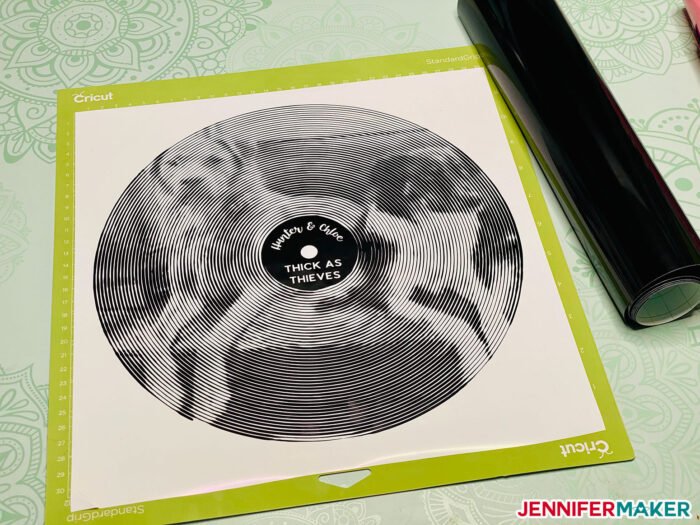
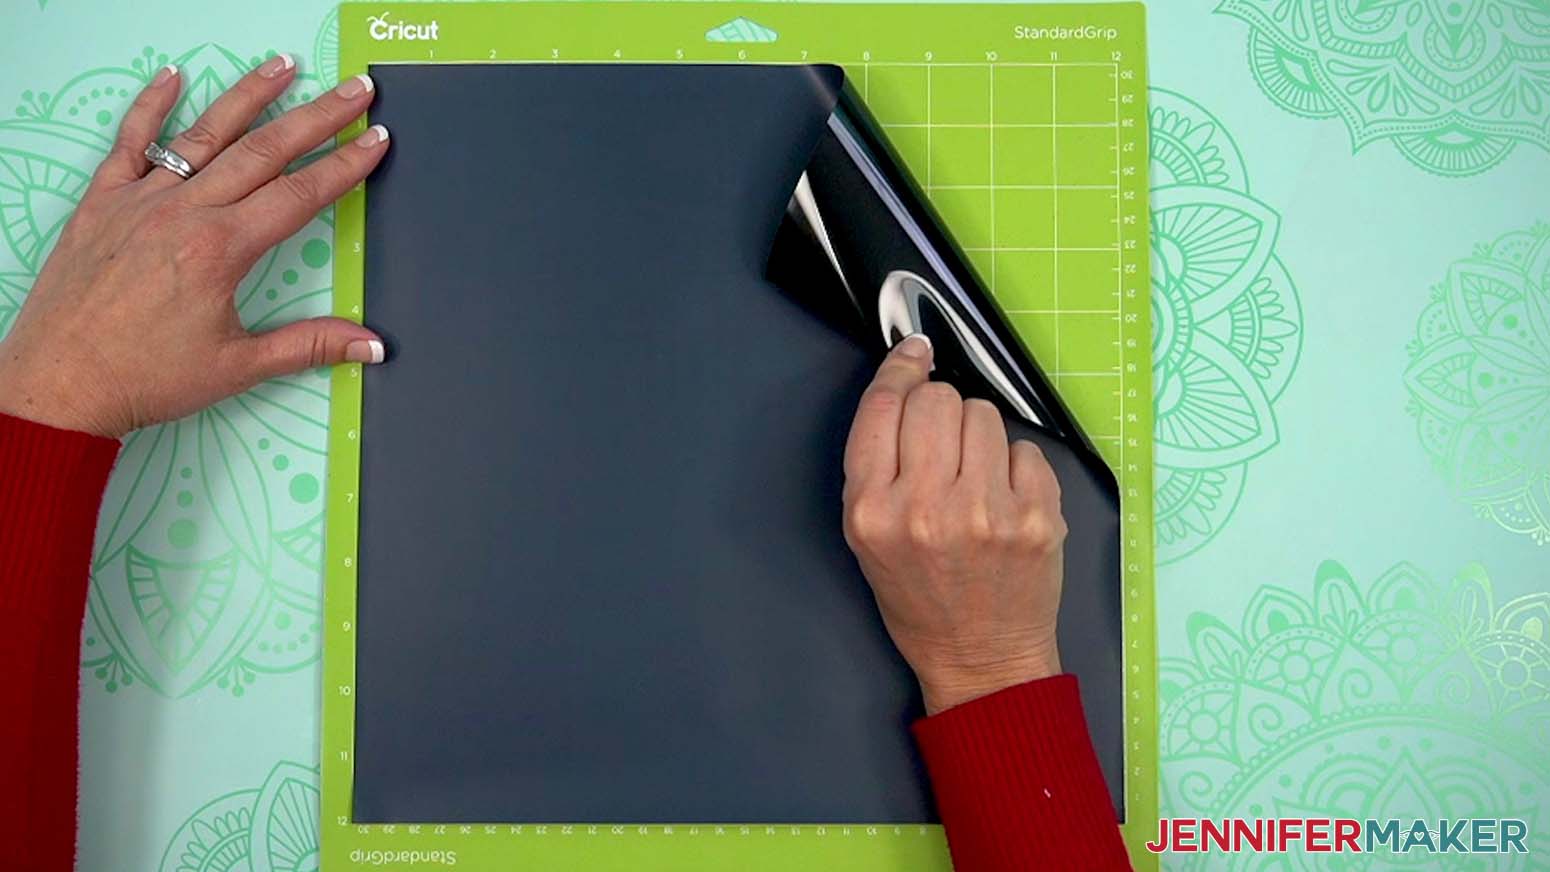
TIP: Changing the Pressure to “More” results in a cleaner cut. - Place your permanent vinyl shiny side up on a green StandardGrip machine mat, or your heat transfer vinyl shiny side down on a green StandardGrip machine mat.
- Use a brayer to make sure it’s fully adhered.
- Check that your Premium Fine-Point Blade is clean and in the clamp.
- Press the flashing “Load/Unload” button to load the prepared mat into your Cricut.
- Press the flashing “Go” button to begin cutting.
- When your permanent vinyl has finished cutting, don’t unload the mat right away. Gently lift a corner of the material to make sure the cuts went all the way through. If not, press the “Go” button again to make a second pass of cuts in the same spots.
NOTE: Cuts should go through the material, but not the carrier sheet. - When the cuts are complete, unload the mat, flip it over onto your work surface, and roll it back to release the vinyl.
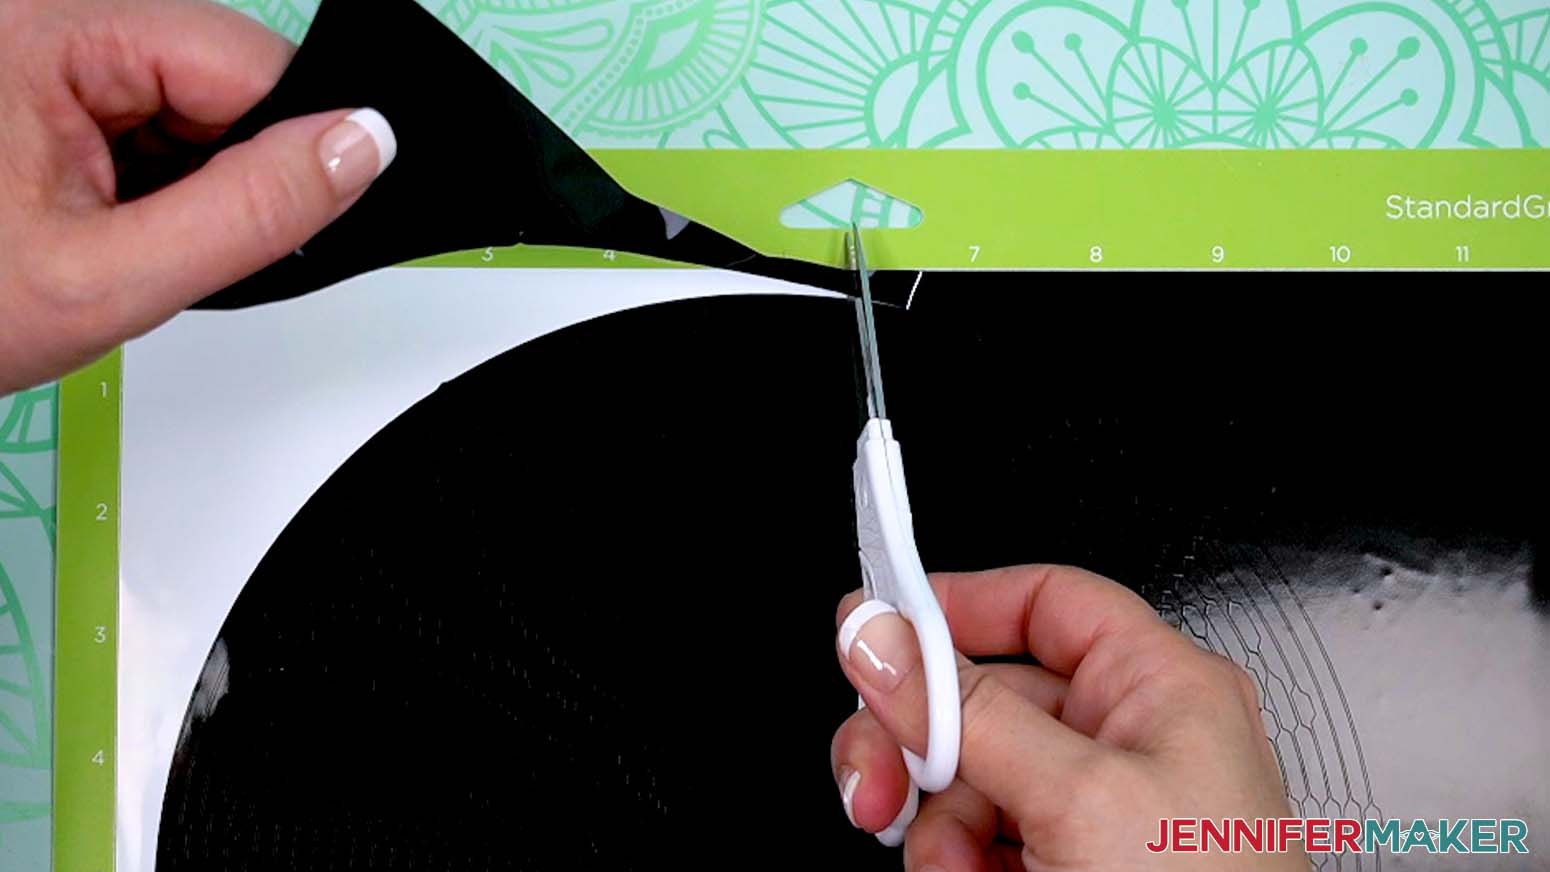
TIP: If you have any issues with your cuts, go to jennifermaker.com/cleaner-cuts. - Use your weeding tool to carefully lift an upper corner of the sunflower’s permanent vinyl, then peel away the excess vinyl around the design to find the start of the spiral in the lower left corner.
- Use scissors to cut away the large background sections of vinyl that have already been lifted to keep it from re-sticking to your design.
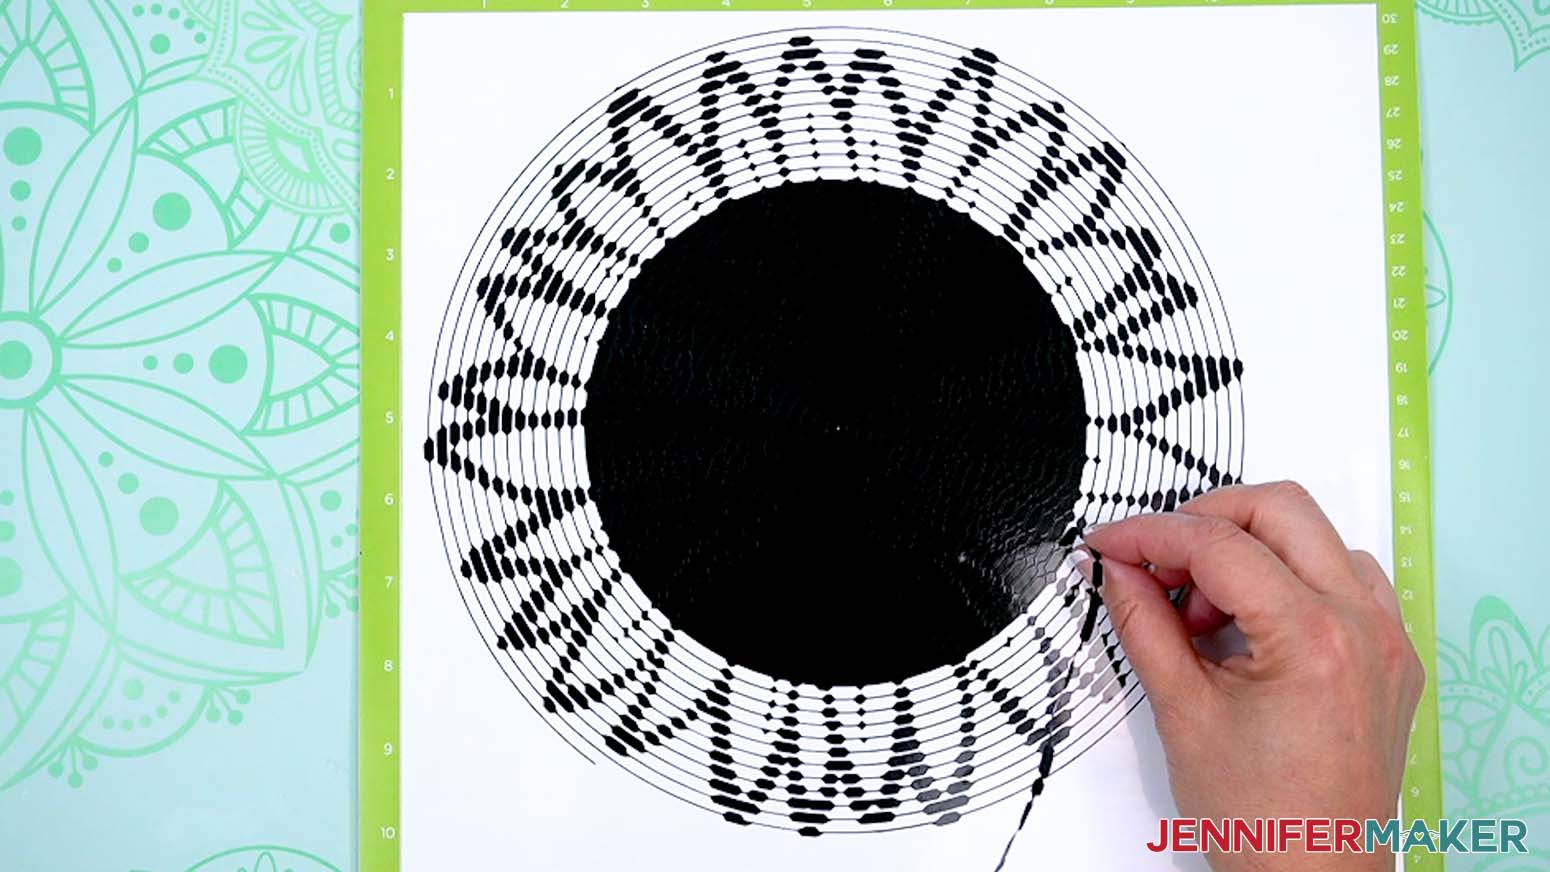
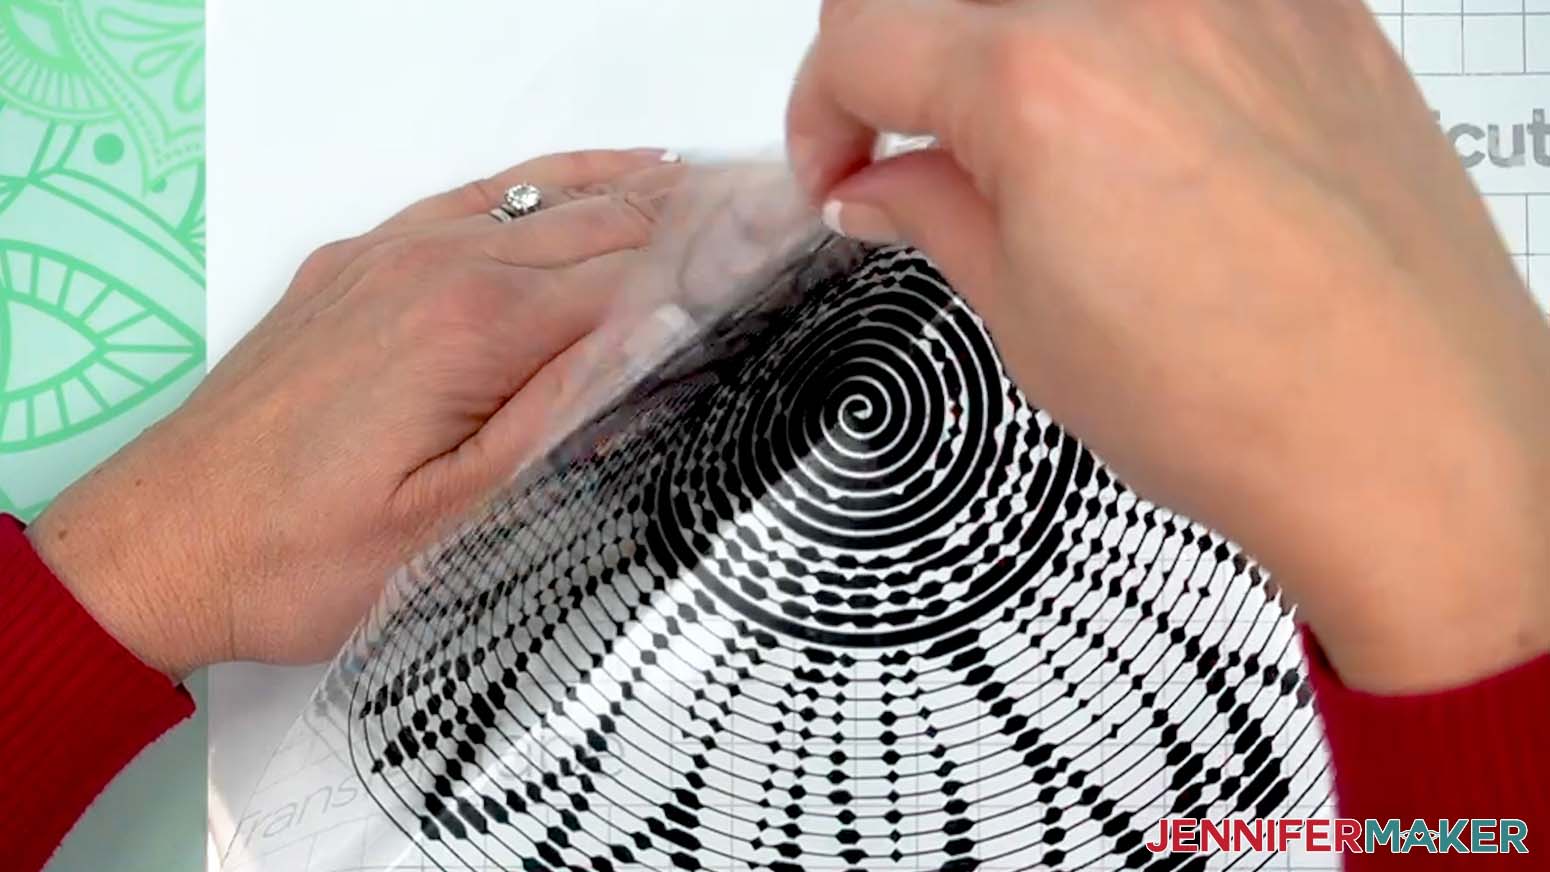
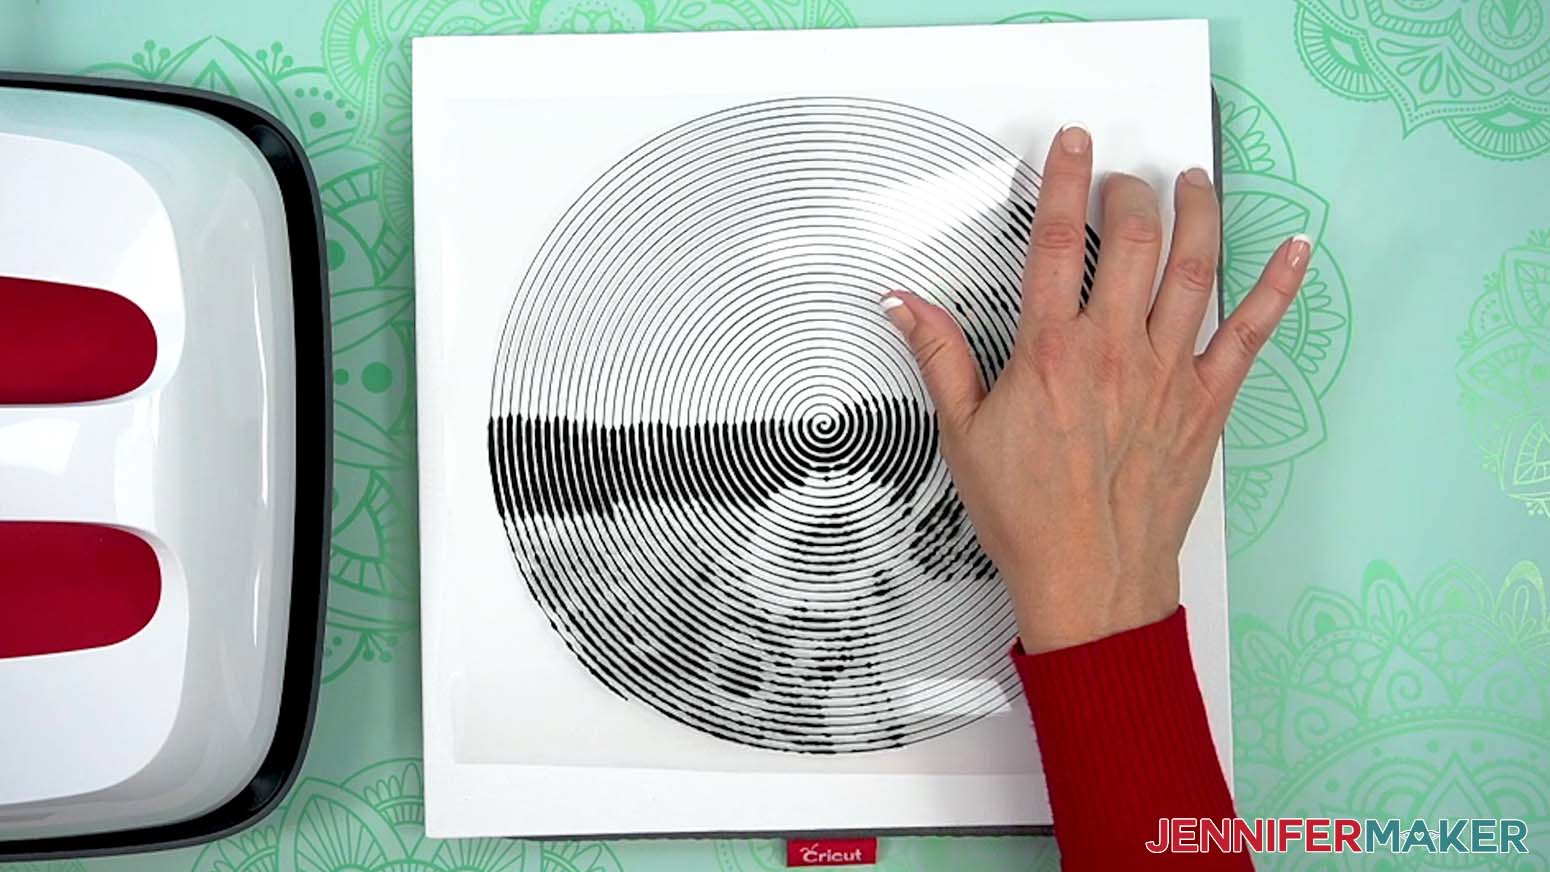
- Use your weeding tool to carefully pull up the vinyl at the start of the spiral, then use your fingers to carefully peel away the excess vinyl until you reach the end in the center of the design.
NOTE: Start at the corner edge of your vinyl to make sure you weed its negative parts. Don’t start in the middle, or you might peel the wrong part off!
TIP: Weed slowly to avoid breaking your design’s delicate lines. If any lines come up, gently pat them back in place and try again.


STEP 5: APPLY THE SPIRAL BETTY VINYL DECAL TO YOUR CANVAS
APPLY THE PERMANENT VINYL TO YOUR CANVAS
- Lay the Spiral Betty vinyl decal face up on your work surface.
- Cut a piece of StandardGrip transfer tape just larger than the decal.
- Remove the backing from the transfer tape.
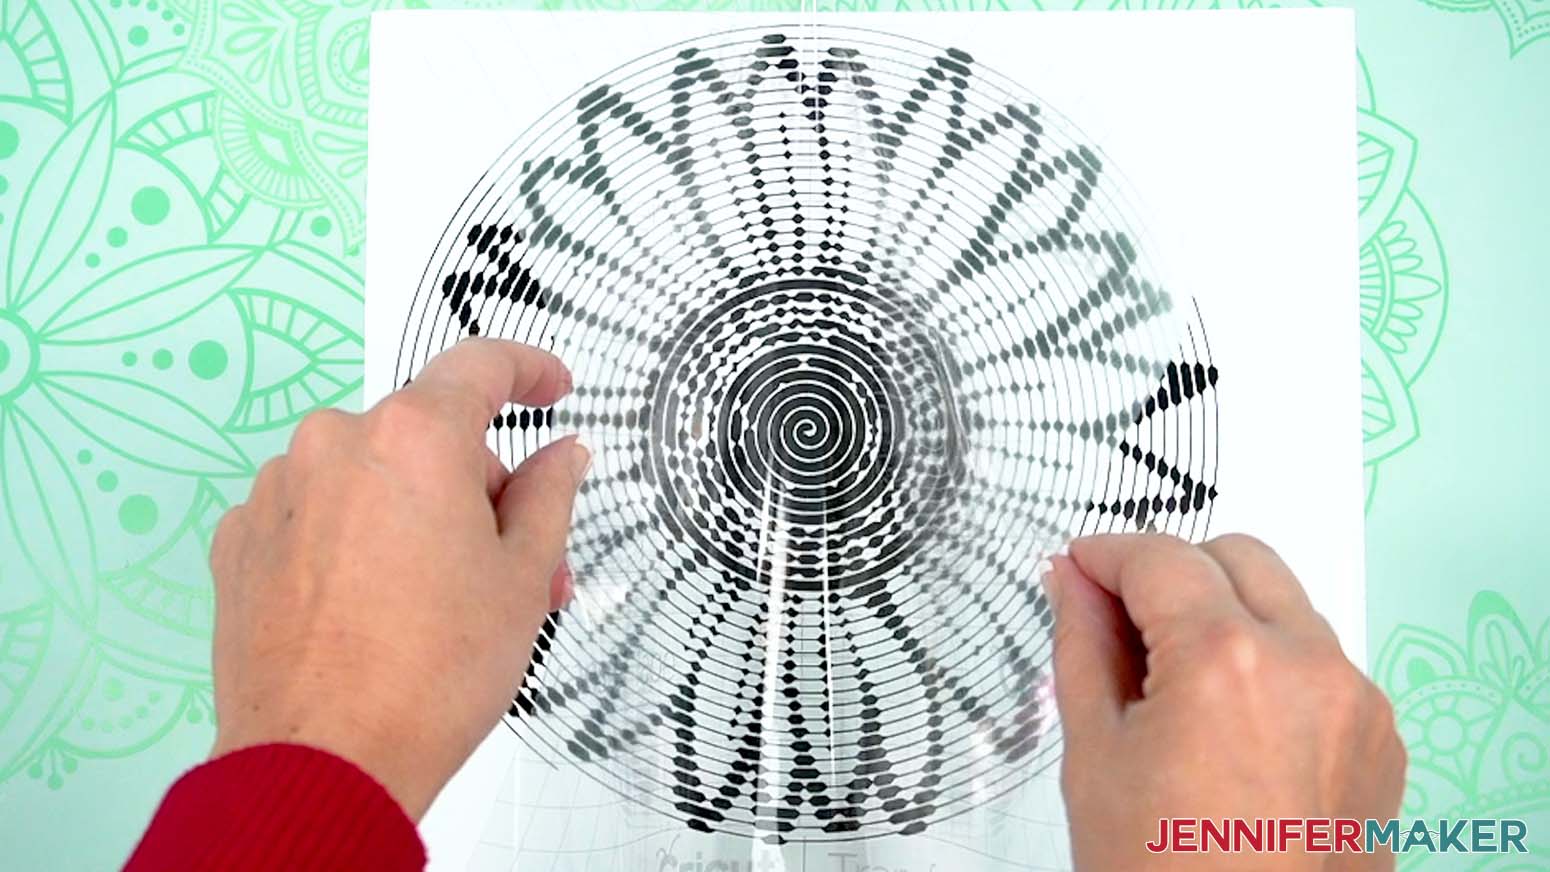
- Hold your transfer tape in the shape of a “taco” sticky side down, then put the bottom of the “taco” onto the middle of your decal.
- Smooth the transfer tape over the decal from the center outward and burnish it down using the Scraper Tool. Then flip the design over and burnish on the back as well.
- Flip the design right side up again and gently lift the transfer tape and vinyl off the carrier sheet.
TIP: If any pieces of the decal cling to the carrier sheet instead of transferring to the tape, lay the sheet back down, burnish the area with your scraper, and carefully try again. - Lay your canvas textured-side up on your work surface.
- Lightly center your decal on the canvas, but don’t press down yet.
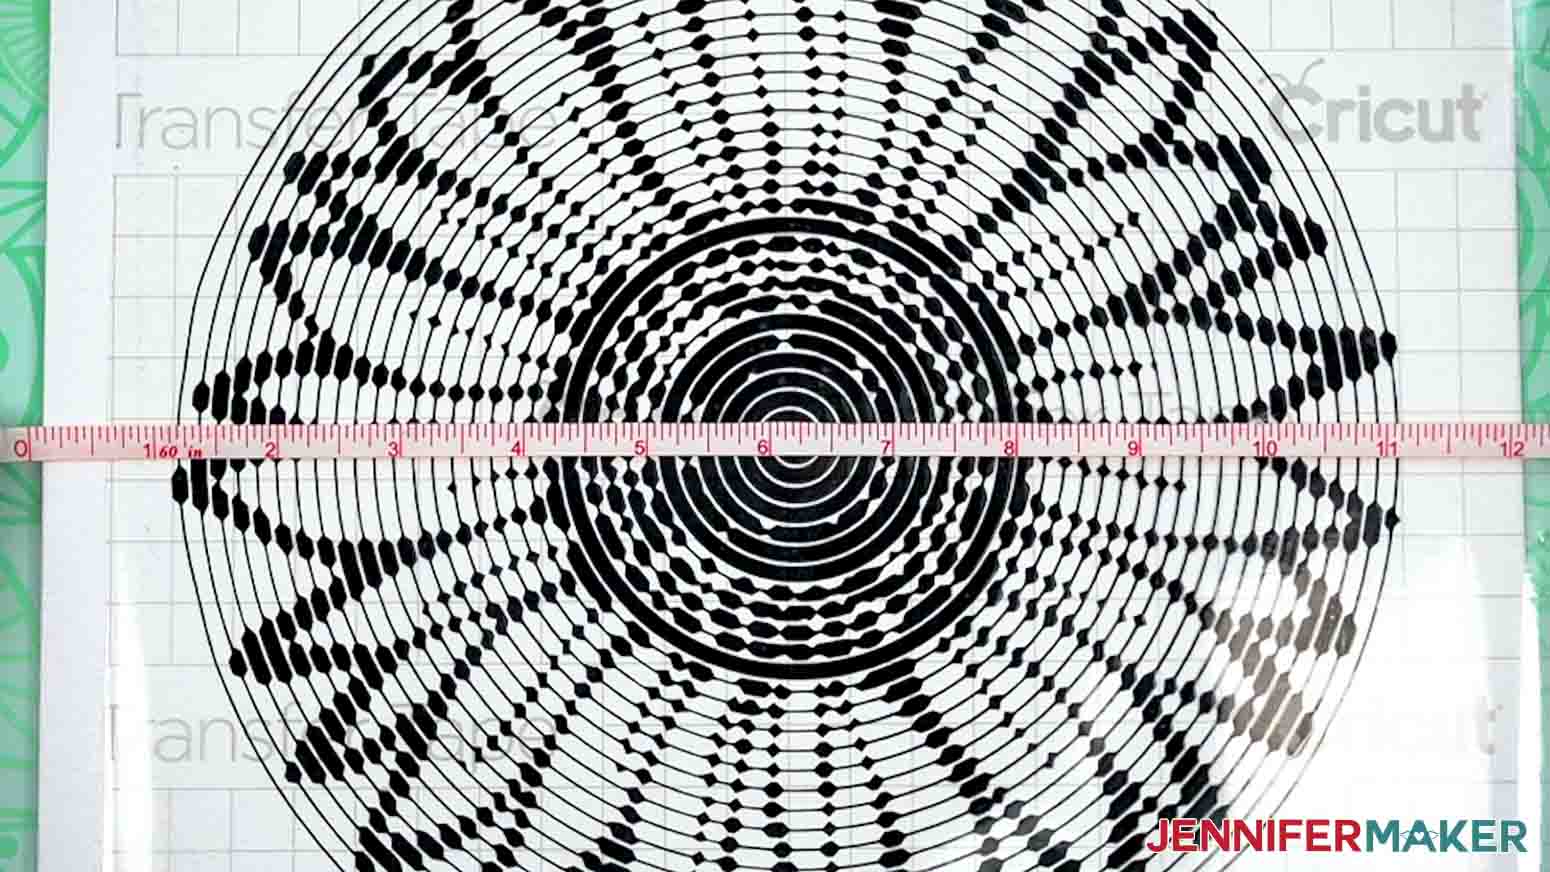
- Use a measuring tape to make sure the decal is 1” away from all four sides. Adjust as needed to center the design exactly.
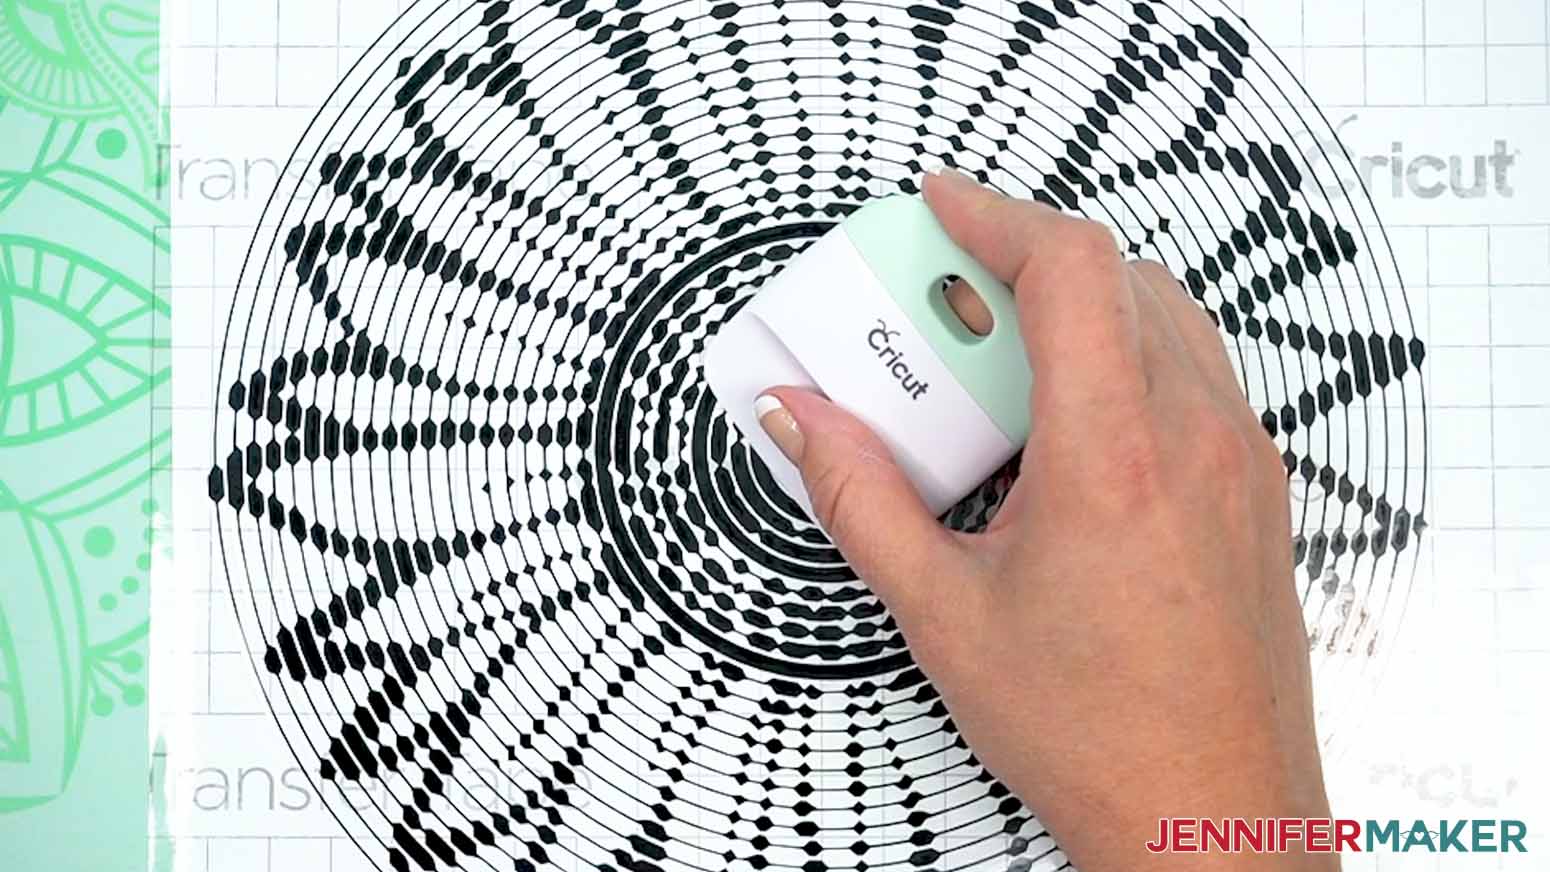
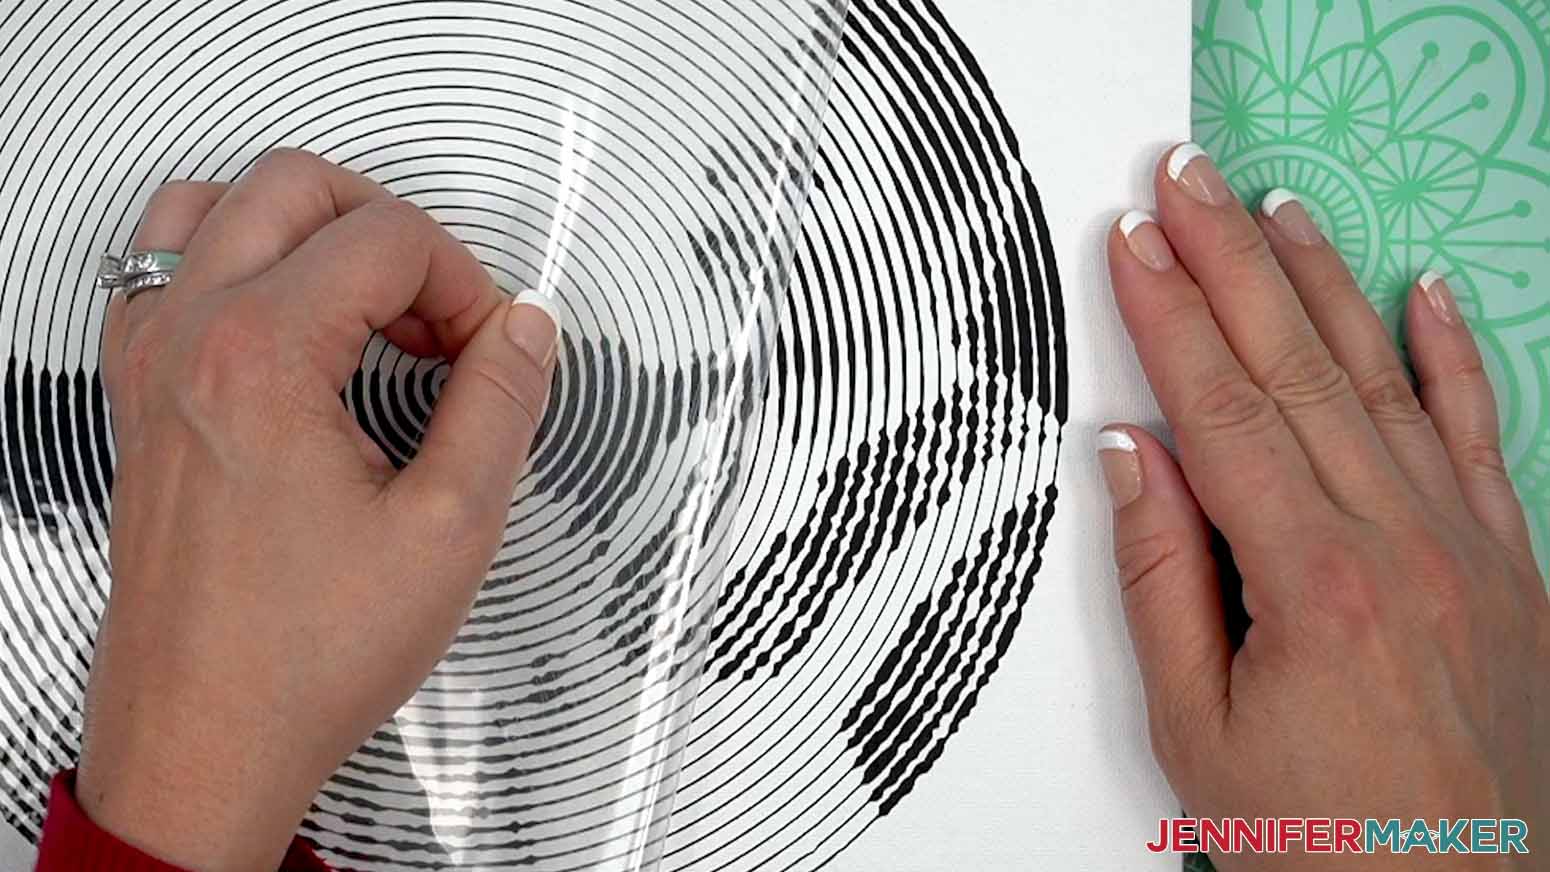
- Once the decal is in place, burnish it firmly onto the canvas, starting in the center of the design and working your way out.
- Starting in a corner, carefully peel the transfer tape away from the vinyl, burnishing down any vinyl that lifts from the surface as you go. The lines are delicate, so be patient!
TIP: It can be helpful to pull your transfer tape parallel to the canvas while peeling it away.
APPLY THE IRON-ON DECAL TO YOUR CANVAS
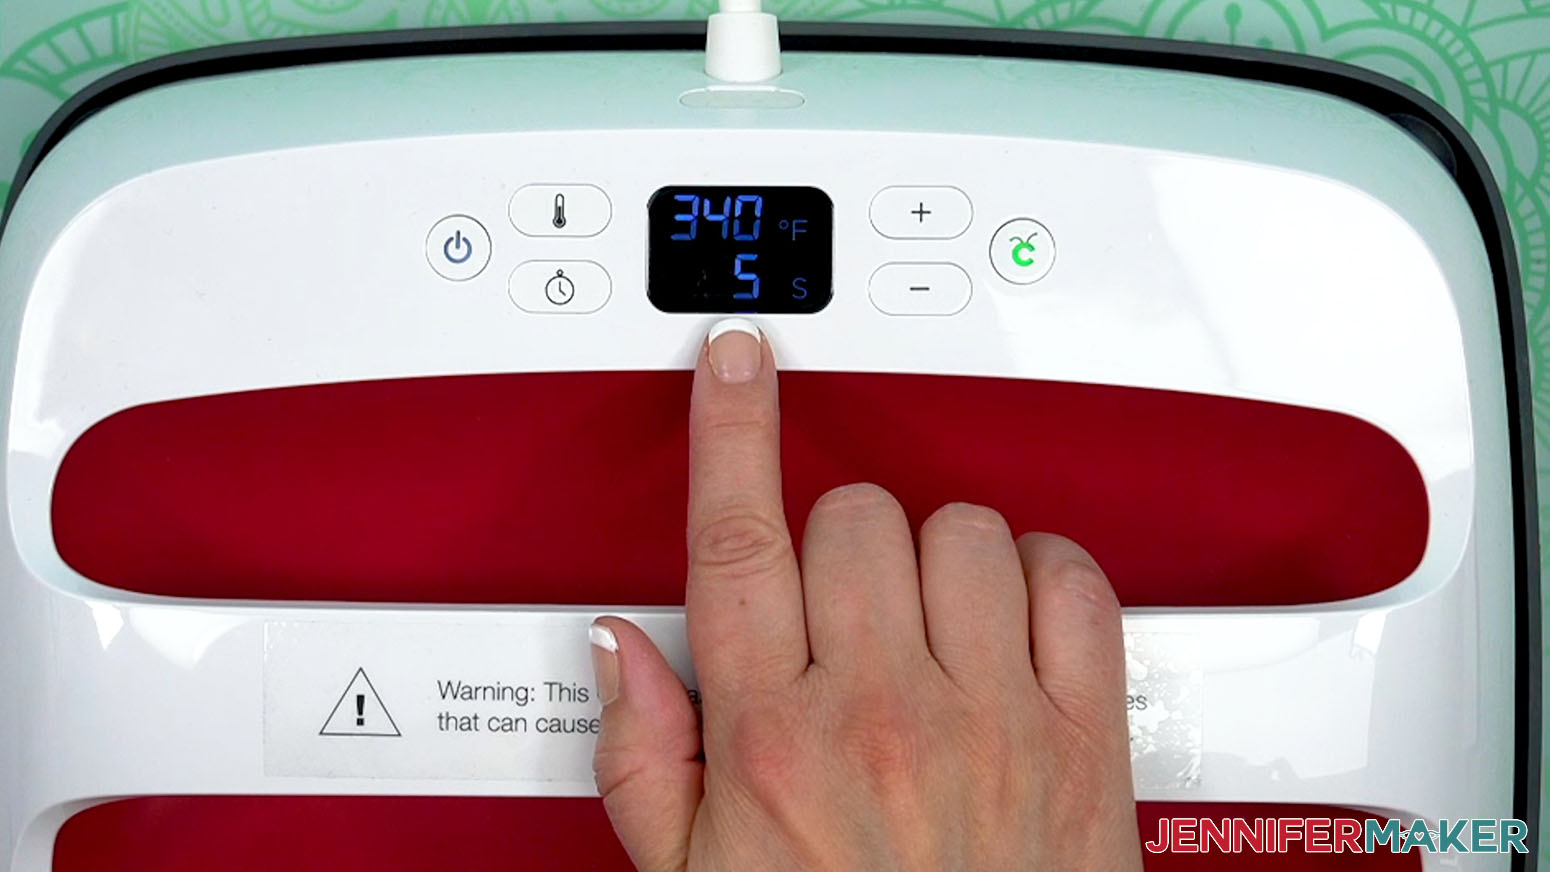
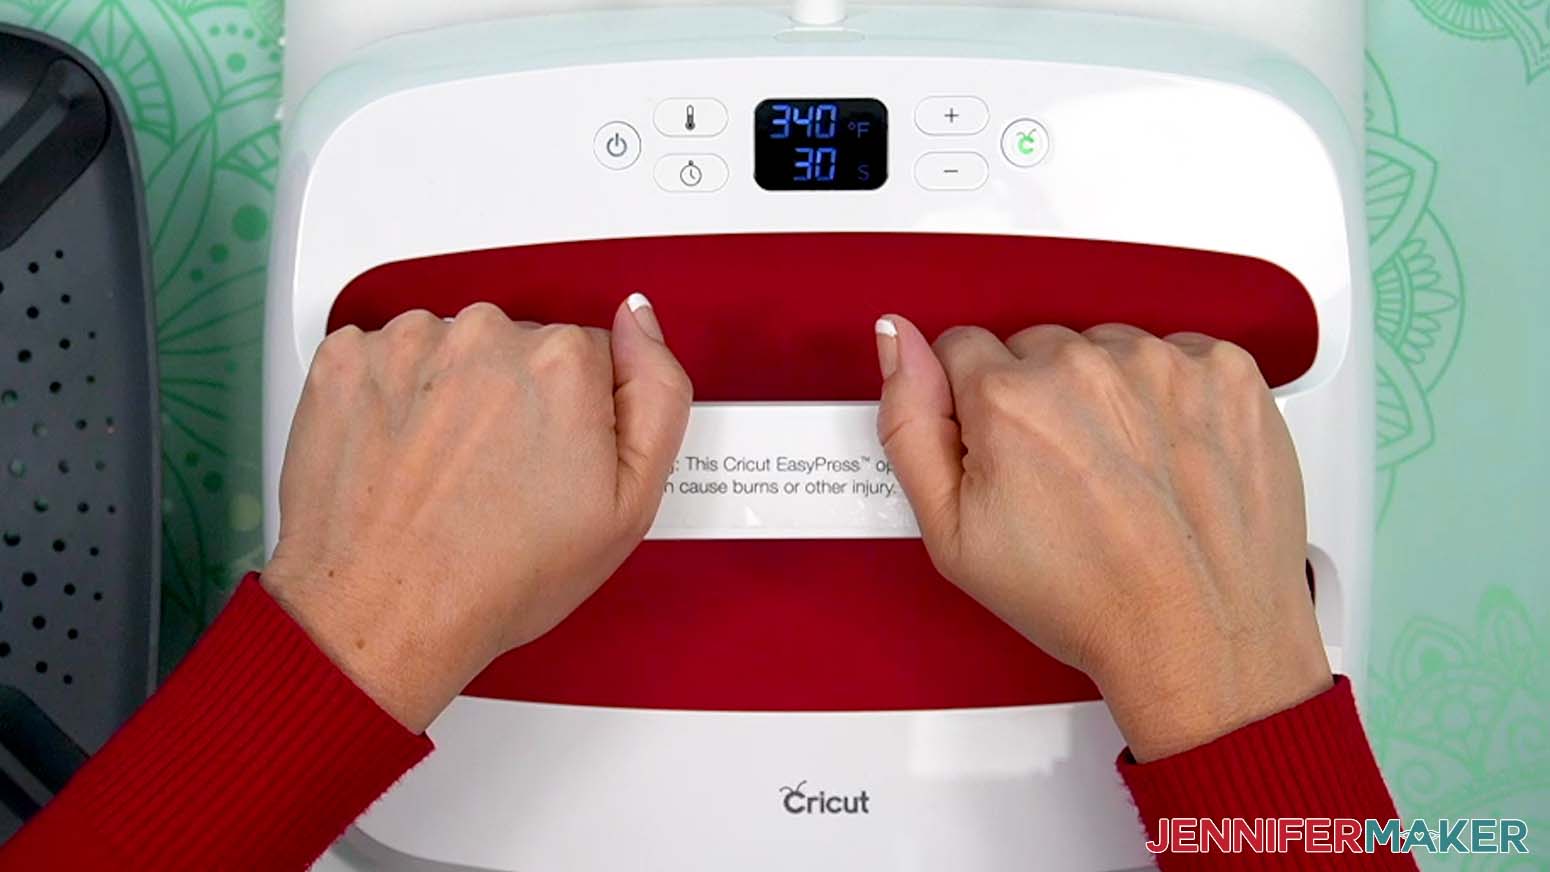
- Preheat your heat press.
NOTE: I’ll use the Cricut EasyPress set to 340°F (171° C) with the timer set for 5 seconds. If you’re using a different heat press or type of iron-on vinyl, my HTV Cookbook has recipes for many combinations! You can find it at jennifermaker.com/htv-cookbook. - Place your canvas textured-side up on a pressing mat.
- Use a lint roller to clean the front cover of your canvas.
- Once your EasyPress is at temperature, cover the canvas with a sheet of white, uncoated butcher paper, then use the press to preheat the entire front cover for 5 seconds to remove moisture.
NOTE: Always remember to place your press back on the base after use because it’s very hot. - Remove the butcher paper and allow the canvas to cool.
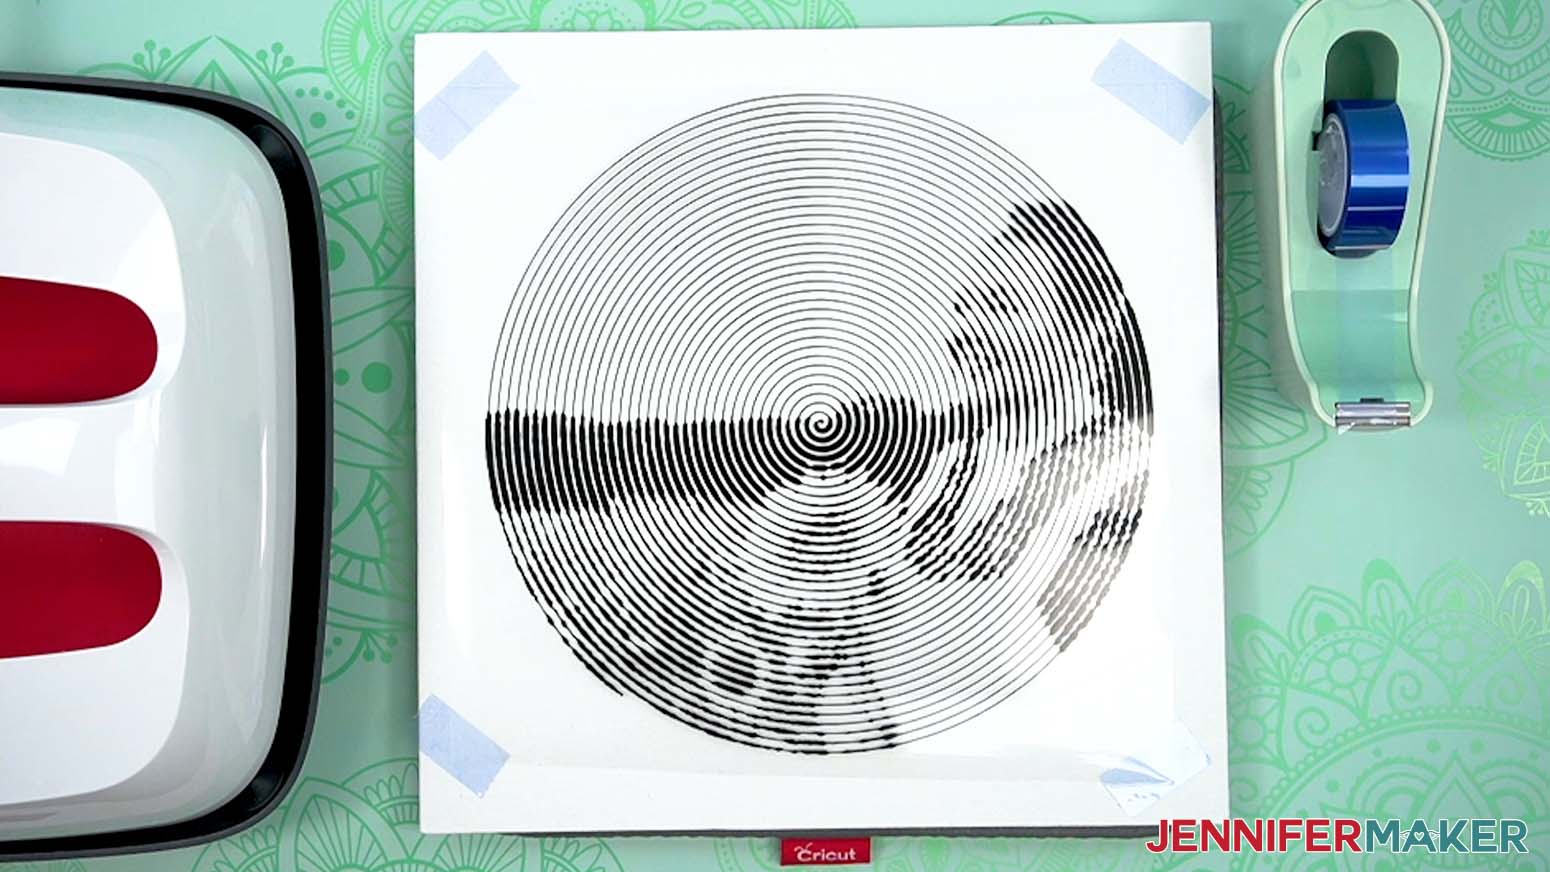
- Center your Spiral Betty photo decal vinyl-side down on the canvas, making sure the decal is 1” away from the edge on all four sides.
TIP: If your alignment isn’t quite right, lift up the carrier sheet to move and reposition the decal.
NOTE: If you’re unsure of the design’s orientation, refer back to your Design Space Canvas. - Press down on the sticky parts of the clear carrier sheet to keep it in place.
- Tape down the carrier sheet’s corners with heat-resistant tape to keep the decal in place while pressing.
- Cover the canvas with a sheet of white uncoated butcher paper.
- Make sure the temperature of your EasyPress is at 340℉ (171℃), and set the timer for 30 seconds.
- Heat the entire decal on the canvas with strong pressure for the entire length of the timer.
TIP: If you can’t heat the entire design at once, try to heat it evenly in sections without much overlap. - When the time is up, lift the press straight up and remove the butcher paper.
- Allow the vinyl to cool, then slowly peel up the carrier sheet.
- If any vinyl areas don’t stick well, replace the carrier sheet and re-press in 15 second increments until the vinyl is fully adhered, allowing time to cool between presses.
NOTE: It can be easy to miss areas of the spiral’s thin vinyl that don’t adhere, so double check your pressing.
STEP 6: SHOW IT OFF
You now have an impressive Spiral Betty Canvas to hang on your wall!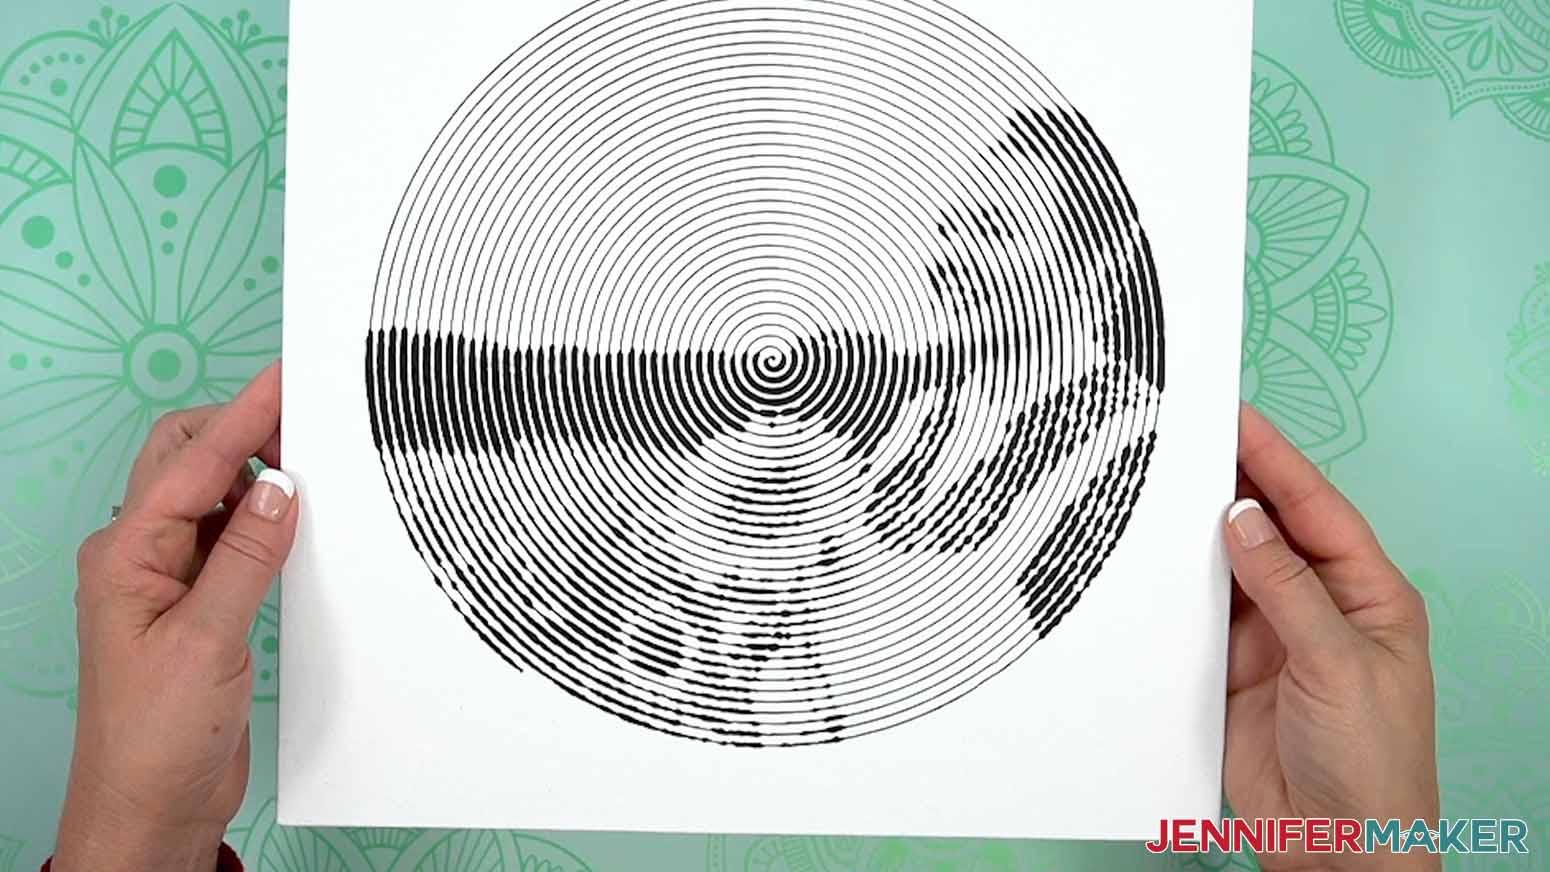
Notes
Finished Size: 12” W x 12” H
Answers to Your Questions About How to Make a Spiral Betty Photo Design
Q: How do I customize my spiral betty?
A: You can learn how to add a middle design to your spiral betty in my ADVANCE program. Learn more about ADVANCE here!
Q: What’s the best material to cut a Spiral Betty from?
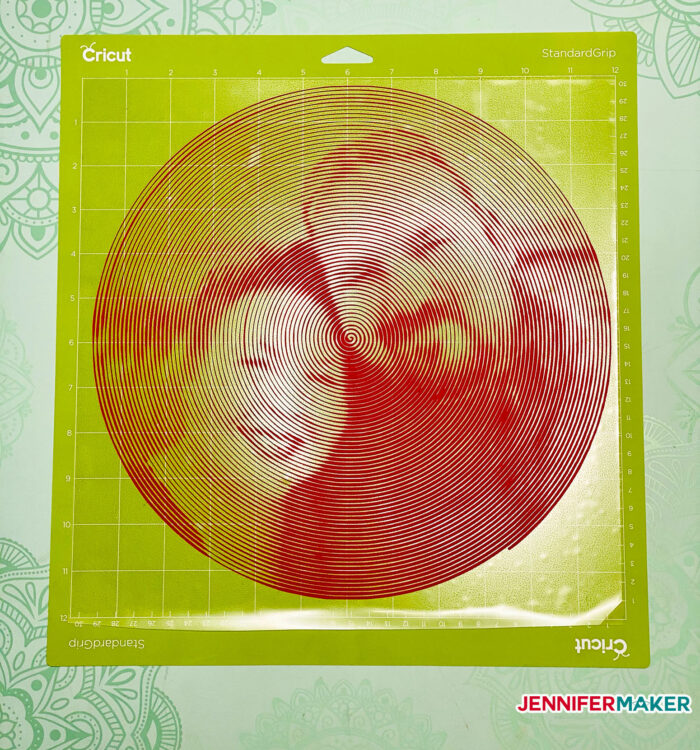
Iron-on vinyl (HTV) is the easiest to cut and weed this particular project (just be sure to mirror the design). Permanent adhesive is second easiest (you do not need to mirror adhesive vinyl). Here is a Spiral Betty design I did with red iron-on vinyl (my very first):
Q: Can I use removable vinyl?
Although you can use removable vinyl, I suggest using permanent vinyl because it will be easier to cut and to transfer to your canvas. Removable vinyl is great for wall decals, indoor signs, stencils, and any time you want a temporary application. But if you use it for a spiral betty vinyl project, you may find your vinyl comes off the liner while you’re cutting and creates a mess.
Q: Can this be put on a real record?
A: Vinyl is best applied to smooth clean surfaces. All records do have some texture to them that may show through the design. If using a record for your surface, be certain to clean it well with alcohol to remove fingerprints or dust prior to application.
Q: Can I make and sell these felt coasters?
A: I love supporting creative entrepreneurs! If you want to use my designs and projects for commercial use, please familiarize yourself with my important licensing information before selling your crafts.
I do not permit sale of my digital items, but you can sell the creative goods you make with them — as long as you follow my licensing requirements. That means you cannot sell the spiral betty example files, but you can sell items that you made with the tool. The Spiral Betty creator has been very generous, and has options to support their work, especially if you plan to sell items.
Q: Will the Spiral Betty work with multiple people in a photograph?
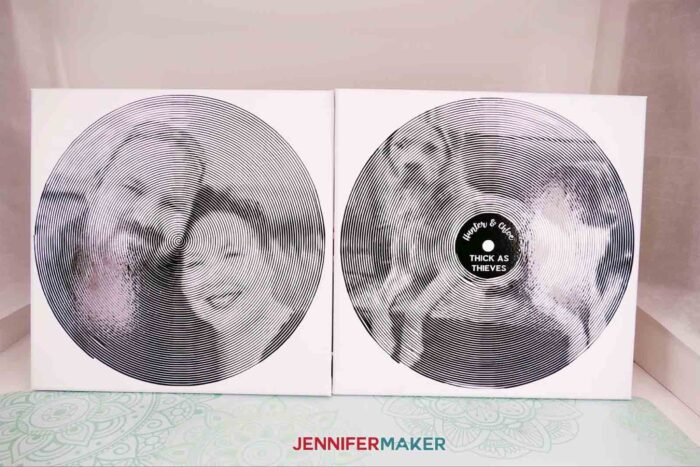
It will, but I want to caution you to not pick an image that is too intricate! I have only tried with two people, an image of myself and Greg, but you would have to be careful adding more people. Those lines can become very fine and hard to weed.
Q: Can you transfer this to a shadow box?
Absolutely, this would look great in a shadow box! The shadow box glass be cleaned with alcohol and allowed to dry before you apply the vinyl. If the vinyl is to be applied to the inside glass of a shadow box make sure you mirror the image prior to cutting! Make sure to use regular transfer tape to apply the vinyl to the shadow box glass and use a scraper tool to apply the design onto the glass before gently removing the transfer tape from the design.
Q: If I put this on a shirt do I need to mirror the image?
Yes, you will use heat transfer vinyl (iron-on vinyl) and mirror the image!
Q: Will this work if I resize it small enough to cut on the Cricut Joy?
Yes, but it is important to know that the smaller you make it, the harder it will be to weed! I think it would be very challenging to weed if cut on a Joy unless you had fewer rings than usual in your spiral design.
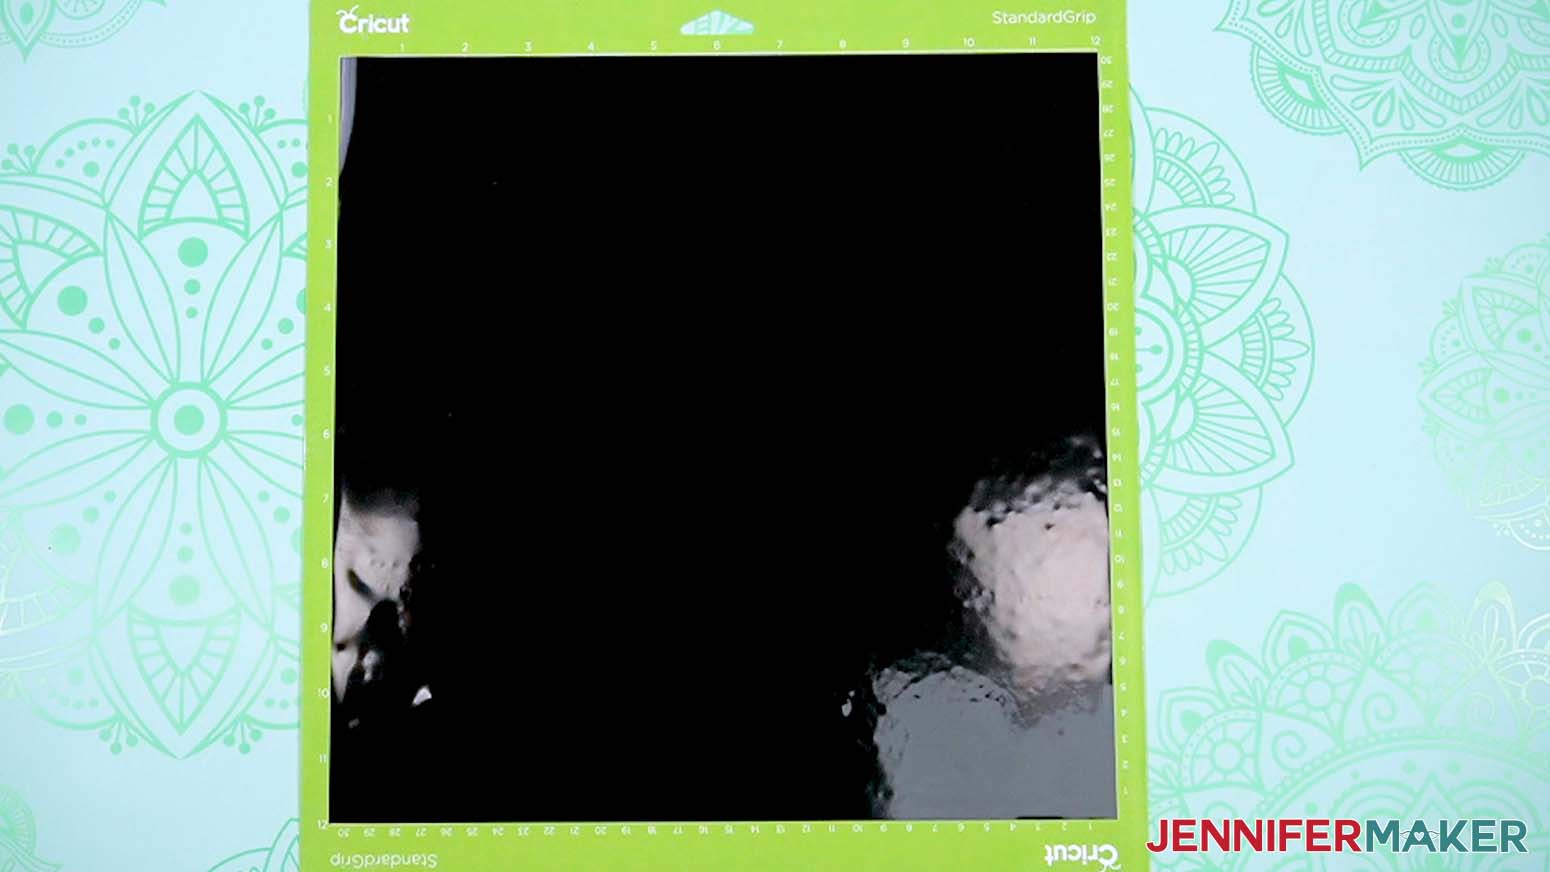
Q: When I upload my image to Design Space, it becomes a black square. What am I doing wrong?
Make sure you have uploaded a JPEG file and then you need to clean up your image before you save it in Design Space as I show in this tutorial.
Q: When I cut my Spiral Betty design, it looks really jagged. Why?
It’s supposed to! Those “jagged” and variable-width lines are what creates your image after you remove the excess vinyl. Follow this tutorial to remove the vinyl and you’ll see what we mean.
Q: When I cut my Spiral Betty design, the vinyl began to lift up from the cutting mat and wrapped itself around my roller. Why?
This happened to me too. I checked my vinyl and realized it was older vinyl, probably 3 years or older. Vinyl has a shelf life of 1-2 years. So I went to the store and bought a new package of vinyl. I cut this new vinyl on the same mat, with the same blade, and the same settings… and it worked perfectly. So if you’re having issues, try a newer package of vinyl.
Q: When I weeded my design, the vinyl pulled up other sections of lines. Why?
Your cut was probably not clean enough and it pulled at vinyl as you weeded it. I recommend you increase the pressure when you cut again to avoid this.
A: When I transferred my Spiral Betty design vinyl to my canvas, some of the lines moved out of place. What can I do to fix this?
You can go back afterward with a weeding tool and gently nudge the lines back into position, then press down again so they stay in place.
Q: What can I use Spiral Betty designs for in finished projects?
If you do not want to make a simple canvas as I have in this tutorial, here are more ideas:
- Cut iron-on vinyl to make a T-shirt or totebag
- Add some dates or even a Spotify code and frame it!
- Put it into a shadowbox and surround it with paper flowers
- Get a wood round or metal pizza pan and make a hanging plaque
- Put it on a mirror and then decorate the mirror
- See dozens of more Spiral Betty ideas from our crafters in our Cricut Crafters & Makers Facebook group!
Get my free SVG files to follow my spiral betty tutorial!
(If you do not see the signup form above, click here.)
I’d love to see YOUR spiral betty photo projects! Please share a photo in our Facebook group or tag me on social media with #jennifermaker.
Love,

Want to remember this? Save this tutorial showing you how to make a Spiral Betty photo project to your favorite Pinterest Board!


Jennifer, Thank you so much for teaching this technique, I was so curious when I saw all the beautiful pictures on the Facebook crafters group.
Now I am waiting for your video or tutorial on the new Design Space Feature “Offset”. You are my favorite teacher, and wish to learn that from you. Thank you again.
Hi Taimara! I hope to have it included in my Cricut Coach Playbook soon but I encourage you to play with it on your own too! You can’t break anything, I promise.
If I transfer to a canvas, can I paint the canvas first? I’m thinking it would look fun with a tye dye effect.
Hi Sandy! It is best and recommended to paint or seal your canvas with mod podge before applying vinyl.
“GET MY FREE SVG FILES TO MAKE A SPIRAL BETTY PHOTO DESIGN”. I looked in your library and couldn’t find any SVGs for this. Am I missing something? Thank you for the great tutorial!
Hi Diana! I have updated this, thank you for letting us know! There aren’t any specific to this project, the idea is to use a photo of your own.
when you weed the sprial bettys are you pulling the outside tab or inside the lines?
Hi Pam, You pull from the inside line. Don’t start in the center, but rather the second outer line in. You can see more in “Step 5.” of the blog post.
Ok Thank you!!
Thank you so much for all your encouragement. I did play with the Offset features and it is a lot fun, and possibilities. Thanks
I have a question:
What time of sealer can I use to seal the canvas that I use to apply my Spiral Betty, I followed your instructions to use spray Adhesive before applying the vinyl, but I know that many curiuos people with touch the canvas and it’s kind of sticky, any recommendations please?
Thank you again!!
Taimara
Hi Taimara! You would want to use a matte mod podge to seal your canvas before applying your vinyl. Hope this helps!
Great! Thank you so much!!
You are very welcome, Taimara!
Hi Jennifer,
Thank you soo much for making a tutorial on this cool design. I hope a video will be coming out soon! How did you make the middle part to make this image look like a real vinyl record? Its going to be my mom and dad’s 50 th anniversary this year so I would like to make their picture look like a vinyl record with their spotify song frame. Could you please share you secret with me on how did that part? I didn’t see it in the tutorial above.
Thank You,
Sarah
Hi Sarah! What you need to do is upload your Spiral Betty design to Design Space and then weld a circle from the shapes menu to the center of your spiral (however big you want it) and then create your font, place it on the circle, select everything and then hit slice and pull your spiral away to reveal the sliced out words.