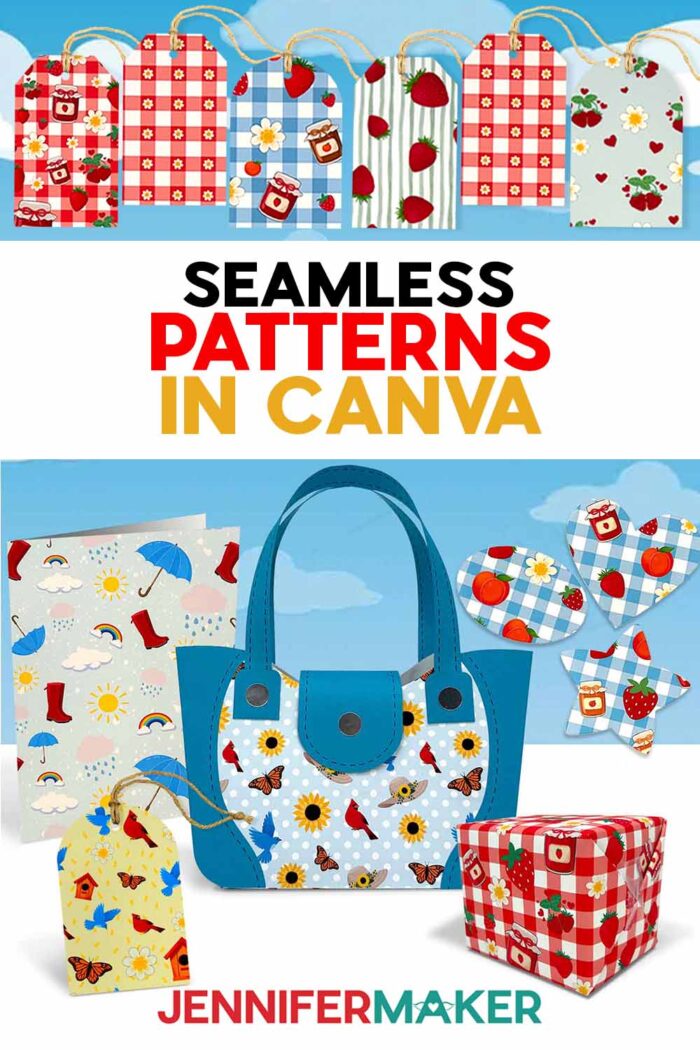
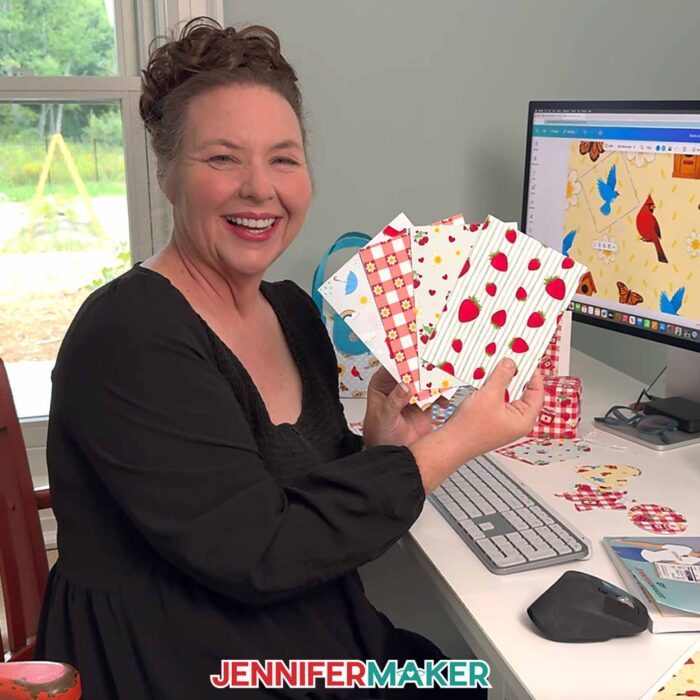
Learn how to design a seamless pattern in Canva for unique & stunning paper projects!
I’ll never forget the first time I tried (and failed at) making my own patterned paper. How hard could it be, right? I was so sure it was going to be adorable, but instead of a beautiful repeating pattern for my craft project, I ended up with awkward an composition and glaringly obvious seams. The whole thing looked a little too homemade, if you get what I mean. But later, I discovered the real magic of creating a truly seamless pattern in Canva. Once you learn my tricks, you can make amazing projects with your very own one-of-a-kind patterned paper and cardstock that looks like it came straight from your favorite craft store! I even have a free guide and example tiles for you!
See the full step-by-step video tutorial on how to make a seamless pattern in Canva:

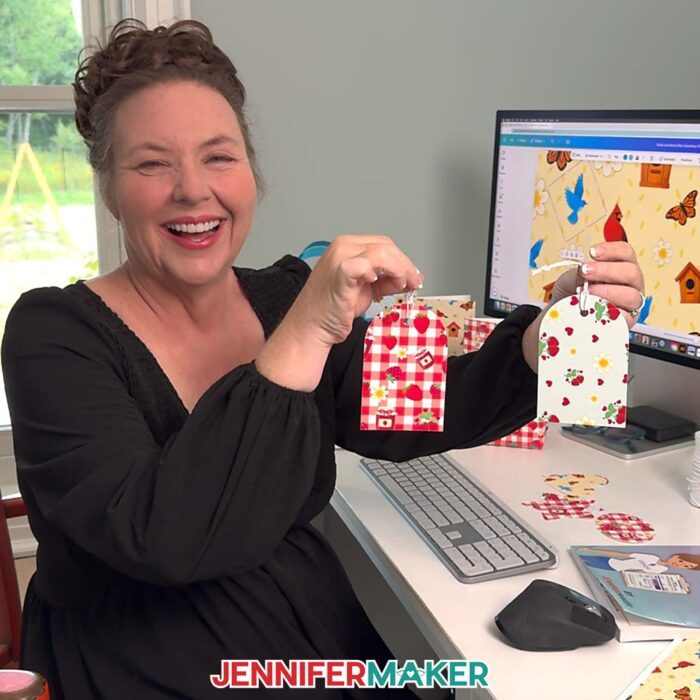
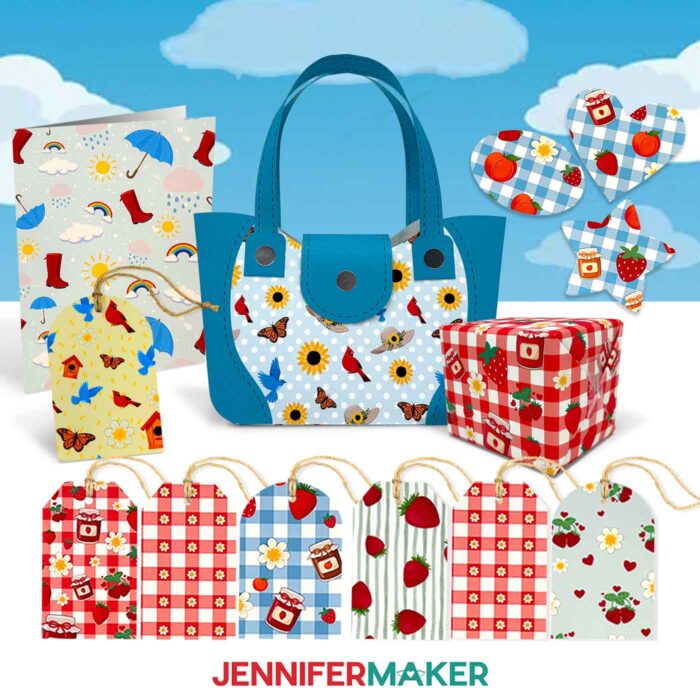
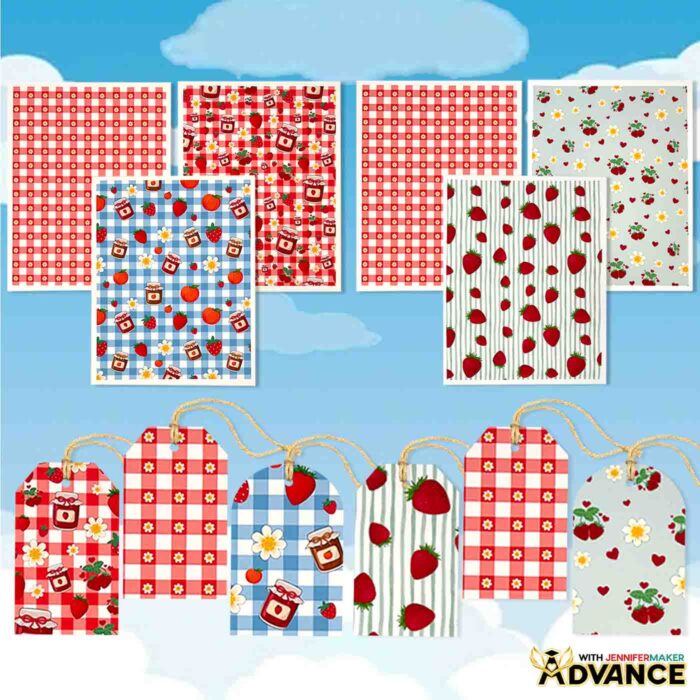
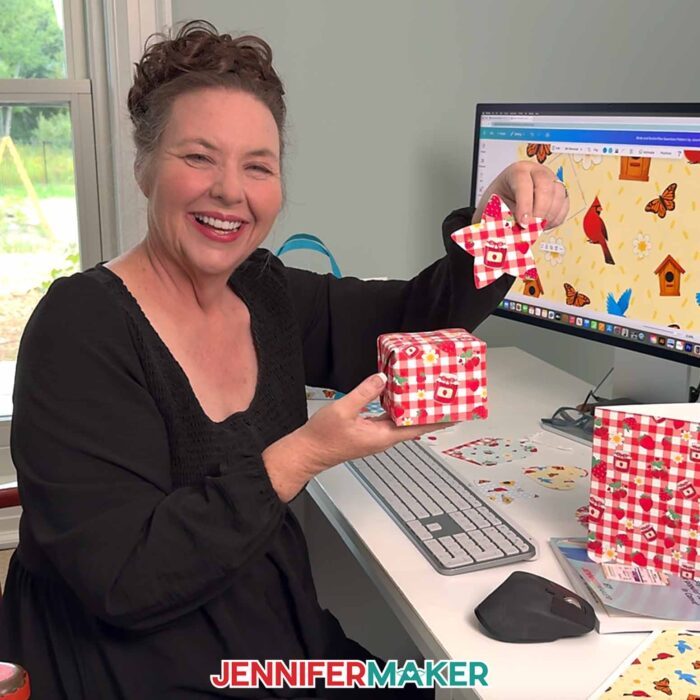
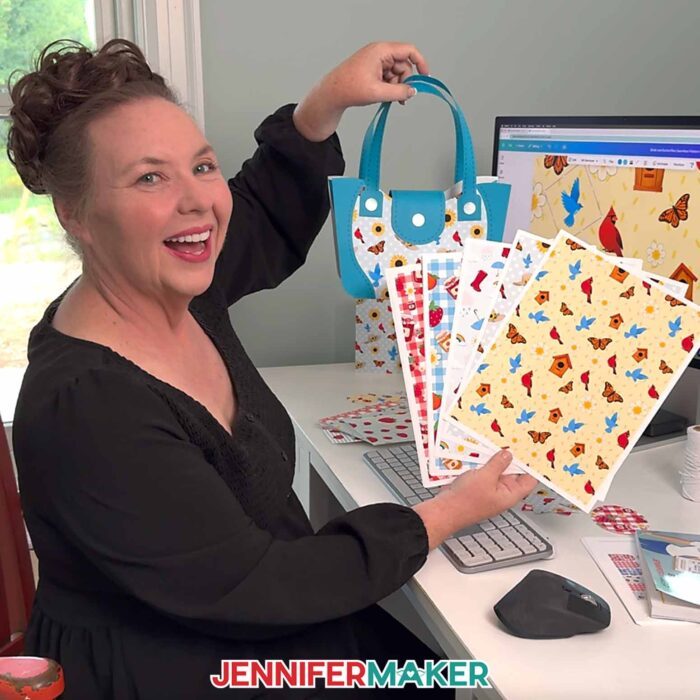
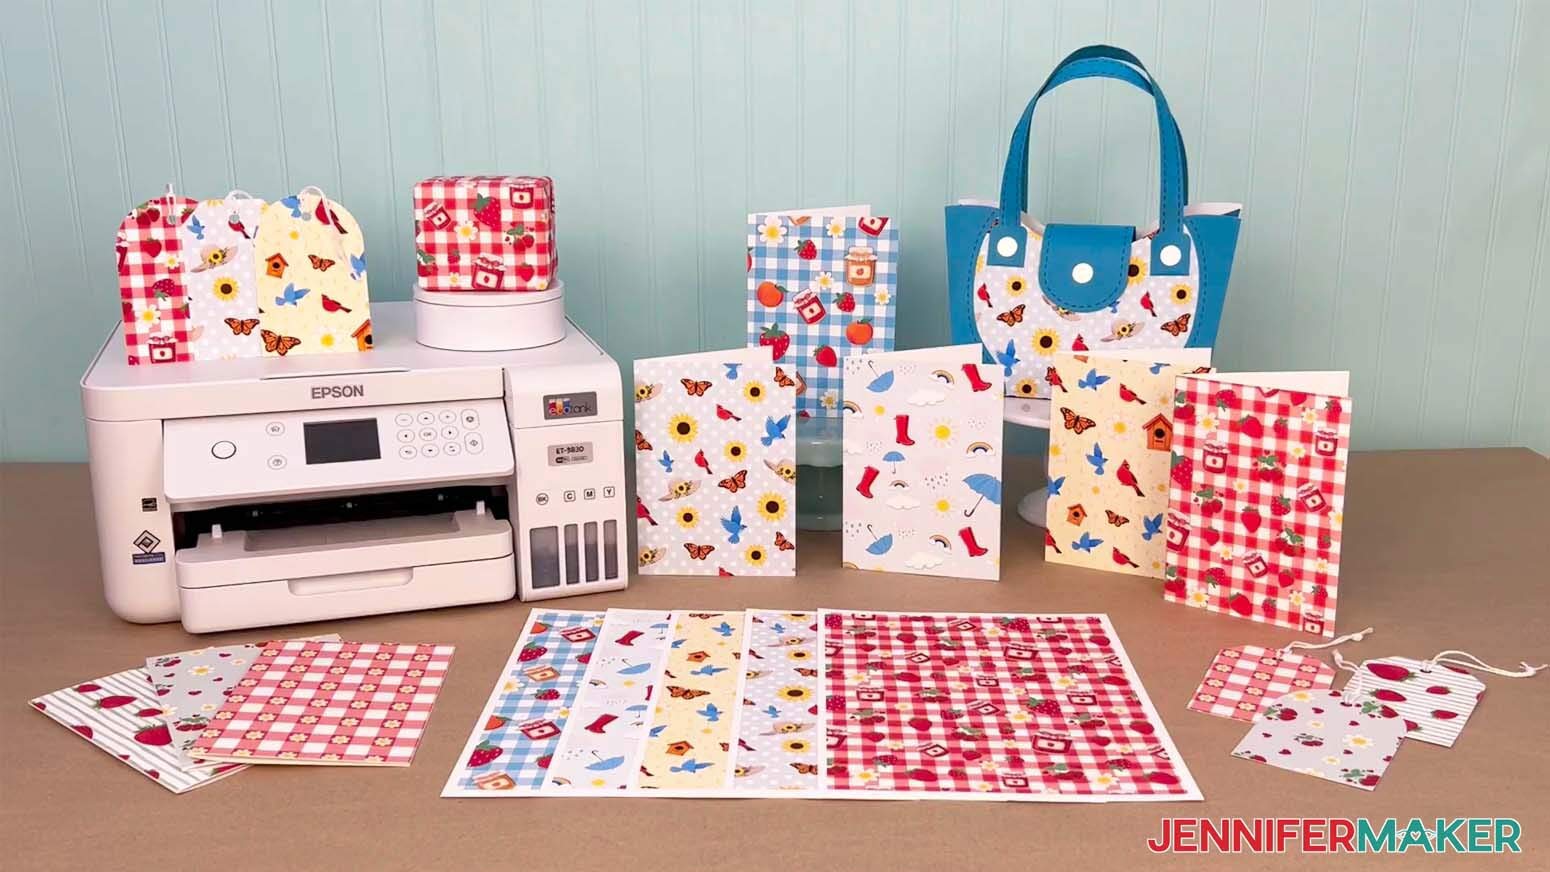
One of the best parts of making your own seamless patterned paper is putting it to use in real projects! I’ve made a paper purse gift bag, a cheerful greeting card decorated with patterned paper embellishments, the cutest little gift tags, and even custom wrapping paper for those extra-special gifts. If digital crafting is more your style, you can use your repeating pattern designs in projects like my recent Canva photo book project, too. And these are just a few suggestions to get you started! There are countless other ways to bring your designs to life. You’ll find plenty more inspiration and ideas for using your patterned paper in all kinds of crafts throughout my blog.

You don’t need fancy software, pricey tools, or graphic design experience to make a seamless pattern in Canva. All you need is a computer or device and a free Canva account. That’s it! I promise, once you get started, you’ll be making all the patterns! I’ve even put together a free PDF guide on Seamless Patterns in Canva for you, which is available in my free library! The download also has PNG elements I made with the help of an AI generator and image editing software, plus links to the tiles I used to make my papers! I’ve tested these tiles, so you can practice with them, knowing they will align perfectly if you follow my steps.
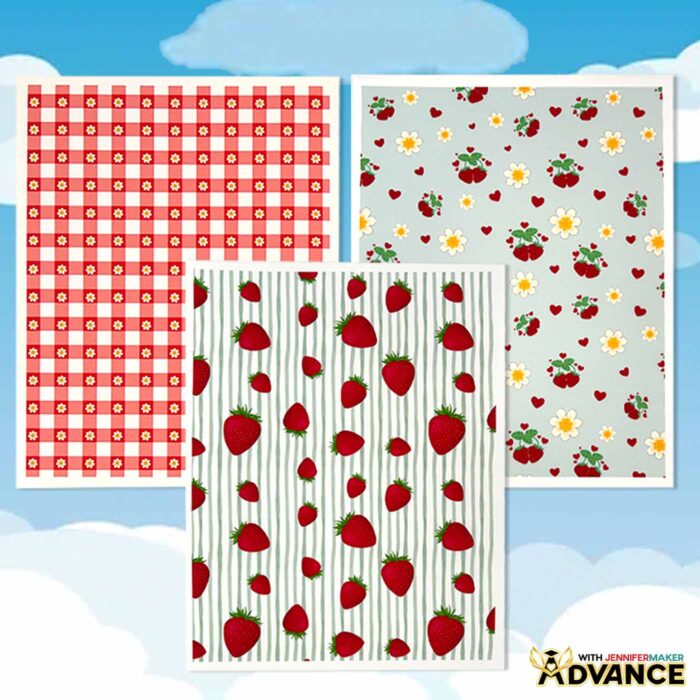
Here’s how it works. You start small, with a design tile in Canva. Think of it like the building block for your entire pattern. In this square, you get to sprinkle all sorts of fun design elements like shapes, graphics, doodles, or even my free strawberry and jam jar designs you can download at the bottom of this post. Canva’s library is like a candy store for digital crafters. You can get lost (in a good way!) searching, experimenting, and mixing things together until your tile feels just right!
Now, here’s where the crafting magic happens: learning to arrange your elements so they repeat seamlessly. Canva has handy snapping tools that let you line up graphics super precisely, so you can create a seamless transition when the tiles are repeated across a page. It’s kind of like quilting with graphics! When the seams disappear, the whole design feels polished and professional, as if it’s one image. And yes, it’s just as satisfying as it sounds.

You can play with background color, swap in new design elements, or experiment with color schemes that match your project. The creative process is addicting, in the best way!
Once you’ve finished your tile, its time to save it as a PNG file and test it out. This is the “hold your breath” moment! Upload it back into Canva, then I’ll show you how to tile it across a bigger page to test that it’s truly seamless. When everything lines up, oh my goodness! Suddenly you’re staring at a full sheet of custom patterned paper that you made yourself. How cool is that?
Printing your design is like the cherry on top, and it’s as easy as pie with the free Google Docs tool. I’ll show you all the steps! I always recommend choosing the highest quality print settings on your printer so the colors look crisp and vibrant. It’s such a thrill to see your Canva design transform from screen to paper! Whether you’re using plain printer paper or printable white cardstock, you suddenly have custom paper that’s ready for scrapbooking, card making, or even wrapping up a sweet little gift. Or, you can keep it digital and use it for social media posts, website backgrounds, and more. And because it’s your one-of-kind design, it feels extra special.
The fun doesn’t stop there, though! If you’re ready to take things further, that’s exactly what we do inside my ADVANCE with JenniferMaker program. I’ll show you how to turn your very first seamless tile into a whole collection of coordinating patterns that look like they belong in a designer’s catalog.
Together, we’ll play with scale so you can make bold patterns, detailed and delicate patterns, and everything in between. With a few simple tweaks and the guided steps I’ll walk you through, you’ll be amazed at how quickly you can build a set of fresh designs ready for any project. Learn more about ADVANCE with JenniferMaker here!
One of my favorite parts about design is that there are no wrong answers here, only endless possibilities. Every Canva design is a chance to play, experiment, and create something beautiful. And when you share your creations, people can hardly believe you made the paper yourself. It’s such a joy to hold something that started as a tiny idea and turned into a polished craft supply you can use.
So if you’ve ever wanted to try your hand at designing your own patterned paper, I’m here to help. Seamless patterns aren’t just for professionals anymore, they’re for makers like you and me who love putting a personal touch on everything we create. Watch my full video tutorial that shows you exactly how to do it, from setting up your tile to printing your finished sheet!
Let me show you how to make a seamless pattern in Canva! This post contains some affiliate links for your convenience (which means if you make a purchase after clicking a link I will earn a small commission but it won’t cost you a penny more, there is no additional cost)! Read my full disclosure policy.
Materials to Make Projects with Seamless Patterned Paper
(Coming soon!) View my Amazon shopping list with the exact items I used for the example projects.
For all projects:
- A Free Canva account
- A Free Google account (to print designs)
For patterned paper cards:
- Several Sheets of 8.5″ x 11″ Heavyweight 61 lb. Matte Photo Paper
- Several Sheets of 8.5” x 11” Copy Paper (for Print Then Cut calibration)
- Adhesive Foam Tape, ¼” wide (optional for dimensional front element)
- A way to cut your material – I’m using the Cricut Maker 4, but you can also use a Maker series machine, an Explore series machine, the Venture, or the Joy Xtra
- Cricut Green StandardGrip Machine Mat 12″ x 12″
- Cricut Blue LightGrip Machine Mat 12” x 12” (for Print Then Cut calibration)
- A Color Inkjet Printer
- Craft Glue (I used Bearly Art Precision Glue)
- Scoring Stylus (optional for files with score lines) -OR-
- Single Scoring Wheel (optional for files with score lines)
- Scraper
- Spatula
- Brayer
- Scissors
For paper purse gift bags:
- Ten to Fourteen (10-14) Sheets of 8.5″ x 11″ or 12″ x 12″ 65 lb. Solid Core Cardstock (any colors)
- One to Two (1-2) Sheets of 8.5″ x 11″ White Cardstock (for printing patterned cardstock)
- One (1) Sheet of 8.5″ x 11″ 65 lb. Gold Foil Cardstock (for accent)
- One (1) Sheet of 8.5” x 11” or 12” x 12” Heavy Cardstock (optional to reinforce the bottom)
- Several Sheets of 8.5” x 11” Copy Paper (for Print Then Cut calibration)
- One (1) Set of Keychain Accessories (optional for attaching keychains)
- One (1) Set of 3/8″ Clear Hook and Loop Dots (optional to fasten the flap closure)
- One (1) 6″ x 3″ Piece of Window Tint Film (optional for sunglasses lenses)
- Two (2) Pieces of 5/8″ Wide Ribbon (optional for small handles) -OR-
- Two (2) Pieces of 1″ Wide Ribbon (optional for large handles)
- A Color Inkjet Printer (I used my Epson EcoTank ET-2800 Inkjet Printer)
- A way to cut your material – I’m using the Cricut Maker 4, but you can also use a Maker series machine, an Explore series machine, the Venture, or the Joy Xtra
- Cricut Green StandardGrip Machine Mat 12″ x 12″
- Cricut Blue LightGrip Machine Mat 12” x 12” (for Print Then Cut calibration)
- Scoring Stylus (optional for files with score lines) -OR-
- Single Scoring Wheel (optional for files with score lines)
- Scraper
- Spatula
- Brayer
- Scissors
- Craft Glue (I used Bearly Art Precision Glue)
For gift tags:
- One to Two (1-2) Sheets of 8.5″ x 11″ White Cardstock (for printing patterned cardstock)
- Several Sheets of 8.5” x 11” Copy Paper (for Print Then Cut calibration)
- A way to cut your material – I’m using the Cricut Maker 4, but you can also use a Maker series machine, an Explore series machine, the Venture, or the Joy Xtra
- A Color Inkjet Printer (I used my Epson EcoTank ET-2800 Inkjet Printer)
- Cricut Green StandardGrip Machine Mat 12″ x 12″
- Cricut Blue LightGrip Machine Mat 12” x 12” (for Print Then Cut calibration)
- Scraper
- Spatula
- Brayer
- Scissors
- 8-10″ of Jute Twine
For Canva photo book:
- Canva Printing Photo Book (I used the Large 14″ x 10.5″ size)
- Black Metal Display Stand (optional to display your photo book) -OR-
- Acrylic Large Open Book Display Stand (optional to display your photo book)
- 14.5″ x 19″ Padded Shipping Envelope (optional for shipping to a friend or family member)
- Leather Bookmarks (optional for marking favorite pages)
How to Make a Seamless Pattern in Canva!

Seamless Patterns In Canva
Learn how to create a Seamless Pattern In Canva!
Materials
- Several Sheets of 8.5" x 11" Heavyweight 61 lb. Matte Photo Paper (for patterned paper cards)
- Several Sheets of 8.5” x 11” Copy Paper (for calibration for patterned paper cards)
- Adhesive Foam Tape Roll, ¼” wide (optional for dimensional front element for patterned paper cards)
- Ten to Fourteen (10-14) Sheets of 8.5" x 11" or 12" x 12" 65 lb. Solid Core Cardstock (any colors for paper purses)
- One to Two (1-2) Sheets of 8.5" x 11" White Cardstock (for printing patterned cardstock for paper purses)
- One (1) Sheet of 8.5" x 11" 65 lb. Gold Foil Cardstock (for accents for paper purses)
- One (1) Sheet of 8.5” x 11” or 12” x 12” Heavy Cardstock (optional to reinforce the bottom of paper purses)
- One (1) Set of 3/8" Clear Hook and Loop Dots (optional to fasten the flap closure for paper purses)
- One (1) Set of Keychain Accessories (optional for attaching keychains for paper purses)
- One (1) 6" x 3" Piece of Window Tint Film (optional for sunglasses lenses for paper purses)
- Two (2) Pieces of 5/8" Wide Ribbon (optional for small handles for paper purses) -OR-
- Two (2) Pieces of 1" Wide Ribbon (optional for large handles for paper purses)
- One (1) Sublimation Pen Blank with included Shrink Wrap Sleeve (for sublimated pens)
- One (1) Sheet of A-SUB 125g Sublimation Paper 8.5" x 11" (for sublimated pens)
- Canva Printing Photo Book (I used the Large 14" x 10.5" size, for Canva photo book project)
- Black Metal Display Stand (optional to display a printed Canva photo book) -OR-
- Acrylic Large Open Book Display Stand (optional to display a printed Canva photo book)
- 14.5" x 19" Padded Shipping Envelope (optional for shipping a printed Canva photo book to a friend or family member)
- Leather Bookmarks (optional for marking favorite pages in a printed Canva photo book)
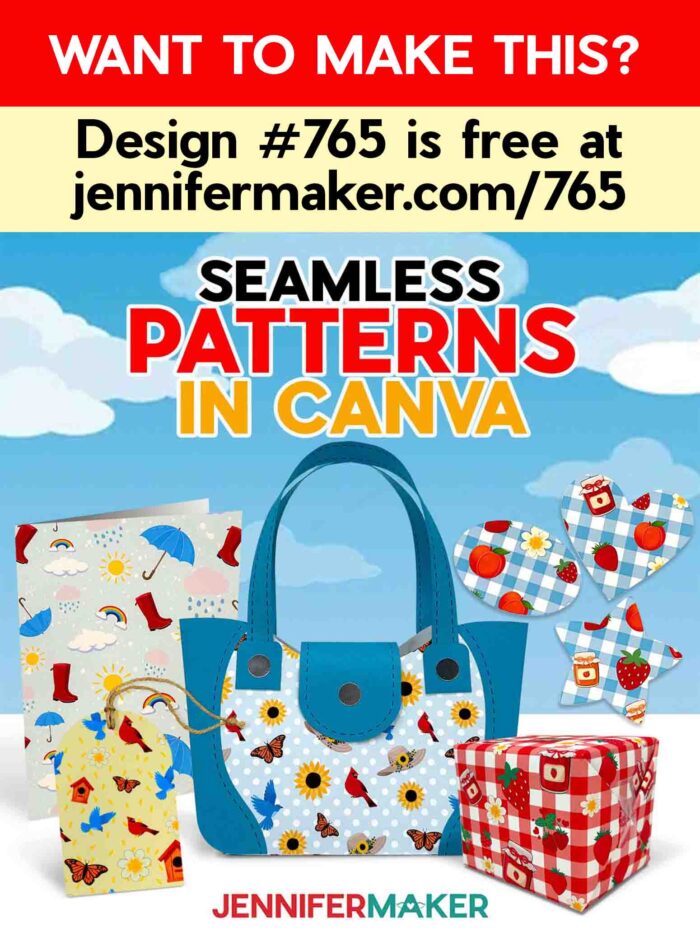
- Design #765 (My free PNG design files are available in my free resource library - get the password by filling out the form at the bottom of this page)
Tools
- A Free Canva account
- A Free Google account (optional for printing projects)
- A way to cut your material - I’m using the Cricut Maker 4, but you can also use a Maker series machine, an Explore series machine, the Venture, or the Joy Xtra
- Cricut Green StandardGrip Machine Mat 12" x 12" (for patterned paper cards, paper purses, and sublimated pens)
- Cricut Blue LightGrip Machine Mat 12” x 12” (for Print Then Cut calibration for patterned paper cards, paper purses, and sublimated pens)
- A Color Inkjet Printer (I used my Epson EcoTank ET-2800 Inkjet Printer, for patterned paper cards and paper purses)
- Scraper (for patterned paper cards, paper purses, and sublimated pens)
- Craft Glue (I used Bearly Art Precision Glue, for patterned paper cards and paper purses)
- Scoring Stylus (optional for files with score lines) -OR-
- Single Scoring Wheel (optional for files with score lines)
- Spatula (for patterned paper cards, paper purses, and sublimated pens)
- Brayer (for patterned paper cards, paper purses, and sublimated pens)
- Scissors (for patterned paper cards, paper purses, and sublimated pens)
- Sublimation Printer - I used a converted Epson EcoTank ET-4700 Inkjet Printer (for sublimated pens)
- Sublimation Ink (for sublimated pens)
- Convection Oven (for sublimated pens) -OR-
- Air Fryer (for sublimated pens - the air fryer I used is currently unavailable but there are many other great options)
- Sublimation Pen Pincher (for sublimated pens)
- Oven Thermometer (for sublimated pens)
- Fan for Ventilation (for sublimated pens)
- Heat Resistant Gloves (for sublimated pens)
- Heat Resistant Tape (for sublimated pens)
- Heat Gun (for sublimated pens)
- Silicone Mat (for sublimated pens)
- Looped Tape Measure (for sublimated pens)
- Paper Trimmer (for sublimated pens)
- Isopropyl Alcohol (for sublimated pens) -AND-
- Lint Free Cloth (for sublimated pens)
- Cooling Rack (for sublimated pens)
Instructions
STEP 1: GET MY FREE SEAMLESS PATTERN ELEMENTS
First, download my free files, including PDFs with Seamless Pattern links and a reference guide, from my free library – look for Design #765. Alternatively, you can use the Save This Project form near the top of this post and the design link will be emailed to you.
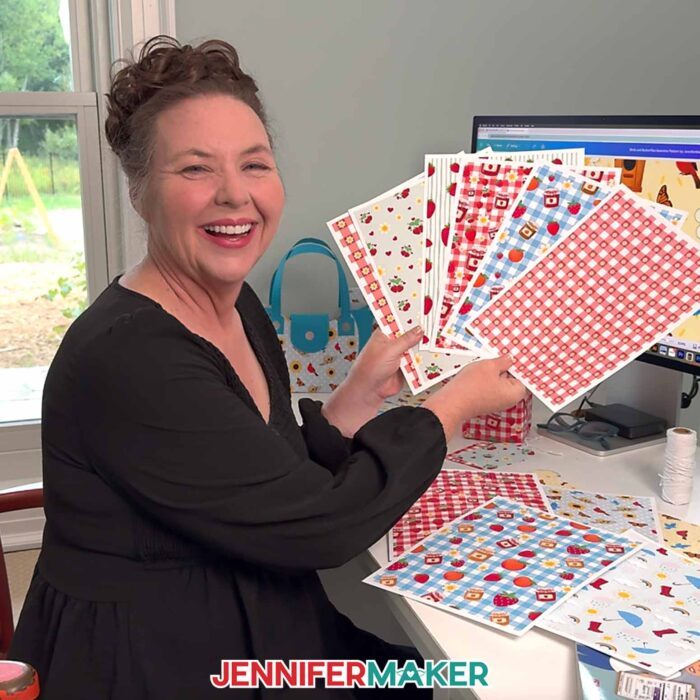
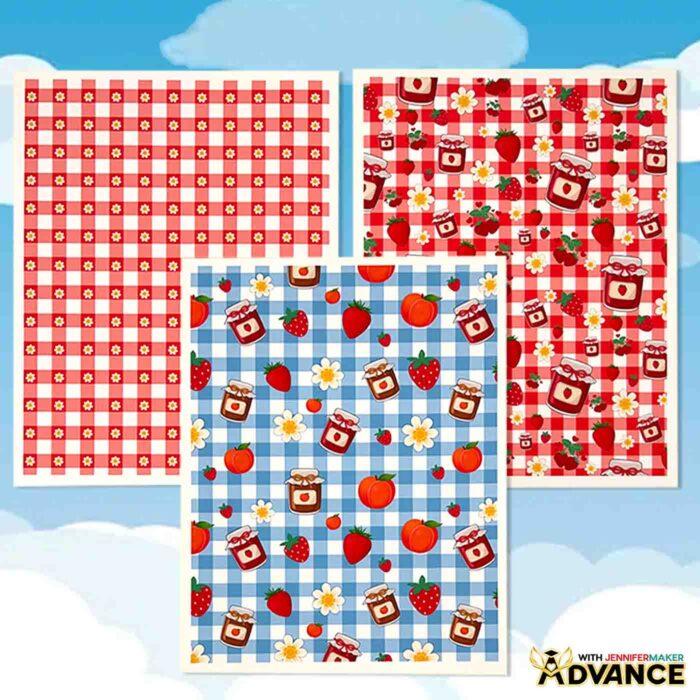
In the PNG folder, you’ll find a collection of elements you can upload to Canva and use to create seamless patterns. There’s a birdhouse, a bluebird, a jam jar, a peach, a pair of rain boots, a rainbow, a strawberry, and an umbrella design. I used AI image-generating software to create the elements, then made them design-ready using image-editing software.
TIP: If you’re not sure how to unzip the download file, go to jennifermaker.com/svgs to learn how. The process is similar for PNG files.
STEP 2: CREATE A TILE FOR A SEAMLESS PATTERN IN CANVA
- To get started, open your computer’s browser and go to jennifermaker.com/canva.
NOTE: If you’re new to Canva, check out my Canva for Beginners tutorial. - Either sign in to your account or follow the prompts on the screen to sign up for a free account.
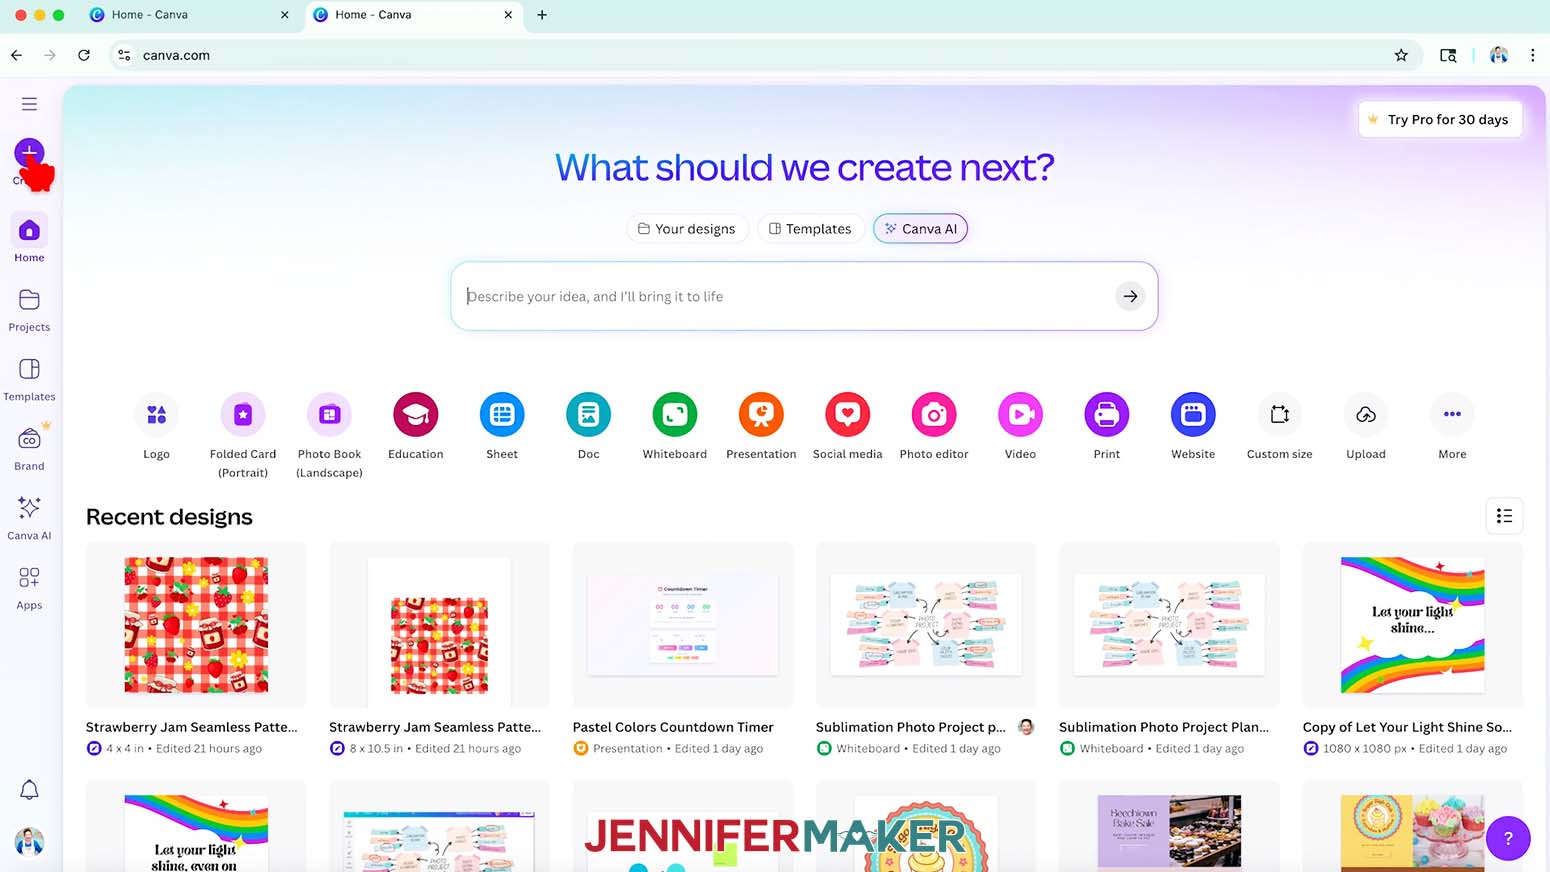
NOTE: Canva does offer paid subscriptions with more tools and elements, but I’ll show you how to do everything with the free account. - On the Canva Home screen, click “Create.”

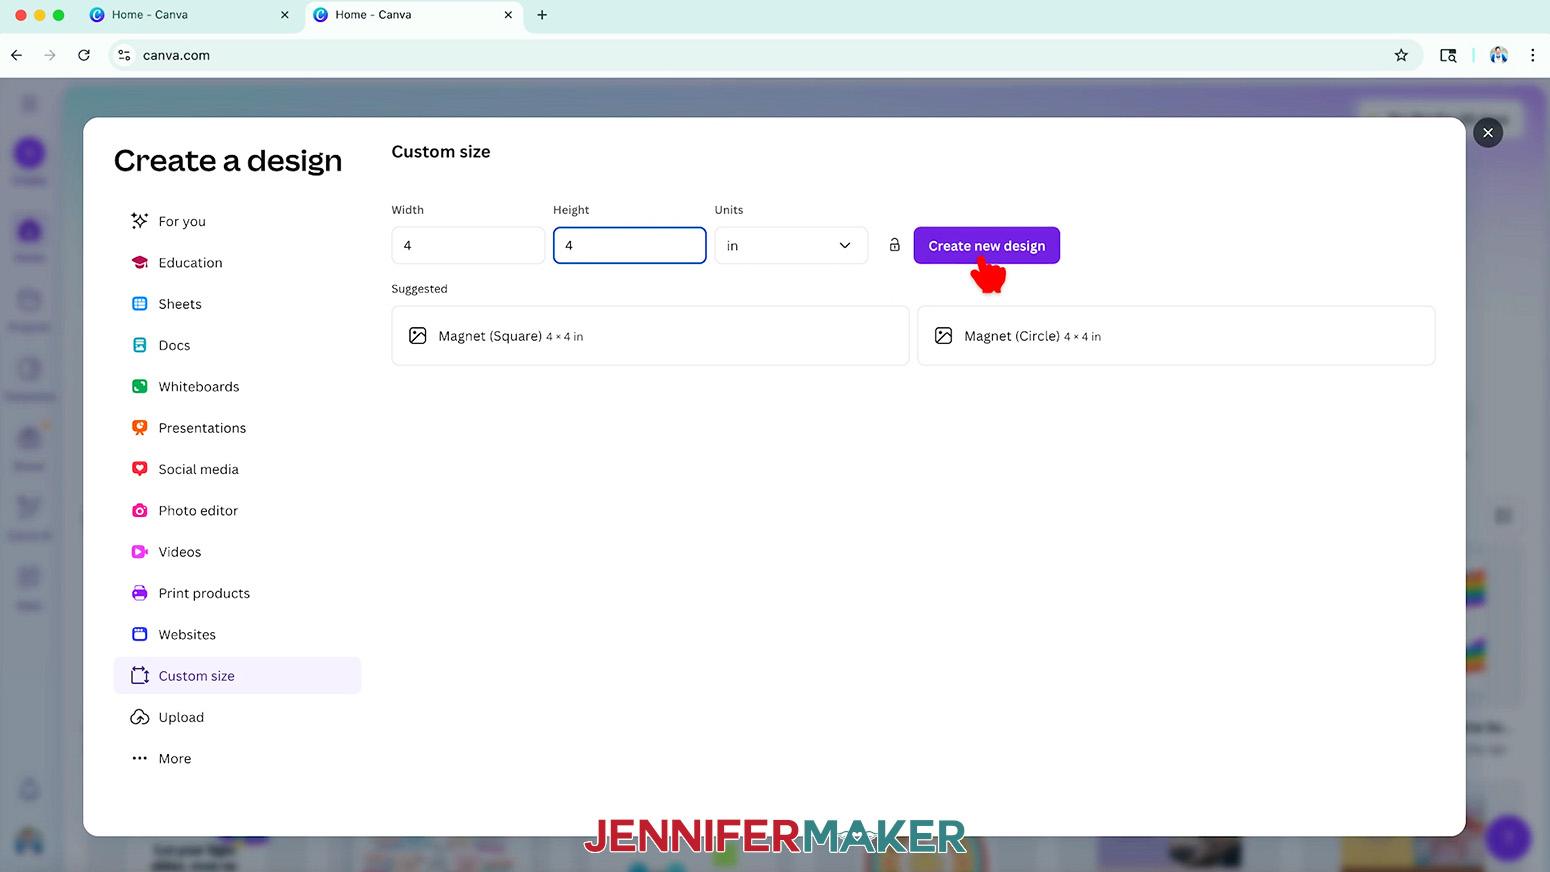
- Click “Custom size.”
- Change the Units to “in” for inches, then enter “4” in the “Width” field and “4” in the “Height” field.
NOTE: This size works well to make the initial tile we’ll use to create the seamless pattern. - Click “Create new design.”
- Choose a name for your tile that you’ll remember later.
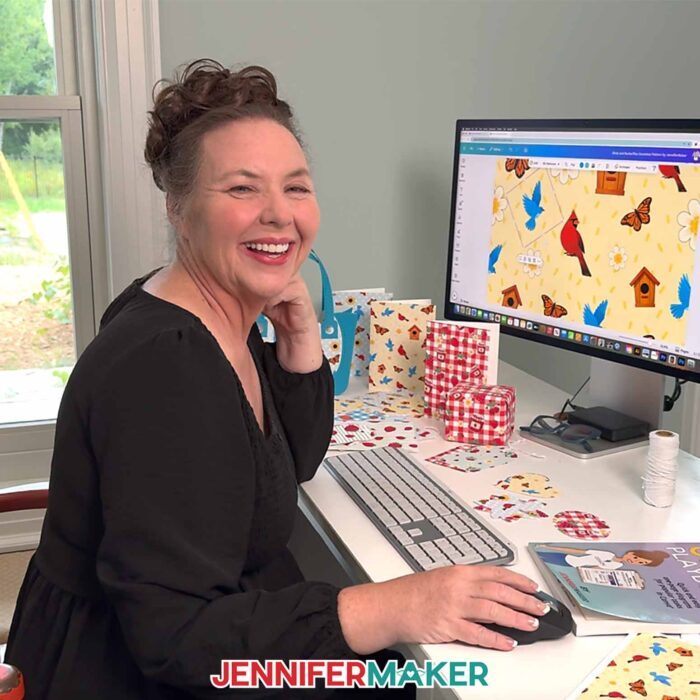
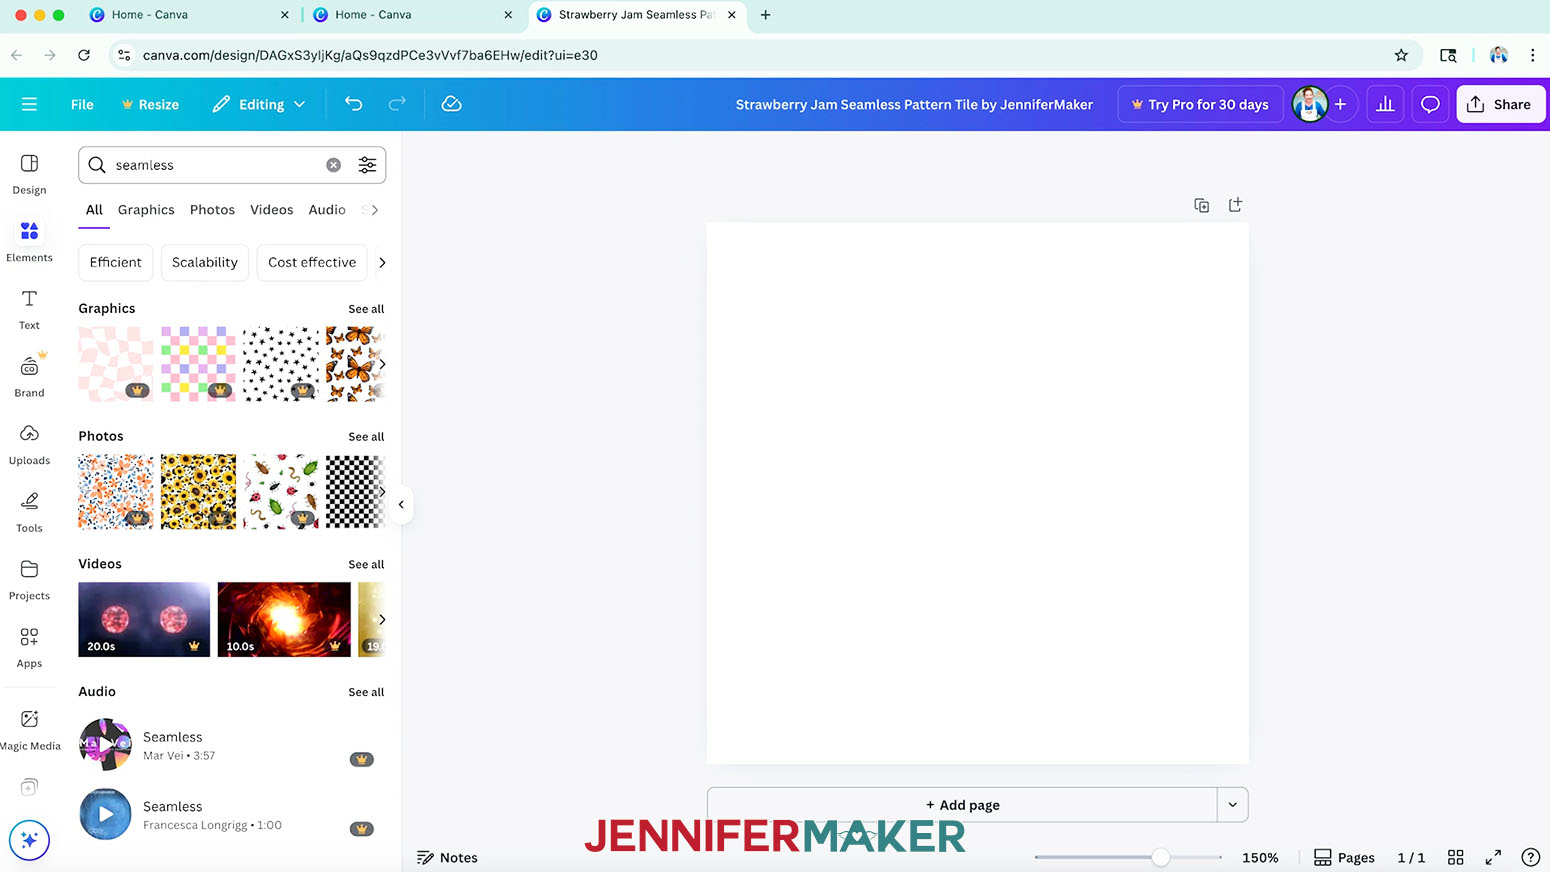
NOTE: I named my tile “Strawberry Jam Seamless Pattern Tile by JenniferMaker.” - First, let’s add a background to the tile. To search for an appropriate background image in Canva, click “Elements” in the side panel.
- Type “seamless” in the “Search” bar and press your “Enter/Return” key on your keyboard to search.
NOTE: Look for a background design with an evenly-distributed pattern, with no large blank areas.
NOTE: Items with a crown are Canva Pro items. You’ll need to purchase them individually or sign up for a paid membership to download images using these elements. We’ll stick to free elements for this project. - In the “Graphics” section, find a background design and click it to add it to your canvas.
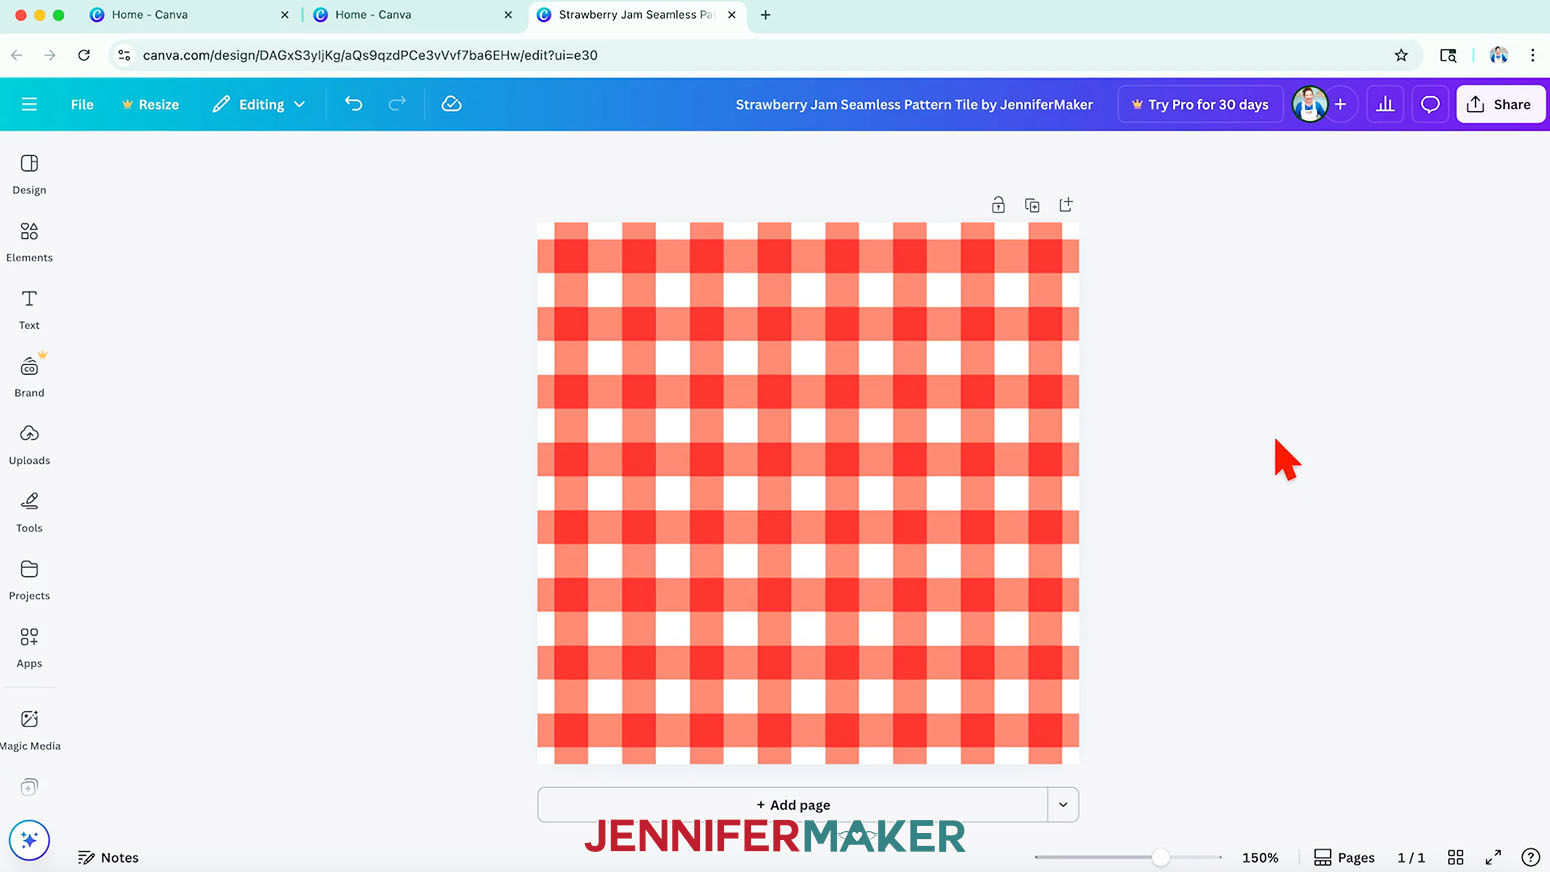
NOTE: I used a graphic called “Gingham Fabric Seamless Pattern.” - To check if the background you selected is truly seamless, drag the design to the top left area of the canvas until it snaps into place.
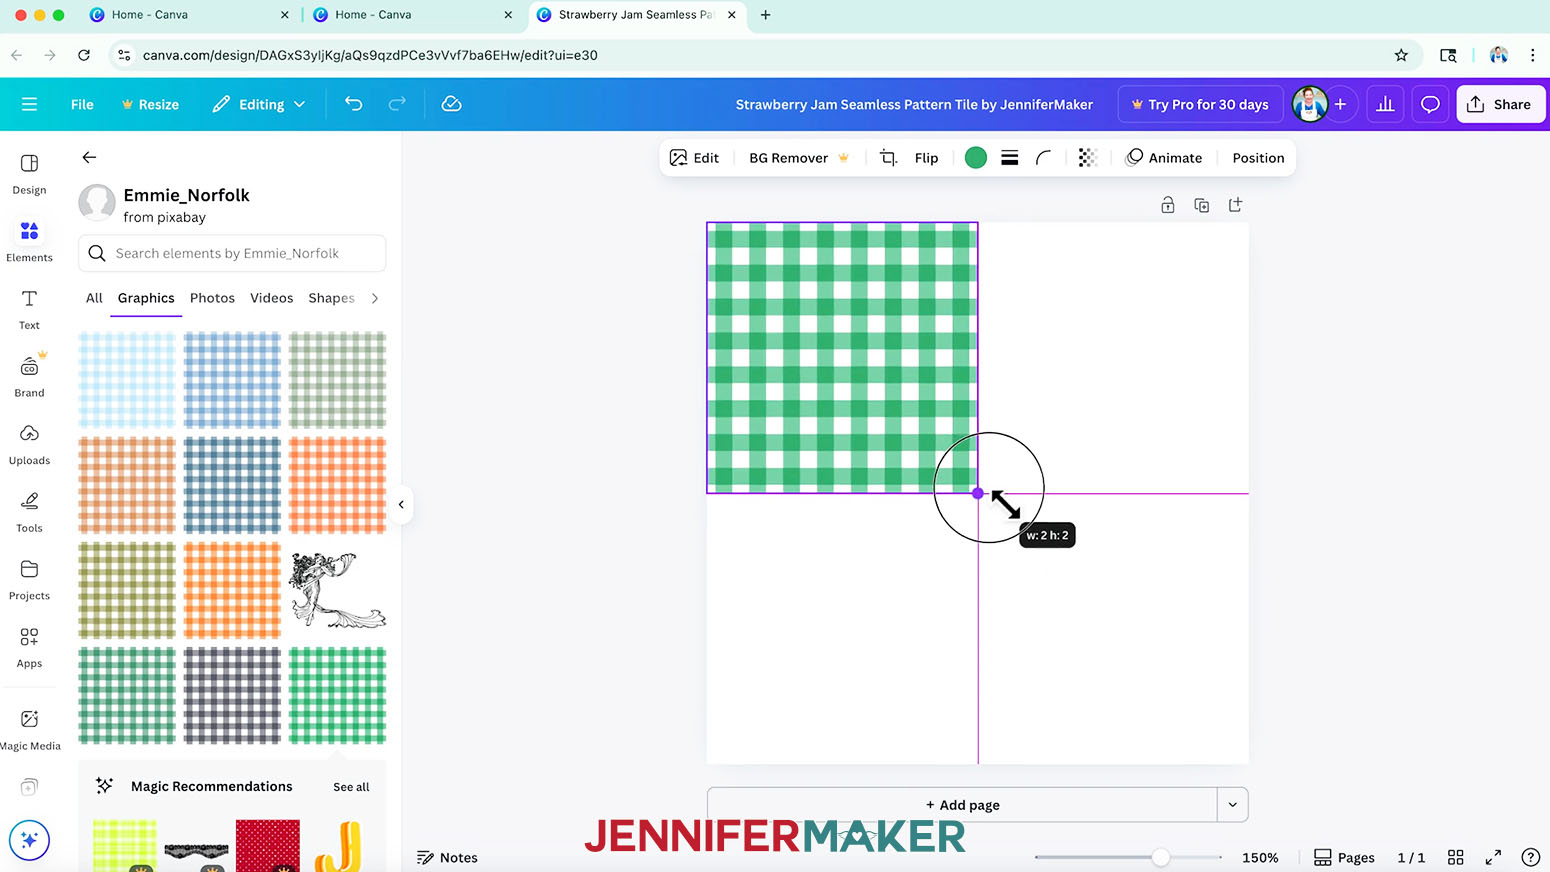
NOTE: If the image is very large, resize it smaller so it fills less than half the canvas. - With the image selected, click the “Duplicate” icon to make a copy.
- Drag the duplicate so its left edge matches up with the right edge of the original background and it snaps into place. If the design is seamless from left to right, the design will line up across both background images.
- If the design does not line up across both background images, it’s not truly seamless and shouldn’t be used for this project. Find another seamless background and try again.
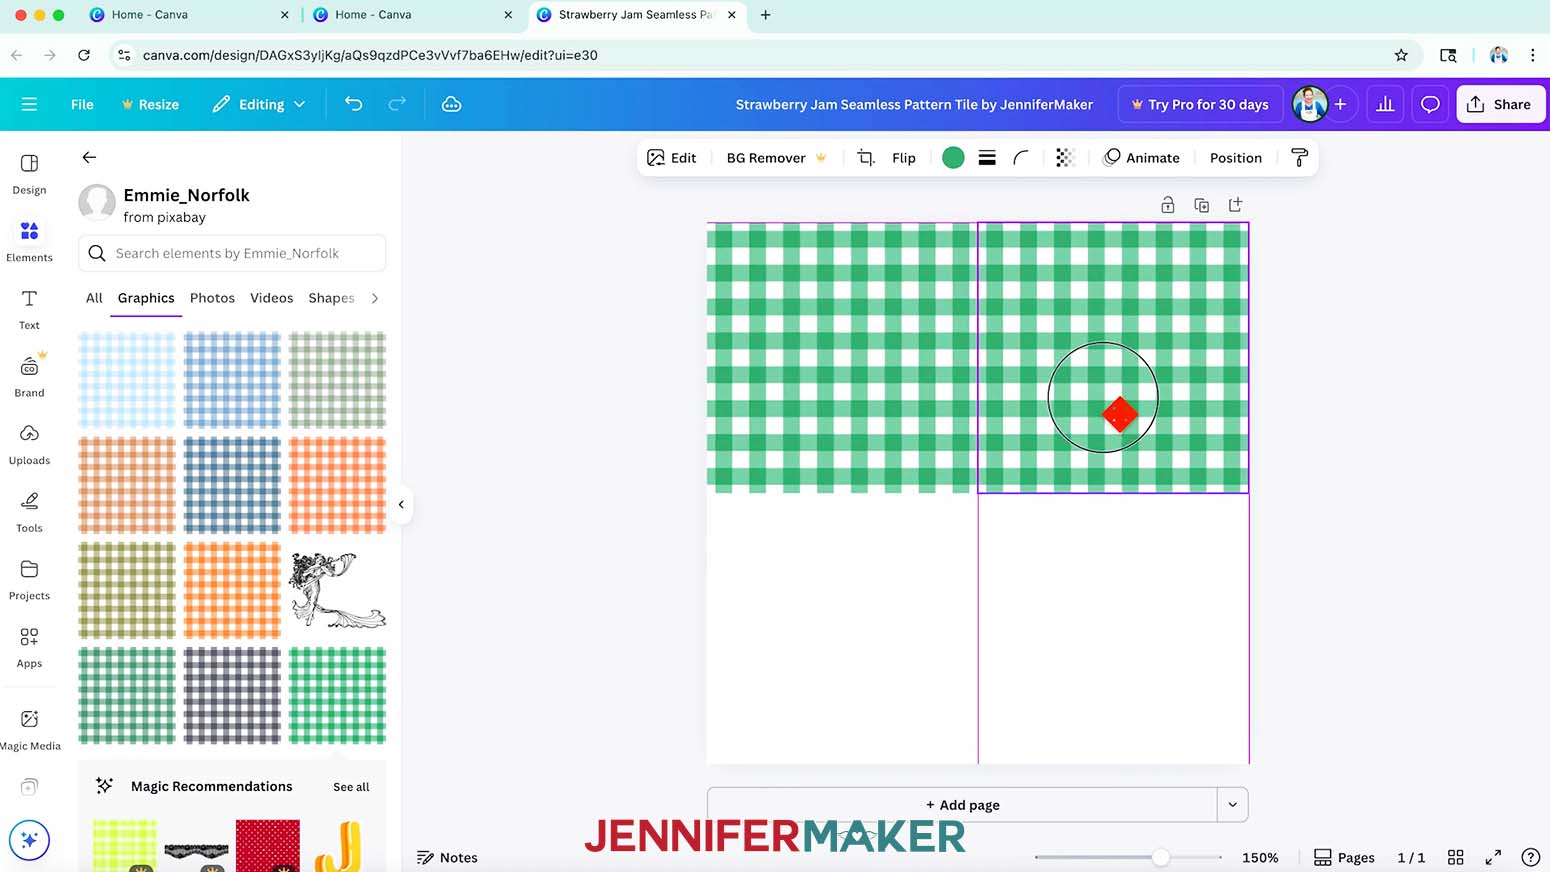
NOTE: You may see a white gap or line between the two background images. This is okay for now, but I’ll show you where to look out for it later. - Repeat steps 13-14, aligning the duplicate along the bottom edge of the original background image. If the design is seamless from top to bottom, the design will line up across both background images.
- If the design does not line up across both images, it’s not truly seamless in that direction and shouldn’t be used for this project. Find another seamless background and try again.
- Once you have found an image that will create a seamless pattern in both directions, delete the duplicated background images, leaving only the original on the canvas.
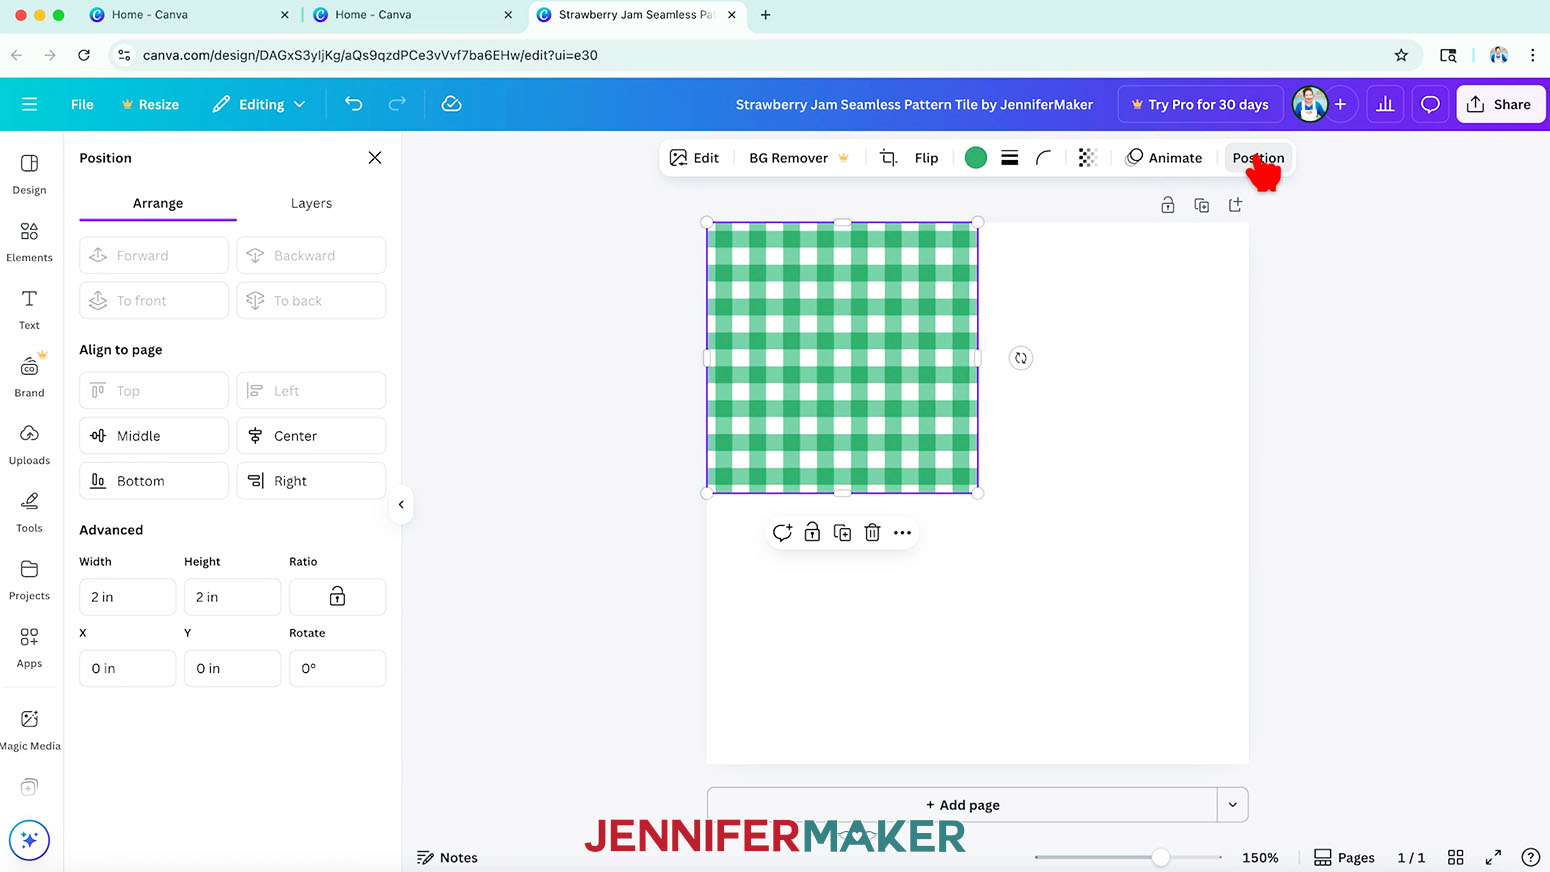
- Select the background image again, and click “Position.”
- To make the pattern fill the tile exactly so the pattern repeats properly across multiples, go to the “Arrange” tab and make sure the “Ratio” lock icon is closed under “Advanced.”
- In the Width and Height fields, enter the size of your canvas (4” wide by 4” high).
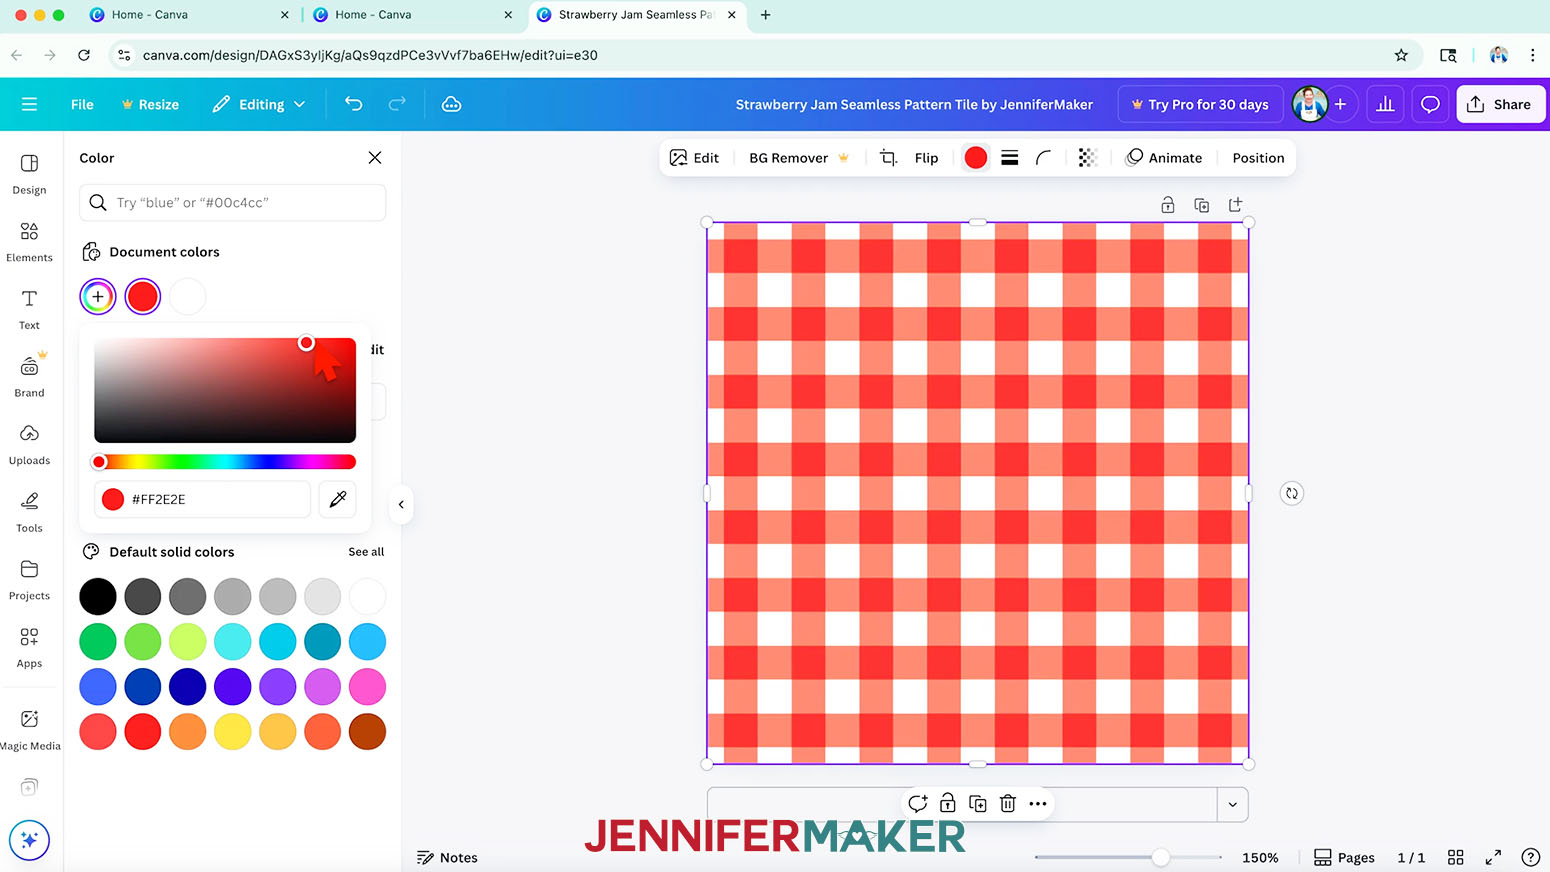
TIP: I recommend resizing your background this way to ensure it’s precise and will repeat correctly. - If you see a color swatch(es) in the top menu, that means you can change the color(s) of the image. Click the color swatch and select a new one from the menu that opens.
NOTE: I used the red color #FF2E2E.
TIP: Some images or graphics in Canva cannot be directly color edited, but I'll show you a workaround in “STEP 3: ADD ELEMENTS TO YOUR SEAMLESS TILE DESIGN.” - You can stop here for a simple seamless pattern tile, or add more Canva elements in a precise way to add more interest in “STEP 3: ADD ELEMENTS TO YOUR SEAMLESS TILE DESIGN.”
STEP 3: ADD ELEMENTS TO YOUR SEAMLESS TILE DESIGN
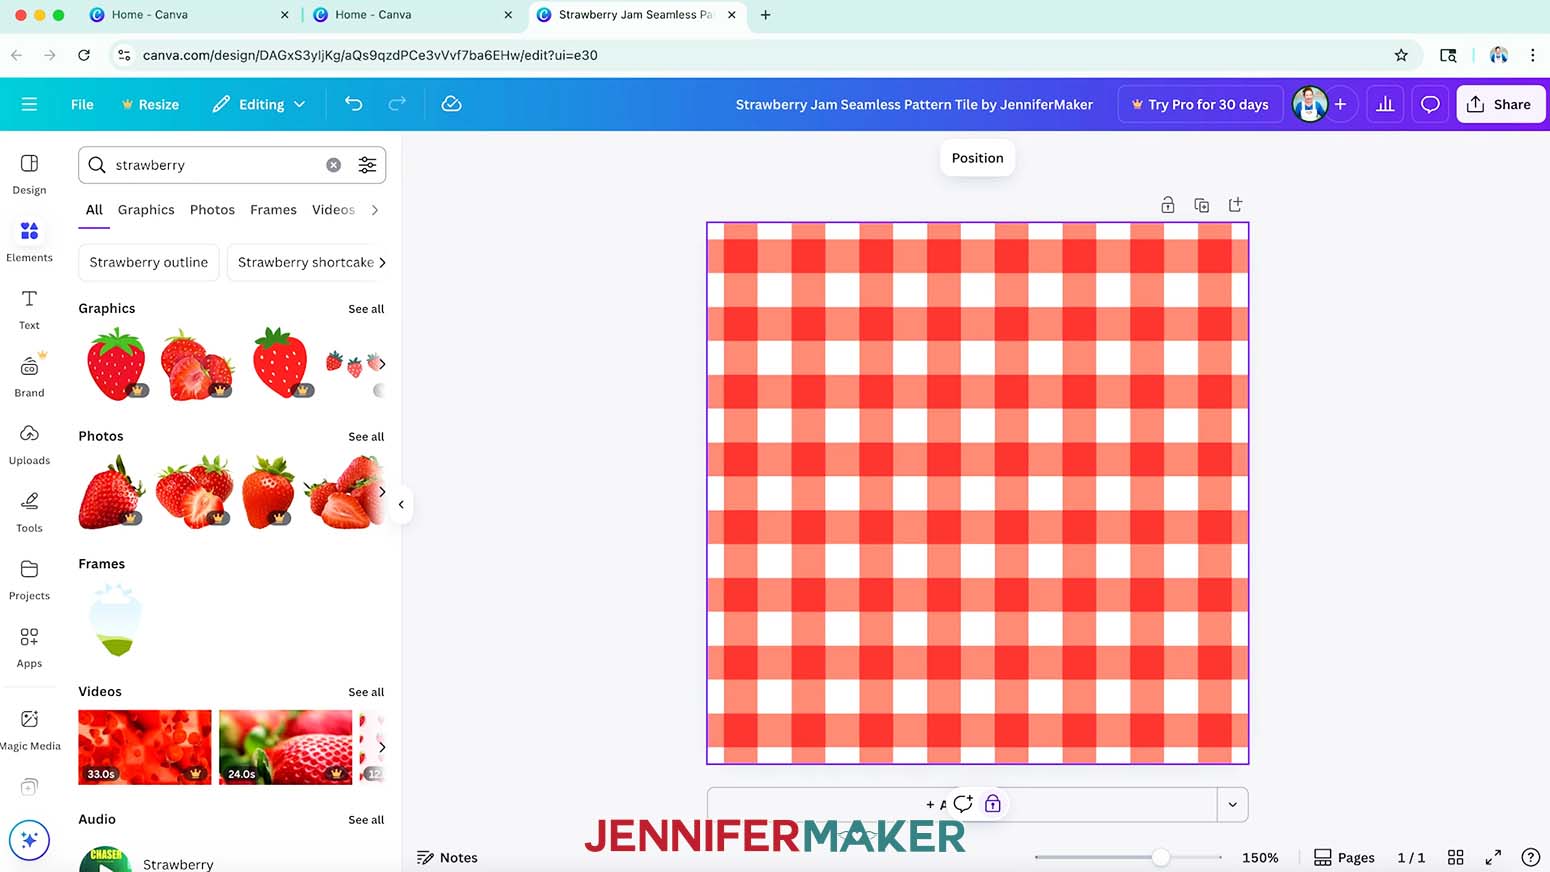
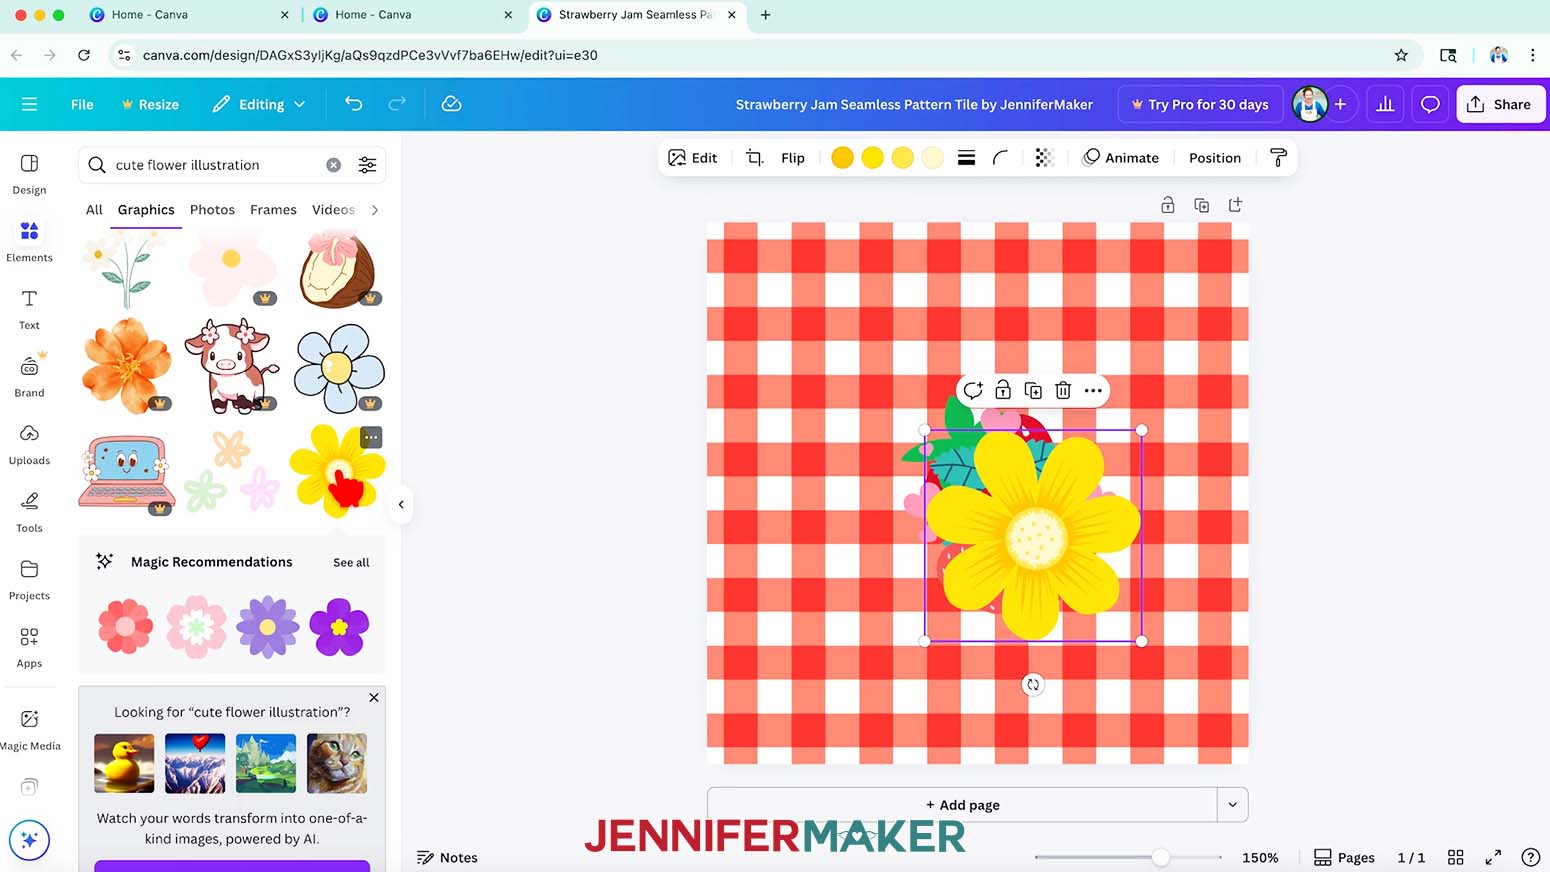
- To add Canva elements to your tile, click “Elements” in the side panel and type a word or phrase in the “Search” bar.
NOTE: I’ll search for “strawberry.” - Click “See all” to expand a section to see more available options in that category, like “Graphics.”
- Click an element to add it to your canvas.
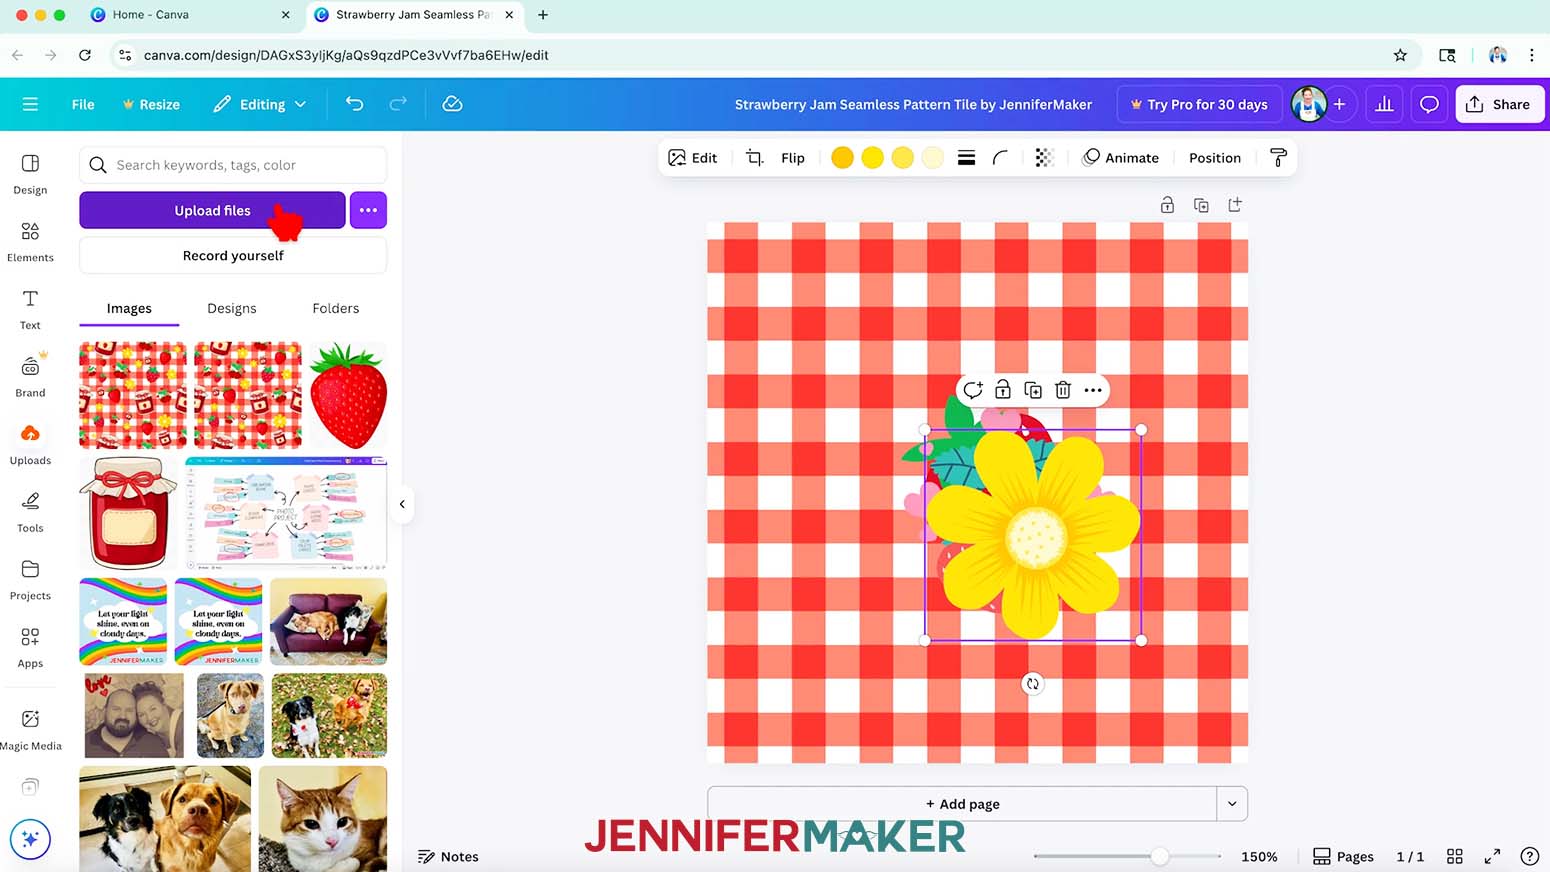
NOTE: I used two strawberry elements named “Fresa” and “Cute Quirky Valentines Day Stickers - Sweet Valentines Strawberries,” along with a flower element called “Cute Flower Illustration.” - Or, to upload elements from my free download folder, click on “Uploads” in the side panel, then “Upload files.”
- Select the PNG images you want to add and click “Open.”
- In the Uploads Panel, click the images to add them to your canvas.
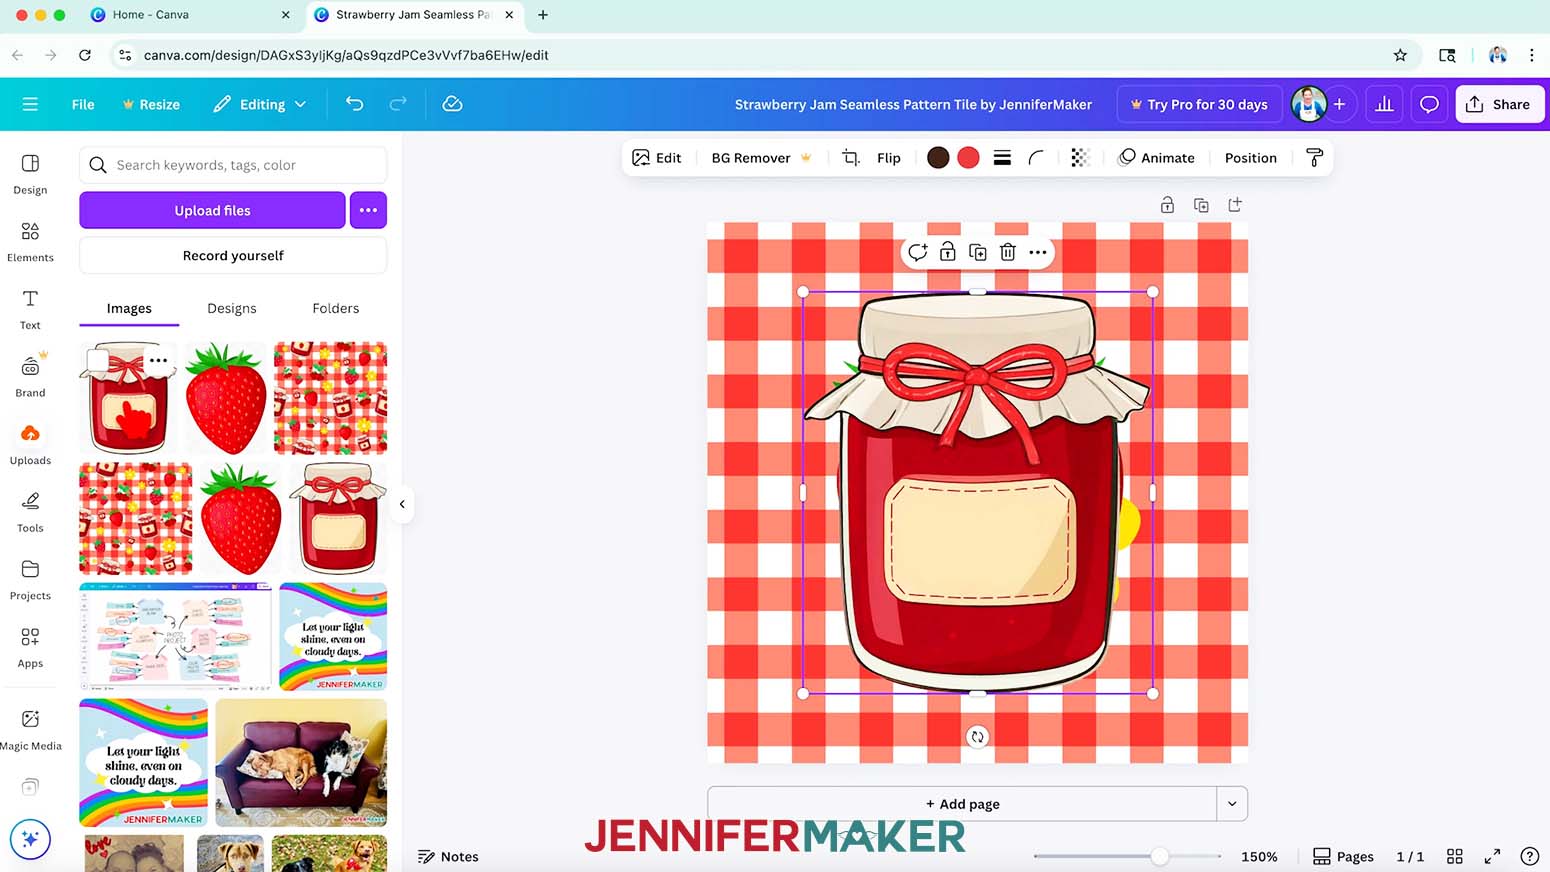
NOTE: I uploaded my jam jar and strawberry designs and added them to my canvas. - Resize your element(s) to be proportionate to your base design.
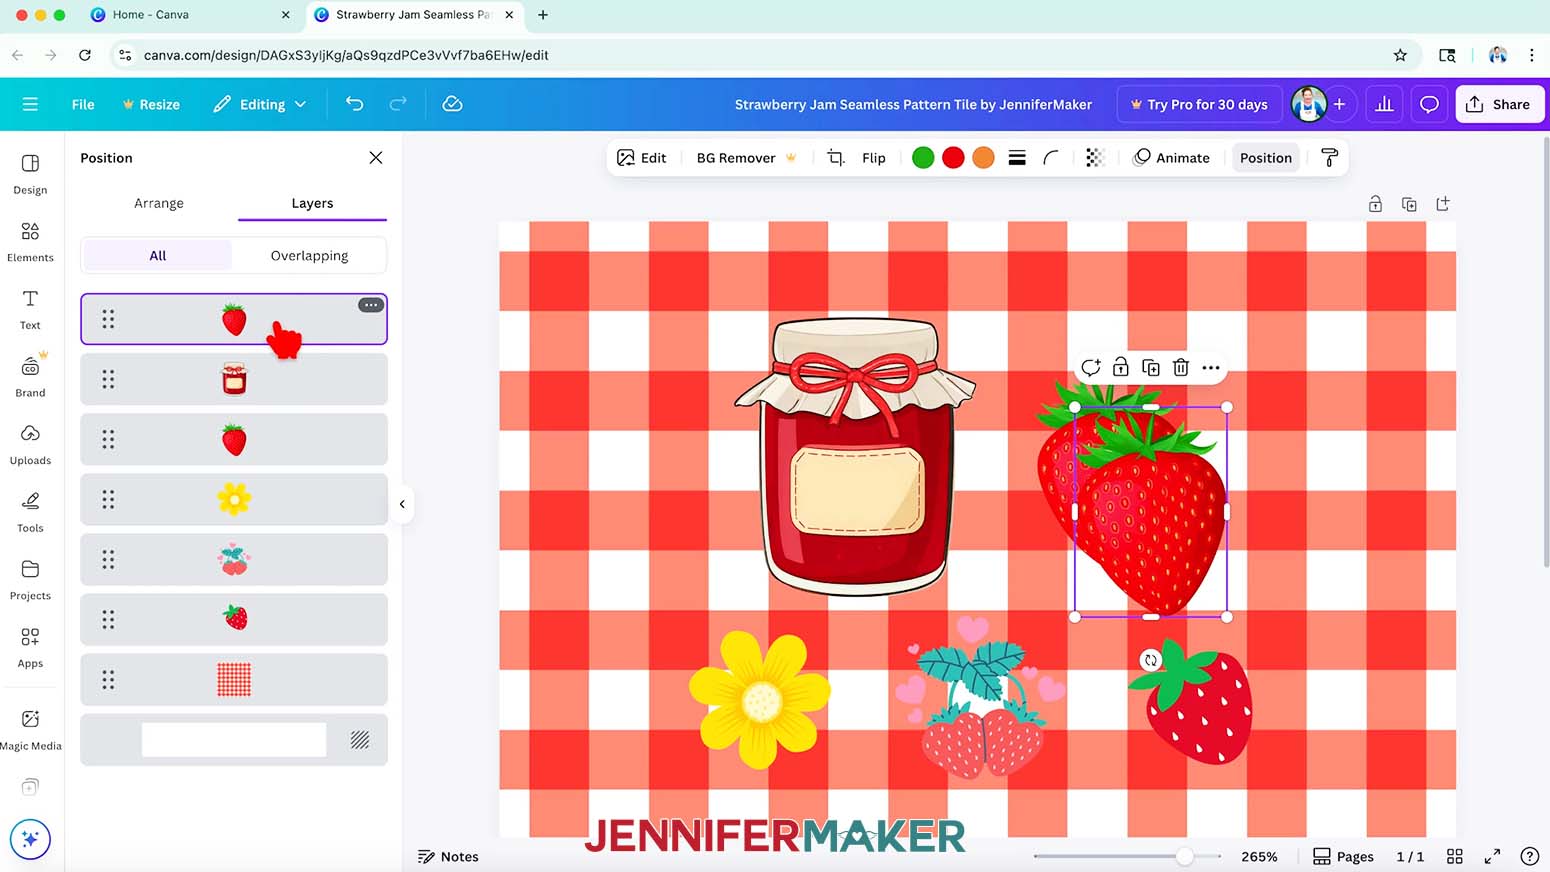
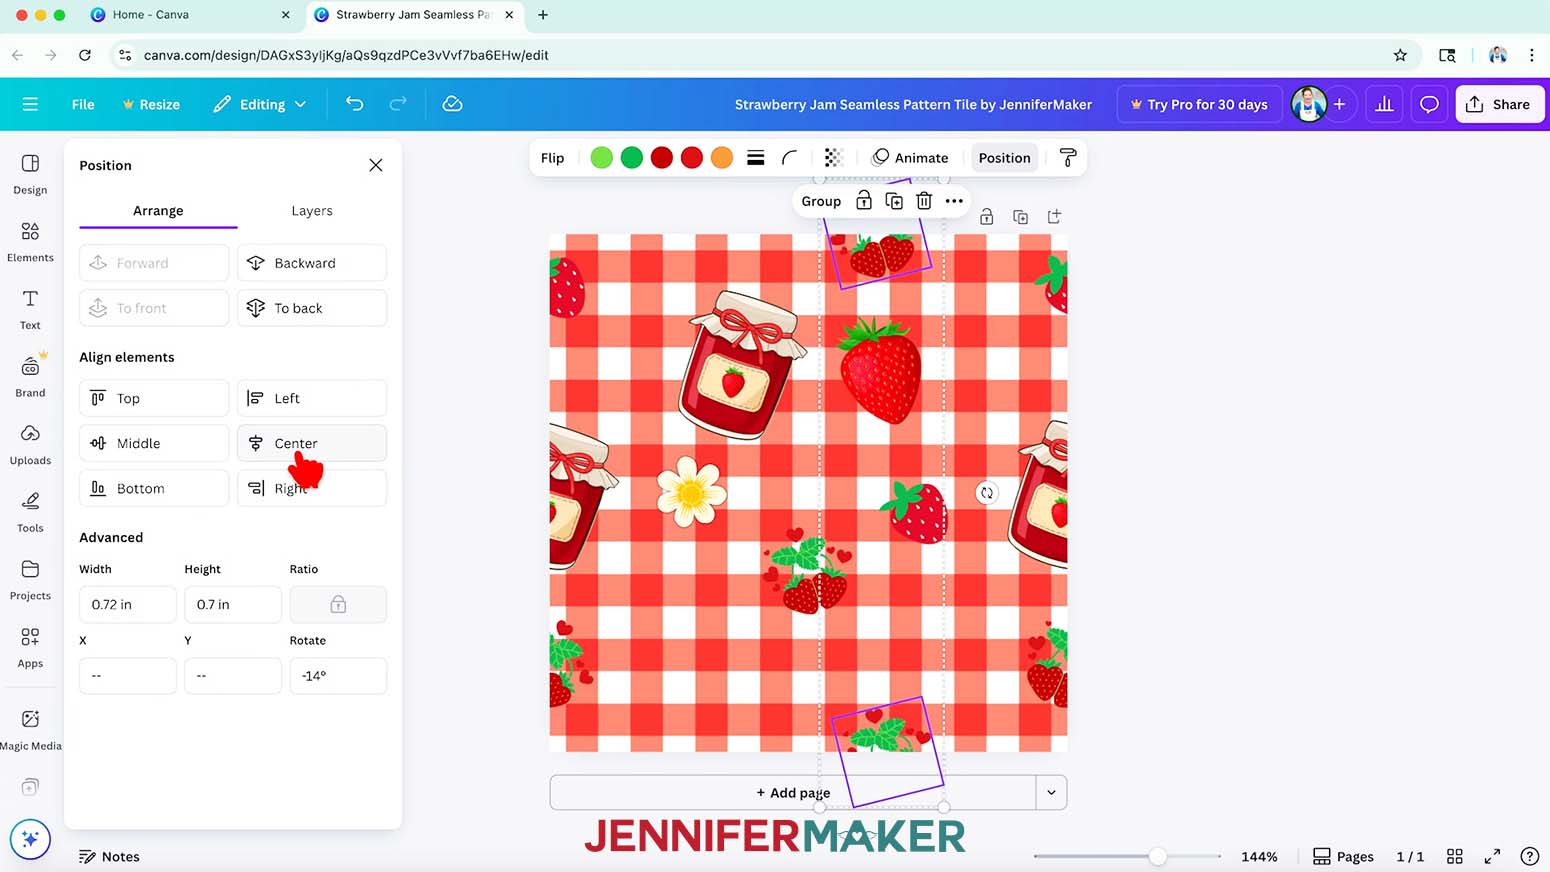
NOTE: I resized mine so they’re each 0.25” to 1” tall. - You can also create new elements by grouping existing elements. For example, to make a strawberry jam jar, first duplicate the strawberry.
- With the duplicated strawberry selected, click “Position,” then click “Layers.” If the strawberry isn’t already at the top of the layers, click and drag it to the top.
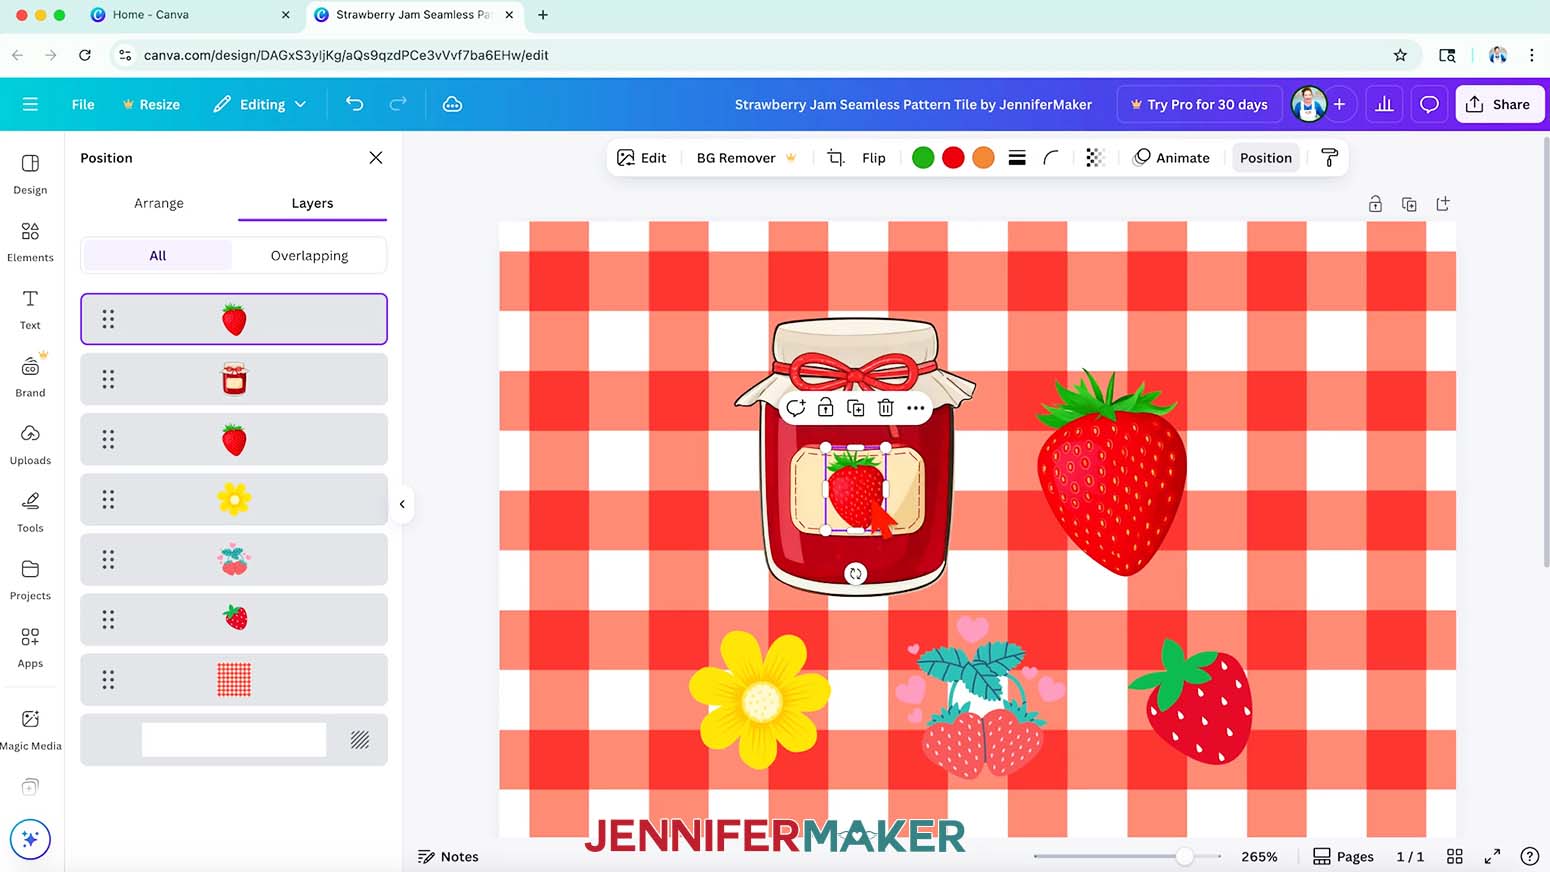
- Use the corner handles to resize the strawberry so it fits on the jam jar’s label.
- Adjust the strawberry so it’s centered on the jar’s label.
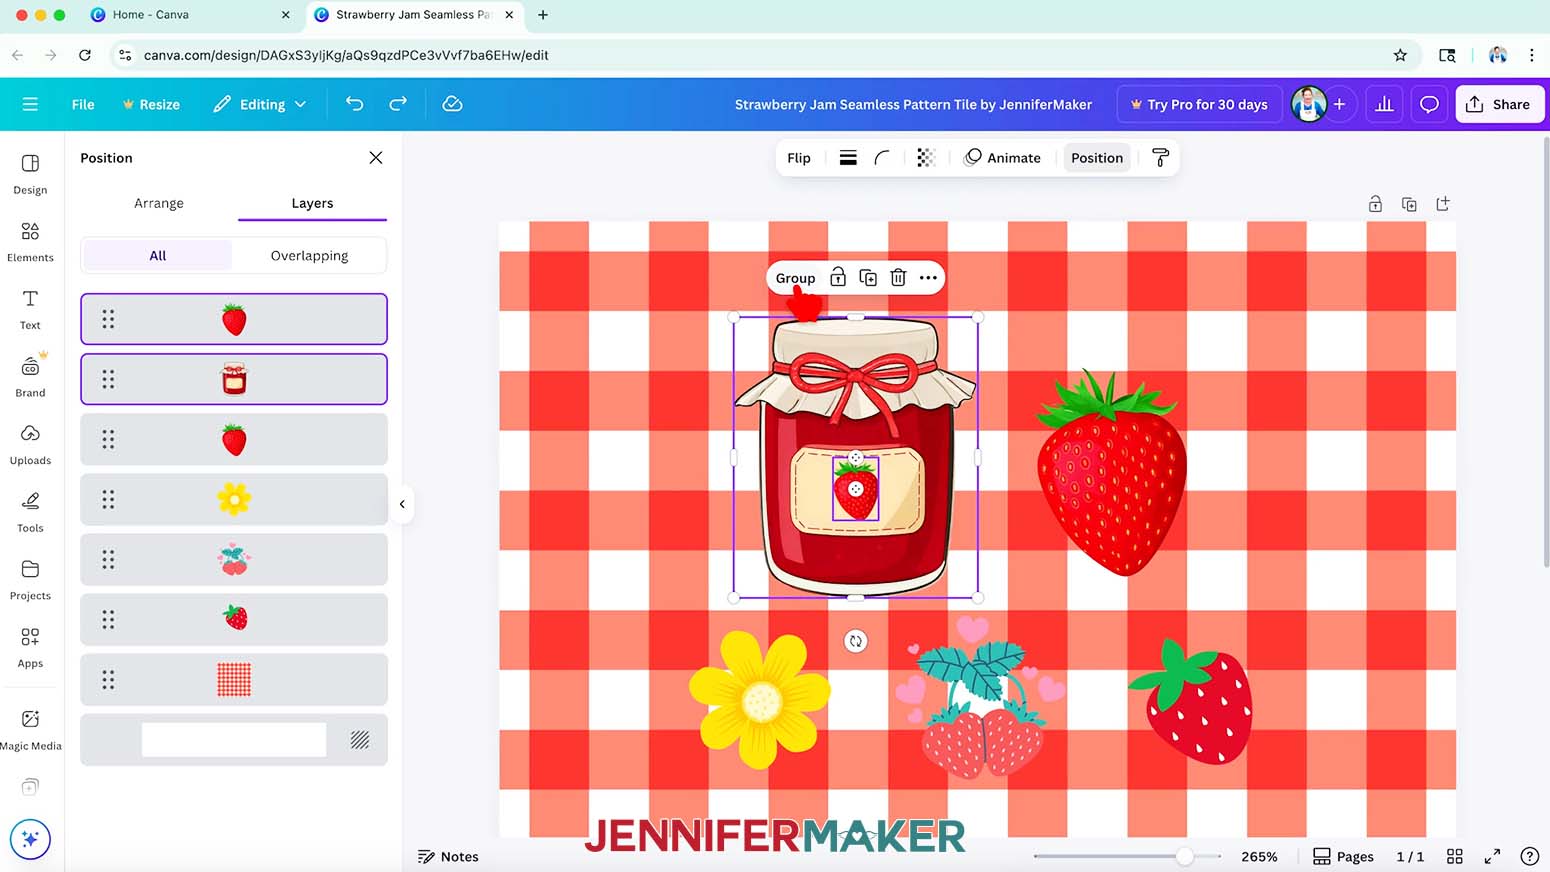
- Hold your Shift key on your keyboard and select the strawberry and the jam jar, then click “Group” to keep them together.
- Click a color swatch in the top menu to adjust your element’s color(s) if desired.
NOTE: I changed some of the colors of the “Sweet Valentines Strawberries” to the following:
Leaf veins: #7ED957
Leaves: #19B358
Strawberries: #BD0000
Hearts: #D22025
Seeds: #F89A49
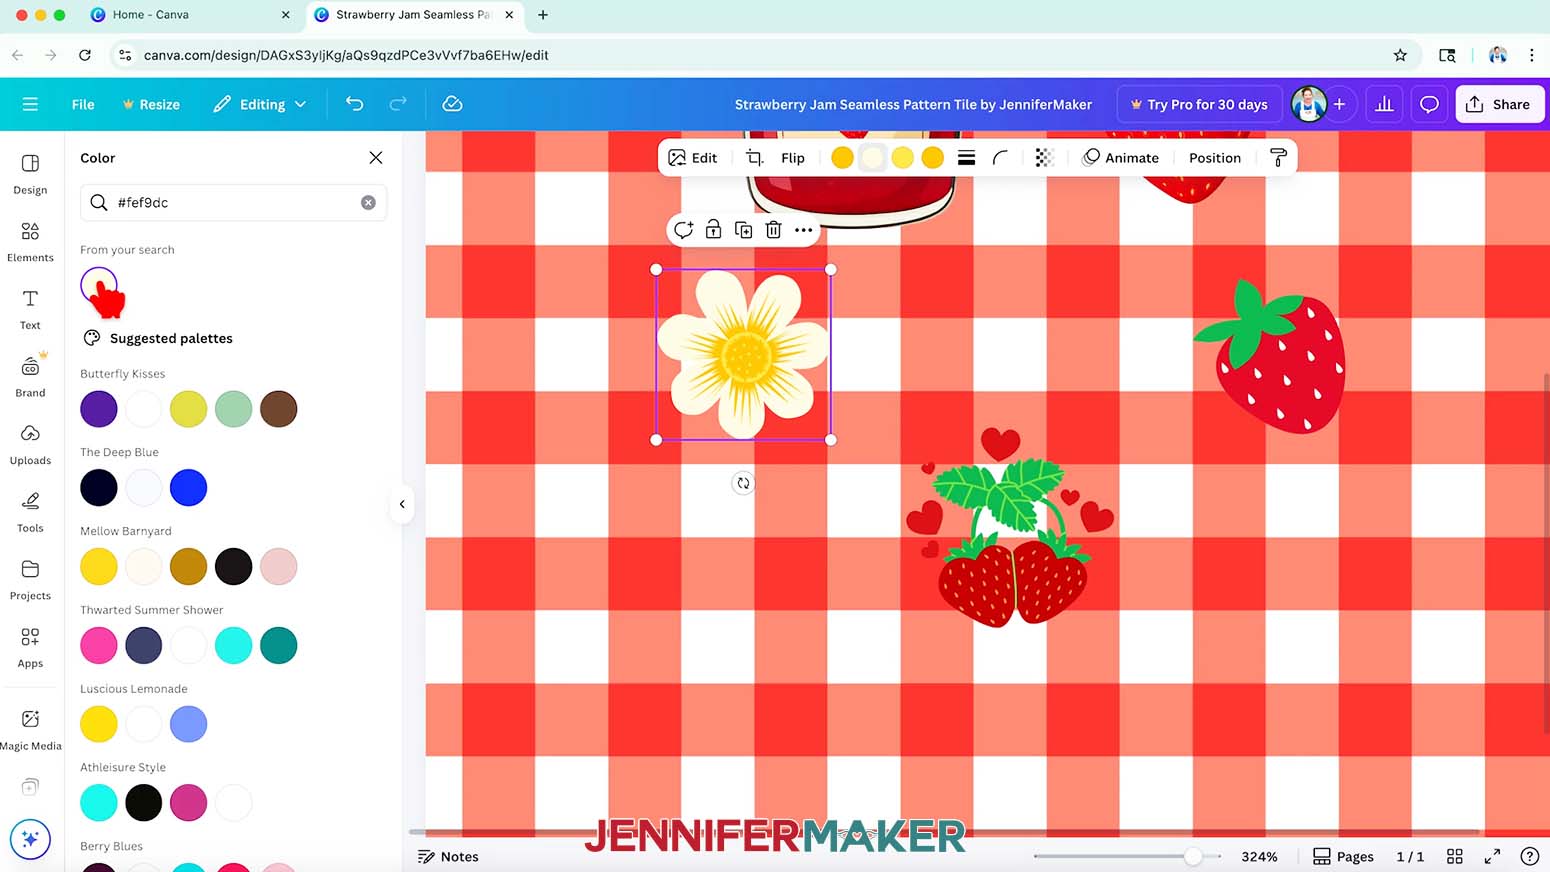
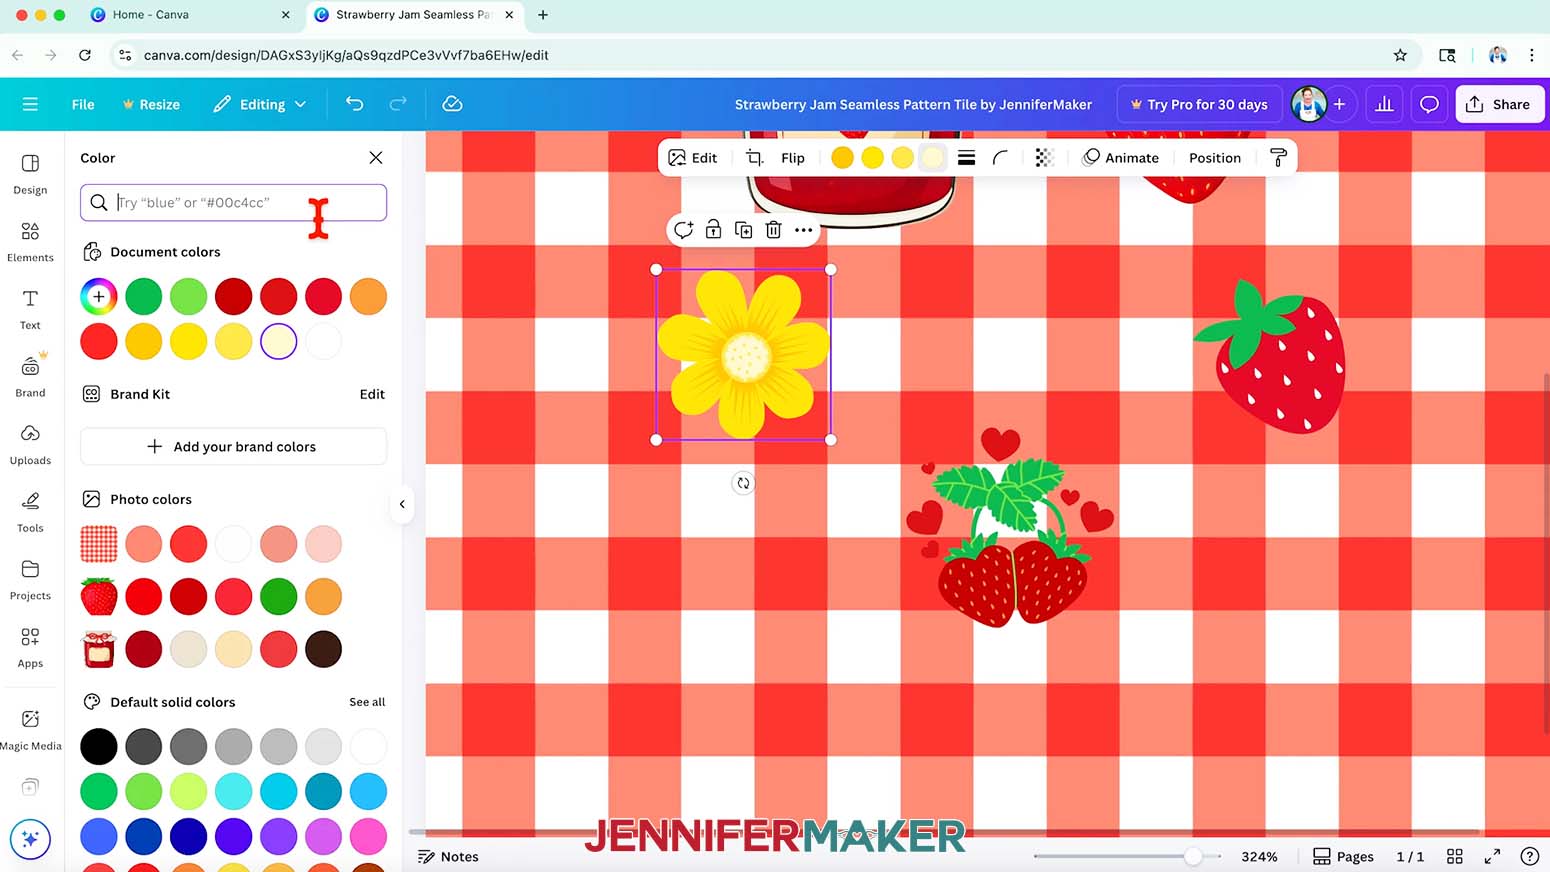
I changed some of the colors of the “Cute Flower Illustration” to the following:
Petals: #FEF9DC
Center: #FFBE0B
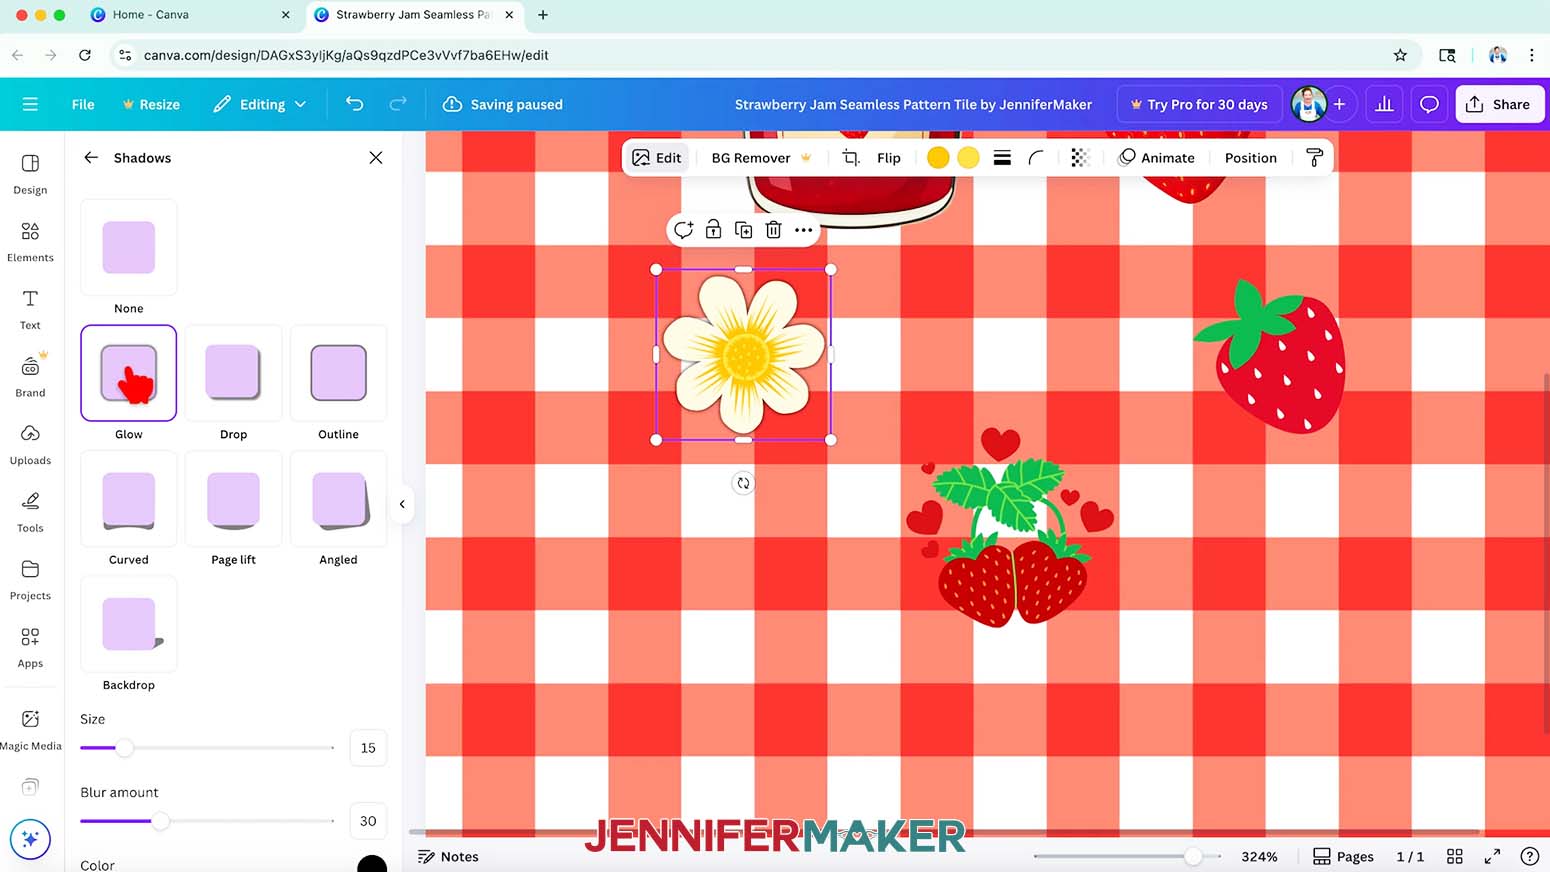
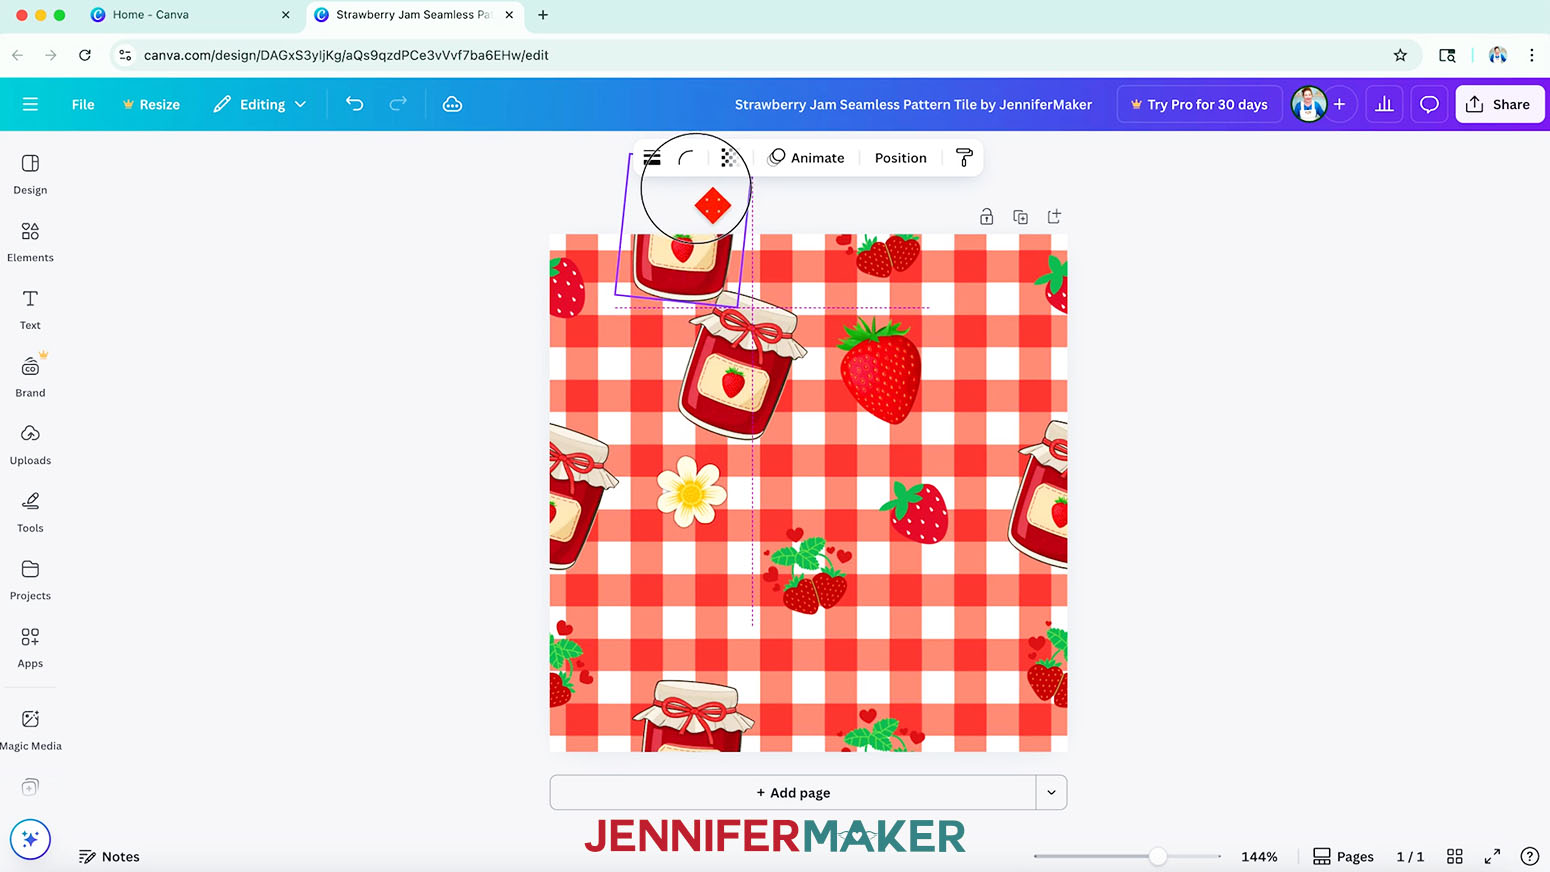
TIP: You can also use the colors shown under “Photo colors” to coordinate with your other existing elements. - Some elements in Canva cannot be directly color edited. This means that if you change the color, the result does not match the color you selected. As a workaround, click “Edit” and “Adjust,” then adjust the sliders until the color looks closer to what you want.
- You can also change an element’s look by clicking “Edit” at the top and selecting an “Effect” or “Filter” from the side menu.
NOTE: In “Effects,” I selected “Shadows,” then I chose “Glow” to add a slight outline around my “Cute Flower Illustration” element. You can change the “Size,” “Blur amount,” “Angle,” “Distance,” “Color,” and “Intensity” sliders to adjust the look of the shadow. I left my settings as-is. - Choose one of your elements to start detailing the design tile.
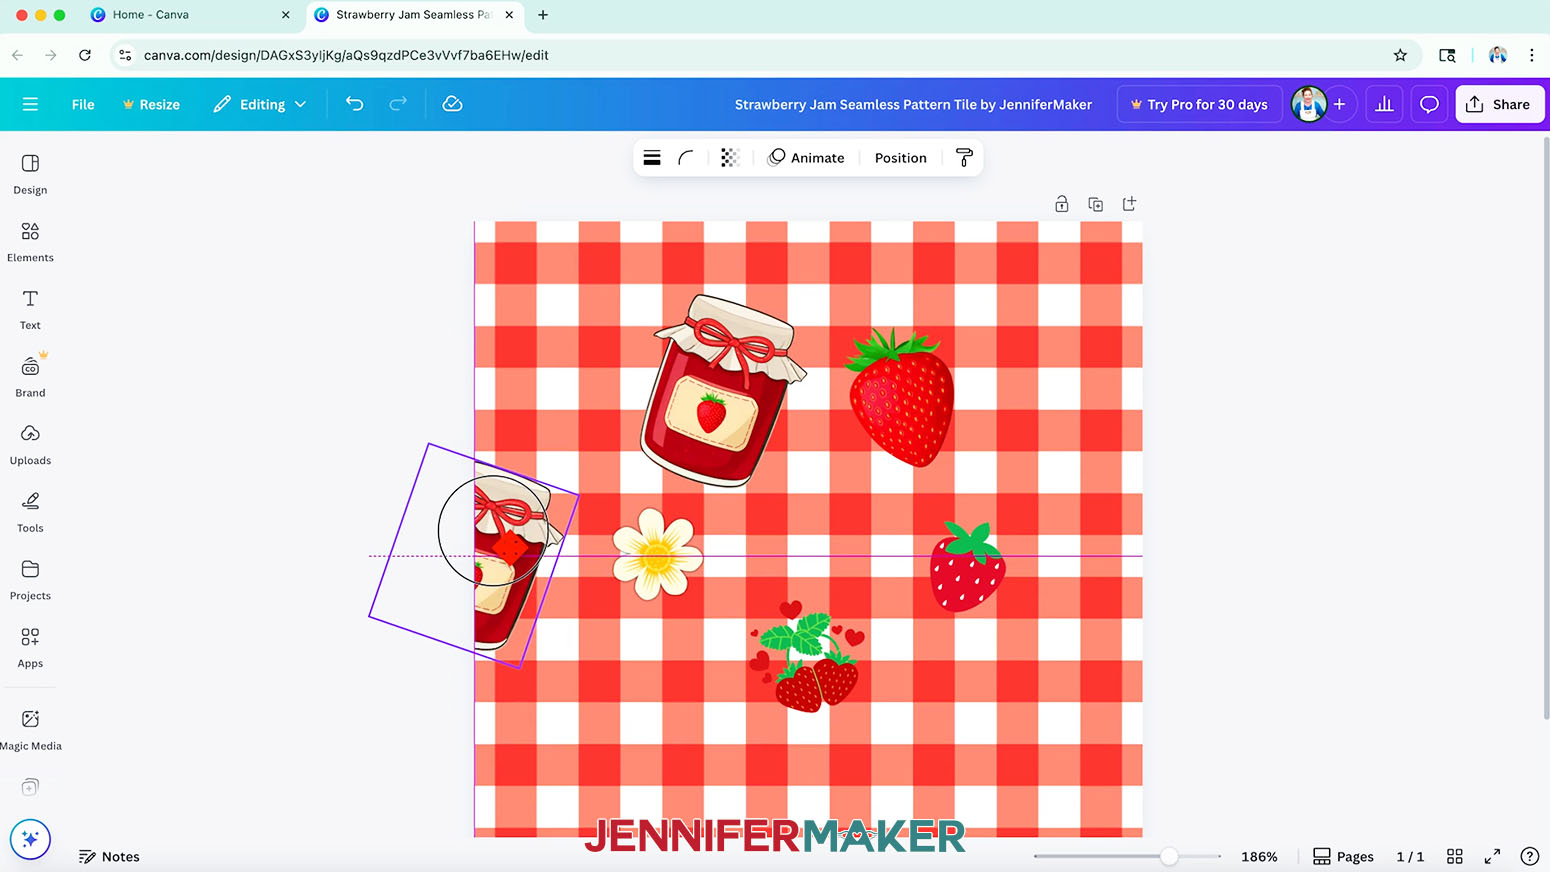
NOTE: I’ll start with the strawberry jam jar by duplicating it to keep the original intact. - For a seamless result, it’s most important to precisely place elements at the tile’s edges. Drag the first element to the center of the left edge halfway off the canvas, so it snaps into place vertically.
NOTE: A vertical pink guideline will appear along the edge of the canvas when the element is exactly half on and half off the canvas.
TIP: The elements look best in a repeating pattern if they are rotated in various ways. To rotate your elements, drag the curved arrow icon below the element to rotate it clockwise or counterclockwise. - Click the “Duplicate” icon to make a copy of the element.
- Drag the copy to the center of the right edge, halfway off the canvas, so it snaps into place vertically along the right edge, and the vertical pink guideline appears.
TIP: If it’s difficult to center the element half on and half off the edge, use the slider at the bottom to zoom in so you can see better.
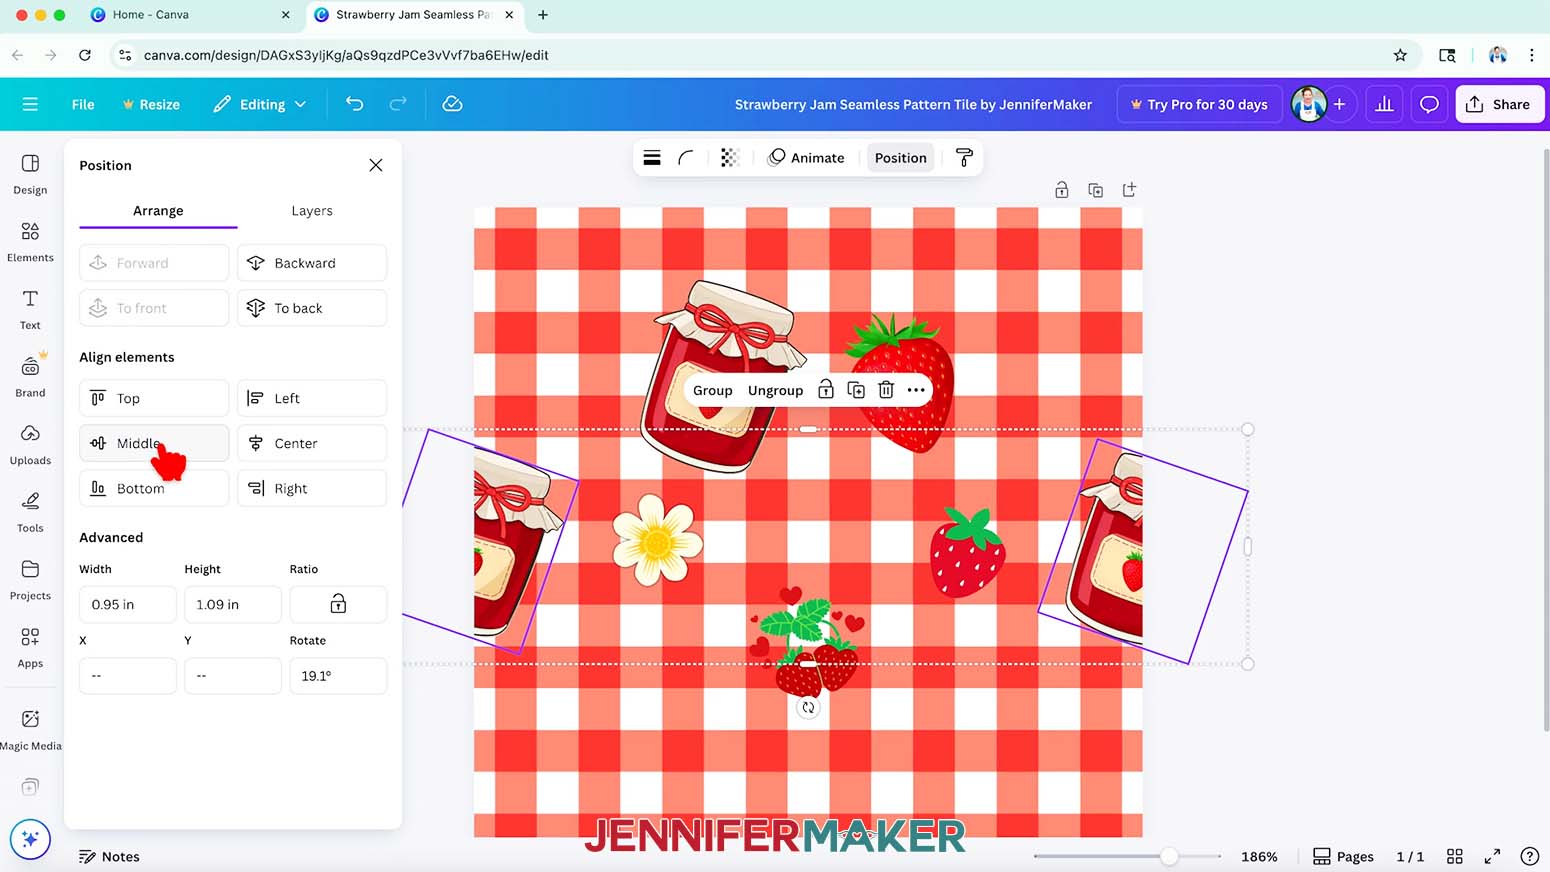
NOTE: Avoid positioning repeating edge images in corners because it can be tricky to get four images to align perfectly. - To make sure the elements are perfectly aligned for a repeating pattern, hold your Shift key on your keyboard and click the element and its duplicate to select both.
- Click “Position” and in the “Arrange” tab under “Align elements,” click “Middle.”
- Repeat steps 16-21 to position other elements and their duplicates along the left and right edges.
TIP: I recommend placing two to three repeating edge images along each edge. - To add repeating edge elements to the top and bottom edges of the tile, drag an element to the the top edge of the canvas, halfway off the canvas, so it snaps into place horizontally along the top edge. A horizontal pink guideline will appear along the edge of the canvas when the element is exactly half on and half off the canvas.
- Click the “Duplicate” icon to make a copy of the element.
- Drag the element to the center of the bottom edge of the canvas, halfway off the canvas, so it snaps into place horizontally along the bottom edge, and the horizontal pink guideline appears.
- To make sure the elements are perfectly aligned for a repeating pattern, hold your Shift key on your keyboard and click the element and its duplicate to select both
- Click “Position” and in the “Arrange” tab under “Align elements,” click “Center.”
NOTE: Remember, when aligning repeating edge images that go off of the left and right edges of the canvas, under “Align elements,” use “Middle.” When aligning repeating edge images that go off of the top and bottom edges of the canvas, under “Align elements,” use “Center.” - Repeat steps 23-27 to position other elements and their duplicates along the top and bottom edges.
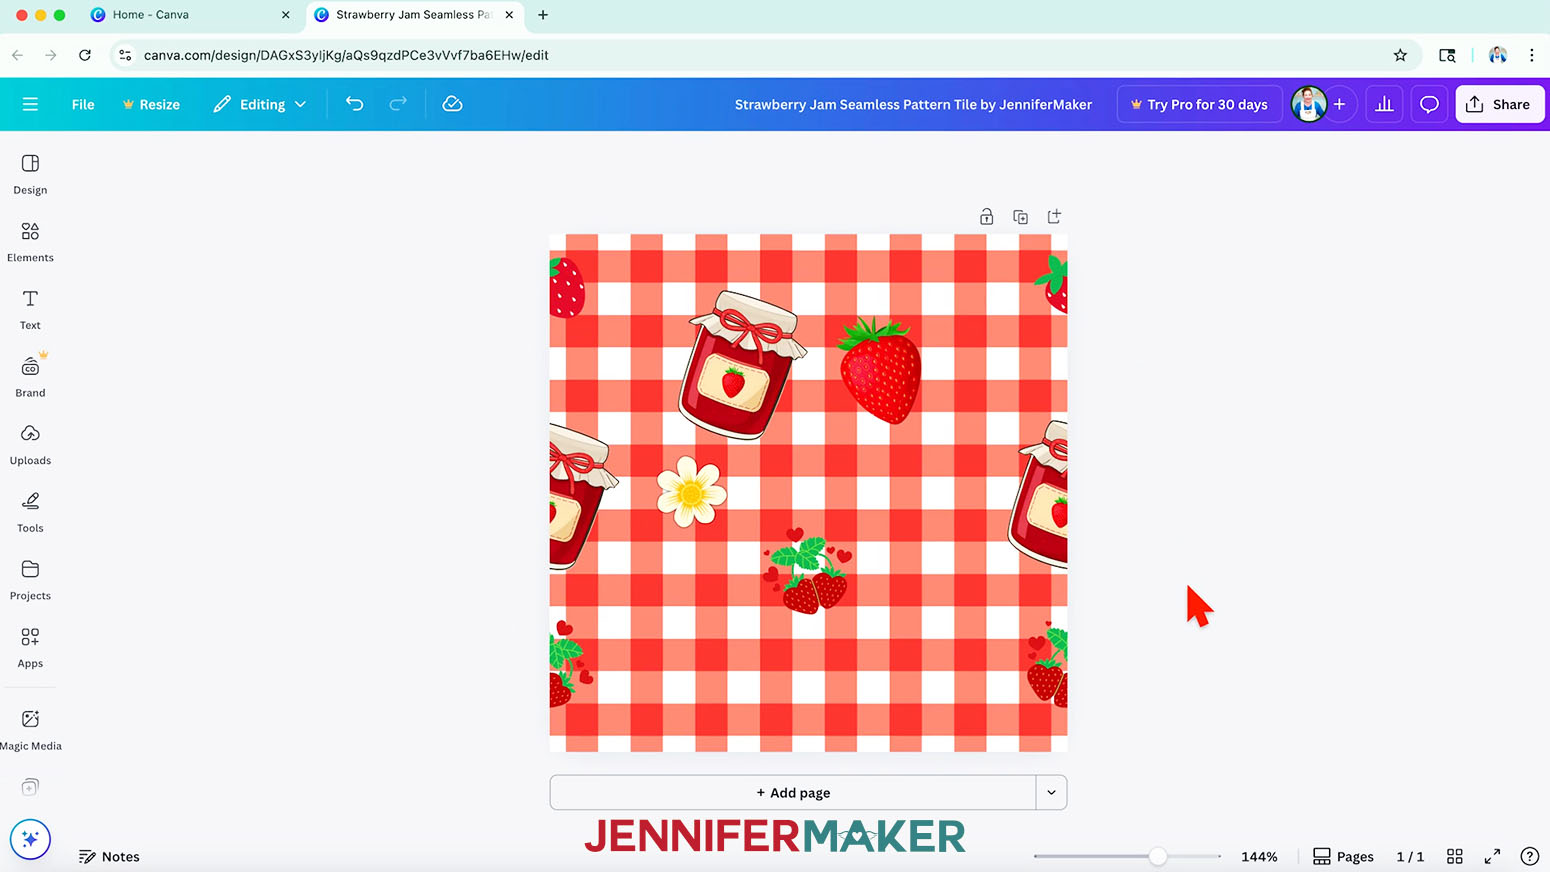
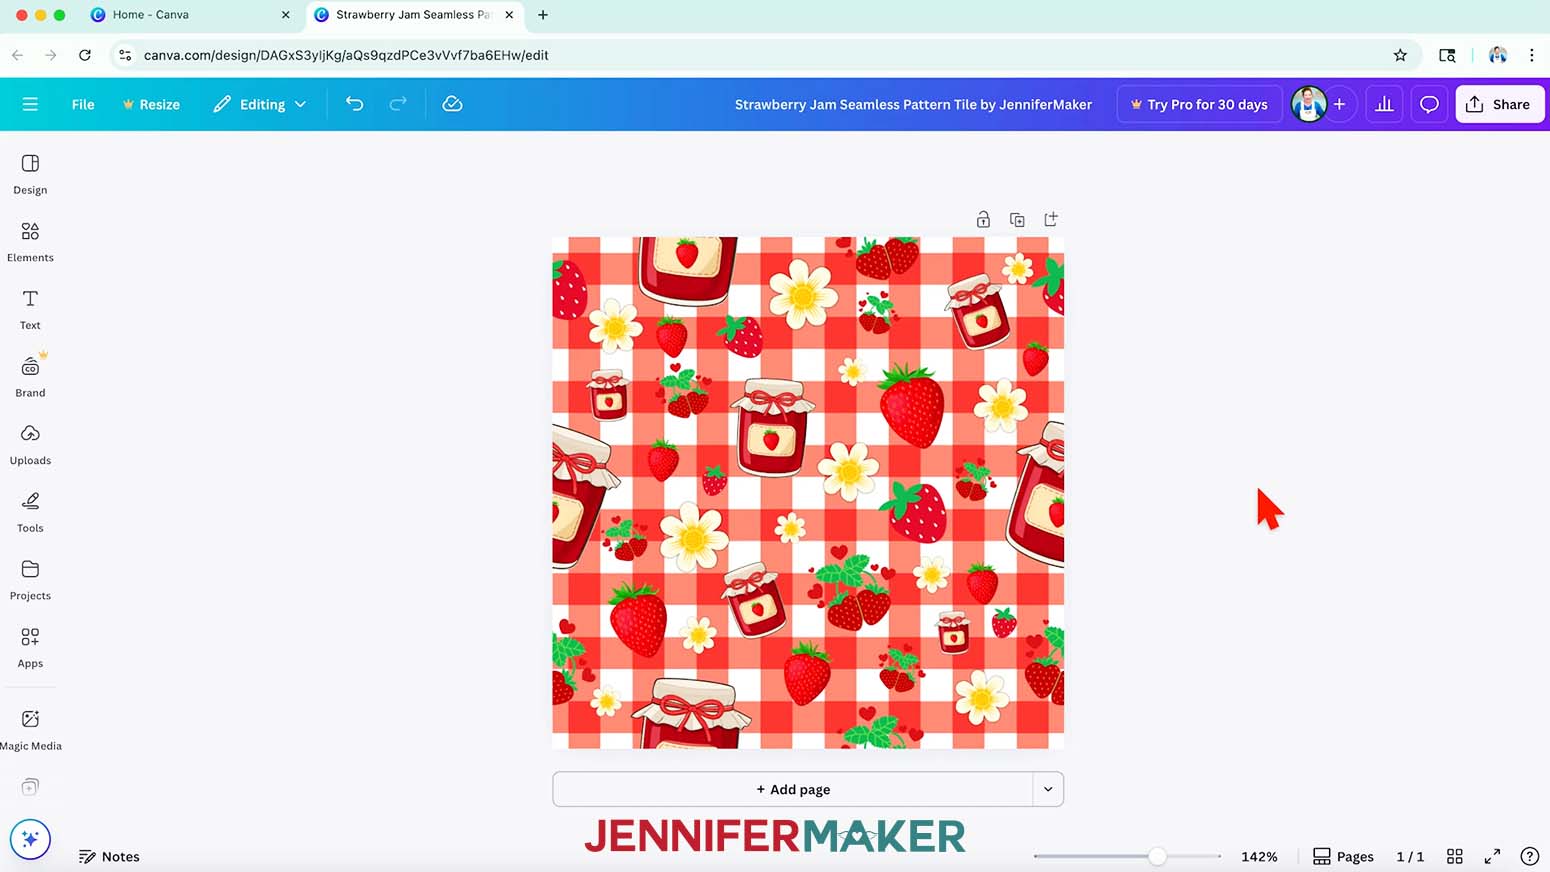
- Duplicate some or all of the elements that you used along the edges to fill in the empty space in the middle of the tile. Resize, rotate, and position them so the elements are evenly distributed around the tile.
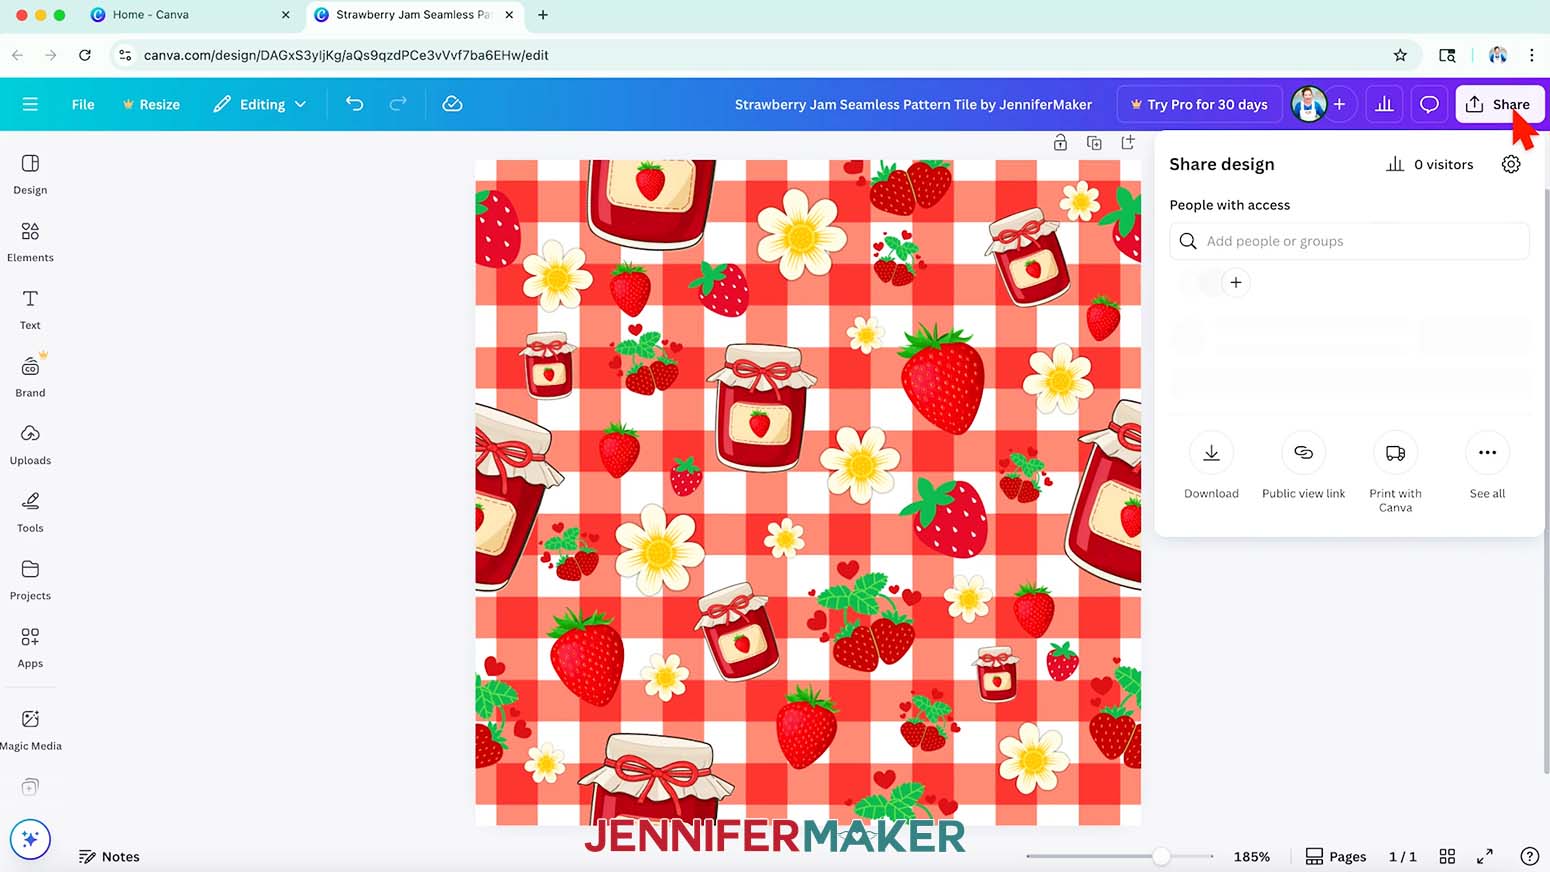
NOTE: Be sure not to move any of the elements you’ve placed half on and half off the edges. - To test if your tile is seamless, click “Share.”
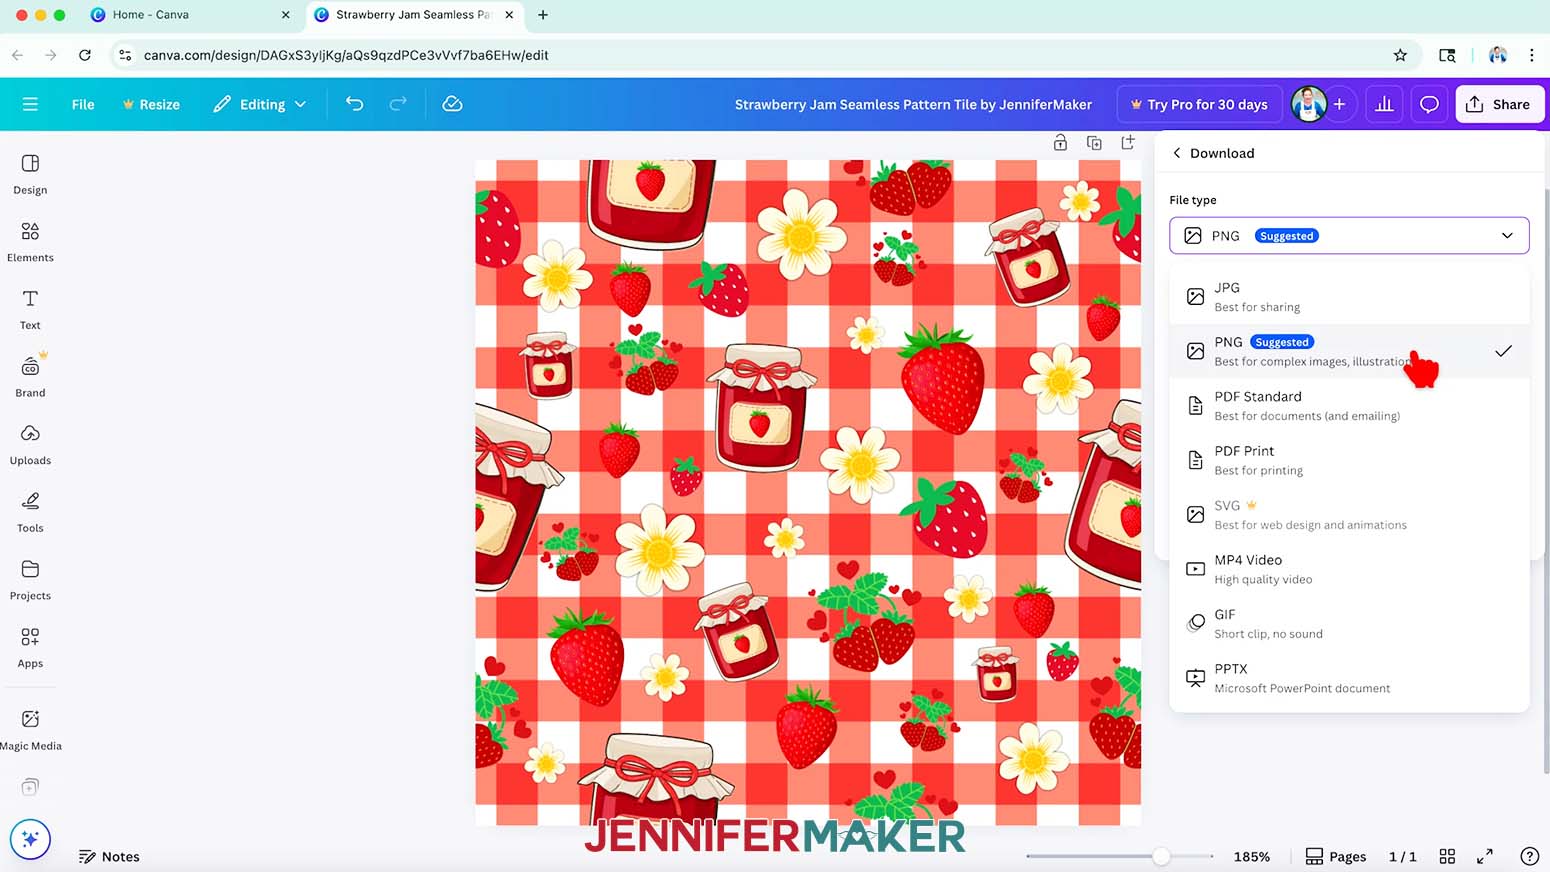
- Click “Download.”
- Under “File type,” select “PNG.”
- Click “Download” to save the test pattern tile to your computer.
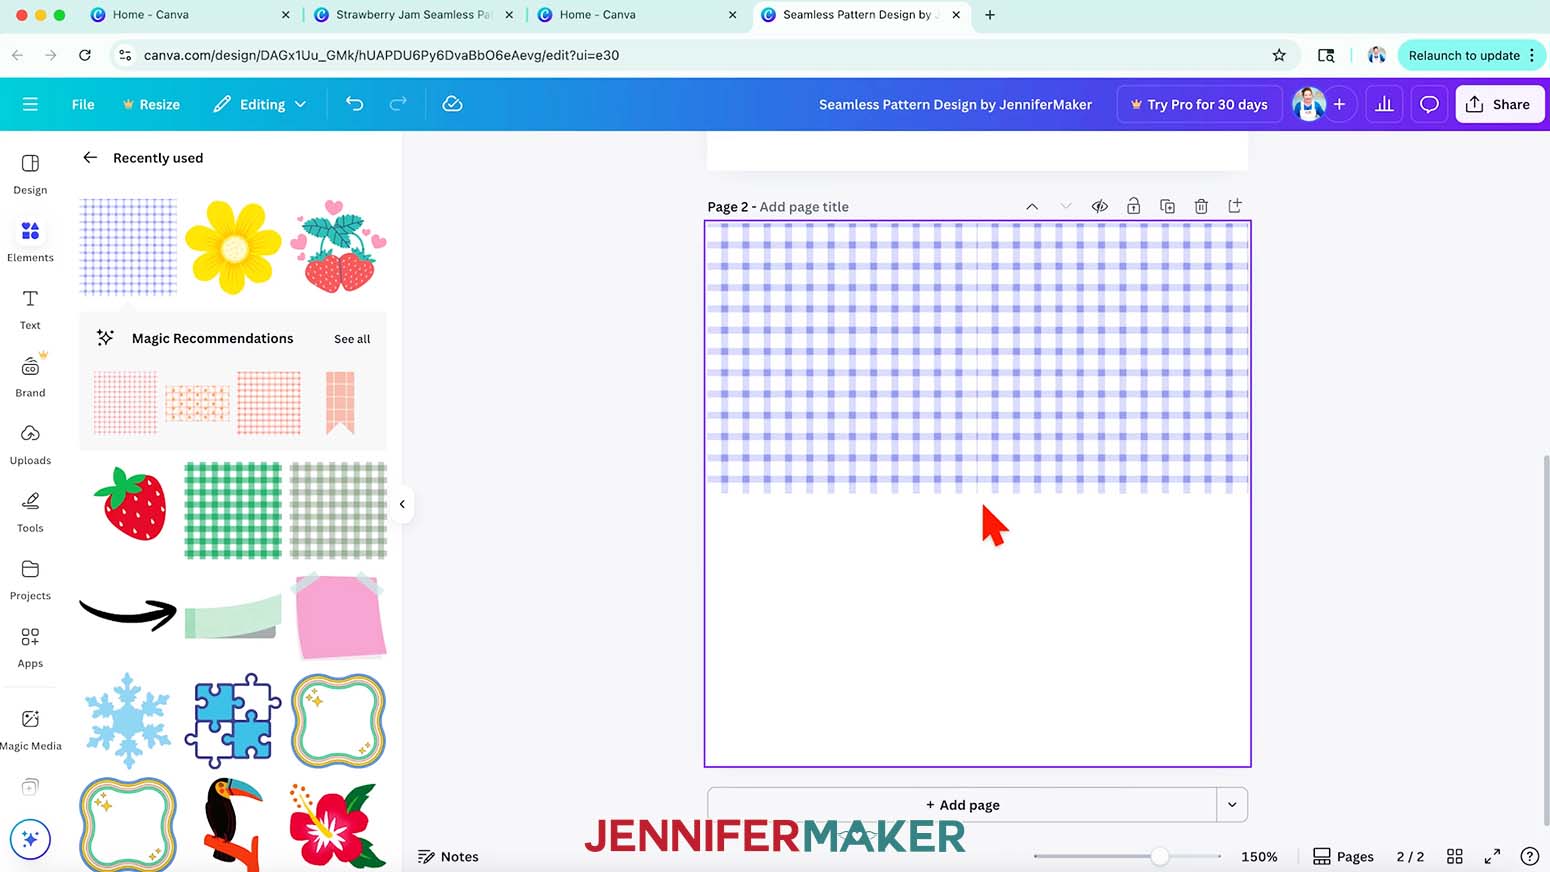
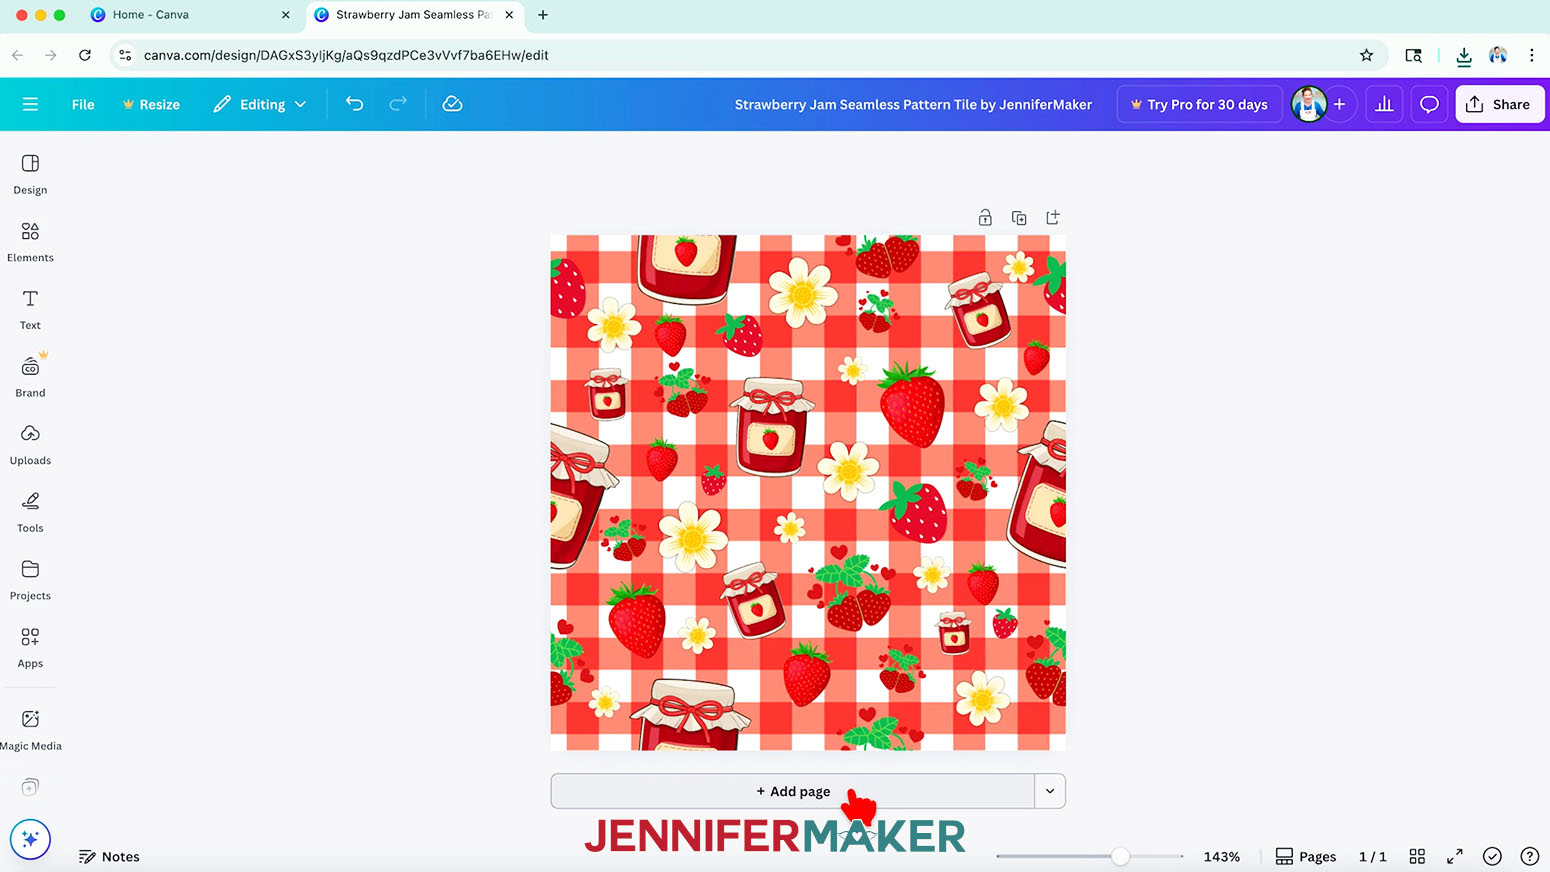
- Click the “Add page” icon to add another page below the first.
- Upload the test tile pattern and add it to the new page.
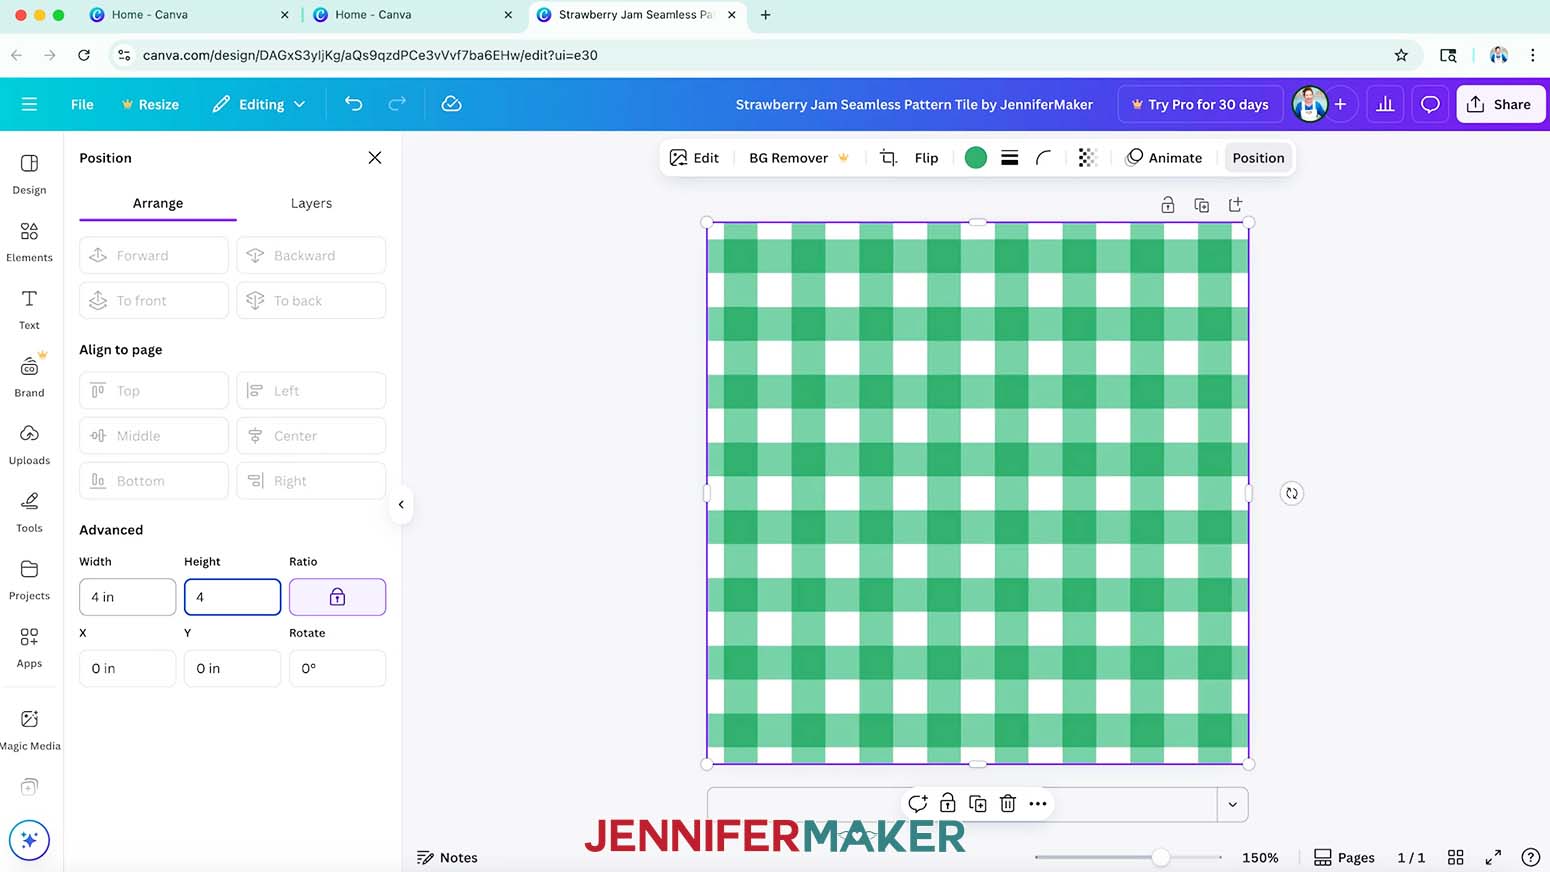
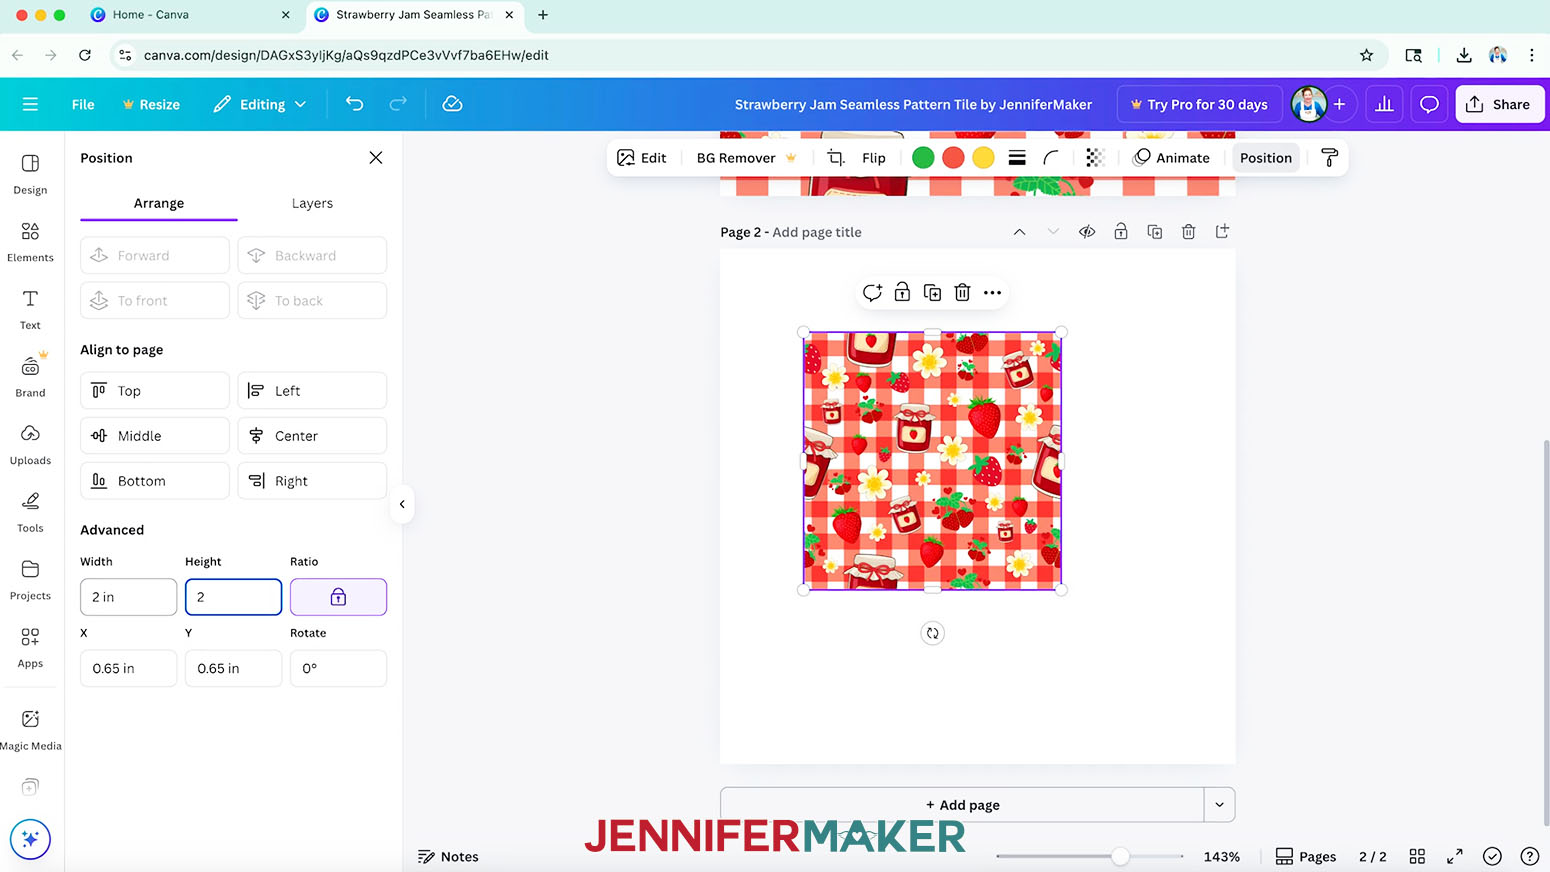
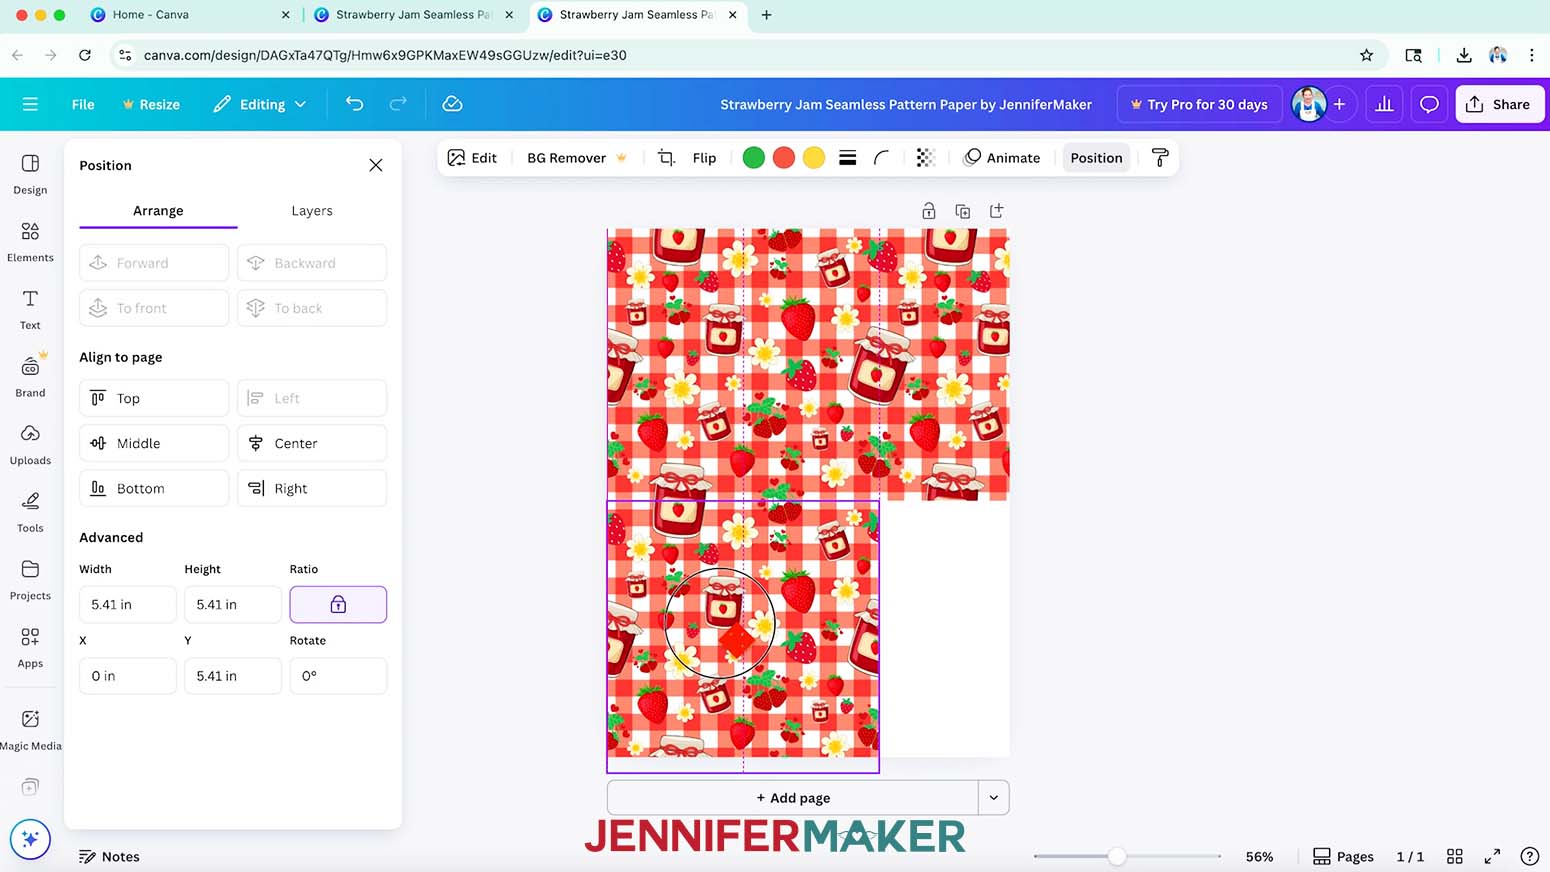
- Click “Position,” and in the “Arrange” tab under “Advanced,” keep the “Ratio” lock icon closed to maintain proportions, and resize the grouped tile’s “Width” to 2 inches. The “Height” should automatically resize to 2 inches as well.
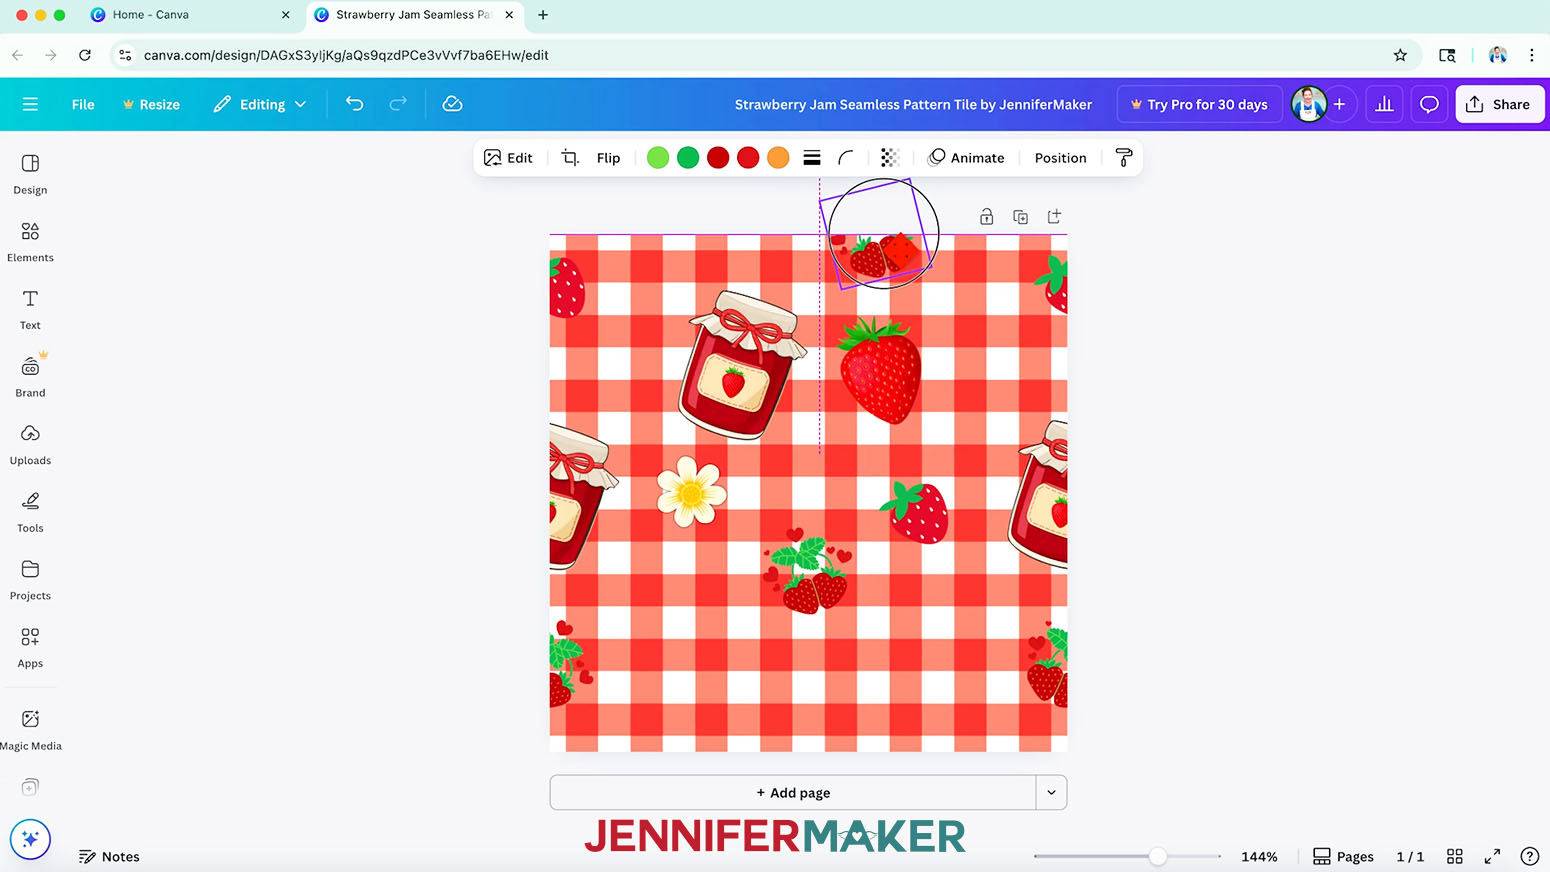
- Drag the tile copy to the top left area of the canvas until it snaps into place.
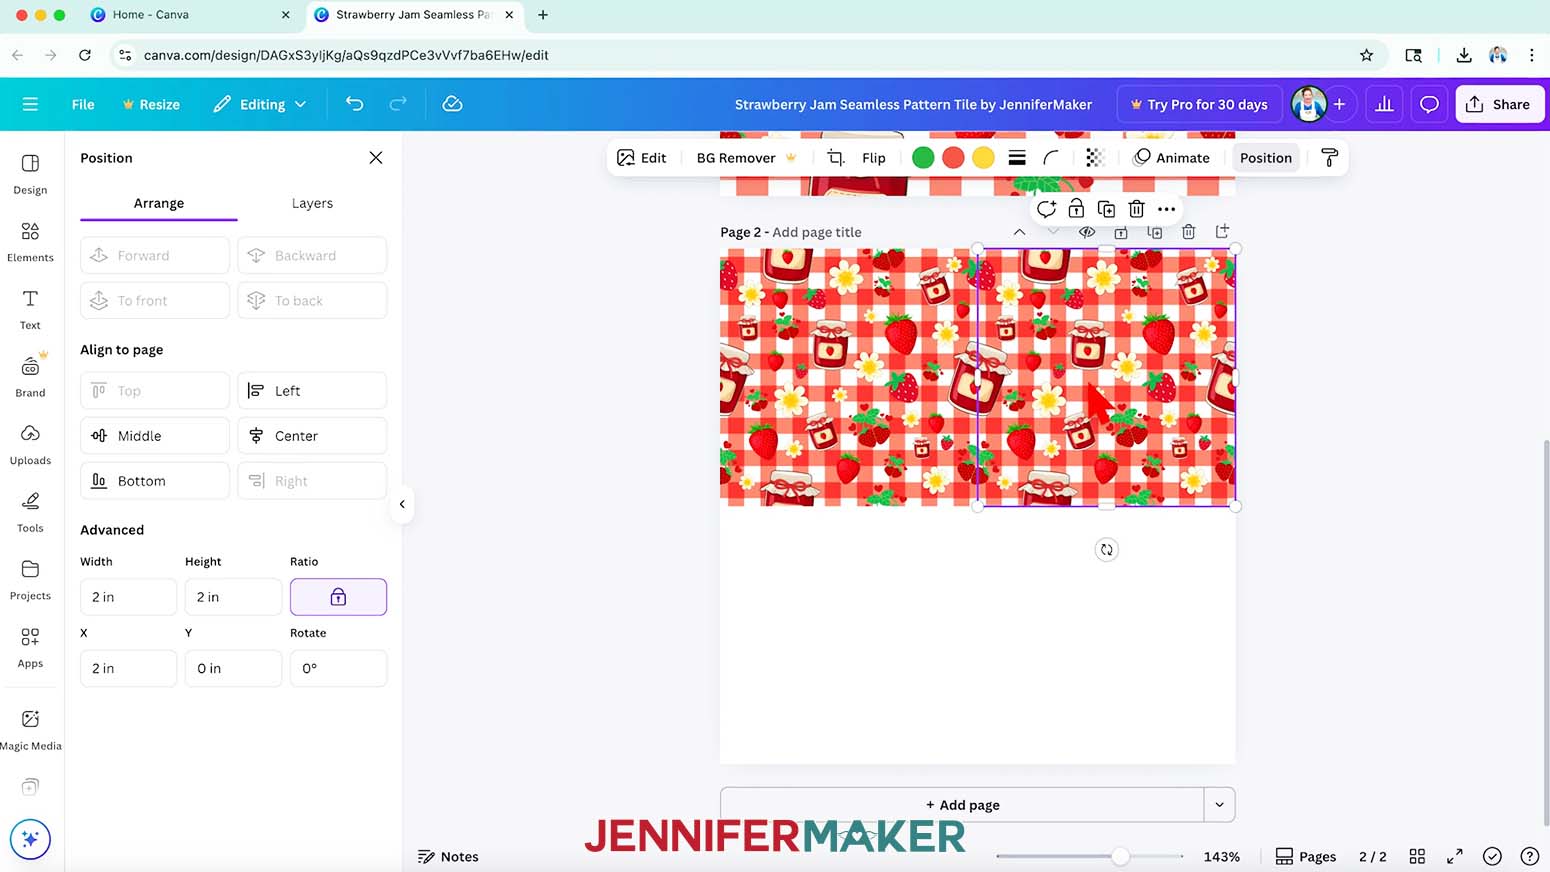
- With the tile still selected, click the “Duplicate” icon to make a duplicate.
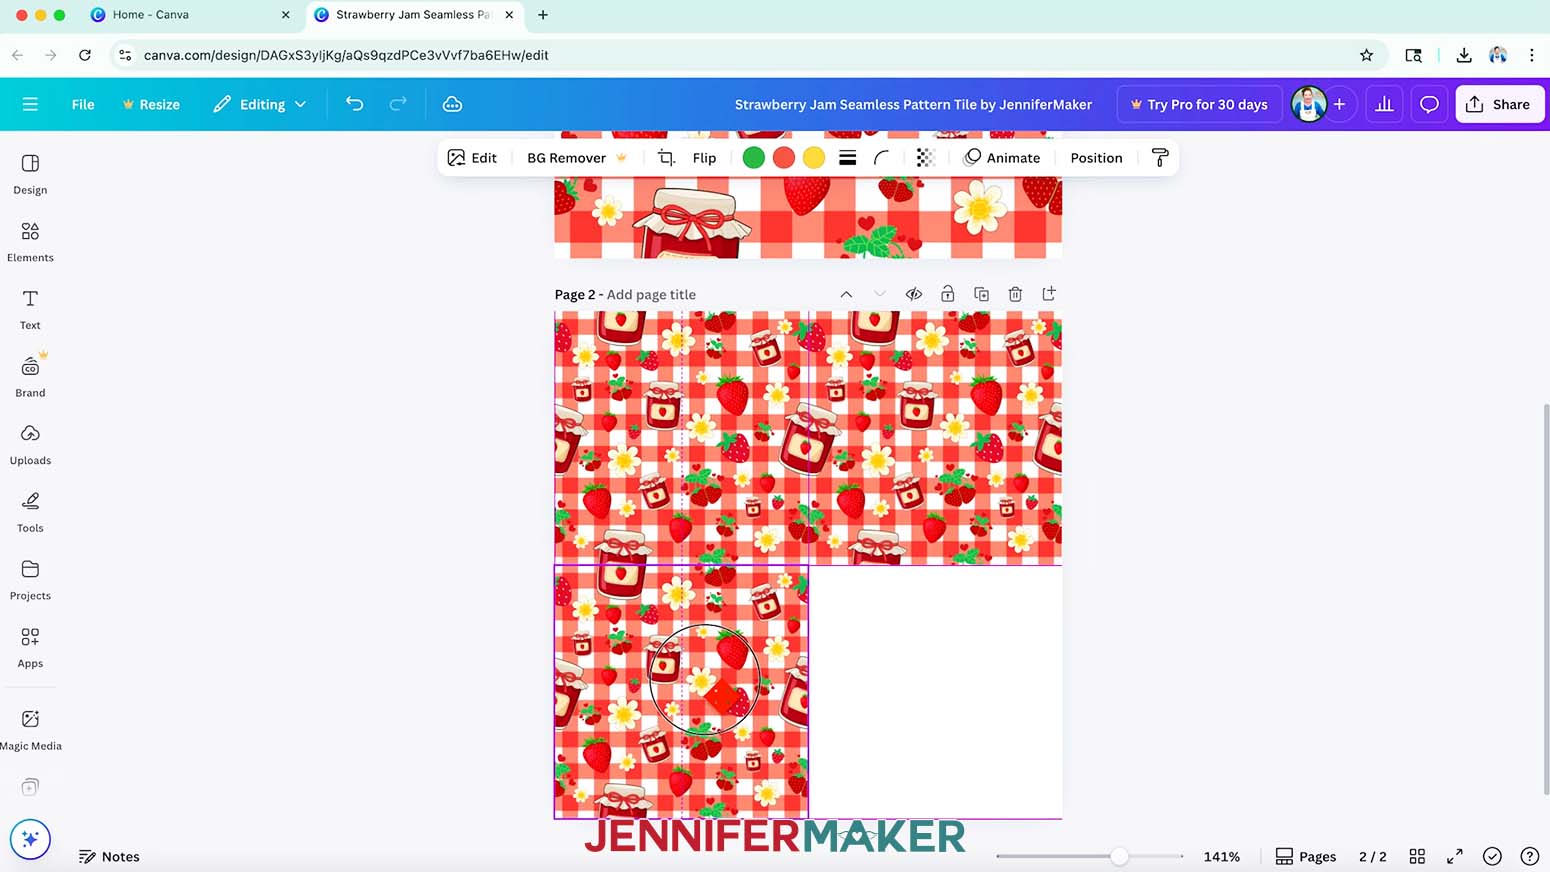
- Drag the duplicate so its left edge matches up with the right edge of the original tile and it snaps into place. If the design is seamless from left to right, the design will line up across both tiles.
- If the design does not line up across both background images, it’s not truly seamless. Go back and make adjustments until it is.
NOTE: You may see a white gap or line between the two tiles. This can be a problem later (I’ll show you when), but it’s fine for now. - Repeat steps 37-40, aligning the duplicate along the bottom edge of the original background image. If the design is seamless from top to bottom, the design will line up across both background tiles.
- If the design does not line up across both background images, it’s not truly seamless. Go back and make adjustments until it is.
- Once you’ve verified that your tile is seamless in both directions, delete the second page, and any excess elements, leaving only the original 4” x 4” canvas with one tile. If the tile is not seamless and you need to make adjustments, download the adjusted PNG again using a new file name so you don’t confuse it with the first.


STEP 4: MAKE A SEAMLESS PATTERN TO PRINT ON PAPER
- On the Canva Home screen, click “Create.”
- Click “Custom size.”
- Change the Units to “in” for inches, then enter “8” in the “Width” field and “10.5” in the “Height” field.
NOTE: I chose a size that is 0.25” smaller on all sides than my 8.5” x 11” paper I’m printing the pattern on so nothing will get cut off during printing. - Click “Create new design.”
- Click on “Uploads” in the side panel, then “Upload files.”
- Select the seamless pattern tile PNG you created and click “Open.”
NOTE: You can also use my pre-designed tiles by clicking the links in my PDF file, which will open on their own canvas in Canva. Save the design as a PNG file, download it, and upload it to Canva. Then start with step 7 below. - In the “Uploads” Panel, click the PNG to add it to your canvas.
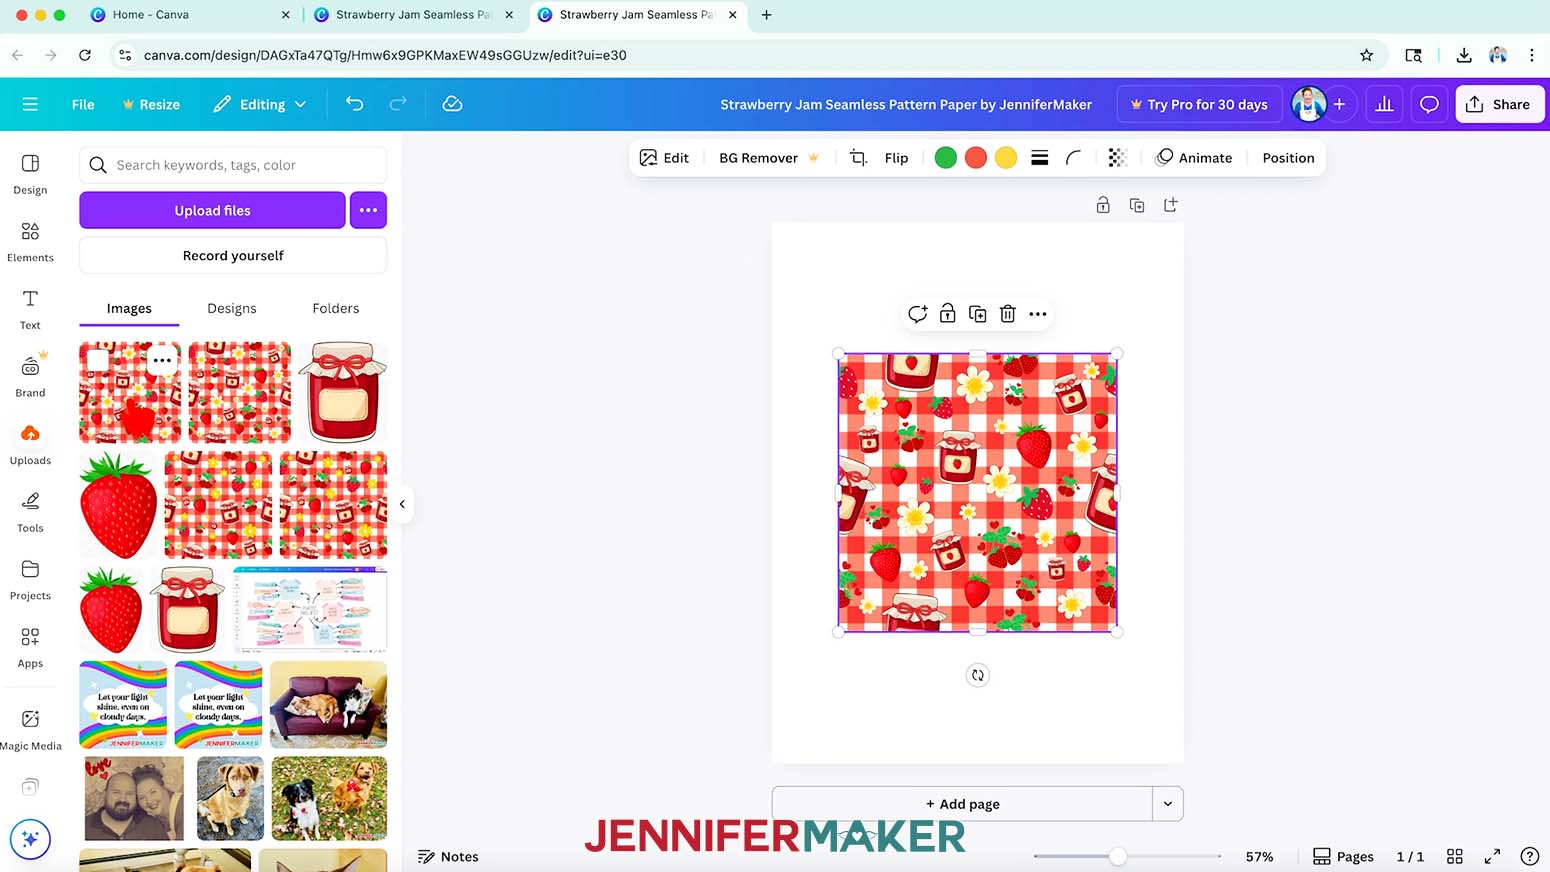
NOTE: I uploaded my “Strawberry Jam Seamless Pattern Tile by JenniferMaker” tile design. - Drag the tile to the top left area of the canvas until it snaps into the corner.
- If you’d like to resize the tile, click “Position” and make sure the “Ratio” lock icon is closed to maintain proportions, then enter a new size into the “Height” and “Width” fields.
NOTE: I resized my tile to 5.41” by 5.41”. - With the tile selected, click the “Duplicate” icon to make a copy.
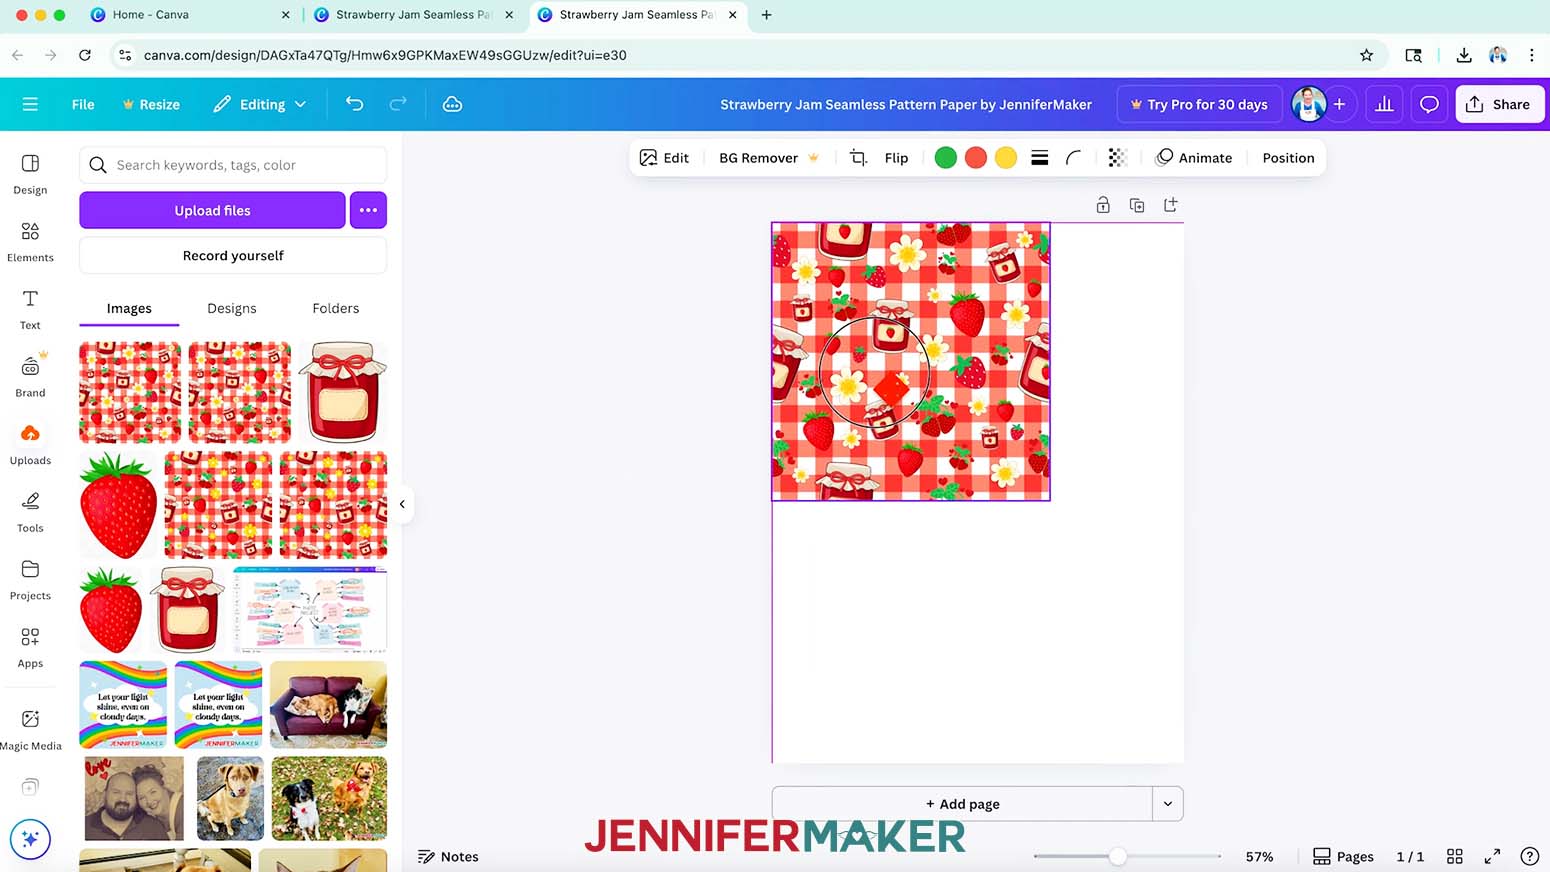
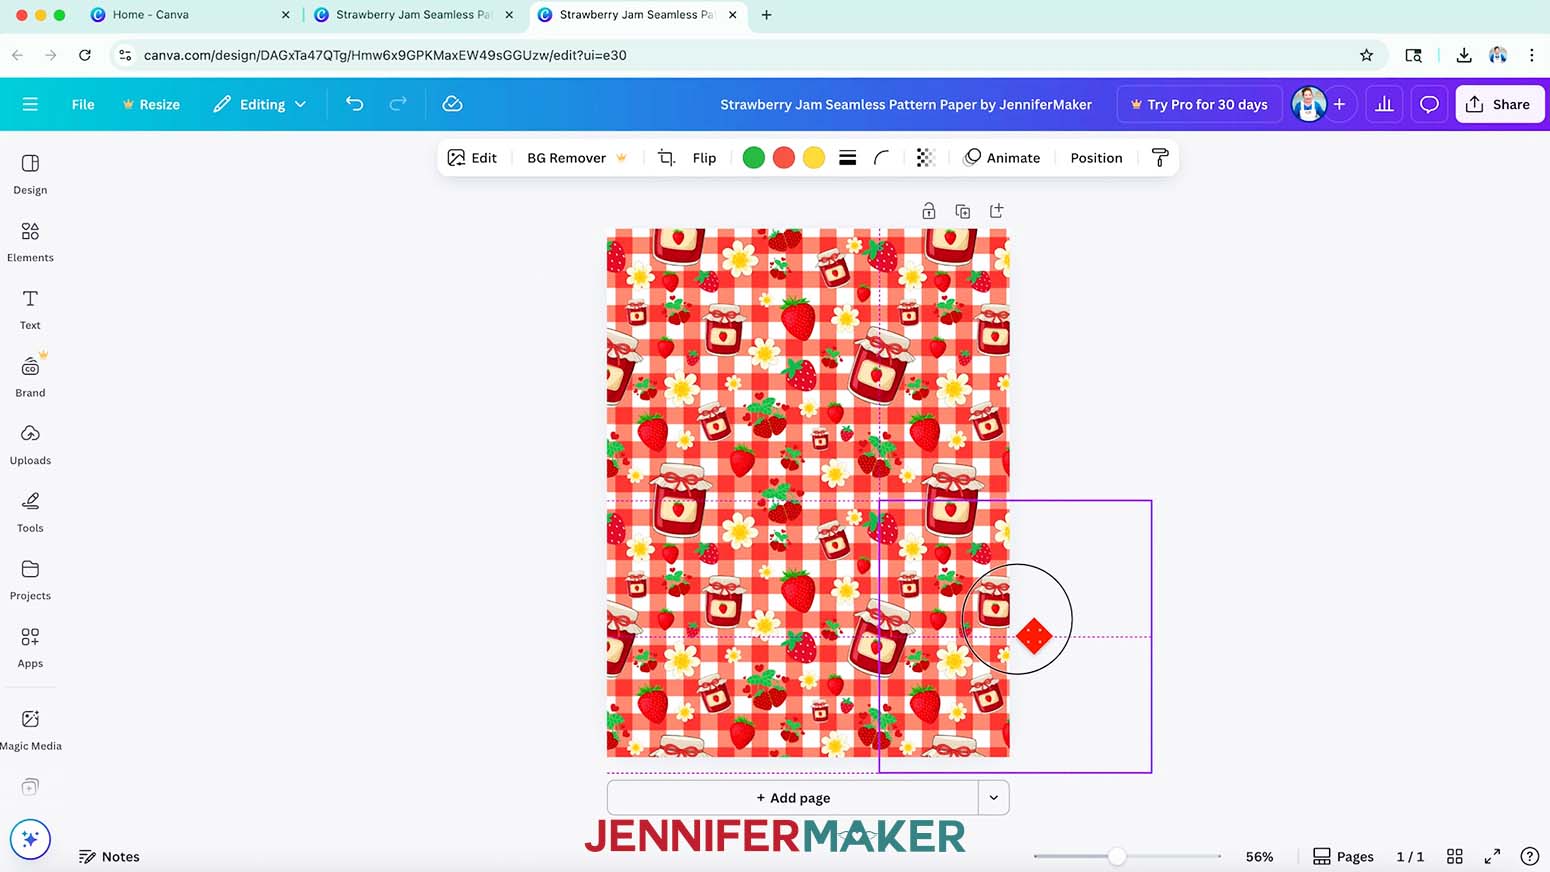
- Drag the duplicate so its left edge matches up with the right edge of the original tile and it snaps into place. The design should line up across both tiles.
- You may see a white gap or line between the two tiles. This may or may not appear in your printed pattern. To nudge the tile slightly to close the gap without distorting the pattern, keep the duplicate tile selected and click “Position.”
- The tile needs to move horizontally to the left to close the gap. Under “Advanced,” change the X axis field to 0.01 inches less than the number shown.
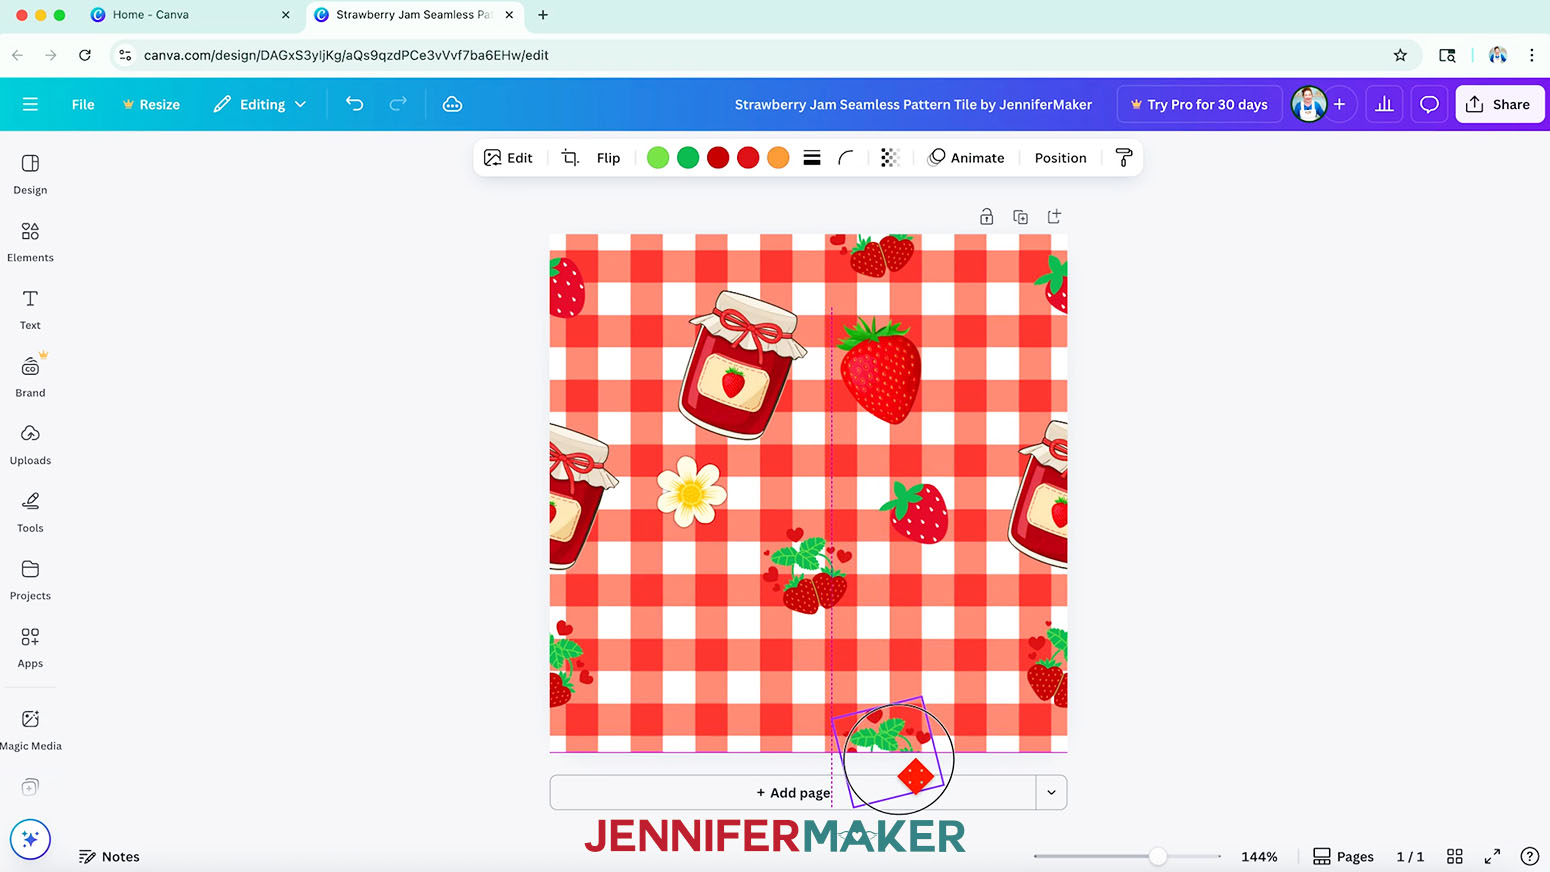
NOTE: I’ll change the "5.41" to "5.4." - Duplicate the tile again, and drag it underneath the first.
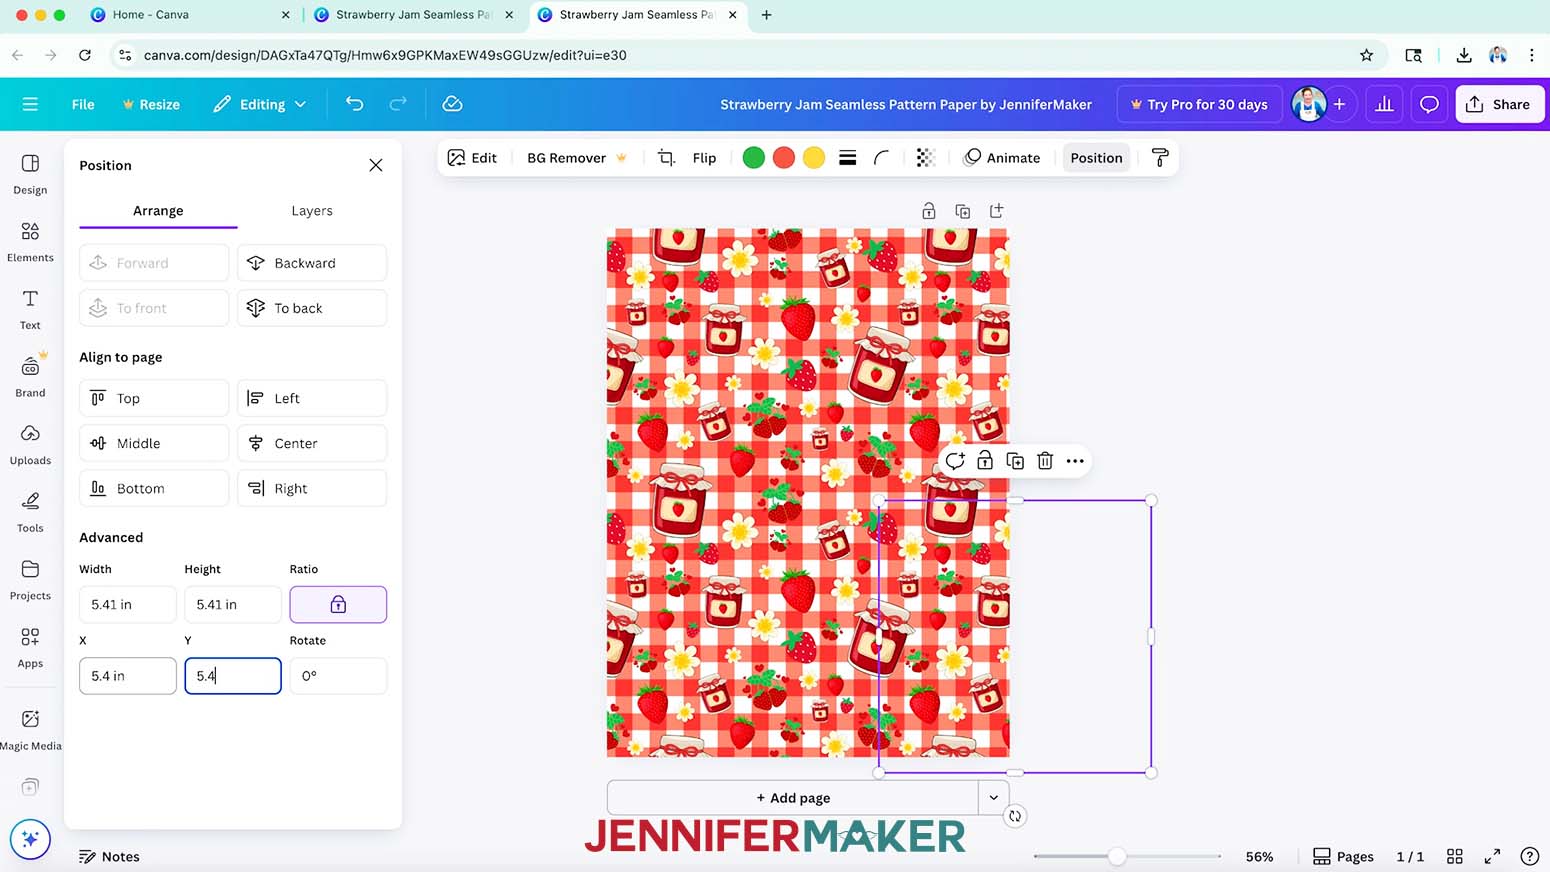
- Since the tile needs to move vertically to close the gap, click “Position.”
- Reduce the size in the Y axis field by 0.01 inches.
- To fill in the remaining spot, duplicate the tile, move it to cover the canvas.
- Click “Position” and since the tile needs to move up and to the left to close the gap, reduce the size in both axis fields by 0.01 inches.
NOTE: If elements are still not matching up across your duplicated tiles, open your original tile file and follow the steps in “STEP 3: ADD ELEMENTS TO YOUR SEAMLESS TILE DESIGN” to adjust the placement of the elements so your design is truly seamless. - Once you’re happy with your tile design, click “Share.”
- Click “Download.”
- Under “File type,” select “PNG.”
- Choose a name for your patterned paper that you’ll remember later.
NOTE: I named my paper “Strawberry Jam Seamless Pattern Paper by JenniferMaker.” - Click “Download” to save the finished pattern to your computer.


STEP 5: PRINT A SEAMLESS PATTERN ONTO PAPER
GOOGLE DOCS
- Open Google Docs in the Google Chrome web browser on your computer.
NOTE: You will need a free Google account to use the free Google Docs software.
TIP: You can also download and open the Google Docs app, but you will have limited access to features, so I do not recommend it on a mobile device. - Click “Blank document” at the top left to open a new document.
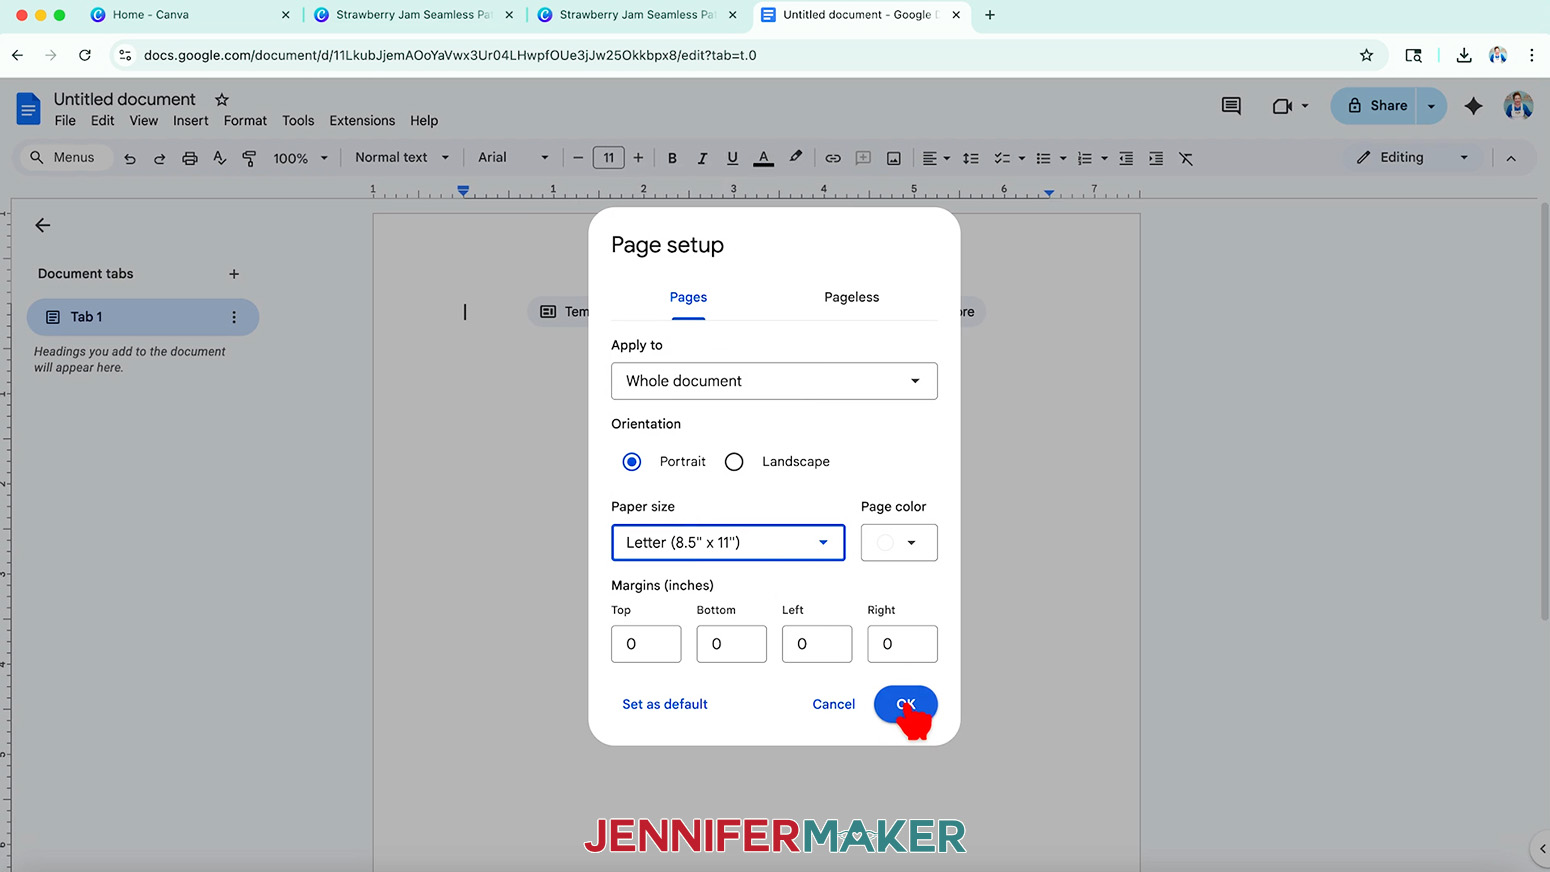
- Go to the File menu and select “Page setup.”
- Make sure “Portrait” is selected.
- Change your margins to “0” to use more of the page.
- Make sure your Paper Size matches your printer paper size. I’m using 8.5” x 11” or letter-size paper.
- Click “OK” to apply the settings.
- Click the area that says “Untitled document” at the top and type a name for the file.
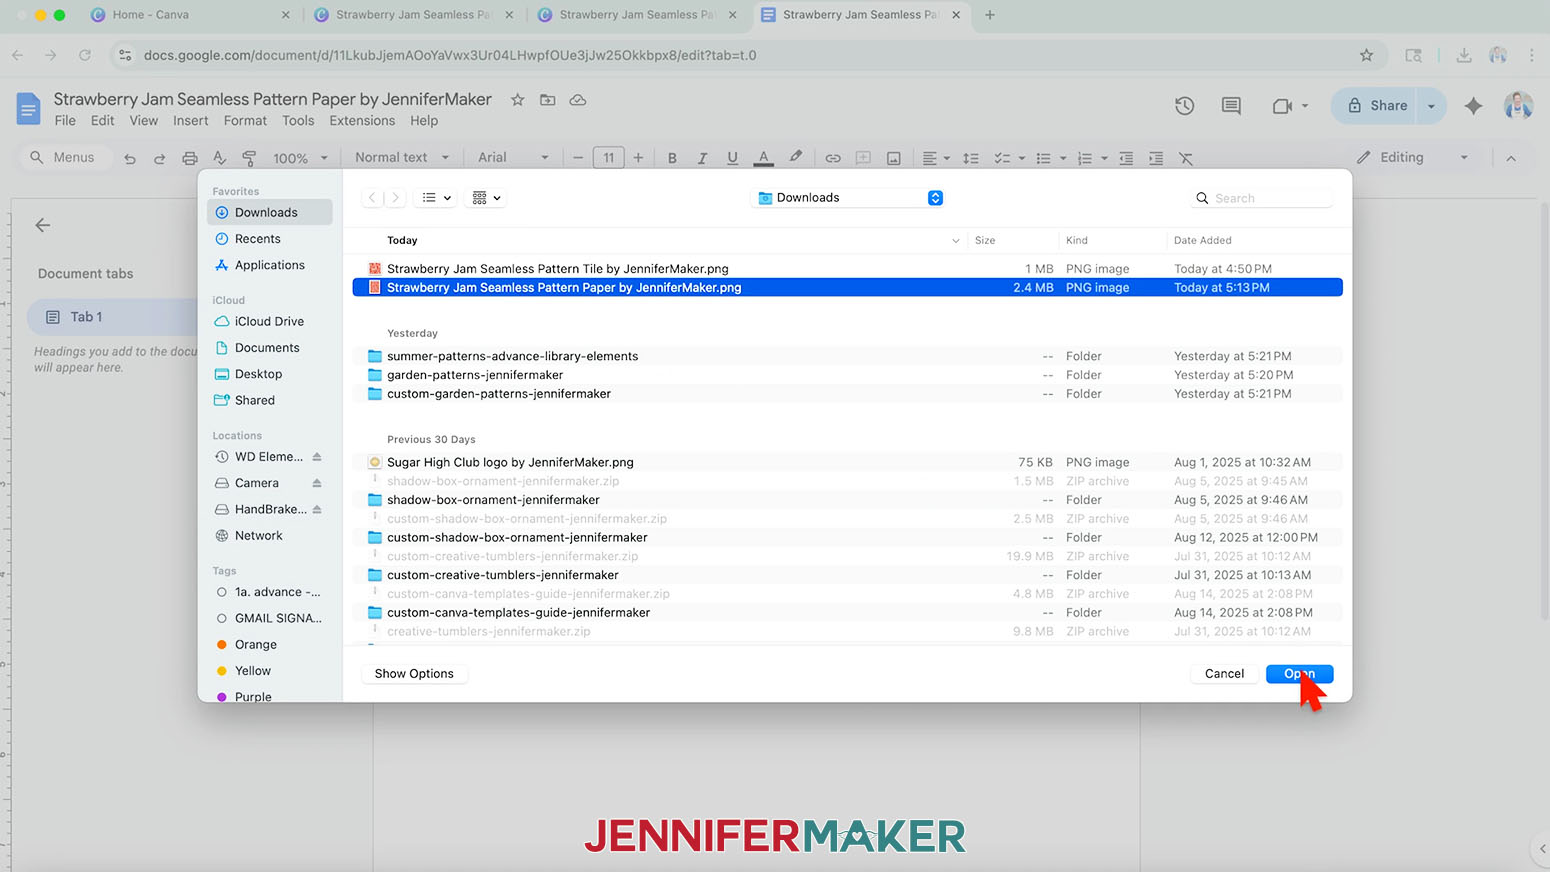
NOTE: I’ll name mine “Strawberry Jam Seamless Pattern Paper by JenniferMaker.” - Click the “Insert” menu, select “Image,” and select “Upload from Computer.”
- Select your seamless paper design.
TIP: You’ll most likely find it in your Downloads folder. - Click “Open.”
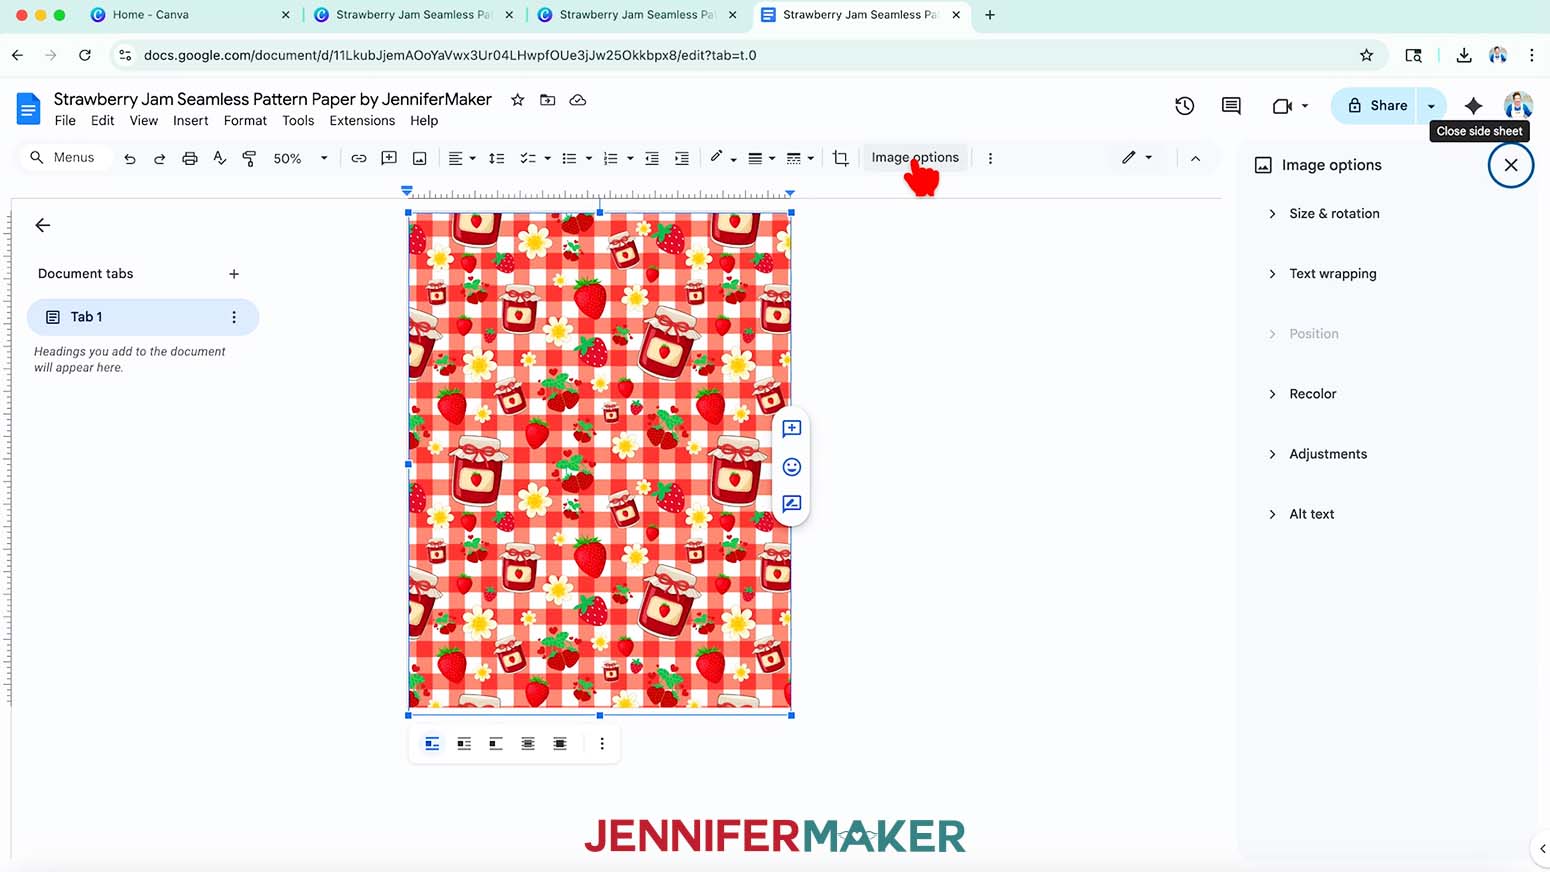
- Click “Image Options” at the top of the canvas.
NOTE: You can also open the menu by going to “Format,” “Image,” and “Image Options.” - Select “Size & Rotation.”
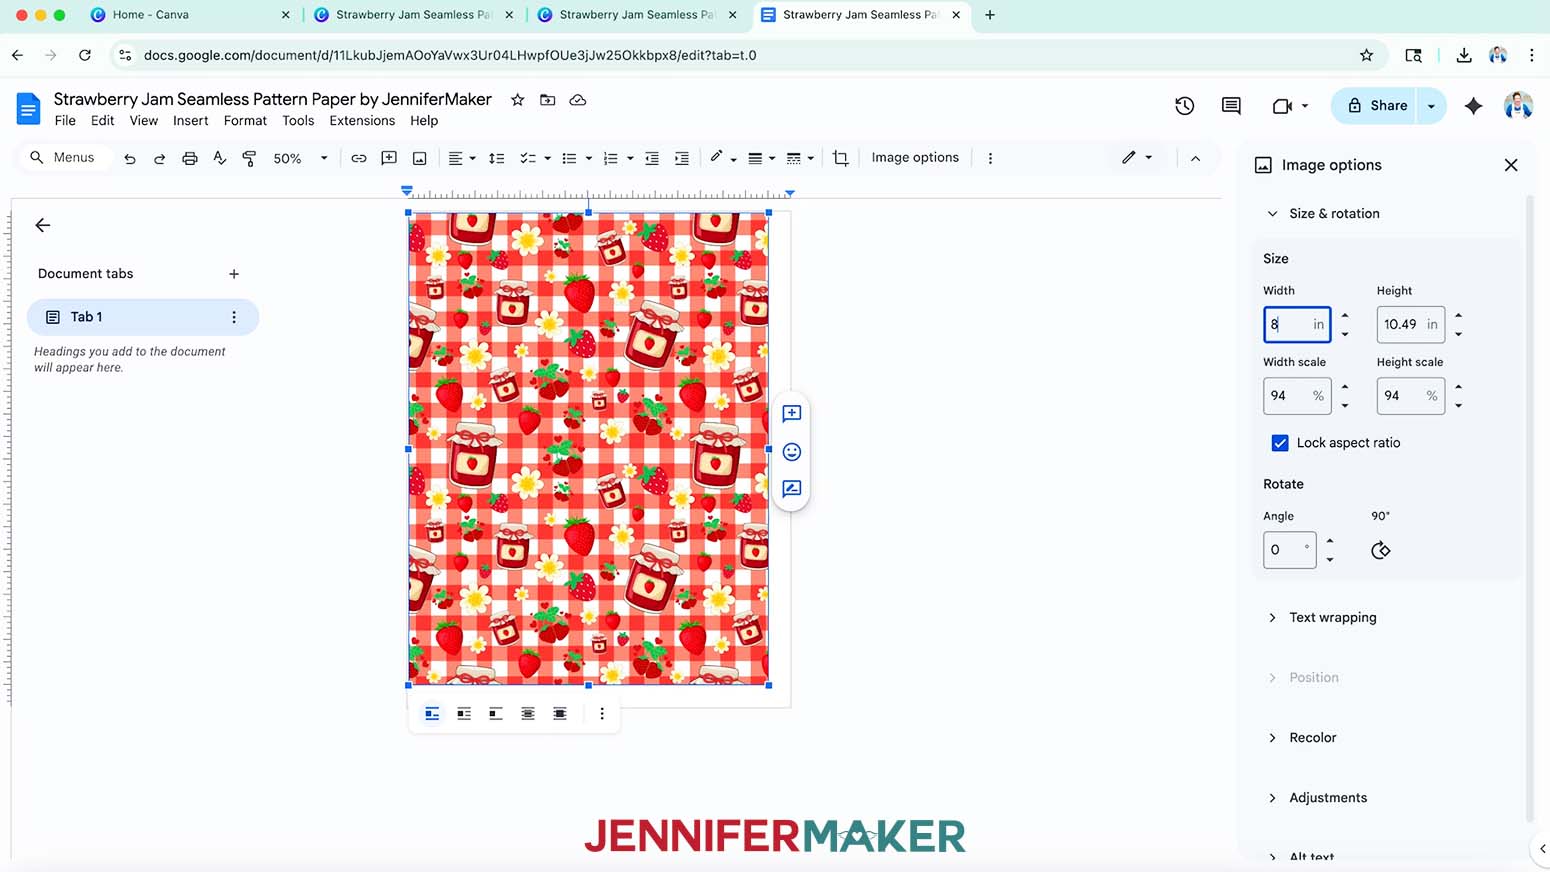
- Keep the “Lock aspect ratio” box checked to maintain the design’s proportions.
- Change the “Width” field to 8”, and the “Height” should automatically change to 10.5”.
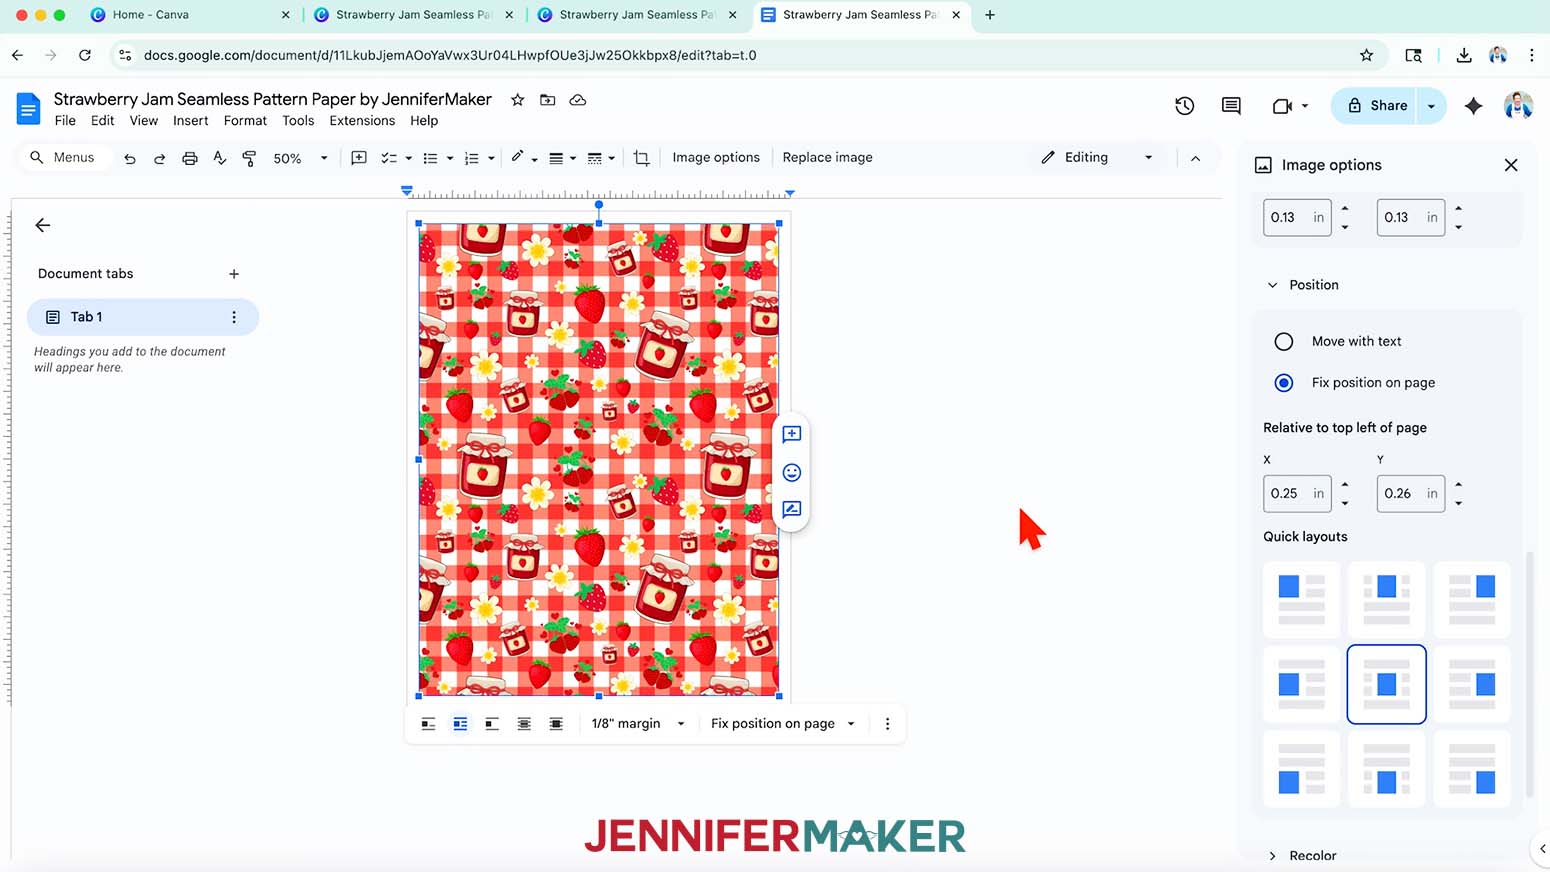
NOTE: Printing the design 0.25” smaller on all sides than the paper prevents any of the design from being cut off when it’s printed. - Click the image and click "Image Options."
- Click "Position" and "Center."
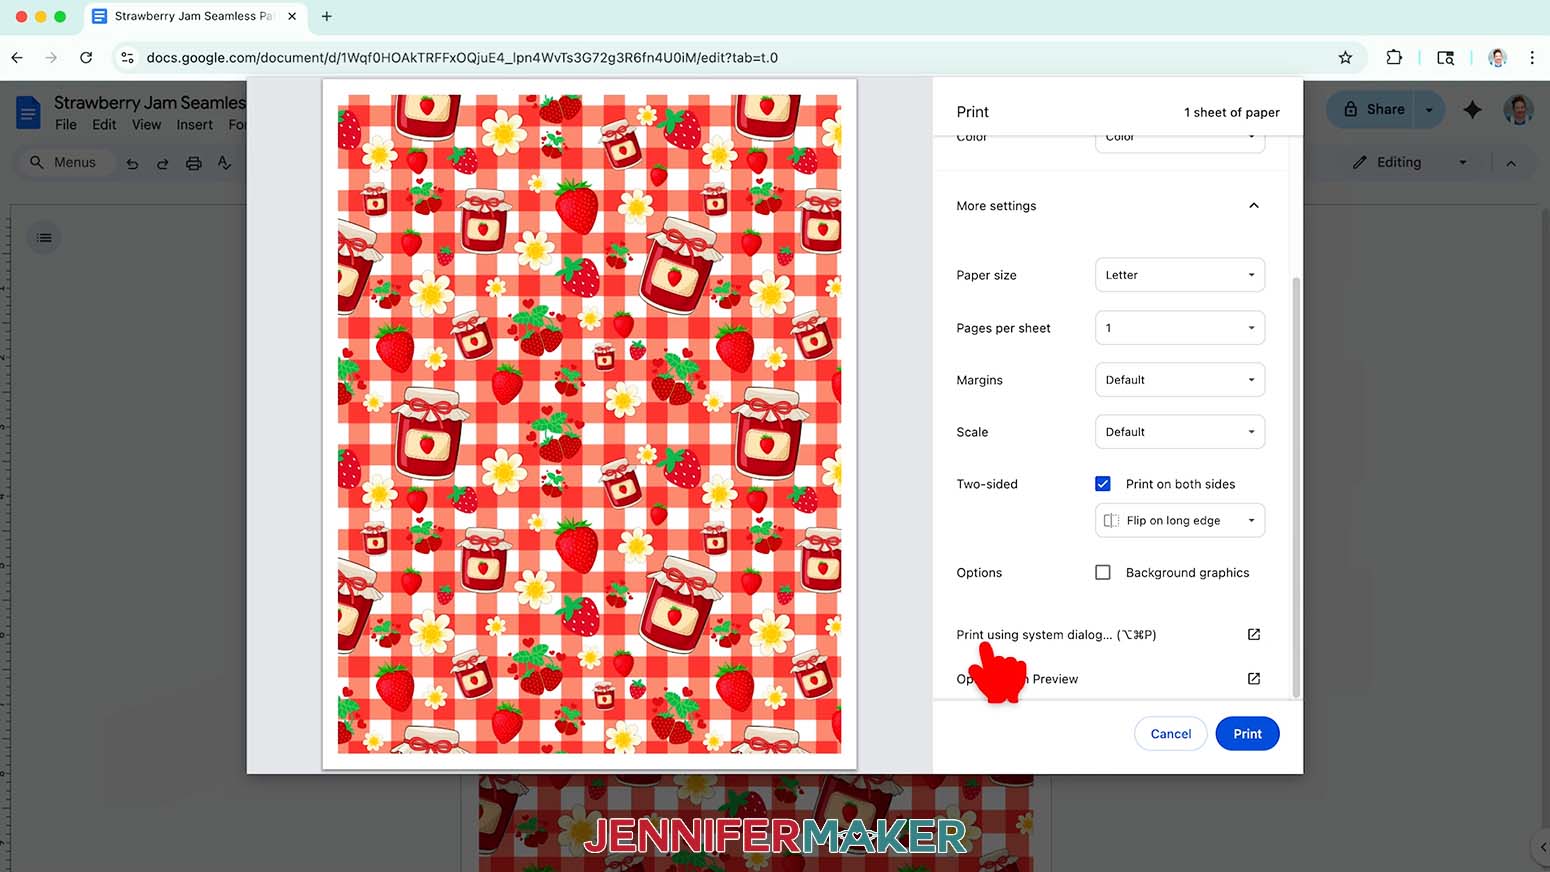
- Go to the File menu and choose “Print.”
- Select your inkjet printer under “Destination.”
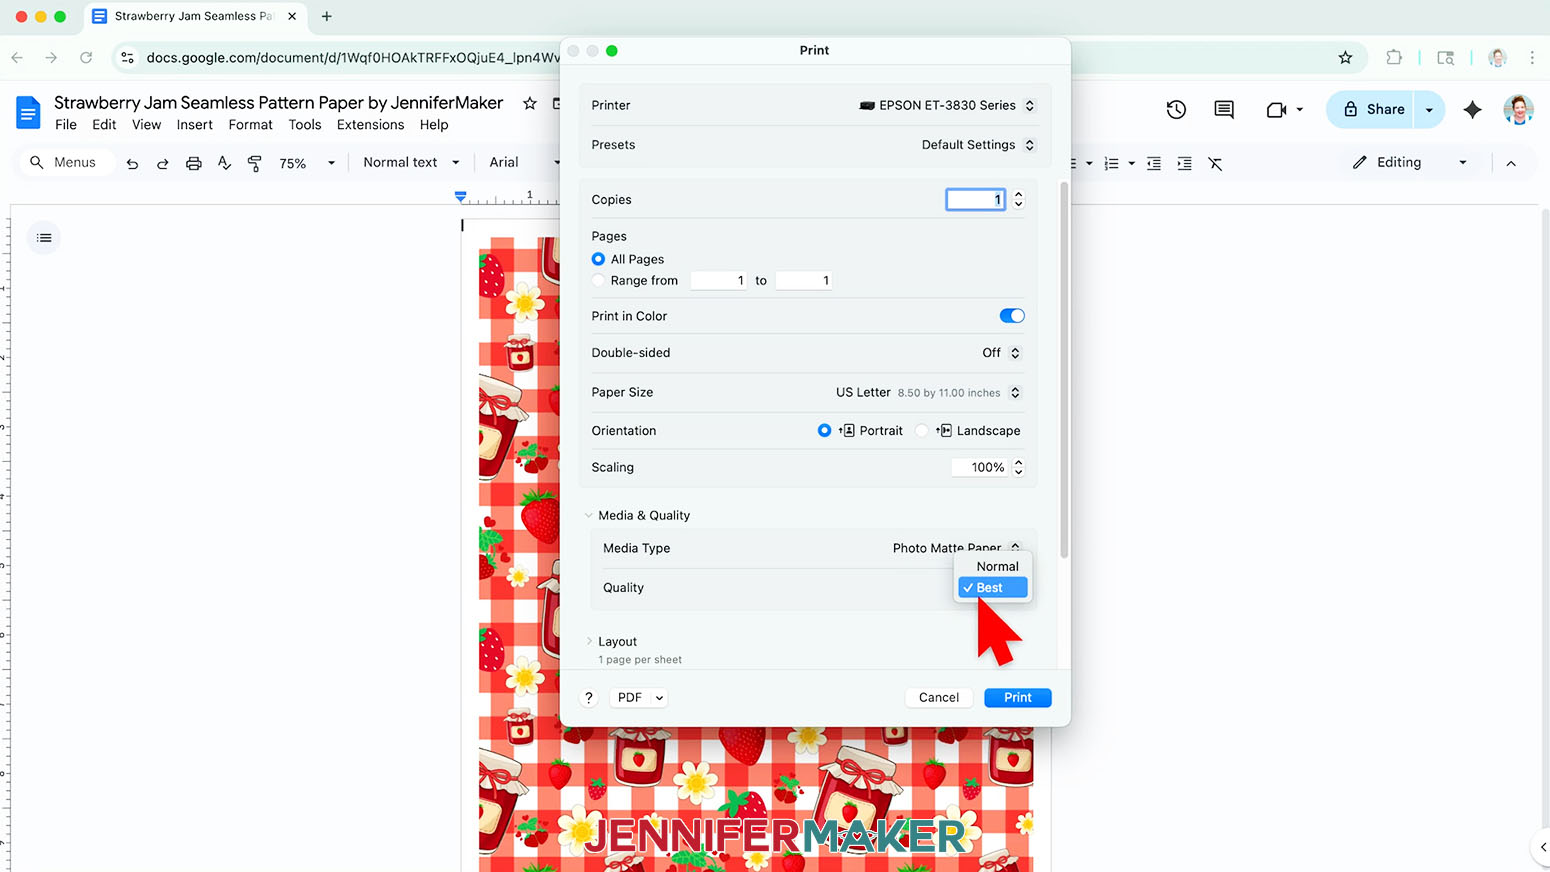
- Click the arrow beside “More Settings” to select “Print Using System Dialog.”
- Your print menu may look different than mine - just make sure the inkjet printer is selected and select the highest quality paper setting.
- Load some 8.5” x 11” paper correctly into your inkjet printer.
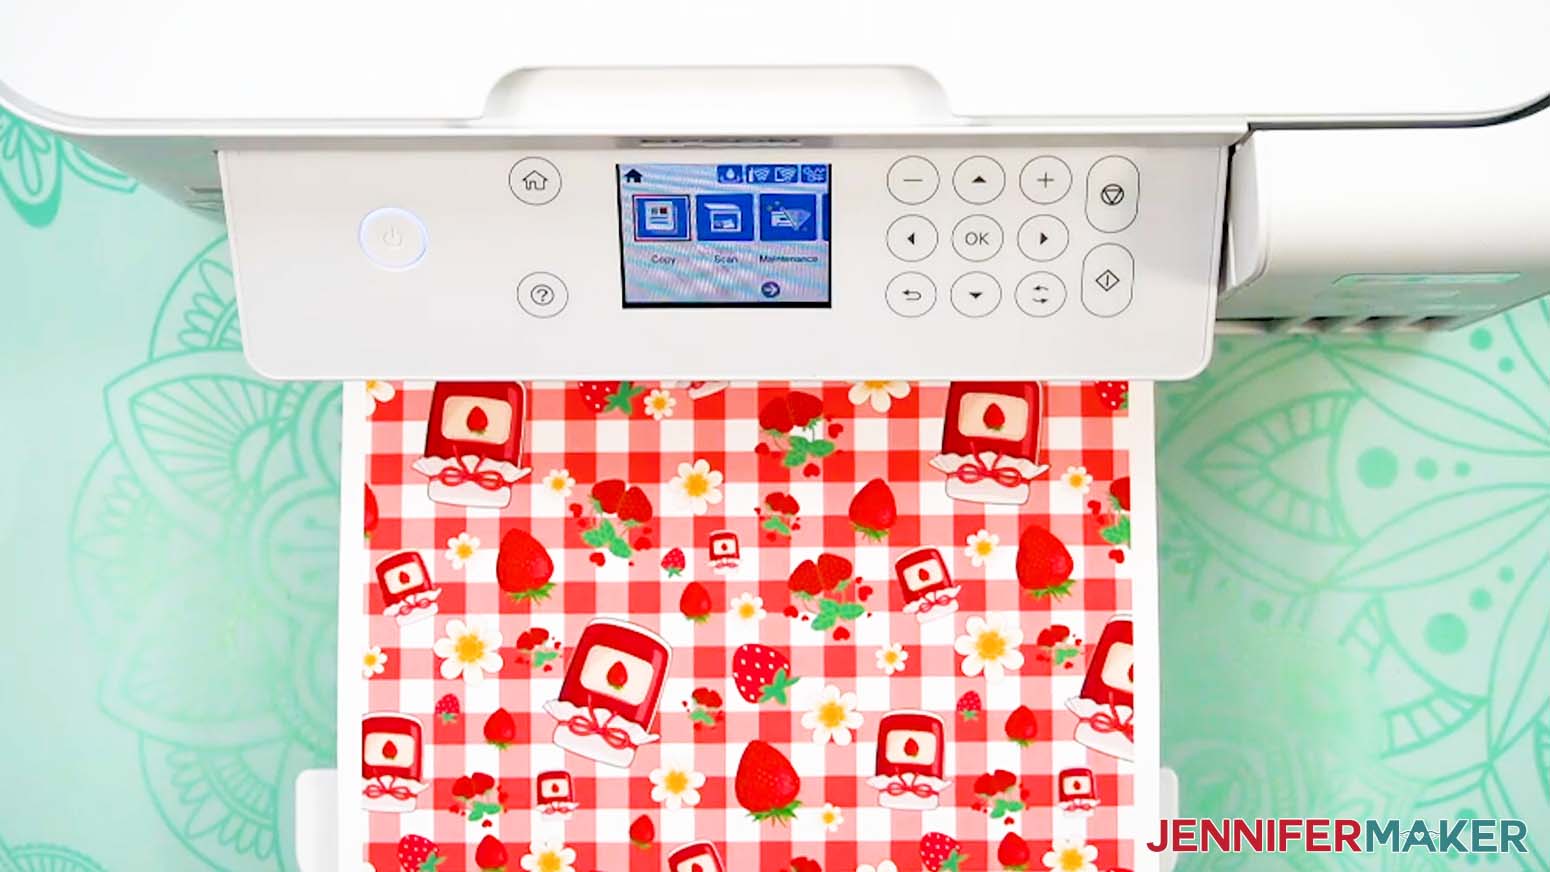
- Click “Print.”
- Allow the print to dry before handling it, as the ink can smear.
- Your paper is ready to use!
STEP 6: SHOW IT OFF
Here are my finished projects that I made using my seamless patterns!
Notes
Final tile size: 4” x 4”
Digital paper design size: 8” x 10.5”
Printed paper size: 8.5” x 11”
Answers to Your Questions About How to Make a Seamless Pattern in Canva
Q: I want to design a cohesive set of digital paper patterns in Canva. How do I do that?
A: You can learn how to design a coordinating set of custom digital paper patterns in Canva in my video workshop and get a cheat sheet with tips for creating a seamless pattern in Canva as part of my ADVANCE program. Learn more about ADVANCE here!
Q: Can you make seamless patterns on Canva?
A: Yes! Everything I show in this tutorial can be done with Canva’s free account capabilities. A Pro account does give you extra elements and features, but you don’t need it to follow along.
Q: Can I use my own images to make a seamless pattern in Canva?
A: Absolutely! You can upload your own PNGs, SVGs, or photos into Canva and arrange them just like the free elements I provide. This is a great way to make personalized patterns with your own artwork, logos, or family photos.
Q: What can I do with a seamless pattern once I make it?
A: So many things! You can use your pattern as a background in Canva projects, save it as a PNG or JPG to print on paper or fabric, or even upload it to Cricut Design Space to use in Print Then Cut projects. To make a paper purse gift bag, a greeting card decorated with patterned paper embellishments, or gift tags, click those links and follow the tutorials (just substitute your patterned paper for the cardstock). Don’t forget to resize your design to fit your paper if needed!
Q: Can you share tips on how to make your Canva design better?
A: When you’re arranging your elements in Canva, don’t overcrowd the tile. Leave a little breathing room between objects and repeat a few shapes to create rhythm. A balanced tile looks more professional and will repeat more smoothly. Plus, it makes your final pattern easier on the eyes! There’s a cheat sheet with seamless pattern design tips available as part of my Advance program!
For even more step-by-step tricks, check out my Canva Coach Playbook. It’s full of easy-to-follow visuals and tips that Canva users of any level can use to improve their projects.
Q: Can you export seamless patterns from Canva to use in other programs?
A: Yes, once your pattern tile is finished, you can download it as a PNG or JPG and use it in image editing programs like Photoshop and others.
Q: What’s the difference between a tile and a seamless pattern?
A: A tile is a single “block” of your design. When you repeat it across a page, it creates the seamless pattern. Canva doesn’t have a one-click “make seamless” button, so we create the tile carefully so the repeats line up without gaps.
Q: What size should my seamless pattern tile be in Canva?
A: A good starting size is 4 inches by 4 inches. It’s easy to work with and repeats nicely. You can go larger if you want more detail in your final pattern.
Q: How do I make sure my pattern is really seamless?
A: The trick is in how you position the design elements along the edges of the tile. In my tutorial, I show you how to line them up so when the tile repeats, everything flows smoothly without visible lines.
Q: What are some Canva hacks?
A: Some of my favorite Canva hacks include turning on rulers and guides for perfect alignment, using the Position tool to center or layer design elements instantly, and saving a custom template so you don’t have to start over each time. I share lots more in this tutorial and in the Canva Coach Playbook. It’s full of clever shortcuts and my best tips for making your designs look polished without spending a lot of time.
Get my free Seamless Patterns in Canva guide and PNG files to create a seamless pattern in Canva!
(If you do not see the signup form above, click here.)
I love seeing what you make with my tutorials and how you customize them! Please share a photo of the projects you made with your patterned paper designs in our Facebook group or tag me on social media with #jennifermaker.
Love,

Want to remember this? Save this How to Make a Seamless Pattern in Canva tutorial to your favorite Pinterest Board!