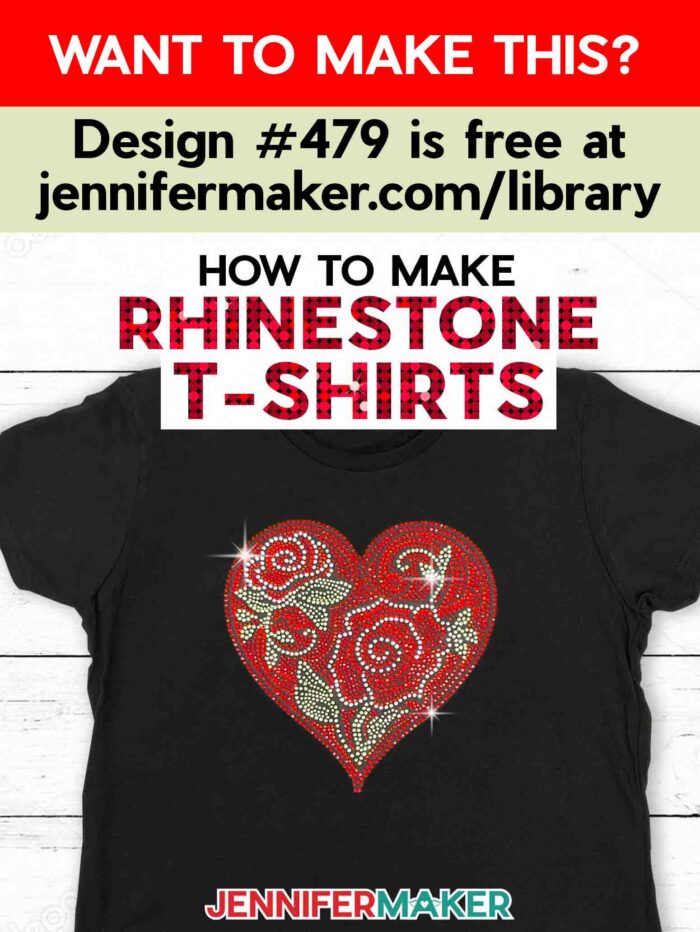
Learn how to make rhinestone templates with Cricut!
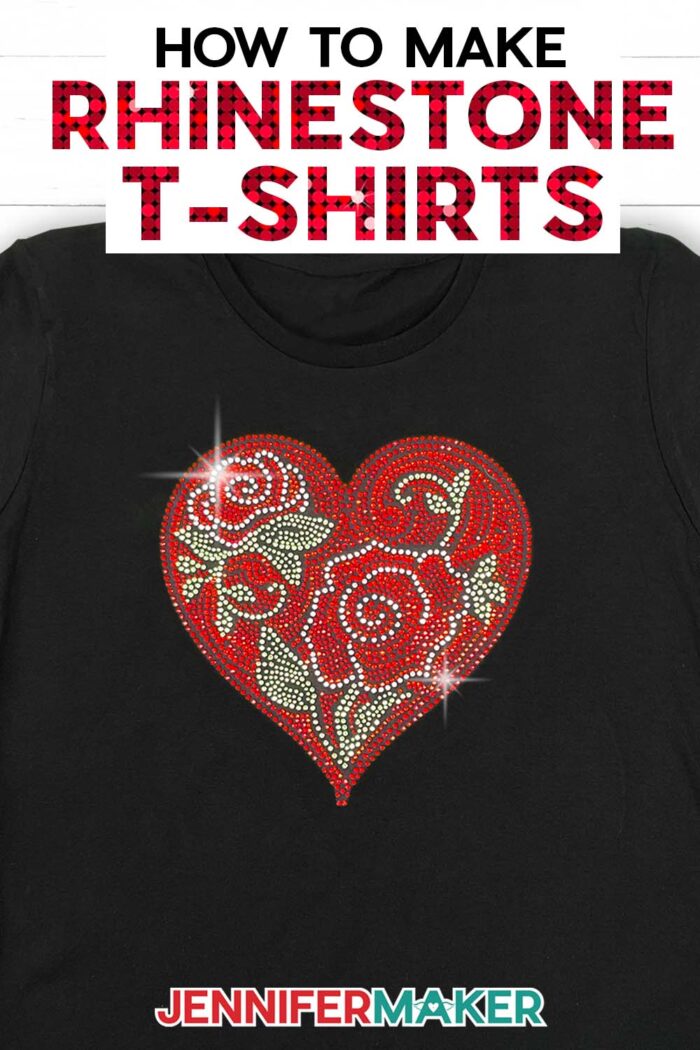
Calling all sparkle lovers! Have you ever wished you could add some bling to your wardrobe? You all loved my glitter heart mandala T-shirt, so now we’re dialing up the dazzle with rhinestones! My new rhinestone templates with Cricut tutorial makes creating stunning rhinestone T-shirts easy and fun! You can cut my gorgeous rose heart design on a Cricut Maker or Explore series, and I’ll show you how to create your own rhinestone design templates that can be cut on all machines, including the Cricut Joy! This tutorial is for beginners, and I’ll walk you through the whole process from start to finish so you don’t miss a step.
Want to save this project? Enter your email below and we’ll send the project straight to your inbox.

See the full step-by-step video tutorial on how to make rhinestone templates with Cricut:

I love discovering unique new ways to customize T-shirts, so when I stumbled upon some tees with gorgeous rhinestone appliqués, I thought: “Hey, I can make that!” Designing and creating a rhinestone T-shirt was easier than I thought, and the results were just beautiful! So, I knew I had to share what I’d learned so you could make them too! If you’re ready to add some major bling to your wardrobe, you’re going to love this tutorial.
First we’ll start with my rose heart rhinestone template, then I’ll show you how to make your own rhinestone template design in Cricut Design Space. That’s right, there’s no fancy software needed; you can make and cut the whole template in the same program. Cool, huh? I can’t wait to share everything I learned so you can get dazzling results your first time.
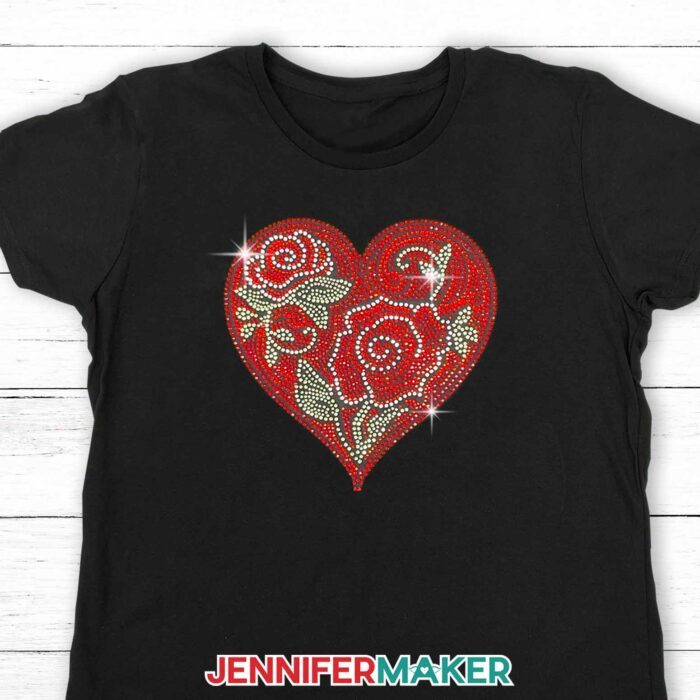
My heart-shaped rose design uses a total of seven separate templates – one for each different color or size rhinestone. Splitting the design up into separate templates helps make sure the right rhinestones go in the right spots. It helps for easy application with your heat press too, since we’ll be heat-applying each template one at a time.
Cutting your template on your Cricut makes the process super easy, and you can use any Cricut cutting machine to make rhinestone templates. You can even use the Cricut Joy for custom mini rhinestone designs.
To make our template, we’ll use flock material, which feels a lot like thin felt. I’ll show you two different methods of cutting the flock on your Cricut – the manufacturer’s method and the method that I prefer. You may think you need a special blade to cut your flock, but I’ll show you how to adjust your settings to cut it with your Cricut’s regular fine-point blade! I’ll also share a bonus tip for using transfer tape to make weeding your flock so much quicker and easier (plus a secret tip for managing the mess of all those weeded holes).
And don’t worry about eyeballing the placement of your rhinestones – I’ve included holes for rhinestone guides in each template, so you’ll have no trouble lining up each layer perfectly!
Lastly, I’ll show you how to create your own customized rhinestone templates in Cricut Design Space using a really neat rhinestone font designed just for projects like this! You’ll learn all about how to size your template the right way to fit your rhinestones, so there’s no surprises or frustration when it’s time to turn up the bling on your T-shirts.
I’m already dreaming up so many fun color combinations and design ideas, and can’t wait to bring more stunningly sparkly ideas to life!
Ready to make your own rhinestone shirts? This post contains some affiliate links for your convenience (which means if you make a purchase after clicking a link I will earn a small commission but it won’t cost you a penny more)! Read my full disclosure policy.
Materials & Tools to Make Rhinestone Templates with Cricut
- One bag each of Clear SS10 Rhinestones, SS10 Light Siam Rhinestones, SS6 Light Siam Rhinestones, SS10 Peridot Rhinestones, SS6 Peridot Rhinestones, SS10 Red Rhinestones, and SS6 Siam Rhinestones
- One roll each of Flock Rhinestone Template Material and Rhinestone Heat Transfer Material – mine came together in a kit and I used about 70″ of each 12″ wide roll for all of my layers
- Small paint touch up pad and applicator
- Tweezers
- Rhinestone Picker Tool and Wax
- T-Shirt – I used a black, size medium, 100% cotton T-shirt, but you can use any size or color you’d like, of course! You can apply rhinestones onto any material suitable for heat-transfer, like cotton, cotton/poly blends, or polyester
- A method to cut your template: I used the amazing Cricut Maker 3, but you can also use a Cricut Maker series or Cricut Explore series machine
- Cricut EasyPress – or similar method for heating the rhinestones
- Cricut EasyPress Mat (12″ x 12″)
- Cricut Green StandardGrip Mat (12″ x 12″)
- Scissors
- Brayer
- Weeding Tool
- Scraper
- Baking Sheet large enough to hold your template layers
- Lint Roller
- Ruler
- StrongGrip Transfer Tape (Optional)
- Design #479 (My free SVG/PDF/DXF design files available in my free resource library – get the password by filling out the form at the bottom of this page)
How to Make Rhinestone Templates with Cricut

Rhinestone Templates With Cricut
Learn how to use your Cricut to size and cut rhinestone templates to add bling to your t-shirts!
Materials
- 1 Bag Clear SS10 Rhinestones
- 1 Bag SS10 Light Siam Rhinestones
- 1 Bag SS6 Light Siam Rhinestones
- 1 Bag SS10 Peridot Rhinestones
- 1 Bag SS6 Peridot Rhinestones
- 1 Bag SS10 Red Rhinestones
- 1 Bag SS6 Siam Rhinestones
- 1 Roll Flock Rhinestone Template Material
- 1 Roll Rhinestone Heat Transfer Material
- 1 Each Black T-Shirt
- Design #479 (My free SVG/PDF/DXF design files available in my free resource library - get the password by filling out the form at the bottom of this page)
Tools
- A method to cut your template: I used the amazing Cricut Maker 3, but you can also use the Cricut Maker, or Cricut Explore Series
- Cricut EasyPress - or similar method for heating the rhinestones
- Cricut EasyPress Mat (12" x 12")
- Cricut Green StandardGrip Mat (12″ x 12″)
- Scissors
- Brayer
- Weeding Tool
- Scraper
- Baking Sheet
- Small Paint Touch Up Pad and Applicator
- Tweezers
- Rhinestone Picker Tool
- Wax for Picker Tool
- Lint Roller
- Ruler
- (Optional) StrongGrip Transfer Tape - if using the optional cutting method
Instructions
STEP 1: GET MY FREE RHINESTONE TEMPLATES
First, download my Rhinestone Template SVG/PDF/DXF files from my free resource library. It's Design #479.
Each file includes template pieces that make the final heart and flowers pattern when assembled.
Upload the SVG to Design Space and Add it to your Canvas.
Tip: If you're not sure how to upload an SVG cut file to Cricut Design Space, watch this helpful video training series I made. If you're on an iPhone or iPad, here's how to download and upload SVG files to the Cricut Design Space app.
STEP 2: PREPARE YOUR DESIGN FILE
This is what my Rhinestone Templates look like on my Canvas. You can zoom out to see all of the parts by clicking on the minus (-) sign on the lower left.
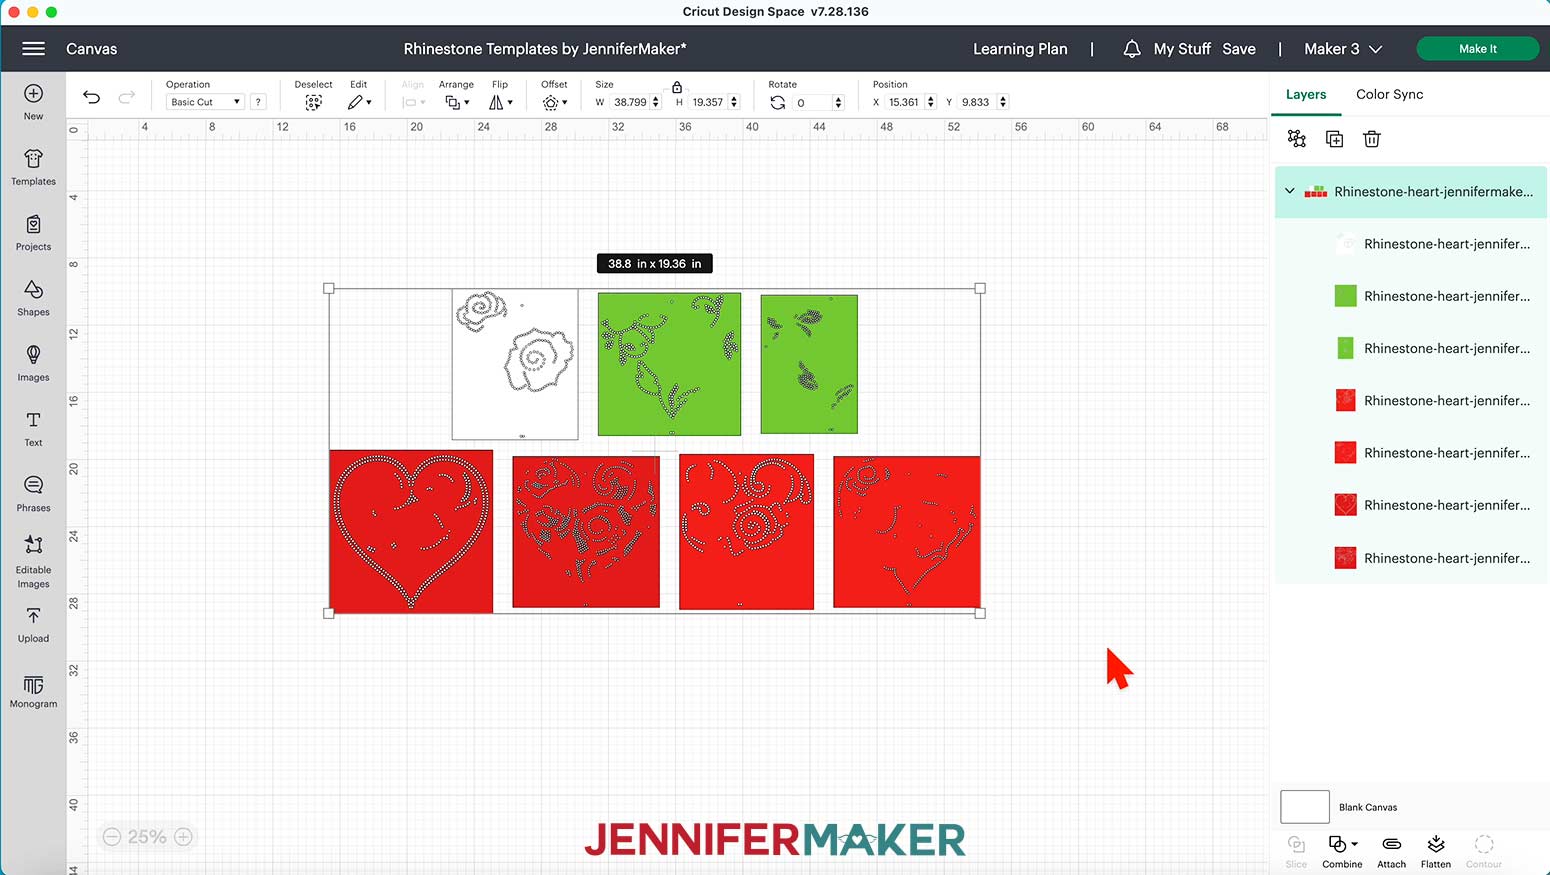
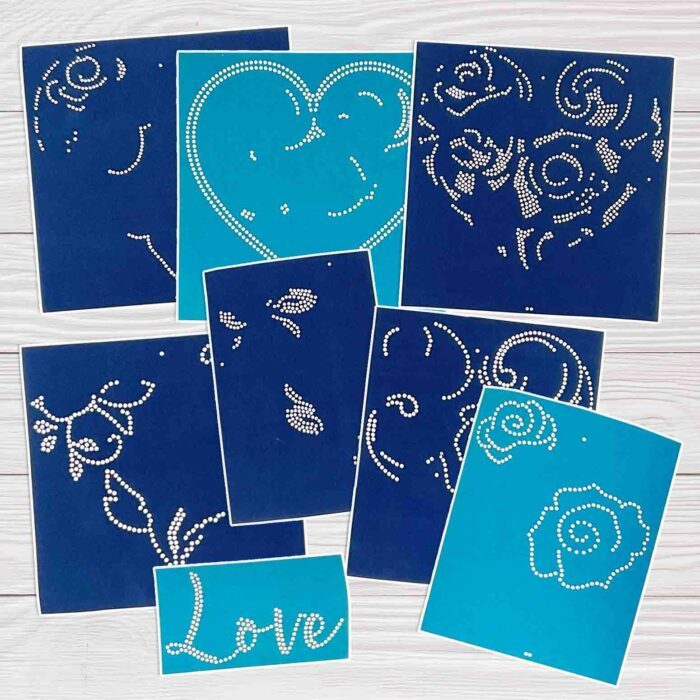
The design is set up to be made with a total of seven different templates. The templates consist of the following:
One (1) White for size SS10 Clear Rhinestones (7.5” x 9”)
One (1) Green for size SS6 Green Rhinestones (5.75” x 8.25”)
One (1) Green for size SS10 Green Rhinestones (8.5” x 8.5”)
One (1) Dark Red for sizes SS6 Red Rhinestones (8.75” x 9”)
One (1) Dark Red for sizes SS10 Red Rhinestones (9.75” x 9.75”)
One (1) Bright Red for sizes SS6 Bright Red Rhinestones (8.75” x 9”)
One (1) Bright Red for sizes SS10 Bright Red Rhinestones (8” x 9.25”)
All of these templates together will make the final image by adding the rhinestones one template pattern at a time to the shirt.
The holes in the templates are created at a specific size to allow the correct size of rhinestones to fall into them when the templates are filled, so it is very important to not change the size of the templates.
SIZING NOTE: This design is too large to fit on a Joy, and can not be downsized, but a Joy is certainly capable of cutting the flock material used to make the templates. Smaller patterns and custom made designs can be created with the Joy.
STEP 3: CUT THE RHINESTONE TEMPLATES
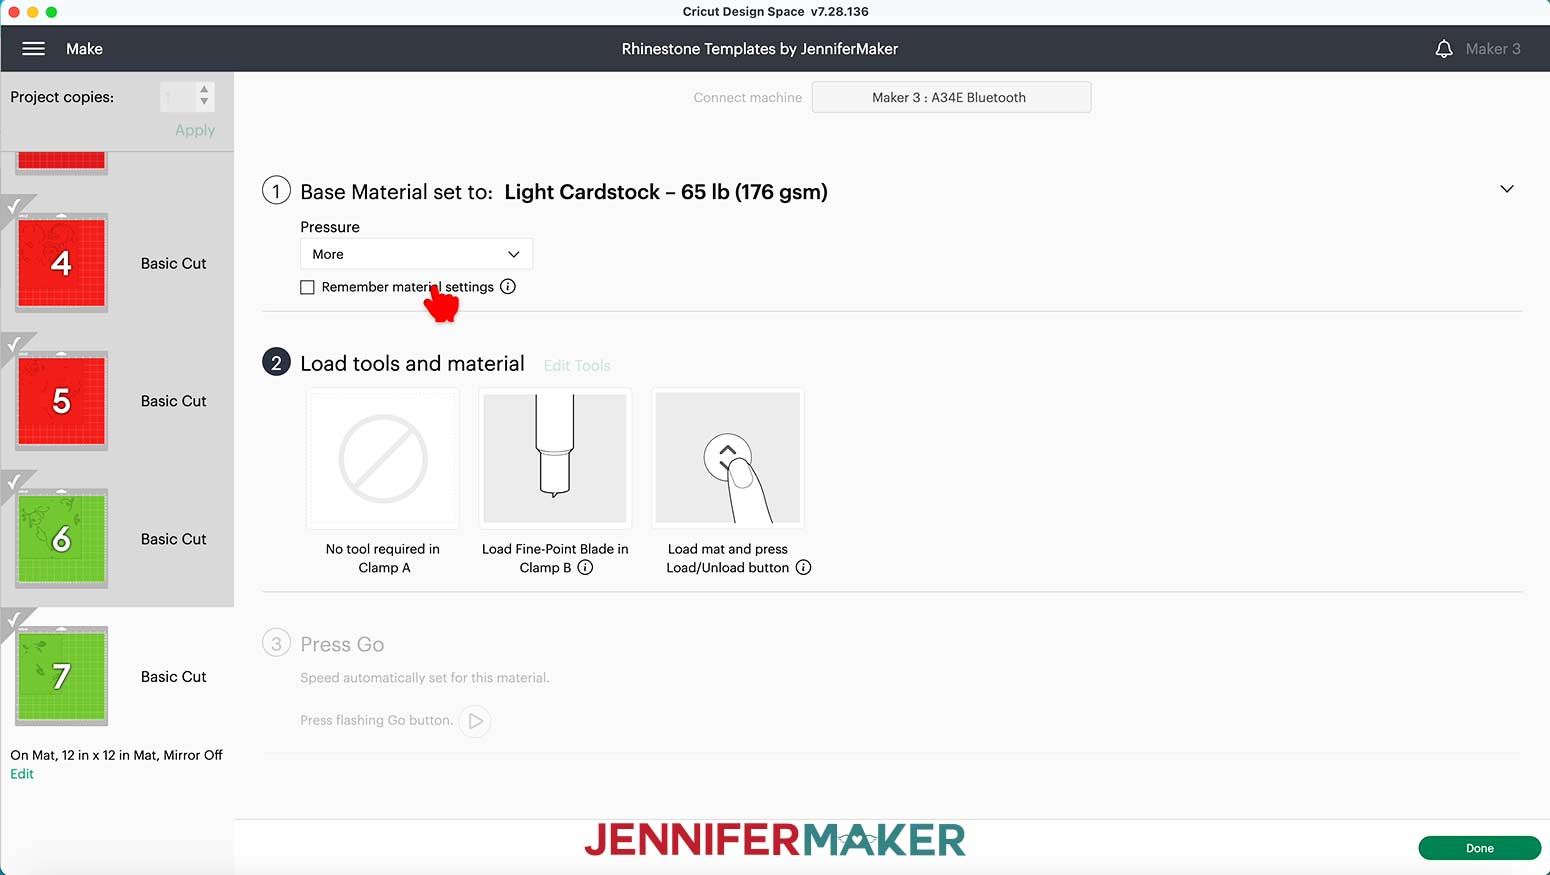
Check that the right machine is listed in the top corner, then click "Make It!"
If you are prompted about how you will load your materials, select "On Mat" and 12" x 12". Then click the green “Confirm” button.
The designs will appear on seven mats.
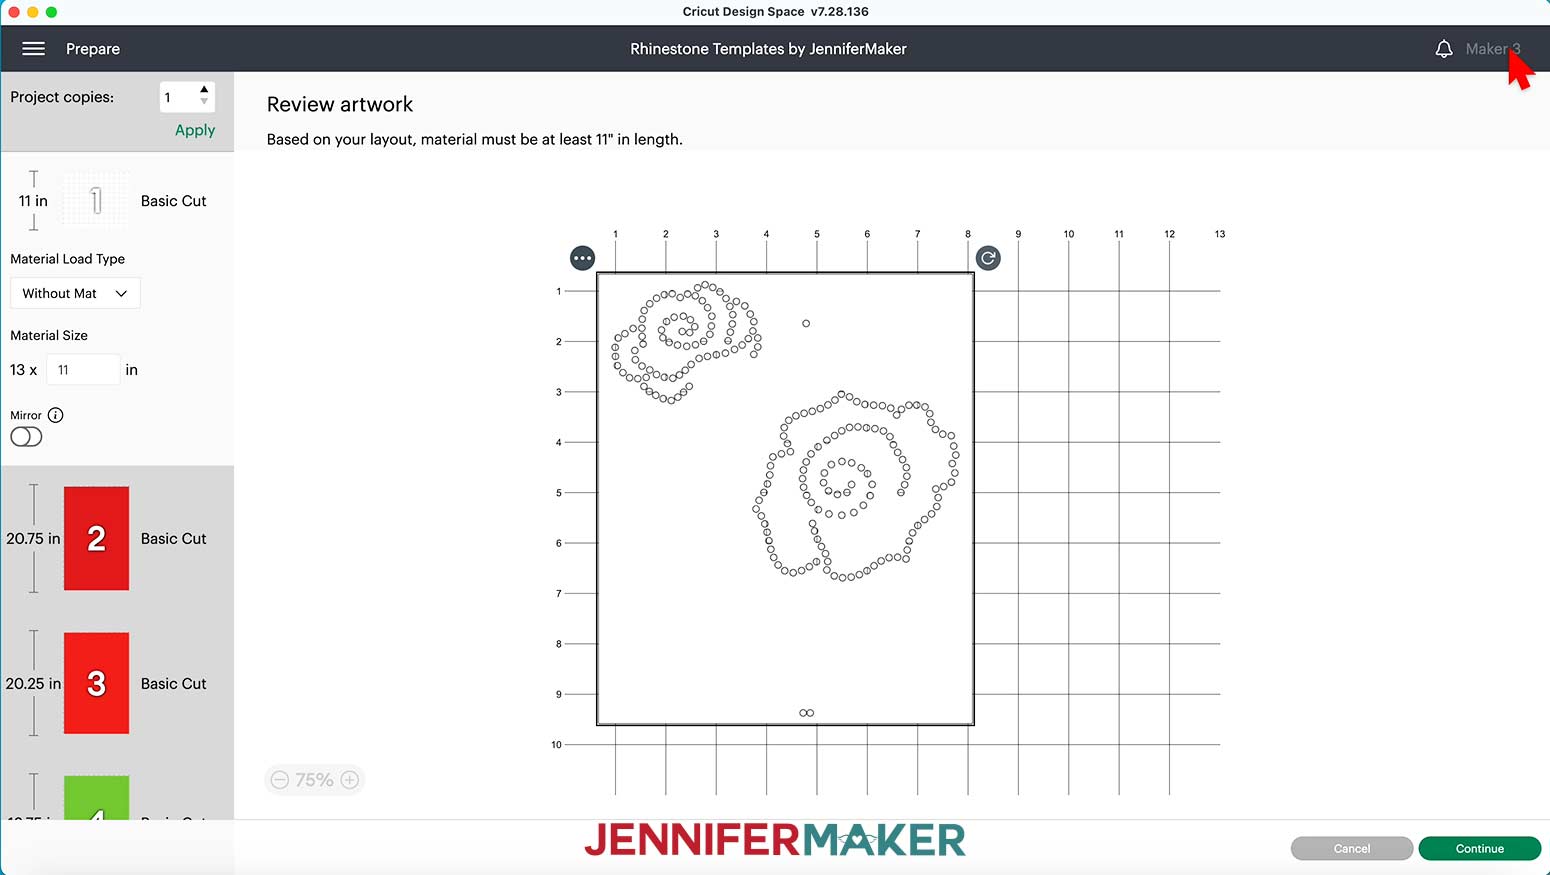
Click “Continue.”
On the “Make” screen, select the cutting settings for each mat.
There are two options for cutting the flock material. The first method is recommended by the manufacturer and it is the method I prefer. The second is an option that makes it easier to keep your mat clean, but I feel it was ultimately more work and used more material to weed the flock. Both methods are popular ways of cutting the material, so please use whichever you find to be the easier method.
Remember that all machines are different and though these cut settings worked well for me, you may need different settings. Flock material can also come in different thicknesses and material types. Testing your settings is always recommended.
TIP: If you run into any issues cutting your materials, check out my Cricut Tips & Tricks for Cleaner Cuts.
MANUFACTURER SUGGESTED METHOD
The flock material comes with instructions for cutting, so I’ll create a new material cut setting to match the instructions from the manufacturer.
First, choose “Browse All Materials,” then select “Material Settings” at the bottom of the screen.
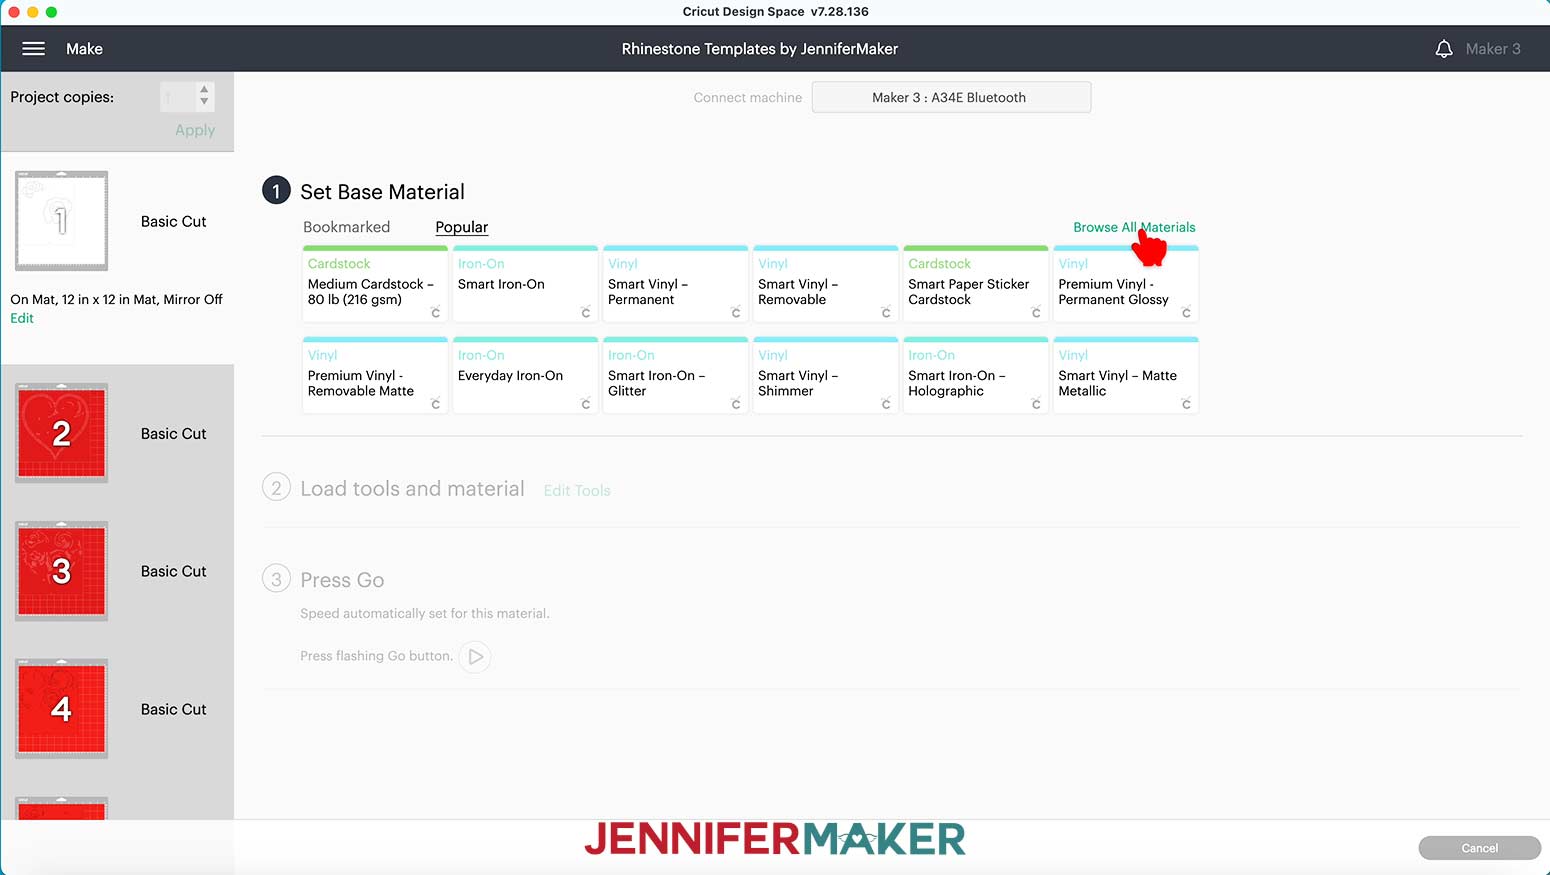
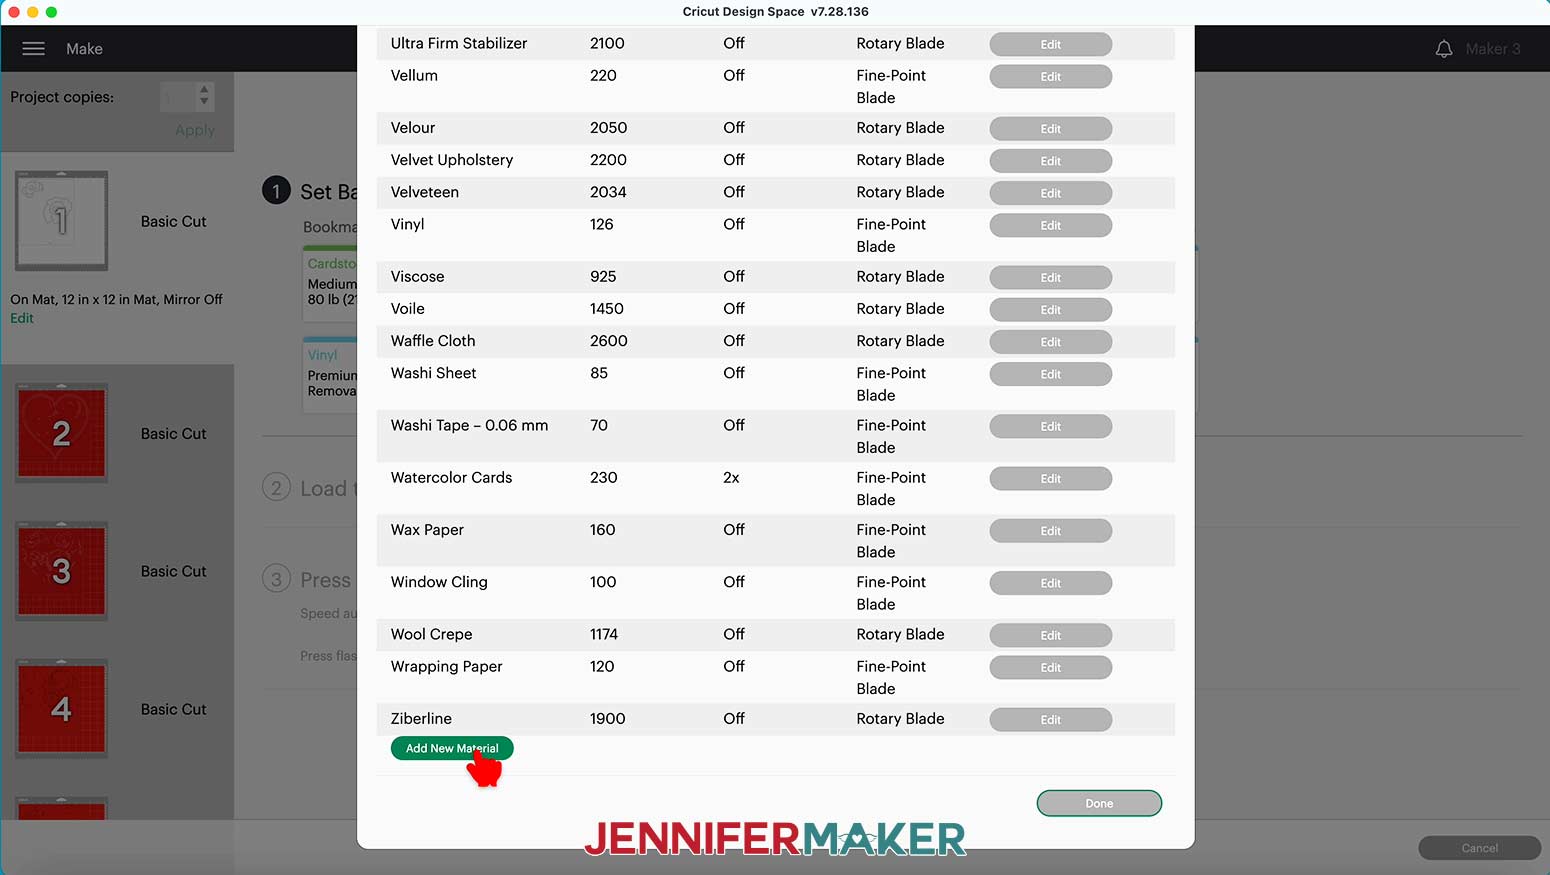
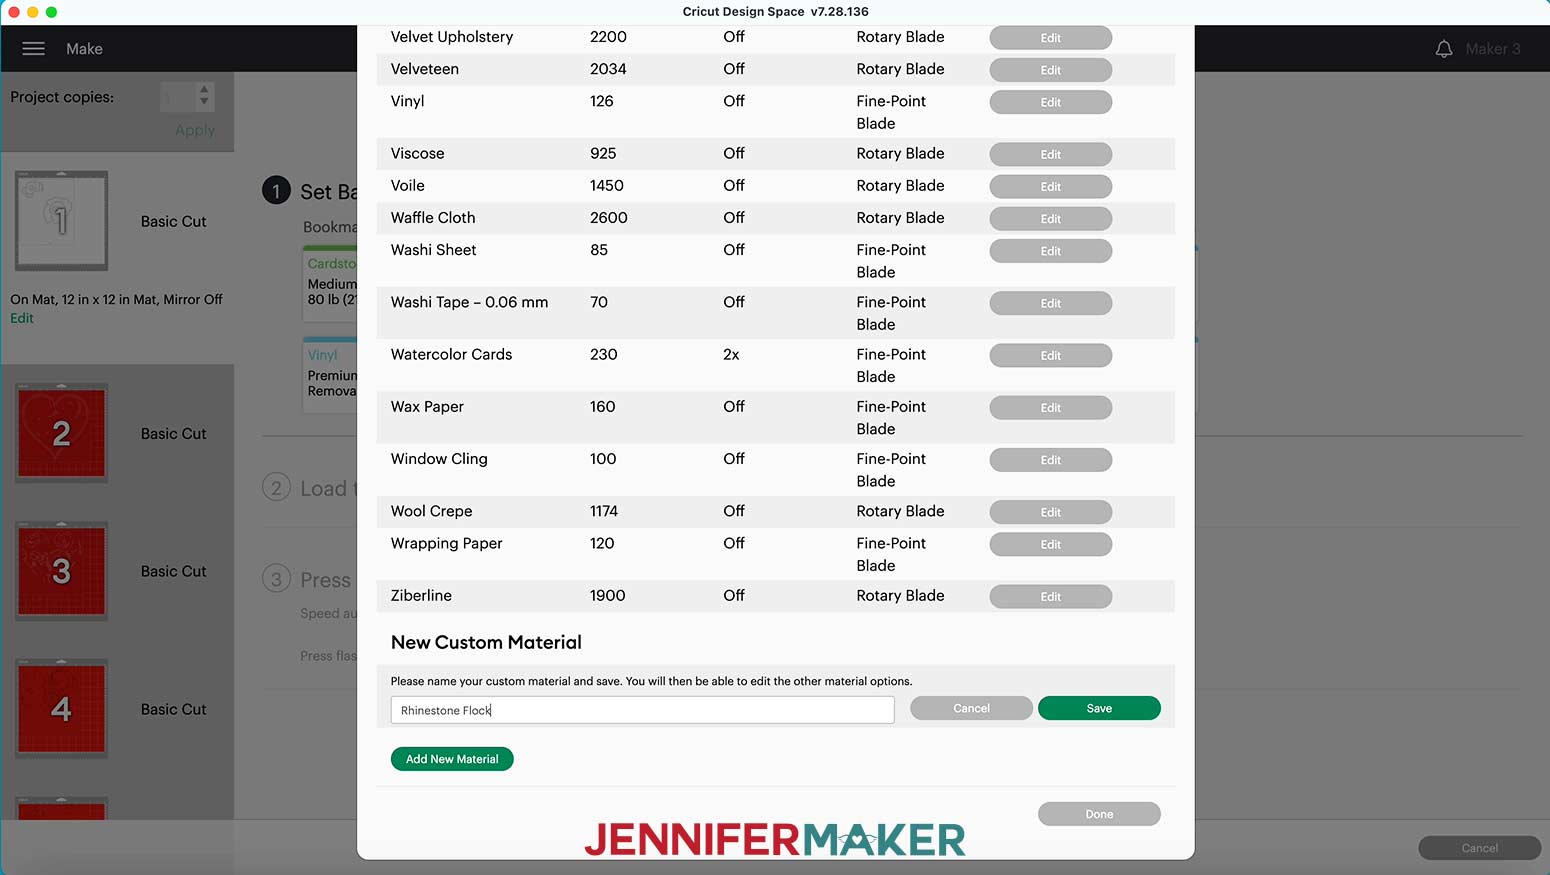
Finally, scroll all the way to the bottom and choose “Add New Material.”
Give the new material setting a name. I called mine “Rhinestone Flock.” Then click “Save.”
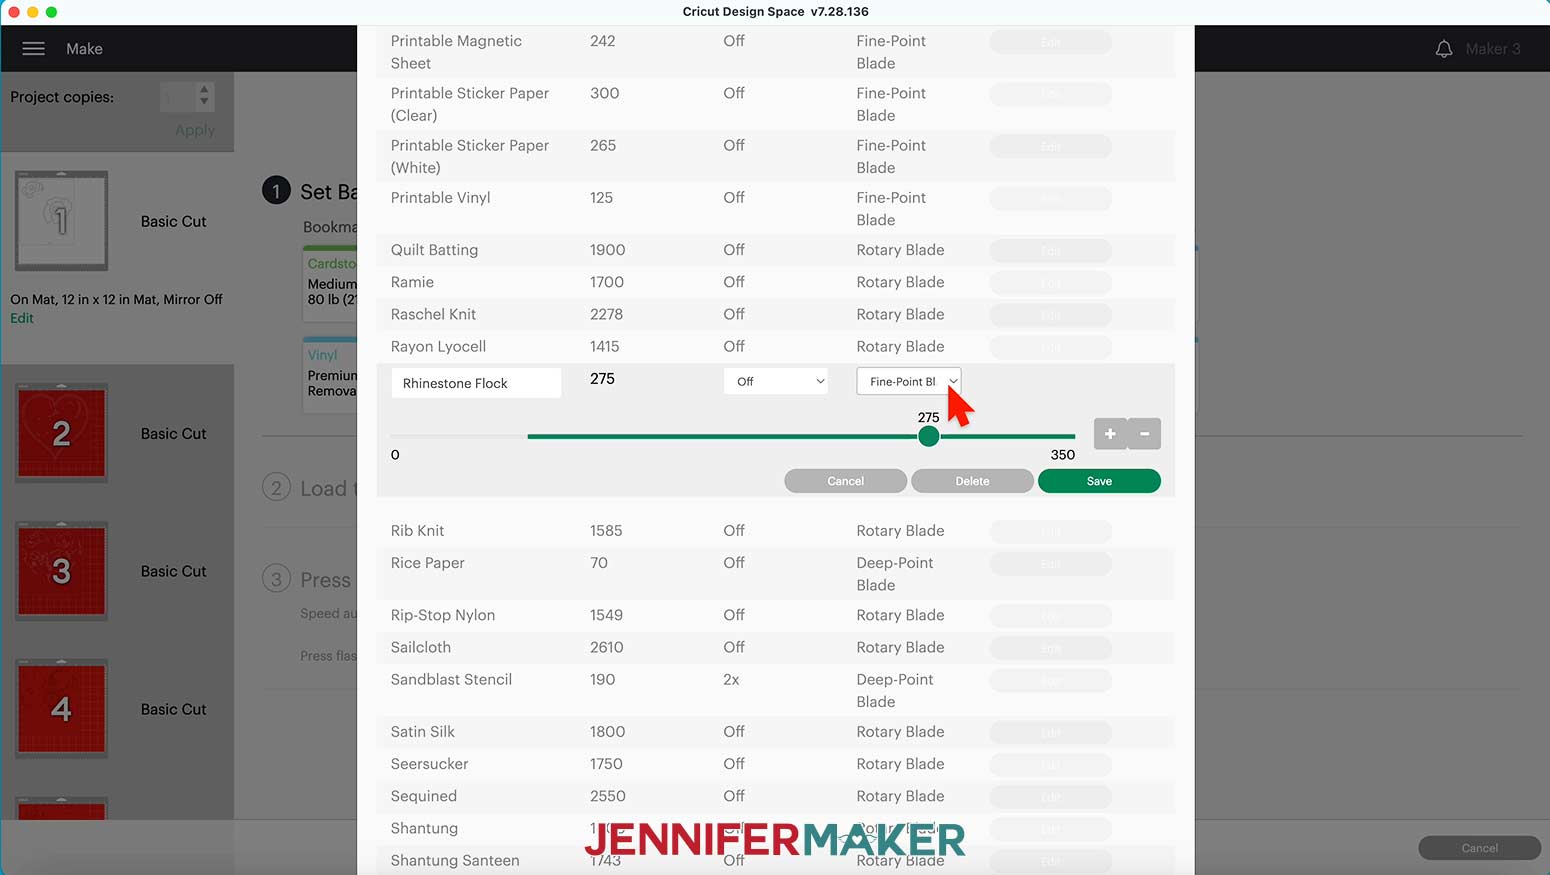
The menu will take you to the new cut setting to enter the correct pressure and blade information.
To match the instructions from the manufacturer, I chose 275 as the pressure, left multiple passes turned off, and selected the Fine-Point Blade.
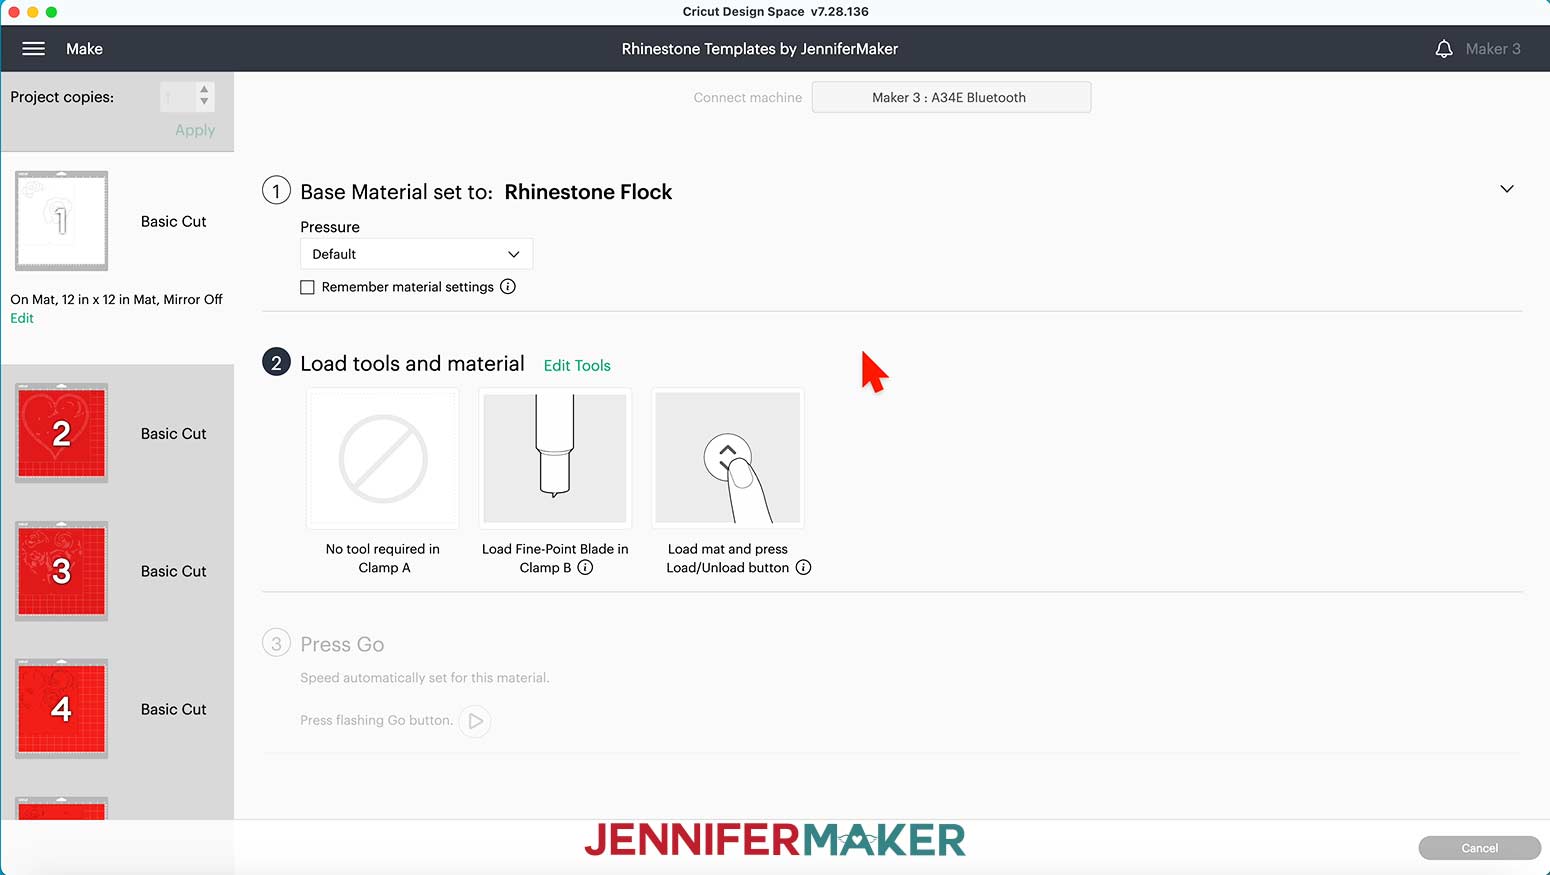
Scroll back to the top and close the menu by clicking on the X in the upper right corner. Now open the “Browse All Materials” menu again, and find and select your new cut setting. Also, select “More Pressure” and click the box to remember the settings for all the mats.
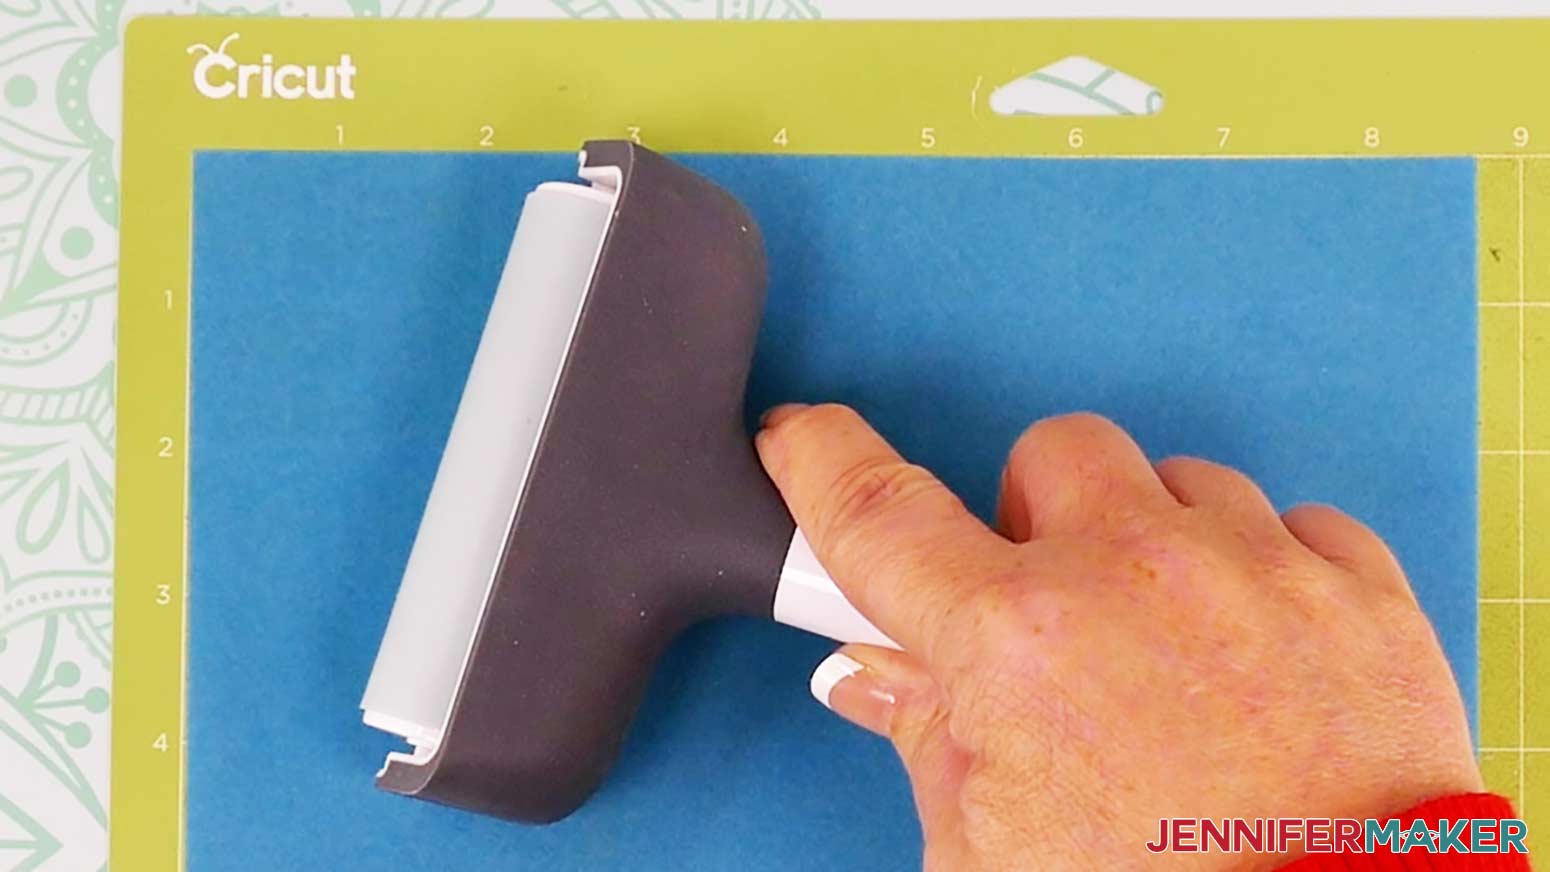
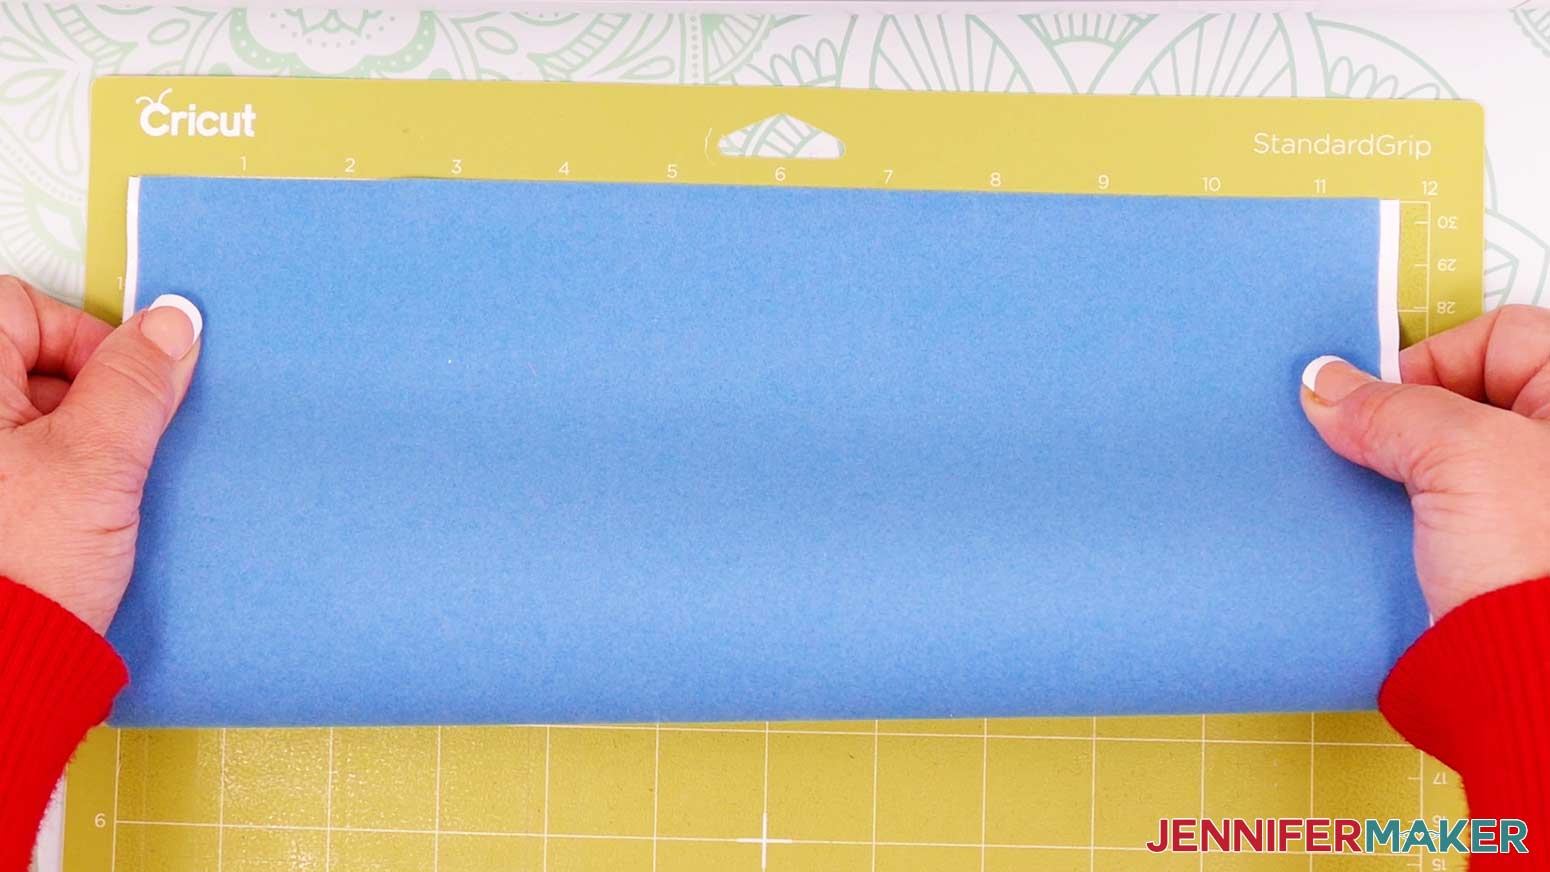
Now, cut a piece of flock large enough for the first mat. Remove the backer and place it sticky side down directly on the green StandardGrip machine mat. (Keep the backer handy to use for keeping the template clean and for storage after cutting.)
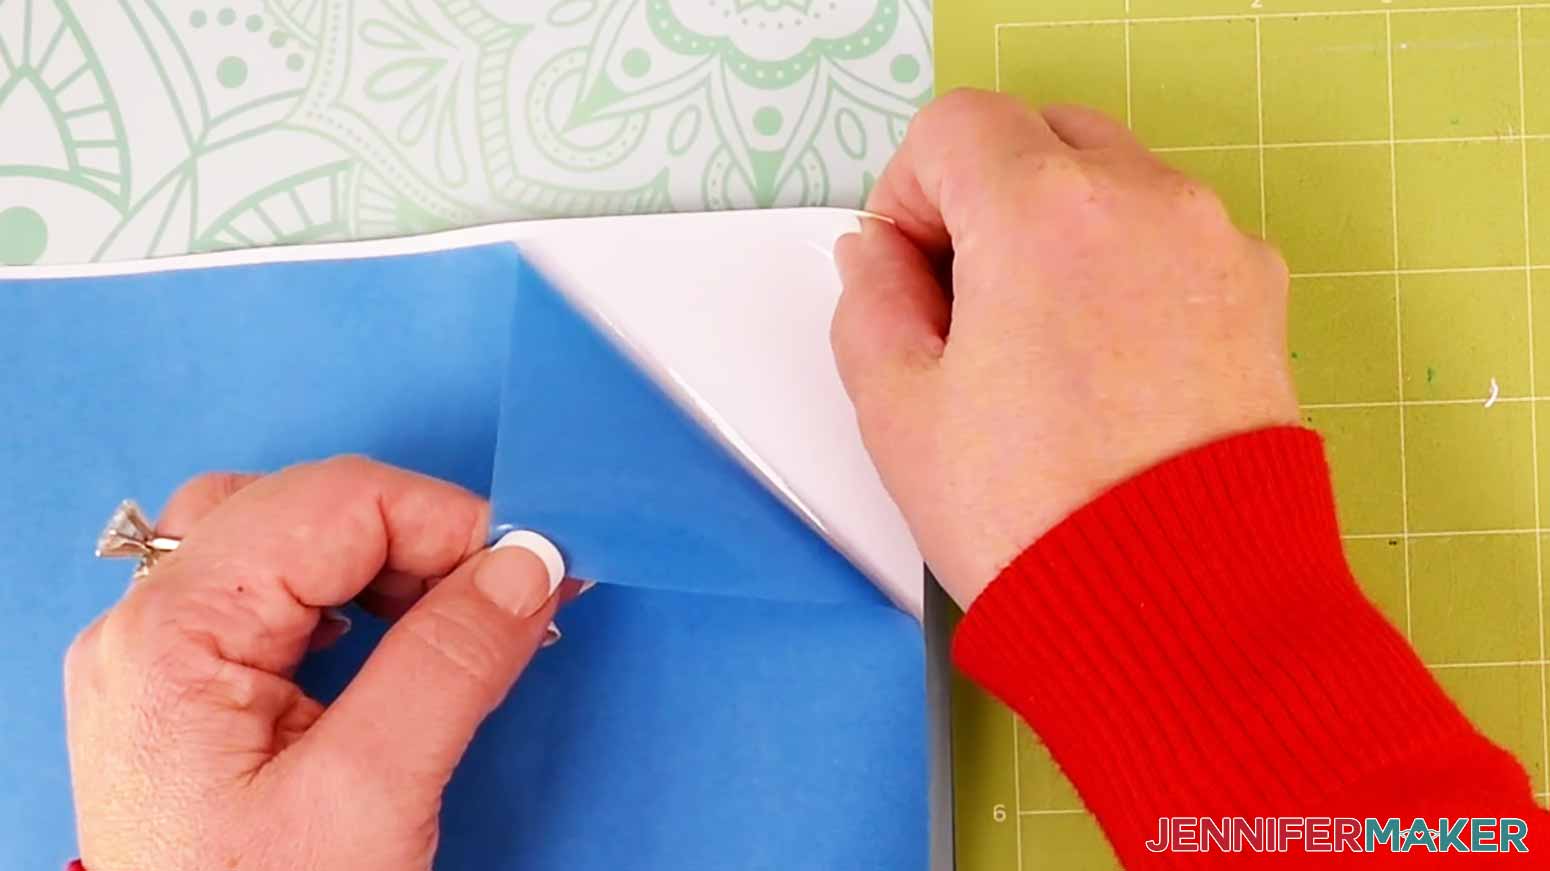
Make sure it has adhered well by pressing it with a brayer.
Load the mat into your Cricut and press the flashing button to begin.
Once the cutting is complete, and before unloading your mat, check to see if the cut went all the way through. If not, press Start for another pass.
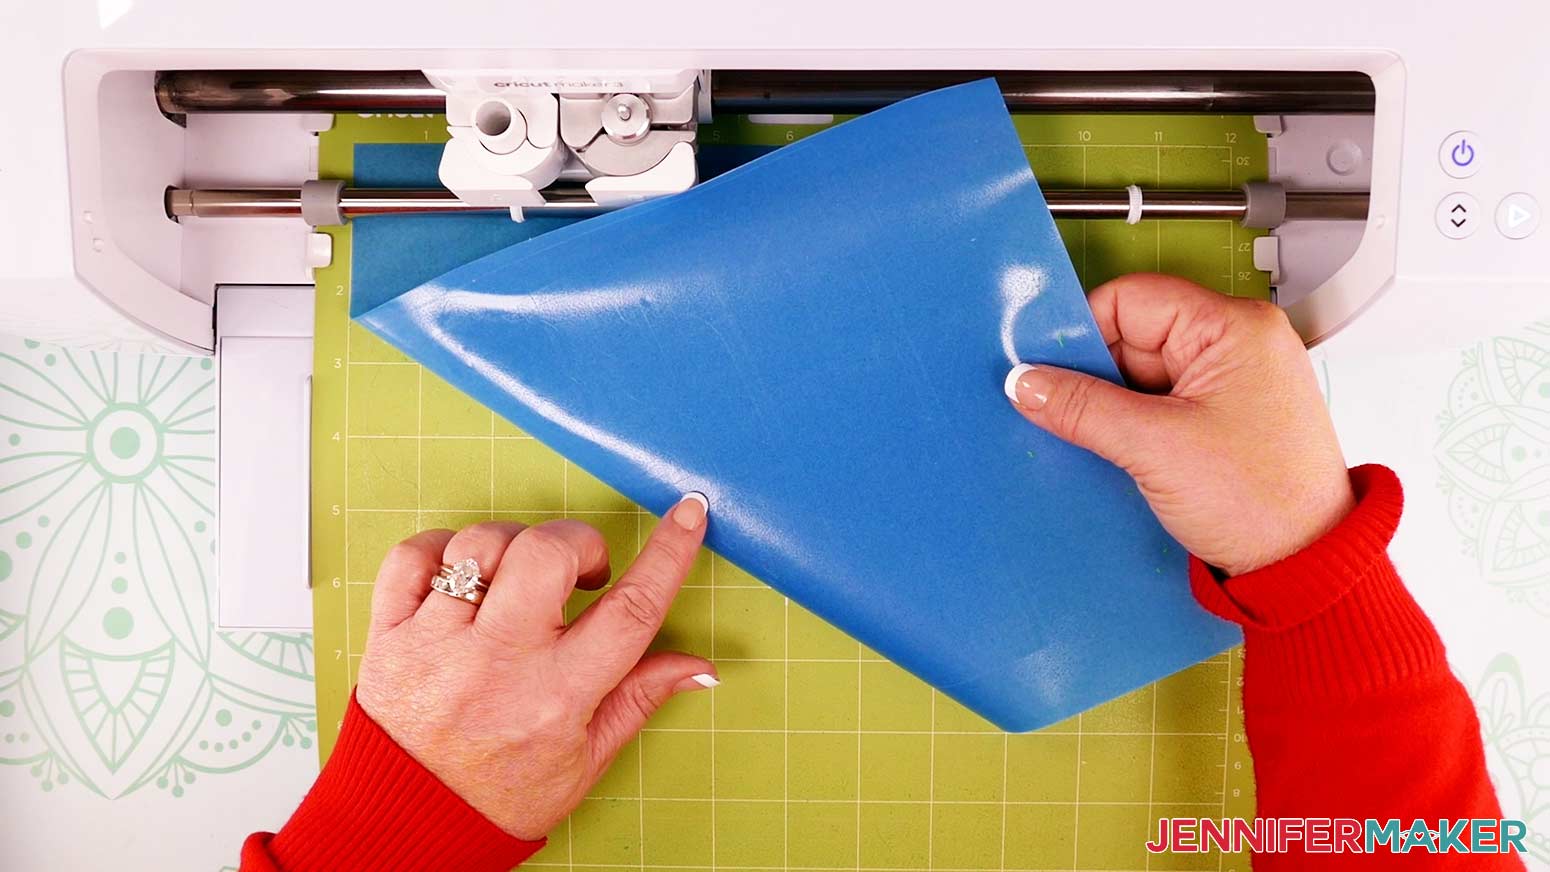
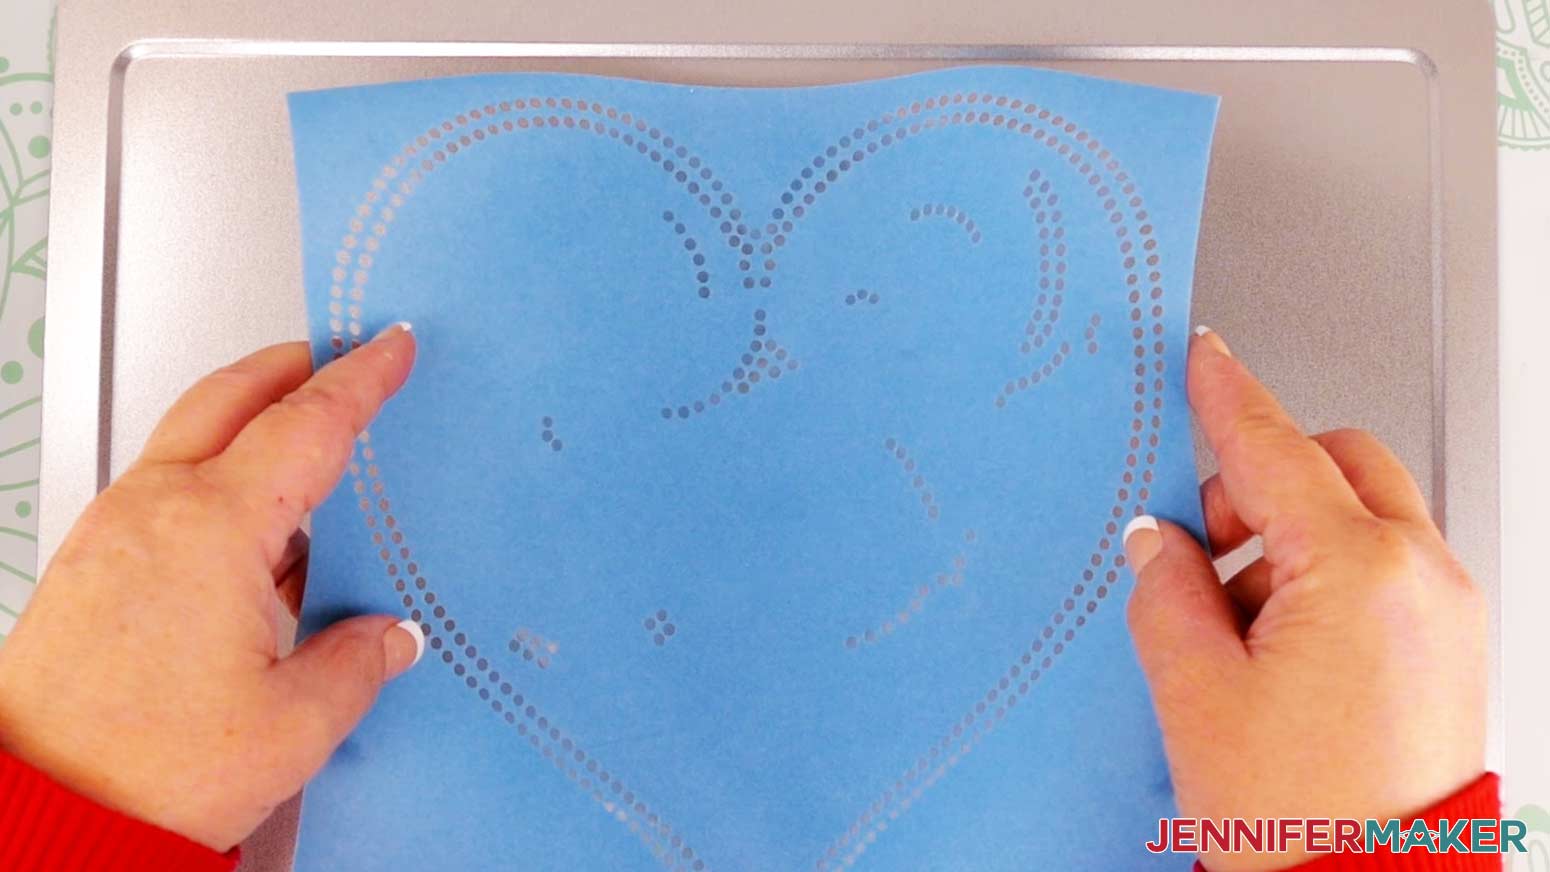
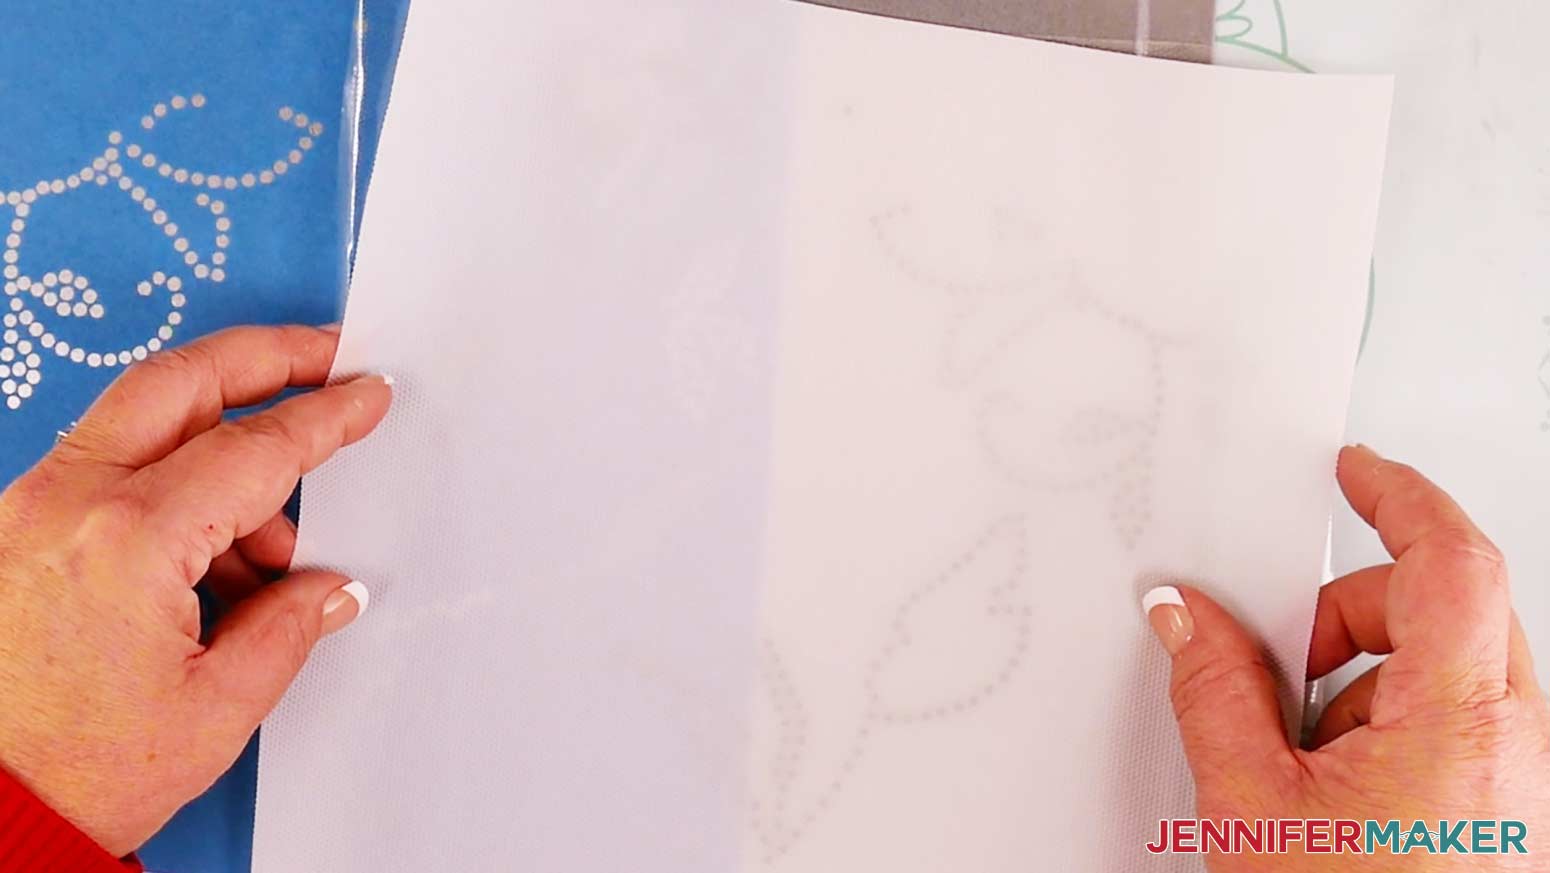
After the cut is complete, remove the flock material by flipping the mat over and carefully rolling the mat away from the flock material. The back of the flock is sticky so be careful to not let it touch any surfaces that are not clean. All the small dots will stay on the mat and you’ll be left with the rectangular template. Place the cut template back onto the backer to store it for later use.
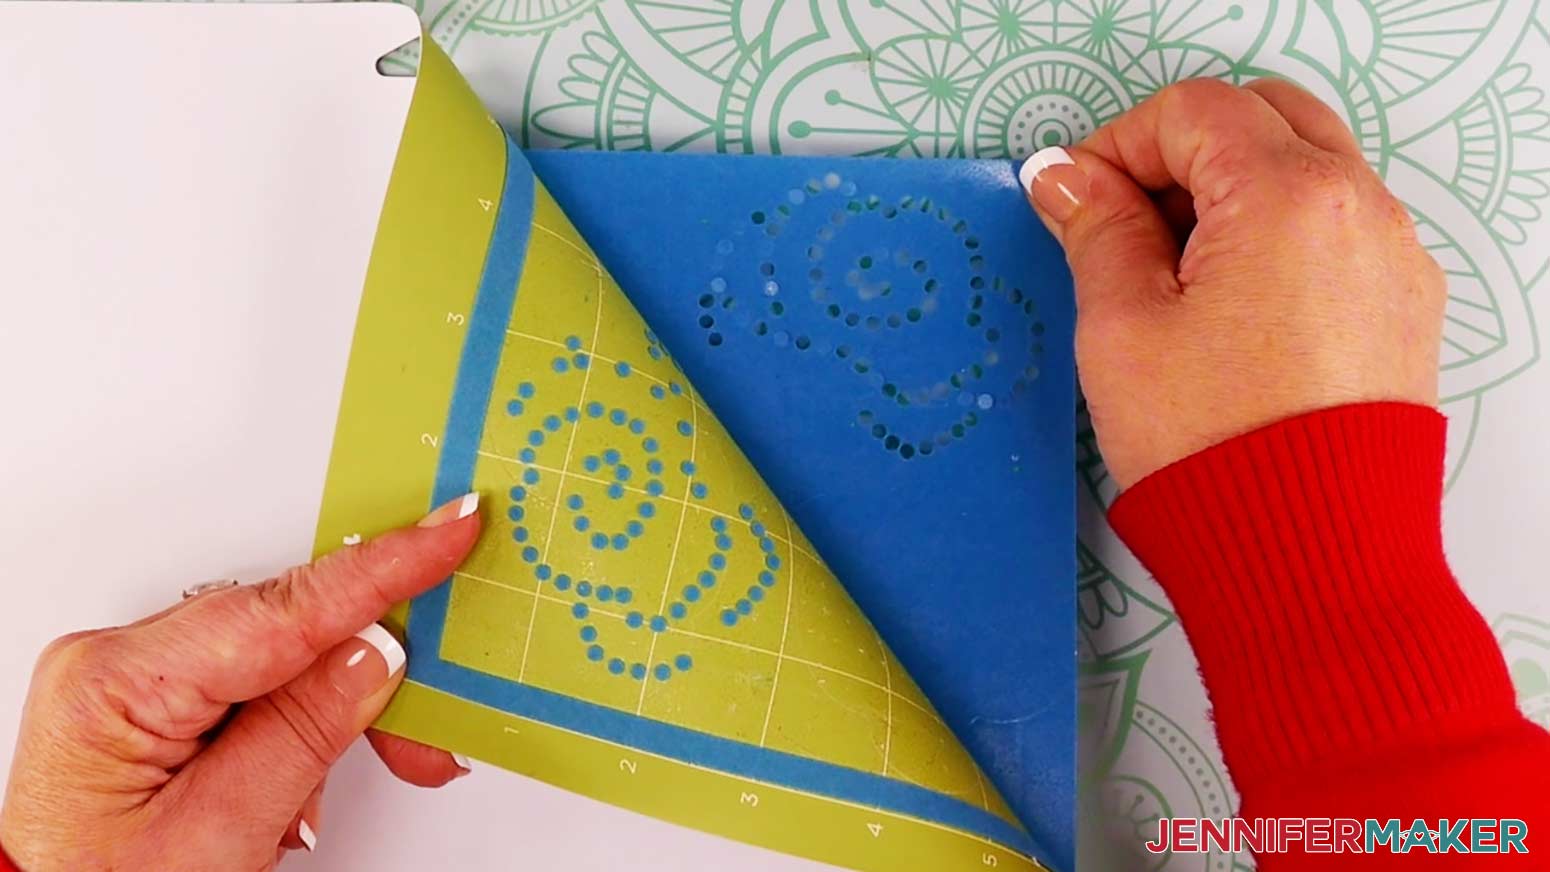
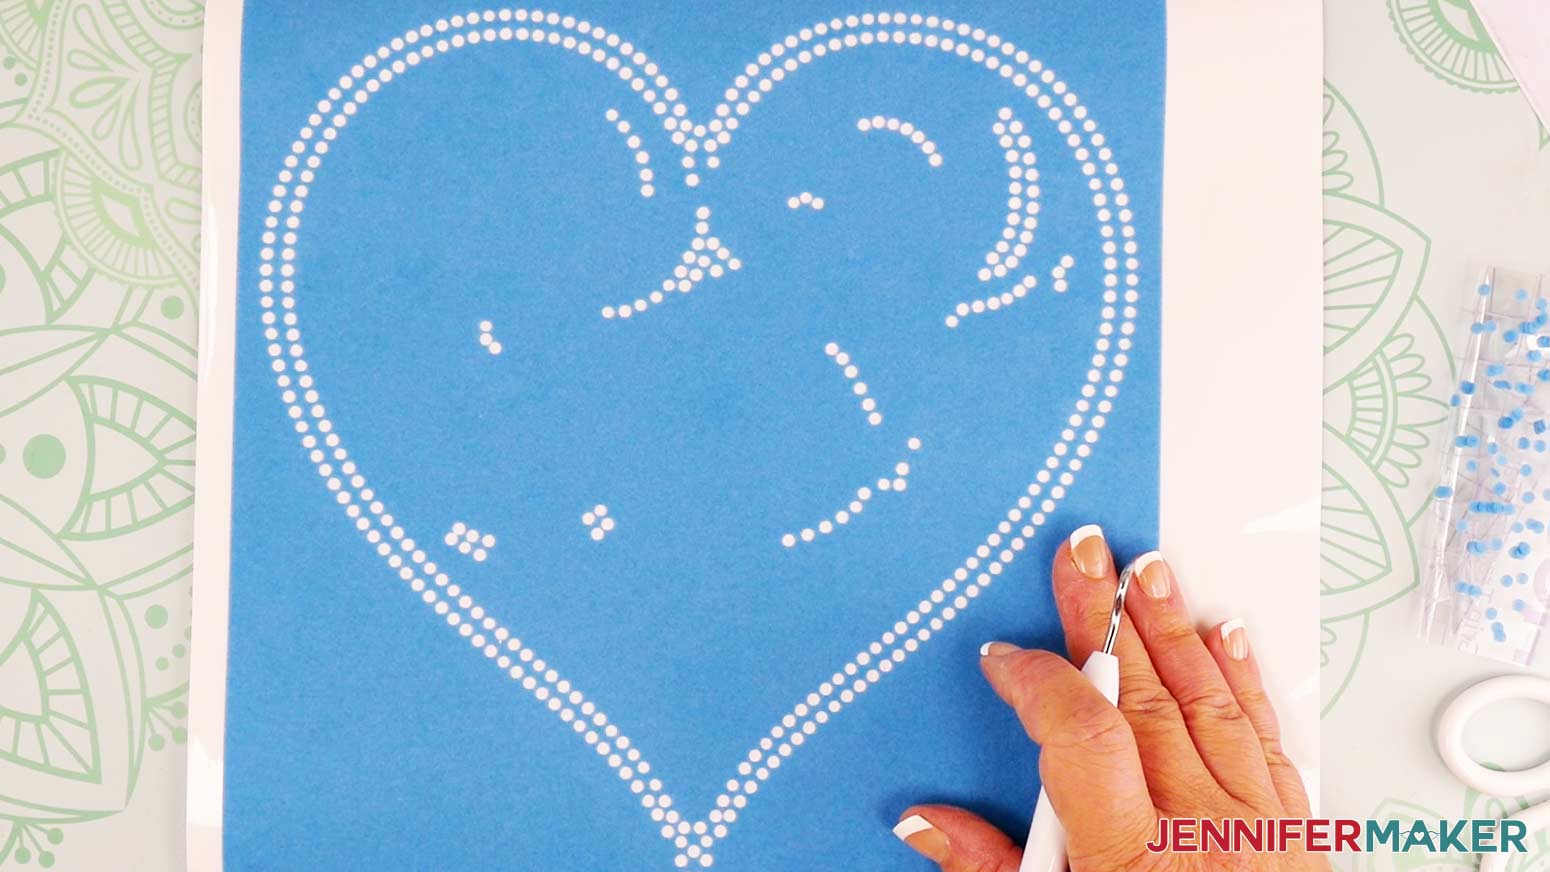
If any dots stay attached to the template, use a weeding tool to poke them out and remove them from the template.
Use a scraper to remove the little dots from the mat to clean it for the next template.

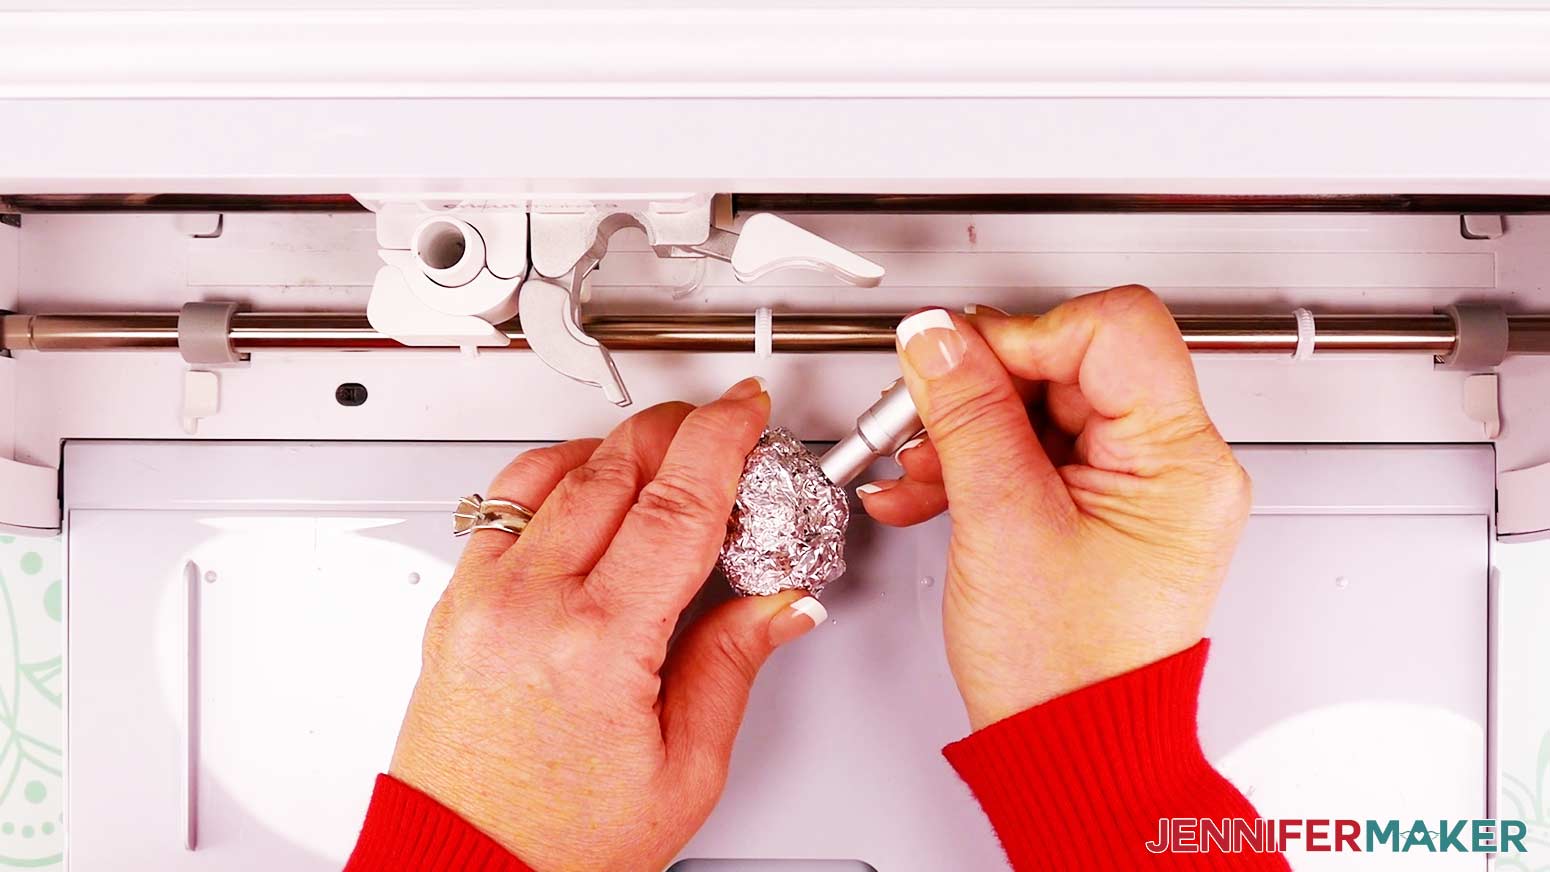
The flock makes a bit of a mess on the edge of the blade, so I recommend cleaning your blade after cutting each mat.
Continue to load, cut, and remove mats until all the pieces are cut.
ALTERNATE METHOD OF CUTTING:
Cut a piece of flock the correct size and place directly on the machine mat without removing the backer. Use a brayer to make sure it is well adhered as in the other method.
Since we do not want to cut through both the flock and the backer, I used a lighter pressure setting. “Light Cardstock-65lb” with “More Pressure” worked well for me.
After cutting each mat, remove the mat from the flock by flipping the mat over and rolling it away from the flock.
To remove the dots from the template, press a piece of Strong Grip Transfer Tape into the top of the flock material and pull it away from the flock, taking the dots with it.
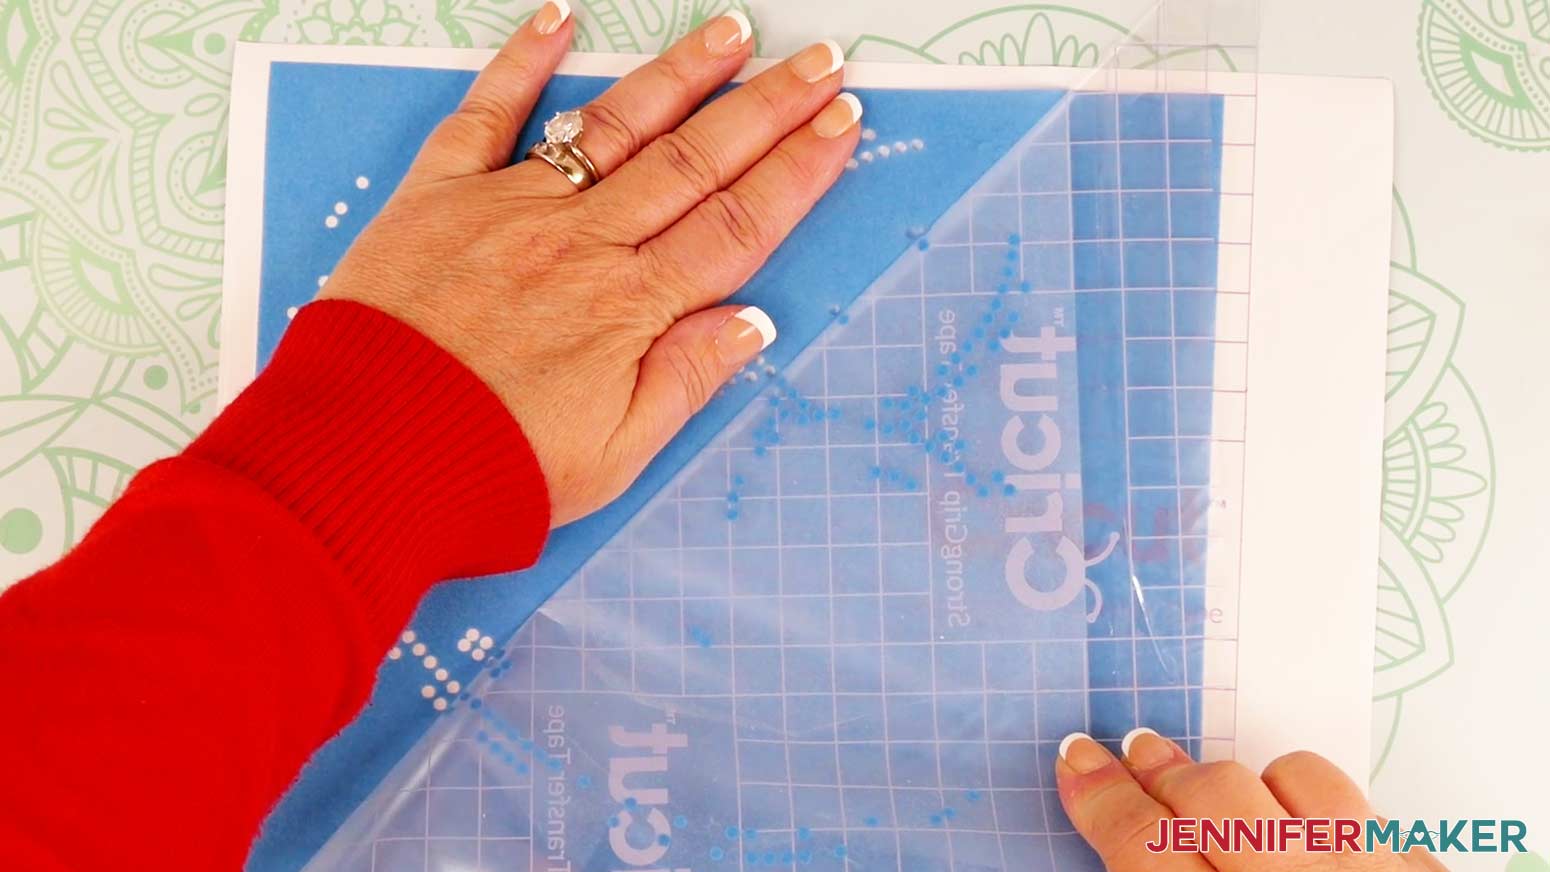
You may have to do this multiple times to remove all the dots. You will be left with the template still adhered to the backer and a clean machine mat ready to cut the next template.
Continue cutting and removing templates in this manner until all are ready.
Once all the mats are cut and weeded, the templates are ready to use!
STEP 4: ASSEMBLE THE RHINESTONE TEMPLATES
First, choose a template to start. I like to start with the largest and most detailed templates and work to the smallest and least detailed.
Let’s start with the large template that matches the outline of the heart. This template has larger size holes to match size SS10 rhinestones.
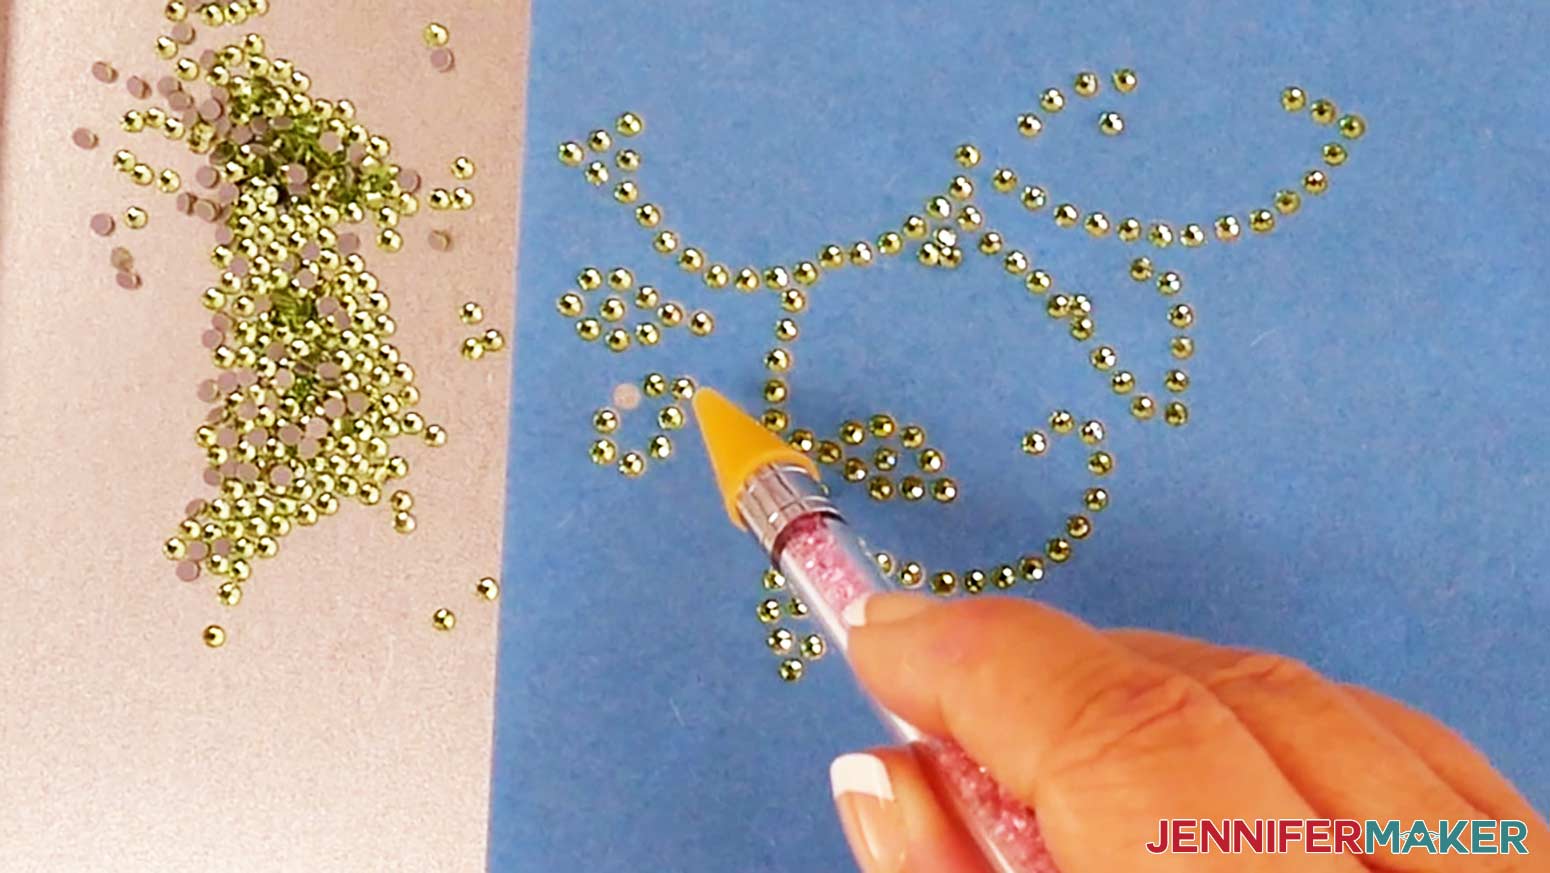
Remove the backer and place the template sticky side down onto the cooking sheet. The template can be placed on any flat surface, but a cooking sheet allows you to easily catch all the unused rhinestones and pour them back into their container.
Pour a pile of hotfix rhinestones in the correct size and color onto the center of the template. Make sure the rhinestones are heat apply and not glued rhinestones!
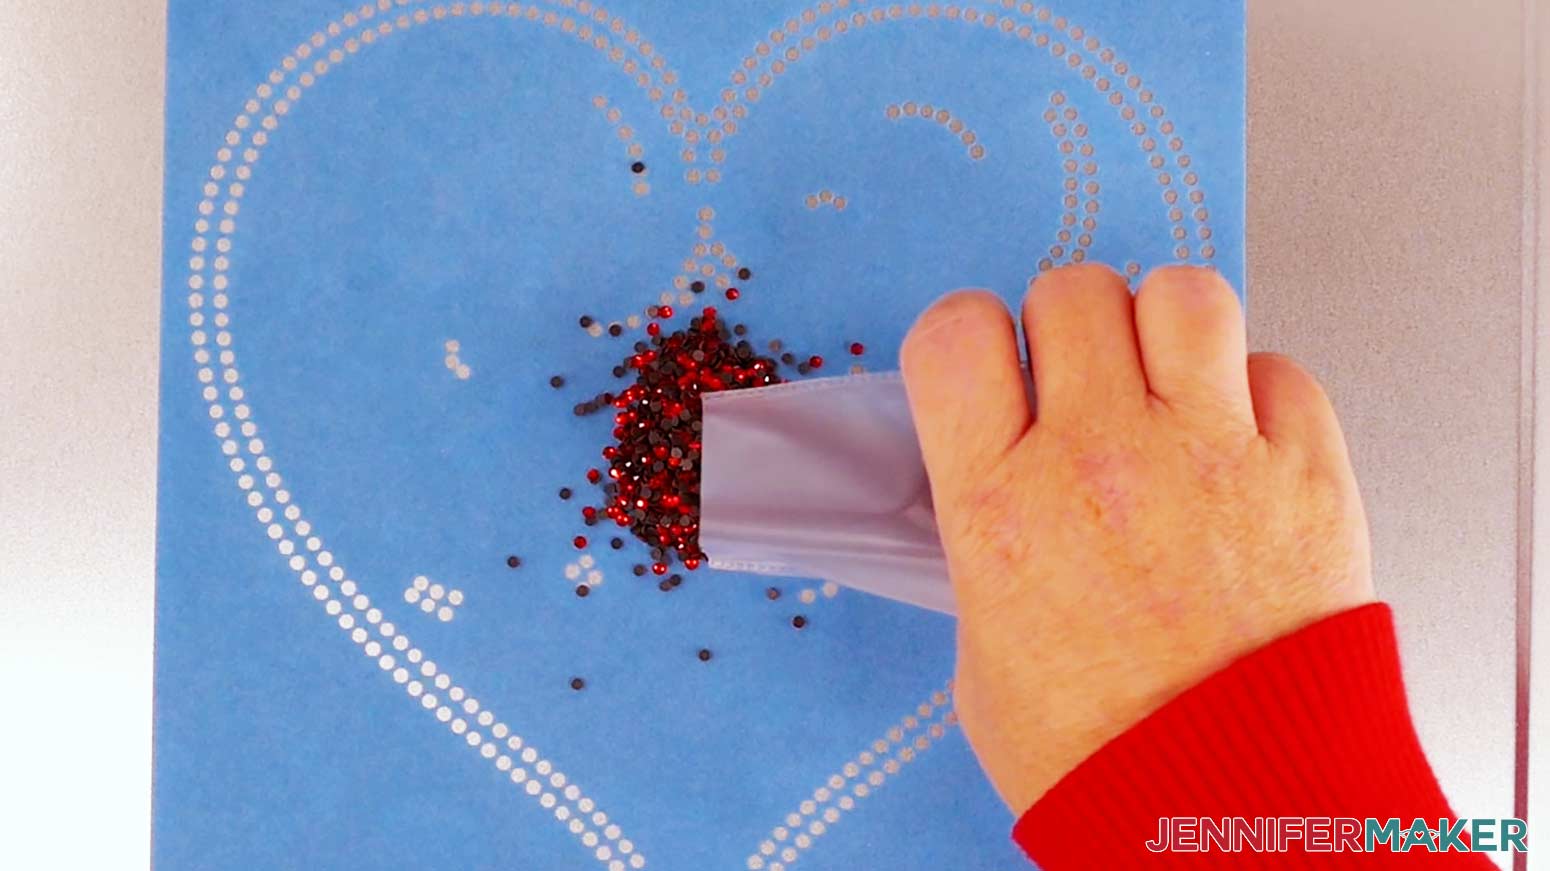
Use the paint tool to gently brush the rhinestones around the surface of the template in a circular pattern. The stones will fall into the holes in the template.
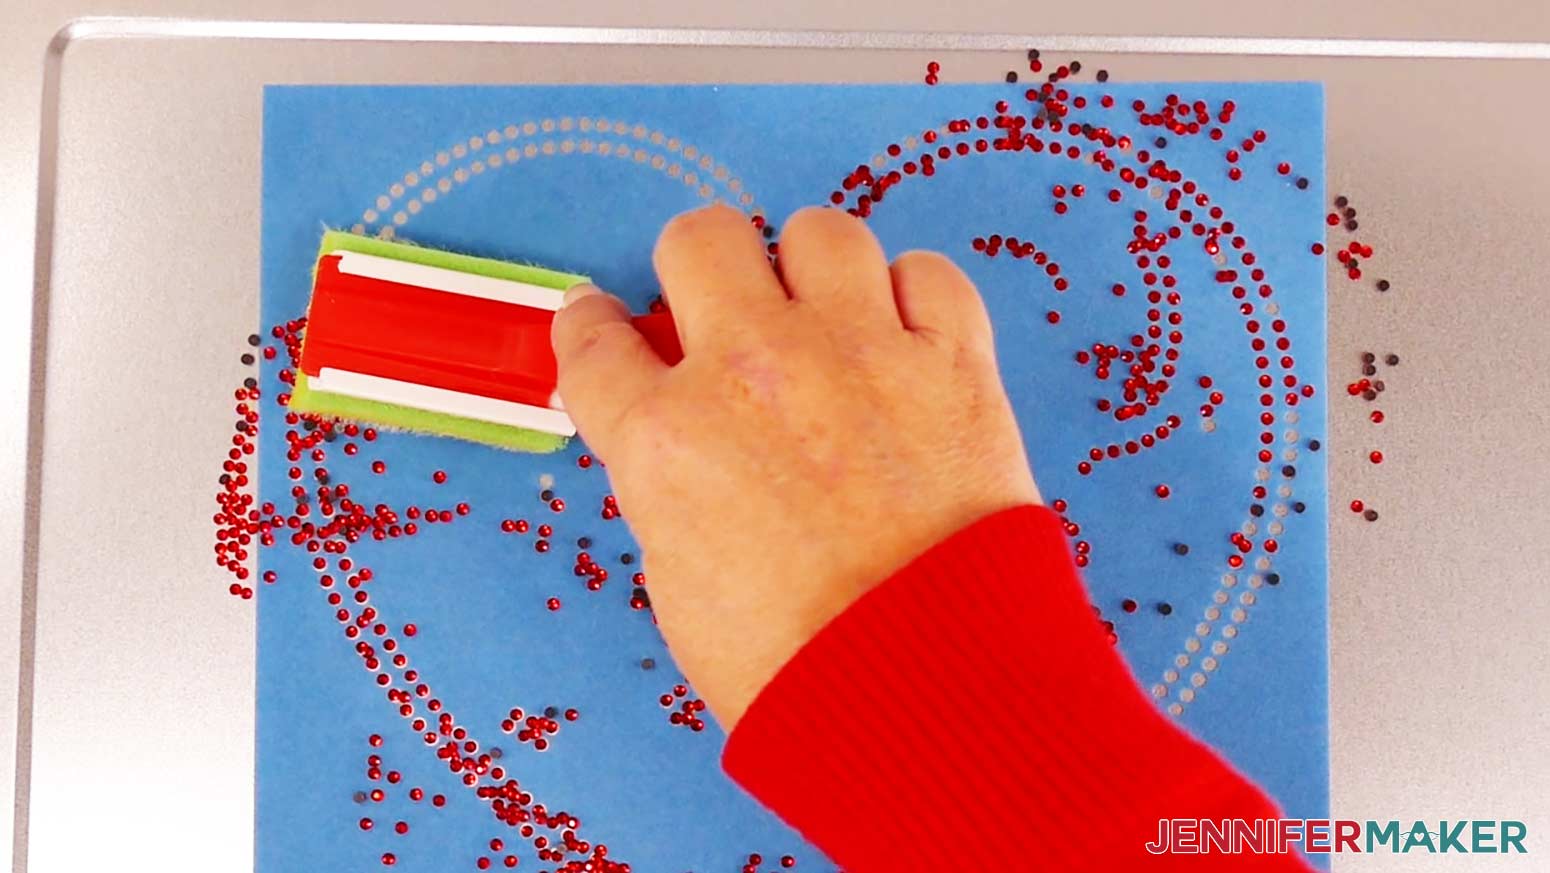
Once most of the holes are filled in, use the brush to gently brush any unused rhinestones off the edge of the template and onto the pan.

Use a pair of tweezers, a rhinestone picker tool, or a wax pencil to pick up individual rhinestones and fill empty spots on the template. Make sure no rhinestones are flipped bottom up and all holes are filled before proceeding.
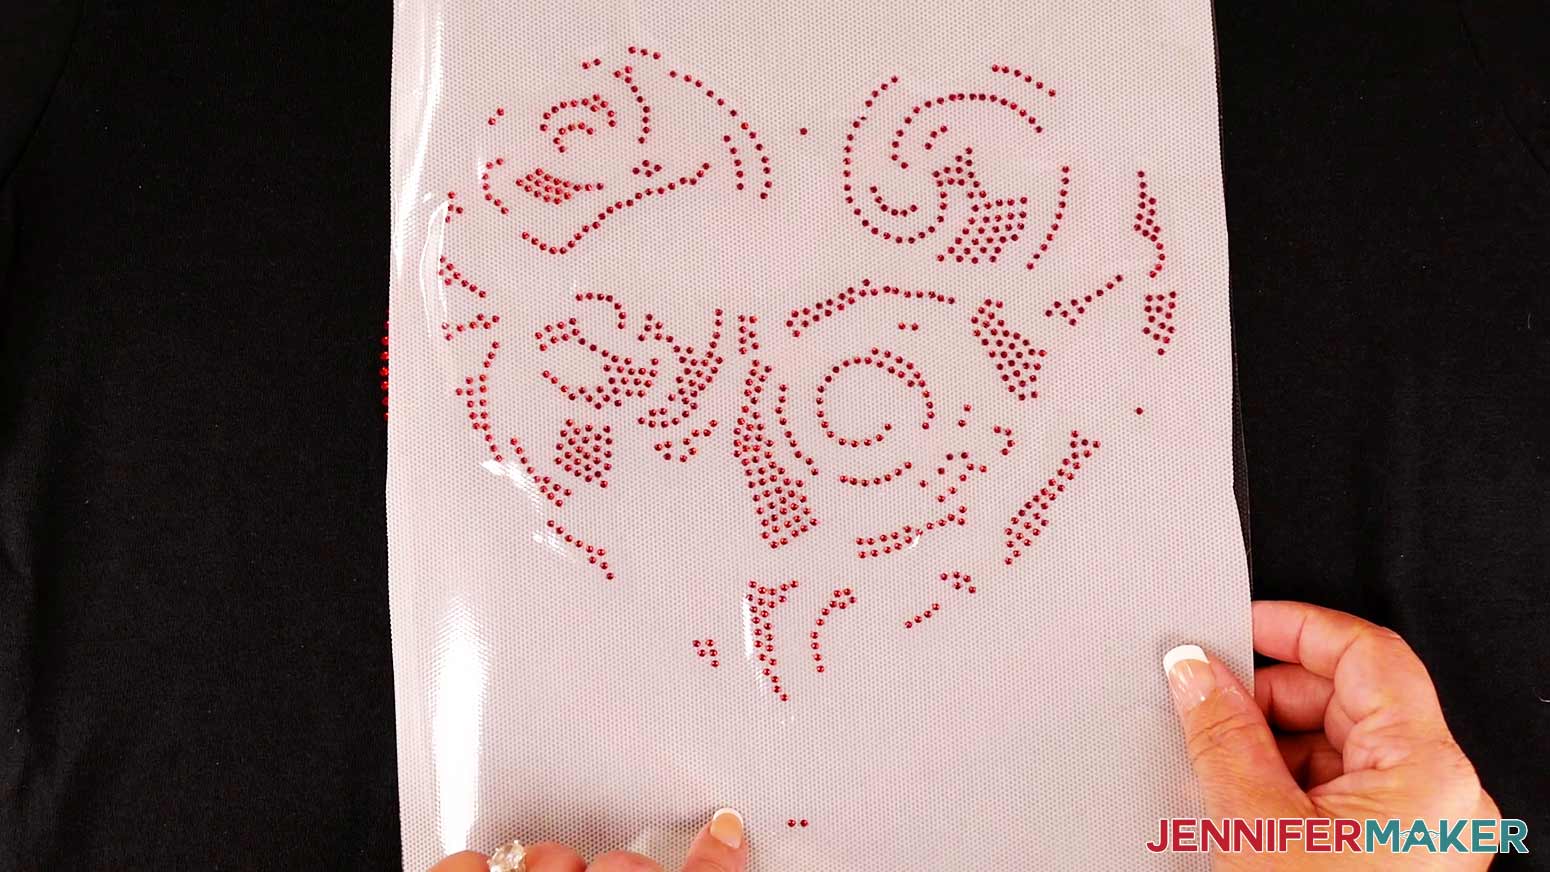
Cut a piece of rhinestone heat transfer material to cover the size of the template. Remove the backer from the heat transfer material and hold it over the template in a taco shape. Gently lay the heat transfer material down from the center outward.
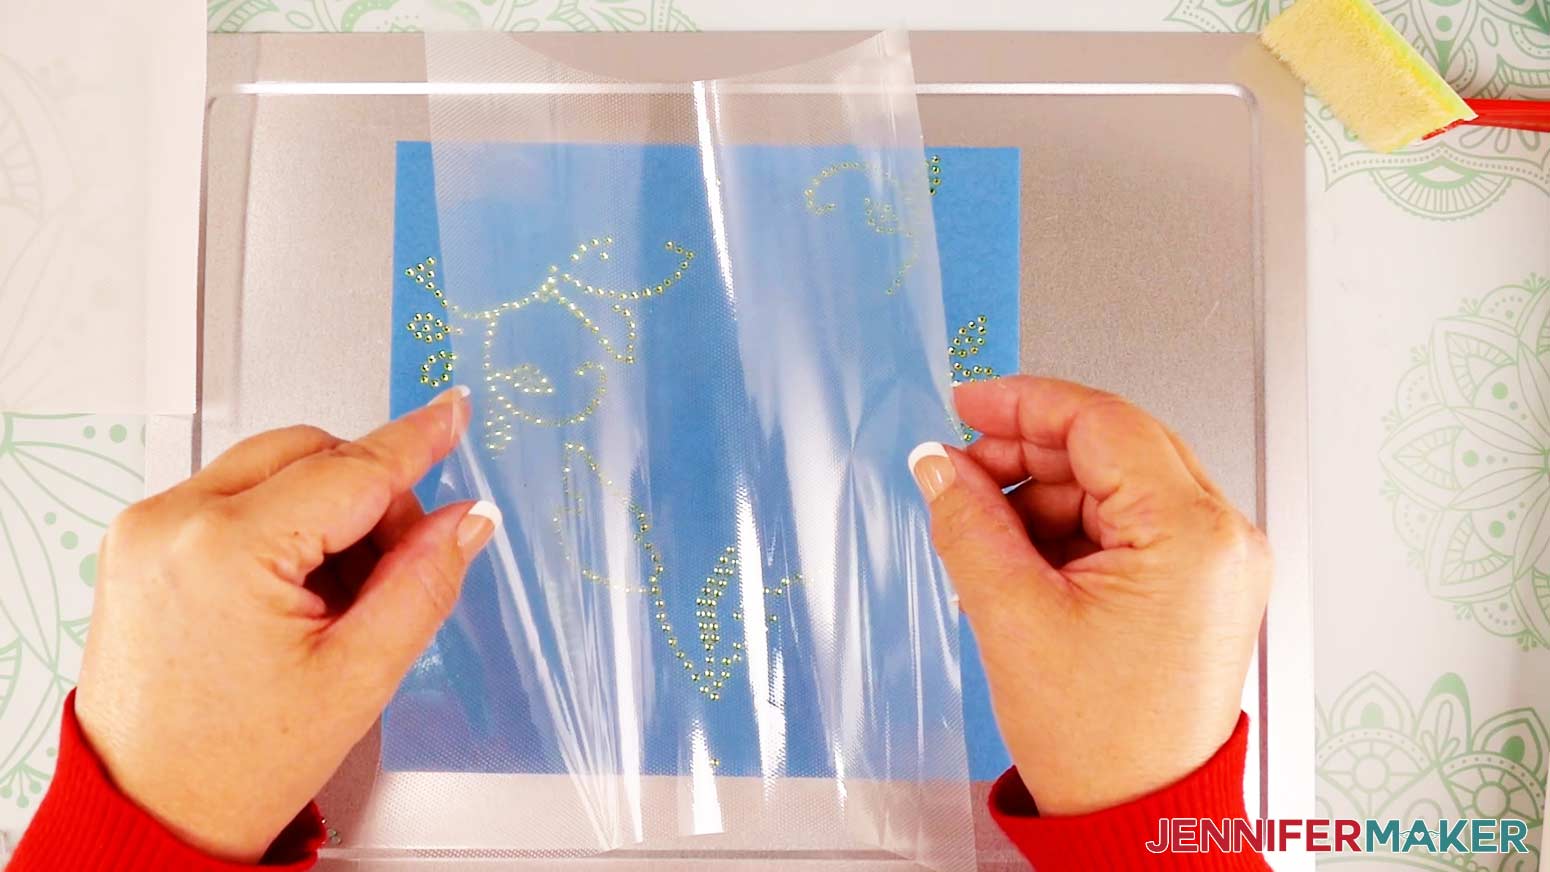
Carefully and lightly press your fingers on all the rhinestones to make sure they have adhered to the heat transfer material.
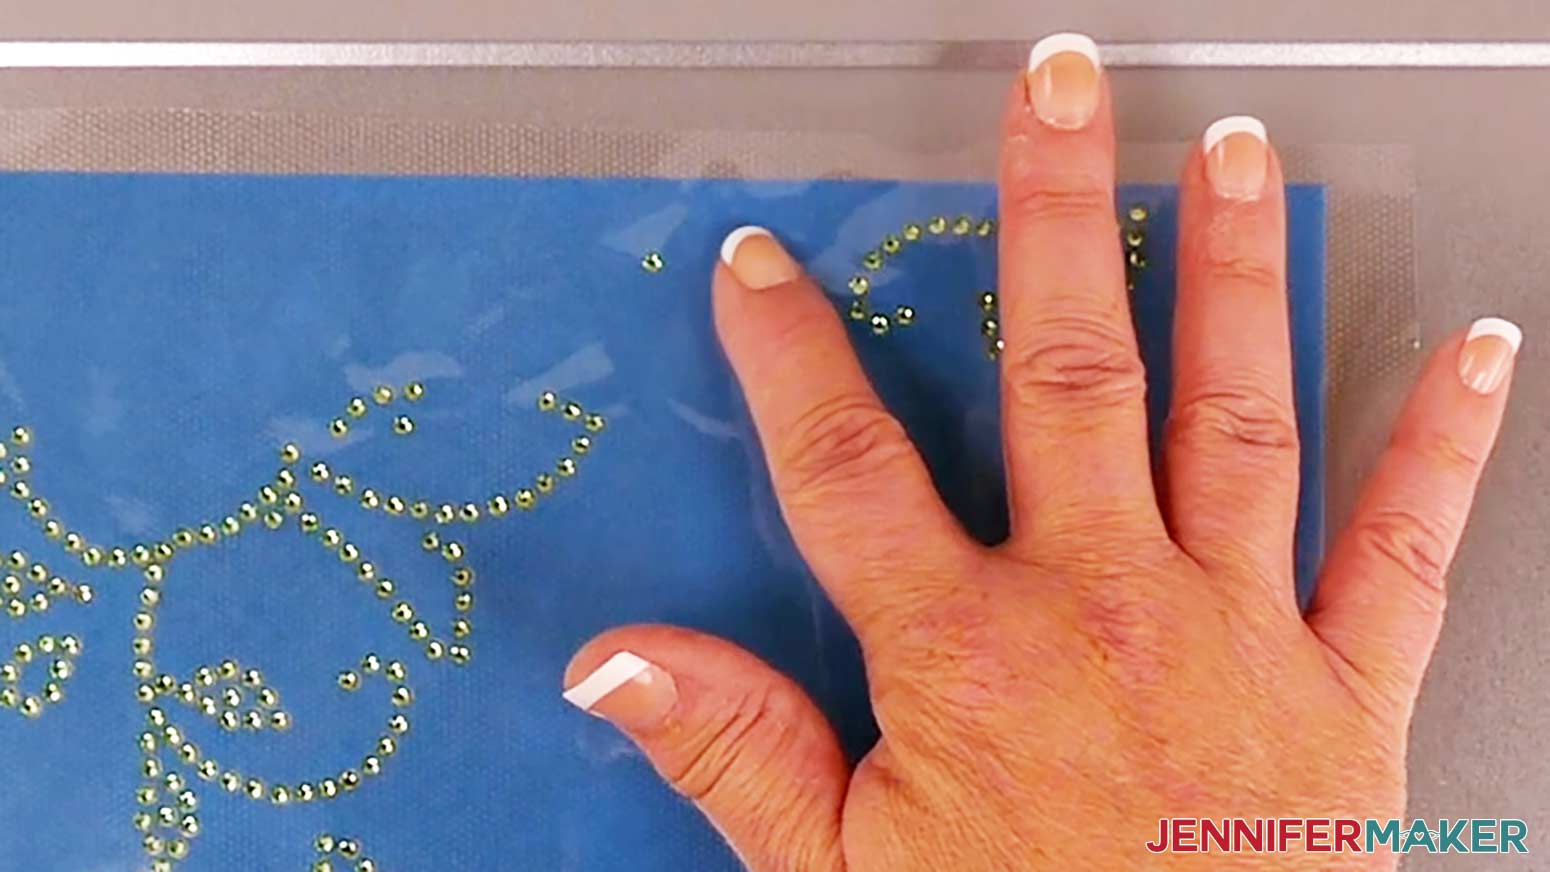
Slowly lift and roll the heat transfer material away from the flock template. Take care to not touch the rhinestones on the back of the material. They shift easily!
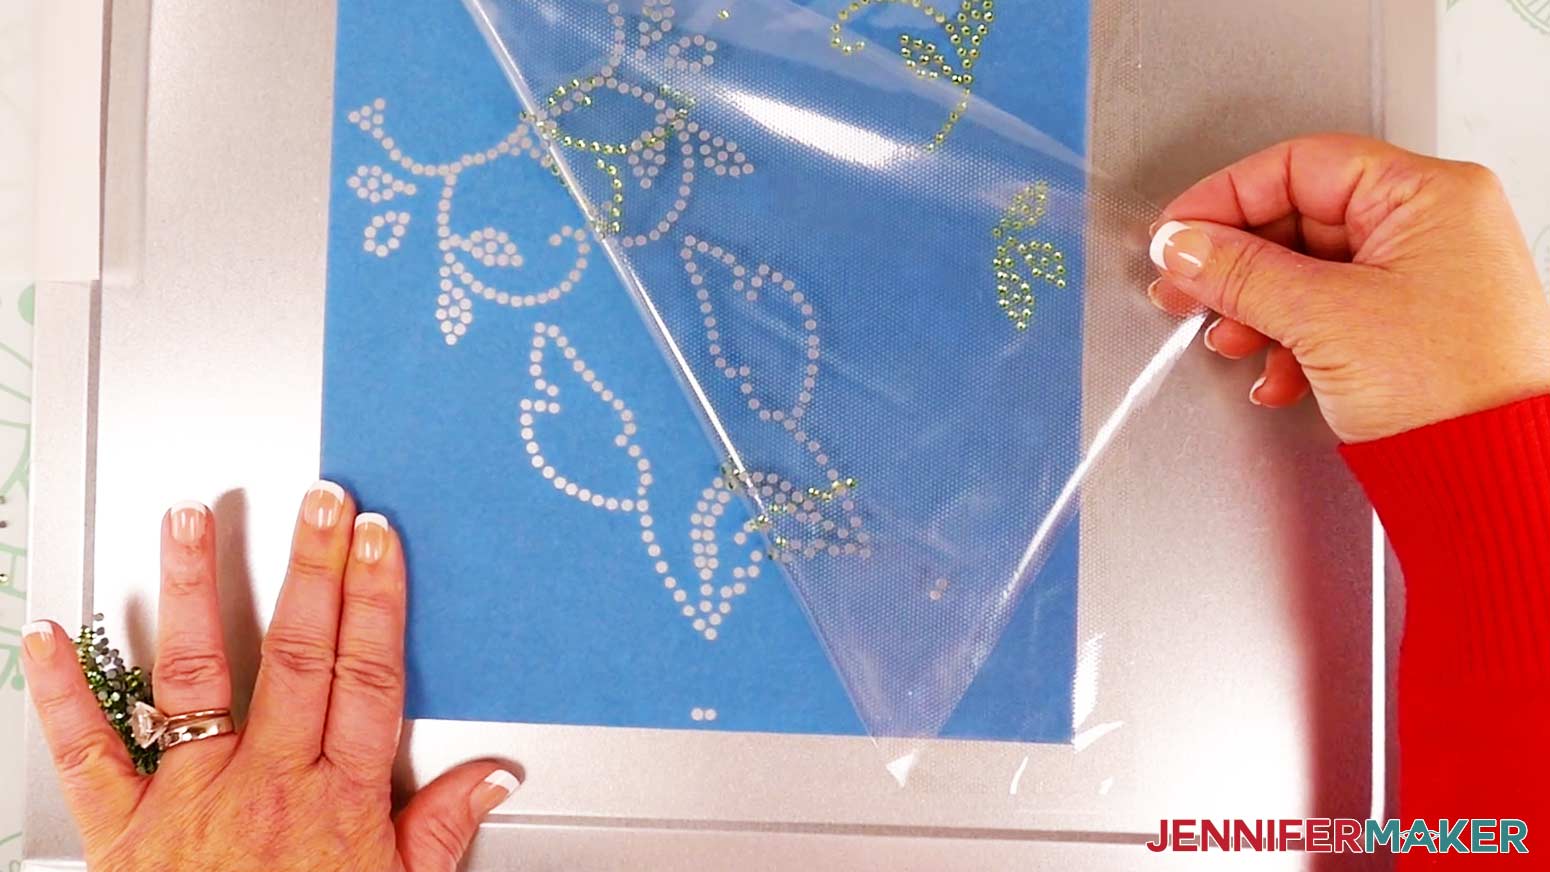
Immediately place the rhinestones and heat transfer material flat onto a surface with the sticky side up and place the backer down onto the material. Now the rhinestone pattern can be safely stored until used.
Clean up the unused rhinestones and return the flock template to its backer.
Continue filling and applying the heat transfer material to each template.
Once all the rhinestones have been added to heat transfer material, we can now press them onto the shirt!
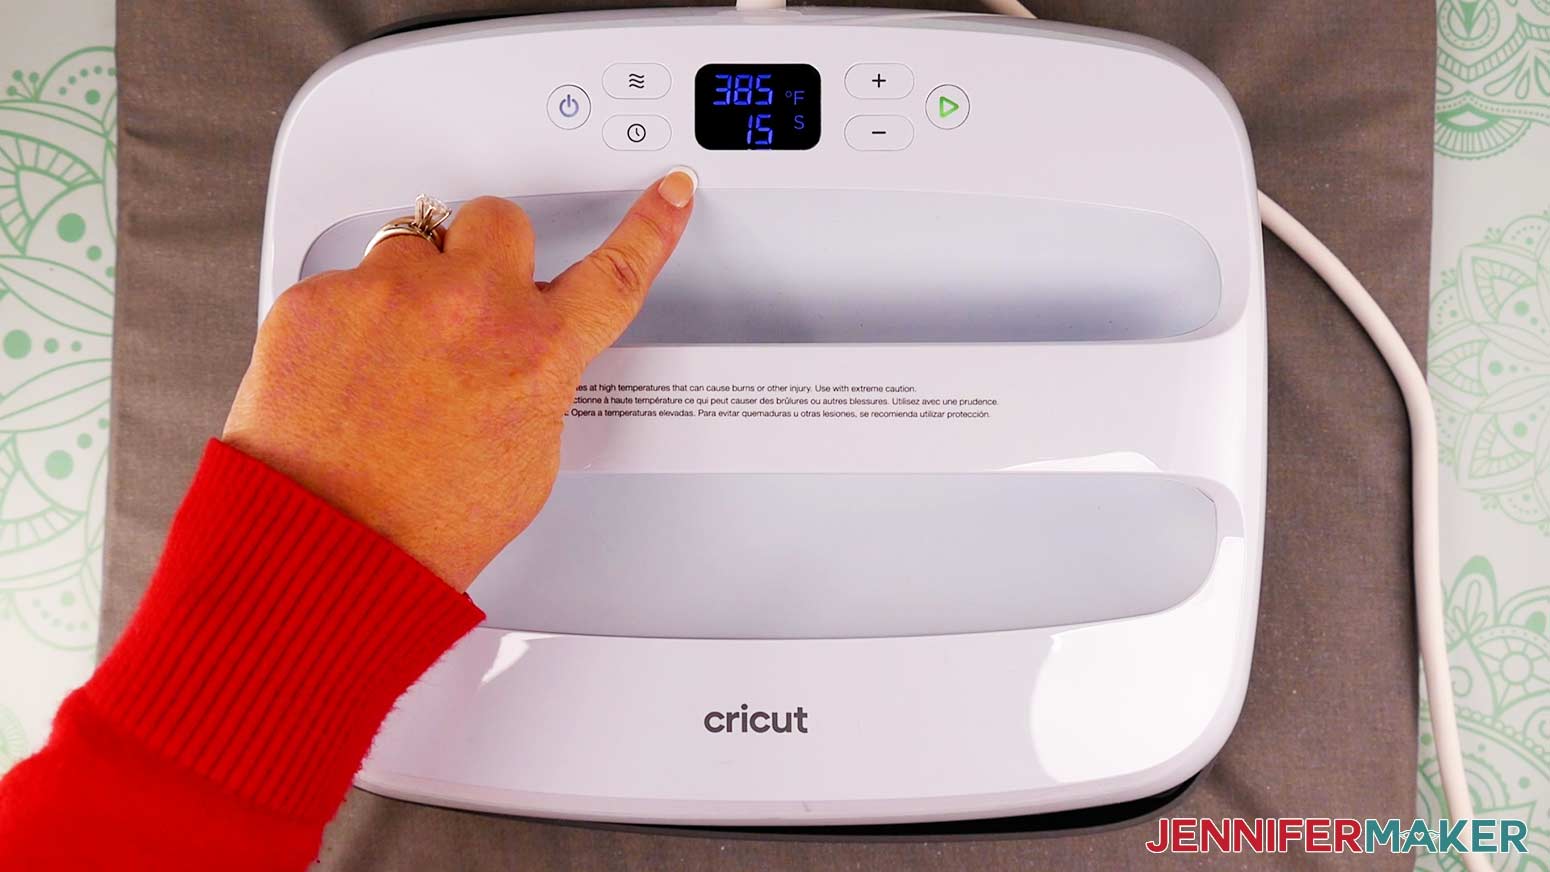
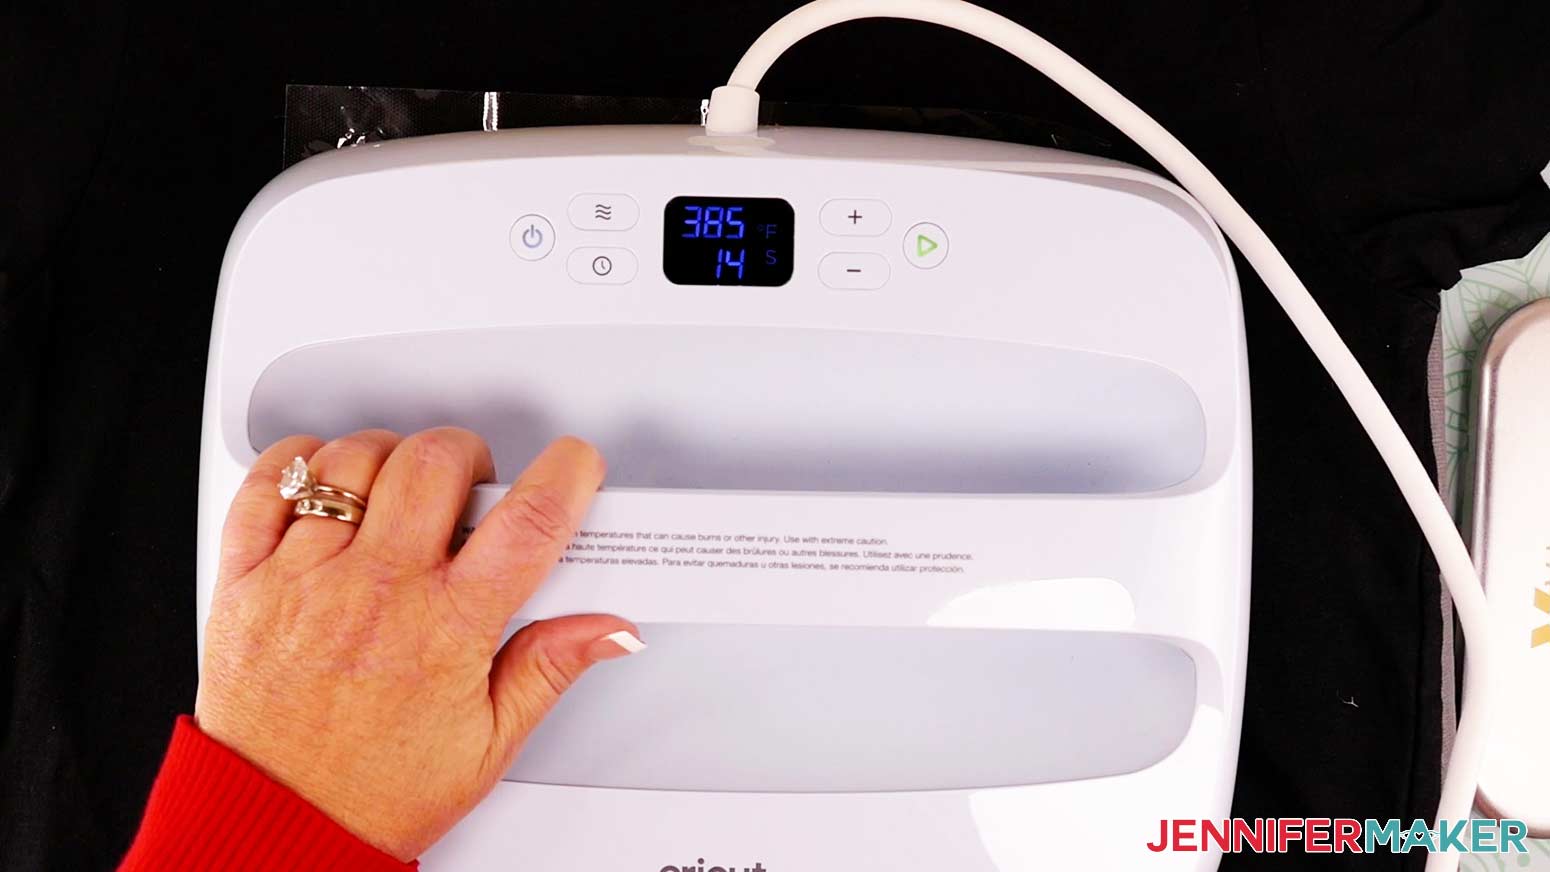
Preheat your heat press to the proper heat setting listed by the rhinestone supplier. The rhinestones I am using are pressed for 305 degrees Fahrenheit (152 degrees Celsius) for 15 seconds with Medium Pressure.
To make it easier to find the center of the front of the shirt, fold the shirt in half and lightly press the shirt with heat to hold the crease.

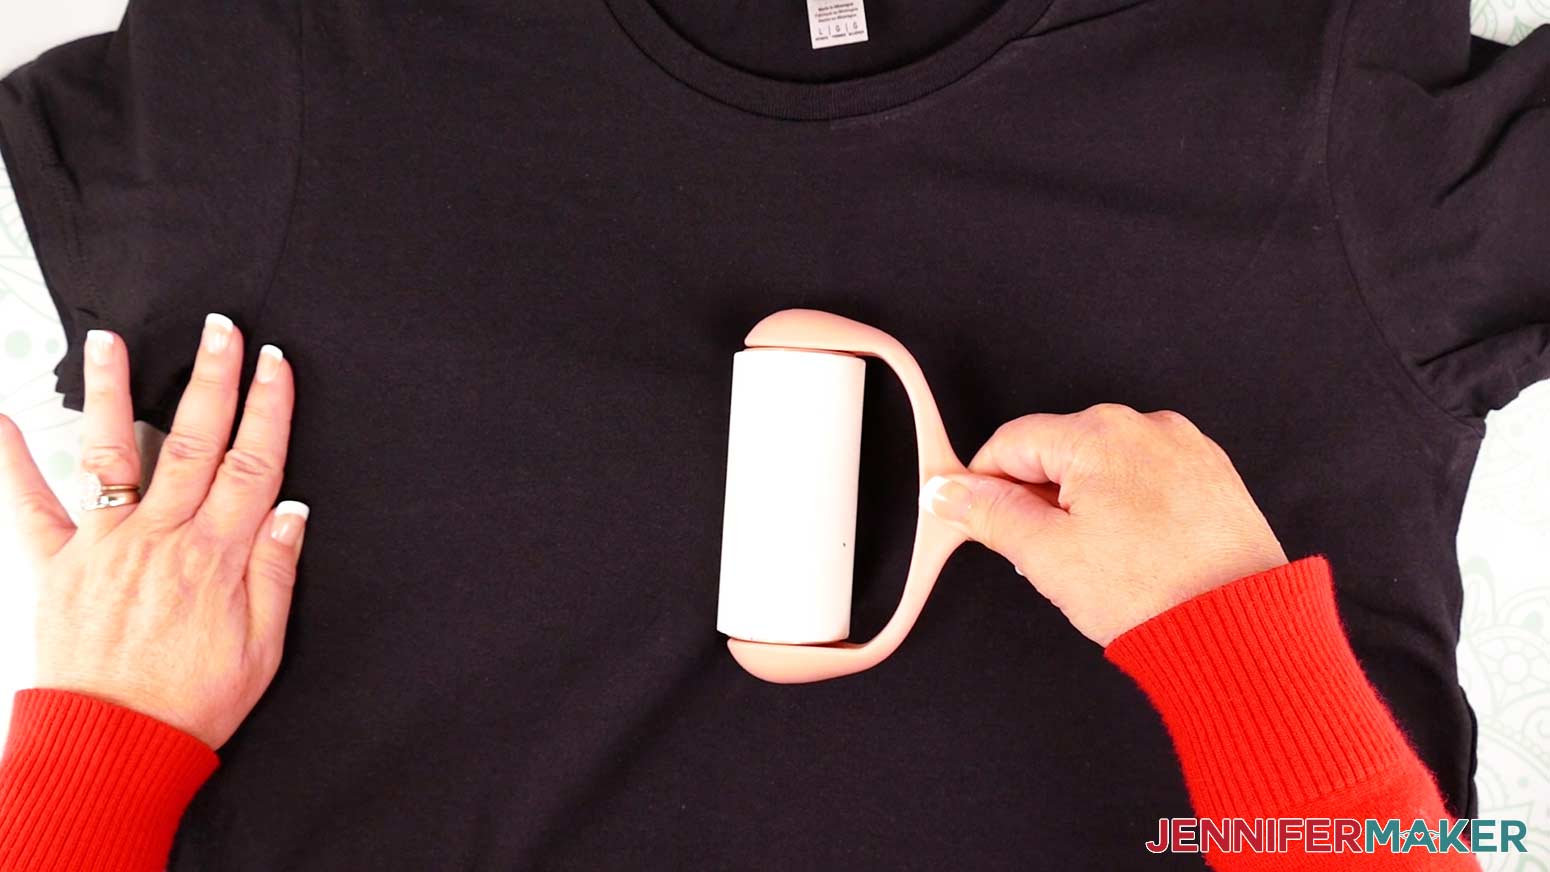
Open the shirt and use a lint roller to prepare the surface for the rhinestones.
Once the shirt is ready, start with the rhinestone pattern that includes the outside edge of the heart. Place it in the center of the shirt approximately two inches from the edge of the collar.
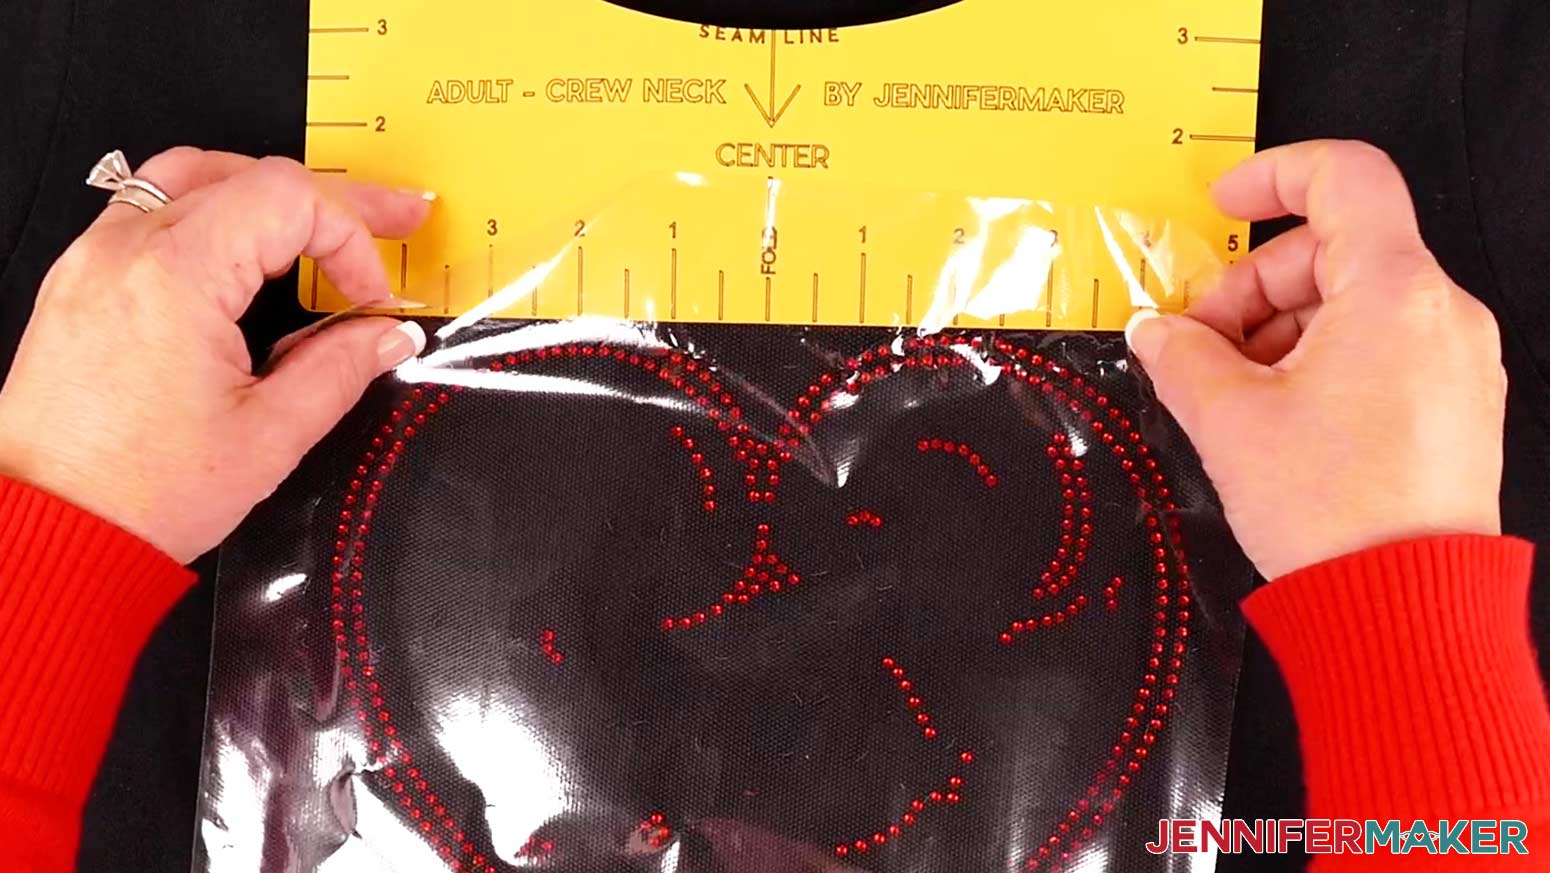
TIP: Check out my T-Shirt Rulers for an easy way to measure the placement of T-Shirt designs.
When the rhinestones are placed where you want them, carefully check the whole design to make sure no rhinestones are obviously missing or flipped the wrong way over. The heat transfer material is sticky and will help hold the rhinestones in place while they are pressed. There is no need to place any other material over the top of the rhinestones other than the heat transfer material. The rhinestones are also less likely to move if the shirt is pressed on a softer surface, like a Cricut EasyPress Mat.
When ready, press the rhinestones with the proper heat, time and pressure.
The heat transfer material can be carefully removed from the rhinestones once the material has cooled completely.
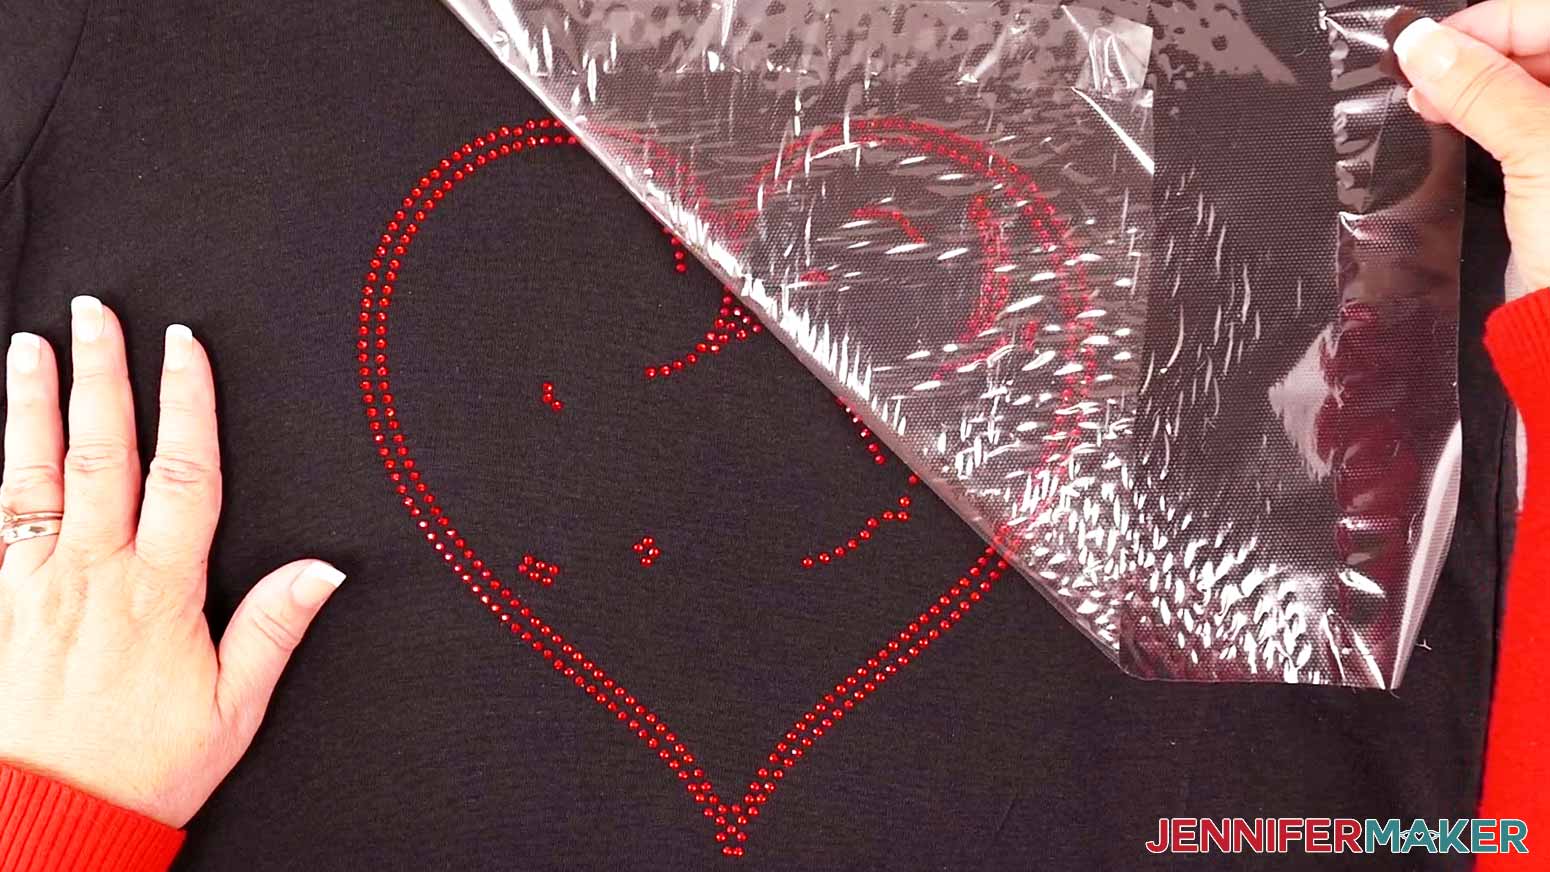
The heat transfer material can be used multiple times so once you remove it from the shirt, immediately place it back onto its backer to save for the next shirt.
Choose the next set of rhinestones to add to your shirt. I selected the same color in the smaller rhinestone size. Each template includes some marker rhinestones to help place the layer correctly. Look for a single rhinestone at the top and two rhinestones next to each other at the bottom that match the stones in the same locations on the first layer that is already applied.
Use these rhinestones as guides by placing them directly on top of the rhinestones already pressed on the shirt.
Sometimes pressing the shirt stretches it out of shape a little bit. If the guide rhinestones don’t quite match up to the shirt remove the new heat transfer material and rhinestones and lightly press the shirt again for about five seconds. This is usually enough to shrink the shirt back down a little to the original size.
Once the next layer is in place, and before pressing, carefully pull up the edge of the heat transfer material and remove the guide rhinestones from the material.

Press the next layer. It is ok if the heat transfer material doesn’t cover all the rhinestones already pressed down. They won’t be damaged by the heat.
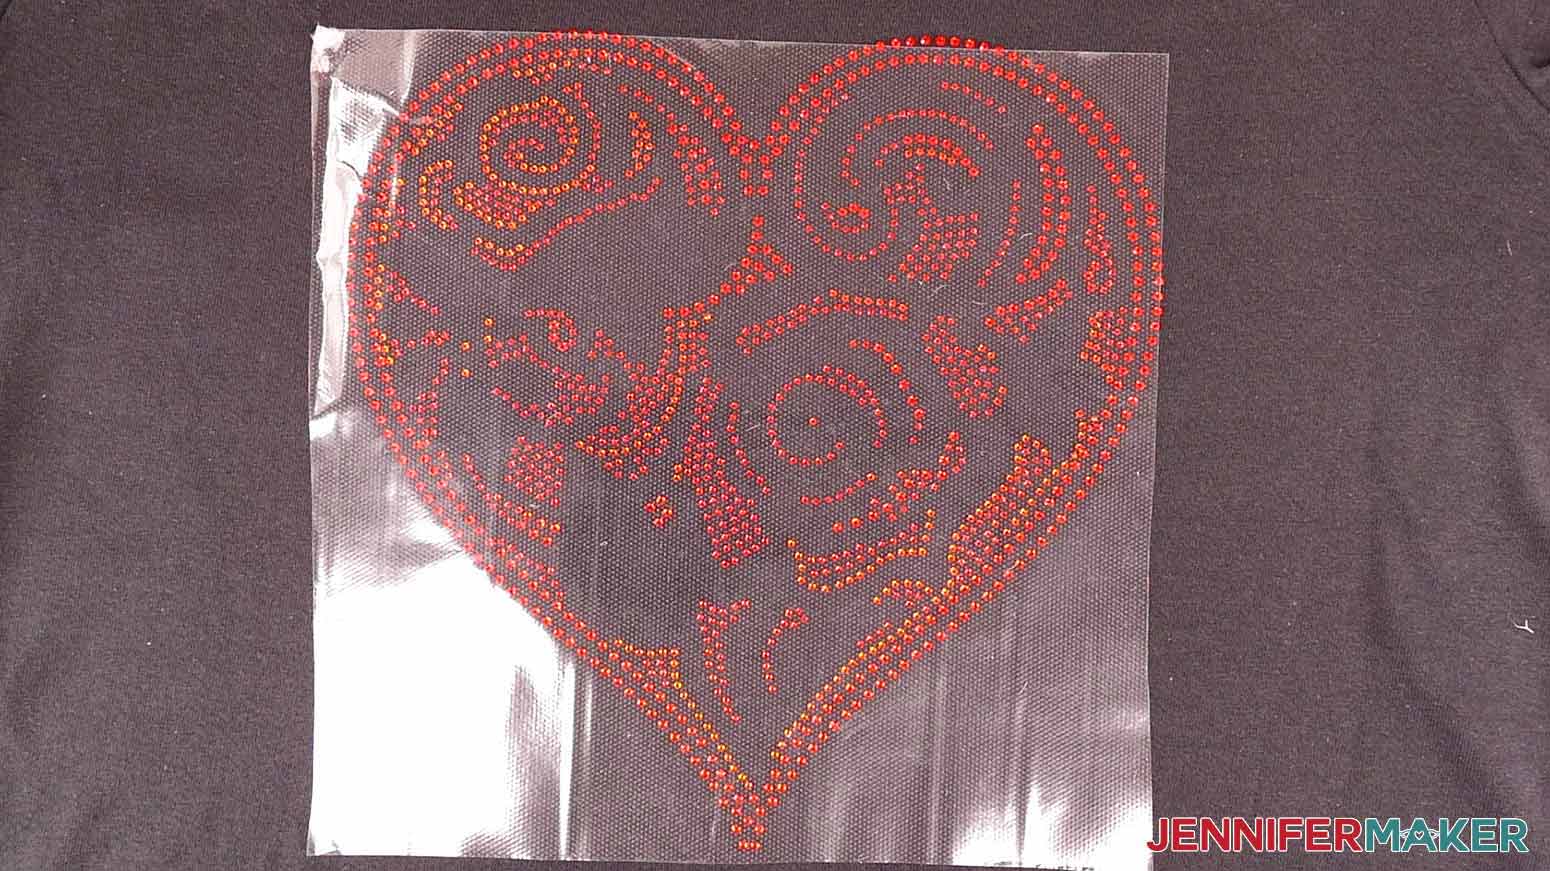
Continue applying and pressing each layer in this manner until the heart is completely filled in. Occasionally, you may need to carefully pull the shirt slightly to move new rhinestones into place around other already-pressed rhinestones. Go slowly and check each layer for missing or turned rhinestones and to make sure rhinestones don’t overlap each other before pressing.
Your rhinestone shirt is now ready to wear!
BONUS! LEARN TO USE DESIGN SPACE TO CUSTOMIZE YOUR OWN RHINESTONE PATTERNS!
It is also possible to use Design Space to create your own shapes and patterns for rhinestone templates by using circles in the correct size for each size rhinestone in the pattern.
To use circles to create your own shapes, first, click the “Shapes” menu on the left-hand side of Design Space and choose the circle from the free section.
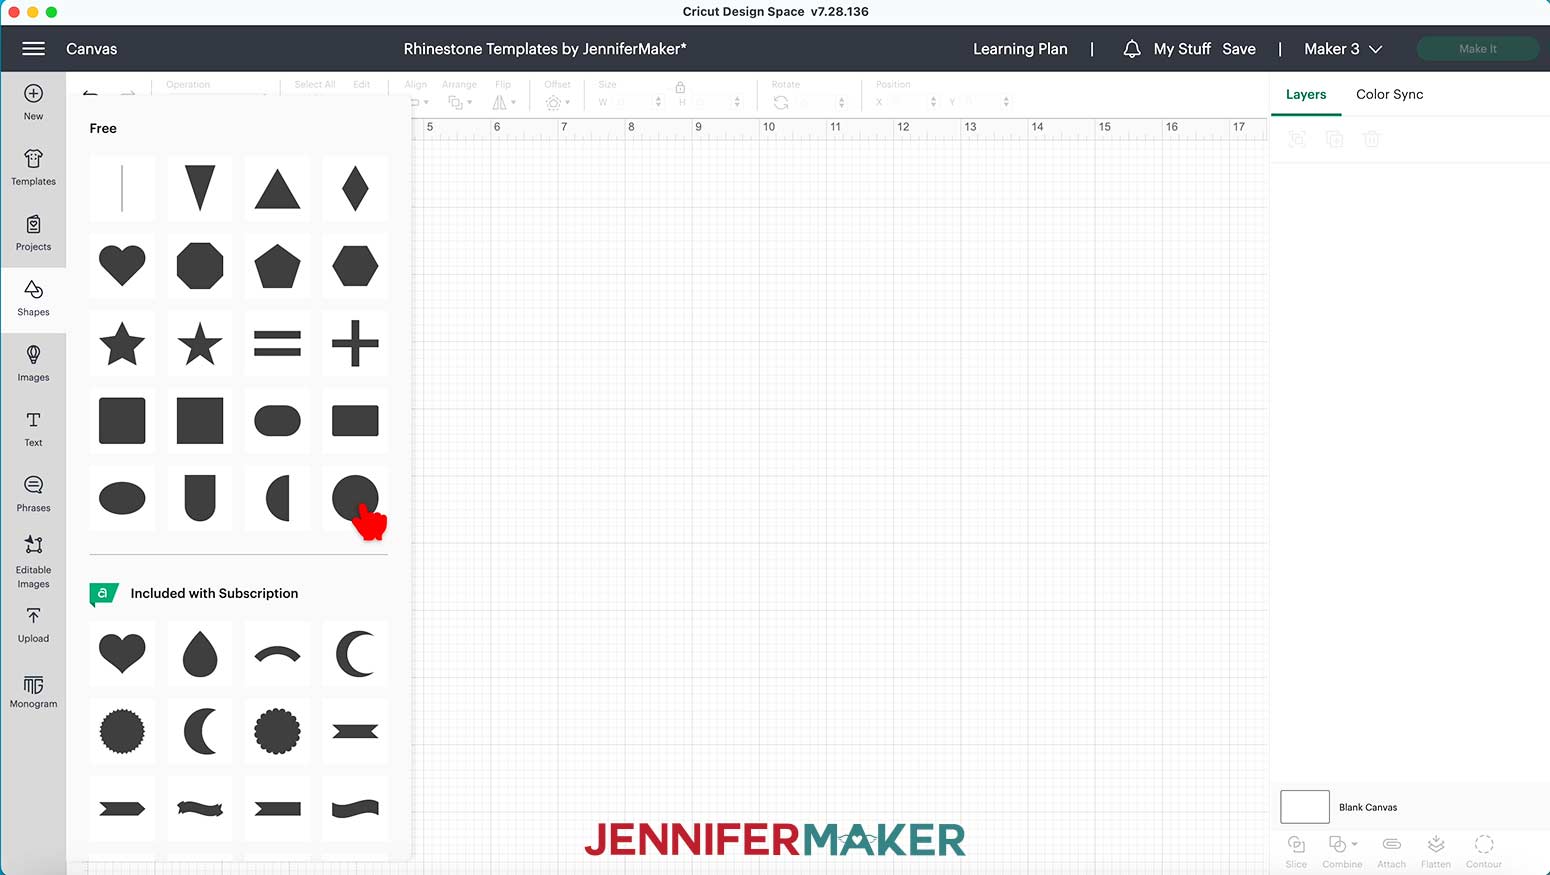
With the circle selected, change the size in the upper menu to match the size needed for the rhinestone you plan to use. The circle will be slightly larger than the actual size of the rhinestone. The following sizes work well for each size rhinestone:
SS6: 0.102”
SS10: 0.13”
SS16: 0.177”
SS20: 0.21”
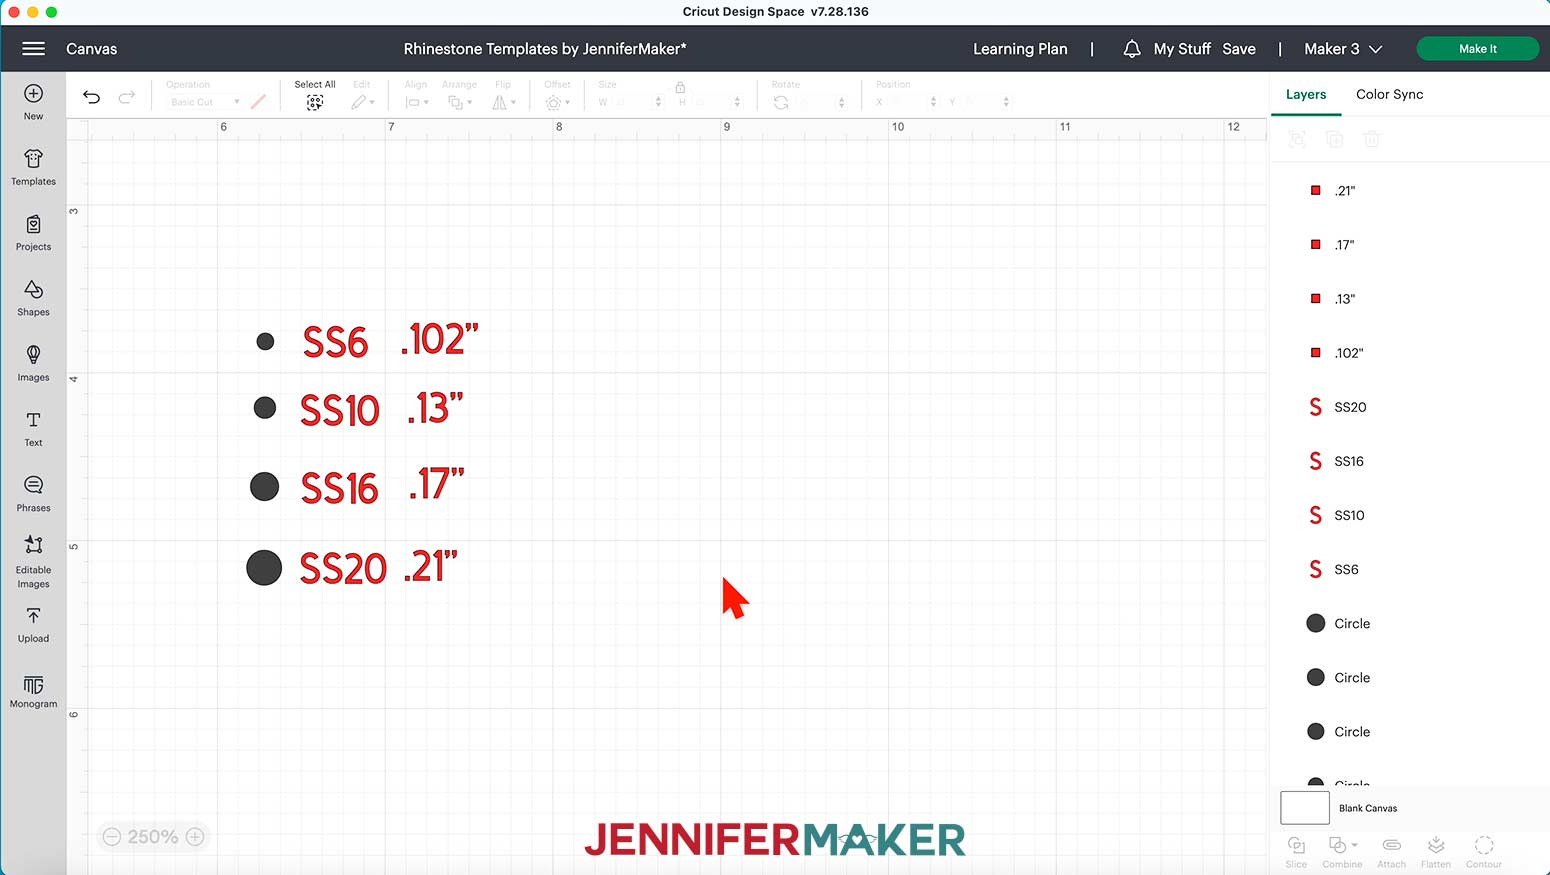
Copy and paste the circles as many times as needed to fill in shapes or outlines.
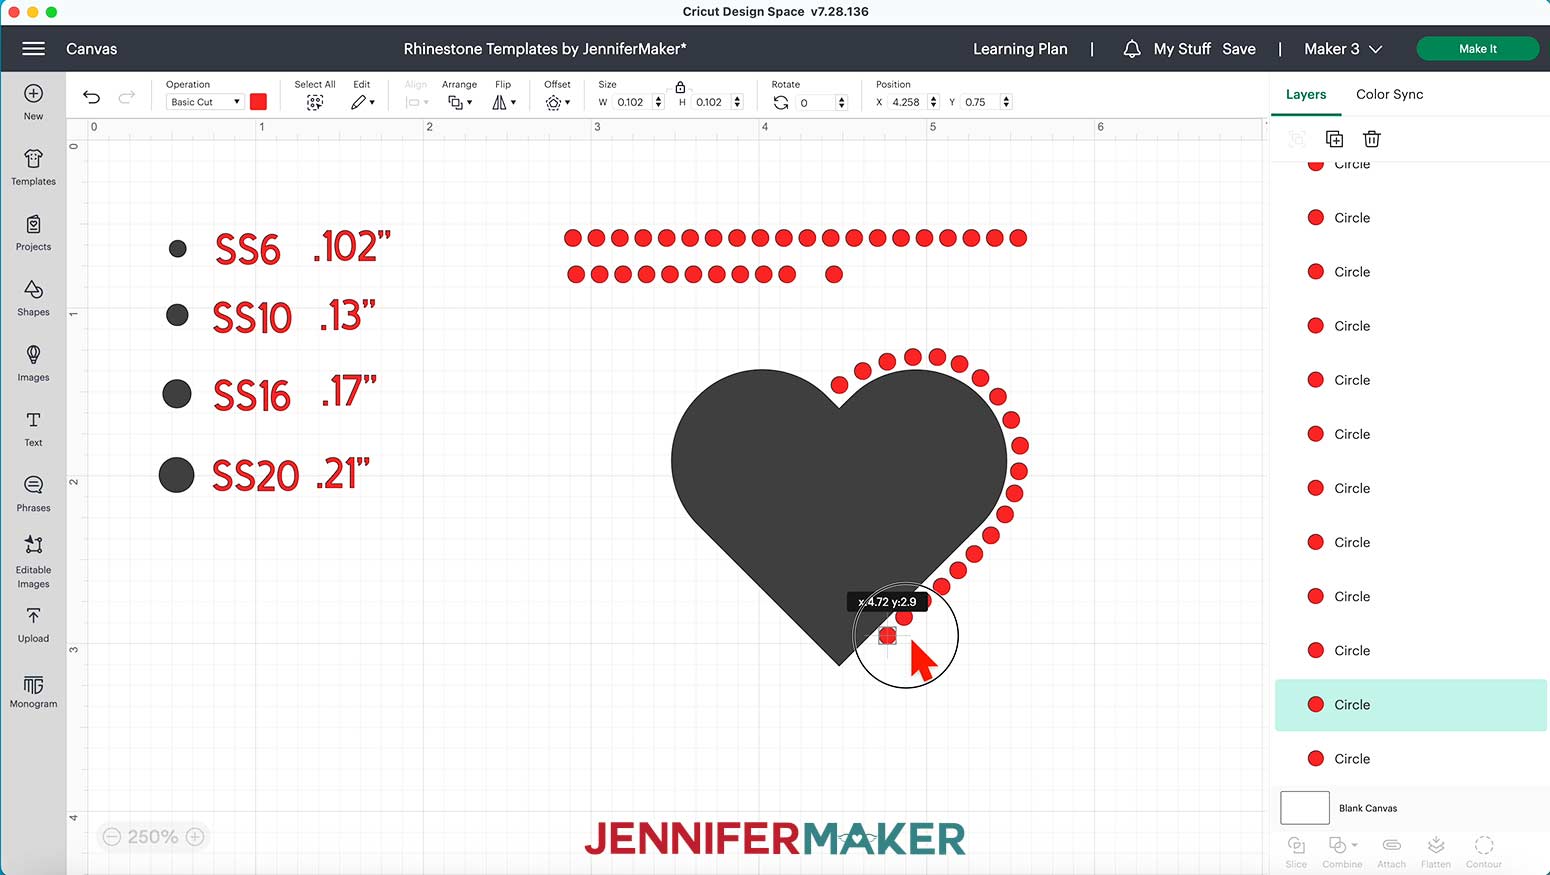
Once you have filled or outlined the original shape, delete it so you are left with just the circles in the proper arrangement for your template.
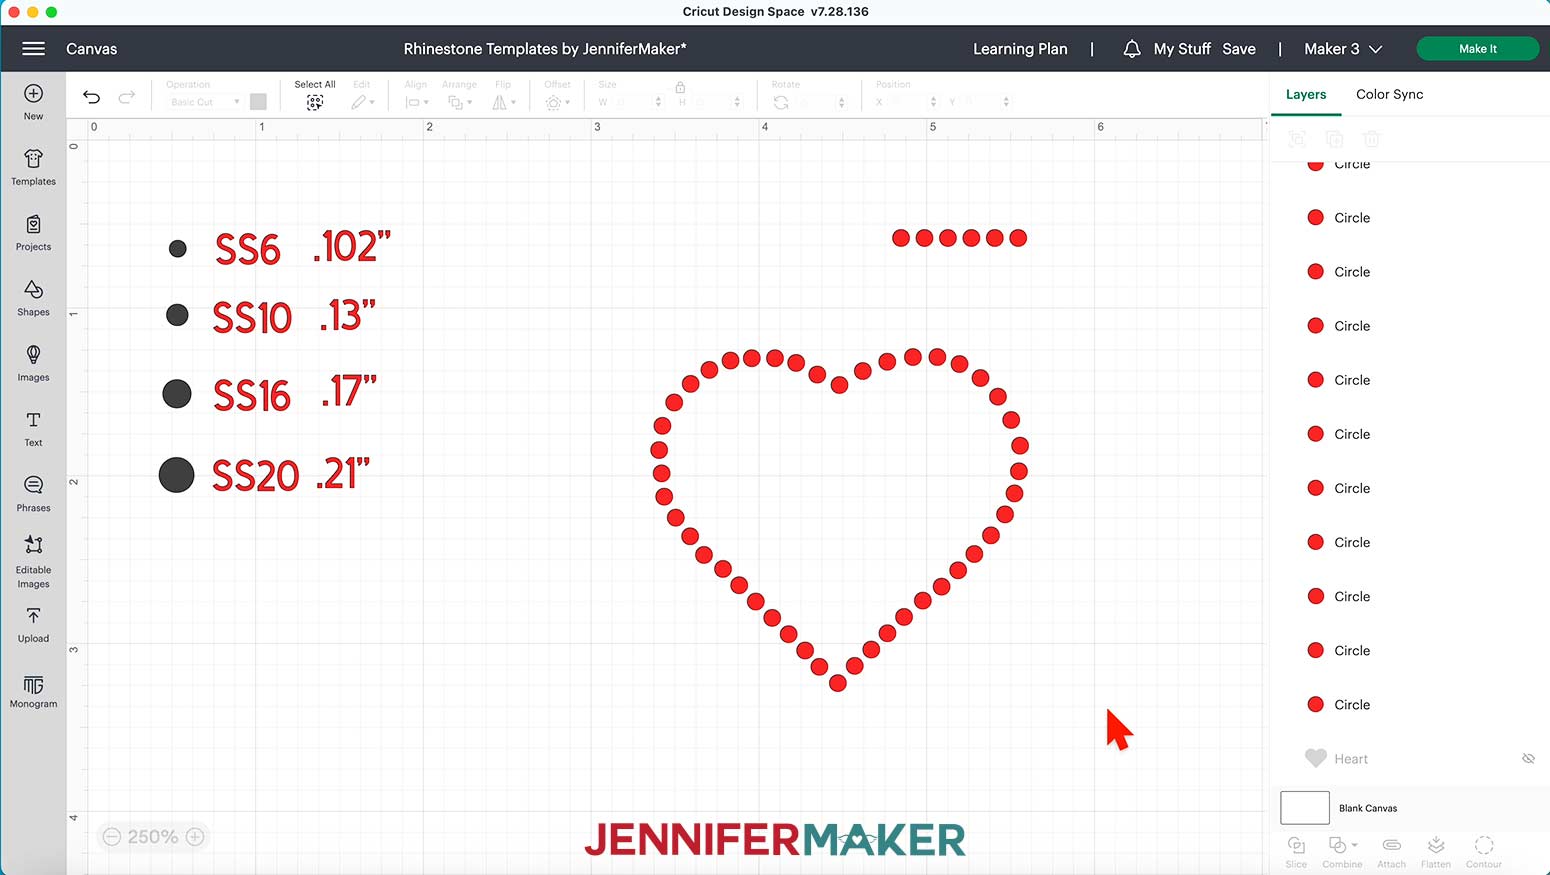
We can add a cut outline to complete the template. Choose a square from the “Shapes” menu.
Click and drag on a corner to make it large enough to cover the entire shape.
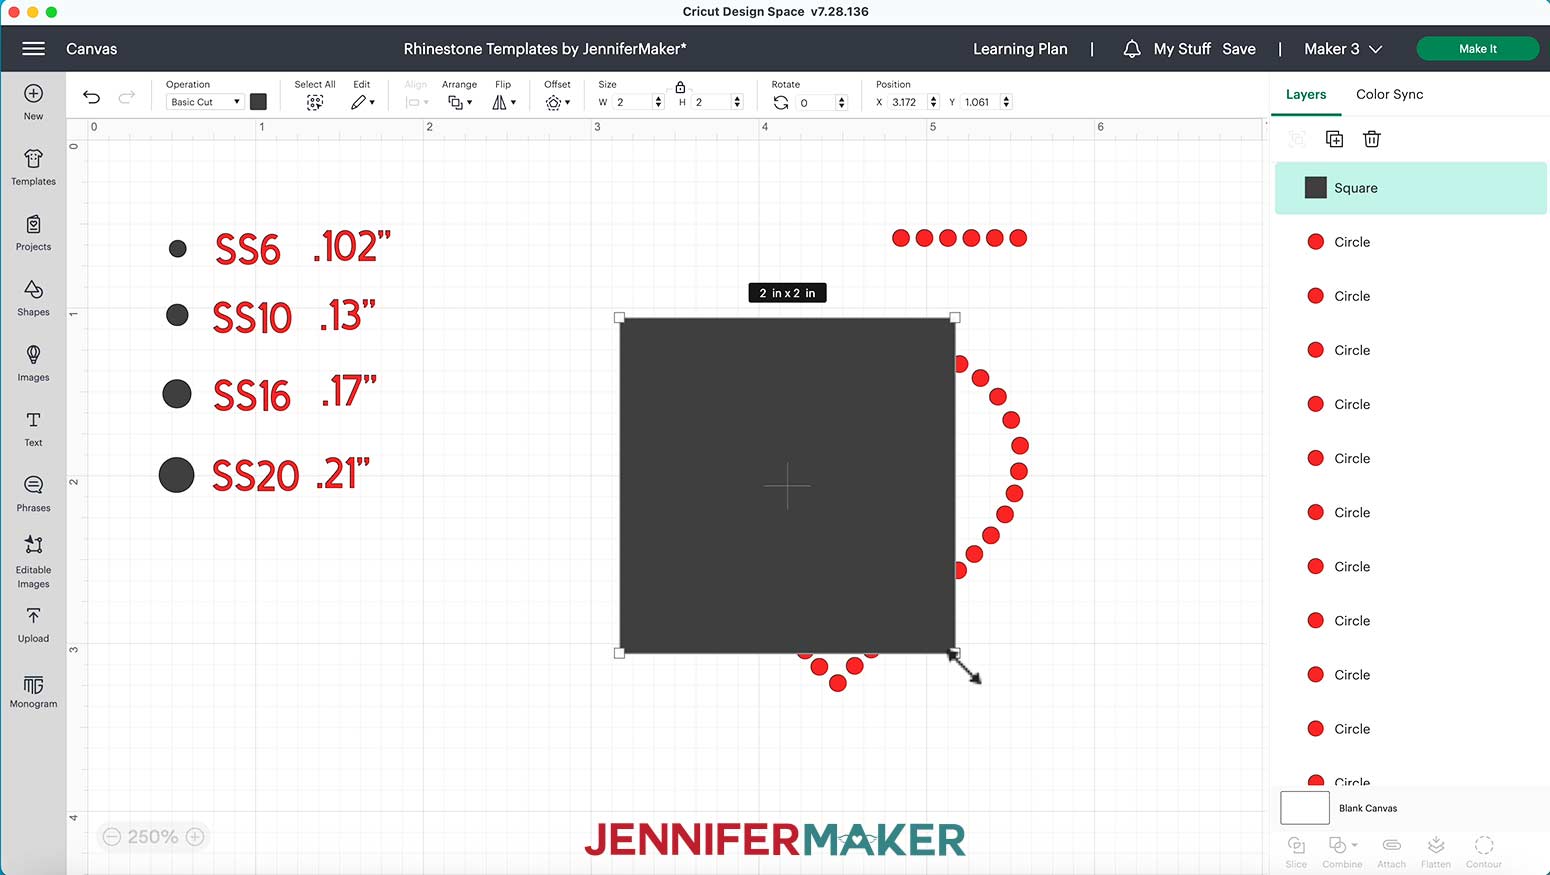
Right-click on the square and choose “Send To Back.”
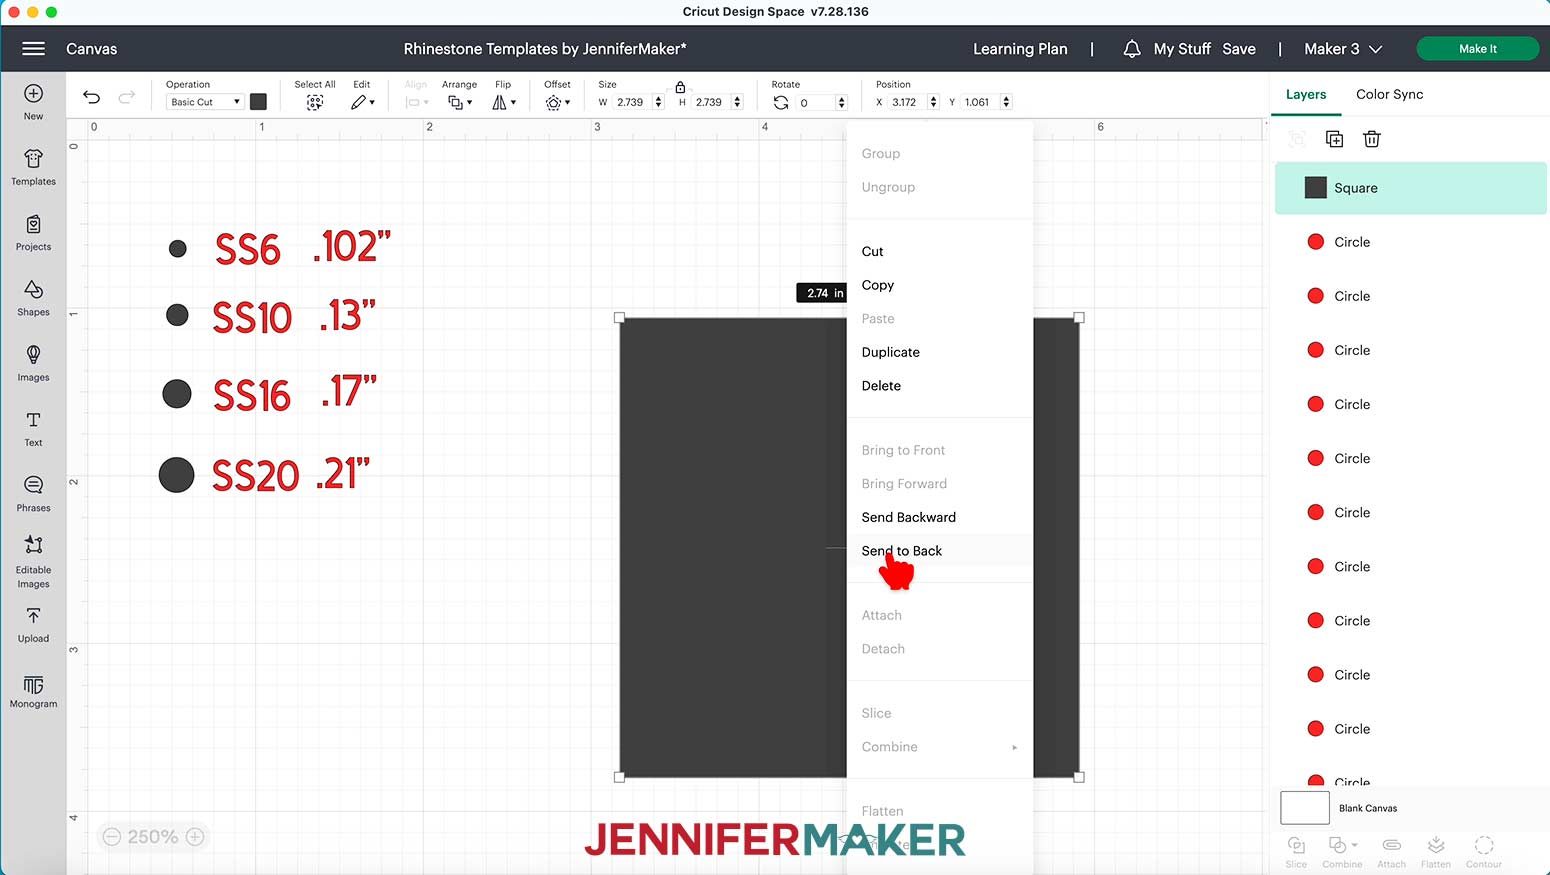
Center it under the design created by the circles. Select the circles and square all together, then choose “Attach” from the bottom right menu.
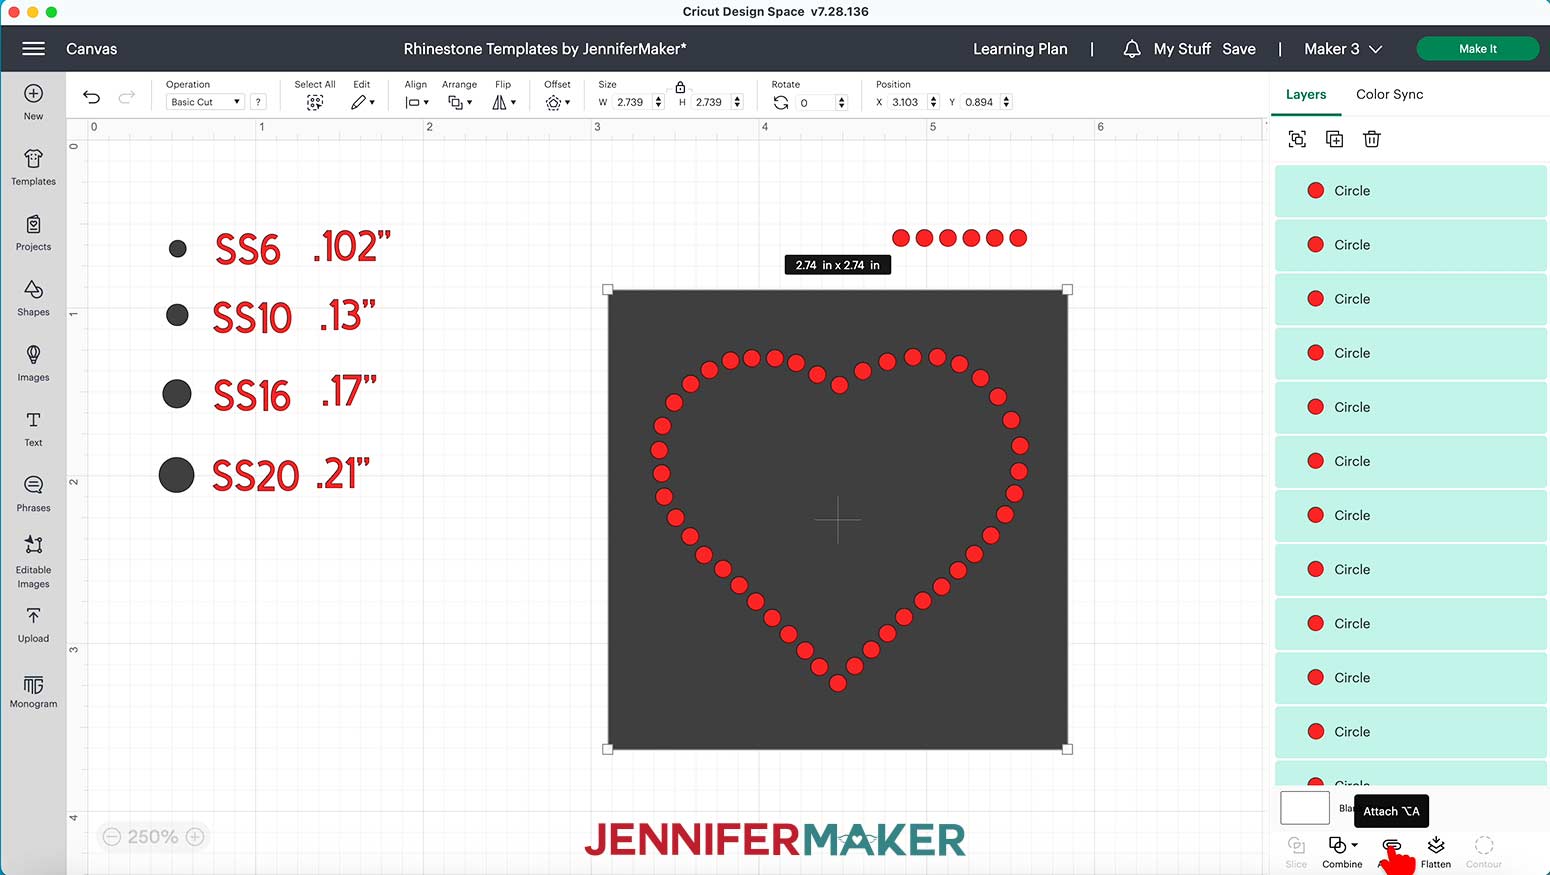
Now you have created your own rhinestone template pattern and it is ready to cut!
If you purchase a rhinestone design or font, it might not fit your project. Or, it may not be compatible with the size rhinestones you have on hand.
I’ll show how to fix both these issues with the TYPEABLE RHINESTONE Digital template fancy script font I purchased from FontBundles.net.
First, download and install the font on your computer using these steps. There will be two options in the font folder, use the TTF file.
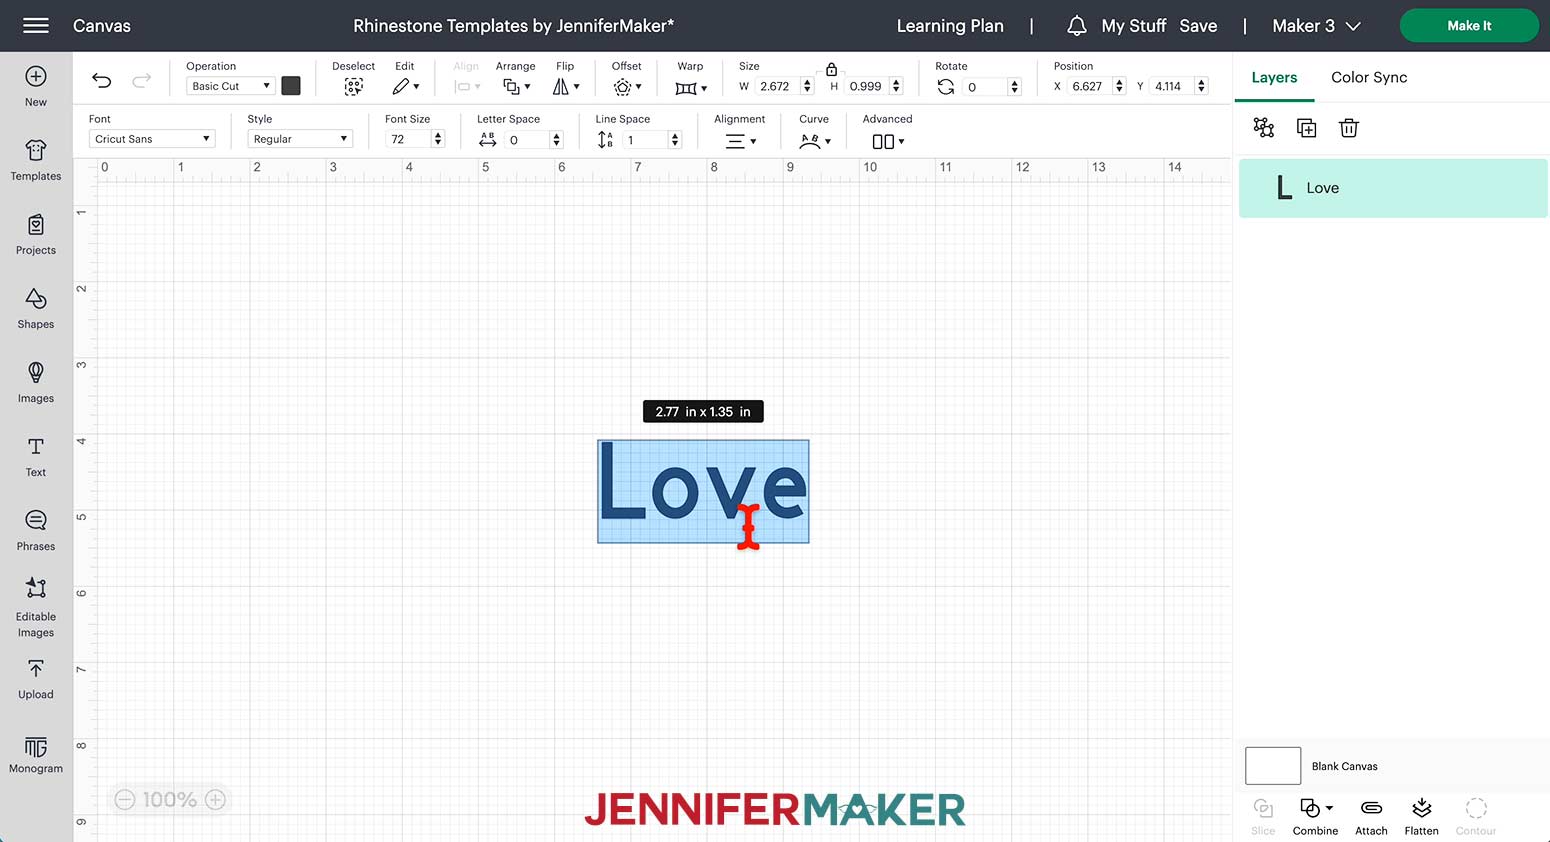
Then open Cricut Design Space and choose “Text” from the left side of the Canvas.
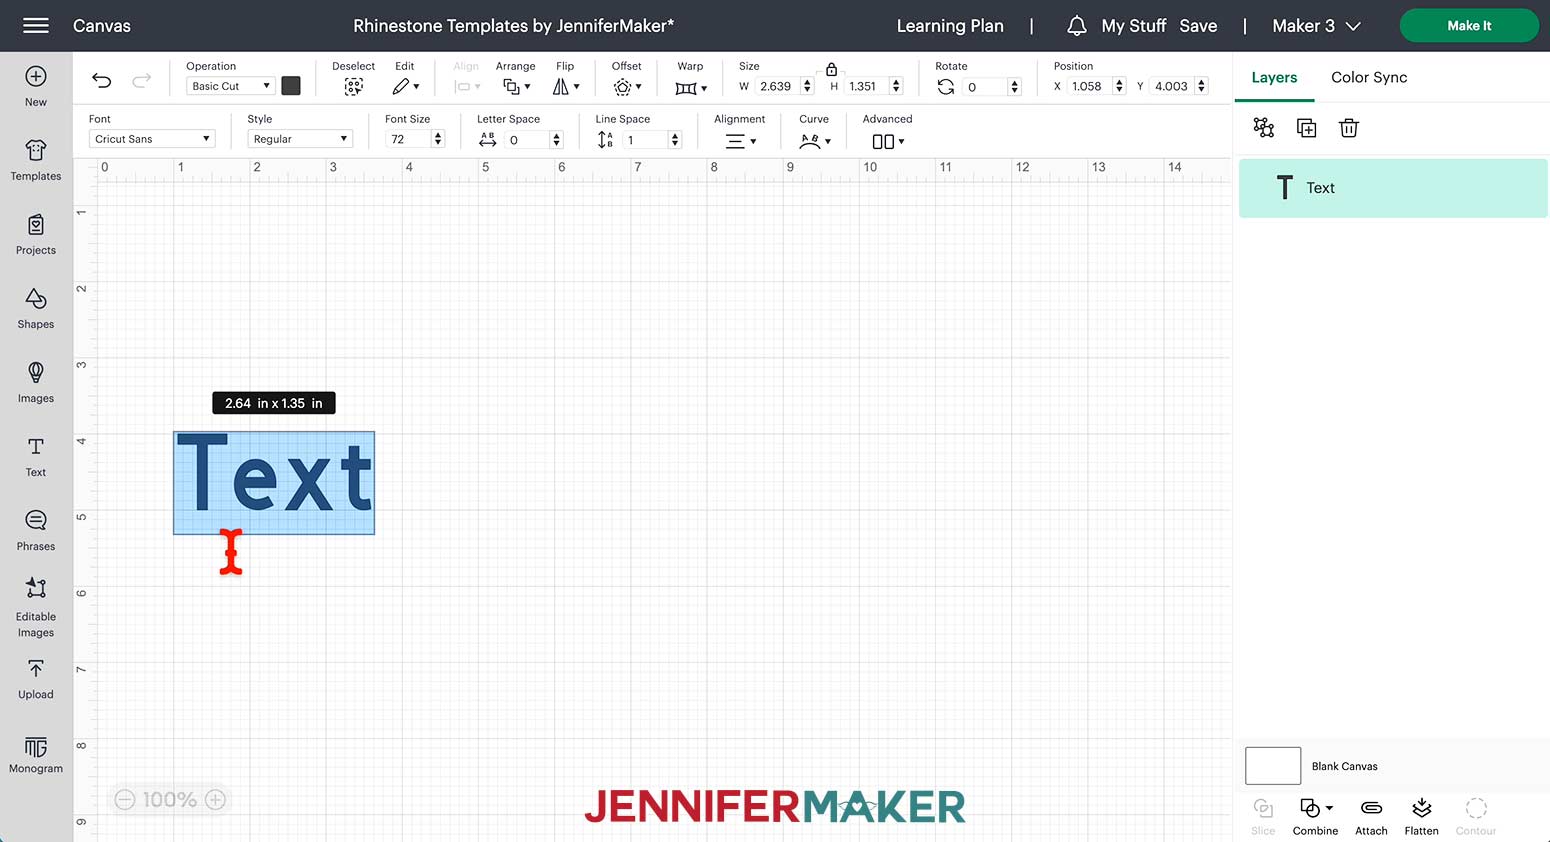
Type the word “Love”.
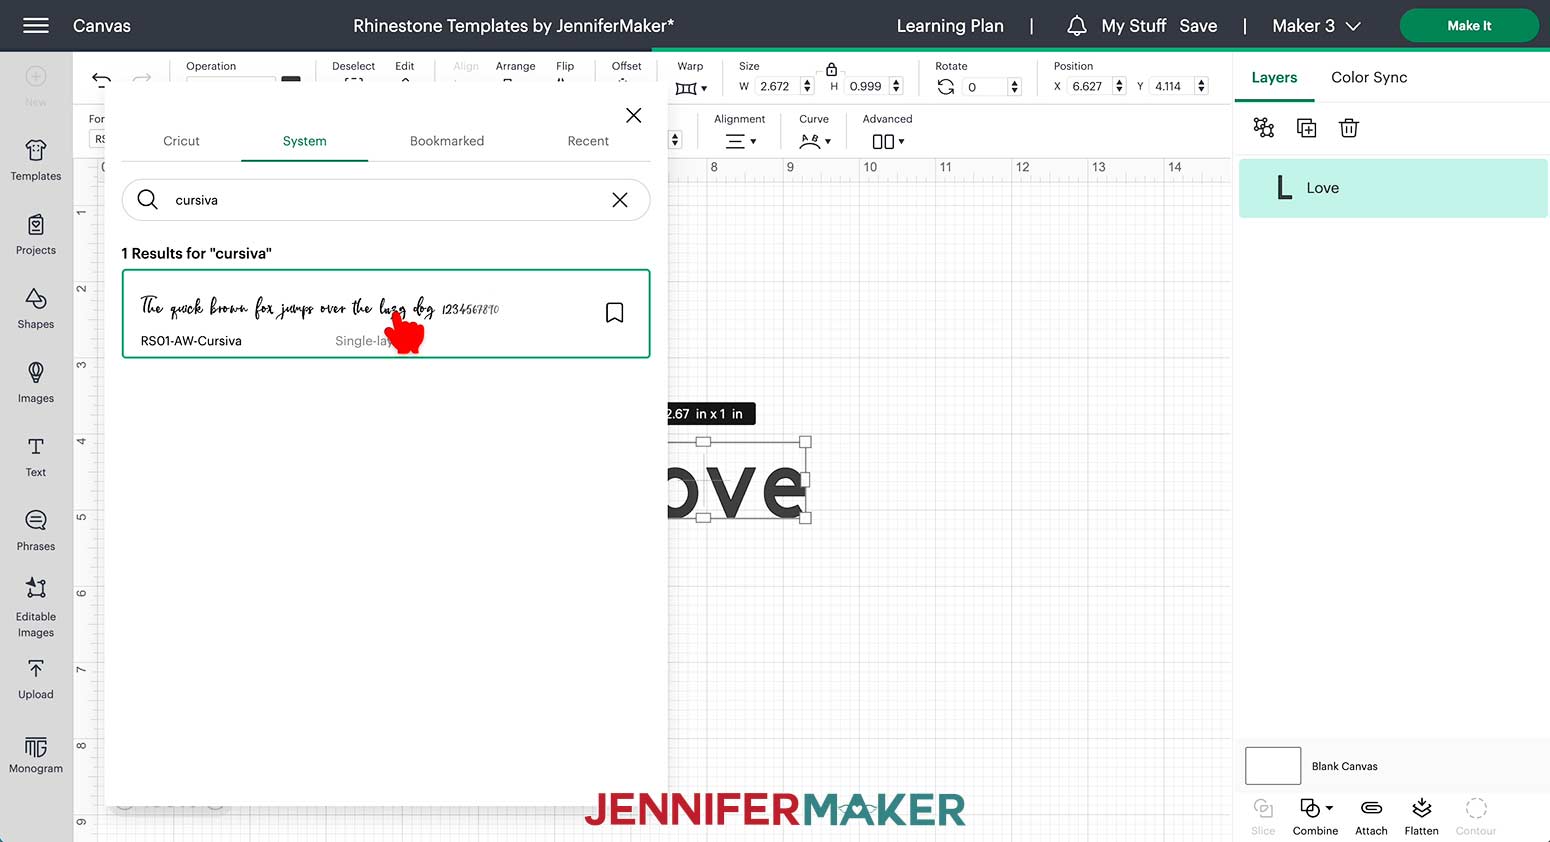
With the word selected, click the drop-down menu under “Font,” choose “System” and search for the font name. This font appears as RS01-AW-Cursiva.
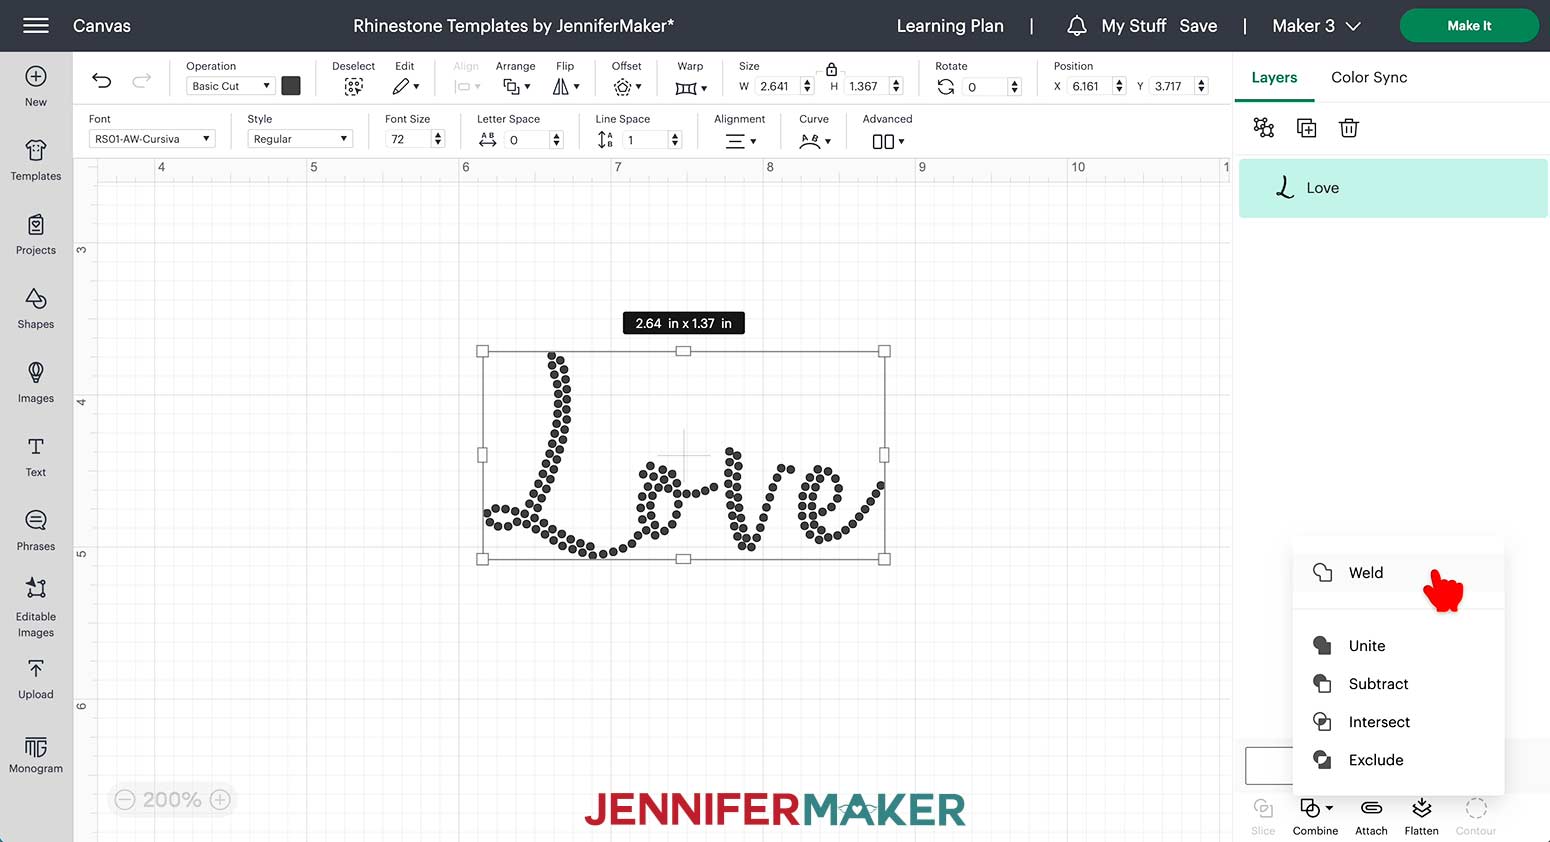
The word on the Canvas will now change to a series of dots. It will be very small, though, so now we need to enlarge the word so the dots match the size of the circle recommended for the rhinestones being used.
With your design selected, click Combine, then Weld.
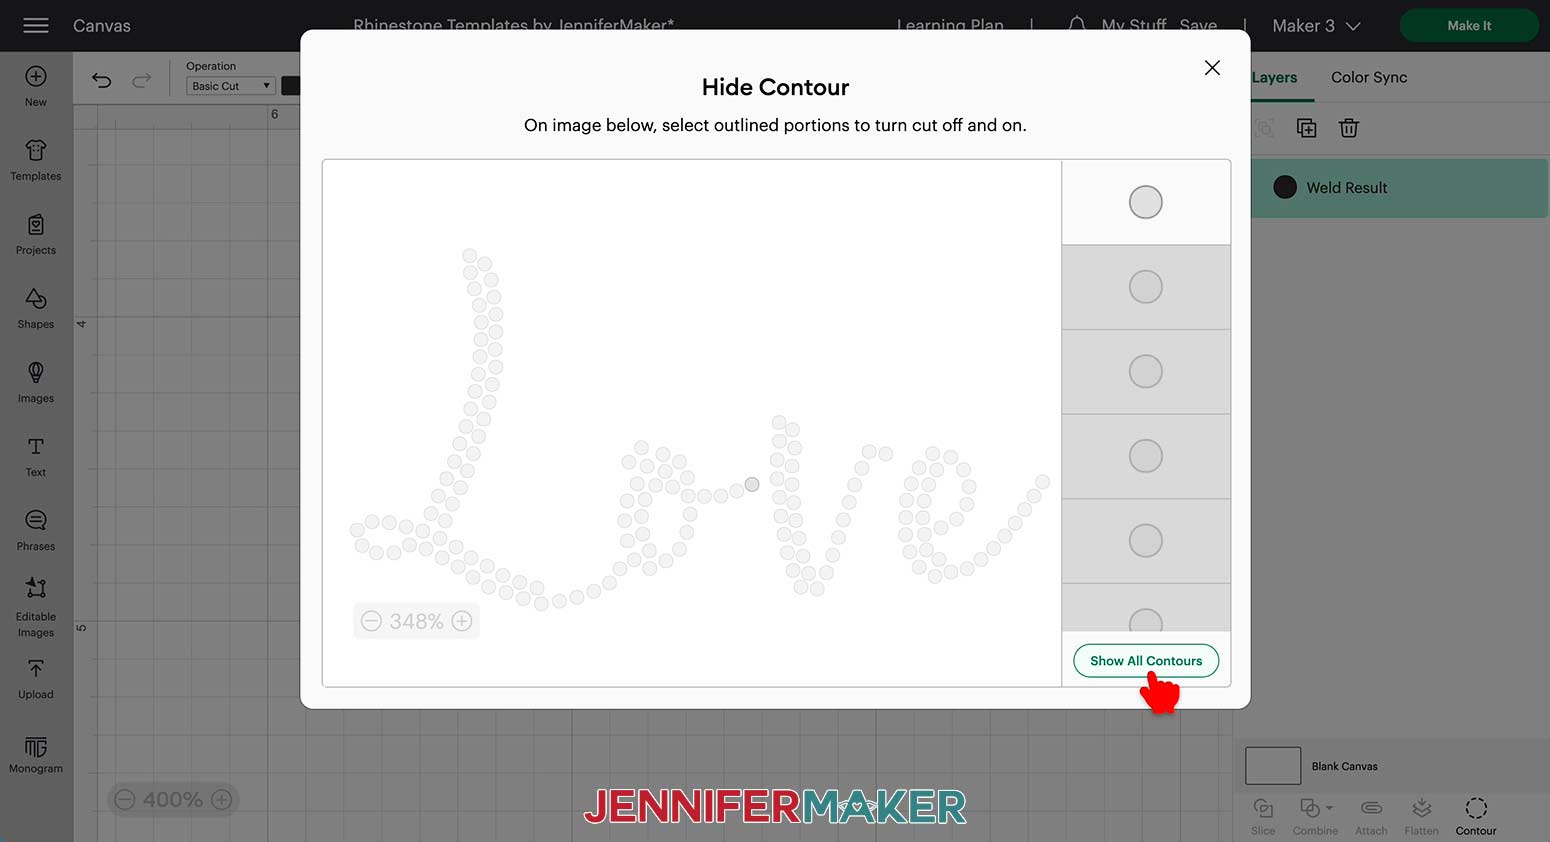
Select the word again, and then click Contour. When the window pops up, click “Hide All Contours”.
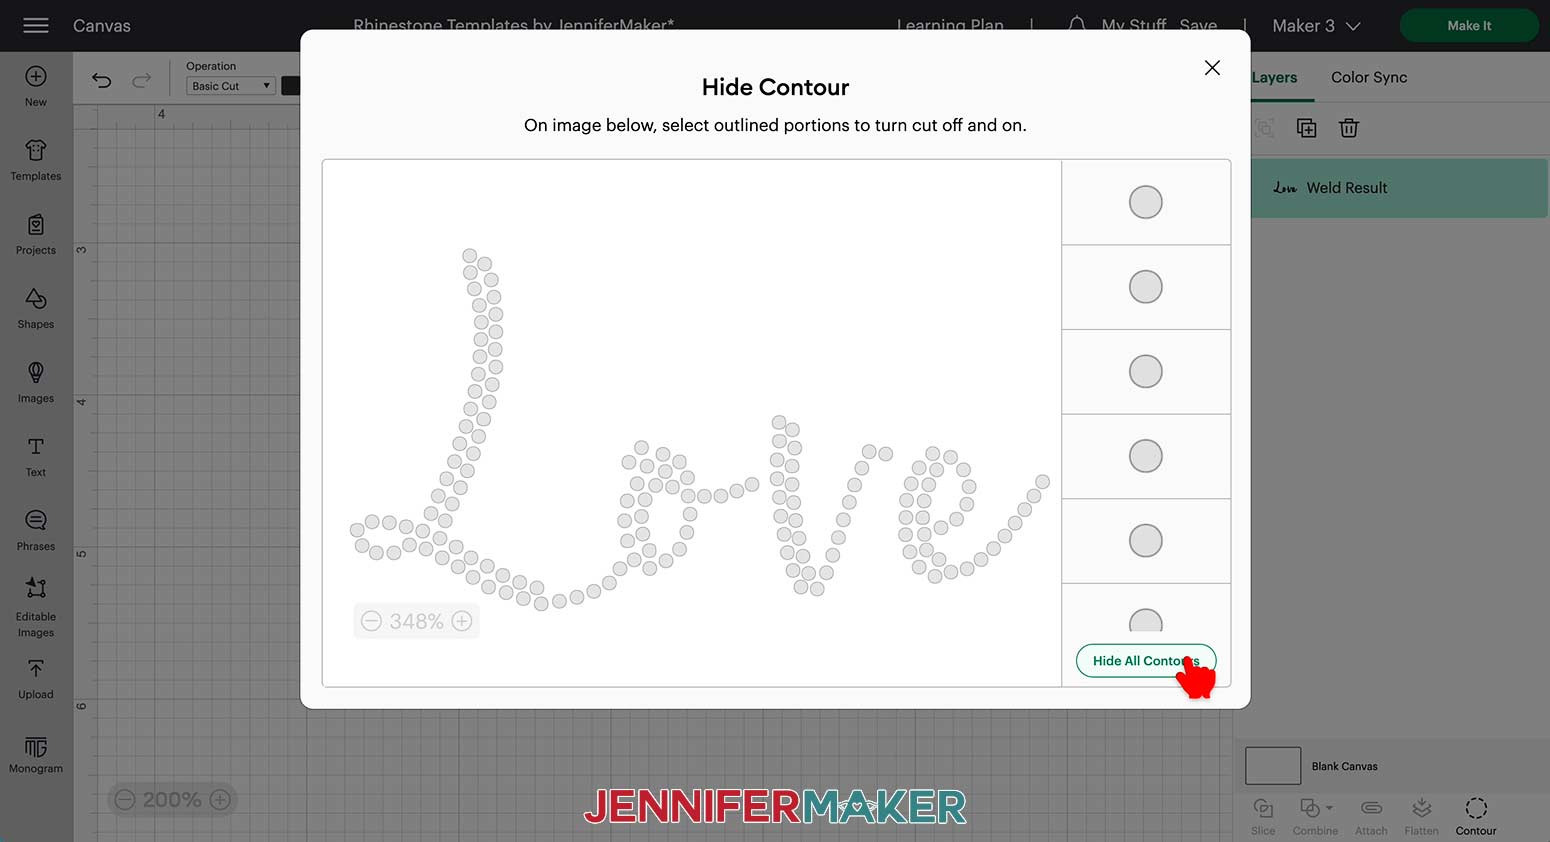
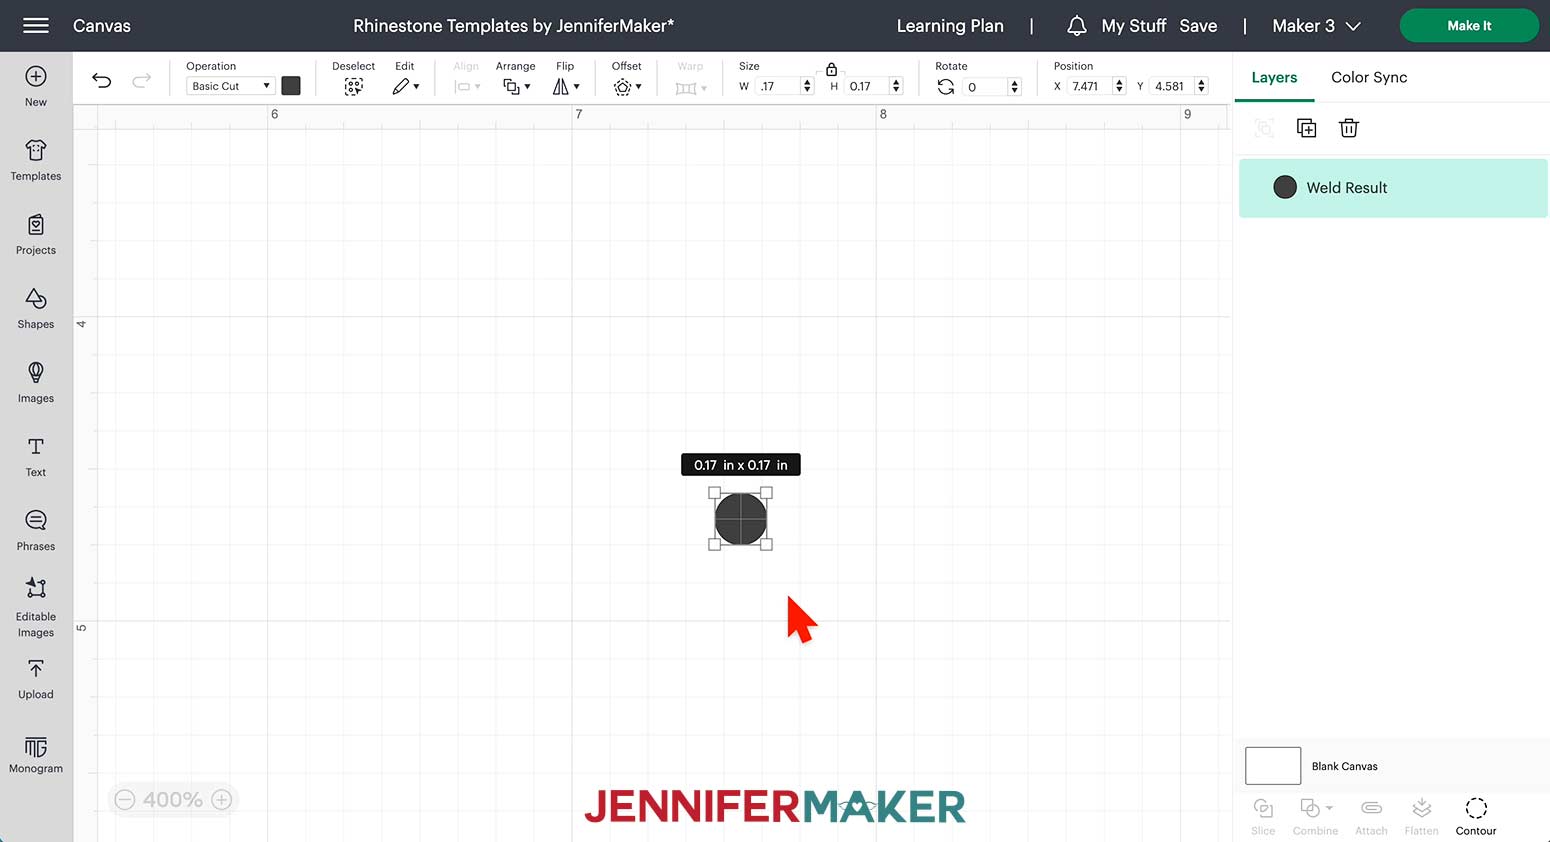
Click the “X” to close the pop up, and on your canvas you’ll see a single circle. With the circle selected and the lock icon closed, change its size to accommodate your rhinestones. I’d like to use size SS16 sized rhinestones for this design, so I’ll change it to 0.17”.
Now, with the circle still selected, click Contour again. We want to make all the circles visible, so click “Show All Contours”, then exit the pop up.
The circles in your letter are now the right size to fit your rhinestones.
Once the dots match the size of the circle, finish the text template by adding a cut border as explained above and the word is ready to cut!
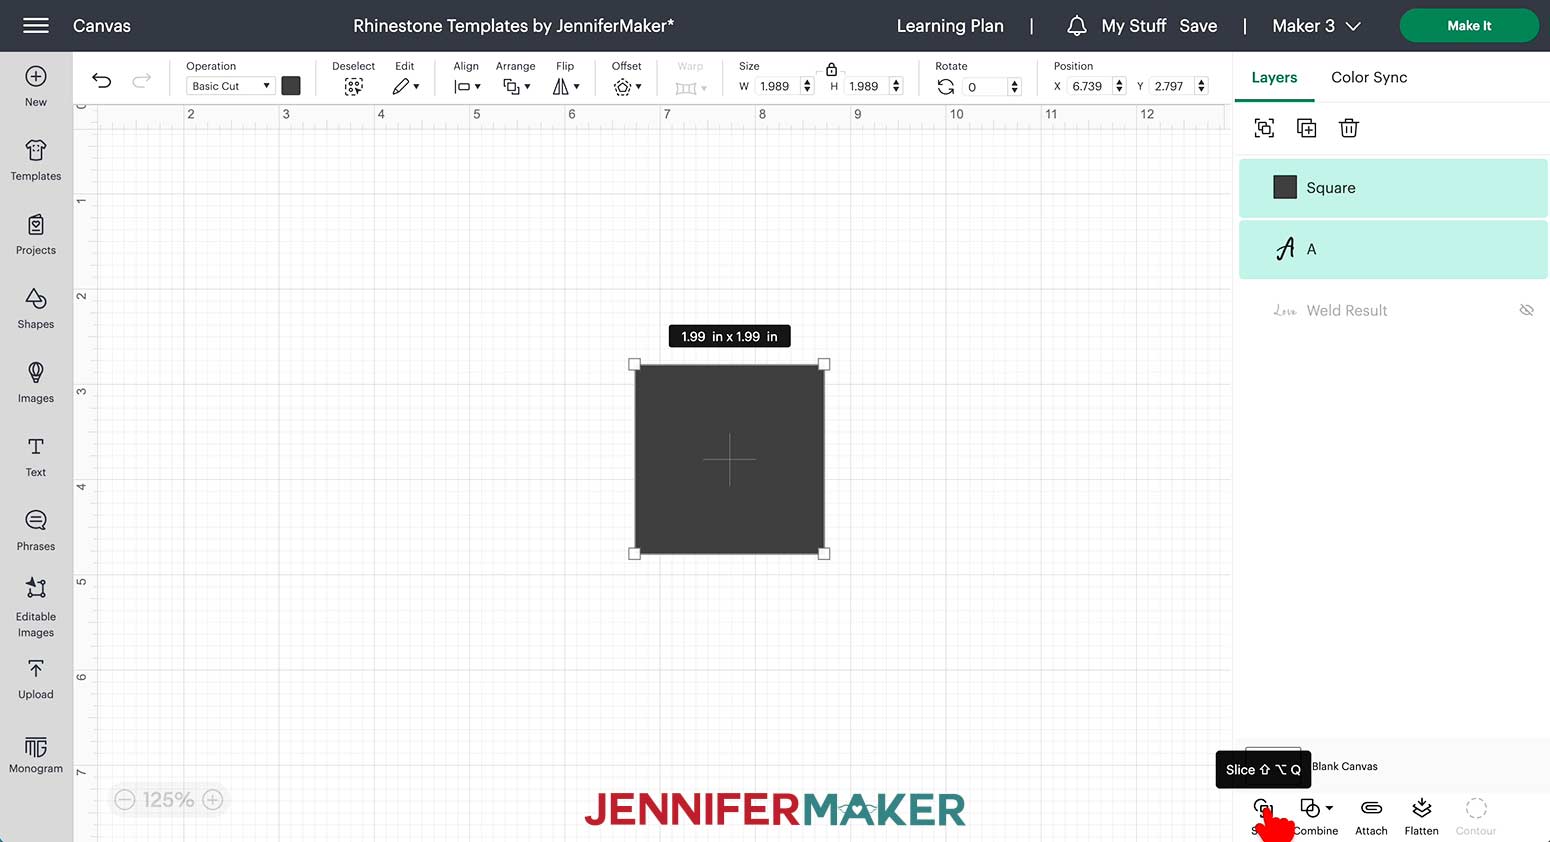
Making a template with a single letter is a slightly different process. I’ll show you how to do this by using “A” for Alexa. Type a letter A, then, with the letter selected, again change the font to RS01-AW-Cursiva.
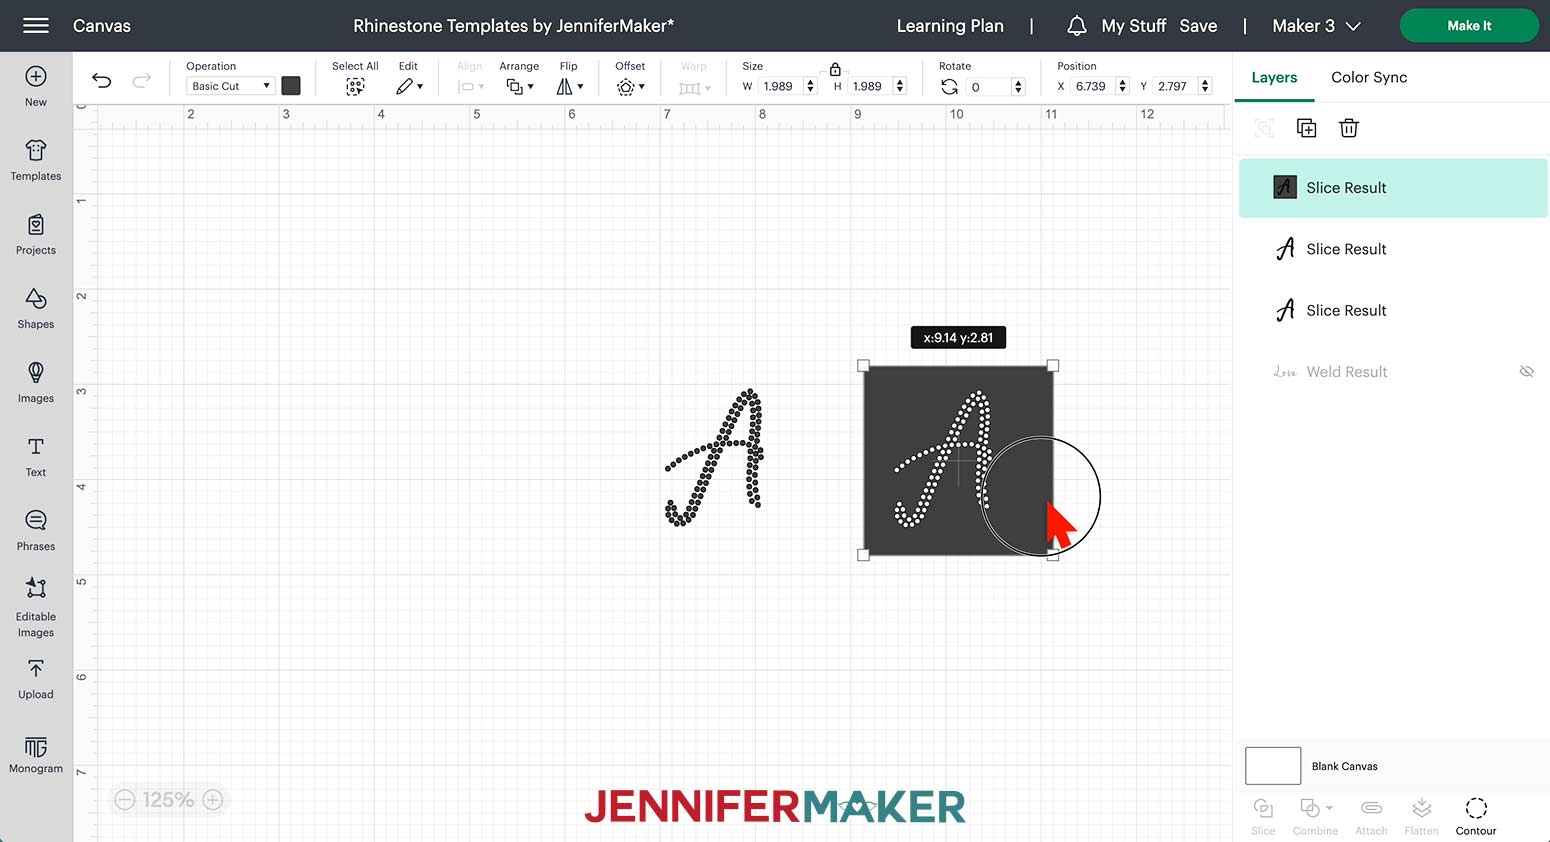
The letter will transform into a series of circles, just like our word. However, we’ll need to slice the letter before we can contour it. Click “Shapes” and choose the square. Drag it on top of your letter, then resize the square so it completely covers it. Drag a box around both the square and the letter to select them, and then click “Slice”.
Click and drag the cut results apart, then delete all the pieces but one set of circles that create the letter A.
Now you can finish using the same steps you did for the word. Select the letter, and then click Contour. When the window pops up, click “Hide All Contours”.
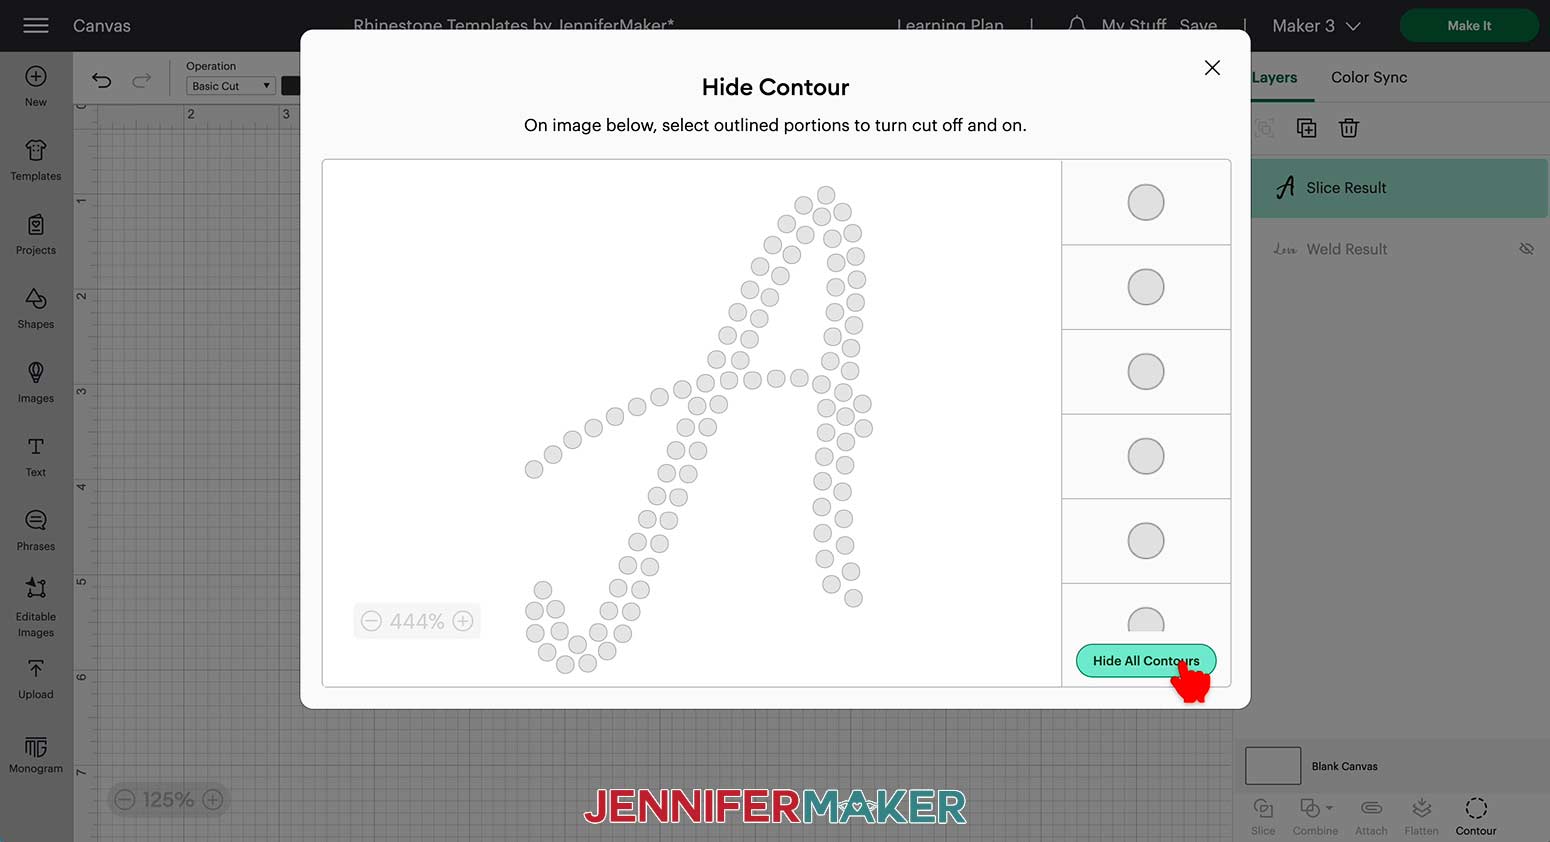
Close the pop up, and resize the remaining circle to accommodate your rhinestones. I’ll use SS16 sized rhinestones again, so I’ll change it to 0.17”.
With the circle still selected, click Contour again, then “Show All Contours”, and exit the pop-up.
And that’s it!
Now, finish your template by adding a cut border as above.
Follow the above assembly steps to cut and apply your own designs.
STEP 5: Show It Off
Use hotfix rhinestones to bling up your shirts, hats, and any surface that will hold heat apply transfers!

T-shirts applied with hotfix rhinestones can be turned inside out to wash on the gentle cycle in warm or cold water and dried on low heat. For added longevity, washing by hand is recommended.
Notes
Finished Design Size: 9.25" x 9.13"
Font: TYPEABLE RHINESTONE Digital template fancy script font TTF
Answers to Your Questions About How to Make a Rhinestone Template on Cricut
Q. Can a Cricut create rhinestone templates?
A: Absolutely! Once I show you how to apply my rose heart rhinestone design, I’ll walk you through the entire process of creating your own rhinestone templates to cut on your Cricut cutting machine.
Q: What software can create rhinestone templates?
A: You can make rhinestone templates right in Cricut Design Space! This tutorial will walk you through every step for not only working with my design, but creating your own custom rhinestone transfer templates.
Q: What setting do you cut rhinestone flock on Cricut?
A: Your rhinestone flock material may have manufacturer’s suggestions right on the packaging. I found that creating a new material setting and setting the pressure to 275, then using the fine-point blade with multiple passes turned off worked well for cutting my flock.
Q: What do you need to make rhinestone templates with Cricut?
A: Scroll up to see my complete list of materials and tools you’ll need to create rhinestone transfers on any one of the Cricut machines!
Q: How do I resize a rhinestone template in Cricut Design Space?
A: The holes in the templates are created at a very specific size to let the correct size of rhinestones fall into them and onto your shirt in the right spot. It’s super important that you do not change the size of the templates, otherwise your project will not turn out as expected. I will however show you how to create custom templates in your desired size!
Q: How do you press rhinestone transfers?
A: You can press your rhinestone design onto any material that can withstand heat transfers (like 100% cotton, polyester, and cotton/poly blends). I used my Cricut EasyPress to apply my rhinestone transfers, but you can use any heat press. I walk you through the entire process in my tutorial!
Q. Can you use vinyl transfer tape on rhinestones?
A: I recommend using Rhinestone Heat Transfer Material to transfer your rhinestone design to your T-shirt for pressing.
Get my free SVG files to make Rhinestone Templates with Cricut!
I’d love to see YOUR rhinestone template designs and all the sparkling T-shirt designs you make with this tutorial! Please share a photo in our Facebook group or tag me on social media with #jennifermaker.
Love,

Want to remember this? Save this tutorial on making Rhinestone Templates with Cricut to your favorite Pinterest Board!