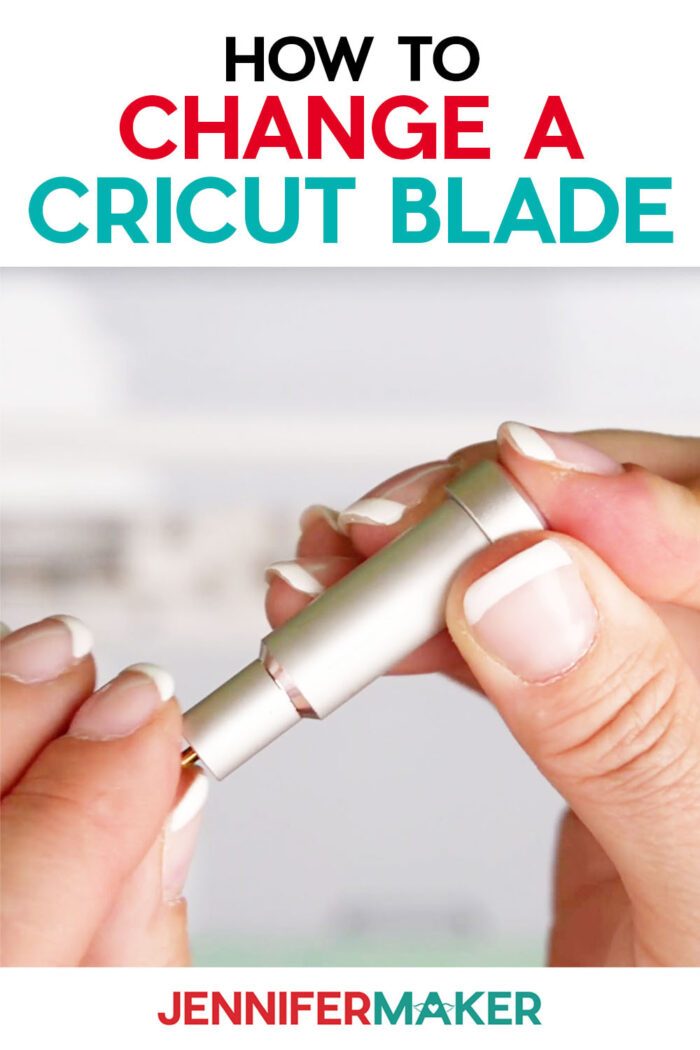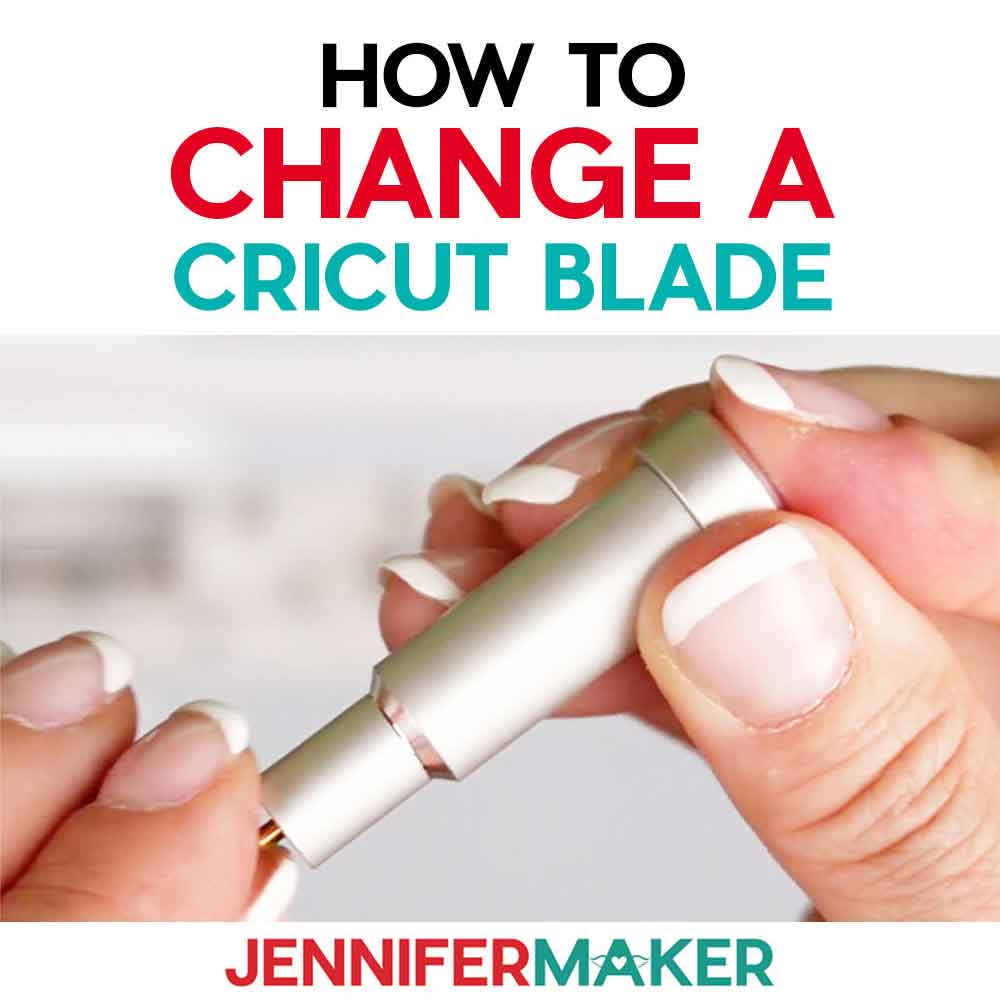
Learn how to replace a Cricut blade the easy way!
All of a sudden, something seems seriously off with your Cricut! It might be shredding your cardstock, having major issues with thicker materials or intricate cuts, or dragging through paper and vinyl that it once cut with ease. You’ve tried cleaning your blade and following my tips and tricks for cleaner cuts, but problems persist. What’s a crafter to do? Before you panic and think your beloved cutting machine is toast, have you ever learned how to replace a Cricut blade? Every once in a while, your blade can become chipped, dull, get a nick in it, you name it — and no amount of cleaning is going to help with that! If your blade is ready to be changed, don’t worry — I can show you how to replace a Cricut blade and get your nice clean cuts back!
@jennifer.maker Cleaning the blades almost always works for me, but once in a while, you might need to replace it. Safety first! #cricut #cricutblades #cricut101 #cricuttips ♬ Good Vibes (Instrumental) – Ellen Once Again
Let’s look more closely at Cricut blades and how to change them safely! This post contains some affiliate links for your convenience (which means if you make a purchase after clicking a link I will earn a small commission but it won’t cost you a penny more)! Read my full disclosure policy.
This is a Cricut Mystery Box project — it uses the Cricut Premium Fine-Point Replacement Blade from the “Spring Flowers” Cricut mystery box (affiliate link) that came out on March 27, 2023. Even if the mystery box is not available when you check, you can still purchase the individual vinyls, which are all linked below in my material list. Learn more about Cricut Mystery Boxes and their contents in my Cricut Mystery Box Guide.
Cricut Blade Details
Cricut blades come in two parts — the blade and the housing. First, you’ll need to purchase a new blade that is compatible with your Cricut cutting machine, as well as the blade housing you have. I’ll show you how to replace a standard fine-point blade, but many other blades like the, deep point blade, premium fine point blade, and some other different blades work the same way and follow these steps. To learn how to replace a Cricut knife blade, rotary blade, or scoring wheel, check out this post all about Cricut blades!
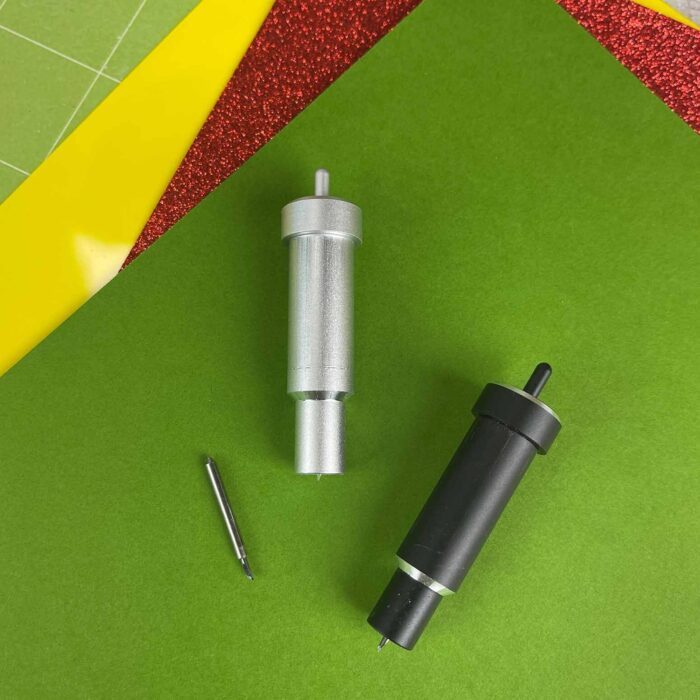
All new Cricuts come with both a blade housing as well as a new fine-point blade, but you only need to replace the blade piece — not the housing. The shaft of your plain cutting blade (the non-pointy end) could be silver if it’s a fine-point blade or gold if it’s a premium fine-point blade. I haven’t noticed a difference between the two but both work with the main housing in Explore or Maker machines.
How to Replace a Cricut Blade
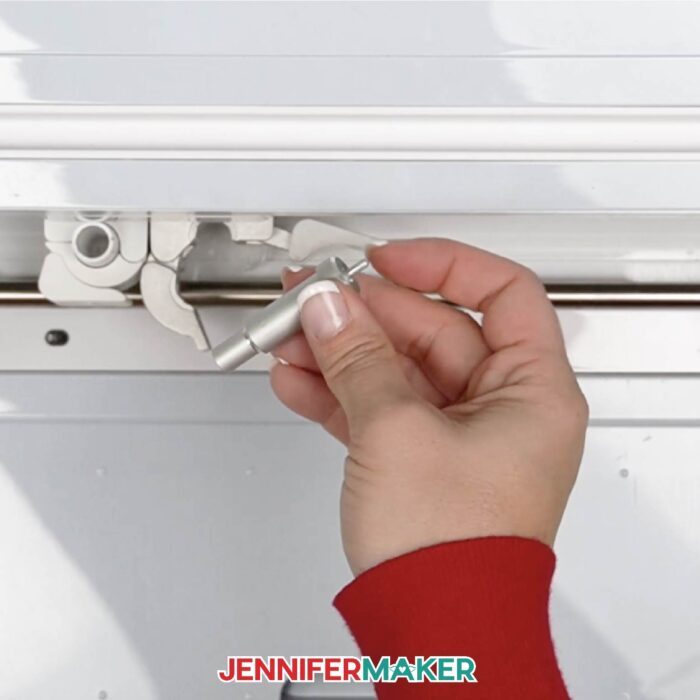
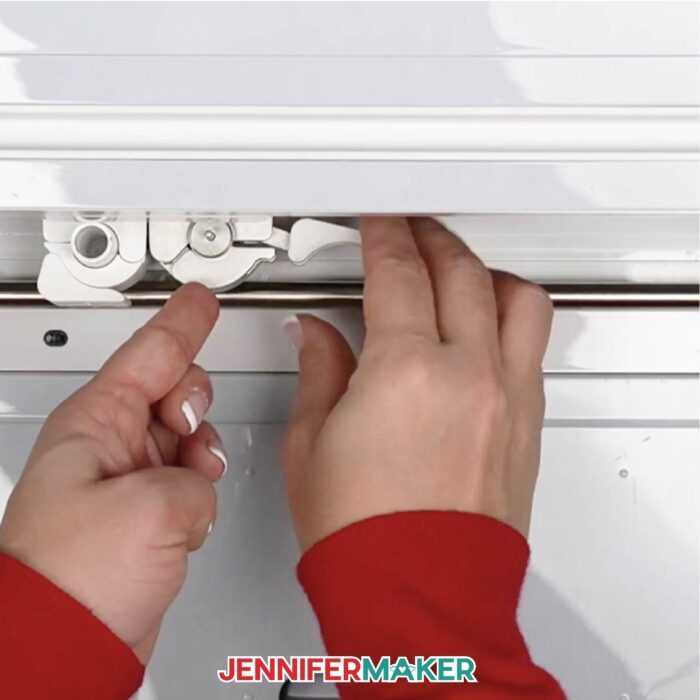
When you’re ready to replace your blade, remove the blade housing from your Cricut by pulling open the latch on Clamp B and simply lifting it out of the machine.

Unbox your new Cricut blade and set it to the side for a moment. I’ve got a brand new premium fine-point replacement blade I’ll be demonstrating with.
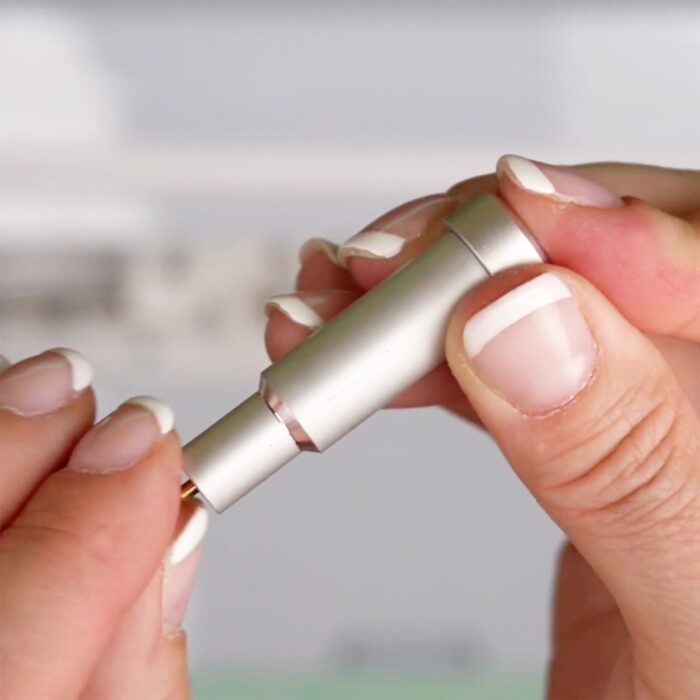
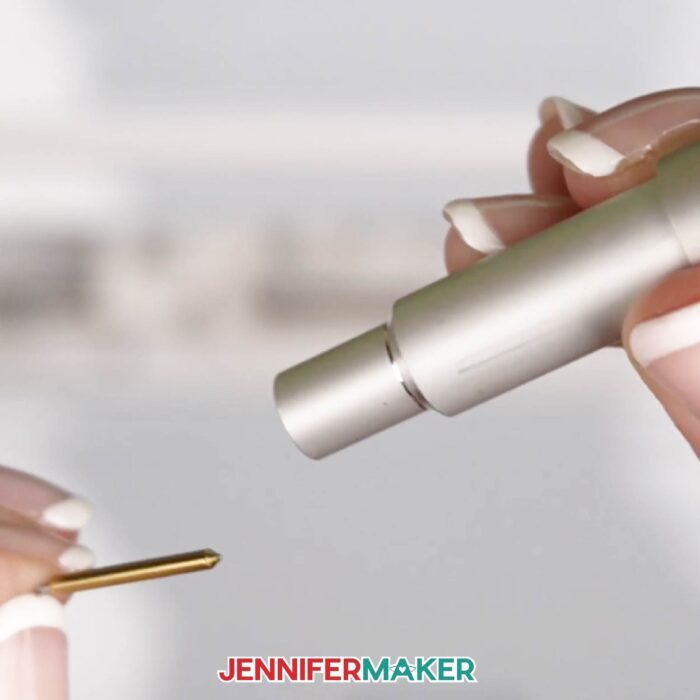
Pick up the Cricut blade housing with the old blade inside. Press the small plunger at the top of the housing. You’ll see the blade stick further out — be careful not to poke yourself!
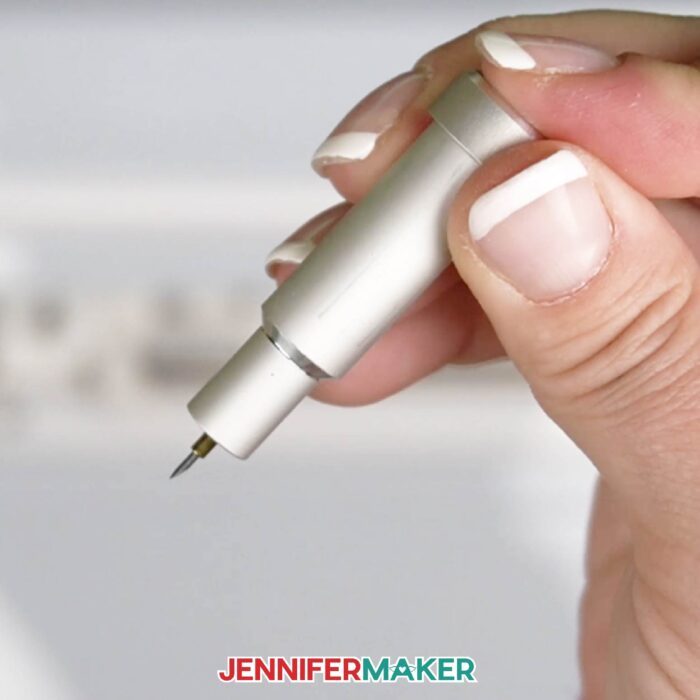
Grasp the slightly thicker part right above the blade with your fingers and carefully pull the blade out from the bottom of the housing.
You’ll feel some resistance, as the blade is held inside the housing by a magnet.
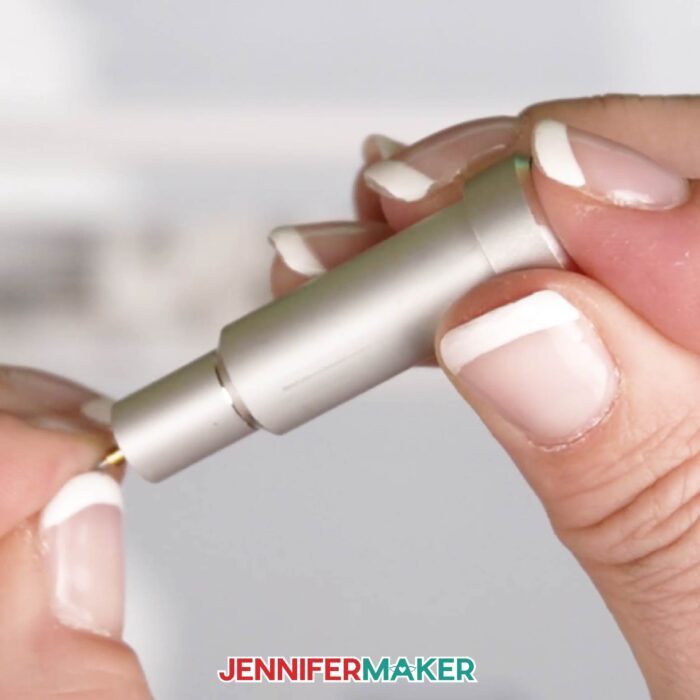
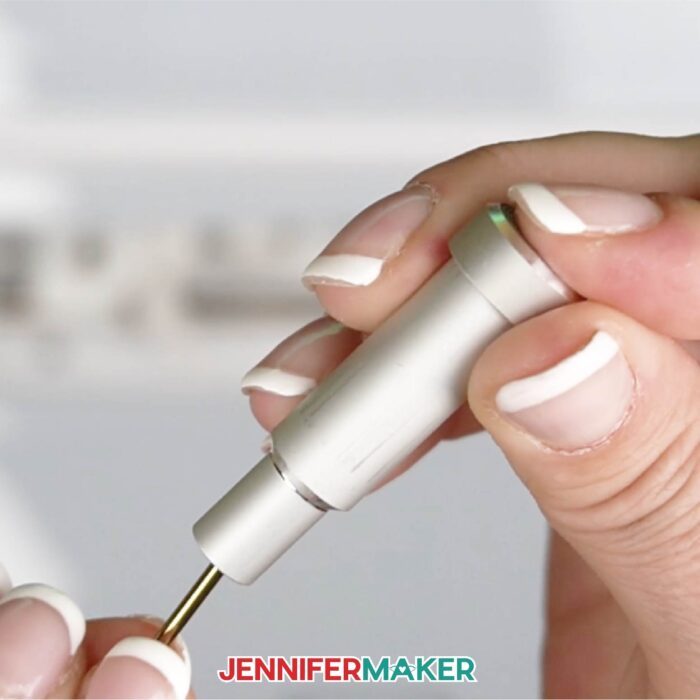
Next, remove the protective cover from the new blade and set it aside nearby. We’ll use it again in a moment.

With the plunger pressed down, insert the new blade’s shaft into the housing. You’ll know it’s fully inserted when you feel the magnet grab it!
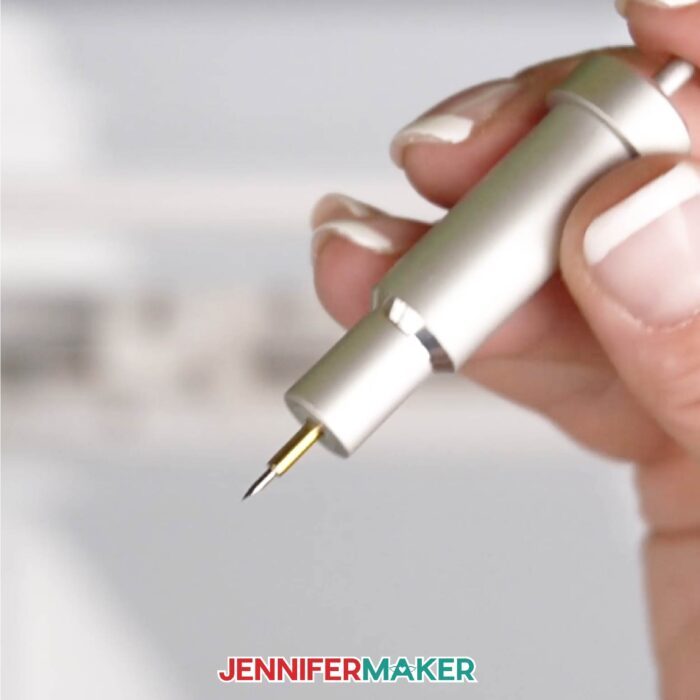
Release the plunger to correctly position the new blade and it’s ready for action!
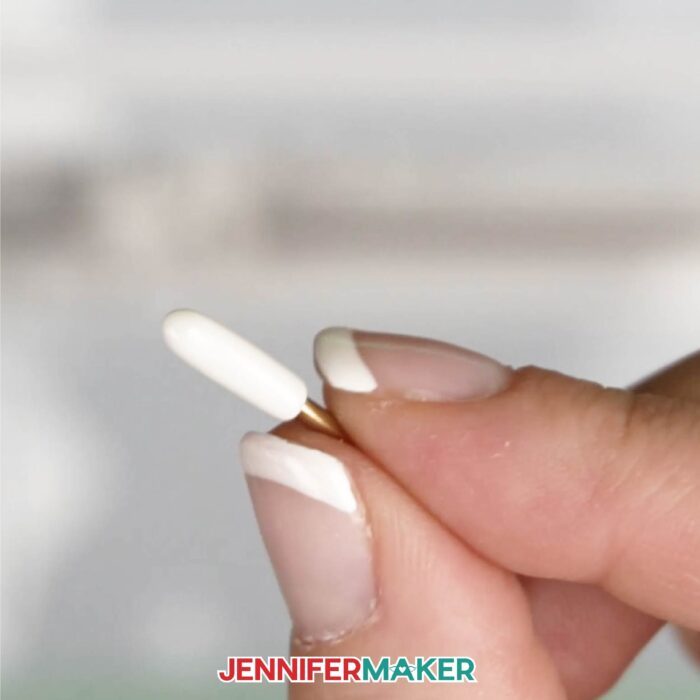
Place the small plastic cover over the old blade tip to safely discard it.
Put your blade housing back in Clamp B on your Cricut, close the latch, and voila! Now you know how to replace a Cricut blade!
You’ll likely see a difference first thing when you replace your blade. Intricate designs will be easier to achieve, and you’ll be able to cut a wide variety of materials with precision cuts! And who doesn’t want to keep their Cricut in peak performance? I know I do!
Answers to Your Questions About How to Replace a Cricut Blade
Q: How do I know if my Cricut needs a new blade?
A: If you’ve tried cleaning your blade and following my tips and tricks for cleaner cuts and your Cricut is still not cutting well, I recommend replacing your blade for best results.
Q: How often do you change Cricut blades?
A: The jury is out on this one! Some sources say to replace your old blades after two months of regular use, but I’ll let you in on a little secret: I very rarely replace my blades. Usually cleaning the blade with a ball of aluminum foil does the trick, and following my troubleshooting tips, but sometimes the blade does just need to be replaced.
Q: Do Cricut blades need to be sharpened?
A: What are Cricut users’ Kryptonite? Dull blades. If you’ve tried cleaning your blade, trying out my tips and tricks, and none of these work — I recommend replacing it for a new, sharp blade. They’re so tiny that sharpening them safely would be difficult and change the angle of the cutting surface.
Q: Does aluminum foil really sharpen Cricut blades?
A: I find that aluminum foil cleans Cricut blades really well, but I don’t believe it sharpens the actual blade. It can absolutely help if your blade is dirty, has adhesive residue on it, or has glitters stuck to it, though.
Q: How do you put a blade in a Cricut maker?
A: Make sure the blade is inside its appropriate housing, then (on your large Cricut cutting machine), pull the latch to open Clamp B. Simply place the housing inside, with the top “lip” of the housing poking out the top. Close the clamp and that’s it!
Q: What different types of Cricut blades are available?
A: Cricut has a blade for everything, it seems! The current Cricut cutting machines available are the Cricut Maker 3, Cricut Maker, Cricut Explore 3, Cricut Explore Air 2, and Cricut Joy.
When choosing a blade, be sure that it fits with your Cricut machine! All blades work with the Cricut Maker series (except the special tips that only fit in the Cricut Joy), but not all fit in the Explore or Joy machines.
- The Fine Point Blade (both the standard version and the premium version with German carbide) works with Cricut Maker and Explore series machines. There’s also a version that works with the Cricut Joy. It’s a true multi-use blade that comes standard with Cricut Maker and Explore machines and can cut most materials.
- The Cricut Joy Blade is only compatible with the Joy cutting machine, and is an all-purpose blade that can cut vinyl, infusible ink transfer sheets, cardstock, and more.
- The Deep-Point Blade works with Cricut Maker and Explore series machines. It cuts a bit deeper than the Fine-Point Blade, and is best used on thick materials like leather, cardboard, and felt. It has a dark gray shaft.
- The Bonded Fabric Blade works with Cricut Maker and Explore series machines, but is especially designed for the Explore — since the Maker can use the Rotary Blade. It’s designed to cut fabric! The shaft is pink.
- The Rotary Blade cuts fabric, crepe paper, and any other material that would normally snag on a regular blade. It’s only compatible with Cricut Maker series cutting machines since it uses a special housing.
- The Knife Blade is another one only compatible with Maker series machines as it uses a special housing. I like to compare this blade to a super sharp miniature Xacto knife — it can really cut the tough stuff! This blade cuts leather and even thin pieces of wood.
- The QuickSwap Housing is another option for the Cricut Maker series machines only. It’s one housing that allows you to swap out a multitude of different tips based on your project, like the Scoring Wheel, Engraving Tip, Perforation Blade, Debossing Tip, and Wavy Blade. You only need one QuickSwap Housing, then you can use the different tips with it:
- The Scoring Wheels come in a single scoring tip and a double scoring tip, and are only compatible with the Maker series cutting machines. While they resemble the Rotary Blade, they doesn’t actually cut — instead, they can score materials like paper, cardstock, and cardboard for easier folding.
- The Engraving Tip works with the Maker series only, and allows you to engrave on soft, flat metals, leather, acrylic, and even paper.
- The Fine Debossing Tip works only with the Maker series and allows you to create beautiful debossed effects on paper, cardstock, basswood, and more.
- The Perforation Blade is only compatible with the Maker series, and create tear-off perforations in paper, acetate, poster board, cardstock, and more!
- The Wavy Blade is a fun way to create an interesting decorative edge to your projects! It’s only for use with the Maker series.
- The Foil Transfer Kit works with the Cricut Maker and Explore machines, though there is also a Cricut Joy version as well. Use this tip to transfer metallic foil designs to your projects using your Cricut! The Maker and Explore version comes with three tips of different thicknesses, while the Joy version comes with one.
Now that you know how to change a Cricut blade and a bit about all the different Cricut blades available, I’d love to see all of the wonderful creations you make with your Cricut cutting machine (and sharp new blade)! Please share a photo in our Facebook group or tag me on social media with #jennifermaker.
Love,

Want to remember this? Save this tutorial on How to Replace a Cricut Blade to your favorite Pinterest Board!