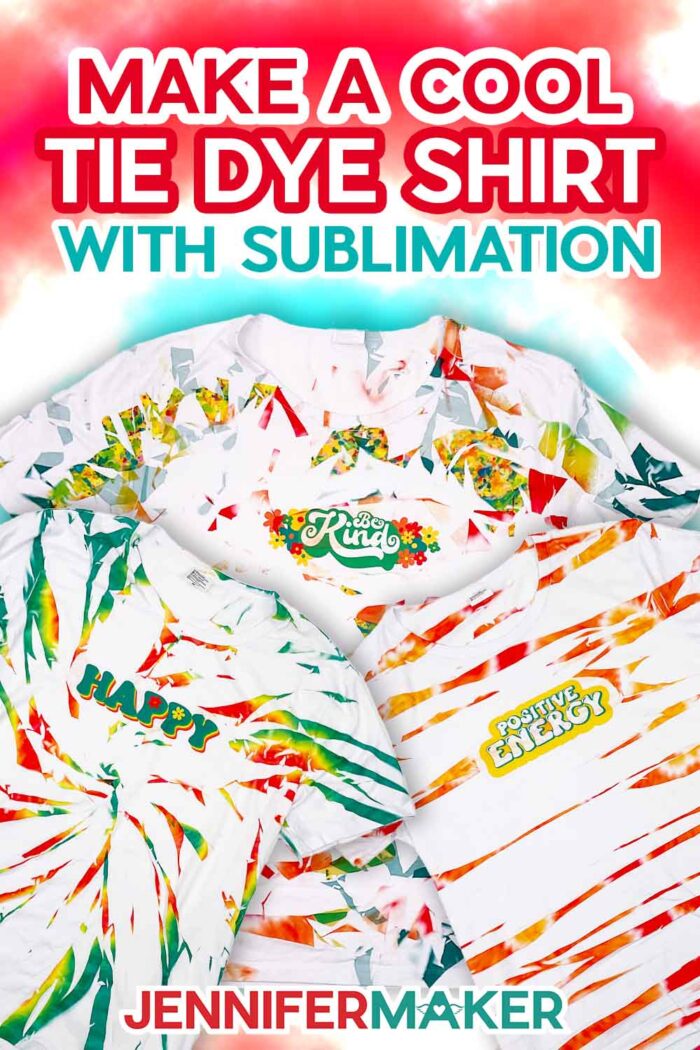
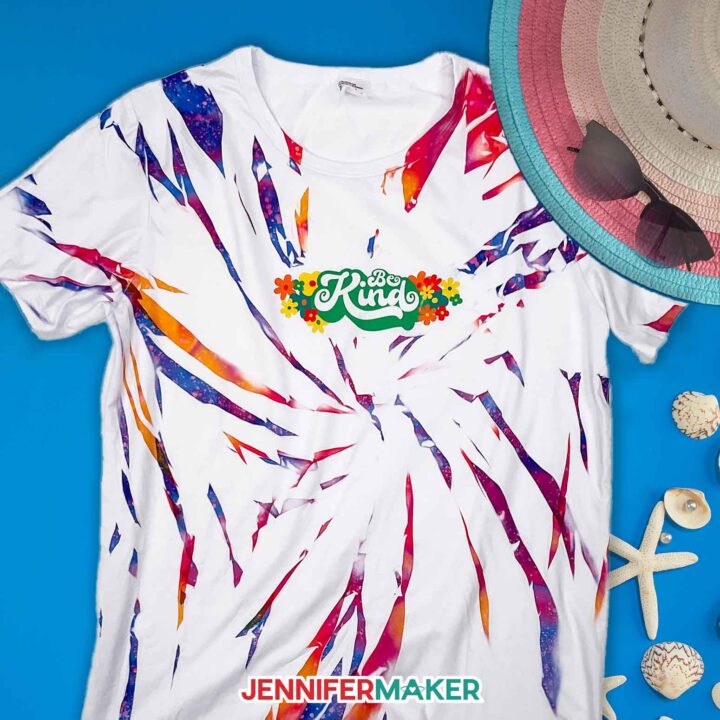
Create a sublimation tie dye shirt using printed designs or Infusible Ink!
Tie dyeing is such a fun craft, but it can get pretty messy with so much dye and water involved. Well what if there was an easier way? I’ll show you how to make a cool tie dye shirt with sublimation designs or Infusible Ink transfer sheets! It’s simple, and you can make unique patterns with different folding methods. There’s even a fun way to keep different sections open to add one of my free illustrated designs if you like!
Watch my complete step-by-step tutorial on how to create a sublimation tie dye shirt:
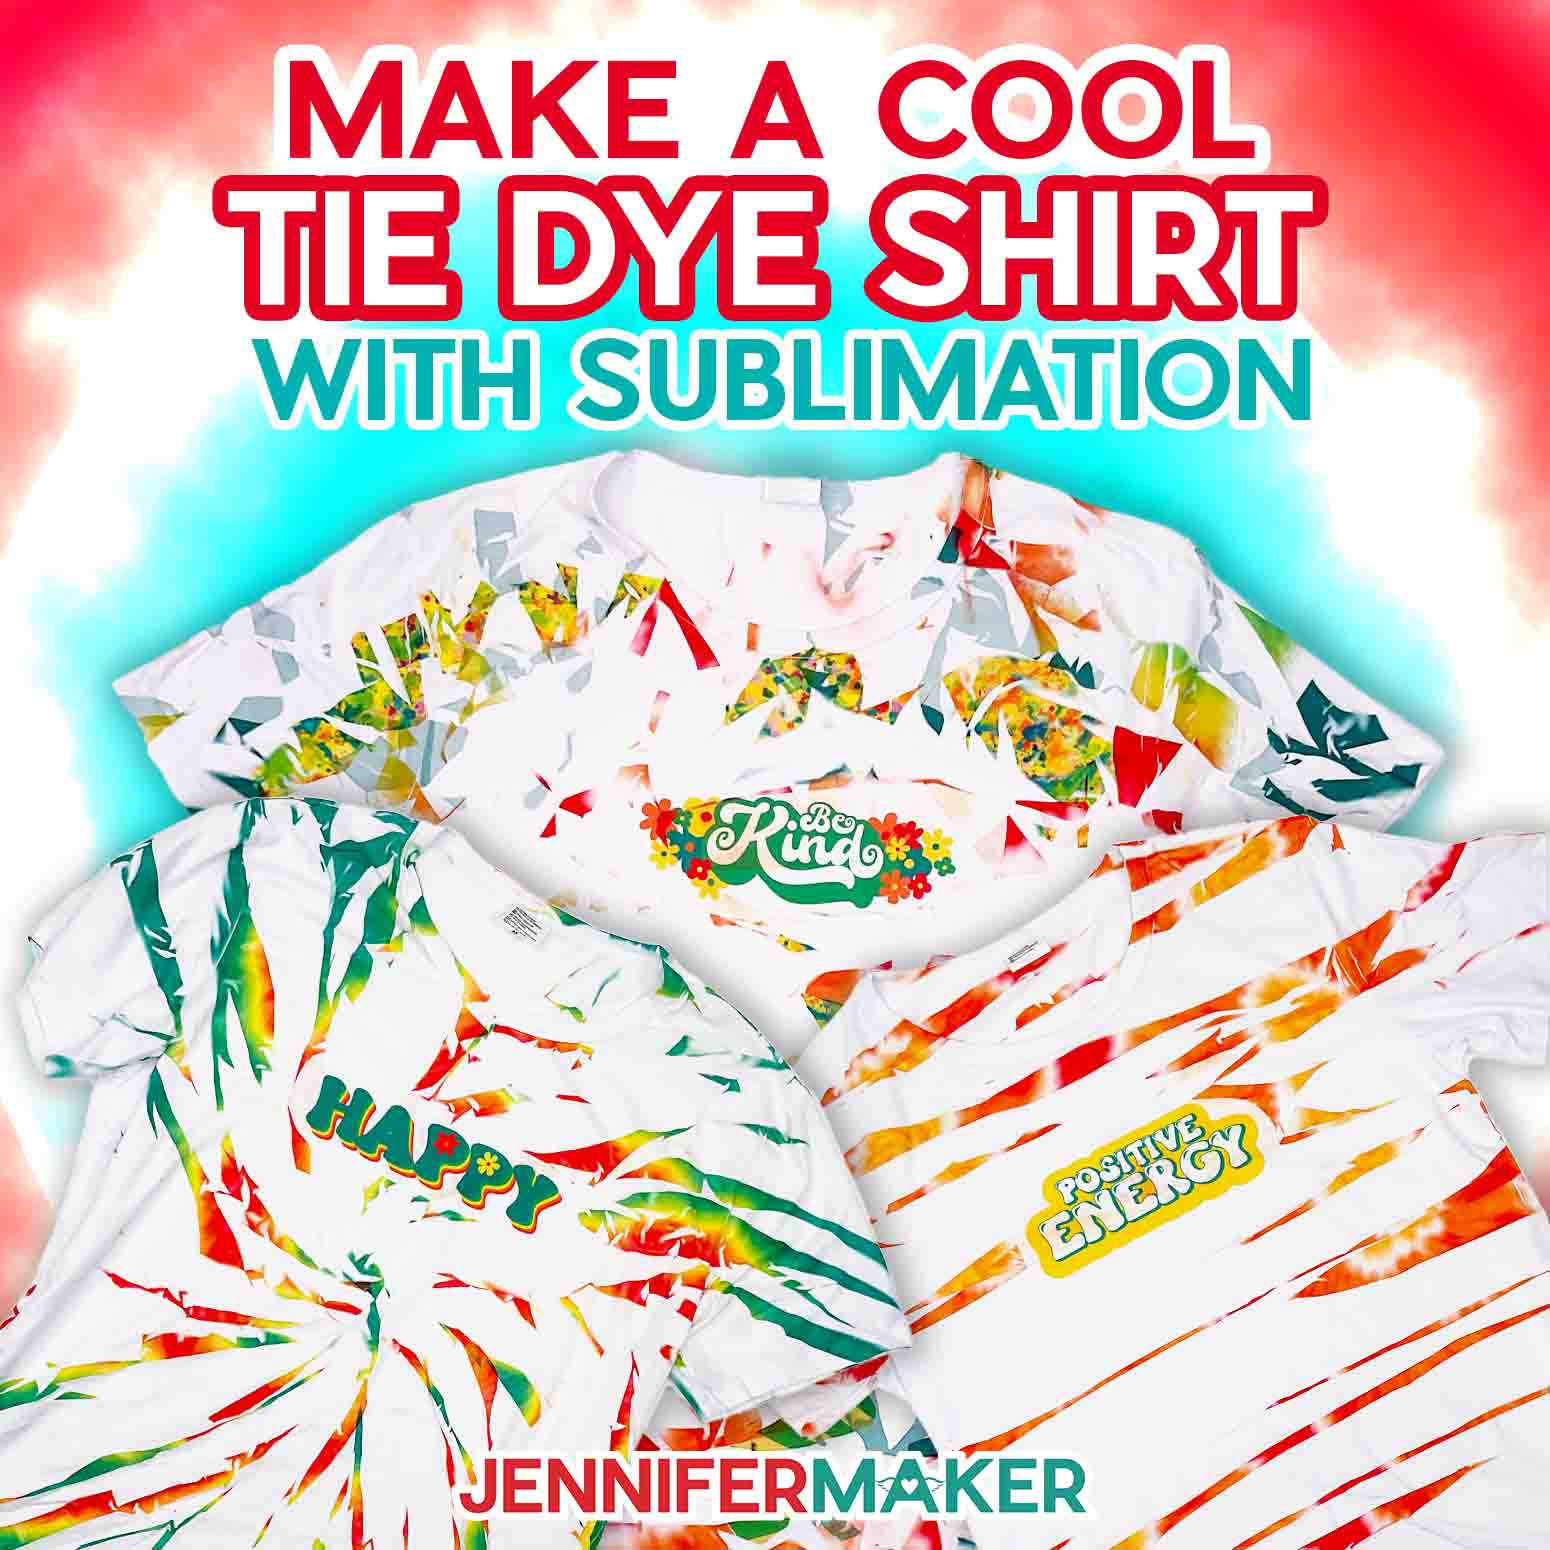

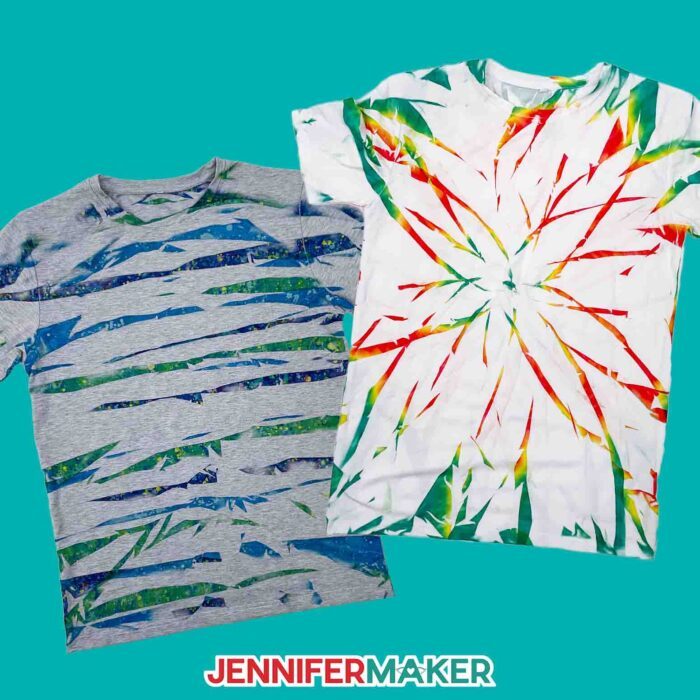
There are many different ways to make tie dye shirts, but sublimation might be my favorite technique, now! If you’ve ever tie dyed before, the materials and process are pretty different, but the folding will be familiar! I’ll share my three favorite patterns, and a few surprises to take them to the next level!
You can try this technique with either printed sublimation designs or Infusible Ink transfer sheets. I tested both materials on polyester shirts (a white t-shirt is best, but gray worked well, too) and really liked the results for both! Sublimation tie dye is a great way give old t-shirts new life. Just make sure they’re light and as close to 100% polyester as possible. Especially if you’re using bright colors.
The printed sublimation tie dye method requires the usual sublimation tools and supplies. I used my converted Epson EcoTank ET-4700 Inkjet Printer with Hiipoo ink and 125g A-SUB sublimation paper, but you can use any sublimation printer with compatible ink and paper. We’ve created four FREE colorful background PNGs for you to start with. They already look like traditional tie dye designs, but wait until you see how we use them! The free download folder also has three illustrated designs that you can use with the backgrounds.
I prepared my backgrounds and designs in Google Docs, totally free software that works great with sublimation printers. Don’t worry, I detail all the easy steps in my Sublimation T-Shirt tutorial.
Folding different patterns on the shirts is the best way to create different looks. I’ll demonstrate a few easy tie dye patterns for you to try and combine. You don’t need rubber bands, but careful folds help get the different colors in the right place. Take your time for the best results.
I’ll show you how to twist and fold the fabric into a spiral shape. You can apply designs in different layers to create a spiral pattern!
Or, make an accordion fold to create horizontal stripes. By starting the pleats in a different spot, you can also make vertical stripes or diagonal stripes.
Finally, we’ll experiment with scrunching the fabric item for an organic, all over design!
The best part of making a sublimation tie dye shirt is that you don’t need to set the dye or prepare the fabric with anything like soda ash or the other things that come in the average tie-dye kit from craft stores. You don’t even need all the elastic bands traditional tie dye uses. We’ll hold the design in place with heat resistant tape on white cardstock during pressing. White butcher paper will keep any excess dye from getting on your press. I used my Cricut Autopress, but you can certainly use an EasyPress with a large pressing mat.
The tools are similar for the Infusible Ink process, and there are so many patterns that work for a sublimation tie dye shirt! I tried a few using a full sheet, but I’ll also show you how to use cut scraps. You can even combine Infusible Ink sheets and printed sublimation designs.

As with any sublimation project, a lint roller will help prepare your surface. Any dust or lint on the shirt can cause splotches in your transfer. Ventilation is also important, so open a window and have a gentle fan going to dissipate the fumes.
If you want to add an illustrated design or even a photo to the front, I’ll show you how to keep a spot open using adhesive paper. Then, you can use one of my t-shirt guides to get the placement correct using one of my free designs in the download folder or one of your own.
So, ready to make your own sublimation tie dye shirt? I’m super excited to show you how! This post contains some affiliate links for your convenience (which means if you make a purchase after clicking a link I will earn a small commission but it won’t cost you a penny more)! Read my full disclosure policy.
Materials to Make a Sublimation Tie Dye T-Shirt
View my Amazon shopping list with the exact items we used to make this project.
- Polyester T-Shirt – I used Men’s Medium shirts in white and gray
- Sublimation Printer – I used my converted Epson EcoTank ET-2800 Inkjet Printer
- Compatible Sublimation Ink – I used Hiipoo ink
- Google account to use the free Google Docs software to print sublimation designs
- 8.5″ x 11″ Sublimation Paper – if you want to use a printed design -OR-
- Infusible Ink Transfer Sheets
- Heat Press – I used my Cricut Autopress for both sublimation and Infusible Ink techniques, but you can also use an EasyPress with a pressing mat
- White Butcher Paper – if you use Infusible Ink transfer sheets, the rolls come with butcher paper, but using fresh white paper for each press will protect your heat press and work surface
- White Cardstock 12″ x 12″
- Heat Resistant Tape
- Optional Pencil and Adhesive Paper – to block ink to add another design, using my T-Shirt Guide for alignment
- Lint Roller – to clean your shirt before adding a design
- Fan – to help with ventilation
- Scissors
- Design #466 – My free Tie Dye PNG collection (available in my free resource library—get the password at the bottom of this post)
How to Make a Cool Tie Dye Shirt
How to Make a Cool Tie Dye Shirt With Sublimation
Learn how to get a tie dye effect with sublimation.
Materials
- Polyester T-Shirt I used a Men's Medium shirt size
- 8.5" x 11" Sublimation Paper - if you want to use a printed design -OR-
- Infusible Ink Transfer Sheets if you don't have a sublimation printer, like Rainbow Paint Splash Pattern -OR-
- Infusible Ink Transfer Sheets Scatter Dots Pattern -OR-
- Infusible Ink Transfer Sheets Galactic Stars Pattern
- Butcher Paper
- White Cardstock 12 x 12
- Heat Resistant Tape
- Optional Adhesive Paper - to block ink to add another design
- Sublimation Ink
- Design #466 – My free Tie Dye PNG collection (available in my free resource library—get the password at the bottom of this post)
Tools
- Sublimation Printer - I used my converted Epson EcoTank ET-4700 Inkjet Printer
- Heat Press - I used my Cricut Autopress - for both sublimation and Infusible Ink techniques but you can also use an EasyPress with pressing mats
- Lint Roller
- Fan - to help with ventilation
- Scissors
- T-Shirt Guide
- Pencil - to trace your design
- Free Google account to use the free Google Docs software
Instructions
STEP 1: GET OR PREPARE A SUBLIMATION DESIGN
If you want to use a printed sublimation design, you can use any of my Sublimation Tie Dye files from my resource library, Design #465.
NOTE: If you want to use the Infusible Ink technique, the details are at the bottom of the directions.
Download the files and pick your design. There are seven PNGs to choose from.
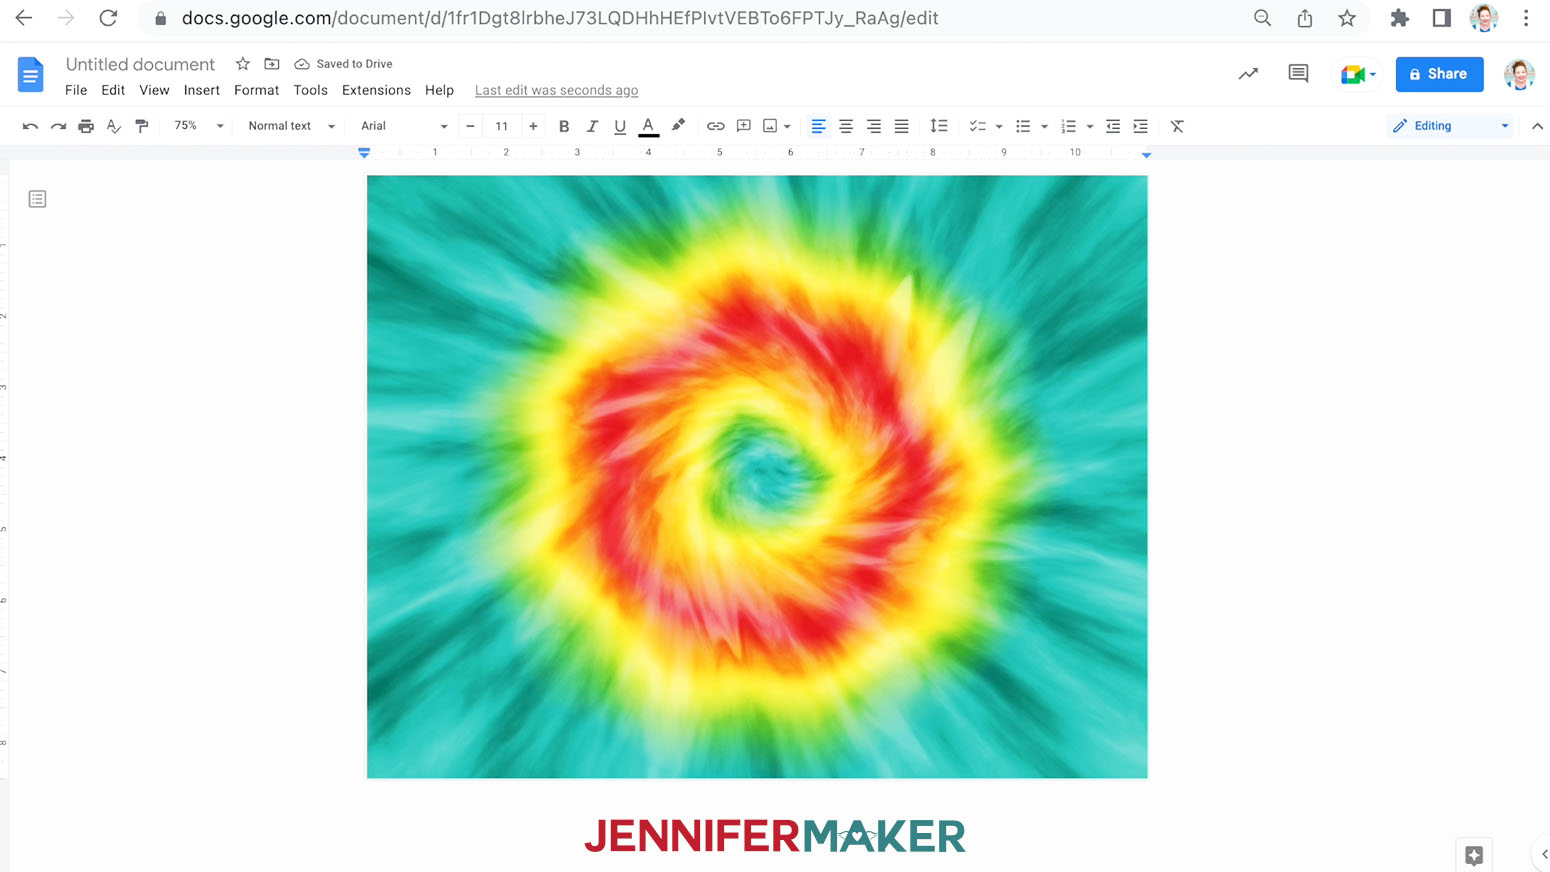
A tie dye blue rainbow background design.

A tie dye red rainbow background design.

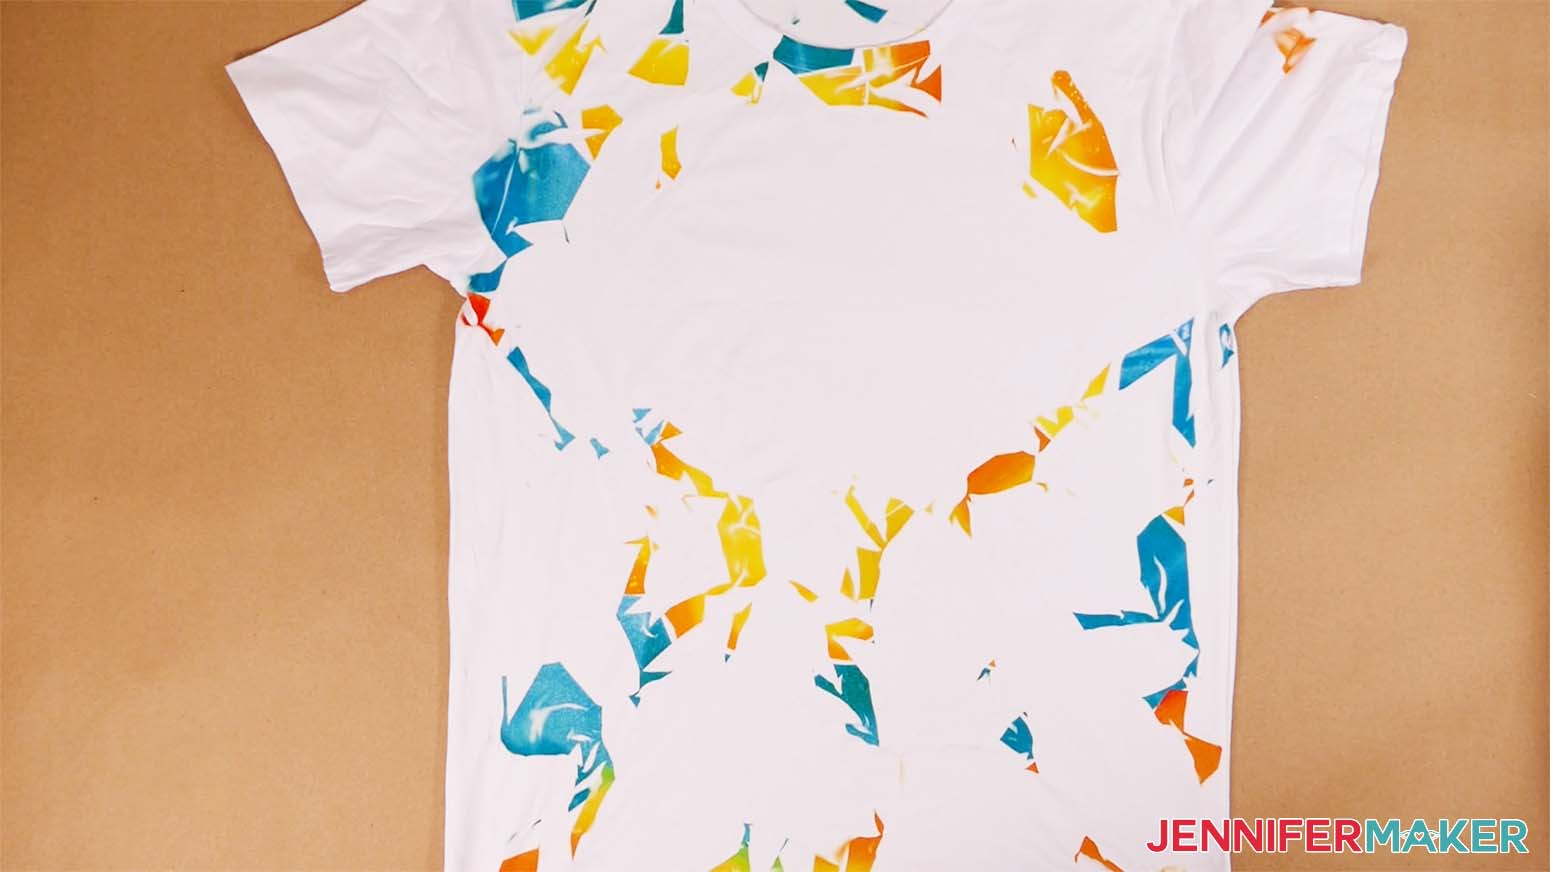
A tie dye with cool colors blue, green and purple background design.

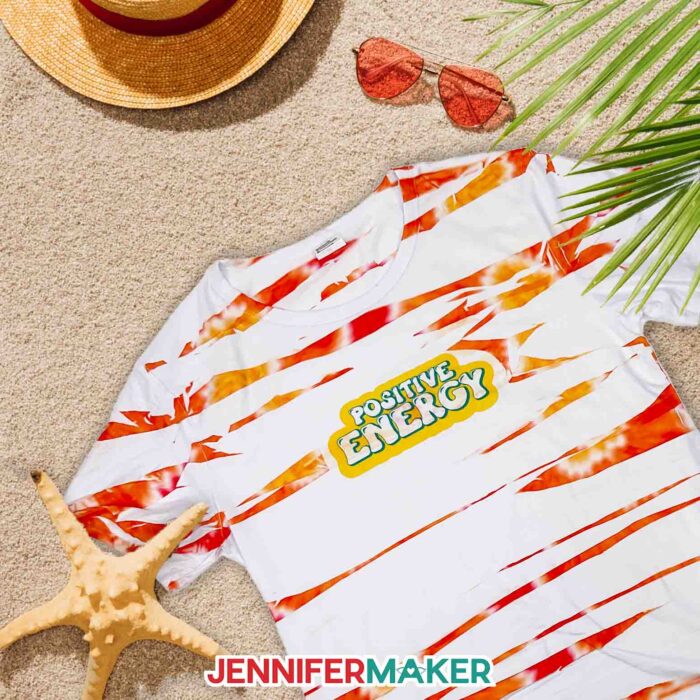
A tie dye with warm colors red, orange, and yellow background design.

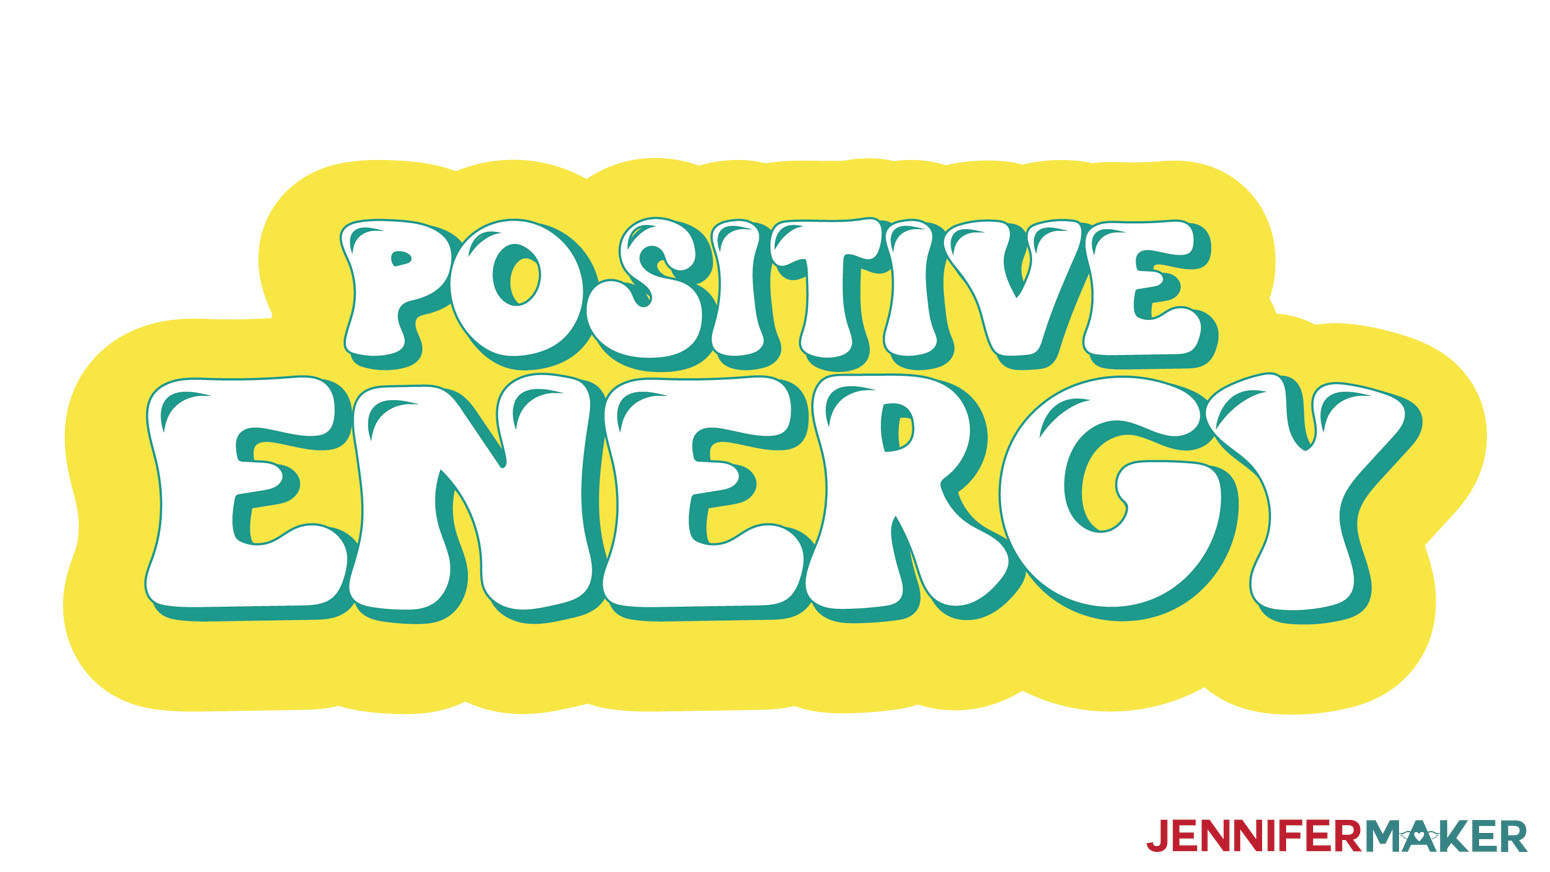
A Positive Energy design
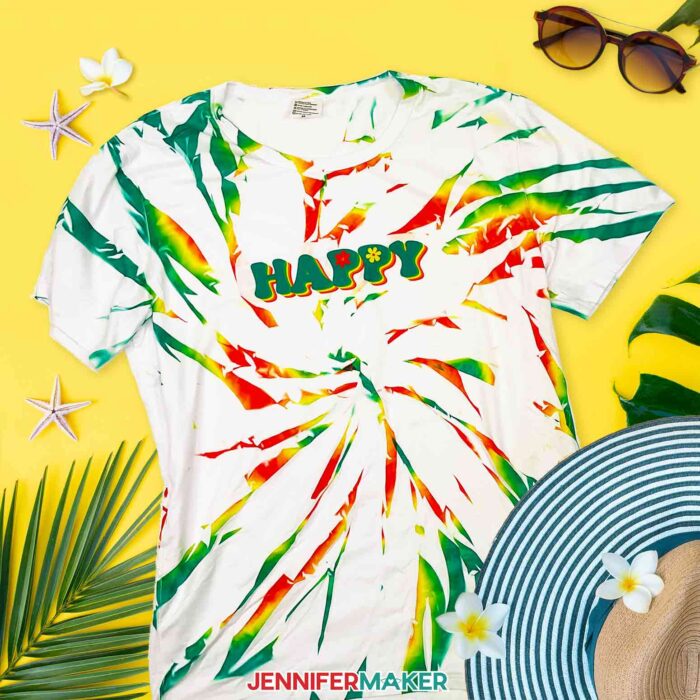
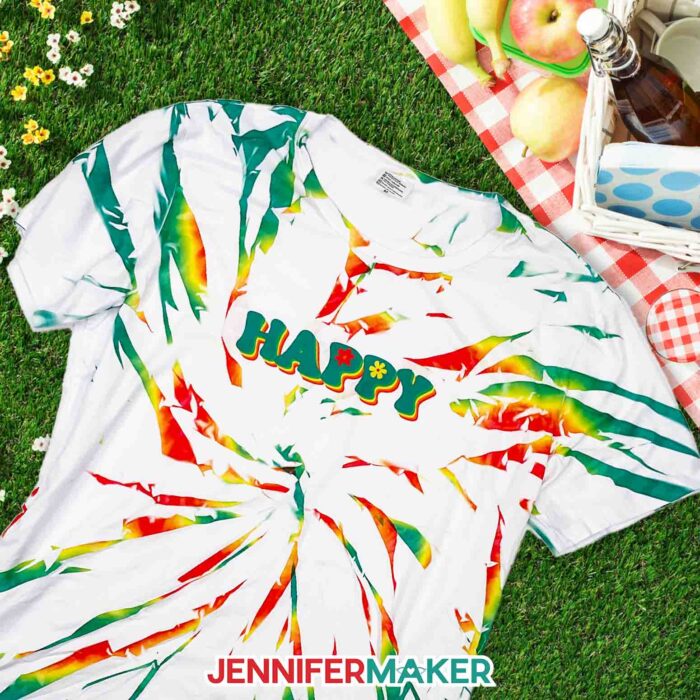
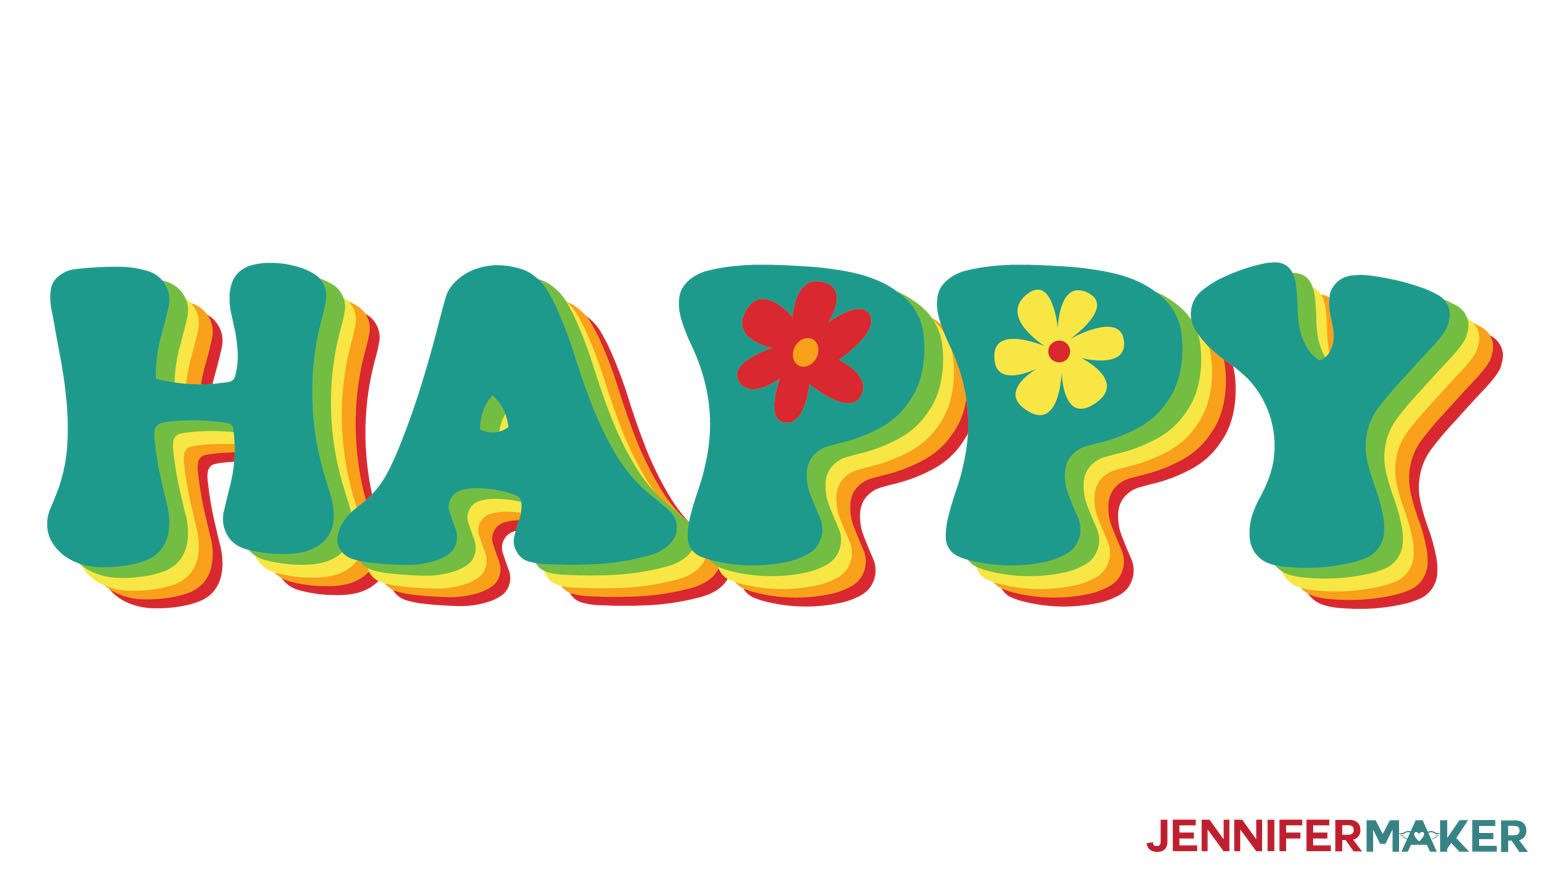
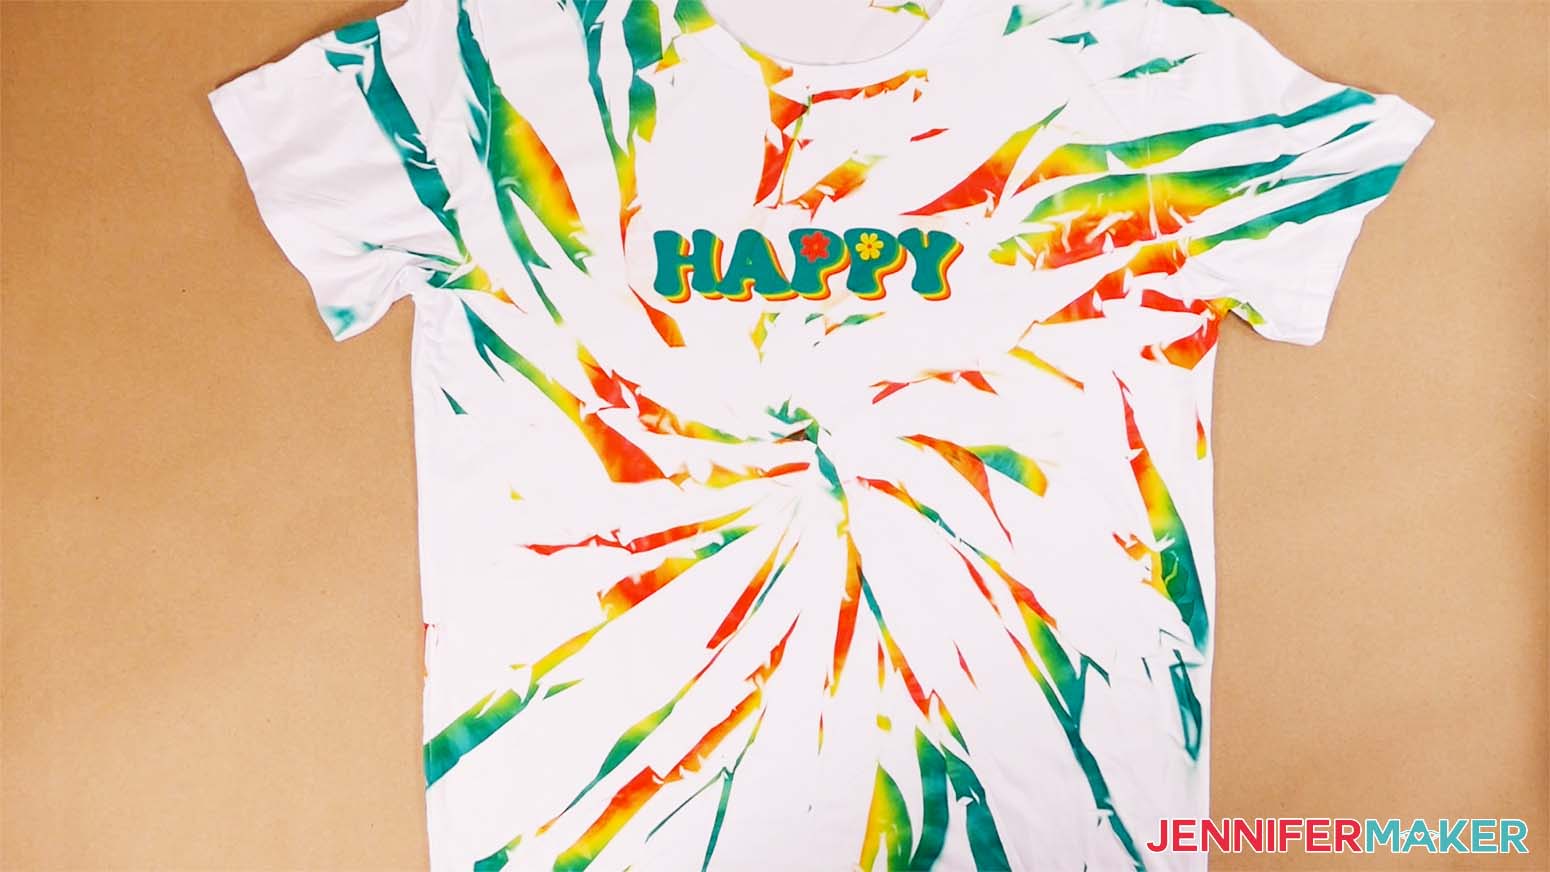
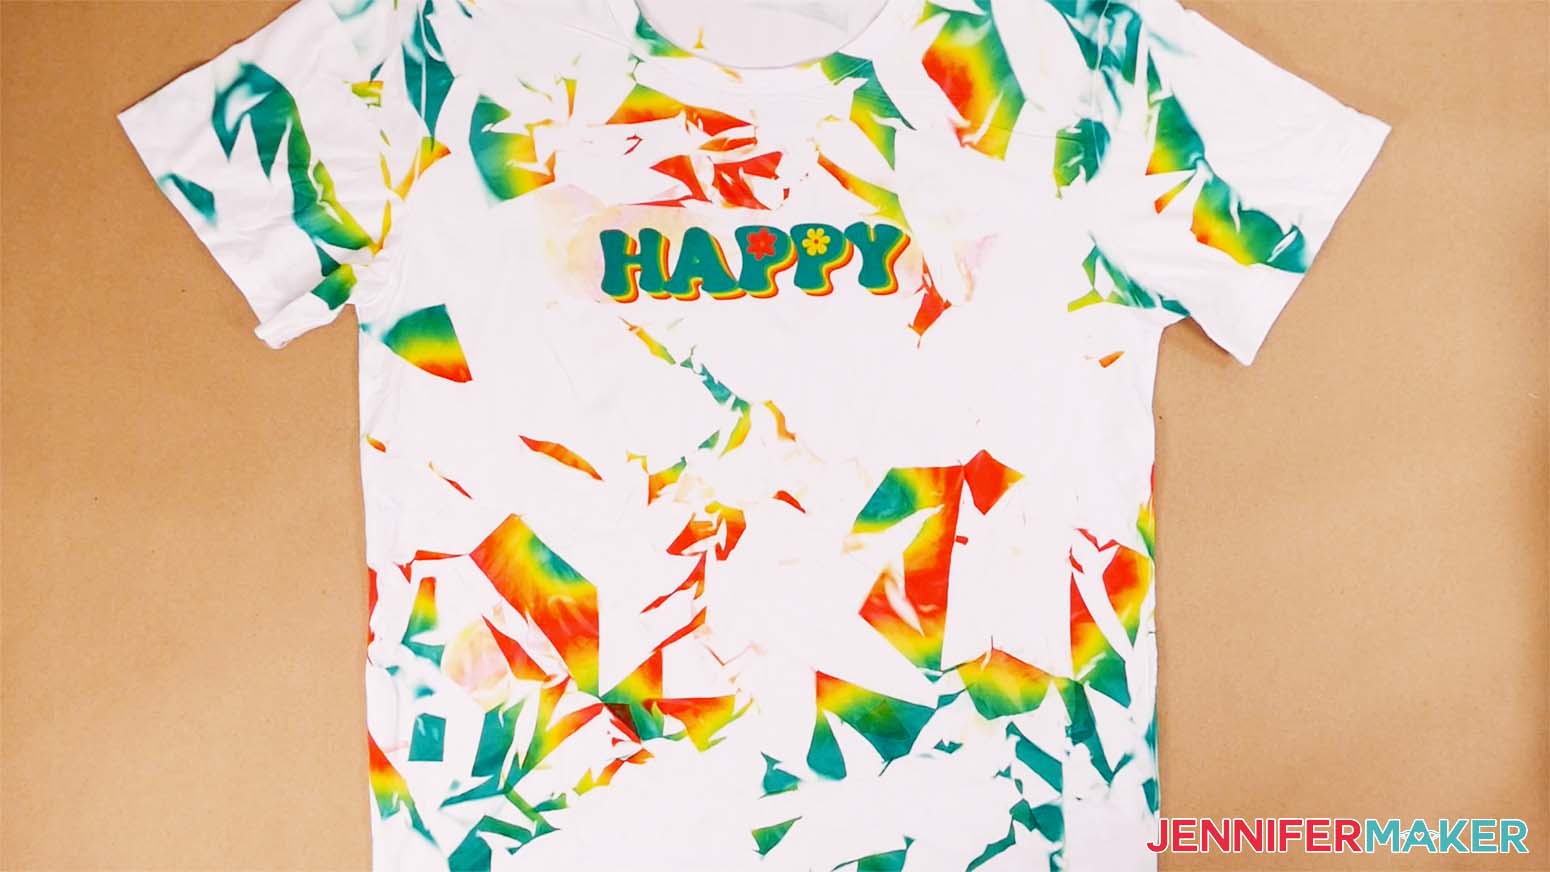
A Happy design.
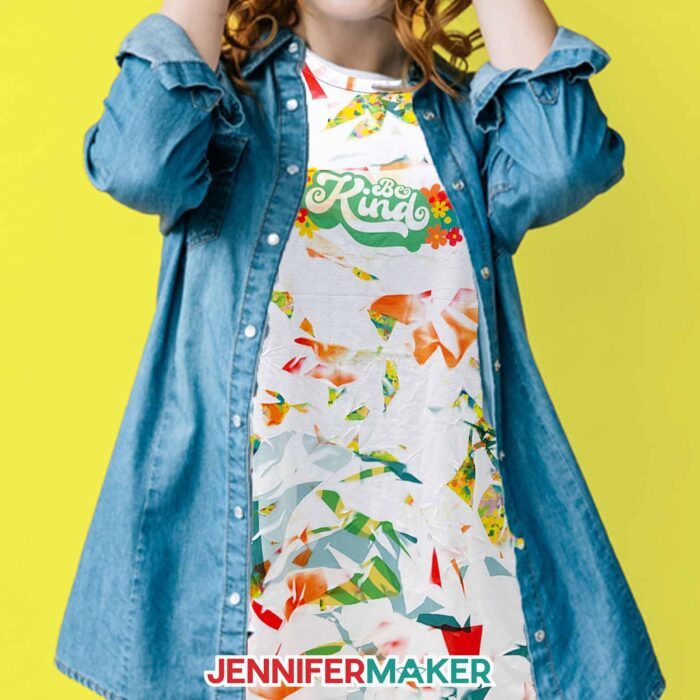
A Be Kind design.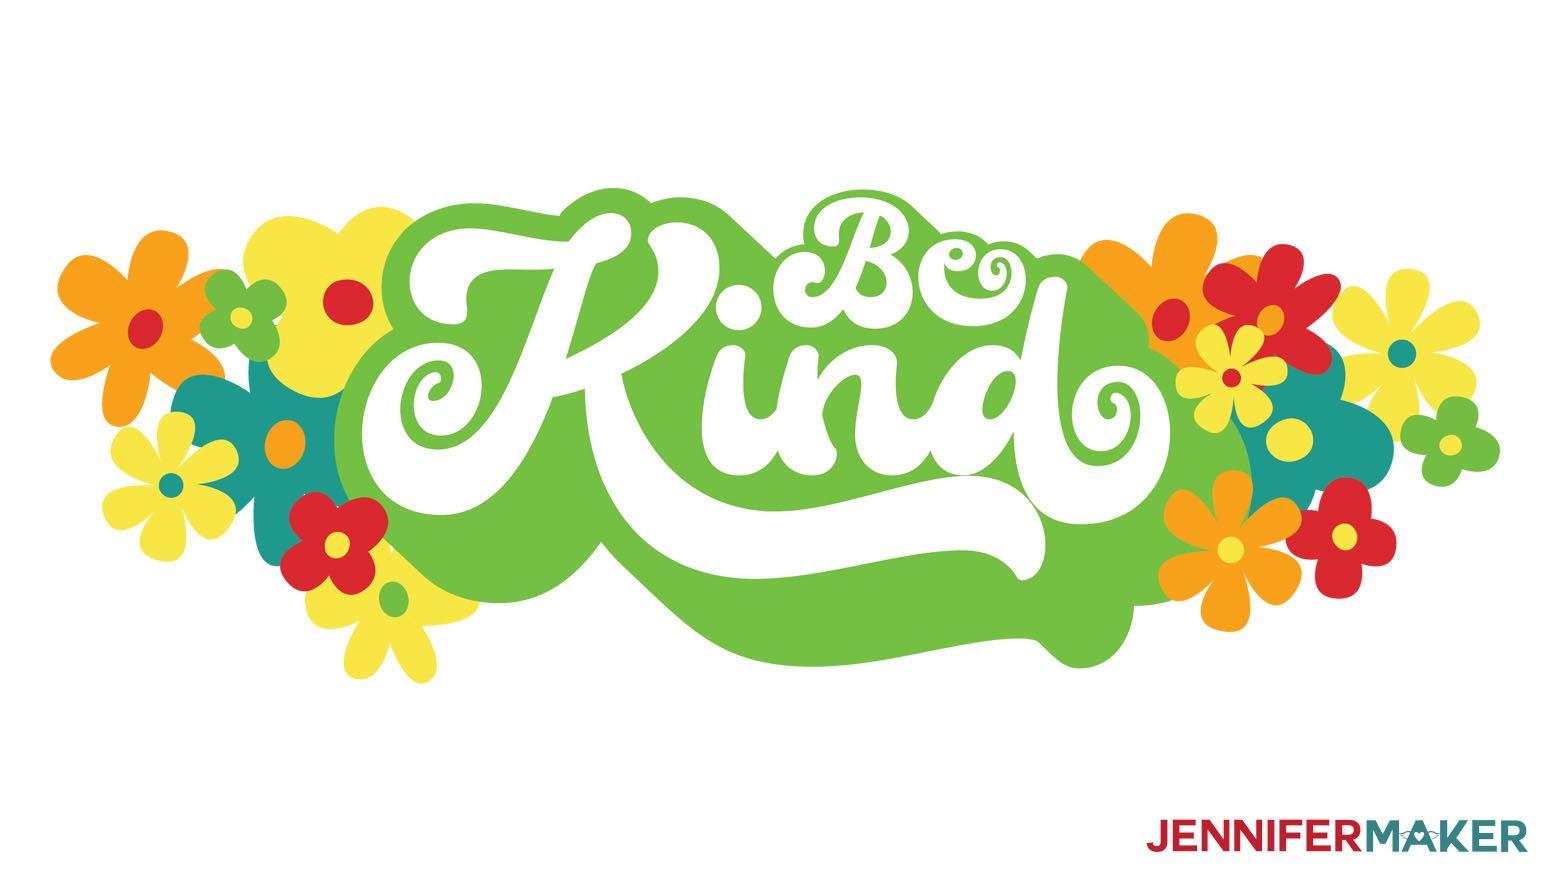
You can use the backgrounds and designs one at a time or combine them.
Open Google Docs in the Google Chrome web browser on your computer. You can also download and open the Google Docs app, but be aware that you won’t be able to install or access any printer profiles from a mobile device, and you’re also limited in features, so I do not recommend it on a mobile device. (Note: You will need a free Google account to use the free Google Docs software.)
With Google Docs open, click on "Blank" in the upper left corner to open a new document.
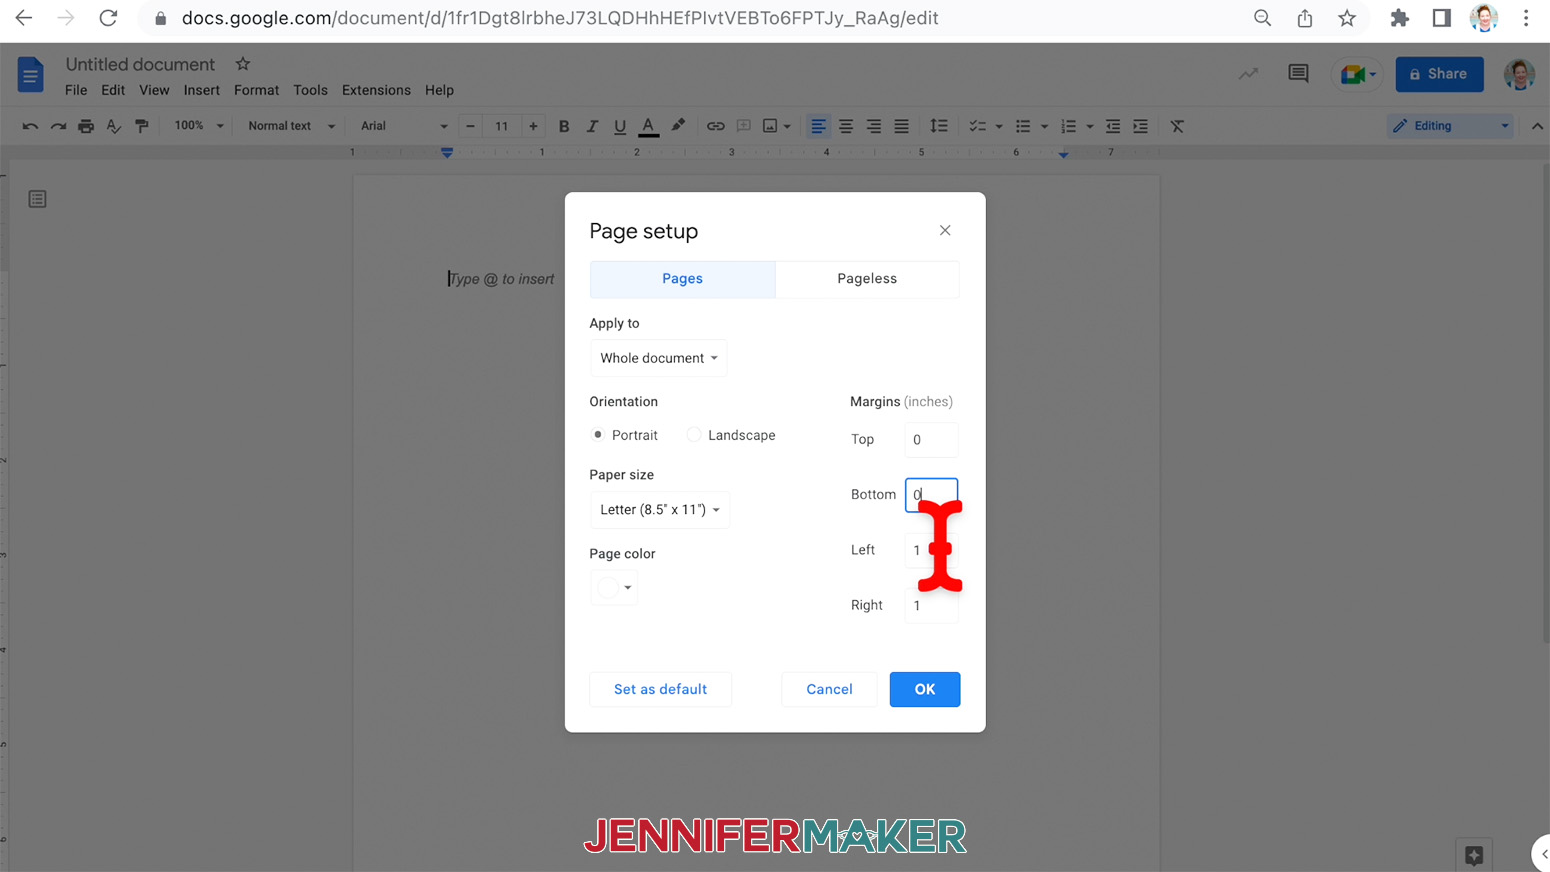
Go to the "File" menu and select "Page Setup". Change your margins to “0” and change your Paper Size to match your sublimation paper size. Mine is 8.5" x 11".
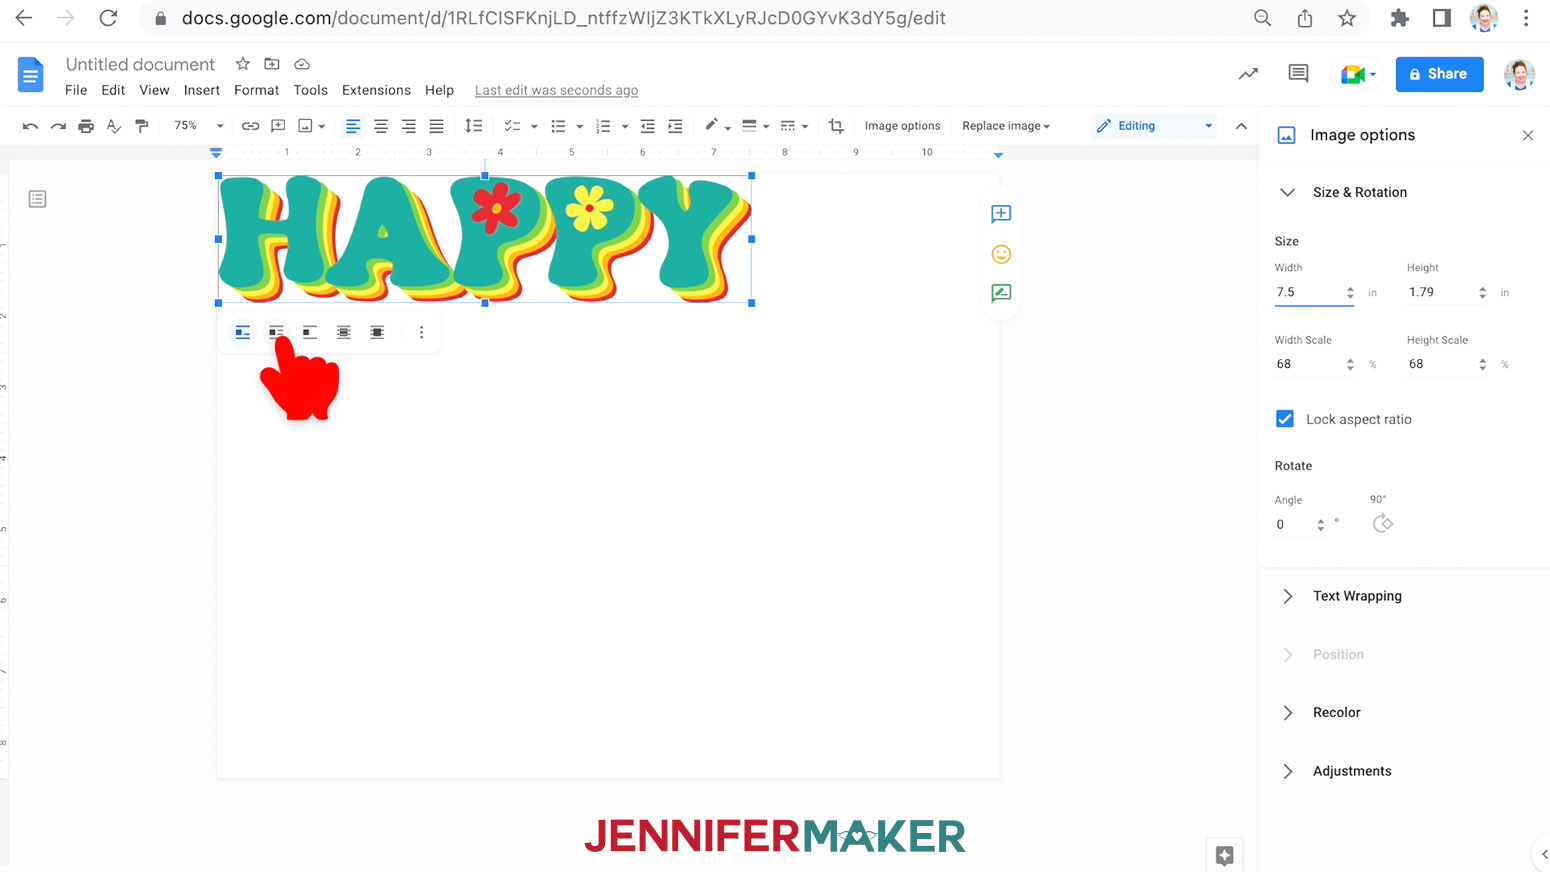
Go to the "Insert" menu, select "Image", and select "Upload from Computer". Locate the sublimation design you want to use (hint: it’s probably in your Downloads folder), and click "Open". I'll use the blue tie dye background and the Happy design. The image or images will appear and fill your page — but will not necessarily come in at the size originally designed.
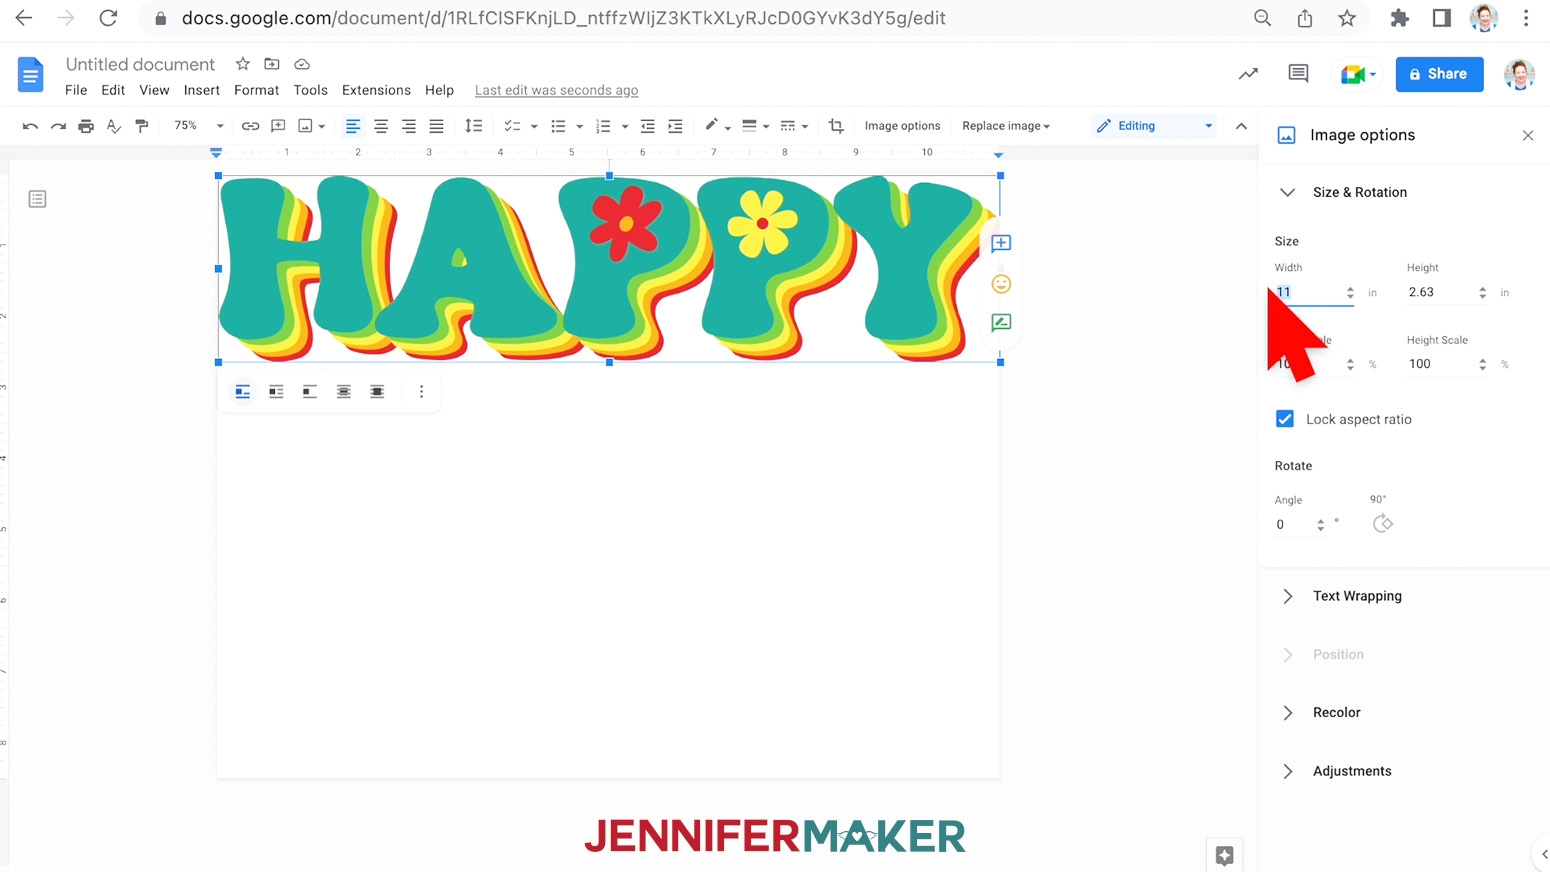
To resize, right-click the image, select "Image Options," make sure the "Lock aspect ratio" box is checked, and change the Width or Height field.
If you are just printing the tie dye backgrounds, make sure they are sized to fill your 8.5" x 11" sheet of paper. If you are also printing a design image, make sure to change the image size. For the happy image, I set my image size to 7.5" x 1.8".
For the other designs, resize them to:
Positive Energy 7" x 2.74"
Be Kind 7.5" x 2.56"
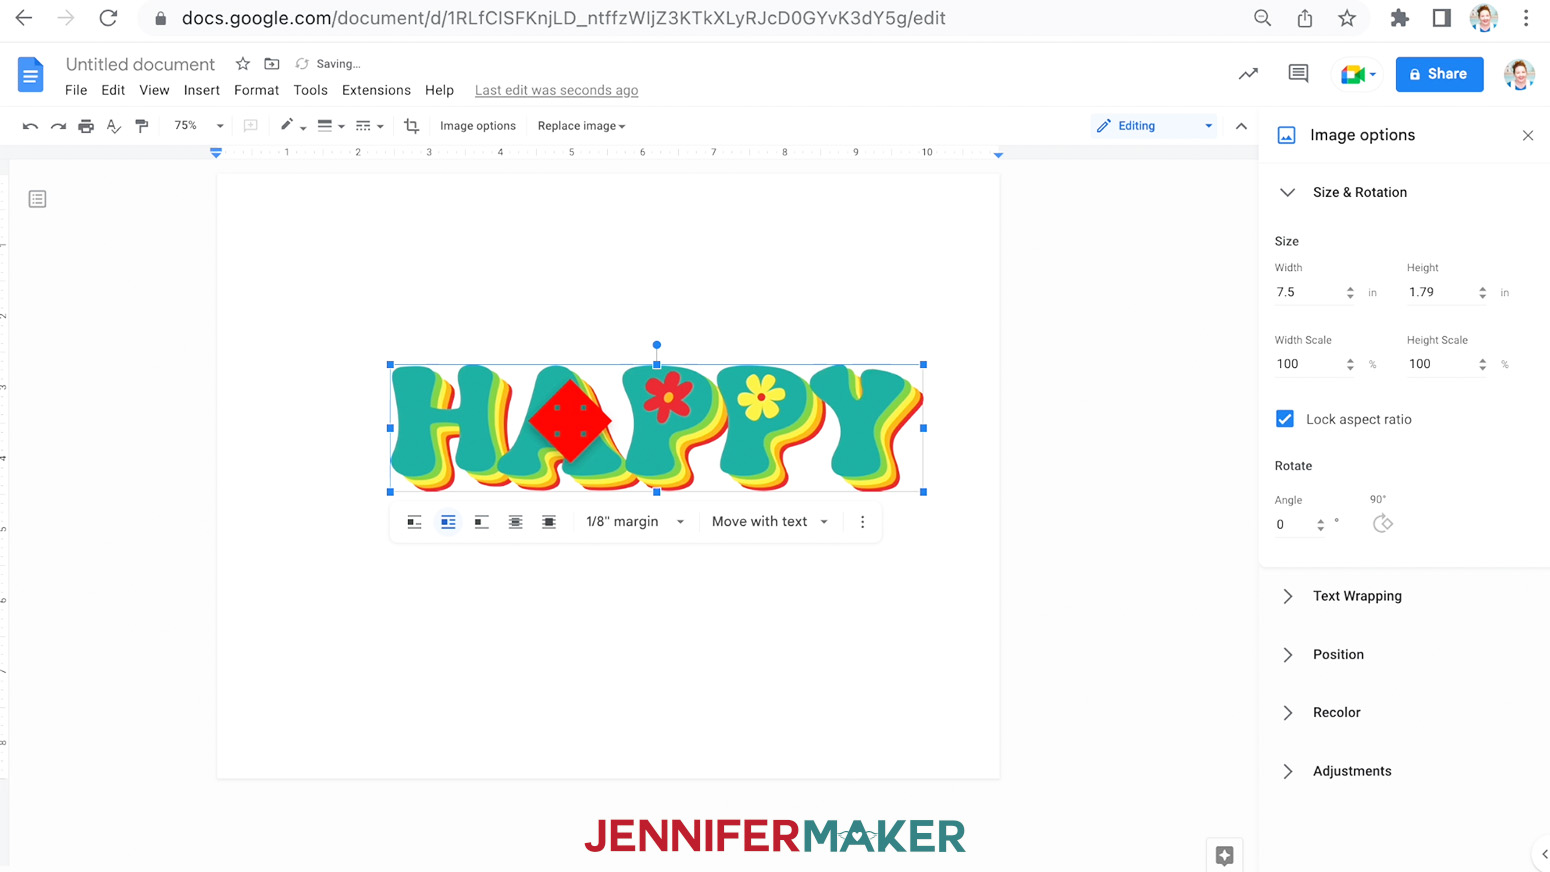
Adjust the image on your page by selecting it, then click on the second icon from the left in the menu below it, which means “Wrap Text”.
Now, you can click and drag the image anywhere on your page. I recommend putting your design in the center of your page, as that ensures it won’t get cut off at the edges and you have plenty of space for cutting/tearing edges if needed.
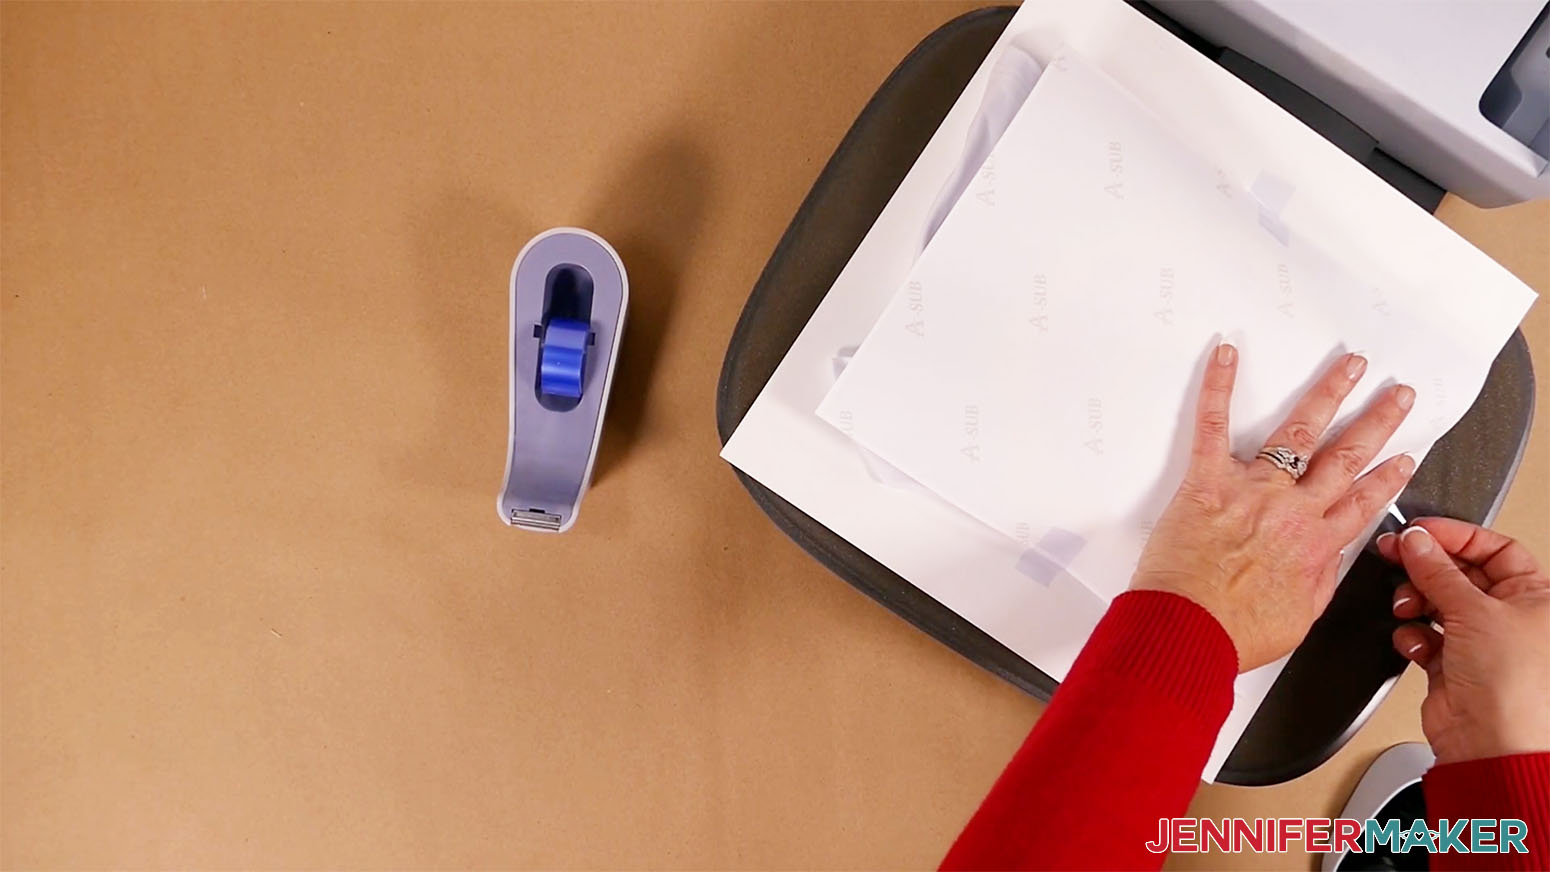
Print the design following my earlier Sublimation Design Printing tutorial. I used a few rounds of twisting and sublimating the shirts to get more color on the fabric, so I printed two copies of the background.
STEP 2: PREPARE YOUR T-SHIRT
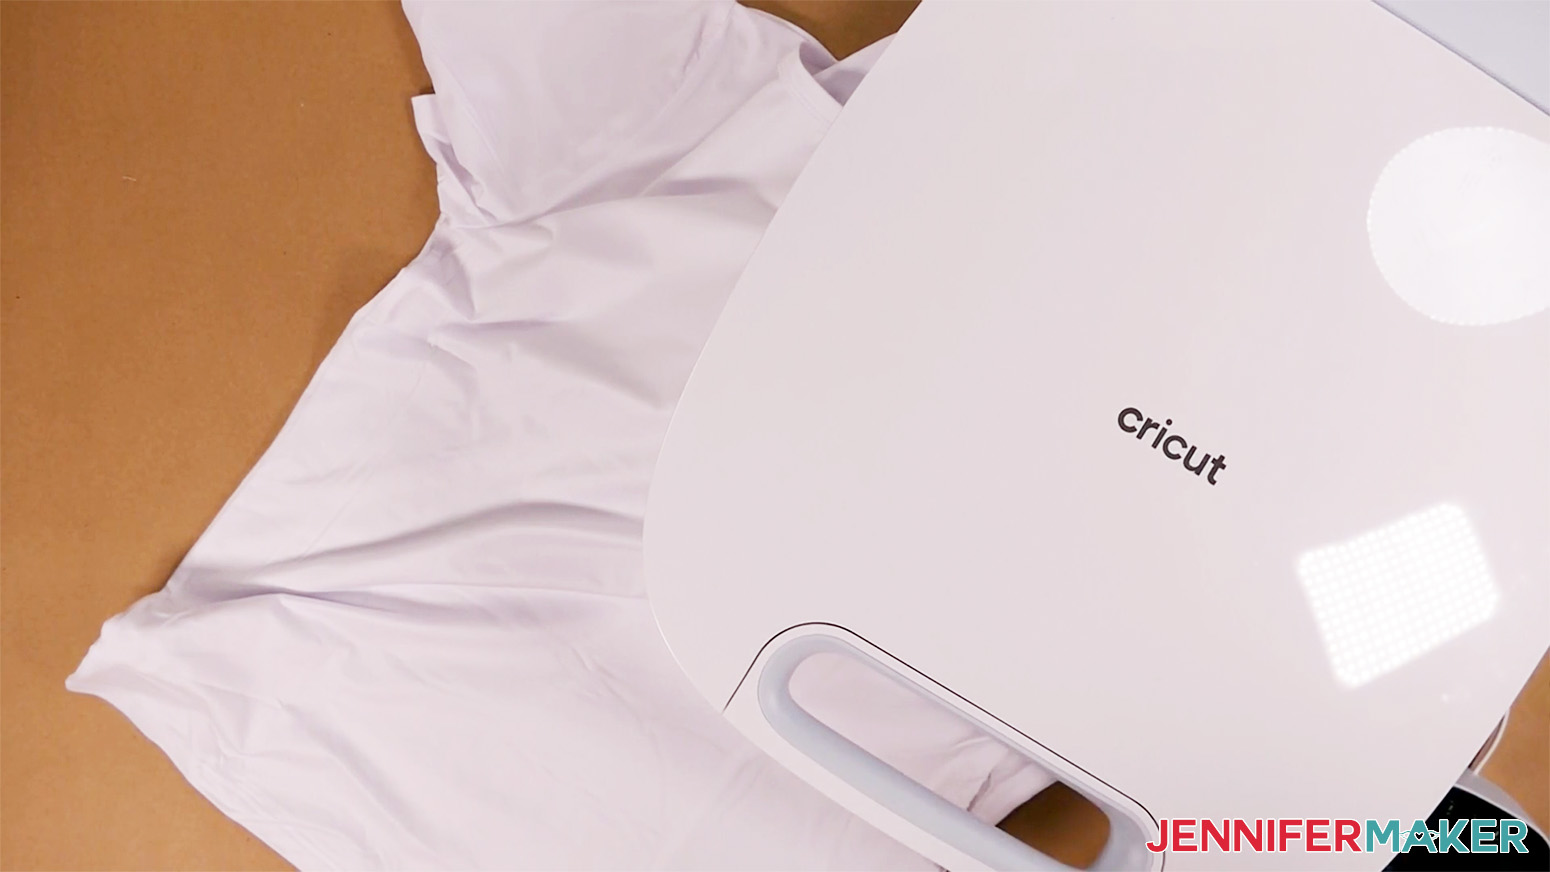
Preheat your press 385° and set the time to 10 seconds. And be sure to open a window or set up a fan to improve your ventilation.
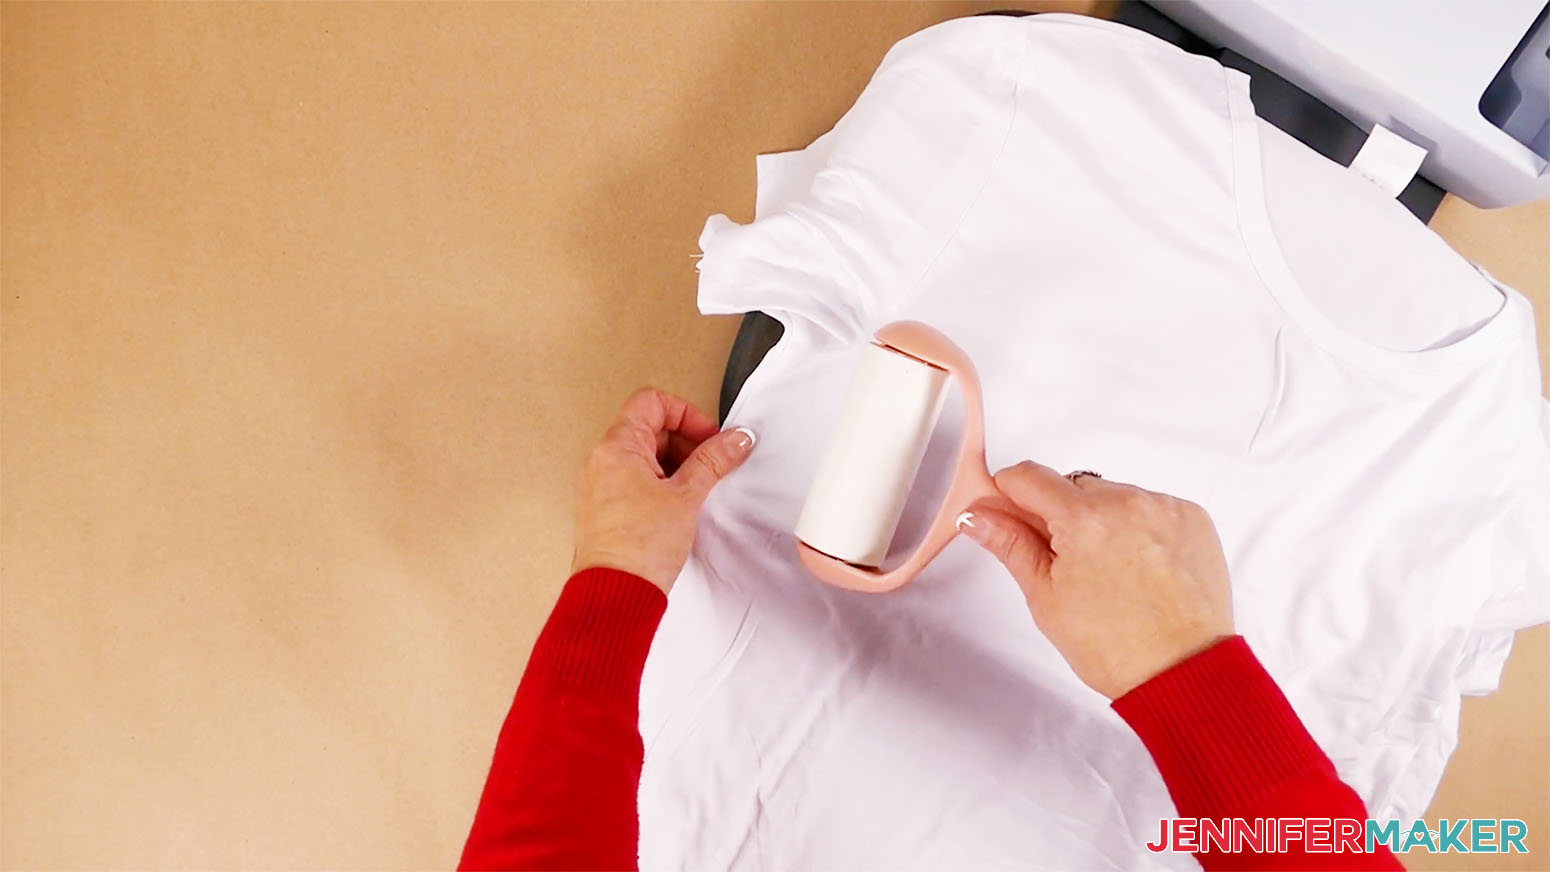
Since we'll be sublimating all over the shirt, lint roll it all thoroughly to remove excess lint or debris.
We also need to preheat the entire shirt before sublimating. Working in sections helps.
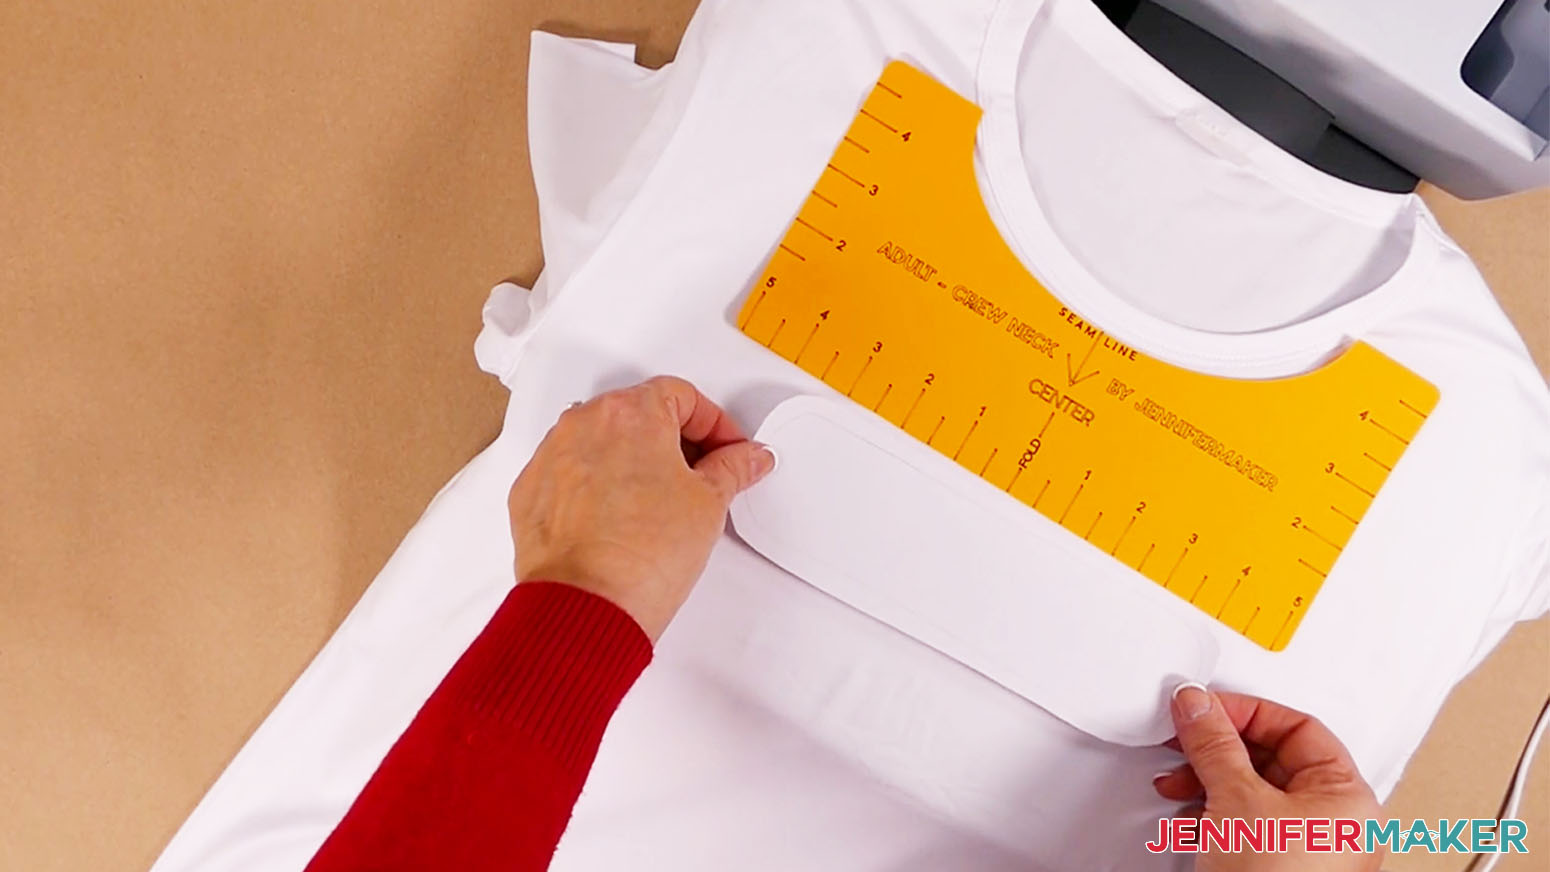
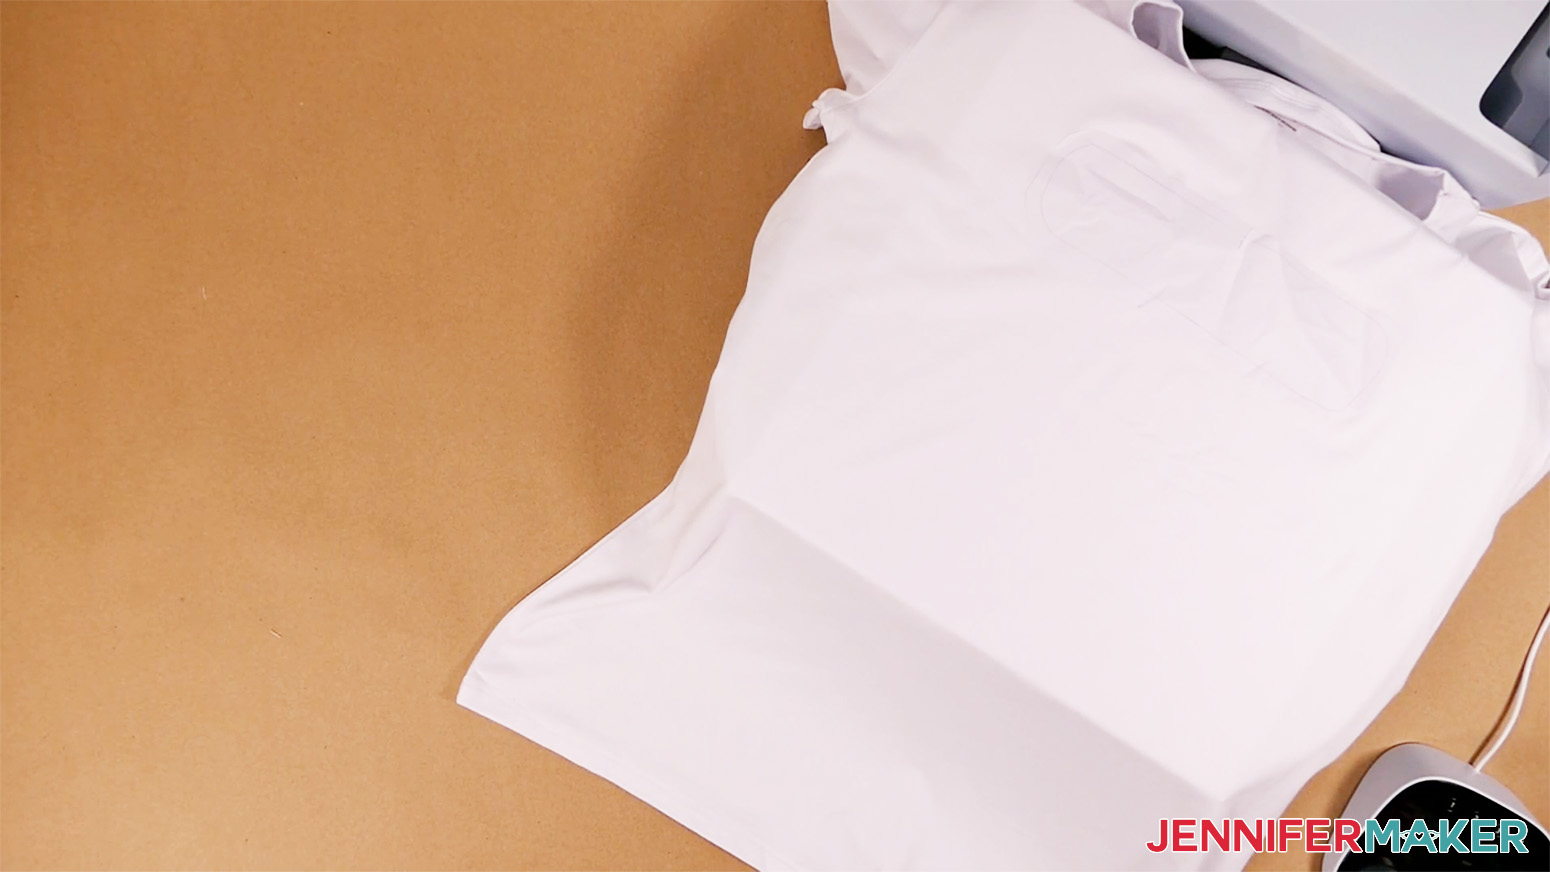
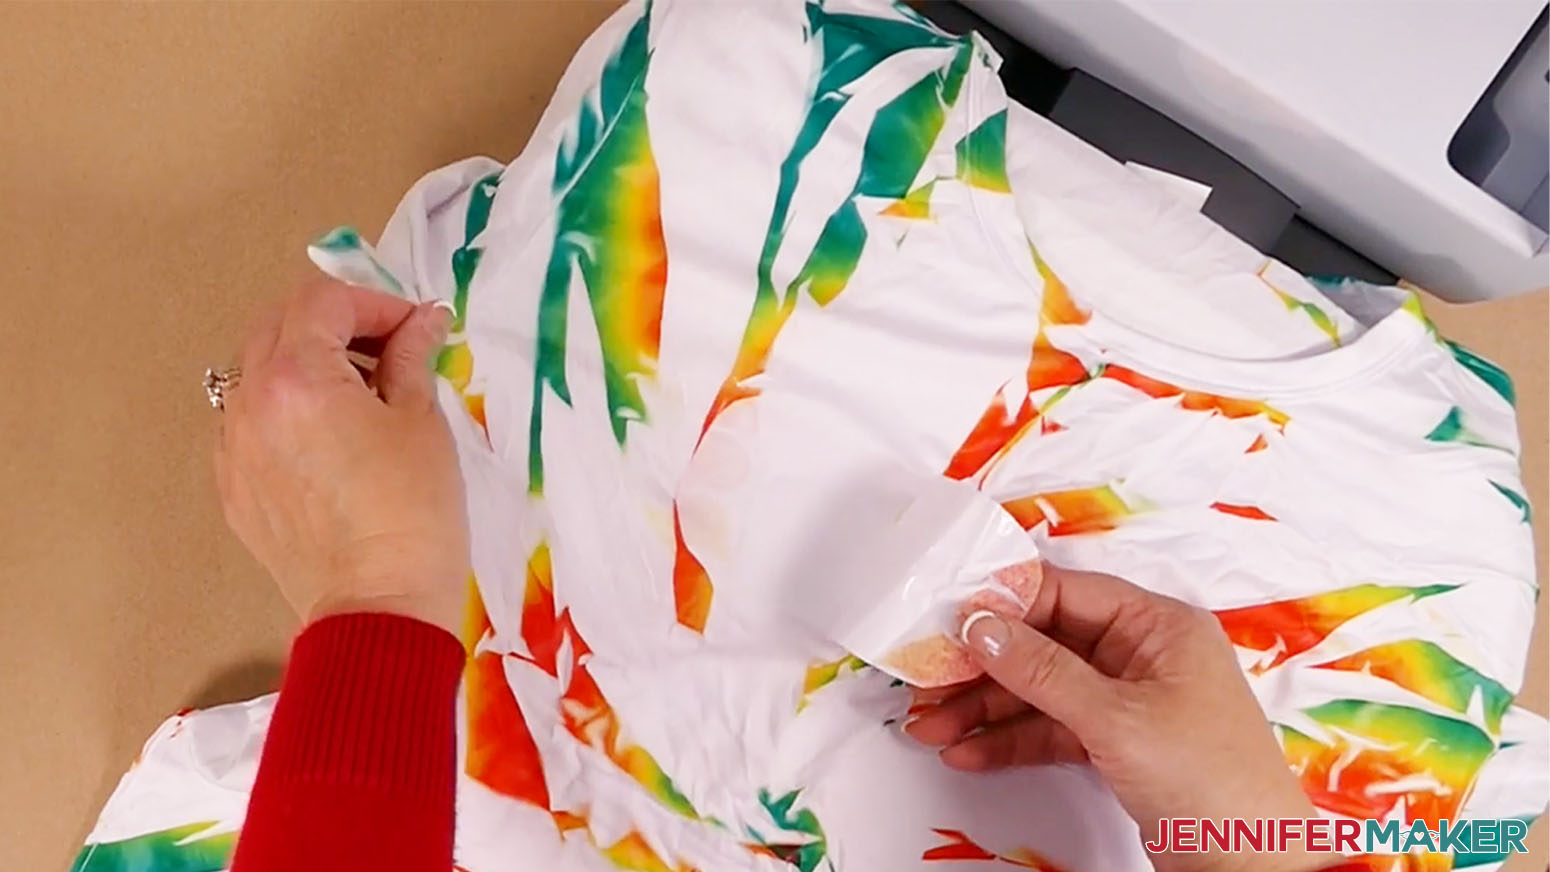
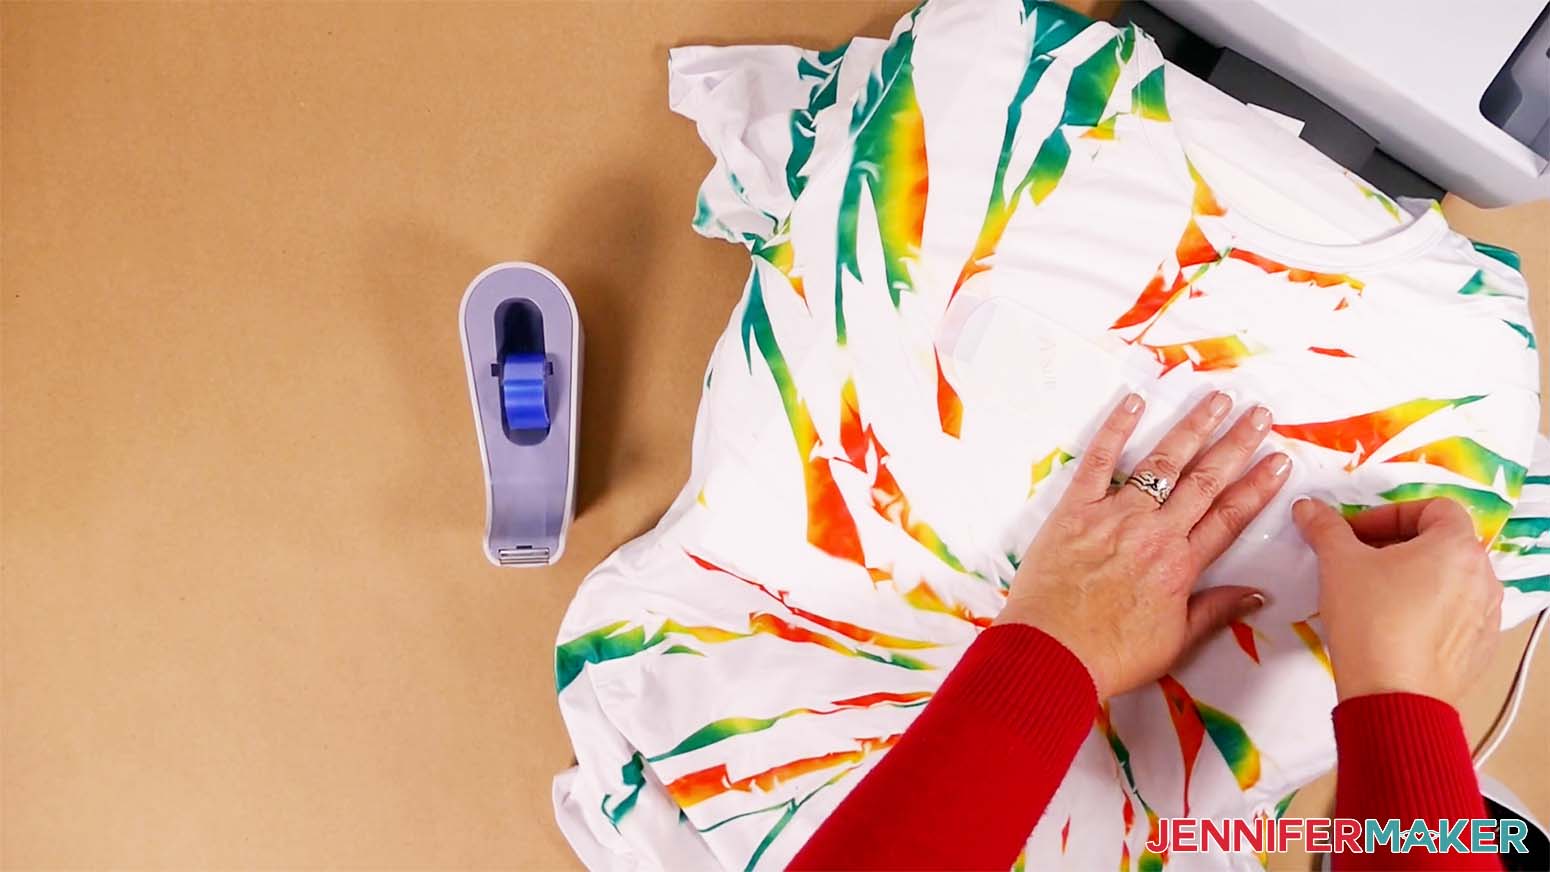
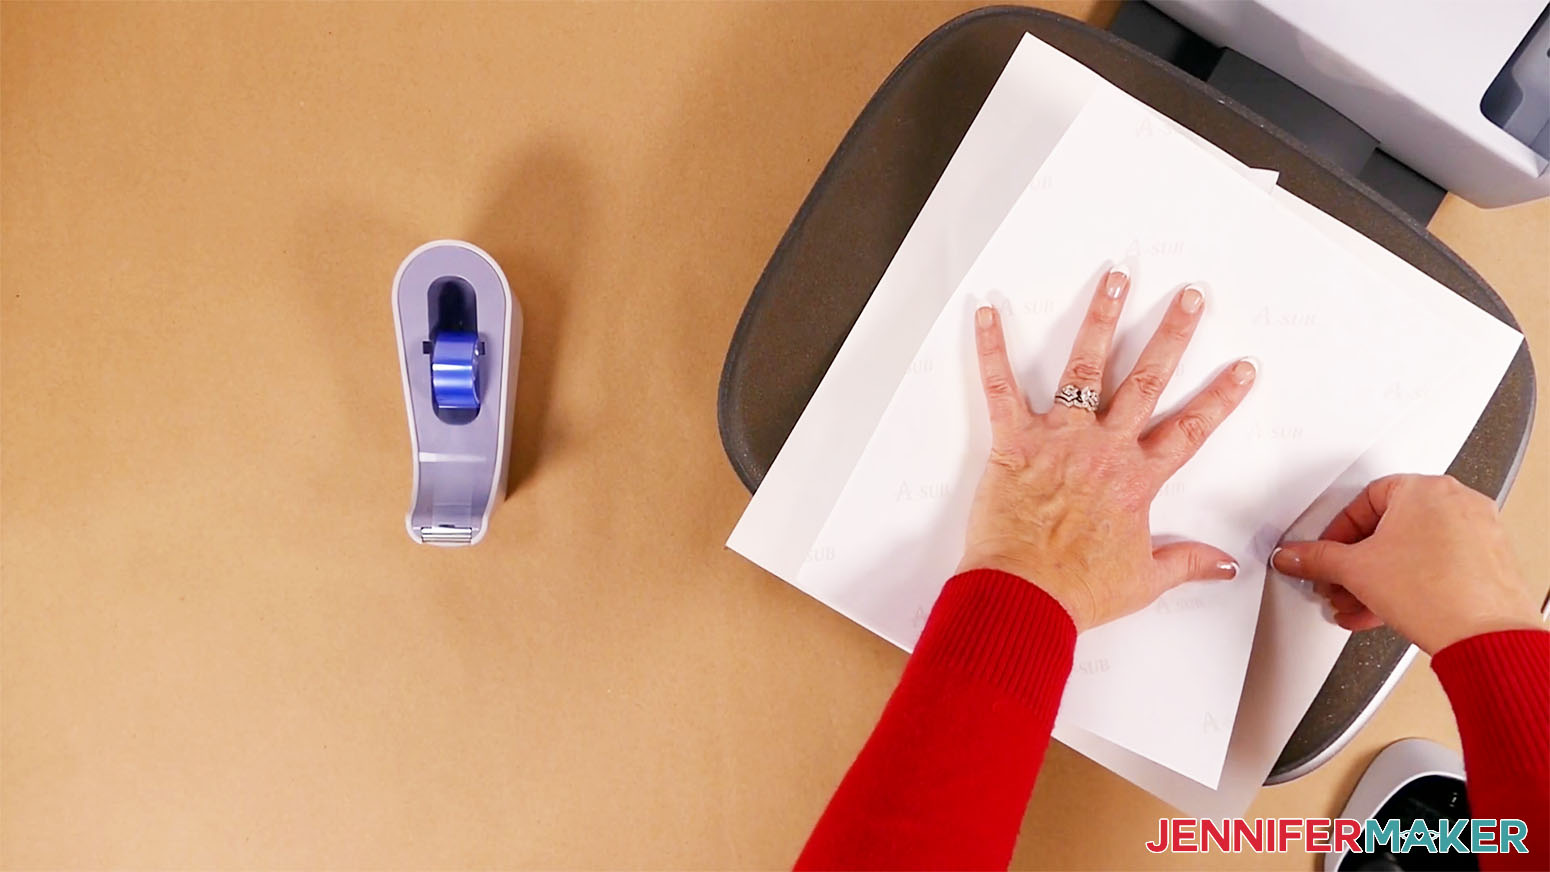
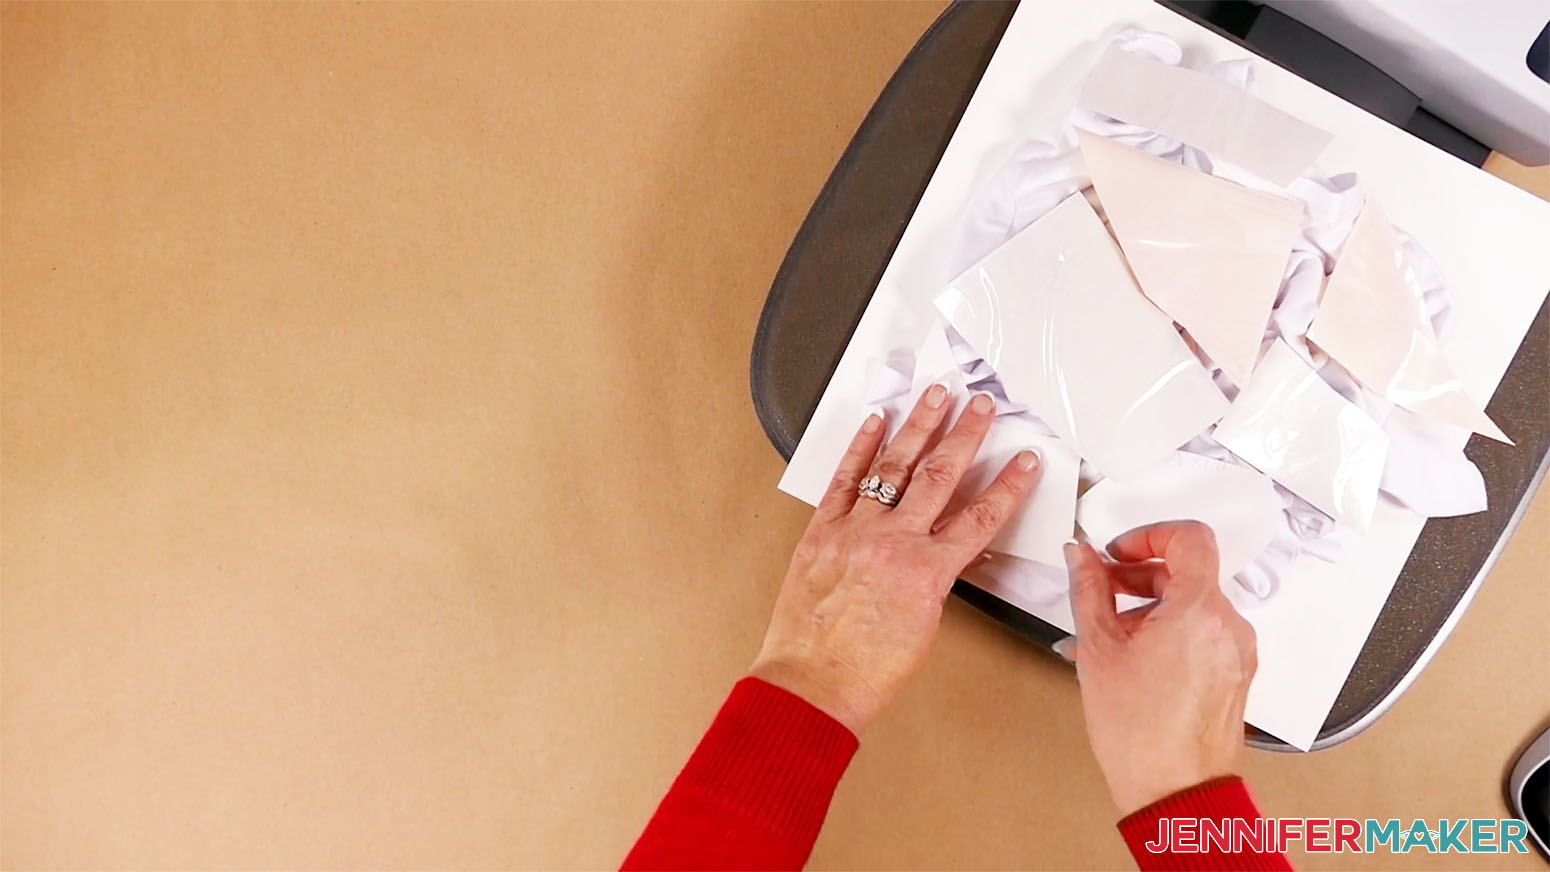
Since I'm combining a printed design with the tie dye background, I want to leave some white space for the image. Adhesive paper will act like a mask during the first round of sublimation. It won't block all of the ink, but it will be significantly lighter, which will let the additional design look more clear.
To make the mask the right size, trim your design close to its outline and place it face down on the adhesive's backing. Trace the design, then cut the sheet just a little larger than the outline.
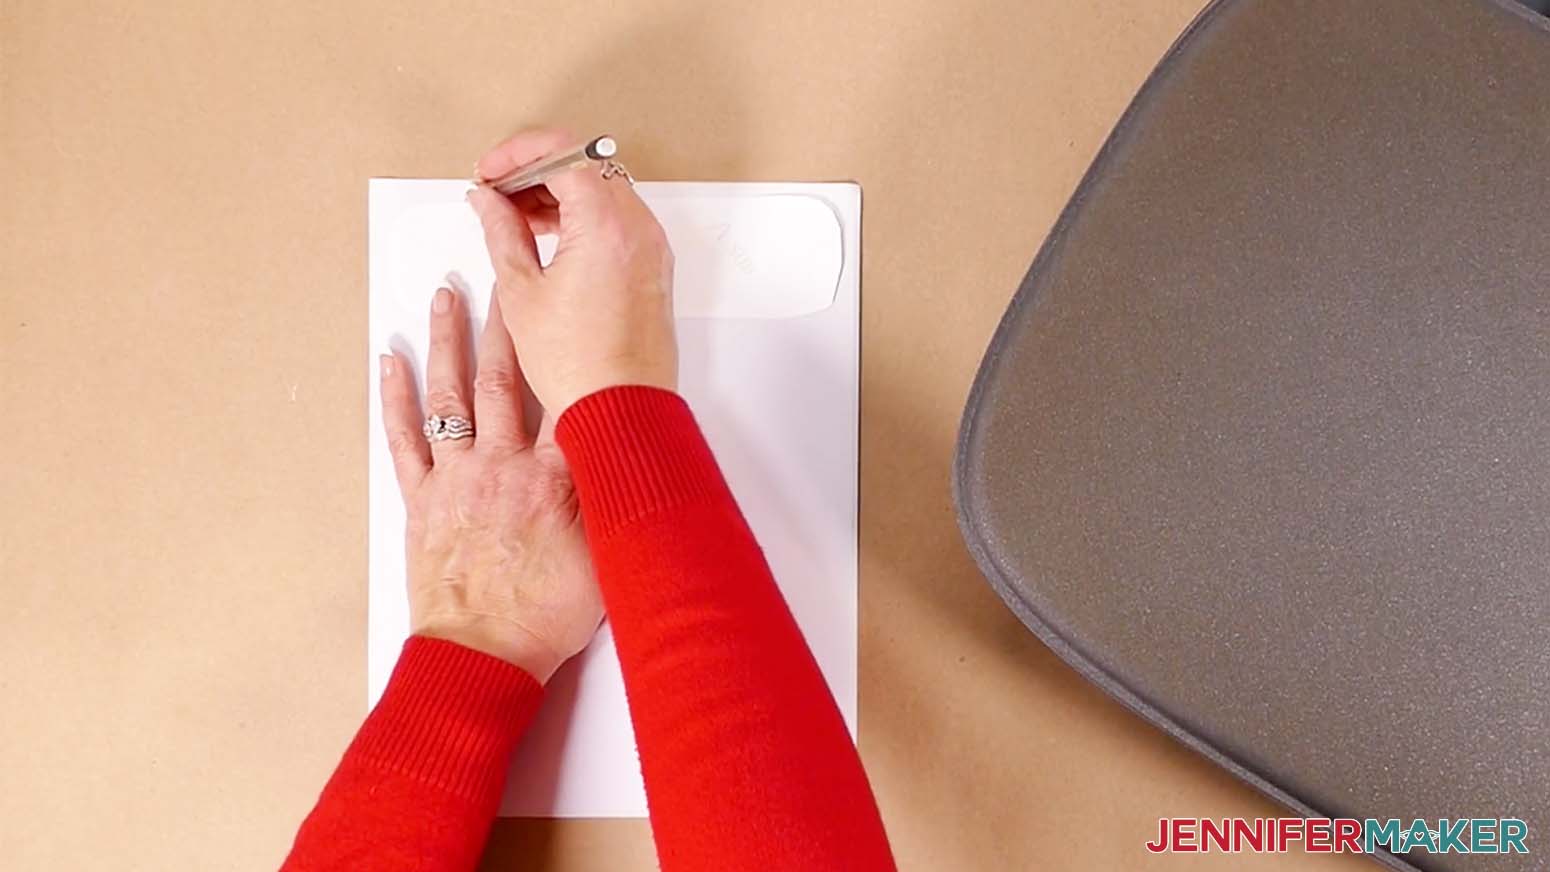
Using the t-shirt guide, find where you'd like to place the image.
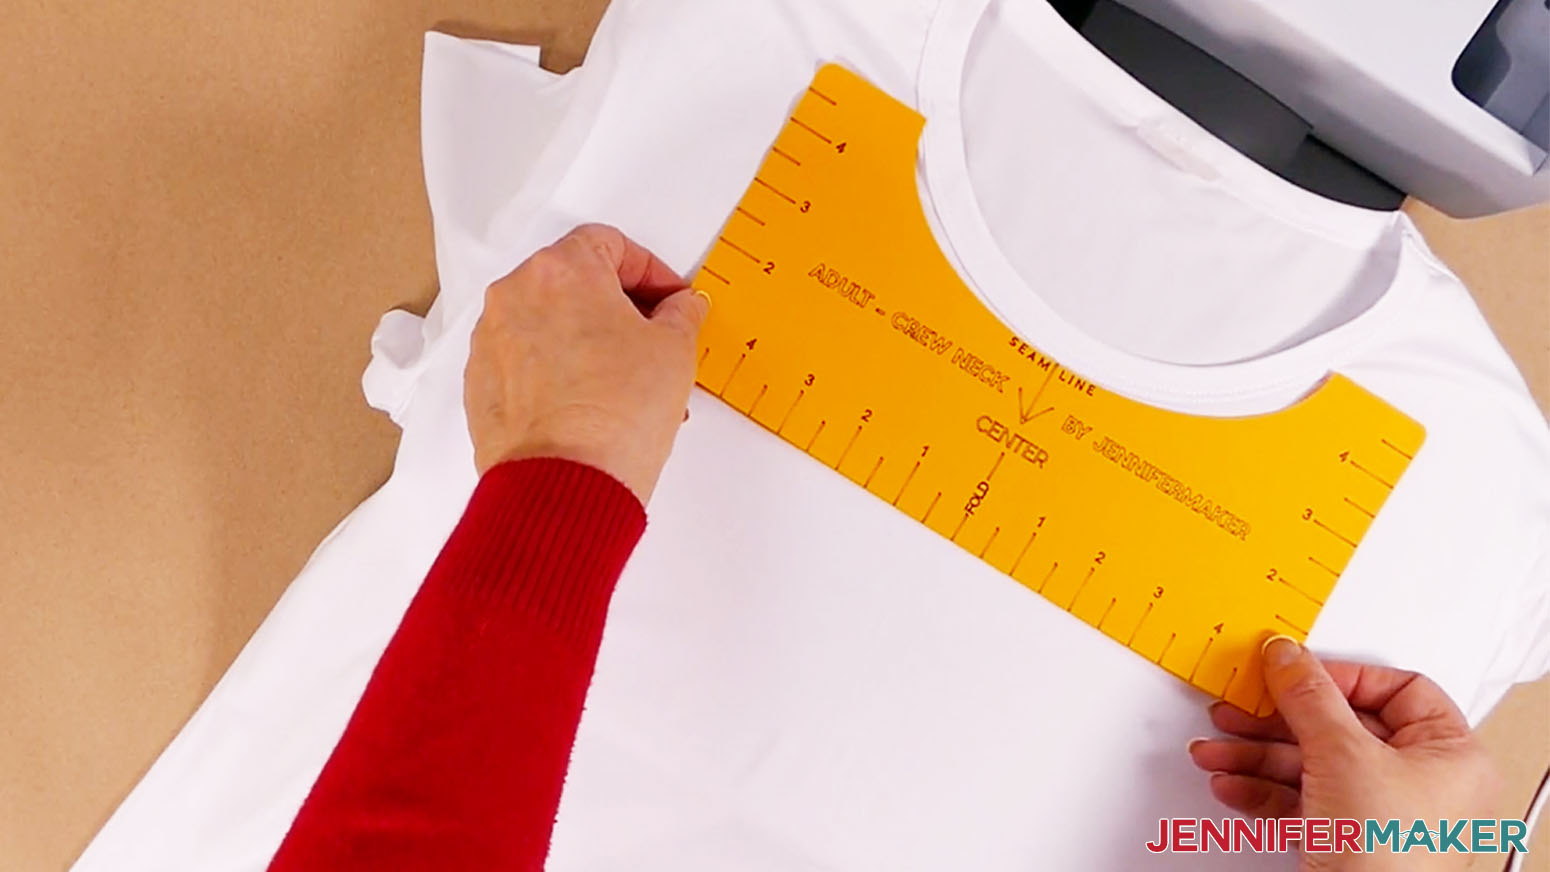
Peel the backing off and place it on the shirt. Press it down so it can fold with the fabric without coming undone.
STEP 3: FOLD AND SUBLIMATE YOUR SHIRT
I have a few ways to get a tie dye like effect.
CIRCULAR FOLD
I used two rounds of this fold to make a more intricate tie dye design, but you can use however many you want.
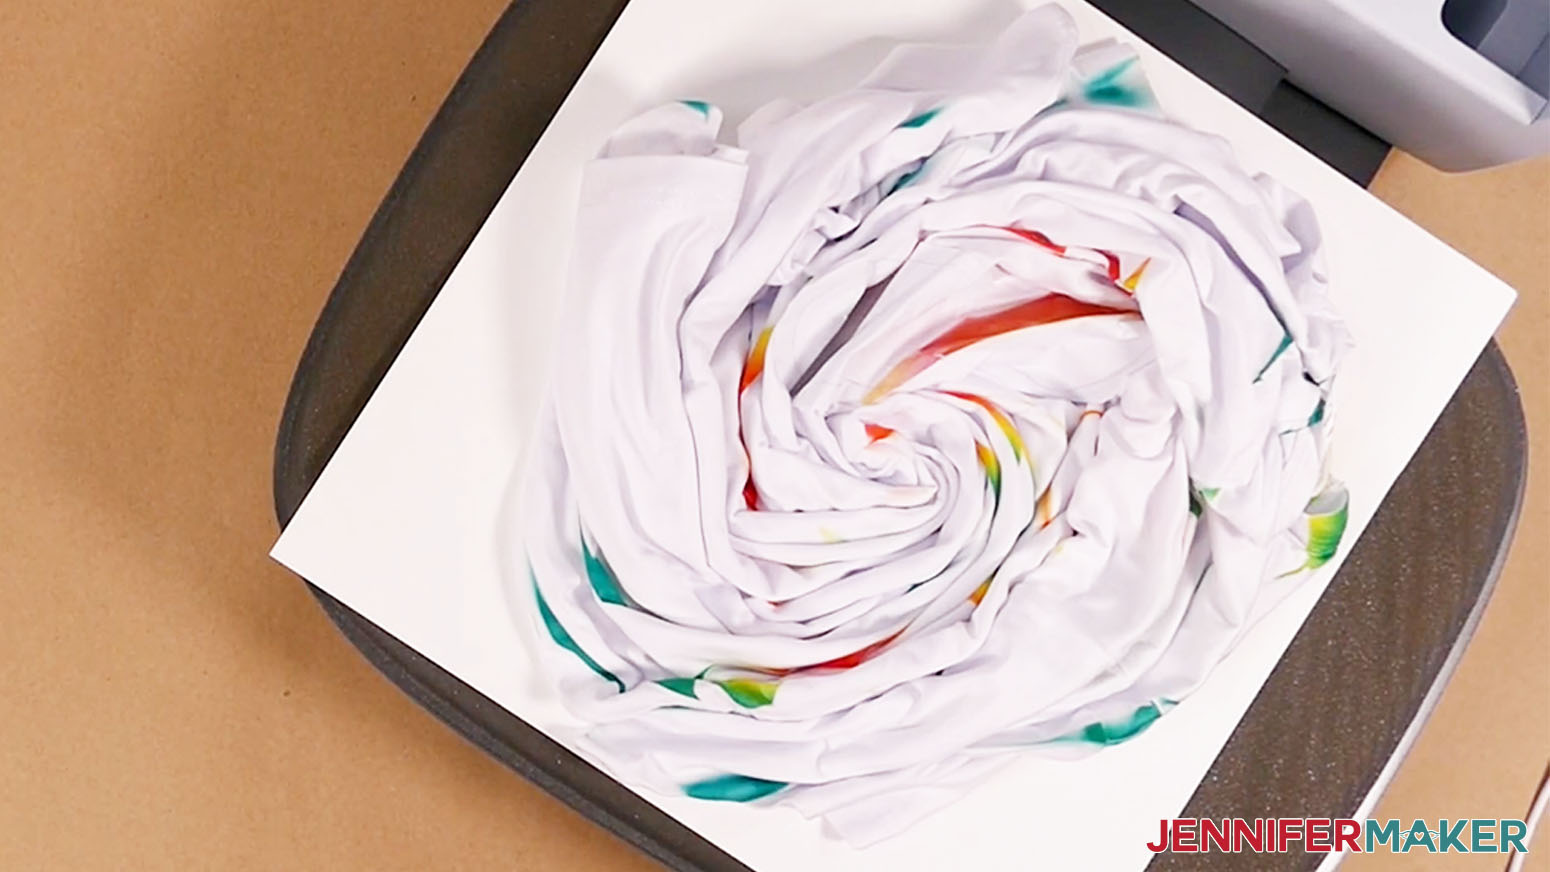
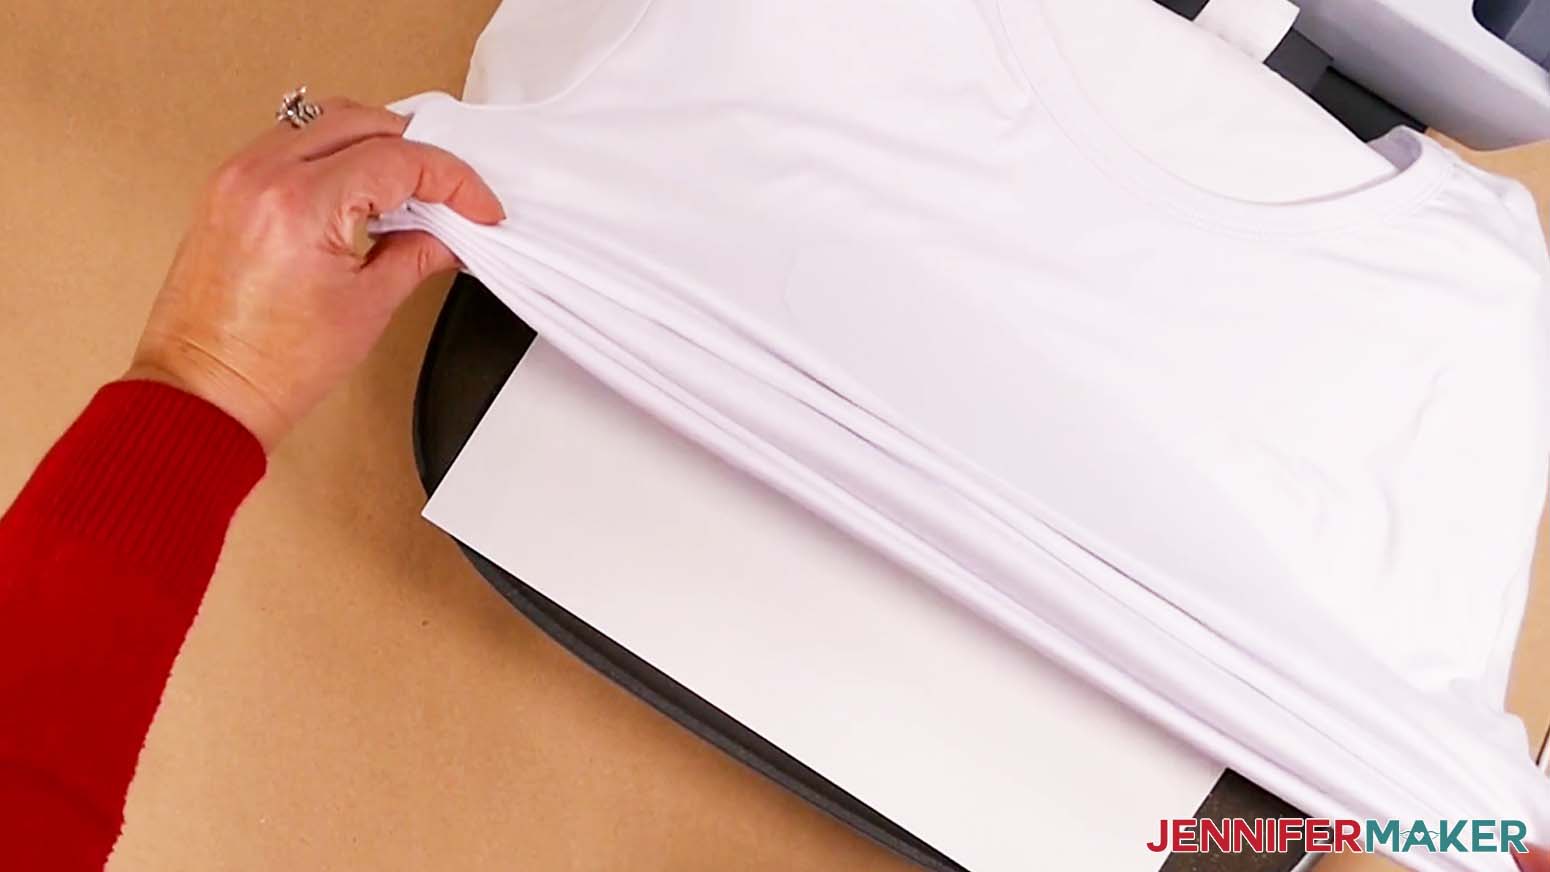
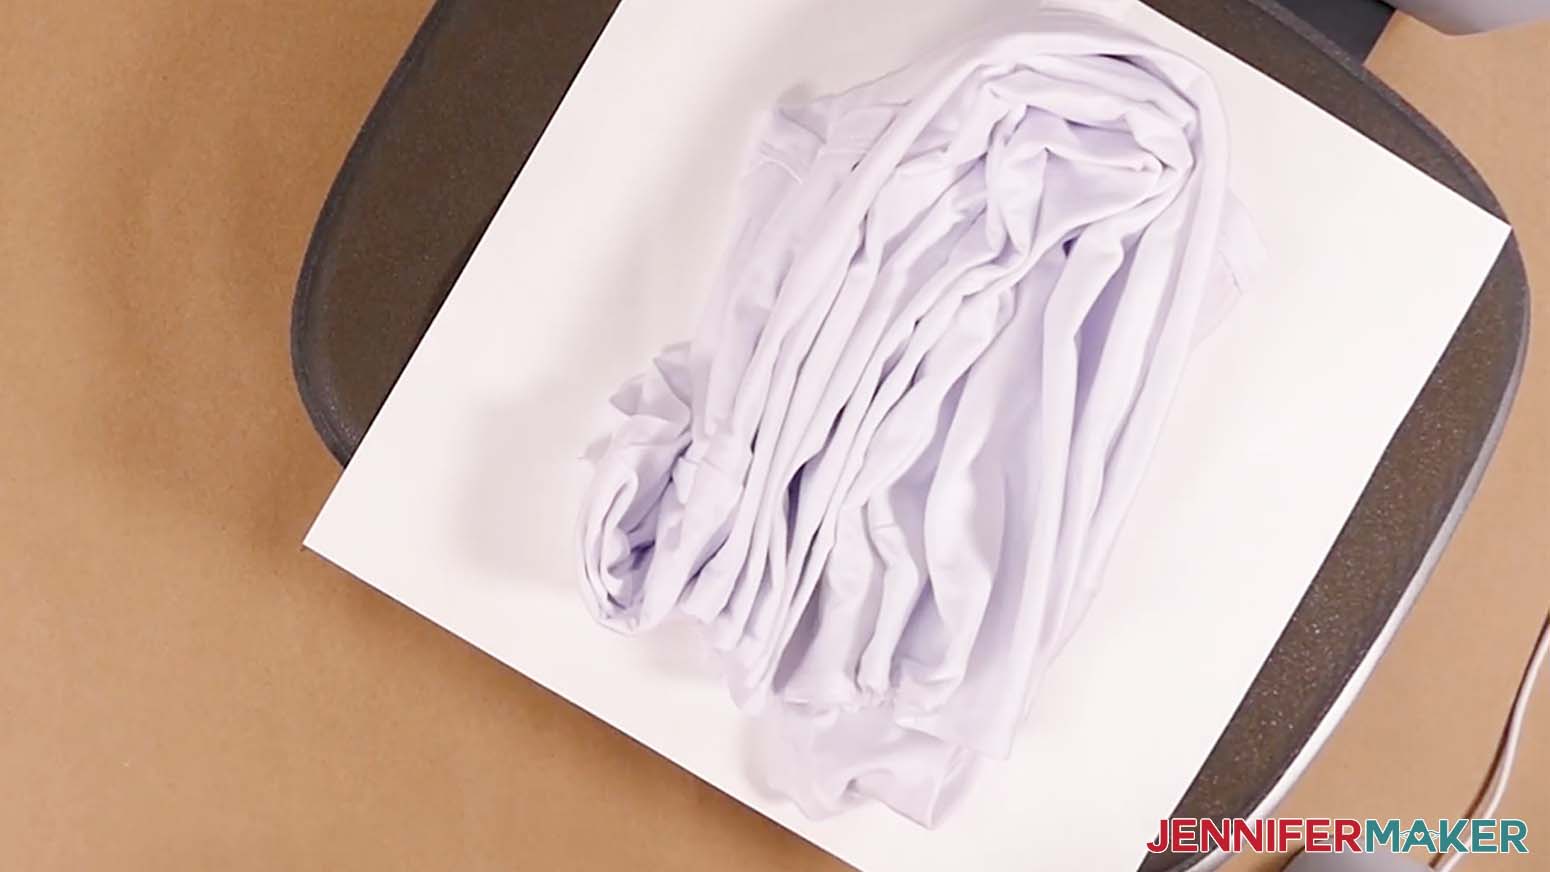
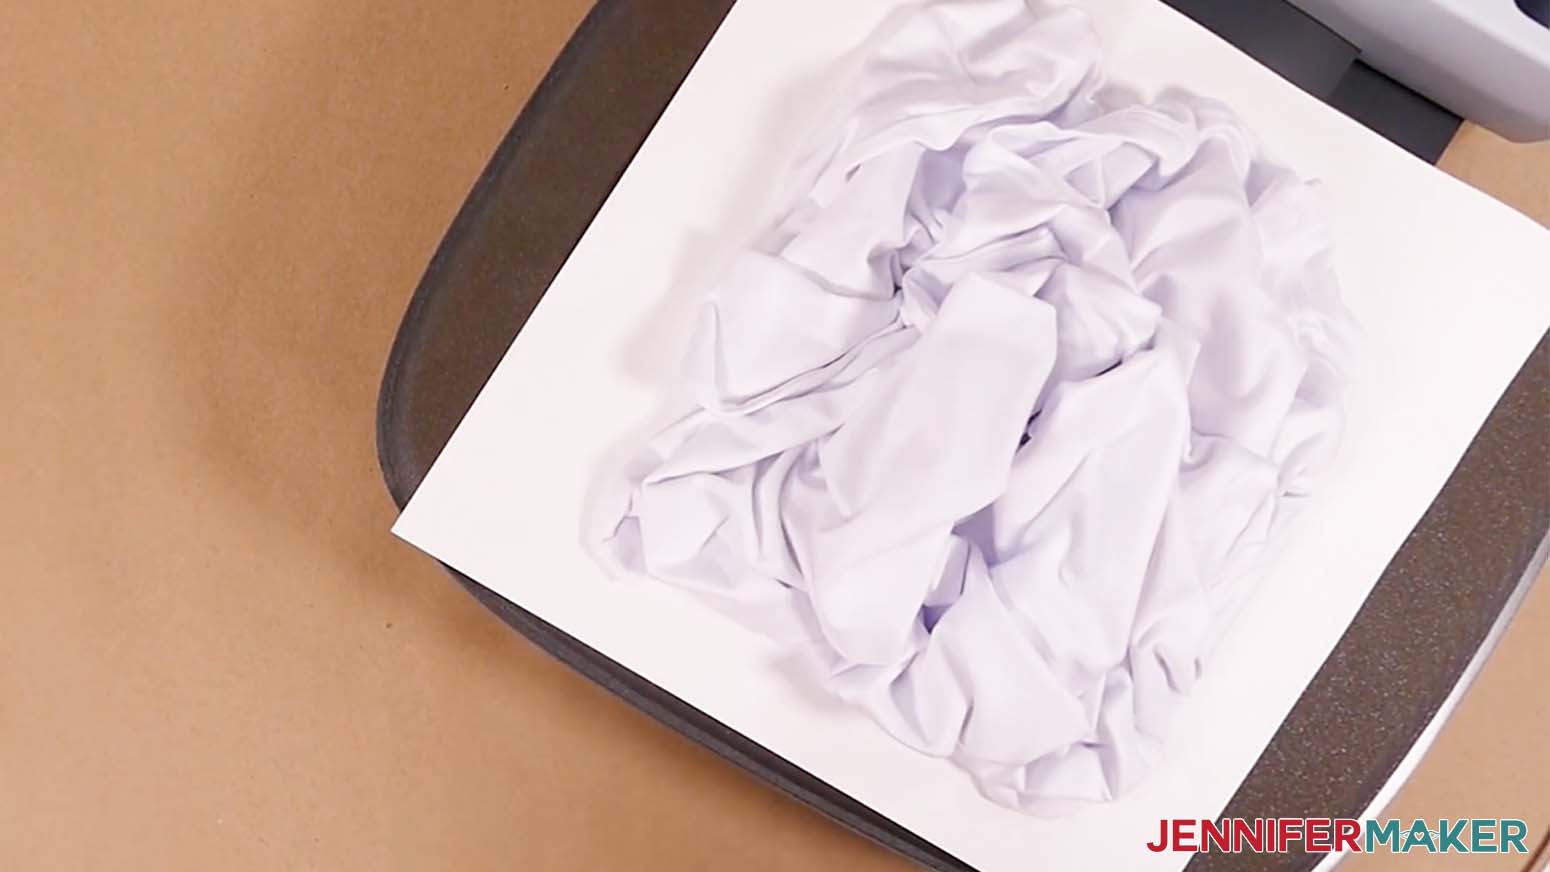
Place a clean piece of white cardstock on the pressing area. Then lay your t-shirt face up on the cardstock.
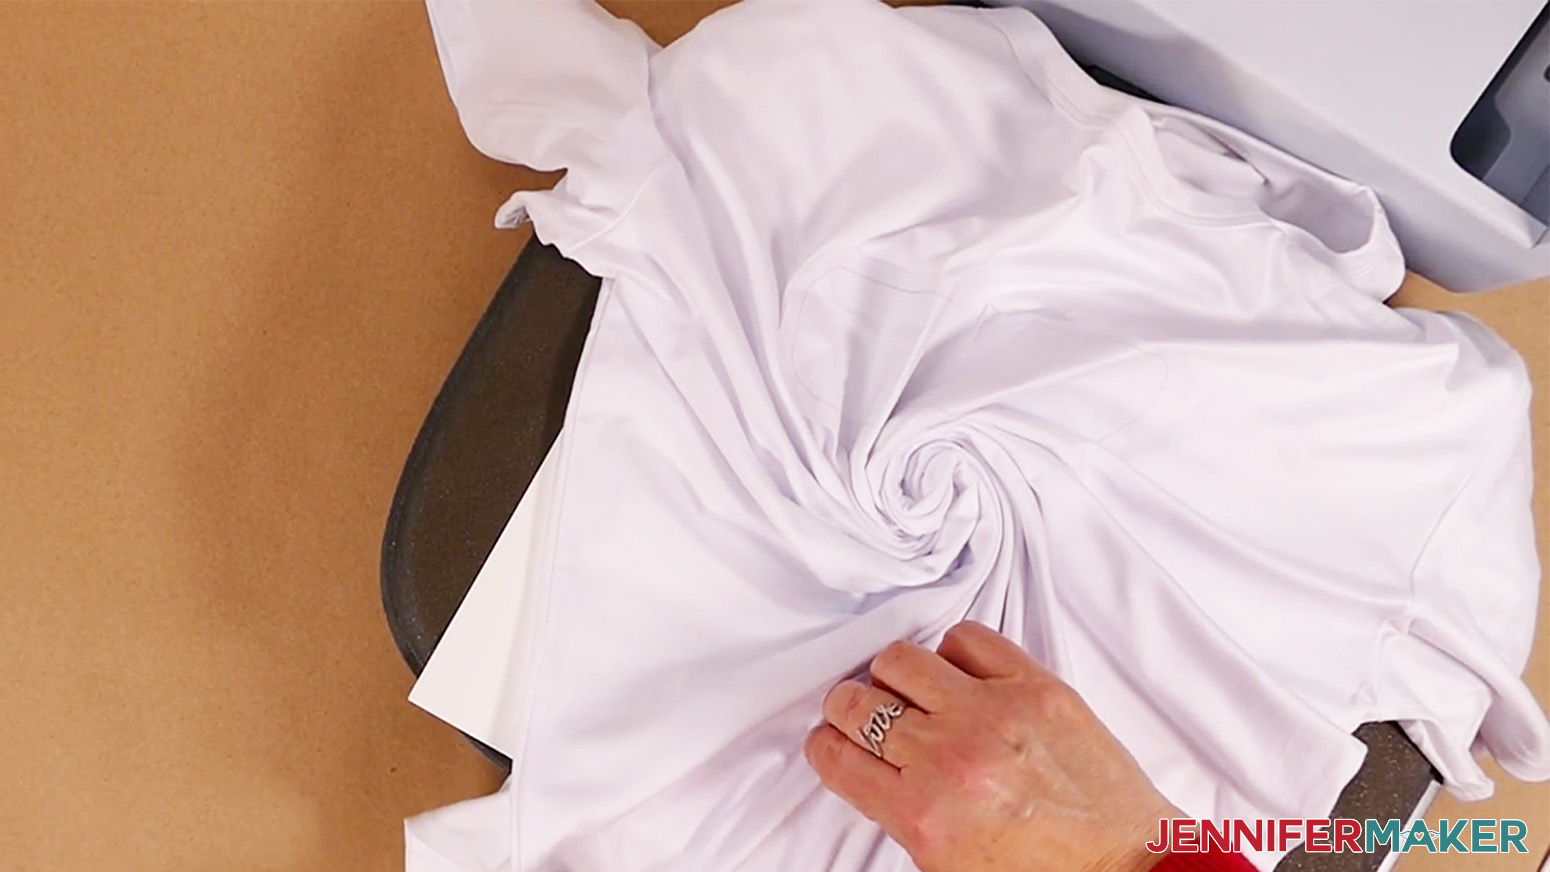
Pinch the center of the shirt, making sure you grab both layers. While still holding the shirt center, twist counterclockwise just a bit. You will start to see folds form!
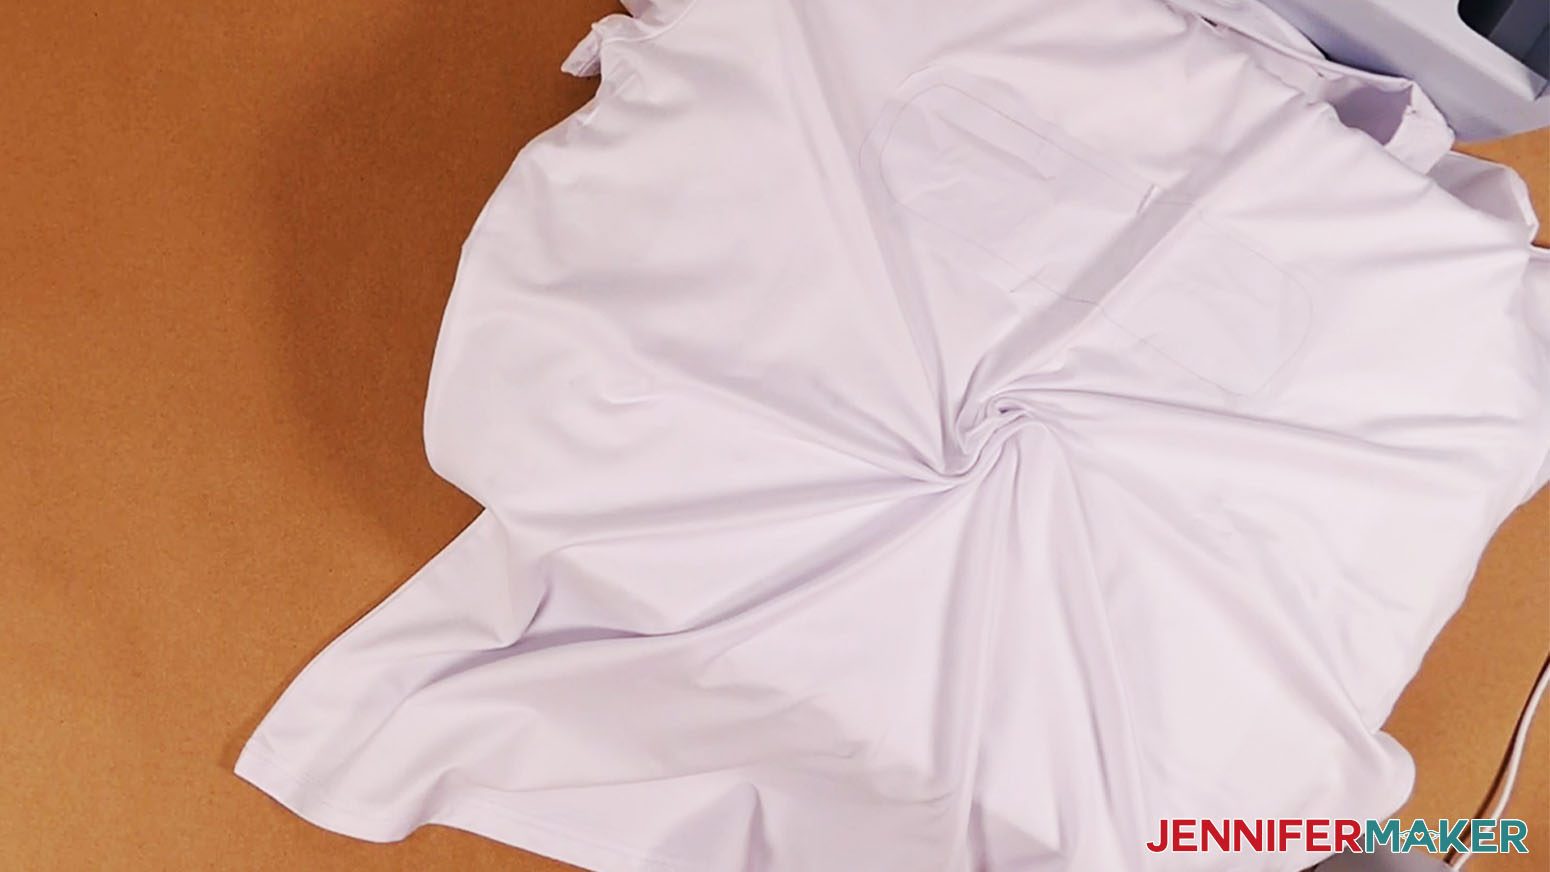
Here's the trick to getting a great print. Keep defining the formed folds by pinching them tight. The top white section is what you really want to dye to get a fun pattern, so making sure the folds that form are pretty consistent will help. Keep twisting and defining the folds.
If you're using the adhesive, you'll really need to pinch up the folds under it. That way, the design won't look totally different on each side of the design space.
As the center gets bigger, you will eventually be able to smooth the folds around the center circle that you have formed.
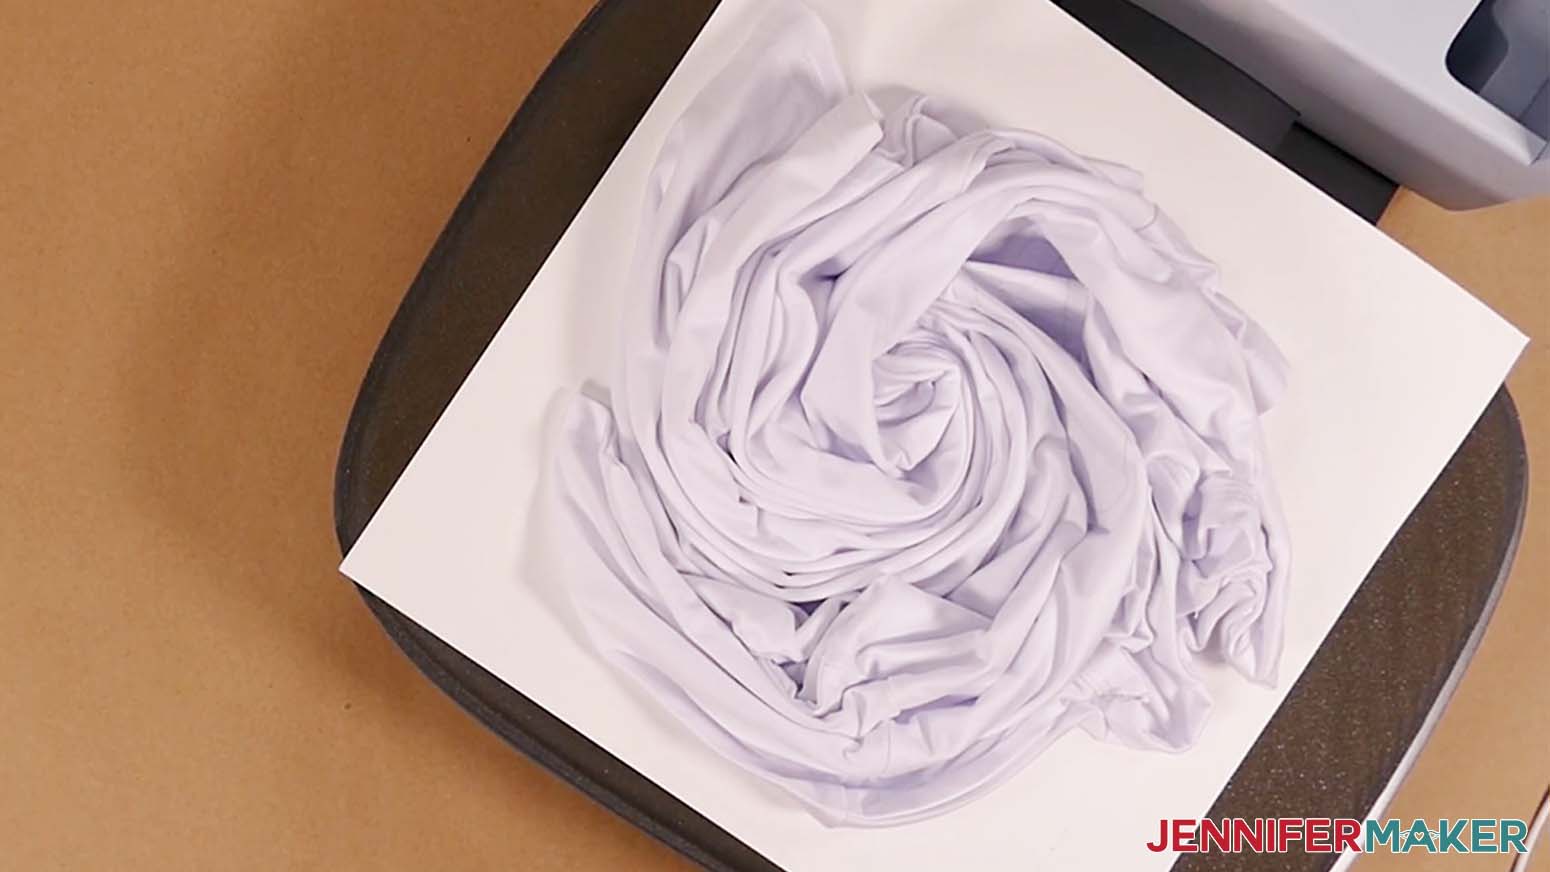
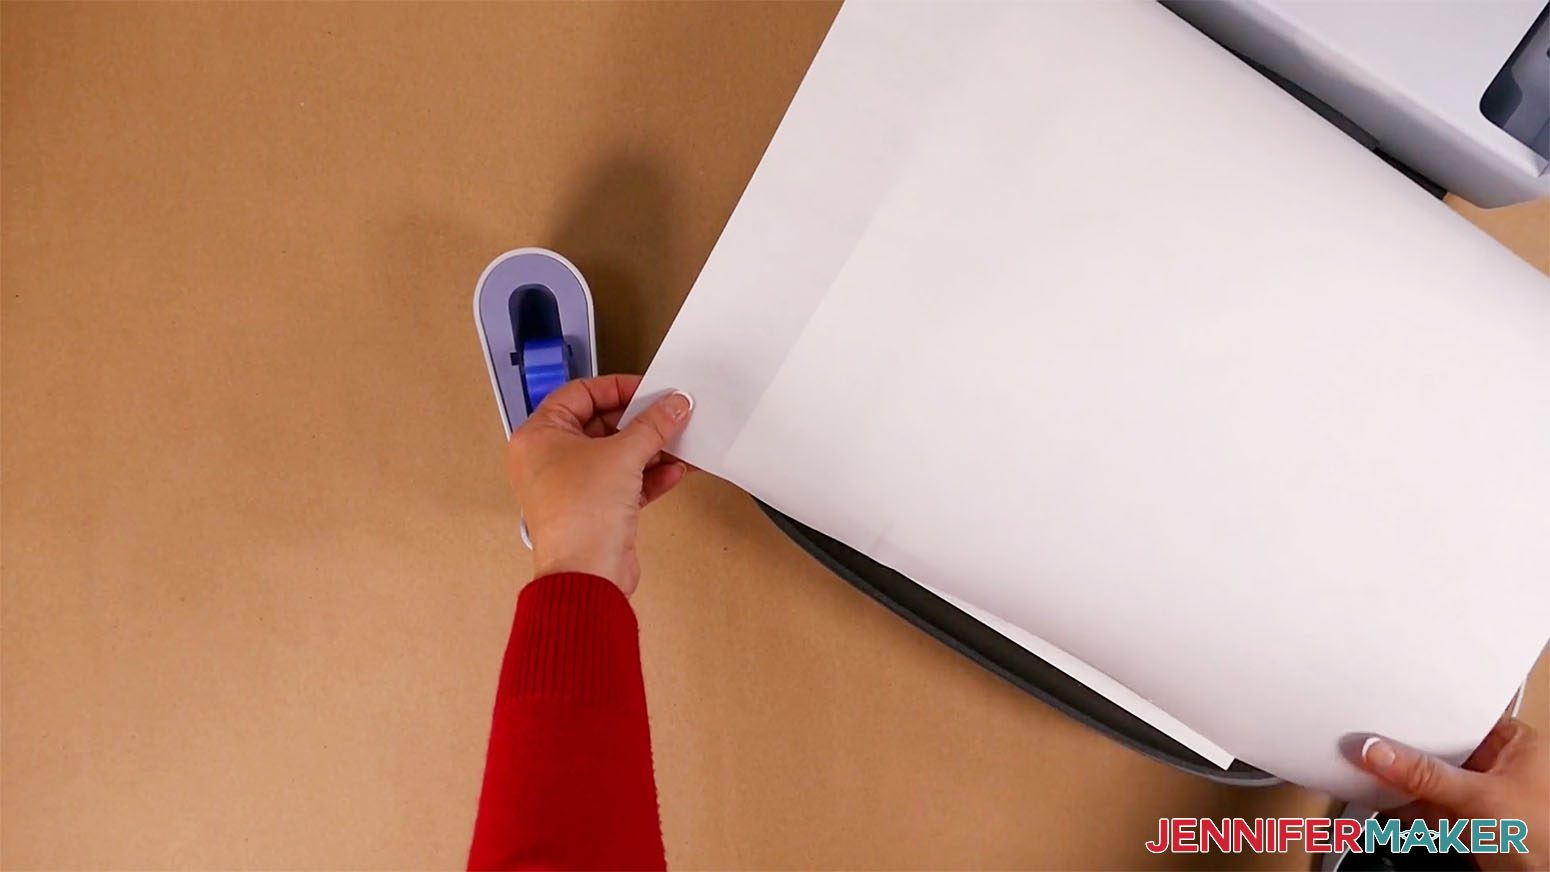
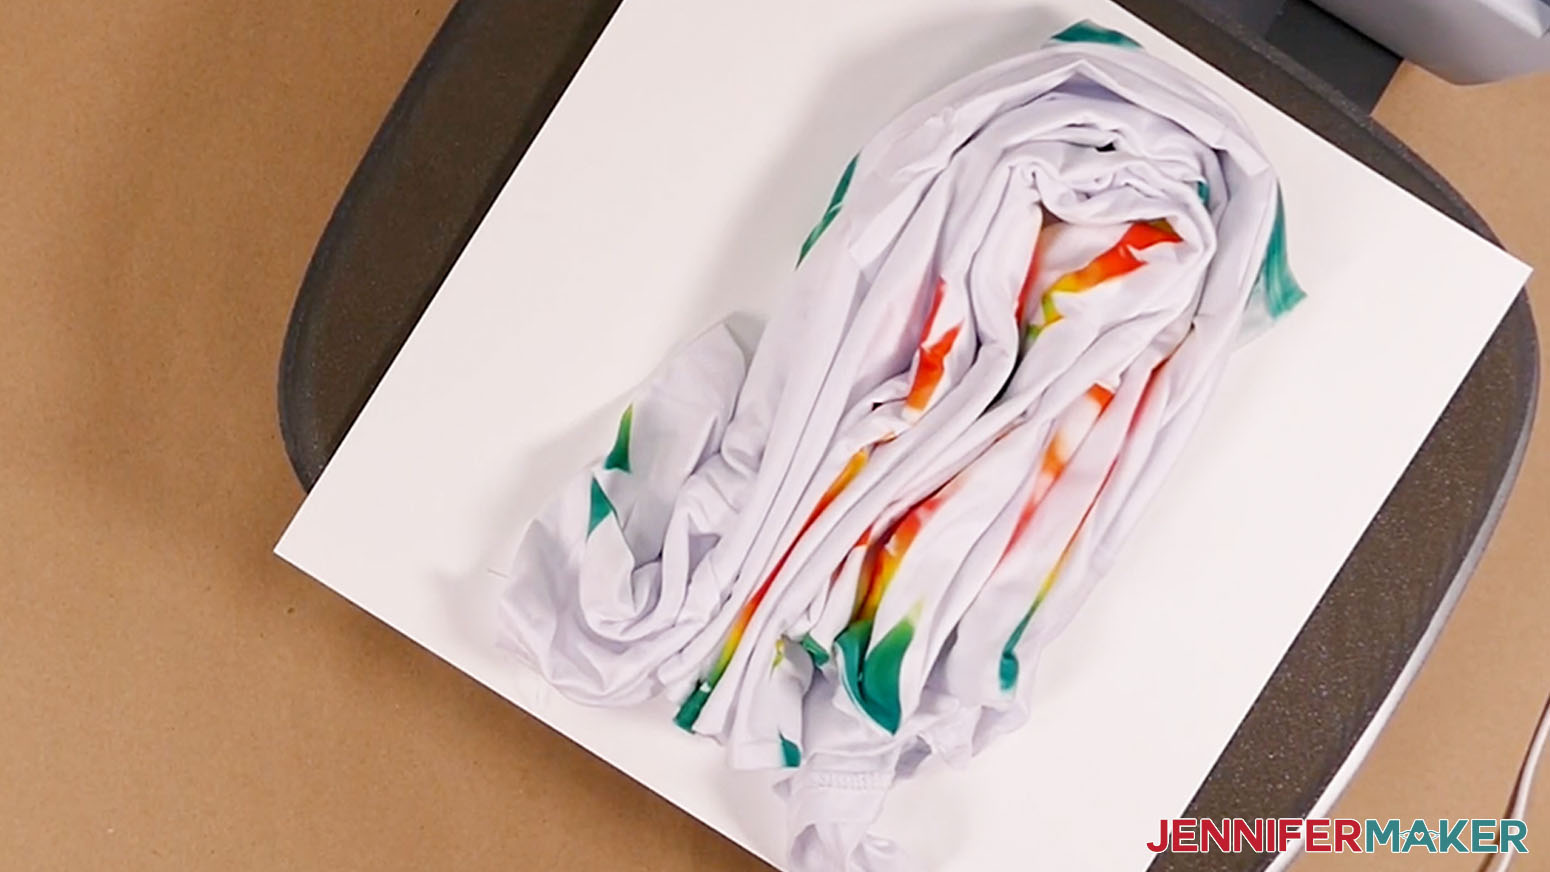
Once you are satisfied with your folds, place the sublimation print on top of the shirt. Make sure that the shirt is covered by the paper. The folded shirt is pretty thick and will squish down during pressing, but we want to keep it as still as possible to retain the twirled design and avoid ghosting. Taping the design paper to the cardstock instead of the fabric makes a little package to help contain the shirt!
Place a clean sheet of butcher paper on top, completely covering the project.
Press at 385° for 60 seconds.
When the time is up, you can remove the butcher paper. To prevent ghosting, let the print cool for a couple minutes to let the sublimation process complete. After it has cooled, remove the tape and paper.
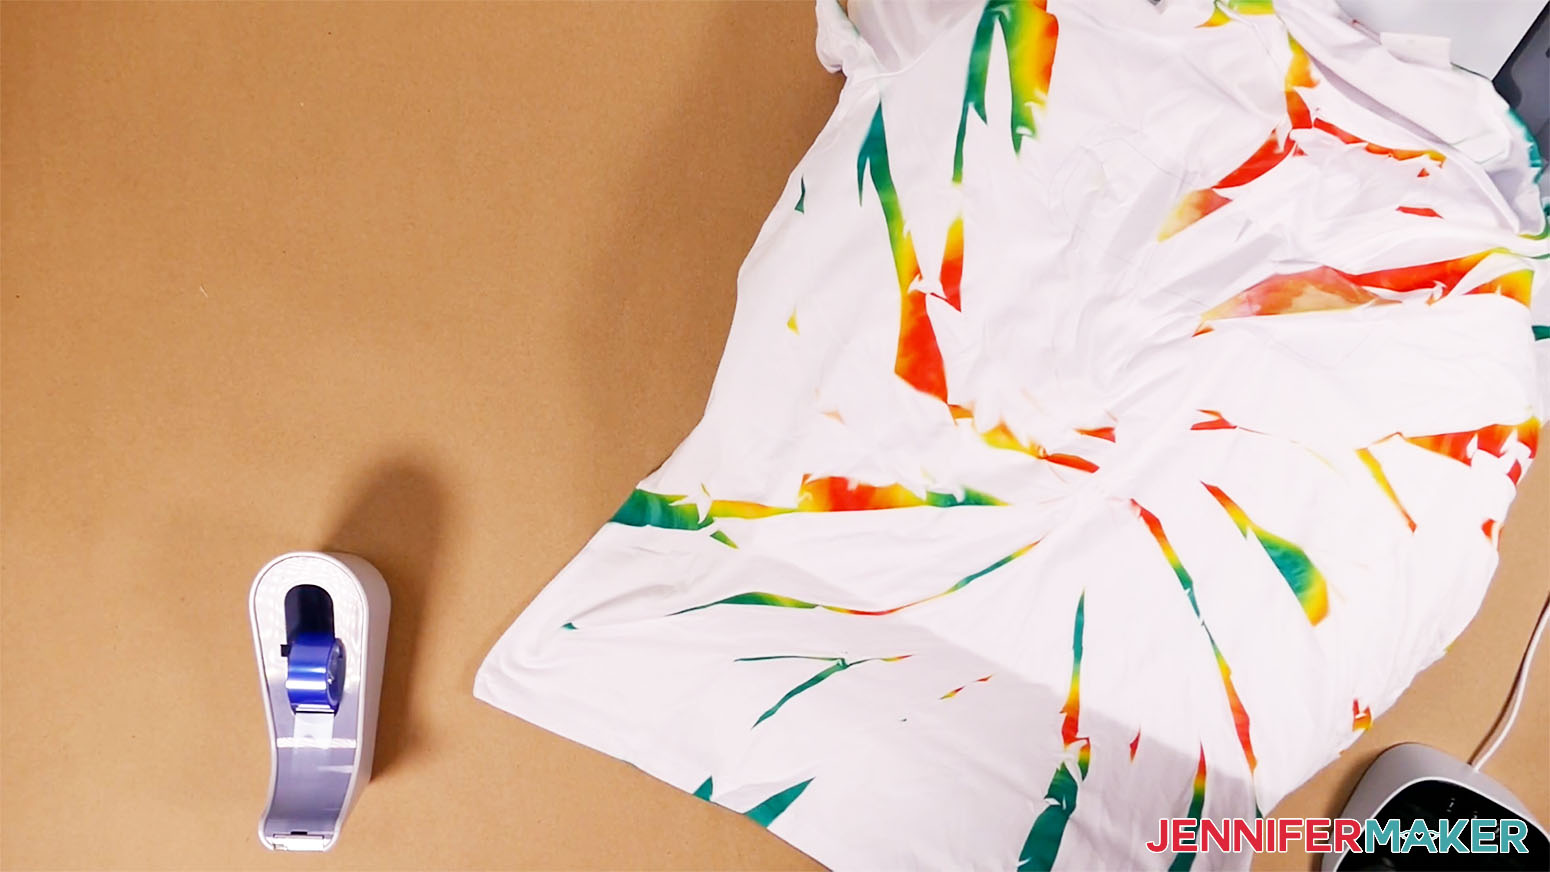
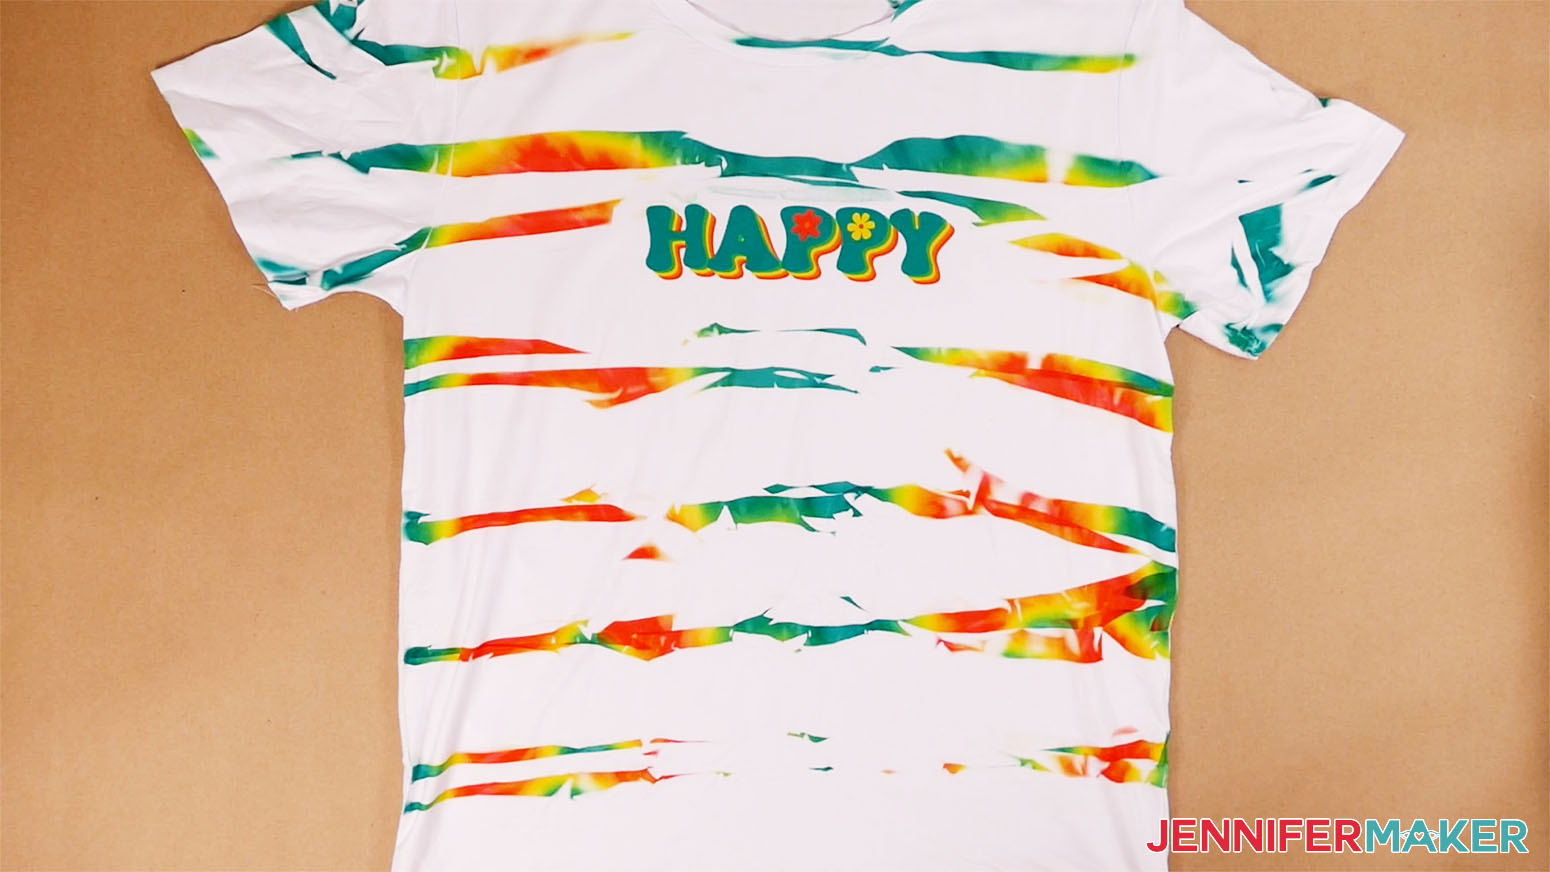
Open up your shirt. Looks good, but I want more color! Let's do another round.
Place a clean piece of cardstock on the pressing mat and put your shirt back on top. Make sure it's smoothed out so the folds will be more consistent.
We'll use the same twisting method but this time we are going to look for folds that don't have color. Try to tuck colored areas inward so that we get more color on the shirt.
Tape your next print on top in the same way. It can be the same print/pattern or something different. That's the fun part of this project all the different results you can get!
Put a clean piece of butcher paper on top and press again at 385° for 60 seconds.
When the time is up, you can remove the butcher paper. To prevent ghosting, let the print cool for a couple minutes to let the sublimation process complete. After it has cooled, remove the tape, paper, and adhesive mask.
To add the final design, place your t-shirt on the pressing mat on top of clean cardstock. Put a clean sheet of cardstock in between the front and back layers where the design will go to protect from ghosting.
Tape the image face down to the shirt and cover the entire shirt in the pressing area with a clean sheet of butcher paper. That's important to keep the heating element clean since there's lots of dye on the fabric.
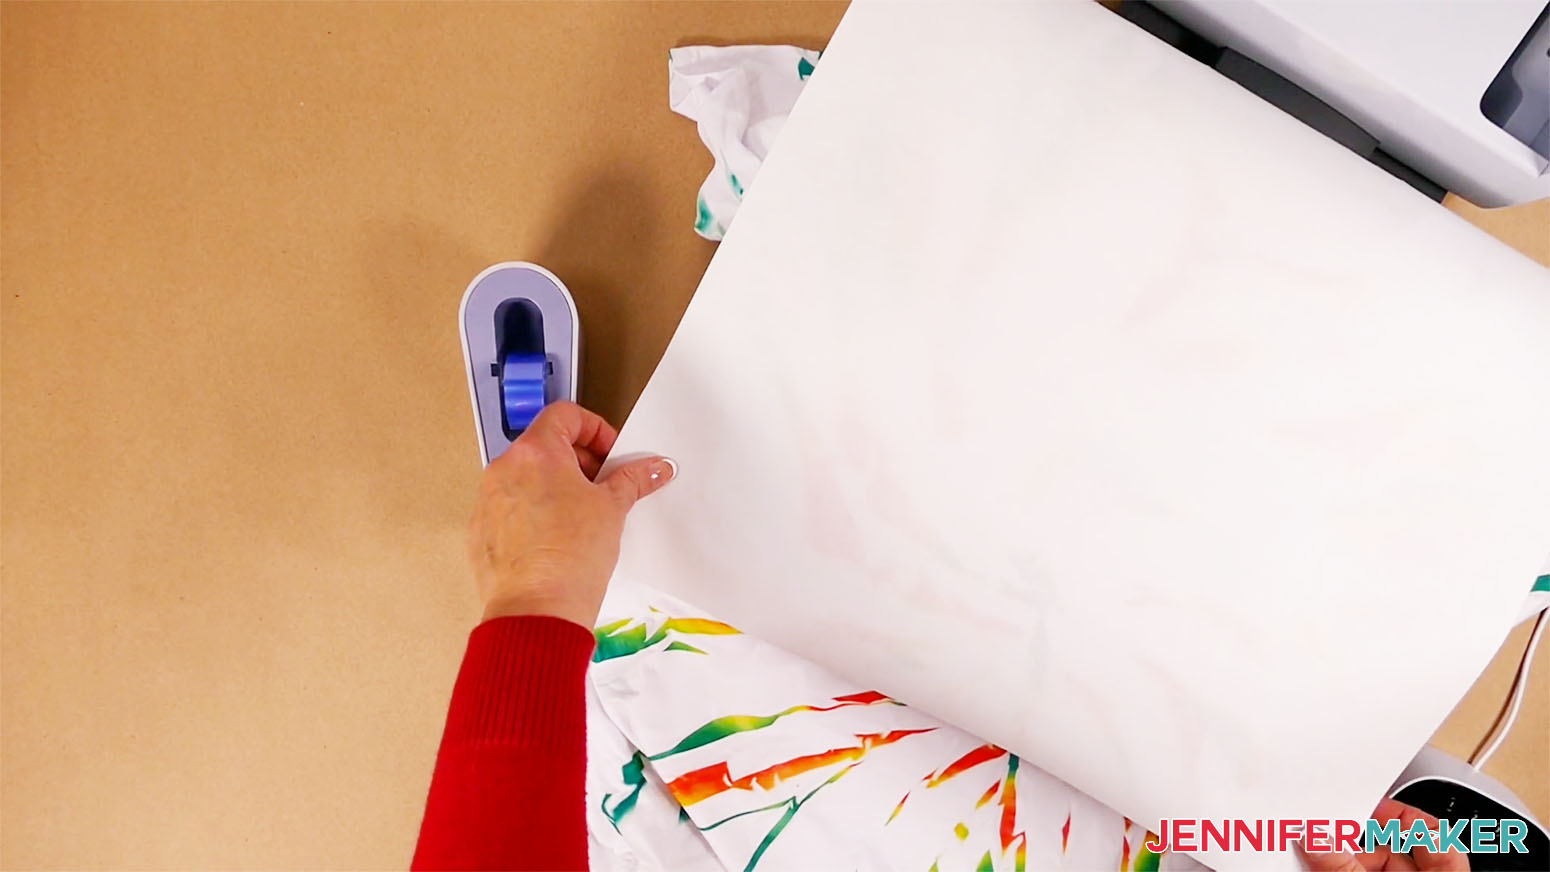
Press at 385° for 60 seconds.
NOTE: You can also do the back of the shirt if you choose. I would recommend doing both sides before placing the image on the front.
ACCORDION FOLD
Put a clean piece of cardstock on the pressing mat and then place your shirt on top of that.
Starting at the bottom of the shirt and working upward, make accordion folds horizontally.
When you have folded the length of the shirt, gently fold it in half at the center to make a U shape.
Place your print on top and start taping and tuck the shirt under the print.
Place a clean sheet of butcher paper on top.
Press 385° for 60 seconds.
If you choose to do another pressing, accordion fold the shirt again but this time make sure the top of the folds have more blank white space. When you are satisfied with the folding, gently make another U shape. Place your print on top of the shirt and secure with heat resistant tape. Cover with butcher paper and press.
Repeat the steps until you get the result that you like.
If you placed any adhesive on the shirt, take it off when it has cooled down. Put cardstock in between the front and back layers of the shirt. Put a clean piece of butcher paper making sure it covers the entire shirt - we want to protect the heating element. Press your design.
SCRUNCHING
This method is the easiest out of the three.
If you choose to use an image, put the adhesive sticker sheet in place using the t-shirt ruler.
Put clean cardstock on the heat press.
Put your shirt on top of the card stock. Now all you need to do is scrunch the shirt towards the center so that it is small enough to fit under the print.
Place the print on top of the shirt and secure with heat resistant tape.
Cover with butcher tape and press at 385° for 60 seconds.
You can do multiple pressings with this method, just repeat scrunching the shirt, making sure that you show more blank white space each time you refold.
When you are satisfied with the result, cold peel the adhesive. Place cardstock between the front and back of the shirt and secure your image with heat resistant tape. Cover the entire pressing area with butcher paper and press.
STEP 4: VARIATIONS
If you don't have a sublimation printer, this is a great project for Infusible Ink sheets!
You can fold up your shirt using the methods above, then cut an Infusible Ink transfer sheet large enough to cover the project or use the entire sheet. Place the Infusible Ink sheet face down on top of your folded shirt, and secure with heat resistant tape. Cover the shirt with butcher paper and press.
You can do multiple pressings with Infusible Ink sheets as well.

Or, do you hoard your small scraps of Infusible Ink sheets or keep old sublimation prints? This project is a great way to use up some of those scraps. Just cut or tear pieces and fit them on your shirt like puzzle pieces. Since this project is more free form, I did not tape the individual scraps to my shirt, but you can feel free to do this if you'd like.
Cover the shirt with butcher paper and press. You can do as many pressings as you like, just keep refolding your shirt so that no blank space is showing. I found that doing the scrunch fold method works best with the scraps.
STEP 5: SHOW IT OFF
I washed my shirts in cold water with regular detergent, no bleach and dried with medium heat.
Notes
Typefaces used: BFC Hippie Chick and Brenson Charlotte
Free Alternatives: Abstract Groovy and Simplisicky
Answers to Your Questions About How to Make a Cool Tie Dye Shirt
Q: How do you make cool tie-dye shirts?
A: There are many ways to create tie-dye projects, but I prefer to use sublimation designs or Infusible Ink transfer sheets.
Q: What are 3 methods of tie-dye?
A: People all over the world have been dyeing intricate patterns onto cloth for ages. Many different tie dye techniques are special cultural traditions. A few methods of contemporary tie-dye a sublimation tie dye, using ice cubes to randomize dye, or adding liquid dye to intricately tied fabric.
Q: How do you make a vibrant tie-dye shirt?
A: To make a sublimation tie dye shirt brighter, use a new, white item that is 100% polyester. Cotton shirts don’t accept the sublimation dye well at all.
Q: Is it better to tie-dye dry or wet?
A: Whether you use printed sublimation designs or Infusible Ink transfer sheets, make sure the entire shirt is dry for the best results.
Q: Do you soak tie-dye shirts in cold or hot water?
A: Making a sublimation tie dye shirt doesn’t require soaking in cold water, hot water, or warm water!
Q: How long should tie-dye sit before rinsing?
A: I let my sublimation tie dye shirt sit for at least 24 hours before putting it in the washing machine.
Q: Which tie-dye method is best?
A: Now, I really prefer making a sublimation tie die shirt. You can get beautiful results from a tie dye kit, but I don’t want to deal with the plastic bag, squeeze bottles, dye powder, plastic gloves, water, vinegar, and all the other items they often require. Using heat to transfer a custom design is so much fun, to me!
Q: How do you make a sublimation tie-dye shirt?
A: Follow my tutorial for step-by-step instructions, but basically you print a sublimation design, use heat to transfer it to a folded or scrunched shirt, then reveal the sublimation tie-dye t-shirt! If you’re trying the method for the first time, you can experiment on old clothes to see how different folds will create unique tie dye patterns.
Get my free download of the Sublimation Tie Dye Shirt Printables and Illustrated Design files here:
(If you do not see the signup form above, click here.)
If you make any sublimation tie dye projects, I’d love to see them! Please share your t-shirts in my Facebook group where you’ll find hundreds of thousands of crafters like you, sharing their tips, projects, and inspiration.
Love,

Want to remember this? Save this How to Make a Cool Tie Dye Shirt Tutorial to your favorite Pinterest Board!