

See how the Cricut Mug Press compares to a traditional mug heat presses and other methods of sublimating Infusible Ink onto your coffee mugs to find out the best mug heat press for your needs!
The Cricut Mug Press is just out and the number one question I’ve heard so far is this “How does the Cricut Mug Press compare to a traditional mug press and other methods of sublimating ink? What is the best mug heat press, bang for buck and easiest to use?”
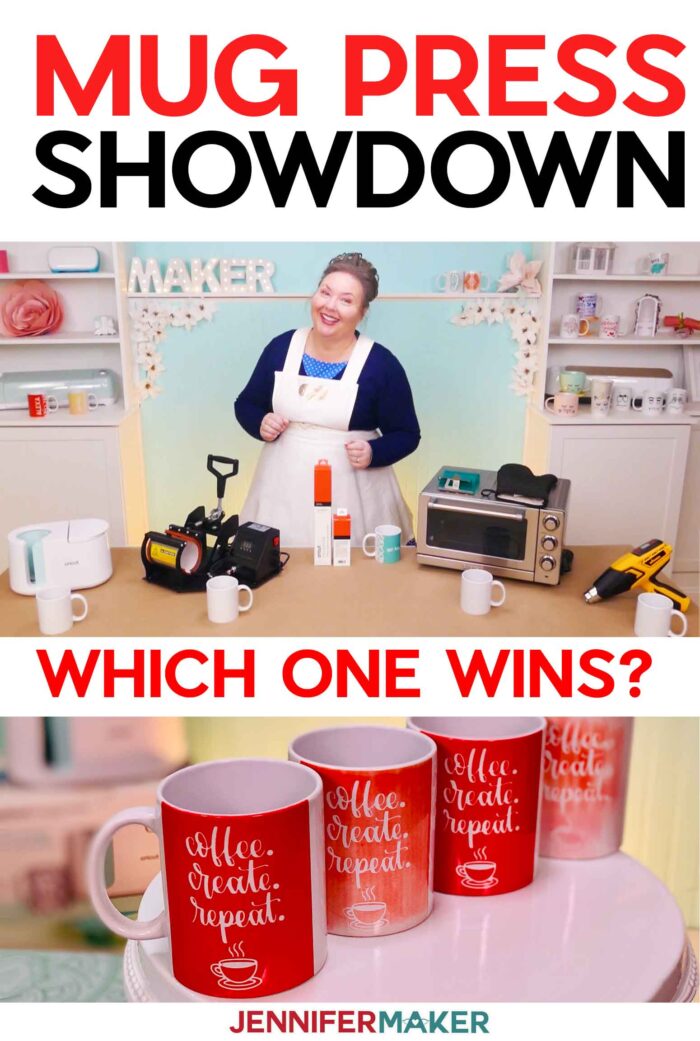
Watch my mug press showndown video to see how mug heat presses and wraps compare:

I have also been wondering and decided to put the Cricut Mug Press to a test with Cricut Infusible Ink and a sublimation mug! For those who aren’t familiar, Infusible Ink is a type of sublimation paper that you can cut on your Cricut cutting machine. And sublimation is simply a method of transferring ink to an object in a gaseous state with high heat.
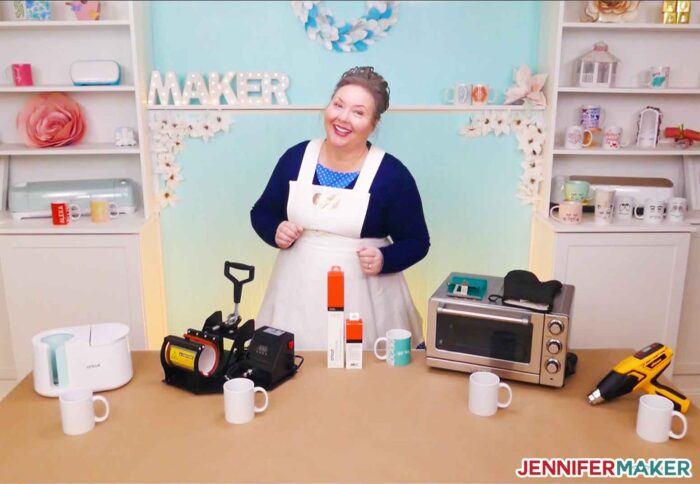
I want to compare four different Infusible Ink mug transfer methods and see how they stack up. I have four different heat transfer methods for us to try: the Cricut Mug Press, a traditional clamshell mug heat press, a silicone wrap + convection oven, and a heat gun. This is my version of a mug heat press showdown!
Now I’m a mug press newbie, but I was also a Cricut Mug Press newbie, so this is a fair comparison. I figure most of you are new to this as well, if you’re reading this blog post, so it’s helpful for you to know what an out-of-box experience is like for an experienced crafter like me.
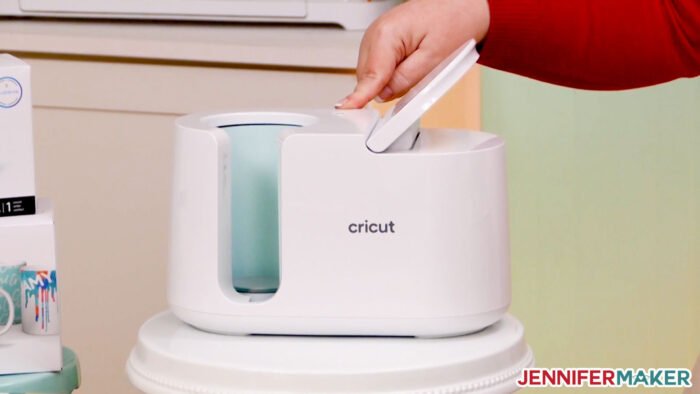
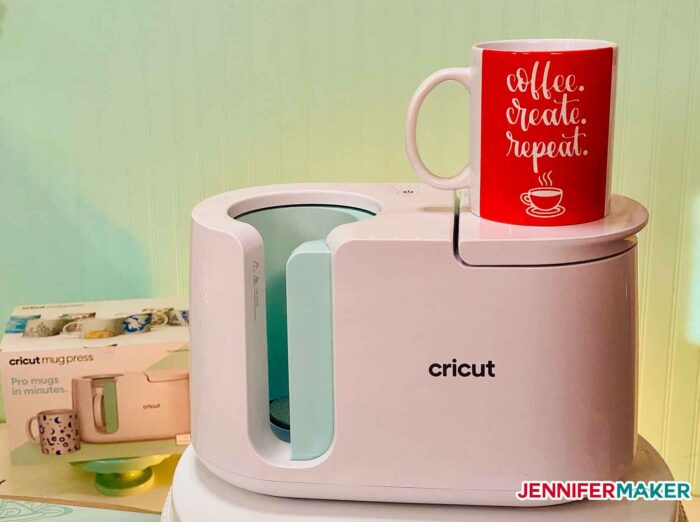
Our first contender is the Cricut Mug Press. This is a user-friendly mug press that automatically detects and sets the right temperature and pressure settings for you, with one-touch operation. The Cricut Mug Press features a safety conscious design with a plastic housing that does not get hot, plus an auto-off safety feature. It presses mugs from eleven to sixteen ounces with a special heat plate that heats from the sides and base for a consistent transfer, even at the very bottom edge of the mug. The Cricut Mug Press is $199, but as it’s not out at the time I’m writing this blog post, Cricut gifted this one to me so I could test it out in advance.
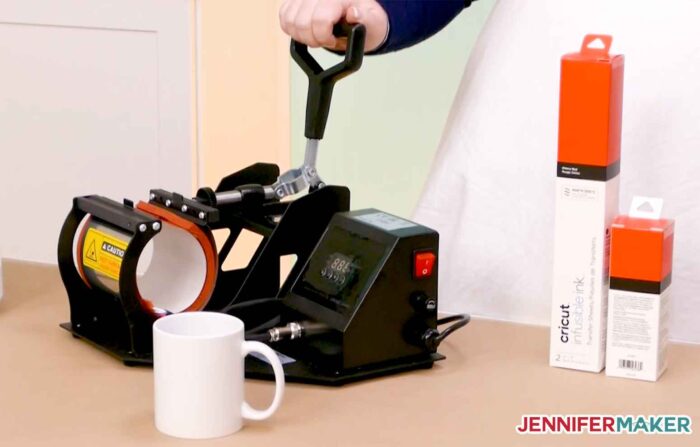
Next up is a traditional clam shell mug heat press. I did my research and found a four-and-a-half star mug heat press on Amazon. There are several presses on there, but this is the one I purchased. This mug press features a 3″-3.5″ diameter for an eleven ounce mug and claims to be easy to operate, with adjustable pressure, automatic baking time, and automatic temperature. This mug press cost me just under $100.
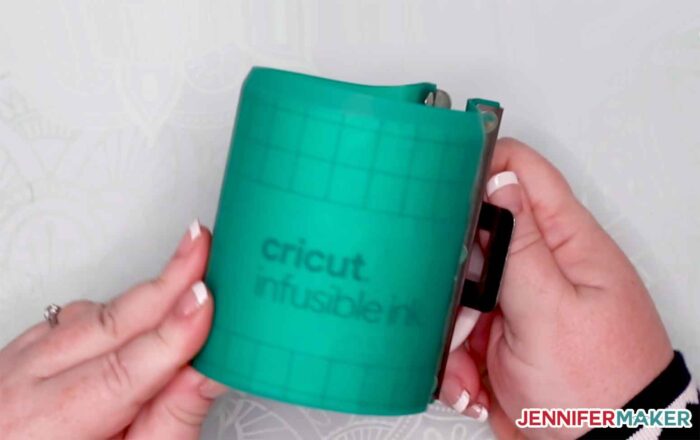
Next we’ll try a simple silicone wrap that you clamp around a mug and put into the oven. You shouldn’t put this in a household oven because we don’t want to mix fumes and food, so that also means we need a dedicated countertop convection oven that reaches at least four hundred degrees Fahrenheit. The cost of a silicone wrap plus an inexpensive convection oven is about $100 to $125. You can get better convection ovens fo a lot more, but we’ll stick with the cheapest option for now.
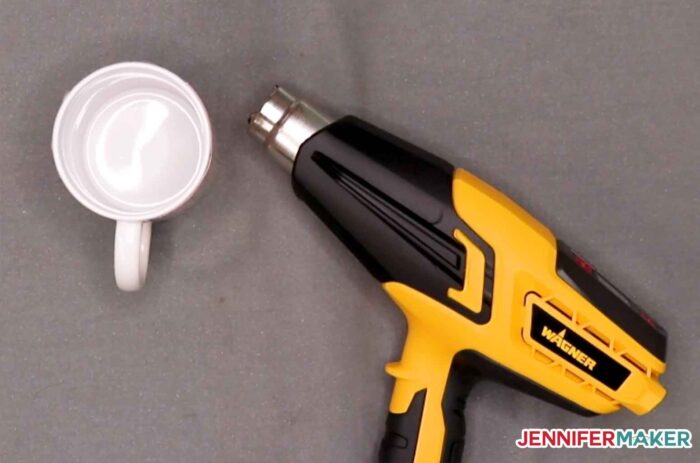
And finally, we’ll try a heat gun, which some of my fellow crafters have successfully used to transfer Infusible Ink … so we’ll try it, too! You can get heat guns in varying sizes — the one I used goes up to thirteen hundred degrees Farenheit, so it gets plenty hot. This heat gun was $62.
It is important to remember that finding the best tool is not all about price — a bad tool that’s cheap will cost us much more in ruined materials and frustration than the right tool for the job that costs more. So even though the Cricut Mug Press is the most expensive of these four, it’s worth it to test out all of our options. AND, we also can’t judge by looks alone. I mean, yeah, the Cricut Mug Press is cute, but we don’t buy tools based on how cute they are, right?
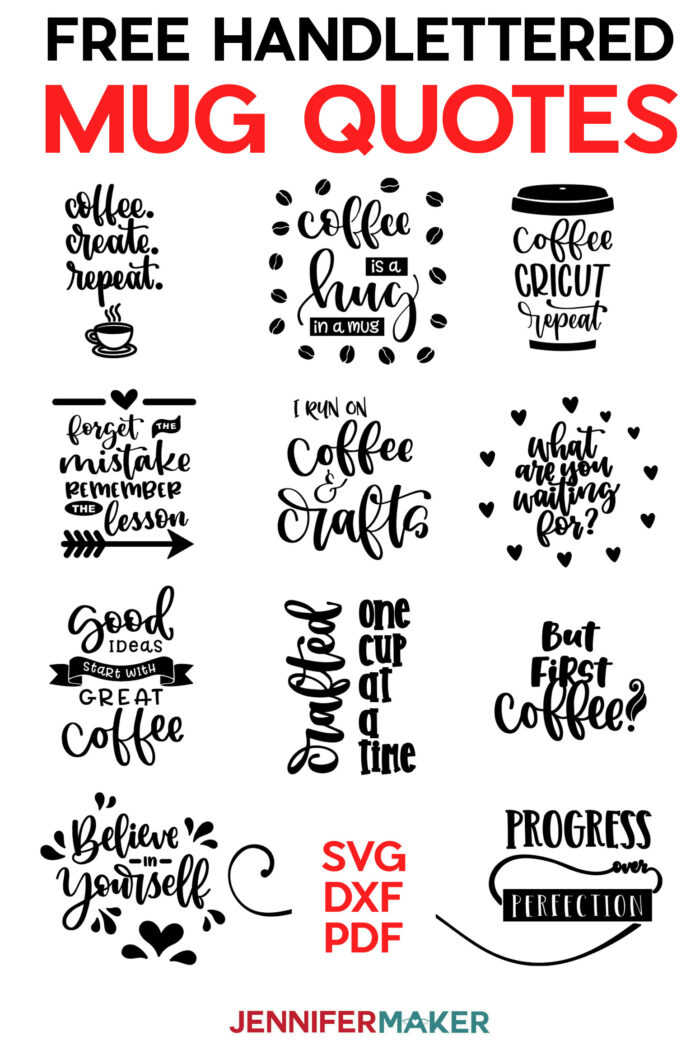
To have a fair mug press test, I’m using the same design on all of them — my cute hand-lettered coffee sayings that you can get free in my library. I have a whole set of them for you to use, and you can find them in design #289 in my library!
For each mug test, I’m using transfer sheets from the same package of solid cherry red Infusible Ink. And I cut and applied all of them on the mug in exactly the same way.
This is an important reminder — whenever we sublimate ink like we’re about to do, you should work in a well ventilated area, like near an open window or with a fan going, and be sure to use heat resistant surface.
Let’s make Infusible Ink mugs with the Cricut Mug Press, traditional heat press, silicone wrap, and heat gun! This post contains some affiliate links for your convenience (which means if you make a purchase after clicking a link I will earn a small commission but it won’t cost you a penny more)! Read my full disclosure policy.
Materials to Make an Infusible Ink Mug
- Cricut Infusible-Ink compatible mug, 12 oz or 15 oz
- Infusible Ink transfer sheet (I used Cherry Red)
- Design #289 with my Handlettered Quote Decals (free in my resource library)
- Cricut cutting machine (I used the Cricut Explore Air 2, but you can also use the Maker or Joy)
- Green Standard Grip Cutting Mat
- Heat resistant pad
- Lint roller
Plus an Infusible Ink Transfer Method of your choice:
How to Make an Infusible Ink Mug with Cute Coffee Decals
Learn how to make cute inspirational quote mugs with handlettered decals in Infusible Ink with the Cricut Mug Press The handlettered inspirational quote decals I used in this project are design #289 in my free library. You can find the files by searching the page for the design number and then click it to download the SVG cut files, as well as DXF and PDF patterns. Inside the folder are many different decal designs, from motivational sayings to coffee quotes, all ready to for your Cricut mugs! Upload the SVG cut file for the quote you like best to Cricut Design Space. If you’re not sure how to upload a SVG cut file to Cricut Design Space, watch this helpful video training series I made. This is what the “Coffee is a Hug in a Mug” SVG cut file looks like in Cricut Design Space after uploading: (photo) There are TWO sizes of mug designs in all of my files — the smaller one on top is for the 12 oz. mug, while the larger one on the bottom is for the 15 oz. mug. Hide or delete the sizes you do not need by selecting the layer and clicking the eye icon (to hide it) or the trash can icon (to delete it). You can see many of the cute designs I made in the file. For this test, I combined two different decals and sliced one design out of a solid background. This will allow us to see how how well a transfer works with both a lot of ink, and just a little ink. To do this, just create a rectangle the size of your background, position your decal over it, select both layers, and click Slice. Now delete the layers you do not need and attach everything together. Now I cut four identical wrap designs from cherry red Infusible Ink for each of our four mug tests, and weeded each one so it was ready to go on each mug. Now it's time to wrap your design onto your mug! Begin by cleaning the surface of your mug with a lint roller. This removes any dirt or dust and get the surface as clean as possible, and makes sure the Infusible Ink transfers cleanly and vividly. To get the design on straight and centered. position the mug with the handle pointing at you, just like this. Now position the wrap behind the mug, with the matte color side facing the mug and the bottom of the sheet touching your work surface, and center it on the mug. Slowly wrap the design around the mug, watching how much you have on each side as you do so to keep it centered. Keep the design touching the work surface to keep it straight. Your goal is to stretch the design tightly across the mug. It's also important that your design be at least a 1/2 inch away from the handle -- if you go beyond that, you may see fading at the edge of your design. Feel free to reposition it until it is right. When it looks good, press down on the sticky carrier sheet to adhere it to the mug's surface. If your carrier sheet doesn't seem to want to stick very well, you can add some heat resistant tape just under the handle to bridge the two sides, but avoid putting the tape over any place where you see Infusible Ink. And that's it! Your design is wrapped around your mug and it's time to press it! You do NOT need to cover your design with butcher paper if you're just using Infusible Ink transfer sheets! If you're using the Cricut Mug Press: Power it on with the power button green (which indicates it is ready), hold your wrapped mug by the handle and place it in the heating chamber. Note: If your Cricut Mug Press does not power on, this means you haven't activated it yet — review Cricut Mug Press setup here. Pay attention to where the mug handle is and make sure the heat plate appears to be covering all of your design. I usually move my handle a bit to the left rather than center it. Now close the clamp on the top of the Cricut Mug Press and check that the heat plates are completely covering your design. If not, immediately open the clamp, reposition the mug (you'll probably want to rotate the handle a bit to the left), and close the clamp again. Closing the clamp starts the pressing process. There is no other button to push or settings to worry about. The Cricut Mug Press takes the temperature of your mug and the ambient temperature of your room, and determines the correct settings for you. The little lights on the top of the Cricut Mug Press indicate the progress of your press — an average mug takes about six minutes to press. When the Cricut Mug Press is finished, it will beep at you. Lift up on the clamp to release it and pull the mug out by the handle, which will NOT be hot. Be careful not to touch the heat plate with the back of your fingers or touch any other part of the mug, as it will be quite hot. If you're using a traditional mug press, follow the directions that came with it and note that you may need to press it longer and hotter than it suggests. When your Infusible Ink transfer is done, immediately place your mug on a heat-resistant surface to cool. I place my mug on the same mat I am using for my mug press itself as it's right there and super convenient. Allow the mug to cool down before you remove the liner. This takes anywhere from 15 to 30 minutes. When the mug is cool enough to handle, pull off an end of the transfer sheet under the handle and unwrap your beautiful mug! The color is gorgeous from top to bottom, vivid and consistent. And that's all there is to this! There were no fonts used in these designs — all are handlettered and optimized to be easy to weed with Infusible Ink! As an Amazon Associate and member of other affiliate programs, I earn from qualifying purchases.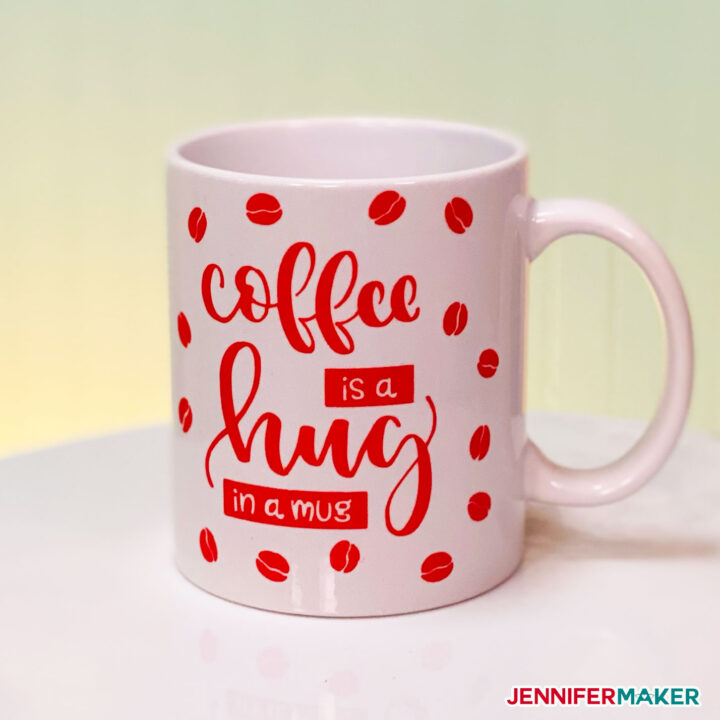
Infusible Ink Mugs with Handlettered Decals
Materials
Tools
Instructions
STEP 1: GET THE MUG DESIGN
When you're ready, just cut your Infusible Ink transfer sheets -- and remember to MIRROR it. All Infusible Ink designs should be mirrored. If you're not sure how to cut Infusible Ink, check out my Infusible Ink Mug Tutorial I've linked here.
STEP 2. APPLY THE DESIGN TO THE MUG
All of our test mugs are sublimation blank mugs with a special poly coating, and I'm using the same brand for all mugs. To apply the design, put the mug handle facing you and wrap the design around the mug tightly. Make sure the design is well adhered to the mug. We're now ready for the transfer tests!
STEP 3: WRAP AND PRESS YOUR MUGSTEP 4: SHOW IT OFF
Notes
Recommended Products

Cricut Mug Press Test Results
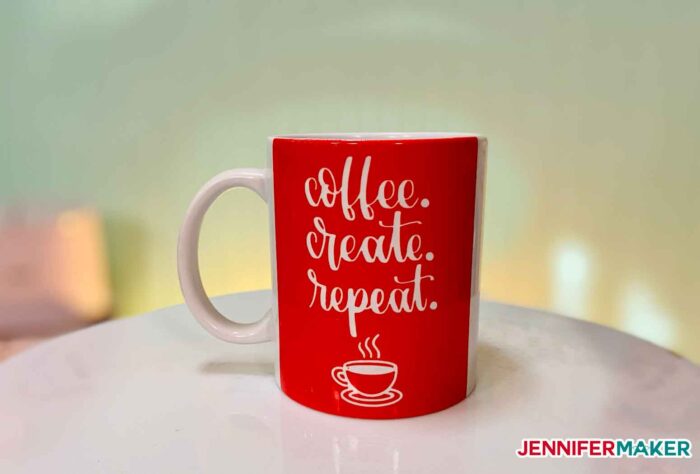
The Cricut Mug Press did a bang-up job of transferring the Infusible Ink to our mug — easy to use and gorgeous results. This has been true of every mug I’ve made on the Cricut Mug Press.
Traditional Mug Press Test Results
The traditional clamshell mug press was a fail, with inconsistent and unsaturated color, and while it could be that I have a defective heat press, I rather think it’s just user error. Following the “manual” I set the press time for three hundred and sixty degrees for sixty seconds with moderate temperature. It seems like it should have worked, but my guess is that it just wasn’t a long enough press for the ink to fully sublimate onto the mug.
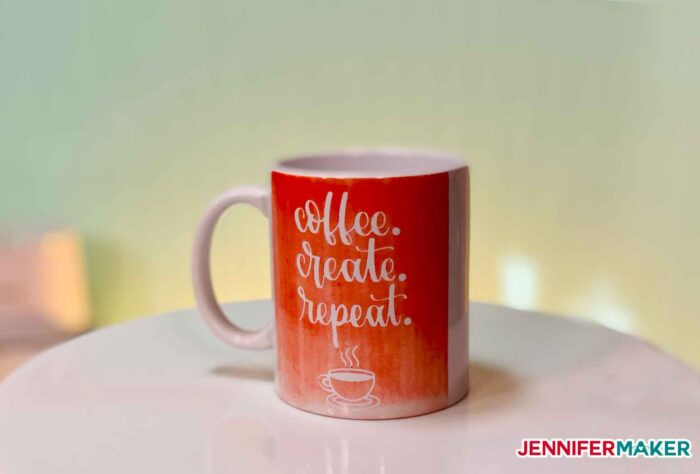
After my fail, I Googled to see what settings other crafters had tried for their Infusible Ink mugs and I had both my temperature too low and my press time too short. (If you’re like me and have one that is failing, try 400°F for 3 minutes.) This is a major drawback of the traditional mug press, as you have to know the right settings to use. I was also surprised at how inconsistently it seemed to heat the mug, with almost not ink at the very bottom. This type of mug press is missing the bottom heating element present on the Cricut Mug Press. I was not impressed. Maybe this was fine before the Cricut Mug Press was introduced, but now that I’ve compared them, it’s clunky, ugly, and hard to use.
Silicone Wrap + Oven Test Results
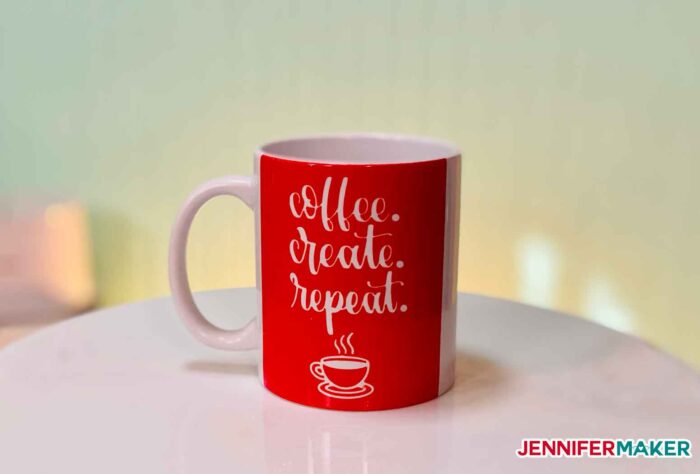
The Infusible Ink mug made with the silicone wrap and oven method fared much better, with vibrant and clear color just as good at the Cricut Mug Press. It was a little fiddly to get the silicone wrap around the mug, and I didn’t enjoy heating the mug in an oven. Even though I used a separate convection oven to make this (to keep my kitchen’s oven clean for cooking food), I still got a whiff of the fumes when I opened the door and had a headache and watery eyes all evening. Plus it produced a rather unpleasant odor in my house. So this method while effective, had some serious safety concerns.
If you use a silicone wrap, be sure to get it out of your main living area into a space with good ventilation, and you should probably also wear a respirator to avoid the concentrated fumes that come out when you open the oven door — this is a problem we don’t have with the other three methods because they do not heat in a concentrated area like that.
Heat Gun Mug Test Results
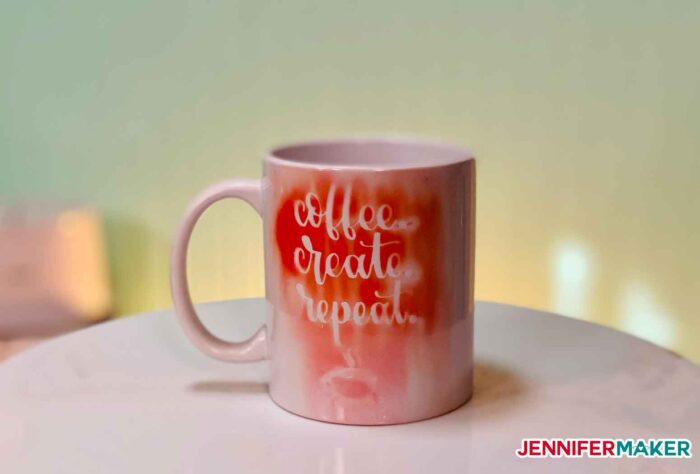
And finally, the Infusible Ink mug made with a heat gun was an utter fail. I figure I could get it to work with more effort, maybe a different heat gun? I’m just not sure. But even so, it took FOREVER to do. Very inefficient.
And The Mug Press Showdown Winner is…
So in the showdown between these four Infusible Ink mug transfer methods, the clear winner for me is the Cricut Mug Press. Easy, safe, and small. Plus, I suspect it’s convenience will mean I’ll use it more often and I’ll get more bang for my buck.
Get my free SVG files for Infusible Ink Mugs with Coffee Quotes & Motivational Sayings
I’d love to know about YOUR experiences with various Infusible Ink transfer methods for mugs! Please share your experiences or a photo in our Facebook group or tag me on social media with #jennifermaker.
Love,

Want to remember this? Save this Best Mug Heat Press showdown to your favorite Pinterest Board!


Thanks so much for doing this comparison. $200 is not a small amount of money, but if I will use it a lot, it is worth saving me from lots of bad mugs. Can you tell me what non cricut mugs you used? I want to try both cricut and non cricut mugs, but they are also another expense.
Hi Debra! This blog post will help answer your question and so many more! https://jennifermaker.com/cricut-mug-press-ultimate-guide/#answers_to_your_questions_about_the_cricut_mug_press
Do you need to use the Cricut mug blanks or are there other blanks that work?
Hi Kathy! Your non-Cricut mug has to be straight-walled and has to have a poly-coating for the infusible ink to adhere to.
thankyou the mug press looks amazing, hope it comes to new zealand soon
We hope so too, Sharon!
I use my Cricut mostly for t-shirts and greeting cards but always love cute mugs. I know from other crafters vinyl and epoxy are not safe so designs needed to be away from the mouth area. I have no clue about infusible ink (as long as it’s been out I’ve been afraid to try it!). With your cute red design obviously up all over the mouth area, does this mean it is safe? After reading your convection oven fumes paragraph, I’m still a little worried!
Hi Wendy! Yes, the infusible ink system is safe.
Would love to know if the Cricut Mug Press would work with regular sublimation prints – not just the Cricut Infusible Ink.
Hi Jennifer! I am actually going to test it! Stay tuned!
The video was great and definitely the cricut mug press works best.
Thank you, I appreciate the feedback!
is there a specific mug you recommend for heat transfer?
Hi Mary! If using the Cricut mug press, I would go with Cricut brand mugs.
I am looking for the font that you recommended for the mug personalization. It started with a “t” and I am not finding it!!! Thank you!!!
Hi Sheila. Was it Tingler font from Fontbundles.net?
can you use the joy to make transfer for mugs
Hi there! You absolutely can! My templates will fit perfectly for the Joy!
Hi there! I just love your tutorials, you are an amazing teacher! My question is regarding using the “Decal” type process, not using the wrap because of waste. When attaching my quote, I cut the carrier sheet close to the lettering as suggested and then used heat transfer tape to adhere. When the mug was pressed, I noticed a faint outline where the carrier sheet was. This has happened twice, so I was wondering if you have seen this issue before. Thanks so much for all you do!
None of us has had that problem, Robyn, but Cricut has a great Troubleshooting Guide you can look at! Thank you for your kind words – thanks so much for crafting along with us!!! 😁