Learn how to cut and create intricate layered paper designs with my mandala tips!
Creating a mandala project requires planning, precision, and patience, but I love them so much! Mandalas are versatile designs, with intricate, repeating details and lovely shapes and colors. Today, I’m here to share my best paper mandala tips for conquering your crafting challenges when it comes to creating a stunning piece of mandala art!
Watch the full step-by-step video tutorial featuring my top mandala tips:

There are so many ways to use mandalas or mandala-inspired designs in your crafts, but today I’ll focus on paper mandala tips. Shadow boxes are one of my favorite ways to display mandala designs, but what kind of adhesives should you use between the layers? You’re in the right place! We’ll discuss that (and more) in this tutorial.
So, what exactly is a mandala? The word “mandala” is Sanskrit for “circle.” Often used in Hindu and Buddhist meditation, a mandala is a series of intricate patterns that all revolve around one central point. They’re beautiful, and I love creating mandala-inspired art!
But how do you create gorgeous mandala art of your own? Since we’re focusing on paper mandala tips today, we’ll learn which adhesives work best with which types of layers, and where exactly to place them so the layers are well-supported and not saggy. Plus, I’ll share how to make sure the adhesives stay hidden — even with overlapping spots.
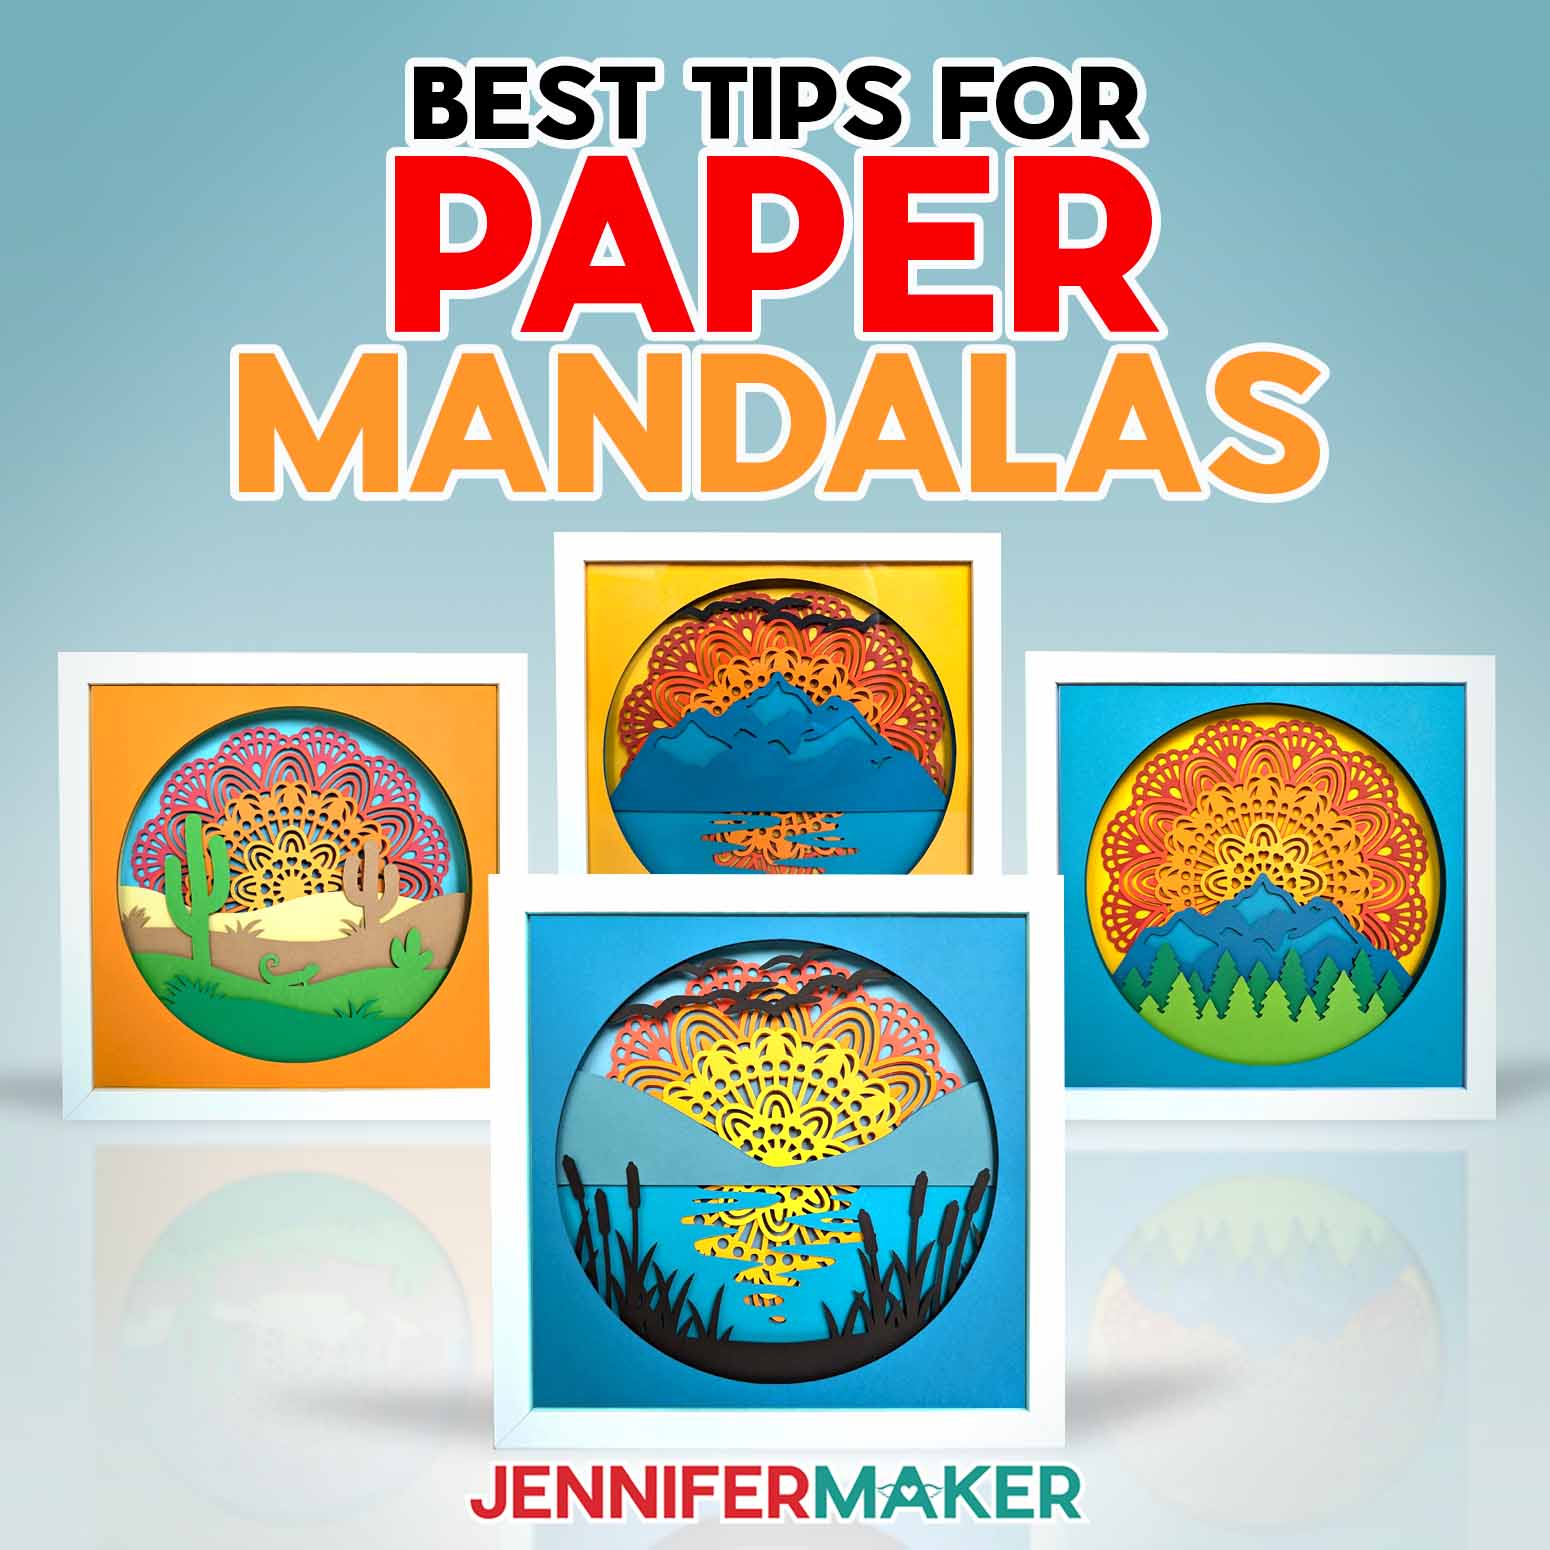
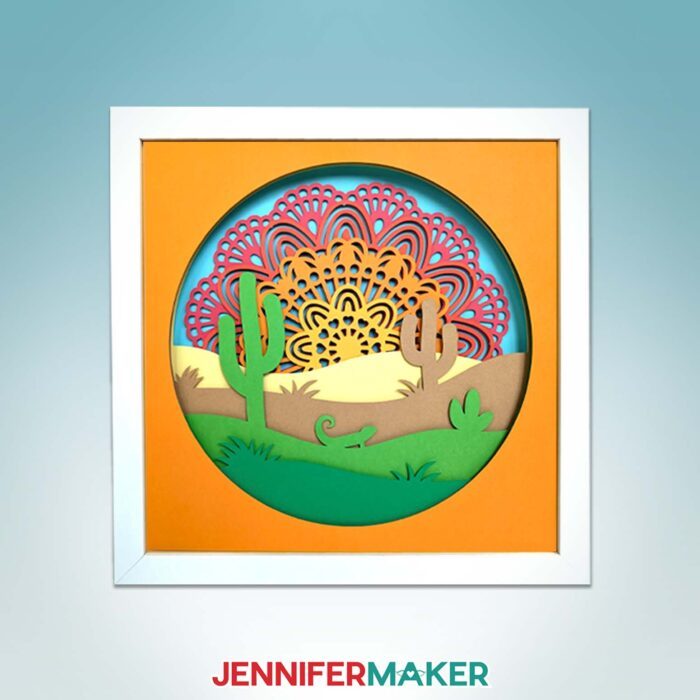
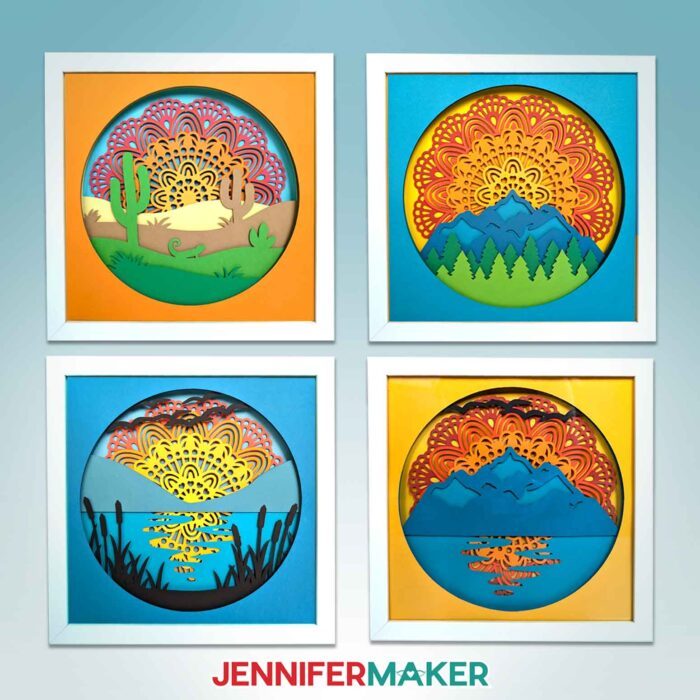
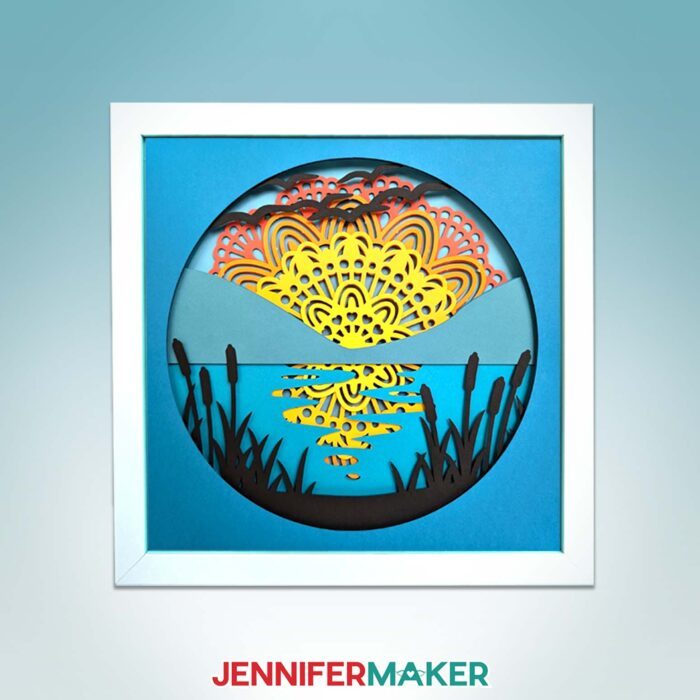
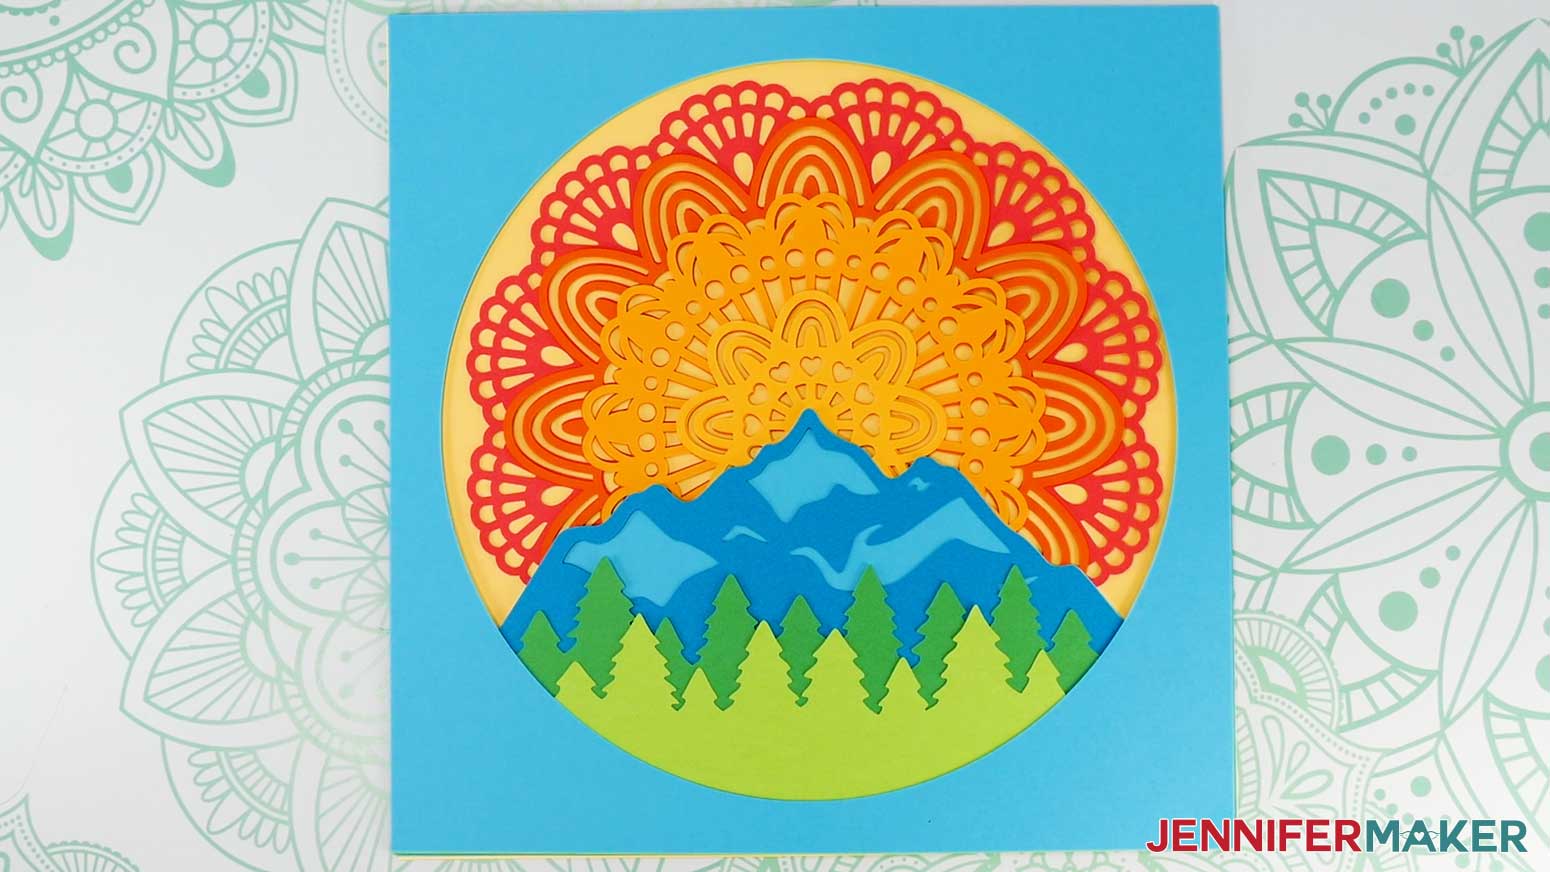
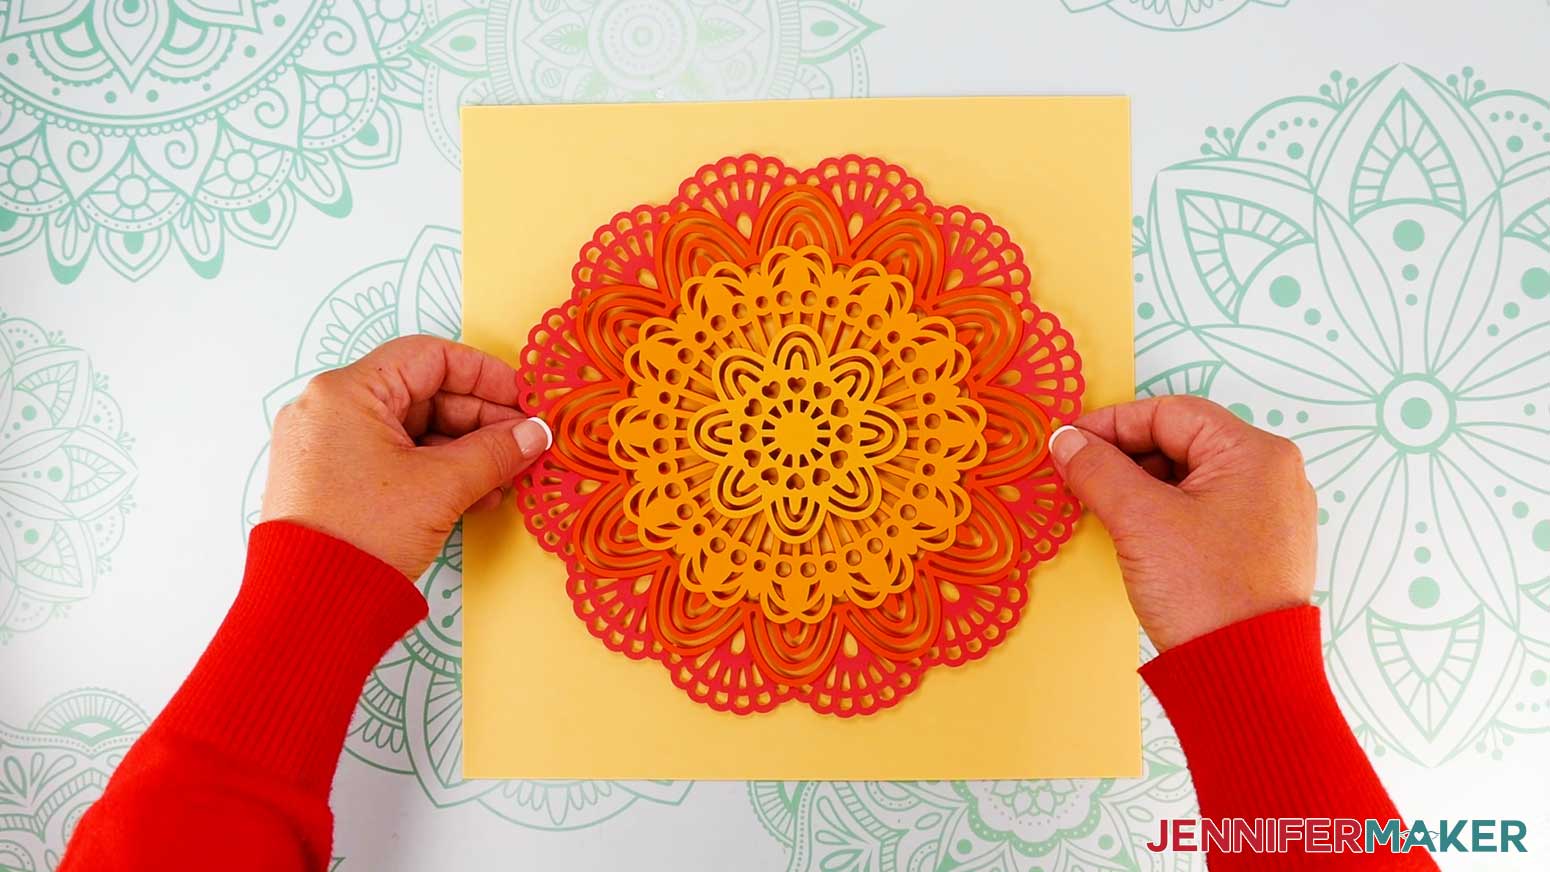
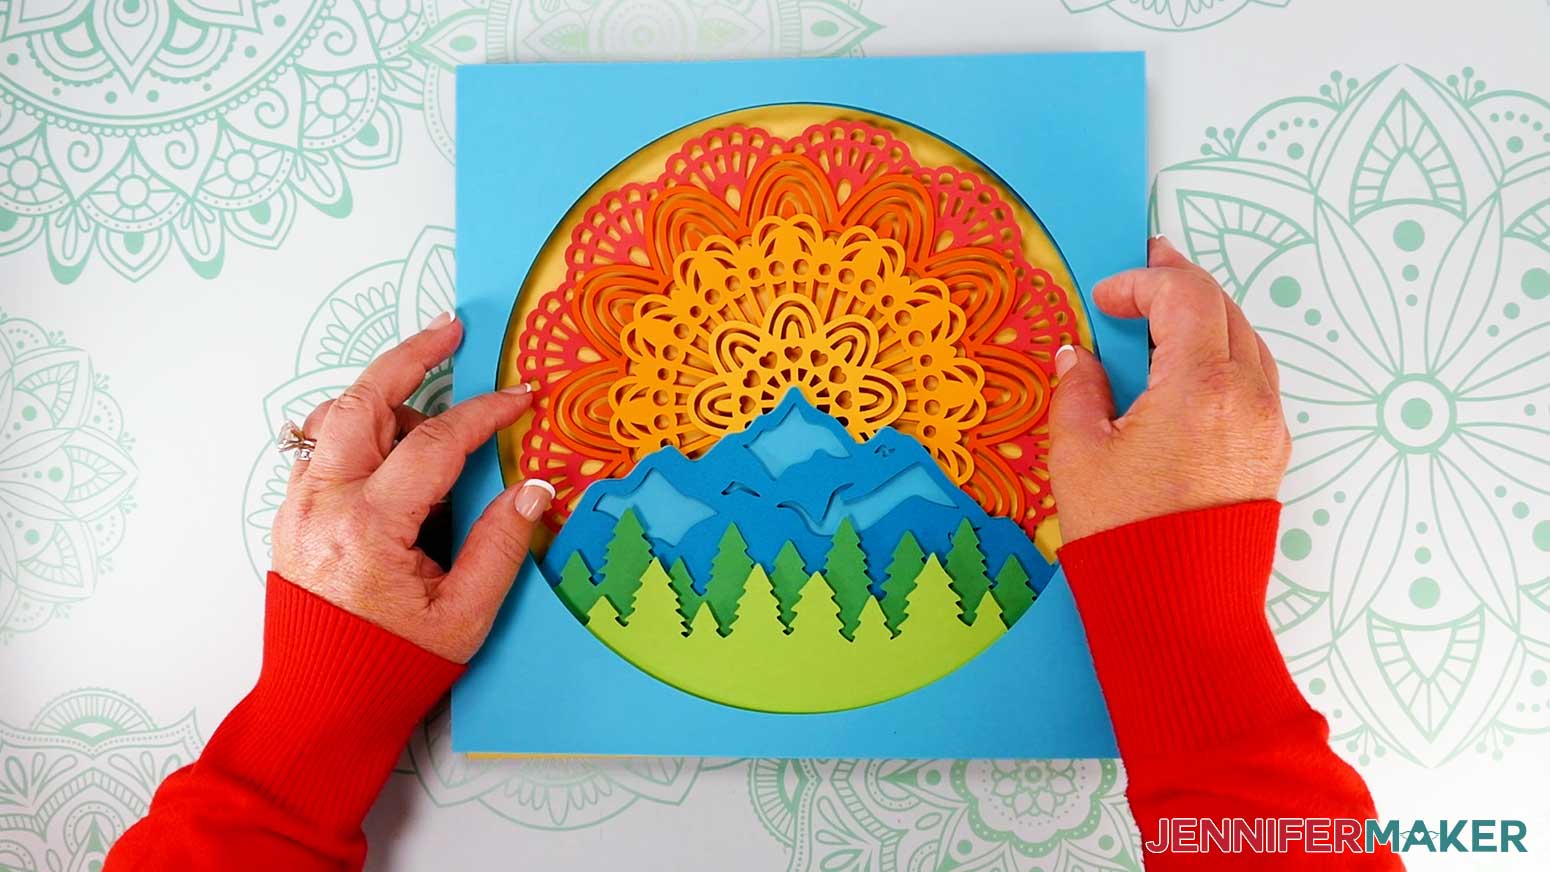
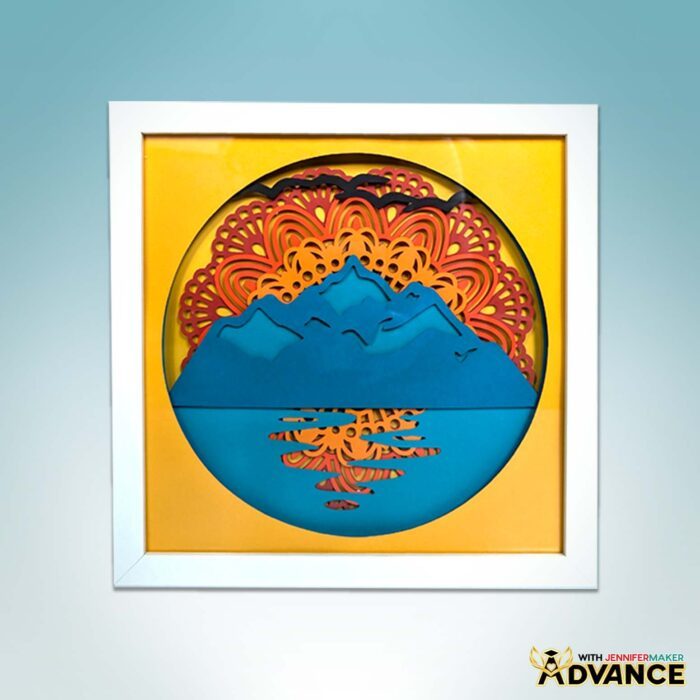
I’ve got three landscape mandala designs to share with you, all featuring a different nature scene in the foreground. Each design uses the same mandala to represent the sun, but with a different color scheme. Aren’t they gorgeous?
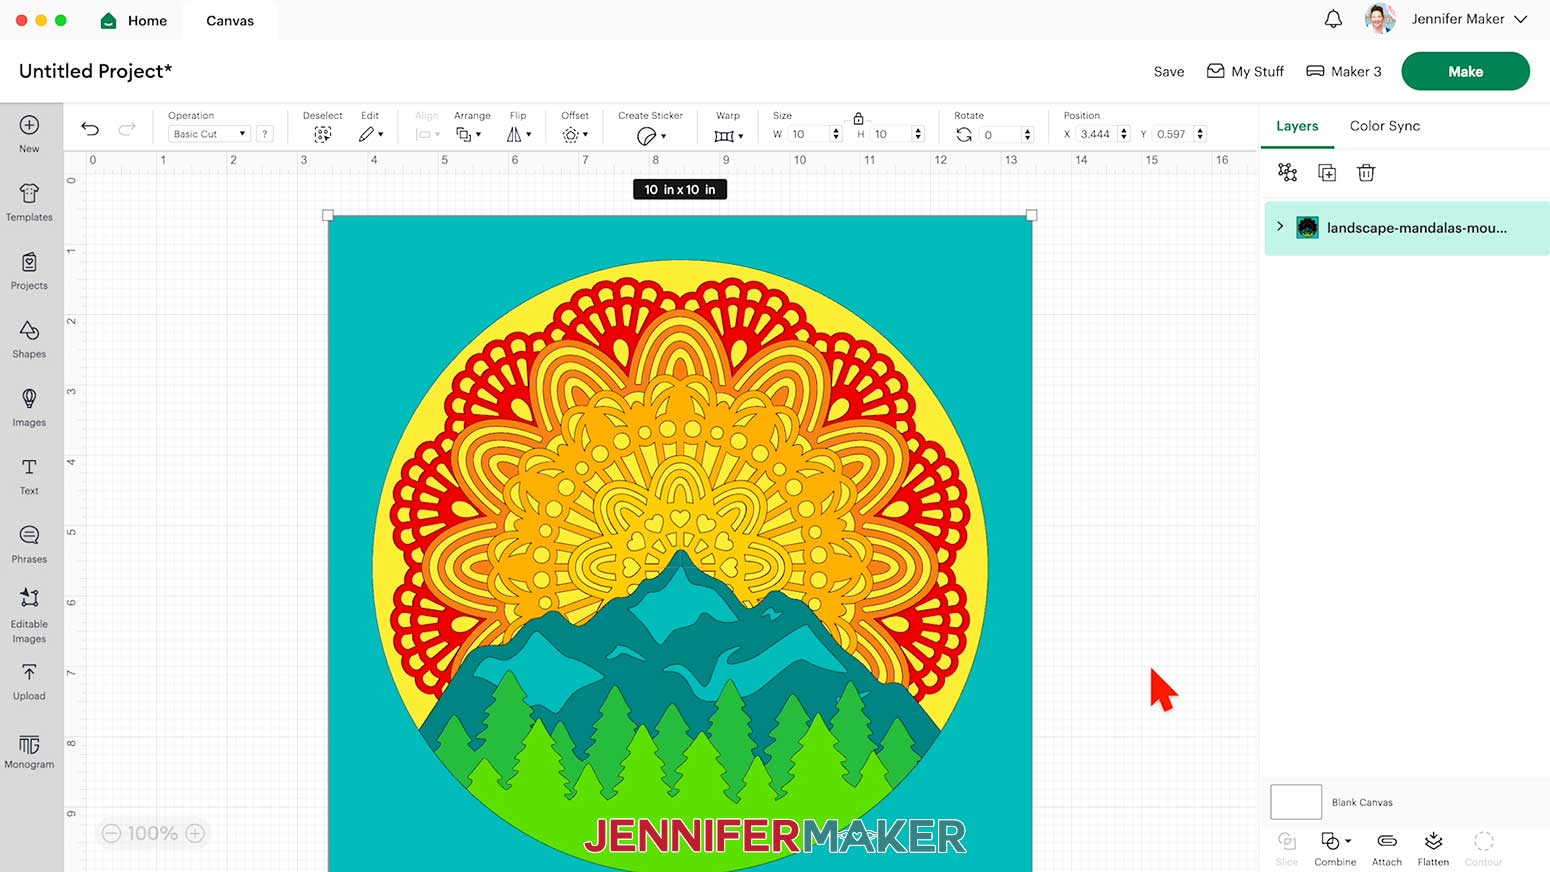
The first step is to upload a design to your Canvas in Cricut Design Space. Each design is ready to cut! I don’t recommend resizing the designs much smaller than they already are, because they’re very intricate and the tiny cuts may not come out the way you expect.
The super-detailed designs couldn’t be sized smaller enough to be cut with a Cricut Joy, but you CAN cut just the mandala — not the foreground layers — with a Cricut Joy Xtra.
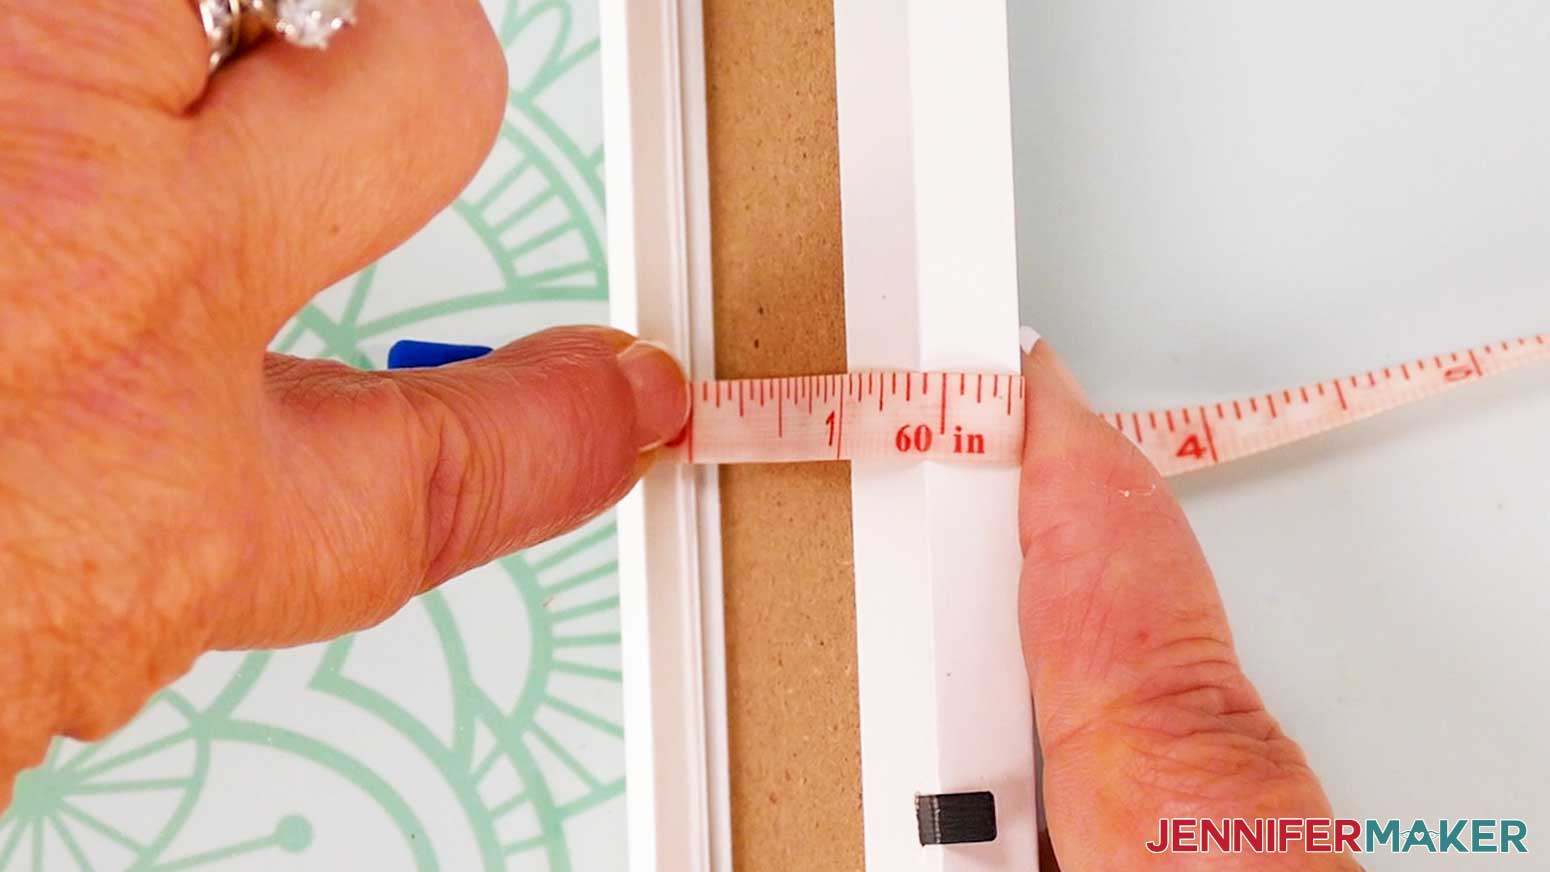
The frame in my materials list fits my mandala files perfectly, but if you use a different brand of 10 inch by 10 inch shadow box frame, there may be very small differences in size. Be sure to measure the inside of your frame, then size your shadow box layers about 1/8″ smaller so they’re sure to fit.

One of my favorite mandala tips to ensure nice, clean cuts with the intricate designs is to use high-quality cardstock. It really makes all the difference! Cheaper cardstock is often made with shorter fibers that are prone to tearing when the cuts are really detailed. Longer fiber paper produces much cleaner, more accurate cuts.
After cutting your cardstock, the next step is the fun part: Sticking the layers of your mandala together and watching it come to life. The adhesive you use to adhere the layers should depend on a few factors:
- How intricate your layers are
- How much depth you want between the layers
- Whether or not you’ll frame the project
I’ll explain everything you need to know in the tutorial, so you can choose the right adhesives for your mandala project. Once you know the best use of each adhesive type, you can even experiment with different adhesive combinations to get the look you want.
There are lots more mandala tips in the tutorial, too — like, why I recommend having a fine point pen, scissors, and reverse action tweezers handy while you’re mandala making.
After you’ve started cutting your mandala layers, a craft spatula can help lift the delicate pieces off the mat without tearing them, and a weeding tool can help poke out any bits of paper from your cut areas. I also recommend having a small scraper tool to push the bits left behind off the mat — otherwise they can cause the blade to jump and mess up your next cut. Get the full list of tools and supplies you’ll need in my materials list below.
My scenic landscape mandalas really evoke a tranquil state of mind, and are a great way to bring a peaceful vibe to your space. Next time you make one, try out different colors and types of cardstock to make it even more unique. With knowledge of these tips, you can create beautiful mandalas that can be displayed for many years to come!
Let me show you how to make gorgeous paper mandalas! This post contains some affiliate links for your convenience (which means if you make a purchase after clicking a link I will earn a small commission but it won’t cost you a penny more, there is no additional cost)! Read my full disclosure policy.
Materials to Make Cardstock Mandala Scenes
View my Amazon shopping list for the exact items I used!
-
- One (1) 10″ x 10″ Shadow Box Frame
- One (1) Sheet of 12″ x 12″ 65 lb. Cardstock (I used black for the Lake design and brown for the Desert design)
- Two (2) Sheets of 12″ x 12″ 65 lb. Green Cardstock (I used two different shades for the Desert and Mountain designs)
- One to Four (1-4) Sheets of 12″ x 12″ 65 lb. Blue Cardstock
- Four to Six (4-6) Sheets of 12″ x 12″ 65 lb. Orange/Yellow Cardstock
- A way to cut your materials – I’m using the Cricut Maker 3 but you could also use the Cricut Maker, an Explore Series machine, a Venture, or even a Cricut Joy Xtra.
- Cricut Green StandardGrip Machine Mat 12” x 12”
- Dark-Colored Fine-Point Pen
- Brayer
- Spatula
- Scraper
- Weeding Tool (optional for popping out small cutouts from intricate areas)
- Scissors
- Bearly Art Adhesive Foam Squares and Tape Collection (Squares and Strips 1/8″ and 1/4″ tall) -AND/OR-
- Double-Sided Adhesive Foam Micro Pop-Dots (3/25” x 1/16”
- Reverse Tweezers (optional for applying the Micro Pop-Dots)
- Ruler or Measuring Tape (optional for measuring your shadow box opening)
- Isopropyl Alcohol (optional to clean your shadow box glass) -AND-
- Lint-Free Cloth

How to Make a Landscape Mandala Shadow Box!

Mandala Tips With Landscape Designs
Learn how to make a detailed paper landscape scene with my mandala tips!
Materials
- One (1) Sheet of 12" x 12" 65 lb. Cardstock (I used black for the Lake design and brown for the Desert design)
- Two (2) Sheets of 12" x 12" 65 lb. Green Cardstock (I used two different shades for the Desert and Mountain designs)
- One to Four (1-4) Sheets of 12" x 12" 65 lb. Blue Cardstock
- Four to Six (4-6) Sheets of 12" x 12" 65 lb. Orange/Yellow Cardstock
- Bearly Art Adhesive Foam Squares and Tape Collection (Squares and Strips 1/8" and 1/4" tall) -AND/OR-
- Double-Sided Adhesive Foam Micro Pop-Dots (3/25” x 1/16”)
- One (1) 10" x 10" Shadow Box Frame
- Design #636 (My free SVG/DXF/PDF design files are available in my free resource library - get the password by filling out the form at the bottom of this page)
Tools
- A way to cut your cardstock - I’m using the Cricut Maker 3, but you can also use the Cricut Maker, a Cricut Explore Series machine, or the Cricut Venture
- Cricut Green StandardGrip Machine Mat 12" x 12"
- Brayer
- Scraper
- Spatula
- Weeding Tool (optional for popping out small cutouts from intricate areas)
- Scissors (optional for cutting the adhesive foam tape)
- Reverse Tweezers (optional for applying the Micro Pop-Dots)
- Ruler or Measuring Tape (optional for measuring your shadow box opening)
- Isopropyl Alcohol (optional to clean your shadow box glass) -AND-
- Lint-Free Cloth
- Dark-Colored Fine-Point Pen (optional for marking the back of the Micro Pop-Dots)
Instructions
STEP 1: GET MY FREE LANDSCAPE MANDALA DESIGNS
First, download my Landscape Mandala designs from my free library – look for Design #636. Alternatively, you can use the Save This Project form near the top of this post and the design link will be emailed to you.
There are 3 designs:
A desert
A lake
And a mountain
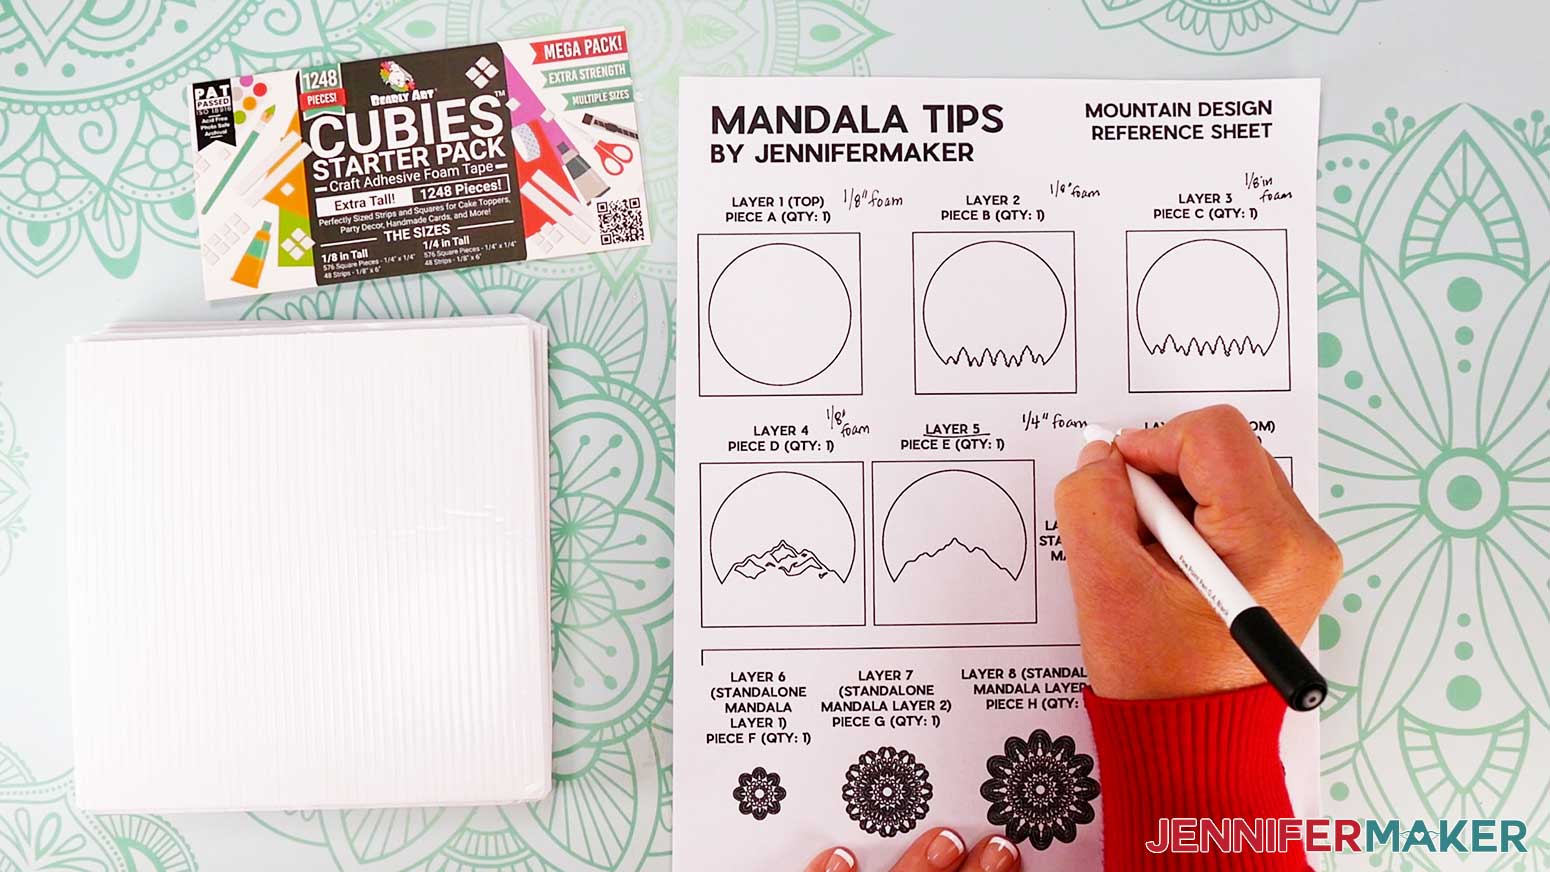
There is also a PDF Guide to help keep the pieces straight.
I’ll show you how to prepare, cut, and assemble the mountain design, but you can use the same steps for the other designs.
TIP: If you’re not sure how to work with zip files, go to jennifermaker.com/svgs to learn how.
STEP 2: PREPARE AND PLAN YOUR MANDALA
- Open Cricut Design Space and click “New Project.”
- Click “Upload” and then “Upload Image.”
- Click “Browse.”
- Select the SVG file of your choice.
NOTE: I’ll demonstrate with the mountain mandala design. - Click “Open.”
- On the “Upload Image” screen, there will be a design preview. Click “Continue.”
- On the next screen, click “Upload.”
- The design is now on your Canvas.

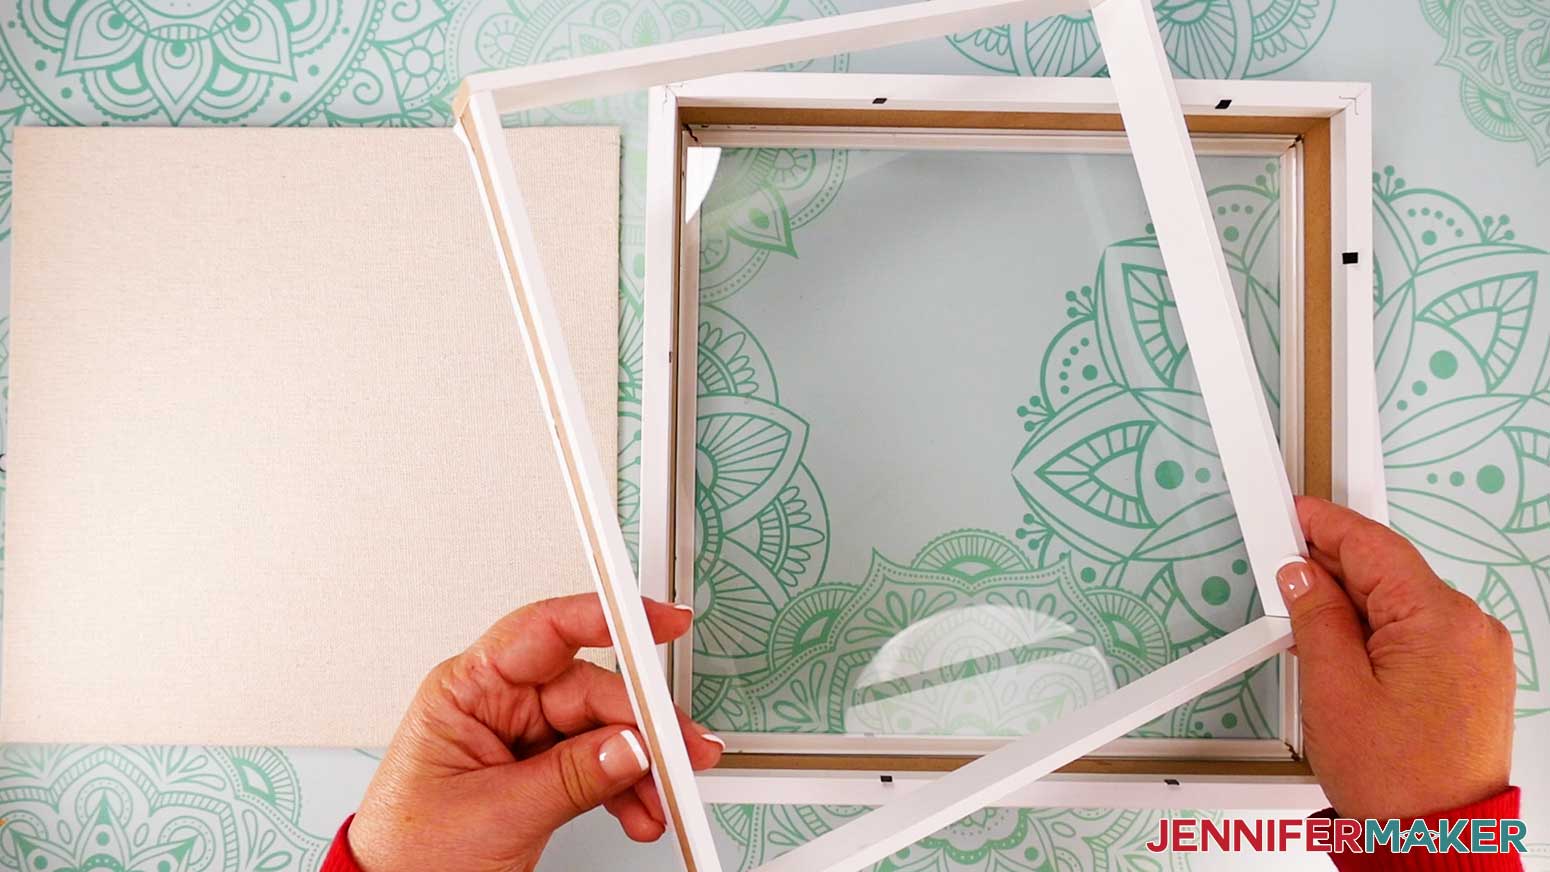
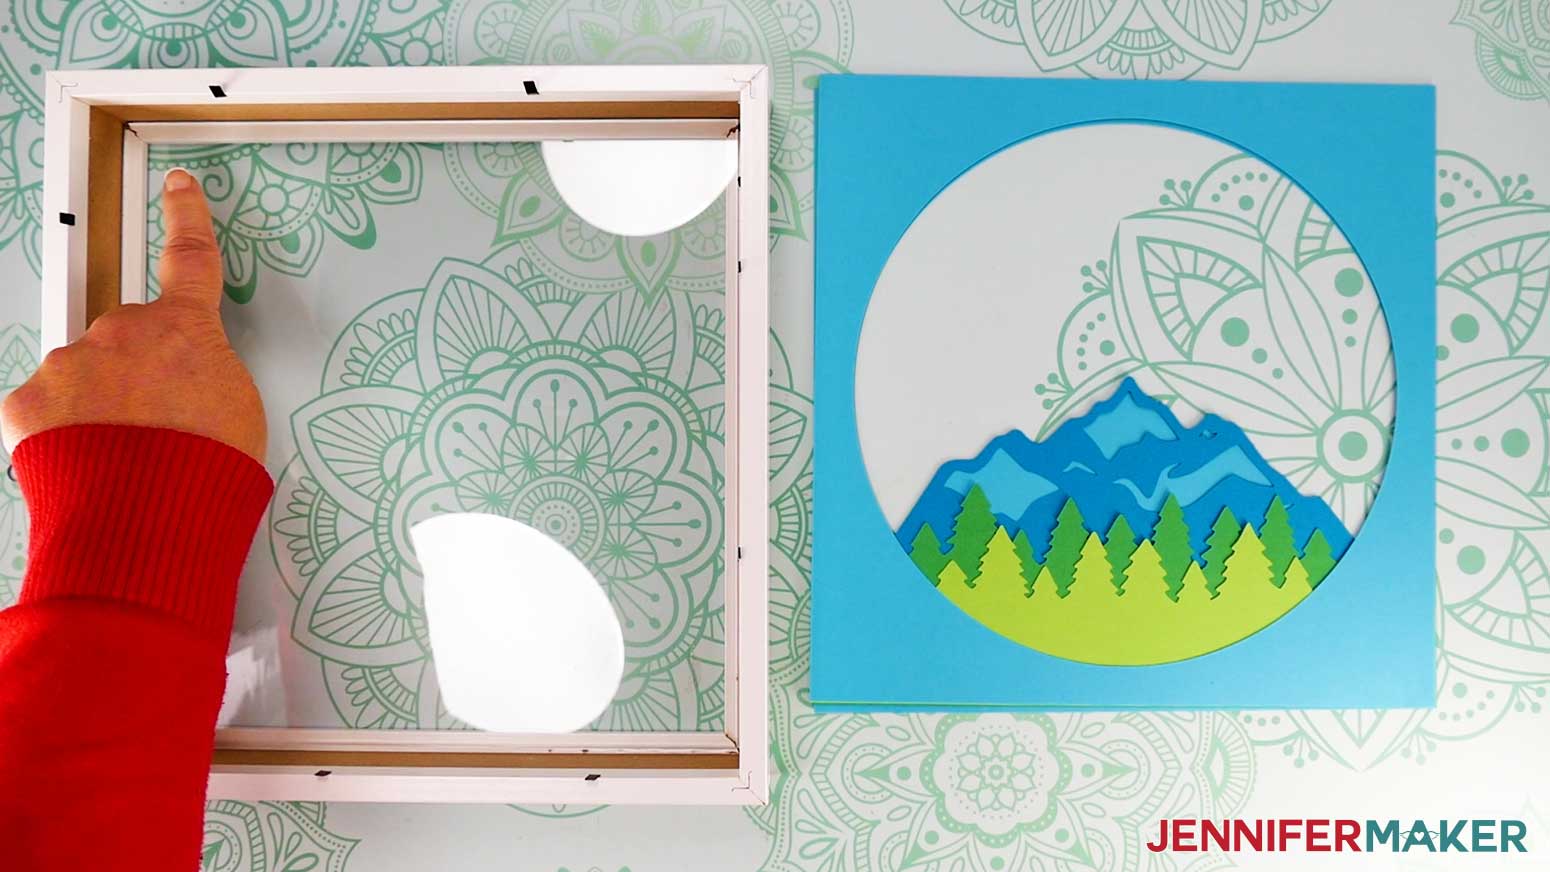
- Open your shadow box frame by gently prying up the metal tabs holding the frame’s backer in place and remove it.
- The shadow box I’m using has a 1” deep wooden insert to take up extra space if you’re displaying a thin design. If you have more than six layers like the designs we’re making, you don’t need it.
NOTE: I won’t use the insert, but if you want to, measure the width and height inside it. Mine is 9.5” square. Then in Design Space, keep the Lock icon closed to maintain the mandala design’s proportions and resize it to about ⅛” smaller than your measured dimensions. - Measure and record the width and height inside the shadow box, so you can size your layers slightly smaller.
NOTE: Since my frame is a little bigger than 10" square, the current design size is perfect. If your frame is larger, keep the Lock icon closed and adjust the design’s width to be ⅛” smaller than your measurements. - Measure the frame’s depth from the back of the glass to where the finger prongs will hold the backer in place.
NOTE: The frame I’m using has 1.5” of depth. The padded backer will use some of that space, but we can adjust the depth a little during final assembly. - In Design Space, click “Save” and give your project a name so you can find it easily.
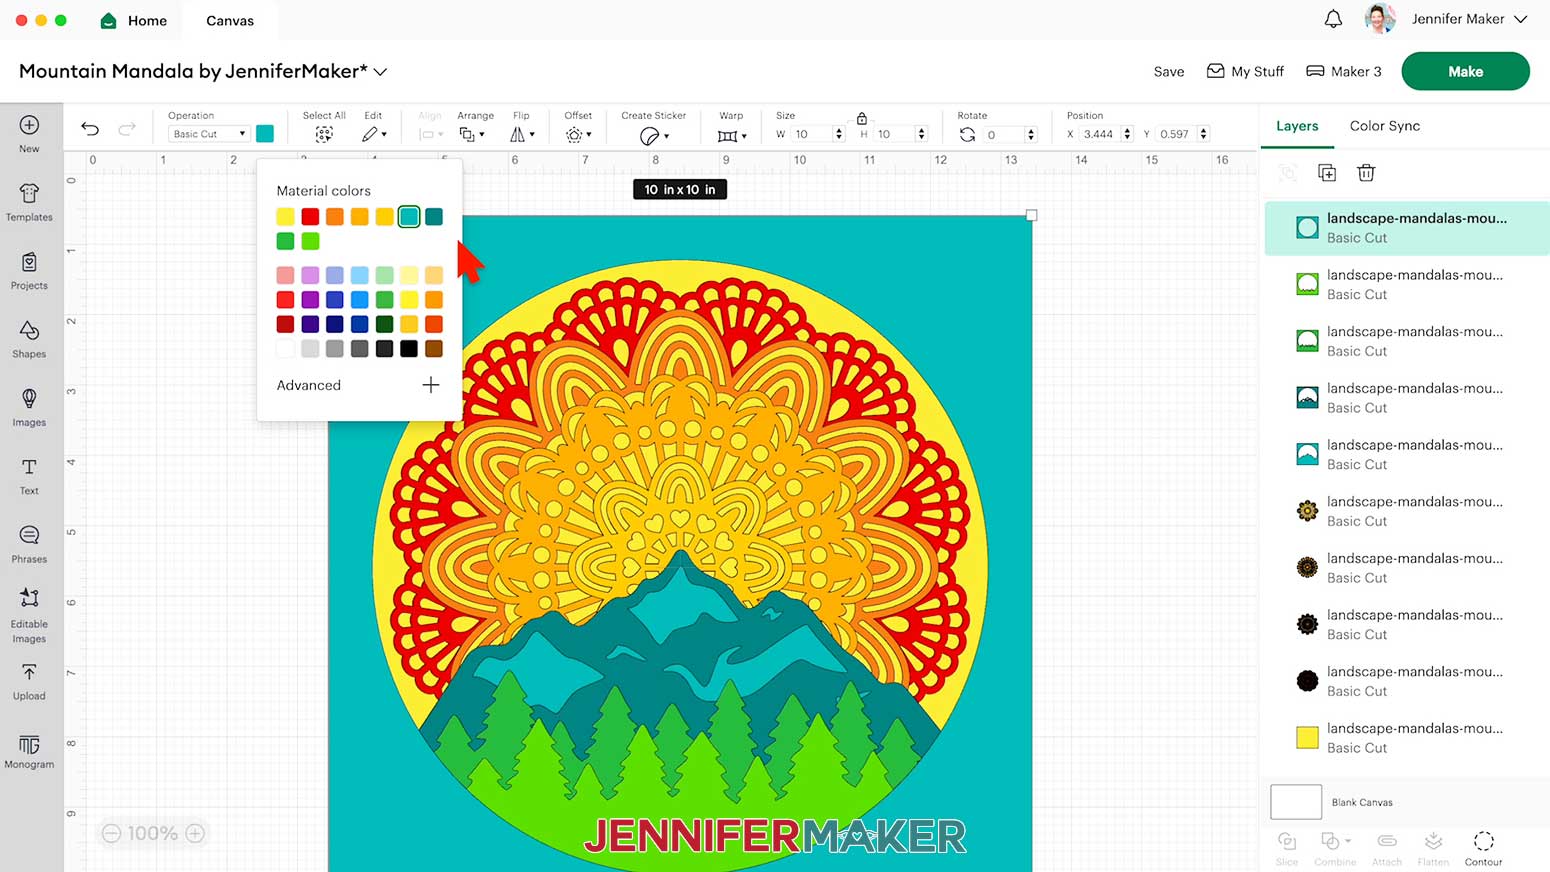
- Ungroup the design to see all of its layers in order.
NOTE: If you want to use just the layered mandala without a frame, delete the other layers. - If you want to change the color of a layer, select it in the Layers Panel.
- Then click the Color Box next to “Operation” and pick a new color for the layer.
NOTE: I’ll leave my colors as is. - You can also drag the layers apart to see where they’ll overlap.
- You can double-click each layer in the Layers Panel and rename them Layer 1 through Layer 10 so you can see the order better.
- Once you’ve seen how the layers will go together and measured the frame’s depth, plan which adhesive options you’ll use between each layer and keep track of your choices.
TIP: Keep in mind how detailed the layers are, because some of the adhesives are too large to hide behind delicate sections of the layers. It’s okay to use different types of adhesive on the same layer as long as they're the same depth and will keep the surfaces even.
NOTE: I’ll use:
Bearly Art Adhesive Foam Squares and Tape (1/8” / 0.125” thick) on the back of Layers 1, 2, 3, and 4 (which will take up approximately 1/2” or 0.5” total depth)
Micro Pop-Dots (1/16” / 0.0625” thick) on the back of Layers 6, 7, 8, and 9 (which will take up approximately 1/4” or 0.25” total depth)
Since Layer 5 in my Mountain design will connect to Layer 10 (the background) I’ll use the thicker Bearly Art Adhesive Foam Squares and Tape (1/4” / 0.25” thick) to match the height of the assembled mandala to keep everything even.
This plan means my assembled layers along with their adhesive will use approximately 1” of the usable depth in the frame and they won’t be squished when the backer is in place. - You’re ready to cut!

STEP 3: CUT YOUR MANDALA LAYERS
- Make sure the correct machine is selected in the top right.
- Click “Make.”
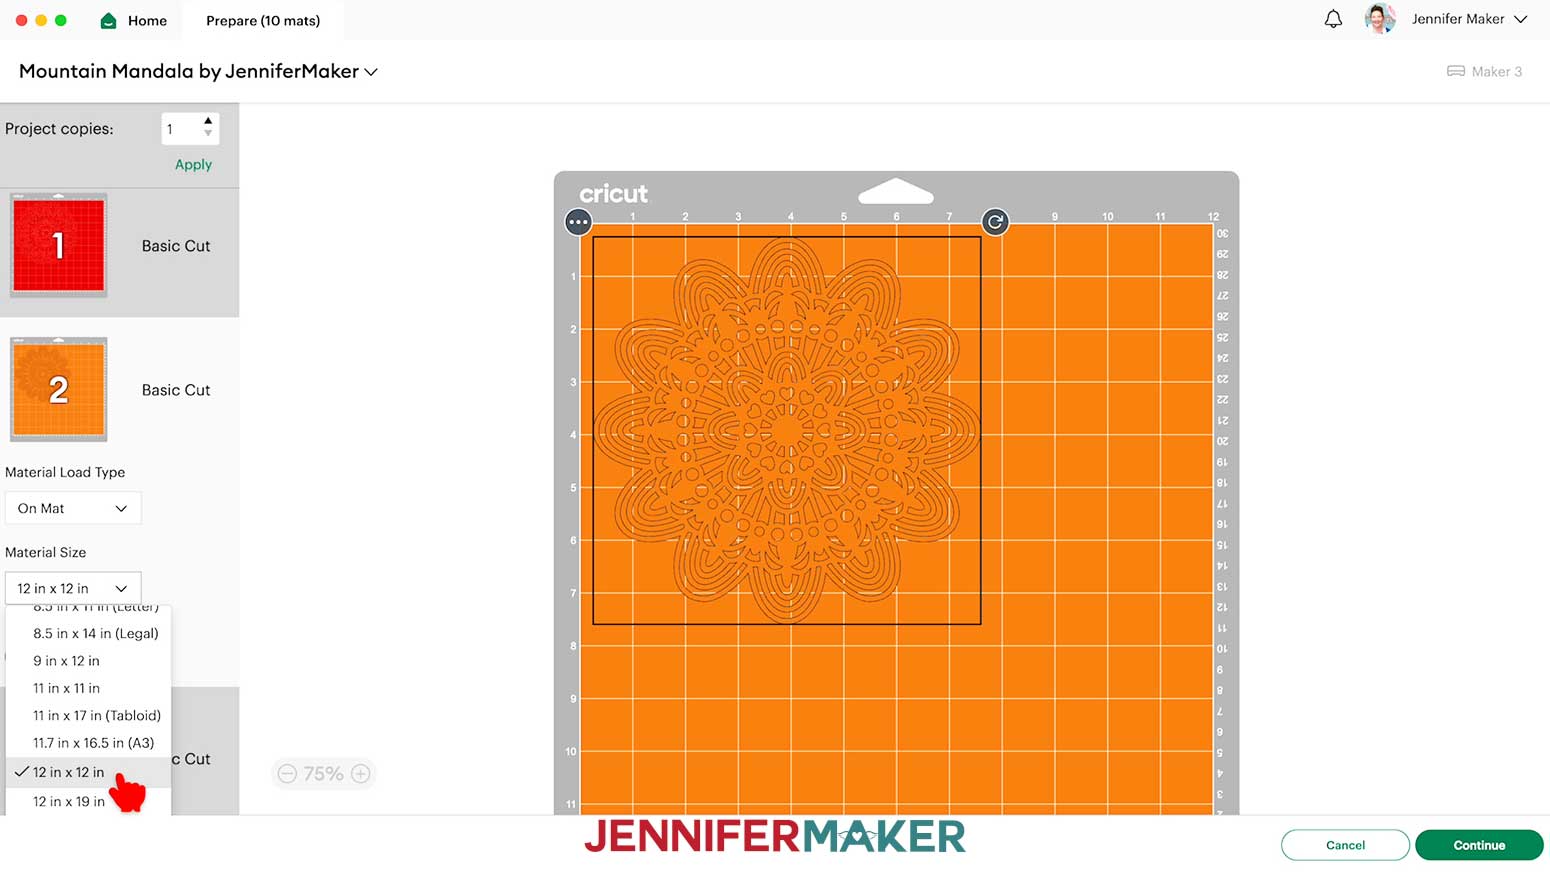
- On the Prepare screen, make sure the correct Material Size is selected for your materials.
- Click “Continue.”
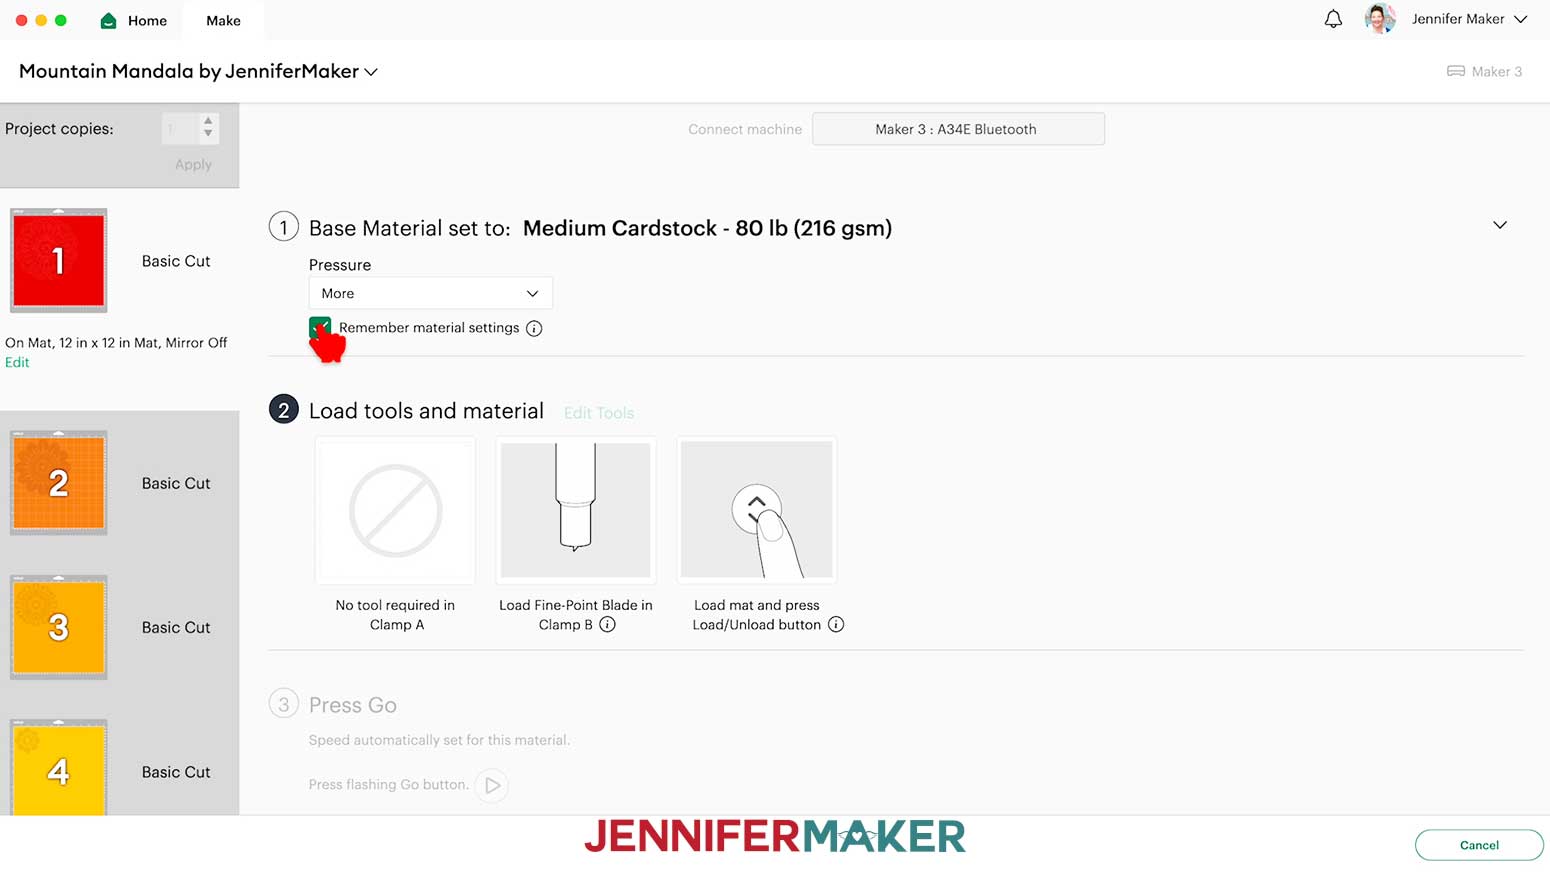
- On the Make screen, set the Base Material for your first mat. I’ll use the “Medium Cardstock - 80 lb (216 gsm)” setting and change the Pressure to “More” to cut the 65 lb. cardstock.
NOTE: Not all machines cut the exact same way, but I got the best results with these settings.
TIP: Changing the Pressure to “More” results in a cleaner cut. - If you’re using the same material for all of your mats, check the box next to “Remember material settings” to save time between mats.
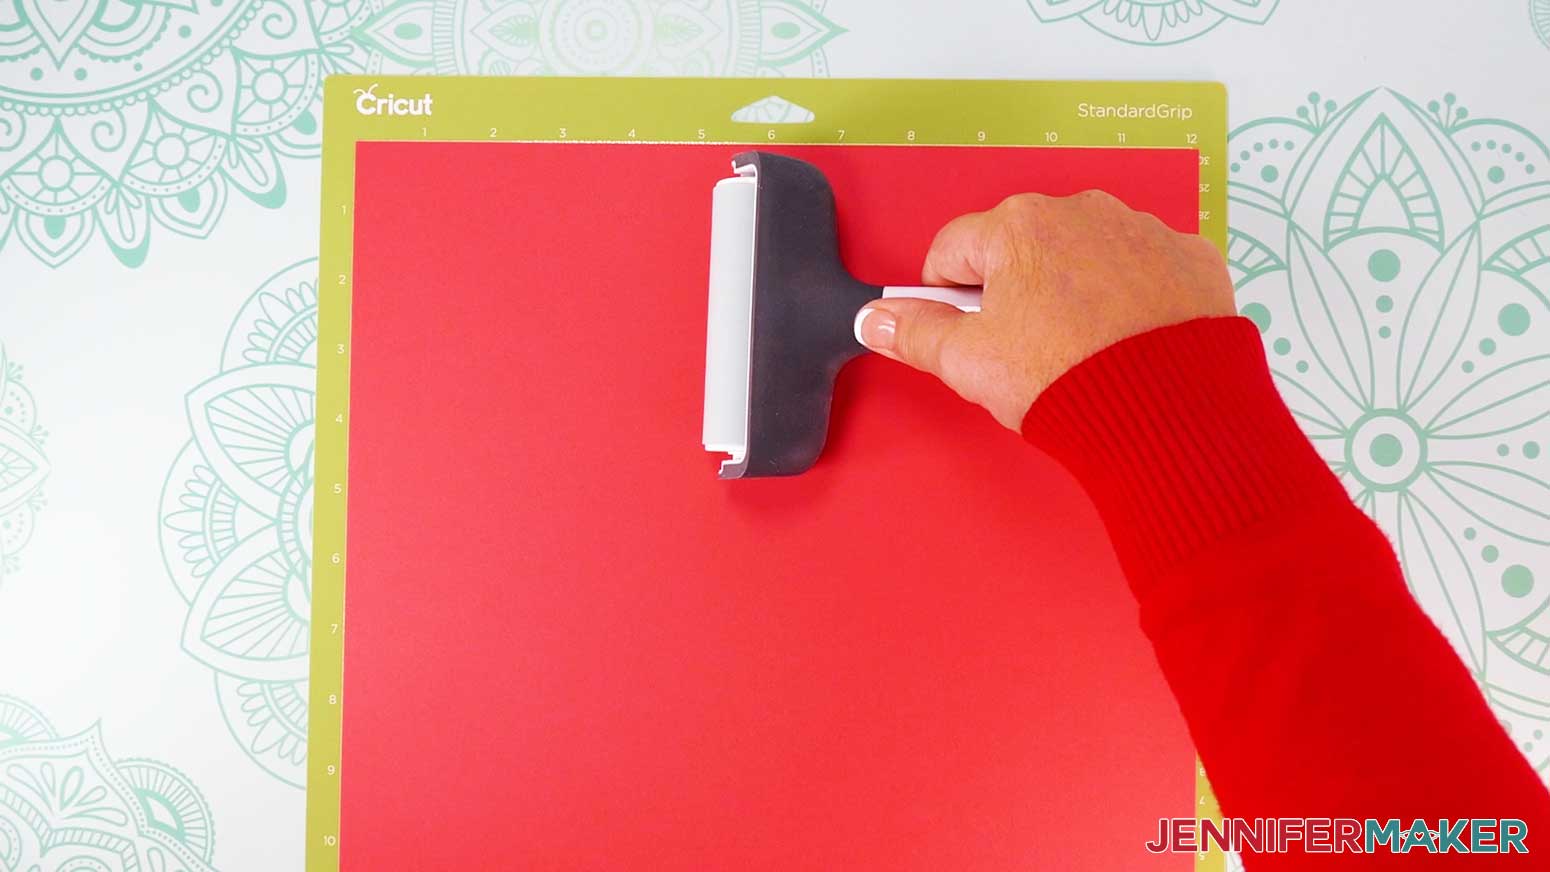
- Place your first color of cardstock on a green StandardGrip machine mat.
NOTE: My first color is red. - Use a brayer to make sure it’s fully adhered.
- Check that your Premium Fine-Point Blade is clean and in the clamp.
- Press the flashing “Load/Unload” button to load the prepared mat into your Cricut.
- Press the flashing “Go” button to begin cutting.
- When the cuts finish, don’t unload the mat right away. Gently lift a corner of the material to make sure the cuts went all the way through. If not, press the “Go” button again to make a second pass of cuts in the same spots.
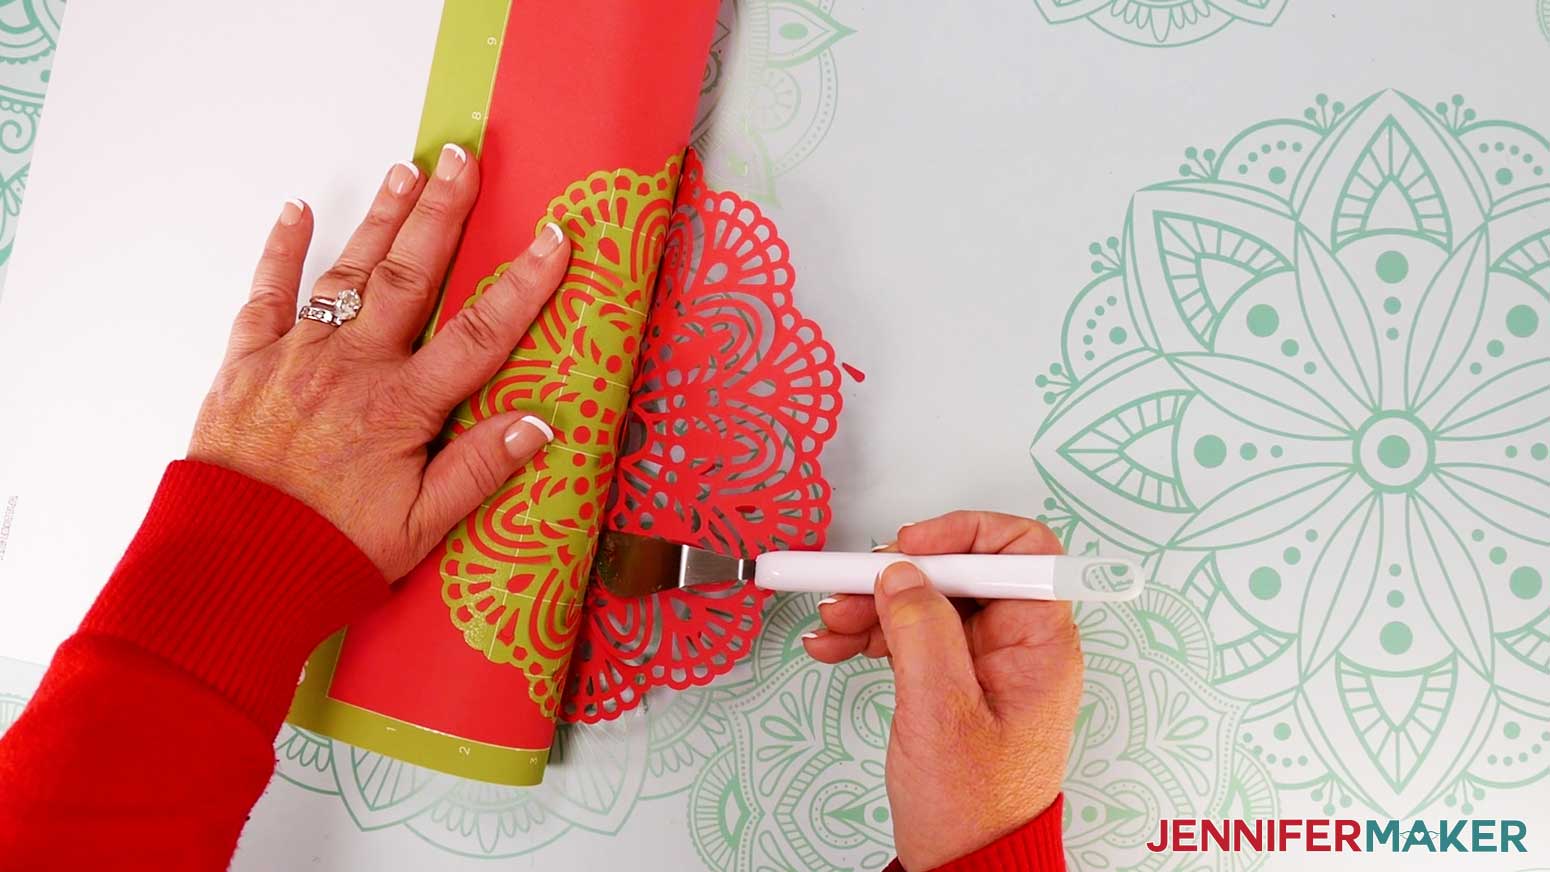
- When the cuts are complete, unload the mat, flip it over onto your work surface, and gently roll it back to release the cardstock.
TIP: If you have any issues with your cuts, go to jennifermaker.com/cleaner-cuts. - Use a spatula to help lift delicate areas and a weeding tool to pop out small cuts from intricate areas.
- Place the piece face up in the correct orientation so assembly is easier later.
- Use a scraper to remove cutouts left on the mat.
- Continue cutting the rest of the cardstock, aligning the layers face up in the correct order as you go.
NOTE: Be sure to load the correct color of cardstock for each mat by referring to the current mat on your Design Space screen.
STEP 4: ASSEMBLE THE MANDALA SHADOW BOX
- Make sure your layers are face up in the correct order and aligned so the complete design looks correct.
TIP: If you need help, refer back to the Cricut Design Space Canvas to check the layers’ orientation and order. - We'll assemble this design in three parts: the foreground scene layers, the four mandala sunset layers, and the final assembly.
NOTE: If you only want to assemble the mandala without a shadow box, skip to the “Mandala Assembly” section.
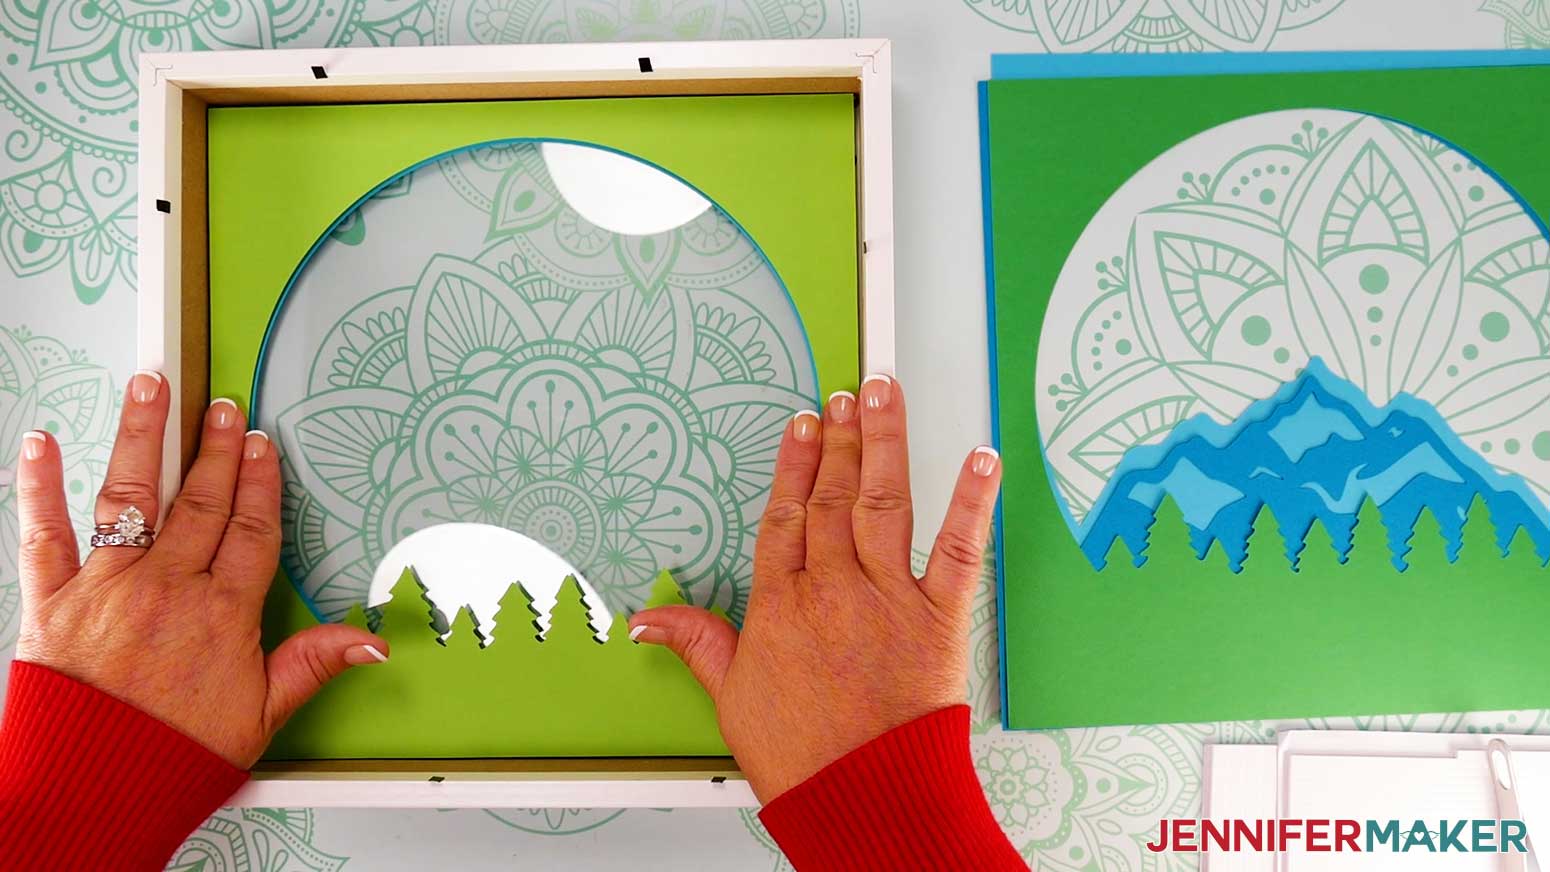
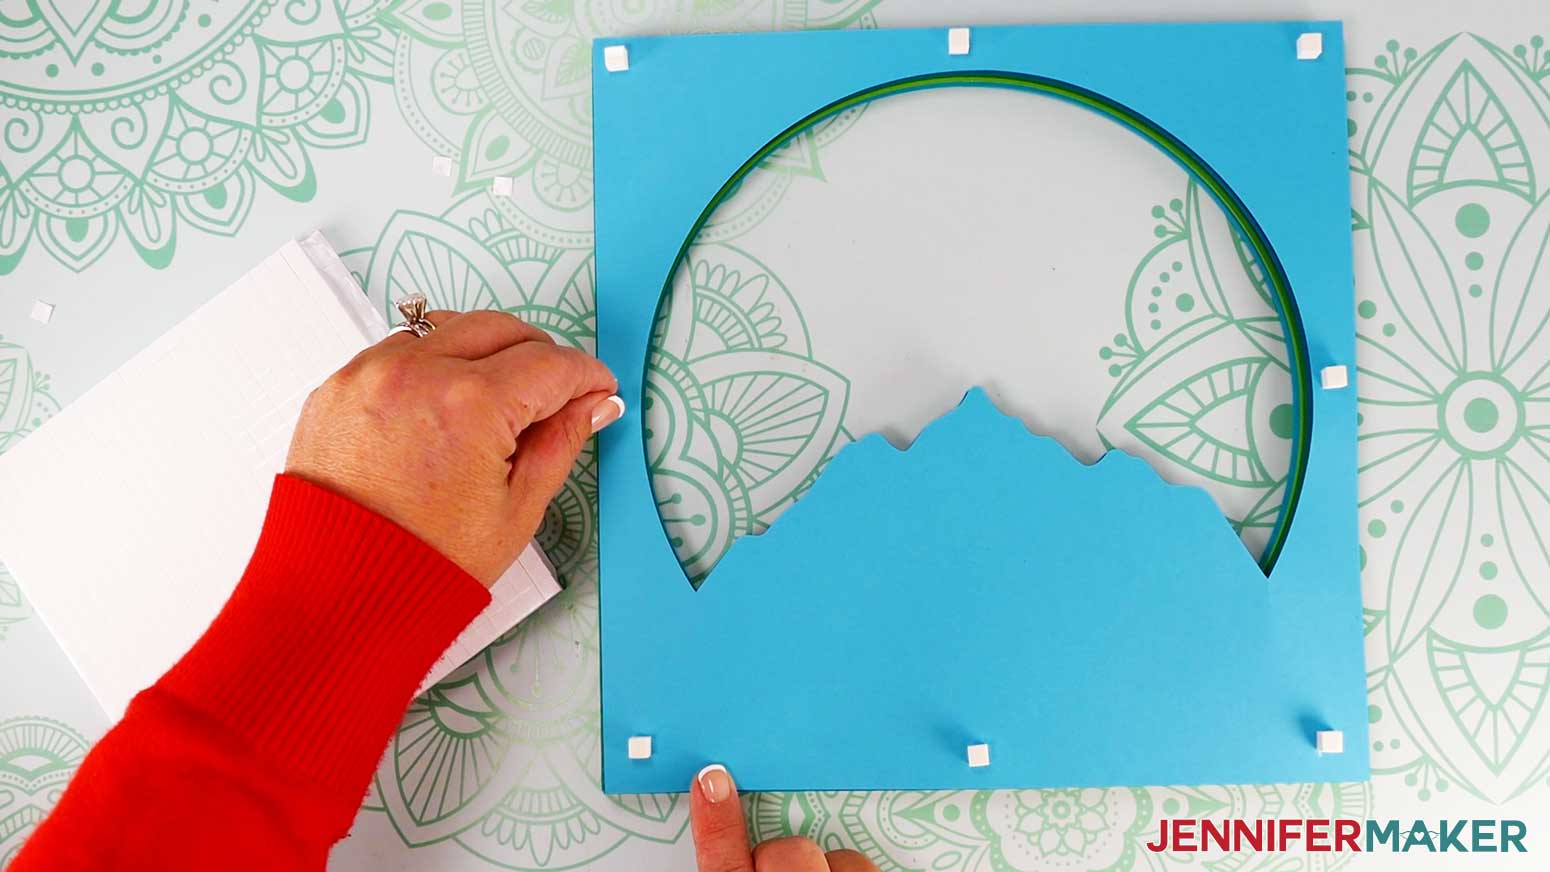
FOREGROUND
- Place the foreground section of stacked layers (Layer 1 through Layer 5) so they’re face up.
- The shadow box frame helps with alignment, so have that open and face down.
- Notice where the current top piece (Layer 1) will overlap with the next one (Layer 2) because those are the areas we need to adhere and support.
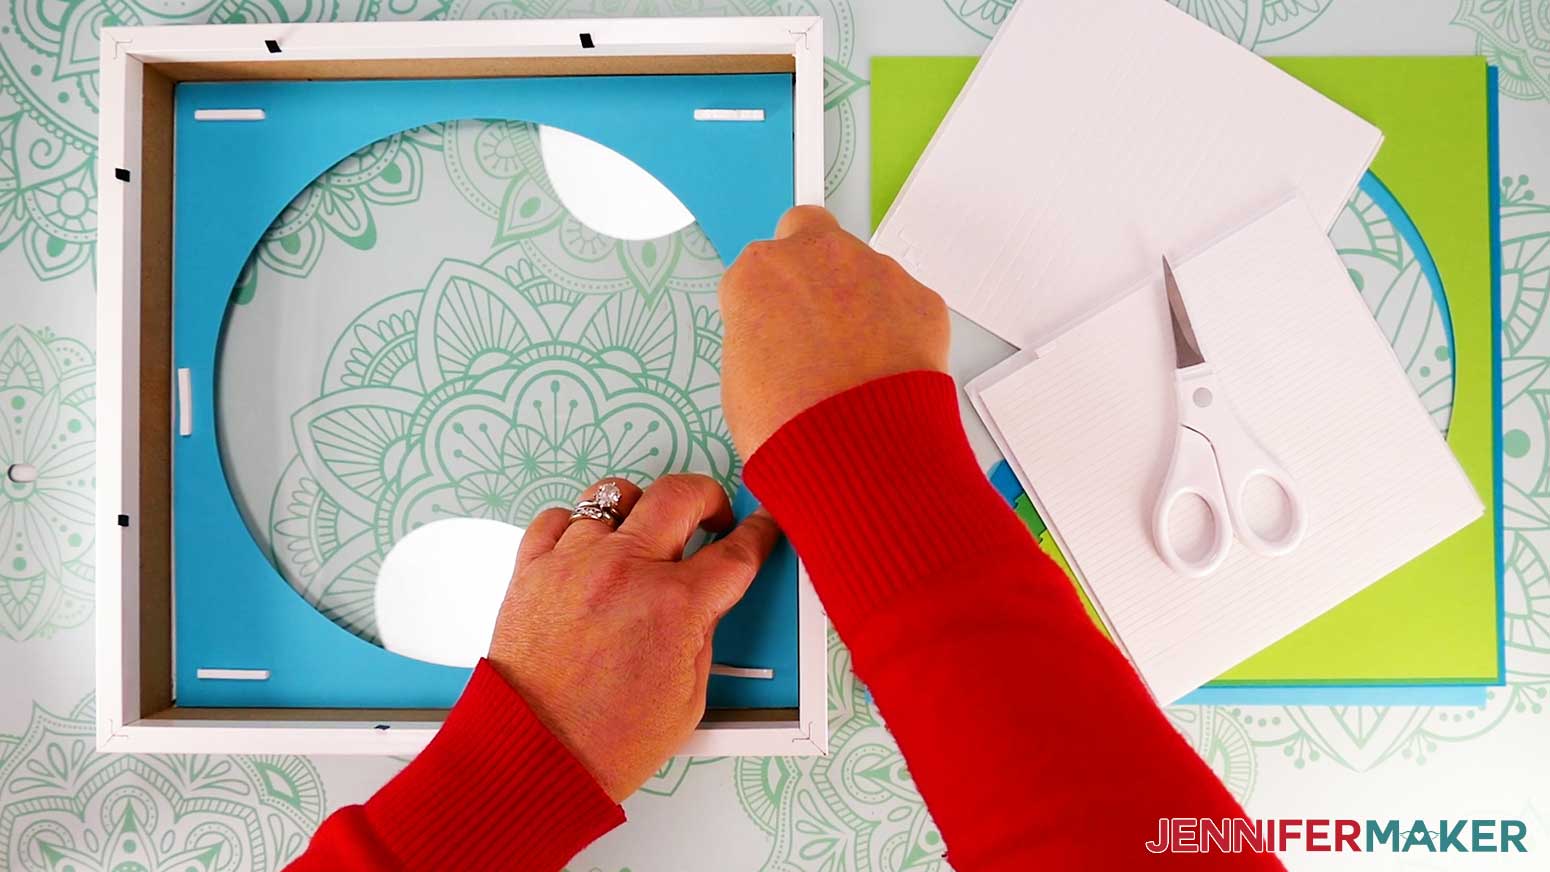
NOTE: Since the layers' inner circle cutouts align, we know we need to evenly support the entire back of Layer 1. - Flip the cover piece (Layer 1) face down in the frame.
- Check your notes for which adhesive you want to use between Layers 1 and 2.
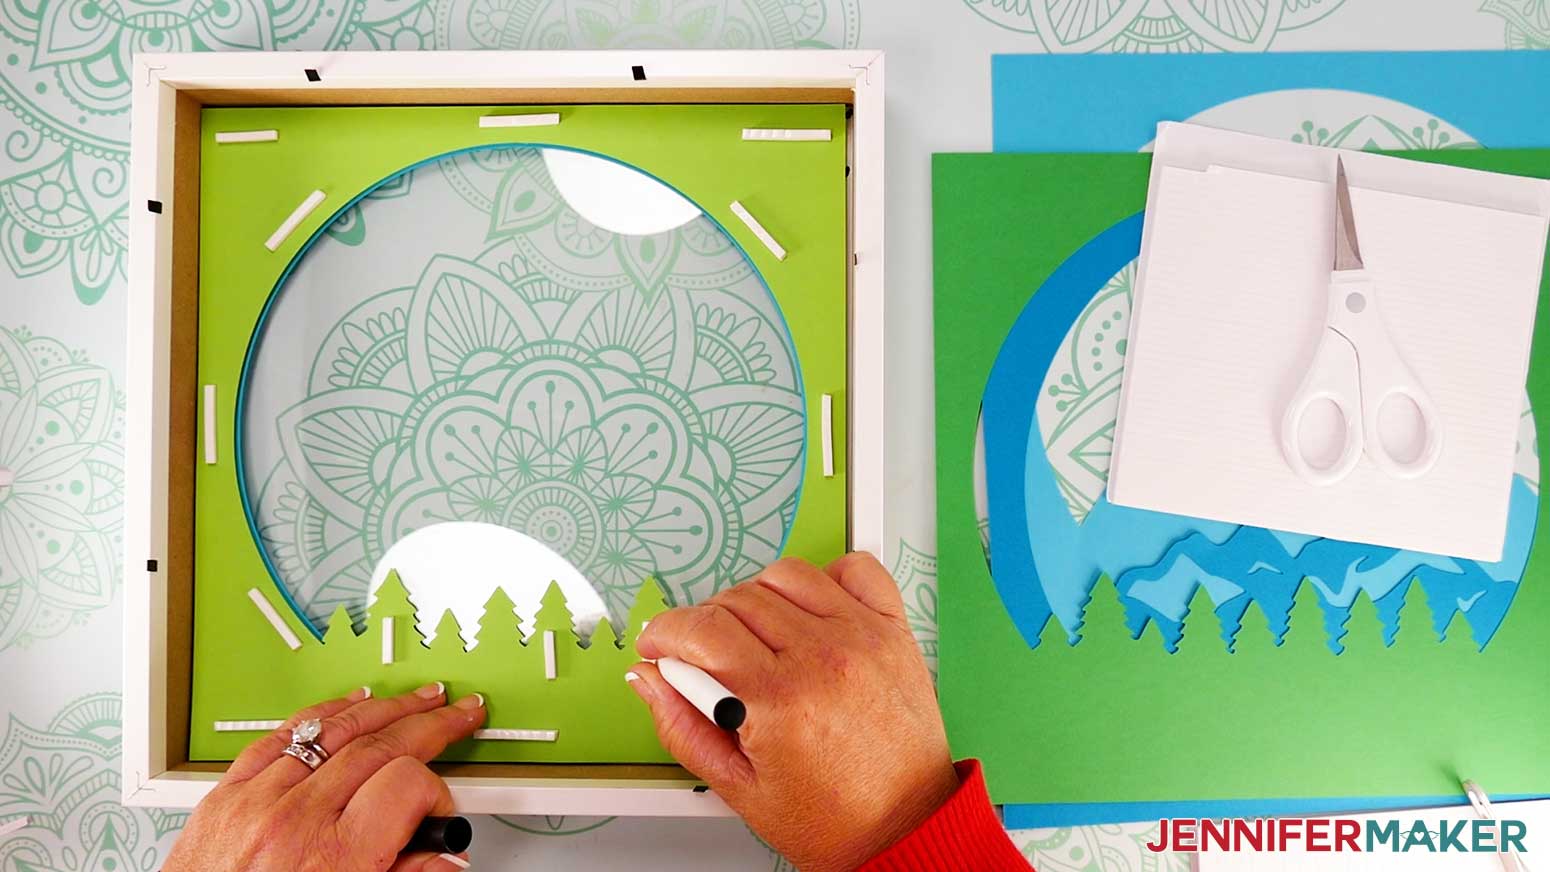
NOTE: I’m using the thinner ⅛” (0.125”) Bearly Art Cubies and Tape Strips cut to fit with scissors. - Add adhesive pieces with the same depth to the back of Layer 1 with even spacing, leaving the protective paper in place.
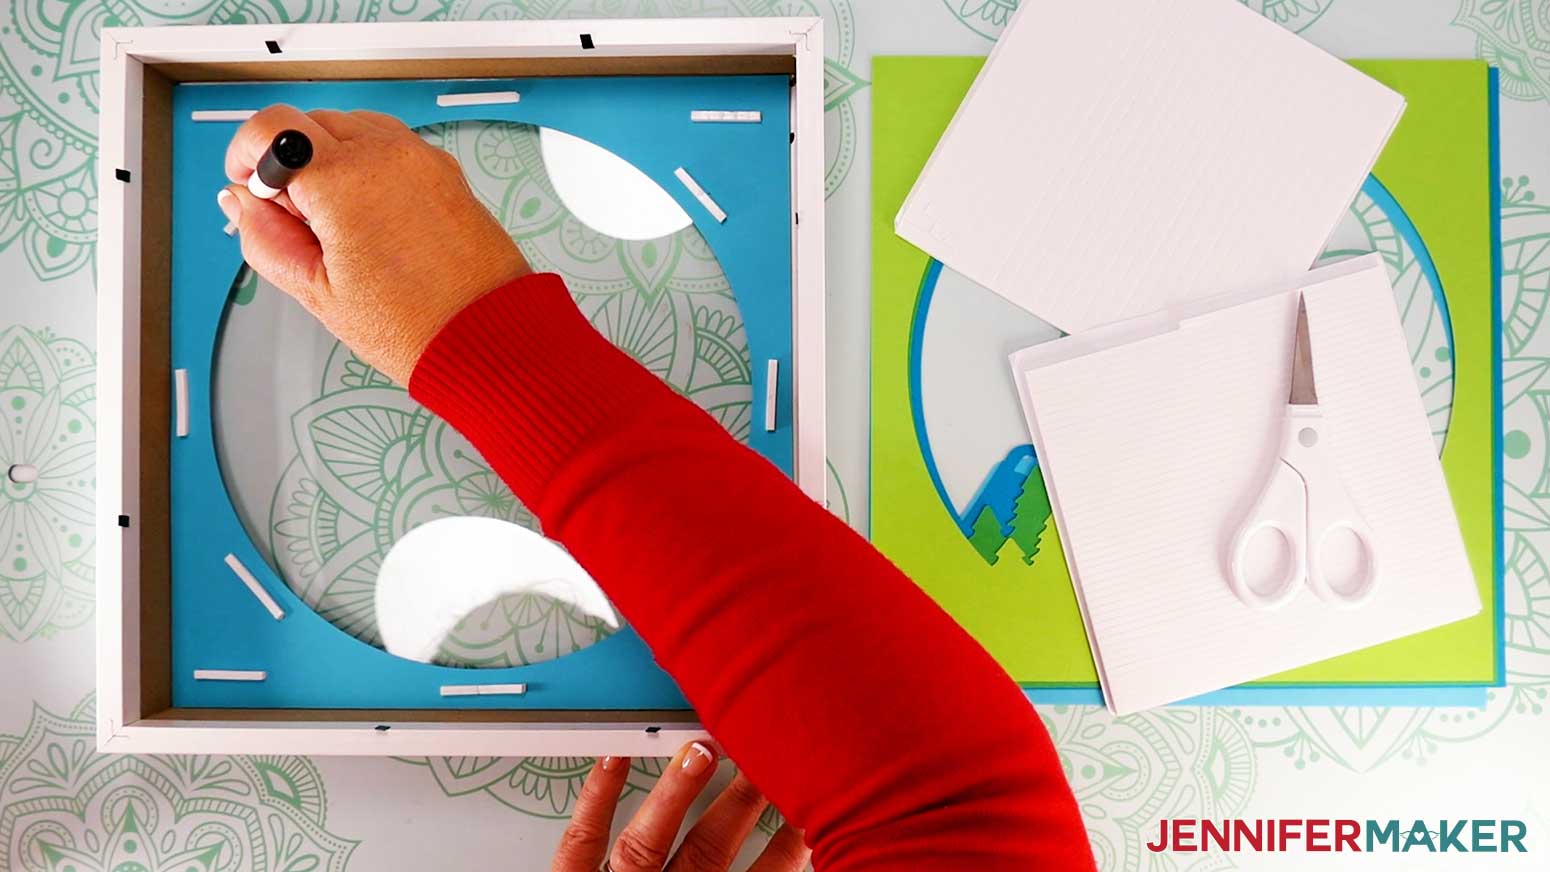
TIP: Put adhesives wherever the cardstock layers might sag, so in the corners, at the middle edges, and where the circle’s edges are farthest away from the other tape pieces. Keep them consistent so you can put the next layer’s adhesive pieces in roughly the same spot for the most even and sturdy assembly. - Use a dark-colored pen to mark the backing paper of each adhesive piece so you know which ones still need to be removed.
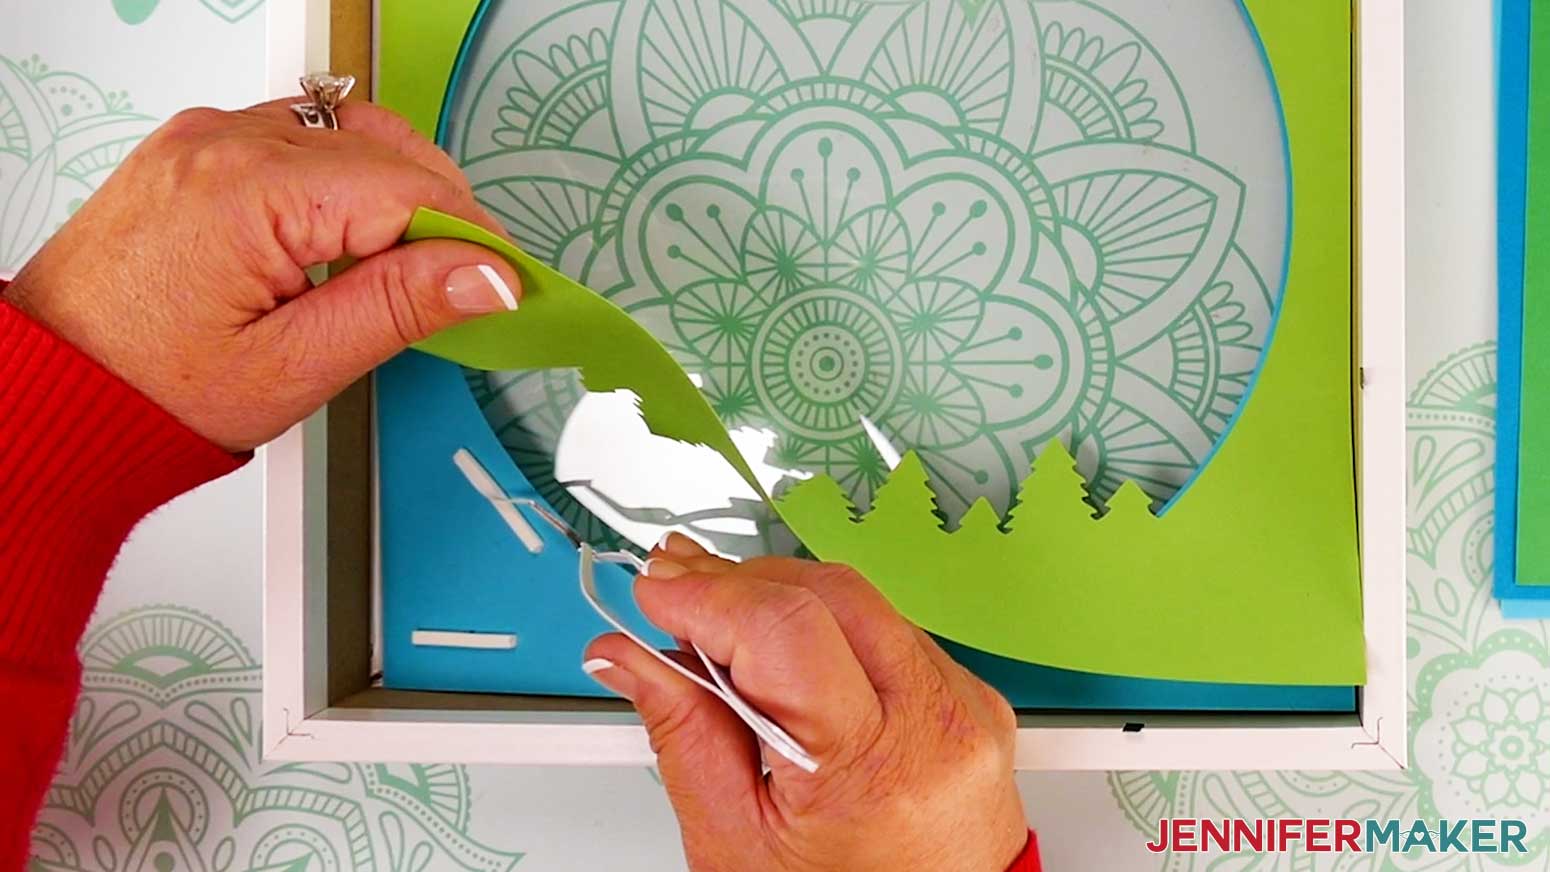
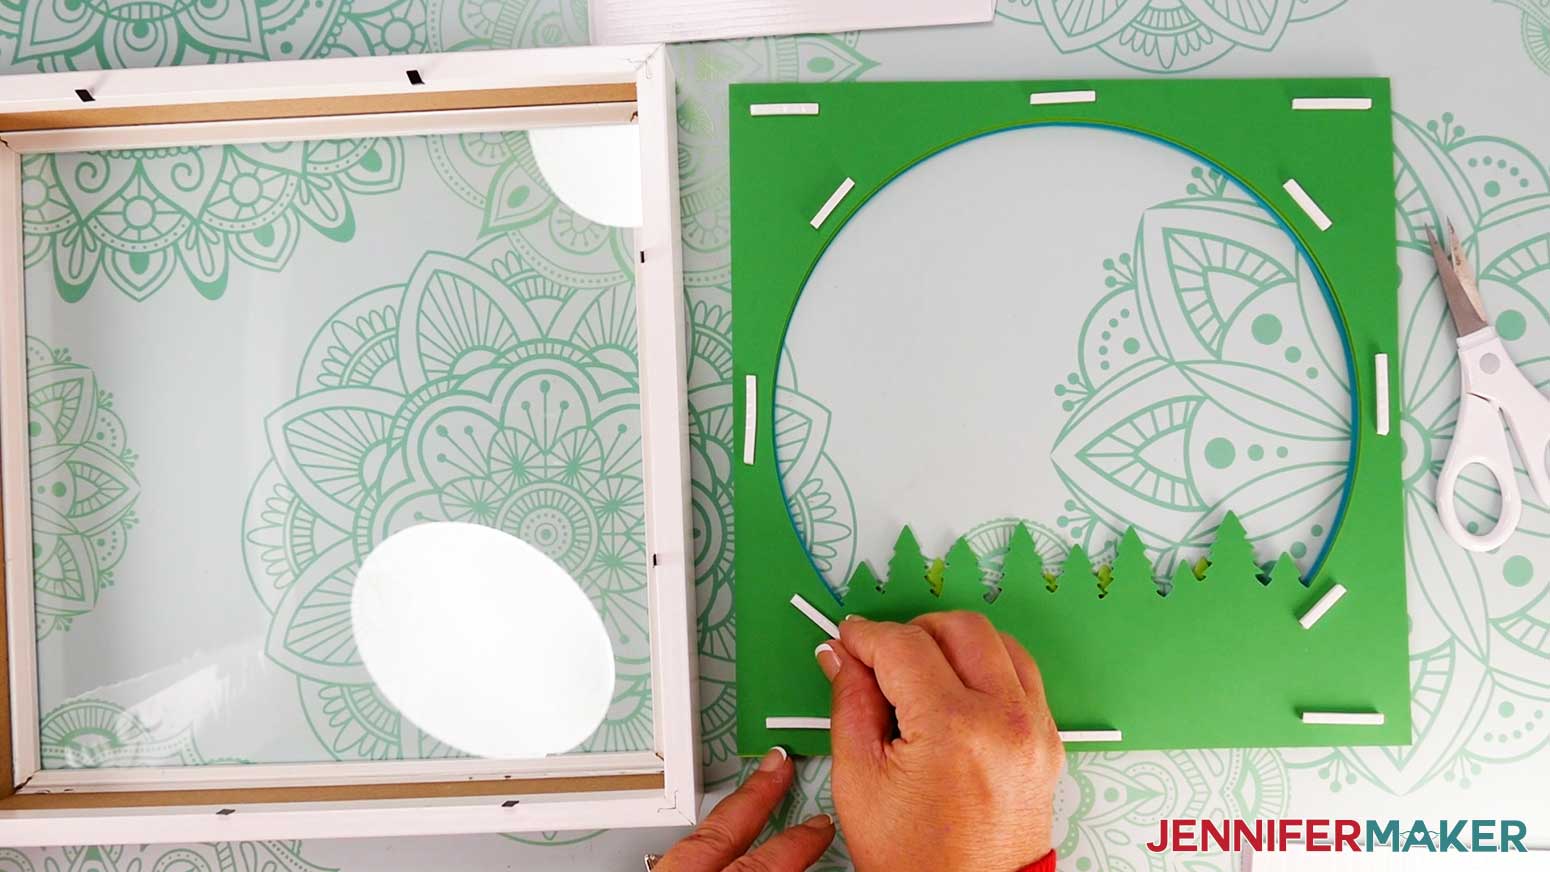
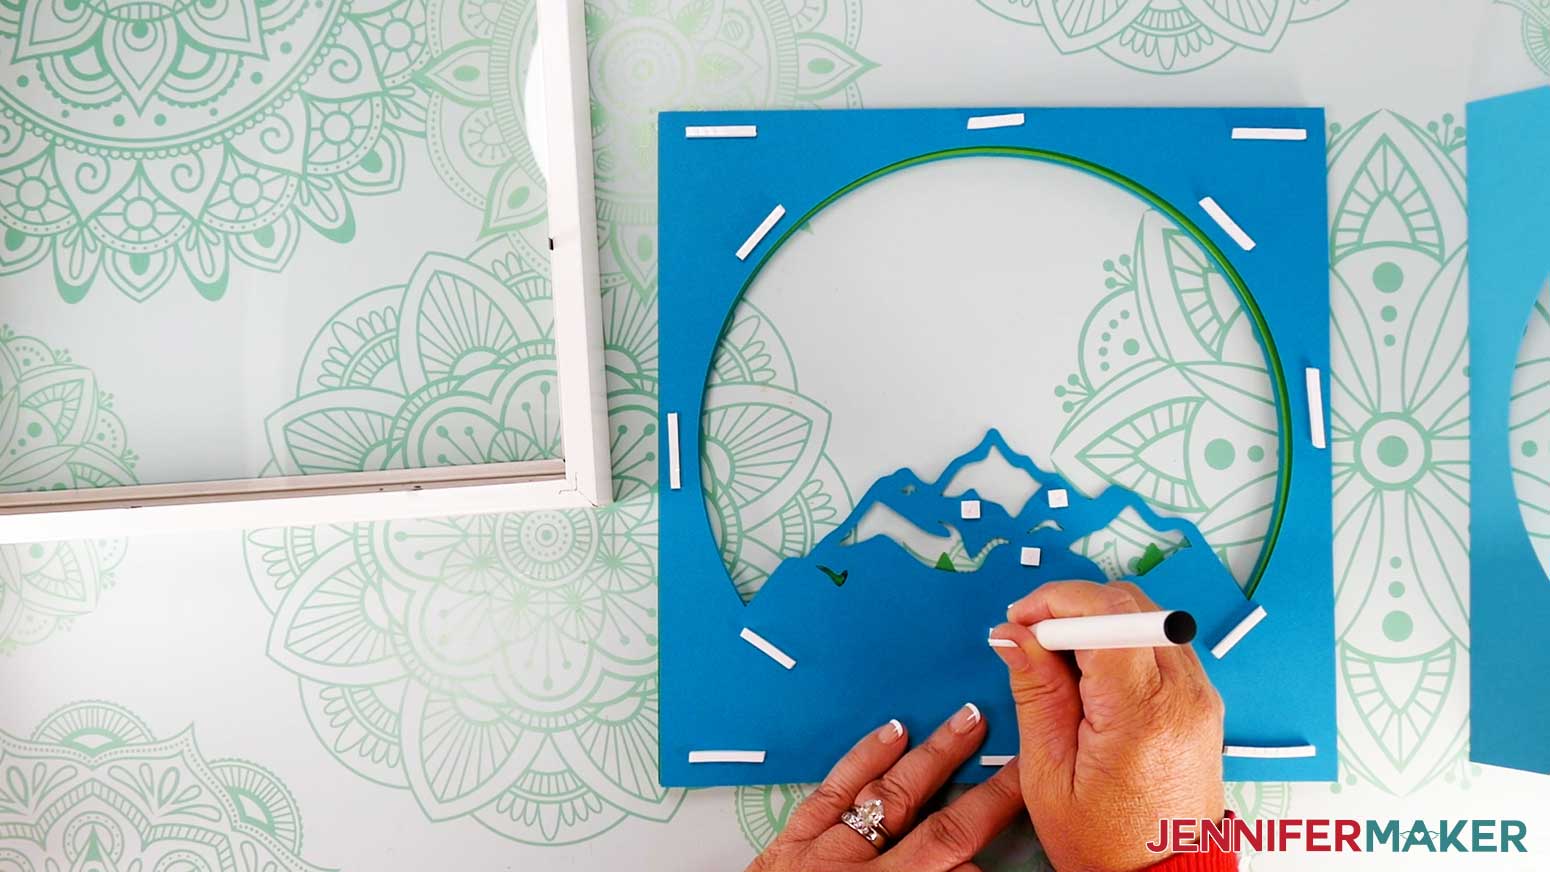
- While the other layers are still stacked face up, check where the next layer (Layer 2) will overlap with the one below it (Layer 3) to note the spots for adhesives.
NOTE: I’ll put adhesives all around the solid frame like I did on the previous layer, and in the lower solid tree section. I also want to secure the trees, but I need to avoid putting adhesive near the tips. This is because the next layer’s trees are offset, and any adhesive on Layer 2's tree tips could stick to Layer 4 by accident and cause uneven layers. - Remove the backing papers from the top half of the adhesive pieces.
NOTE: This way, you'll only have half of the adhesive's sticky sides exposed while checking alignment, and it will be easier to adhere the layers in the right spot. Once the top half is secured, you’ll be able to access the remaining protective papers for the bottom half of the adhesive pieces by gently lifting the top layer. - Hold the next piece (Layer 2) face down and correctly-oriented over the piece in the frame (Layer 1).
- Align the top corners and lightly press them in place.
NOTE: Once the top corners are aligned, the rest of the design will fall into place correctly. - Carefully lift up the top layer to access the remaining backing paper pieces and remove them a few at a time, moving down the design and aligning and pressing the cardstock in place as you go.
TIP: Avoid creasing the top layer. If you have trouble reaching the adhesives, gently lift the adhered layers out of the frame to access them, then put the design back in the frame.
NOTE: The alignment should be very close, but you can gently lift and adjust the pieces as needed before pressing down on the adhesives to really secure them. - Once everything is aligned, gently press down over the adhesives to secure the layers together.
- Use Steps 5-13 to assemble the rest of the foreground layers, finishing by adhering Layer 5 to Layer 4 without adding adhesive to the back of Layer 5.
NOTE: Place each new layer of adhesives as close as possible to the ones on the previous layer so they stack evenly.
TIP: You can lift the assembled layers up and look between the pieces to see where to place the new adhesive. - Set the frame and assembled foreground layers aside.


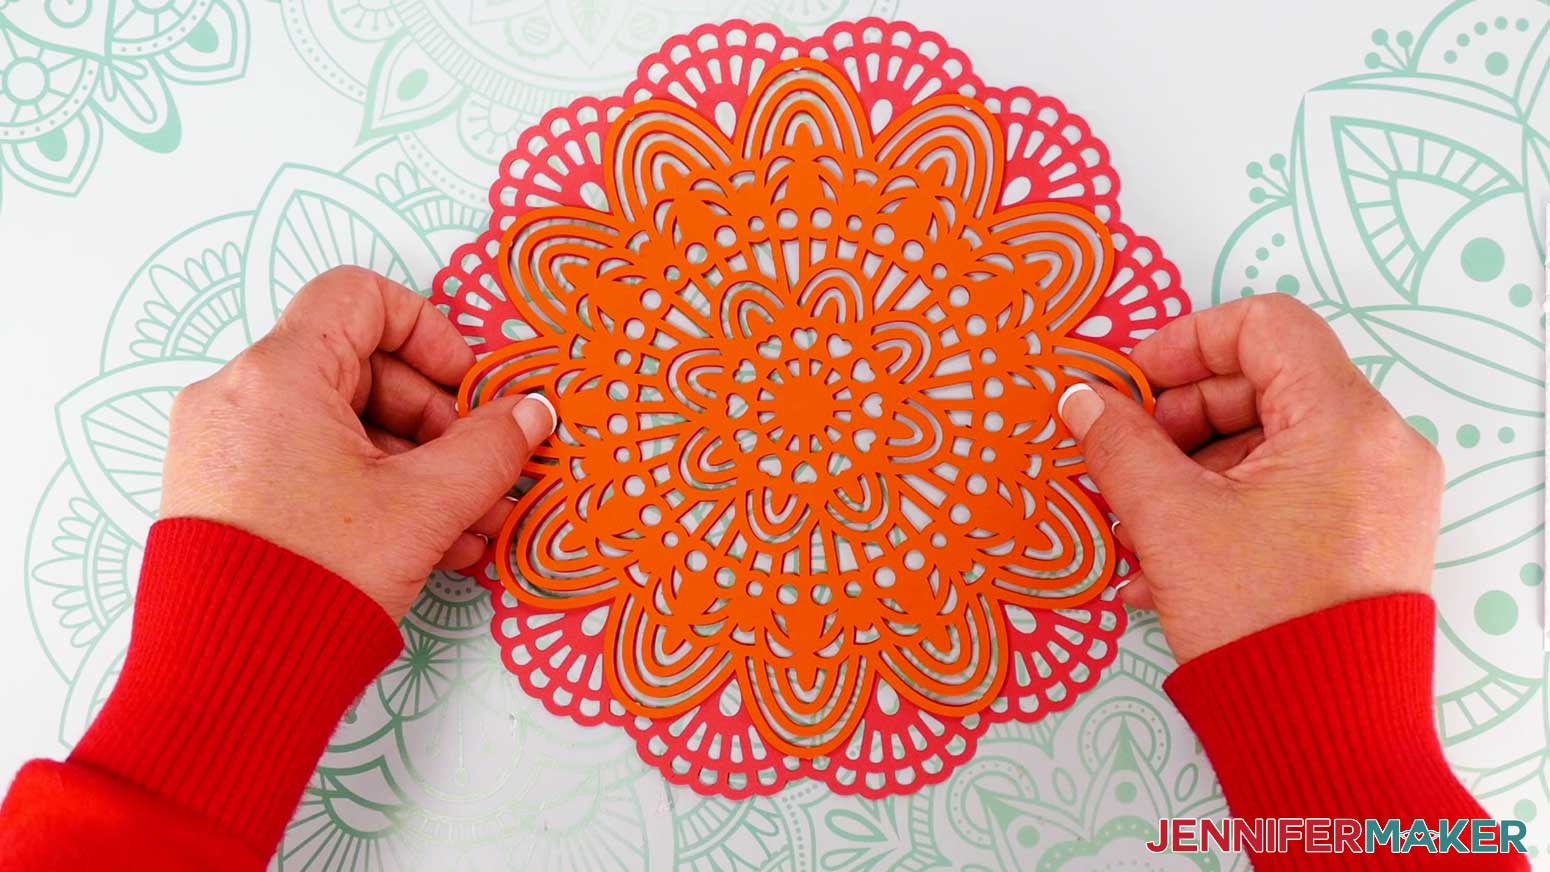
MANDALA ASSEMBLY
- The intricate circle mandala layers don’t have the outer frame sections like the foreground layers, so we’ll use a different assembly technique for those.
- Place the four mandala layers face up to make sure they align. You might need to rotate some of the pieces to get all the cuts stacked correctly.
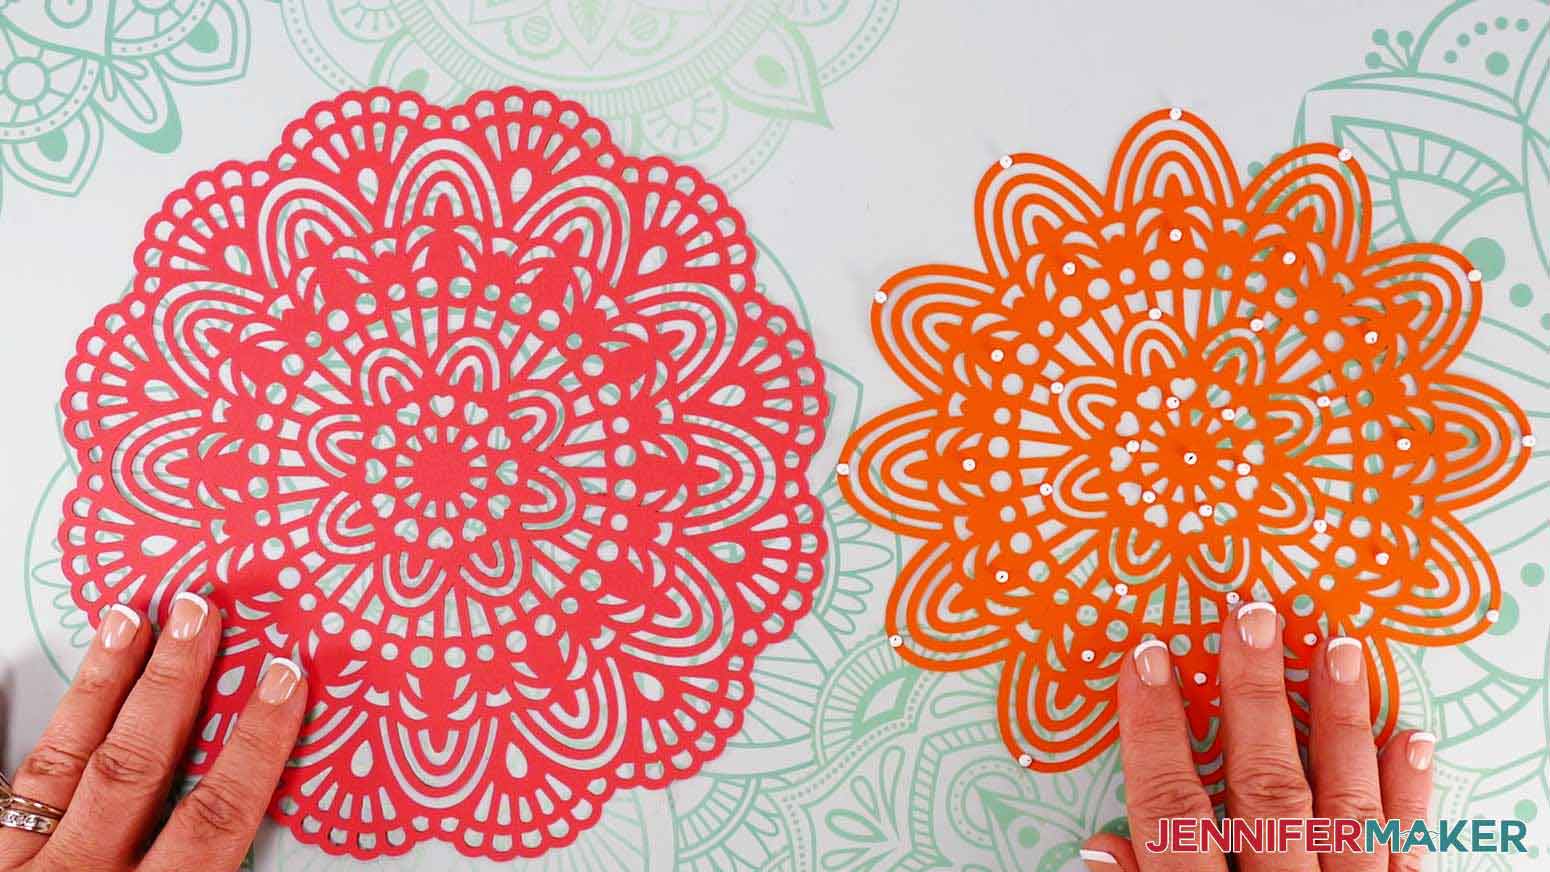
- Note which overlapping elements will be large enough to hide adhesive pieces.
NOTE: I recommend using Micro Pop-Dots, which are small enough to hide behind the intricate layer’s details while still adding depth between the cardstock pieces. - It’s easier to work from the largest layer to the smallest, so set the smaller two (Layers 6 and 7) aside.
- Place the smaller remaining mandala (Layer 8) face down.
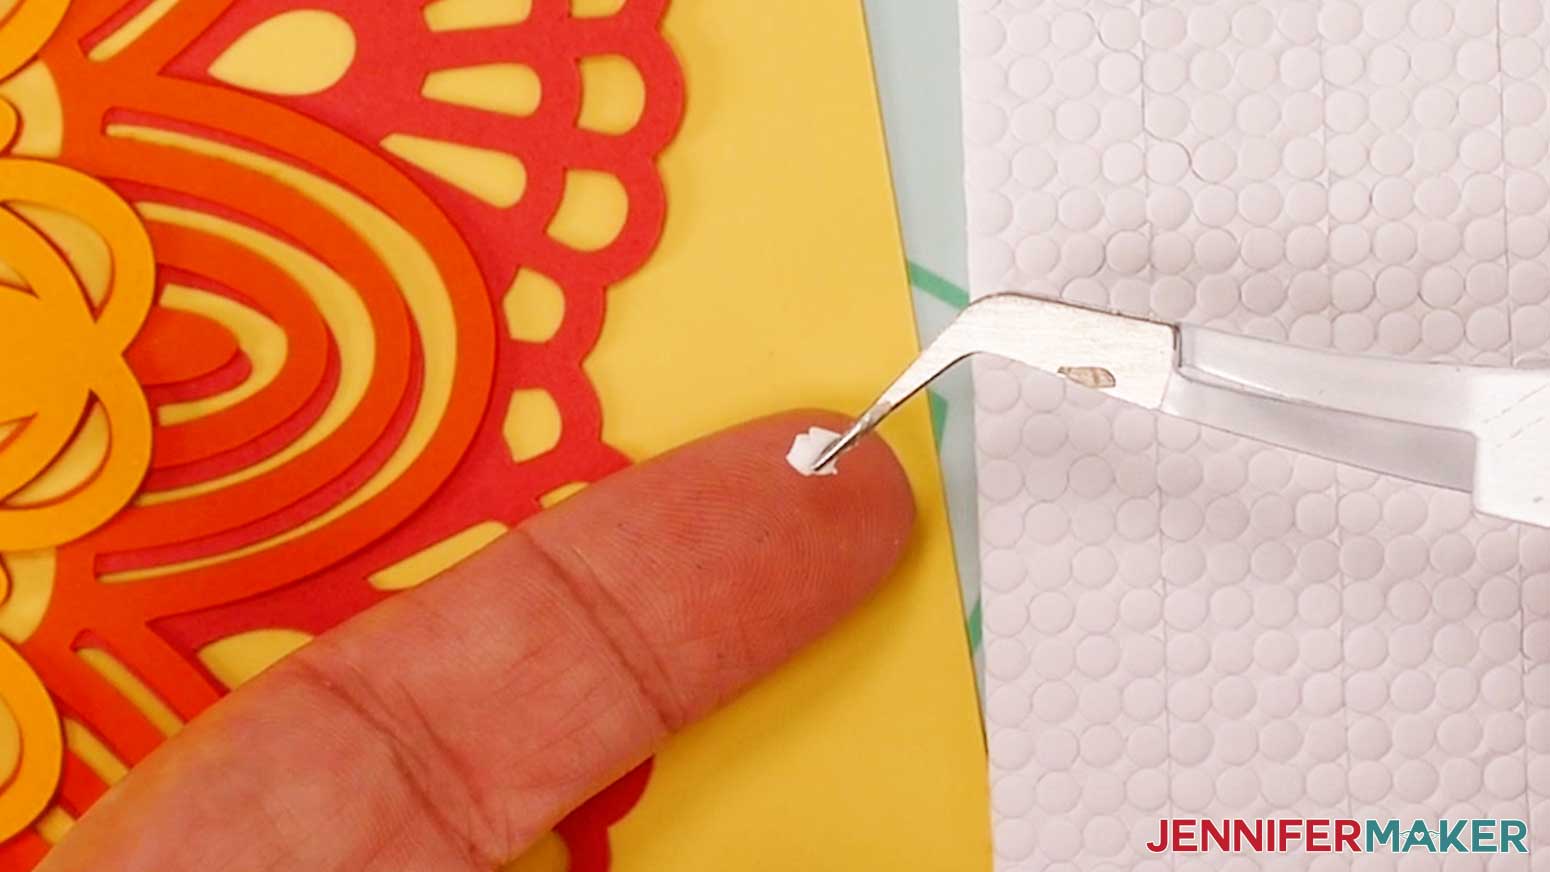
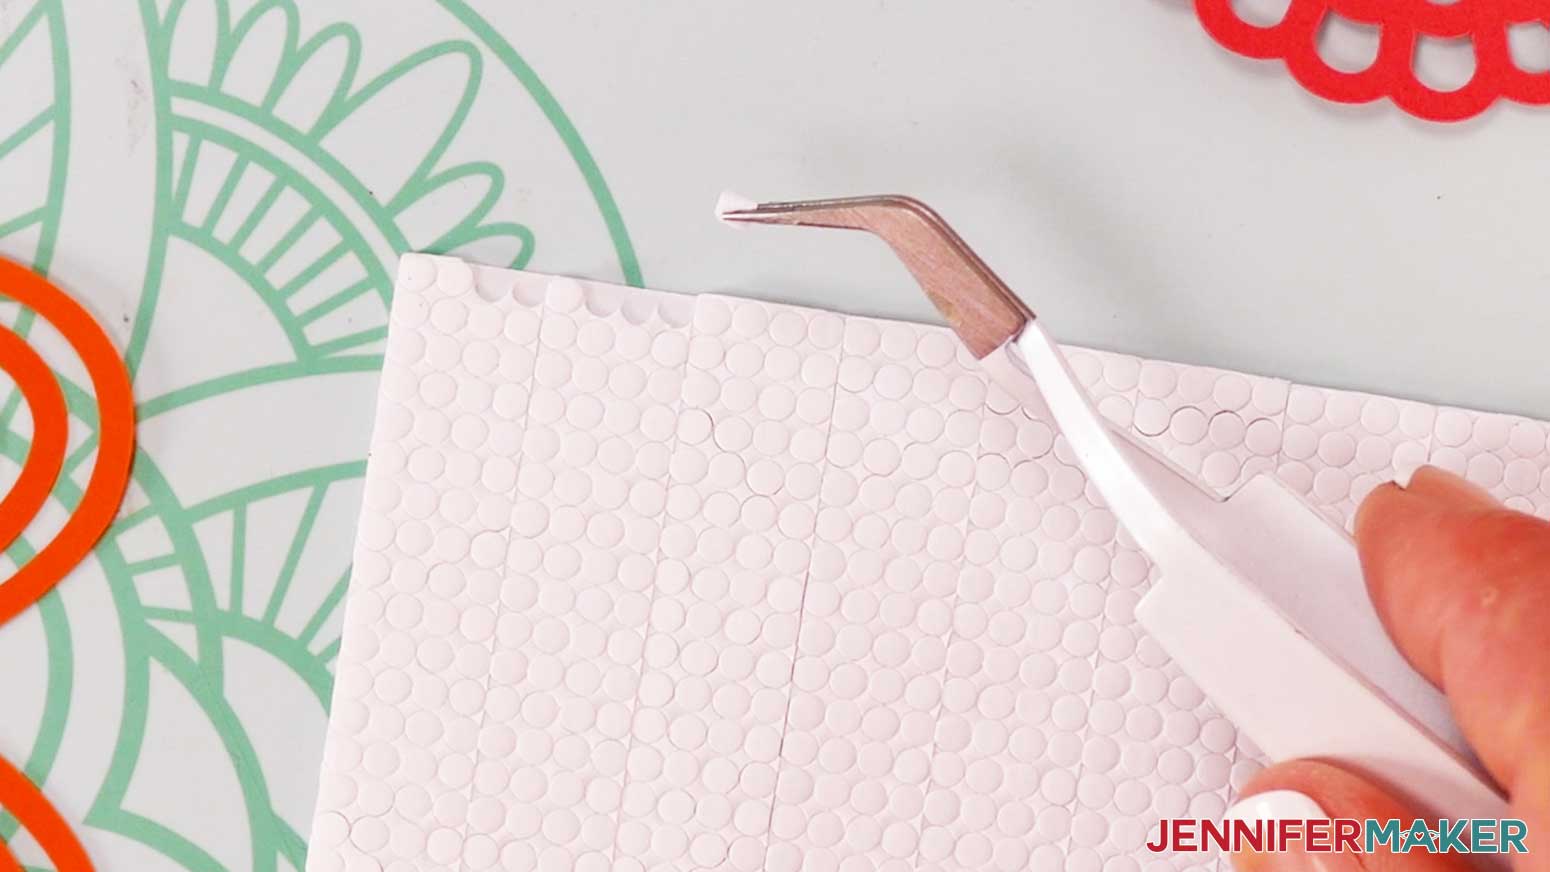
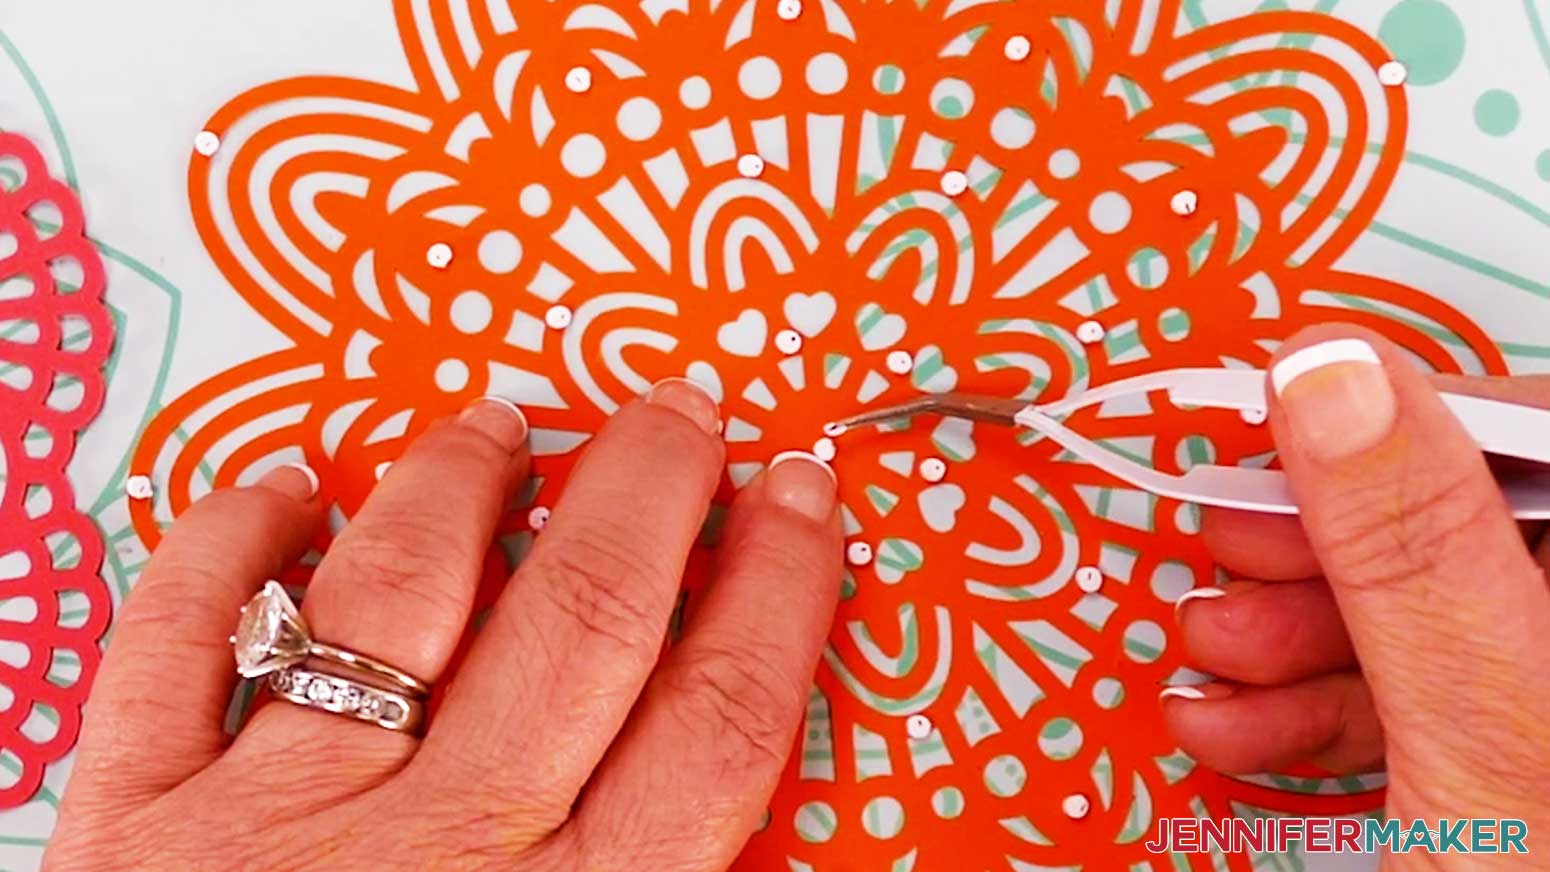
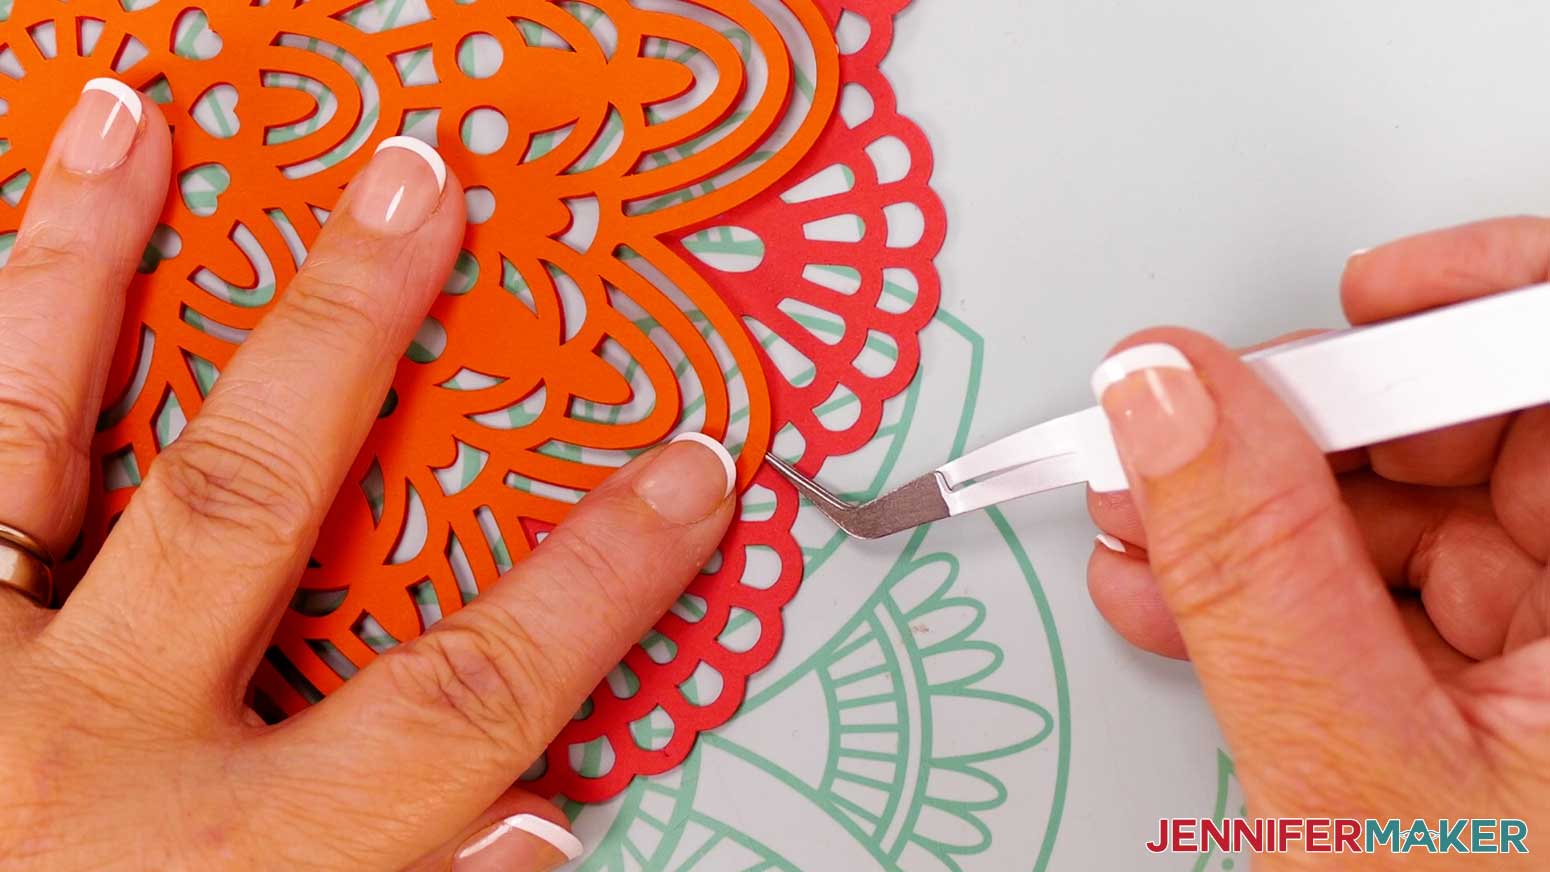
- Use reverse-action tweezers to lift a dot by the sides.
TIP: I prefer the reverse action tweezers because you don’t need to hold them shut to keep the Micro Pop-Dot secure.
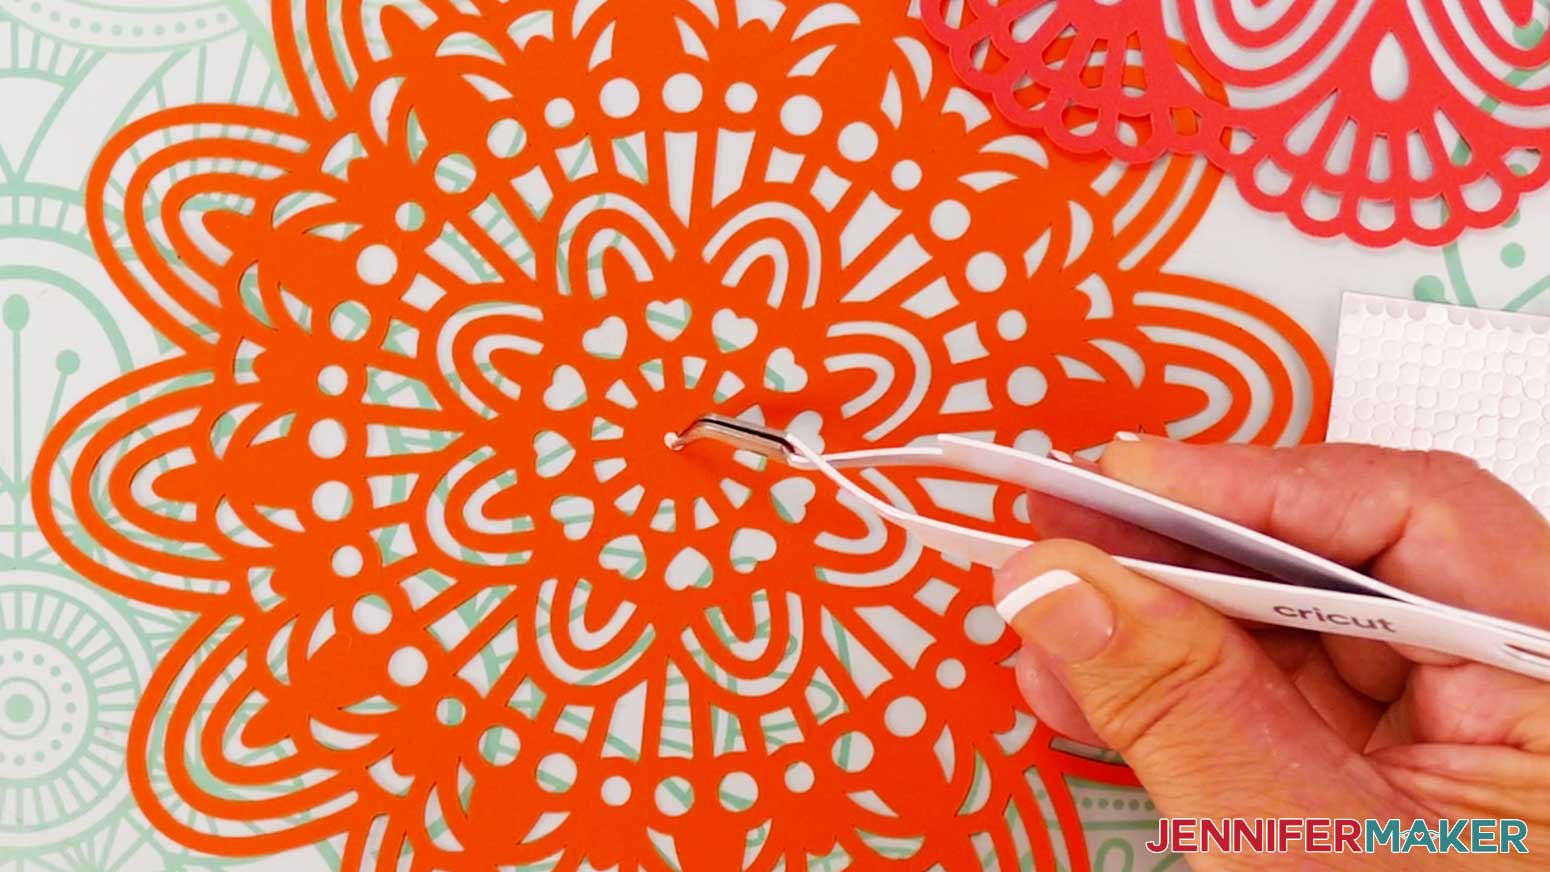
NOTE: Some of the excess foam from around the Micro Pop-Dots might come up with the circle. Gently remove it. You can also try removing the excess foam from around the dots when they are still on their packaging. - Place the Micro Pop-Dot sticky side down in the middle of the face-down mandala.
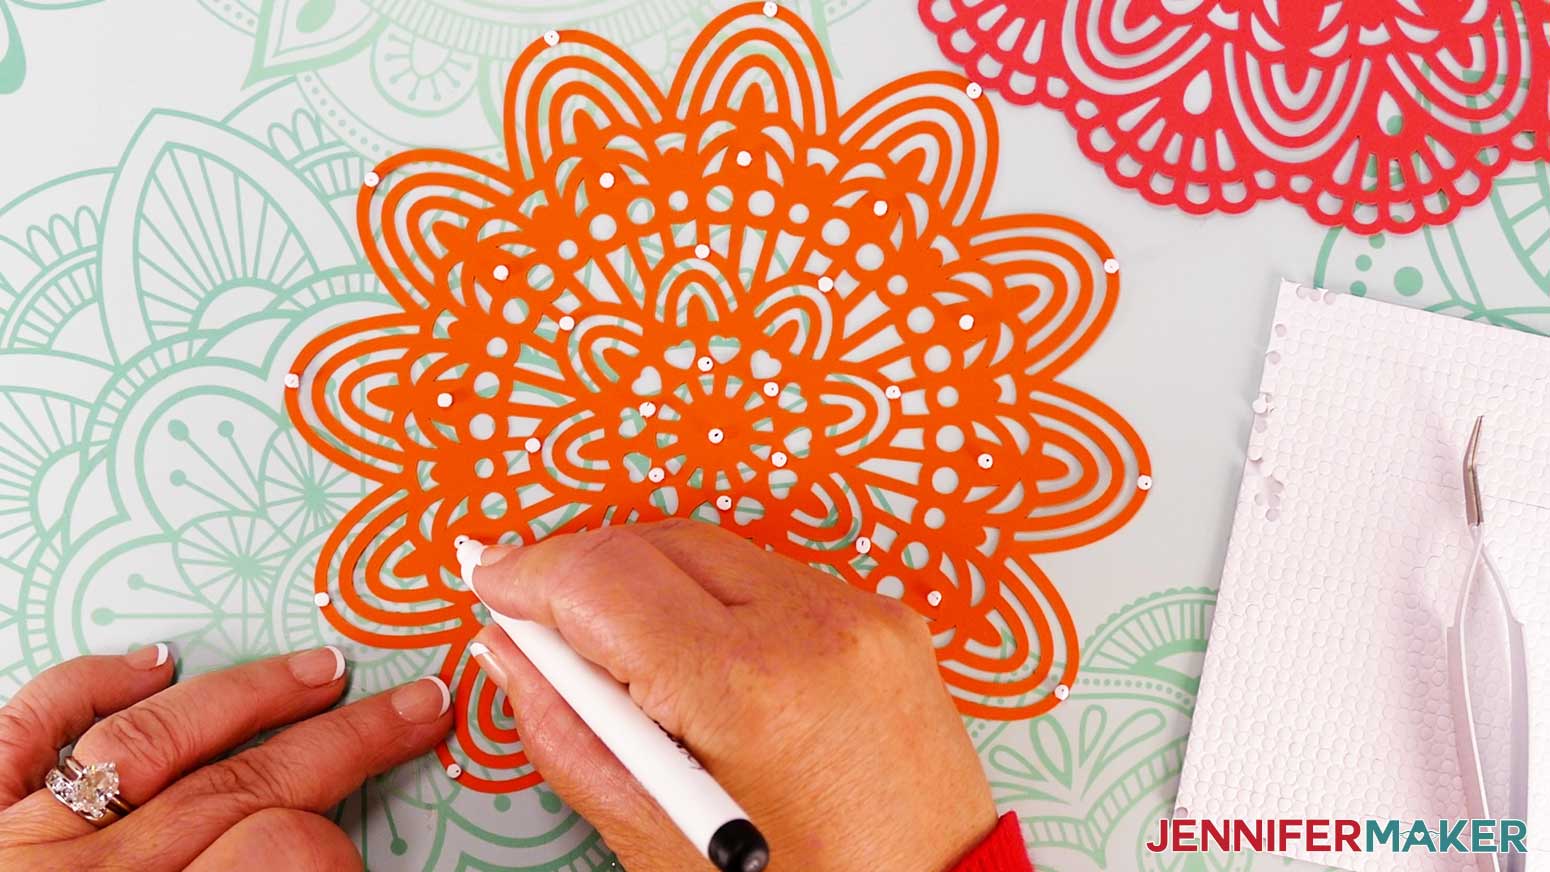
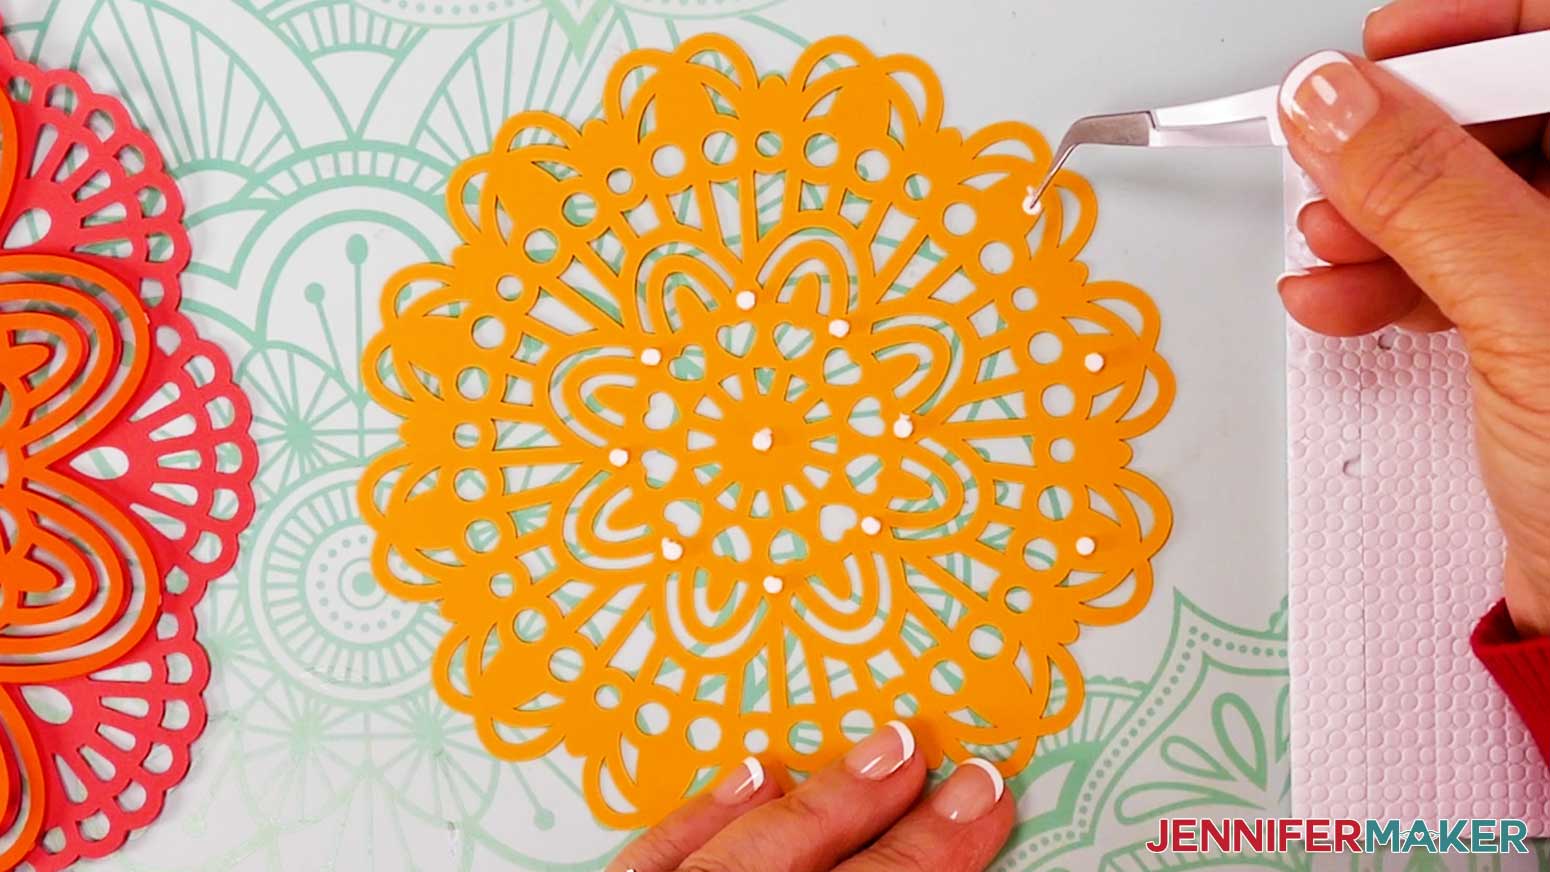
NOTE: Leave the backing paper in place for now. - Continue placing Micro Pop-Dots in the areas you identified as large enough to hide the adhesive. Position them evenly across the mandala (try for an adhesive piece every inch or so to avoid sagging) so you can stack the layers and create a smooth surface.
NOTE: Try to place the dots so you can see a little of the cardstock’s color all around the foam. This way, you’ll be less likely to see the adhesive after everything is assembled. - Mark the backing papers with your dark-colored pen, just like we did before.
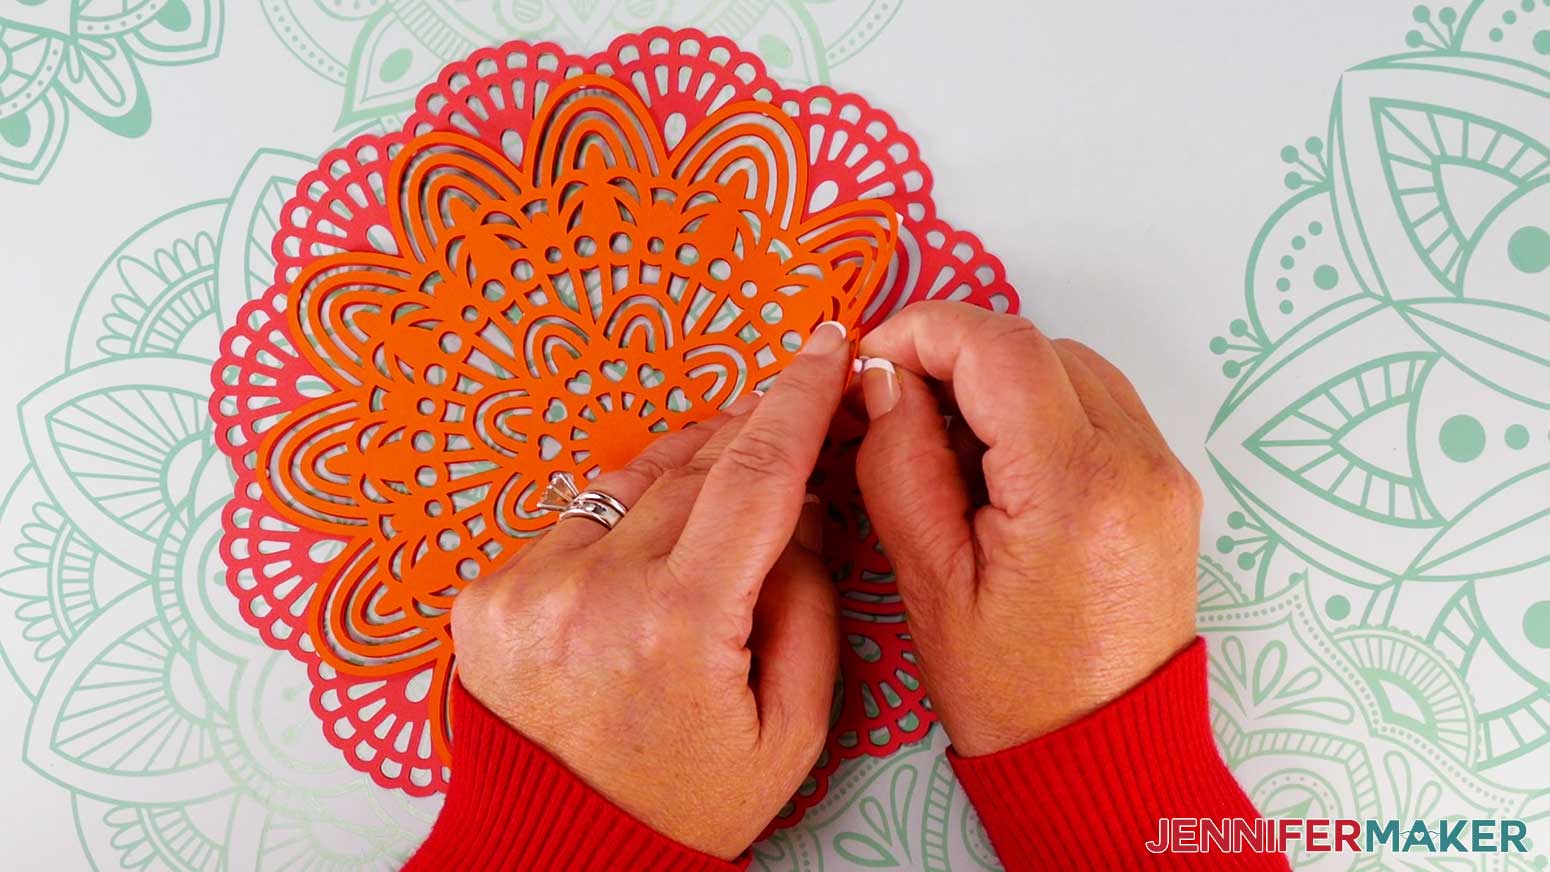
- It’s easy to accidentally move the mandala while adding the adhesives, so with the sticky sections still protected, flip the smaller mandala (Layer 8) over and check its alignment on the larger one (Layer 9), rotating it until they match.
- Flip the top mandala (Layer 8) to the side like opening a book so the orientation remains aligned with the larger layer.
- Remove the marked backing papers from the middle area.
NOTE: Remember to use the pen marks to help you track which protective papers you’ve removed.
TIP: To keep the dots in place, hold the sticky section to the cardstock with your fingernail or tweezers, and carefully lift the paper from an edge. - Flip the smaller mandala (Layer 8) like closing a book and check if the pieces align with Layer 9. If not, slightly rotate it so a different top arch aligns with the top of the lower mandala.
- Make sure the delicate middle cuts align, too.
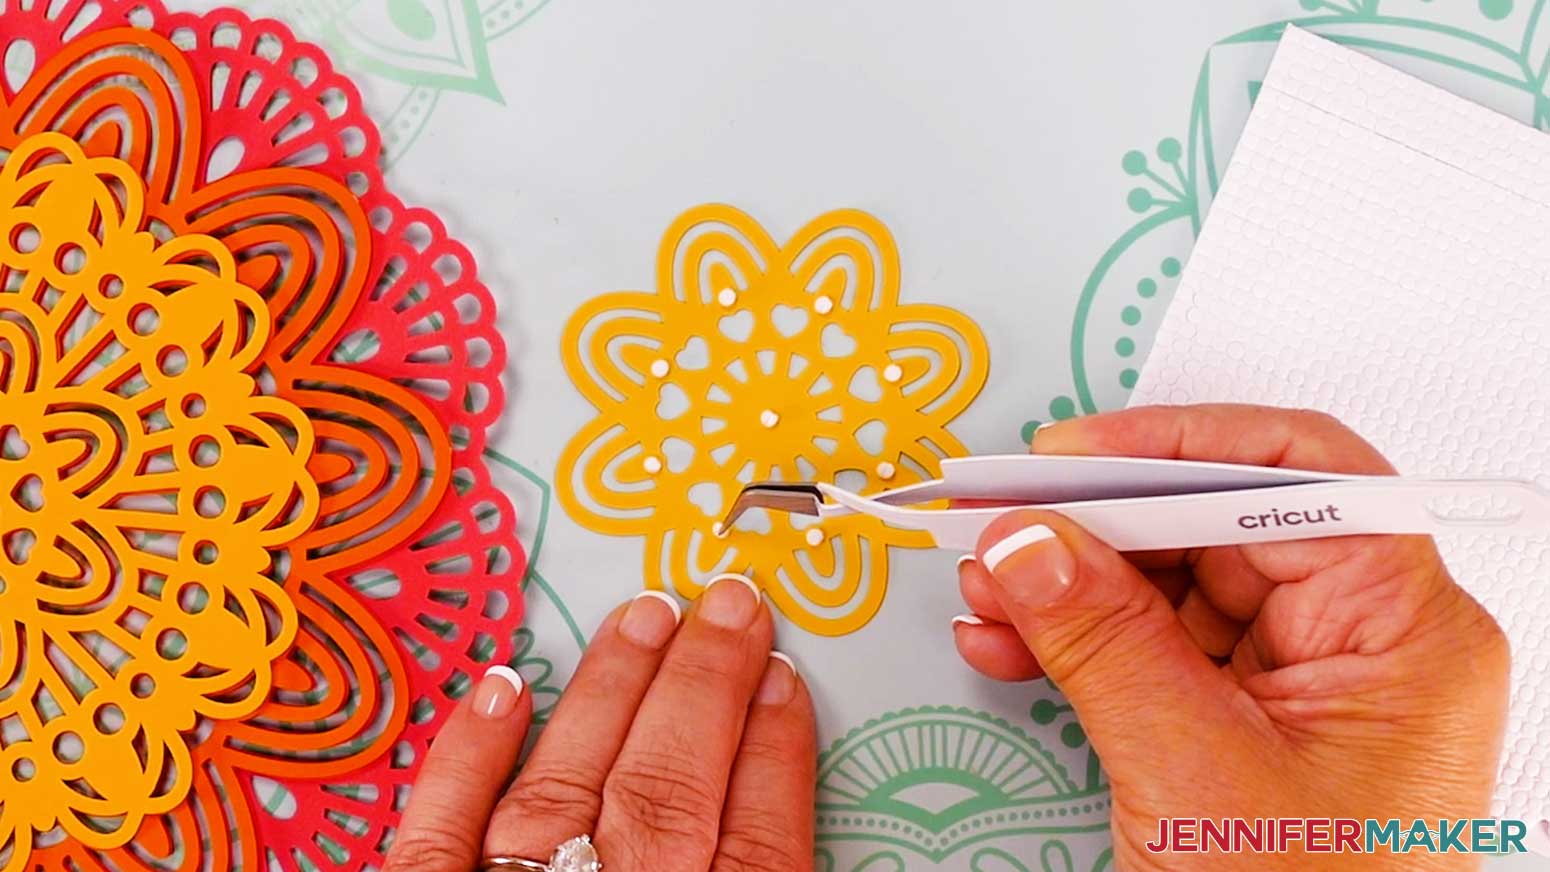
- Gently set the middle (where the uncovered adhesives are) down and check the alignment again, then press down to secure Layer 8 to Layer 9.
TIP: Don’t press down so hard that the foam compresses and won’t expand back up. - Gently pick up the assembled mandala layers and look in from a side to see the still-covered adhesive pieces.
- Carefully lift the cardstock just enough that you can reach in with your fingers and tweezers to hold the furthest-away adhesive dot in place and remove its paper backing.
- Look at the assembled layers from the front and make sure the white adhesive isn’t visible. You can use your tweezers to gently push any misplaced dots into place.
- Make sure everything is still in place and let the layers come back together.
- Take your time and work around the mandala, adhering each dot.
TIP: Try not to crease your cardstock, especially the top layer.
NOTE: If you can’t reach or miss removing some papers, it’s ok because the others will be enough to hold everything in place. - Repeat for the other mandala layers in descending order.
- Add Micro Pop-Dots to the back of the largest mandala (Layer 9) the same way, but leave the marked protective papers in place for now.
FINAL ASSEMBLY
- Place the background cardstock face up.
NOTE: You can use the frame to help with alignment again, but I found it easier to position the layers on my work surface. - Remove the middle backing papers from the assembled mandala.
- Hold the assembled mandala face up over the background, roughly centered and rotated as you prefer.
TIP: If one section didn’t come out as nicely as the others, or if the adhesives are more visible in one area, you can rotate the mandala so that section will be at the bottom and hidden by the foreground elements. - Very lightly put the mandala in position, but don’t press down on the adhesives in case you need to make adjustments.
- Place the assembled foreground layers on top of the mandala so the corners align with the background layer.
- Hold the foreground layers and background in place, then gently shift and rotate the mandala until it’s centered in the middle of the circle cutout.
- Lightly press down on the mandala’s middle section where the adhesives are uncovered to secure the alignment.
- Set the foreground layers aside.
- Gently lift an edge of the assembled mandala and remove the remaining backing papers from the back of Layer 9 one section at a time, like we did with the other layers.
TIP: If you can’t reach a dot without damaging the layers, it’s ok to leave the backing papers on a few pieces here and there. - Press down on the layers to adhere everything in place.
- Place the background and mandala layers face up in the frame with the assembled foreground layers face down to the side.
- Add adhesives to the back of Layer 5 just around the edges. Use adhesives that will take up the same depth as the assembled mandala layers and keep Layer 5 in place on the background (Layer 10).
TIP: Make sure the adhesives won’t touch the mandala, because the extra height will push that adhered section higher than the rest of the layer.
NOTE: I used the ¼” (0.25”) Bearly Art Foam Squares and positioned them in line with the adhesives from the earlier layers to keep everything as even as possible. - Remove all the backing papers.
- Orient the foreground layers in the frame on top of the background and mandala, then let them fall into place using the frame's corners to help with alignment.
- Check the alignment of the layers' rounded inner cutouts because that is the area which will be most noticeable if it’s misaligned. Once it's correctly positioned, press everything in place.
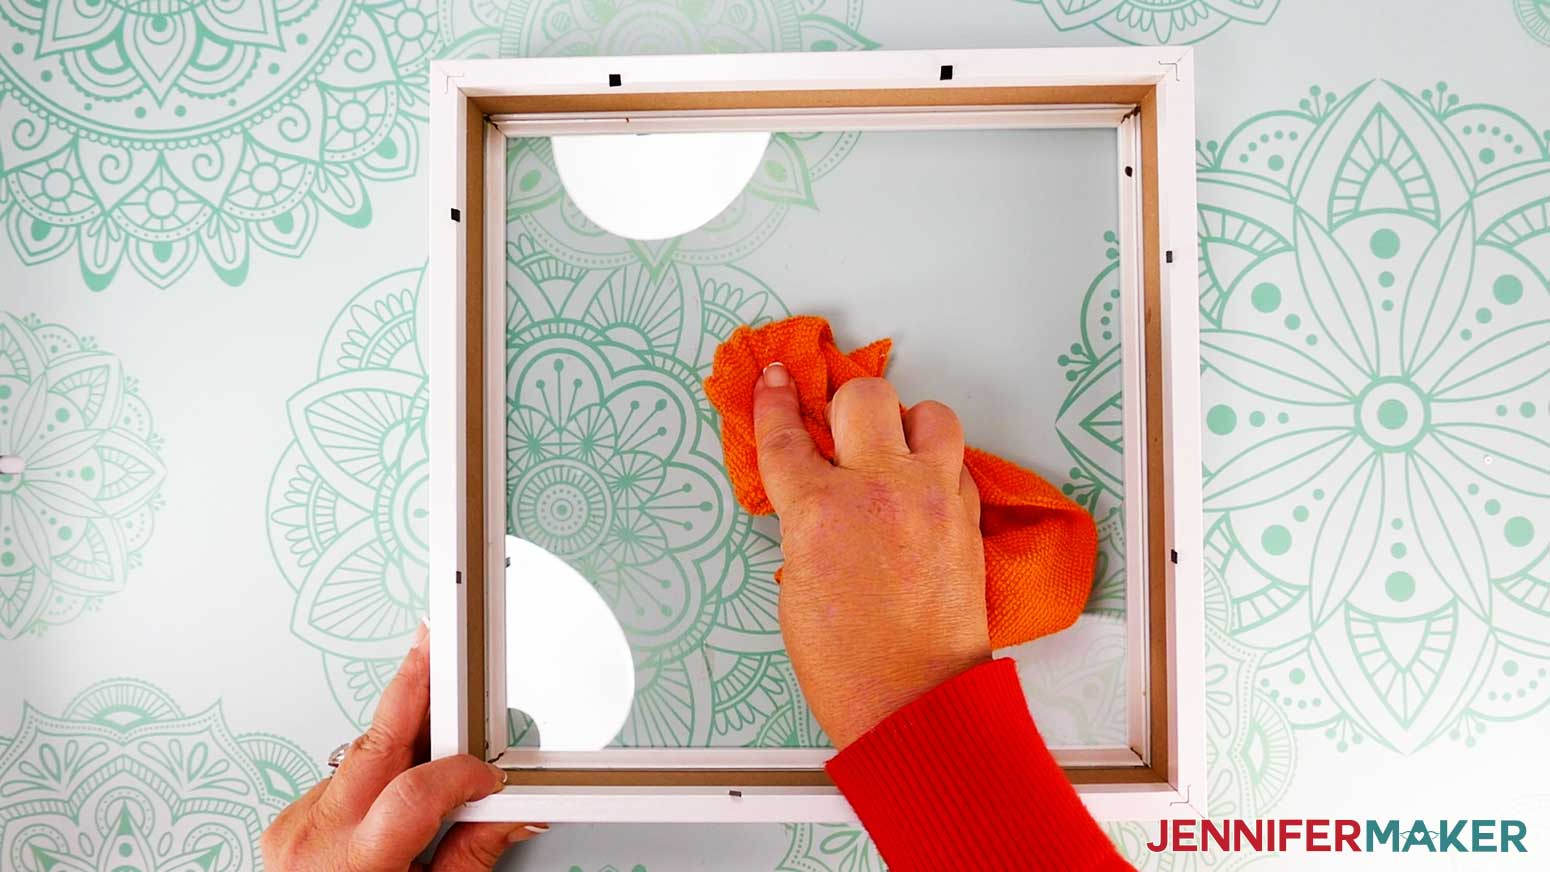
- Once assembled, carefully lift the layers out of the frame.
- Use rubbing alcohol and a lint-free cloth to wipe down the inside and outside of the shadow box’s glass and frame to remove any dust, cardstock bits, or adhesive pieces that may have stuck to it during prepping the layers.
- Once the frame is dry, place the assembled layers face down inside.
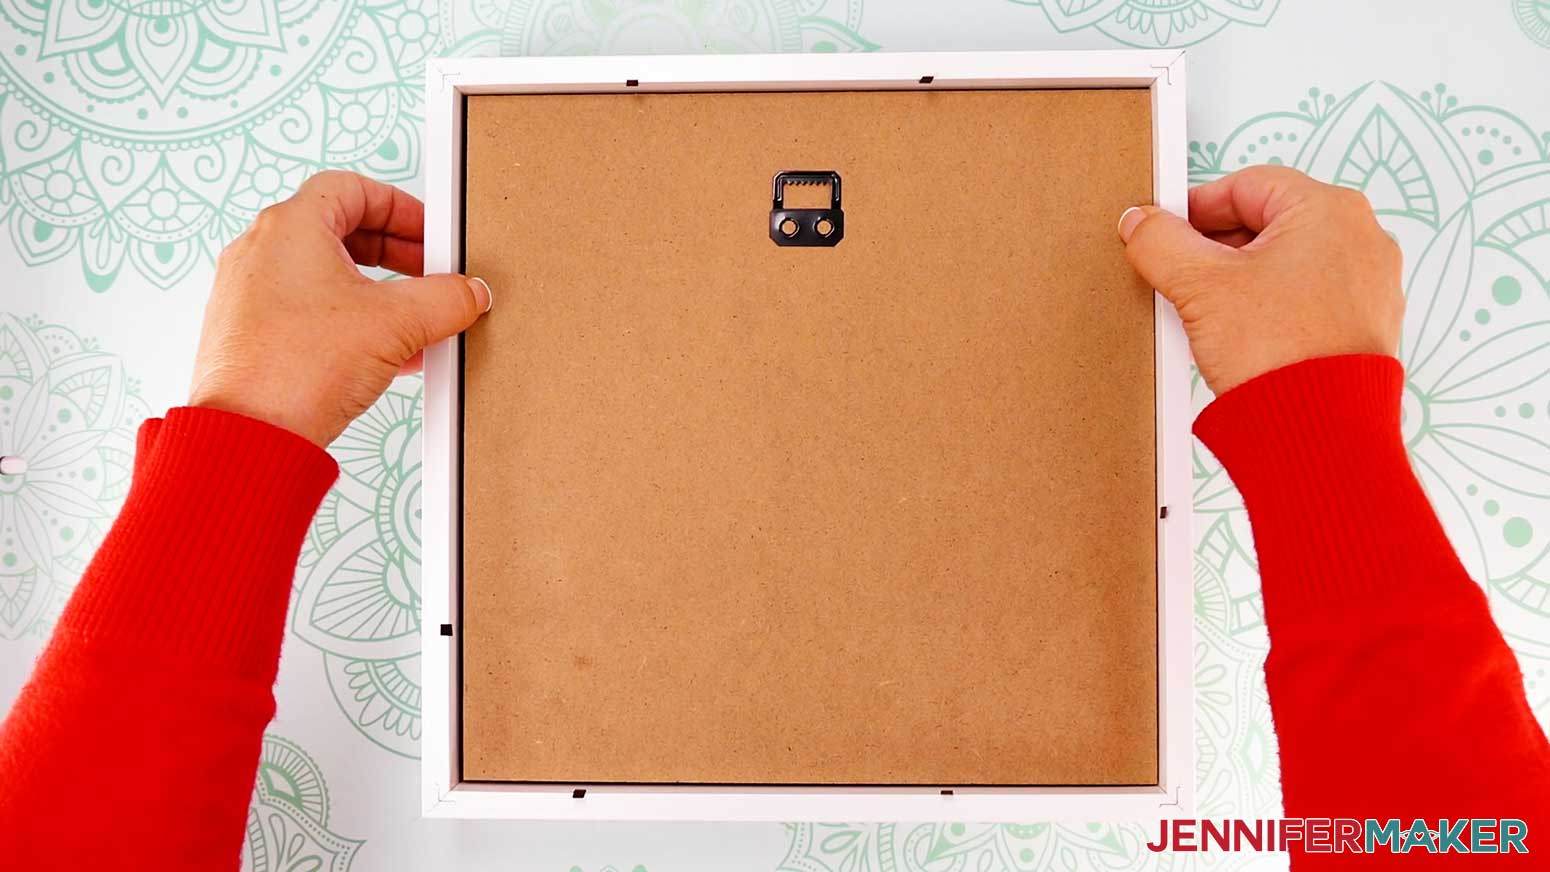
TIP: If your frame or layers are slightly not square, try rotating the assembled layers until they fit better. - Place the backer in the frame with any hanging hardware oriented to match the design.
- Check the backer’s height against the frame’s prongs.
- If there’s a large gap between the backer and prongs, the layers could move around during hanging. So remove the backer to fix this.
- Fold a rectangular piece of scrap cardstock in thirds to make a rounded triangle.
- Add some craft glue to the middle section.
- Press it onto the back layer.
- Let it dry, then add the backer with any hanging hardware oriented correctly.
TIP: You can place more rolled spacers or adhesive foam pieces of roughly the same depth across the back layer if the layers look uneven with the frame closed. - Gently press down the prongs to hold the backer in place.
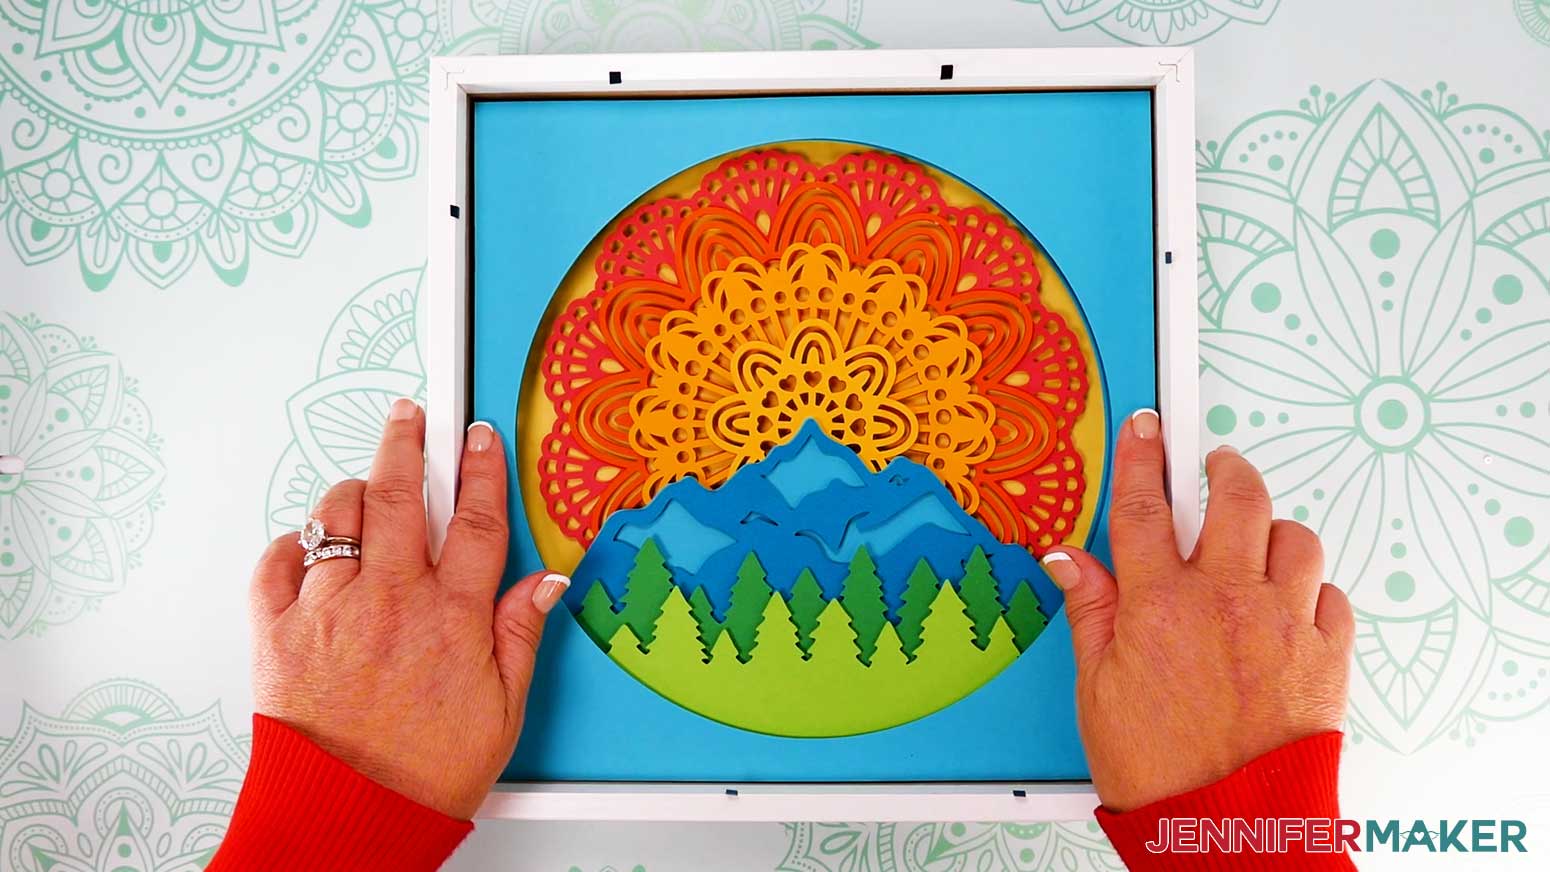

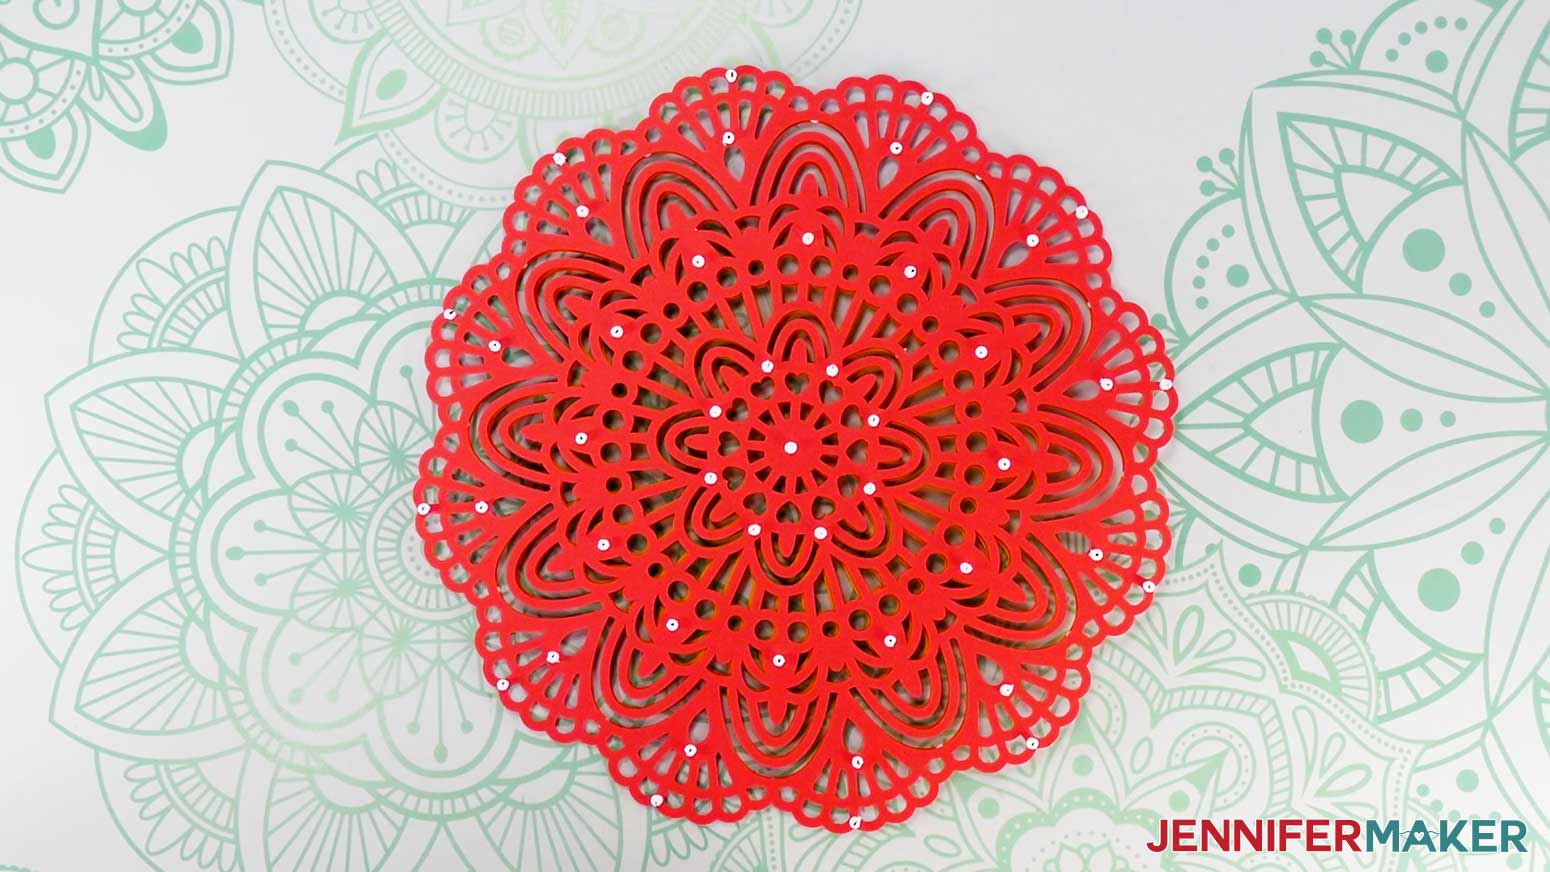
STEP 5: SHOW IT OFF
Your layered mandala shadow box is complete!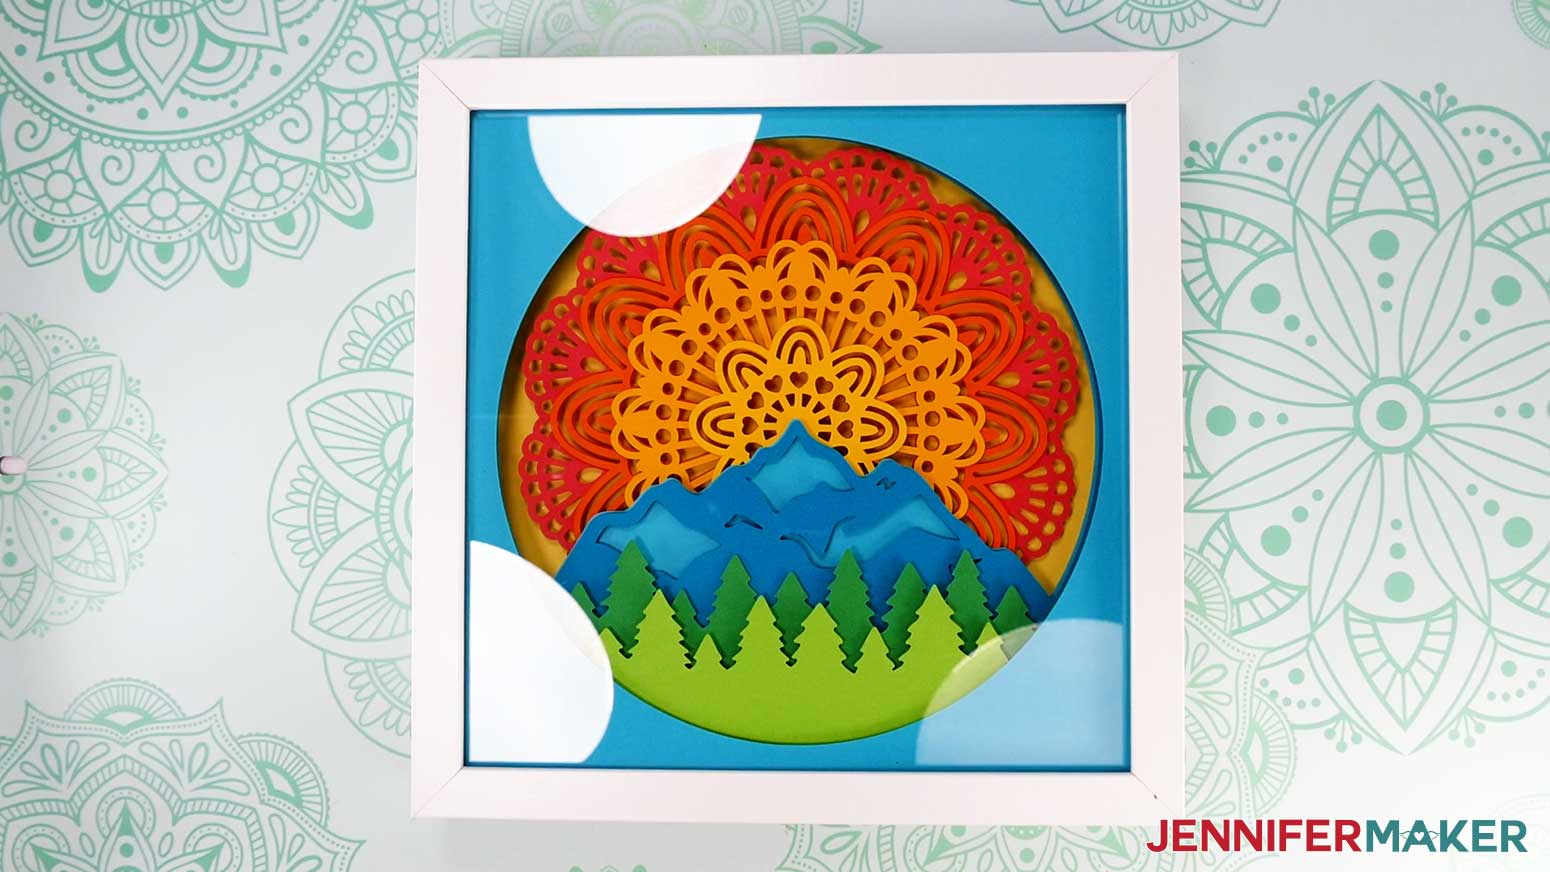
Notes
Finished Dimensions:
Design Layers: 10" x 10"
In Shadow Box: 11" x 11" x 1.75"
Answers to Your Questions About Making Mandala Shadow Boxes
Q: I want a different design. How do I design my own mandalas?
A: You can learn how to design your own scenic mandala designs in my ADVANCE program. Learn more about ADVANCE here!
Q: What makes a good mandala?
A: A nicely constructed paper mandala has consistent spacing, no droops between layers, and is cut from a harmonious palette of cardstock colors. Paper mandalas don’t take hard work, I promise! They’re really quite easy when you have good materials and know the right techniques.
Q: How can I improve my mandala?
A: Practice makes progress! Just like any creative skill, the more you make, the better your results will look after each try. Check out my blog and video tutorials for more mandala tips, designs, and inspiration for paper crafted mandalas, infusible ink mandala projects, etched slate mandalas, and more!
Q: Is there any rule for mandala art?
A: As far as mandala crafting goes, there aren’t any hard and fast rules. In my opinion, unique, one-of-a-kind mandalas are the best kind of mandalas, and as long as you love the color palette, you’re doing it right! Experiment with different patterns, basic shapes or more intricate ones, like geometric shapes, or even shapes and designs you create yourself.
Q: What do you put between layers in a shadow box?
A: Watch my tutorial and find out my favorite tried and true ways to use different adhesives in shadow boxes and mandalas, along with other useful mandala tips.
Q: What kind of paper do you use for a shadow box?
A: I recommend using high-quality cardstock for your mandala and shadow box crafting. Usually 65 pound weight cardstock works best for shadow boxes. Avoid lower cost cardstock (unless you get a great deal on high-quality paper!) for projects like this with intricate cuts, because it can have the exact opposite effect that you want — often tearing or leaving bits not fully cut out.
Q: Can I cut these layered designs on a Cricut Joy Xtra or original Cricut Joy?
A: The round mandala layers of each design (not the scenic foreground layers) can be cut on a Cricut Joy Xtra. Neither the mandala nor the foreground can be cut on a Cricut Joy, though — the details are just too intricate to size down that small.
Q: How do you know what colors to use?
A: This is a perfect project to bring out your personality and creativity! Have fun and see what combinations you can come up with that fit your home and style. Experiment with colors in Design Space to find the color combinations you like best.
Q: Do I have to use a Cricut machine to make 3D layered mandalas?
A: No! We always include several versions of each free file in the free download ZIP file. If you have a Silhouette Cameo, which uses Silhouette Studio, you can use the DXF file in Silhouette Basic Edition. If you have upgraded to Silhouette Designer Edition, Designer Edition Plus, or Business, you can use the SVG format with your Silhouette machine to cut each intricate design. If you don’t have a cutting machine, you can print and then cut out my digital download PDF files, too! The ZIP archive in my resource library includes these file types and more!
Q: I’m new to paper crafting. Can you help me learn more about it?
A: Want to learn all there is to know about paper crafting? Check out my ultimate guide to paper crafting with your Cricut, my Cricut Coach Playbook. It’s full of tips, tricks, and techniques, for all kinds of Cricut crafts. The best part is you can apply these tips to thousands of projects — not just mandalas or shadow boxes, but tons of new ideas, too!
Get my free SVG mandala designs!
(If you do not see the signup form above, click here.)
I love seeing what you make with my designs and how you use them! Please share a photo of your projects using my mandala tips in our Facebook group or tag me on social media with #jennifermaker.
Love,

Want to remember this? Save this Mandala Tips & Tricks Tutorial to your favorite Pinterest Board!