The best Star Wars cosplay without the costumes in fun Disneybounding styles!
I love Disney and Star Wars! So when we planned a last-minute trip to Walt Disney World on the Star Wars Galactic Star Cruiser, I knew I had to go Disney Bounding by coming up with a fun Star Wars cosplay dress. The Disneybounding style of cosplay is fun and comfortable, and also totally acceptable if you’re also going into the Disney parks! And my method of Disneybounding is very DIY and highly customizable. All you need is regular clothing, some iron-on vinyl, and a way to cut it out!
What does Disney Bounding mean?
Disneybounding simply means to dress up in a style reminiscent of a Disney character, but without wearing a full blown costume. It’s like cosplay, but without the costume. You wear normal clothes that are colored, patterned, and decorated to resemble Disney characters. Not only is this way more comfortable and stylish than a costume, it’s a way for adults to dress up, as no one over the age of 14 can wear a costume to the parks normally.
I think Disneybounding is the best way to dress up as your favorite characters when you go to a park, because you can get into the fun without sacrificing comfort. And you get to pick your favorite Star Wars character! Popular characters include Darth Vader (black suit or dress with shiny black and silver vinyl!), Jyn Erso (you can make your own kaiber crystal necklace), Princess Leia (a white shirt/dress with silver vinyl would be perfect), or even a Rey costume (offwhite with the Jedi symbol on it would be awesome). And I can think of so many more fun ideas for Star Wars fans — why not dress up like Kylo Ren, Obi-Wan Kenobi, Ahsoka Tano, Poe Dameron, Jango Fett, Qui-Gon Jinn, Padme Amidala, any Star Wars Jedi, Jedi Knight, or a bounty hunter like The Mandalorian. Greg has already told me he wants to come up with a fun Mandalorian Costume he can wear when we go on the Starcruiser again.
And these Star Wars costumes / cosplay outfits aren’t just for going to Disney — you could wear them to Comic Con, to a fancy dress costume party, to the premiere of a new Star Wars movie (oh yes please!), or even as Halloween costumes.
Let me show you how to do this! This post contains some affiliate links for your convenience (which means if you make a purchase after clicking a link I will earn a small commission but it won’t cost you a penny more)! Read my full disclosure policy.
How do you decorate normal clothing and turn it into a cosplay outfit?
The way I do it is so easy and fun! I use my Cricut cutting machine to cut out iron on vinyl and then apply it to my clothing with an iron or an EasyPress. It can be done in an hour or two — sometimes less — and it results in a completely custom outfit! I love to use my Cricut because they license Disney images — including Star Wars — and provide them for purchase right within Cricut Design Space. This lets me easily find and legally use the Disney images for my personal use.
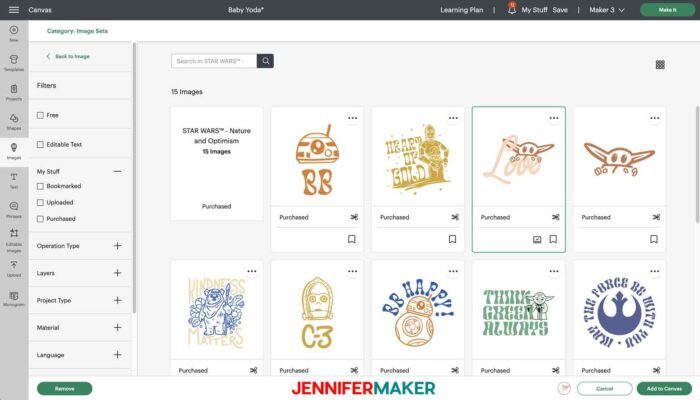
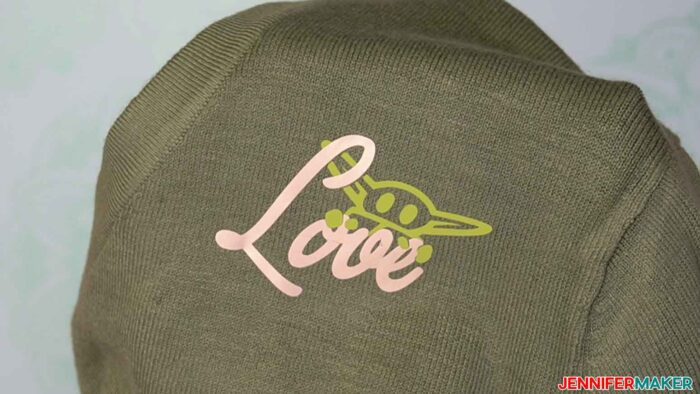
For example, the sweater for my Baby Yoda dress uses the “Love” Grogu image in the Nature and Optimism image set from the “Star Wars” digital mystery box (affiliate link) that came out on February 7, 2023. Even if the mystery box is not available when you check, you can still purchase the image sets (see links below). Learn more about Cricut Mystery Boxes and their contents in my Cricut Mystery Box Guide.
My Star Wars Cosplay Outfits
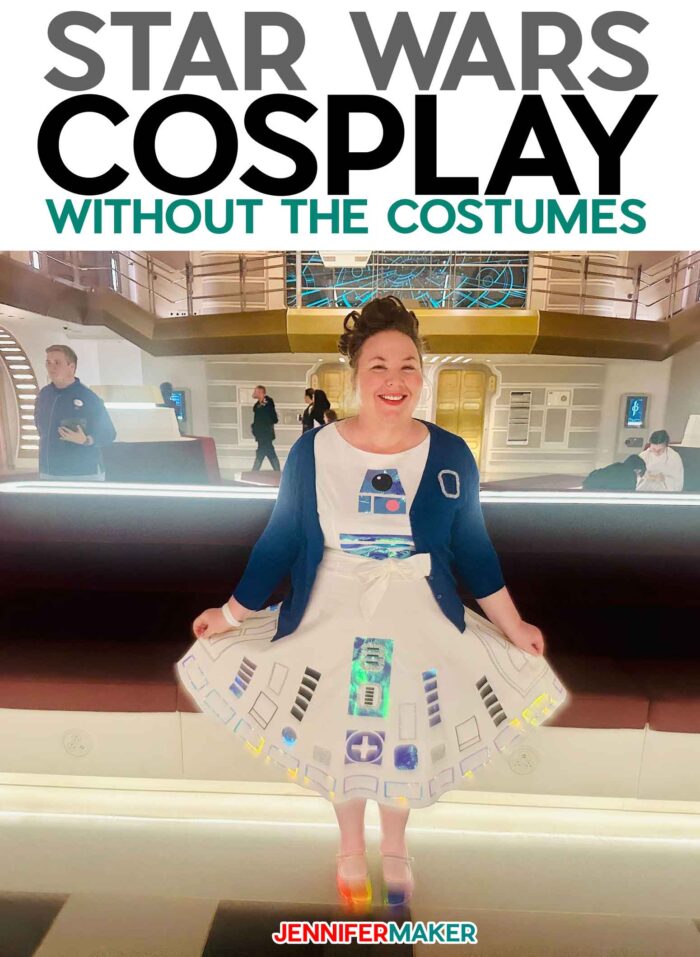
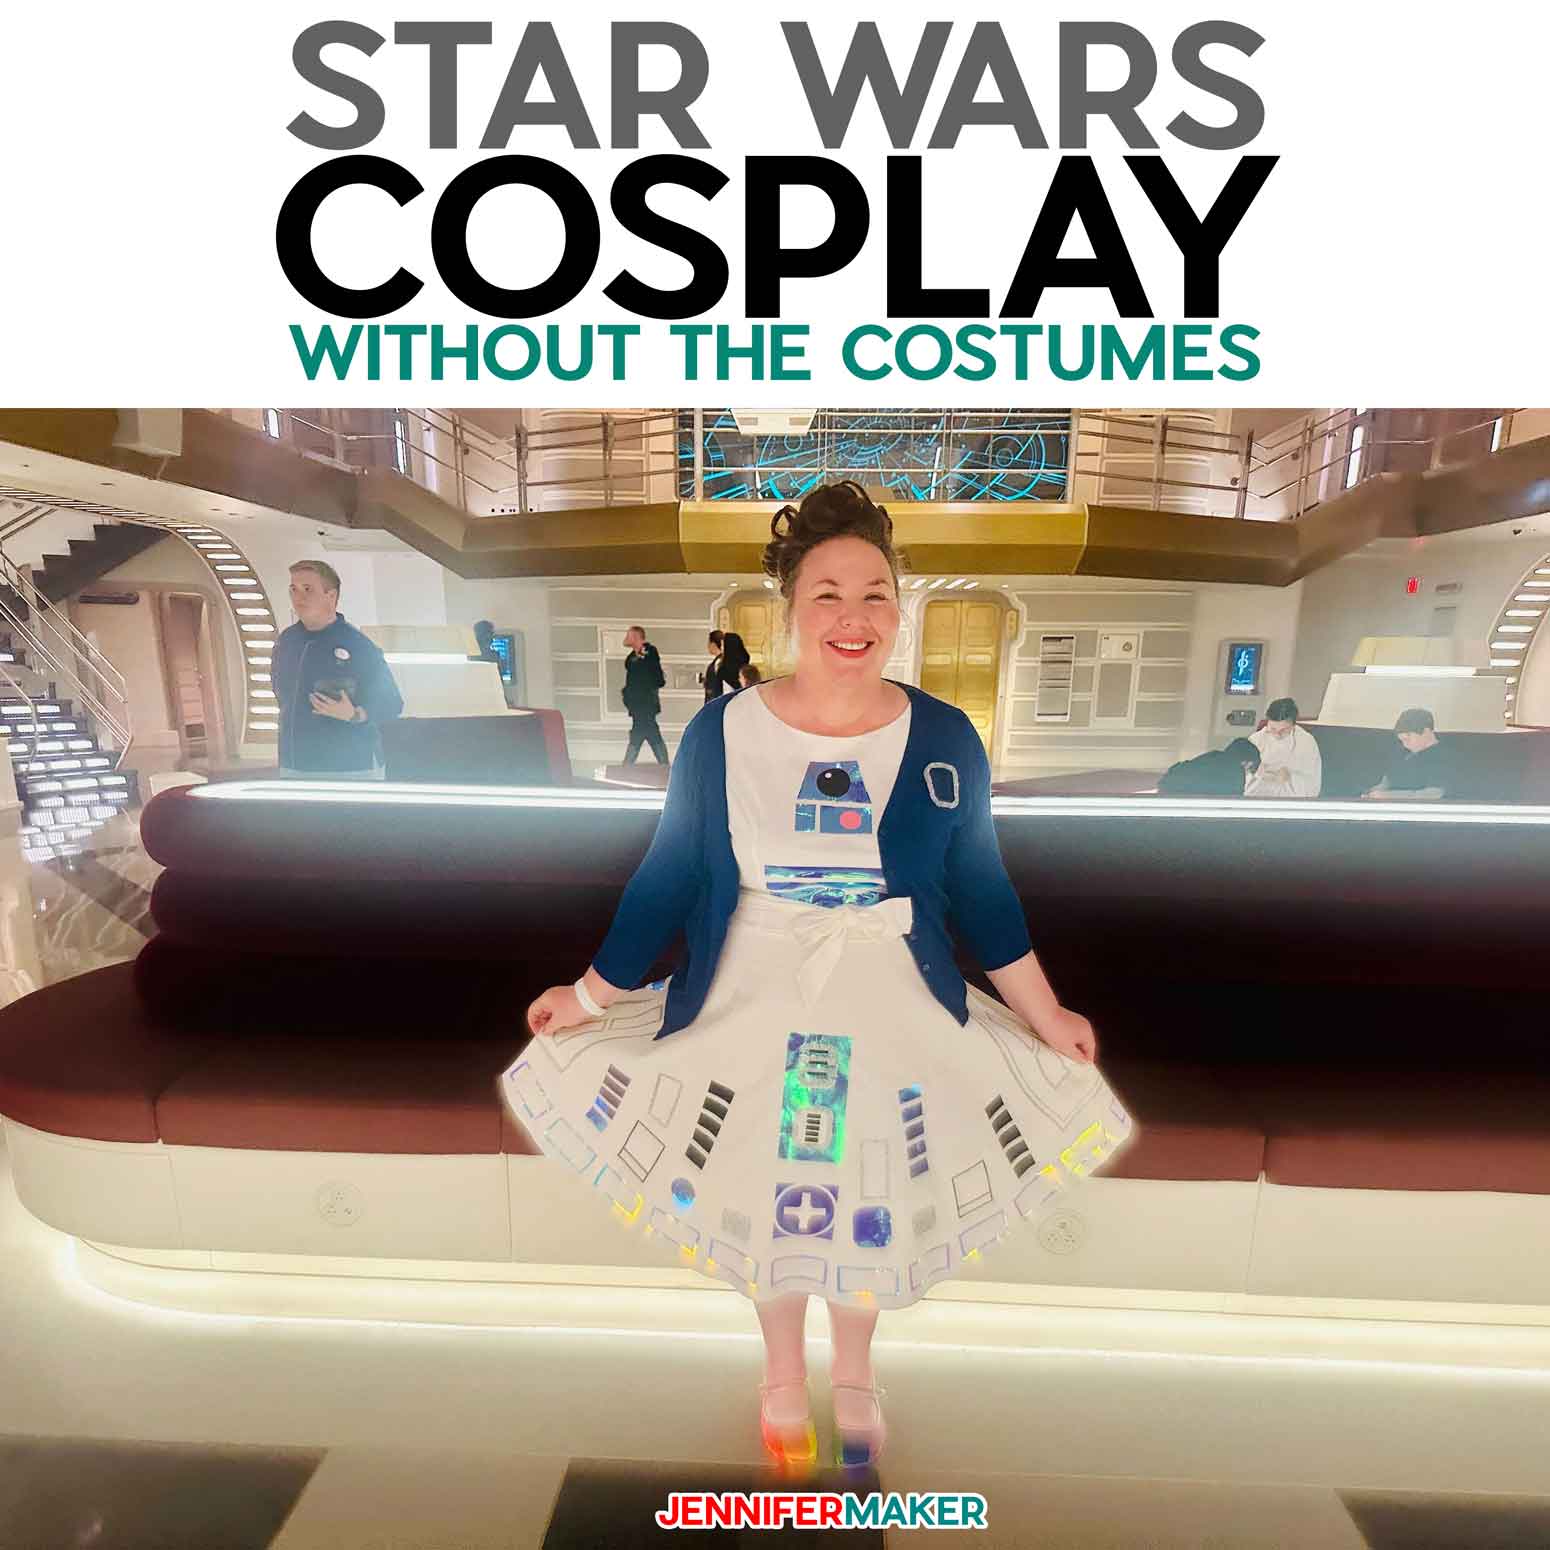
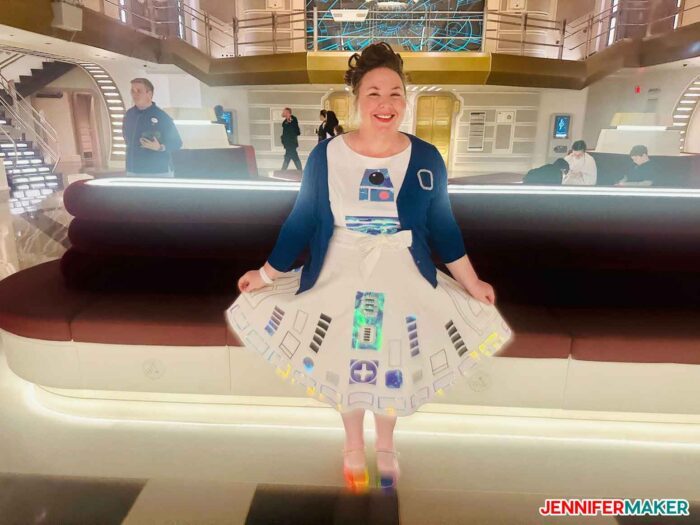
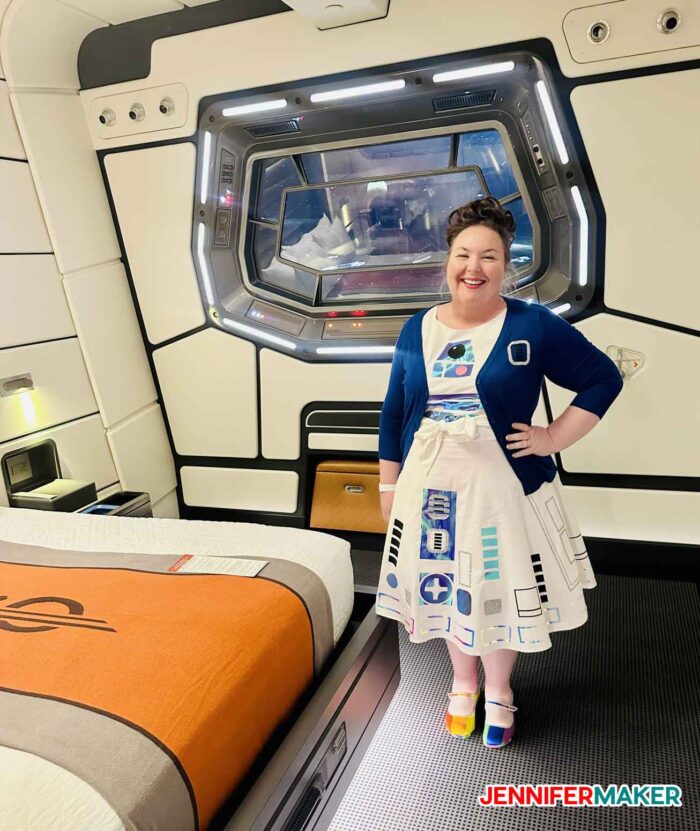
R2D2
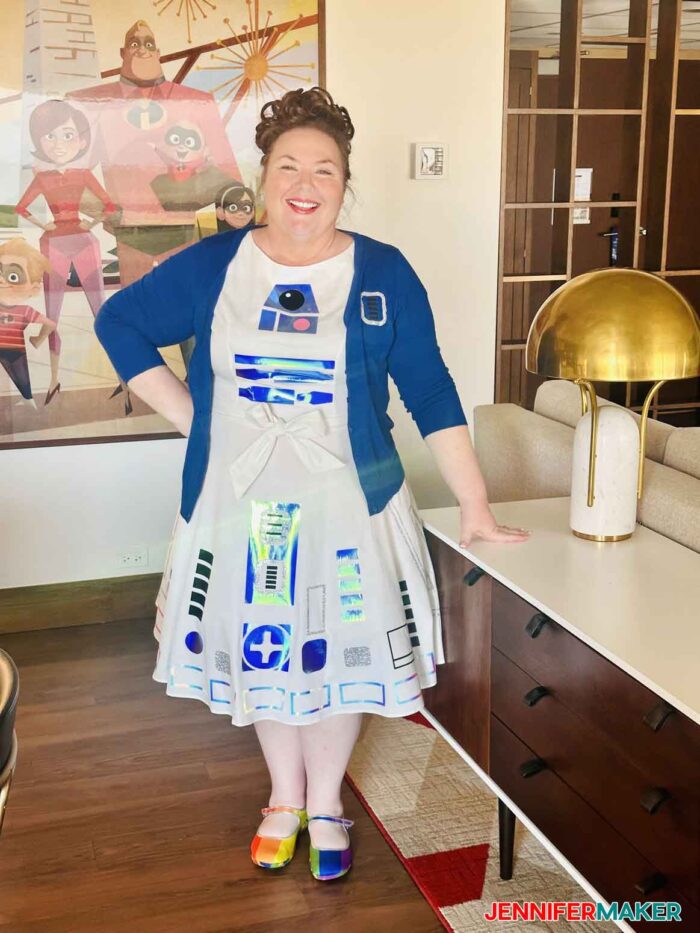
Here is my R2D2 dress, made from the Star Wars – Geo Linear image set (#M2648E72A). This was so fun to wear and I got so many compliments on it. I also had some fun when cast members would ask me what it felt like to be inside a droid.
Here are the exact items I used to make this outfit:
- White vintage-style dress made of 95% cotton/5% polyester (be sure to check the size chart, as these run small)
-
Holographic iron on vinyl (I used both blue and translucent blue)

-
Rainbow Mary Jane flats (these are the “Pride” color by Hot Chocolate Design)
Here I am in my amazing cabin on the Star Wars Galactic Starcruiser — we had SO much fun!
Applying the iron on vinyl was simple. I just cut it, weeded it, and applied it 330°F for 30 seconds following the Cricut Heat Guide. Here’s the R2D2 outfit at the Contemporary Resort the morning before our cruise:
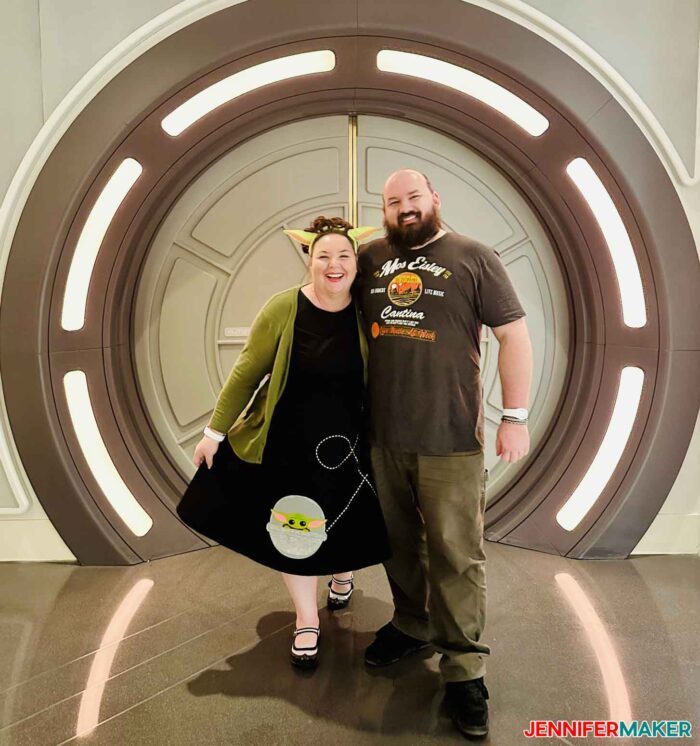
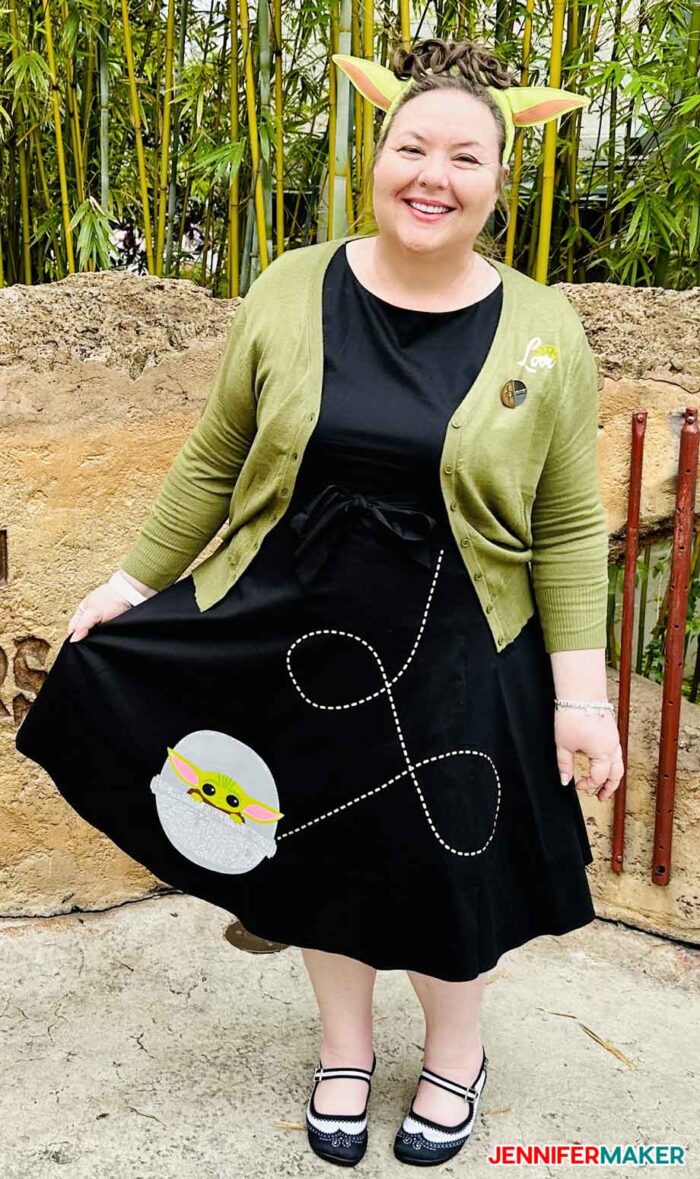
Baby Yoda, aka Grogu, aka The Child Outfit
As the Star Wars Galactic Starcruiser is a two-night adventure, I made a second Star Wars cosplay dress with “baby Yoda.” Yes, I know his name is “Grogu,” but most of us know him as Baby Yoda because we didn’t know his name for so long. When I was researching ideas for this dress, I came across The Mandalorian dress on Her Universe with “The Child” in the style of a poodle skirt. So I borrowed that idea to make my own baby Yoda “poodle” skirt dress. For this one, I found the image on Cricut Design Space in the Star Wars Mandalorian: The Child image set (#M139646F0). And the sweater I’m wearing has the “Grogu Love” image (#M43DFC8BA) from the Nature and Optimism image set. I love that Cricut partners with Disney so I can get and use these high-quality images without breaking any rules.
Here’s Greg and I in the Atrium of the Star Wars Galactic Starcruiser:
Here are the exact items I used to make this outfit:
- Black vintage-style dress made of a cotton blend with 5% polyester
-
Sage green button-down cardigan with 3/4 sleeve and a v-neck
-
Everyday iron on vinyl (in avocado green, coral pink, black, gold, and beige)
-
Silver glitter iron on vinyl (the last layer on top)
-
Black and white Mary Jane flats (these are the “Havana” by Hot Chocolate Design)
- Grogu ear headband by Loungefly (I bought these on site at Tatooine Traders in Disney’s Hollywood Studios)
So exactly how do you iron on vinyl on clothing like this?
Let me show you the simple steps to applying iron on vinyl to clothing so you, too, can make fun outfits like this … in ANY style or theme you want!
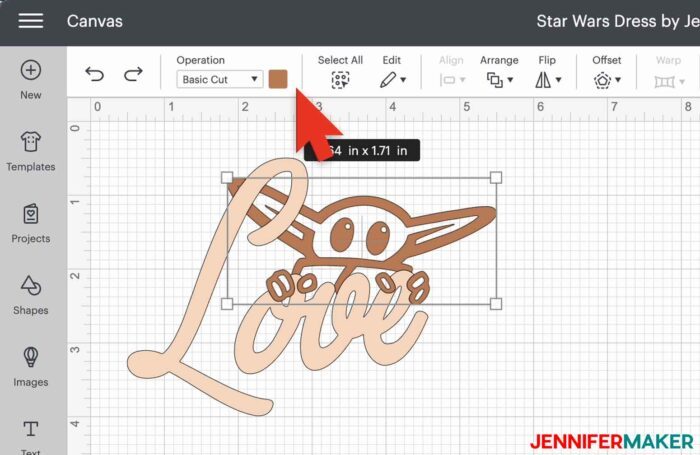
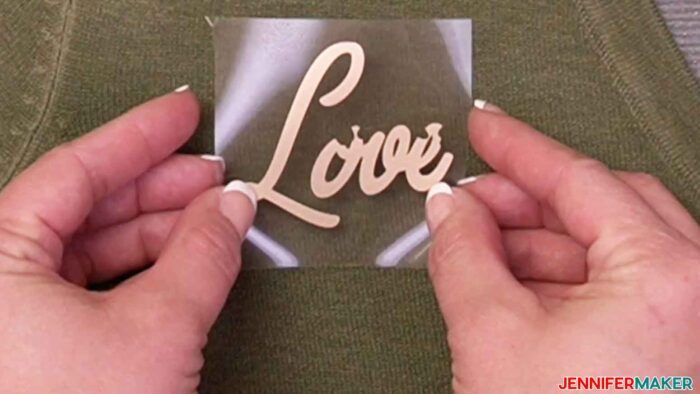
First, find your design. You can make something, buy something, or just find something on Cricut Access. Here’s the “Grogu Love” image I put on my sweater. You just locate the design you want, click it to select it, then click the green Add to Canvas button.
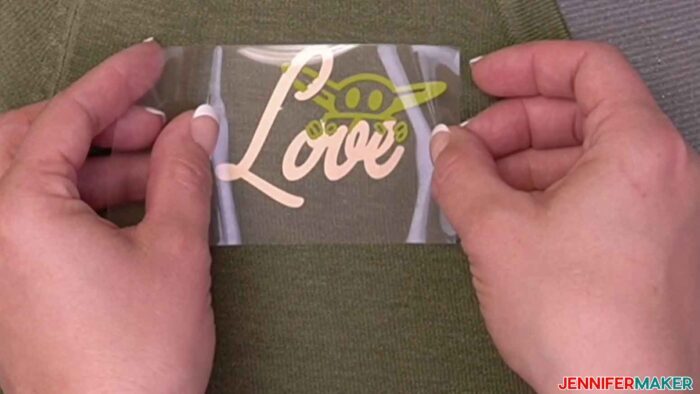
Next, you need to recolor the design to fit your needs — just select a layer and click the Color Picker box at the top to play with different colors. I changed mine to green and gold.
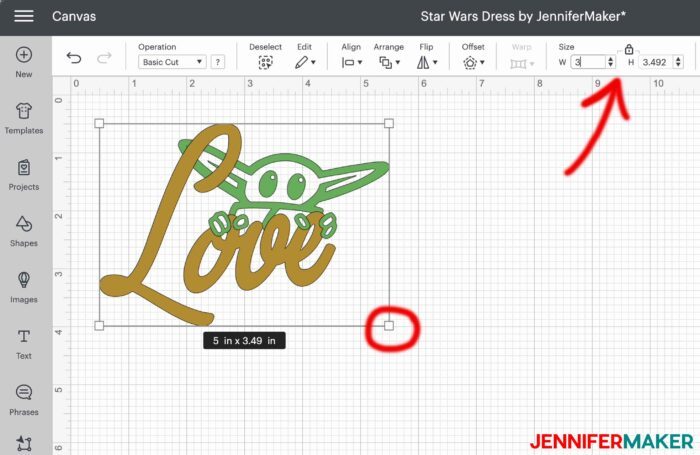
Now you can resize and otherwise customize the design to fit whatever you’re putting it on. I changed mine to be 3″ wide using the W box at the top of the screen, but you could also just drag one of the corners to resize it.
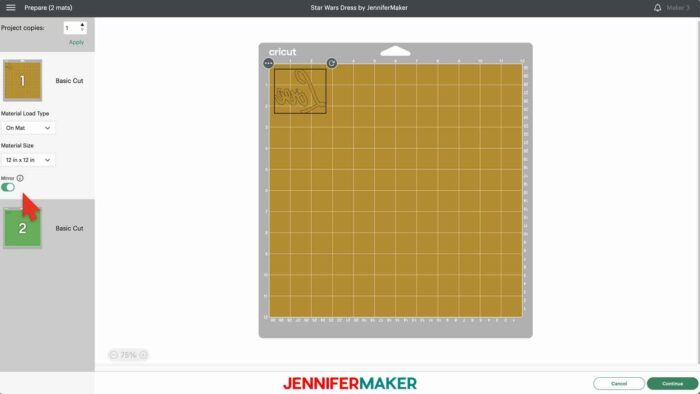
And that’s basically it! Now just click Make It and make sure you turn Mirror to On on the next screen, as iron on vinyl should always be mirrored.
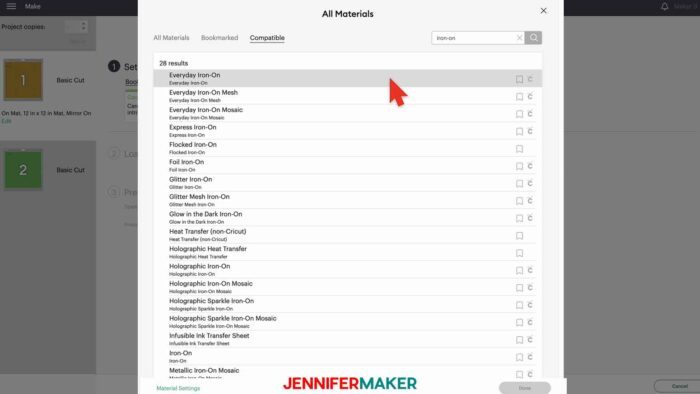
Once mirror is on, click Continue to get to the Make screen. Here, you’ll want to click Browse Material Settings and choose Everyday Iron On vinyl (or whatever vinyl you’re using).
Now just put your vinyl on a green Standard Grip machine mat — shiny side down. You can also get more help determining which side of the vinyl goes down on your mat.
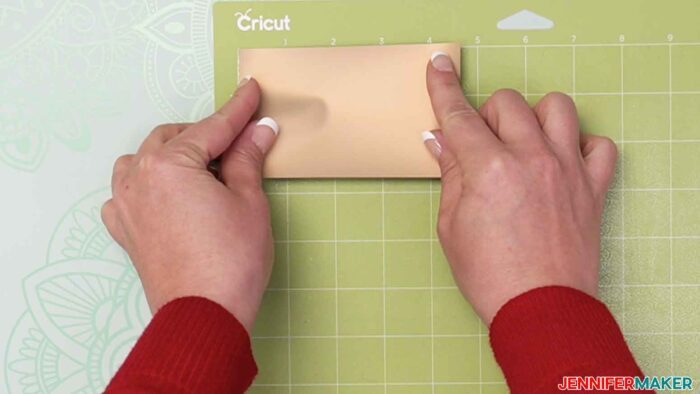
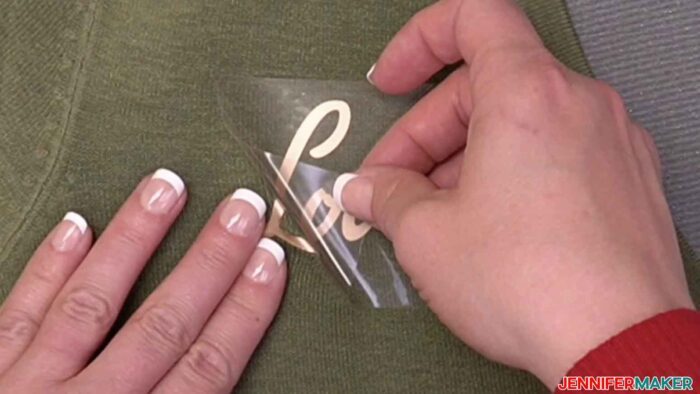
When you’re ready, load your mat in your machine and cut your vinyl. When it’s done, unload it, flip the mat over onto your work surface, and peel the mat away from the vinyl.
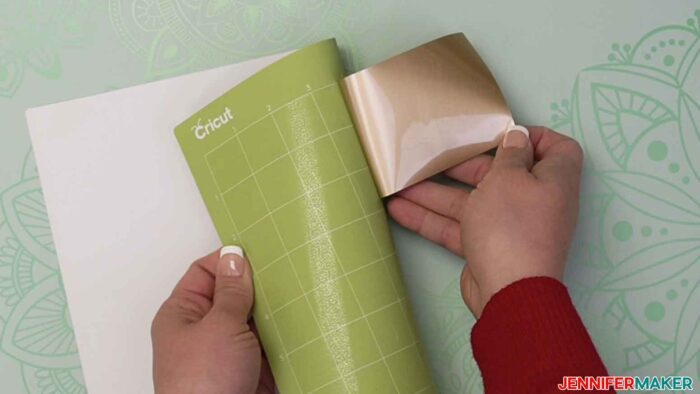
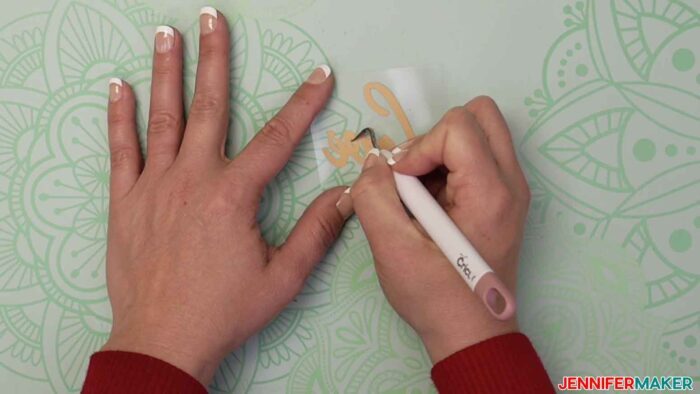
Now you need to remove the excess vinyl with a weeding tool — don’t forget the insides of the letters.
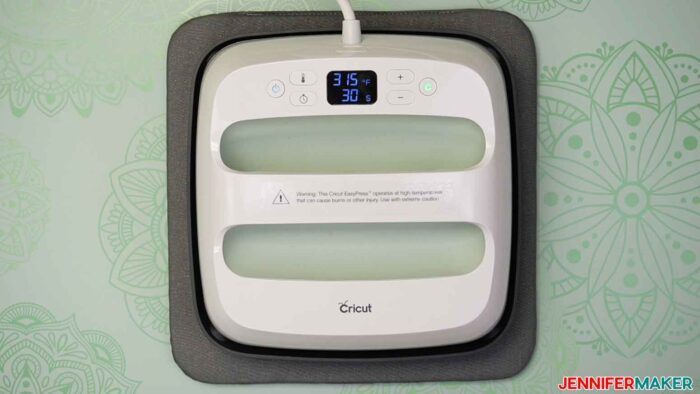
Once everything is weeded, it’s time to iron it on! I used my EasyPress 2 and set my temperature to 315°F for 30 seconds, because my sweater is made of acrylic, which has a low melting point. Acrylic is not listed in Cricut’s Heat Guide, so I chose polyester instead (also a low melting point fabric). You could also use a household iron to do this — set it to the polyester setting if you’re doing a sweater like me. If you’re pressing this onto cotton, you can use the cotton setting instead.
Now just place one of your iron on vinyl layers into position. If you’re using Cricut iron on vinyl, you do not need to cover the liner with anything. Just position and press. Since this is a layered design, I recommend you press the first layer for just 15 seconds. Learn more about layering iron on vinyl here.
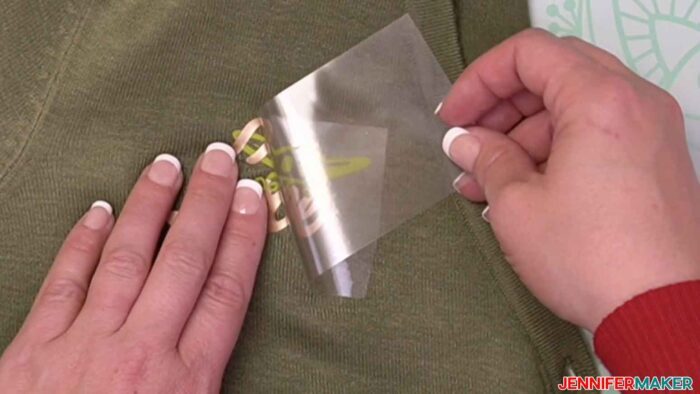
After pressing, carefully remove the liner — the iron on vinyl stays on your fabric!
Now just position the second layer of iron-on vinyl into position. The sticky liner will keep it in place if you press down.
Press the second layer for the full 30 seconds, and then remove the liner when it’s warm to the touch.
And now you have a fun and cute design on your sweater!
The process for putting iron on vinyl onto other garments, like a cotton dress, is exactly the same. Just cut, weed, position, and press! It’s easy and fun to do. I usually make my outfits the night before a trip, so I can attest to the fact that it doesn’t take a long time to do this.
Here’s the full set — the green “Love” sweater with my Grogu poodle dress:
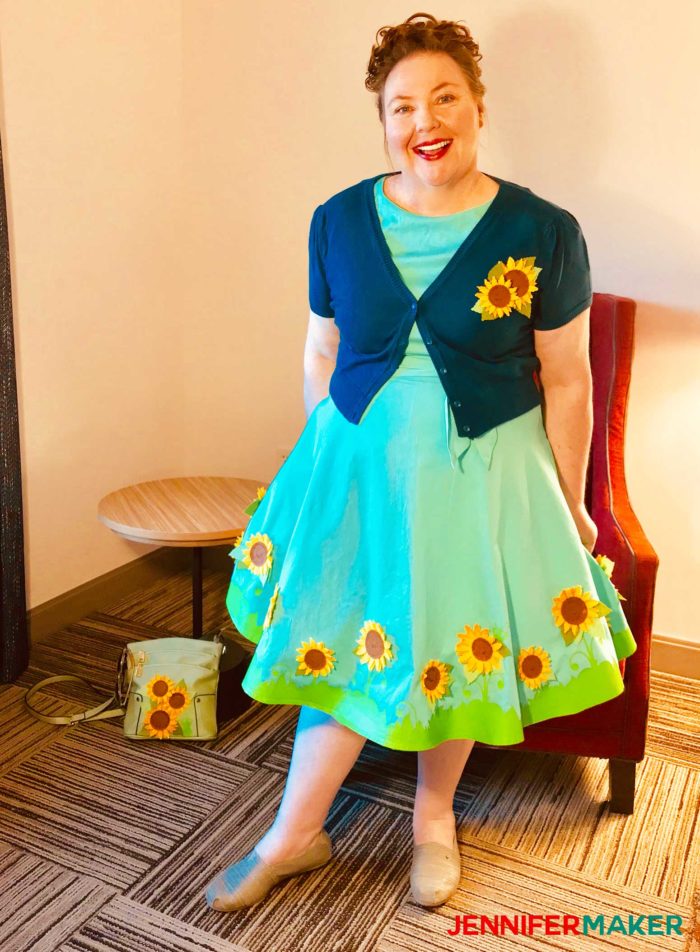
You can even put other things onto your outfits — like felt! Here’s me in a dress decorated with both iron-on vinyl and felt sunflowers. Learn how to make this fun dress here.
How do I accessorize my Star Wars Disneybound outfit?
Let’s talk about extra options! I love to add ear headbands and jewelry, like bracelets, pins, and necklaces. Themed Loungefly backpacks are also fun and functional, too! And depending on what character you go as, you could add a lightsaber (just remember the red lightsaber is generally used by the dark side Jedi). A gun holder also works, so long as it’s empty (no play guns in the parks). Other fun ideas, again depending on the characters, are PU leather wrist guards, shoulder armor, and even artificial leather leg cover. And because you’re making it, you get to decide on how high quality it is, which I just love.
I’d love to see all of the wonderful creations you make with your Cricut cutting machine! Please share a photo in our Facebook group or tag me on social media with #jennifermaker.
Love,

Want to remember this? Save this tutorial to your favorite Pinterest Board!