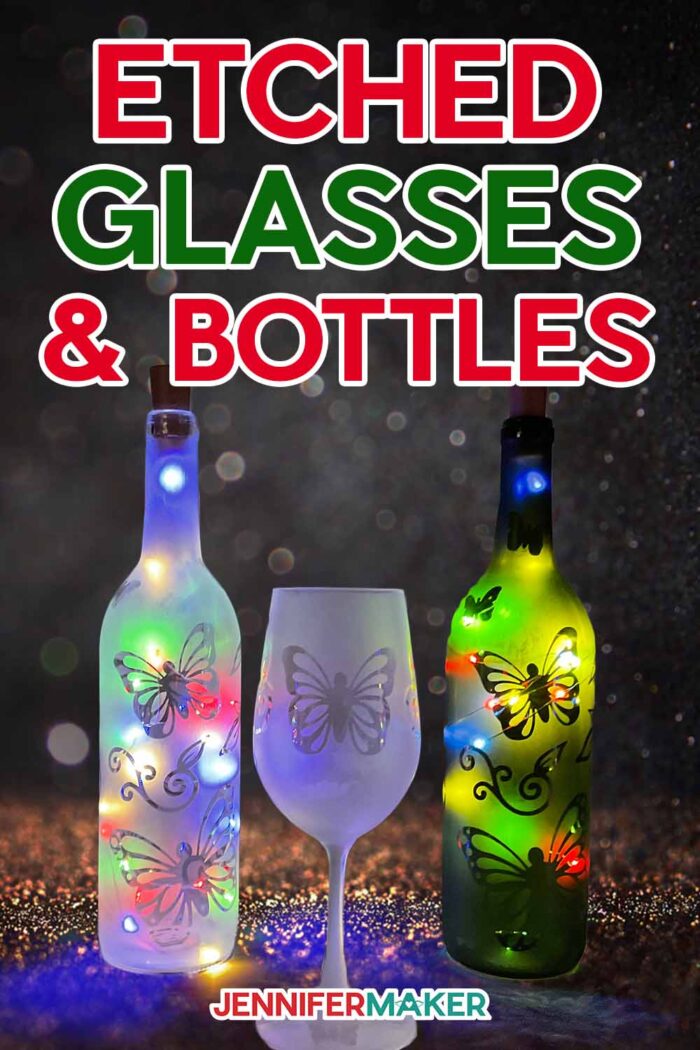
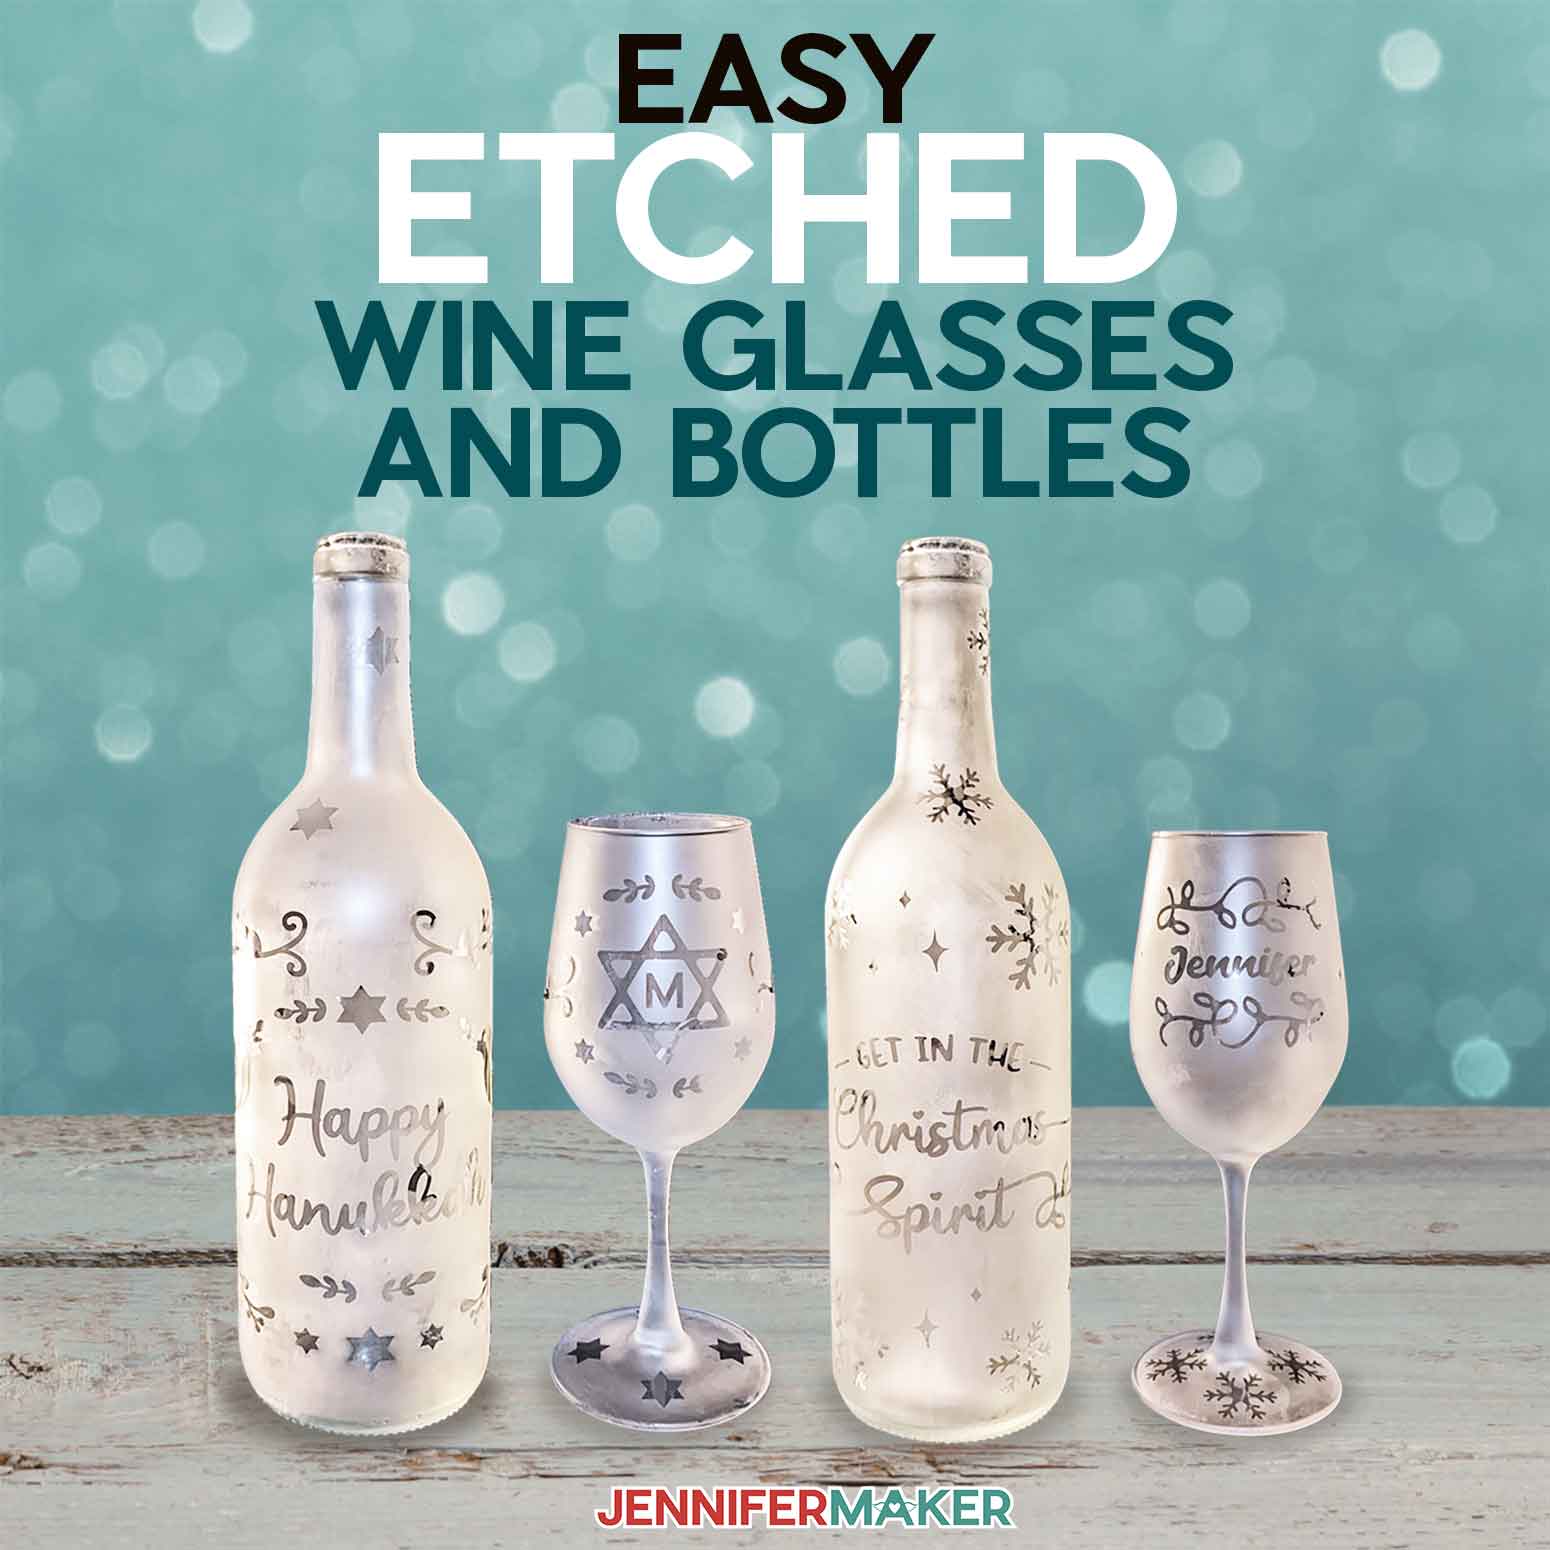
Learn how to make Etched Wine Glasses and Glass Bottles!
There are many ways to decorate custom wine glasses depending on your interests, supplies, and time. But if you have the ability and right equipment, etched wine glasses are some of my favorite custom gifts! And once you get the right supplies (including the necessary safety equipment covered below!) you can create many etched glass projects with my free designs. When you’re ready to gift a set, remember to make a matching wine bag!
Watch the full step-by-step Etched Wine Glasses and Glass Bottles tutorial:

 What is the Merry Maker Mingle? This is an annual tradition here at JenniferMaker! Every day for the first 25 days of December, we gift you with a brand new project, design, tutorial, and video for something YOU asked us to make. On top of that, we host a giveaway with 25 days of prizes. Some of the amazing prizes are Cricut cutting machines, sewing machines, gift cards, and beautiful print editions of our popular Cricut Coach Playbook. You can even earn bonus entries for sharing photos of the daily projects! Click here to learn more about the Merry Maker Mingle!
Etched wine glasses are a homemade gift that truly looks professional once you get the techniques down.

Adhesive vinyl works perfectly to make disposable, flexible stencils for the curved surfaces of etched wine glasses. I cut mine on on a Cricut Maker 3, but you can use any Cricut cutting machine, as long as the designs will fit on the green StandardGrip machine mat you have.
Getting the vinyl decal stencils to stick well is very important, because that way the etching cream will stay where you want it. Cutting them with a Cricut really helps because you get precise cuts and can easily adjust designs if needed. I’ll show you how to do both traditional and reverse etching with my free designs!
You can use the same technique on stemless wine glasses or even champagne flutes. If you make a design you love, feature it across your entire home bar! Or, make a custom version for a special occasion. I’ll show you how to easily adjust the files in Cricut Design Space. They make great gifts!
The most important part of this DIY project is safety. Etching cream is strong enough to cut glass, so that means it can harm you if you’re not careful.
Always wear disposable nitrile gloves when applying, handling, and rinsing your projects until the cream is completely gone.
Also, the liquid produces fumes, so even if you have good ventilation, wear a fitted respirator with the correct cartridge to protect your respiratory system. If the respirator doesn’t include eye protection, wear goggles, especially while rinsing in case it splashes up. An apron will help protect your clothes, and cover your work surface with butcher paper.
The cream is still active when the project is done, so be careful when rinsing it in a bucket or utility sink. It can etch many home sinks. Always check the bottle for disposal instructions, too!
I’ve also included designs for an etched wine bottle you can turn into a lantern! It’s a kind gift to make if someone loves this project but maybe doesn’t need etched wine glasses.
Let me show you how easy it is to make etched wine glasses and glass bottles! This post contains some affiliate links for your convenience (which means if you make a purchase after clicking a link I will earn a small commission but it won’t cost you a penny more)! Read my full disclosure policy.
Materials to Make Etched Wine Glasses and Glass Bottles
View my Amazon shopping list with the exact items we used to make this project
- One (1) 750 ml Clear Glass Wine Bottle -OR- One (1) 750 ml Green Glass Wine Bottle
- One (1) Stemmed Wine Glass (12 oz or larger)
- Permanent Vinyl (any color, approximately 12″ x 12″)
- Cricut StandardGrip Transfer Tape
- Armour Etch Cream
- One (1) String of Wine Bottle Fairy Lights (optional)
- A way to cut your vinyl stencil – I used the amazing Cricut Maker 3 but you can also use the original Maker or an Explore series machine with the Fine-Point Blade.
- Cricut Green StandardGrip Machine Mat 12″ x 12″Respirator (with proper fit)
- Respirator CartridgeSafety Goggles (if your breathing protection doesn’t cover your eyes)
- Disposable Nitrile Gloves
- Apron (to protect your clothing)
- Butcher Paper (to protect your work surface)
- Paint Brush (to apply Armour Etch)
- Painter’s Tape (to cover areas of glass you don’t want to etch)
- Access to a plastic or metal sink to rinse off etching cream
- Isopropyl Alcohol (to clean glass before applying stencil)
- Lint-Free Cloth or Coffee Filter (to wipe away alcohol)
- Scissors
- Brayer
- Weeding Tool
- Scraper
- Timer
- Measuring Tape (optional, if you need to measure your glass or bottle to change the stencil size)
- Ruler and Marker to make alignment marks
- Design #450 (My free SVG/PDF/DXF design files available in my free resource library – get the password by filling out the form at the bottom of this page)
How to Make Your Own Etched Wine Glasses and Glass Bottles
Etched Wine Glasses and Glass Bottles
Learn how to make beautiful reverse etched wine glasses and glass bottles for the holidays!
Materials
- One (1) 750 ml Clear Glass Wine Bottle -OR-
- One (1) 750 ml Green Glass Wine Bottle
- One (1) Stemmed Wine Glass (12 oz or larger)
- Permanent Vinyl (any color, approximately 12" x 12")
- Cricut StandardGrip Transfer Tape
- Armour Etch Cream (I used several tablespoons)
- One (1) String of Wine Bottle Fairy Lights (optional)
- Design #450 (My free SVG/PDF/DXF design files available in my free resource library - get the password by filling out the form at the bottom of this page)
Tools
- A way to cut your vinyl stencil - I used the amazing Cricut Maker 3 but you can also use the original Maker or an Explore series machine with the Fine-Point Blade.
- Cricut Green StandardGrip Machine Mat 12" x 12"
- Respirator (with proper fit)
- Respirator Cartridge
- Safety Goggles (if your breathing protection doesn't cover your eyes)
- Disposable Gloves
- Apron (to protect your clothing)
- Butcher Paper (to protect your work surface)
- Paint Brush (to apply Armour Etch)
- Painter's Tape (to cover areas of glass you don't want to etch)
- Access to a plastic or metal sink to rinse off etching cream
- Isopropyl Alcohol (to clean glass before applying stencil)
- Lint-Free Cloth or Coffee Filter (to wipe away alcohol)
- Scissors
- Brayer
- Weeding Tool
- Scraper
- Timer
- Measuring Tape (optional, if you need to measure your glass or bottle to change the stencil size)
- Ruler (optional, to make alignment marks) -AND-
- Dry Erase Marker (optional, to make alignment marks)
Instructions
STEP 1: GET MY FREE ETCHED WINE GLASSES AND GLASS BOTTLES DESIGN FILES
First, download my Etched Wine Glasses and Glass Bottles SVG/DXF/PDF files from my free resource library. It's Design #450. There are three different designs in the folder:
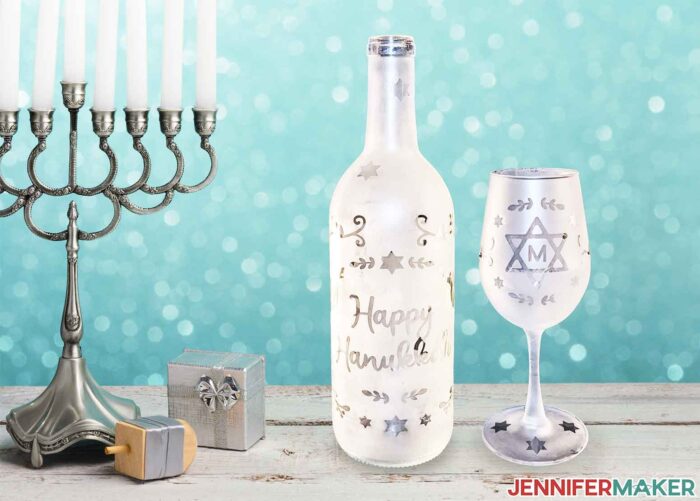
- Butterflies
- Hanukkah (I've included three different spellings -- choose whichever one you prefer!)
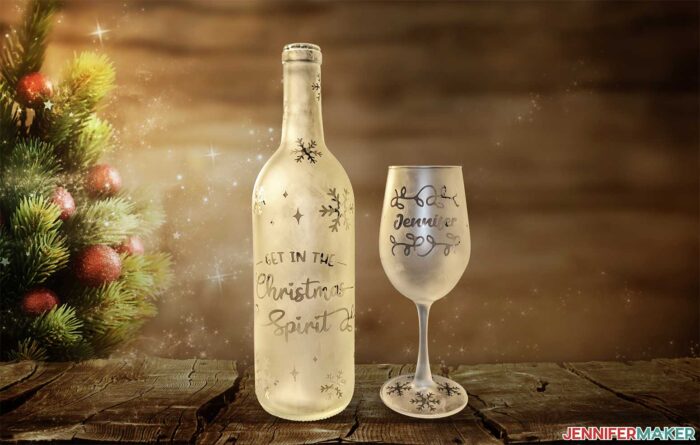
- Christmas
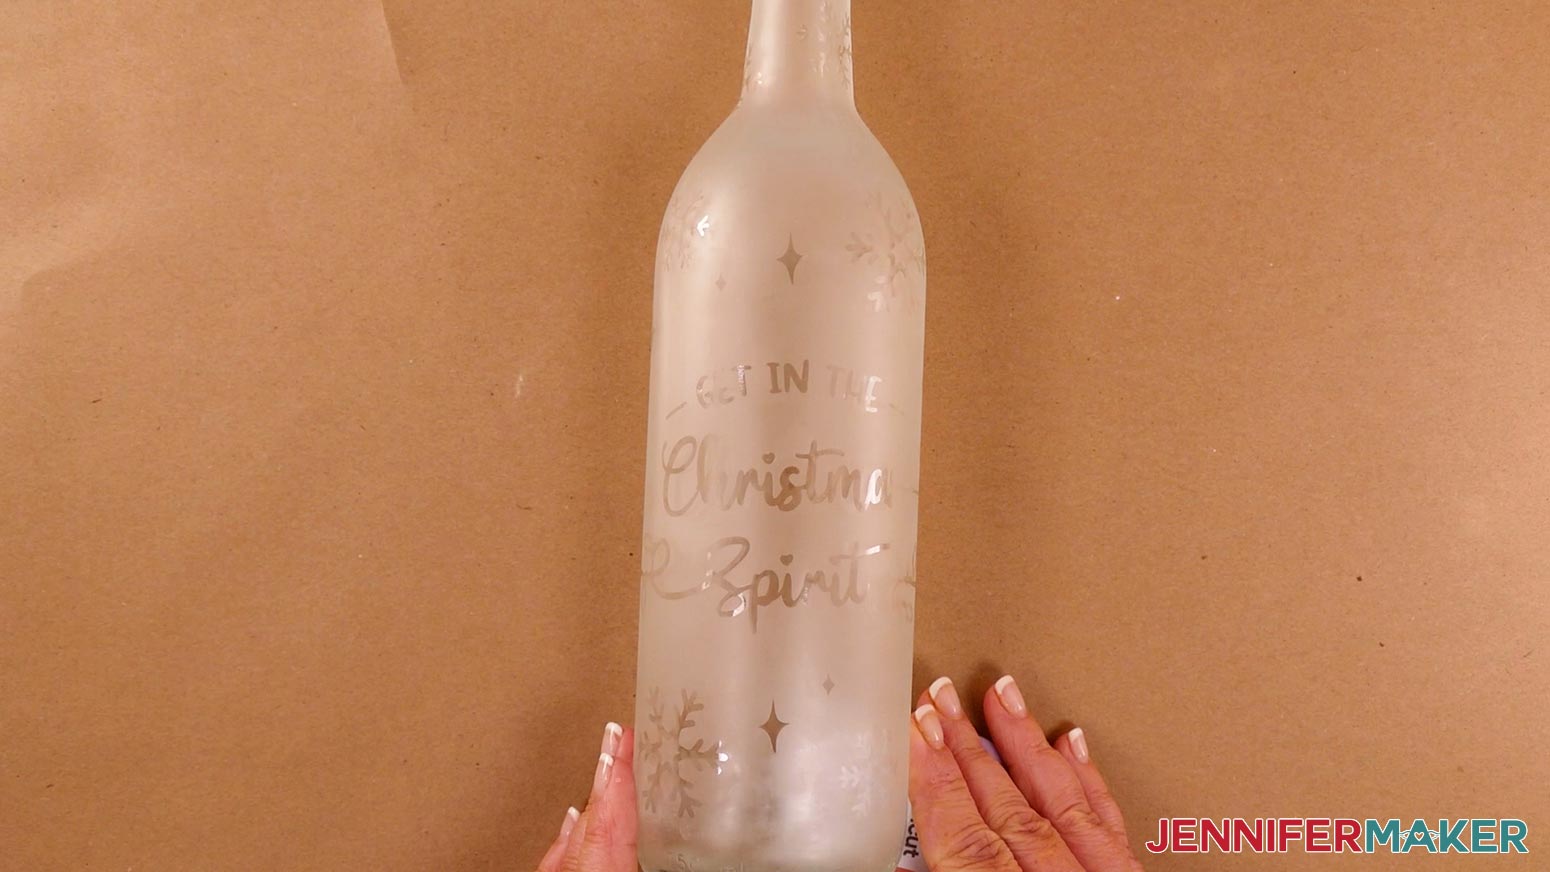
I'll show you how to reverse etch the Christmas design on a stemmed wine glass and standard wine bottle. Upload your chosen SVG file to Cricut Design Space and add it to your Canvas.
TIP: If you are not sure how to upload an SVG cut file to Cricut Design Space, watch this helpful video training series I made. If you are on an iPad or iPhone, here is how to download and upload SVG files to the Cricut Design Space app.
This is what my Etched Wine Glasses and Glass Bottles SVG files look like on my Canvas.
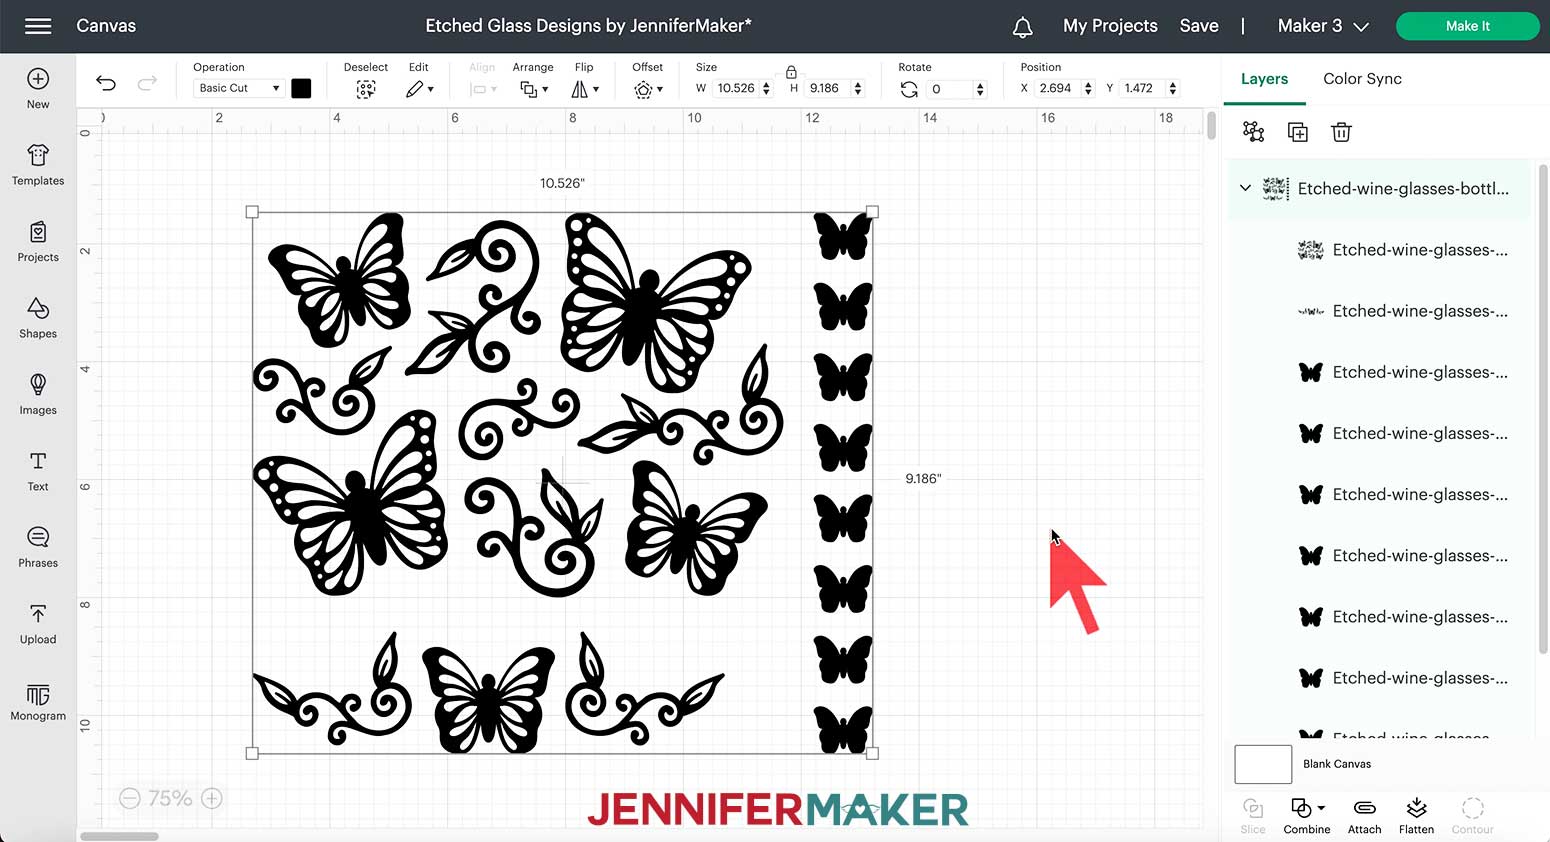
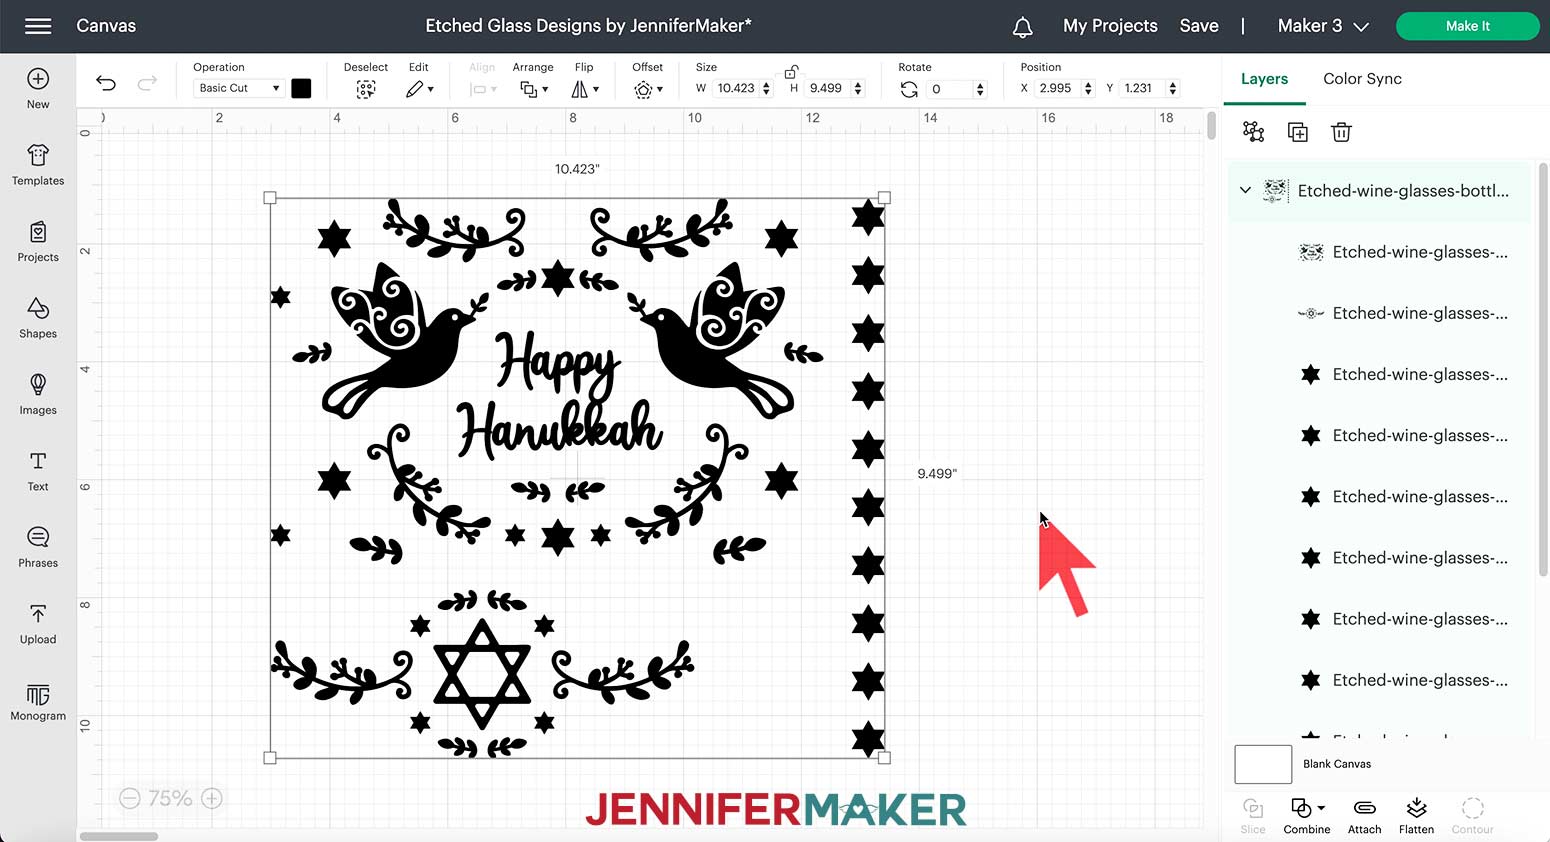


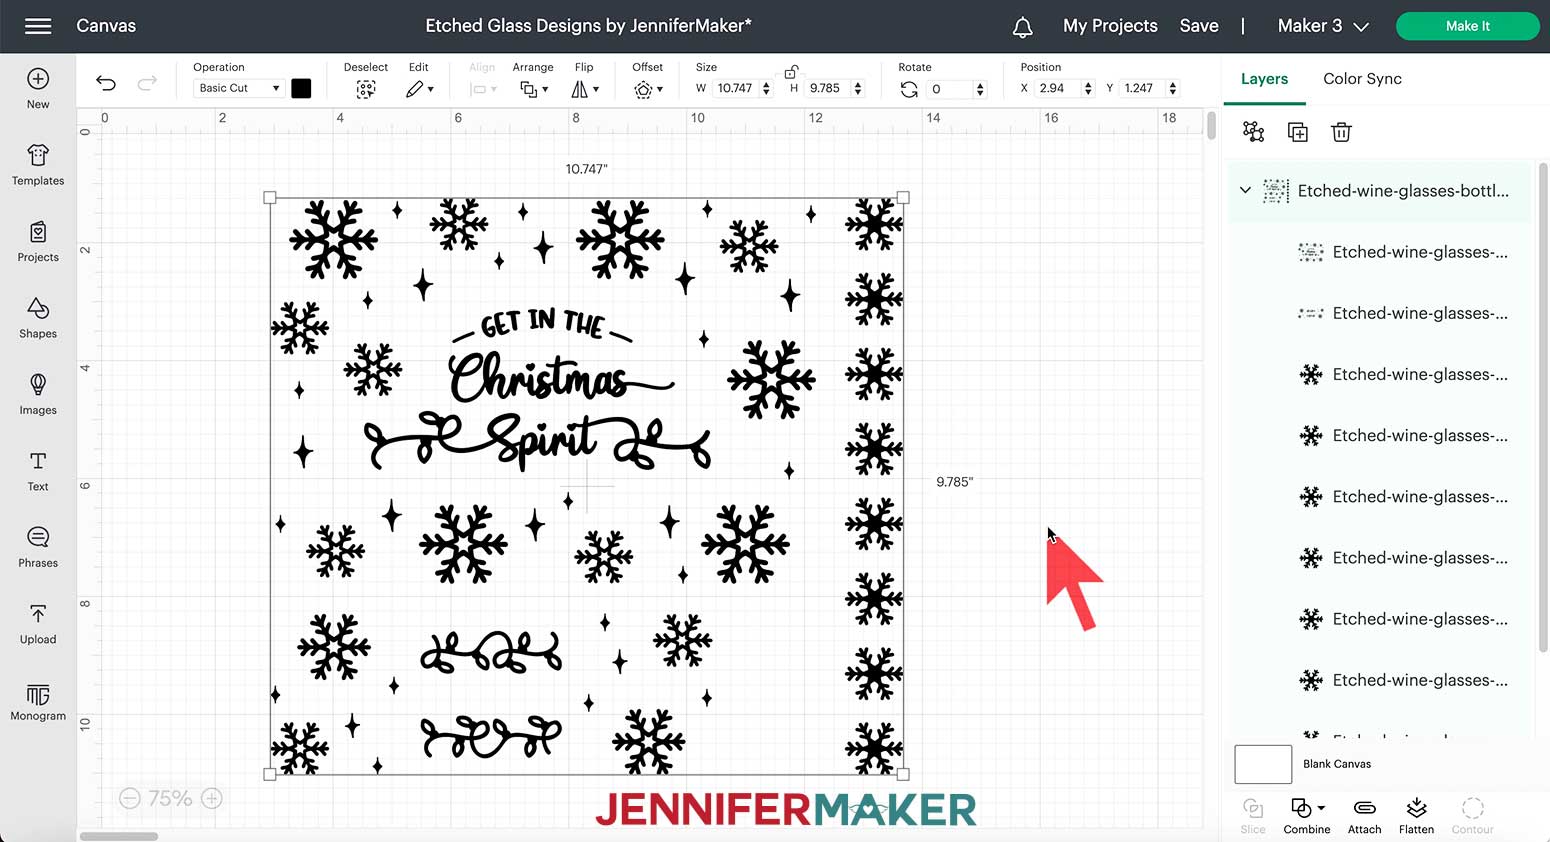
Each file includes the design for a wine bottle at the top, a wine glass at the bottom, and some separate additional shapes on the right.
STEP 2: PREPARE AND CUSTOMIZE THE STENCIL DESIGN
All the designs are sized for a standard 750 ml wine bottle and a 12 oz stemmed wine glass. The Christmas wine bottle design is approximately 9.3" wide by 6.5" tall. The Christmas wine glass design is approximately 7.5" wide by 2.7" tall.
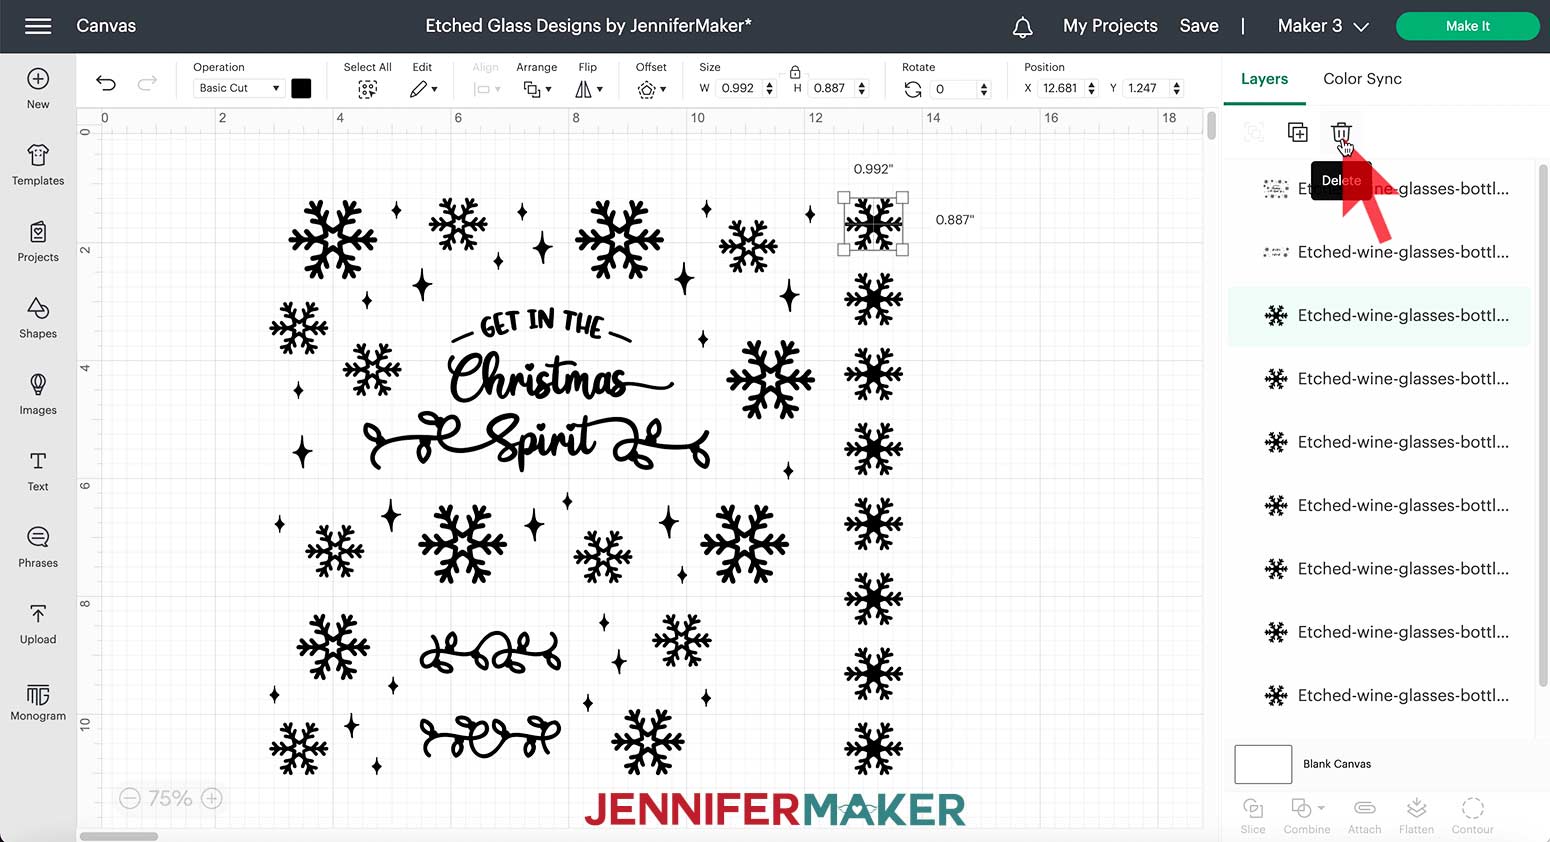
There are also eight 1" wide snowflakes that you can choose to add separately around the neck of your wine bottle and the base of your wine glass. If you don't want to use all the additional snowflakes, you can select one or more of them in the Layers Panel and remove them by clicking "Delete" at the top.
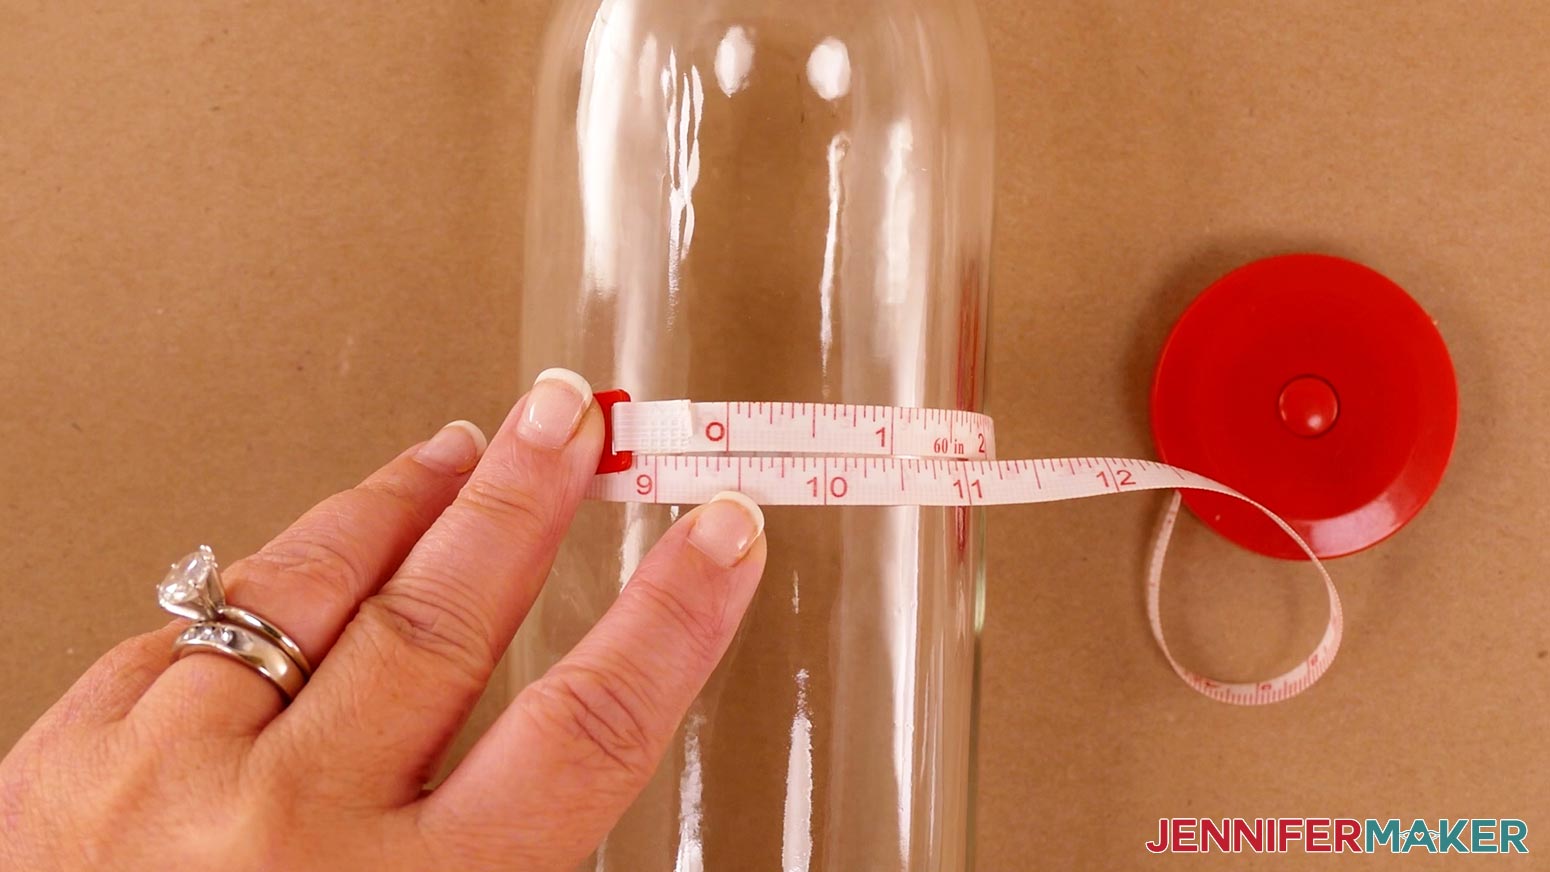
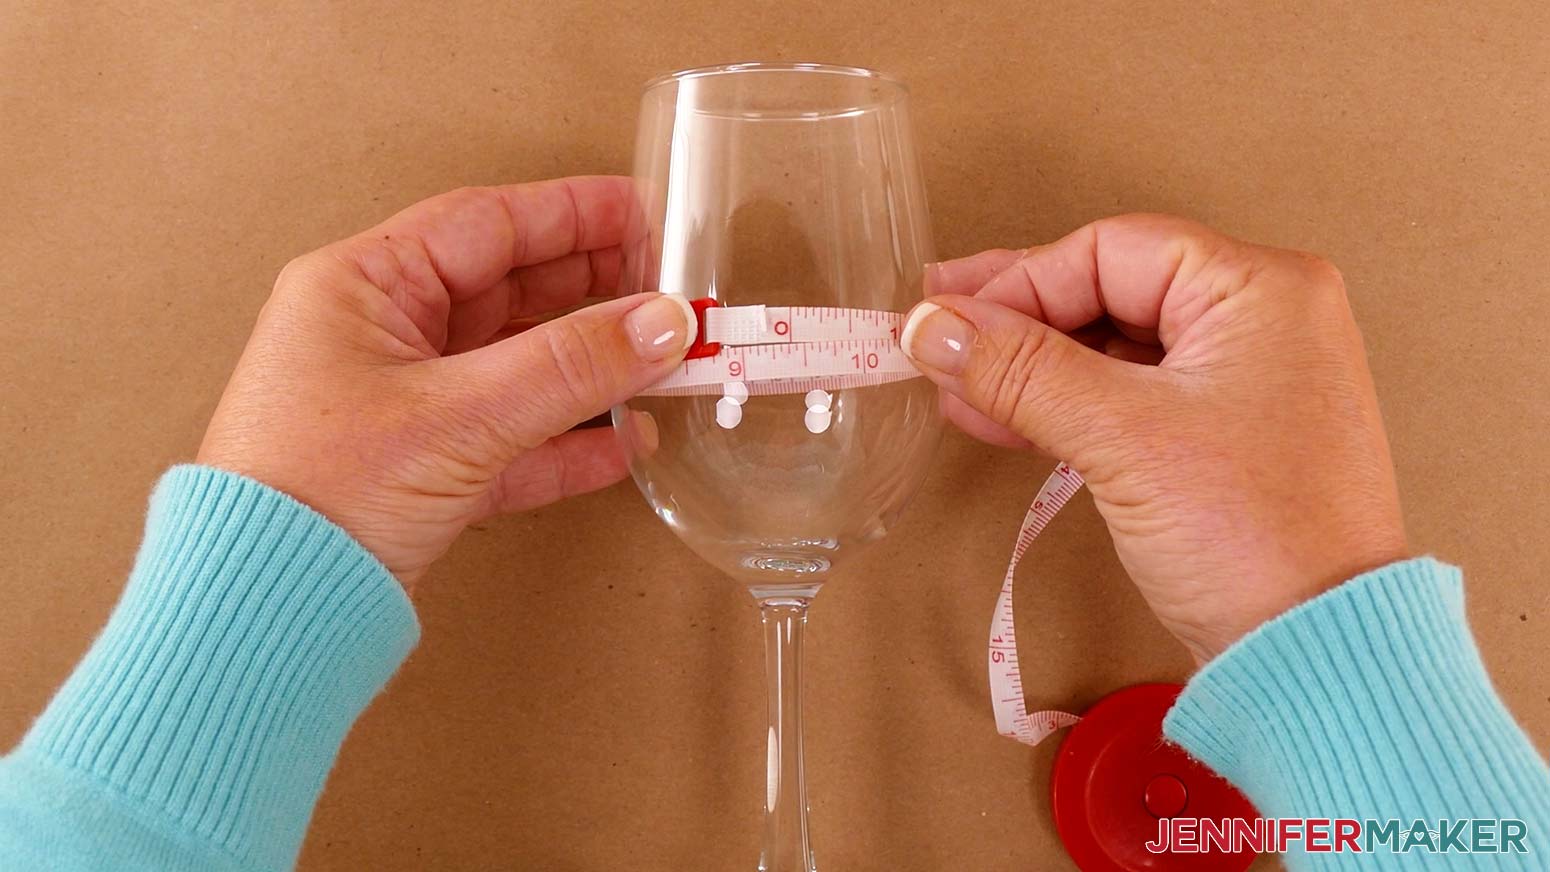
NOTE: If you are etching the designs on a different sized glass or bottle, enlarge or reduce them accordingly. You'll need to measure the height and circumference of your bottle and/or glass where you want the design to be. Then, you can use those measurements (the circumference will be the width of the design) to resize the designs.
First, with the artwork selected, click the Ungroup button at the top of the Layers Panel. Then, click and drag a corner of the bounding box around the design you wish to resize, or type a new dimension into the width ("W") or height ("H") box at the top menu under Size.
NOTE: Remember to keep the Lock icon closed to maintain the design proportions! And if you make your design larger, use larger pieces of vinyl and transfer tape.
TIP: If you need help resizing an SVG in Cricut Design Space, you can check out my resizing guide where I explain exactly what you need to do to resize any design to fit your needs.
Customizing the Designs
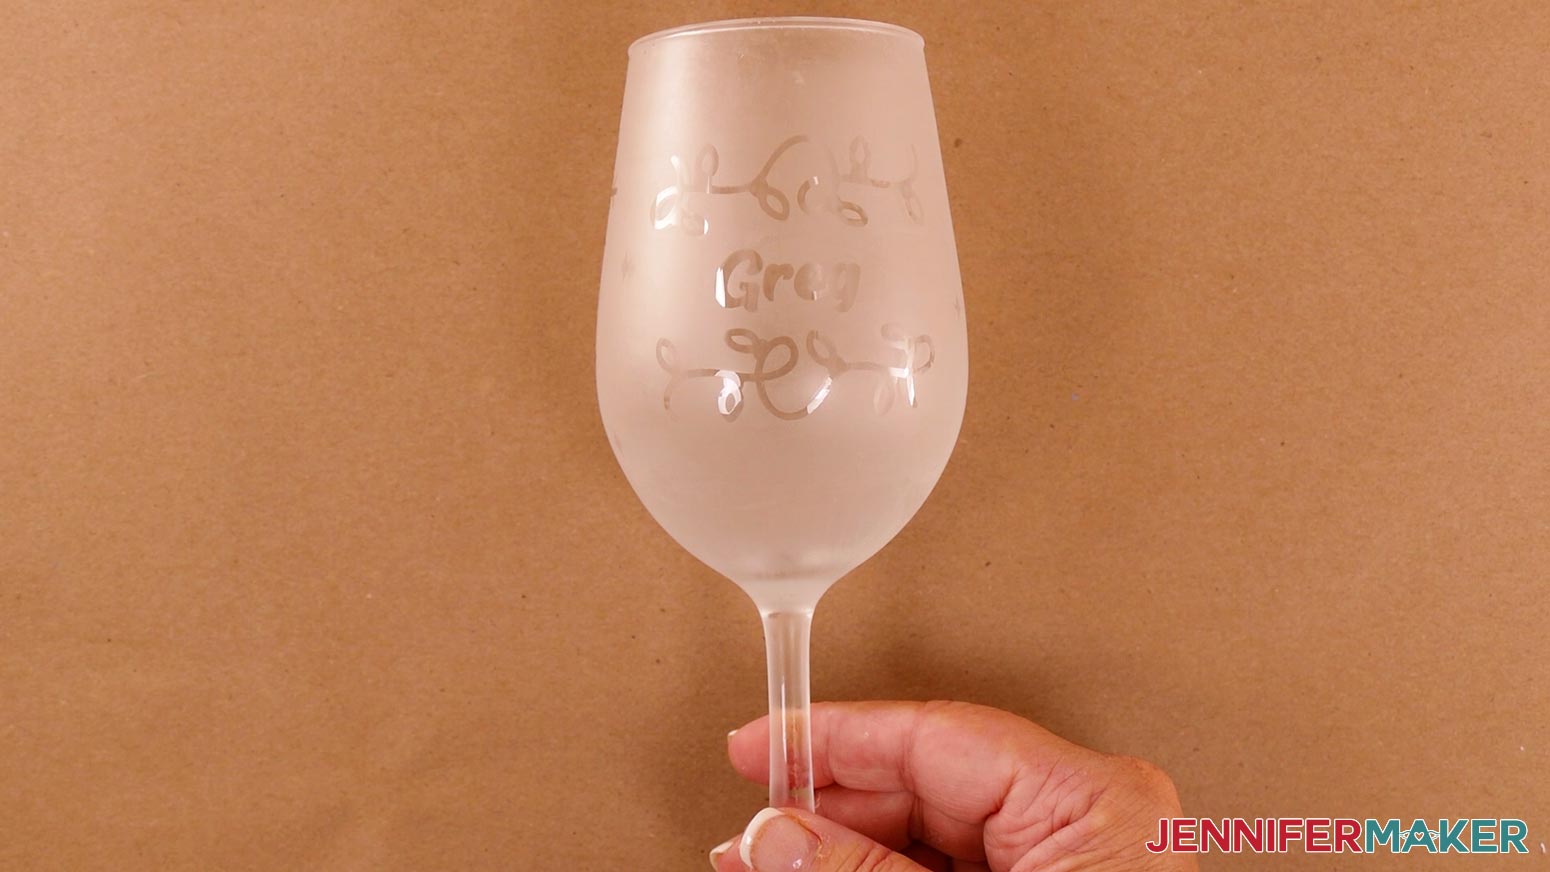
I'll show you some customization steps for the Christmas wine glass design. You can follow the same steps to customize the star in the center of the Hanukkah wine glass design. The butterflies design is ready to cut as is!
If you look at the wine glass design at the bottom of the file, you'll notice there are two strings of lights with a blank space in between them. This is where we'll put our text! Start by clicking UnGroup at the top of the Layers Panel if you haven't already. Next, click the Text icon on the left hand side of the screen. A box with "Text" highlighted in it will appear on the Canvas. Without clicking anything else, type in the text you want. I'll use "Greg" for this glass.
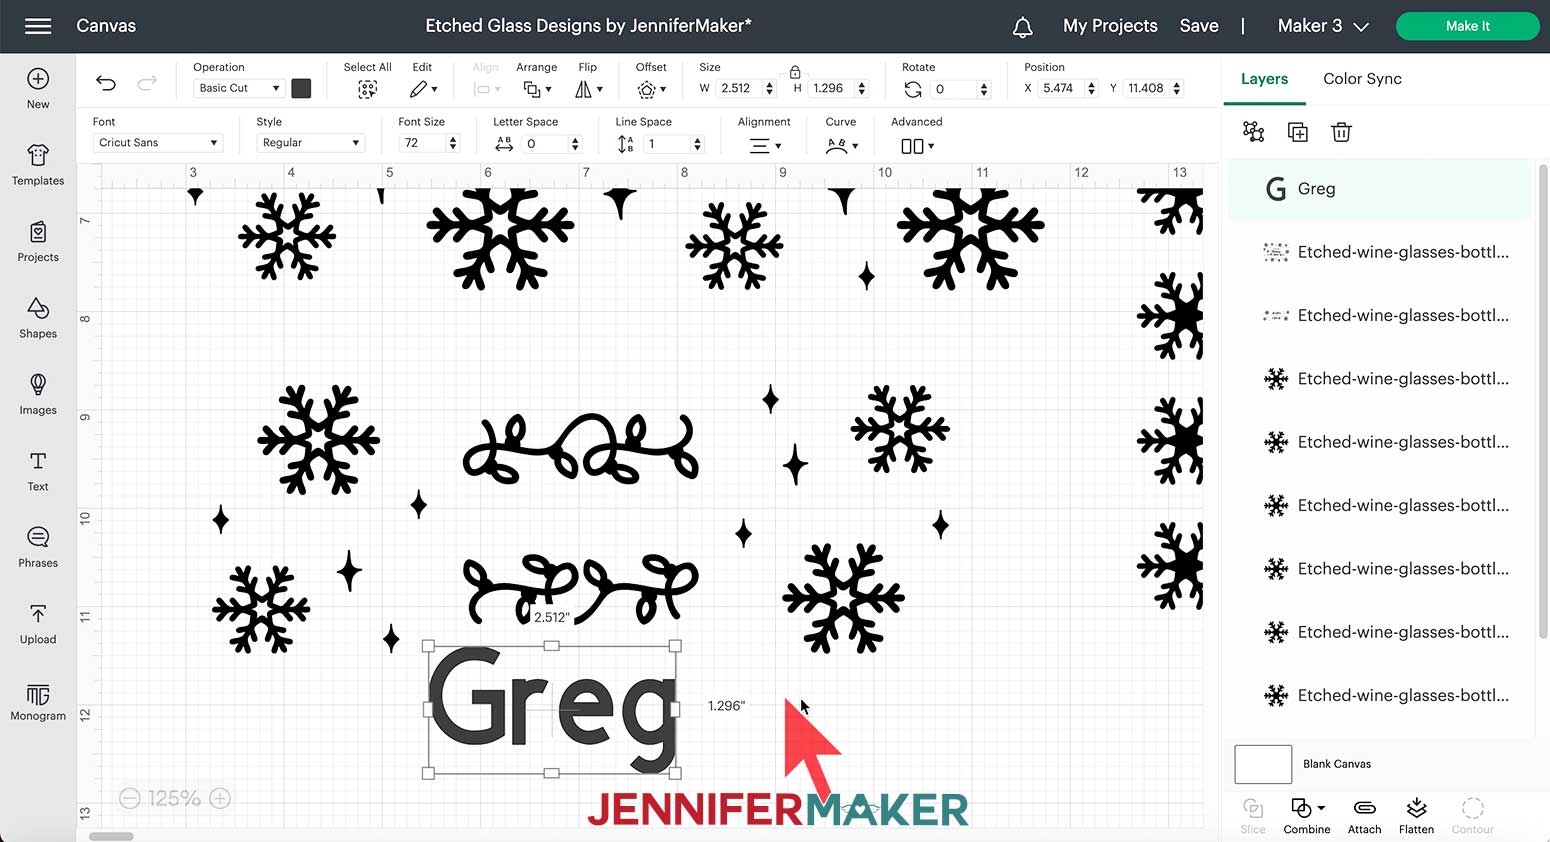
Click the box that says "Cricut Sans" under Font in the top menu to see your font options. I'm going to use the font Andala Script, which you can download for free from FontBundles.net. Remember to click the System section to find fonts you've downloaded.
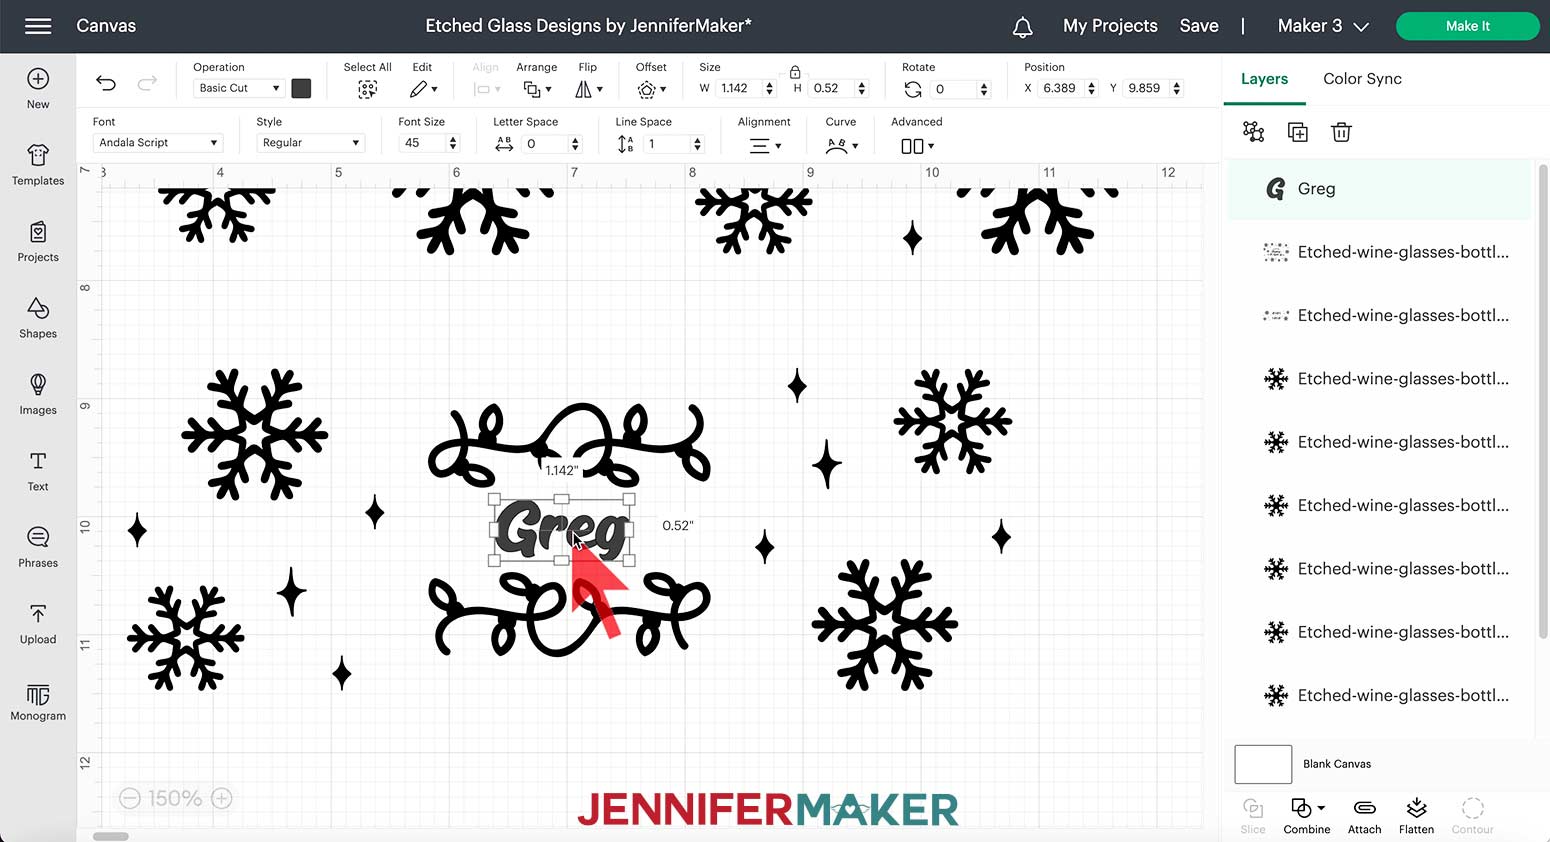
Zoom in so you can see the details.
Move your text into the blank area and resize it to fit. I made mine Font Size 45. Make sure your text doesn't get too close to the other elements or it may be hard to read after etching.
Once you're happy with the placement, hold Shift and click the wine glass design and the text you just added. Then, click "Attach" below the Layers Panel to ensure the text cuts in the correct spot on your stencil.
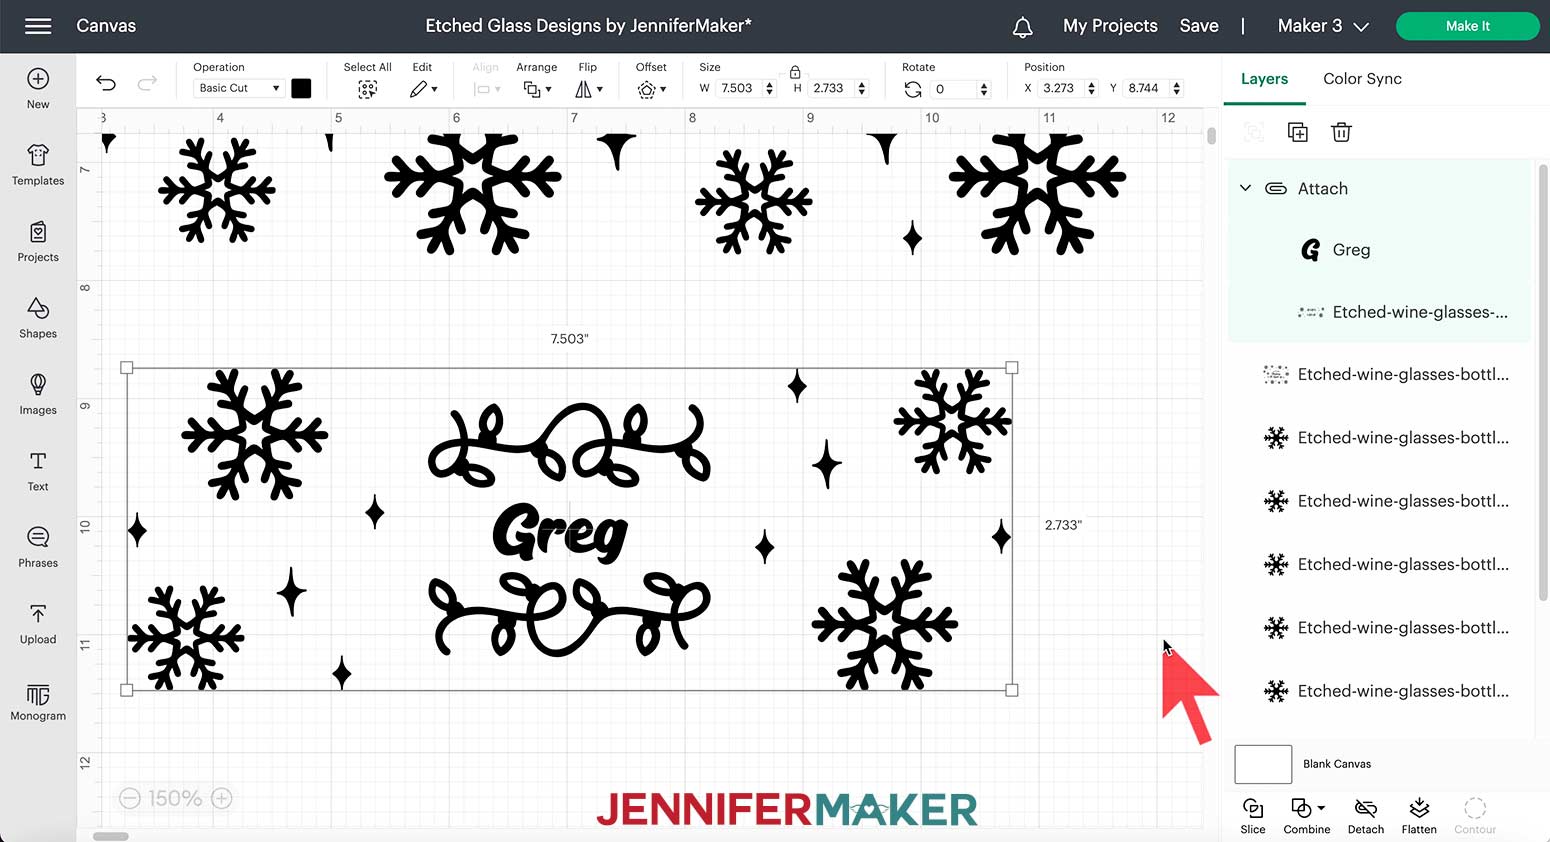
Your design is now ready to cut!
STEP 3: CUT THE DESIGN
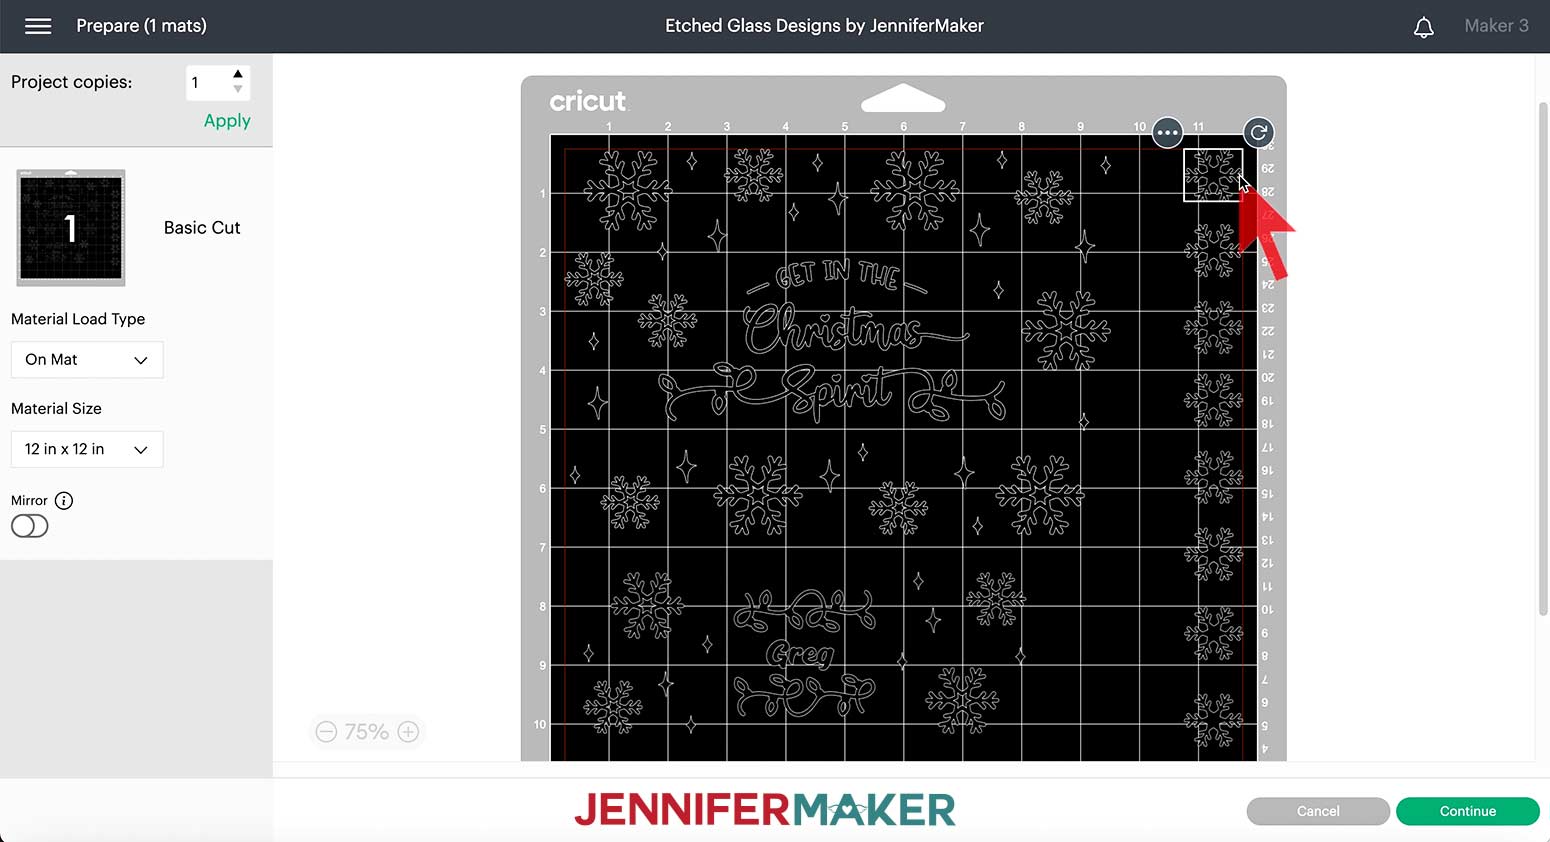
Select the correct machine in the top menu and click "Make It" to move to the Prepare screen. A pop-up window might appear asking how you want to load your materials. Select "On Mat," "12 x 12" and click "Continue".
On the Prepare screen, make sure your design is laid out correctly on one mat. Do not mirror your design, since we need it to face the right way on the glass and bottle.
You'll need to cut your bottle stencil, glass stencil, and additional snowflakes apart with scissors after your machine cuts the designs. To make sure there's enough space between them to do this, you can move them apart from each other on the screen by clicking and dragging each object.
Click "Continue" to move to the Make screen.
Under Set Base Material, I am choosing "Premium Vinyl - Permanent Glossy", which means permanent vinyl. Make sure your Cricut Fine-Point Blade is clean and in Clamp B as indicated on the screen. I always change my Pressure to "More" for a cleaner cut.
Put your vinyl shiny side up on your machine mat, making sure it covers the correct design areas visible on your screen. Use a brayer to get the vinyl as smooth as possible on your mat.
Then, load the mat into your Cricut and press the flashing button to begin cutting. When the cut is complete, unload the mat. Flip it over on your work surface and gently roll a corner back to release the vinyl.
TIP: If you have any trouble cutting the vinyl, check out my Cricut Tips & Tricks for Cleaner Cuts.
STEP 4: PREPARE THE STENCILS, GLASS, AND BOTTLE
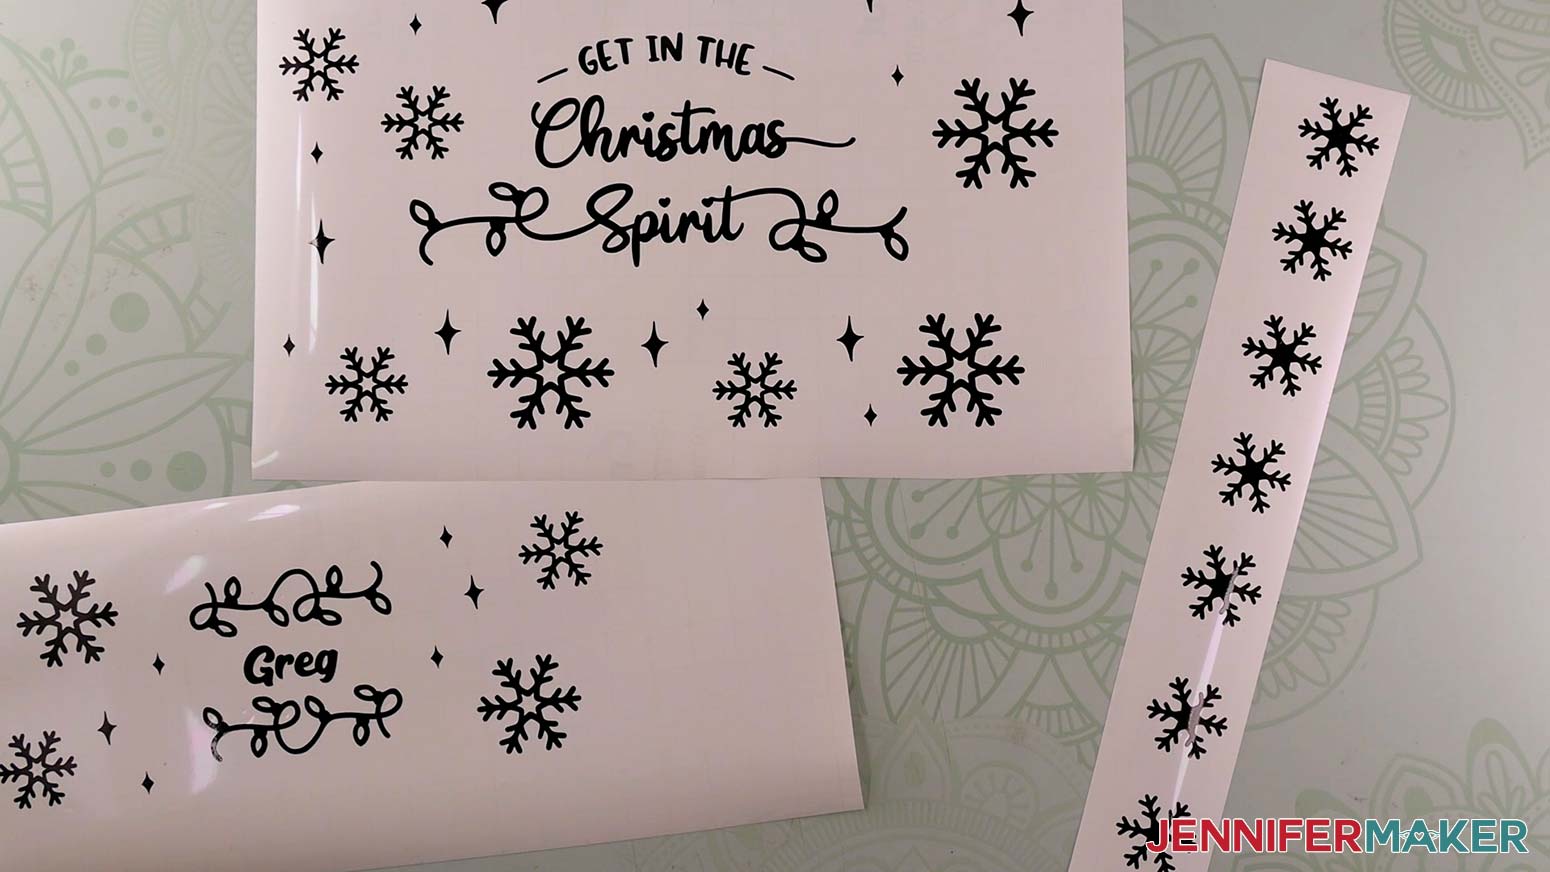
This project uses reverse etching, meaning that the words and snowflakes will be clear and the rest of the bottle and glass will be etched. Because of this, we can weed the designs as we normally would for a traditional vinyl project.
Weed your vinyl with your weeding tool by removing the parts that you don't need from the design. Don't forget to remove the centers of any letters and the center pieces of the snowflakes.
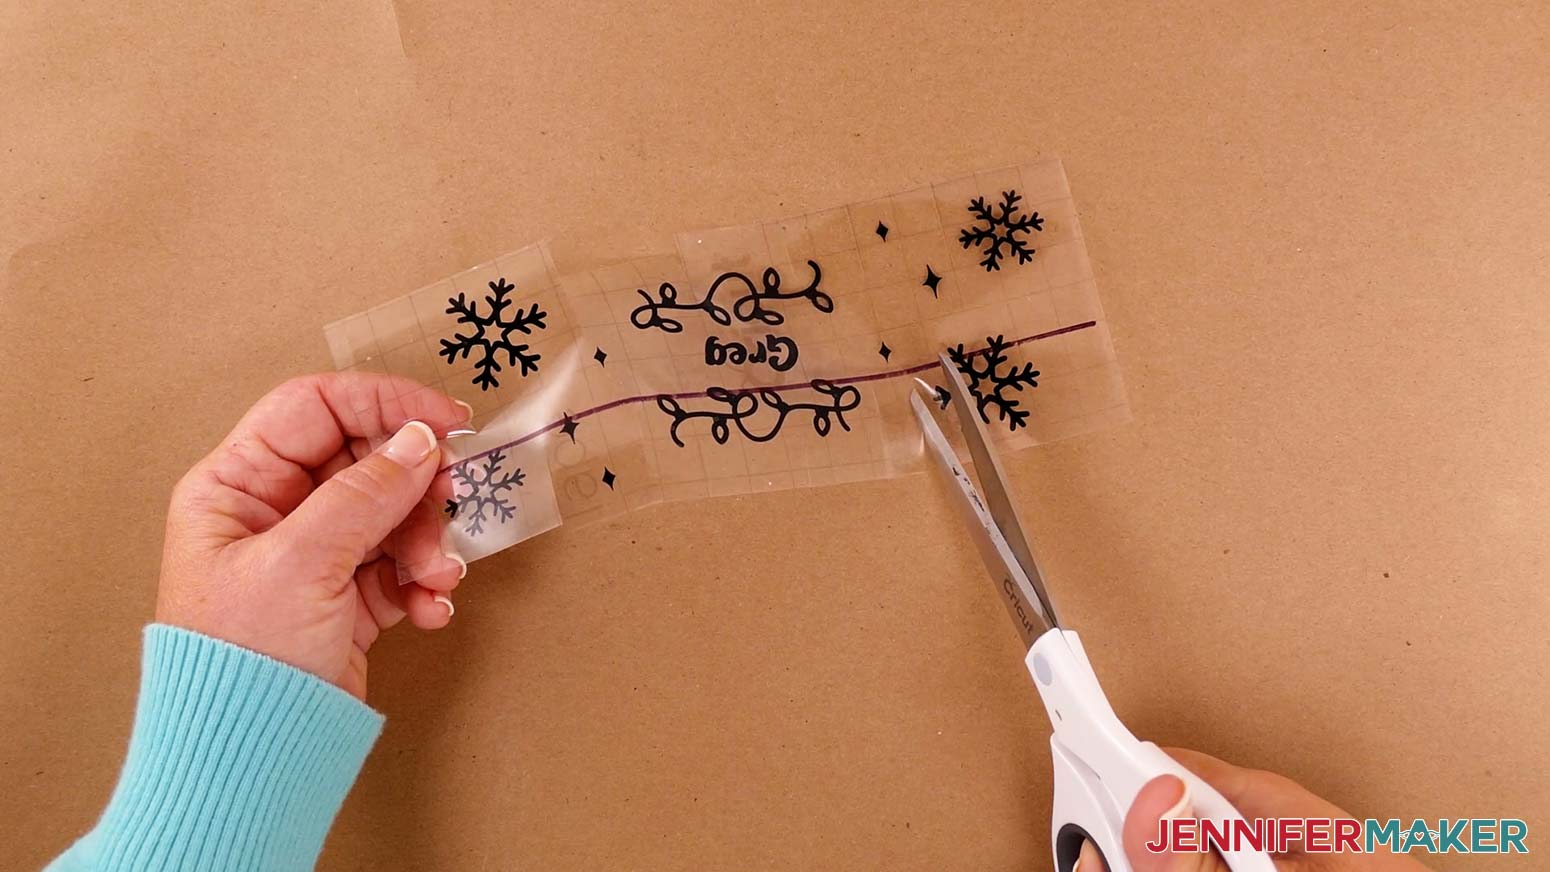
Then, cut around each design group with scissors so you have three separate pieces -- the bottle stencil, the glass stencil, and the additional snowflakes. You can cut the additional snowflakes apart if you like, but I left mine on one sheet.
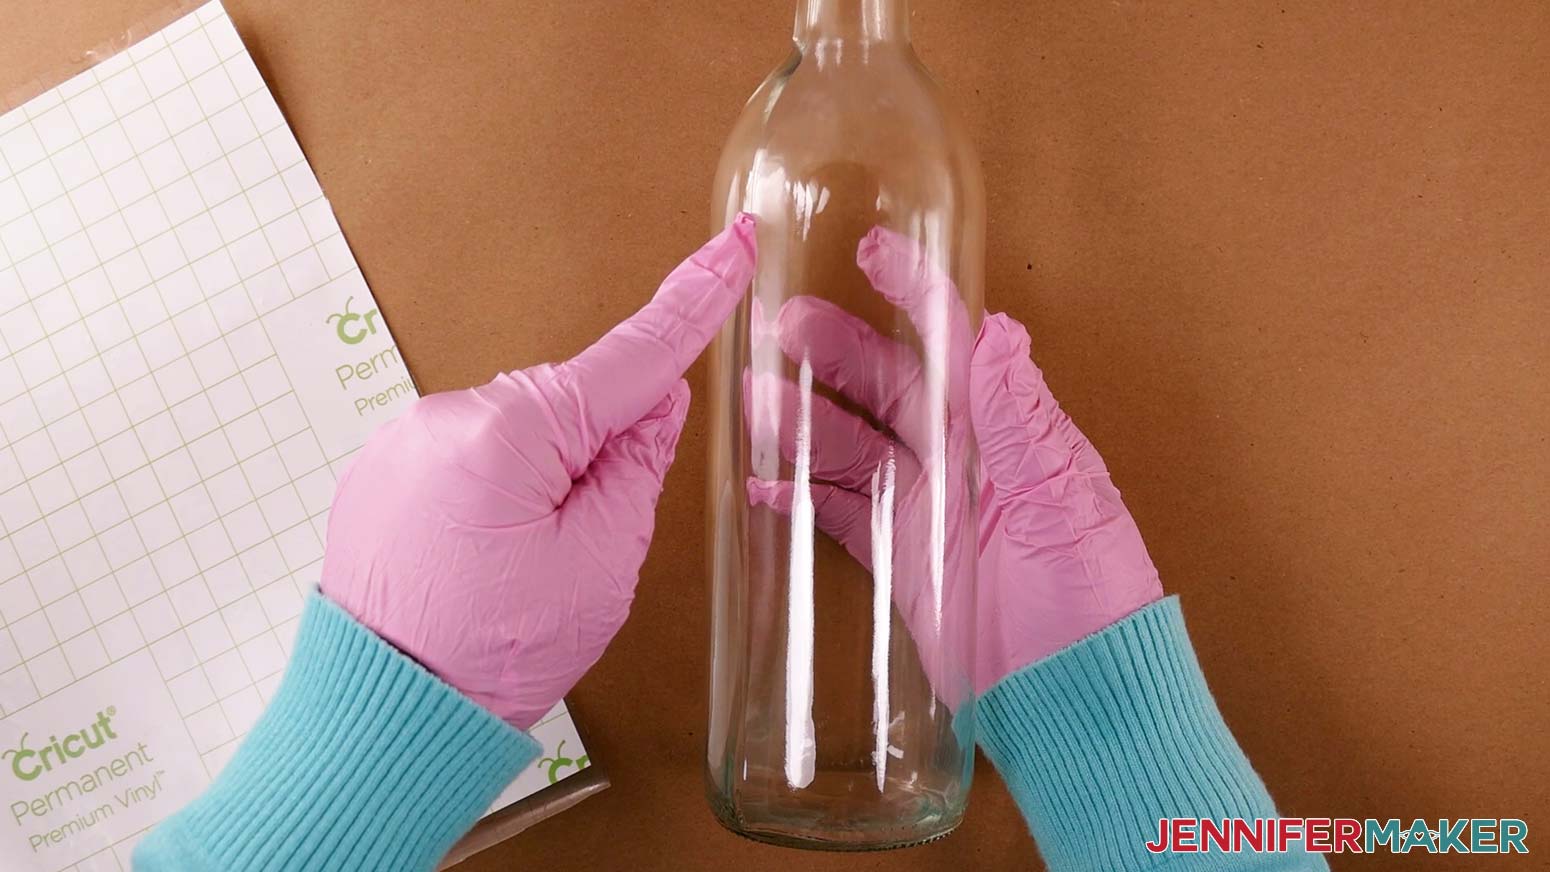
To prepare your wine bottle and glass for good vinyl adherence, wipe them with isopropyl alcohol and a lint-free cloth or coffee filter. This will remove any dust or oils that will make the vinyl stick less. Then, set them aside to let them dry and avoid handling them with your bare hands.
Next, we'll move the vinyl stencils from their carrier sheets to the glass and bottle. You'll want to focus on one stencil at a time. I'll start with the bottle.
Wine Bottle Stencil
Cut a piece of transfer tape slightly larger than your stencil. Remove the backing from the transfer tape. Apply it to your wine bottle stencil by using my Taco Method. Hold the transfer tape in the shape of a taco, or a "U" shape. Then, put the bottom of your “taco” onto the middle of your design. Smooth the tape over the decal from the center outward to minimize wrinkles and bubbles.
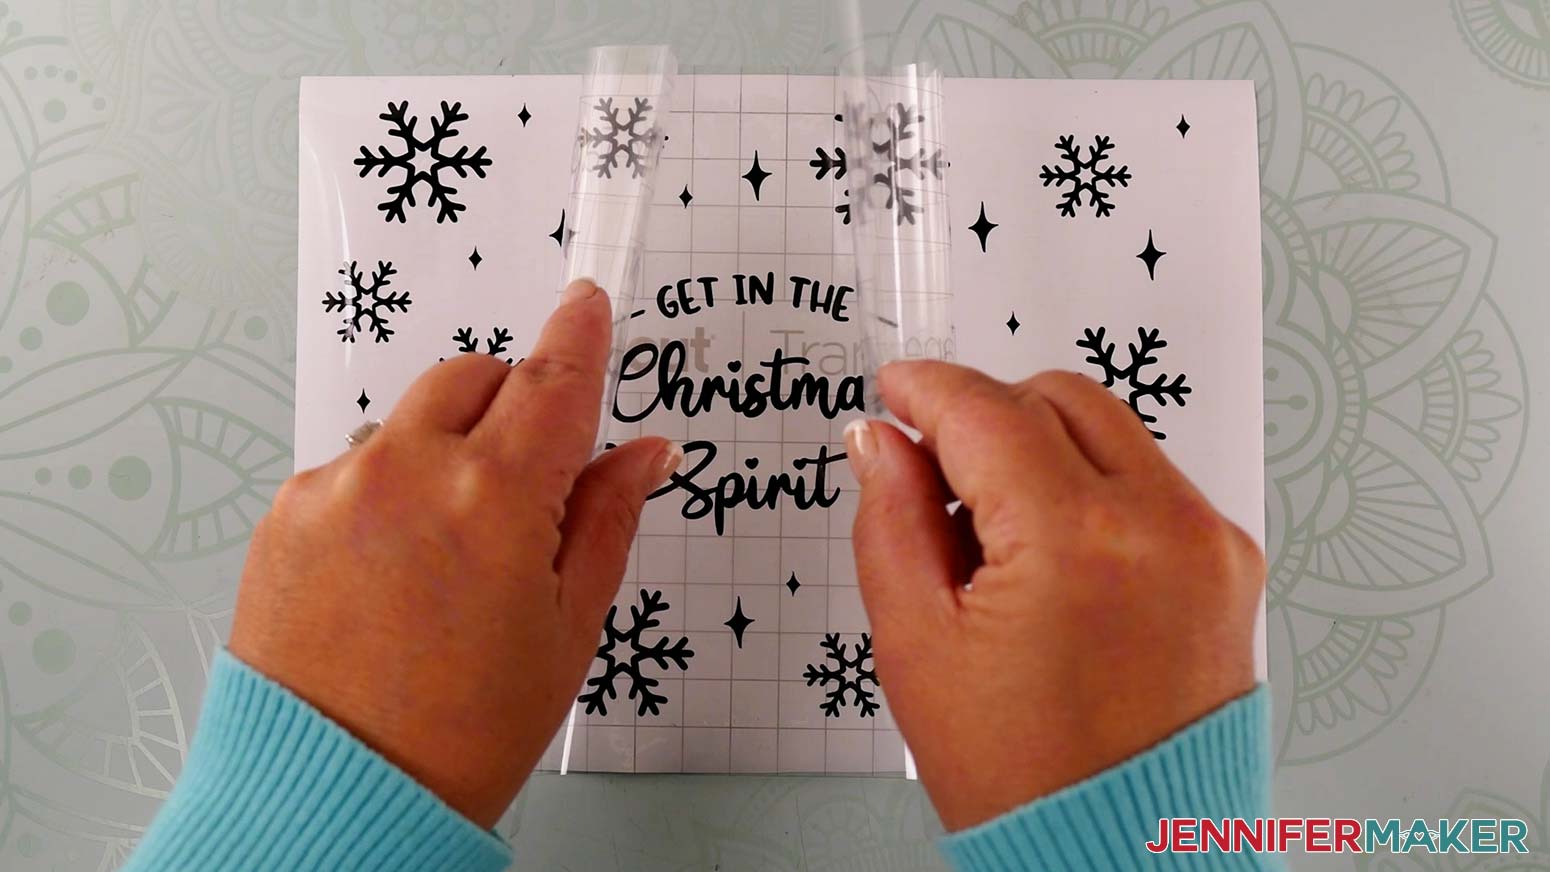
With the transfer tape in place, run a scraper tool or other hard and flat-edged item (like a store loyalty card) all over the project’s front and back with medium pressure.
Before removing the paper backing from the vinyl, wrap the stencil around your bottle to get an idea of where you'll be placing it. You may want to put some gloves on so you don't get any fingerprints on the clean glass. Pay attention to the seams on the sides of the bottle.
You'll want to make sure those don't end up right in the middle of your words. Trust me, I made this mistake when testing and it doesn't look good. But I have a great tip to make sure this doesn't happen to you!
Once you've got your stencil wrapped around the bottle with the seams where you want them, look at where the left and right edges of your design are. They should almost be touching. Take a small piece of painter's tape and use it to mark this spot on the bottle. You can place it above where you'll be adhering your design.
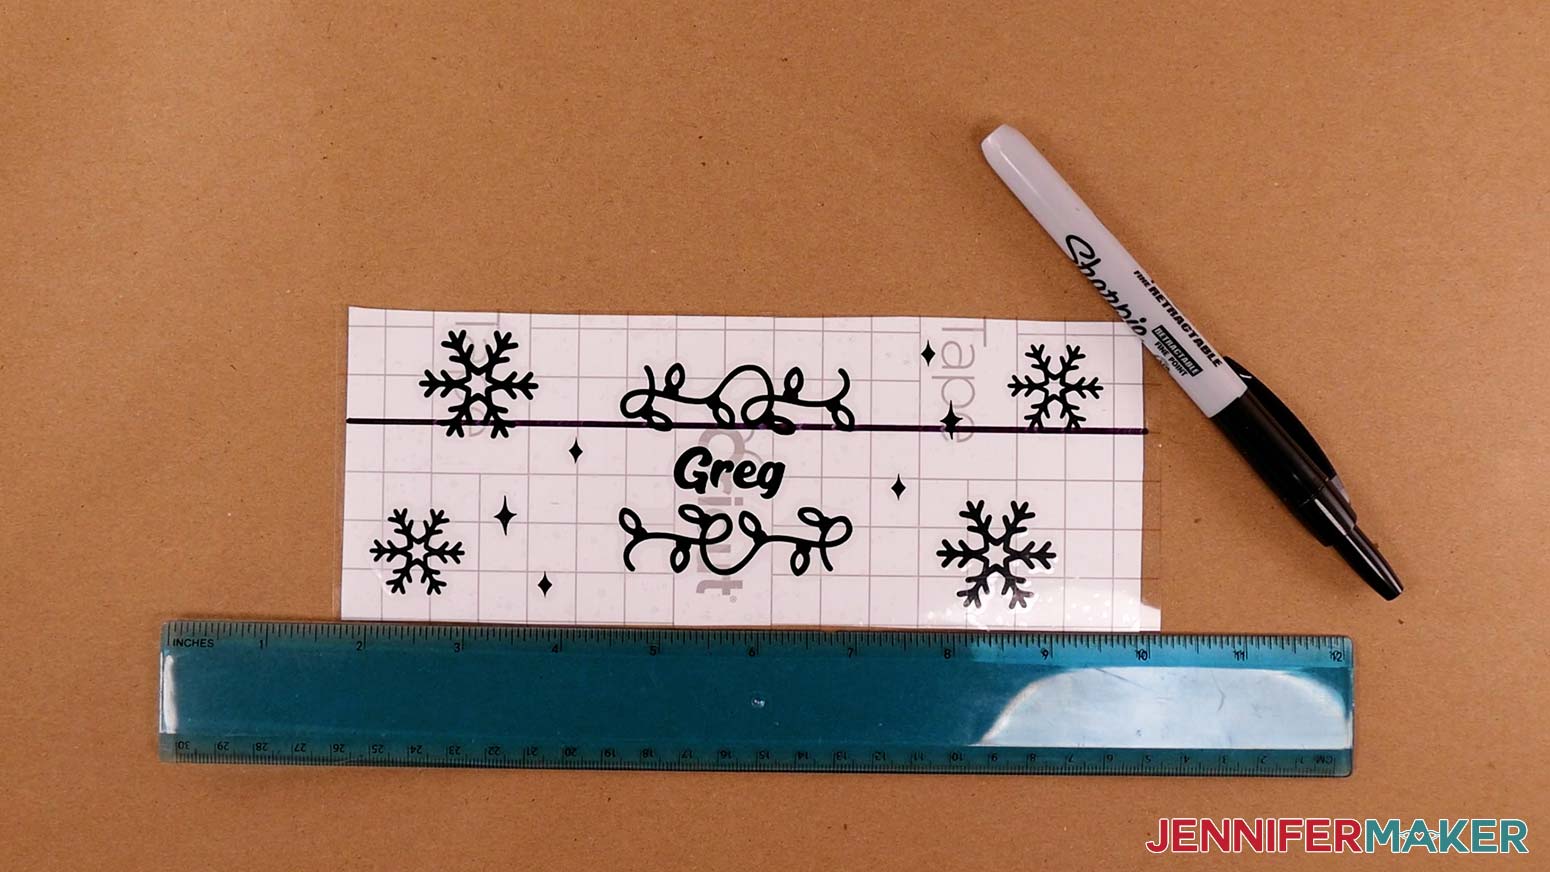
TIP: Applying your stencil nice and straight can be difficult, but a little preparation now will help. Draw a horizontal line across the center of your transfer tape -- parallel with the text -- with a ruler and ake alignment . If you aligned your Cricut transfer tape nice and straight on the stencil, you may be able to use the horizontal grid lines instead. Then, when putting your stencil on your bottle, you can position your horizontal line so that it's parallel with the bottom of your bottle to apply the decal nice and straight!
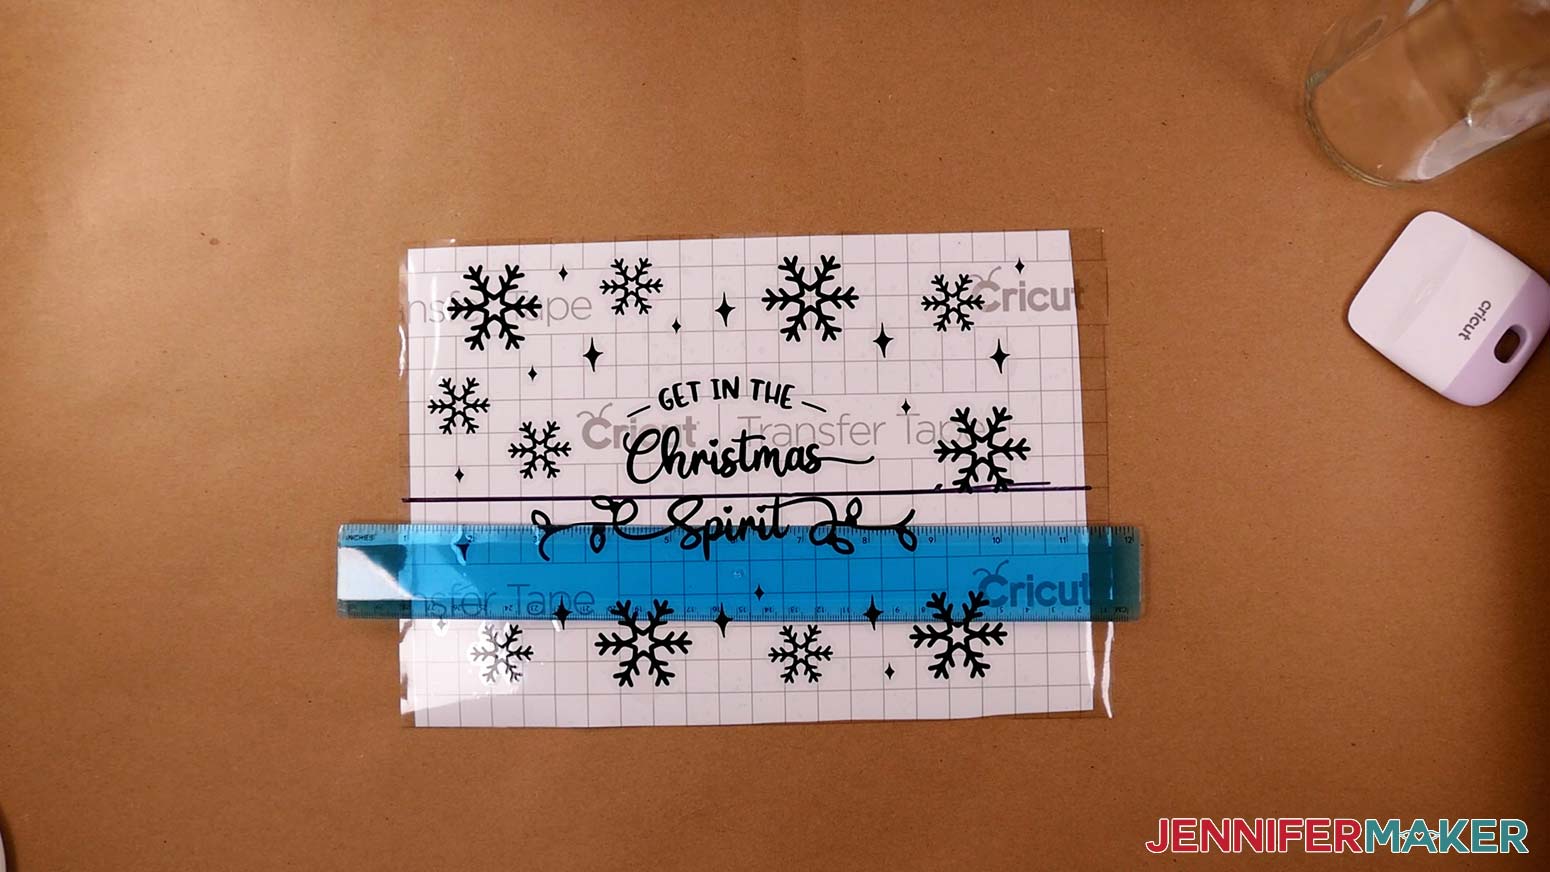
Now, flip your design over and remove the paper backing from the vinyl. If your stencil is still sticking to the backing paper, replace the transfer tape and burnish again.
Your bottle stencil is now ready to use!
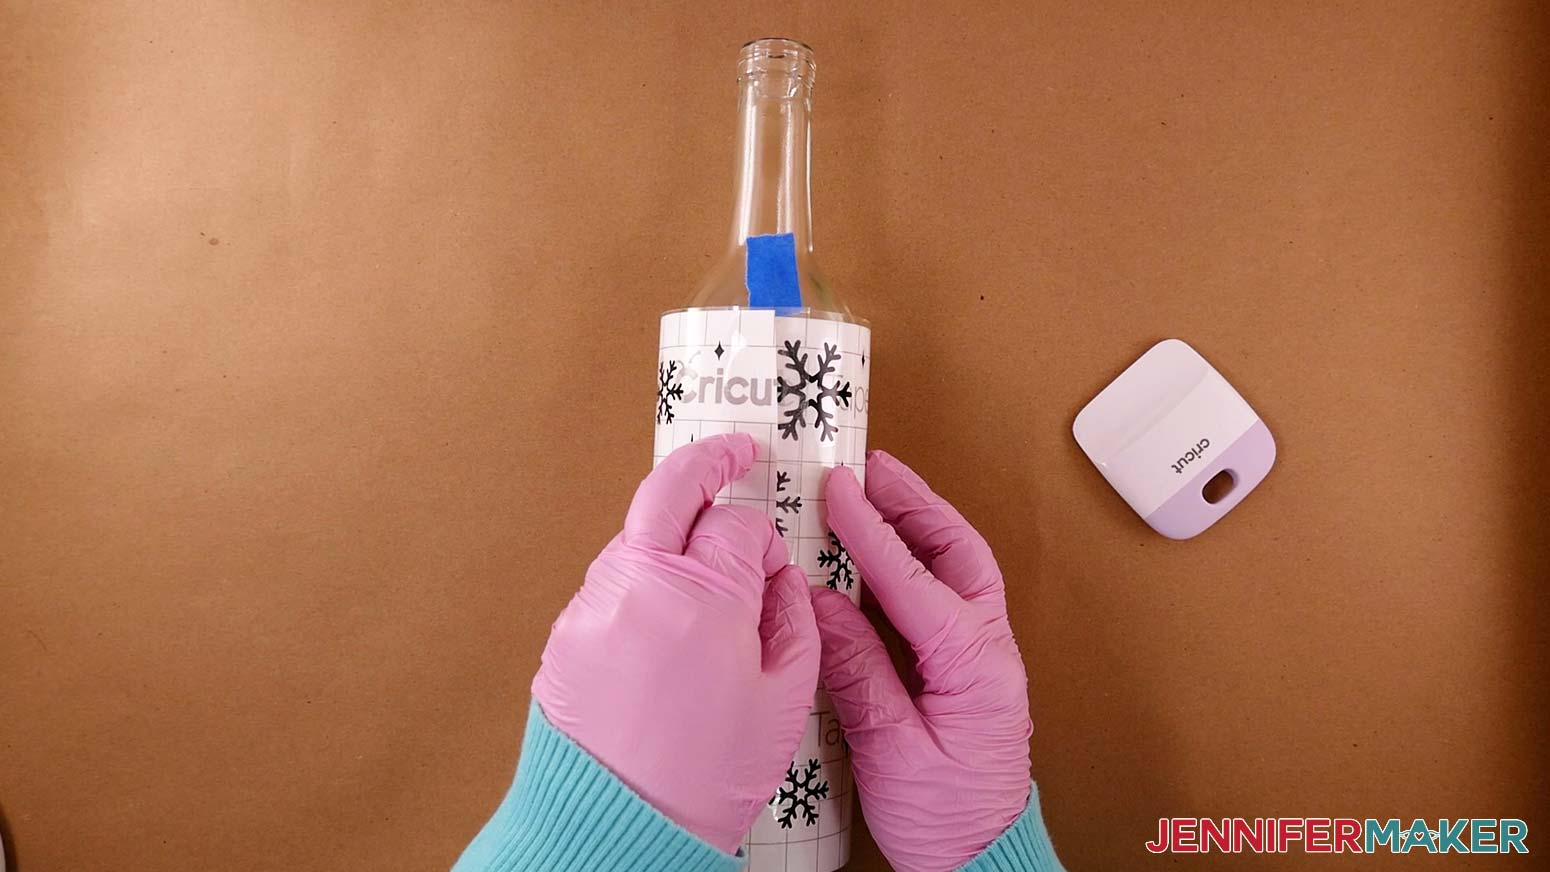
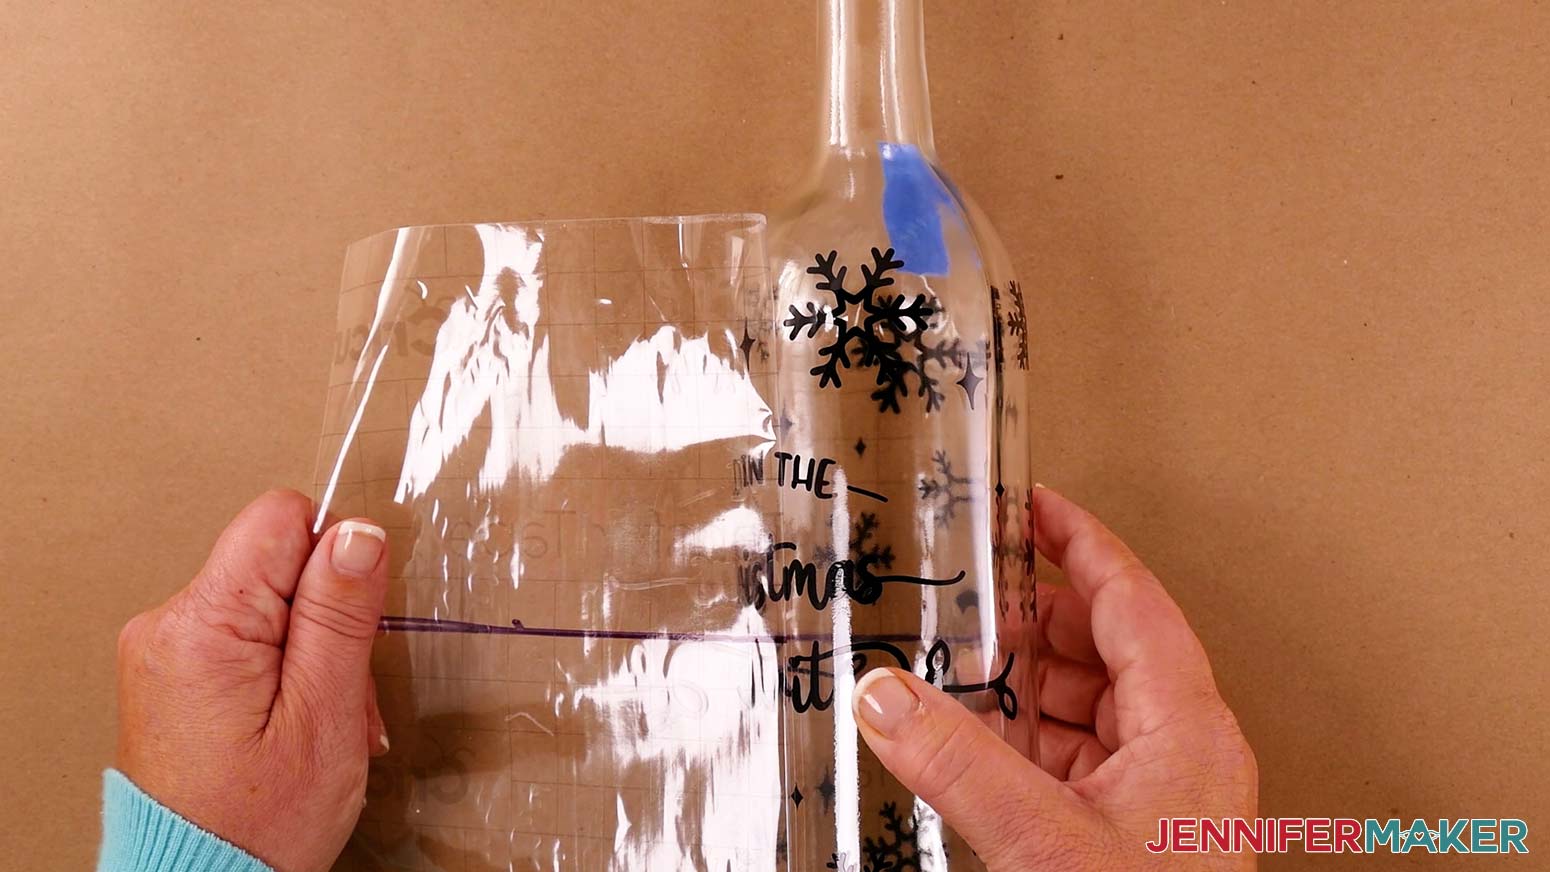
Lay the design face down on your work surface and line your bottle up to one end of the stencil. Make sure your words are facing the right direction! Rotate the bottle until the piece of painter's tape is just lined up with the edge of the design.
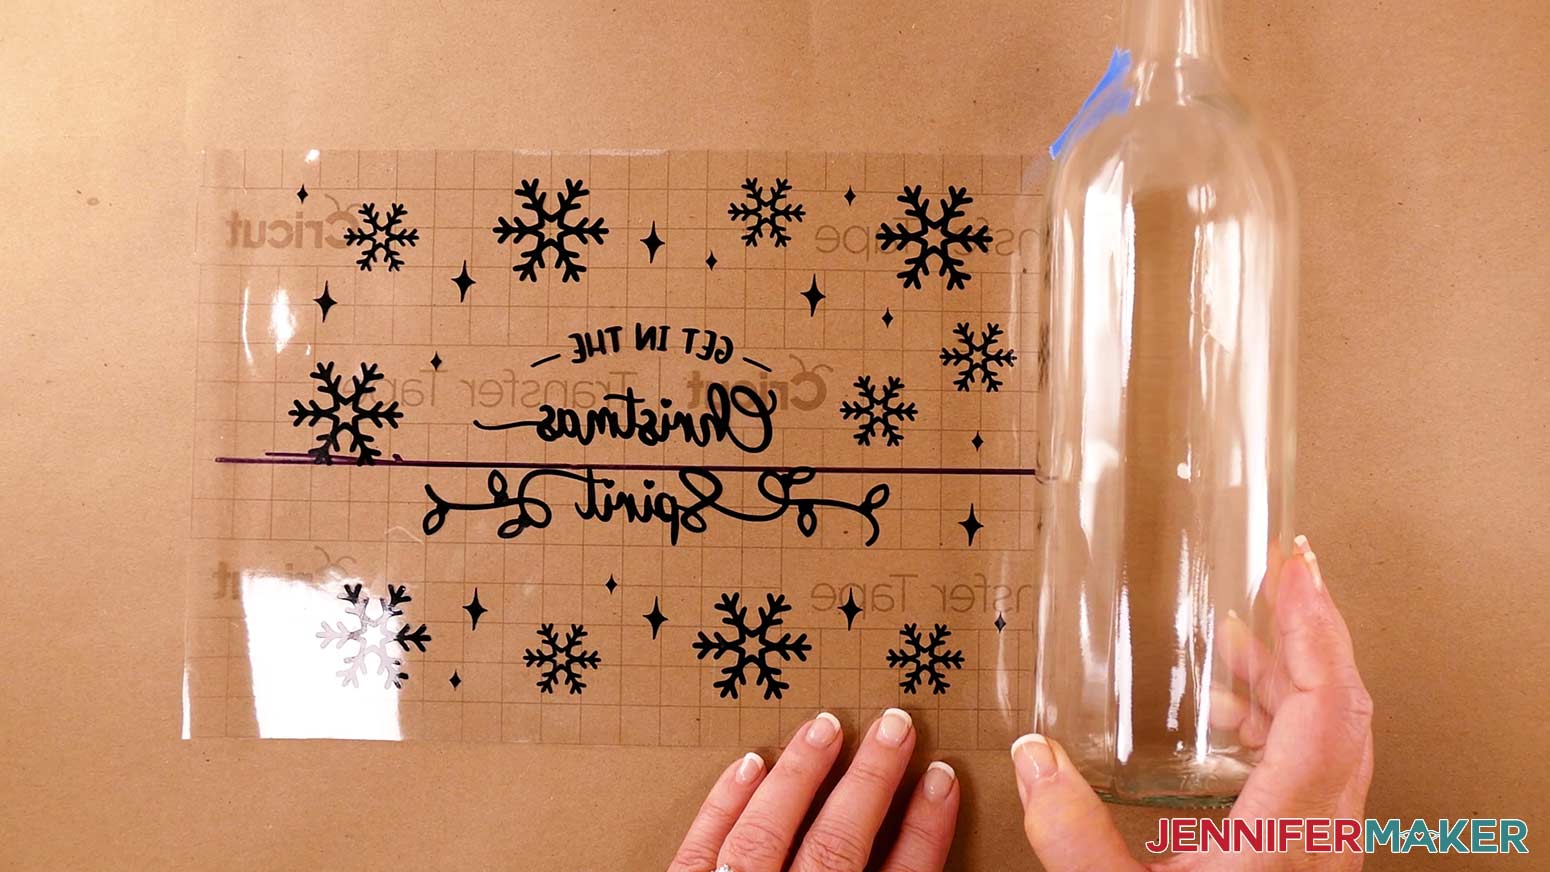
Now lay the bottle down on the design, making sure it's nice and straight. Slowly roll your bottle onto the stencil to apply it to the bottle.
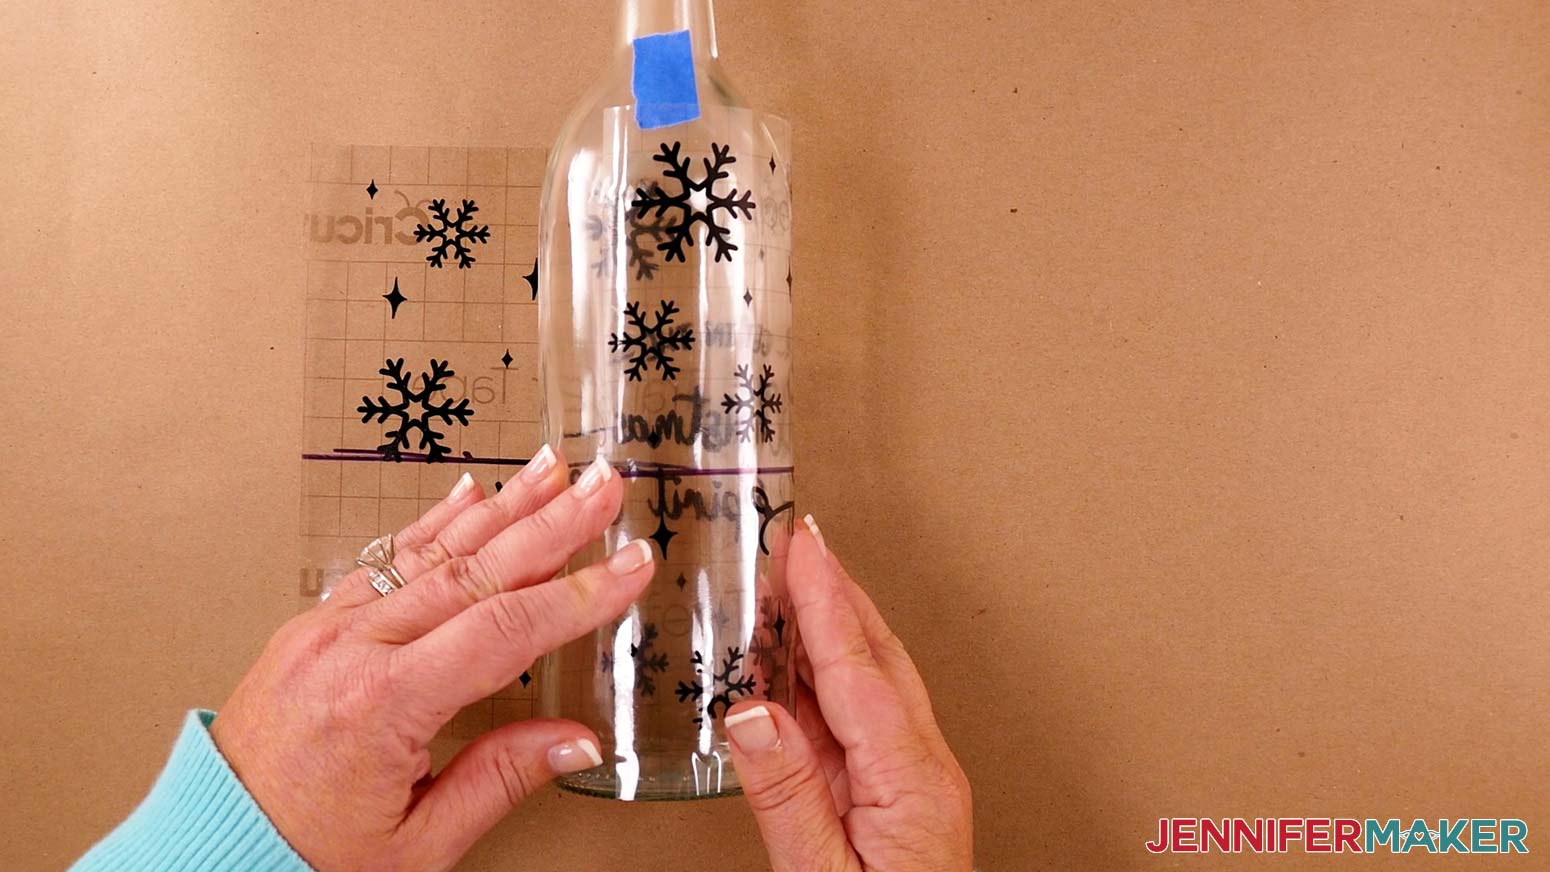
When you get to the end of the design, the bottle will be completely covered with the vinyl. Burnish down the vinyl to the bottle with your fingers.
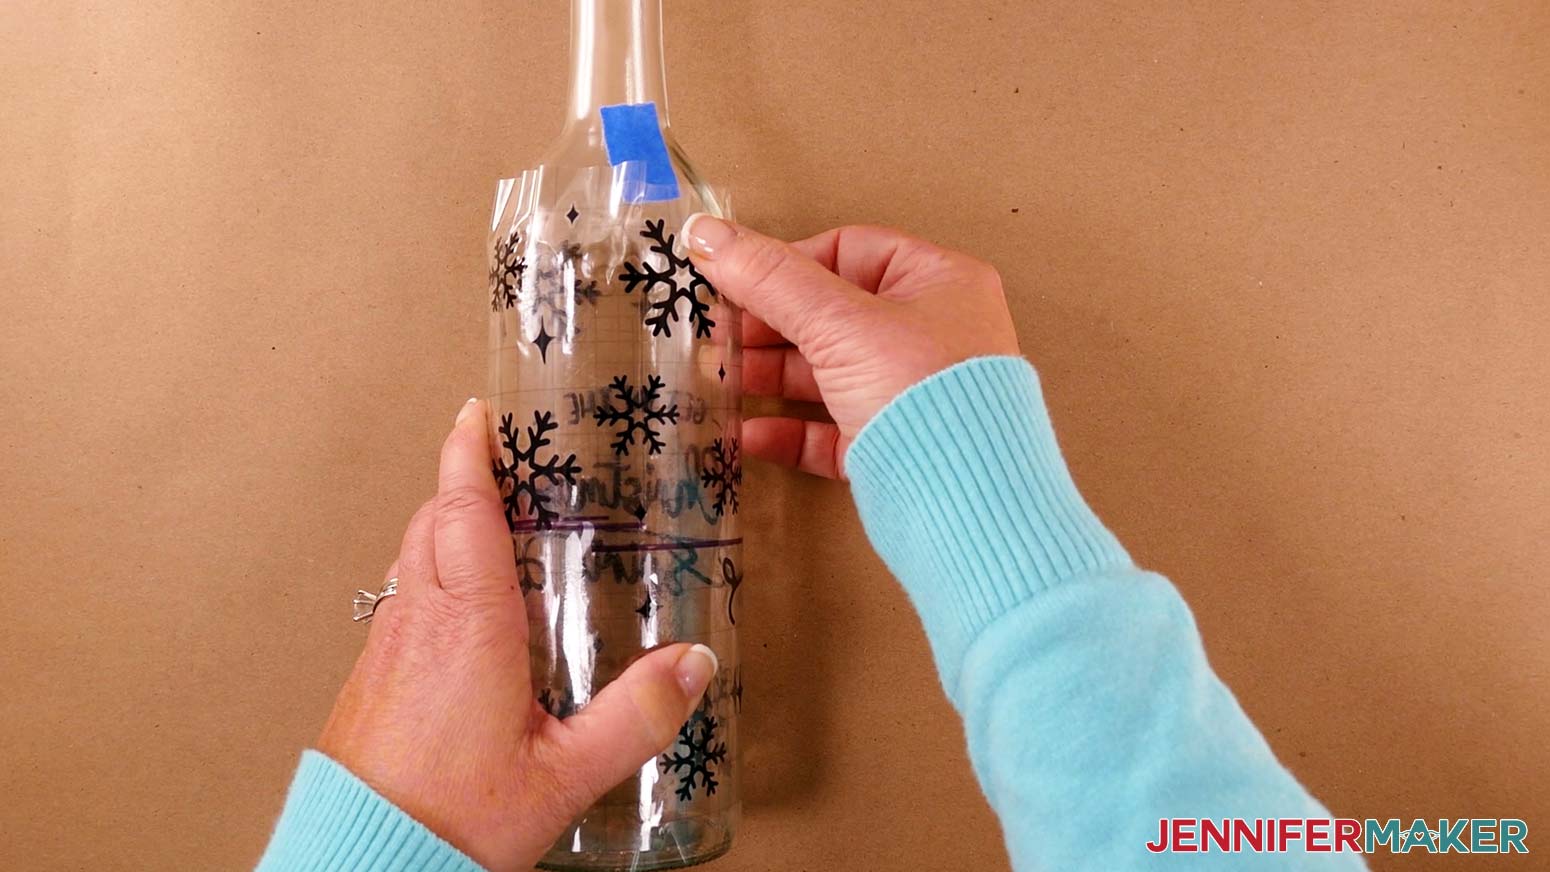
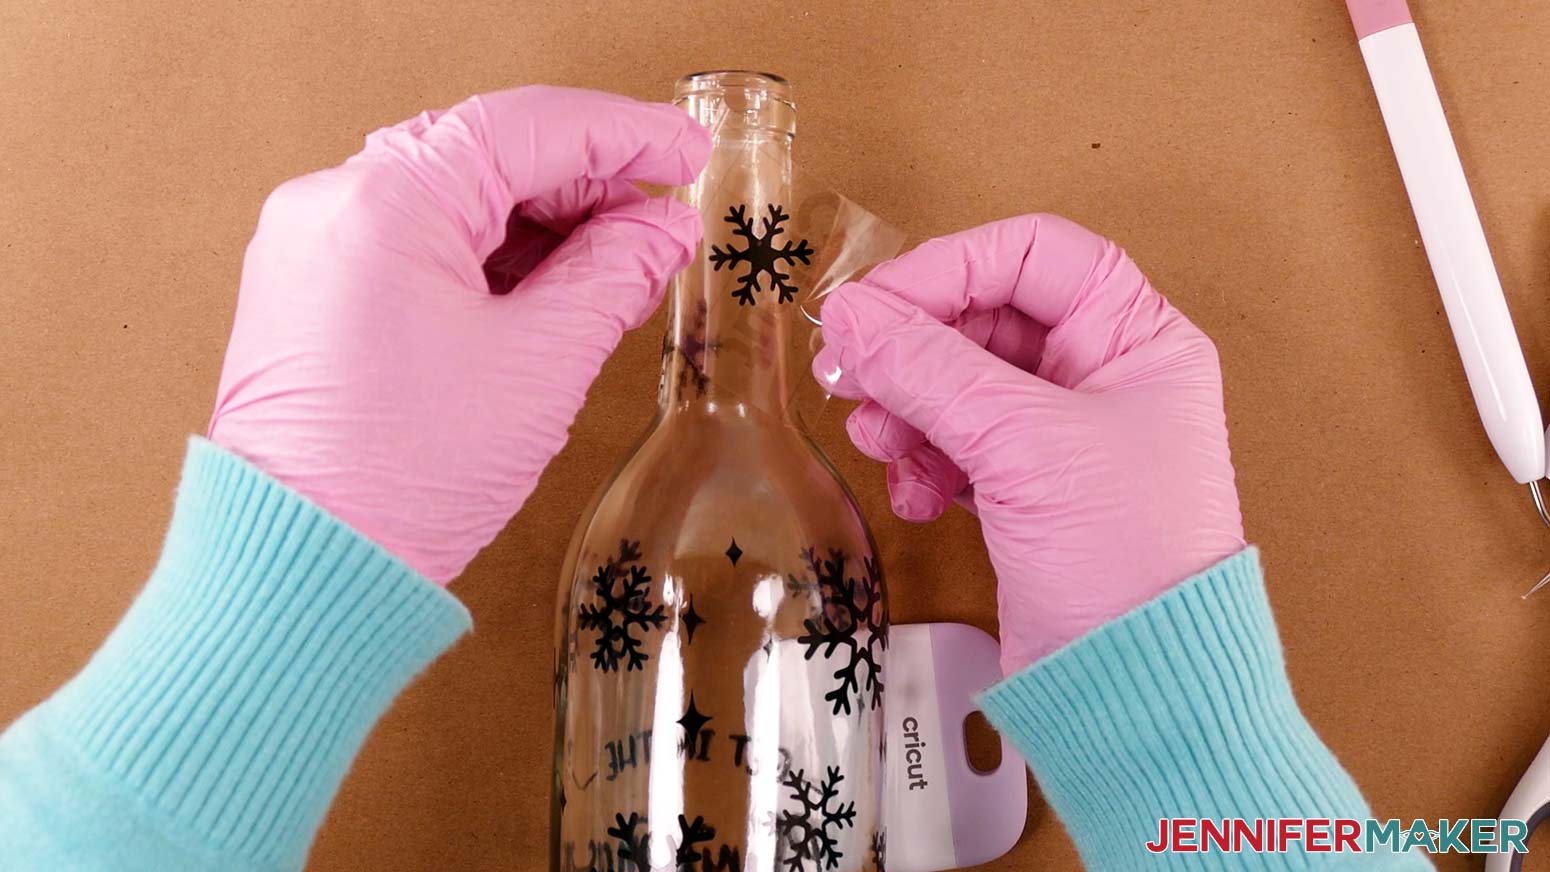
Remove the transfer tape from the bottle. I began to remove the tape from where the two ends met. You may have one end that has overlapped the other a bit, preventing the vinyl from adhering to the bottle. If that happens, pull up the transfer tape that is in the way, push down the other side to the bottle well, and then begin to remove the transfer tape slowly. If there are some vinyl pieces that are not stuck to the bottle, push them down again with a little more pressure and continue to remove the transfer tape. Don't forget to remove the piece of painter's tape too.
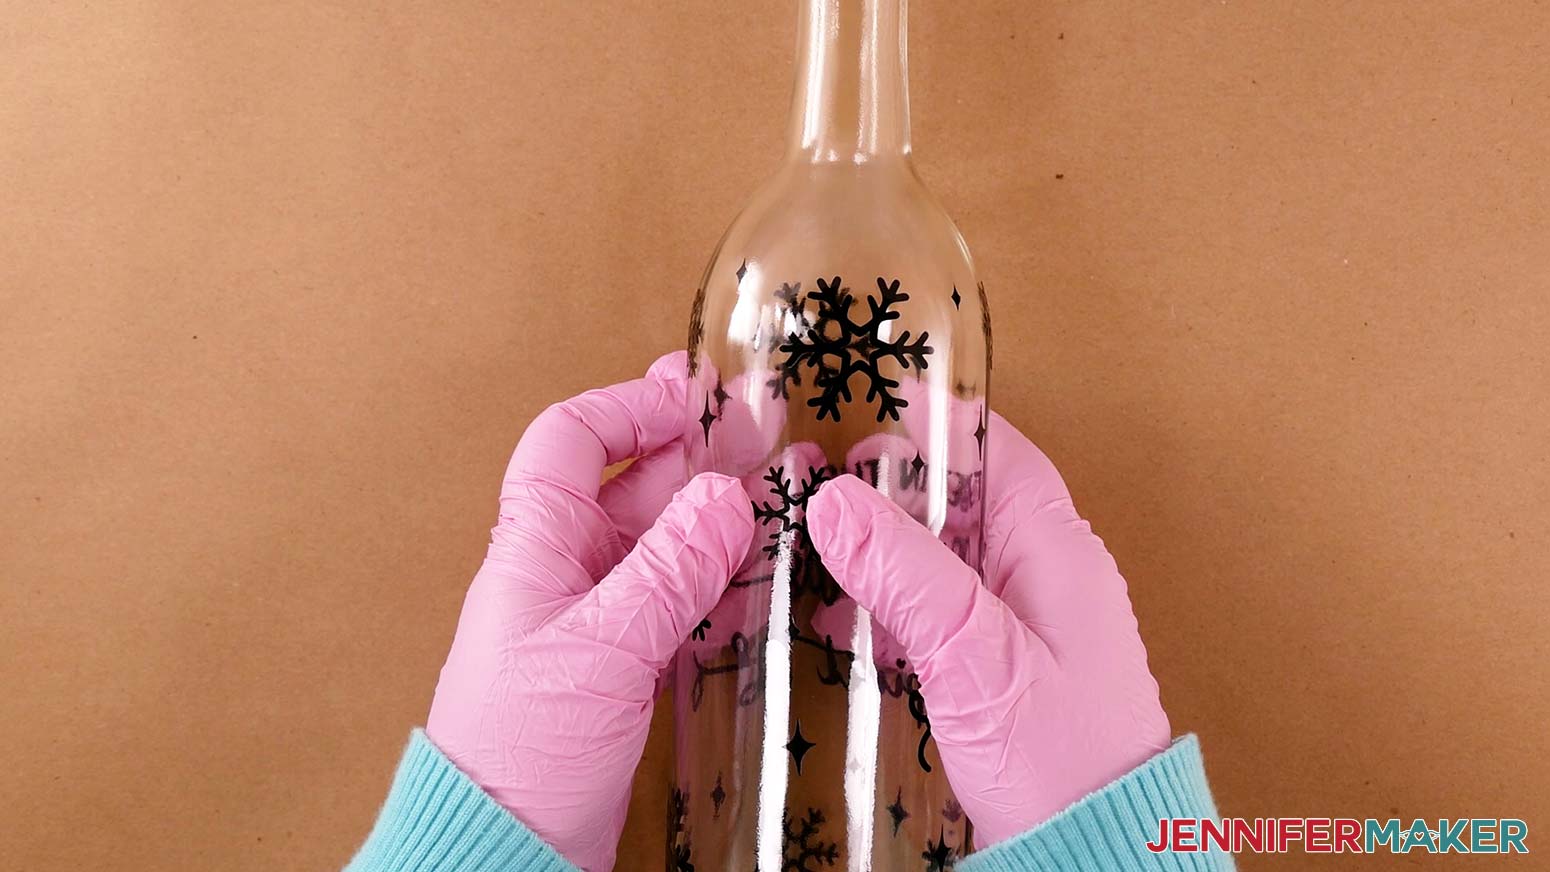
Once the transfer tape has been removed, go over all parts of the design with your fingers and press down any vinyl that may not be adhered properly -- make sure you wear gloves to keep the bottle clean. Remove all bubbles as best as you can. If you have some spots in the vinyl that have creases in them, carefully use your weeding tool to lift them a bit so you can lay them flat. This step is important, as it will stop your etching cream from bleeding into areas you don't want it to etch.
If you cut additional snowflakes, you can apply some of those around the neck of your bottle now. I cut a small piece of transfer tape and used the same process as above to transfer each snowflake individually. You can also peel them off the backing and apply them like stickers with your fingers. Use whatever method works best for you! I applied three snowflakes to the neck of my bottle.
NOTE: If you apply the snowflakes with your fingers, you may need to clean the neck of your bottle with some alcohol after you're finished to remove any oils or fingerprints. This will help you get a nice, even etch on your bottle neck.
Wine Glass Stencil
Now we can move to our Christmas wine glass stencil! The process is a bit different for the glass, as its surface has more curves than the bottle.
Cut a piece of transfer tape slightly larger than your stencil. Remove the backing from the transfer tape. Apply it to your wine glass stencil by using my Taco Method. Hold the transfer tape in the shape of a taco, or a "U" shape. Then, put the bottom of your “taco” onto the middle of your design. Smooth the tape over the decal from the center outward to minimize wrinkles and bubbles.
With the transfer tape in place, run a scraper tool or other hard and flat-edged item (like a store loyalty card) all over the project’s front and back with medium pressure.
TIP: Applying your stencil nice and straight can be difficult, but a little preparation now will help. Draw a horizontal line across the upper part of your transfer tape -- parallel with your text -- with a ruler and marker. If you aligned your Cricut transfer tape nice and straight on the stencil, you may be able to use the horizontal grid lines instead. Then, when putting your stencil on your glass, you can position your horizontal line so that it's parallel with the top of your glass to apply the decal nice and straight!
Now, flip your design over and remove the paper backing from the vinyl. If your stencil is still sticking to the backing paper, replace the transfer tape and burnish again.
Before you apply the vinyl to the glass, cut small slits around the outside edge of the transfer tape. This allows the transfer tape and vinyl to bend around the glass and curve to the surface, preventing bubbles and creasing. This is super important for an etching project because you don’t want any of the cream to get under the vinyl.
Your glass stencil is now ready to use!
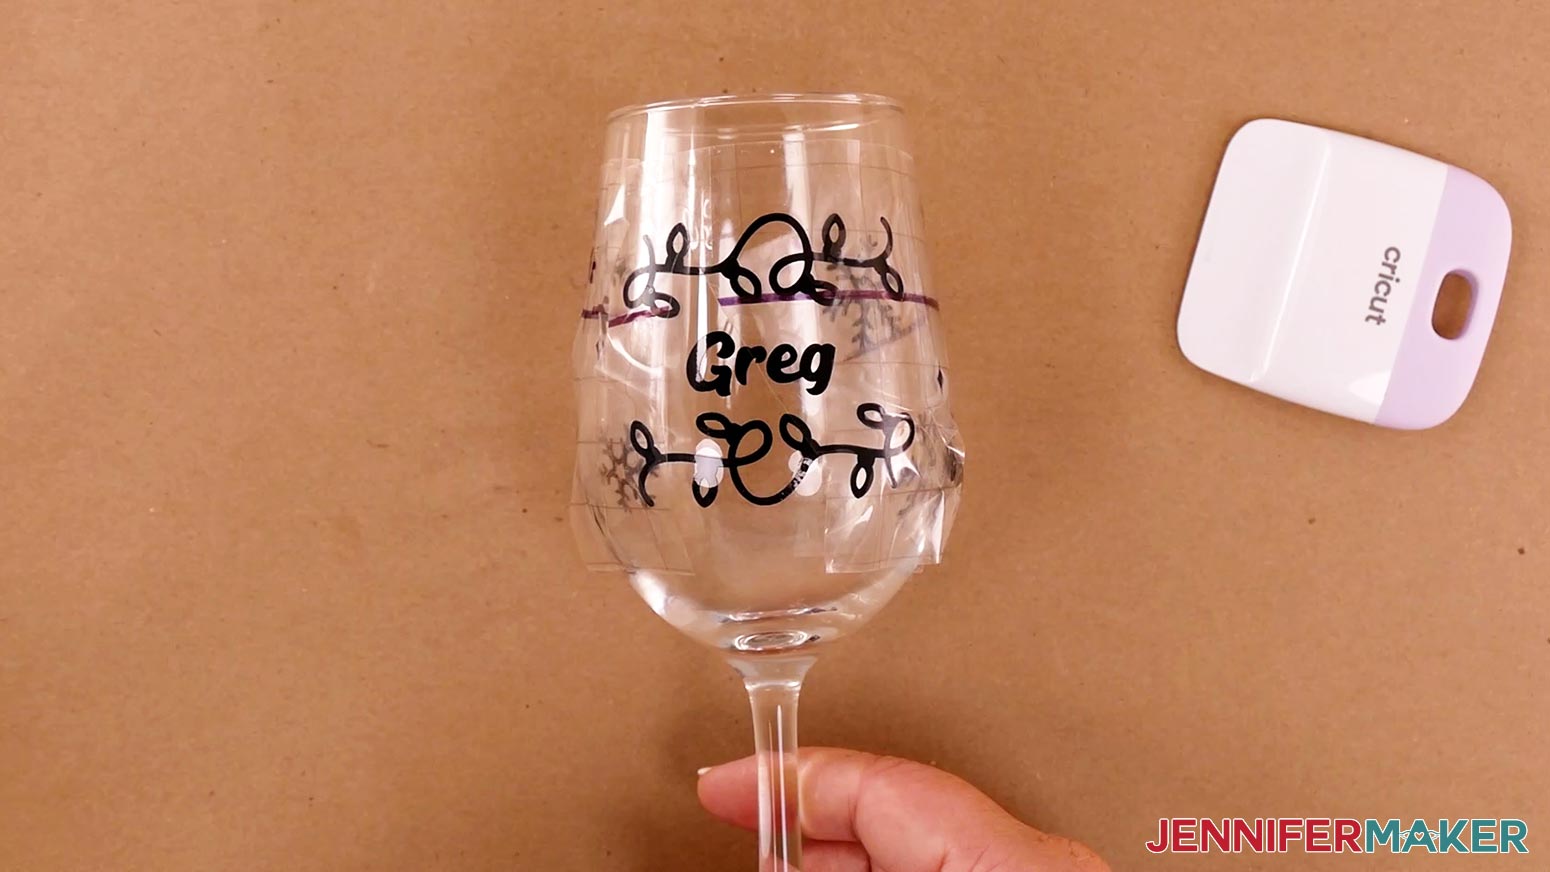
Now bend your design into a taco shape and lay the middle onto your glass, smoothing it from the center outward with your fingers. Make sure the letters are well adhered so you can easily read the text once your glass is etched.
If your horizontal line slants down a bit on the sides, that's OK! I've made these designs so that the sides don't have to be perfectly straight.
Remove the transfer tape from the glass. If there are some vinyl pieces that are not stuck to the glass, push them down again with a little more pressure and continue to remove the transfer tape.
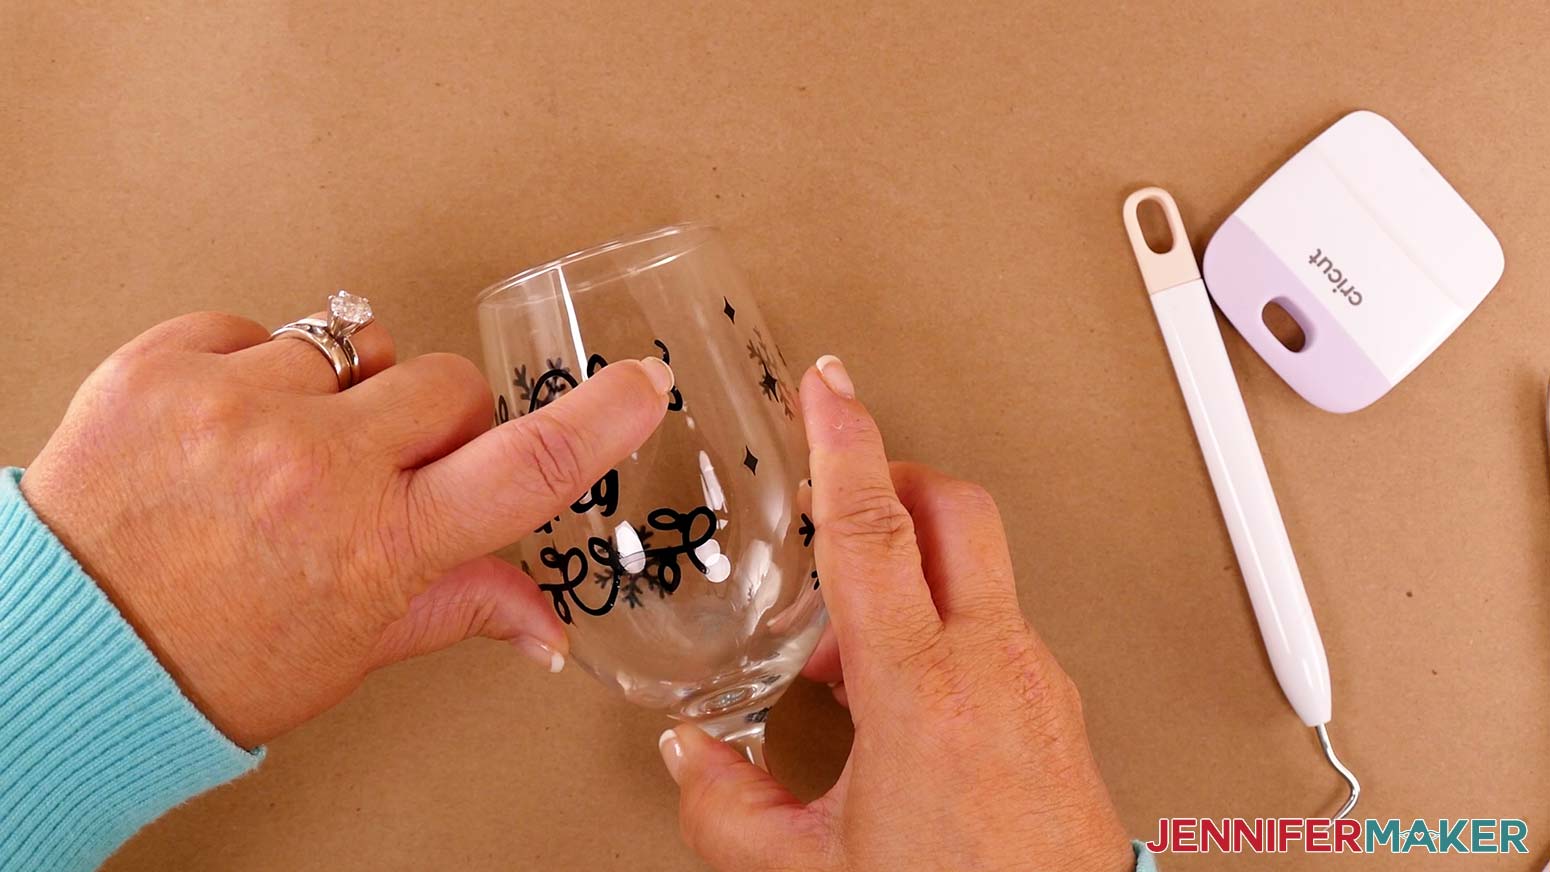
Once the transfer tape has been removed, go over all parts of the design with your fingers and press down any vinyl that may not be adhered properly. Remove all bubbles as best as you can. If you have some spots in the vinyl that have creases in them, carefully use your weeding tool to lift them a bit so you can lay them flat. This step is important, as it will stop your etching cream from bleeding into areas you don't want it to etch.
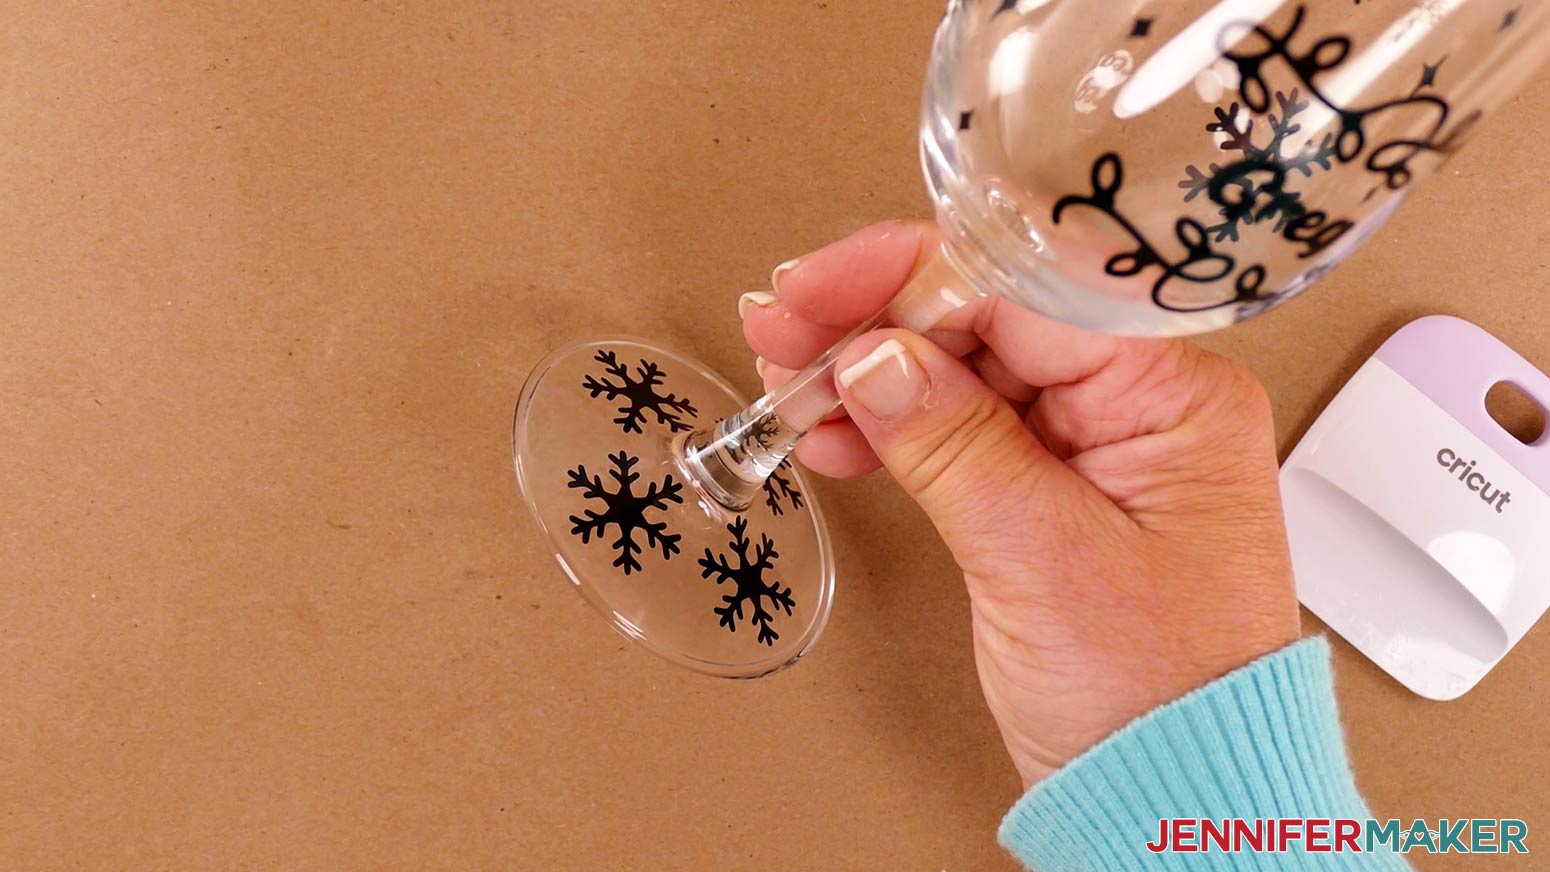
If you cut additional snowflakes, you can apply some of those around the base of your glass now. I cut a small piece of transfer tape and used the same process as above to transfer each snowflake individually. You can also peel them off the backing and apply them like stickers with your fingers. Use whatever method works best for you! I applied four snowflakes to the base of my glass.
NOTE: If you press the vinyl down or apply the snowflakes with your fingers, you may need to clean your glass with some alcohol after you're finished to remove any oils or fingerprints. This will help you get a nice, even etch on your entire glass.
STEP 5: APPLY THE ETCHING CREAM
IMPORTANT: Read the etching cream's instructions and guidance on accidental exposure before proceeding. Etching cream is caustic and you don't want to inhale it or get it on your skin or in your eyes. Before opening the etching cream, be sure to put on a pair of safety goggles, rubber gloves, an apron, and a fitted respirator. If you do come in contact with the cream, follow the bottle's directions immediately.
Be sure you're in a well-ventilated area or outside with a flat surface on which to work. Cover your work surface with butcher paper before you begin, as you don't want to get any etching cream on it. You may want to use two sheets, as reverse etching can be pretty messy.
Shake your etching cream really well before you open it. Note that new etching cream works best for this project. The older the cream is, the more difficult it will be to apply and the less even the etch will be.
Set your timer for 20 minutes.
NOTE: I etched my wine bottle separately from my wine glass, but the directions are the same for both. I recommend etching one item at a time for the best results.
Apply the cream to the glass with a regular paint brush (avoid foam brushes) -- the larger the brush, the better, as there's a lot of surface to cover. Use your brush to move the cream on top of your stencil. Brush up and down, side to side, and diagonally. Work in sections and keep the cream moving as you go, getting it into every nook and cranny. Keeping the cream moving around the surface will result in a deeper and stronger etch.
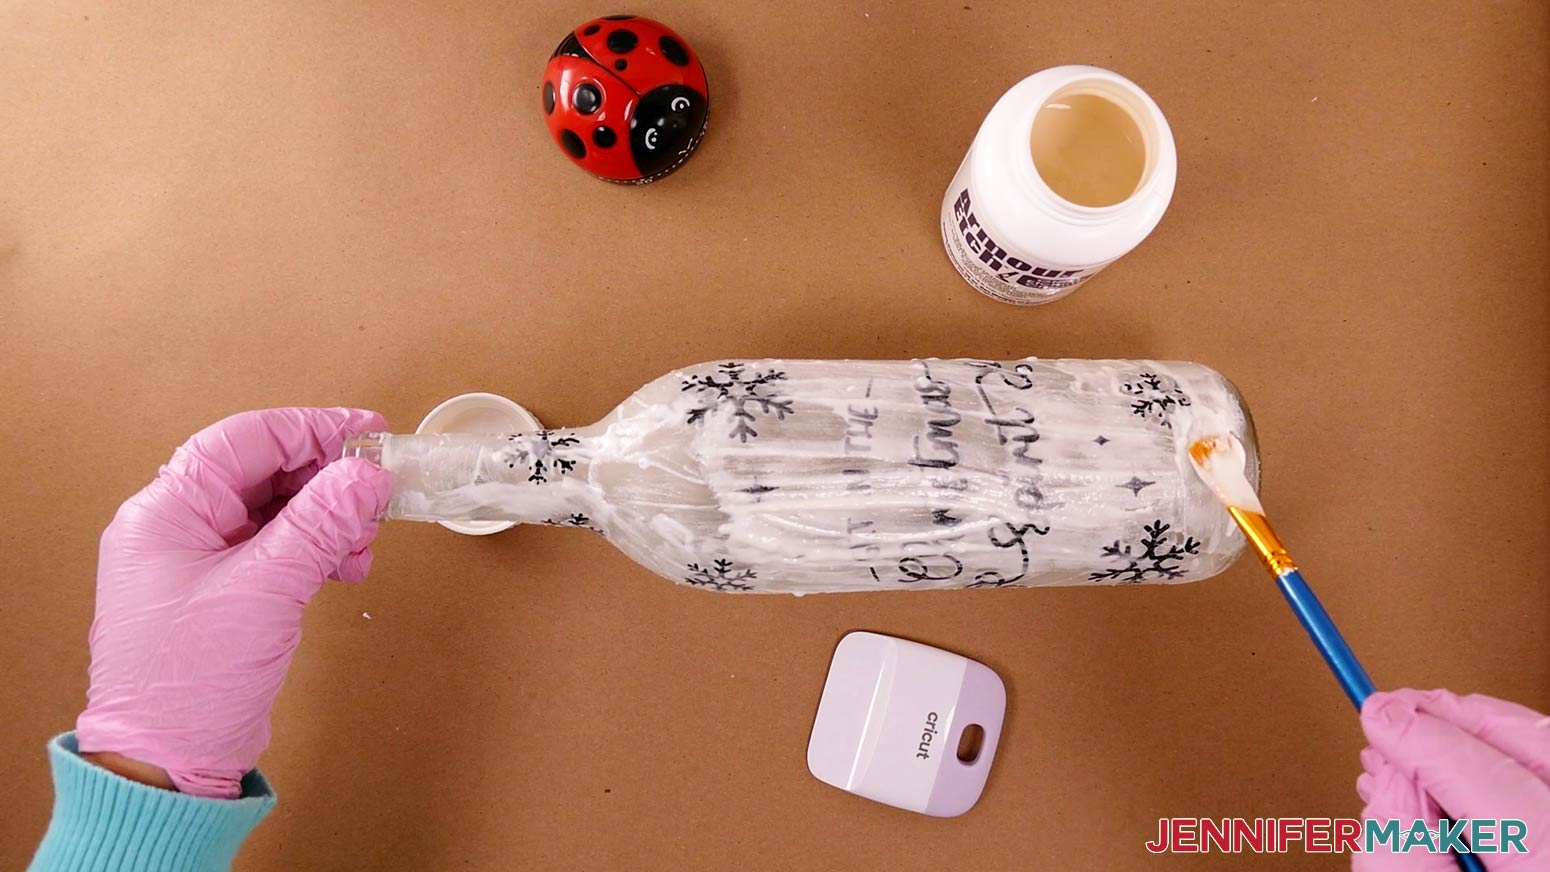
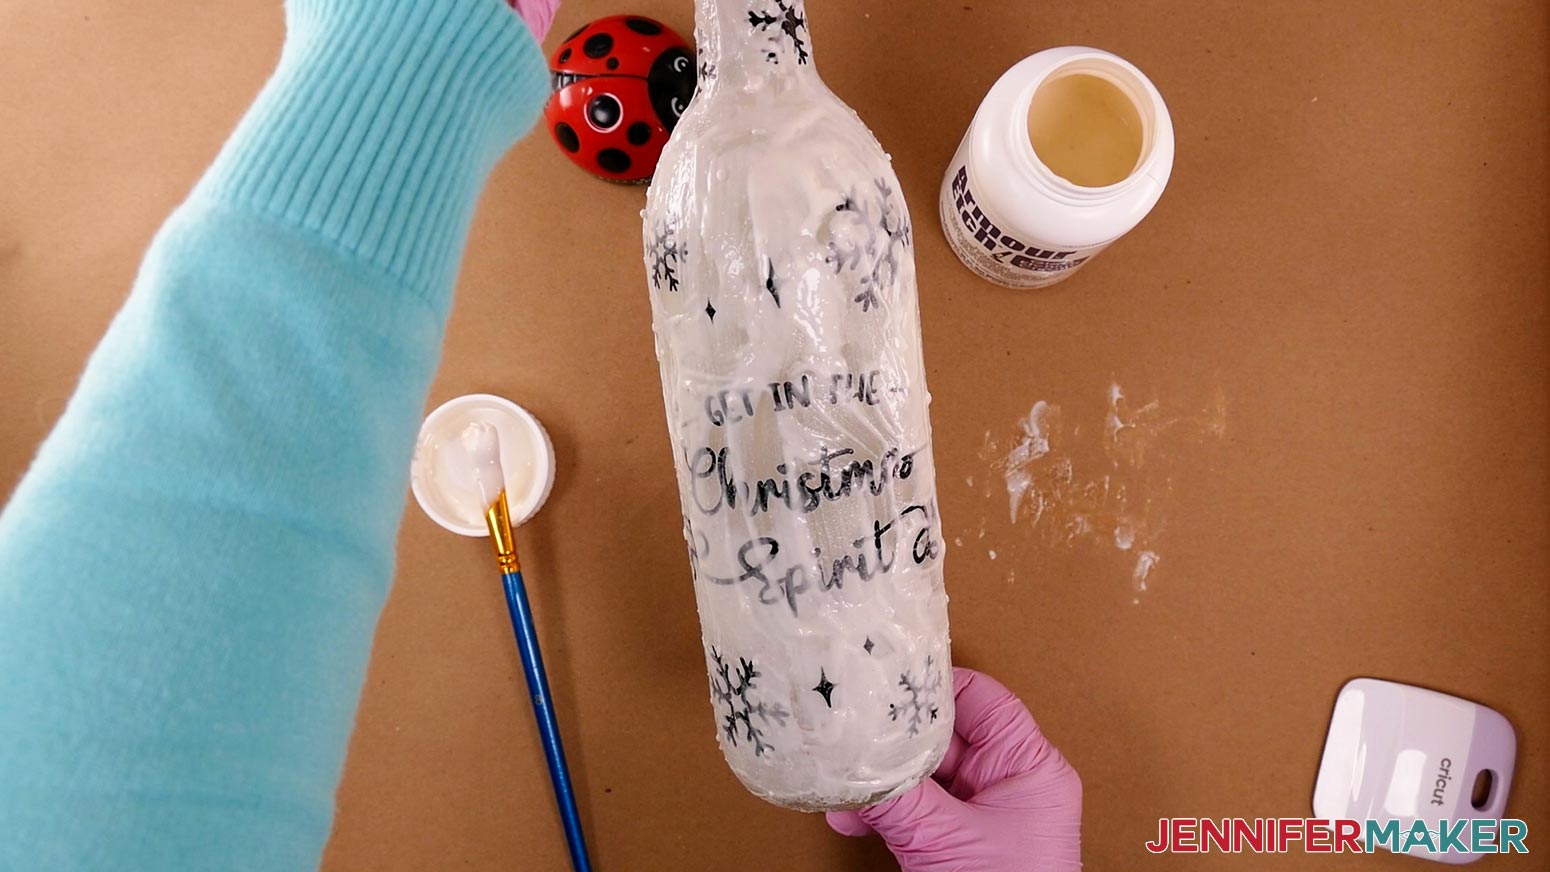
You'll want to use a generous amount of cream, enough that you can no longer see the clear glass showing through. This will help you get more even etching over the entire surface of your bottle or glass. Don't worry if you get some cream on the butcher paper. That's why it's there!
TIP: You can rotate your bottle while applying the cream by holding onto it at the top near the opening, since you won't be etching that small part.
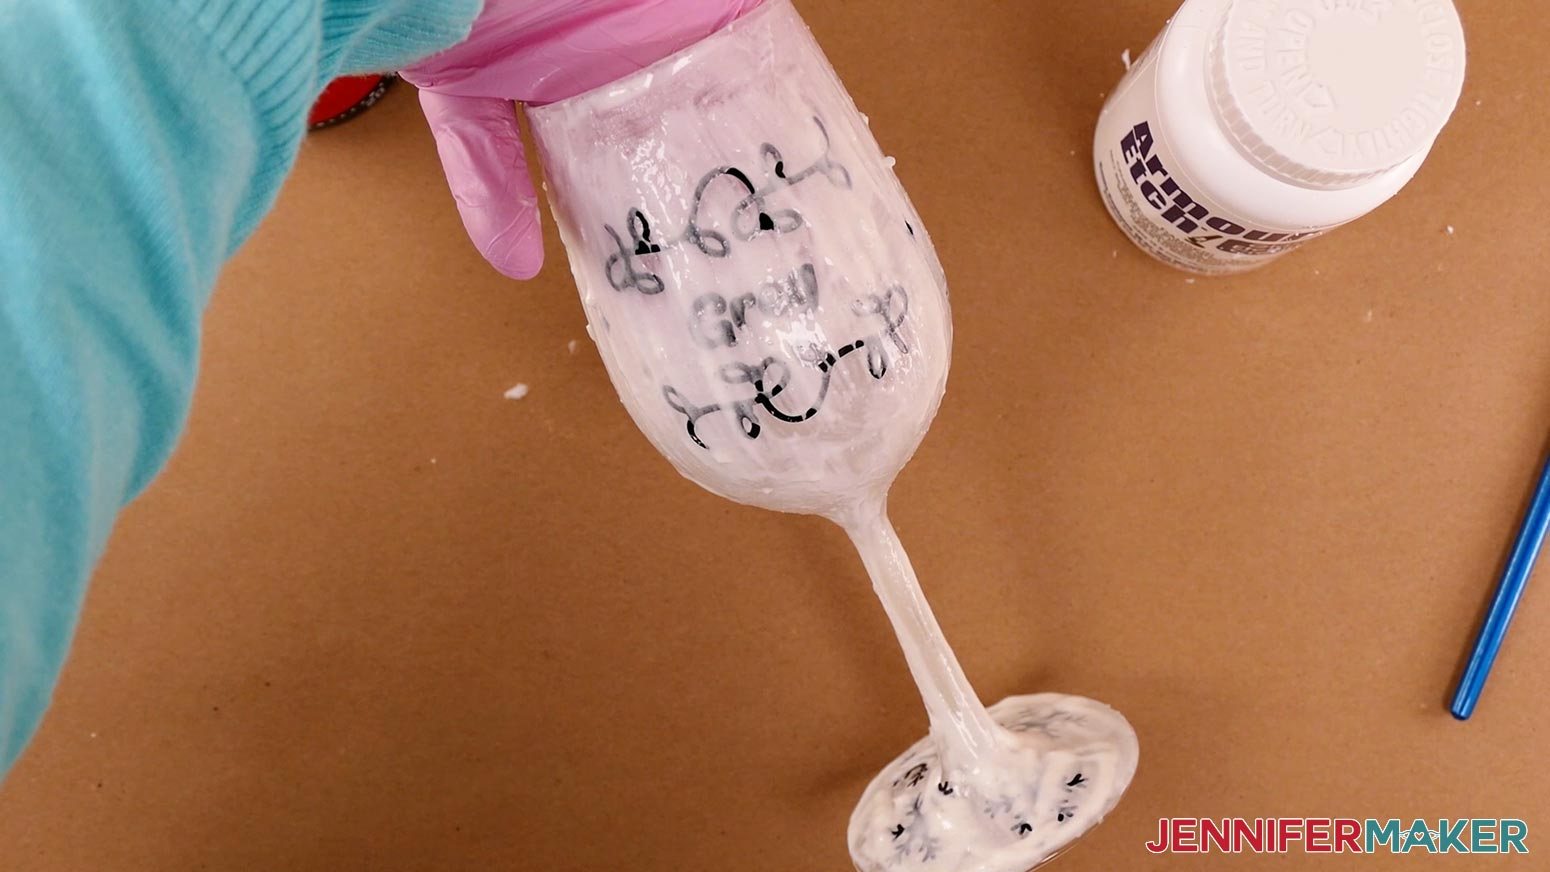
When applying the cream to your wine glass, don't forget the stem and base! I covered my stem last so that I could hold onto it and use it to rotate the glass as I applied the cream everywhere else.
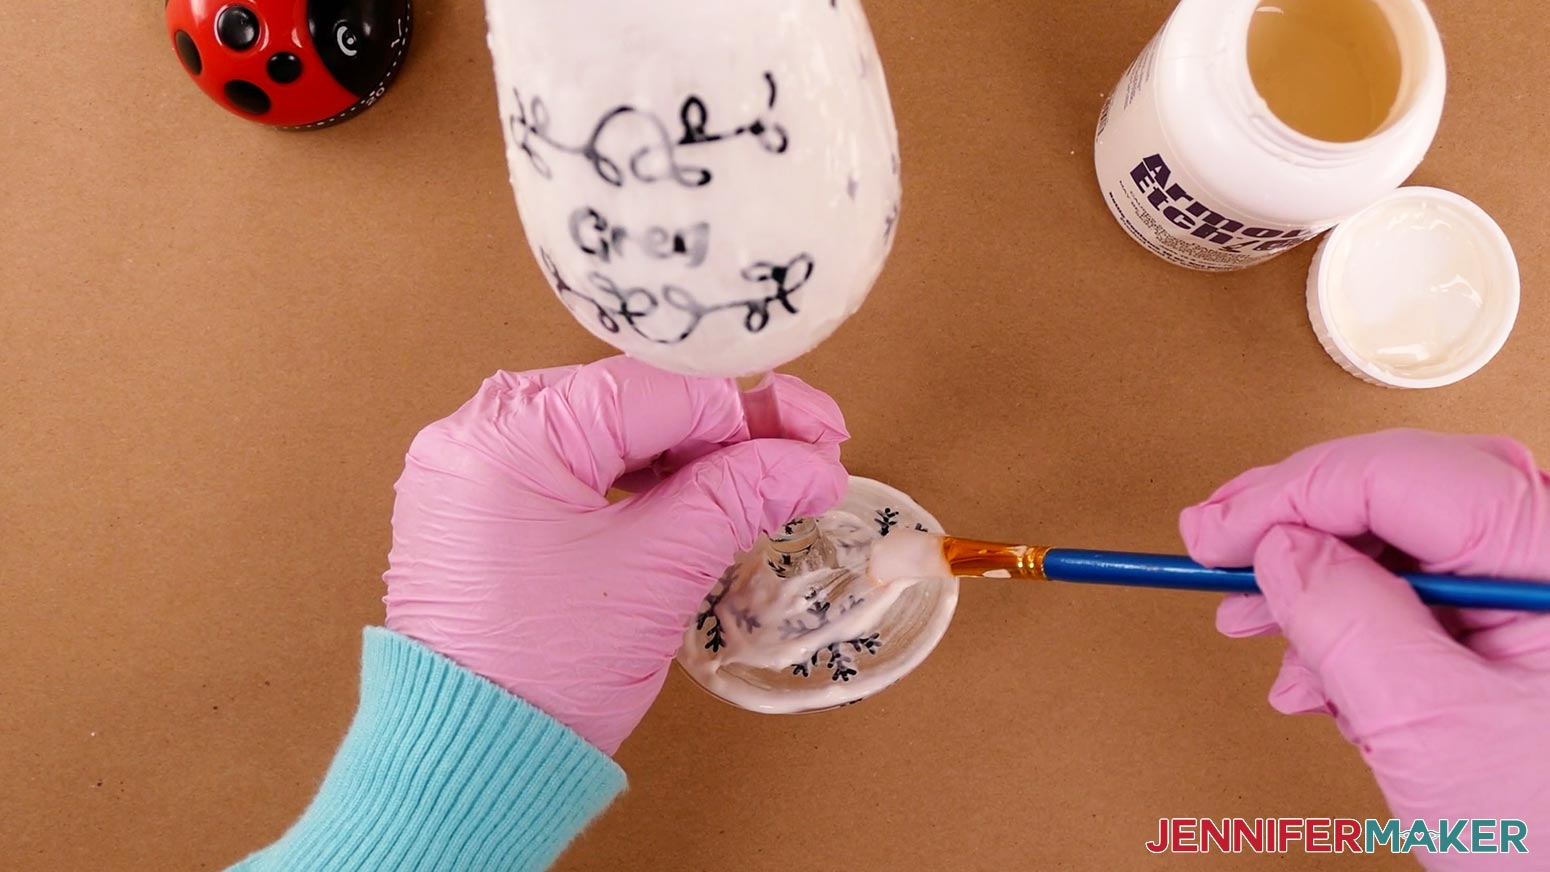
Once you get to the stem, try your best not to touch the etching cream already on the glass as you cover that area. I put my hand inside the top of the glass and used my fingers to rotate the glass from the inside. Since you have protective gloves on, it's OK if a little bit of cream gets on your fingers. Just make sure to rinse it off when you're done, and try not to get it inside the glass.
After the entire surface is covered, apply more cream in areas where it looks thinned out and then let it sit on the butcher paper until the timer chimes. Overall, the cream needs to stay on each area of the glass at least 5 minutes. I found that covering the entire bottle really well with cream took me about 15 minutes. Covering the entire glass took me about 10 minutes. It may take you more or less time, but 20 minutes should be enough time to create a strong, even etch.
When the timer chimes, you can remove the cream. Keep your protective equipment on. If you used a lot of cream, scrape it back into the container to be reused. Rinse the remaining cream off of the glass under running water into a plastic or metal sink. Be sure to get all the etching cream off the glass before you remove the vinyl stencils. You do not want to accidentally touch it or get it on your work surface.
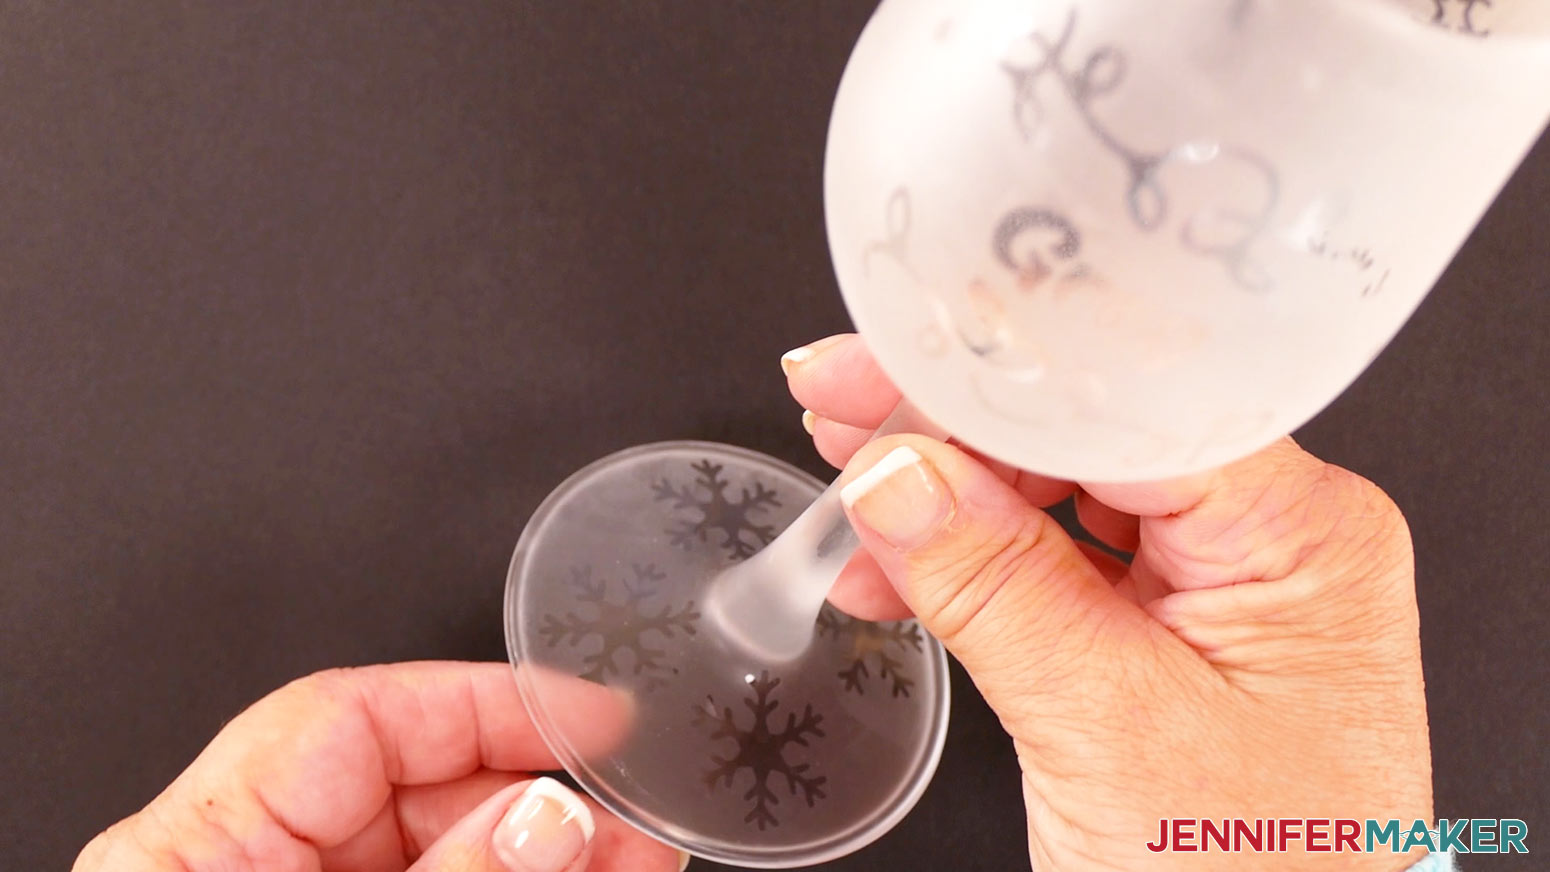
Dry the item well and remove the stencils. You may need to use your weeding tool to help remove some of the pieces. Just be careful not to scratch the glass!

Give the glass or bottle a final rinse after all the stencil pieces have been removed, and dry it off.
TIP: It’s important to know, etching glass isn’t an exact science and takes practice. If you notice some areas of your glass that aren't fully etched, you can do another round of etching to cover them up. Just use painter’s tape to cover the parts of your design that you don't want to etch and press it down really well. Then, set your timer for 5 minutes and etch that section again. Then rinse and enjoy! This trick works best in areas that aren't too close to the design, such as the glass stem.
Make sure to clean off any etching cream from your brush before you put everything away. Now you can remove your safety equipment.
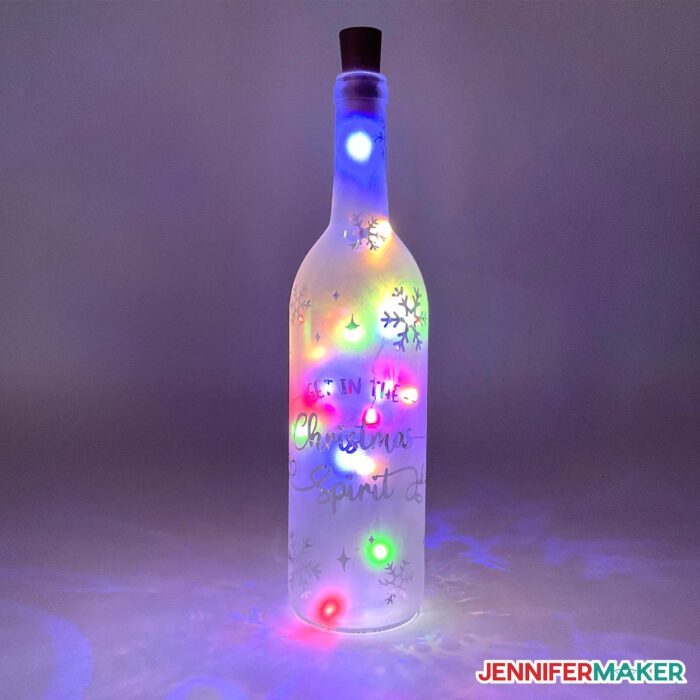
STEP 6: ADD LIGHTS TO YOUR ETCHED BOTTLE
The etching is nice already, but you can make it pop even more -- and add some color at the same time -- by adding fairy lights inside your wine bottle.
You'll need a strand that is at least three feet long and has a cork at the end with a switch on it. The ones linked in my materials list worked great for me! And they even come with extra batteries.
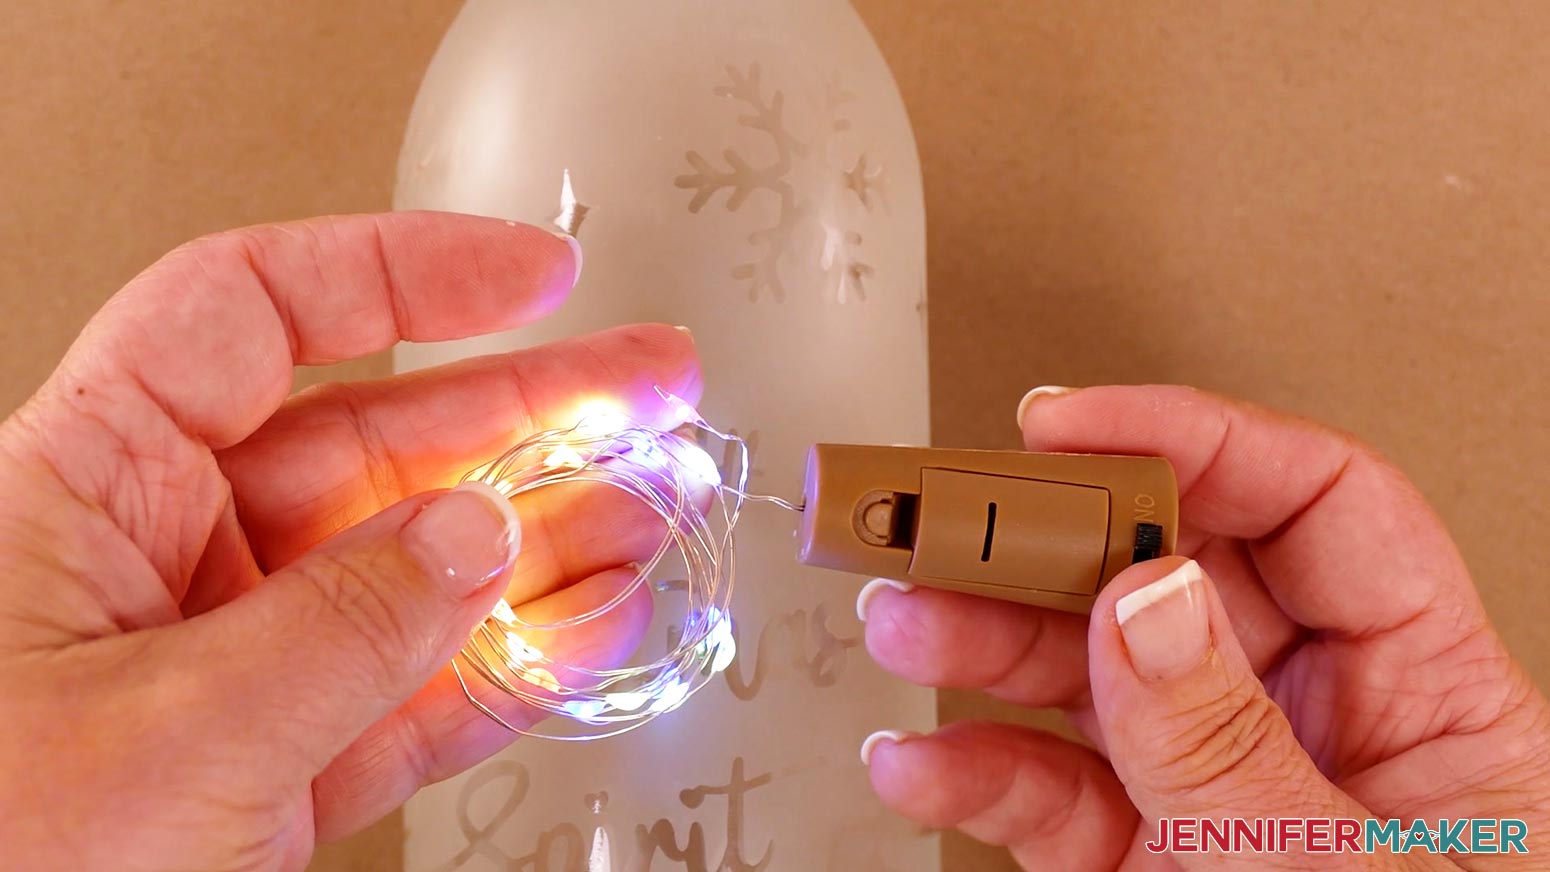
First, turn your lights on to make sure they work. You may have to insert batteries if they didn't come pre-installed. If batteries are already installed, you may have to remove a battery protector tab. Then, feed your fairy lights into the bottle, insert the cork at the top, and enjoy! It's as simple as that!
STEP 7: SHOW THEM OFF!
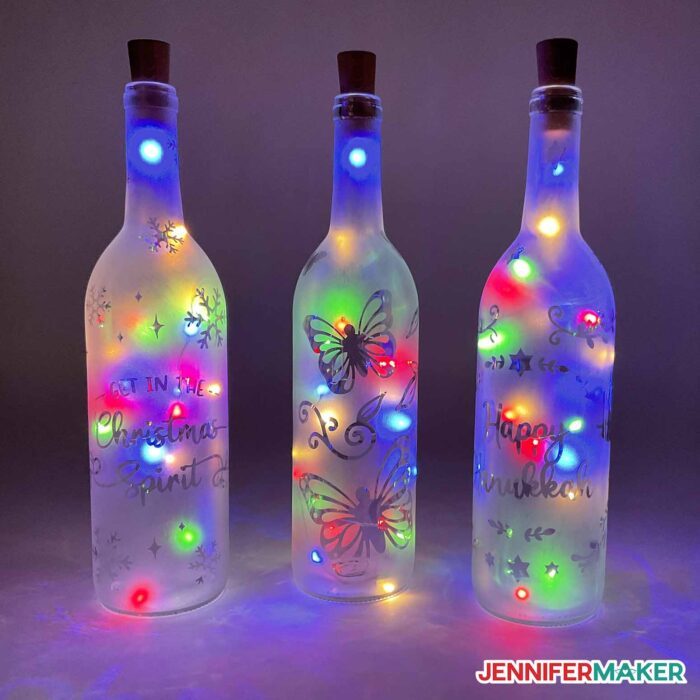
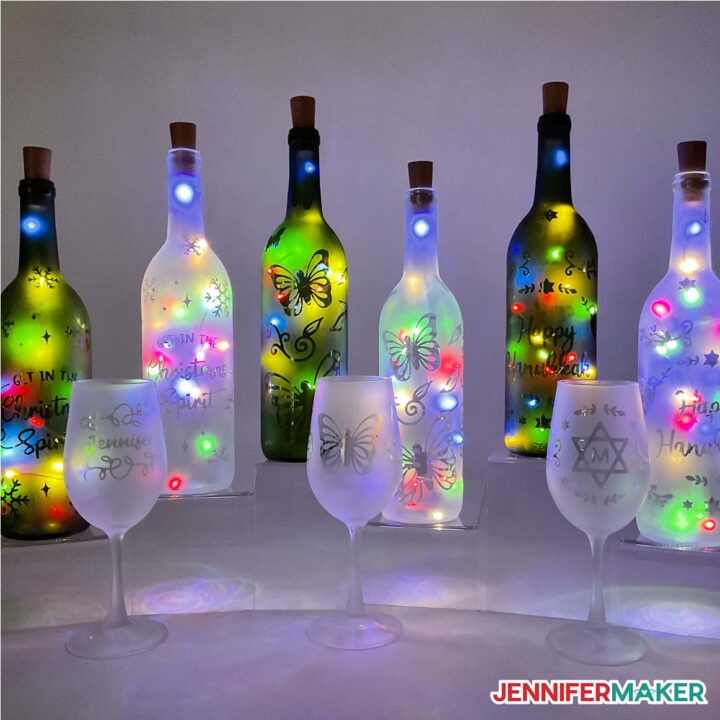
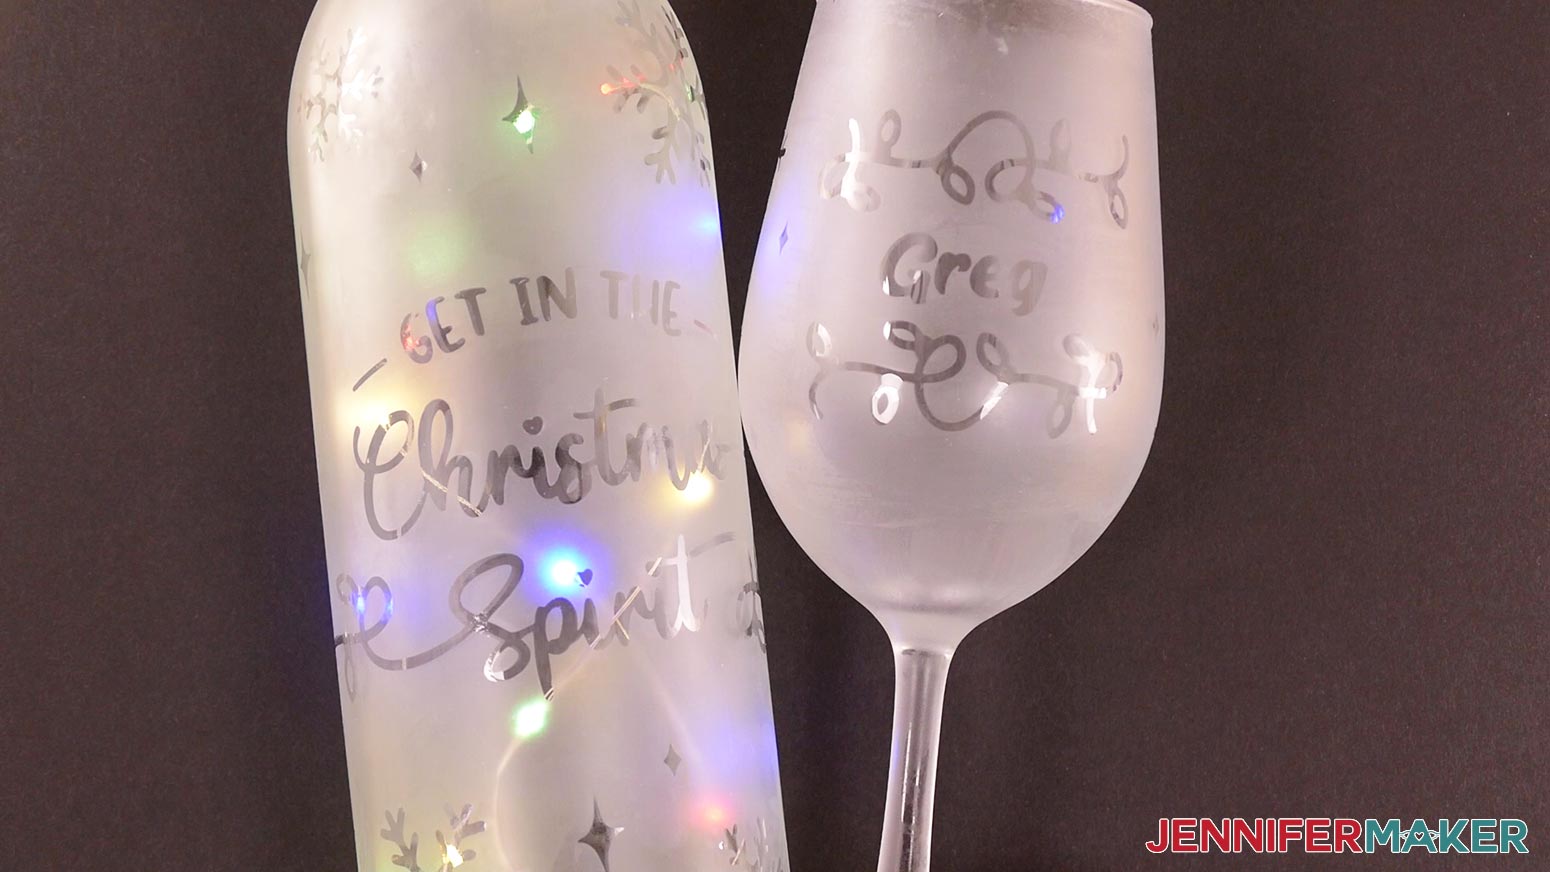
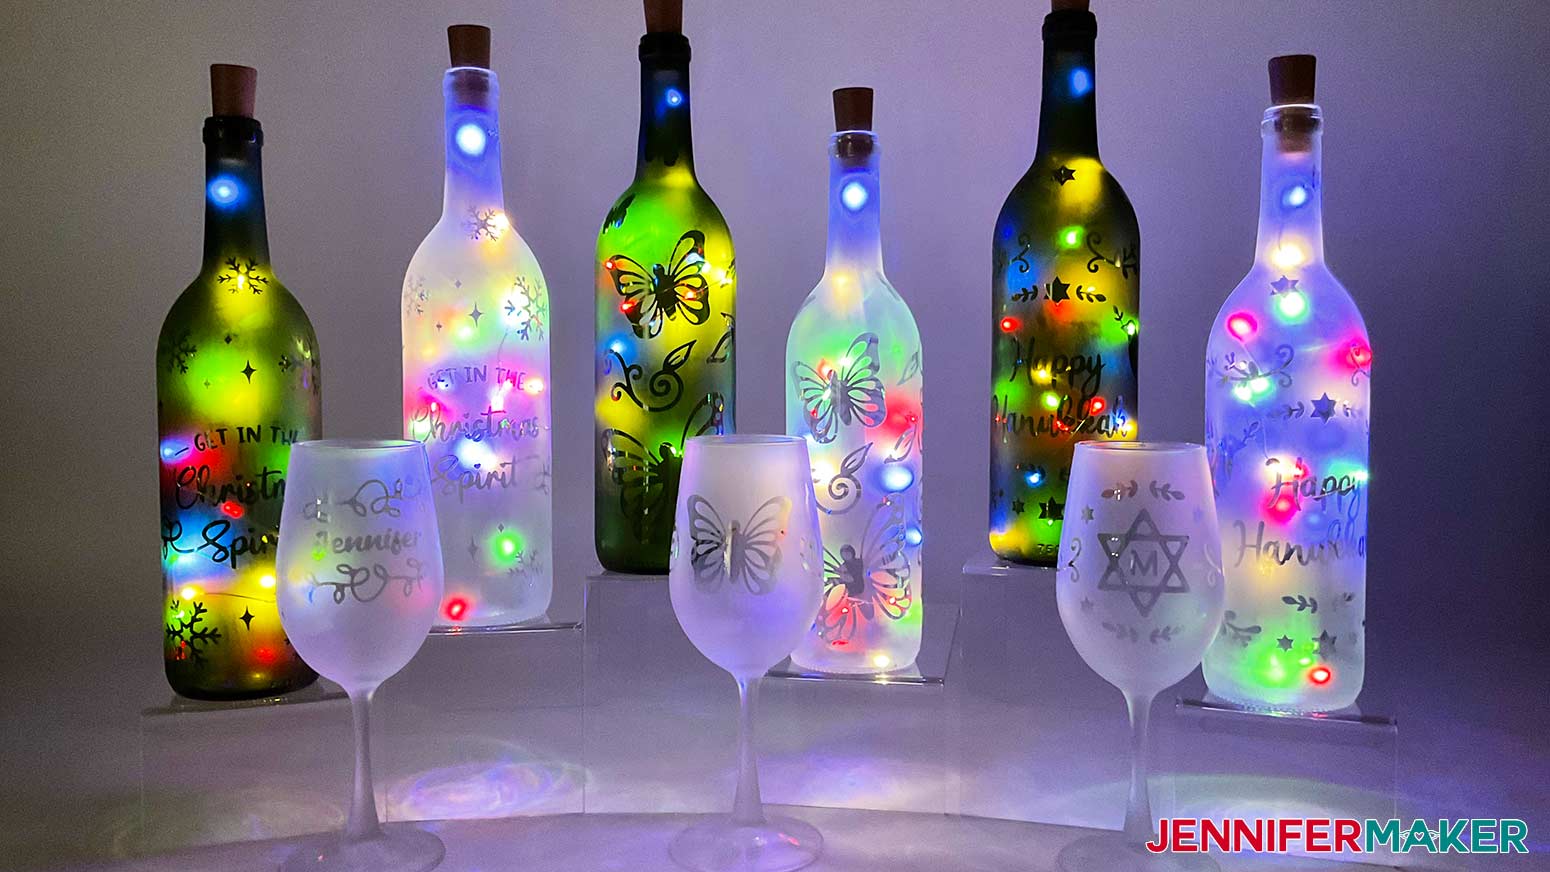
Here's what my finished etched wine glasses and glass bottles look like. I just love them, especially the bottles with fairy lights inside! This is a great way to create beautiful home decor for the holidays -- or anytime! -- using some of those empty wine bottles you may have sitting around. And a set of wine glasses would make a great gift!
Notes
Finished Sizes:
Bottle: 3" wide by 11.5" tall
Glass: 3" wide (at base) by 7.75" tall
Fonts Used:
Falling Leaves Print (Christmas design)
Sweetie Almeera Script (Christmas and Hanukkah designs)
Andala Script (name on Christmas design)
Cricut Sans (letter on Hanukkah design)
Answers to Your Questions About Making Etched Wine Glasses and Glass Bottles
Q: Can you etch wine glasses?
A: Yes! I’ve etched both stemless and stemmed wine glasses with great results
Q: How do you personalize a wine glass?
A: Once you make your custom artwork, you can apply it as a vinyl decal, or etch it into the glass using the tutorial above.
Q: How do you permanently decorate a wine glass?
A: wine cup Try out my screen printing tutorial to make a bag for the delicate gift!
Q: How do you etch a design into glass?
A: You can use Armour Etch to add designs to glasses, even crystal wine glasses.
Q: How do you write on wine glasses permanently?
A: After you etch a design, you can add color to glasses in a few ways. Since the liquid will be visible through the design, pick your colors carefully. A red design on a red wine glass won’t show up well!
Q: What liquid do you use to etch glass?
A: I use Armour Etch cream with the necessary safety equipment: nitrile gloves, a fitted respirator with the correct cartridge, and eye protection as well as coverings for myself and the work area.
Q: How much does custom glass etching cost?
A: It can get expensive depending on the materials and techniques if you order custom etched wine glasses. You can usually save by ordering from crafters with free shipping, though!
Q: Does glass etching last?
A: Yes, designs on etched wine glasses last ages! I have some decorated white wine glasses that still look lovely years later.
Q: Can I cut this project on a Cricut Joy?
Yes, you can cut parts of the stencils with a Joy if you separate them in Cricut Design Space. See our Resizing Guide for more details.
Q: What is Merry Maker Mingle?
A: Each day in December leading to Christmas, I present you with a brand new “gift” — a project to craft, make, or do. You can make these projects on a Cricut cutting machine or by hand if you don’t have one. Most of our Merry Maker Mingle projects will come with a fun video with yours truly, a step-by-step printable photo tutorial, and a free pattern/SVG cut file. Sign up to get daily updates and prizes!
Get my free SVG files to create Etched Wine Glasses and Glass Bottles
I love seeing what you make with my designs and how you use them! Please share a photo of your Etched Wine Glasses and Glass Bottles in our Facebook group or tag me on social media with #jennifermaker.
Love,

Want to remember this? Save this Etched Wine Glasses and Glass Bottles Tutorial to your favorite Pinterest Board!