Learn how to screen print a shirt with Cricut cutting machines and make your own stencil!
We’ve made a lot of custom t-shirts with our cutting machines, but do you know how to screen print a shirt with a Cricut? With the right supplies and process, screen printed shirts are really easy and fun! I’ll show you how to perfectly layer ink on fabric using a free t-shirt design SVG file. Then, we’ll cover how to make your own vinyl stencil in Cricut Design Space to cut on a Cricut machine. You’ll be silk screening in no time!
Watch my step-by-step tutorial on how to screen print a shirt with Cricut tools on my Youtube channel!

Screen printing is a great way to create intricate designs with several colors. And you can use your Cricut to create stencils for any design you like!

All you’ll really need is a Cricut, permanent adhesive vinyl, a shirt, and a screen printing kit! You can see the exact tools and materials I used down below with links to my preferred products.
Making the stencils for a screen printed shirt is similar to any other vinyl project. But instead of working right on the garment, you’ll place the stencils one at a time on a framed screen that is laid on top of the shirt. Then, you’ll use a squeegee to pull special ink across the design, letting the color transfer to the fabric in the uncovered sections. Getting the right ink consistency and pressure with your squeegee makes all the difference, so practice a little bit your first time!
And since we’re layering, I’ll show you some helpful printing techniques to get perfect alignment with each stencil. You might end up using these tips in other projects with complex designs, too! We’ll use registration marks, which we’ve included in our design, as well as in our blank design. Many thanks to PigskinsAndPigtails.com for sharing their circle registration idea with the world — check out their awesome screen printing tutorial here!
The result is much more durable and flexible than iron-on vinyl. After drying, a screen printed shirt is set with heat, that’s why they last so long. I’ll show you how to use an Autopress or Cricut EasyPress to get the best results.
While I used a new screen in my tutorial, I found during testing that keeping your tools and screen printing frame clean is very important. Before the ink sets, gently rinse it off with warm water and use a soft toothbrush to remove any stubborn spots. That way everything will be ready for your next new project!

Looking for other ways to create layered designs? Here are some of my favorites!
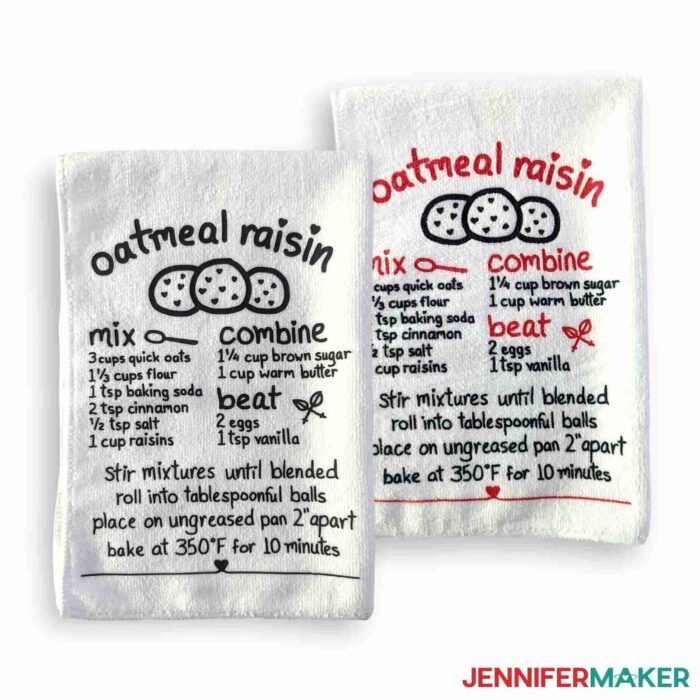
Recipe Tea Towel with HTV or Infusible Ink
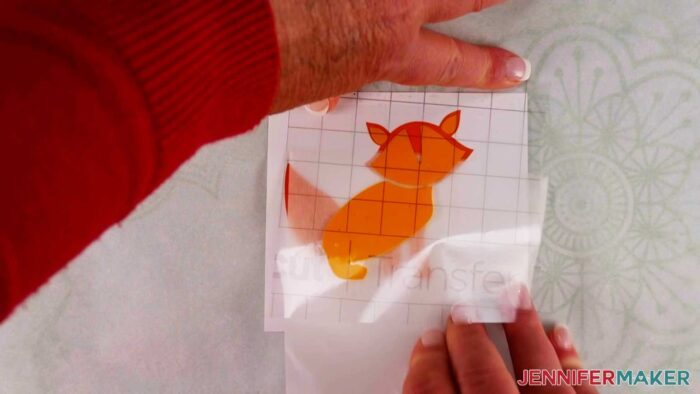
Layer Vinyl Using Parchment Paper
Ready to learn how to screen print a shirt with Cricut techniques? I’m super excited to show you how! This post contains some affiliate links for your convenience (which means if you make a purchase after clicking a link I will earn a small commission but it won’t cost you a penny more)! Read my full disclosure policy.
Materials for How to Screen Print a Shirt with Cricut
View my Amazon shopping list with the exact items we used to make this project.
- Screen Printing Kit and Speedball ink – I used Red and Iridescent Emerald ink on a white shirt, and Black and White ink on a red shirt
- Permanent Adhesive Vinyl and Cricut StandardGrip Transfer Tape or Paper Transfer Tape for the stencils
- Scrap cardstock larger than your design in a color that contrasts with your ink and painter’s tape to help with alignment
- Butcher Paper, an apron, disposable gloves, a toothbrush, and access to water to stay clean and clean up — to protect your work surface
- A way to cut your vinyl – I used the amazing Cricut Maker 3 but you can also use the original Maker or an Explore series machine with the Fine-Point Blade and a Cricut StandardGrip Machine Mat
- A heat press large enough to cover your design (I used the Cricut Autopress but most larger heat presses will work) and a Pressing Mat big enough to fit under your entire design
- Tools including and a brayer, weeding tool, scissors, XL scraper, eye dropper and cups with water if you need to thin your screen printing ink
- Design #435 (My free SVG/PDF/DXF Screen Printed shirt designs available in my free resource library – get the password by filling out the form at the bottom of this page)
How to Screen Print a Shirt with Cricut Tools

How to Screen Print a Shirt with Cricut
Learn how to make your own two-color screen printed shirt with your Cricut that rivals the quality and durability of one from a store!
Materials
- One (1) Cotton T-Shirt (any color) - I used a Medium-sized unisex crew neck shirt in white and one in red
- Two (2) Colors of Speedball Fabric Screen Printing Ink — I used Red and Iridescent Emerald ink on a white shirt, and Black and White ink on a red shirt
- One (1) Screen Printing Kit
- Two (2) 11" x 12" Pieces of Permanent Vinyl (any color)
- One (1) 11" x 12" Piece of Cricut StandardGrip Transfer Tape -OR-
- One (1) 11" x 12" Piece of Paper Transfer Tape
- Butcher Paper — to protect your work surface
- Two (2) 2" x 2" Pieces of Scrap Cardstock in a color that will show each of your ink colors
- Any Color Scrap Cardstock (the same size or larger than your design) — for placing inside your shirt to keep the ink from bleeding through
- Design #435 (My free SVG/PDF/DXF design files available in my free resource library - get the password by filling out the form at the bottom of this page)
Tools
- A way to cut your vinyl - I used the amazing Cricut Maker 3 but you can also use the original Maker or an Explore series machine with the Fine-Point Blade
- Cricut StandardGrip Machine Mat, 12" x 12"
- Heat Press large enough to cover your design - I used the Cricut Autopress
- Cricut EasyPress Pressing Mat large enough to fit your entire design
- Brayer
- Weeding Tool
- Scissors
- XL Scraper
- Painter's Tape
- Disposable Gloves
- Apron — to protect your clothing
- Toothbrush — for cleaning the screen
- Plastic or Paper Cups (optional) — for mixing the ink with water to thin it out
- Eye Dropper (optional) — for adding water to the ink to thin it out
Instructions
NOTE: If this is your first time screen printing, have a few test shirts ready and cut extra copies of your designs, just in case. Getting the ink amount and squeegee pressure just right takes some practice, so don't try it out on your favorite shirt right away! You can use any type of shirt except nylon and 100% polyester. I've found that 100% cotton shirts, like the Bella+Canvas ones I'm using, work best for screen printing.
If you need to start over with the same shirt, wash the shirt in cold water while the ink is still wet. It should come right out! Just make sure your shirt is completely dry before trying again.
STEP 1: GET MY FREE SCREEN PRINTED SHIRT DESIGN FILES
First, download my Screen Printed Shirt SVG/DXF/PDF files from my free resource library. It's Design #435.
There are four files in the folder, designed to fit on a Medium-sized unisex crew neck T-shirt:
- Be You! - 8" wide by 7" tall
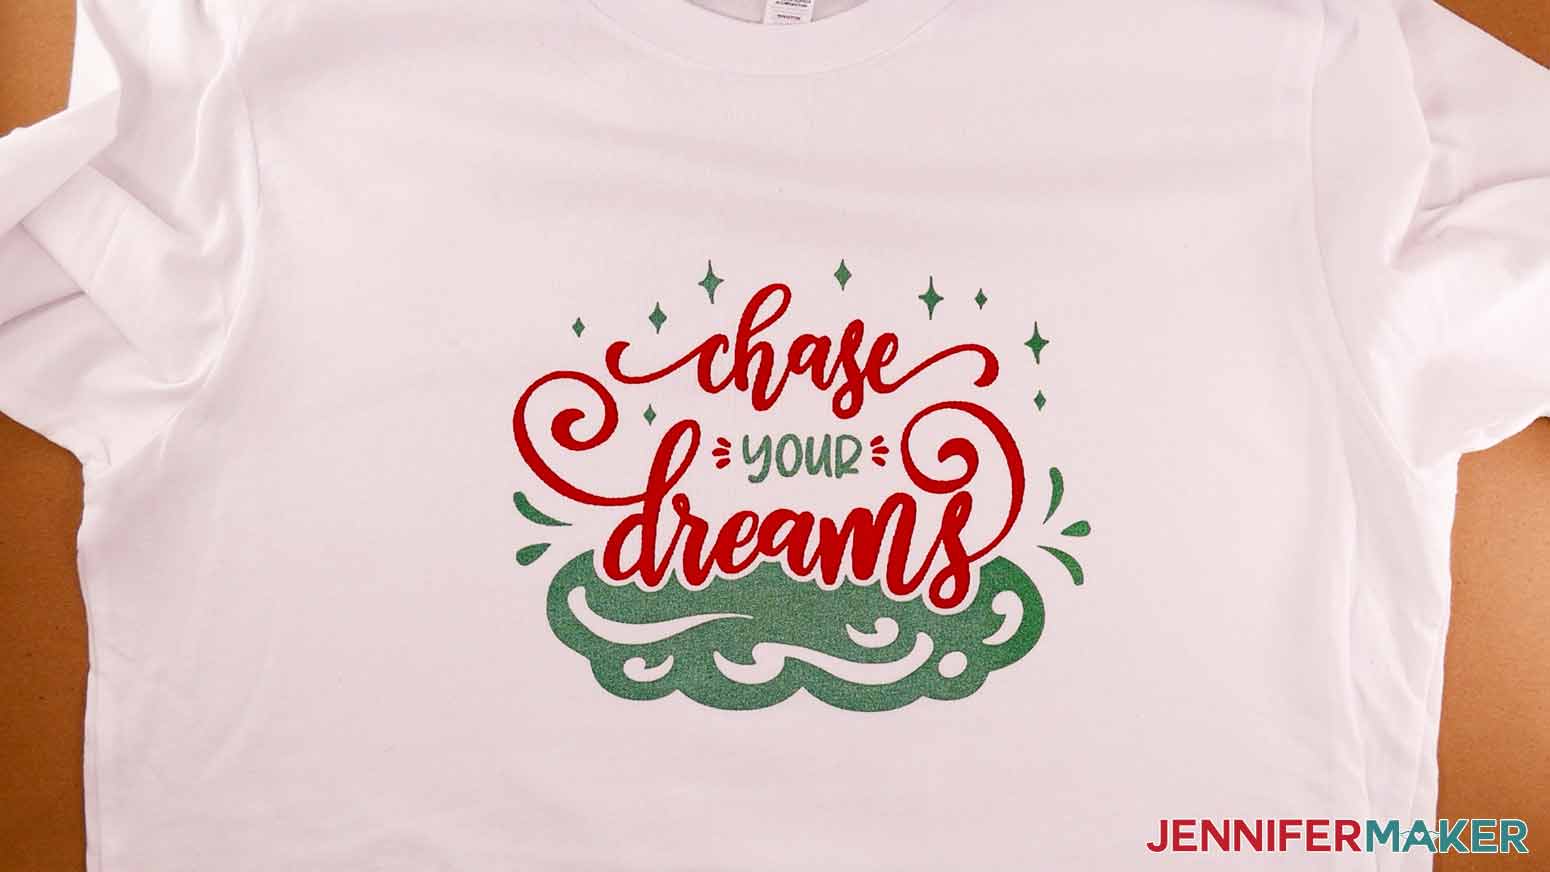
- Chase Your Dreams - 8" wide by 6.3" tall
- Happiness Comes from Within - 8" wide by 5" tall
- A blank stencil you can use for any design you wish
The three designs are set up to be printed in two colors. I'll show you how to print the Chase Your Dreams design in red and emerald ink on a white shirt, but you can choose any ink and shirt colors you'd like. Each layer requires a 12" x 12" sheet of adhesive vinyl.
Upload the SVG file you need to Cricut Design Space and add it to your Canvas.
STEP 2: PREPARE YOUR DESIGN
Let me first show you how to use the blank stencil to create any design you wish. Then I’ll show you how to prepare my other designs that have two colors.
Here's what my blank screen printed stencil looks like on the Canvas. You can zoom out to see all of the design by clicking on the minus (-) sign on the lower left.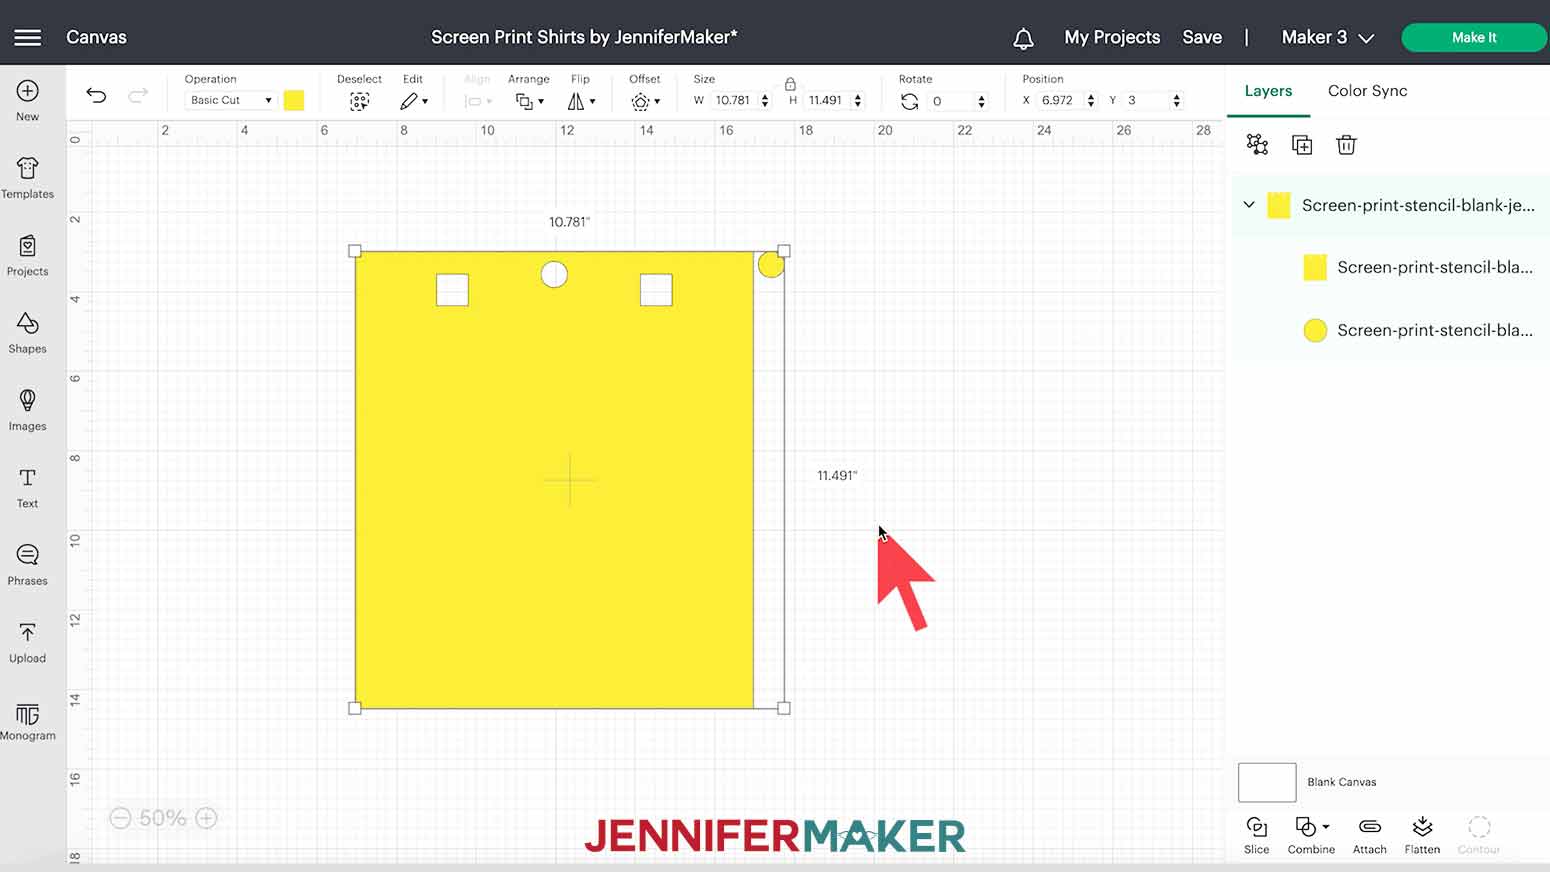
This stencil has two squares and a circle at the top, which we'll use as alignment or registration marks. There is also a circle alignment symbol to the right, which is useful if you want to do multi-color designs. To begin using this blank stencil, select it on your Canvas, then click Ungroup above the Layers panel.
To personalize this blank stencil, simply find an image you like under the Images tab. I recommend you filter the images by clicking "Browse All Images," then click "Free" and, under Operation Type, choose "Cut Only." Then choose an appropriate image. Pay attention to layers -- you can do multiple layers, but single layers are easiest if you’re a beginner. I’ll choose this Cricut Cutie #M3A9A15A2.
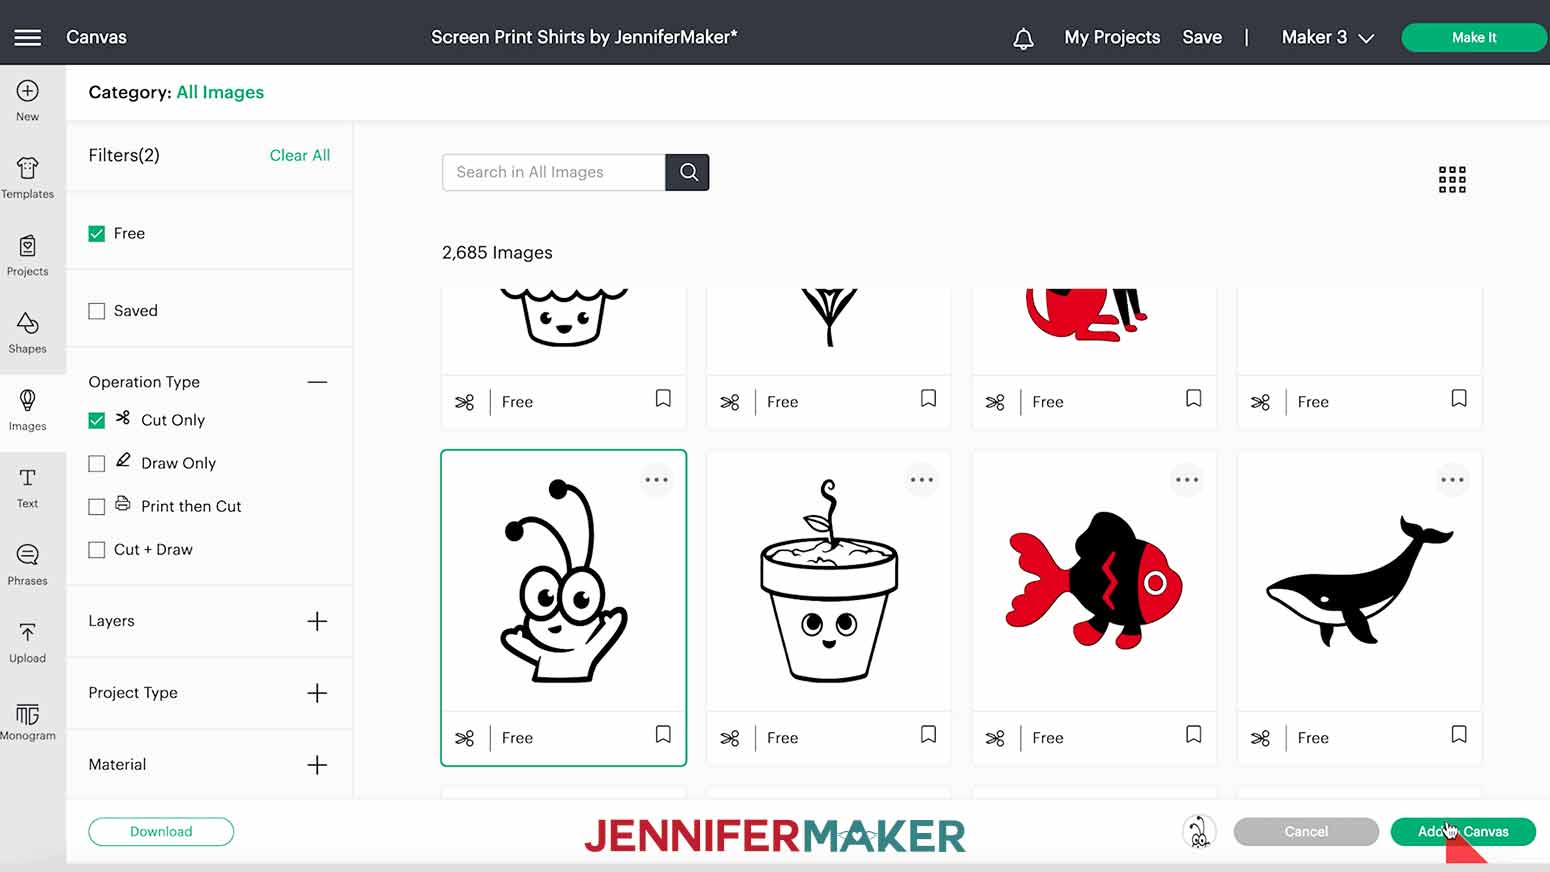
Select the image, then click "Add to Canvas." The image will appear on your Canvas. Now just click and drag a corner to resize it to fit inside your stencil.
Now select both the blank stencil and the image, and click Combine below the Layers Panel, then choose Exclude. This creates the stencil with the negative space you need for your ink.
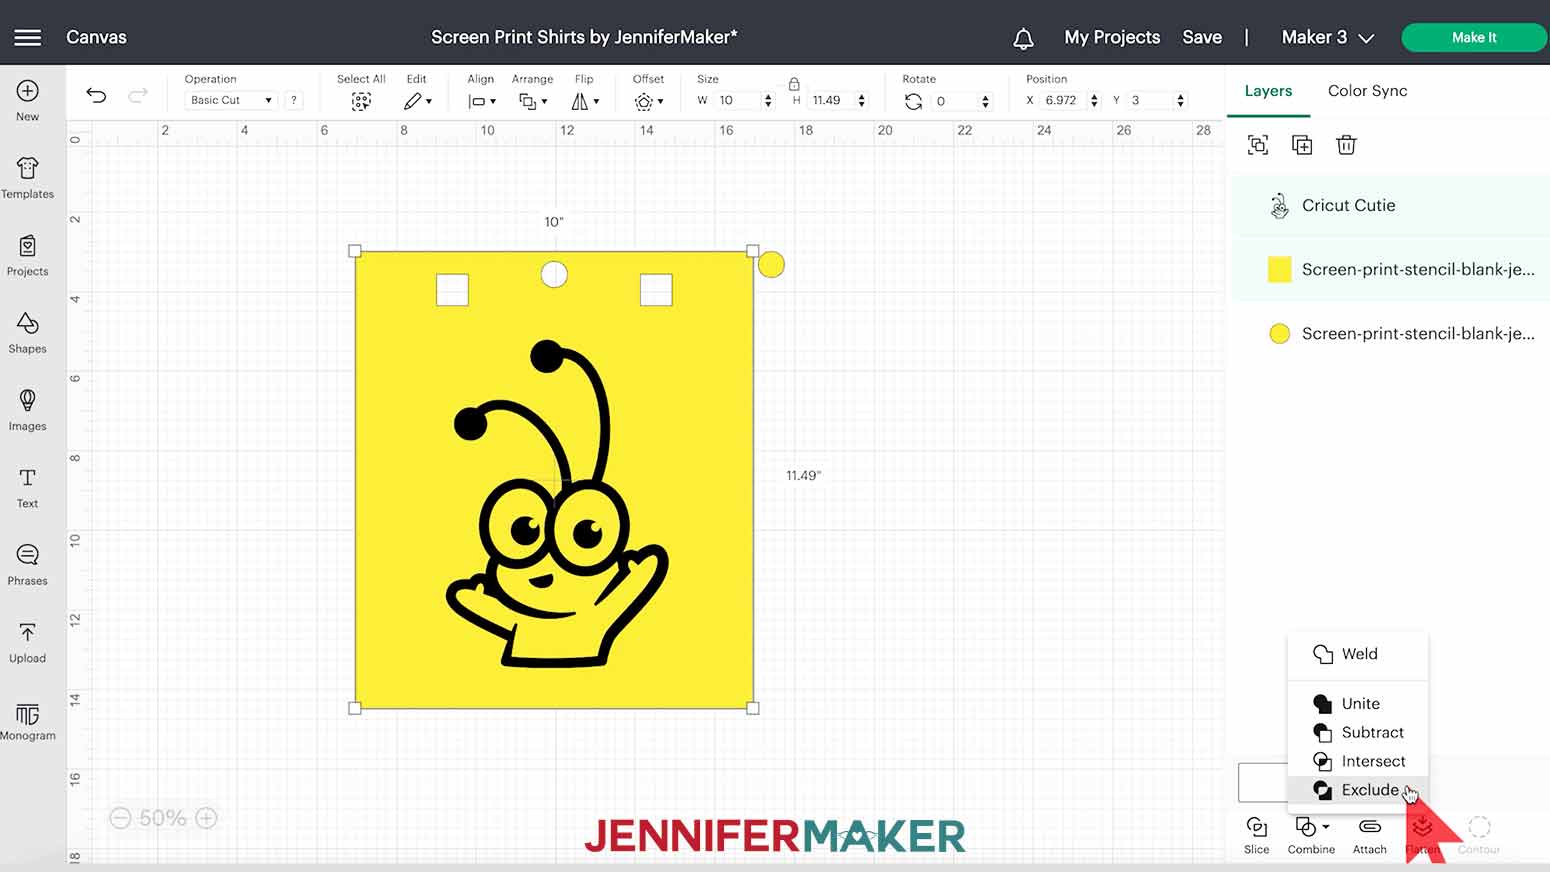
Note that you could also use Slice instead, but using the Exclude feature under Combine is faster AND it means you can undo it later if you decide you don’t want that design after all.
So that’s how you make your own screen printing stencil! But I also pre-designed some two-color screen printing stencils for you to learn with.
Here's what my designs look like on the Canvas. You can zoom out to see all of the design by clicking on the minus (-) sign on the lower left.
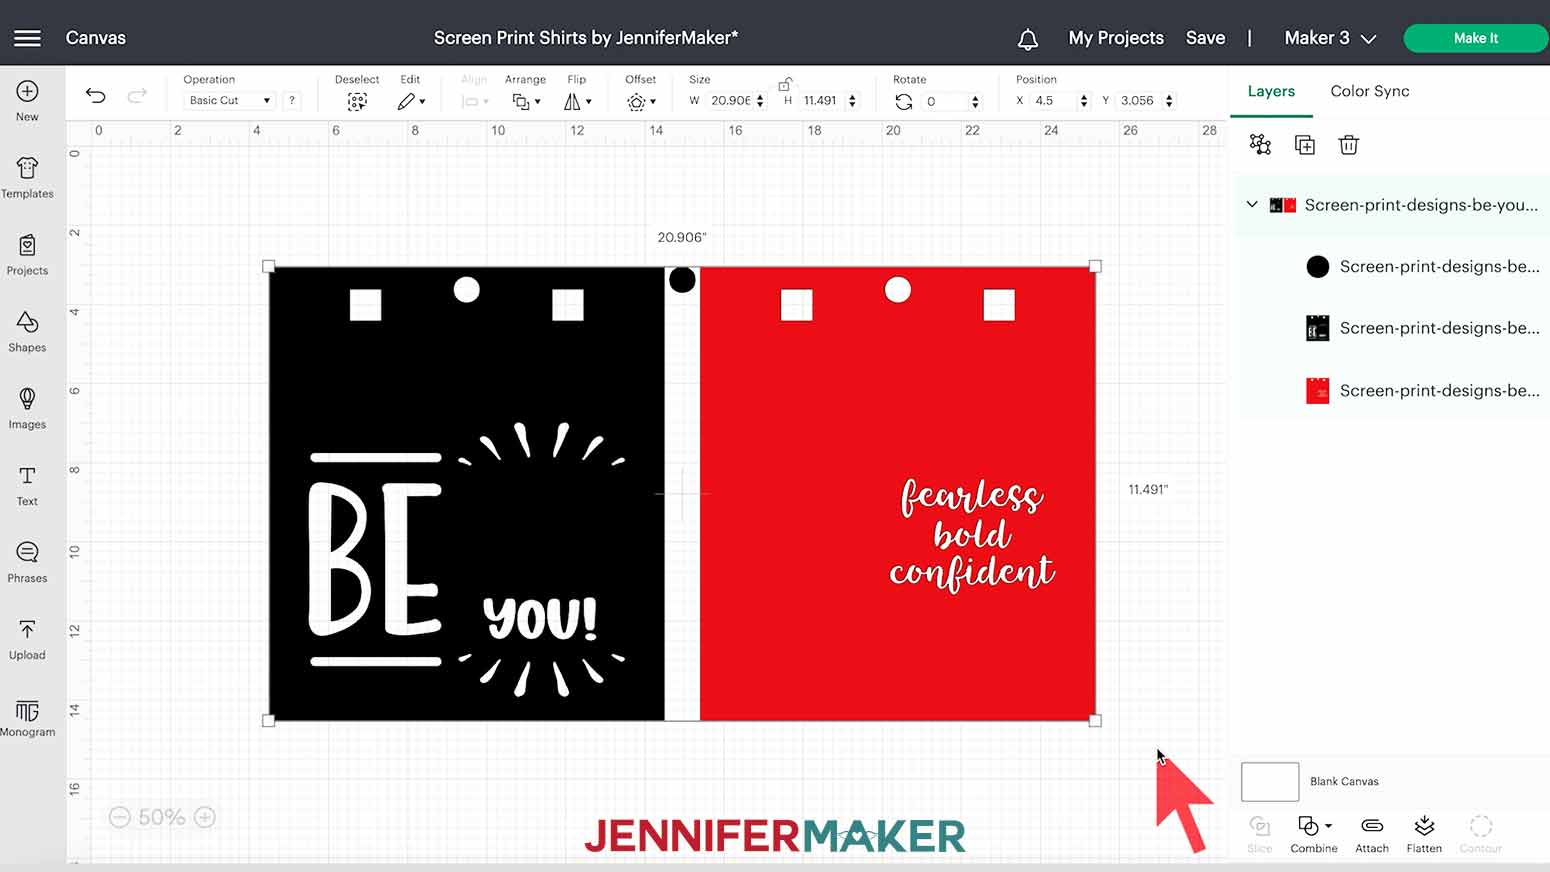
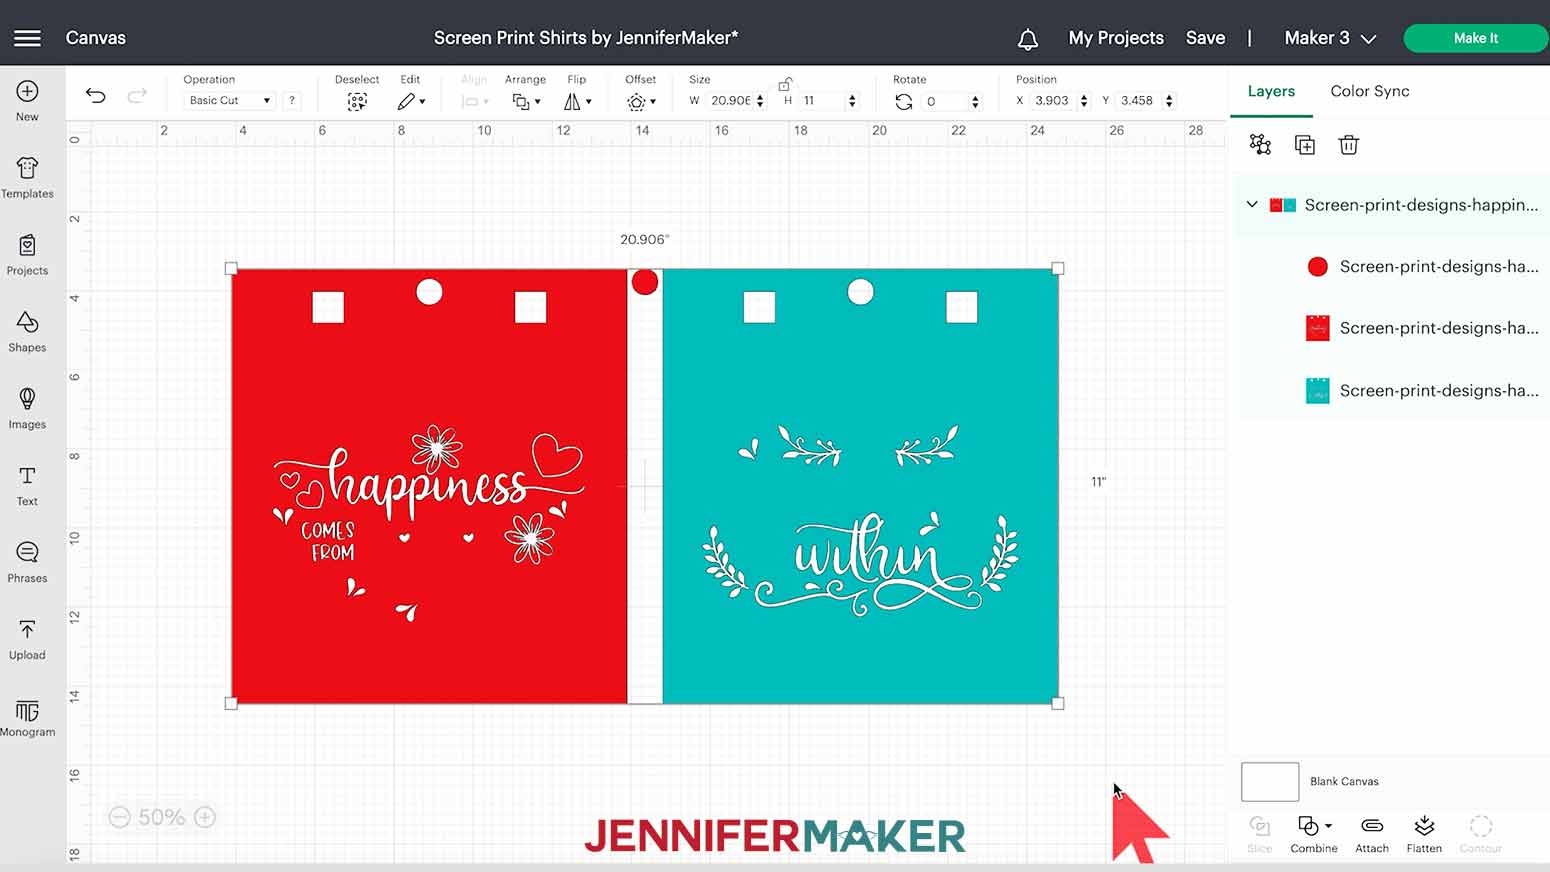
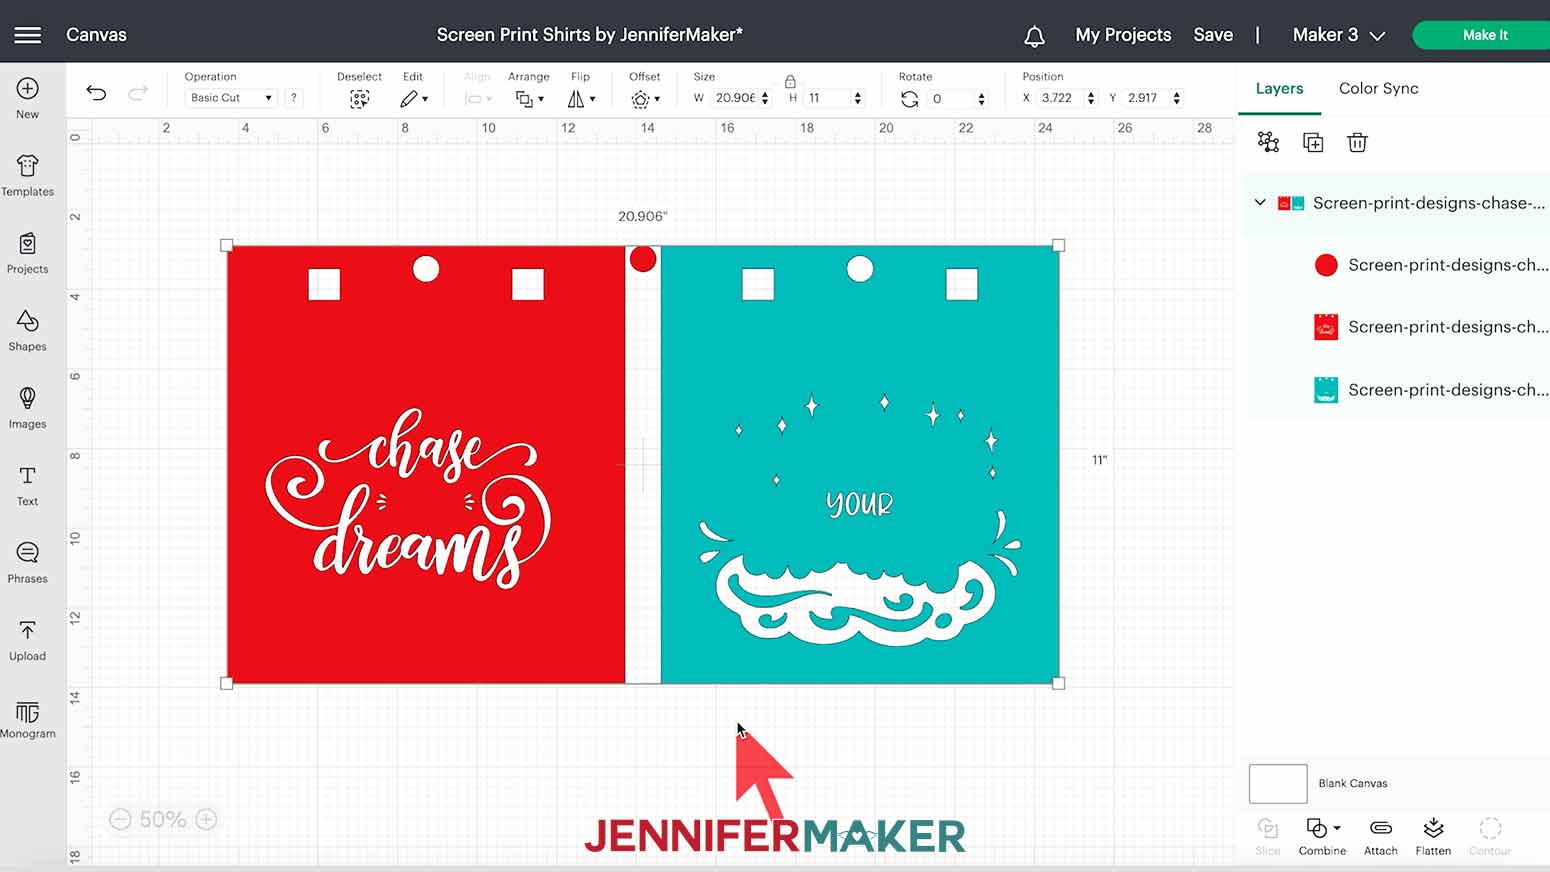
Multi-color screen printing ink is applied in perfectly-aligned layers, one color at a time, so this SVG has two layers.
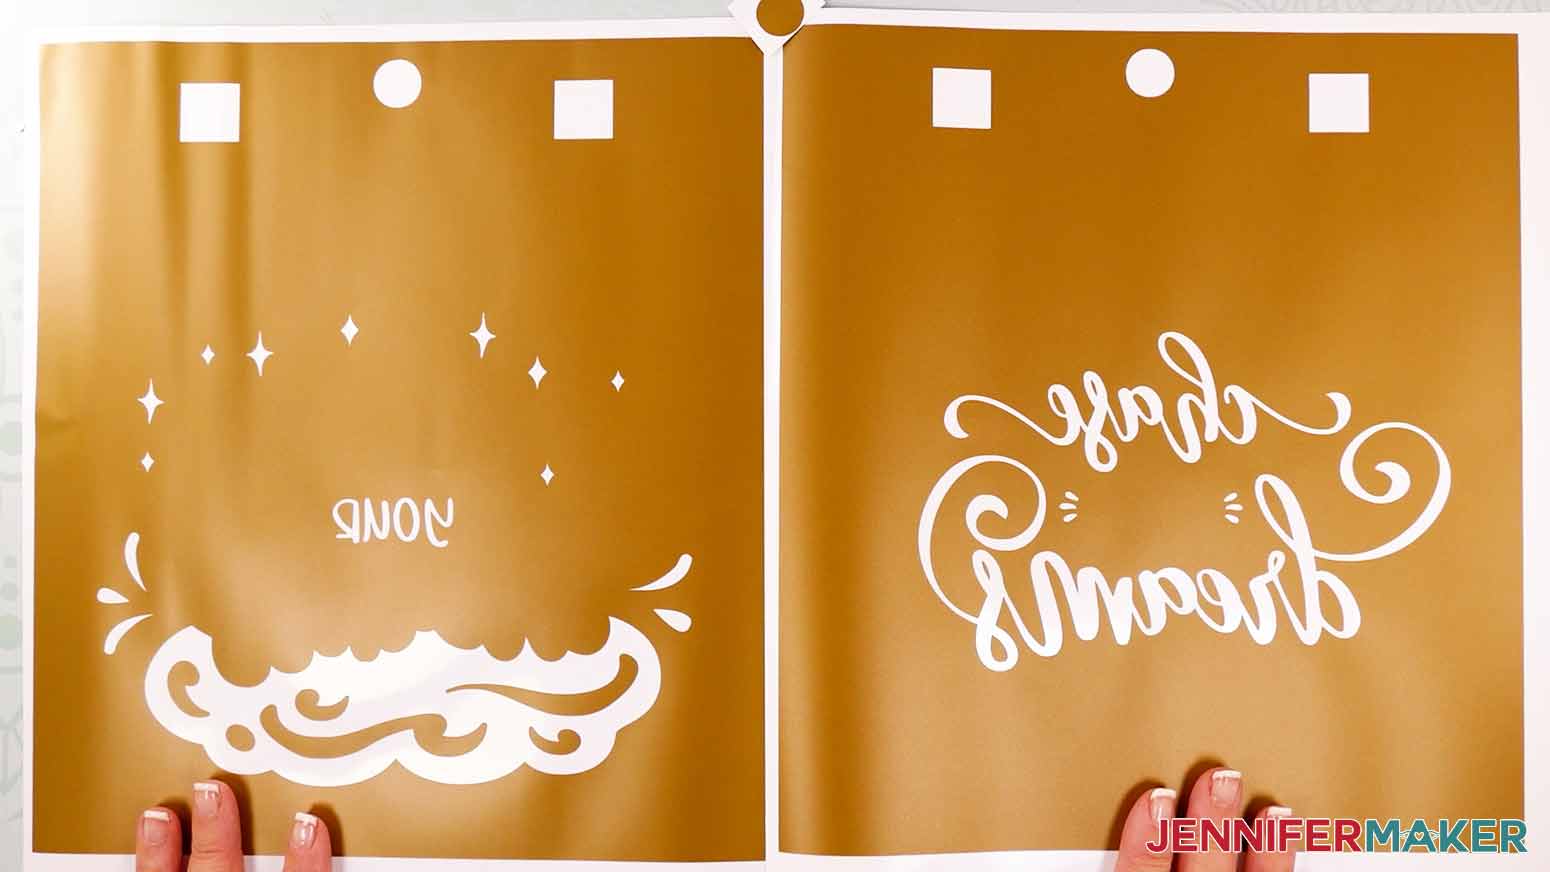
The design is separated into two pieces - one for each color. Each piece has two squares and a circle at the top, which we'll use as alignment or registration marks. There is also a circle alignment symbol between the pieces - don't lose it during weeding!
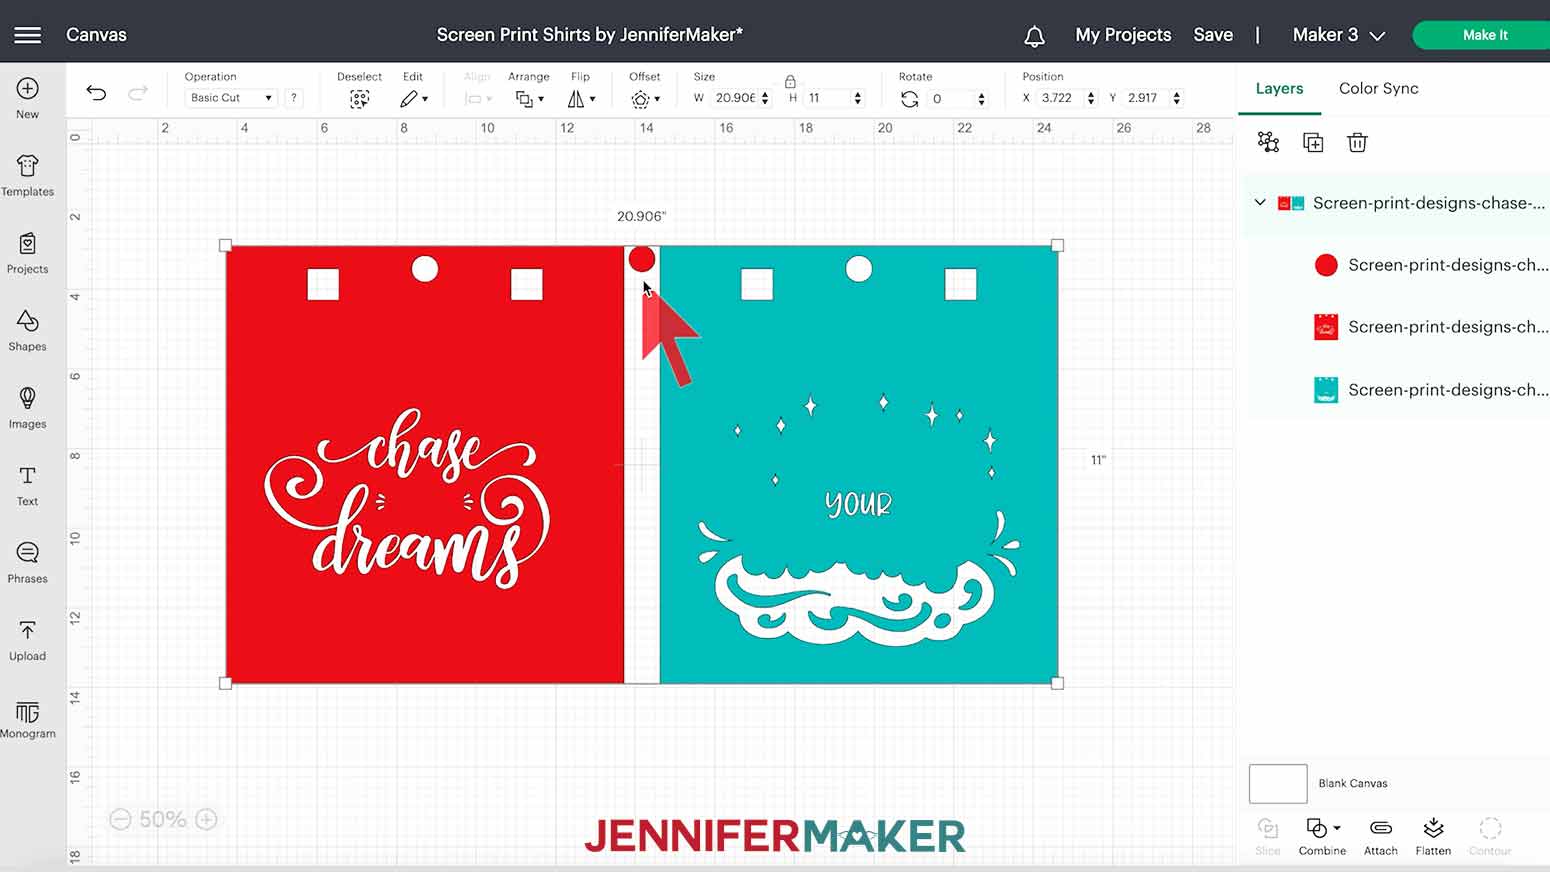
To make the design smaller, keep the lock icon closed, then click and drag a bounding box corner to your desired size, or type a new dimension into the width (W) or height (H) box at the top menu under "Size." I don't recommend making the designs bigger, because you would need a larger screen printing kit.
The design is ready to cut!
STEP 3: CUT AND WEED YOUR VINYL STENCILS
Make sure the correct machine is selected in the top right and click "Make It."
If prompted, click "On Mat," "12 in x 12 in," and "Continue."
On the Prepare screen, make sure you see two mats.
Then, toggle "Mirror" ON for each mat. All screen printing stencil designs should be mirrored so the design will read correctly after it's done.
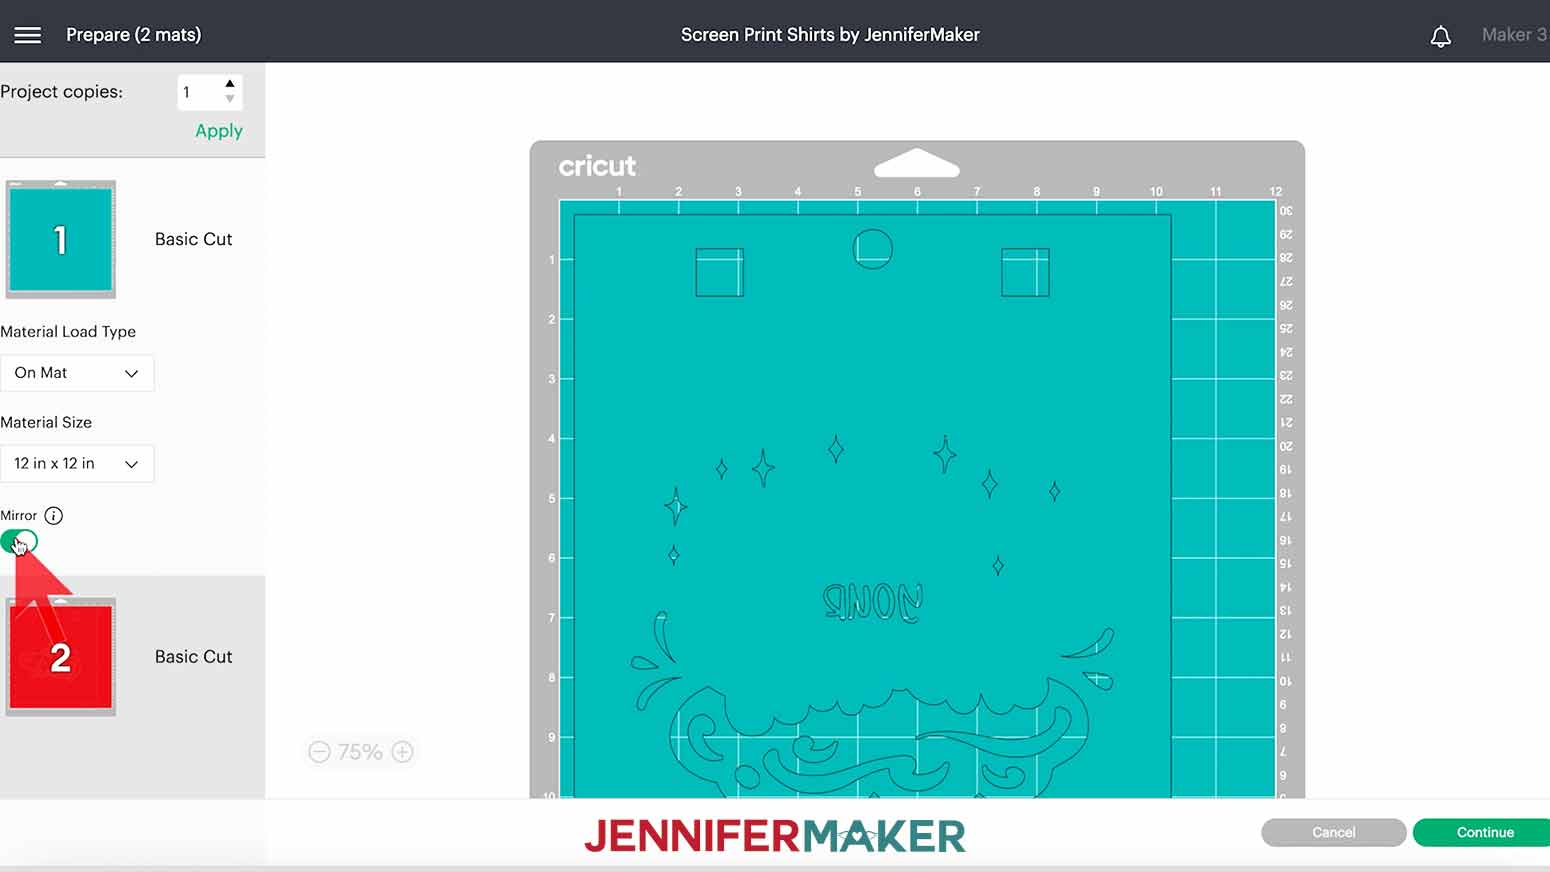
Click back on the first mat and select "Continue" in the lower right corner.
On the Make screen, select the "Premium Vinyl - Permanent Glossy" setting and change the Pressure to More for a cleaner cut. You can also check "Remember material settings."
Place your vinyl SHINY SIDE UP on a green StandardGrip machine mat. Use a brayer to make sure it's fully adhered. Check that your Fine-Point Blade is clean and in Clamp B.
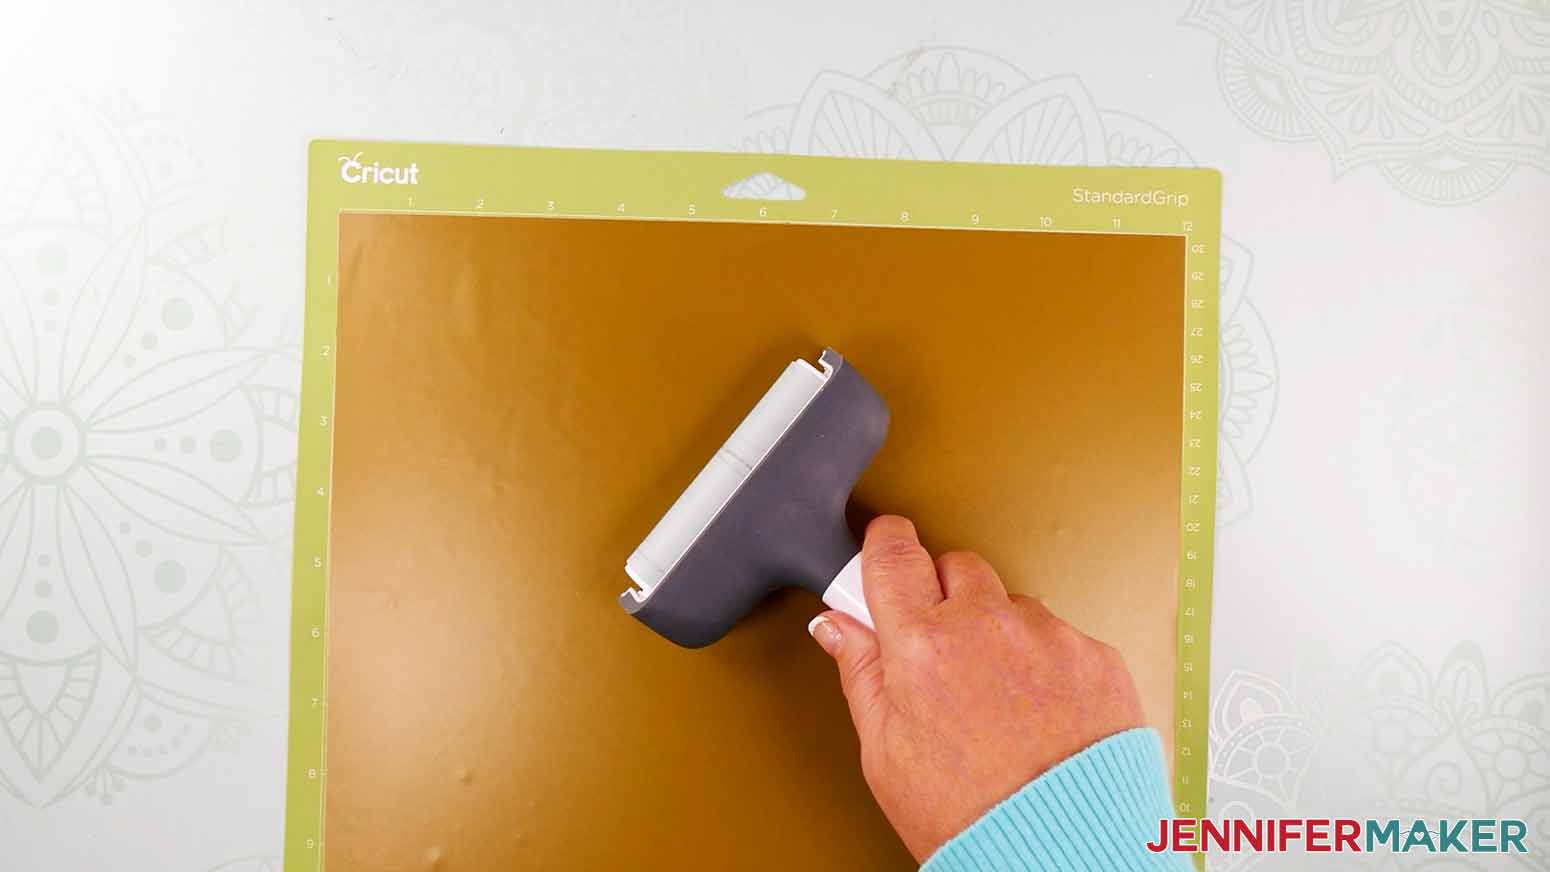
Then, load the mat into your machine and press the flashing button to cut your stencil.
When the cut is finished, unload the mat, flip it over, and roll it back to release the vinyl. This helps prevent unwanted curling.
Repeat these steps for your next stencil.
IMPORTANT: Once the vinyl is done cutting, you can weed the design, but you'll do it the opposite way you would a normal decal. Remove only the parts that you want to PRINT WITH INK, which are usually your letters, images, and registration marks. This is called reverse weeding. Be sure to leave everything else, including the large sections of vinyl around the cut design. Those will protect the rest of your shirt from the ink.
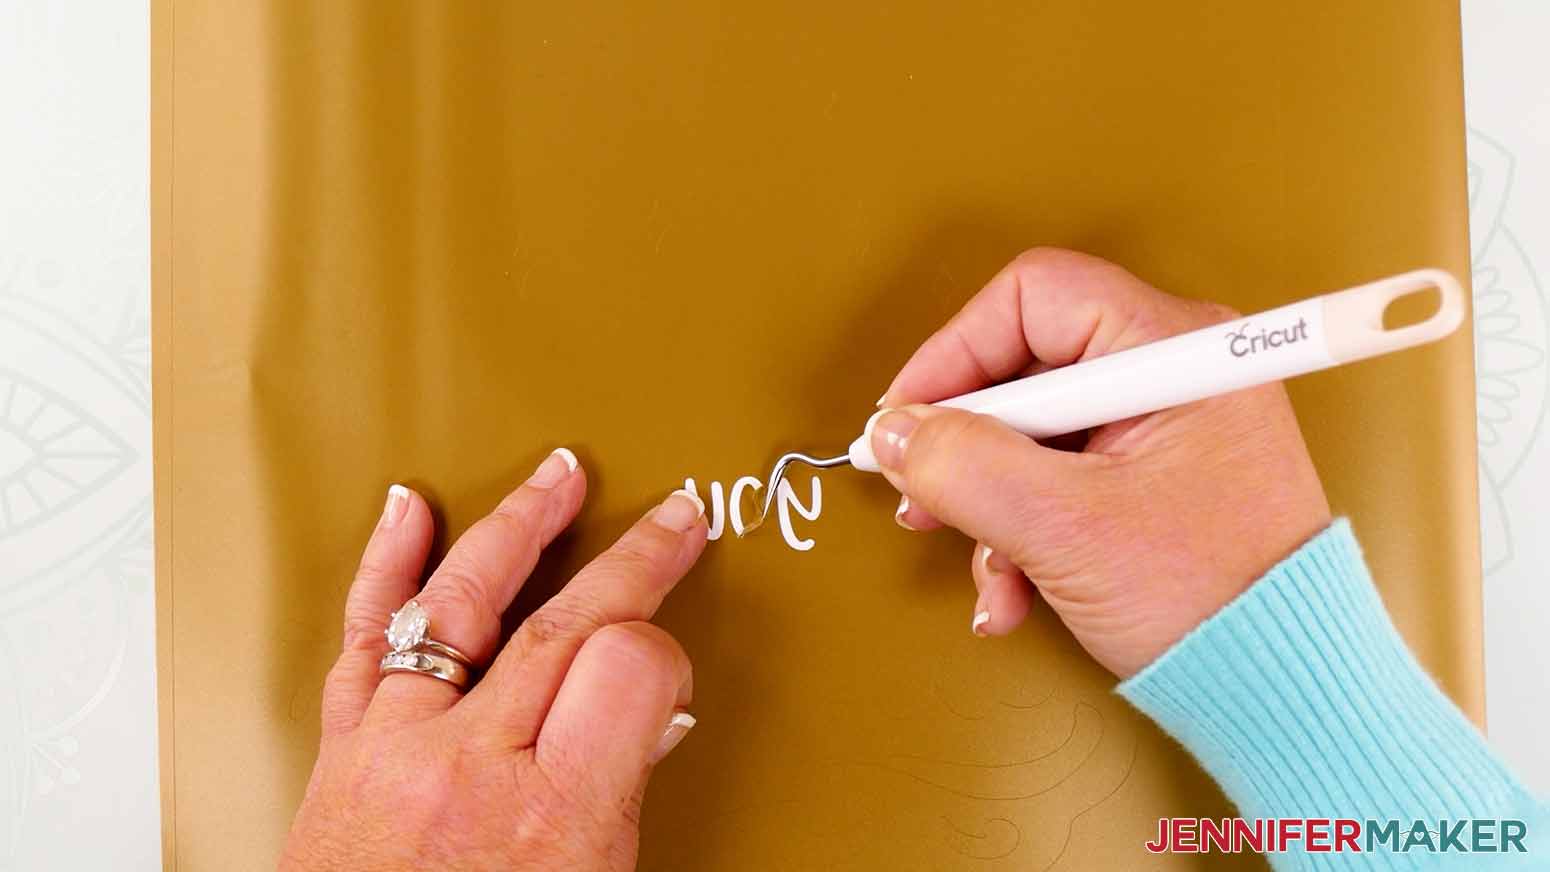
Remove the extra vinyl around the outside of your large rectangle and small circle. You can use scissors to cut around the small circle to separate it from your design.
Here are what my design layers look like when they are completely weeded.
STEP 4: PREPARE YOUR SCREEN
You can influence the final result by applying one design or the other first. I'll show you my preference for these designs, but if you're working on another, here are some tips:
- If one layer has a bigger design, try that one first.
- If the layers are pretty equal in size and complexity, you can place either one first.
- Black ink is a bit harder to wash out of the screen than the other colors, so if possible, add your black layer last.
- If your layers will overlap, make sure the first layer is dry before adding another. Some colors will still be influenced by each other when layered.
First, protect your work surface with a drop cloth or butcher paper. Gloves, an apron, and a set of clothes that you wouldn't mind getting a little ink on are good, as this project can be a little messy.
Next, especially if you're using a new screen, use a lint roller to gently remove any debris or wood splinters from the equipment.
Now we are going to take the first stencil and transfer it to the screen. I'll start with the one that says "chase" and "dreams."
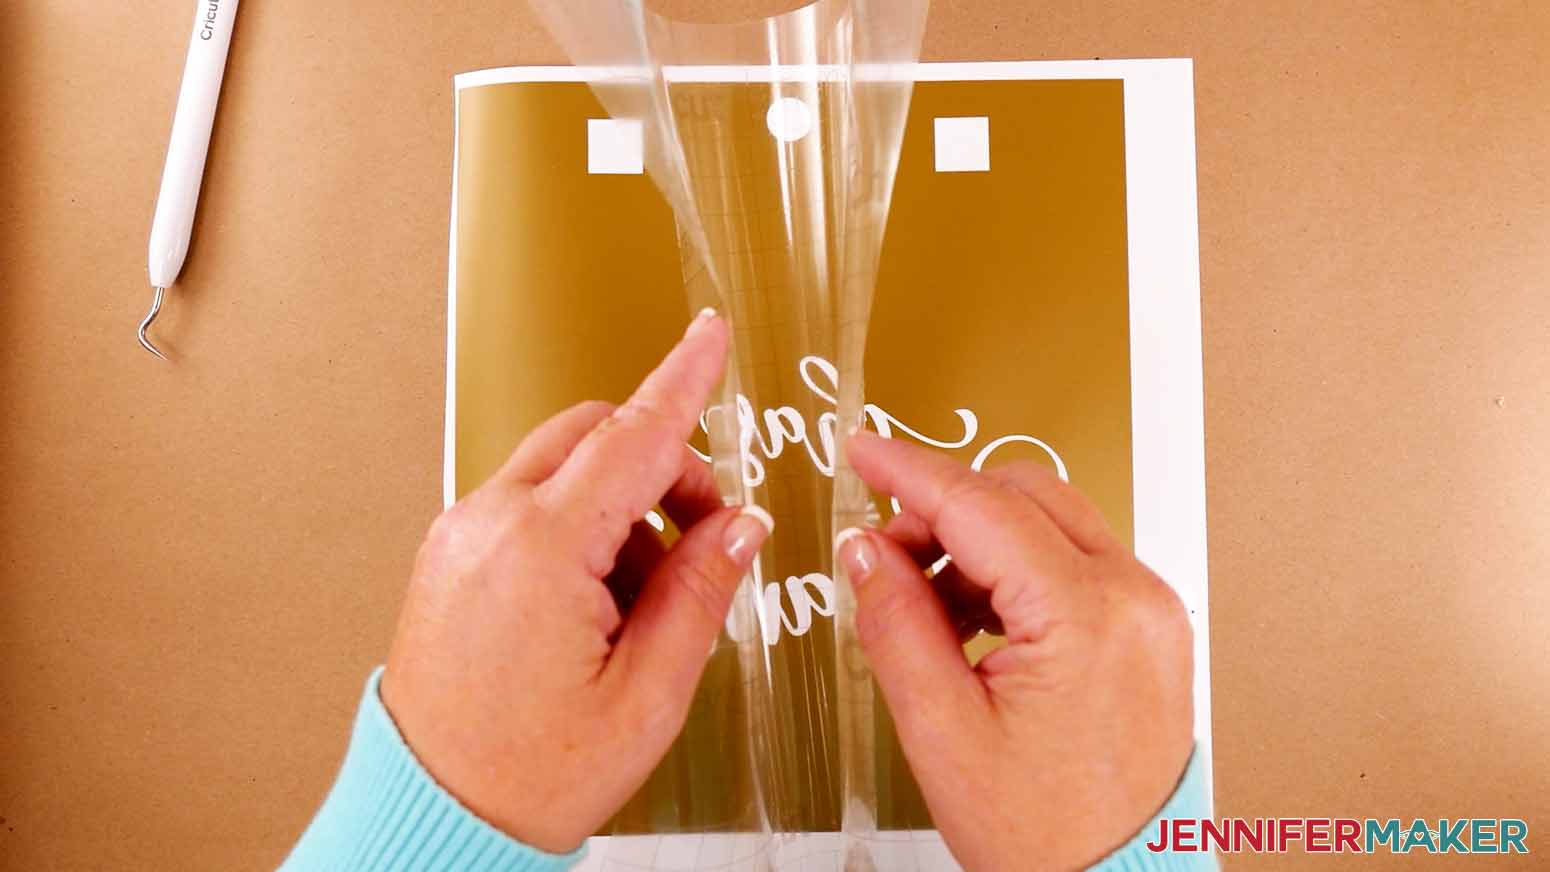
Place the decal face up on your work space. Cut a piece of transfer tape the same size as your design, including the extra vinyl. Remove the backing and set it aside to save the tape for the second layer.
TIP: Reduce the tack on your transfer tape first by sticking it to your shirt or a paper towel -- this will make it less sticky and easier to remove when you put it on your screen.
Next, apply the transfer tape to your vinyl decal by holding the transfer tape in the shape of a taco, or a U-shape, then putting the bottom of the taco onto the middle of your stencil. Smooth the tape over the decal from the center outward using the XL Scraper.
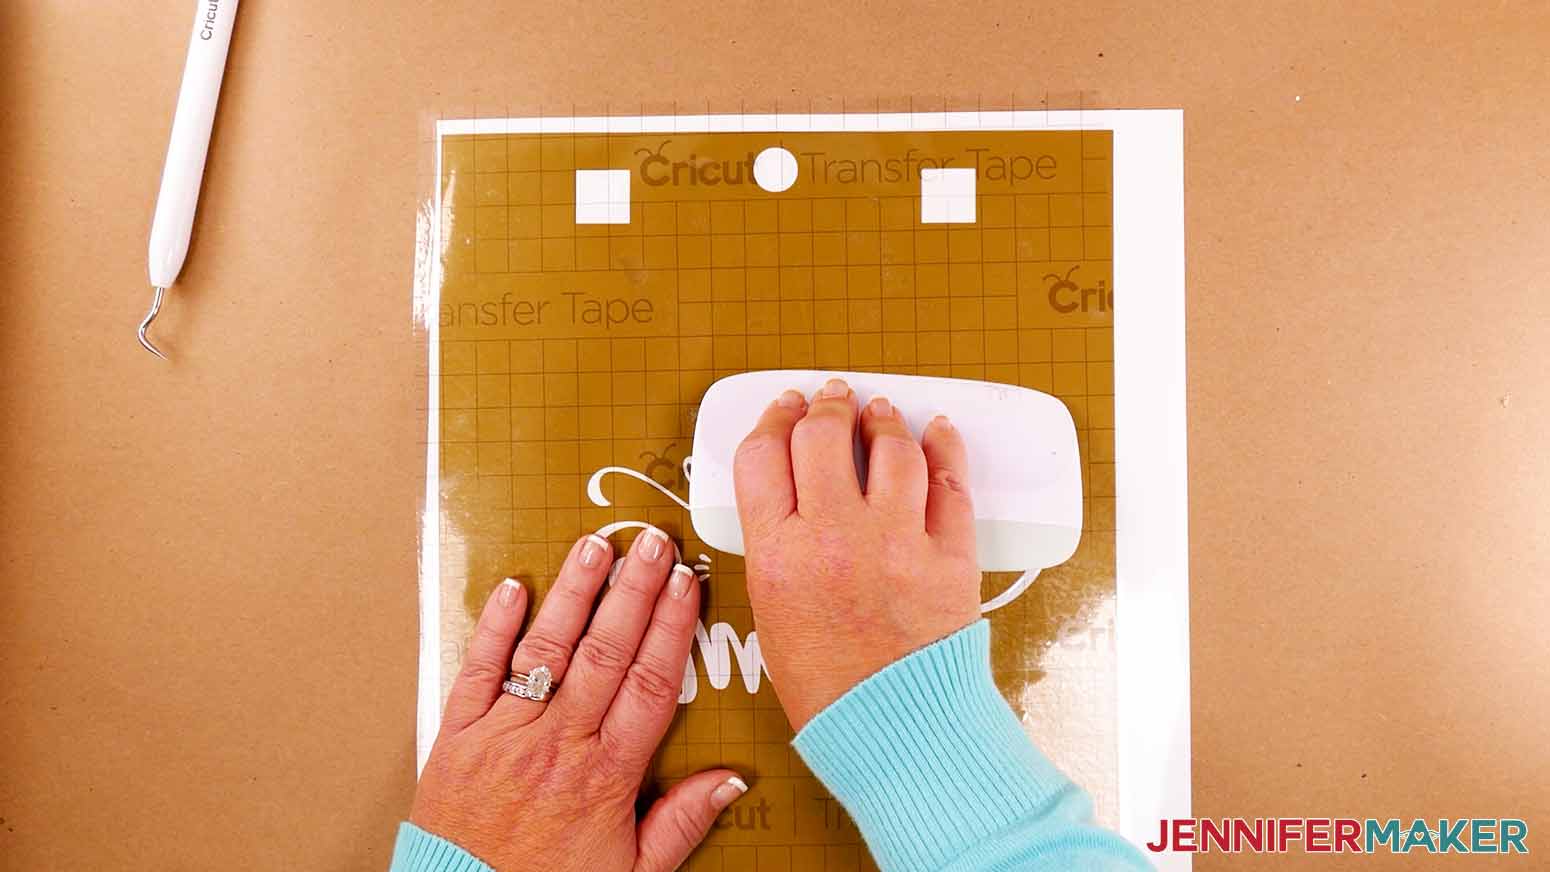
Gently lift the transfer tape, bringing the design with it. If the vinyl does not stick to the transfer tape, place it back down and burnish it with the scraper again on both sides.
Next, place the stencil on the back side of the screen, which is flat with the frame. Don't try to burnish or remove the tape yet.
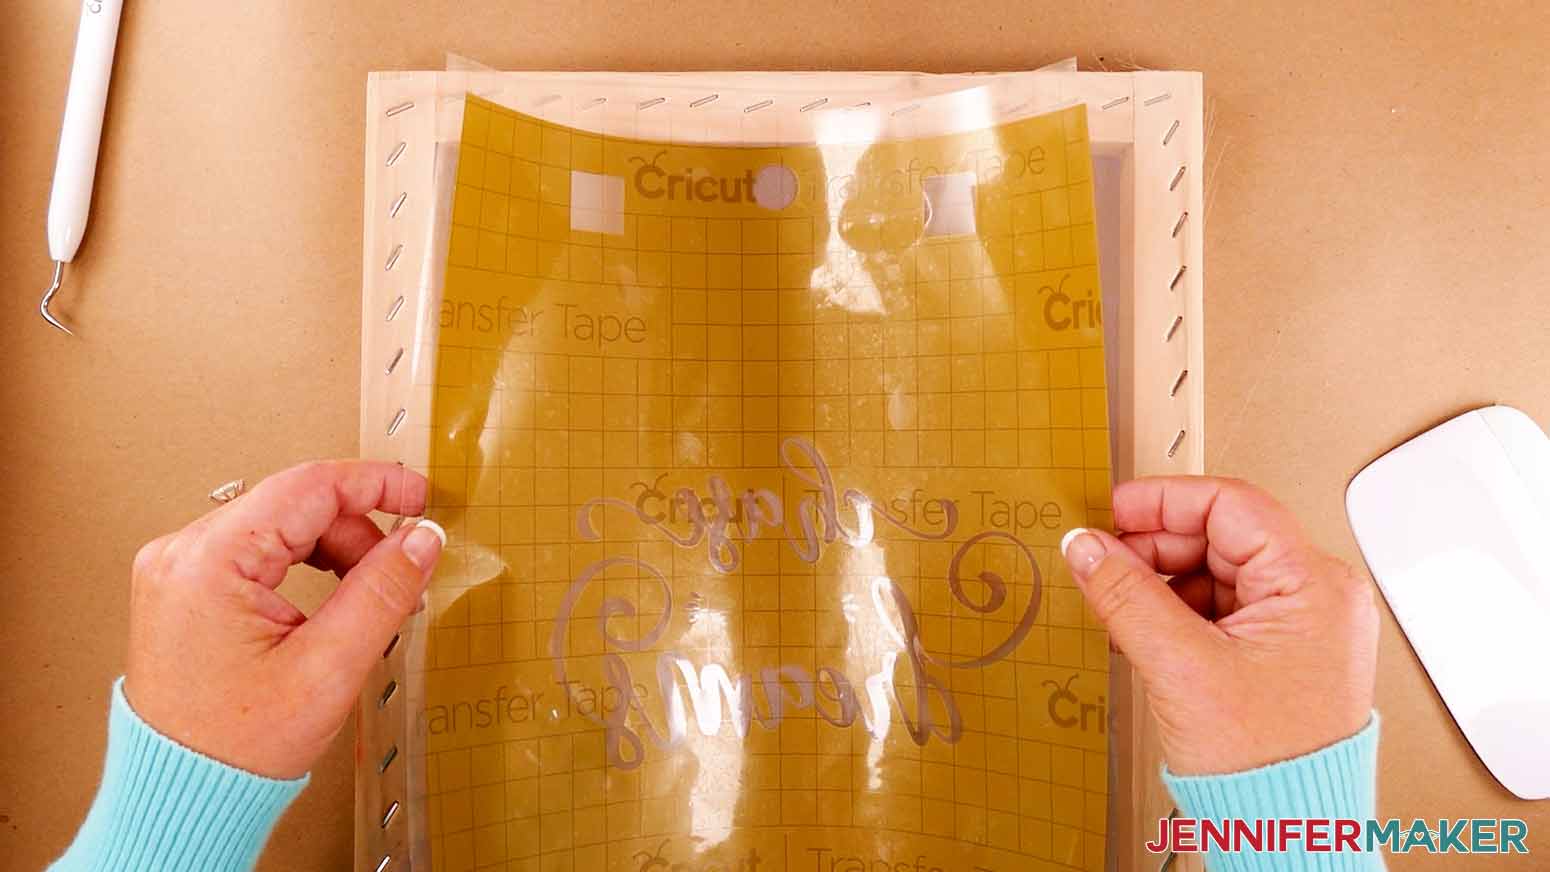
Flip the screen over so the indented side faces you. Burnish the design onto the screen with the scraper.
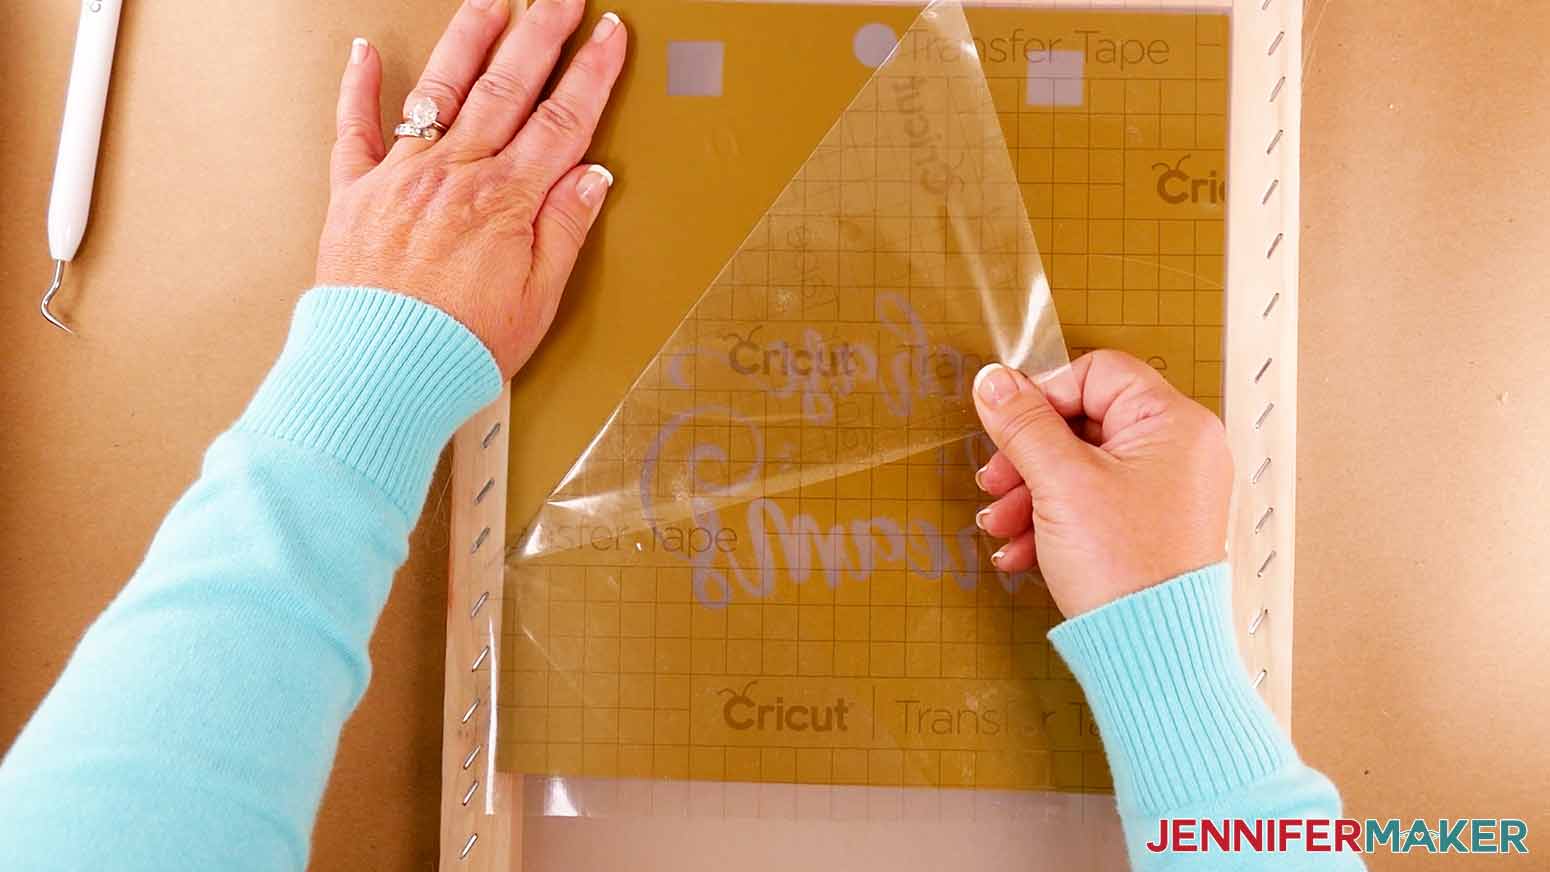
Next, flip the screen back over and remove the transfer tape.
NOTE: The transfer tape is hard to take off smoothly, so start at one corner and peel a little off to start. Put your thumb or hand down on the uncovered vinyl and start pulling the transfer tape off at an angle. Watch your vinyl to make sure it stays on the screen and not the transfer tape. If it comes up, place the transfer tape back down and burnish it again from the other side.
Once the transfer tape is off, set it aside on its backing liner to reuse.
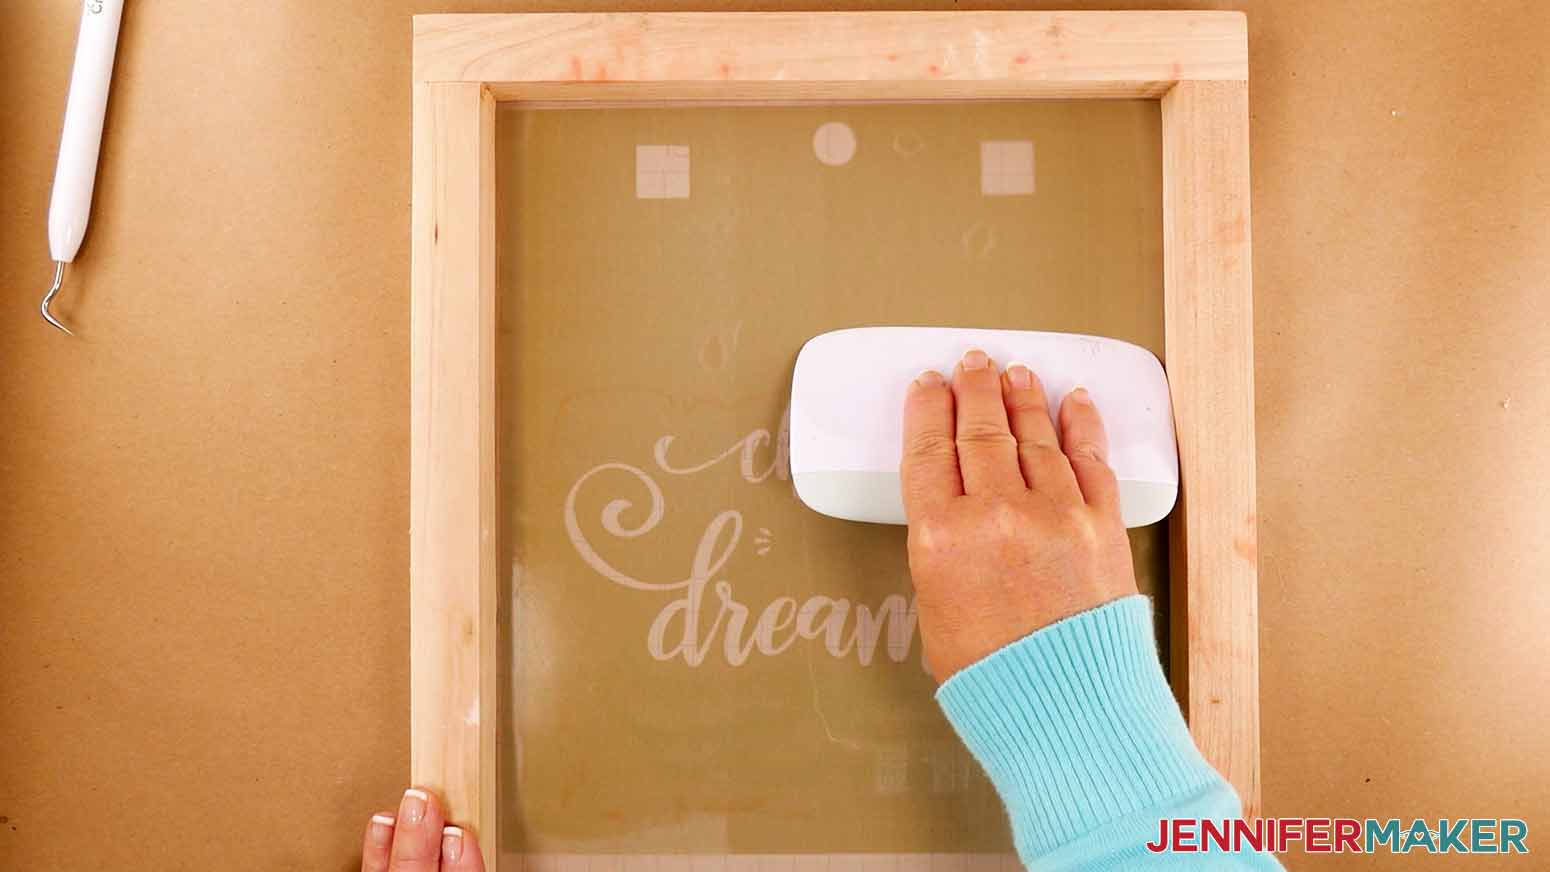
Now flip your screen over to the front again, and gently burnish the design onto the screen using the XL Scraper one more time.
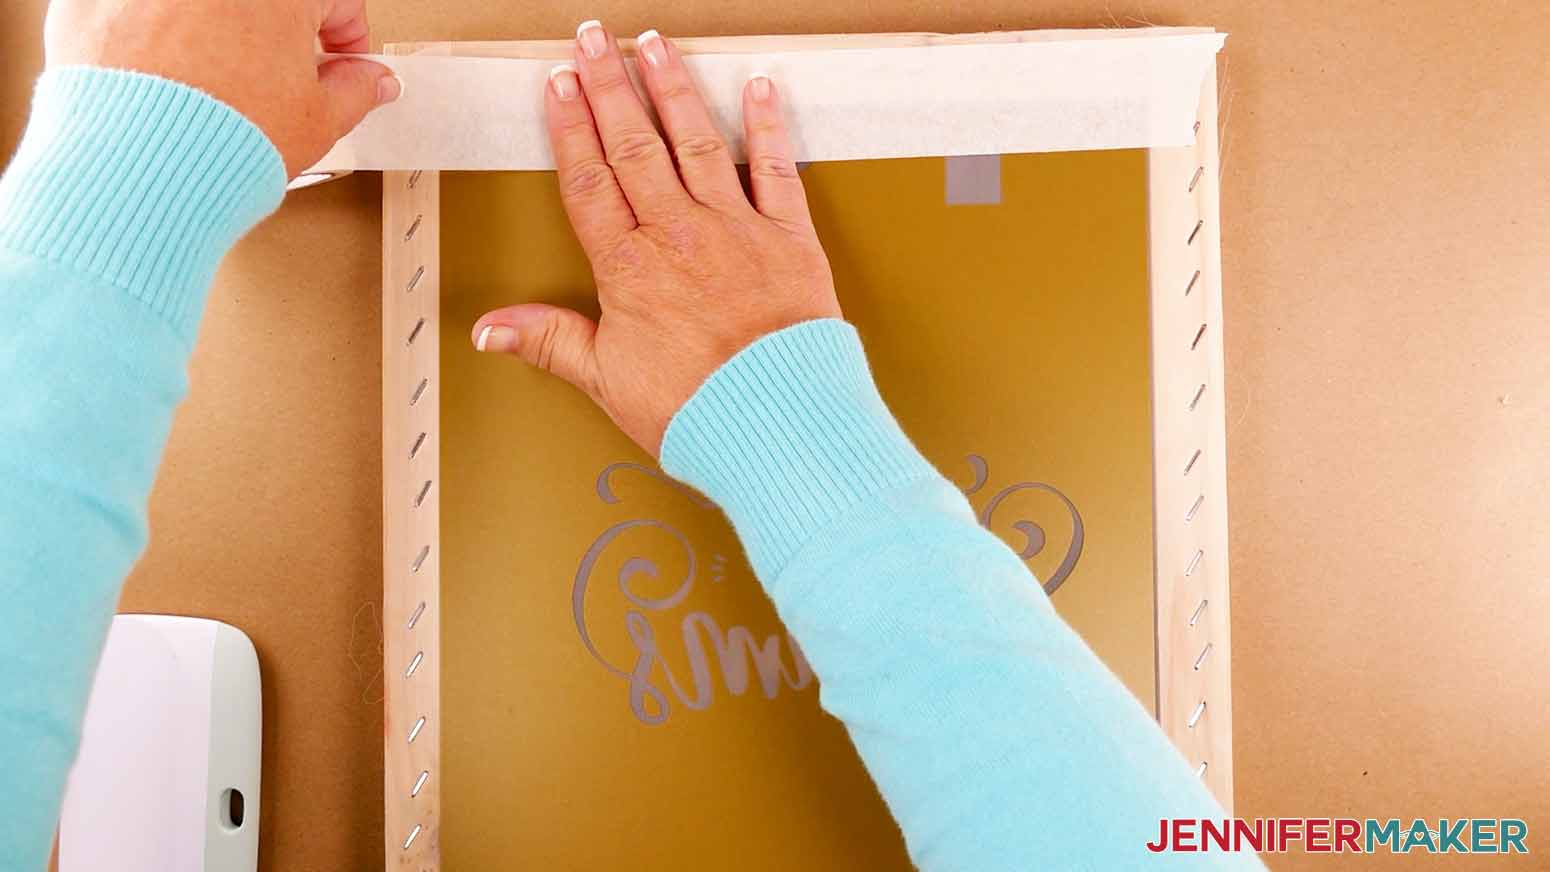
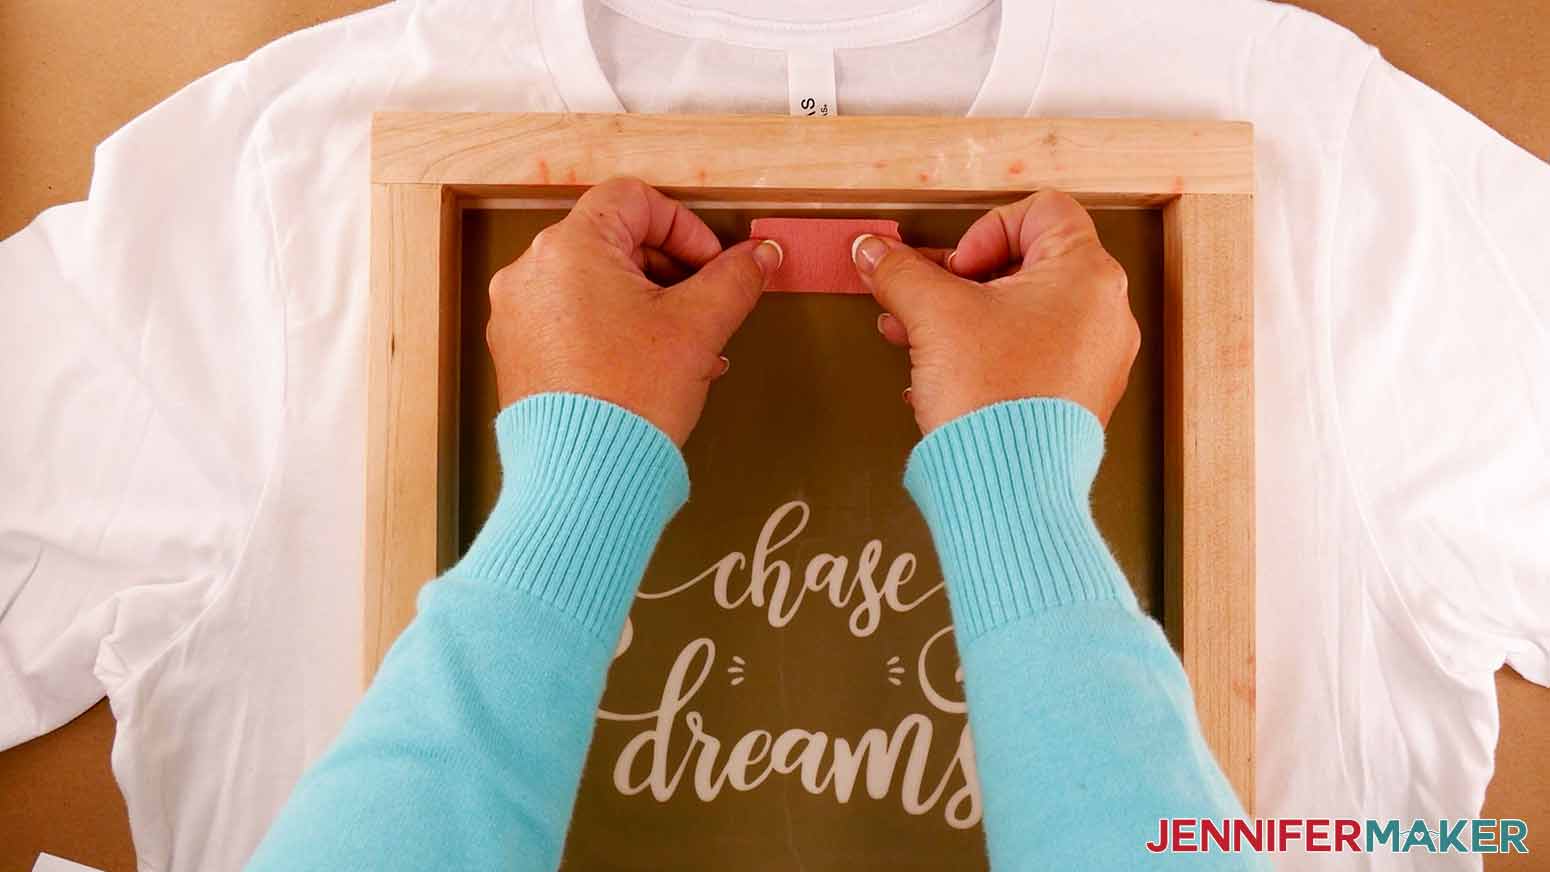
On the back side of the screen, add painter’s tape or masking tape to the top, bottom, and sides of the screen to cover the bare areas. Be sure to overlap the tape so that the ink does not seep through. The cut design areas should be the only spots where you can see the screen.
STEP 5: PREPARE YOUR SHIRT FOR SCREEN PRINTING
Grab your shirt, heat press, pressing mat, lint roller, prepared screen, painter's tape, and cardstock pieces.
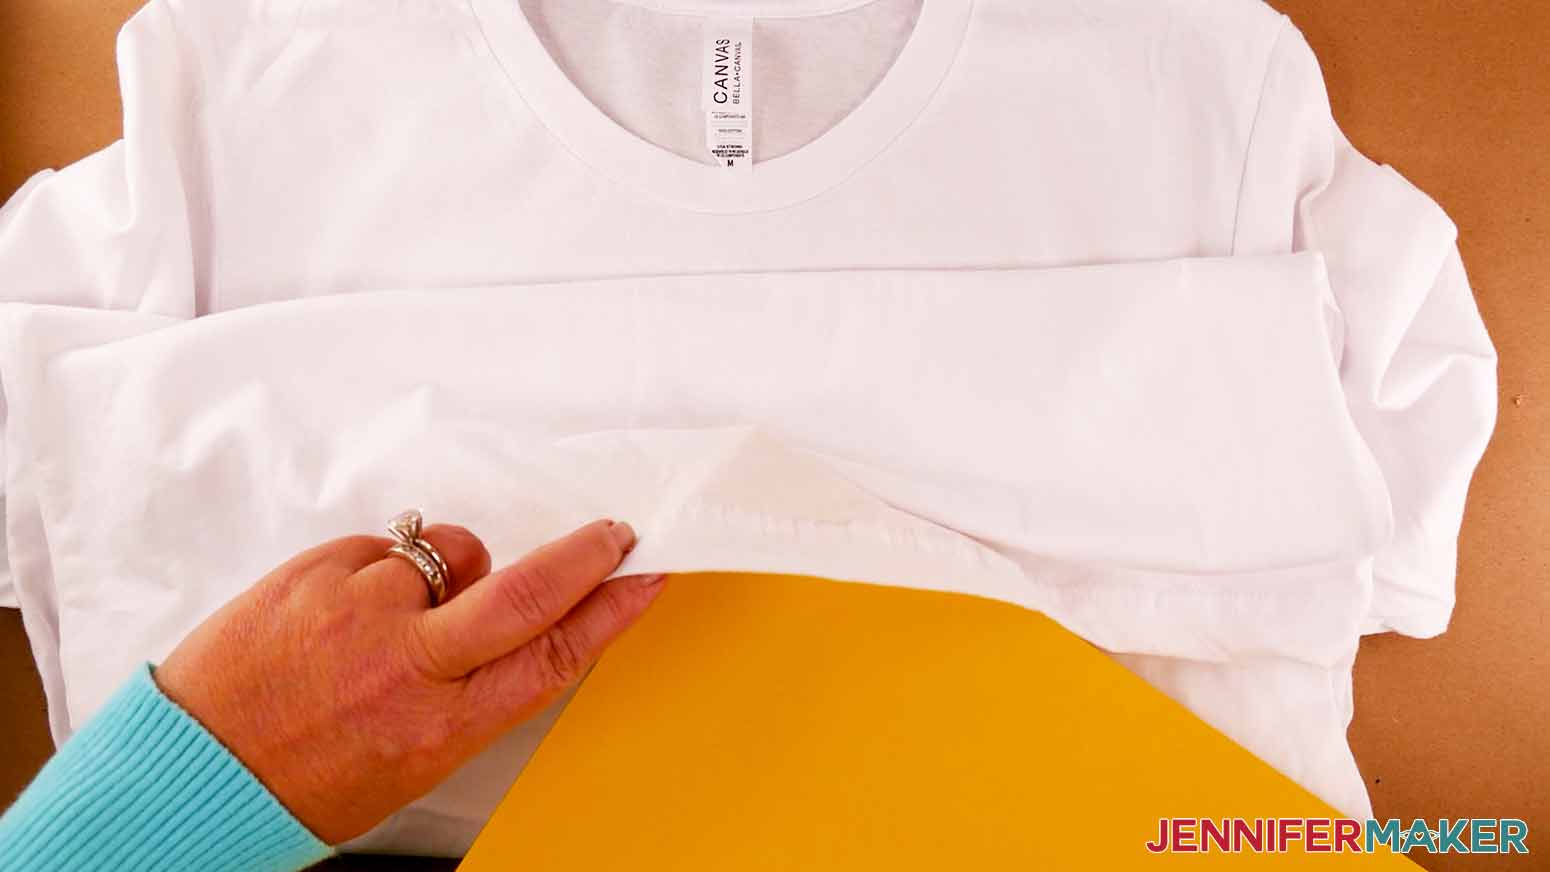
Place your shirt face up on the pressing area and lint roll it to remove any debris. Press the design area at 320°F for about five seconds to make sure it's nice and smooth. Put the large piece of cardstock inside the shirt under where the design will go to add structure and catch any ink bleeding through.
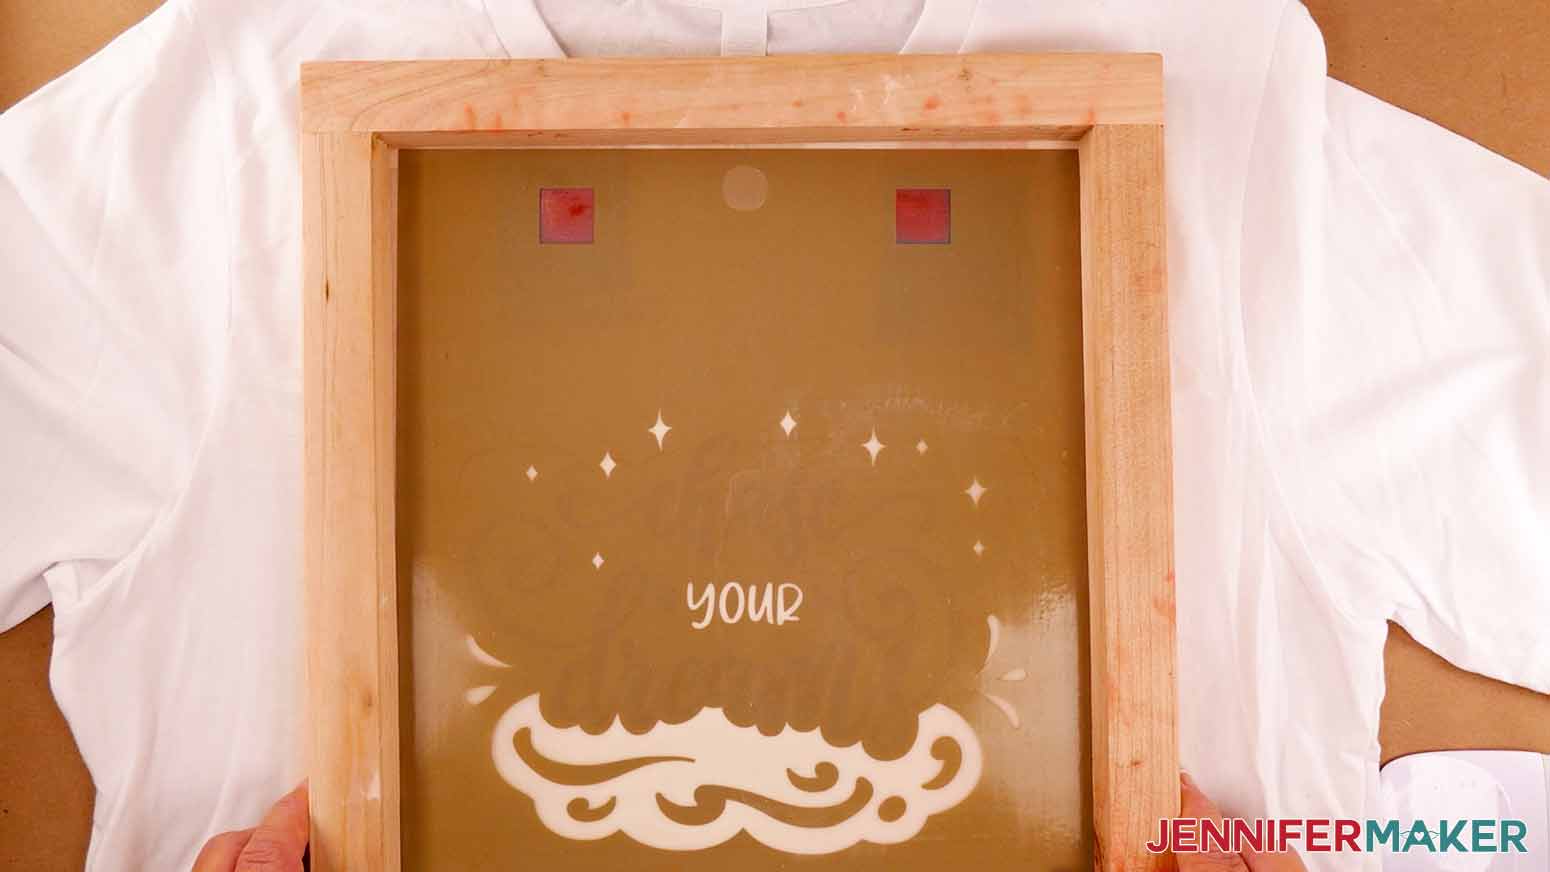
Make sure the fabric is flat, then position your prepared screen where you want the design to be.
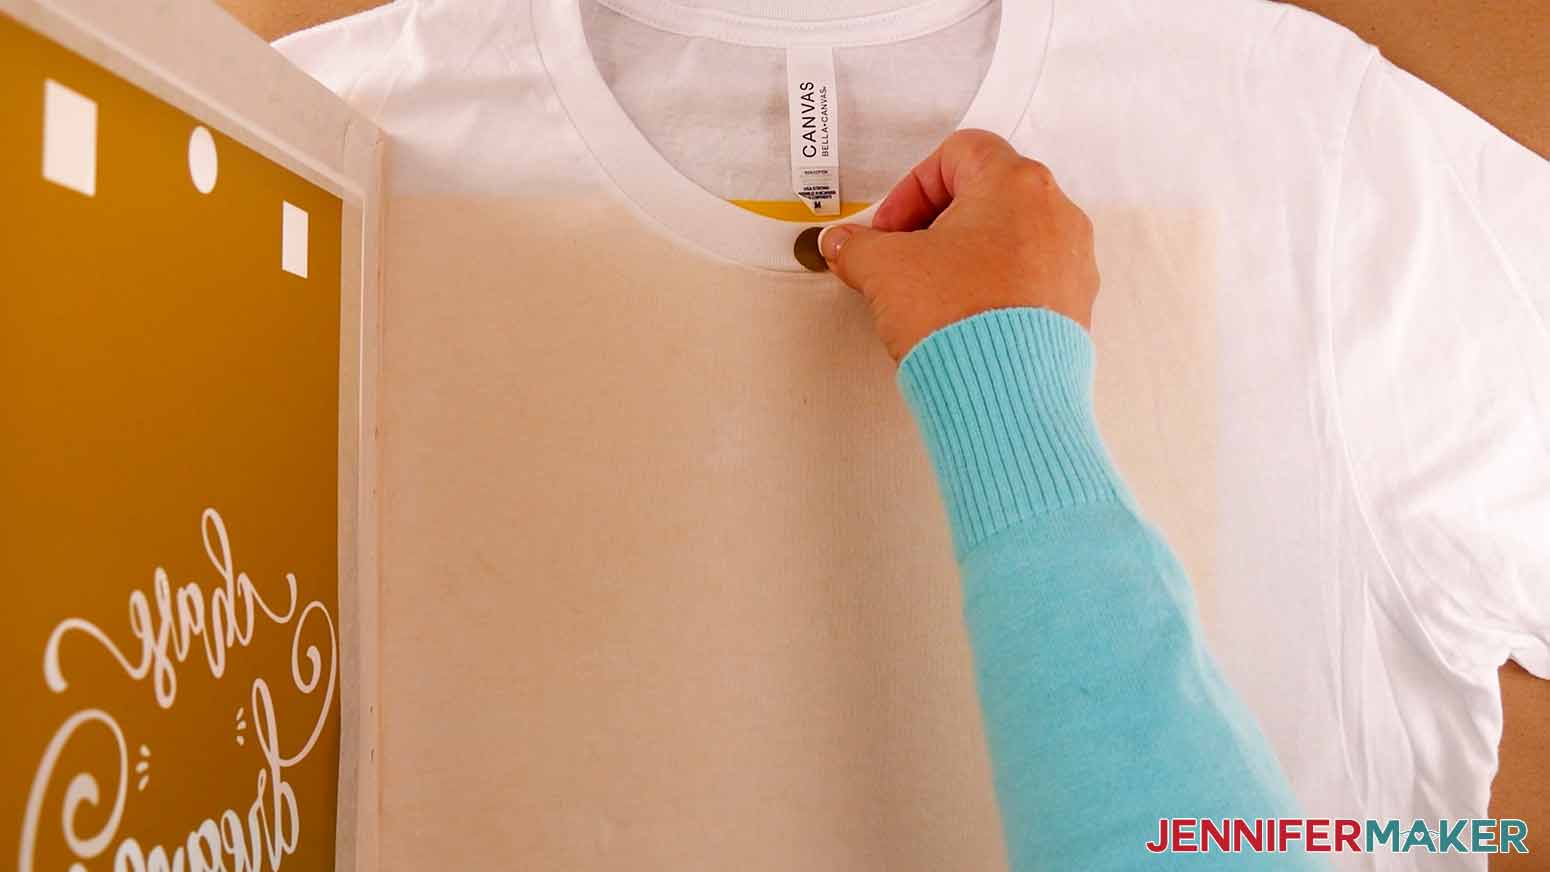
Peel the registration circle cut by itself up like a sticker and place it on the center of the collar.
Now, place the screen down so that the circle on the shirt lines up with the circular hole in the design. That's how we'll keep everything centered.
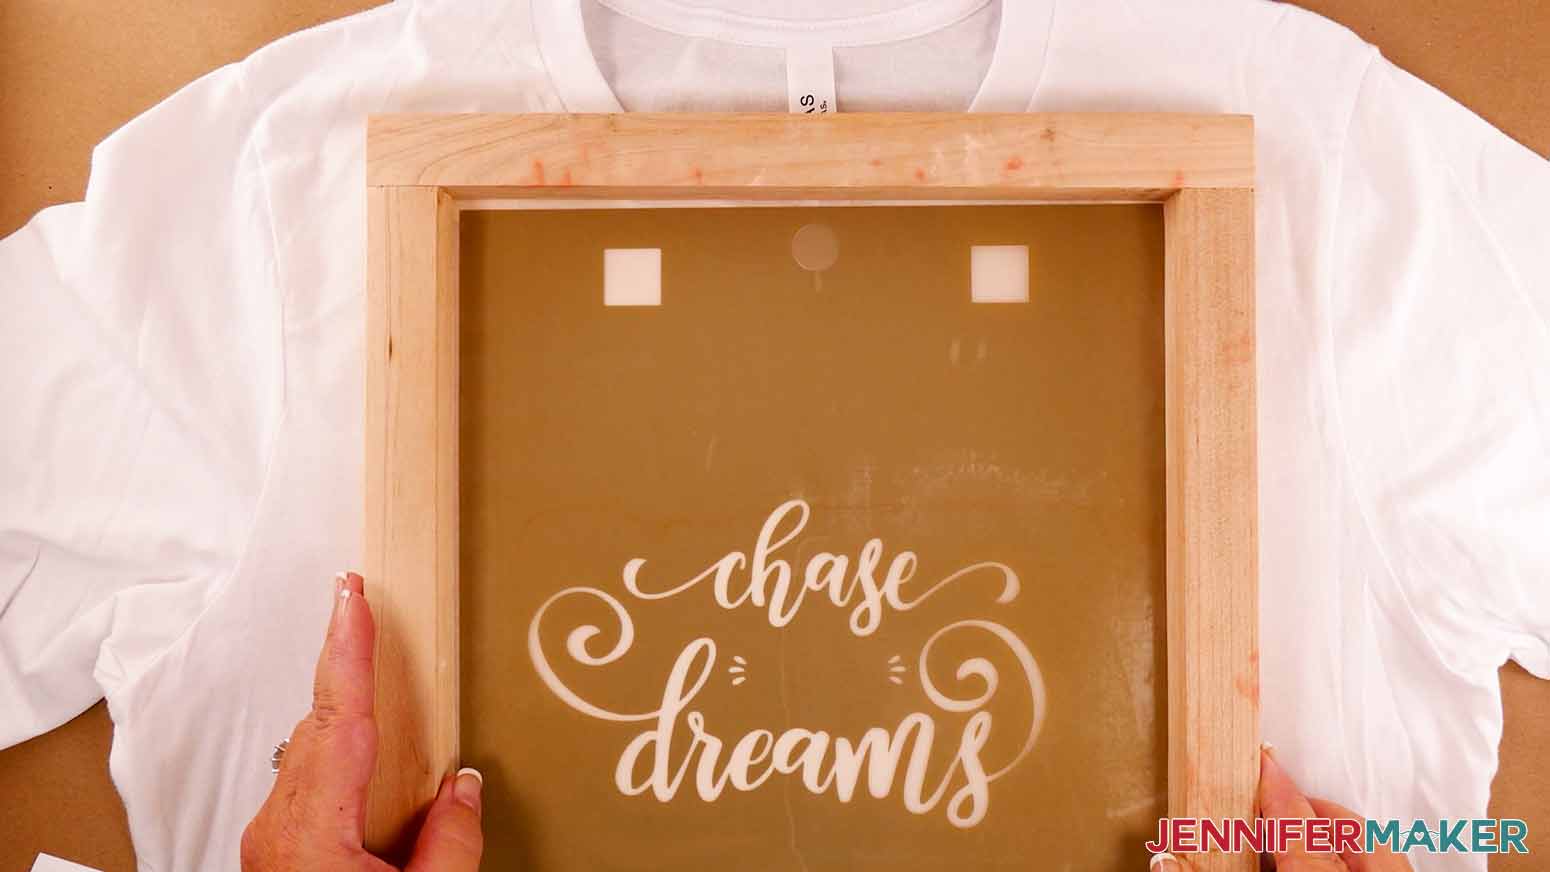
There should be just a thin gap between the shirt and the screen if you gently press on the design. If the screen is not completely level, ask someone to help you hold it flat while you apply the ink.
Slide the two small pieces of scrap paper between the squares on the screen and the shirt. Hold them in place with painter's tape on the fabric. We'll ink over the cut squares during the first layer and use the dried shapes to align the second layer, but the cardstock keeps the color off of the shirt.
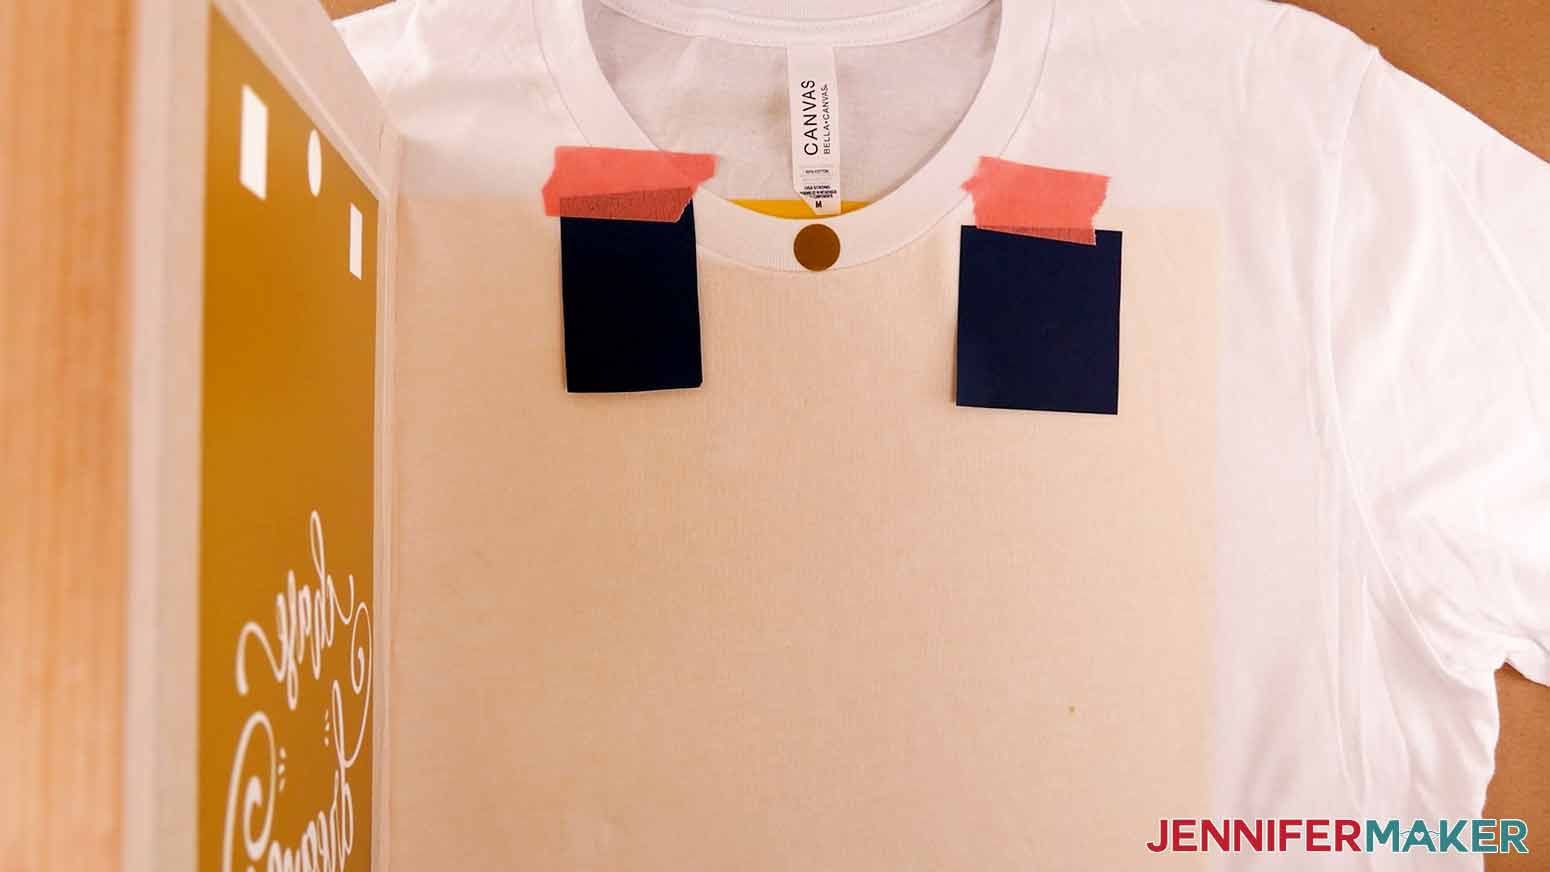
Place a piece of painter's tape over the circle at the top of the design to keep ink from going through.
STEP 6: SCREEN PRINT YOUR SHIRT
If you have several shirts you want to make with the same design, set up the shirts beforehand and repeat the first layer's steps for each one before moving to the next color. Make sure you do not let the working ink dry between shirts.
First Layer
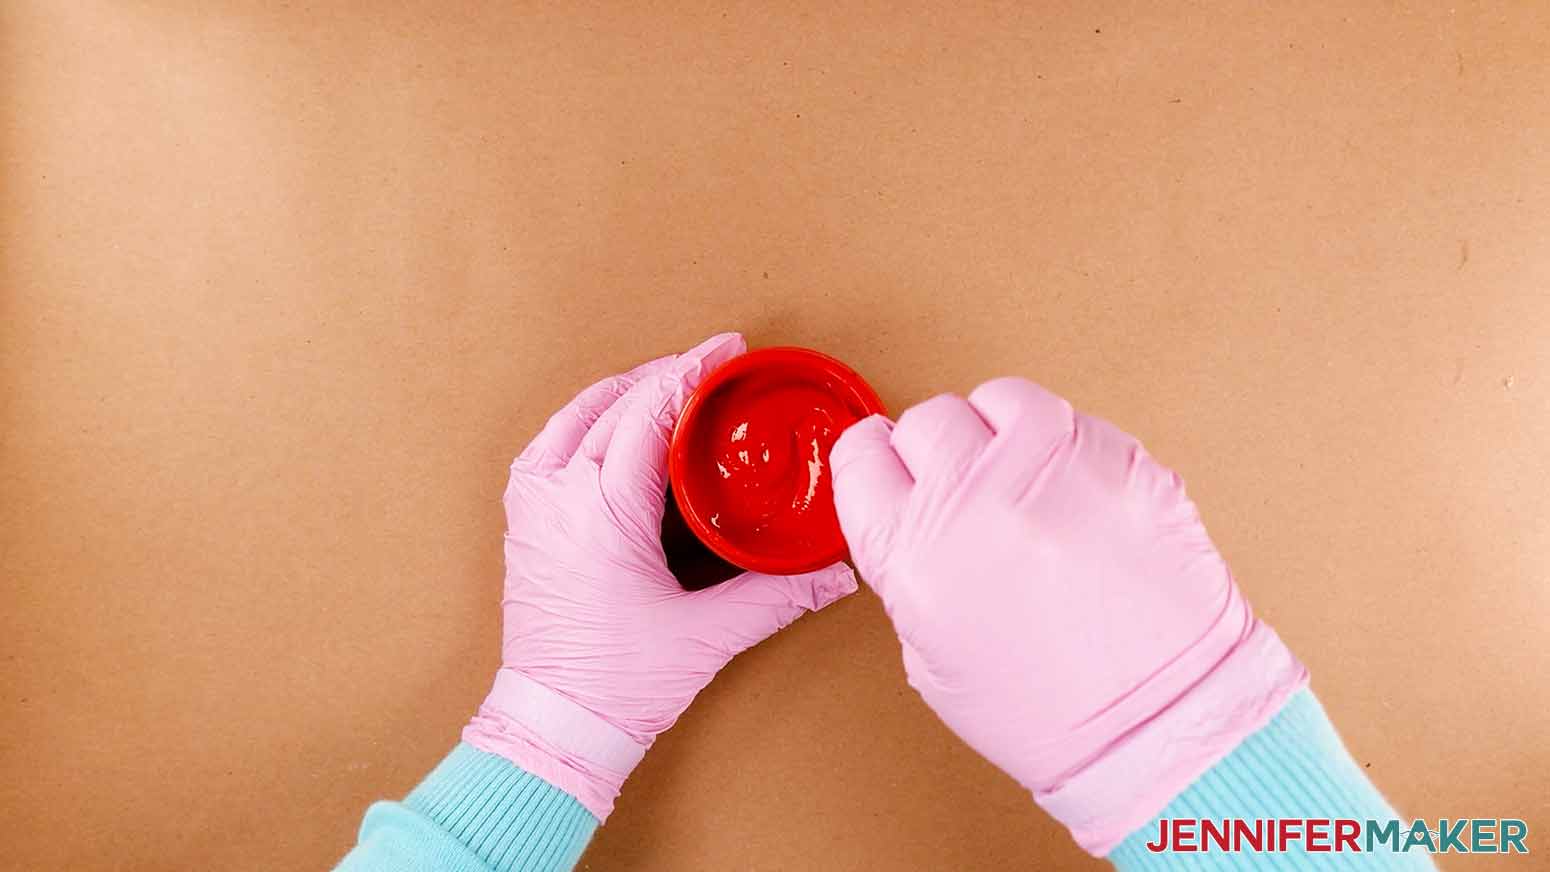
Put on your apron and gloves to open the ink and remove the seal. Stir the ink really well with a stick from your screen printing kit. The ink is very thick and similar in consistency to paint. It should be thick enough that it doesn't readily drip off of the stick, but not so thick that it doesn't flow. And it shouldn't be stringy.
TIP: To thin ink that is too thick, place about two ounces in a disposable cup. Then use an eye dropper to add water, one drop at a time, and stir until the ink has reached the desired consistency. I used six drops, but all ink is different.
Use the stick or a disposable spoon to dollop ink onto the screen just above the square holes. Also add a decent amount of ink across the screen right above the design. More ink is better than not enough -- we can reuse any excess, so be generous! It also helps to spread the ink out evenly at the top.
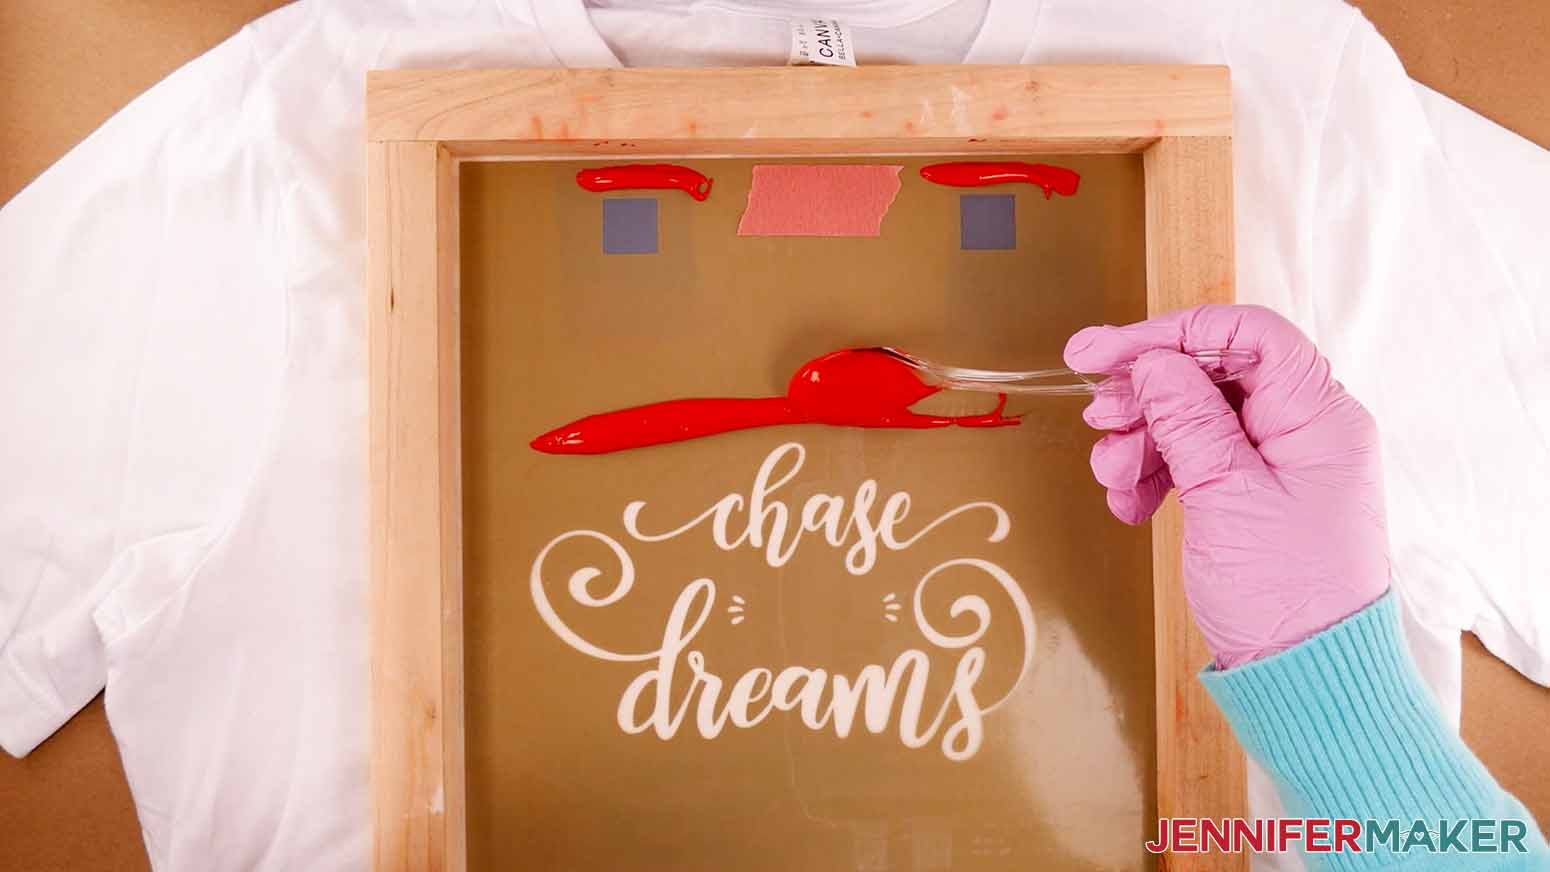
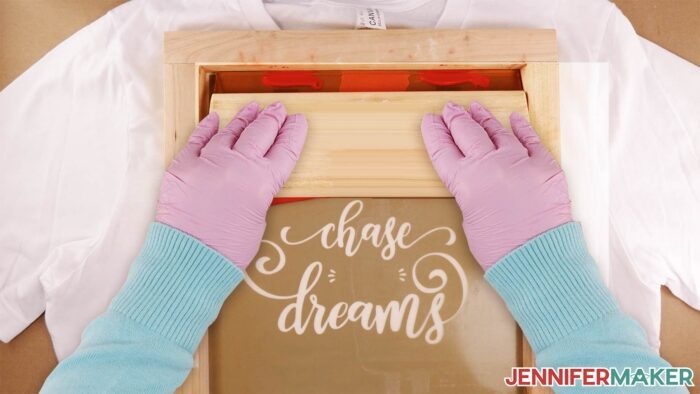
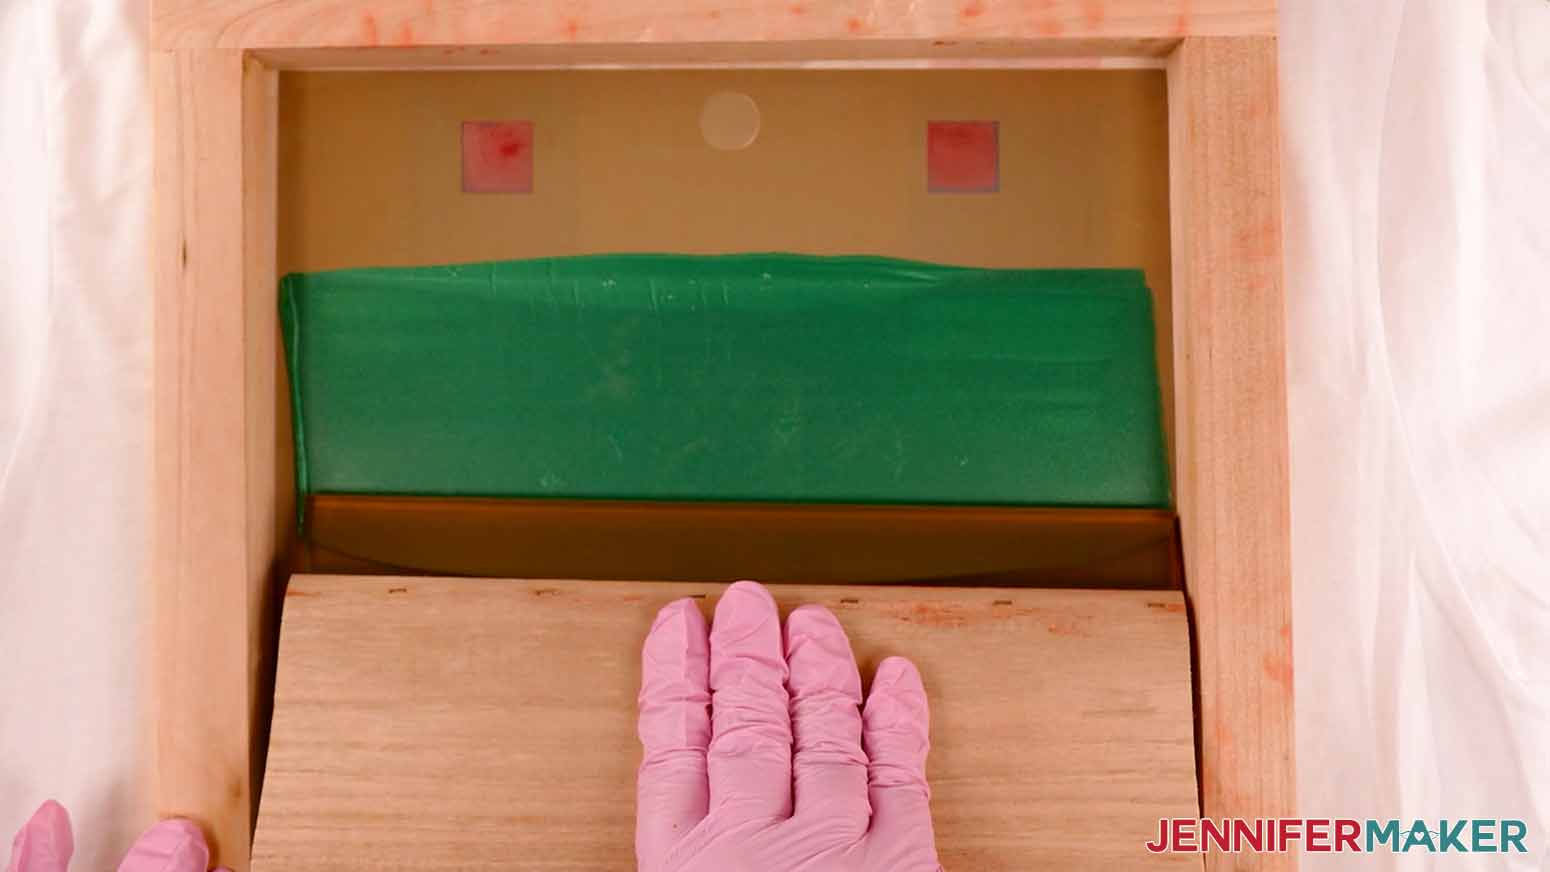
Then, making sure not to jostle the shirt or frame, place the flexible end of the squeegee above your ink spots. Without applying pressure, squeegee the ink toward yourself in a smooth motion to coat the design and squares in a thick layer of ink from top to bottom (don't go bottom to top!). It won't be perfect -- we're just covering the screen with ink, which is called "flooding."
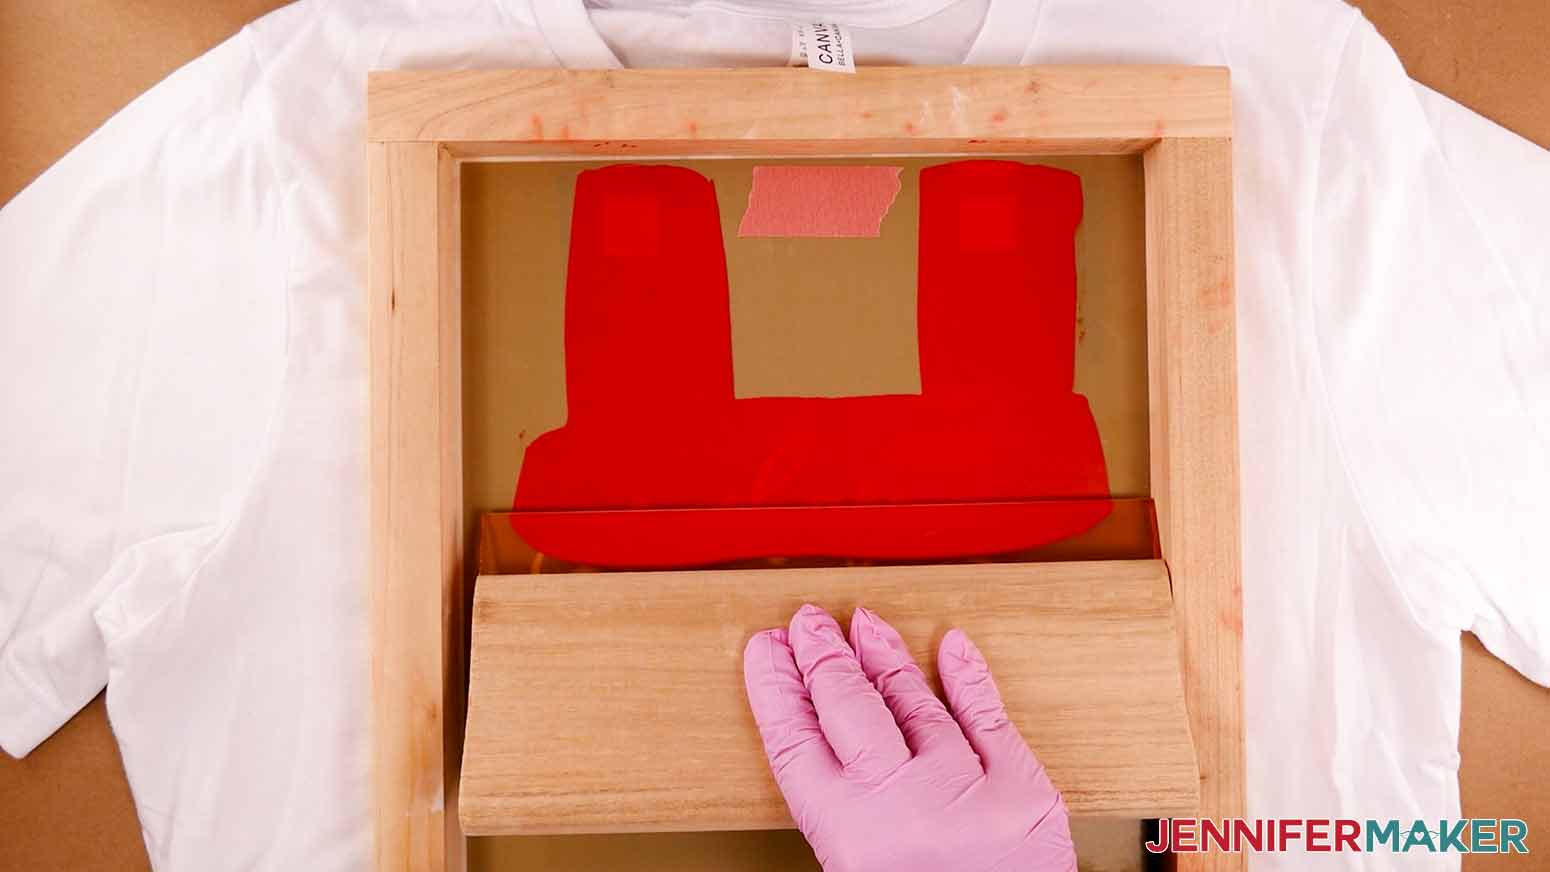
Go back to the top and press firmly and evenly while squeegeeing down to the bottom. You should see a line of ink at the bottom of the frame.
DO NOT use an extreme amount of pressure or not enough pressure. Too much pressure will cause bleeding by squishing ink under the vinyl. Not enough pressure will prevent the ink from going through the screen, and the design won't be even.
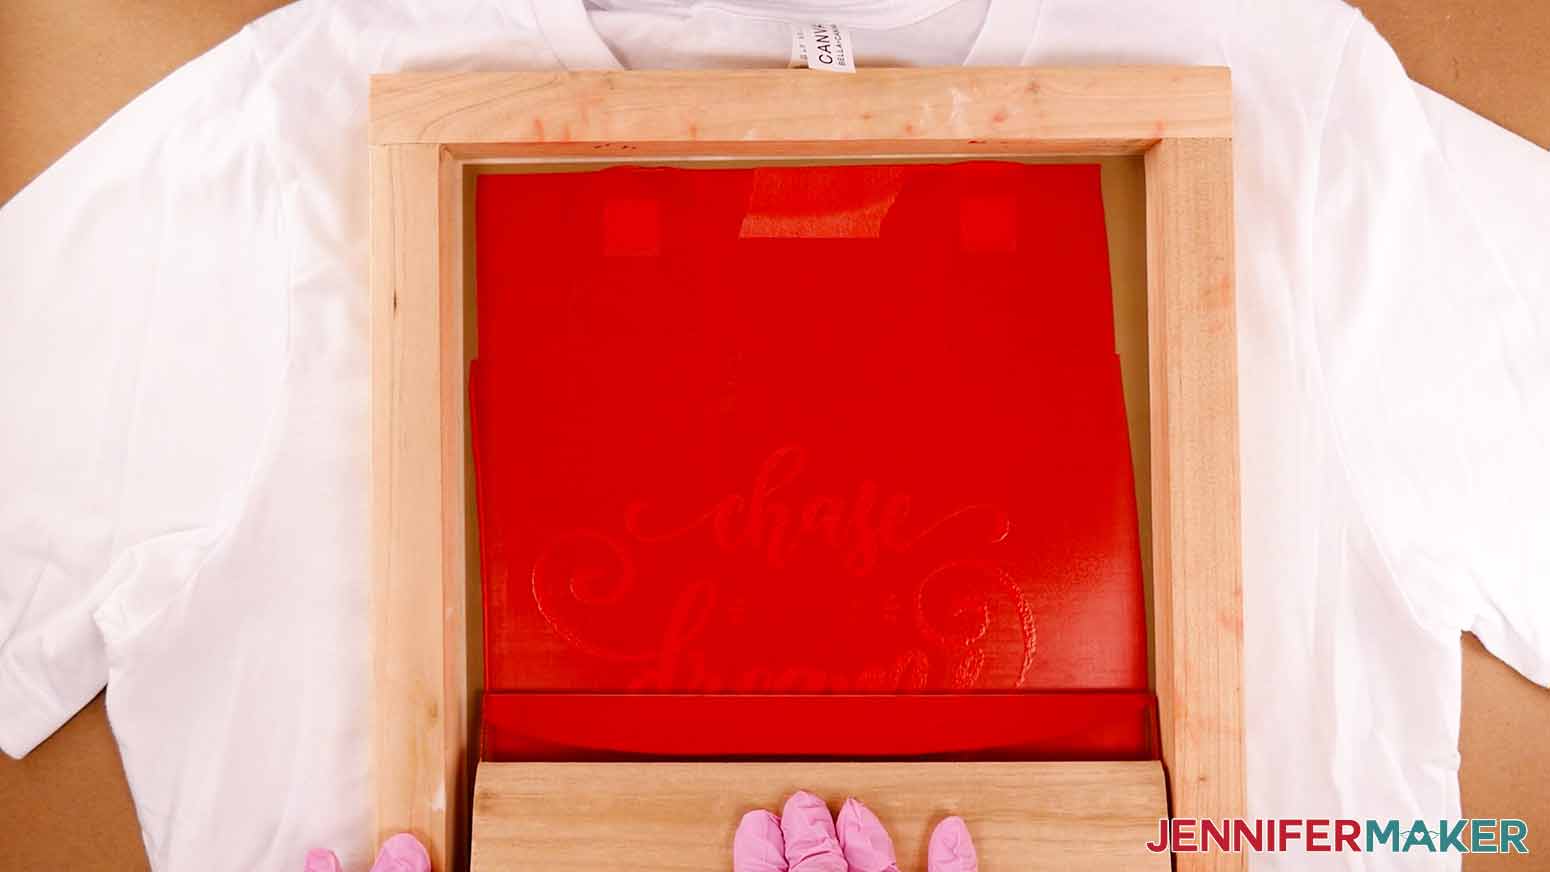
Scoop up some of the excess Ink that is at the bottom, bring it to the top, and squeegee down again.
NOTE: You do not need to include the squares in this process after the first round.
Repeat this step a few times until all areas of the design are thoroughly coated.
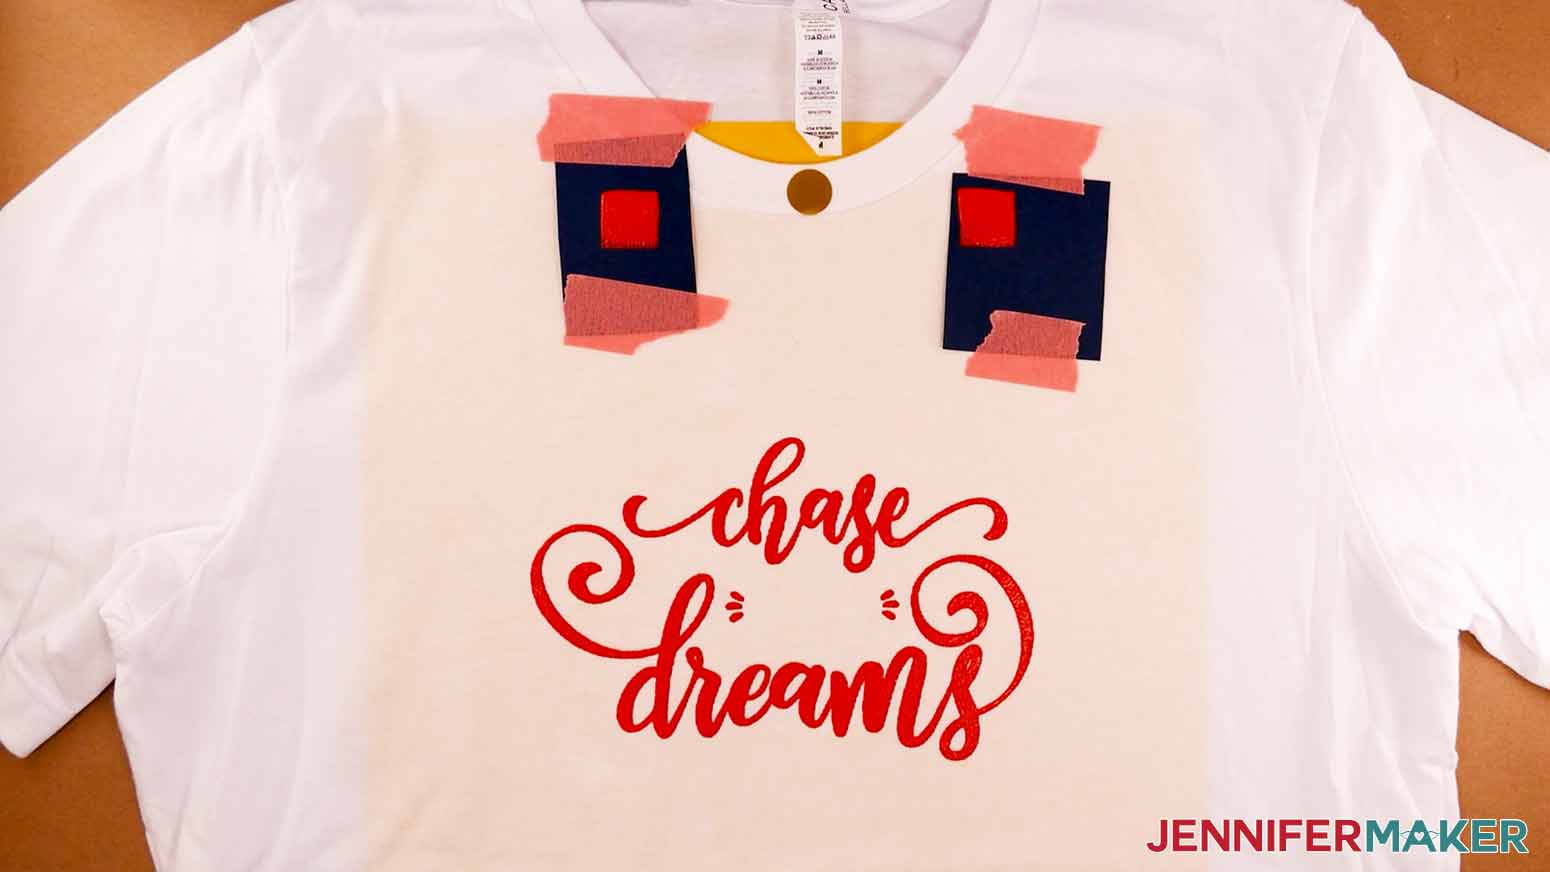
Once you're finished squeegeeing, hold down the top of the shirt with one hand and slowly lift the screen off of it with your other hand. Leave the vinyl circle and painted cardstock pieces in place.
NOTE: If you see that the ink has not been applied evenly to your shirt, and your shirt has NOT moved, you can carefully place the screen back down and squeegee again. If your ink continues to look splotchy, and you're sure you used an even amount of pressure with a completely flat screen, try thinning out the ink again with some water.
The first layer needs to dry completely before you continue. The drying time depends on the amount of ink you applied and your local conditions. The thicker the ink, the longer it will take to dry. It could take anywhere from forty minutes to a few days.
I waited at least an hour before checking if my ink was dry. To test if the ink is dry, check if it still looks shimmery. If it does, it's definitely still wet. If it doesn't shimmer, lightly touch it with your finger. It must feel completely dry before you can add another layer, so wait extra if you can!
Clean Your Screen
IMPORTANT: Do not let the ink dry on the screen.
While the ink dries on the shirt, take your screen, squeegee, and a soft or medium bristled toothbrush to a utility sink or outside to use a hose. Darker inks may color your sink, but I've chosen non-toxic inks so you can clean your supplies outside if needed. Rinse most of the ink from the screen first. Then, peel the vinyl and masking tape off.
Don't dent the screen, but thoroughly scrub it with the toothbrush, rinsing with water to check your progress. If the ink is stubborn, try hot water.
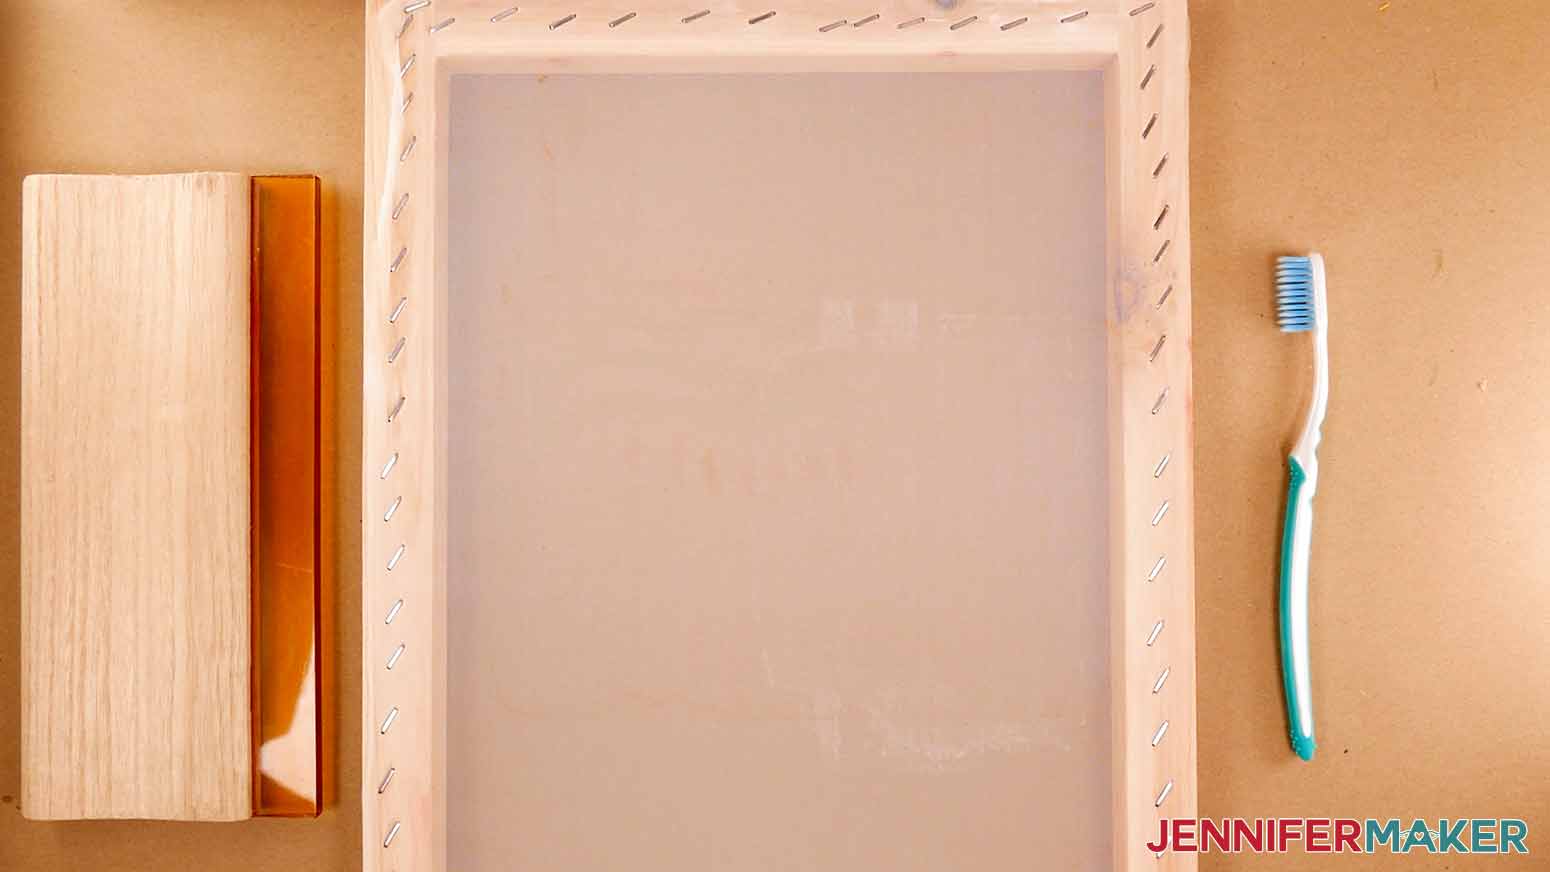
Rinse off the rest of your supplies and set everything out to dry thoroughly before going on to the next color. Mine took forty minutes in the sun on a non-humid day and two hours with a fan in the house.
Second Layer
Once everything is dry, add your second stencil to the back of the screen just like the first layer. You can use the same piece of transfer tape that you saved.
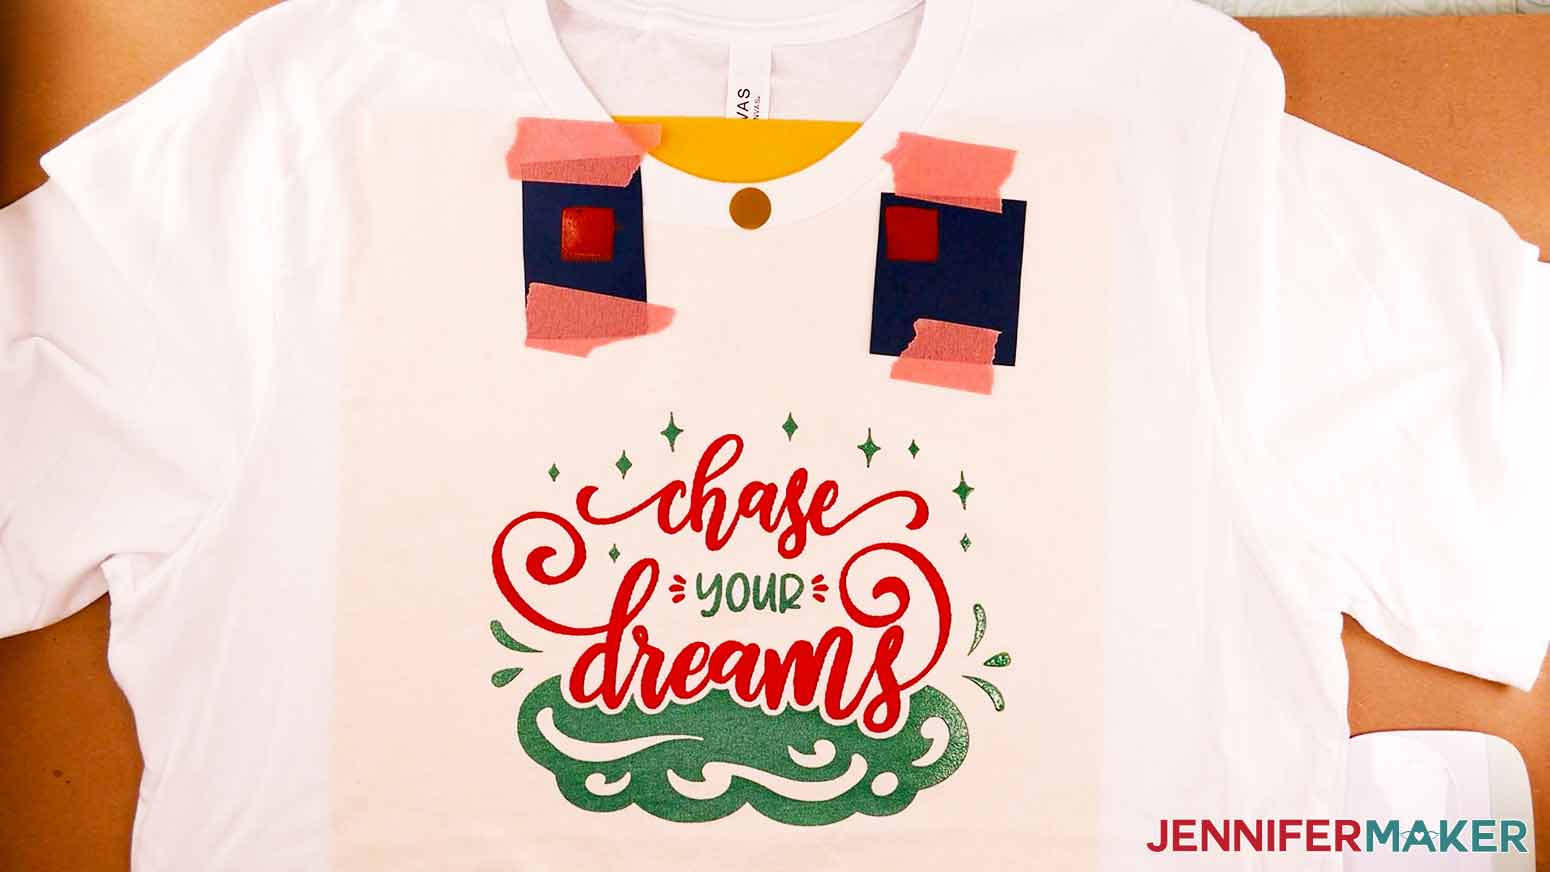
Make sure the shirt is flat and the first layer of ink is dry. Line up the circle cutout at the top of your stencil with the vinyl circle on your shirt, and align the painted squares on your cardstock pieces with the square cutouts on your stencil. Make sure you can't see any of the cardstock around the paint.
TIP: If you used a lighter color of vinyl on your screen, like the gold vinyl I used, you may be able to see your first color's design through the stencil to help you align the layers perfectly on your shirt.
Stir your second color of ink really well and add water as before if needed. Ink consistency varies by color, so you need to adjust each one separately. Dollop a generous amount of ink across the screen just above your design. You don't have to ink over the squares this time. Remember, more ink is better than not enough.
Use your squeegee to flood the screen with ink from top to bottom. Next, go back to the top and press firmly while squeegeeing down to the bottom.
Remember, DO NOT use an extreme amount of pressure or not enough pressure.
Again, scoop up some of the excess ink that is at the bottom, bring it to the top, and squeegee again. Repeat this a few times, just like we did before. Make sure to get all areas of the design thoroughly coated.
Once you're finished squeegeeing, hold down the top of the shirt with one hand and slowly lift the screen off of the shirt with your other hand. Make sure you're happy with the coverage before moving the screen or shirt.
STEP 7: CLEAN UP AND LET THE SHIRT SIT
Set the shirt somewhere safe to dry and clean off your supplies just as before.
The second layer might seem dry after the same amount of time as the first layer, but wait at least 48 hours before heat pressing it to seal the ink.
STEP 8: SEAL THE INK WITH A HEAT PRESS
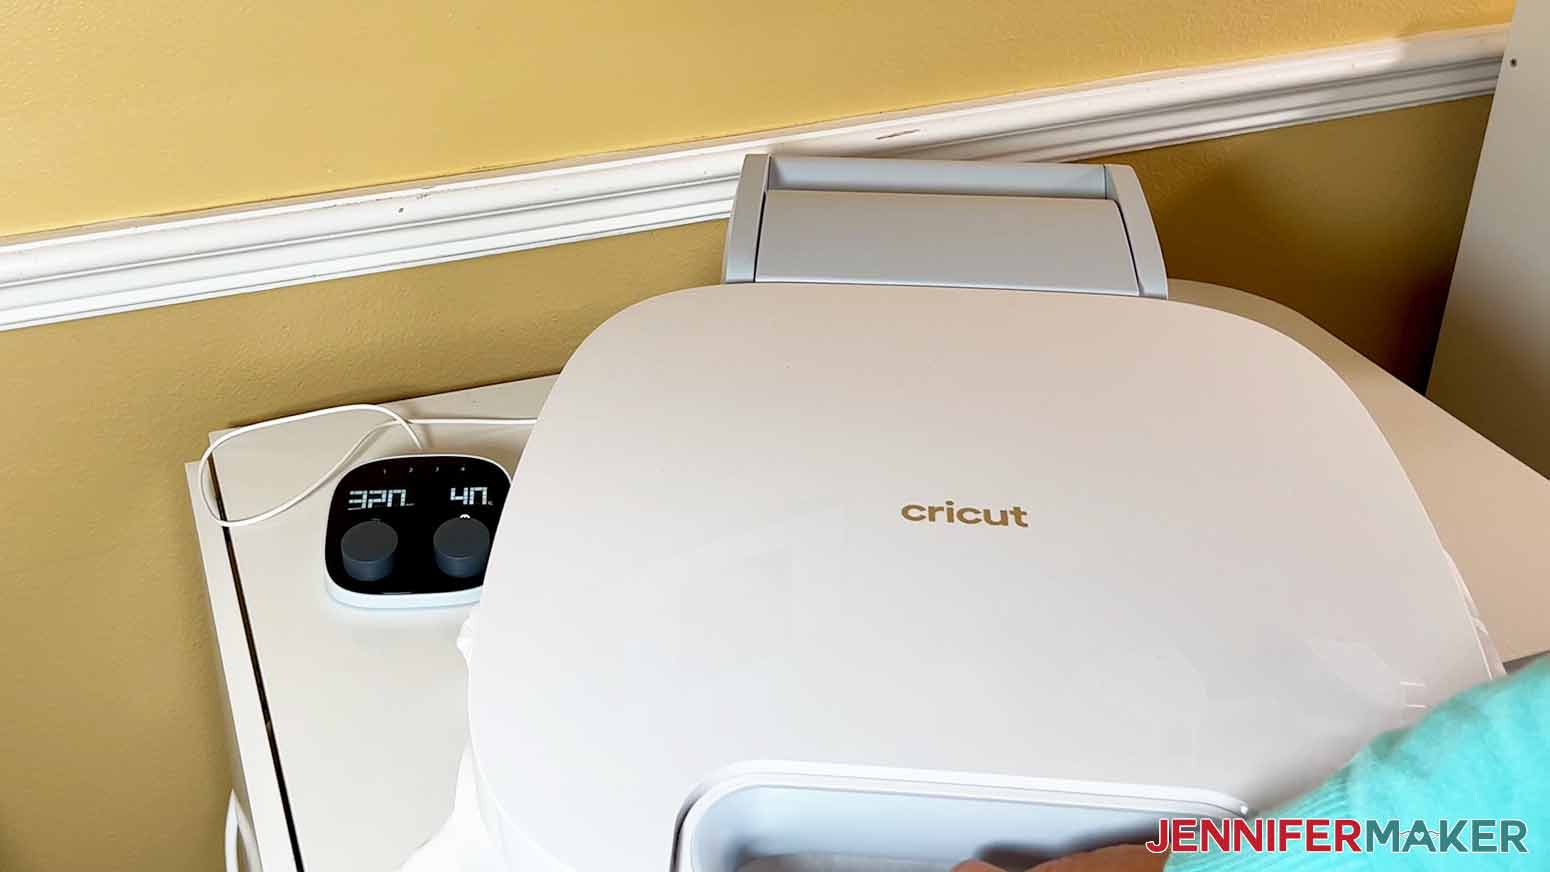
You can use a Cricut EasyPress with a pressing mat or an Autopress to seal the screen printing ink on your shirt. I'm going to use my Autopress.
Set the temperature to 320 degrees Fahrenheit and the time to forty seconds.
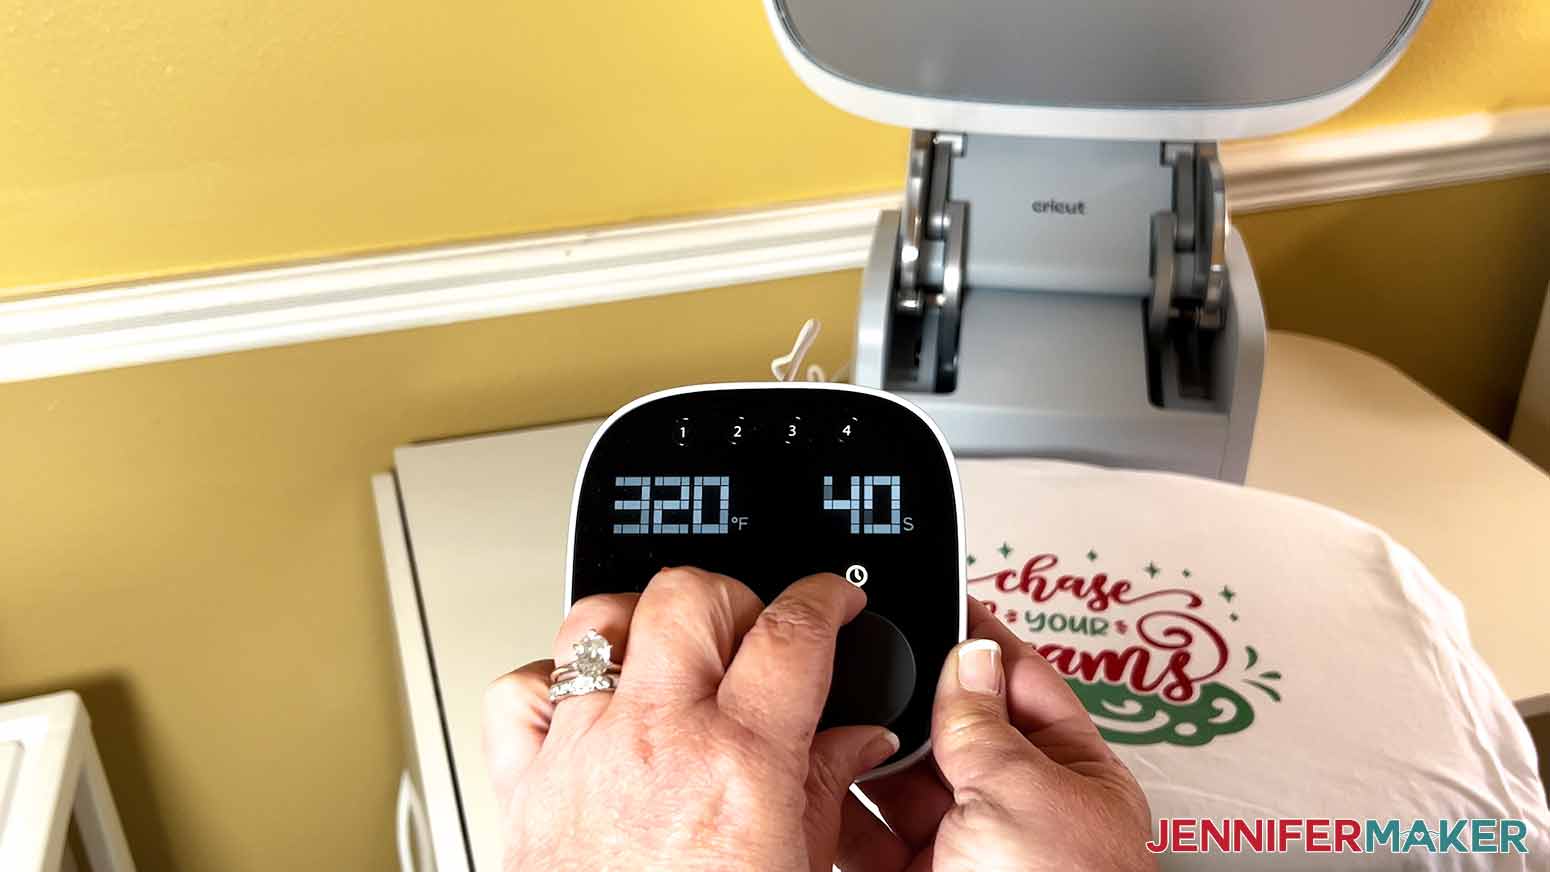
Place a piece of butcher or parchment paper over the top of your printed design to protect your heat plate from the ink. Once your press is ready, press your shirt with light pressure and then give it a minute or two to cool before touching it.
STEP 9: SHOW IT OFF!
You're done! Now you can wear your shirt with pride, give it as a gift, or even sell it! Seriously, it looks just like a shirt you can buy at the store. I just love how easy it is to make these at home. Look at how mine turned out.
To make your design last, wash it inside out with cold water.
Notes
Finished Design Sizes:
Be You Design: 8" wide x 7" tall
Chase Your Dreams Design: 8" wide x 6.3" tall
Happiness Design: 8" wide x 5" tall
Fonts Used:
Berson Dream Script (Chase Your Dreams design)
Falling Leaves Print (Chase Your Dreams and Happiness designs)
Sweetie Almeera Script (Happiness design)
Beachwood Sans (Be You design)
Tingler Script (Be You design)
Splash (Be You design)
Answers to Your Questions About How to Screen Print a Shirt with Cricut
Q. Can you make screen prints with a Cricut?
You can make stencils for screen printed shirt projects with a Cricut, but not printed transfers.
Q. How do you screen print on a Cricut shirt?
Use your Cricut cutting machine to create the stencils you need to apply ink to a screen printed shirt!
Q. Can a Cricut make silk screen?
Yes! Silk screening is an older term for screen printing, which is when you place a stencil on a mesh screen to apply ink to a substrate in the uncovered spaces. Printed silk screen transfer uses the same layering technique, but creates the design on a separate substrate. Then, the printed image is applied to the final project using heat and pressure.
Q. How do you keep multiple colors of ink aligned on a screen print shirt?
We recommend registration marks, which we’ve included in our design, as well as in our blank design. Many thanks to PigskinsAndPigtails.com for sharing their circle registration idea with the world — check out their awesome screen printing tutorial here!
Q. Can you use Cricut heat press on screen print transfers?
Yes, a Cricut Easy Press gets hot enough to apply printed screen print designs to most materials.
Q. What kind of vinyl is used for screen printing?
I used permanent adhesive vinyl because it sticks to the mesh screen better than removable vinyl.
Q. Is vinyl or screen printing better?
Heat transfer vinyl designs are great for custom t-shirts because they take simple materials and not a lot of clean up. But if you want long-lasting results and don’t mind some extra steps, screen printed shirt projects are often more comfortable and hold up to more wear and cleaning.
Q. Can you heat press over screen print?
Yes, you need to heat press a screen printed shirt to set the ink, so I recommend doing that before adding anything else to the garment.
Get my free download of SVG cut files to learn how to screen print a shirt with Cricut here:
If you make a project using my how to screen print a shirt with Cricut tutorial and designs, I’d love to see it! Please share your screen print shirts in my Cricut Crafters & Makers group where you’ll find hundreds of thousands of crafters like you, sharing their tips, projects, and inspiration.
By the way, you’re free to use my free SVG files to create physical items to sell — I just ask that you share that you used one of my designs on your listing or with your product. I wish you luck with your projects and T-shirt business!
Love,

Want to remember this? Save this How to Screen Print a Shirt with Cricut Tools and Materials tutorial to your favorite Pinterest Board!