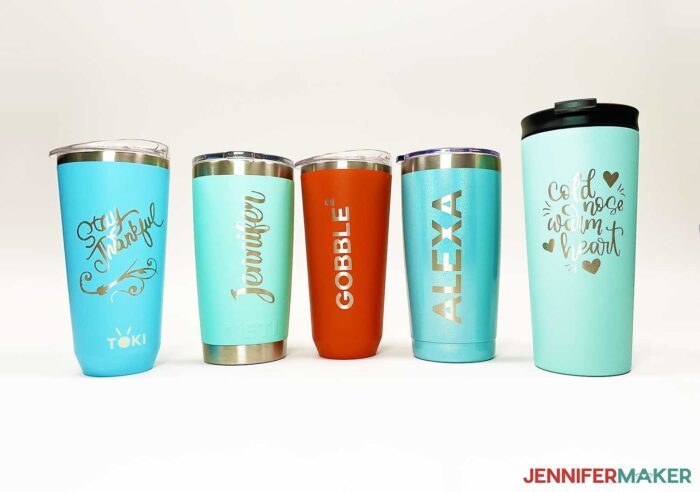
Learn how to etch tumblers with Citristrip and custom stencils!
Custom tumblers are popular craft projects and I know you love them! Sublimation designs, vinyl decals, glitter tumblers–there are so many options we’ve tried! We’ve even etched stainless steel tumblers before, but I always felt they could be a bit more colorful. There are so many beautiful tumblers on the market, how could we customize them with a Cricut? After lots of experimenting, I’m excited to share the safest, easiest, and most reliable ways to etch tumblers with Citristrip! The gel will reveal the metal just where you want it, creating a really beautiful look. I’ll show you how to use my free stencil designs and how to create your own!

This is a Cricut Mystery Box project — it uses the Kelly Green Permanent Vinyl from the Brights Sampler that you can get in the “Aloha” mystery box (affiliate link) that came out October 12, 2022. Even if the mystery box is not available when you check, you can still purchase the individual vinyls, which are all linked below in my material list. Learn more about Cricut Mystery Boxes and their contents in my Cricut Mystery Box Guide.
Making etched tumblers with custom designs takes some experimenting, but I’ve done a lot of the testing for you! With this tutorial, you can etch any of my free intricate designs into the surface of a coated metal tumbler. And your Cricut machine will cut the stencil design perfectly for you!
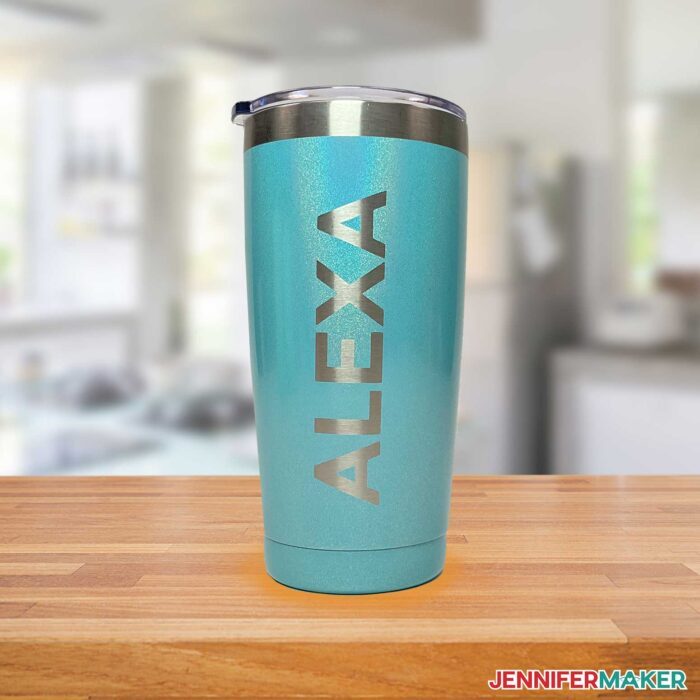
I’ll also show you how to make a custom vinyl stencil from scratch for your etching, like this one I made for Alexa! We’ll cover the simple steps in Cricut Design Space.
I tested a few processes on both matte and glossy tumblers, which are more delicate than the ones with matte surfaces. Citristrip worked very well on both, but the glossy ones were less consistent early on. Eventually, I found the best way to get reliable results involved aluminum foil, a heat gun, lots of heat-protective gear, and a delicate scrubbing sponge. It works great and is much faster than the other process! You can also use the heated technique on the matte tumblers with good results.
My biggest tip is to make sure your specific tumblers will work with Citristrip before. To check, use my included test stencils on the bottom of the tumblers you want to decorate. The test spot won’t be noticeable if it doesn’t work, and it’s great practice before you work with the more intricate designs, too!

Paint stripping is a caustic process and produces fumes, so remember to craft safely! Wear eye protection, a mask, nitrile gloves, and an apron whenever you etch tumblers with Citristrip. It’s best to work with any chemical strippers outside, too.
You can make stencils to create etched tumblers on both Maker and Explore machines, or even a JoyI I cut my adhesive vinyl on a green StandardGrip machine mat using a fine-point blade. Using a brayer to get a good stick is really important, too! You’ll also need Standard Grip Transfer Tape, a scraper, brayer, scissors, a weeding tool, timer, rubbing alcohol, coffee filters, painter’s tape, and lint roller.
Let me show you how to etch tumblers with Citristrip using my free designs! This post contains some affiliate links for your convenience (which means if you make a purchase after clicking a link I will earn a small commission but it won’t cost you a penny more)! Read my full disclosure policy.
Materials to Etch Tumblers With Citristrip
View my Amazon shopping list with the exact items we used to make this project
- To etch a matte tumbler like Toki Powder coated tumblers or a YETI Rambler tumbler, you will need the supplies below and a Blue Scotch-Brite Non-Scratch Scour Pad.
- I found that glossy tumblers like Civago Gloss and Gradient Tumblers worked better with the second technique described, which also requires a Heat Gun, Aluminum Foil, Heat Resistant Gloves, a Sillcone Fire Safe Mat, and a Scotch-Brite Delicate Care Scrub Sponge instead.
For either type of tumbler, you will need:
- Citristrip Stripping Gel with Foam Brushes, a Paint Tray, a Bucket, and access to water
- Safety equipment including Protective Eyewear, a N95 Mask, Nitrile Gloves, an Apron, and Butcher Paper
- Cricut Permanent Adhesive Vinyl (any color, but I used kelly green and recommend darker colors that contrast with your tumbler) and Cricut Standard Grip Transfer Tape
- A method to cut your vinyl, I used the amazing Cricut Maker 3 but you can also use the Cricut Maker, Cricut Explore 3, Cricut Explore, or the Cricut Joy if you make a small stencil — you can use the standard fine point blade for this project and a Cricut Green StandardGrip Machine Mat, 12″ x 12″
- Tools including a Scraper tool, Scissors, Weeding tool, Timer, Rubbing Alcohol, Coffee Filters, Painter’s Tape 2″ wide, and Lint Roller
- Design #438 (My free SVG/PDF/PNG design files are available in my free resource library – get the password by filling out the form at the bottom of this page)

How to Etch Tumblers With Citristrip
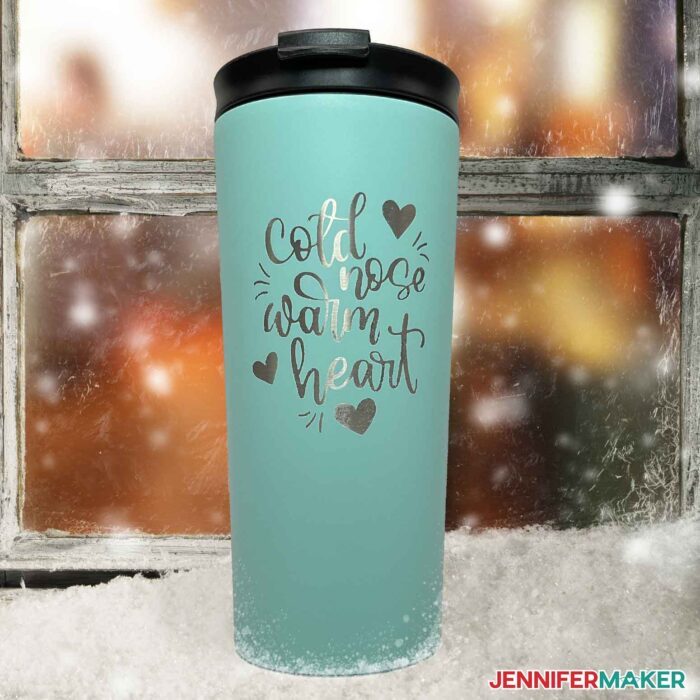
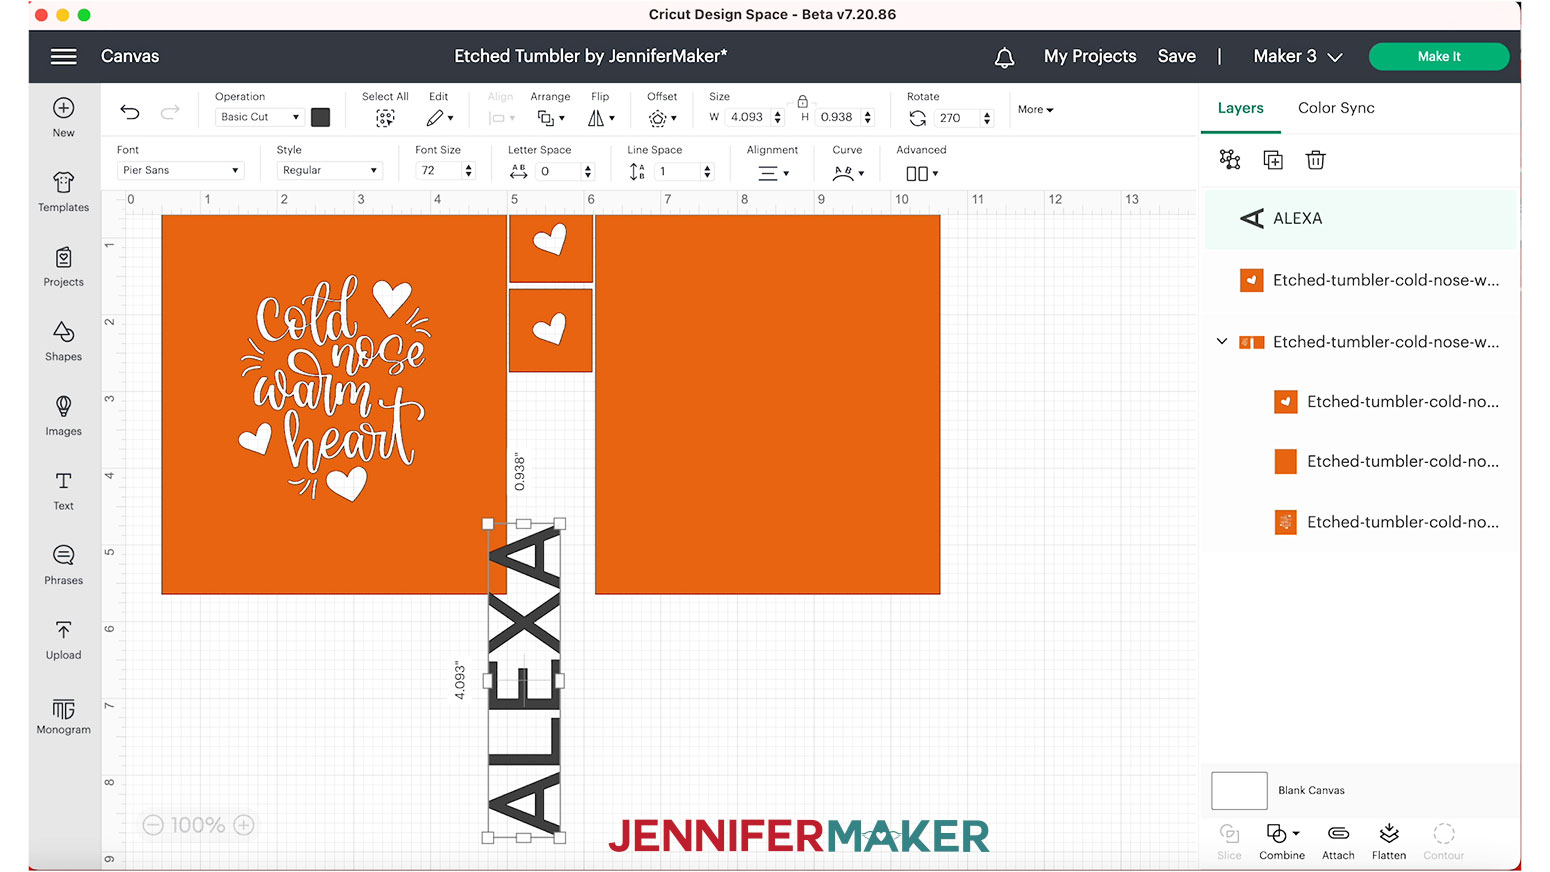
Learn to etch tumblers with Citristrip and vinyl stencils! First, download my free Etched Tumblers with Citristrip SVG/DXF/PDF templates from my resource library --it's Design #438. Each file also includes a heart shape for testing your etching cream and a blank rectangle to create a custom decal. You can cut the printable PDFs by hand, but I'll show you how to prepare and cut the Cold Nose Warm Heart SVG with a Cricut. The steps are the same for the other designs. Upload the SVG design file of your choice to Cricut Design Space and add it to your Canvas. Here is how my Cold Nose Warm Heart file looks on the Design Space Canvas. You can zoom in to see more detail by clicking on the plus (+) sign on the lower left. Resize the template only if you are using an item so small that the stencil wraps more than a third around the object. If you need to change the size, make sure the lock icon at the top is closed to maintain the design proportions. I'll also show you how to test Citristrip on the bottom of your cup with the included heart piece. The blank rectangle is in case you want to make a custom stencil, so use the eye icon in the Layers Panel to hide it if you don't plan to create one. I'll leave it visible as we'll make both! The design is ready to cut! Variation: Add a Custom Name It’s pretty easy to create a custom name stencil to fit a tumbler! We’ll use the blank rectangle next to the Cold Nose Warm Heart design as a reference. Next, click the Text icon on the left hand side of the screen. A box with “Text” highlighted in it will appear on the Canvas. Without clicking anything else, type in the text you want. I’ll add “Alexa” in caps. I used Pier Sans Bold at 72pt to achieve a name no longer than 4.5" using the name 'Alexa'. You may have to resize the letters depending upon how many letters are in the name or phrase you are creating. You can then rotate your name in Design Space vertically at 270 degrees, or just design it horizontally, and then apply it to the tumbler vertically. Move the text over the template and resize it to fit with a corner of the bounding box to be as close to the Cold Nose Warm Heart's height dimension and fit nicely inside of the blank rectangle. Select the text and decal shape then using Align, and Center helps get it in the right position fast. Now select both the blank stencil and the text, and click Combine below the Layers Panel, then choose Exclude. This creates the stencil with the negative space you need for your etching gel. If you only want to make the custom design, hide the Cold Nose Warm Heart stencil, but I’ll leave it. If you are asked if you are cutting your designs without a mat, on a mat, or multiple ways, select "On Mat" and "12 x 12." If you are using Smart Vinyl, you would select “Without Mat.” Click "Confirm." On the Prepare screen, keep the "Material Size" at 12" x 12". Click Continue. On the Make screen, set your Base Material to "Permanent Vinyl - Glossy" and set the Pressure at "More" When the cut is complete, unload the mat. Flip it over on your work surface and gently roll a corner back to release the vinyl. TIP: If you have any trouble cutting the vinyl, check out my Cricut Tips & Tricks for Cleaner Cuts. Now, it is time to weed! Stencils require the opposite weeding approach (reverse weeding) from traditional vinyl projects. Since we want the Citristrip to create the design, we need the vinyl to protect the area between, and around our phrases. Cut a piece of Standard Grip transfer tape slightly larger than the test shape. Remove the backing. Hold the transfer tape in the shape of a taco, or a "U" shape. Then put the bottom of your “taco” onto the middle of your decal. Smooth the tape over the shape from the center outward to minimize wrinkles and bubbles. Repeat for the other tests if you're doing more than one. Flip your decal over and remove the paper backing from the vinyl. If your stencil is still sticking to the backing paper, replace the transfer tape and burnish again. Use caution as to not touch any part of the adhesive backed vinyl. The oils from our fingers degrade adhesion and will not create a well-applied stencil. Shake your Citristrip really well before you open it. If you have a lot of trouble or tear the design, re-cut it in a darker color as the imperfections are easier to see in them. Again, put some Citristrip in a paint safe disposable, or glass bowl. Use a small foam brush to apply a thick layer on top of the open areas. Always use a foam brush and nothing with harder bristles or rollers that could affect the stencil's application stability. Brush it thoroughly in all directions for 1 minute. No need to over-do-it, or use too much. If it looks good, get ready to rinse and scrub the cup! Dispose of the waste water safely according to your local guidelines. Once the image is clear, remove the stencil, rinse the tumbler, and let it dry.
Etch Tumblers with Citristrip
Materials
Tools
Instructions
STEP 1: GET MY FREE ETCHED TUMBLERS DESIGN FILES
There are three files in the SVG folder for you to chose from:
Cold Nose Warm Heart
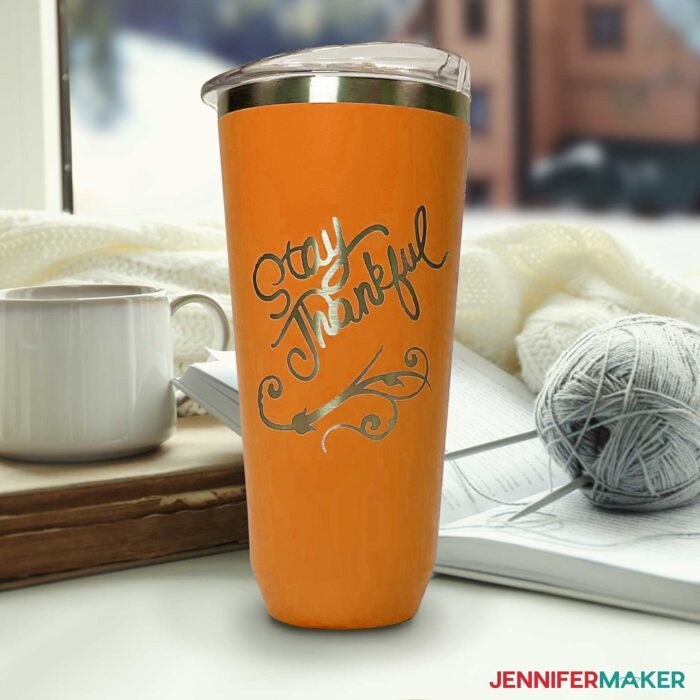
Stay Thankful
Gobble²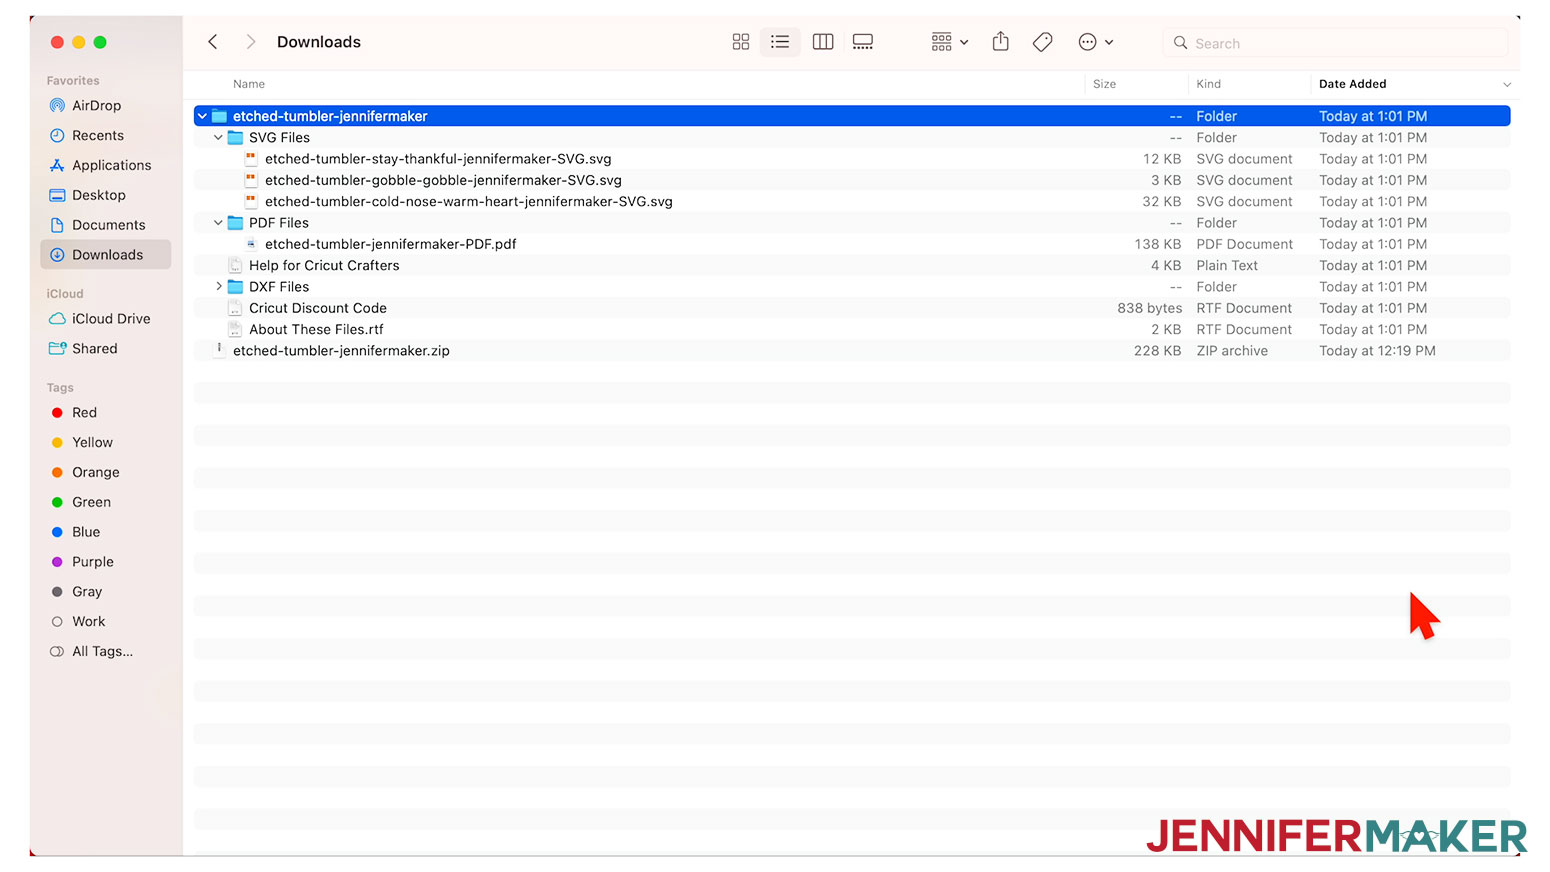
TIP: If you are not sure how to upload an SVG cut file to Cricut Design Space, watch this helpful video training series I made. If you are on an iPad or iPhone, here is how to download and upload SVG files to the Cricut Design Space app.
STEP 2: PREPARE THE DESIGN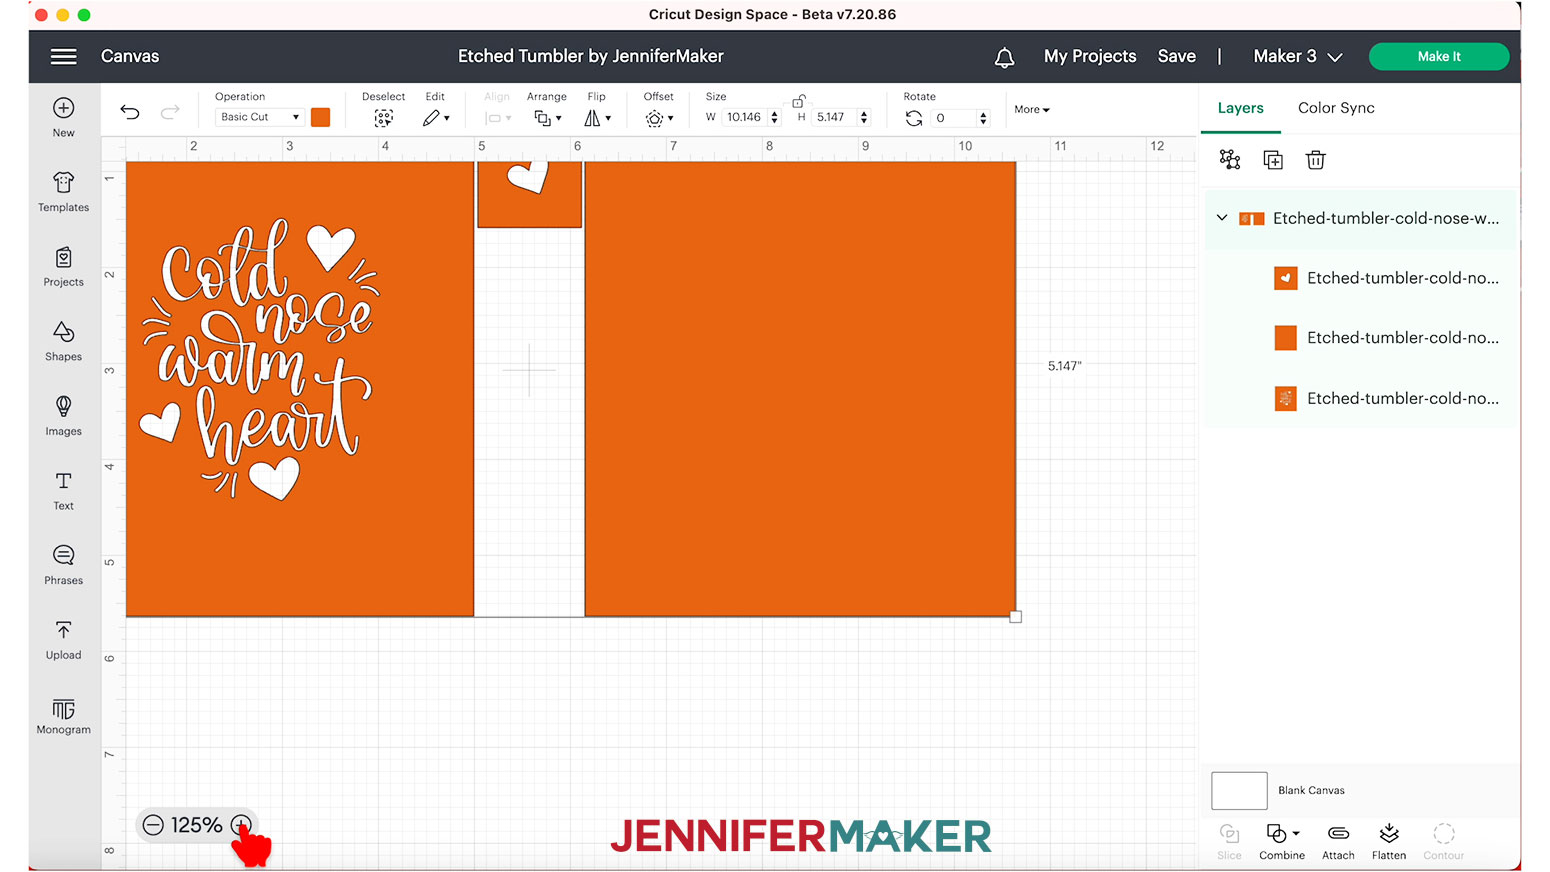
The designs are sized to use on any of the 20 oz or 16 oz tumblers in my material list.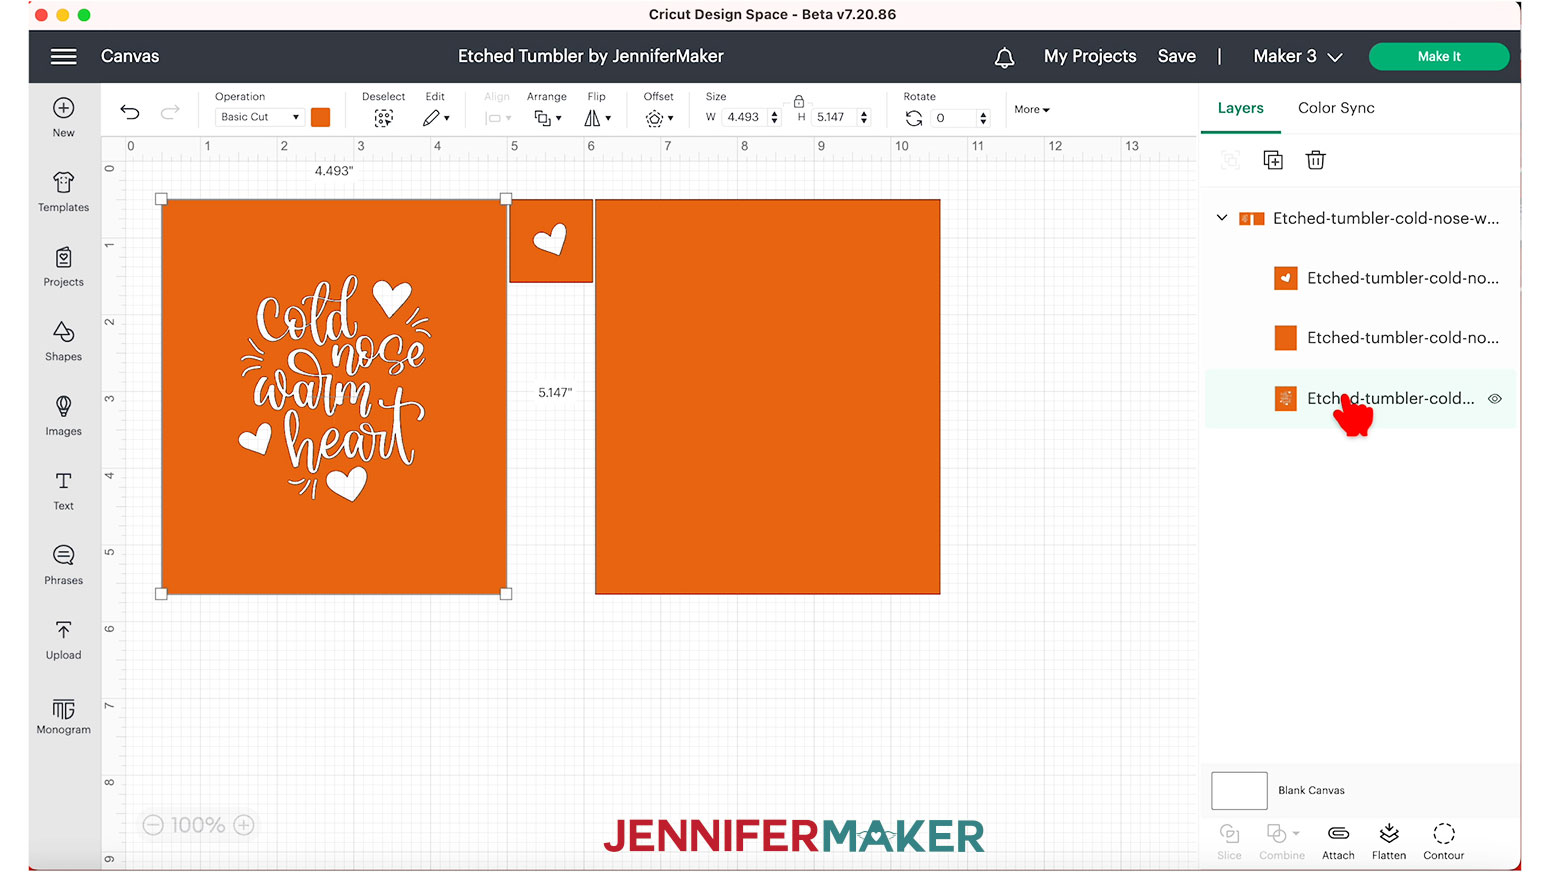
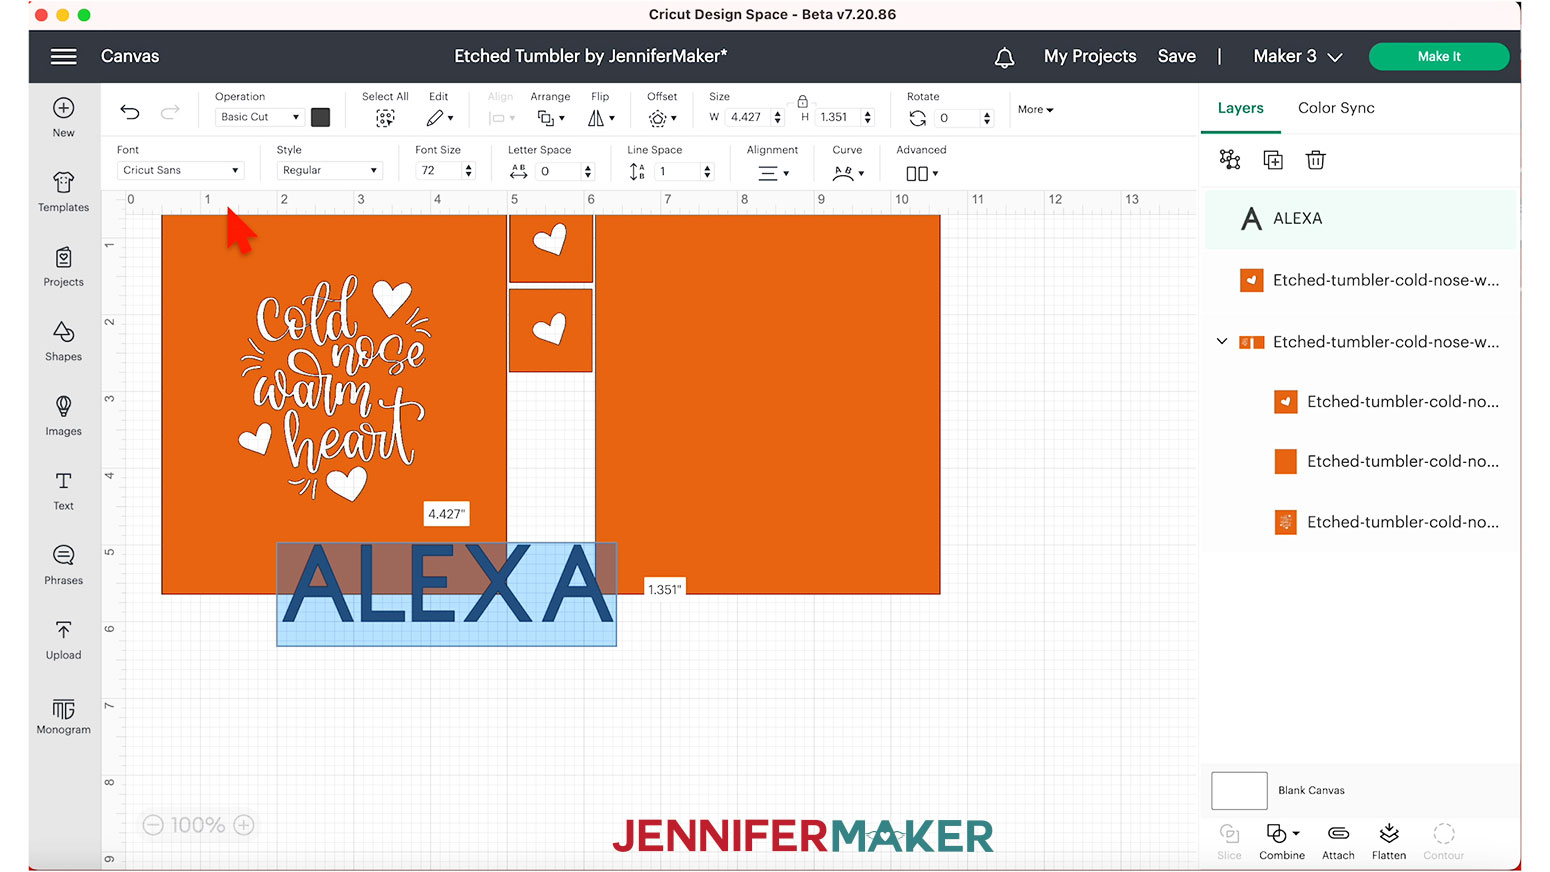
Click the box that says “Cricut Sans” under Font, in the top menu, to see your font options. I’m going to use the font Pier Sans Bold, which you can download from the designer’s site for personal use. Remember to click the System section to find fonts you’ve downloaded.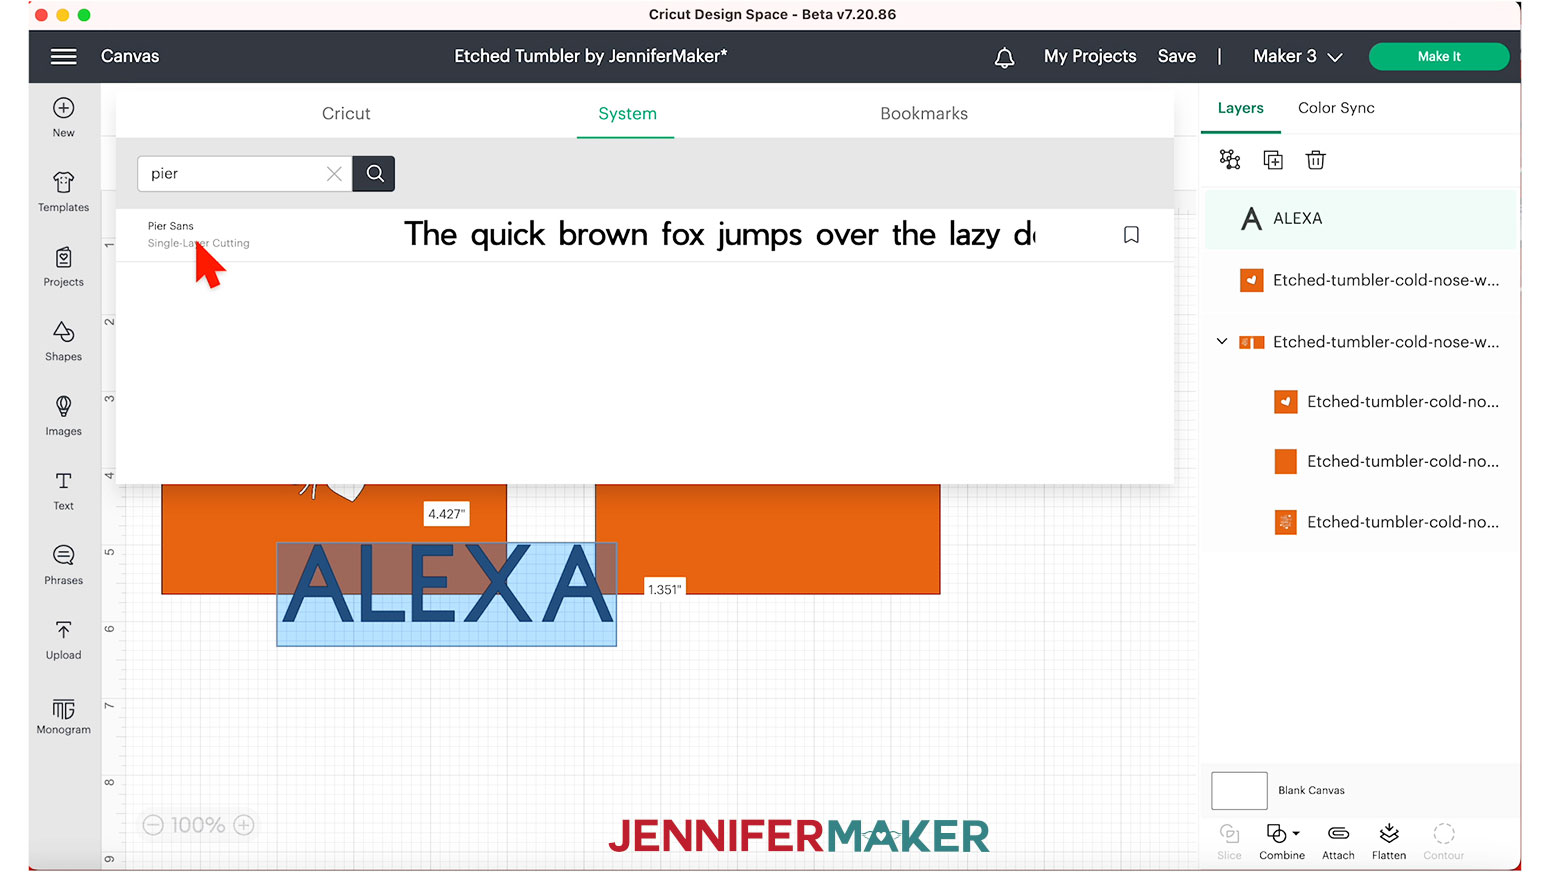
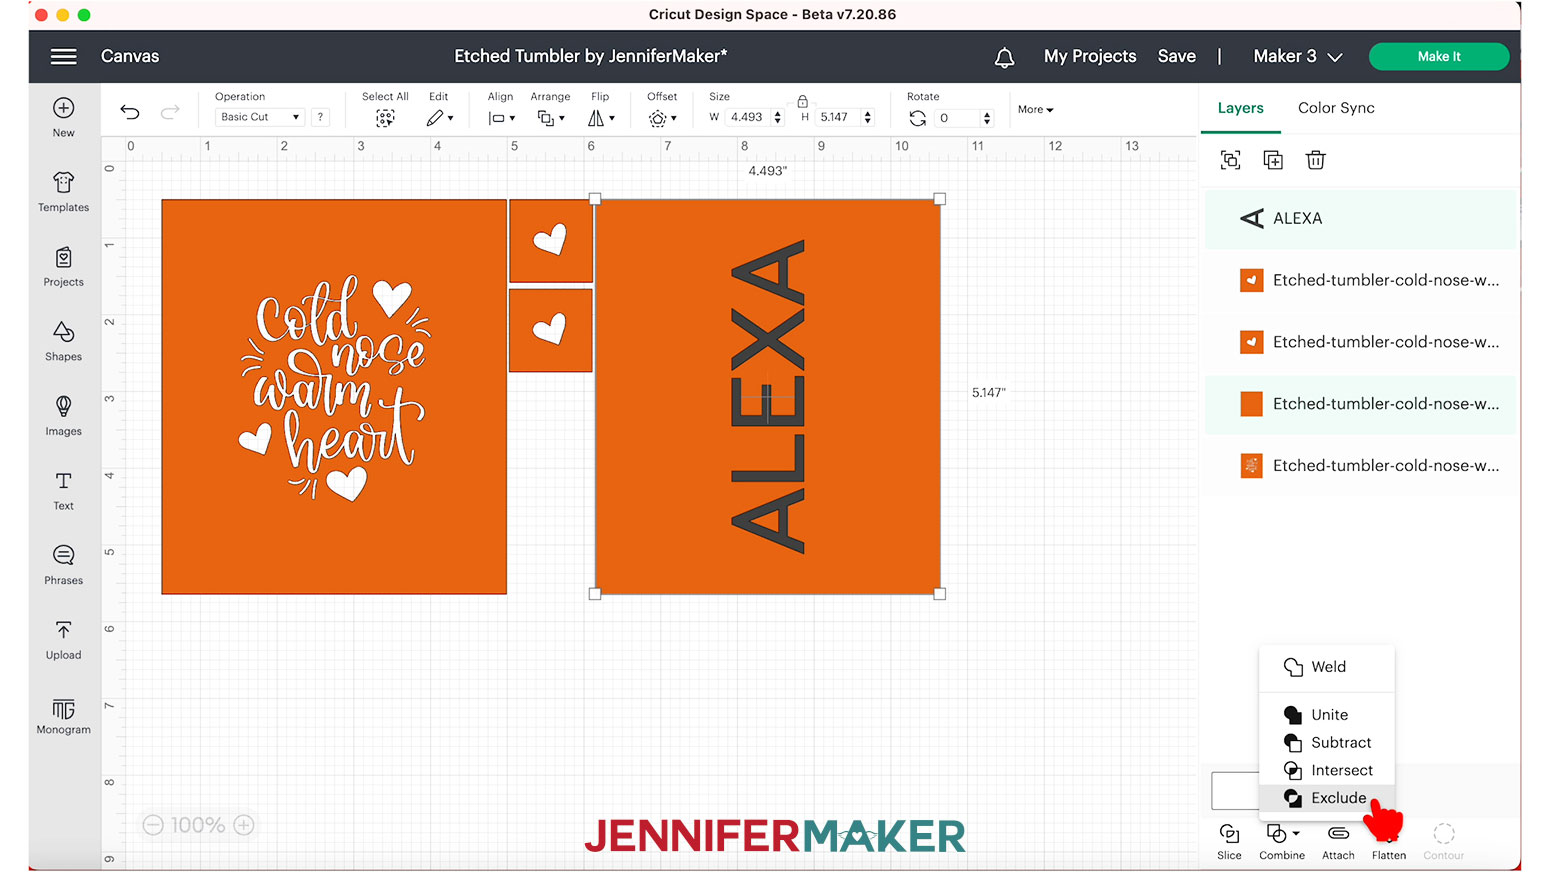
Note that you could also use Slice instead, but using the Exclude feature under Combine is faster AND it means you can undo it later if you decide you don’t want that design after all.
STEP 3: CUT AND WEED THE DESIGN
When you are ready, select your Cricut machine — I selected Maker 3 — and then click the green “Make It” button in the upper right corner.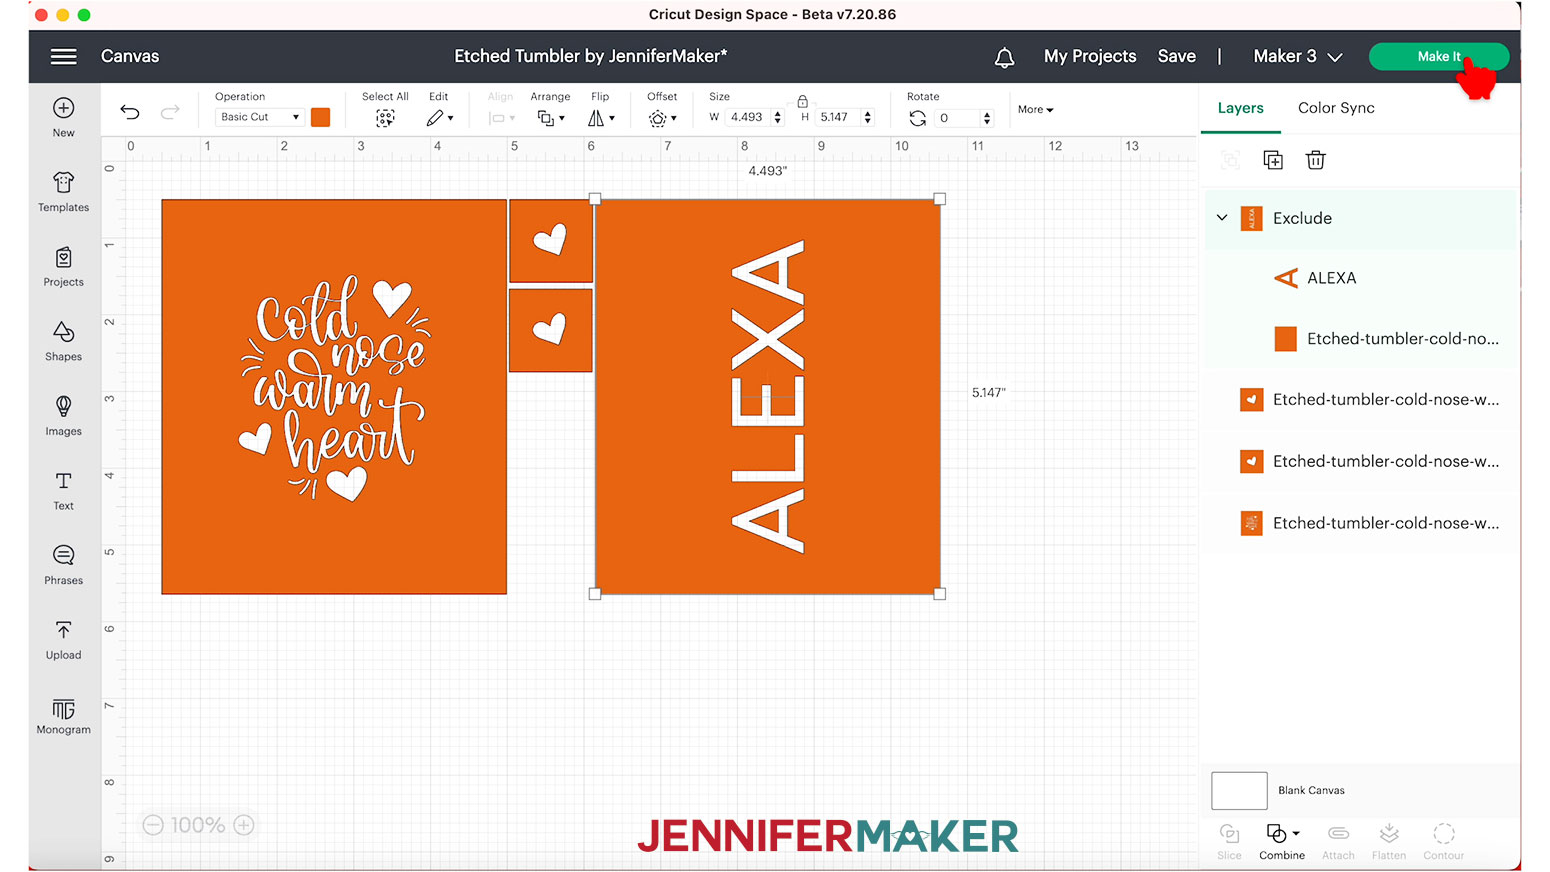
Since we're making stencils, you don't need to mirror the design.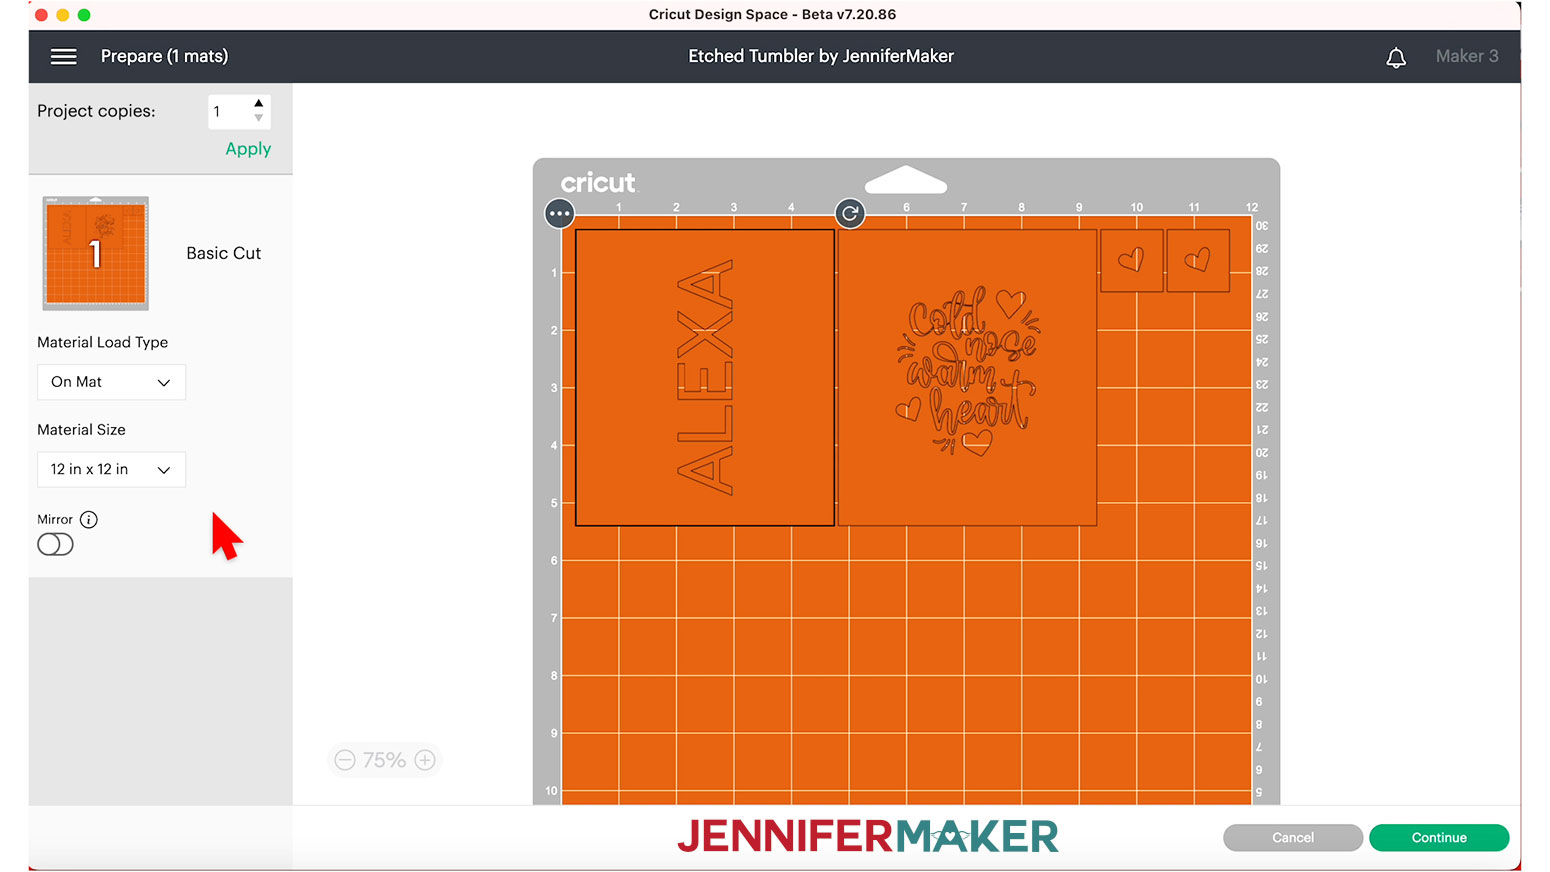
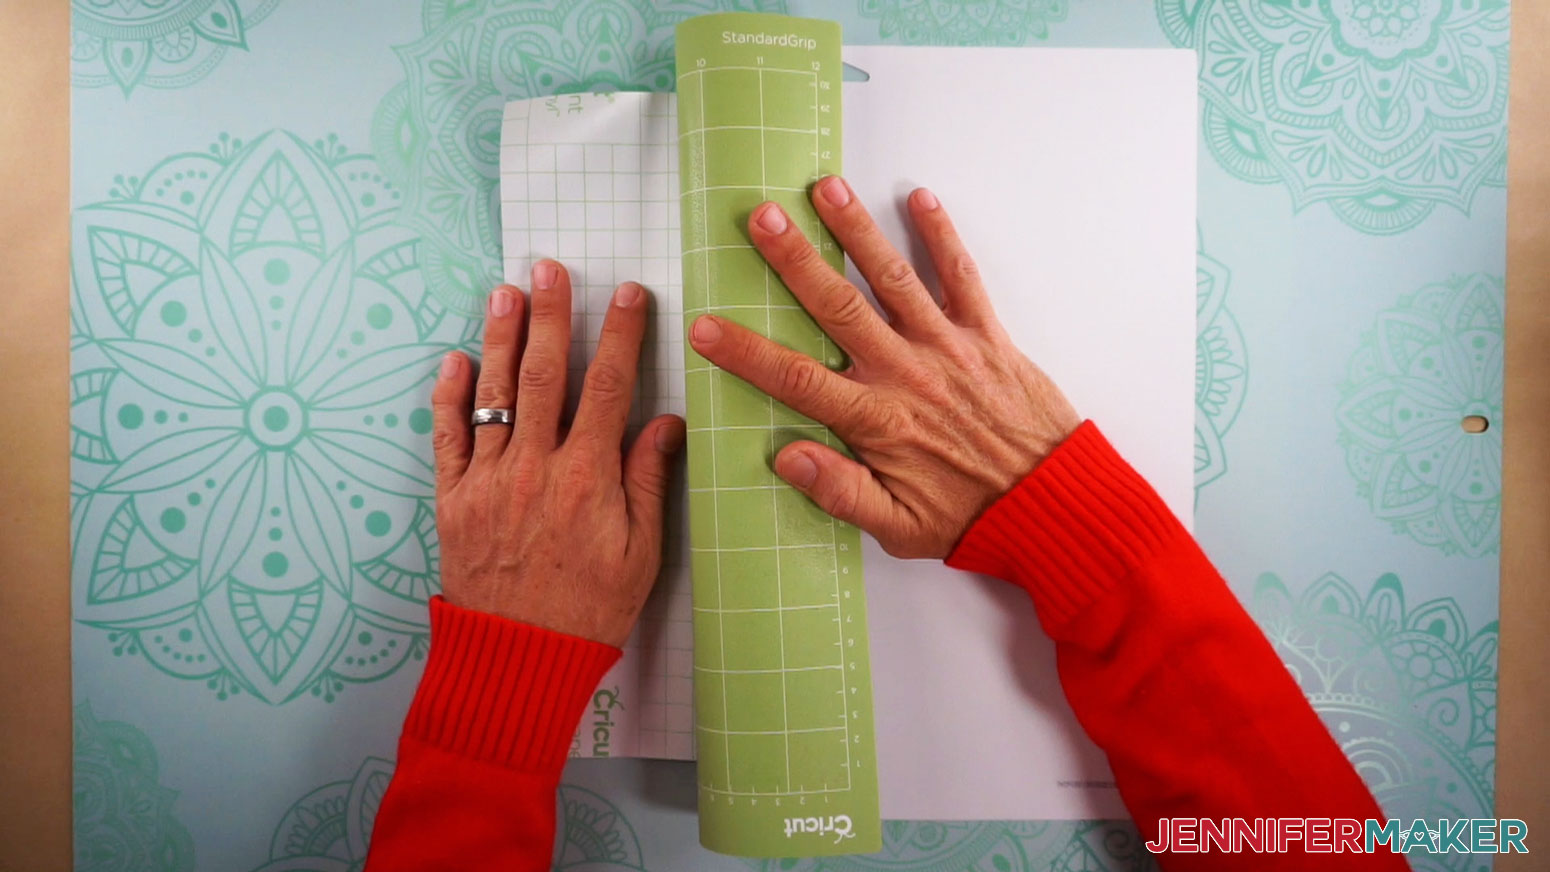
Add your vinyl color side up to a clean, green StandardGrip Machine Mat and adhere it well with a brayer. 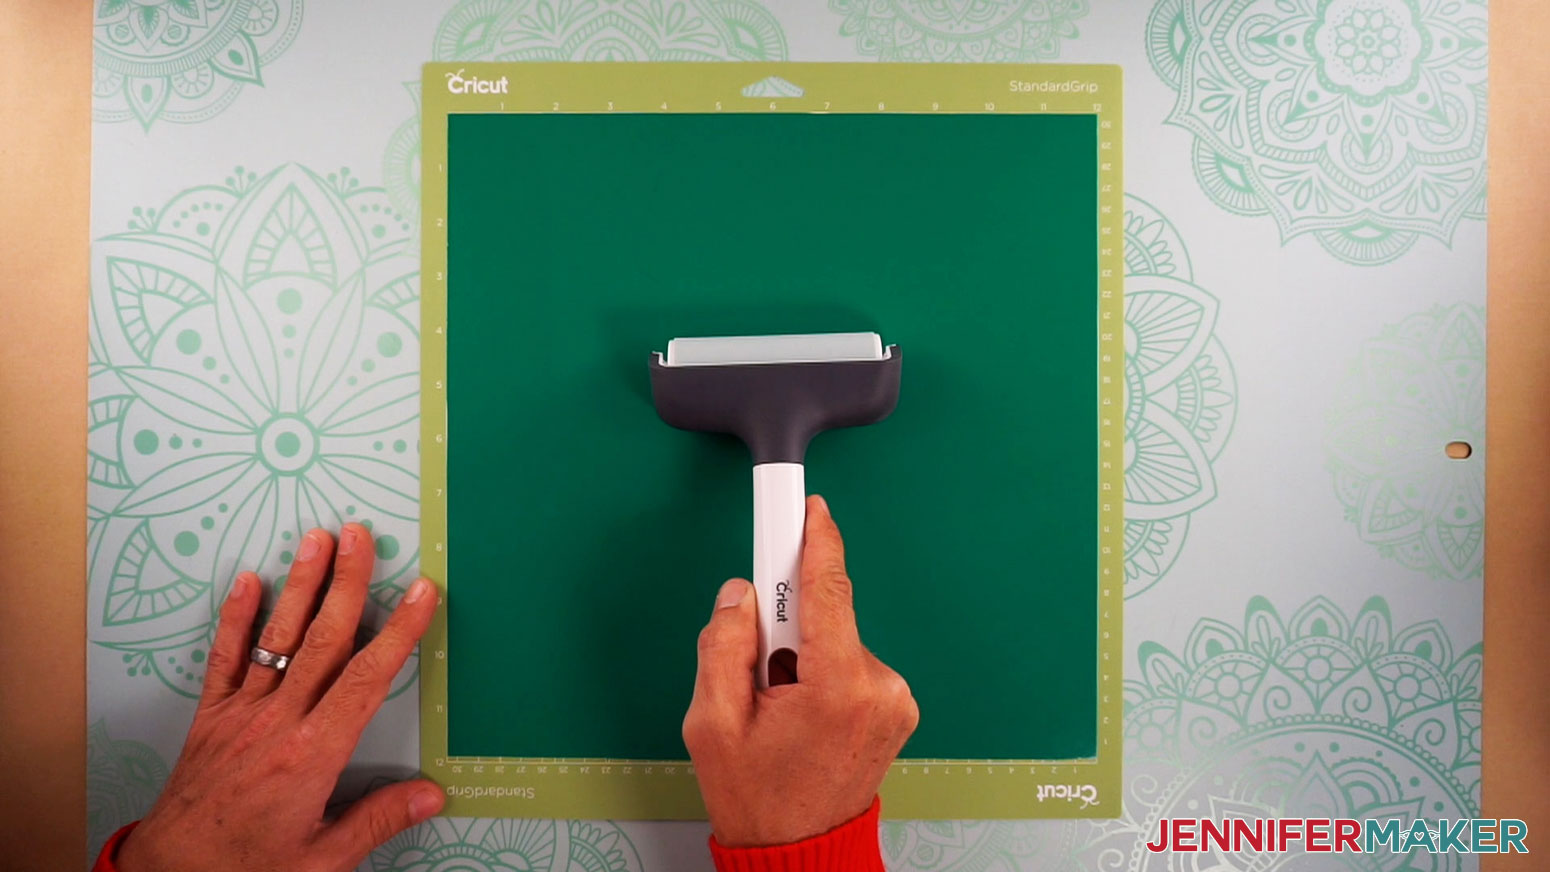
Make sure your Fine-Point Blade is clean and in the correct clamp.
Load the mat into your Cricut and press the flashing button to load the material. Press the "Go" button to cut the vinyl.
Instead of removing the vinyl around the designs and words, you’ll remove the decorations themselves with your weeding tool. Be sure to leave the centers of any letters in place. If they accidentally come off while weeding, just put them back in place carefully. Also, remove the vinyl around the squares and test piece.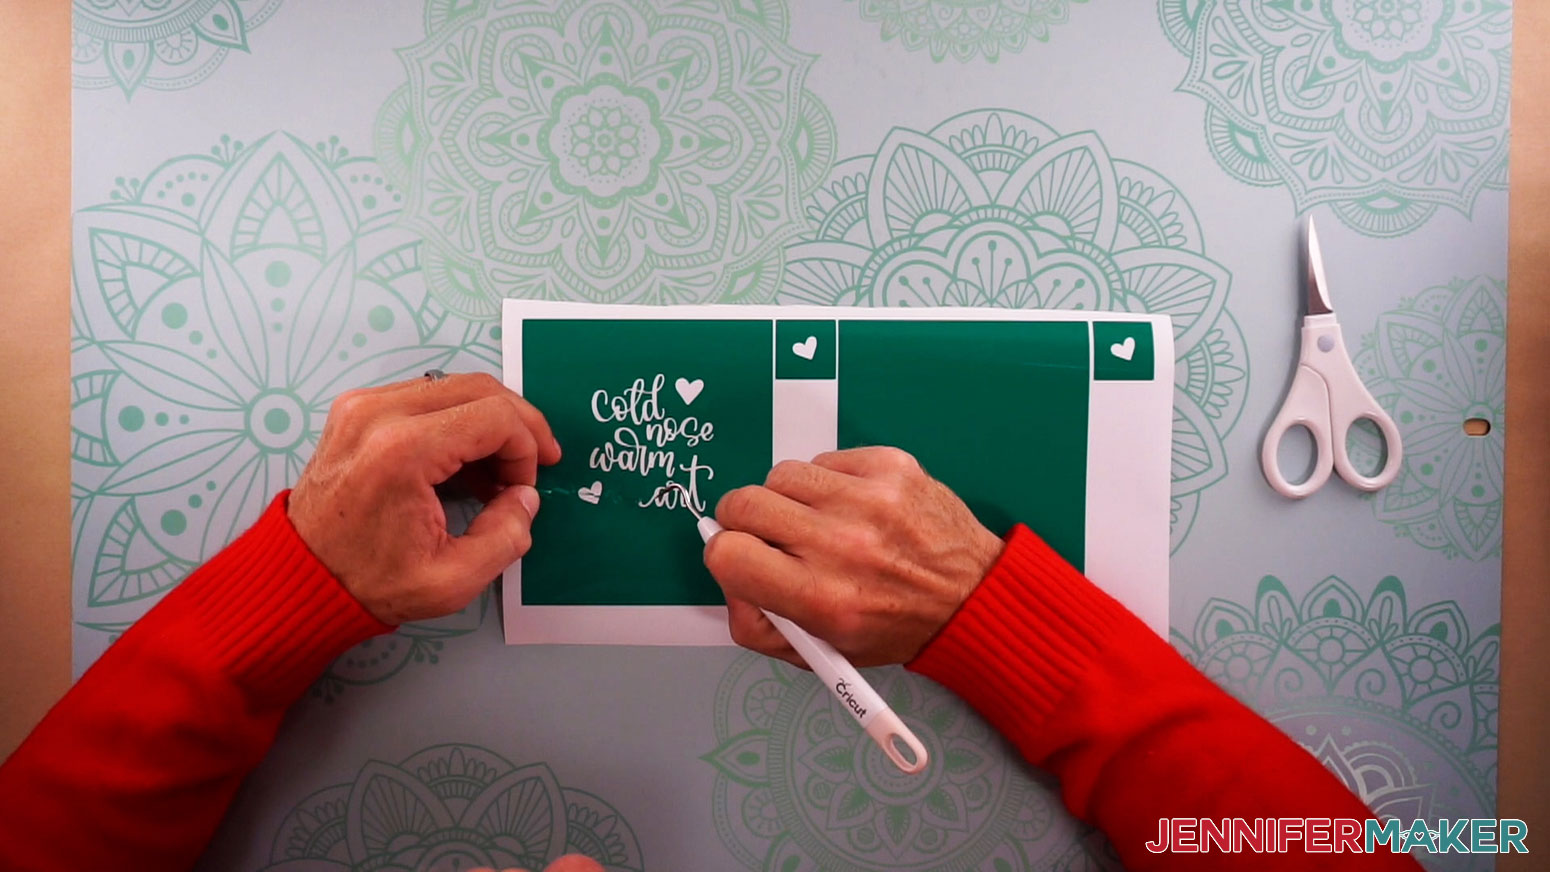
Then cut around each design and test decal with scissors to separate them.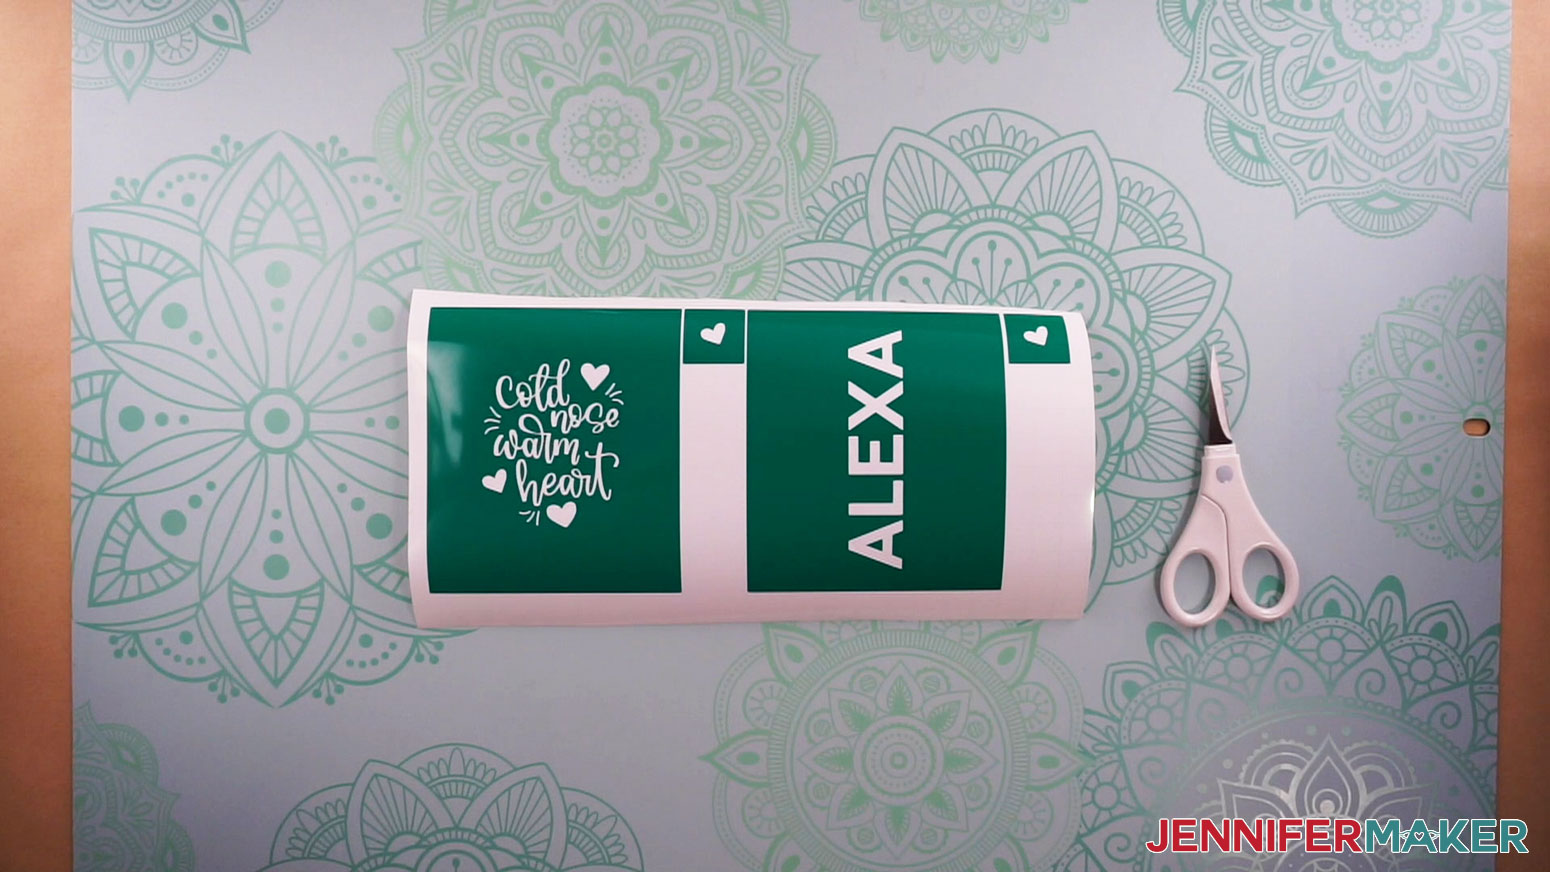
STEP 4: TEST AND ETCH YOUR TUMBLER
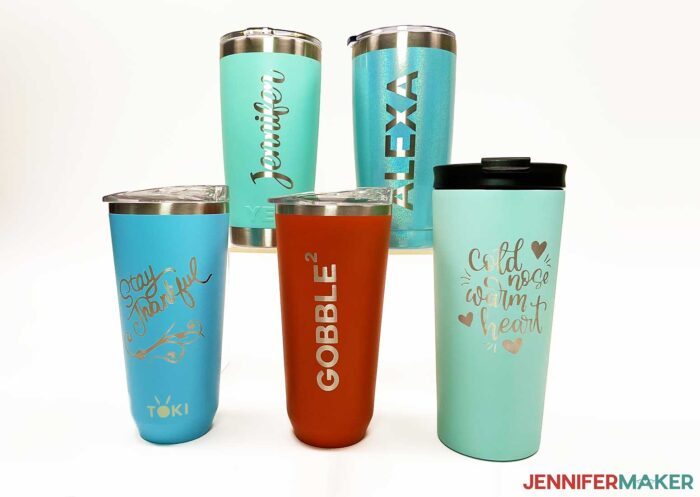
I tested different tumblers and techniques to find my favorite combination!
It's very important to test that Citristrip will work on the tumbler you want to use. I recommend etching a small design on the bottom using the heart I included. You can test one tumbler at a time or several, it's up to you.
Etching Test
Place your cup with the bottom up. Clean the bottom with rubbing alcohol and a coffee filter to remove any oils or other debris.
Next, prepare to move the test stencil from the carrier sheet to the tumbler's bottom using my Taco Method. You can also move it like a sticker, but this is good practice for the main design!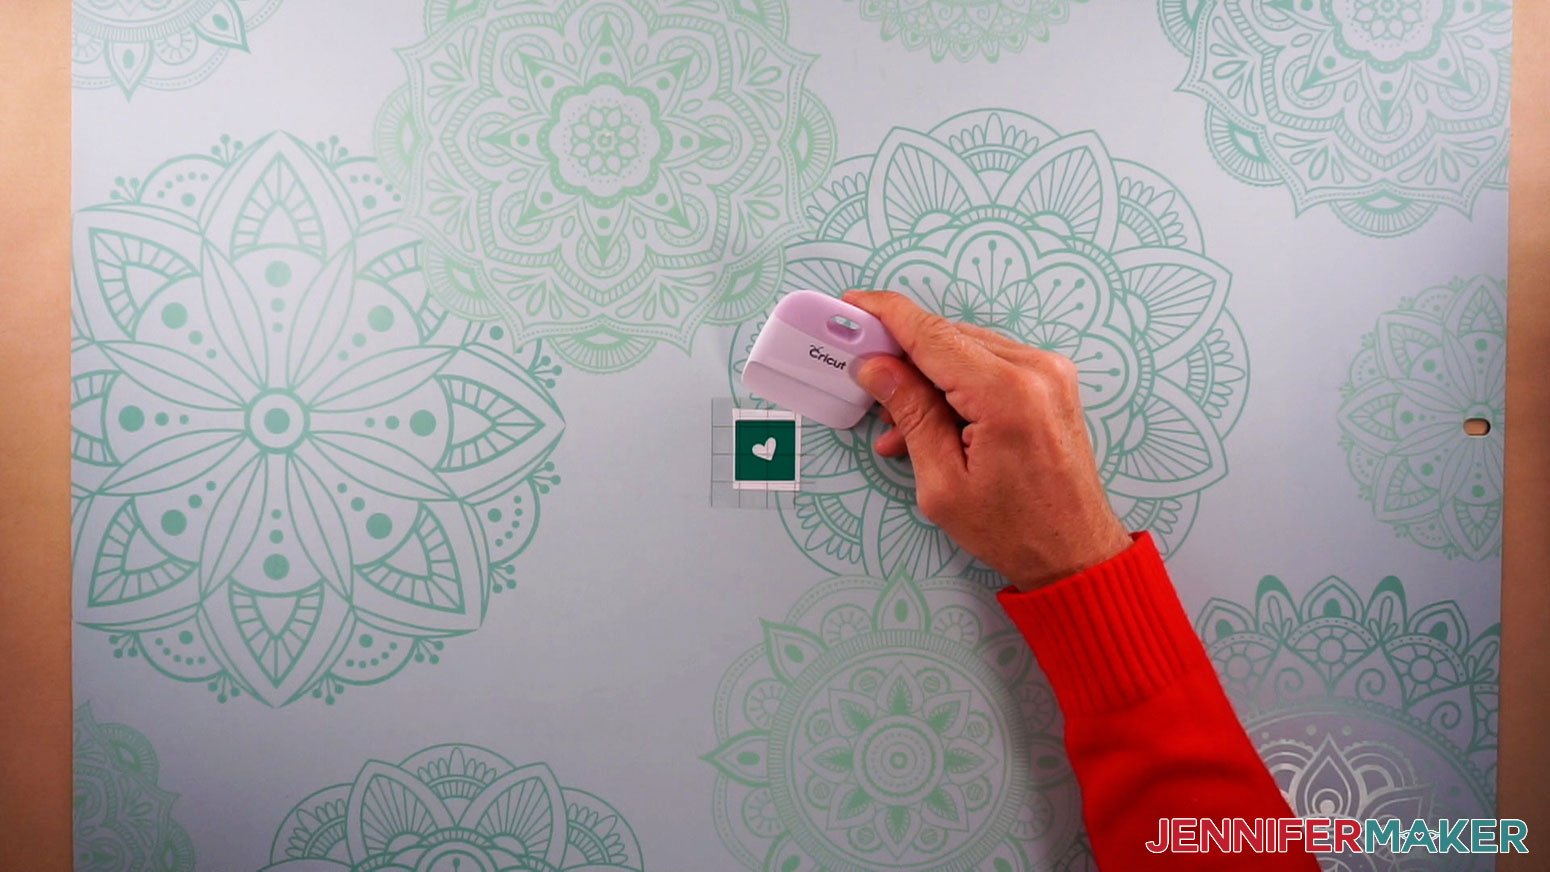
With the transfer tape in place, run the Cricut scraper all over the project’s front and back with medium pressure.
Now bend your test design up in a taco shape over the tumbler's bottom and lay the middle down in an even area, gently smoothing it from the middle outward.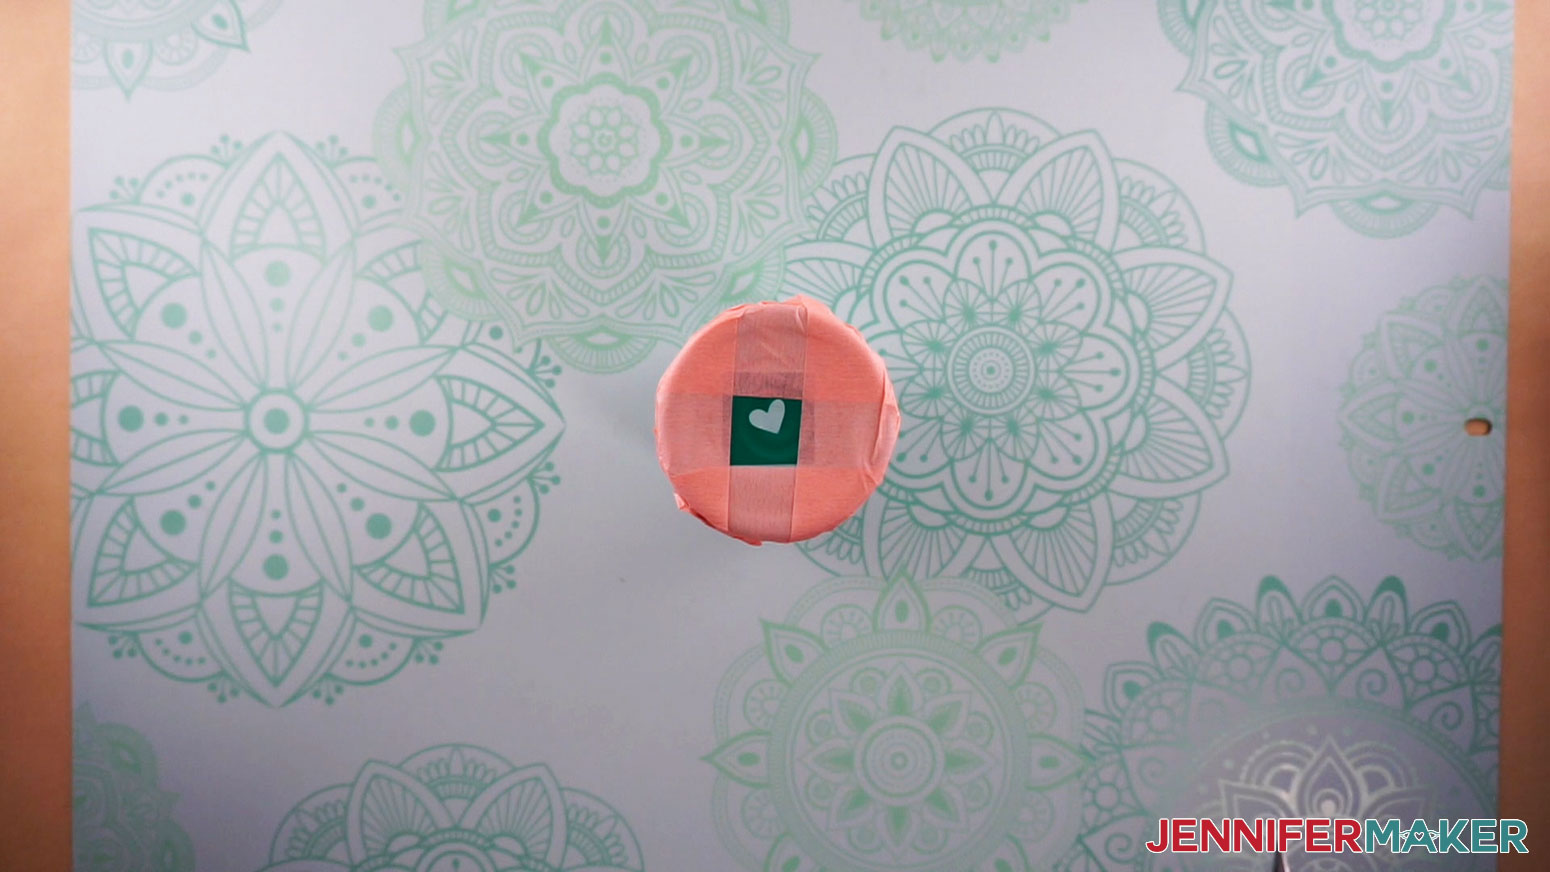
Check that all areas around the design are adhered well to the surface. This will stop Citristrip from bleeding into areas you don't want it to etch. Just go around all parts of the design with your fingers and gently push the vinyl down well, removing any bubbles or creases as best as you can. If your tumbler's bottom isn't smooth, it will be a bit harder, but do your best.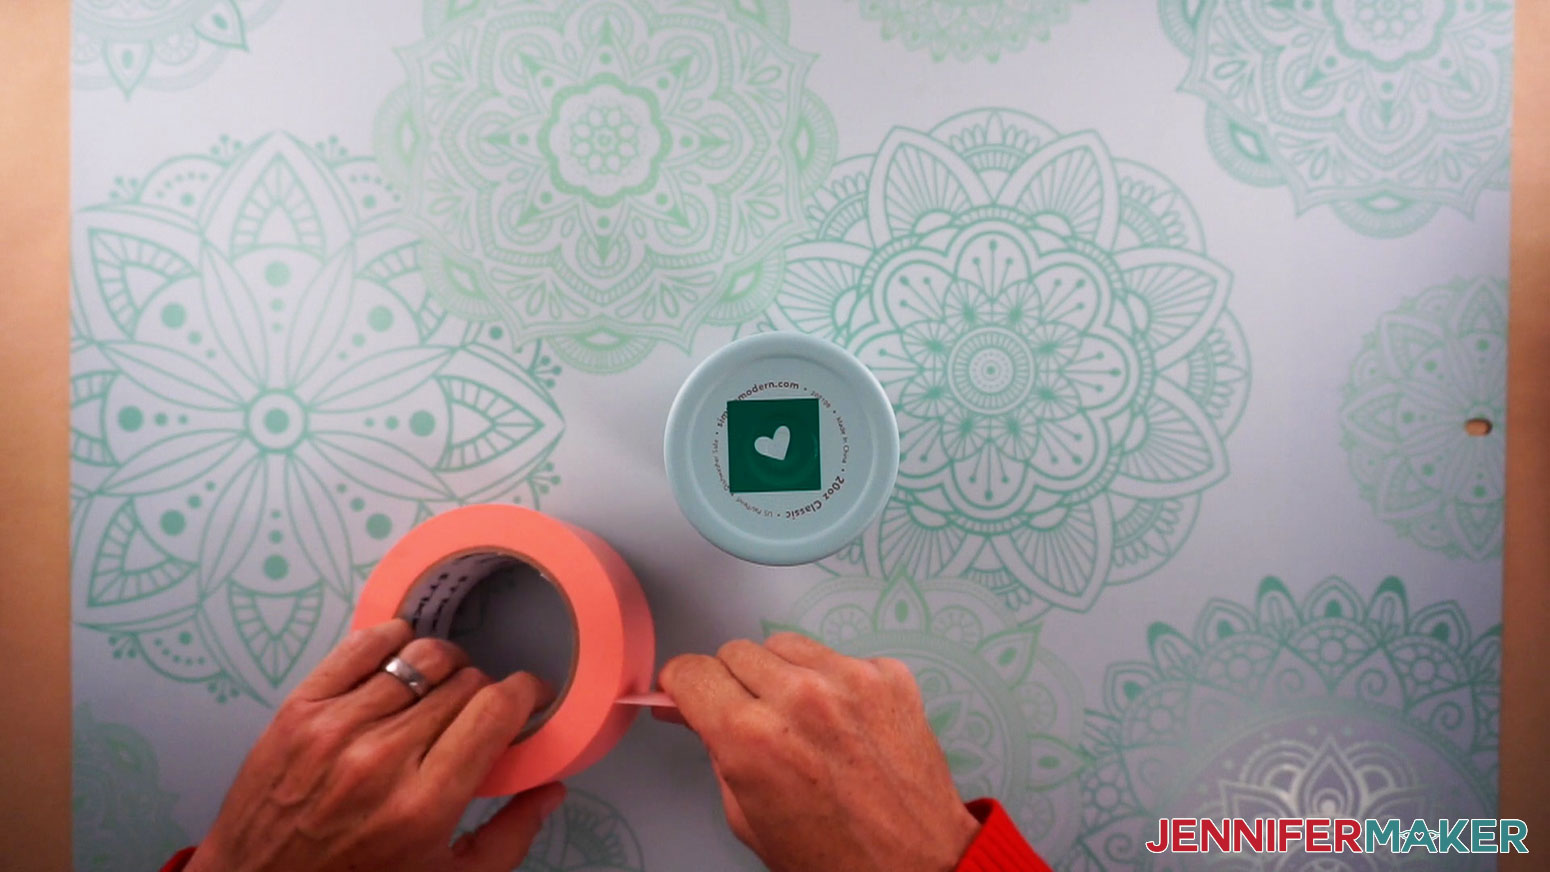
Before applying the etching liquid, cover the rest of the area around your stencil with painter's tape to avoid getting the etching gel where you don't want it. Add some up the sides, too!
IMPORTANT: Read the Citristrip's instructions and guidance on accidental exposure before proceeding. The liquid is caustic and you don't want to inhale it or get it on your skin or in your eyes. Before opening it, put on safety goggles, nitrile gloves, an apron, and an appropriate mask. If you do come in contact with the liquid, follow the bottle's directions immediately.
Before opening the Citristrip, make sure you're in a well-ventilated area or outside with a flat surface. Put on your mask, gloves, and apron and protect your work surface with butcher paper. And set your timer for 50 minutes so you're not trying to do it with etching gel on your gloves.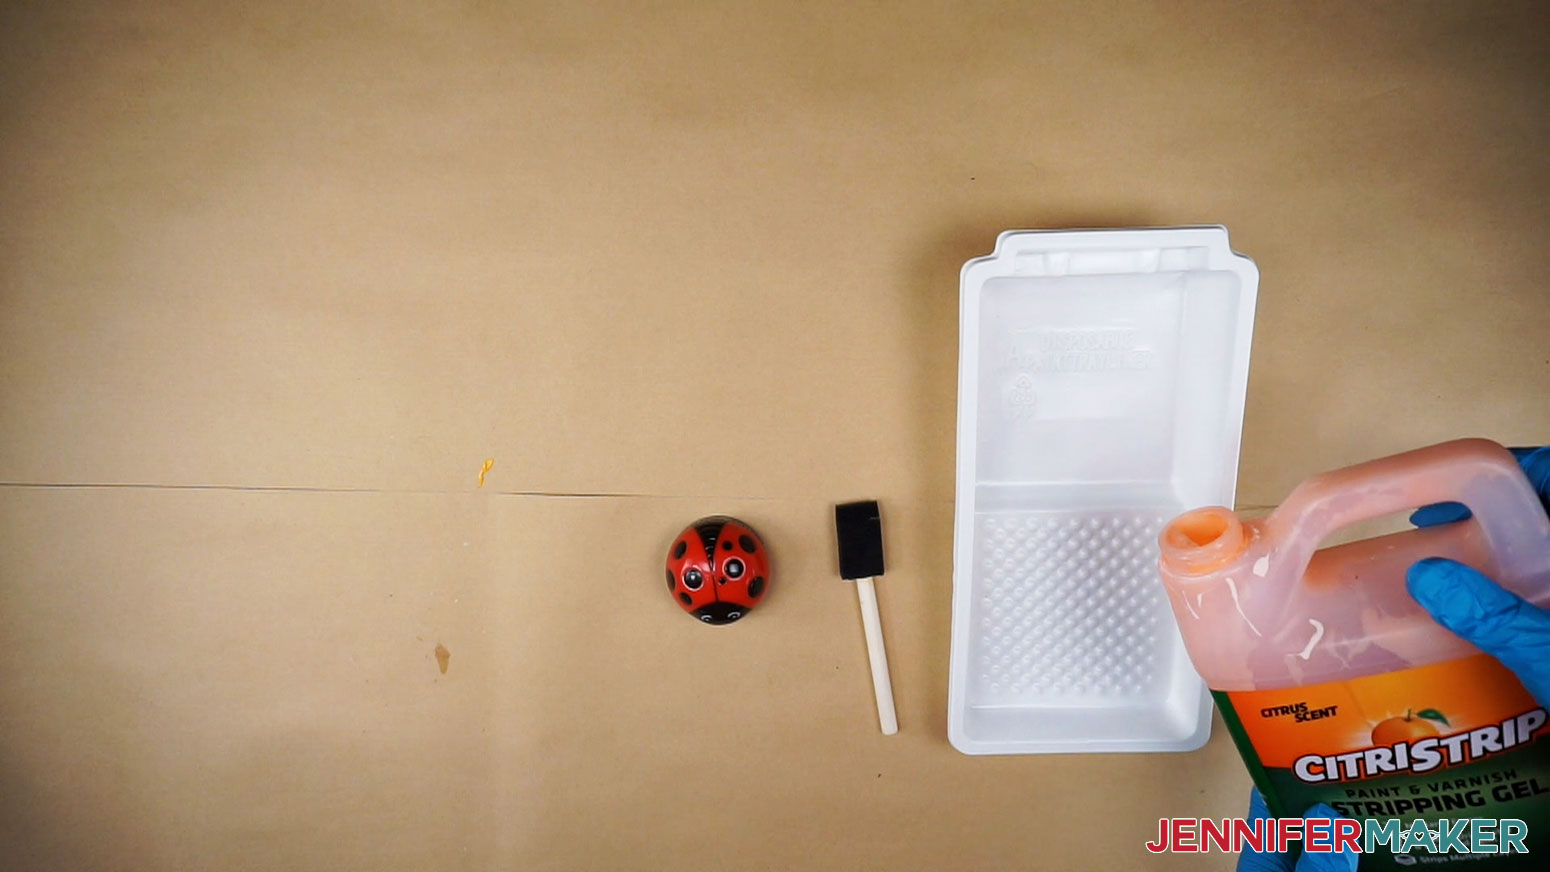
Put some Citristrip in a paint-safe, disposable paint tray, then use a foam brush to add a little Citristrip over the heart shape, and let it sit for 50 minutes.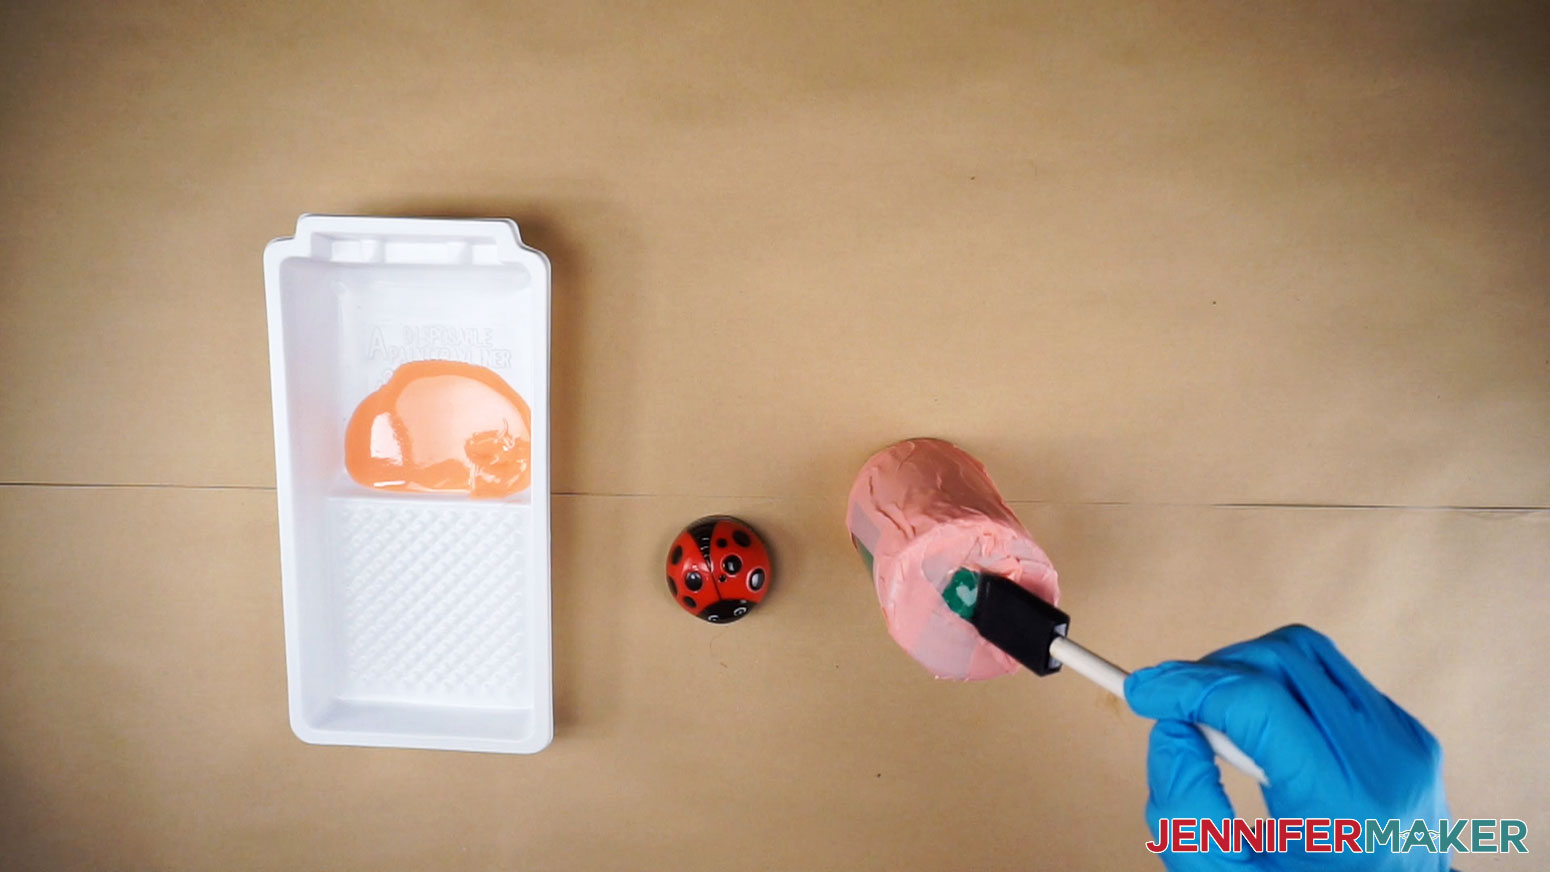
When the time is up, use your weeding tool to see if the powder coating feels loose, but don't scratch the metal. If it moves easily, it's a success! Record that time for that type of tumbler. If not, let it sit for 10 more minutes. If it doesn't work well, try another tumbler!
When you get a good result and know how long it takes, keep your protective equipment on to rinse the cup in a bucket of clean water. Remove the protective tape, rinse again, and get ready for the designs! Make sure to dispose of the brush, and any other objects with any amount of Citristrip on it, safely.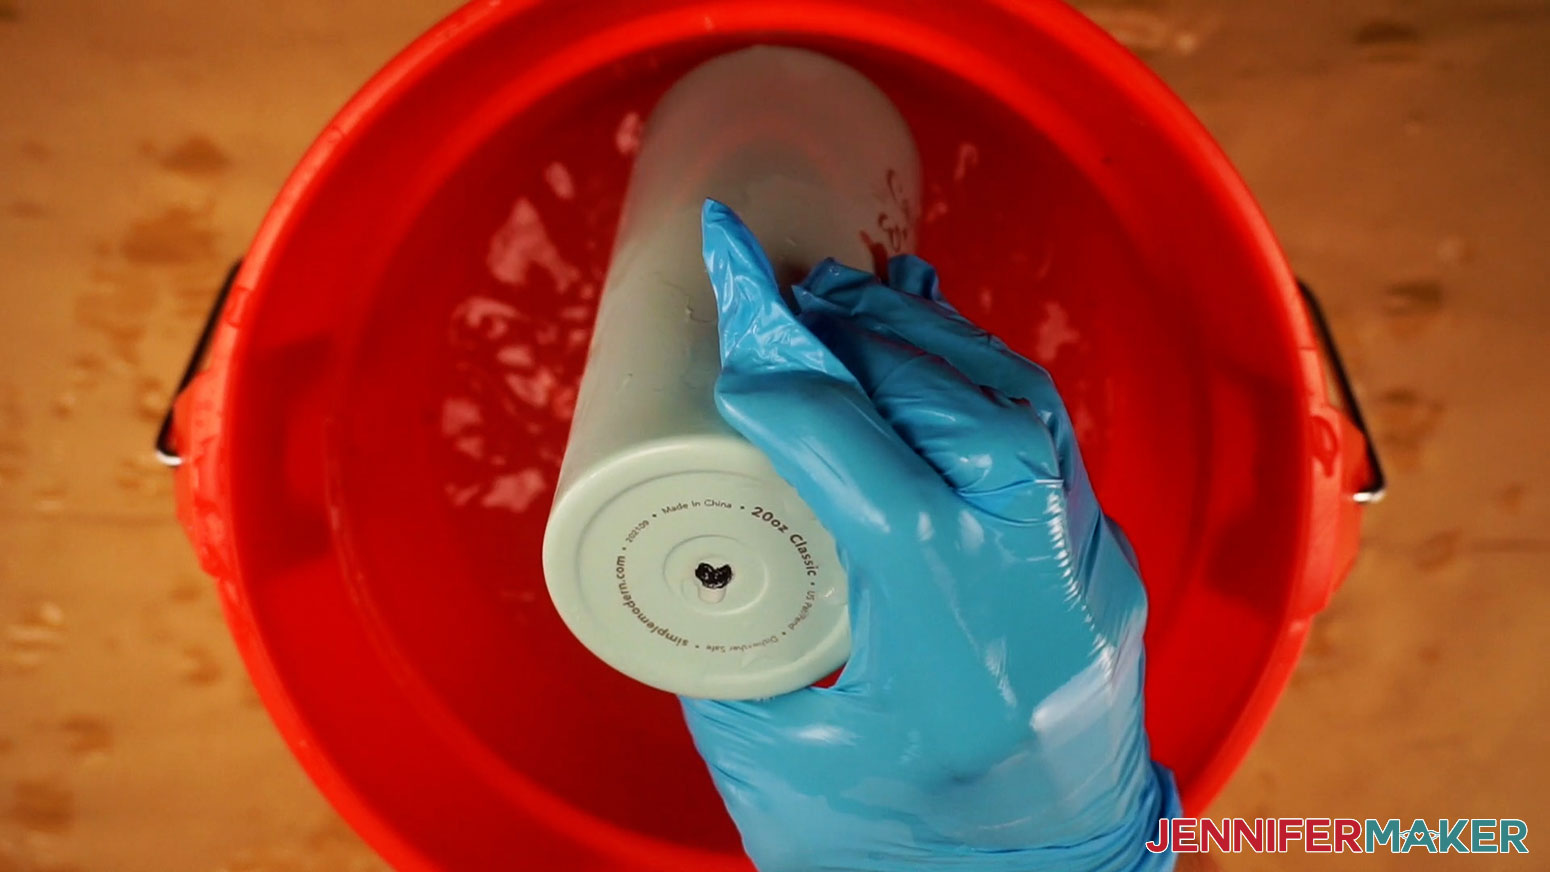
Normal Tumbler
Remember to work outside or in a well-ventilated area. Put on your protective gear before you start etching, but you can prepare inside.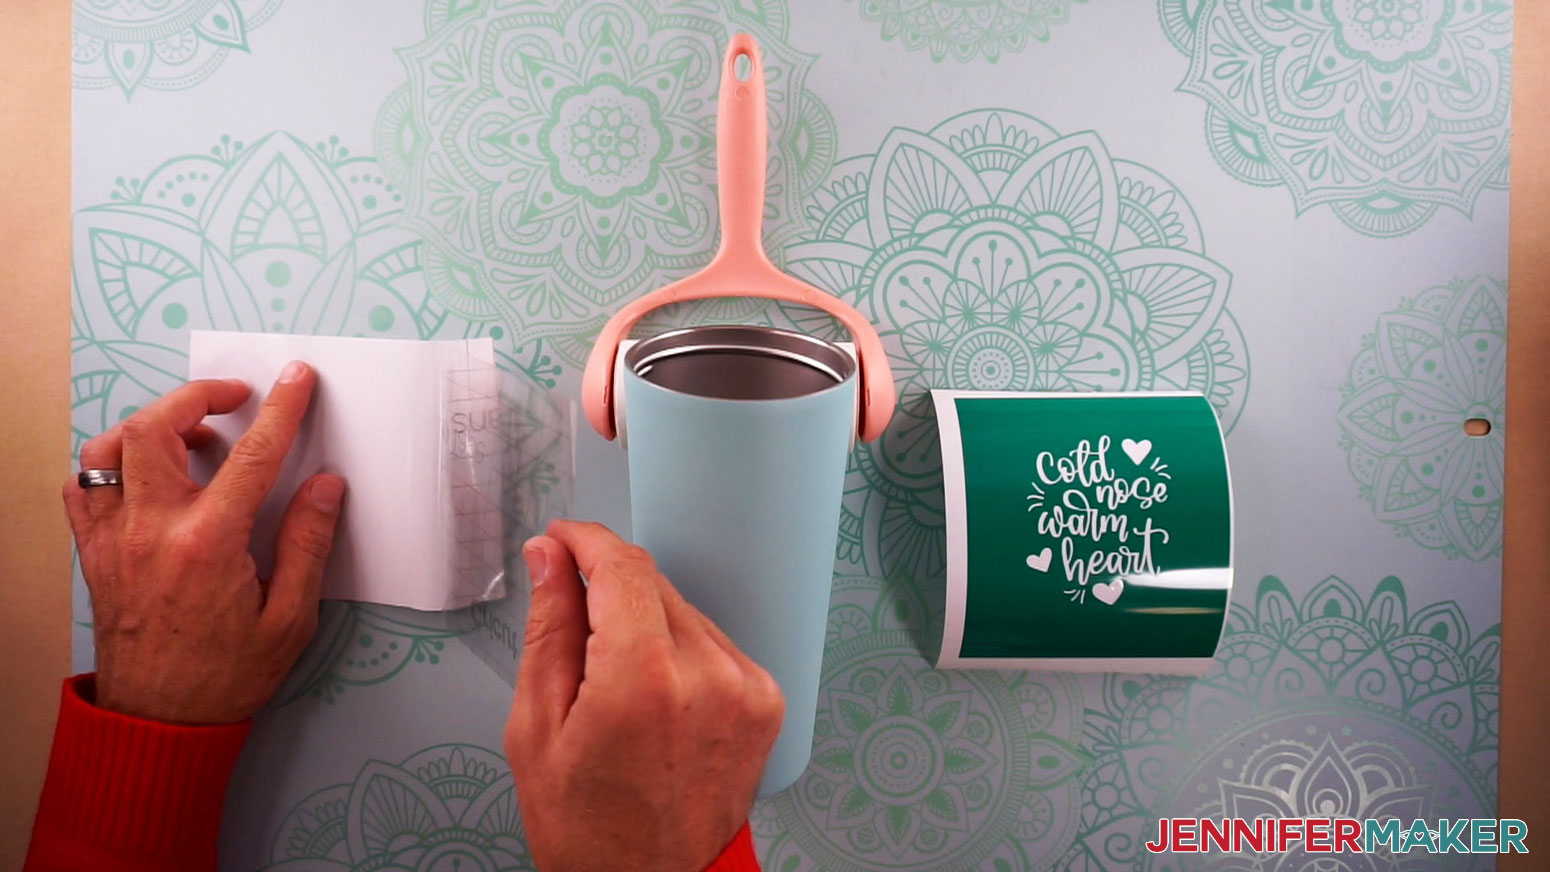
Use the same steps from the test decals to add transfer tape to the design you want to use.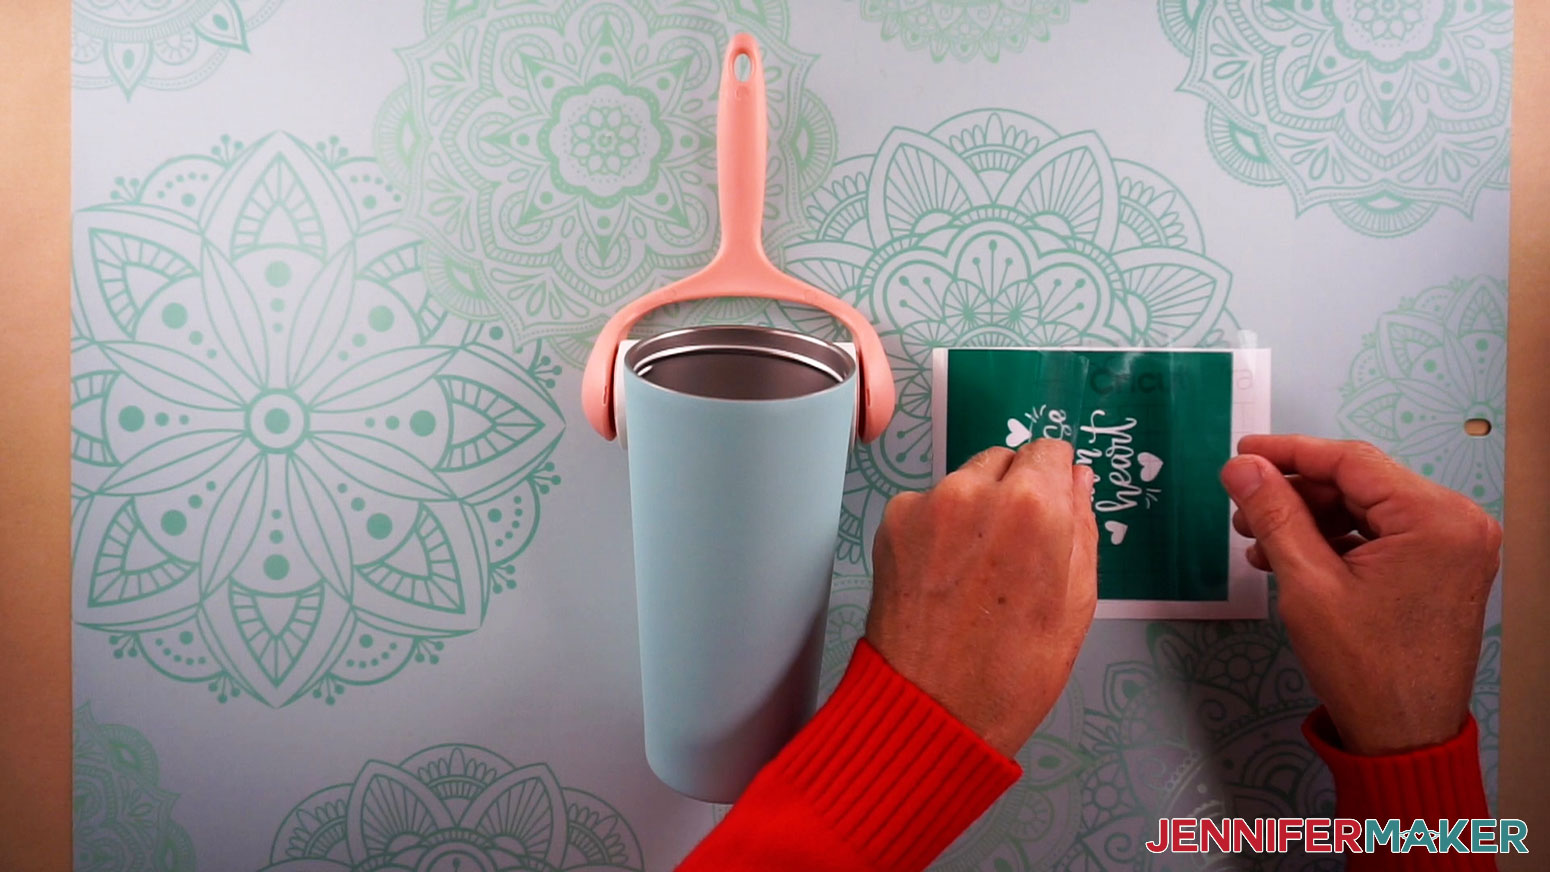
Place the tumbler with the opening at the top. Remove any grease or dirt with rubbing alcohol and a coffee filter. Then, use a lint roller or tape roll to keep the cup in place on your protected work surface.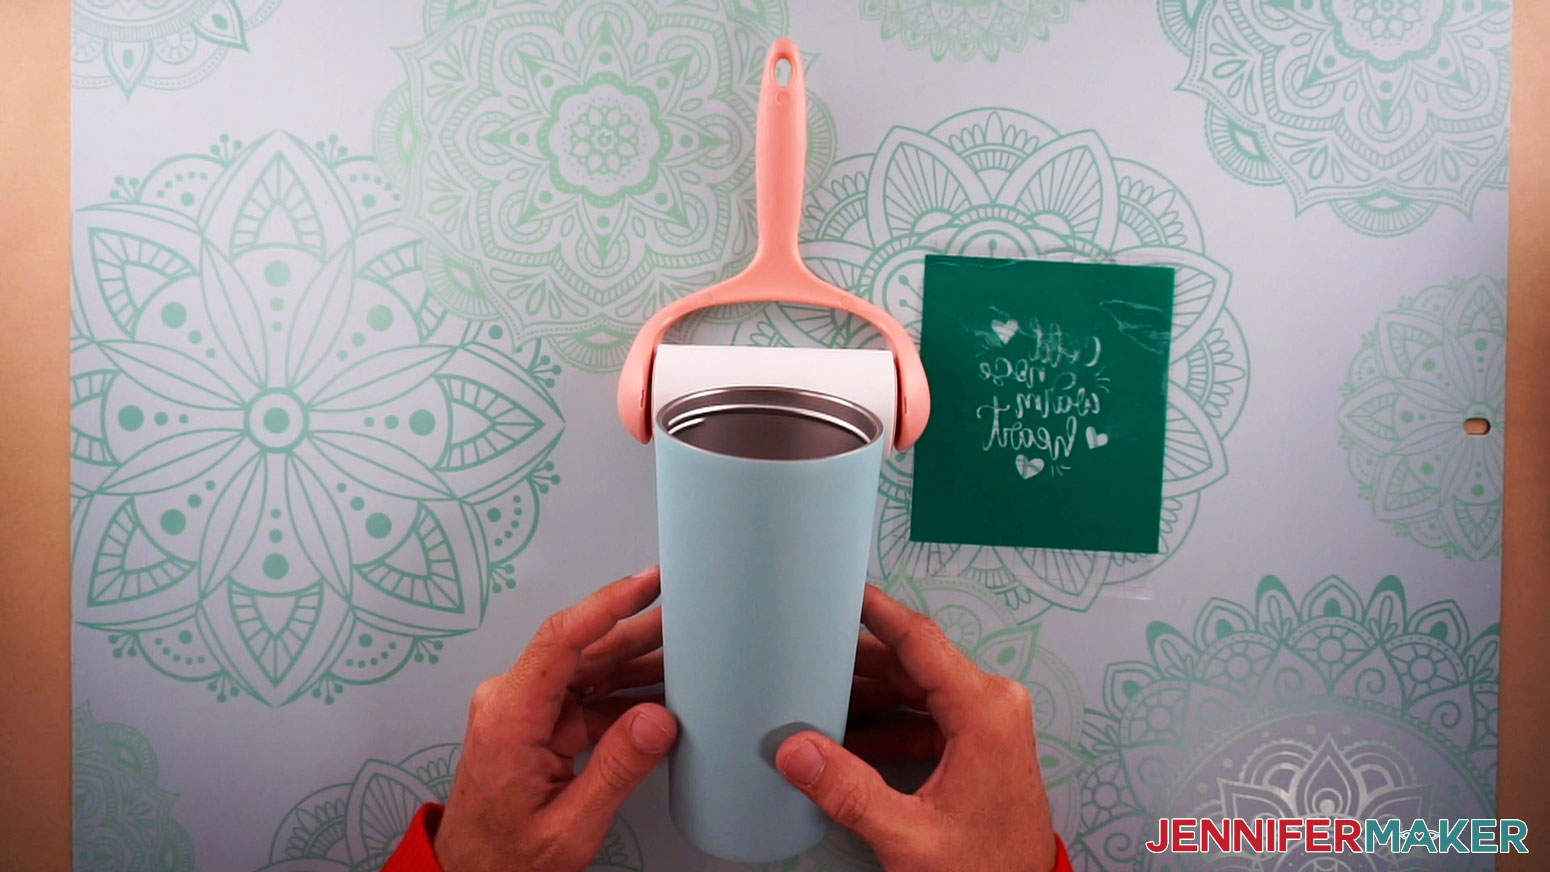
You can position the design however you like on the tumbler, but I recommend placing the top edge of the vinyl at the upper edge, for the best result. Larger tumblers will simply have the design closer to the top. The box around the design measures approximately 4.5" x 5".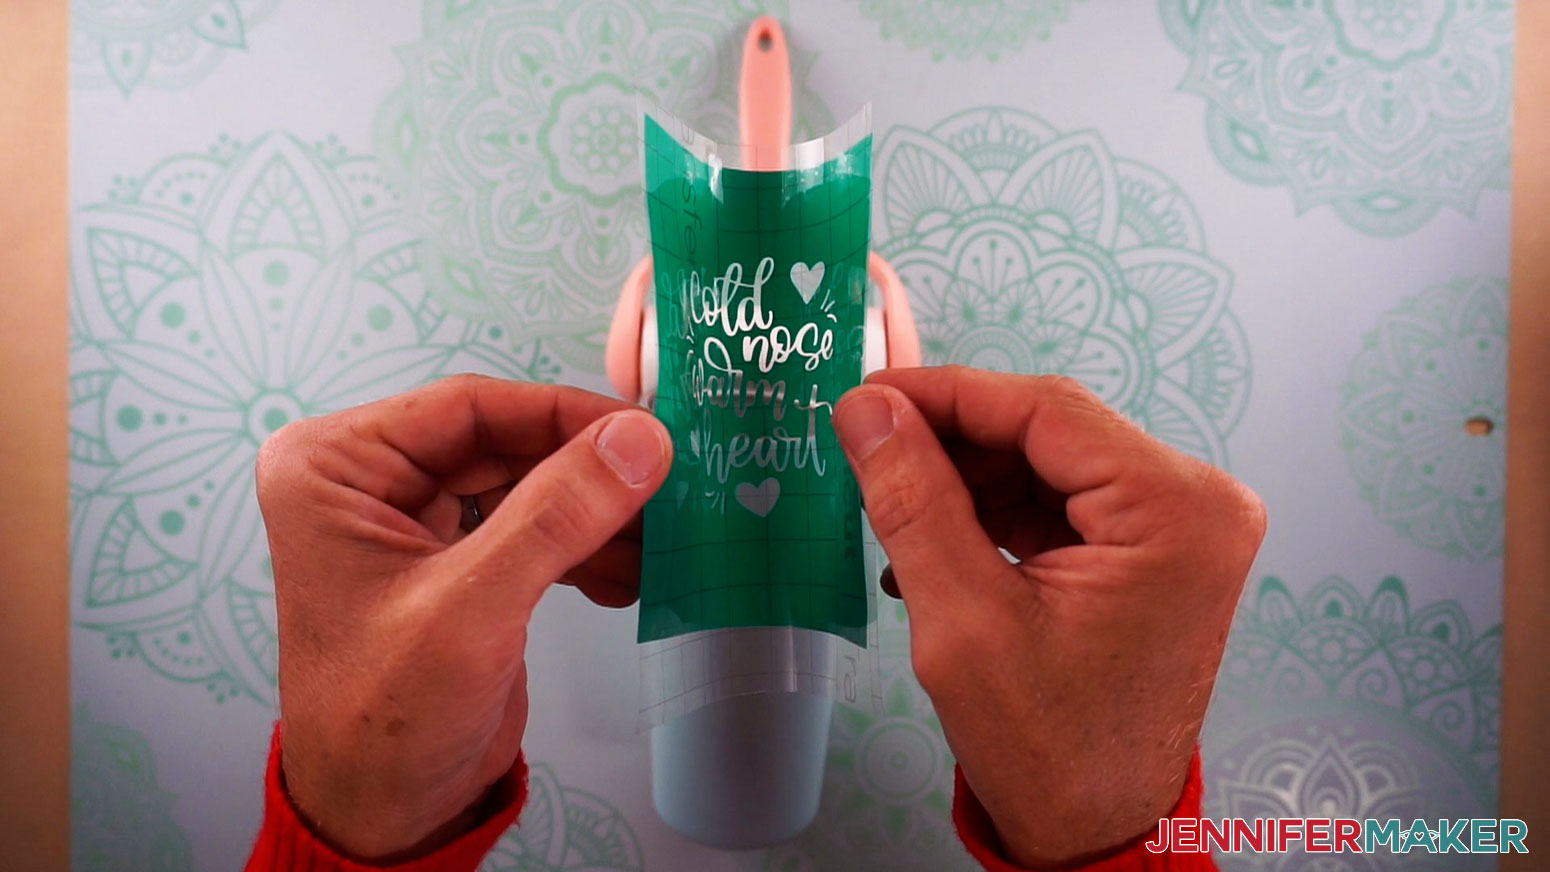
After you place the design on the tumbler, start smoothing the most detailed areas first, as they need the most precision. Your fingers and the scraper will both help. Once you get to the edges, you can lift up the vinyl and reapply it if it gets too wrinkly.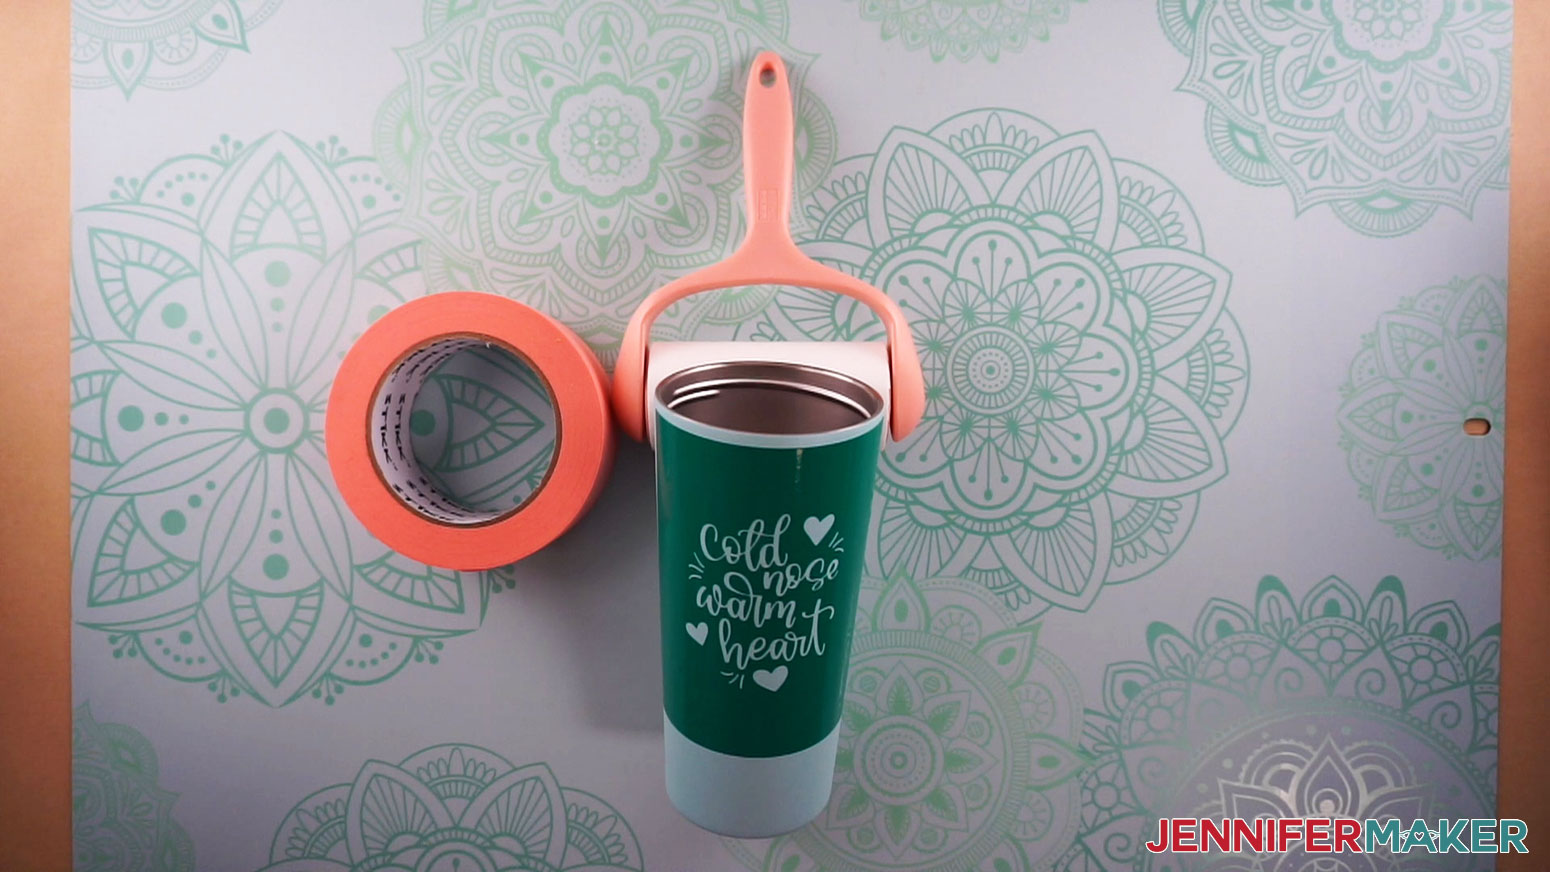
Once your stencil is smoothly adhered to the tumbler, you can peel the transfer tape off the vinyl at a steep angle while continuously pressing smaller details down on the cup to make sure every piece sticks well!
If you find any wrinkles or creases, smooth them out again. Then, cover the rest of the cup with painters tape, scrap vinyl, or transfer tape. Remember to protect the bottom and the upper part of the inside!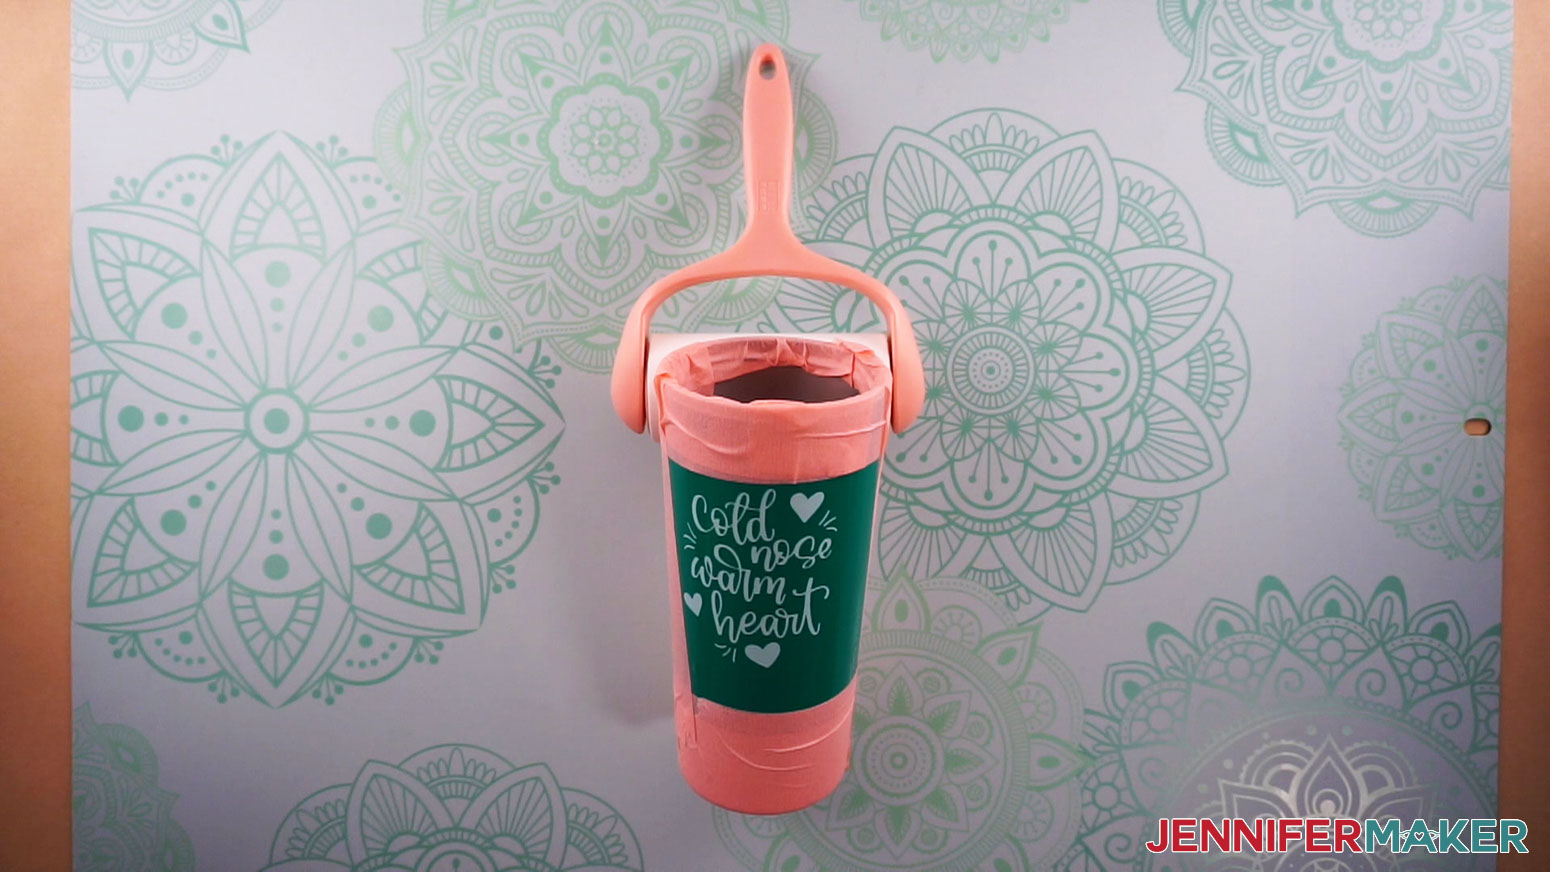
Time to put your safety equipment back on and go outside!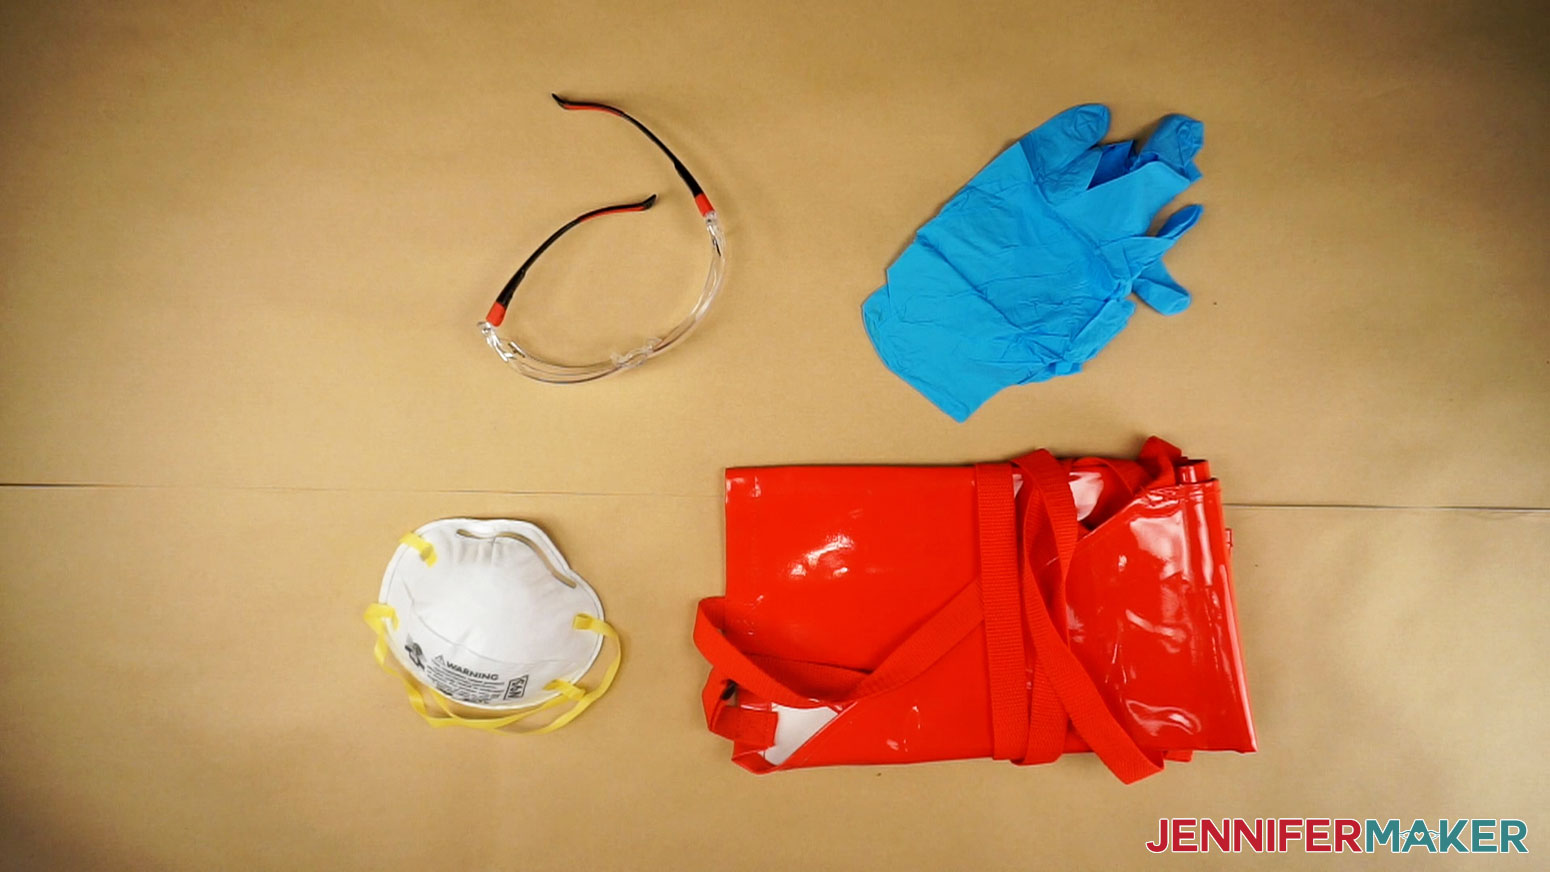
Set your timer for the amount you found most successful during testing. I had the best results at 50-60 minutes, with shorter etching times on hot days. Some tumblers will take more or less time, so just use my findings as guidelines.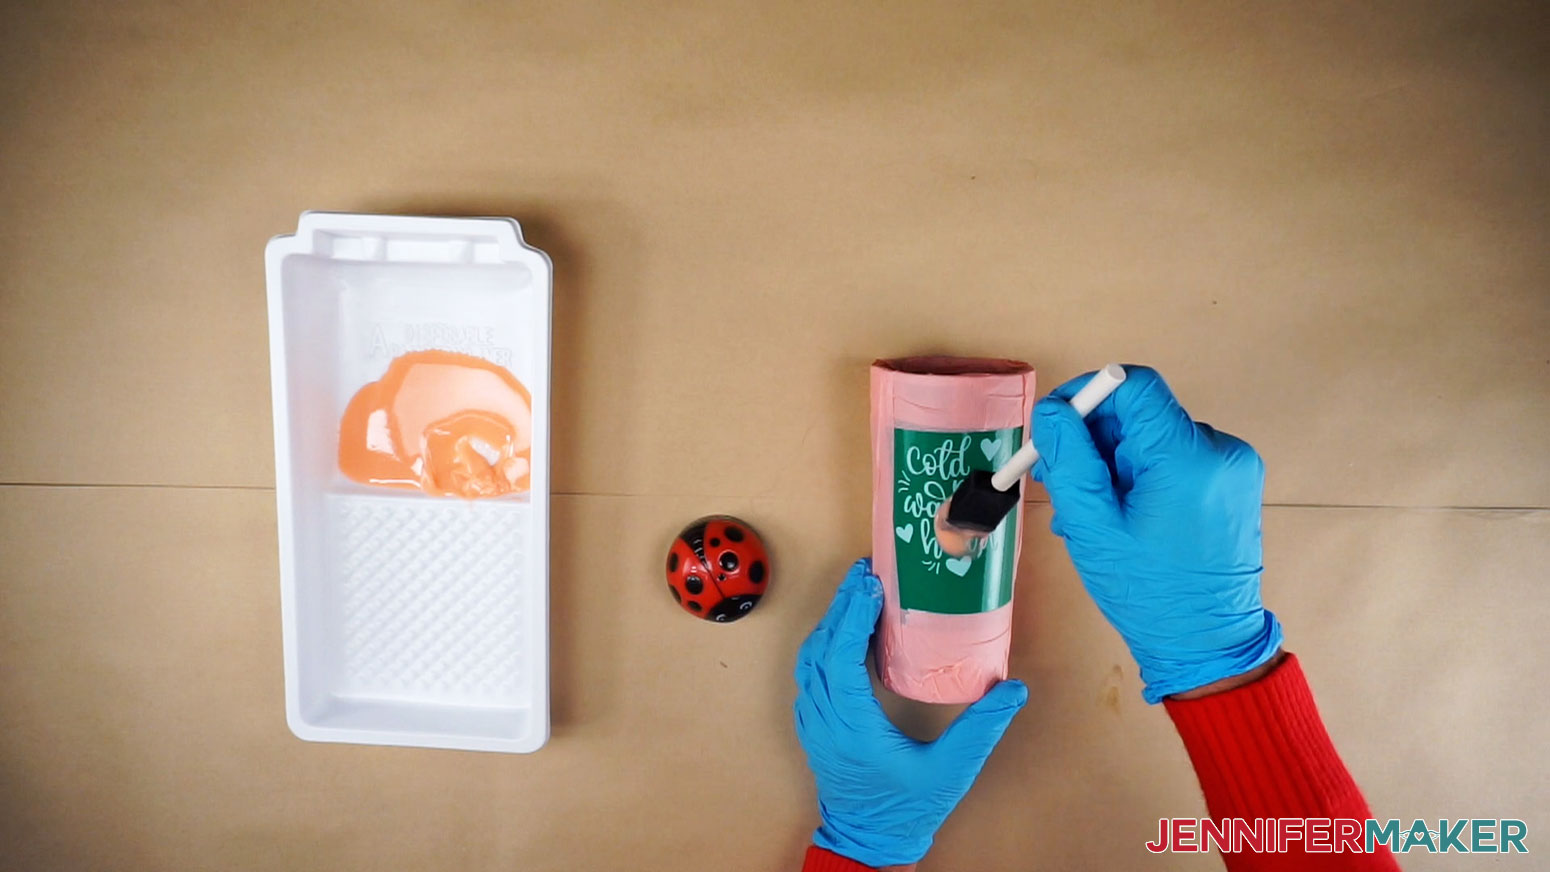
Start your timer!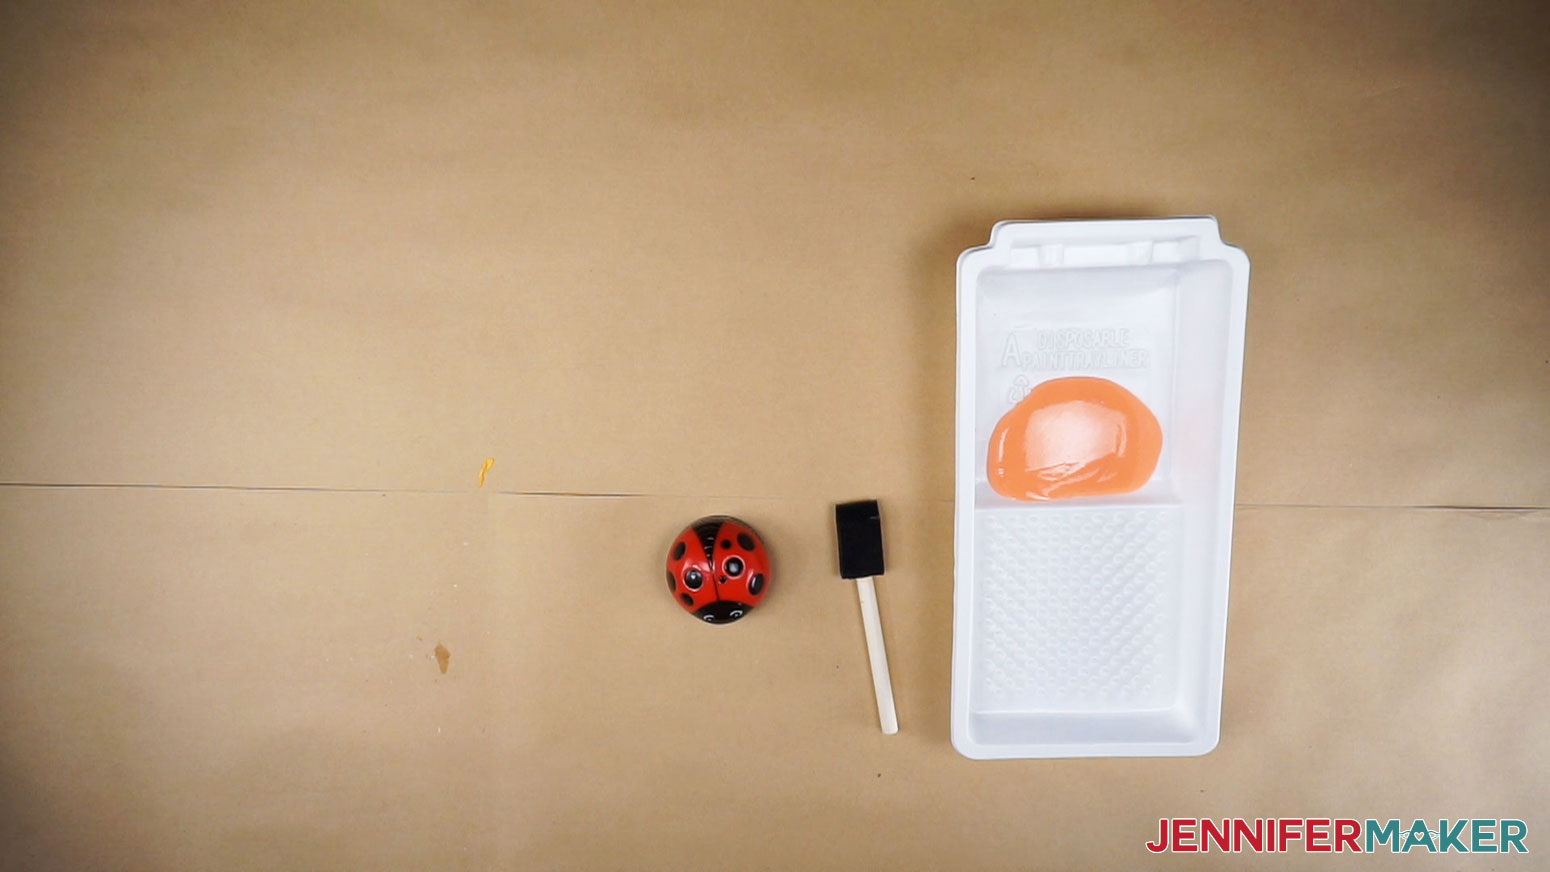
Once the elapsed time is up, test the progress by poking a small spot with the weeding tool to see if the powder coating feels loose. Don't scratch the metal behind, though. If it's still stubborn, wait a few more minutes.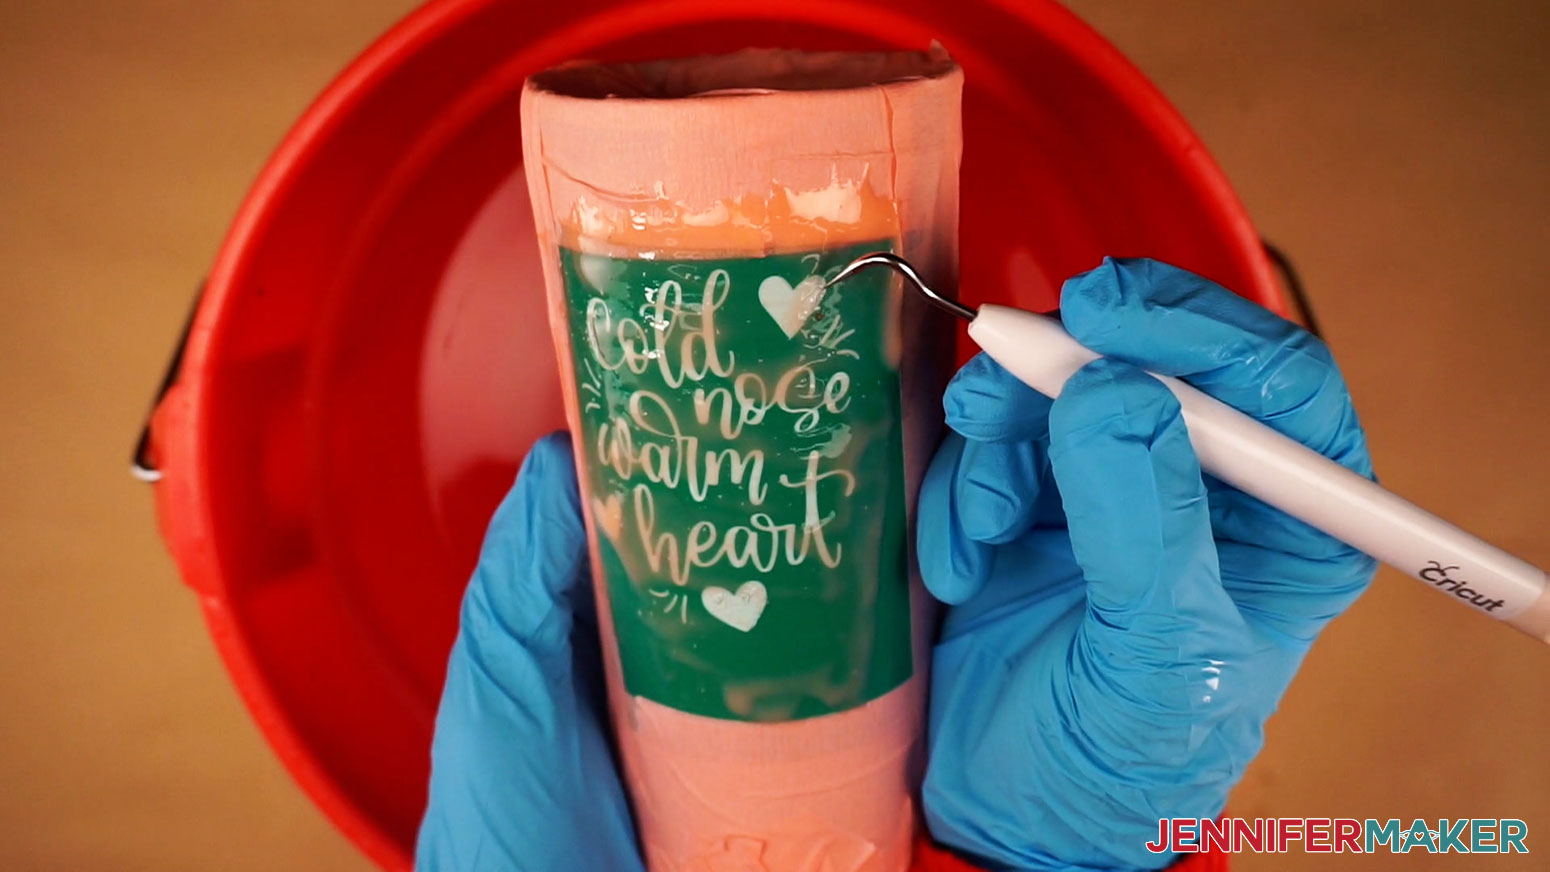
Make sure to remove the extra gel in a safe manner, keeping your protective equipment on in case of splashes. I used a bucket of water. Leave the stencil in place and gently wipe the design with a gloved hand to remove the gel. At this point, the design should start to appear, but there's still more work to do!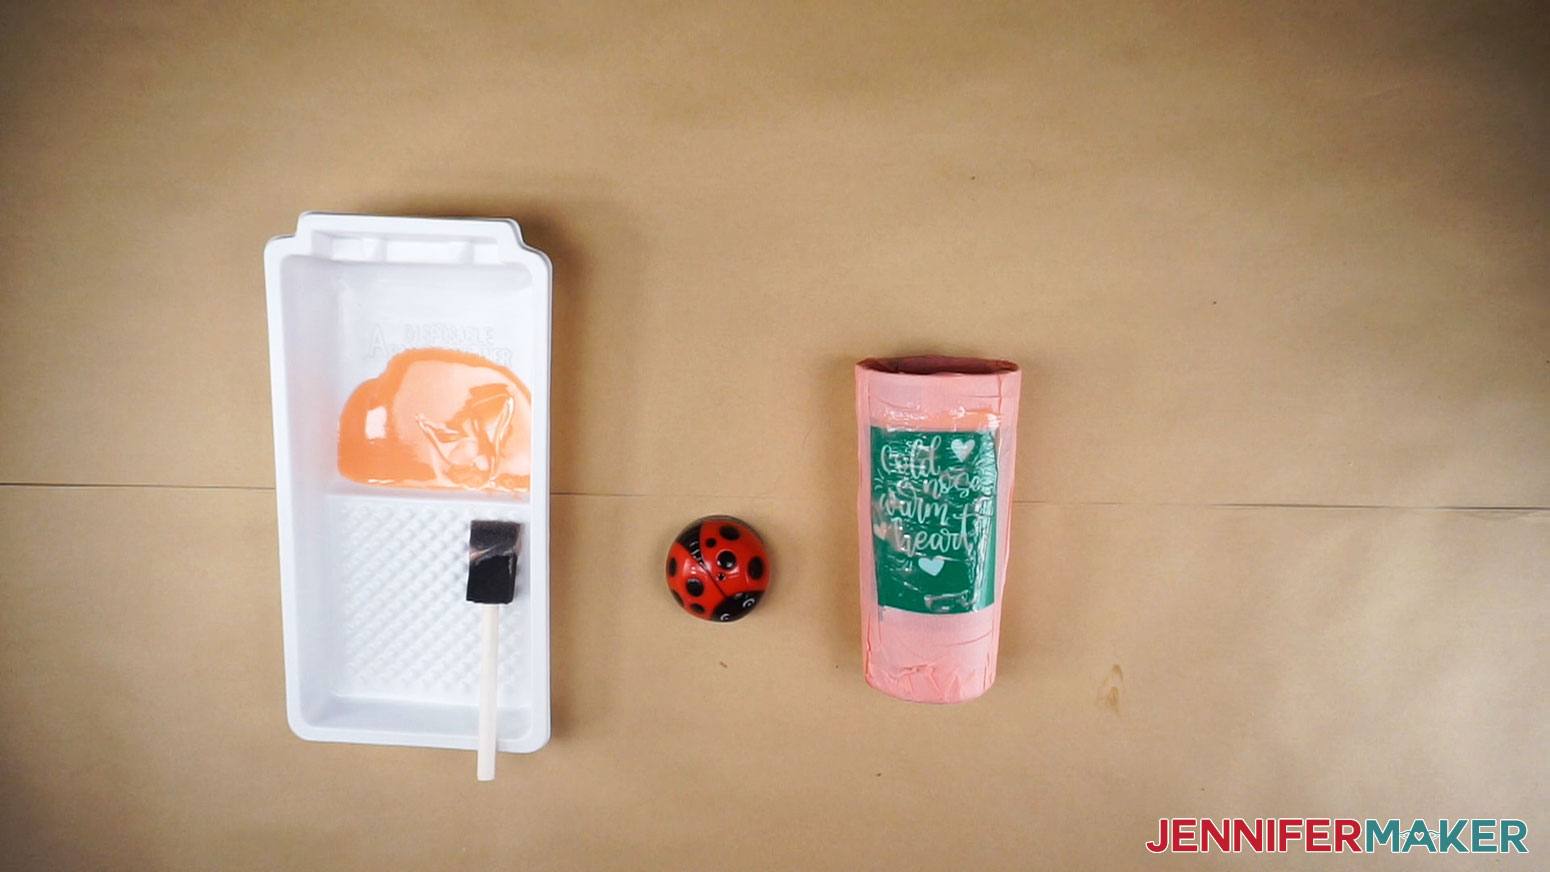
Now it is time to see our designs come into focus!
With the stencil still on, grab a blue Scotch Bright pad. Blue won't scuff a matte tumbler, but green will!
Over your bucket, scrub the design like you would a dirty pot, to remove most of the loosened powder coating. Place the tumbler under running water or wipe away the debris to check your progress.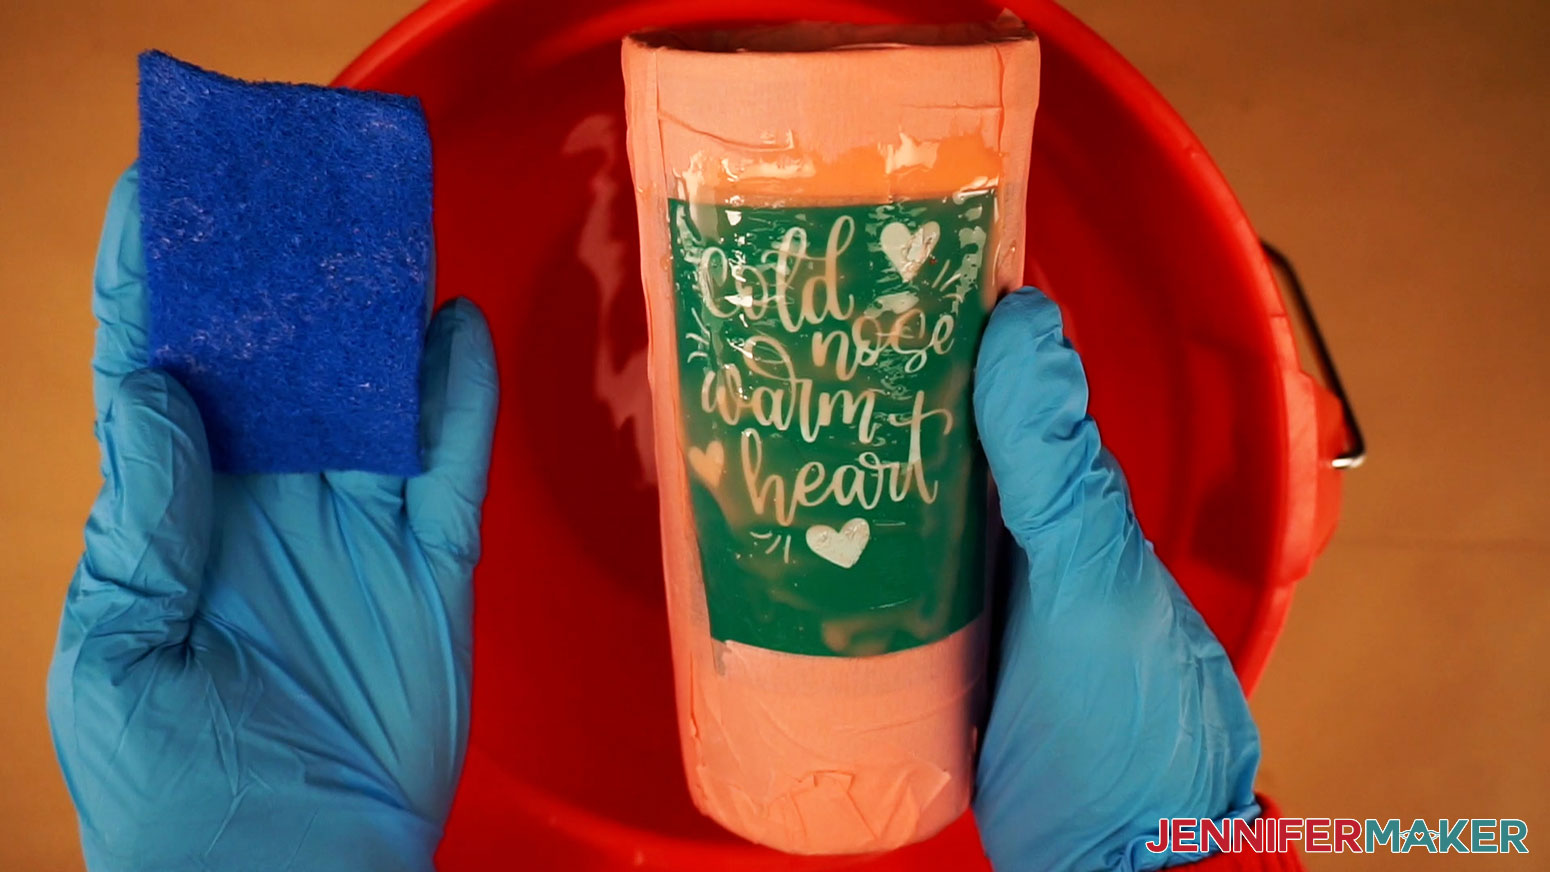
Once most of the material is gone, peel off the stencil.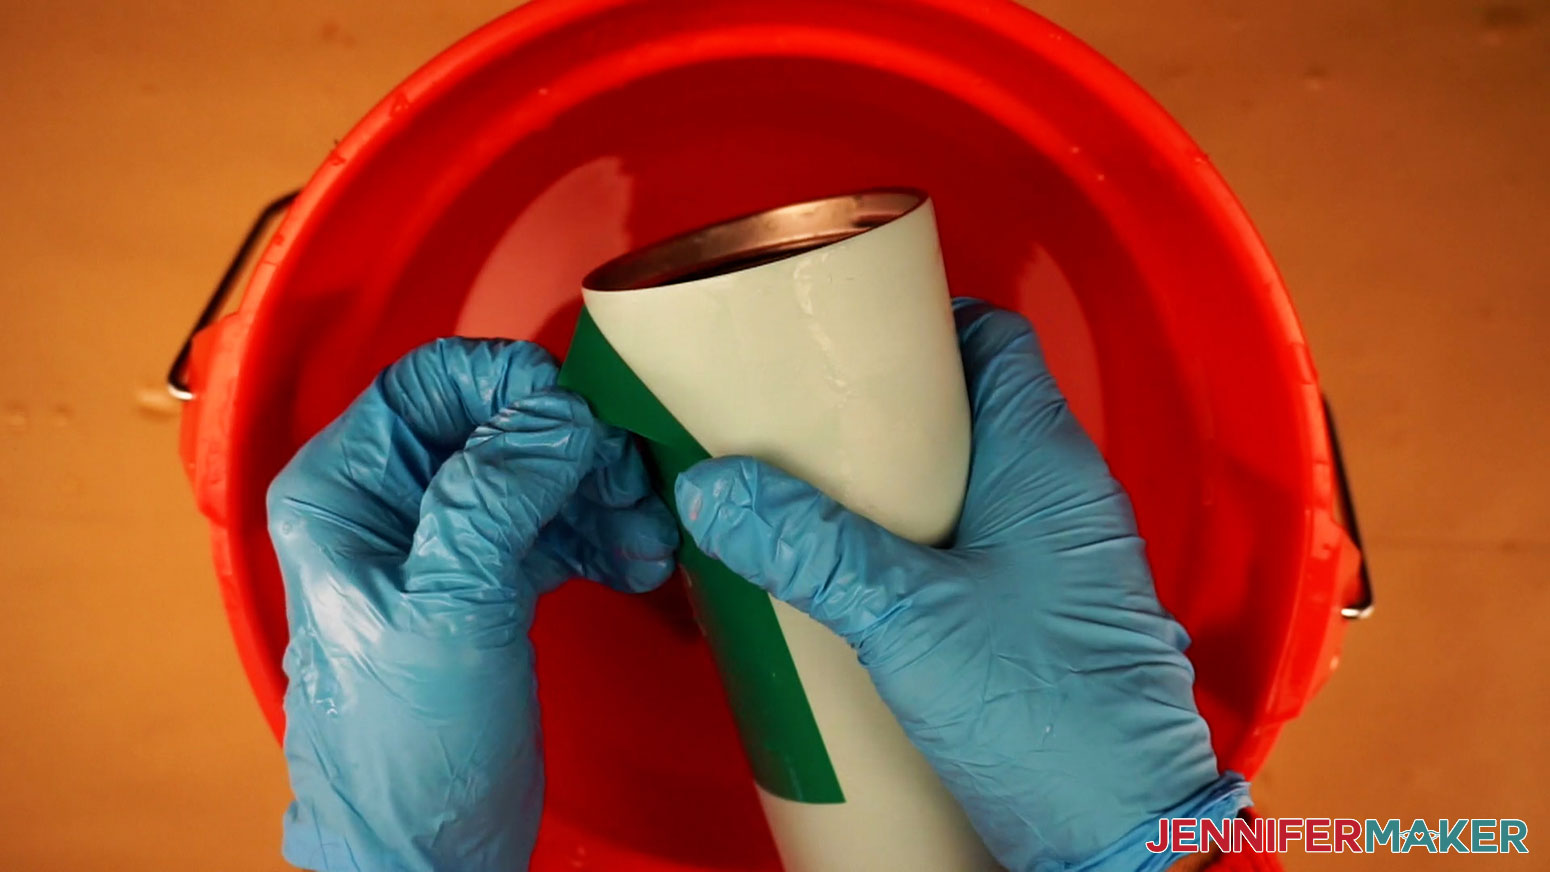
Use the blue Scotch Bright pad to make sure you have hard edges for your designs. Rinse off any extra debris.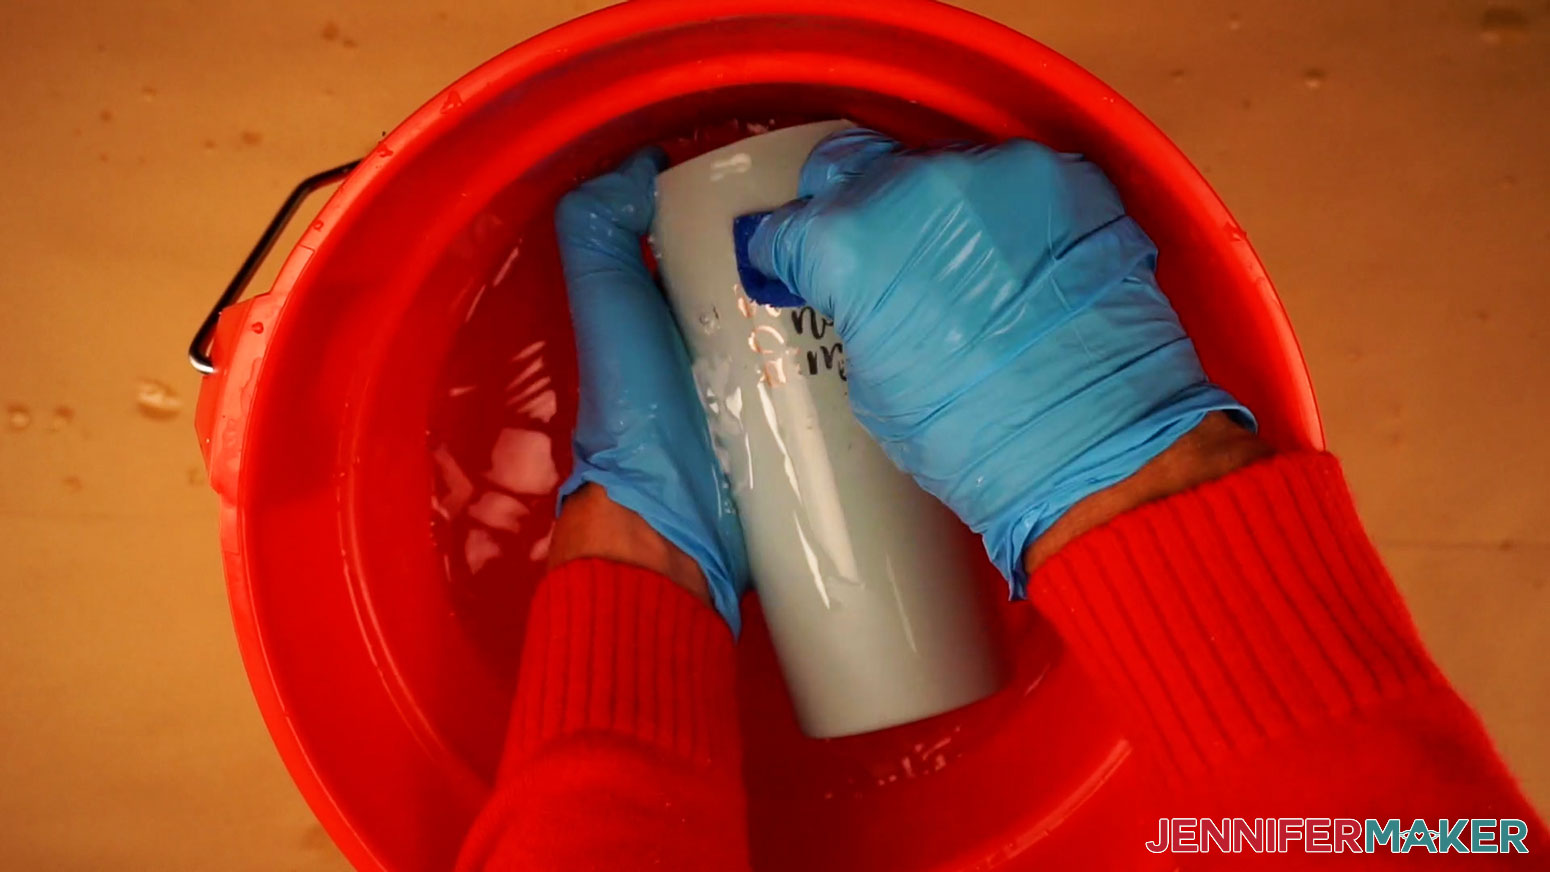
Once you're happy with the results, clean or dispose of your tools, containers, brush, and dry off the tumbler. 
Glossy Tumbler
If you want to try a more glossy tumbler, follow the same steps to apply the Citristrip, then wrap aluminum foil around the cup, covering the whole thing.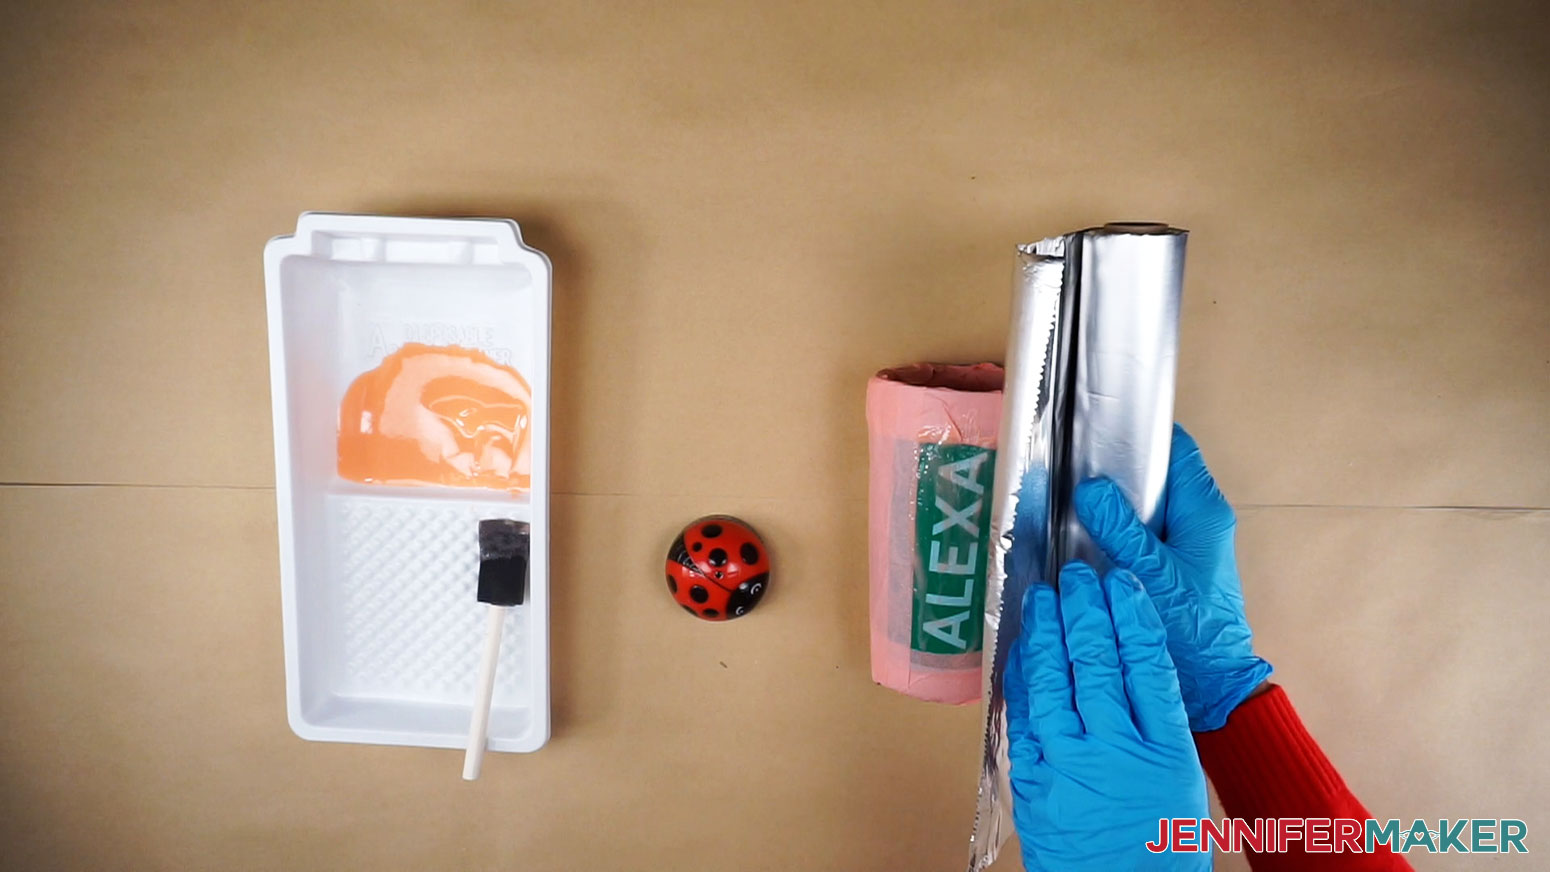
Then, swap your disposable gloves for heat-resistant ones and set the heat gun to 700°F. Heat the tumbler with the machine for one minute, being careful to keep it moving. This will go a lot faster than the traditional way of letting it sit!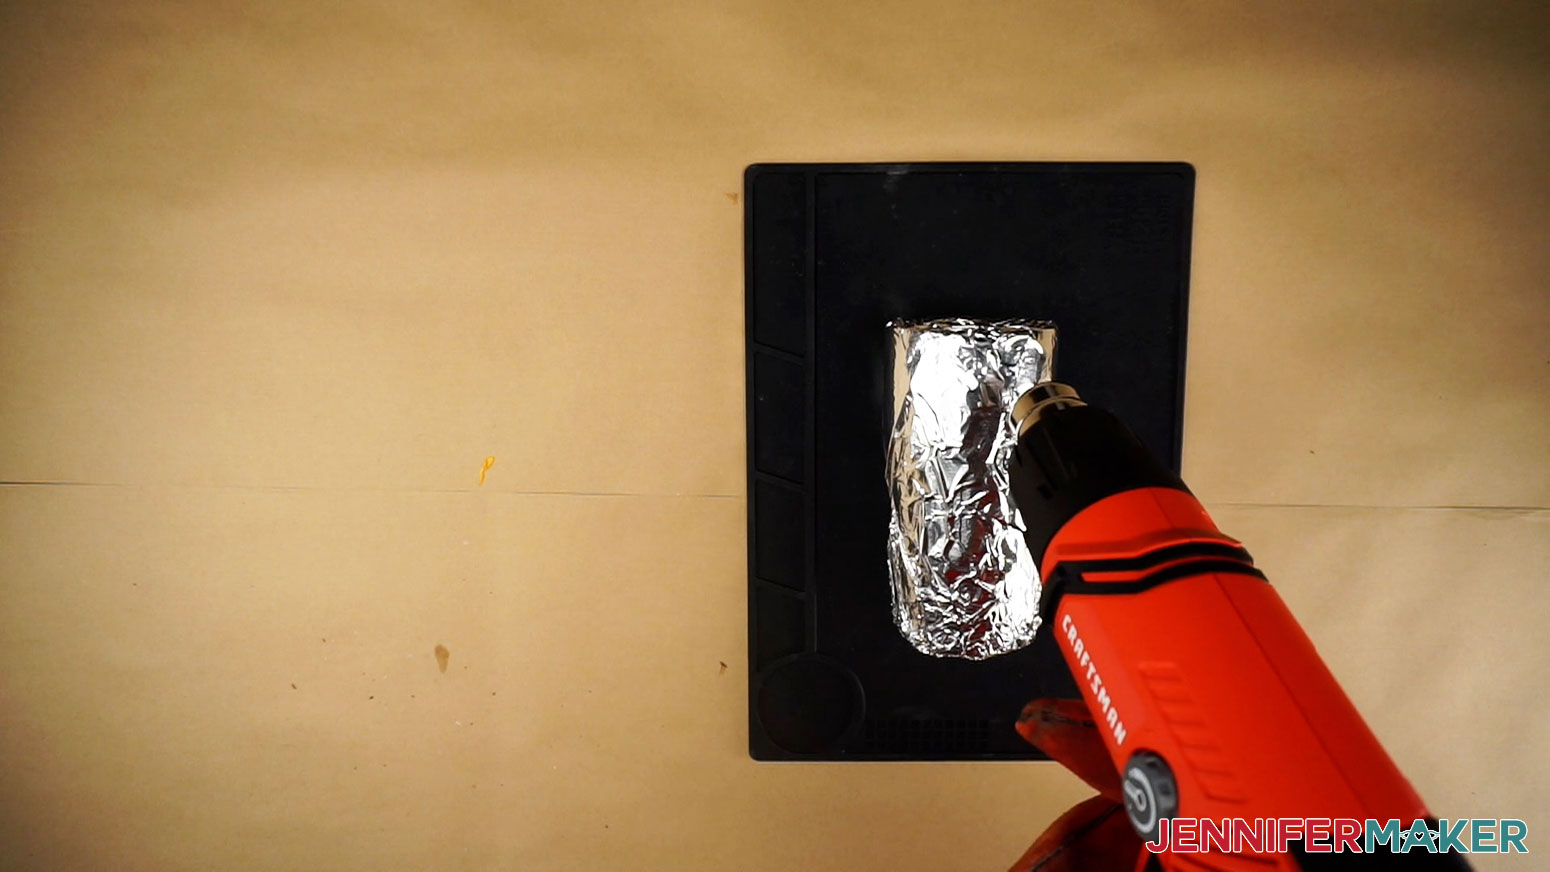
After a few minutes, place the wrapped (still hot) tumbler on a fire safe work surface, like a silicone mat, free of any flammable debris.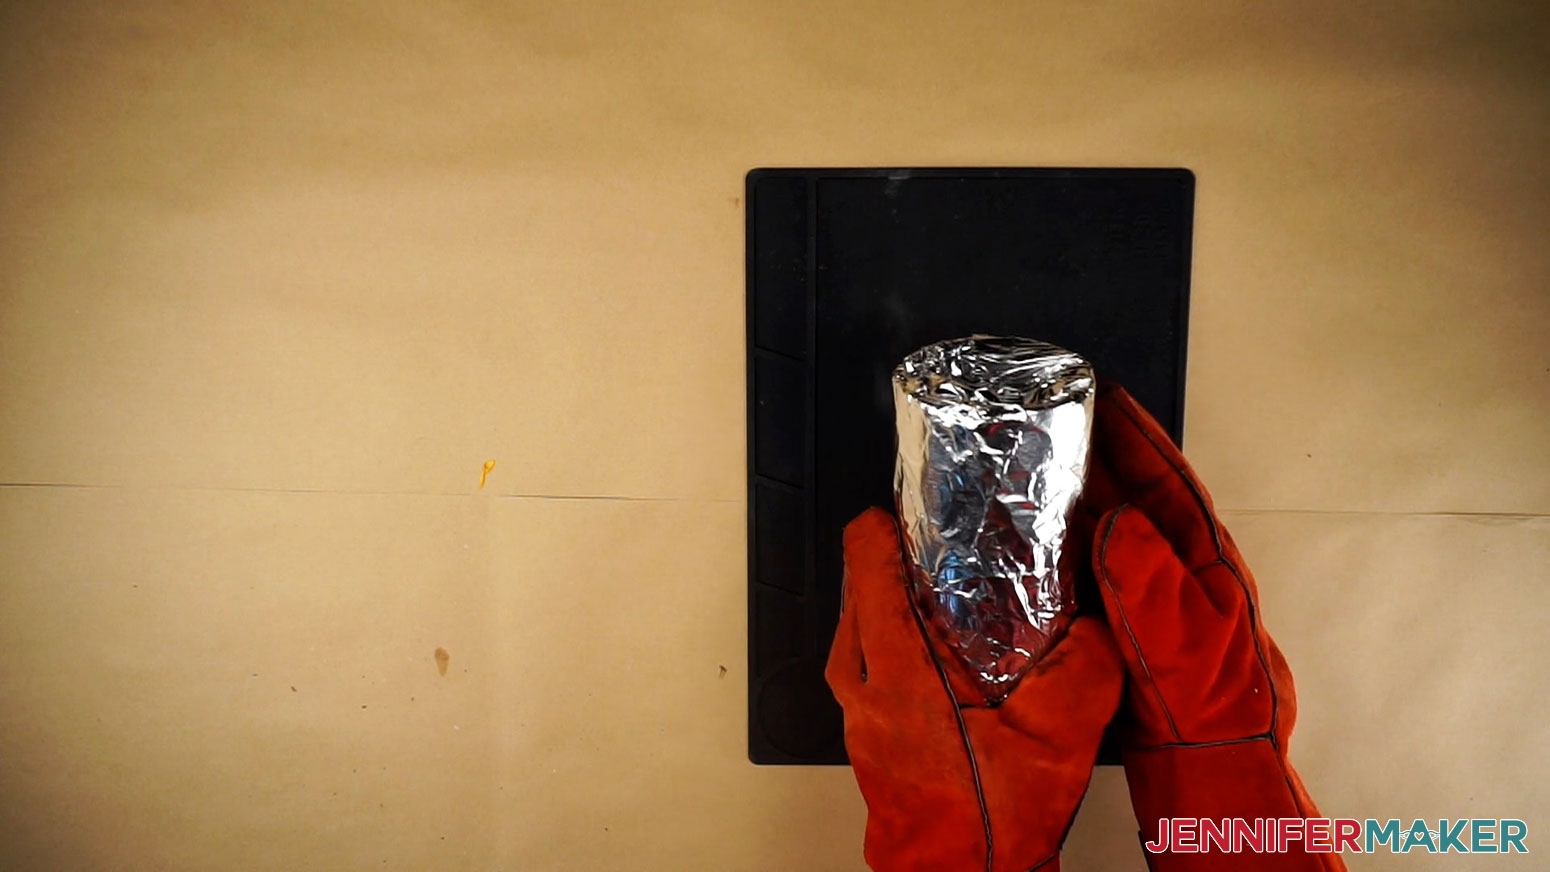
Once the tumbler has cooled for a few minutes, remove the aluminum foil.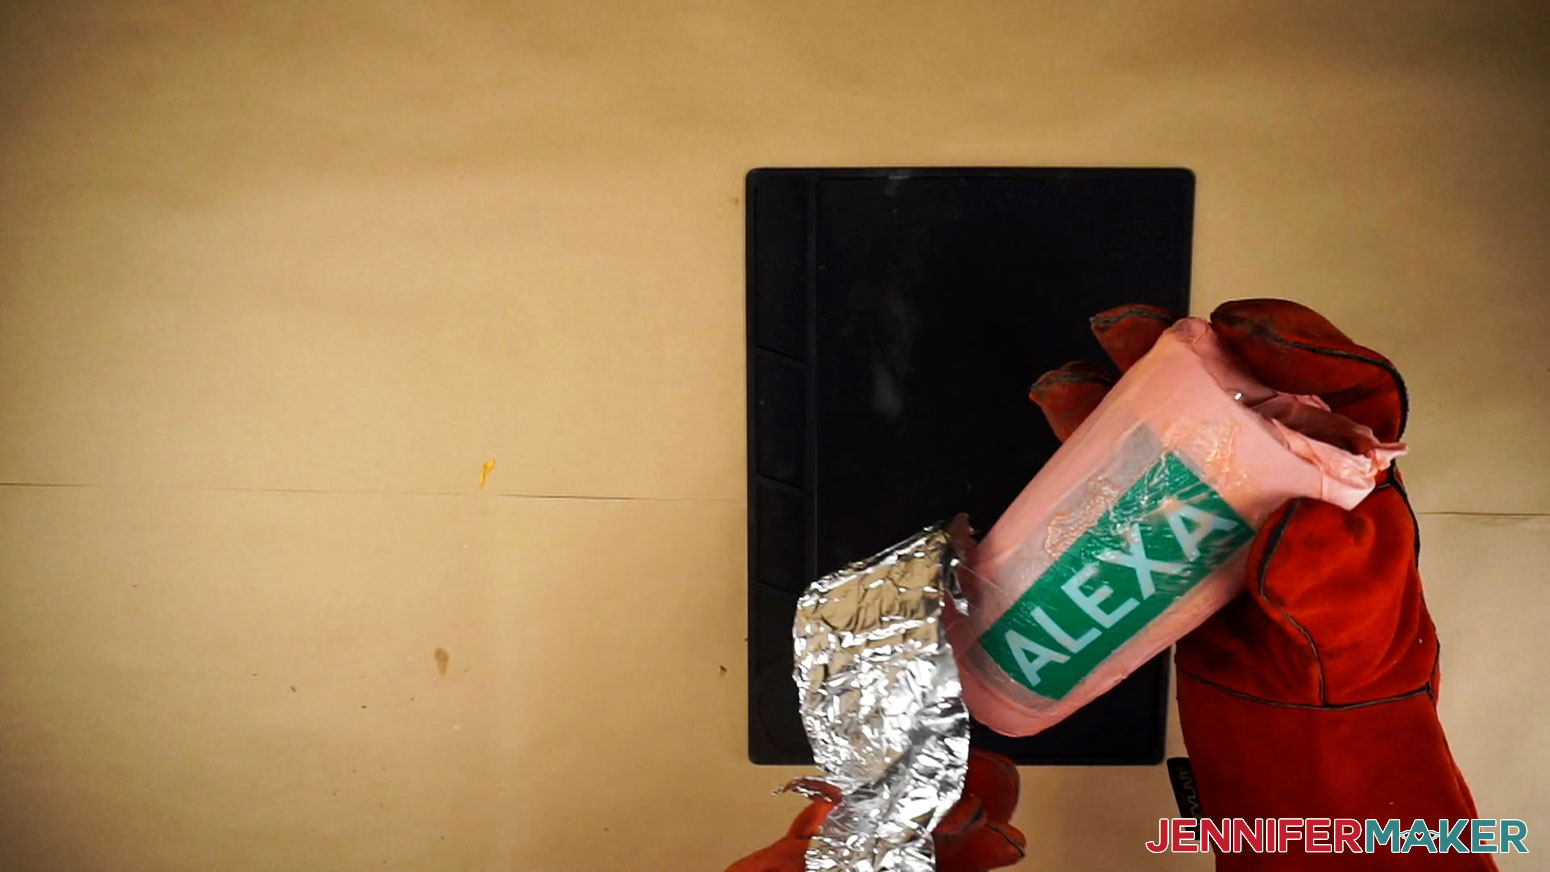
Just like the other process, get your bucket of water and wipe off the gel. This time, use the more delicate pink scrubber to remove the coating material. It should be much easier to remove, but be careful, a glossy tumbler is also much easier to scuff. Try leaving the stencil on to make sure the gloss tumbler stays glossy.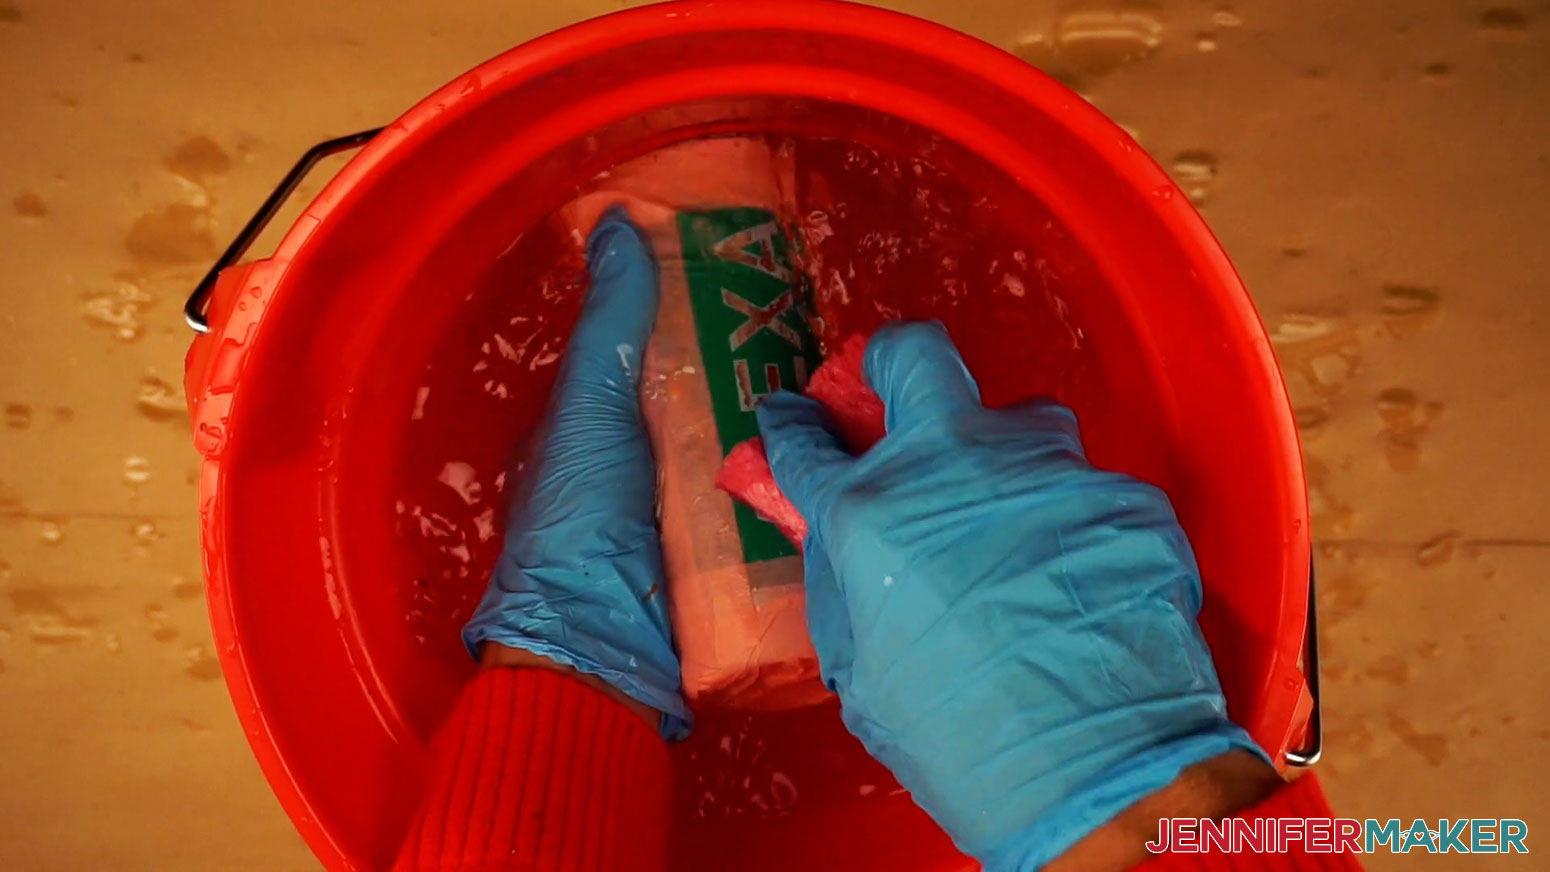
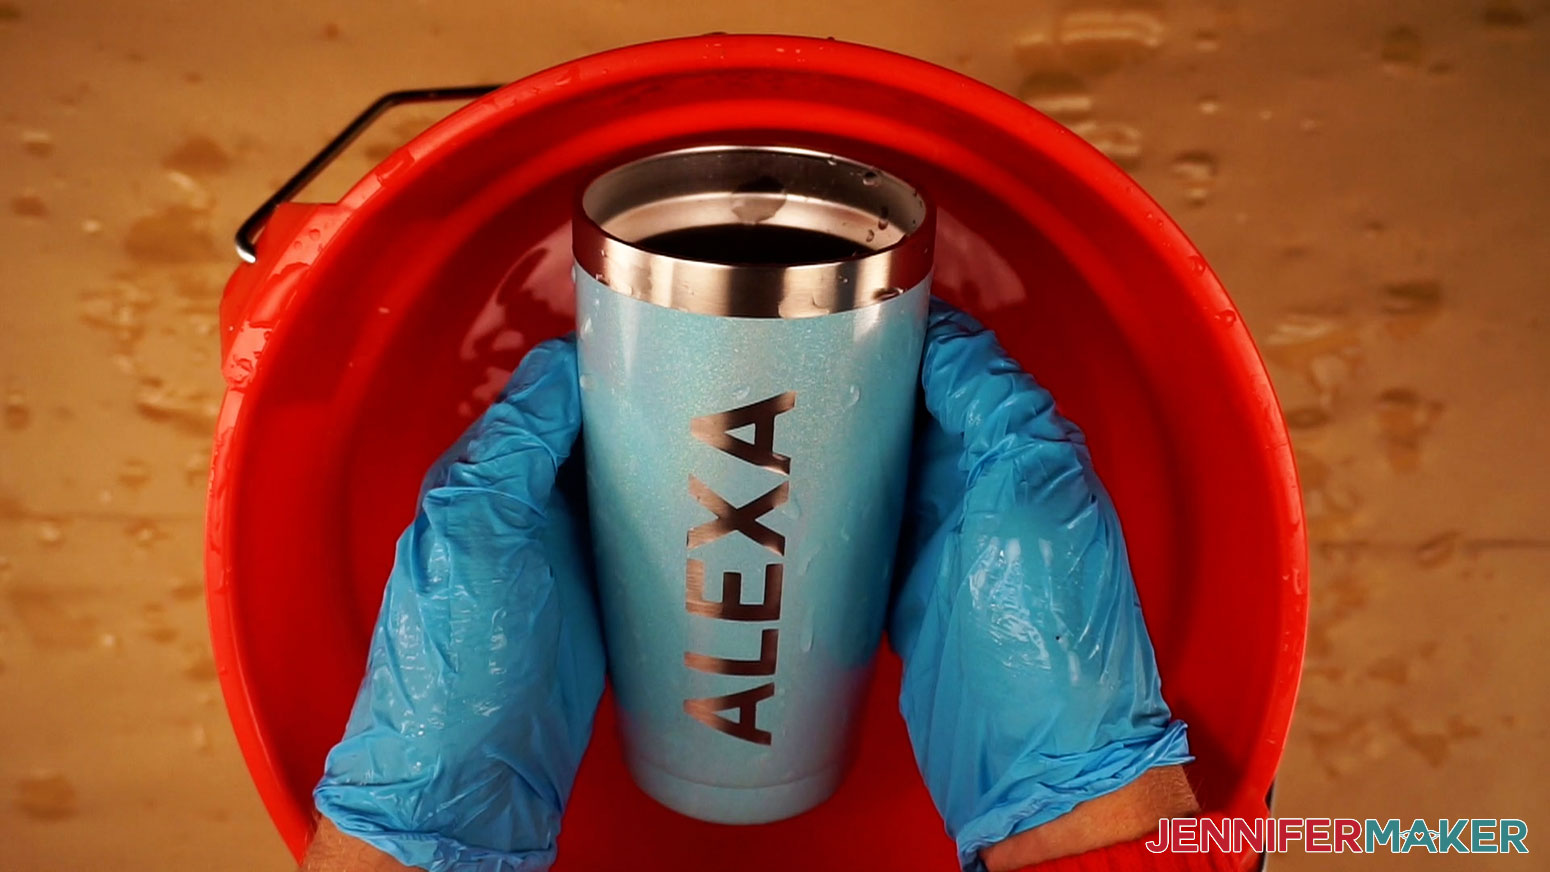
STEP 5: SHOW IT OFF!
Enjoy your tumbler or give it away as the perfect holiday, or everyday gift. To take the best care of your cups, hand wash and dry them with a dish towel.Notes
Answers to Your Questions About How to Etch Tumblers With Citristrip
Q. How long do you leave Citristrip on tumbler?
I had the best results at 50-60 minutes, with shorter etching times on hot days. Some tumblers will take more or less time, so just use my findings as guidelines.
Q. What tumblers work with Citristrip?
Yeti cups, Toki Powder coated tumblers, and Civago Gloss and Gradient Tumblers worked best for me, but I encourage you to experiment with other brands!
Q. How do you use Citistrip on tumblers?
My favorite way is to make a Cricut vinyl stencil to protect the negative space around a design. Then, add a little bit of Citristrip and let it sit and then remove it according to my tutorial. You could also use stencil vinyl.
Q. Does Citristrip work on Yeti tumblers?
Yes, I got some of the best results on my Yeti water bottle!
Q. Do you have to use mineral spirits after Citristrip?
A. I did not find mineral spirits necessary to remove the Citristrip gel. Water worked well on my painted tumblers. I also did not find a brillo pad or steel wool any better than the gentler scrubbing sponges I’ve listed.
Get my free designs to Etch Tumblers with Citristrip!
If you etch tumblers with Citristrip using this tutorial, I’d love to see your project! Please share a photo of your etched tumblers in our Facebook group or tag me on social media with #jennifermaker.
Love,

Want to remember this? Save this tutorial on How to Etch Tumblers with Citristrip to your favorite Pinterest Board!