
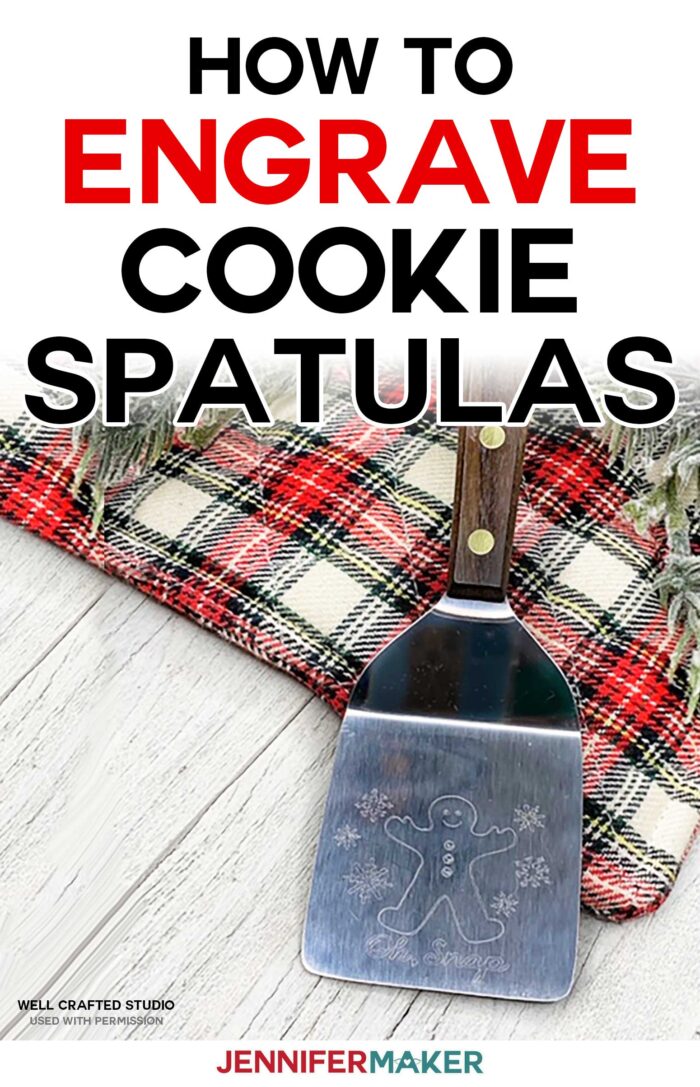
Learn how to engrave a cookie spatula with the Cricut Maker and its engraving tip! PLUS, get templates to design your own personalized engravings for spatulas, turners, and servers.
When the engraving tip for the Cricut Maker came out this summer, I engraved every metal I could think of— from aluminum and copper to dog tags and Mason jar lids. But I never thought to try a metal utensil like a cookie spatula, pie server, or spoon! So when fellow blogger Jen Swift posted her engraved pie server in our Facebook group, I was awestruck and knew I needed to try it. So for Day 6 of The Great Maker 25-Day Gift-Away Challenge, I am showing you how to engrave a cookie spatula with the Cricut Maker’s engraving tip Jen is actually providing all the instructions for us here as a special guest post, which I use in today’s video!
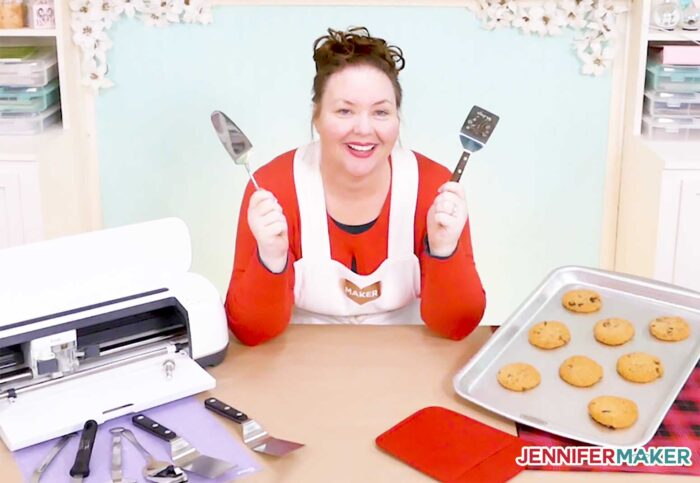
See exactly how to engrave a cookie spatula with a Cricut Maker in the tutorial video below (or keep scrolling if you prefer a step-by-step photo tutorial):
Here is Jen’s gift to US…. an entire tutorial on how to engrave cookie spatulas. Take it away, Jen!
Hi! I’m Jen from Well Crafted Studio, and I am so excited to be able to share this project with you! I know from the things Jennifer has said that she has an AMAZING reader community that is always ready and excited to try new things! This engraved Christmas Cookie Spatula project demos a new technique for engraving an object with a handle that uses the Cricut Maker and the Engraving Quick Swap Housing and Tip. Like Jennifer, I love to experiment and find out what’s possible. When I got the engraving tool, I saw it as a challenge to try new things. Which led me, through some trial and error, to figure out a way to engrave objects like pie and cake servers!
When THAT worked, I wanted to try and engrave even more things – like these cookie spatulas! Not only are they easy to make, but they’re an inexpensive handmade gift that you’ll love to give. If you pair them with a cookie mix and some baking mitts, they’re the perfect “little” holiday gift for teachers, neighbors, or co-workers. And can you imagine how amazed your guests will be when you hand them out as favors at your Christmas Cookie Party? Sweet, right? So thanks again to Jennifer and to you, for giving me this chance to share this project tutorial with you! And I’m beyond excited that JENNIFER MAKER (yup, fangirl moment) is going to be the one to show you how simple it is to make these engraved Christmas cookie spatulas!!!
Ready? Let’s engrave some cookie spatulas with our Cricut Makers! This post contains some affiliate links for your convenience (which means if you make a purchase after clicking a link I will earn a small commission but it won’t cost you a penny more)! Read my full disclosure policy.
Materials to Engrave Cookie Spatulas
- This Cookie Spatula (inexpensive) or this This Lovely Cake Server (polished stainless steel)
- A Cricut Maker
- Engraving Tool for the Cricut Maker (with Quick Swap housing or just the tip)
- Cricut Strong Grip Mat (purple)
- Painter’s Tape
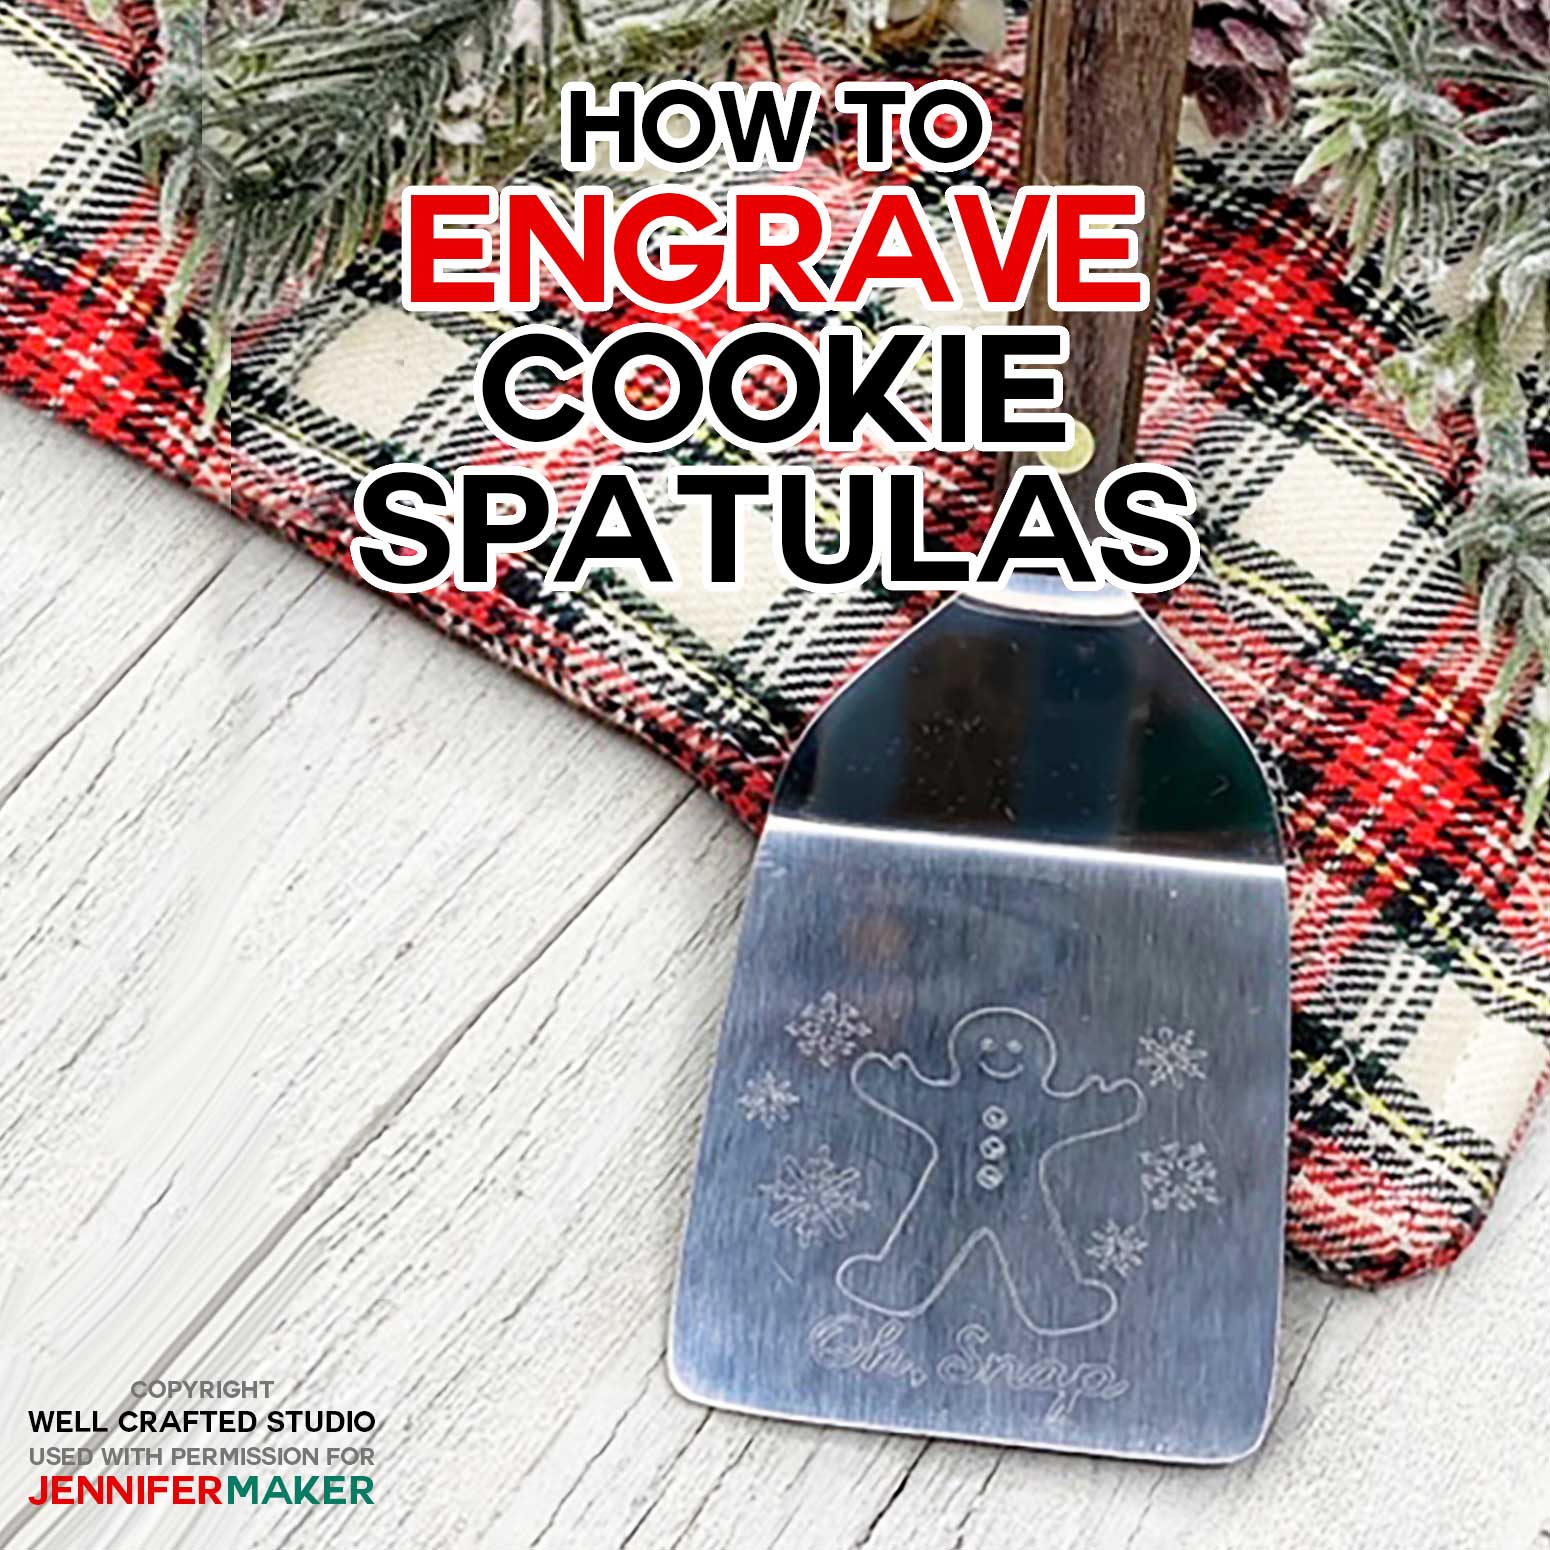
- Design #171 – The free SVG/DXF/PDF cut file/pattern for the gingerbread man (available in my free resource library—get the password at the bottom of this post)
How to Engrave a Cookie Spatula
Step 1: Get the free gingerbread man pattern.
Download the free personalized gingerbread man and templates (Design #171) from my free resource library (get the password to the library in the form at the bottom of this post).
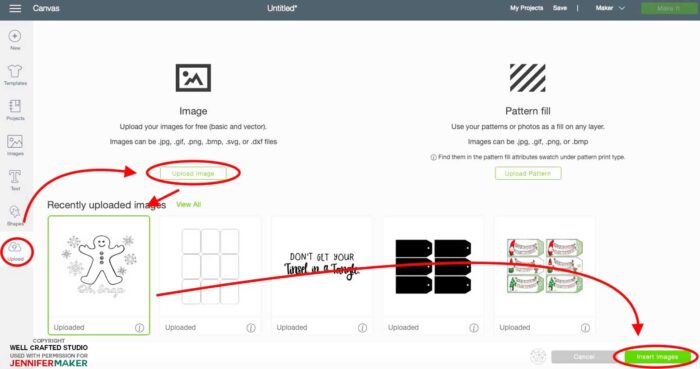
Step 2: Upload the pattern to Cricut Design Space
If you’re not sure how to upload an SVG cut file to Cricut Design Space, watch this helpful video training series I made. If you’re on an iPhone or iPad, here’s how to download and upload SVG files to the Cricut Design Space app.
Choose the Gingerbread Man Design from your uploaded images and click on “Insert Images” to upload it to your canvas. Insert the image into your canvas.
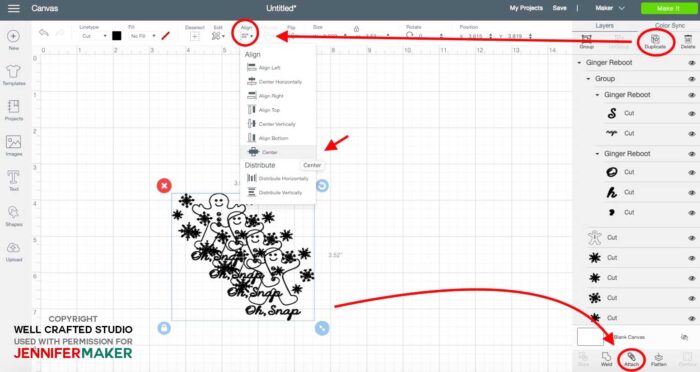
Step 3: Duplicate, Align, and Attach the Design
To get a deeper engraving, use the “Duplicate” button in the layers panel and duplicate the design 2-3 times. Select all, and from the drop-down options under “Align” in the edit panel, choose “Center.” The images will now stack perfectly.
IMPORTANT: Also be sure to group.
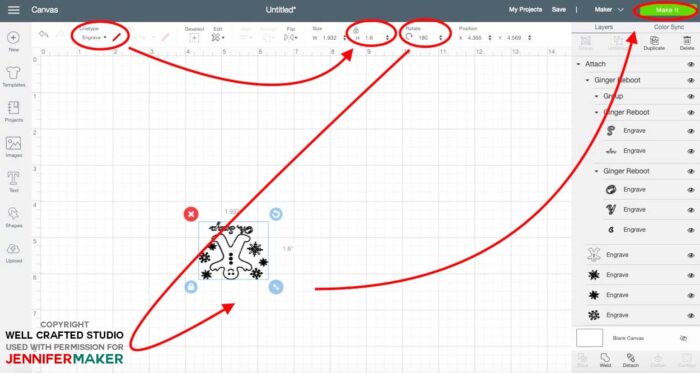
Step 4: Change the Linetype to Engrave, Size the Design, and Rotate it
With all of the layers still selected, click the “Attach” at the lower right side of your screen. Change the Linetype from “Cut” to “Engrave.”
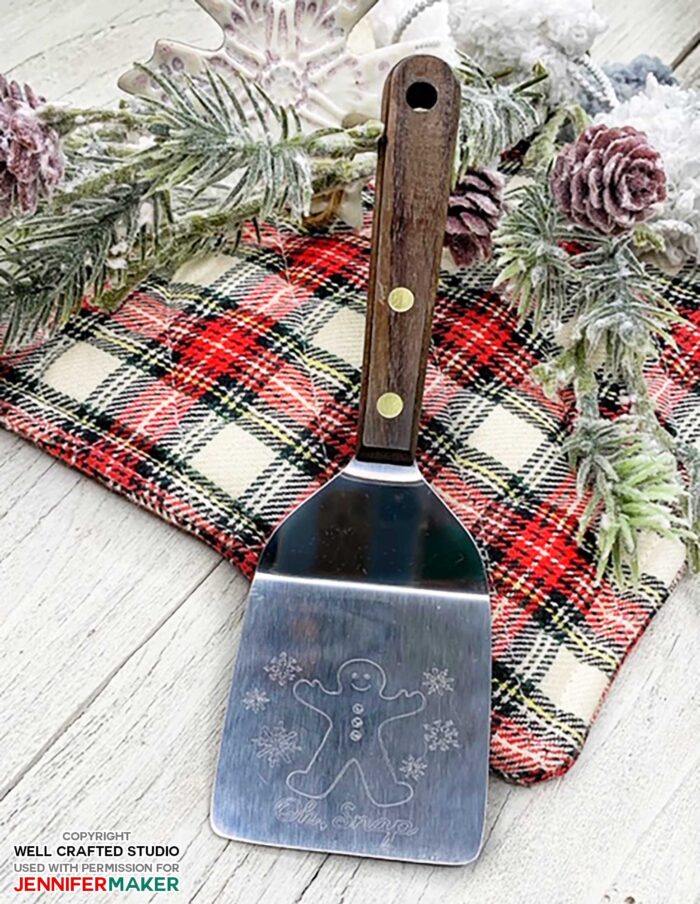
The spatula we’re using has an engravable surface that is about 2.25″ x 2.25″. Because of the room that the roller needs, Cricut automatically limits us from placing a design any closer to the edge of the grid than 11.75″. So those are the two restrictions you have when you size your image.
I found that this design fits best if we change its height to 1.6″. When we do this, the width will change automatically to stay in proportion. The last thing to do before we are ready to go is to rotate the design upside down. The top toolbar has a rotate feature that is perfect for this. Just type in 180, and the design turns perfectly into position. And we’re ready to cut!
Whoo-hoo! Go ahead and click on the “Make it” button in the upper right corner of your canvas! Now it’s time to get the mat ready.
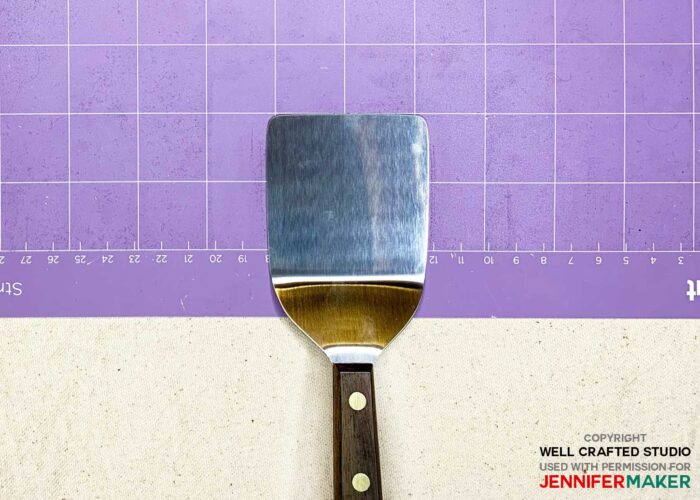
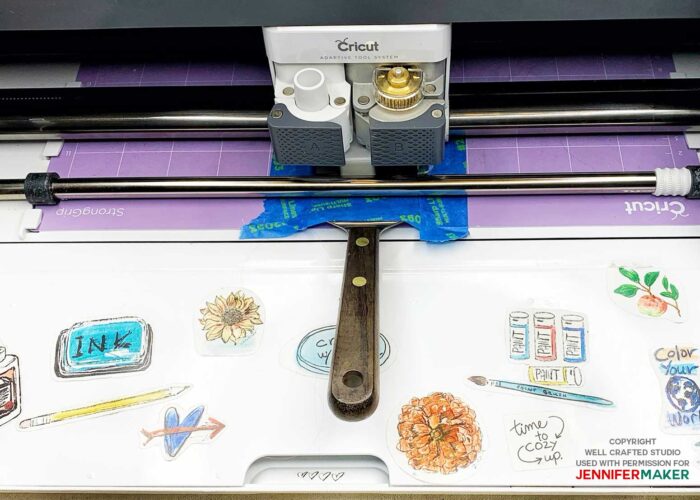
Step 5: Tape the Spatula to the Edge of your Mat Upside Down
This is the part where we talk about the handle. It’s kind of what made engraving servers or spatulas seem impossible, since the handle is too big and/or curved to go through the Maker. The handle jams the rollers, but the flat metal part of a server or spatula can go through so I kind of noodled on it. The Cricut machine doesn’t feed the entire mat through the rollers. So if we position our object so that the handle hangs off the bottom edge of the mat, then only the part we want to engrave on actually goes through the machine!
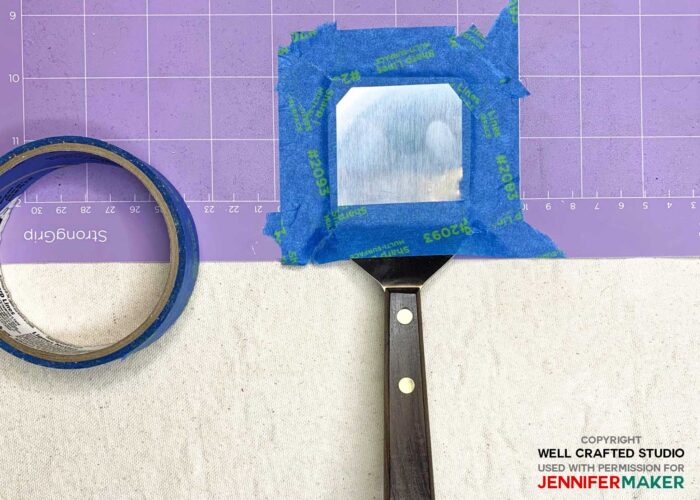
So with this project, you’ll want to place your spatula’s top edge so that it’s at the 10″ horizontal grid line and then center it on the 6″ vertical line. If you don’t want to eyeball the center, you can use a small tip sharpie and a ruler to find and mark the center of your spatula. Center and position the spatula as shown.
Press down on its surface, so you get a strong adhesion. Then use some painter’s tape and tape just along the edges. You don’t want to engrave through the tape as this will gum up the engraver. The Sharpie will rub right off if you do it right away.
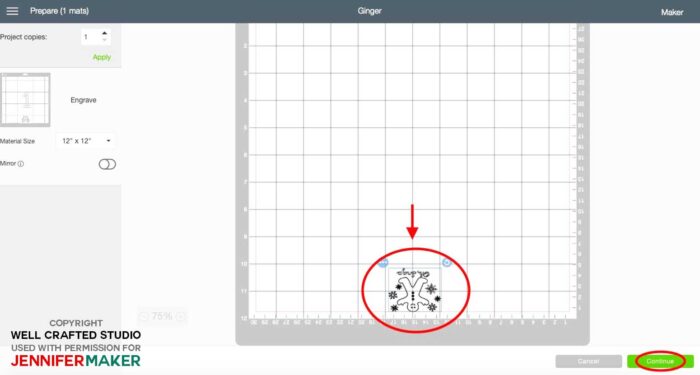
Step 6: Move the Design to the Center and Bottom Edge of the Screen
On the next screen, you’ll see a representation of the mat with your design on it. Drag your design to the very bottom of this mat image until it hits the red margin line, and then center it on the 6″ vertical line. With this design, it’s easy to see how to position it because we can line up the center grid line with the buttons on our Ginger man. Oh, snap! Now just double-check that the spatula’s position on the mat matches the location of the image on the screen. Finally, select the “Continue” button on the lower-right corner of the screen. Almost done now!!!
Step 7: Prepare to Engrave your Cookie Spatula
Turn on your machine and move the star wheels all the way to the right side of the roller. Load your mat into your Maker. Follow the prompts on the screen, choosing “Stainless Steel” as your material setting. Make sure you’ve inserted your engraving tip.
Step 8: Engrave your Cookie Spatula!
When prompted, press the flashing go button on your Cricut Maker. This will start the engraving. Because it’s going over the design three times, it will take a little longer than you may be used to. It will take about 10 minutes. Now watch it engrave a cookie spatula! Once it’s finished, you can unload your mat and then peel off the tape.
Pro tip: As I peel off the tape, I use the adhesive side of the tape to press on the engraving to remove the surface metal shavings. Don’t use your hand to wipe across the surface as you could end up with embedded bits of metal in your hand. Ouch!
And that’s it!

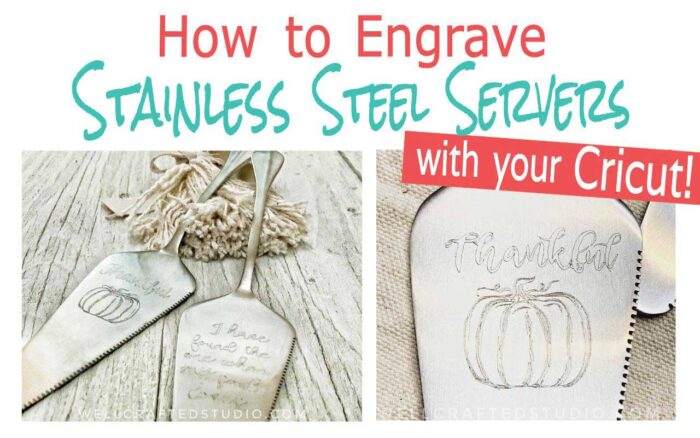
I hope you enjoyed this project tutorial and can’t wait to make your own engraved Christmas Cookie Spatula! If you’d like to see how to engrave on a pie or cake server, I would LOVE to have you stop by and read my post, How to Engrave Stainless Steel Servers with a Cricut.
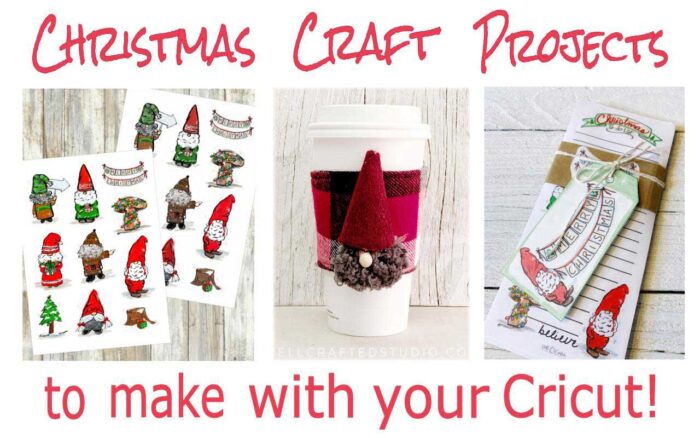
I also would love to have check out my Christmas craft projects! I have lots of free printables, stickers, and SVG’s to celebrate the season. I am a little heavy on the Gnomes, but I’m adding new holiday projects all season long. I’d love to have you come and see!
Thank you, Jen! Great tutorial! She also provided some important reminders, that I’d like to pass along to you:
Always Tape Down the Spatula
You may be tempted to not tape down your cookie spatula because you have a new StrongGrip mat that seems like it would be sticky enough, but always tape it down. If it moves for any reason, it can get caught under your rollers. Just tape it down and avoid this possibility.
Safety First
Don’t leave the room while the Cricut is engraving. If something happened where the spatula got caught and you didn’t recognize it, who knows what might happen. So staying close during the cut is just smart.
Test Your Design First
If you want to create your own design to engrave a cookie spatula, use a piece of aluminum flashing sheet to test the size of your design first. You can trace the size of your spatula onto the sheet, then experiment with the placement of the design based on where the rollers were. This will help you determine how high and wide you can make your design.
Make Sure to Move the Star Wheels!
Jen tells me when she forgot to move them, the Cricut had less room because they took up another ¼” or so. That mattered, and her design was messed up. So be sure to move them when you go to engrave a cookie spatula!
Get the free spatula engraving pattern and gingerbread man SVG cut files and patterns
If you engrave a spatula or server, please show us! Please share your photo in our Facebook group or tag me on social media with #jennifermaker . You can even earn two bonus entries for my 25-Day Gift-Away giveaway if you upload a photo of your version of this project by December 25th.
See all of the projects, tutorials and free designs in The Great Maker 25-Day Gift-Away Challenge!
Love,

Want to remember this? Save the Engraved Cookie Spatula Tutorial to Your Favorite DIY Pinterest Board!


Aaaahh!!!! I am SOO LOVING THIS!!! I just watched the video and am filled with gratitude. Thank you!!!
Woohoooo! So happy you like it, Jen! I was hoping you’d say that. You did a fantastic job on this tutorial and I’m very grateful you shared it with all of us. I hope you’ll do another guest post for us in the spring!
loving the videos…
I love u 2 Jennifer. Love your projects. Have not started anything yet but going to after Christmas for next year I hope. Bonus word. MENORAH