Learn how to create a photo gallery shadow box with layered frames made from cardstock!
I absolutely love showing off photos of my family and our favorite memories! But sometimes a plain old photo frame just doesn’t capture the magic of the moment. Shadow boxes are always a great choice for showcasing amazing pictures, and layered cardstock will always be a simple yet elegant way to add depth and dimension to a shadow box frame for easy wall decor. And with the help of my Cricut cutting machine, it’s a breeze to create beautiful shadow boxes in a wide variety of styles. Sounds like a good reason to combine both of these ideas into one to create a shadow box with layered frames! Want to make a photo gallery shadow box of your own? I’ll show you the easiest way to size digital photos (but you can use your own photos, too!) to fit inside a layered photo frame, and how to cut and assemble all of the colorful layers inside a shadow box.
Watch the full step-by-step video tutorial on making a photo gallery shadow box:


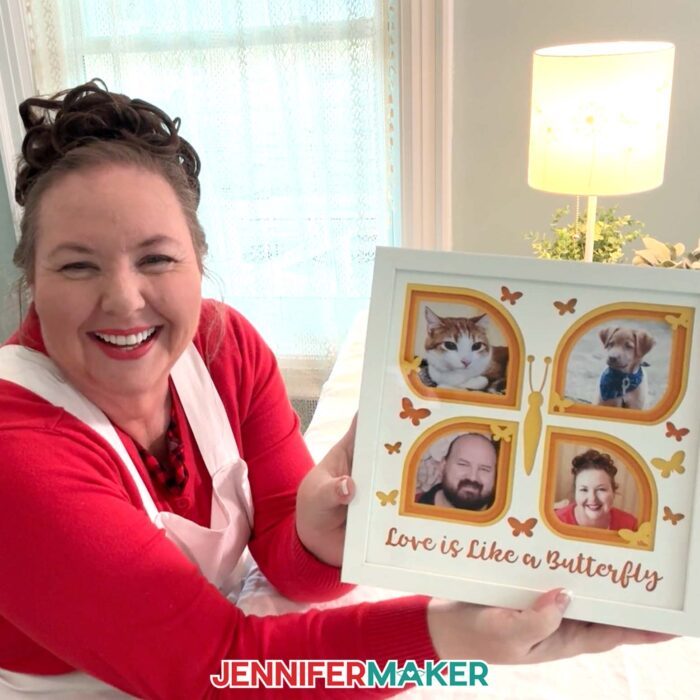
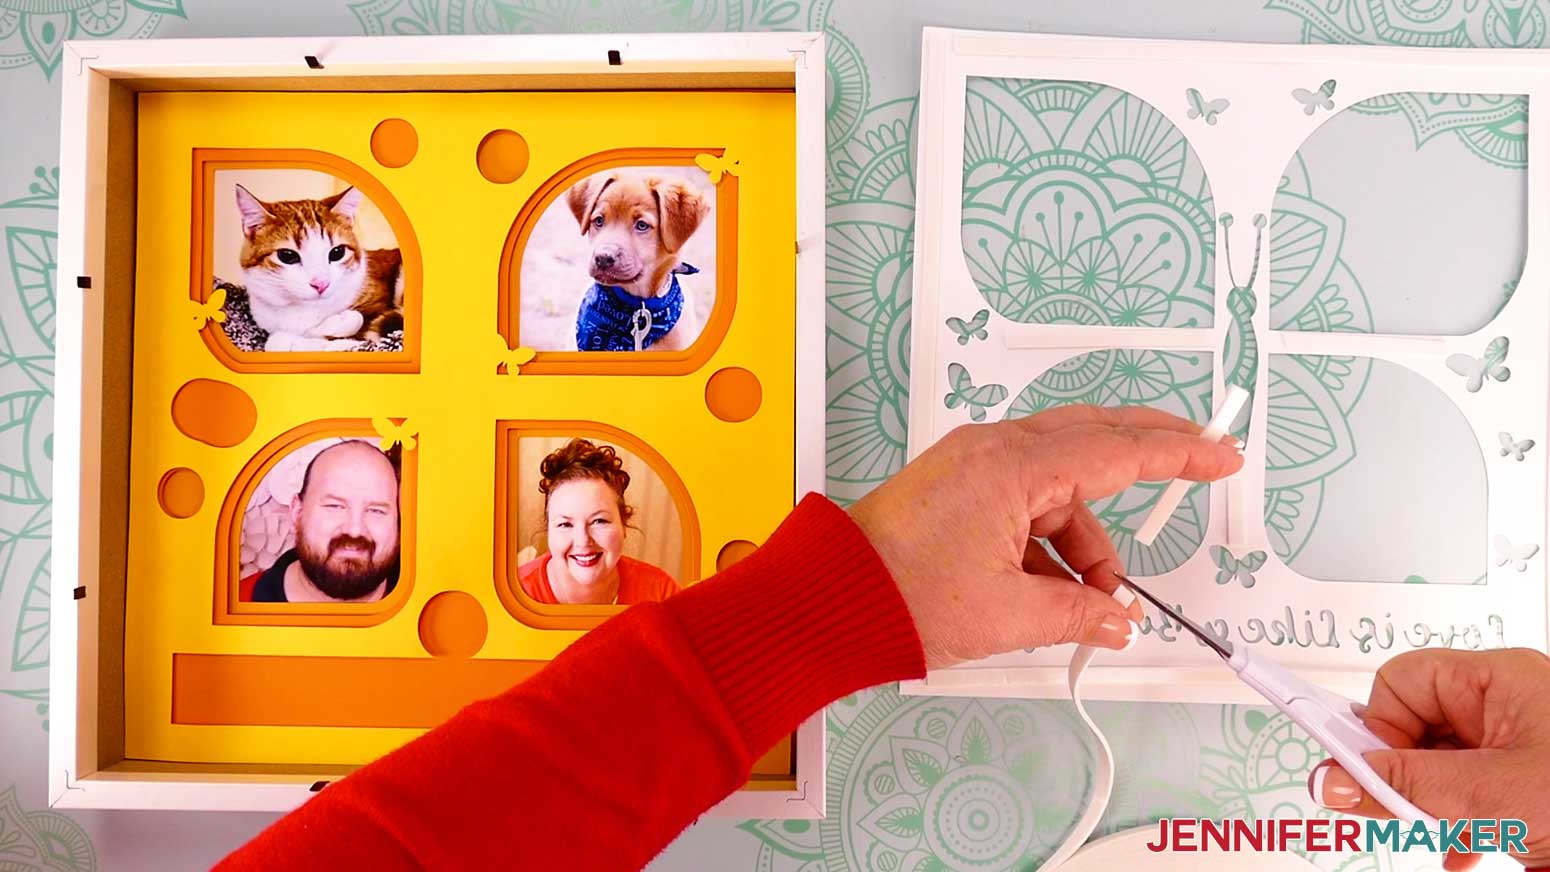
I have two versions of my photo gallery shadow box to share today. The first design features a butterfly to celebrate love and family. I love how the butterfly’s wings frame the photos! Just like how the wings are the most striking part of the butterfly, the four photos within the frames really grab your attention! Plus, butterflies are sometimes considered to symbolize finding beauty in all the small moments we experience every day. That’s exactly the essence I want to capture in my photos!
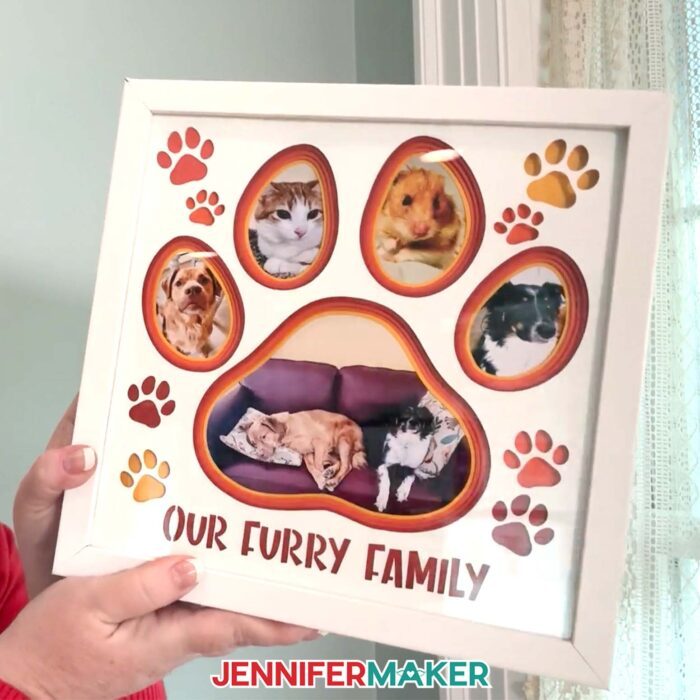
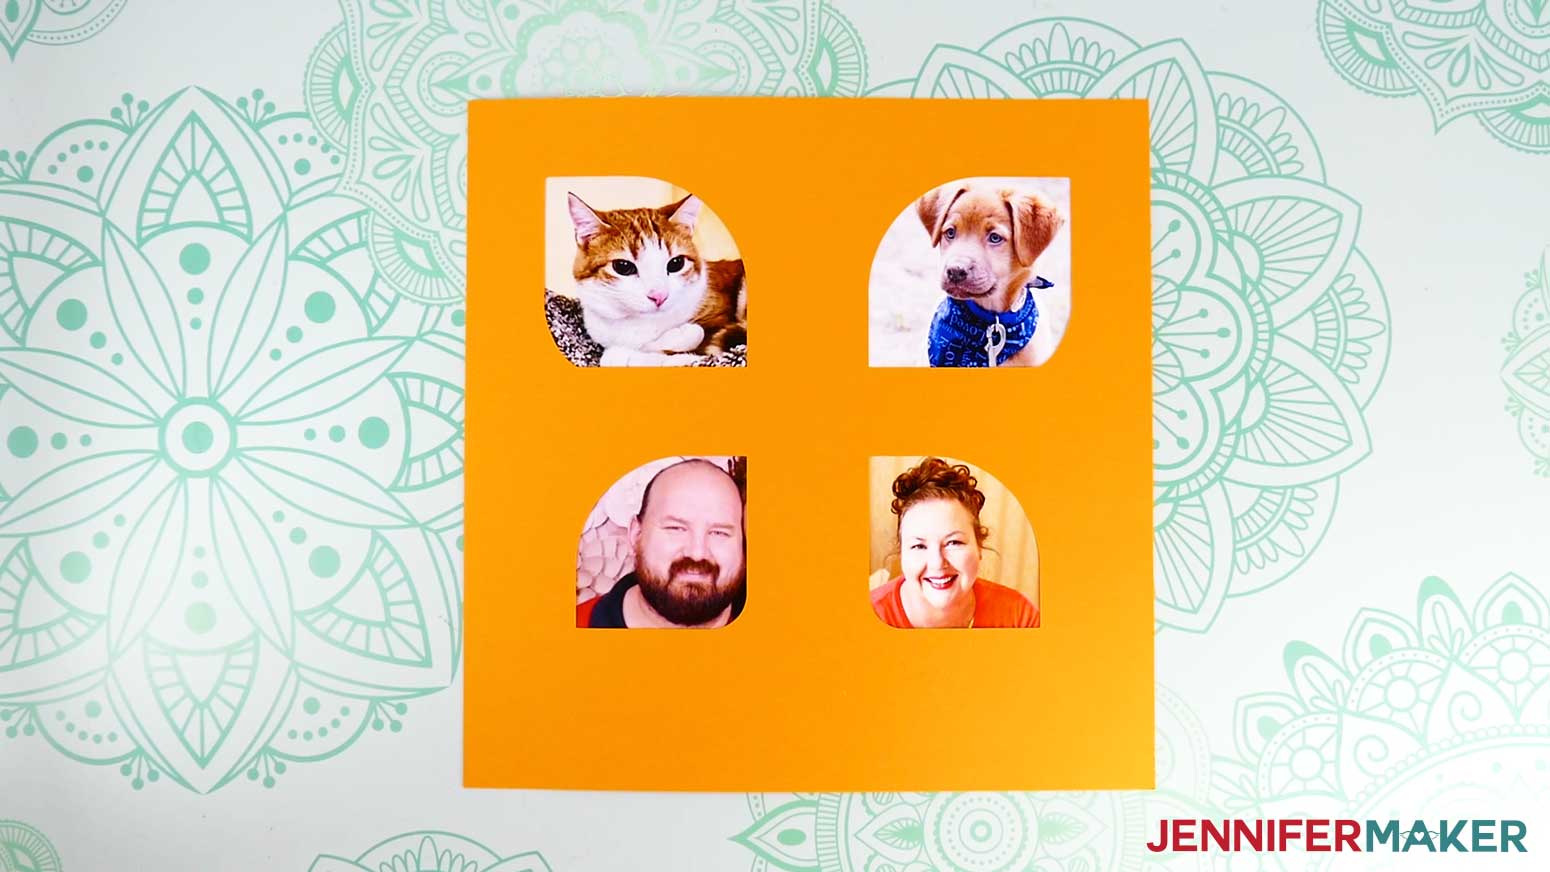
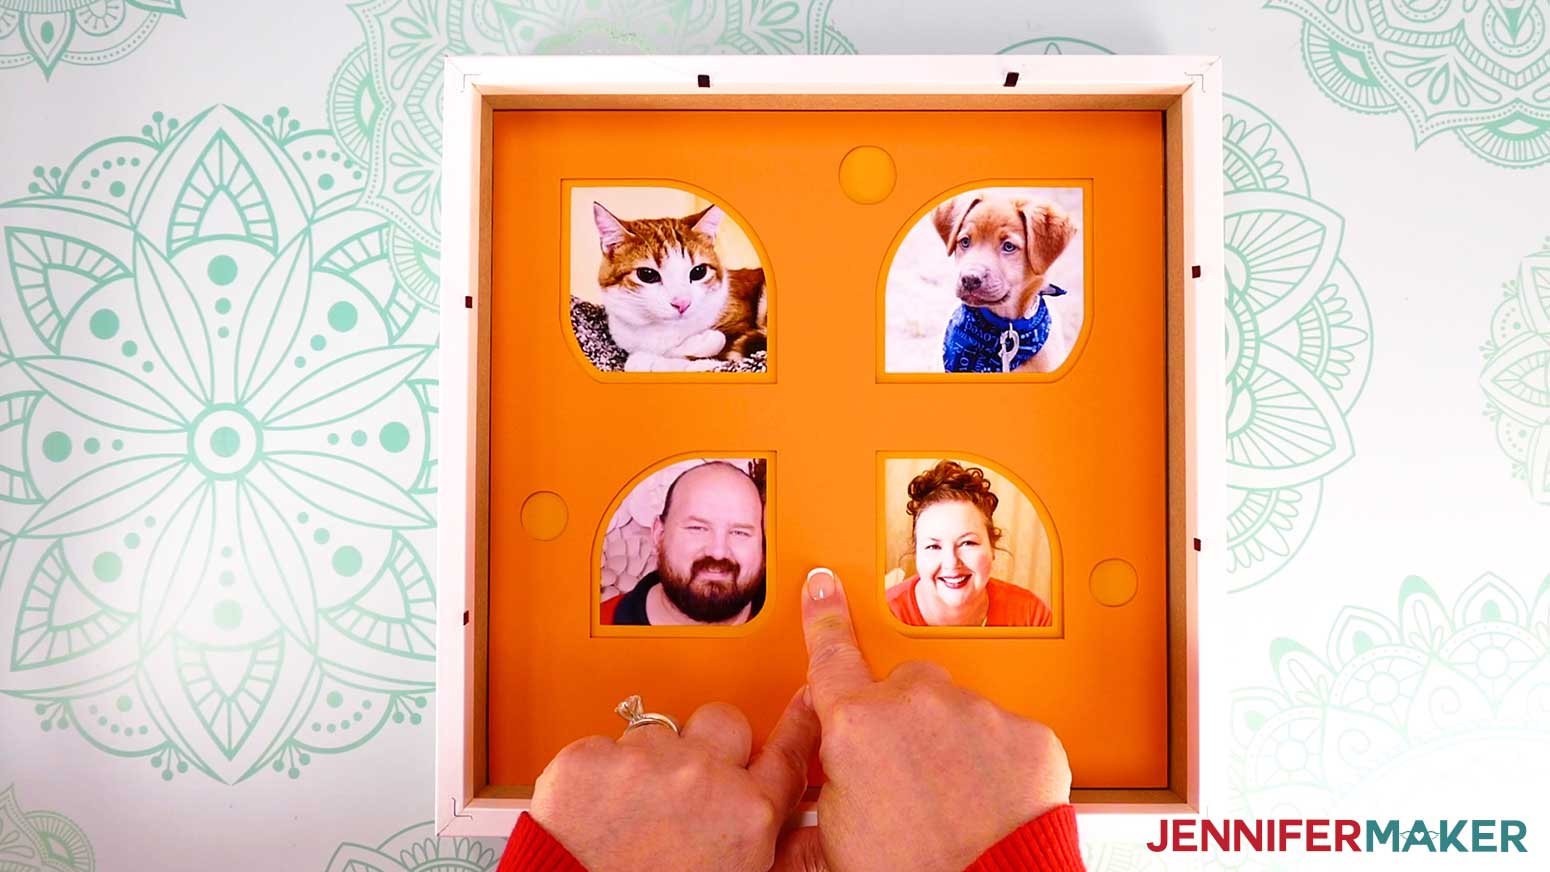
The other photo gallery shadow box design features a giant paw print, and is specially made to spotlight the furry members of our family. Our animal friends are just as much a part of the family as the humans! These four-legged balls of energy would never sit still long enough for a family picture, so putting them all together in a shadow box makes this a perfect addition to our wall decor.
Making a photo gallery shadow box is quick and easy! I’m excited to teach you how to cut and assemble one for your own gallery walls. First, you’re going to need some photos! I like to use digital photos for this project since I can preview how they’ll look inside the frames before cutting the cardstock layers. I’ll show you how to upload your images to Cricut Design Space and which settings to use for the best Print Then Cut result.
High-quality PNG and JPG files are the best kinds of images to use since they typically have a higher resolution than other image types, but GIF and BMP images are also compatible with Design Space. I’ll also help you adjust your photos for the perfect framing, and then we’ll print and cut our photos. For that you’ll need a few sheets of Matte Photo Paper for photo-quality prints with your home printer. And if this is your first time using Print Then Cut, I’ll walk you through the process from start to finish.
Next you’re going to need a few sheets of high quality 65 lb cardstock to make your photo gallery shadow box’s layers. I recommend using colored cardstock for the bottom layers with white cardstock on top to really make the colors pop! I like to use three similar shades to create a gradient effect, but you can use any colors you like. Add in some adhesives for mounting your photos and building height between your cardstock sheets, and you have everything that goes inside your 10″ x 10″ shadow box!
And if you’d like to create a custom design for your photo gallery shadow box layers, I can show you how to add custom size text and cutouts to reveal the colorful cardstock beneath your top layer with my Advance tutorial. Learn more about Advance here!

In the video tutorial for my photo gallery shadow box I demonstrate how to cut the design’s SVG pieces with my Cricut Maker 3, but you can also use an original Cricut Maker, a Cricut Explore series machine, or the Cricut Venture. I don’t recommend resizing to fit a Cricut Joy or Joy Xtra. If your cutting machine uses DXF files instead, you can find those versions in the design folder! You can also use the included PDF files to cut the layers by hand, but a cutting machine will handle the design’s intricate cuts quickly and easily.
You’ll also need some basic Cricut paper crafting supplies like a green StandardGrip machine mat to cut your cardstock. A spatula can be handy to remove the delicate pieces from the mat, and a scraper tool is so useful for removing any leftover bits that stay behind. If you use digital photos for your shadow box, you’ll need a color inkjet printer. And don’t forget to clean your shadow box’s glass with isopropyl alcohol and a lint-free cloth! Let’s see those photos!
Let me show you how to make a photo gallery shadow box! This post contains some affiliate links for your convenience (which means if you make a purchase after clicking a link I will earn a small commission but it won’t cost you a penny more, there is no additional cost)! Read my full disclosure policy.
Materials to Make A Photo Gallery Shadow Box
View my Amazon shopping list for the exact items I used!
- One (1) 10” x 10” Shadow Box Frame
- Three (3) Sheets of 65 lb. 12” x 12” Colored Cardstock
- One (1) Sheet of 65 lb. 12” x 12” White Cardstock
- Two (2) Sheets of 8.5″ x 11″ Heavyweight (61 lb.) Matte Photo Paper
- Double-sided Adhesive Foam Tape
- Clear Tape
- A way to cut your cardstock
- Cricut Green StandardGrip Machine Mat, 12” x 12”
- A Color Inkjet Printer (I used my Epson EcoTank)
- Brayer
- Weeding Tool
- Scraper
- Spatula
- Isopropyl Alcohol (to clean your glass)
- Lint Free Cloth
- Tweezers (optional)
- Measuring Tape (optional to measure the size of your shadow box frame)

How to Make A Photo Gallery Shadow Box
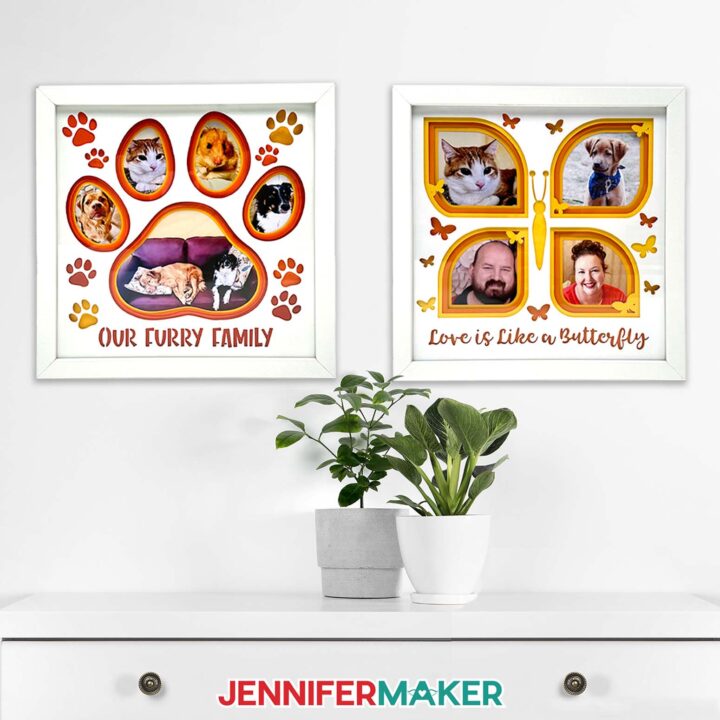
Photo Gallery Shadow Box
Learn how to create a Photo Gallery Shadow Box with layered cardstock!
Materials
- One (1) 10” x 10” Shadow Box Frame
- Three (3) Sheets of 65 lb. 12” x 12” Colored Cardstock
- One (1) Sheet of 65 lb. 12” x 12” White Cardstock
- Two (2) Sheets of 8.5" x 11" Heavyweight (61 lb.) Matte Photo Paper
- Double-sided Adhesive Foam Tape
- Clear Tape
- Design #688 (My free SVG/PDF/DXF design files are available in my free resource library - get the password by filling out the form at the bottom of this page)
Tools
- A way to cut your cardstock - I’m using the Cricut Maker 3, but you can also use the original Maker, the Explore series machines, or the Venture
- Cricut Green StandardGrip Machine Mat, 12” x 12”
- A Color Inkjet Printer (I used my Epson EcoTank 4700)
- Brayer
- Weeding Tool
- Scraper
- Spatula
- Isopropyl Alcohol (to clean your glass) -AND-
- Lint Free Cloth
- Tweezers (optional)
- Measuring Tape (optional to measure the size of your shadow box frame)
Instructions
STEP 1: GET MY PHOTO FRAME SHADOW BOX FILES
First, download my Photo Gallery Shadow Box files from my free library – look for Design #688. Alternatively, you can use the Save This Project form near the top of this post and the design link will be emailed to you.
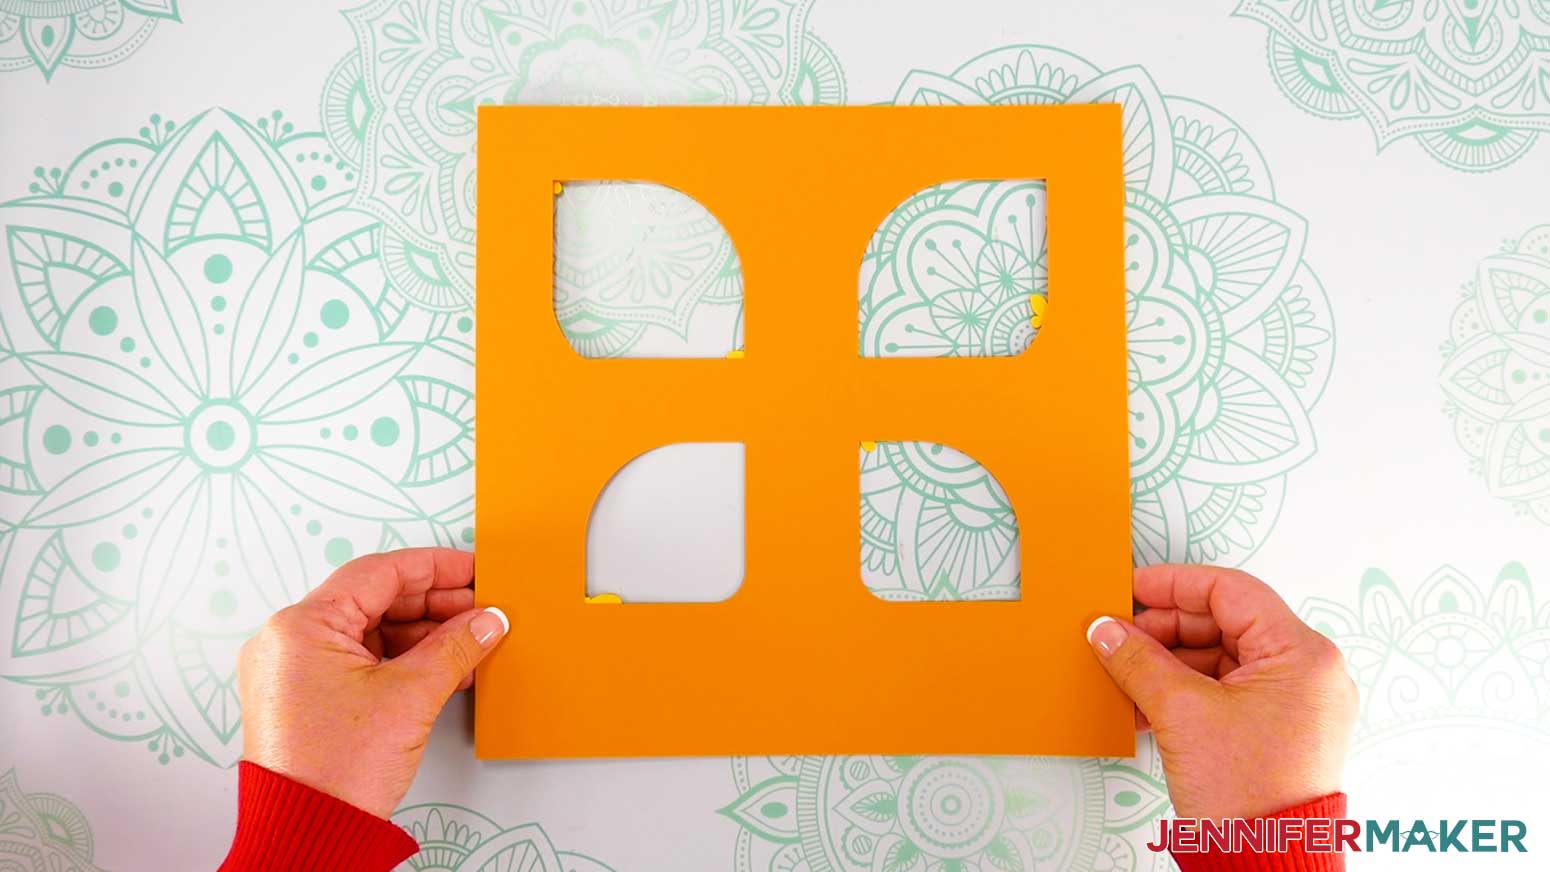
In the SVG folder, you’ll find butterfly and paw print versions of my Photo Frame Shadow Box design. There are also DXF files that you can use for other machines, as well as PDF files that you can print and cut by hand.
I’ll show you how to add your personal photos as Print Then Cut images, as well as how to cut and assemble your photos and frame layers inside your shadow box.
TIP: If you’re not sure how to upload, go to jennifermaker.com/svgs to learn how to unzip and upload SVG files.
STEP 2: PREPARE AND PRINT YOUR PHOTO GALLERY SHADOW BOX DESIGN
CRICUT DESIGN SPACE
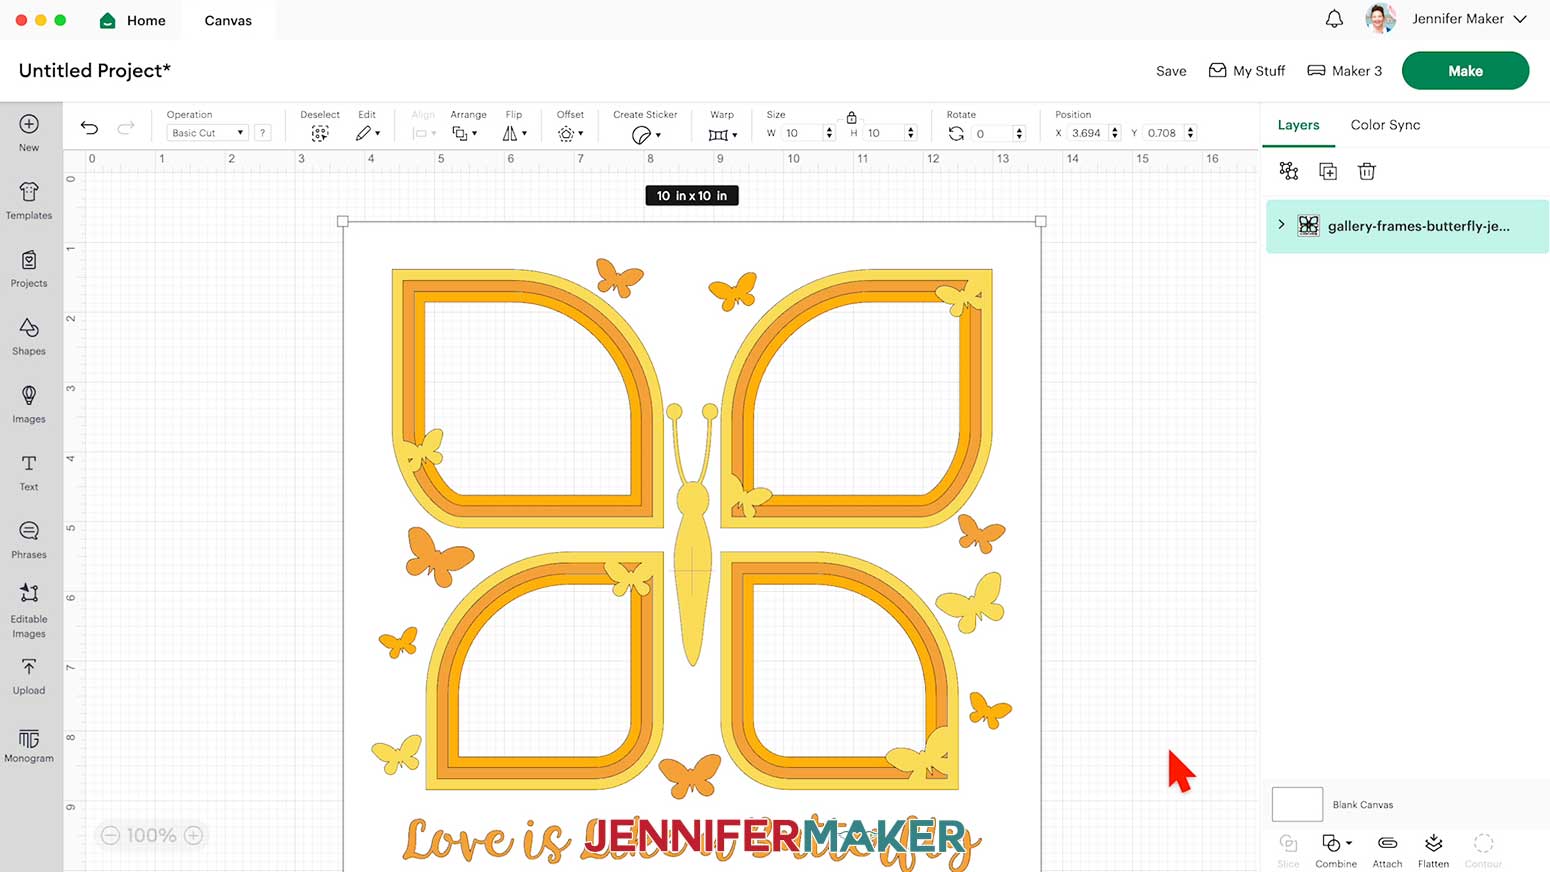
- In Cricut Design Space, open a blank Canvas.
- Click “Upload” and then “Upload Image.”
- Click “Browse.”
- Select the SVG you want to use.
NOTE: I’ll pick the “butterfly” design, which has four cut layers stacked on top of each other. - Click “Open,” and then “Continue.”
- Click “Upload” to add the design to your Canvas.

- Click “Save” and give your project a name.
- “Ungroup” the frame layers.
- To add your first photo, click “Upload” and then “Upload Image.”
- Click “Browse,” and then find the photo you would like to add to your top left frame.
- Click “Open” and then “Continue.”
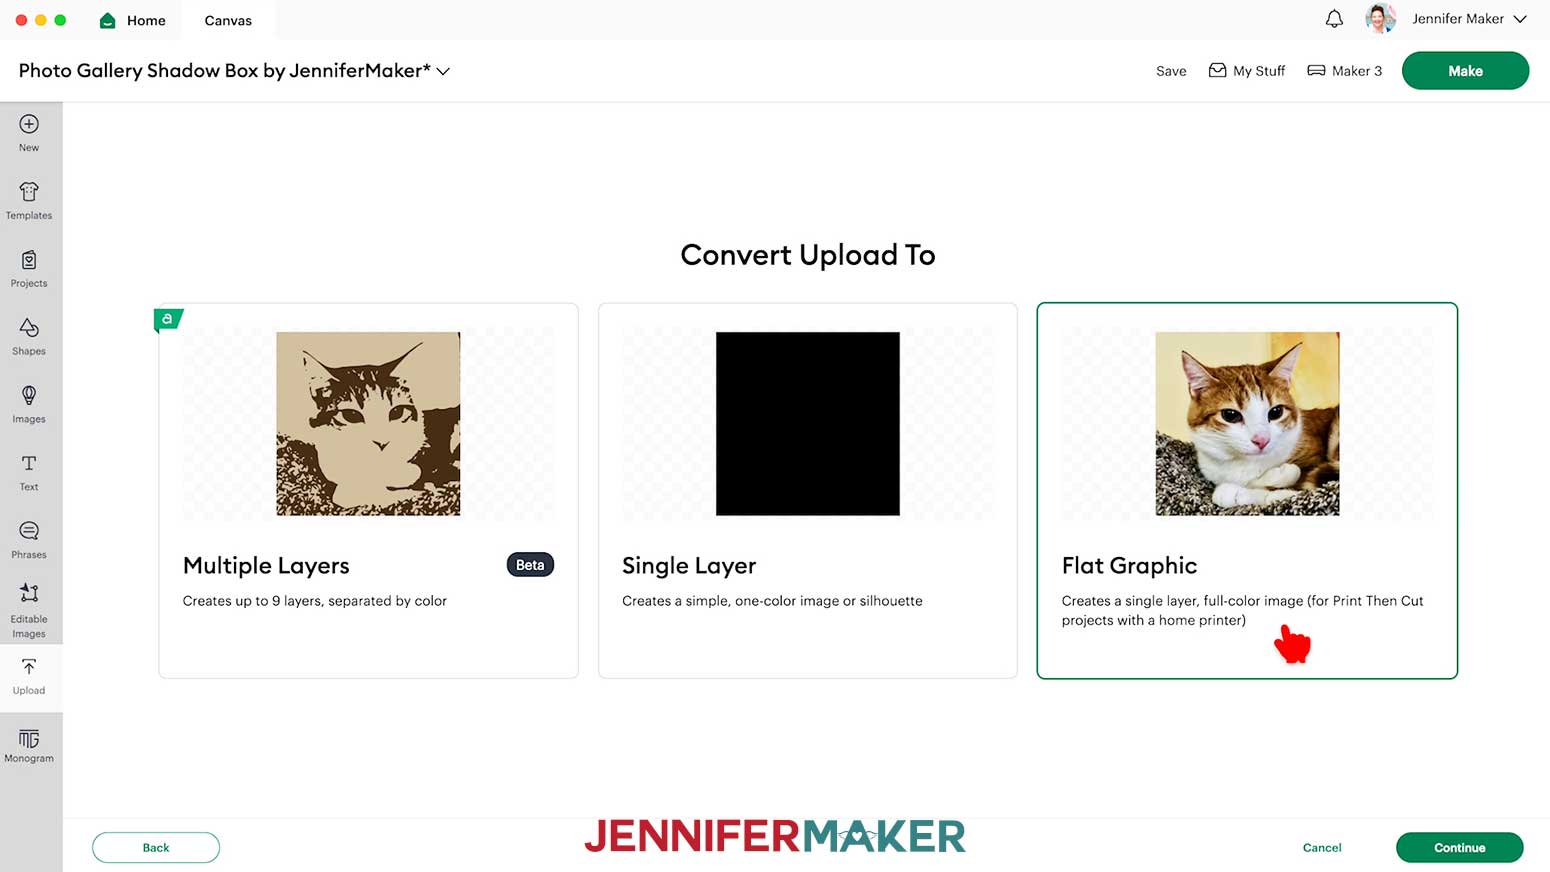
- You don’t need to do anything on the “Background Remover” page, so click “Apply & Continue.”
- On the “Convert” page, select “Flat Graphic” and click “Continue.”
- Click on “Upload” to add the image to your Canvas.
NOTE: It might take a minute or so to load. - If your photo is very large when it loads in, click the “Minus (-)” icon to zoom out so you can see everything on your Canvas.
- Drag your photo to the side of your Canvas so it doesn’t cover your frame elements.
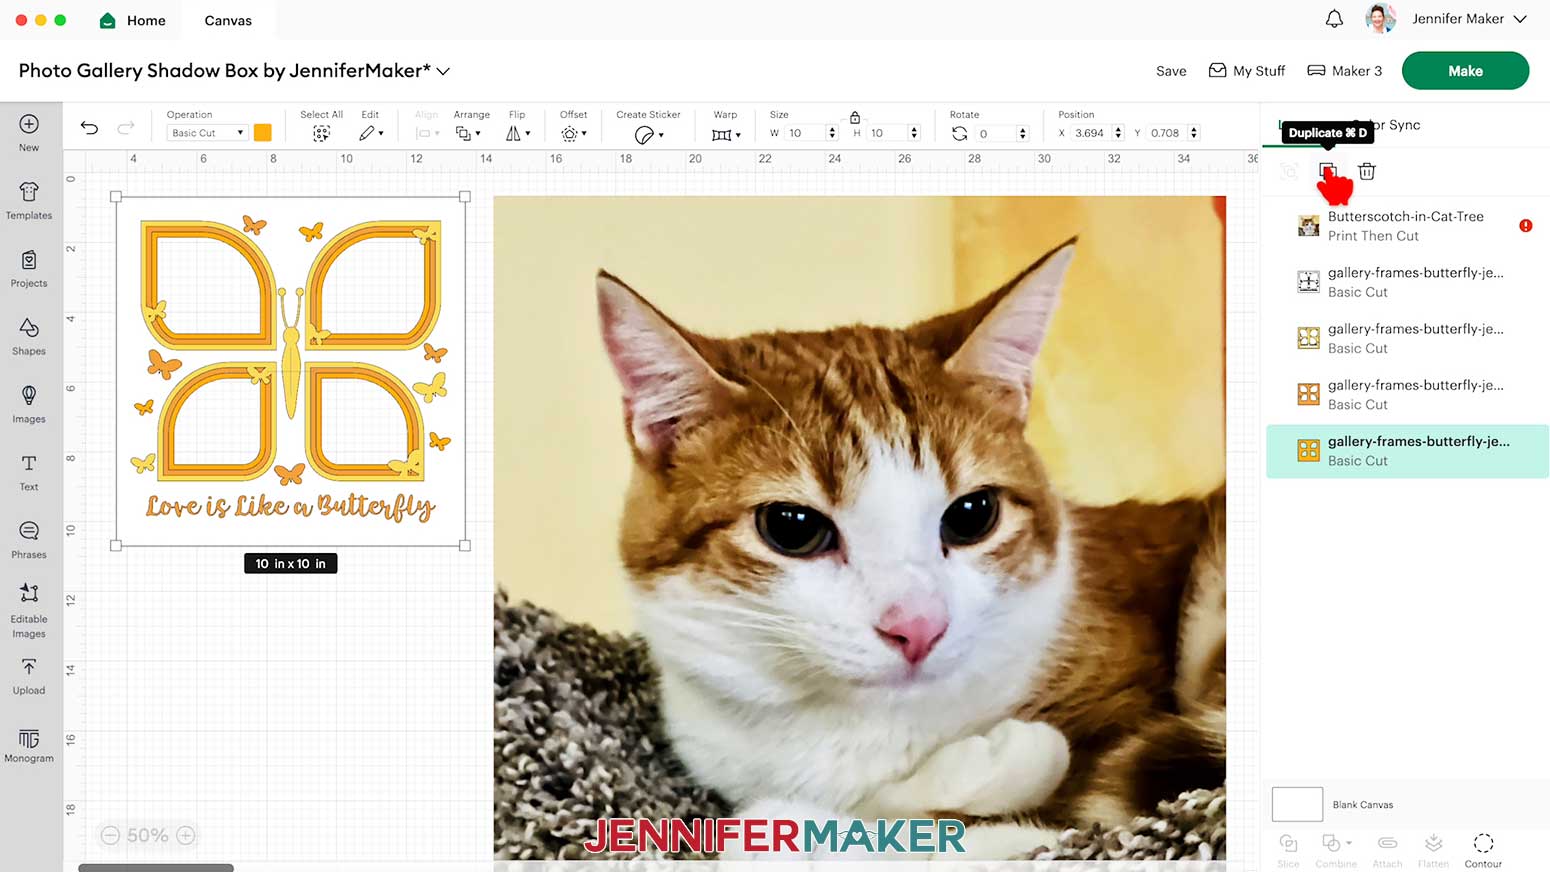
- In the Layers Panel, select the bottom frame layer that has just the cutout areas for your photos, then click the “Duplicate” icon to create a copy of it.
- Drag the copy over to the side with your first image.
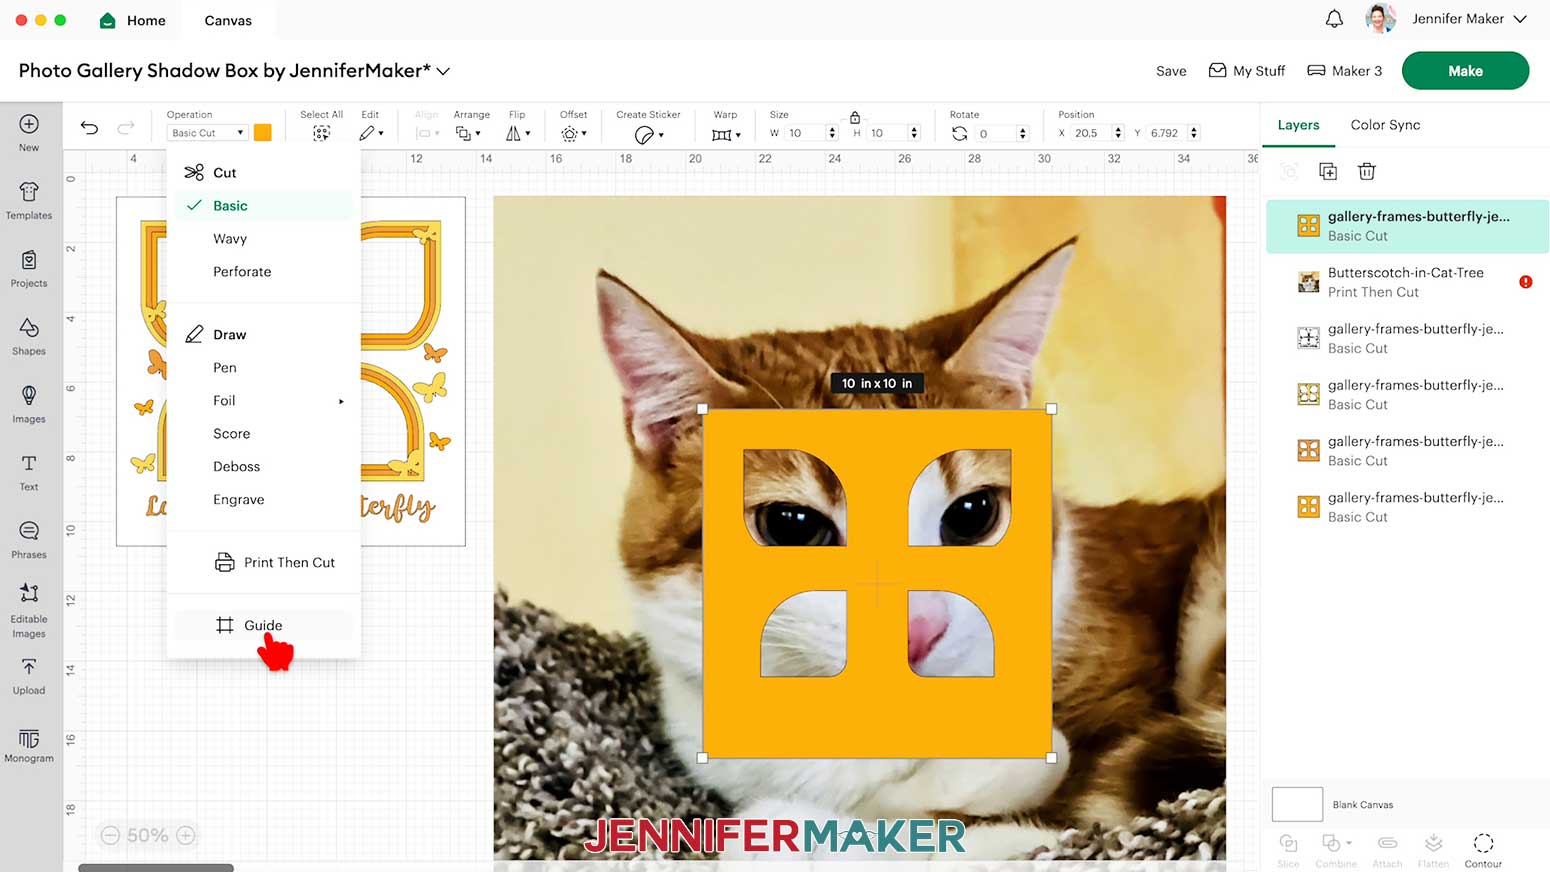
- With the duplicate layer selected, click on “Operation” and choose “Guide” so your photo is visible behind the frame layer.
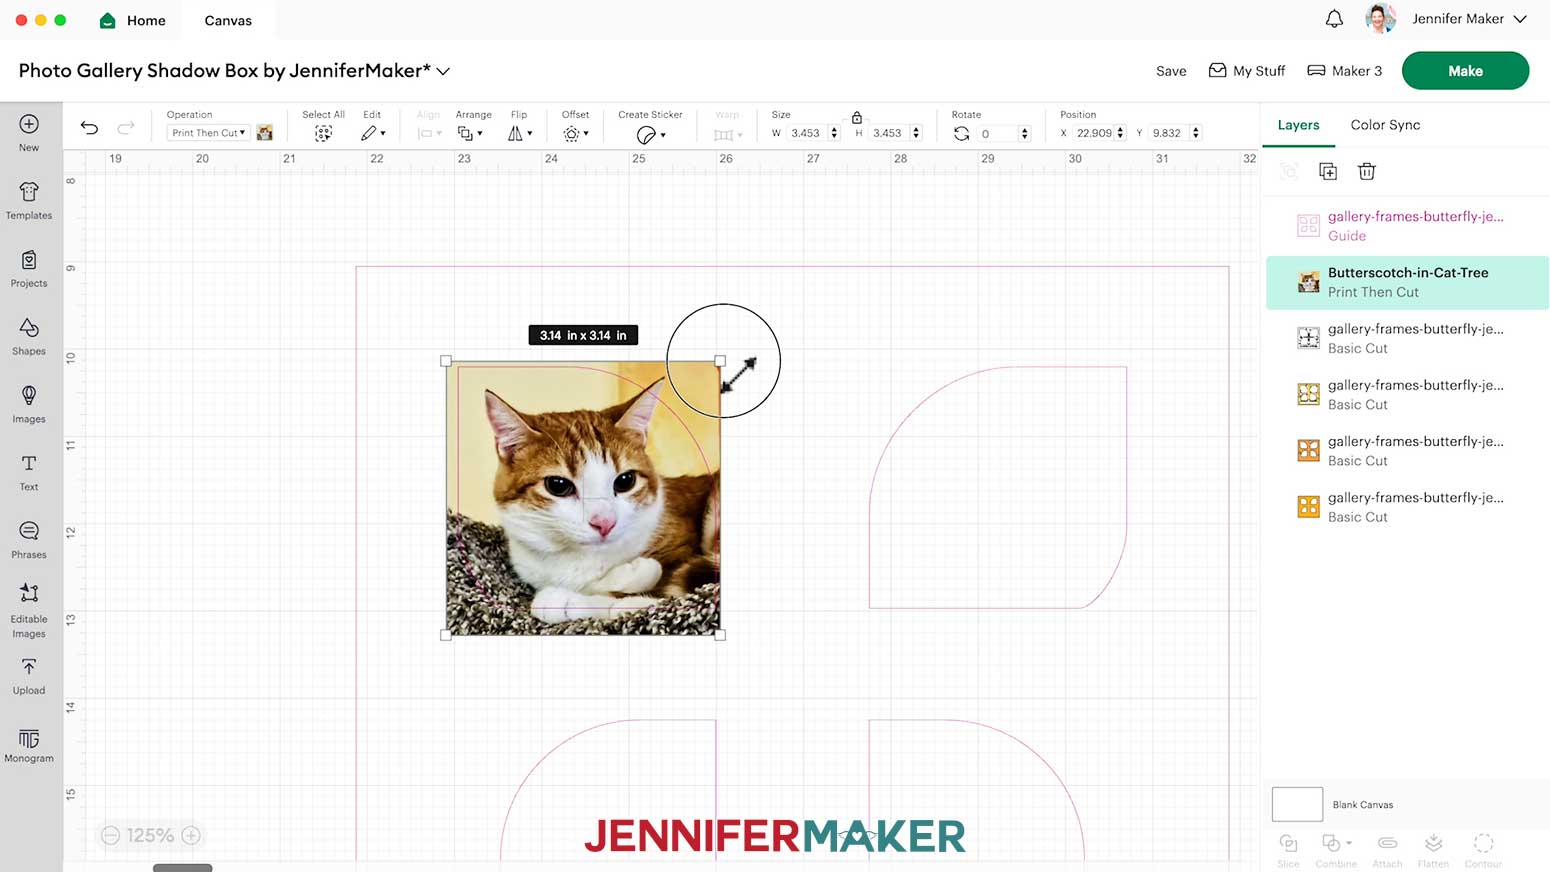
NOTE: The frame layer will become a pink outline, and the corresponding layer will turn pink in the Layers Panel. - Select your photo, then, with the “Lock” icon closed, click and drag the corners of its bounding box until the subject fits in the top left Guide frame. Use the “Plus (+)” icon to zoom in and see the pink line more easily if needed.
NOTE: Your image needs to fit on a Print Then Cut sheet, so make sure there aren’t any red “Warning” icons in the Layers Panel. - Repeat Steps 9-20 to add your second photo.
- Select your photo, then click “Arrange” and “Send Backward” so it’s behind the Guide layer.
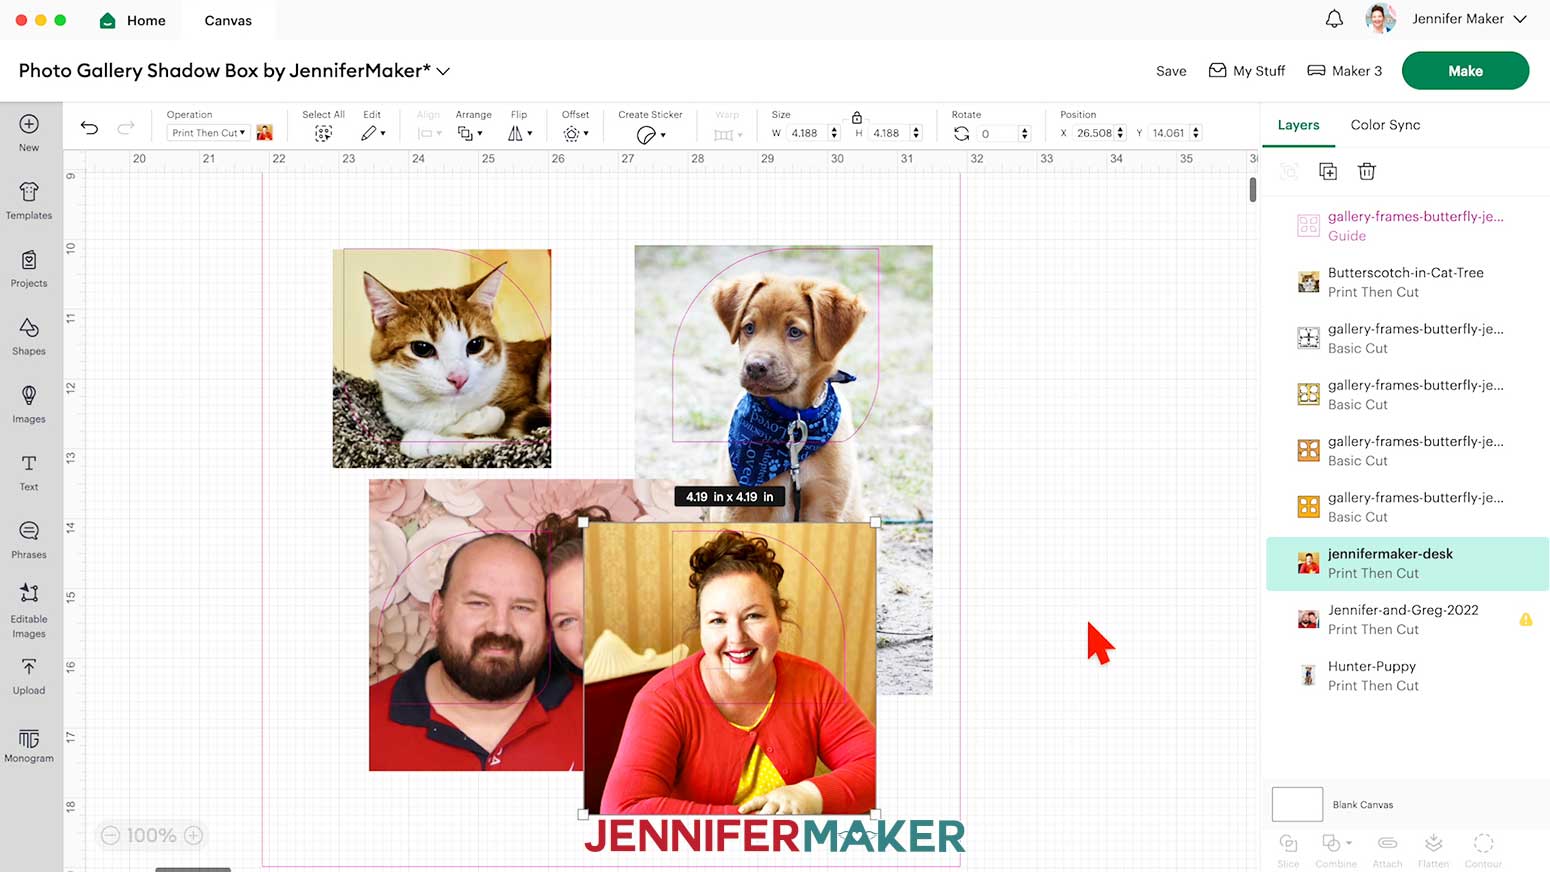
- Resize the photo to fit in the top right Guide frame, and check for warnings in the Layers Panel.
NOTE: If your photo overlaps with other frame openings, we’ll trim these areas away after printing. - Repeat Steps 21-23 to add photos for the two bottom Guide frames.
- In the Layers Panel, select the “Guide” layer and delete it.
- Your frames and photos are ready to print and cut!
CUTTING
- Make sure the correct machine is selected in the top right.
- Click “Make.”
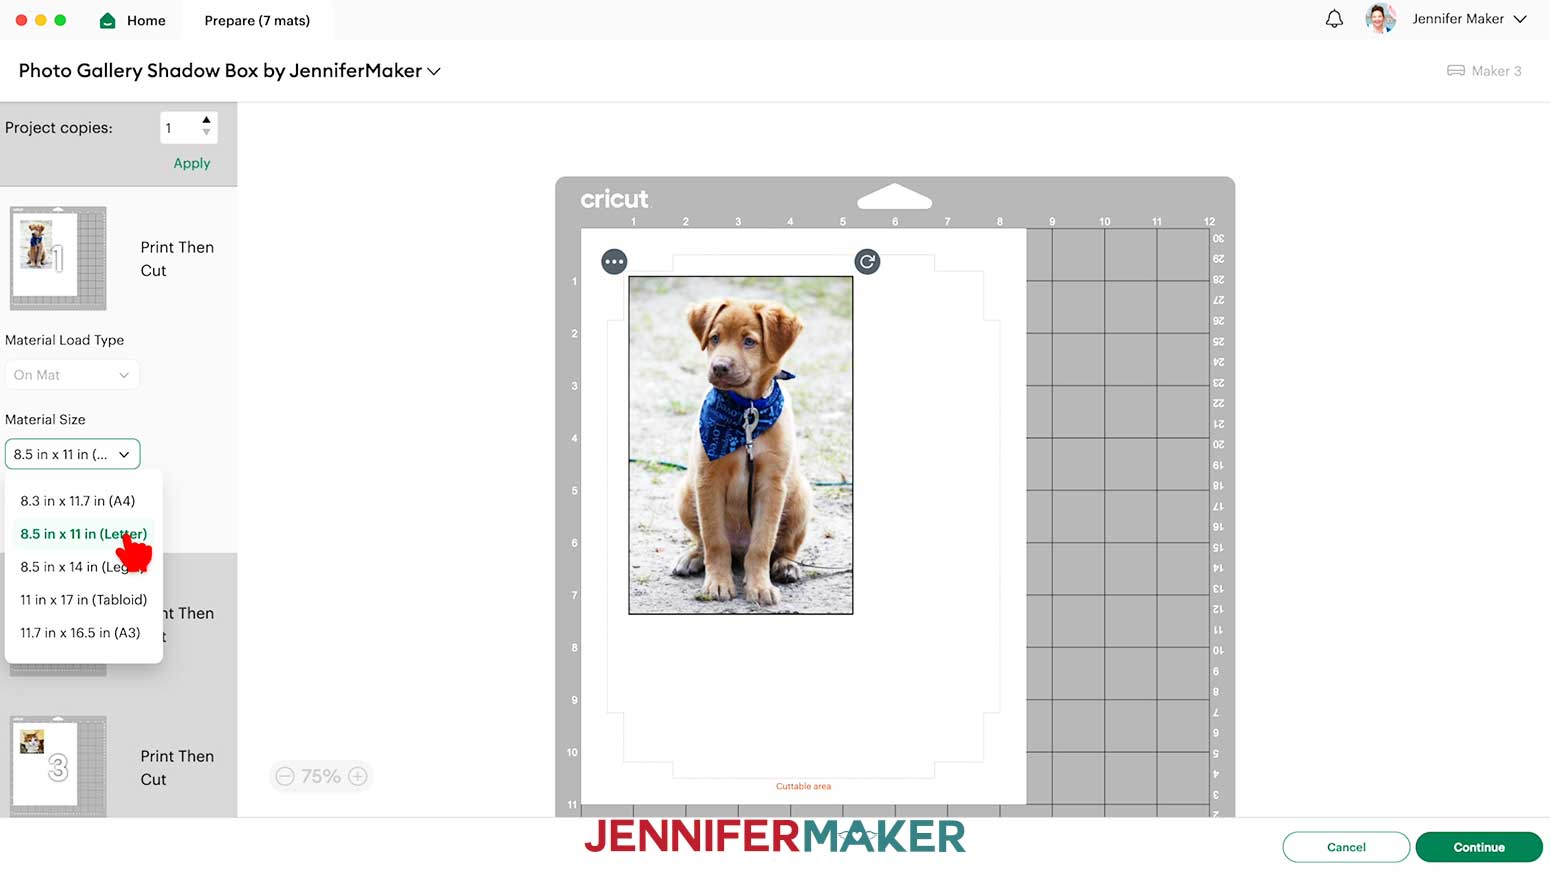
- On the Prepare screen, make sure the correct Material Size is selected for your mats.
NOTE: I’ll use “8.5 in x 11 in” for my Print Then Cut mats, and “12 in x 12 in” for my Basic Cut mats. - Click on Mat 1 again so it will load first on the next screen, then click “Continue.”
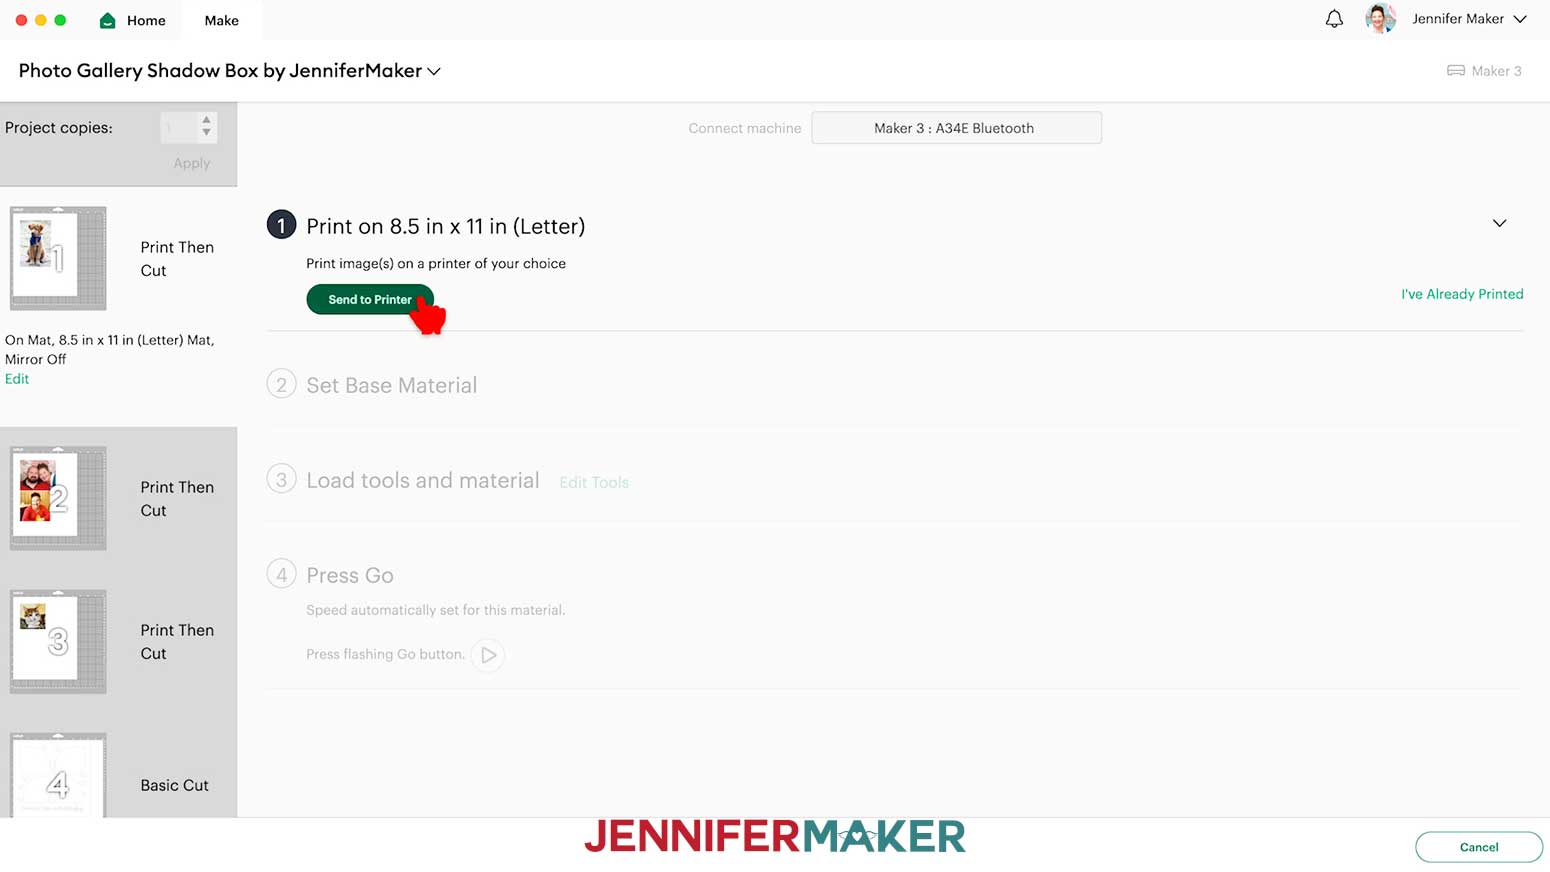
- On the Make Screen, click “Send to Printer.”
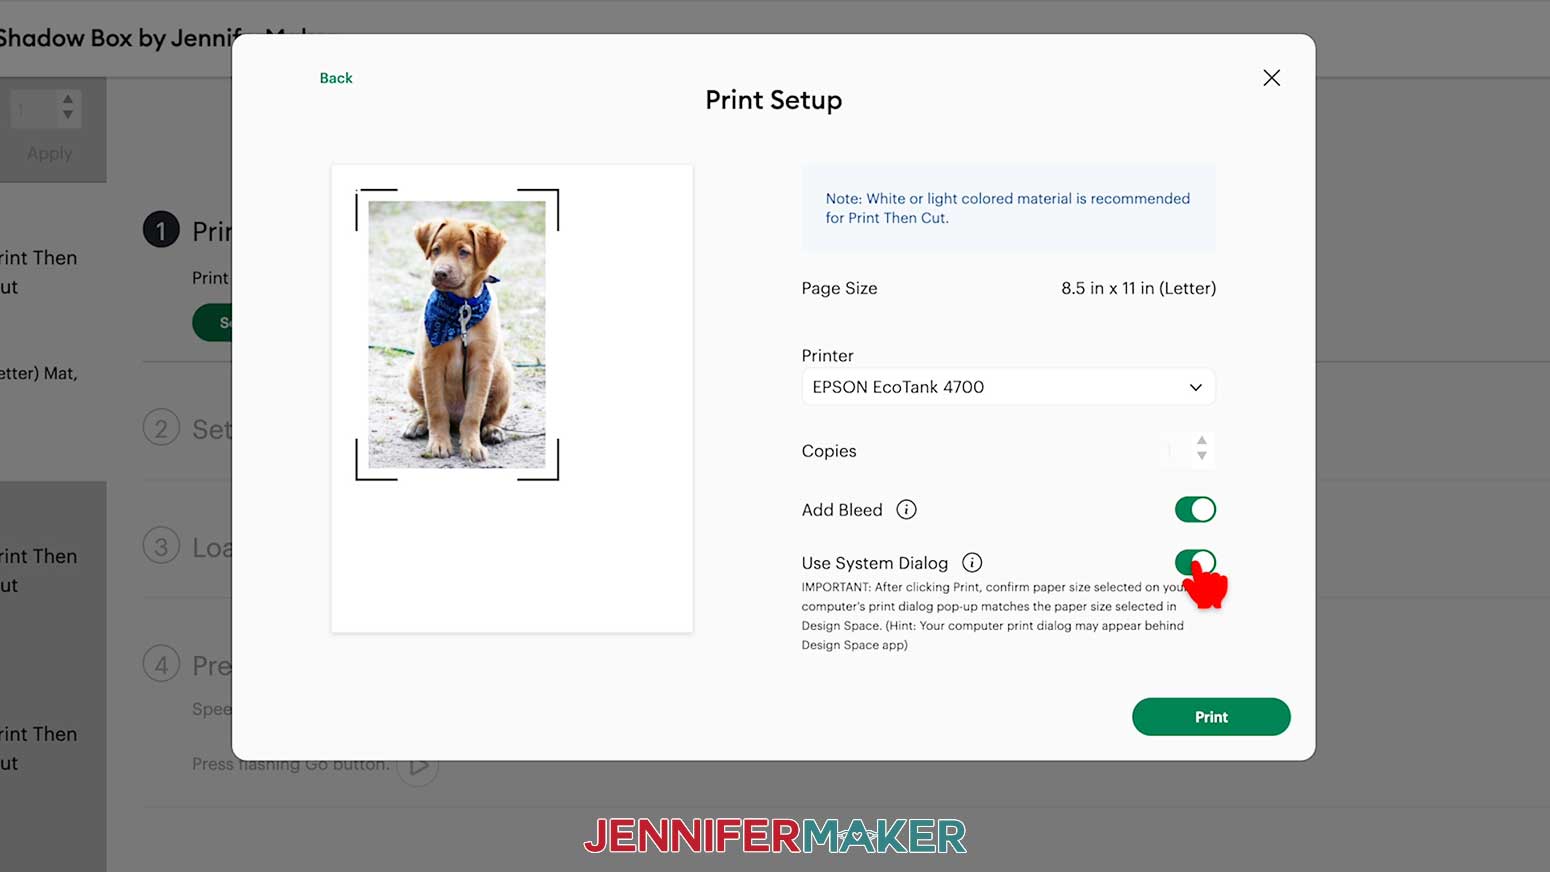
- In the pop-up window, select the correct printer in the drop-down menu, and toggle on “Use System Dialog.”
- Click “Print.”
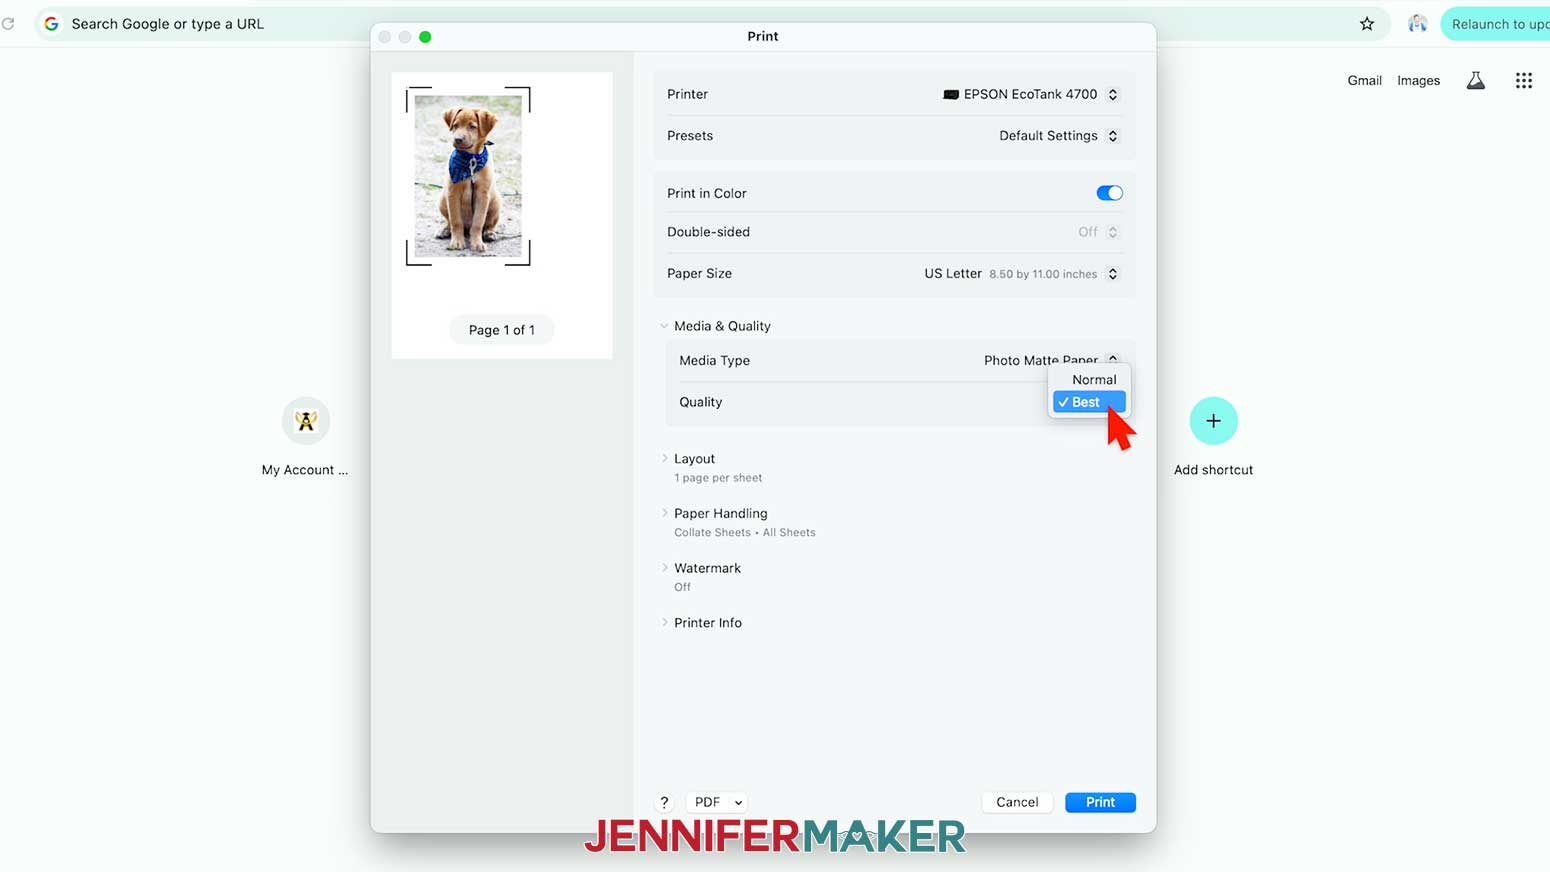
- In the System Dialog Box, make sure the correct printer is selected, change the Media Type to “Photo Matte Paper” and the Quality to “Best,” or whichever settings are closest to these.
NOTE: The System Dialog Box is sometimes hidden behind Cricut Design Space. - Load the photo paper in your printer, following the directions on the package.
- Click “Print” to send the Mat 1 photos to your printer.
- Let the print dry before handling it to avoid smudges.
- Back in Cricut Design Space, repeat Steps 5-11 to print your remaining photos.
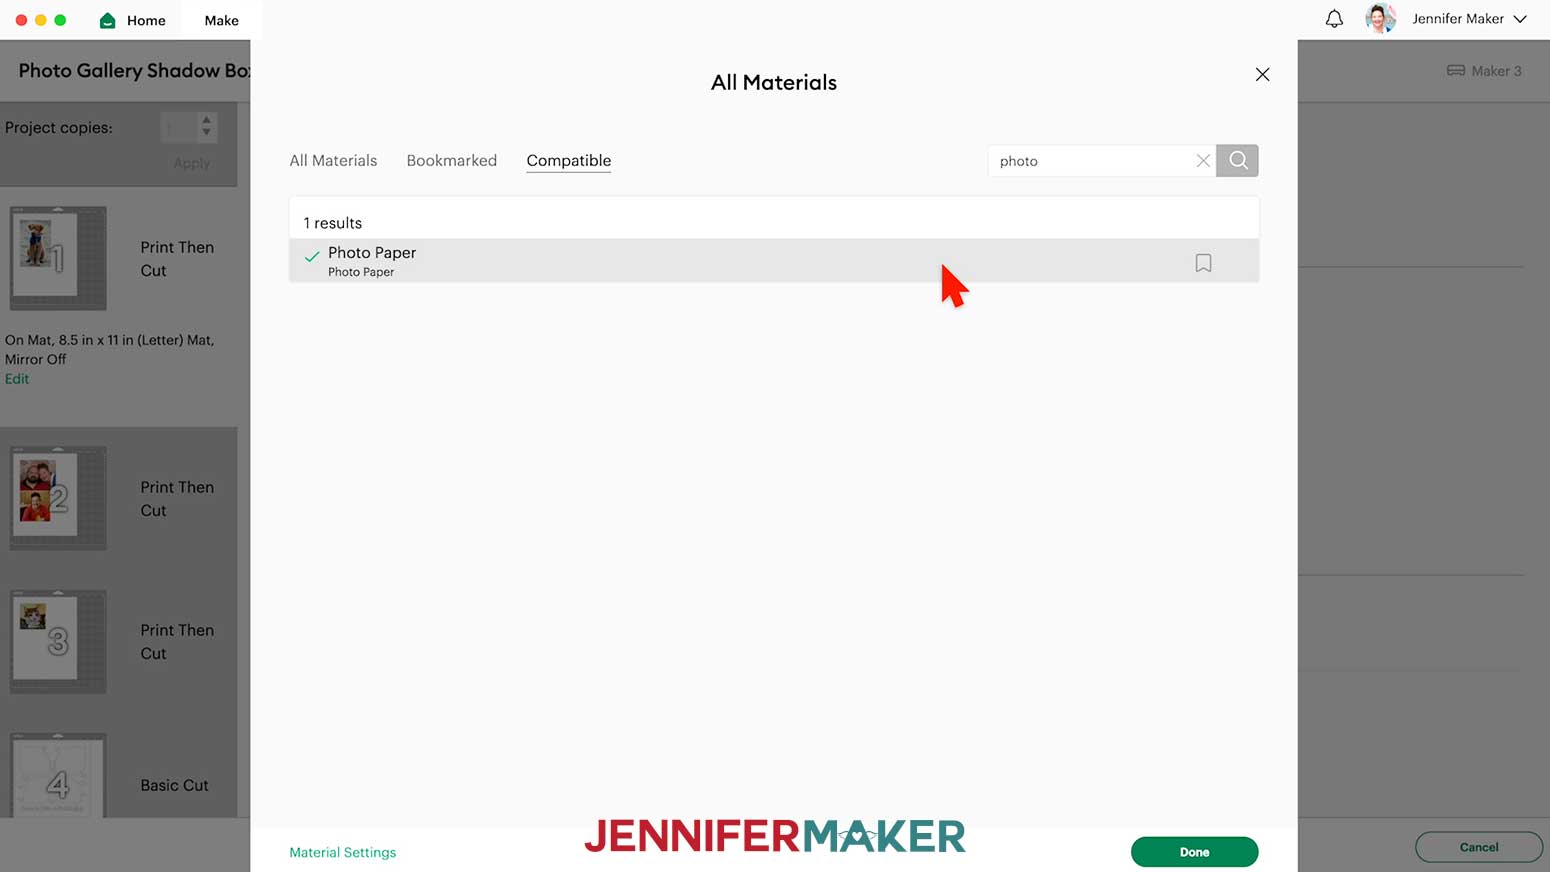
- Then set the Base Material for your mats. I’ll use the “Photo Paper” setting with “More” Pressure for my “Print Then Cut” mats.
NOTE: If you don’t see “Photo Paper” in your materials list, click on “Browse All Materials.” Then type in “Photo Paper” to search for and select the “Photo Paper” setting.
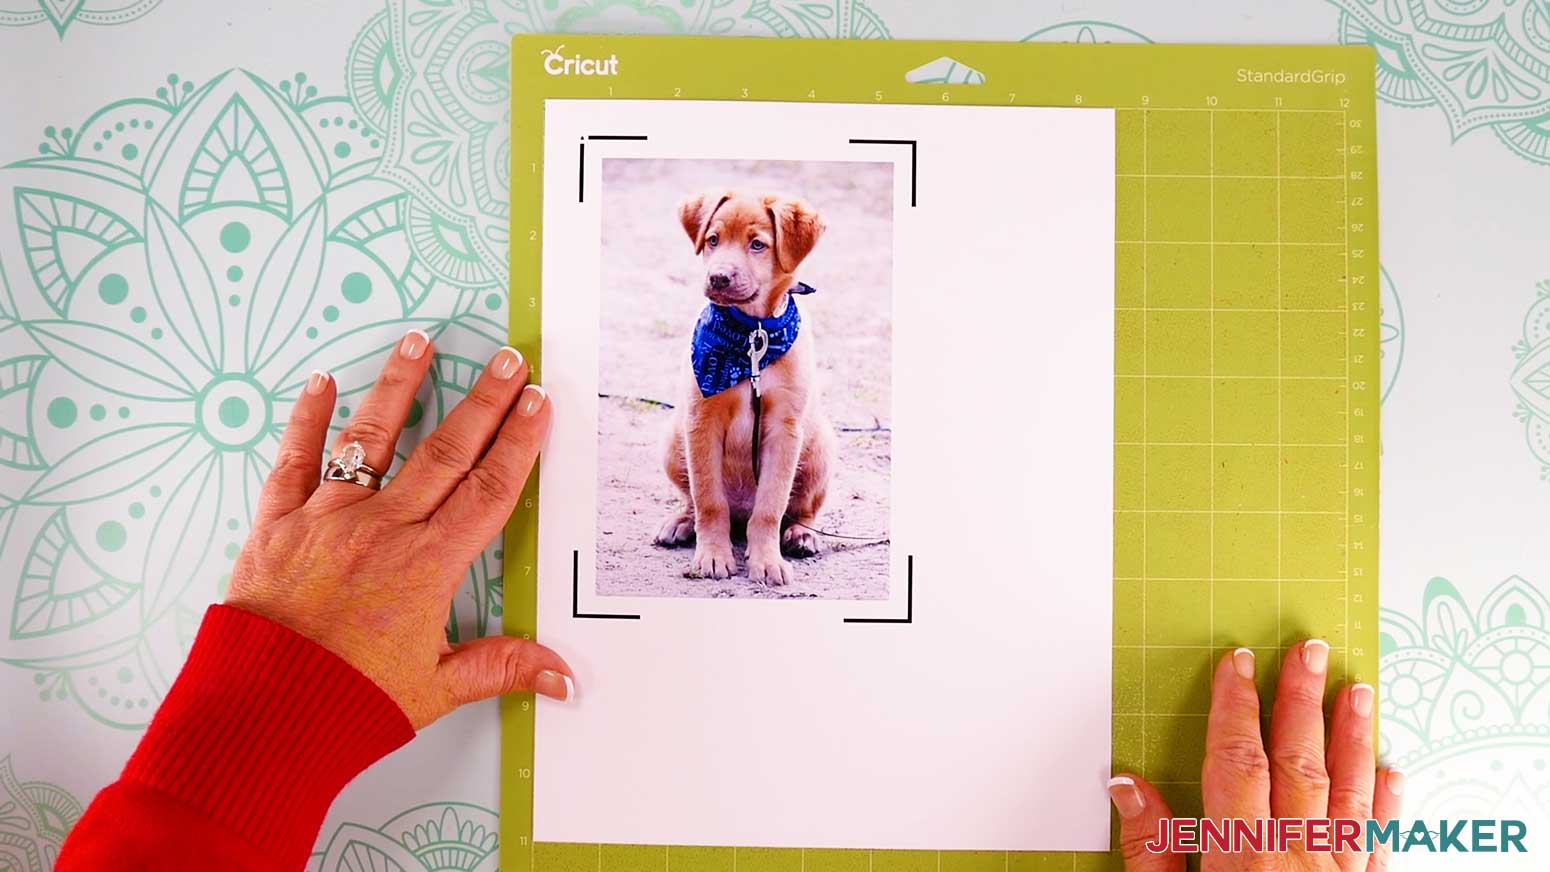
TIP: Changing the Pressure to “More” results in a cleaner cut. - Place your first mat’s printed photo face up on a green StandardGrip machine mat.
- Place a sheet of clean copy paper on top of the print and use a brayer to make sure the print is fully adhered. Remove the copy paper.
- Check that your Premium Fine-Point Blade is clean and in the clamp.
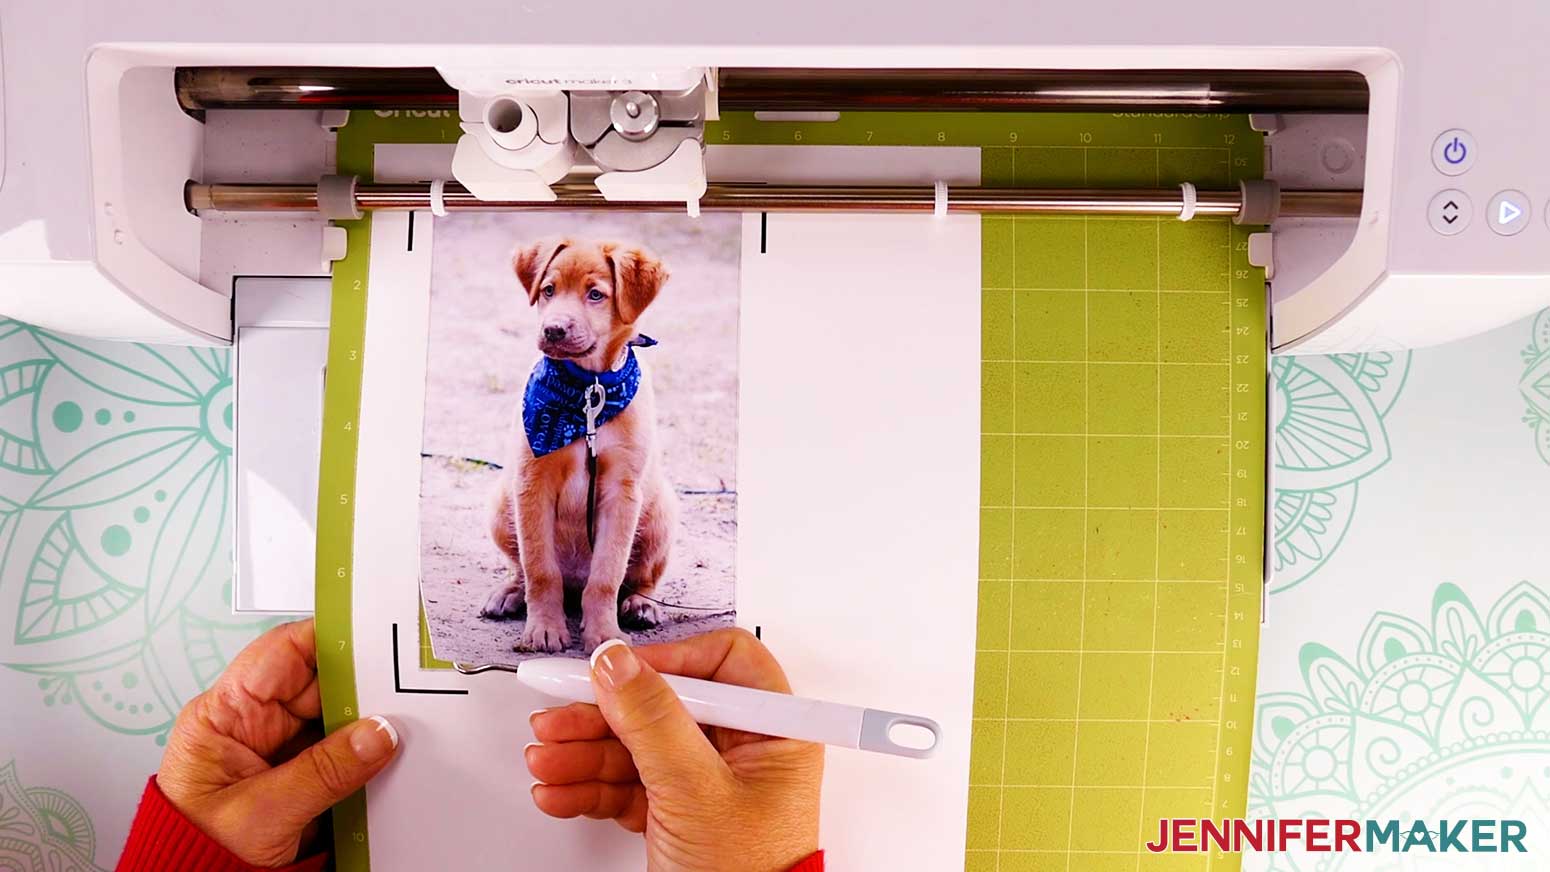
- Press the flashing “Load/Unload” button to load the prepared mat into your Cricut.
- Press the flashing “Go” button to begin cutting.
- When it has finished cutting, don’t unload the mat right away. Gently lift a corner of the material to make sure the cuts went all the way through. If not, press the “Go” button again to make a second pass of cuts in the same spots.
- When the cuts are complete, unload the mat, flip it over onto your work surface, and roll it back to release the photo paper.
- Use the same process to cut the remaining sheets of photos.
- When you get to your cardstock mats, make sure to change the material settings to “Medium Cardstock - 80 lb (216 gsm)” with “More” pressure.
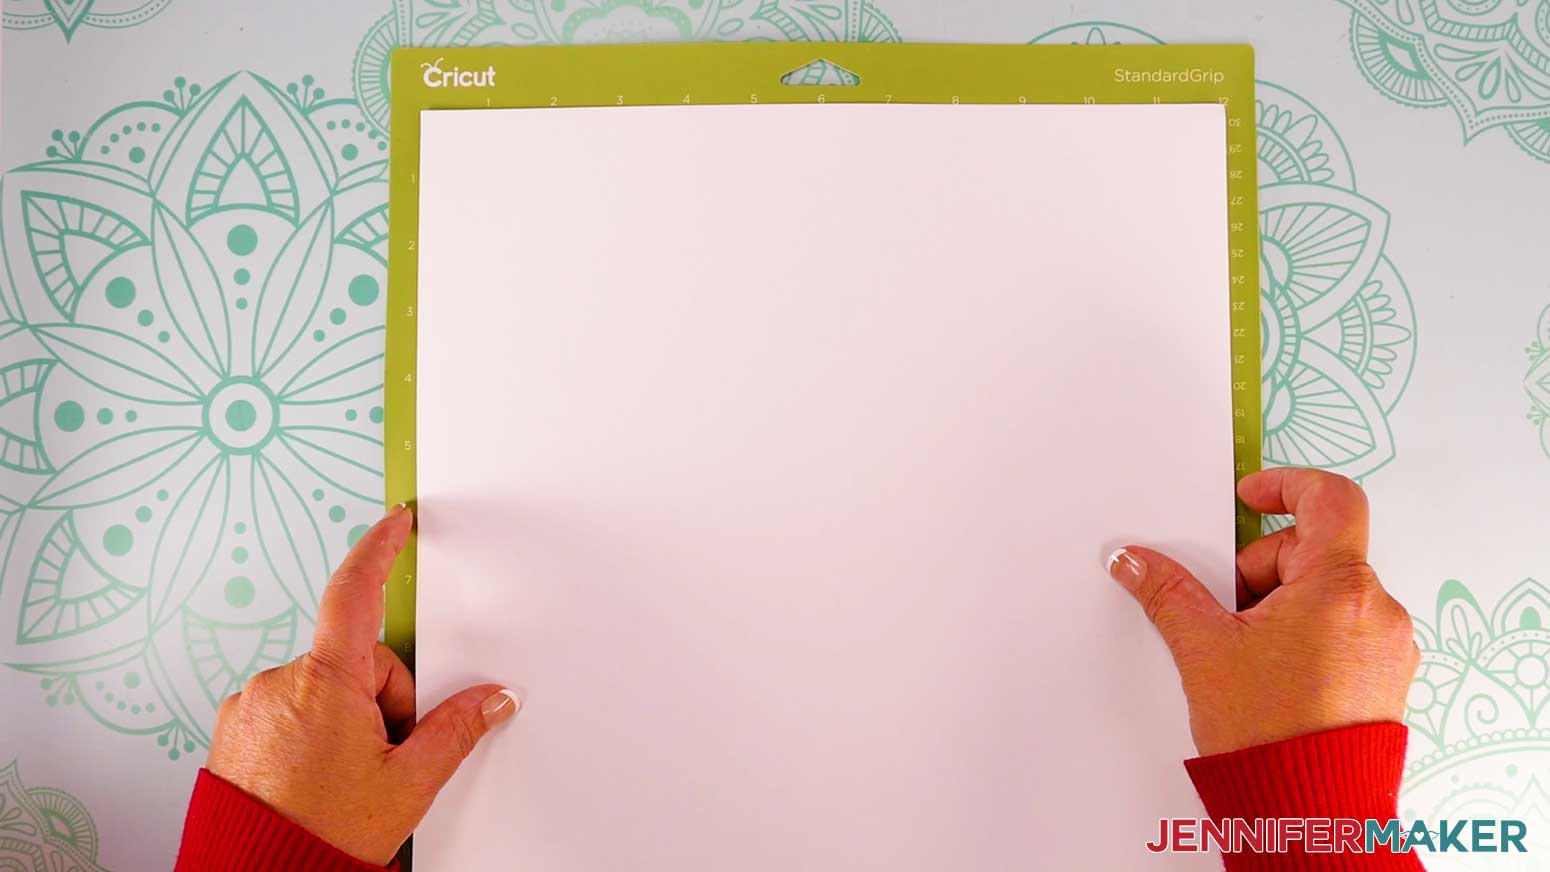
- Place your cardstock face up on a green StandardGrip machine mat.
- Use a brayer to make sure it’s fully adhered.
- Then follow Steps 16-20 to cut and release your cardstock for each mat.
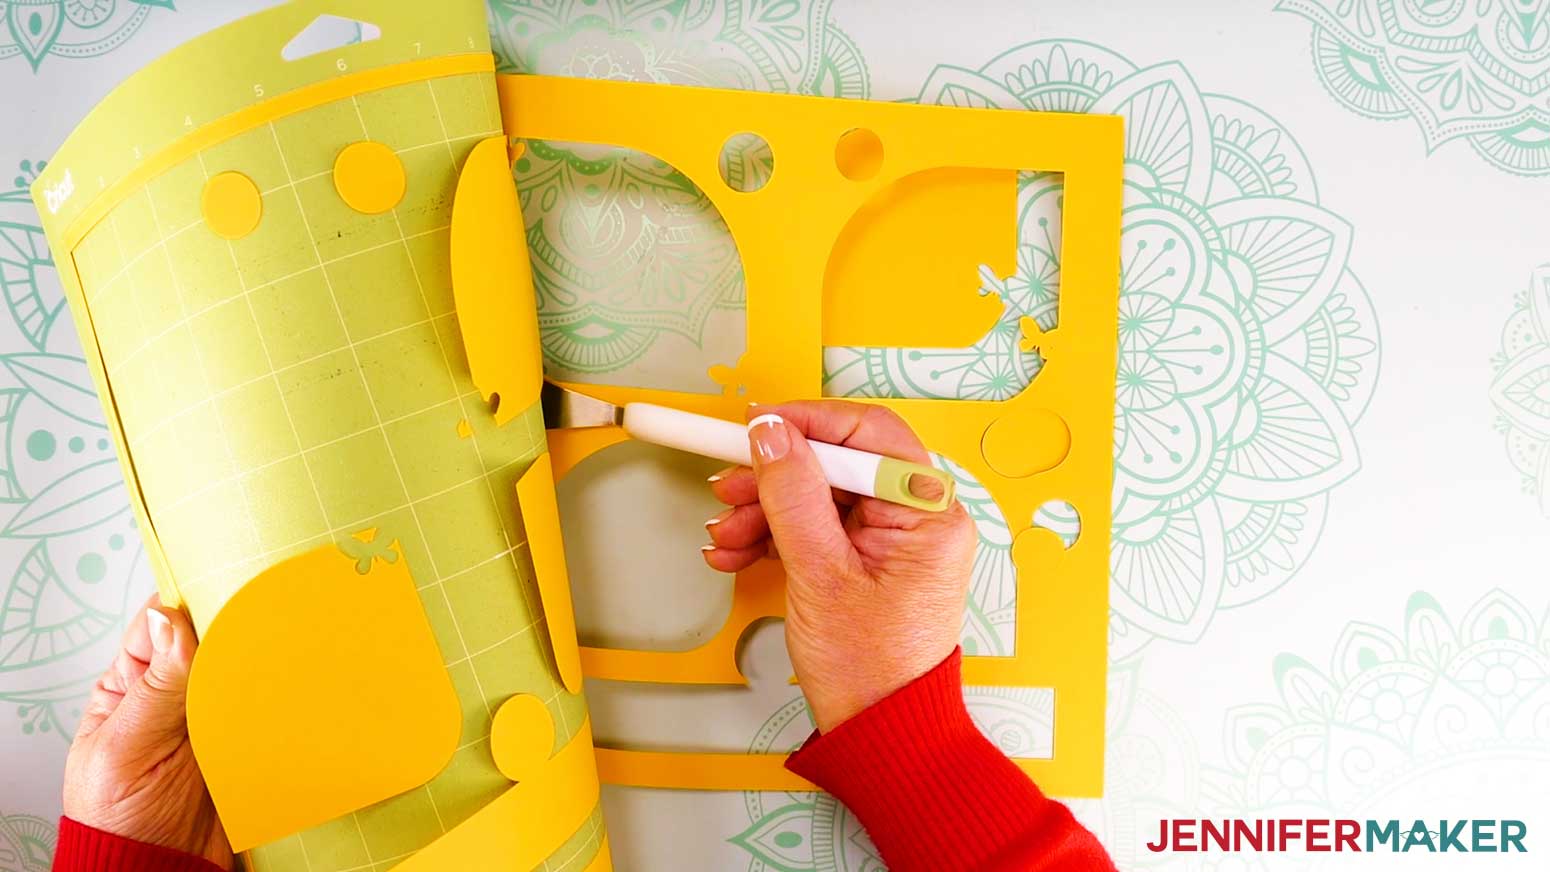
TIP: Make sure to match your cardstock colors with the proper mats in Design Space since the layers might not cut in the right order. - Use the spatula to help lift delicate parts, and your weeding tool to poke out small bits of cardstock that may have been left behind.
TIP: If you have any issues with your cuts, check out my Cricut Tips & Tricks for Cleaner Cuts. - Use a Scraper tool to remove any small bits left on your mat after you remove the cut pieces.
- Your photos and frames are ready to assemble!


STEP 3: ASSEMBLE YOUR PHOTO FRAME SHADOW BOX
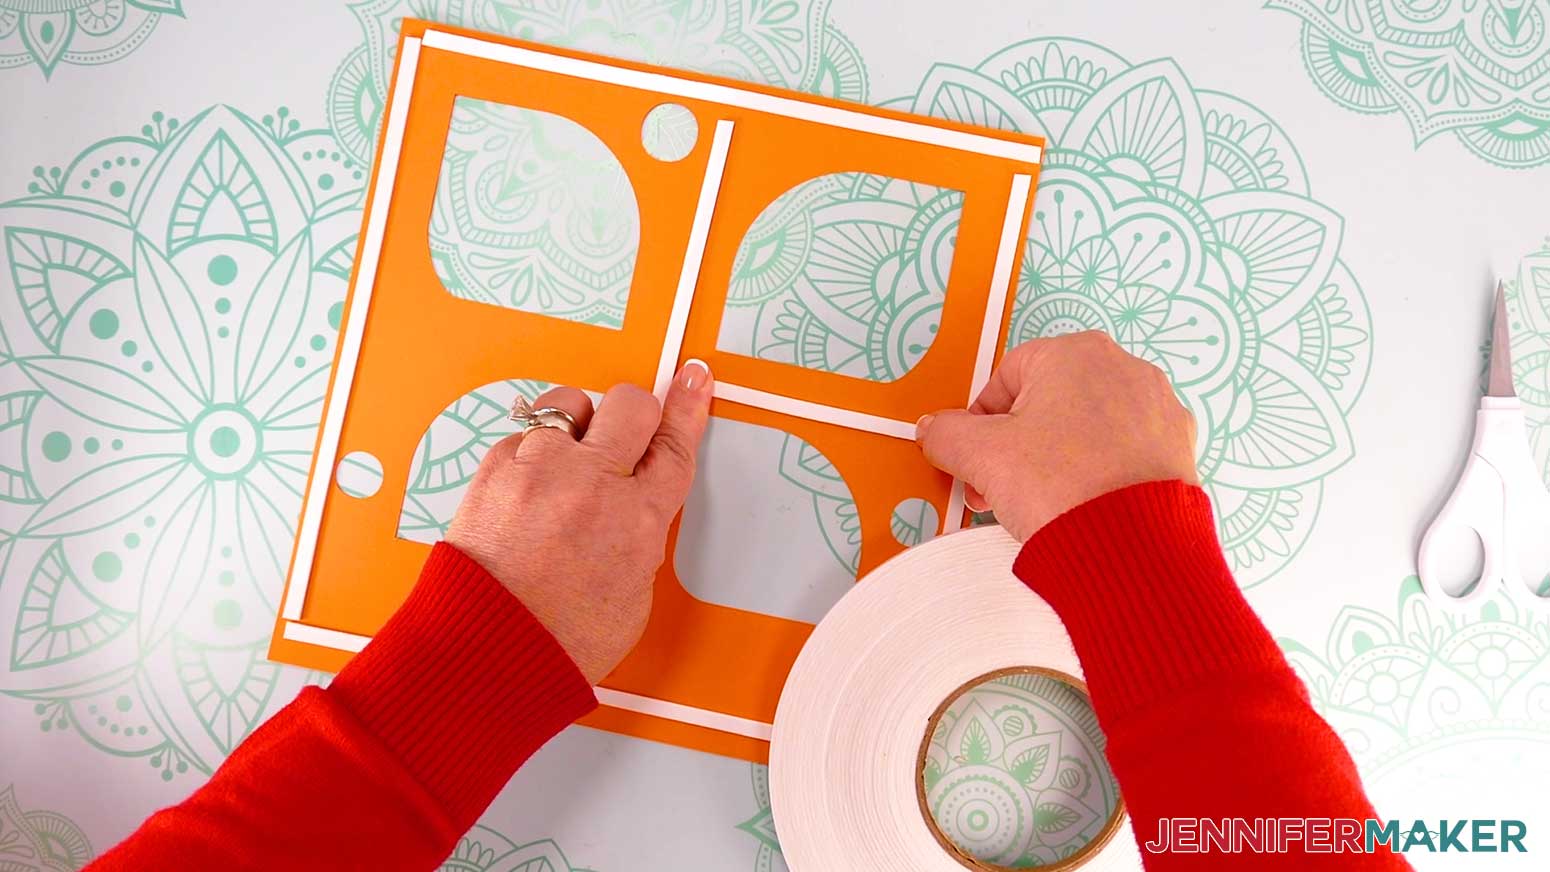
- Stack your paper layers face up in the order they’ll fit in the frame, with the white layer on top.
TIP: Refer back to your Design Space Canvas if you need help ordering your layers. - Flip the stack over so the top layer rests face down on your work surface.
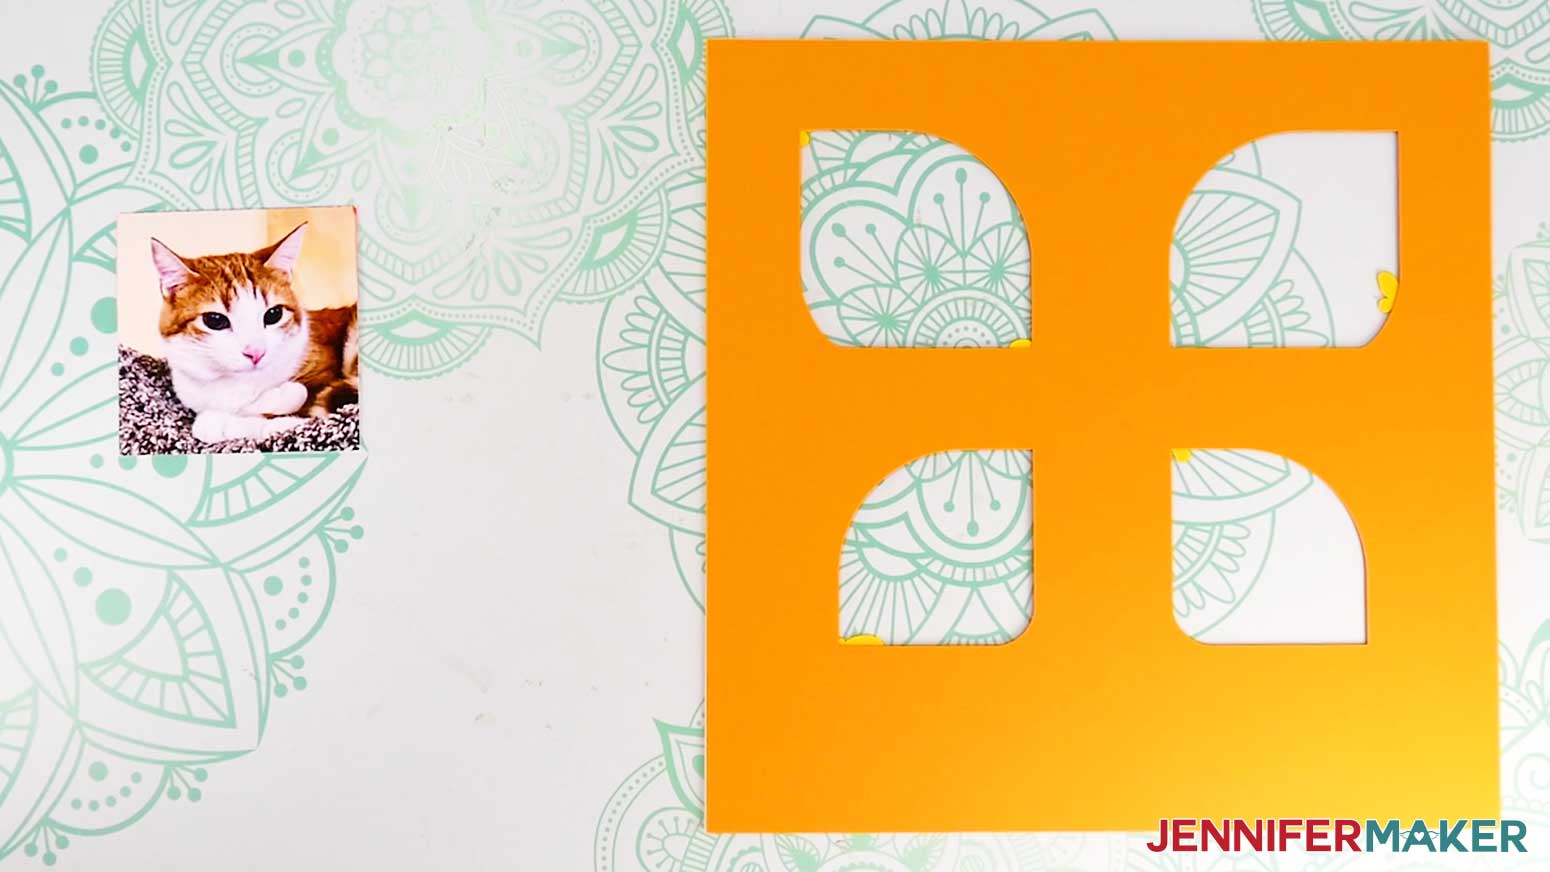
- Take the photo that will go in the top left corner of your frame and lay it face up.
- Flip over your paper frame’s bottom layer and arrange its top left cutout over the photo print, with the subject fully in the frame.
- If any parts of the print extend beyond the outer edges of the cardstock or are visible in other frames, use scissors to trim those parts away.
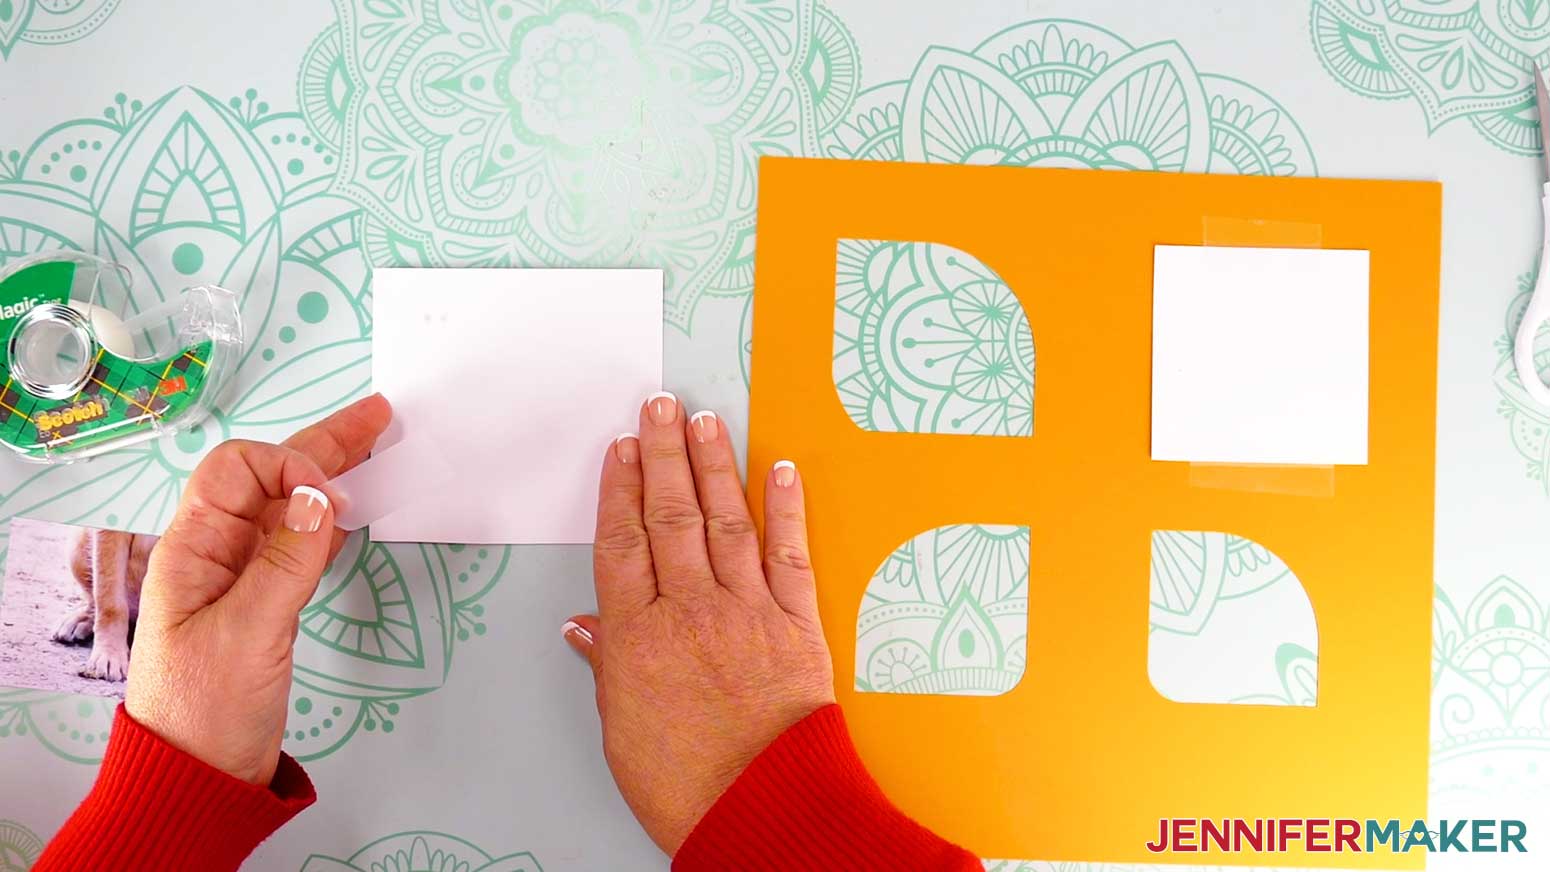
- Lay your trimmed photo face down on your work surface.
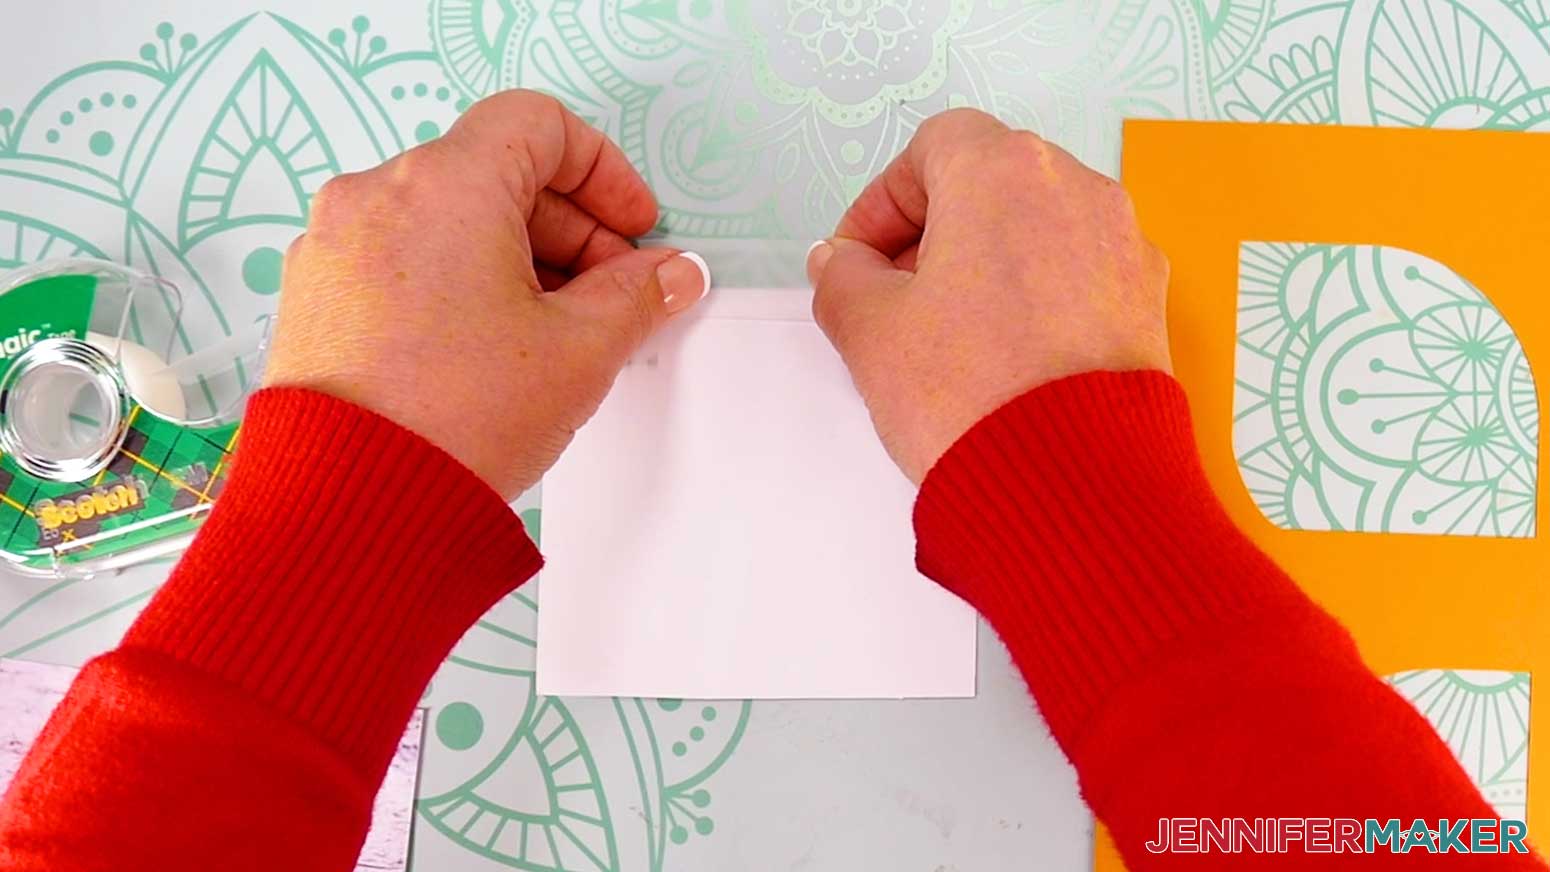
- Add a piece of clear tape sticky-side-down along the photo’s top edge, half on the print and half hanging over.
- Press the bottom half of the clear tape onto the print, and avoid pressing the top half onto your work surface.
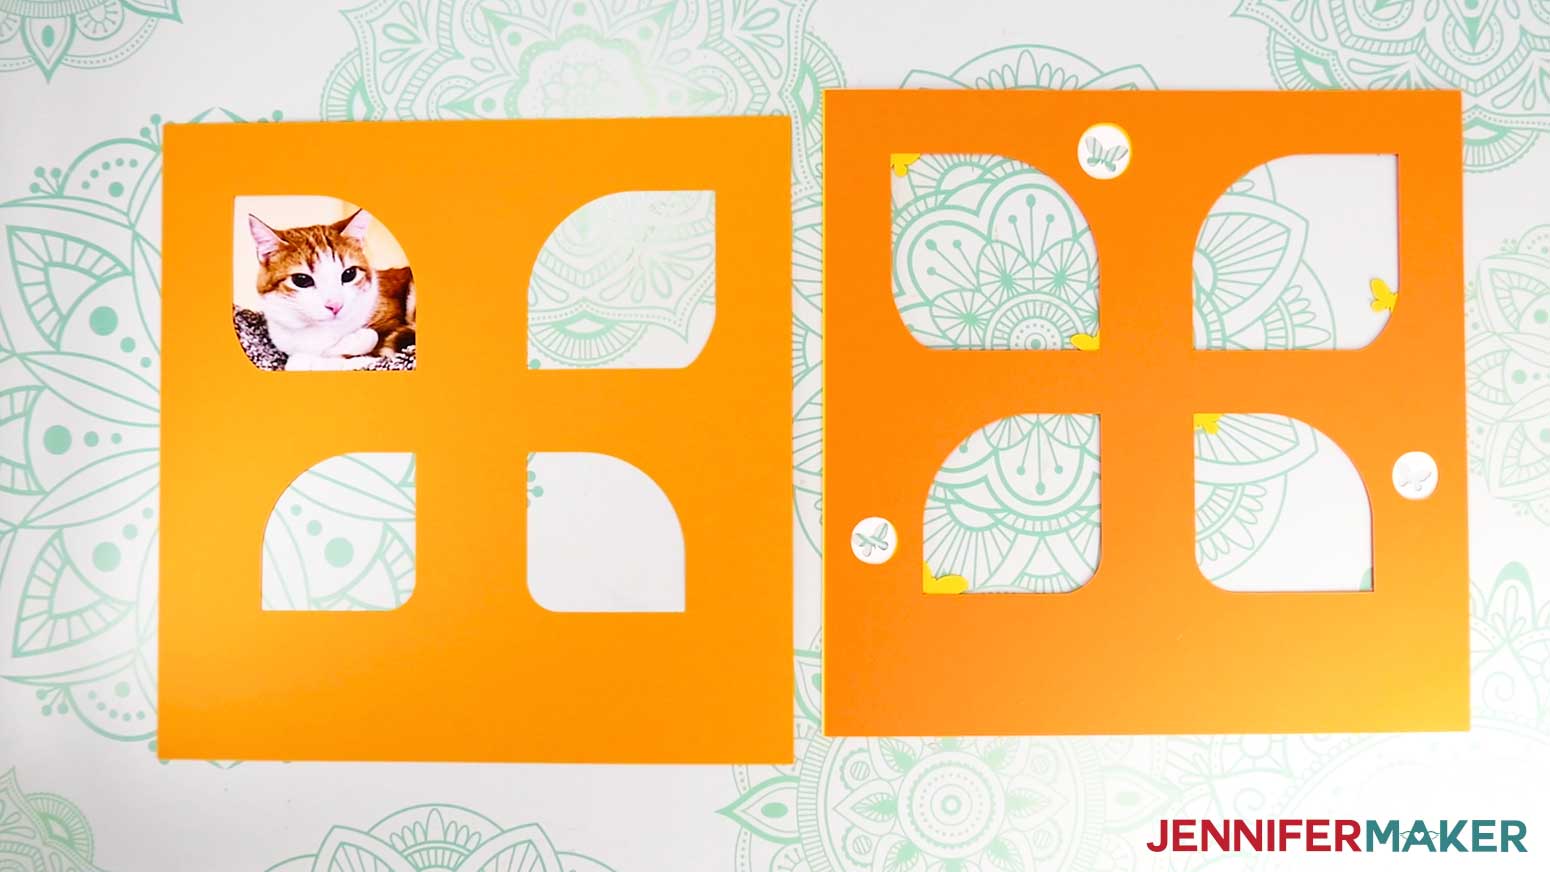
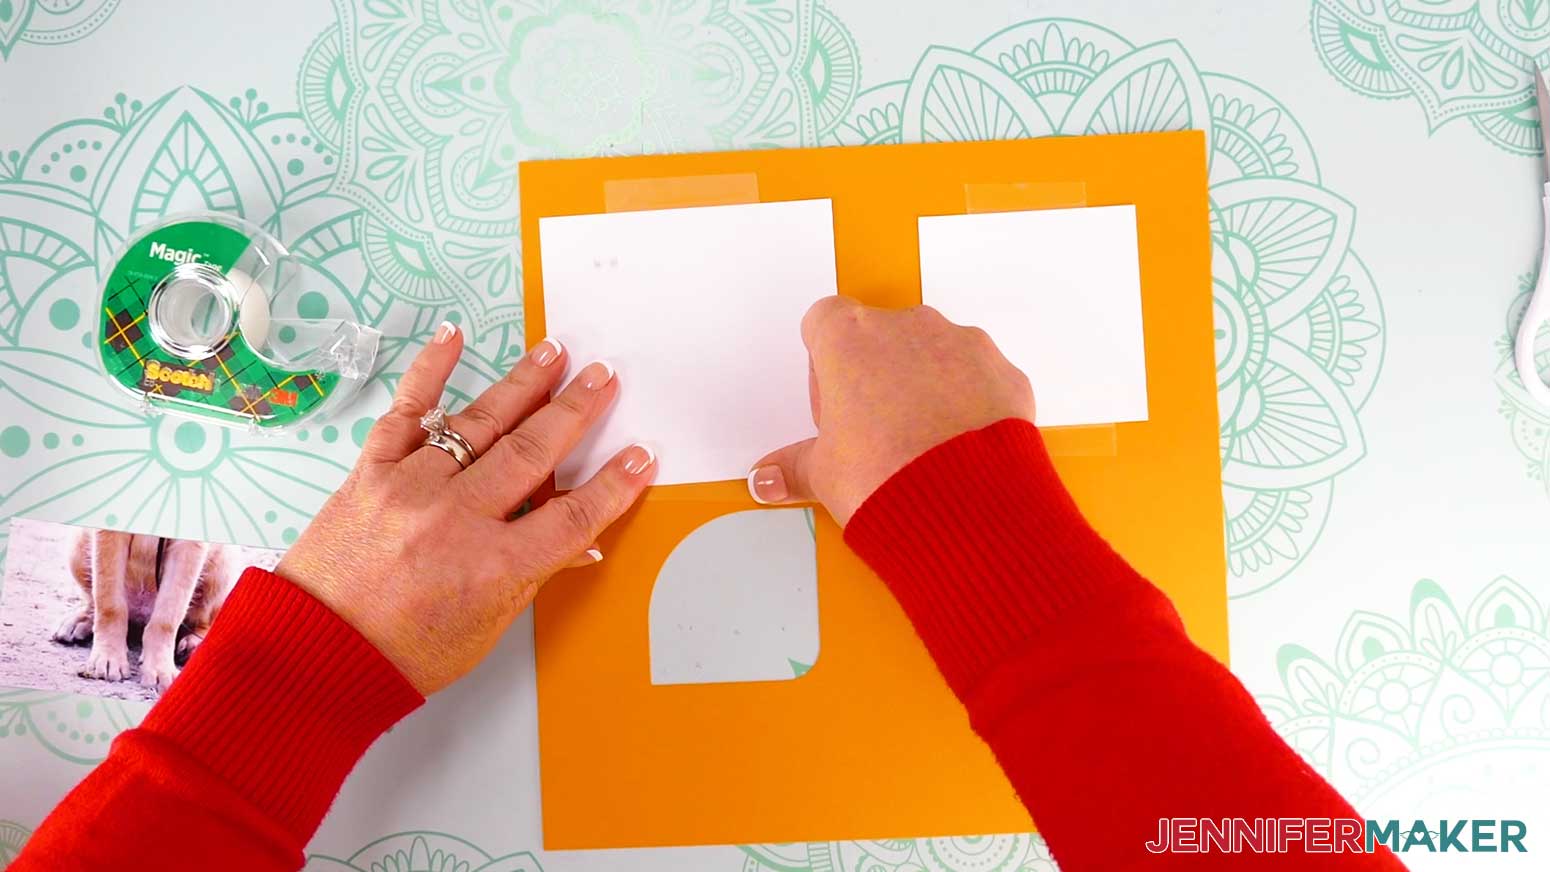
- Flip the photo face up and place the frame’s bottom layer on top so it shows the photo in the top left cutout again.
- Press the paper frame onto the clear tape, then flip the frame and attached photo over and press the tape from the other side to make sure it adheres well.
- Add another piece of clear tape to the bottom of the photo to secure it to the cardstock.
- Repeat Steps 3-11 for the remaining photos, making sure to match them to the proper cutout areas.
- Add clear tape to any spots that don’t hold down well.
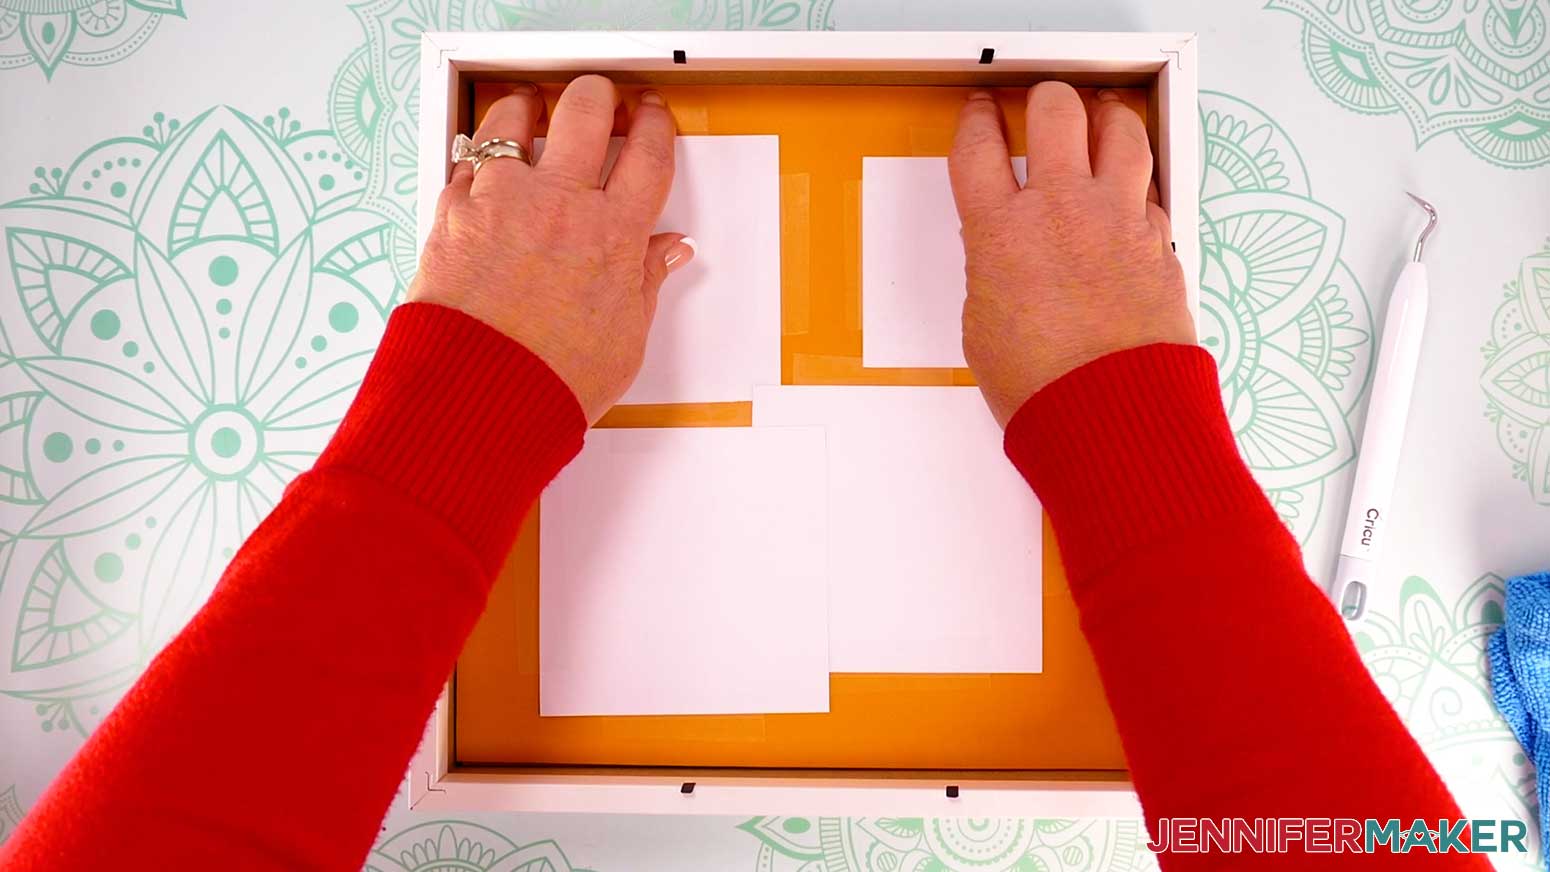
- Lay the bottom photo frame layer inside the shadow box, face up.
- On the back of the next stacked layer, cut and add strips of foam tape around the border, down the center, and in any other open areas.
TIP: You want roughly even coverage on the paper, but avoid getting foam tape over the edges or in the cutout areas. - Peel the backing from each piece of foam tape.
- Flip the prepared layer over and center it over your bottom layer in the box.
NOTE: Use the sides of the box to help with alignment. - Place the layer down lightly and gently press the foam strips onto the underlying layer.
- Repeat Steps 15-18 for the remaining two layers.
TIP: As the layers get more intricate, cut your foam strips smaller. - Gently lift and remove the layers from the shadow box.
TIP: Use a weeding tool or tweezers to help lift the layers if needed. - Use rubbing alcohol and a lint-free cloth to clean both sides of your shadow box’s glass and place it face down.
- Place your cardstock layers face down inside the shadow box on top of the glass, pressing the layers forward until the top layer touches the glass.
- Place the shadow box’s wooden spacer on top of the frame layers.
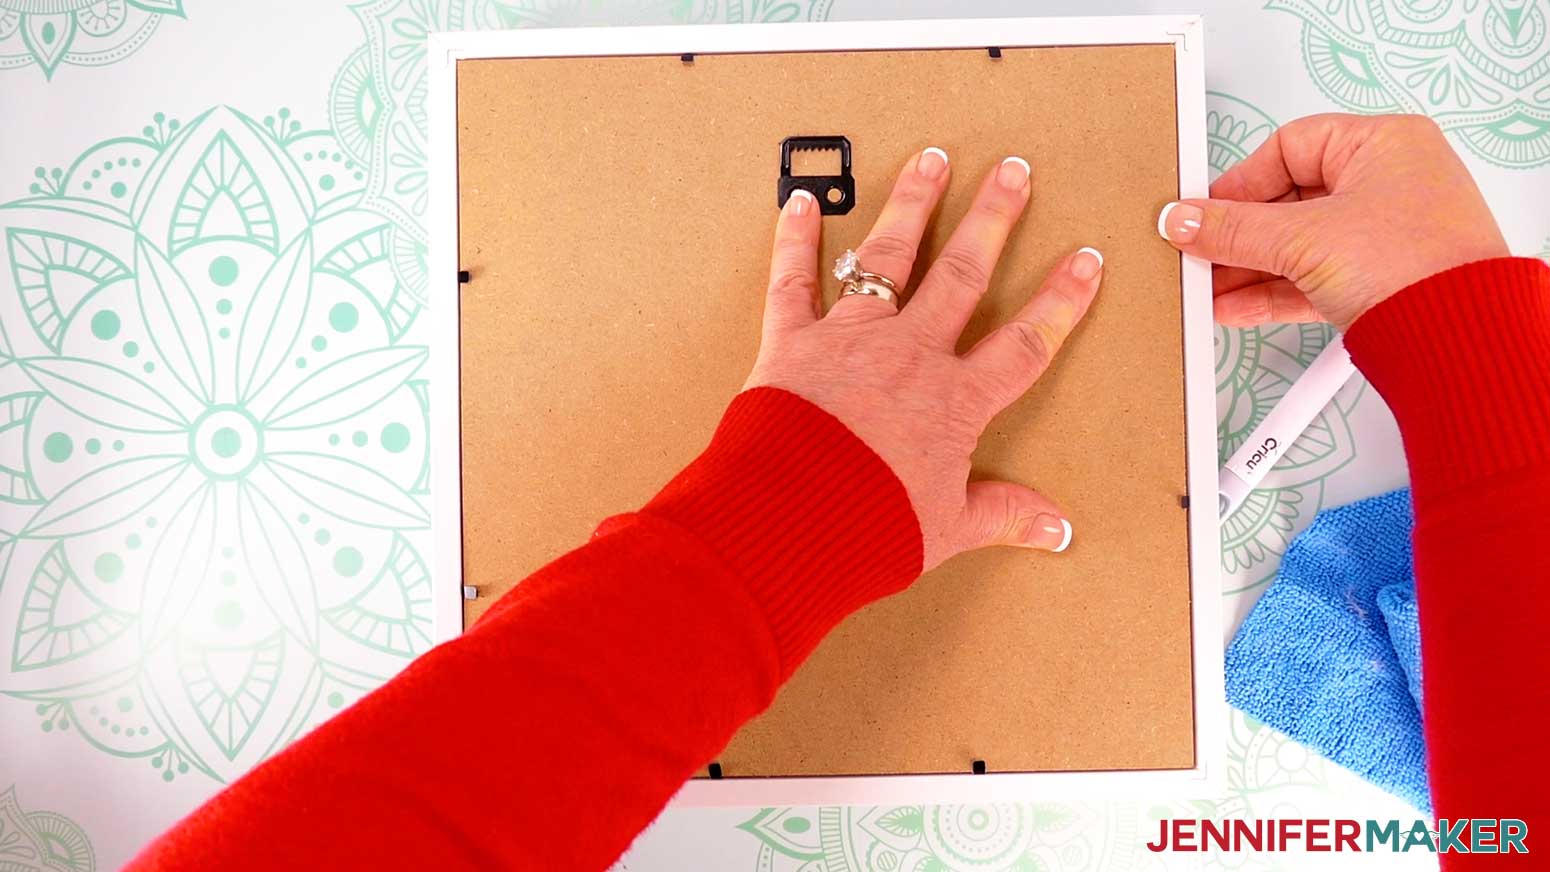
- Place the backing board on top of the spacer, with the hanger positioned at the top, and press down the metal tabs to secure it.
- Turn your project face up.
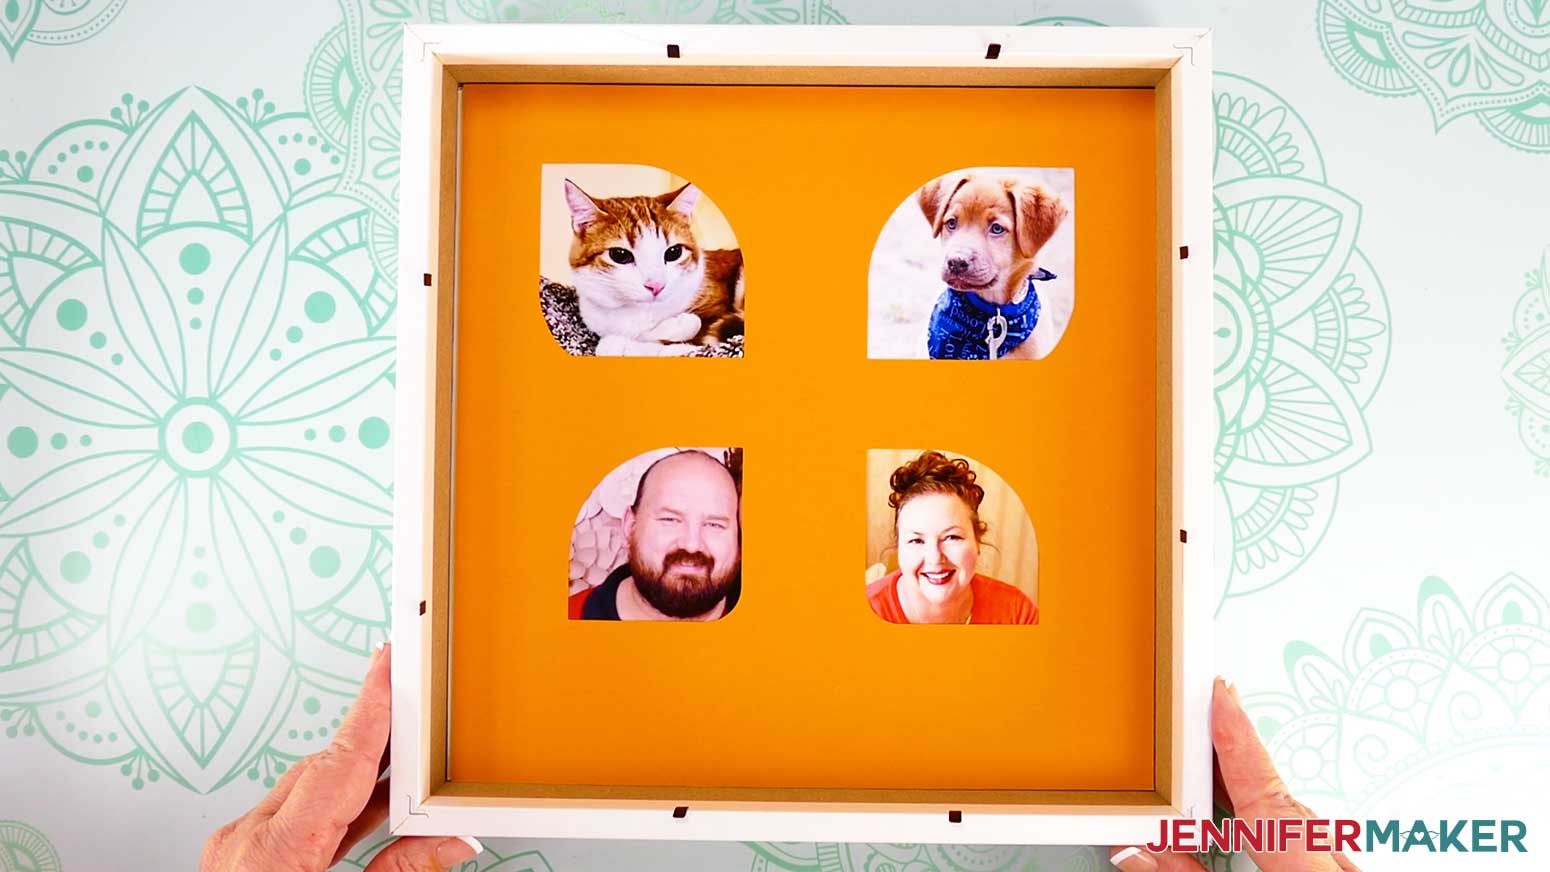
STEP 4: SHOW IT OFF
You have successfully created a Photo Frame Shadow Box with a gallery of personal photos!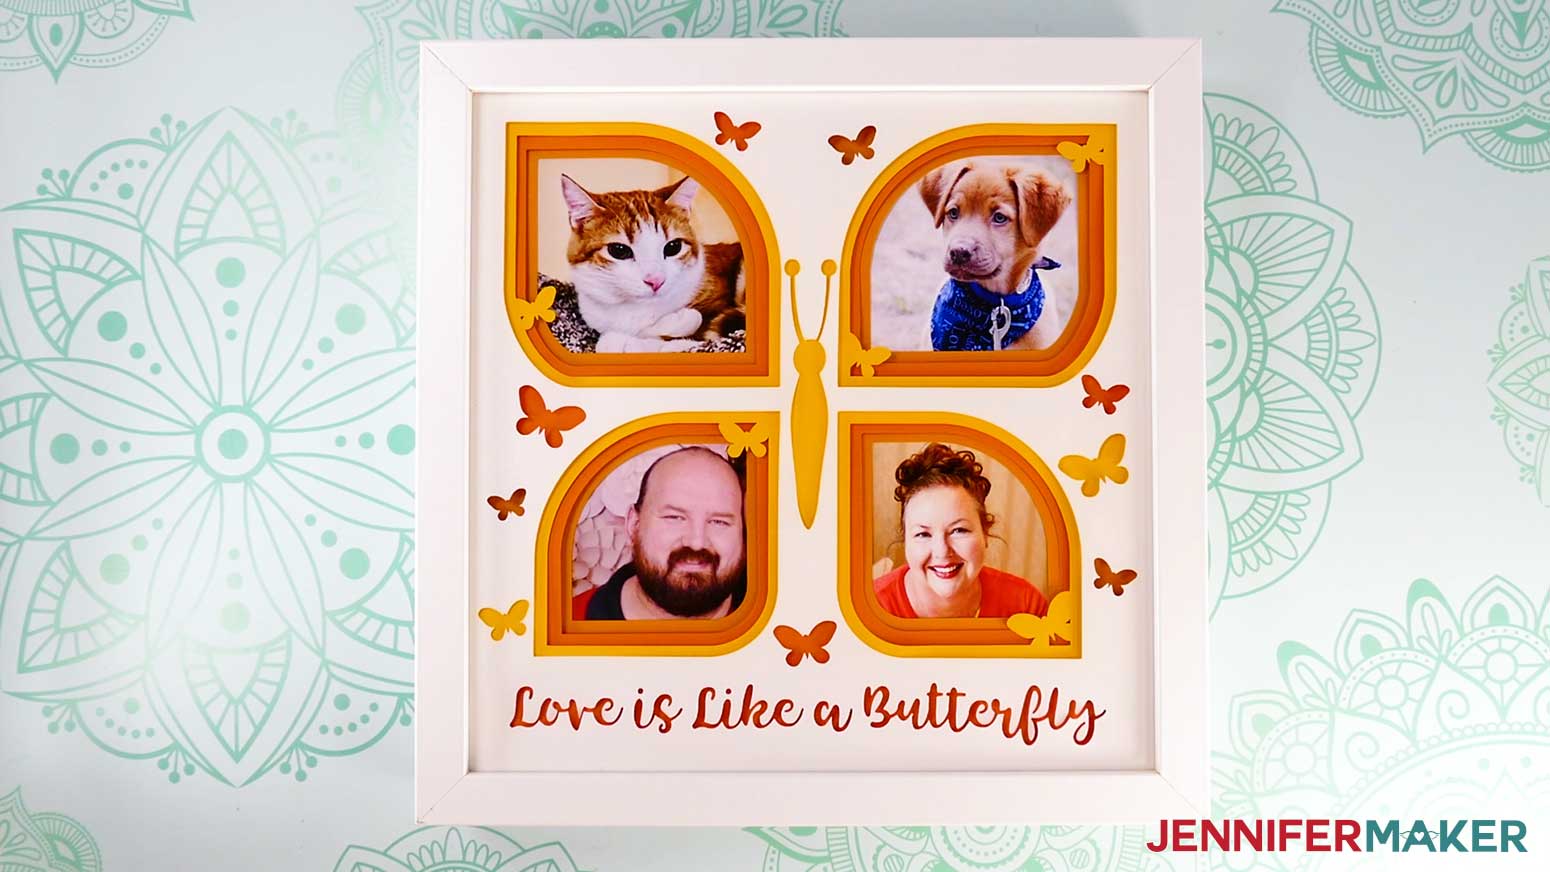
Notes
Typefaces Used:
Tingler Script (Butterfly Design), Free Alternative: Timberly
Wonderful Display (Paw Design), Free Alternative: Norch
Care Instructions: Carefully clean the glass with isopropyl alcohol and a lint-free cloth.
Finished Size: 12” x 12”
Answers to Your Questions About How to Make a Photo Gallery Shadow Box
Q: I want a different design. How do I design my own photo frame?
A: You can learn how to design your own customized photo gallery shadow box frames in my ADVANCE program. Learn more about ADVANCE here!
Q: What is Merry Maker Mingle?
A: Each day in December leading to Christmas, I present you with a brand new “gift” — a project to craft, make, or do. You can make these projects on a Cricut cutting machine or by hand if you don’t have one. Most of our Merry Maker Mingle projects will come with a fun video with yours truly, a step-by-step printable photo tutorial, and a free pattern/SVG cut file. Sign up with your email address to get daily updates and prizes!
Q: How do I know if my design uploaded at the correct size?
A: You can make sure your dimensions match mine after uploading your files:
- gallery-frames-butterfly-jennifermaker-SVG: 10″ x 10″
- gallery-frames-paw-jennifermaker-SVG: 10″ x 10″
If your projects are not coming in at the right size, try uninstalling and re-installing Cricut Design Space. If you need help resizing your design, please see our Resizing Guide.
Q: Can I cut these on a Cricut Joy Xtra or original Cricut Joy?
A: No, the photo gallery frames are designed to fit a 10″ x 10″ shadow box, which is larger than the dimensions the Cricut Joy or Joy Xtra are able to cut. I don’t recommend resizing to fit these machines since some details are already quite small, and you may have trouble cutting them correctly using a Joy model.
Q: Do I have to use a Cricut to cut my photo gallery shadow box SVG pieces?
A: No! You can make a photo gallery shadow box from paper or card stock that works with your equipment, or even just with scissors. We always include several versions of each free file in the free download ZIP file. If you have a Silhouette Cameo, which uses Silhouette Studio, you can use the DXF file in Silhouette Basic Edition. If you have upgraded to Silhouette Designer Edition, Designer Edition Plus, or Business, you can use the SVG format with your Silhouette machine to cut each intricate design. If you don’t have a cutting machine, you can print and then cut out my digital download PDF files, too! The ZIP archive in my resource library includes these file types and more!
Q: Help! My Cricut Design Space screen looks different than yours!
A: If you’re using the latest version of Cricut Design Space, your screen may have slight variations than the screen you see on the video tutorial. Good news: All of the same functions are there, they may just be in different spots or have new icons. Pause the video if you need, or follow along with the written tutorial. If you get stuck, ask for expert support in our Facebook group. Our group has become not just a help center, but also a vibrant community of real people and crafters! Plus, you can catch the latest news on JenniferMaker tutorials and more.
Q: Where can I find the supplies and tools to make a photo gallery shadow box?
A: My photo gallery shadow box SVG files can be made with simple supplies you may already have. I like to shop on Amazon for their free shipping with my Amazon Prime membership (just make sure to look for sellers with 5-star reviews). You can also find most, if not all of the supplies and tools at your local craft store.
Q: Can I make and sell these photo gallery shadow box designs?
A: If you want to use my designs and projects for commercial use, please familiarize yourself with my important licensing information before selling your crafts.
I do not permit sale of my digital items, but you can sell the creative goods you make with them — as long as you follow my licensing requirements. That means you cannot sell the photo gallery shadow box SVG files, but you can sell the layered shadow box frames that you made with the files on platforms like Etsy. Whether you use the Etsy app or the browser version, you’ll find a global marketplace filled with thousands small businesses, and interested buyers can find thousands of made-to-order items. I love to see creative crafting businesses thrive with the help of my designs and inspiration!
Q: What fonts did you use in the project?
A: For the butterfly design, I used a paid typeface called Tingler Script, but a free alternative is Timberly.
For the paw design, I used a paid typeface called Wonderful Display, but a free alternative is Norch.
Q: What can I do with a photo gallery shadow box?
A: A photo gallery shadow box is a great way to decorate your home. Fill it with all of your favorite photos so you can look back on your cherished memories. It also makes a perfect gift for friends and family!
Q: What cardstock should I use for a shadow box?
A: Different shadowbox projects call for different weights of paper. For this shadow box, I recommend using 12″ x 12″ 65 pound cardstock. Make your top layer white and your other layers bright colors for the best results!
Get my free SVG files to make a photo gallery shadow box!
(If you do not see the signup form above, click here.)
I love seeing what you make with my designs and how you use them! Please share a photo of your photo gallery shadow box in our Facebook group or tag me on social media with #jennifermaker.
Love,

Want to remember this? Save this Photo Gallery Shadow Box Tutorial to your favorite Pinterest Board!