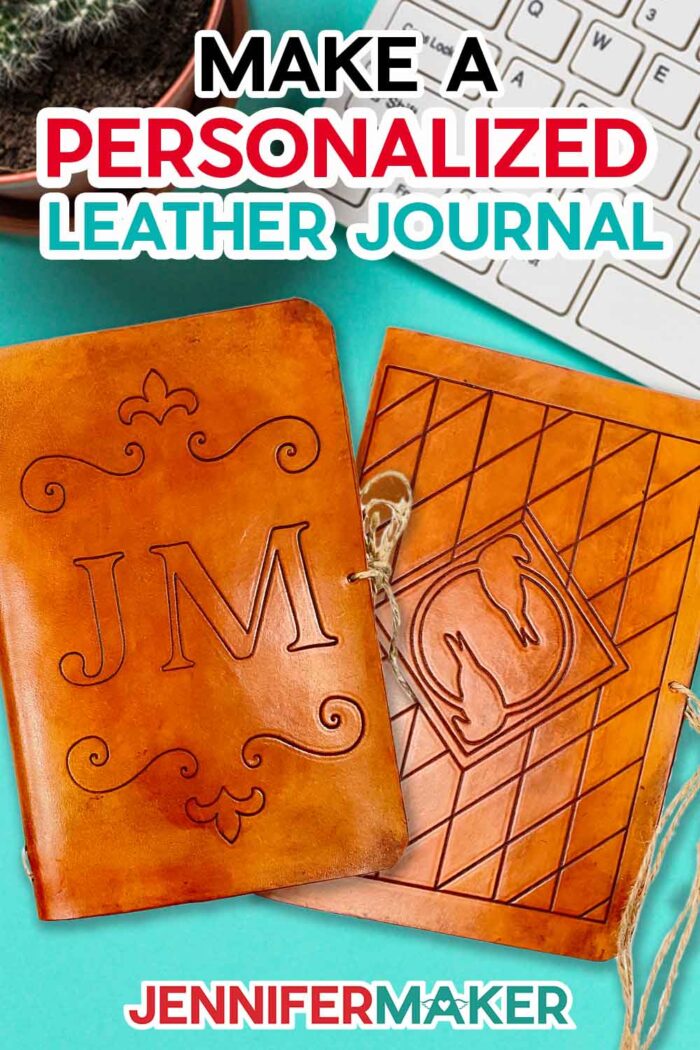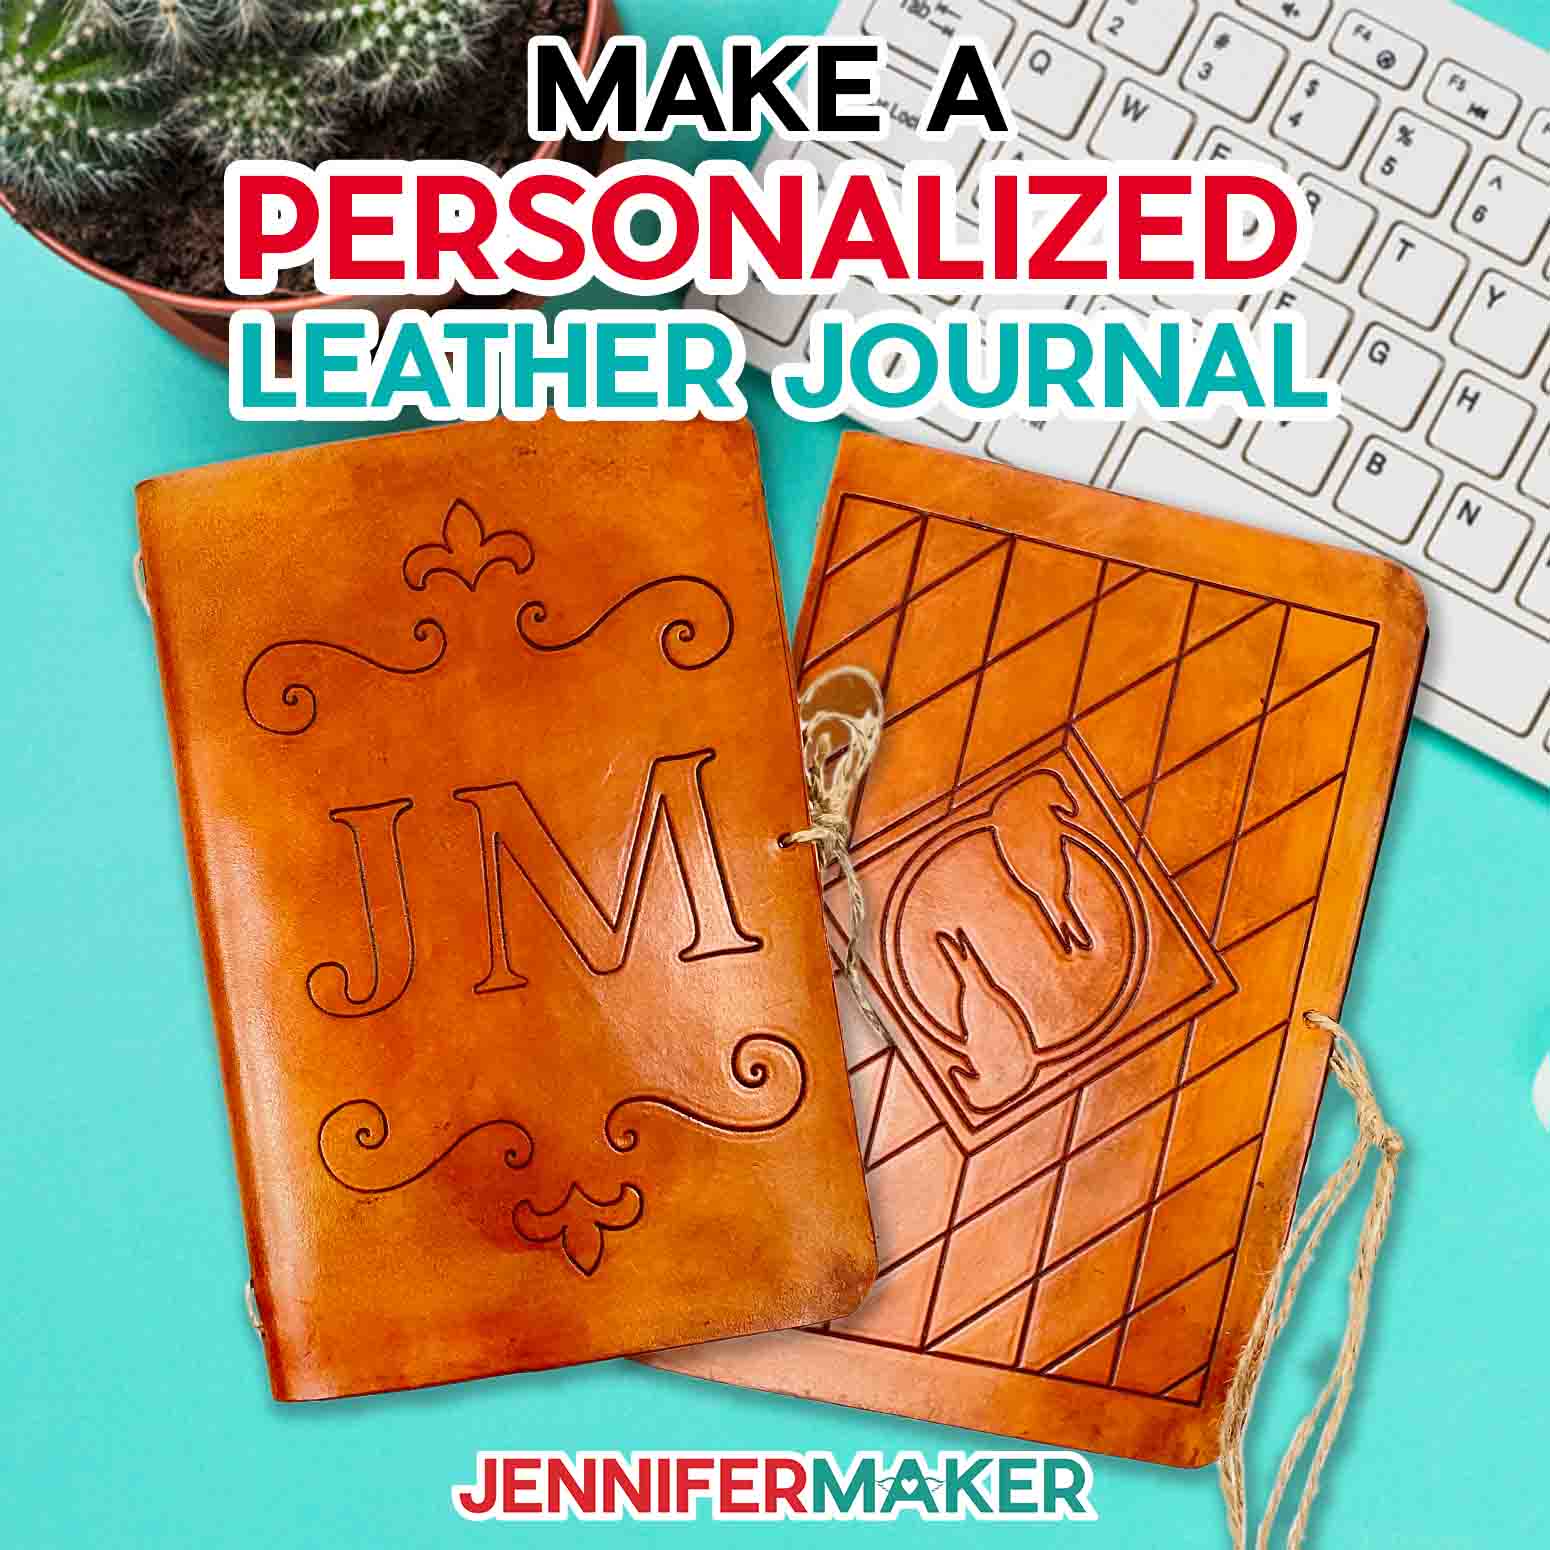
Learn how to make a DIY leather journal with a tooled style!
I love Cricut crafting with unexpected materials, like genuine leather! Yes, you can cut, mark, and use other methods to create a great gift such as a DIY leather journal. After some experimenting and help from the talented Kay Hall at cleversomeday.com, I’m excited to share a new cut file collection of journal designs that you can finish with traditional leather working techniques. They’re a great combination of old and new crafting!
Watch the full step-by-step DIY Leather Journal tutorial

 What is the Merry Maker Mingle? This is an annual tradition here at JenniferMaker! Every day for the first 25 days of December, we gift you with a brand new project, design, tutorial, and video for something YOU asked us to make. On top of that, we host a giveaway with 25 days of prizes. Some of the amazing prizes are Cricut cutting machines, sewing machines, gift cards, and beautiful print editions of our popular Cricut Coach Playbook. You can even earn bonus entries for sharing photos of the daily projects! Click here to learn more about the Merry Maker Mingle!
We’ve made small leather projects together, but this DIY leather journal is large enough to hold up to 50 sheets of 4″ x 6.5″ paper. That’s plenty of space to write down dreams, memories, ideas for the new year, or anything else you’d like! In fact, one of my free designs features two ravens, a nod to Huginn and Muninn who represent thought and memory in Norse culture!

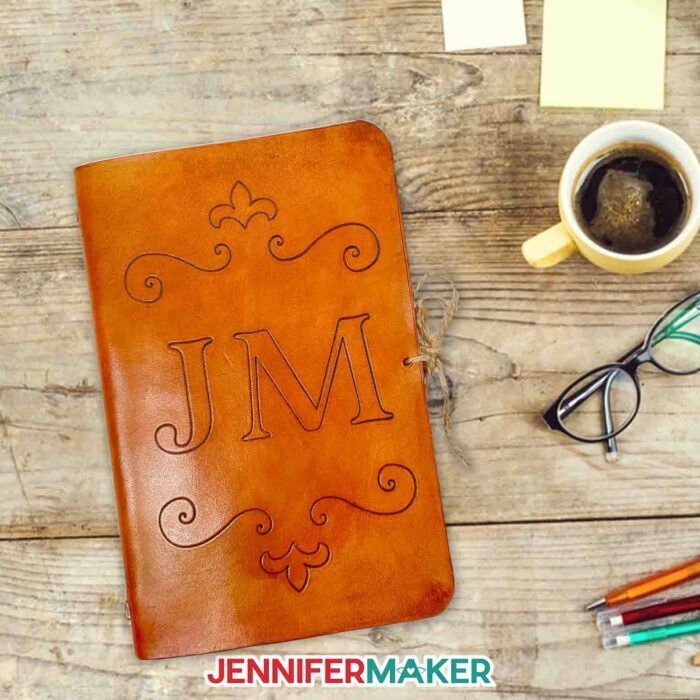
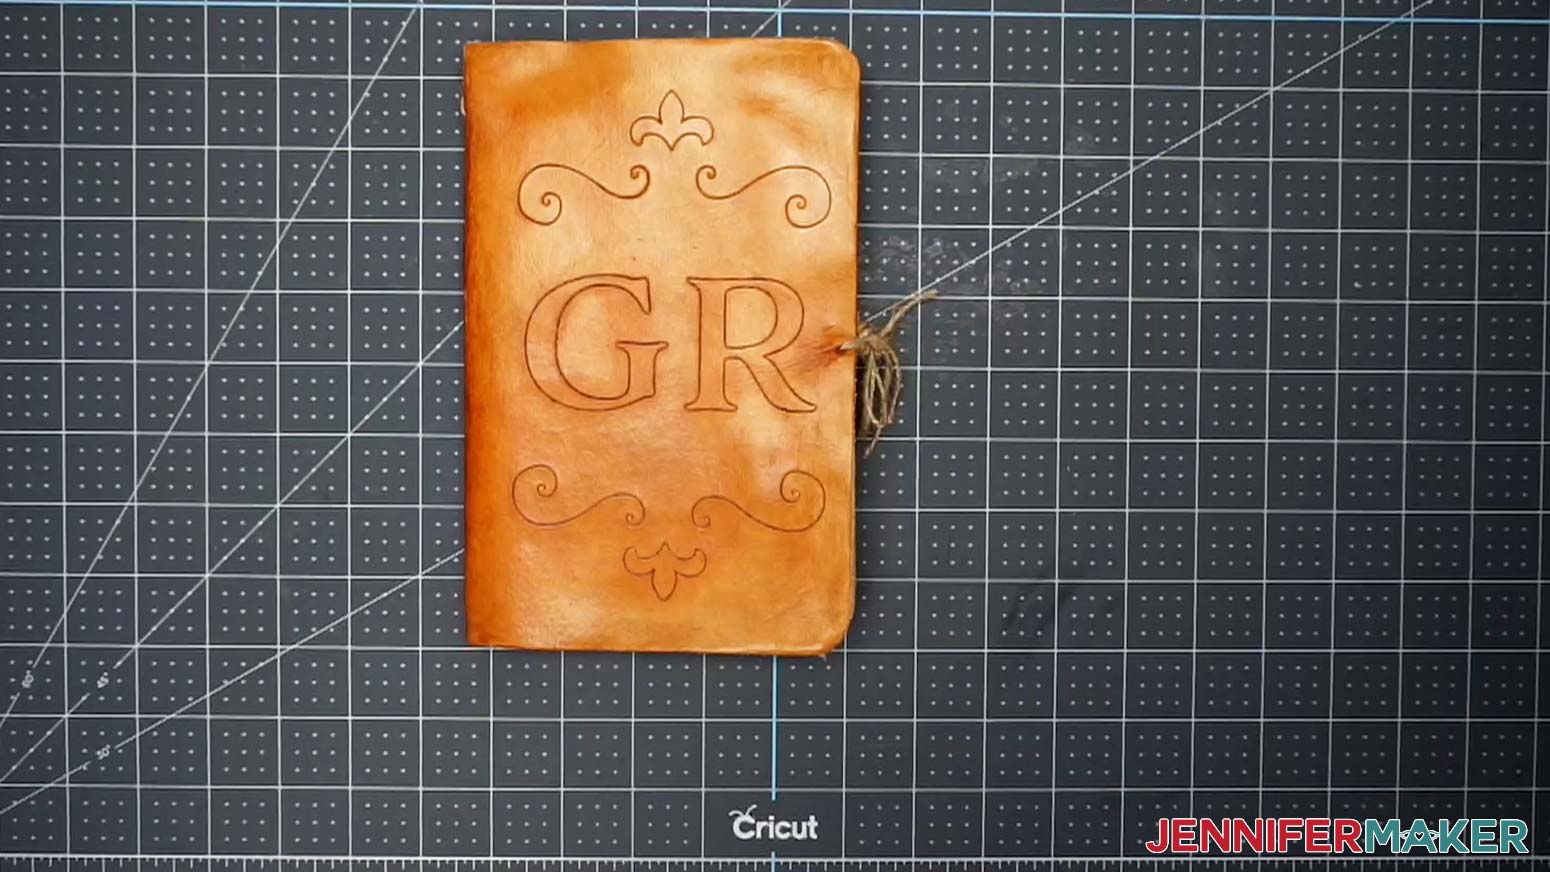
You can use one of my free designs, but I’ll also show you how to make a custom journal cover with initials. The steps are pretty specific in Cricut Design Space, so pay attention to the video!
I used genuine leather and jute twine for my covers. It’s sold by weight, but it’s really important to check the thickness of the leather since natural materials aren’t always consistent. Make sure it will go under the Cricut’s roller bar once it’s on the machine mat.
I used a Cricut Maker 3, but you can also use an original Maker. If you don’t have a Maker, you can follow the steps from my leather bookmarks to create a similar effect with an Explore.
We’ll use the foil transfer tool with the medium tip, fine debossing tip, and deep cut housing and blade to create the designs and cut through the leather. A damp sponge and bowl of water will also come in handy, I’ll show you how!
Along with your Cricut machine and tools, you’ll also need a purple StrongGrip Machine Mat and Strong Grip transfer tape. Several tools will also be helpful, including painter’s tape or masking tape, a TrueControl Knife, a self-healing mat, a ruler, and a scraper.
These make beautiful handmade gifts, but do take some time since I recommend dyeing or staining and finishing them. Don’t try to make a DIY leather journal cover at the last minute! You can certainly make a few at a time, though, if you cut, dye, and finish them in groups. Make sure to have disposable gloves and lots of protection for your work area. Wool daubers, rags, and paper towels will also help with the color.
We’ll also use some fun leatherworking tools like a slicker, awl, and leather needle to add the twine to hold in the paper and close the DIY journal covers. To make your project last, I recommend adding some leather conditioner at the end, like mink oil.
I haven’t gotten perfect results using this technique on faux leather yet, but if you’d prefer to use a vegetarian or vegan option, my cutwork leather journal is a good fit!
Let me show you how easy it is to make this DIY leather journal! This post contains some affiliate links for your convenience (which means if you make a purchase after clicking a link I will earn a small commission but it won’t cost you a penny more)! Read my full disclosure policy.
Materials to Make a DIY Leather Journal
View my Amazon shopping list with the exact items we used to make this project
- Leather Cowhide 4-5 oz (1.6-2mm) Thickness – I started with a 12″ x 12″ piece of leather
- Eco-Flo All-In-One Stain and Finish 4.4 oz – I used Acorn Brown
- Eco-Flo Stain
- Nitrile Gloves
- Wool Daubers
- Mink Oil, or another leather conditioner
- Rag
- A method to cut your leather pieces – I used the Cricut Maker 3, but you can also use the original Maker, you’ll need a:
- Cricut DeepCut Blade
- Cricut Fine Debossing Tip with its housing
- Cricut Transfer Foil Kit – I just used the housing and medium tip, not the foil sheets
- Cricut StrongGrip Cutting Mat 12″ x 12″
- Cricut StrongGrip Transfer Tape
- Cricut TrueControl Knife – or another craft knife
- Self-healing Mat
- Ruler
- Awl – I used a Tandy Leather Craftool 4-in1 Awl Set to create pre-made holes for adding the twine
- Wood Slicker – to shape the edge of the leather
- Soft Scotch-Brite Sponge
- Bucket large enough to fit the folded leather cover and access to water
- Printer Paper and Cricut Portable Paper Trimmer – to make the refillable journal pages
- Leather Needle – I used one by Tandy
- Cotton Twine Jute String
- Cricut Scraper
- Painter Tape 2” or masking tape
- Butcher Paper
- Paper Towels
- Design #458 – My free handmade leather journal cover design collection (available in my free resource library—get the password at the bottom of this post)
How to Make Your Own DIY Leather Journal
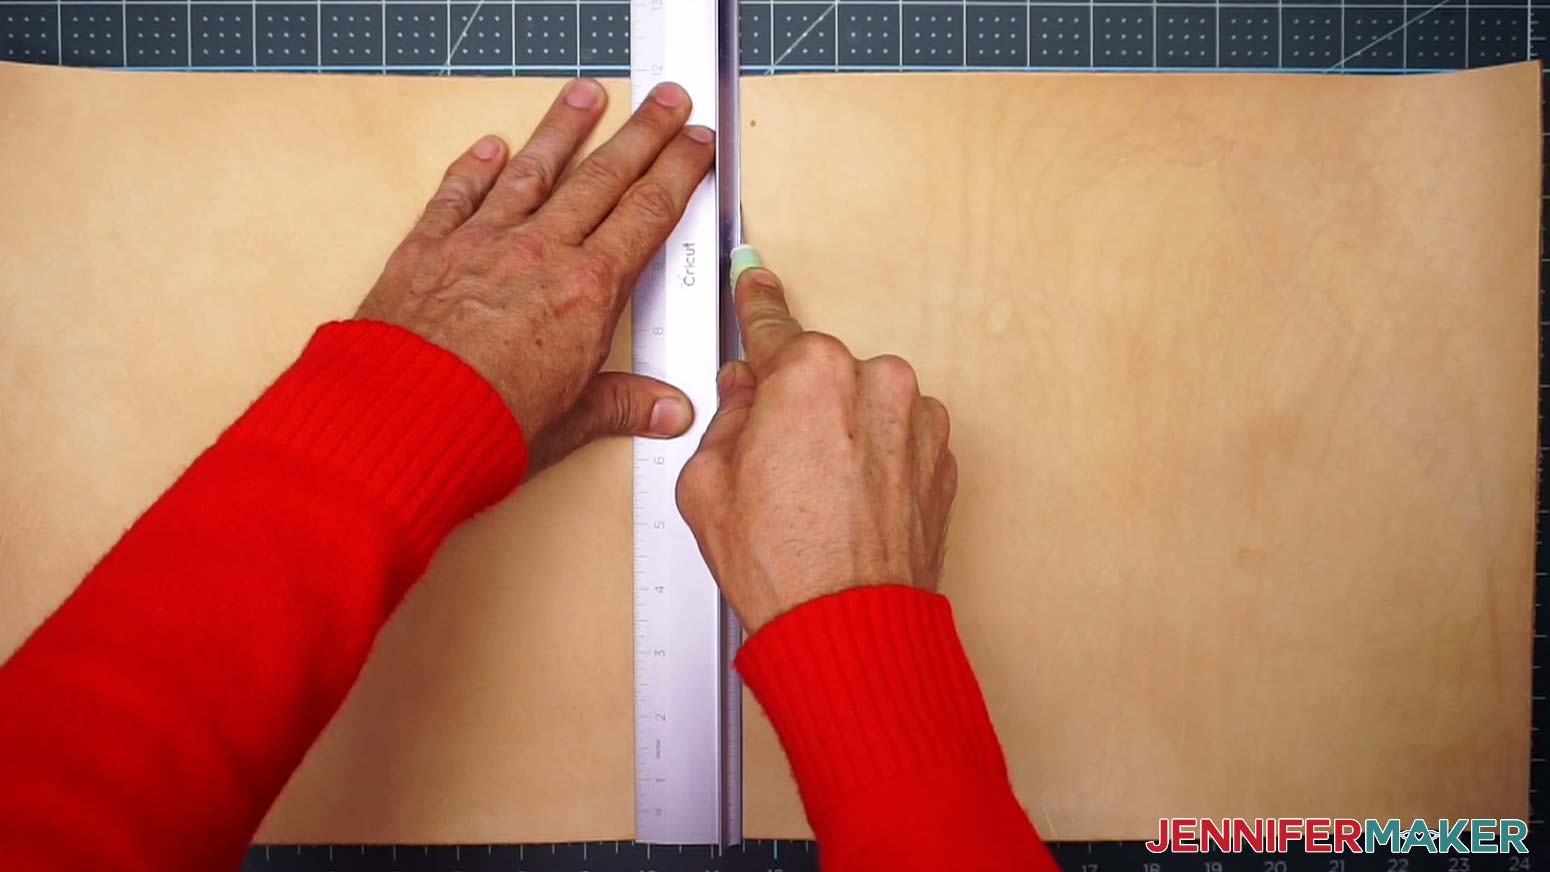
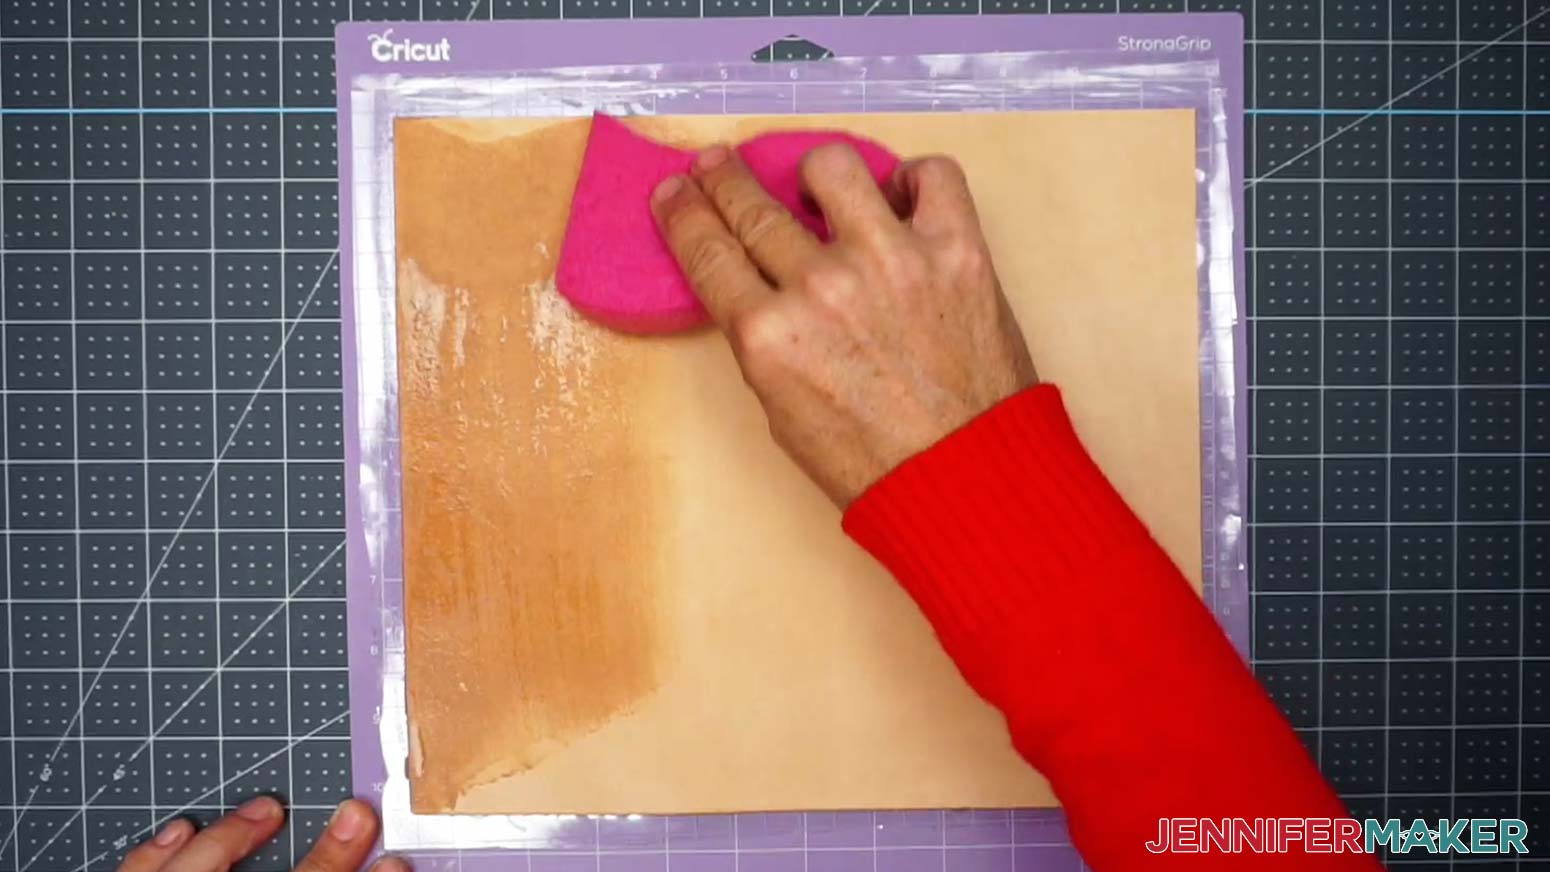
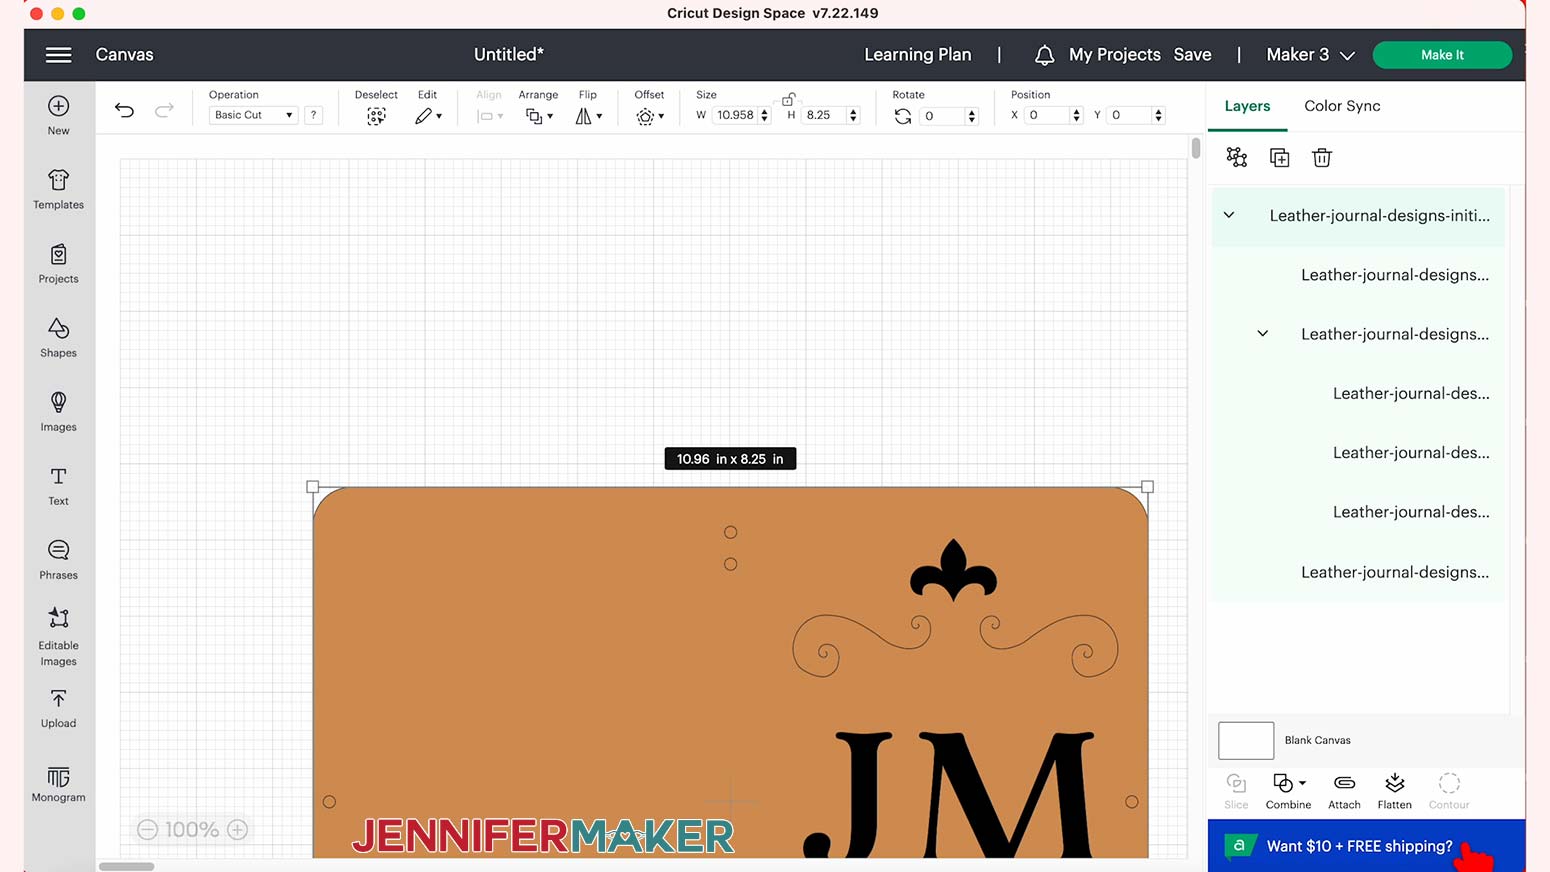
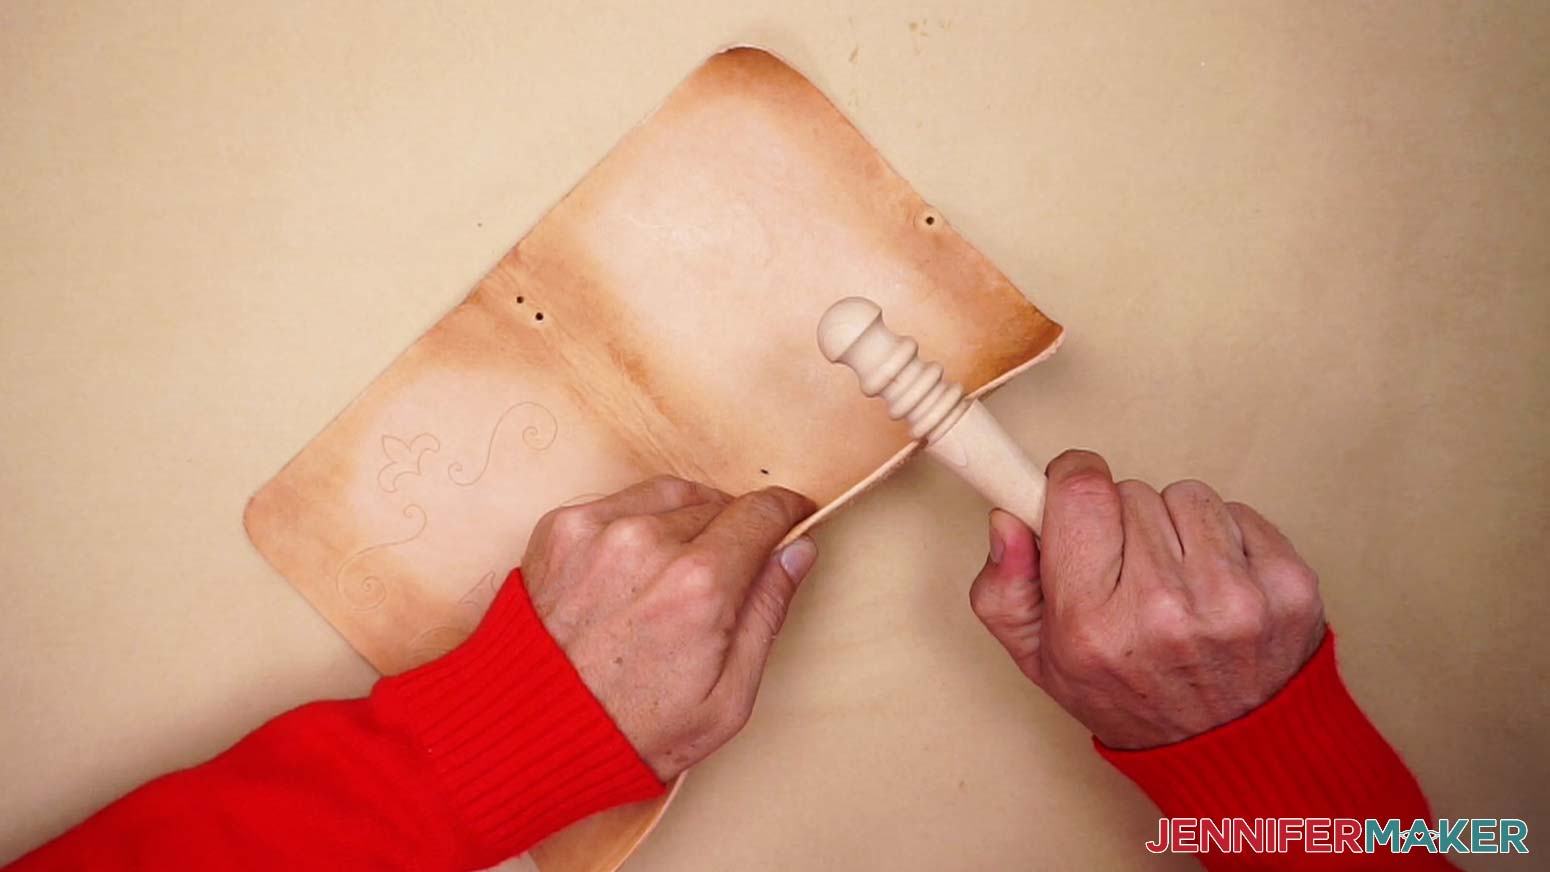
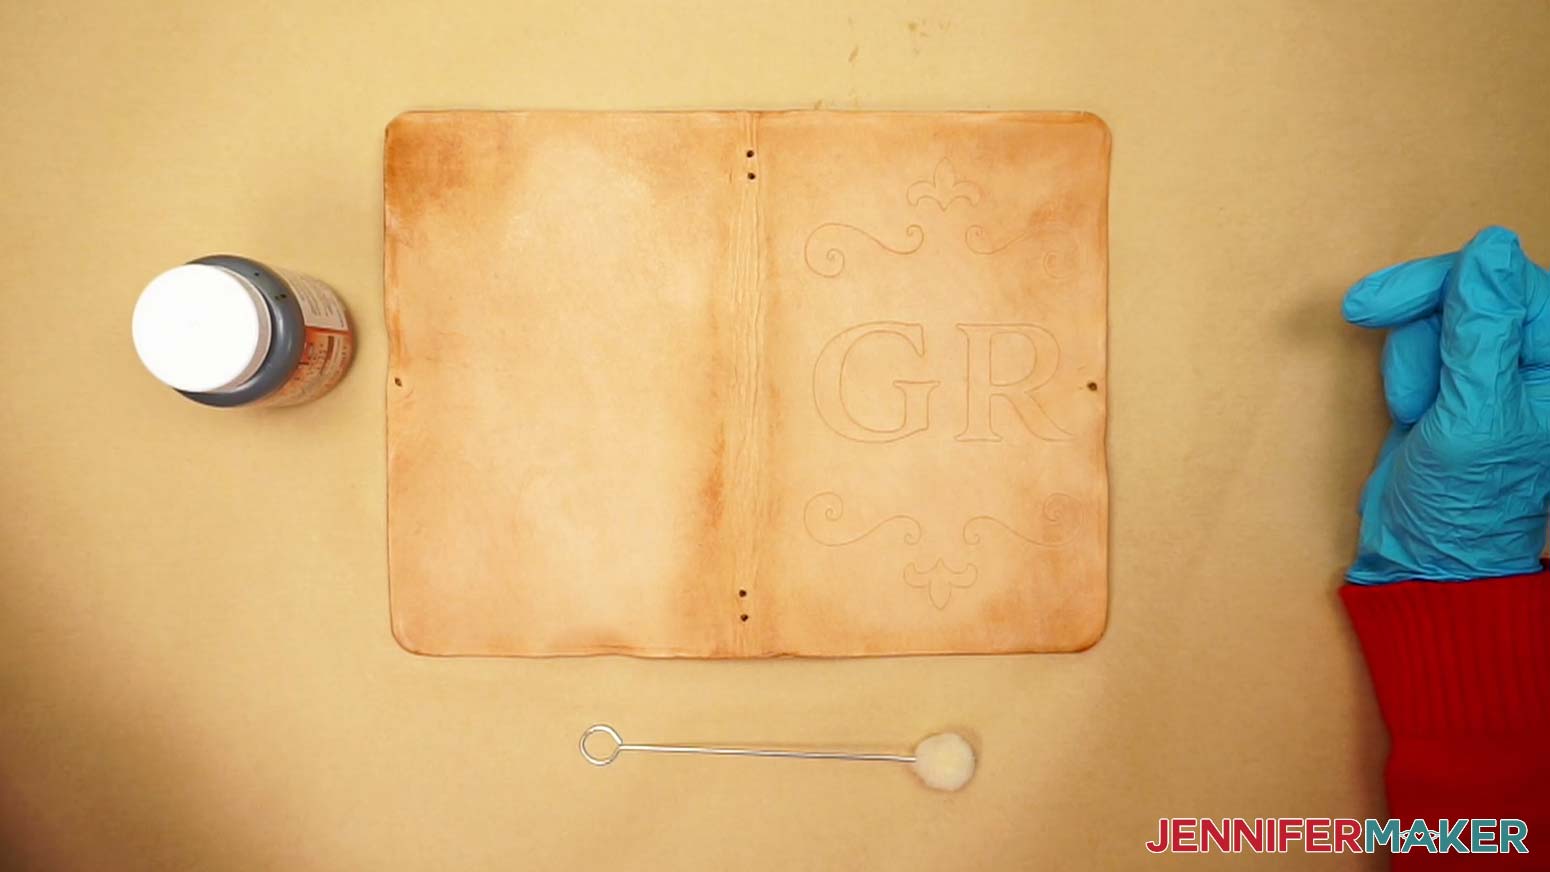
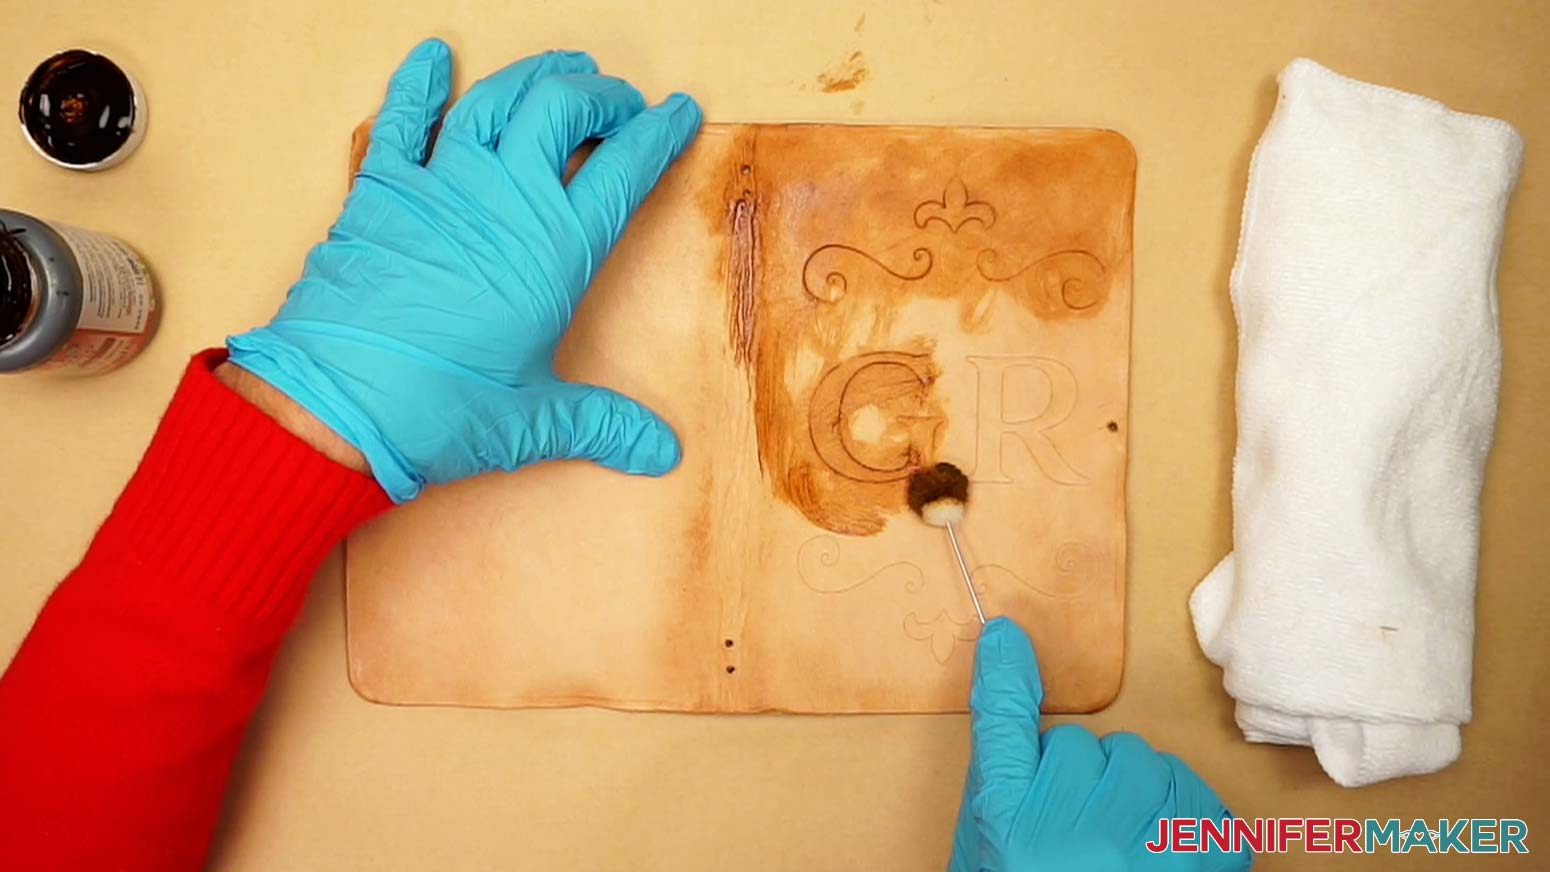
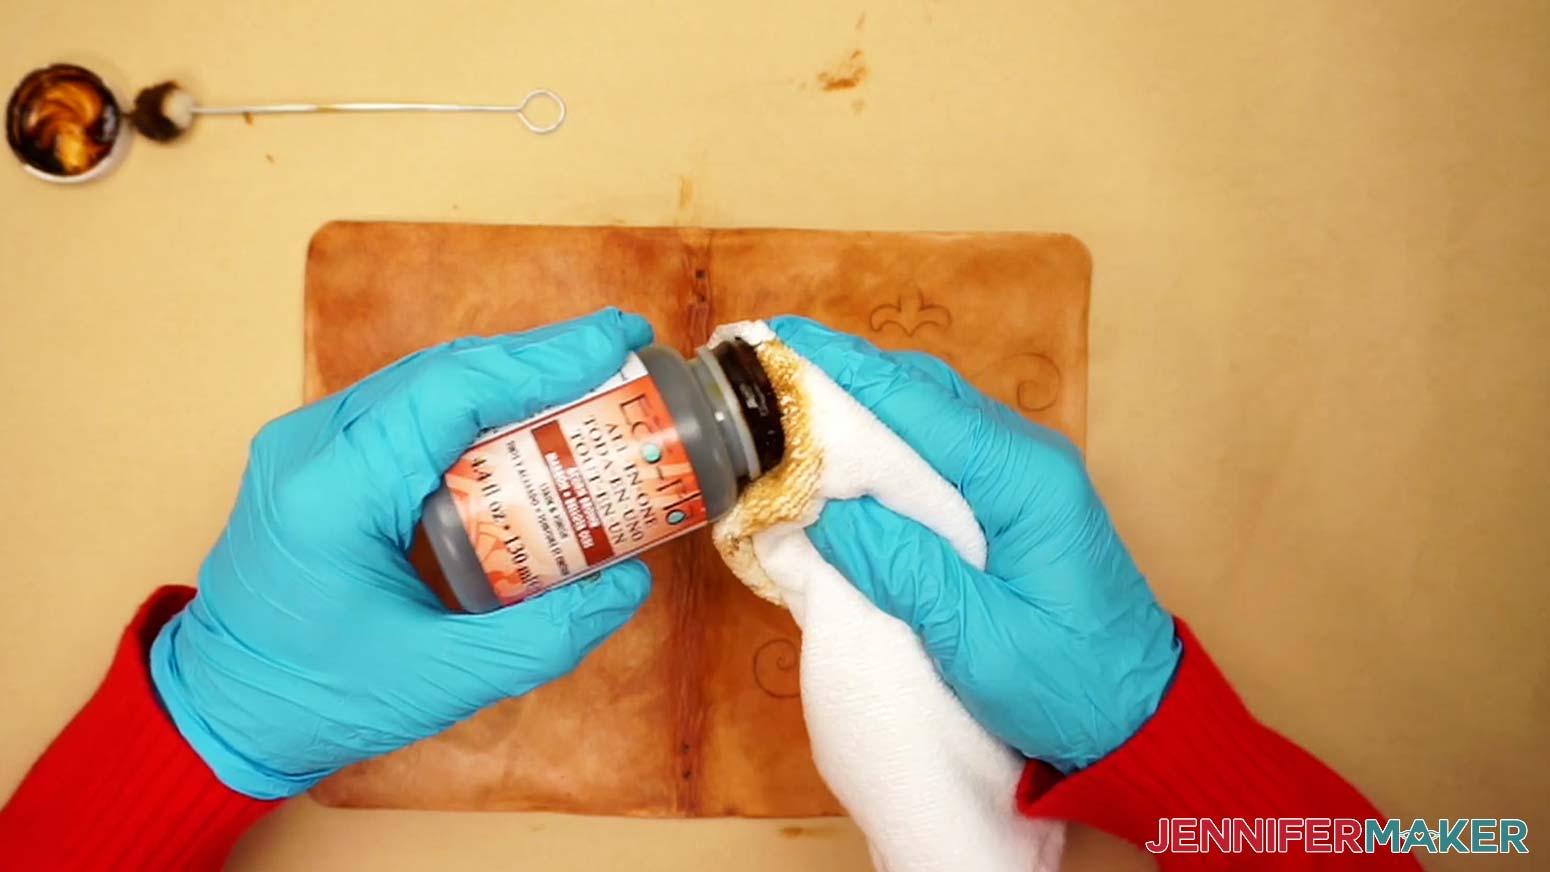
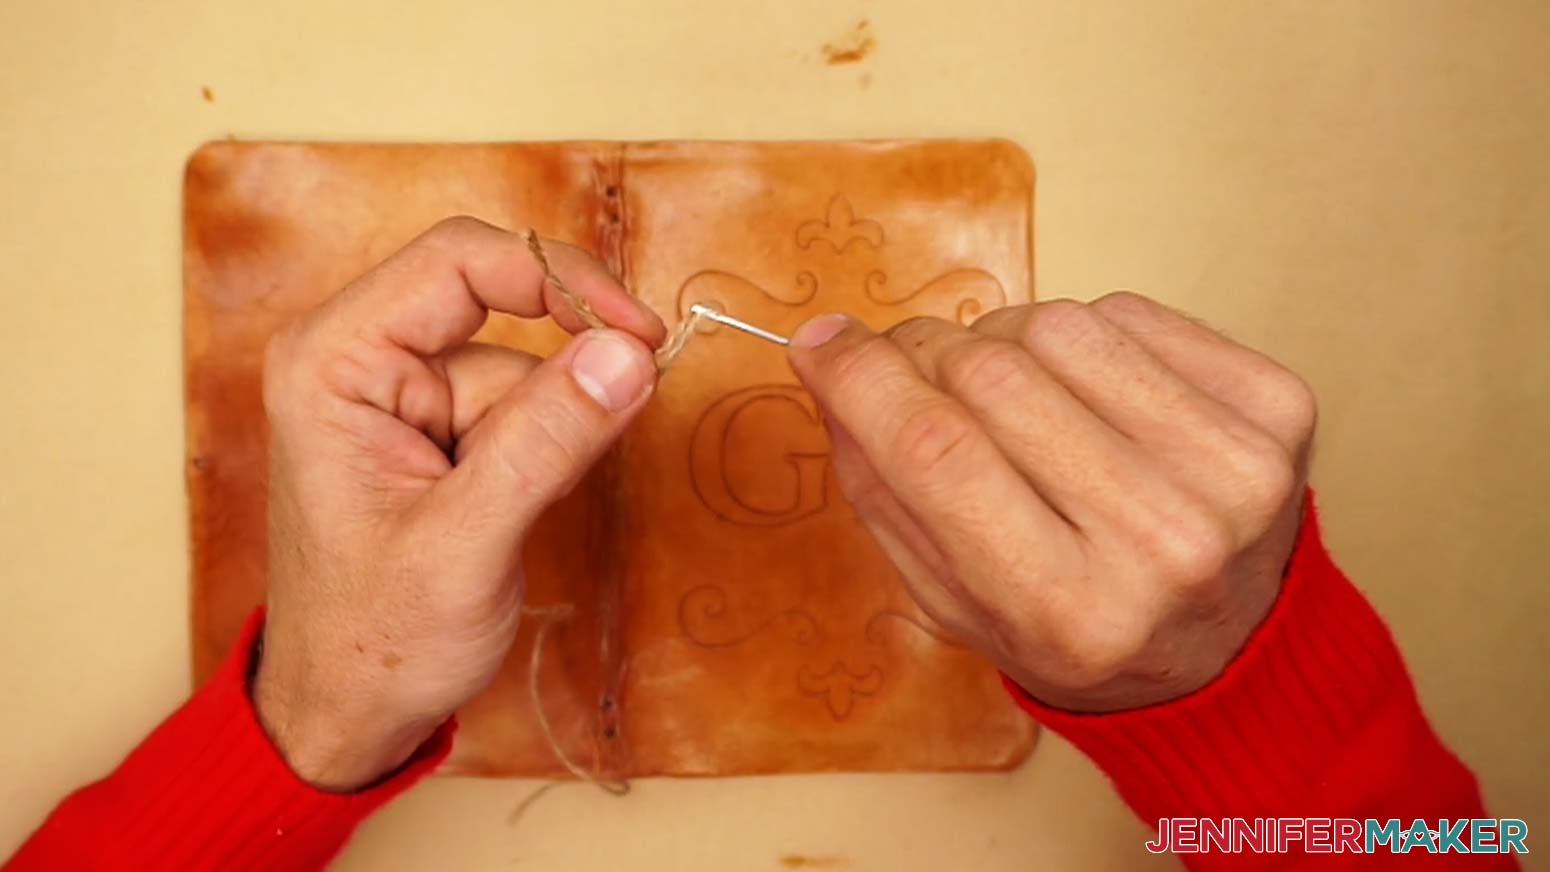
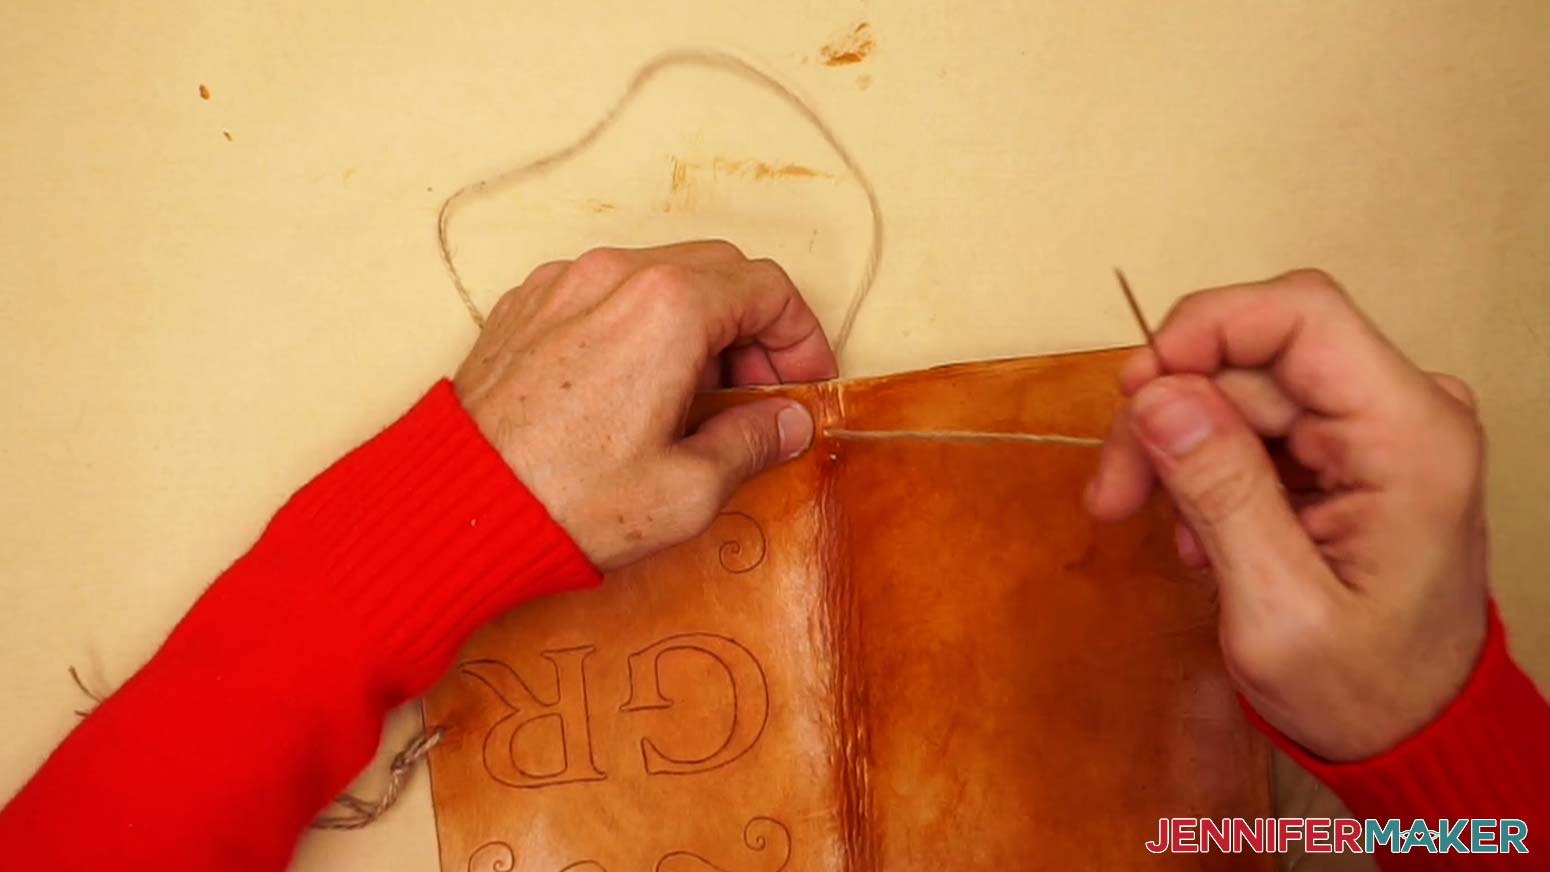
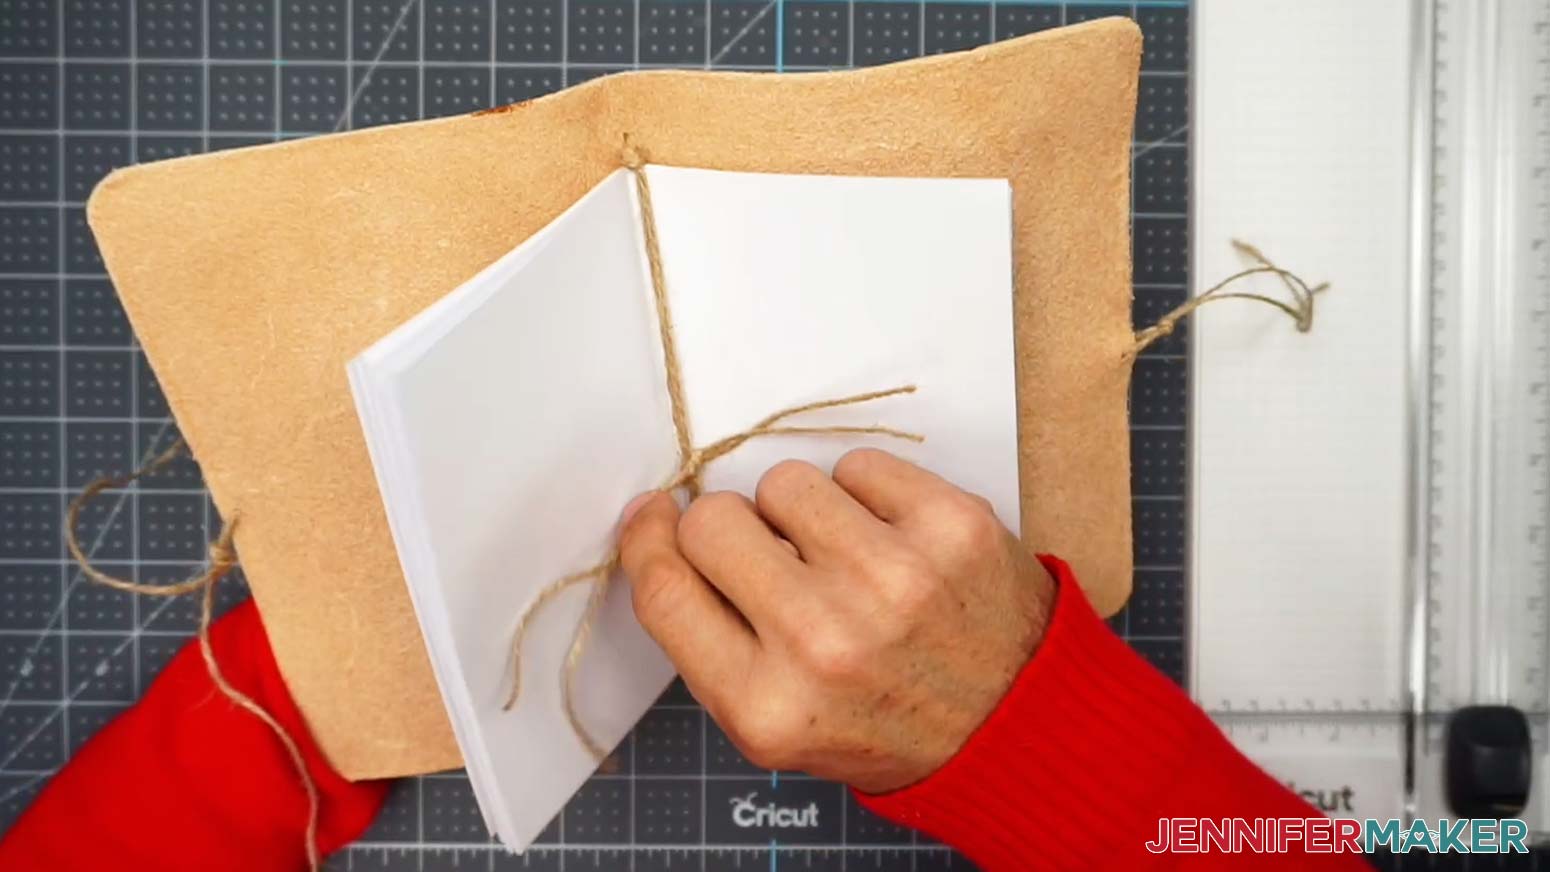
Learn to make a customizable leather journal! First, download my free DIY Leather Journal SVG/PDF/DXF collection from my resource library -- it's Design #458. The download folder includes PDFs to cut by hand, and DXF or SVG files for use with a cutting machine. I'll show you how to use the SVGs with a Cricut. There are three journal designs to choose from. You can even customize them! There is the initials design, floral design, and the ravens design. Upload the SVG file of your choice to Cricut Design Space and add them to your Canvas. I'll show you how to customize the initials design. TIP: If you're not sure how to upload an SVG cut file to Cricut Design Space, watch this helpful video training series I made. On a self-healing mat, use a ruler and craft knife to cut your leather to 10" X 11.5" to avoid the rollers of the Cricut. We need to place the leather fuzzy side down in order to cut and tool the leather's exterior. But sticking leather directly to the machine mat will leave lots of debris, so adding transfer tape as a buffer helps! Cut a piece of Strong Grip Transfer Tape slightly larger than the piece of leather. I'm going to add about an inch to the height and width to give me a 1/2" margin all around. Remove the transfer tape backing. Then, place the transfer tape sticky side down on to the fuzzy side of the leather. Use your scraper tool to adhere the transfer tape to the leather. Since the leather is thicker than most materials and we don't want the transfer tape to stick to the rollers, we won't place the material right in the corner. If there is enough space, place the leather with its top left corner .5" in from the left and down from the top on a Purple StrongGrip machine mat, transfer tape down. The leather should be placed so the longer dimension runs side to side. Make sure the leather lines up with the straight lines on the mat to help with alignment. Now, we need to dampen the leather. Fill your bucket with water and get the sponge wet, then gently wipe the sponge across the leather up and down and side to side. Re-wet the sponge as needed. The leather will get darker. This is good and exactly what we want! Do your best to evenly distribute the moisture on the leather. Allow to sit for 30 minutes. This allows the leather to be tooled easier. Place painters tape along the edges of the leather. Make sure the painters tape strips are thin as to not get in the way of the cutting or tooling. Move your star wheels as far over as you can, as they will mark your leather when feeding into your Cricut. Here is how my initials design looks on the Canvas. You can use these steps for the other designs, too. We'll need to move the design around a bit, so make a duplicate for reference. I'll show you how to customize the design, but you can use the same steps to adjust the layers for the complete designs, too. Let's add some initials. I’ve added my initials as a reference, but let's change them. Click the Text icon on the left side of your Canvas and type the initials you want to use. I'll add GR for Greg. Click on the Font icon to see your options. I’m using a font called AdornS, which you can purchase from my affiliate link at Creative Fabrica. Remember to search under System for fonts you've downloaded. Click the journal design and click Ungroup. Select the decoration layer with the JM. Click Contour at the bottom of the Layers Panel. In the popup, click the J and M to hide them in the design. Then click the X to close the popup. Now the GR is where JM was! Hold Shift to select the initials and the decoration layer then click Attach. Here's the secret to getting a tooled look on leather: multiple passes with different tools! And some non-traditional uses! Click the bottom copy and change the Operation to Deboss. Then, change the other three layers to Foil-Medium. We're just going to use the tool, not the foil sheet, though! Select all four grouped design layers and move them back into the right position on the journal cover, using the original copy for reference if needed. Then delete the reference. In the Layers Panel, click the group of six layers with circles and change the Operation to Deboss. These will help us place holes using the awl for the jute string. Select all the layers and click Attach. Your design is ready! Make sure the right machine is selected in the top corner and click "Make It." On the Prepare Screen, you should only see one mat with the journal shape and the design. If you see something different, go back and try again. Leave the Material size at 12 x 12" even though we're using a slightly smaller piece of leather. Drag the design so it will be created in the area covered with leather on your mat. Use the lines for reference! Click Continue. On the Make screen, click Browse All Materials. You will notice the list is rather short and "Leather" is not an option. That's because of the Operations we're using, but you don't always have to use the programmed settings for the indicated material! After some experimenting, I found that using the Kraft Board setting works really well. Select it and click Done in the lower right corner. Leave the pressure at Default. On your machine, push your star wheels to the sides so that they will not roll over your leather. Check your leather's dampness. If any spots still seem wet, let it dry a bit longer. Place your Fine Debossing Tip in the QuickSwap housing and in clamp B. Make sure your medium foil tips and Deep Blade are ready to go for the next passes. Press the flashing arrows to load your mat and then press the middle flashing button to begin debossing. When the debossing is done, do NOT remove the mat. Swap the debossing tool for the Medium Foil Transfer Tool in Clamp B and press the middle flashing button to continue the process. Once the Foil tool is done, swap in the deep-point blade and press the flashing button to finish. When the Cricut is done with the project, press the flashing arrows to unload your mat. Remove the materials from the mat. If you find that any area didn't cut all the way through, use the TrueControl knife to finish the cut on your self-healing mat. After removing the excess material, place the leather journal cover in water for a few minutes to soften it. Then, take it out and fold it in half so the holes match up on the right and the design is visible. Once the leather has dried, grab your awl and slicker. Place the cover face up on a protected self-healing mat so you can see the debossed circles. Put the awl’s SHARP tip in the center of one and press down on the handle to start making a hole. Then carefully lift the leather and support either side around the awl. Keep your fingers out of the way and carefully press the sharp tip through the leather. Once it’s through move the tool up and down and in circles a bit to widen and smooth the hole. We’ll need to get a thick needle with a knot just through it later. Carefully use the awl to make holes at the other five spots. Then, to make the edges smoother, hold the journal with one side up and grab your slicker. Starting with the smallest opening in the tool, insert the leather edge then run the tool back and forth along the full length. This will start rounding the cut edge. After a few swipes, use the middle slot, and then the biggest slot. That makes the roundness more gradual. No need for chisels! Stain really makes the designs pop! First, protect your work area with butcher paper and have paper towels handy. I recommend wearing gloves to protect your hands, too. Place the journal face up. We used the amazing Eco-Flo Stain in multiple colors. Go for acorn brown for a more traditional look, or try another color for a more modern look. Shake the stain well, then use the Wool Daubers to apply a small LIGHT amount to the front. Circular motions help get all the crevices. Some extra in the tooled areas and edges helps! Let the stain dry overnight. You can leave the suede inside plain, or stain or dye it for a more finished look. Remember, the suede is 'thirstier' than the outside, and requires a lot more stain or dye. Really push it into the fibers to cover all the plain color. Two coats worked well for me. If you want to add polish to the outside, you can use Mink Oil, or any leather polish. Wear gloves and apply it with a rag like buffing dress shoes with small circles. Let it dry overnight, and lightly buff with a clean rag again to add a slight gloss. You can try different ways to keep the journal closed, but I added jute ties. Thread 18" or so of jute on a leather needle. You can trim the end to a point to help! Tie a knot at the needle by twisting it to make a loop and feeding the short end through. Let’s start on the front cover. Pull the needle through the side hole from the inside. If the hole you made with the awl is tight, you might need to use your rag to grip the needle. When you have an even amount of jute on either side of the leather, cut it at the needle. Tie a knot close to the cover’s edge. Add a tie to the back cover in the same way. Now for the center, where the jute will keep the paper in place. Thread more jute on your needle and tie a knot again. You can trim the excess to make it easier to sew through the holes. The spine holes might be a bit tight, so you can poke through them again with the awl. Rotating the tool a bit can stretch them, too. Starting at the bottom, push the needle through from the inside, then back in through the next hole. Even off the lengths inside the journal, then cut off the needle and tie the same way as the sides. Add a tie to the upper spine holes, too. If the needle has trouble, you can use your rag to press down on the leather around the area while pulling hard. Finish the last tie. Six at a time, cut up to 25 pieces of 8.5" x 11" laser jet 32 lb paper down to 8" x 6.5". Stack and fold them in half to be 4" x 6.5". With the journal cover open and the ties out to the sides, align the crease with the stacked papers. Bring the two spine ties to meet and tie them in a secure knot so the paper can’t easily slide out. I didn’t trim my ends, because I might want to re-tie the jute tighter or looser in the future. But it’s up to you! Close the journal and test out the closure ties! For an added layer of shine and protection, you can buff on some leather conditioner, like mink oil. You’ve worked hard on this journal cover, so conditioning it as needed will make it last longer! I can't wait to see your journals!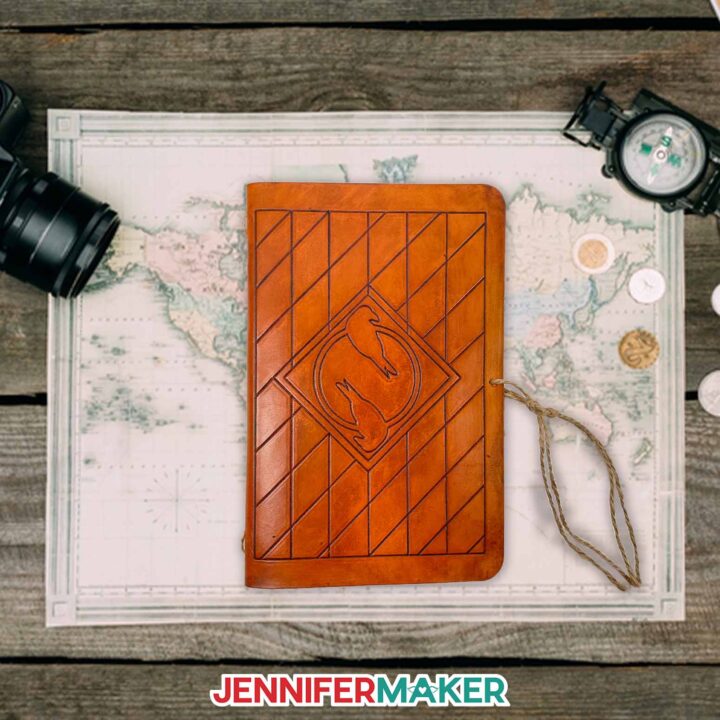
DIY Leather Journal
Materials
Tools
Instructions
STEP 1: Get my free DIY Leather Journal design files
Step 2: Prepare Your Leather
STEP 3: Prepare the Design files
Drag the letters into place and check the layout. With the lock icon closed, resize it if needed so they are about the same size as the JM in the original. Four inches wide is perfect.
Duplicate the attached decoration and initials layer until you have four identical ones. Select them all and use Align, Center them so they overlap perfectly.STEP 4: CUT YOUR MATERIAL
If prompted, select "On Mat" and "12 x 12."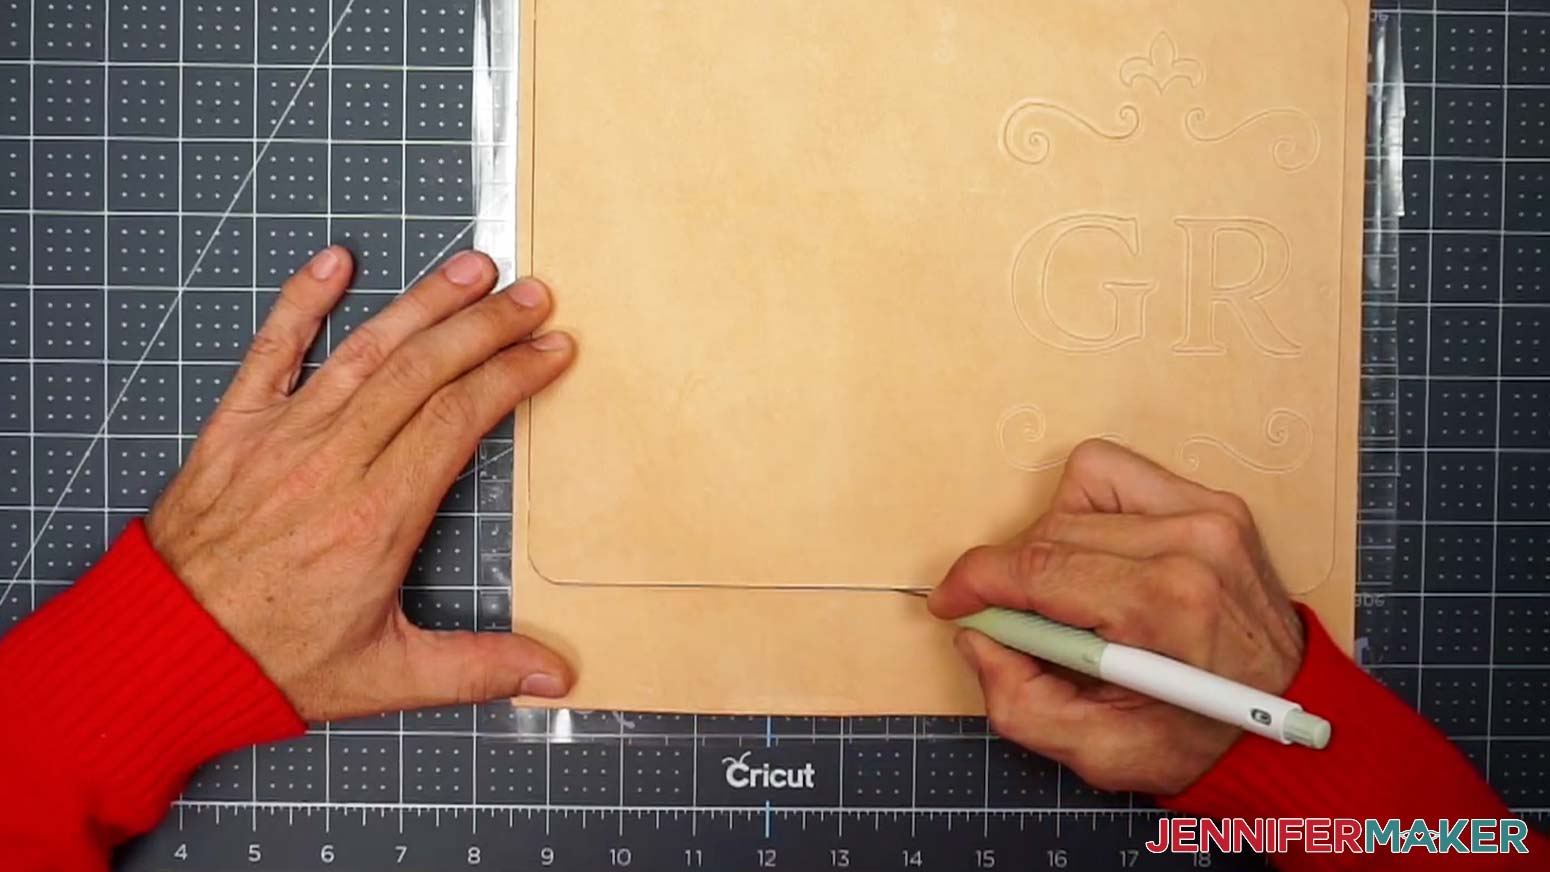
Place something heavy on the folded leather and leave it there for a few hours or until the leather is dry. This will help your leather stay folded.STEP 5: STAIN THE JOURNAL
STEP 6: ASSEMBLE THE JOURNAL
STEP 7: SHOW IT OFF!
Notes
Answers to Your Questions About Making a DIY Leather Journal
Q: How much does it cost to make a leather journal?
A: The cost of a handmade leather journal depends on your tools and supplies, especially the type of leather. If you have a scrap piece of leather large enough, you can print and trace my designs on to the front cover and use simple leather tools to create a similar look.
Q: How do you make a leather refillable journal?
A: I cut stacks of paper to size and secured them in the journal with the twine. They can be removed and replaced as needed.Six at a time, cut up to 25 pieces of 8.5″ x 11″ laser jet 32 lb paper down to 8″ x 6.5″. Stack and fold them in half to be . own custom binding
Q: Can I cut this project on a Cricut Joy?
A: No, unfortunately the Joy is not able to cut the materials for a DIY leather notebook.
Q: What is Merry Maker Mingle?
A: Each day in December leading to Christmas, I present you with a brand new “gift” — a project to craft, make, or do. You can make these projects on a Cricut cutting machine or by hand if you don’t have one. Most of our Merry Maker Mingle projects will come with a fun video with yours truly, a step-by-step printable photo tutorial, and a free pattern/SVG cut file. Sign up to get daily updates and prizes!
Get my free SVG files to create a DIY Leather Journal
I love seeing what you make with my designs and how you use them! Please share a photo of your DIY leather journal in our Facebook group or tag me on social media with #jennifermaker.
Love,

Want to remember this? Save this DIY Leather Journal Tutorial to your favorite Pinterest Board!