
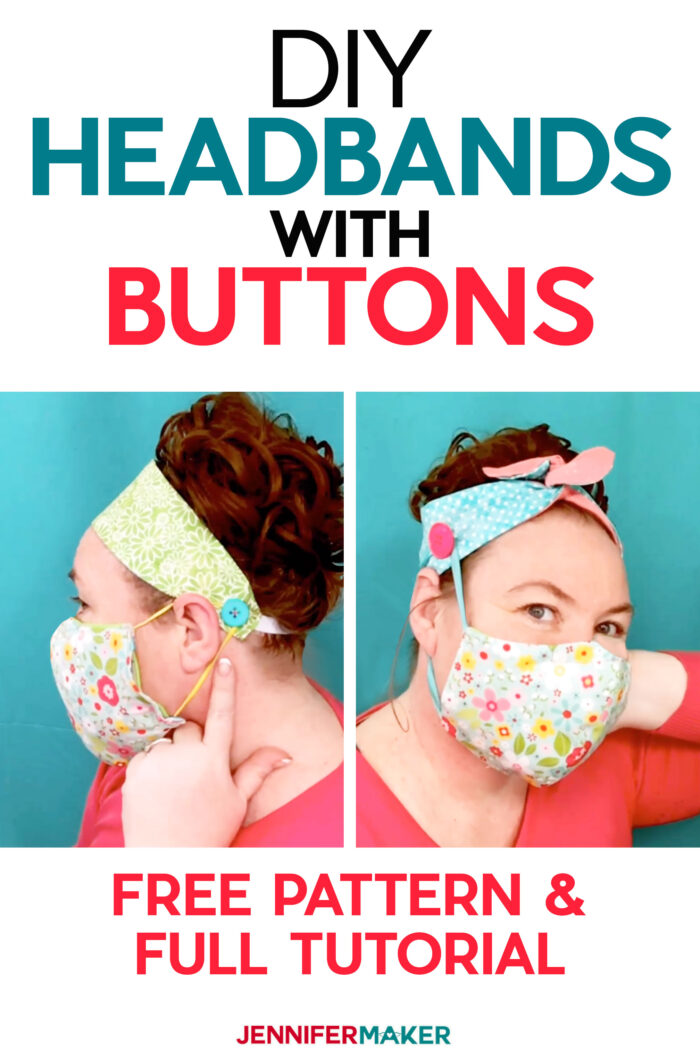
See how to make these DIY headbands with buttons for masks!
Ever since we all began wearing face masks, we’ve been hearing stories of nurses and healthcare workers with sore ears from the behind-the-ear style headband. Well, that just won’t do! So we designed some super easy (and cute) DIY headbands with buttons for masks. Now we all know elastic is hard to come by right now, so we made two different styles so you can also make these headbands with wire or ribbon. Cut these out on your Cricut or with a pair of scissors, sew them on a machine or by hand — your choice! These easy-to-sew and free headband patterns feature buttons that hold your face mask securely in place!
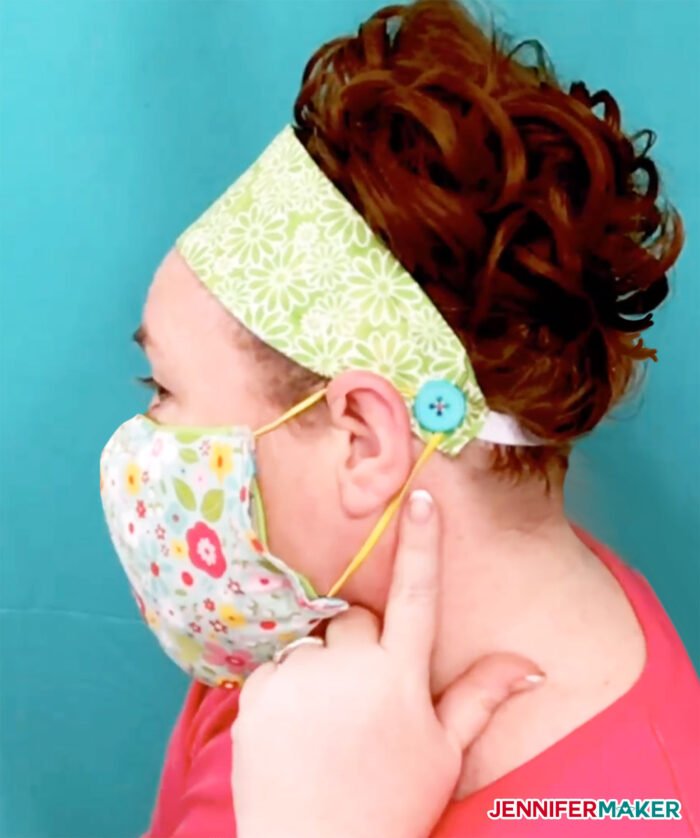
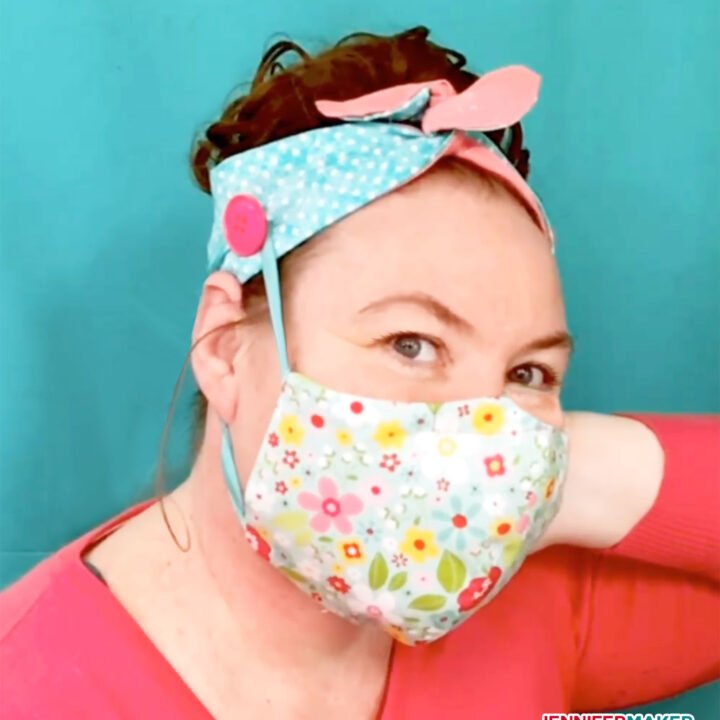
Here’s what the simple elastic or ribbon headband with buttons for masks looks like with my DIY face mask pattern:

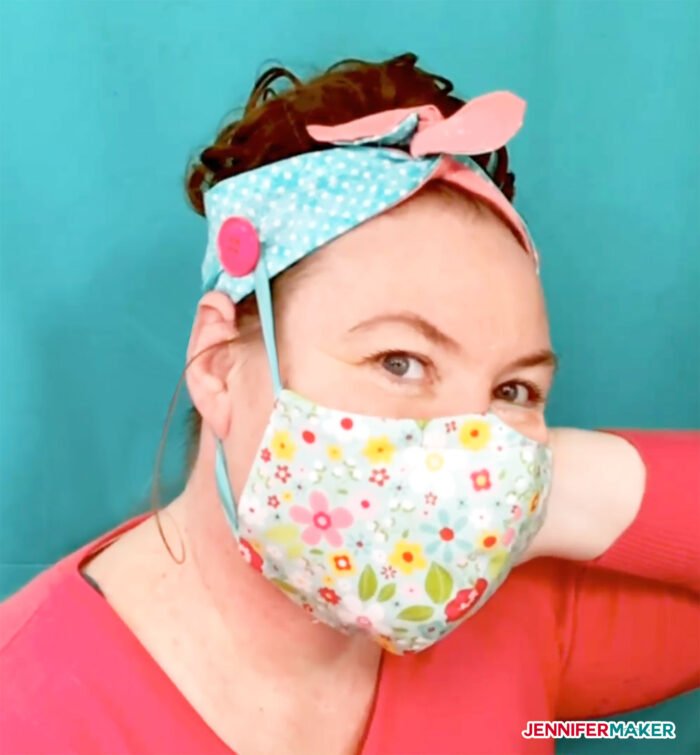
And here’s what the over-the-head topknot “tie” style of headband looks like — it’s a little vintage, a little sassy, but super cute:
And the headband looks SO cute all by itself, too!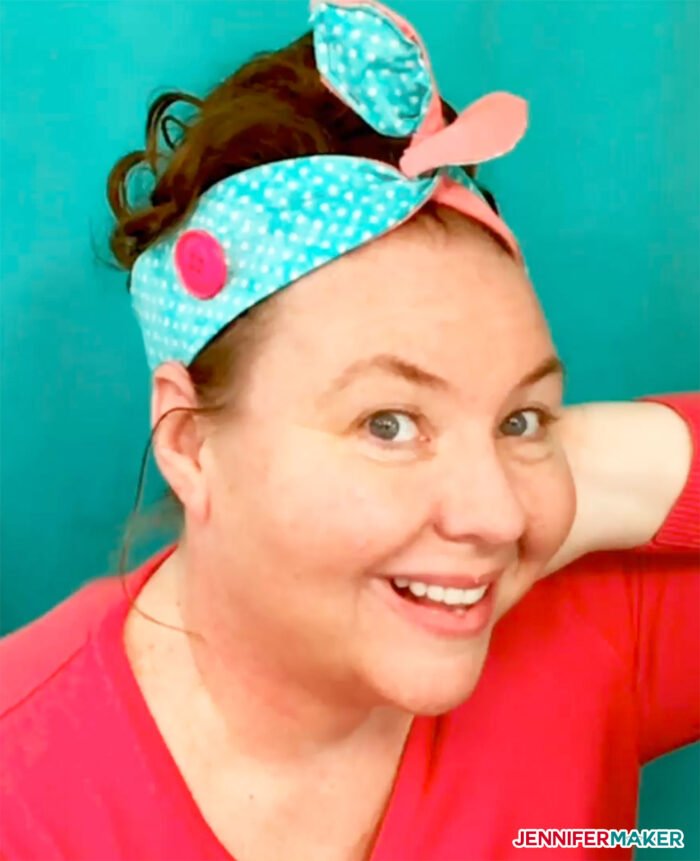
Ready to make your own DIY headband with buttons for masks? This step-by-step tutorial shows you how to do it. This post contains some affiliate links for your convenience (which means if you make a purchase after clicking a link I will earn a small commission but it won’t cost you a penny more)! Read my full disclosure policy.
Materials to Make DIY Headbands with Buttons for Masks
View my Amazon shopping list with the exact items we used to make this project!
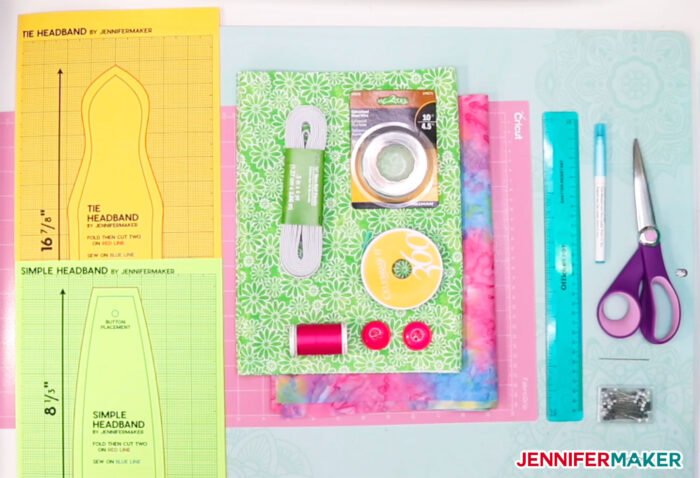
- 100% cotton or cotton blend, about 9″ x 36″ (Tip: Use a fat quarter or one of the Cricut fabric samplers)
- 1/2″-1″ size buttons (do not go smaller than 1/2″, or the mask ties won’t stay secured)
- Thread
- (Optional) Fabric marker (good if you want to mark the seam allowance)
- (Optional) 20-22-gauge wire or floral wire, 36″ long (for the “tie” style of headband)
- (Optional) 1/4″-1/2″ wide ribbons or ties, at least 24″ (two feet) to make two 12″ ties — ribbons/ties make it adjustable and fit better (you can also use elastic if you prefer)
- (Optional) Elastic (1/2″ wide and length of 6″)
- Scissors
- Ruler
- Iron or Cricut EasyPress
- 12″ x 24″ Pink FabricGrip mat (if you’re cutting this on your Cricut Maker, you can use the green 12″ x 24″ StandardGrip mat, or even the purple StrongGrip mat, if you’re cutting on your Cricut Explore)
- (Optional) Freezer paper (for bonding your fabric when cutting on a Cricut Explore — not needed with a Maker or hand cutting)
- Sewing machine as shown in the tutorial or this sewing machine as another option
- Hand sewing needle for attaching the buttons
- Pins (for keeping fabric attached while sewing)
- A way to cut your material (this tutorial covers using the Cricut Explore cutting machine and the Cricut Maker cutting machine, but you can also use scissors or a rotary blade with my printable PDF pattern)
- Design #208 – My free headband pattern which comes as an SVG cut file or printable PDF pattern (available in my free resource library—get the password by filling out the form at the bottom of this page)
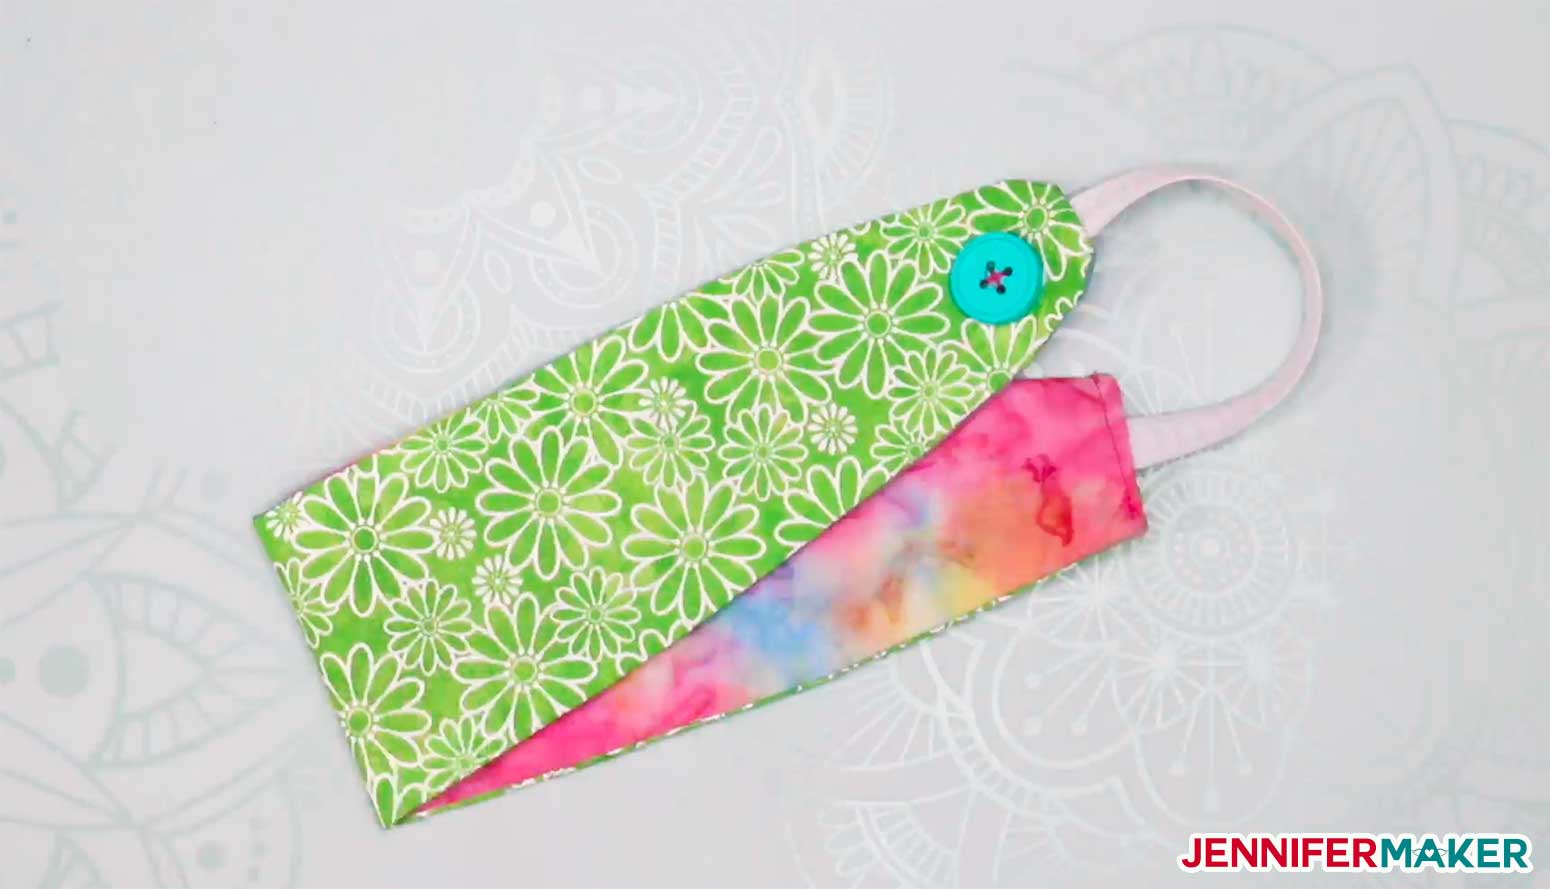
Headband with Buttons
Keep your ears happy and safe while wearing face masks with this easy headband with buttons tutorial.
Materials
- Tightly woven Cotton or Cotton Blend Fabric (9" x 36" or a quarter of a yard)
- Thread
- 1/2" elastic (about 6", used for the Simple Headband)
- 2 Buttons (at least 1/2" in diameter, and you can go as large as 1")
- (Optional) 1/2" ribbon (for Headband 1, in lieu of elastic)
- (Optional) 20-22 gauge wire (floral wire works, for the Tie Headband)
- (Optional) Fabric Marker
- Freezer paper (if you're cutting this on a Cricut Explore)
- Design #208 - My free SVG/DXF/PDF cut files (available in my free resource library—get the password at the bottom of this post)
Tools
- A way to cut your fabric (I use the amazing Cricut cutting machine -- you can do this on both a Maker and an Explore)
- Pink FabricGrip Mat, 12" x 24" (for Maker) or Green StandardGrip Mat, 12" x 24" (for Explore)
- Sewing Machine and/or a hand needle & thread
- Iron or EasyPress (I used both -- the iron for seams, the EasyPress for the freezer paper)
- Scissors (for cutting fabric and ribbons)
- Ruler (for measuring fabric and ribbons)
- Pins (for keeping pieces of fabric together)
- Hand needle for sewing on the optional buttons
Instructions
Step 1: Get my free DIY button headband pattern
My free DIY Button Headband Pattern (Design #208) comes in several formats. You can get a printable PDF for cutting by hand, or an SVG cut file for cutting with a Cricut or another cutting machine. My pattern collection has everything you need to make two different styles of headbands, both with buttons so you can secure a face mask in place. Download the DIY button headband pattern collection from my free resource library (get the password to the library in the form at the bottom of this post), or click here!
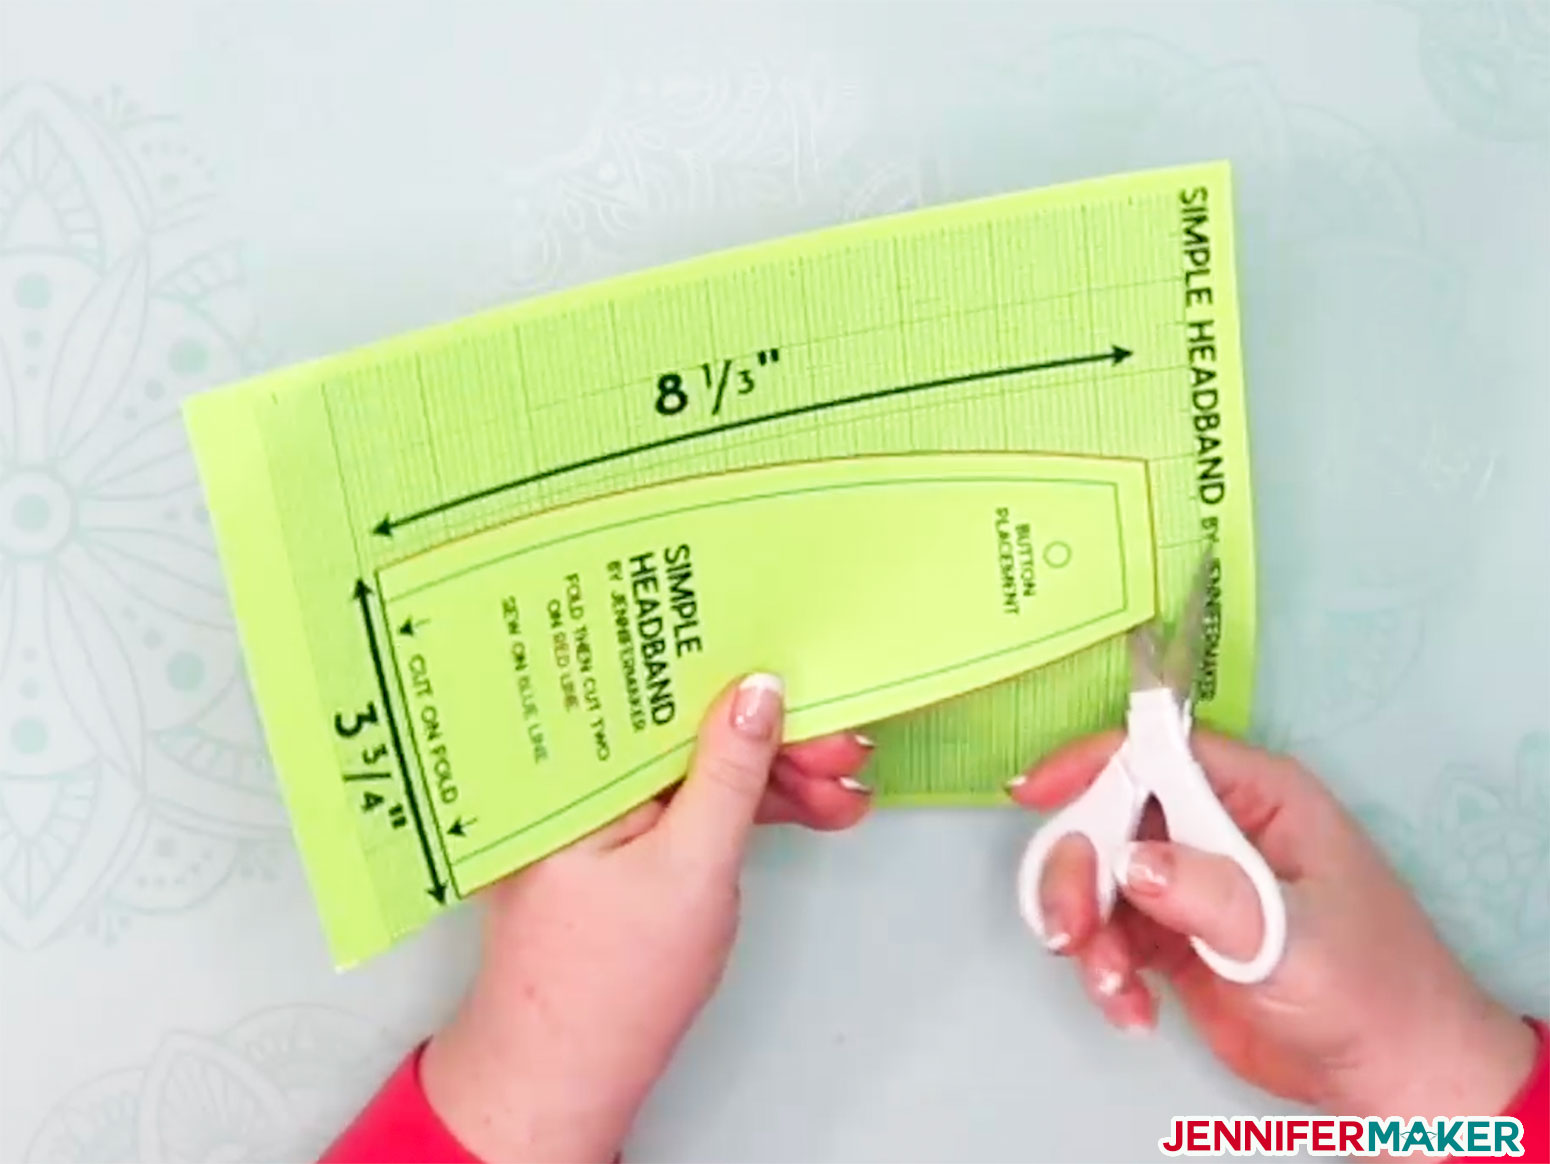
Here's what the printable headband patterns look like after you download and print it (yes, you'll need to tape two pieces of paper together to complete the tie headband pattern).
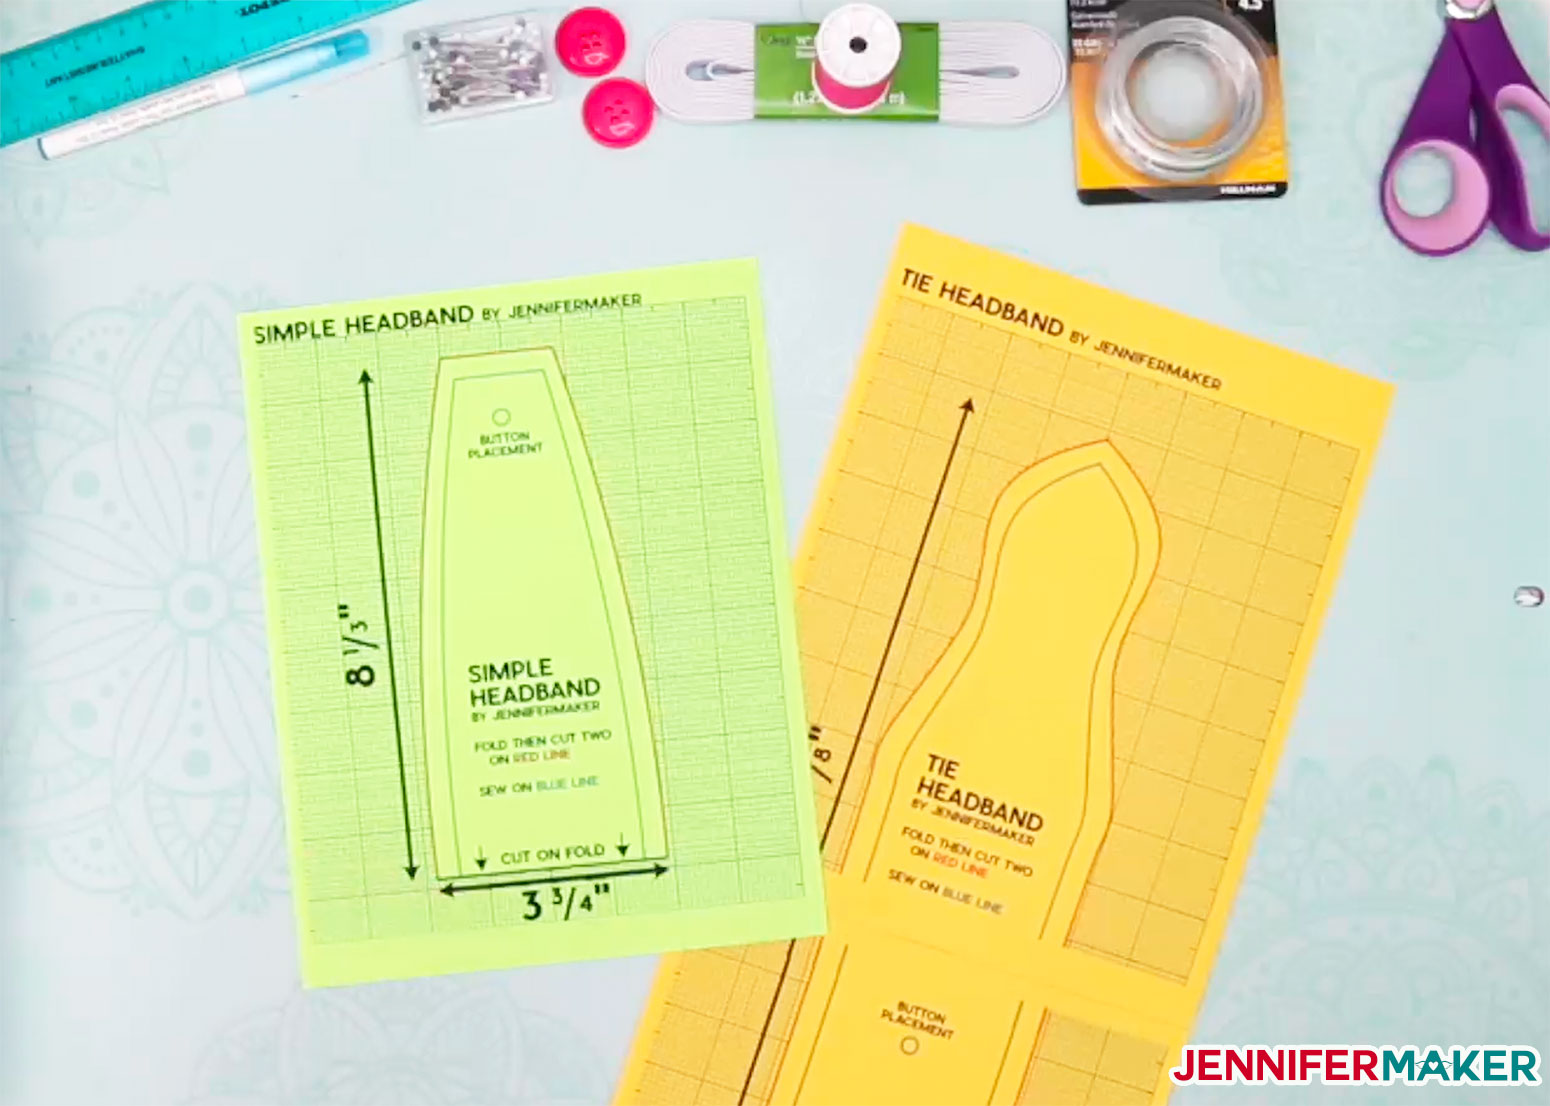
Tip: See this tutorial to learn what it means to "Cut On Fold."
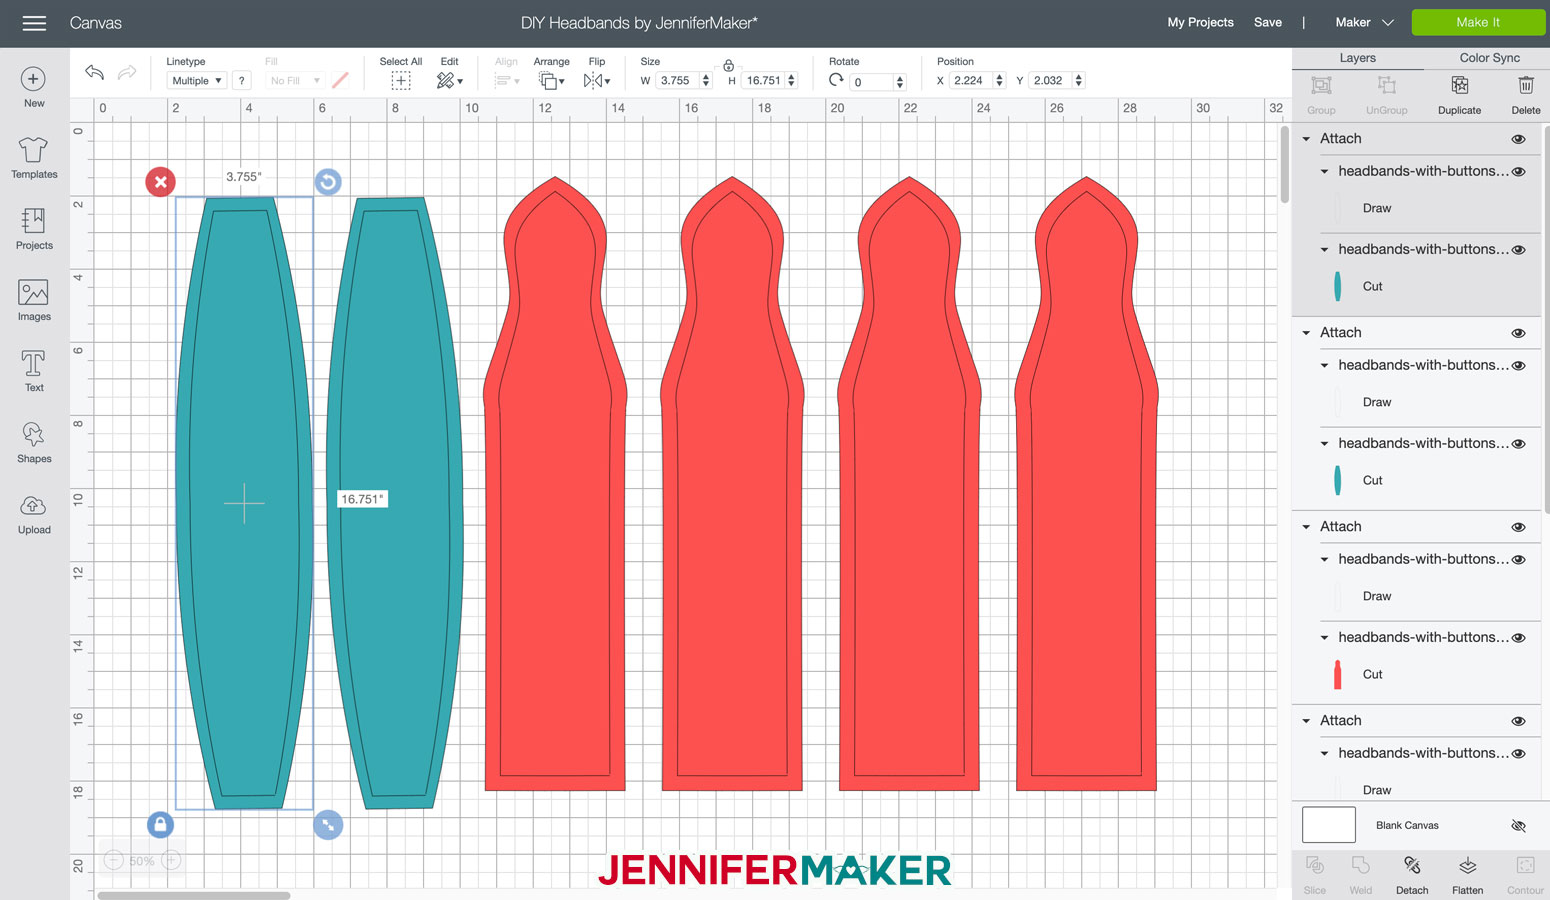
And here’s what the DIY button headband SVG cut file will look like once uploaded to Cricut Design Space:
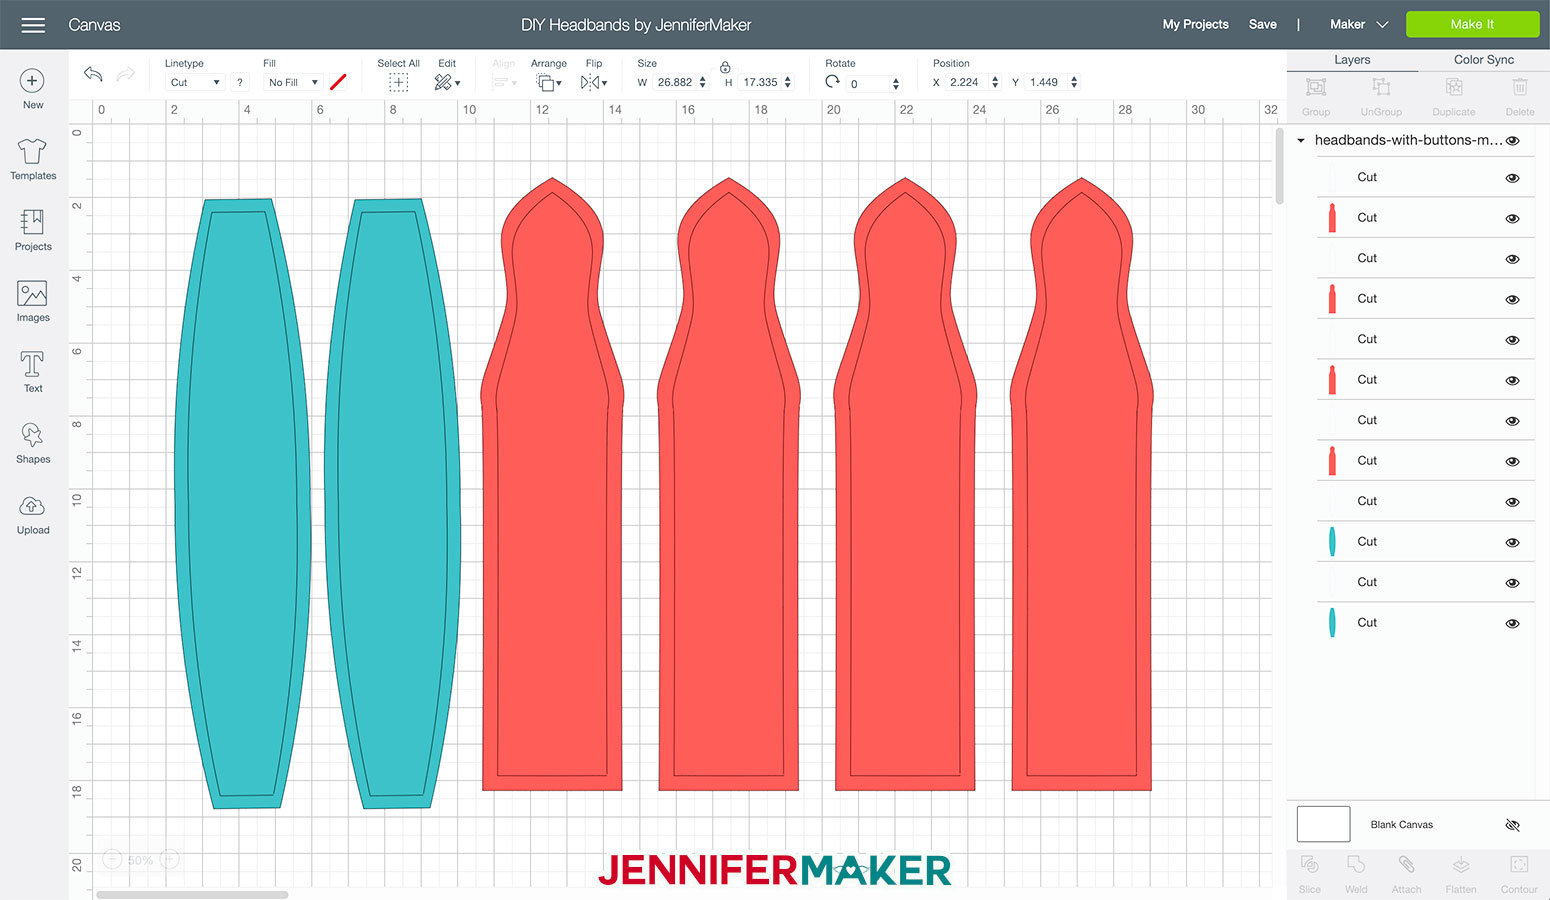
Tip: If you’re not sure how to upload an SVG cut file to Cricut Design Space, watch this helpful video training series I made. If you’re on an iPhone or iPad, here’s how to download and upload SVG files to the Cricut Design Space app.
If you're new to cutting fabric on a Cricut Explore or Maker, check out my how to cut fabric with Cricut guide!
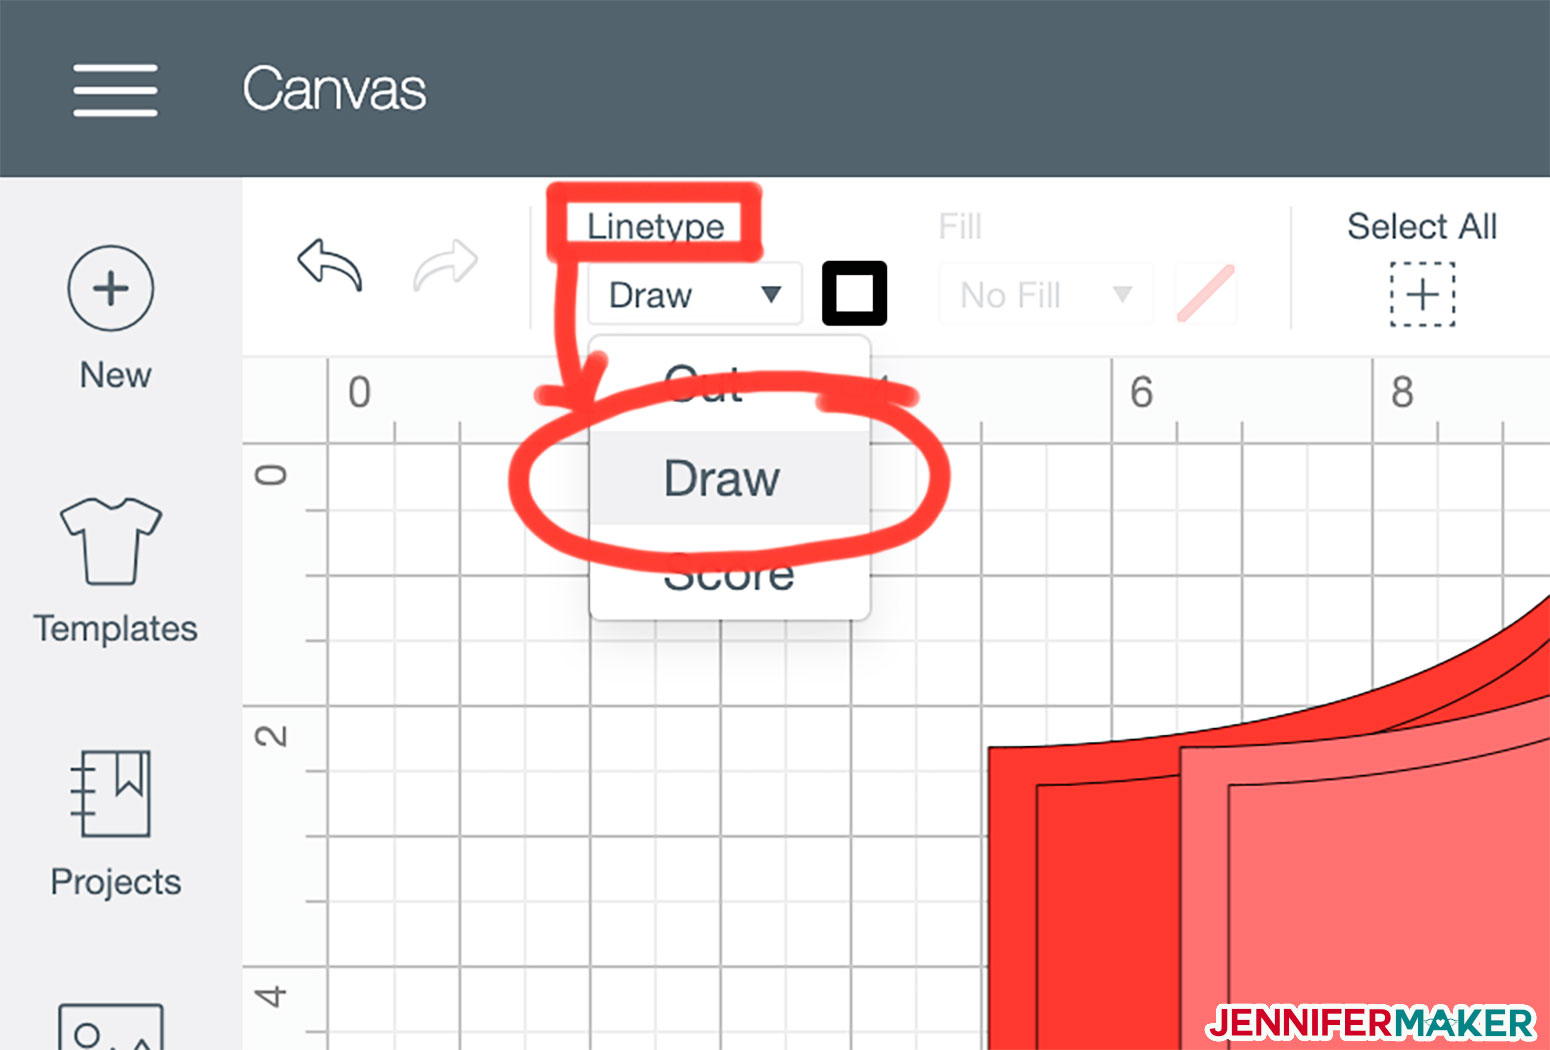
Important Note: If you're using the pattern with marked seam allowances, you'll also want to make sure to change the inner line of each headband piece from "Cut" to "Draw" in the Linetype menu and then select both the line and the fabric layer and click Attach. Watch this video to learn how to change draw lines and attach.
Here's what the prepared SVG looks like once the marked seam allowance lines are ready to go:
Step 2: Cut out your DIY button headband pattern pieces from fabric
There are two different styles to choose from - the Simple Headband uses elastic at the base and the Tie Headband uses wire at the front to twist the ends together.
If you're cutting the headband by hand, just print out the printable PDF, cut out each piece as directed, and use it to trace the patterns onto your fabric. Once you've traced the shapes, measure in 3/8" on all sides and mark (for seam allowance) and cut out your fabric.
Tip: If you plan to make a LOT of these headbands, print out your patterns on cardstock for tracing!
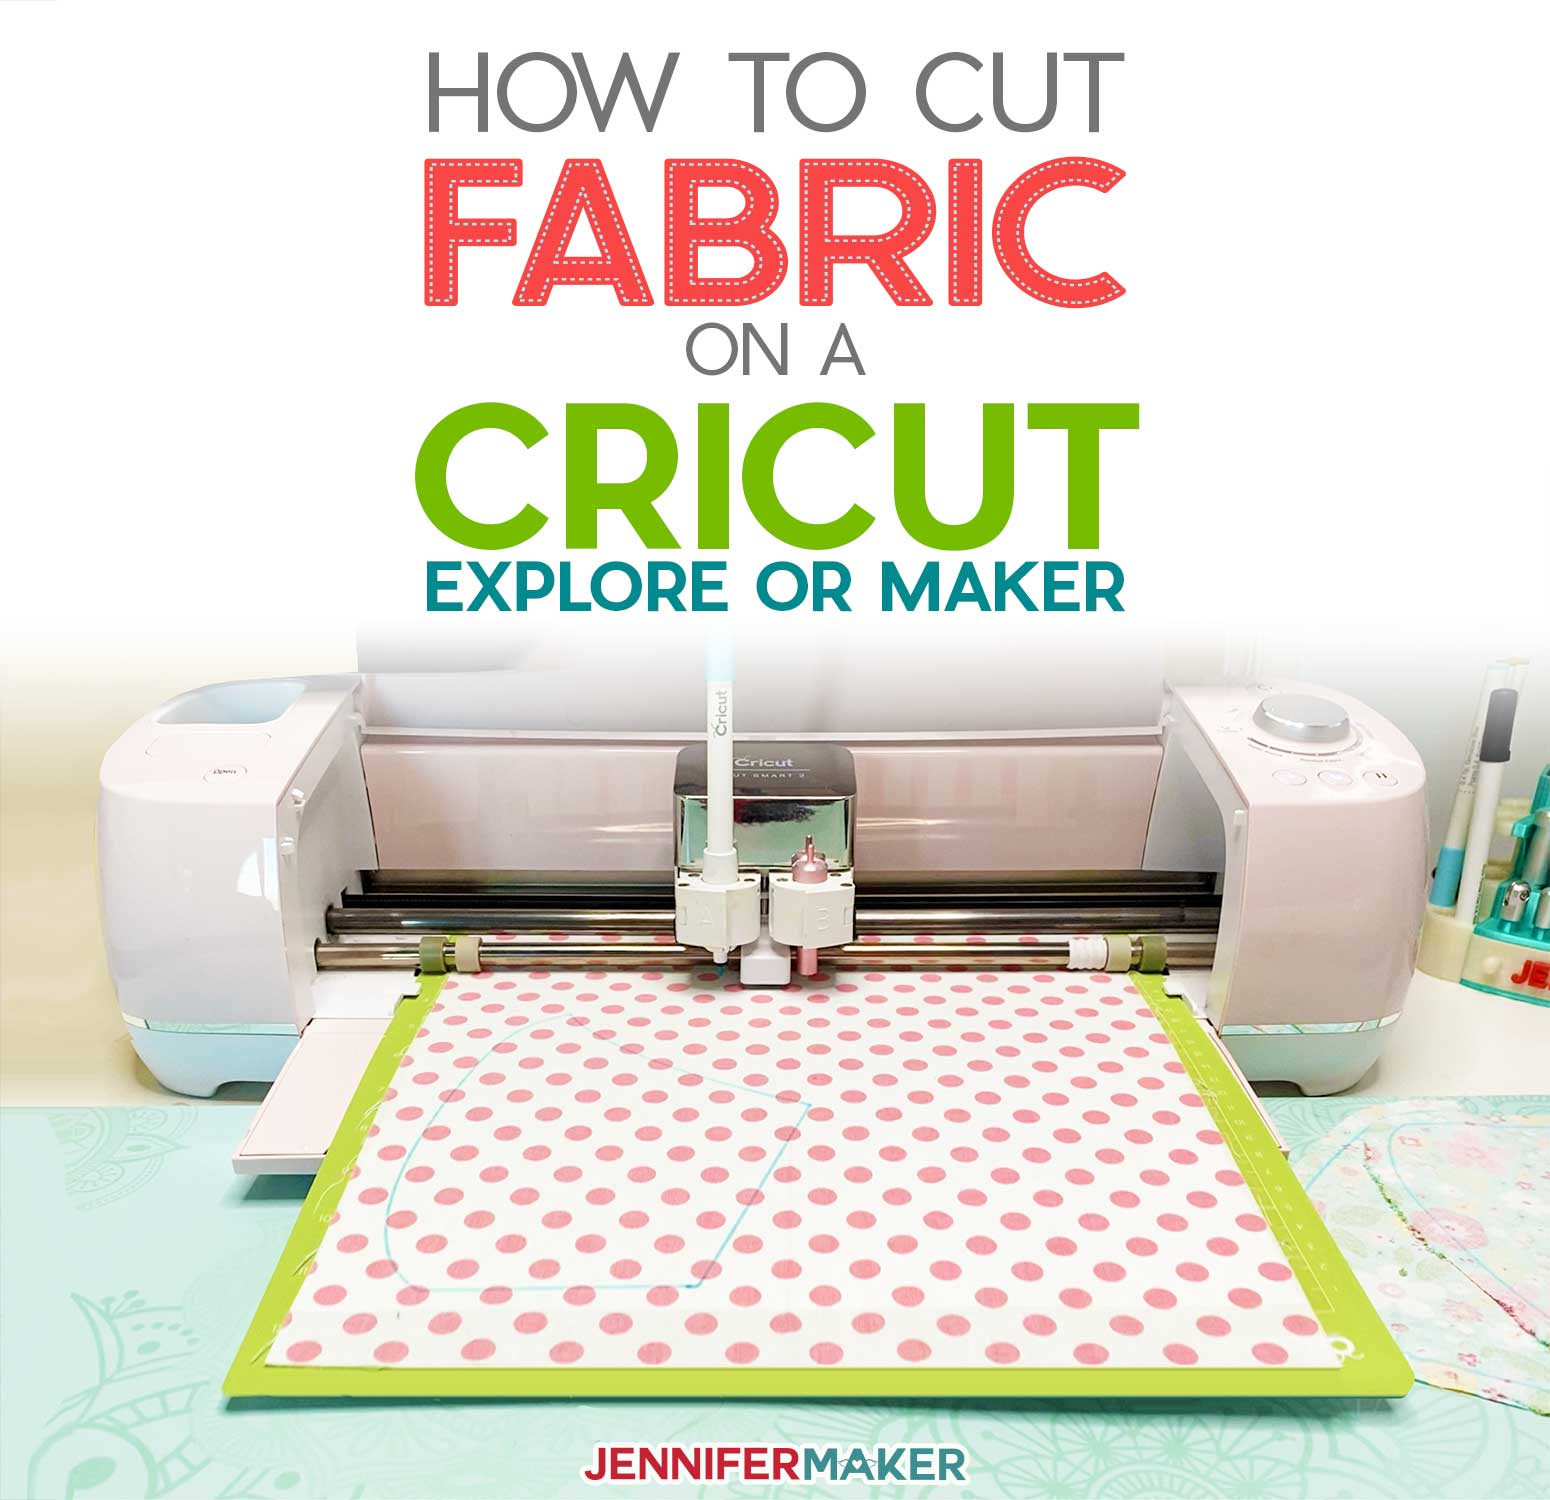
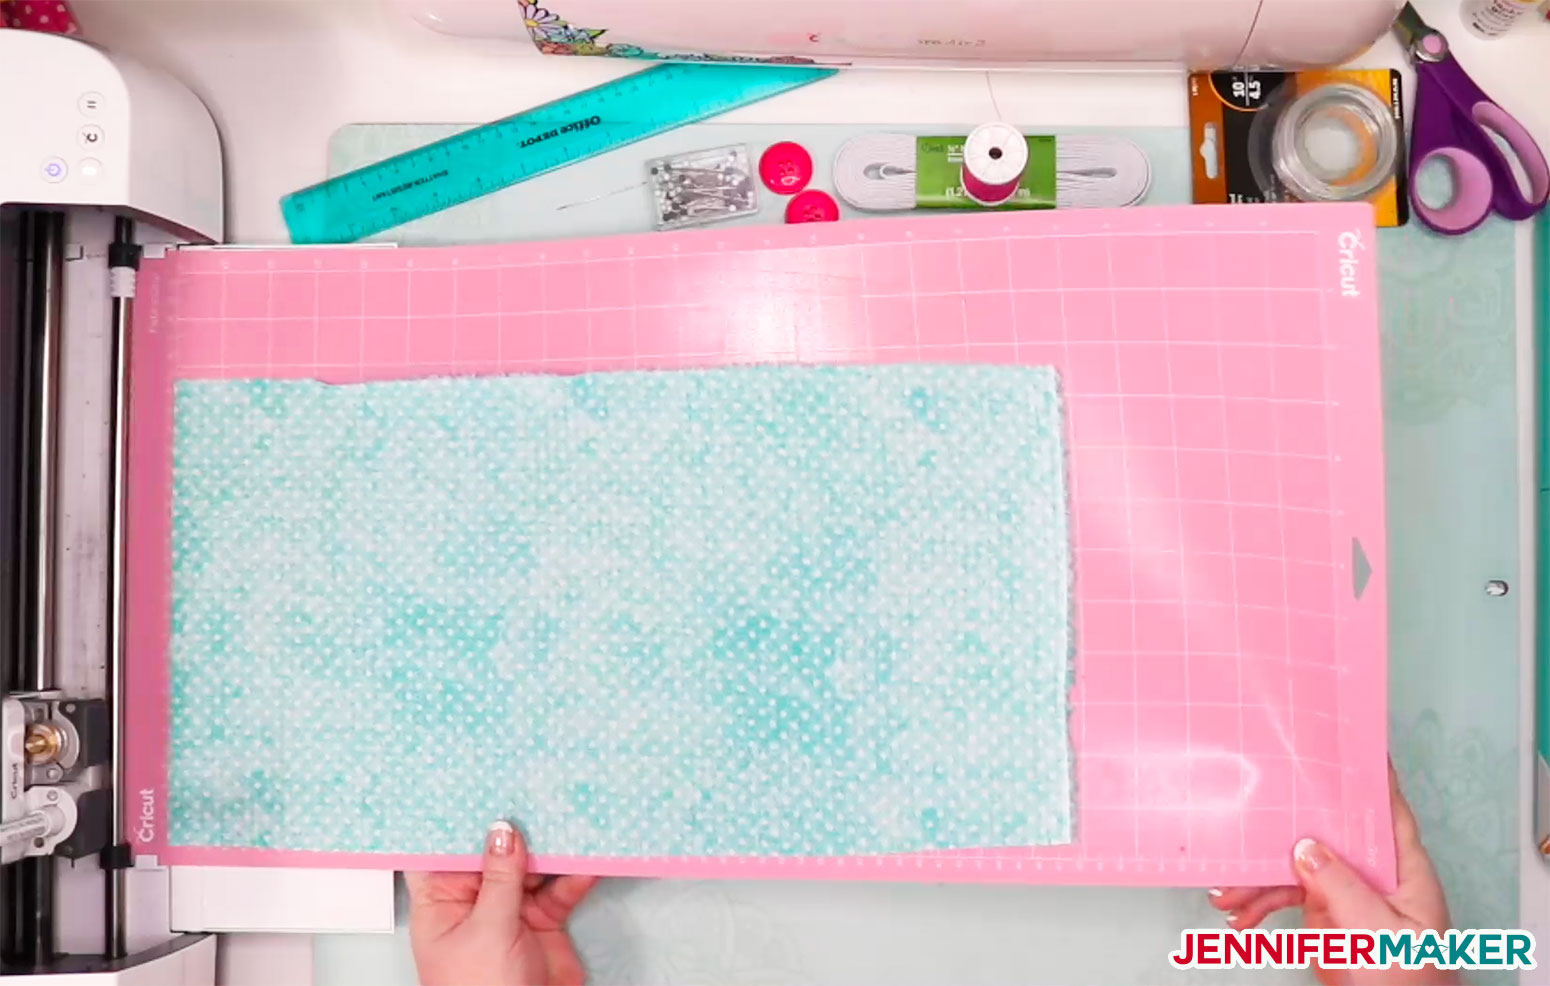
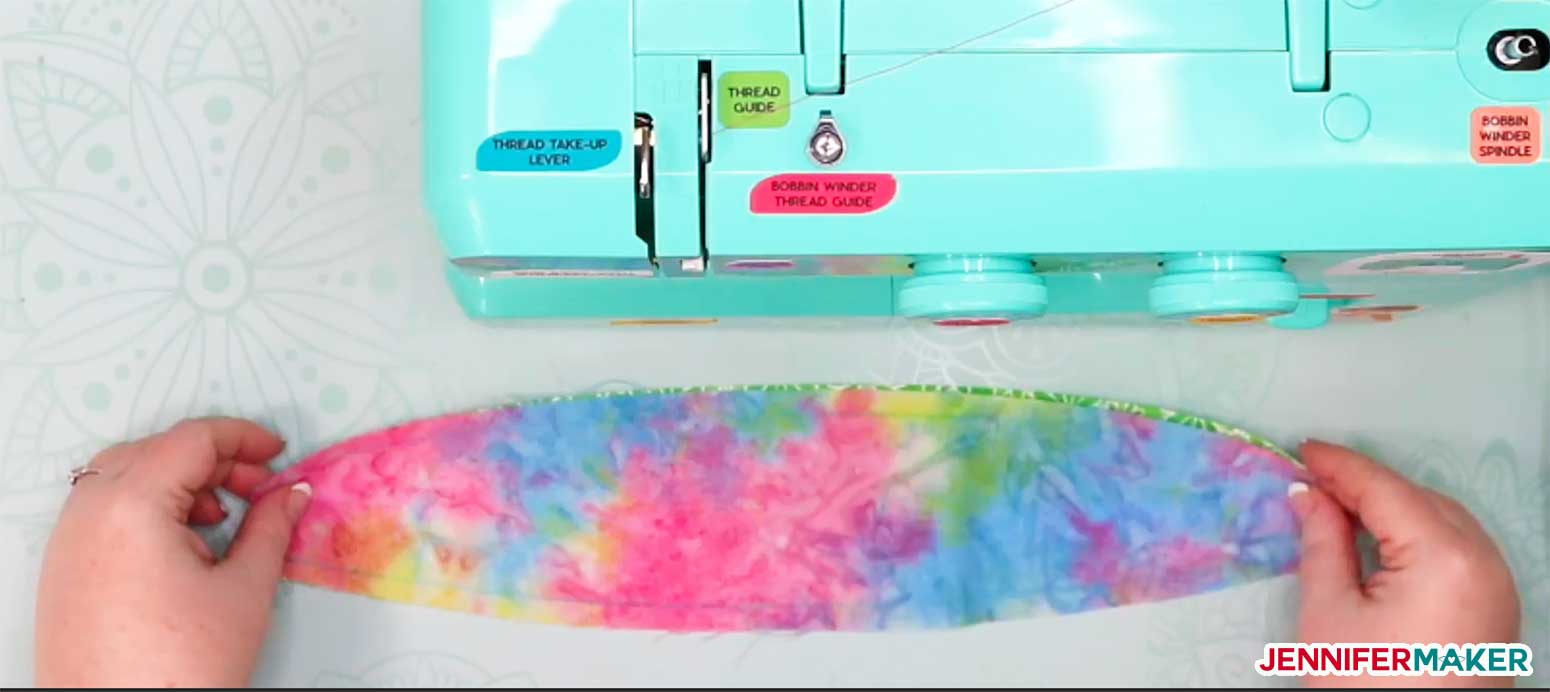
If you're cutting this DIY headband on a Cricut Maker: Place your fabric right side down on a pink FabricGrip cutting mat. Load your rotary blade and fabric marker into your Cricut machine, load your mat, and press the flashing button to begin your cut.
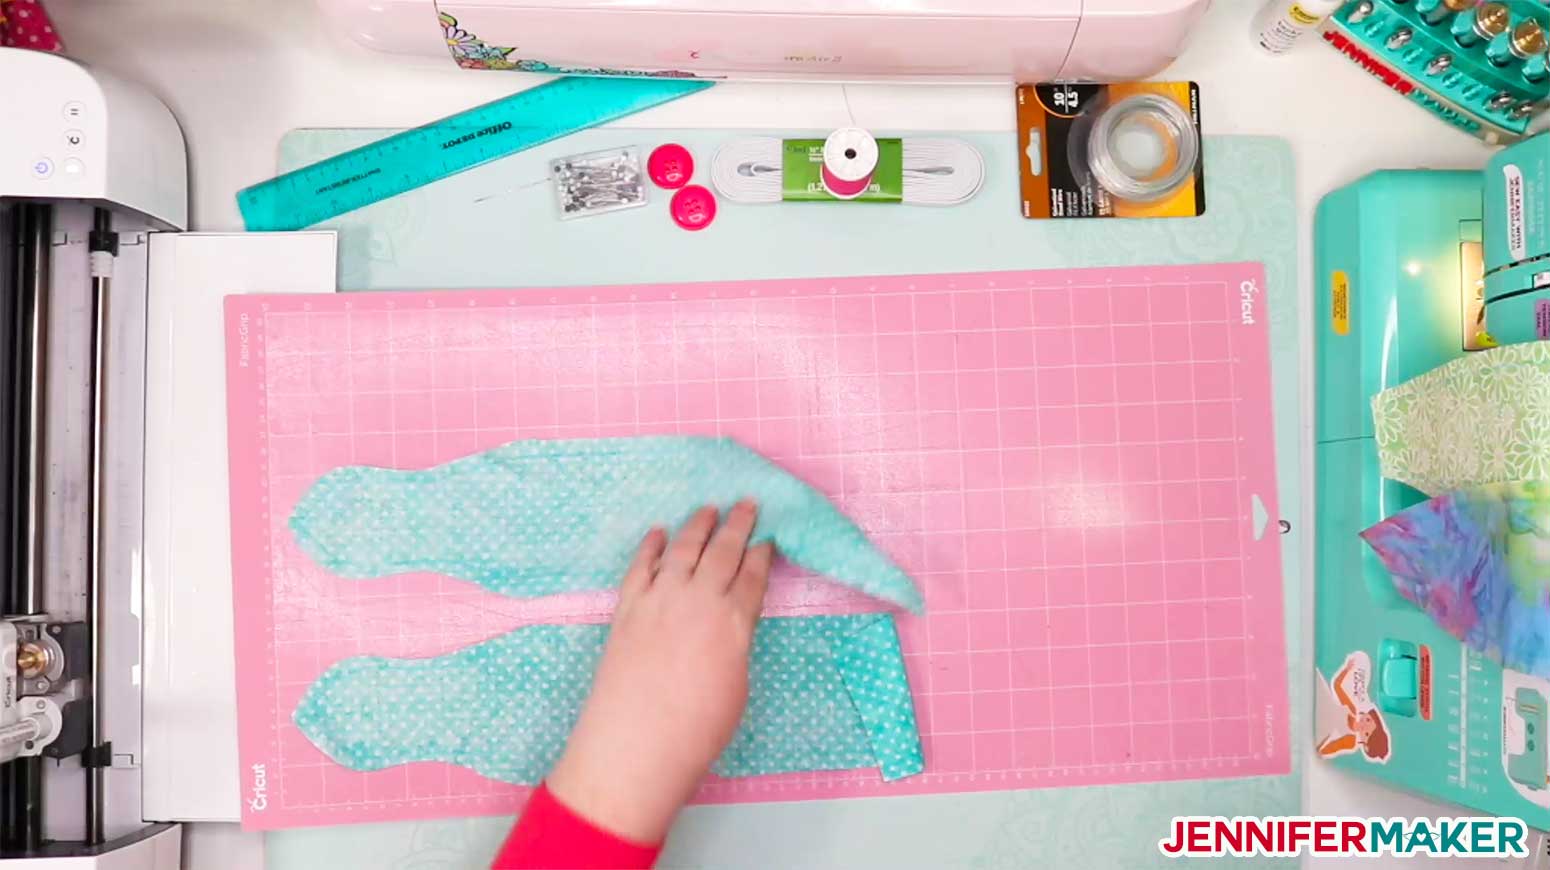
If you're cutting this headband on a Cricut Explore, you must bond your fabric first. To bond your fabric, cut a piece of freezer paper the same size as your material and adhere the shiny side of the freezer paper to the wrong side of your fabric by pressing with an EasyPress or iron for 30 seconds at 350°F. Once your fabric is bonded, place the bonded fabric freezer paper side DOWN on your cutting mat (you can use the pink mat or a green mat), load your regular fine point or bonded fabric blade in (both will work), put in your Cricut fabric marker (optional), load your mat, and press the flashing button to begin your cut. When done with your cut, remove the cut pieces from the mat and peel off the freezer paper.
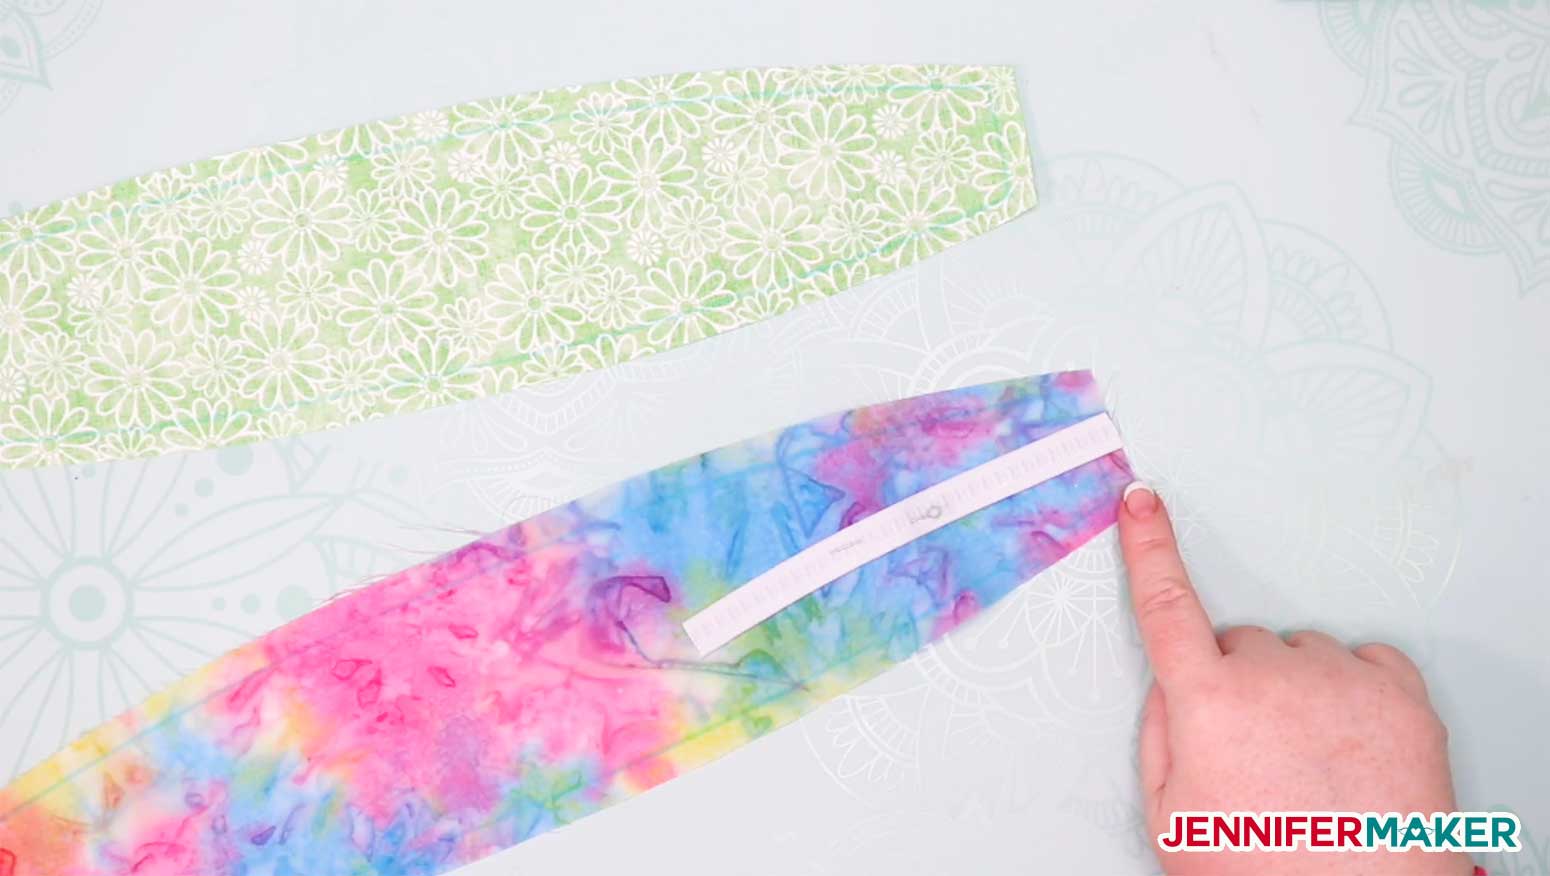
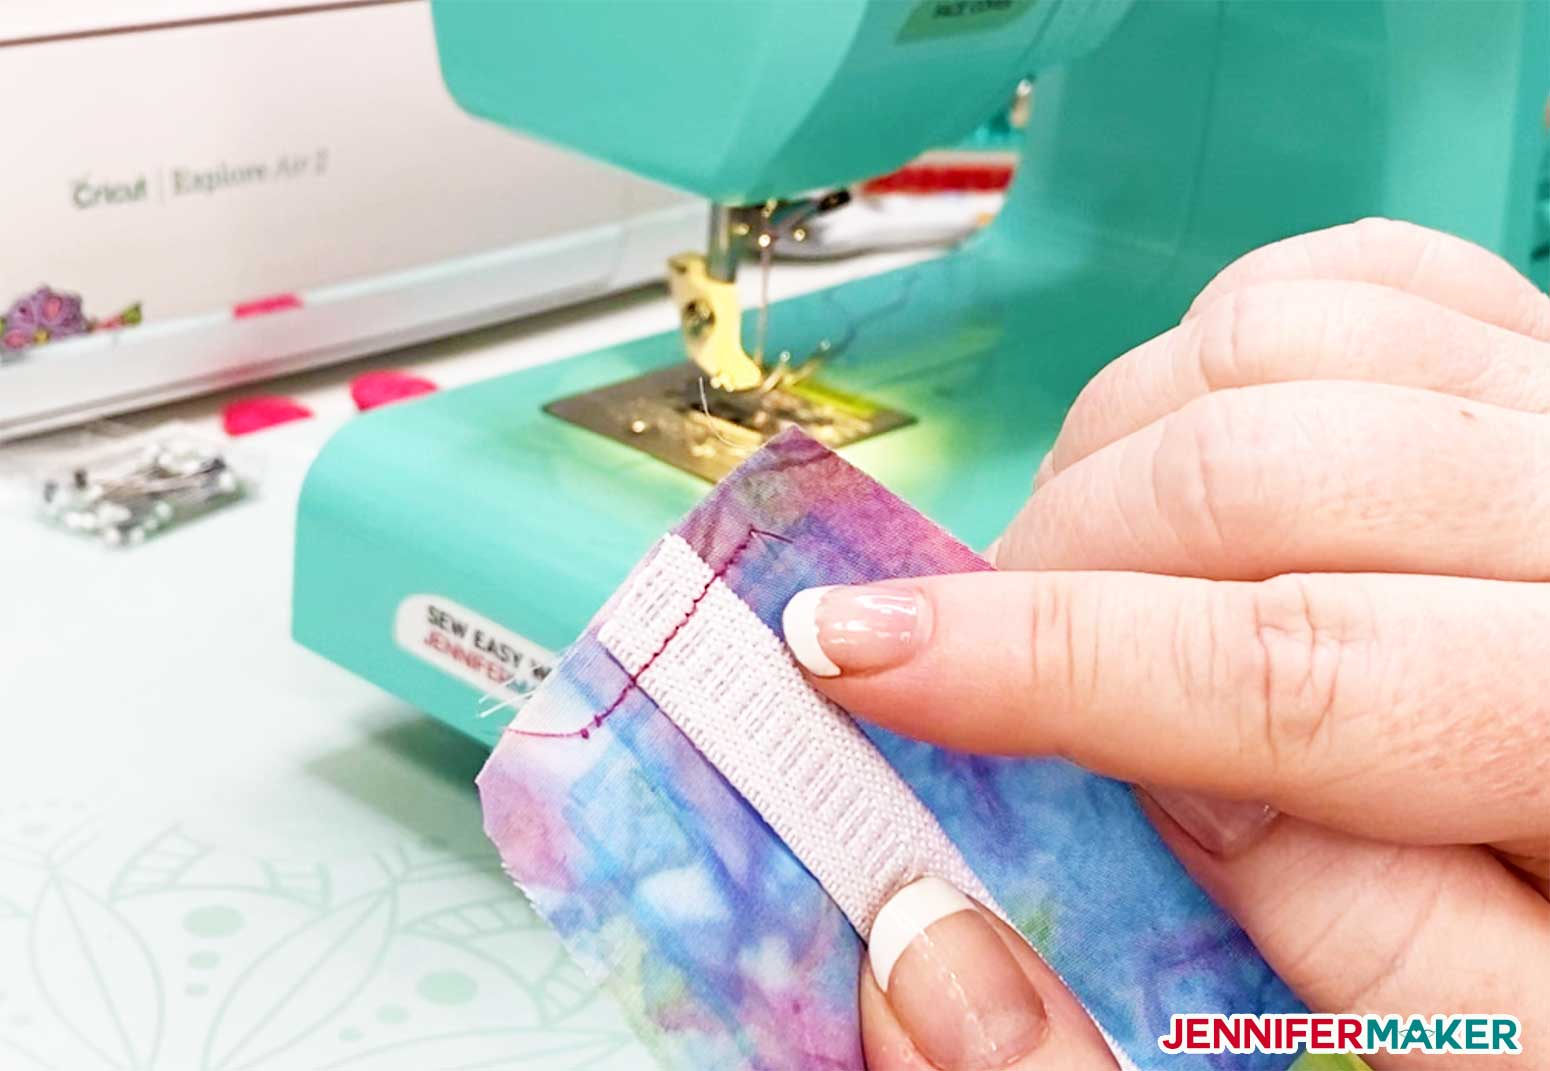
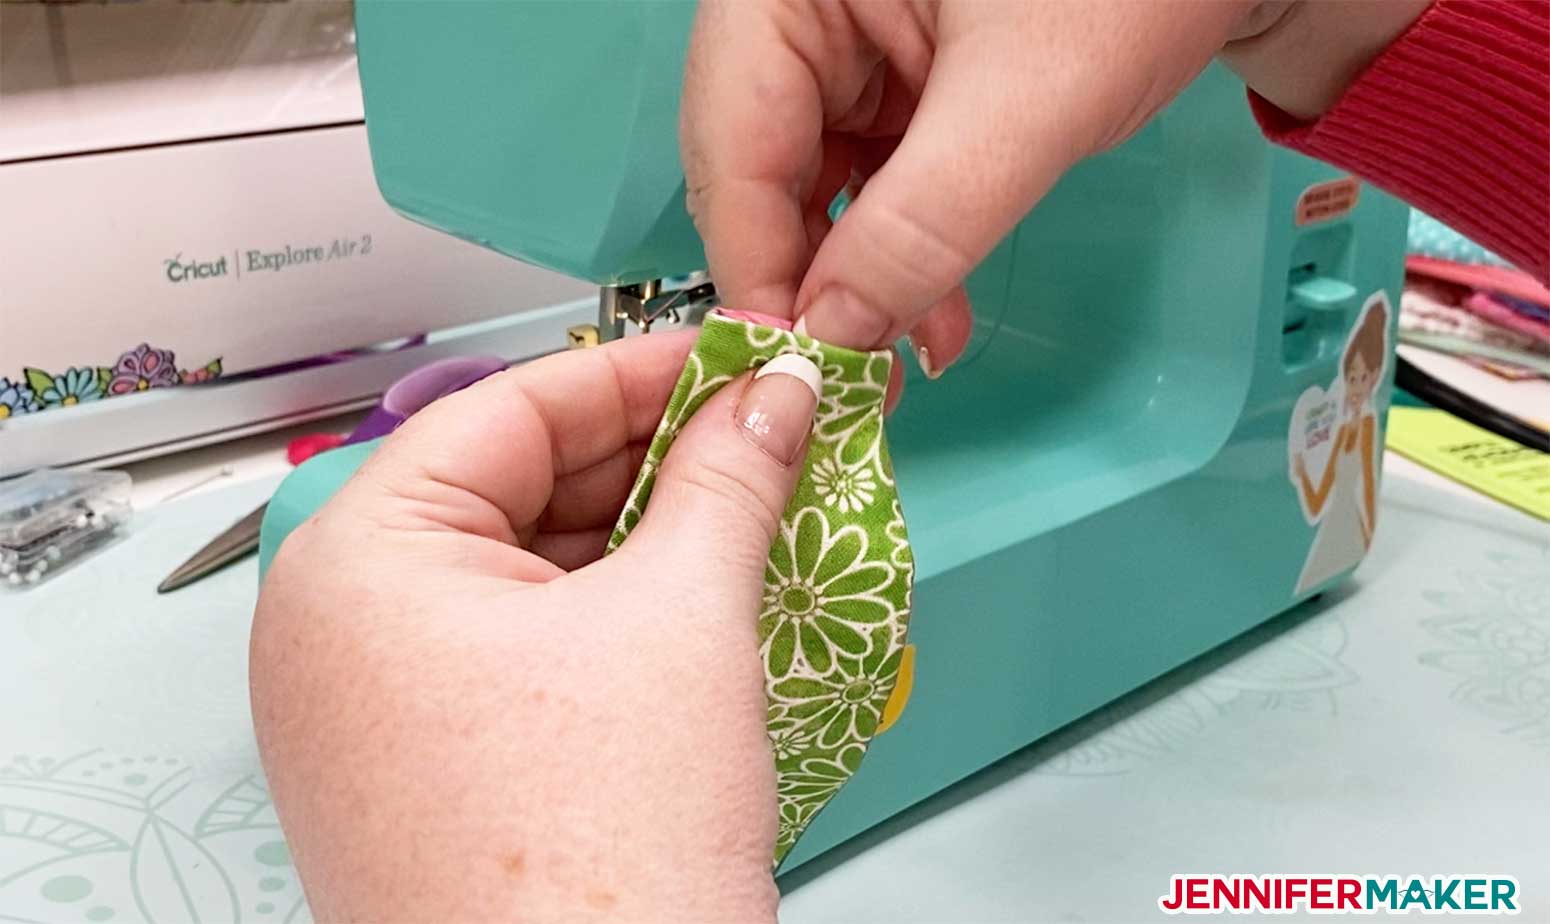
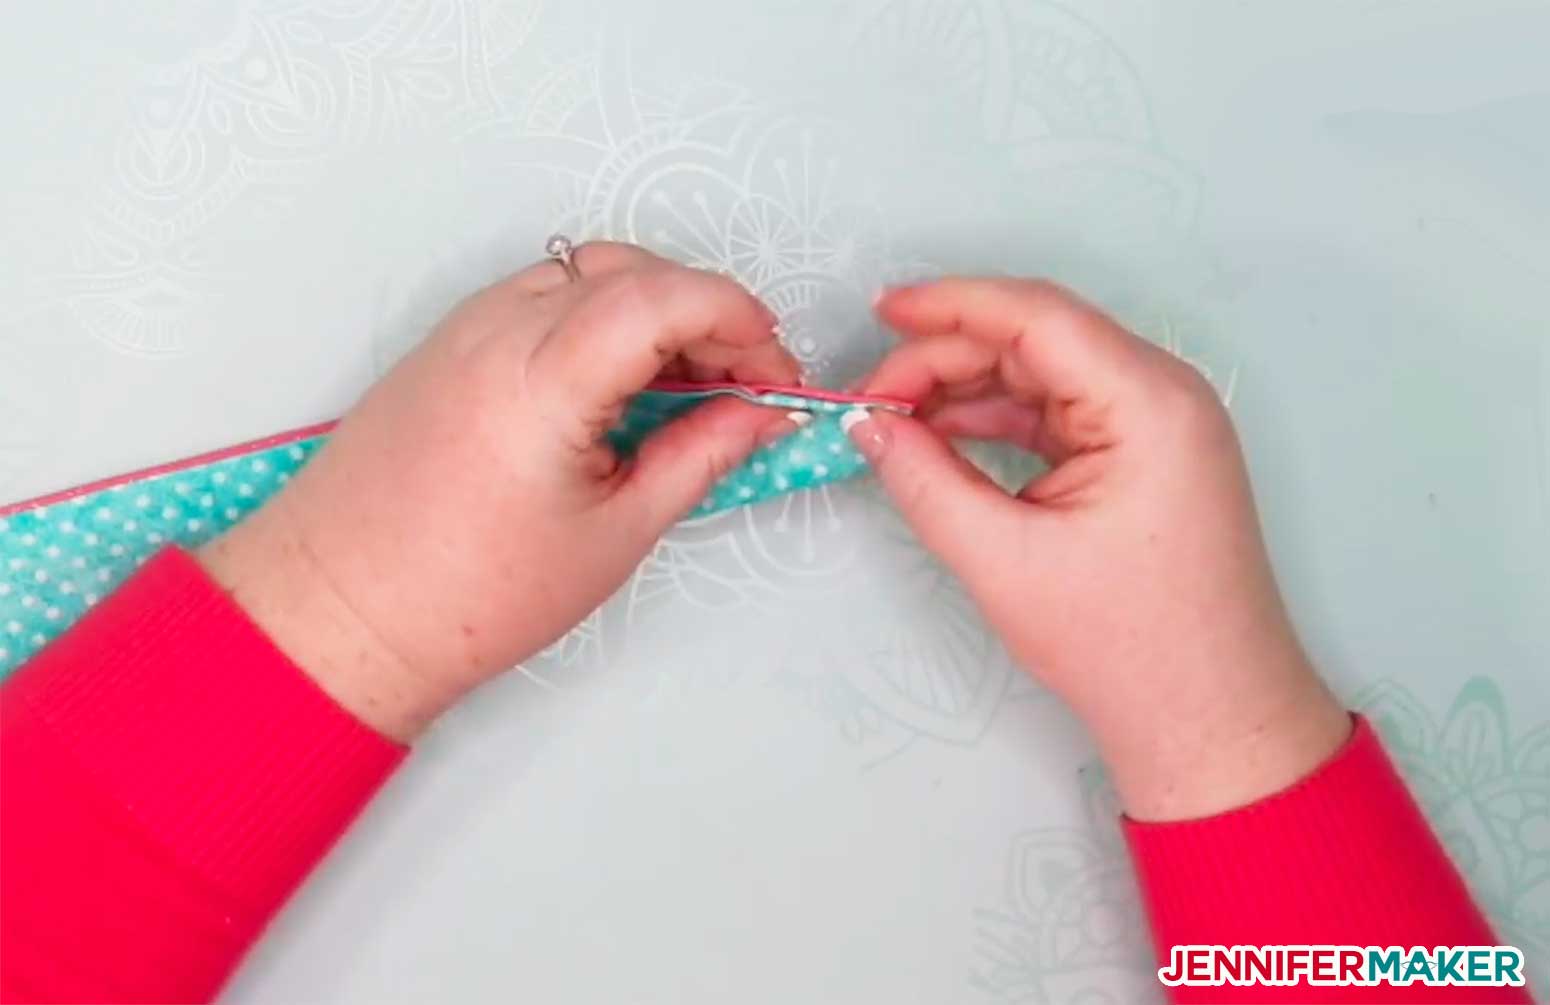
Step 3: Pin and baste your ribbon/elastic to one side of your DIY Button Headband
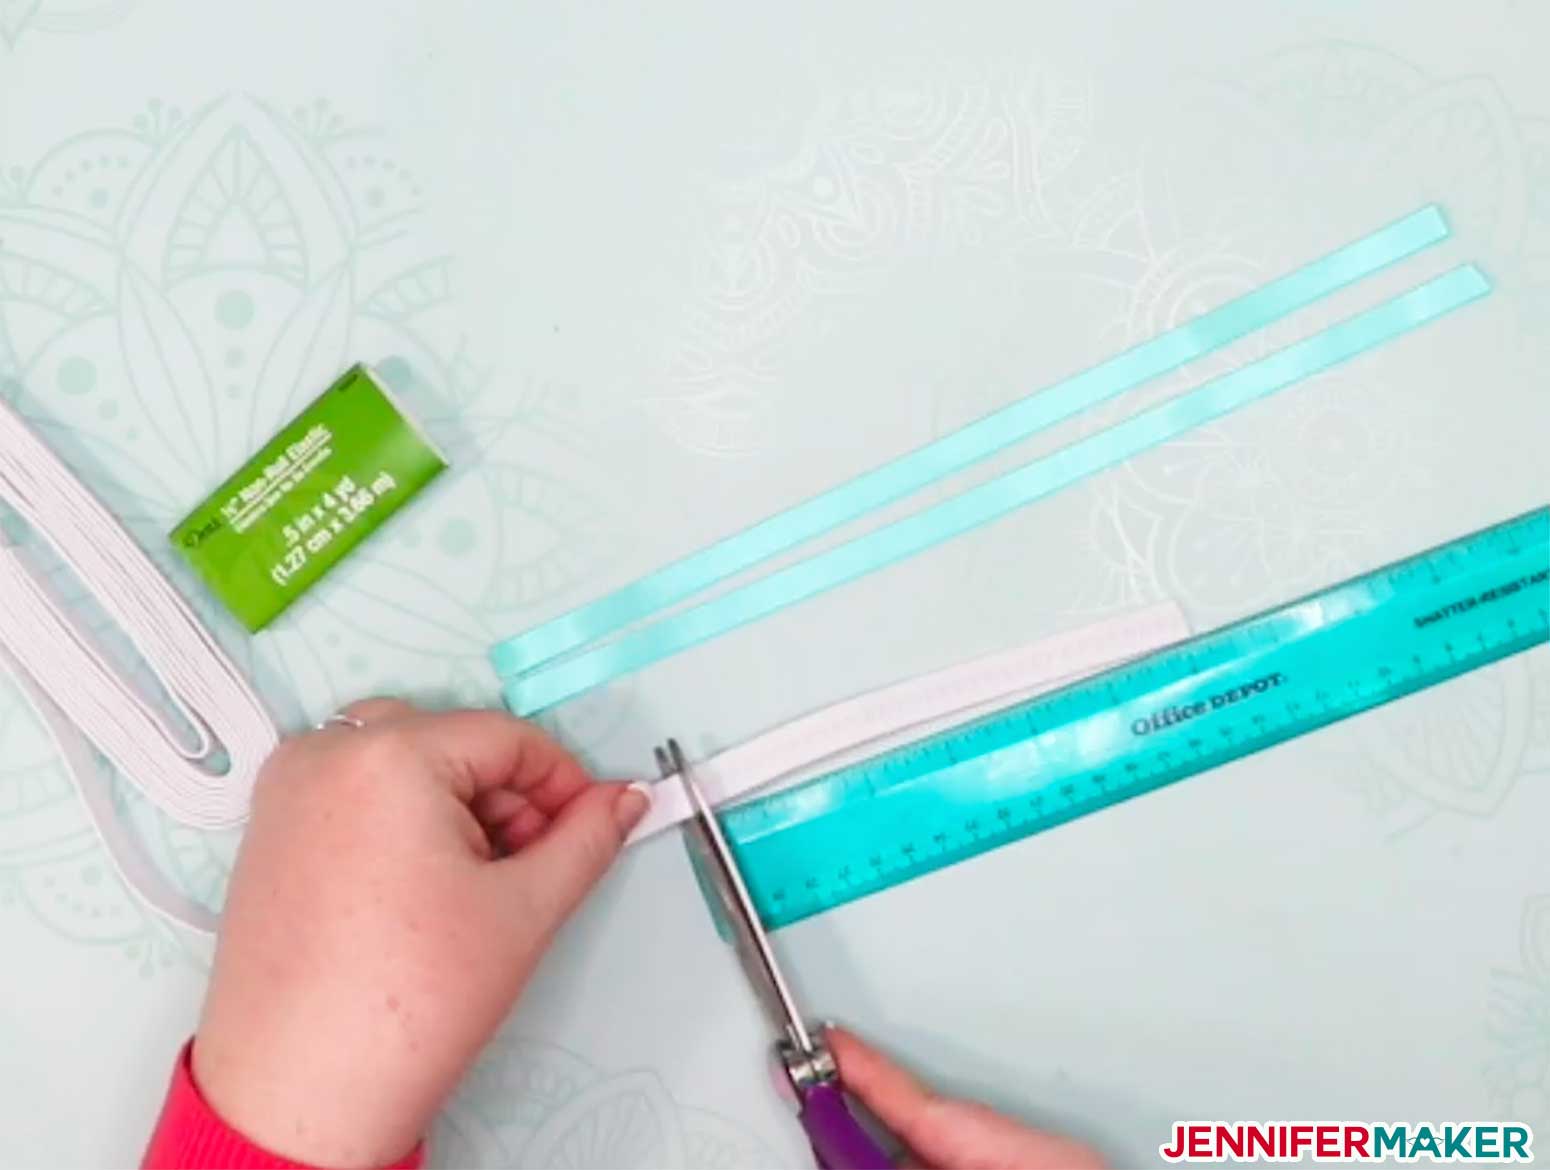
For the Simple Headband, cut two 12" pieces of ribbon or 1 4" - 6" piece of elastic (depending on how snug you want your headband).
Pin one ribbon/elastic to one side of your inner fabric layer about 3/8" down, like this:
... or ...
Tip: Put a pin in halfway down the the length of the elastic/ribbon to avoid having it moving while sewing — you don't want to catch it accidentally.
Baste ribbon/elastic in place with a sewing machine or needle & thread.
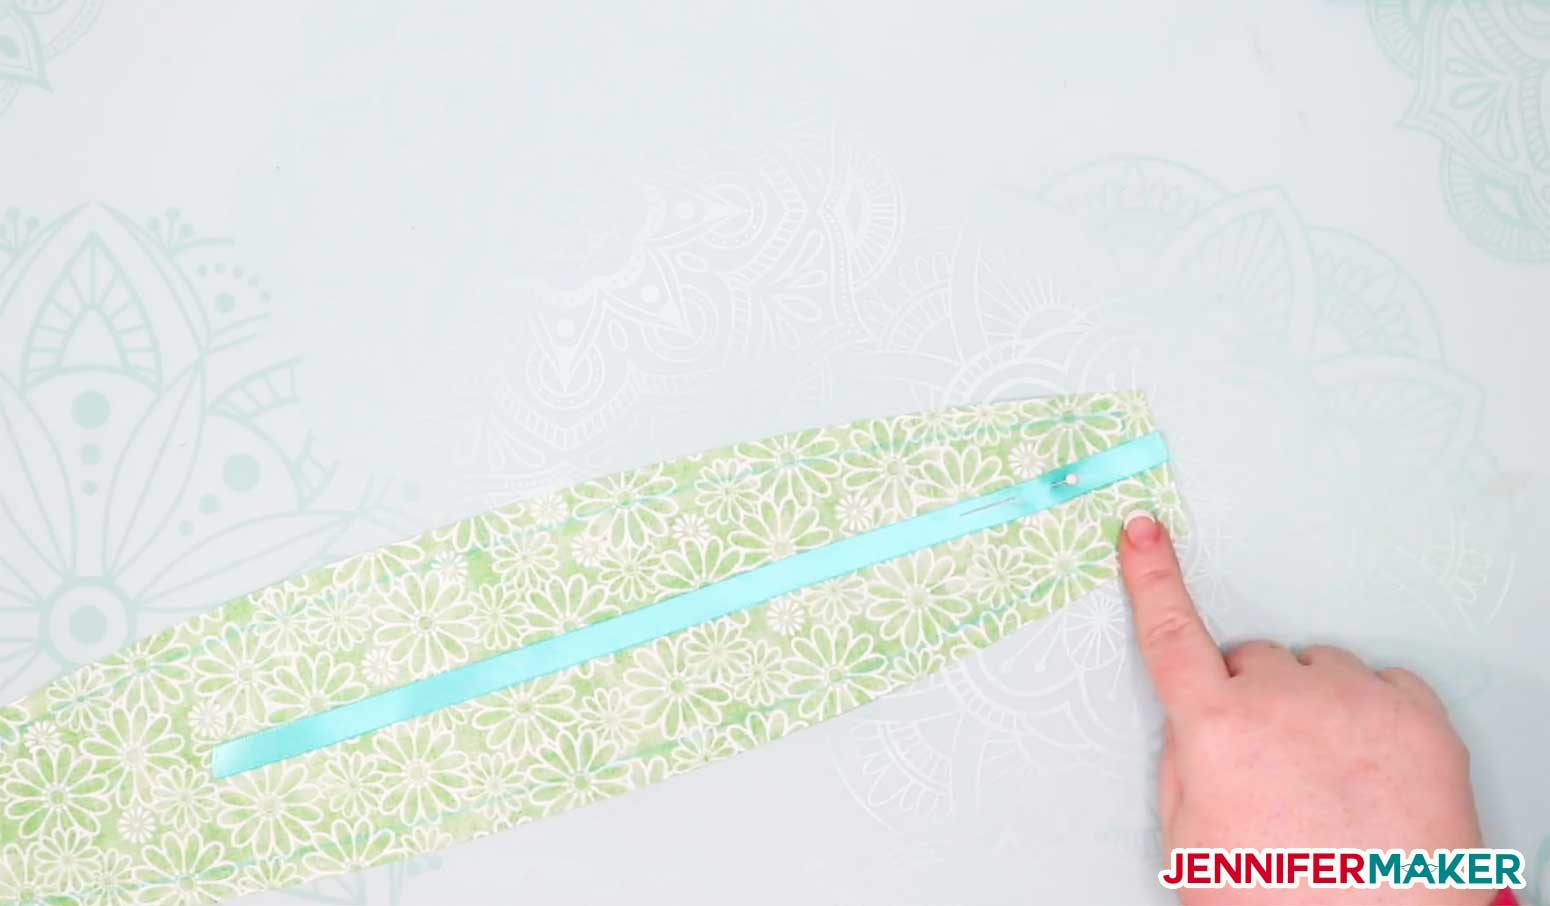
For the Tie Headband (with wire bow), you may need to first sew the two pieces of your headband at the base to form a long strip like this if you cut this on a cutting machine (if you cut it by hand, you can skip this step):
Do this for both sides.
Next, cut 36" of 20g-22g wire, bending at each end to form a loop, measuring about 31"
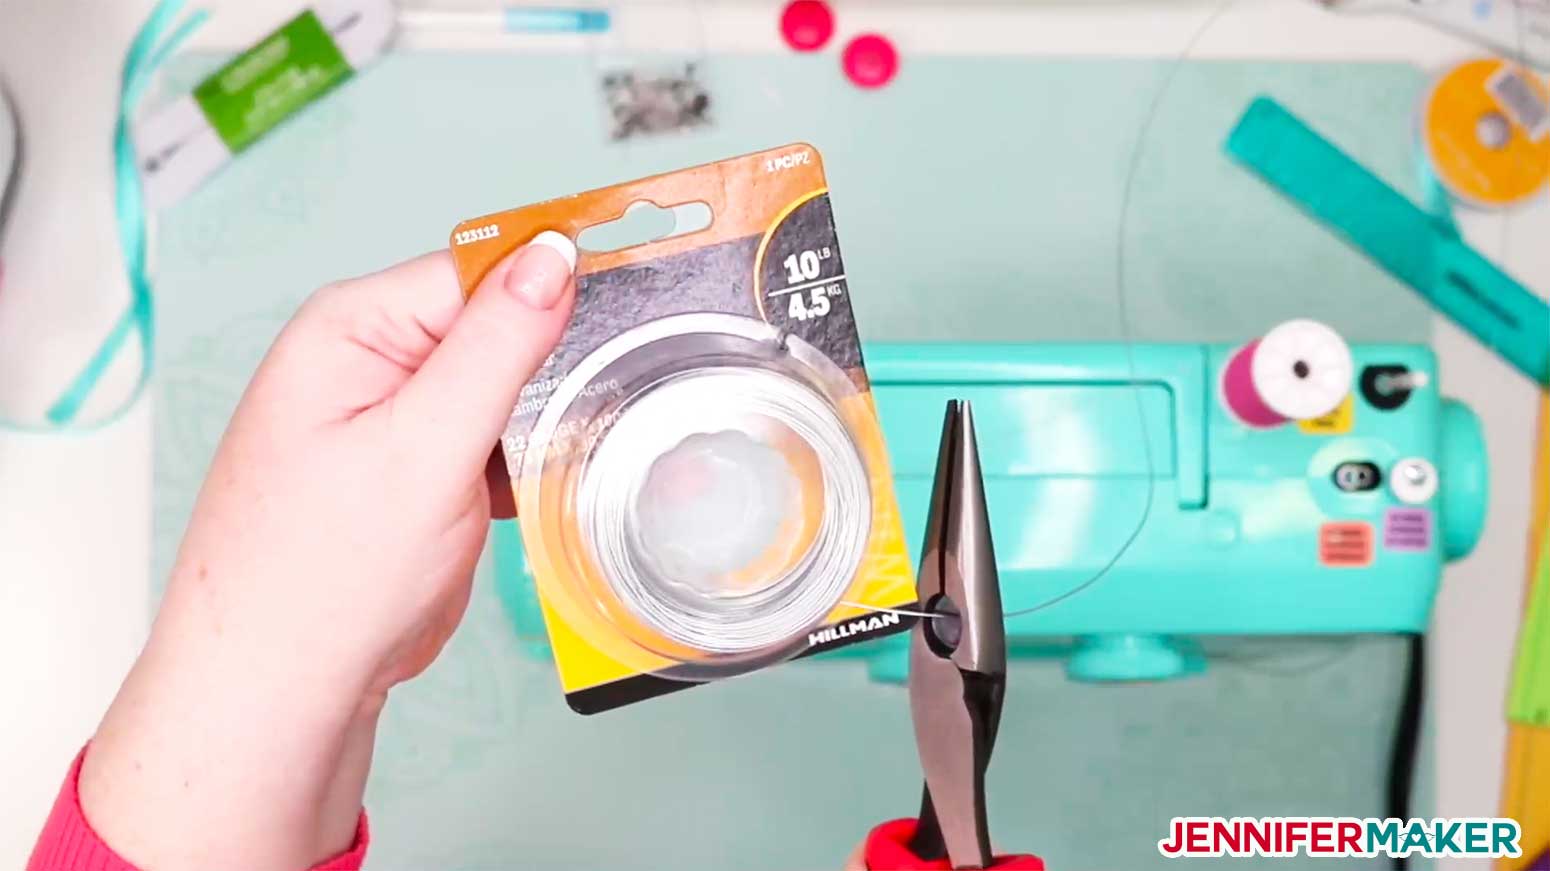
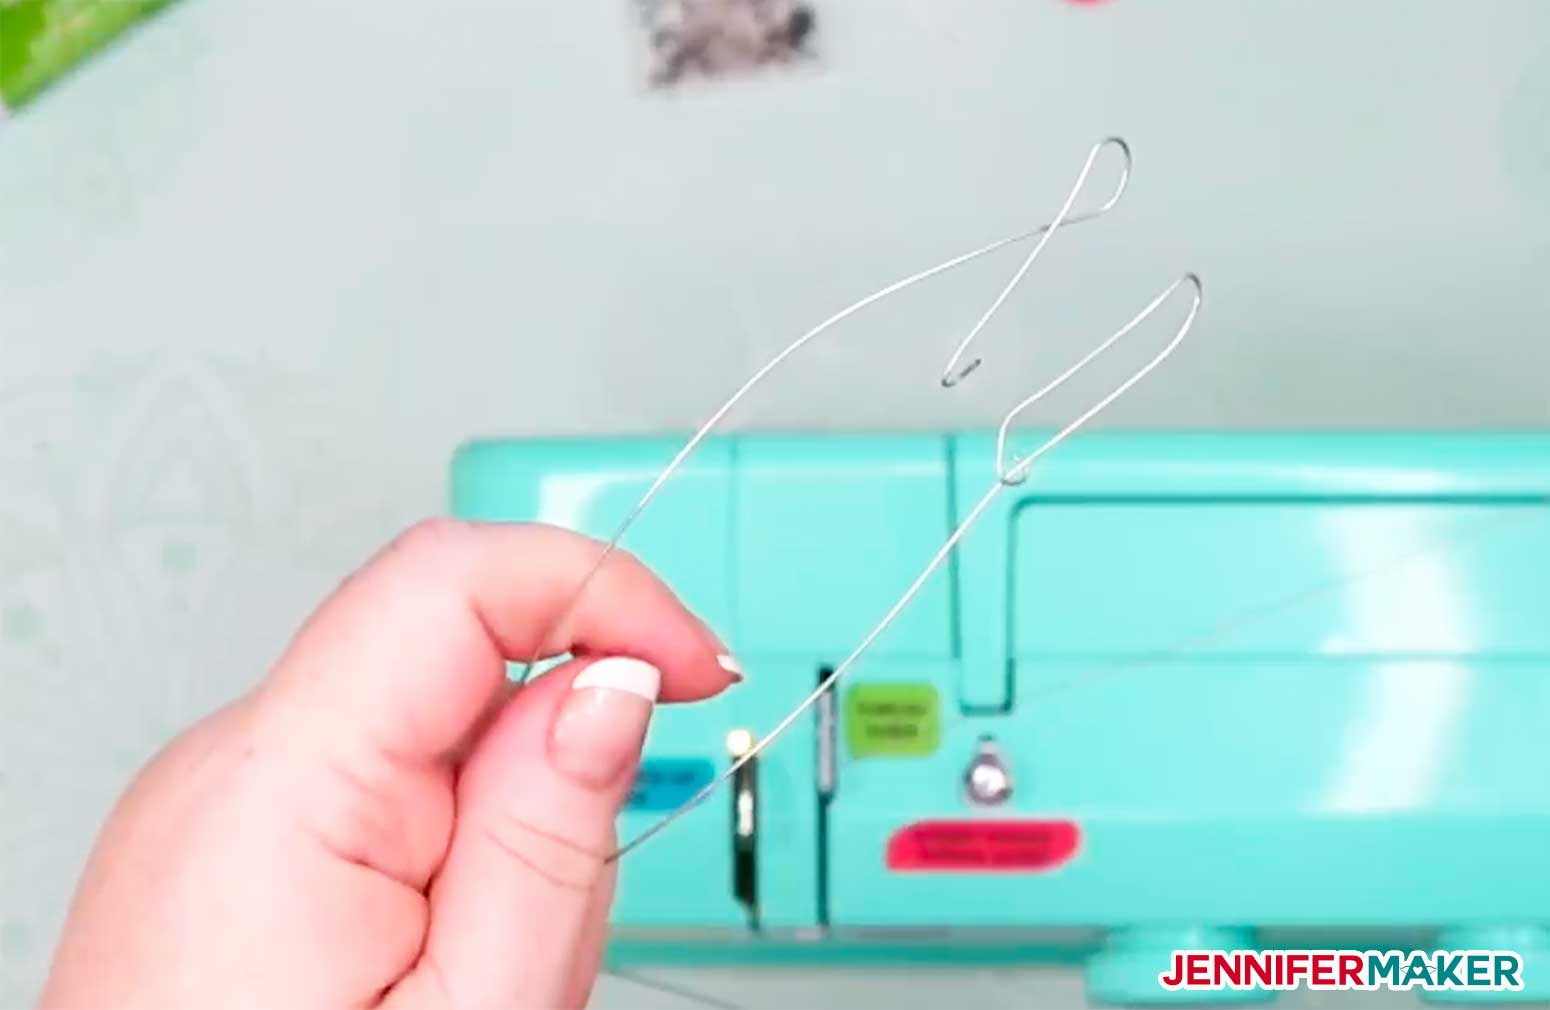
Note: You can also double the wire to 72" and fold over for a tighter hold. You can also wrap some floral tape or scrap fabric and glue around the end of the wire to avoid poking through your headband.
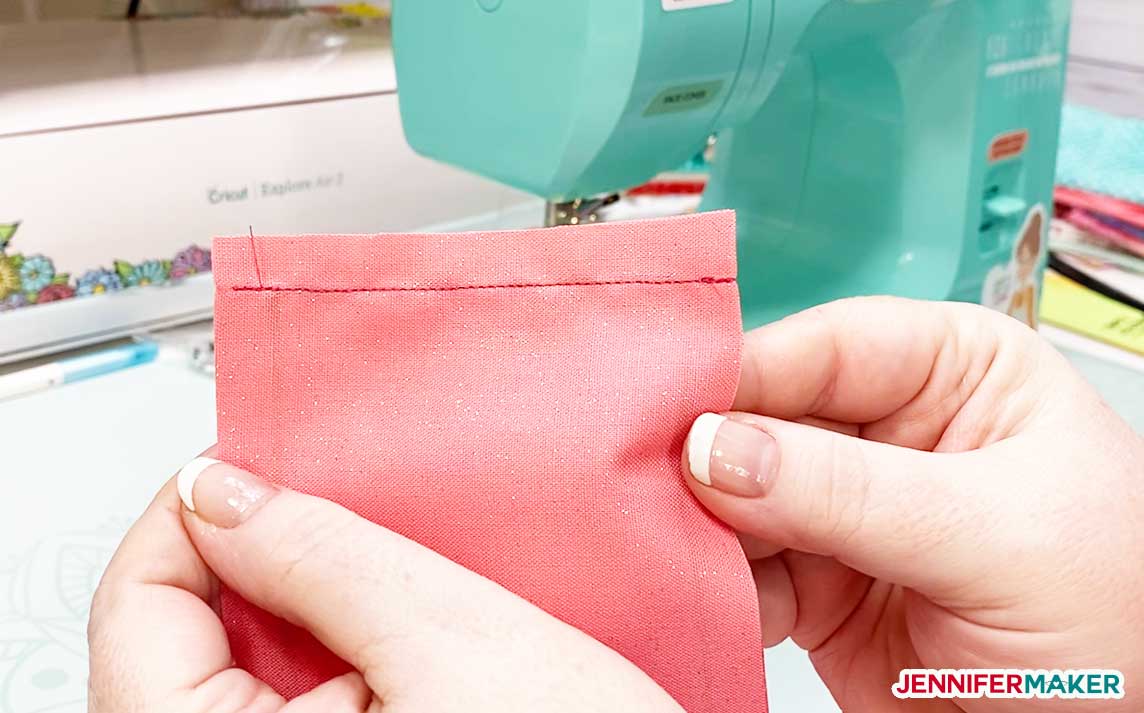
Step 5: Sew your DIY headband halves together
After you've finished cutting out your headband pieces (either pattern), place your outer fabric layer on top of your inner fabric layer, right sides together, like this:

Take your fabric pieces and line up the two halves, right sides together, and sew along the outer edges, attaching the two pieces together, using a 3/8" seam allowance.
Make sure to leave about 2" - 3" space along one side or one of the ends open to turn it inside out. Here is the simple headband sewn around the edges, with the left end left open:

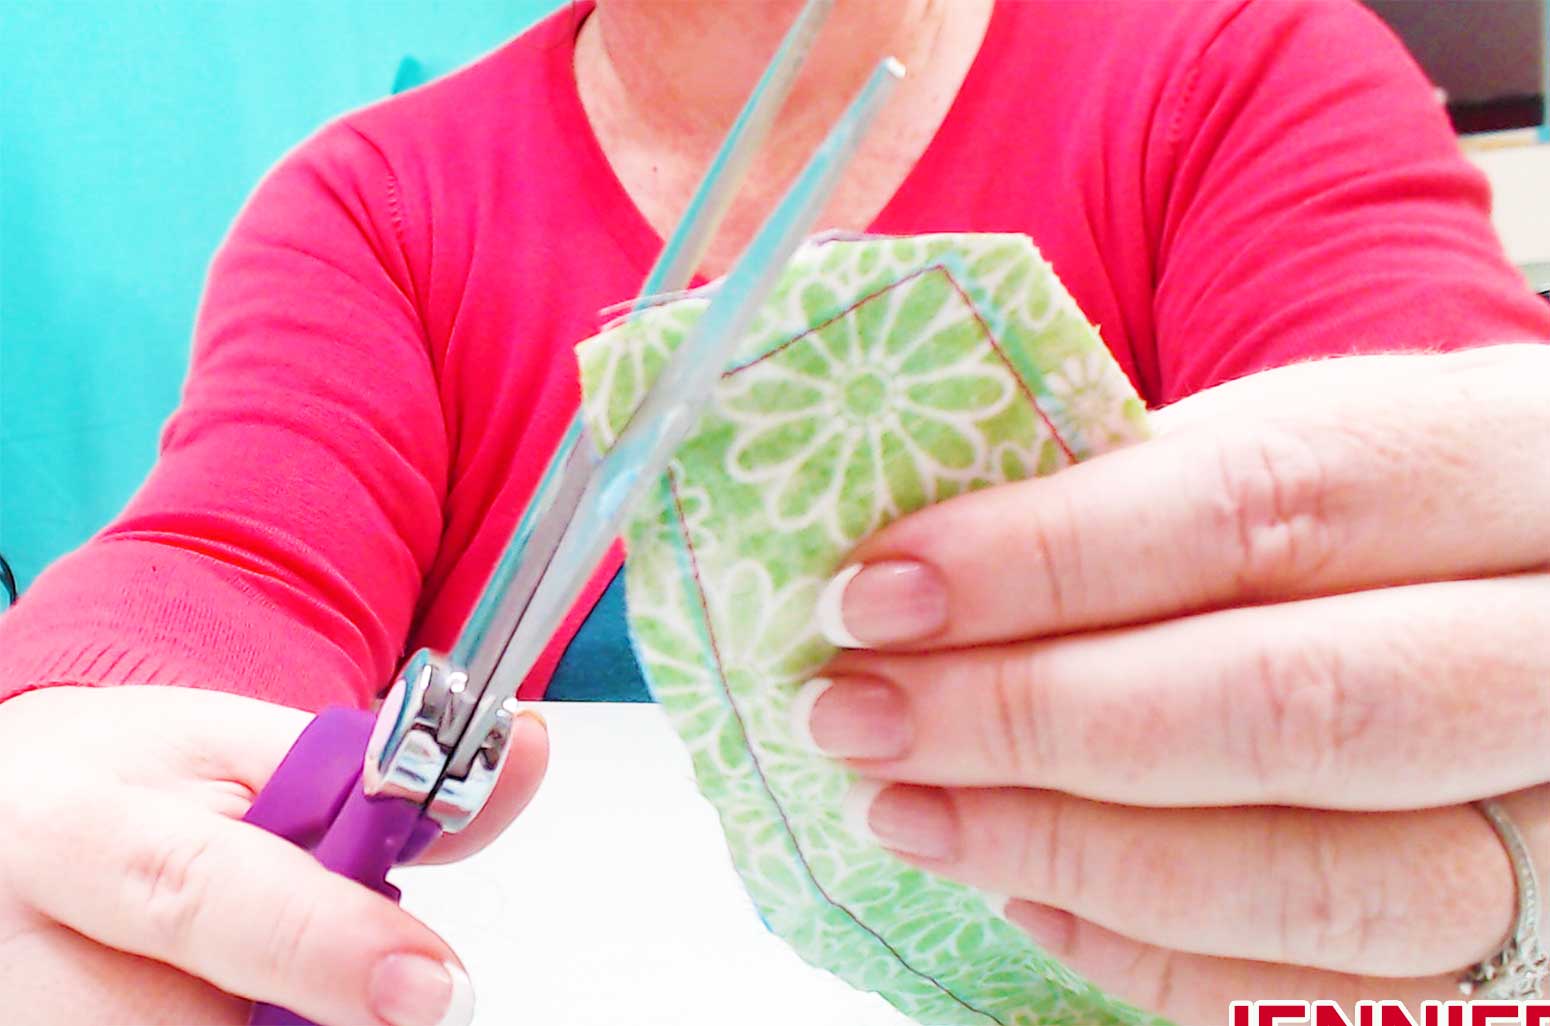
Clip each corner to reduce bulk.
Carefully turn your DIY headband right side out and poke any corners.
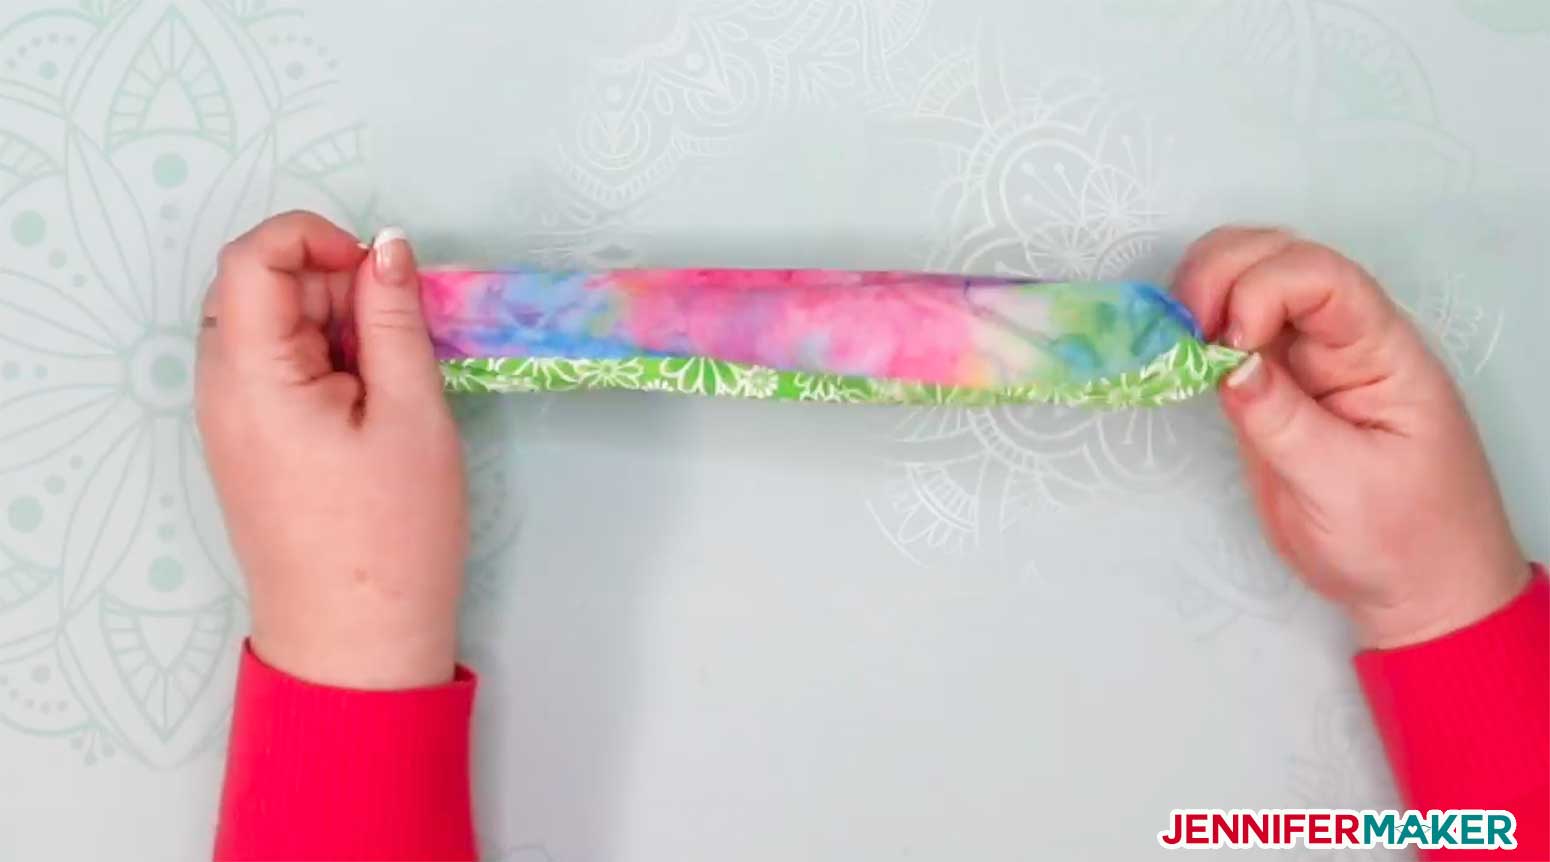
Tip: Having problems getting the corners straight? Poke them from inside with the end of your scissors.
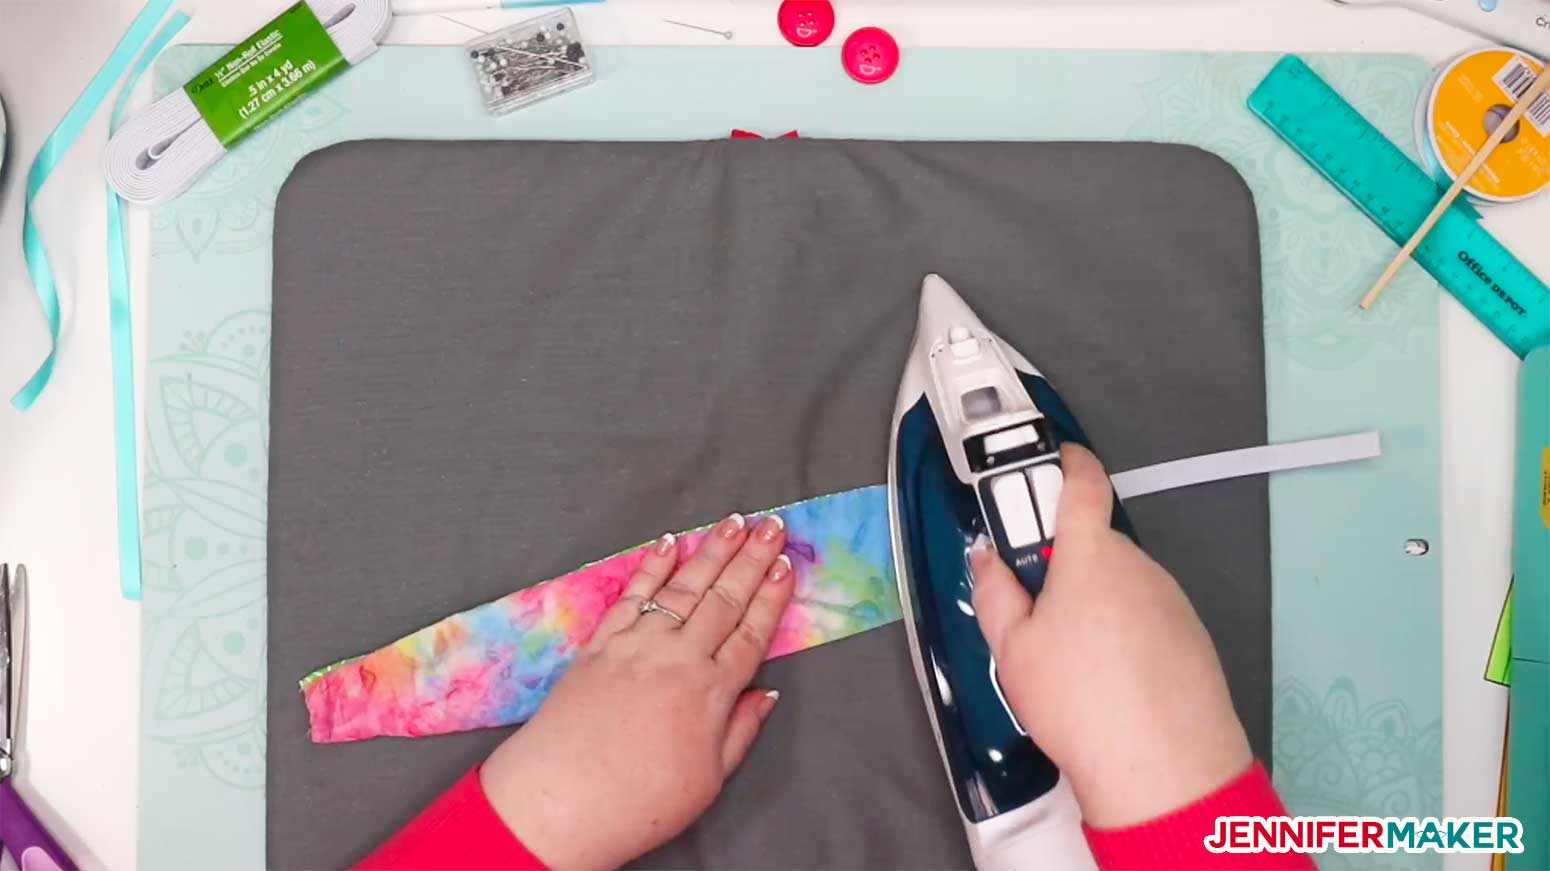
Iron your headband for crisp edges:
For the Simple Headband, turn in and enclose the hole that is not sewn, like this:
Insert the free end of your elastic to the unsewn end and pin it in place (if you're not using elastic, just put the other ribbon in the unsewn end instead)
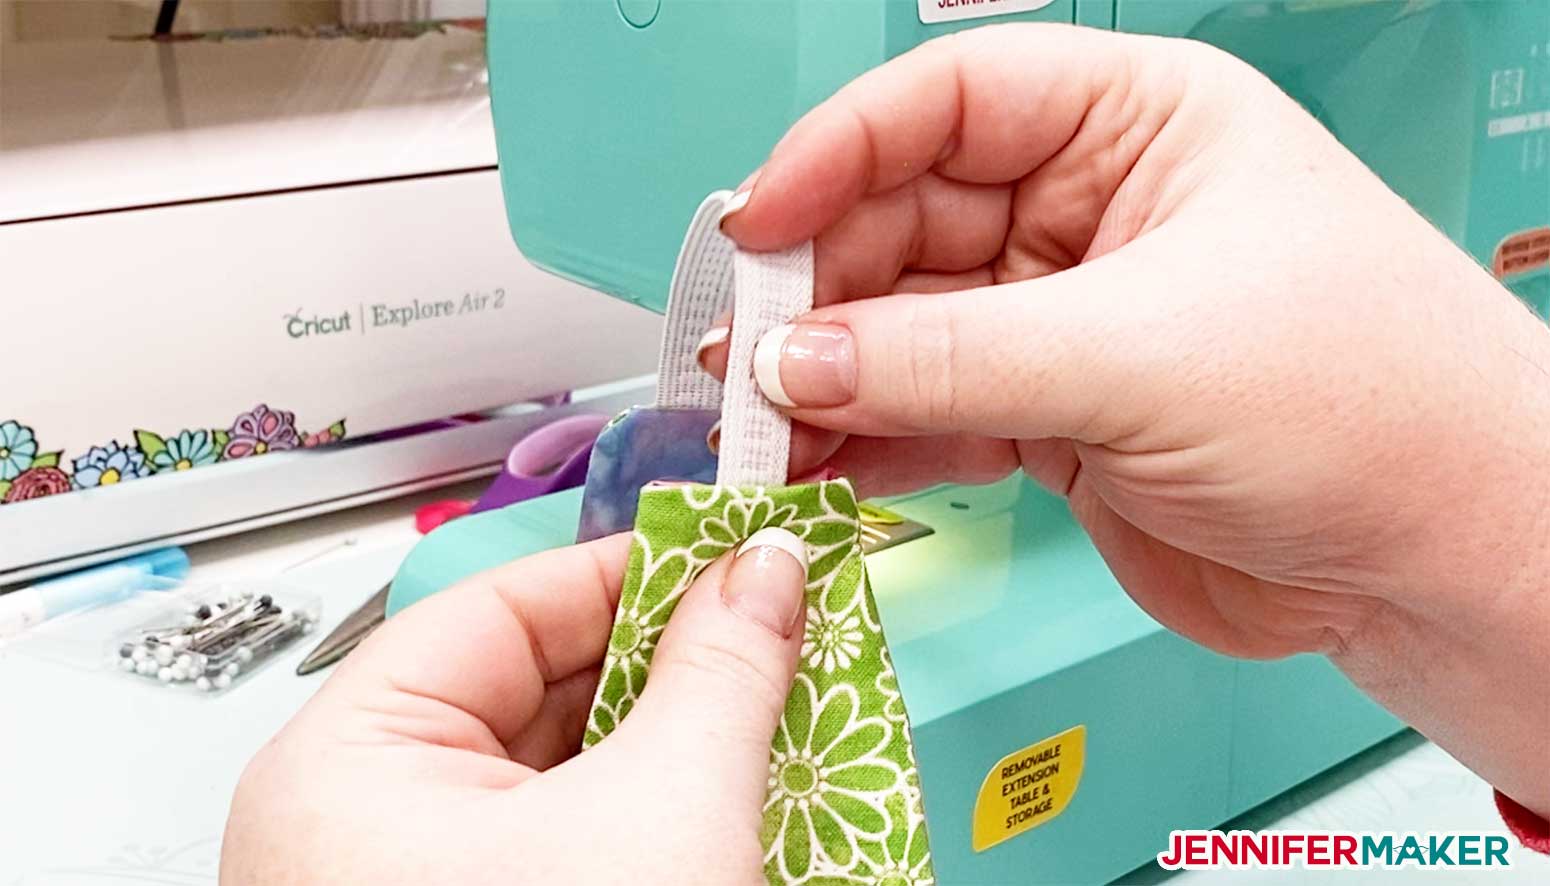
Tip: Pin the elastic in place and try it on to be sure it fits well. If it's too loose, tuck more of the elastic in before you sew it.
Carefully sew the end of the headband closed, being sure to do a backstitch at the start and end to keep it secure.
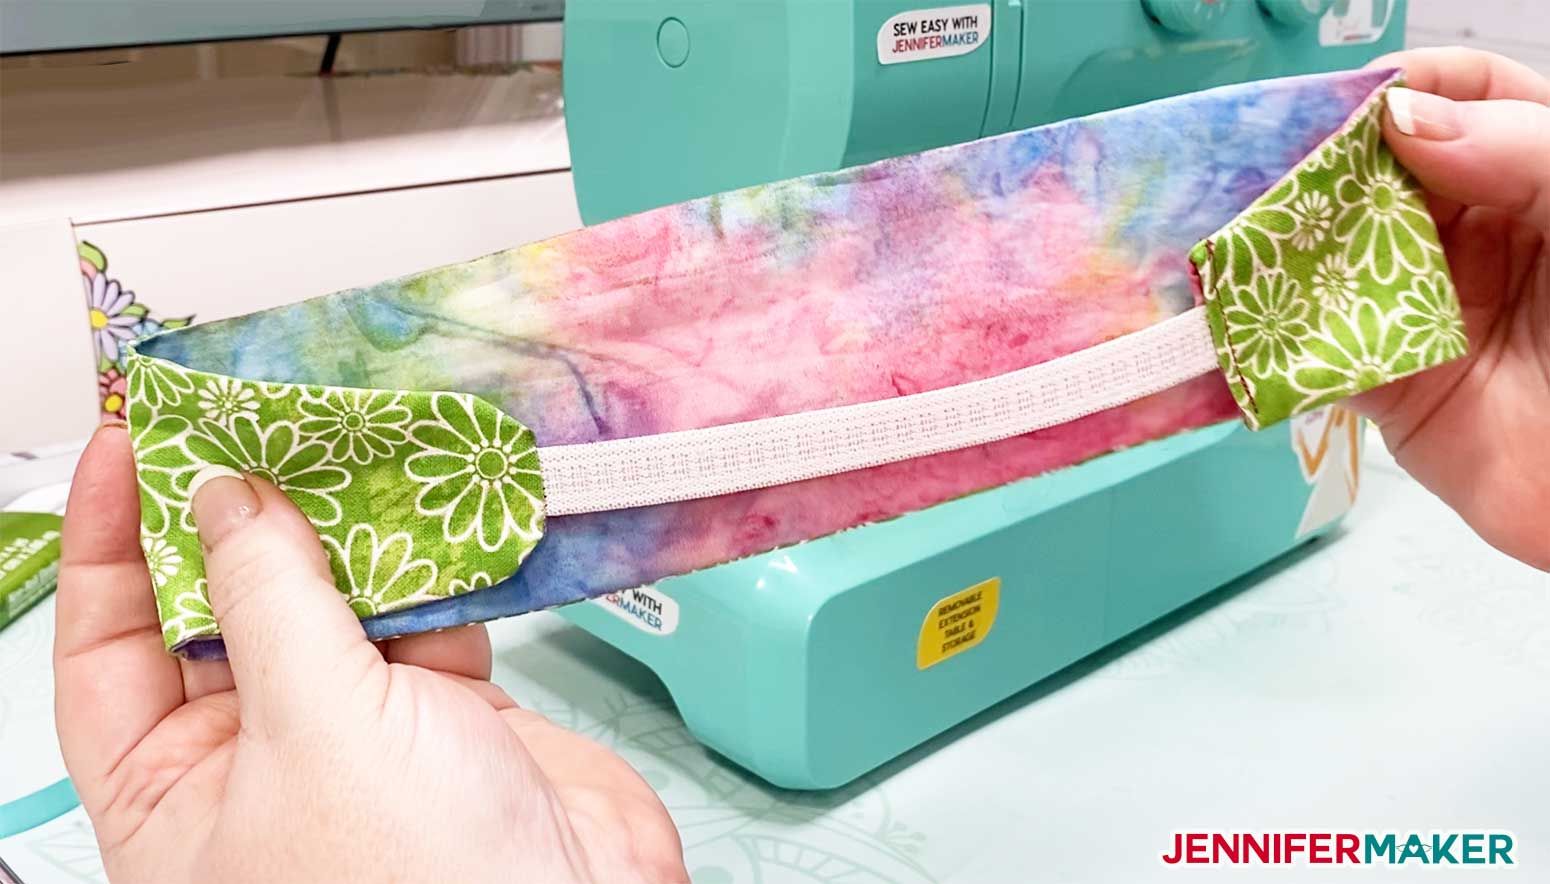
Once it's all sewn up, iron the edges of your headband again for a nice, crisp appearance and better fit.
For the Tie Headband, insert your cut and bent wire, making sure each loop is resting nicely at each end.
Turn in and enclose the hole that is not sewn.
I found it helpful to pin it in place.
Carefully sew around the side closed, being sure to do a backstitch at the start and end to keep it secure.
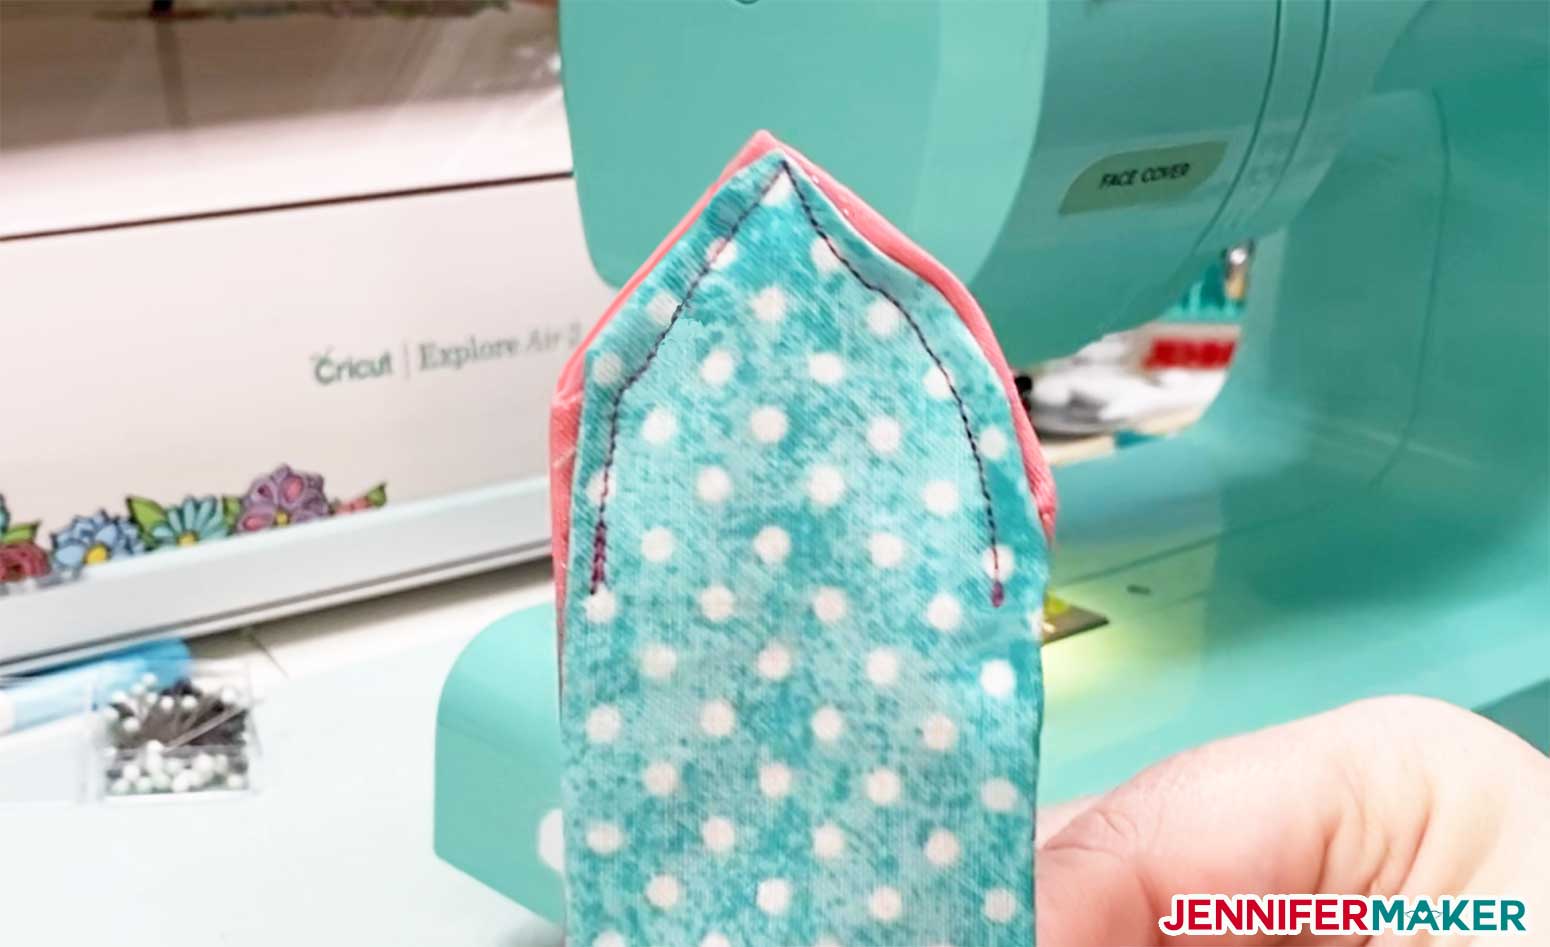
Once it's all sewn up, iron the edges for a nice, crisp appearance and better fit.
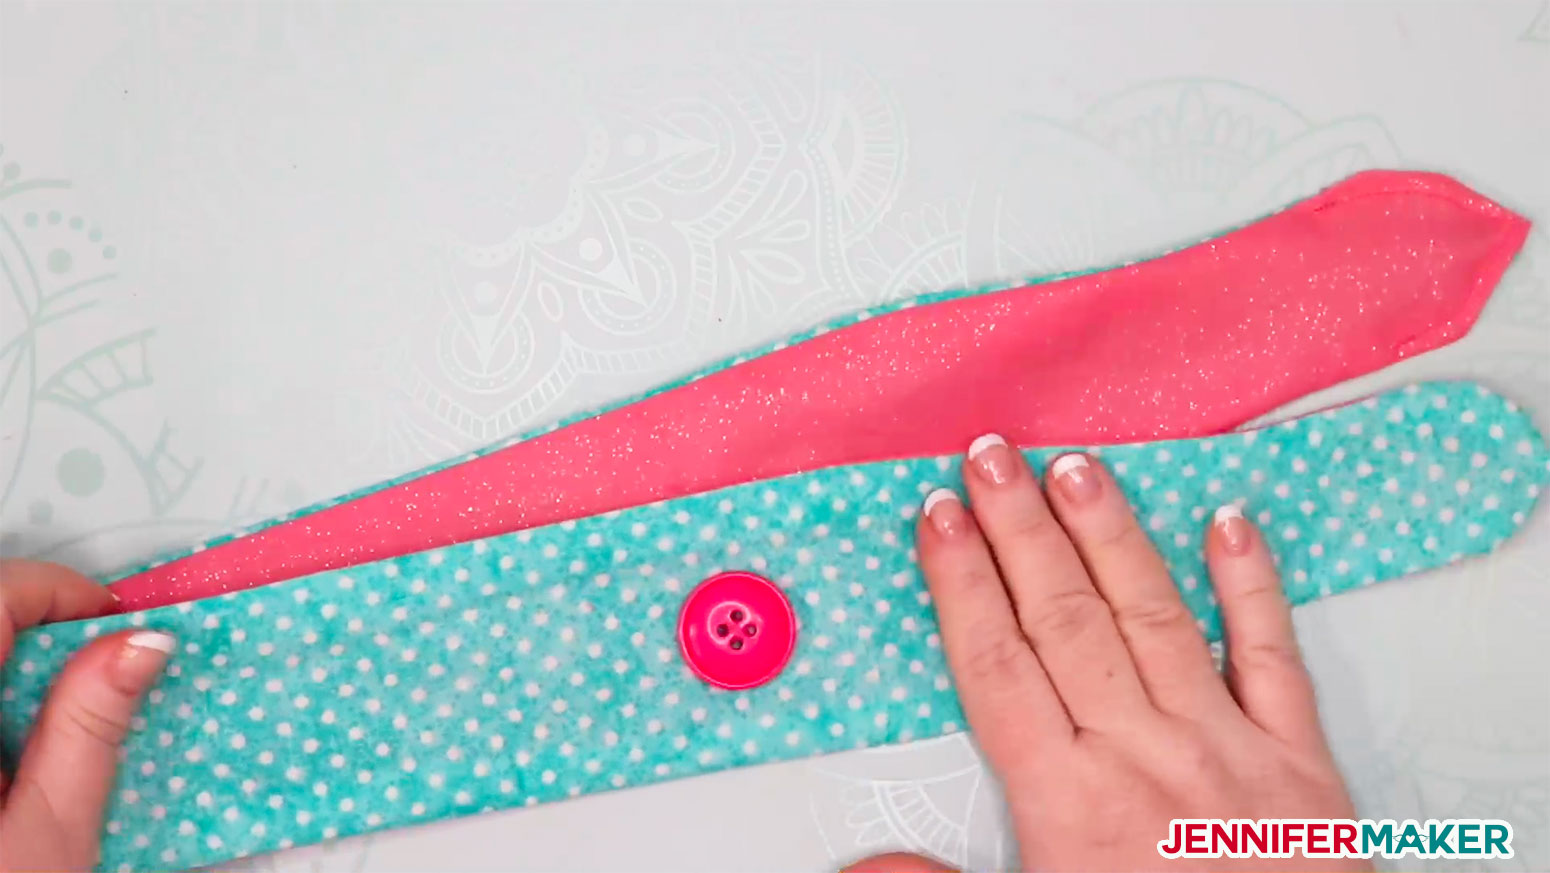
Step 6: (Optional) Sew buttons onto your headband
If you'd like to add buttons to your headband to help you keep a face mask on your face more comfortably, this is when you do it!
First, put the headband on your head along with your face mask and mark the position on the headband that seems the most comfortable for you to have buttons. We marked some suggested placements on the PDF printable version of the pattern if you need a starting point.
To sew your buttons, get a length of 24" thread, thread your hand needle, tie it at the bottom, place the button into position on the headband, and bring your threaded needle up from the underside of your headband into and through one of the holes in the button. Now sew down into and through a different hole. Repeat this 8-10 times, being sure to sew each hole in the button. When done, double knot the thread on the underside of the headband and snip off the excess thread.
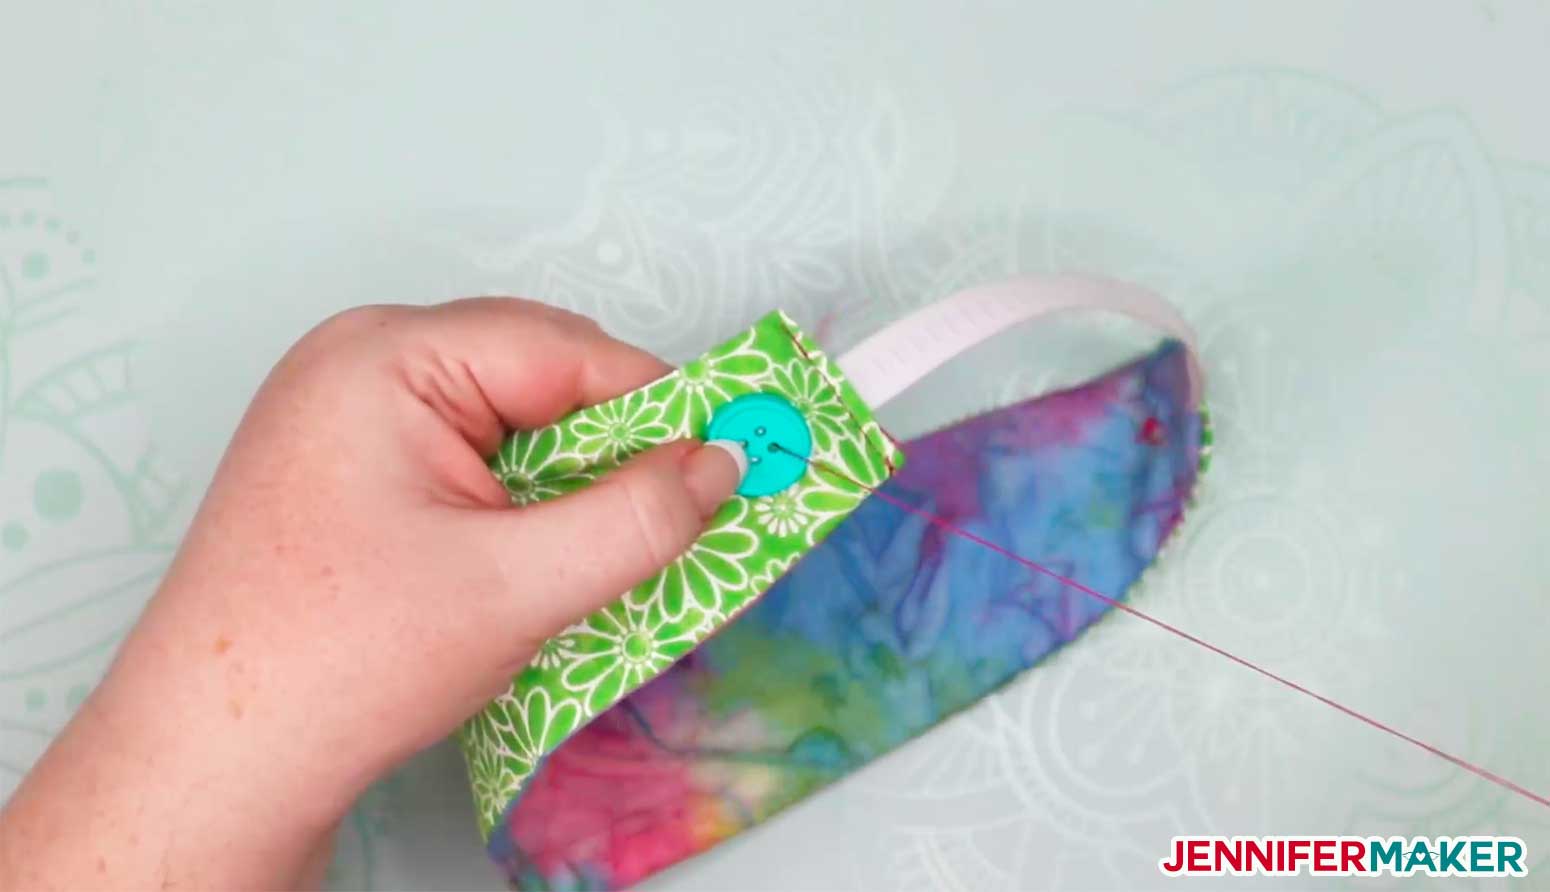
Here's where the Simple Headband's buttons could go:
And here's where the Tie Headband's buttons could go:
Congratulations! You made an easy headband to go with your DIY face mask!!
Notes
ACKNOWLEDGMENTS
Special thanks to the JenniferMaker Design Fairy team for helping me design and assemble this awesome Easy DIY Button Headband.
Answers to Your Questions About Making DIY Headbands
Q: Do both sides of the headband need to be different fabrics, or can I use the same fabric?
A: It’s your choice. If you’re not putting on buttons, these headbands can be reversible and then two different fabrics are useful! If you’re adding buttons to your headband, you can use the same fabric on both sides (or just change them for fun).
Q: I don’t have cute cotton fabric. Can I use an old pair of jeans or a T-shirt?
A: Totally! You can really use any fabric for your headband, but keep in mind an ultra lightweight or stretchy fabric might not hold up to holding onto masks.
Q: What kind of sewing machine do you recommend? I am new to sewing and want to make these headbands!
A: I am a big fan of Janome sewing machines, and that is the brand I am using in this tutorial. I think they are simple to use, affordable, and long-lasting. This is a good beginner sewing machine and the same one I use in this tutorial.
Q: I don’t have elastic. Can I still make these headbands with buttons?
Q: Yes! Use ribbon or bias tape instead. You can even make your own ties by cutting a long length of fabric, folding it in thirds lengthwise, ironing flat, and sewing it shut!
Q: I don’t have 20 gauge wire. Can I use a more flexible wire (like 22 or 24)? Or can I use pipe cleaners?
A: Probably, yes. But you may need to use extra and double or triple it up. Pipe cleaners will work only if you secure the ends of several of them together to form a long length of it that extends from tip to tip inside your tie headband. I think it is doable, though! I have not tested it, however.
Q: Do I have to cut these on my Cricut?
A: Nope! If you’re only cutting out one headband, you’ll probably like using a Cricut (if you have one). If you are making more than one headband, you’ll find it faster to print out the printable PDF pattern from cardstock and cut out multiple layers of fabric using a rotary cutter.
Q: I don’t have freezer paper, but I really want to cut fabric on my Cricut Explore. Can I use wax paper or parchment paper instead?
A: No. Using wax paper will leave a waxy residue on your fabric that will be hard to get out. And using parchment paper will do nothing—it will not stick to your fabric. You need to either use freezer paper or another bonding material, such as Wonder Under. (Tip: In the UK, freezer paper is known as grease proof paper).
Q: Do I have to add the buttons?
A: Nope! These make great headbands with or without the buttons. And you can still add the buttons even if you aren’t wearing a mask — they look pretty cute with the buttons!
Get my free printable PDF and SVG files to make your own DIY headband with buttons for masks!
Have questions about making headbands with buttons? Come on over and ask in our Facebook group — everyone is welcome! We’d love to see your headbands with buttons, too! Please share them in the group or email us at [email protected].
Love,

Take a Look at My Other Face Mask Patterns and Learn More About Face Masks


Want to remember this? Save this DIY Headbands with Buttons for Masks tutorial to your favorite Pinterest Board

What a great idea! I never thought of a headband to hold the mask in place – you have saved my ears!
I am in health care, and have been wearing masks since October. The tight strings have hurt my ears. However, I have a workaround. Before I put the mask on, I use gloves and apply some hand sanitizer gel to the strings, then I stretch the strings for 30 seconds. This makes them less tight and more comfortable. Save yourself some time, energy and expense.
I love this idea, but I was thinking a few days ago we need something like this to hide our roots.
Thank you! great idea!
LOVE IT
When I saw this, I nearly cried. I wear oxygen and glasses. My ears hurt all the time and a mask makes it even worse. I can use this to hold the oxygen tubing. Thank you for your brilliance. I just found your site today, and I’ll be back. Cheers!
can not wait to try this pattern
thank you, love the headbands going to try them