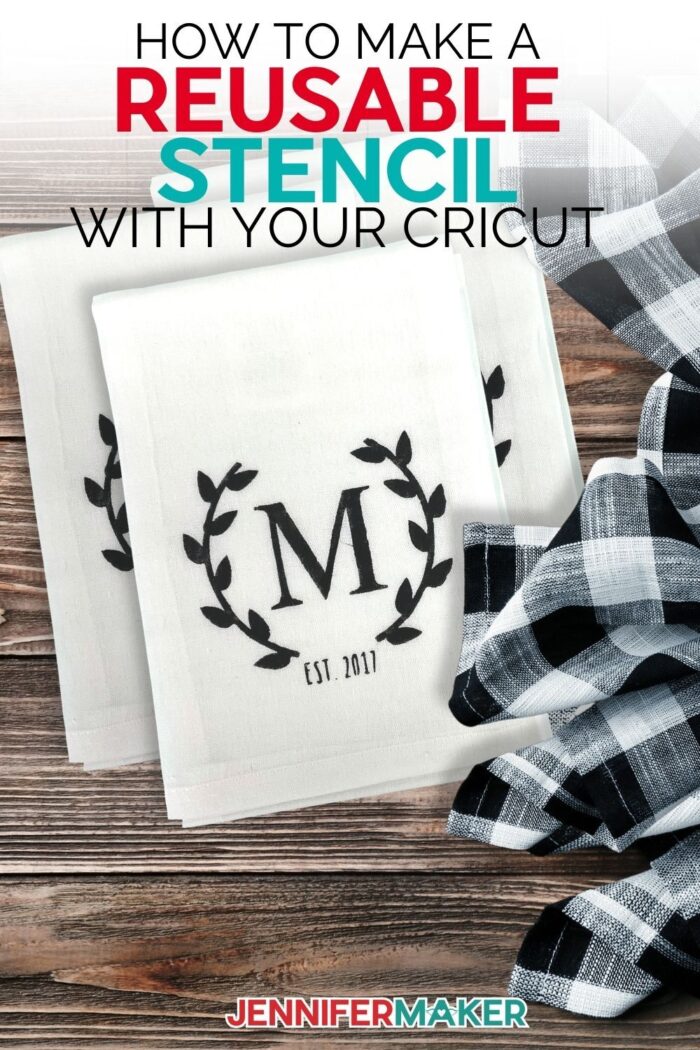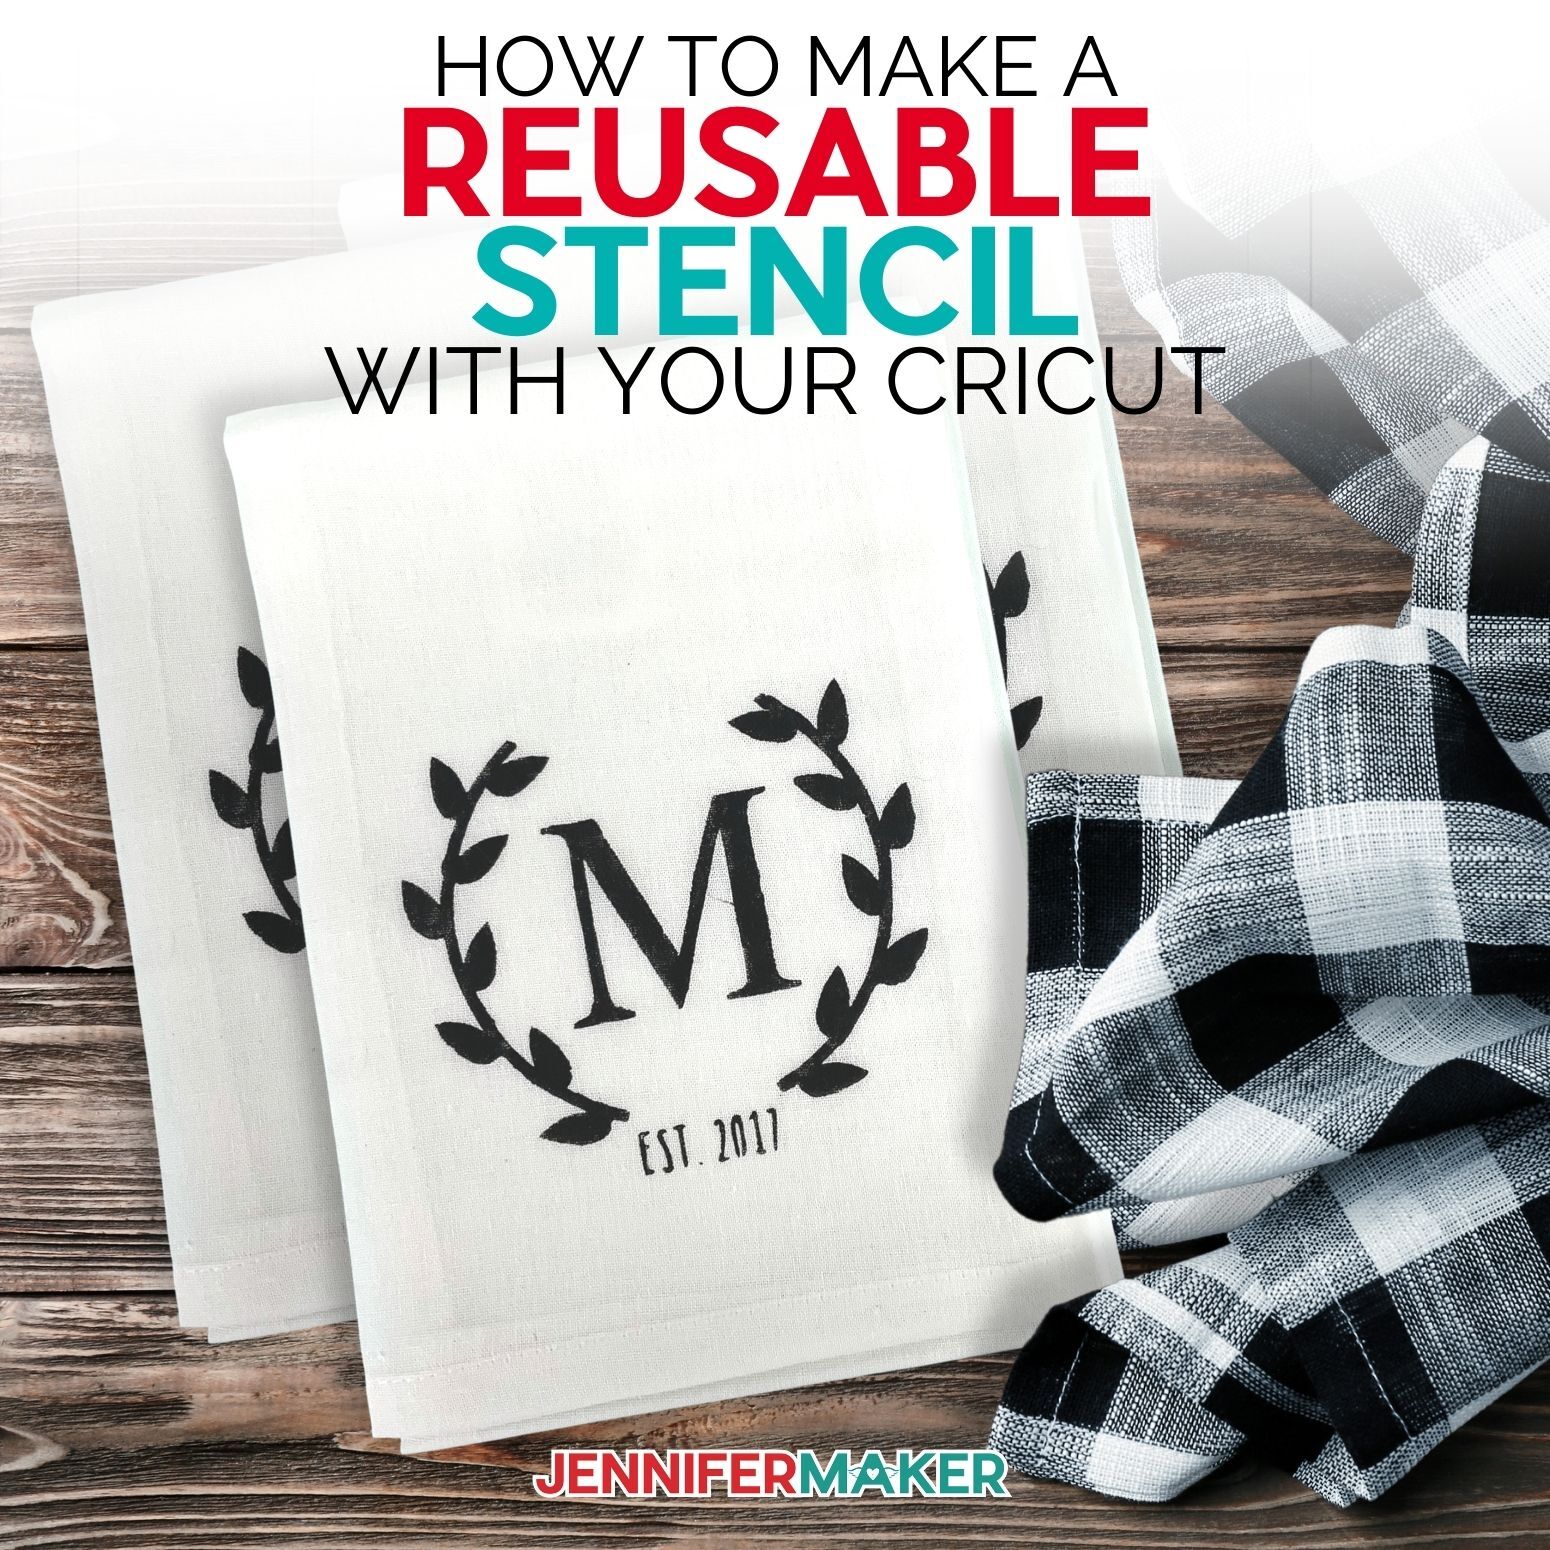
Learn how to make a reusable stencil with your Cricut for easy DIY gifts and decor!
Have you ever made something you really loved and thought to yourself, I wish there was an easy way to replicate that without having to start from scratch. OR maybe you sell your crafts and you’ve wondered if there was an easier way to make the design in bulk to save time. Well I have some great news, there is! And I’m going to show you exactly how to do it by making a reusable stencil with Cricut!
Watch my step-by-step video tutorial on how to make and use reusable stencils with Cricut:

The secret to being able to replicate your designs without having to start from scratch is a little tool called a reusable stencil. You can cut your favorite design once or even cut a few of your favorites all at the same time and then reuse the DIY stencils over and over again to make beautiful things and gorgeous home decor! And the best part is, you can use the stencil on all sorts of blanks: wood signs, tea towels, t-shirts, tote bags, you name it! And did I mention how big of a time-saver this is? Seriously, this is a must for every craft lover!
Now, of course you can also make a stencil out of regular vinyl, but that is just a one-time use stencil and then it’s gone. This is fine if you only need to make one of something but if you are looking for the best way to make LOTS of somethings using the SAME design then this is for you! If you haven’t noticed yet, I really love this technique and I’m super excited to share it with you!
To get started with this Cricut stencils project, craft plastic is key! I tested all sorts of things to make this project and think this plastic sheet is the best stencil material. It’s an ultra-clear polyester plastic (not mylar) that can be reused over and over. So that means no vinyl and no transfer tape is needed for this technique.
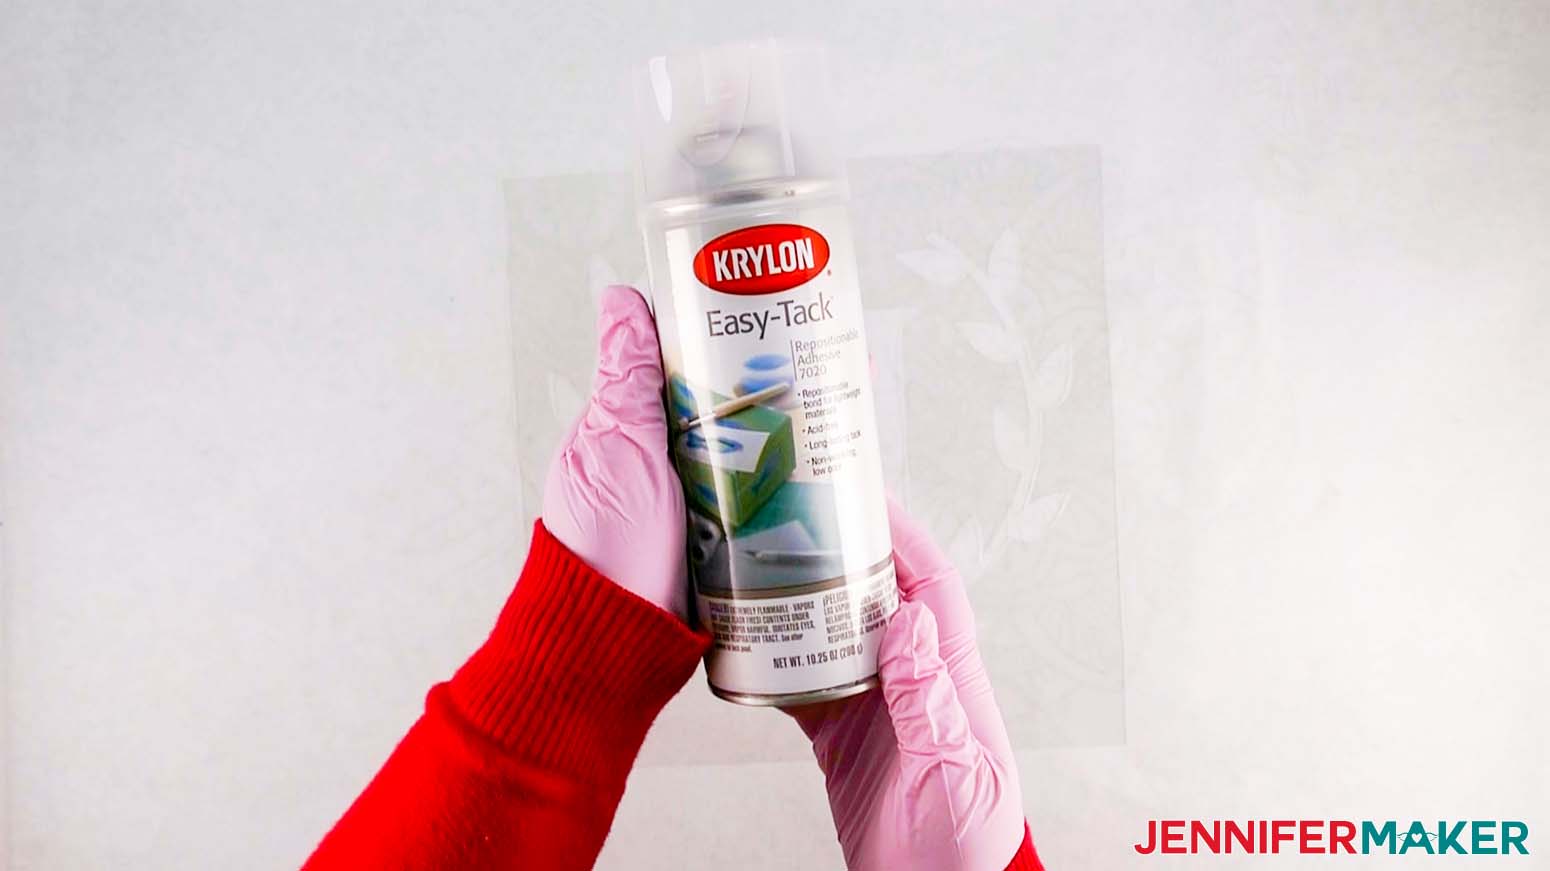
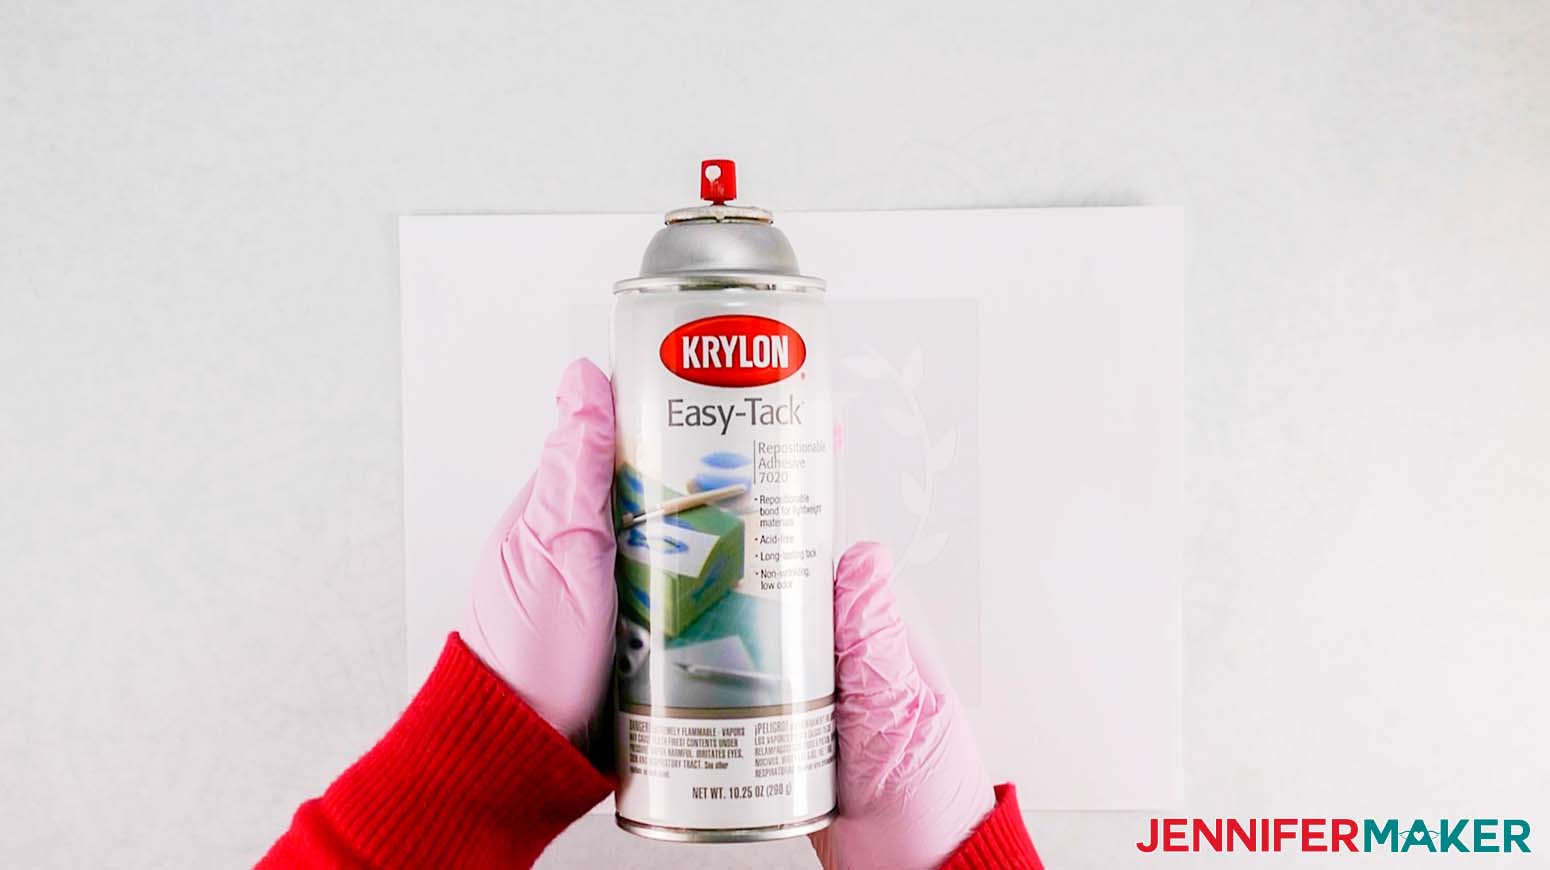
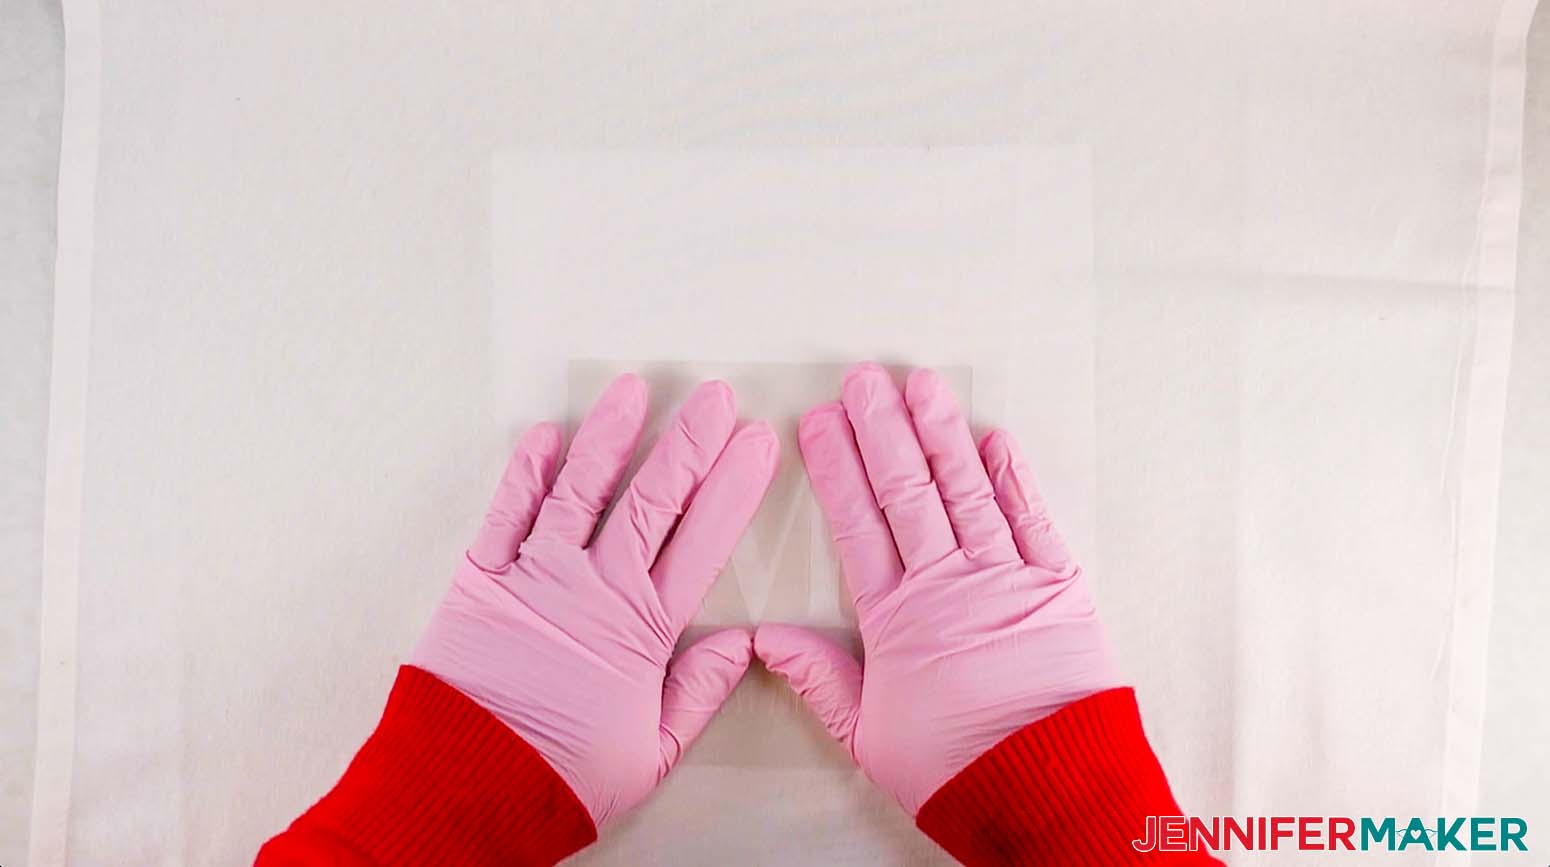
You will also need Krylon Easy Tack Repositionable Adhesive Spray. This spray helps hold the stencil in place when adding our design and it’s the easiest way to keep it in place. I’m also using paint including both fabric paint and chalk paint in a variety of colors, along with some Matte Mod Podge.

To apply the paint to the reusable stencils I used a round foam brush. And I do want to point out that the shape of the stencil brush is very important for a good application.
For my blanks, I used 10 by 10 inch wood panels and 100-percent cotton flour sack towels. These are 20×30 inch towels, but they come in all sorts of sizes.
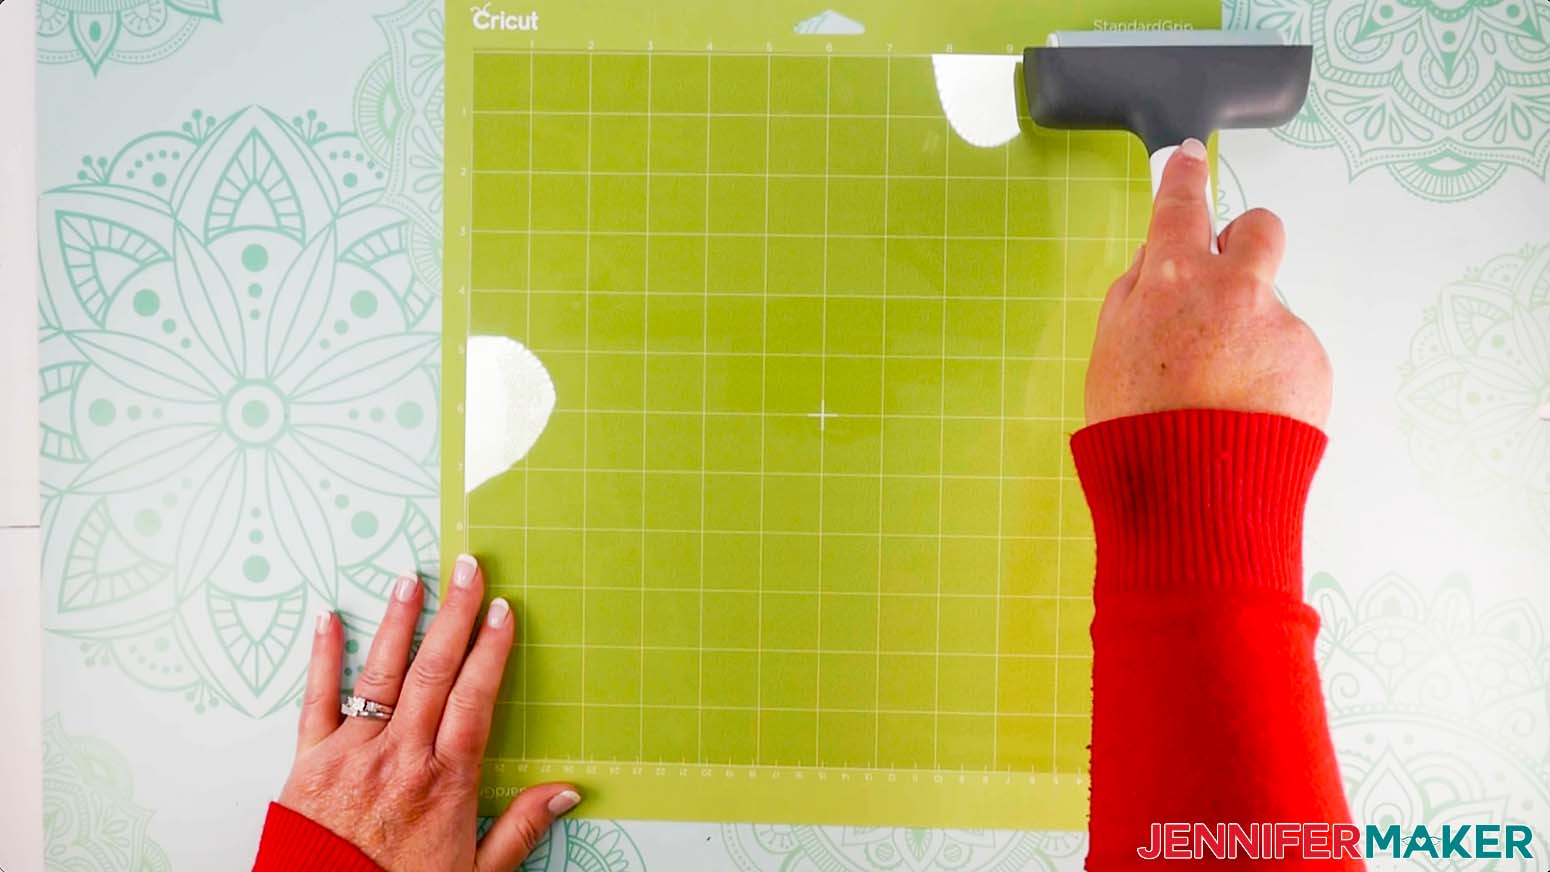
Of course I will be using my amazing Cricut machine and machine mats to make my own stencils. You will need a green Standard Grip mat, along with a purple Strong Grip mat. We’ll also need a brayer, extra large scraper, painter’s tape, butcher paper and gloves to protect our hands and work surface.

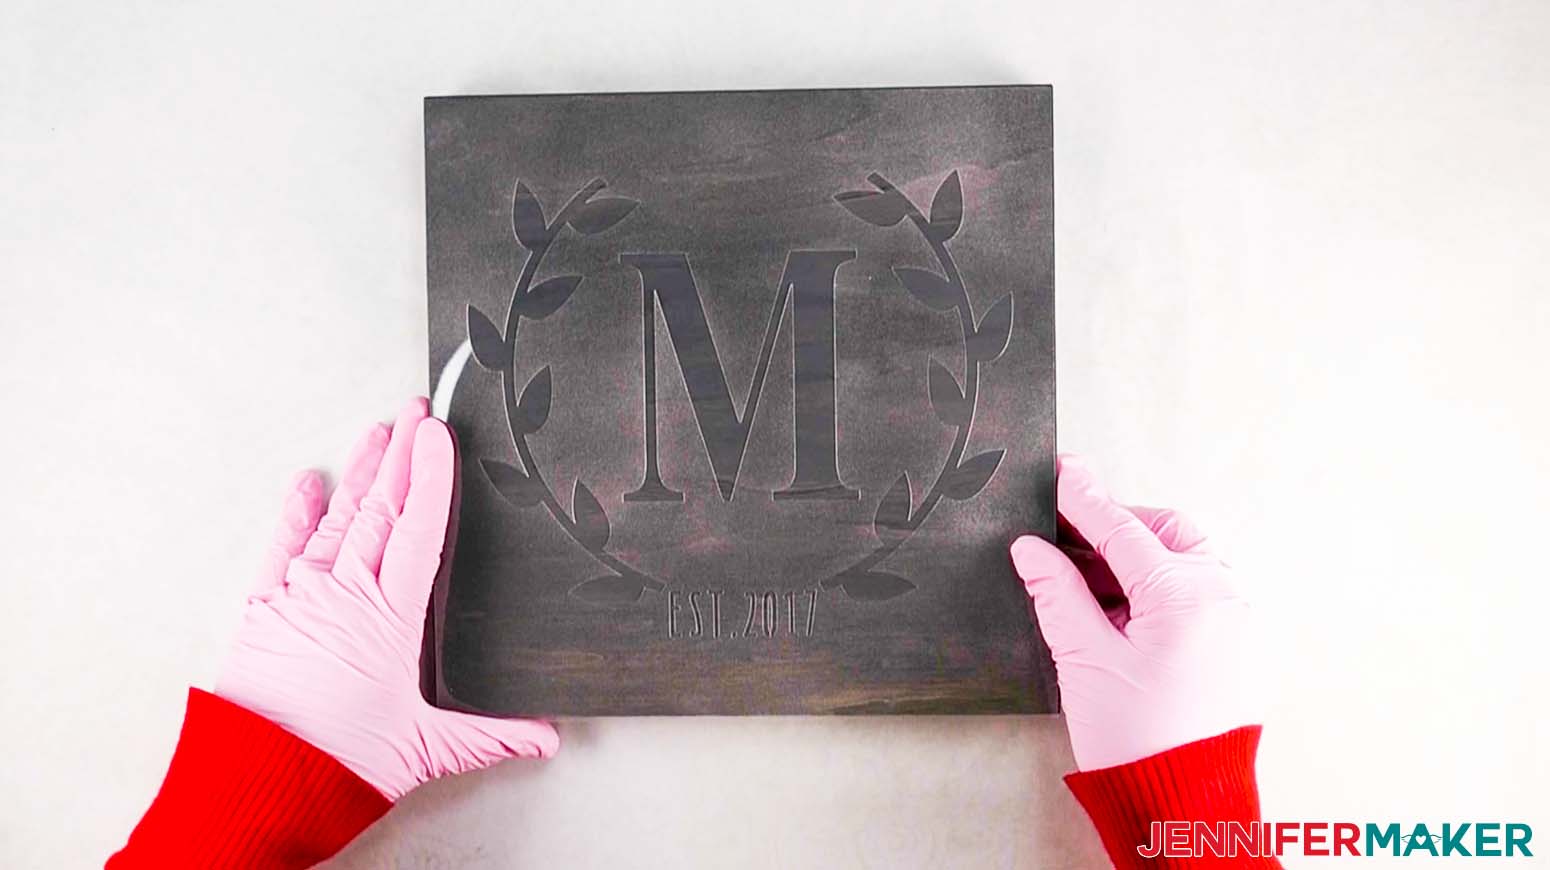
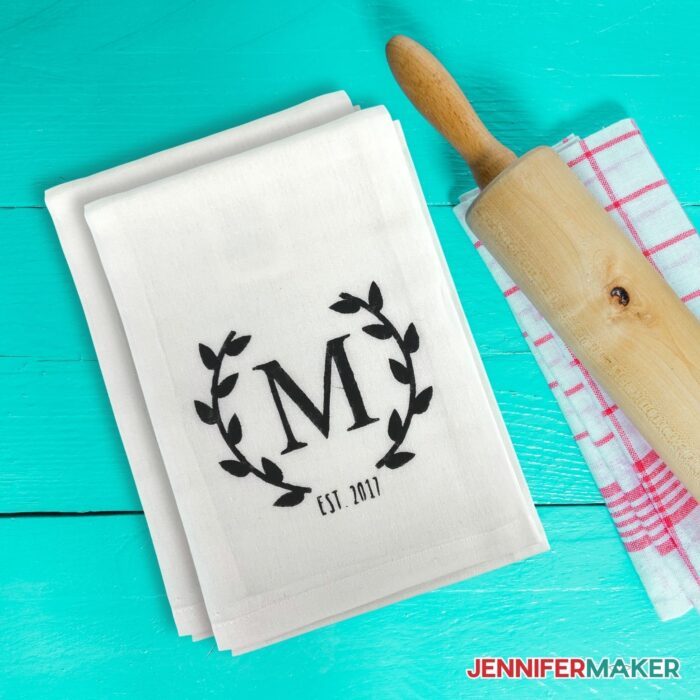
Didn’t this stencil project turn out great? I really love these stencil designs! And they make for great gifts! And honestly, what a time-saver this technique is when it comes to making a lot of gifts or items you want to sell all at once.
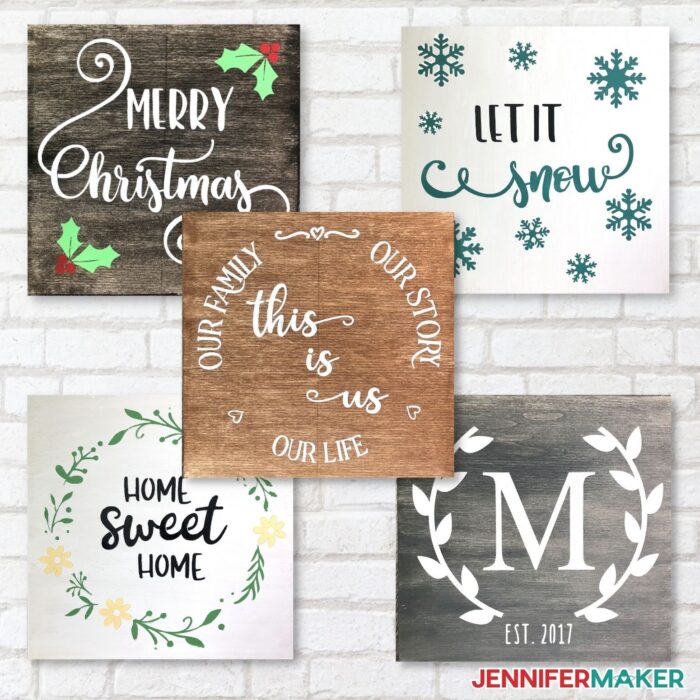
I’ve created a whole collection of my own designs for this project and I’m happy to share my digital cut files with you freely! I’ll also show you how to customize them so you can make your own design.
Let me show you how easy it is to make a reusable stencil with Cricut with my free SVGs! This post contains some affiliate links for your convenience (which means if you make a purchase after clicking a link I will earn a small commission but it won’t cost you a penny more)! Read my full disclosure policy.
Materials to Make a Reusable Stencil with Cricut
View my Amazon shopping list with the exact items we used to make this custom stencils project
- Craft Plastic (.007 thick)
- Krylon Easy-Tack Repositionable Spray
- Wood Board/Sign
- White Flat Flour Sack Embroidery/Craft Towels
- Fabric Paint – Assorted Colors
- Chalk Paint – I used Black, White, Grotto (Teal), Imperial (Red) , Java, Irish, Parisian Grey, Summer Porch (Yellow) — you can use acrylic paint instead if you prefer
- Mod Podge Matte
- Dawn Dish Soap
- A way to cut your stencil material – I used the amazing Cricut Maker but you can also use the Cricut Maker 3, Cricut Explore 3, Cricut Explore Air, or Cricut Joy machines.
- Cricut Green StandardGrip Mat OR
- Cricut Purple StrongGrip Mat
- Brayer
- Cricut XL Scraper
- Small Paint Sponge Brush
- Round Foam Brushes
- Baby Wipes
- Paint Tray (Optional)
- Butcher Paper (To Protect Work Area)
- Painter’s Tape (Optional)
- Gloves
- Kitchen Timer (Optional)
- Stencil fonts (Optional)
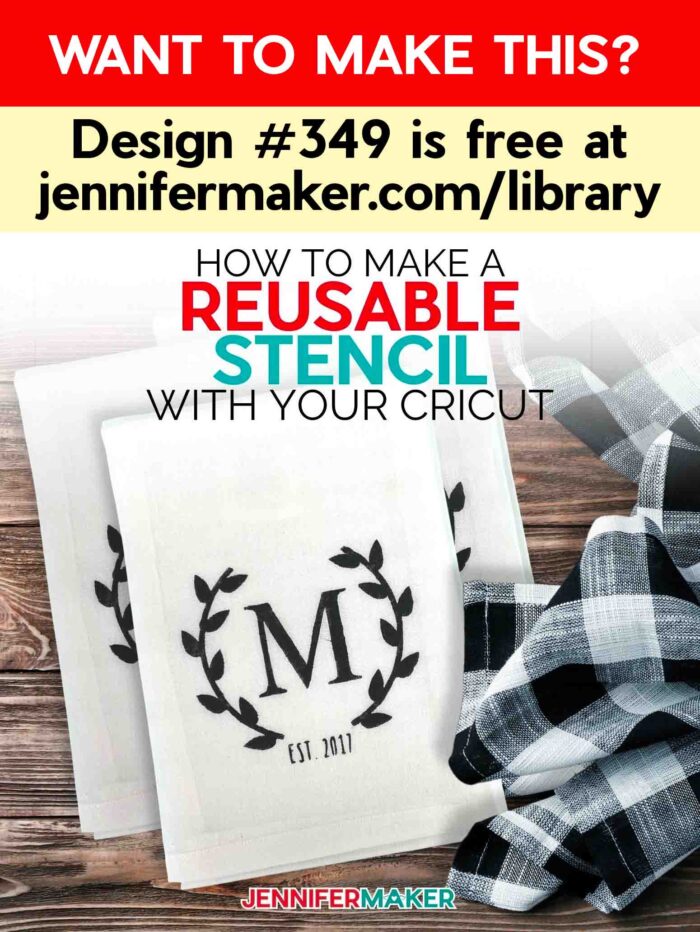
- Design #349 – My free stencil designs SVG/DXF/PDFs are available in my free resource library – get the password by filling out the form at the bottom of this page
How to Make Your Own Reusable Stencil with Cricut
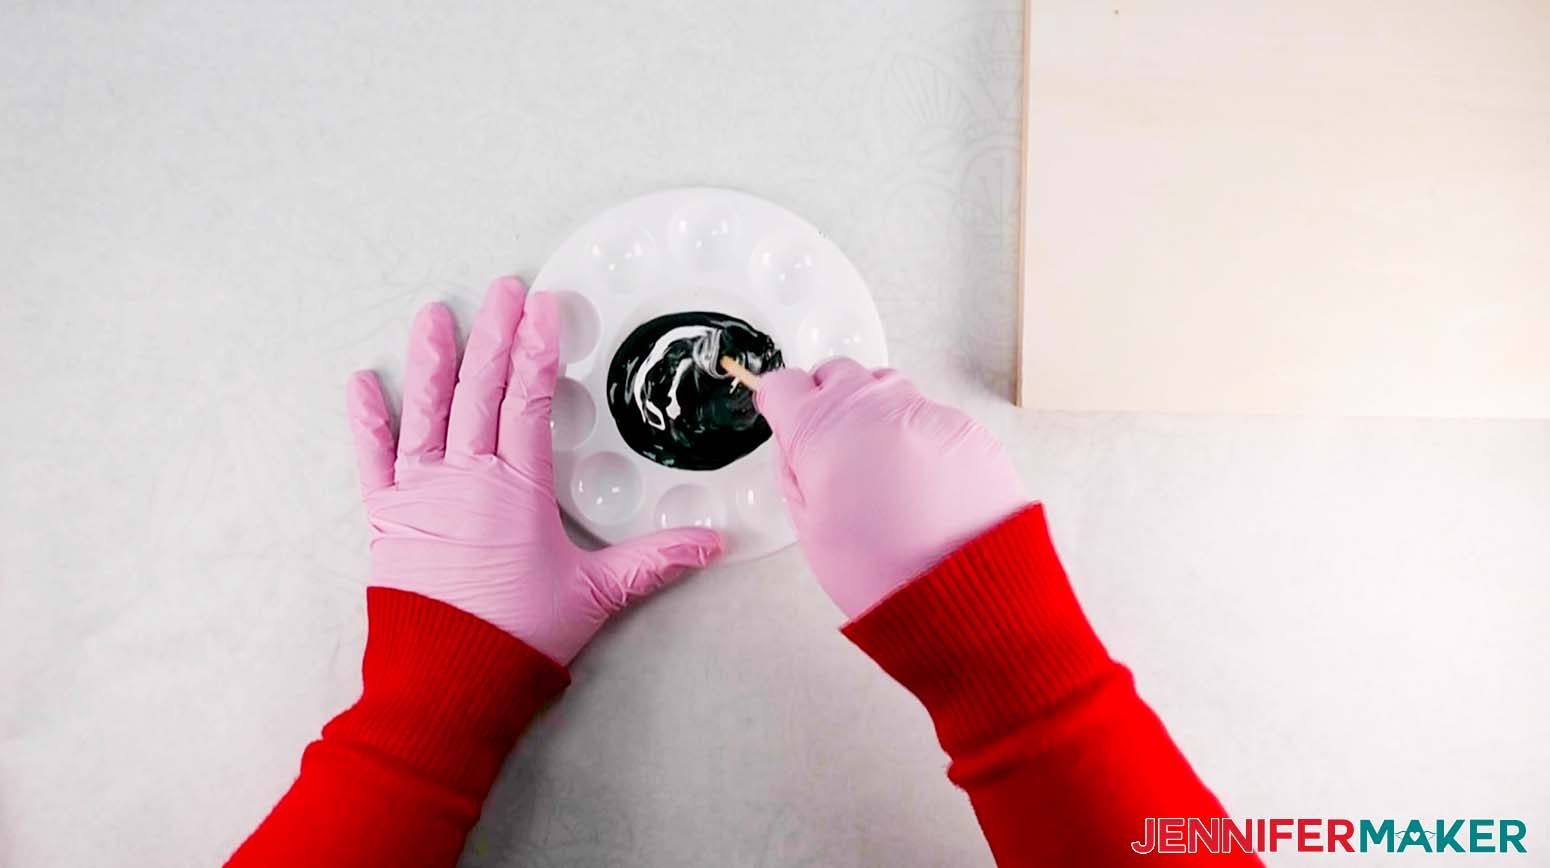
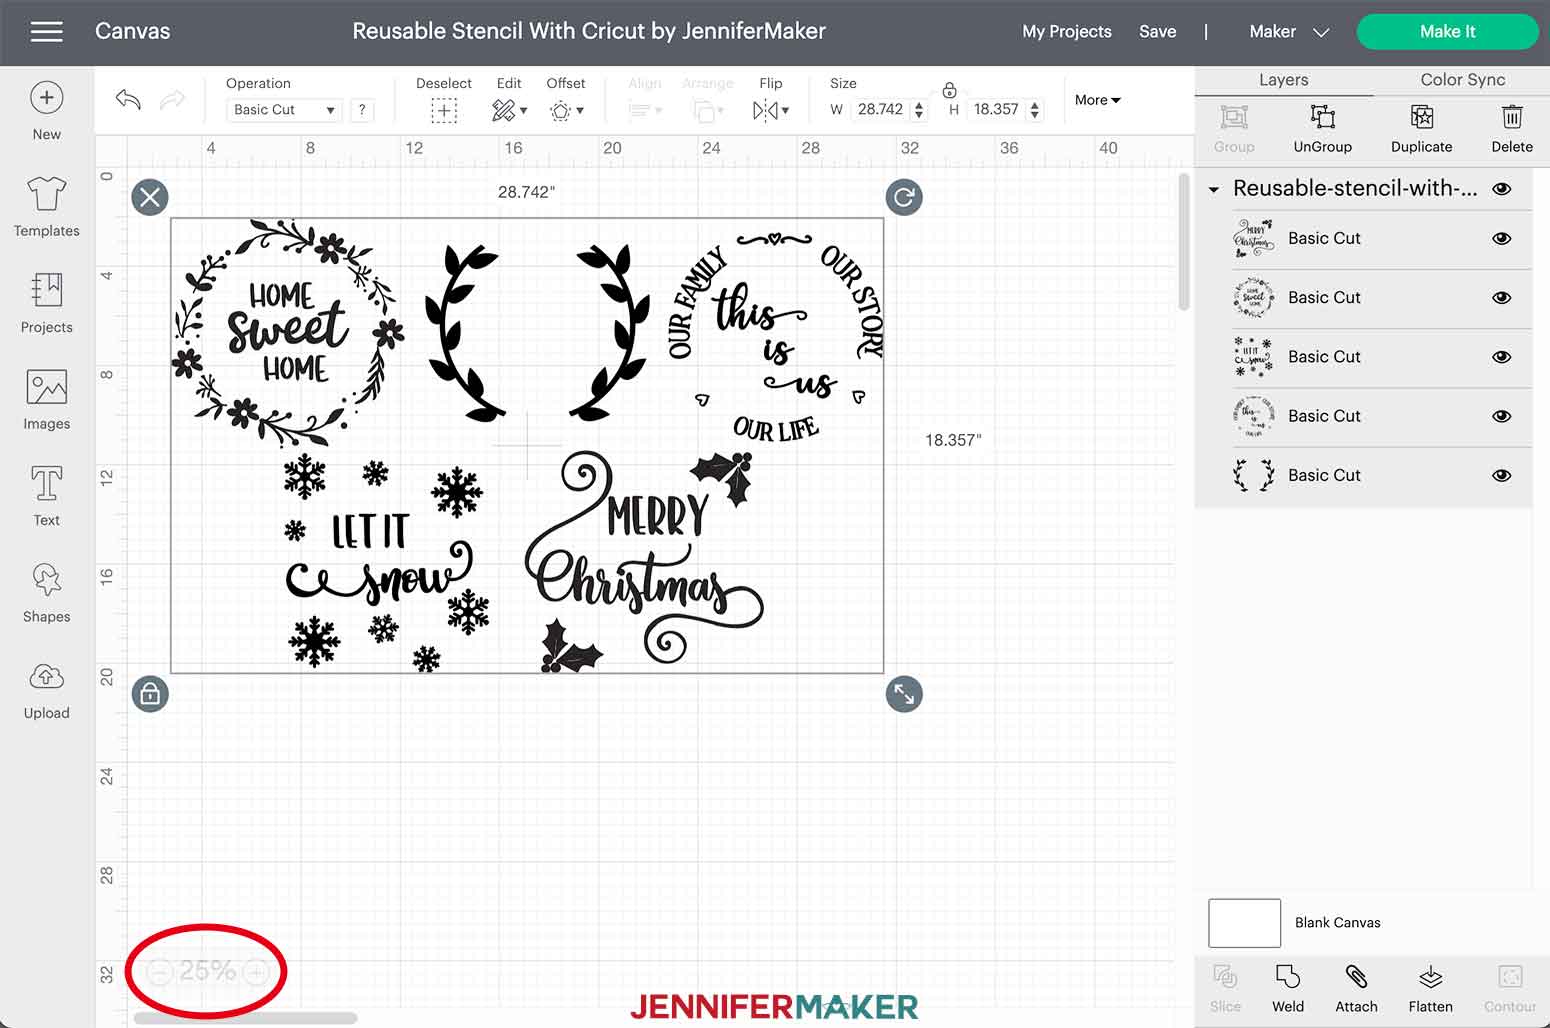
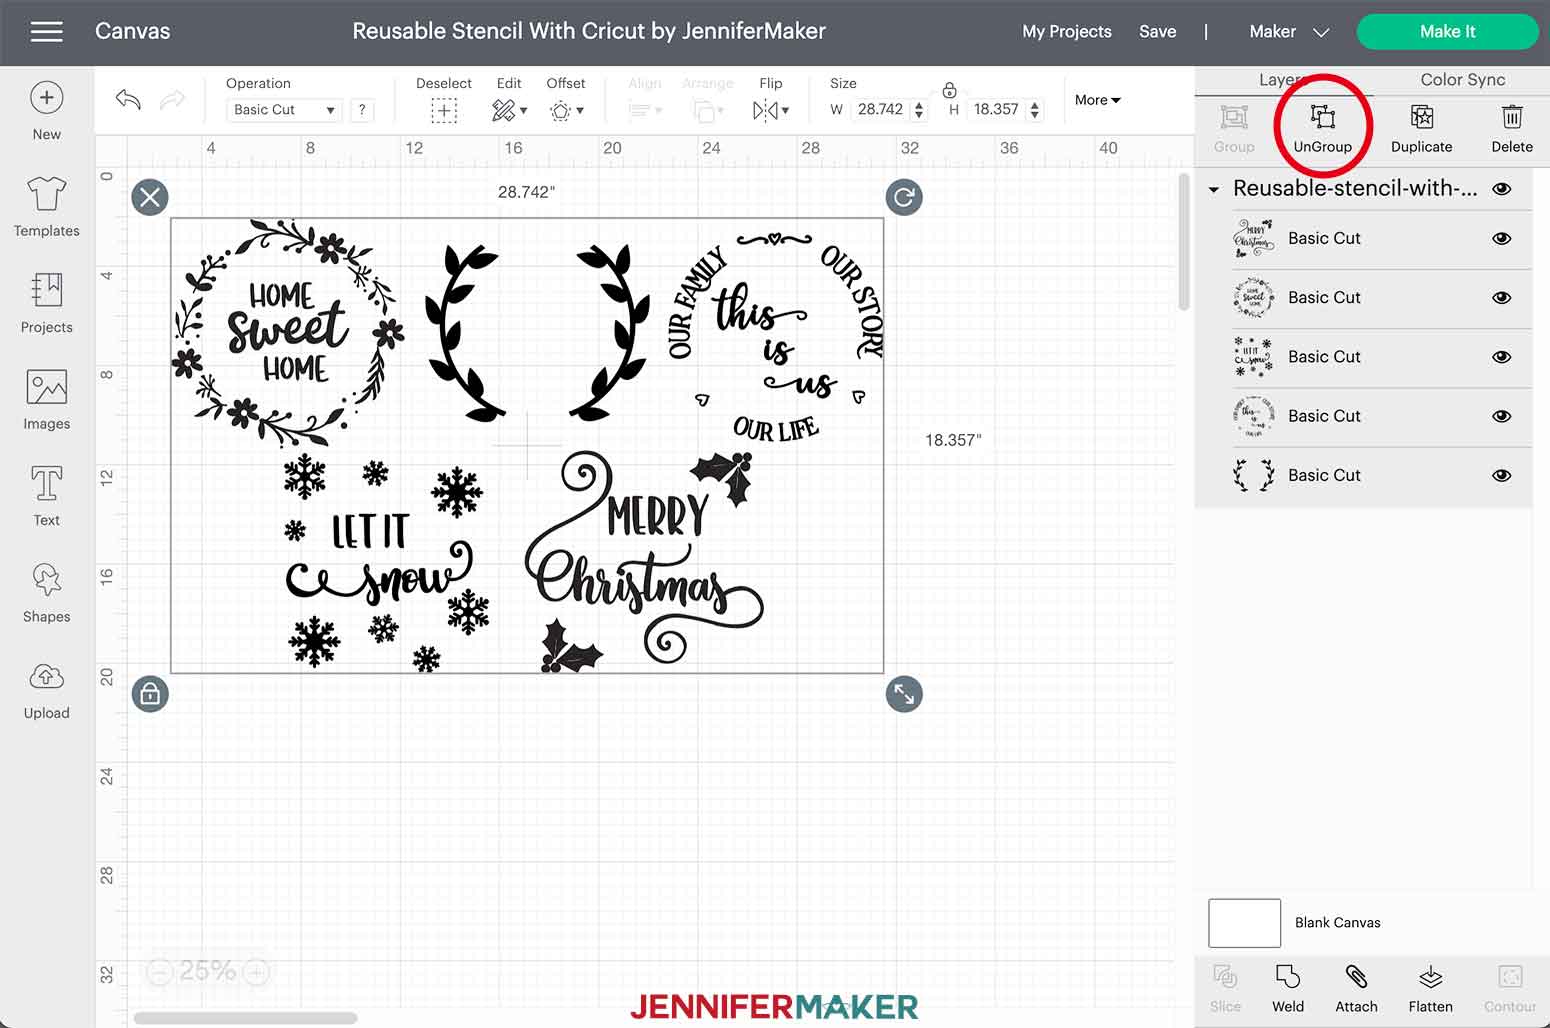
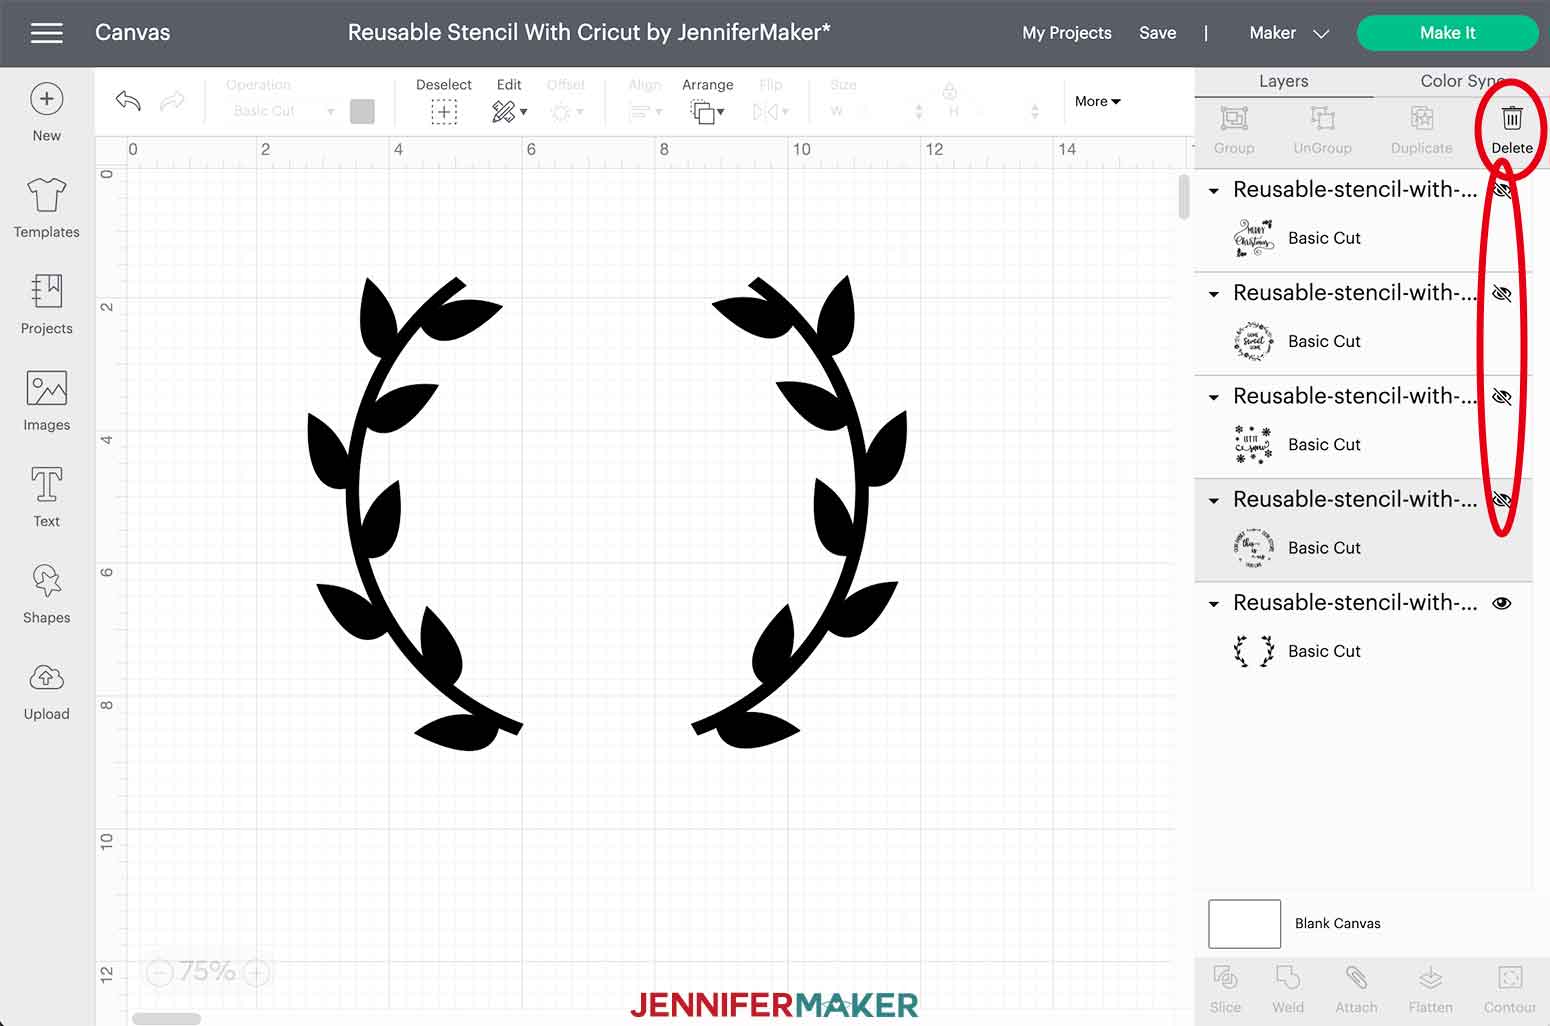
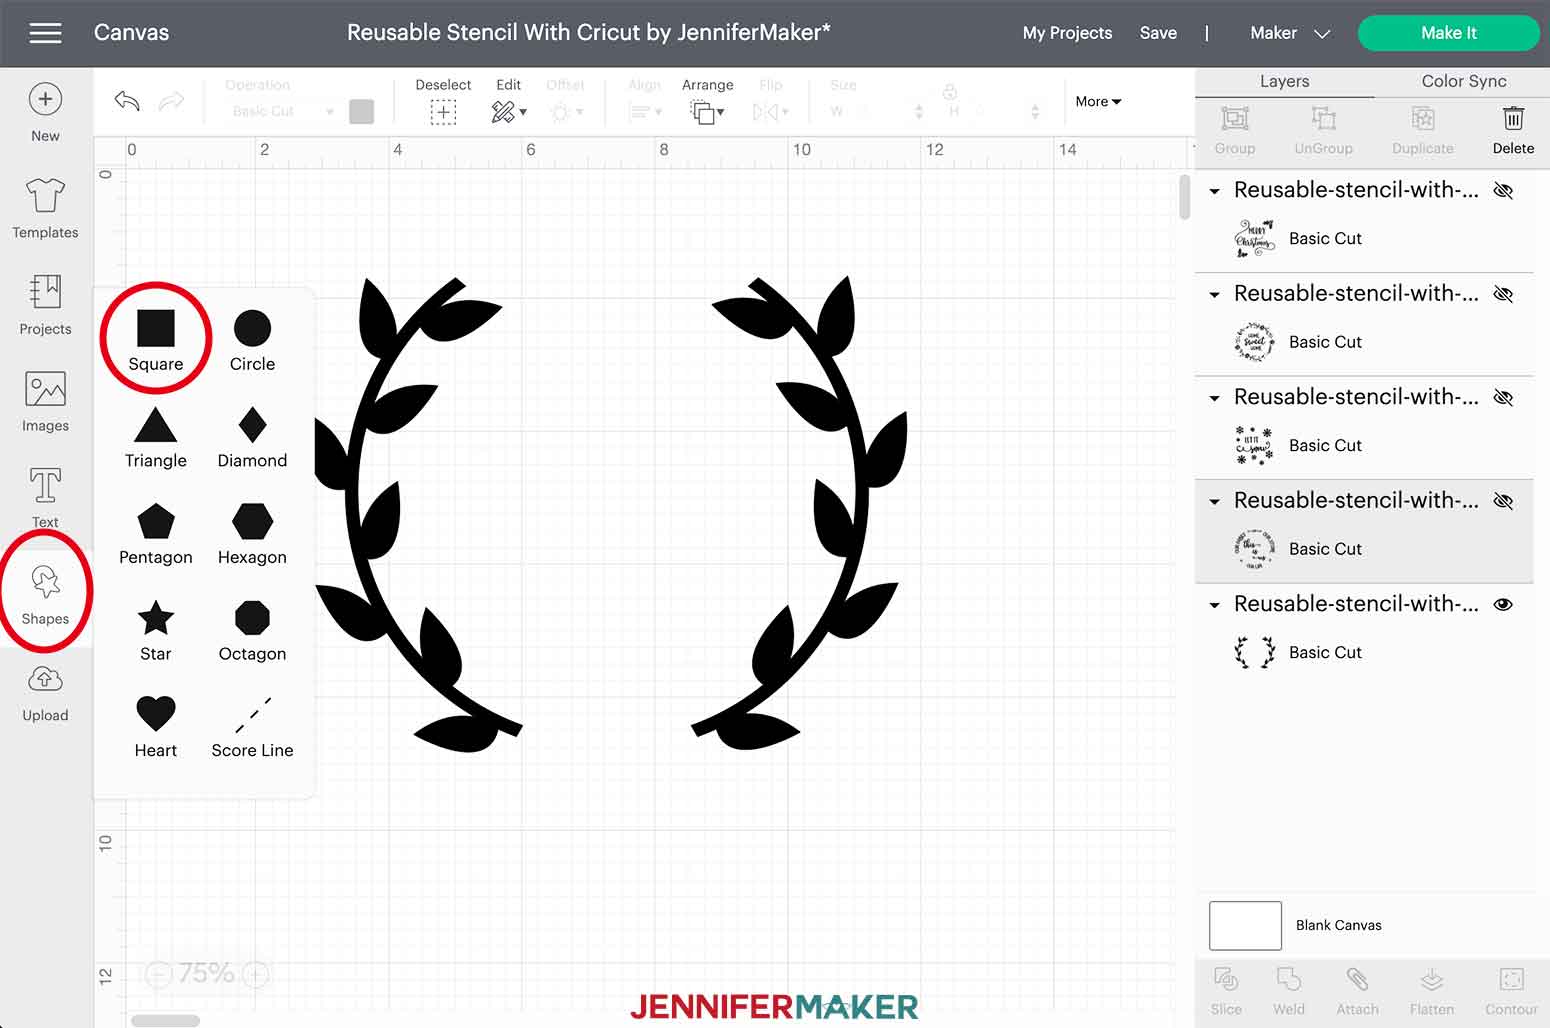
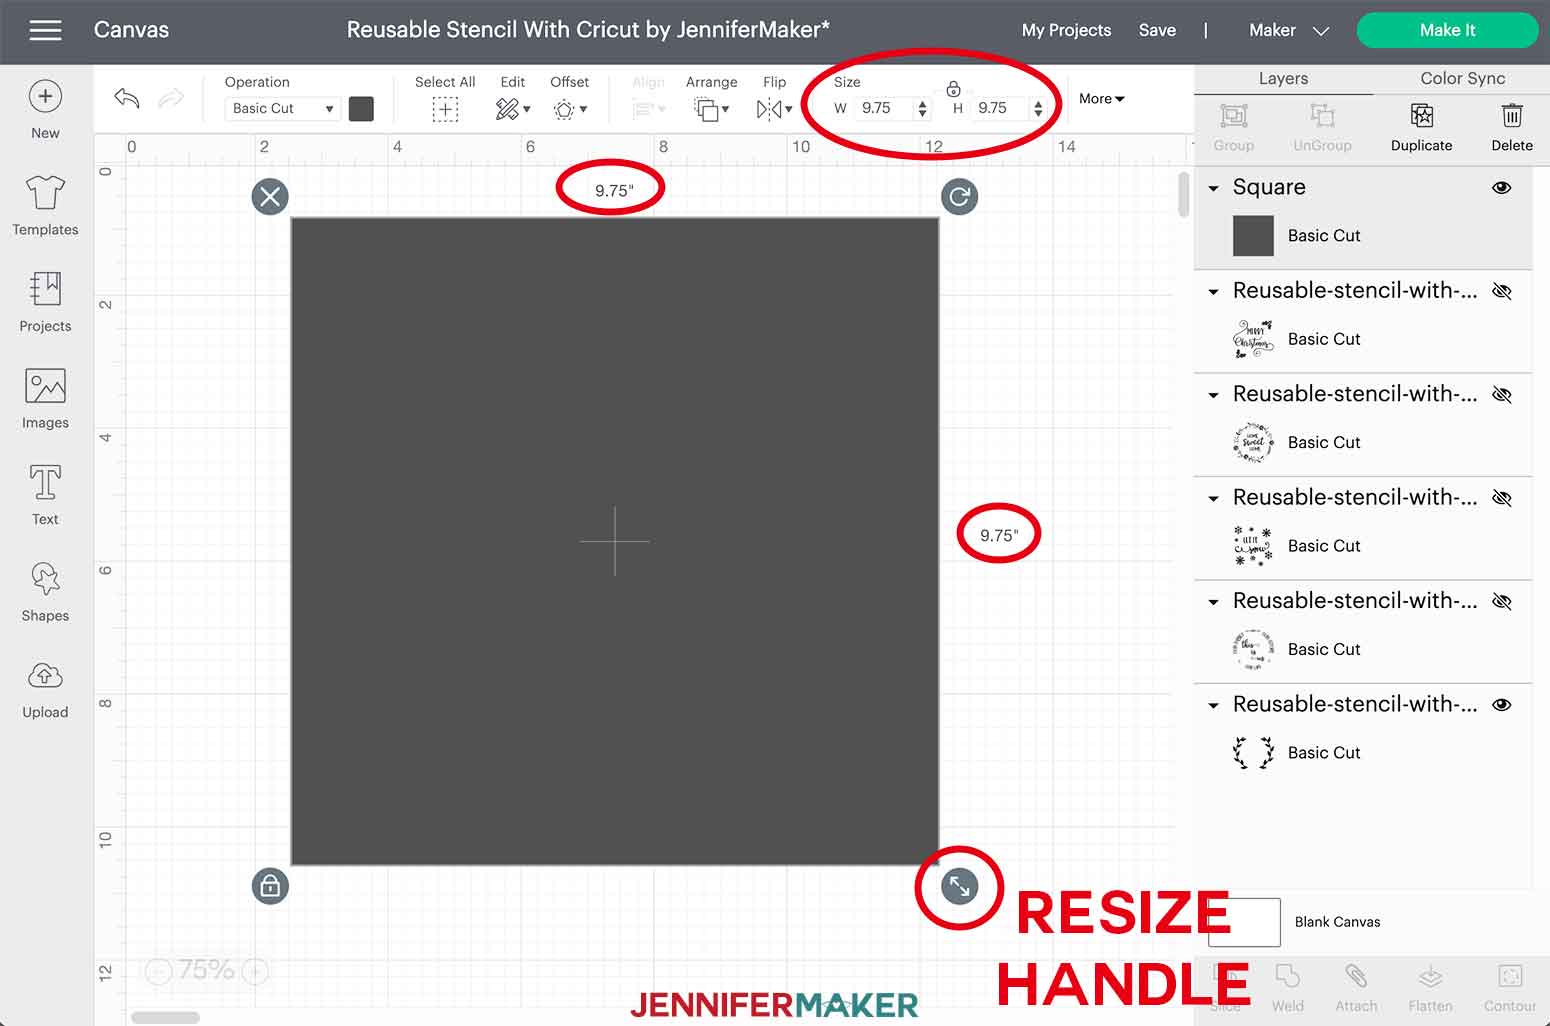
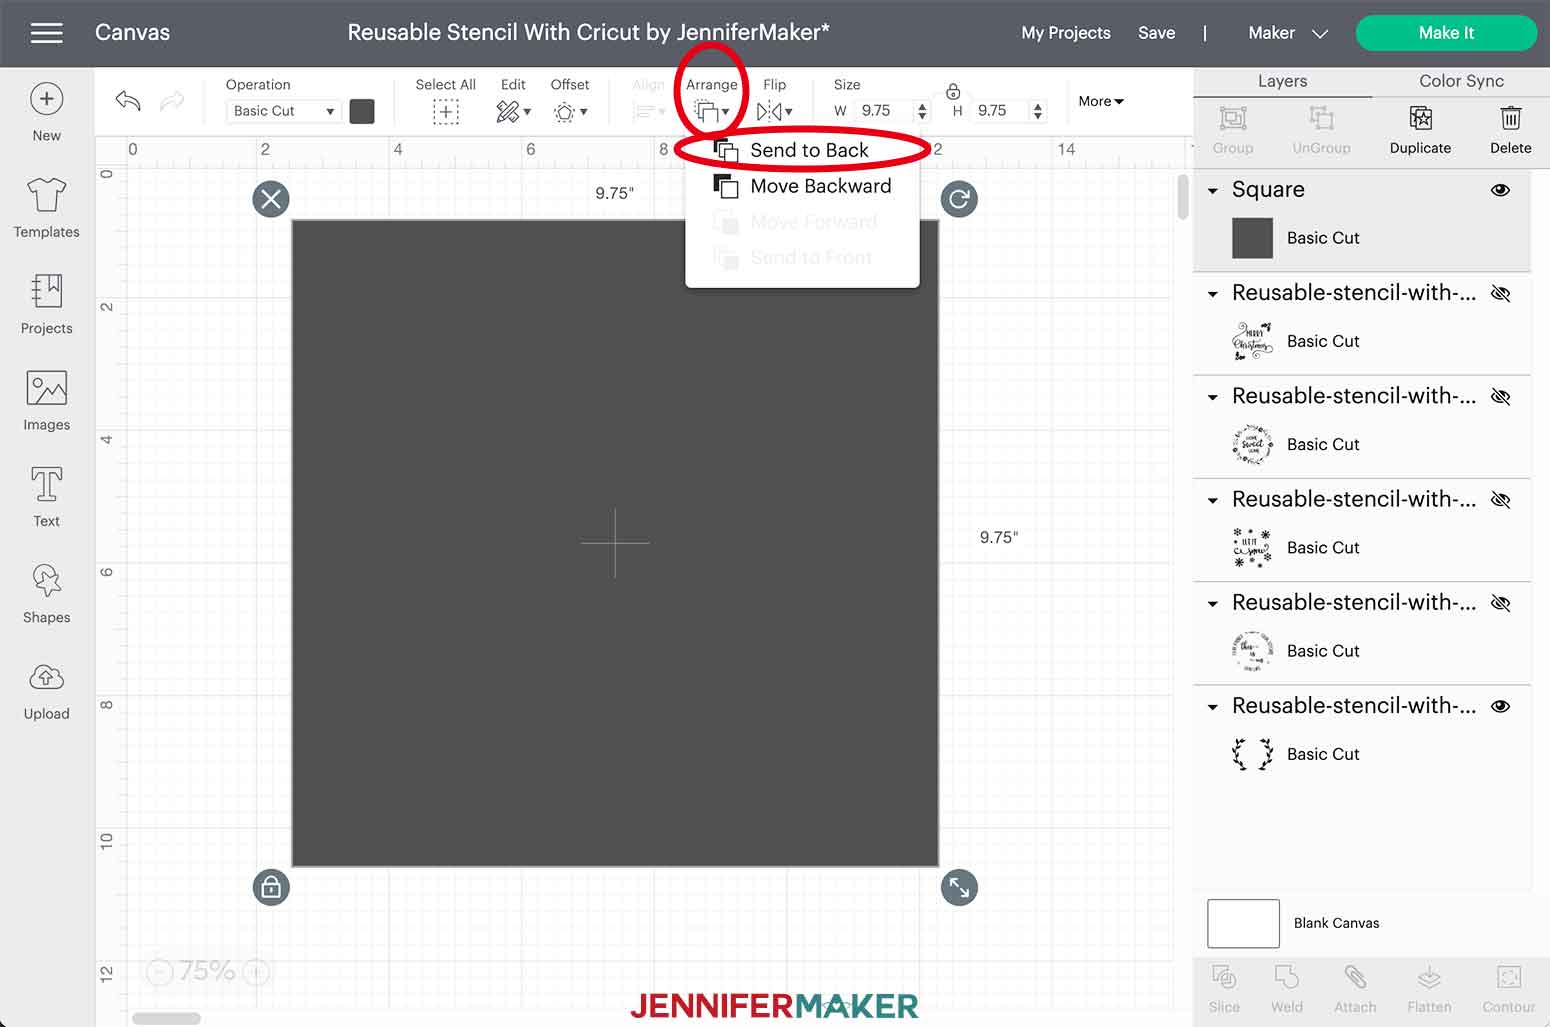
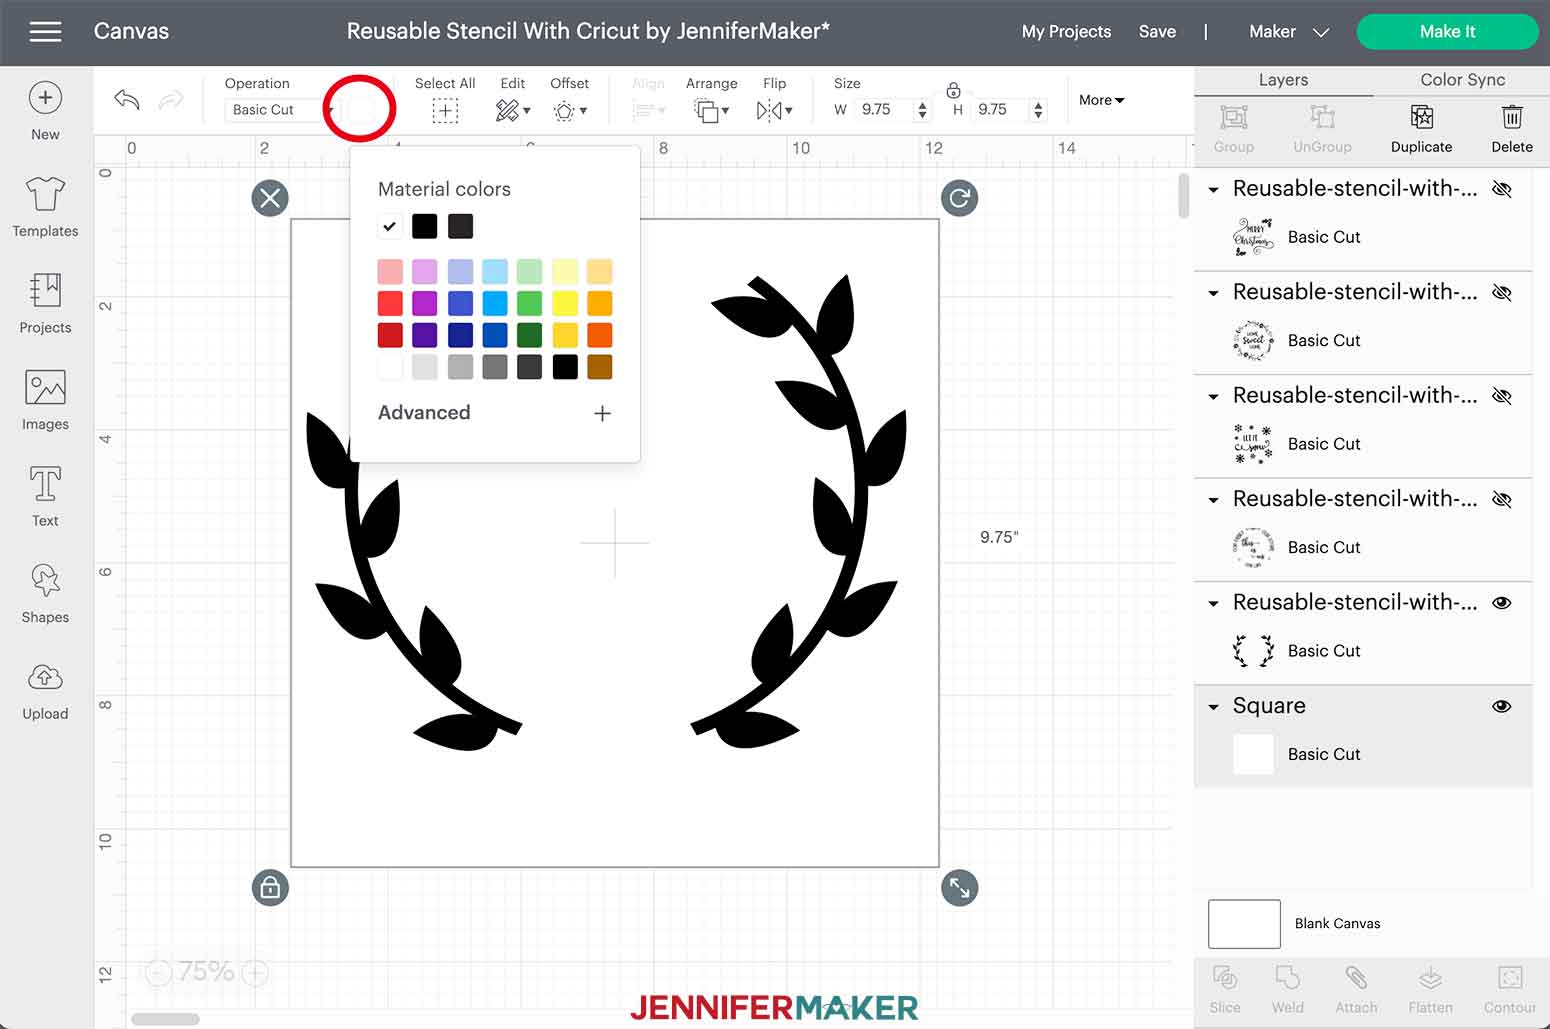
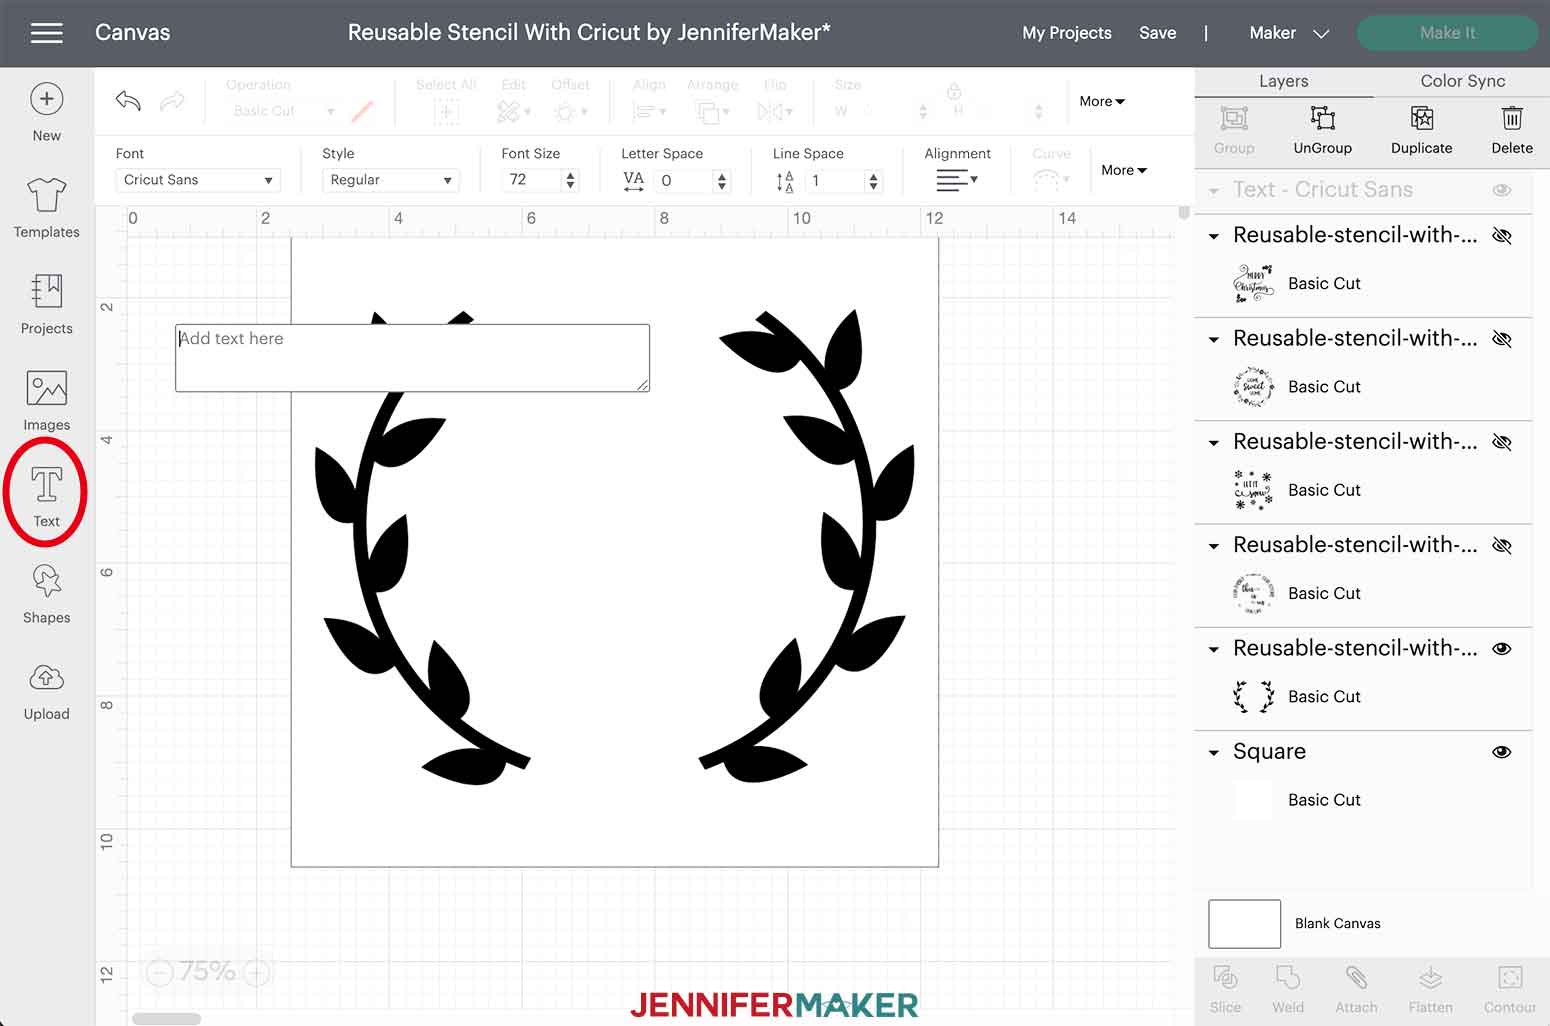
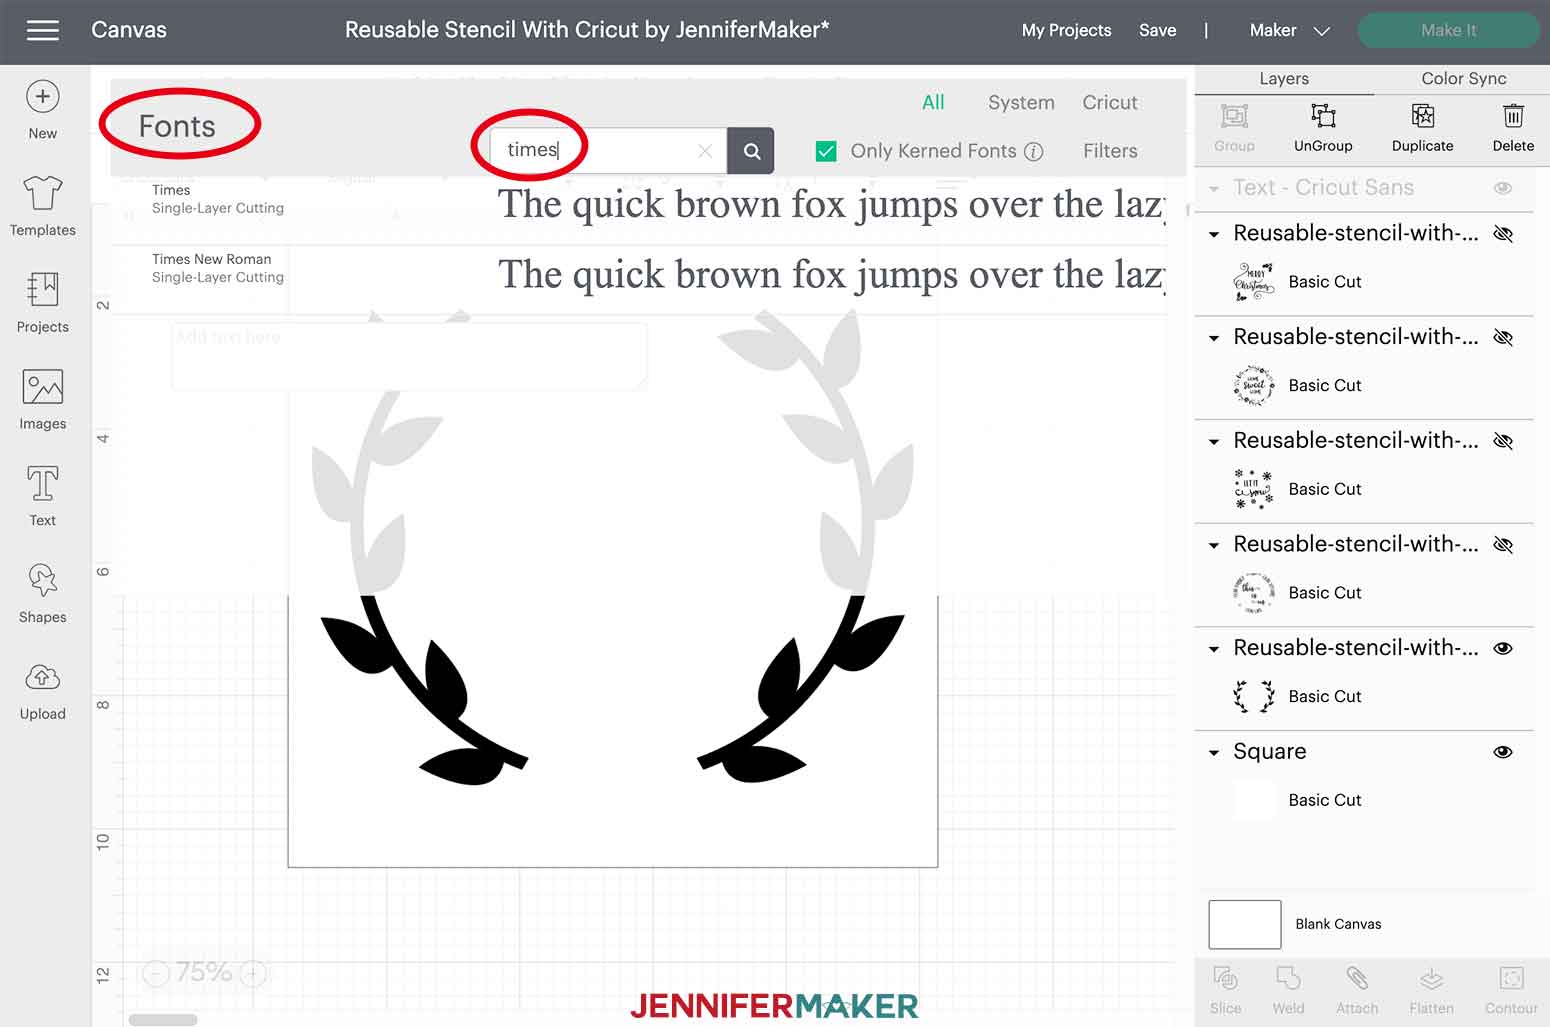
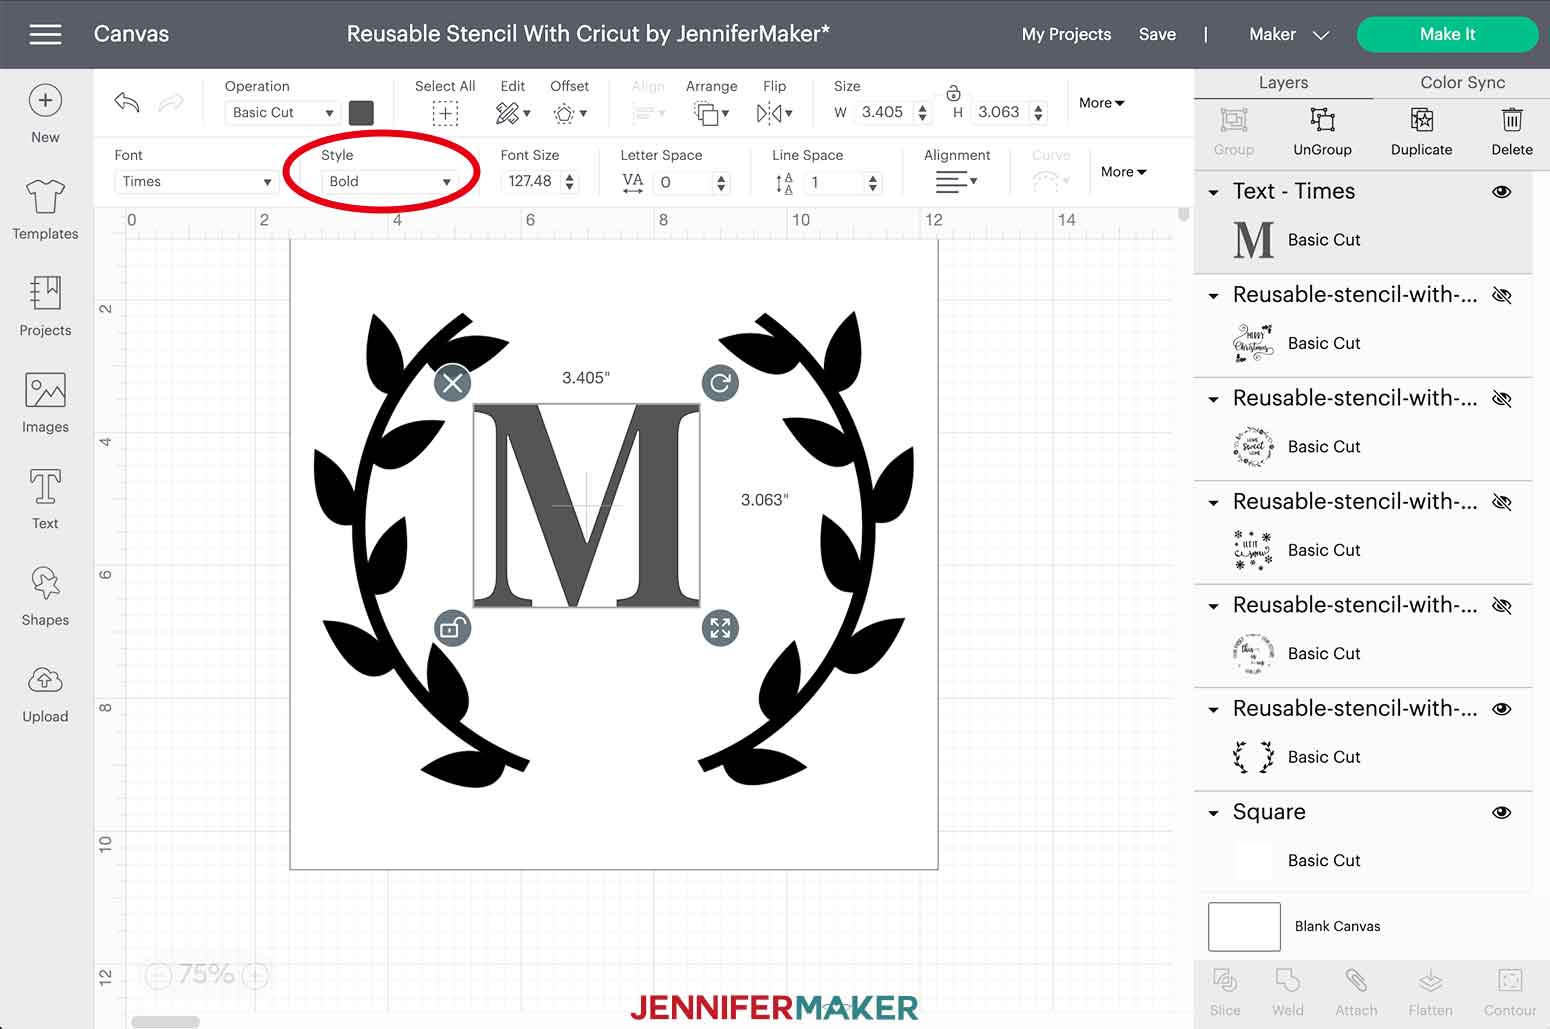
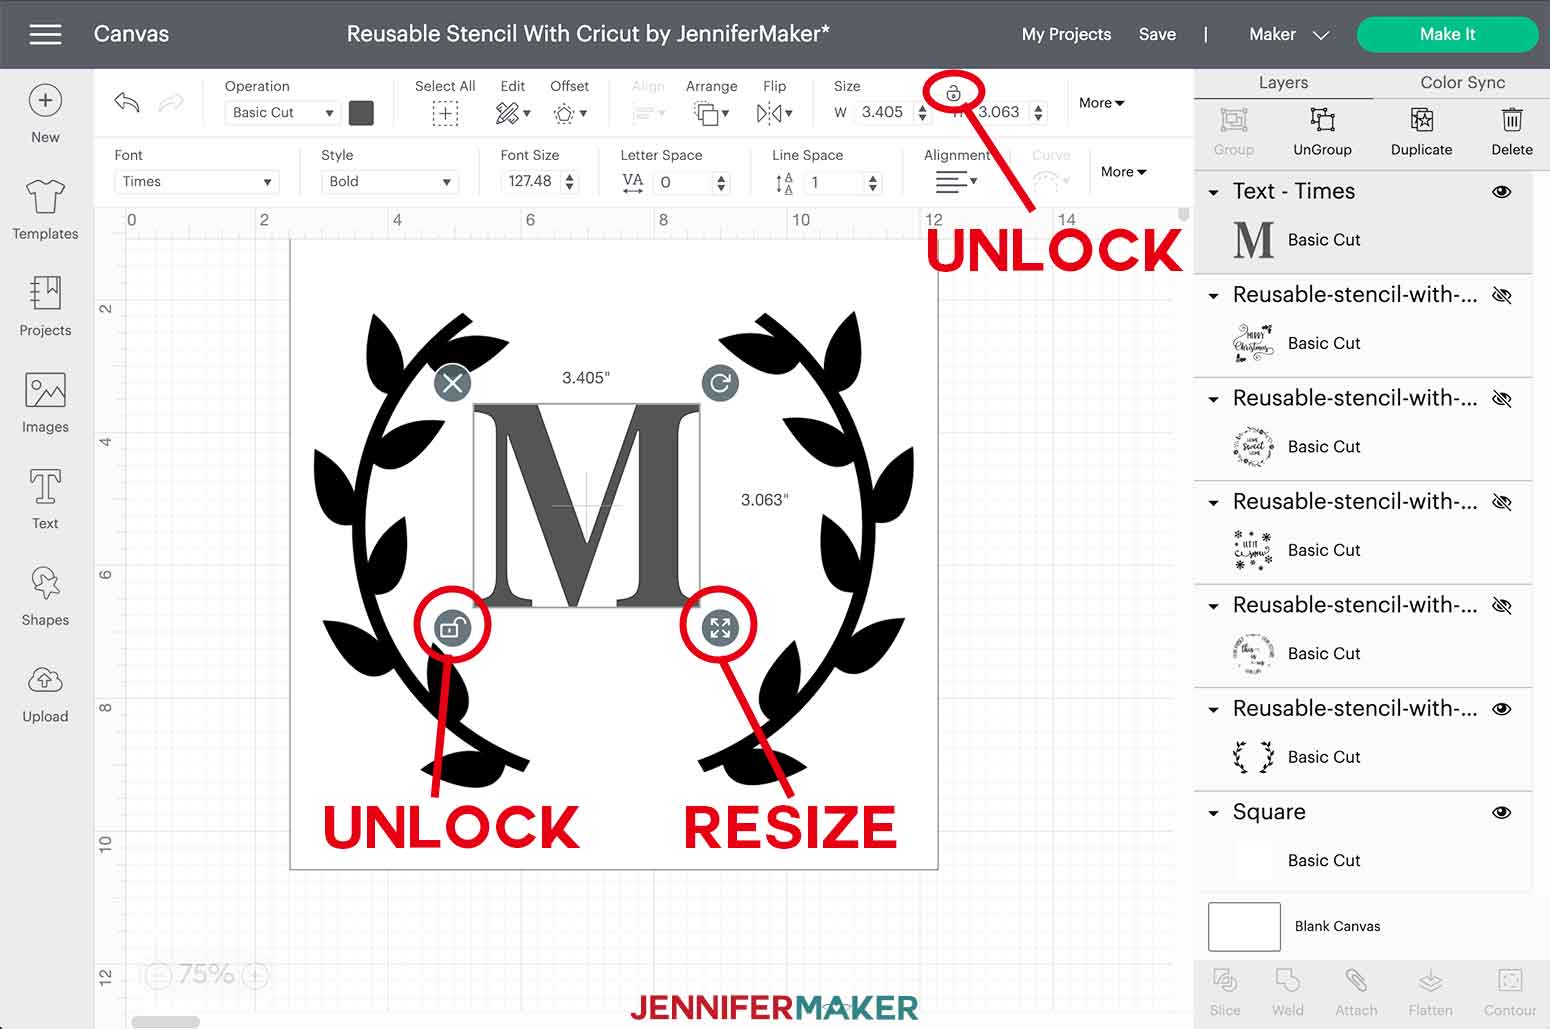
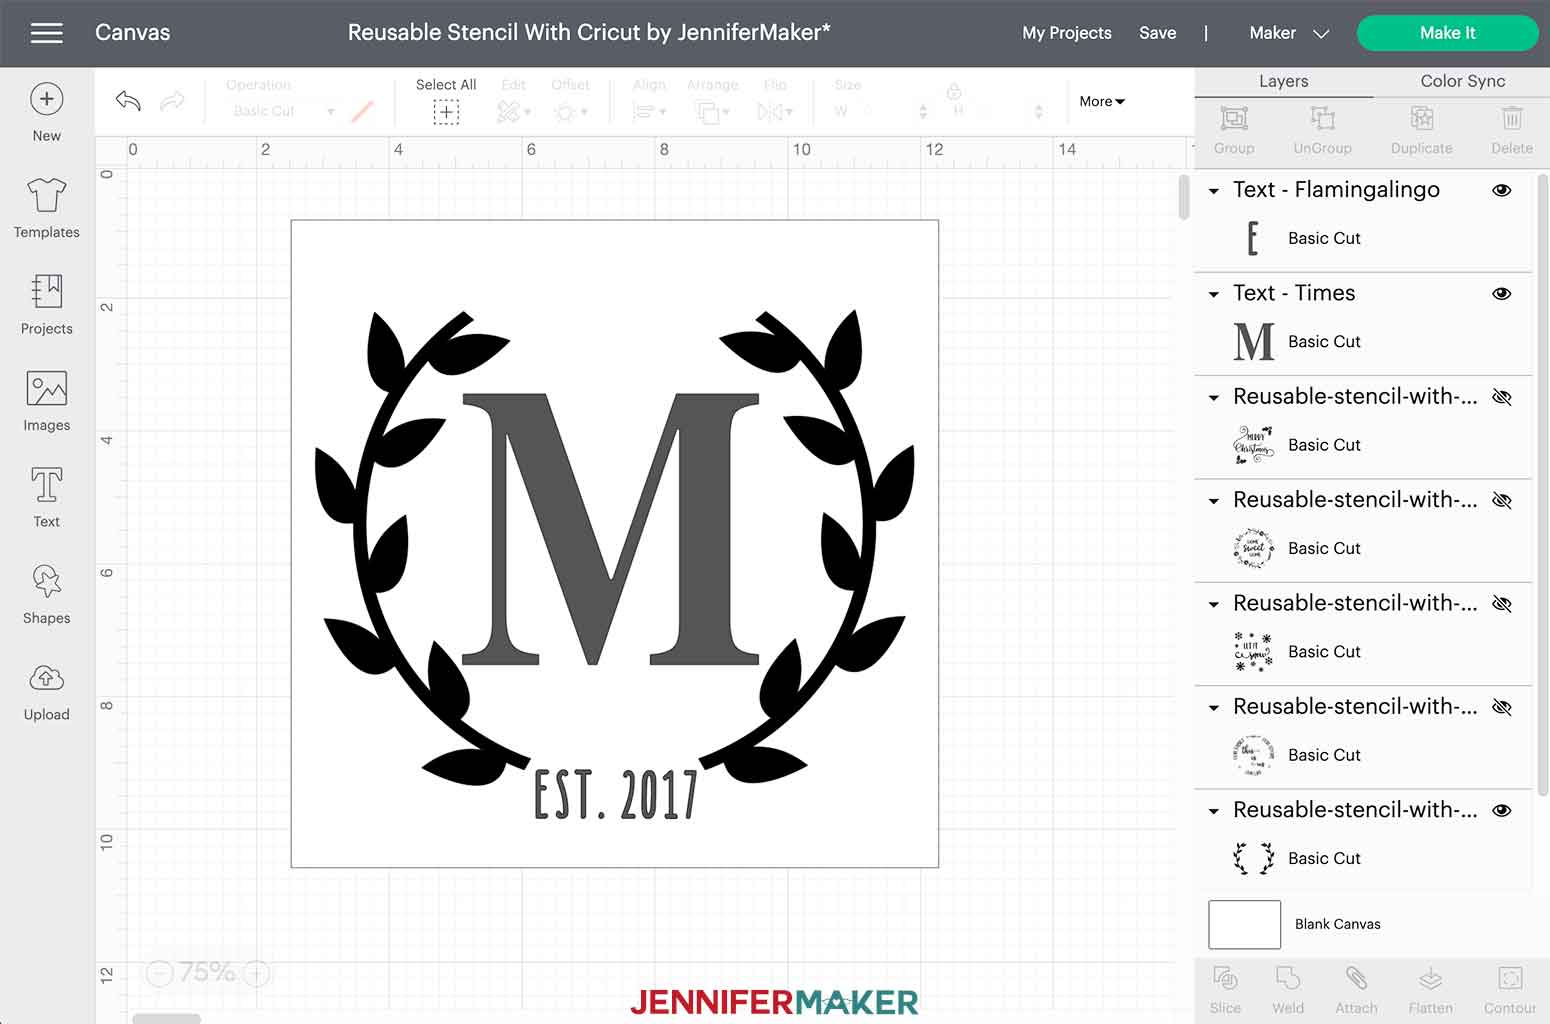
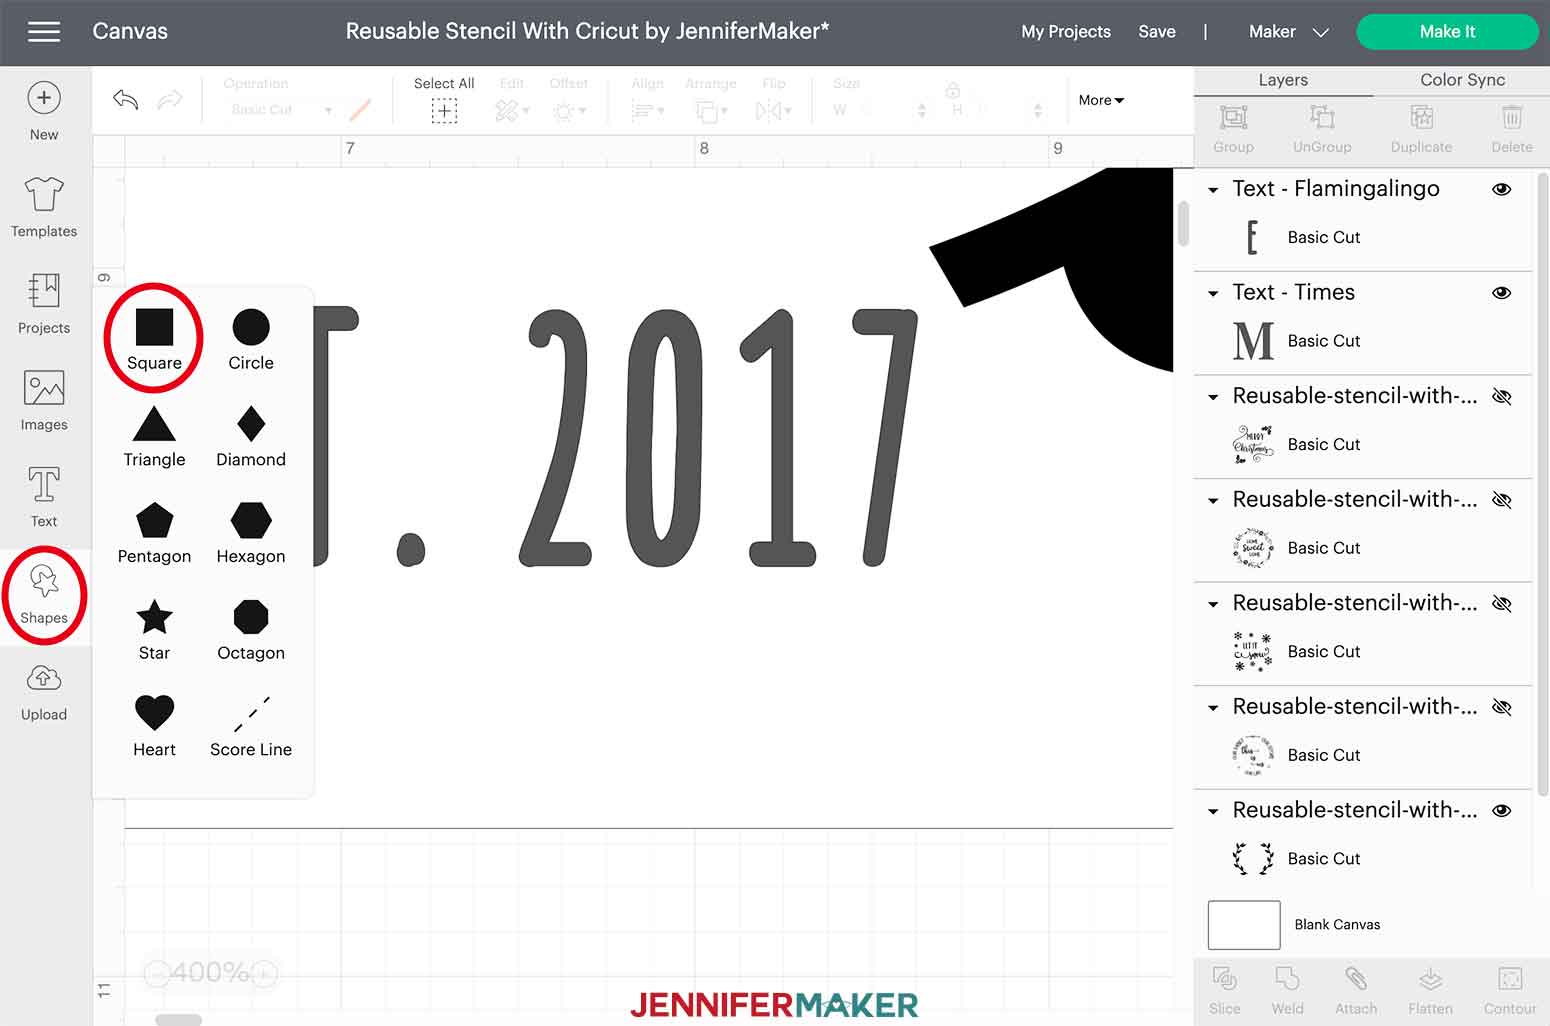
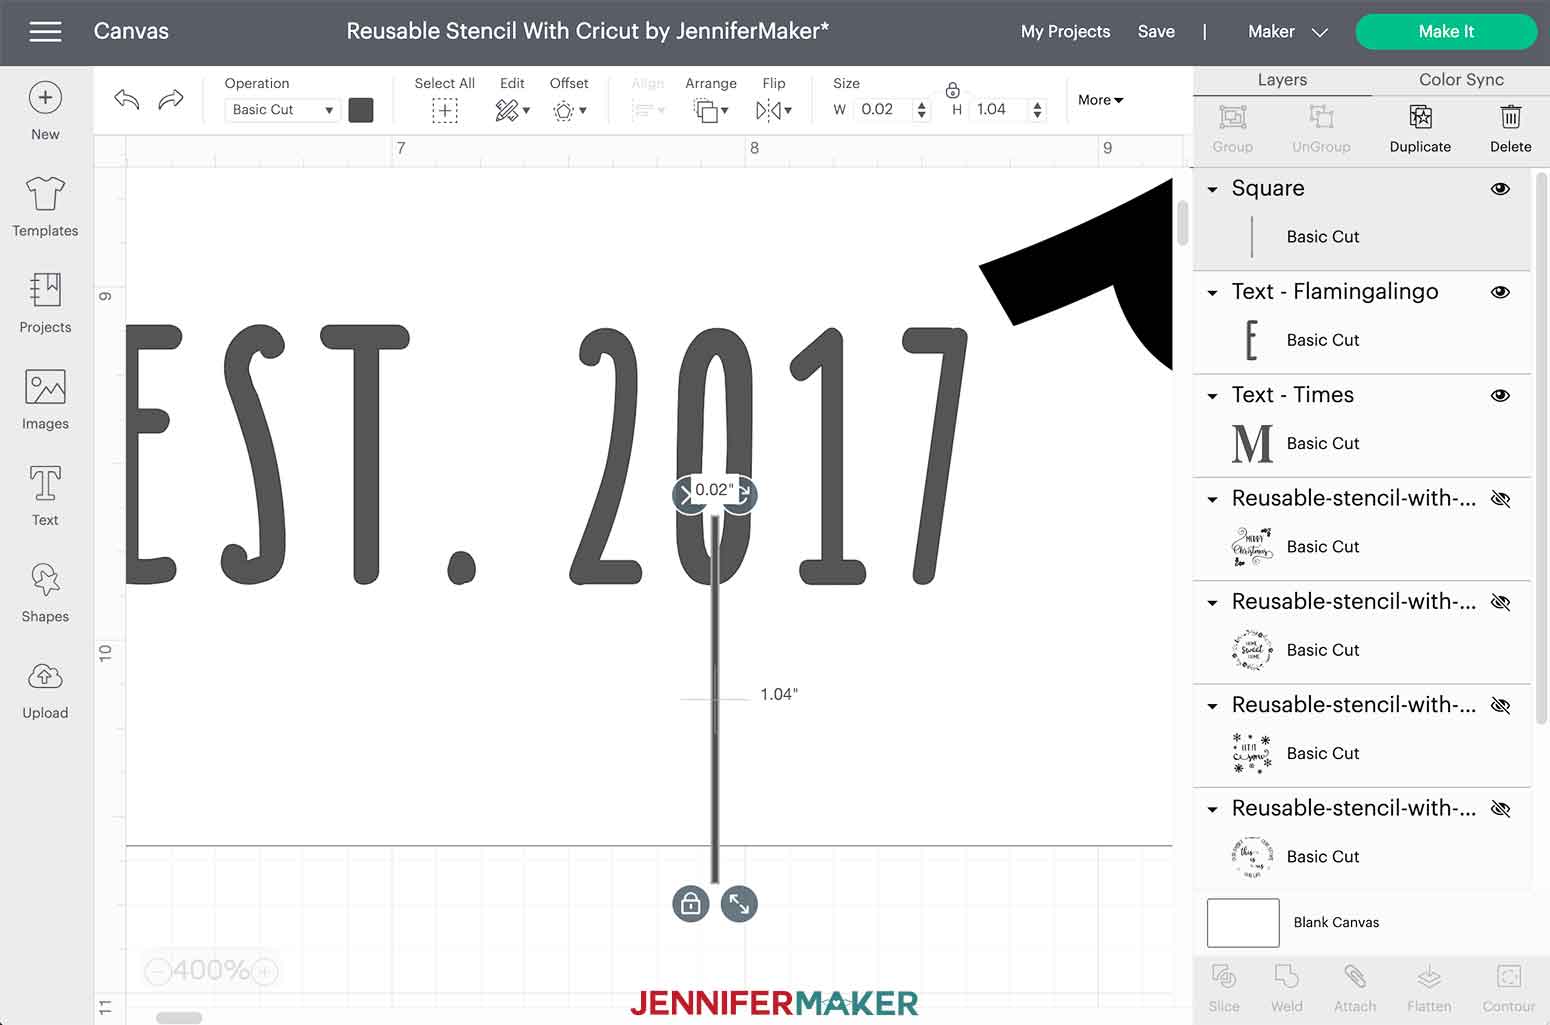
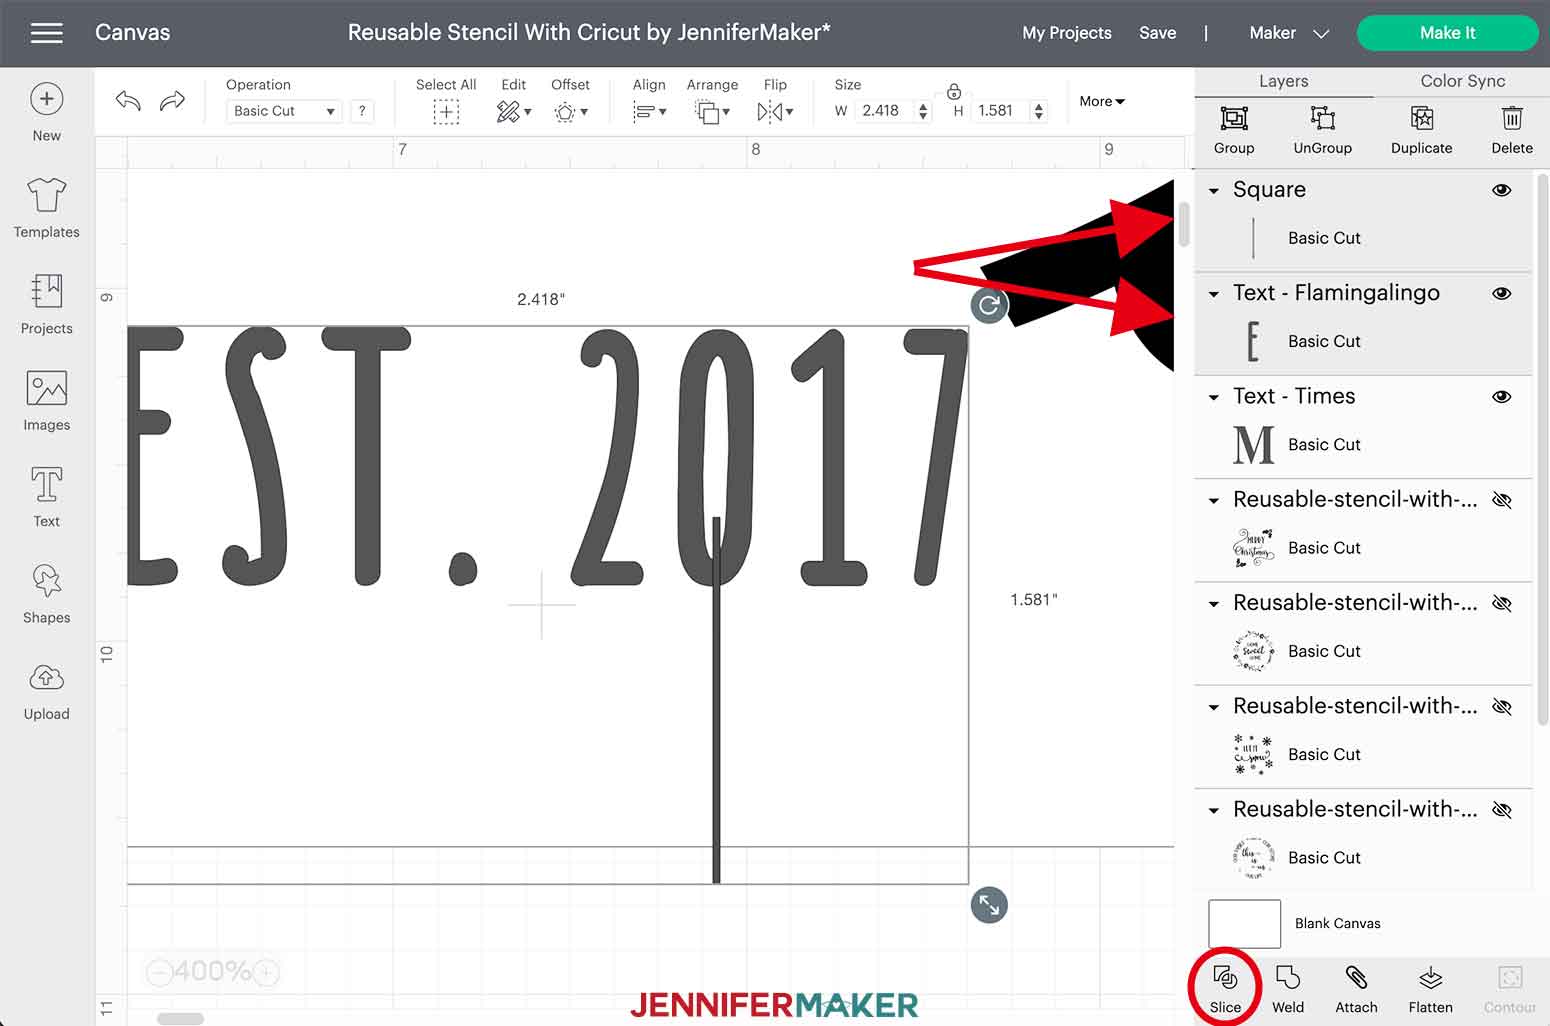
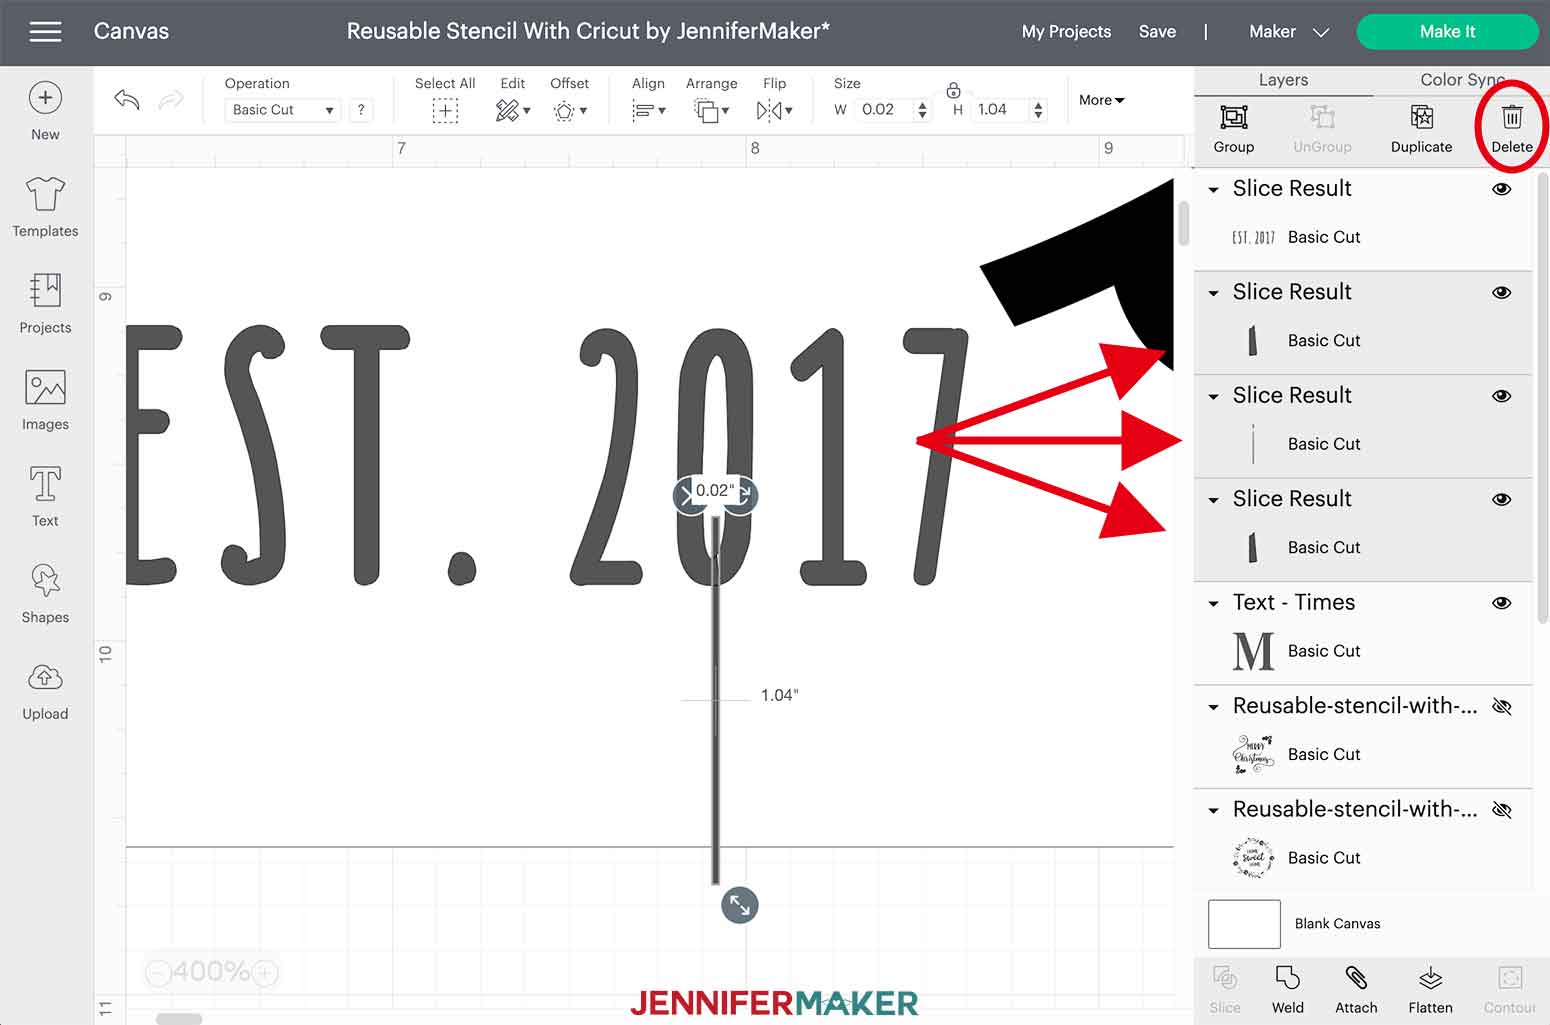
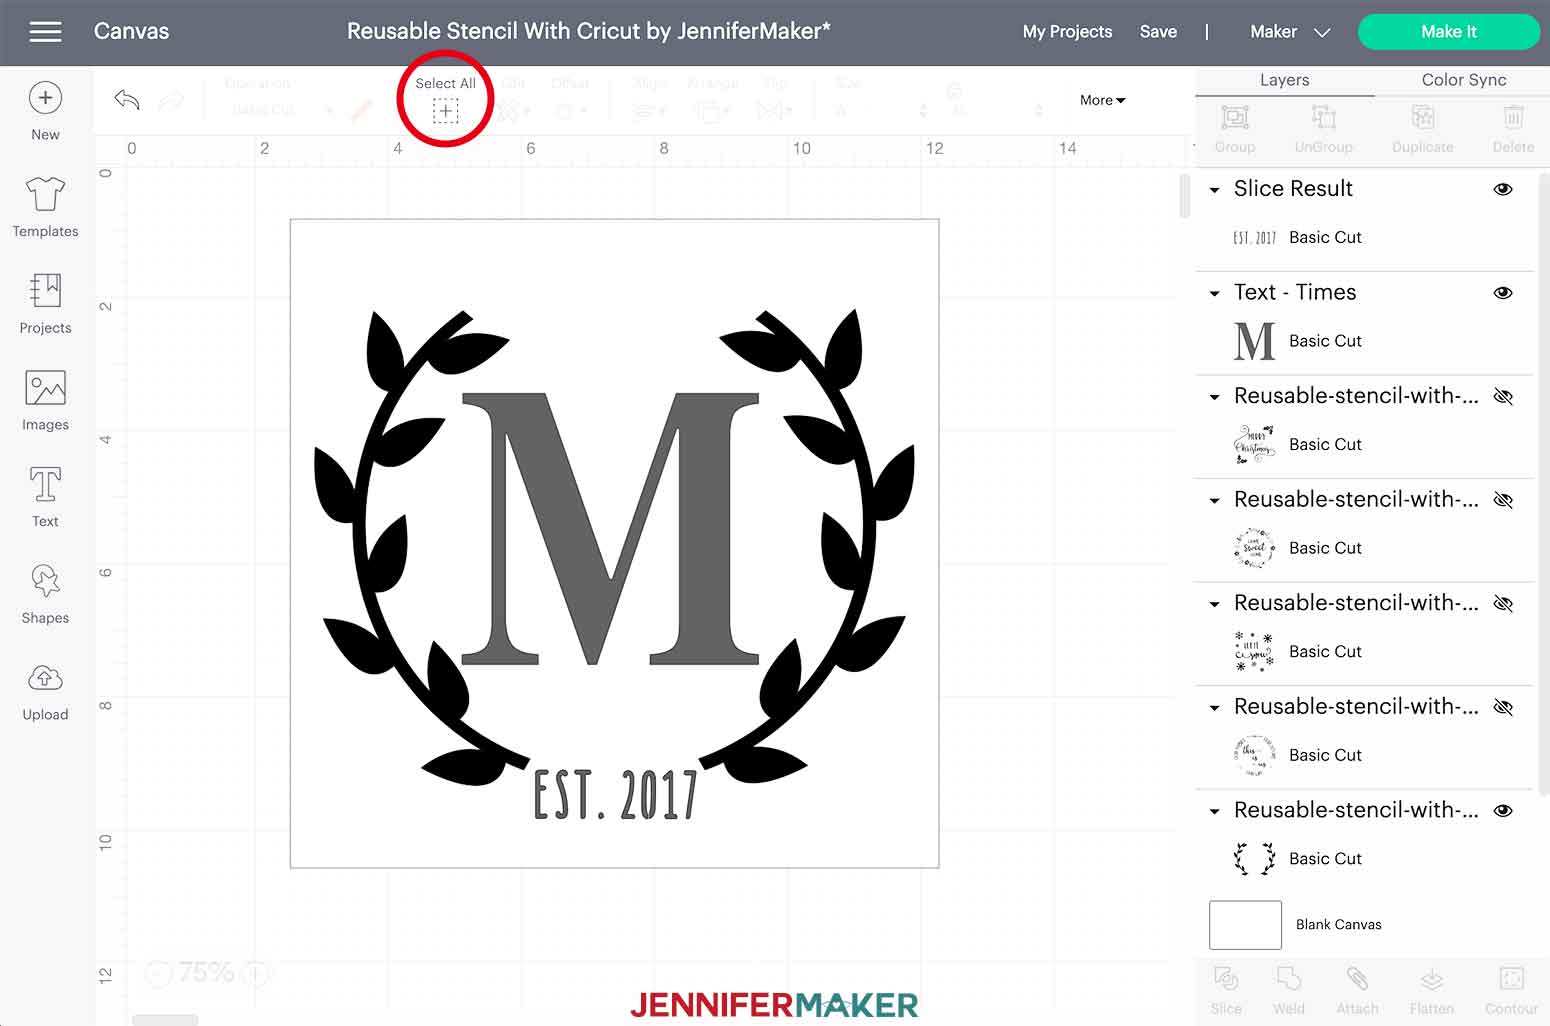
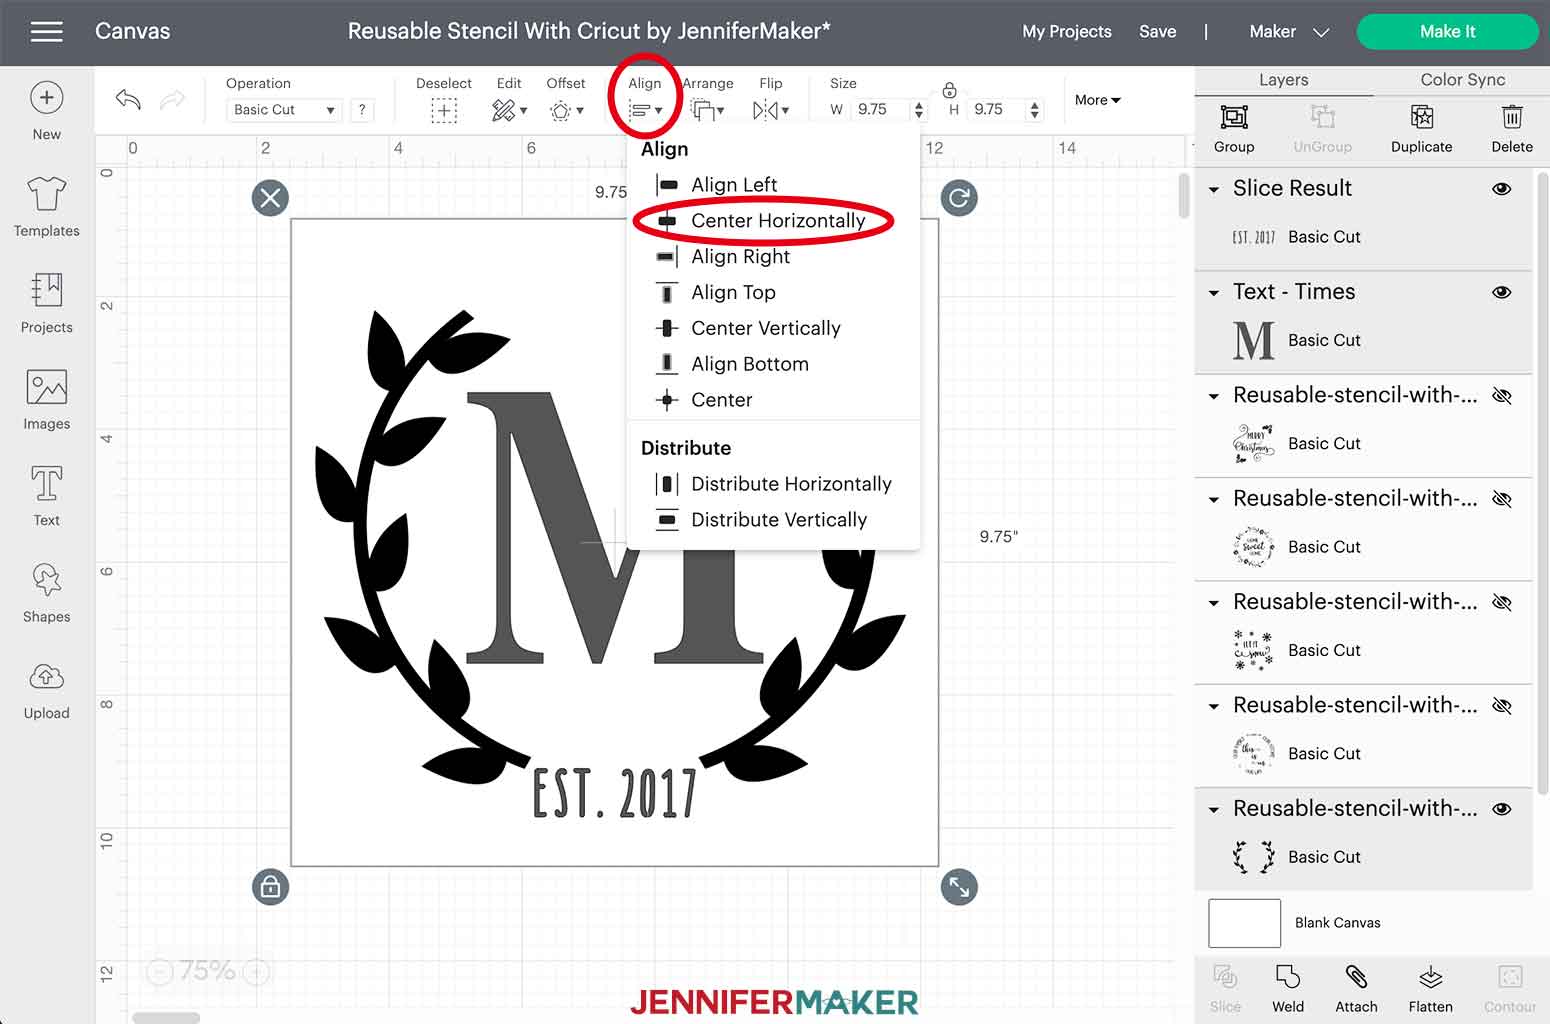
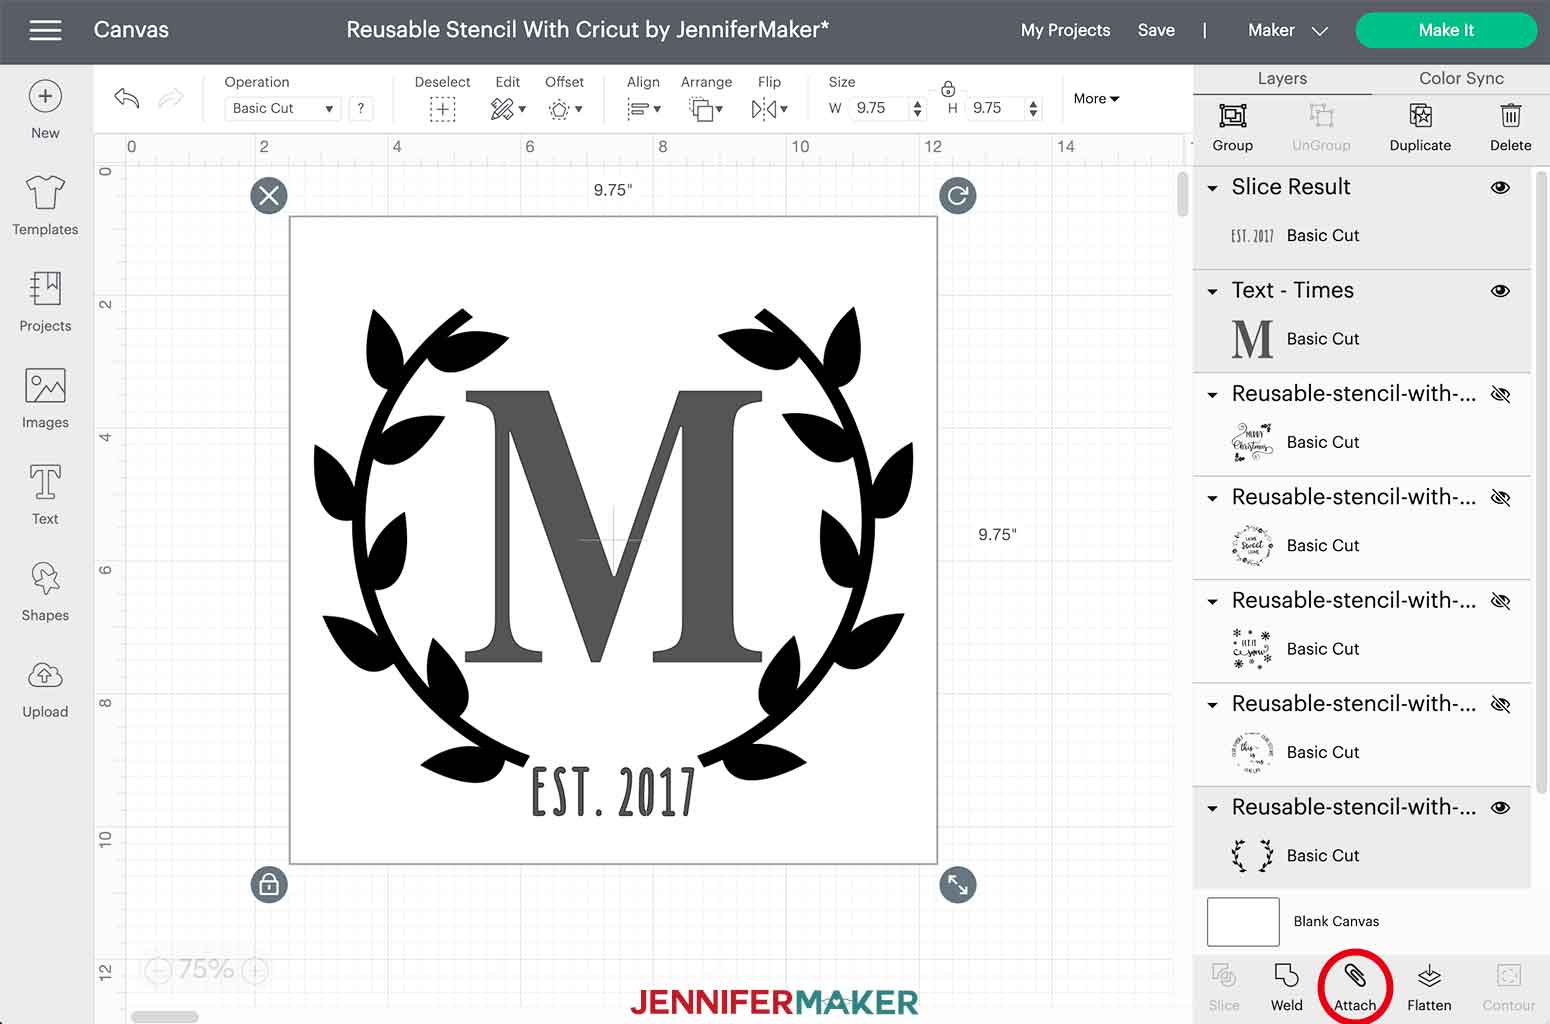
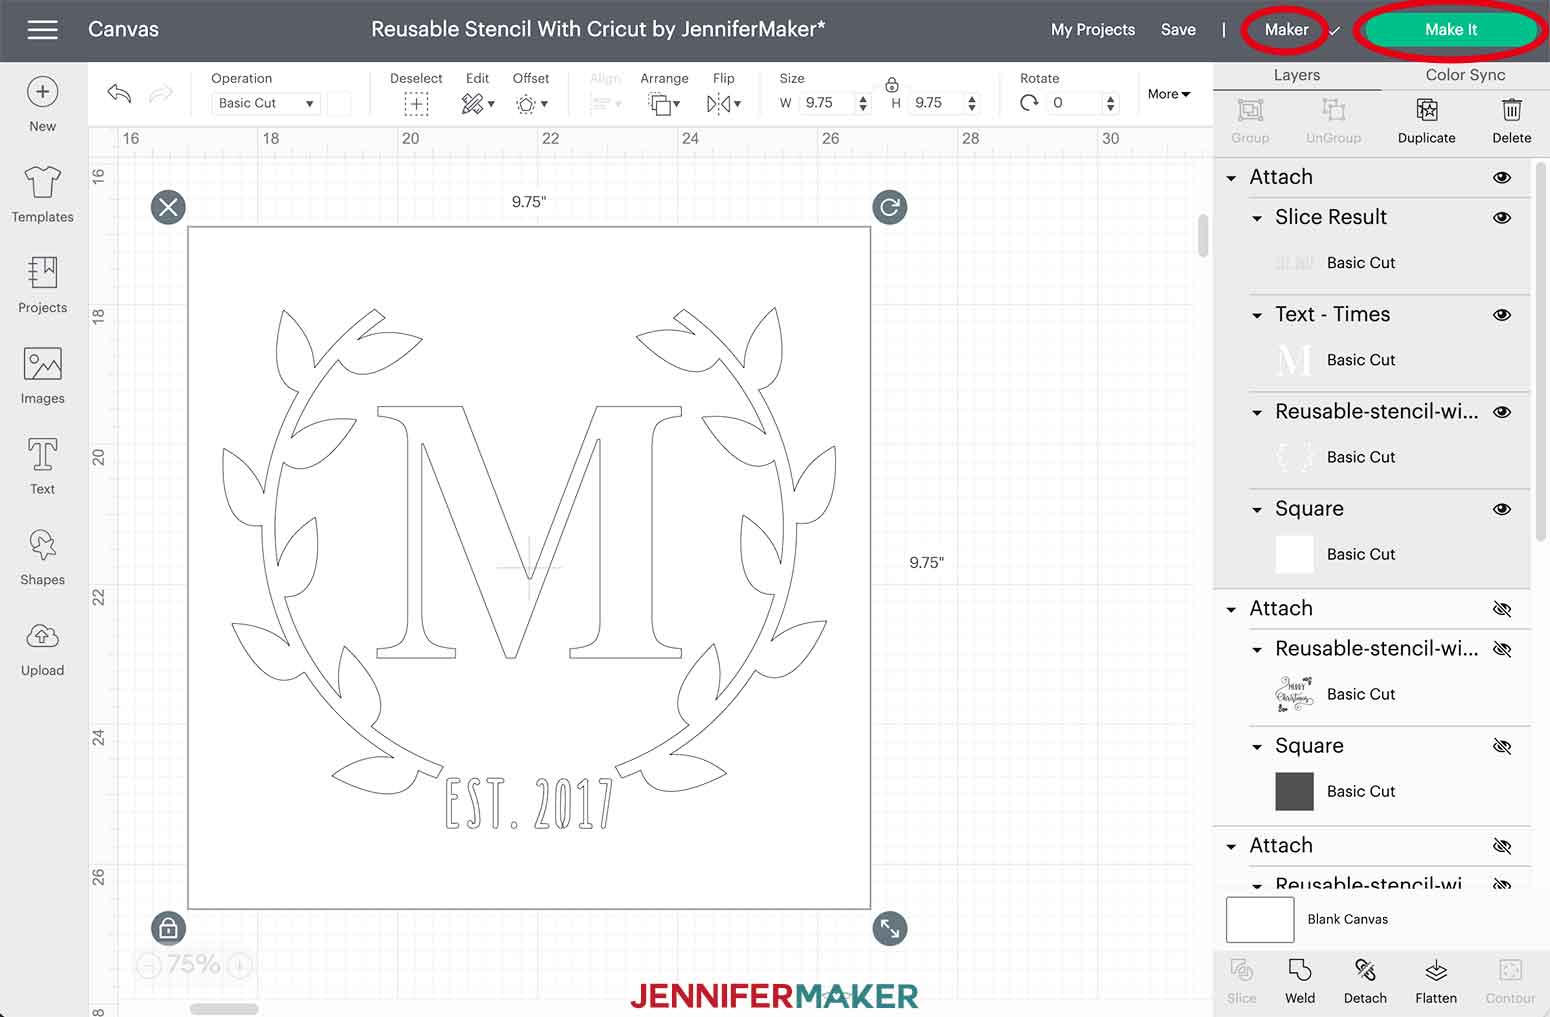
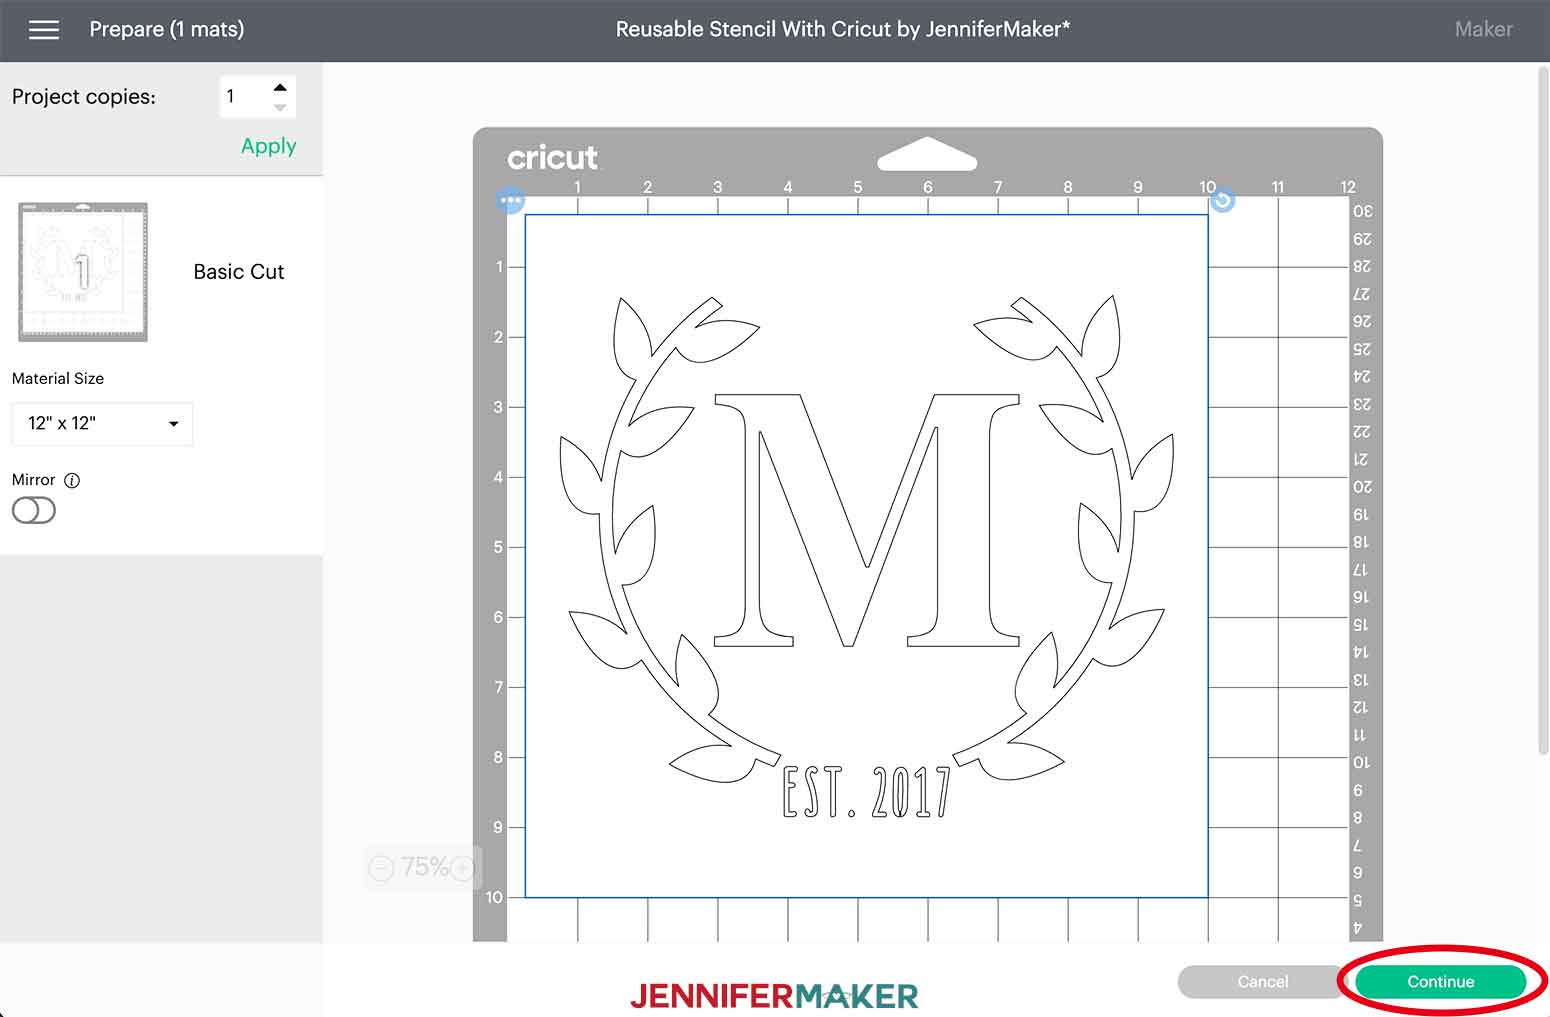
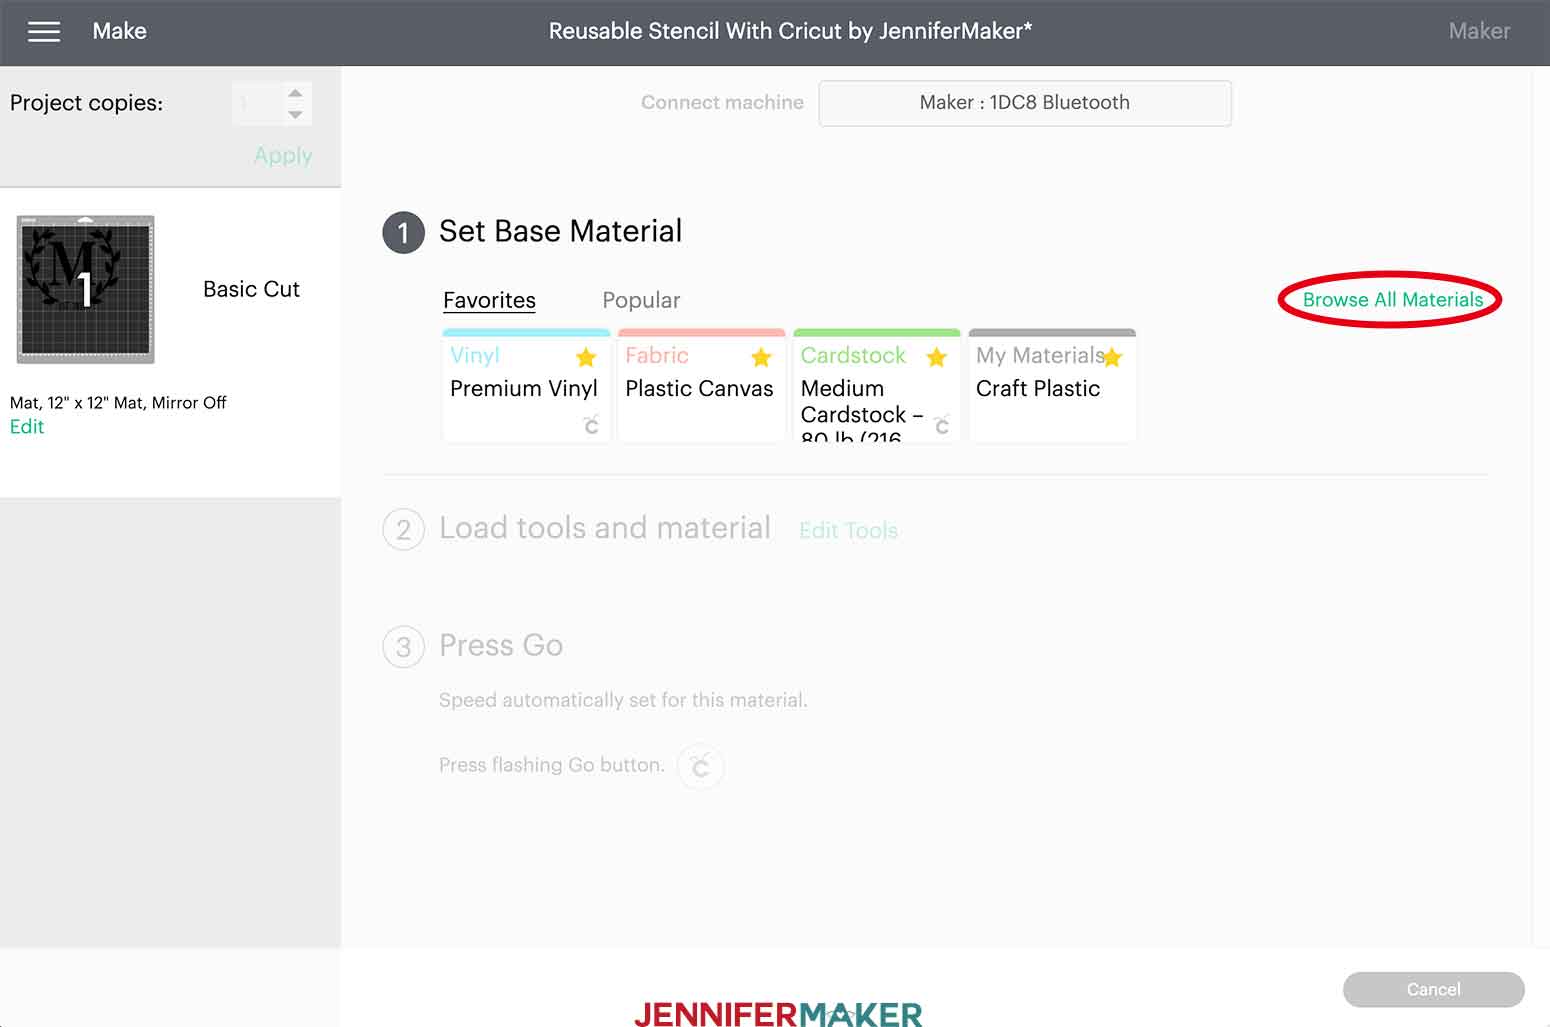
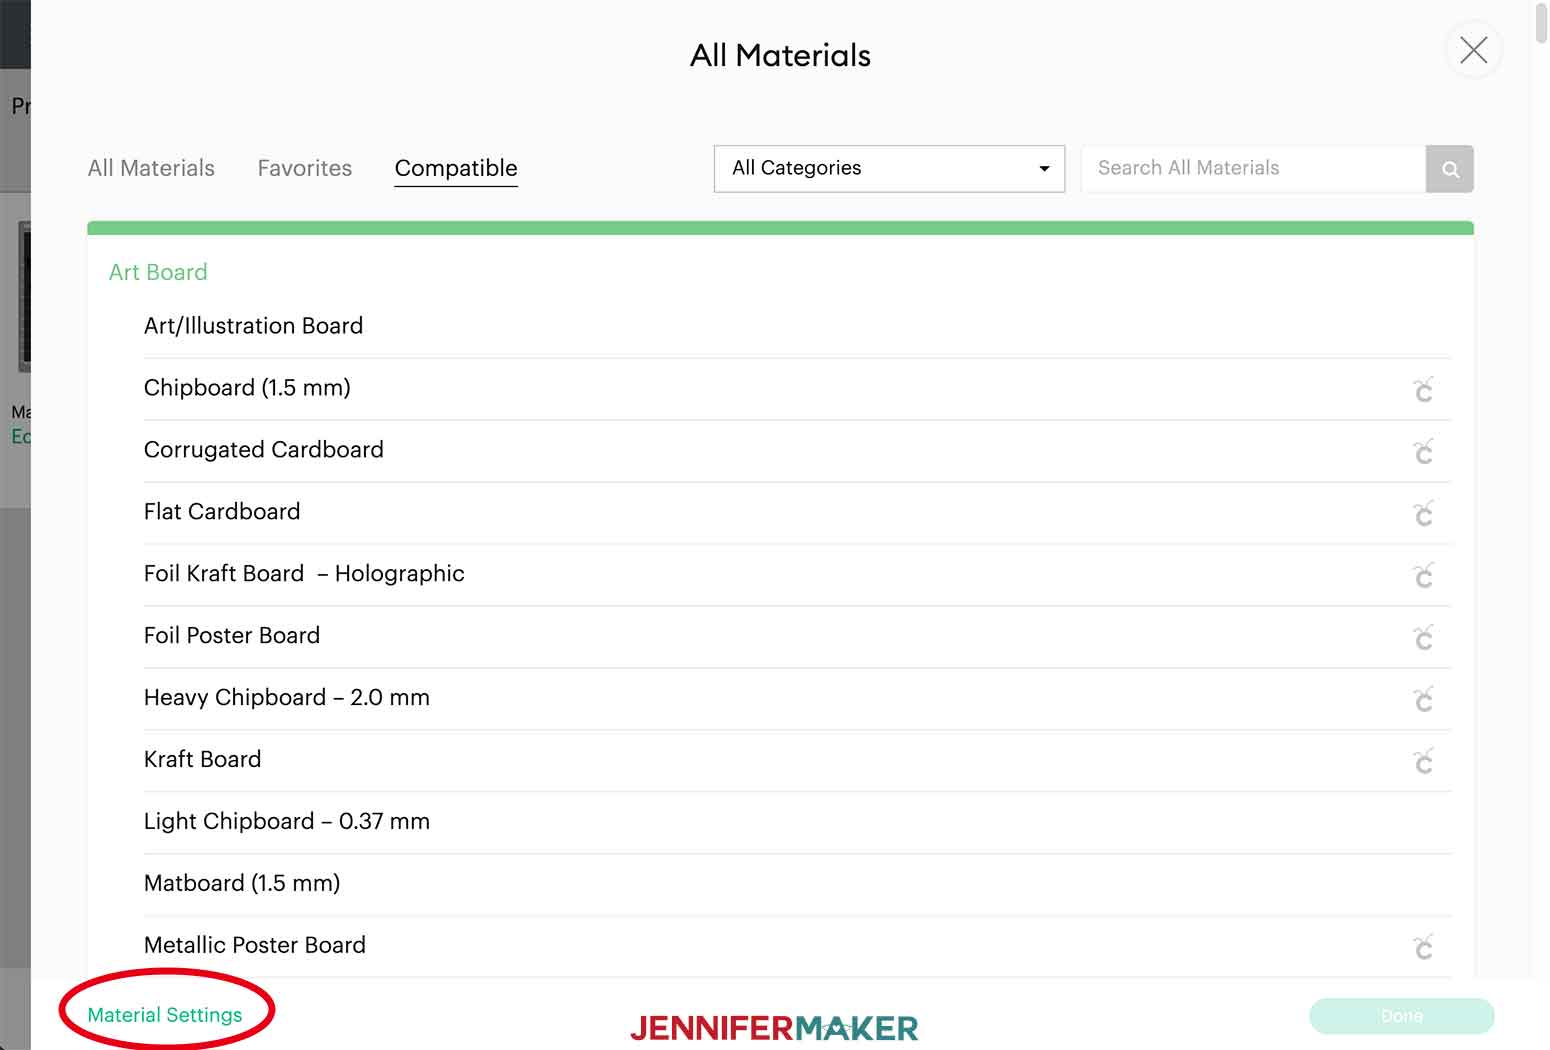
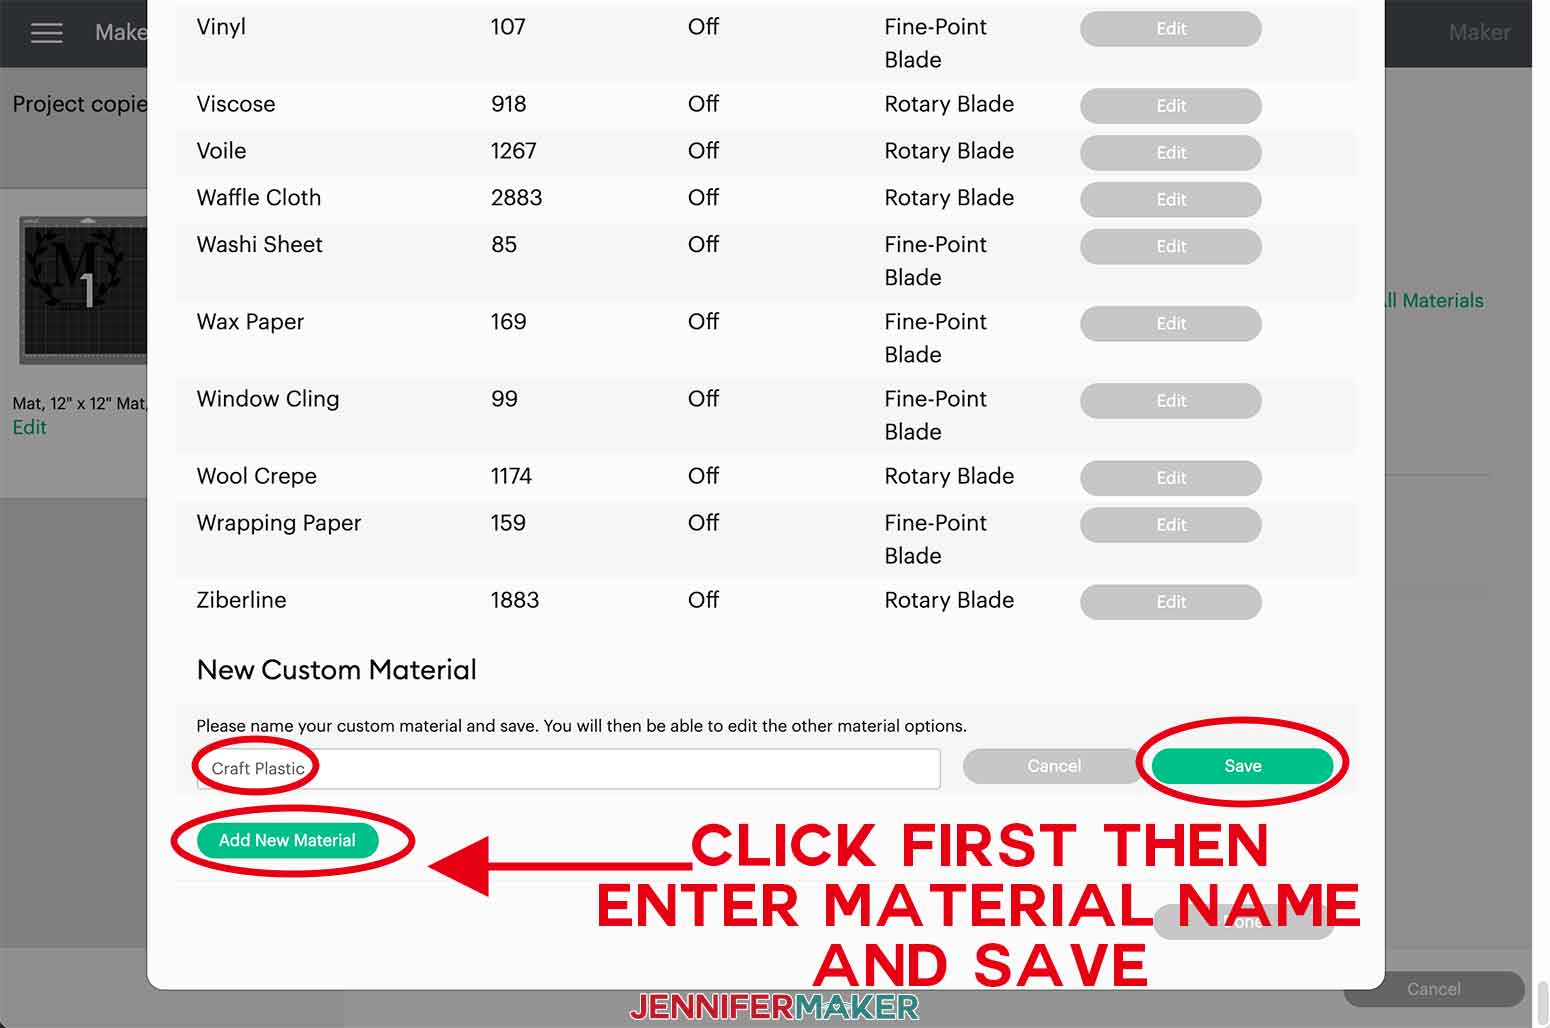
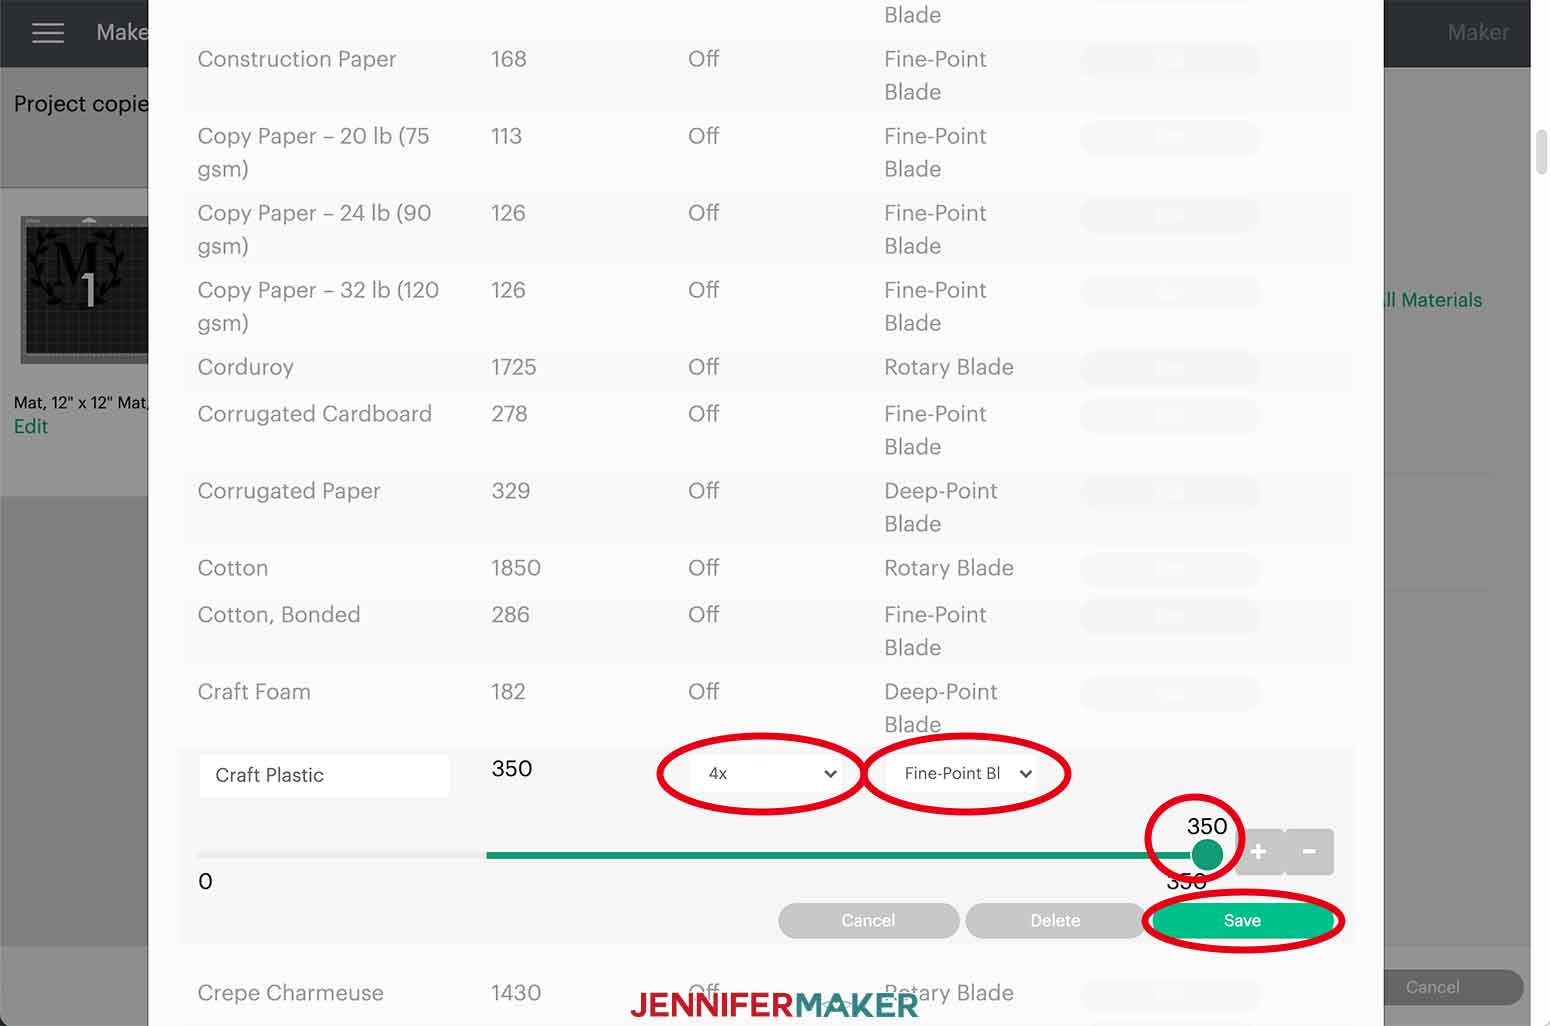
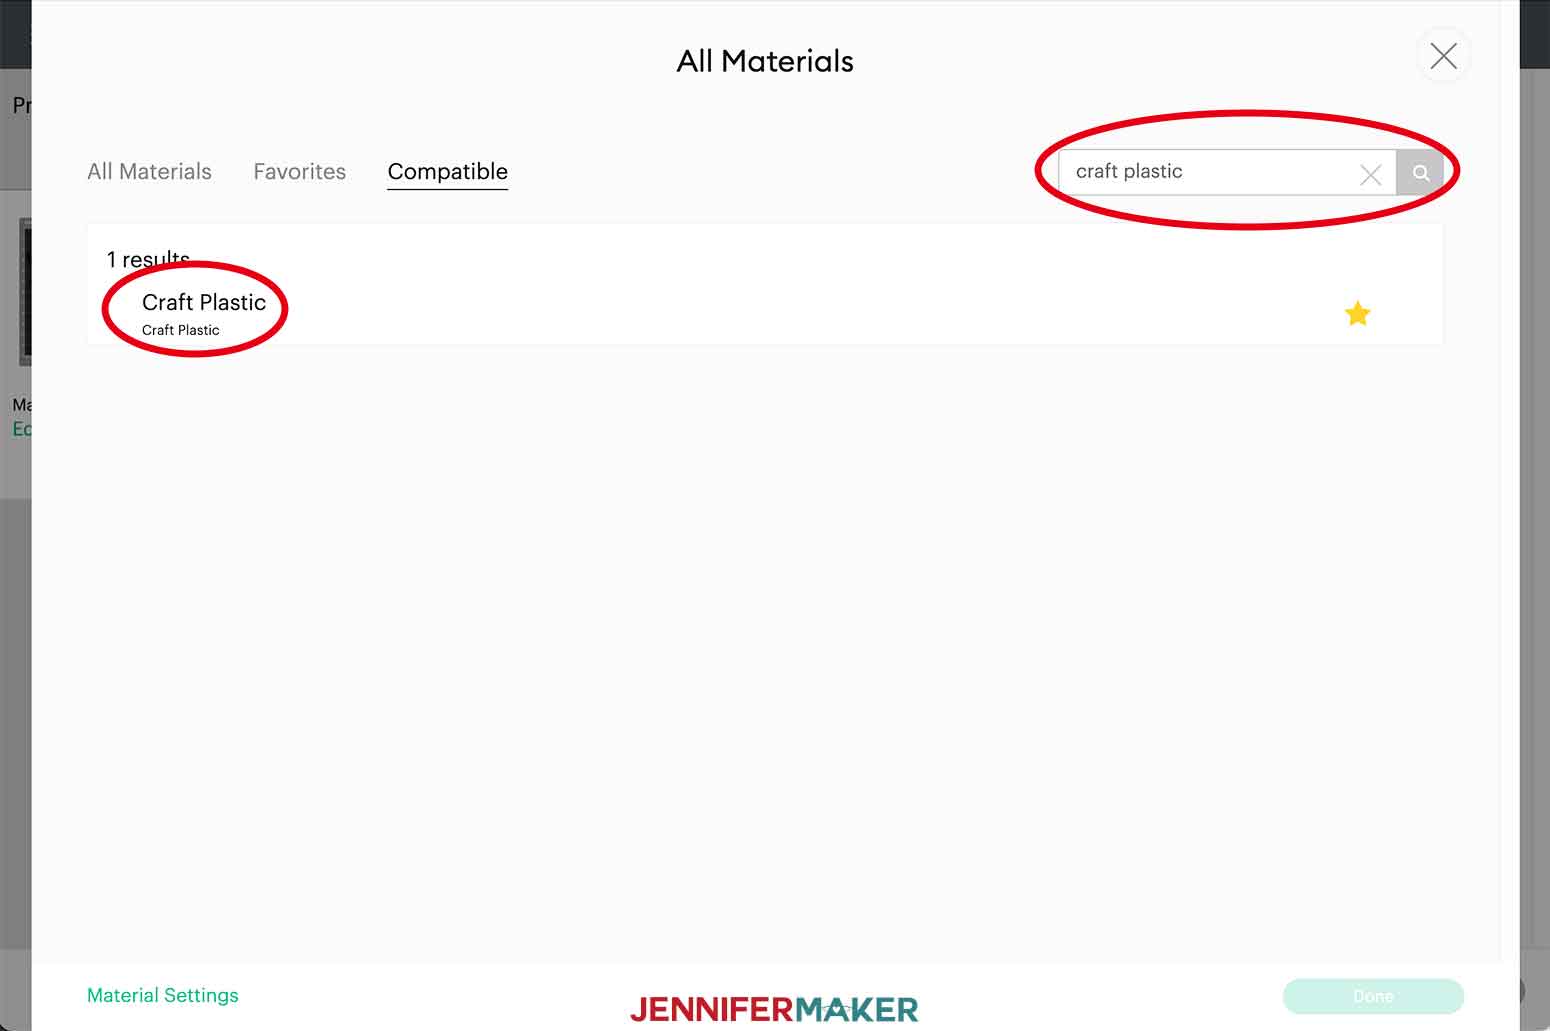
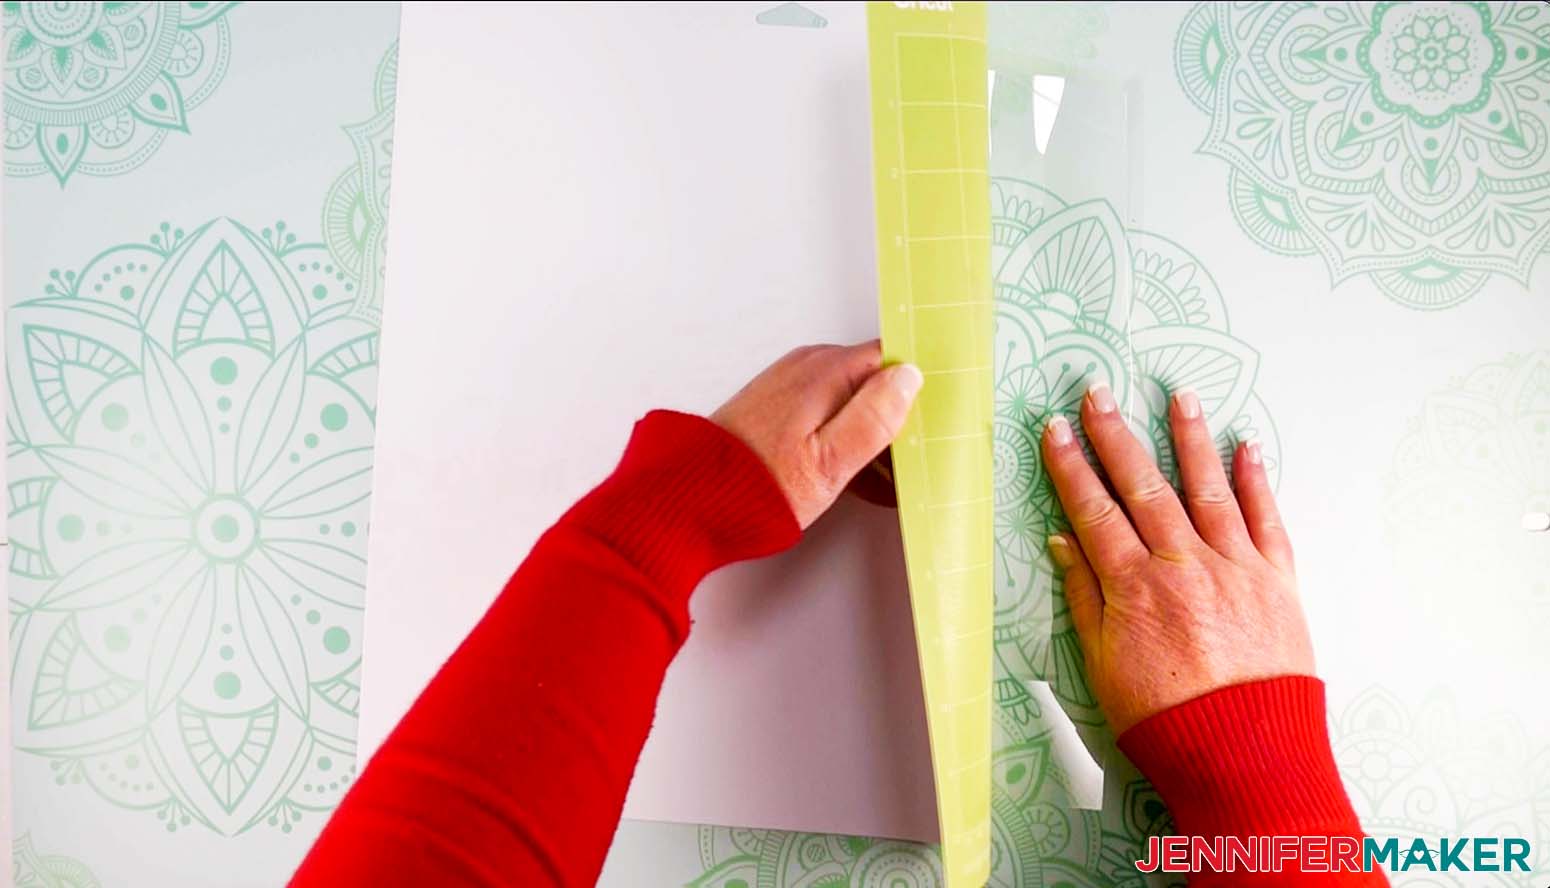
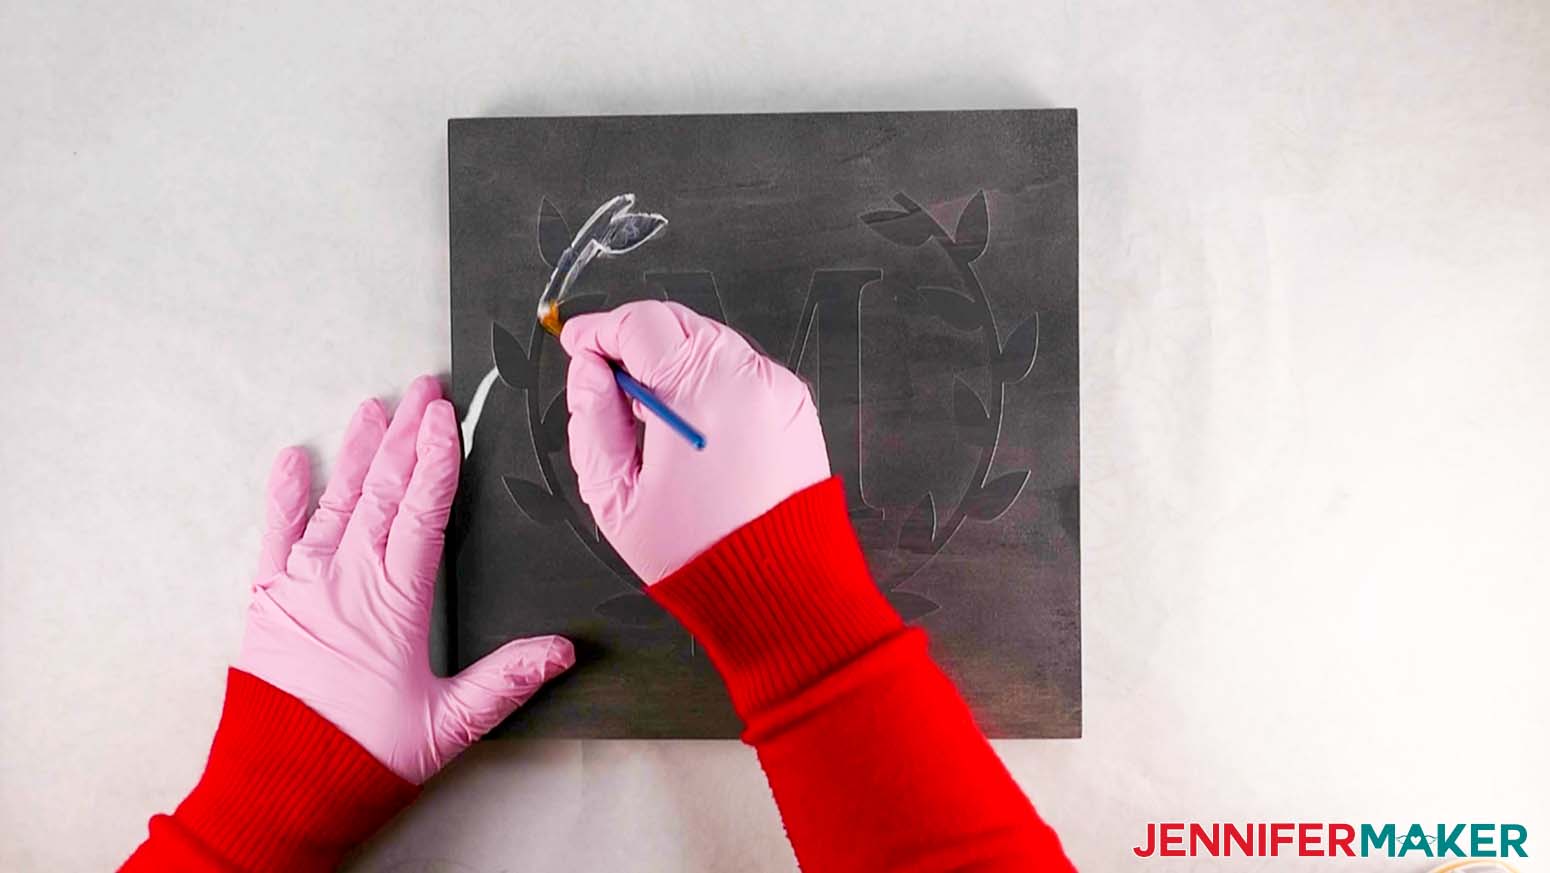
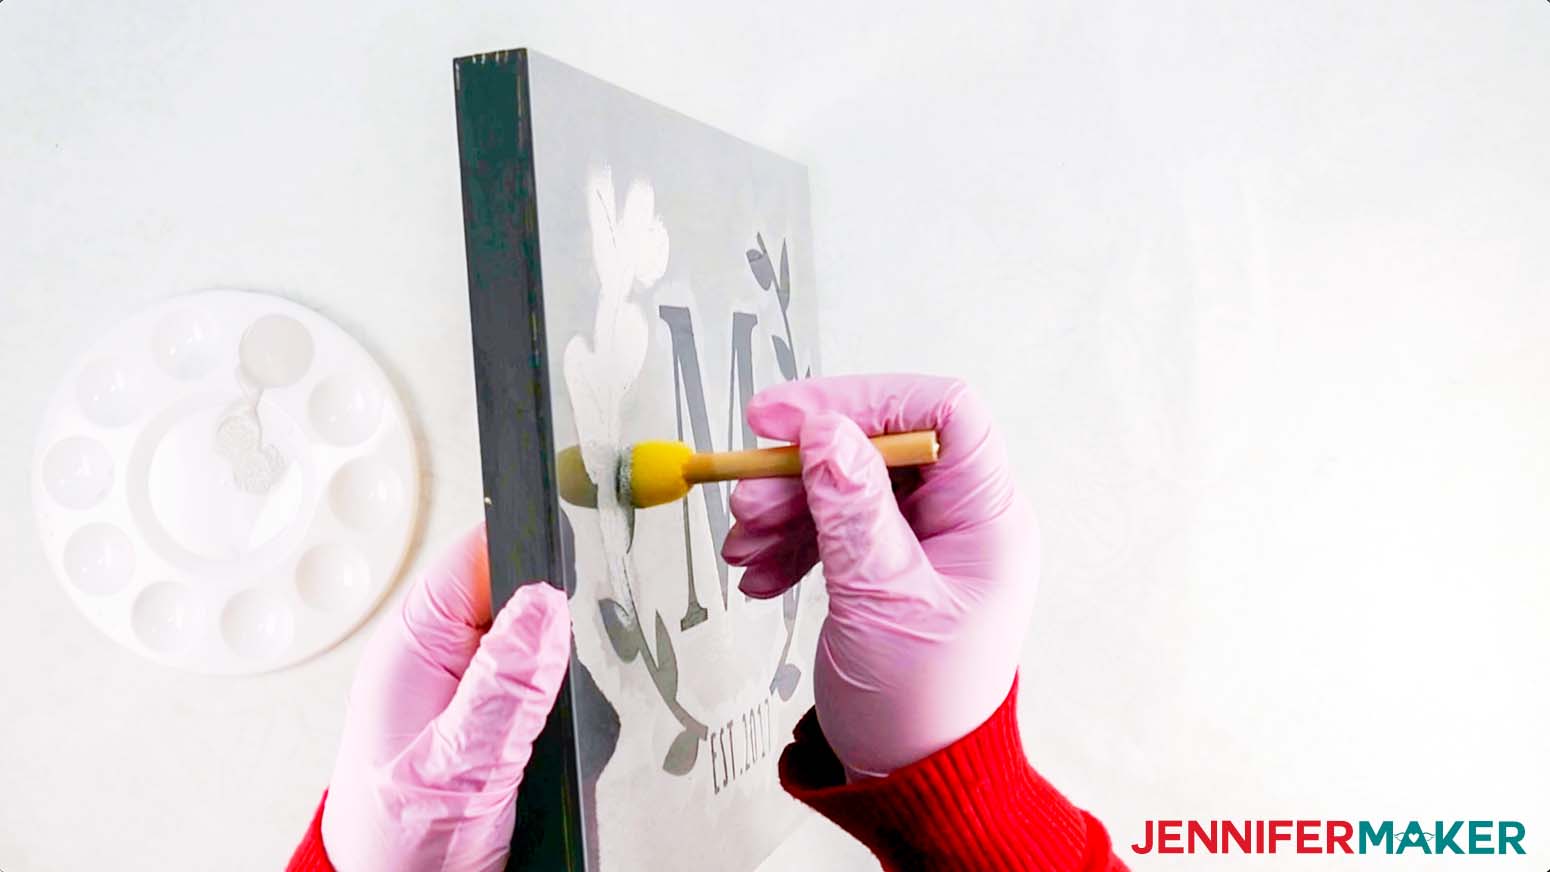
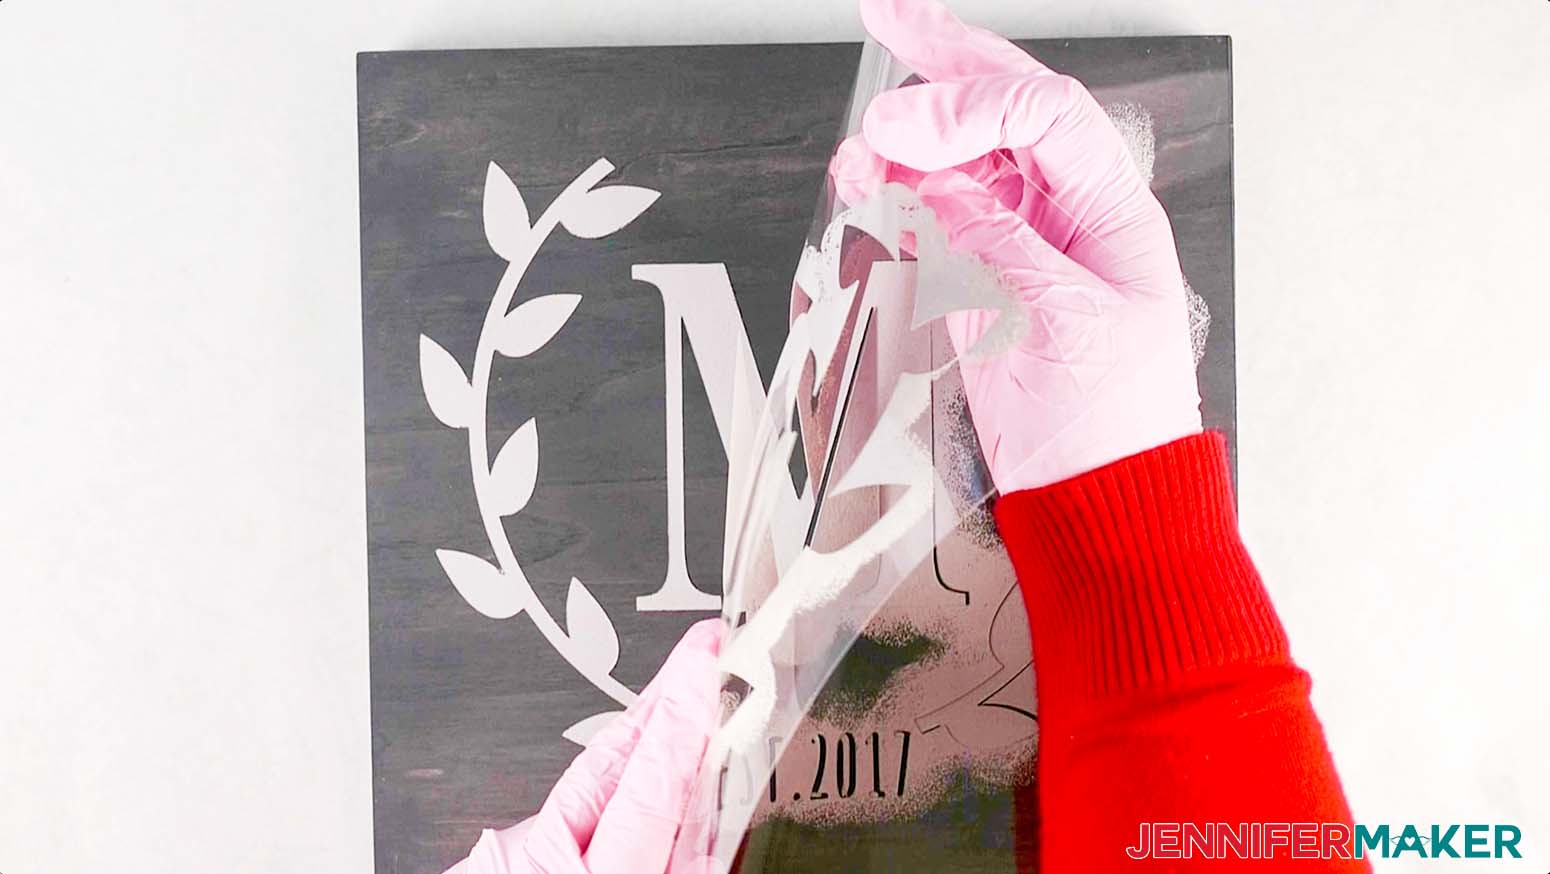
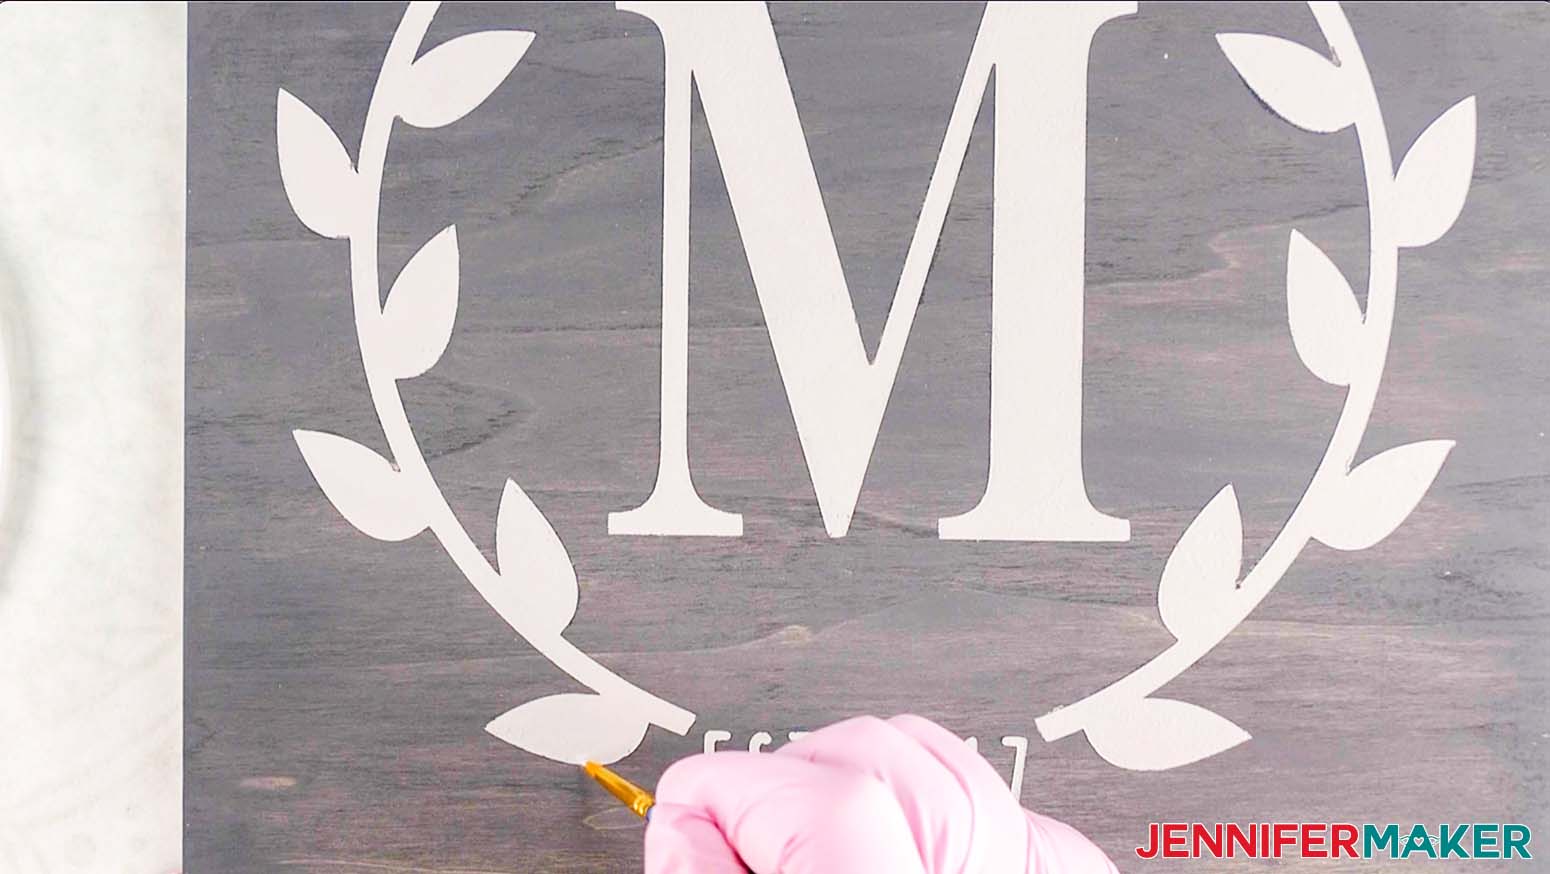
Learn how to make a reusable stencil with your Cricut for easy DIY gifts and decor! If you are using an unfinished wood sign like me, you'll want to start preparing that first so that it has time to dry while you prepare your design. I recommend laying down some butcher paper to protect your work area. You can fully paint your signs or use a faux stain method like I did. I used some of the paints just as they are but I also had fun mixing some paints. For this sign, I'm going to mix black and white chalk paint to create a dark grey rustic sign. Once you have your color chosen, dab a pea-size amount of paint on a baby wipe (or damp paper towel) and rub it onto the wood sign. I recommend going with the grain. Apply a little at a time to make sure the paint isn't too thick. This method dries quickly so allow about an hour for the paint to be dry. If you used a different method, be sure to allow enough time for your sign to fully dry before applying your Reusable Stencil with Cricut. The next step is to download my Reusable Stencil designs from my free resource library -- it's design #349. TIP: If you are not sure how to upload an SVG cut file to Cricut Design Space, watch this helpful video training series I made. If you are on an iPad or iPhone, here is how to download and upload SVG files to the Cricut Design Space app. This is what my Reusable Stencil with Cricut SVG files look like when they are uploaded to Cricut Design Space. NOTE: Once the SVG is uploaded, zoom out to see the whole design by clicking on the minus (-) sign next to the magnifying glass in the lower left. My Reusable Stencil designs are sized for 10" x 10" blank signs. If you are using a different size, I will show you how to make a template to size your stencil correctly. First, click Ungroup above the layers panel. You can hide or delete any of the stencils that you do not want to make. You can hide a design by clicking the eye icon on the right of the layers panel. You can also select a design and click Delete. Click on Shapes and select the Square. Enter your dimensions in the Size boxes in the tool bar at the top. TIP: My wood signs say they are 10" squares but when I measured them, they were closer to 9.75". Be sure to measure your blank even if you think you bought a specific size! NOTE: If you are making a rectangular sign, you'll want to unlock the square to change the dimensions. Click the Unlock on the lower left corner of your square to make a rectangular shape with the Resize handle. Your template will be the top layer. With the template selected, click on Arrange at the top and Send to Back. It also helps to change your template to white so you can better see your design over the template. Make sure your template is still selected and click on the Color menu at the top near "Operation." I chose white. Click and drag your design over the template. Use the Resize handle on the lower right-hand side of the bounding box to adjust the size of your design. NOTE: Make sure that you leave enough margin around your design to easily position the stencil on your blank material. I made the widest part of my design about one inch smaller than my template. This left about a half inch margin for the top and bottom. If you do not want to add any personalization, you can hide or delete your template and move on to Step 4 below. HOW TO ADD PERSONALIZATION: I personalized my monogram design and I explain how you can too! First, click on the Text icon. You can browse or search for the font you'd like to use. For this part, I'm using Times but you can use any font you'd like! Select your font and the font menu will close. You may need to single click into your text box to type your monogram letter. I also chose to change my font to Bold. Once you've typed your letter, click anywhere on the canvas to exit out of text editing mode. You can now click and drag your letter into the center of your design. Use the Resize handle to enlarge your letter. If the letter does not fit how you'd like, you can Unlock it for more adjustments by clicking on the padlock on the lower left-hand side of the bounding box. Next, I want to add an established date. I'm going to repeat the steps above by clicking on the Text icon, selecting my font, and typing it in the text box. This time, I'm using the font "Flamingalingo," a font I purchased from FontBundles.net. Once your additional text is set, click and drag it into place and resize it if necessary. TIP: Need help installing a font in Cricut Design Space? Check out this video and blog post I made that explains everything step by step. IMPORTANT: If you have typed any letters with an enclosed center area, also called a counter, you will need to connect those to the stencil or they will fall out after you remove your stencil from your cutting mat. These are letters like: a, e, o, and p. There is not a set list of letters because different font styles may or may not connect to have counters. My design has a counter in the date. I recommend zooming in closely for this part. I've zoomed in to 400%. Click on Shapes and select the Square (just like you did for the template). Unlock your square and resize it down to a slender rectangle. Click and drag it over your closed letter so that the rectangle overlaps the inside of the letter and the stencil outside the letter. Now, with the rectangle selected, hold down your Shift key and select the text with the counter. With the two selected, click the Slice icon. Four Slice Results will appear at the top of your Layers panel. You can delete all of the layers except for the text you want in your design. Now you have your letter connected to your stencil! Repeat these steps if you have more than one letter that needs the center attached to the stencil. You can go ahead and zoom back out to see your template and design. To make sure your added elements are in alignment, click Select All. Click on Align and then Center Horizontally. Now, once again click Select All at the top (if your monogram design layers aren't still selected) and click Attach. This will cut your stencil in a square to help you better align it on your wood sign. Don't worry about what color Design Space changes your stencil to because you're cutting it out of once piece of stencil material. Select your Cricut machine and click Make It. If using the Cricut Maker 3 or Explore 3, you will be asked to choose Without Mat, On Mat, or Multiple Ways. Since we are not using Smart Materials today, select On Mat and click Continue. There is nothing to change on the preview screen so simply click Continue in the lower right corner. The stencil material can be a little tricky to cut but I found a great custom setting that gave me a clean cut every time. To set up your own custom material setting, click Browse All Materials. Next, click on Material Settings in the lower left. Scroll all the way to the bottom of the window and click Add New Material. I am naming my setting "Craft Plastic." Click Save. After clicking Save, the window should scroll up to the new setting you just named. If it doesn't, find it in the list and click Edit. I changed the Cut Pressure to 350 and the Multi-cut to 4x. Then click Save. Scroll back up to the top and click the X or scroll all the way down and click Done to exit the Custom Materials Settings screen. Once again, click on Browse All Materials, find your custom material, and select it. I normally recommend changing your pressure to more but since our setting has the maximum pressure applied, keep it set to Default. Time to put your Craft Plastic onto your sticky green mat. I used my Brayer to make sure it was best adhered to the mat. You're ready to load it into your machine and watch it cut! TIP: If your mat is not new or super sticky, I suggest using a Strong Grip Mat or painter's tape to hold down the Craft Plastic. A clean mat is KEY for a successful cut! Once your Reusable Stencil is done cutting, press the arrows to unload your mat. Flip your mat over and gently peel your mat away from your Craft Plastic. TIP: Your Scraper may be helpful with removing bits that are stuck to your mat. Remember to go slow so you don't rip your stencil. STEP 5: USE YOUR REUSABLE STENCIL ON A WOOD BLANK OR TEA TOWEL HOW TO APPLY YOUR STENCIL DESIGN TO A WOODEN SIGN: Once you have your stencil and all the small bits removed, it is time to make your craft! Remember, as always, safety first! I recommend wearing protective gloves, a mask and eye protection whenever you are working with any type of household or industrial chemicals. Also, always make sure to follow all of the safety precautions on the product label to avoid any possible issues. Make sure you are in a well ventilated area for this part.. Again, make sure the area under and around your stencil is protected from the spray. We'll need the Krylon Easy-Tack Repositionable Spray . Shake the can well and spray the back side of your stencil. Let your stencil dry for 1 minute and then position it on your sign. Remember to consider the margins you made to help you align your design on your sign. Press all areas to adhere your stencil to your sign. Once your stencil is set, it is time to apply some Mod Podge. This will help prevent your paint from bleeding. With a small paint brush, apply Mod Podge into all areas that you plan to paint your design. Apply it in all directions on your stencil. Once your Mod Podge is fully applied, your sign needs to dry 1-2 hours. It all depends on your local climate and humidity! When the Mod Podge is dry, it is time to apply your paint. The key is to not apply too much paint at once so I recommend pouring a little paint into a paint tray or paper plate. Lightly dab your round foam brush into the paint and apply it with a pouncing motion. That means, keep your brush upright and continue to dab. Do not use strokes. Once all the paint is applied, I let my sign sit for about 5 minutes and then gently peeled away the stencil. How'd you do?! Mine turned out great but there were a few small areas of improvement. I used a small, fine paint brush to touch up a few imperfections. Your stencil will leave a small exposed area where you had to connect the counters. Some people may like the stencil look but if you'd like, you can use your small paint brush to connect these areas by hand. HOW TO APPLY STENCIL TO A TEA TOWEL: Now let's use our stencil to make a pretty tea towel. Again, make sure to follow all the safety guidelines I mentioned above. Next add the Krylon Easy-Tack Repositionable Spray . Shake the can well and spray the back side of your stencil. Let your stencil dry for a minute and then gently press it on to your tea towel. Make sure to press down those counters for a better paint application. Before applying any paint, place a piece of butcher paper or parchment paper underneath your towel. The paint will bleed through so you want to make sure you have something underneath that will absorb it. Squeeze a small amount of fabric paint into your paint tray. With a small, round foam brush, dab a little bit of paint onto your brush. With a pouncing motion, meaning straight up and down, dab your fabric paint onto your tea towel. TIP: Be careful not to press down too hard or the fabric paint may bleed under your stencil. Once you've applied paint to your entire design, allow your paint and stencil to dry for about 5 minutes. Carefully peel your stencil away from your tea towel. I hung my tea towel over the back of a chair to allow it to air dry over night. I was able to use mine more than 5 times without having to wash it. If you don't plan to reuse it right away, you can gently wash your Reusable Stencil with soap and water to get more life out of it. After washing, gently pat it dry with a paper towel and allow it time to fully air dry. Be careful if using a regular towel, they sometimes get caught on the small cut edges of a design. The next time you use your stencil, don't forget to start with applying a fresh coat of Easy-Tack Repositional Spray. I can't wait to see how many amazing signs I see you make! 1. Home Sweet Home Sign Falling Leaves / Free Alternative: Goldie Rainbow Beachwood / Free Alternative: Magical Feather 2. Monogram Sign Flamingalingo / Free Alternative: Pumpkin Cheesecake Times (System Font) 3. This Is Us Sign Home / Free Alternative: Homework Sweet Almeera / Free Alternative: Sweet Purple Romantica / Free Alternative: Fine Serif 4. Let It Snow Sign Amastery Duo / Free Alternatives: Sweet Purple 5. Merry Christmas Sign Amastery Duo / Free Alternative: Joseph Sophia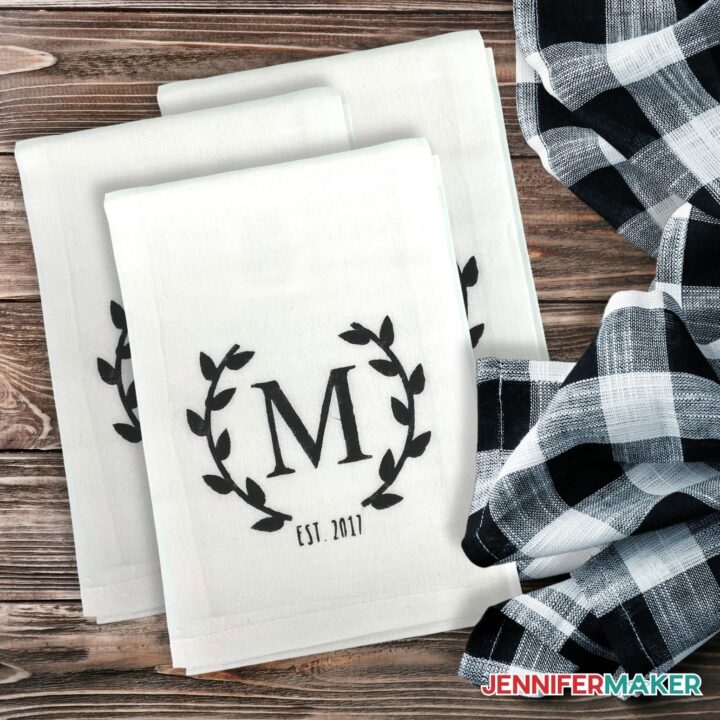
Reusable Stencil With Cricut
Materials
Tools
Instructions
STEP 1: PREPARE YOUR WOOD SIGN
STEP 2: GET MY FREE REUSABLE STENCIL DESIGNS
STEP 3: PREPARE YOUR REUSABLE STENCIL DESIGNS

STEP 4: CREATE YOUR CUSTOM MATERIAL SETTING AND CUT YOUR DESIGN

STEP 6: CARING FOR YOUR STENCILS
STEP 7: SHOW IT OFF
Notes
FONTS USED
Answers to Your Questions About How to a Reusable Stencil with Cricut
Q: Can I use vinyl instead?
You can use vinyl if you’d like. If you do, be sure to use permanent vinyl, not removable vinyl. Just remember that with vinyl stencils, they only last you for one use. This is why craft plastic is the best thing!
Q: What is the best material to make reusable stencils with?
I really think the .007 polyester craft plastic called Grafix Clear Craft Plastic works the best! It’s intended for stencils, cuts well on all Cricut models, and can be washed.
Q: How do I care for my stencils?
If you don’t plan to reuse it right away, you can gently wash your Reusable Stencil with soap and water to get more life out of it. After washing, gently pat it dry with a paper towel and allow it time to fully air dry. Be careful if using a regular towel, they sometimes get caught on the small cut edges of a design. The next time you use your stencil, don’t forget to start with applying a fresh coat of Easy-Tack Repositionable Spray.
Get my free SVG files to create your very own reusable stencil with Cricut
I love seeing what you make with my designs and how you use them! Please share a photo of your projects from a reusable stencil with Cricut in our Facebook group or tag me on social media with #jennifermaker.
Love,

Want to remember this? Save this Reusable Stencil with Cricut Tutorial to your favorite Pinterest Board!