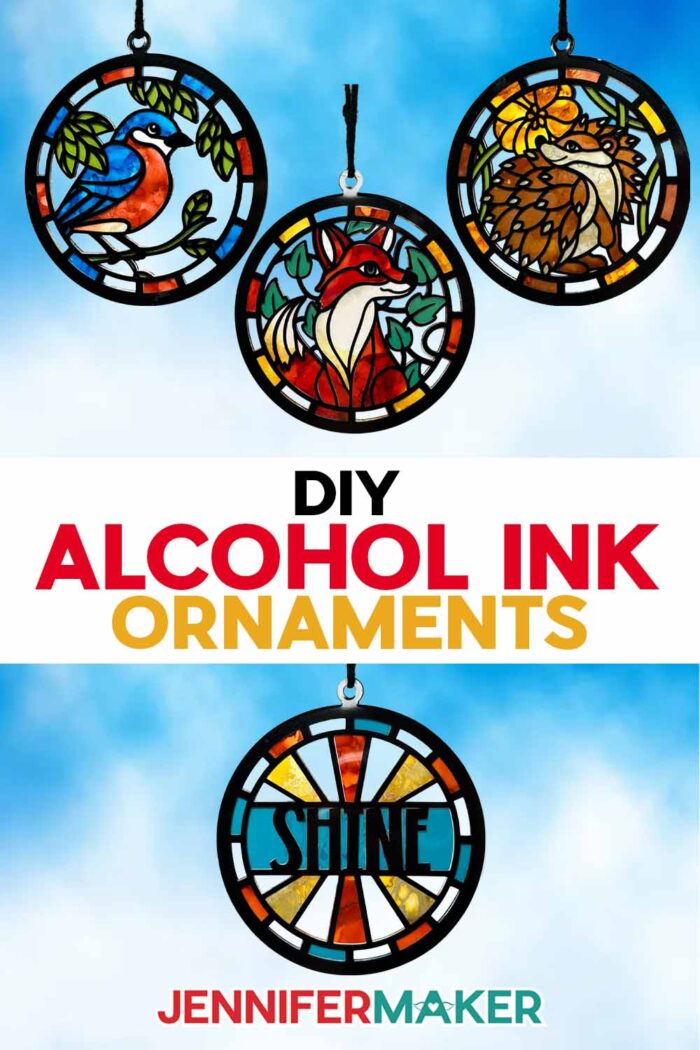
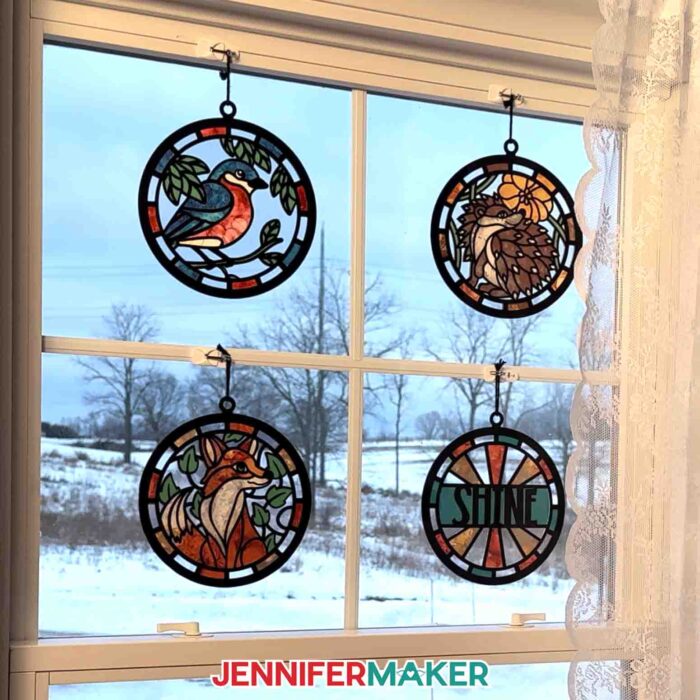
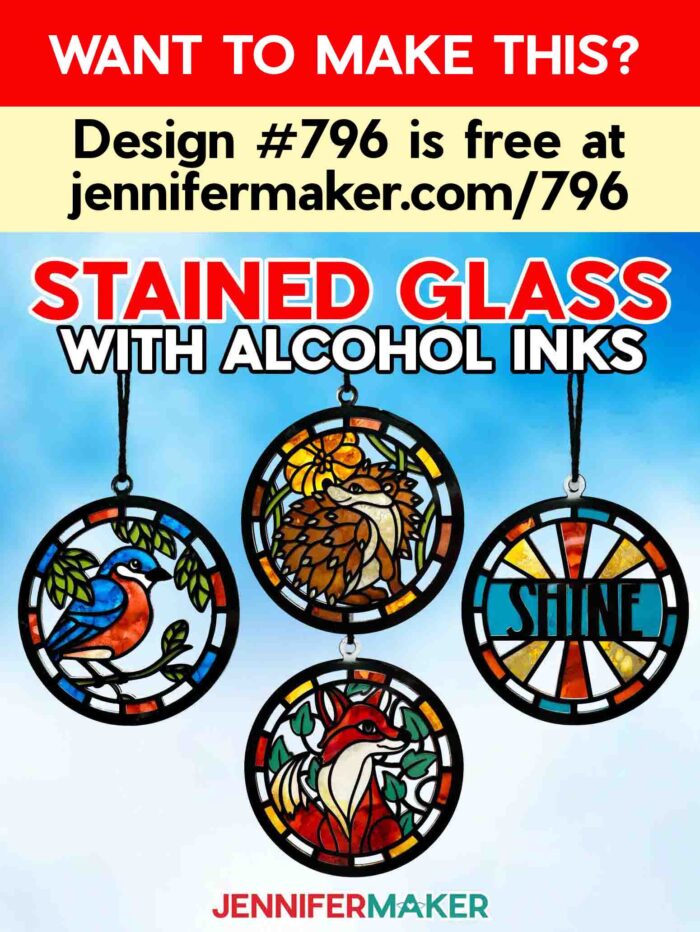
Learn how to make a colorful alcohol ink paper stained glass window, without cutting glass!
If you’ve ever stared at a piece of stained glass art and thought, “That’s gorgeous… and also completely not happening in my craft room,” I have fantastic news. This alcohol ink paper stained glass window gives you the same swirly, luminous look without soldering, a glass cutter, or an actual glass pane. And I’m sharing my woodland animal designs for you to try it out on!
Watch the full step-by-step tutorial on how to make an alcohol ink paper stained glass window decoration:

The first time I tried alcohol ink art, I learned two things fast: the beautiful colors are addictive, and the whole process feels like a science experiment in the best way… especially when those stained glass effects start swirling and the colors pop against the bright white surface of the alcohol ink paper.
Alcohol ink is a fast-drying, super-saturated dye ink that loves a smooth surface and non-porous materials. Think of it like painting, but instead of brushstrokes you’re using air and blending solution so color spreads and swirls with a truly magical effect.
If you want to make your own eye-catching work of stained glass-inspired art, I can show you how to cut layered shapes, ink the pieces, and “frame” everything with vinyl on acetate so it reads like a real stained glass window… from both sides. Just watch my tutorial video to see how I did everything, step by step.
We’ll use a Cricut to cut:
- white alcohol ink paper,
- green cardstock for the center layer,
- clear acetate sheets, and
- black permanent vinyl.
Then comes the fun part: adding drops of alcohol ink, perhaps a little blending solution, and moving the ink around to create one-of-a-kind effects. Different methods work here: a blower tool, canned air, or a simple straw.
If you need a reset, isopropyl alcohol (also known as rubbing alcohol) can lift color, and blotting excess ink helps you regain control.
Be sure to watch the video for the step-by-step process (especially the parchment paper “hinge” trick for aligning vinyl on acetate). It makes the different methods feel simple and repeatable, even if it’s your first time using any of these materials.
What a fantastic project to try when you want a new work of art that’s lightweight, hangable, and seriously display-worthy!
Want even more creative ways to level it up? My ADVANCE tutorial shows you how to take the same concept and customize it with names or words. Your stained glass window can become even more personal, and that’s the key when turning a pretty craft into a polished gift. Click here to learn more about my ADVANCE with JenniferMaker program!

Do you want to learn how to make alcohol ink paper stained glass projects? Let me show you how fun and easy it is with my alcohol ink tutorial and stained glass window designs! This post contains some affiliate links for your convenience (which means if you make a purchase after clicking a link I will earn a small commission but it won’t cost you a penny more)! Read my full disclosure policy.
Materials to Make Alcohol Ink Paper Stained Glass Windows
View my Amazon shopping list with the exact items I used.
- Six (6) Sheets of 8.3″ x 11.7″ Alcohol Ink Paper -AND-
- One (1) Sheet of 12″ x 12″ 65 lb. Green Cardstock (for the foliage layer in all three designs)
- Two (2) Sheets of 12″ x 12″ Acetate
- Black Permanent Value Vinyl -AND-
- Cricut StandardGrip Transfer Tape
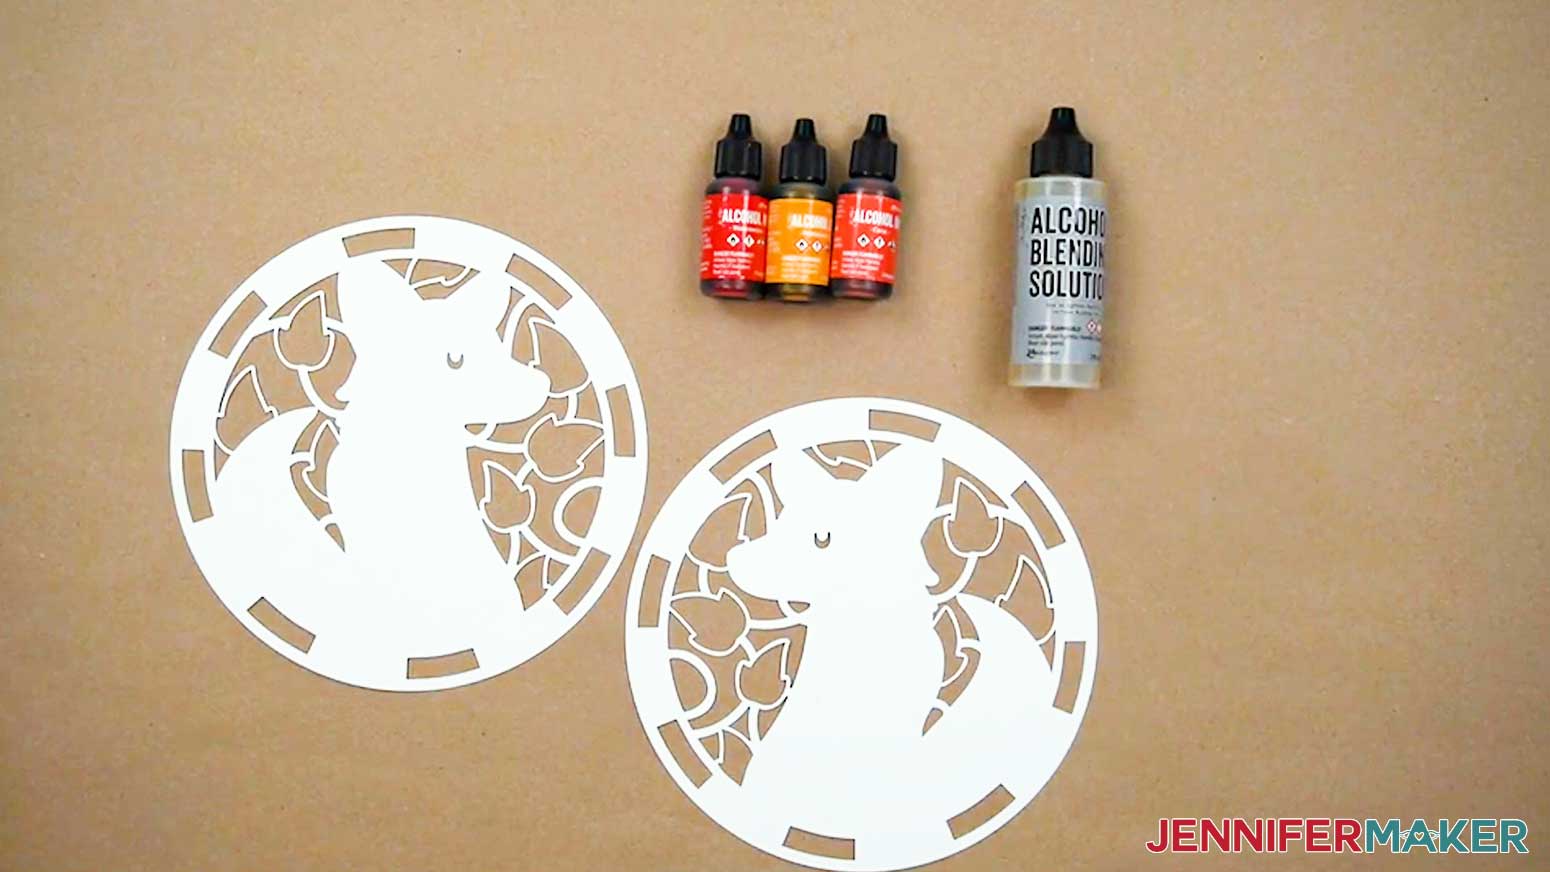
- Alcohol Ink (For the Fox, I used “Coral,” “Honeycomb,” and “Watermelon.” For the Bird, I used “Honeycomb,” “Coral,” and “Glacier.” For the Hedgehog, I used “Honeycomb” and “Gilded.”)
- Metallic Alcohol Ink (For the Fox, I used “Pearl” and “Silver.” For the Bird, I used “Pearl.” For the Hedgehog, I used “Copper.”)
- Alcohol Ink Blending Solution
- Parchment Paper (for aligning the vinyl on the acetate)
- A way to cut your materials – I’m using the Cricut Maker 4, but you can also use any Cricut Maker series machine, a Cricut Explore Series machine, the Cricut Venture, or the Cricut Joy Xtra
- Cricut Green StandardGrip Machine Mat
- Brayer
- Spatula
- Scraper
- Weeding Tool (optional for poking out small cutouts)
- Tweezers (optional)
- Painter’s Tape
- Alcohol Ink Blower Tool (optional for moving the ink around your paper) -OR-
- Straw
- Pipettes (optional for dropping alcohol or ink onto the page)
- Craft Glue – I used Bearly Art Precision Craft Glue
- 8″ of Medium Weight Black Yarn
- Lint-Free Cloth (optional for cleaning acetate and workspace)
- Paper Towels (optional for cleaning workspace)
- Apron (optional for protecting your clothes while inking)
- Old Newspaper or Butcher Paper (for protecting your work surface when inking)
- Fan (for ventilation when using inks)
- Safety Goggles (optional for protecting your eyes while inking) (optional)
- Design #796 (My free SVG/DXF/PDF design files are available in my free library – get the password by filling out the form at the bottom of this page)
How to Make Alcohol Ink Paper Stained Glass Windows
Alcohol Ink Paper Stained Glass
Learn how to make an alcohol ink paper stained glass window with simple supplies!
Materials
- Six (6) Sheets of 8.3” x 11.7” Alcohol Ink Paper -AND-
- One (1) Sheet of 12” x 12” 65 lb. Green Cardstock (for the foliage layer in all three designs)
- Two (2) Sheets of 12” x 12” Acetate
- Black Value Permanent Vinyl
- Cricut StandardGrip Transfer Tape
- Alcohol Ink (For the Fox, I used “Coral,” “Honeycomb,” and “Watermelon.” For the Bird, I used “Honeycomb,” “Coral,” and “Glacier.” For the Hedgehog, I used “Honeycomb” and “Gilded.”) -AND-
- Metallic Alcohol Ink (For the Fox, I used “Pearl” and “Silver.” For the Bird, I used “Pearl.” For the Hedgehog, I used “Copper.”) -AND-
- Alcohol Ink Blending Solution
- Craft Glue - I used Bearly Art Precision Craft Glue
- 8” of Medium Weight Black Yarn (for hanging)
- Design #796 (My free SVG/PDF/DXF design files are available in my free resource library - get the password by filling out the form at the bottom of this page)
Tools
- A way to cut your material - I’m using the Cricut Maker 4, but you can also use a Cricut Maker series machine, a Cricut Explore series machine, a Cricut Venture, a Cricut Joy, or a Cricut Joy Xtra.
- Cricut Green StandardGrip Machine Mat 12" x 12"
- Parchment Paper (for aligning the vinyl on the acetate)
- Painter’s Tape
- Alcohol Ink Blower Tool (optional for moving the ink around your paper) -OR-
- Straw
- Pipettes (optional for dropping alcohol or ink onto the page)
- Isopropyl Alcohol
- Disposable Gloves (for protecting your hands while inking)
- Scissors
- XL Scraper
- Spatula
- Weeding Tool
- Tweezers (optional)
- Paper Towels (optional for cleaning workspace)
- Lint-Free Cloth (optional for cleaning acetate and workspace)
- Apron (optional for protecting your clothes when inking)
- Old Newspaper or Butcher Paper (for protecting your work surface when inking)
- Fan (for ventilation when using inks)
- Safety Goggles (optional for protecting your eyes while inking)
Instructions
STEP 1: GET MY FREE ALCOHOL INK PAPER STAINED GLASS DESIGN FILES
First, download my Alcohol Ink Paper Stained Glass designs from my free library – look for Design #796. Alternatively, you can use the Save This Project form near the top of this post and the design link will be emailed to you.
TIP: If you’re not sure how to upload, go to jennifermaker.com/svgs to learn how to unzip and upload SVG files.
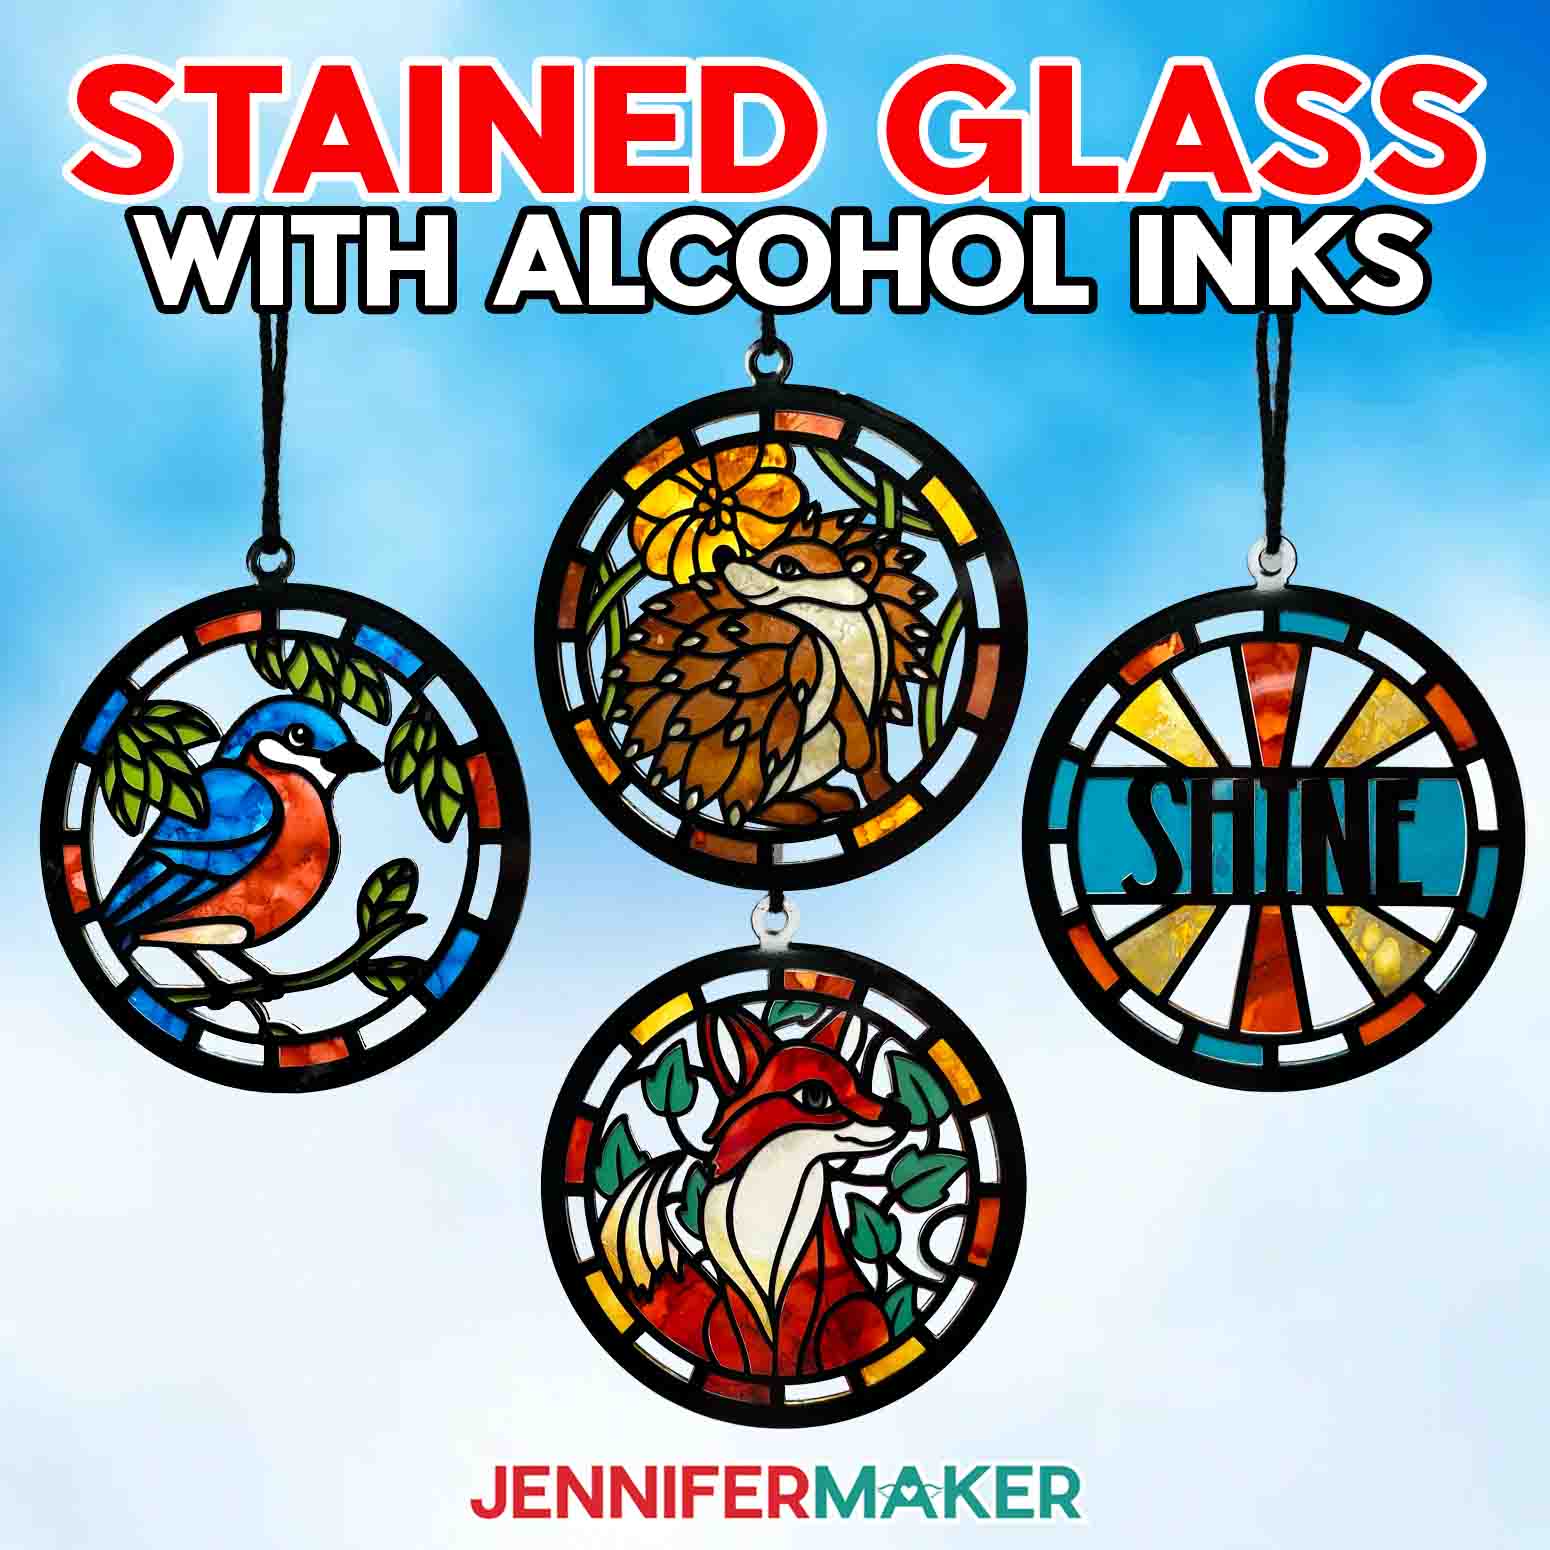
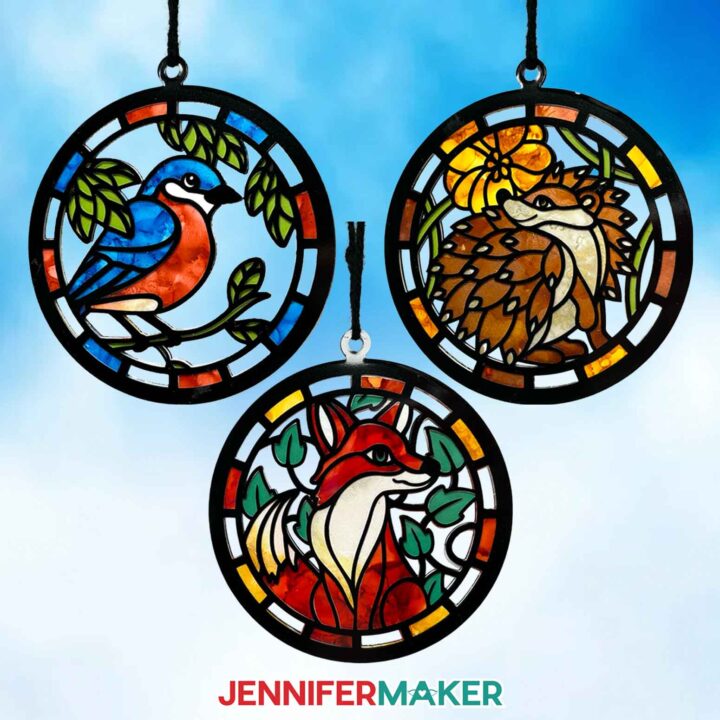
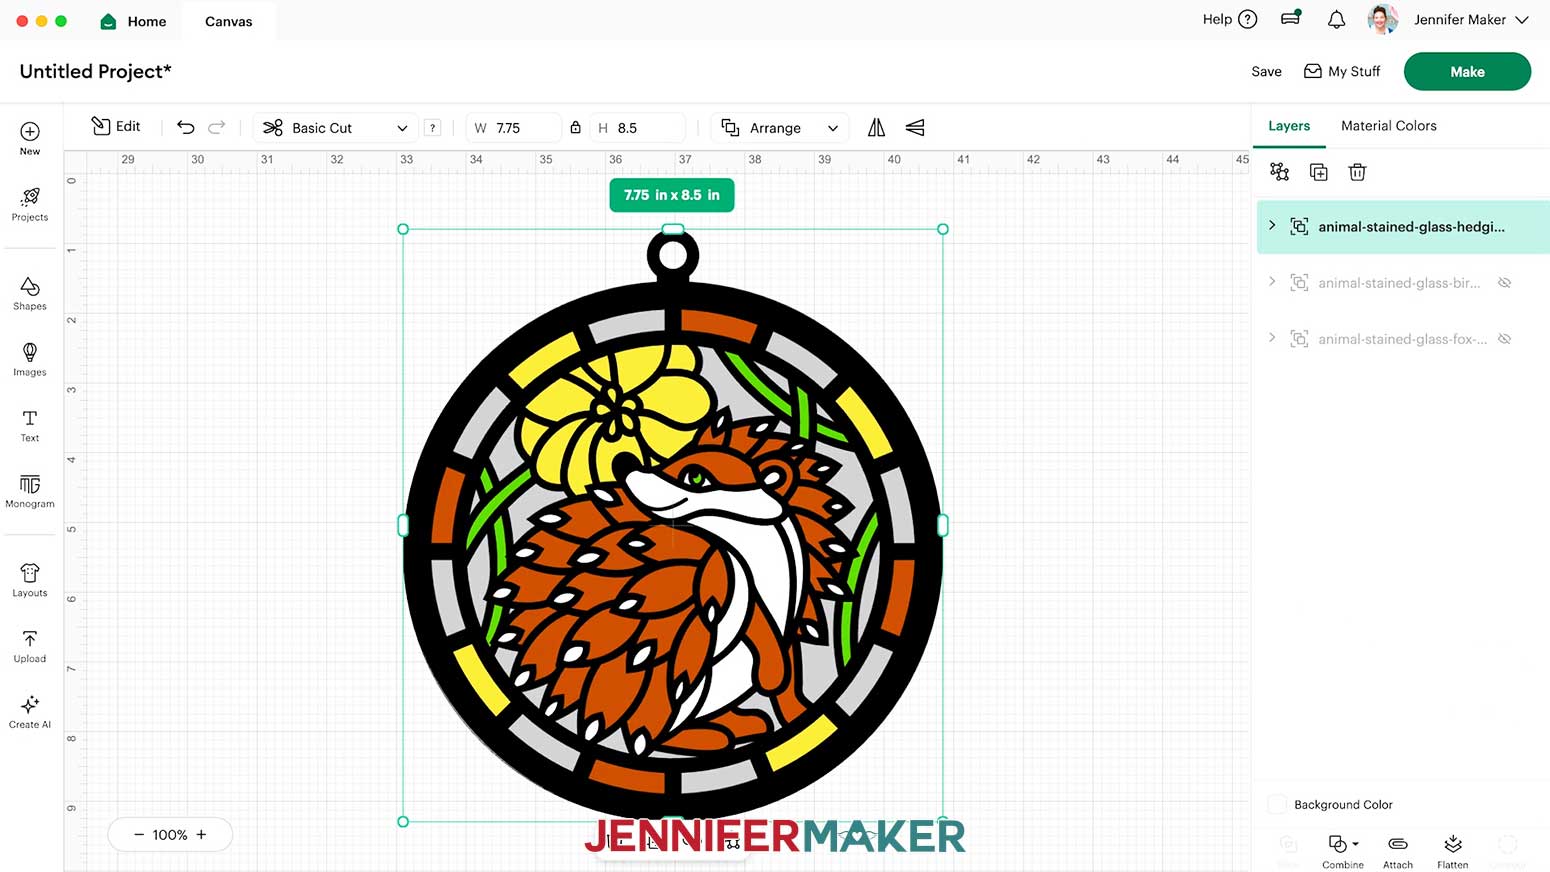
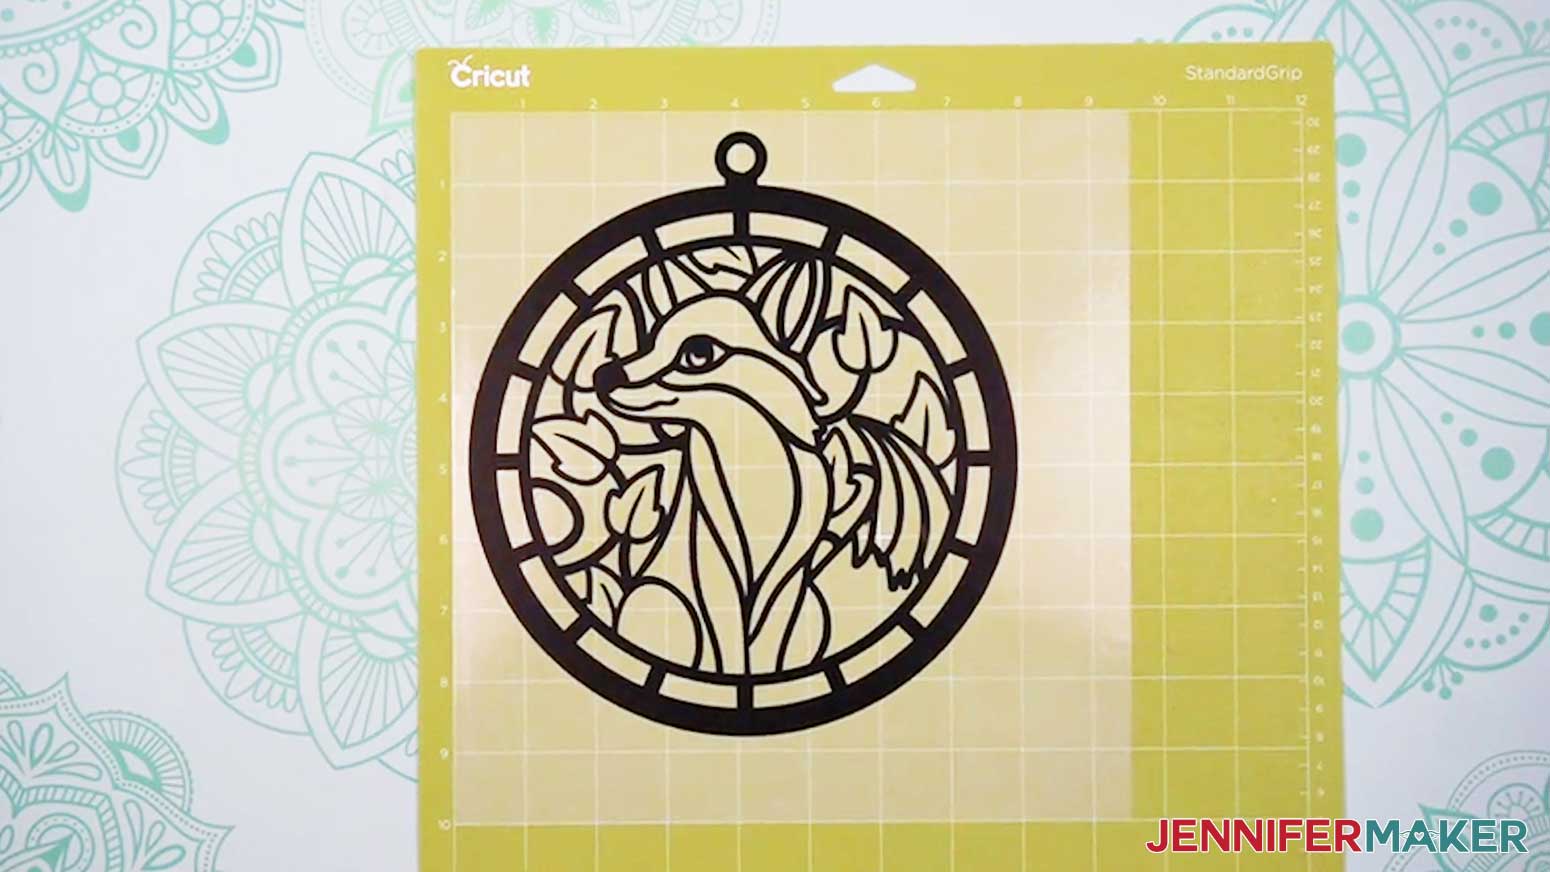
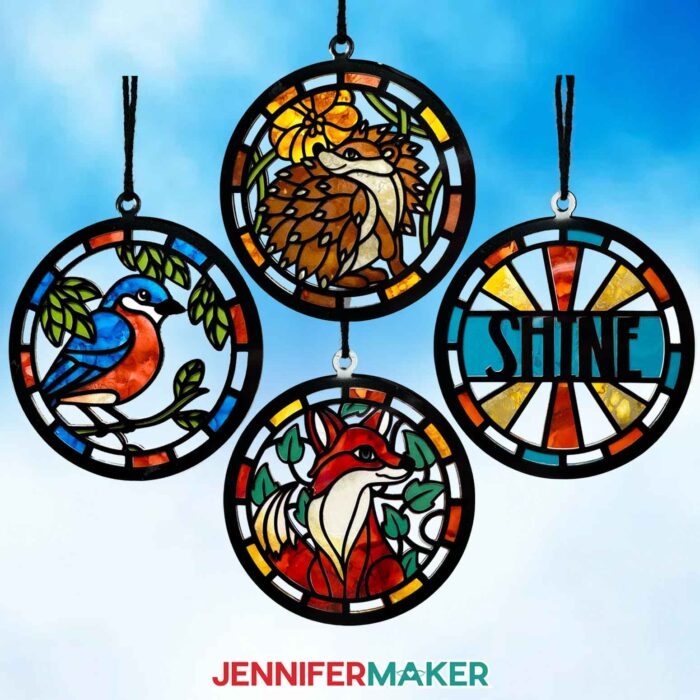
Inside the SVG folder, you’ll see three stained glass animal designs: a Bird, a Fox, and a Hedgehog.
For this tutorial, I’ll show you how to make the Fox SVG using my Cricut Maker 4, but you can follow the same steps to make the other two designs on any Cricut cutting machine, including the Cricut Joy.
STEP 2: PREPARE & CUT YOUR ALCOHOL INK PAPER STAINED GLASS DESIGN
CRICUT DESIGN SPACE
- In Cricut Design Space on a blank Canvas, click “Upload.”
- Click “Upload Image.”
- Click “Browse.”
- Find and select the SVG of your choice from the main SVG folder.
NOTE: I’ll demonstrate with the Fox design. - Click “Open” and then “Continue.”
- Click “Upload” to add the design to your Canvas.

- Click “Save” and give your project a name.
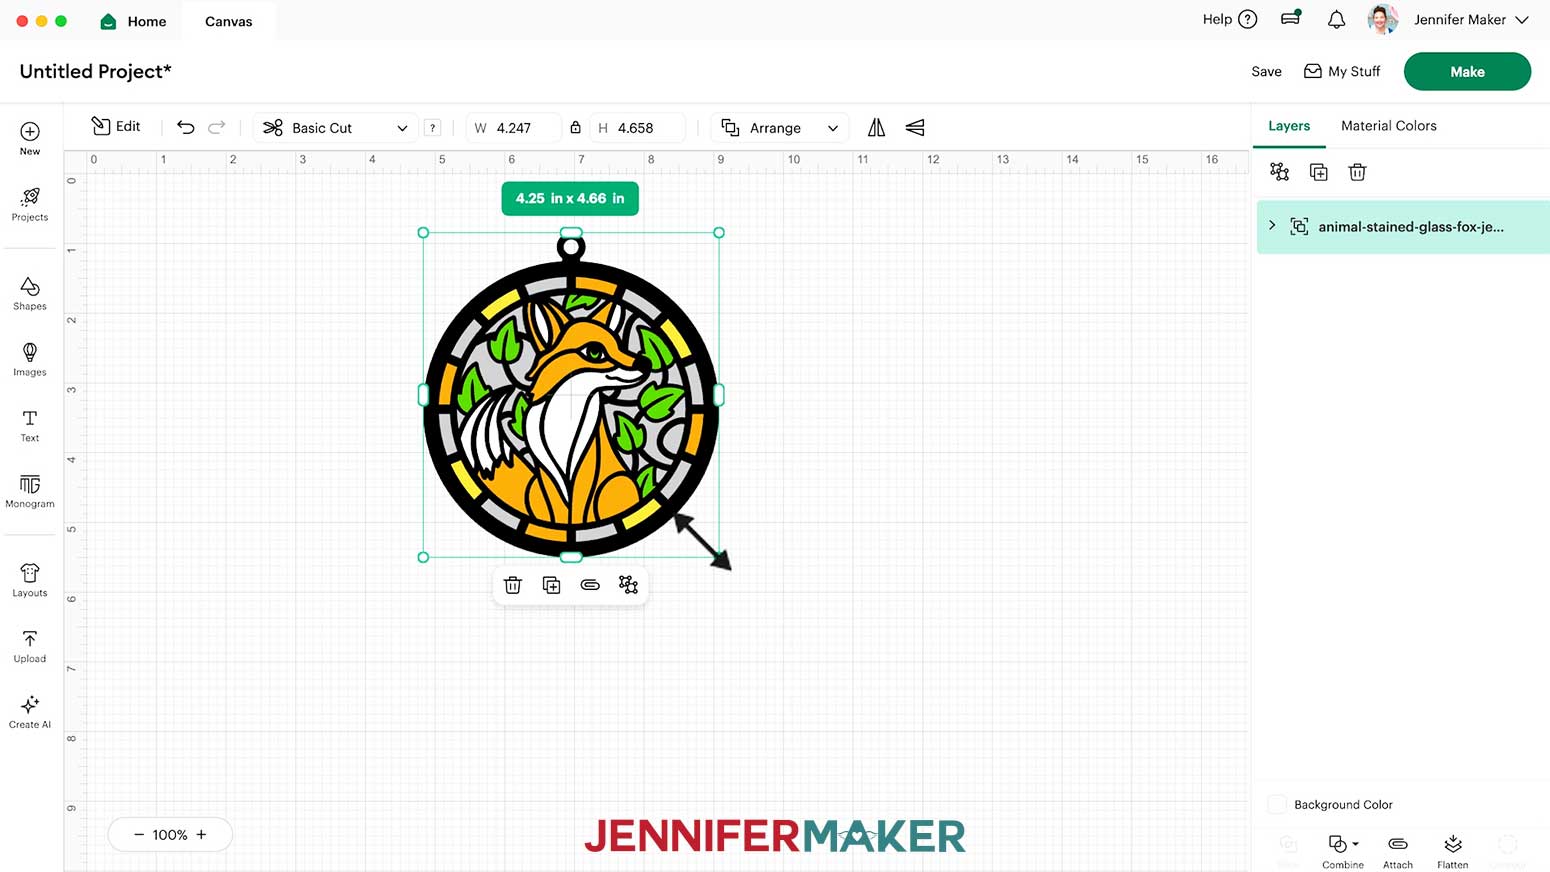
- If you’d like to resize the layers, select the entire design and make sure the Lock icon is closed to maintain proportions. Then click and drag the corner handles to resize it.
TIP: The original designs will fit on the larger machines and a Cricut Joy Xtra. If you’re using a Cricut Joy, resize your design to 4.25” W by 4.661” H to fit on a standard mat.
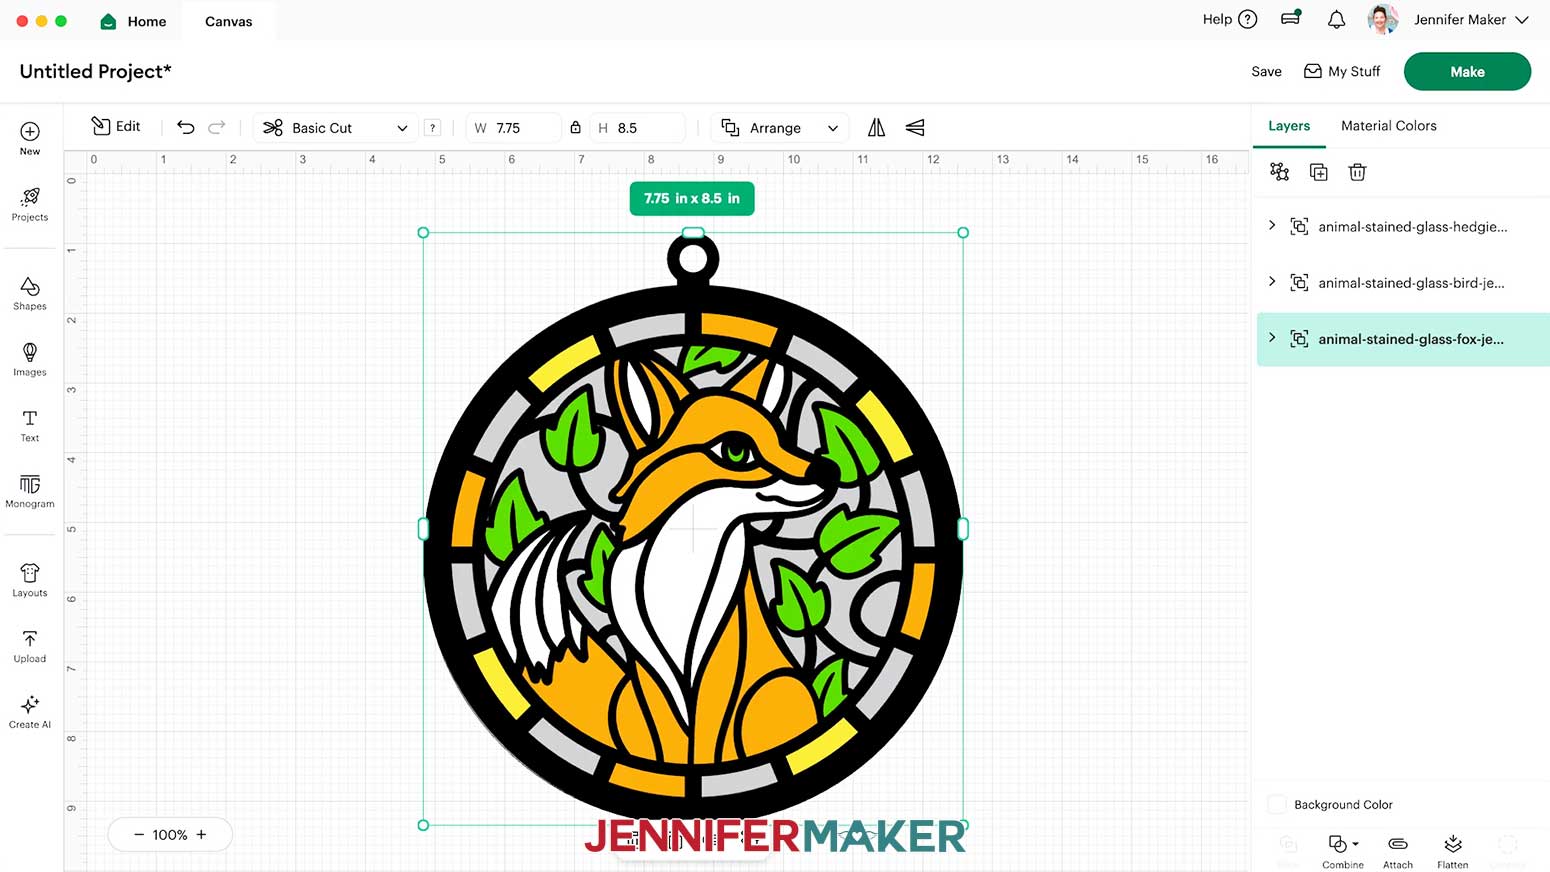
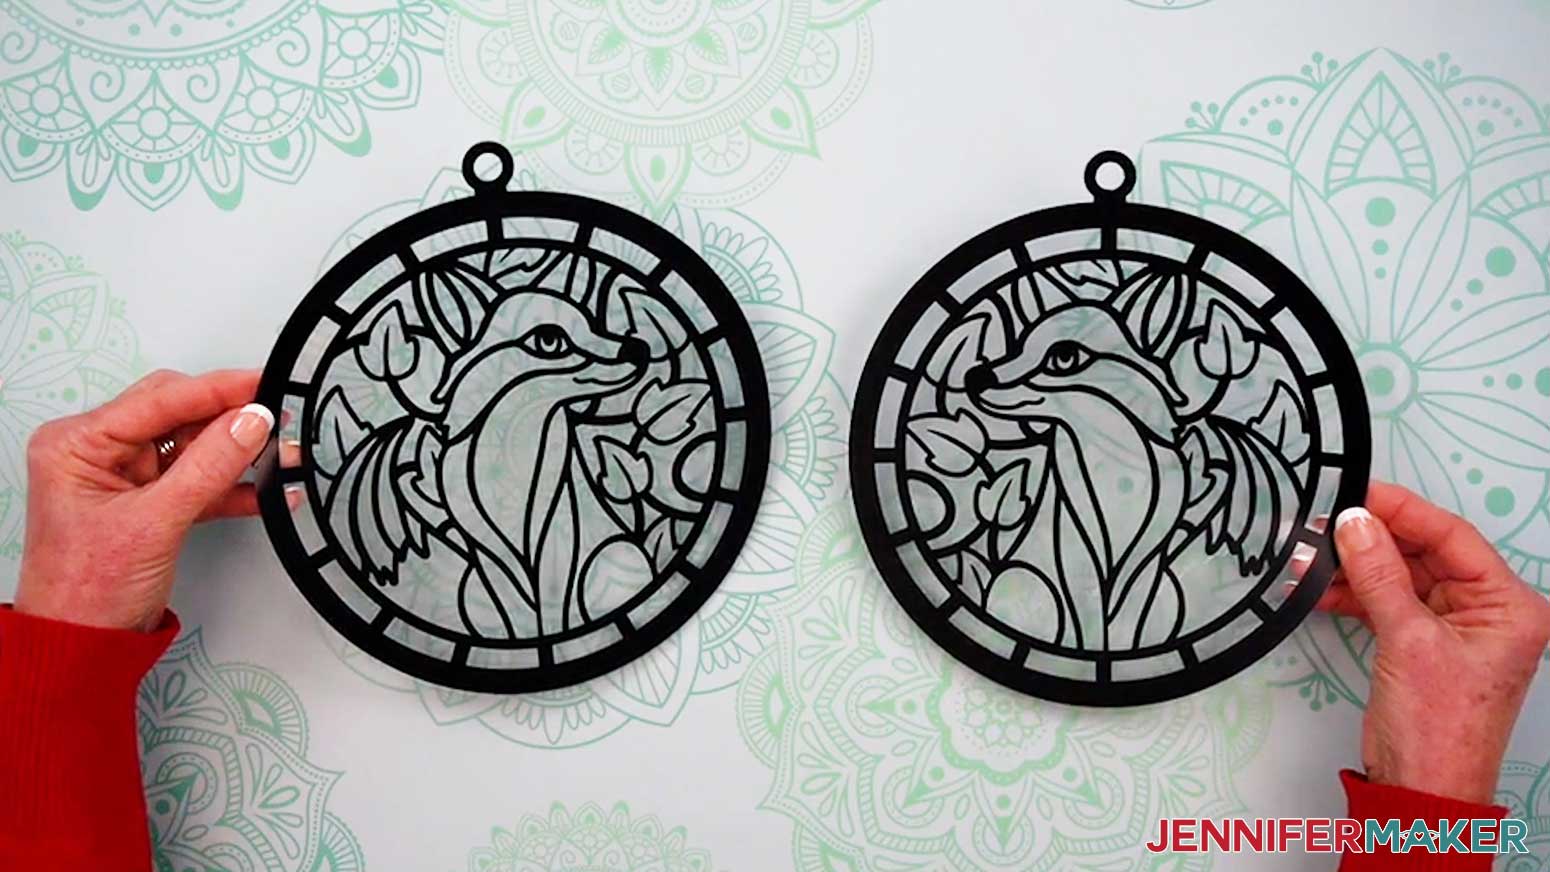
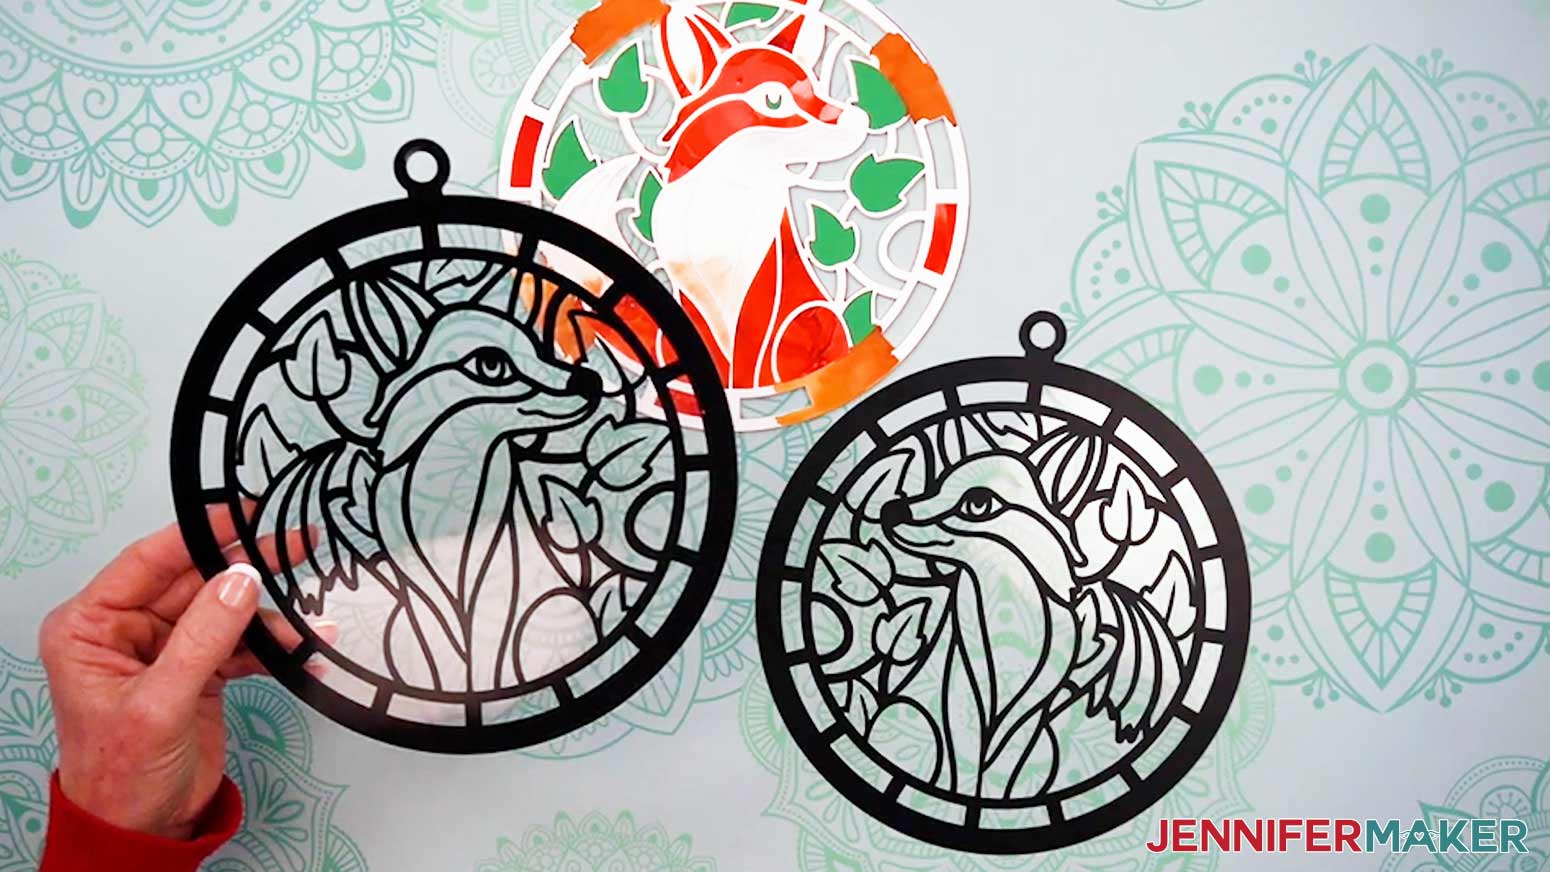
NOTE: I’ll keep my design full size. - “Ungroup” the design and spread out the pieces so we can see how they go together.
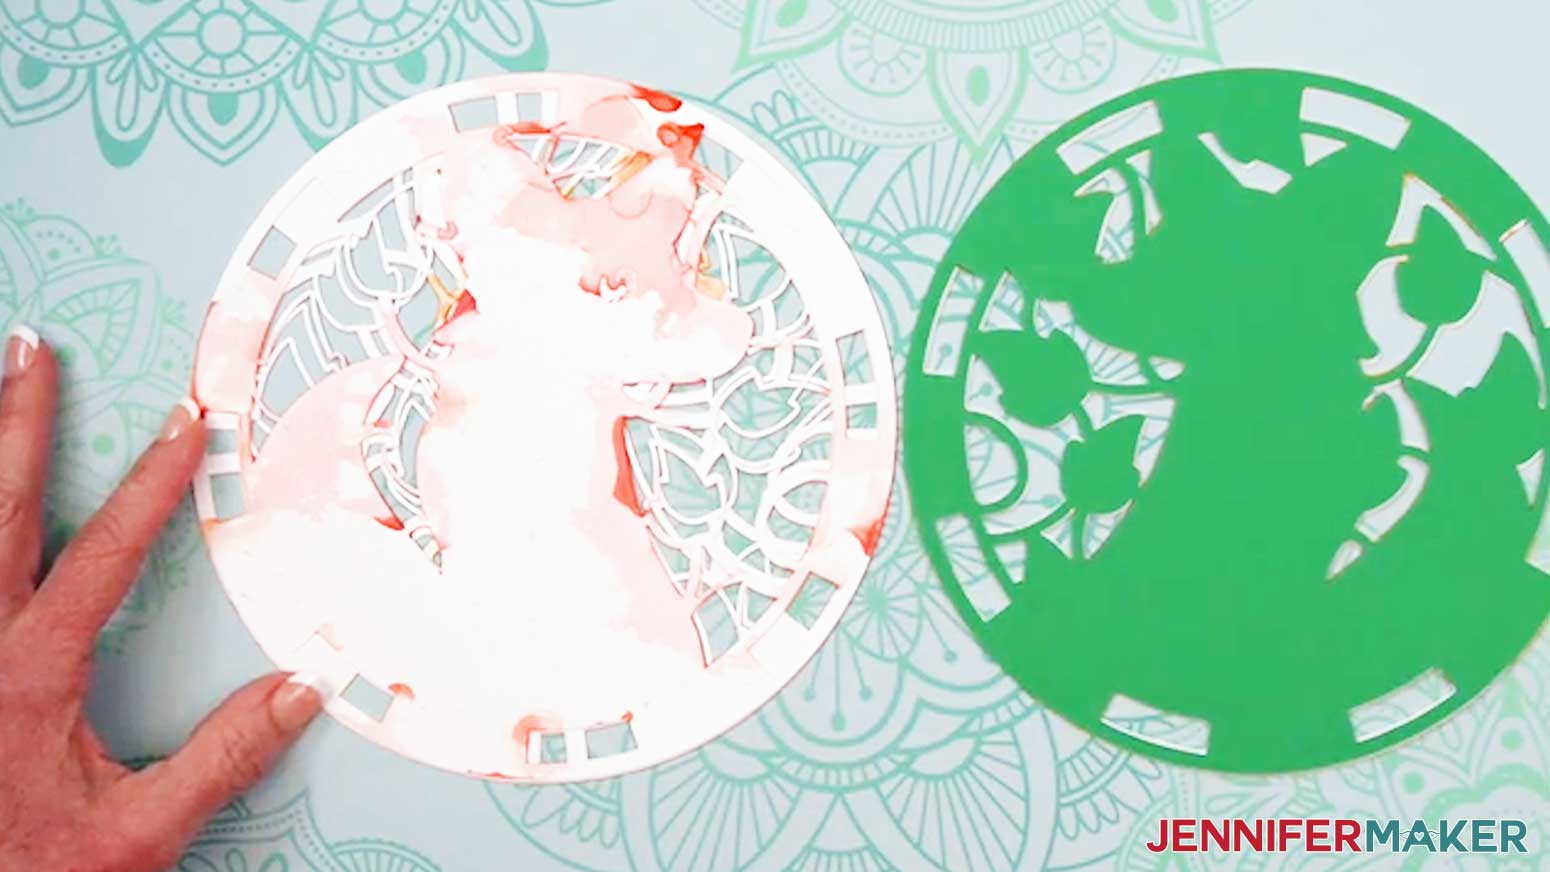
NOTE: Each design has 11 layers. - The white, yellow, and orange layers show the colors I used by inking alcohol ink paper. The green middle layer is the base and will be visible from both sides. I recommend using green cardstock for it. The two black layers will be cut from permanent vinyl, which we’ll apply to acetate. The two gray layers will be cut from acetate.
TIP: I recommend cutting your alcohol ink paper first and then applying the ink to it because it uses less ink to cover the cut paper. Plus, you will be able to better ink specific areas of the design once the paper is shaped. If you’d like to change the color of a layer to more closely match your material or design idea, select it and use the Color Box at the top to pick a new color.
NOTE: I recommend keeping each front and back pair of layers matching in color so the stained glass design looks the same from both sides.
TIP: Avoid changing any of your layers’ colors to black, so your Cricut doesn’t apply the black vinyl’s cut settings to those layers too. - Your design is ready to cut!
CUTTING & WEEDING
- At the top right, select the machine that you’ll use to cut your project, then click “Make.”
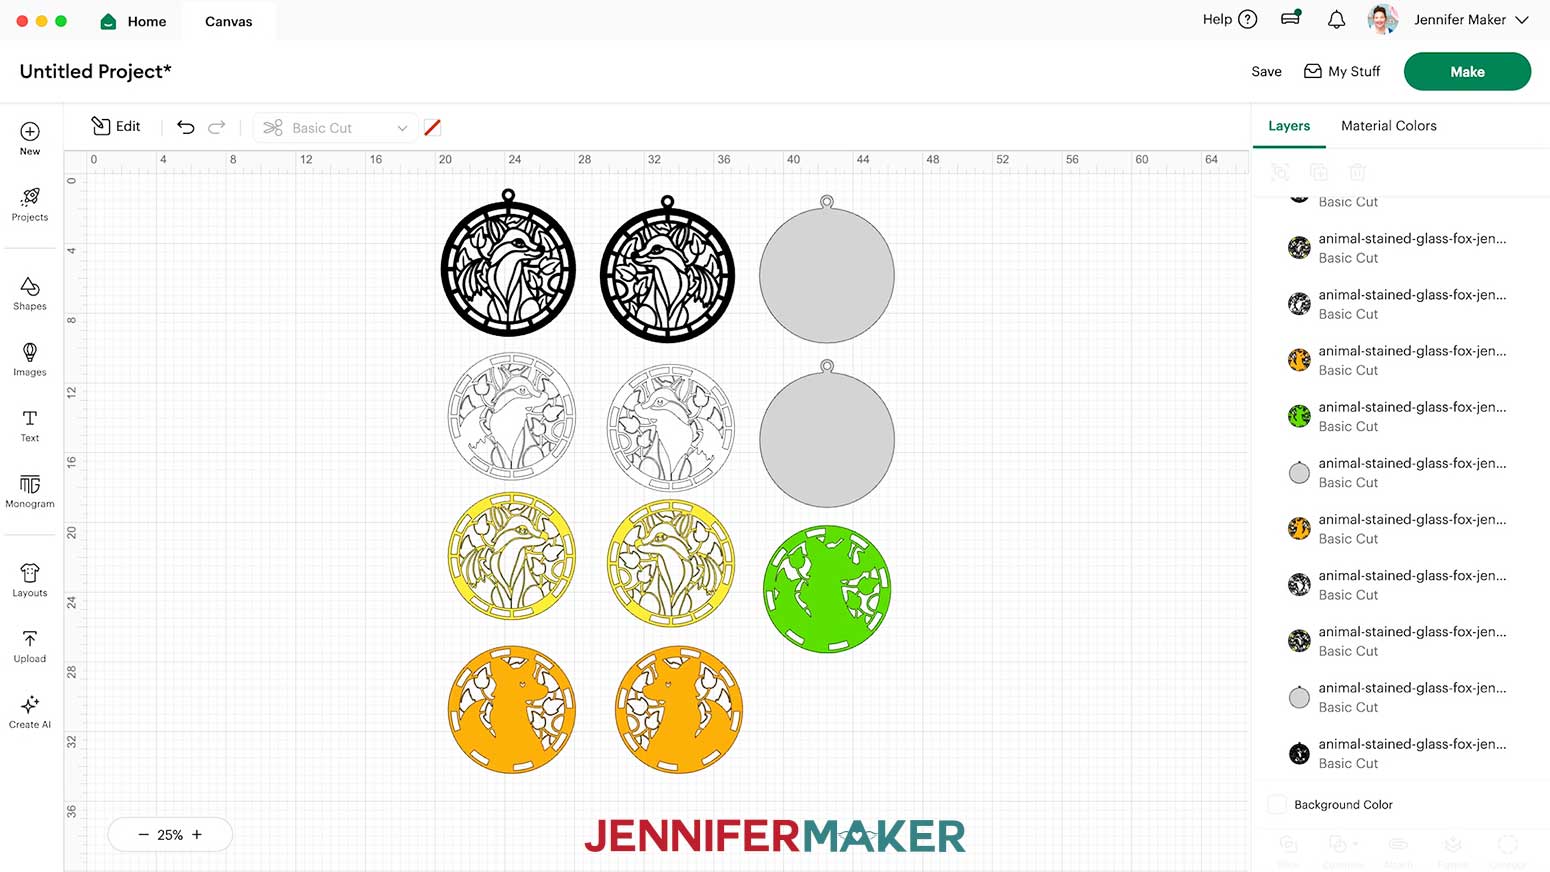
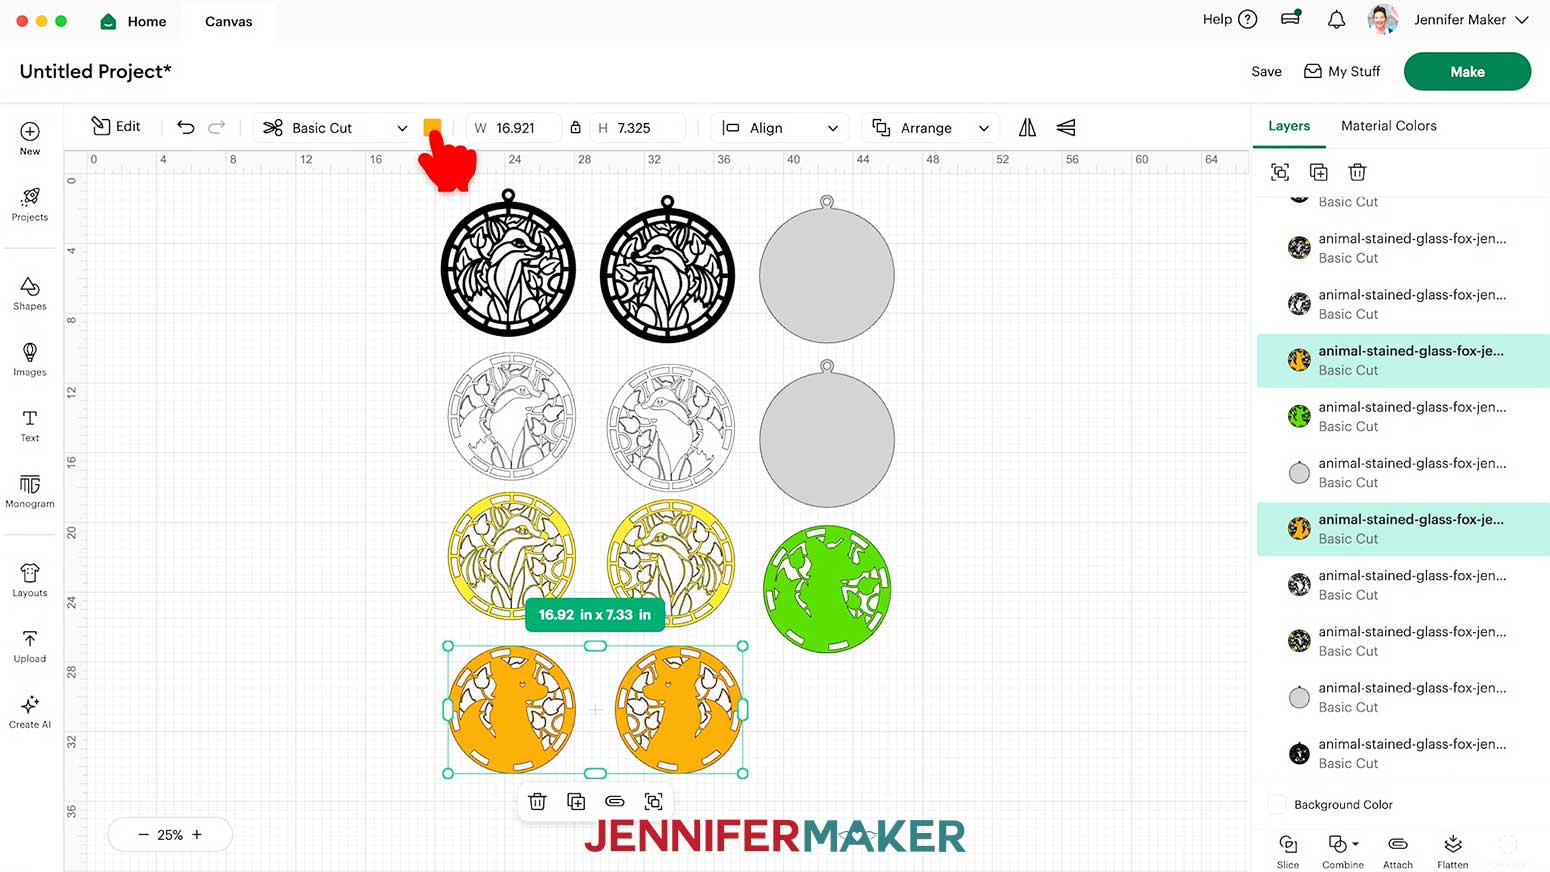
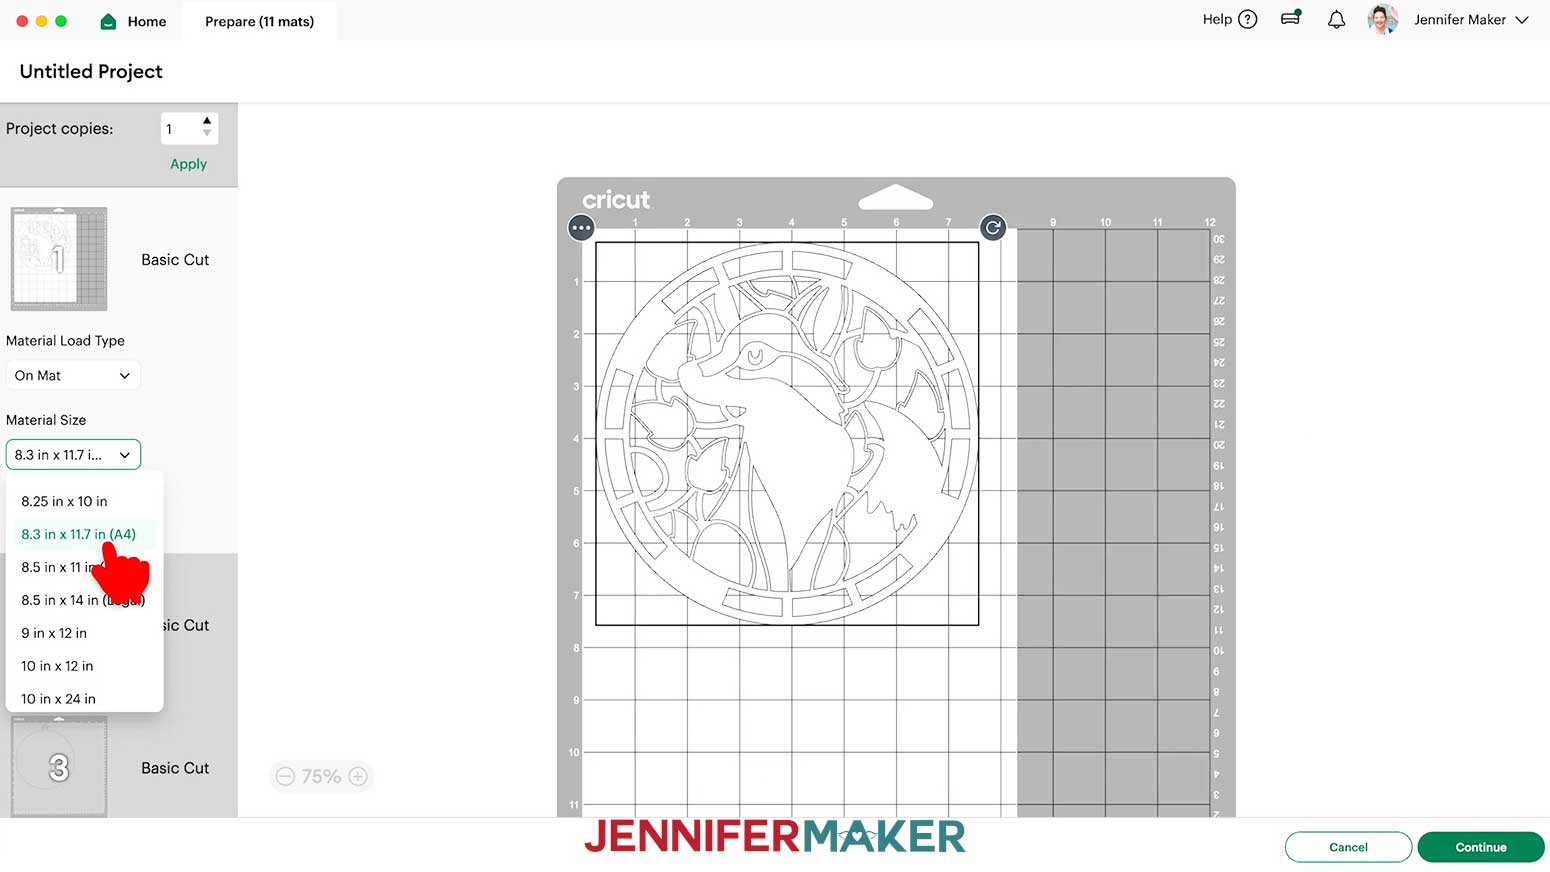
NOTE: If prompted, click "On Mat," choose your mat size, and click “Confirm.” - On the “Prepare” screen, make sure the correct “Material Size” is selected for each of your mats.
NOTE: I used 8.3” x 11.7” alcohol ink paper for the design layer pair mats, 12” x 12” acetate for the gray mats, 12” x 12” for the green cardstock base mat, and 12” x 12” for the vinyl mats. - Click the first mat so it loads first on the next screen, then click “Continue.”
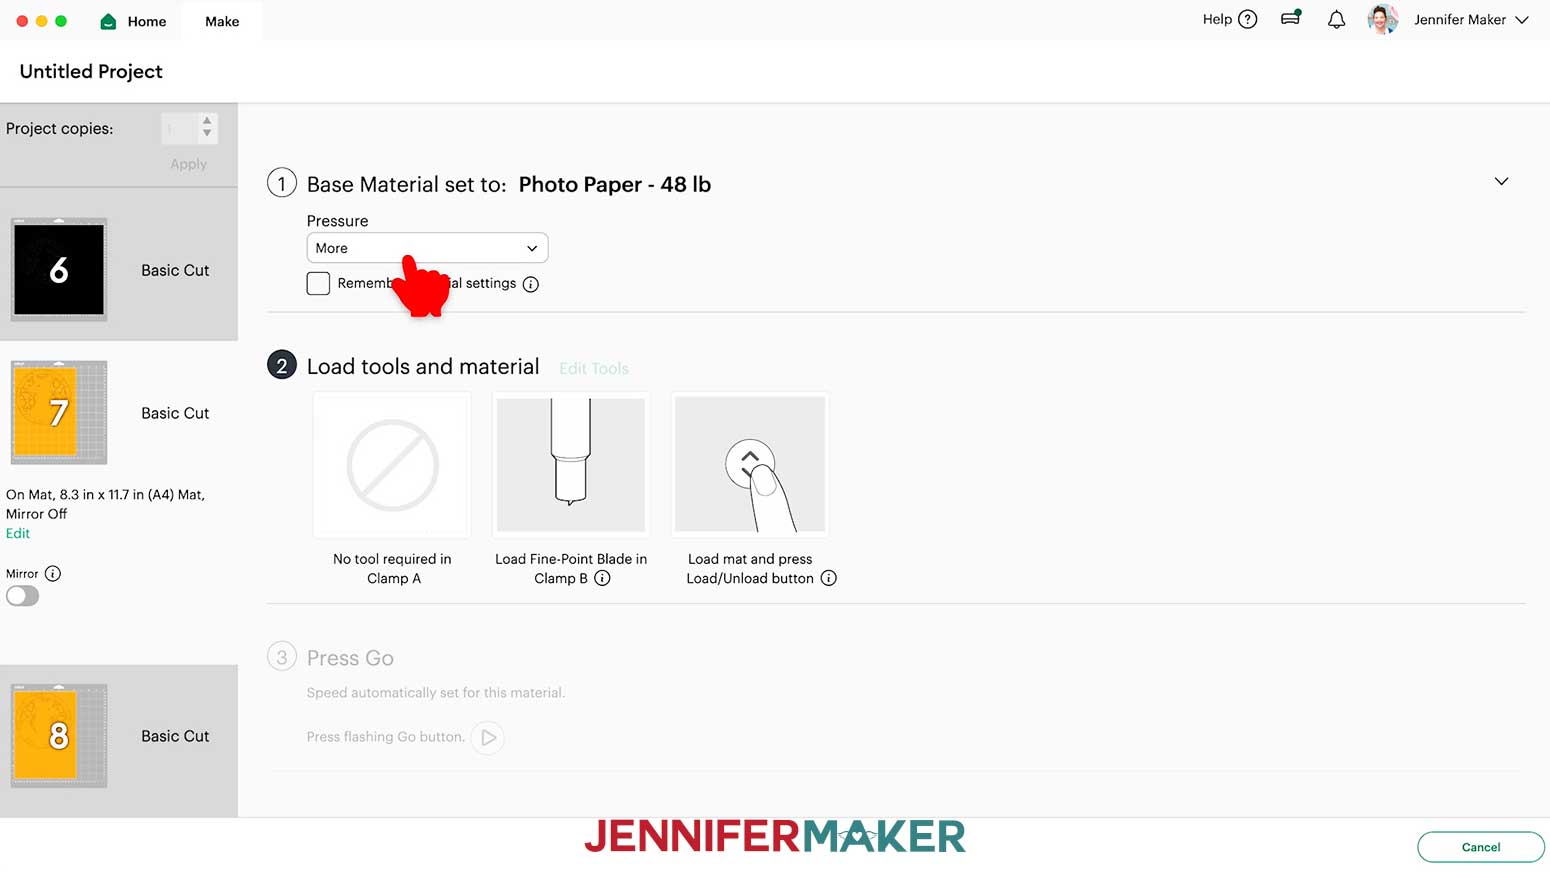
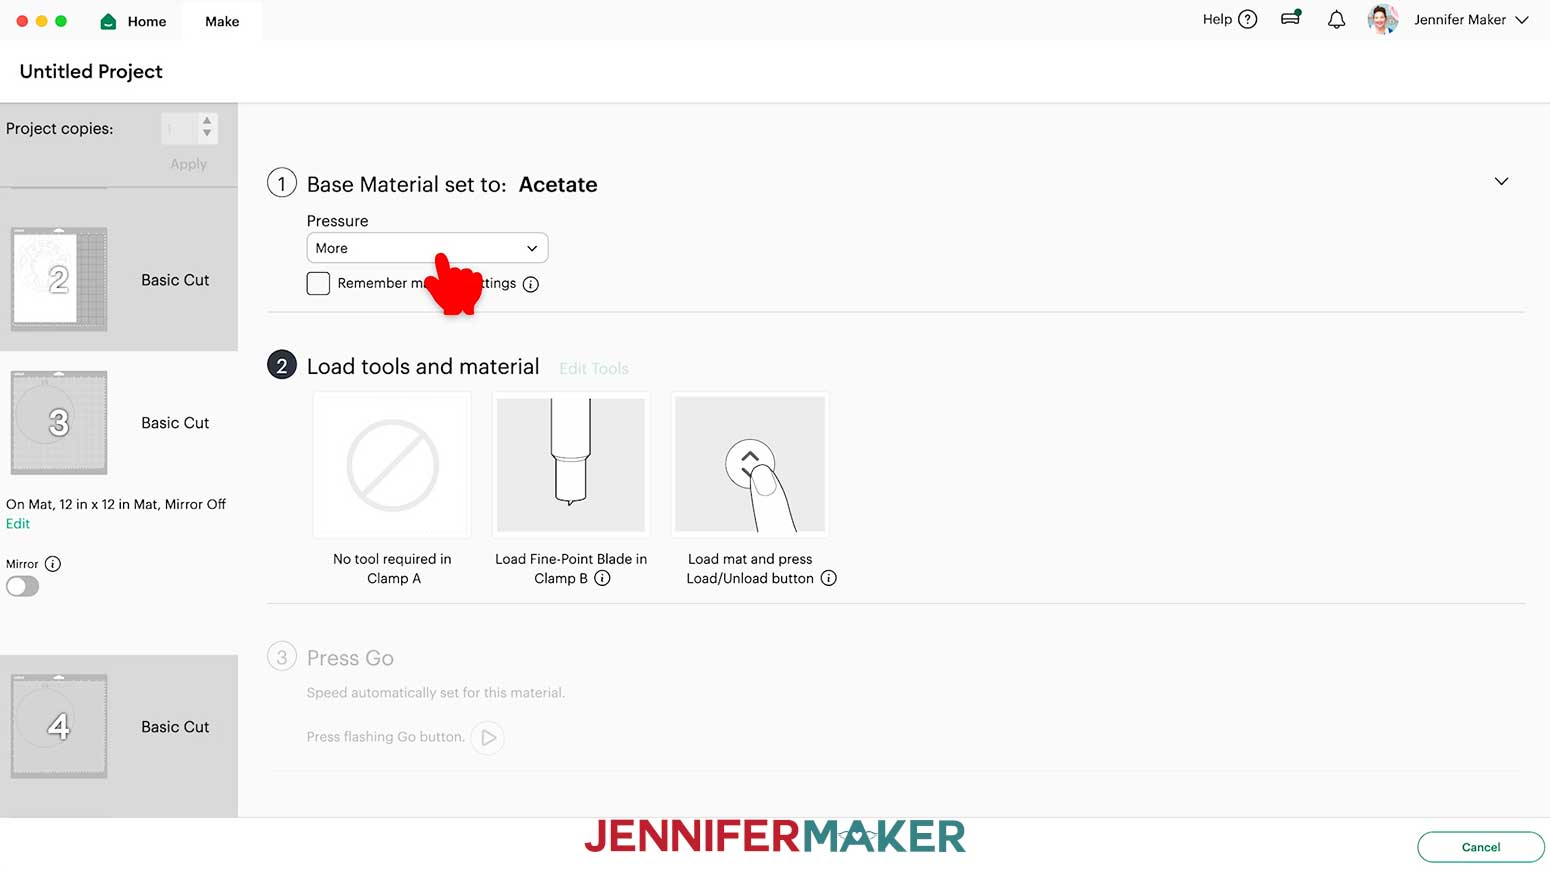
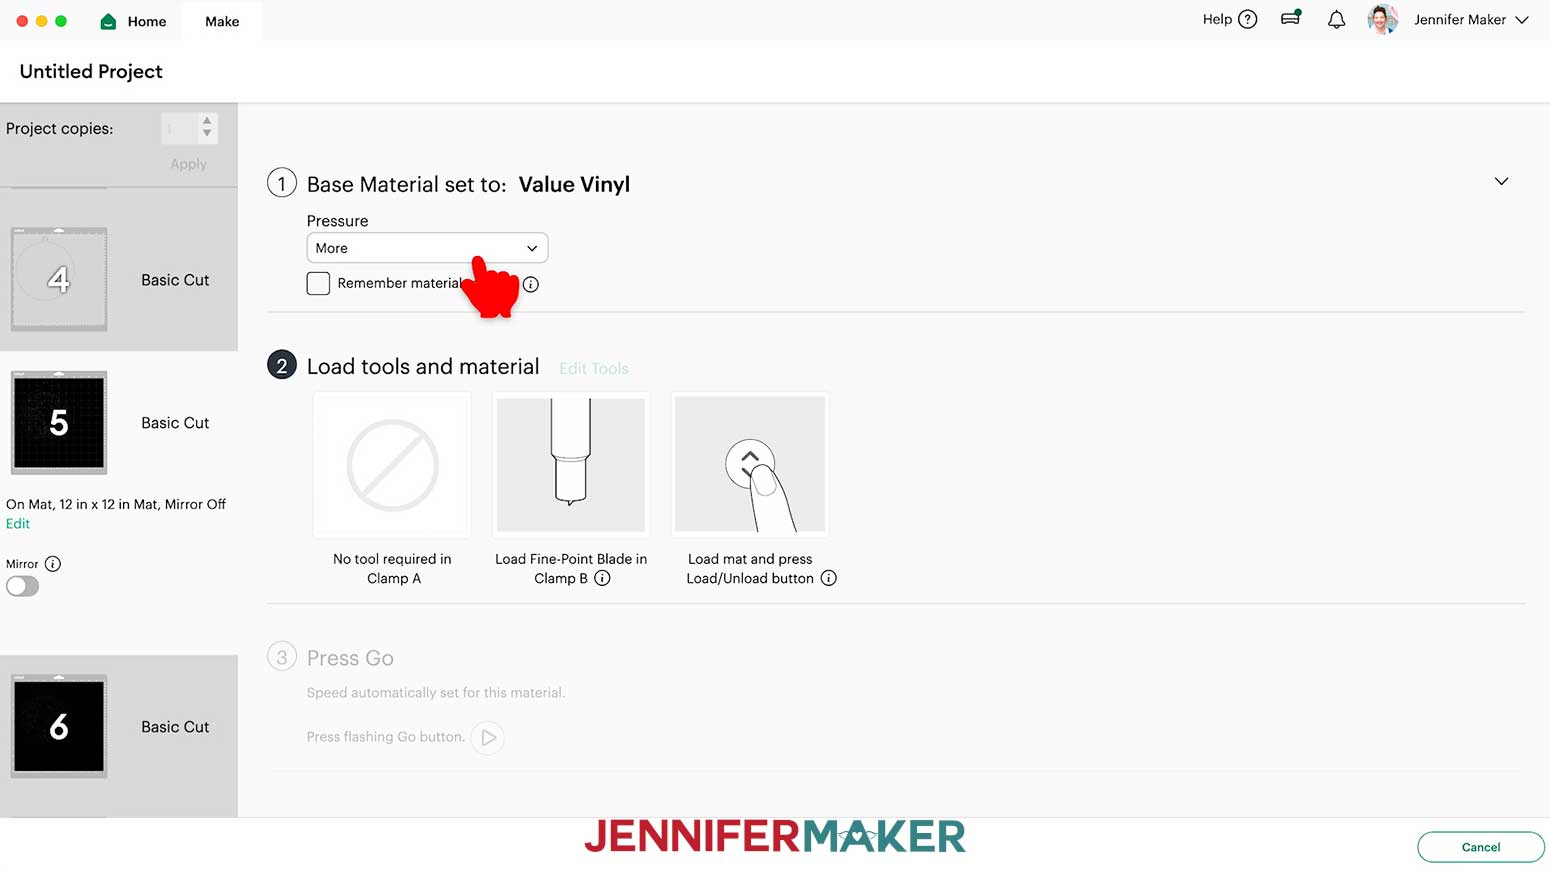
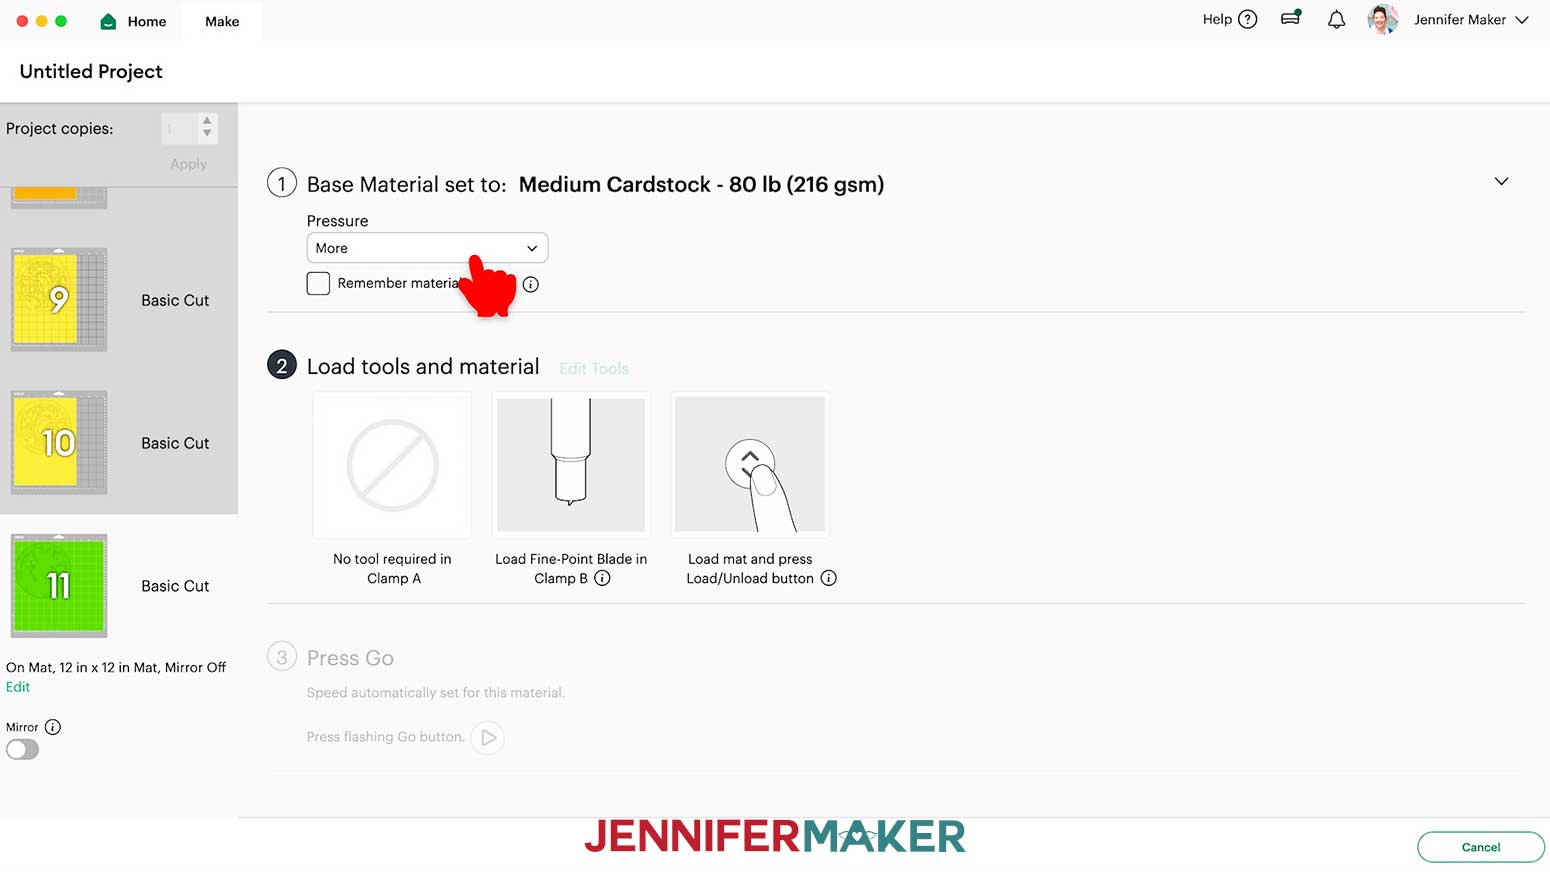
- On the “Make” screen, choose the “Base Material” settings that correspond to each of your mats. I used the following settings:
For alcohol ink paper: “Photo Paper” setting with “More” Pressure
For acetate: “Acetate” setting with “More” Pressure
For permanent adhesive Value vinyl: “Value Vinyl” setting with “More” Pressure
For 65 lb. cardstock: “Medium Cardstock - 80 lb (216 gsm)” setting with “More” Pressure - My first mat is one of the white alcohol ink layers. Place the alcohol ink paper on a green StandardGrip machine mat, in the orientation shown on your screen.
NOTE: You’ll see different colored mats on the Prepare screen because the layers are different colors in the design. Those colors are just for organizing the layers and adding ink later. All of these layers are cut from the same white alcohol ink paper, so place white alcohol ink paper on the white, yellow, and orange layers. - Use a clean brayer to adhere it well.
- Check that your Fine-Point Blade is clean and in the clamp.
- Press the flashing “Load/Unload” button to load the prepared mat into your Cricut.
- Press the flashing middle button to begin cutting.
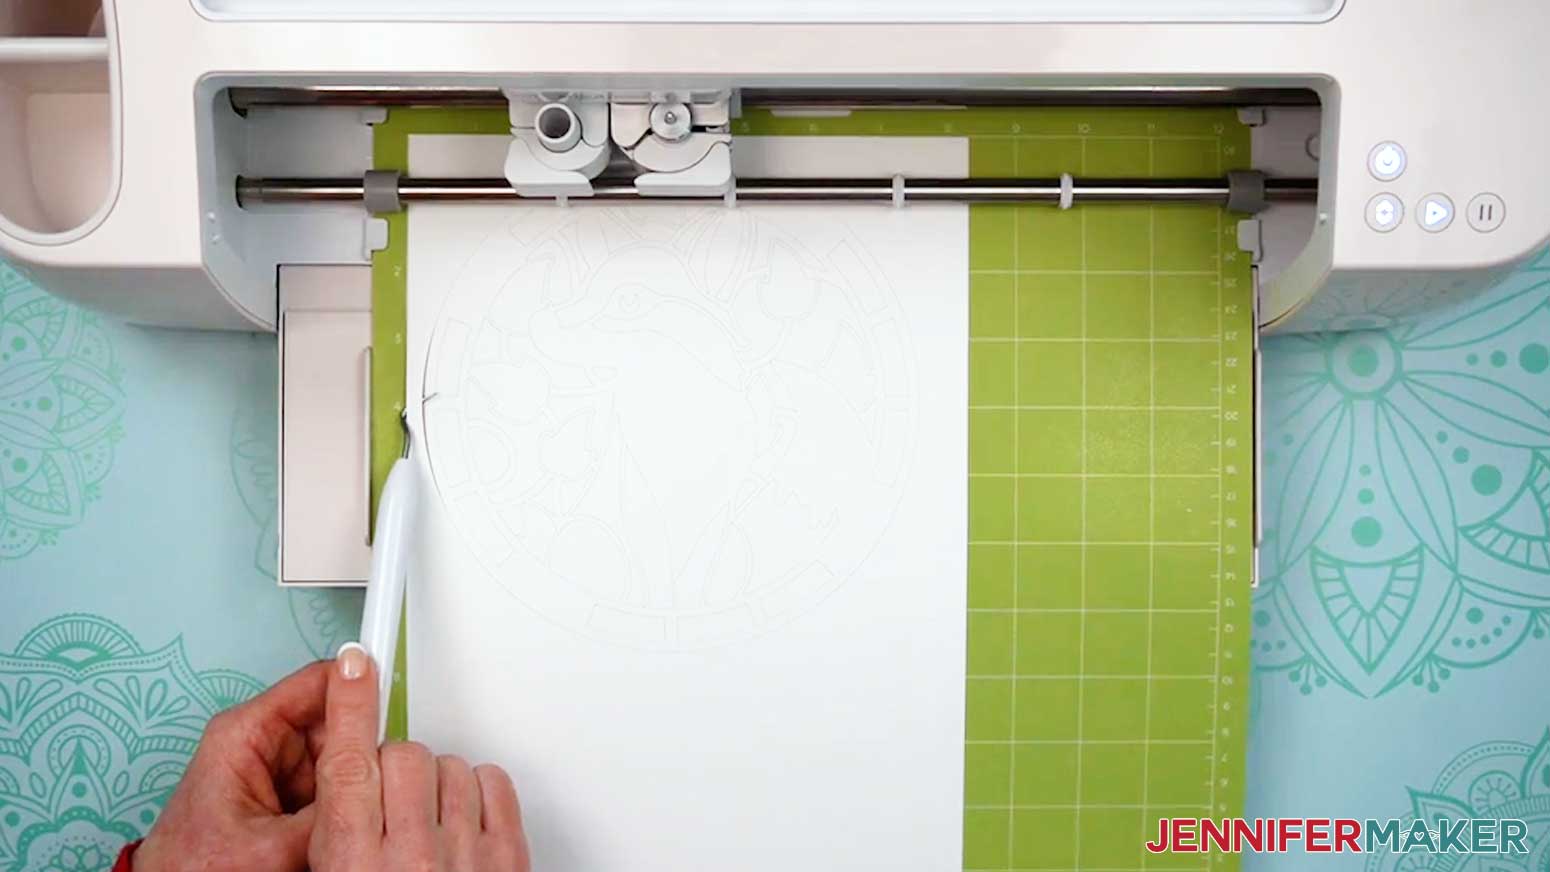
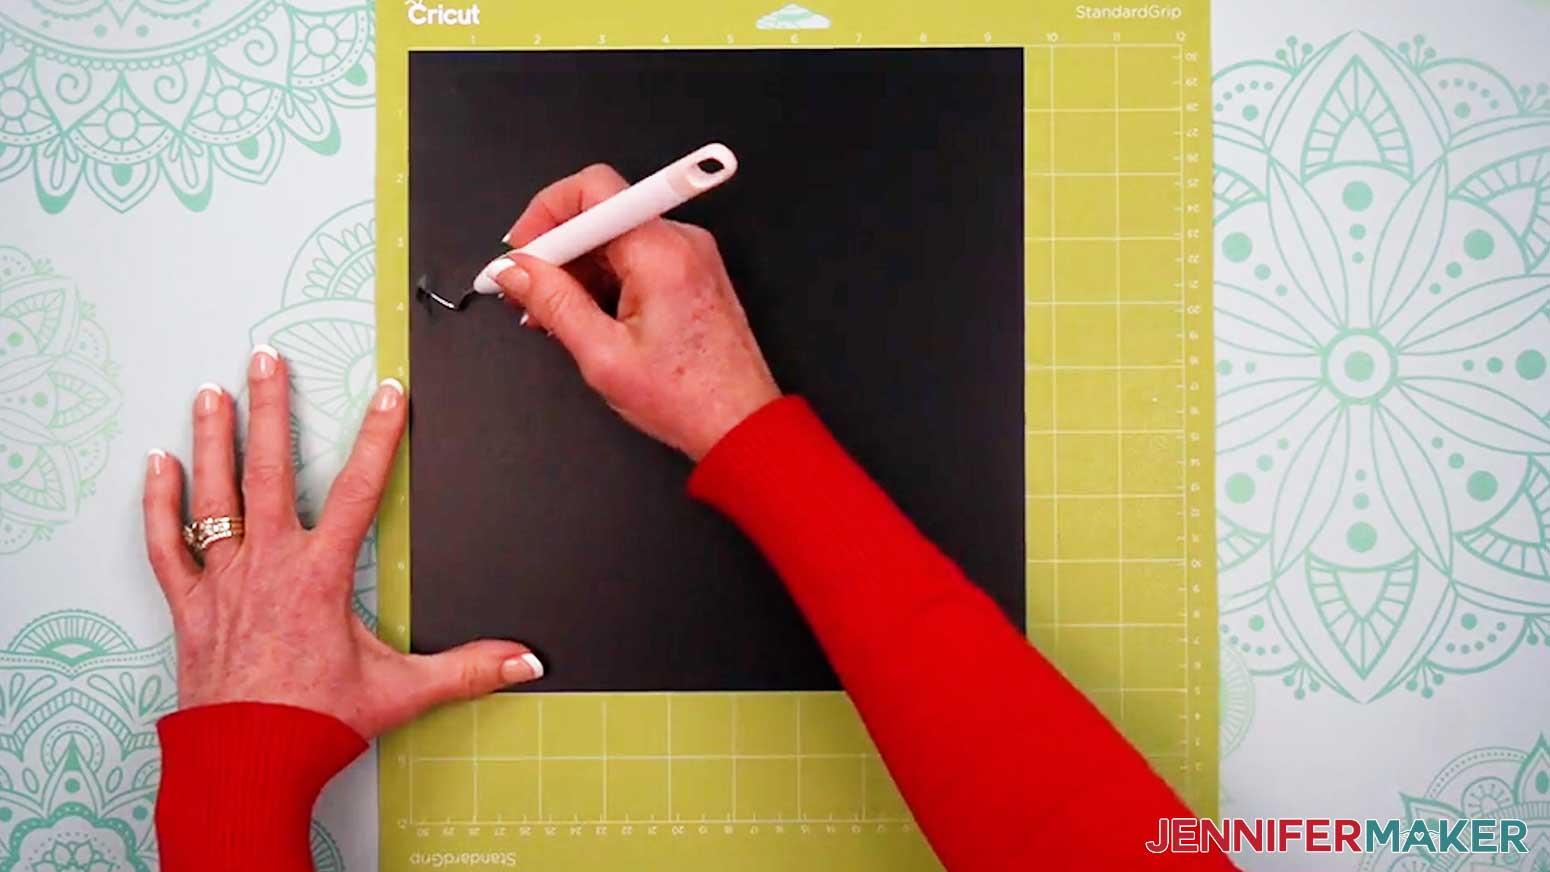
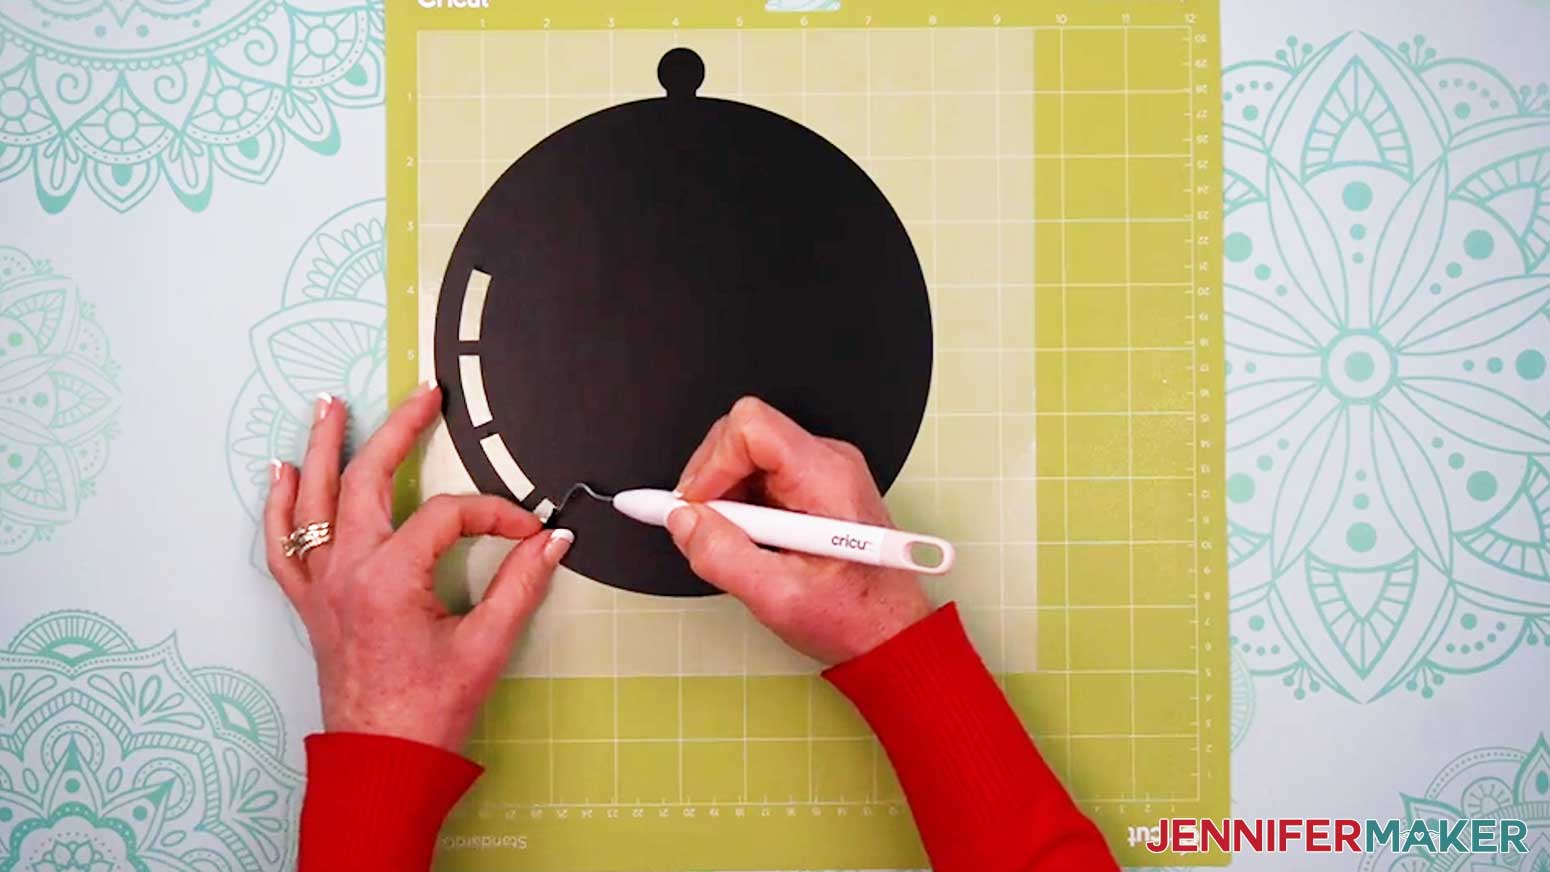
- When it has finished cutting, don’t unload the mat right away. Gently lift a corner of the material to make sure the cuts went all the way through. If not, press the middle button again to make a second pass of cuts in the same spots.
- When the cuts are complete, unload the mat, flip it over onto your work surface, and roll it back to release the material.
TIP: Use a Spatula Tool to help lift extra delicate areas. If you have any issues with your cuts, go to jennifermaker.com/cleaner-cuts. - Cut the rest of your alcohol ink paper layers and lay them face up on your work surface.
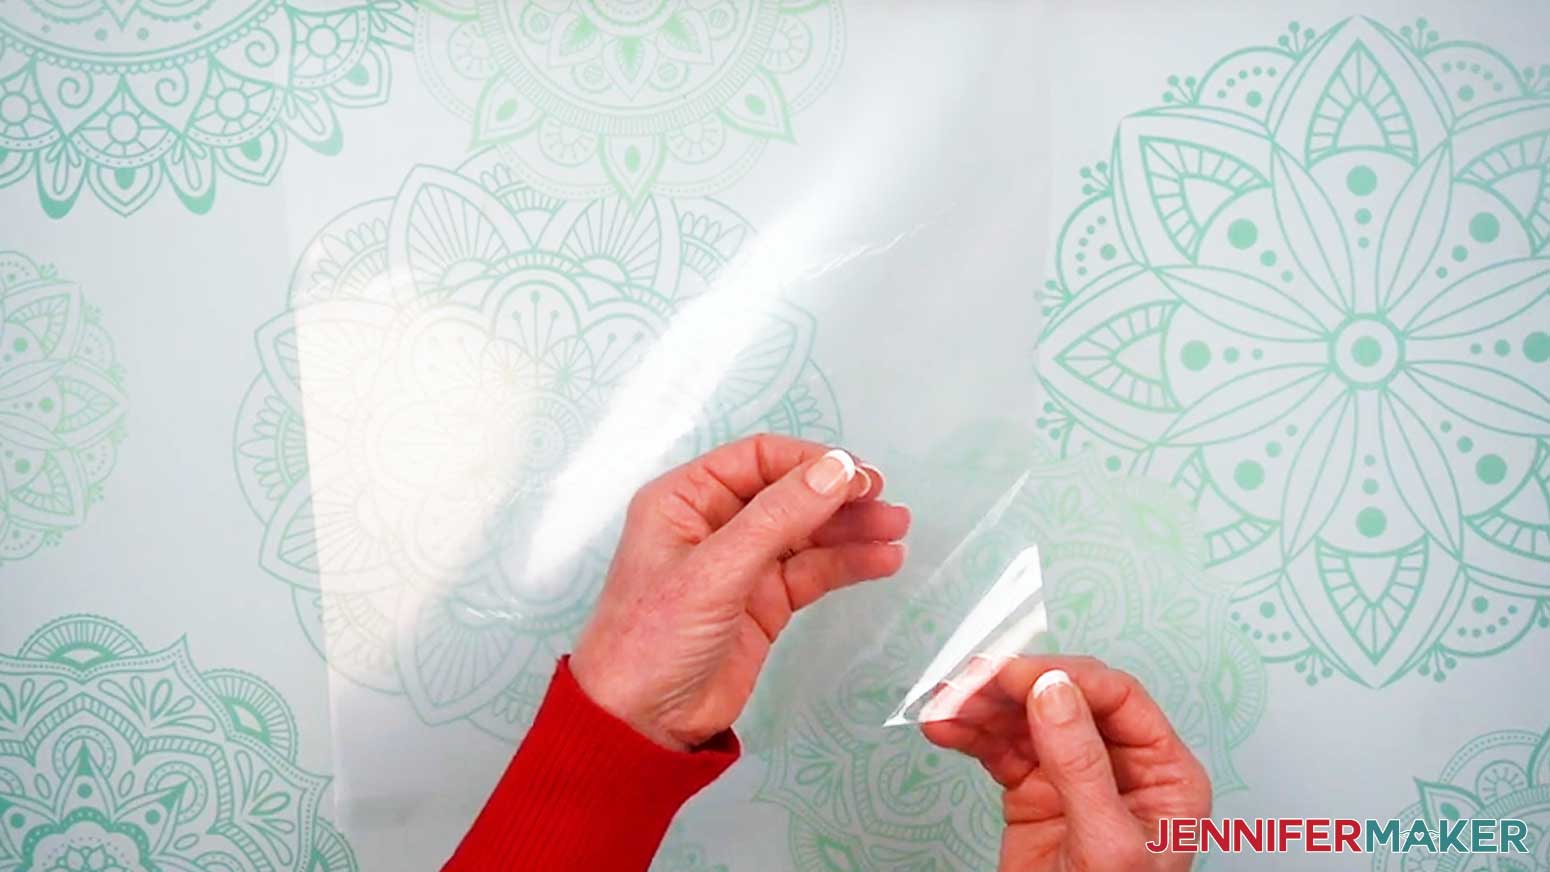
- When you get to an acetate mat, remove the protective film from one side of the material. Leave the other side protected for now.
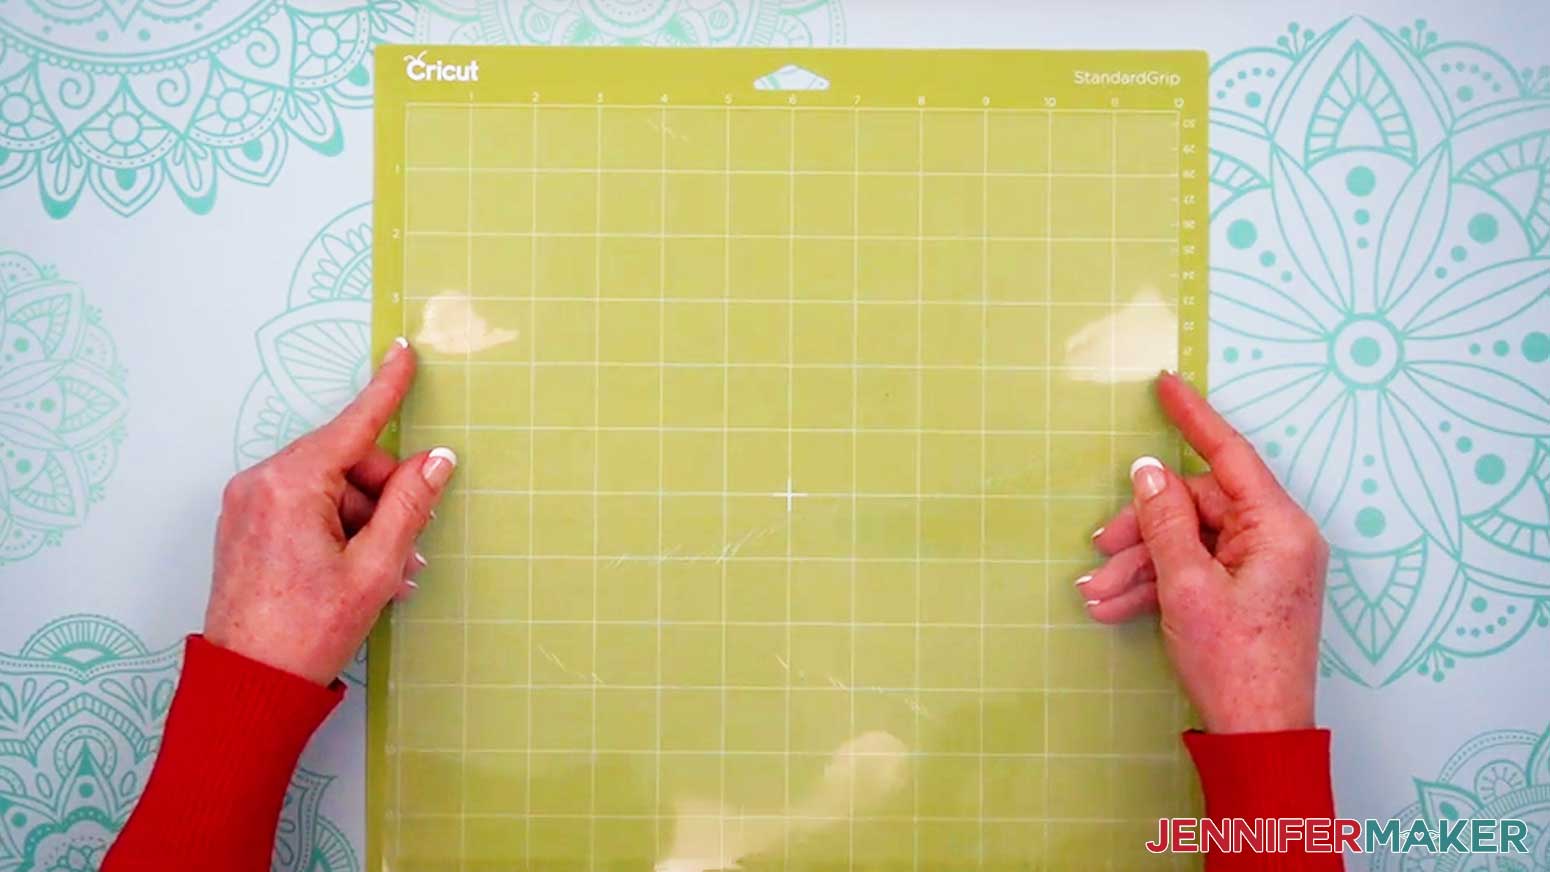
- Place the acetate onto a green StandardGrip machine mat, with the unprotected side facing up.
- Using the cut settings in Step 4, cut each sheet of acetate, repeating the same process for each sheet.
- Using the cut settings in Step 4, cut each sheet of vinyl, repeating the same process.
NOTE: Trim the vinyl so it’s about ½” larger on each side than the design area, then place it pretty-side up on a green StandardGrip machine mat so it covers the design area on the screen. - When the cuts to the vinyl are complete, unload the mat, but keep the vinyl on the mat.
TIP: It can be easier to weed vinyl, especially small, detailed designs, while it is still adhered to the machine mat. - Use your weeding tool to carefully peel away the extra background vinyl.
- Poke your weeding tool into small sections of the vinyl you want to remove. Gently lift the tool away from the design to remove the excess vinyl.
TIP: Make sure you do not pull up any pieces you want to keep! If they come up, gently pat them back in place and try again. Refer back to the Design Space screen if you’re not sure which pieces to remove. - Continue to weed until all that is left is the vinyl for your design.
- Flip your mat over onto your work surface, and roll it back to release the vinyl decal.
- Follow steps 5-11 to cut your cardstock mat.
- Place all of your cut pieces face up on your work surface.

STEP 3: INK YOUR CUT PIECES
- Check the safety information and specific instructions for your alcohol inks, including putting on safety equipment such as goggles, an apron, and disposable gloves, and using a fan or opening a window to improve ventilation.
- Put several layers of butcher paper on your work surface to protect it.
NOTE: Most spots can be cleaned up with rubbing alcohol, but the inks can stain some surfaces. - Place one of the alcohol ink paper layers on top of the butcher paper.
- Double-check that the paper is in the correct orientation and the correct side is facing up, using your Design Space Canvas for reference. Each pair of colored layers are mirror-images of one another, so be sure to ink the correct sides of your paper.
TIP: To avoid confusion, I recommend inking one pair of matching mirrored layers at a time. - Gather your blending solution and the alcohol inks you want to use.
NOTE: Use your Canvas in Cricut Design Space to determine which color or color scheme to ink each layer.
TIP: Ink the layers by color group; choose ink colors that are similar to the layer’s base color in Cricut Design Space so each layer stands out in your finished project.
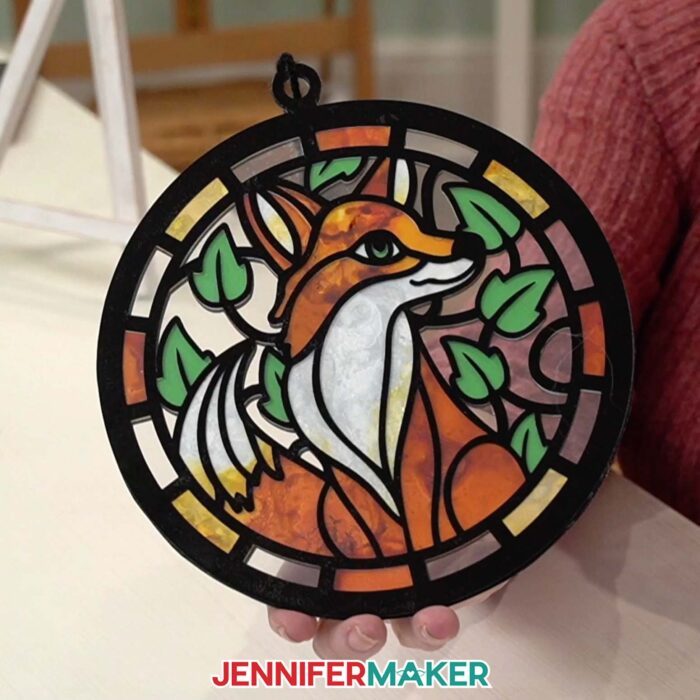
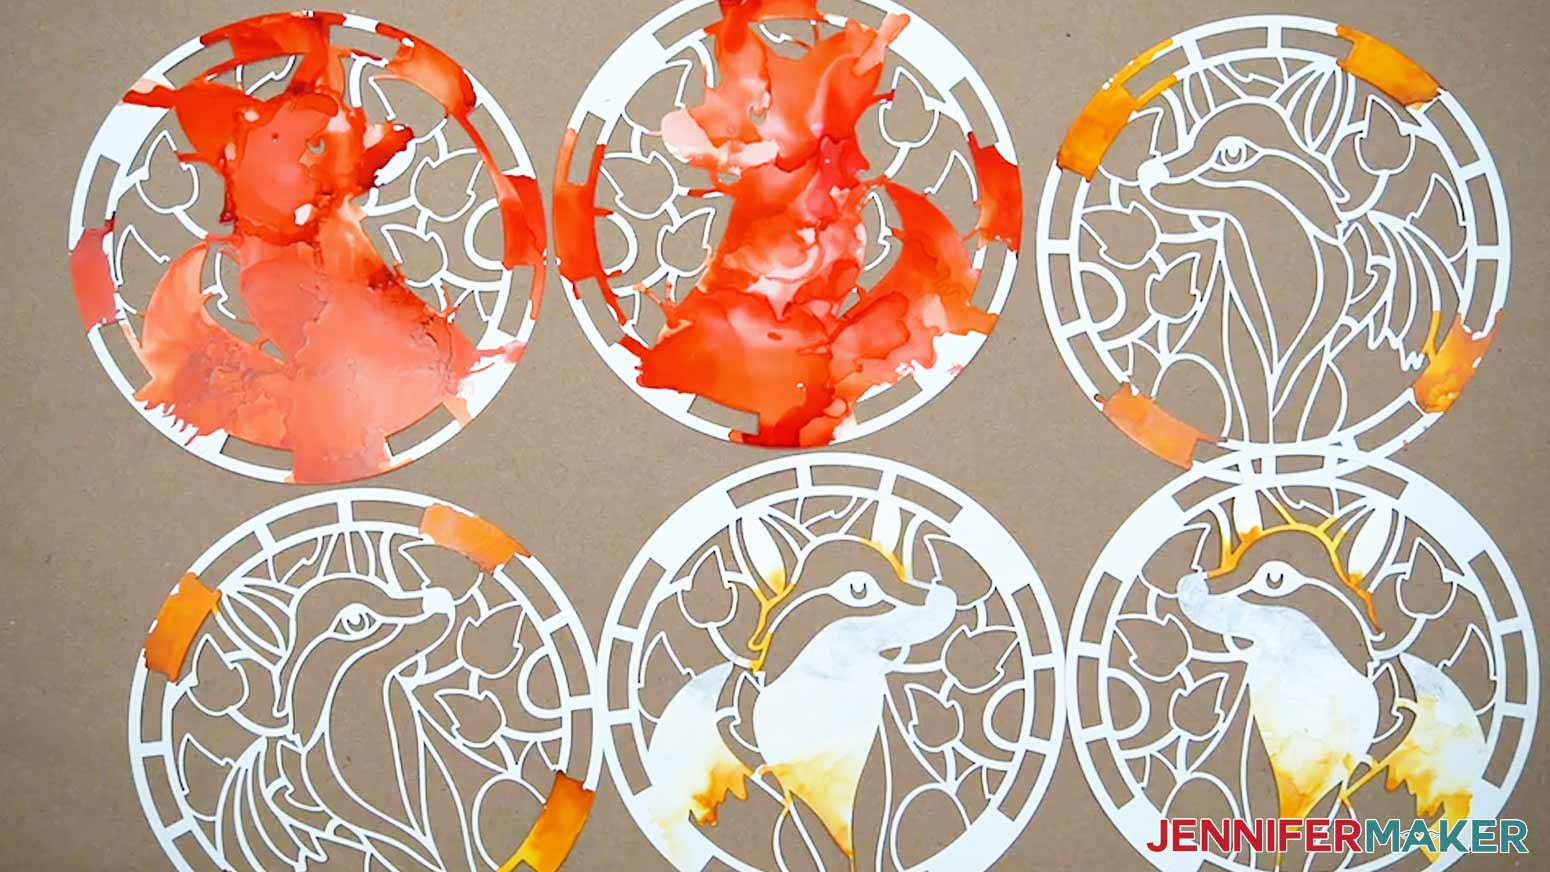
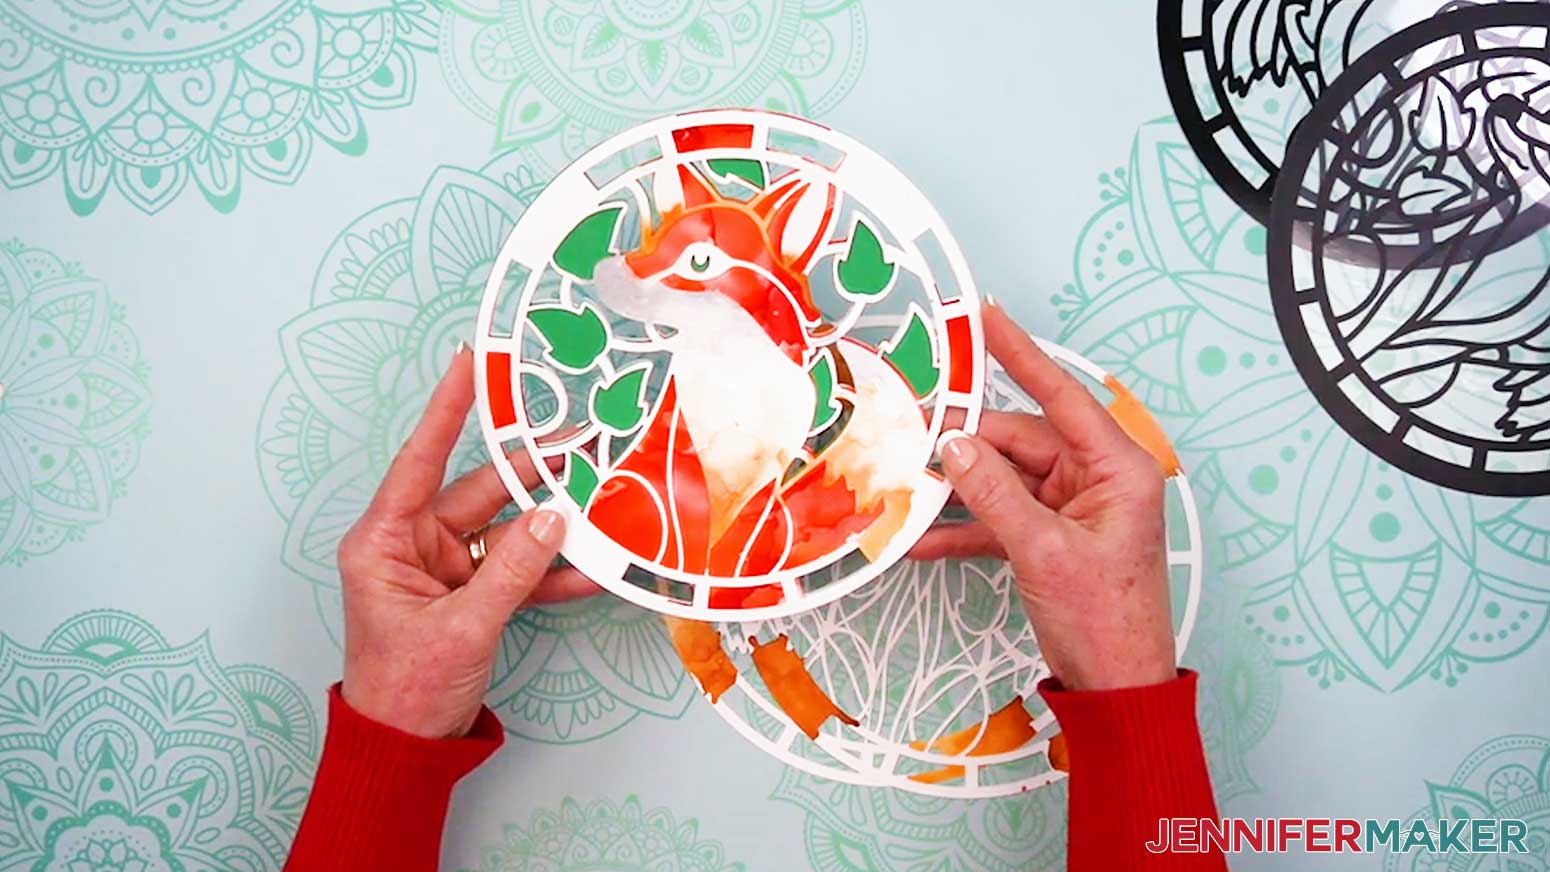
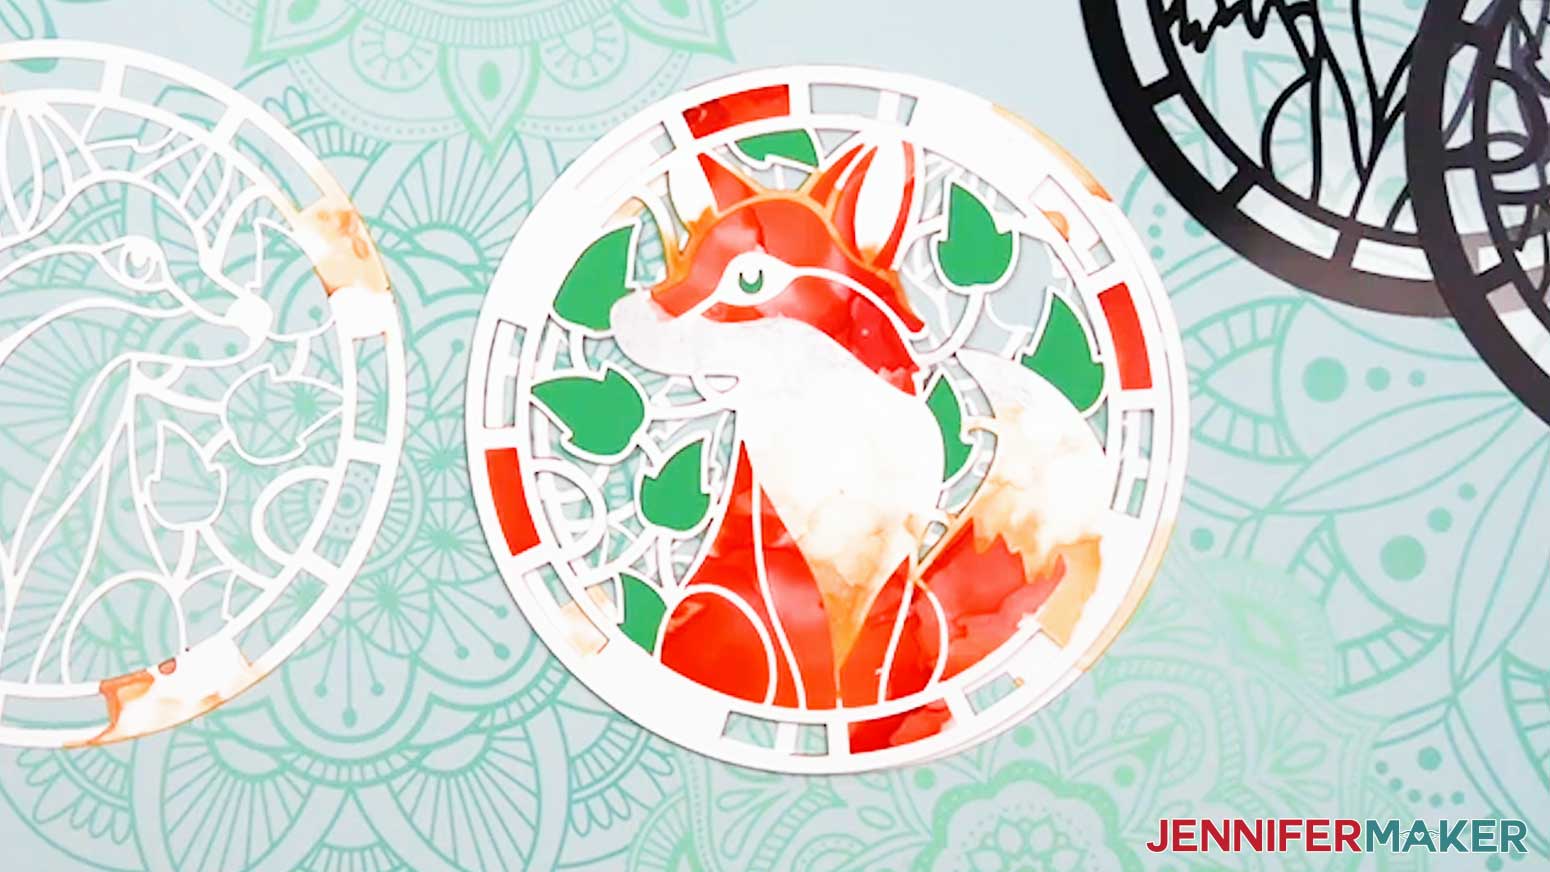
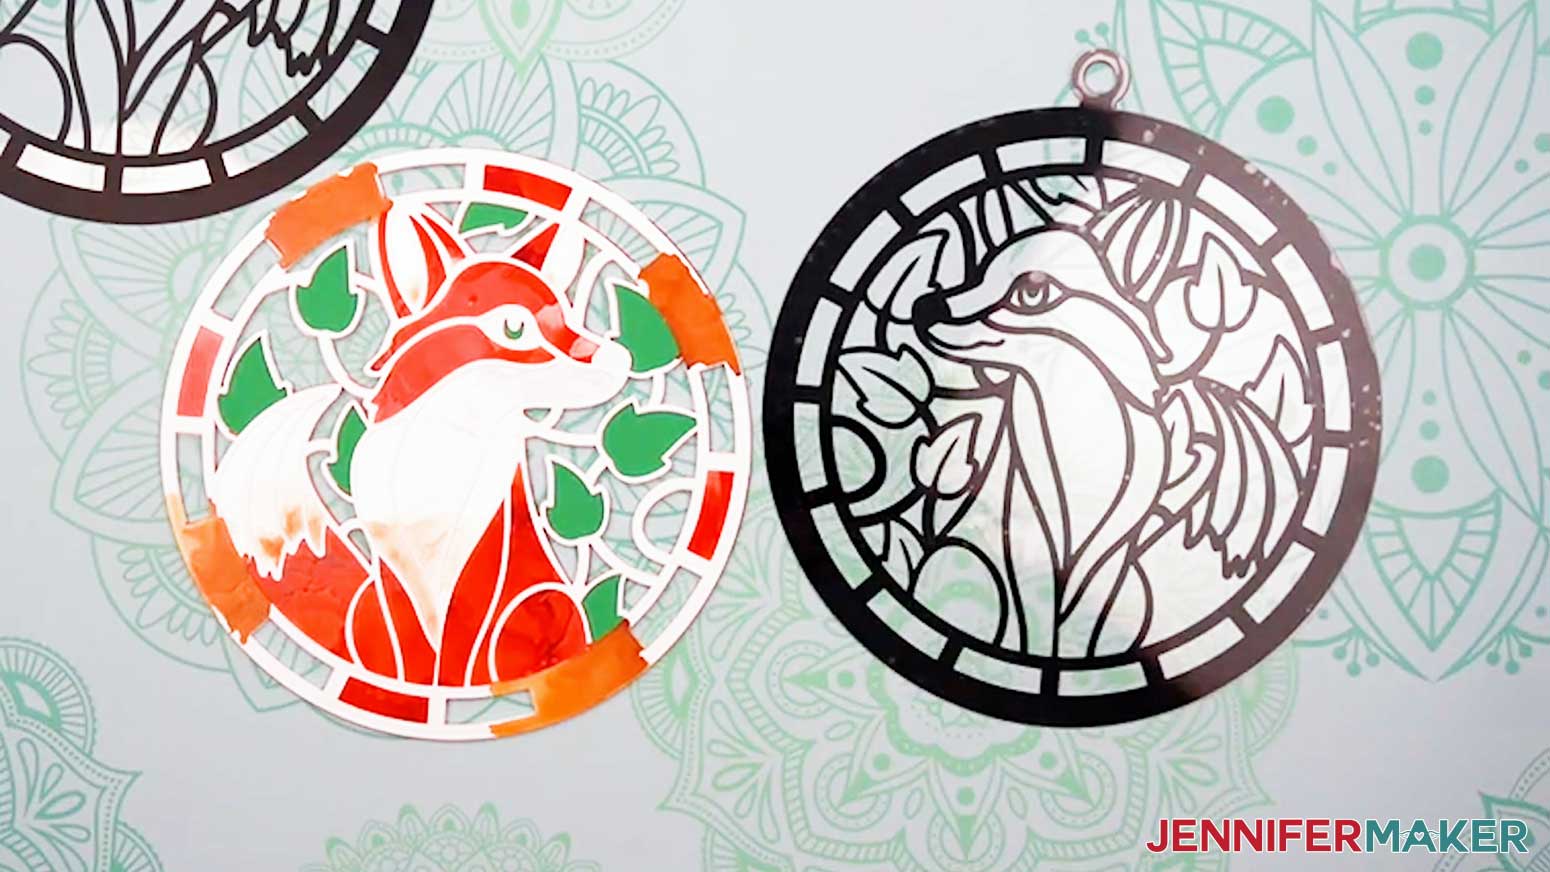
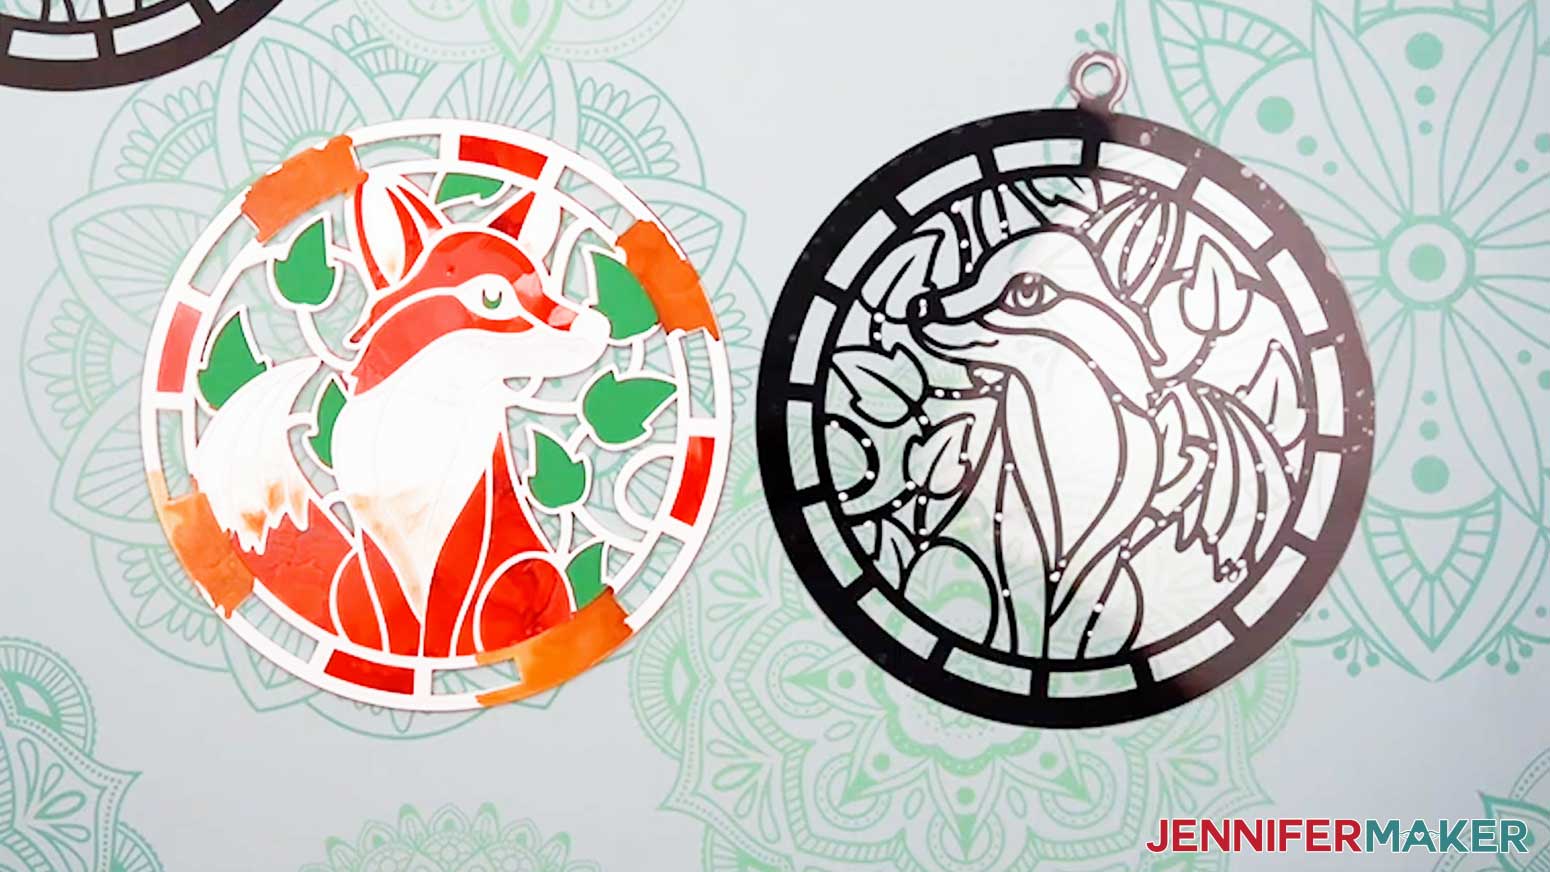
For the Fox design, I used warm orange tones for the body, soft yellow tones for the outer ring, and pearl and silver tones for the white details. The green cardstock center layer fills in the leaves and the Fox’s eyes.
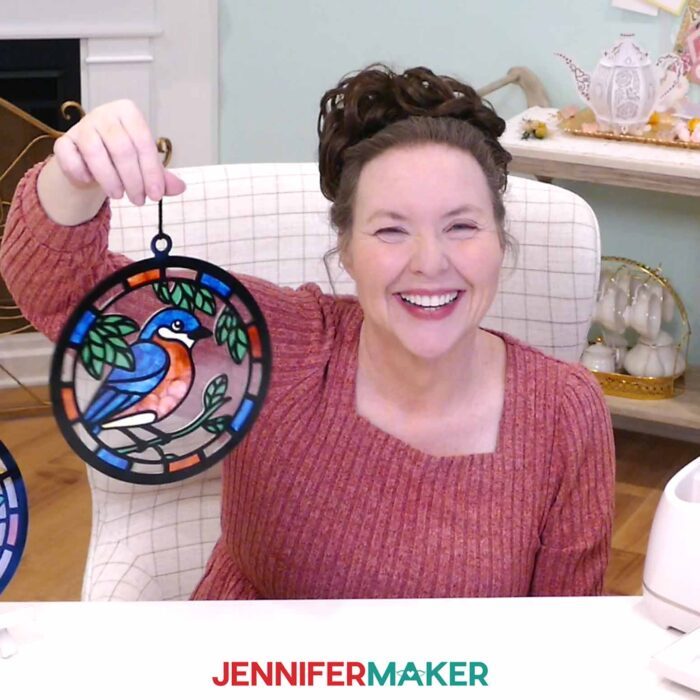
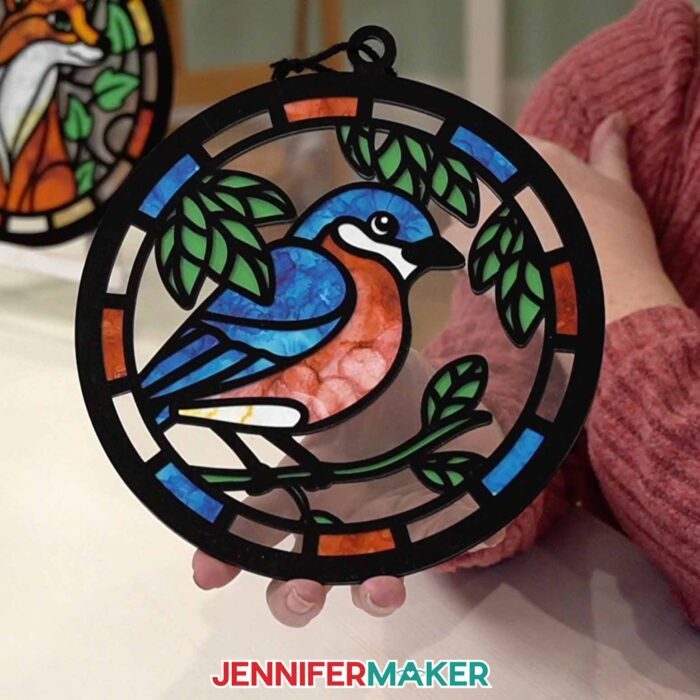
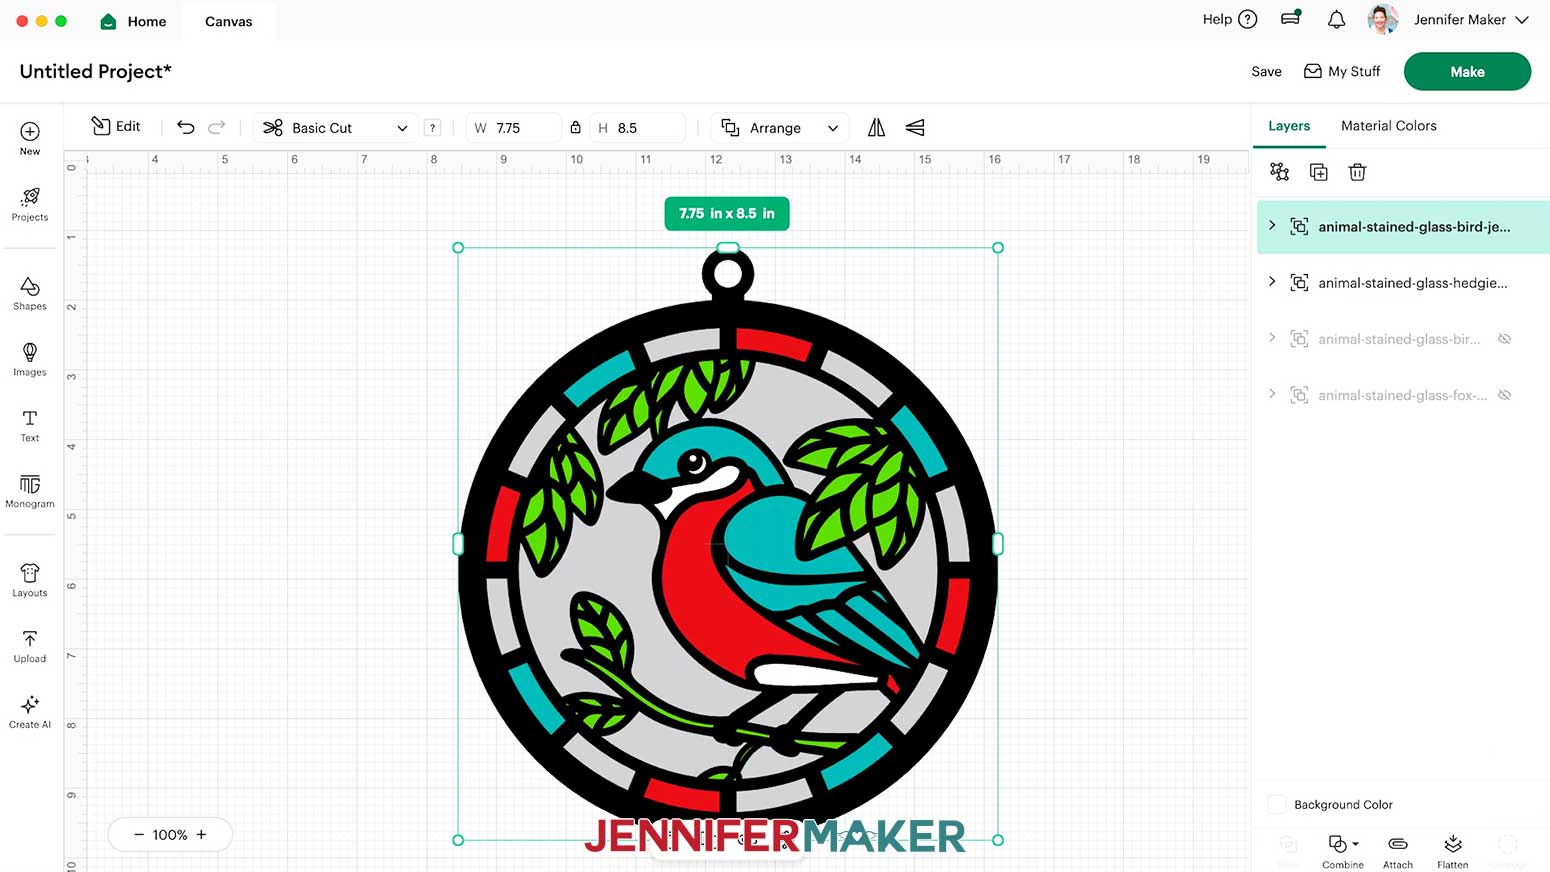
For the Bird design, I used pearl and yellow tones for the body accents and eye, orange and yellow tones for the chest and outer ring, and blue tones for the head, wings, and outer ring. The green cardstock center layer fills in the leaves and branch.
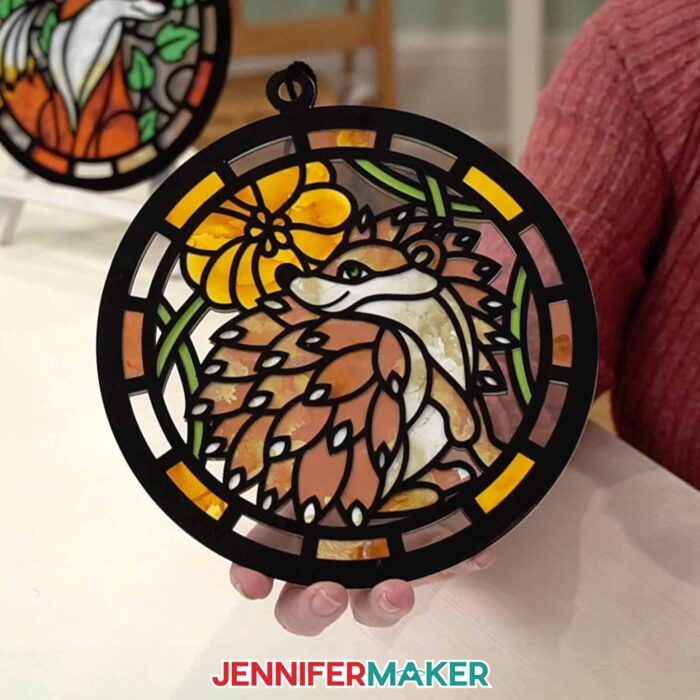
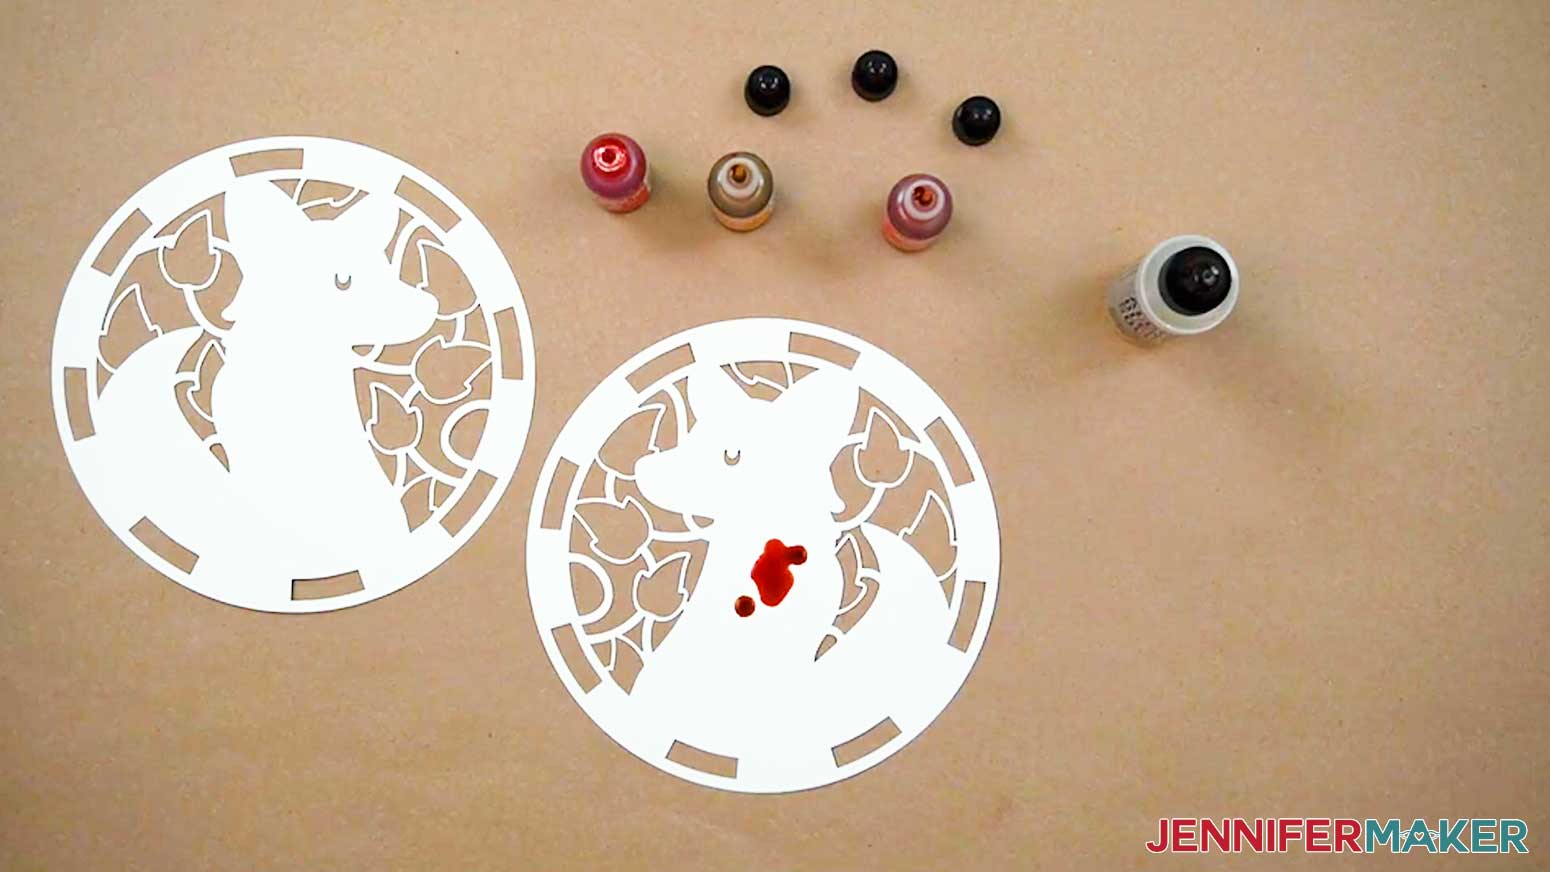
For the Hedgehog design, I used yellow tones for the flower and outer ring, a little bit of gold on chest and quill tips, and copper, gold, and yellow tones for the body, quills, and outer ring. The green cardstock center layer fills in the flower stems. - Shake each of the bottles well to mix the liquid, then uncap them so they’re ready to use when you need them.
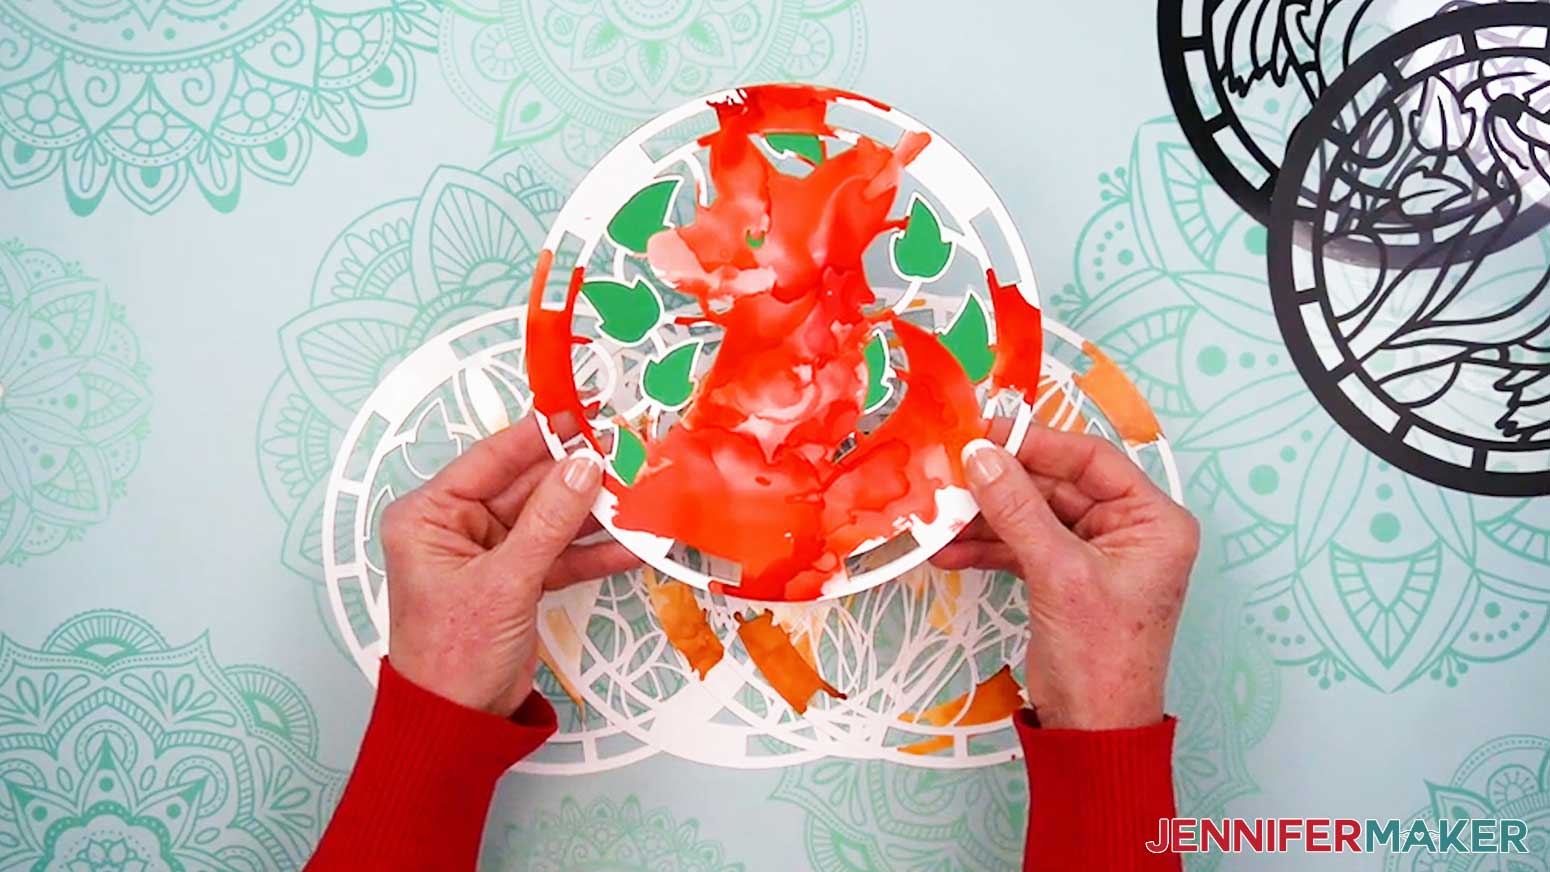
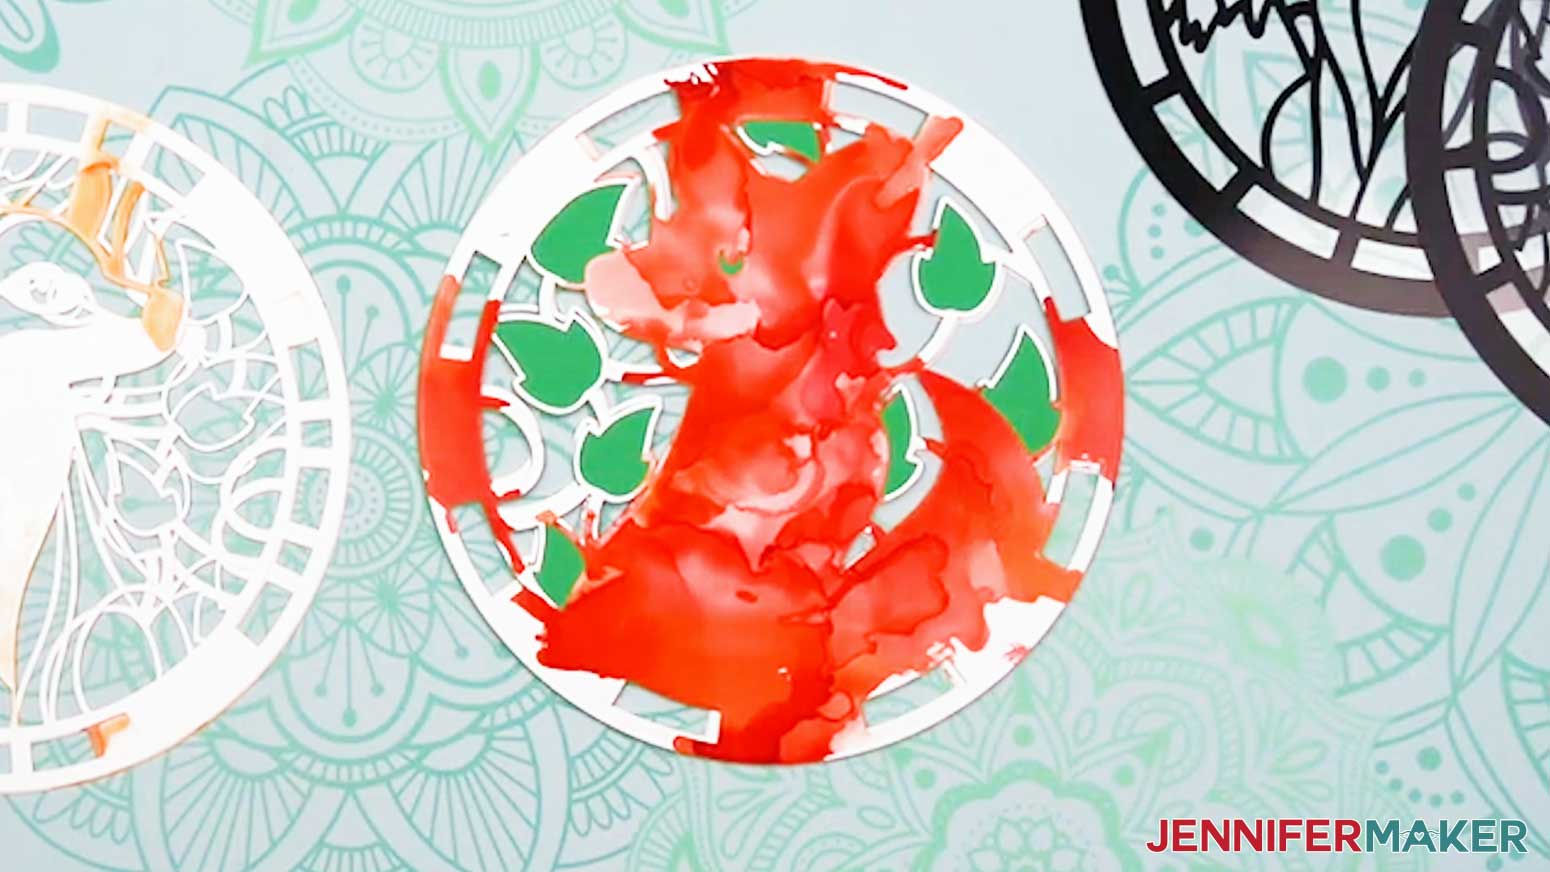
TIP: Metallic alcohol inks need an extra good shake because their heavier pigments like to settle at the bottom. Before you use a metallic bottle, shake it until you hear the little mixer ball rattling around inside. That’s your sign the ink is ready to use. - Add a few drops of your chosen inks one at a time until the surface of the paper is mostly covered. The inks stay wet for about 30 seconds to 1 minute, depending on your room’s environment.
TIP: You can also add several drops of blending solution before the inks for a more fluid result.
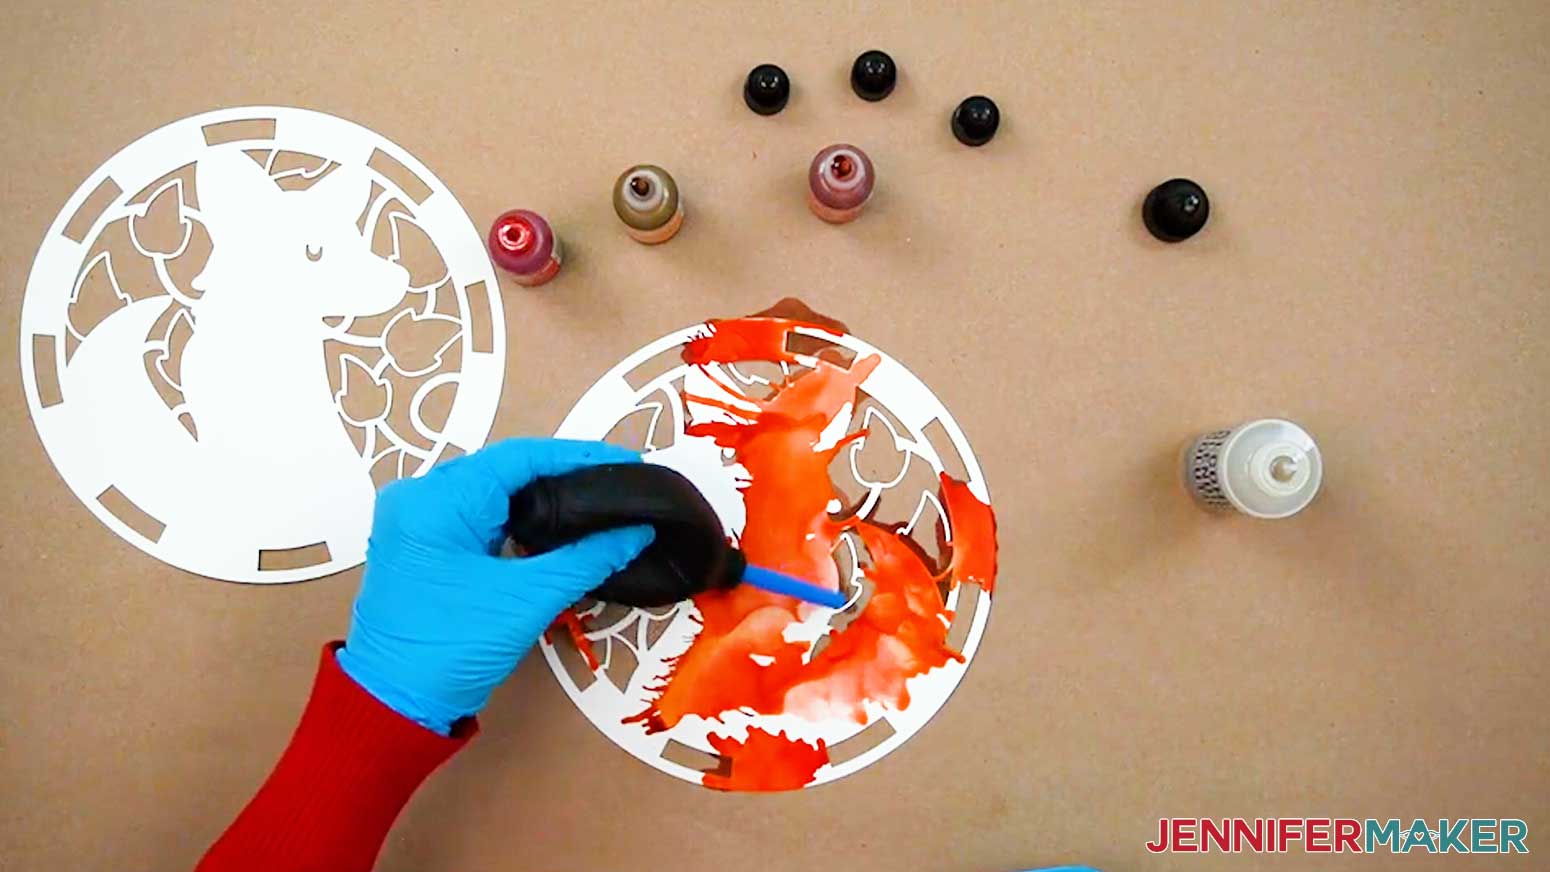
TIP: When you add more colors, you’ll notice that it “pushes” the existing color out and away from it and toward the edges. If you want a certain color on the edge, put it on first. If you want a particular color in the middle, put it on last. - Apply a few drops of blending solution to the heavily inked areas to push the colors around.
TIP: If you add several drops of blending solution, you can “erase” the ink in some areas. It may leave a faint tint behind, though, so the surface likely won’t return to a completely pure white. - Use a blower tool or straw to gently move the inks around on the paper while they’re still wet.
- You can add more ink and blending solution, just keep in mind it may reactivate some of the earlier inks that have begun to dry.
- Let the paper sit until the alcohol evaporates, leaving the colorful inks in place.
TIP: My inks dried completely in about 30 minutes, but your results may vary. - Repeat steps 3-11 to ink your remaining alcohol ink paper layers.
TIP: If the colors don’t turn out how you hoped, you can use a pipette to apply a few drops of rubbing alcohol on the paper, then use a paper towel to lift and remove much of the ink, even after it’s dried.

STEP 4: APPLY THE VINYL STAINED GLASS DESIGN TO THE ACETATE
- Once everything is dry, remove your protective gear and clean up your work surface so any excess ink doesn’t get on your pieces during assembly.
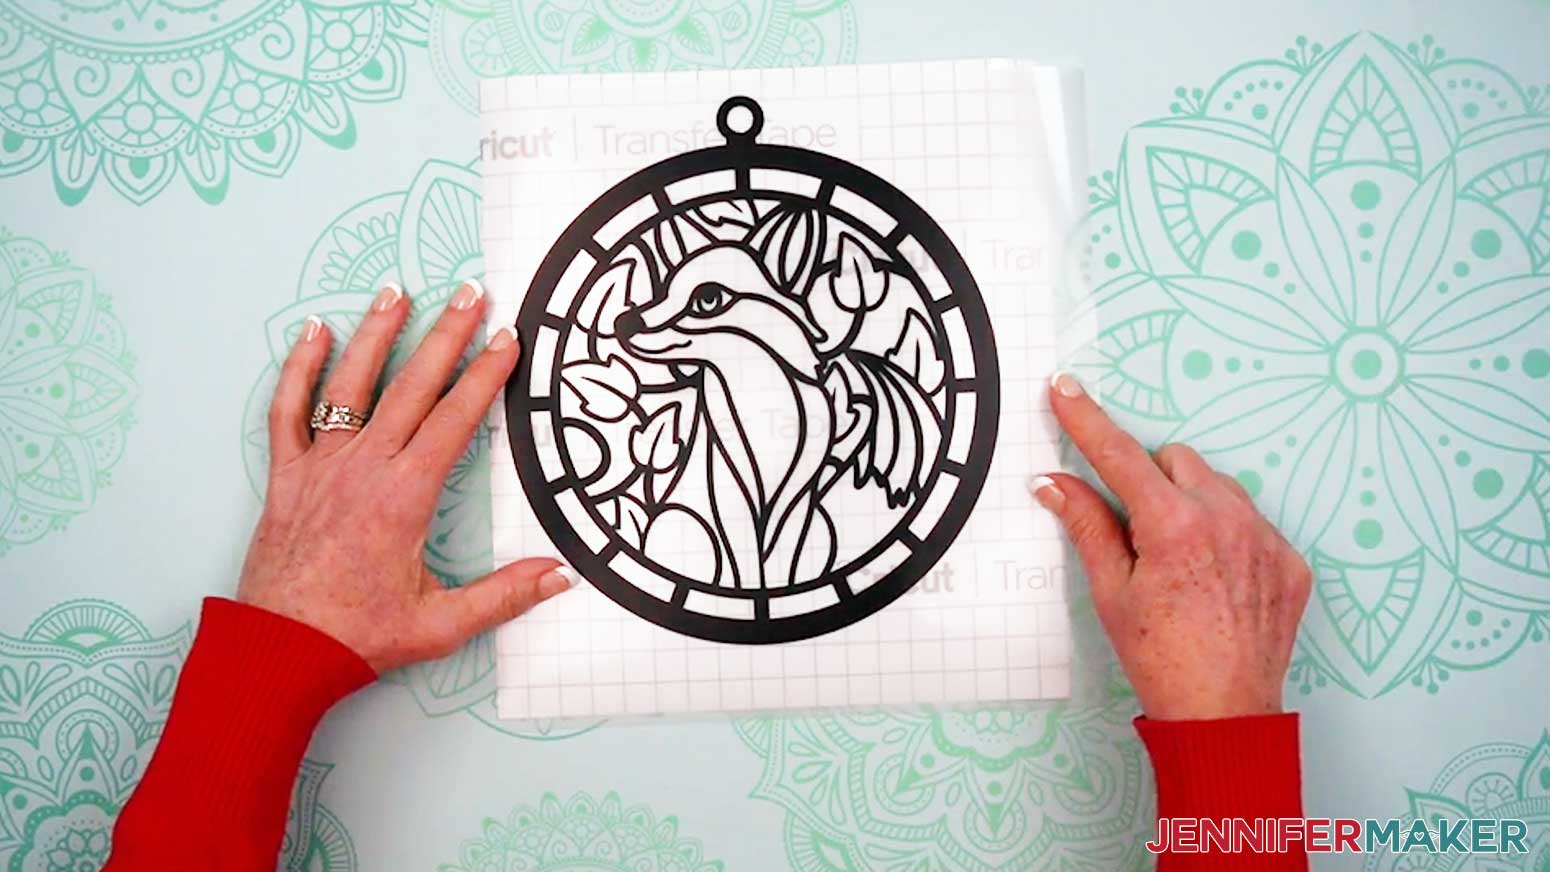
- Place one of your weeded vinyl decals face up on your work surface.
- Cut a piece of StandardGrip transfer tape about an inch larger on all sides than the vinyl decal.
- Remove the backing from the transfer tape.
- Apply the transfer tape to the vinyl decal by holding the transfer tape in the shape of a taco or “U” shape. Then, put the bottom of your “taco” onto the middle of your design.
- Smooth the transfer tape over the decal from the center outward.
TIP: This minimizes wrinkles and bubbles. - Use your scraper to burnish the transfer tape to the vinyl on both sides.
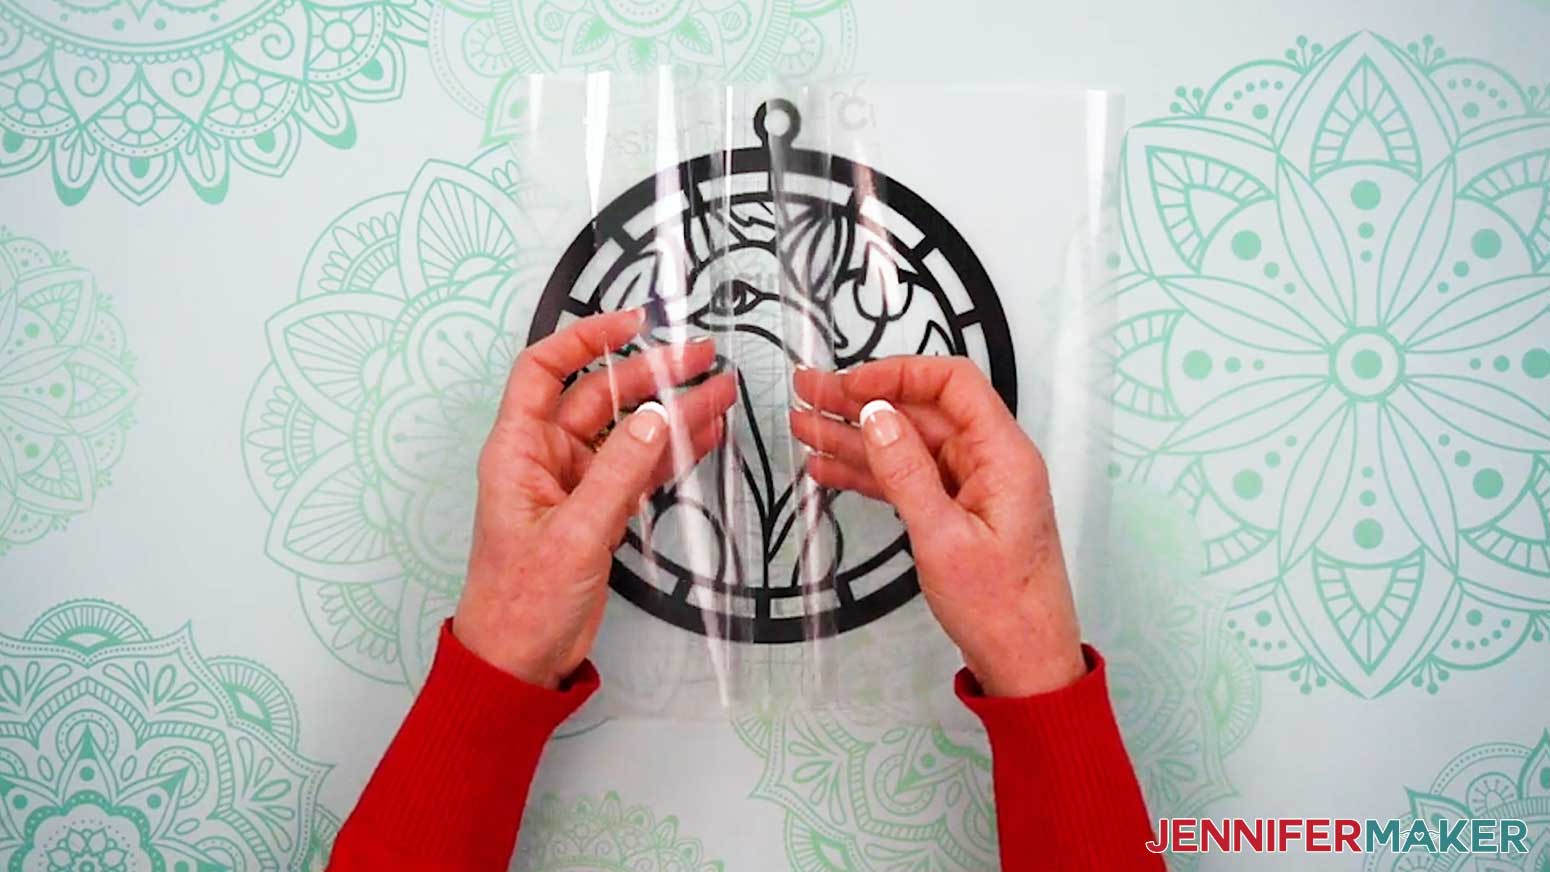
- Cut a piece of parchment paper about the same size as your transfer tape.
- Remove the backing from the vinyl, leaving the transfer tape and vinyl design sticky-side up on your work surface.
- Apply the parchment paper to the sticky side of the decal and transfer tape.
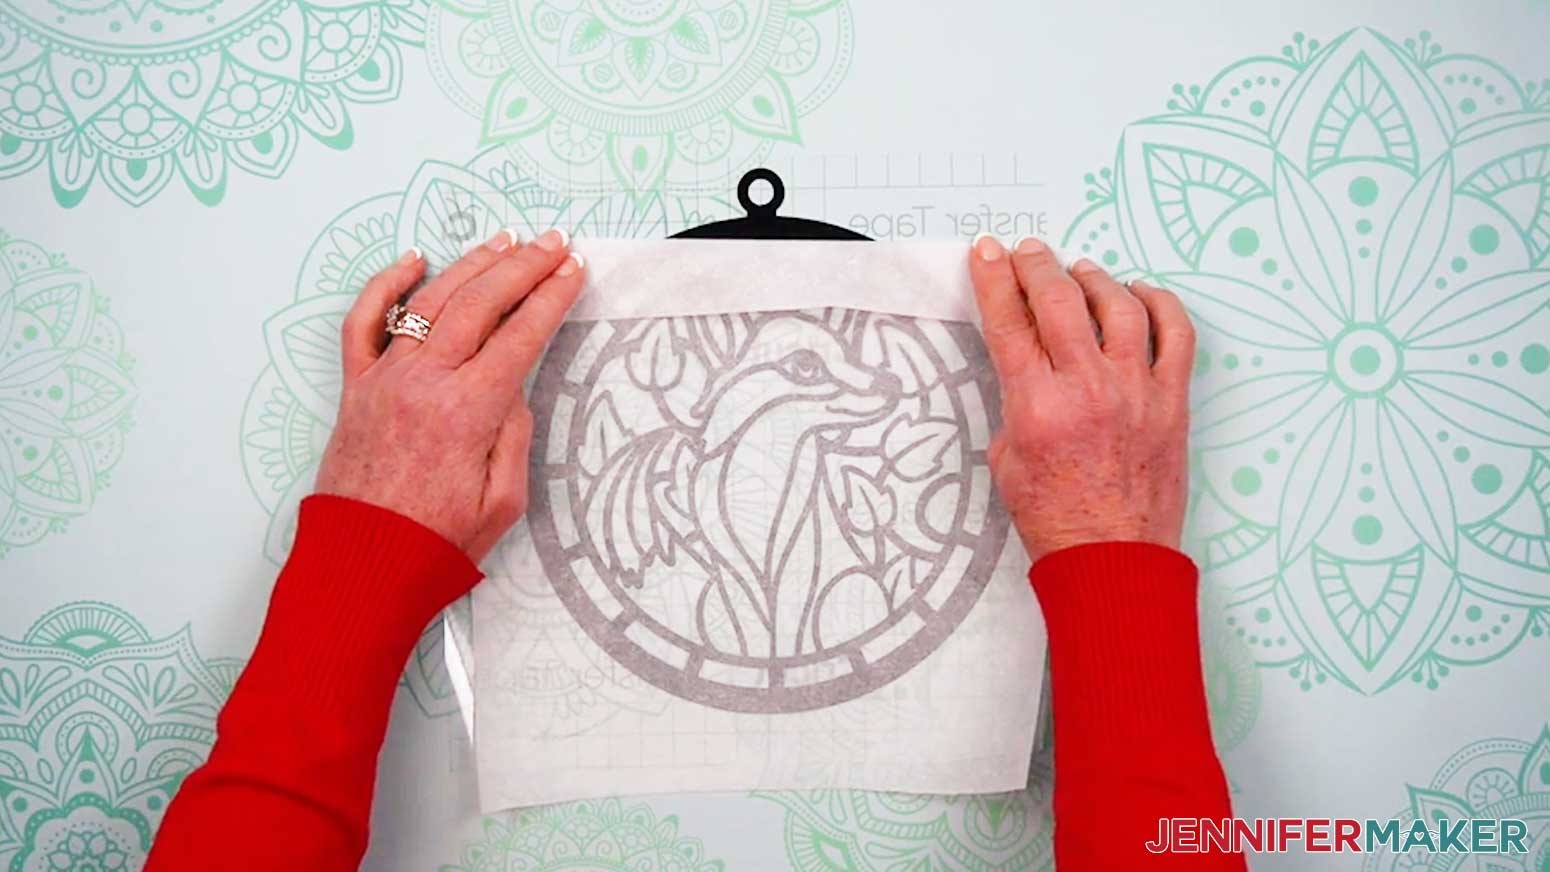
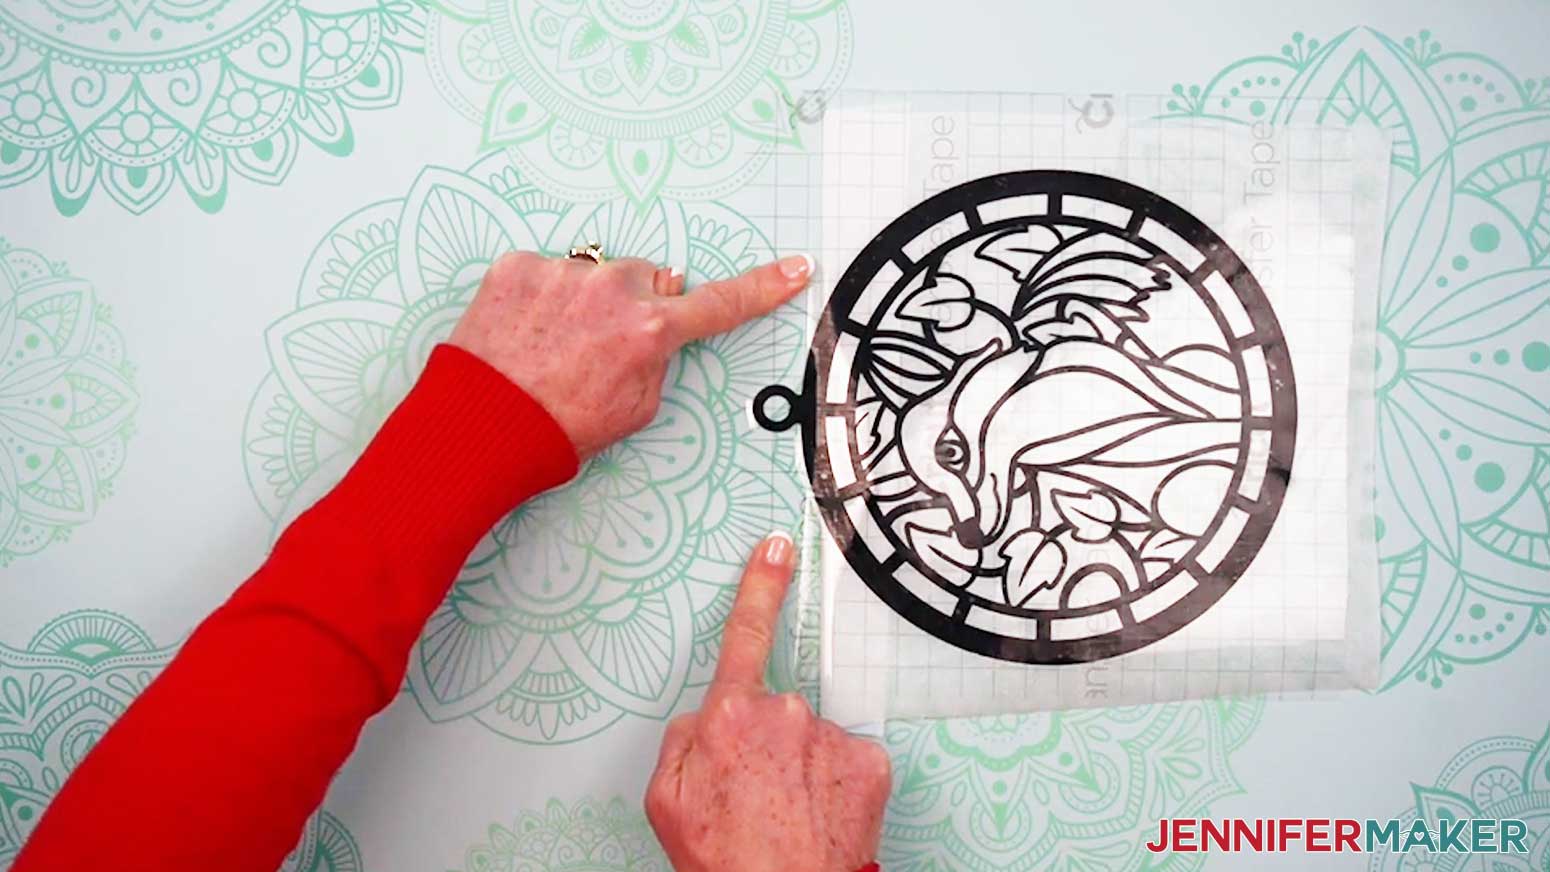
- Fold the parchment down from the top to expose the “hanger” and the design’s top curved edge
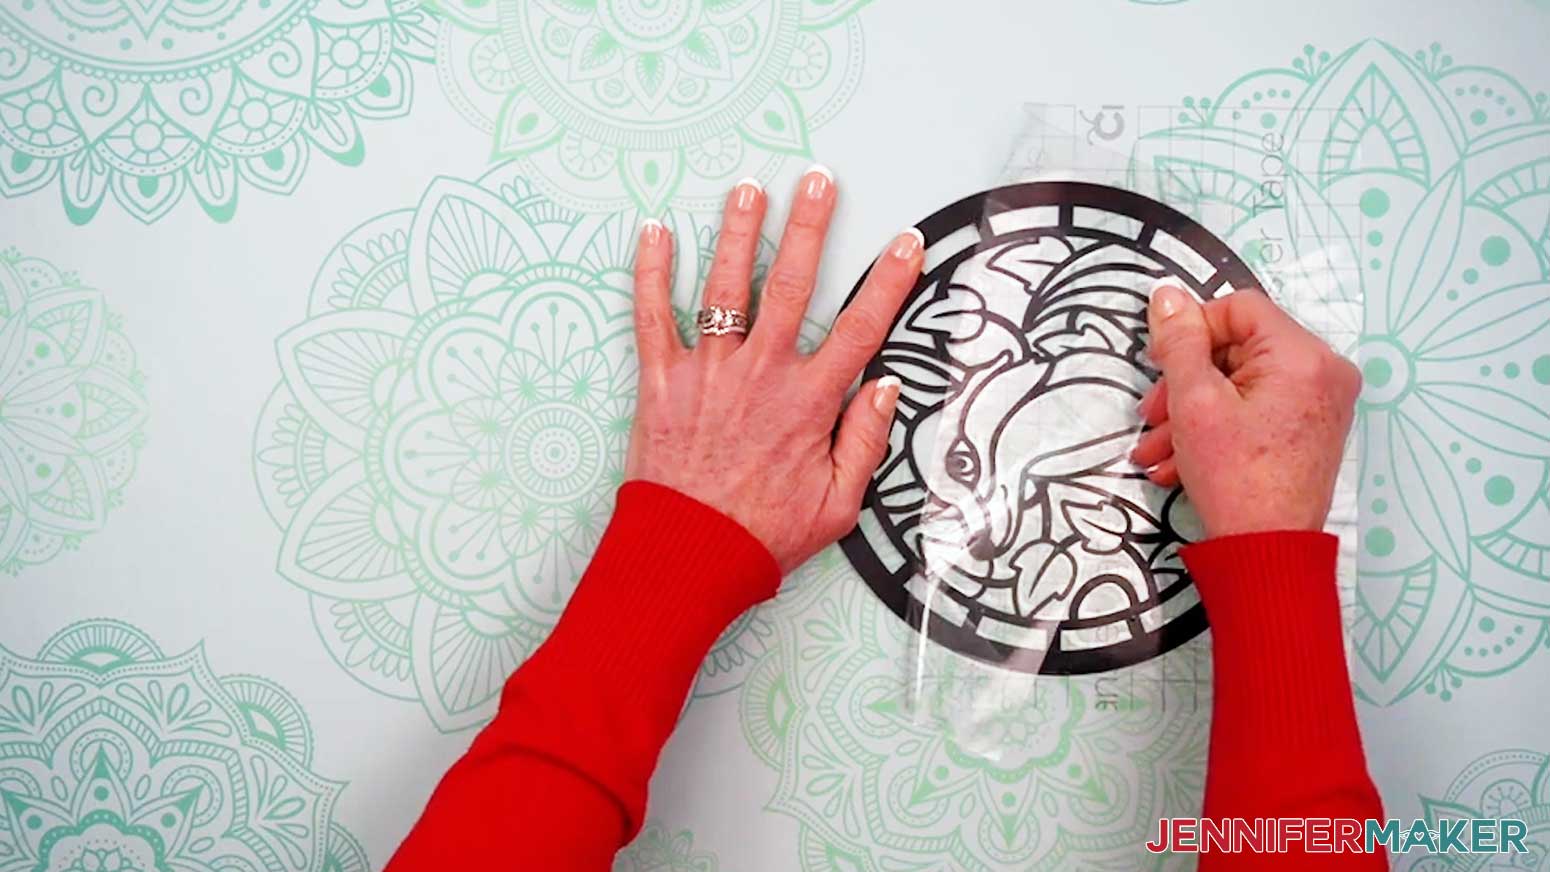
- Align the unprotected side of an acetate piece on the decal using the hangers and top edges.
TIP: Make sure the curve of the acetate lines up with the curve of the vinyl all the way around so the rest of the shapes will align correctly. - Carefully flip the stacked layers over so the acetate is against the work surface.
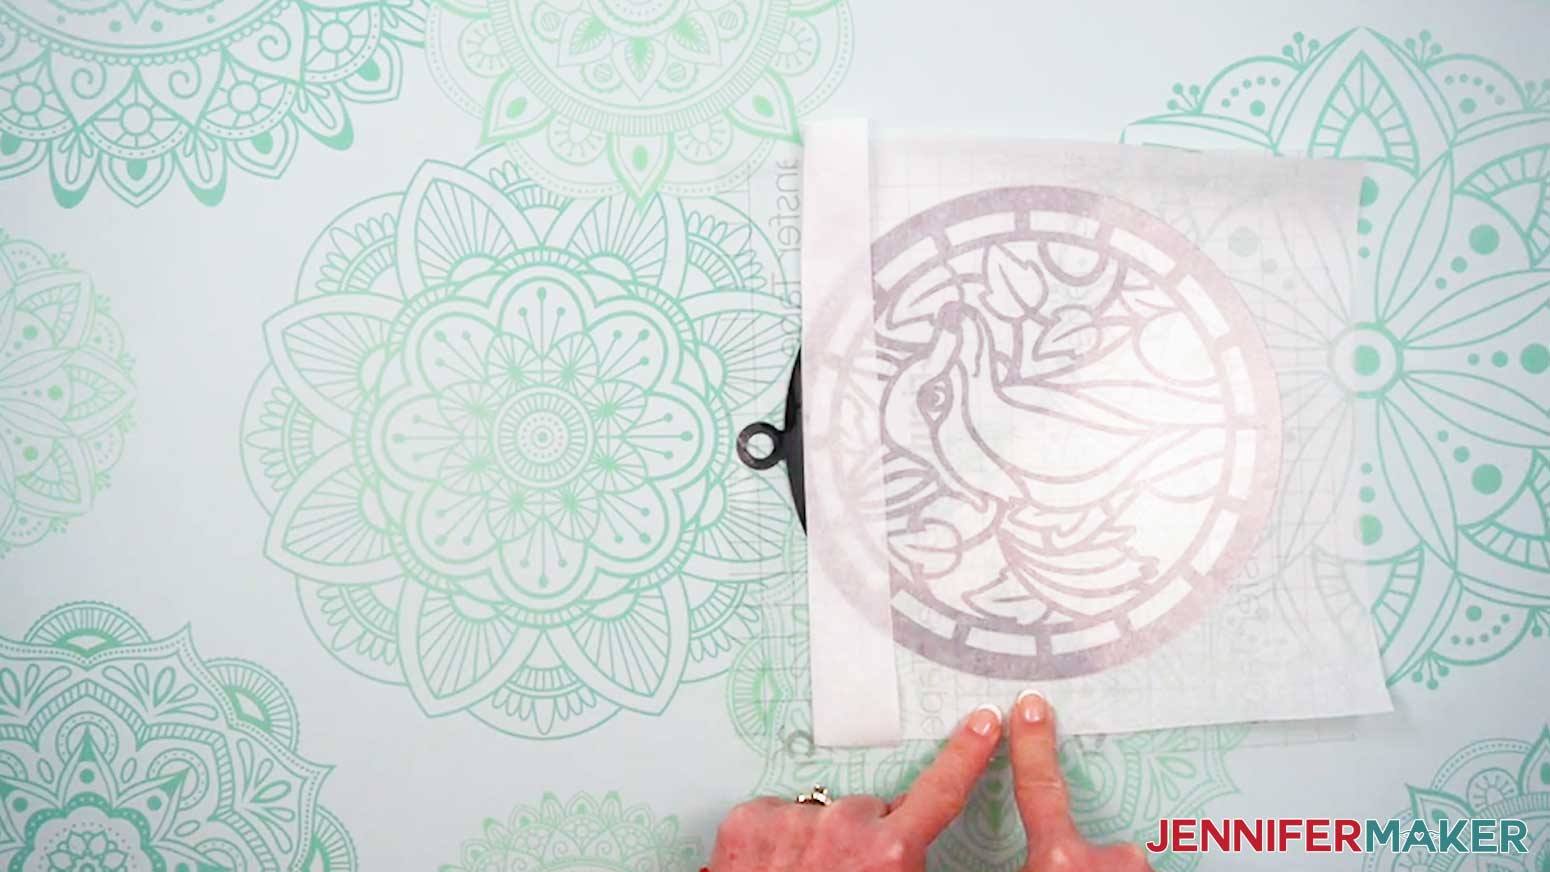
- Use one hand to press the exposed transfer tape near the hanger down onto the work surface to keep the aligned vinyl and acetate in place.
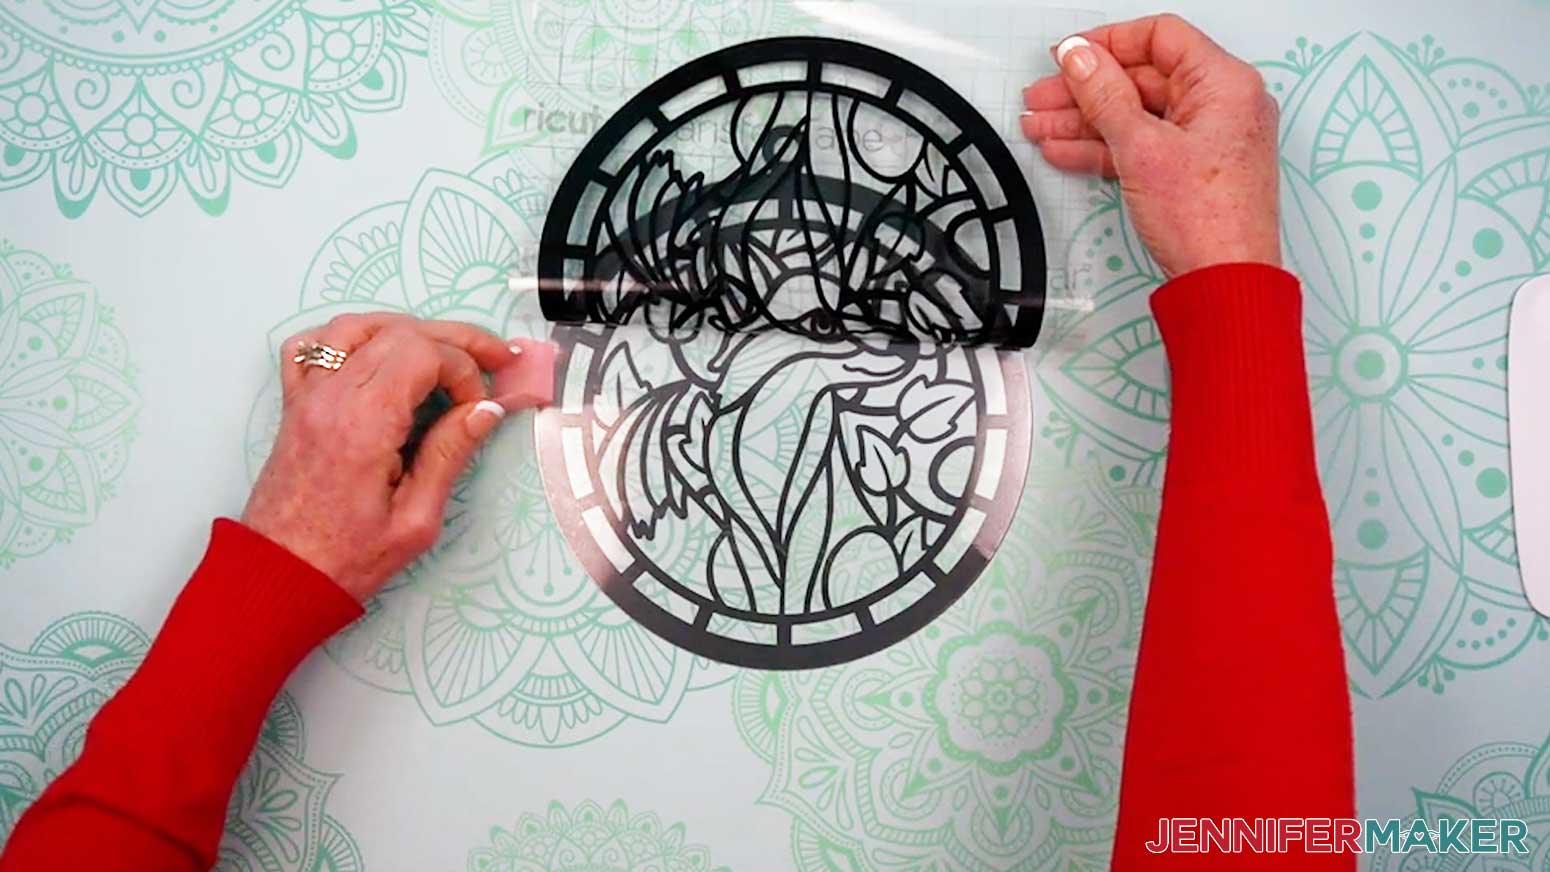
- Use your other hand to flip the transfer tape and vinyl over the hanger like you’re opening a book.
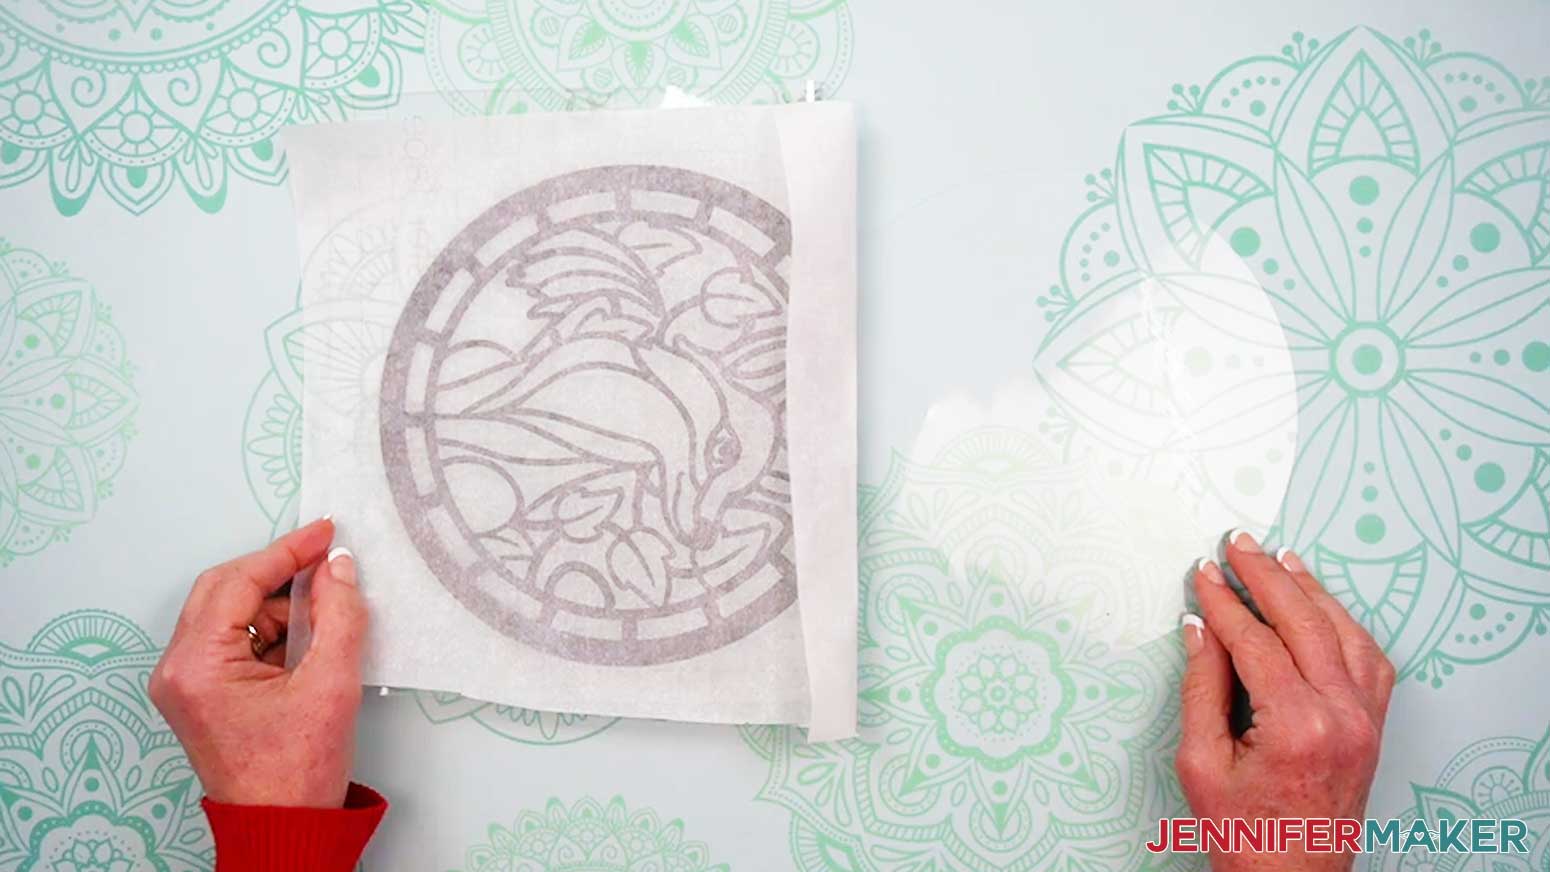
NOTE: Make sure the hanger sections are still securely aligned. - Carefully peel off the parchment paper from the rest of the decal and set it aside for now.
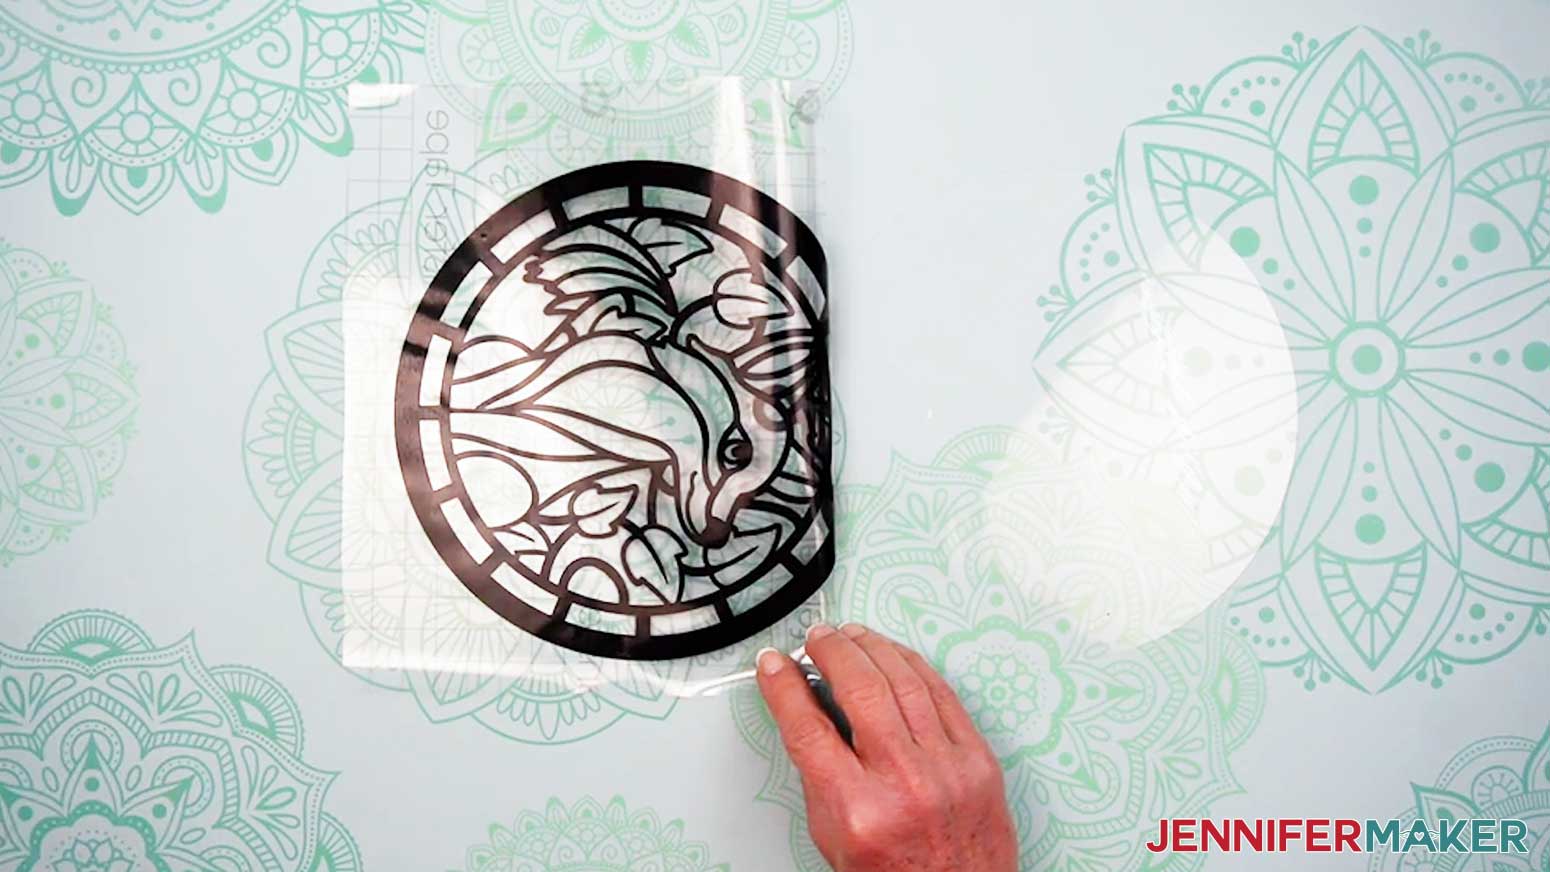
- Grab your XL Scraper Tool and, beginning near the hanger, press and smooth the transfer tape and vinyl design down onto the acetate so the edges align.
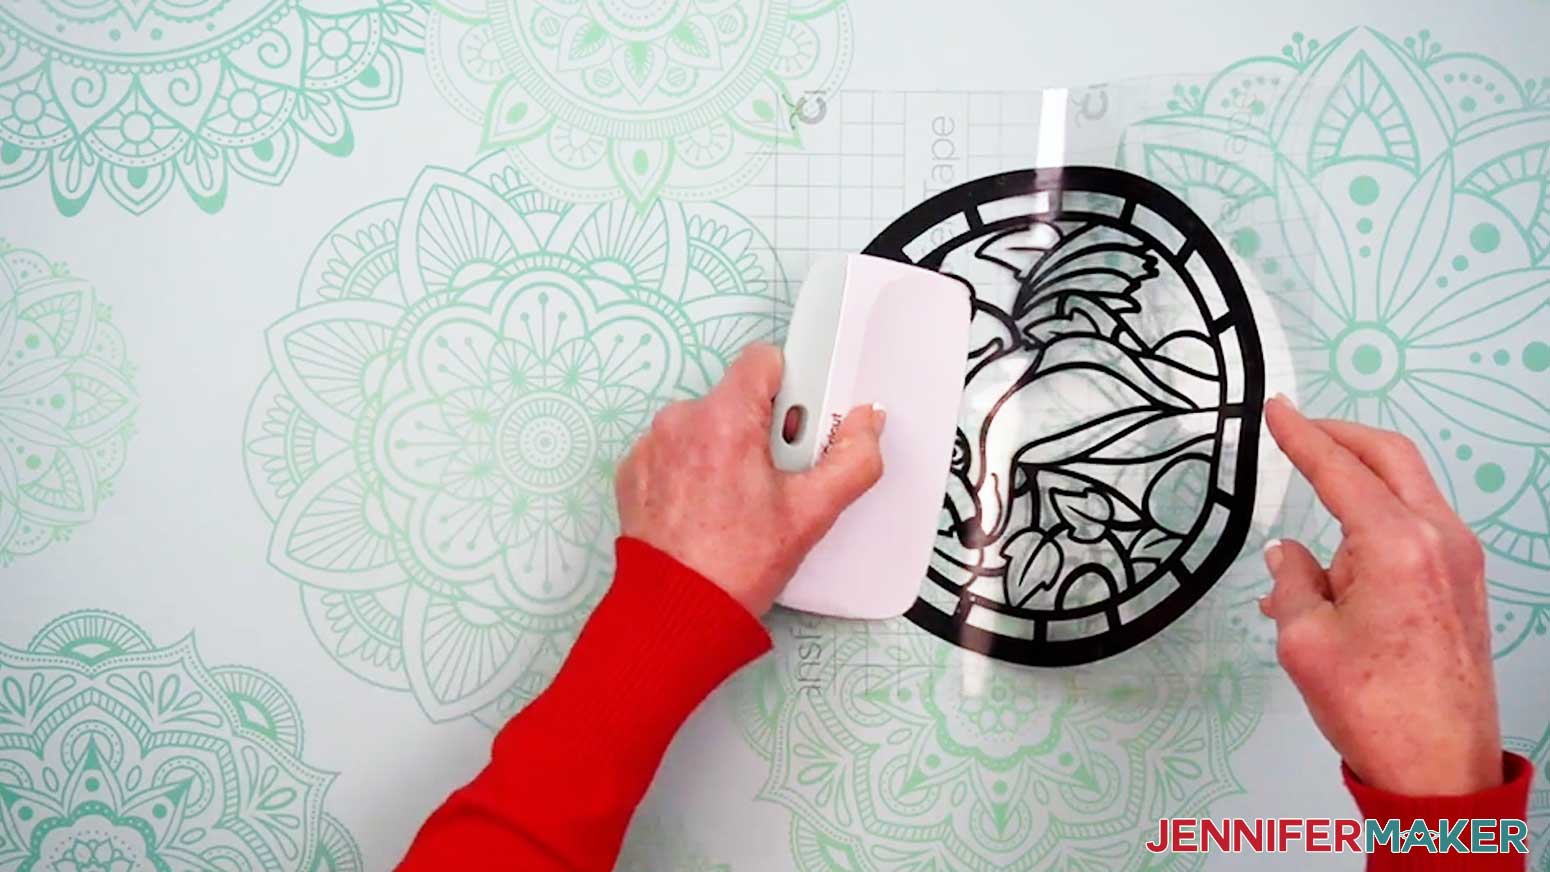
TIP: Be careful not to shift the acetate or the vinyl and transfer tape while you’re applying it. - Use your Scraper to fully burnish the vinyl onto the acetate layer.
TIP: Burnish up and down toward the edges as you move left to right across the transfer tape to help prevent bubbles. - Slowly and carefully peel away the transfer tape, leaving the vinyl design on the acetate.
TIP: Peel and roll the transfer tape parallel to the vinyl to prevent the vinyl from lifting off the acetate.
NOTE: Set the transfer tape aside, sticky-side up, because we’ll reuse it again in a moment. - If there are any air bubbles between your vinyl and acetate, use your finger to push them outward and flatten the vinyl.
- Turn the design over so the vinyl is against your work surface.
- Place your second acetate piece unprotected-side-up and align its edges with those of the first acetate layer.
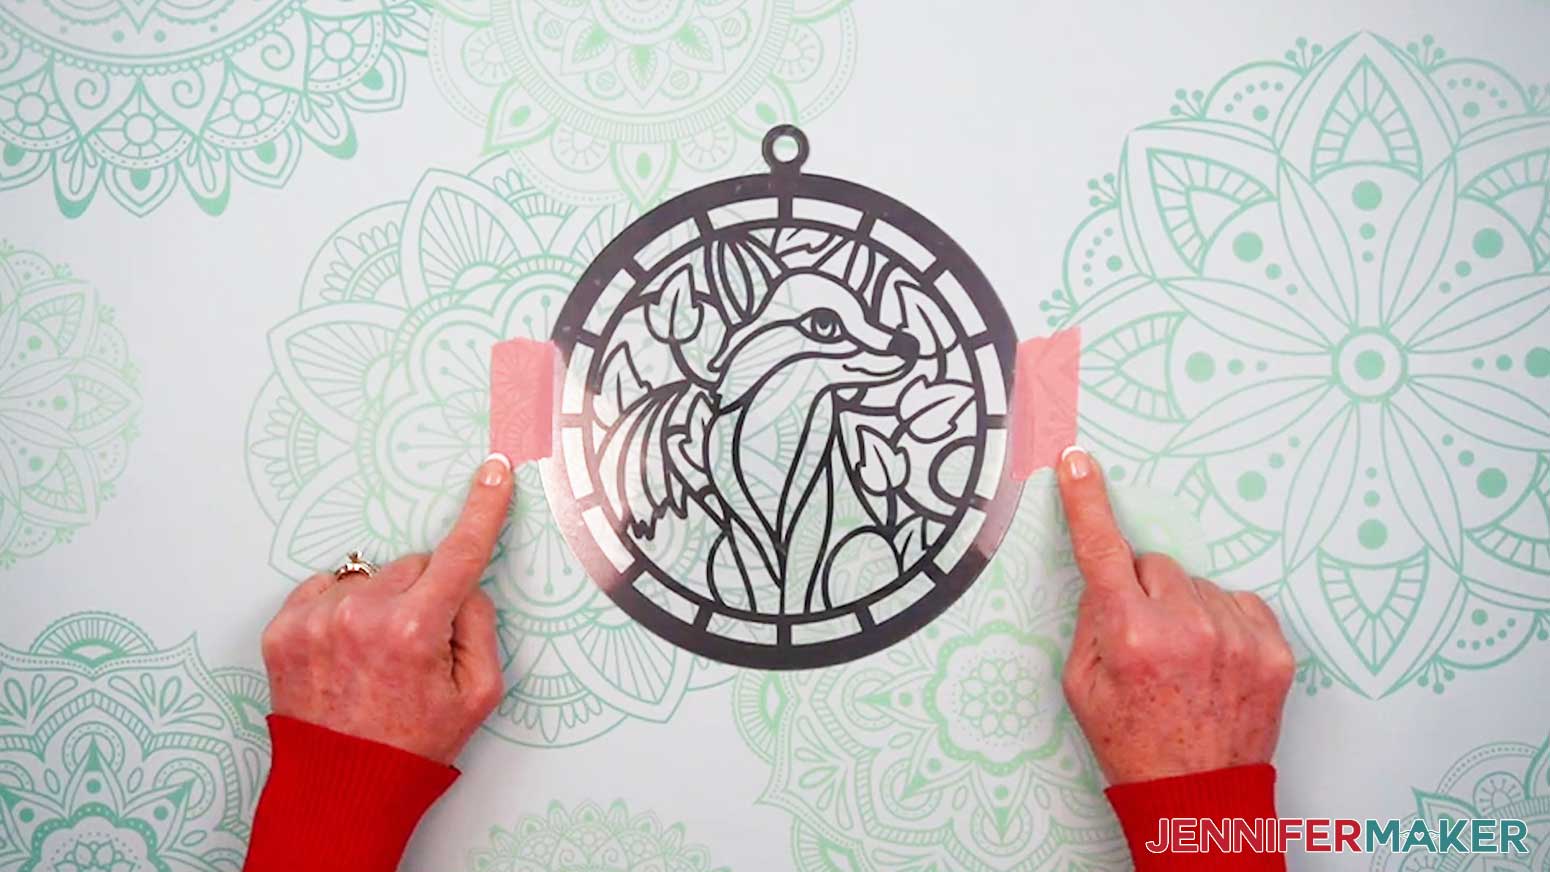
NOTE: Make sure the hangers are aligned. - Use painter’s tape on either side to secure the acetate layers to your work surface.
- Repeat steps 4-11 to apply transfer tape and parchment paper to the second piece of vinyl.
NOTE: The parchment paper will cover the painter’s tape while you figure out the alignment. - Place the sticky side of the transfer tape onto the acetate, making sure the curve of the vinyl design lines up with the curve of the acetate all the way around.
- Follow steps 14-20 to fully apply the vinyl, being sure to remove the painter’s tape as you go.
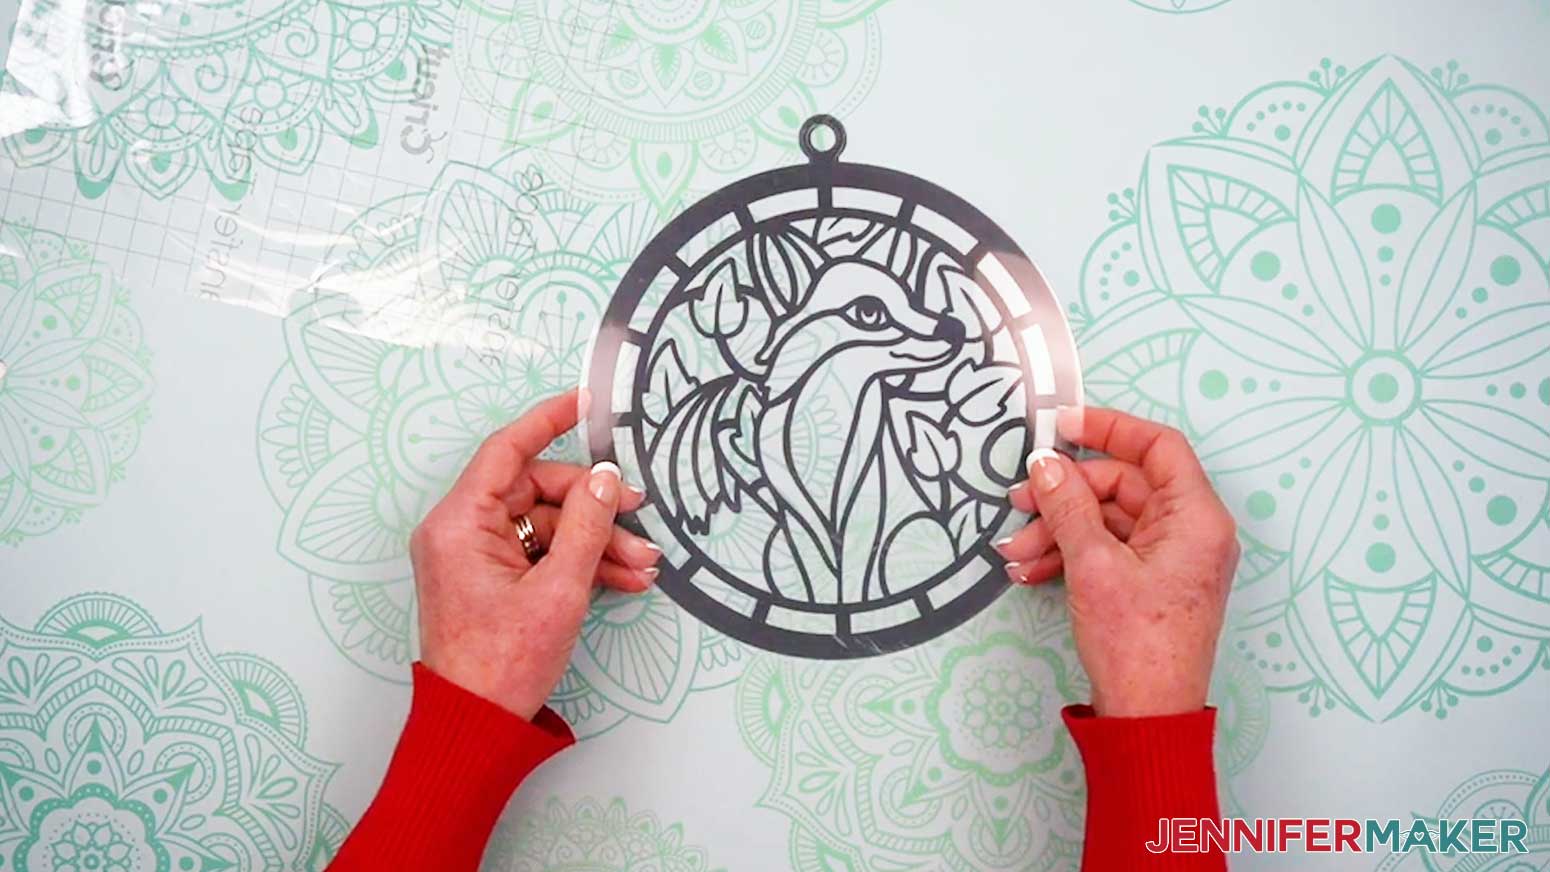
- Now you have two mirrored acetate pieces decorated with vinyl that will hold everything else together.
NOTE: When assembling the layers, the outer edges of the acetate and paper won’t perfectly align because the paper layers are slightly smaller than the acetate.


STEP 5: ASSEMBLE YOUR ALCOHOL INK PAPER STAINED GLASS LAYERS
- Gather your alcohol ink paper layers and your cardstock layer.
NOTE: If you’re making the Fox design, you should have one green cardstock layer and six alcohol ink paper layers: two orange-inked pieces, two white-inked pieces, and two yellow-inked pieces. If you inked any of them with different colors of ink, use your Canvas in Cricut Design Space to help you determine which layer is which. - Grab the green cardstock center piece, then sandwich it between the two orange-inked pieces, aligning the details on both sides. The orange pieces should be mirror images of each other on either side of the green piece.
- Grab the two white-inked pieces, and layer them on either side of the stack, aligning their edges with the previous layers.
- Repeat Step 3 with the two yellow-inked pieces on the outside of the stack.
- Grab the two vinyl-decorated acetate pieces and sandwich them around the paper pieces, aligning the designs with the vinyl facing outwards.
NOTE: Remember, the outer edges of the acetate and paper won’t perfectly align because the paper layers are slightly smaller than the acetate. - Check both sides of the stack and make sure that everything lines up.
- Remove the acetate pieces and set them aside for now.
- Set the paper layers down on your work surface, then flip the top yellow, white, and orange layers over to the side, like you’re opening a book.
- Apply craft glue using a precision tip to the back of the orange layer.
- Flip the orange layer over and adhere it to the green layer, aligning the edges, and pressing down gently to adhere the layers.
TIP: If any glue seeps out, quickly wipe it away with your finger or a paper towel. - Flip the stack with the green layer over, and repeat steps 8-10 to adhere the second orange layer to this side of the stack, using the first orange layer to help align it.
- Repeat steps 9-11 to attach both white-inked then both yellow-inked layers to the stack, using the previously attached layers to help align them.
- Leave the paper stack to dry on your work surface for a few moments.
- Remove any remaining protective film on the acetate pieces.
- Make sure the sides with the vinyl attached are facing up, and grab the piece with the vinyl design that matches the orientation of the layer currently on the top of the stack.
- Turn it vinyl-side down and place it on your work surface.
- On the acetate piece, starting at the center of the design, apply craft glue along the black vinyl lines. Don’t take too long to apply the glue, as it can dry quickly. Avoid applying craft glue to the clear areas and the very outer ring of the design.
- With the paper stack face up, apply craft glue around the outer ring of the paper only.
- Turn the acetate piece over and adhere it to the paper stack, aligning the inner details of the design.
- Turn the assembled stack over and grab the other vinyl-decorated acetate piece.
- Repeat steps 15-19 to adhere it to the stack.
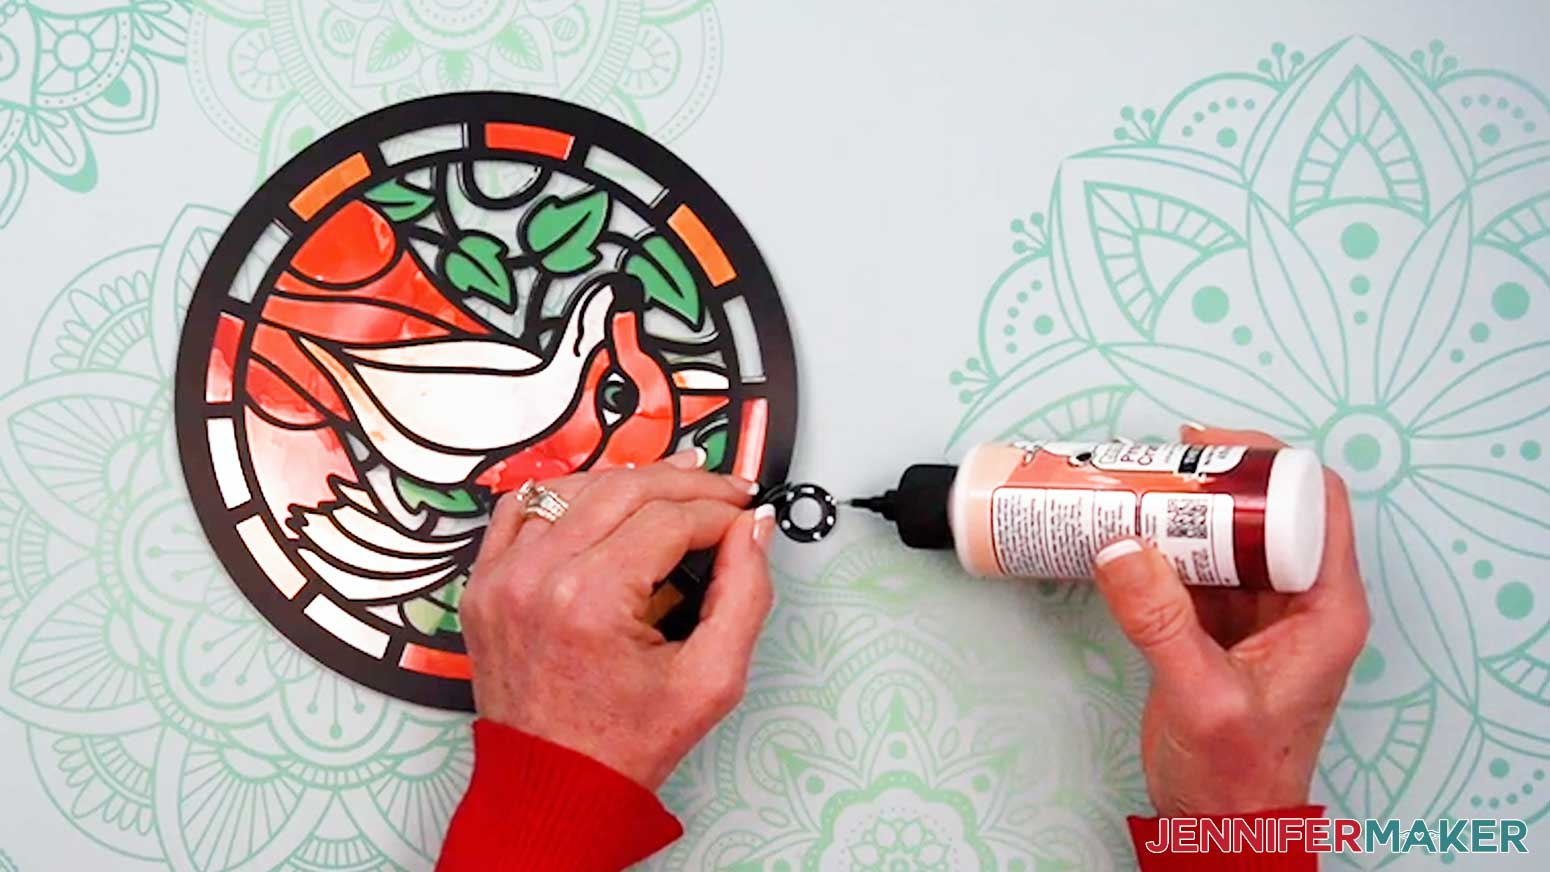
- Use your craft glue’s precision tip to apply glue between the hanging loops, then gently press them together to adhere them.
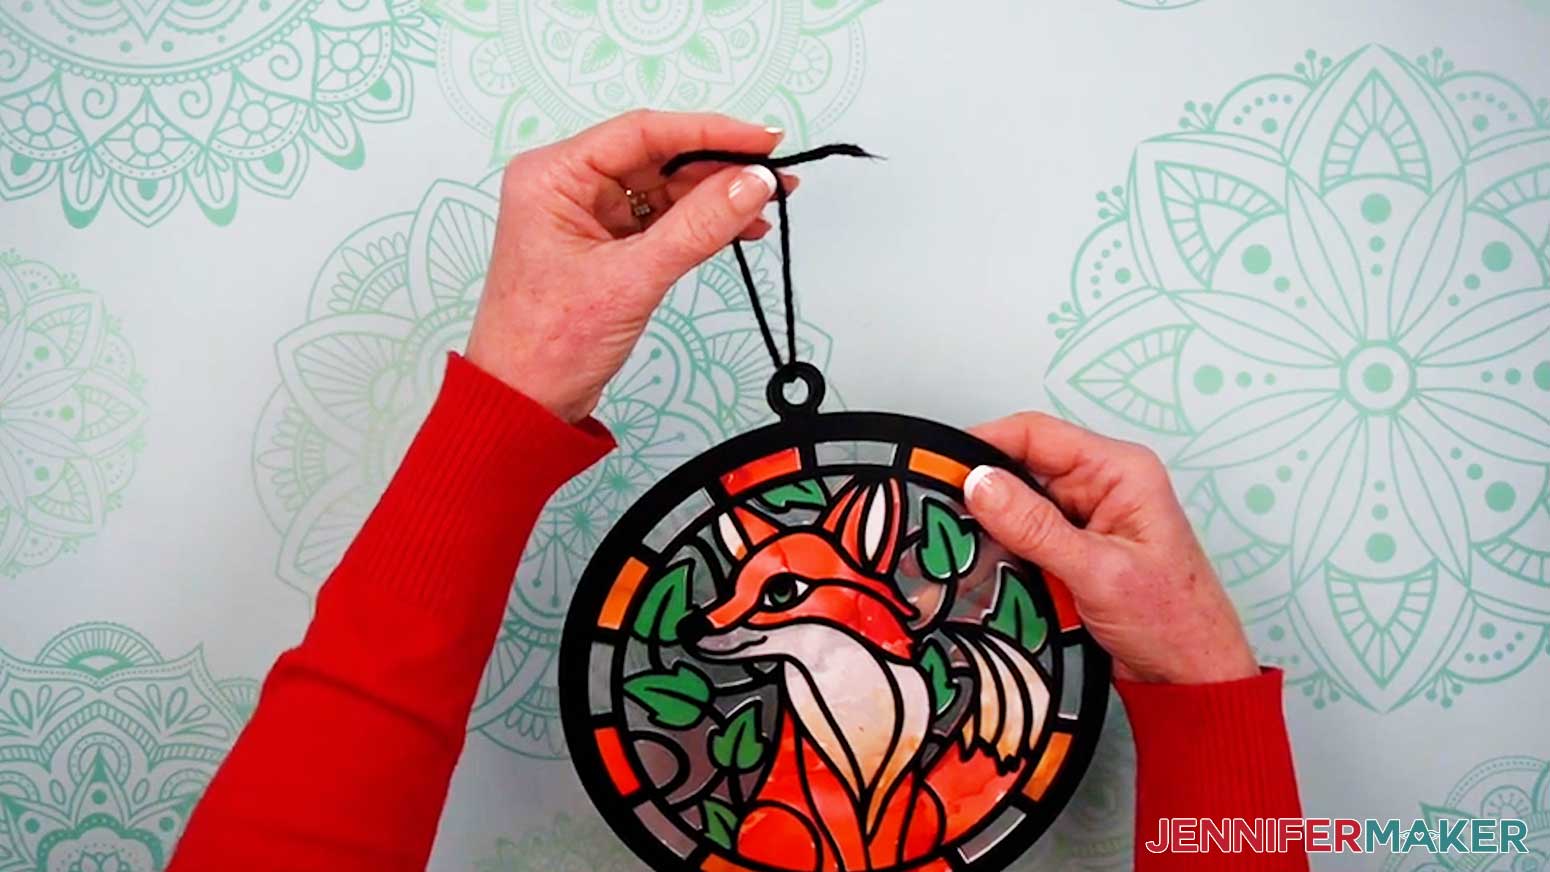
- Cut a piece of yarn or twine approximately 8” long.
- Insert one end of the yarn through the hanger holes, tie the ends together, then trim the excess.

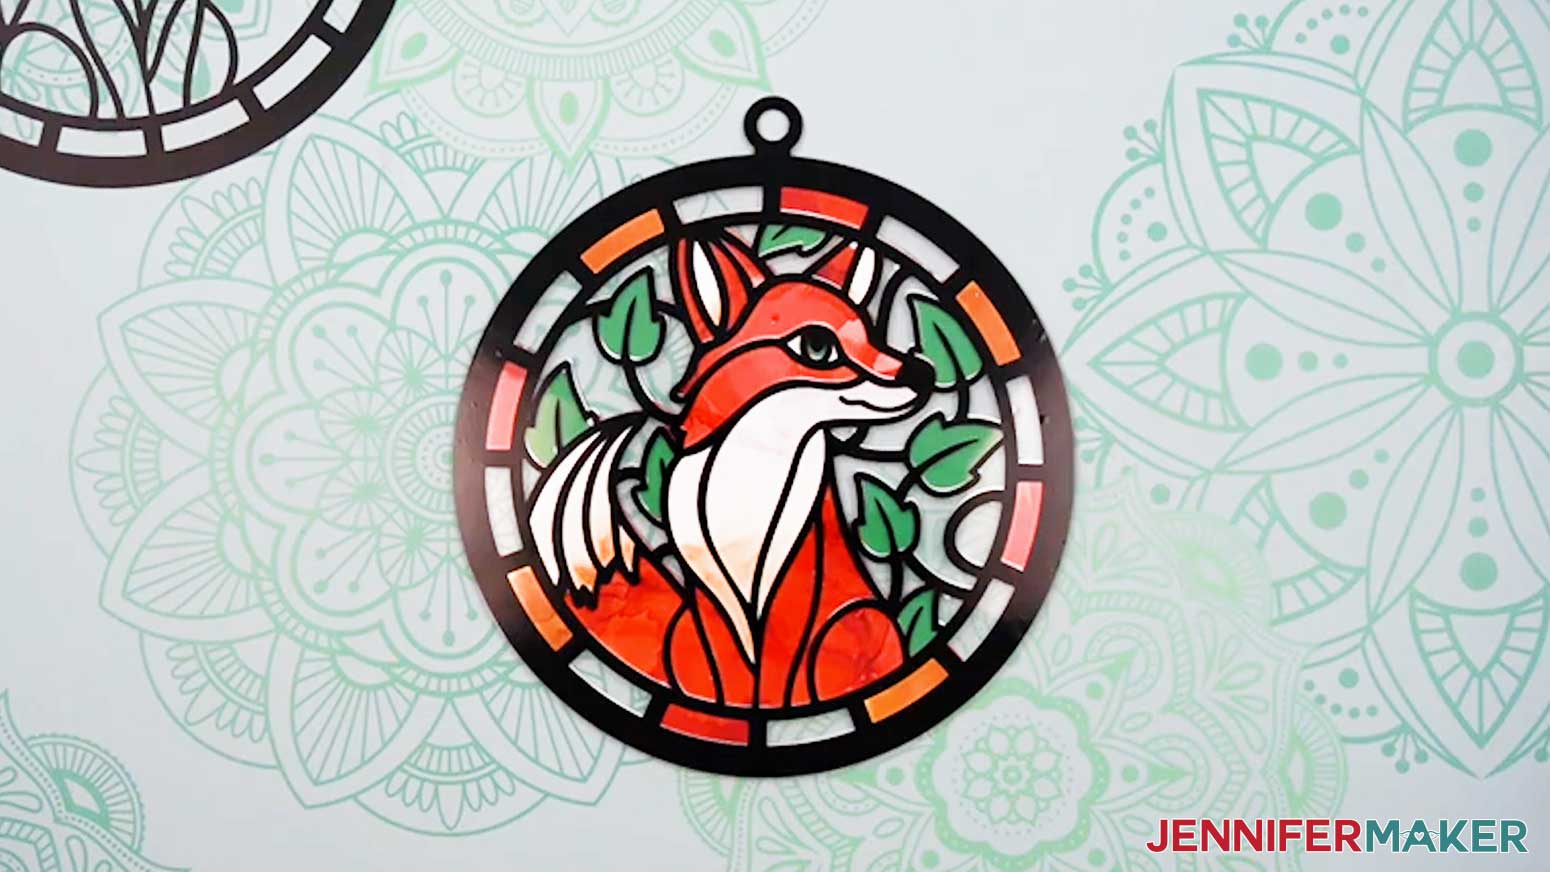
STEP 6: SHOW IT OFF!
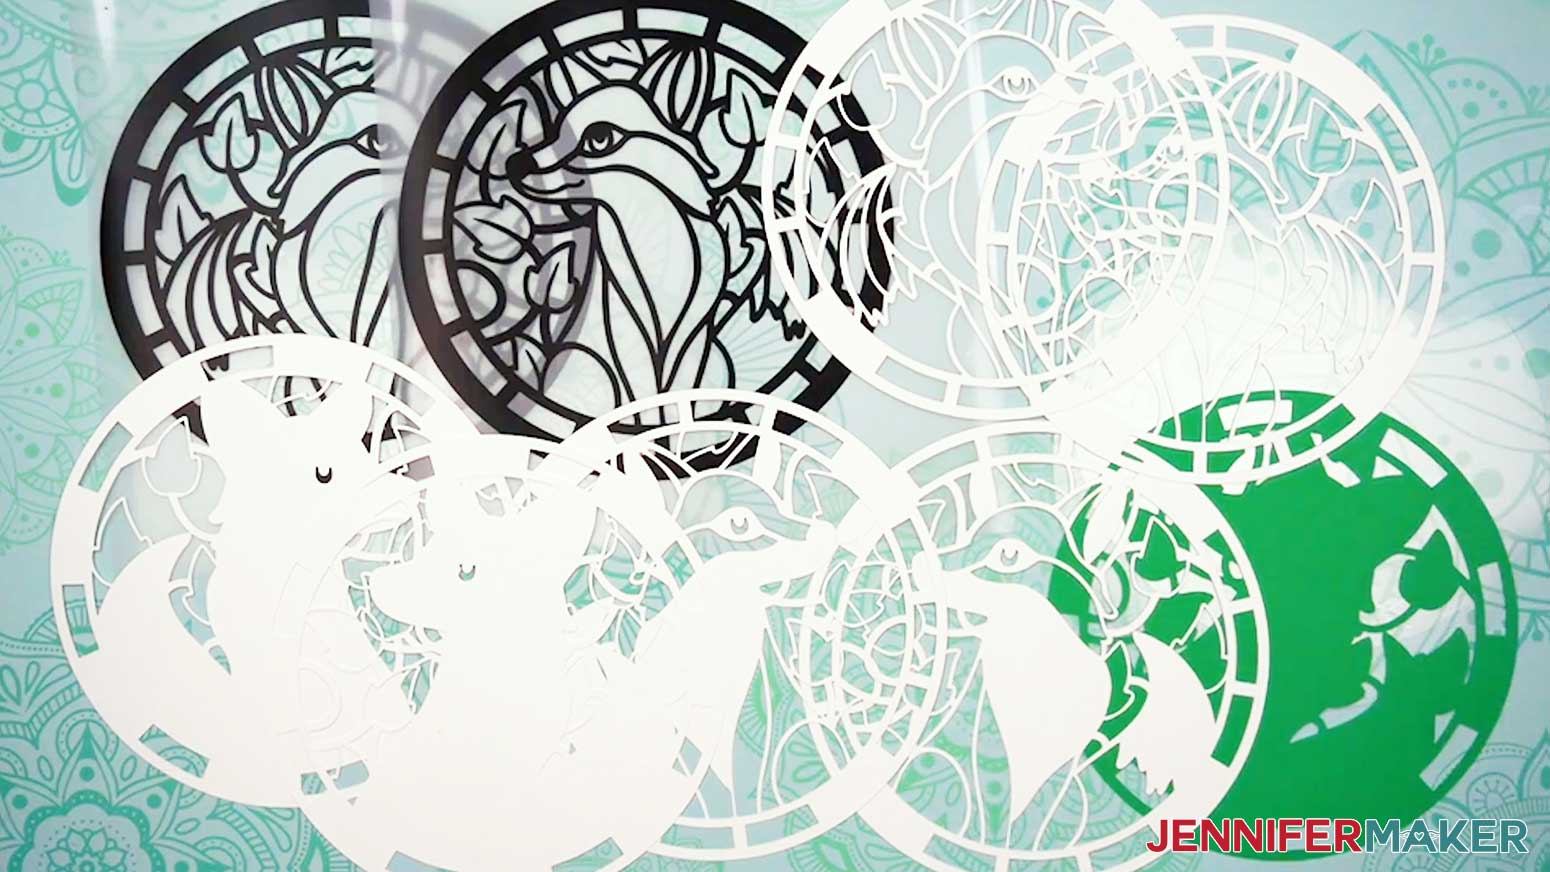
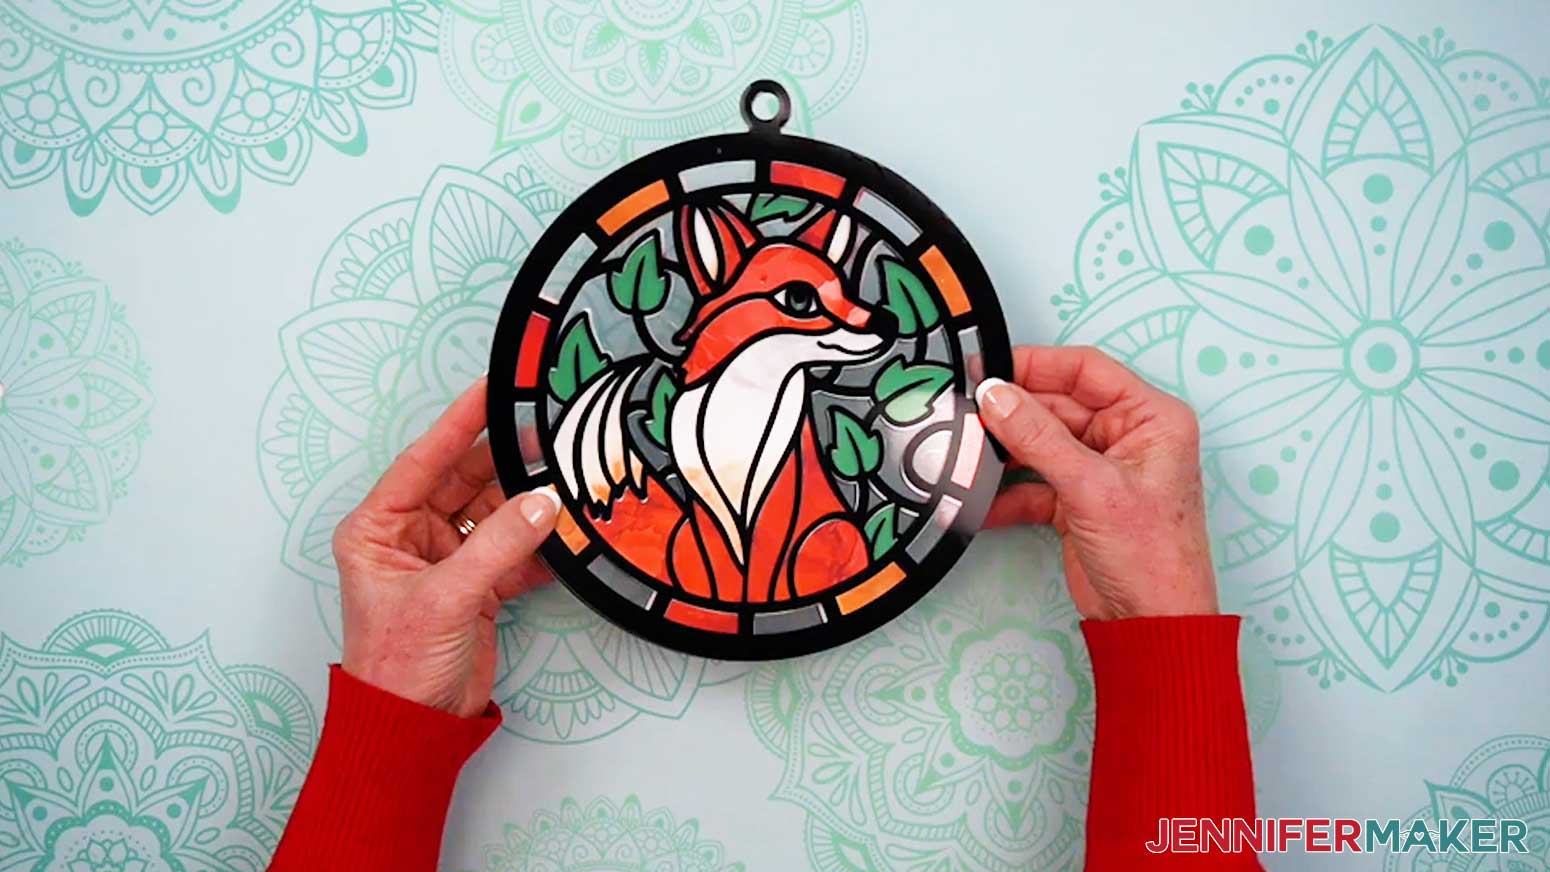
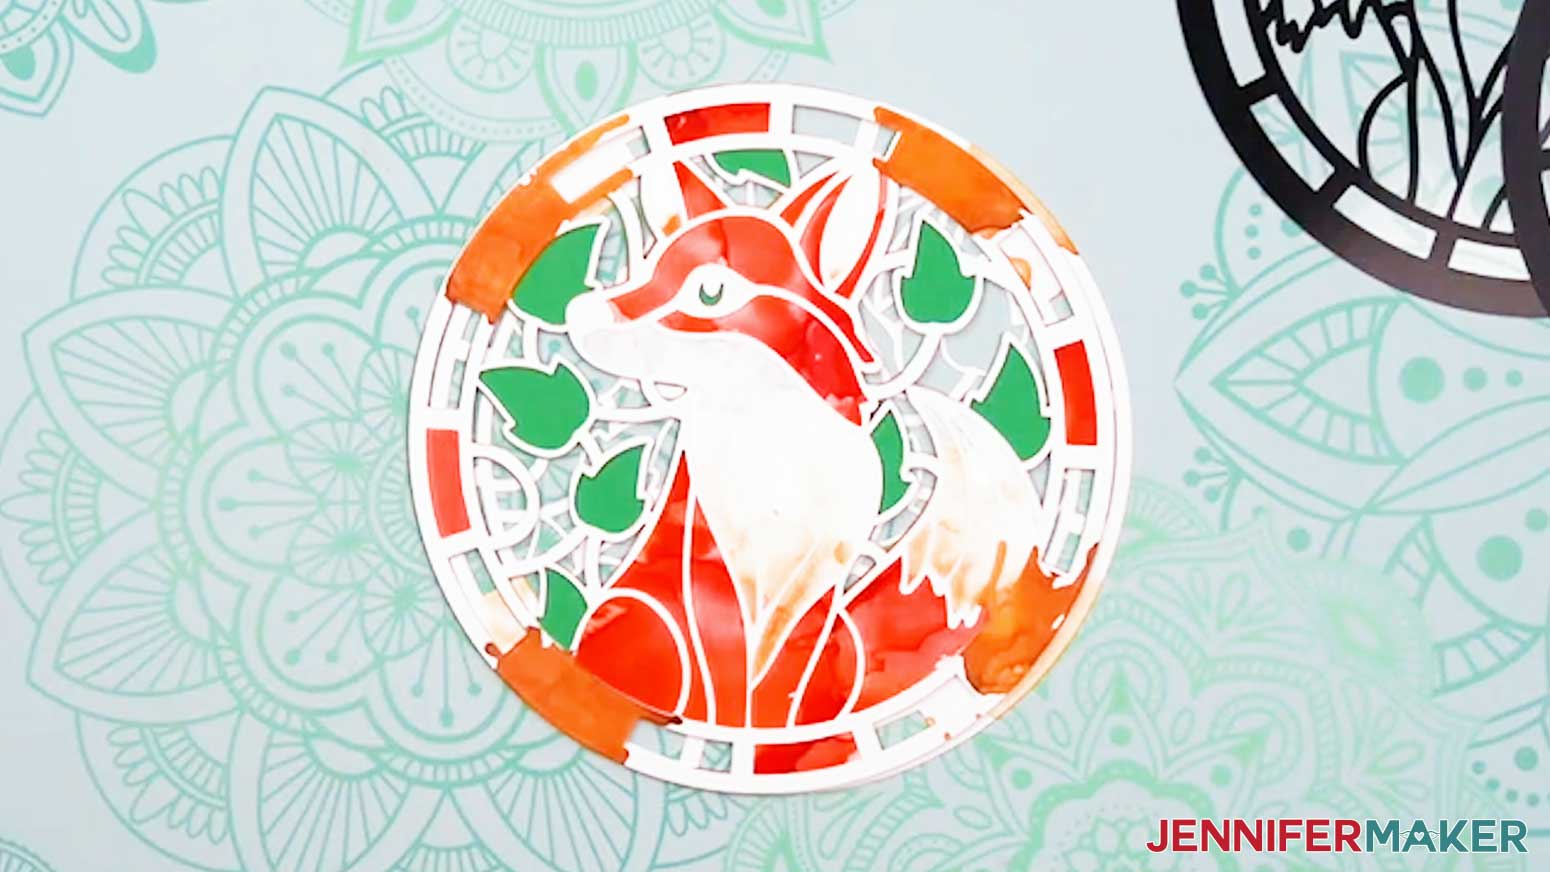
Here’s what my finished alcohol ink paper stained glass project looks like!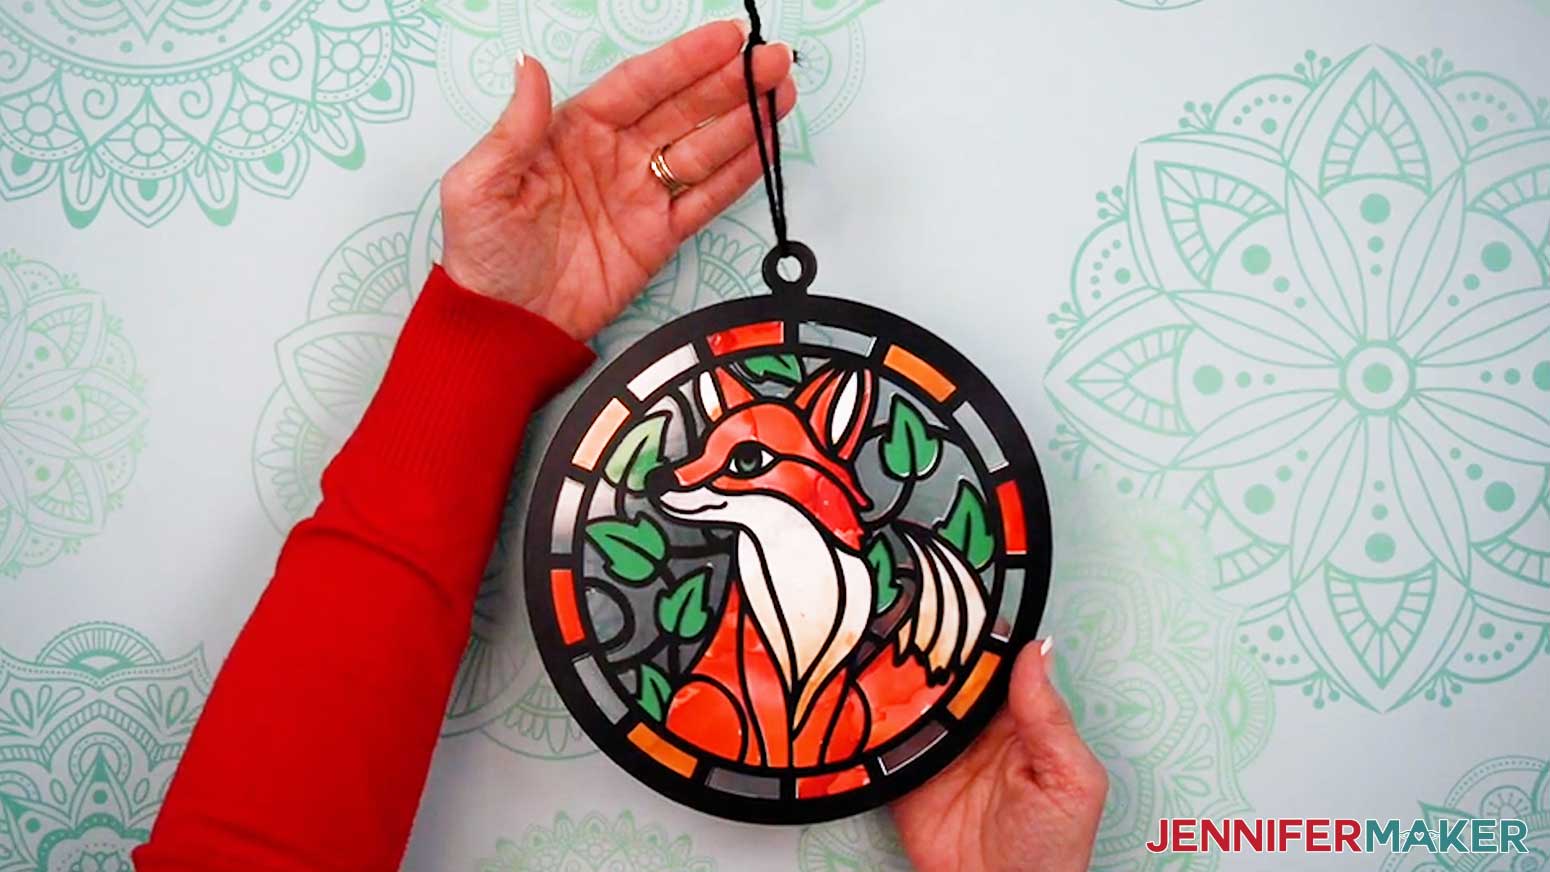
Notes
Finished Stained Glass Sizes:
Full Size: 7.75” x 8.5”
Joy Size: 4.25” x 4.661”
Care: Wipe clean with a soft, dry cloth.
Answers to Your Questions About Making Stained Glass Windows with Alcohol Ink
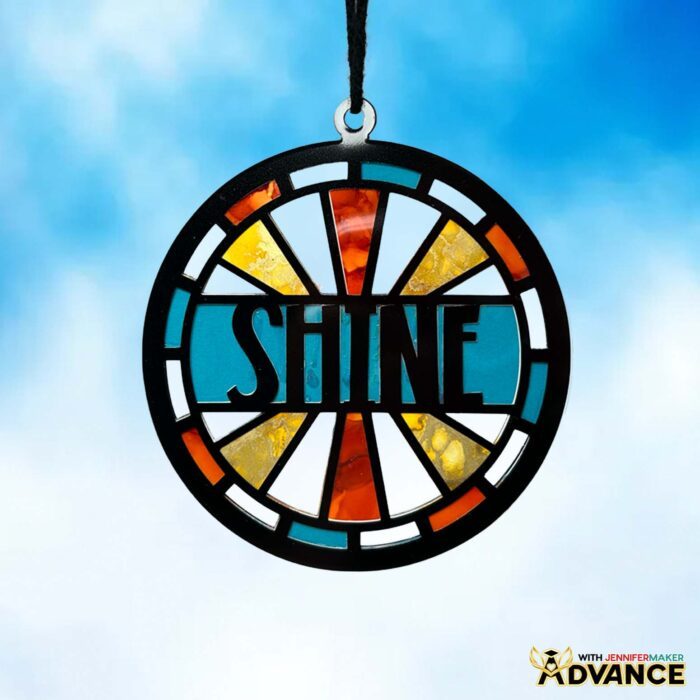
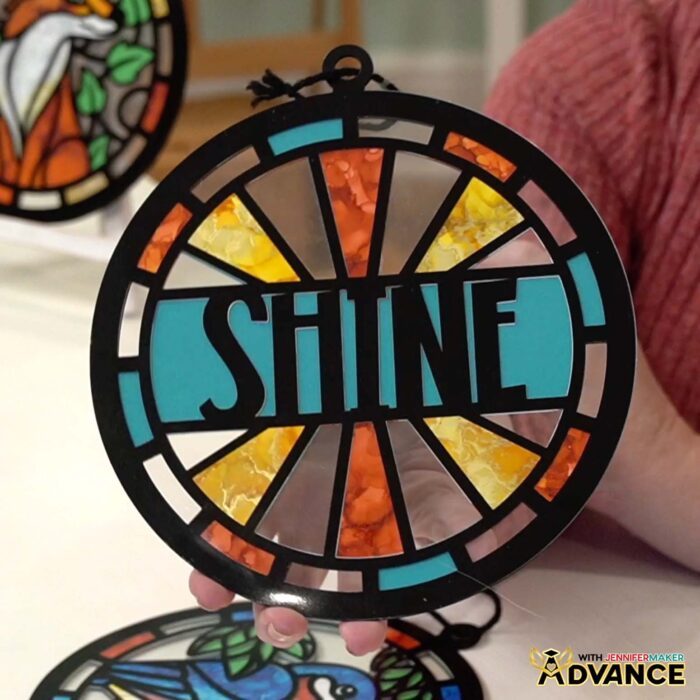
Q: Is there a way to create a custom alcohol ink paper stained glass design?
A: You can learn how to create your own alcohol ink stained glass window design like the “Shine” design below in my ADVANCE program. Learn more about ADVANCE here!
Q: Help! My Cricut Design Space screen looks different from yours!
A: If you’re using the latest version of Cricut Design Space, your screen may have slight variations from the screen you see on the video tutorial. Good news! All of the same functions are there, they may just be in different spots or have new icons.
Q: Can I make and sell alcohol ink stained glass windows using your designs?
A: If you want to use my alcohol ink paper stained glass designs and project for commercial use, please familiarize yourself with my important licensing information before selling your crafts.
Q: What makes this look like a stained glass window (without real glass)?
A: The magic is the “sandwich”: layered color pieces in the middle, plus vinyl “lead lines” on acetate. Together, they create stained glass effects that capture the feeling of real stained glass artworks, without soldering or the risk of cutting yourself on glass. Alcohol ink faux stained glass looks just as stunning as the real thing when hanging in a window with plenty of bright light!

Q: Which Cricut machines work for alcohol ink paper stained glass windows?
A: You’ve got options: Cricut Maker 4, Maker series, Explore series (including the Explore 5), Venture, and Joy Xtra all work, and the step-by-step process is the same. Joy and Joy 2 users can make it too, just resize the design to fit your smaller mat.
Q: Does alcohol ink work on paper?
A: While you can use regular paper with alcohol ink, you’ll get a different effect since the paper will absorb the ink rather than letting it spread the colors around. Alcohol ink is intended to be used on non-porous or synthetic papers like alcohol ink paper. It’s a waterproof paper so the ink stays vibrant and controlled, and the colors pop against its bright white surface. There are other colors of alcohol ink paper available, but I haven’t experimented with them to make faux stained glass yet.
Q: What other surfaces can I use alcohol inks on?
A: Alcohol ink loves non-porous surface materials: acetate, glazed ceramic tiles, and glass objects are perfect. I’ve had lots of fun and gotten gorgeous results on lots of different surfaces like glass vases, glass bottles, acrylic ornaments, and glass ornaments.
Q: Should I ink before or after cutting?
A: After! Cutting before you ink allows you to paint exactly where you want color, use fewer drops of alcohol ink, and protect your beautiful ink results from getting damaged during cutting.
Q: What are the best tools for moving the ink around?
A: A blower tool is my favorite for control, but a straw works too. Canned air is also useful. Use targeted blasts carefully so you don’t blow ink off the paper!
Q: Help! What if I used too much ink?
A: Blot excess alcohol with a paper towel, then use blending solution or isopropyl alcohol (rubbing alcohol) to even things out if needed… and remember, a little goes a long way.
Q: Can I fix my inking if I don’t love it after it dries?
A: Yes. Isopropyl alcohol can lift or dilute ink so you can rework it or blot it away with a paper towel.
Q: Why do I need two mirrored acetate pieces?
A: That’s how you get stained glass windows that look finished from both sides! Mirrored vinyl lines on acetate hold the layers, add structure, and make your new work of art look amazing from either side.
Q: How do I keep the vinyl aligned on the acetate?
A: Follow the step-by-step procedures in the video to use transfer tape and parchment paper for a perfectly-aligned result. That step-by-step process is the difference between “close enough” and chef’s-kiss clean.
Q: What inks should I buy if I’m starting out?
A: A nice set of alcohol inks with a variety of colors plus one or two metallics is plenty. The colors blend well, so you don’t need a huge collection to make vibrant and display-worthy works of art.
Q: Can I try different methods for applying or moving ink?
A: Absolutely! Alcohol ink is super fun and forgiving, and there are no rules! Pipettes, adding blending solution first, dropping ink first, using more air vs. less air… there are tons of creative ways to change the look. The video shares some basic techniques to reference when you experiment.
Q: Any final “don’t skip this” tips?
A: Work in pairs so your front and back layers match, and don’t rush the gluing process. After all, it’s the clean alignment and crisp edges that make these look like gorgeous works of art instead of “craft chaos.”
Q: Where can I get help if I get stuck?
A: If you want quick troubleshooting or you want to show off your finished alcohol ink paper stained glass window, my Cricut Facebook group is a helpful place to get help, compare notes, and see what others are making!
Get my free SVG/DXF/PDF files to make your own alcohol ink paper stained glass windows!
(If you do not see the signup form above, click here.)
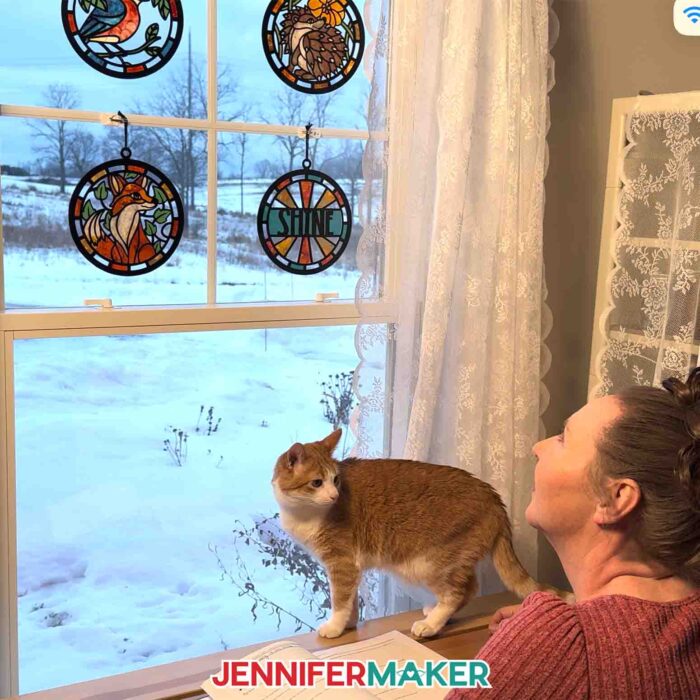
I absolutely love seeing your stained glass windows! Once you’ve learned how to make alcohol ink paper stained glass projects, inspire others and share photos of your project in our Facebook group or tag me on social media with #jennifermaker.
Love,

Want to remember this? Save this tutorial on How To Make Alcohol Ink Paper Stained Glass Windows to your favorite Pinterest Board!