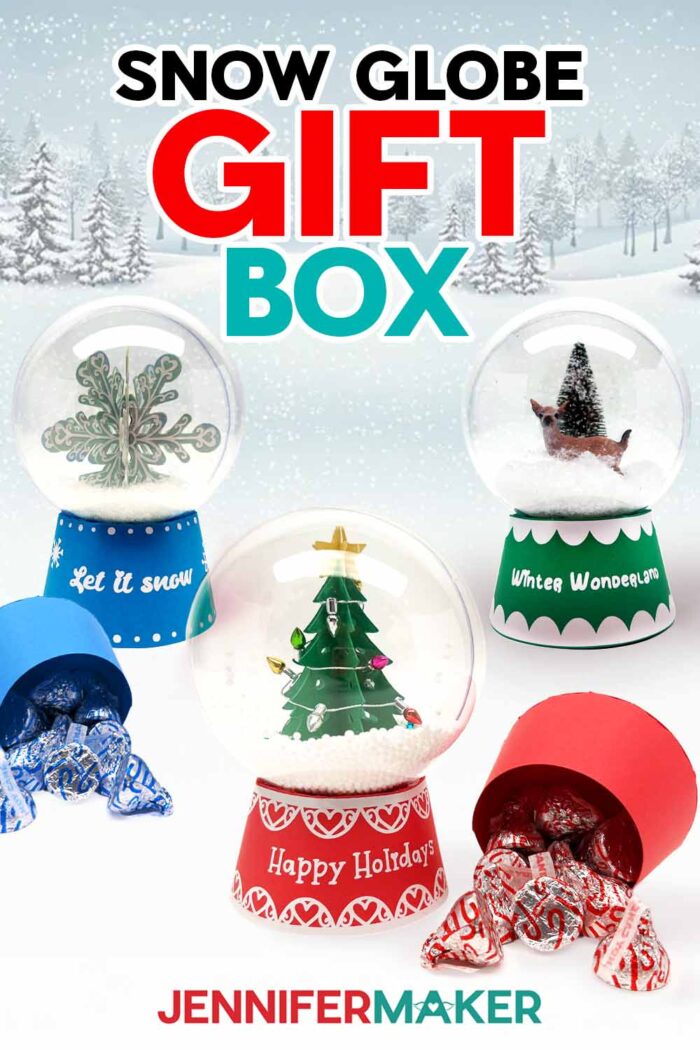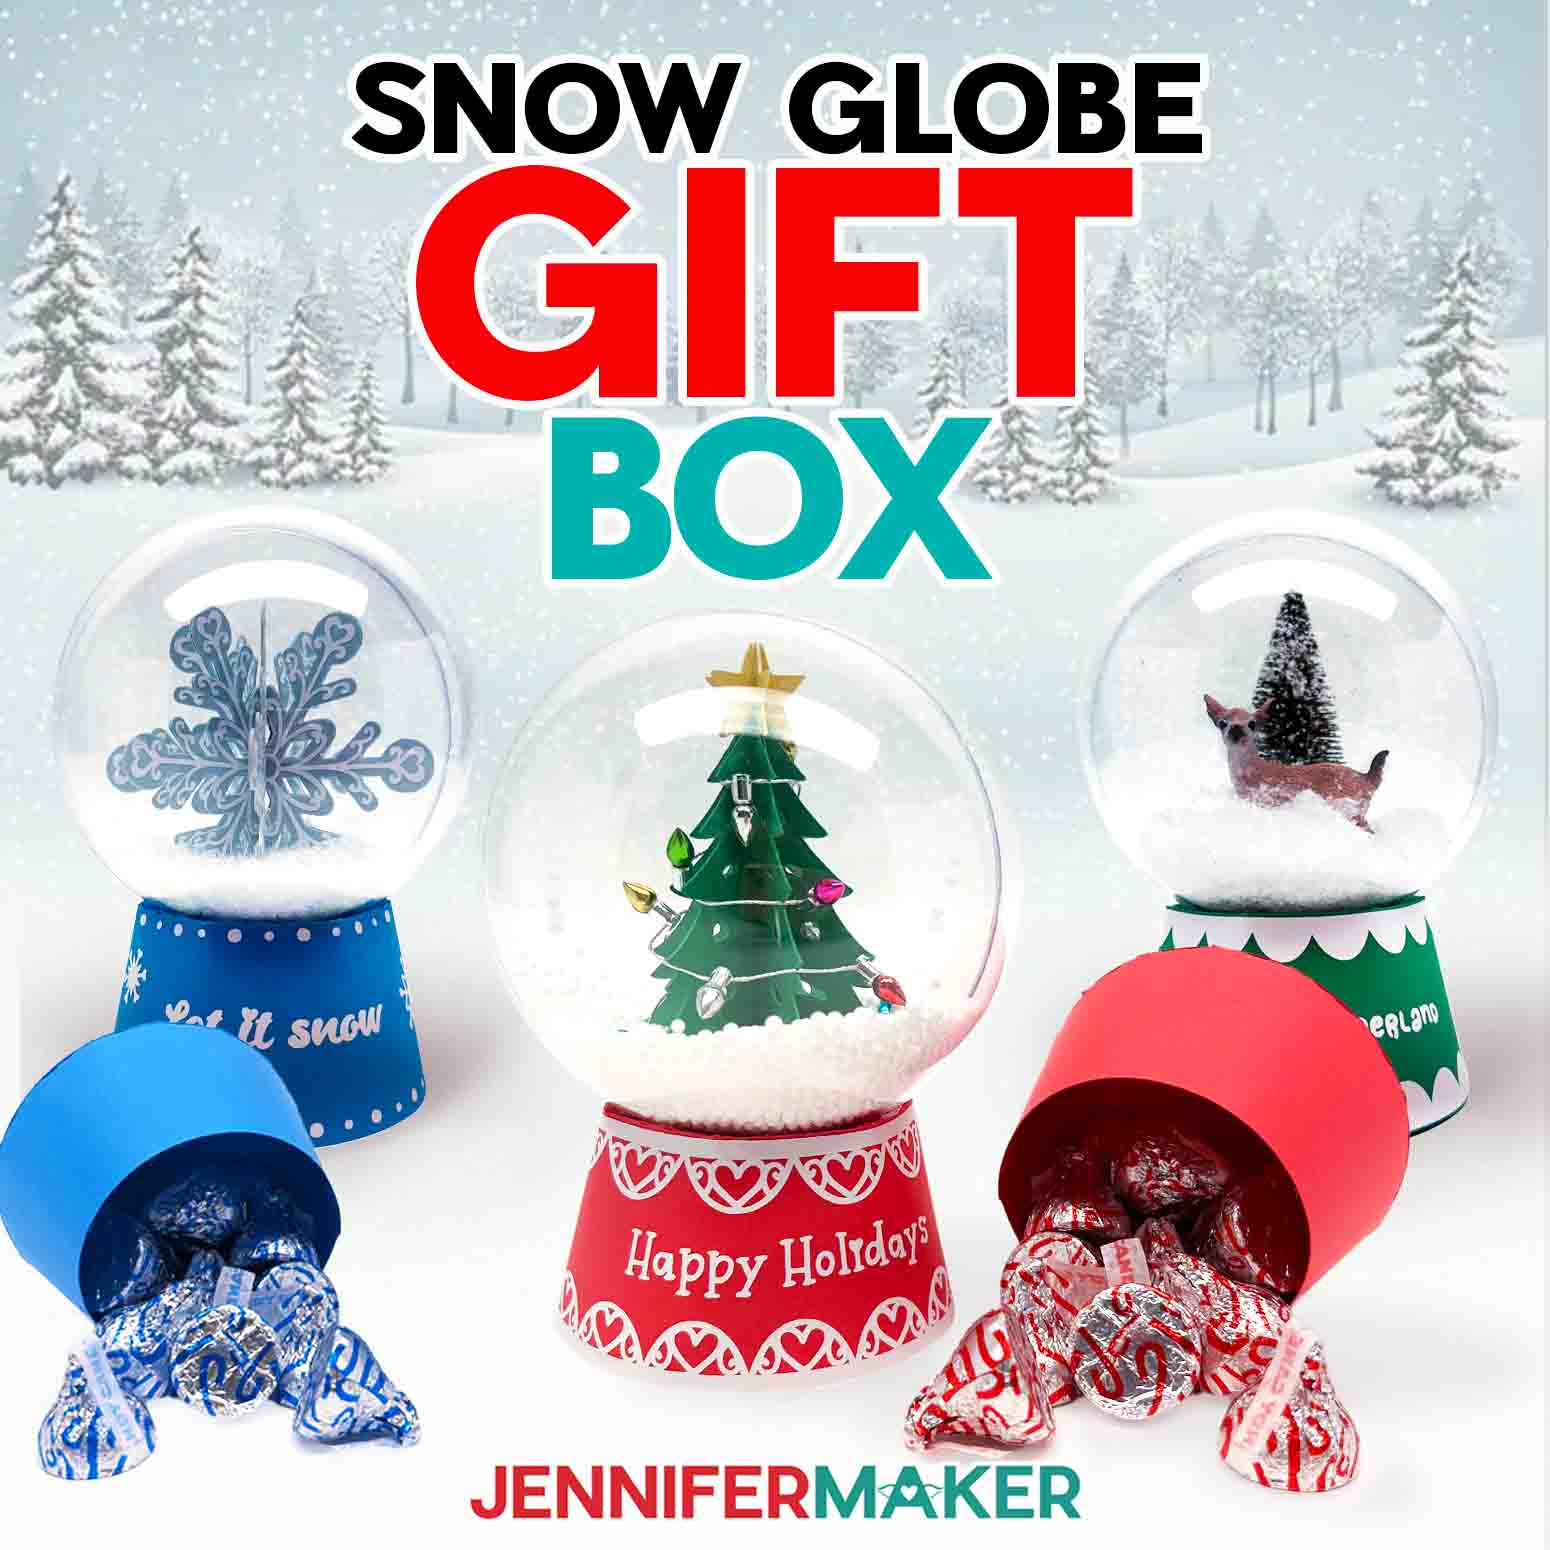
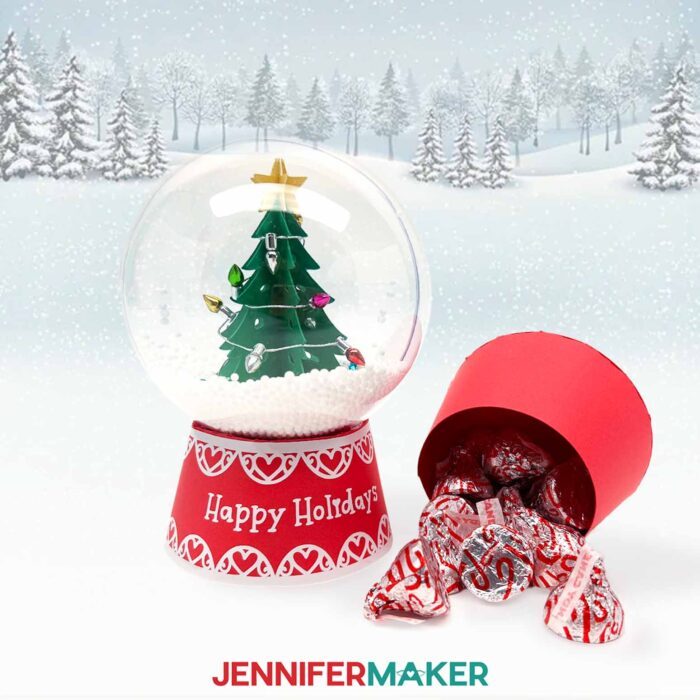
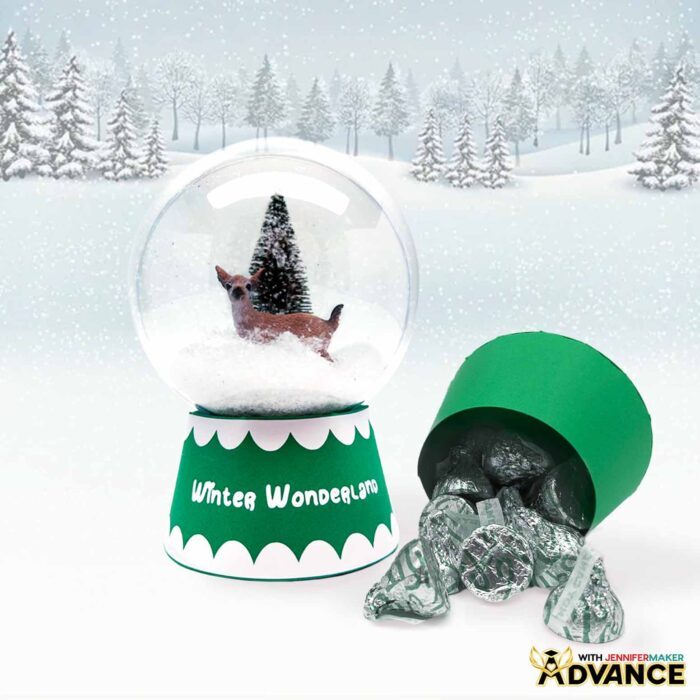
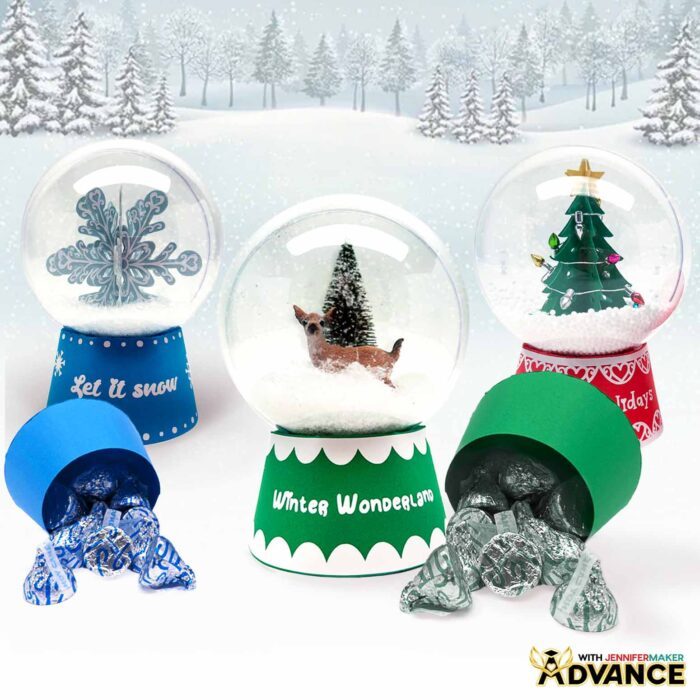
Learn how to make a DIY Snow Globe Gift Box with a base that can hold small candy or gifts!
Do you remember the first time you held a snow globe? The way the snow danced in slow motion, settling gently over a miniature world frozen in time? There’s something deeply nostalgic about snow globes with their quiet wonder and tiny vignettes of winter joy. That’s the feeling I wanted to bring into the craft room with this project: a snow globe gift box. It turns a beloved keepsake into a handmade surprise ready to hold small treasures, treats, or special notes for friends and family members.
NOTE: You can learn how to resize the designs to fit other ornaments in my bonus video!
See the full step-by-step video tutorial on how to make a snow globe gift box:

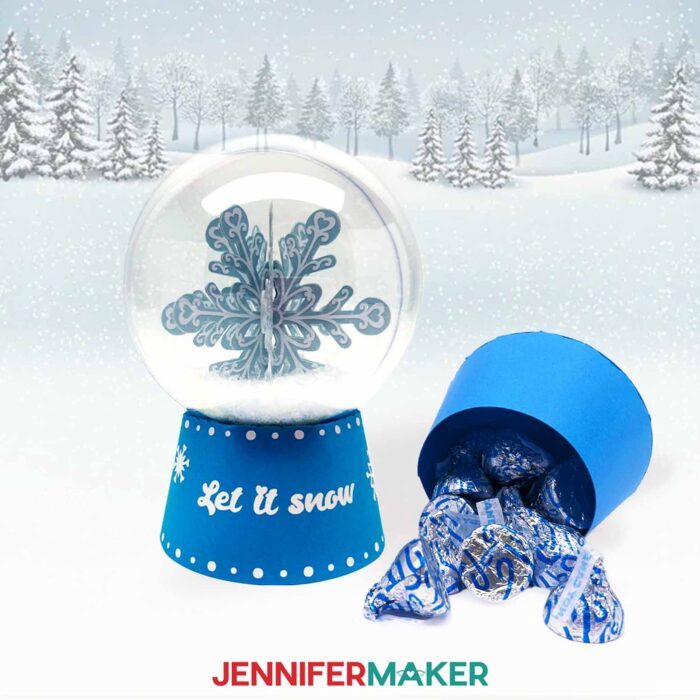
The idea behind this project is simple: take the charm and magic of a snow globe and combine it with the function of a gift box. You get the look of a winter scene captured under a clear dome, with the bonus of a hidden compartment in the base that’s just the right size for a few candies, a rolled-up message, or a tiny present.
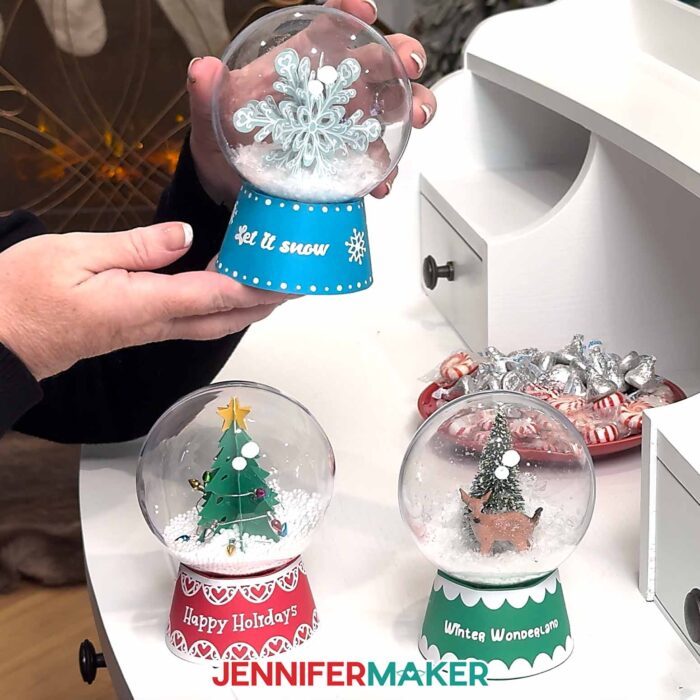
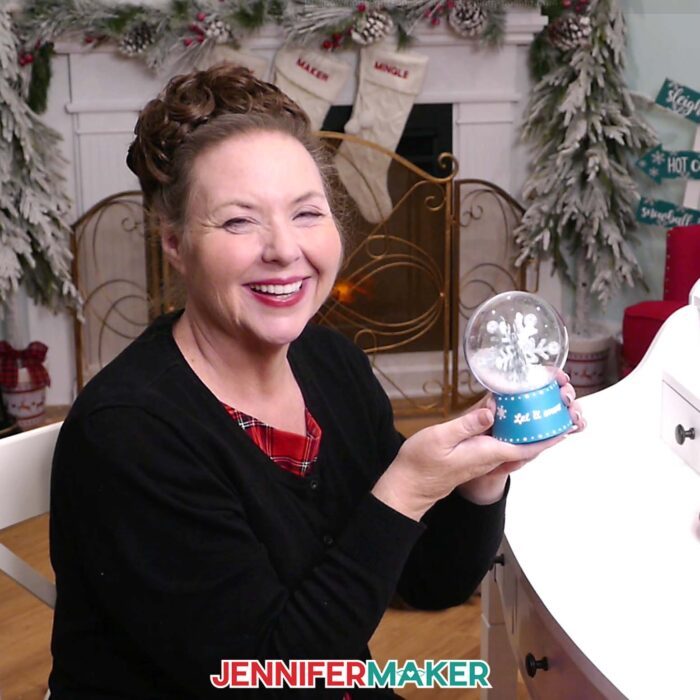
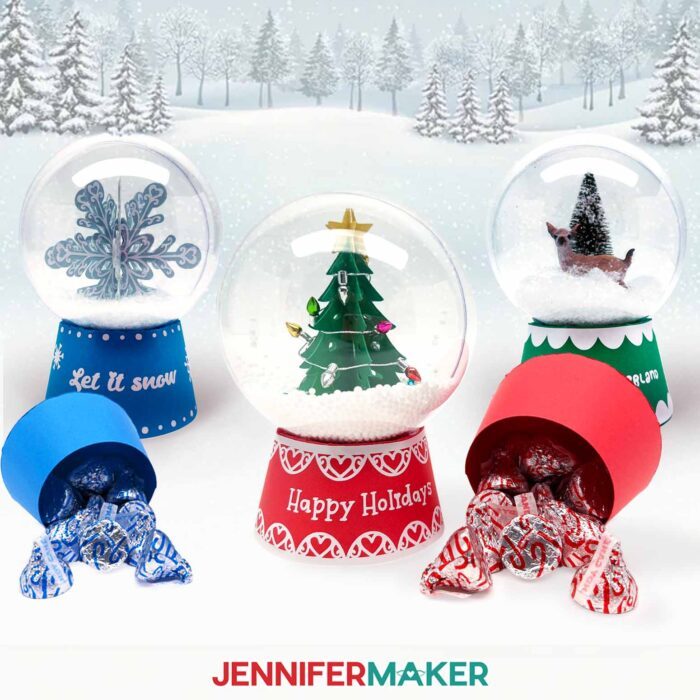
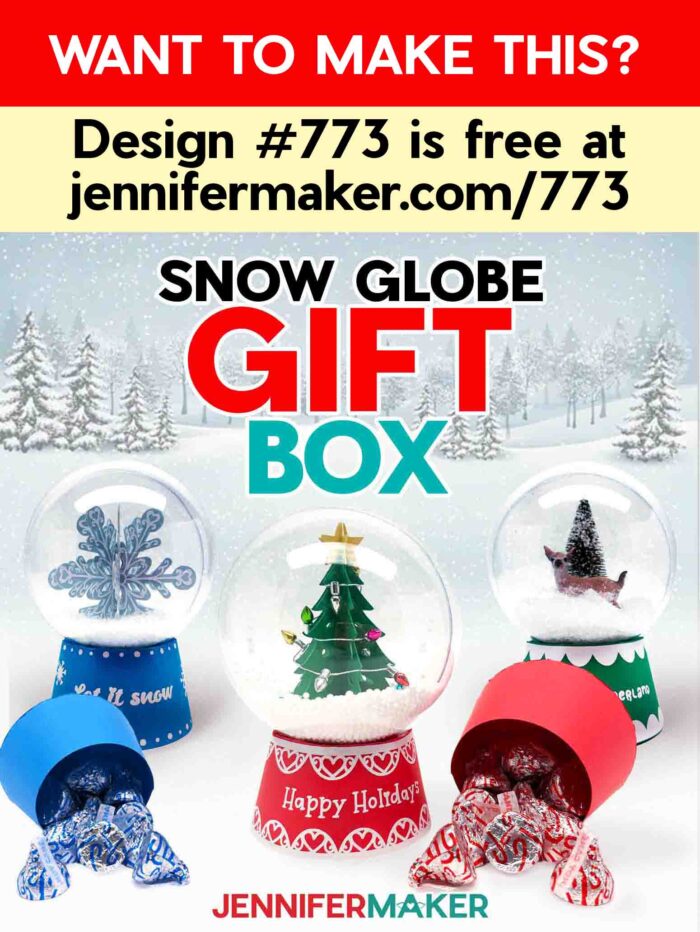
If you’re sharing gifts this holiday season, this project is sure to be a memorable one! To bring this little wonder to life, I started with a two-part clear plastic ornament. These are lightweight and roomy, making them ideal for creating snow globe crafts. I have two original designs for you to choose from: a 3D Christmas tree wrapped in tiny lights and a dimensional snowflake accented with shimmer and sparkle. Both SVG designs are included in my free download, along with DXF and PDF versions for other machines or hand-cutting.
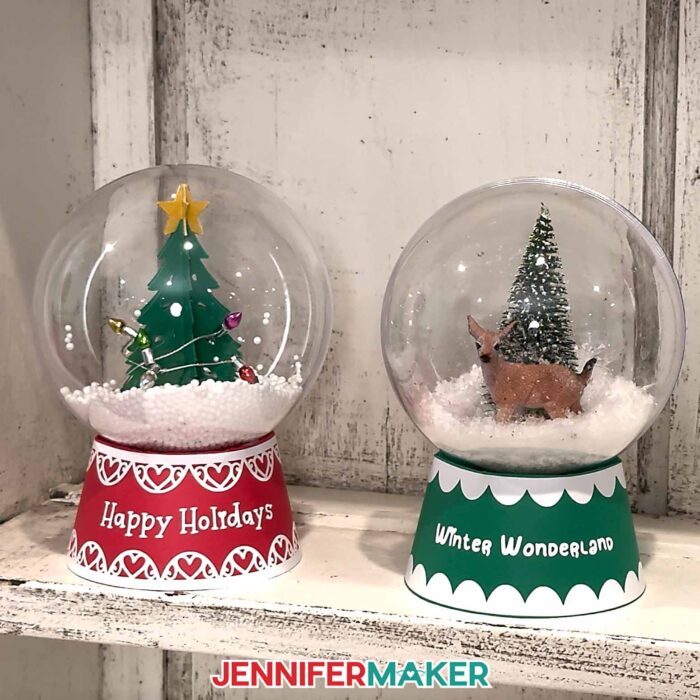
I cut all of my pieces on a Cricut machine using a mix of 65 lb., 100 lb., and shimmer cardstock. The heavier cardstock adds durability, while the shimmer cardstock brings an extra pop to the decorative elements, like the star on top of the tree or the surface of the snowflake.
For the gift box lid, I added a “Happy Holidays” vinyl decal using white Cricut Value Vinyl and StandardGrip transfer tape. To avoid damaging the cardstock when applying the vinyl, I used the taco method to apply the transfer tape and a really neat painter’s tape trick to weed the tiniest vinyl details! Even if you’ve never worked with vinyl on paper before, my simple techniques make the process smooth and beginner-friendly.
The snow globe gift box base comes together with basic folds, a bit of craft glue, and a little patience. You’ll begin by folding and gluing down the tabs on the bottom piece to create a strong, circular base. The lid forms a loop that wraps around and fits over the base snugly. It’s not a tight seal on purpose; the recipient can easily open the box to reveal what’s inside. But if you want to secure the lid for transport or extra stability, a few well-placed glue dots will do the trick!
Now, the real magic happens inside the globe. If you choose the tree version, I’ll show you how to fold and glue six tree shapes back to back, with a six-piece star at the top. It stands on its own using fanned-out bottom tabs. I wrapped mine in a strand of mini lights and attached them with glue dots. The lights add just enough twinkle to catch the eye, and you can add individual lights to fill in any bare spots for a polished look.
For the snowflake option, the process is just as simple and even more elegant. I applied vinyl decals to each of the six snowflake shapes before folding them in half and gluing them back to back. The shimmer cardstock and vinyl reflect beautifully under the clear globe, and the snowflake stands on its bottom tabs just like the tree. Each piece is easy to align, and the symmetrical design makes the snowflake a beautiful alternative if you’re looking for a more minimalist aesthetic.
Attaching the decor to the inside of the globe takes a bit of hot glue and a steady hand. I highly recommend using silicone finger caps to protect your fingertips! Next, we’ll add faux snow and seal the globe. I tested two types of snow: a powdery version that floats delicately and a chunkier version that creates more movement. Both work beautifully, and you can even mix them for a unique texture.
Once the snow globe is sealed and the snow is evenly distributed, it’s time to attach it to the gift box lid. It just takes a bit more hot glue on the lid’s tabs, a careful flip, and a good press. Then, just place the globe lid on the base and admire your work. You now have a show-stopping snow globe gift box that’s perfect for gifting during the holiday season or any special occasion this winter!
And if you’re like me and love to personalize your projects, I have something extra for you. In my ADVANCE with JenniferMaker workshop, I show you how to create custom vinyl decals that wrap around the base of the globe, even on curved surfaces. It’s a great way to add names, dates, or festive phrases that make each gift unique. Whether you’re making a batch of these for teachers, neighbors, or family members, or crafting just one to make someone feel extra special, this design is endlessly customizable. Learn more about ADVANCE with JenniferMaker here!
The full step-by-step video tutorial shows you everything: downloading the free files, uploading to Cricut Design Space, cutting and prepping materials, assembling each part, and finishing with thoughtful touches. I also cover how to change material settings for different cardstock weights, how to test vinyl cuts, and how to troubleshoot common Cricut cutting issues for clean results every time.
So if you’re ready to capture the joy and nostalgia of classic snow globes in a fun, functional craft project, this is the one to try. Be sure to check out the full video for all the tips, tricks, and inspiration you need to get started. I can’t wait to see what magical winter scenes you create!
Let me show you how to make a snow globe gift box! This post contains some affiliate links for your convenience (which means if you make a purchase after clicking a link I will earn a small commission but it won’t cost you a penny more, there is no additional cost)! Read my full disclosure policy.
Materials to Make a Snow Globe Gift Box
View my Amazon shopping list with the exact items I used.
- One (1) 3.94″ Clear Fillable Globe Ornament
- Mini Foam Ball Faux Snow -OR-
- Plastic Sparkling Faux Snow
- Two to Four (2-4) Sheets of 8.5″ x 11″ 65 lb. Cardstock (any colors for gift box base and inner tree decoration)
- One (1) Sheet of 8.5″ x 11″ 92 lb. Gold Shimmer Cardstock (optional for star on inner tree decoration)
- One (1) Sheet of 8.5″ x 11″ 92 lb. Light Blue Shimmer Cardstock (for inner snowflake decoration)
- Permanent Vinyl (I used White Cricut Value Vinyl)
- A way to cut your materials – I’m using the Cricut Maker 4, but you can also use any Cricut Maker series machine, any Cricut Explore series machine, the Cricut Venture, the Cricut Joy Xtra, or the Cricut Joy
- Cricut Green StandardGrip Machine Mat 12″ x 12″
- Scoring Stylus (optional for files with score lines) -OR-
- Single Scoring Wheel (optional for files with score lines)
- StandardGrip Transfer Tape
- Mini String of Lights (optional to wrap around cardstock or bottle brush tree decorations)
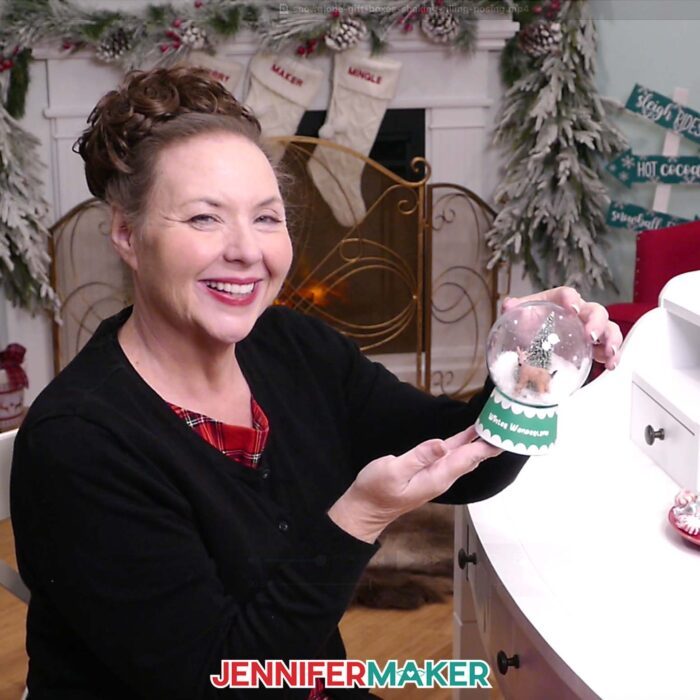
- Mini Bottle Brush Trees (optional to put in globe instead of cardstock decoration)
- Mini Woodland Animal Figures (optional to put in globe instead of cardstock decoration)
- Craft Glue (I used Bearly Art Precision Craft Glue)
- Hot Glue Gun & Glue Sticks -AND-
- Silicone Finger Protectors
- Small 3/16″ Zots Glue Dots
- Brayer
- Spatula
- Scraper
- Weeding Tool
- Tweezers (optional)
- Scissors
- Painter’s Tape (optional for weeding the vinyl designs)
- Design #773 (My SVG/DXF/PDF files are available in my free resource library – get the password by filling out the form at the bottom of this page
How to Make a Snow Globe Gift Box!

Snow Globe Gift Box
Learn how to make a DIY Snow Globe Gift Box with a base that can hold small candy or gifts!
Materials
- One (1) 3.94” Clear Fillable Globe Ornament
- Mini Foam Ball Faux Snow -OR-
- Plastic Sparkling Faux Snow
- Two to Four (2-4) Sheets of 8.5" x 11" 65 lb. Cardstock (any colors for gift box base and inner tree decoration)
- One (1) Sheet of 8.5" x 11" 92 lb. Gold Shimmer Cardstock (optional for star on inner tree decoration)
- One (1) Sheet of 8.5" x 11" 92 lb. Light Blue Shimmer Cardstock (for inner snowflake decoration)
- Permanent Vinyl (I used White Cricut Value Vinyl)
- StandardGrip Transfer Tape
- Mini String of Lights (optional to wrap around cardstock or bottle brush tree decorations)
- Mini Bottle Brush Trees (optional to put in globe instead of cardstock decoration)
- Mini Woodland Animal Figures (optional to put in globe instead of cardstock decoration)
- Design #773 (My free SVG/PDF/DXF design files are available in my free resource library - get the password by filling out the form at the bottom of this page)
Tools
- A way to cut your materials - I’m using the Cricut Maker 4, but you can also use any Cricut Maker Series machine, any Cricut Explore Series machine, the Cricut Venture, the Cricut Joy Xtra, or even the Cricut Joy
- Cricut Green StandardGrip Machine Mat 12" x 12"
- Scoring Stylus (optional for files with score lines) -OR-
- Single Scoring Wheel (optional for files with score lines)
- Craft Glue (I used Bearly Art Precision Glue)
- Hot Glue Gun & Glue Sticks
- Small 3/16" Zots Glue Dots
- Brayer
- Spatula
- Scraper
- Weeding Tool
- Tweezers (optional)
- Scissors
- Silicone Finger Protectors (for use with hot glue)
- Painter's Tape (optional for weeding the vinyl designs)
Instructions
STEP 1: GET MY FREE SNOW GLOBE GIFT BOX DESIGNS
First, download my Snow Globe Gift Box files from my free library – look for Design #773. Alternatively, you can use the Save This Project form near the top of this post and the design link will be emailed to you.
In the SVG folder, you’ll find “score” and “noscore” versions for the “snowflake” and “tree” variations of my design to cut on a cutting machine. There is also a DXF folder with cut files, and a PDF folder with versions you can print and cut by hand.
Upload the SVG file you need to Design Space to get started. The “score” versions require a Scoring Stylus or Single Scoring Wheel, but give smoother results. I recommend using the “noscore” versions if you’re using shimmer cardstock so the lines will be easier to see and fold.
TIP: If you’re not sure how to upload, go to jennifermaker.com/svgs to learn how to unzip and upload SVG files.
STEP 2: PREPARE AND CUT YOUR SNOW GLOBE GIFT BOX DESIGN
CRICUT DESIGN SPACE
1. In Cricut Design Space, open a blank Canvas.
NOTE: If you’re new to using Cricut Design Space, go to cricutkickoff.com for my introductory tutorial on Design Space basics.
2. Click “Upload” and then “Upload Image.”
3. Click “Browse.”
4. Select the SVG file of your choice.
NOTE: I’ll pick the “noscore” version of the “tree” design, and note any differences in the “snowflake” design.
5. Click “Open” and then “Continue.”
6. Click “Upload” to add the design to your Canvas.
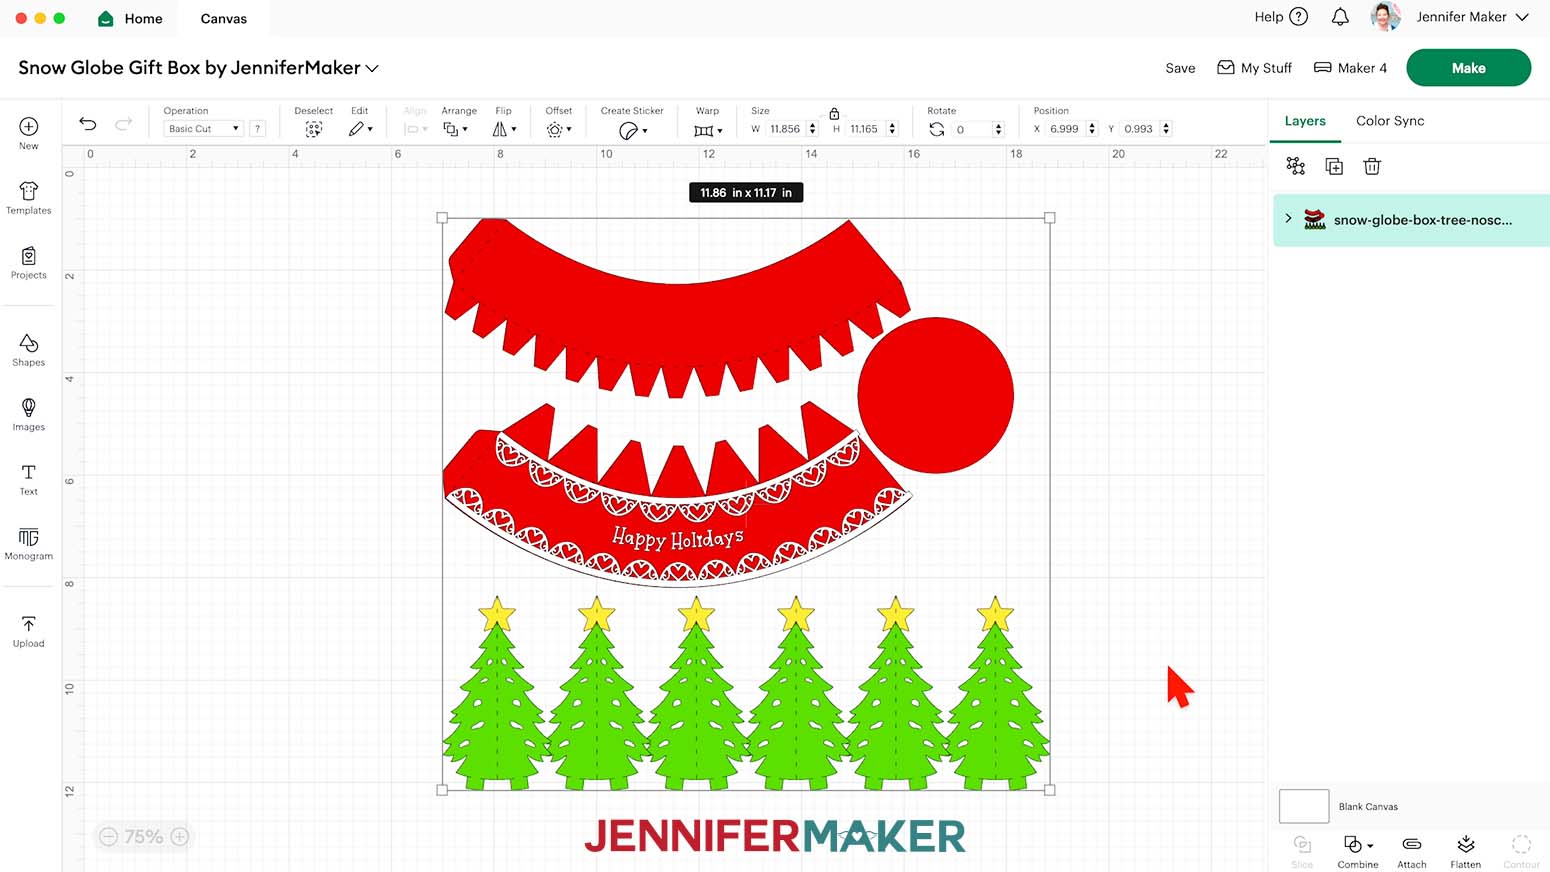
7. Click the minus (-) icon in the lower left corner to zoom out and see everything on your canvas.
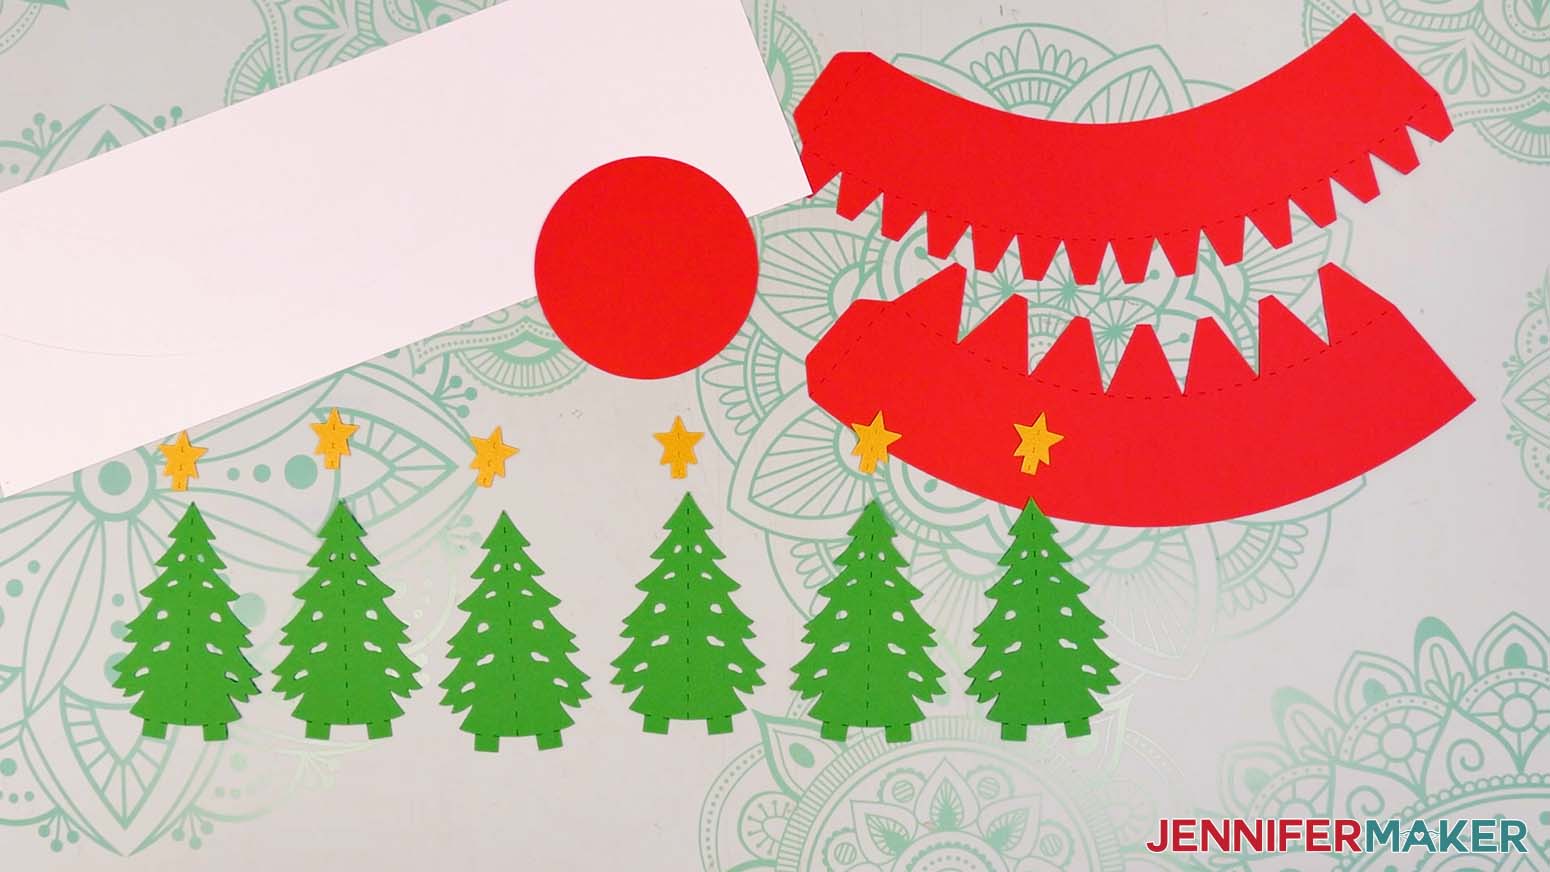
NOTE: For the “tree” design, you will see:
A red base piece with small tabs
A red circle bottom piece
A red lid piece with large tabs
A white “Happy Holidays” with lace trim vinyl design
Six green tree pieces and six yellow star pieces
NOTE: For the “snowflake” design, you will see:
A blue base piece with small tabs
A blue circle bottom piece
A blue lid piece with large tabs
A white “Let it snow” with snowflakes vinyl design
Six blue snowflake pieces and six white vinyl snowflake designs
8. Click “Save” and give your project a name.
9. Ungroup the design.
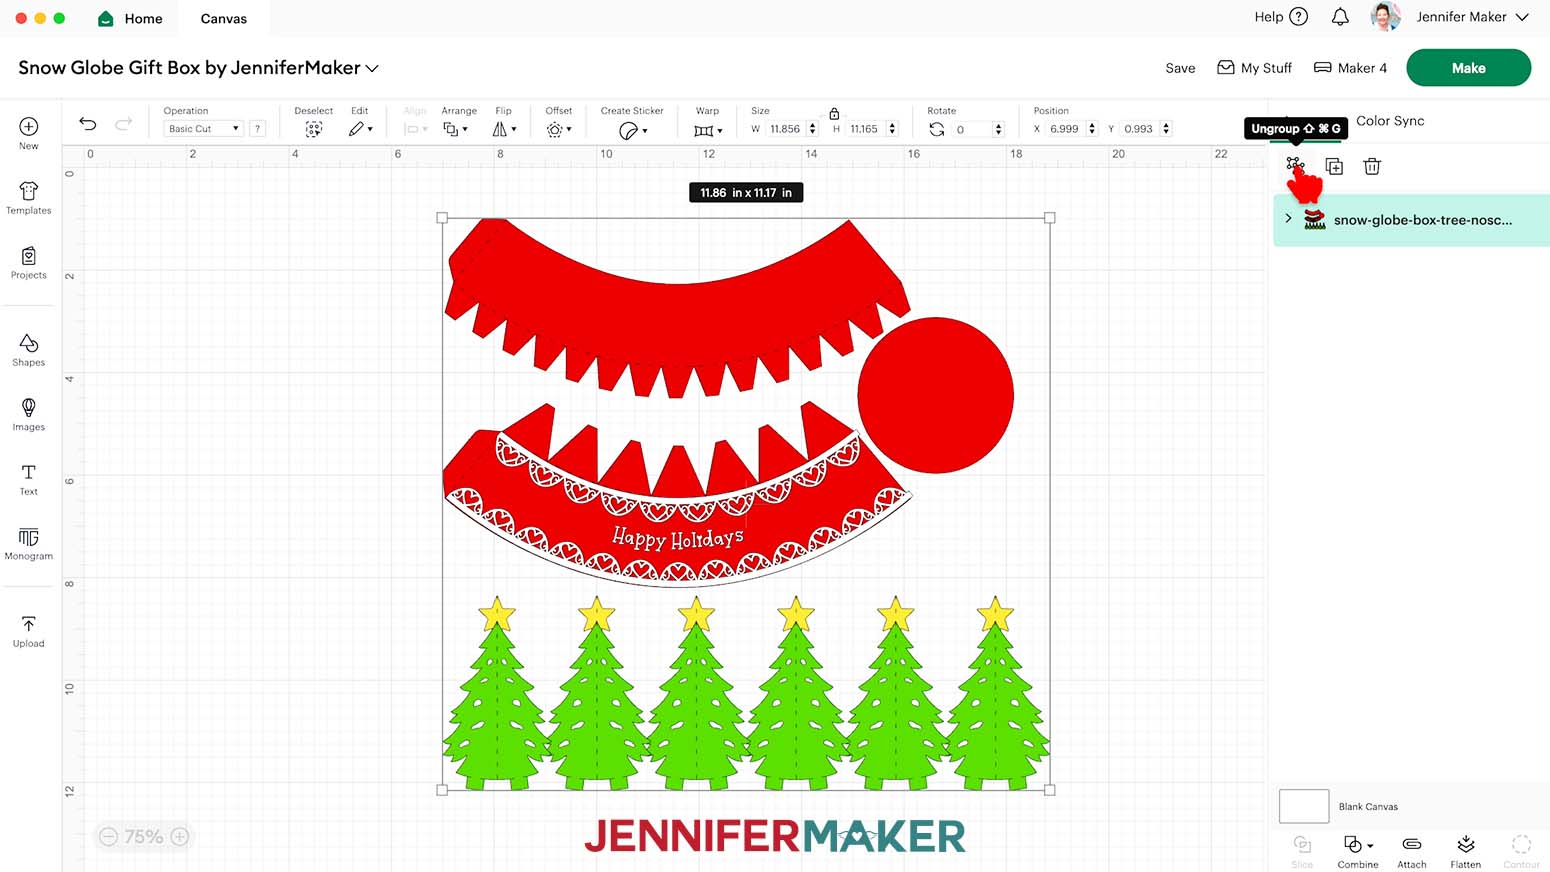
10. To change a piece’s color to match the cardstock or vinyl you’ll cut it from, select it, click the Color Box next to “Operation,” and choose a new color for it.
11. If you’re cutting the “noscore” version of the gift box, your project is ready to cut! If you’re cutting the “score” version, follow the steps from my scoring tool tutorial to adjust your file.

CUTTING
- Make sure the correct machine is selected in the top right.
- Click “Make.”
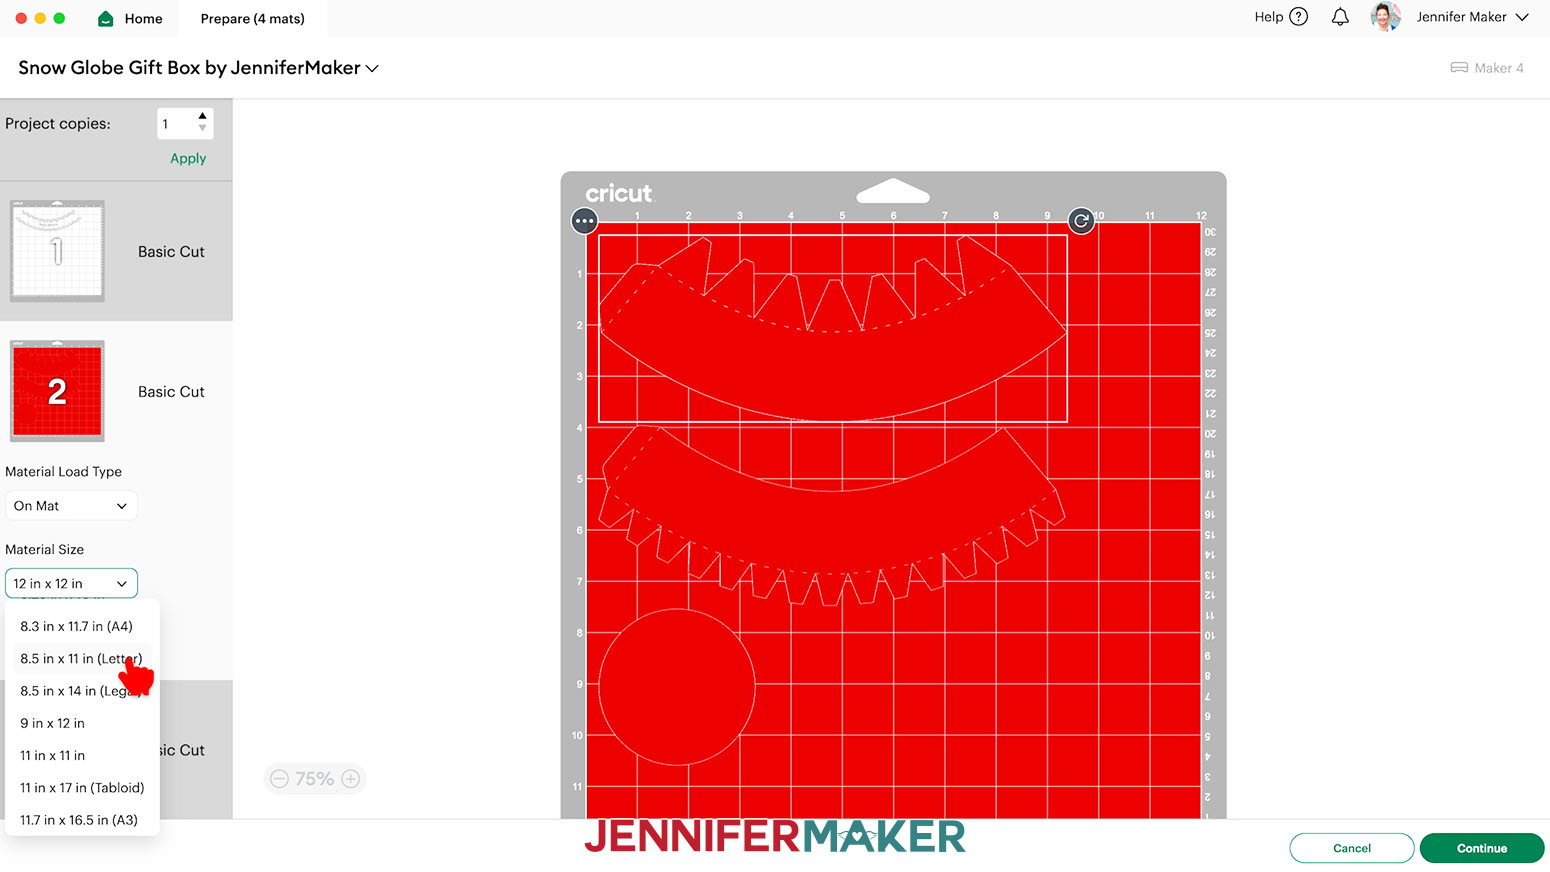
- On the Prepare screen, make sure the correct Material Size is selected for your mats.NOTE: I’ll use “12 in x 12 in” for my vinyl mat and cut my vinyl down to size. I’ll use “8.5 in x 11 in” for my cardstock mats.

- When you’re satisfied with your mat layouts, click on Mat 1 so it loads first on the next page, then click “Continue.”
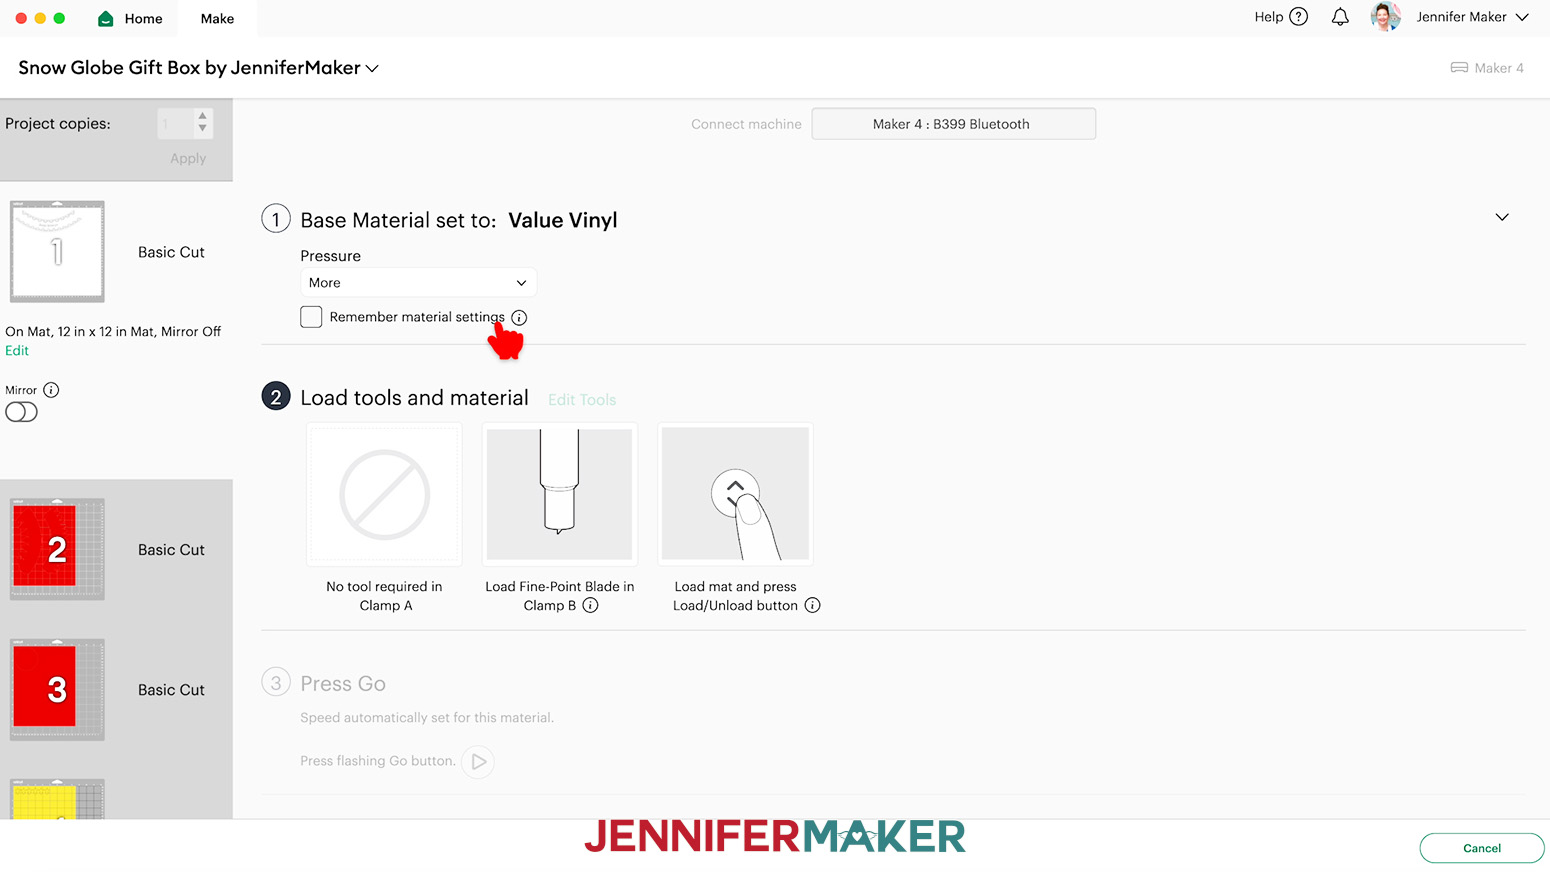
- On the Make screen, set the Base Material for your first mat. Mine is the vinyl mat. I used the “Value Vinyl” material setting with “More” pressure.NOTE: I don’t recommend cutting your decals from glitter or metallic vinyl since using StrongGrip transfer tape to apply them can damage the cardstock.TIP: Changing the Pressure to “More” results in a cleaner cut.
- Use a paper trimmer or scissors to trim your vinyl to cover the design area shown on the screen, plus an inch or so of buffer.TIP: You can save smaller pieces of vinyl for other projects.
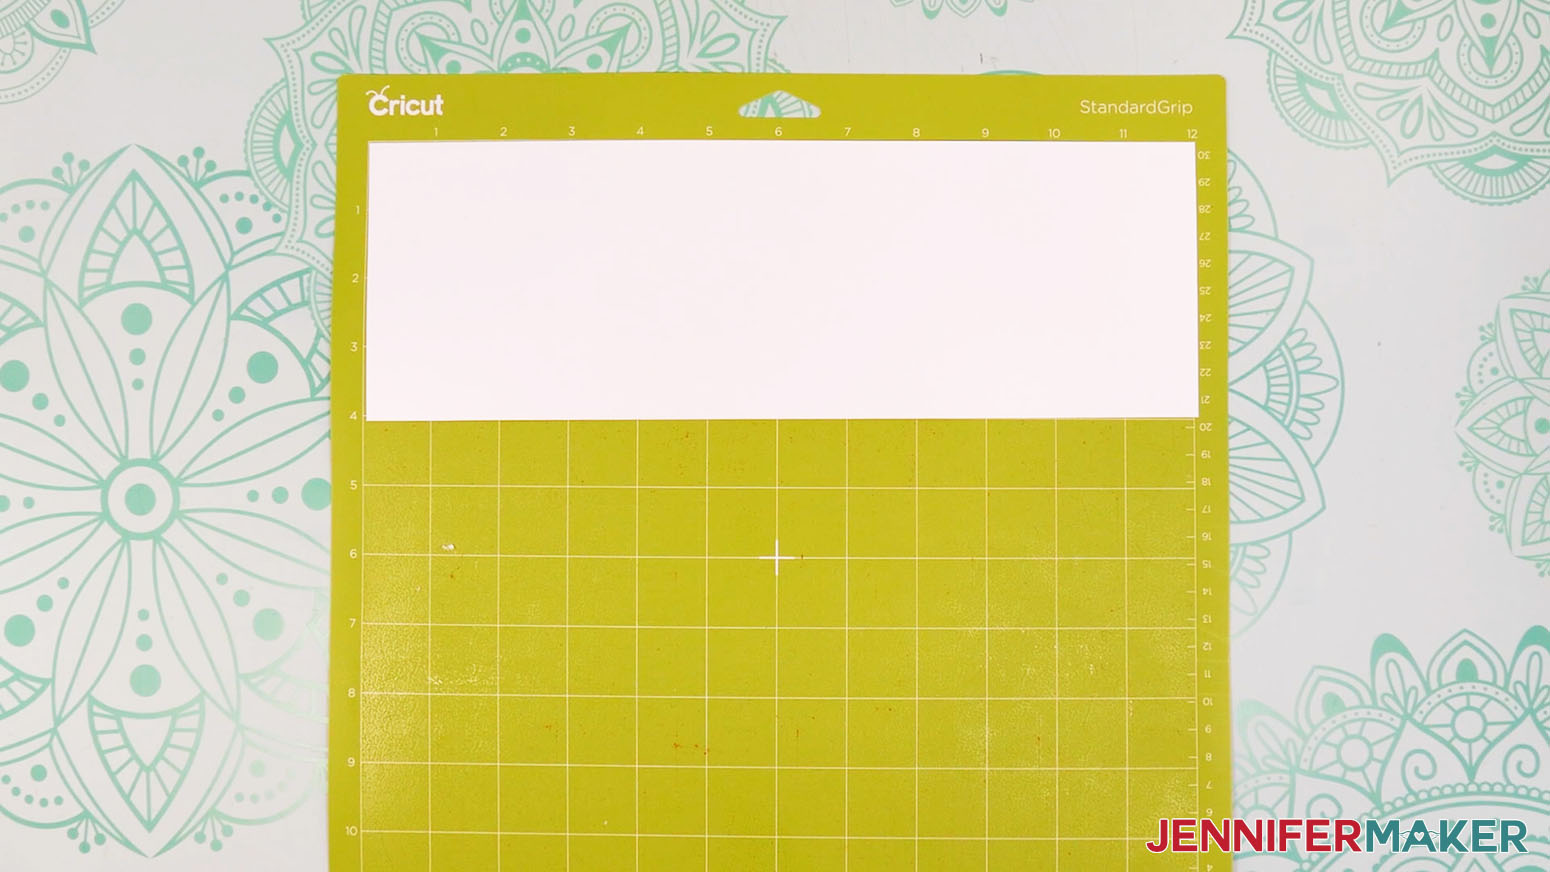
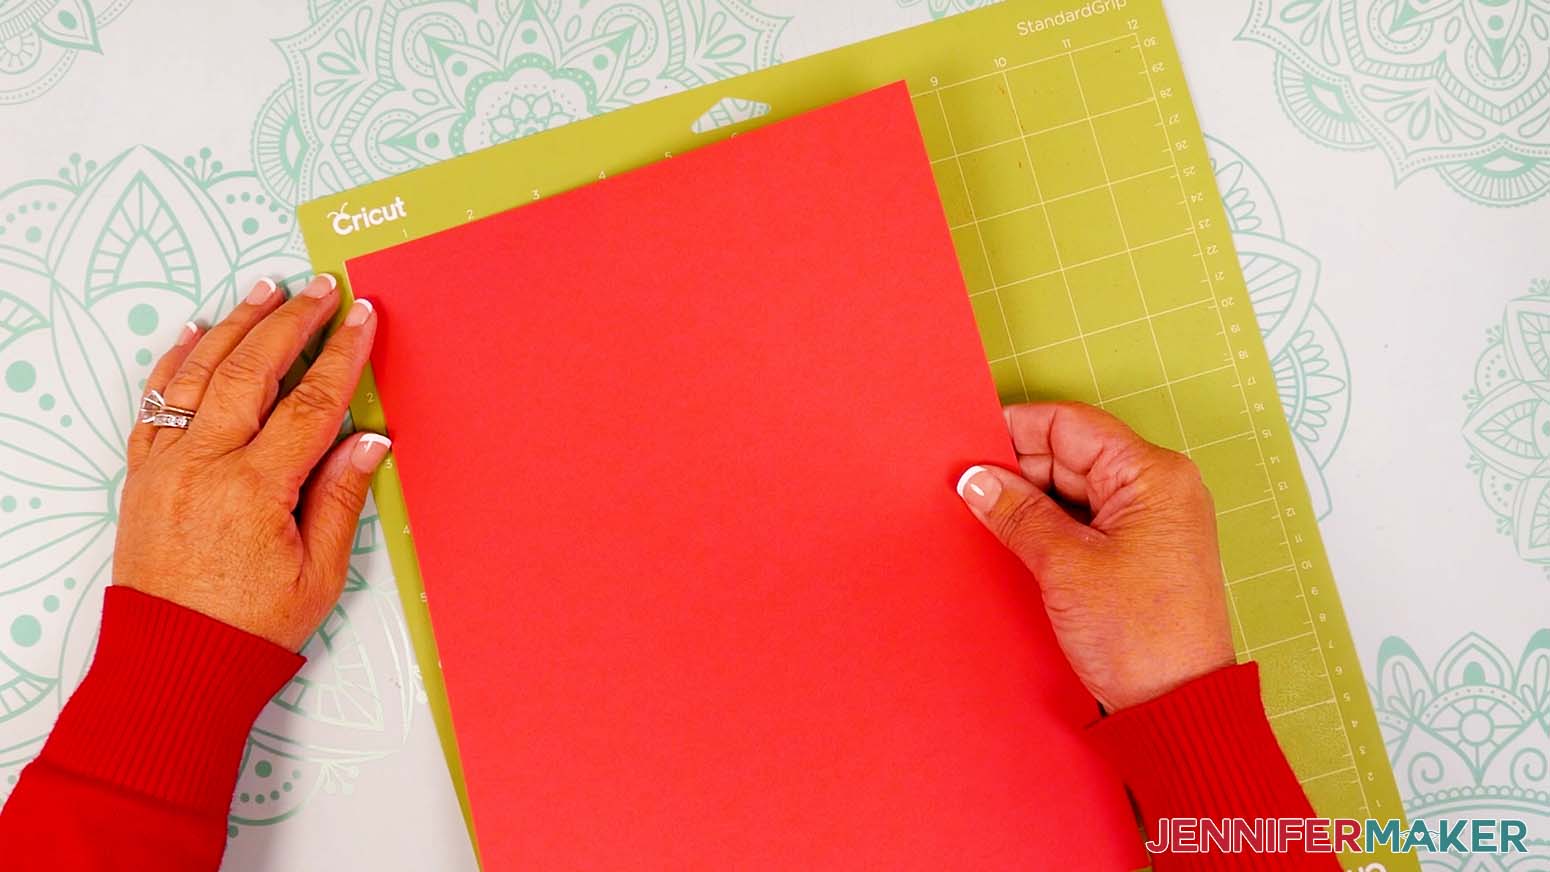
- Place your vinyl pretty side up on a green StandardGrip machine mat so it covers the design area on your screen.
- Use a brayer to make sure it’s fully adhered.
- Check that your Premium Fine-Point Blade is clean and in the clamp.
- Press the flashing “Load/Unload” button to load the prepared mat into your Cricut.
- Press the flashing middle button to begin cutting.
- When it has finished cutting, don’t unload the mat right away. Gently lift a corner of the material to make sure the cuts went all the way through the material. If not, press the middle button again to make a second pass of cuts in the same spots.NOTE: For vinyl, cuts should go all the way through the material, but not the carrier sheet. TIP: If you have any issues with your cuts, go to jennifermaker.com/cleaner-cuts.
- When the cuts are complete, flip the mat over onto your work surface, and roll it back to release the vinyl with its carrier sheet.
- If you cut the snowflake decals, use scissors to cut them into six individual pieces.
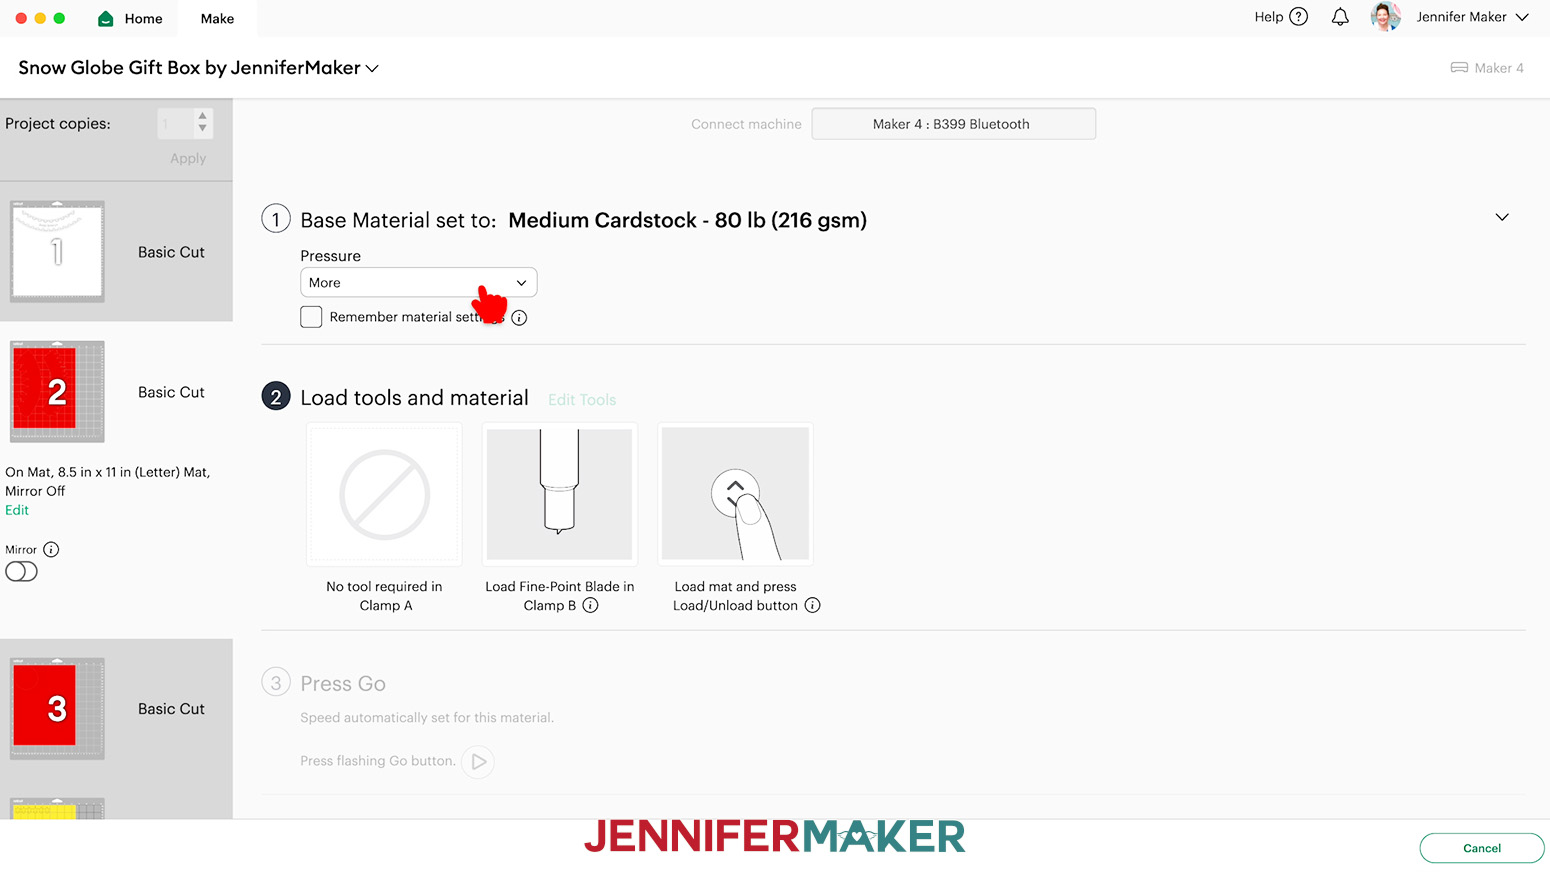
- When you get to your cardstock mats, don’t forget to update your material settings. I used: "Medium Cardstock - 80 lb (216 gsm)” with “More” Pressure for my 65 lb. cardstock pieces (base pieces and tree pieces)"Heavy Cardstock - 100 lb (270 gsm)” with “More” Pressure for my shimmer cardstock pieces (snowflake pieces and star pieces)
- Place your cardstock pretty side up on a green StandardGrip machine mat.
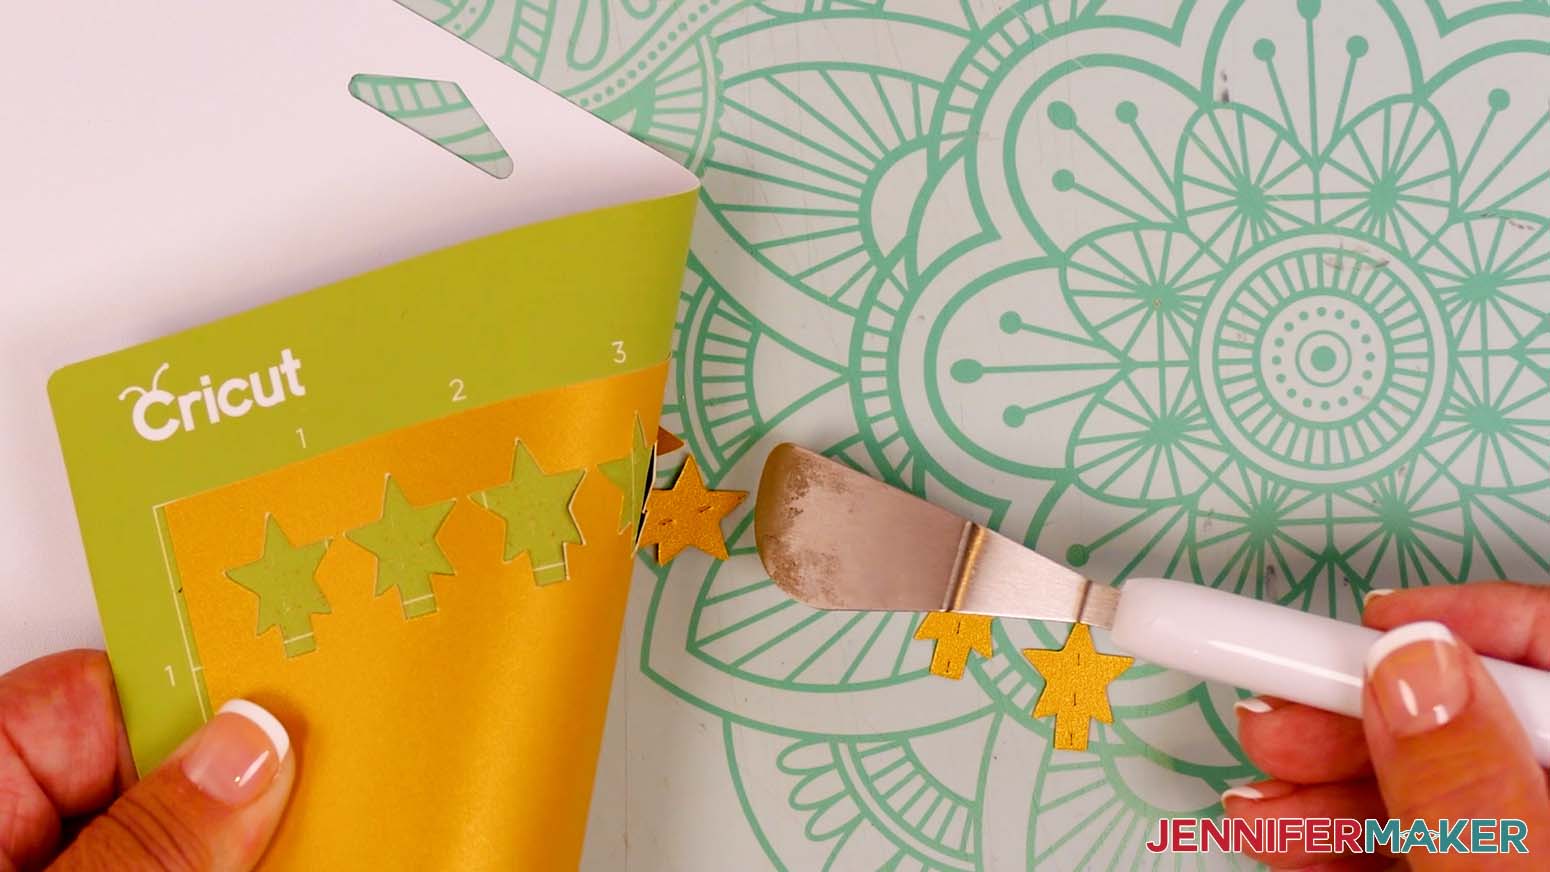
- Follow Steps 8-13 above to cut your cardstock mats.TIP: Use the spatula to help lift delicate parts, and your weeding tool to poke out small bits of cardstock that are still attached to your cut pieces.
- Use a scraper tool to remove the small bits of cardstock left on your mat after you remove the cut pieces.
- Lay out all of your cut pieces face up.TIP: Refer to the Design Space screen if you’re not sure about some pieces’ orientation.
 "Heavy Cardstock - 100 lb (270 gsm)” with “More” Pressure for my shimmer cardstock pieces (snowflake pieces and star pieces)
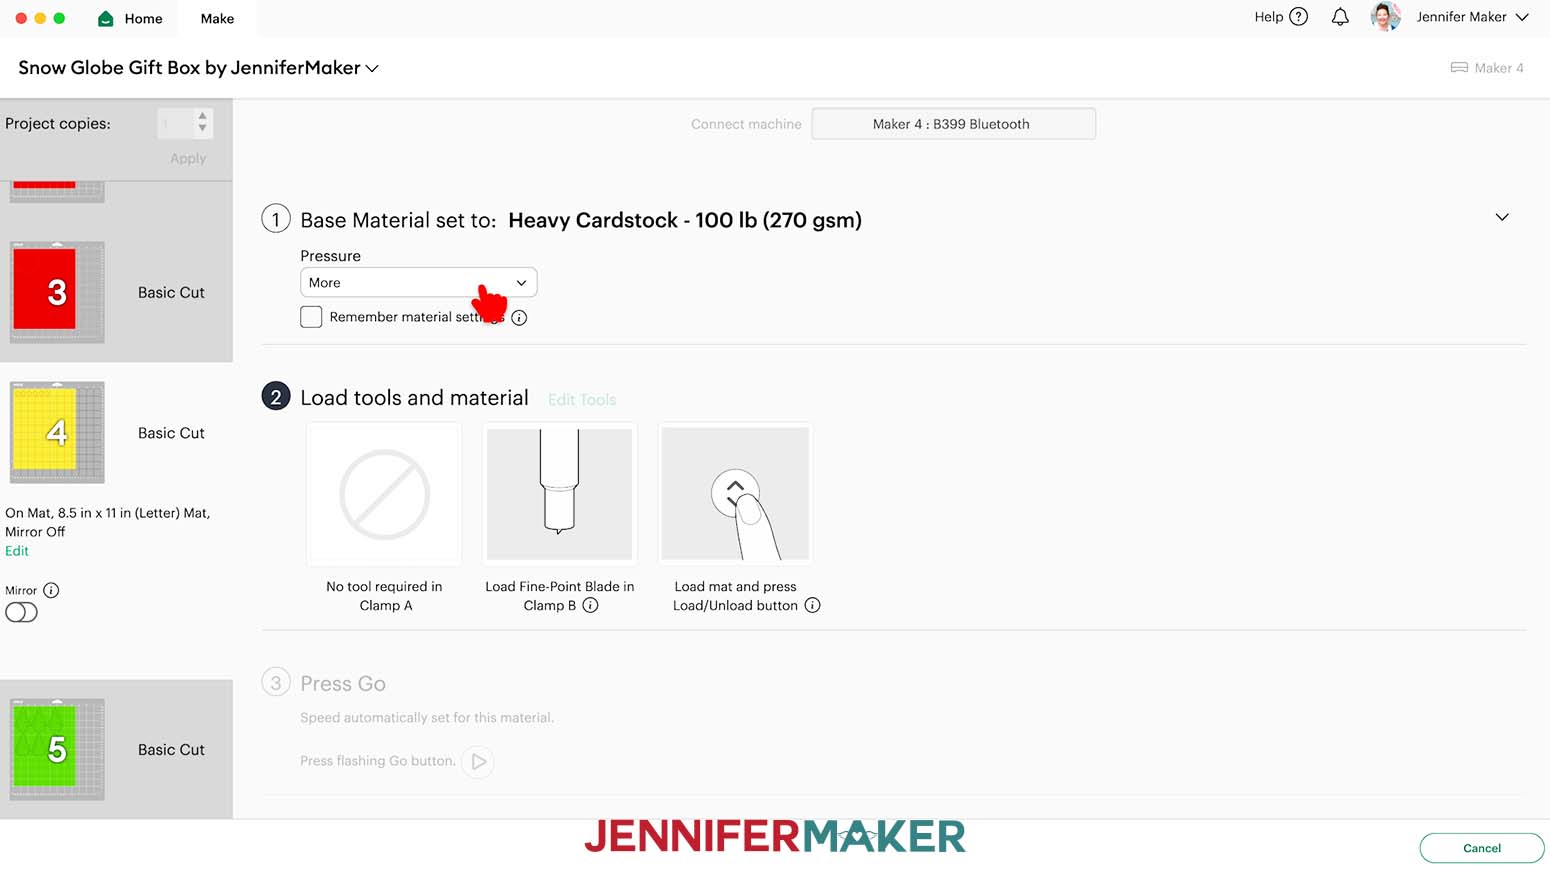
STEP 3: ASSEMBLE YOUR SNOW GLOBE GIFT BOX
WEED YOUR VINYL BASE DECORATION
- Lay the decal vinyl side up on your work surface.
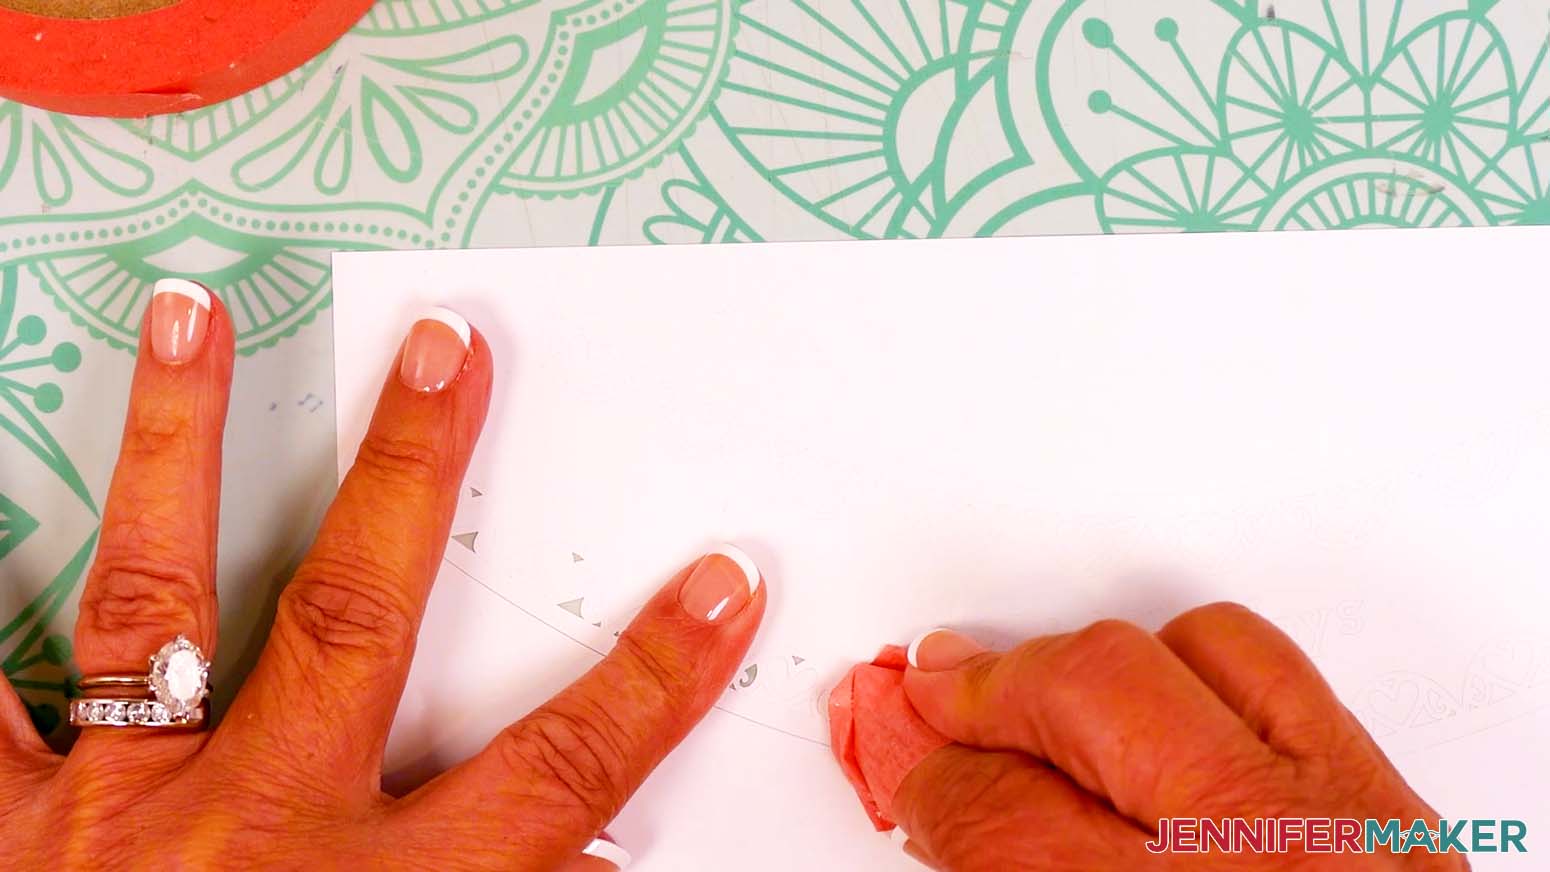
- Use a small piece of painter’s tape or masking tape to carefully pull away the small bits inside the design.TIP: Make sure you do not pull up any pieces you want to keep! If they come up, gently pat them back in place and try again. Refer back to the Design Space screen if you’re not sure which pieces to remove.
- Use your weeding tool to remove the larger pieces of vinyl, trimming with scissors as you go to prevent the vinyl from sticking to your decal.
- Use your weeding tool to remove any remaining unneeded sections.
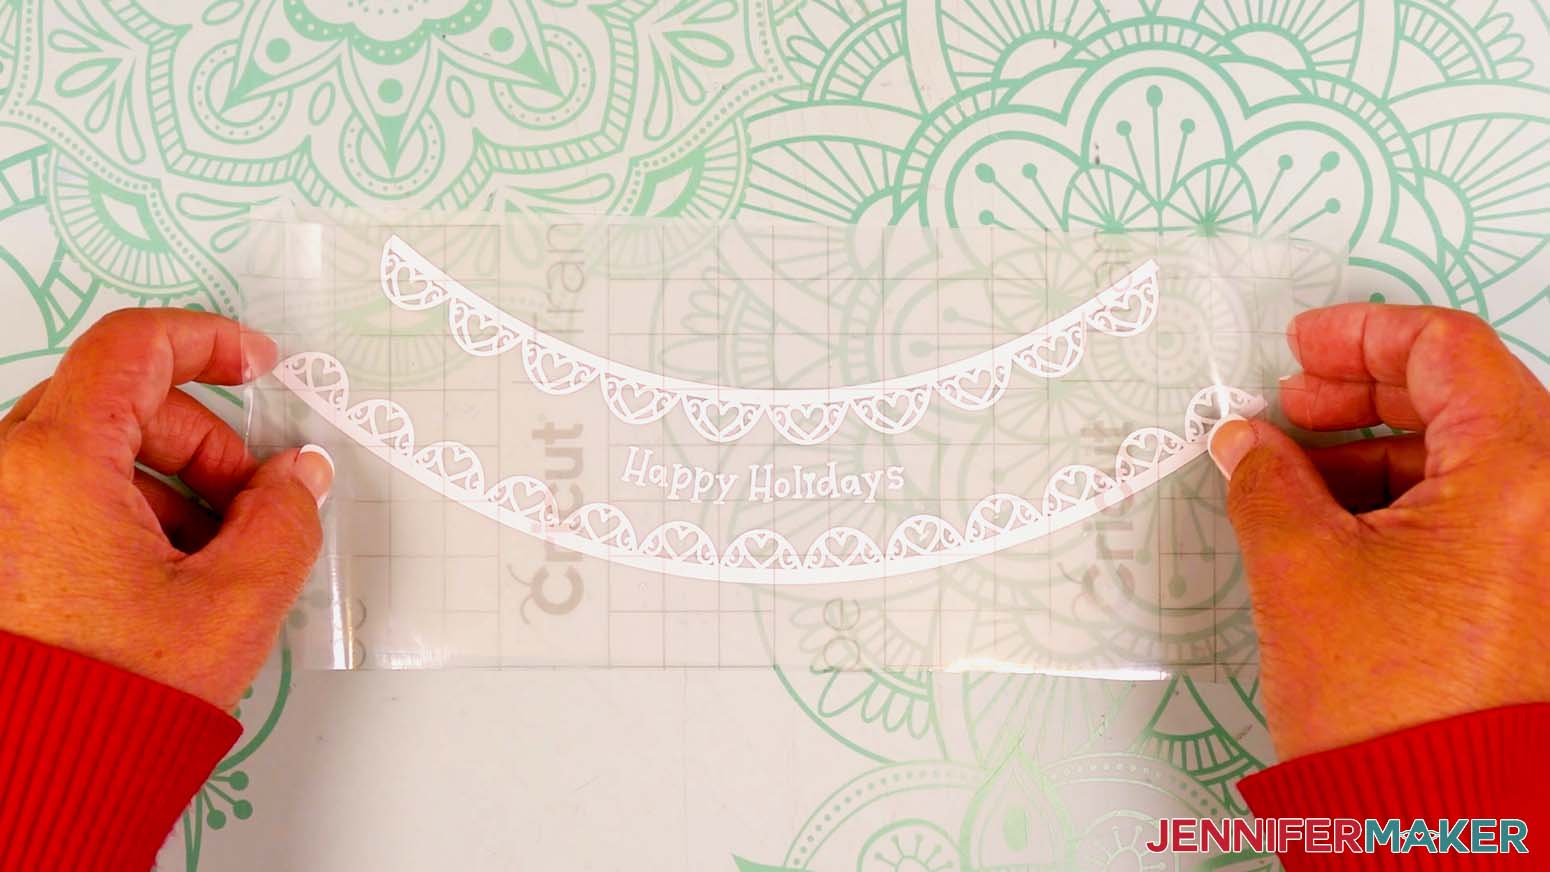
- Cut a piece of StandardGrip transfer tape just larger than the vinyl decal.
- Lay the decal vinyl side up on your work surface.
- Remove the backing from the transfer tape, then pat your fingers on its adhesive side to lessen its stickiness and prevent damage to your cardstock.TIP: You can also stick the transfer tape to a cloth or your clothing and peel it back up several times to lessen the stickiness.
- Hold your transfer tape in the shape of a “taco,” sticky side down, then center the bottom of the “taco” onto the middle of the decal.
- Smooth the transfer tape over the decal from the center outward and burnish it down using the scraper tool.
- Flip your vinyl over and burnish the other side, then gently peel away the backing.TIP: If any pieces of the decal cling to the carrier sheet instead of transferring to the tape, lay the sheet back down, burnish the area with your Scraper, and carefully try again.NOTE: To reverse weed your decal, follow Steps 1-2 above, then Steps 5-10, then Steps 3-4. I recommend only reverse-weeding the “Let It Snow” vinyl decal for the “snowflake” design.
 TIP: Make sure you do not pull up any pieces you want to keep! If they come up, gently pat them back in place and try again. Refer back to the Design Space screen if you’re not sure which pieces to remove.
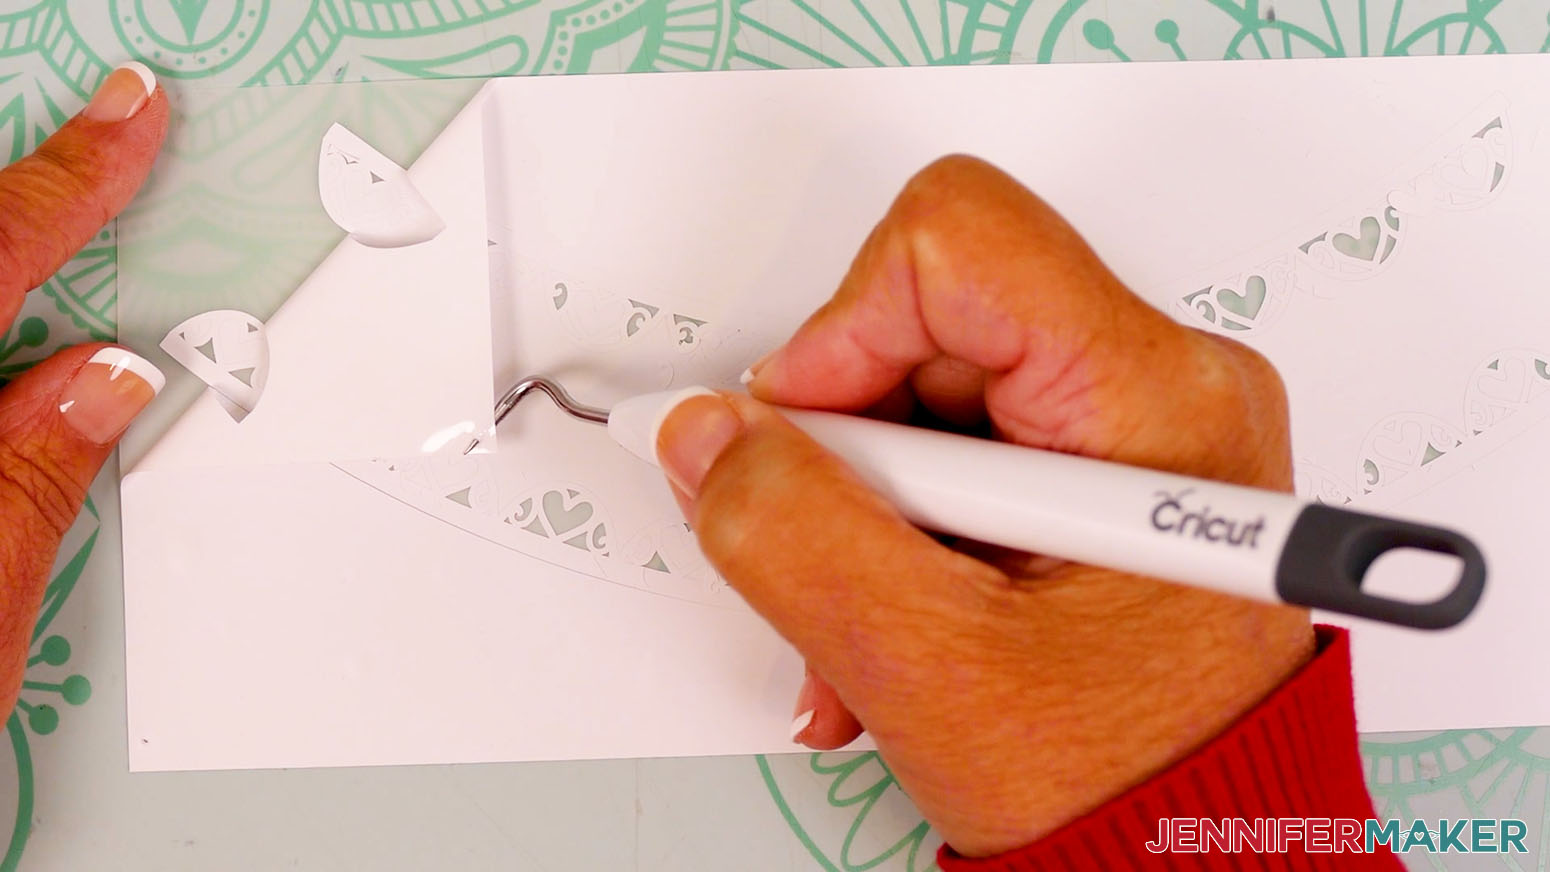

ASSEMBLE THE GIFT BOX BASE
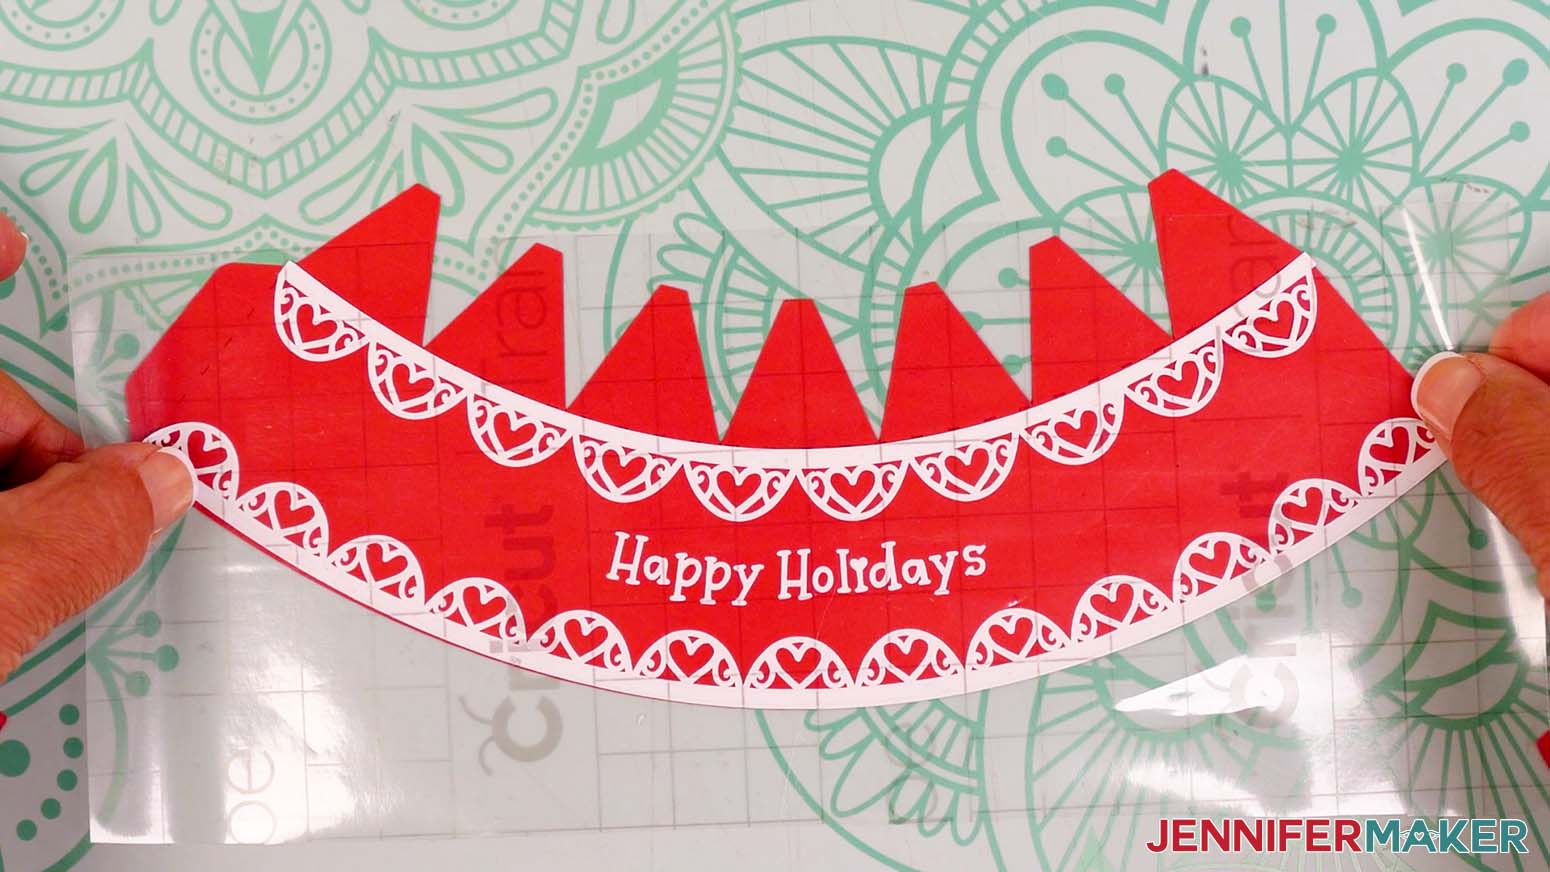
- Lay the lid piece (the one with large tabs) in your work area with the tabs pointing upward.
- Hold your transfer tape sticky side down and lightly center the decal on the lid piece, with the top of the design directly under the tab crease lines.TIP: For easier alignment, you can cut the decal into two sections, then align them one at a time along the top and bottom edges of the lid.
- Once the decal is in place, burnish it firmly onto the lid piece, starting in the center of the design and working your way out.
- Starting in a corner, slowly and carefully peel the transfer tape away from the lid piece, burnishing down any vinyl that lifts from the surface as you go.TIP: It can be helpful to pull your transfer tape parallel to the cardstock while peeling it away.
- Use scissors to trim away any excess vinyl at the ends of the lid piece.
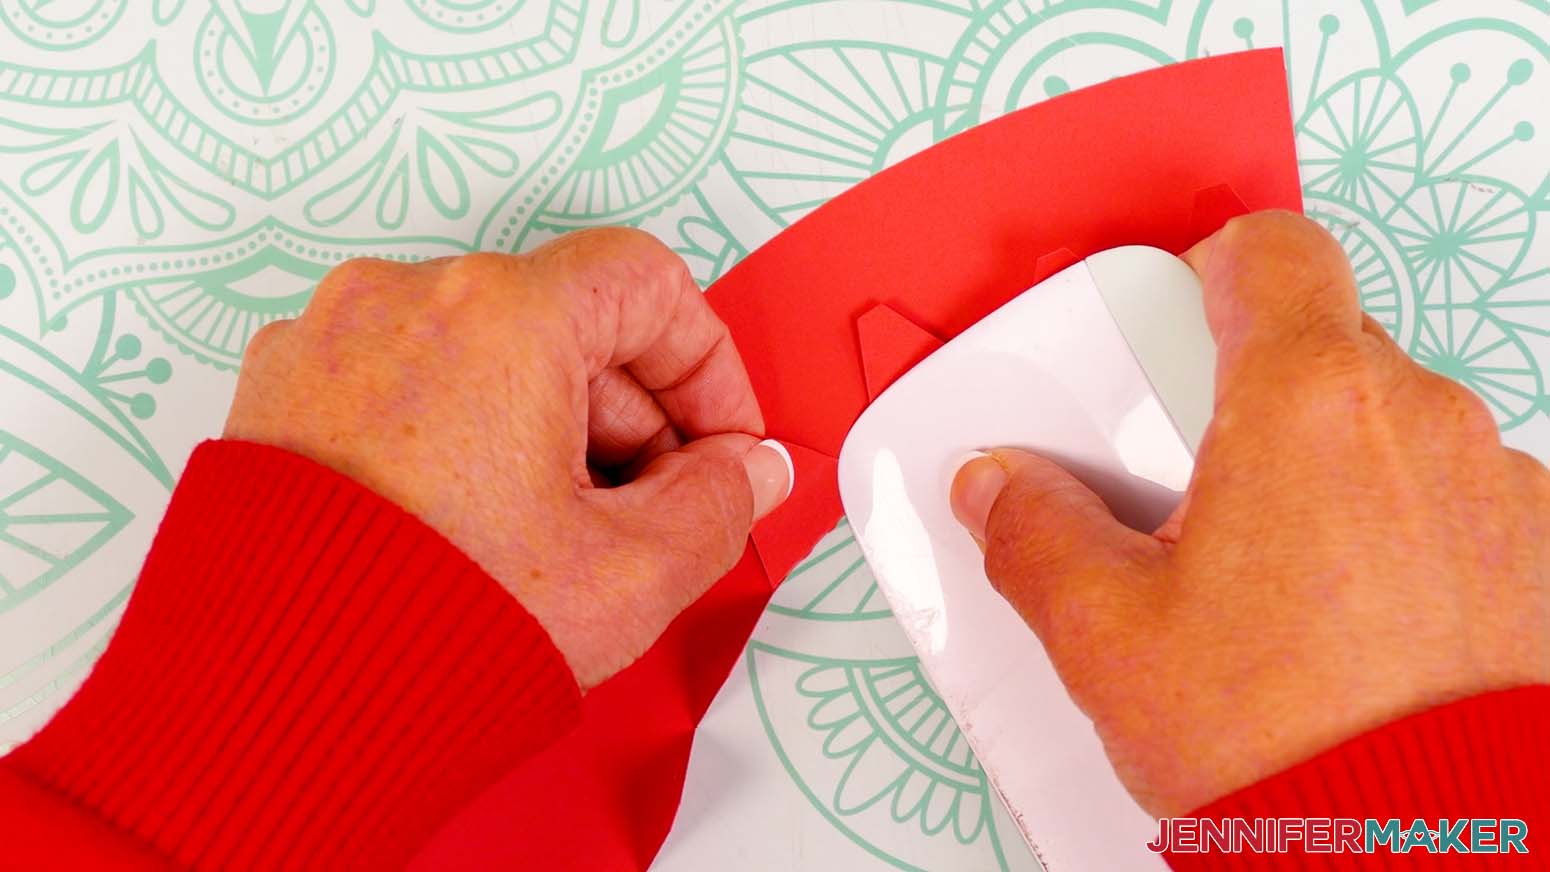
- Fold down just the top tabs of the lid piece, away from the vinyl side.TIP: Use the scraper tool to sharpen the creases.
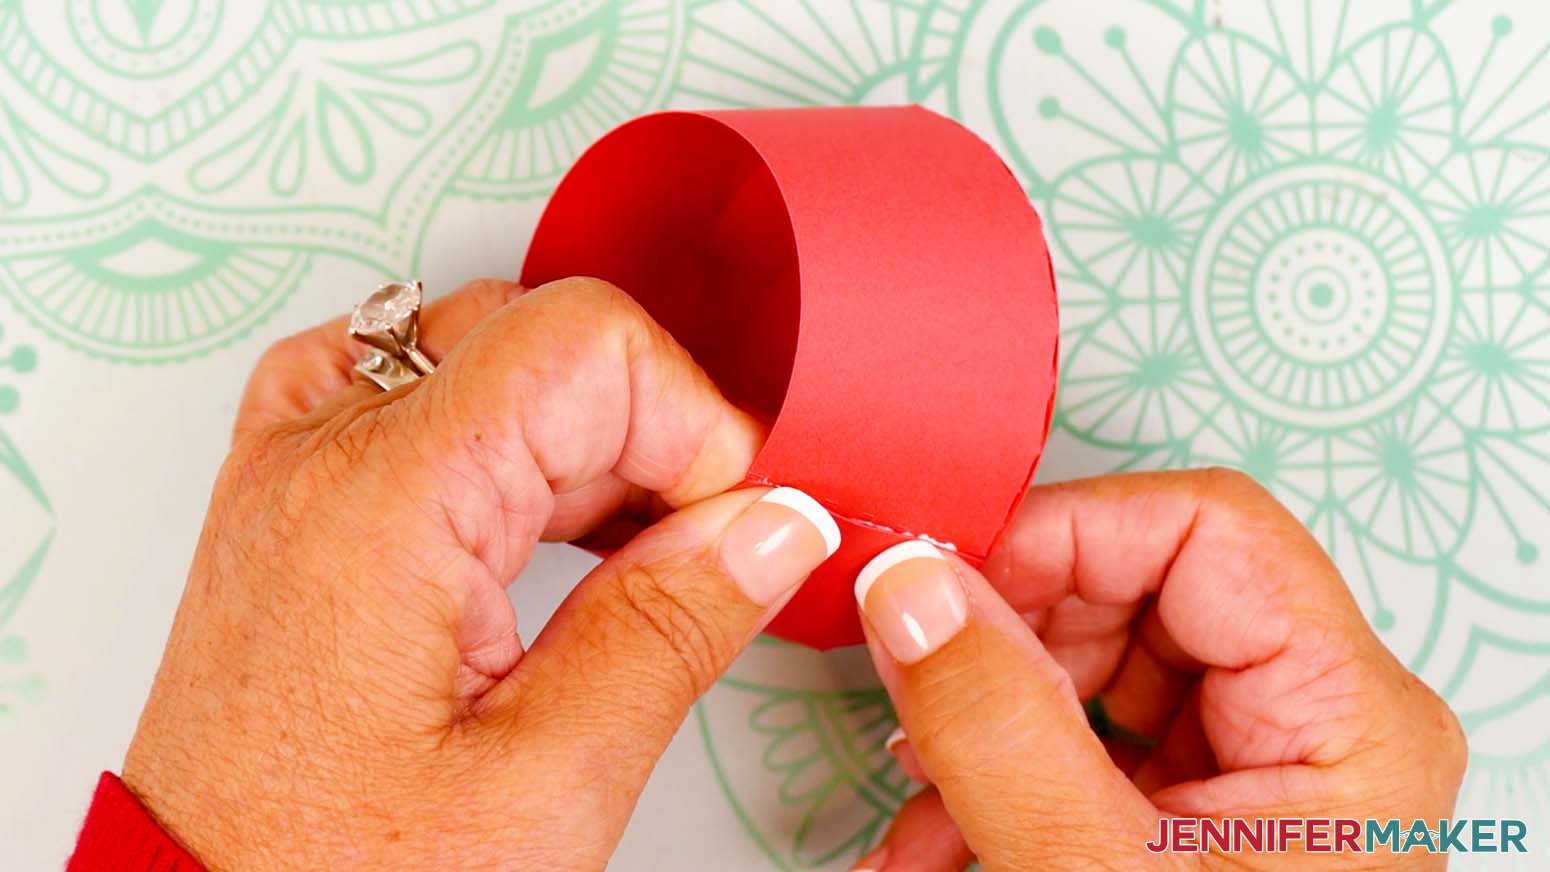
- Add a small amount of craft glue to the side tab, on the side with the vinyl.
- Keeping the vinyl on the outside, bring around the opposite side of the lid and line up its edge flush with the glued tab’s crease line.
- Press and hold to adhere the pieces together to form the circular lid.
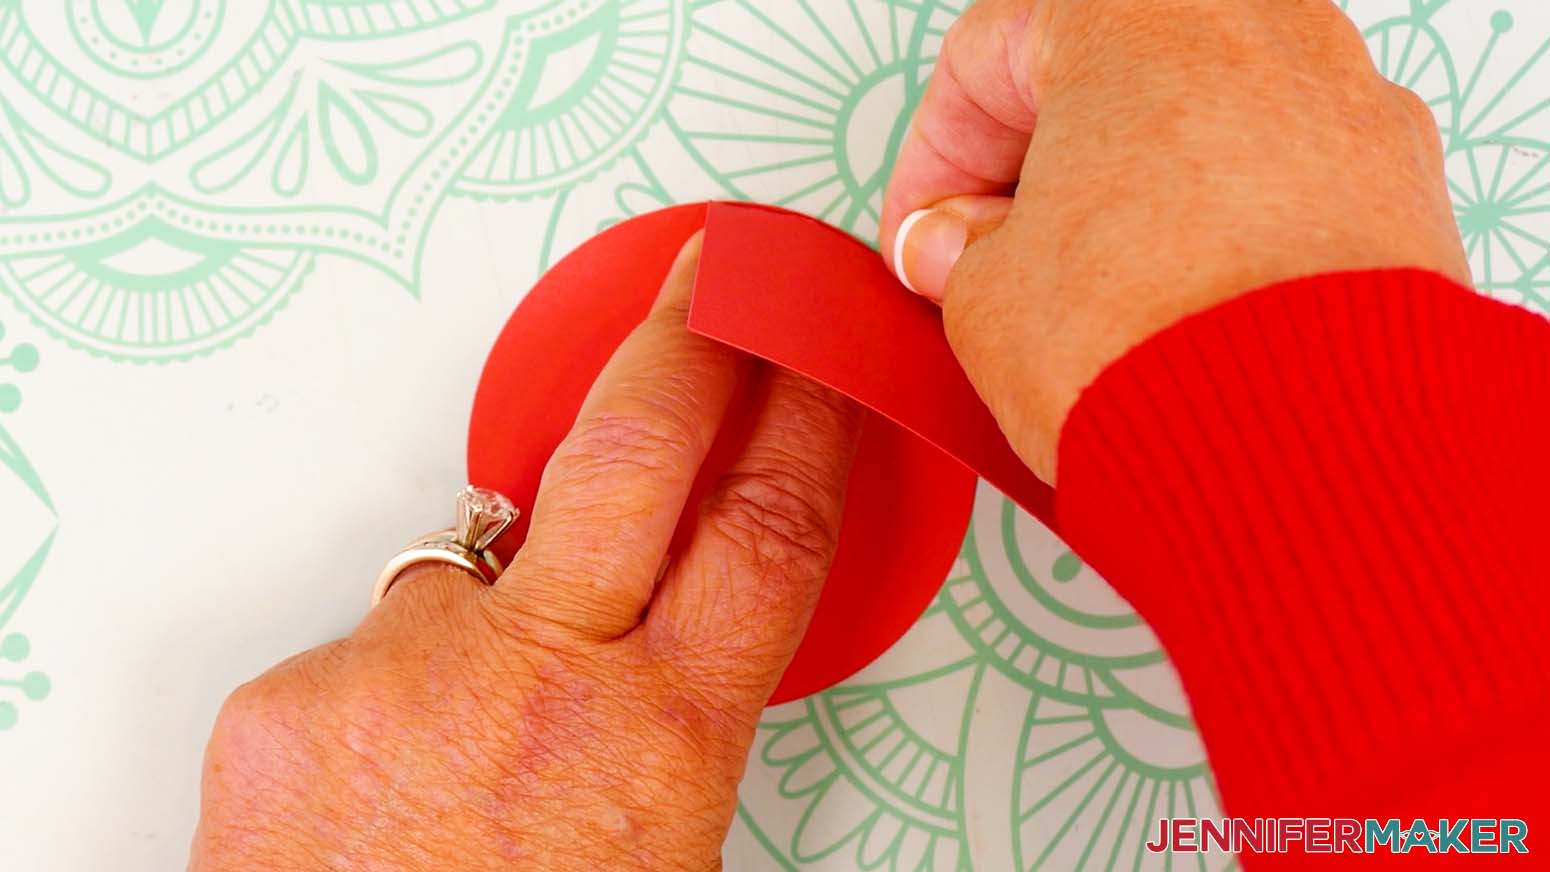
- Take the base piece (the one with small tabs) and fold back its top tabs. Don’t fold the tab on the side.
- Add a small amount of craft glue to the outside of the base piece’s first two tabs.
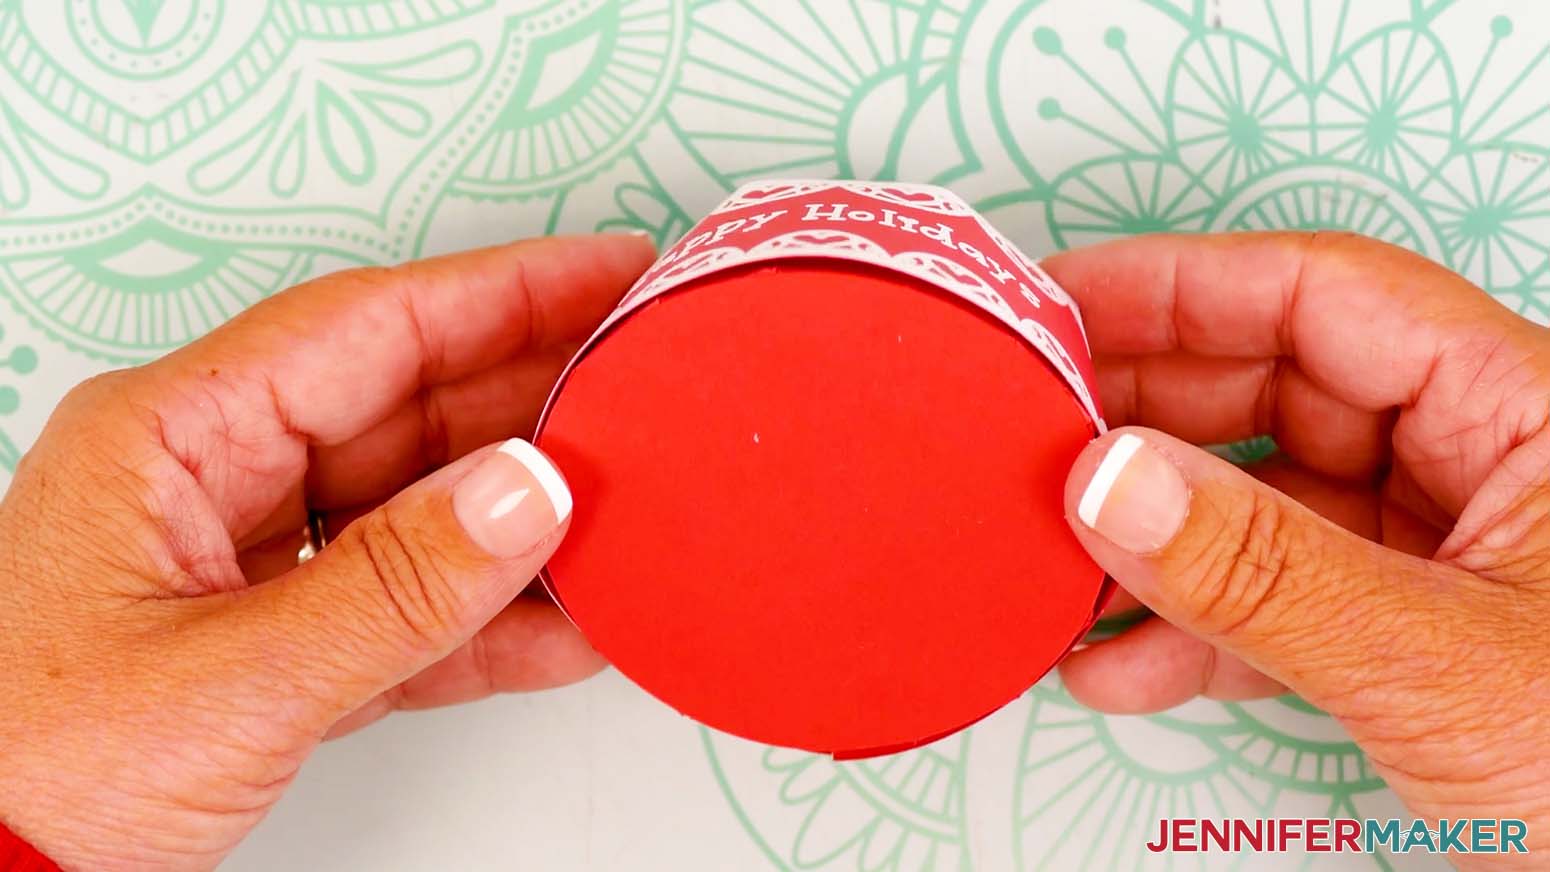
- Line up the two glued tabs on the bottom circle piece, keeping the crease lines flush along the curved outer perimeter.
- Press in place and hold for several seconds to adhere the tabs to the bottom piece.
- Continue adhering the rest of the tabs two at a time along the bottom piece’s outside edge, making sure the tabs are firmly attached before moving on to the next pair.TIP: It might be easier to add glue if you hold the pieces upside down.
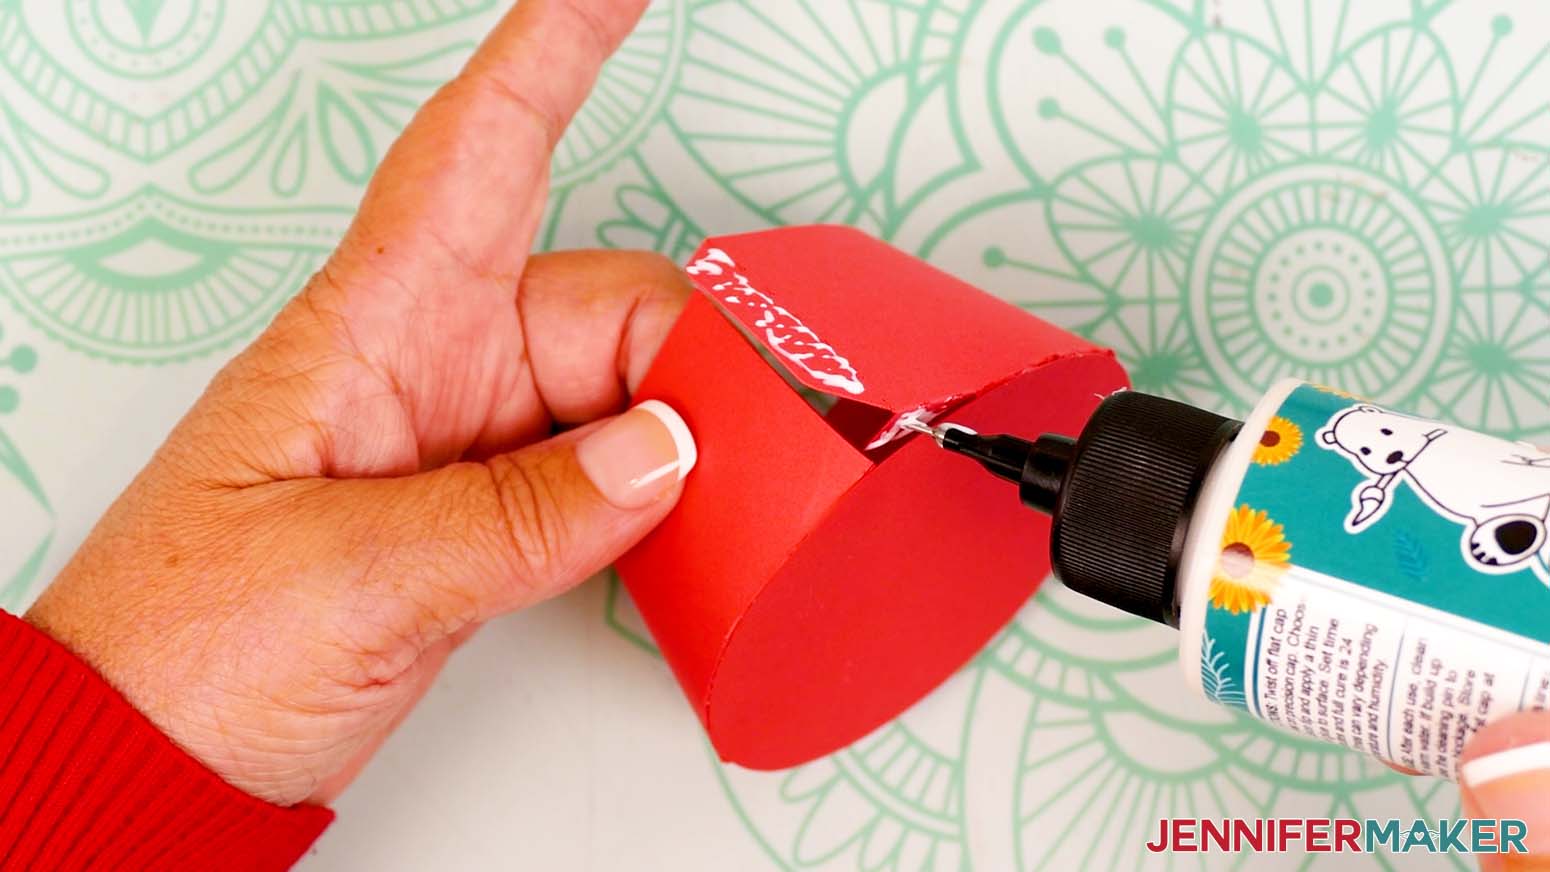
- When you get to the base piece’s final tab, add craft glue to the bottom of its last small tab and the outside of its side tab.
- Slide in the final tab and line up the base piece’s opposite edge flush with the side tab’s crease line, then press and hold to adhere both tabs.
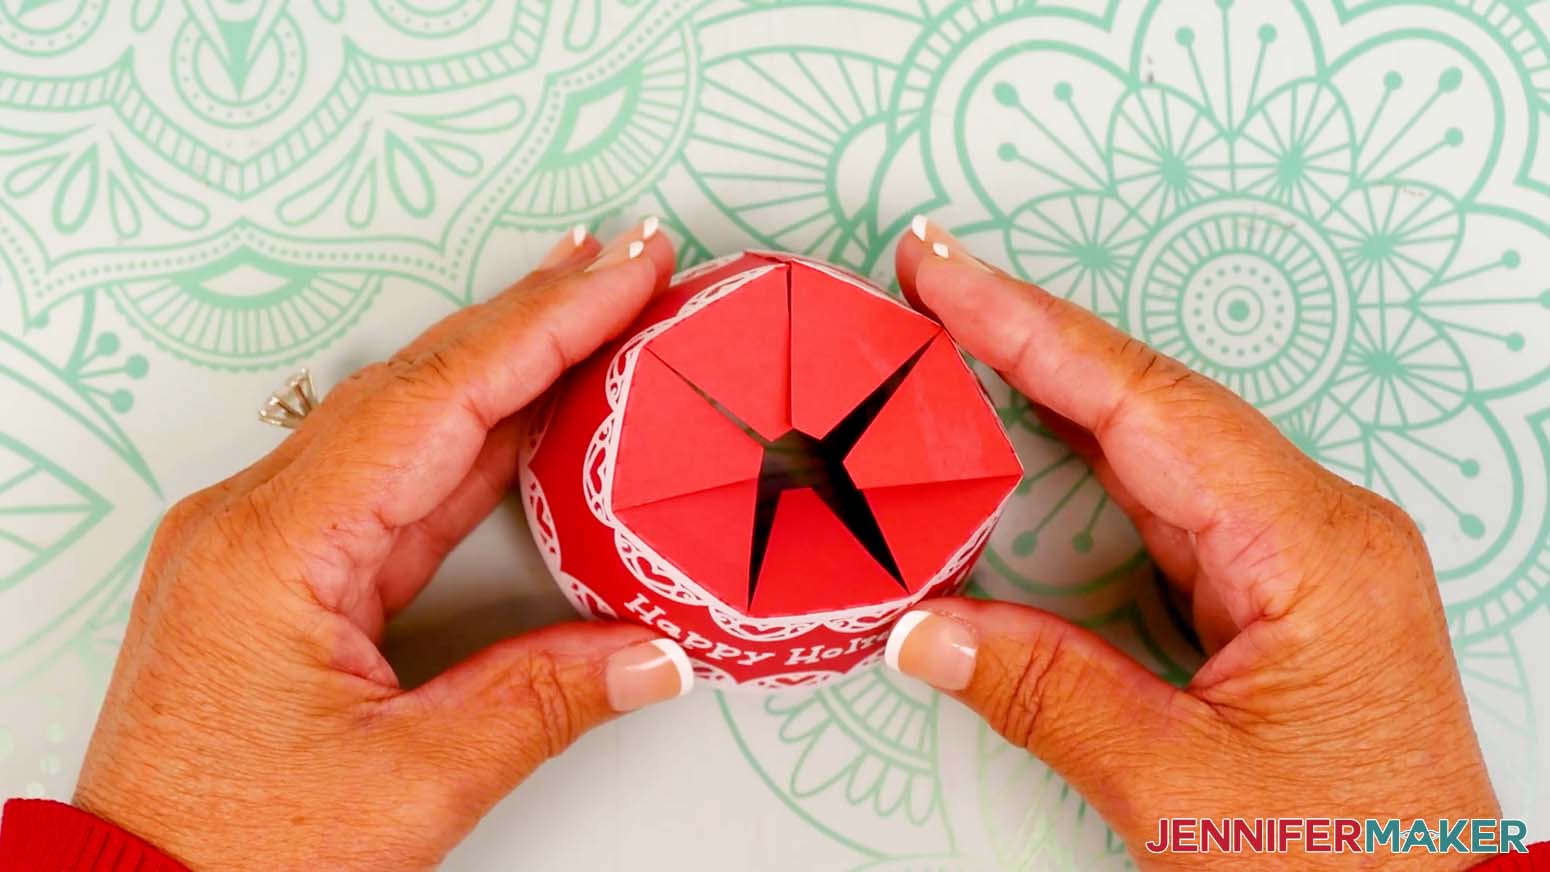
- Place the assembled lid piece on top of the assembled base piece.
- The gift box part of your snow globe is ready!
 TIP: Use the scraper tool to sharpen the creases.

ASSEMBLE YOUR GLOBE’S INNER DECOR PIECE
OPTION 1: CHRISTMAS TREE
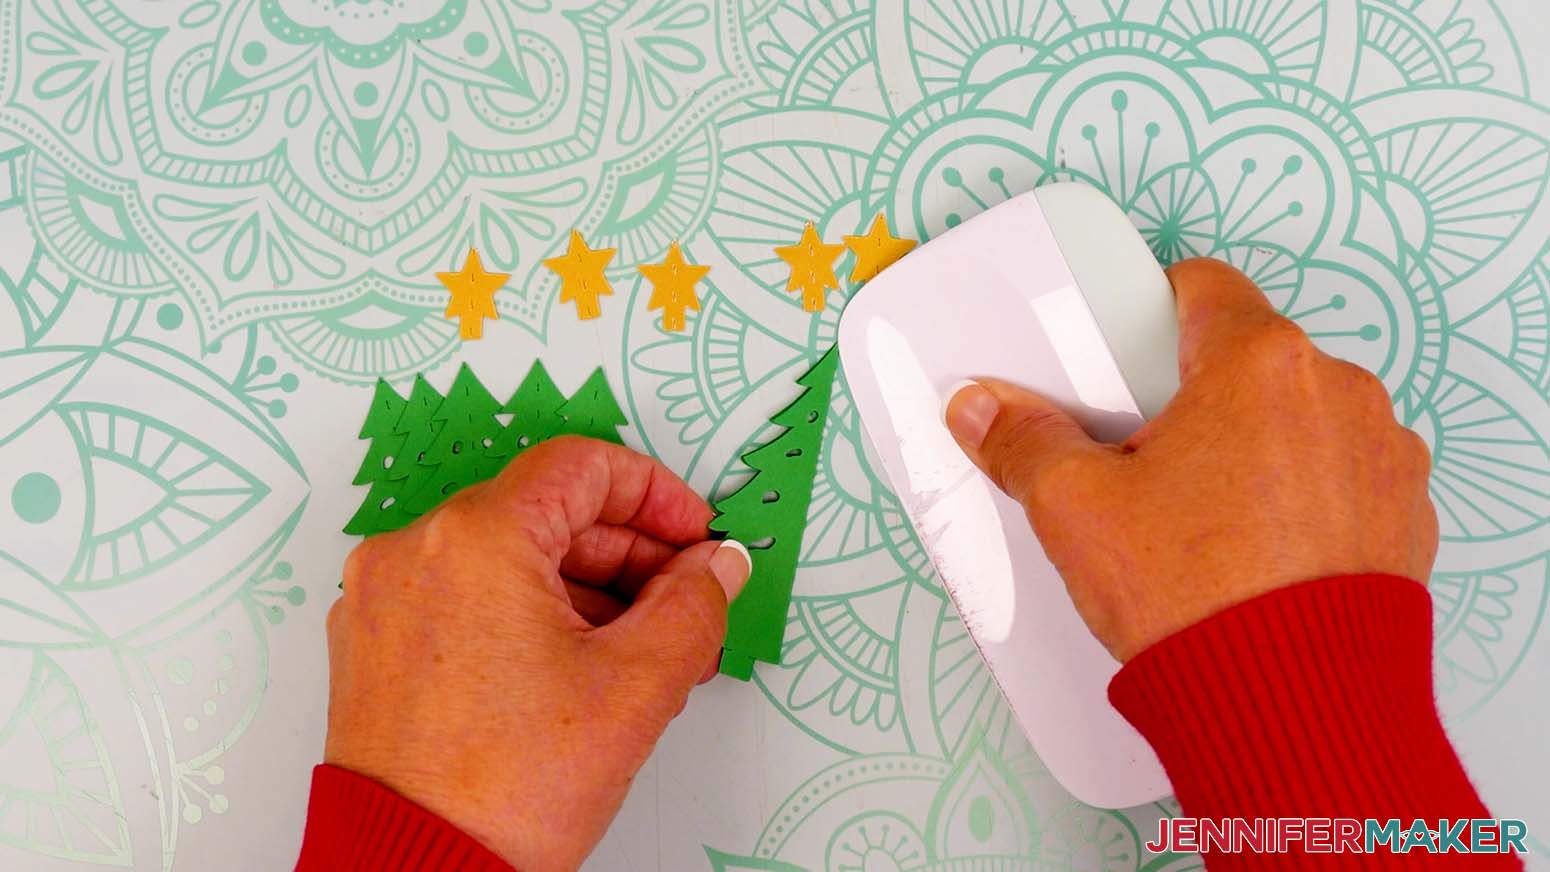
- Fold the first tree piece in half along the center crease line, then sharpen the fold with your scraper tool.
- Fold in the tree’s two bottom tabs toward the crease.
- Repeat Steps 1-2 for the remaining five tree pieces.
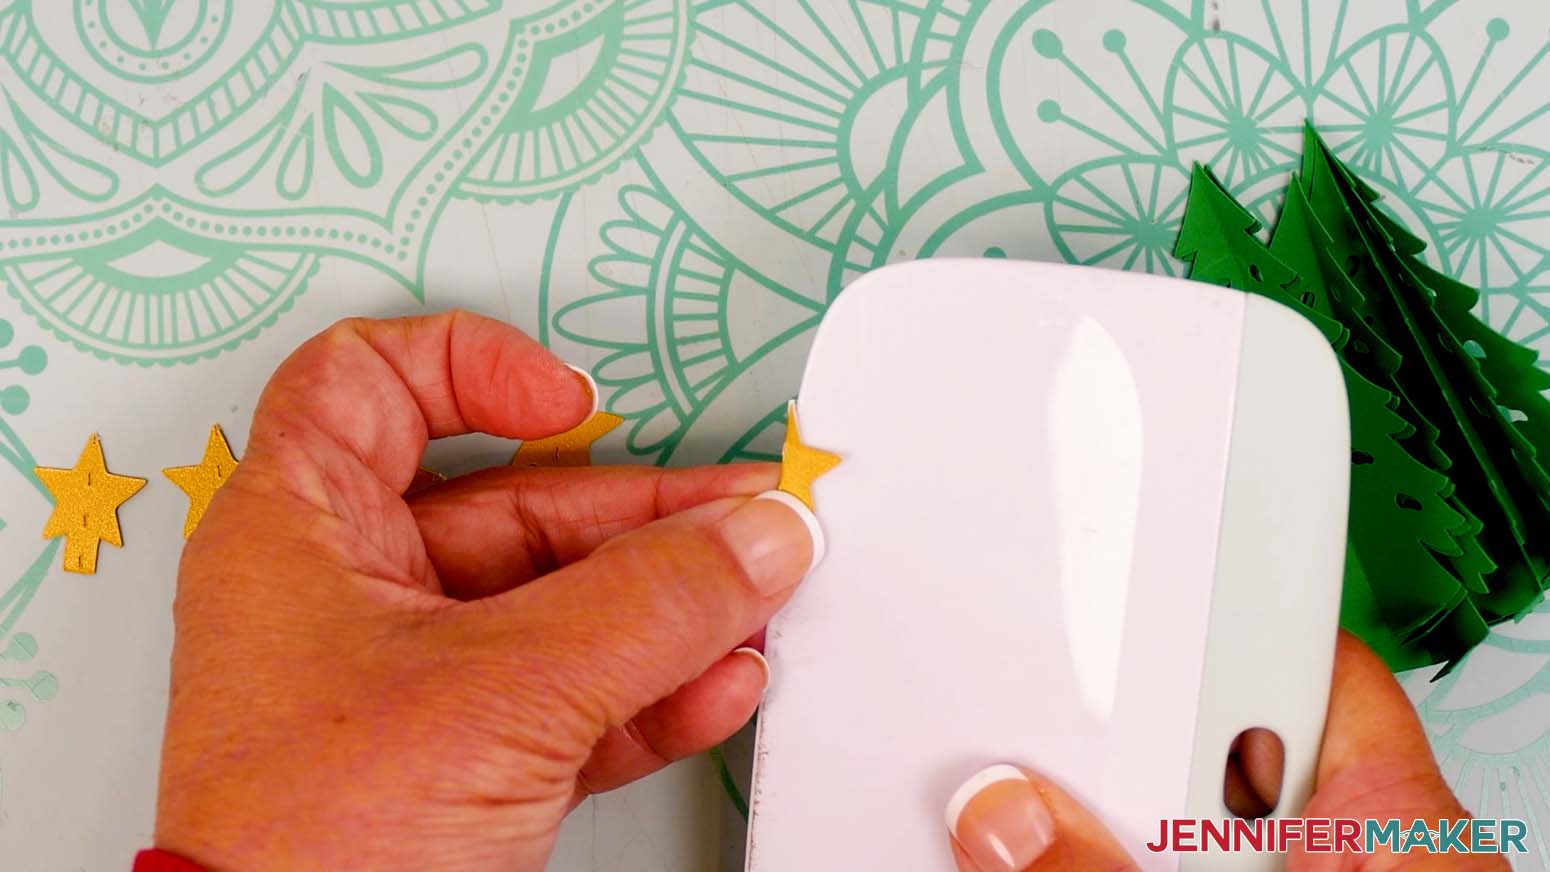
- Fold the first star piece in half along the center crease line, then sharpen the fold with your scraper tool. TIP: Place the edge of your scraper tool along the crease line to help form your fold.
- Repeat for the remaining five star pieces.
- Take a star piece and add a small amount of craft glue to the bottom tab.NOTE: The star piece should open toward you.
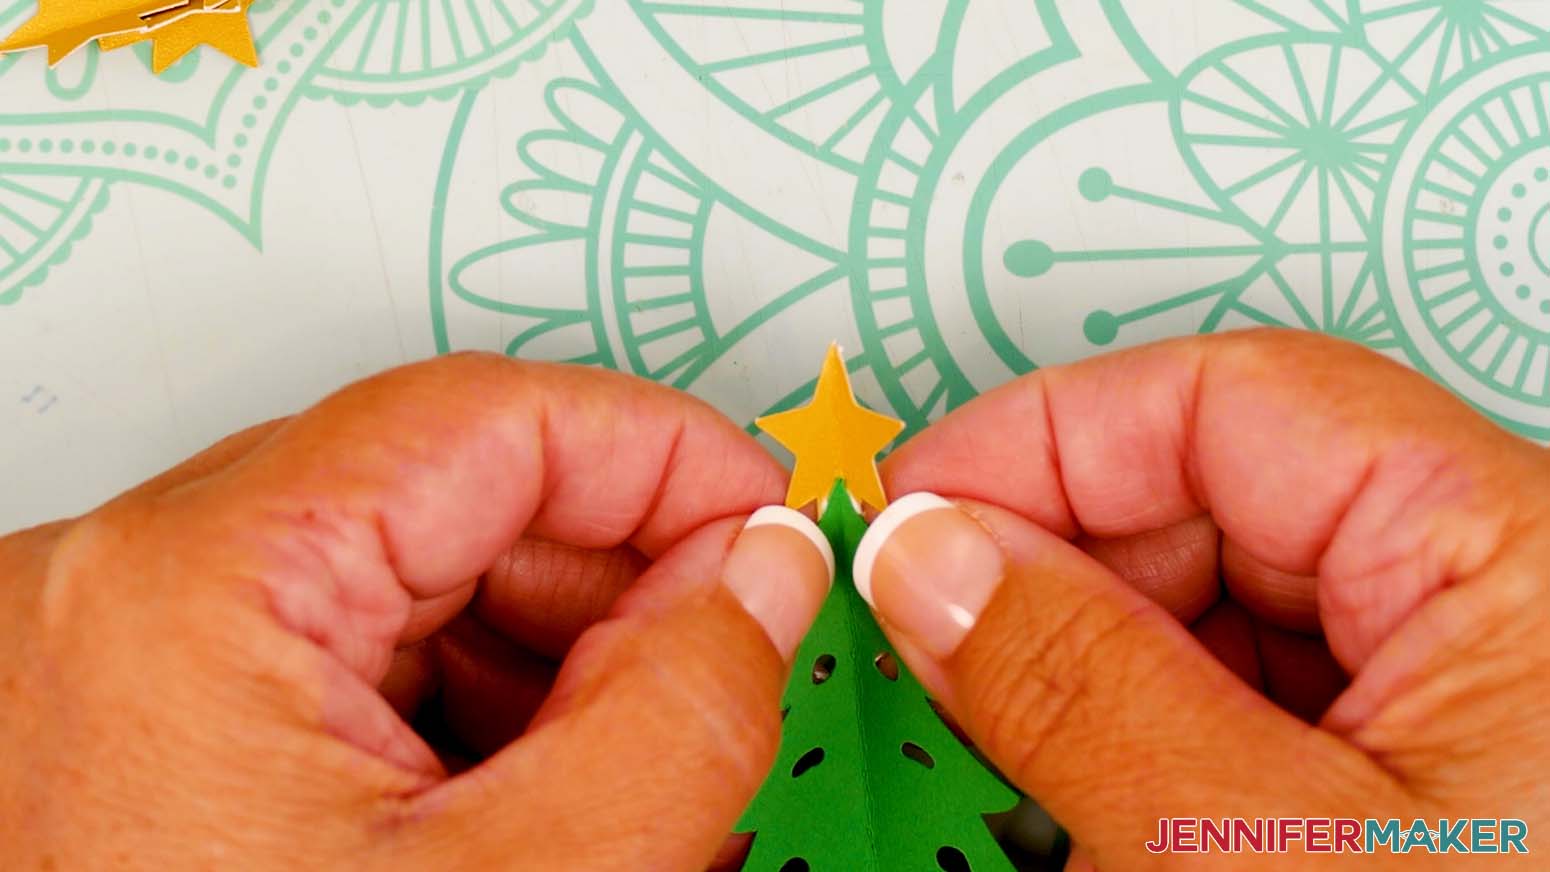
- Take a tree piece and press its top tip onto the star piece, keeping the creases aligned.
- Press and hold to adhere.NOTE: Don’t fold the halves together to adhere the pieces, or the star might stick.
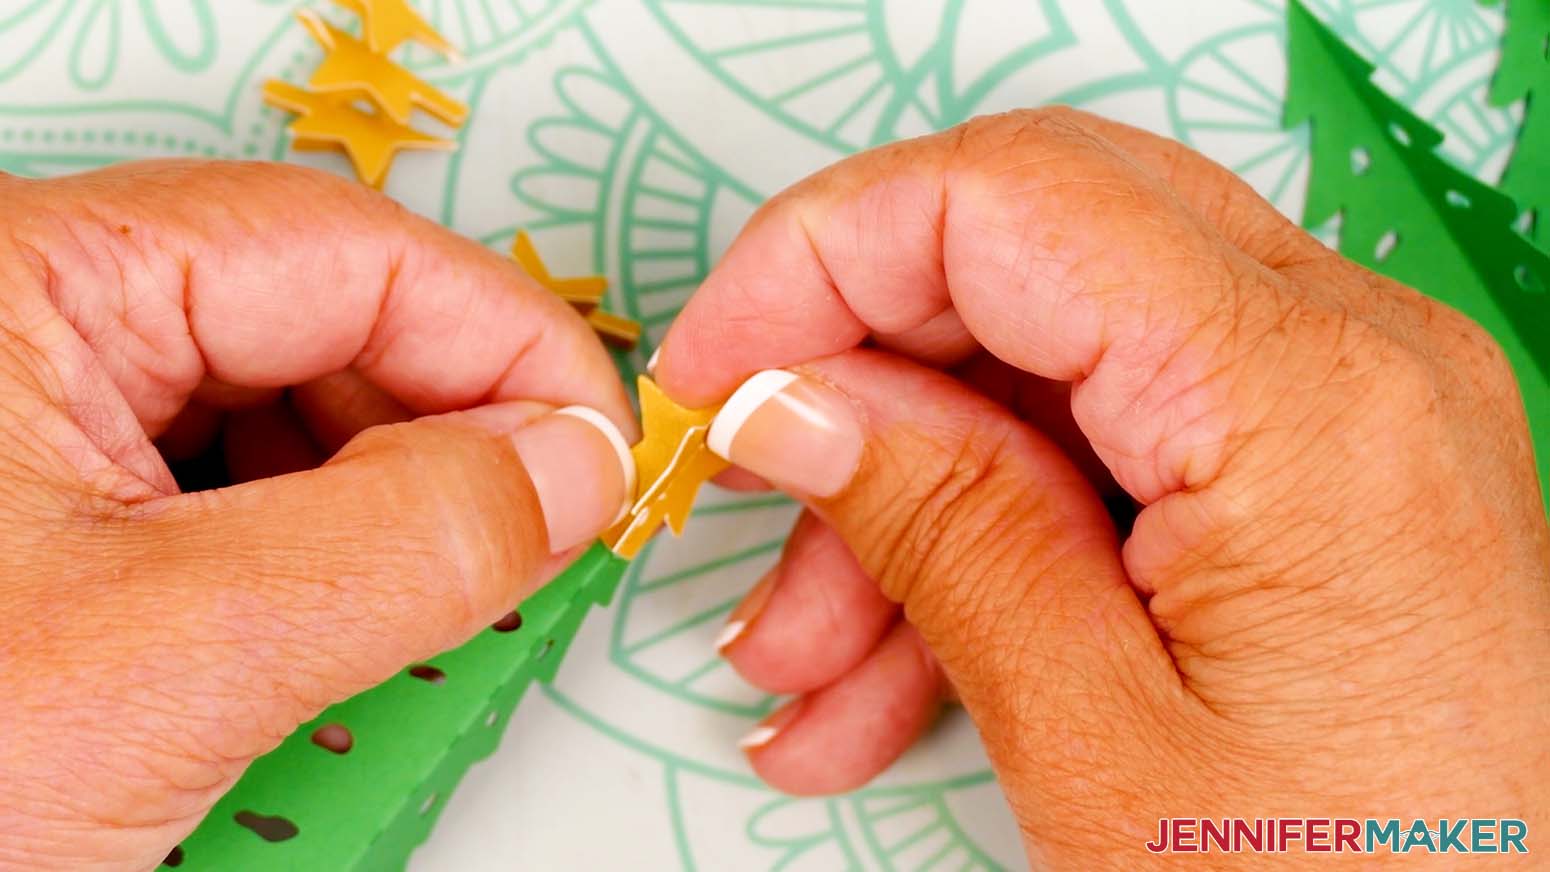
- Take your next star piece and align one of its halves back to back with the star attached to the tree.
- Add craft glue to the back of the second star piece half.
- Align it with the star half attached to the tree again, then press and hold to adhere.
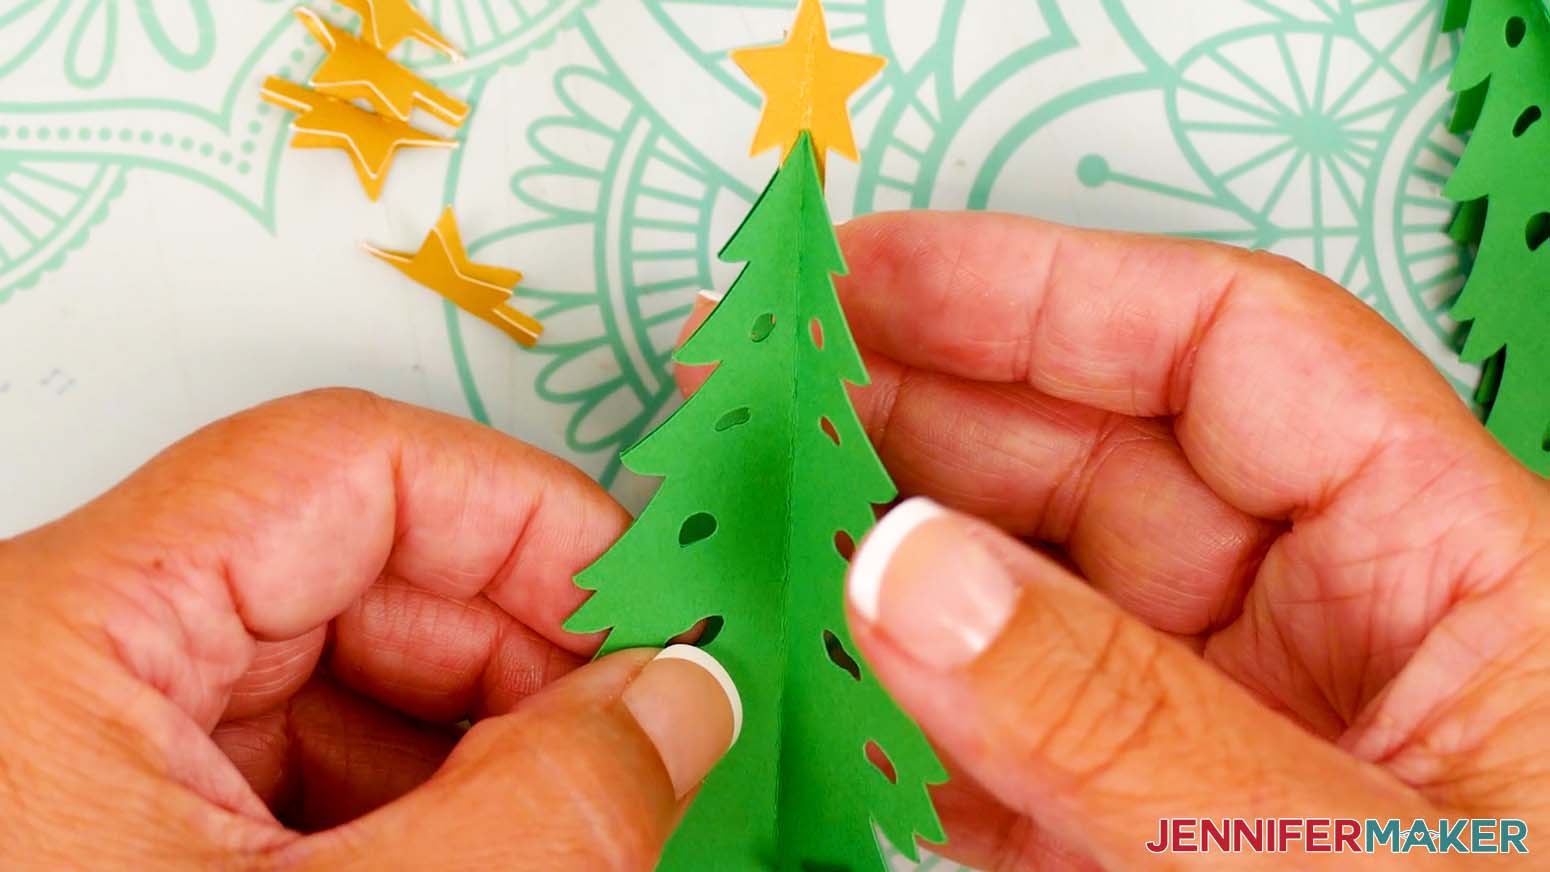
- Then take the next tree piece and align one of its halves back to back with the tree attached to the star.
- Add craft glue to the back of the second tree piece half, avoiding cutout areas and the tree’s tabs.
- Align it with the tree half attached to the star again, then press and hold to adhere. This will sandwich the star’s tab in between the two tree layers.
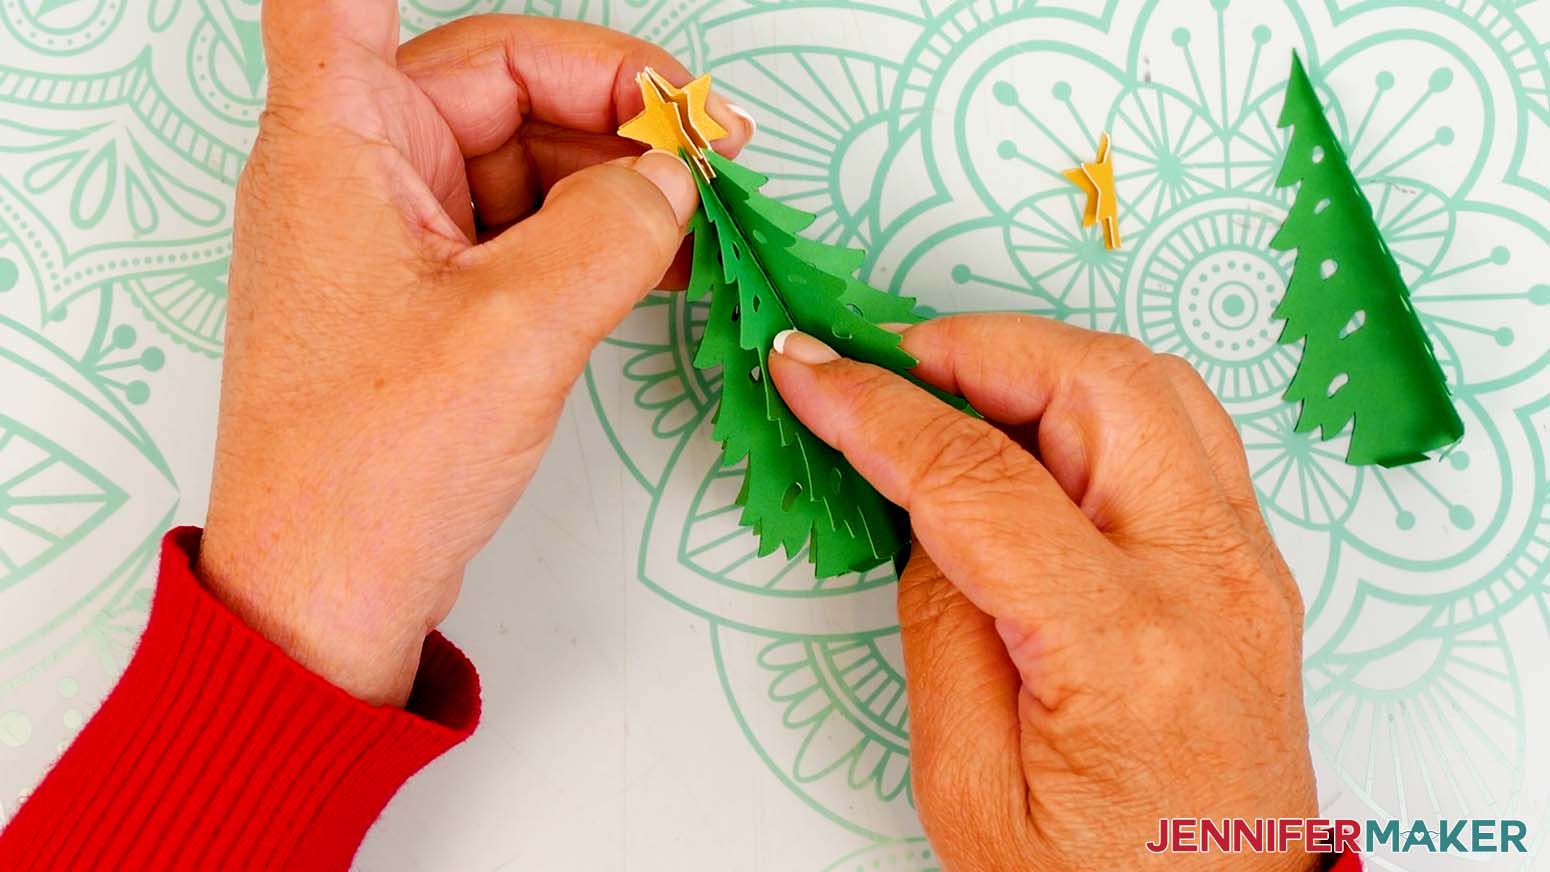
- Repeat Steps 9-14 to attach the remaining four stars and tree pieces one half at a time.TIP: When you get to the last star and tree piece, you can glue both halves at the same time, attaching the star first and then the tree.
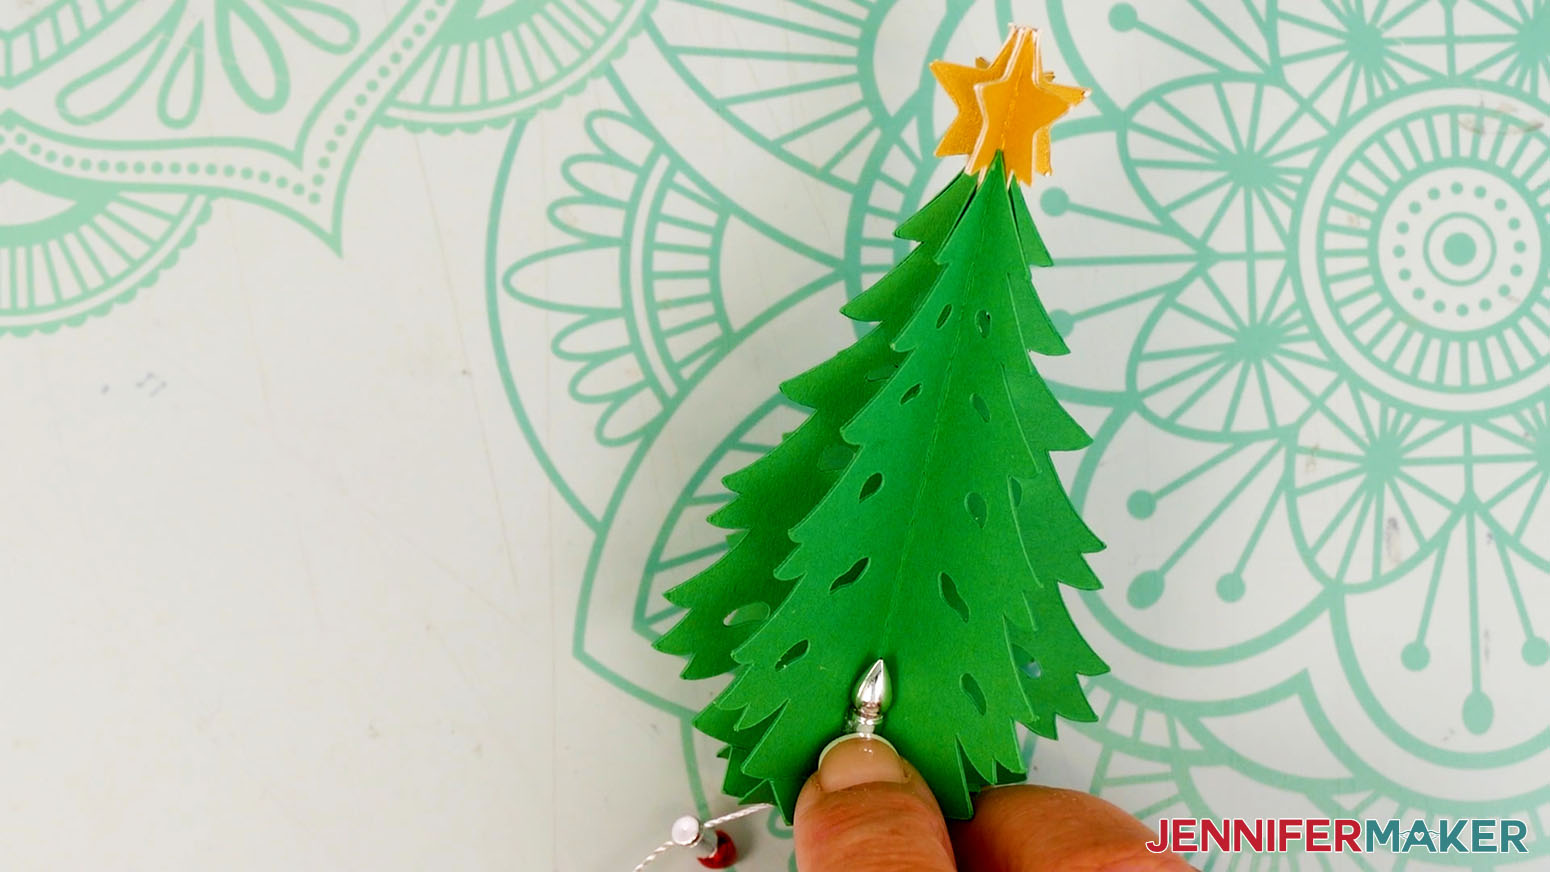
- Fan out your tree so all six sides are evenly spaced.
- Separate the tree’s bottom tabs and push them outward so it stands up on its own.
- If you’d like your tree to have lights, cut approximately 22” of mini string lights off the roll, and then trim away any excess string on one end.
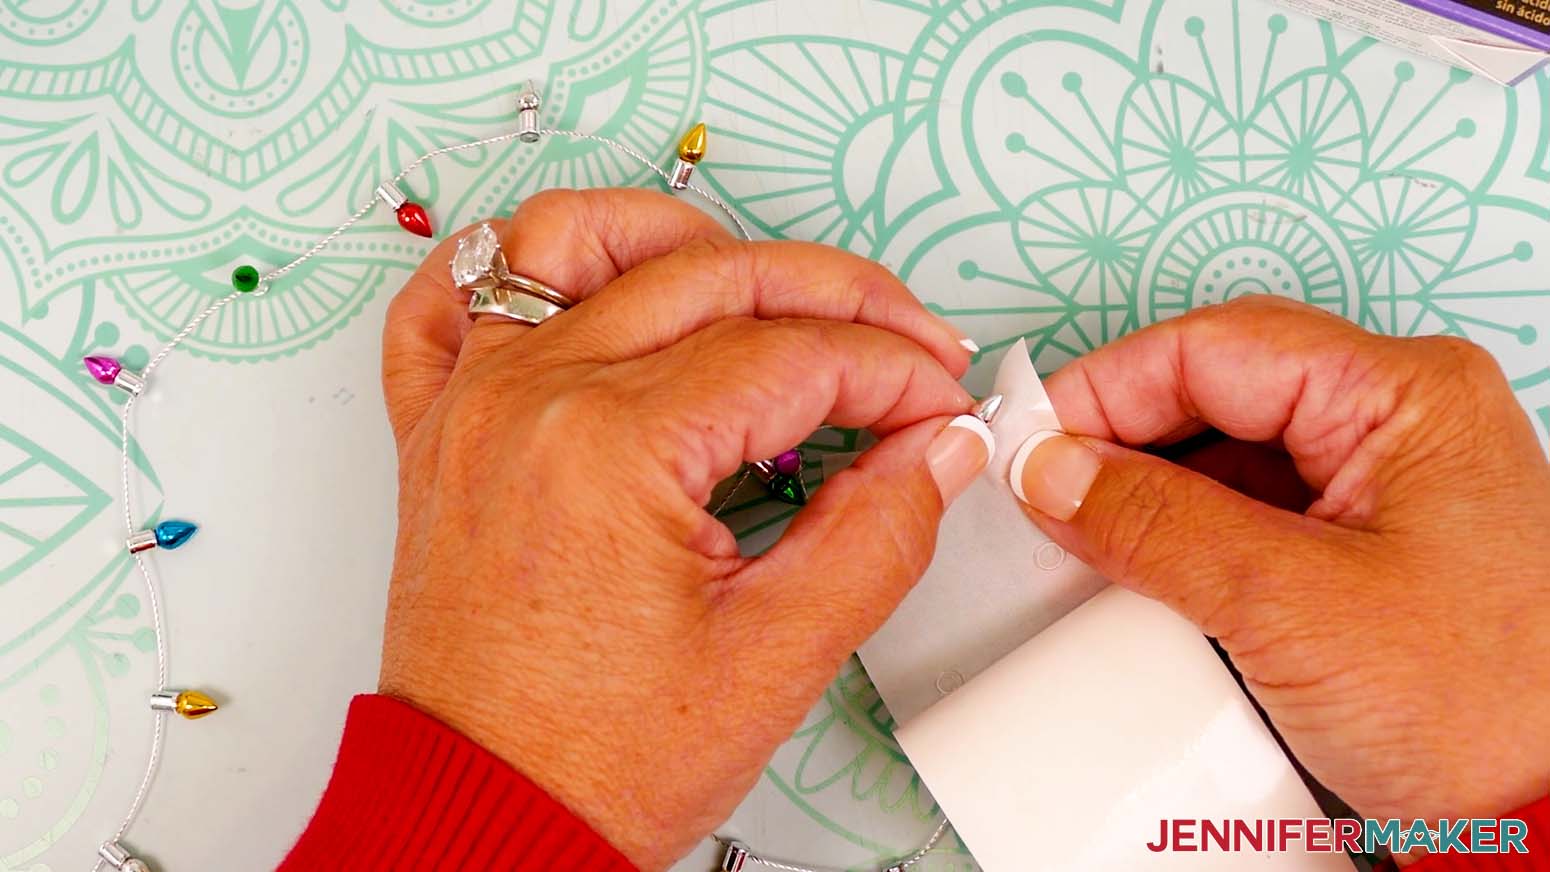
- Place a small glue dot on the back of the light at one end of the strand.
- Firmly press the light into one of the tree sections near the bottom to attach it with the glue dot.
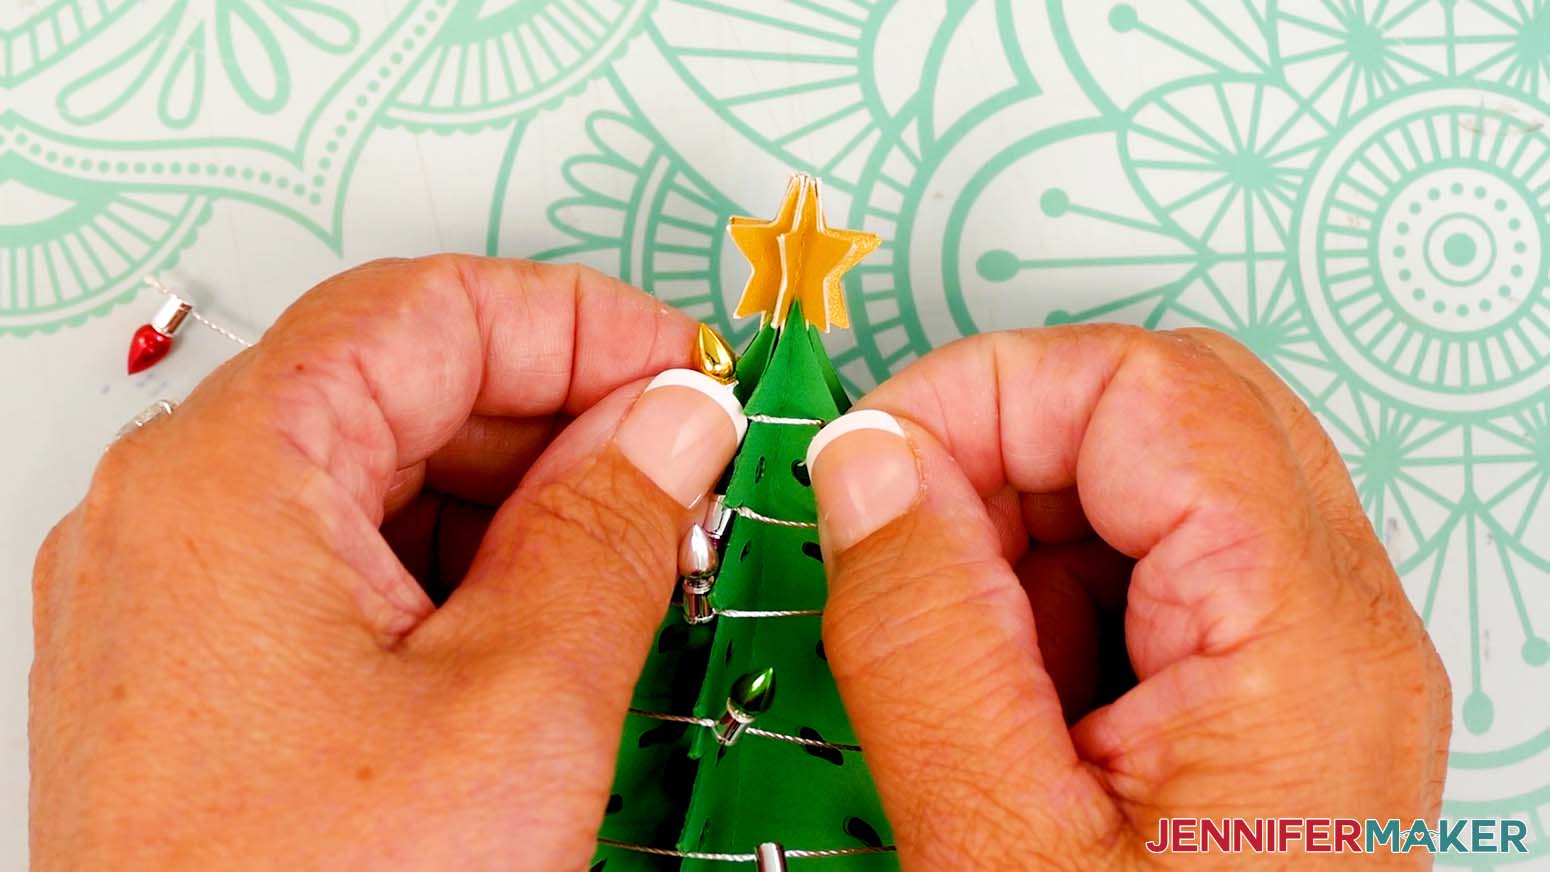
- Wrap the strand of lights around the sections of the tree, moving upwards and adjusting the arrangement as you go. You can use the tree’s outer “branches” to hold the lights in place.
- Add a small glue dot to the last light and firmly press it into place at the top of the tree.NOTE: If you have excess at the end of your strand, use scissors to snip the string just after the last light you have room for.
- If desired, cut individual lights from the spool and use glue dots to adhere them to the tree to fill in gaps without decoration.
OPTION 2: SNOWFLAKE
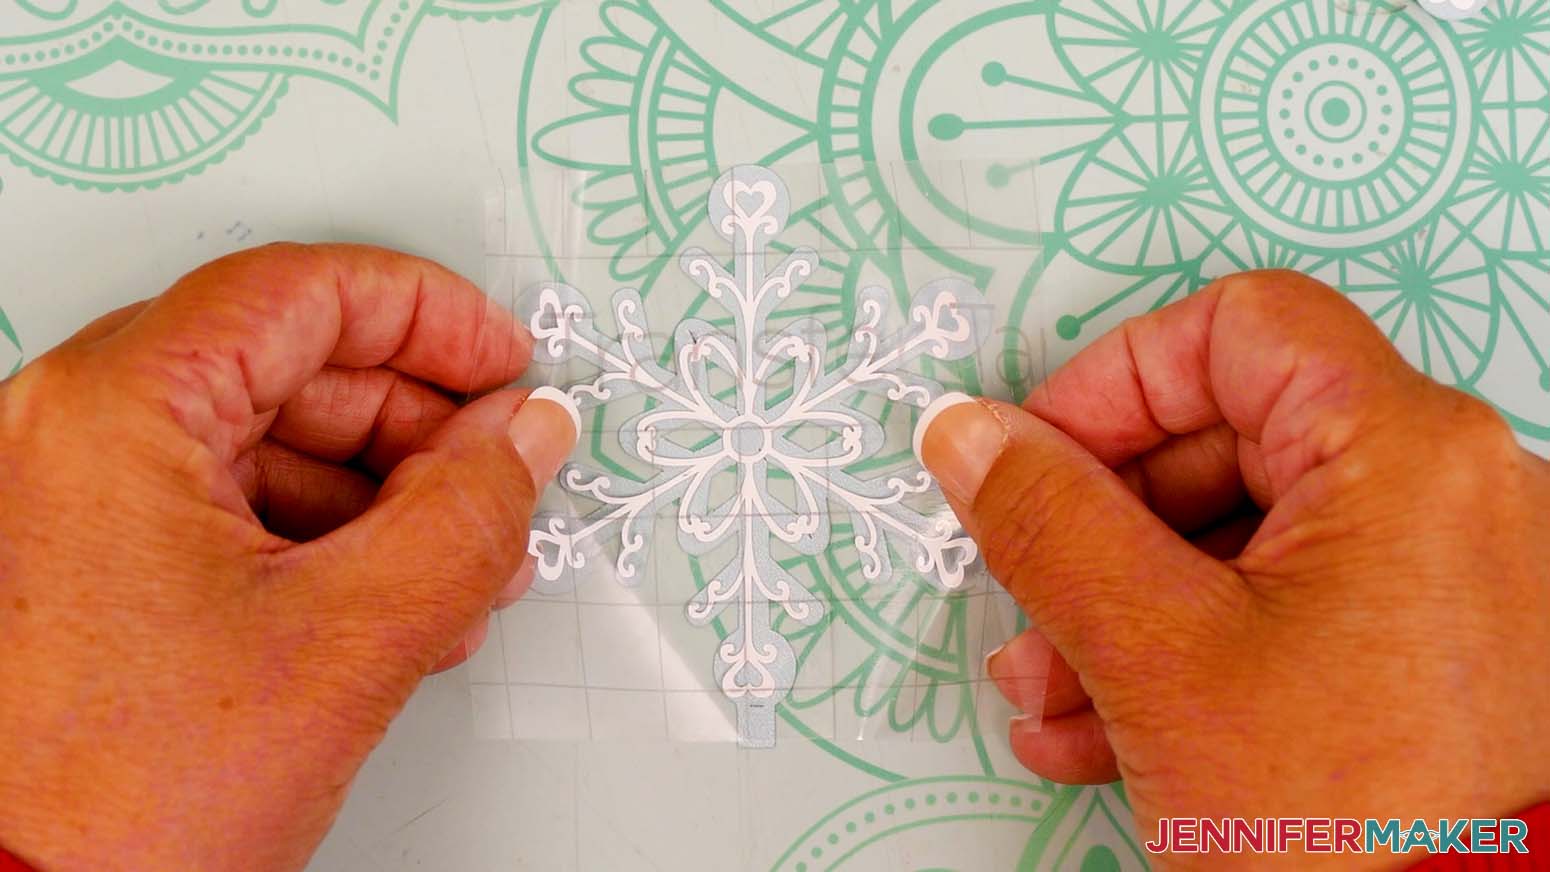
- Follow Steps 1-10 from the “WEED YOUR VINYL BASE DECORATION” and Steps 1-4 of the “ASSEMBLE THE GIFT BOX BASE” sections of this tutorial to weed and apply a vinyl decal in the center of each of your six snowflake pieces.
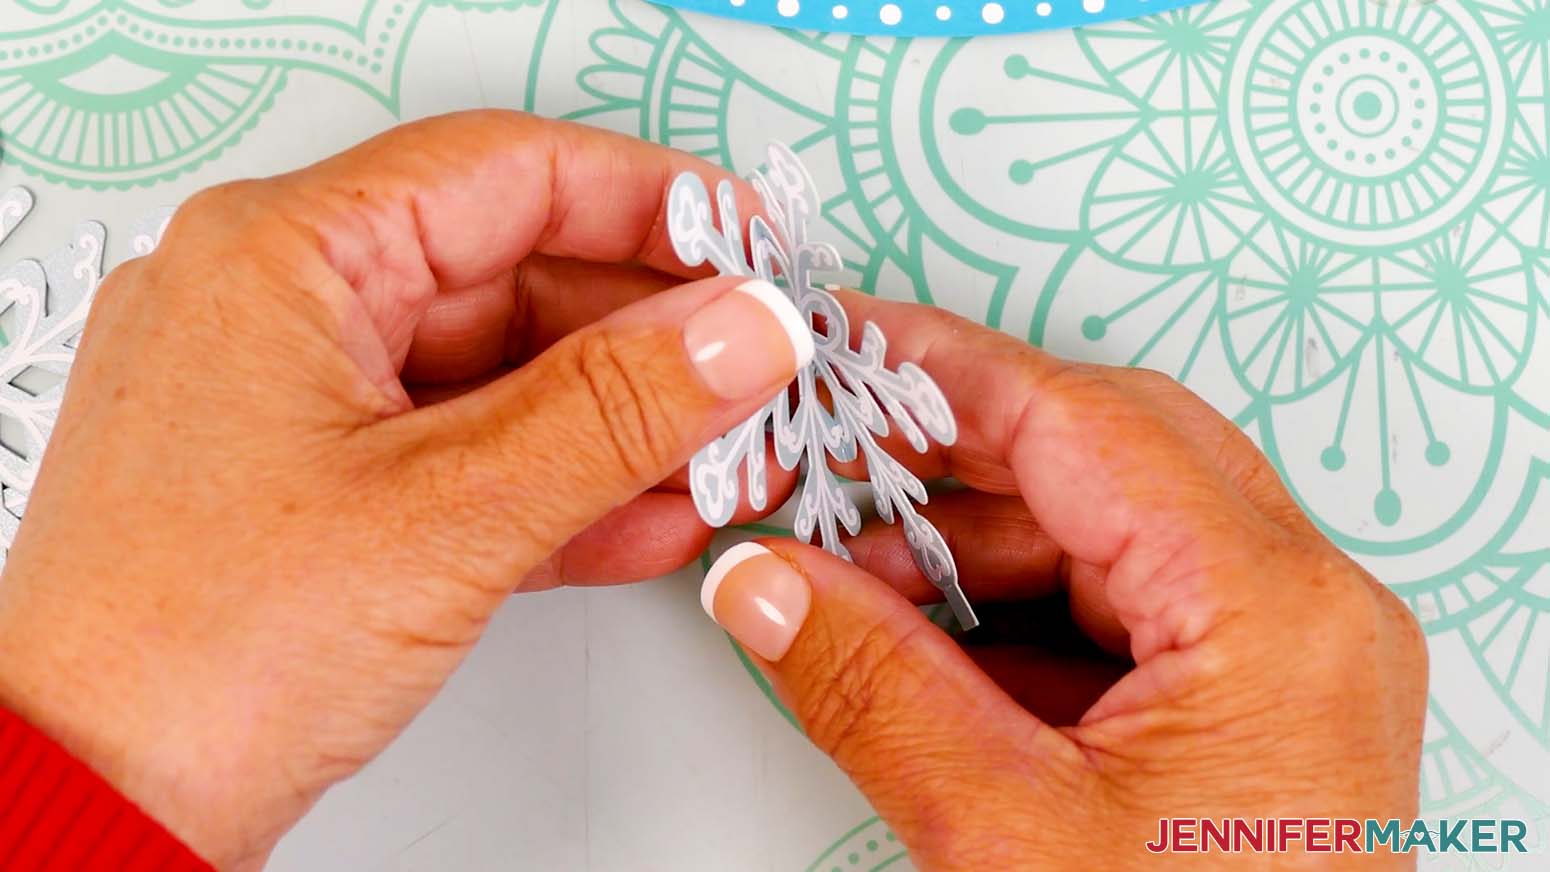
- With the vinyl side face up, fold your first snowflake upward along its center crease lines.
- Then fold the entire snowflake in half along the crease lines, pressing together along the creases for a nice, sharp fold.TIP: If any vinyl pulls away at the creases, use your finger to press it back down.
- Fold the snowflake’s two bottom tabs up toward the vinyl side.
- Repeat Steps 2-4 for the remaining five snowflakes.
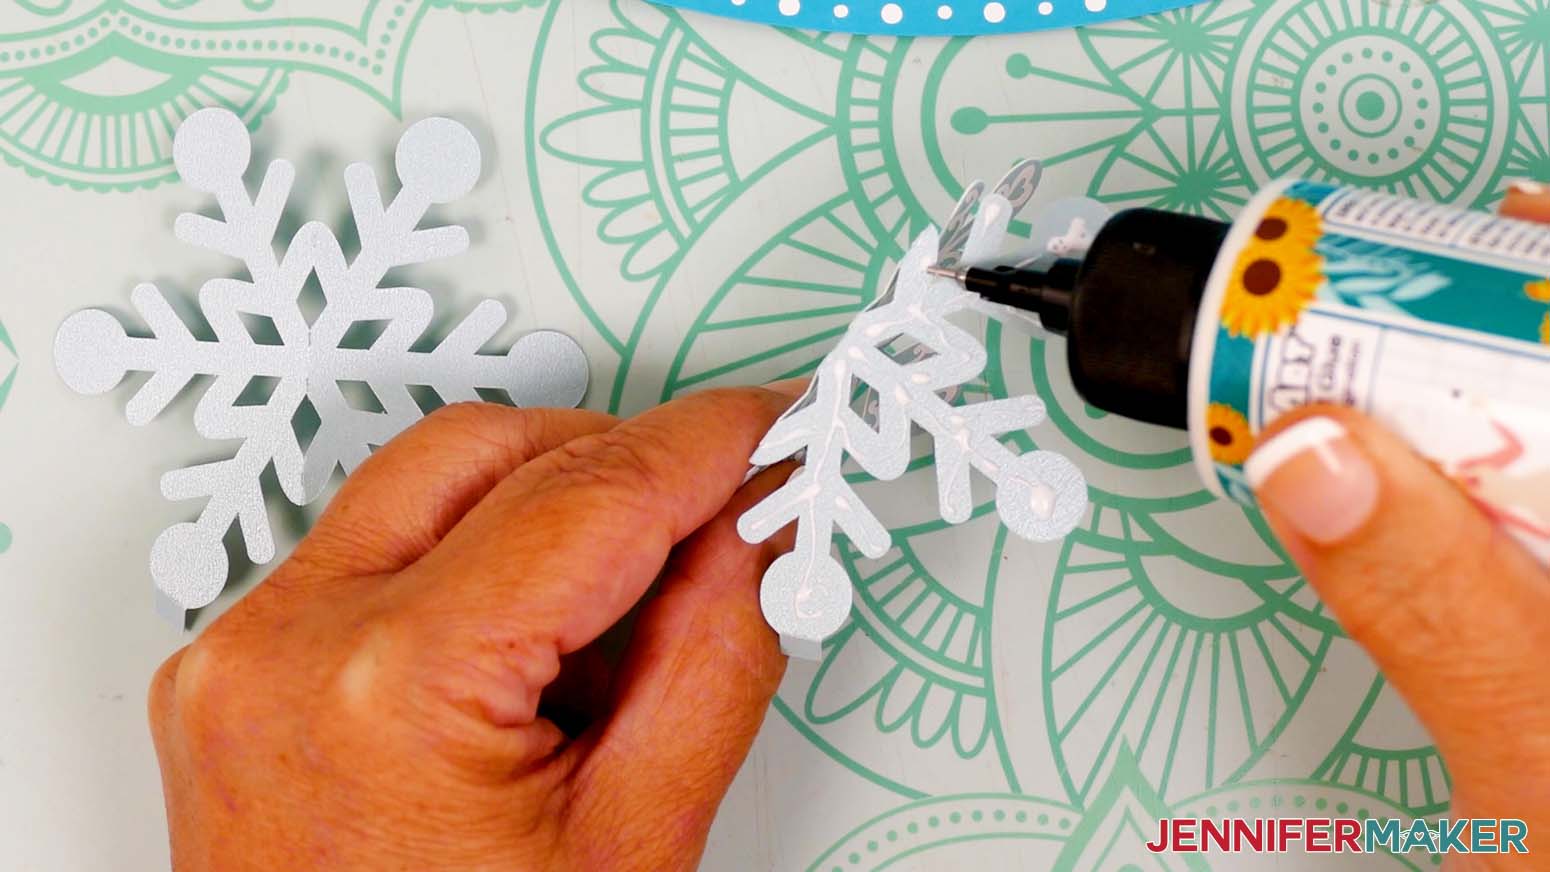
- Take your first snowflake piece and hold it so the vinyl is facing toward you and the tabs are facing downward.
- Add craft glue to the back (non-vinyl side) of one of the snowflake’s halves, avoiding cutout areas and the tab.
- Align the next snowflake piece back to back with the first, tabs facing downward, then press and hold to adhere.
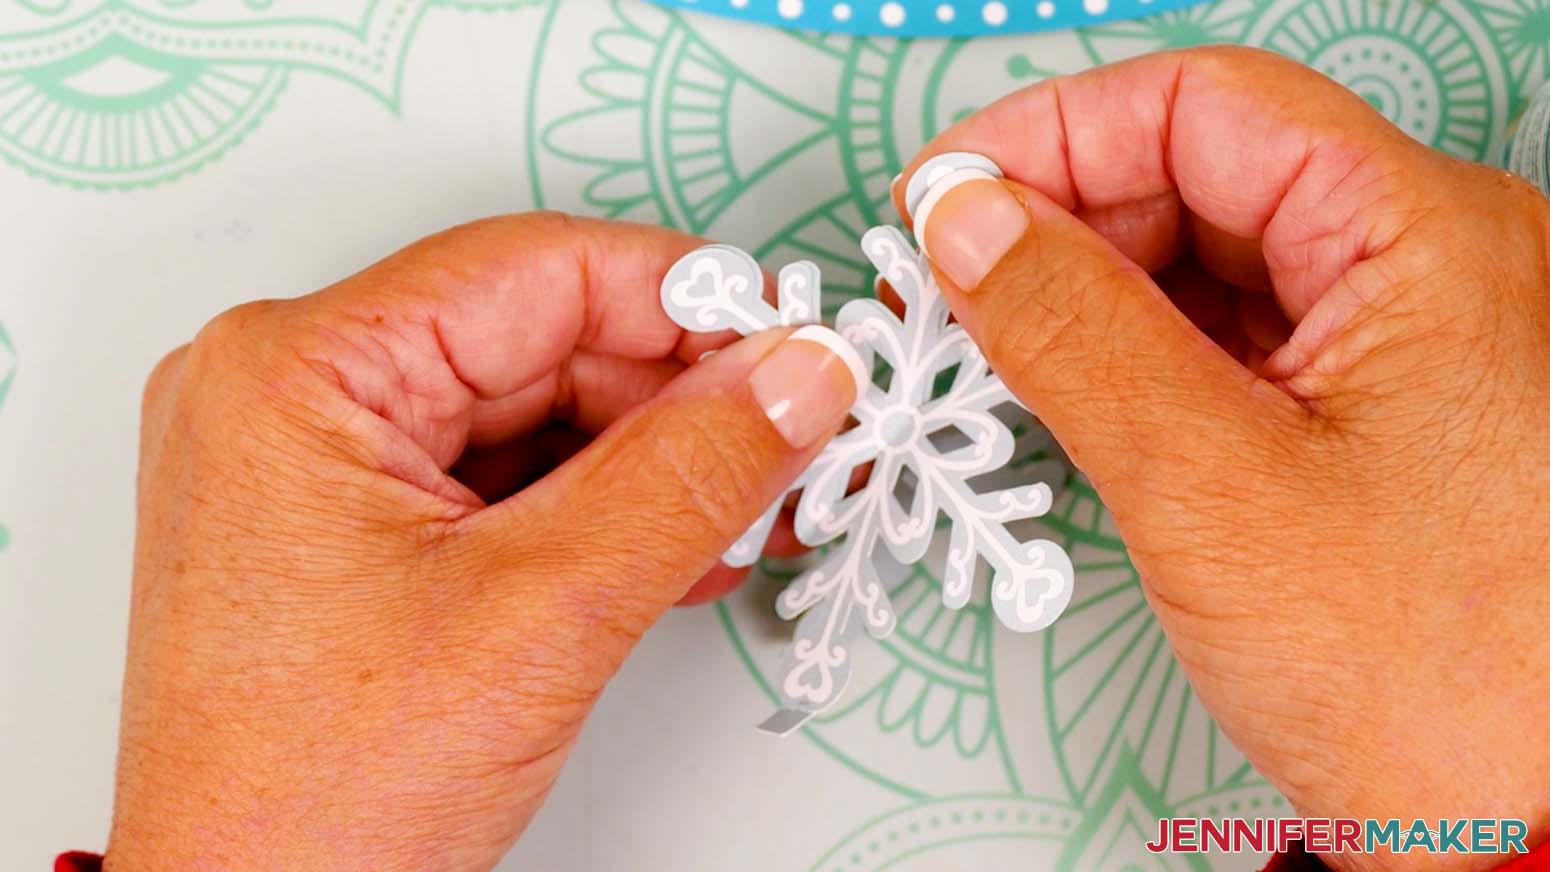
- Repeat Steps 7-8 to attach the remaining four snowflake pieces, one half at a time.
- Add craft glue to the last snowflake half, align it with your original snowflake piece, then press and hold to adhere.
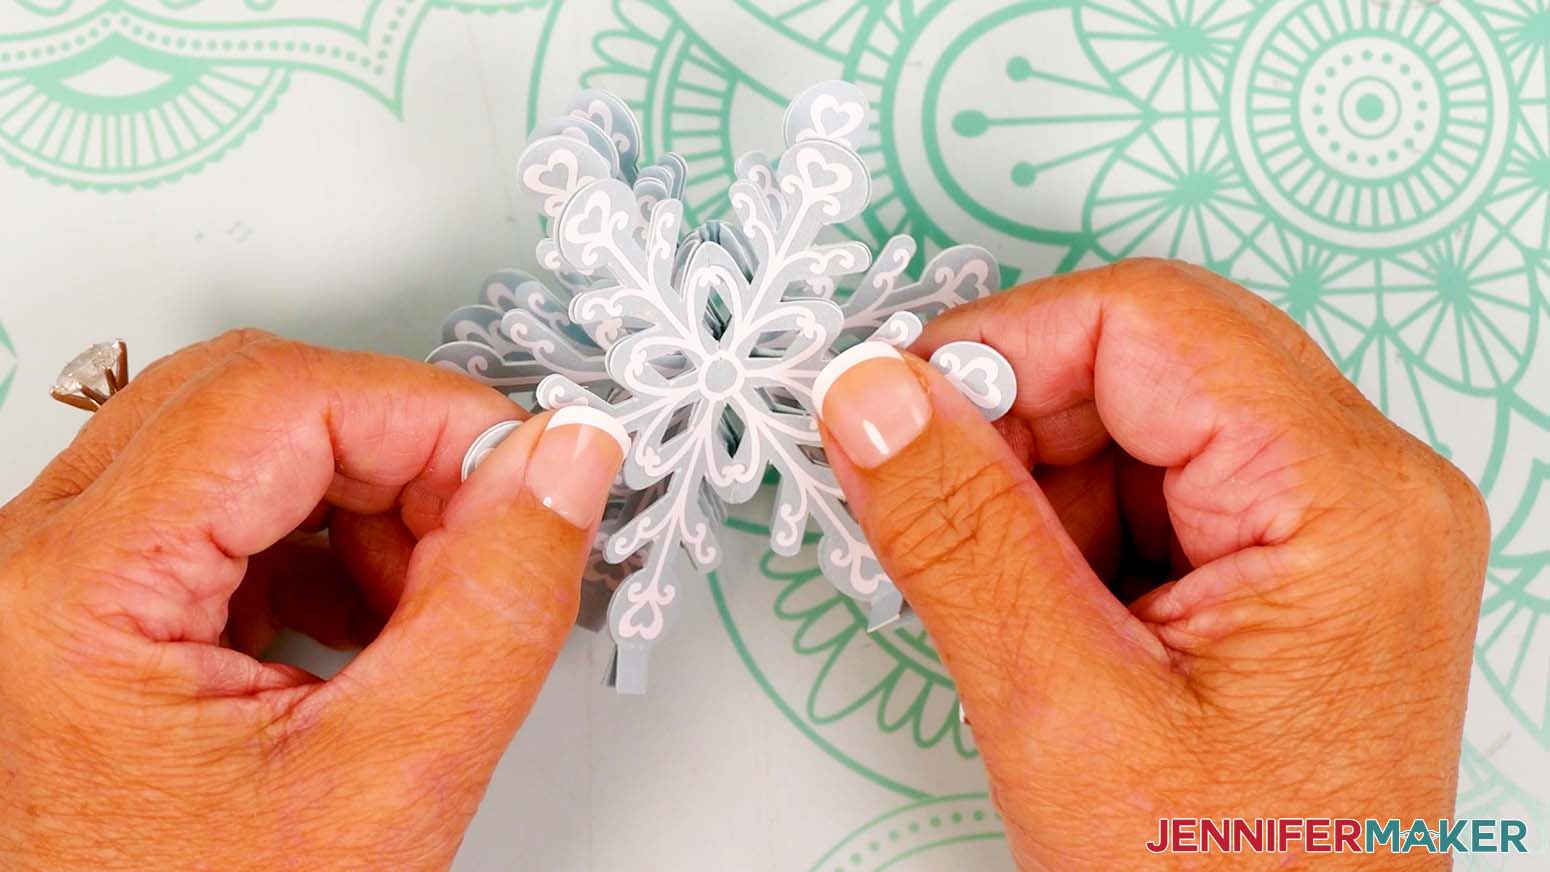
- Fan out your snowflake so all six sides are evenly spaced.
- Separate the snowflake’s bottom tabs and push them outward so it stands up on its own.
ADD THE INNER DECOR PIECE AND SNOW TO THE GLOBE
- Turn on your hot glue gun.
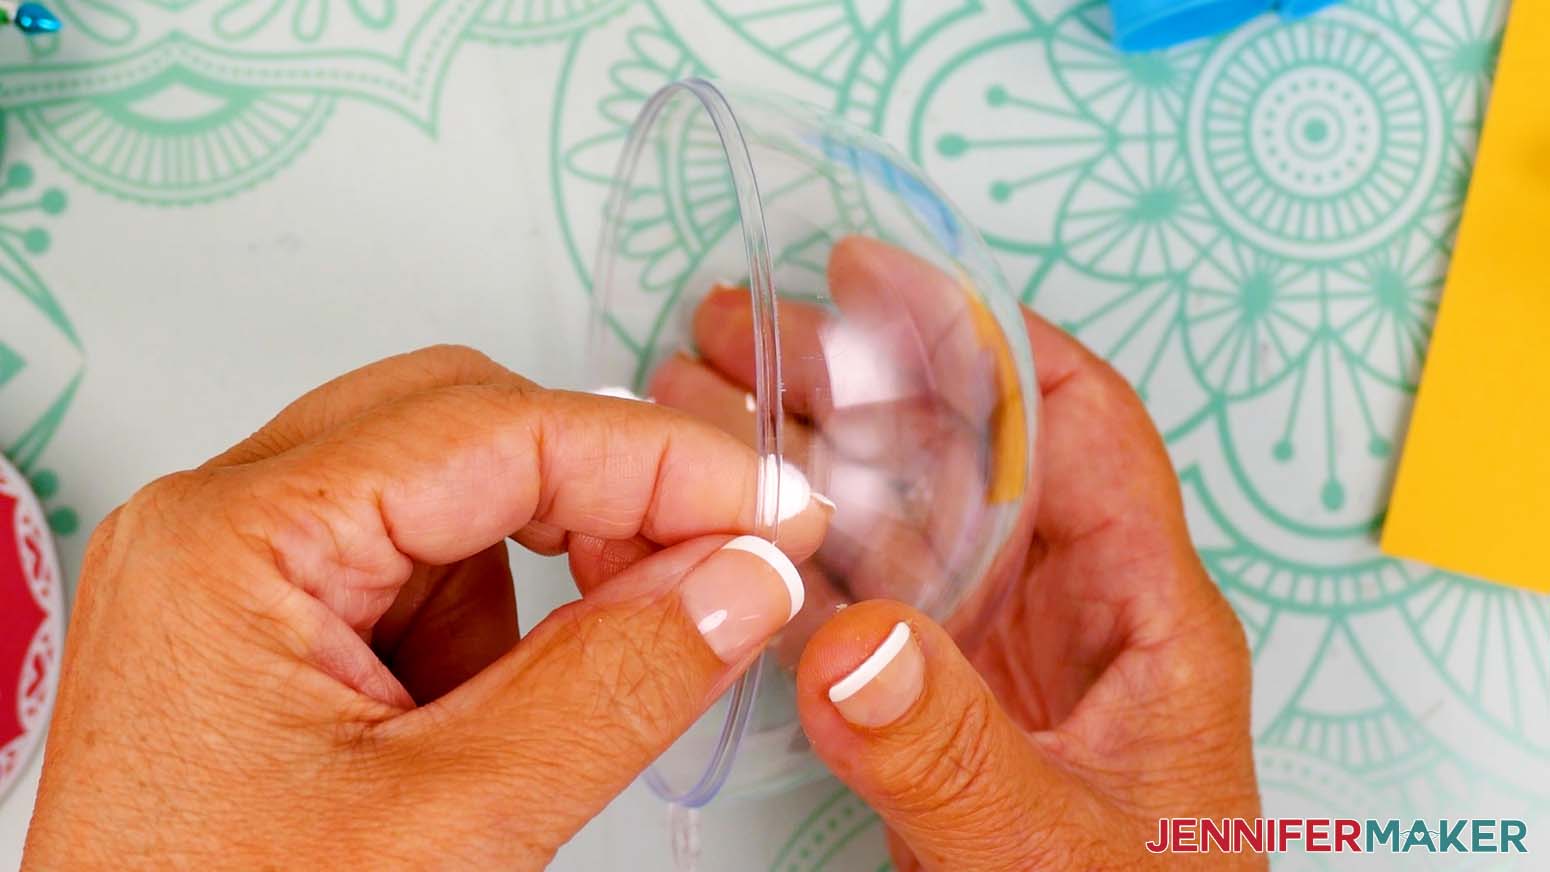
- Separate your globe ornament into two halves.
- Find the half with a ridge on the outside where the two pieces connect. This will be the globe’s bottom half.
- With one hand, hold the bottom half so the globe’s hanging piece points toward you.
- With your other hand, hold your inner decor piece with the bottom toward you, and place it inside the globe so its center aligns with the hanging piece.NOTE: You can fit multiple small pieces inside your globe -- just make sure you can secure them to the globe the way you want before gluing in the next steps. TIP: Be mindful of which way your decor faces and where the globe’s seam will be -- you want a clear view of the scene inside!
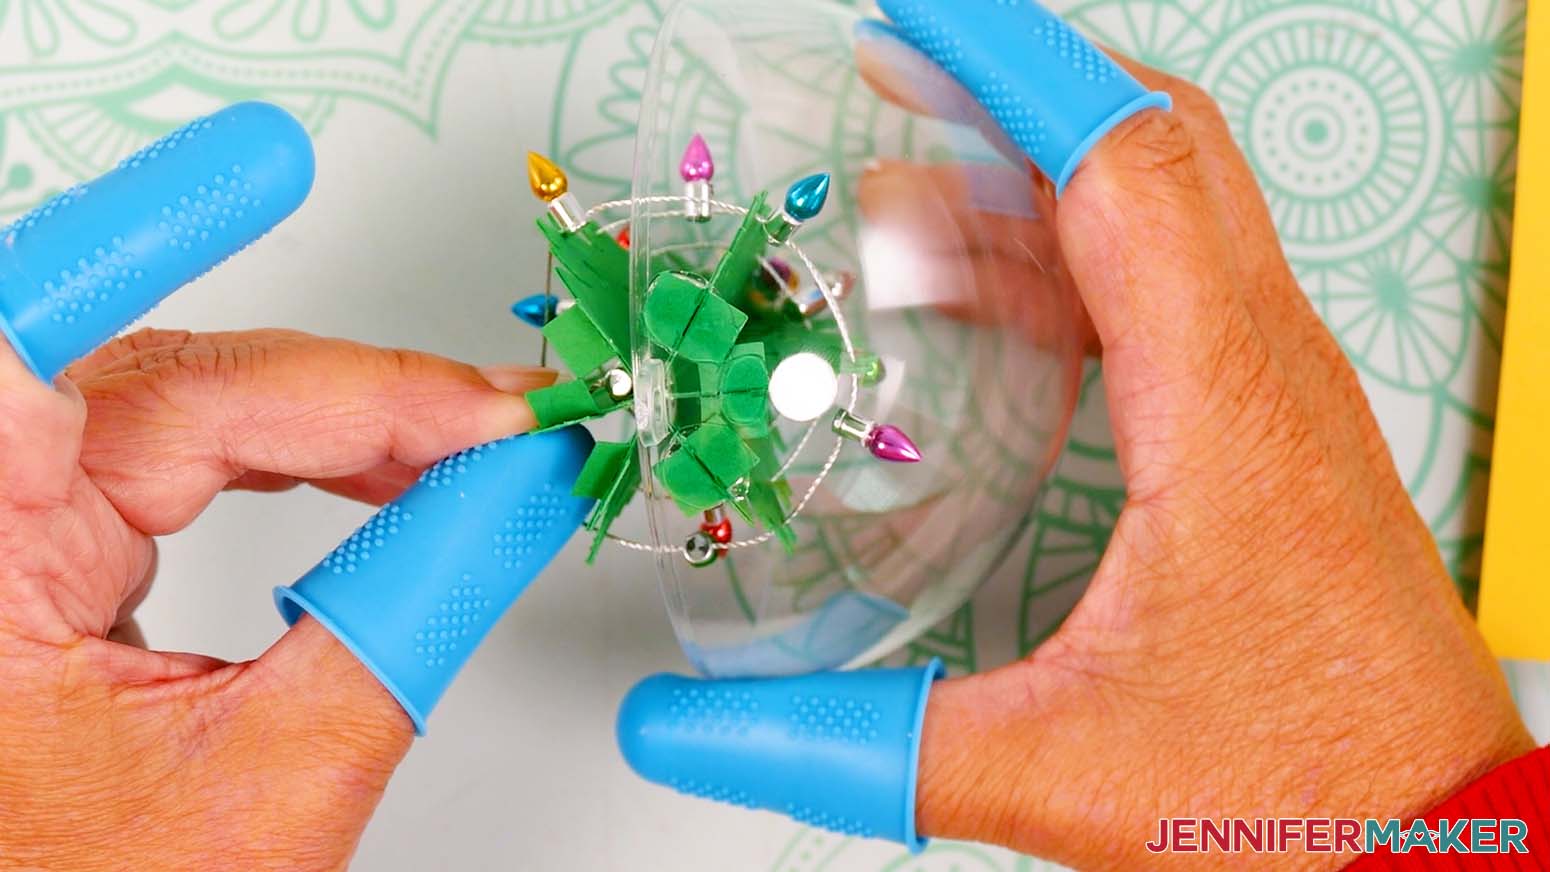
- Set aside your inner decor piece and put on your finger caps to protect yourself from hot glue.
- Working quickly but carefully, add hot glue to the bottom half of the decor piece (tabs, base, feet, etc.) that will be attached to the globe’s bottom half.
- Then align the decor piece inside the globe in the same position as Step 5, centered on the hanging piece.
- Hold the pieces together firmly until the hot glue sets, so the decor piece adheres fully to the globe.
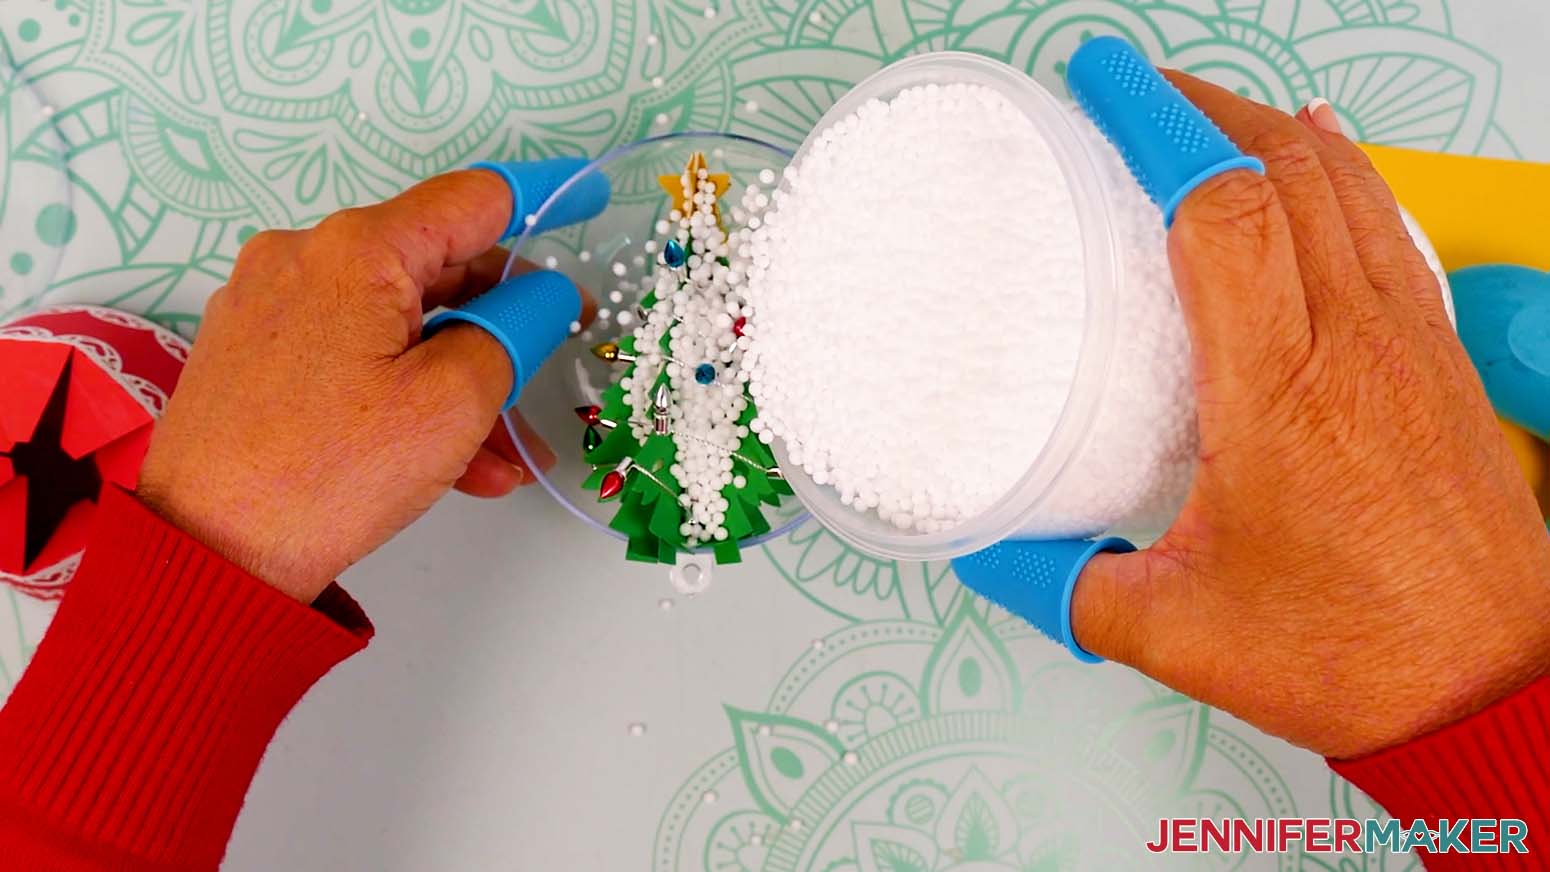
- Next, add fake snow to the same half of your globe as the decorative element. You only need to fill about 30% to 50% of the globe’s bottom half with snow.
- To preview how the snow looks inside the globe, secure the globe’s halves together and then shake to evenly distribute the snow. Decide if you want to add or remove snow. Then hold the globe so the snow settles with the attached decorative piece on the bottom, lift off the top half, and make any desired adjustments.
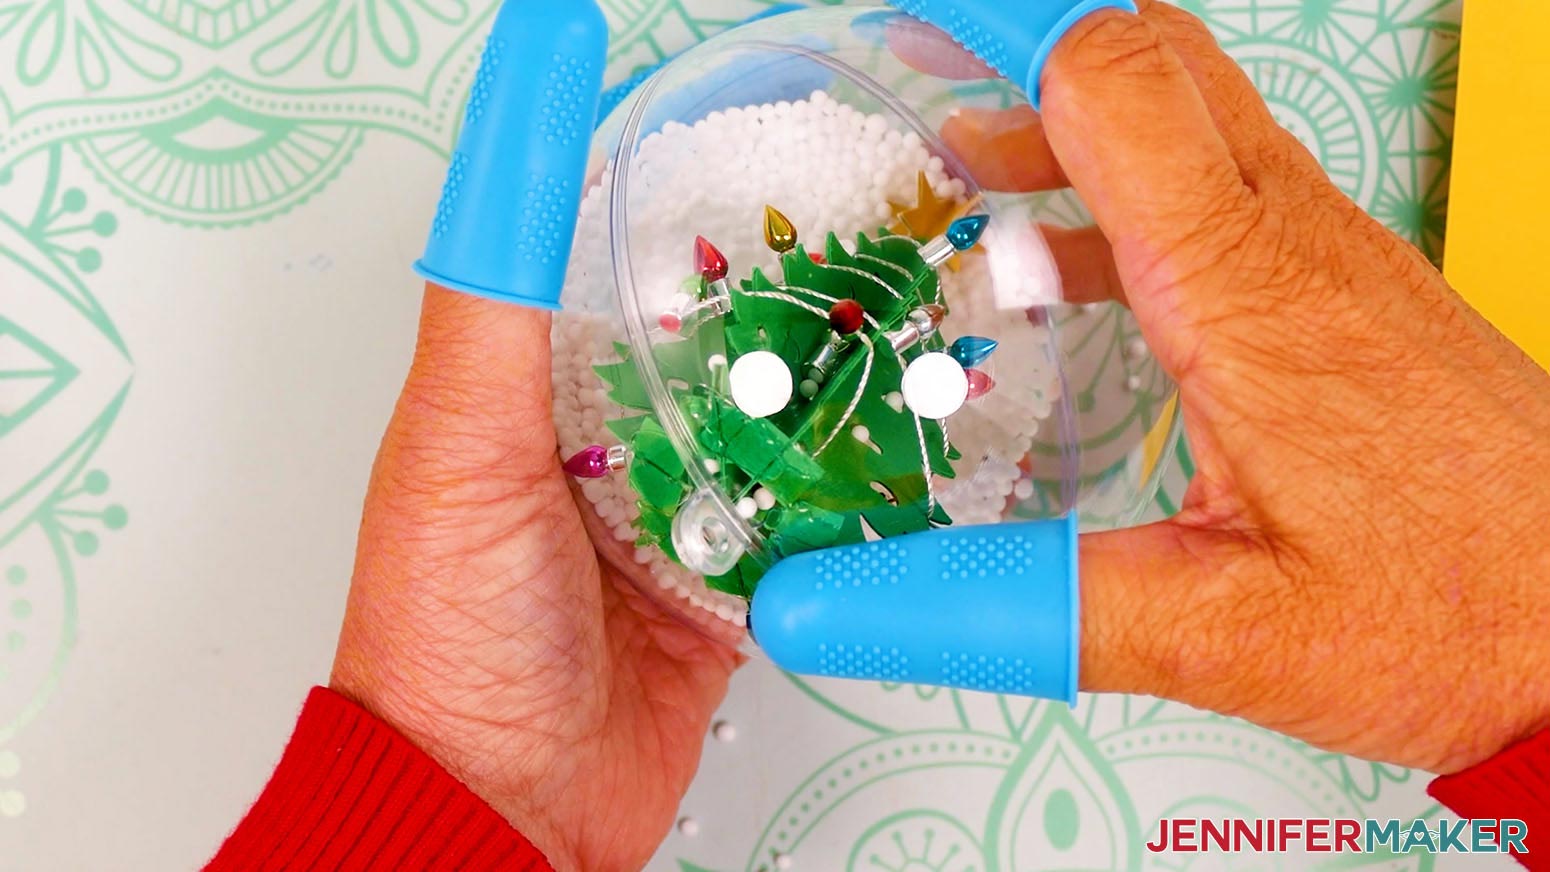
- Working quickly but carefully, add hot glue to the bottom of the other half of the decor piece.
- Secure the globe’s other half with the hanging pieces aligned, then hold in place until the hot glue dries.NOTE: Don’t shake the globe until the glue is fully dry to prevent snow pieces from getting stuck to it.
- Hold the globe so the inner element is upright, and shake to evenly distribute the snow.
- Decide which side of the globe you want to be its front and face it toward you.
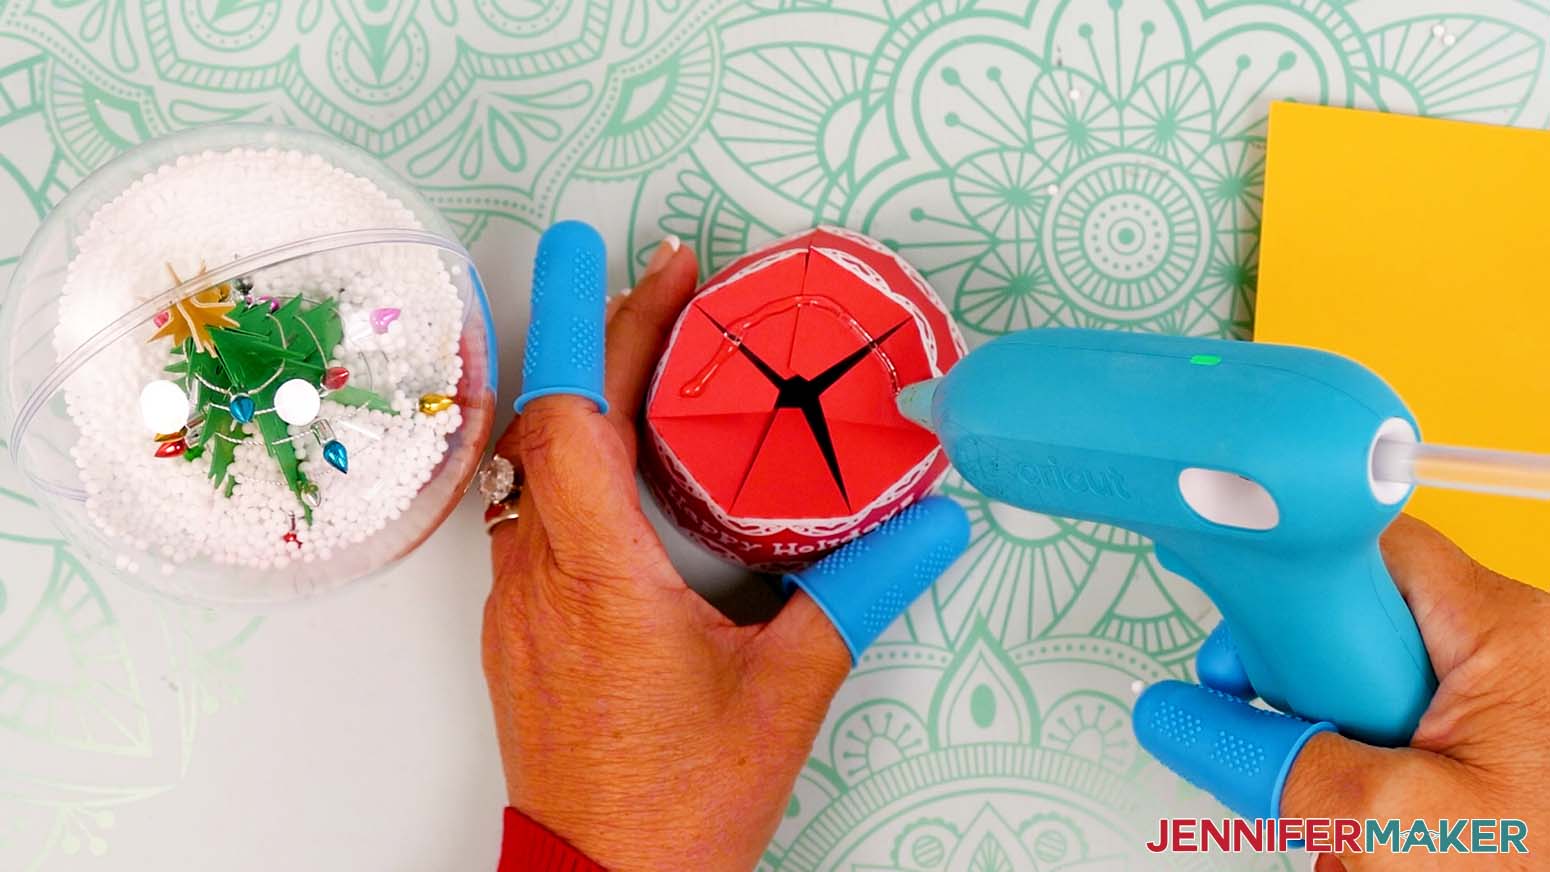
- Place the assembled lid piece right side up with the vinyl decal facing you. Make sure you remove the lid from the gift box’s base.
- Add hot glue to the top of all of the lid’s tabs.
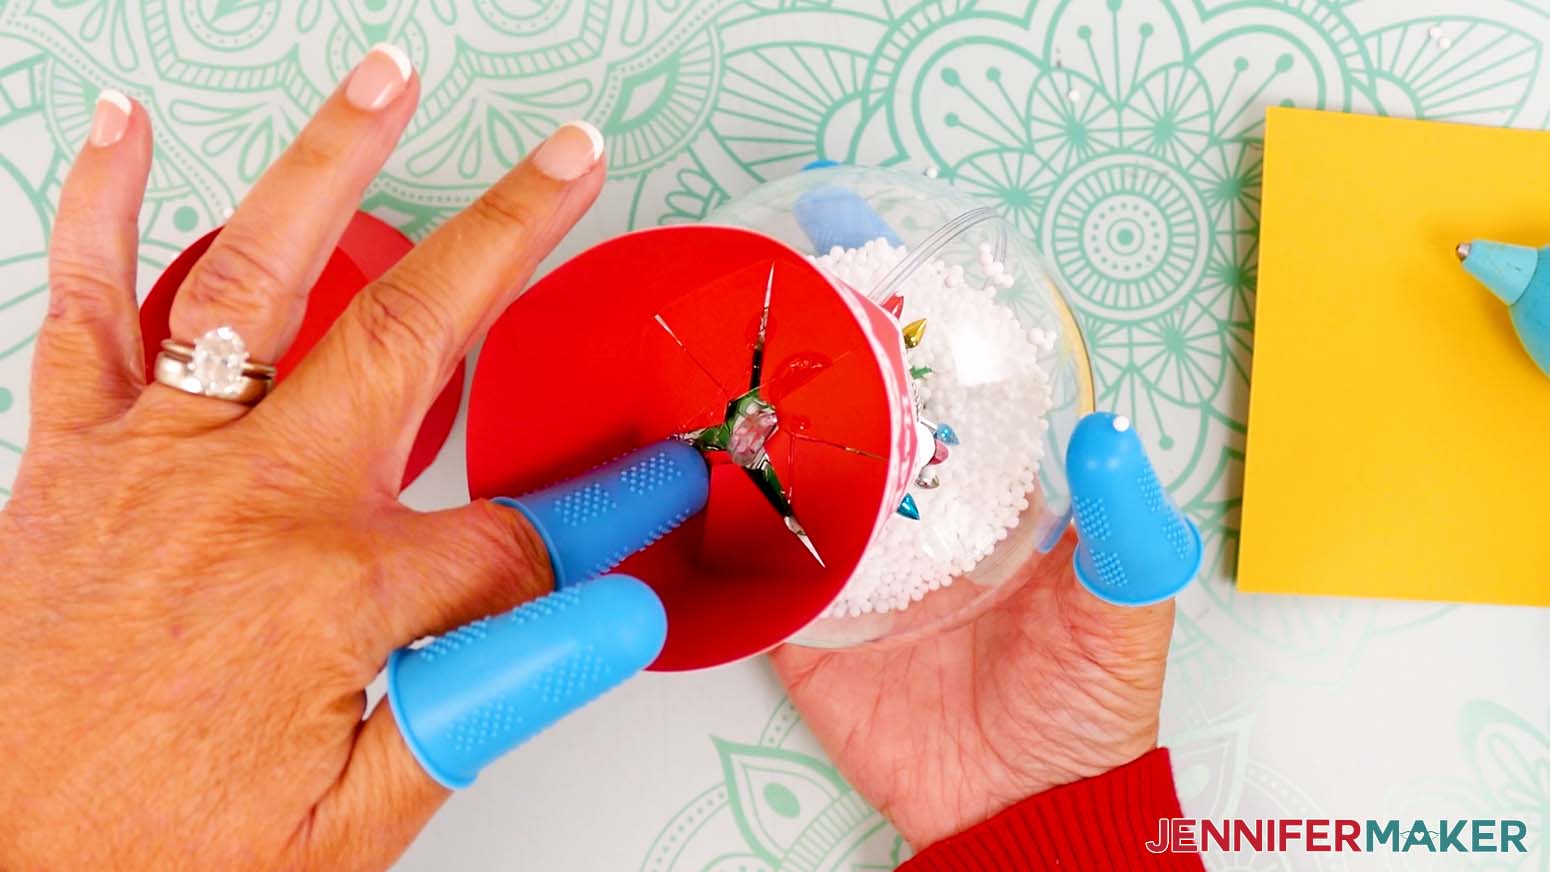
- Center the globe over the lid and lower it onto the tabs.
- Flip over the entire assembly and press the glued tabs onto the bottom of the globe to adhere them together.
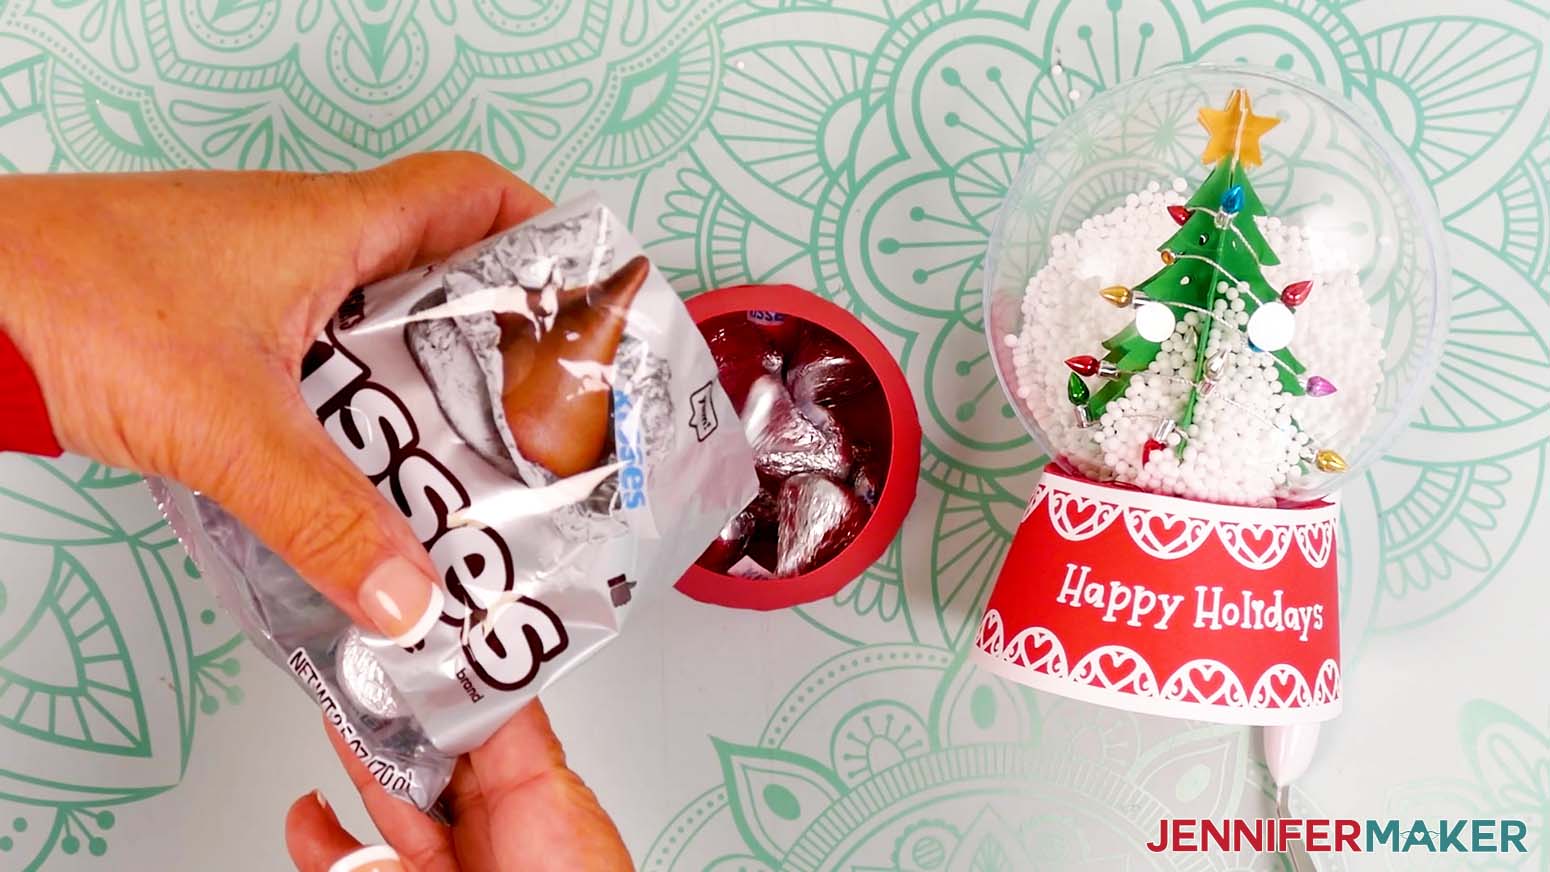
- Add candy or another small gift inside the base, then place the globe lid on top.


STEP 4: SHOW IT OFF
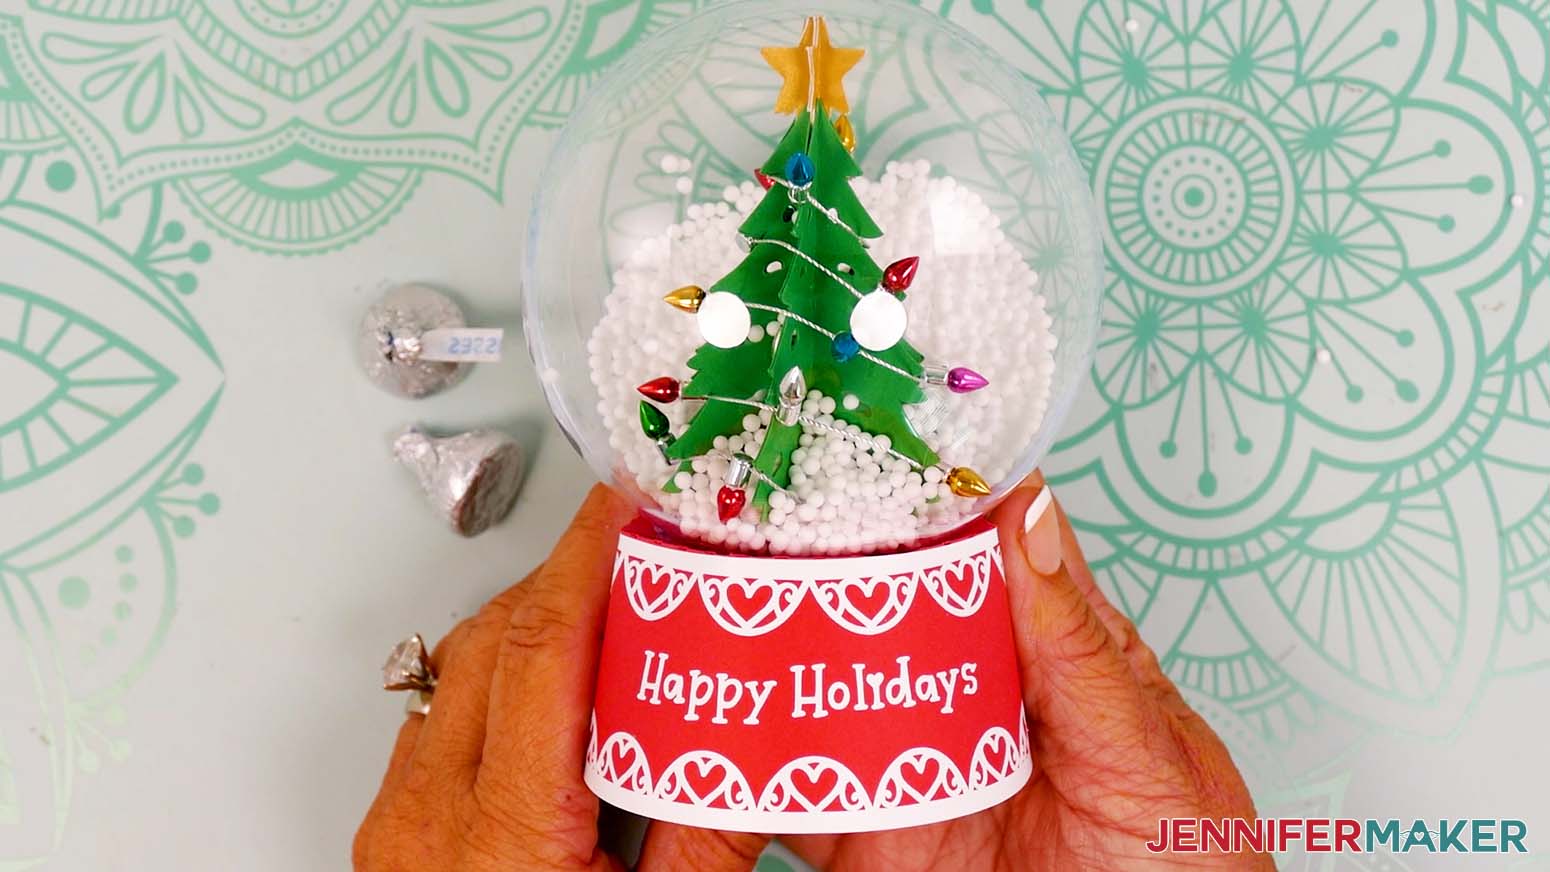
You now have a fun snow globe gift box that is sure to impress!
Answers to Your Questions About Creating Snow Globe Gift Boxes
Q: I want to design a snow globe gift box with a custom message on the base. How do I do that?
A: You can learn how to design a message for your snow globe gift box in my ADVANCE program. Learn more about ADVANCE here!
Q: Can I resize the designs to fit other ornaments?
A: I show you how to resize the bases to fit other ornaments in my bonus video!
Q: Where is your video on making snowglobes with liquid inside?
A: As part of Merry Maker Mingle 2025, I experimented with different ways to make liquid-filled snowglobes and shared the process live on video! I tested baby oil, water, fake snow, glitter, and different adhesives. Baby oil and fine glitter worked best, but you can watch the full video for the full results and inspiration!
Q: What fits inside the snow globe gift box?
A: The snow globe gift box has just enough space inside the base for a handful of candies, a small toy, a piece of jewelry, or a rolled-up special note.
Q: What kind of a paper do I use?
A: This project uses a mix of 65 lb and 100 lb cardstock for strength and structure. Shimmer cardstock is also recommended for decorative elements like stars and snowflakes to add a festive, sparkly touch.
Q: What do you use for the globe on a snow globe gift box?
A: The globe is made from a clear plastic ornament that comes in two halves. These ornaments are lightweight, spacious, and ideal for creating the snow globe effect without using real water or glass.
Q: What kind of glue do you use to make a snow globe gift box?
A: Craft glue is used to assemble the cardstock pieces like the base and lid, while hot glue is used to secure the decorative scene inside the plastic globe and to attach the globe to the box lid.
Q: Can you tell me what to use instead of glitter in a snow globe gift box?
A: Instead of glitter or liquid, this project uses faux snow. Two types were tested (one powdery and one with a chunkier texture), and both work beautifully to mimic falling snow inside the globe without any mess.
Q: Can I make and sell snow globe gift boxes?
A: I love supporting creative entrepreneurs! If you want to use my designs and projects for commercial use, please familiarize yourself with my important licensing information before selling your crafts.
I do not permit sale of my digital items, but you can sell the creative goods you make with them — as long as you follow my licensing requirements. That means you cannot sell the snow globe gift box SVG, PDF, or DXF files, but you can sell crafts that you made with the files within the guidelines linked above.
Get my free SVG files to make a snow globe gift box!
(If you do not see the signup form above, click here.)
I love seeing what you make with my tutorials and how you customize them! Please share a photo of your snow globe gift box in our Facebook group or tag me on social media with #jennifermaker.
Love,

Want to remember this? Save this Snow Globe Gift Box tutorial to your favorite Pinterest Board!