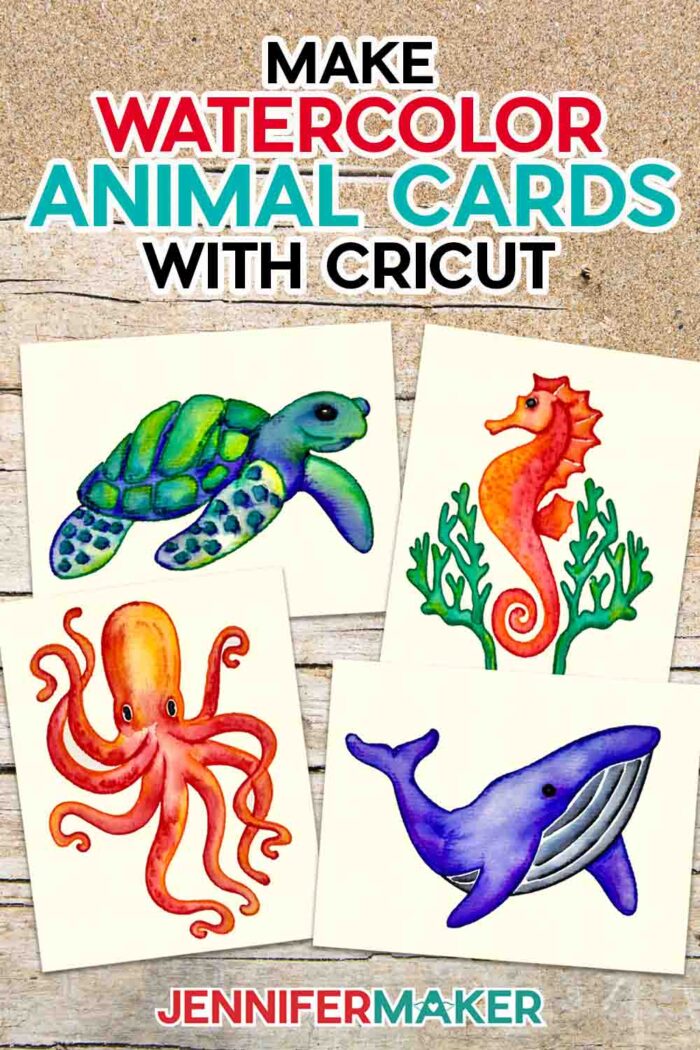
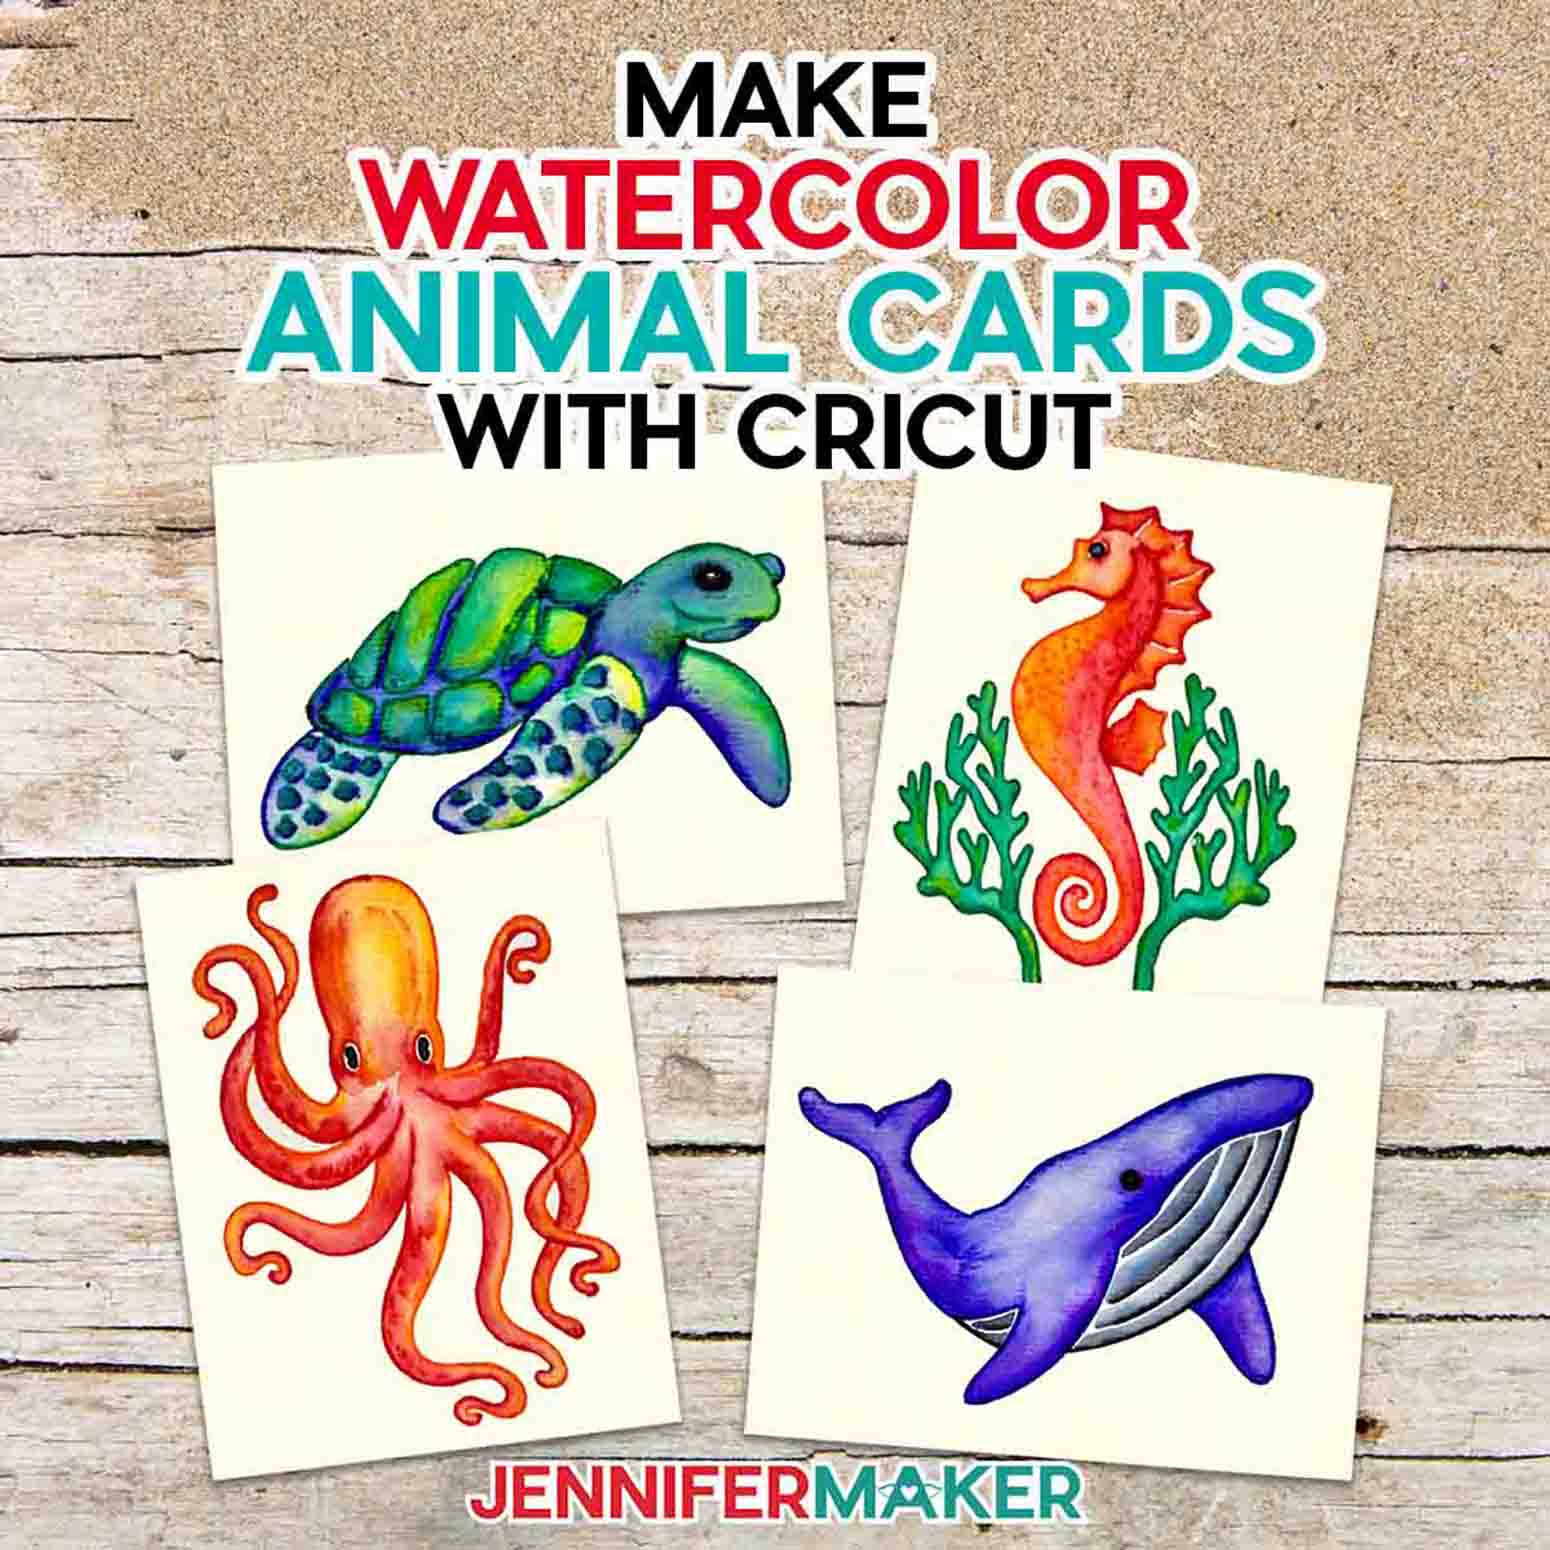
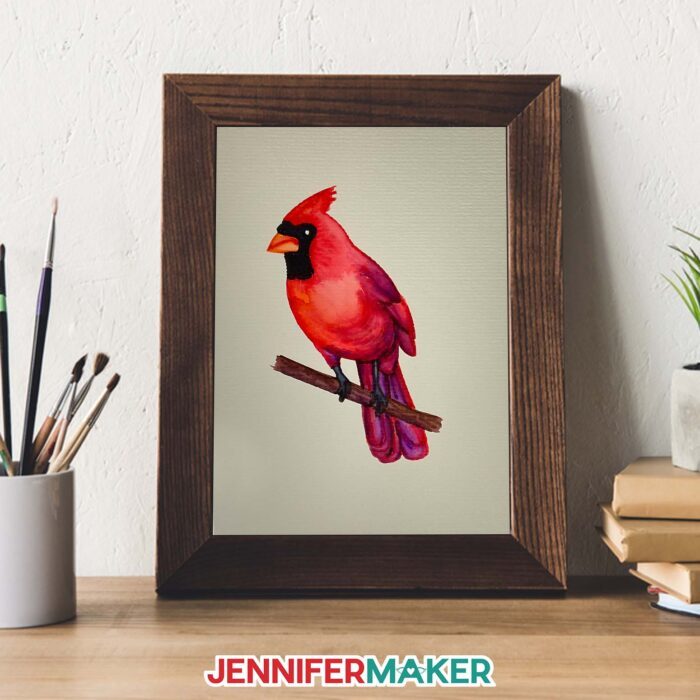
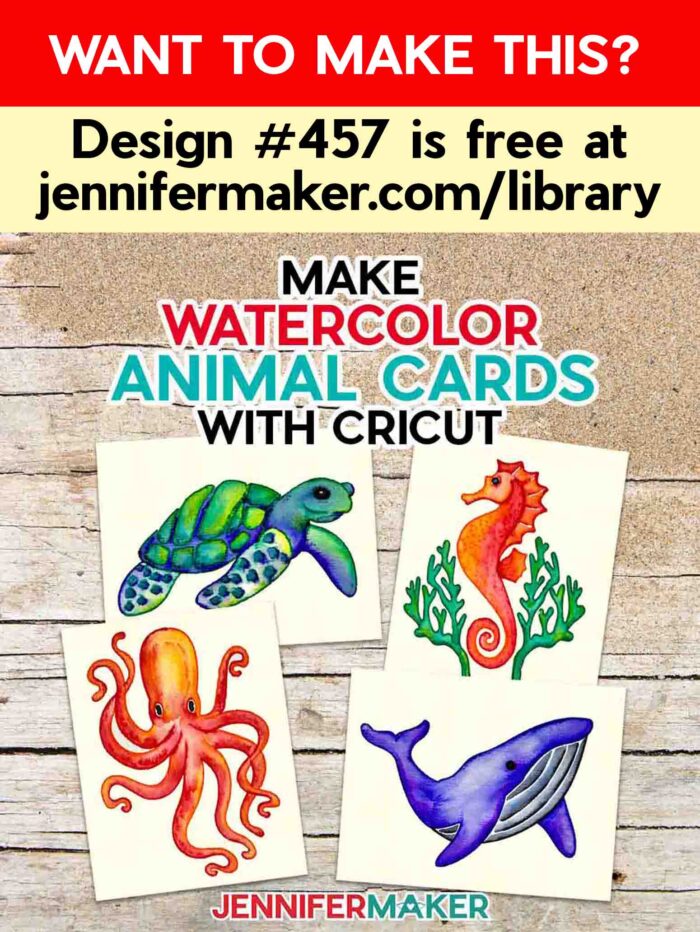
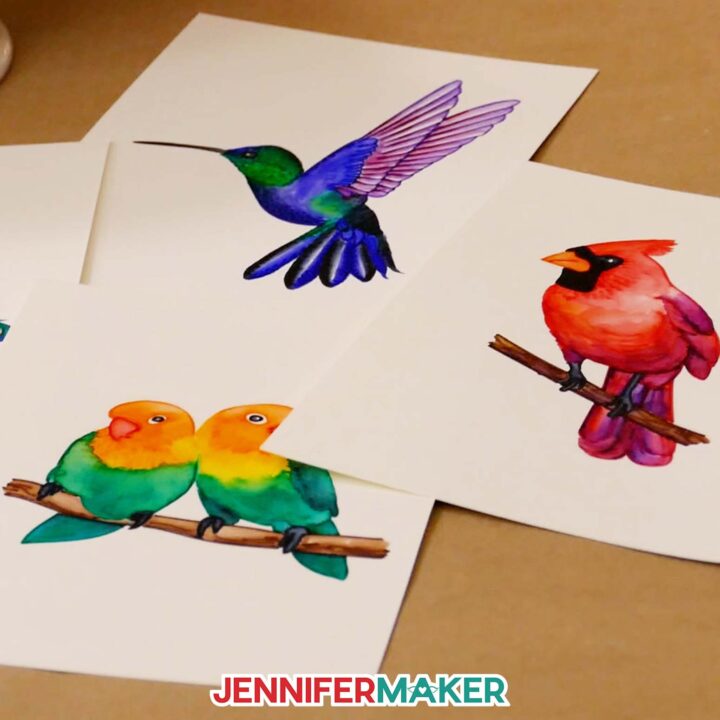
Learn how to make DIY watercolor cards with a practice design and beautiful birds and sea life!
Can a machine really help create the flowy, fun watercolor style we all love? With Cricut watercolor markers and some help from you, yes! I wanted some natural works of art to play with these markers, so I’ve designed some bird files for you to try! (June 2023 Update: The free download also has sea creatures now!) I’ve also provided a practice project that will help you understand how the machine manages designs with multiple colors. It’s really helpful to make these DIY watercolor cards!

 What is the Merry Maker Mingle? This is an annual tradition here at JenniferMaker! Every day for the first 25 days of December, we gift you with a brand new project, design, tutorial, and video for something YOU asked us to make. On top of that, we host a giveaway with 25 days of prizes. Some of the amazing prizes are Cricut cutting machines, sewing machines, gift cards, and beautiful print editions of our popular Cricut Coach Playbook. You can even earn bonus entries for sharing photos of the daily projects! Click here to learn more about the Merry Maker Mingle!
The Cricut watercolor markers are unlike the other watercolor materials I’ve tried before, but they’re fun once you get the hang of them!
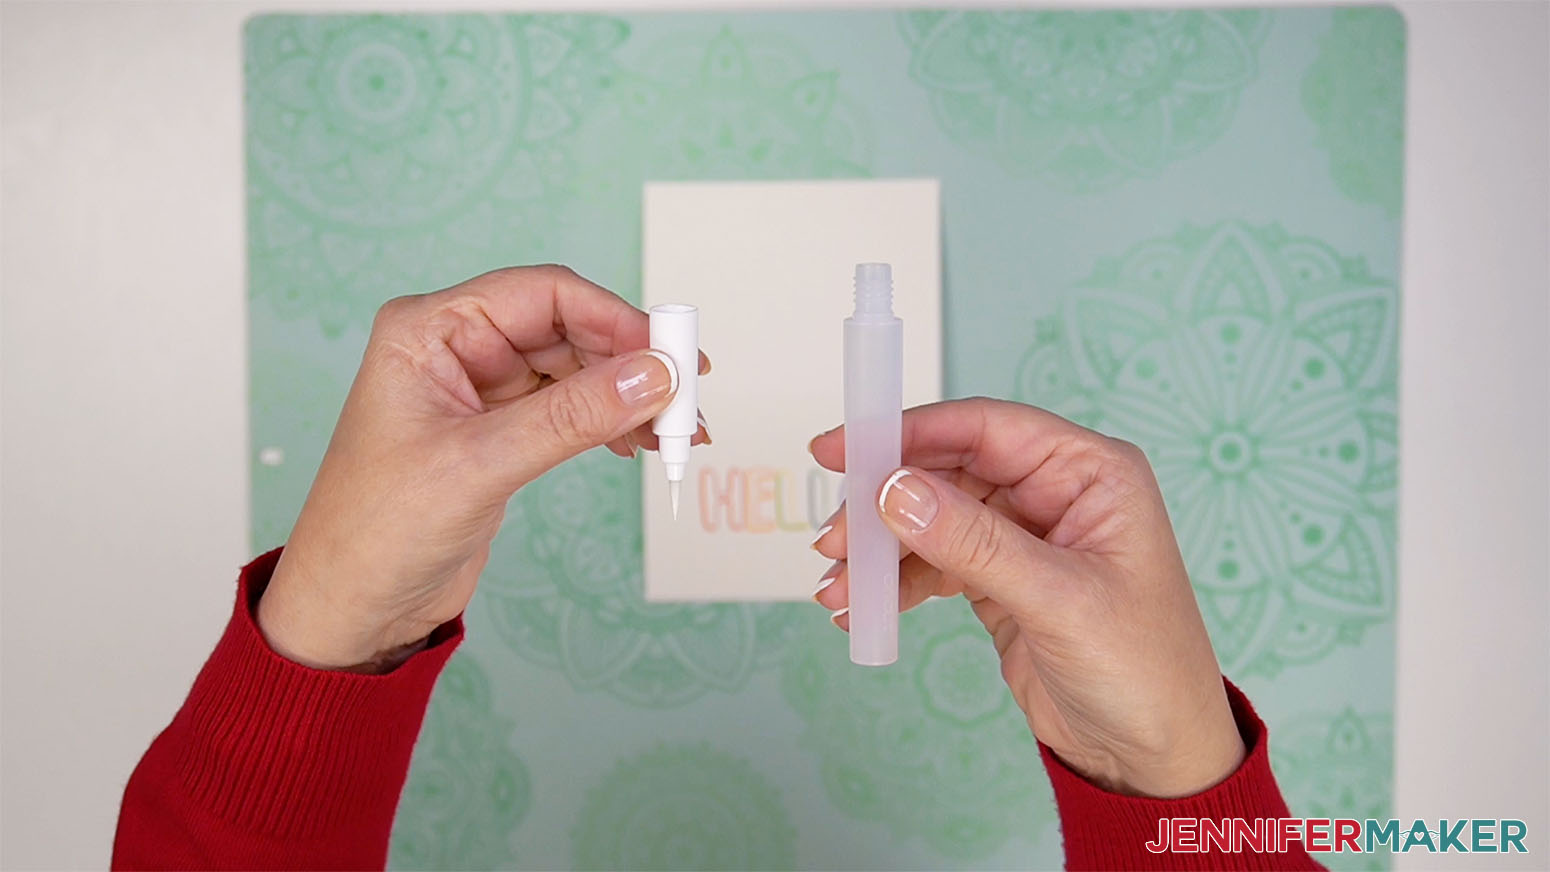
Before you get nervous, no, we aren’t getting water near the Cricut! The machine will draw lines for the design with the markers, then I’ll show you how to use the included water brush pen to activate the colors. It’s kind of like those coloring books where the water-activated pigment is already on the paper!
It can be intimidating to use new materials on a project you LOVE (I think you’ll feel the same way about these animals!) so I’ve created a practice design to learn on!
The Cricut watercolor markers are not like a watercolor pencil or liquid watercolor, they’re somewhere in between. The line doesn’t always blend completely, but since it’s the same color, I think it looks better than tracing a pencil line. Don’t worry if you haven’t tried watercolor painting before. I’ll show you how to paint each animal!
We’ll cover how to prepare the DIY watercolor cards in Cricut Design Space using some fun techniques I’ve found helpful. It looks complex, but it’s totally worth the time to keep the different colors from overlapping and blending on the markers.
I’ve used the markers with great results on the Cricut 4.75” x 6.6” watercolor notecards and the watercolor paper in the materials list. The paper is made for watercolor brush pens like the one that comes with the markers. I used a Maker 3 for my DIY watercolor cards, but there are watercolor markers available for every machine. I’ll also show you how to position the paper on a green StandardGrip machine mat so the designs’ lines go on the top of the card. A brayer is handy, too!
Just like normal watercolor projects, you’ll also need a bowl of water and paper towels.
Water management is one of the most important parts of these DIY watercolor cards. We’ll use a few tools, like smaller water brush pens, cotton swabs, and paper towels during the tutorial. If any of your watercolor greeting cards get wrinkly, you can flatten them out under a heavy book.
Sometimes, DIY watercolor cards need some inking to really come together. I used a fine-point black pen to add a few details to the peacock and the animals’ eyes. I’ll show you how to make it work!
Let me show you how easy it is to make DIY watercolor cards! This post contains some affiliate links for your convenience (which means if you make a purchase after clicking a link I will earn a small commission but it won’t cost you a penny more)! Read my full disclosure policy.
Materials to Make DIY Watercolor Cards
View my Amazon shopping list with the exact items we used to make this project
- Cricut Watercolor Markers and included Water Brush Pen
- Cricut 4.75″ x 6.6″ Watercolor Paper Blank Cards
- 5.8″ x 8.3” piece of Watercolor Paper
- Black Fine Point Pen – for peacock design details
- Paper Towels
- A method to draw your design – I used the amazing Cricut Maker 3 but you can also use the original Maker an Explore, or a Joy
- StandardGrip Green Machine Mat, 12″ x 12″
- Brayer
- Cotton Swabs – Optional, for shading
- Water Brushes – Optional, for more detail
- Bowl of Water
- Design #457 – My free DIY Watercolor Cards SVGs (available in my free resource library—get the password at the bottom of this post)
How to Make Your Own DIY Watercolor Cards
DIY Watercolor Cards
Learn how to make DIY watercolor cards featuring birds your Cricut can draw with watercolor markers!
Materials
- Cricut Watercolor Markers and included Water Brush Pen
- Cricut 4.75" x 6.6" Watercolor Paper Notecards
- Watercolor Paper 5.8" x 8.3” Fine Grade -or-
- Watercolor Paper 5.8" x 8.3” Extra Fine Grade
- Black Fine Point Marker - for peacock design
- Paper Towels
- Design #457 – My free DIY Watercolor Cards SVG (available in my free resource library—get the password at the bottom of this post)
Tools
Instructions
NOTE: You can also use this technique with my other watercolor designs:
Watercolor Valentines
Watercolor Plants
Winter Watercolors
Halloween Watercolors
Watercolor Fruits
STEP 1: GET MY FREE DIY WATERCOLOR CARDS DESIGNS
You can download my free DIY watercolor design SVG/PDF/DXF files from my free resource library. Look for Design #457. You can trace the printable PDFs or use the other files with cutting machines. I'll show you how to prepare the SVGs in Cricut Design Space to make on a Maker or Explore series machine.
The SVG folder contains five files:
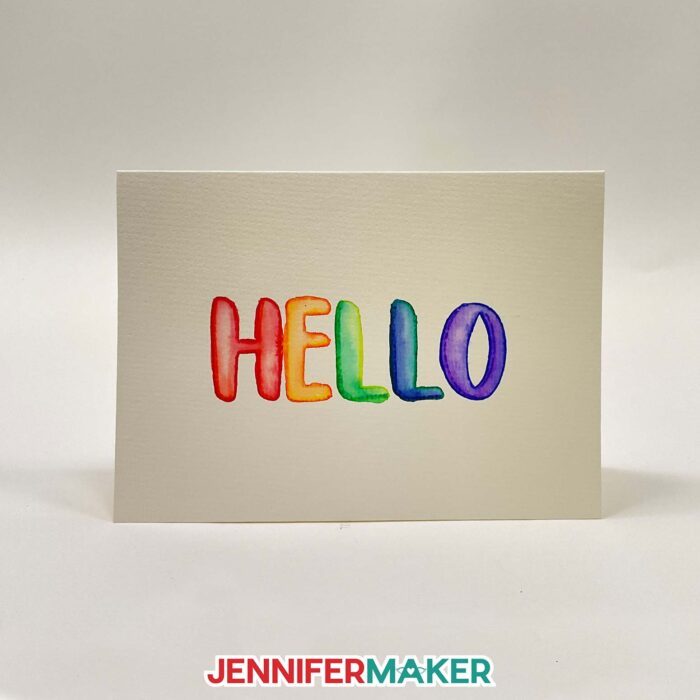
Hello warm up design
Cardinal

Hummingbird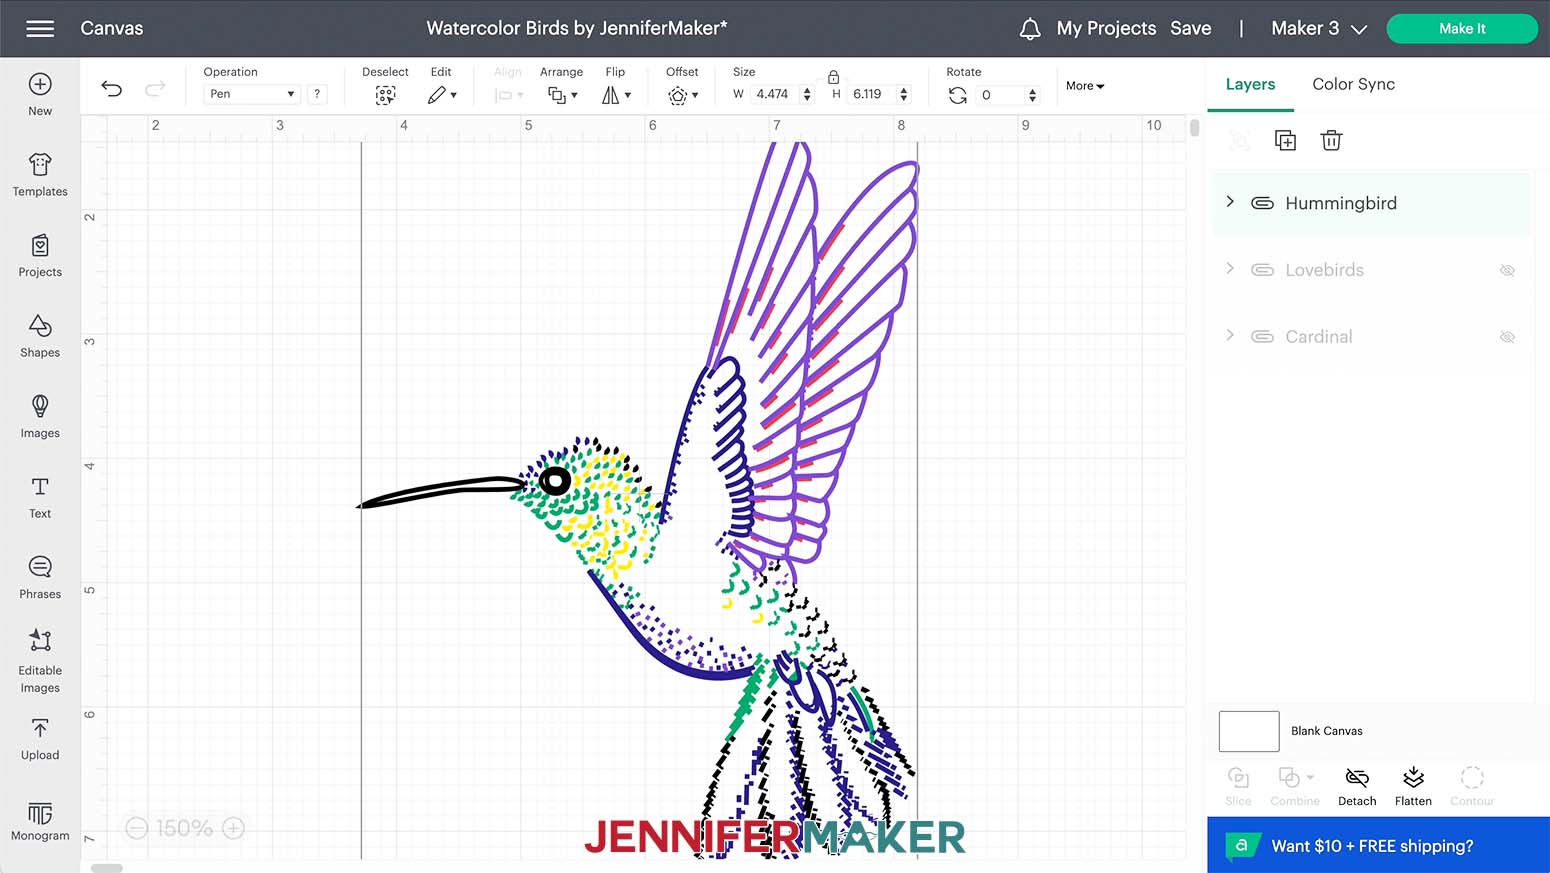
Lovebirds
Peacock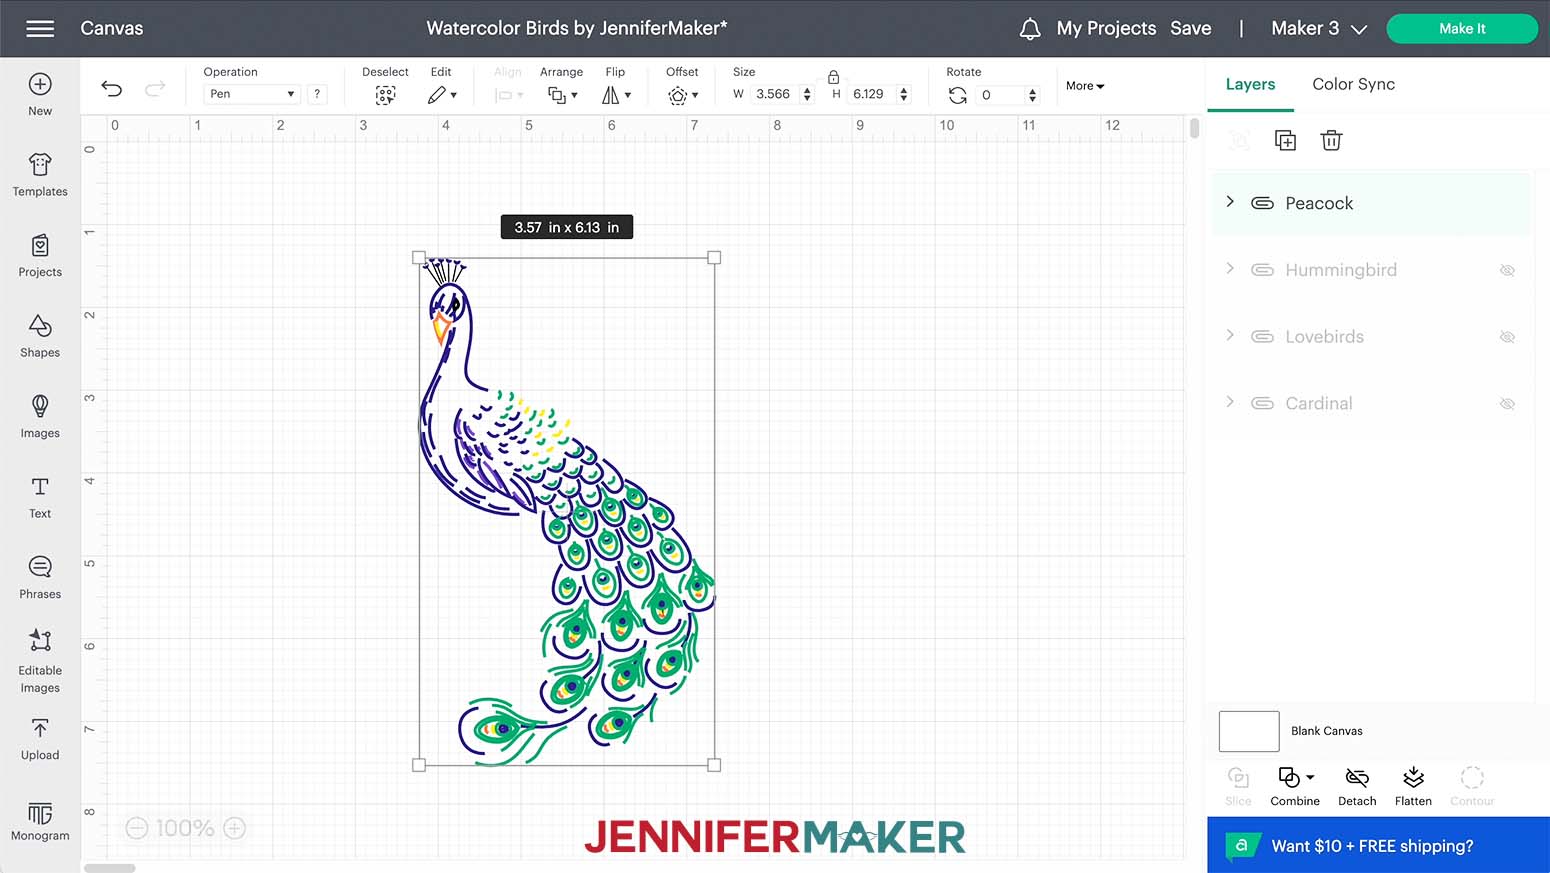
I suggest starting with the warm up design, so upload the file you want to your software and Add it to the Canvas.
If you’re not sure how to upload an SVG file to Cricut Design Space, watch this helpful video SVGs Made Simple training series I made. It will help you SO much!
If you're on an iPhone or iPad, here's how to download and upload SVG files to the Cricut Design Space app.
STEP 2: PREPARE AND DRAW YOUR PRACTICE DESIGN
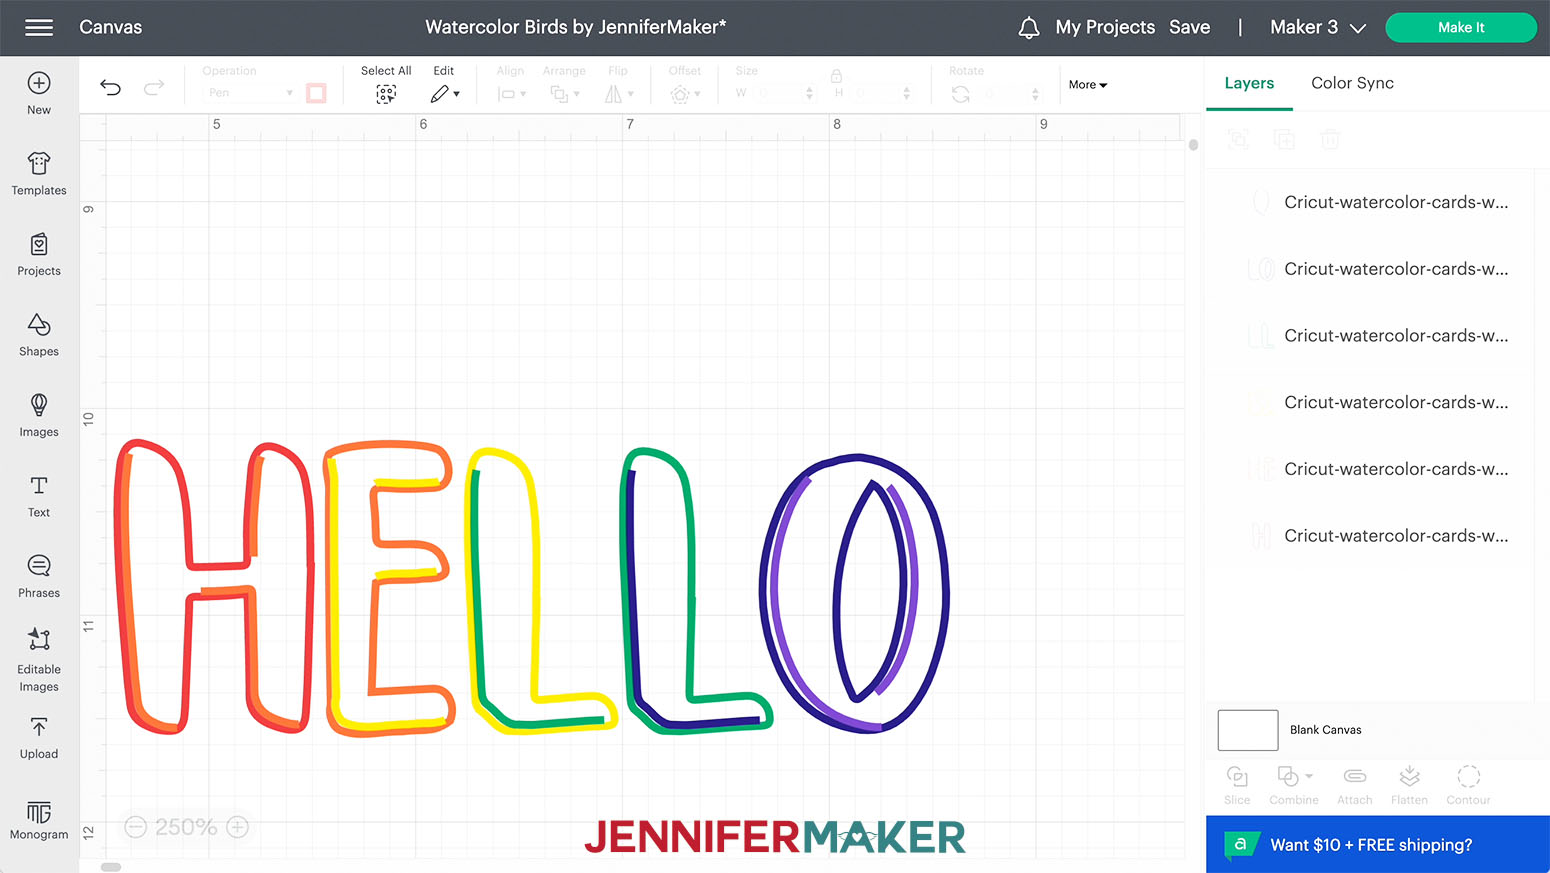
This is what the warm up design looks like on my Canvas. You can zoom in to see the details by clicking on the plus (+) sign on the lower left.
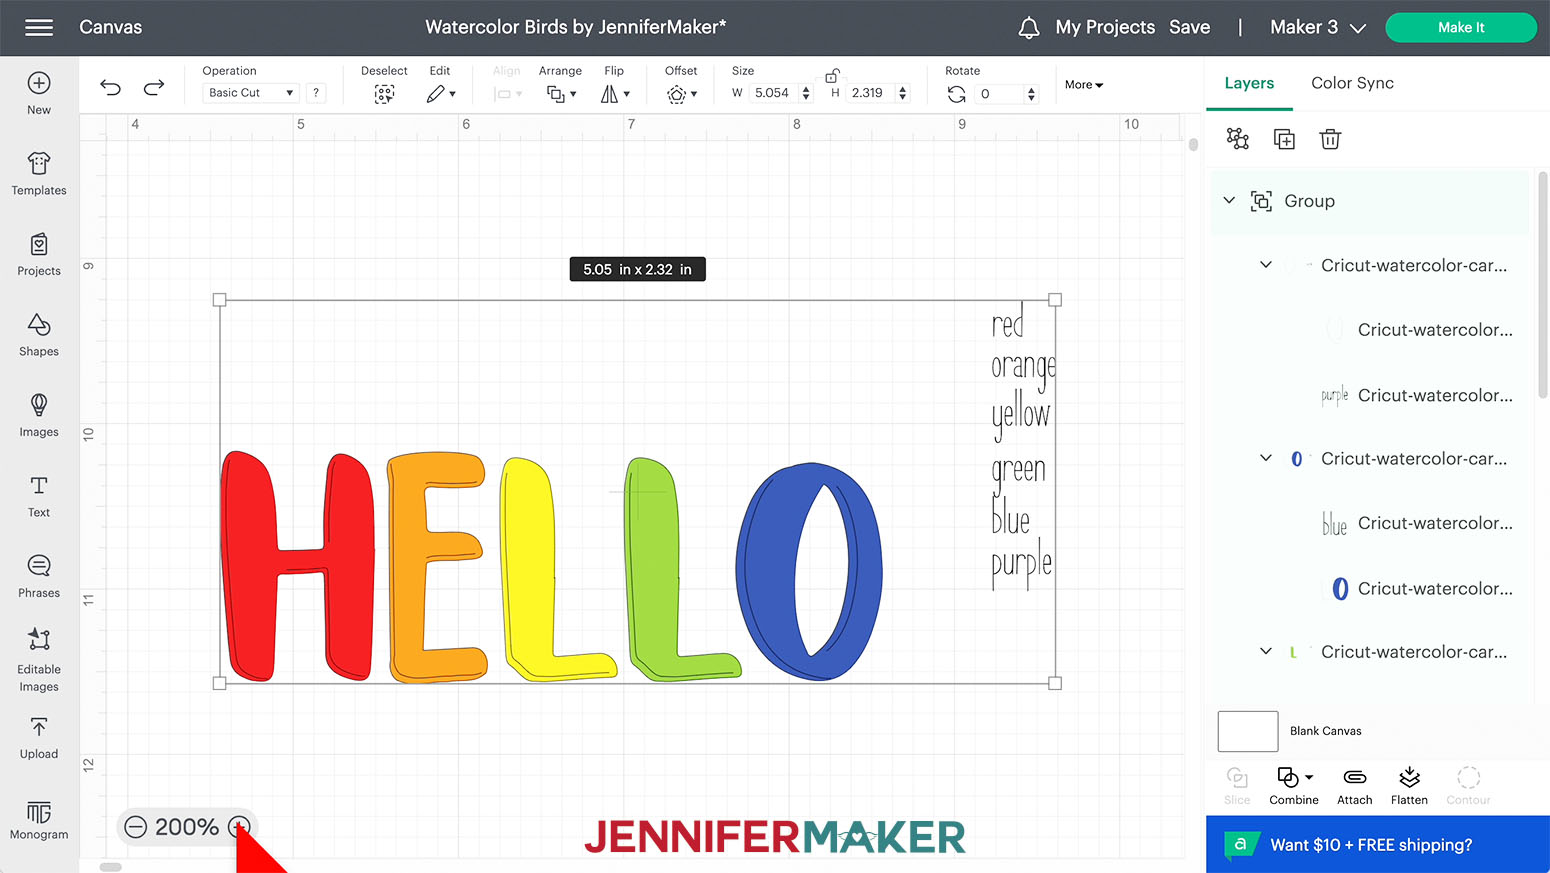
We need to adjust a few things to make the design draw out correctly. Practicing on this file will prepare you to work on the animal designs.
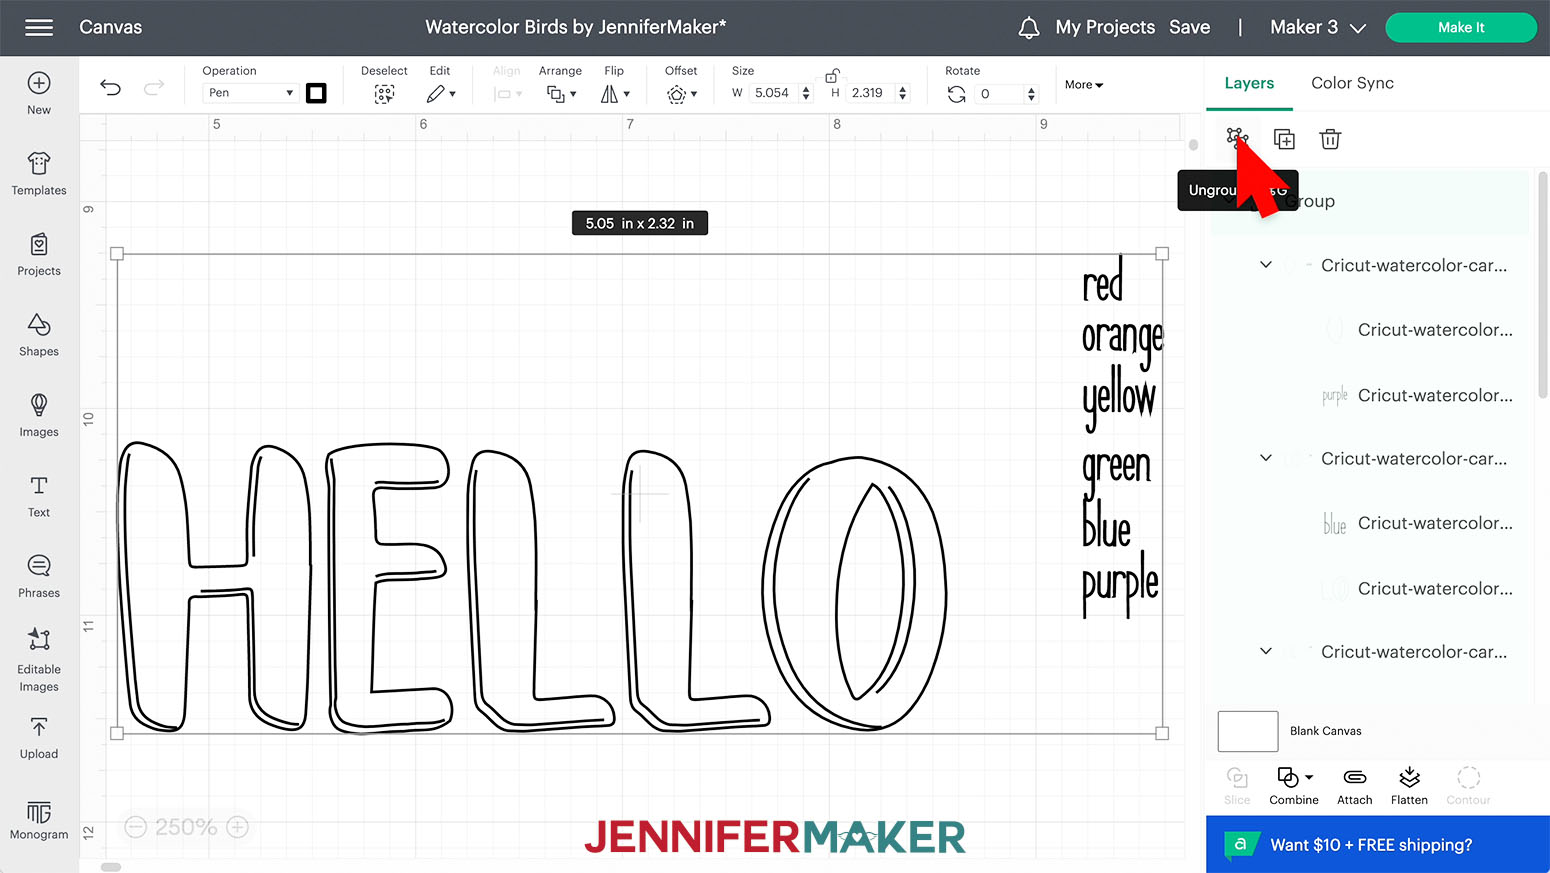
Notice the list of colors to the right of "Hello" on the Canvas? Each color is grouped with part of the main design. These will help you define which color you need to assign to the different layers of the image.
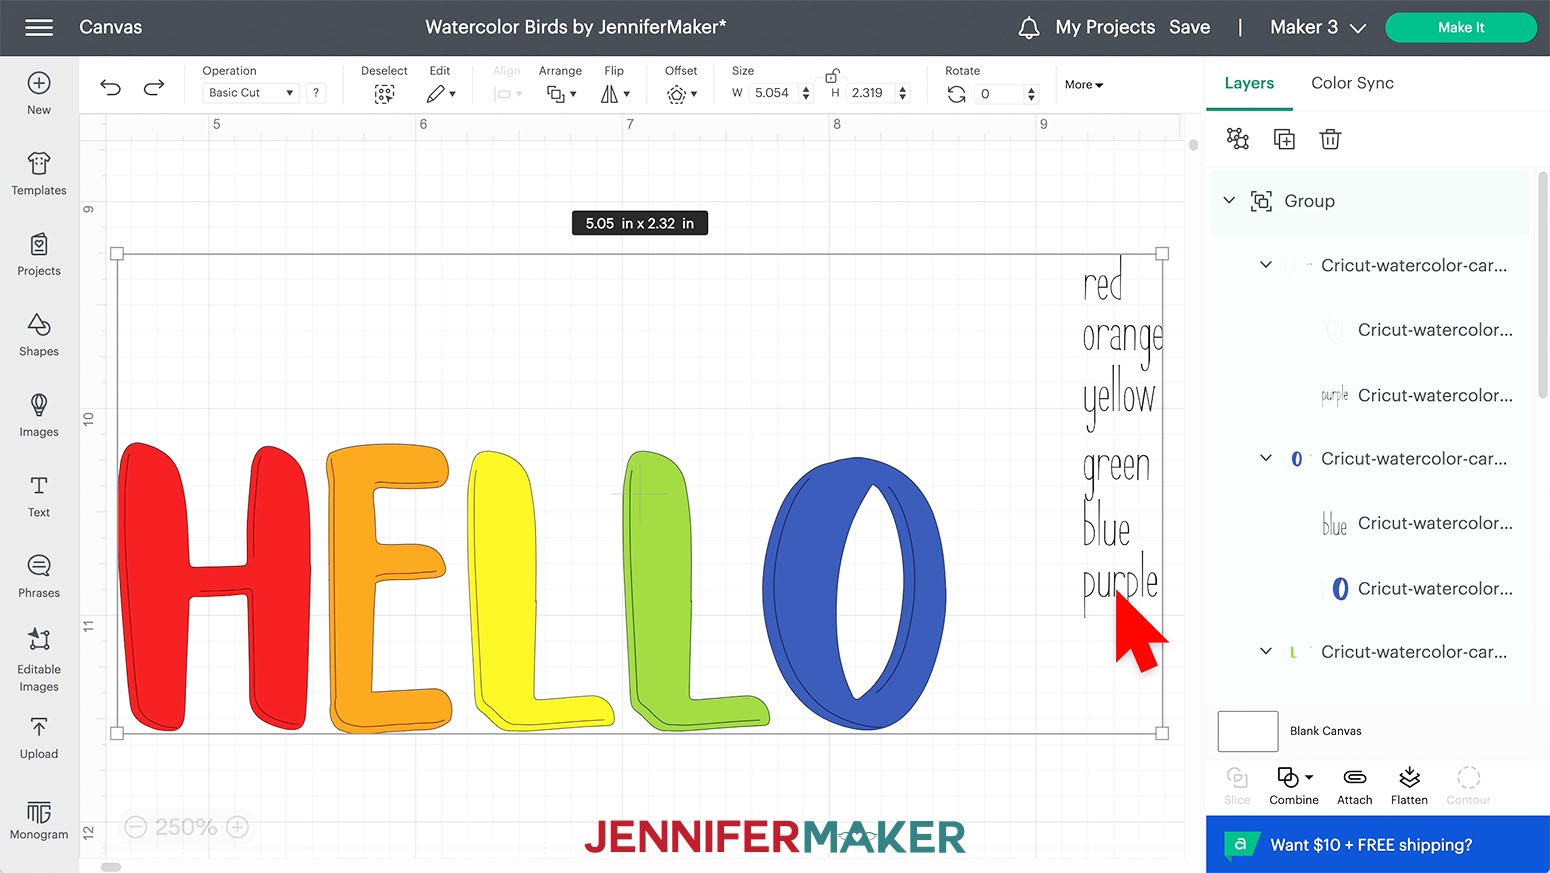
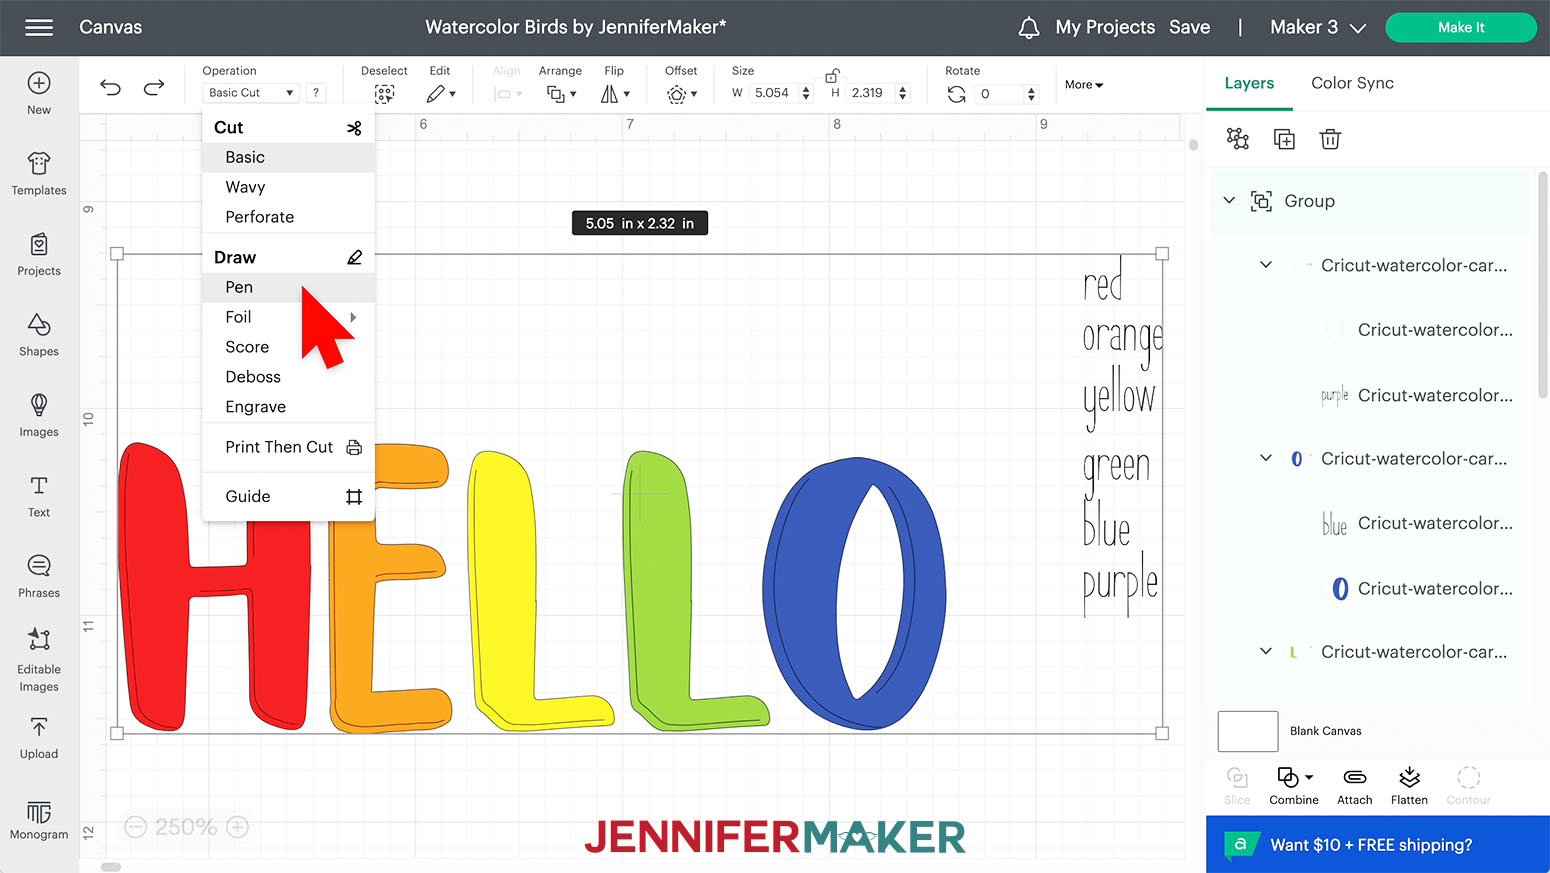
Select the image and under the "Operation" menu, select "Pen".
Next click "Ungroup" in the Layers Panel.
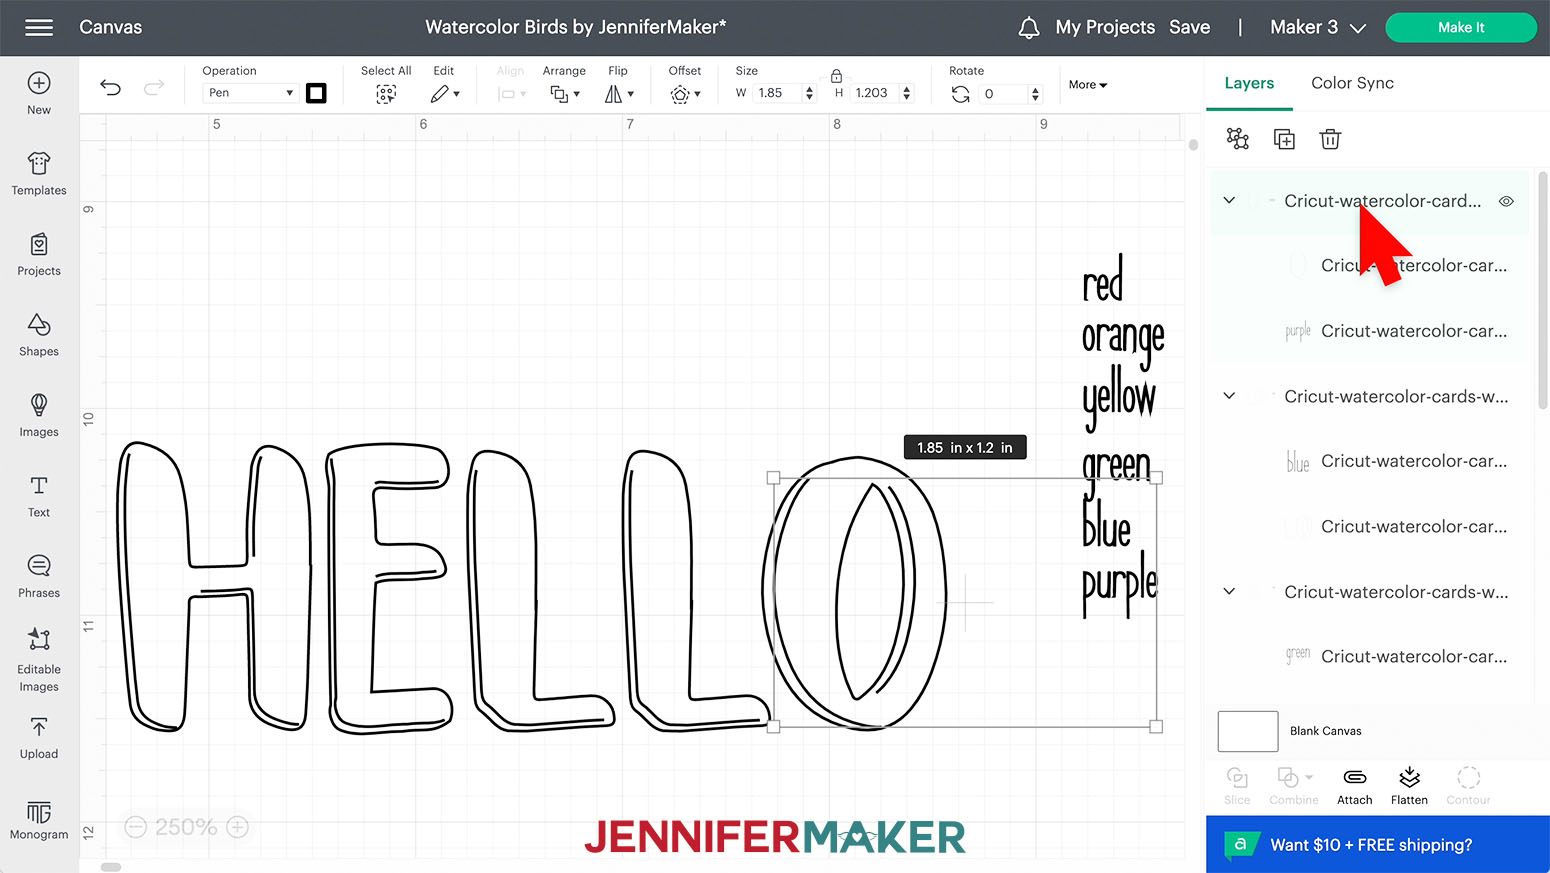
Select the first group in the Layers. You will see in this grouping that the color you need to select is purple.
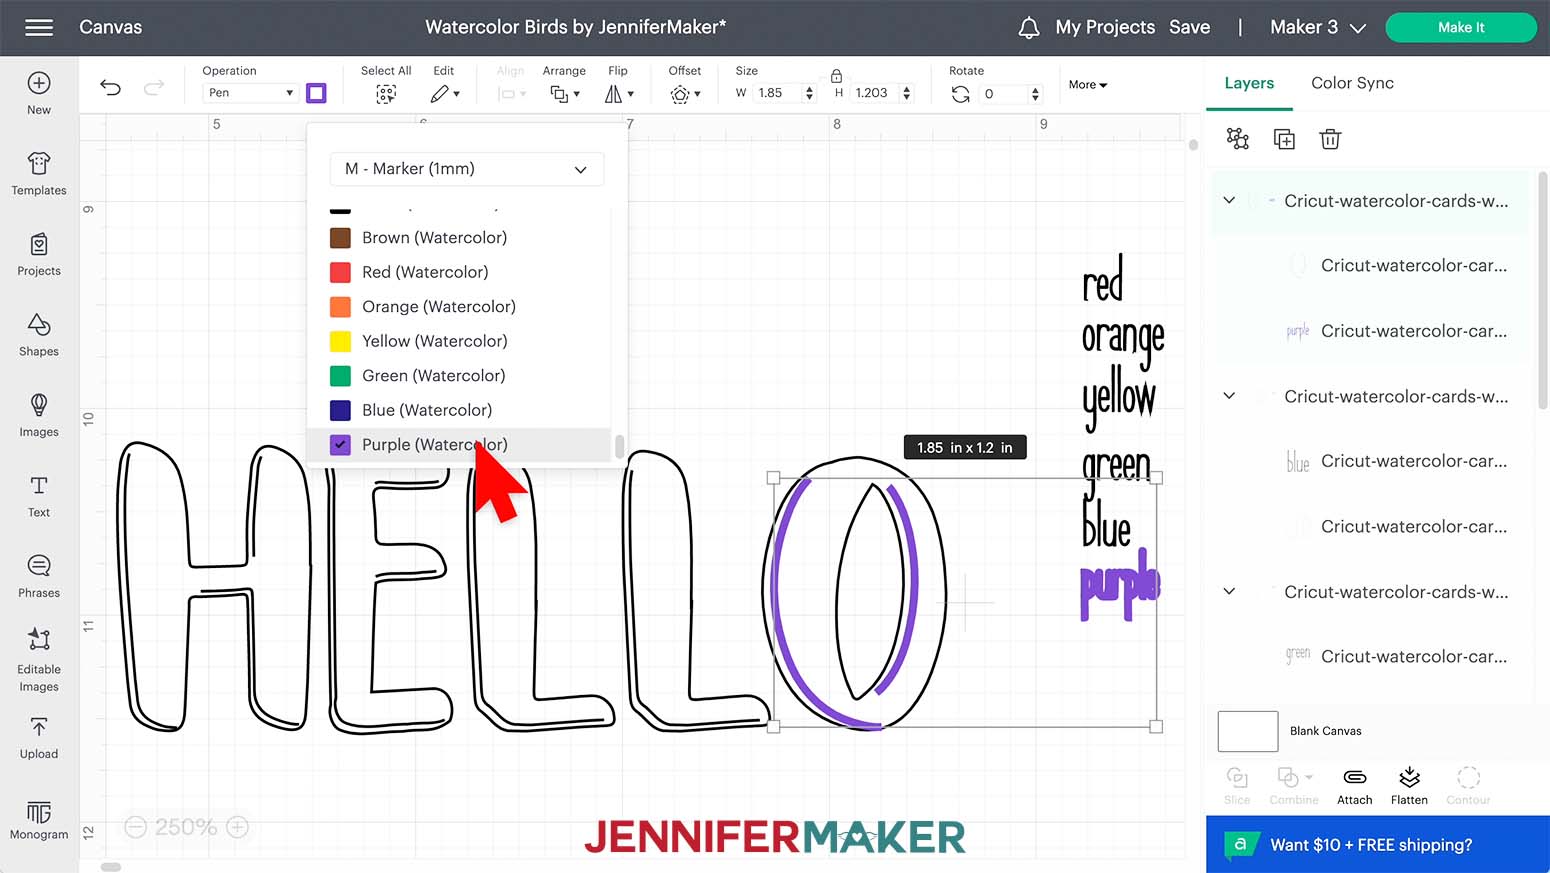
Click on the color box under the "Operation" menu. Select "M-Marker (1mm)" and then "Purple (Watercolor)"
Now that this color has been defined, delete the layer that shows the word "purple" in the Layers.
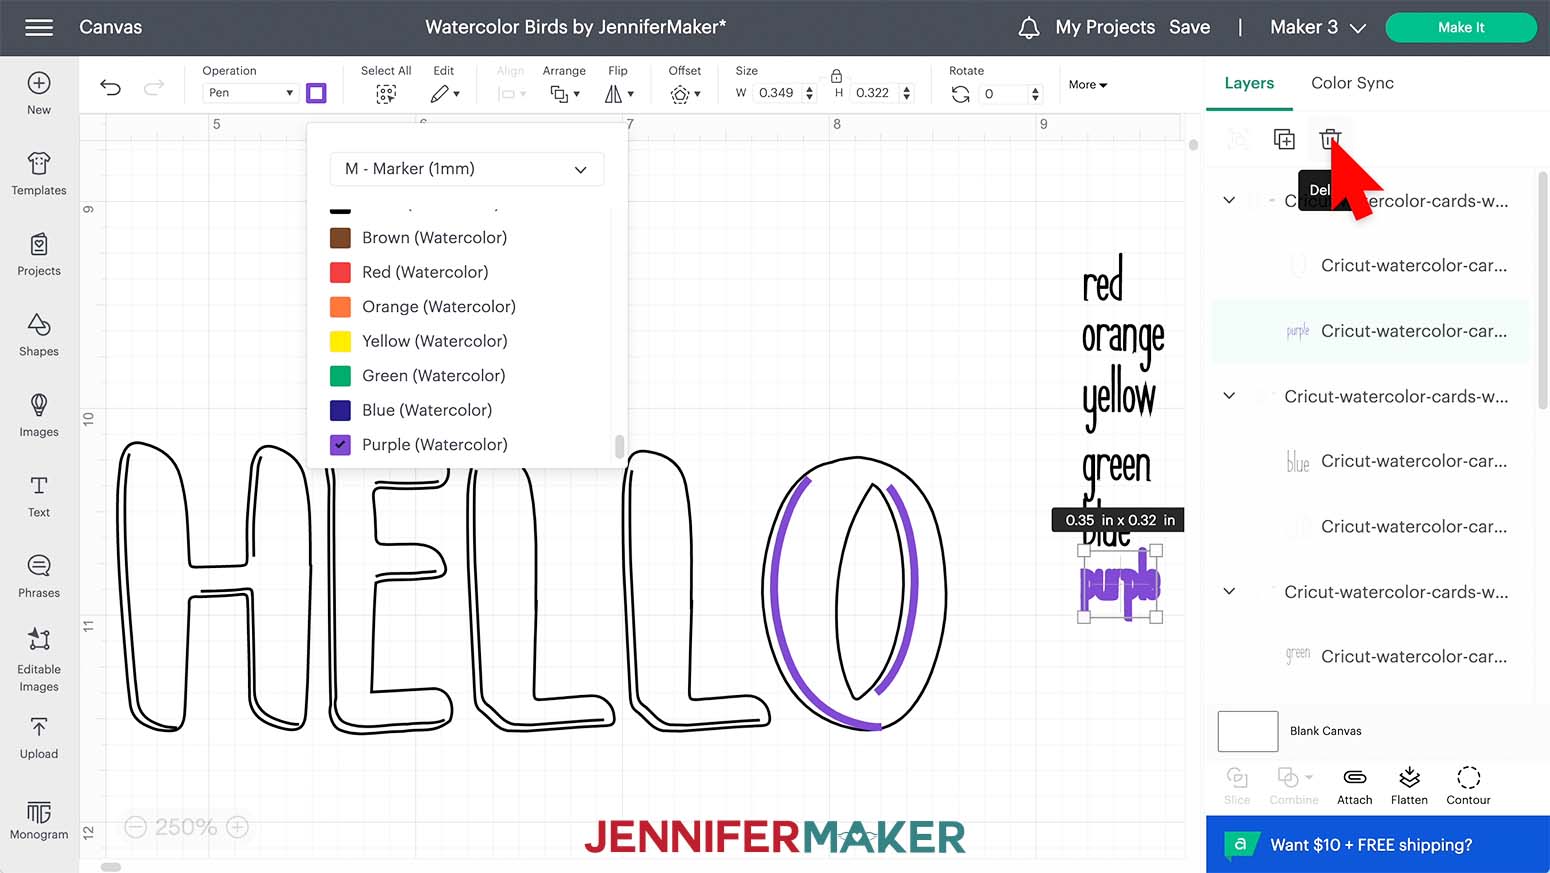
Repeat this for the rest of the groups in the Layers menu.
Your design should now look like this.

Select all the layers and click "Attach" found at the bottom right of your screen.
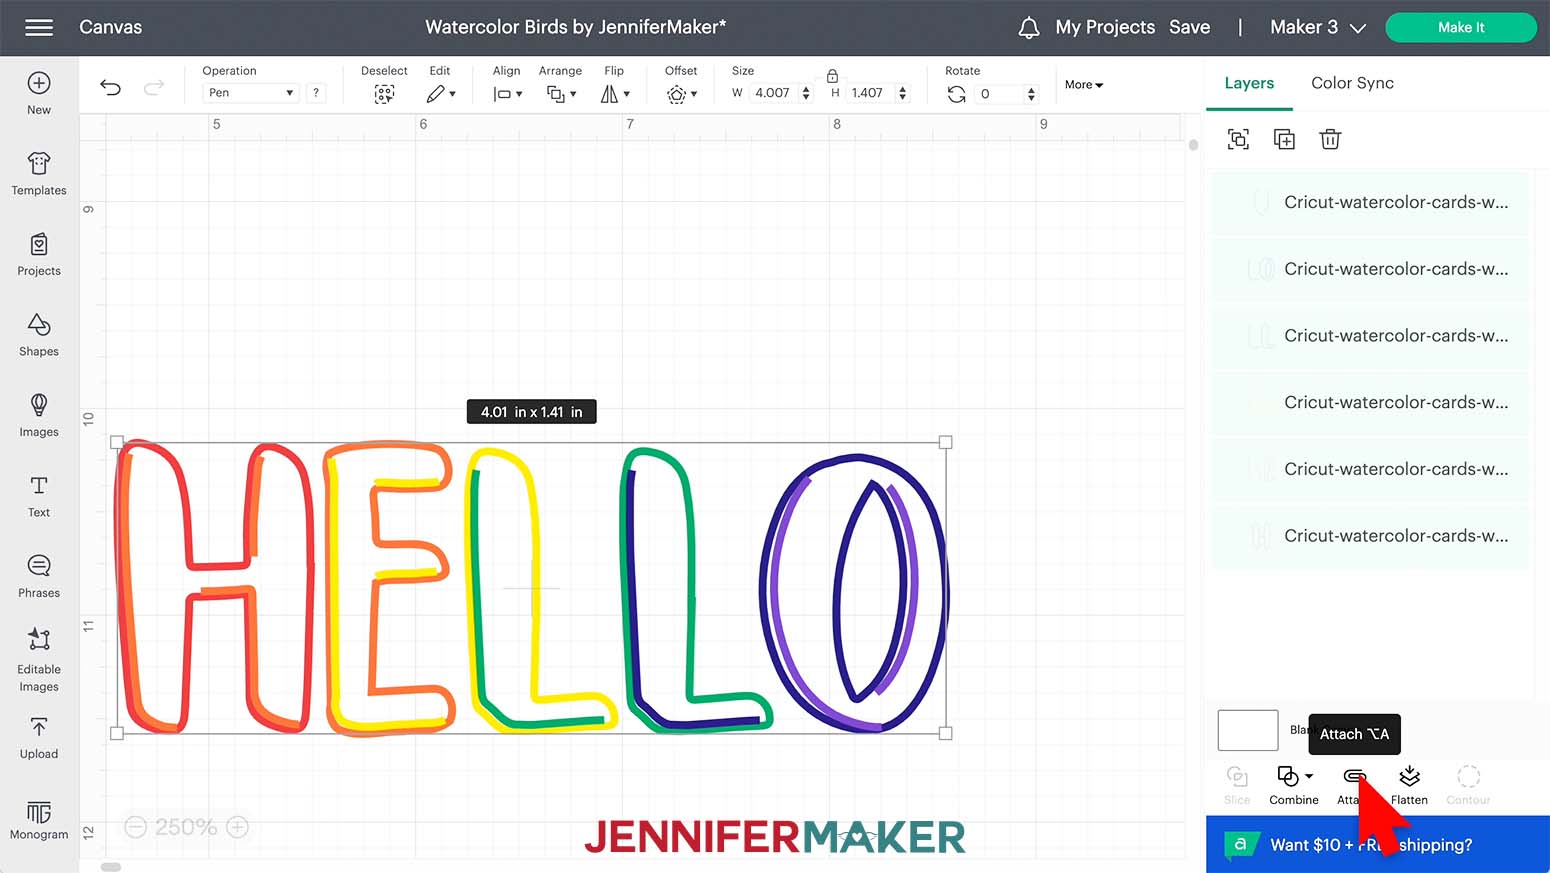
Make sure the correct machine is selected and then click "Make it".
If prompted, select "On Mat" and "12" x 12" in the pop up.
We're using smaller paper, but leave the Material Size at "12" x 12". We'll just place it strategically on the mat.
We'll use the Prepare screen to correctly place the watercolor card on a 12" x 12" Green StandardGrip Machine Mat. Since the design is wider than it is tall, we'll make the card in landscape orientation and add the colors to the front.
Open the card and hold it face up with the crease running horizontally and the front panel at the bottom.
To make lining things up easier, match the crease to a horizontal line on the mat and line up the left edge with a vertical mat guide. I place the crease at the 5" mark and the left edge at 1". That means the front panel is between 1" and 7.5" horizontally and 5" to 9.75" vertically. We'll need to remember that!
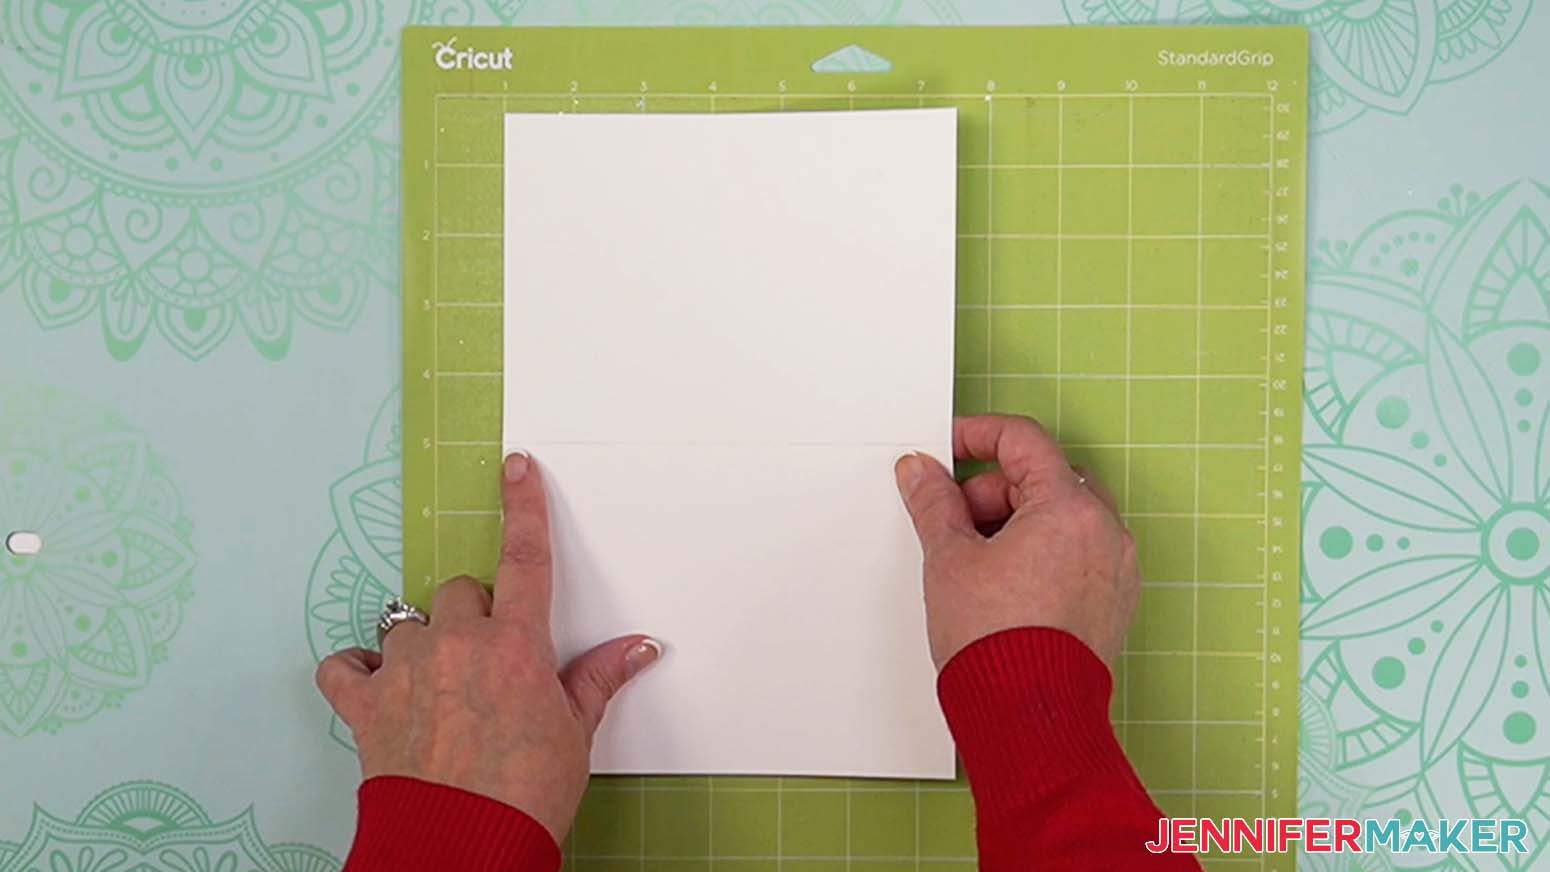
Press it down with the brayer.
Back in Design Space, click and drag the image to the mat area where you put your card's front. Roughly center it if you like in the card's horizontal area, just make sure it's below the horizontal 5” line but above 9.75" so it won't draw on the crease and will all be on the paper. Always double check your measurements and text placements.
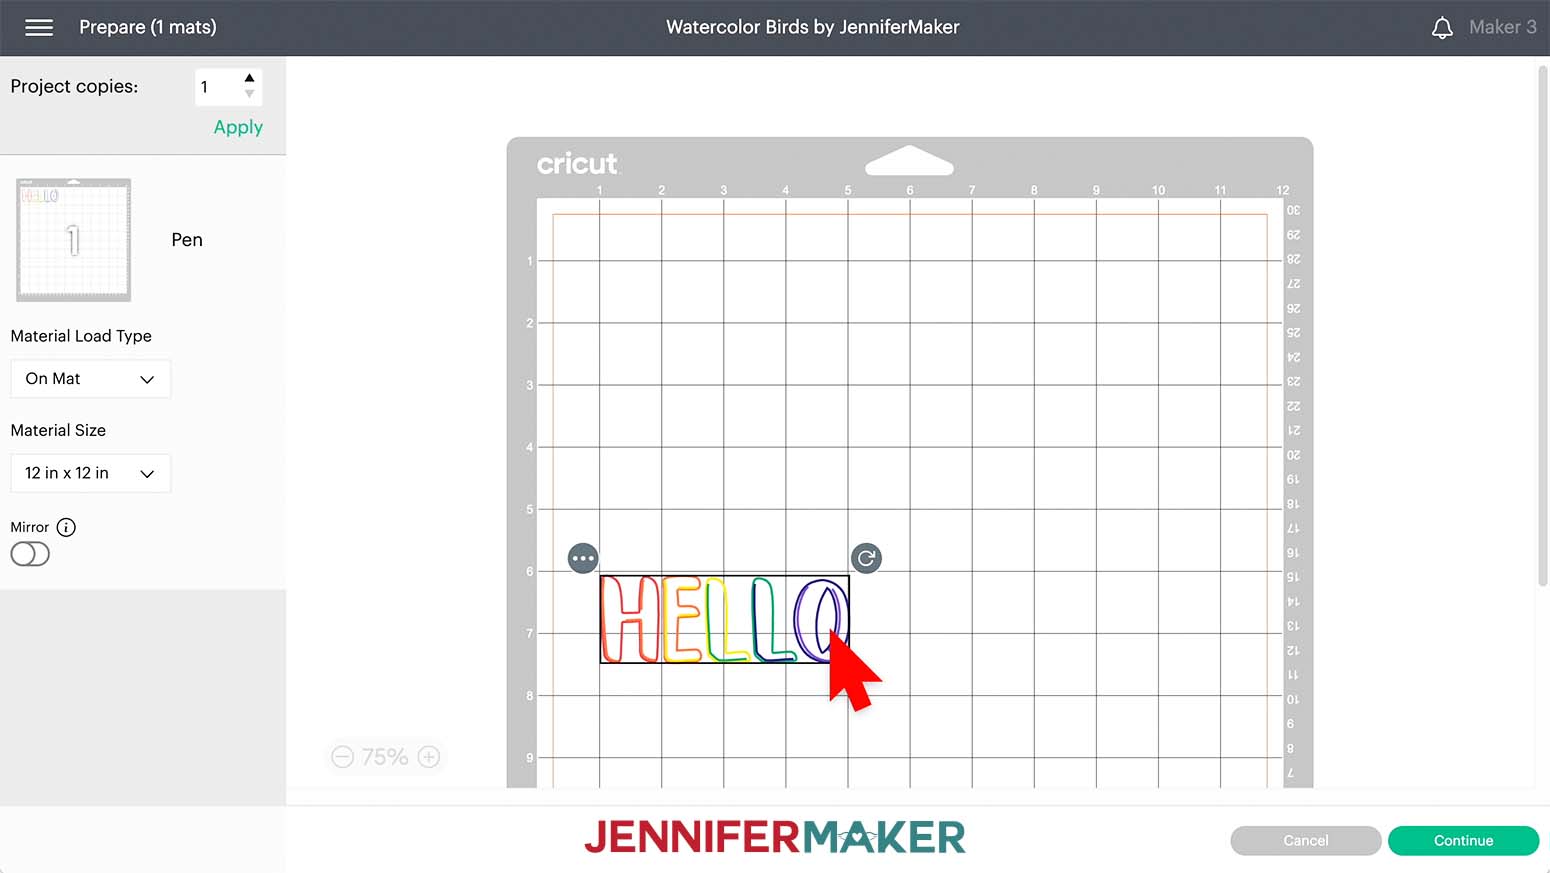
Click Continue.
Set your base material to "Heavy Watercolor Paper - 140lbs (300 gsm)".
Load the first watercolor marker into clamp A following the prompt on the screen.
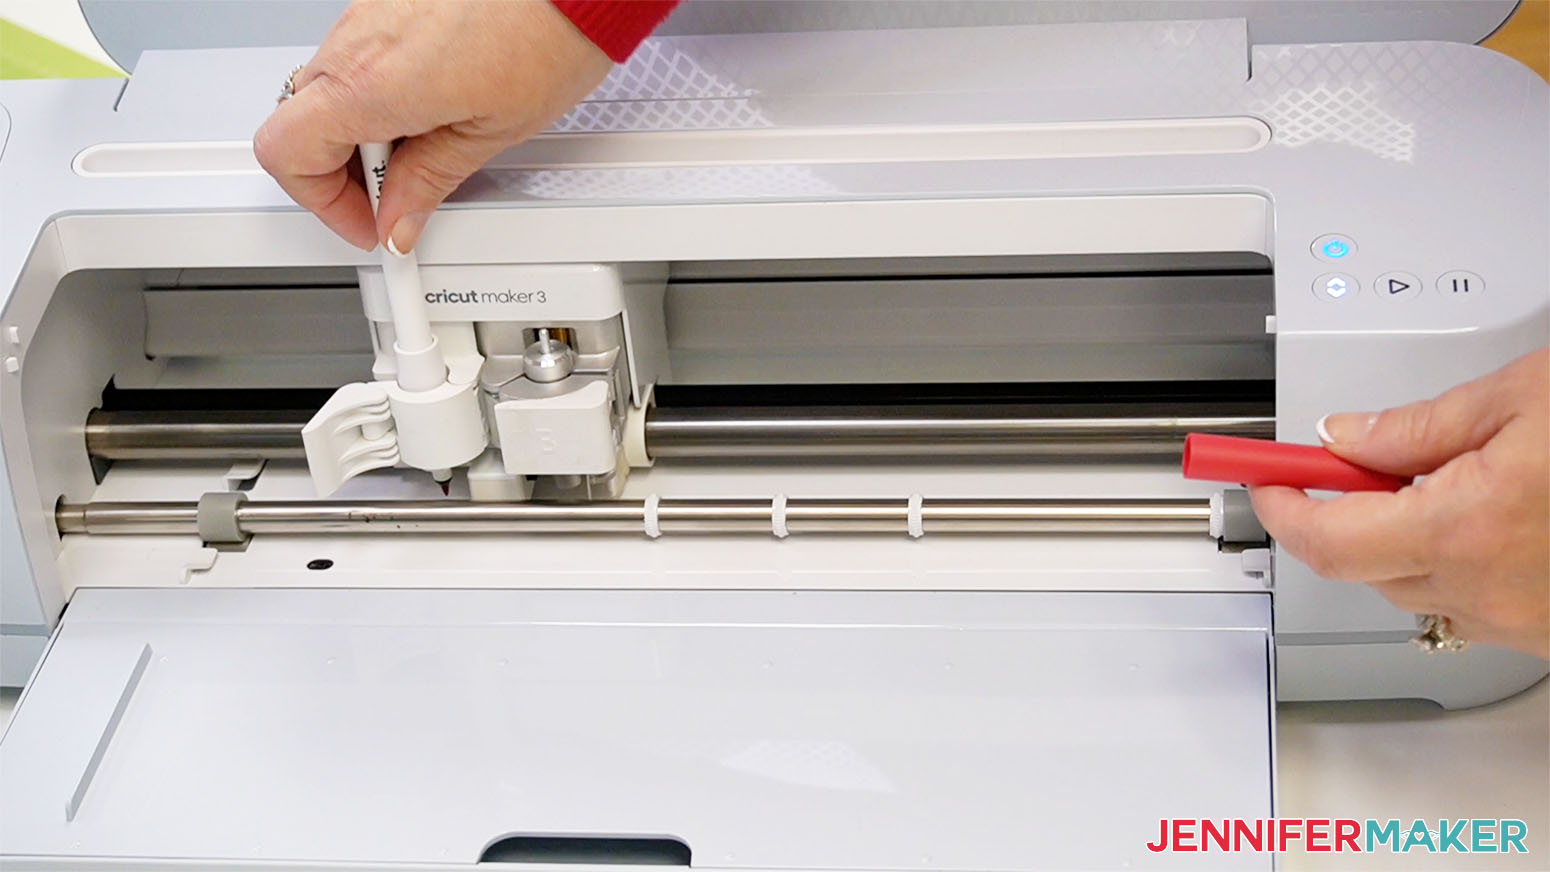
Load you mat, making sure the card orientation and placement matches the screen. Press the flashing button to begin drawing. The Cricut will pause and prompt you to swap the colors of the markers when it's ready.
When image is complete, unload the mat, flip it over, and roll it back to release the notecard without curling.
STEP 3: PAINT YOUR DESIGN
Now it's time to paint! This may seem daunting, but it's not. No two watercolor paintings will look the same, even when a Cricut is involved!
First let's prepare your brushes. While the brush included with your watercolor markers works for all of these designs, you may find it easier to use a smaller brush tip for some. Remove the brush cap. Unscrew the brush tip from the water chamber.
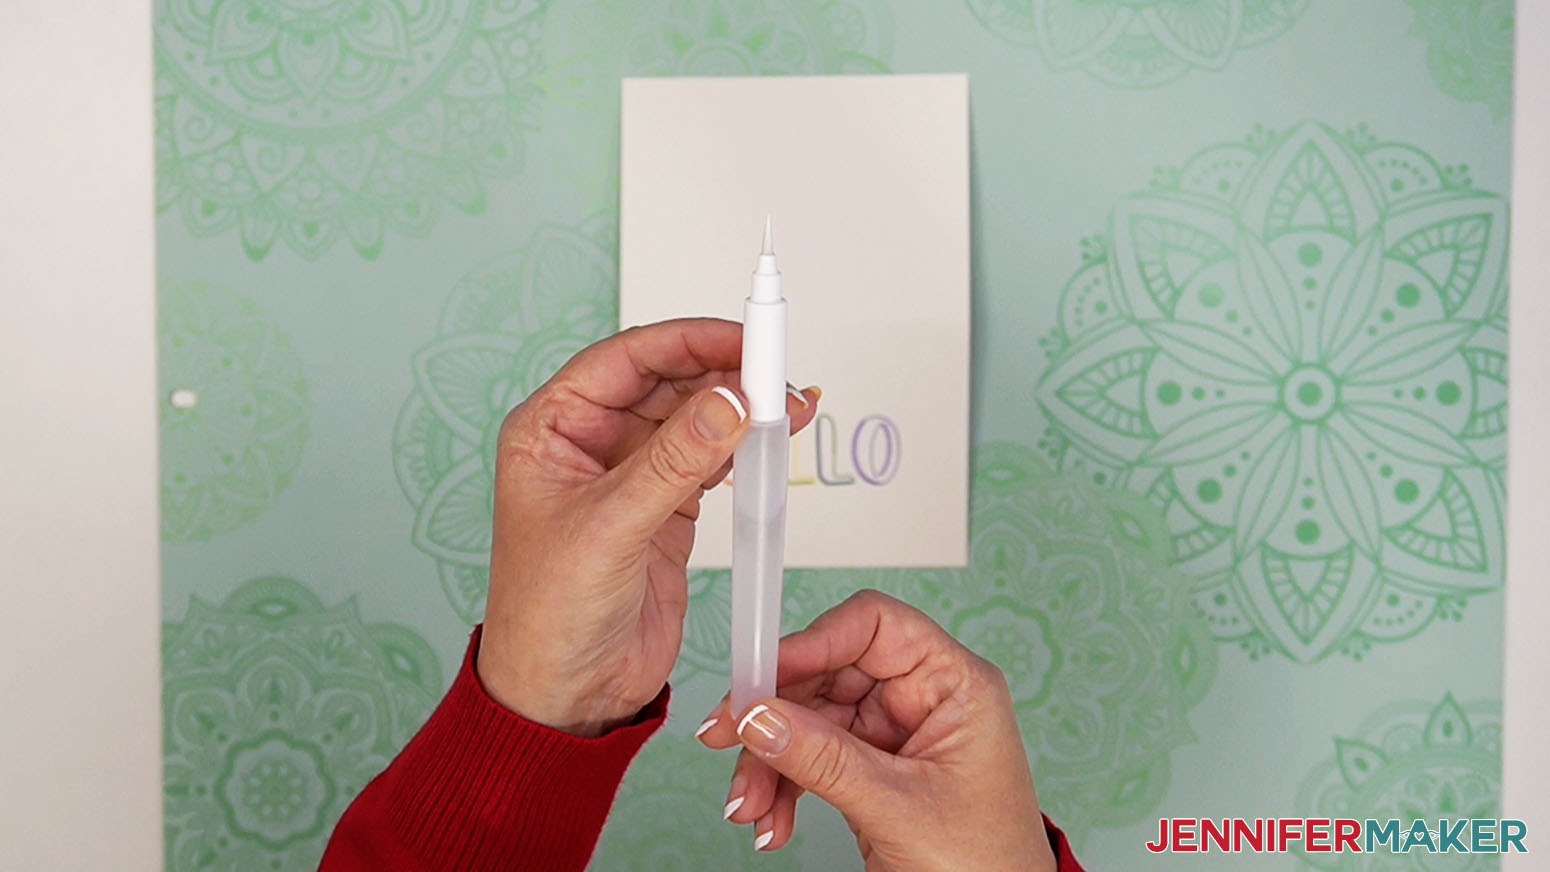
Fill the chamber with water, leaving about a thumb's width unfilled, and put the brush tip back on.
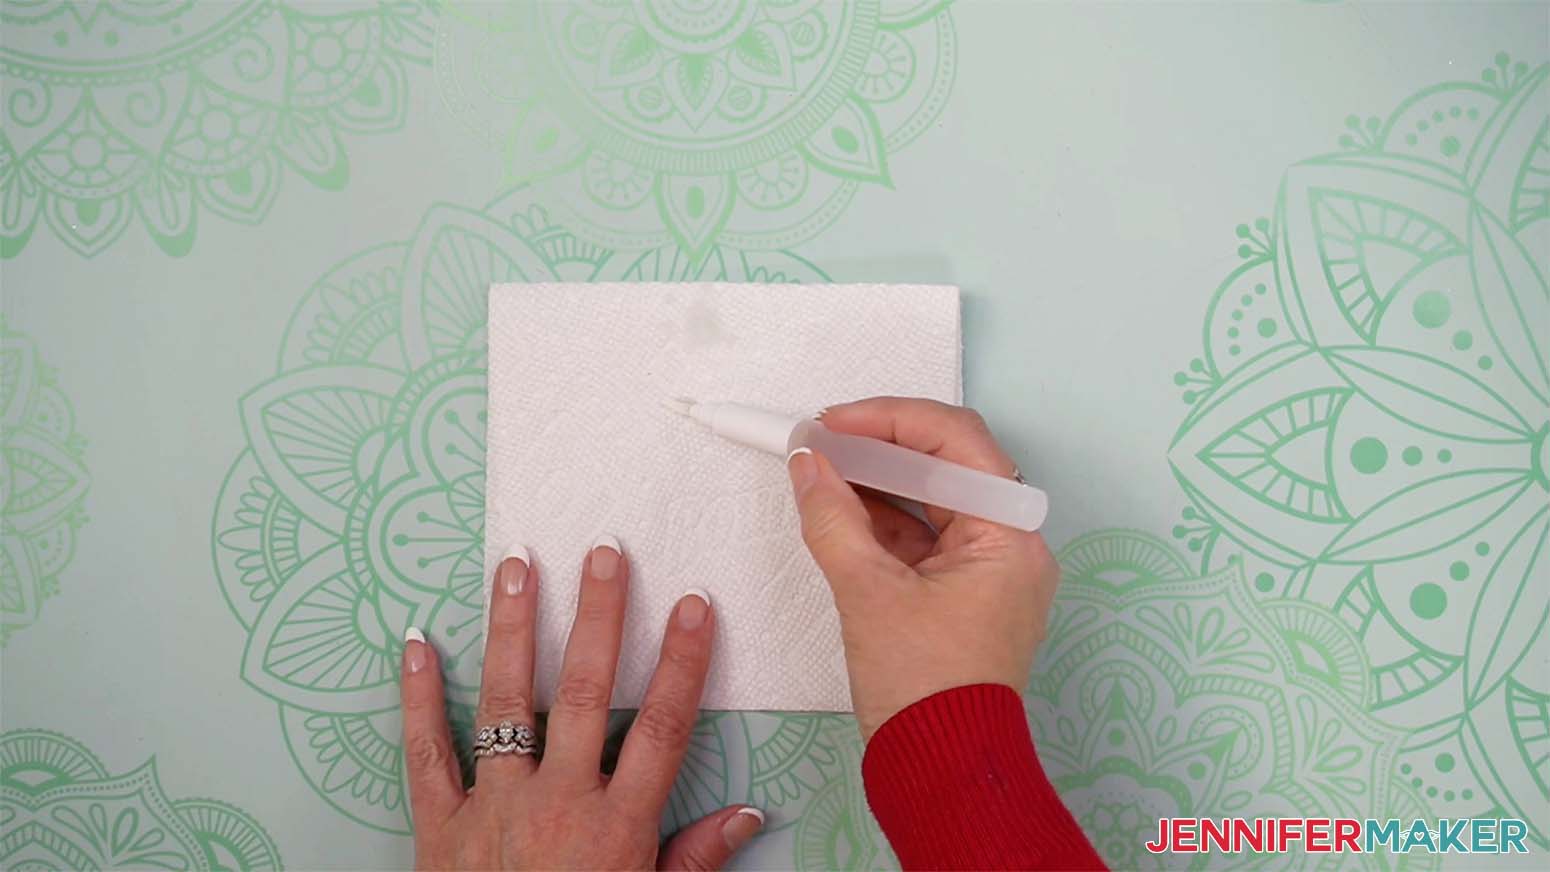
Hold the brush over a paper towel and gently squeeze the water chamber until water starts coming through to the bristles. If this is the first time you are using the brush, it may take a couple of squeezes.
You want your brush to be wet, but not dripping with water. Blot the brush on the paper towel to remove excess water.
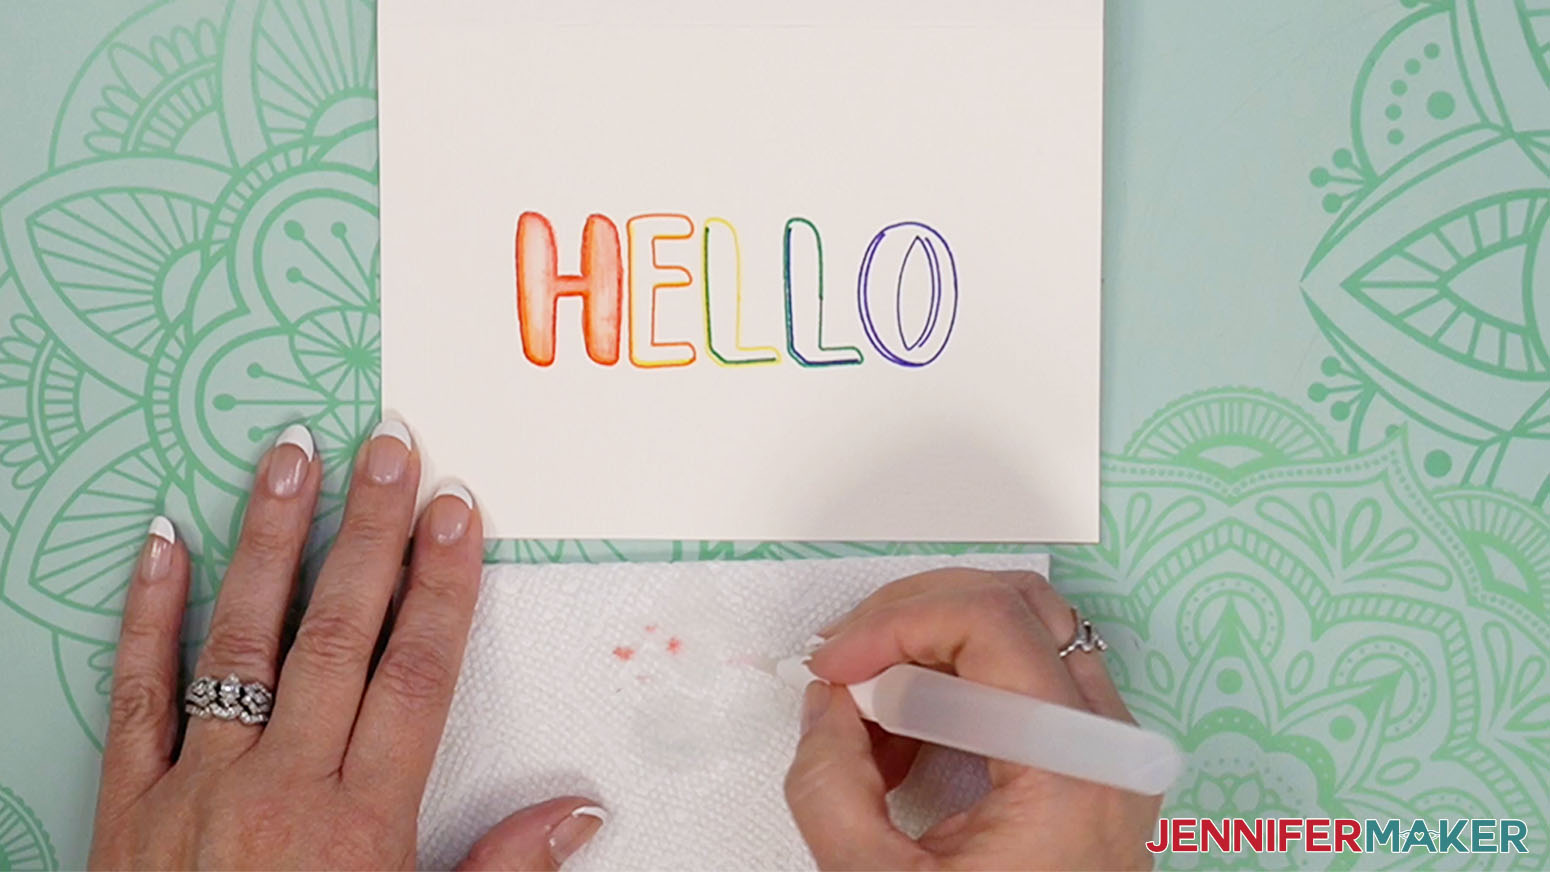
With a damp brush, drag it along the inside of the line on the letter H. Coax the red and orange colors away from the drawn lines and into the center of the letter.
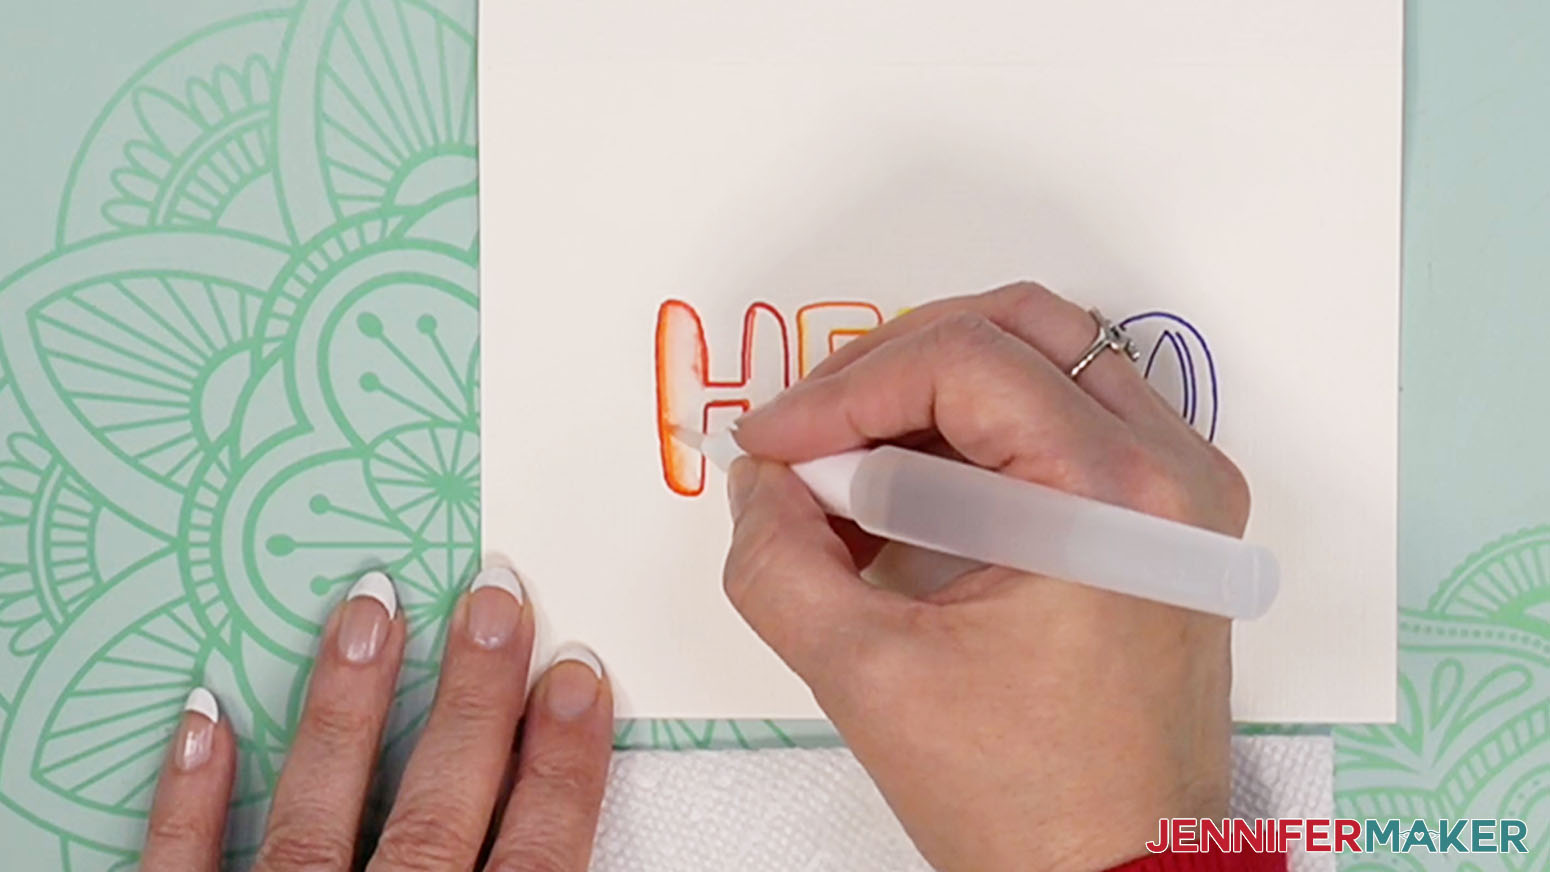
Continue to brush along the inside lines of the H. If your brush seems dry, gently squeeze it to draw more water to the tip.
TIP: When refreshing your brush with water, test the wetness on a paper towel to make sure your don't have too much water on it.
When you have completed the first letter, clean your brush by squeezing and blotting on a paper towel until no color shows. It's important when changing colors to clean your brush so that you don't transfer unwanted colors into other areas of your painting.
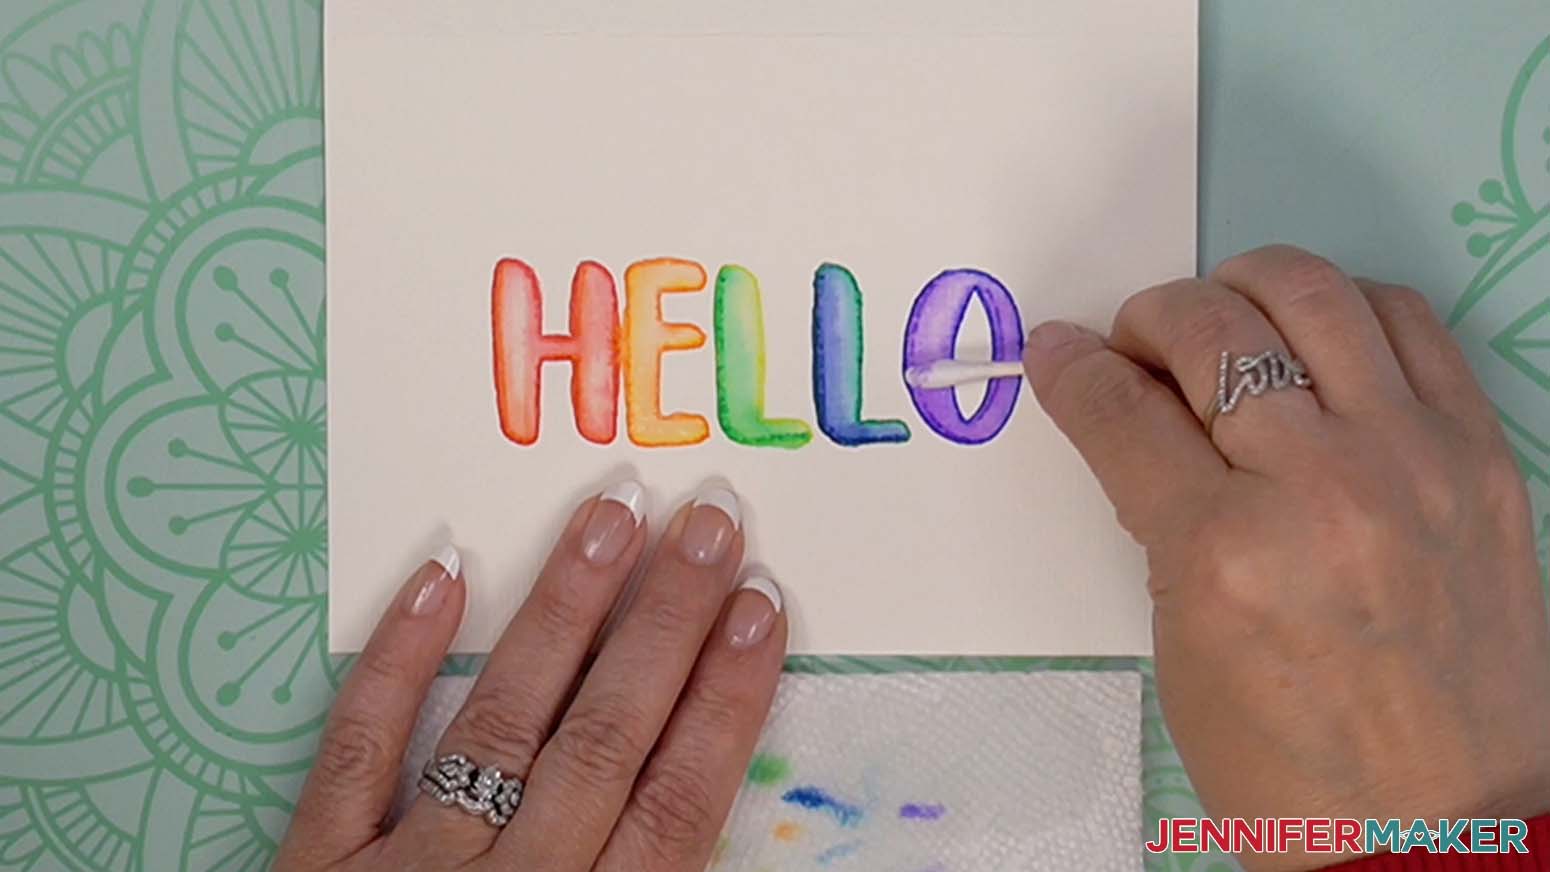
Continue the same method with the other letters. Feel free to experiment with different amounts of water on your brush.
You can lighten dark areas by applying a clean, dry cotton swab to an area of paint. When the swab touches this part of the painting, it will lift some of the colored water off of the paper. You can continue lifting color off until you are satisfied.
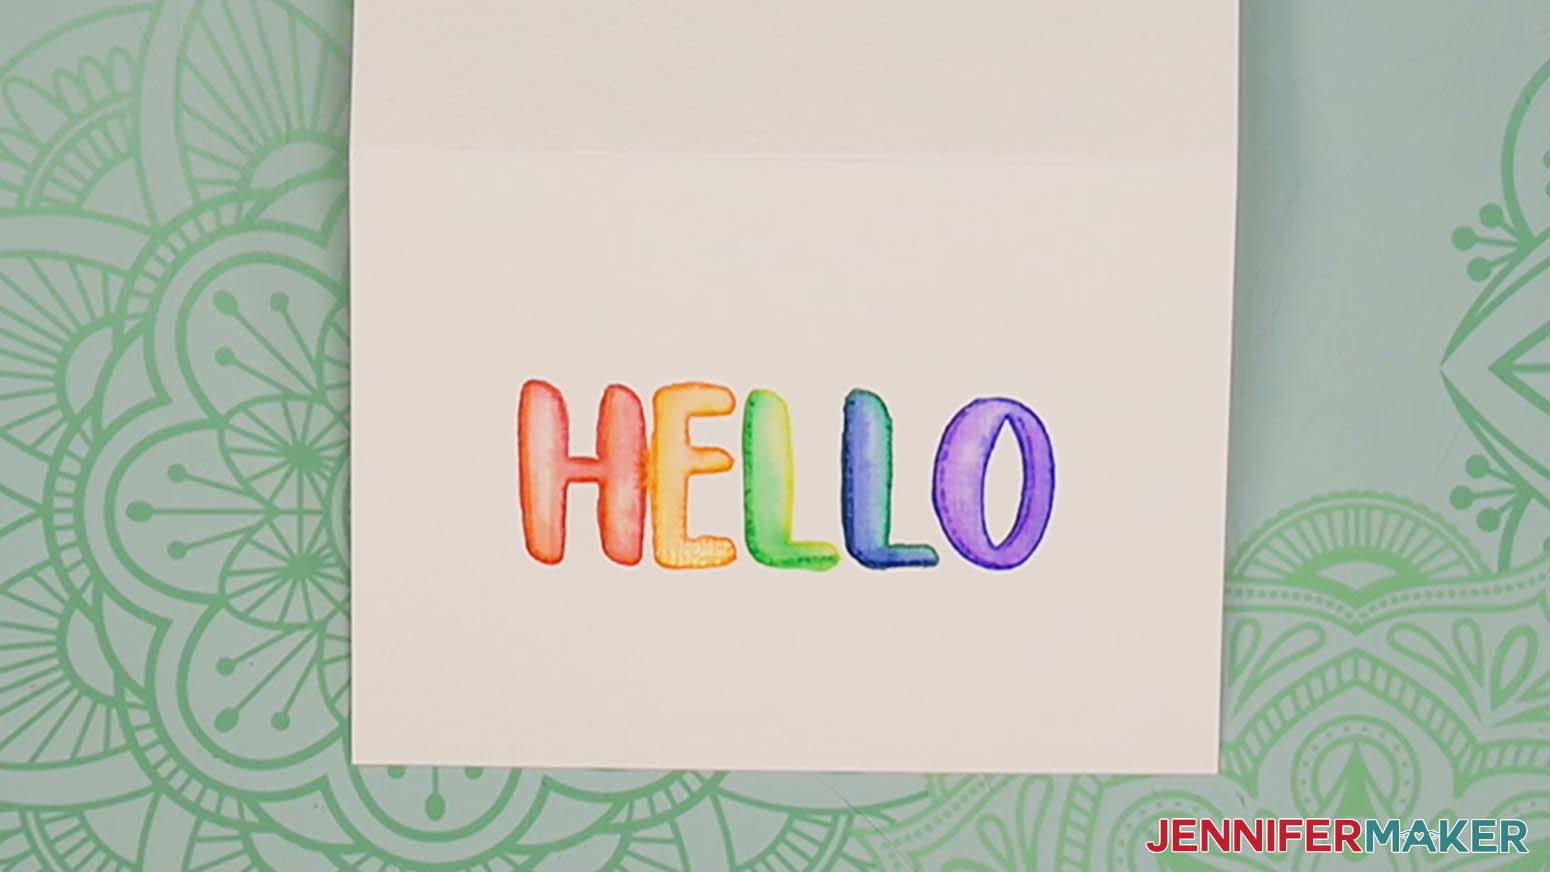
Let the painting dry for about 30 minutes to an hour. It should be dry to the touch. This is what my warm up card looks like when finished.
The animal images work just the same as the warm up image. They look much more complex, but I promise they use the same techniques!
If you want to experiment with blending and saturating or lightening colors before tackling an animal, draw more copies of the Hello design to practice on. Line them up in chronological order and you'll see how your technique changes! Watercolor is fun because it's controlled uncertainty. You can place paint and water in the same exact way and never get the same results, and that's totally ok!
I will show you the steps on how I painted each of the animals. I drew them on the 5.8" x 8.3" watercolor paper to make framable artwork.
CARDINAL
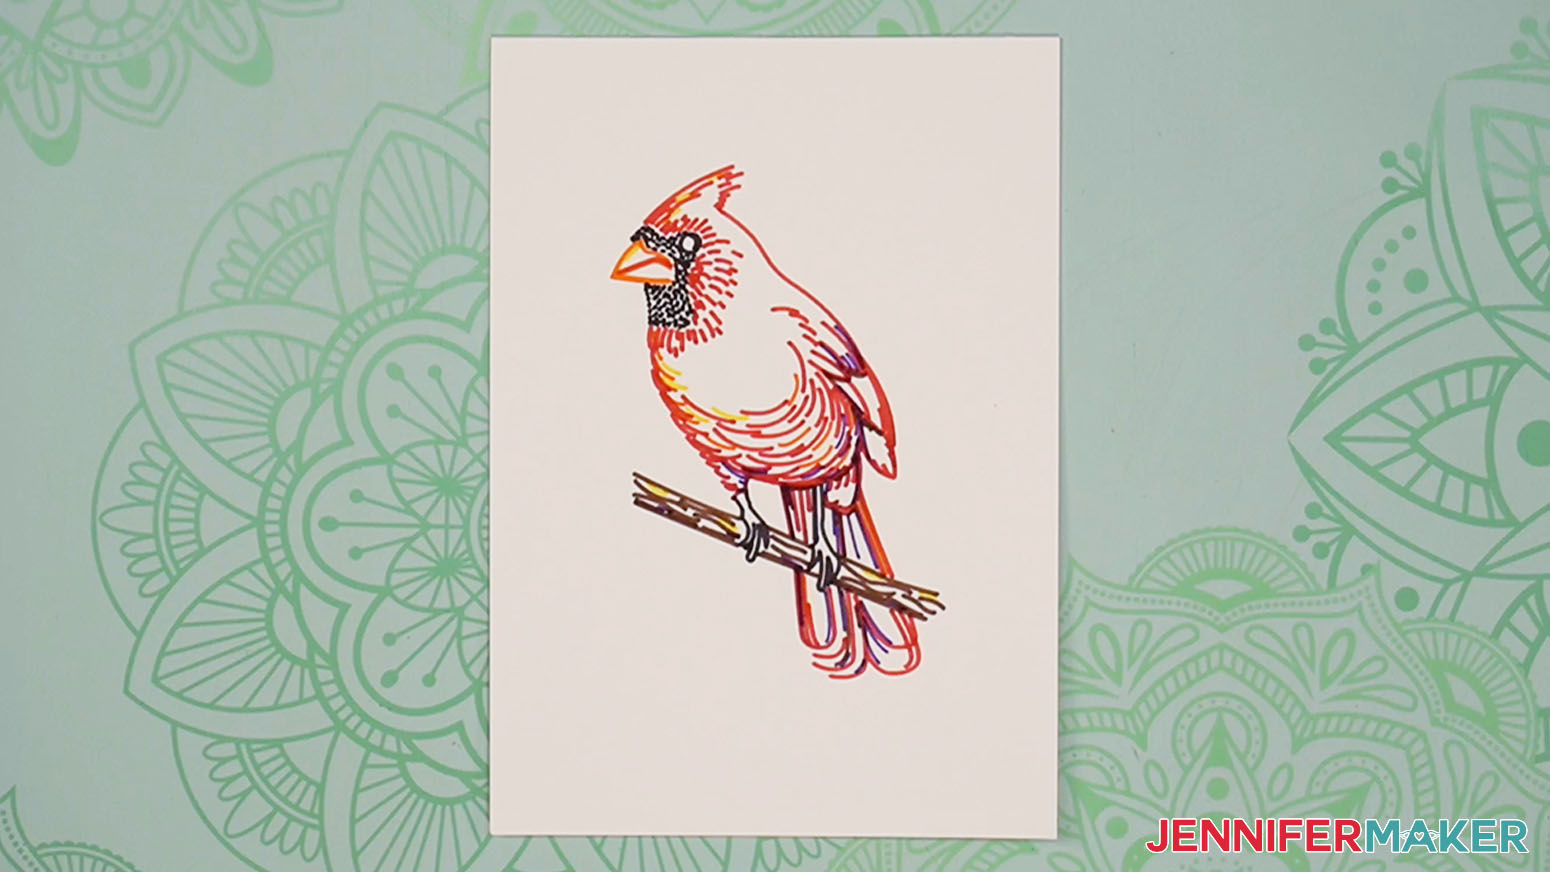
This is what the cardinal looks like right after it's drawn.
With a damp brush, start with the black area around the eye. Outline the area by connecting the outside marks like a dot-to-dot pattern. Try not to get the black on any of the other colored lines. Don't drag the black all the way inside the eye. Leaving a bit of white creates a highlight!
[image 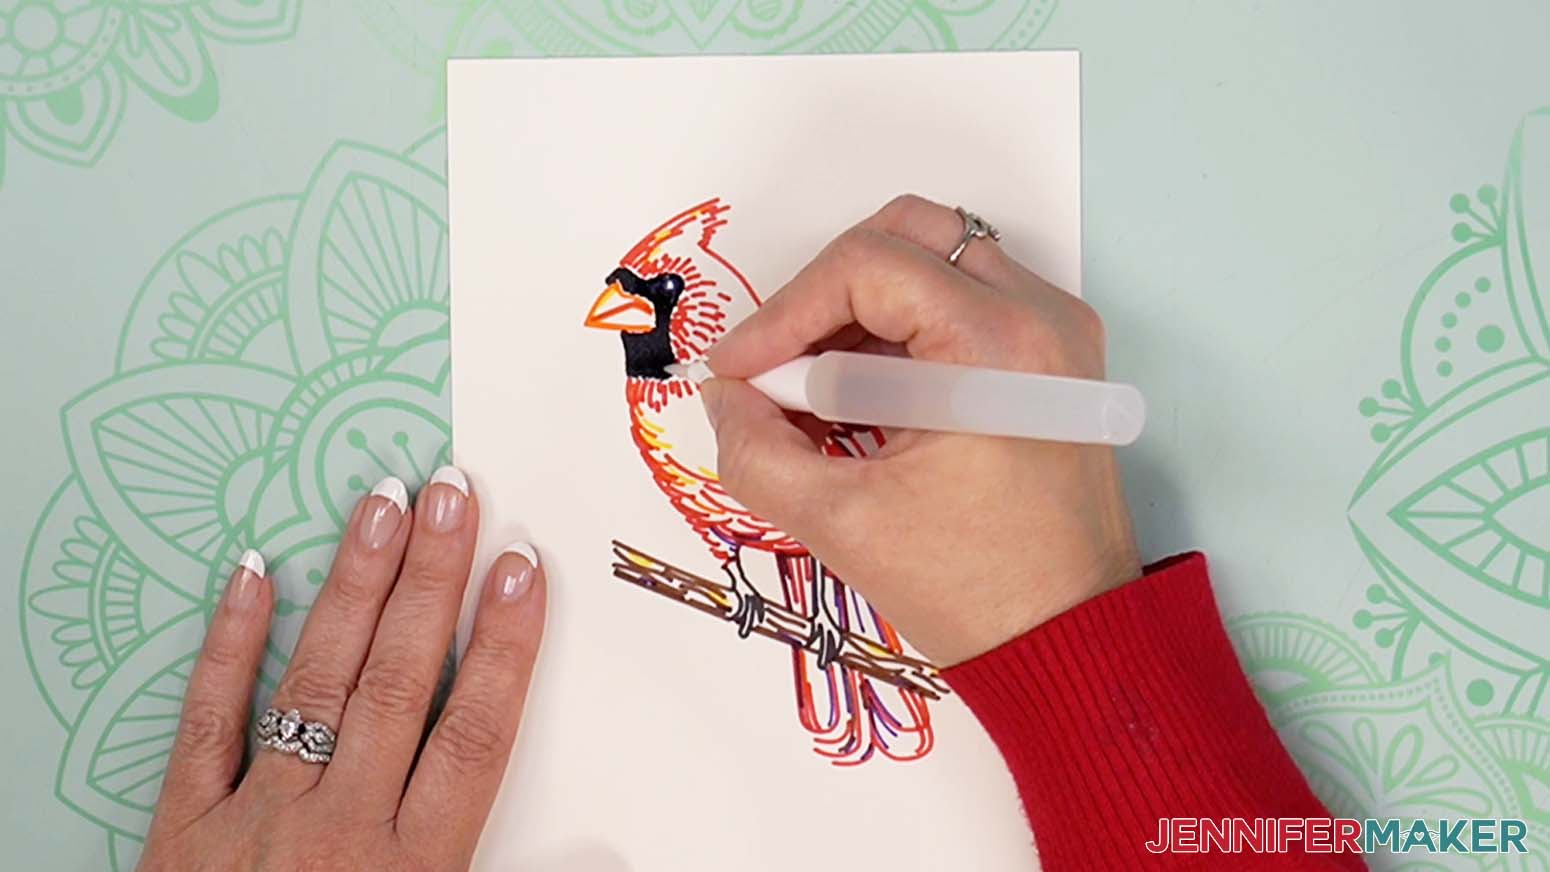
Next, fill in the black around the claws with a brush that is more dry than wet.
Clean your brush and start blending the colors on the branch with a damp brush. Try not to touch the black from the claws to avoid bleeding. If you end up with a little bit of white space, you can go back in and touch it up when it has dried. Watercolor is fun that way!
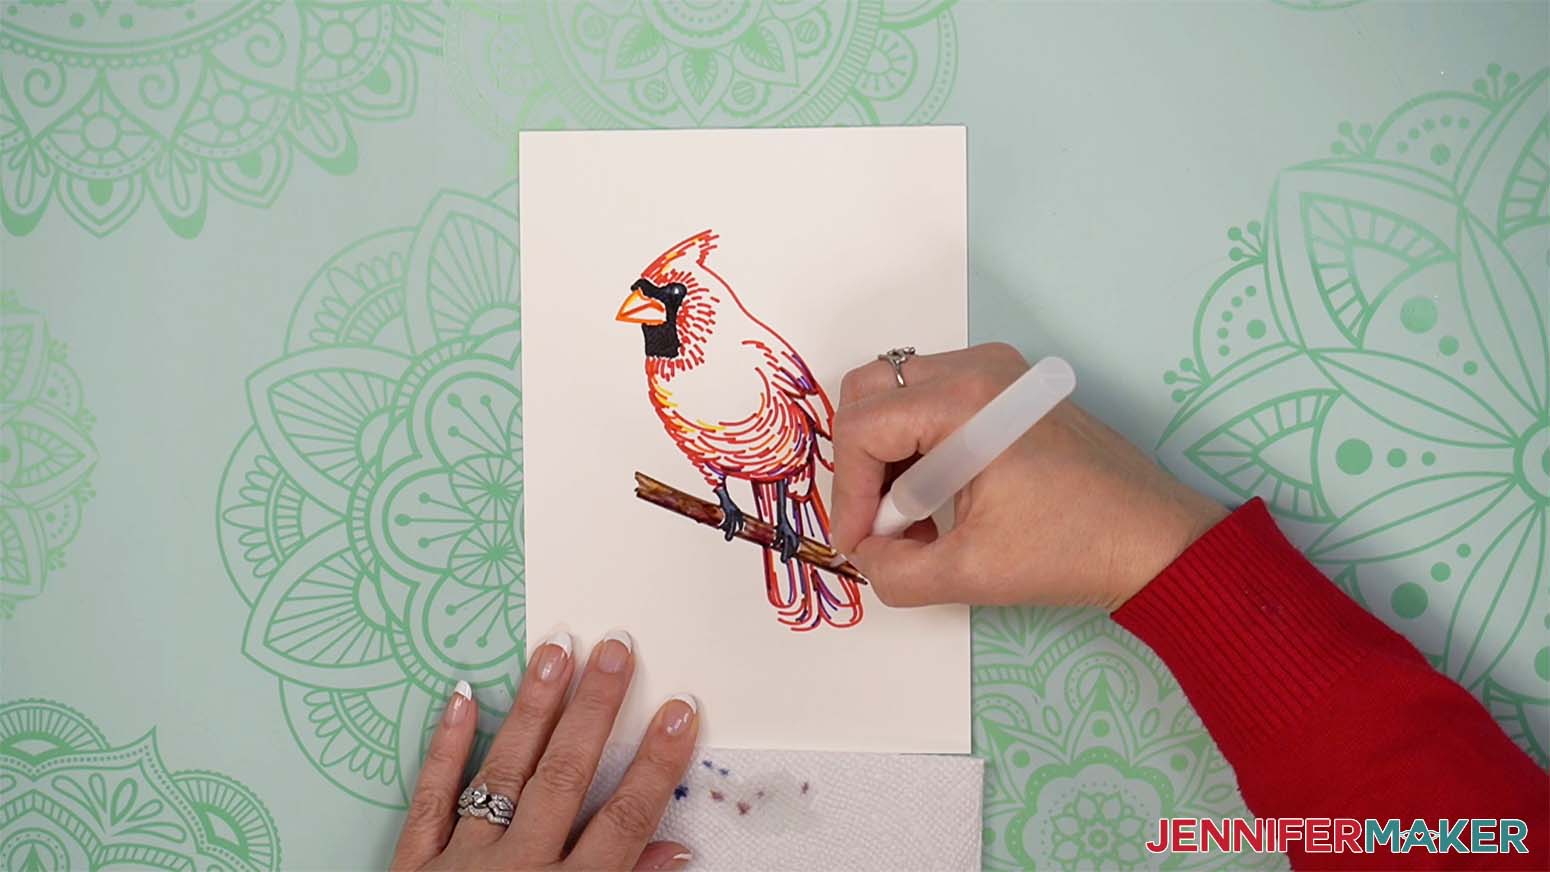
Make sure your brush is clean and blend the beak colors, making sure not to touch the black lines. Leave some white space in between them if possible.
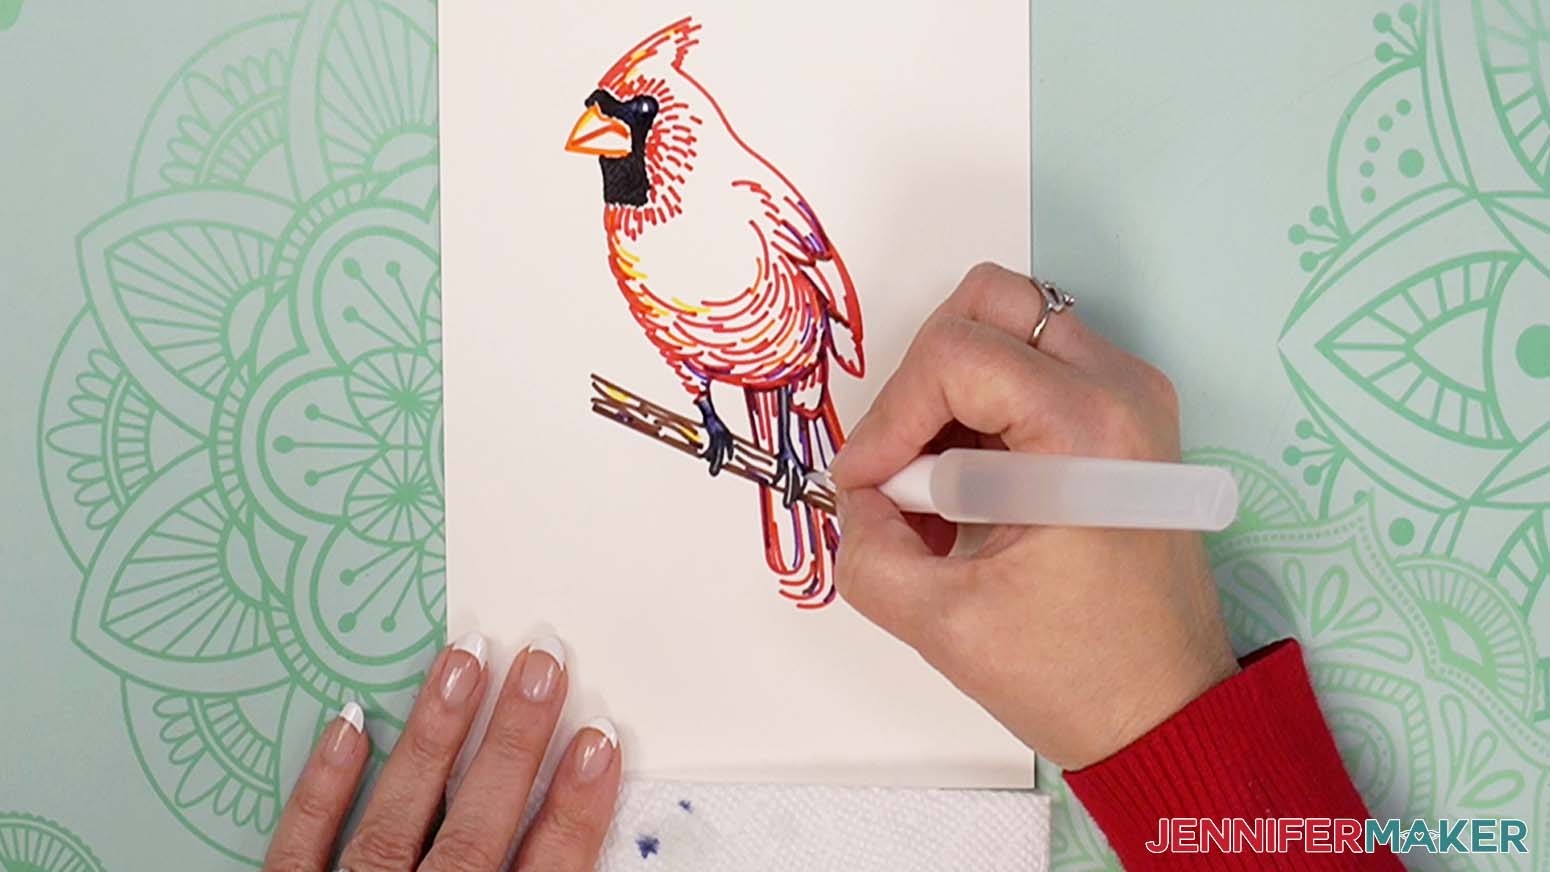
Now we are going to paint the main part of the body. Your brush can be more on the wet side but not dripping with water. Starting at the head near the eye, pull the colors toward the top of the head. You can also add small strokes to show more feathers at the crown of the head.
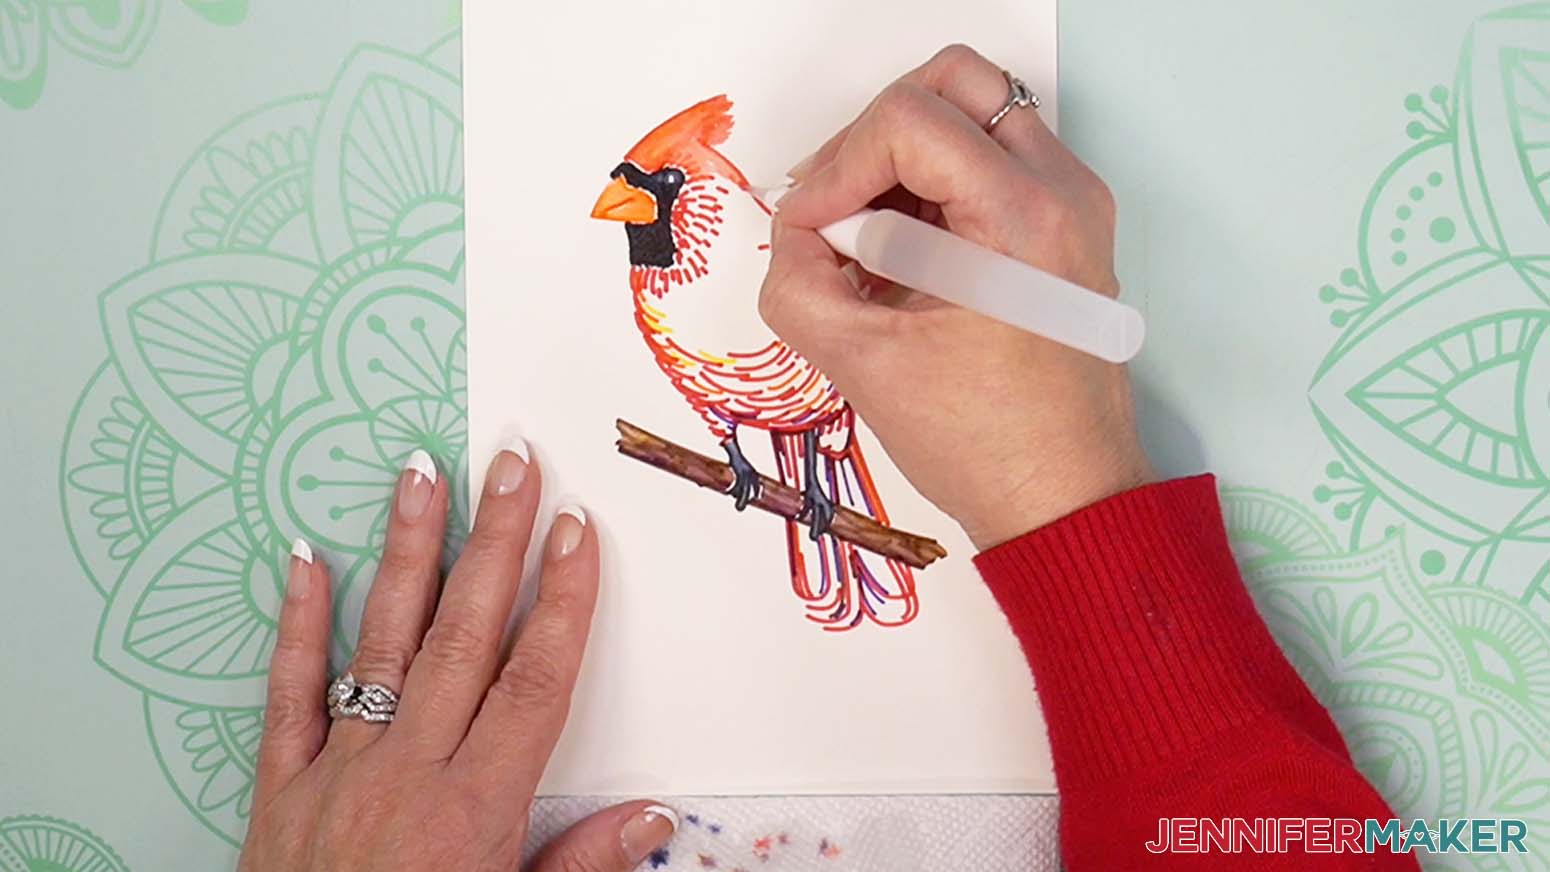
Continue with the rest of the body by saturating the paint lines and drawing the colors away to the center of the body.
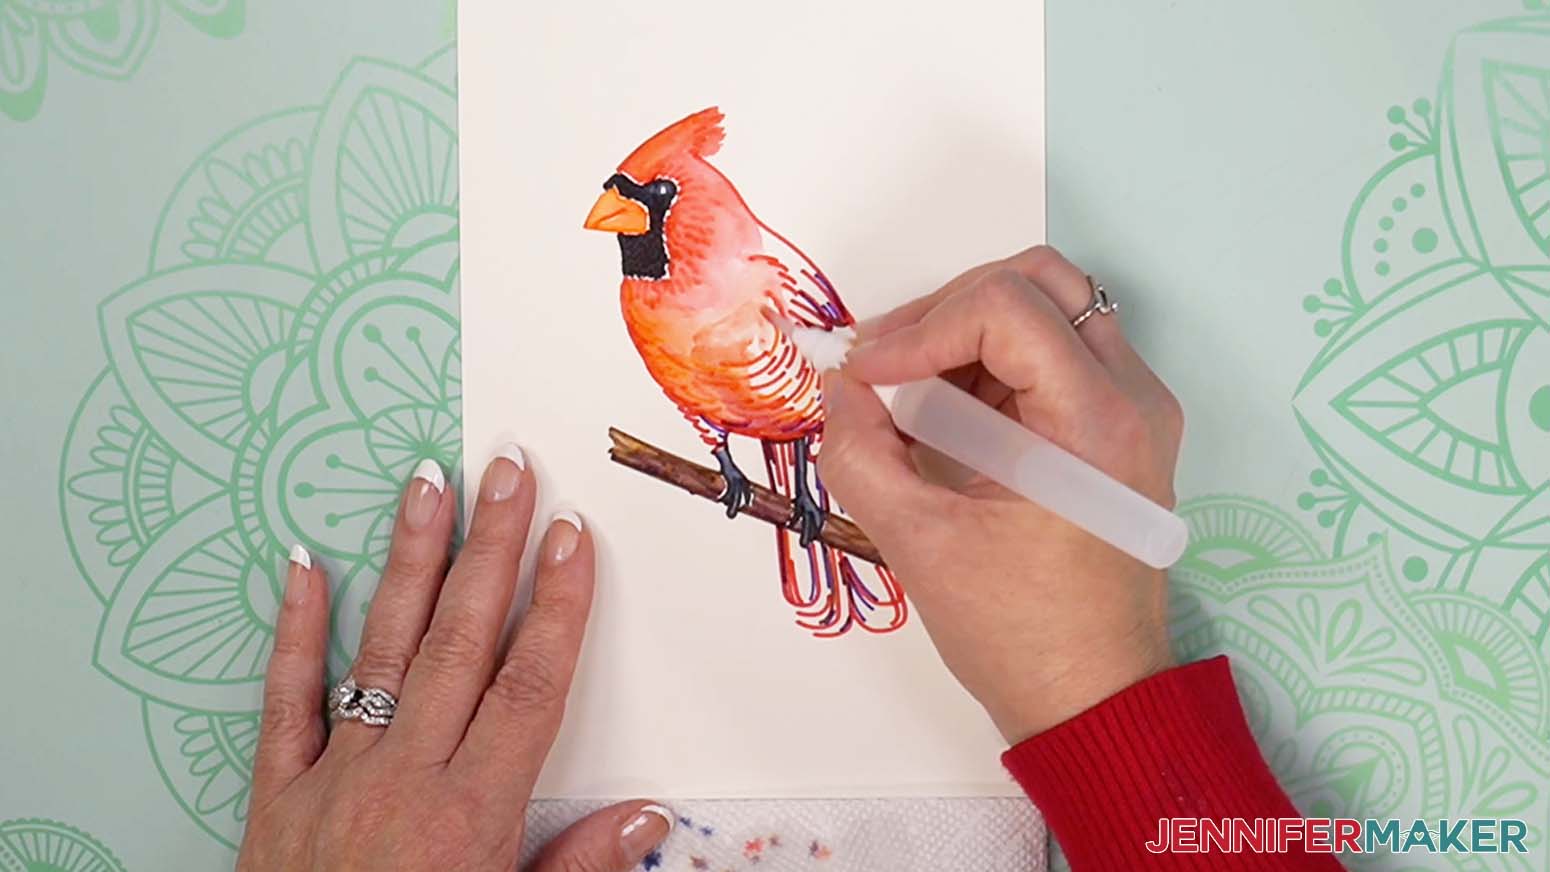
Work on the outer wings and legs the same way.
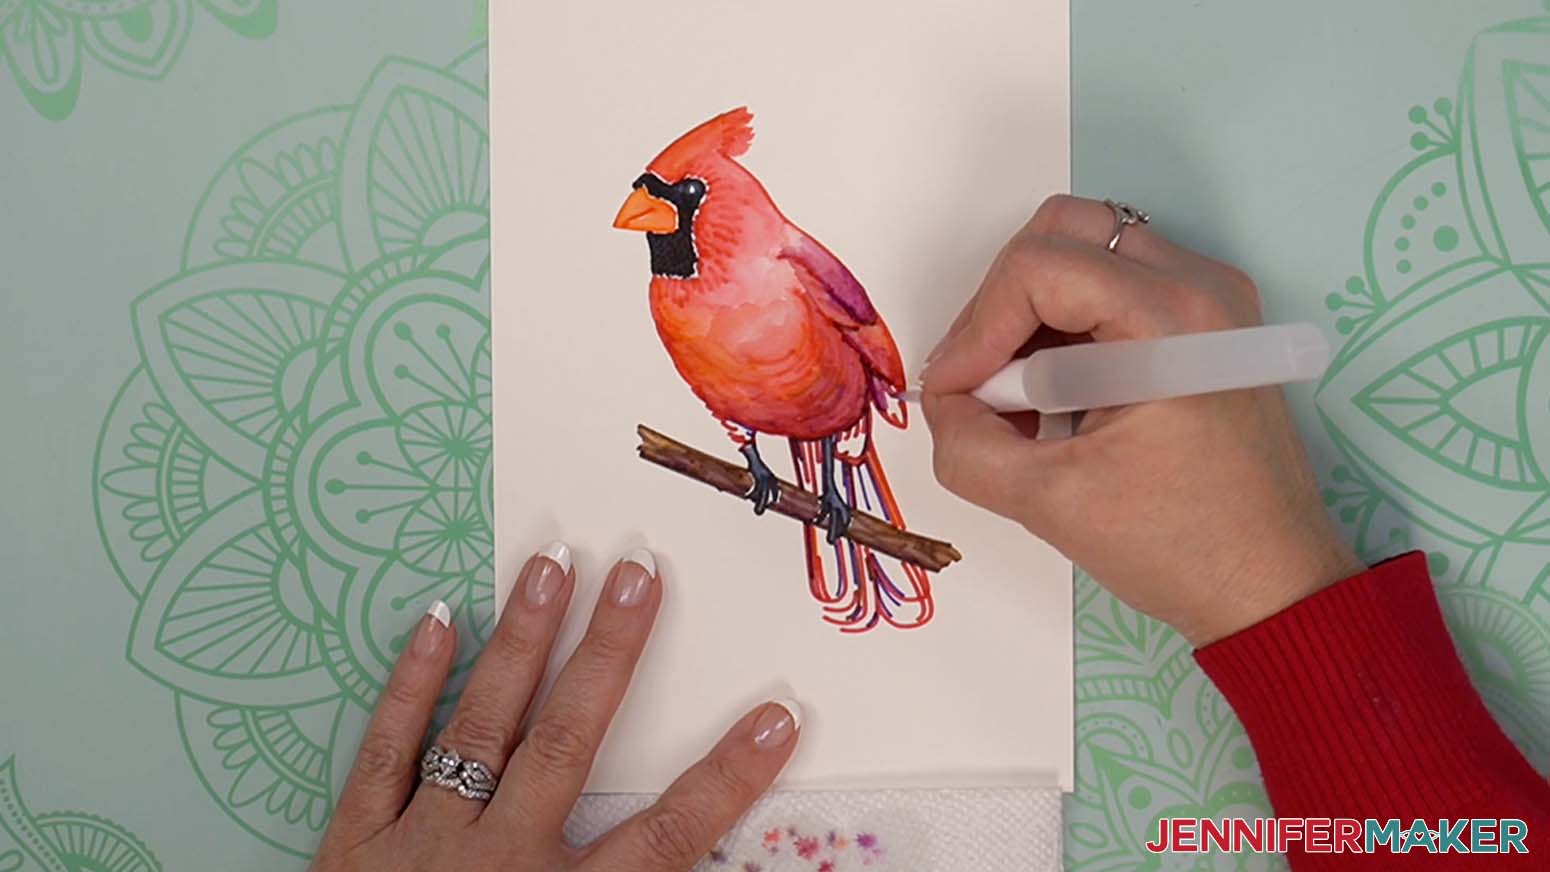
And then the tail feathers.
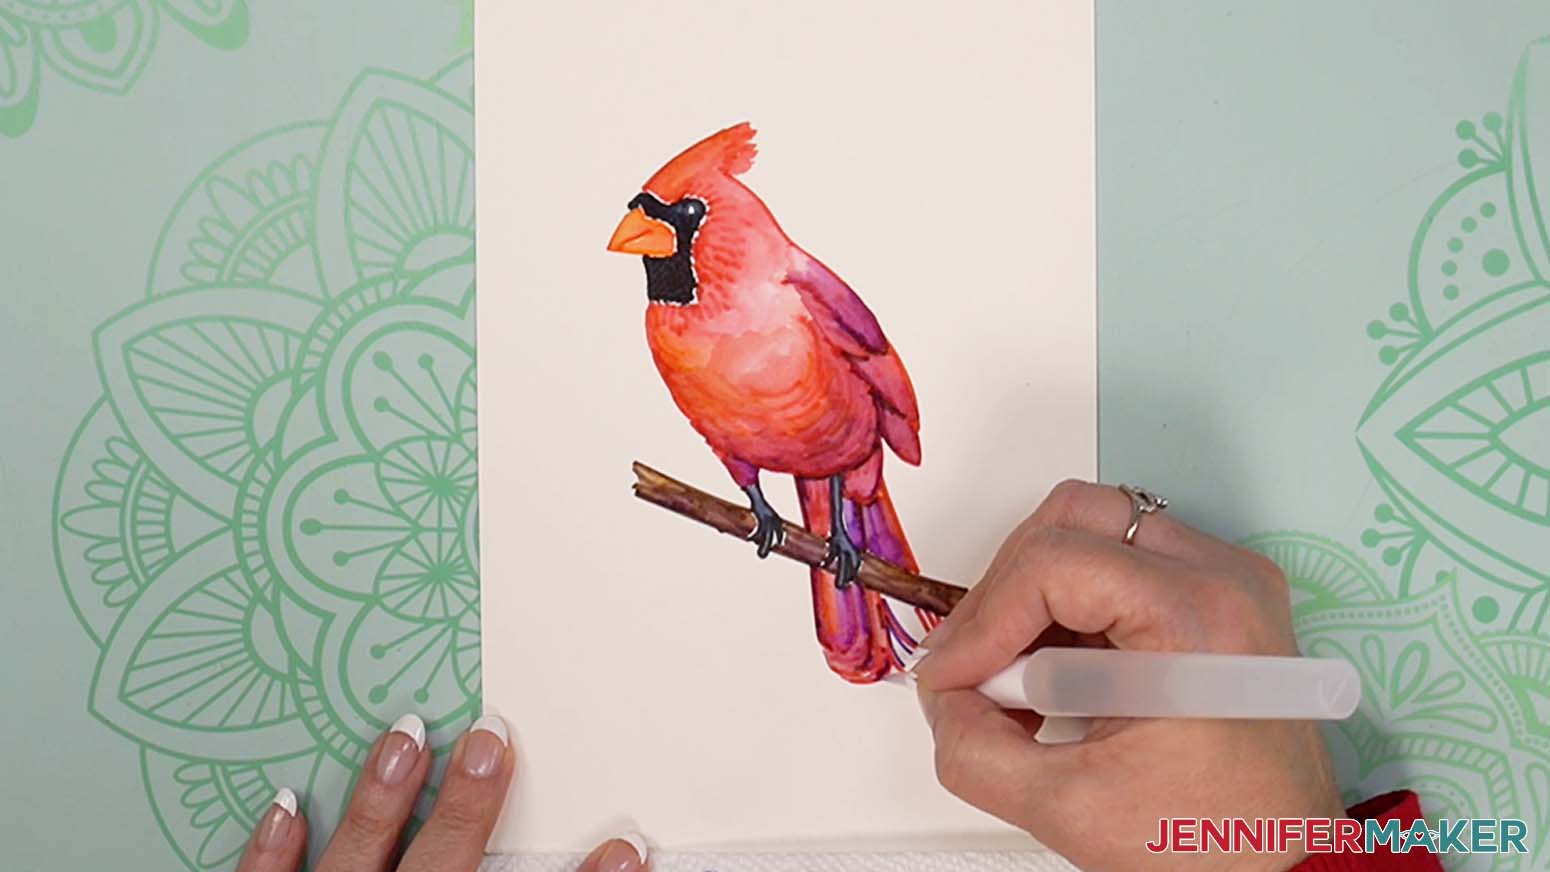
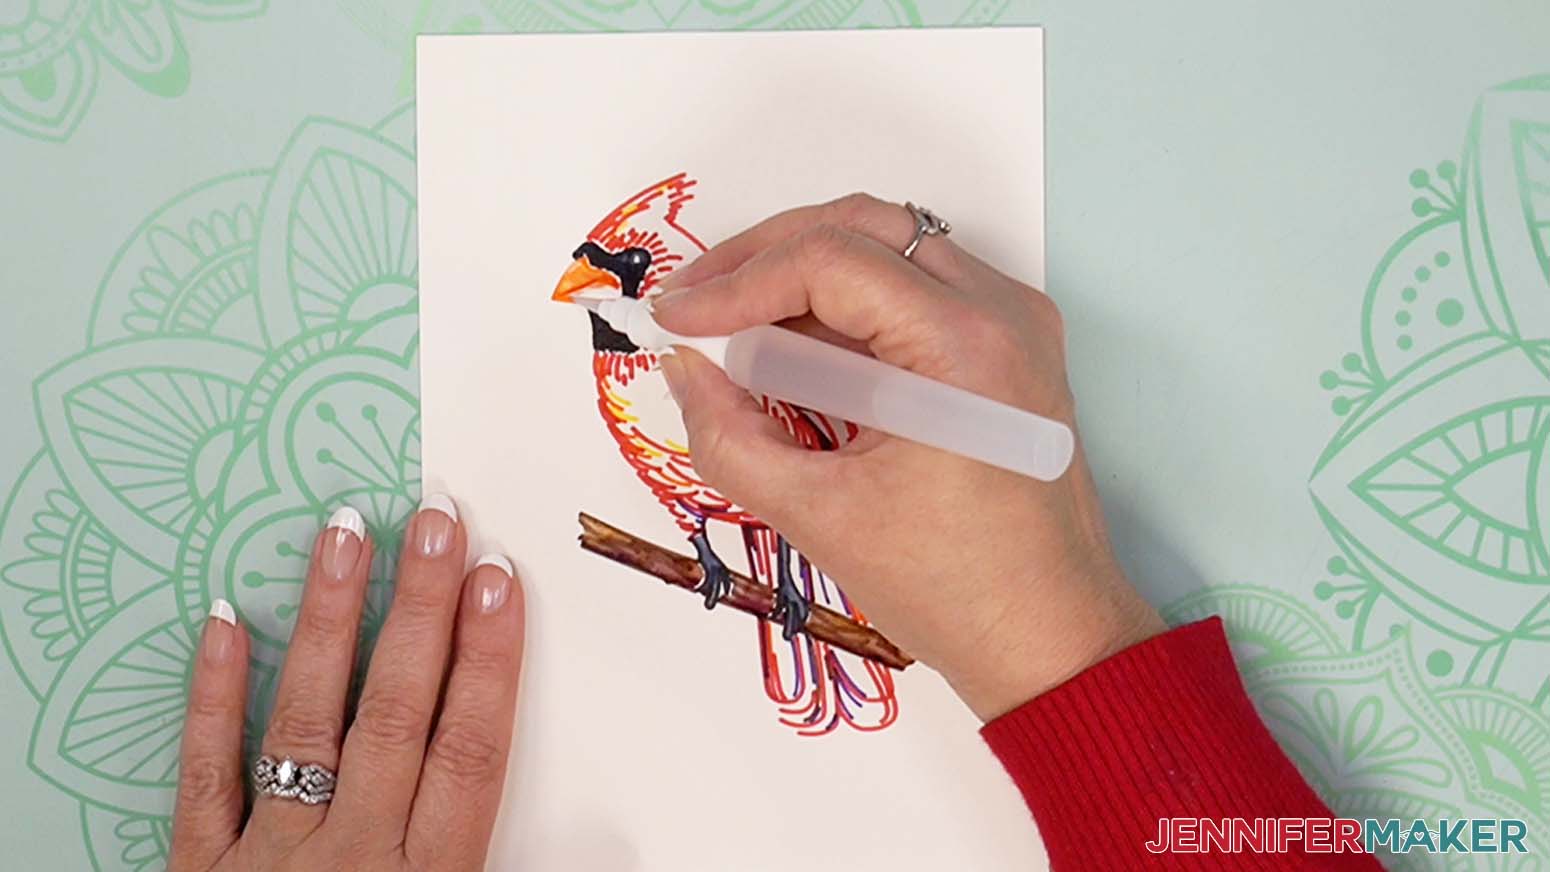
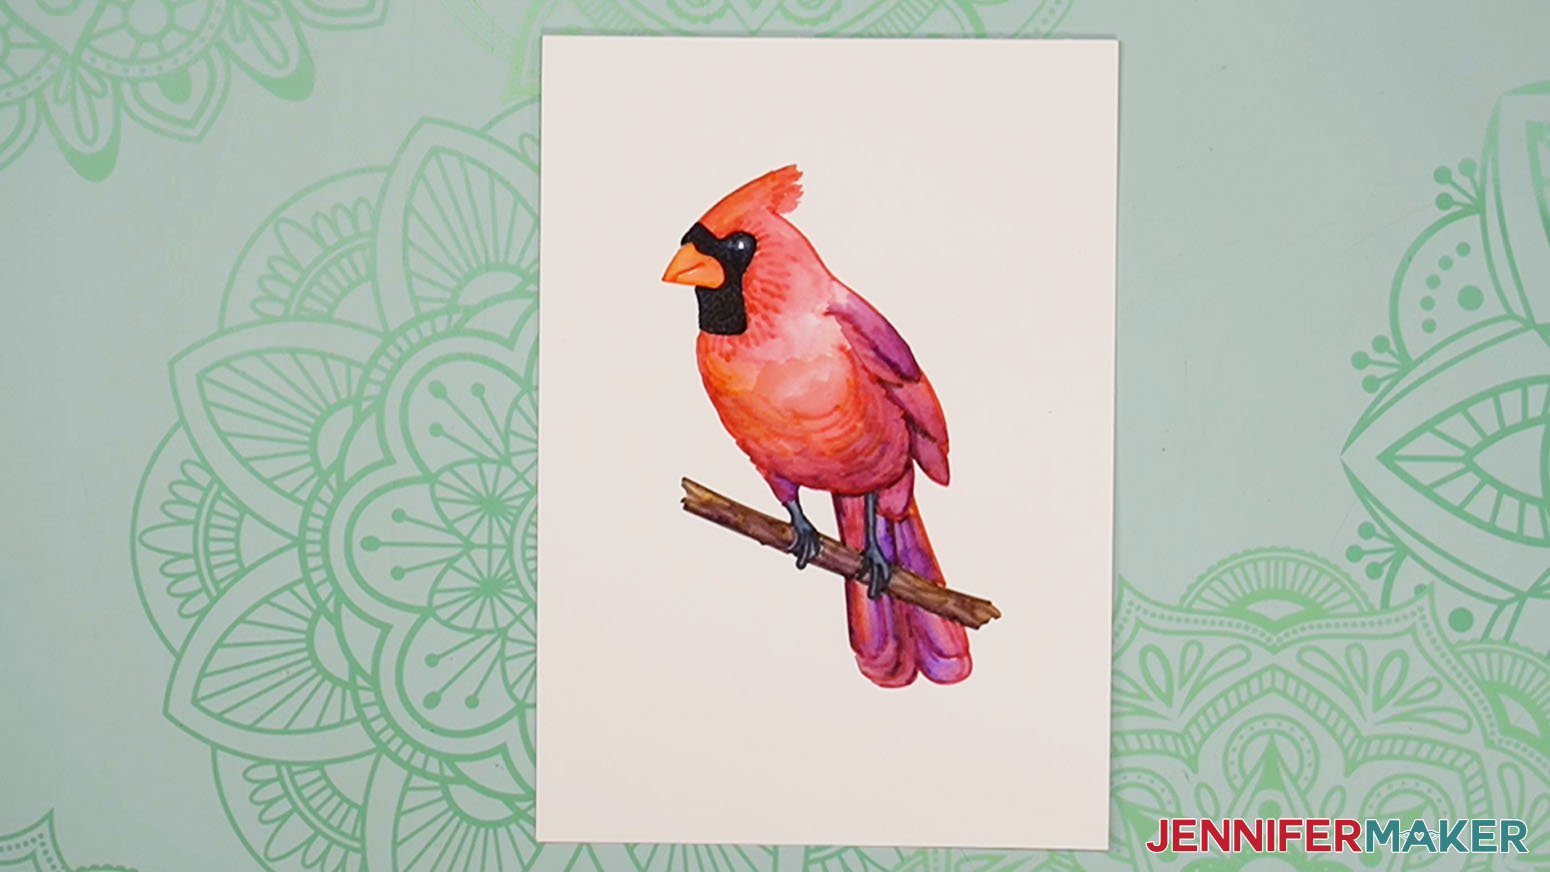
I purposely left some white space around the black area on the cardinal's face. This is so the black pigment didn't bleed into the other colored area. Let the painting dry for about 30 minutes to an hour. It should be dry to the touch. Using your black watercolor marker, touch up the white spaces.
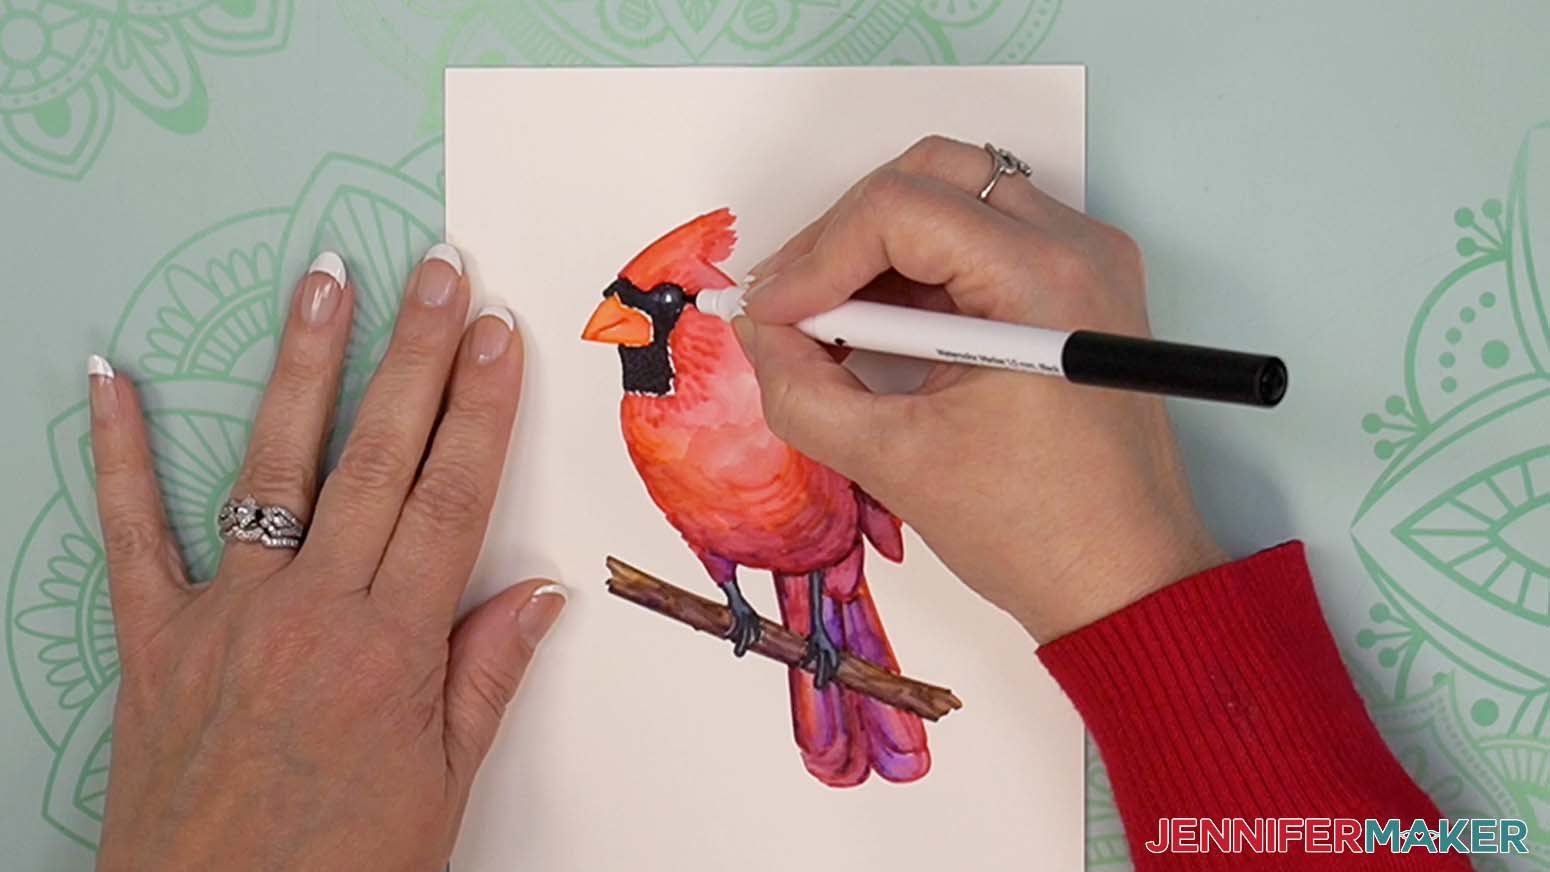
Now it is complete!
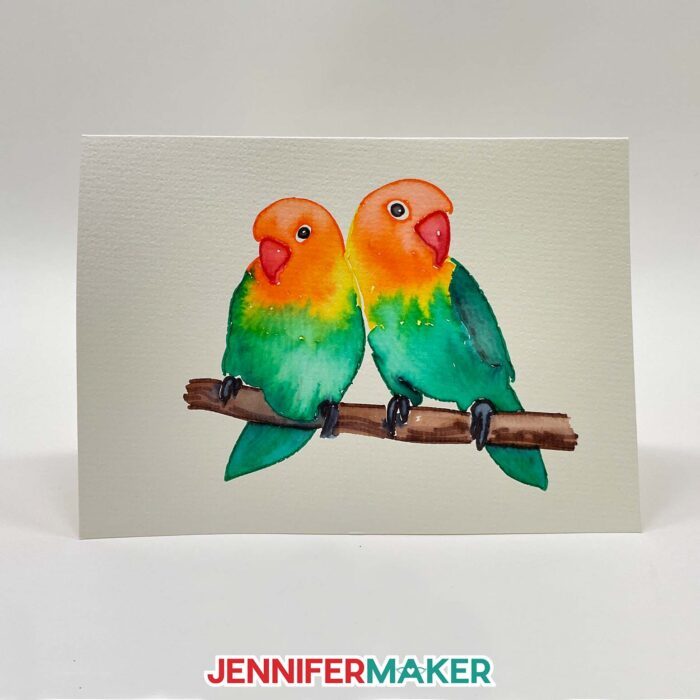
LOVEBIRDS
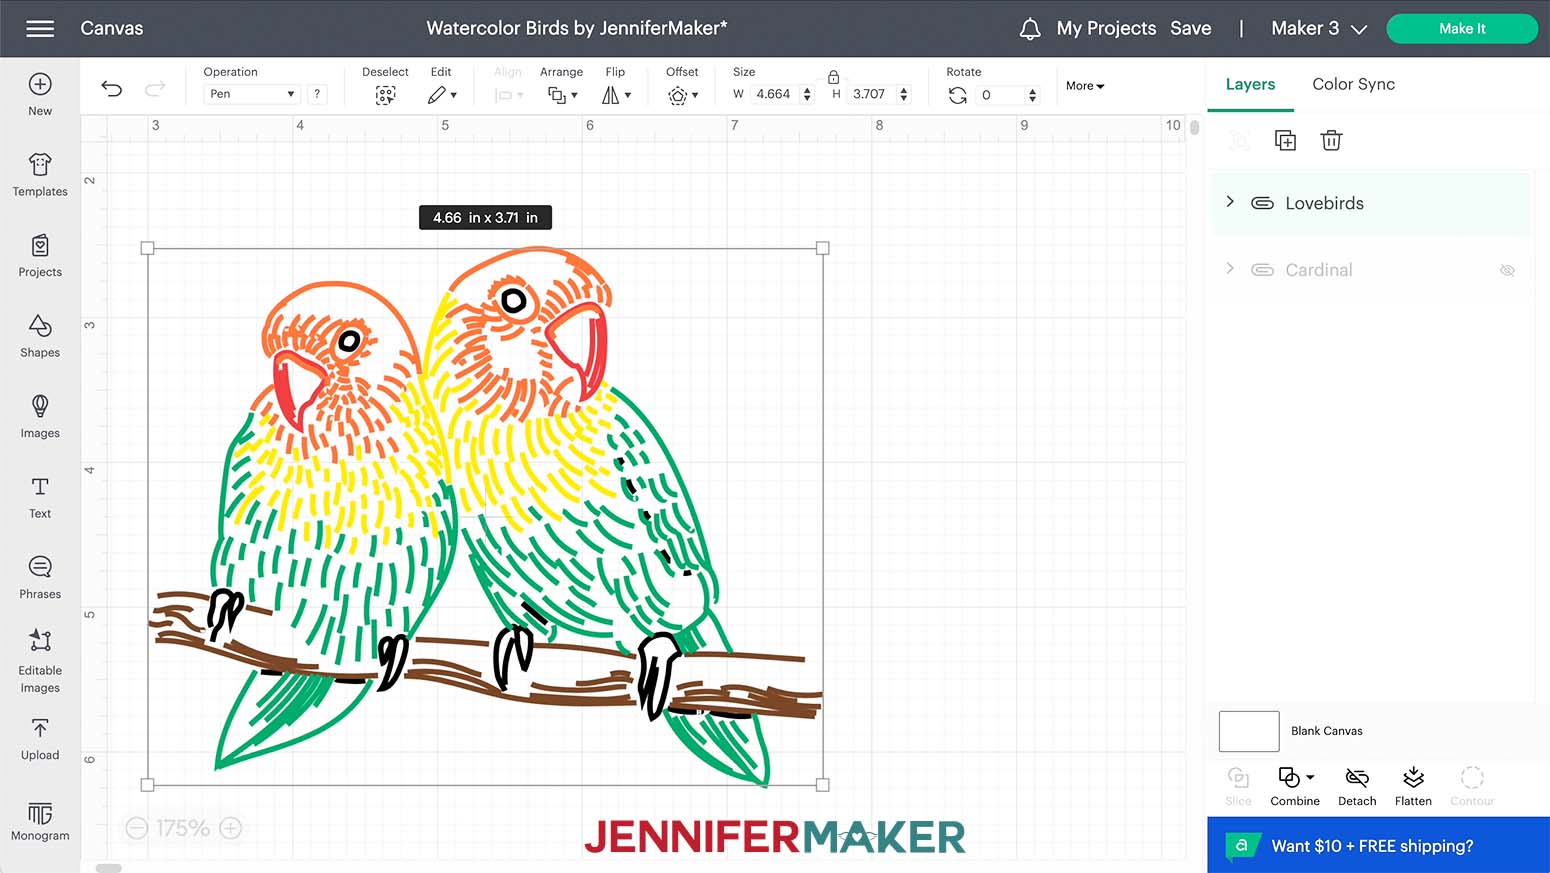
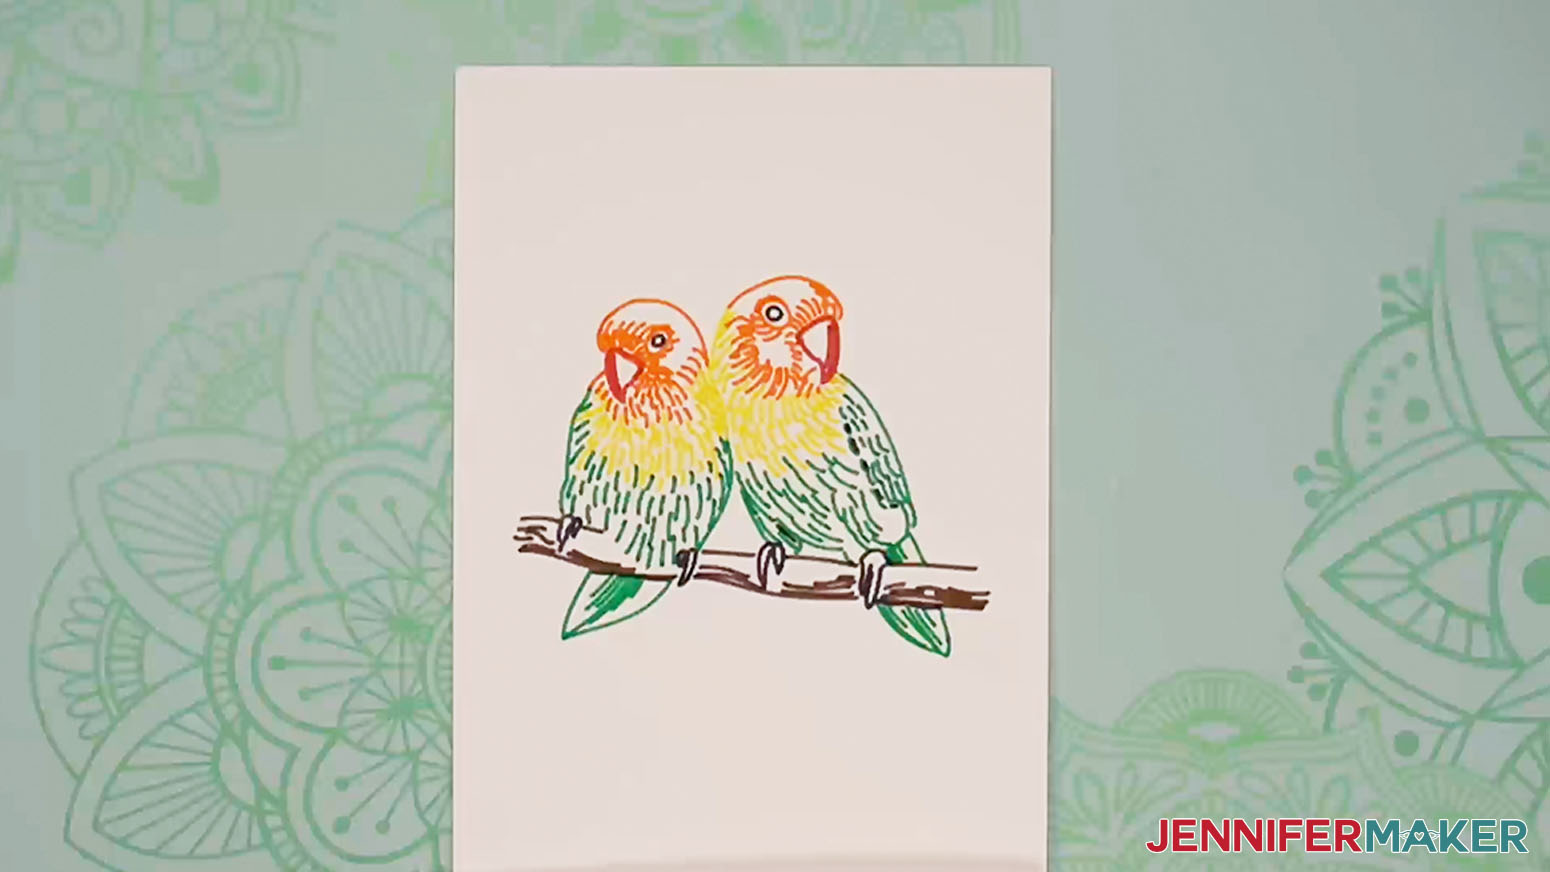
This is what the lovebirds look like right after they're drawn.
Start at the eyes. You don't want a lot of water on your brush. Just enough to push a little bit of paint into the center. Leave a white dot to highlight the eyes again. Fill in the claws with black as well.
Clean your brush, and with a damp brush, paint the red beaks.
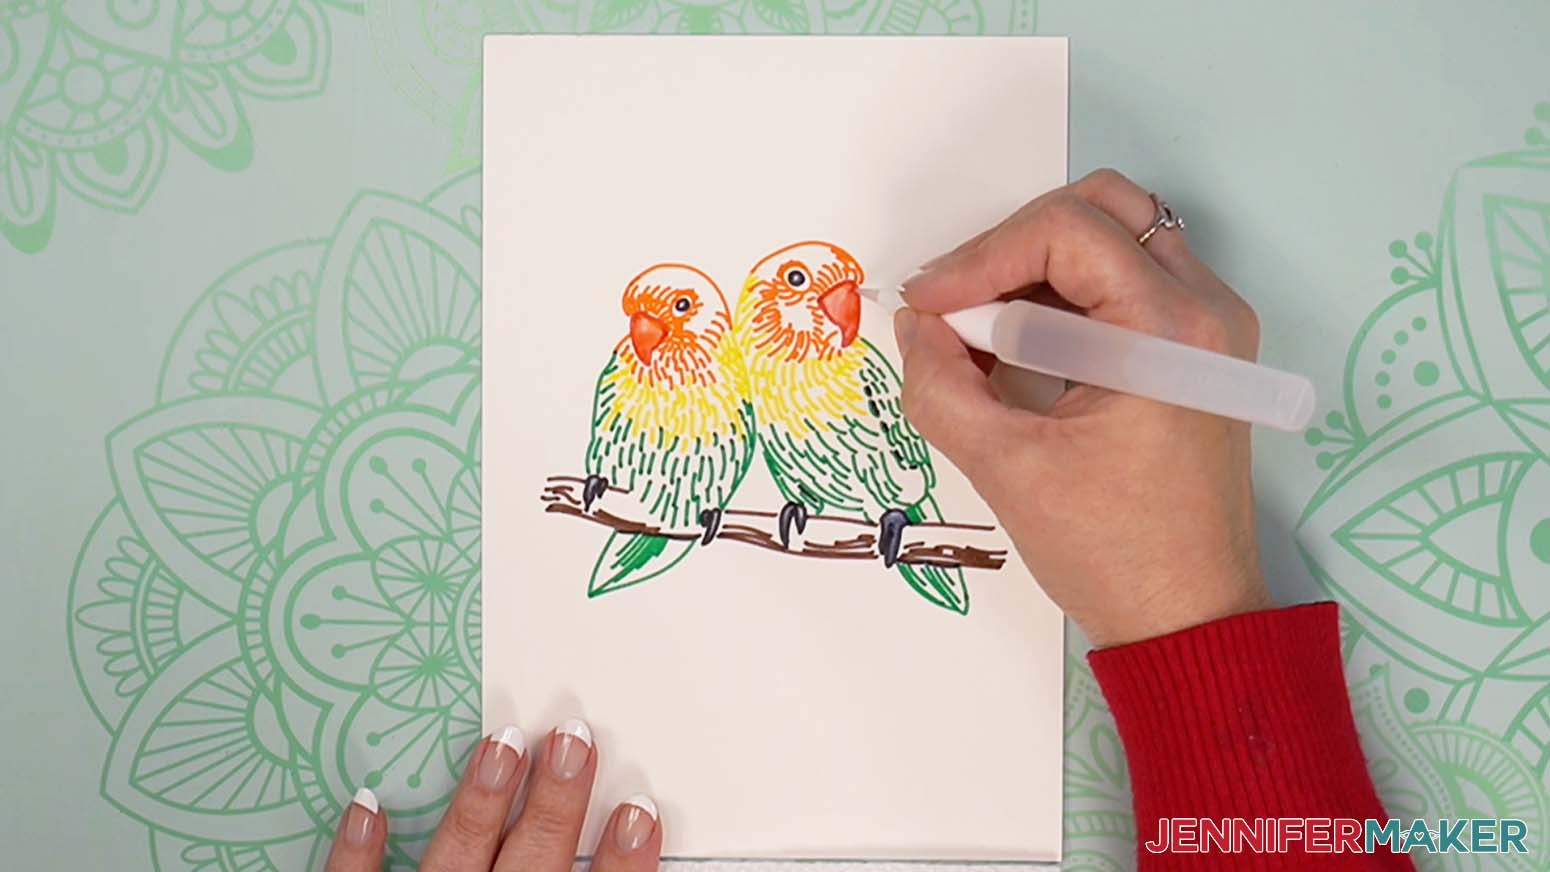
Next is the fun part! Using a wet brush we are going to start with the orange part on the left bird. Cover the orange lines with water and start dragging the water around the eye and down towards the yellow marks but don't touch any of the yellow yet.
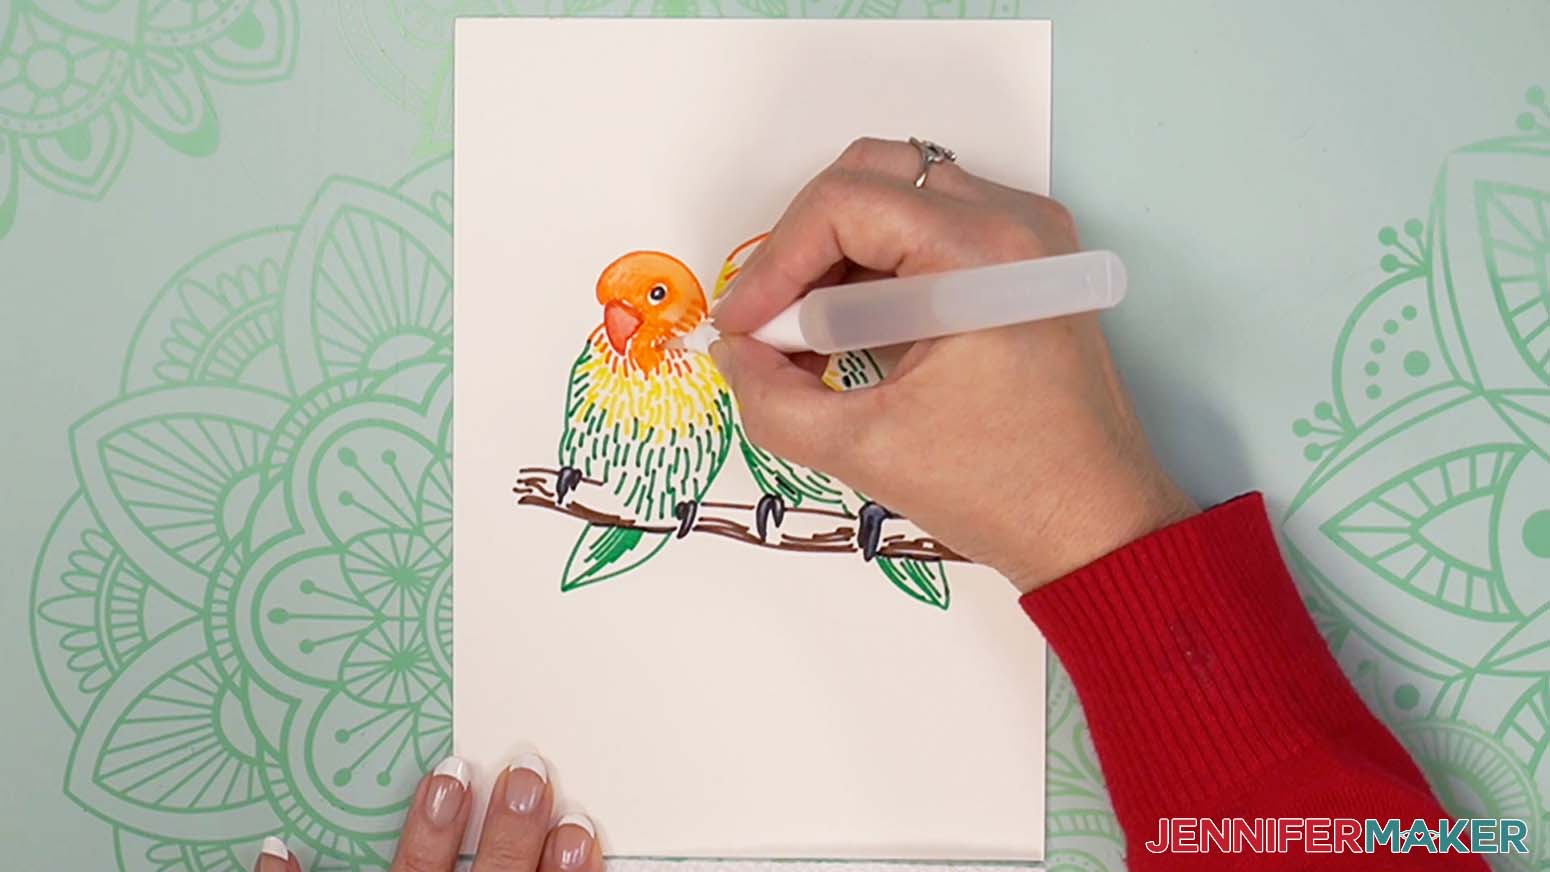
Clean your brush and give it a squeeze to get water into it. Put your brush in the yellow marks near the orange. Get the yellow marks wet and then slowly let the yellow area touch the orange. Look at how the colors blend for you - magic! Continue along the yellow/orange border.
Clean your brush, then do the same for the yellow and green border.
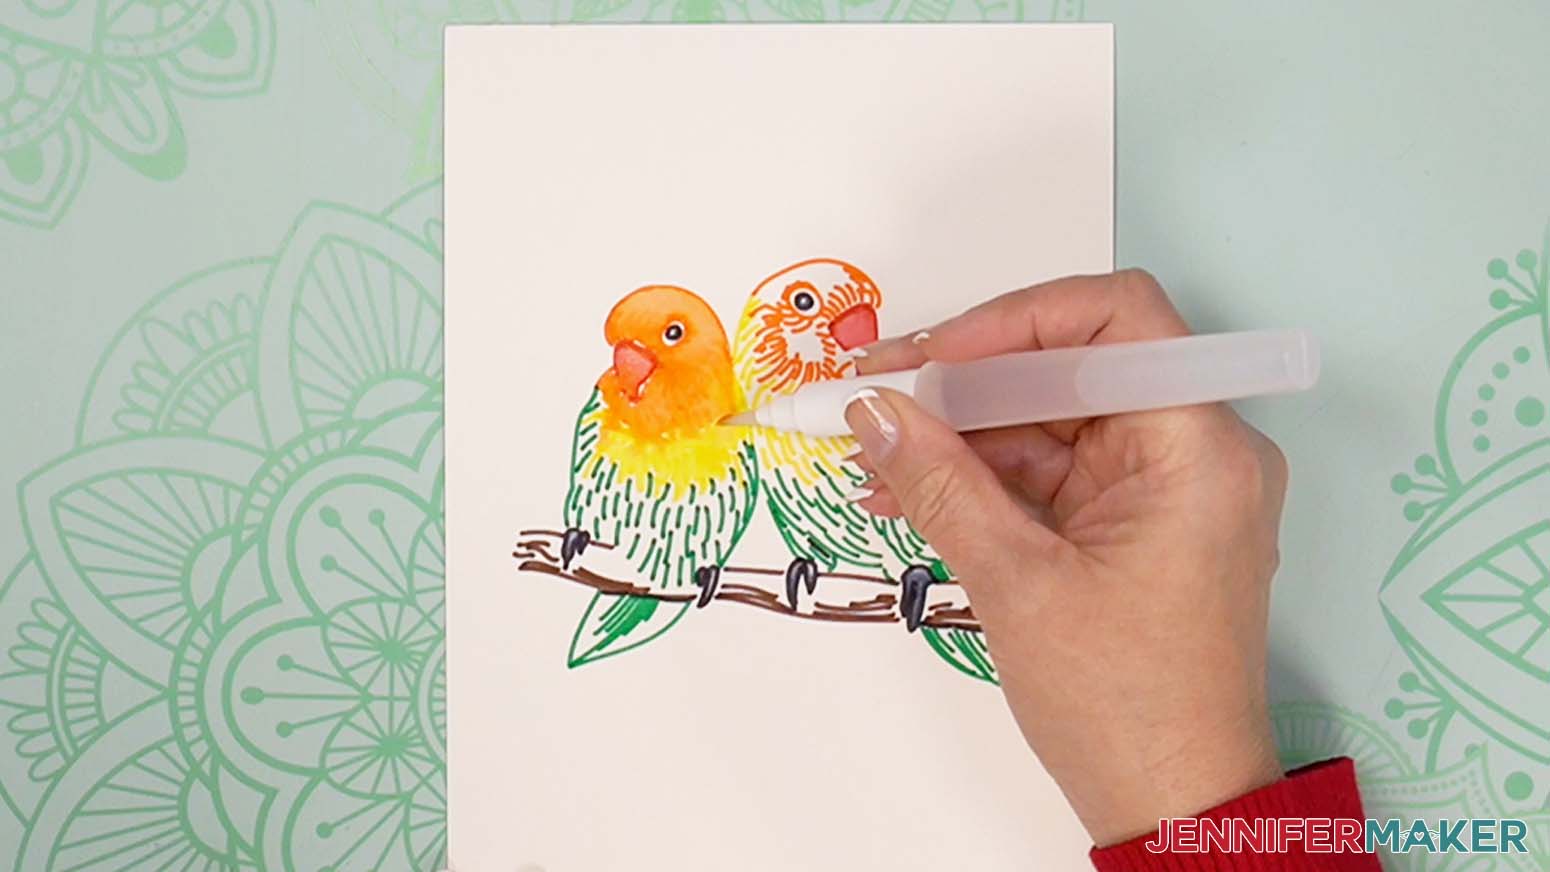
For the tail, use a damp brush and at the top there is a black line on the green. Start your brush at that black line and drag down. This gives the tail a slight shadow.
For the second bird, we will work the same way for the body. Leave the outer wing alone until you have completed the body.
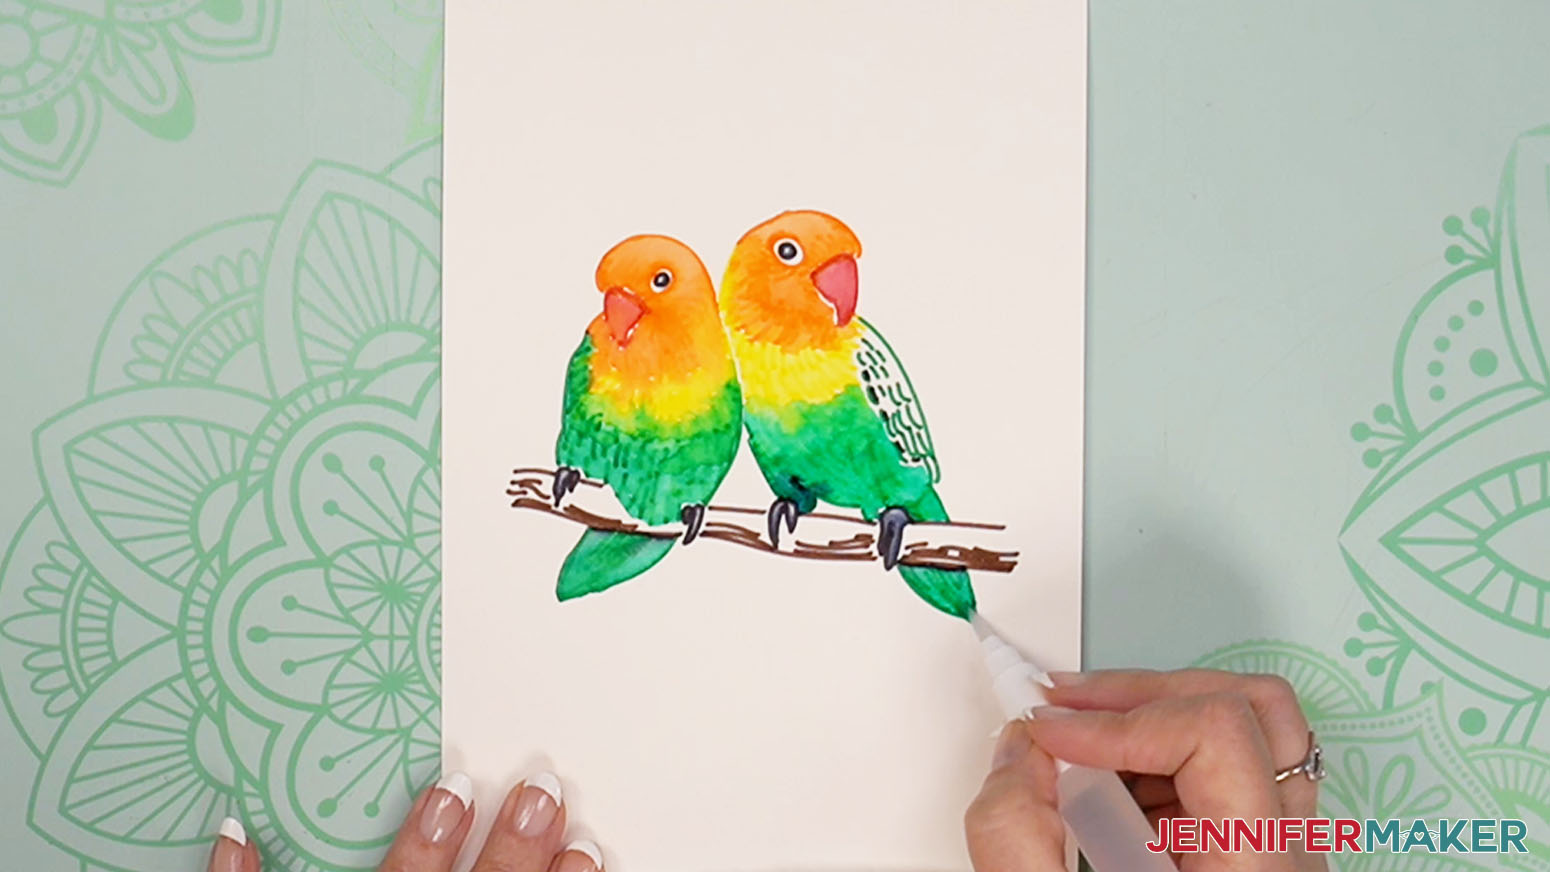
Paint the tail and the right leg.
For the outer wing, just like what we did for the tail, drag the black pigment away and onto the wing taking care not to touch the yellow paint.

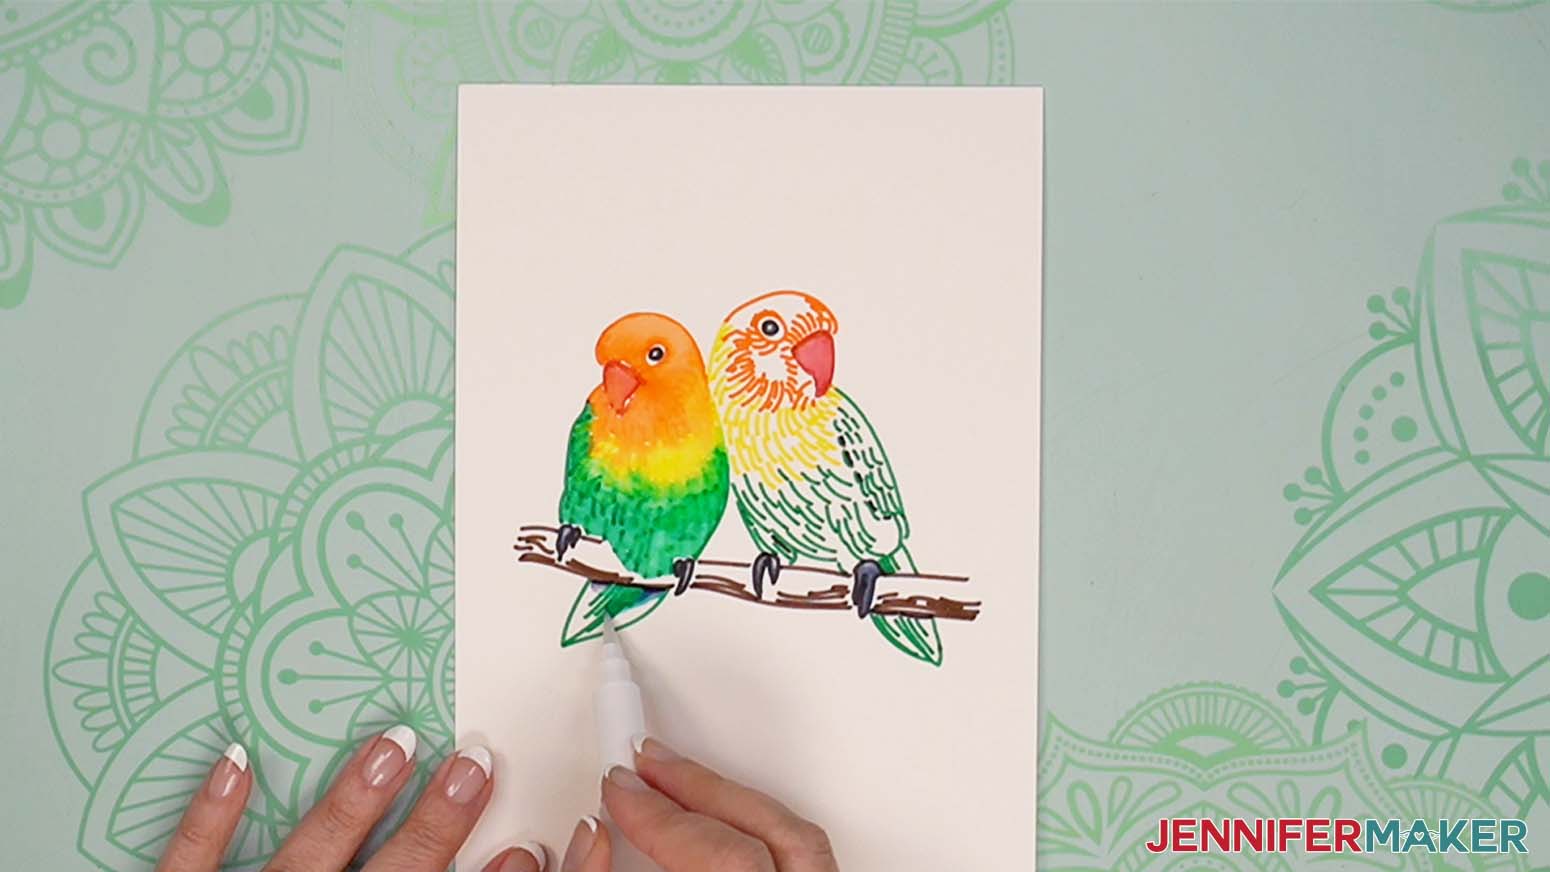
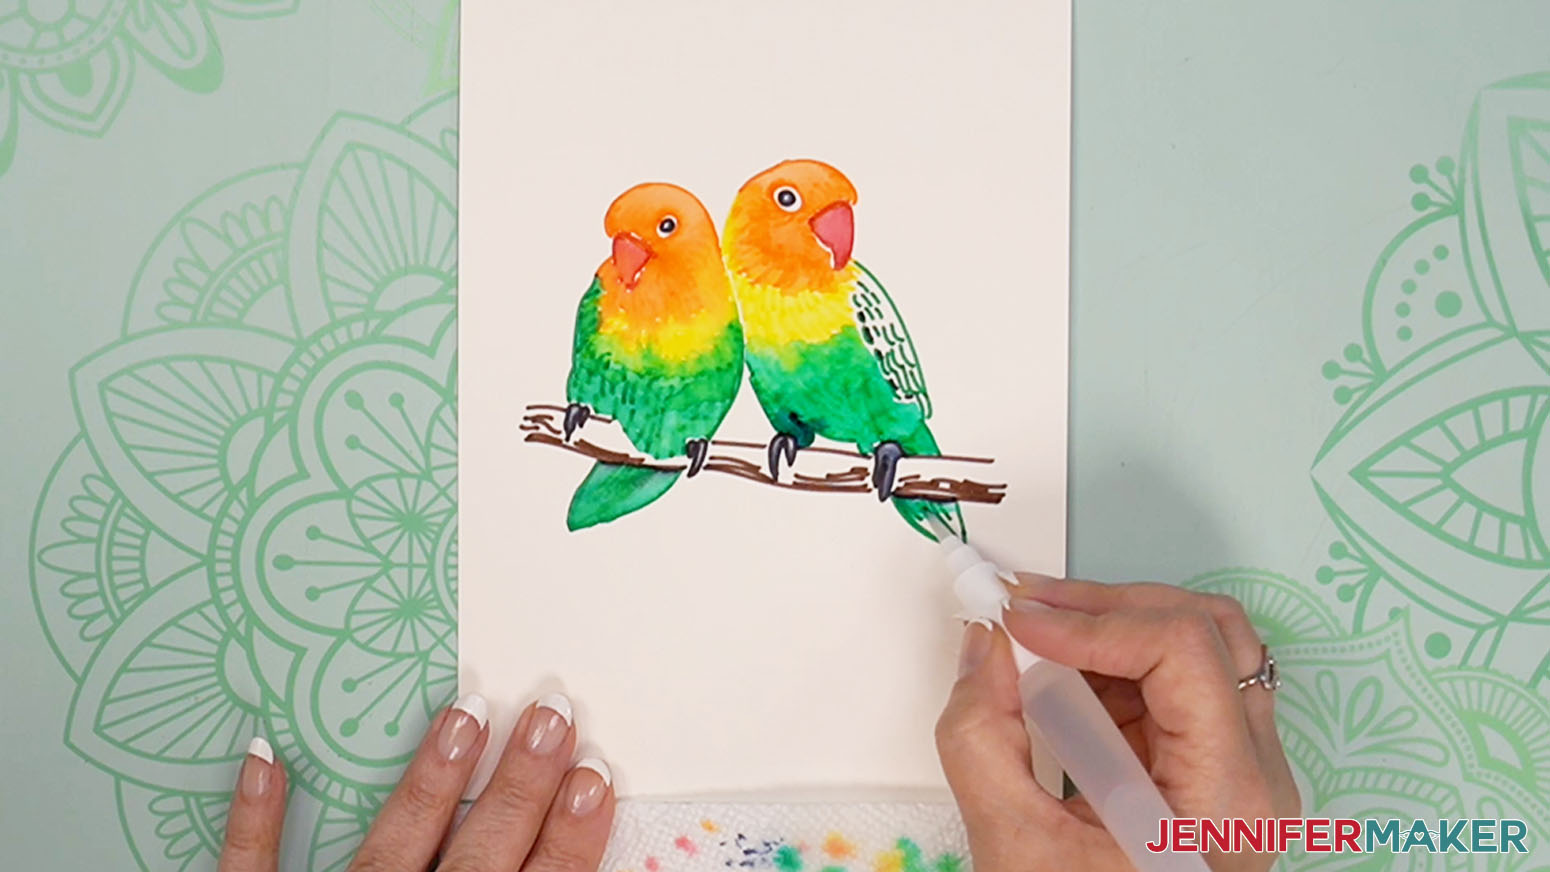
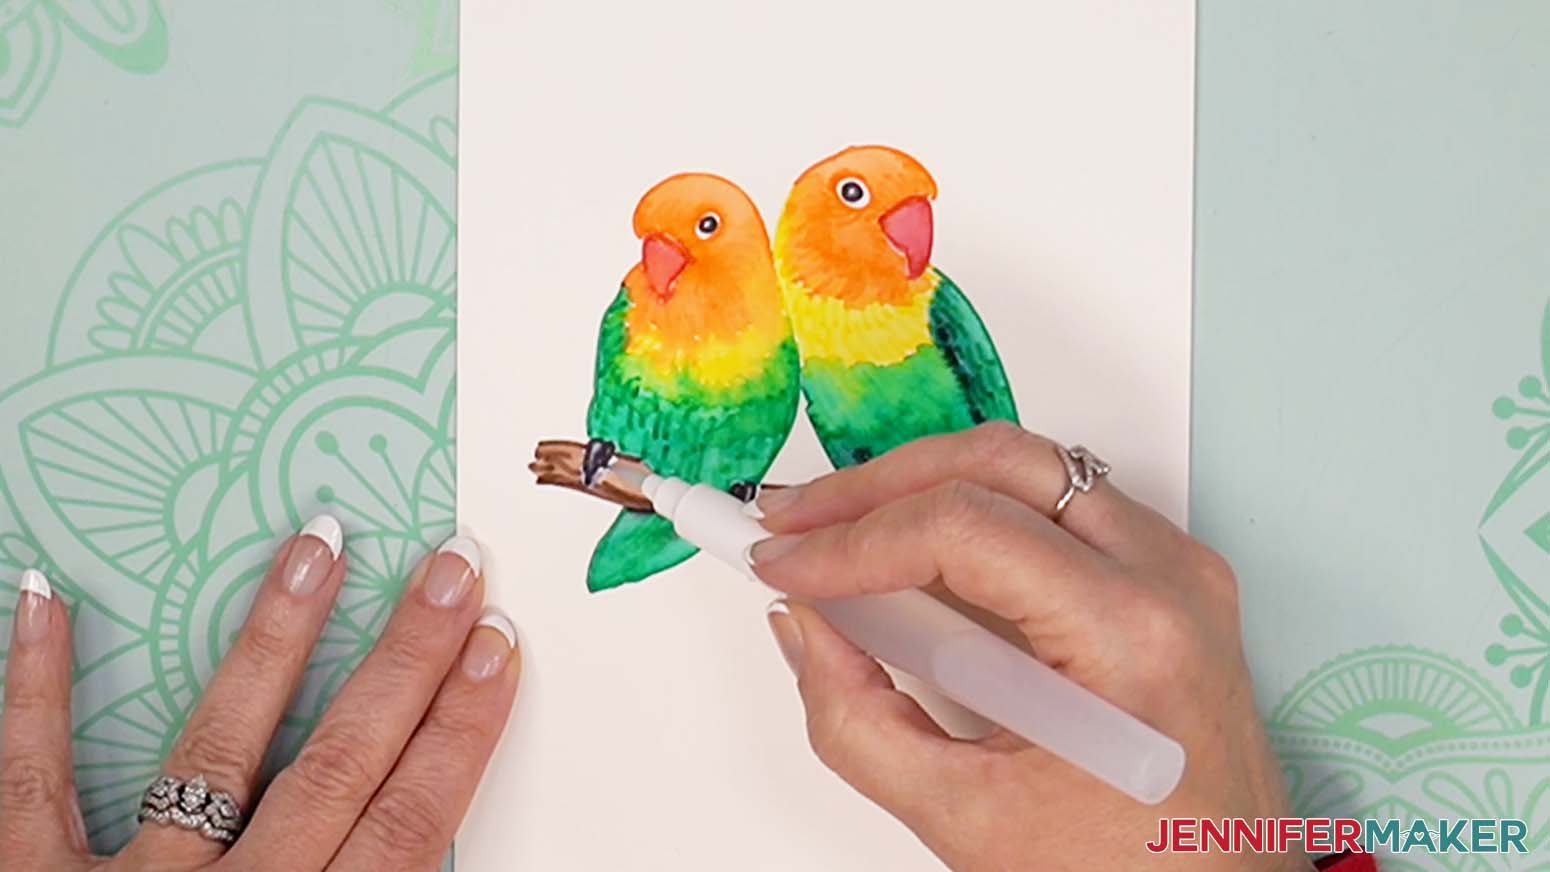
Clean your brush and using a damp brush, paint the branch.

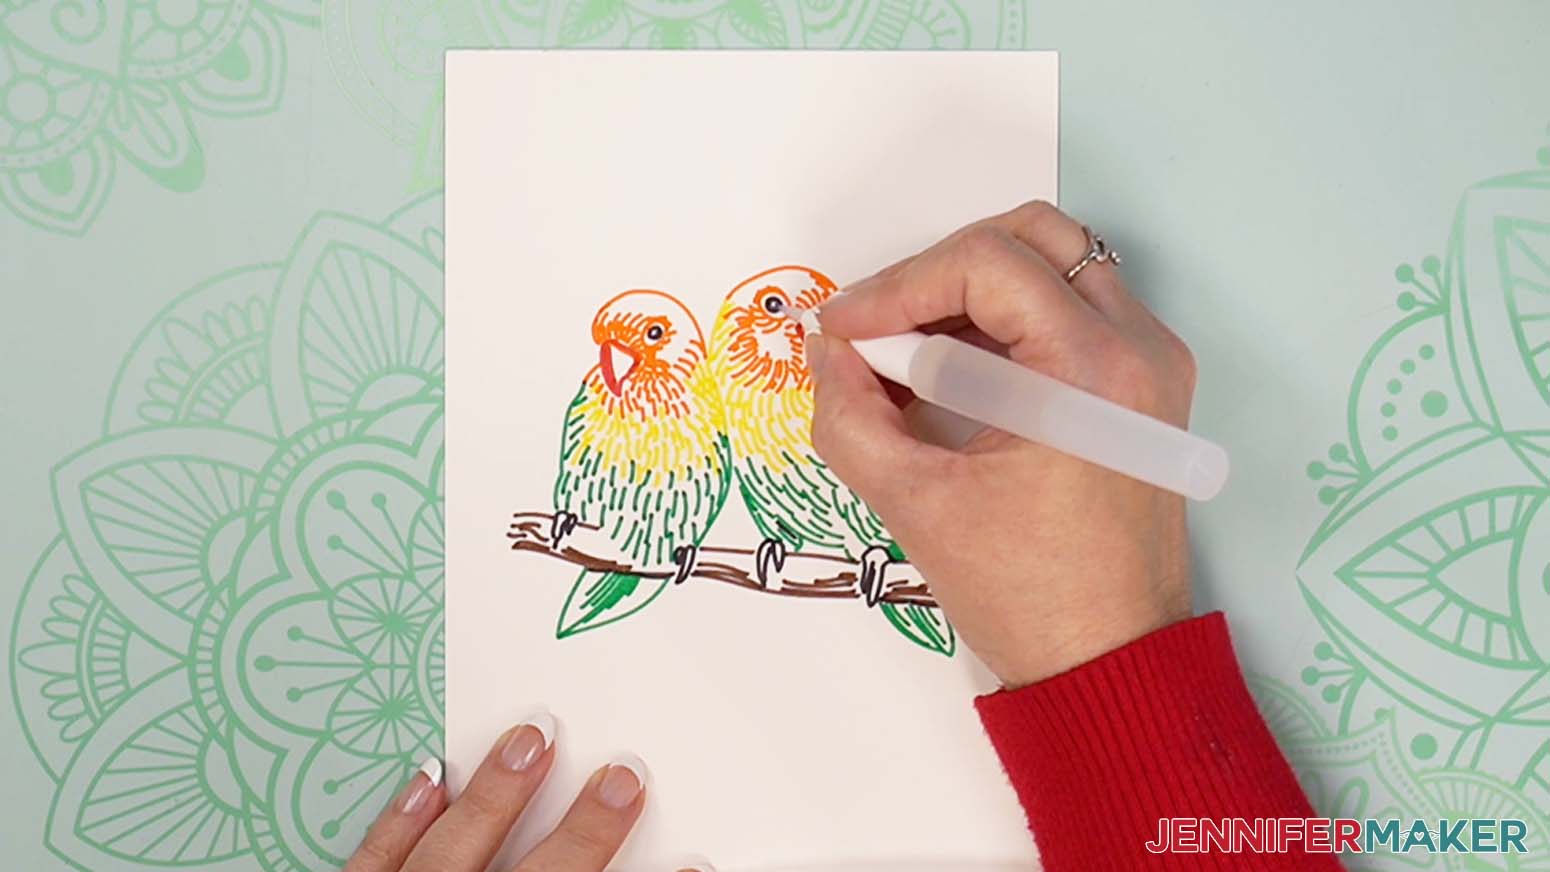
When the paint has dried slightly - meaning it's not soaking and there aren't any puddles of water on the paper, you can touch up the white areas with a damp/dry brush. You don't need a lot of water, you're just pulling some of the damp colors into the white spaces.
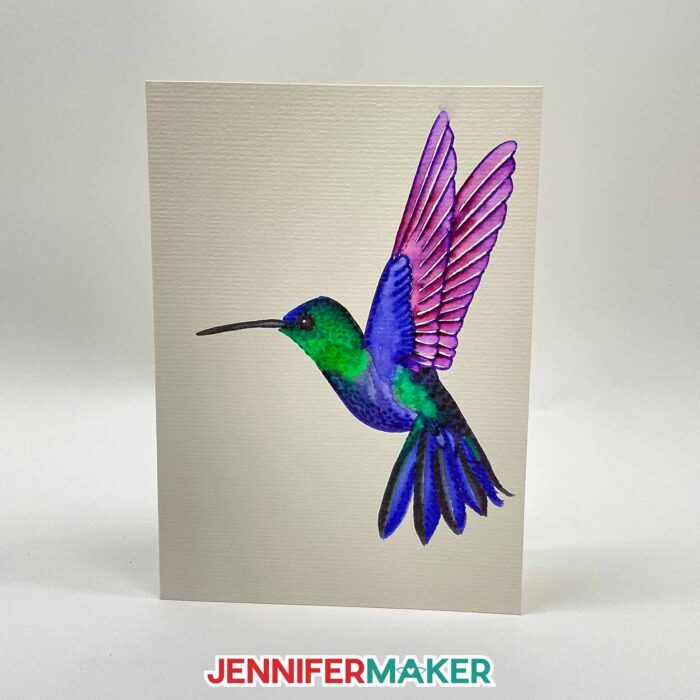
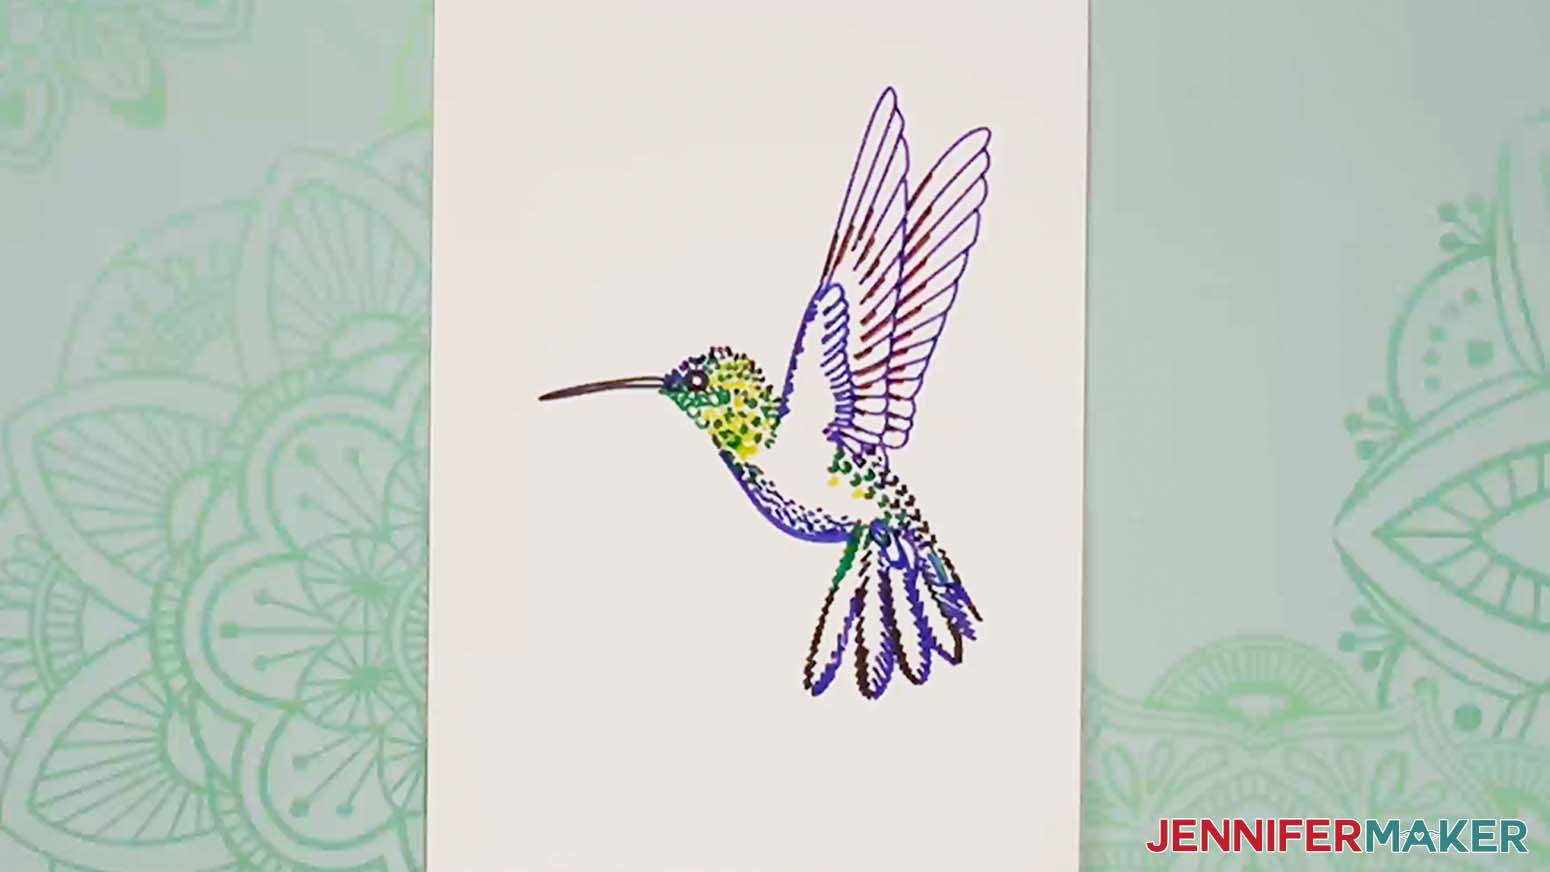
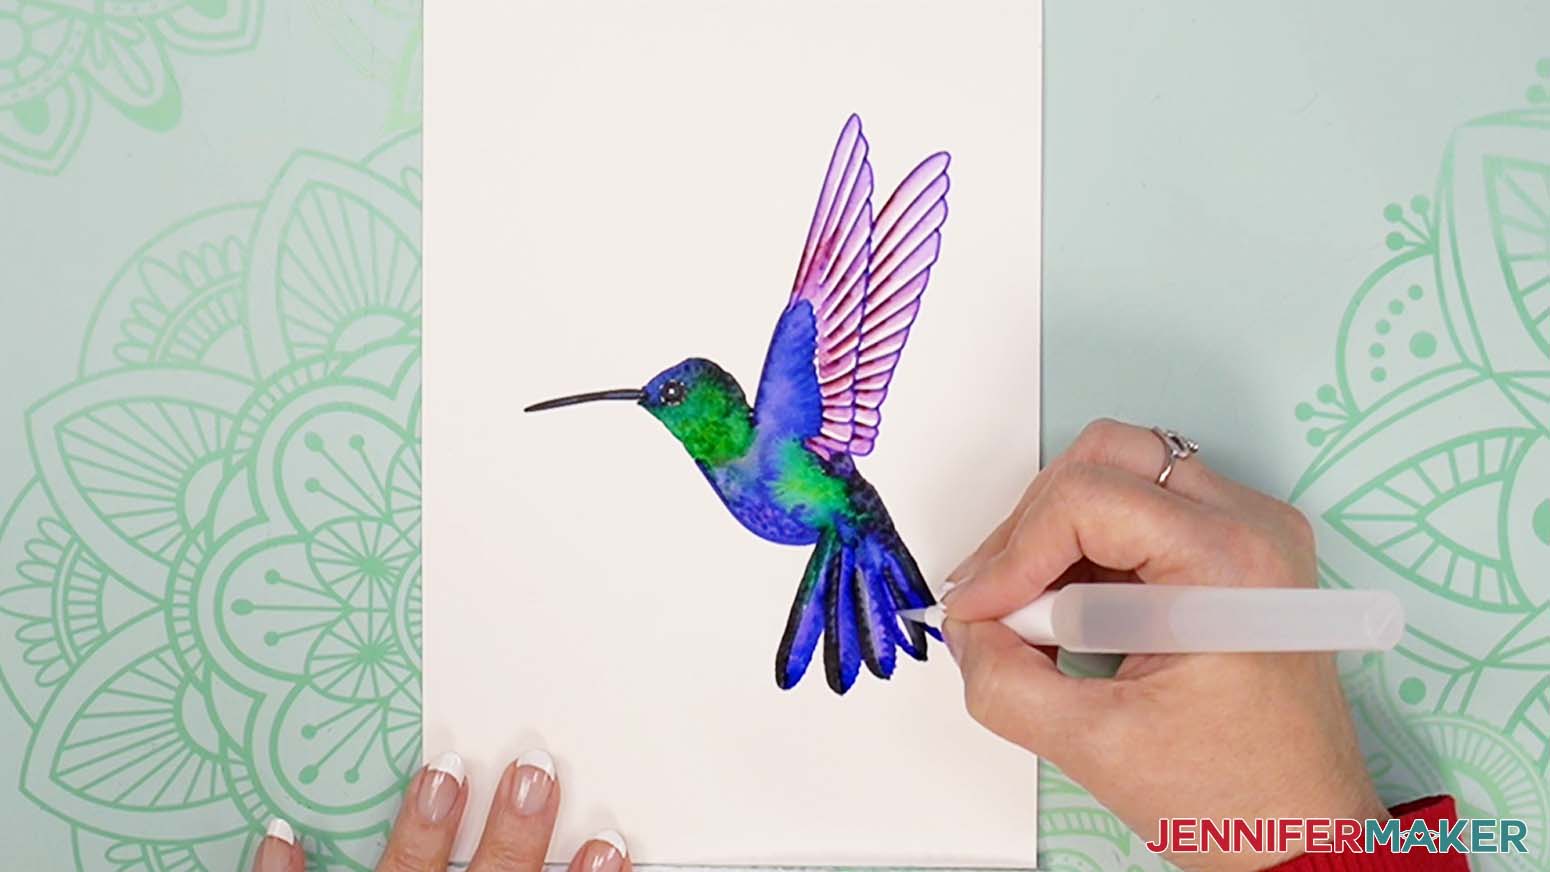
HUMMINGBIRD
This is what the hummingbird looks like right after its drawn.
Use a clean, damp brush and fill in the beak and eye. Leave a white highlight in the eye.
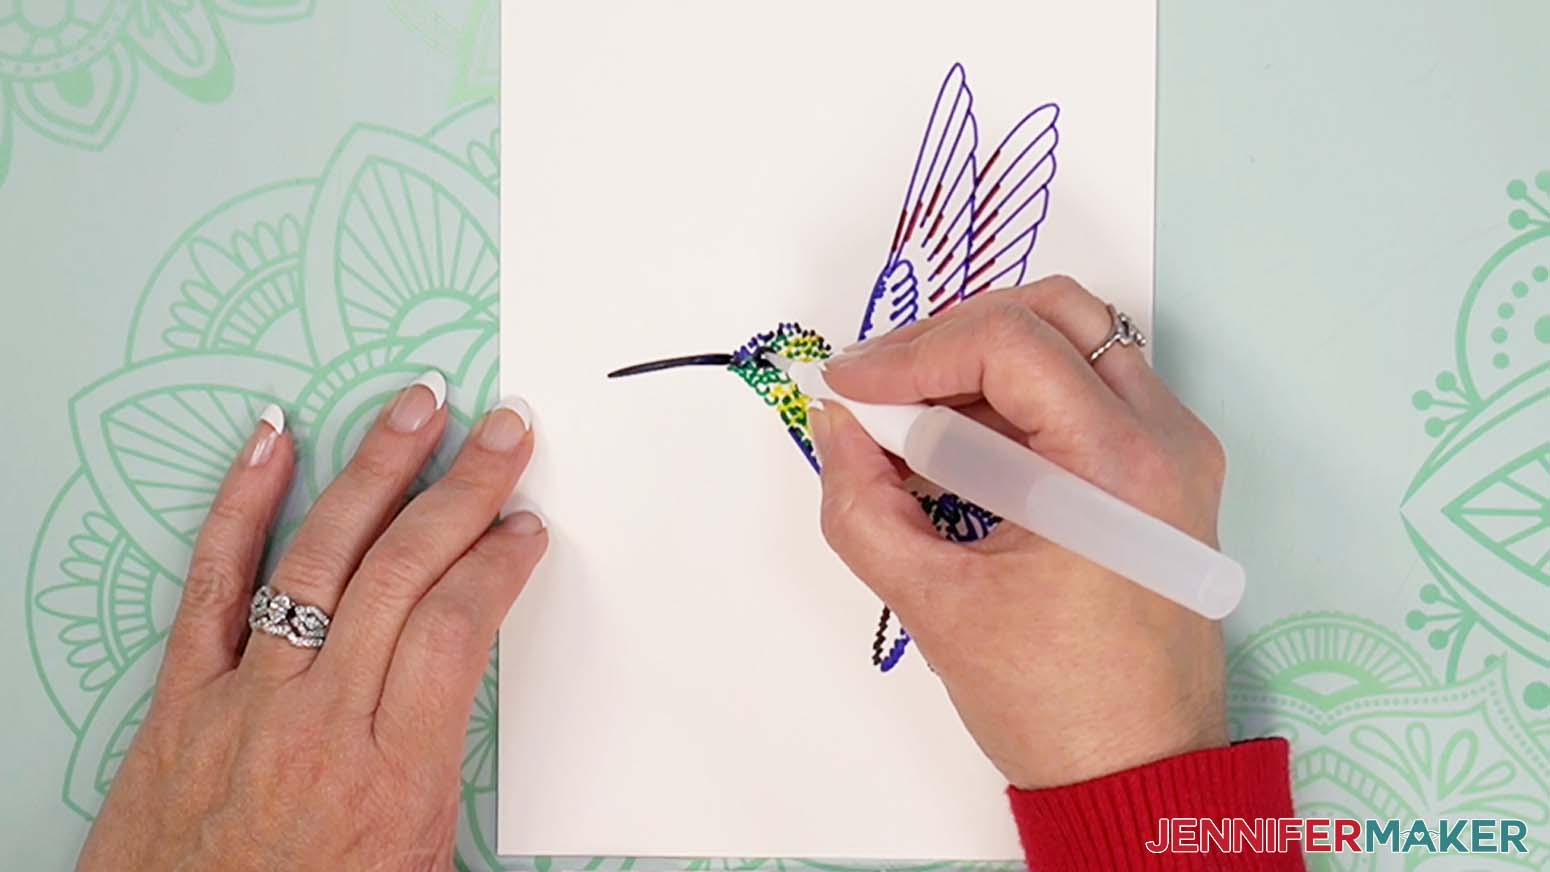
Clean your brush. Next, the wings! Use a damp brush and gently glide it along the top wing section. Pull the color off the line and fill in the wing leaving just a little bit of white along the edge of the next section. You can mix the red in by pushing the color towards the tip of the wing.
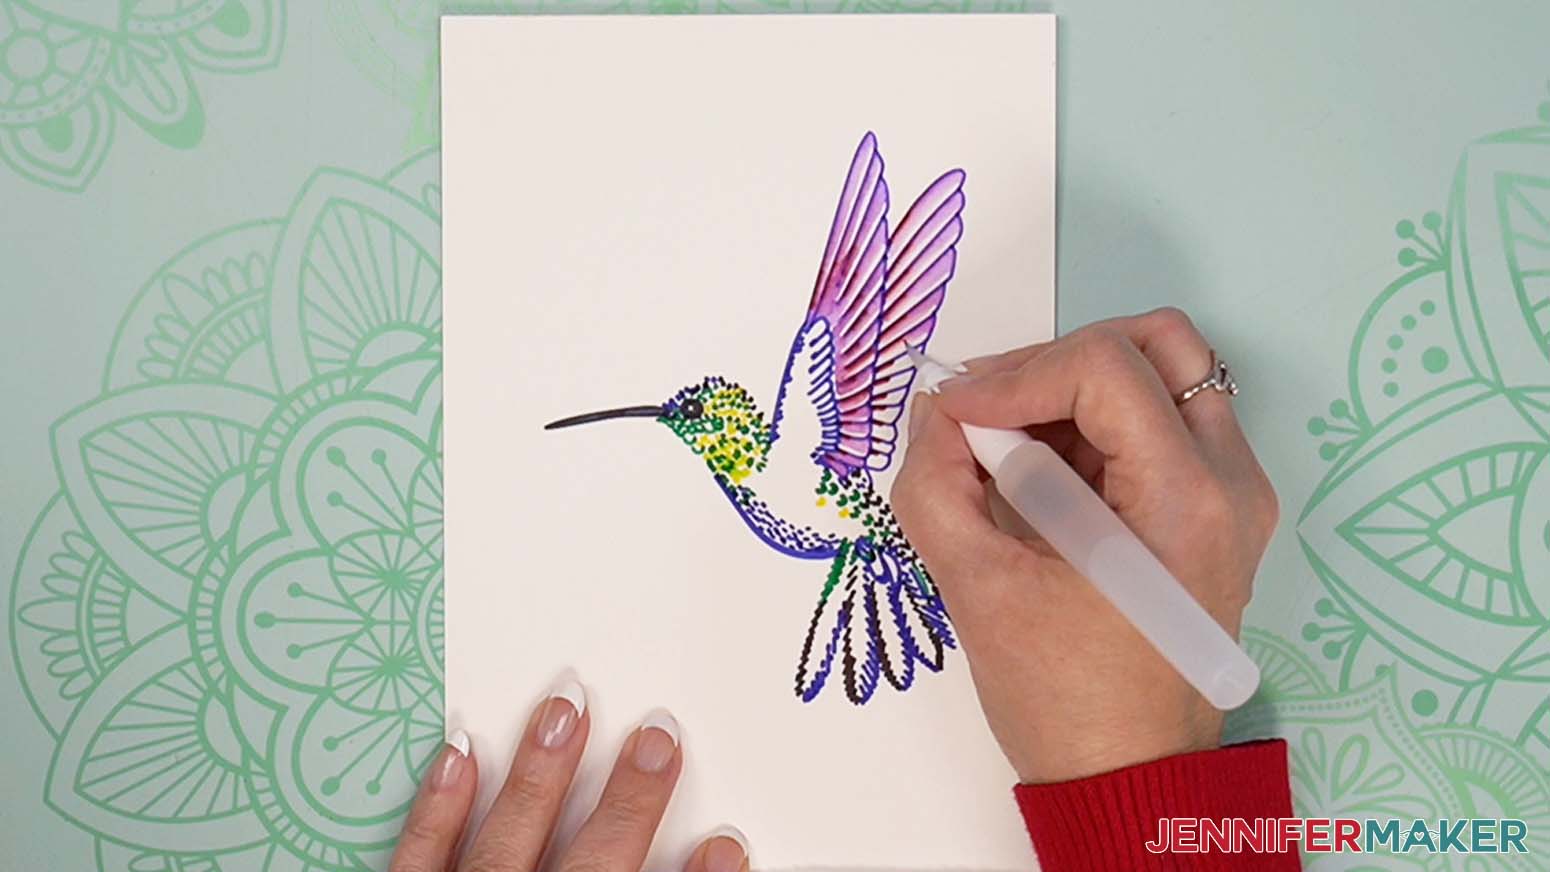
With a clean brush we are going to start at the top of the head near the beak. Your brush should be wet but not dripping. Pull the blue near the beak up towards the top black marks and then down through the yellow and green lines to the base of the wings. Continue applying a wet brush around the eye and through all the green marks stopping near the blue marks.
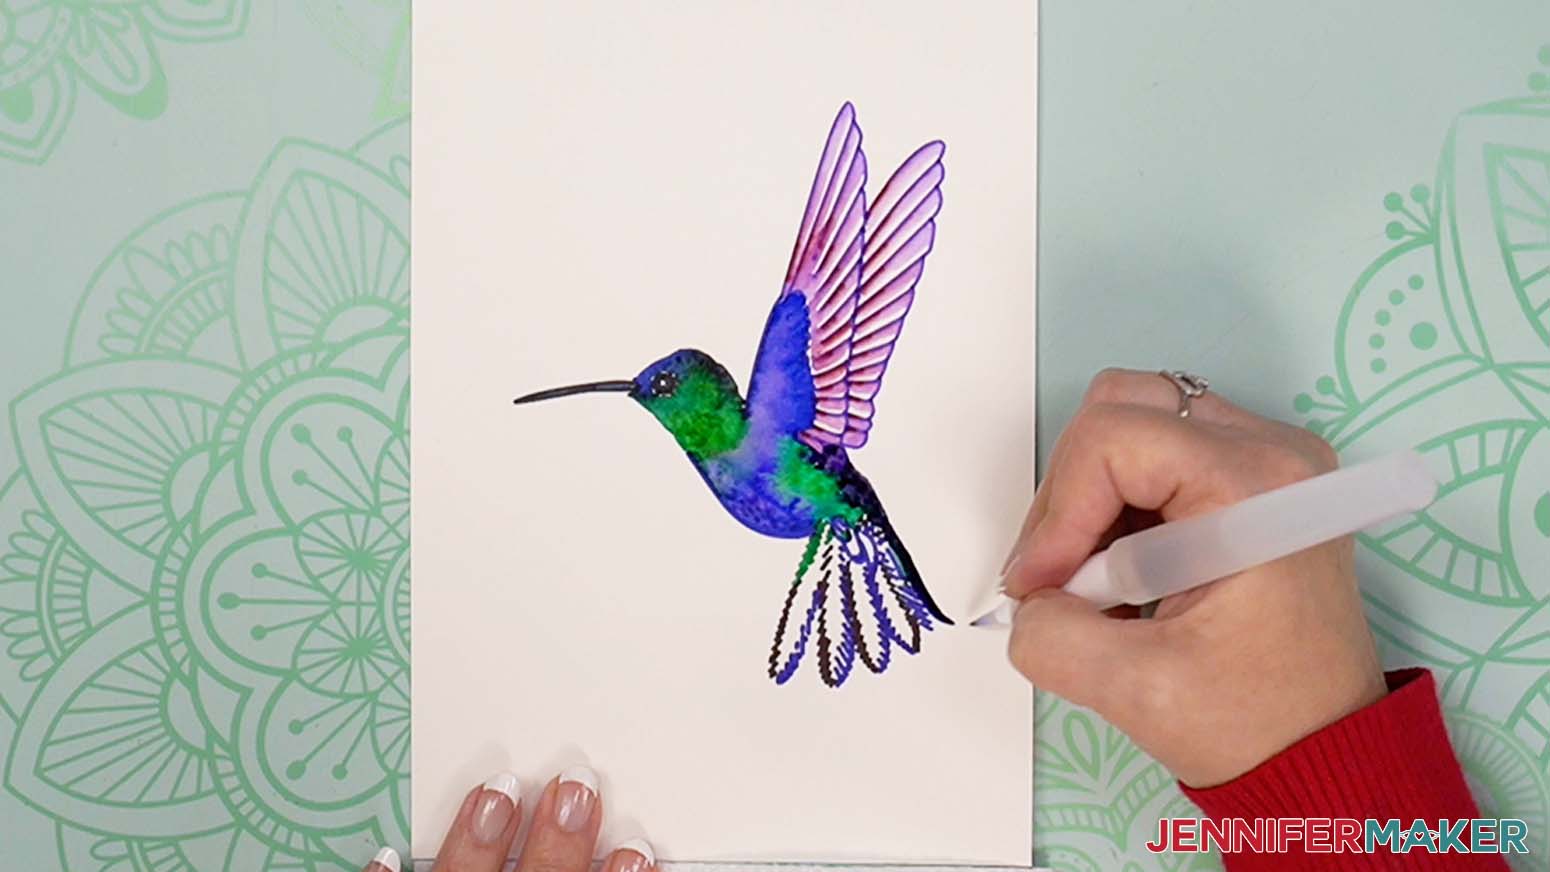
Next, using a clean damp to wet brush, start dabbing the blue marks near the green. After you have saturated the blue a bit, you can start pushing the blue towards the green area.
Continue to brush over the blue marks and the belly, stopping near the green marks. Work the blue up into the wing.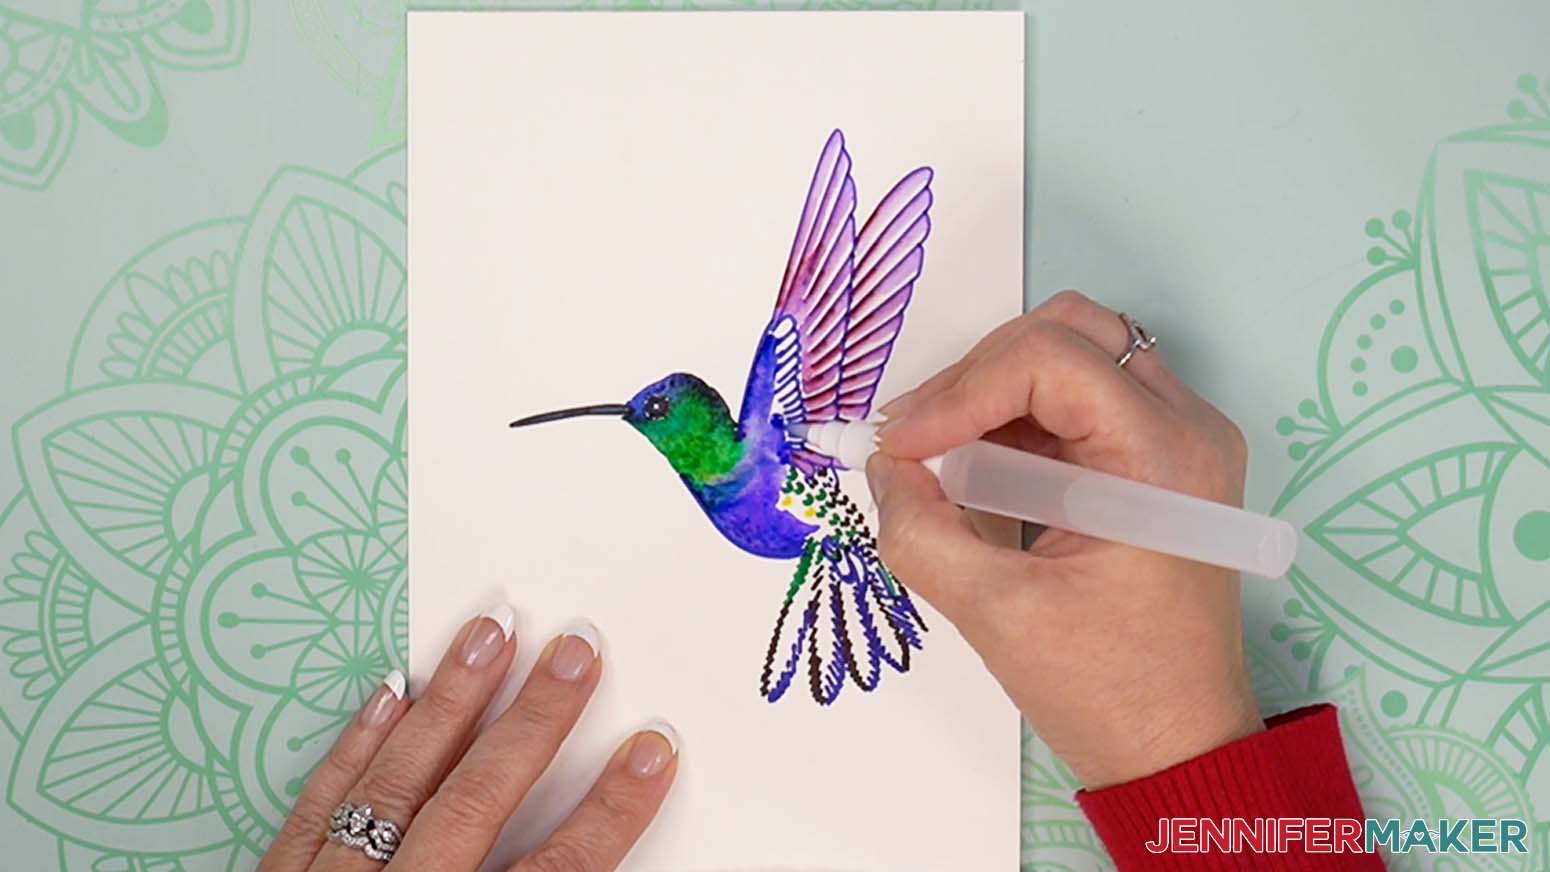
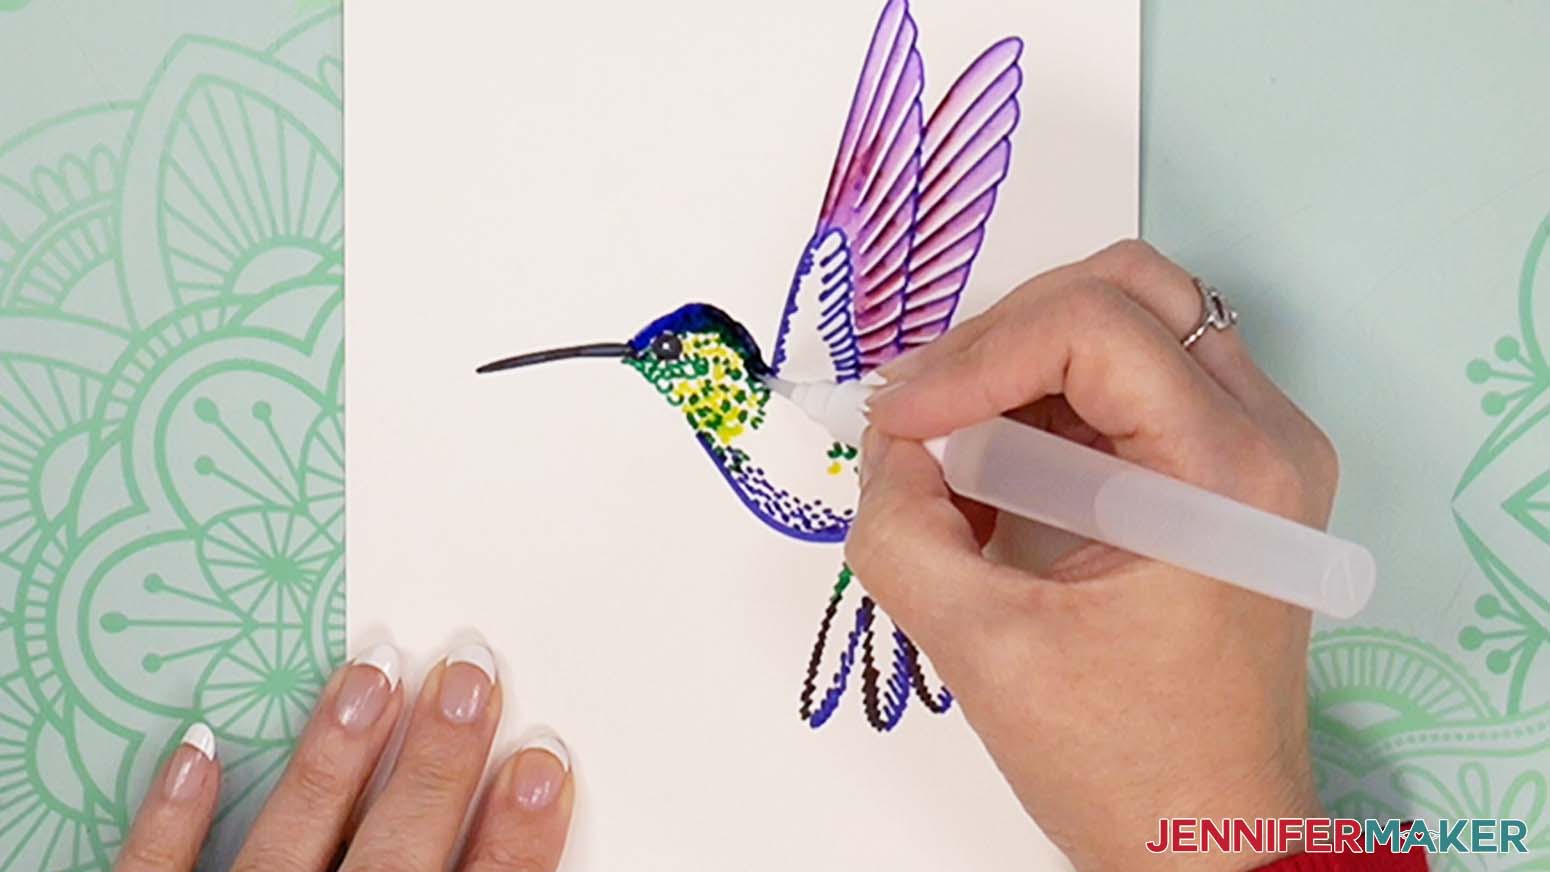
Now start working the color into the green area under the wing.
When you get to the black outermost tail, pull your brush all the way down to the end.
Fill in the smaller blue feathers and the rest of the black and green area.
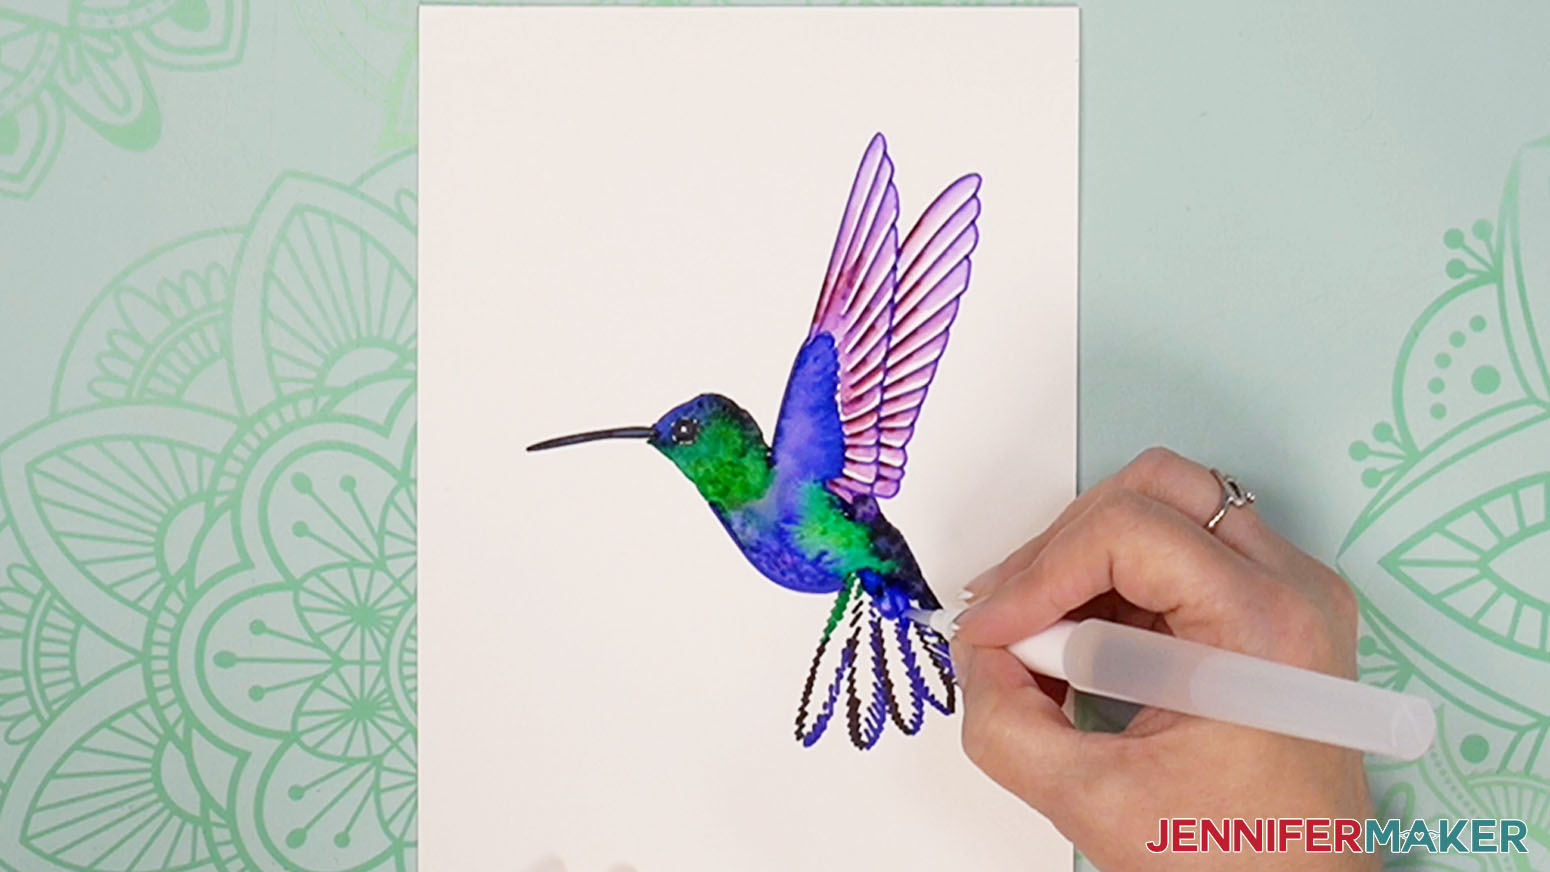
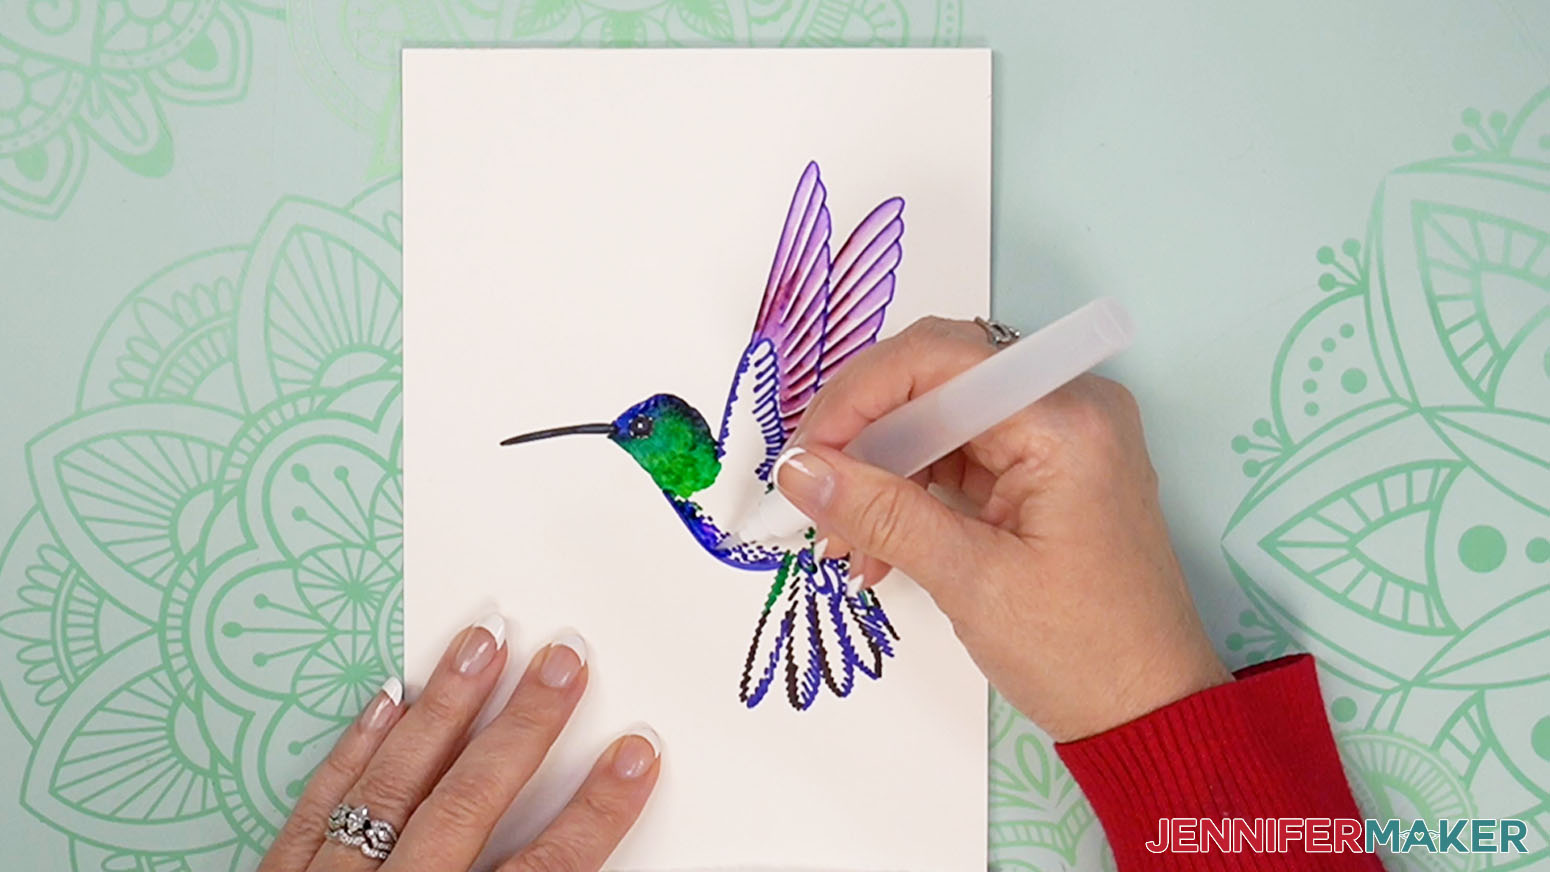
Clean your brush. Now we'll paint the tail feathers starting with the green. Using a damp brush, pull the brush downward toward the black marks. Try connecting the outer parts of the marks like a dot-to-dot to form a solid line. After you have brushed this area, pull the color over half of that feather. Continue to do this with all the black colored areas.
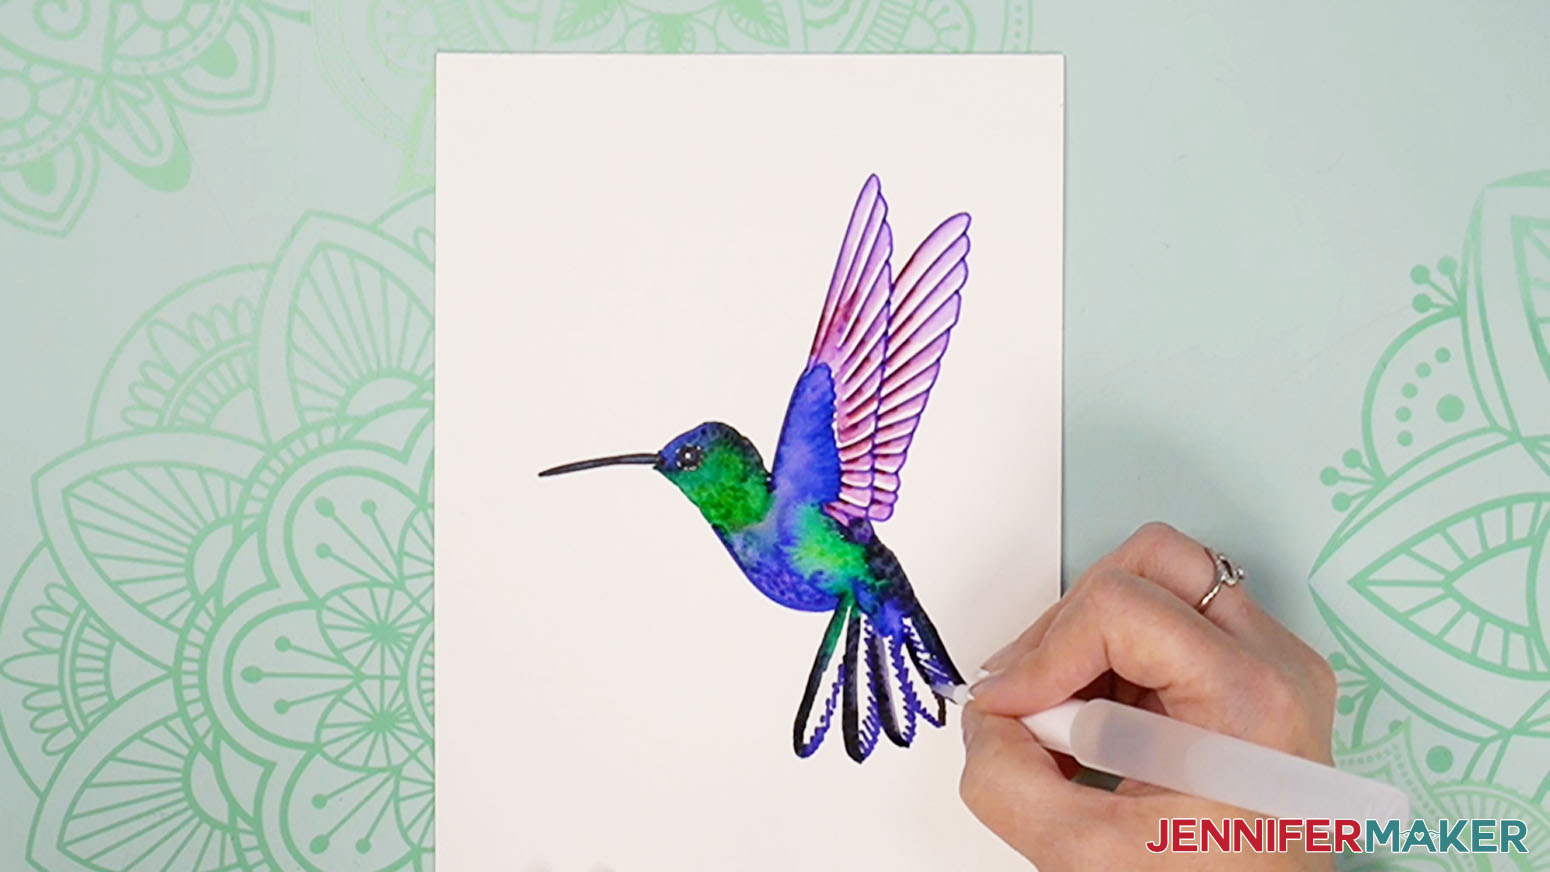
With a clean brush do the same to the blue tail marks.
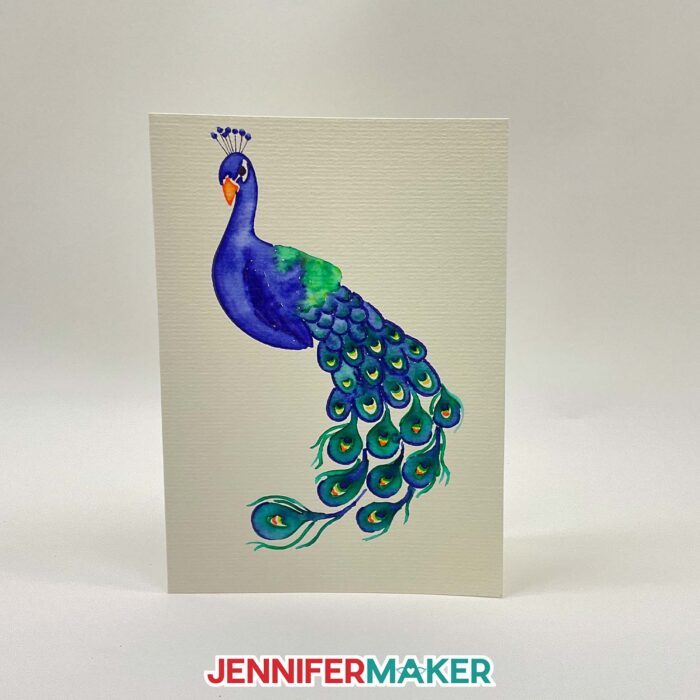
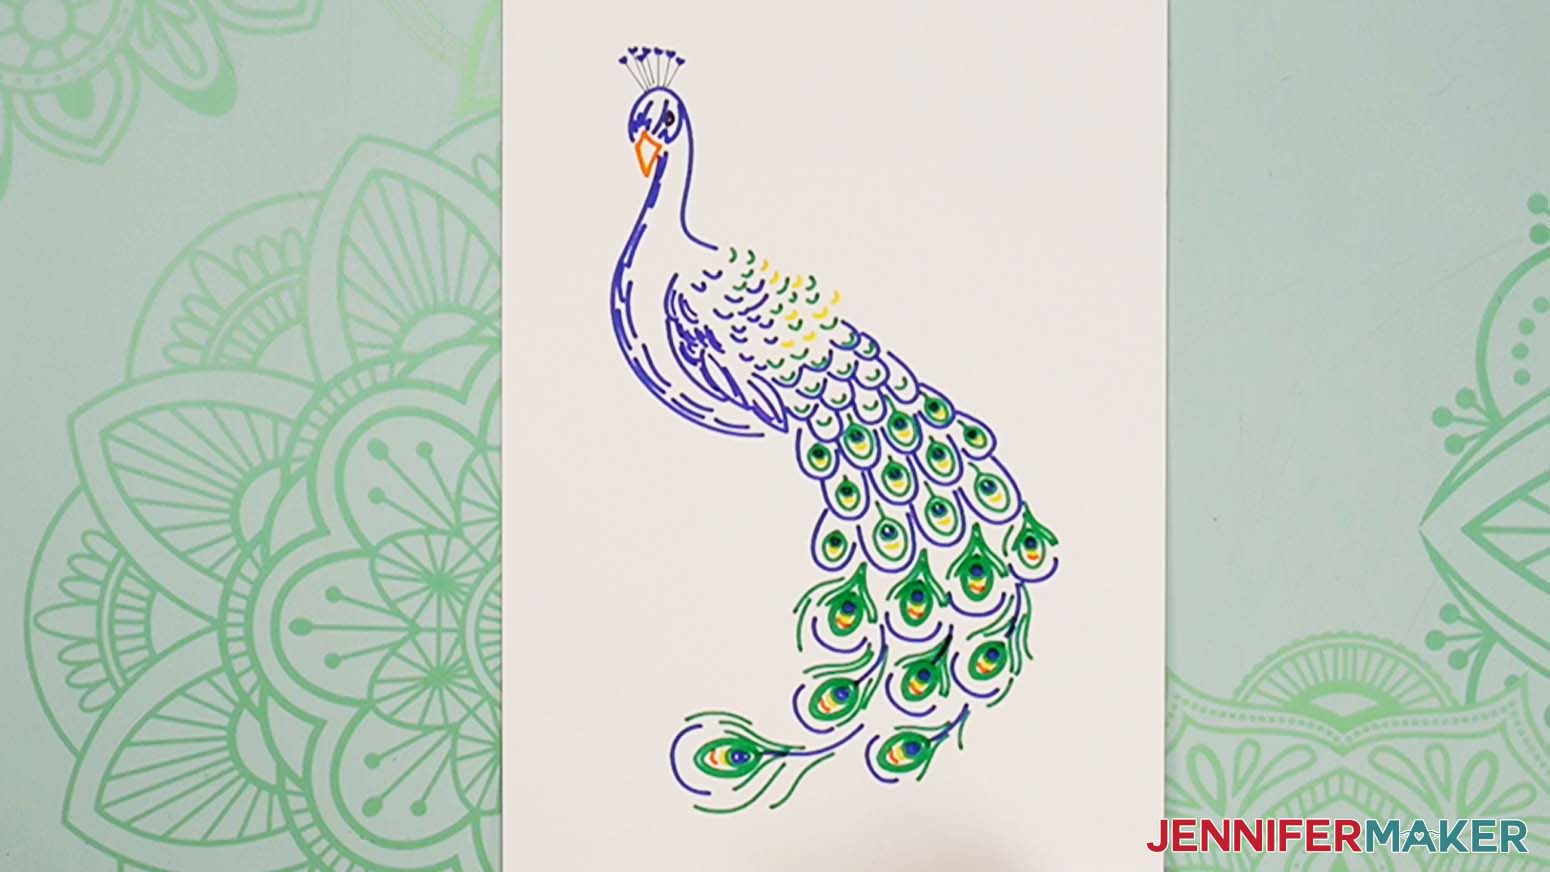
PEACOCK
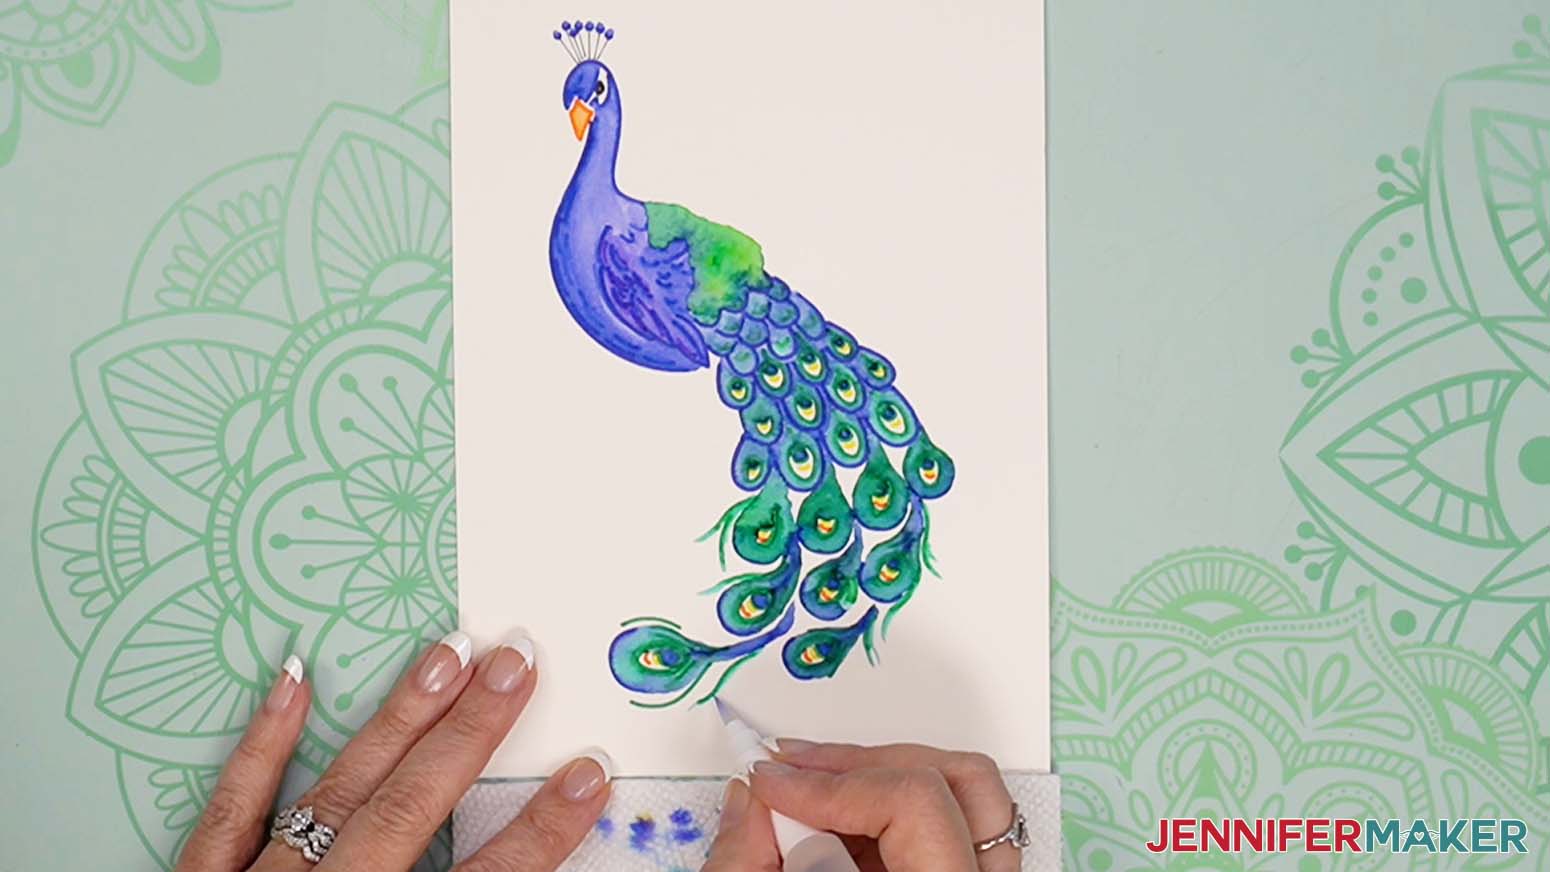
This is what the peacock looks like right after its drawn.
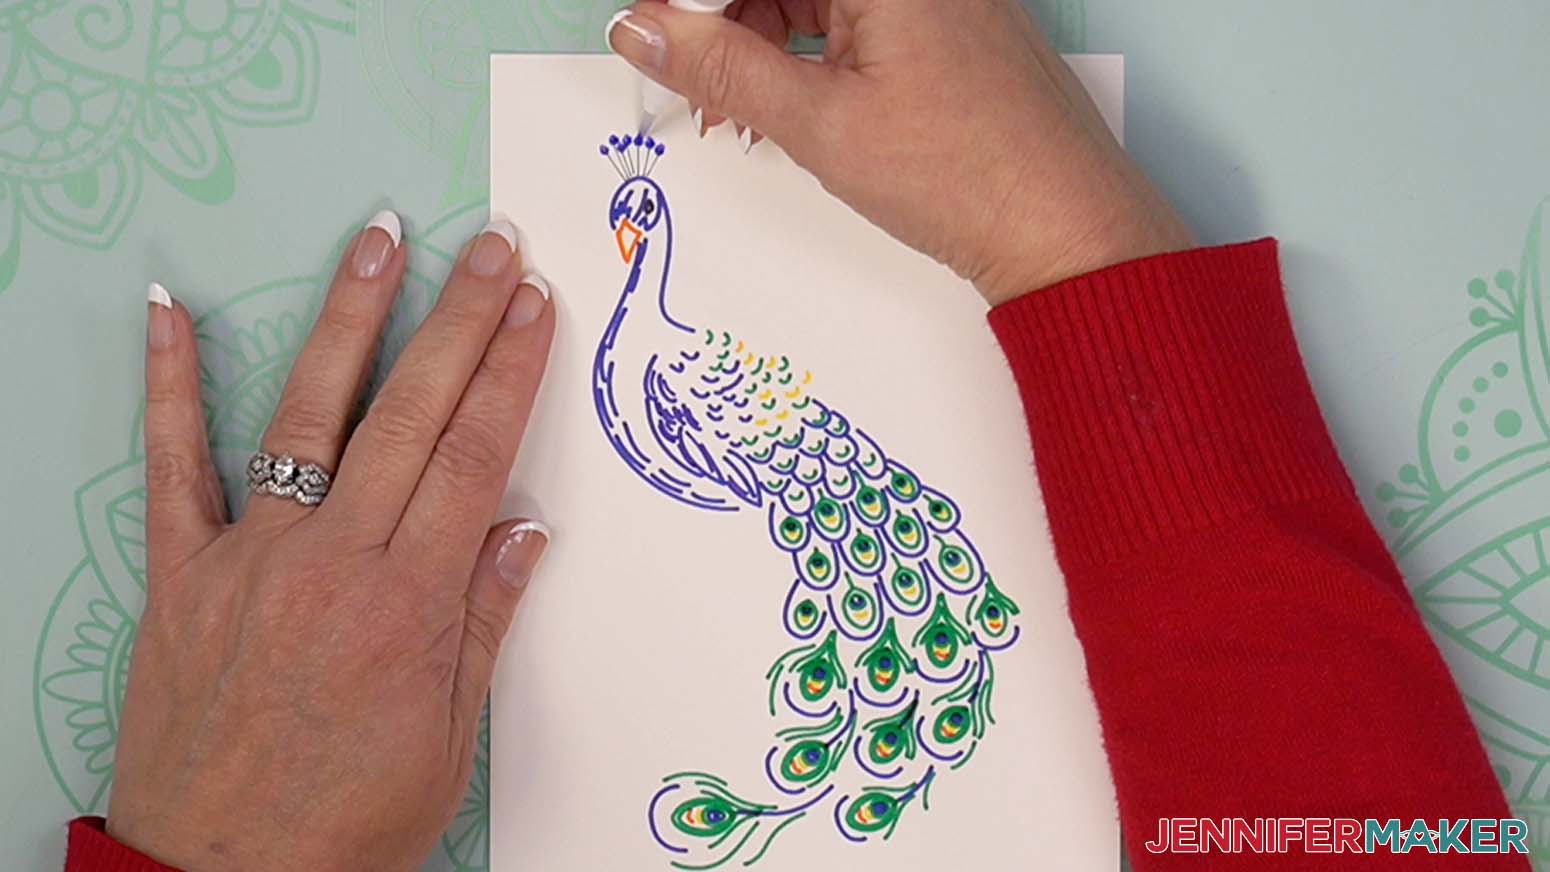
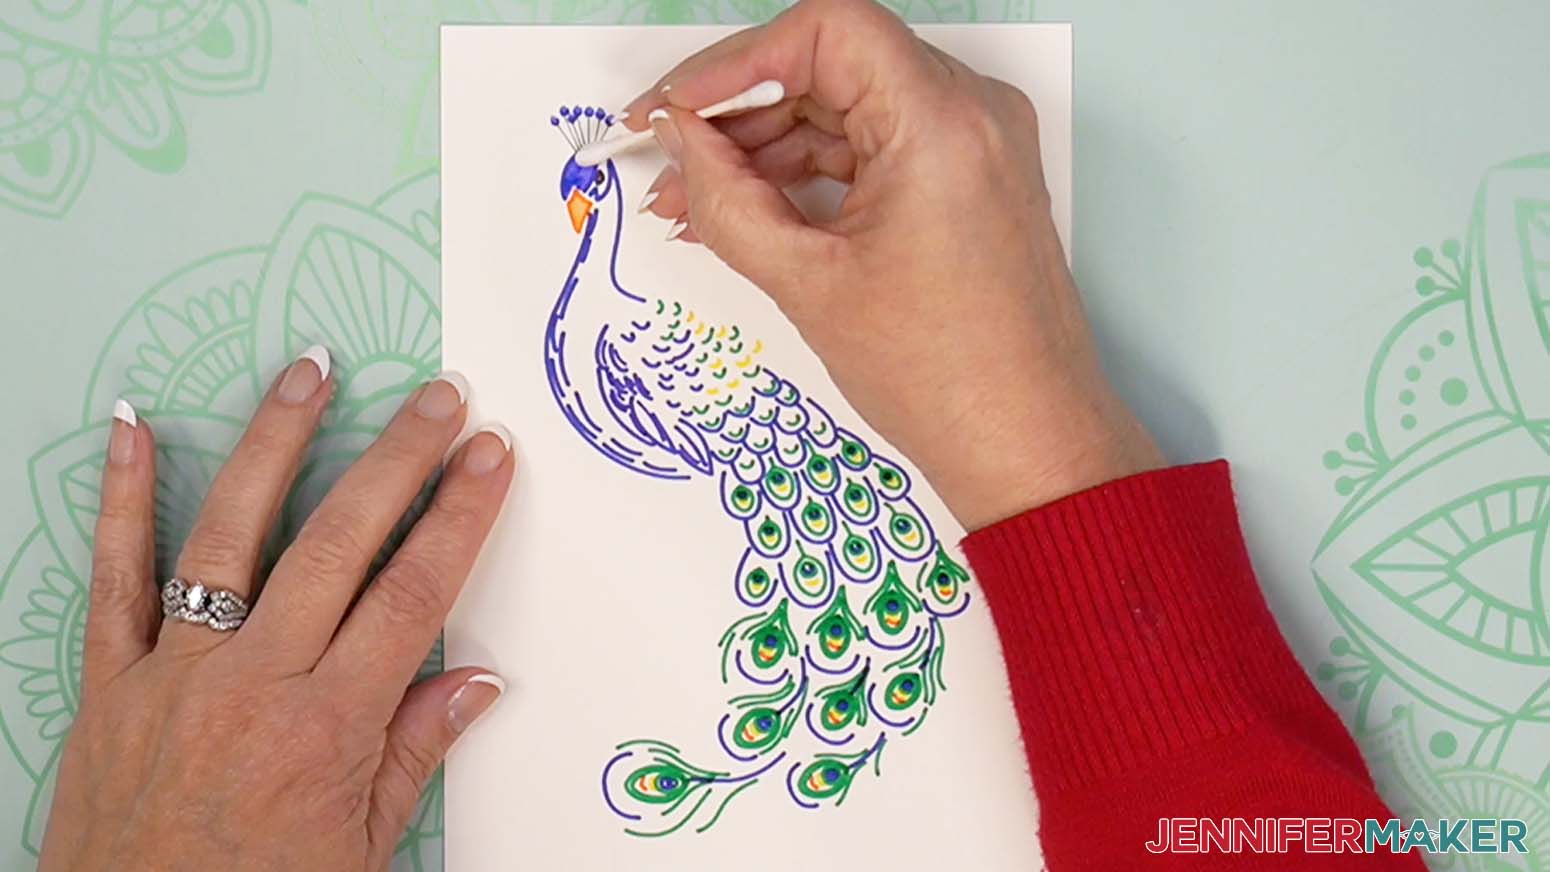
Start with a damp/dry brush and lightly dab the crest feathers on top of its head.
Clean your brush and paint the beak.
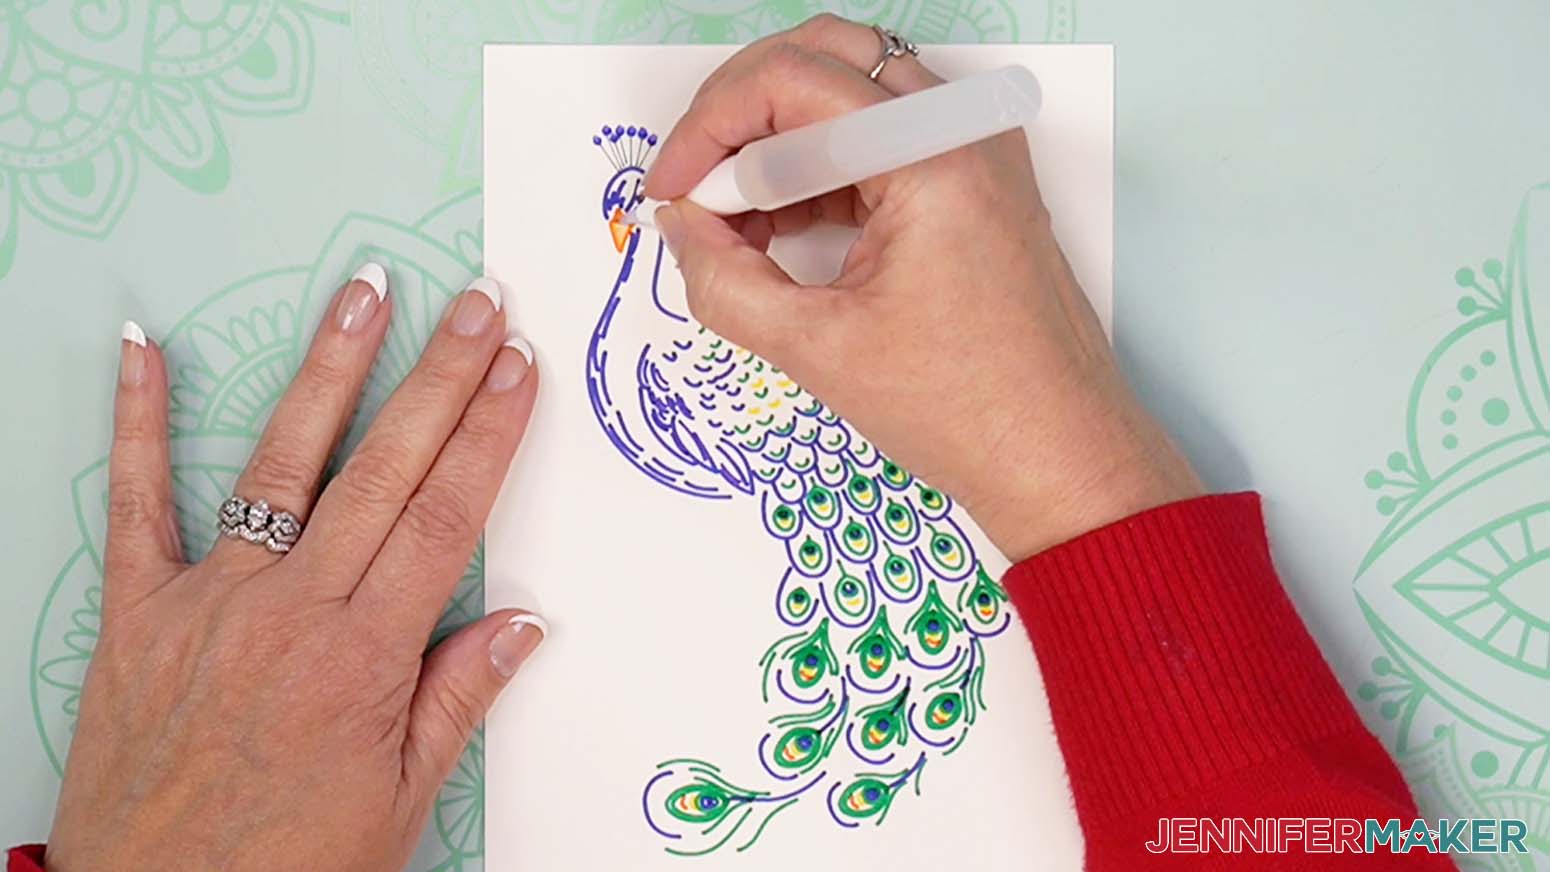
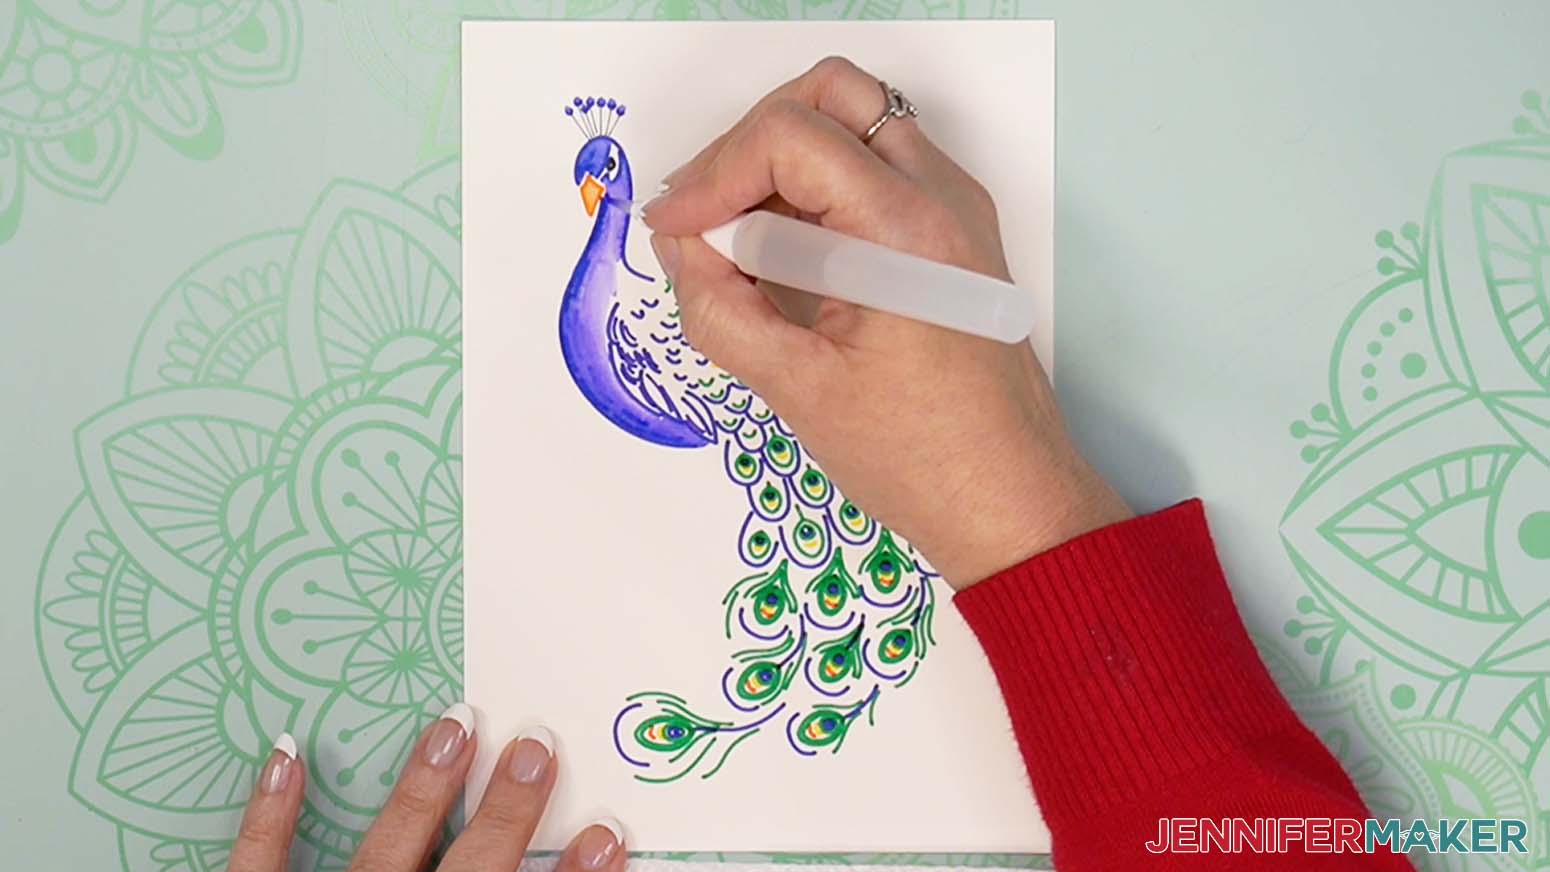
Next, using a clean brush, do the top, front part of the head. Be careful and don't let the blue paint touch the beak. Blue will start bleeding into the beak area if you do. If you would like to do a little bit of shading, you can use a clean, dry cotton swab near the top of the head. The dry cotton swab will lift color off of the paper and create a lighter area. Dab your brush on the paper towel and repeat until there is a lighter area.
With a wet brush, work on the neck and underside of the peacock. Run your brush over the blue marks and then pull the color to the center of the body stopping at the wing and green marks.
Next paint the wing.
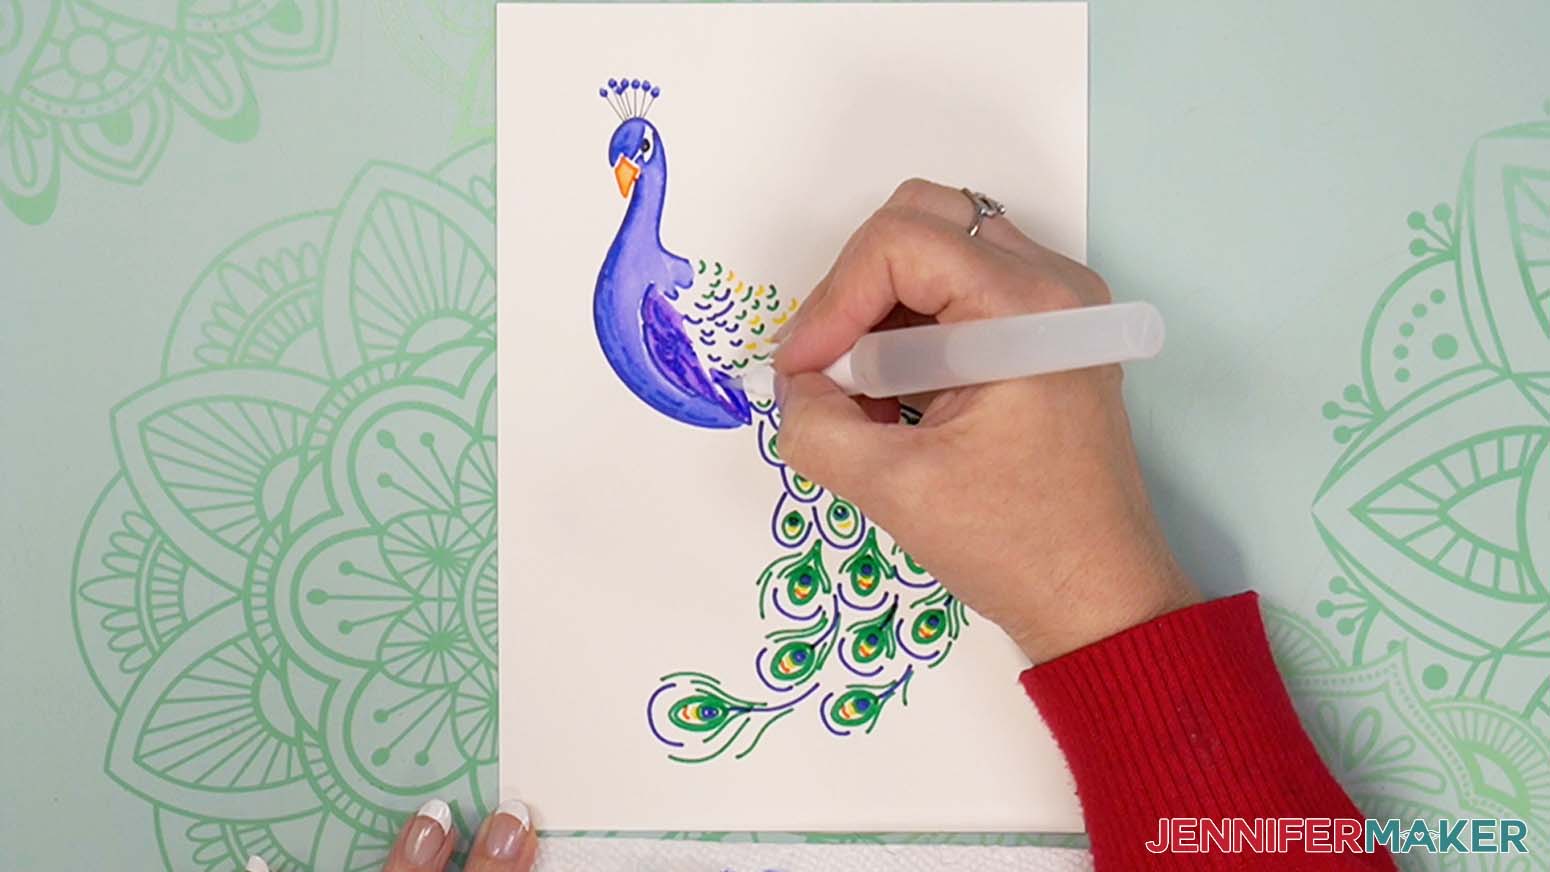
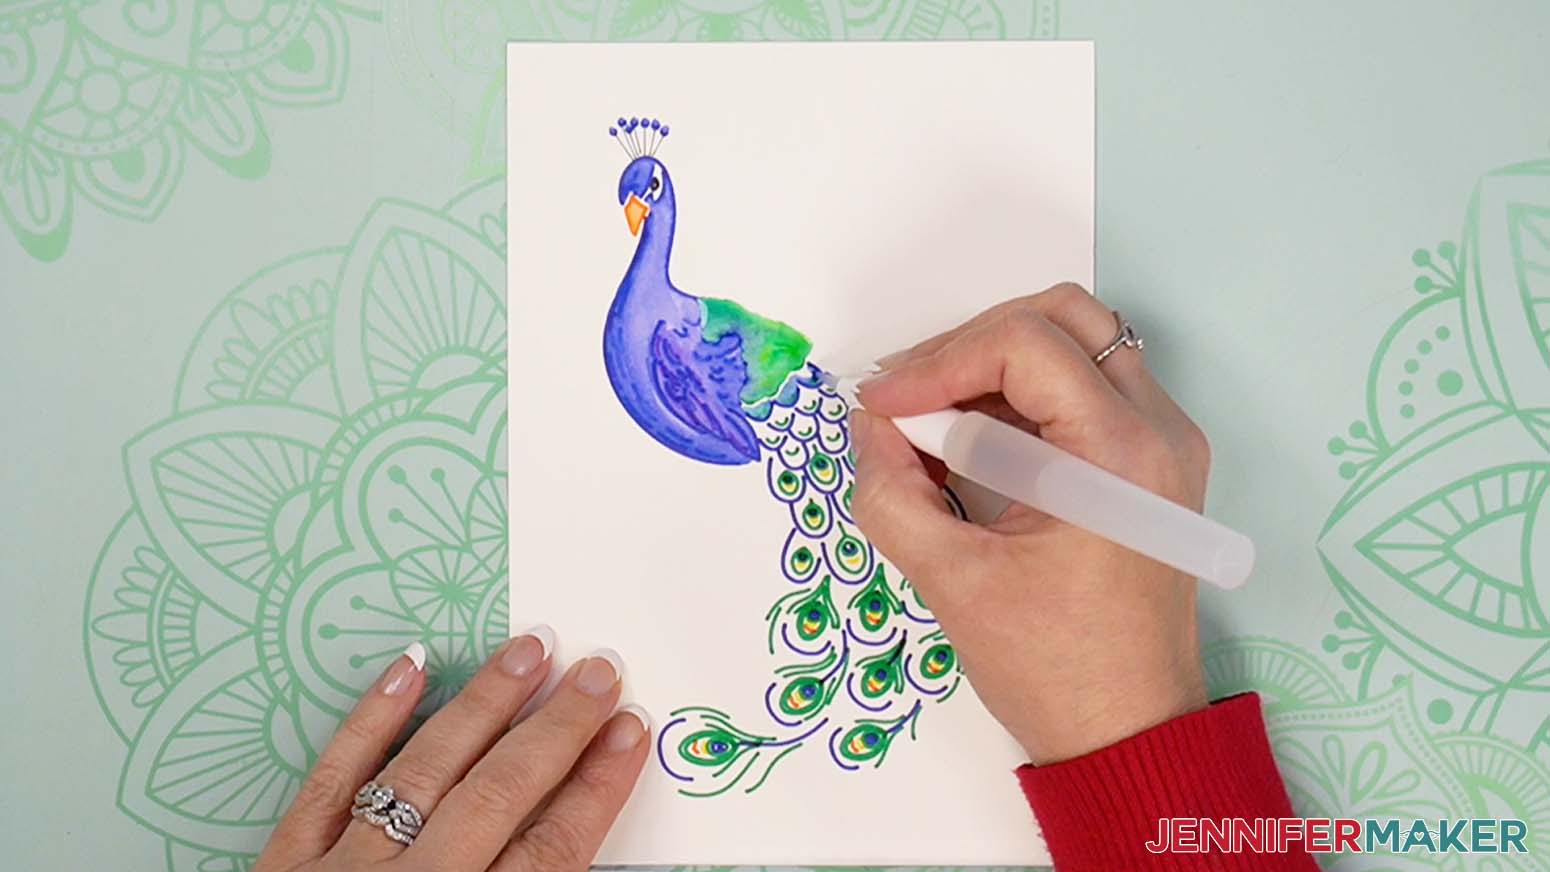
For the rest of the body start by using a damp brush on the blue scallop marks. Clean your brush and then with a damp brush start painting the green and yellow marks. Dab the blue area to join the two sections together.
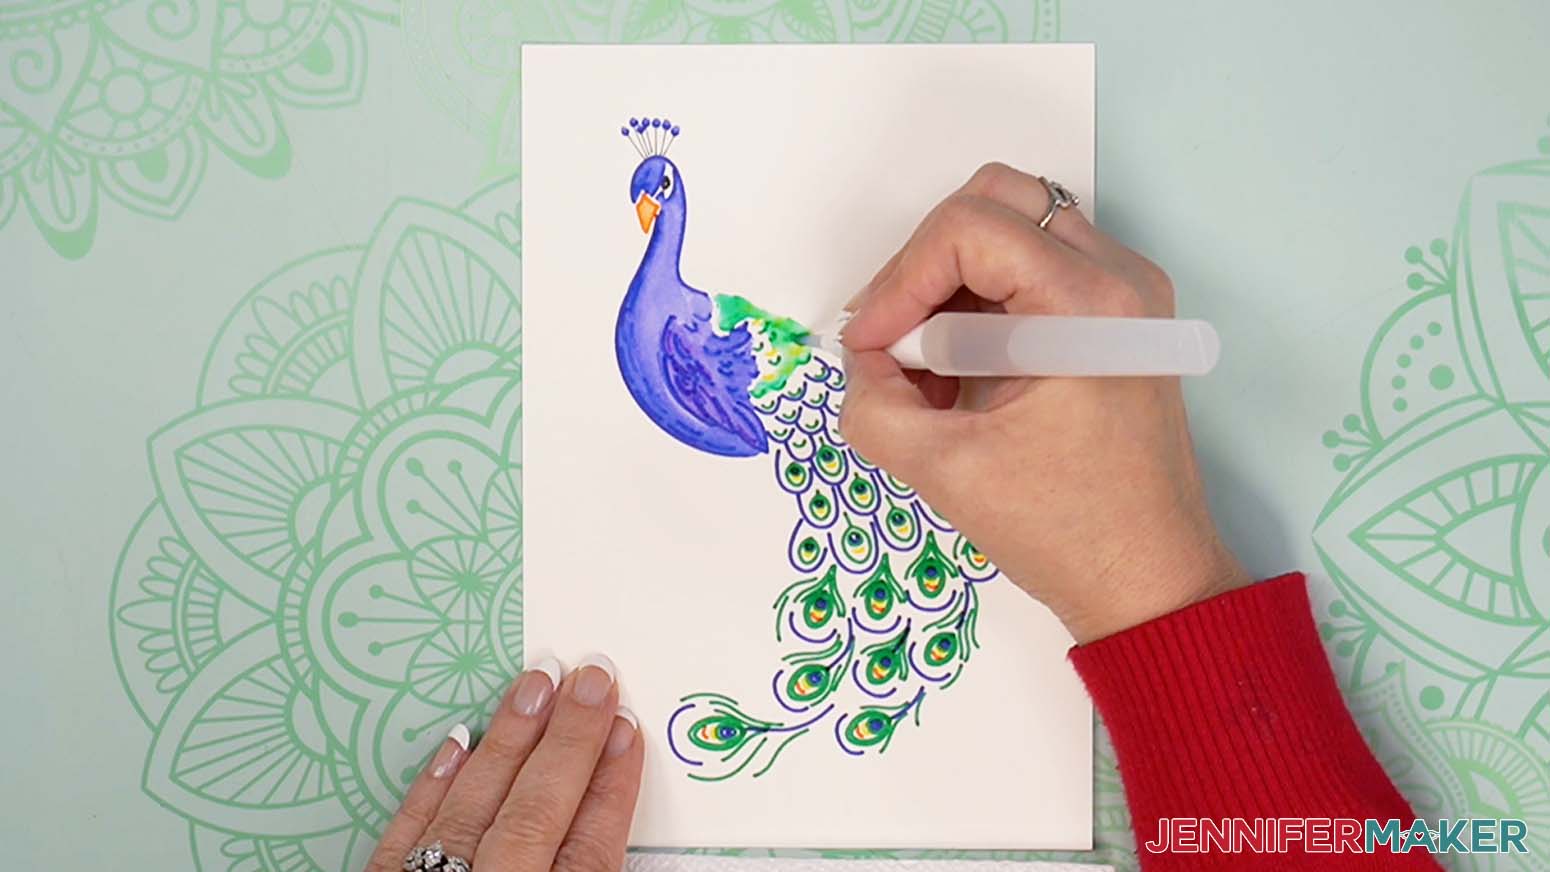
Next, we will paint the first set of scalloped tail feathers. These are the blue and green "u" shapes. With a clean damp brush mix the two colors together and push the colors up toward the layer above it. Be sure not to touch the lines above it right away, give it a minute or two to dry just a little bit and then go back in to touch up the white space.
The next set of scallops have a green oval with a blue dot and yellow mark outlined in blue. Using a damp brush, start with the blue dot and drag the brush with the blue color over the green oval to mix the colors. Fill in the feather being careful not to touch the yellow. We will paint the yellow later.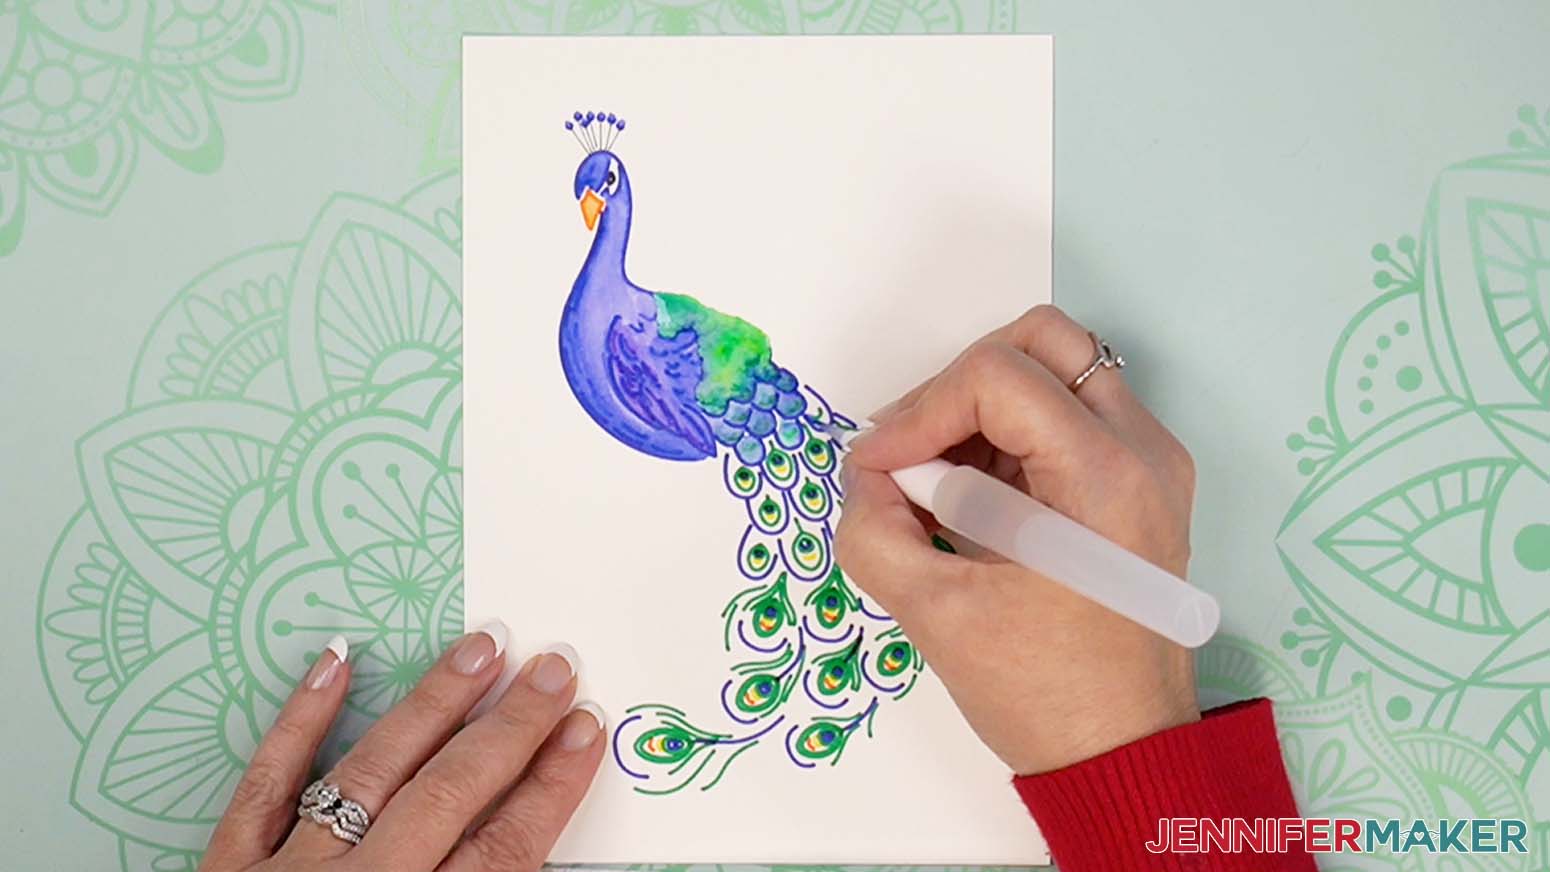
For the larger tail feathers we will start the same way as the previous step with the blue dot. Drag the blue green mixture towards the other scallops and then down towards the blue "U" shape. Leave the yellow and orange marks alone for now. 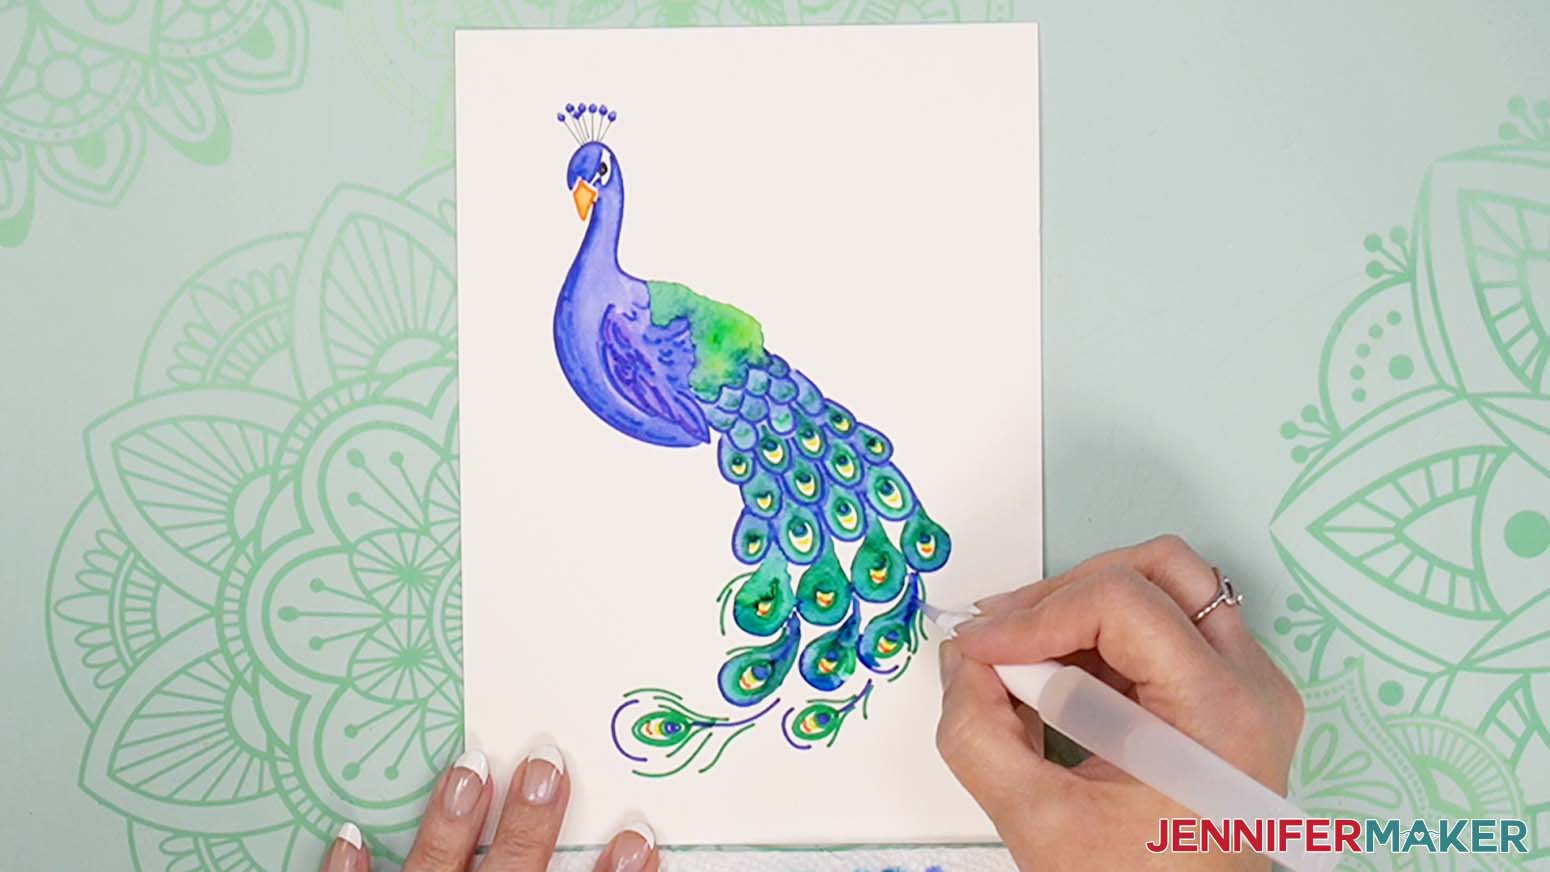
The extra green lines are flourishes, drag a damp/dry brush over the line and extend the color, you can add other flourishes that come off of these lines as well.
Lastly, using a clean, damp/dry brush lightly brush over the yellow and the yellow/orange marks.
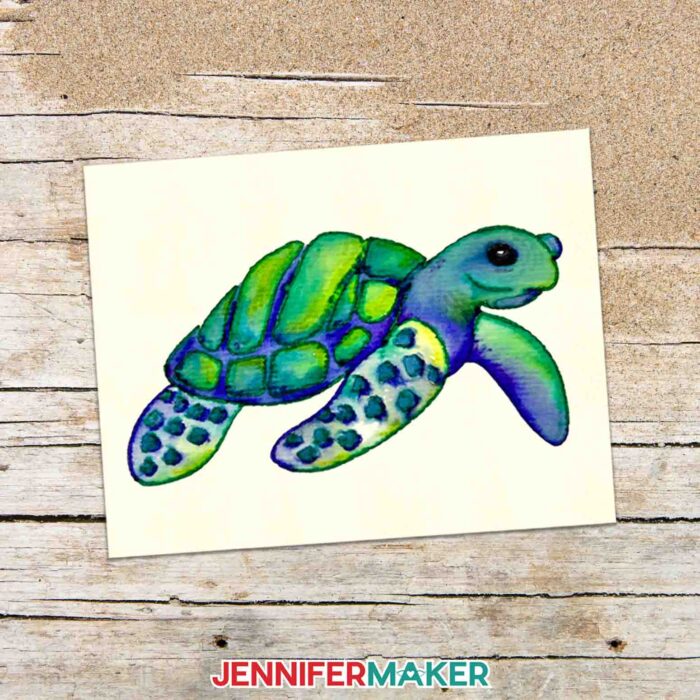
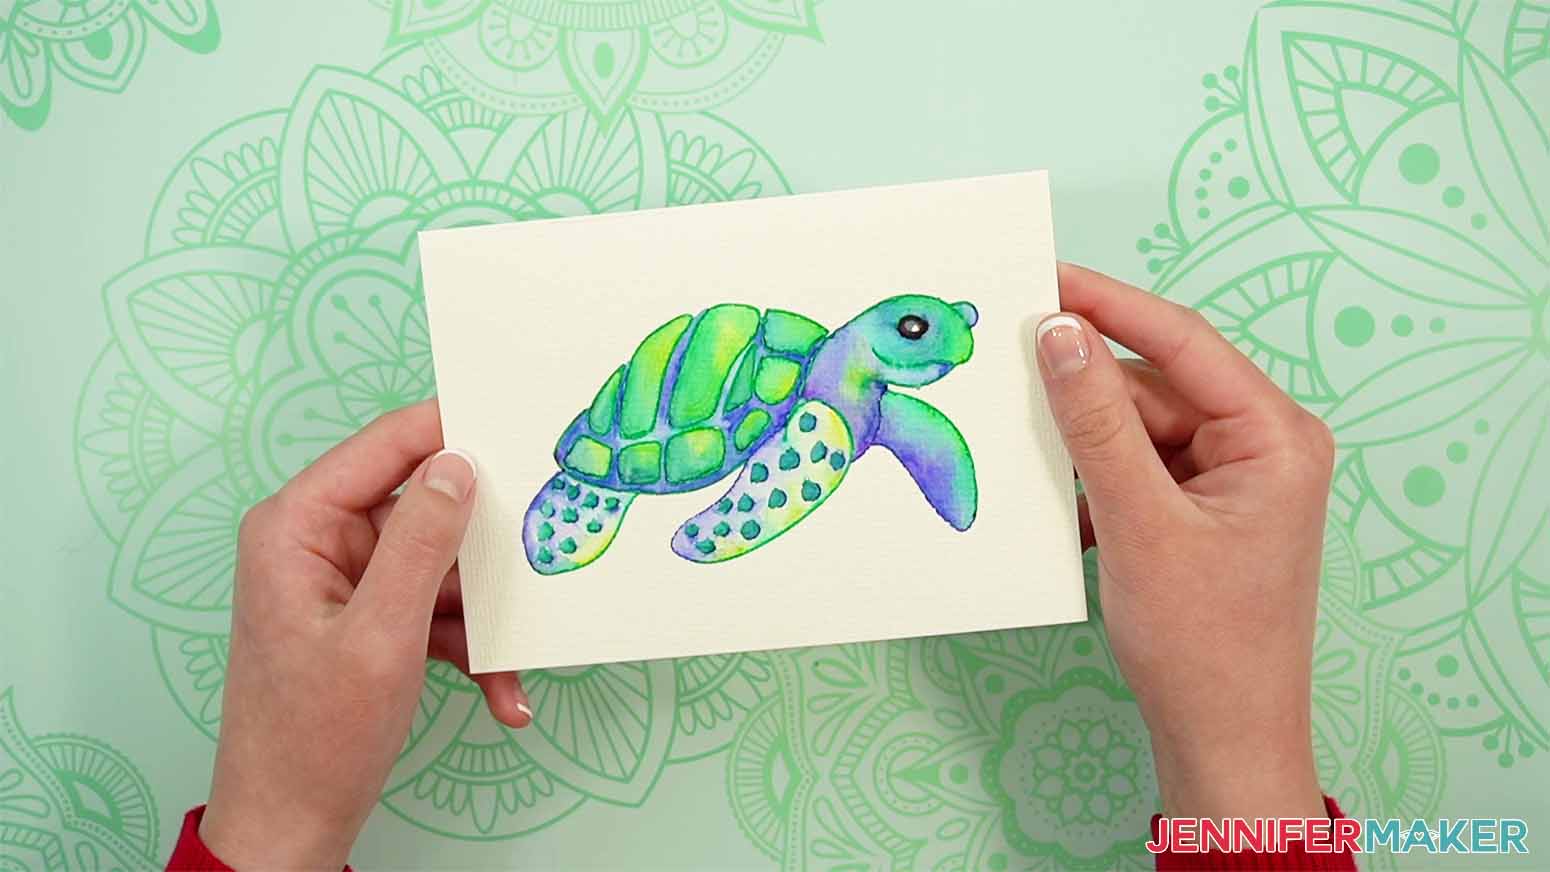
SEA TURTLE
This is what the sea turtle looks like after it’s drawn

Start with the inside of the eye.
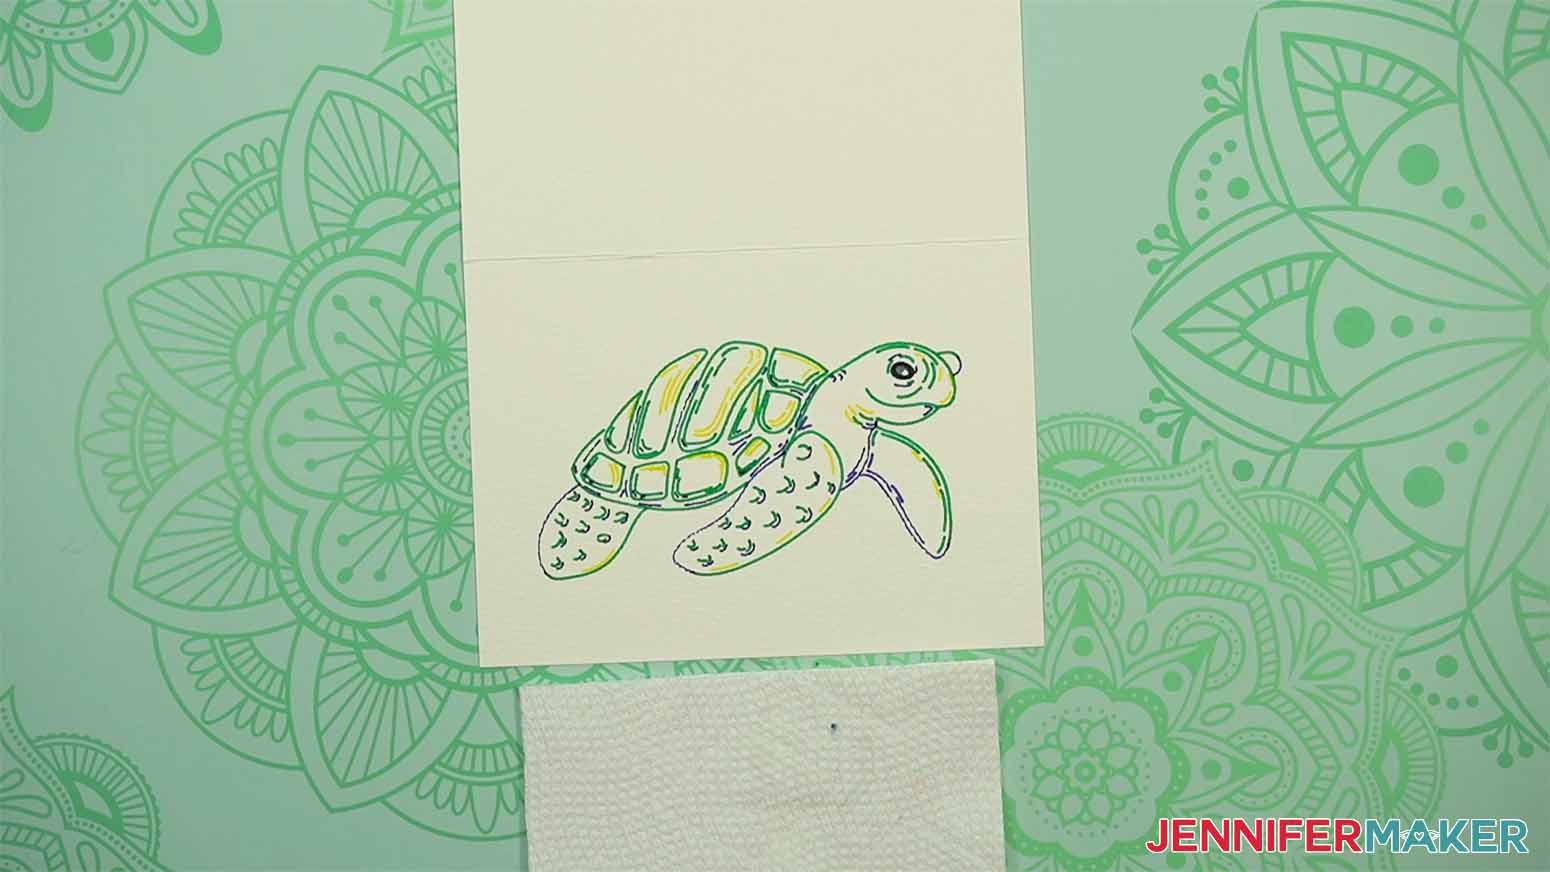
Then paint the spots on the flippers.
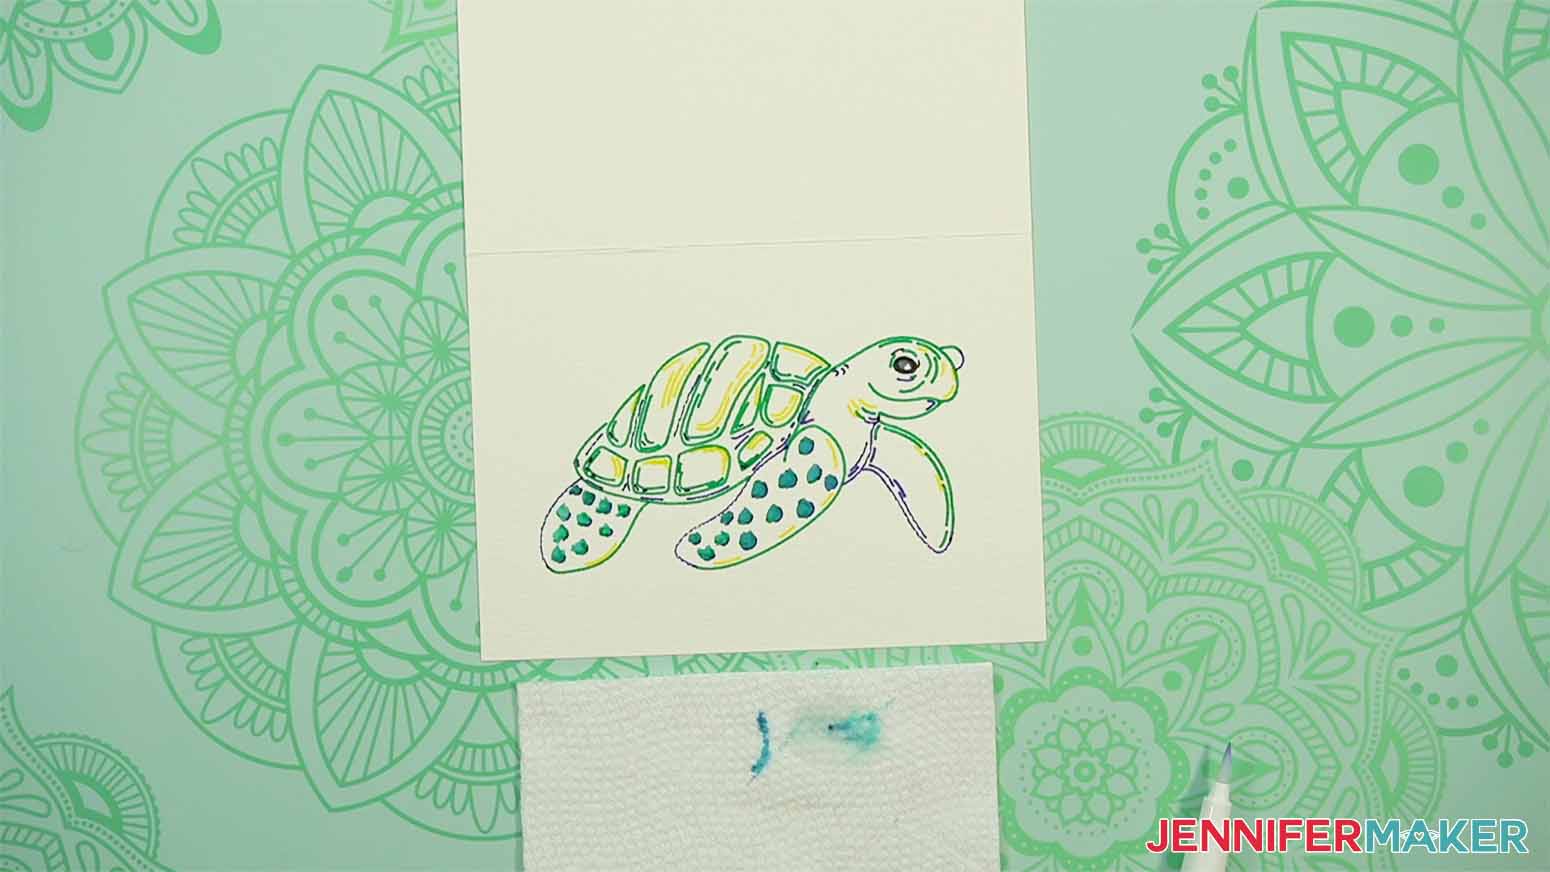
While those dry, fill in the flipper without the spots, and the bumps on the shell.
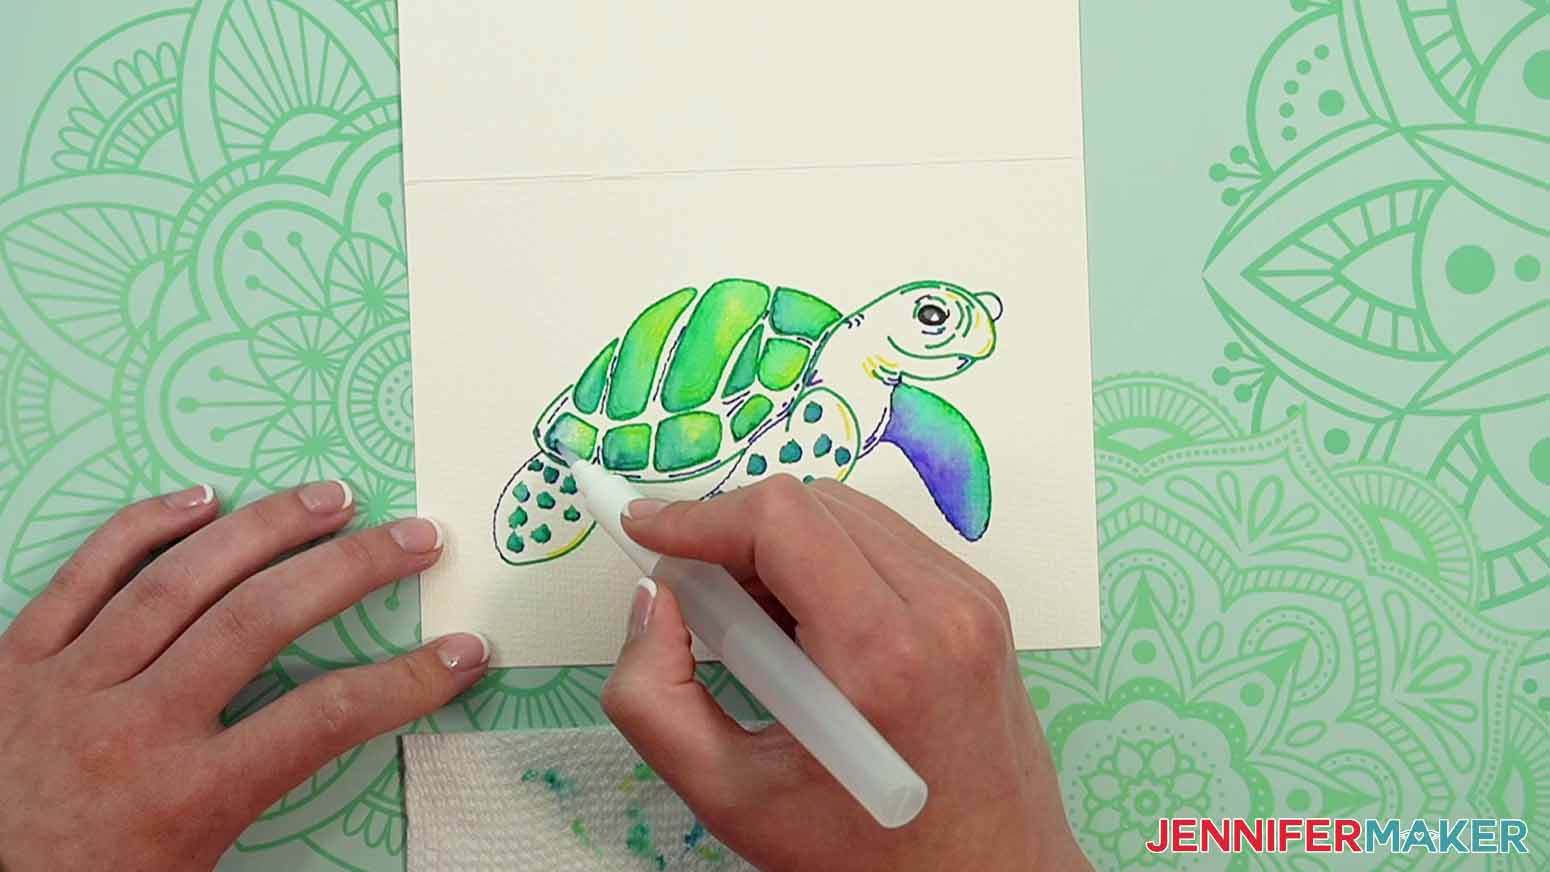
Next, do the head. Leave some white space around the eye so the black doesn’t bleed into the rest of the head
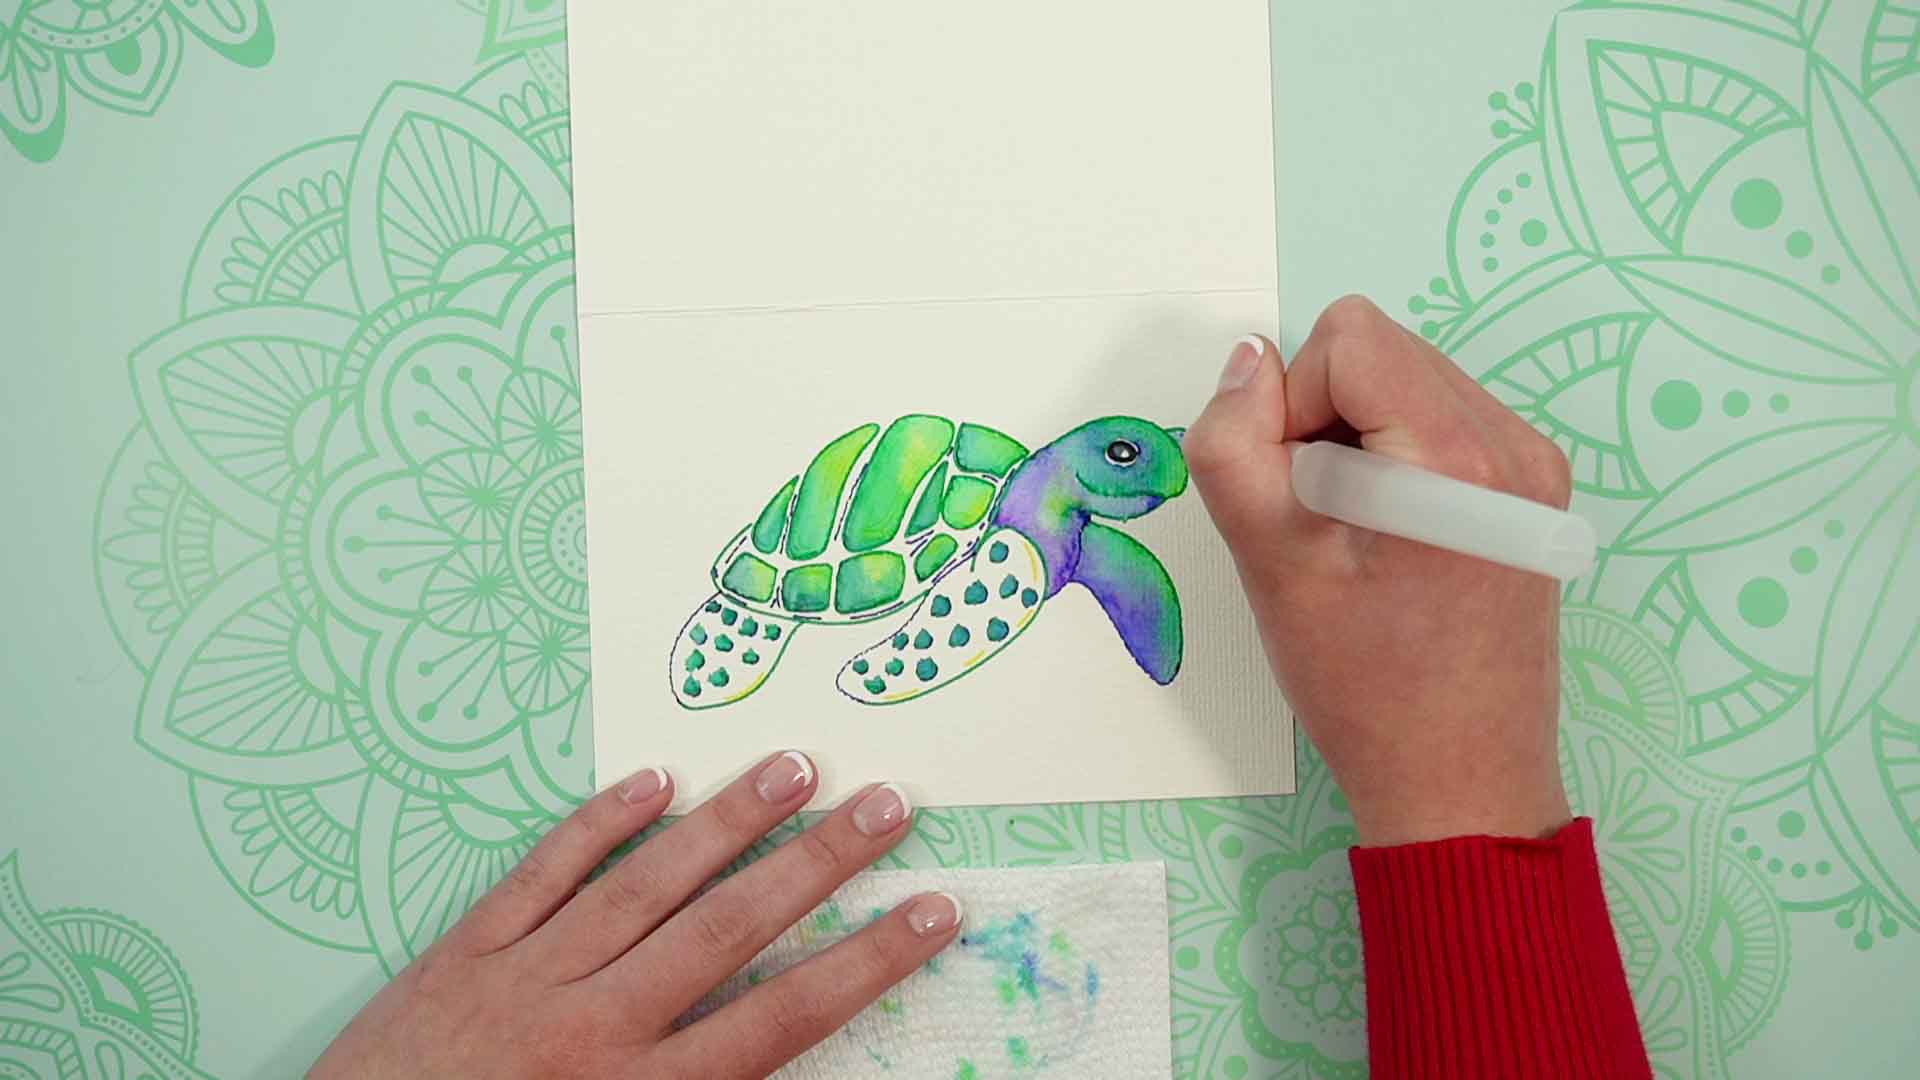
Go back and paint around the spots on the flipper and the spaces in between the shell bumps.
When the paint has dried, fill in the white space around the eye with the black marker.
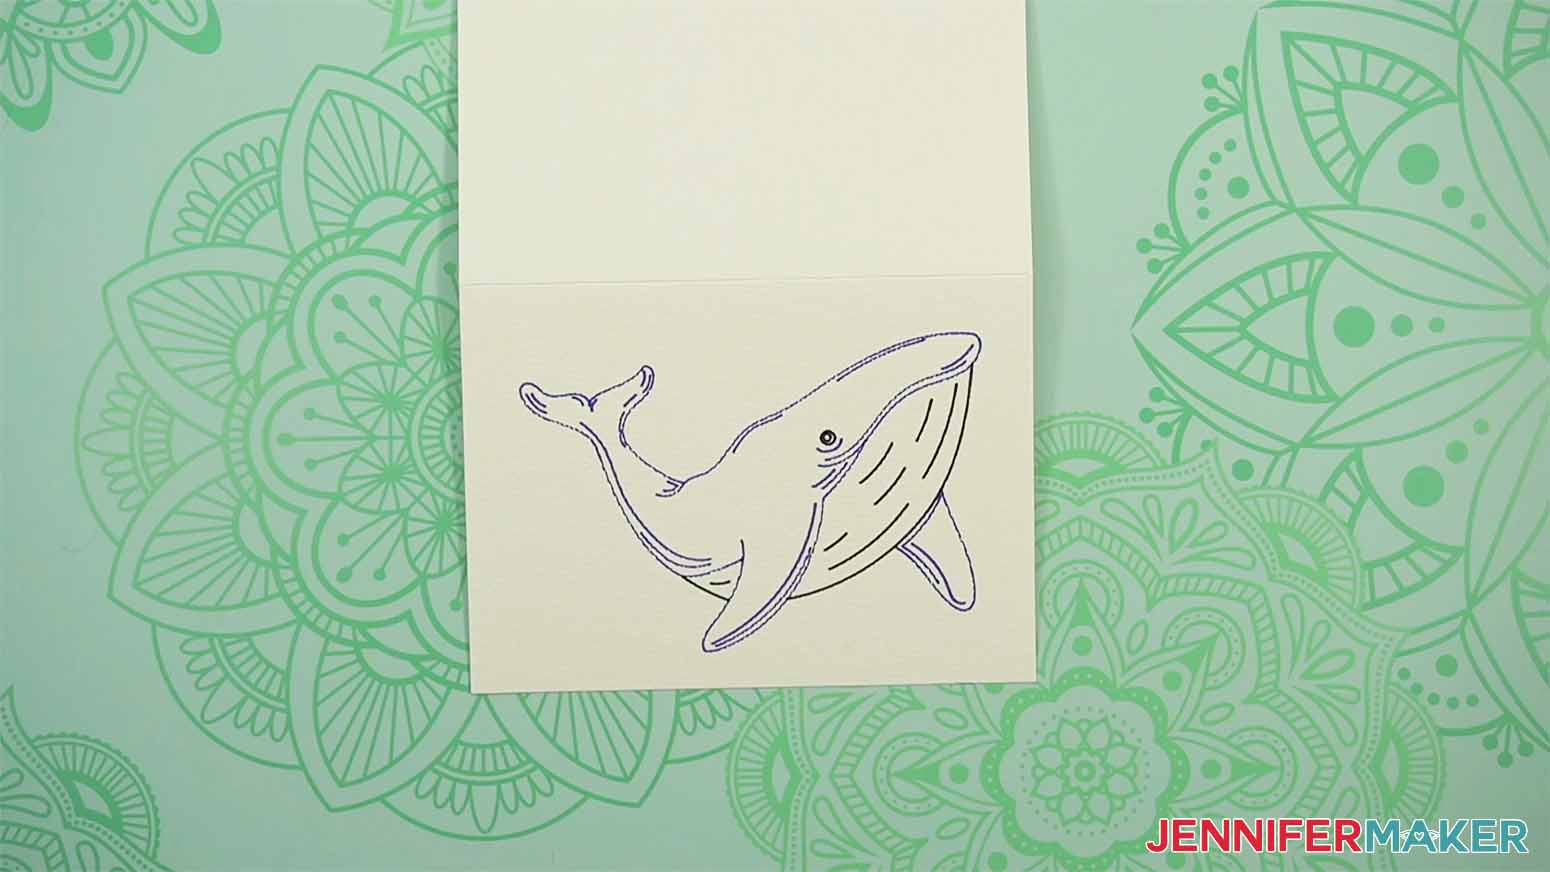
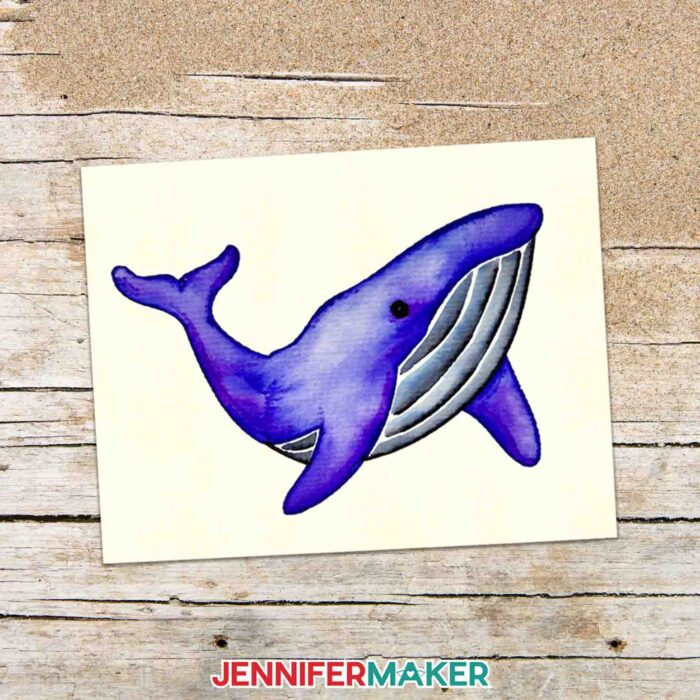
WHALE
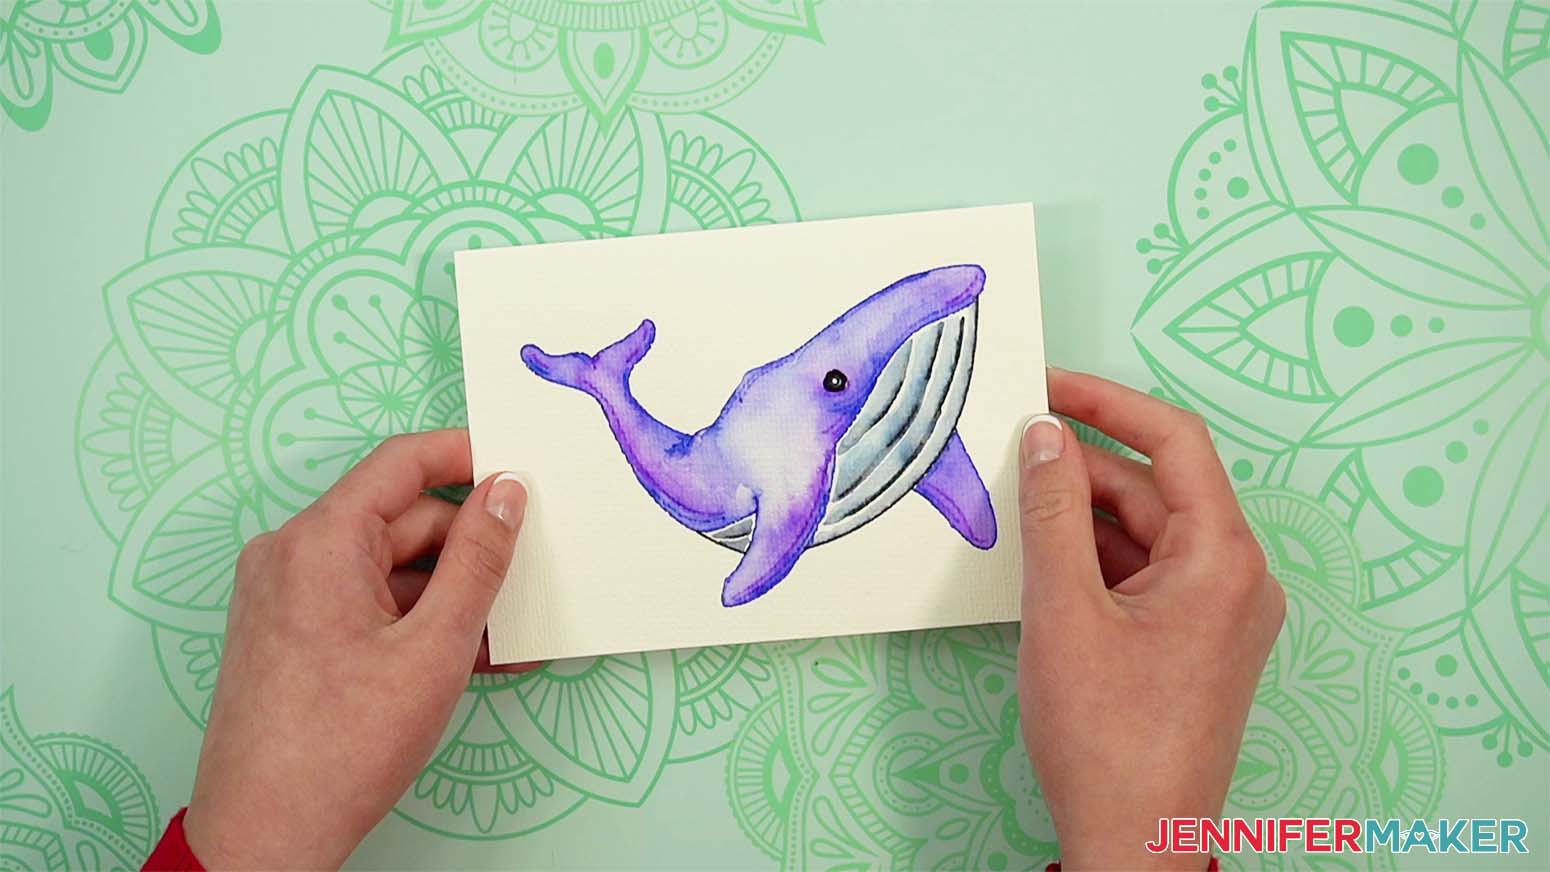
This is what the whale looks like after it’s drawn
Start with the eye and leave a little highlight in it.
Then work on the underside. Drag a damp brush along the black lines, connecting any broken lines and leaving some white space between that and the black line next to it.
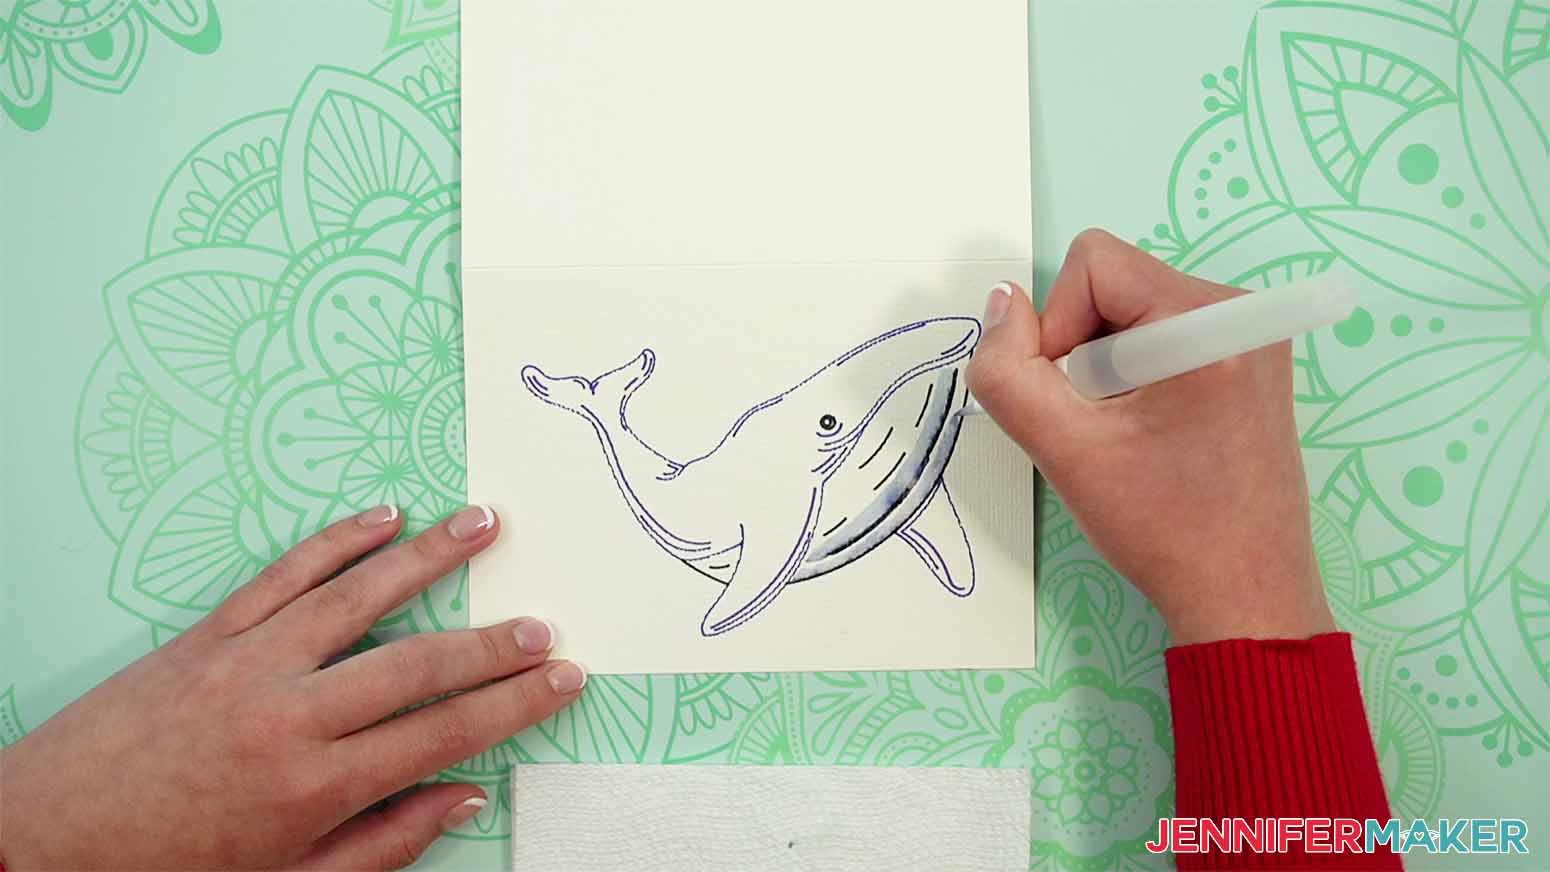
Then with a wet brush fill in the body of the whale, starting at the tail and working towards the head. Leave a little white space around the eye.
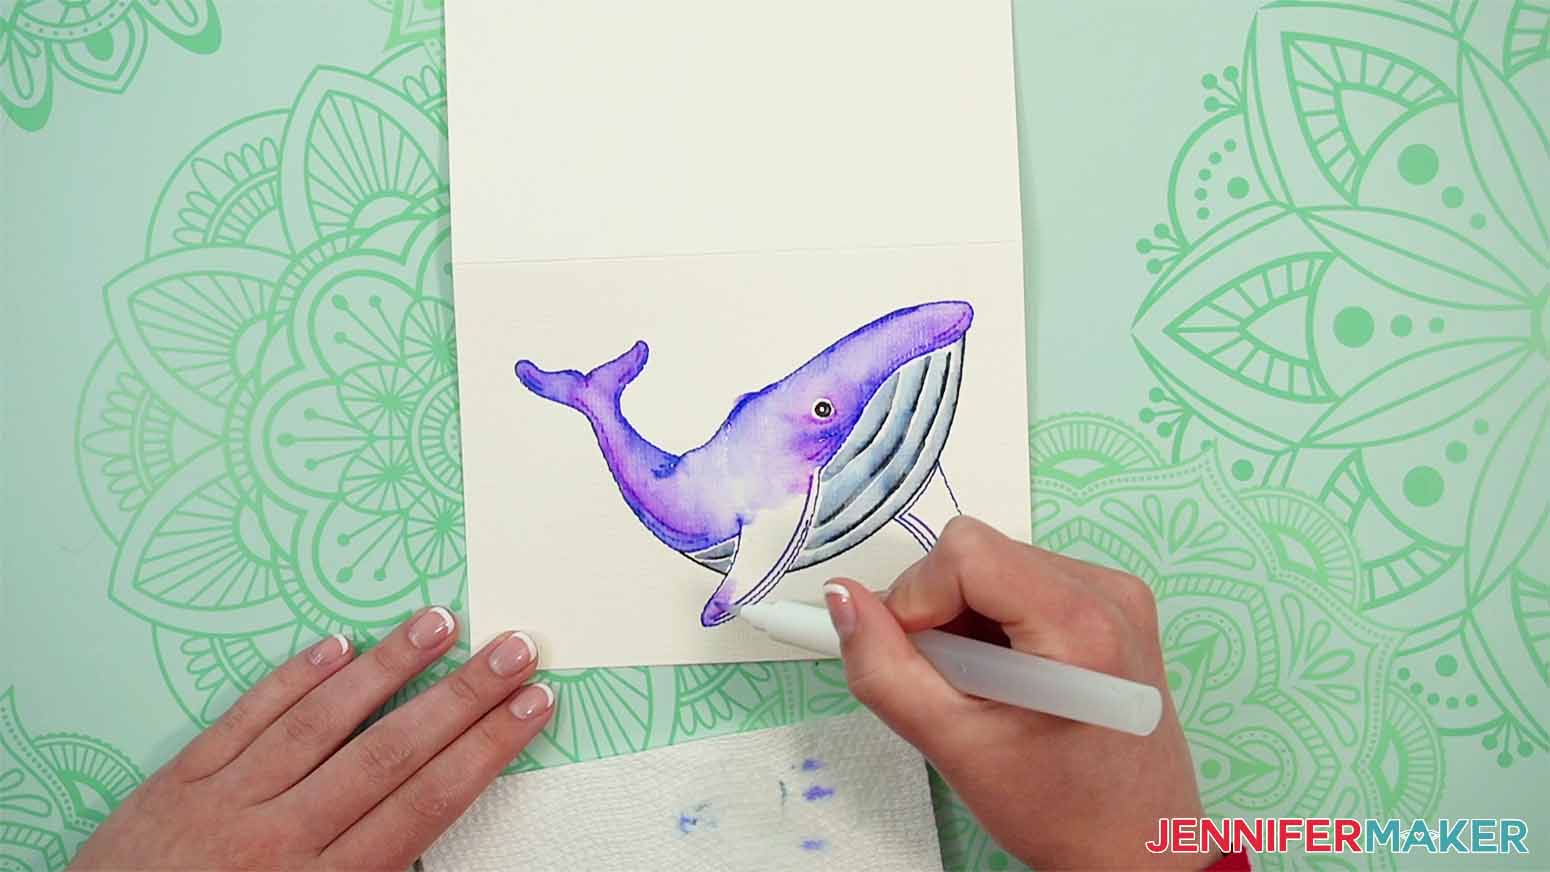
Last, fill in the flipper.
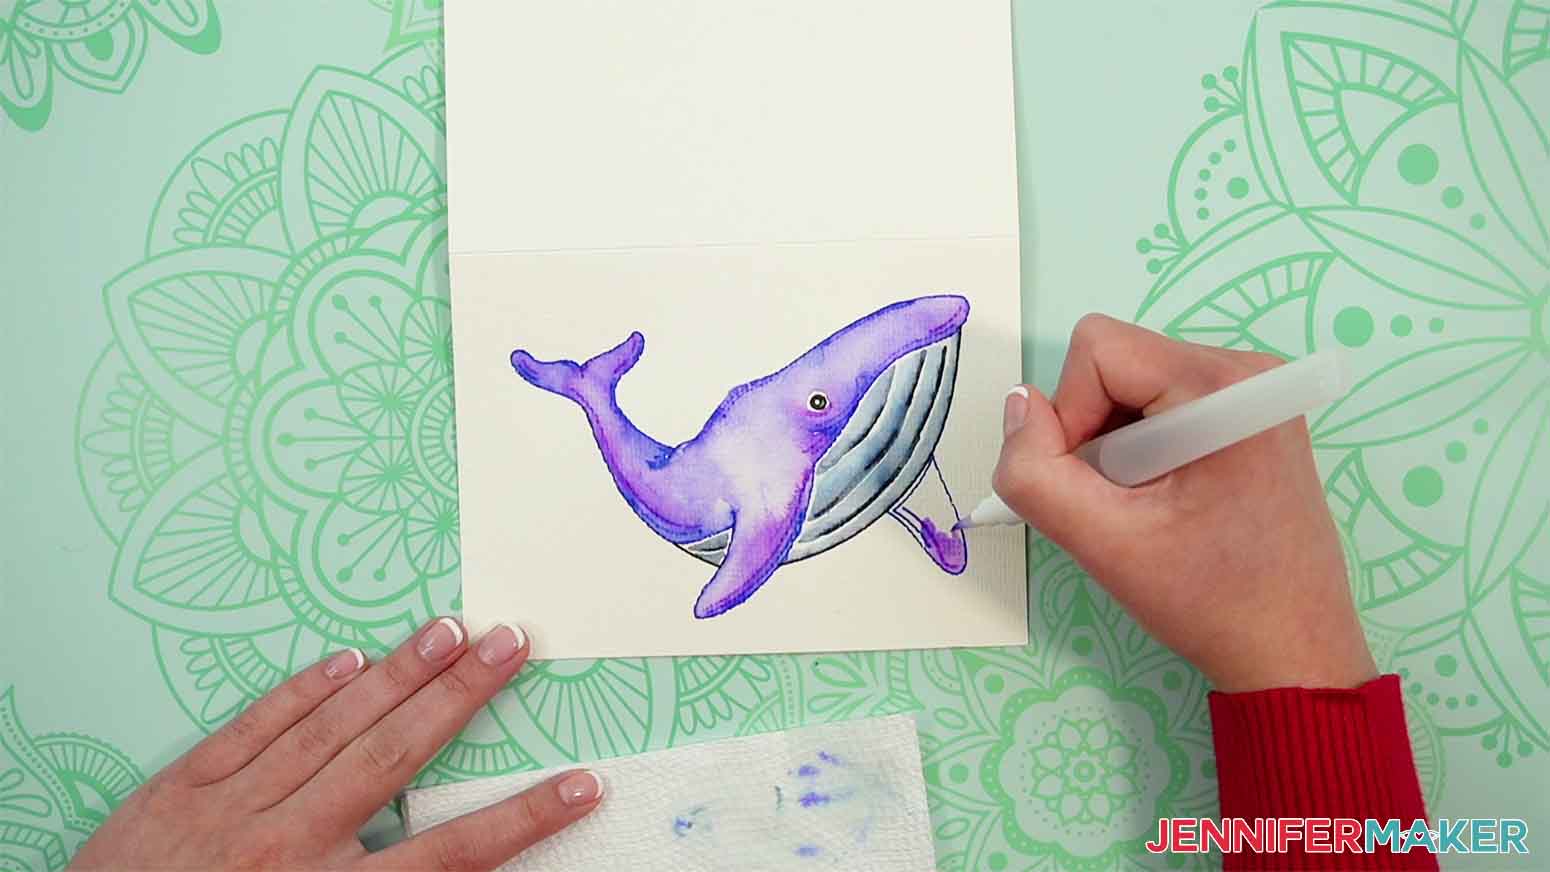
When the paint has dried, fill in the white space around the eye with the black marker.
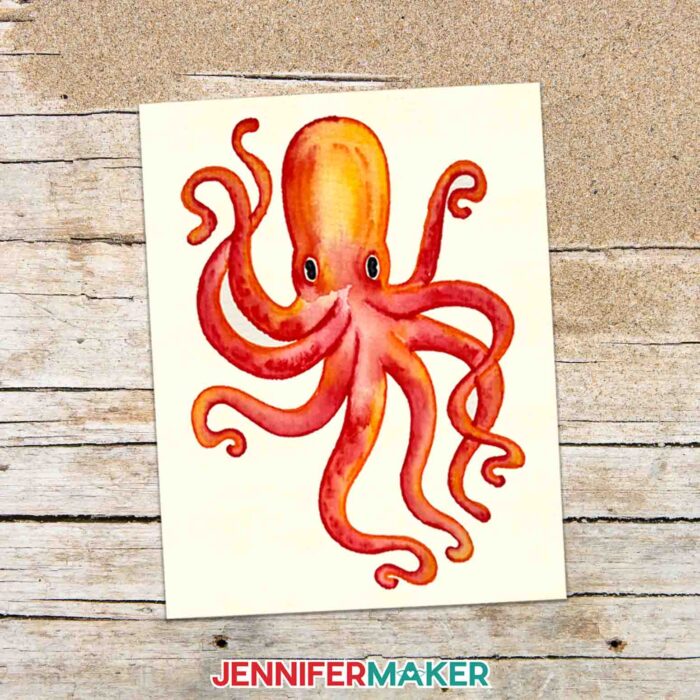
OCTOPUS
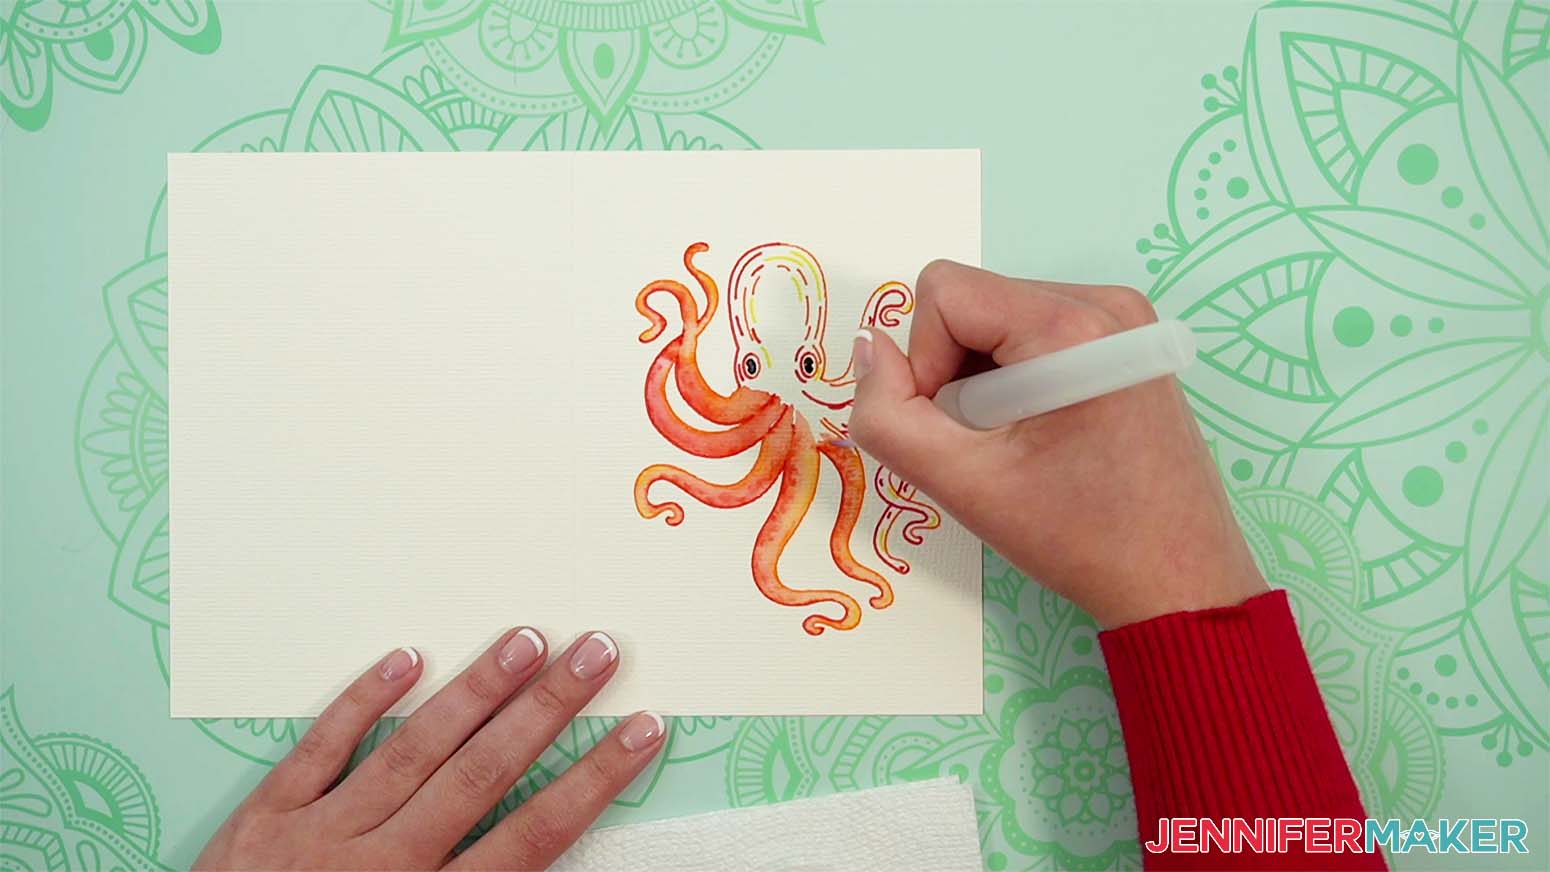
This is what the octopus looks like drawn.
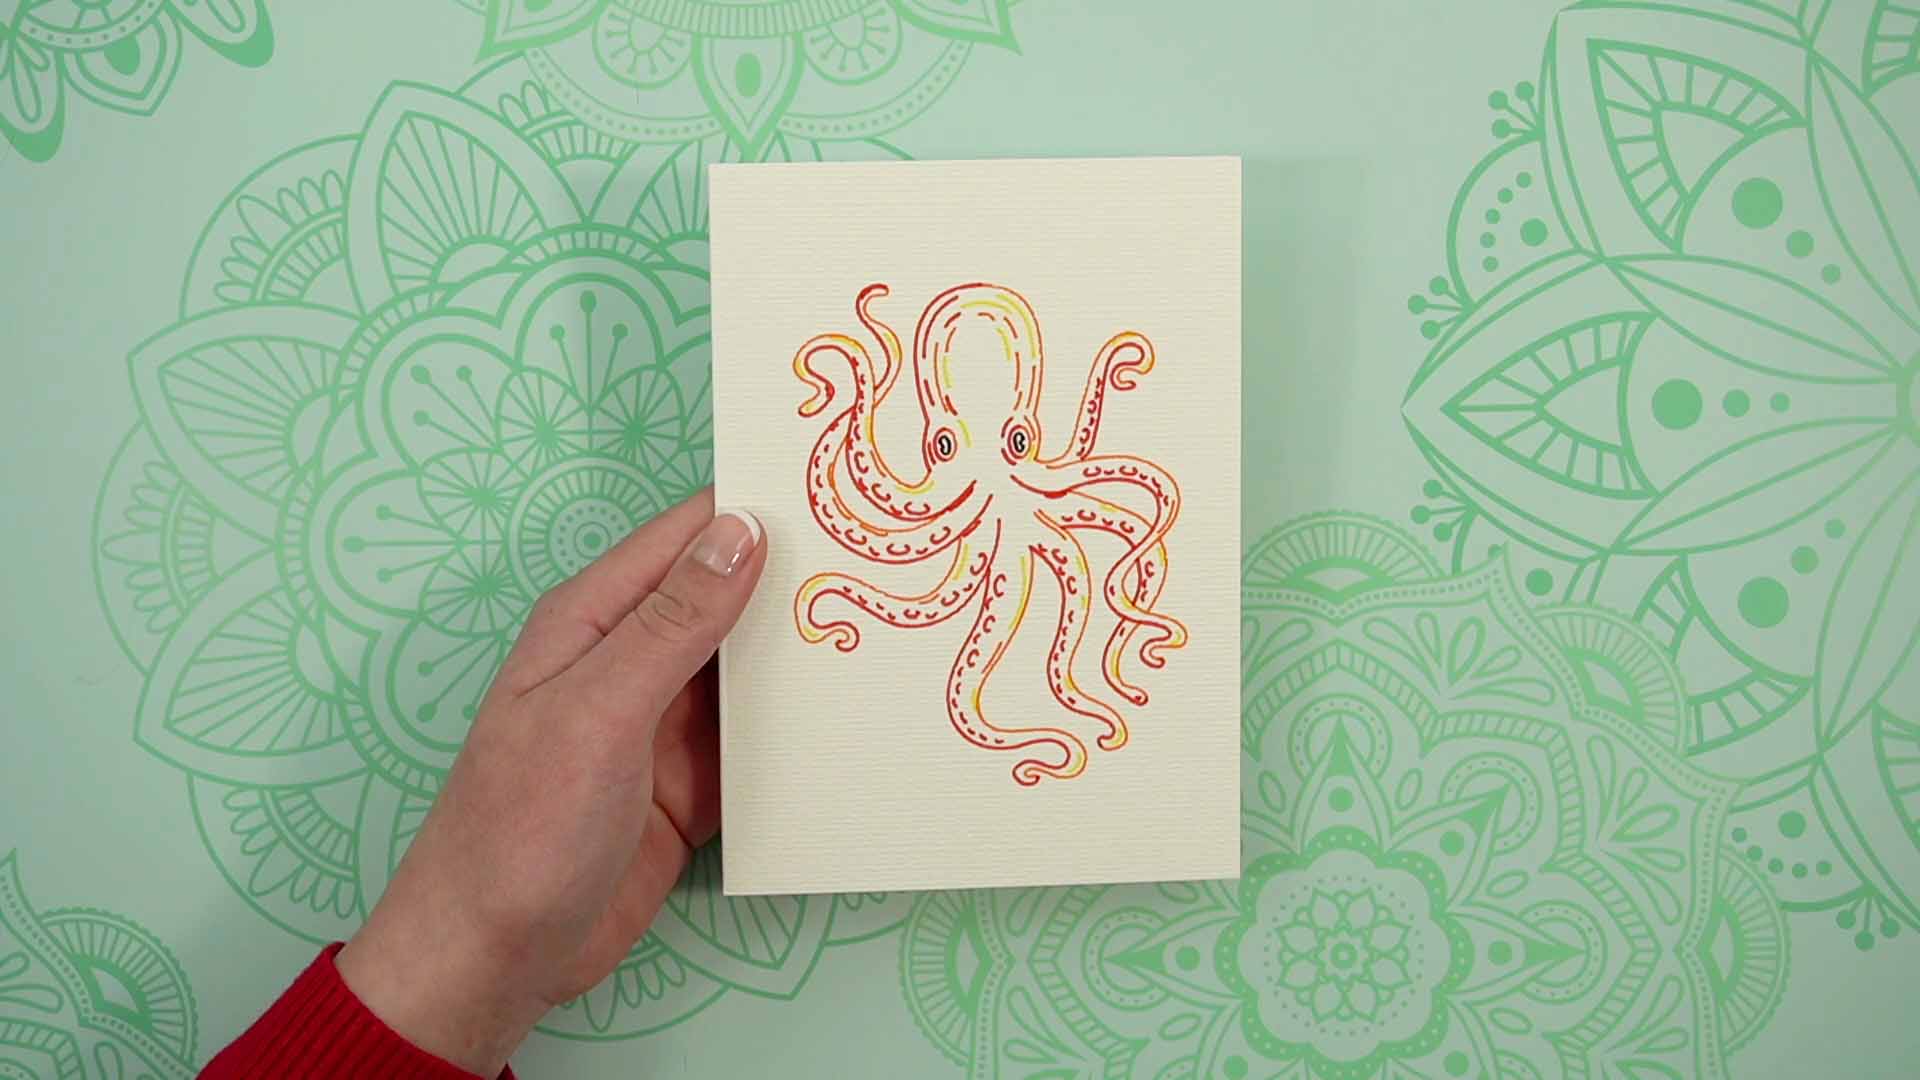
Start with the eyes. Don’t go beyond the lines because we’ll leave the surrounding white ring this time when we paint the body.
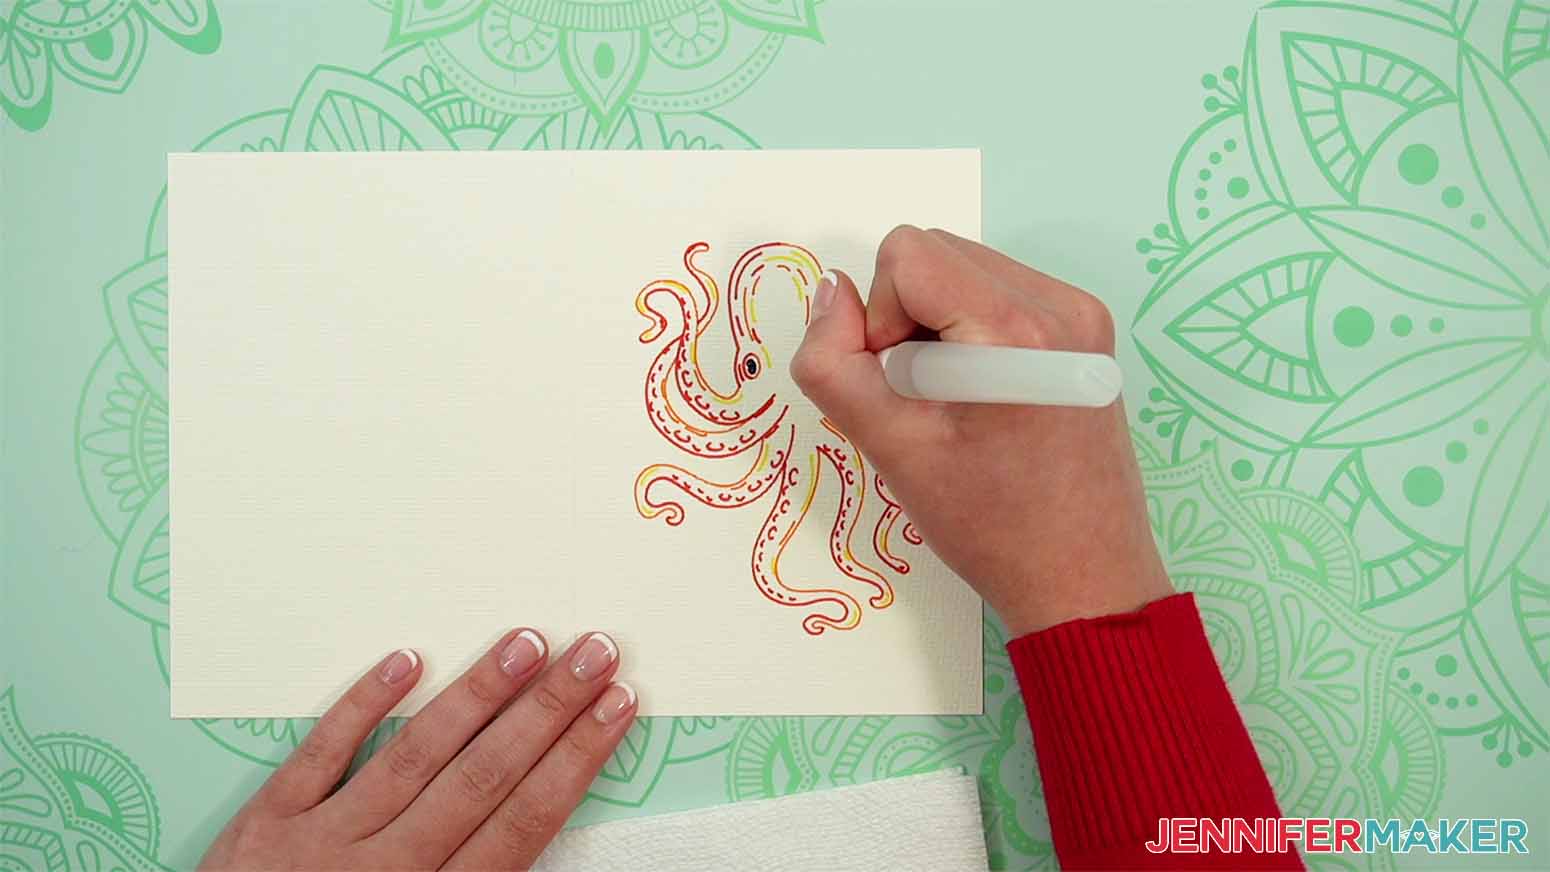
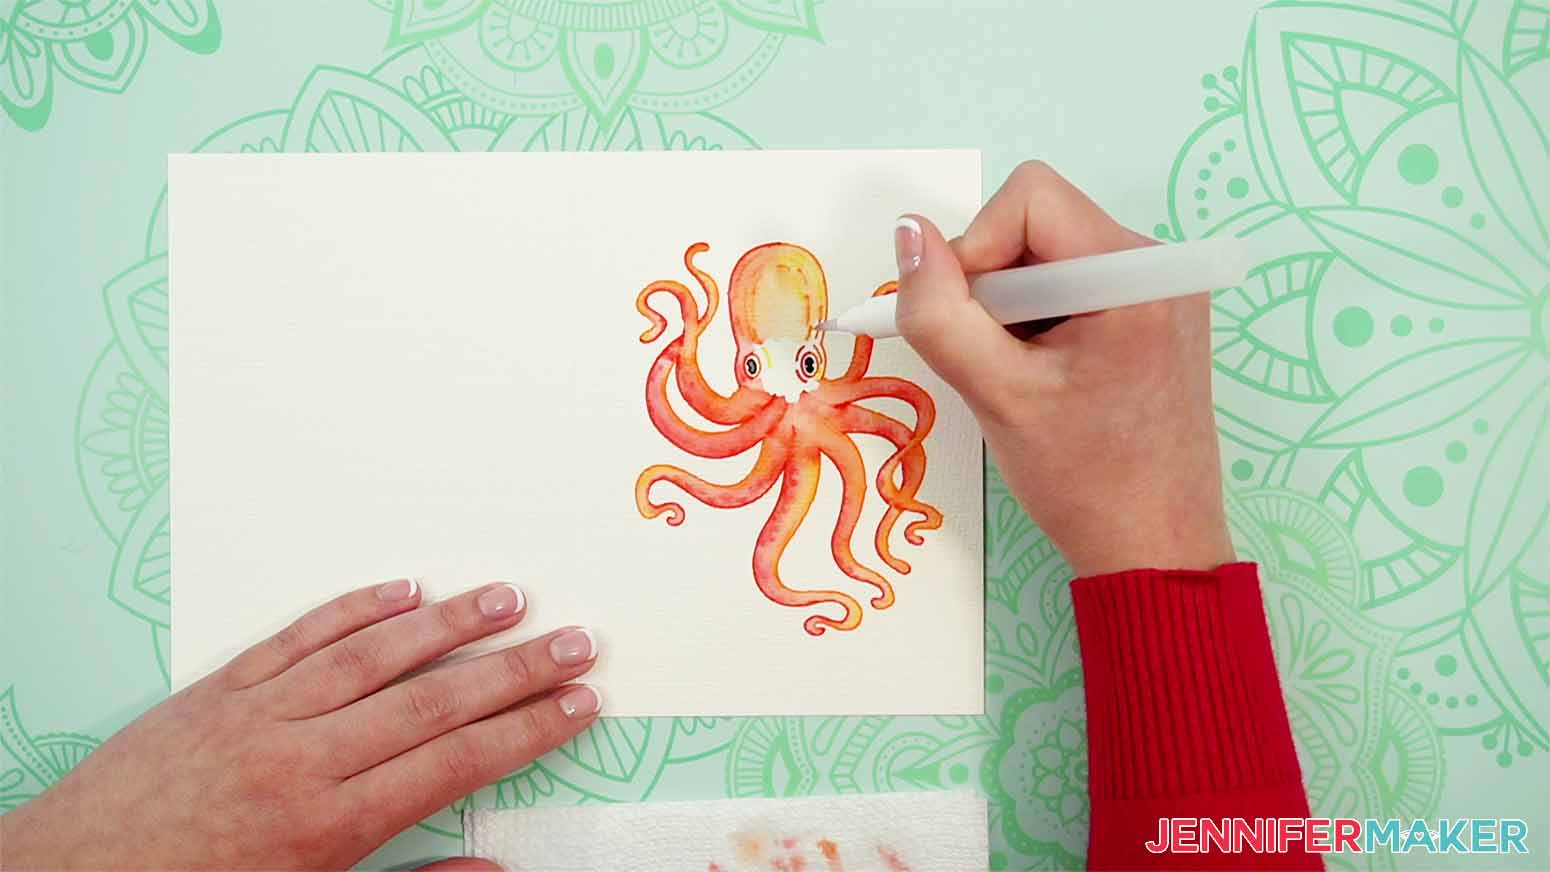
Working from left to right, paint each of the tentacles.
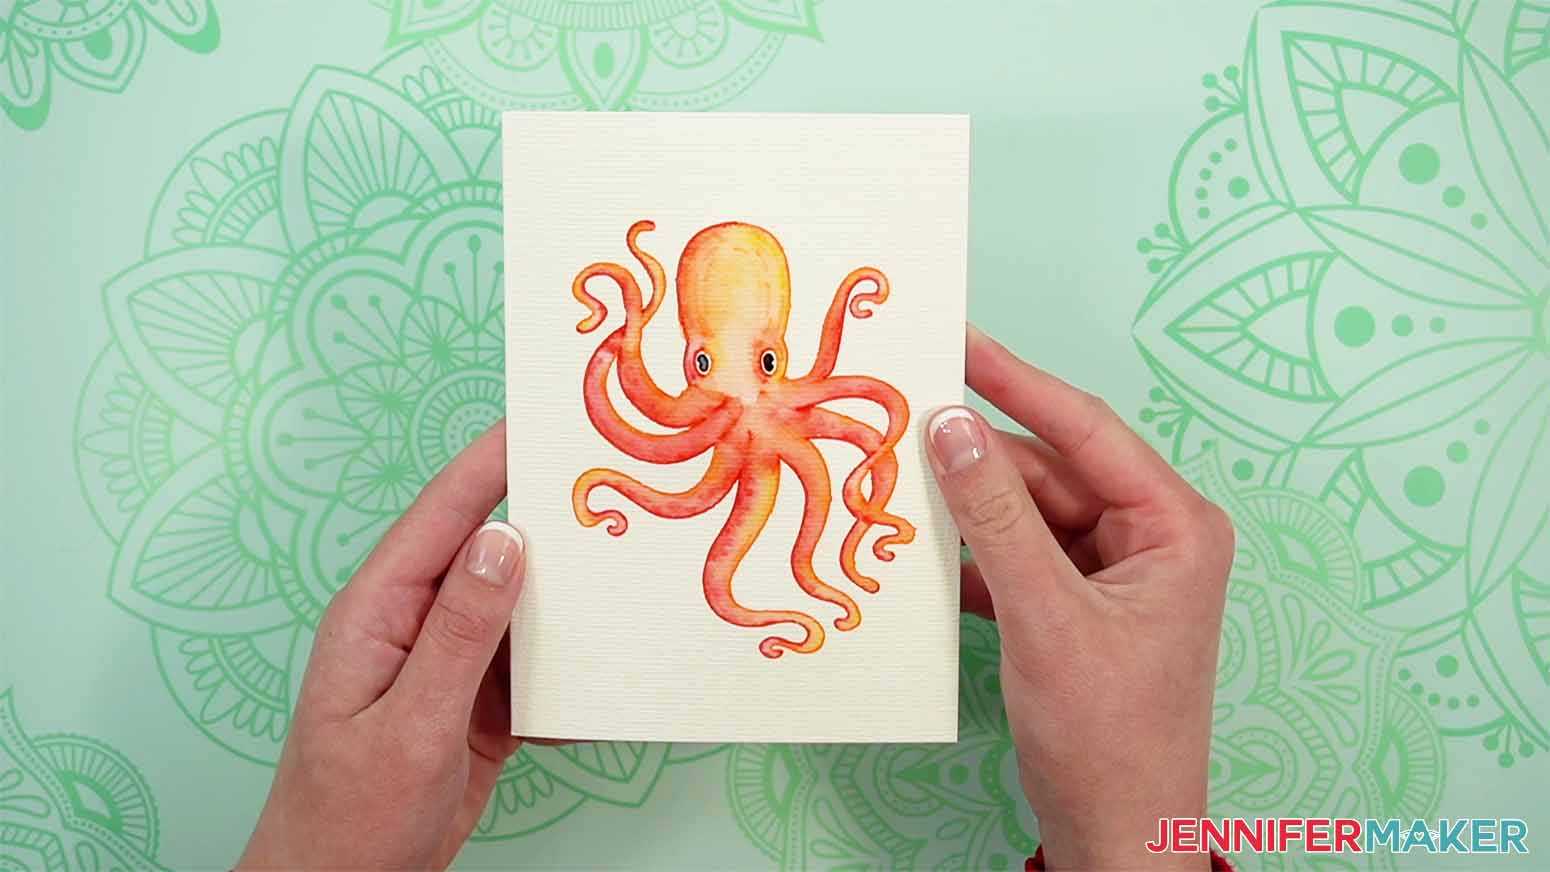
Then paint the head.
 '
'
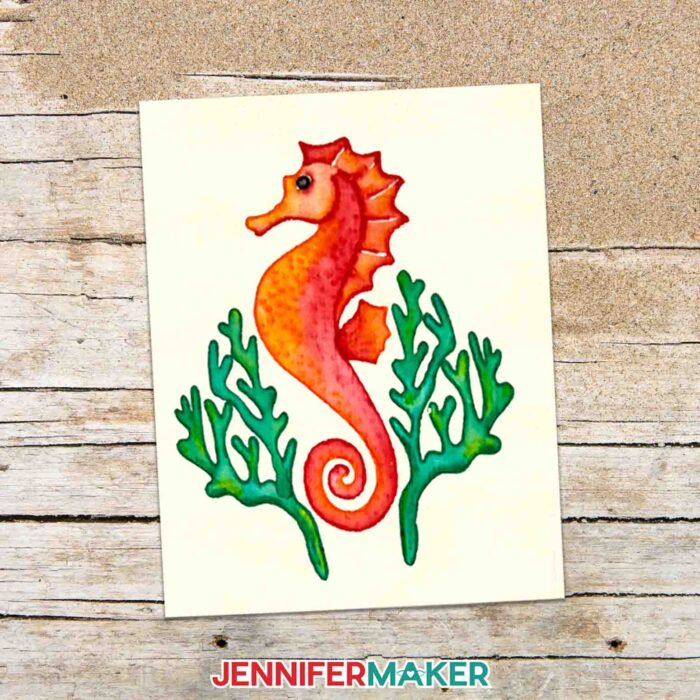
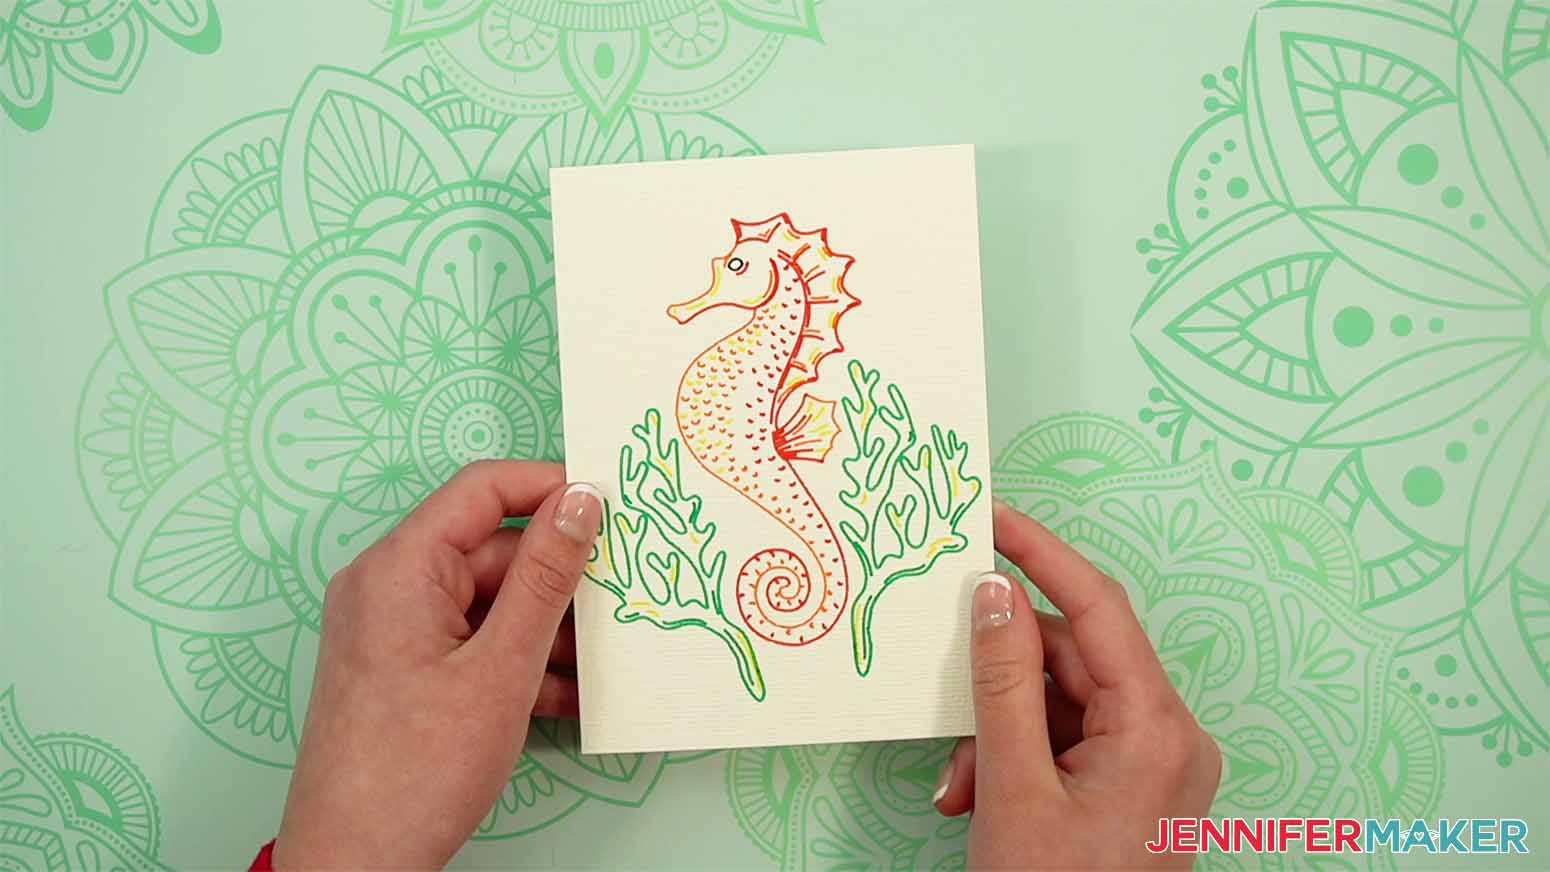
SEAHORSE
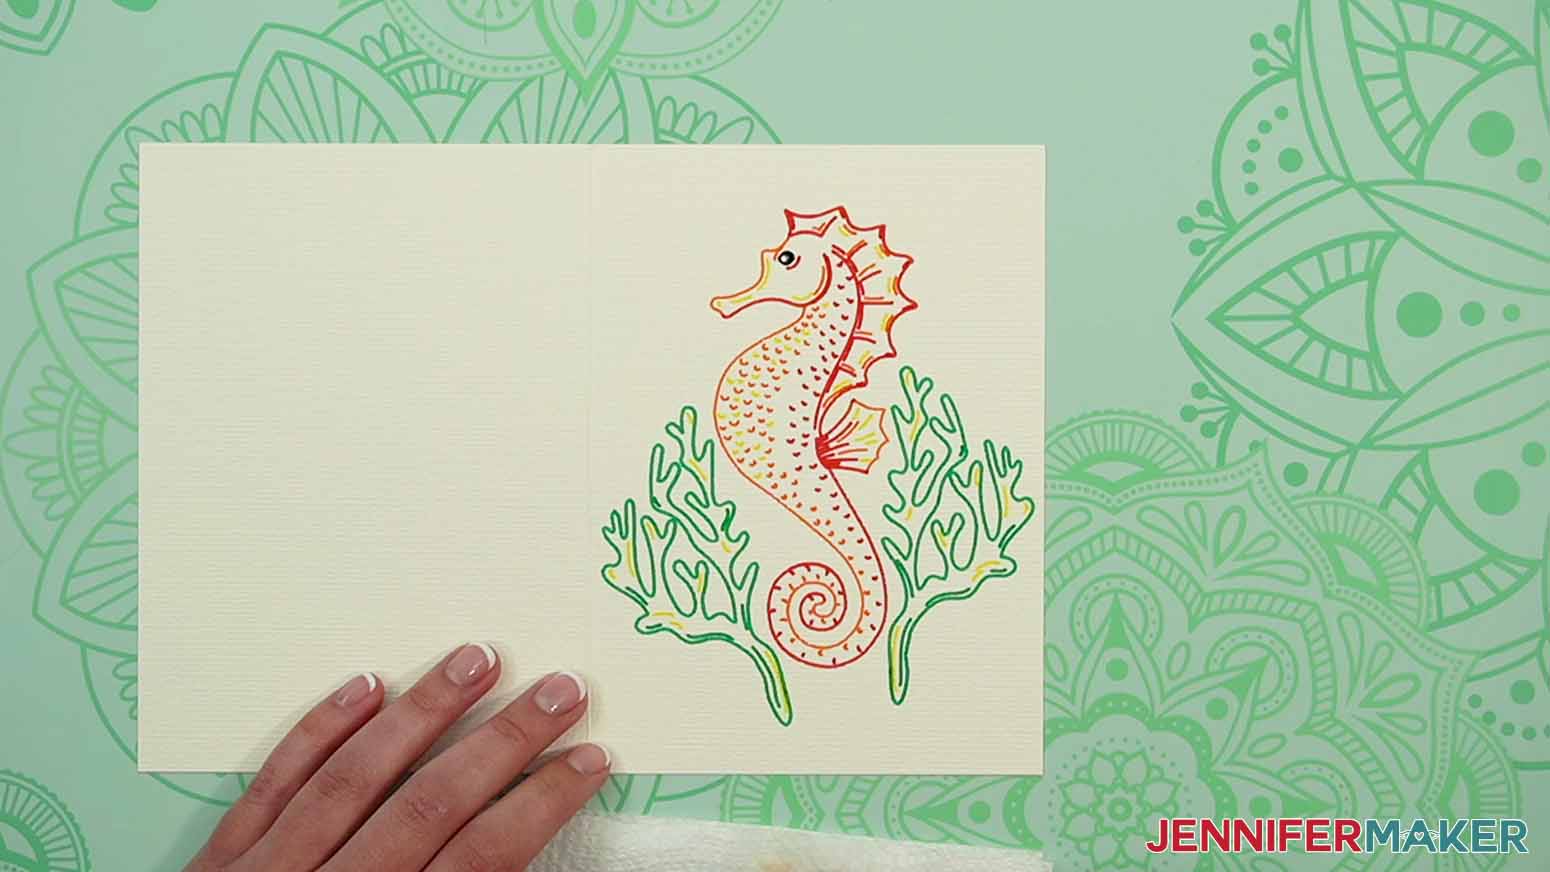
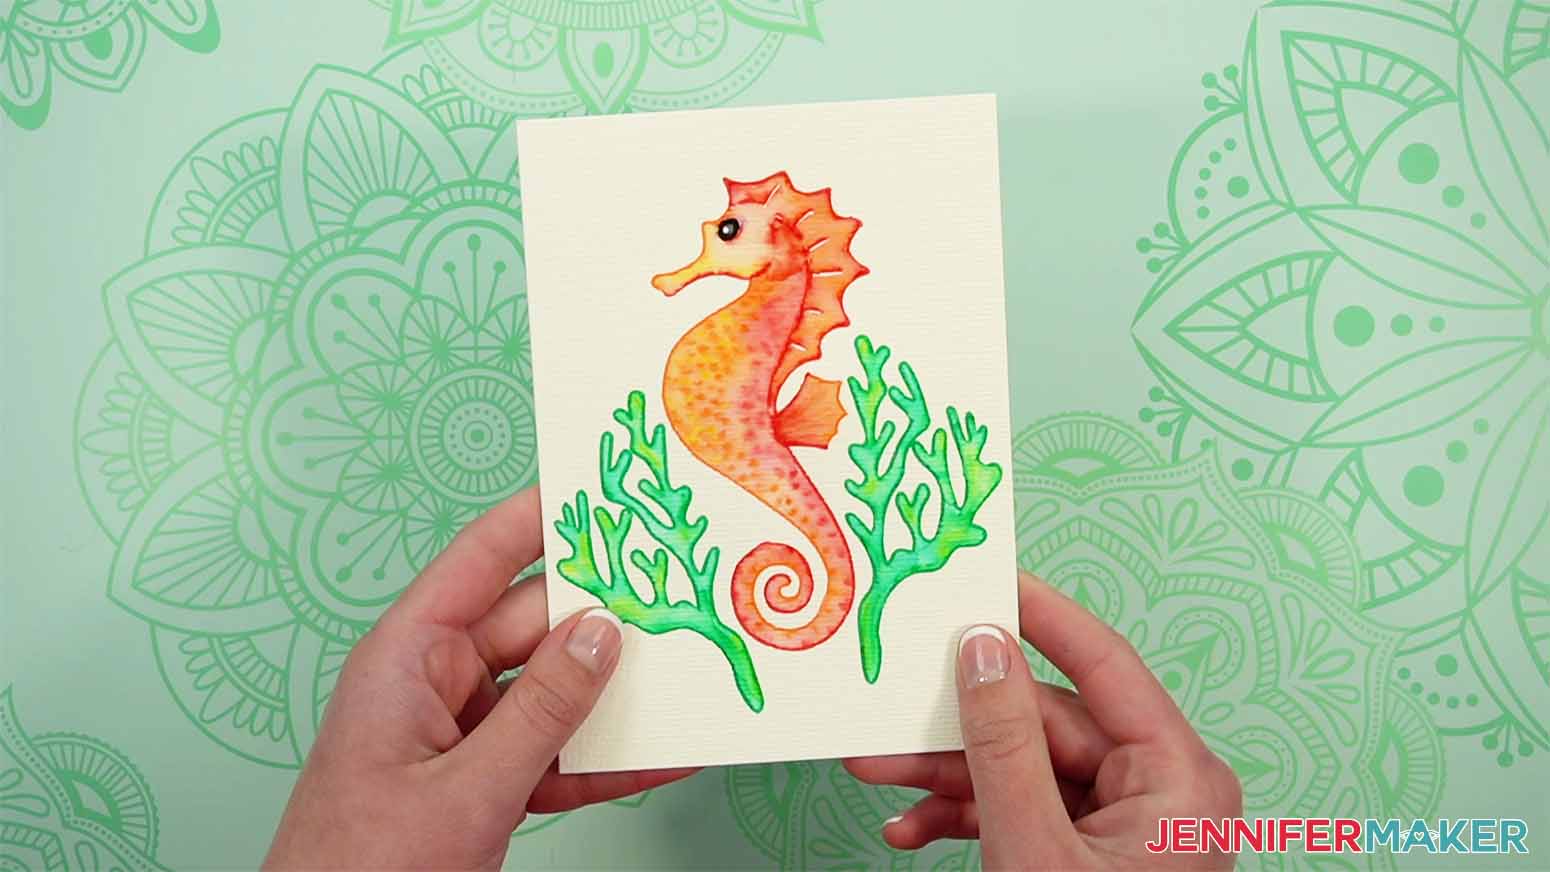
This is what the seahorse looks like drawn
Fill in the eye.
Starting at the end of the tail, paint the body of the sea horse.
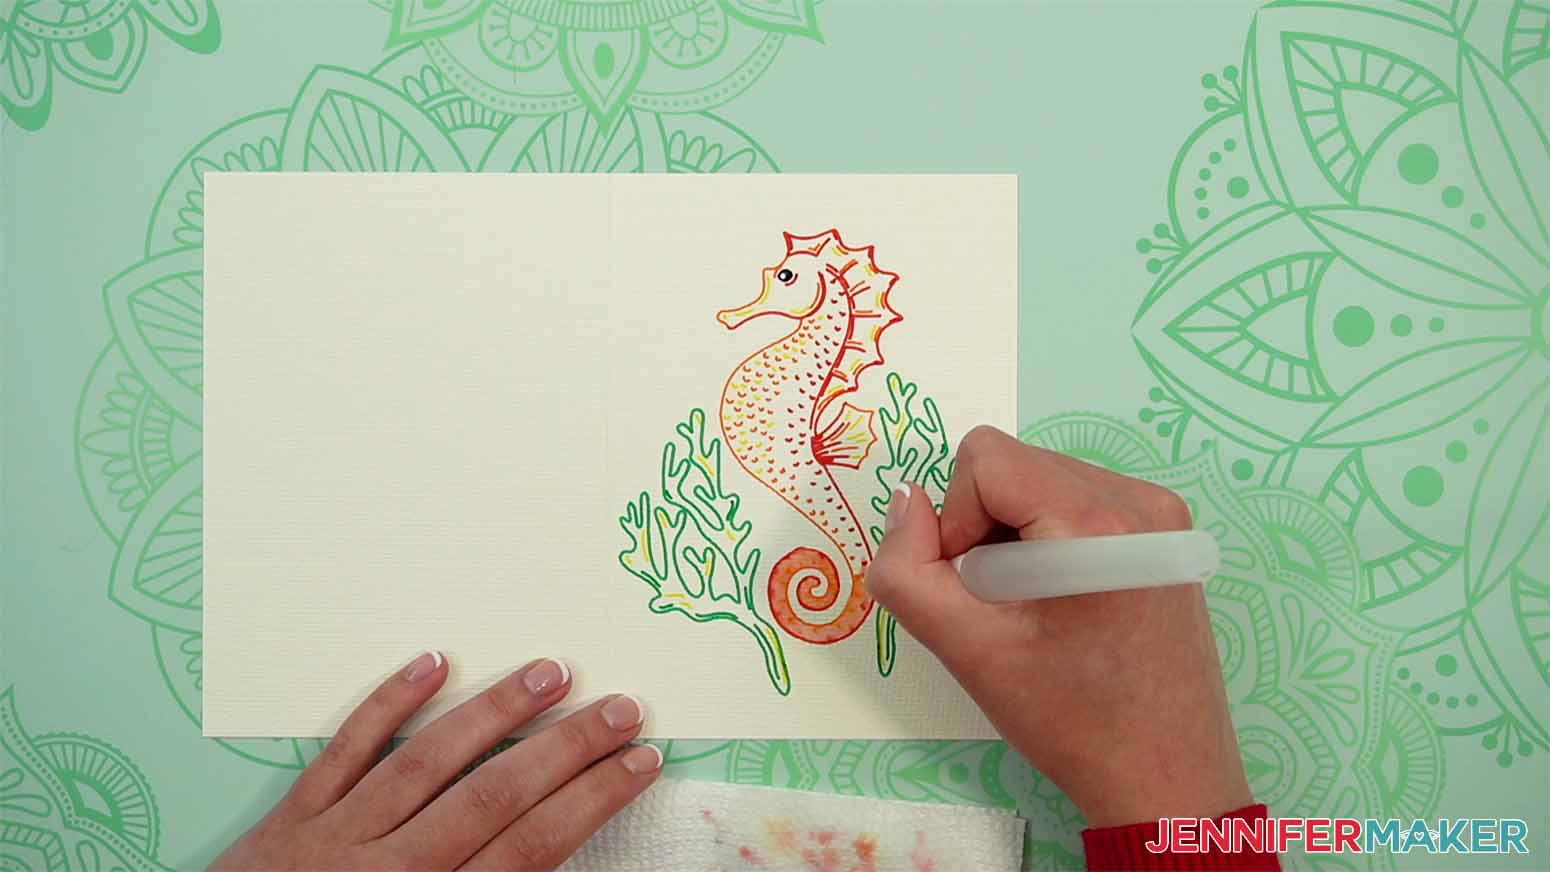
Continue with the head, leaving white space around the eye.
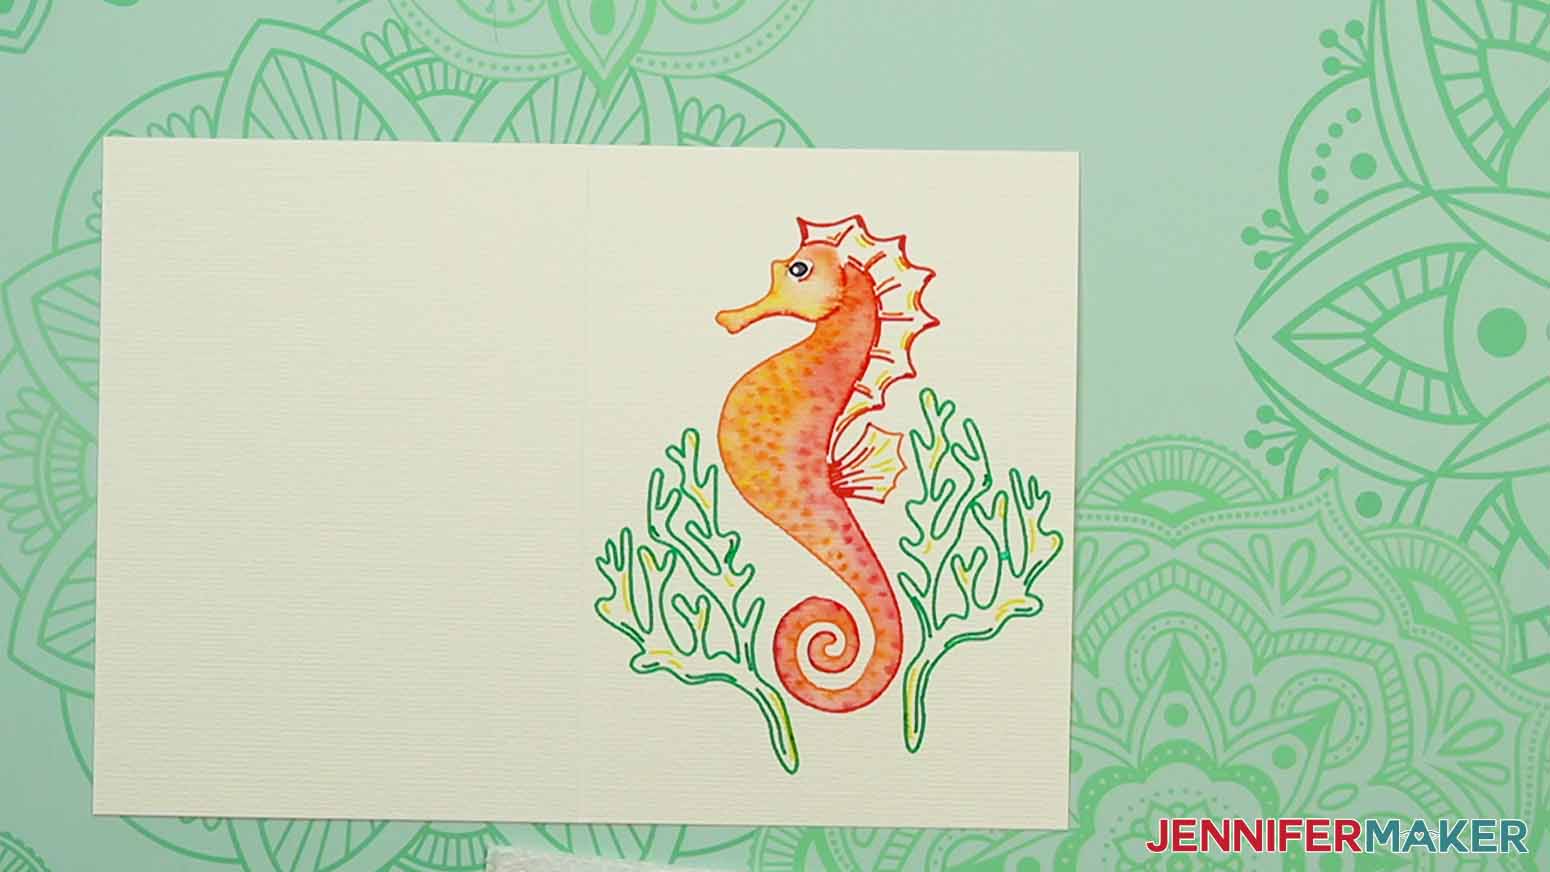
Then work on the fins. If you’d like, you can leave a thin white highlight line between each section.
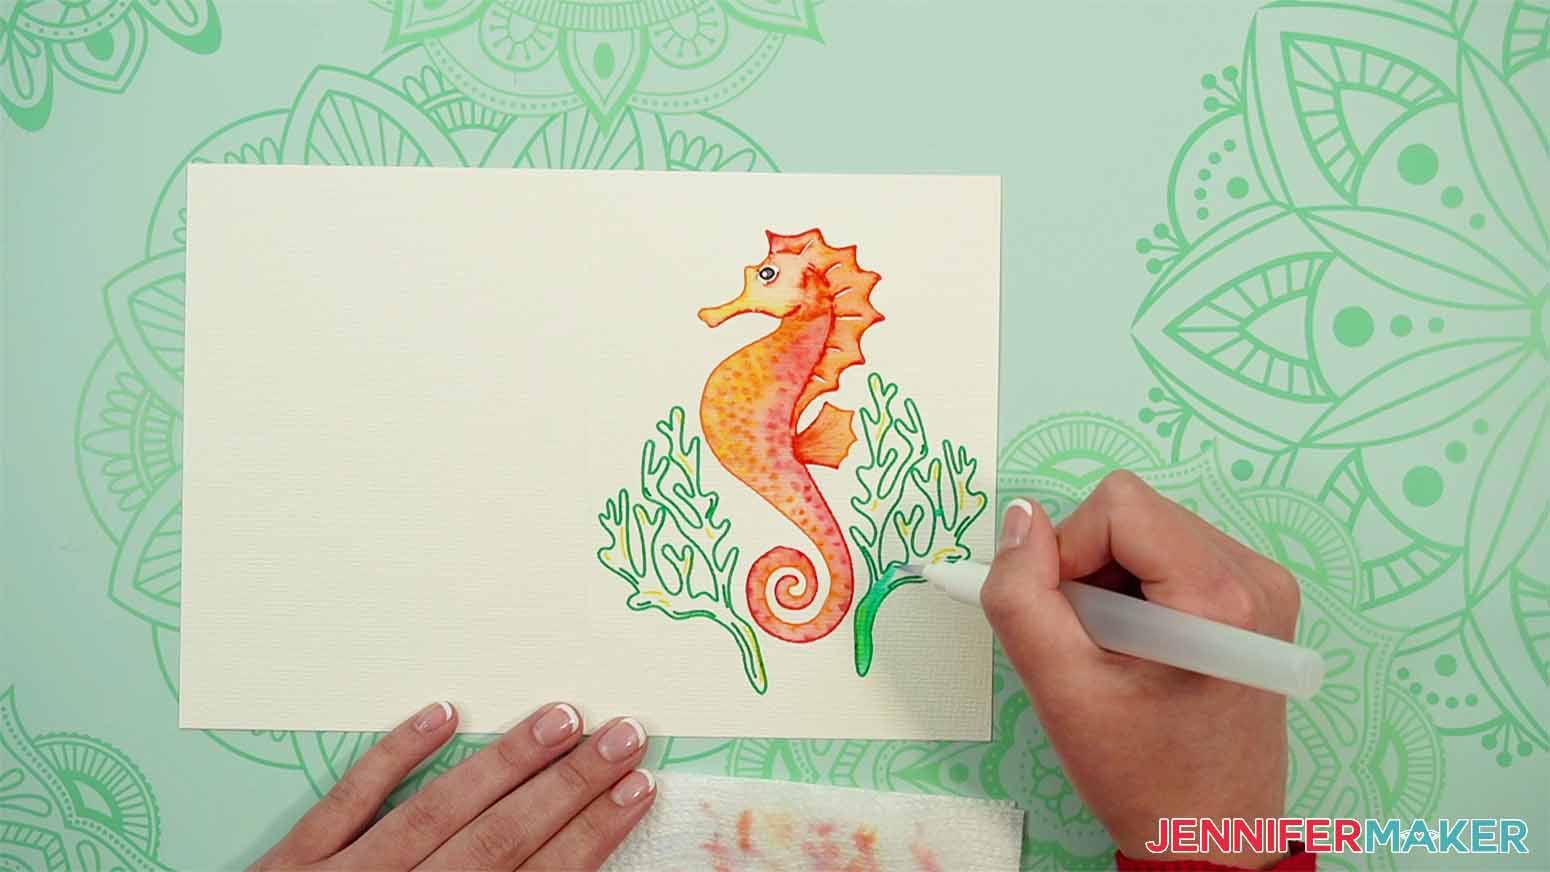
Fill in the coral.
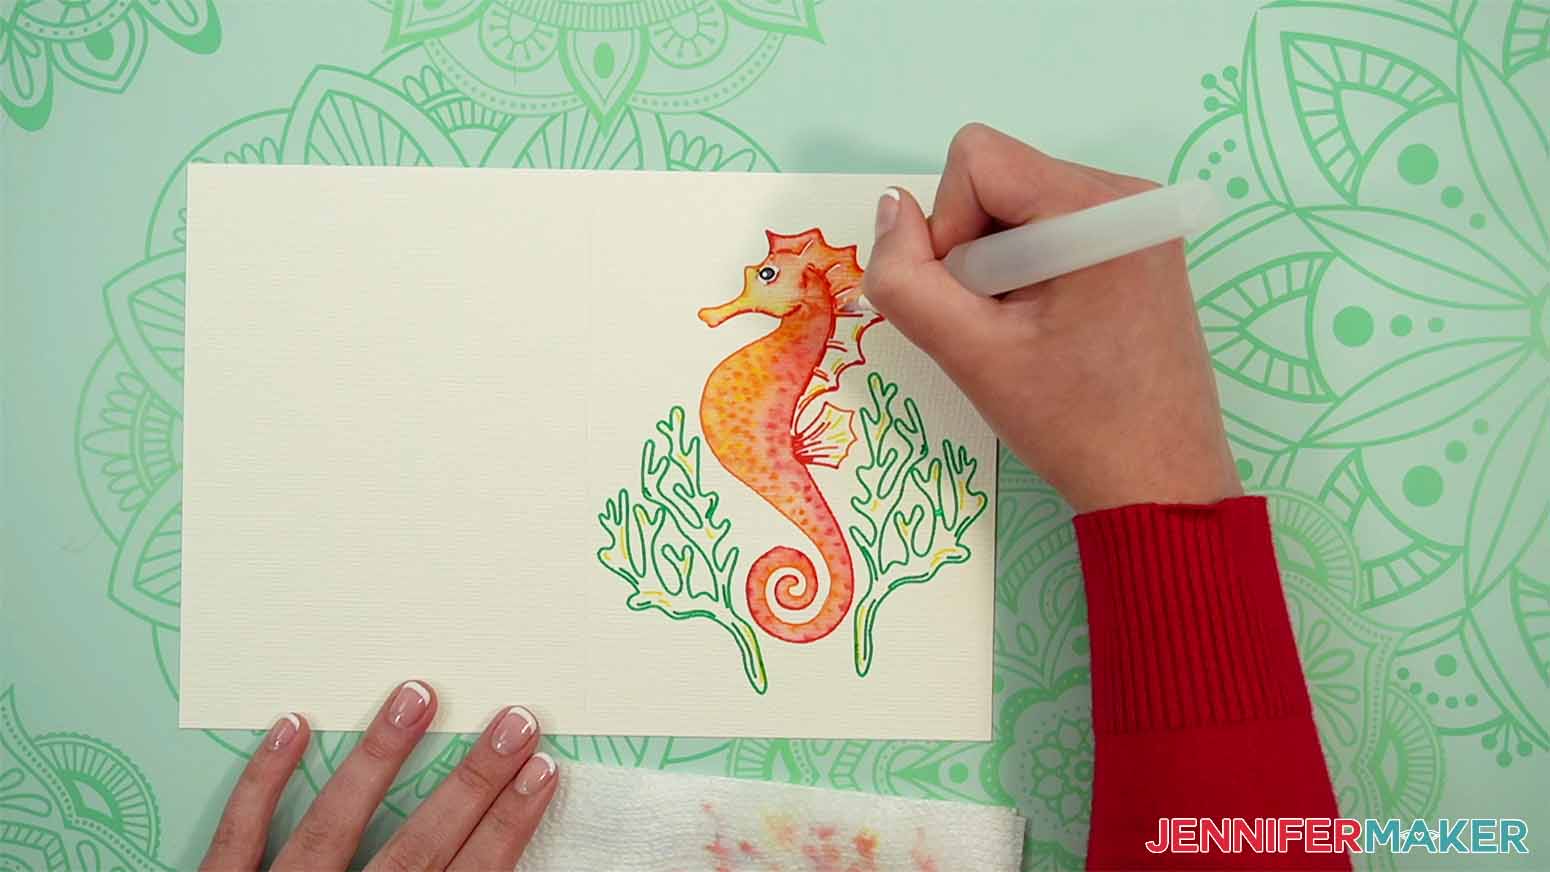
When the paint has dried, fill in the white space around the eye with the black marker.
STEP 4: SHOW IT OFF!
Gift your notecards and prints!
Answers to Your Questions About Making DIY Watercolor Cards
Q: How do you make a watercolor card?
A: If you don’t want to use pre-made blank cards, you can simply fold a piece of watercolor paper to the size you want!
Q: How do you paint a simple watercolor card?
A: You can either paint the design on a separate sheet of paper and attach it to the card, or paint directly on the card’s surface for an easy DIY watercolor card.
Q: What paper is used for watercolor cards?
A: Watercolor paper is used for cards that use this type of paint.
Q: Can cardstock handle watercolor?
A: You can always combine craft supplies however you like, but the results might not be perfect! Traditional cardstock is different from watercolor paper, so it won’t hold up if you use a lot of water.
Q: Do I need to paint the designs right away?
A: No, you can create the designs and save them for later, like an adult coloring book with a handmade touch!
Q: Do I ink before or after watercolor?
A: If you’re using a permanent pen or marker, you can ink before or after painting. I used a pen with water-based inks before adding the water, so was extra careful to keep the thin pen lines dry!
Q: Can watercolor paper go through a printer?
A: Yes, you can print on watercolor paper, but it might not look very nice.
Q: Is it OK to use watercolor on normal paper?
A: Sure, but the paper will get waterlogged and the paints won’t blend nicely. It’s always fun to experiment, though!
Q: How do you transfer an image to watercolor paper?
A: If you have a Cricut, you can prepare an image in Cricut Design Space and have the machine draw it right on the paper for your own cards!
Q: Can I cut this project on a Cricut Joy?
A: Yes, there are watercolor markers available for the Cricut Joy! You will need to shrink the designs, which may create a different look. See our Resizing Guide for more details.
Q: What is Merry Maker Mingle?
A: Each day in December leading to Christmas, I present you with a brand new “gift” — a project to craft, make, or do. You can make these projects on a Cricut cutting machine or by hand if you don’t have one. Most of our Merry Maker Mingle projects will come with a fun video with yours truly, a step-by-step printable photo tutorial, and a free pattern/SVG cut file. Sign up to get daily updates and prizes!
Get my free SVG files to create DIY watercolor cards!
I love seeing what you make with my designs and how you use them! Please share a photo of your DIY watercolor cards in our Facebook group or tag me on social media with #jennifermaker.
Love,

Want to remember this? Save this DIY Watercolor Cards Tutorial to your favorite Pinterest Board!