To order your own DreamBox organizer, watch videos, and get my free DreamBox Planner, visit jennifermaker.com/dreambox2
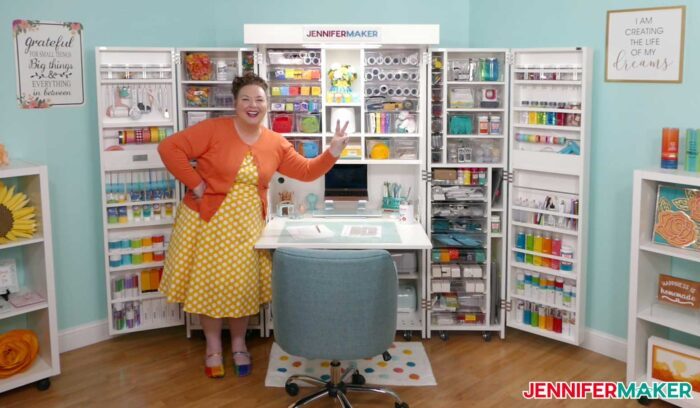
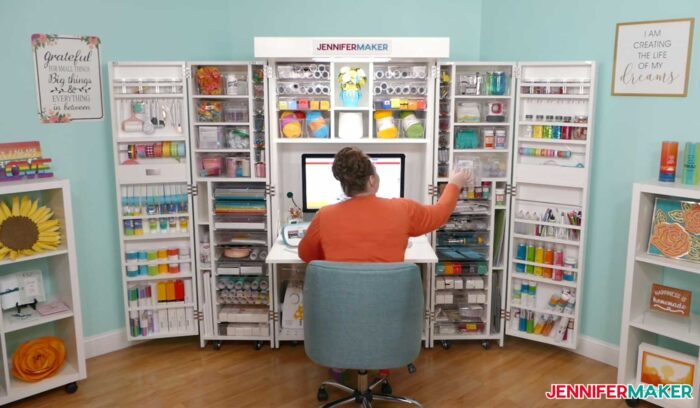
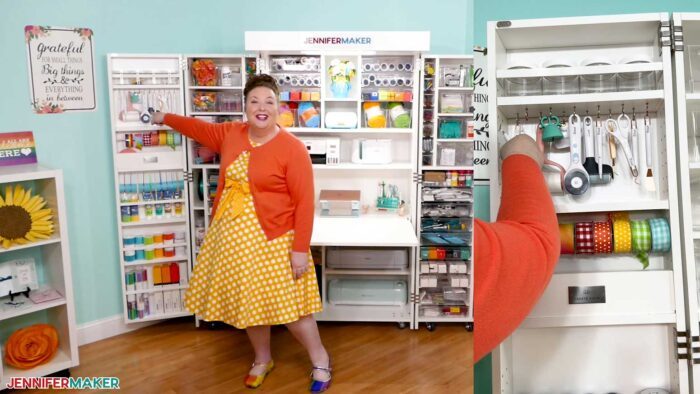
You may have see the white storage cabinet behind me in my videos, and then see me open it to magically to reveal tons of craft supplies inside, and wonder what it is, how it works, and where to get it. This magic cabinet is called a DreamBox organizer. I’m a big fan of the DreamBox craft storage because it not only lets me store a lot of stuff in small spaces, but it’s like a room in a box because there’s a table inside, adjustable shelves, roomy totes, and swing doors that you can reposition so everything is within arm’s reach. Now, there’s a new version coming! I want to share my honest DreamBox 2 craft storage review so you can decide if it is right for you, too.

I was invited to be a tester for the NEW DreamBox 2 craft storage unit, which is the next generation of craft organizer. I bought the new DreamBox 2 and set it up recently. This review is NOT sponsored in any way — I bought this Dreambox with my own money, as I always do, so I can evaluate the value and worth in comparison to the price. I do have affiliate links in this post, however, which means I may earn a small commission if you make a purchase. See my disclosure. This is my honest review!
My Overall Impression of the DreamBox 2
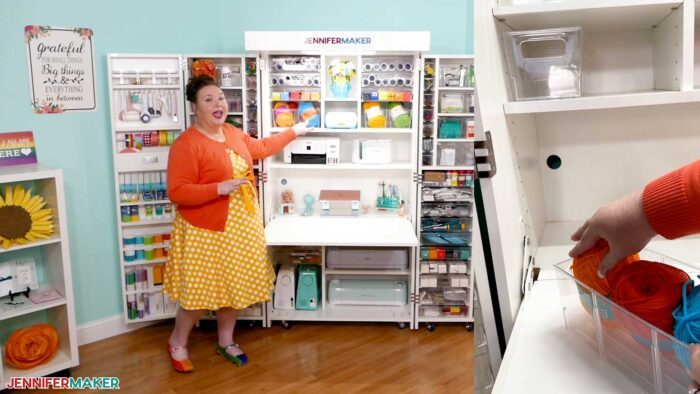
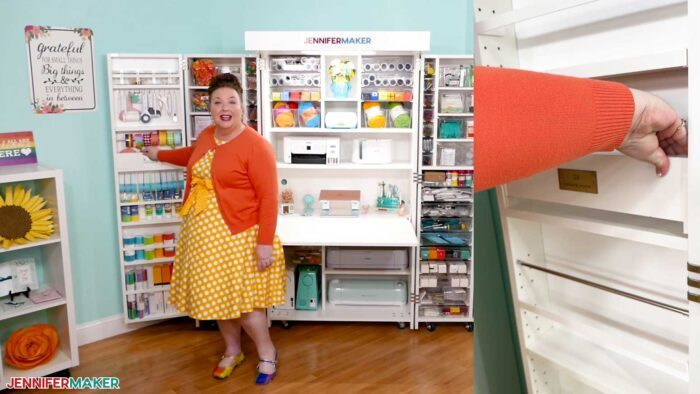
First, and perhaps the biggest thing for me, is how the DreamBox stores my craft supplies in a small space. I can keep the DreamBox open, or I can close it all up.
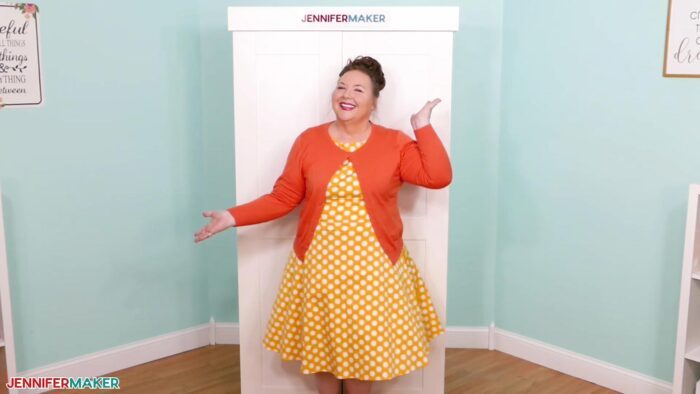
This keeps my chaos controlled, so I show only what I want. I can have just this tidy cabinet, but get easy access to everything inside simply by opening it. And it looks like nice furniture, too. This has been true of all the DreamBoxes, and even the Original Scrapbox before it. It’s not uncommon for people without a dedicated craft room to keep the DreamBox in a shared space, like a living room or guest room, and being able to close it up like this is huge and it’s really the perfect size.

With the DreamBox 2, you have MORE options than ever — it’s highly customizable. Even just the way it looks. I chose dual paneled Dreambox doors for my DreamBox 2. Some people choose to decorate theirs, but I’ve kept mine white so it just blends into the background of the room.
Can We Talk About the Table?
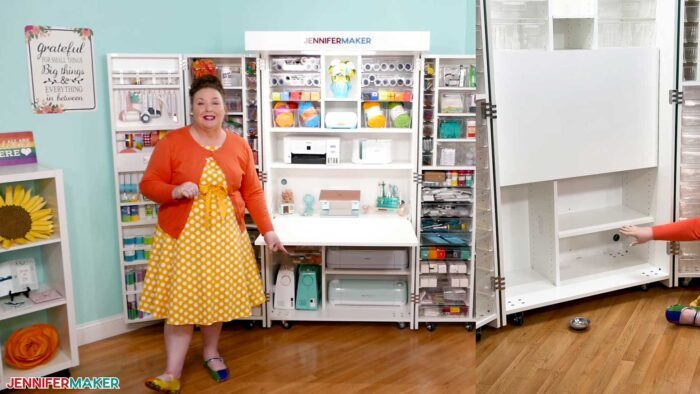
My favorite feature of the DreamBox 2 is the really cool and NEW table inside that transforms a cabinet into a crafting space! The DreamBox 2 table is new and improved — it folds down with just one hand! And there are NO legs to get in the way. It’s on super strong hinges, too. But you can still close it up easily. I LOVE this new table. On the DreamBox 2, the table is 2″ wider, too, so it’s easier to use than ever. This is so much better than the kitchen table (which is where I started crafting).
Let There Be Light!
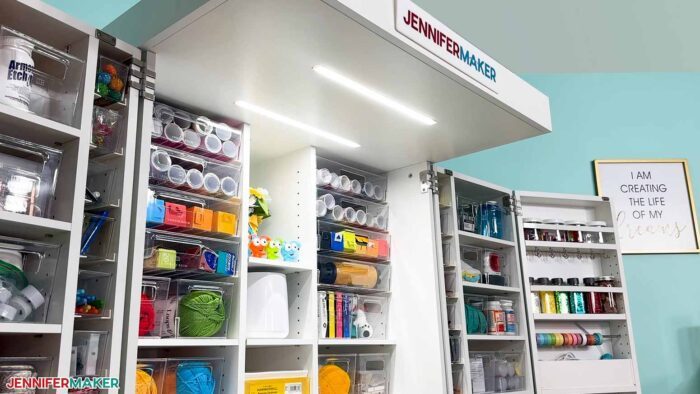
The DreamBox 2 has a built in light! In fact, every new Dreambox 2 comes with super bright LED light that seems just as bright as a daylight Ottlite. If you get the Crown on top, as I did, it adds a second light. I can see everything really really well. I don’t need any extra lighting with these two lights. I even got a little fancy this time and hooked my DreamBox lights up to my smart device with a smart plug, and now I can turn the lights on and off with a voice command. I’m loving it so much.
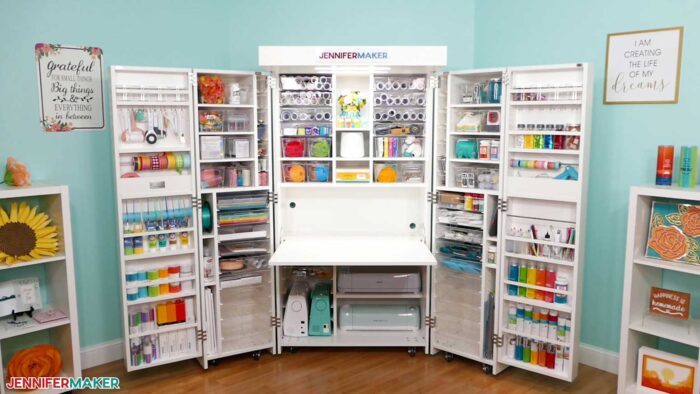
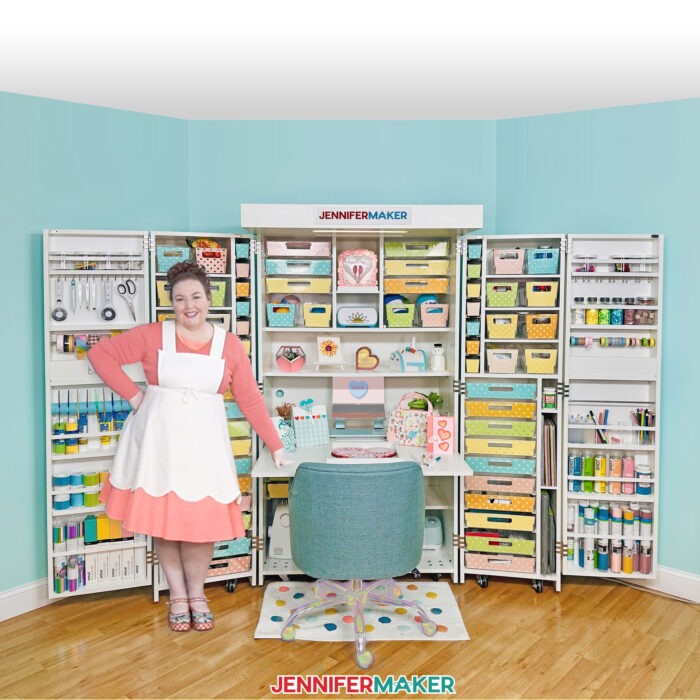
Storage, Storage, Storage
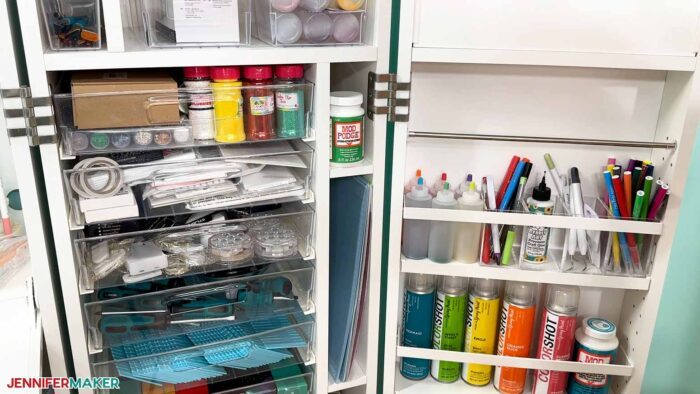
I love all the storage inside the DreamBox cabinet, and it’s so customizable and highly configurable. There are different sizes and styles of Dreambox drawers, too! Big totes store tons of craft supplies, including my 12″x 12″ paper, rolls of vinyl, and other materials totally flat. Medium and small clear totes store all the small items. There are even clear lidded jars to contain tiny things. I can change everything around to suit my needs whenever I want, too, which I often do. You will see my DreamBox change a lot if you watch my videos closely! There’s also storage for big stuff at the bottom, and storage for things I want close at hand in the swing doors. There are 24 hooks to hang my Cricut tools, four rods to store little things, and moveable pockets to stash stuff. A lot of people say all their stuff would never fit in a Dream Box, and I also thought that before I got one. But all this vertical storage is deceptive — you can fit SO much in a small space when you go vertical like this.
Customized For What I Need
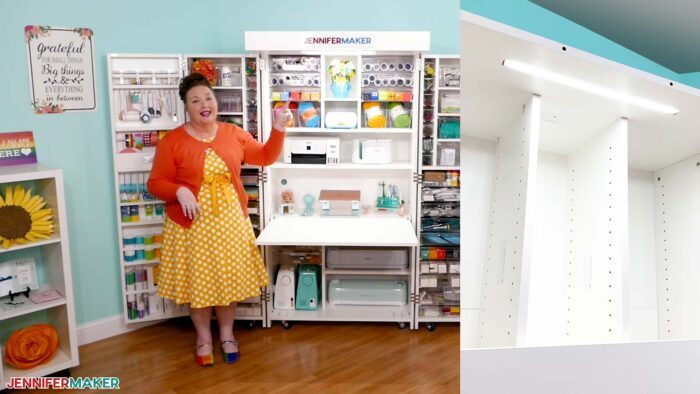
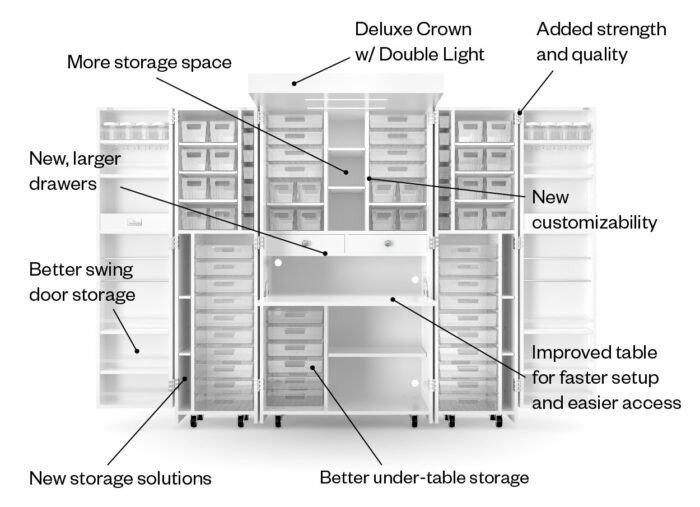
I love that I can truly customize the DreamBox 2 to suit my needs and craft space. The dividers in the top and bottom of the DreamBox 2 can be changed to fit my stuff. For example, I was able to move my sewing machine in and store it with my cutting machines. But if I decide to switch that up, I can fill that side with totes instead. And the top section can be configured differently with a short divider kit, as shown below — it’s like an office in a box then! You can even purchase side tables that fit right into the sides of the swing-down table to really extend your workspace.
Look at all the cool changes and improvements to the DreamBox 2:
So What Don’t I Like?
Now usually when I get to this point, everyone says, “Wow, this is cool, Jennifer, but how much is it?” And I won’t sugarcoat it — a Dreambox is not cheap. It’s a big investment at just over two thousand dollars, even with my discount code, which is usually the very best discount. Because once I fell in love with Dreambox, I asked to become an affiliate. And that’s the thing that’s the hardest for me, it’s the thing about the Dreambox I don’t like. Because money is big deal, and it’s always in short supply. The question really is this: is it worth the money?
So when I first heard about the DreamBox years ago, I knew I wanted it, but I also couldn’t afford it. So I went to IKEA and I bought cheap stuff instead. And I LOVE IKEA, don’t get me wrong, but it is not the same. IKEA stuff needs to be customized and hacked a lot to get it right, and it’s really hard to get it anything even approaching the space saving nature of the DreamBox, let alone the coolness factor of it.
So in 2018, we started saving for a Dreambox. We set it as a big goal. We worked hard toward the goal, we worked when we could have just rested and watched movies or played video games, because this was important to us, both Greg and I. We set aside money each month for it, and we did extra things to earn enough. About a year later, we were able to purchase one. And what I found is that the act of setting the goal, working toward it, and achieving it was not only awesome and amazing in itself, but it set us up to keep going, setting goals, and realizing dreams… like this dedicated studio I’m in right now, and so many other things. And every time I see the Dreambox, I am reminded of how hard we worked to get it, and the tangible reward we received for our hard work.
So is a Dreambox Worth It?
Yes! We keep coming back to the DreamBox craft cabinet as an organization solution for small spaces, which I think is the most telling thing in itself. In the Matrix: Revolutions movie, the Oracle says, “The real test for any choice is how we make the same choice again, knowing full well what it might cost.” While she was talking about something much weightier than a craft storage solution, it still applies. The DreamBox 2 is our FOURTH Create Room DreamBox. We’ve bought every single one at the same price you pay. We use every single DreamBox to this day (one is in Greg’s office at home, one is in my office at home, and two are at our studio — the new DreamBox 2 you see in the photos in this post, plus the older one I moved into the new suite we just leased so my ever-growing team can use it, too).
I haven’t regretted the DreamBox in any way. In fact, pretty much every one I know or I’ve seen online who has gotten one says it was worth it for them. Some don’t have to save to get it, some people use the financing that’s offered. But others do have to save up, and I totally respect that. When there’s something you want, it gives you a goal, and something to strive for … and the reward is very sweet. So yes, it’s an investment …. but it’s not just to get a piece of furniture, it’s totally an investment in yourself and your future. If you decide it’s not for you, that’s totally cool and I respect that, too — but remember those of us who did get it, or are saving for it, and try not to rain on our parade!
Still, I know you probably want one if you’re still reading this, and I want you to save as much on a DreamBox as you can, and that’s THE reason I became an affiliate … so I could get discounts and share them with you! To check on the best discount right now, and see ways to save for or finance it into monthly payments IF you also think it is right for you, visit jennifermaker.com/dreambox2
And when you DO get one, here’s all my tips and tricks for setting up a DreamBox 2:
DreamBox 2 Setup Tips & Tricks
So after the DreamBox 2 arrives in a big crate, it’s your job to unbox it — you’ll want a friend to help you with both the unloading and the assembly. My partner Greg helped me! Be sure to look for the instructions as soon as you open your crate — it will give you details on how to safely unload and store your components until you can assemble them.
Now I purchased the partially pre-built DreamBox, which saves a ton of time. If you can afford the pre-built, I highly recommend it. But if you’ve got more time than money, you can get the DIY Assembly version. When Greg bought his DreamBox several years ago, he got the DIY Assembly version and it took him a full day to assemble it. But I’ve got a timecrunch, so my goal is to unbox, set up, and fill my DreamBox is a single day. Do you think I can do it? We’re about to see. Watch the timer in the bottom of the window to see how long it takes! This is also why you’ll see me wearing the same clothes I am in now while I’m assembling, because I wouldn’t normally wear a dress while I’m putting together furniture — BUT, I gotta get it all done in a day! So let’s get into it and start with what’s in the box.
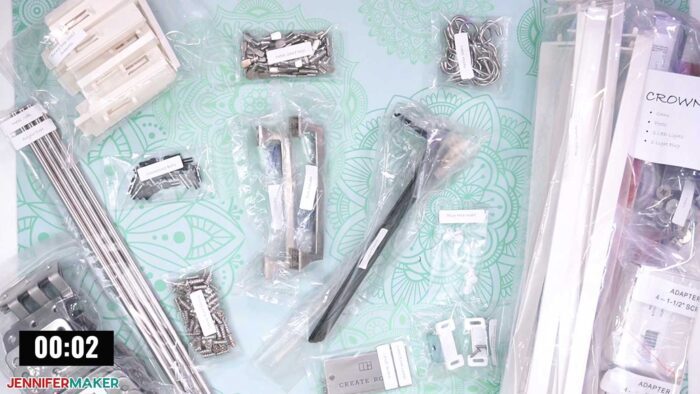
Tip #1 – I always recommend you do an inventory of what you got before you begin. You’ll get a lot of hardware, all of which is detailed right in your instructions, so you can compare what you got with what you have. For my pre-built DreamBox 2, I have Swing Door Shelf Supports, Metal Shelf Pegs (which are an upgrade from previous DreamBoxes that used plastic pegs), metal hooks (and there are MORE of them than in previous DreamBoxes, too), acrylic guards (these are white, not clear like before, so they will look better in the DreamBox 2), metal rods and acrylic cups, hole plugs (which are also new!), tote tracks, connecting bolts, door handles, screws, hinges, door catches, and light kit — the DreamBox 2 now comes with a light standard on all of them, with or without the crown, which is a new feature I’m excited about. I did also get the crown, which goes on top and adds a SECOND light, and we’ll talk about that later.
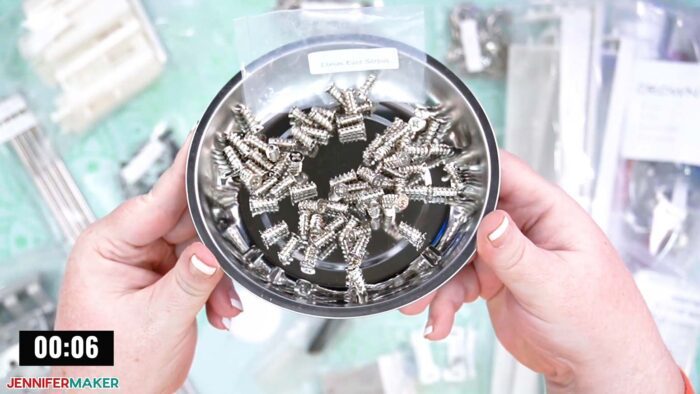
Tip #2 – Get yourself some magnetic bowls like these I got from Amazon to keep your metal parts organized and tidy. You can move and tip these bowls over without losing any of your parts — it’s SO nice! The link to these bowls and all the other things you’ll see me use are linked below this video.
There are also the big parts of the DreamBox you’ll want to locate and check — shelves of various types, dividers, and of course the totes — large totes, medium totes, and small totes, plus dividers for the medium and small totes.
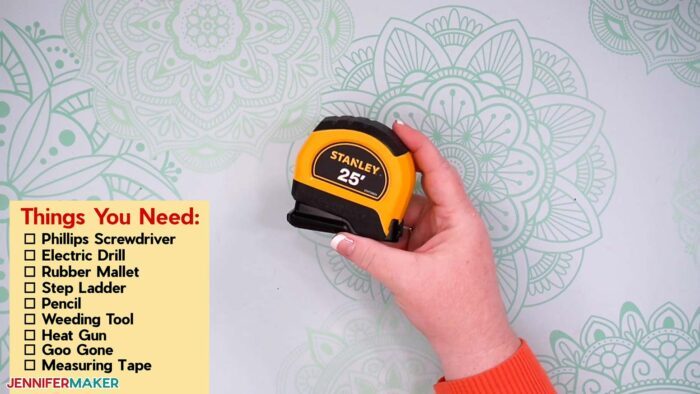
Things you’ll need to set up your DreamBox include a Phillips screwdriver — I highly recommend a ratcheting screwdriver as it’s easier and faster. You’ll also want an electric drill with socket extensions OR a 10 mm wrench — we used a drill. Other tools we got out, even though they are not recommended in the instructions, including a rubber mallet for securing tote tracks, a step ladder to reach high places, a pencil for marking spots, a weeding tool, heat gun, and a bottle of Goo Gone for cleaning removing labels — more on that later. Also, a measuring tape! Which leads me to my next tip…
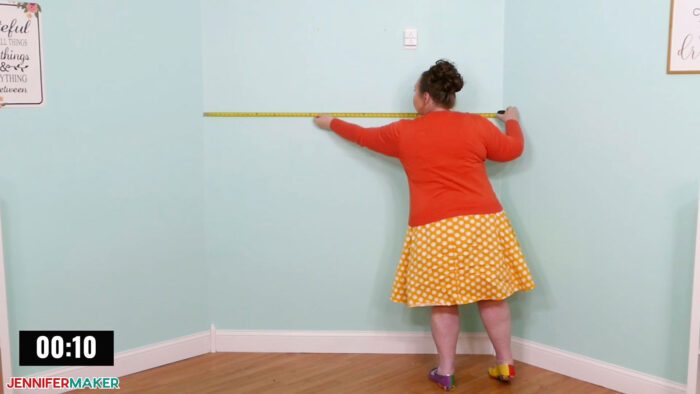
Tip #3 – Be sure you measure your space before you decide where your DreamBox will live — the DreamBox 2 needs a bit over nine feet if you plan to open it fully, or seven feet if you plan to keep the swing doors at an angle. If you’re still in the planning stages for your DreamBox, this is a good time to also prep — clear out the space, paint if you need to, and have it ready to go when your DreamBox arrives.
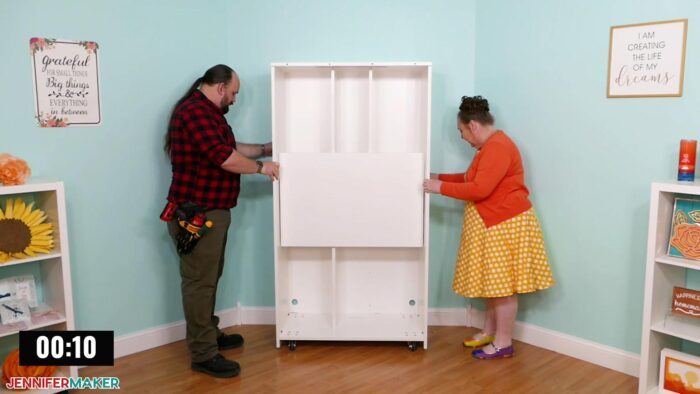
The DreamBox starts with this big center unit, which you’ll want to put into position in its permanent spot. Be sure you have a friend help you out with this, and keep kids and pets out of the room until you’re done for safety. Also, be sure to keep the table in the upright position while you’re building, too.
Next we brought in the side boxes and attached hinges with the ratcheting screwdriver. Well, I used the screwdriver and Greg used the power drill. Either way works.
The left and ride side boxes then get stood up and attached to the center box with screws. This didn’t take long! Be aware that the side boxes can be a wee bit tippy until they are screwed in place, so be careful as you’re moving them.
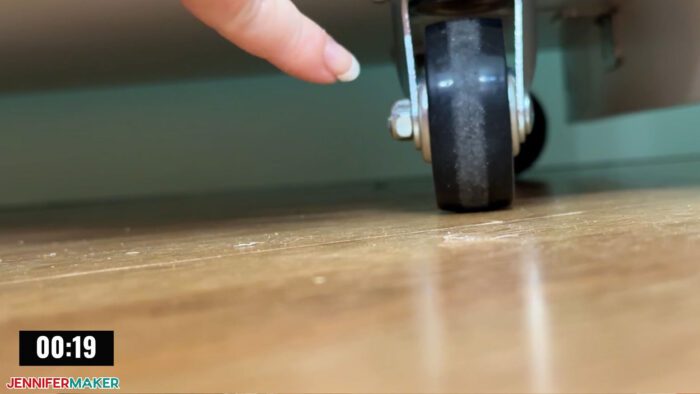
Also, keep the wheels straight and forward like this while setting things up — this helps with stability.
The next step is to add the tote tracks, which look like this.
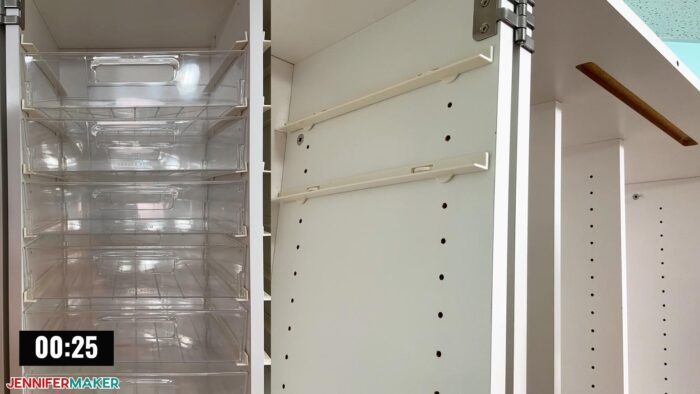
Refer to your instructions to see where these go. These are cool because they have little tabs and press on your totes and keep them in position — this is better than just a shelf, which does not hold onto the totes at all and if you have bins heavy with stuff, they can shift and slide a lot. These tote tracks are different and upgraded from my last DreamBox, too, as they have one longer pressure sensitive tab instead of two, which I think makes it easier to slide the totes in and out. I love the tote tracks!
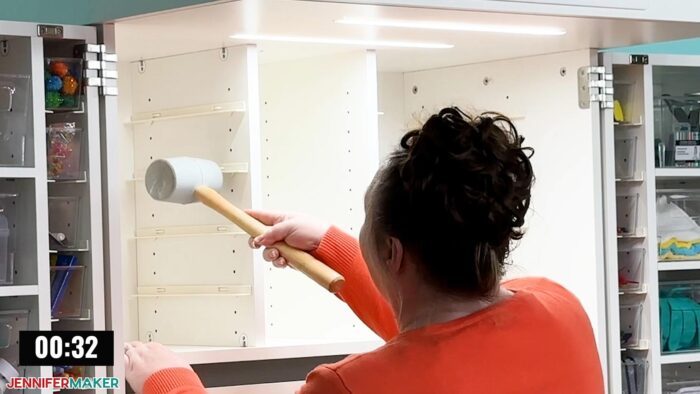
When you put the tote tracks in, be sure the support ledge is at the bottom. You can press them in with your hands, BUT, I have another tip to get them better seated.
Tip #4 is to lightly tap the tote tracks near the peg positions with a rubber mallet. It really helps and saves your wrists and hands. And don’t worry — you can always remove them later if you need to reposition things.
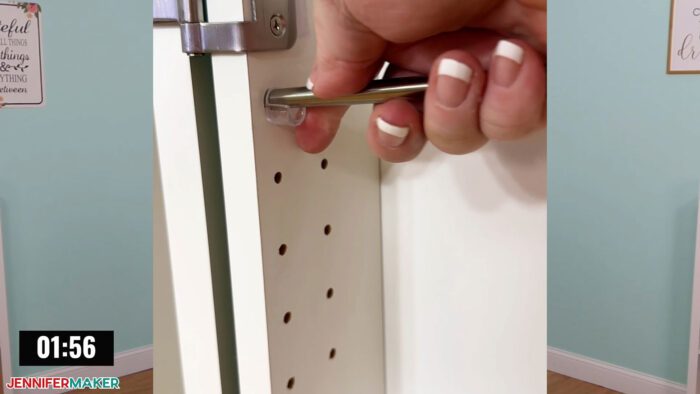
The metal shelf pegs go anywhere there will be a shelf. These are super easy to put in place, and are also easy to remove if you need to reposition shelves later.

The door handles are a little tricky to install. So I have another tip (#5) — put the screw on the tip of your screwdriver and push it in first from the inside, and keep the screw in place while you match up the handle from the outside, then begin screwing it in. This was the easiest and fastest way to do this!
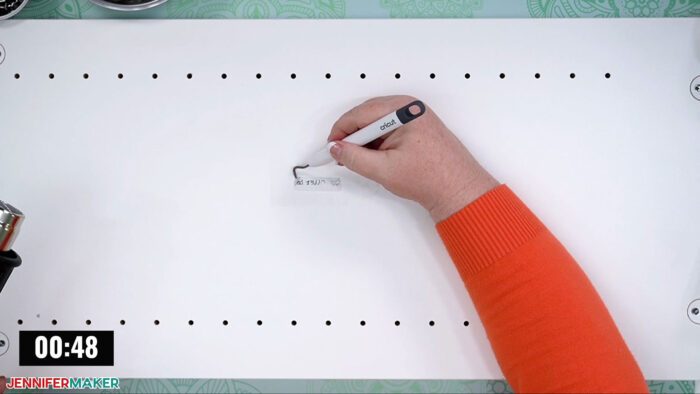
You’ll also need to install tote tracks into the upper dividers. But if you’re like me, you’ll notice the labels and want to remove them. Labels are great for identifying pieces, but you don’t need them once you know what it is. If you have issues getting the labels off, here’s my best tip (#6) on how to do it without any damage to the surface. Get a heat gun or hair dryer and put it on low to medium-low, then heat the sticker for a bit — this warms up the adhesive and makes it possible to easily remove! I like to use a weeding tool to avoid getting gunk on my fingers. You will likely still see the adhesive residue, and a little Goo Gone will wipe it right up. Once you know this trick, you’ll never struggle with labels or stickers again! It’s so easy!
Now you have a nice clean board to put your tote tracks in — refer to your instructions to see the exact placement, as it will show you and even number the holes for you so there’s no need to guess. Also, if you’re wondering about these boards, they are made of wood, but not like a plank of solid wood — they are 3/4″ manufactured wood with a melamine finish. The first time I got these I was a little disappointed — I think I was hoping for solid wood. BUT, what I’ve learned since then is that I am SO glad it’s not solid wood. I’ve since made several pieces of solid wood furniture and I now know that it swells and warps in humid weather, and that would never work for assembling something that requires such precision like the DreamBox. This manufactured wood, which is specifically medium density fiberboard, is exactly the right dimensions and stays in those dimensions. Also, this melamine finish on it makes it so much easier to clean than solid wood would be. Also, it’s not as heavy, which is also really good. I have a lot of experience now with woodworking and I’m super grateful they use this type of wood in the DreamBox. Solid wood is great for some things, sure, but not this.
The Dividers go into place in the side boxes. Getting them in is a little tricky — I recommend you put them in at an angle, like this, then push them in.
It will be a tight fit, but is totally doable.
By the way, if you’re getting the side tables, be sure to put the lower dividers on the outer most part of the box. They can go in either spot, but I think it’s a good idea to just position the lower dividers on the outer side — then you’re good either way! And don’t forget to lock the cams with a screwdriver, too!
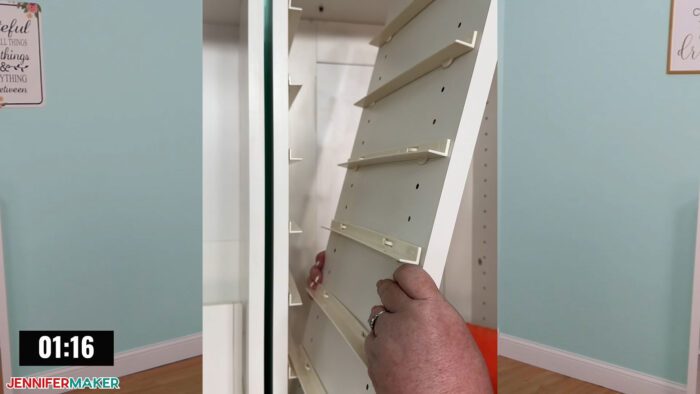
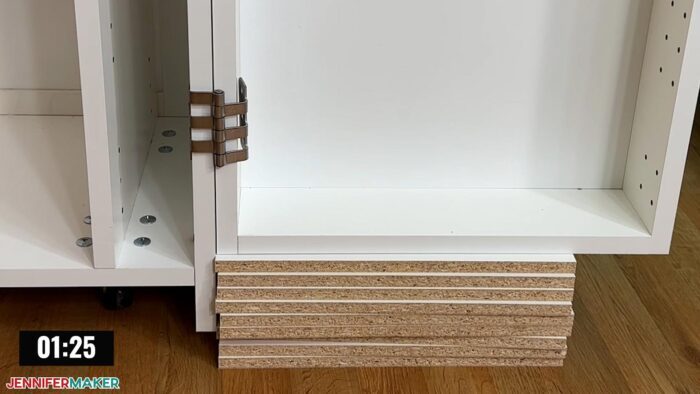
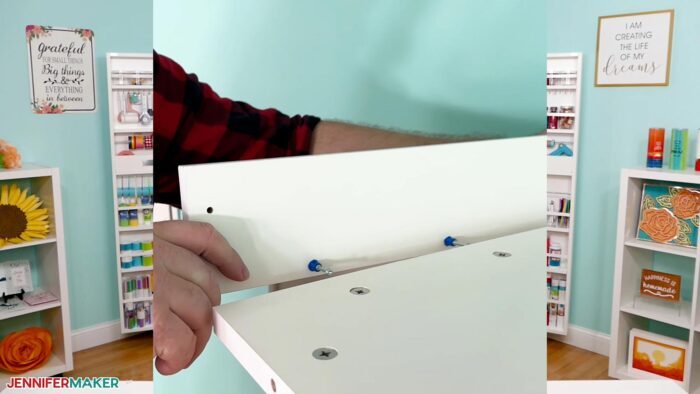
When it’s time to add the swing doors, you’ll need to position them so the top edge is aligned with the top edge of the side boxes, which is a fair amount off the floor. So my next tip (#7) is to use the shelves to prop up the swing doors so you don’t have to try to hold them in place. We found that nine of the half inch thick shelves put our swing doors up to the perfect height.
Then one person holds the swing door while the other fastens the hinges with the screws.
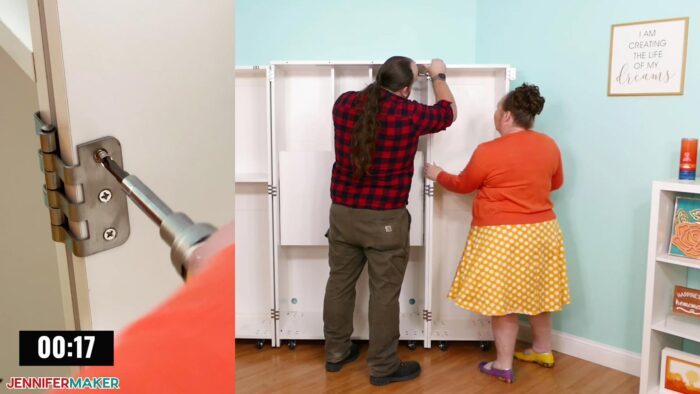
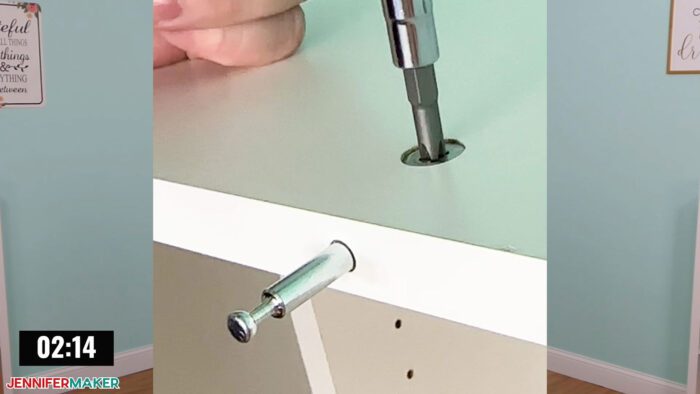
You’ll also want to add all the swing door magnets — mine came with the metal catch plates already attached to the side boxes, and so I had to slide off the metal catch plates from the magnets before fastening them to the swing doors. The holes were predrilled so you know the locations. But here’s another tip (#8) — attach the door magnets, but don’t tighten them all the way at first, then swing the door open until you can see where it hits the metal catch plate, then tighten the screws on the magnet so you know it’s in the right location.
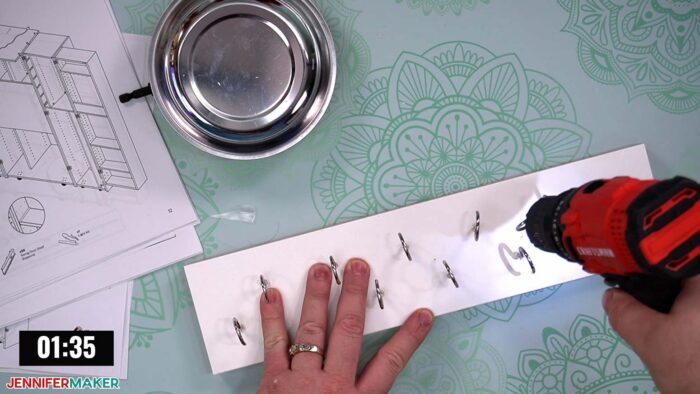
The metal hooks have been doubled in the new DreamBox, which I love because they are so handy for holding tools. You’ll want to screw them in before you put the hook shelves into your DreamBox. My wrists were unhappy after a few, so Greg just attached a hook to the end of his variable speed power drill, slid one hook over another, and used the drill on LOW speed to drive the rest of the screw hooks in. Use this tip (#9) with caution and go slow.
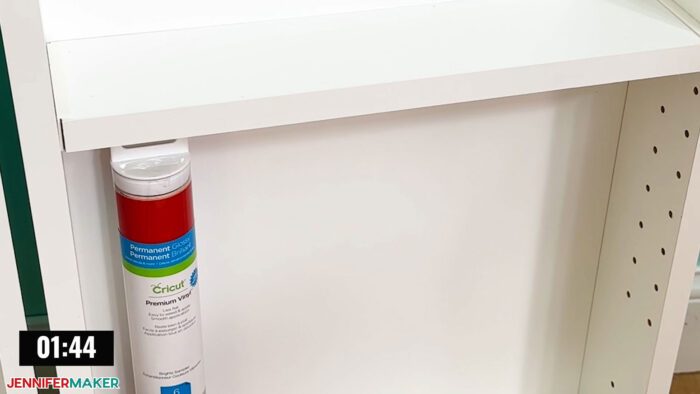
When you’re determining where to put shelves, you can follow the recommendations in your instructions, or you can just go get one of the items you plan to store in your swing drawers to see how much room it needs. For example, I like to put rolls of vinyl in the bottom of my swing doors, so I set a roll in place to see exactly where my shelf should go. Easy peasy!
The light is really cool, and I’m so happy that every DreamBox 2 comes with a light — before, you had to get a crown to have a light. This LED light is super bright, and it’s similar to the super bright natural daylight OttLites. It should last for up to 50,000 hours of lighting! After you remove the tape off the adhesive strip, don’t touch it — just put it into place and push up against it to make sure the adhesive sticks.
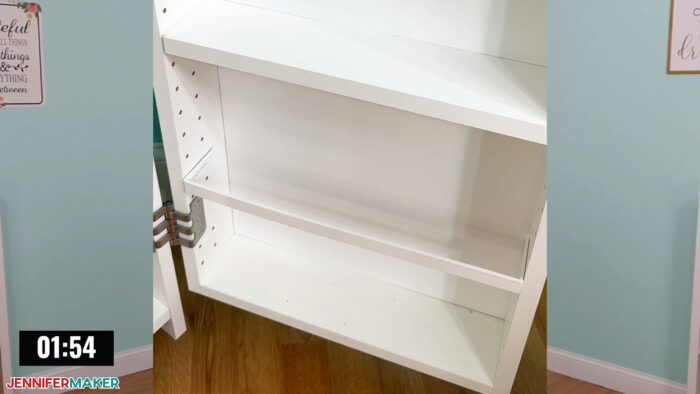
The DreamBox also has these acrylic guards that go the holes to keep items in place — they are now a solid white, instead of a clear plastic, to match the DreamBox, which I like better. You don’t need to install these guards too high up, as that will just make it hard to add and remove things.
The acrylic cups go into position to hold the metal rods. Install the cups so the opening is at the top — this makes them more secure, I think.
The DreamBox 2 also comes with plug hole inserts to cover the divider holes that are not used — I love this and gives it an upgraded look! You really only need to use these in places where the holes are visible on the swing doors. If you use fewer totes and see more holes, you can also buy more hole plugs off Amazon for very little money.
The DreamBox 2 comes with a safety kit. This is a set two metal brackets and screws. Start by determining the appropriate distance of the safety bracket from the wall and note that you can leave some room between the wall and your DreamBox, which you may need to do if you have a wall outlet behind it like we do. Once they are in position, drill them to the top of your DreamBox, put your DreamBox into position, and mark the wall attachment spots with a pencil to make it easier.
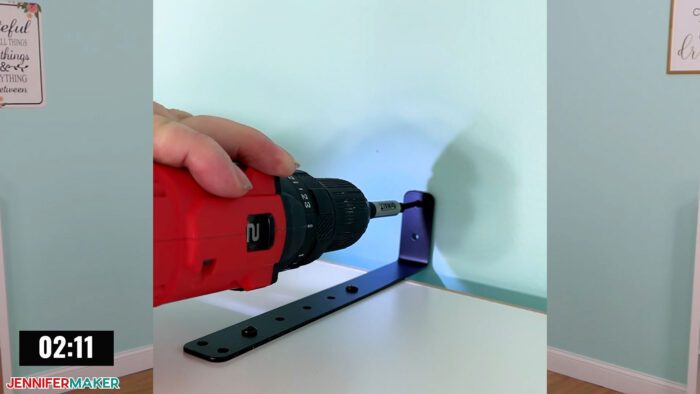
The safety kit brackets not only keep you and your family safe from accidental tippage, but make it easier to open and close your DreamBox as it won’t roll around as much. I don’t personally have any problems with my DreamBox feeling tippy when it is open, but, I believe in safety first.
Now if you got a Crown as we did, you’ll need to attach cams and double connecting posts into the crown top and then build up the crown around it.

It didn’t take too long, but this is a change from the past where the crown was pre-built and all you had to do was lift it up and screw it in. But, we do get a second light with the Crown, and I really like that — I now have a LOT of light in my new DreamBox.
At this point, the DreamBox is ready to be customized with more tracks, totes, and shelves. You get to decide where things go — you can have tracks in the top for large totes, or shelves if you prefer they hold the medium totes. It’s your choice! I like this part the best. Just know that it’s okay to put things in and then later change your mind — it’s really easy to remove tracks and add shelves, and vice versa. In fact, it’s easier to do with the DreamBox 2 than the original DreamBox — I compared the two to be sure, and the new tote tracks pop out easier for rearranging. I didn’t feel that this made them less secure, either. The tote tracks feel good and work well. If you think yours aren’t secure, here’s another tip — you can use either the removable or permanent glue dots. I haven’t needed them, however.
The totes, by the way, are InView totes. I’ve used different totes, and I’ve decided these are my favorites, mostly because they are able to hold 12×12 material without any bending.

And no assembly is required! They are also really sturdy and crystal clear. They do come stacked with protective paper in between. They are built to nest in one another easily, but sometimes if they aren’t lined up right, they can get stuck. If you have troubles separating your totes out of the box, squeeze the long sides together and pull. Or stand them on a corner, press down from the opposite corner — this is usually enough to separate them. If that doesn’t help, put on some rubber gloves to get a firmer grip. I didn’t really have any issues separate my totes, however! If ever you have issues with your totes or ANYTHING in your box, just contact the company that makes the DreamBox — they are super helpful!
So now that it’s all put together, it’s time to fill it! I’m going to move my stuff in as quickly as I can, but you should feel free to take your time. If you’d like to know more about how I filled it, and all the tips and hacks I have for personalizing, organizing, and just generally making the most of a DreamBox, watch my upcoming DreamBox Tips & Tricks video!
Now that it’s all done, I really like the DreamBox 2 and I think it’s improved! My favorite feature is the table — it’s so easy to open and close it. And no legs — it’s really wonderful! I also love the built-in light that comes with all the DreamBox 2 units — and it’s flush with the center box edge, so it looks great. I also love that when I add the Crown, I now have two lights with an overhang! It’s a lot brighter and I can see better without needing an additional light. The Center Section is a bit wider than before, by about two inches, and it’s really customizable — if you don’t want as much storage, or you just want more space in the back area, for say a computer, you can get a short divider kit. And I love that the pins are metal now, instead of plastic!
I also asked Greg what he thought of the new DreamBox, since he’s been using one even longer than I have. He says, and I quote, “I love the new table. I think it’s incredible. I’m constantly having to fight with the table legs on my original DreamBox and I think this is a lot better. I like the additional light in the DreamBox 2 — I think it helps a lot. I like the tote tracks instead of the old plastic pins, as they were a huge pain to put in and I would sometimes break them. The metal pins on the shelves are a nice upgrade, too. They redesigned the swing doors — the pocket face used to be attached permanently and could not be removed, but now it can and now they’re more modular. The big thing I love is that there’s not any more plastic pins.”
I also asked him what he didn’t like about the DreamBox 2, and he said he didn’t like that the crown now has to be assembled. The original DreamBox had a large single piece crown and it was easier to install. The old crown did sometimes sag down and interrupt the opening and closing of the doors, so maybe the new crown will improve that.
He and I both like the new table width on the DreamBox 2, which is a bit wider and less deep than the original table. We’re happy to have a shorter table, because neither of us used the full length and it just stuck out into the room more.
Their site says the table supports 50 lbs, BUT if you attach the DreamBox to your wall (as I have) and use the base stabilizers (which are included with your DreamBox), it’s my understanding they will hold up to 200 lbs.
I feel like the new DreamBox 2 is way more customizable now. It holds just as much stuff, and maybe even more now, because I don’t have to shoehorn things into places that didn’t quite fit — like the bottom section, which now has this divider in it so I can store taller things than before. I love that I can put totes down there if I want, too. I also love the doubled hook storage, the removable pockets, the easier tote tracks, and all the little, thoughtful touches they’ve added. I’m really pleased with it and I can’t wait to really use it!
Let me know if you found this review helpful or if you have more questions! If you do decide to get a DreamBox, you can purchase one at my affiliate link at jennifermaker.com/dreambox2 — this page has links to my current discount code, more videos, and just generally helpful stuff. And many thanks to all of my fellow DreamBox users for sharing your experiences and tips with us — it’s so helpful!
Answers to Your Questions about the DreamBox 2
Q: What exactly did you order for your DreamBox 2 setup?
A: I got the DreamBox 2 in White Shaker with a Full Set of Totes + Long Dividers, Pre-Built Service (yay!), the Deluxe Crown with Double Light, and Side Tables. I also got the Short Divider and Machine Shelf separately, as I wanted to try it out to answer questions for you, so you’ll see that reflected in some of my photos and videos. Get the Short Dividers if you want to put your computer in your DreamBox, and get the Machine Shelf if you’d rather put a printer or cutting machine in the top section instead.
Q: How much weight can the DreamBox 2 table hold?
A: Their site says 50 lbs, BUT if you attach the DreamBox to your wall (as I have) and use the base stabilizers (which are included with your DreamBox), it’s my understanding they will hold up to 200 lbs.
Q: Where did you get that blue chair on wheels?
A; It’s from Amazon! It’s very comfy. You can get the pretty upholstered blue chair here!
Q: What are the items you used to set up your DreamBox 2?
- Ratcheting screwdriver
- Power drill
- Rubber mallet
- Magnetic bowls
- Smart plug
- Wireless Switch
- Heat Gun
- Goo Gone
- Weeding tool
- Blue wheeled chair
Q: What are you wearing? Where did you get those shoes?
My dress is here, my sweater is here, and my shoes are here!
Get my free DreamBox planner to help you save, plan, and prepare for a DreamBox!
If you get a DreamBox, please share a photo in our Facebook group or tag me on social media with #jennifermaker.
Love,

Want to remember this? Save the DreamBox 2 Craft Storage Review and Tips to Your Favorite DIY Pinterest Board!