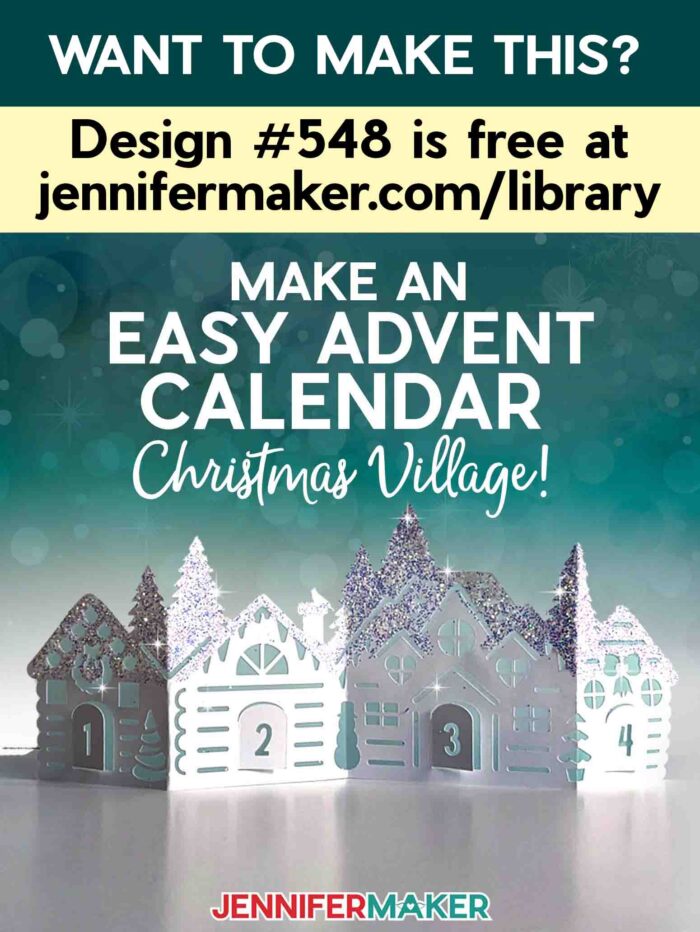
Learn how to make an Advent calendar village countdown from cardstock!
It’s my favorite time of year: Christmas countdown! Each year I share a new design as a fun way to celebrate Merry Maker Mingle, and my new Advent calendar village fits right in with my other designs. This charming Christmas village scene a little easier than my gingerbread village, with even more sparkle! Plus, you can make your calendar in different scales, from small to Venture-sized!


This is a Cricut Mystery Box project — my village Advent calendar uses a Blue StandardGrip Machine Mat that you can get in the “Bargain Blitz” mystery box that came out November 23, 2023. While this mystery box is no longer available for sale, you can still purchase the machine mat, which is linked below in my material list. Learn more about Cricut Mystery Boxes and their contents in my Cricut Mystery Box Guide.
Sometimes, some cardstock, glue, and glitter are all you really need for a beautiful craft and holiday cheer!
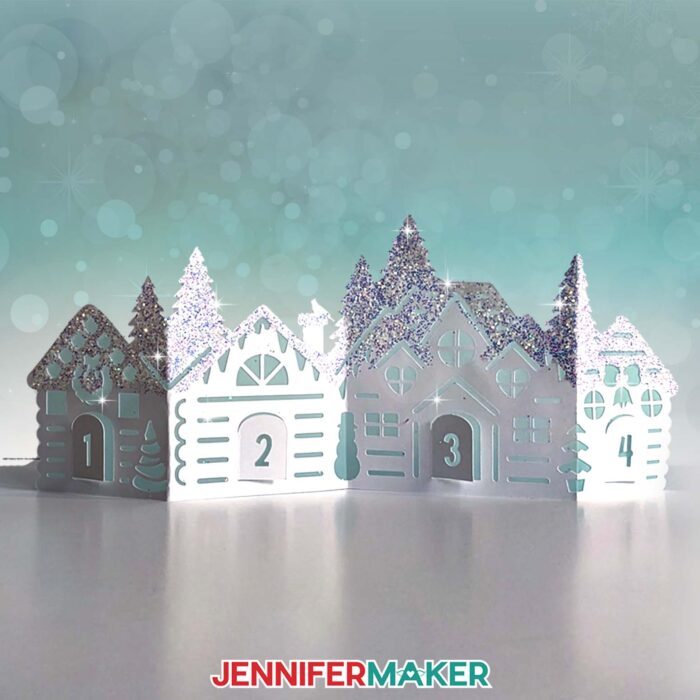
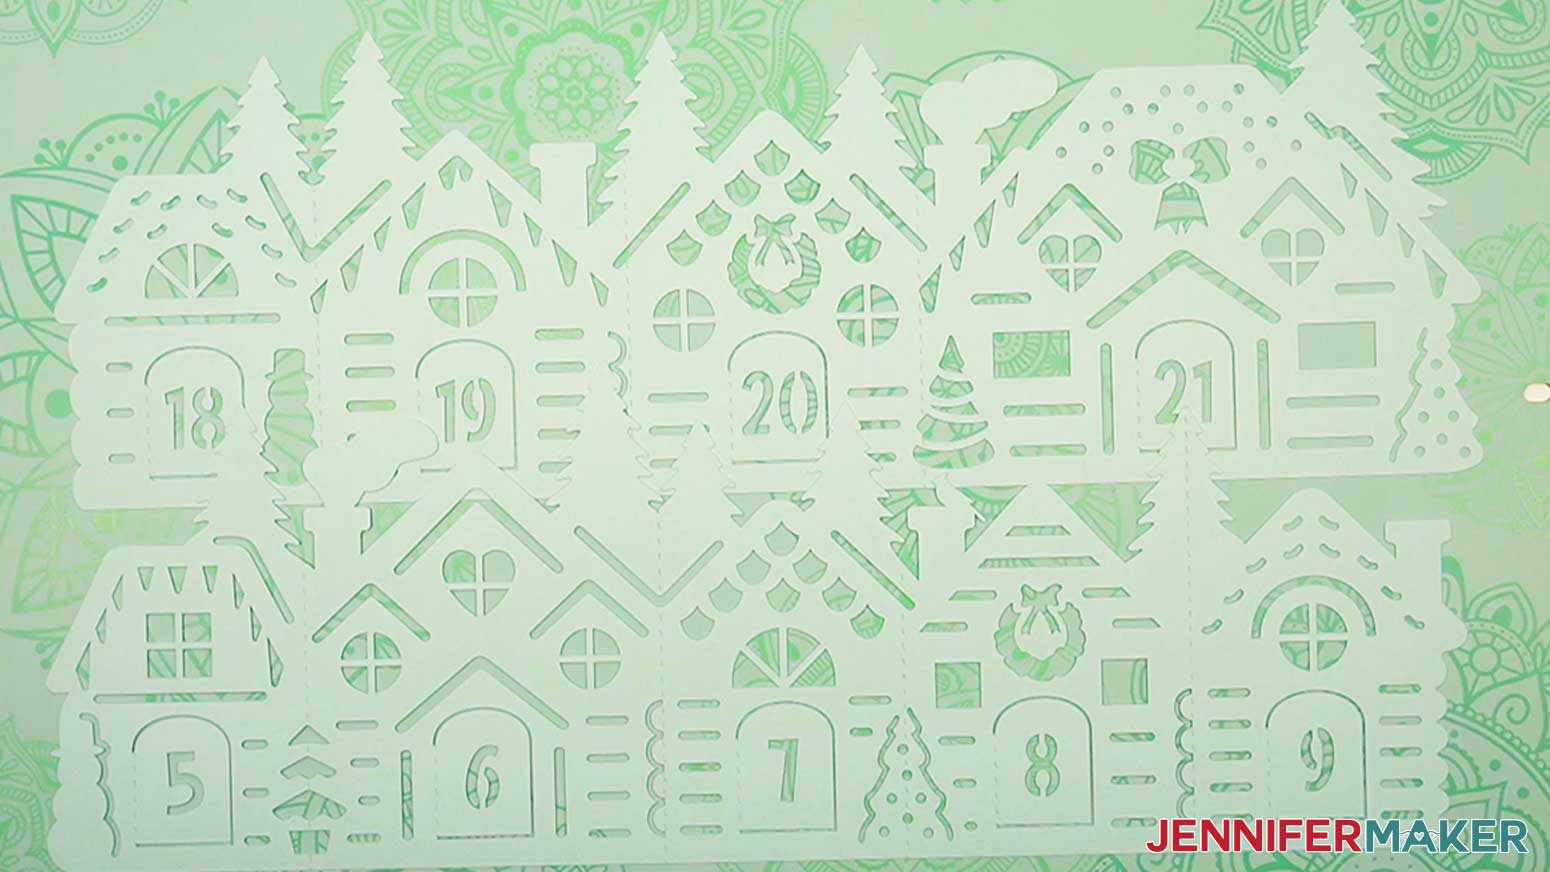
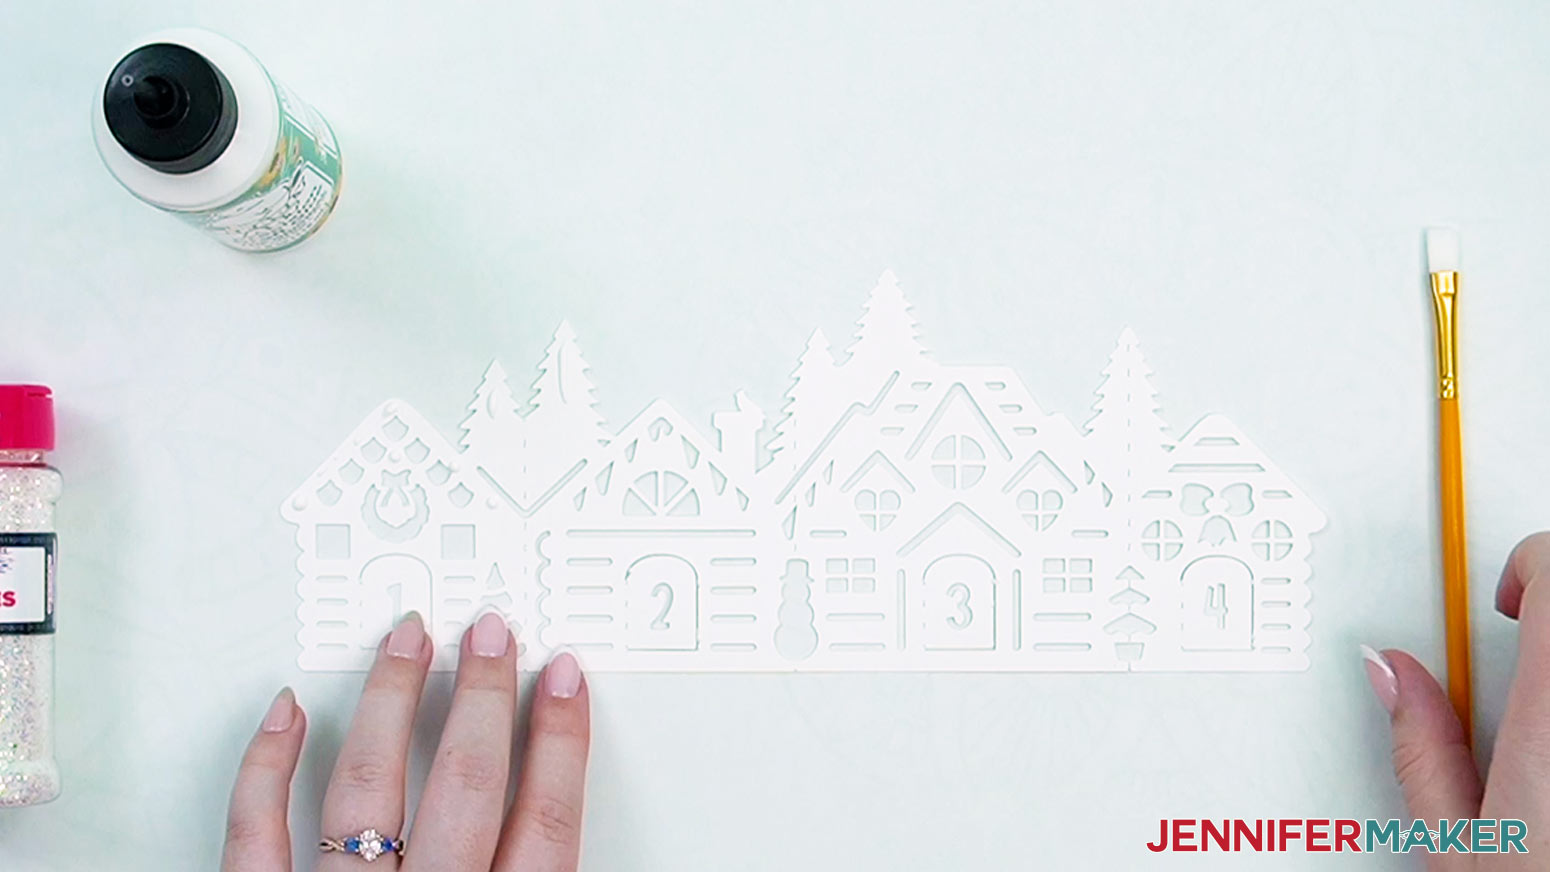
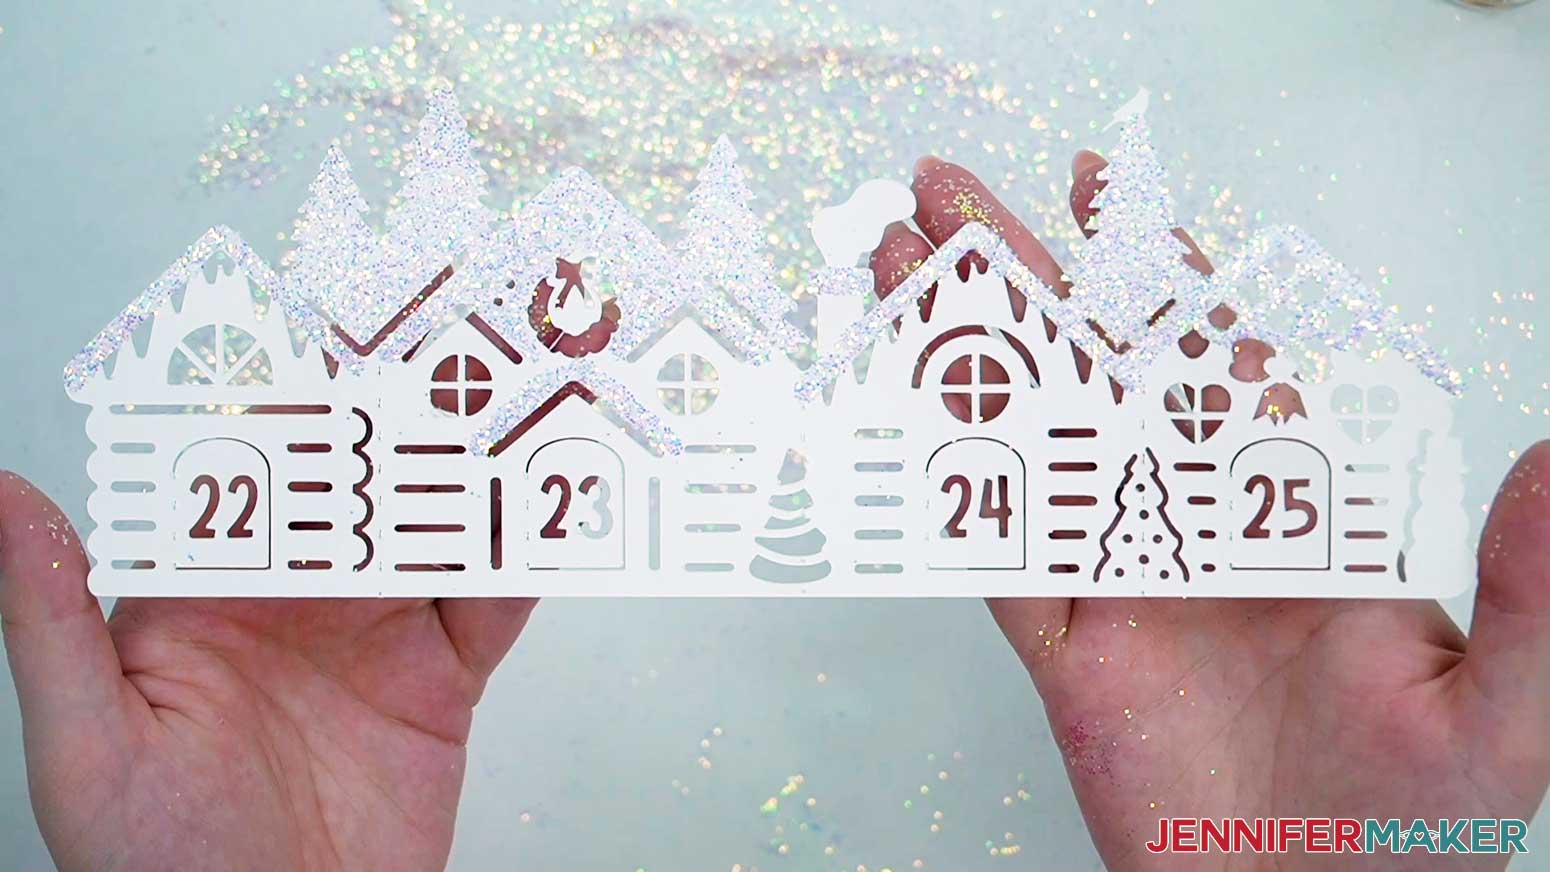
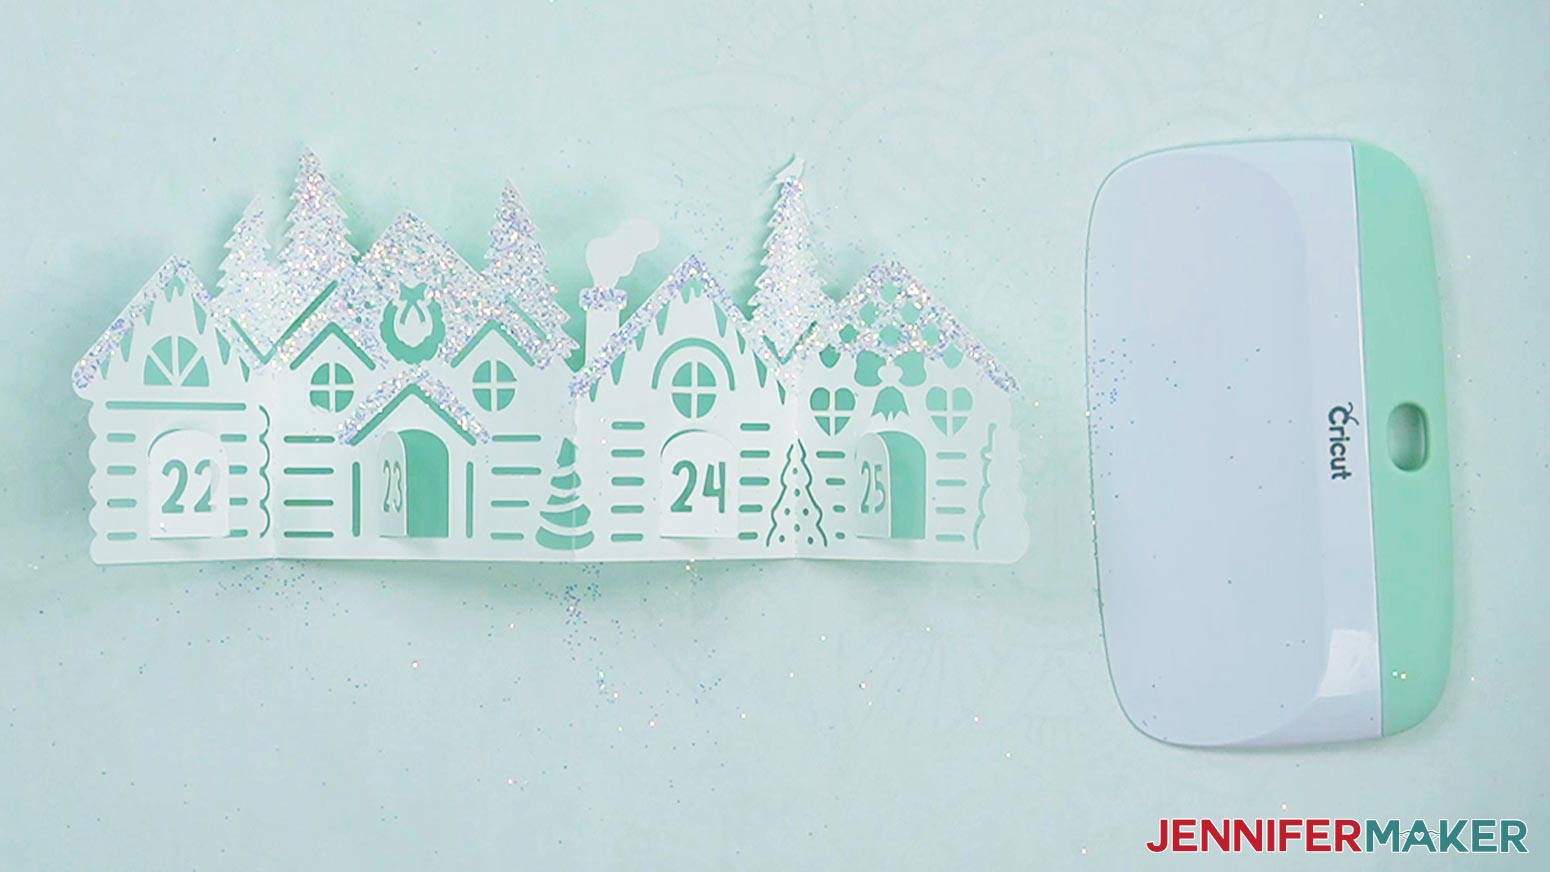
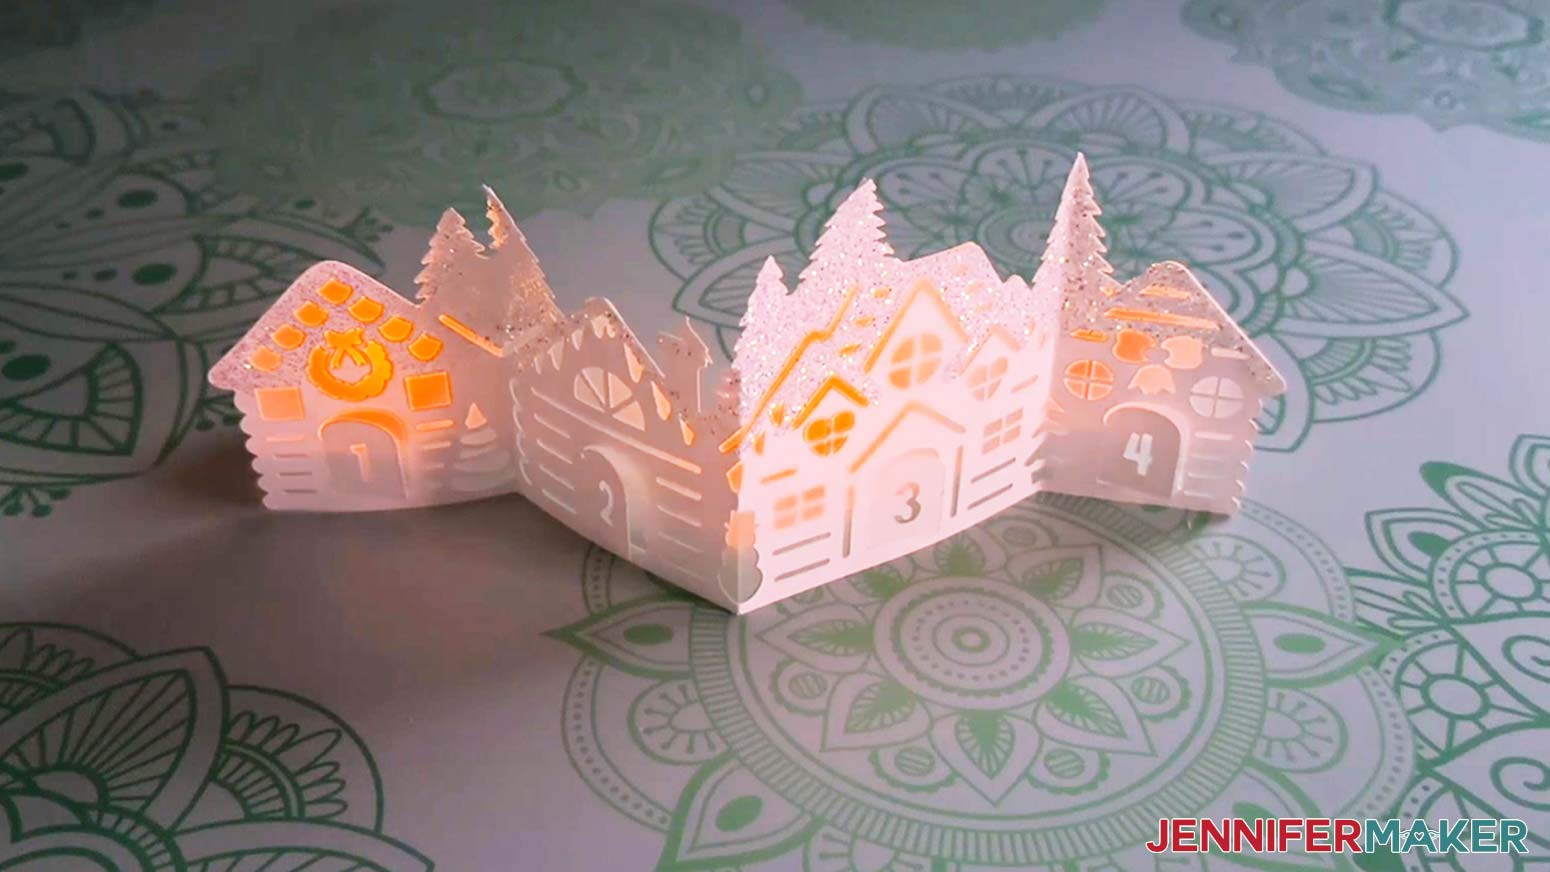
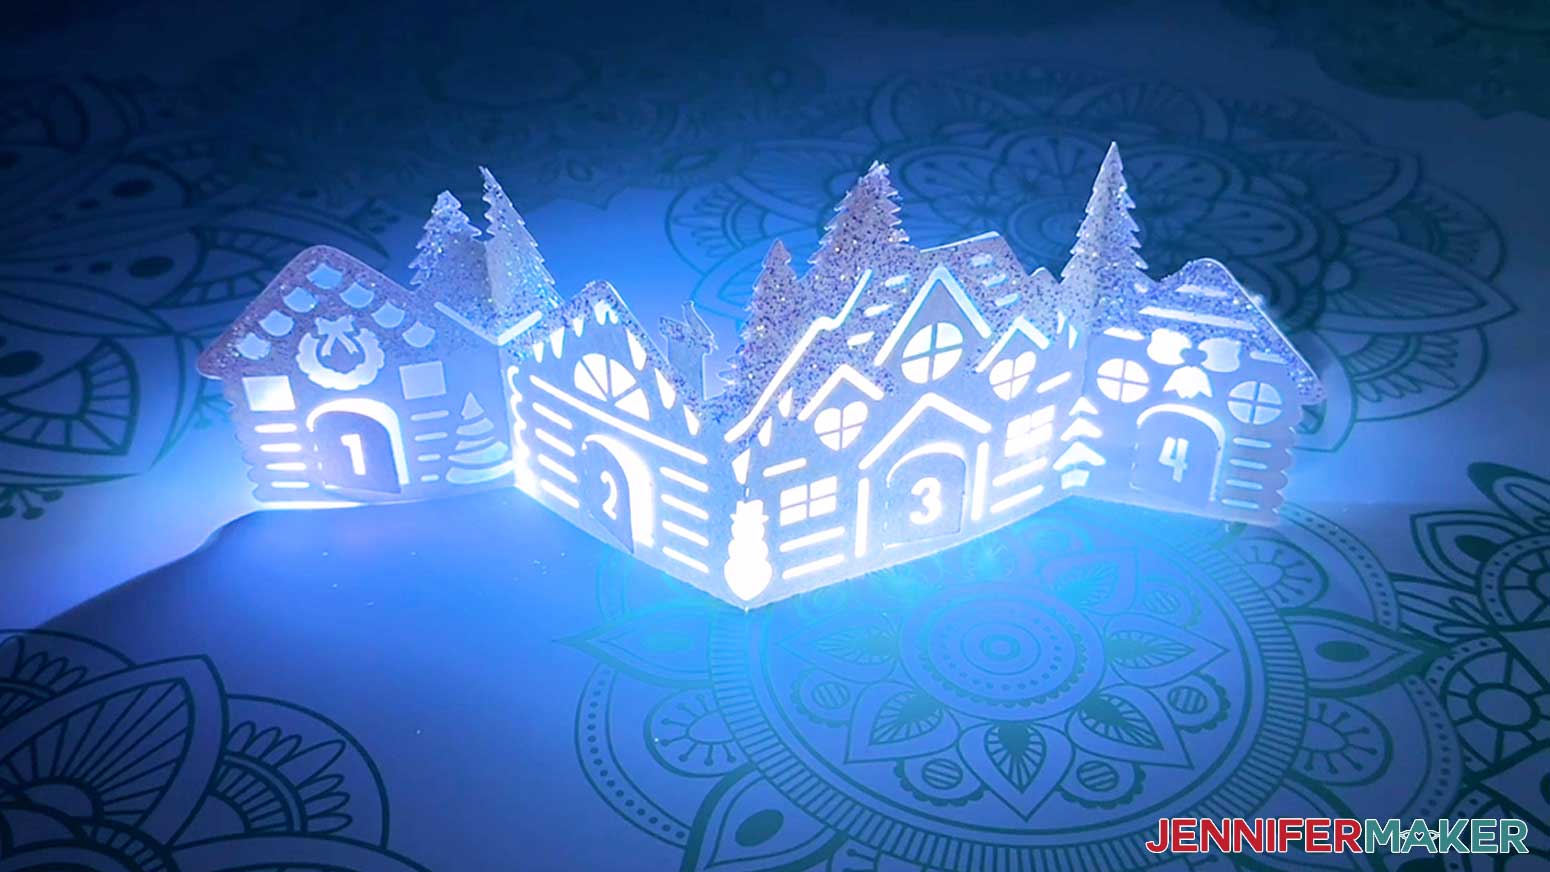
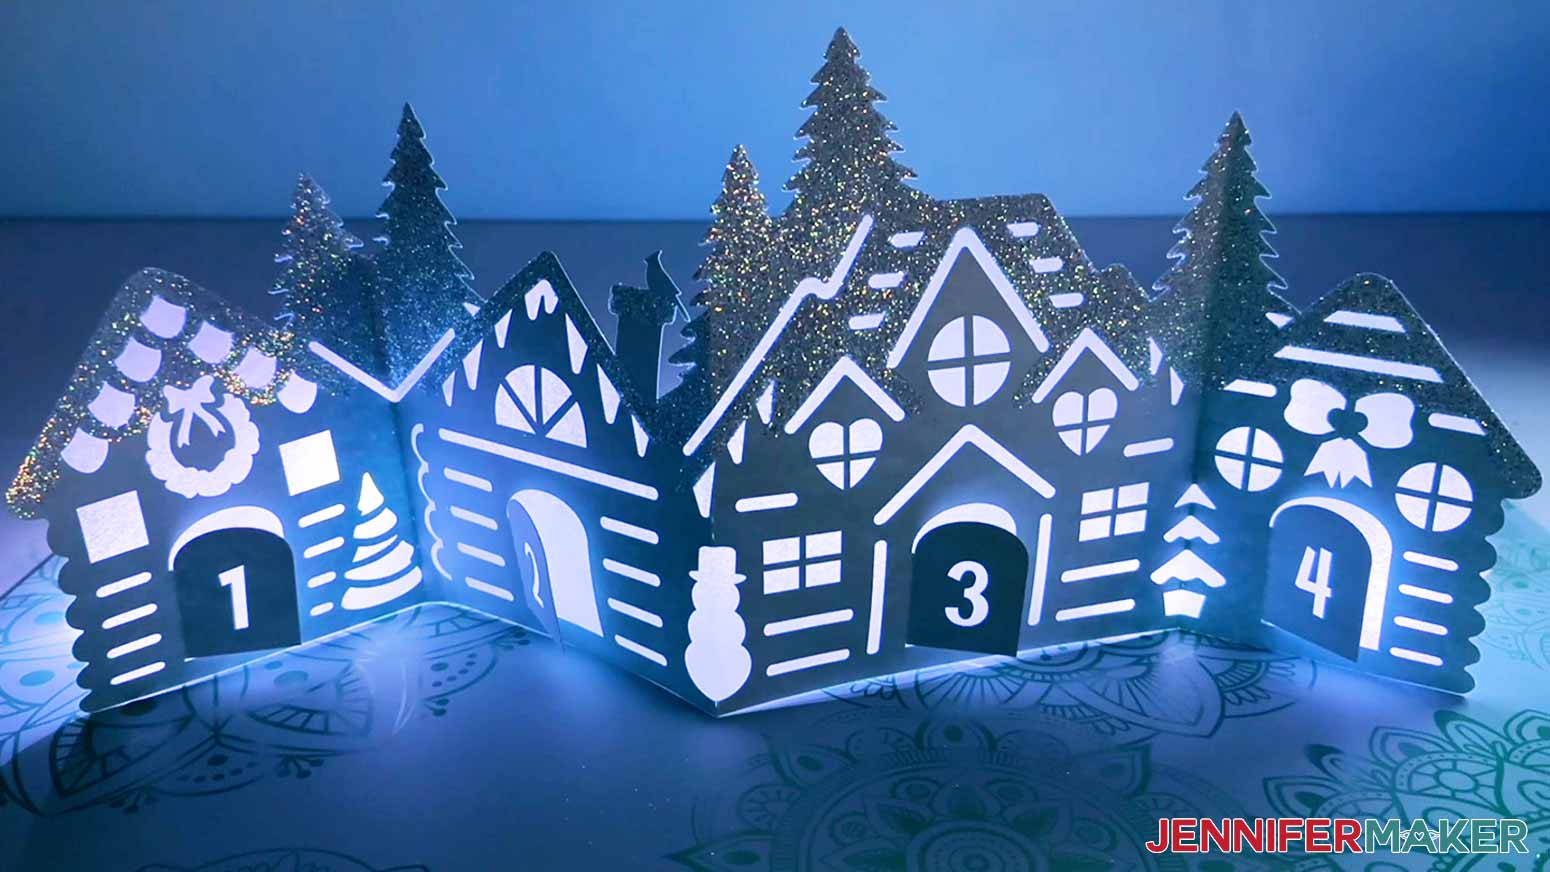
This year’s advent calendar is a collection of house sections that stay up because each is folded like an accordion. Really, that’s it! You can even open the little doors to track the days this holiday season. Or reveal new little surprises every day! I made this countdown calendar in several sections so you can customize the layout to fit your home!

The simplest Advent village countdown just requires good-quality cardstock and a way to cut it. You can cut it by hand, but I cut mine on a Cricut Maker 3. You can use any Maker or Explore, a Joy Xtra, or original Joy, or another brand of cutting machine. And look how fantastic the Venture version looks!

If you want to add a little detail to your Advent calendar village, the free files include matching diffuser pieces you can cut and attach to the cardstock with glue. Pop a tea light behind the doorway and watch it. glow!
I know not everyone loves glitter, so it’s optional, but I really love the snowy look. I’ll show you how to add glitter using high-quality craft glue and a paintbrush so it doesn’t get everywhere.
Let me show you how easy it is to make this Advent calendar village countdown! This post contains some affiliate links for your convenience (which means if you make a purchase after clicking a link I will earn a small commission but it won’t cost you a penny more)! Read my full disclosure policy.
Materials to Make an Advent Village Countdown
View my Amazon shopping list with the exact items we used to make this project
- Two or Three (2-3) Sheets of 8.5” x 11” or 12″ x 12″ 65 lb. Cardstock (any color) -OR-
- Six (6) Sheets of 12″ x 24″ 100 lb. Cardstock (optional for larger houses, any color)
- Three (3) Sheets of 8.5” x 11” Vellum (optional for diffuser layer) -OR-
- Three (3) Sheets of 8.5″ x 11″ Copy Paper (optional for diffuser layer) -OR-
- Two (2) Sheets of 12″ x 12″ Wax Paper or Parchment Paper (optional for diffuser layer) -OR-
- Six (6) 12″ x 24″ Sheets of Vellum or Tracing Paper (optional for larger house diffusers)
- LED Tea Lights -OR-
- Fairy Lights
- Glitter (optional) – I used [“Flurries” semi-translucent glitter from TheGlitterGuy.com — use code JENNIFERMAKER for a 10% discount at checkout!
- Butcher Paper (optional to keep your work surface clean when applying glitter)
- A way to cut your materials – I’m using the Cricut Maker 3, but you can also use the Cricut Maker, a Cricut Explore Series machine, the Cricut Venture, the Cricut Joy Xtra, or even the Cricut Joy.
- Cricut Green StandardGrip Machine Mat 12″ x 12″
- Cricut Blue LightGrip Machine Mat 12″ x 12″ (for optional diffuser layers)
- Cricut Green StandardGrip Machine Mat 12″ x 24″ (optional for larger houses)
- Craft Glue – I used Bearly Art Precision Glue
- Scoring Stylus (optional for score version) -OR-
- Single Scoring Wheel (optional for score version)
- Brayer
- Spatula
- Scraper -OR-
- XL Scraper (optional for larger houses)
- Weeding Tool (for popping out small pieces from intricate areas)
- Paint Brush (for evenly applying glue to adhere glitter)
- Clear Scotch Tape (optional)
- Design #548 My free SVG/DXF/PDF design files are available in my free resource library – get the password by filling out the form at the bottom of this page
How to Make Your Own Advent Calendar Village

Advent Calendar Village
Make an easy paper advent calendar village that you can use to count down to a big day! The village looks beautiful on a mantel, table, or desk.
Materials
- Two or Three (2-3) Sheets of 8.5” x 11” or 12" x 12" 65 lb. Cardstock (any color) -OR-
- Six (6) Sheets of 12" x 24" 100 lb. Cardstock (optional for larger houses, any color)
- Three (3) Sheets of 8.5” x 11” Vellum (optional for diffuser layer) -OR-
- Three (3) Sheets of 8.5" x 11" Copy Paper (optional for diffuser layer) -OR-
- Two (2) Sheets of 12" x 12" Wax Paper or Parchment Paper (optional for diffuser layer) -OR-
- Six (6) 12" x 24" Sheets of Vellum or Tracing Paper (optional for larger house diffusers)
- LED Tea Lights -OR-
- Fairy Lights
- Glitter (optional) - I used "Flurries" semi-translucent glitter from TheGlitterGuy.com — use code JENNIFERMAKER for a 10% discount at checkout!
- Butcher Paper (optional to keep your work surface clean when applying glitter)
- Design #548 (My free SVG/DXF/PDF design files are available in my free resource library – get the password by filling out the form at the bottom of this page)
Tools
- A way to cut your materials - I’m using the Cricut Maker 3, but you can also use the Cricut Maker, a Cricut Explore Series machine, the Cricut Venture, the Cricut Joy Xtra, or even the Cricut Joy.
- Cricut Green StandardGrip Machine Mat 12" x 12"
- Cricut Blue LightGrip Machine Mat 12" x 12" (for optional diffuser layers)
- Cricut Green StandardGrip Machine Mat 12" x 24" (optional for larger houses)
- Craft Glue (I used Bearly Art Precision Glue)
- Scoring Stylus (optional for score version) -OR-
- Single Scoring Wheel (optional for score version)
- Brayer
- Spatula
- Scraper -OR-
- XL Scraper (optional for larger houses)
- Weeding Tool (for popping out small pieces from intricate areas)
- Paint Brush (for evenly applying glue to adhere glitter)
- Clear Scotch Tape (optional)
Instructions
STEP 1: GET MY FREE ADVENT CALENDAR VILLAGE DESIGNS
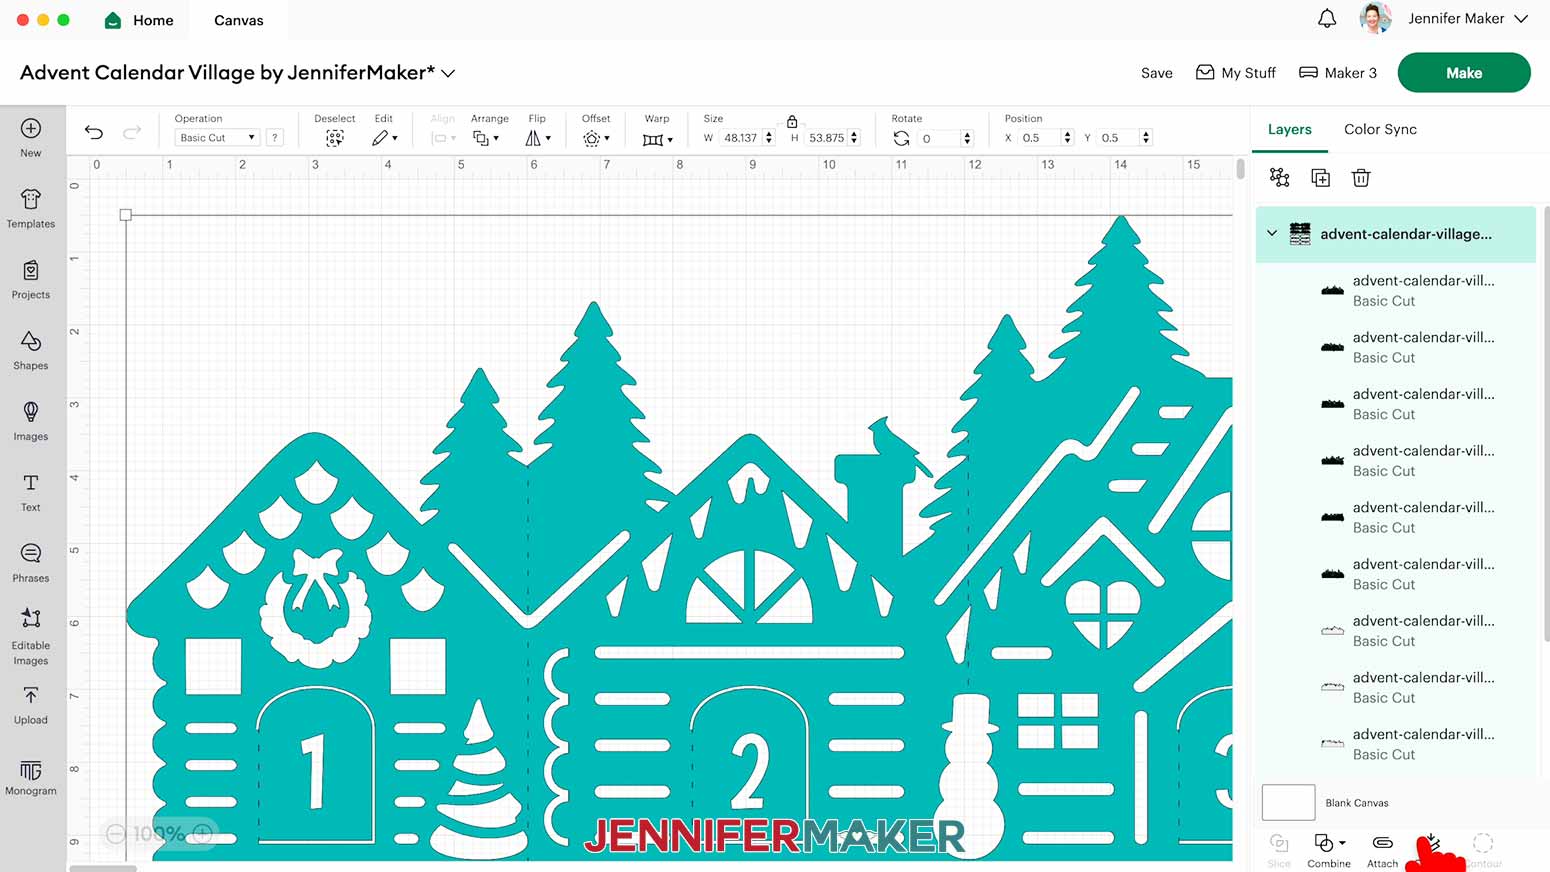
First, download my Advent Calendar Village designs from my free library -- look for Design #548. Alternatively, you can use the Save This Project form near the top of this post and the design link will be emailed to you.
The SVG folder includes designs for small 4” tall houses you can cut on any machine (even the Joy) and designs for larger 8.5” tall houses you can cut on 12” x 24” cardstock. I’ve also included a “score” version of each design that you can cut using a scoring tool, and a “noscore” version with dashed cut lines that only needs the Fine-Point Blade.
If you’d like to make the version with score lines using a scoring wheel or stylus, you can refer to my tutorial on Cricut Scoring to learn how to adjust the files. Note that this version works better without glitter, because the score lines are harder to see once the glue and glitter cover them up.
TIP: If you’re not sure how to upload, go to jennifermaker.com/svgs to learn how to unzip and upload SVG files.
STEP 2: PREPARE AND CUT YOUR ADVENT CALENDAR VILLAGE DESIGN
CRICUT DESIGN SPACE
1. Open Cricut Design Space and click “New Project.”
2. Click “Upload” and then “Upload Image.”
3. Click “Browse.”
4. Select the SVG file you want to use.
5. On the Prepare to Upload screen, it will say “Cut image” with the design preview.
6. Click “Upload.”
7. Find your design in Recent Uploads and add it to the Canvas.
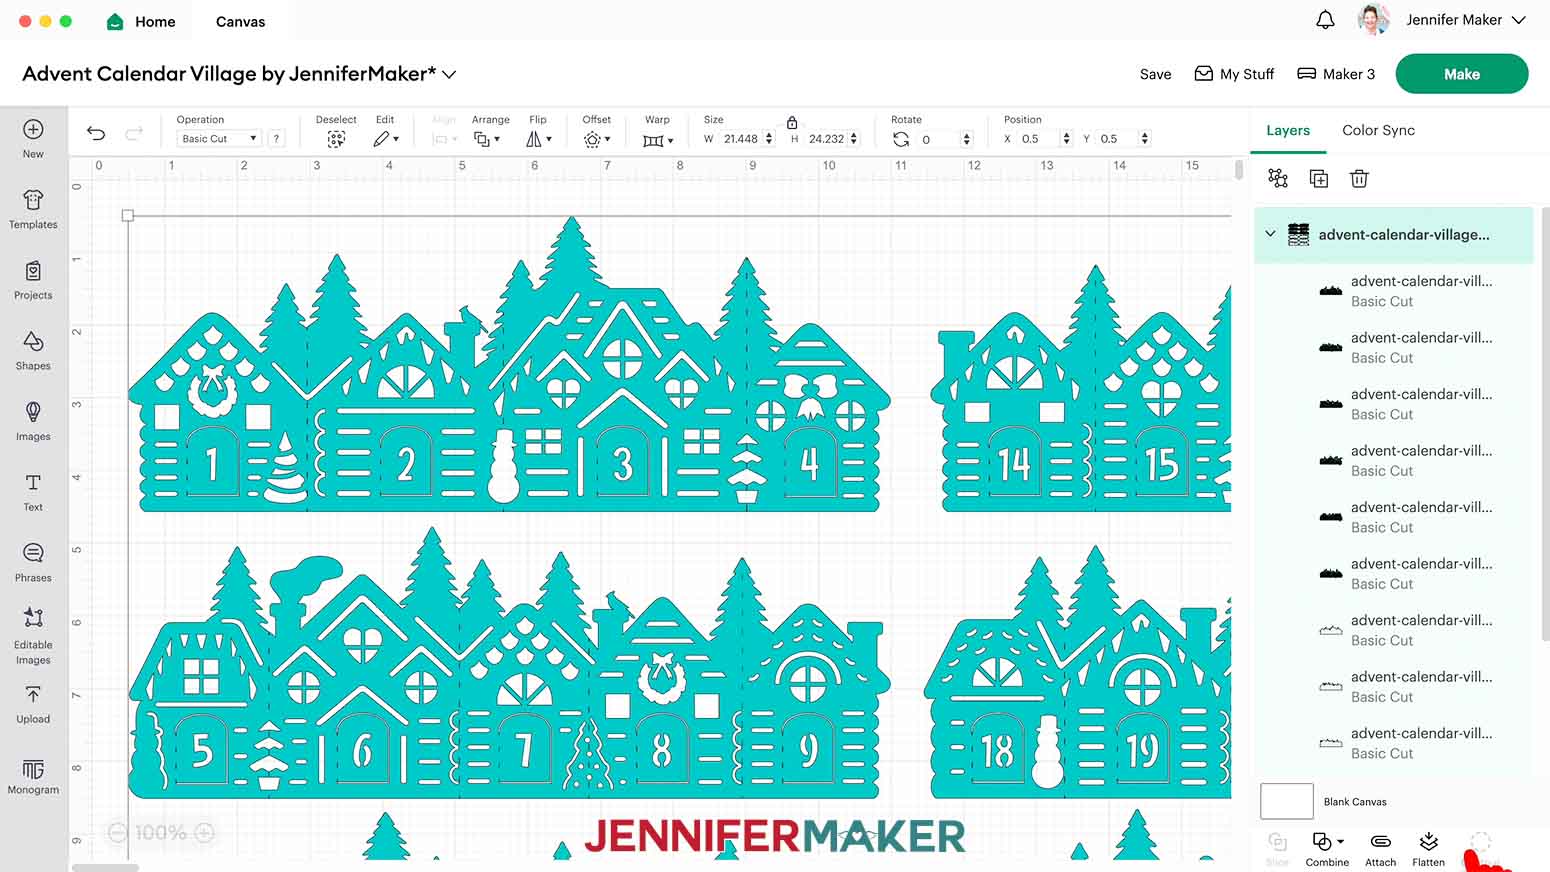
NOTE: I don’t recommend resizing the design.
NOTE: If you don’t want to include light diffuser layers, click the eye icons next to the light gray layers to hide them.
8. Make sure the correct machine is selected in the top right.
9. Click “Make.”
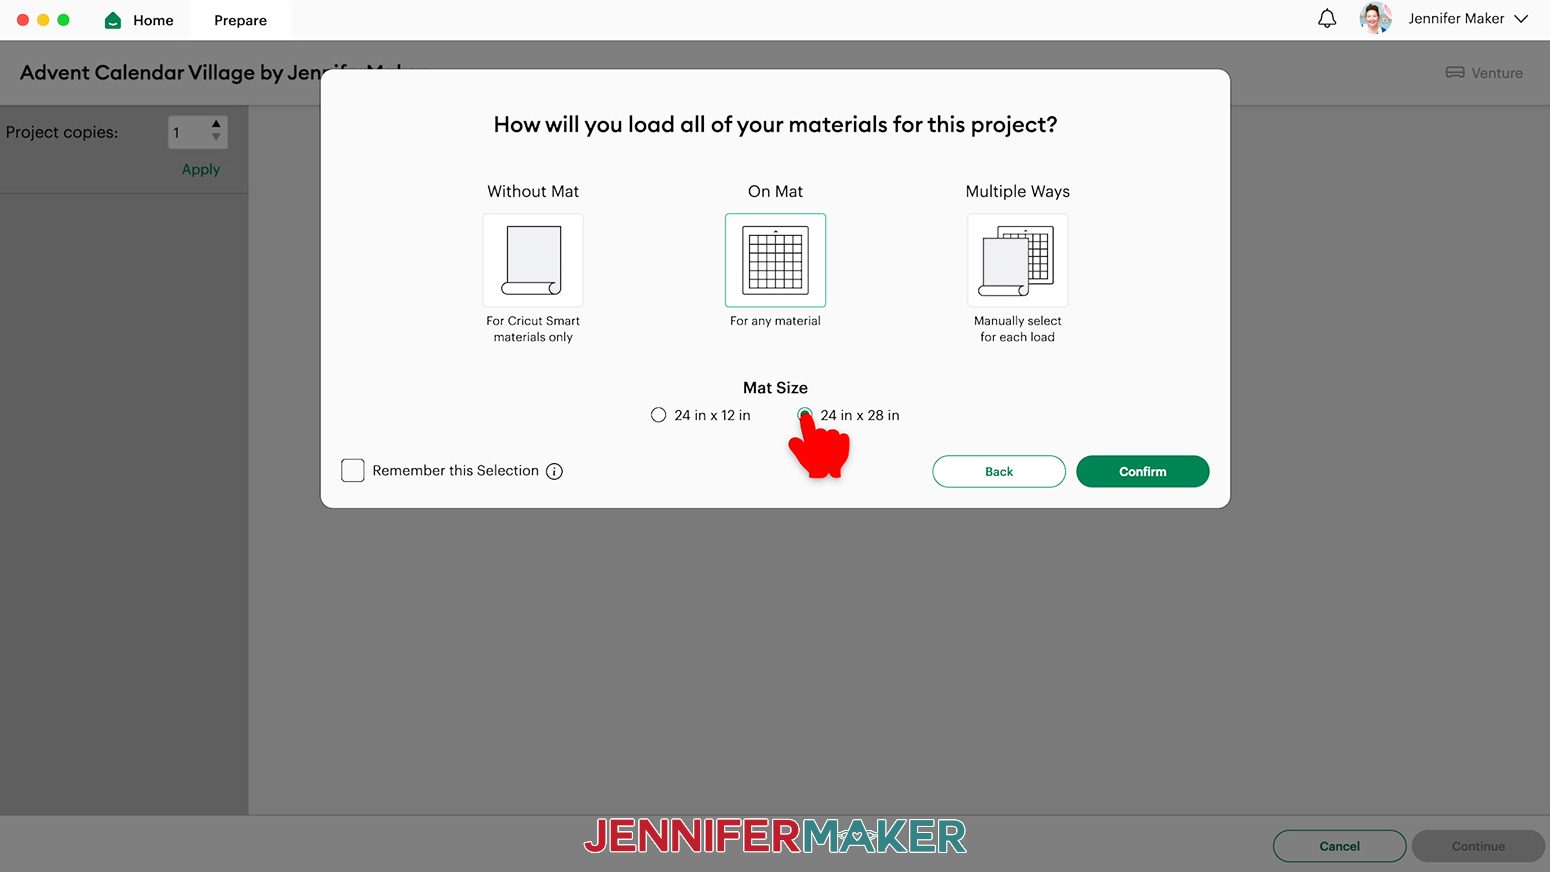
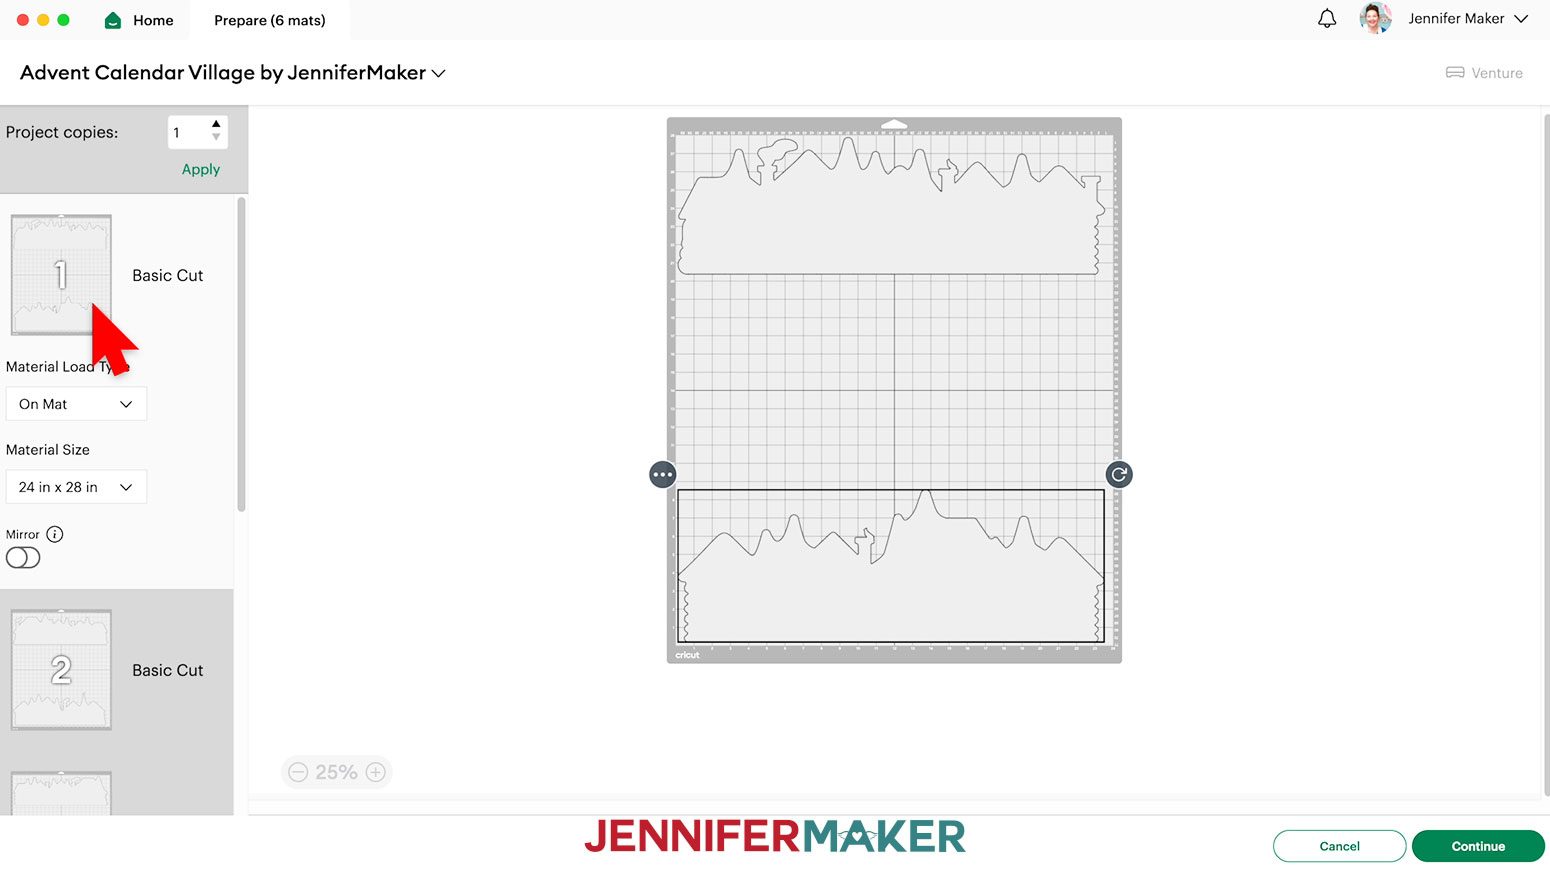
10. If prompted, click "On Mat," choose your mat size, and click “Confirm.”
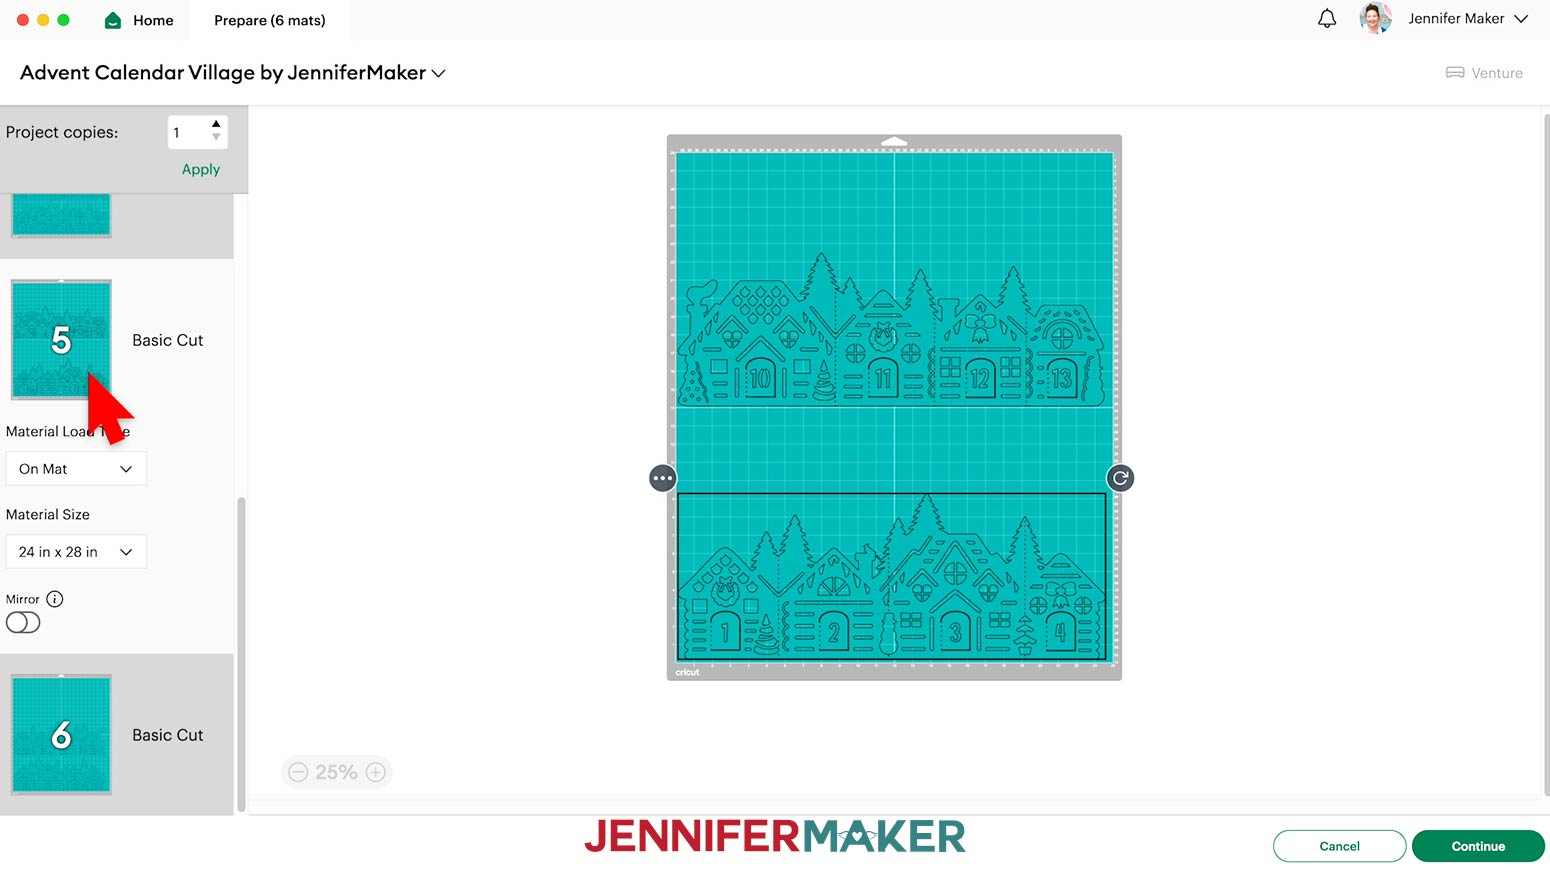
11. On the Prepare Screen, set the Material Size to match each paper you’re using.
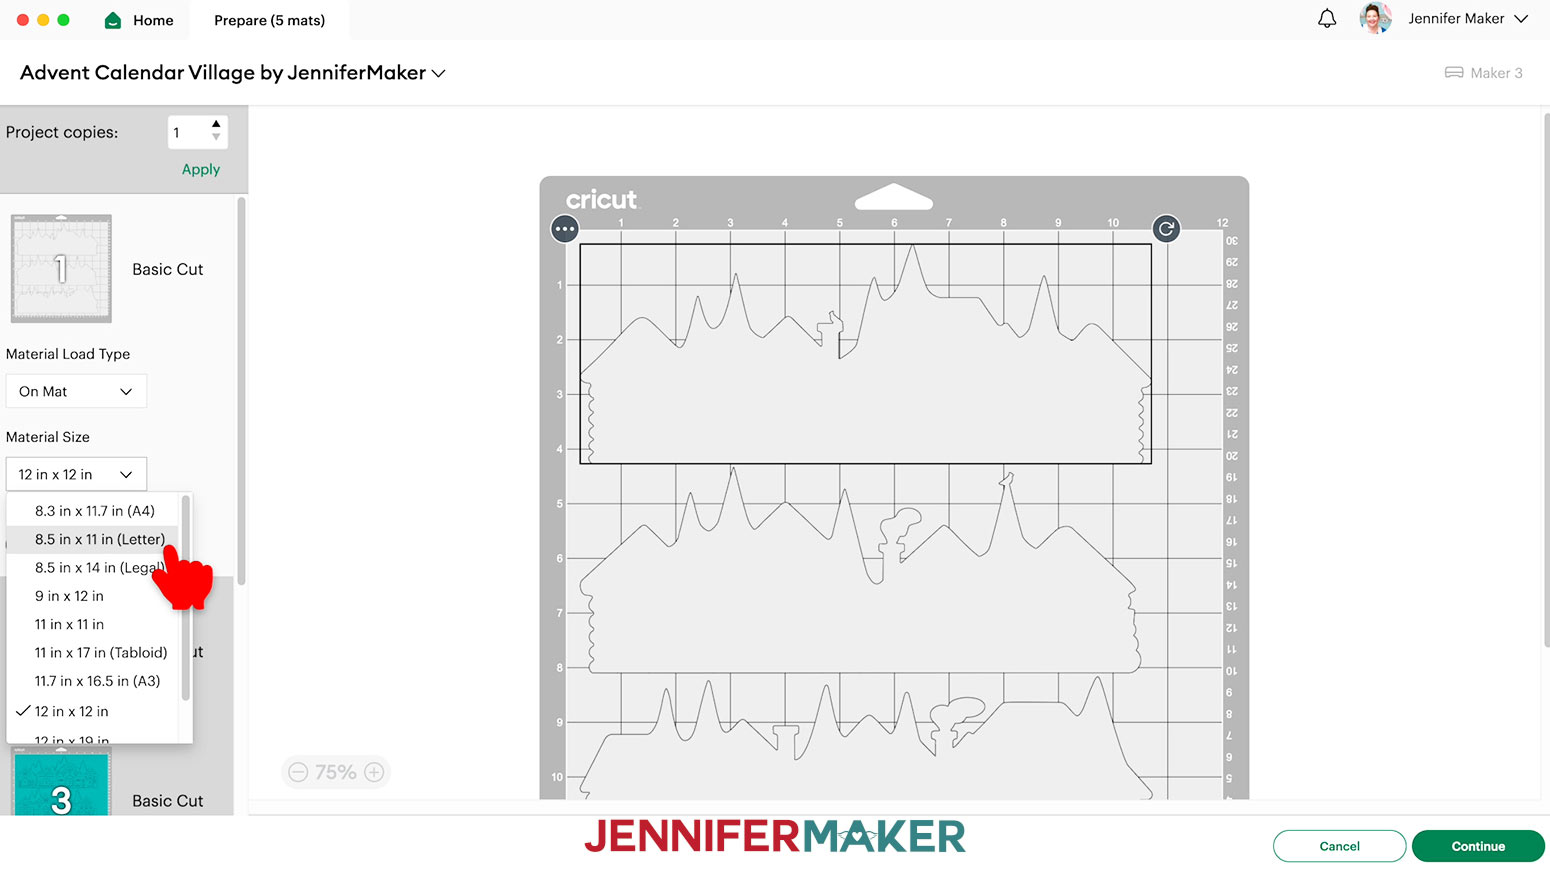
12. Select the first mat again and click “Continue.”
CUTTING
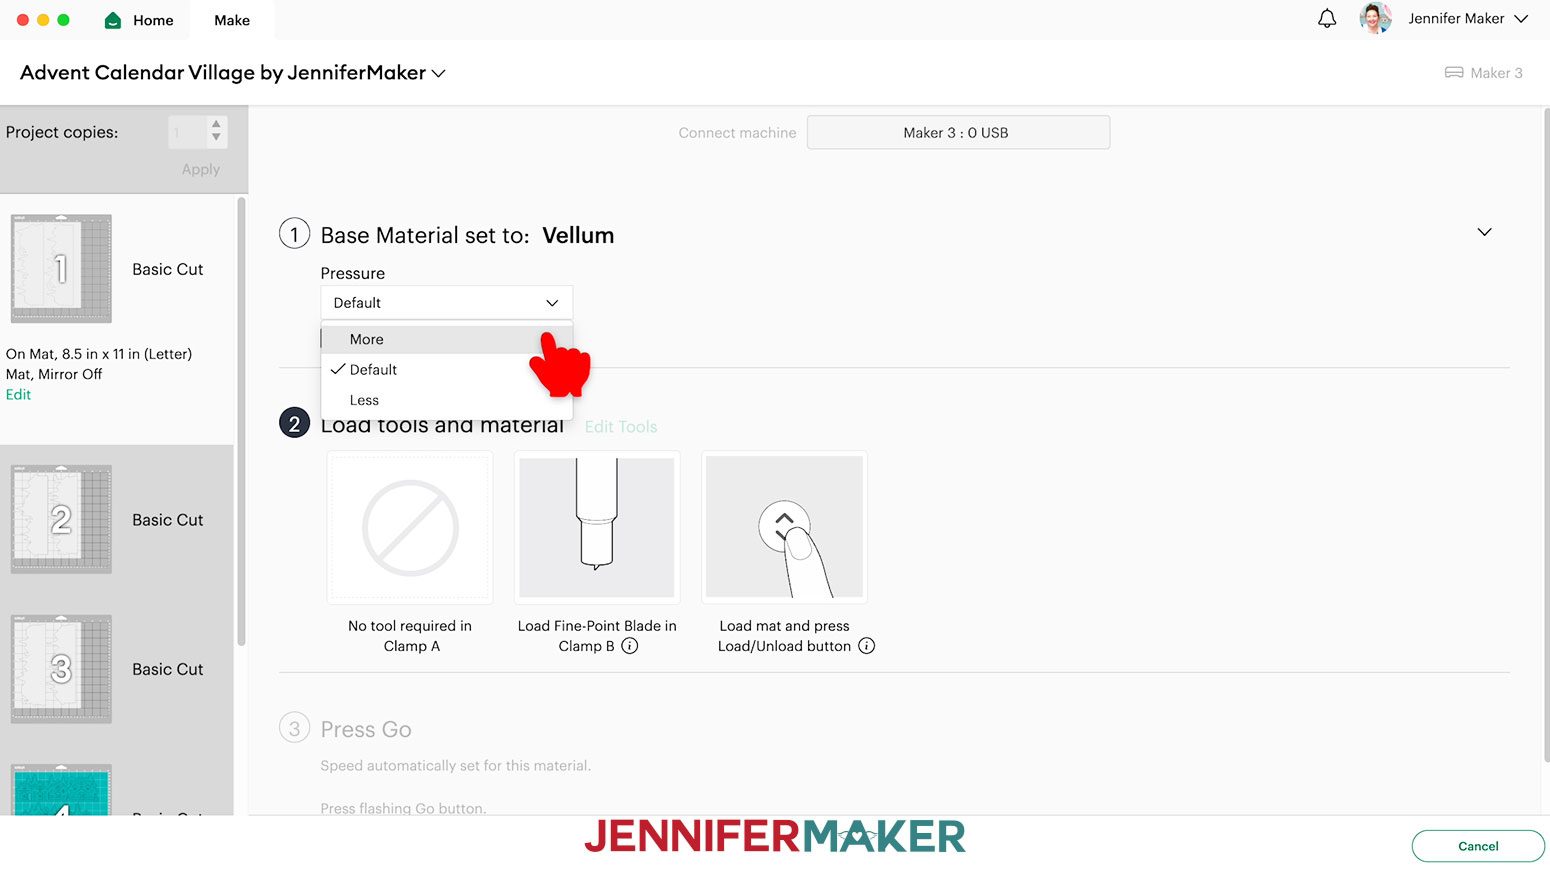
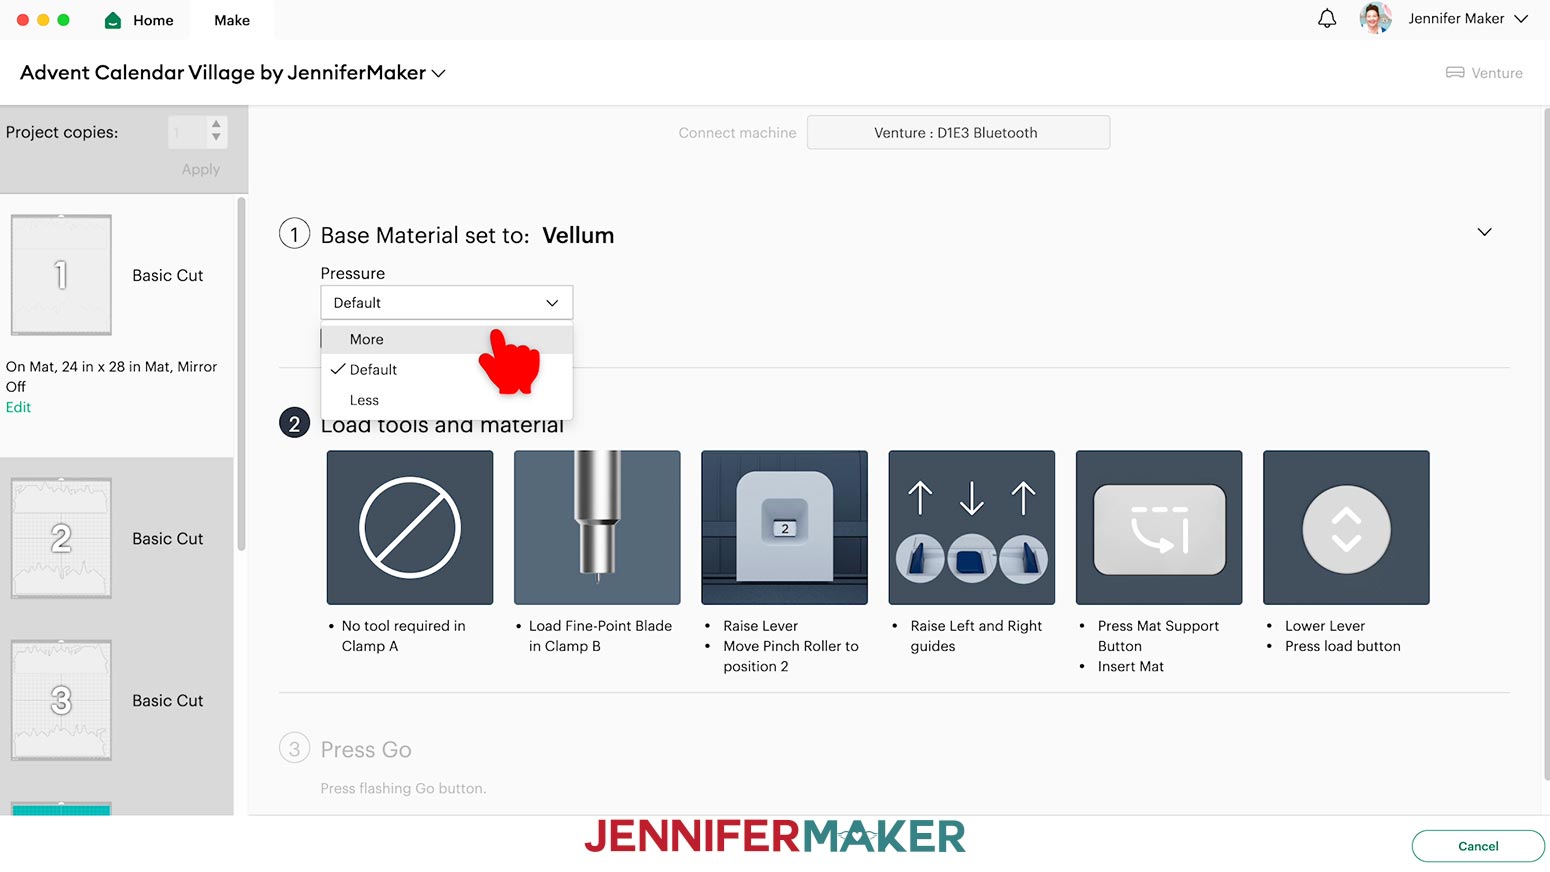
1. On the Make Screen, set the gray diffuser mats to match your material.
- For vellum: Use the “Vellum” setting
- For wax paper: Use the “Wax Paper” setting
- For parchment paper: Use the “Parchment Paper” setting
- For copy paper: Use the “Copy Paper – 20 lb (75 gsm)” setting
2. Change the Pressure to “More” for a cleaner cut.
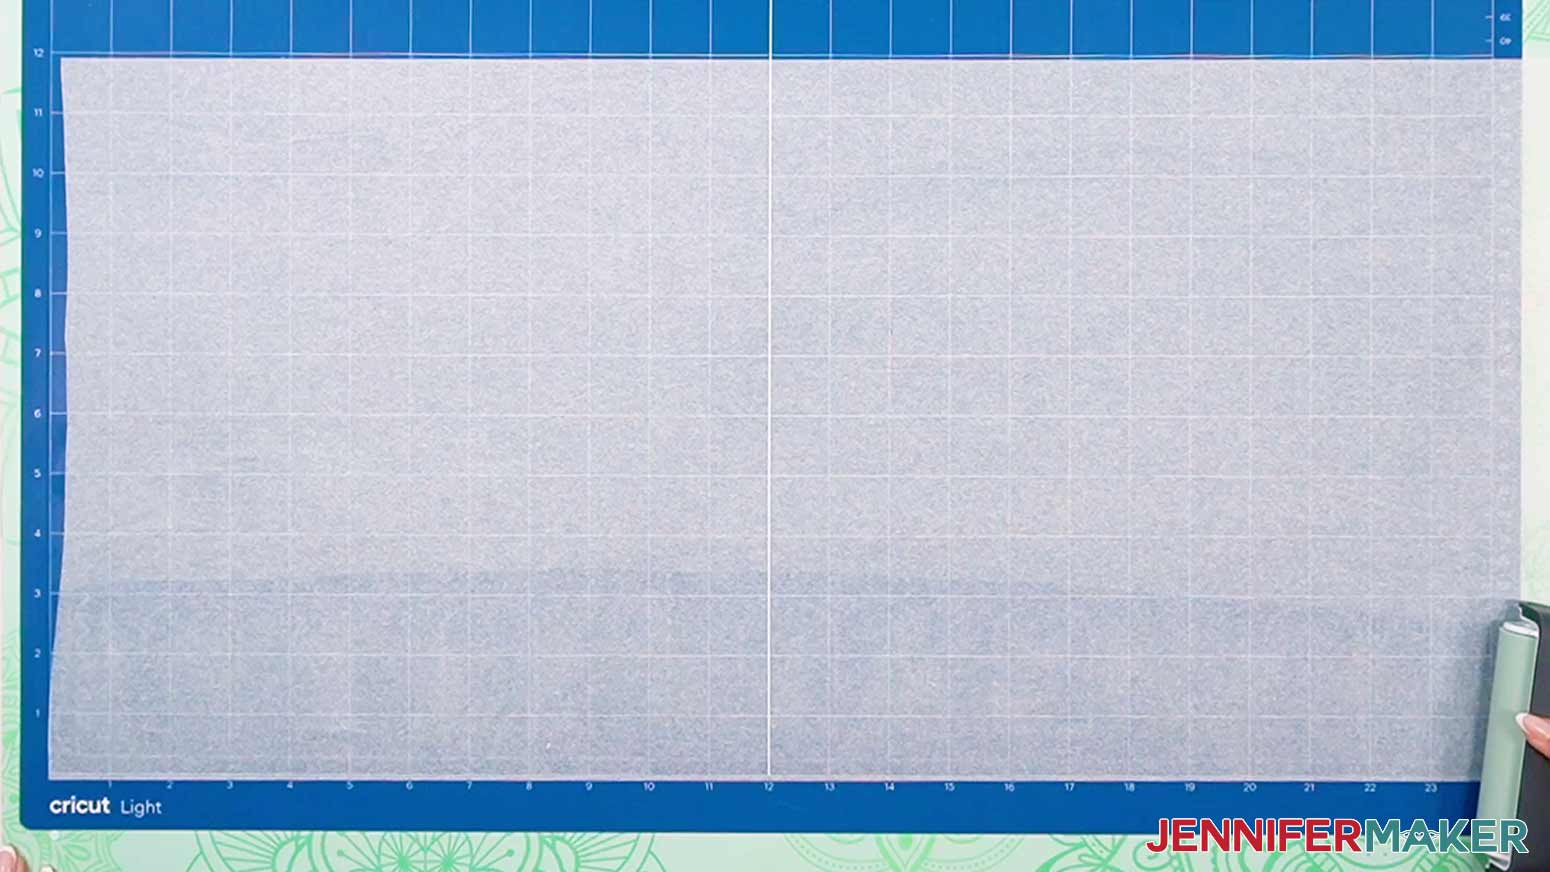
3. Place your diffuser material on a blue LightGrip machine mat.
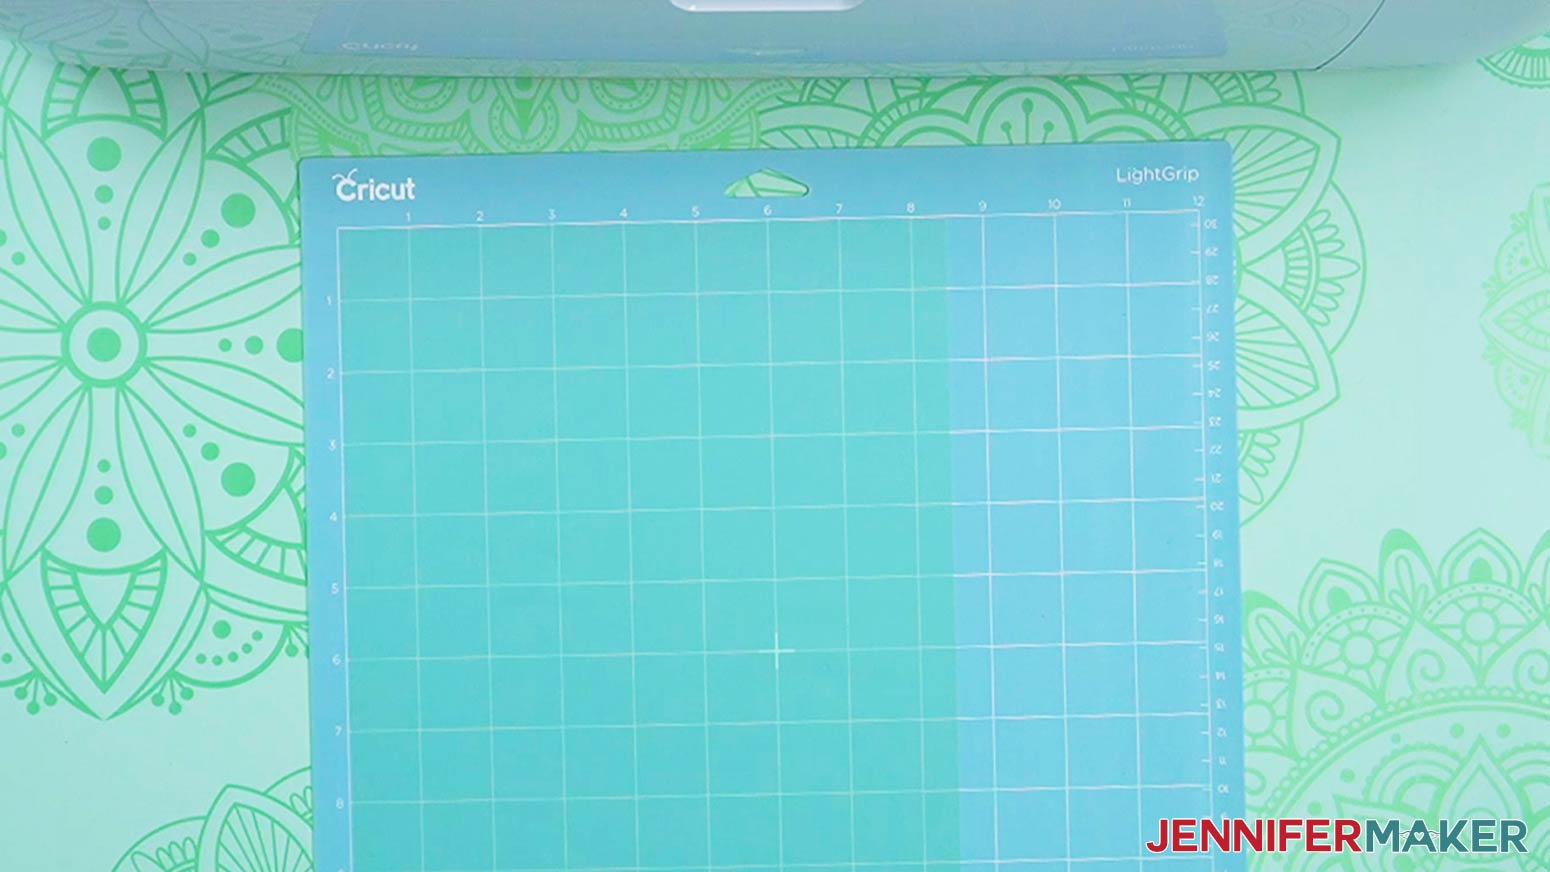
4. Use a brayer to adhere it well.
5. Check that your Fine-Point Blade is clean and in the clamp.
6. Press the flashing “Load/Unload” button to load the prepared mat into your Cricut.
7. Press the flashing “Go” button to begin cutting.
8. When it has finished cutting, check that the cut is complete. If not, press the “Go” button again to make another cut in the same design.
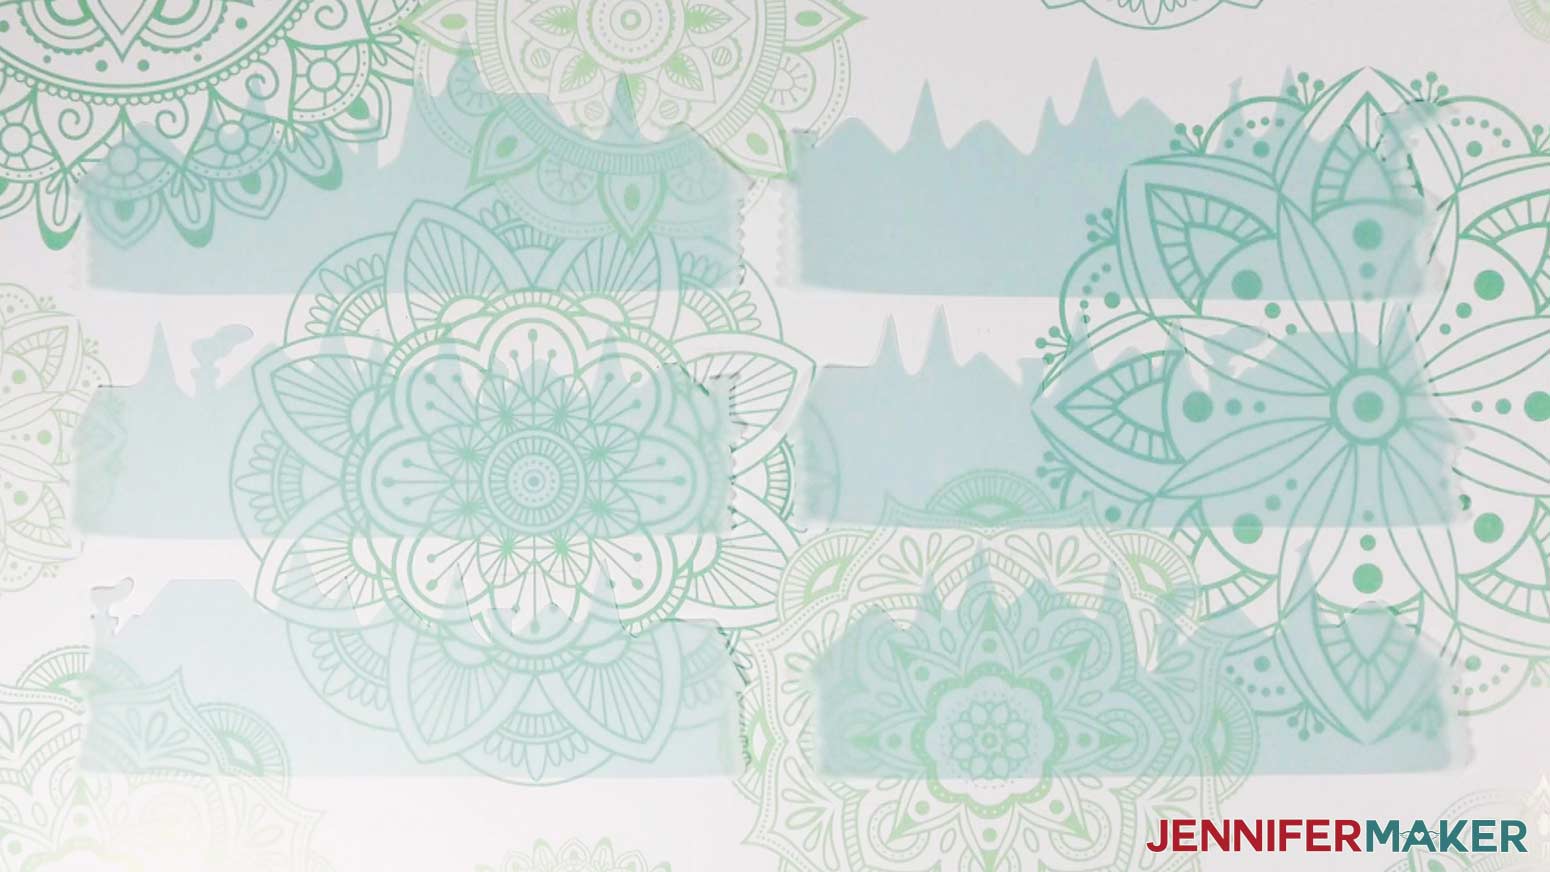
9. When the cut is complete, unload the mat, flip it over onto your work surface, and roll it back to release the paper.
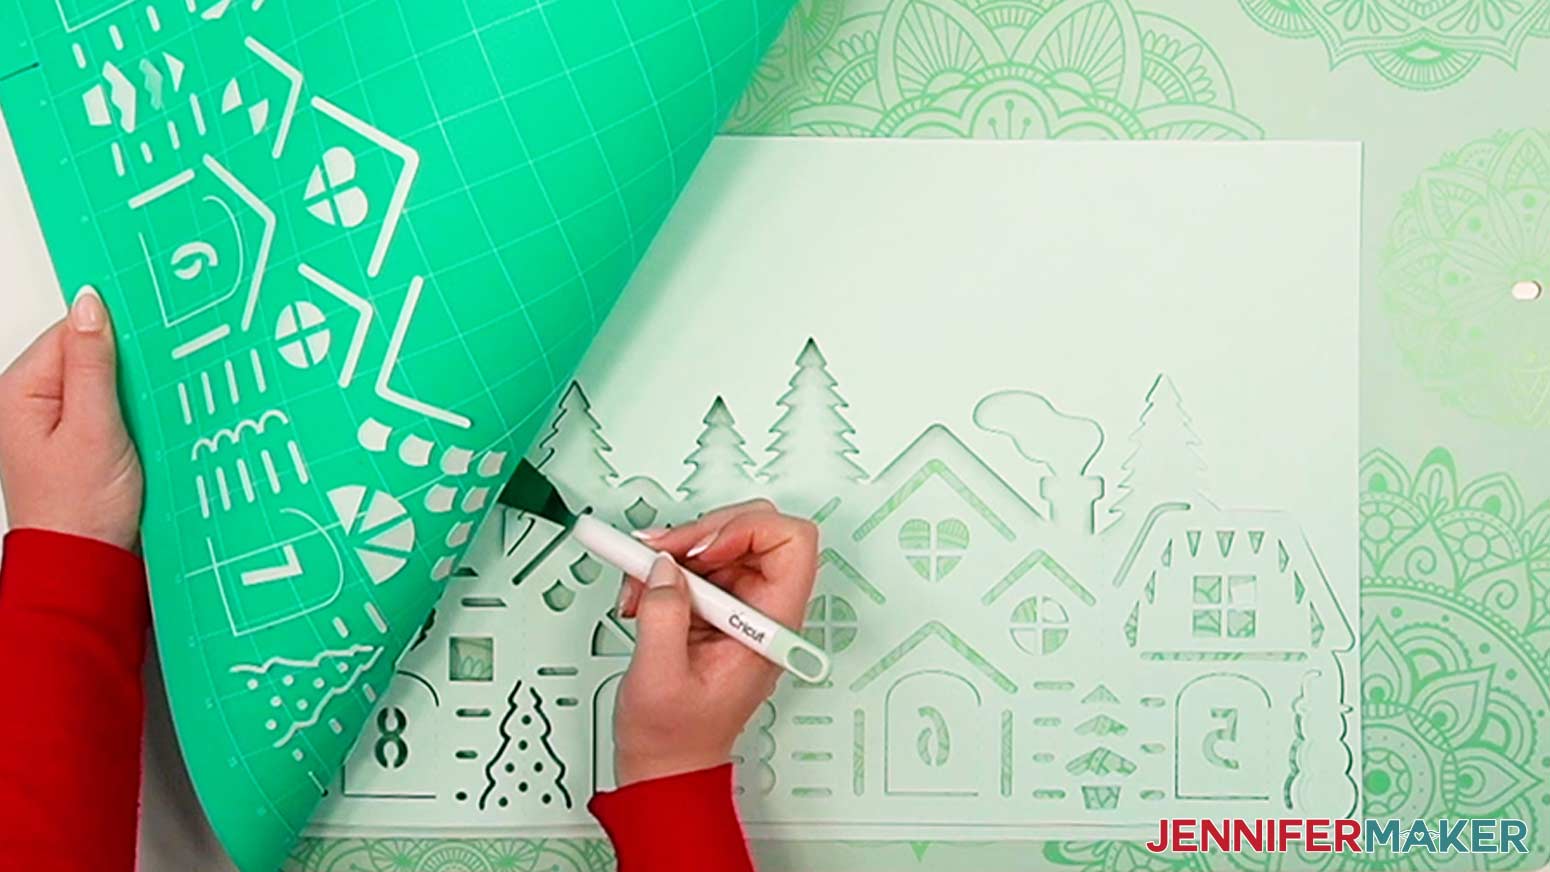
TIP: Be very careful when removing intricate areas like the chimney smoke. You can use a spatula to gently lift them.
10. Use a scraper to remove cutouts left on the mat.
11. Follow steps 3-10 above to cut the other diffuser layers.
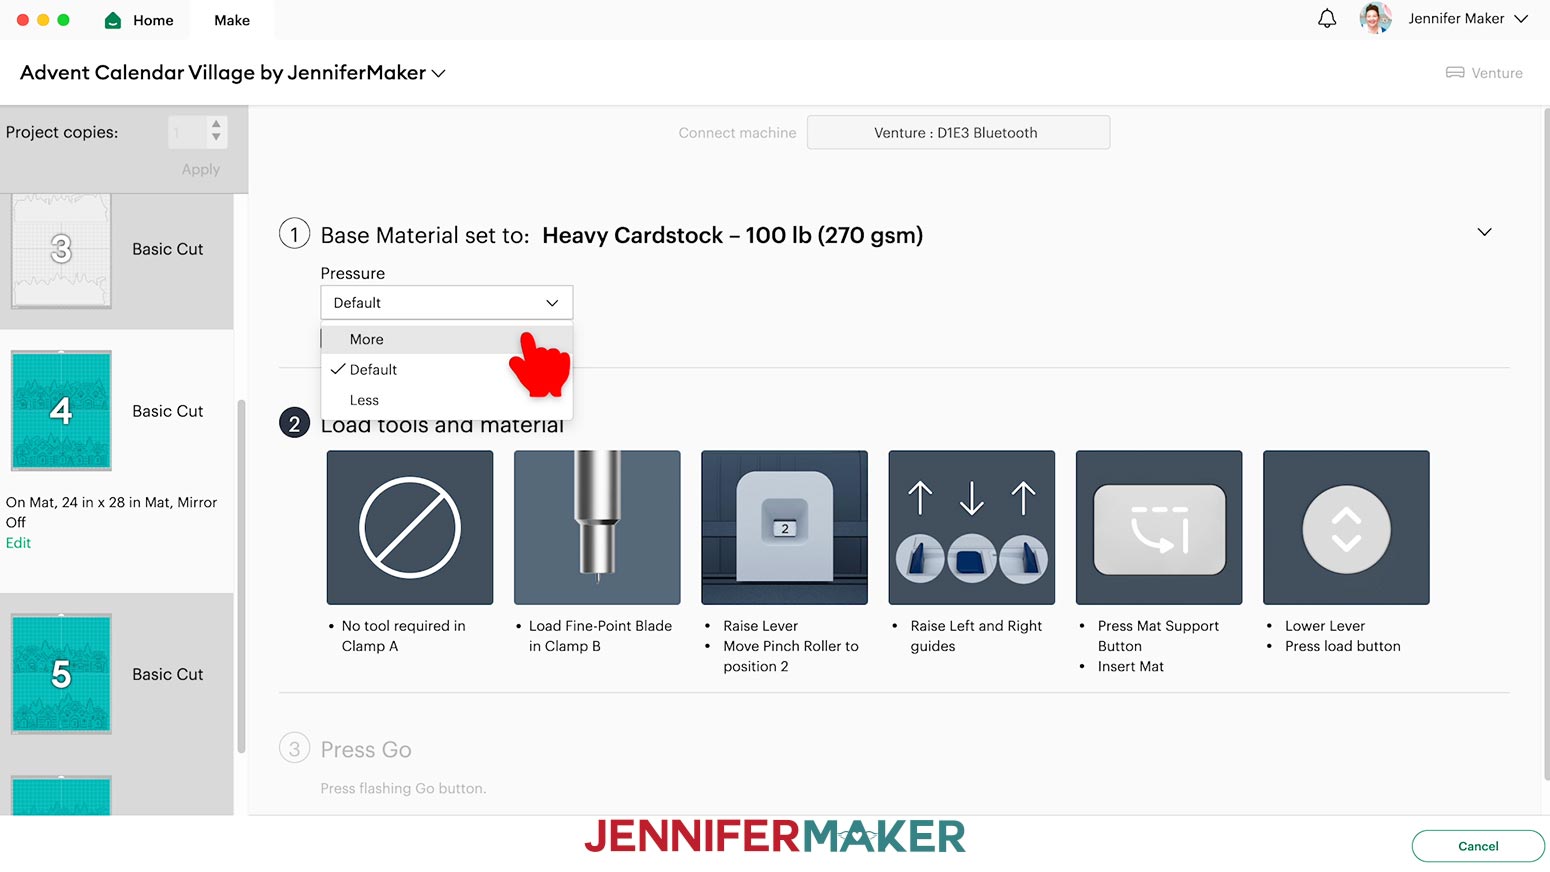
12. In Design Space, select the first teal mat of cardstock houses.
13. Set the material to “Medium Cardstock – 80 lb (216 gsm).”
14. Change the Pressure to “More” for a cleaner cut.
15. Follow steps 3-10 above to cut your cardstock houses using a green StandardGrip machine mat.
TIP: Use a spatula to carefully lift delicate sections like the doors and a weeding tool to pop out stuck cutouts.
STEP 3: ASSEMBLE YOUR ADVENT CALENDAR VILLAGE
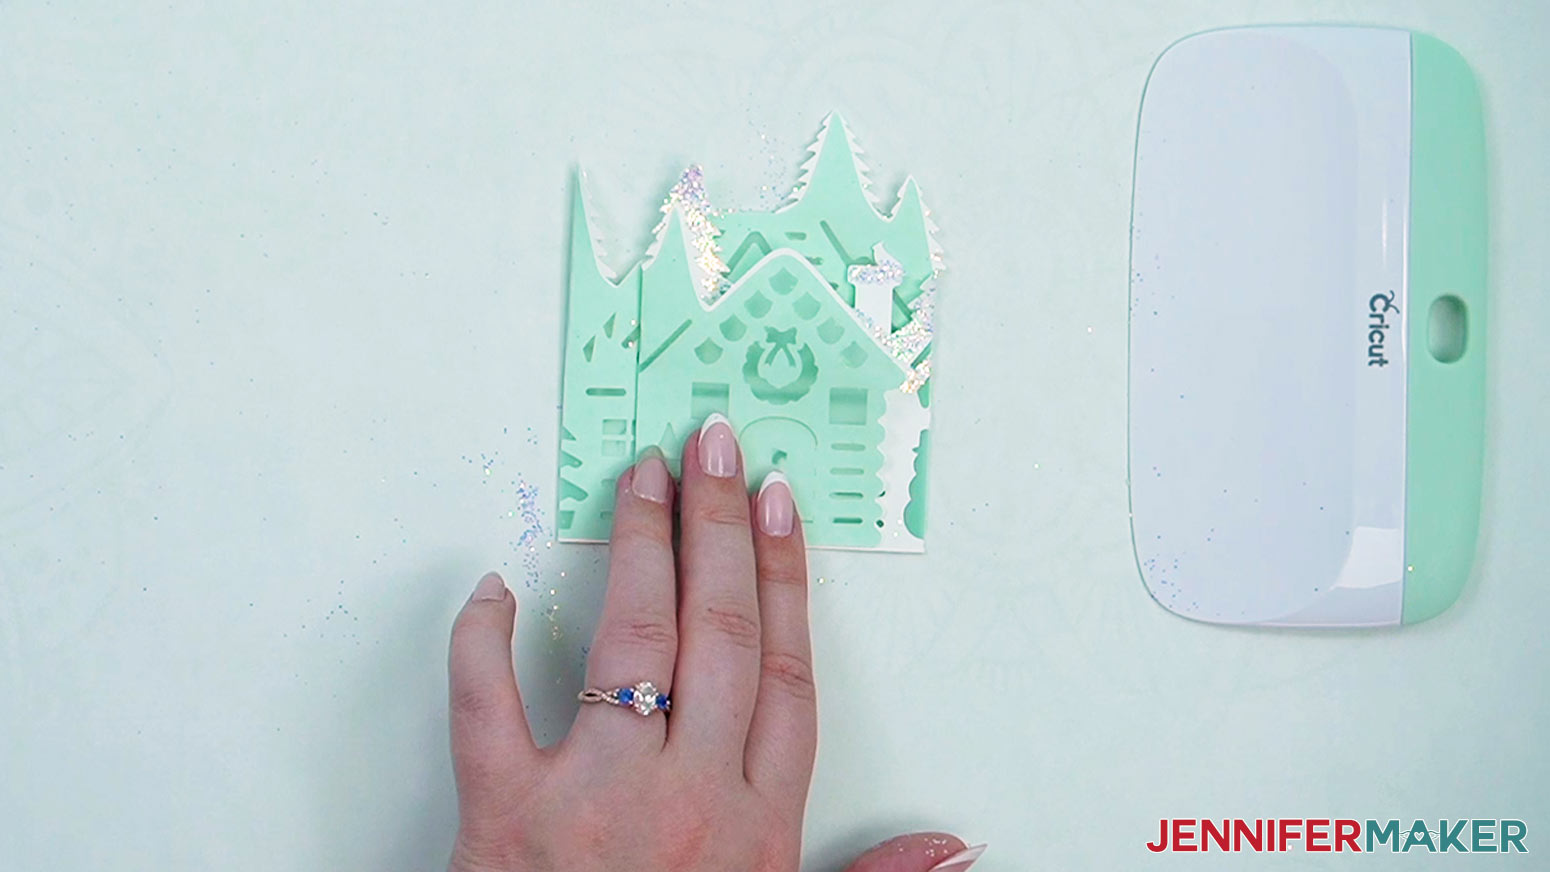
ADD GLITTER (OPTIONAL)
1. Cover your work surface with a piece of butcher paper.
2. With the larger black tip on your glue bottle, apply a small amount of glue to the roof and trees of one house, avoiding the cutouts.
3. Use your brush to evenly spread out the glue so there are no clumps or uncoated areas.
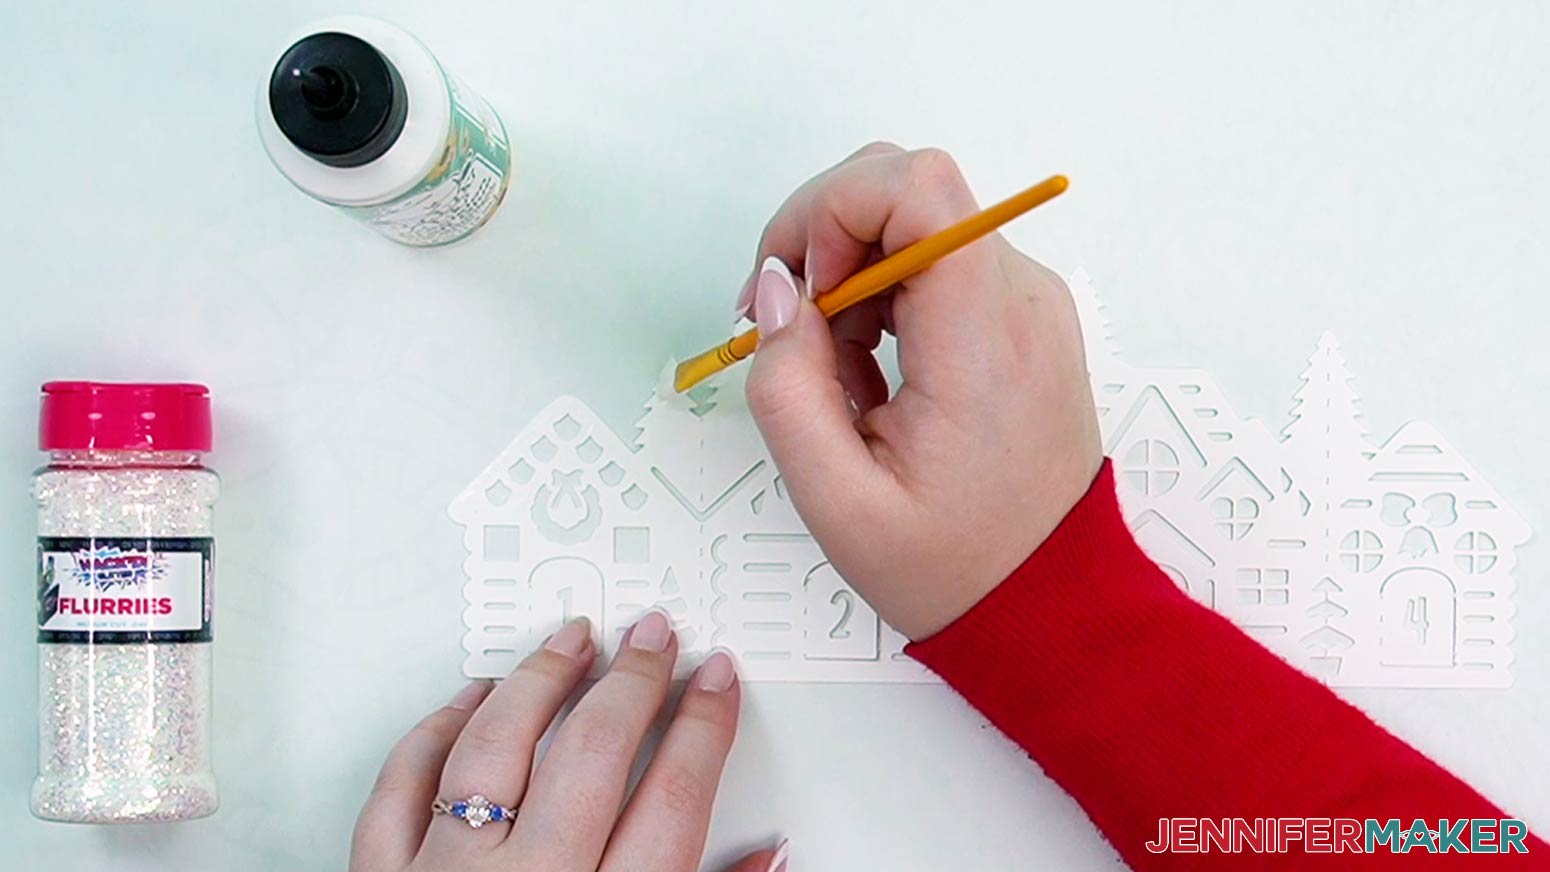
4. Quickly shake or sprinkle glitter onto the wet glue before it dries too much.
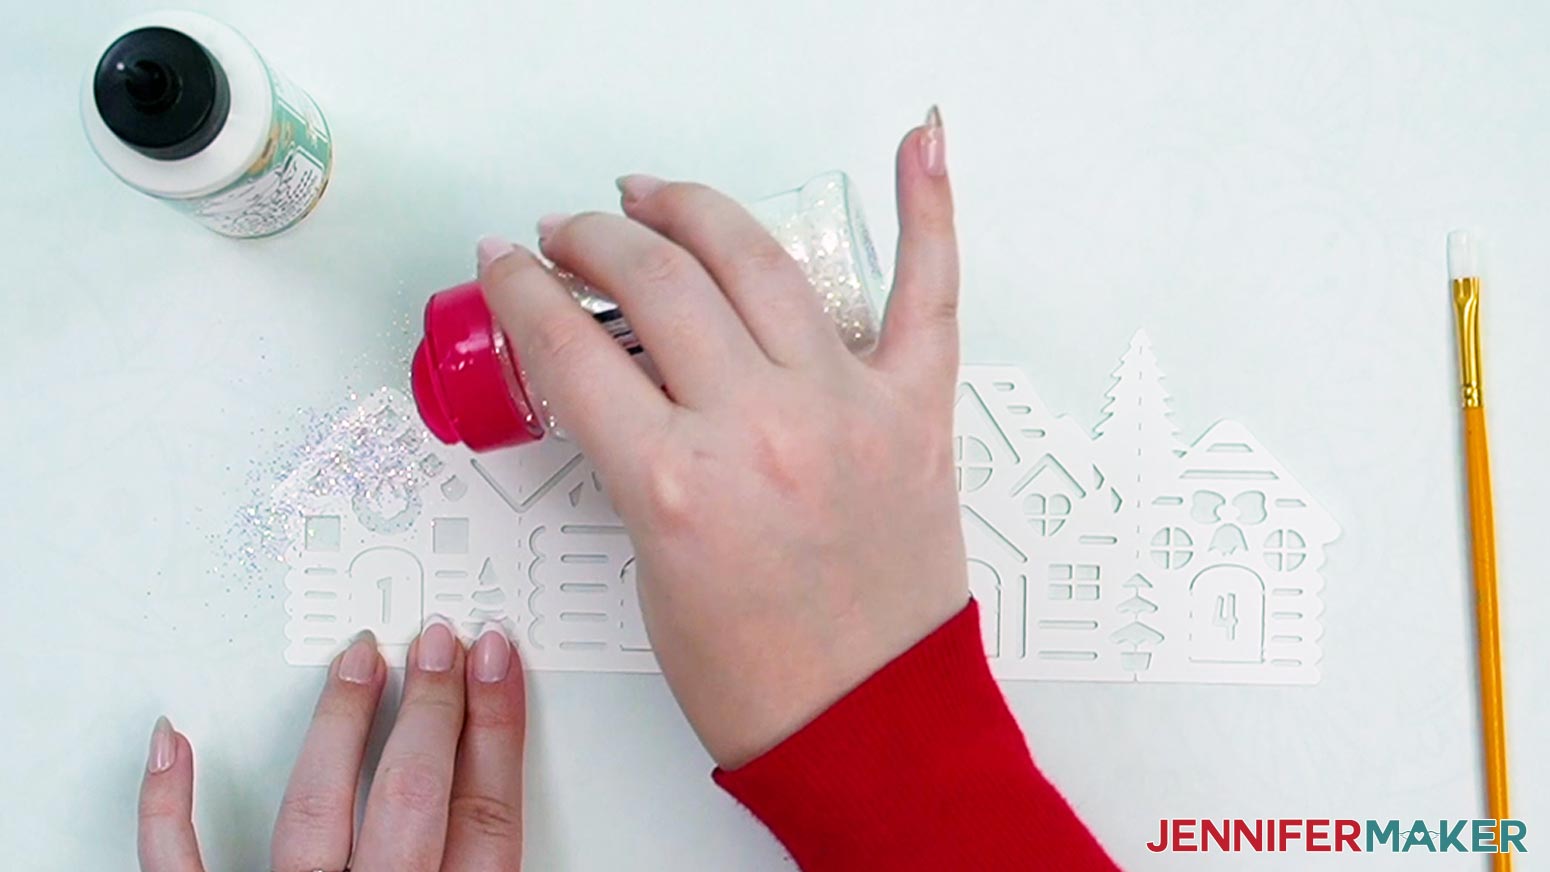
5. Tap off the excess glitter onto your butcher paper.
6. Repeat steps 2-5 for the remaining roofs and trees, working in small sections at a time.
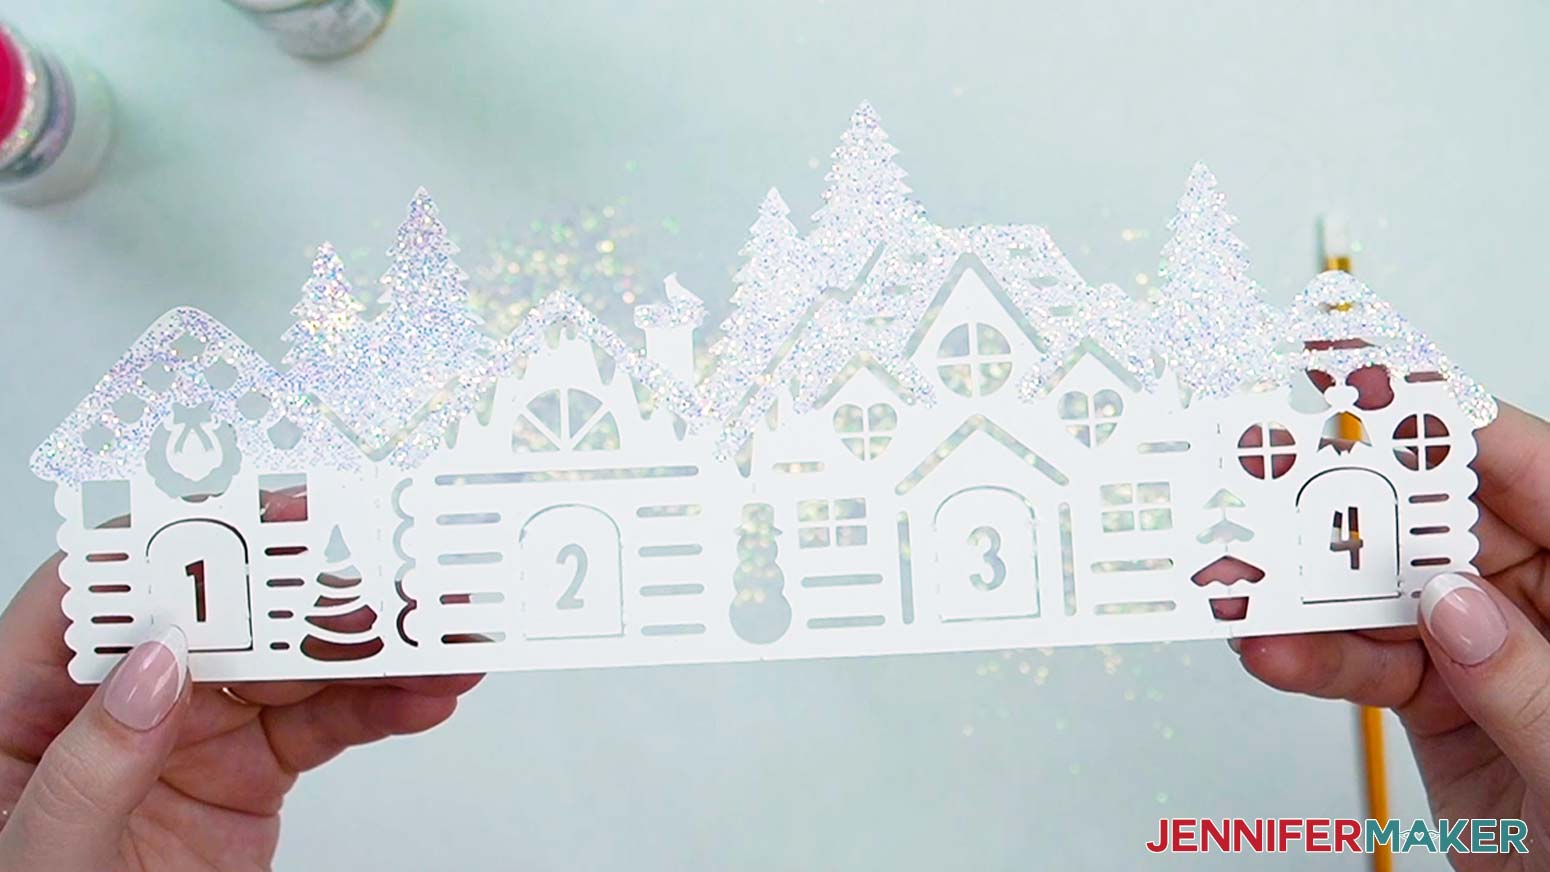
7. Repeat steps 2-6 for the other five house pieces.
8. Allow the glue to dry for 30 minutes to an hour.
ATTACH THE DIFFUSER LAYERS AND FOLD THE PIECES
1. Match up each set of houses with its matching diffuser layer.
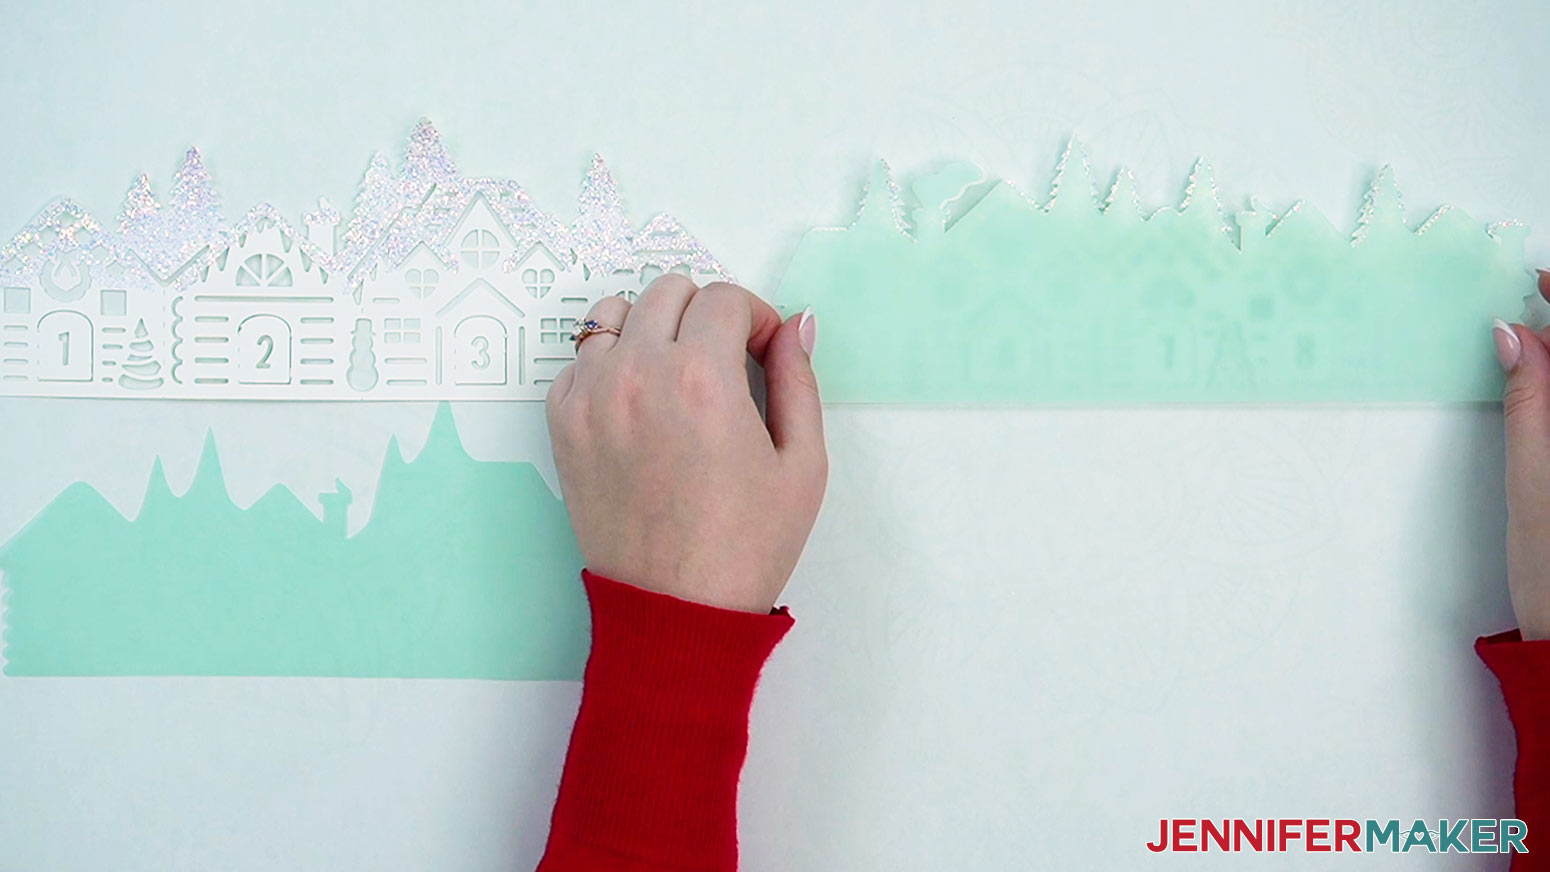
2. Add thin lines and dots of glue to the back of one half of a cardstock house layer, avoiding the doors, cutouts, tree tops, and creases.

3. Line up the matching diffuser layer and press it in place.
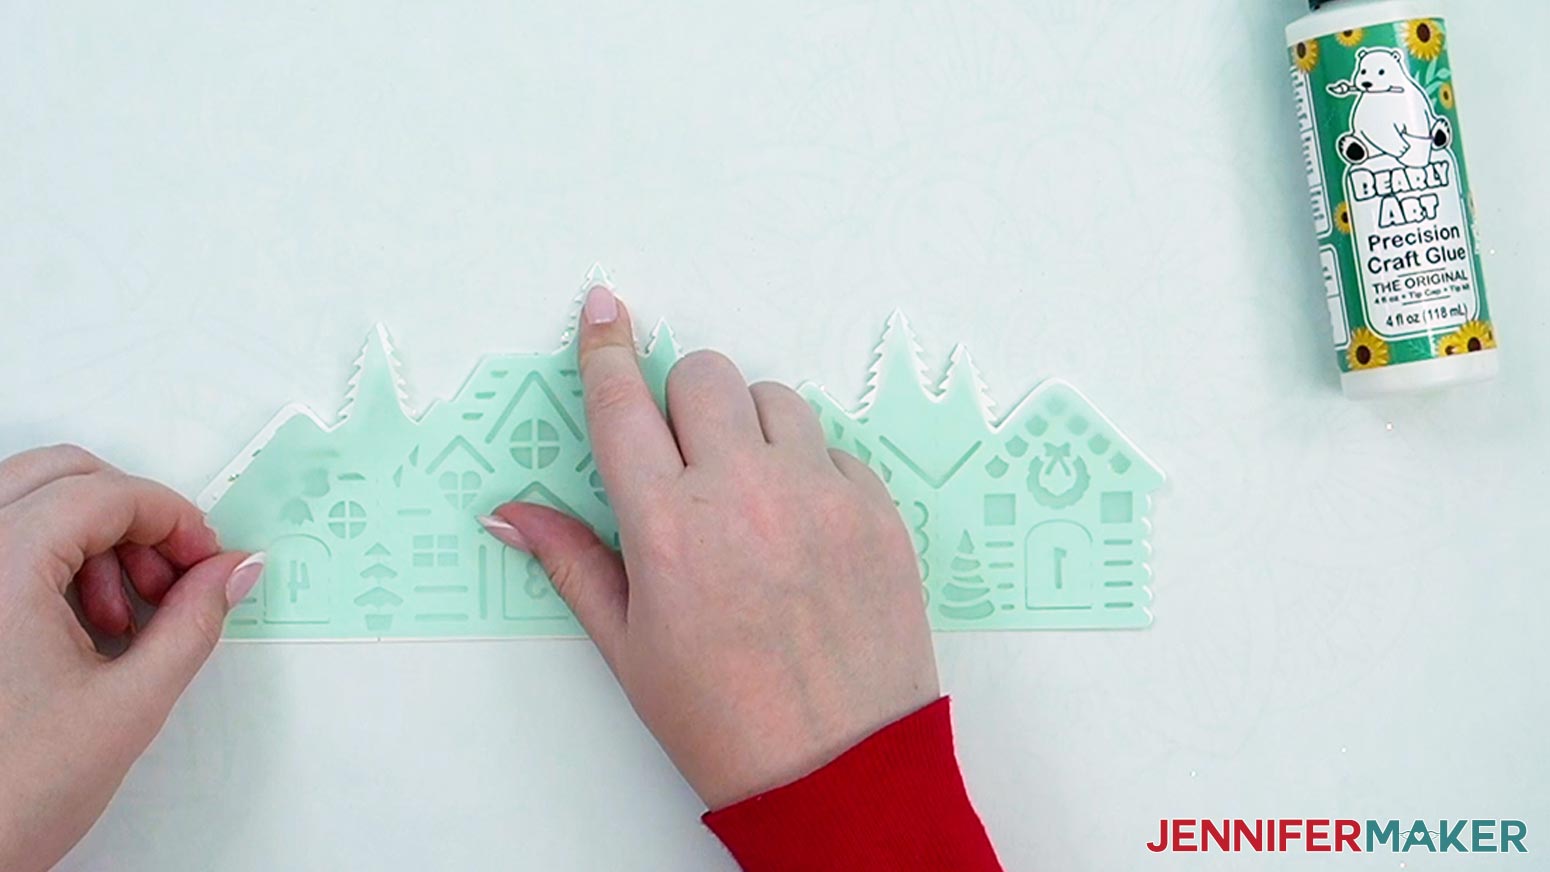
4. Carefully wipe away any excess glue.
5. Repeat steps 2-4 to attach the other half of the diffuser layer.
6. After the glue is dry, place the houses face (glitter side) up.
7. Align your scraper on a door’s dashed cut line, gently lifting the door against it to make a straight crease.
TIP: Don’t crease the door all the way open, just enough that you can open it easily later.
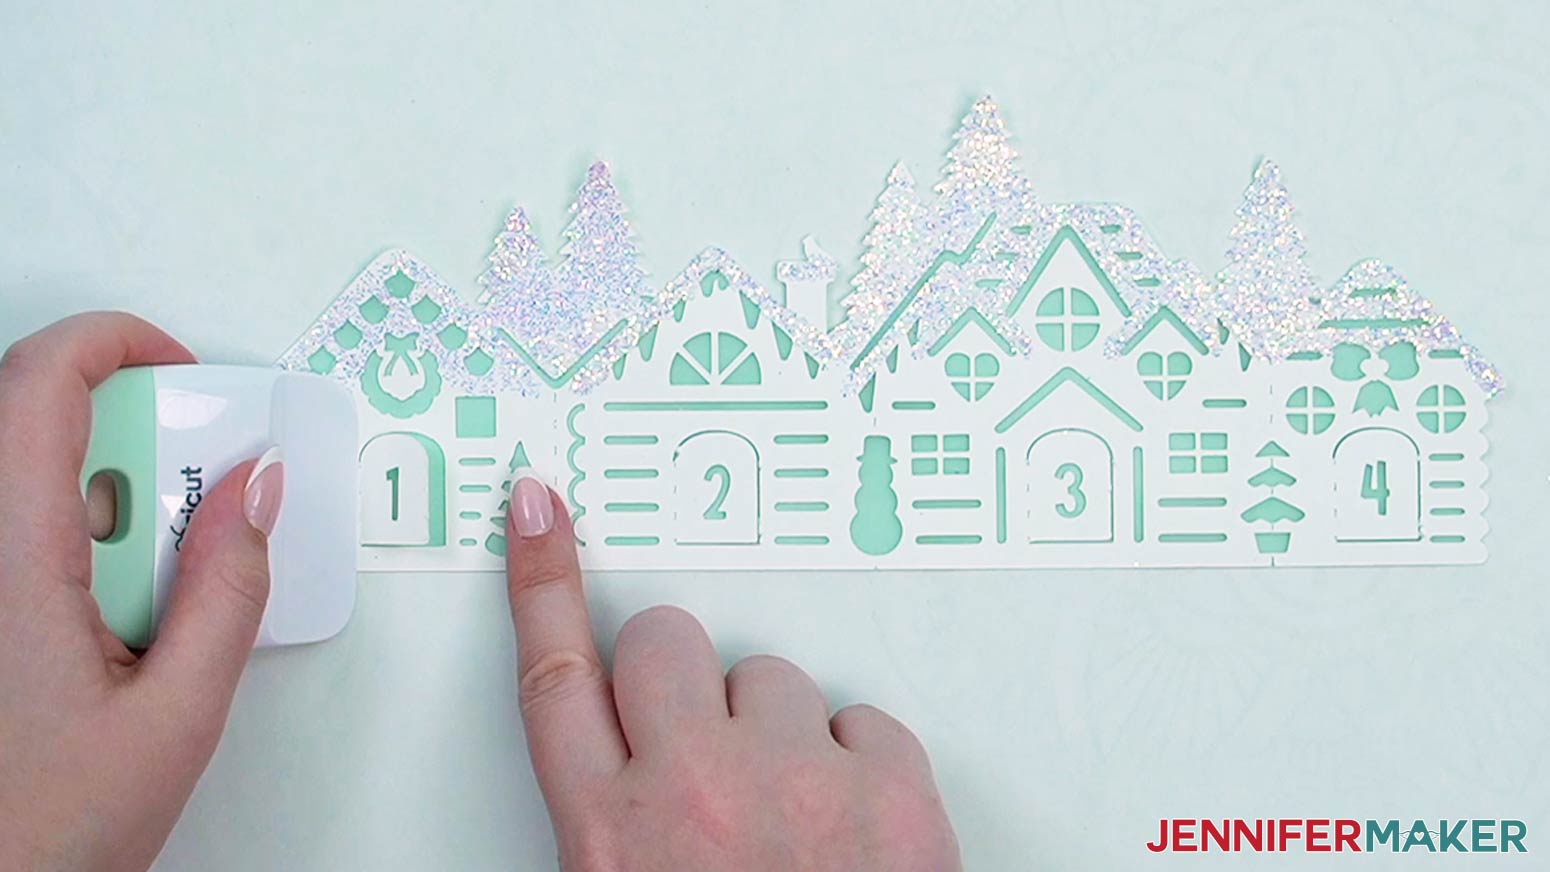
8. Repeat step 7 for the other doors.
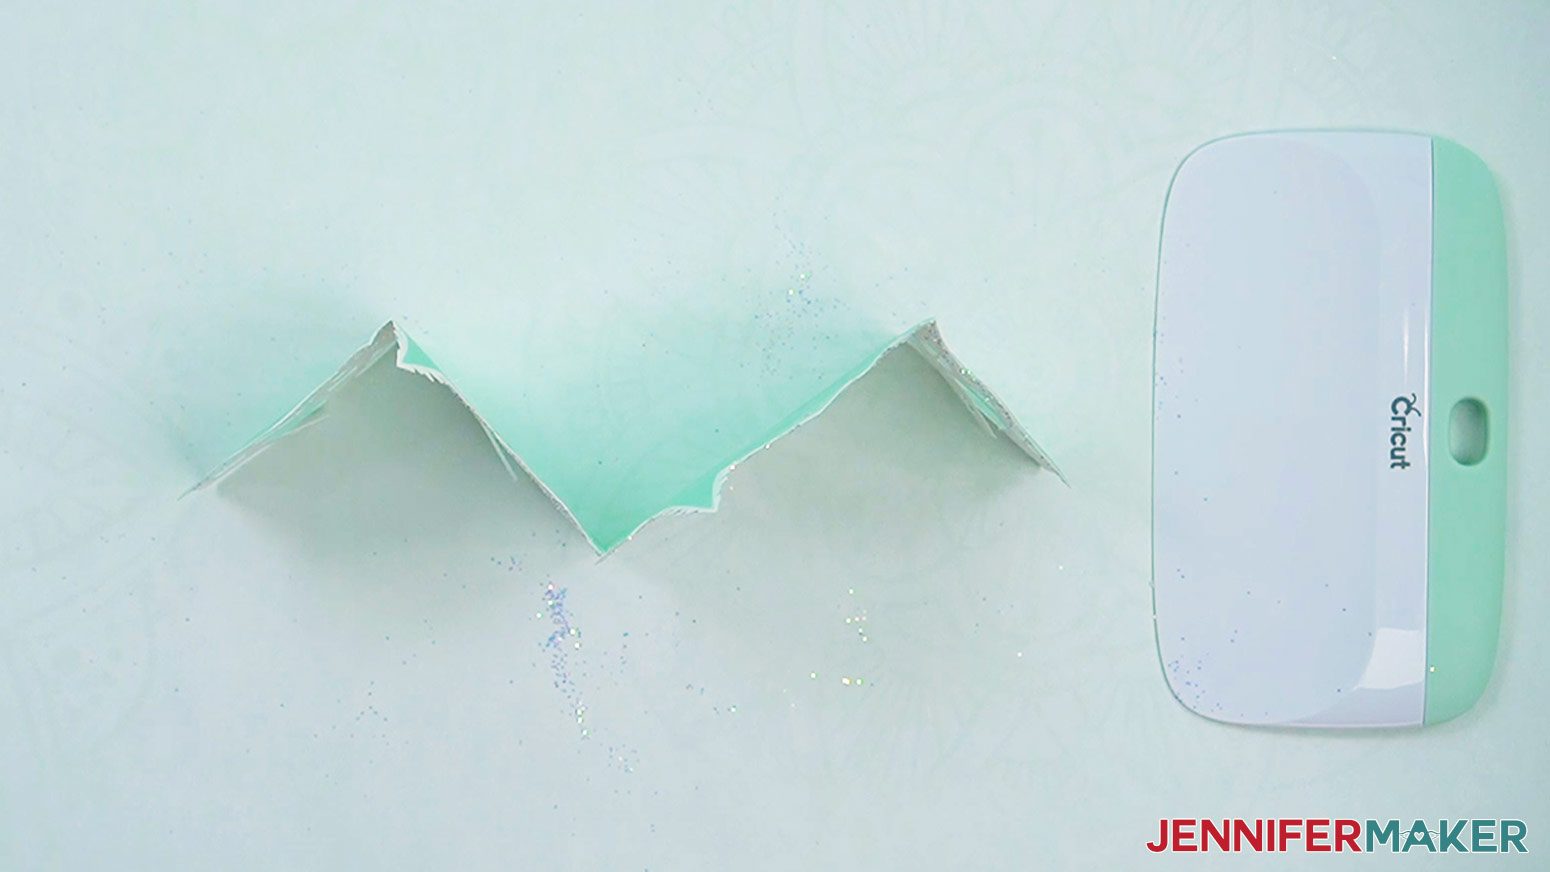
9. Fold the attached cardstock and diffuser layer along the remaining dashed cut lines, house by house, like an accordian.
10. Gently run your scraper over the folded edges to make them crisp.
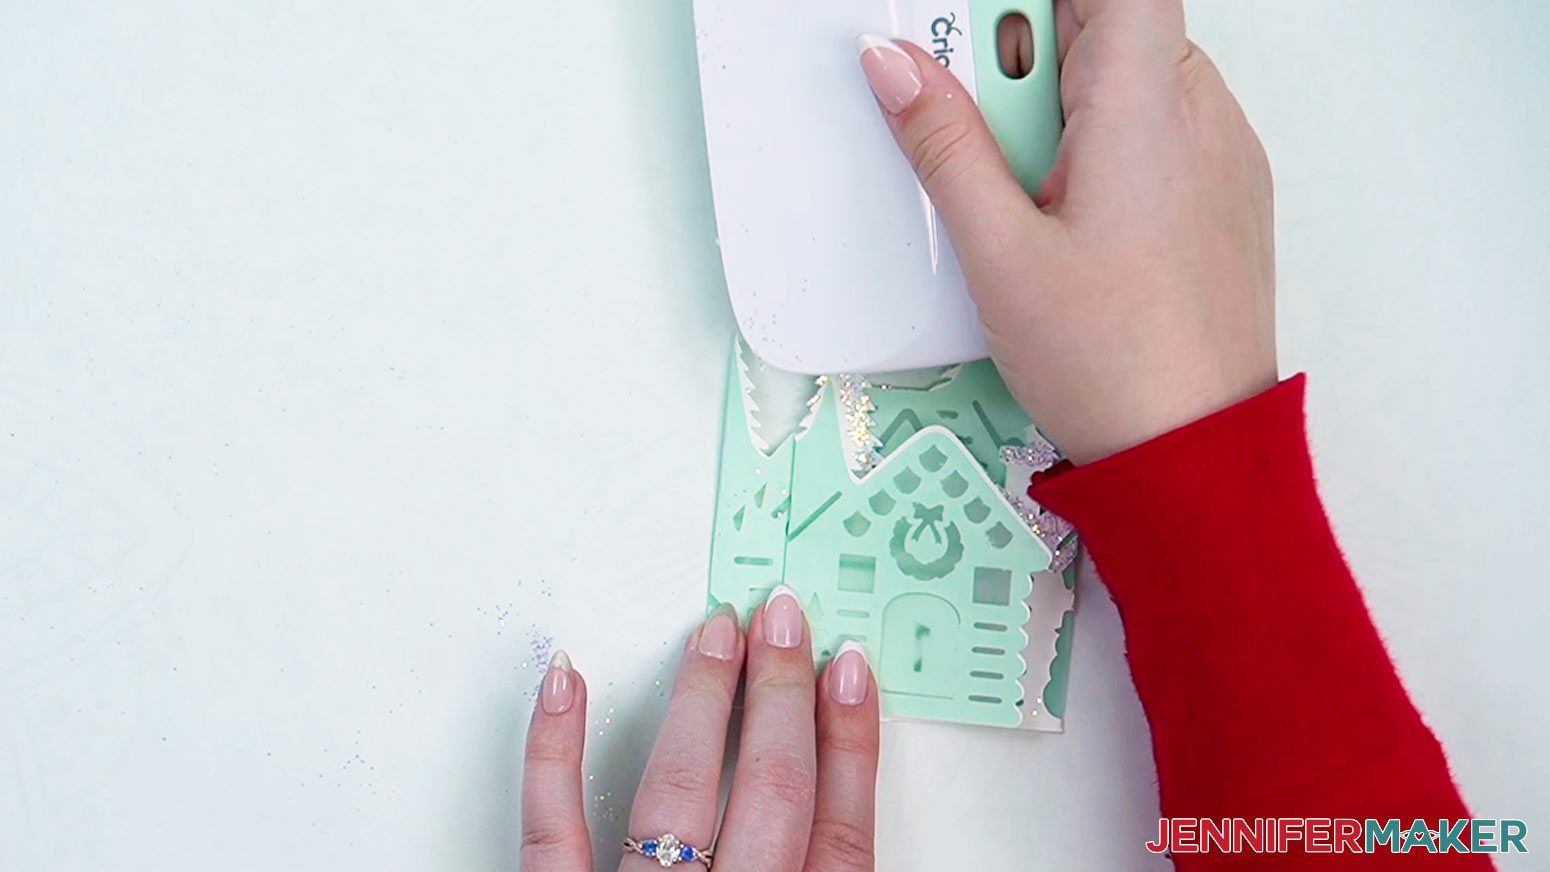
11. Make sure the houses will stand up on their own.
12. Repeat steps 9-11 on the other sets of houses and diffuser layers.
ADD THE LIGHTS
1. Display your assembled house pieces side by side on your mantel, table, or other flat surface, making sure the numbers on the doors are in order.
2. Place remote controlled tea lights or several strands of outstretched fairy lights behind the village.
VARIATION: MAKE A BIGGER ADVENT CALENDAR VILLAGE
1. Follow the “Cricut Design Space” steps 1-9 above to prepare your large advent calendar village SVG file for cutting.
TIP: If you’re adding glitter to your large houses, use the “noscore” file with dashed cut lines, as it’s easier to see the lines and fold along them with an XL scraper.
2. If prompted, click "On Mat," choose your mat size, and click “Confirm.” Select “OK” to use a larger machine mat.
3. Your Prepare Screen settings will depend on the machine, mats, and materials you’re using. Set the Material Size to match each paper you’re using and combine any pieces if needed.
NOTE: The tracing paper I’m using for my diffuser layers is 12” tall, so I can fit two pieces on each 28” tall mat. I found it easiest to place a diffuser shape at the top and bottom of each mat, then add a new gray mat to place the final two pieces.
4. Select the first mat again and click “Continue.”
5. Follow the “Cutting” steps 1-11 above to prepare and cut your large diffuser pieces using the “Vellum” setting with “More” Pressure and a blue LightGrip machine mat.
NOTE: Make sure to remove all wrinkles and bubbles when adhering your tracing paper sheet to your mat. The smoother the paper is on the mat, the cleaner your cut will be.
TIP: Be very careful when removing intricate areas like the chimney smoke. You can use a spatula or your fingers to gently lift them.
6. In Design Space, select the first teal mat of cardstock houses.
7. Set the material to “Heavy Cardstock – 100 lb (270 gsm).”
8. Change the Pressure to “More” for a cleaner cut.
9. Follow the “Cutting” steps 4-10 above to cut your cardstock houses using a green StandardGrip machine mat.
TIP: Use a spatula to carefully lift delicate sections like the doors and a weeding tool to pop out stuck cutouts.
10. Follow the “STEP 3” directions above to assemble your large houses.
NOTE: You will need more glue and glitter and a bigger work area to assemble these houses since they’re about twice the size of the small houses. You can also use an XL scraper to fold along the dashed or scored lines.
STEP 4: SHOW IT OFF!
Here are what both sizes of my Advent Calendar Village look like all lit up!
Notes
Typeface Used: Wonderful Display Font (for house numbers)
Finished Sizes:
Small Houses: Each piece is approximately 10.5" W x 3.75" H
Large Houses: Each piece is approximately 22" W x 8.5" H
Answers to Your Questions About Making An Advent Calendar Village
Q: What do I add to my homemade advent calendar?
A: You can add anything you like, such as chocolates, little gifts, stickers, notes, or directions to a hidden prize too big to fit in the tiny door!
Q: What kind of paper do I use to make the Advent village?
A: You can really use any 65 lb-105 lb. cardstock — it’s your choice what color and texture you want to use. The most important thing is that it be a good quality cardstock.
Q: How do I get clean cuts on my houses?
A: Use good quality cardstock, make sure your blade is clean, and use a stick mat. Learn more about solutions to cutting problems in my Cricut Cutting Problems guide.
Q: What can I use to diffuse the lights?
A: Try vellum, copy paper, or tracing paper! But skip the diffuser if you want to pull little treats out of each door as you count down to Christmas day.
Get my free SVG files to create a beautiful Advent Calendar Village Countdown
I love seeing what you make with my designs and how you use them! Please share a photo of your Advent calendar village in our Facebook group or tag me on social media with #jennifermaker.
Love,

Want to remember this? Save this Advent Calendar Village Countdown Tutorial to your favorite Pinterest Board!