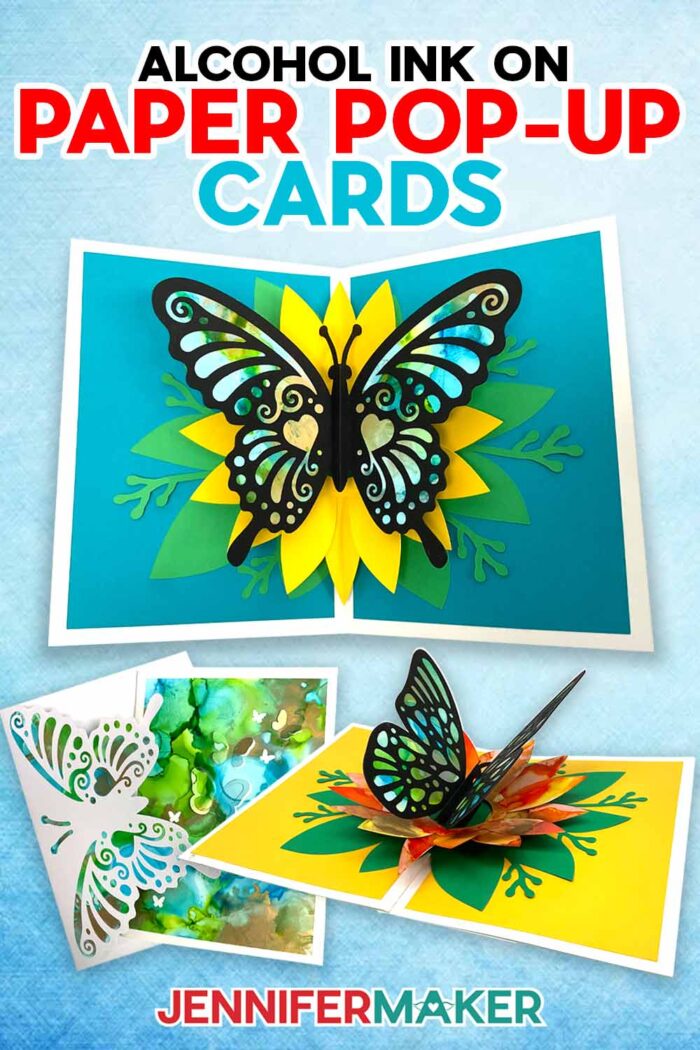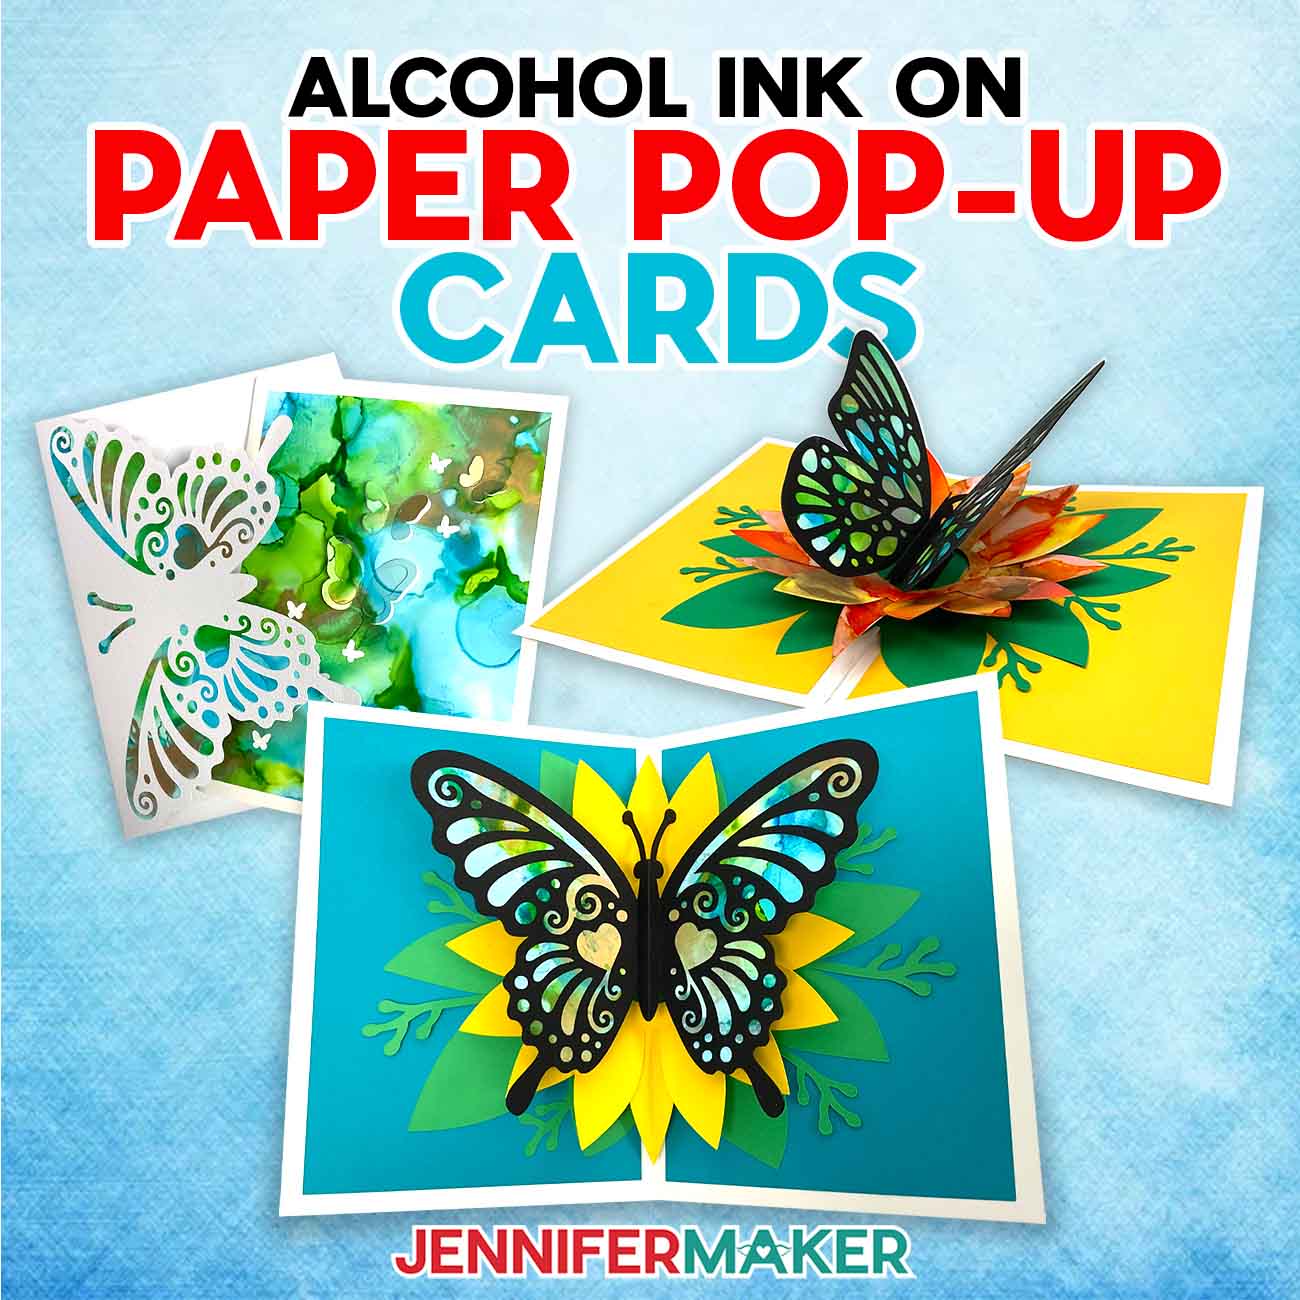
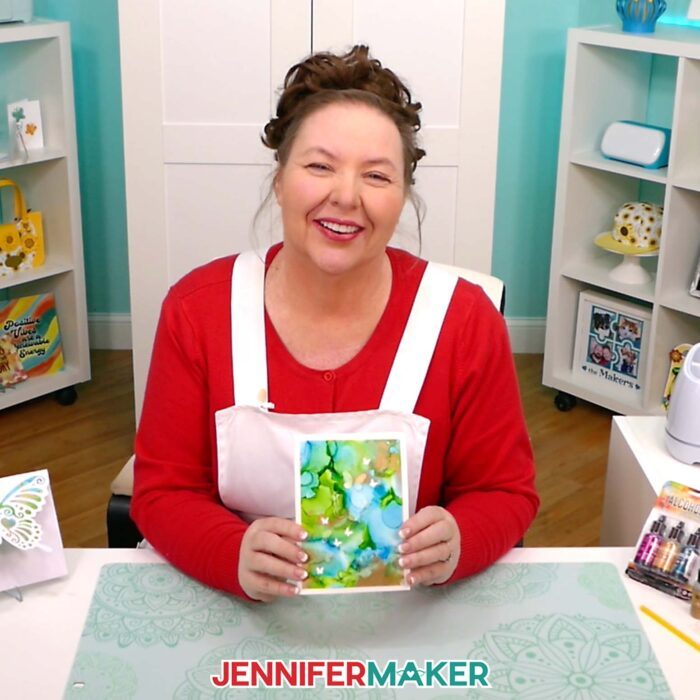
Learn how to make your own amazing pop-up cards with alcohol ink on paper!
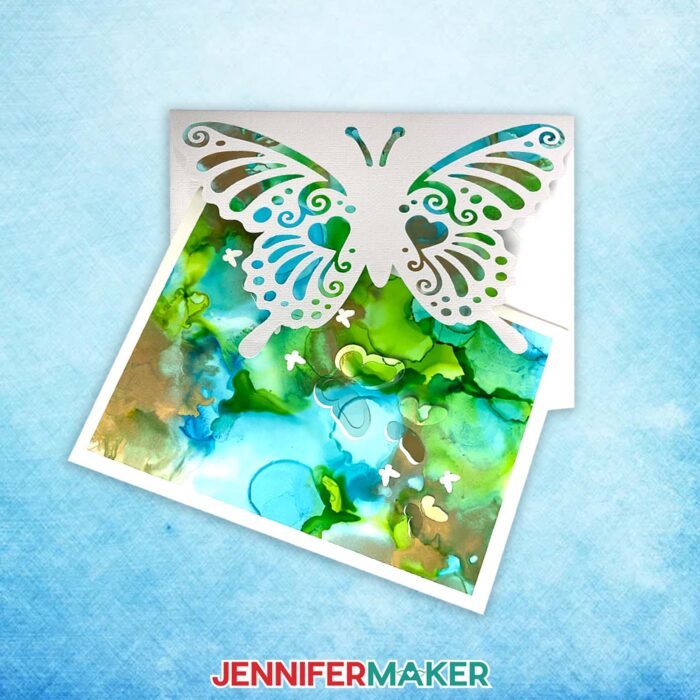
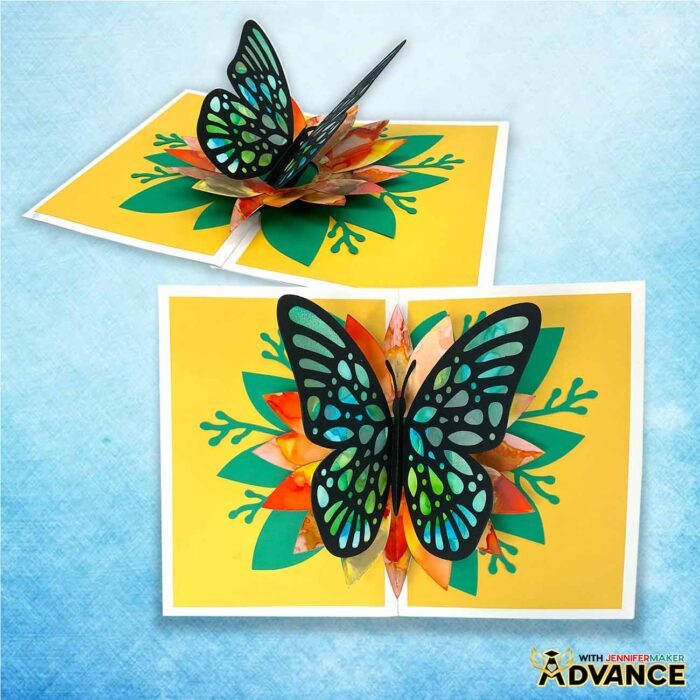
Did you know you can create vibrant, one-of-a-kind greeting cards by combining alcohol inks with Cricut techniques? It’s true! Alcohol inks are one of my favorite ways to play with color. These fast-drying, dye-based inks are filled with rich pigment and have so many possibilities – like using them to make your own custom paper. Today, I’m going to show you how to make a butterfly pop-up card with stunning alcohol ink on paper!
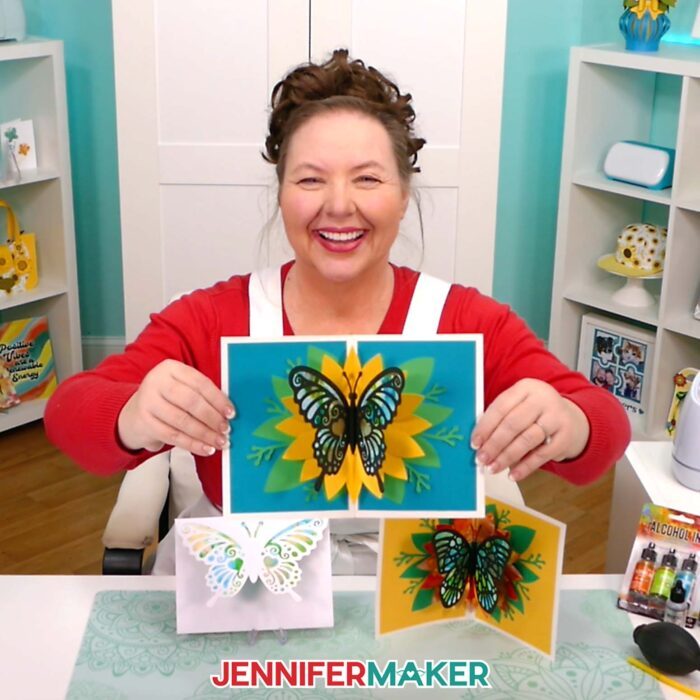
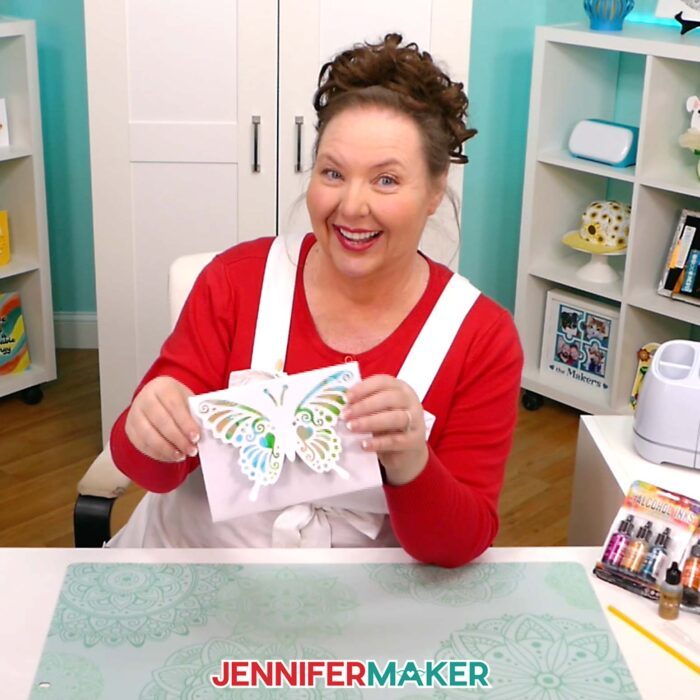
Watch the full step-by-step tutorial on how to make cards with alcohol ink on paper:

I’ve made crafts with alcohol ink before—like suncatchers and glass vases since these fun, swirly dyes work best on a non-porous surface. But I really wanted to make a card with them! So today, we’ll use alcohol ink painting on a type of synthetic paper that works beautifully for card-making. And what’s even better? You can cut this special paper with your Cricut!
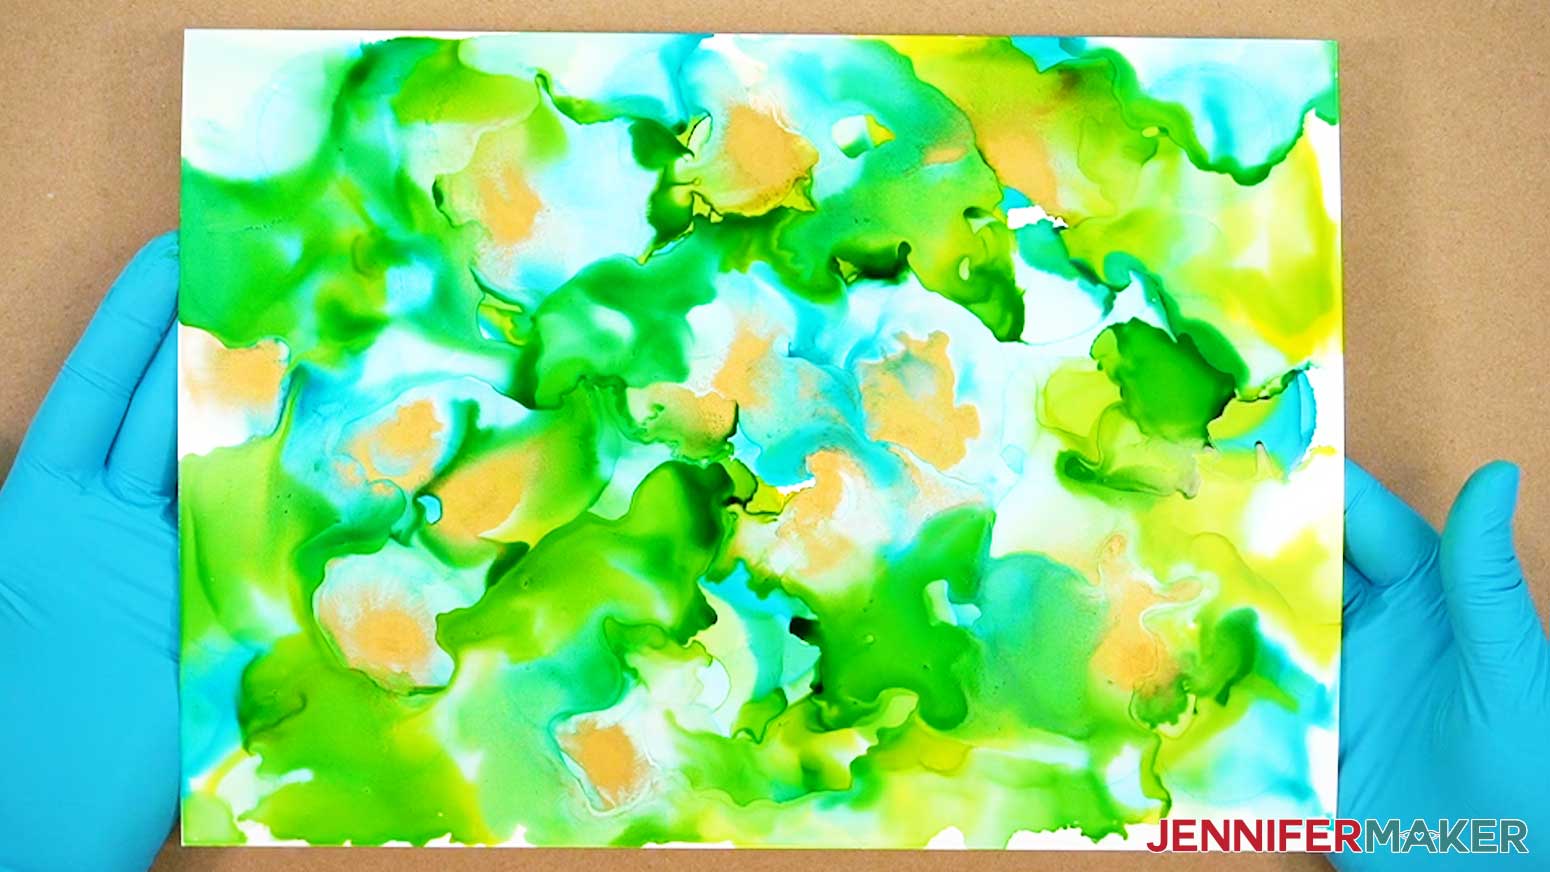
Paper crafting with alcohol inks might sound tricky because paper usually soaks up liquid, right? But the key is using special alcohol ink paper. This isn’t regular paper—it’s a glossy paper made from polypropylene (a plastic), so it’s non-porous. That means the ink doesn’t just soak in. Instead, it stays on the surface of the paper so you can blend it, swirl it, and blow it around. You can get such dreamy and interesting effects this way!

Because they’re alcohol-based inks, they dry quickly and stay in place once the alcohol evaporates. But the great thing is that you can reactivate them by adding more alcohol ink or some blending solution, which lets you move the colors around and experiment. It’s forgiving, flexible, and so much fun to play with!
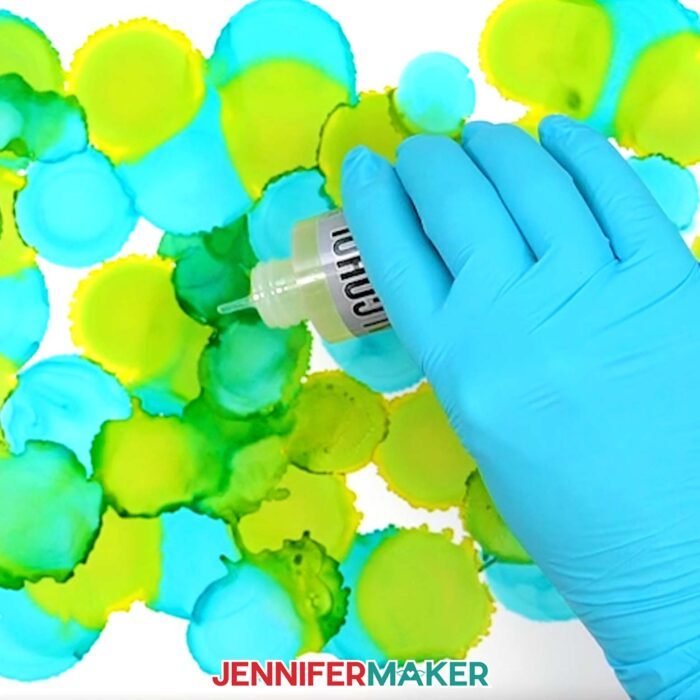
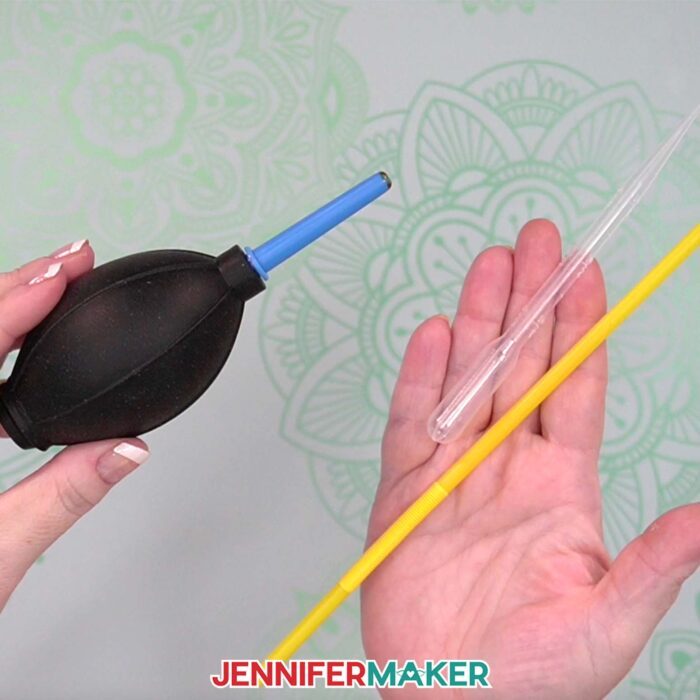
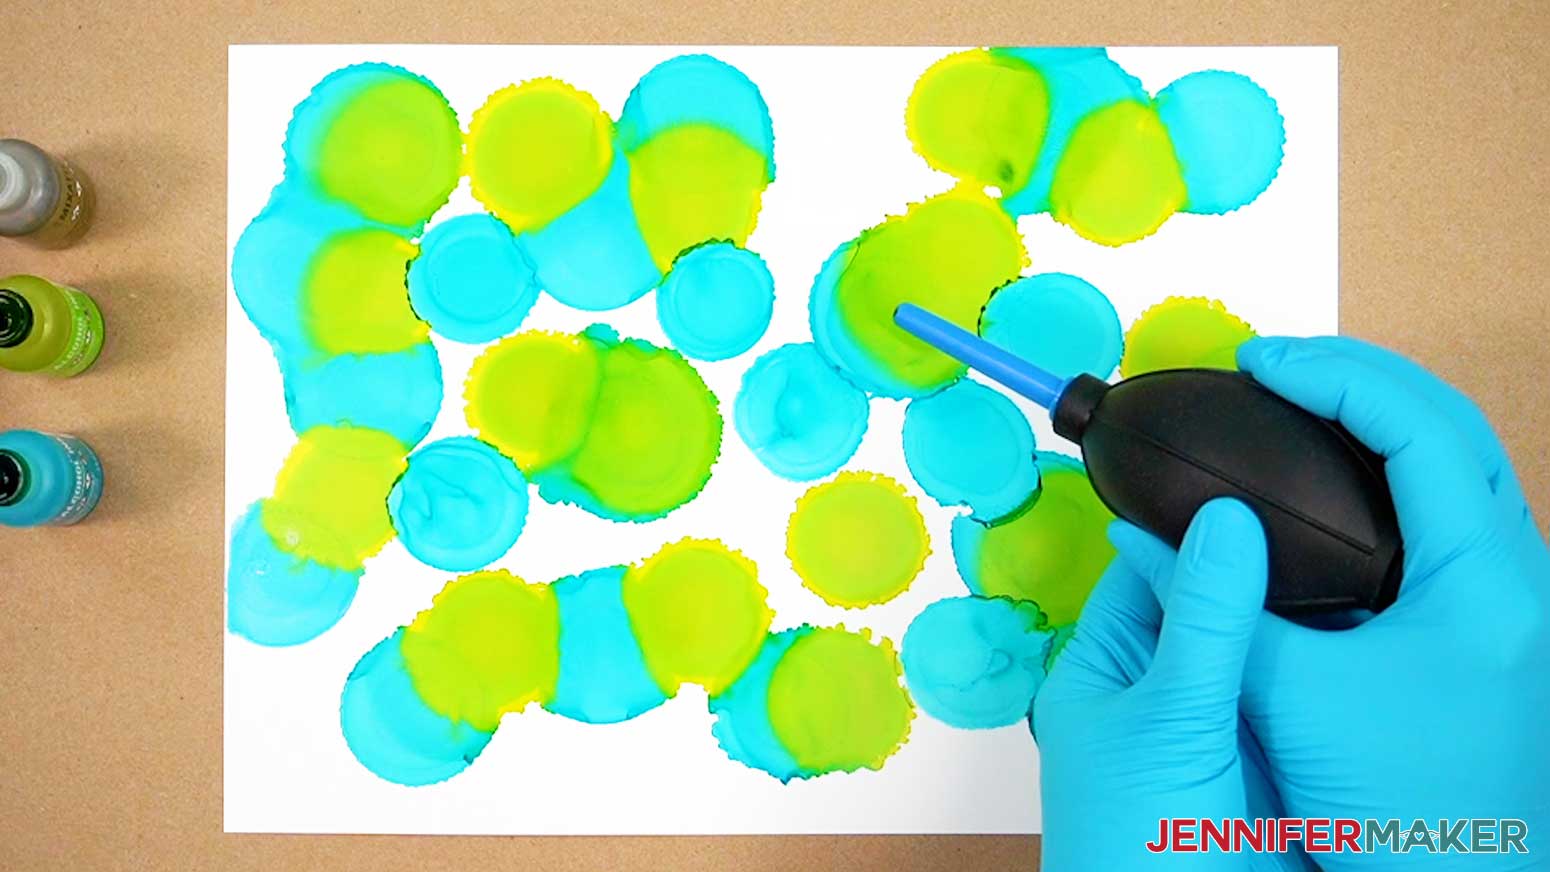
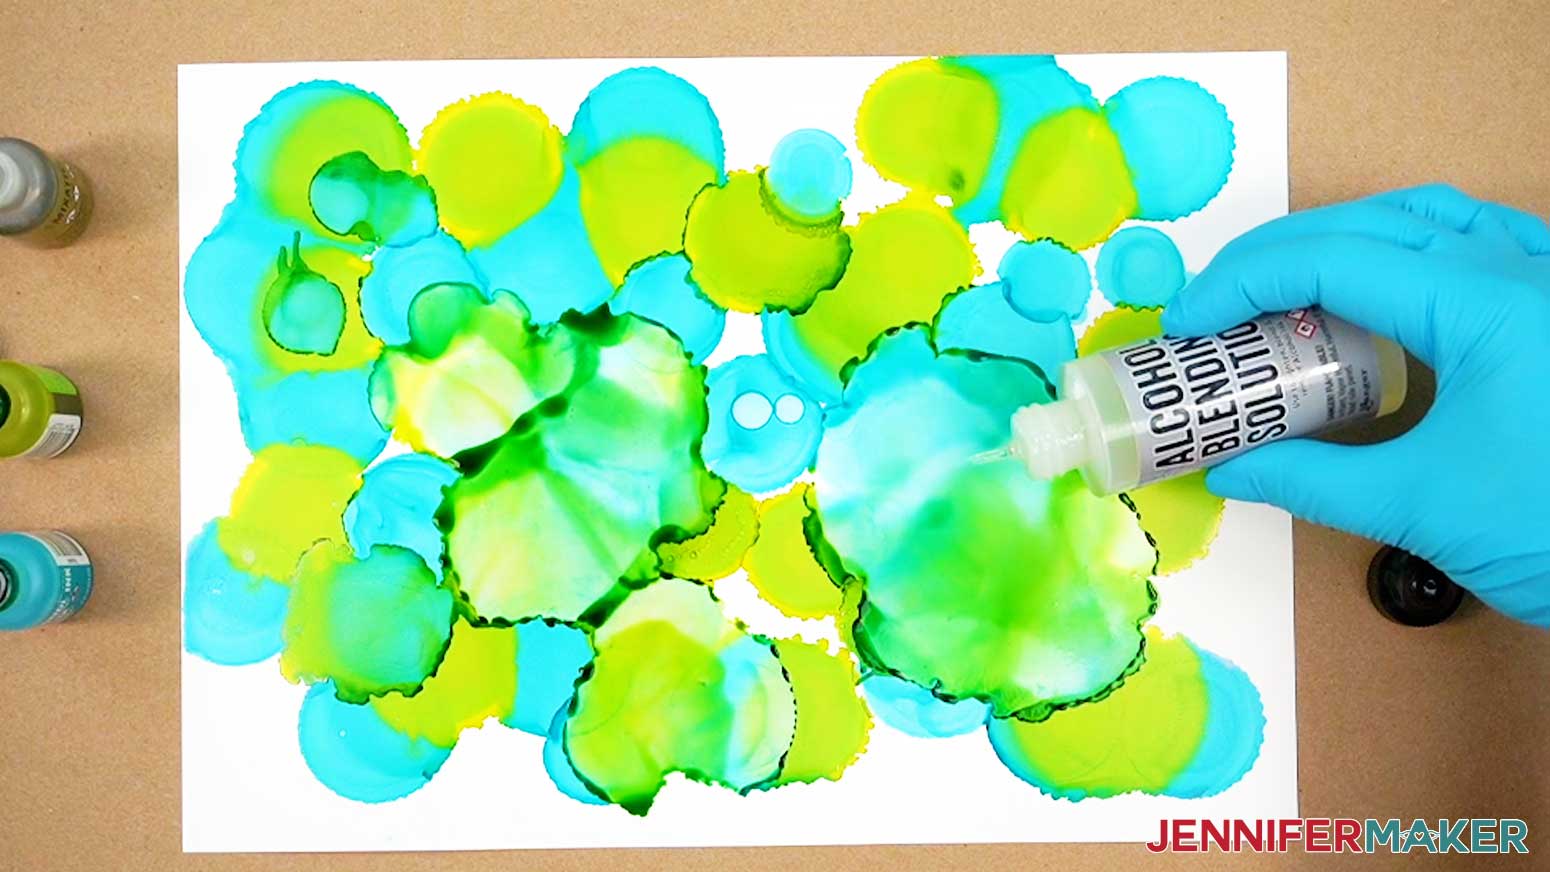
When it comes to using the inks, there are various techniques you can try. You can use a paint brush to paint like watercolors, but I find that dripping is even more fun. The bottles have a handy tip so you can control your drops. I like to add one drop at a time, layer by layer, and then use a blower tool or a straw to move the ink around and create neat effects. You can even use a hair dryer on a low setting if you want to try another way of moving the ink! Each of the different techniques gives you slightly different effects, so there’s no wrong way to do it! Adding that blending solution I mentioned gives you even more options, and I’ll show you how in the video tutorial.
I tested other types of paper just to be sure that this alcohol ink paper works best, like cardstock and printer paper. What can I say, I had to see it for myself! While the results can look pretty, the printer paper and cardstock both soaked up the ink too quickly. Not to mention, the paper warped and wrinkled as it dried. So for the best results—and to keep your butterfly card looking its best—skip the disappointment and just stick with glossy, synthetic paper that is made for alcohol ink. I’ve linked the one I used in my materials list below. Of course, you can also make the card with normal paper and skip the inks, or make my original pop-up butterfly card for another style!
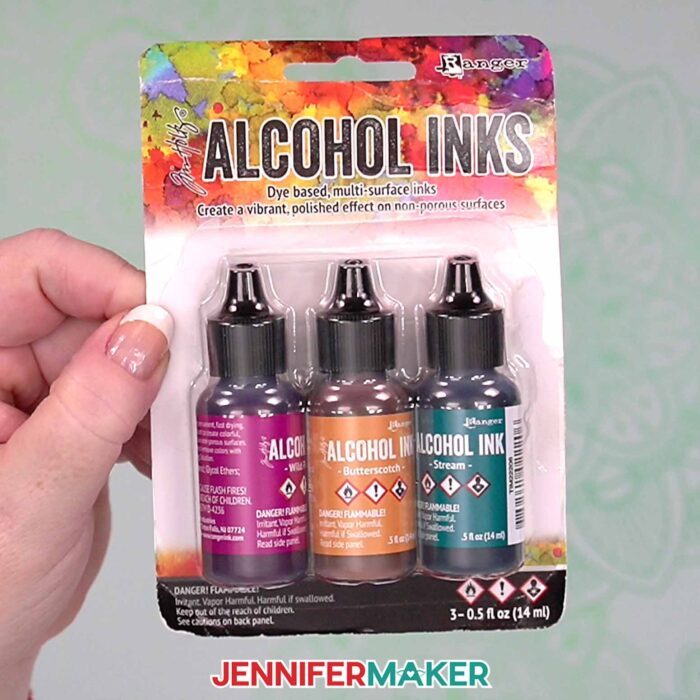
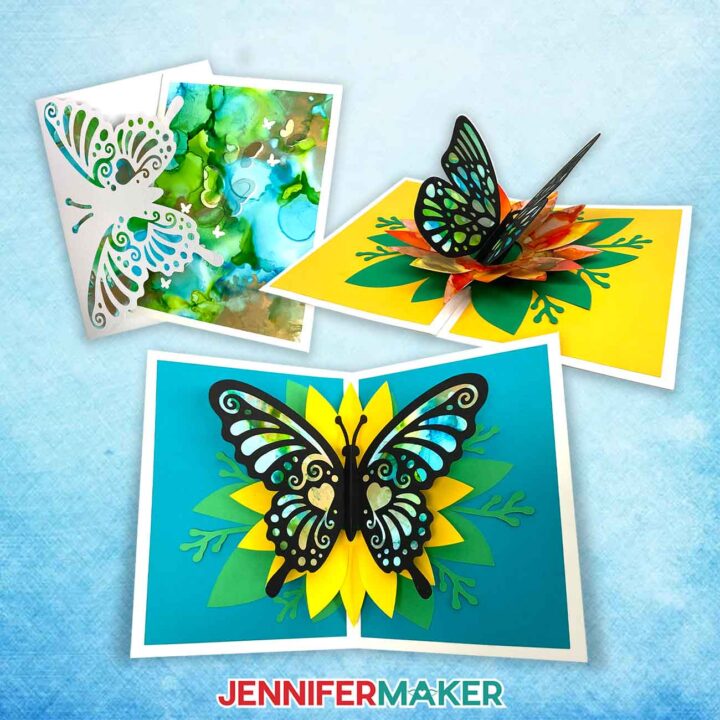
When I sat down to make my butterfly card, I chose a few of my favorite colors from the Ranger Tim Holtz alcohol ink line. These are good for beginners because they’re easy to work with and give a gorgeous, polished look when they dry. I even added a little extra sparkle with some of their metallic mixatives. I love how the touch of metallic alcohol ink adds more dimension to the color! I inked one piece of alcohol ink paper for the butterfly and another for the flower it lands on, using different colors so they’d really pop.
Safety is important when working with alcohol inks, so before I start, I always open a window and turn on a fan for good ventilation, and wear safety glasses. The inks are non-toxic, but the alcohol means they’re flammable and have a strong smell. I put on gloves to protect my hands, an apron, and laid down a few layers of butcher paper to keep my workspace safe. Alcohol ink art can be messy, and they’ll stain most surfaces, so it’s better to be prepared.
Once I had my colorful papers all dry and ready, it was time to cut them with my Cricut. I used my Cricut Maker 3, before I got my Maker 4. You can use any Cricut machine, (including the Joy), or another cutting machine. I designed a beautiful butterfly just for this project and included several versions of the file in case you want to cut it by hand or with a different machine.
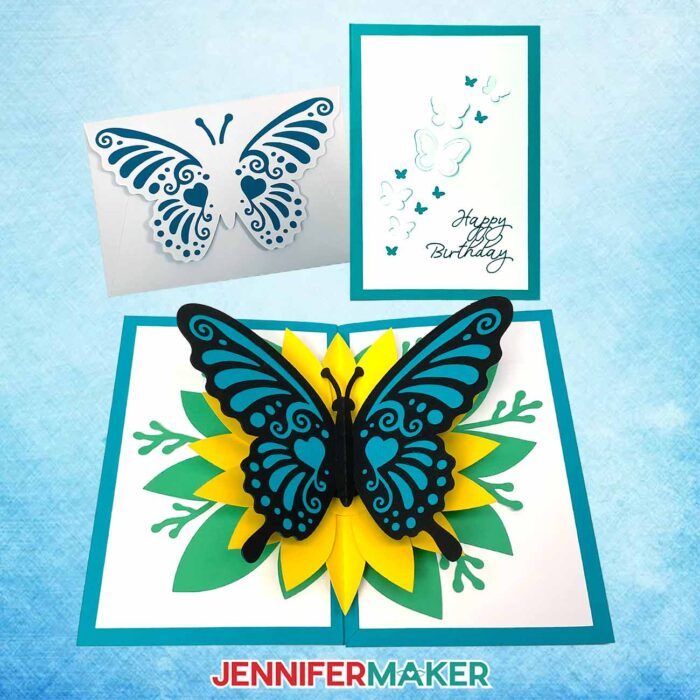
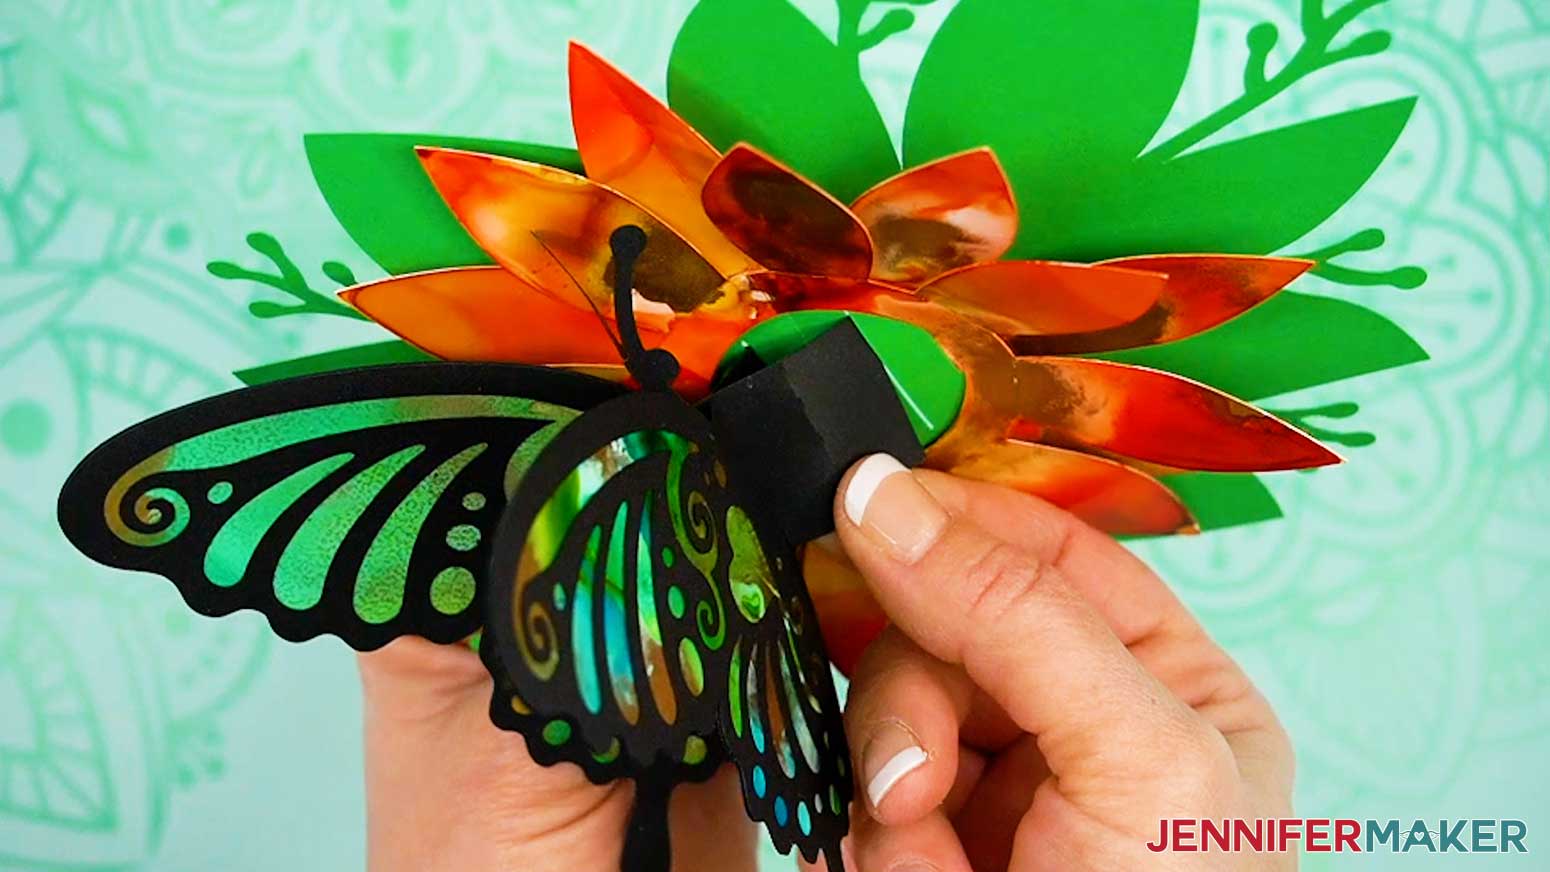
I used a strong craft glue to assemble the pieces, folding along the edges to get that amazing 3D pop-up effect. It comes together like magic—and I even included a matching envelope in the design files, so you can easily mail your creation. Be sure to watch the tutorial video to learn how to assemble the Cricut Joy-sized version of the card and envelope. It’s a little bit different than the normal size!
What I love most about this project is that it combines the magic of alcohol ink painting with the precision and polish of Cricut cutting. The result is something that looks like it came from the card aisle—but better since you made it yourself! Plus, because the alcohol ink is so organic, no two butterflies will ever be the same, making every card totally unique!

If you’re interested in custom butterfly cards for a more personal touch, I can teach you how to create your own design in my Advance with JenniferMaker program! My special workshop shows you how to use my toolkit of elements to design your own butterfly wings. Plus, you’ll have access to my personal collection of design elements in your member library! Click here to learn more about the Advance program!

So, want to learn how to make cards with alcohol ink on paper? Let me show you how fun and easy it is! This post contains some affiliate links for your convenience (which means if you make a purchase after clicking a link I will earn a small commission but it won’t cost you a penny more)! Read my full disclosure policy.
Materials to Make Cards with Alcohol Ink on Paper
View my Amazon shopping list with the exact items I used.
- Alcohol Inks (I used the Tim Holtz Ranger brand “Spring Break” set) -AND-
- Yellow Alcohol Ink (optional for the flower pieces: I used the Tim Holtz Ranger brand in “Butterscotch” from the Nature Walk set) -AND-
- Alcohol Ink Metallic Mixatives (optional: I used the Tim Holtz Ranger brand Gold and Silver colors)
- Alcohol Ink Blending Solution
- One to Two (1-2) Sheets of Alcohol Ink Paper (I used Pixiss 8.3″ x 11.7″ 300 gsm paper
- Five to Six (5-6) Sheets of 8.5″ x 11″ or 12″ x 12″ 65″ lb. Cardstock (alternative) (any colors: I used white, green, blue, yellow, and black) -AND-
- Two (2) Sheets of 12″ x 12″ 80 lb. Cardstock (optional for the matching envelope: I used white)
- Scrap Printer Paper (optional for protecting the alcohol ink paper when brayering it onto the machine mat)
- A way to cut your paper – I’m using the Cricut Maker 3, but you can also use the other Makers, a Cricut Explore Series machine, the Cricut Venture, Cricut Joy Xtra, or Cricut Joy
- Green StandardGrip Machine Mat 12″ x 12″
- Brayer
- Spatula
- Weeding Tool
- Alcohol Ink Blower Tool -OR-
- Straw
- Pipettes (optional for dropping alcohol or ink onto the paper)
- Disposable Gloves
- Safety Goggles (optional for protecting eyes)
- Apron (optional for protecting clothes)
- Isopropyl Alcohol -AND-
- Lint Free Cloth
- Fan (for ventilation)
- Newspaper or Butcher Paper
- Paper Towel
- Design #723 (My free SVG/DXF/PDF design files are available in my free library – get the password by filling out the form at the bottom of this page)

How to Make Cards with Alcohol Ink on Paper
Alcohol Ink On Paper
Learn how to use alcohol ink on paper and make a 3D pop up card!
Materials
- One to Two (1-2) Sheets of Alcohol Ink Paper (I used Pixiss 8.3” x 11.7” 300 gsm paper)
- Alcohol Inks (I used the Tim Holtz Ranger brand Spring Break set of colors) -AND-
- Yellow Alcohol Ink (optional for the flower pieces, I used the Tim Holtz Ranger brand Butterscotch color from the Nature Walk set) -AND-
- Alcohol Ink Metallic Mixatives (optional, I used the Tim Holtz Ranger brand Gold and Silver colors)
- Alcohol Blending Solution (I used the Tim Holtz Ranger brand)
- Five to Six (5-6) Sheets of 8.5" x 11" or 12" x 12" 65 lb. Cardstock (any colors, I used white, green, blue, yellow, and black)
- Scrap Printer Paper (optional for protecting the inked paper when brayering it onto the machine mat)
- Optional for Envelope: Two (2) Sheets of 12” x 12” 80 lb. Cardstock (I used white)
- Design #723 (My free SVG/PDF/DXF design files are available in my free resource library - get the password by filling out the form at the bottom of this page)
Tools
- A way to cut your papers - I’m using the Cricut Maker 3, but you can also use the Cricut Maker, a Cricut Explore Series machine, the Cricut Venture, the Cricut Joy Xtra, or even the Cricut Joy
- Cricut Green StandardGrip Machine Mat 12" x 12"
- Scoring Stylus (optional for files with score lines) -OR-
- Single Scoring Wheel (optional for files with score lines)
- Craft Glue (I used Bearly Art Precision Glue)
- Brayer
- Spatula
- Scraper
- Weeding Tool
- Tweezers (optional)
- Alcohol Ink Blower Tool (optional for moving the inks around on the page) -OR-
- Straw
- Pipettes (optional for dropping alcohol or ink onto the page)
- Isopropyl Alcohol
- Paper Towels (optional for clean up)
- Lint-Free Cloth (optional for clean up)
- Fan (for ventilation when using inks)
- Disposable Gloves (for protecting skin when inking)
- Safety Goggles (optional for protecting eyes when inking)
- Apron (optional for protecting clothes when inking)
- Newspaper or Butcher Paper (for protecting work surface when inking)
Instructions
STEP 1: GET MY ALCOHOL INK POP UP CARD DESIGNS
First, download my Alcohol Ink Pop Up Card files from my free library – look for Design #723. Alternatively, you can use the Save This Project form near the top of this post and the design link will be emailed to you.
In the SVG folder, you’ll find “score” and “no-score” versions of the pop up card and a matching envelope. If you plan to add alcohol ink, I recommend using the “no-score” files to avoid scratching the colors with the scoring tool.
There is also a Joy SVG folder with versions designed to be used with a Cricut Joy, a DXF folder with cut files, and a PDF folder with versions you can print and cut by hand.
TIP: If you’re not sure how to upload, go to jennifermaker.com/svgs to learn how to unzip and upload SVG files.
STEP 2: INK YOUR PAPER
- Check the safety information and specific instructions for your alcohol inks, including putting on safety equipment such as goggles and disposable gloves, and opening a window.
TIP: Put on disposable gloves to keep your hands cleaner! - Put several layers of butcher paper on your work surface to protect it.
NOTE: Most spots can be cleaned up with rubbing alcohol, but the inks can stain some surfaces. - Place the alcohol ink paper on top of the butcher paper. I recommend inking one side, then cutting the pieces, then inking the second side so none of the inked pattern gets damaged by peeling it up from the machine mat.
NOTE: If you want to use alcohol ink for the card’s front, the butterfly’s wings, and the flower petals, I recommend using one set of colors on a sheet for the wings and front piece and another set of colors on another sheet for the flower pieces. - Set up the alcohol inks you want to use.
- Shake each of the bottles well to mix the liquid, then uncap them so they’re ready to use when you need them.
TIP: The metallics need extra shaking because the pigments tend to settle on the bottom of the bottle. - Add a few drops of your chosen colors and metallic mixatives one at a time until the surface is mostly covered. The inks stay wet for about 30 seconds to 1 minute depending on your room’s environment.
TIP: When you add more colors, you’ll notice that it “pushes” the existing color out and away from it and toward the edges. If you want a certain color on the edge, put it on first. If you want a particular color in the middle, put it on last. You can also add several drops of blending solution before the inks for a more fluid result.
TIP: If you plan to ink both sides of your paper, write down the color names for the inks you use so you can use the same color combination on the other side of your paper after cutting. - If you want to blend the colors, use a blower tool or straw to gently move the inks around on the paper while they’re still wet.
- You can add more ink, just keep in mind it may reactivate some of the earlier inks that have begun to dry.
- Apply a few drops of blending solution to the heavily inked areas to push the colors around.
TIP: If you add several drops, you can even clear away areas, like an eraser. - Let the paper sit until the alcohol evaporates, leaving the inks in place.
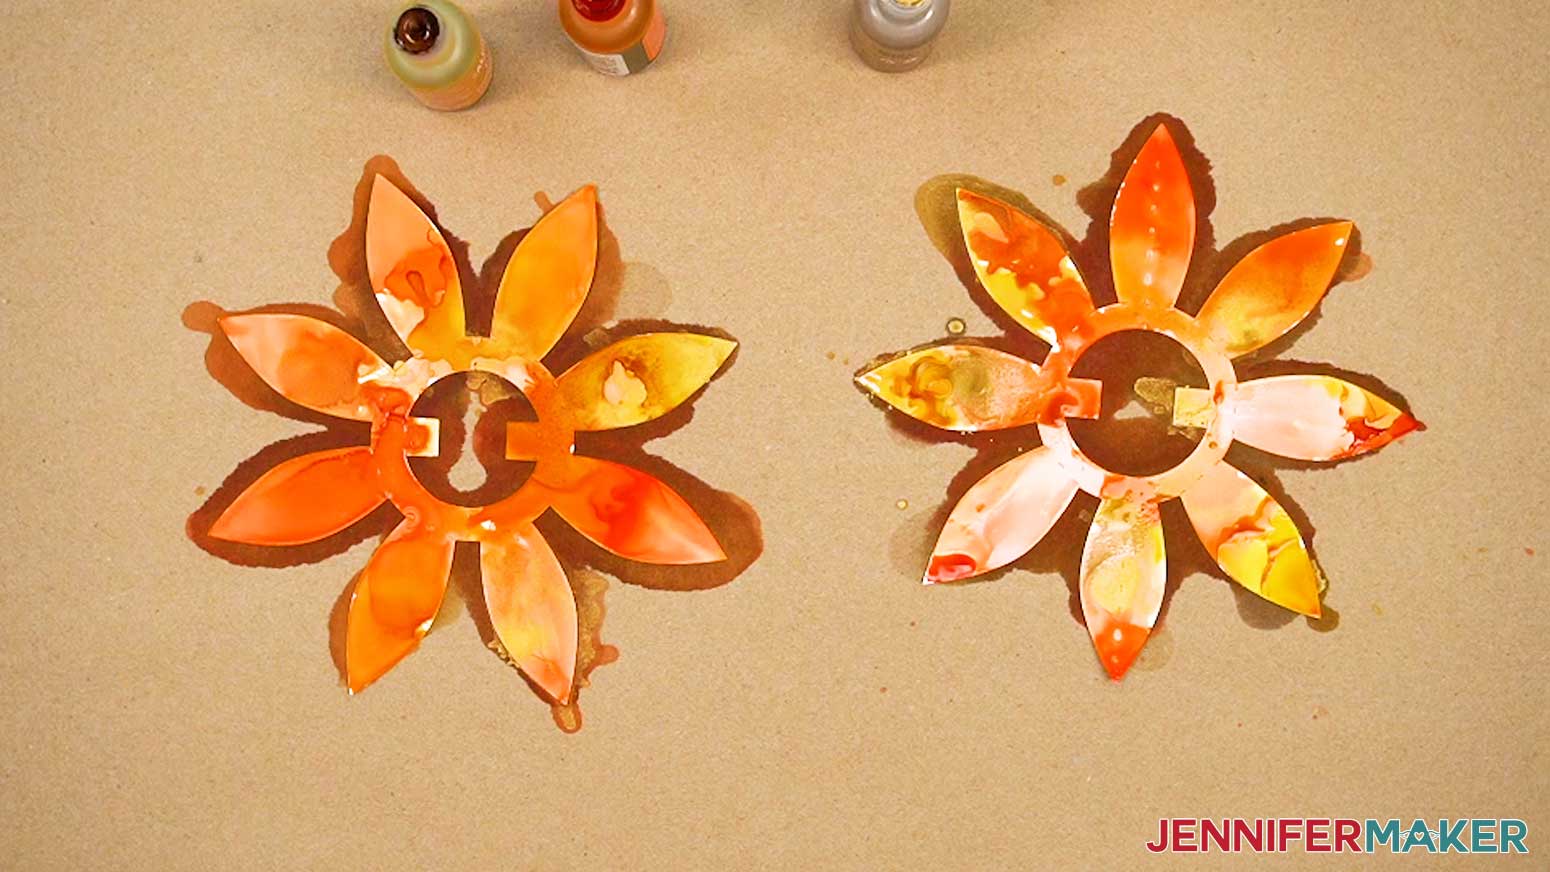
TIP: My inks dried completely in about 30 minutes, but your results may vary. - Follow the same steps to ink another piece of paper using different colors for the flower.


STEP 3: PREPARE AND CUT YOUR CARD DESIGN
CRICUT DESIGN SPACE
- In Cricut Design Space, open a blank Canvas.
NOTE: If you’re new to using Cricut Design Space, go to cricutkickoff.com for my introductory tutorial on Design Space basics. - Click “Upload” and then “Upload Image.”
- Click “Browse” and select the card SVG file you want to use.
NOTE: Since I want to add alcohol inks, I’ll use the “no-score” file. This will prevent any scrapes from appearing in the ink along the crease lines due to the scoring tool dragging across the paper. Dashed cut lines also show up better on the inked paper, and the alcohol ink paper folds easier along dashed cut lines. If you want to use the “score” file, check out my Pop Up Letter Card tutorial to learn how to adjust the score lines before cutting. - Click “Open,” and then “Continue.”
- Click “Upload” to add the design to your Canvas.
- Click “Save” and give your project a name.
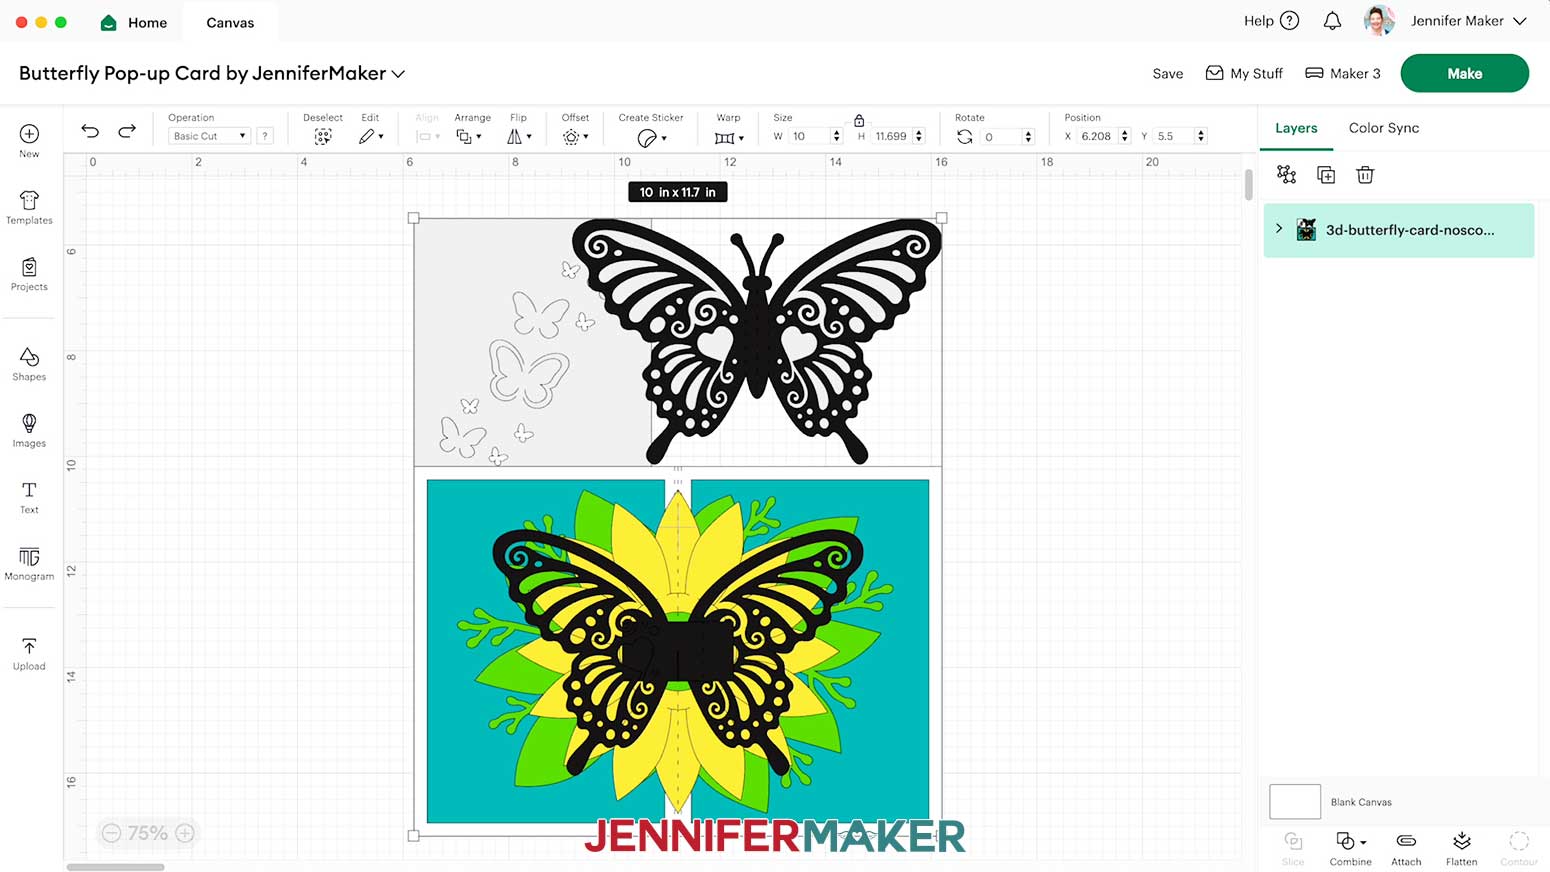
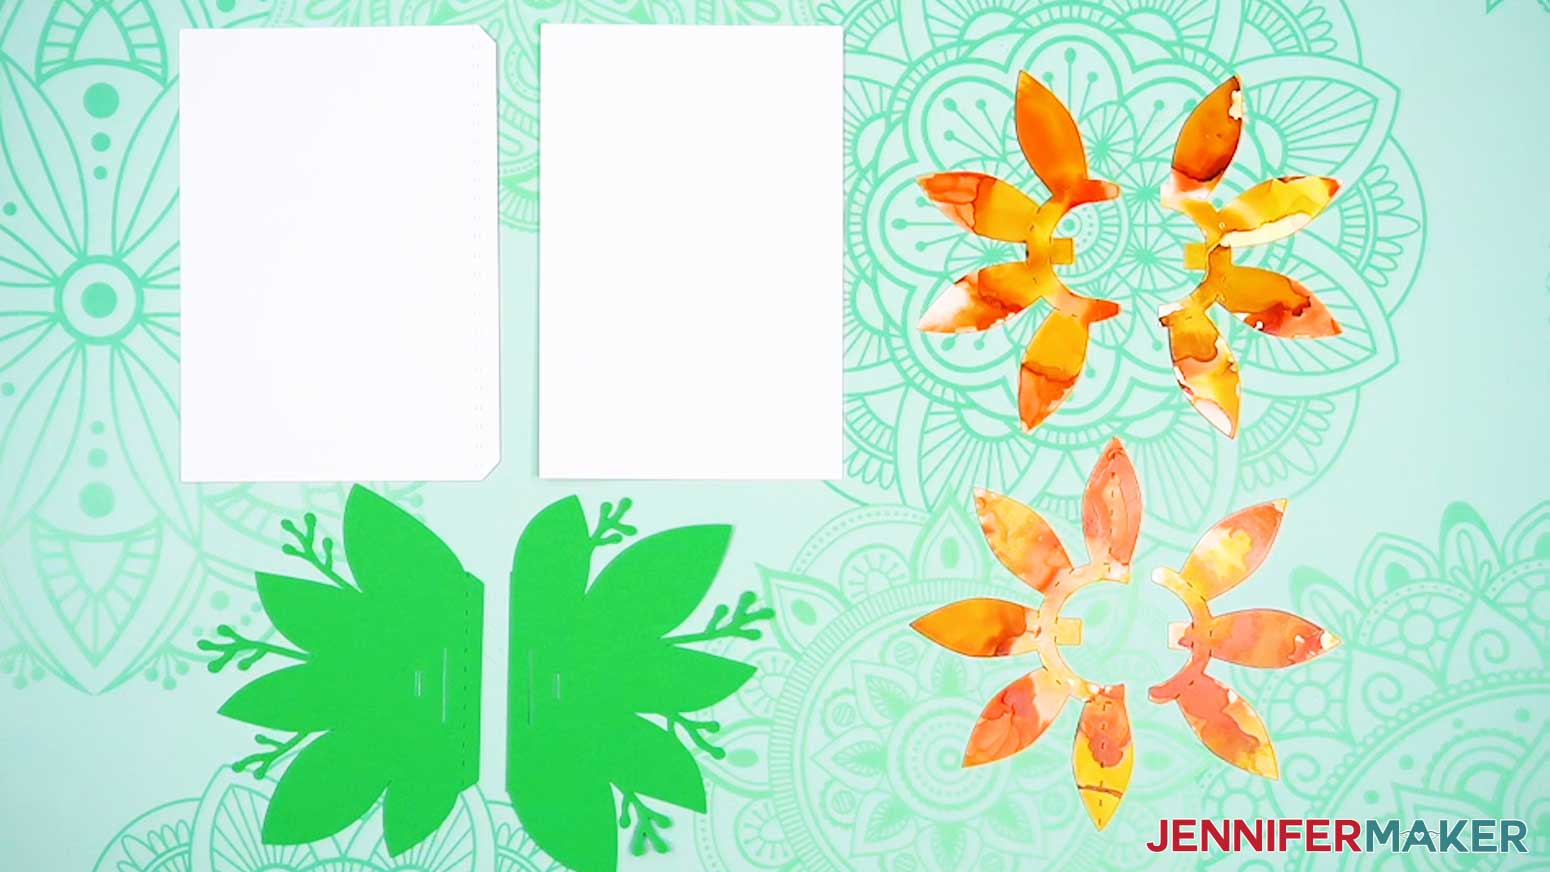
- Ungroup the design and spread the pieces out.
NOTE: The card file includes a black butterfly detail layer, gray pieces for the inner wing layers, bottom black wing details, two layers of flowers, foliage, blue rectangles for the inner surfaces, the white card base, and a gray front detail piece. - If you want, use steps 2-5 to add the “no-score” envelope SVG to the Canvas, too.
NOTE: The envelope file includes a white closure flap with a blue liner and the main section. - Your project is ready to cut!

CUTTING
- Make sure the correct machine is selected in the top right.
- Click “Make.”
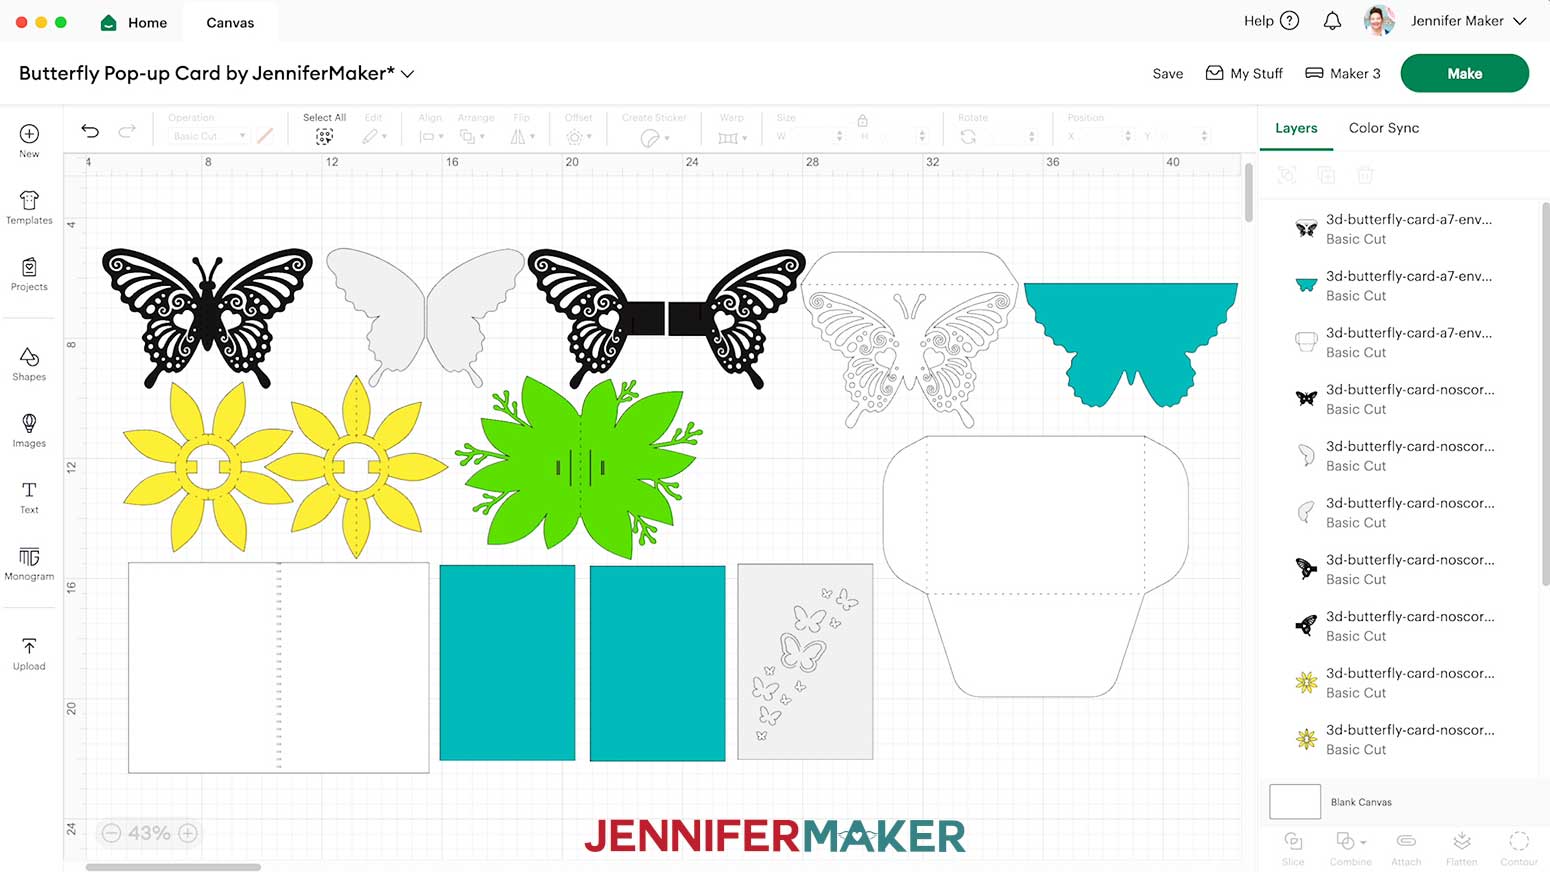
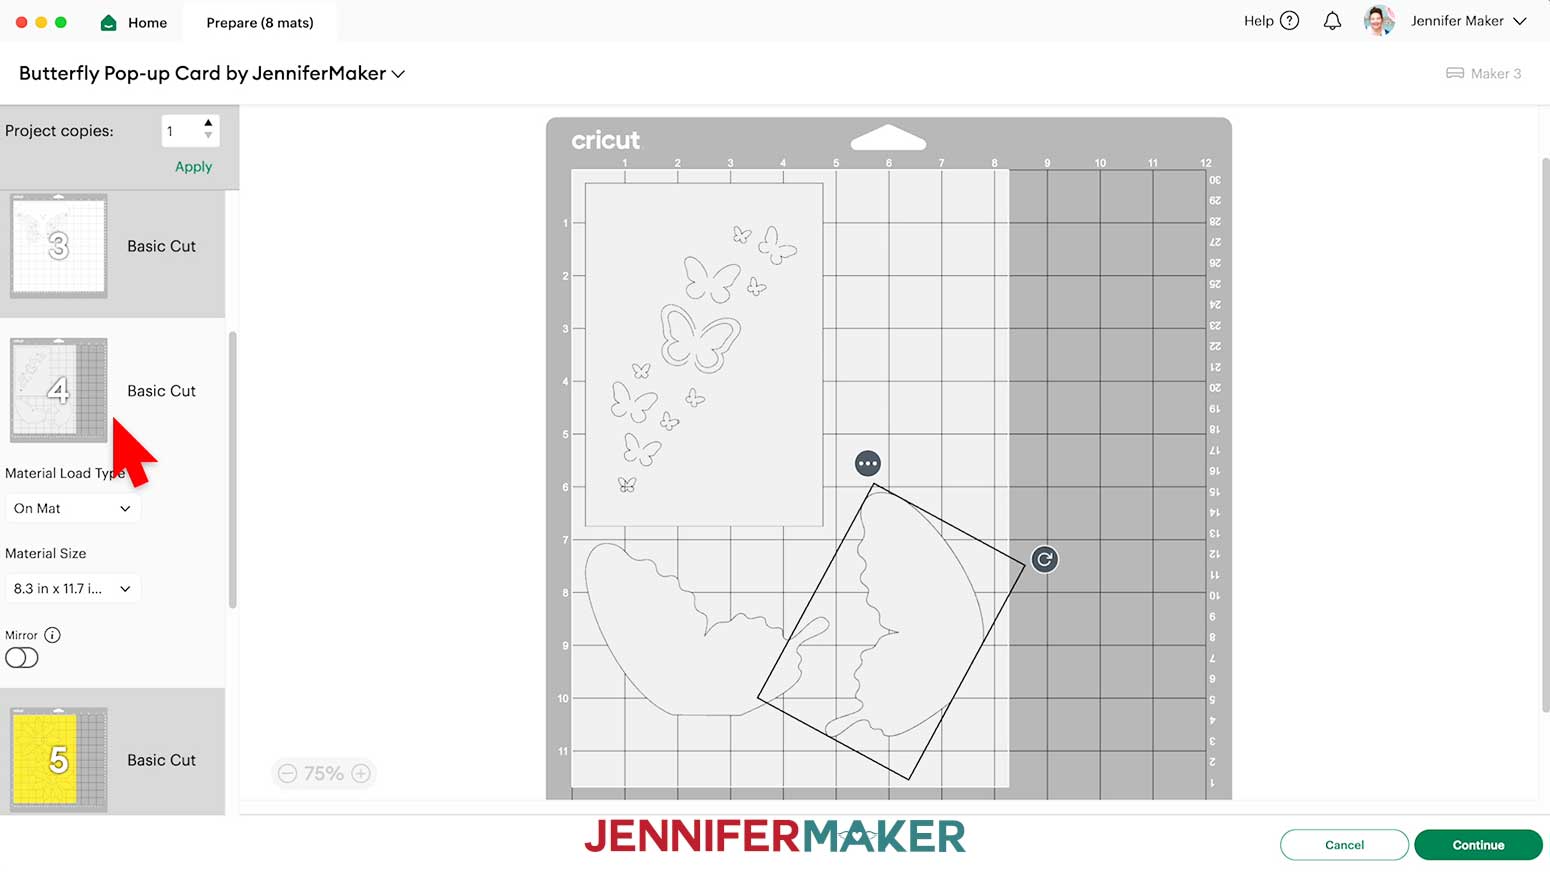
- On the Prepare screen, make sure the correct Material Size is selected for your materials.
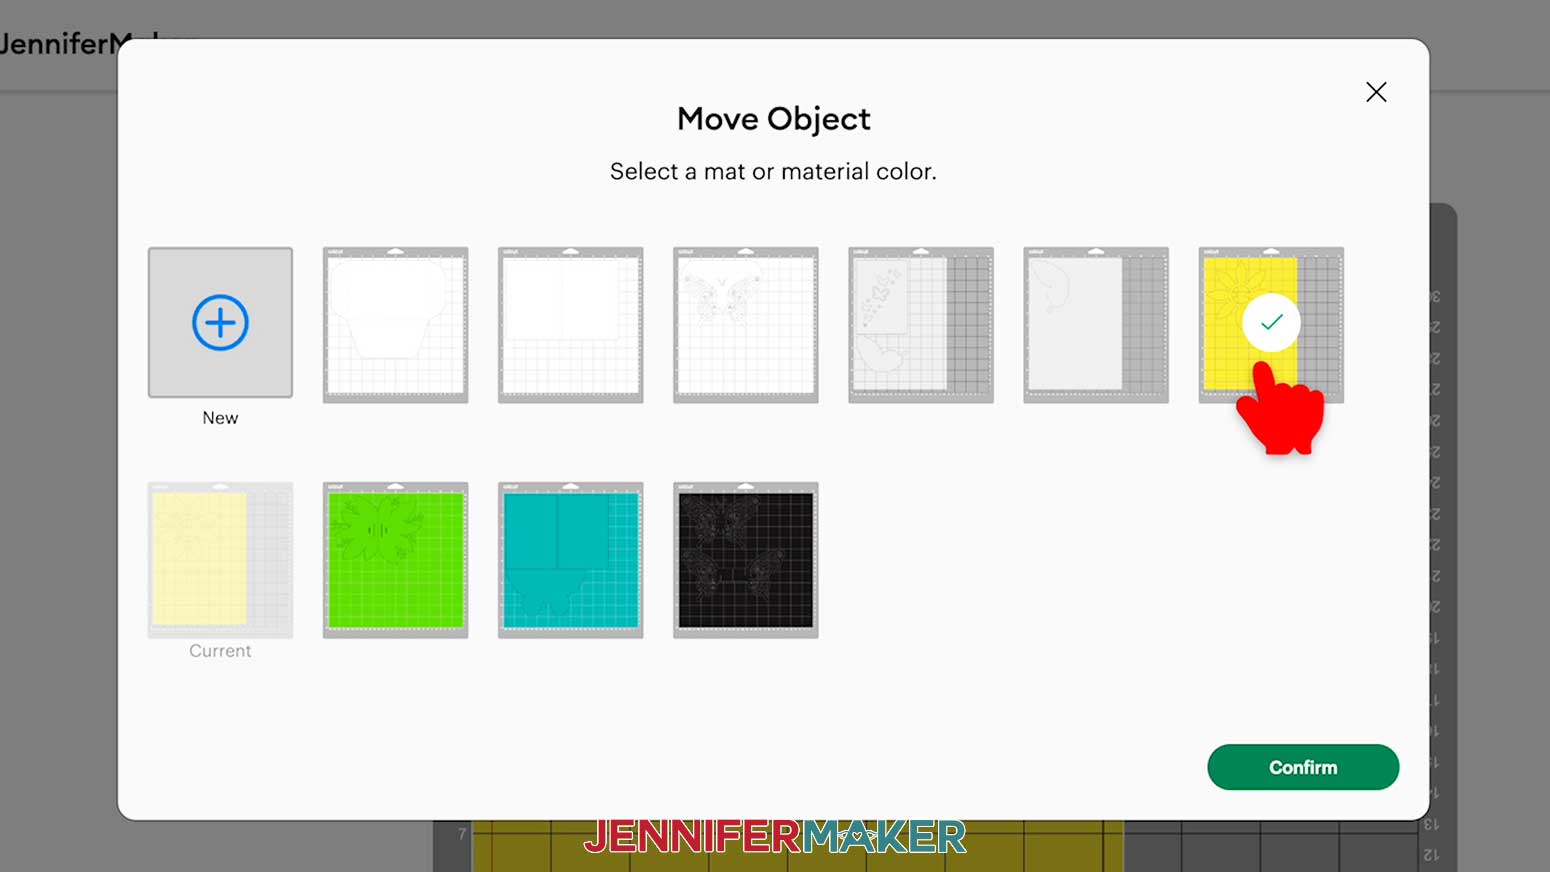
NOTE: I’m using 8.3” x 11.7” alcohol ink paper for the light gray and yellow pieces, and 12” x 12” cardstock for the other pieces. - To save paper, select the second yellow mat and click the flower. Click the icon with three dots and select “Move object.”
- In the pop up window, select the other yellow mat to move the flower to and click “Confirm.”
- Move the flower on the new mat so it doesn’t overlap with the existing one.
- Click the light gray alcohol ink mat so it will cut first on the next screen.
- Click “Continue.”
- On the Make screen, set the alcohol ink paper’s Material Setting to “Photo Paper” with “More” Pressure.
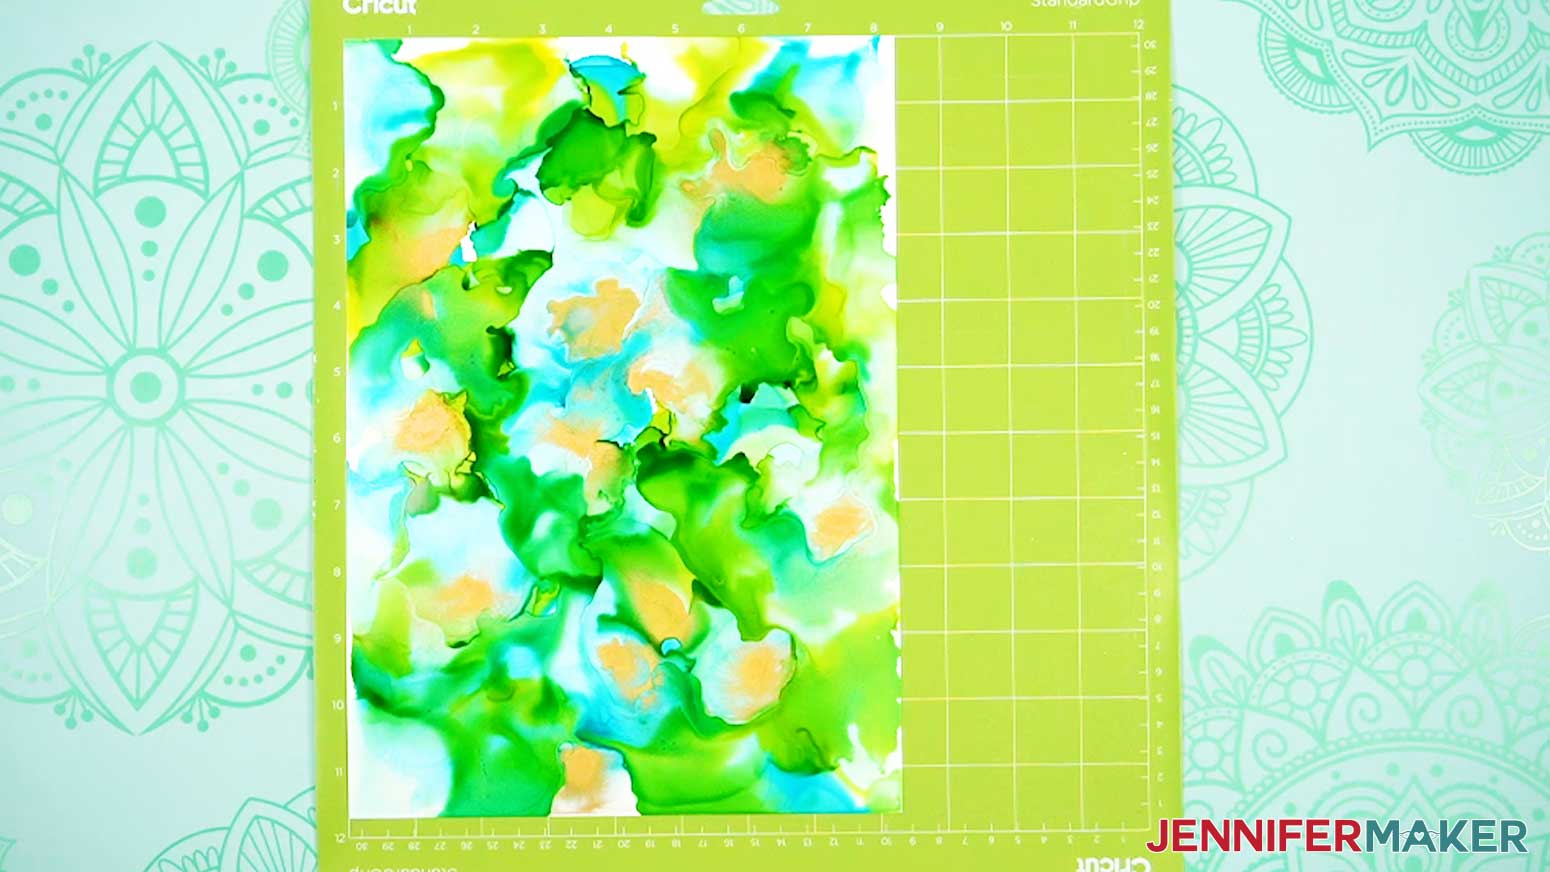
- Place your inked sheet for the wings and front on a green StandardGrip machine mat face up and oriented correctly.
- Put a clean sheet of printer paper on top of the ink to avoid scratching it, then use a brayer to make sure it’s fully adhered.
- Check that your Premium Fine-Point Blade is clean and in the clamp.
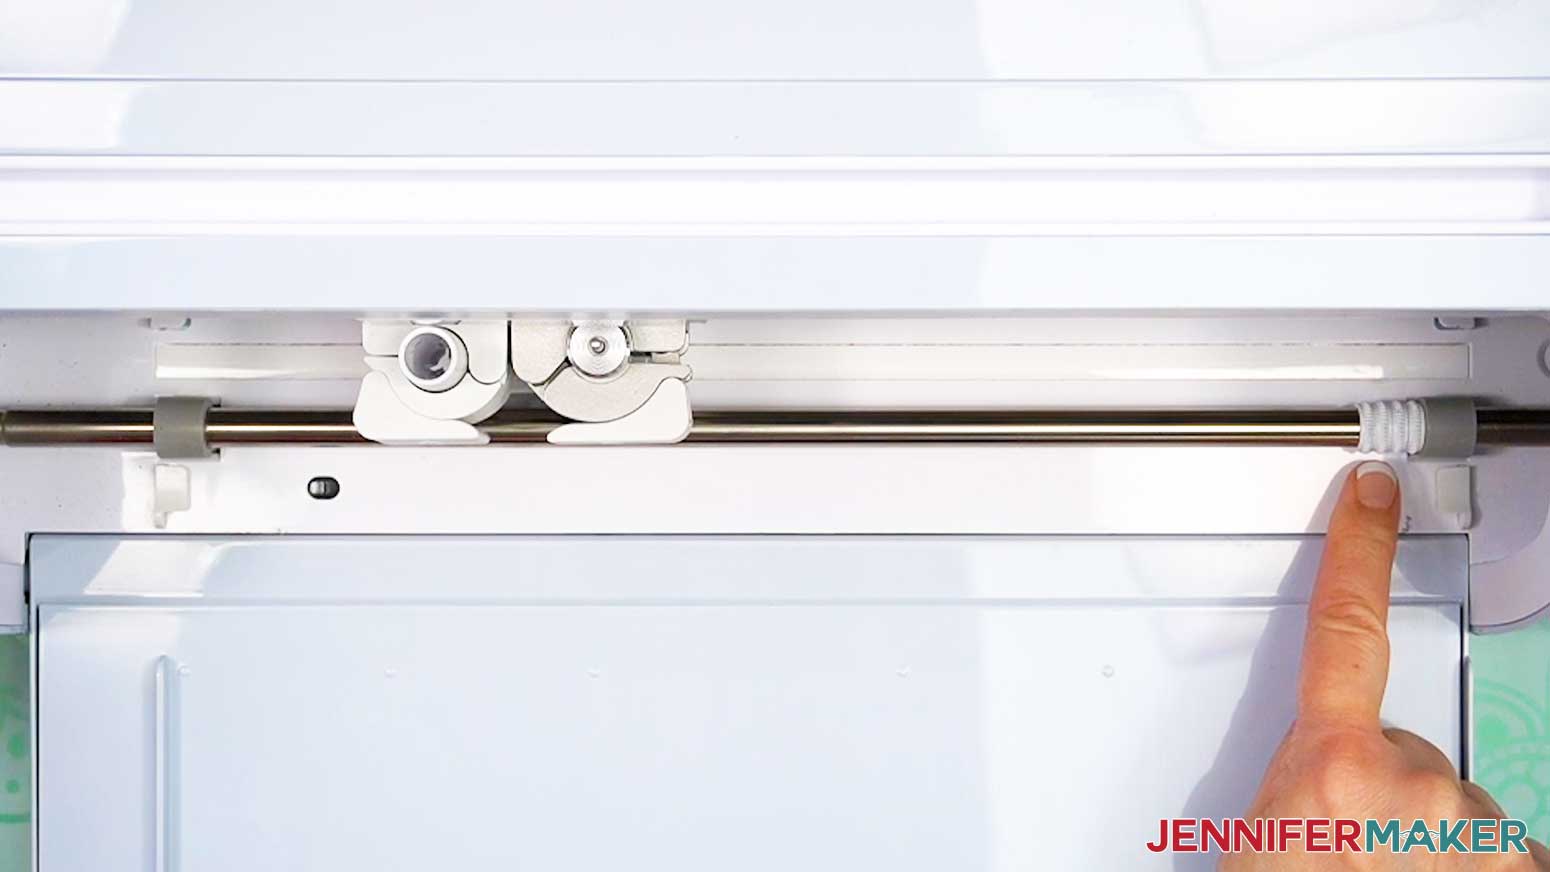
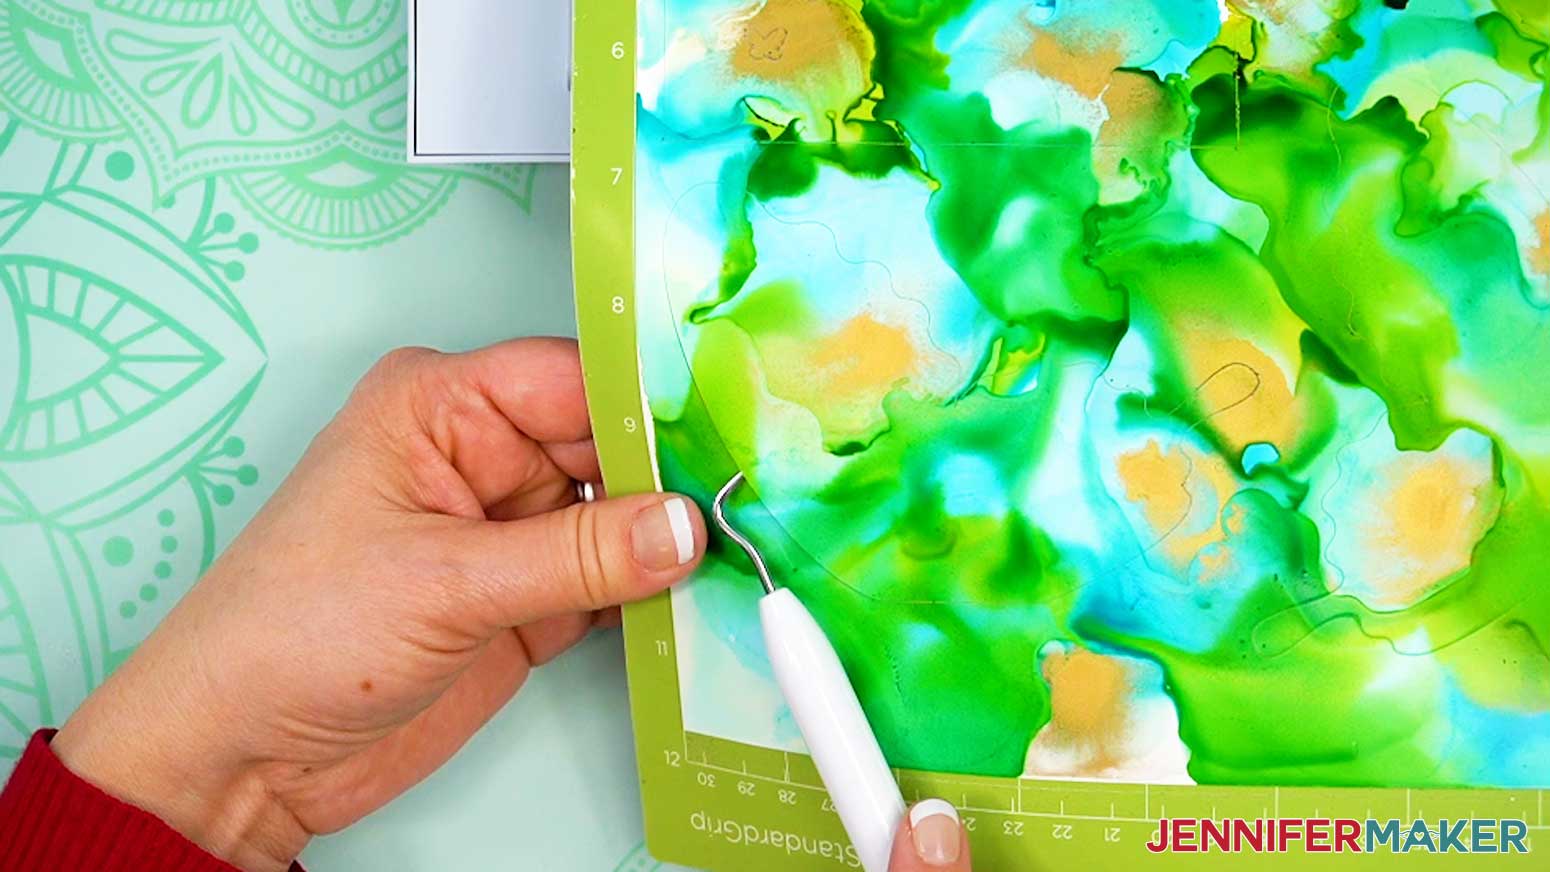
- To avoid scratching the ink, gently move the four white star wheels all the way to the right on the roller bar.
- Press the flashing “Load/Unload” button to load the prepared mat into your Cricut.
- Press the flashing middle button to begin cutting.
- When it has finished cutting, don’t unload the mat right away. Instead, gently lift a corner to make sure the material is cut all the way. If not, press the “Go” button again to make the same cuts in the same spots.
- When the cuts are complete, unload the mat, flip it over onto your work surface, and roll it back to gently release the material. The slightly plastic surface can stick to the mat, so go slowly.
NOTE: If any pieces stick, use your weeding tool to gently pop them out from the back.
TIP: If you have any issues with your cuts, check out my Tips for Cleaner Cuts tutorial at jennifermaker.com/cleaner-cuts. - Repeat steps 9-17 with the second sheet of alcohol paper for the flower pieces.
- Prepare your plain cardstock mats the same way and cut them using the “Medium Cardstock” setting with “More” Pressure on a green mat.
NOTE: You can gently space the four white star wheels back out on the roller bar since the plain cardstock is thinner than the alcohol ink paper.


STEP 4: INK THE SECOND SIDE
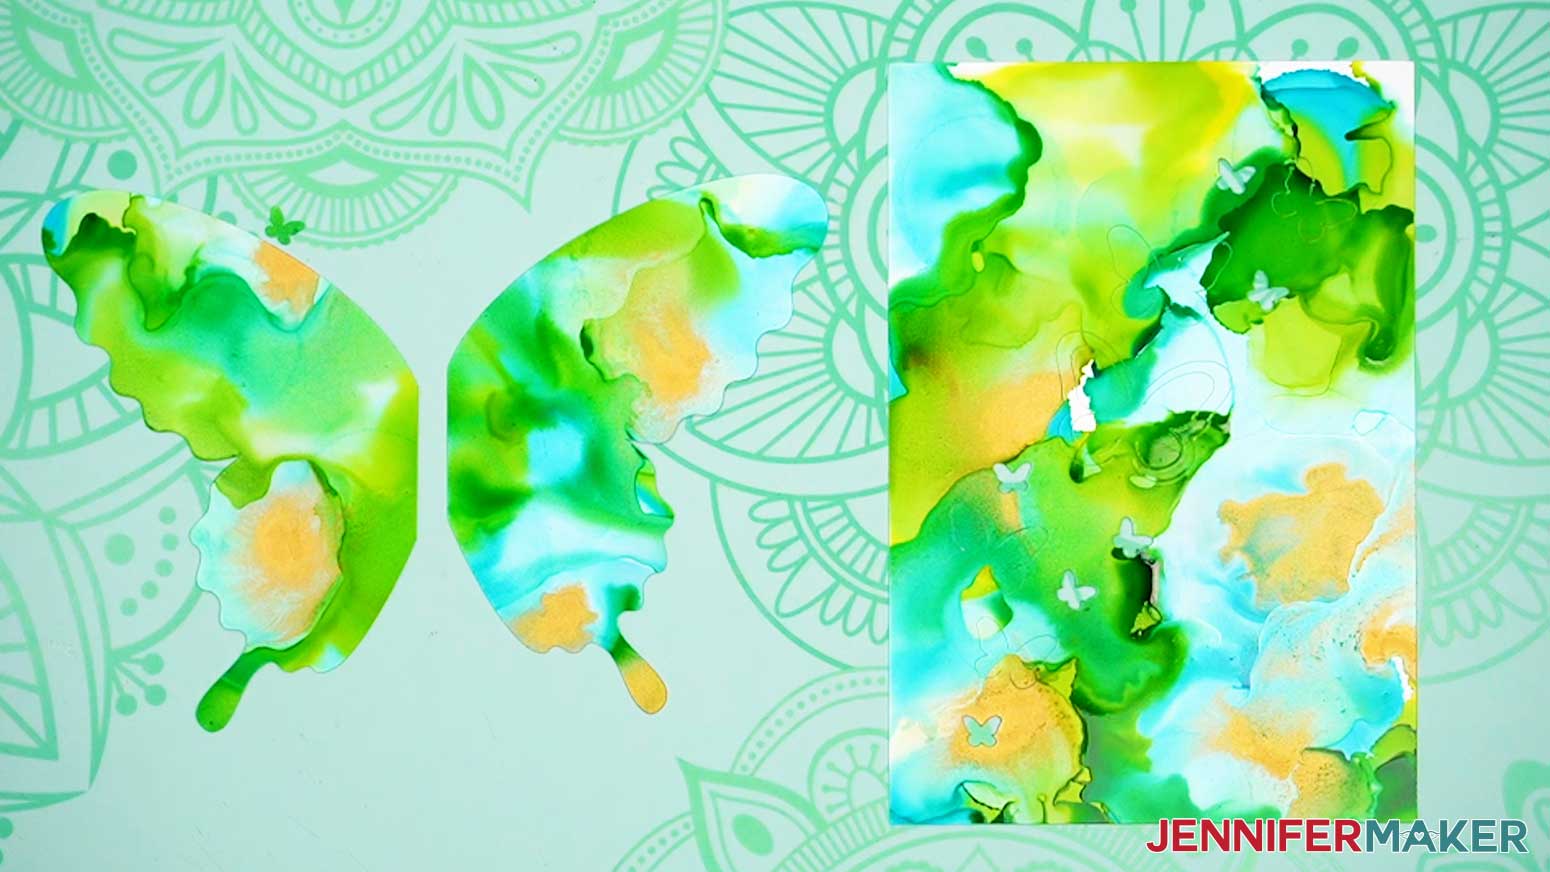
- Place the wing shapes white side up on fresh protective paper, then add ink following the directions in “STEP 2: INK YOUR PAPER.”
NOTE: To reduce reactivating the ink on the front side, let everything dry before working on the other side and work in clean areas. Use the blending solution to touch up the front if needed. - Repeat the process with the flower pieces.
- Let the inks dry for 30 minutes.

STEP 5: ASSEMBLE YOUR CARD
- Fold all the pieces, other than the center line on the butterfly’s body, along their crease lines face up to make valley folds. The body center line will fold away from you to make a mountain fold so the body pops up.
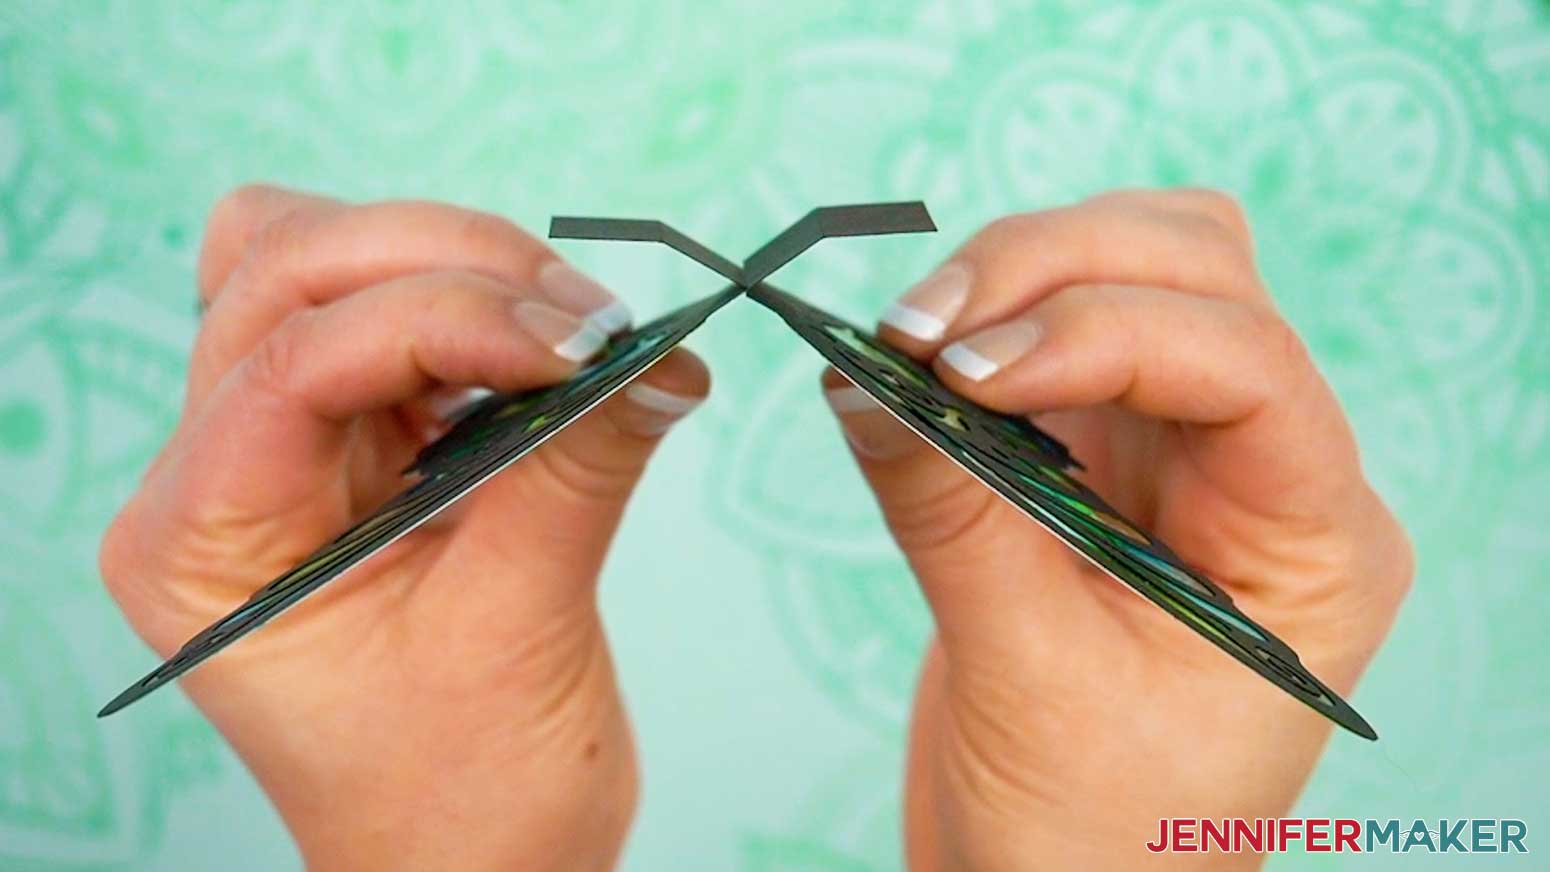
NOTE: The card base has three creases very close together, which create a little extra room for when you want to open the finished card flat. You only need to fold along the middle line now, as the outer two will naturally fold when you open the finished card flat. - Place the black wing halves with their tabs facing each other. The left one should have a slit on the bottom and the right one’s slit will be at the top.
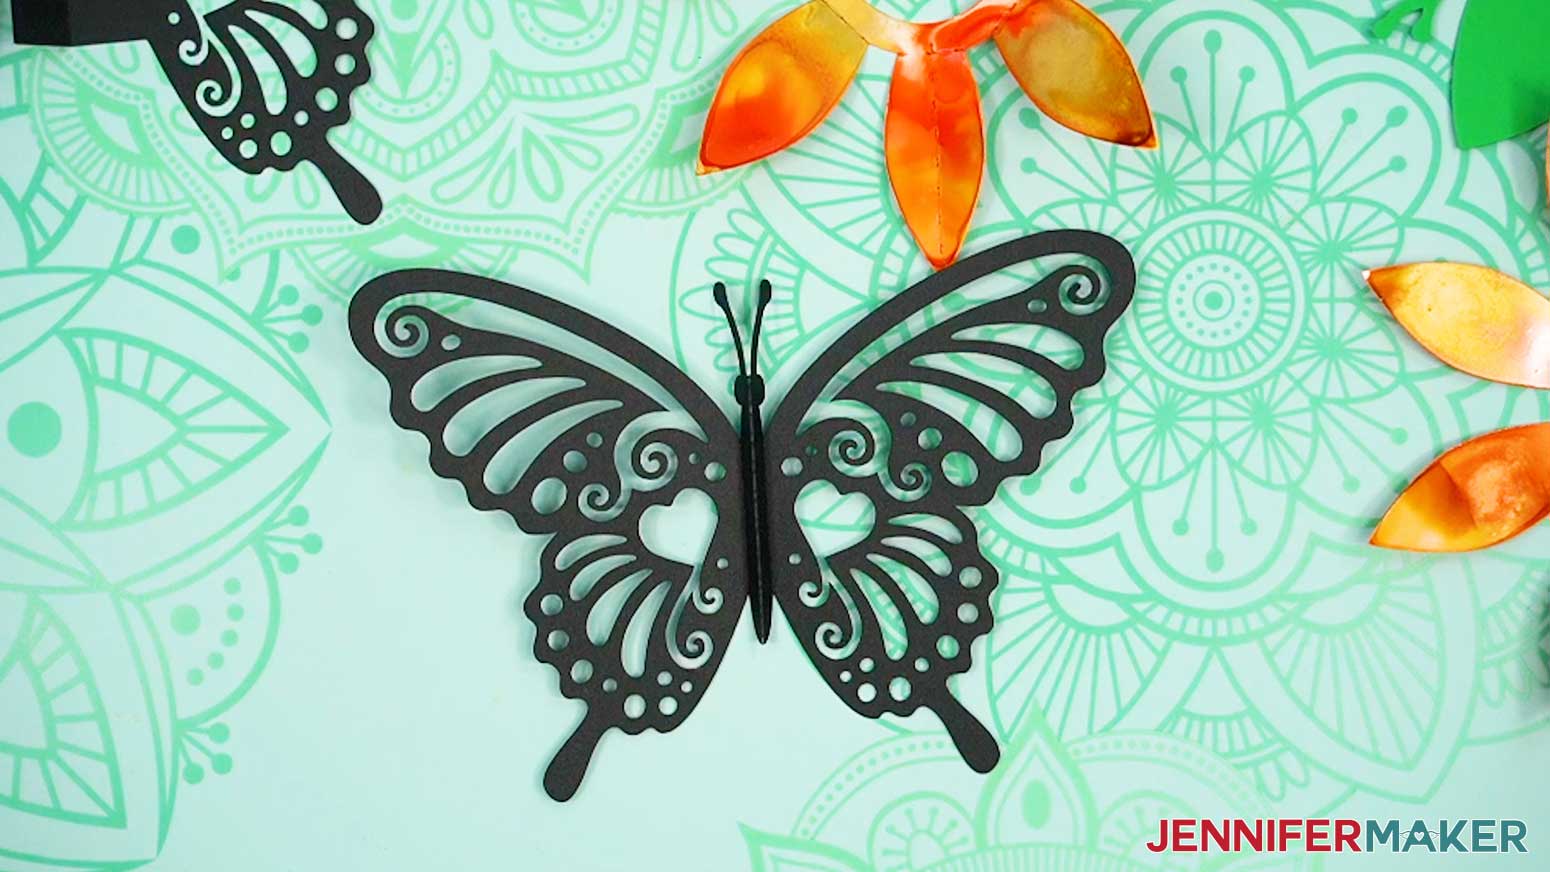
- Place the inked wings with the prettier sides up to match the black detail shapes.
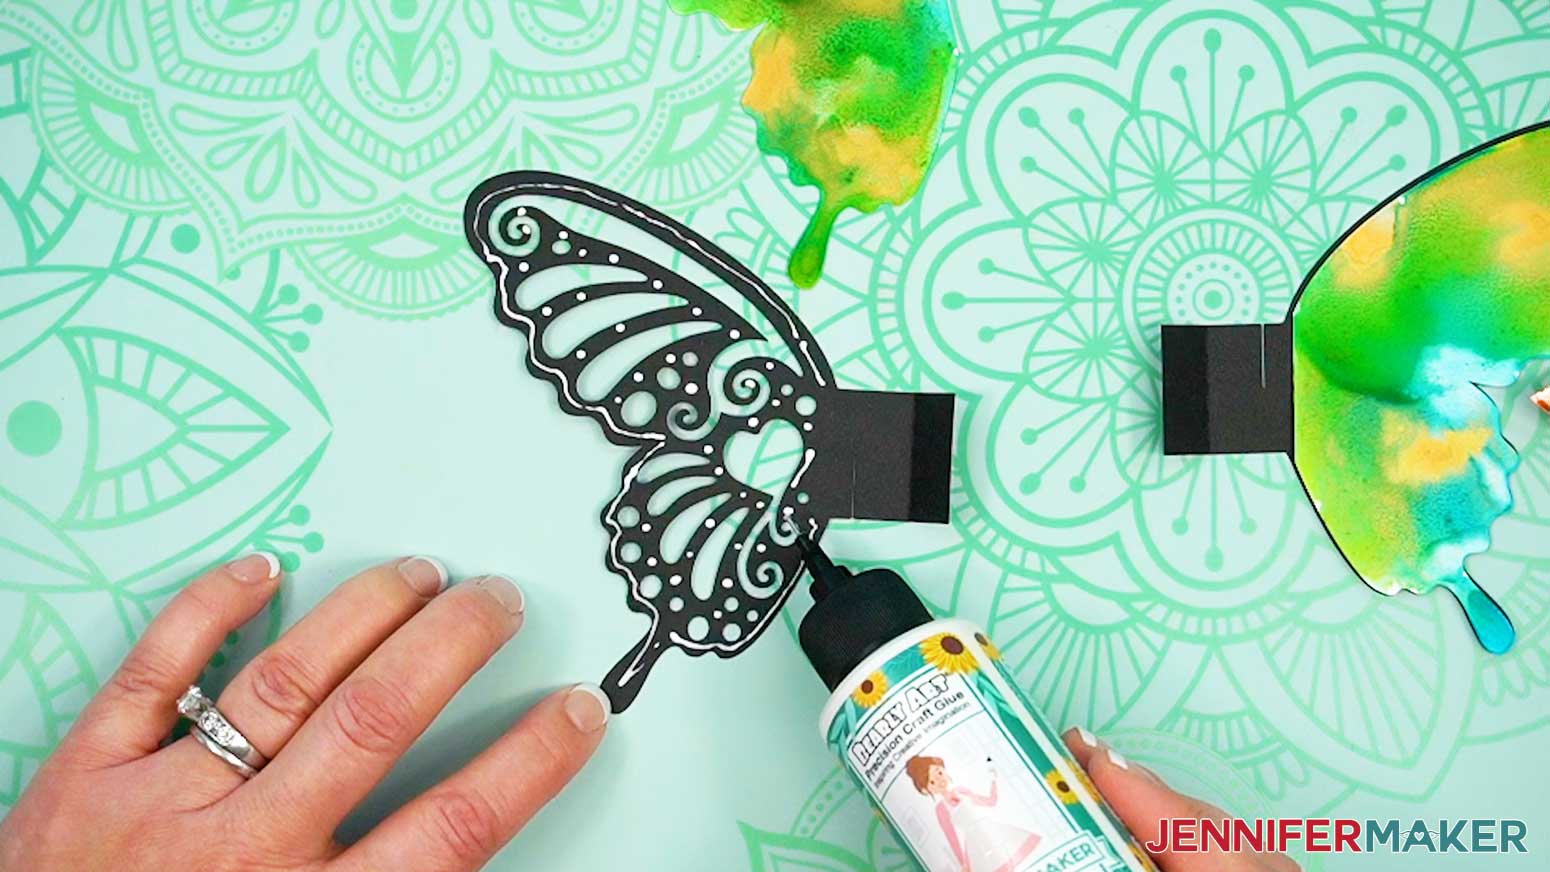
- Add thin lines of craft glue around one black wing’s edges, then add a few dots in the middle. Don’t add glue to the tab.
- Place the matching inked wing piece on the glue so a little black cardstock is visible around the edges. Gently press it in place and wipe away any excess glue.
- Repeat steps 4-5 for the other wing.
- Slot the bottom wing pieces into each other. The left wing (the one with a slit at the bottom) goes onto the right wing from the top with its tab positioned behind the right wing. This is so both tabs end up below the wings.
- Glue the top section with the butterfly’s wings and body onto the bottom wings, one wing at a time.
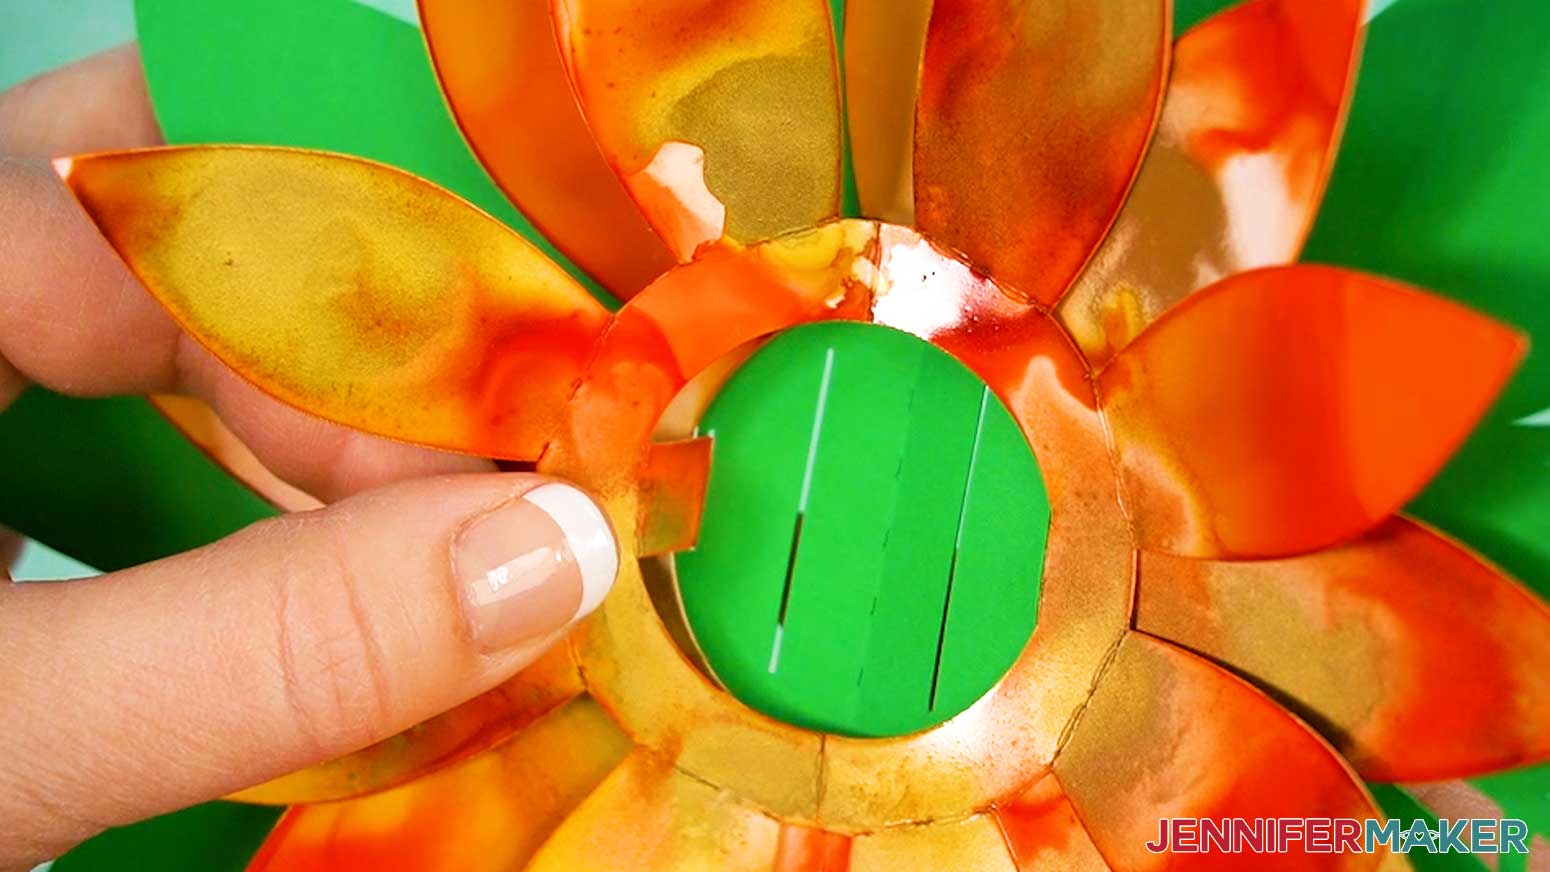
NOTE: When gluing the second wing in place, you’ll need to stretch the piece a bit to make sure the edges of the top and bottom wing details are flush. - Place the green foliage piece face up so the slits are vertical.
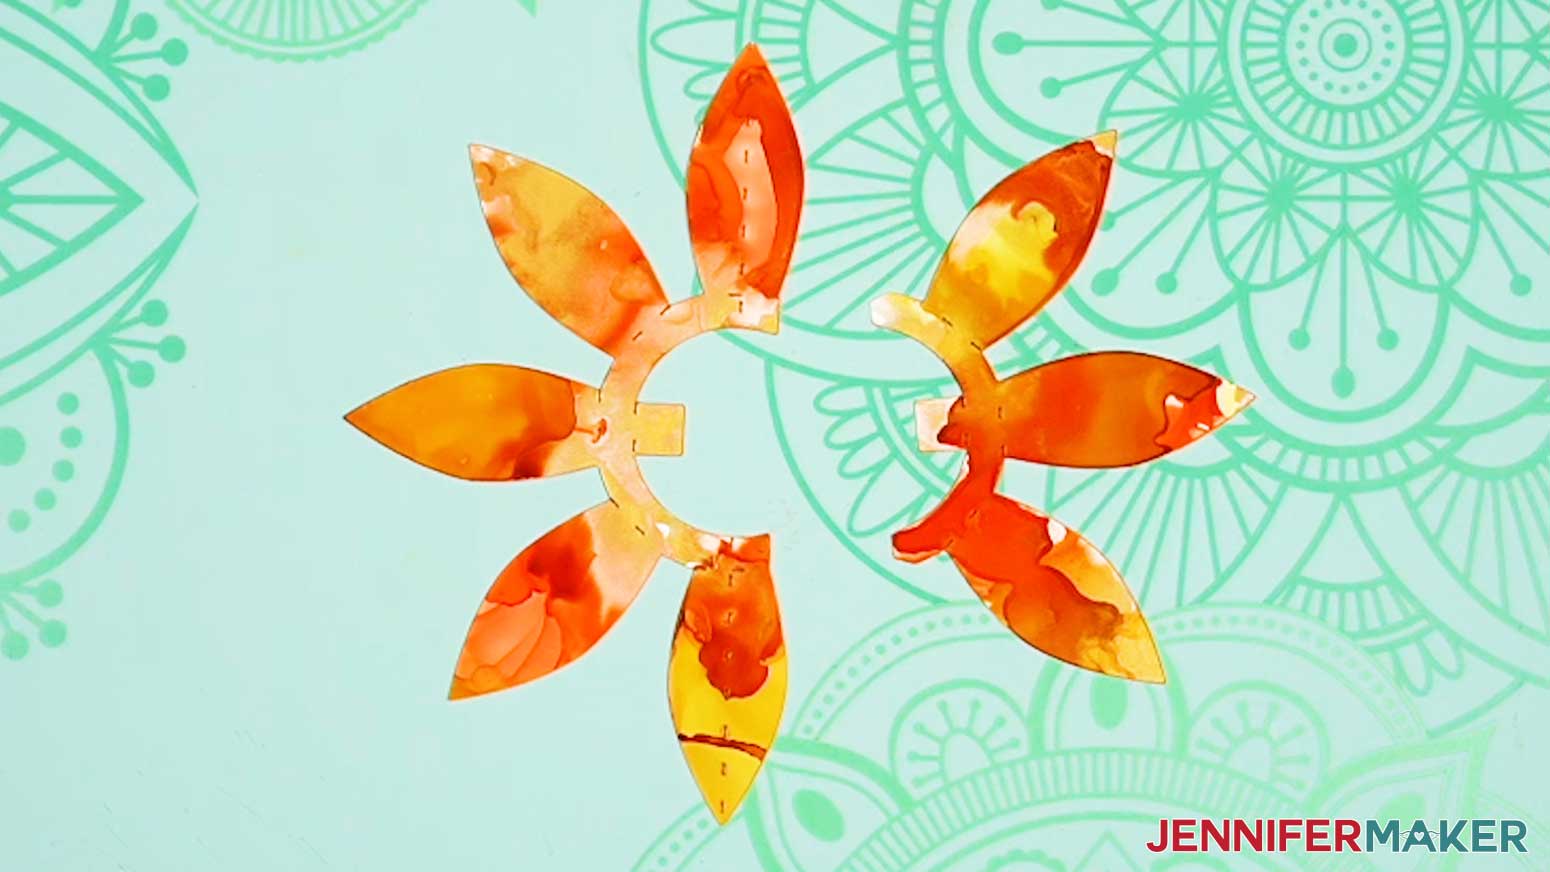
- Take the flower piece with creases through the top and bottom petals and slide both of its tabs into the outermost slots on the foliage piece.
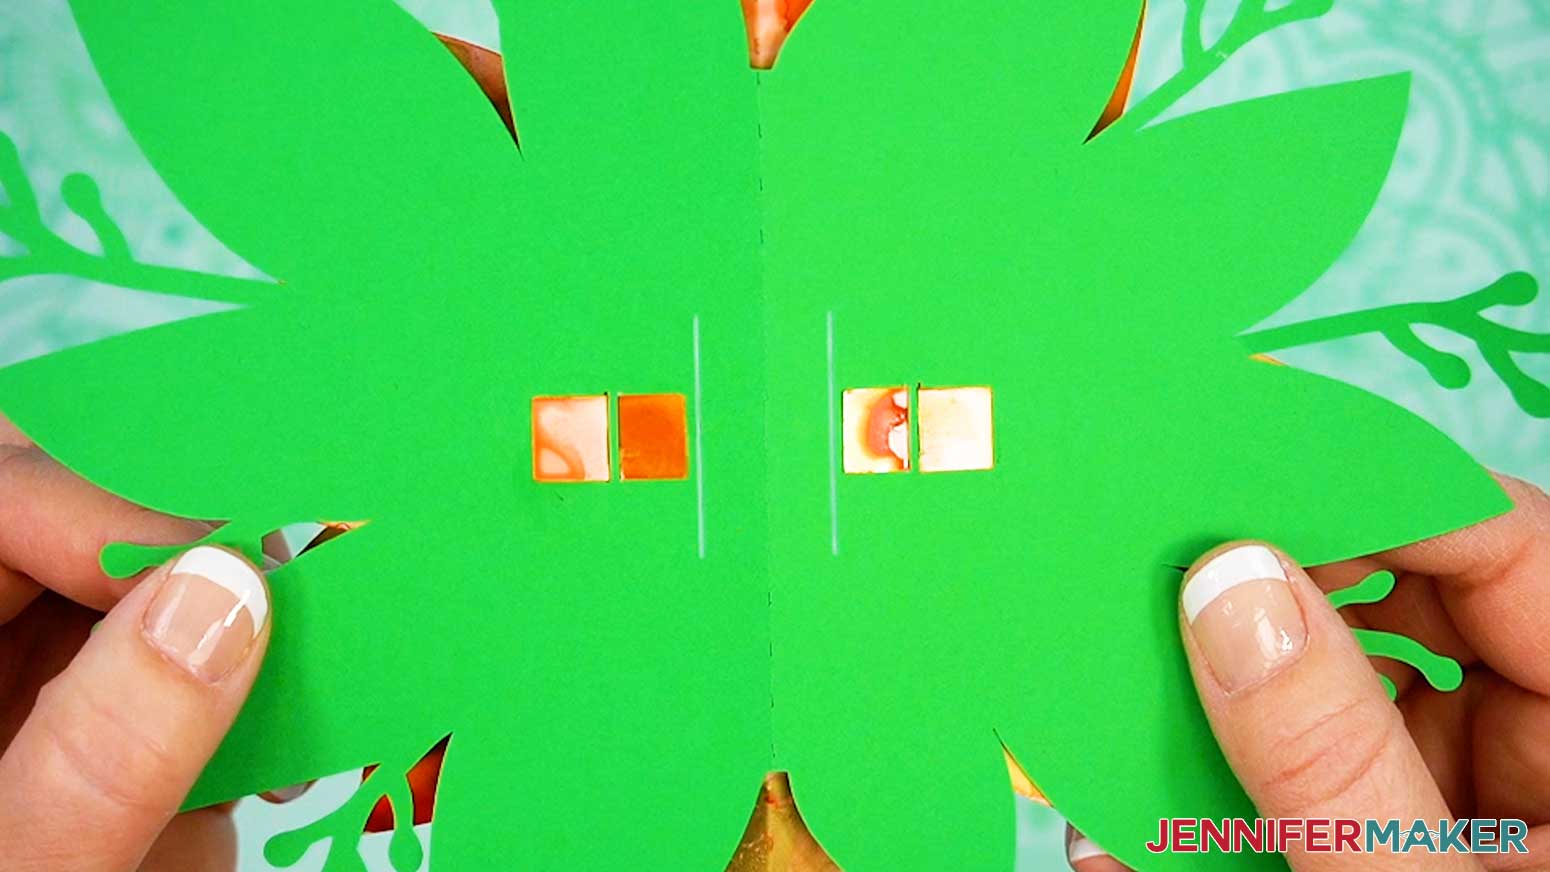
- Once the tabs are through, flip the pieces over and fold the tabs backward (away from the foliage crease line) and glue them in place on the back of the foliage.
- Take the second flower piece and slide both of its tabs into the second set of slots.
- Then glue the tabs on the back of the foliage piece facing the opposite direction of the first tabs.
- Take the assembled butterfly and slide both of its tabs through the last set of slots on the foliage piece closest to the center.
NOTE: You may need to hold one tab in place on the back while sliding the other one through. - Glue the two tabs in place on the back of the foliage piece.
NOTE: Make sure the tabs’ crease lines align with the card slots before adding glue, and hold them in place to set because the alcohol ink paper is slick and the tabs will want to slide through. - Glue the two plain rectangular insert pieces to the inside of the card, centering each one on one half.
- Center the assembled pop up section on the open card with the middle creases aligned. Hold the middle crease in place and lift one half to see the back of the foliage.
- Add glue to the back, then press it in place on the empty side.
- Once that is secure, add glue to the back of the other half of the foliage piece.
- Gently close the card and press down on the glued area for a few seconds before opening the card back up.
- Grab the front rectangular piece and fold the butterfly wing pieces up.
- Glue the front rectangular piece onto the front of the folded card, avoiding the cutouts.
- Open the card and make sure the extra creases in the center fold correctly.


VARIATION: ASSEMBLE THE JOY CARD
- Pair up the tabbed pieces with the pieces they need to be glued to, pretty side up:
Two base card pieces
Two foliage pieces
Two flower pieces with four petals each
One flower piece with five petals, and one flower piece with three petals - For the base card pieces, the foliage pieces, and the flower pieces with four petals, lay out the pairs so the tabbed pieces are on the left side.
- Fold each piece’s tabs along the crease line, then relax it back in its starting position.
NOTE: For the card base, you only need to fold along the rightmost crease line (the one closest to the tab).
TIP: Use a Scraper tool to sharpen the folds’ edges. - Add craft glue to the top of the card base’s tab.
- Align the right piece’s left edge with the glued tab’s top and bottom, then place it on top of the glued tab, keeping its edge flush against the crease line, but not overlapping it.
- Smooth down along the tab and hold to adhere.
- Fold the attached pieces in half along the crease to make sure they’re even.
NOTE: You should still be able to see the left card base’s dashed cut lines. - Repeat Steps 4-7 for the foliage pieces and flower pieces with four petals each.
- For the other flower, arrange the pieces so the one with five petals is on the left, and the one with three petals is on the right.
- Add craft glue to the two tabs at the left edge of the piece with three petals.
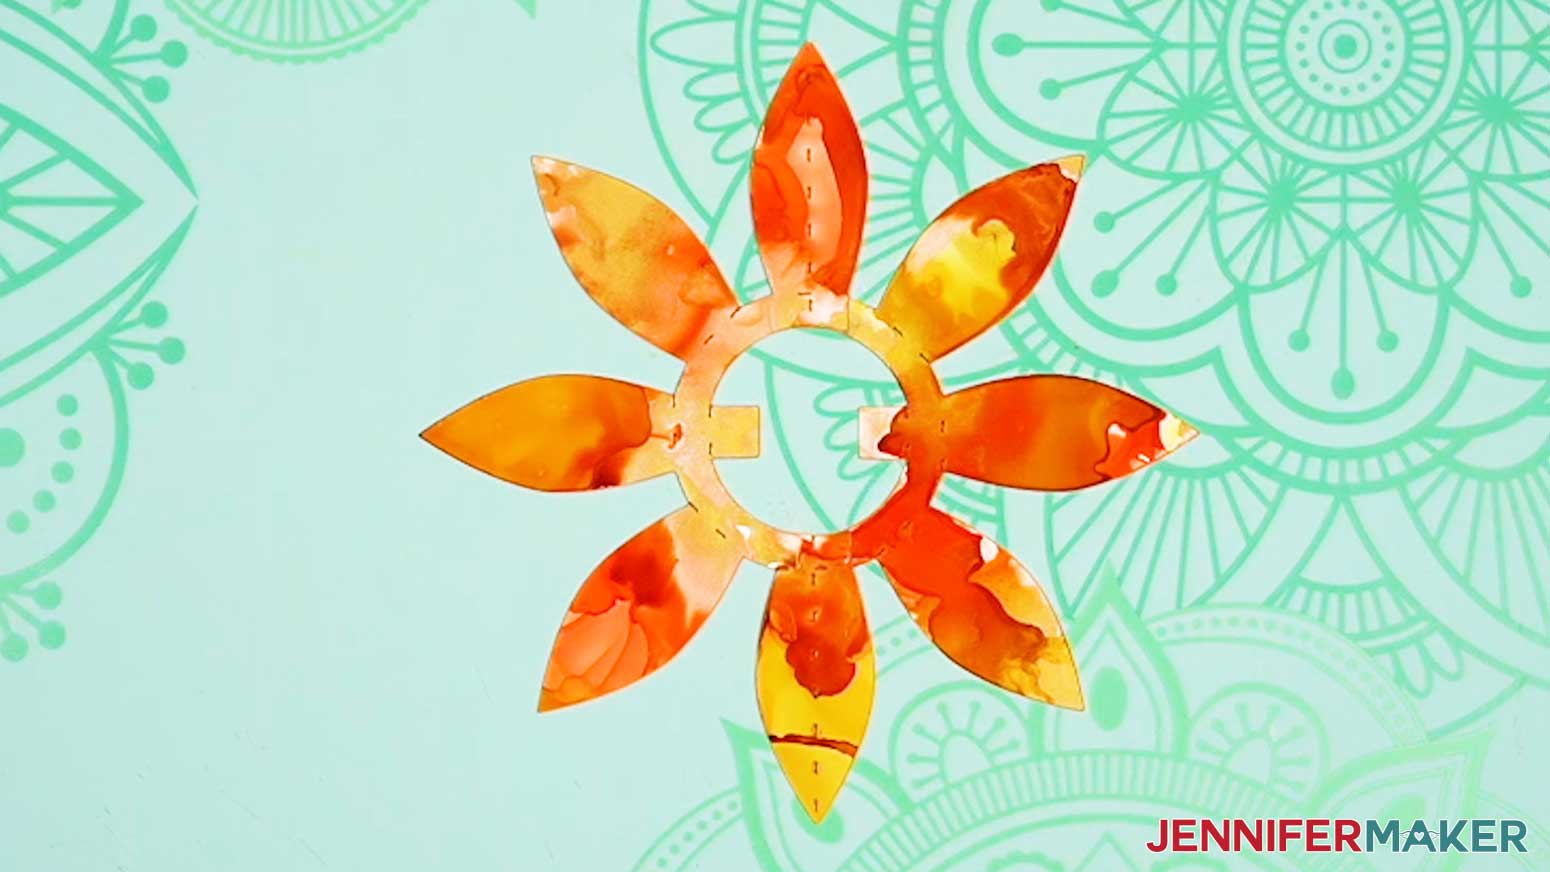
NOTE: There are no crease lines on these tabs because we won’t be folding the flower in this area. - Line up the left flower piece on top of the glued ends so it completes the circle connecting the petals.
- Press down on the tabs and hold to adhere.
- Follow Steps 1-23 of the “STEP 5: ASSEMBLE YOUR CARD” section to complete your card assembly.
NOTE: When your card is complete, it will automatically want to fold against the extra dashed cut line down the center when it’s open. This extra crease will allow your card to sit flat when open.


STEP 6: ASSEMBLE THE ENVELOPE
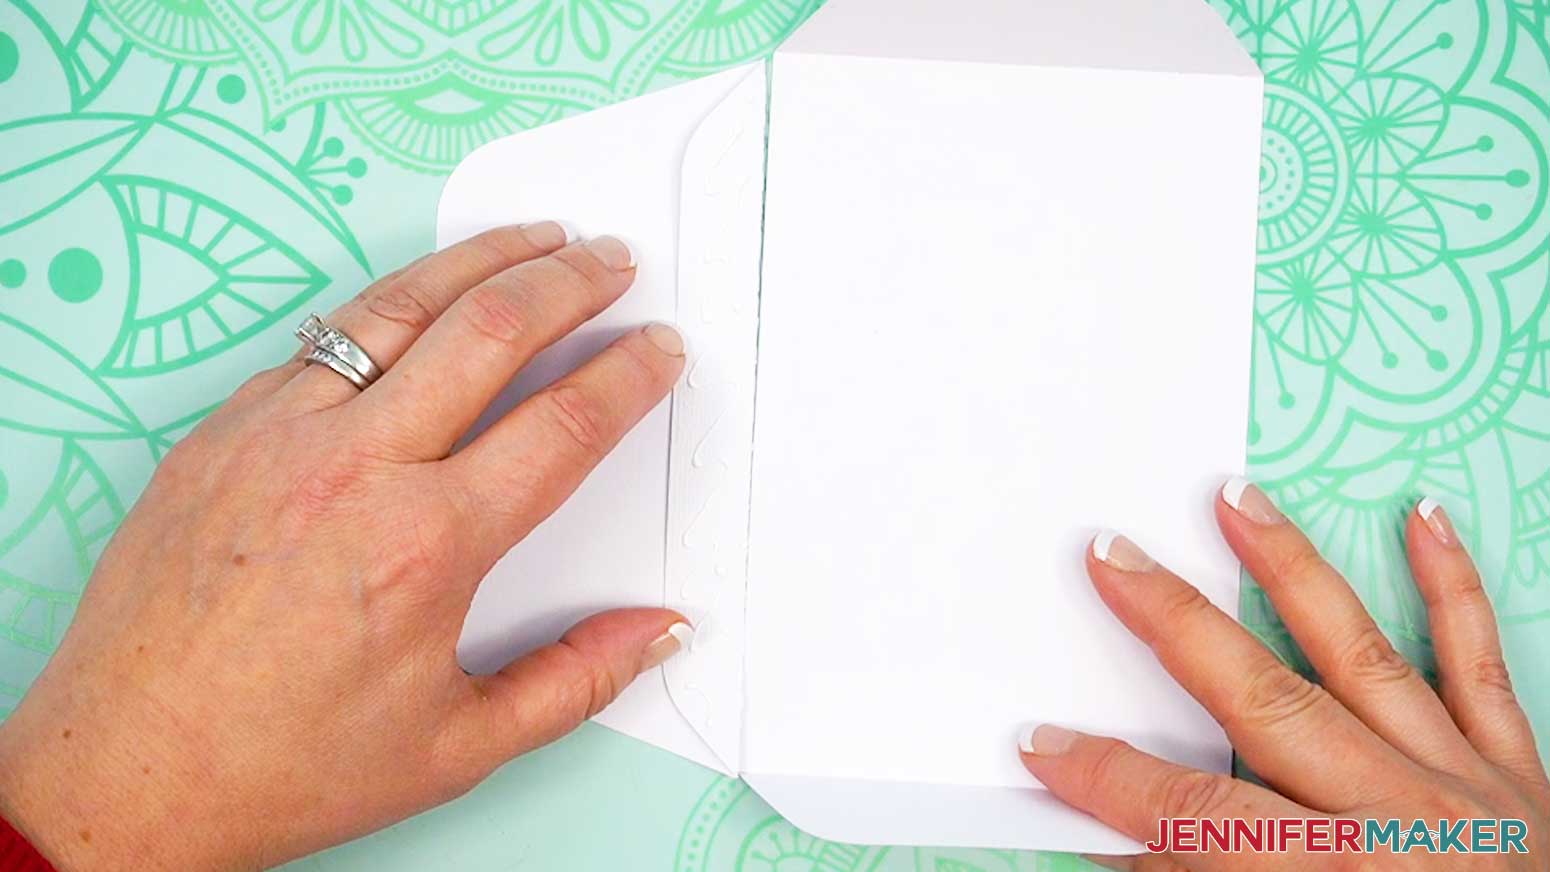
- Lay your main envelope piece with the crease lines face-down.
TIP: If you’re not sure on the orientation, refer to your Cricut Design Space Canvas. - Fold upwards along the crease lines on all three sides.
- Place the flap front side up and fold up along the crease.
- Place the liner on the top panel to make sure its shaped edge matches the envelope’s.
- Set the liner aside, keeping it facing the right way.
- Apply thin lines of craft glue to the envelope’s shaped flap along the outside edge of the cut pattern, and place small dots of glue on all the inner areas, avoiding the cutouts.
TIP: Work quickly to keep the glue from drying. - Hold the liner over the glued section to recheck the orientation and align the straight edge just above the crease on the envelope, then lower it in place.
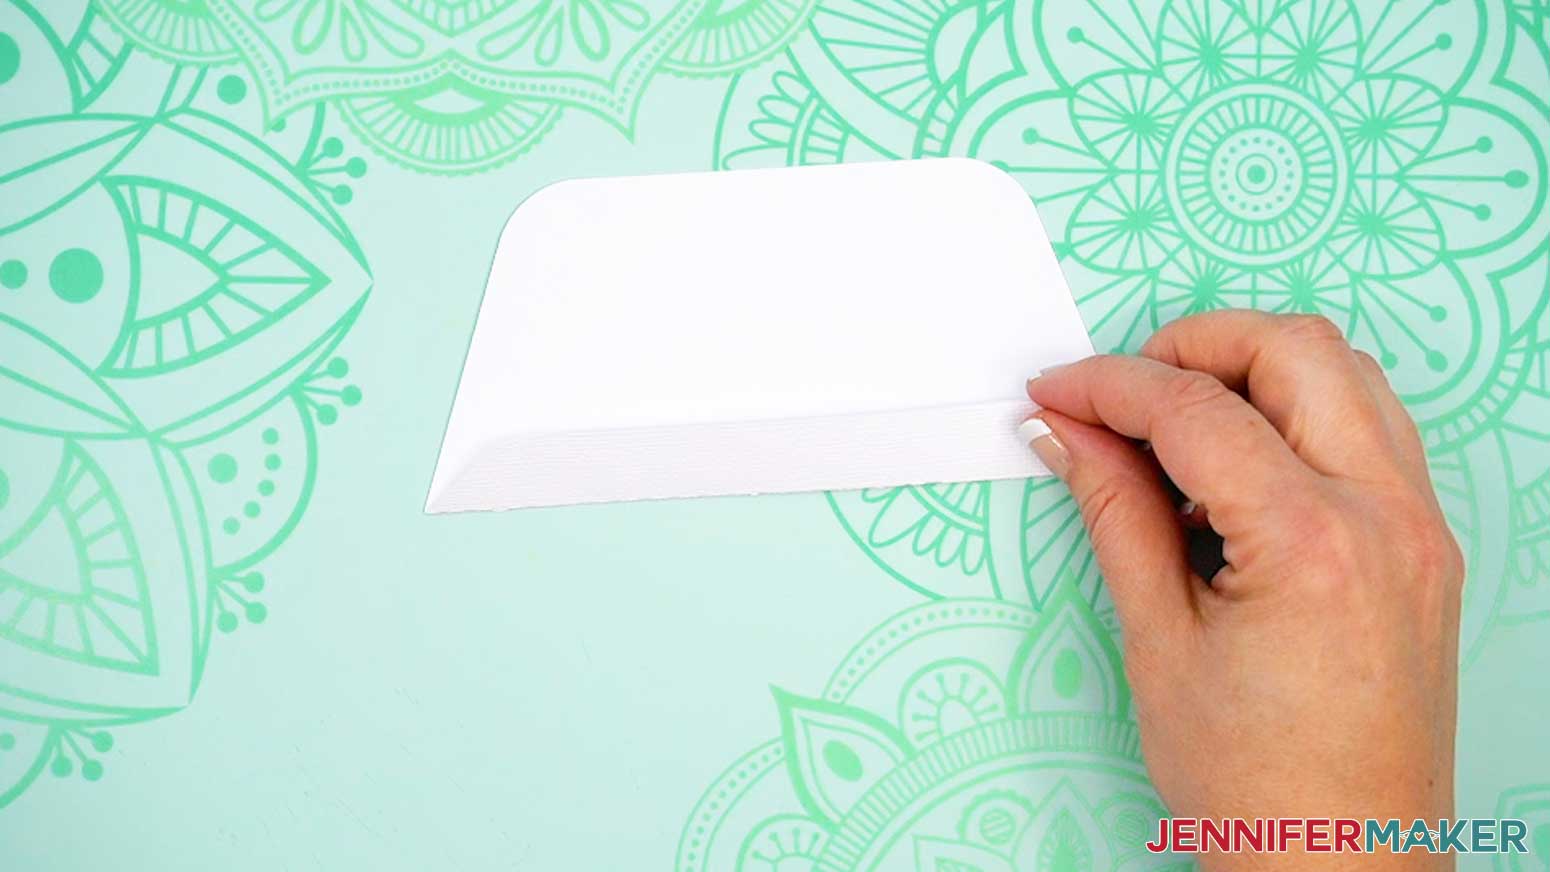
NOTE: A thin border of the envelope’s color will show around the liner. - Once the flap is dry, place it liner-side down and add a thin line of glue to the tab.
- Flip the main envelope piece over and align its straight plain edge over the flap’s tab, just below the crease so it can fold easily. Press it in place to set.
- With the envelope liner-side-up and the shaped edge side in the top position, fold the two side tabs in.
TIP: Run a Scraper tool along the folds to help sharpen the edges. - Fold the bottom panel up to see how much it covers the side tabs, so you know where the glue needs to go.
- Unfold the bottom panel, and apply thin lines of craft glue to the side tabs where the bottom will overlap them.
NOTE: Avoid getting glue too close to the edges of the tabs and wipe away any excess so the envelope doesn’t get sealed shut. - Fold the bottom panel up and press the sides down onto the tabs to adhere the panel in place.
- Gently run a finger or your weeding tool inside the envelope to unstick the insides in case any glue escapes.
- Wipe away any excess glue with a paper towel, then let the envelope dry completely.
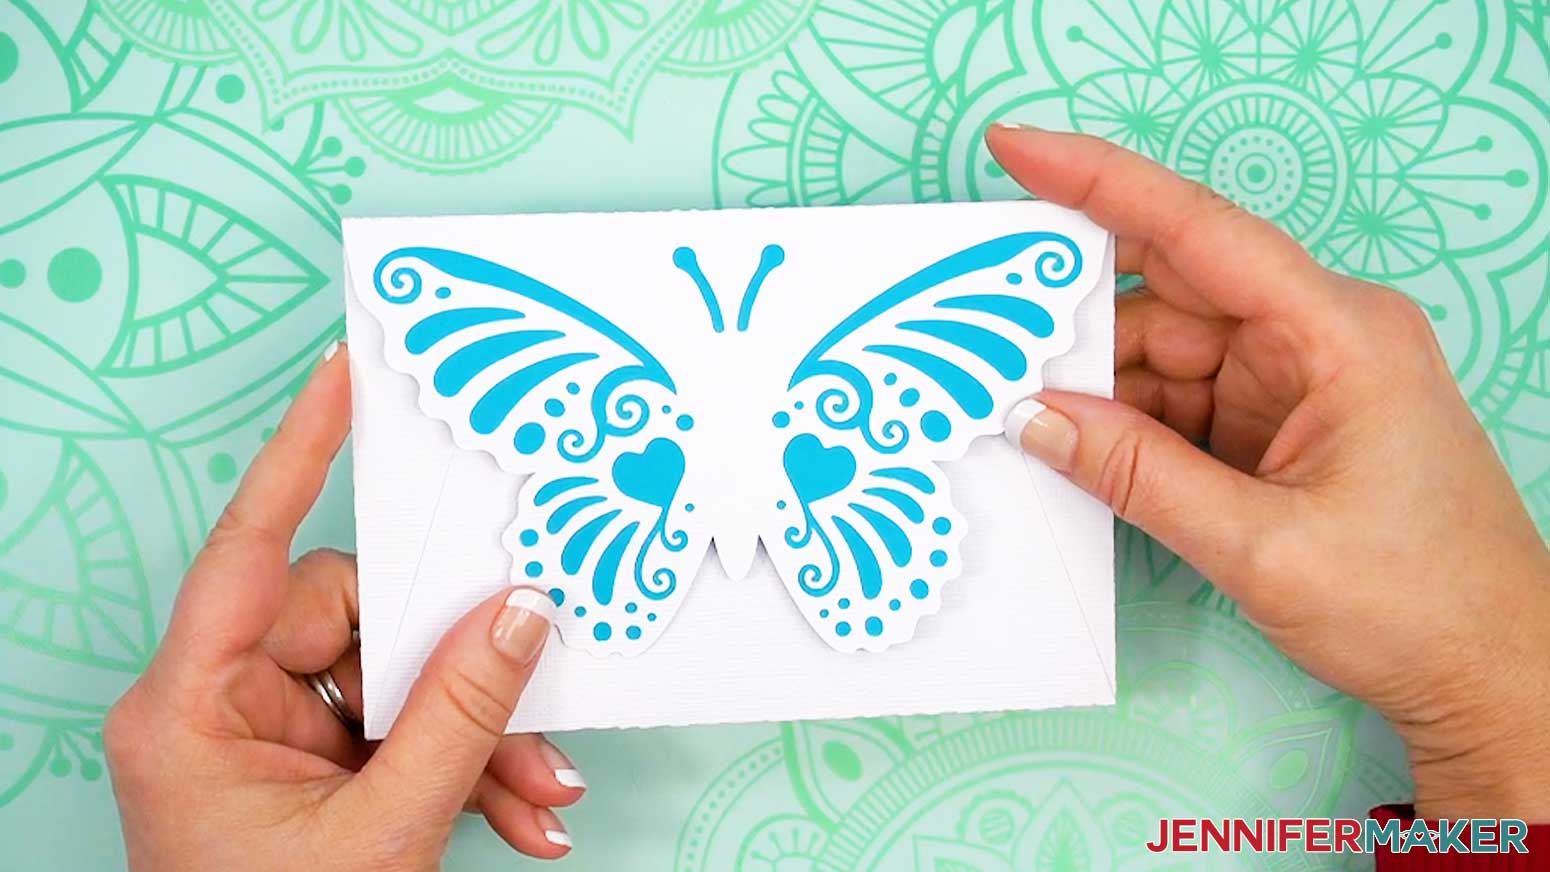
- Your shaped butterfly envelope is ready!


VARIATION: ASSEMBLE THE JOY ENVELOPE
- Take your main envelope piece (the largest one) and fold in the two side tabs (away from the pretty side if using paper colored on one side).
TIP: Run a Scraper tool along the folds to help sharpen the edges. - Then take the bottom flap and fold the tab upward (away from the pretty side).
- Keep the bottom flap’s tab folded, and add glue to the top (pretty side) of the tab.
- With both pieces pretty-side down on your work surface, line up the flap with the main envelope’s bottom edge.
- Hold both pieces down, and press the bottom flap’s glued tab onto the main envelope.
- Press and hold to adhere.
- Fold the butterfly-shaped top flap along the crease line, away from the pretty side.
TIP: Run a Scraper tool along the fold to help sharpen the edge. - Place the liner on the top flap to make sure its shaped edge matches the envelope’s.
TIP: If the edges don’t match, try flipping the liner over. - Set the liner aside, keeping it facing the right way.
- Apply thin lines of craft glue to the envelope’s shaped flap along the outside edge of the cut pattern, and place small dots of glue on all the inner areas, avoiding the cutouts.
TIP: Work quickly to keep the glue from drying. - Hold the liner over the glued section to recheck the orientation and align the straight edge just above the crease on the envelope flap, then lower it in place.
NOTE: A thin border of the envelope flap’s color will show around the liner. - Keeping the top (shaped edge) flap’s tab folded, add glue to the top of the tab, line up the flap with the main envelope’s top edge, then press the glued flap onto the main envelope. Press and hold to adhere.
- Then follow Steps 10-16 from the “STEP 6: ASSEMBLE THE ENVELOPE” section to finish assembling your Joy-sized envelope.


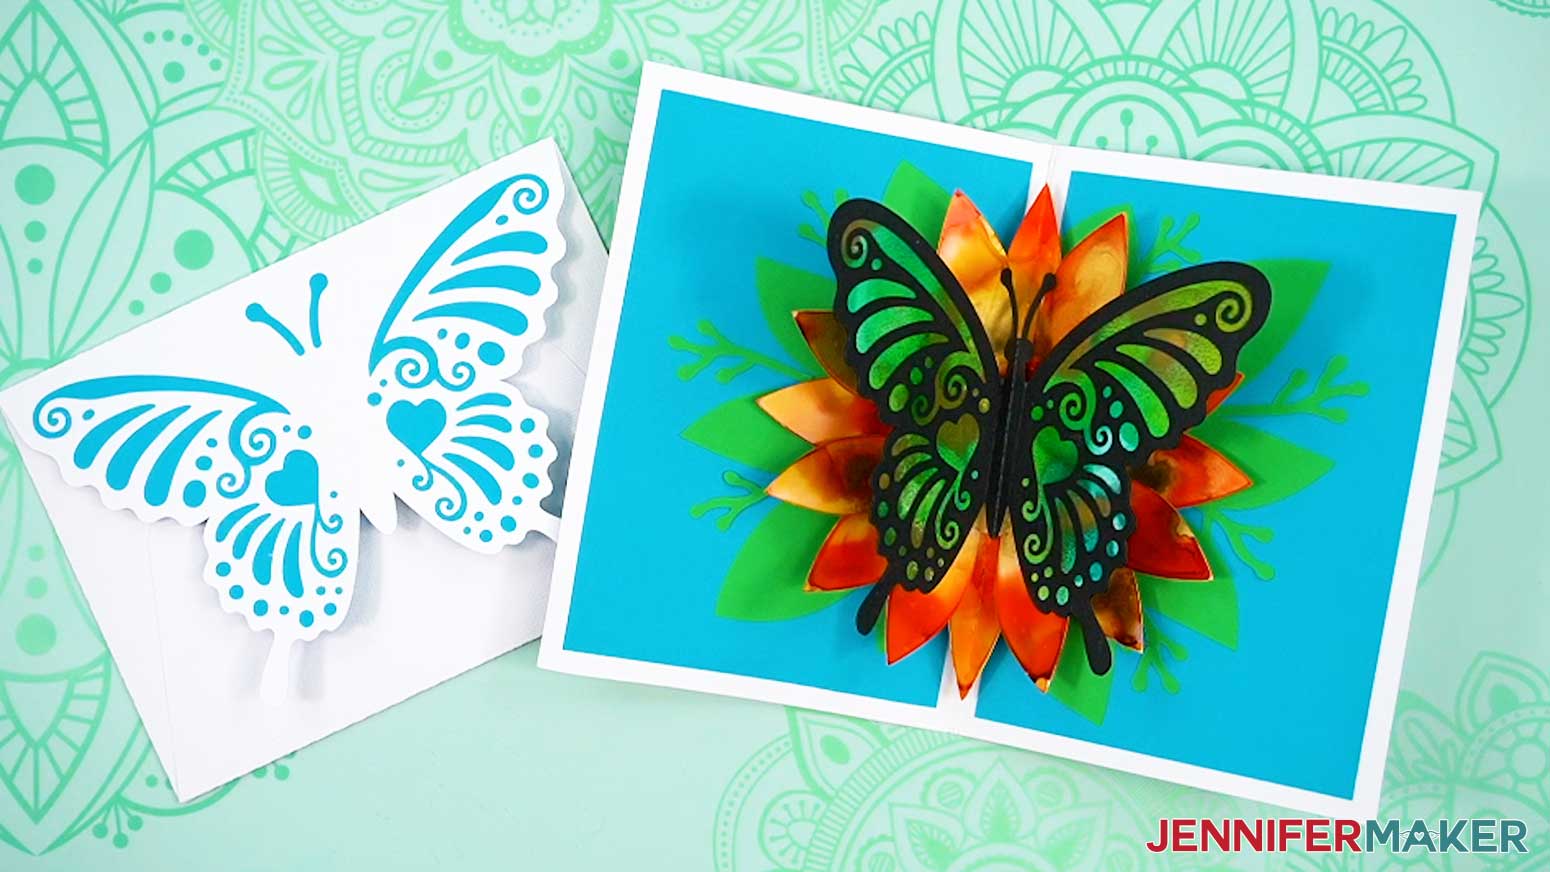
STEP 7: SHOW IT OFF
Your inked pop up card and envelope are ready!
Notes
Finished Sizes:
Large Card: 5"W x 7"H when closed, 10"W x 7"H x 3.5"D when open
Large Envelope: 5.25" x 7.25" (A7)
Joy-Size Card: 4”W x 6”H when closed, 8”W x 6”H x 3”D when open
Joy-Size Envelope: 4.25” x 6.25” (A4)
Answers to Your Questions About Crafting with Alcohol Ink on Paper
Q: Is there a way to create a custom butterfly design for my alcohol ink card?
A: You can learn how to design your own custom butterfly card in my ADVANCE program. Learn more about ADVANCE here!
Q: Do alcohol inks work on paper?
A: Yes, alcohol inks can work on paper, but the best way to use them is on non-porous surfaces. If you’re using regular paper, the ink might soak in too fast and look dull or messy.
Q: Can you explain how to use alcohol ink on paper for beginners?
A: Watch the tutorial video to learn my favorite techniques for using alcohol ink on paper for a beginner! Start with a special polypropylene paper like the kind in my materials list—it helps the ink flow and blend nicely. Just drop on a few colors, tilt the paper, or blow the ink around with a straw to create unique effects!
Q: What surfaces can you do alcohol ink on?
A: Alcohol ink works best on a variety of surfaces, but smooth, non-porous surfaces like polypropylene paper, Yupo paper, glossy photo paper, ceramic tiles, glass, metal, and plastic will give the best results. Surfaces like these that won’t absorb the ink will help the colors stay bright and move around more easily.
Q: Does alcohol ink bleed through paper?
A: Yes, on regular paper or cardstock, alcohol ink can bleed right through. That’s why it’s better to use thicker, coated, or non-porous paper to keep your designs looking sharp.
Q: Can you use cardstock for alcohol ink?
A: You can, but the results might not be as bold since cardstock absorbs the ink. It works better for simple designs or testing out colors—just don’t expect super bright blends.
Q: Do you have any other pop-up cards I can make?
A: I sure do! Here are some of my favorites:
- Butterfly Pop-Up Card (the inspiration for this design!)
- Birthday Pop-Up Cards
- Hot Air Balloon Pop-Up Birthday Card
- Pop-Up Grill Gift Card Holder
- Pop-Up Apple Tree Card
- 3D Pop-Up Flower Bouquet
Q: Can I make and sell butterfly cards with alcohol ink?
A: If you want to use my butterfly designs and projects for commercial use, please familiarize yourself with my important licensing information before selling your crafts.
Get my free SVG/DXF/PDF files to make your own butterfly cards with alcohol ink!
(If you do not see the signup form above, click here.)
I absolutely love seeing your homemade card projects! Once you’ve learned how to use alcohol ink on paper, inspire others and share a photo of your cards in our Facebook group or tag me on social media with #jennifermaker.
Love,

Want to remember this? Save this Butterfly Cards with Alcohol Ink on Paper Tutorial to your favorite Pinterest Board!