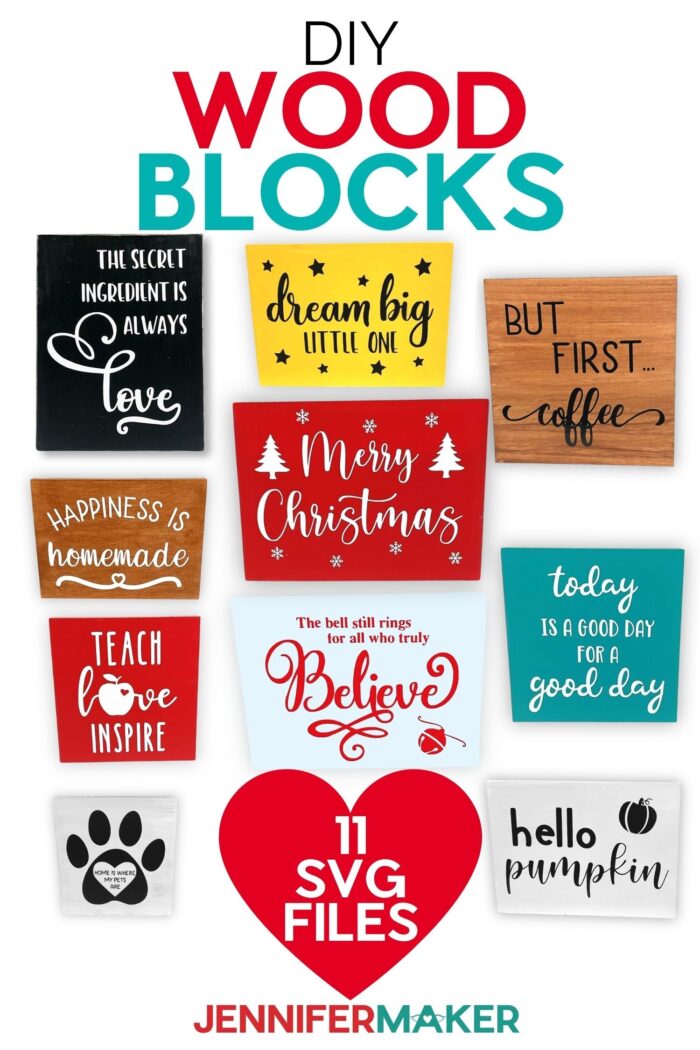
Learn how to make easy wooden block signs to decorate your home or give as gifts!
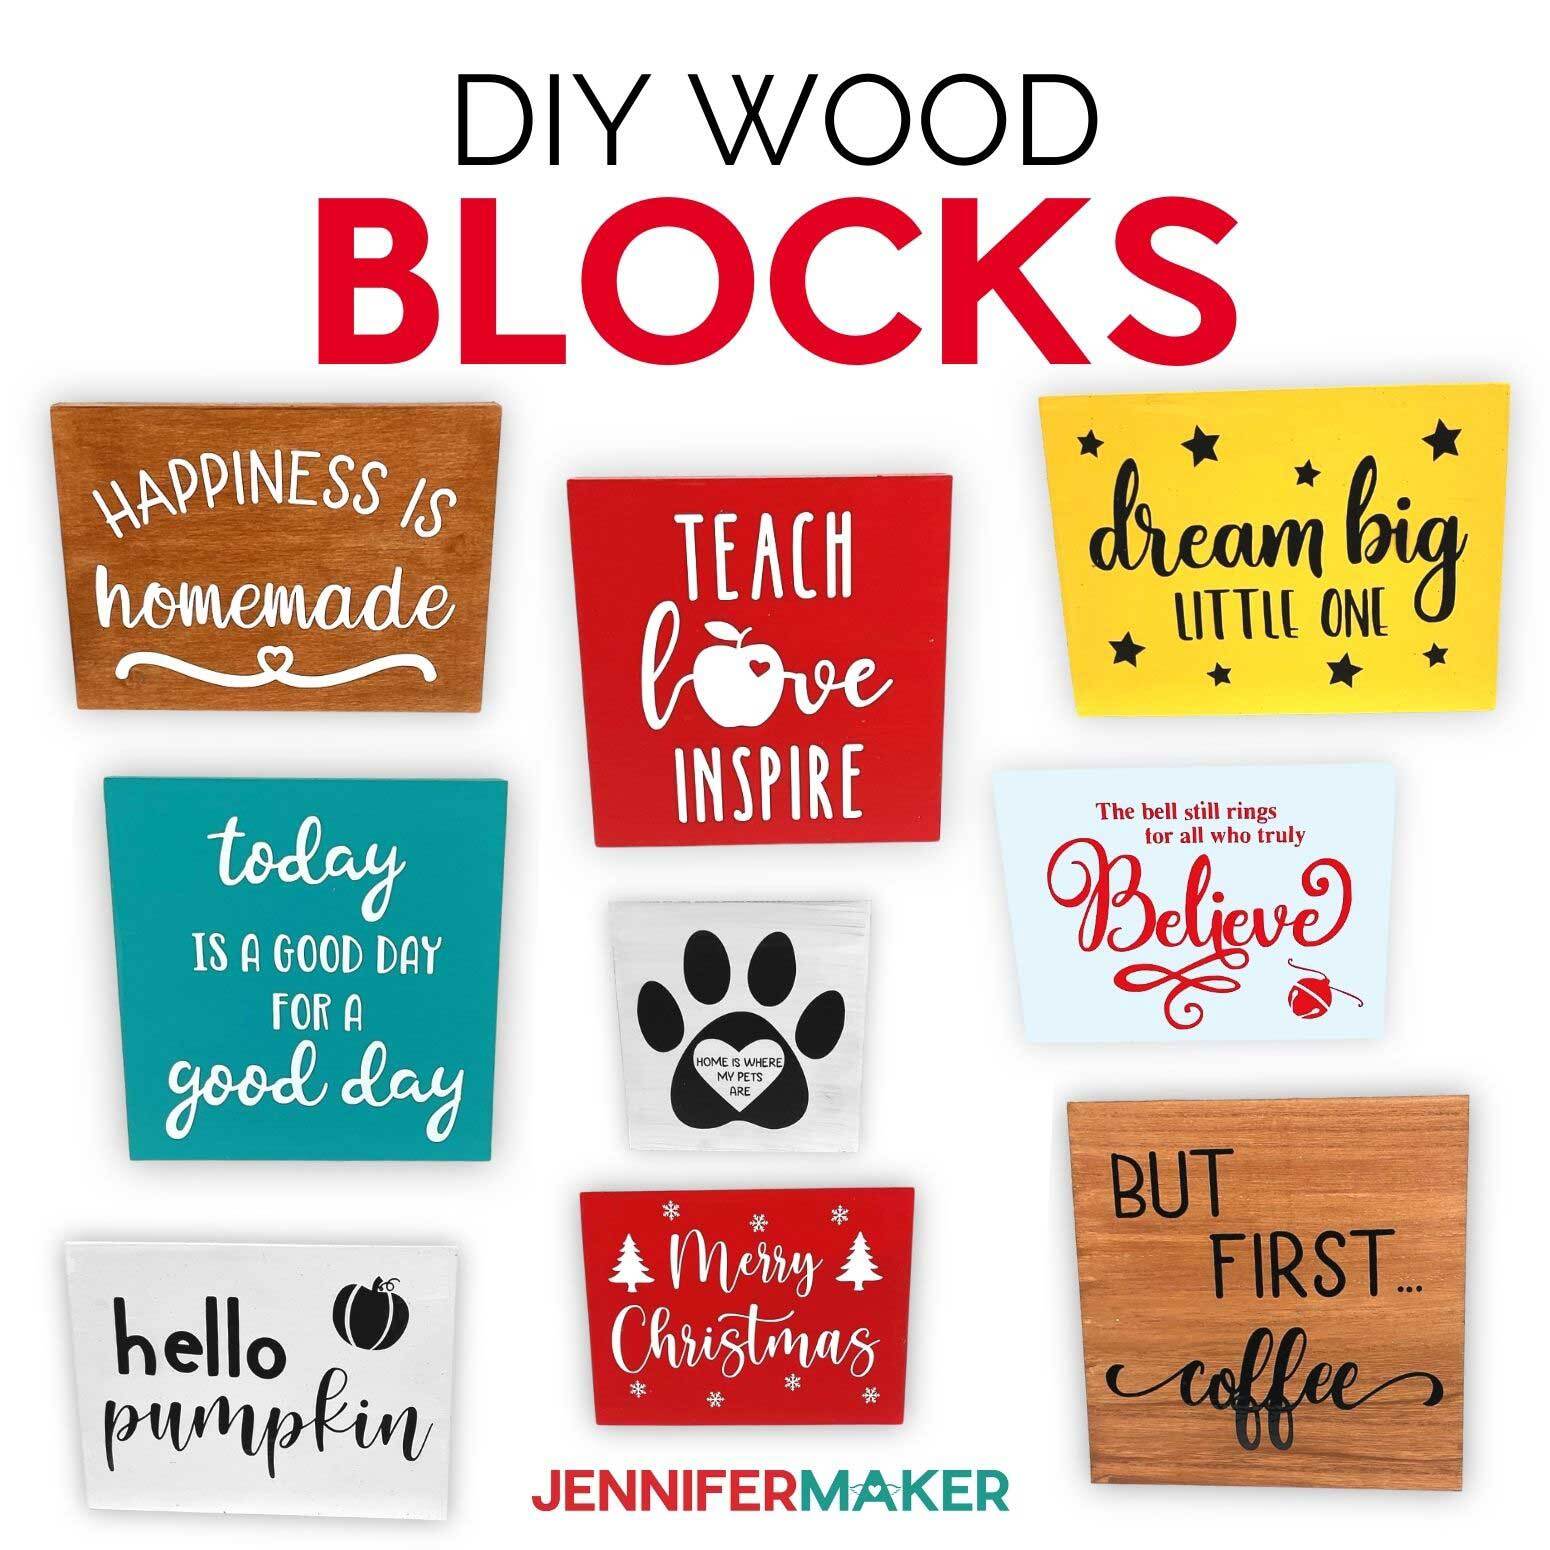
I just love these super cute wooden block signs. They come in all shapes and sizes and can be customized with fun sayings and designs and they make great holiday decorations! Signs like this usually sell for ten to fifteen dollars in stores. But, if you make your own wood block signs you can save a bundle!

These wood block signs add the perfect touch to any home. Also, they make great gifts during the holidays or birthdays. I’m a big fan of versatile projects and this is one that can be used in so many different ways!
Let’s face it, wood block signs are something that we see everywhere! I see them in almost every single store I go to. Depending on where you go, sometimes the prices are completely insane! So I thought, why not make my own?
Sometimes when you make your own designs you not only have fun creating them, but you cherish them more. It becomes something that is more sentimental to you and you can even personalize them to match your home.

Of course, we will need wood blocks for this project. I’m going to make two sizes: 5 by 7 inches and 6 inch squares. I want to show you a few different ways to make these so we’ll use paint, mod podge and permanent vinyl.
We’re also going to “stain” one of the blocks, but we’re not using “stain.” Wait til you see how we do it. It’s pretty cool! Other things we’ll need include: a weeding tool, scissors, scraper tool, foam paint brush and of course our Cricut Cutting Machine and a mat.
Here’s a supply list of what you need to make wood block signs! This post contains some affiliate links for your convenience (which means if you make a purchase after clicking a link I will earn a small commission but it won’t cost you a penny more)! Read my full disclosure policy.
Materials to Make Wood Block Signs
View my Amazon shopping list with the exact items we used to make this project
- Unfinished Wood Block Sign -OR-
- Square Unfinished Wood Block Sign
- Chalk Paint – ( I used Imperial Red, Rich Black, Aqua, White, Nutmeg Brown)
- Mod Podge Matte
- Permanent Vinyl ( I used Black, White, and Red)
- StandardGrip Transfer Tape
- (Optional) Fonts (I used Beachwood, Amastery, Berson Dream, Breethy, Homework, Flamingalingo, Black Mint, Cream Candy, Home, Be Honest, and Gloria Ramsey Two Faced Serif)
- A method to cut your vinyl designs, I used the amazing Cricut Maker 3 but you can also use a Cricut Maker series, Cricut Explore series, Cricut Joy series, or Cricut Venture
- Cricut Green StandardGrip Machine Mat
- Weeding Tool
- Scraper Tool
- Foam Paint Brush
- Scissors
- Butcher Paper
- Baby Wipe or Damp Paper Towel (for Faux Stain Method)
- Ruler
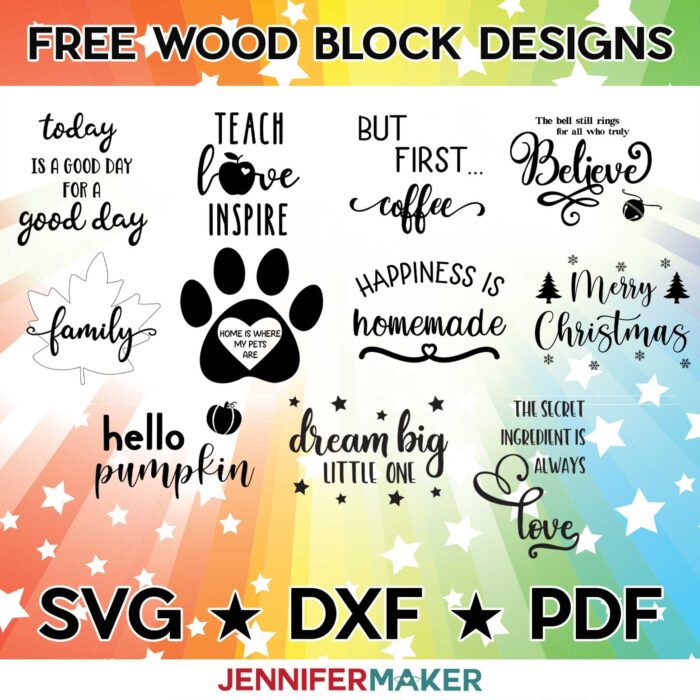
- Design #333 – My free SVG/PDF/DXF design files are available in my free resource library (get the password by filling out the form at the bottom of this page)
How to Make Your Own DIY Wood Block Signs
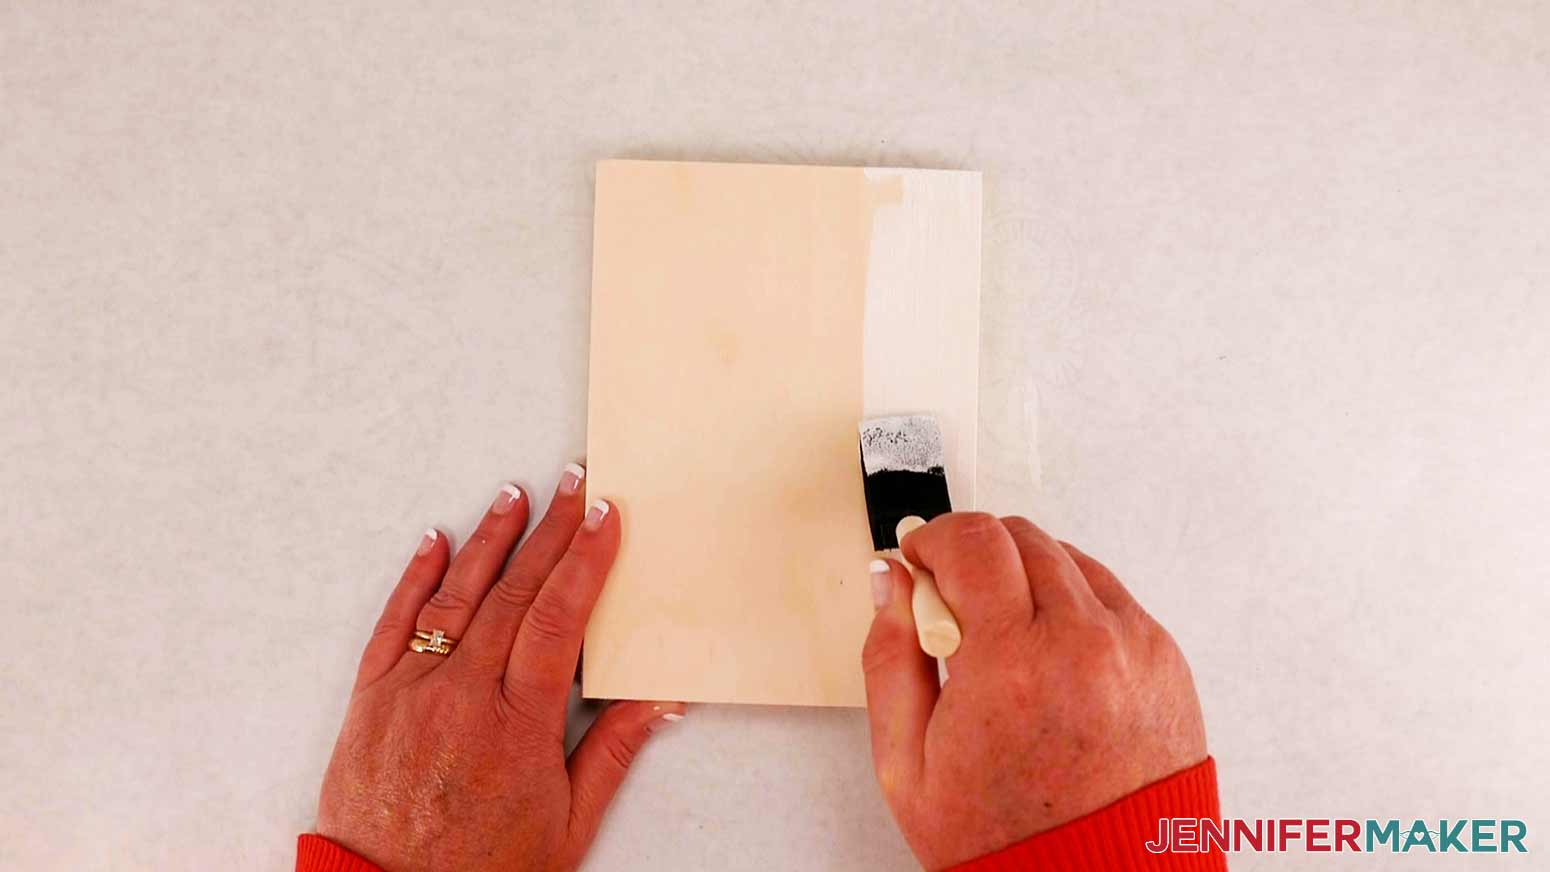
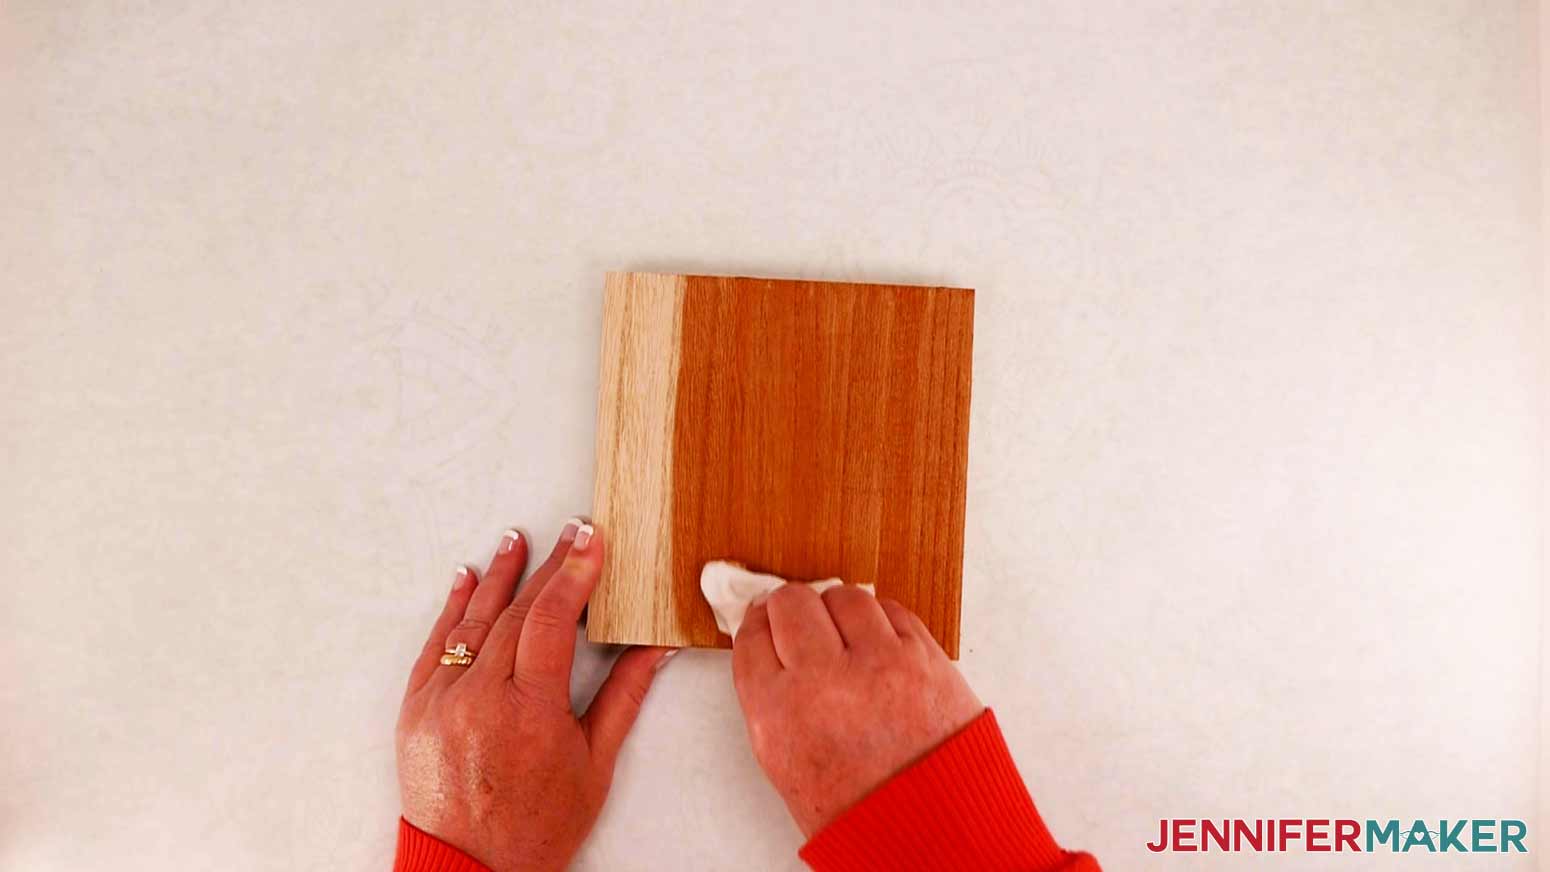
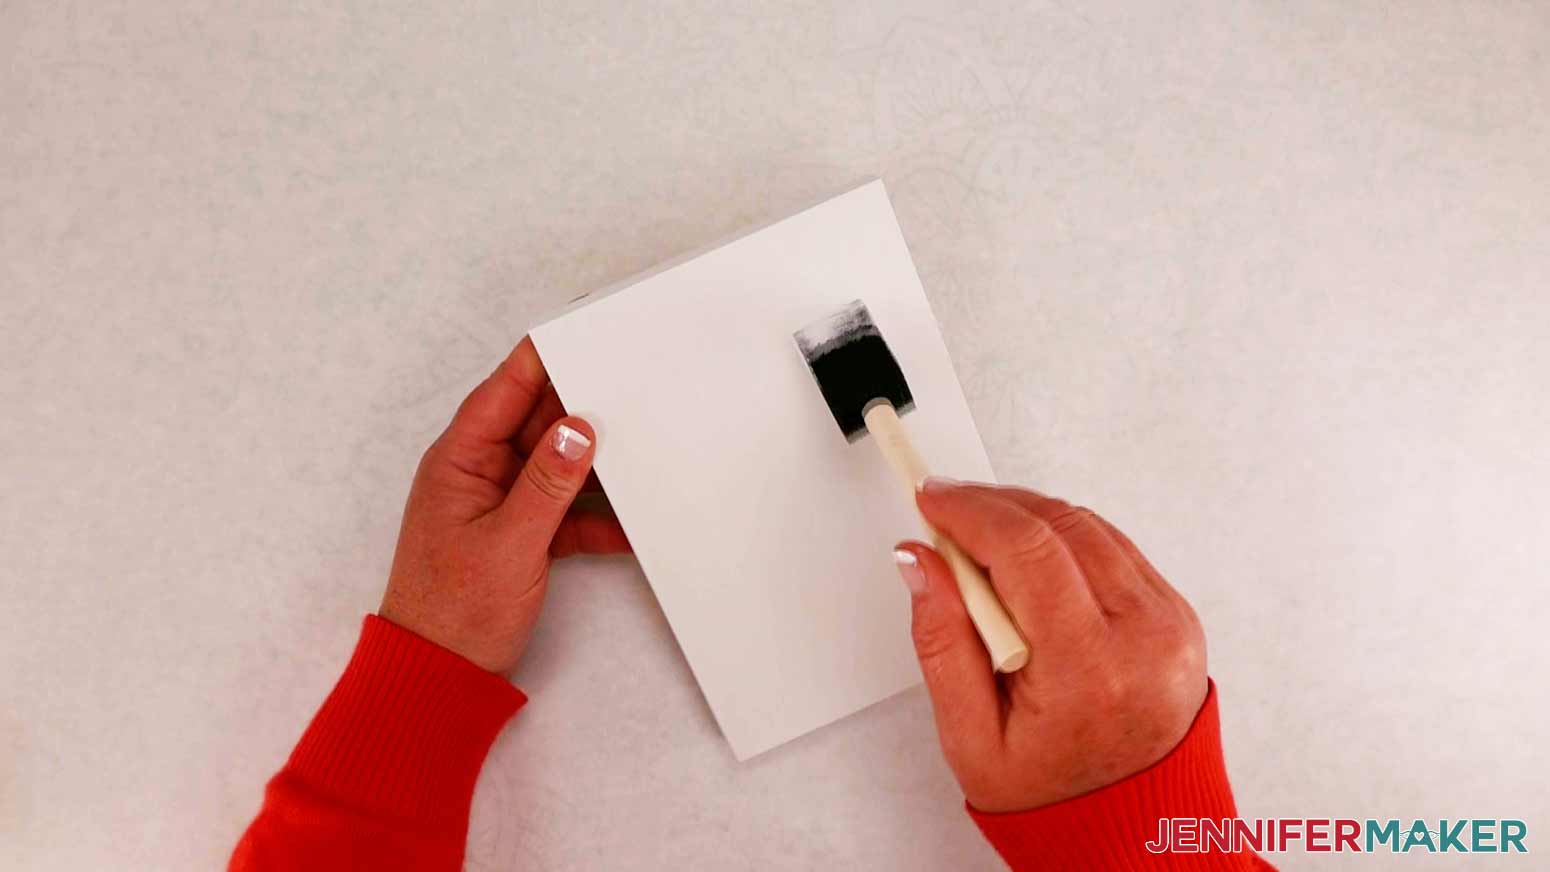
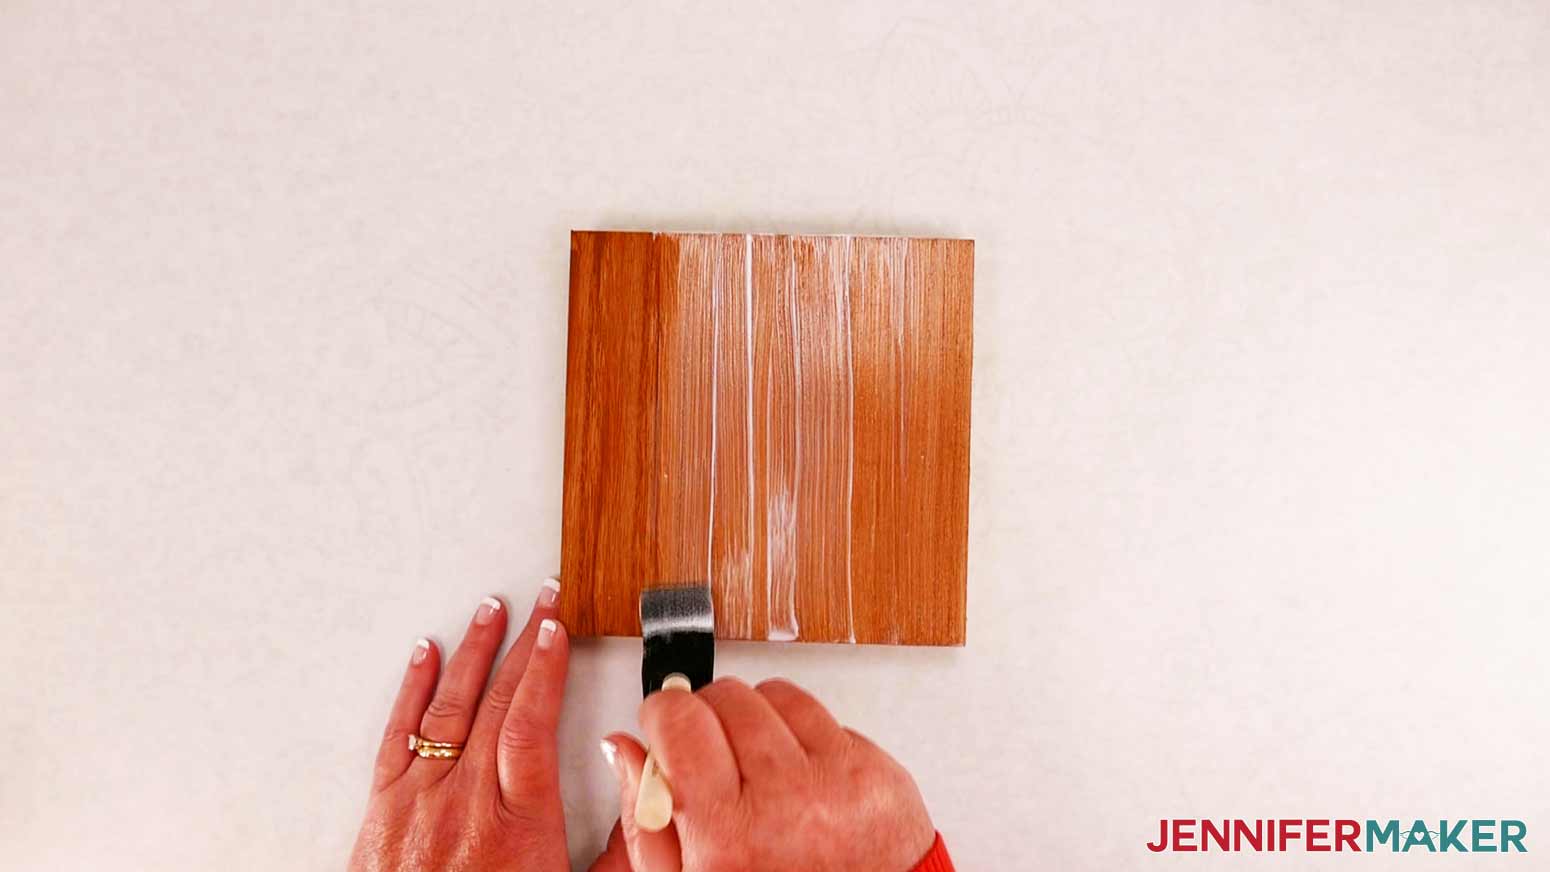
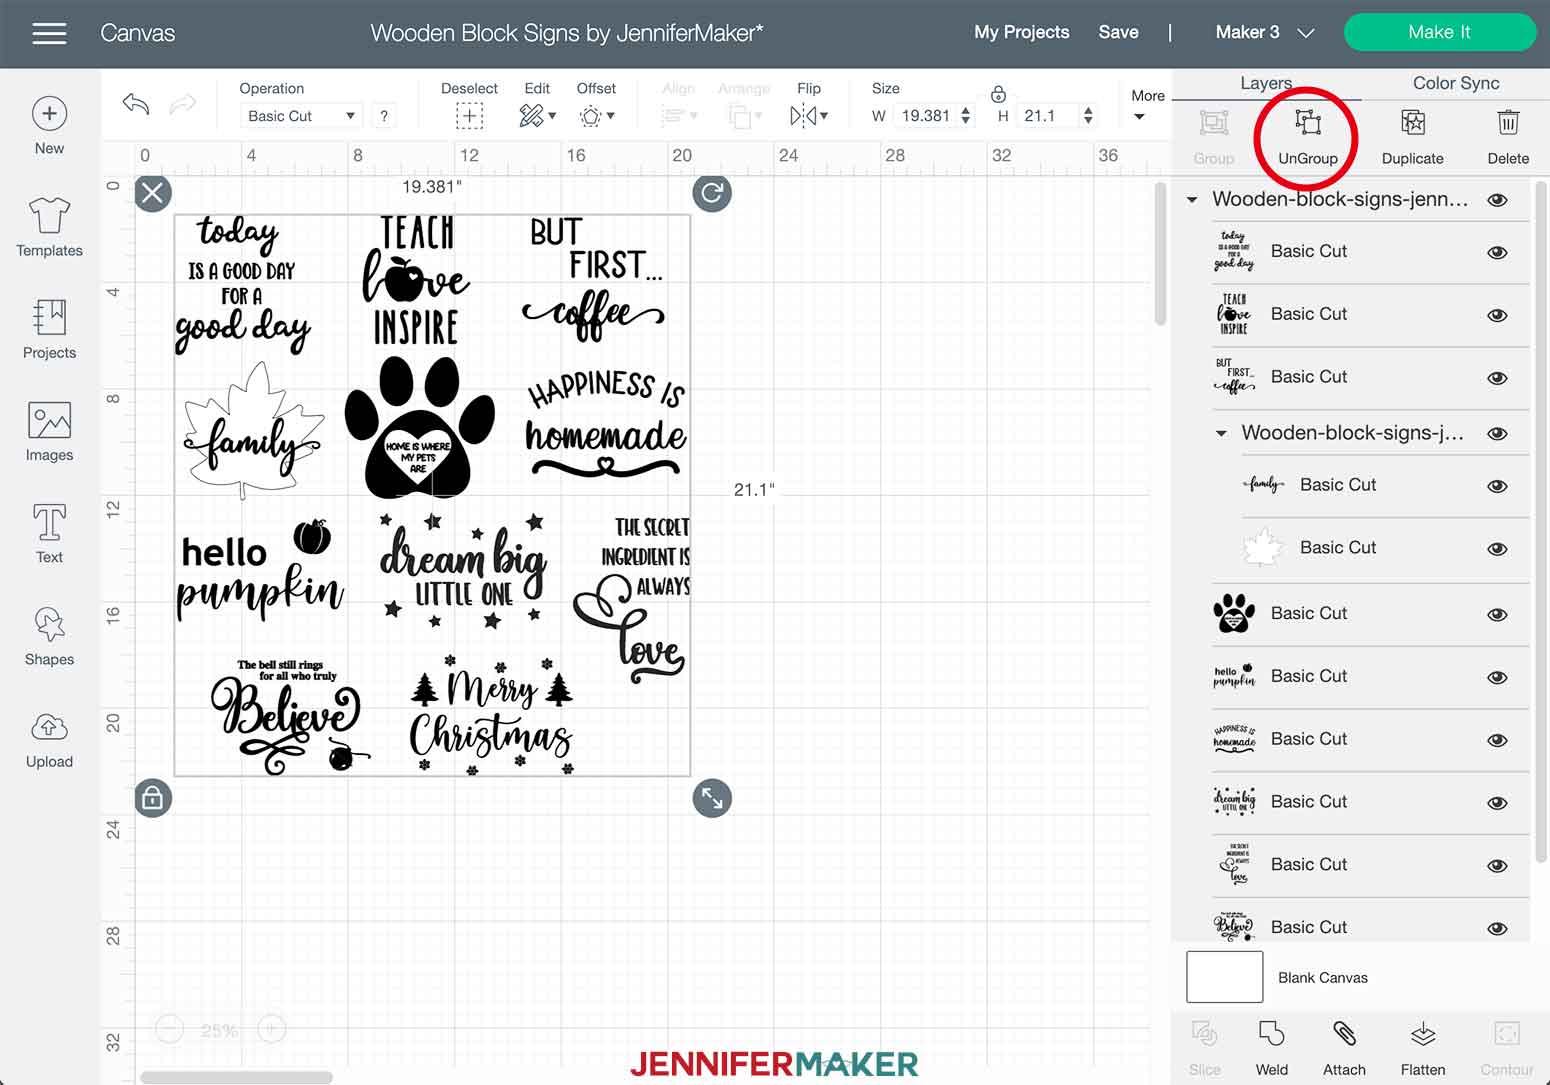
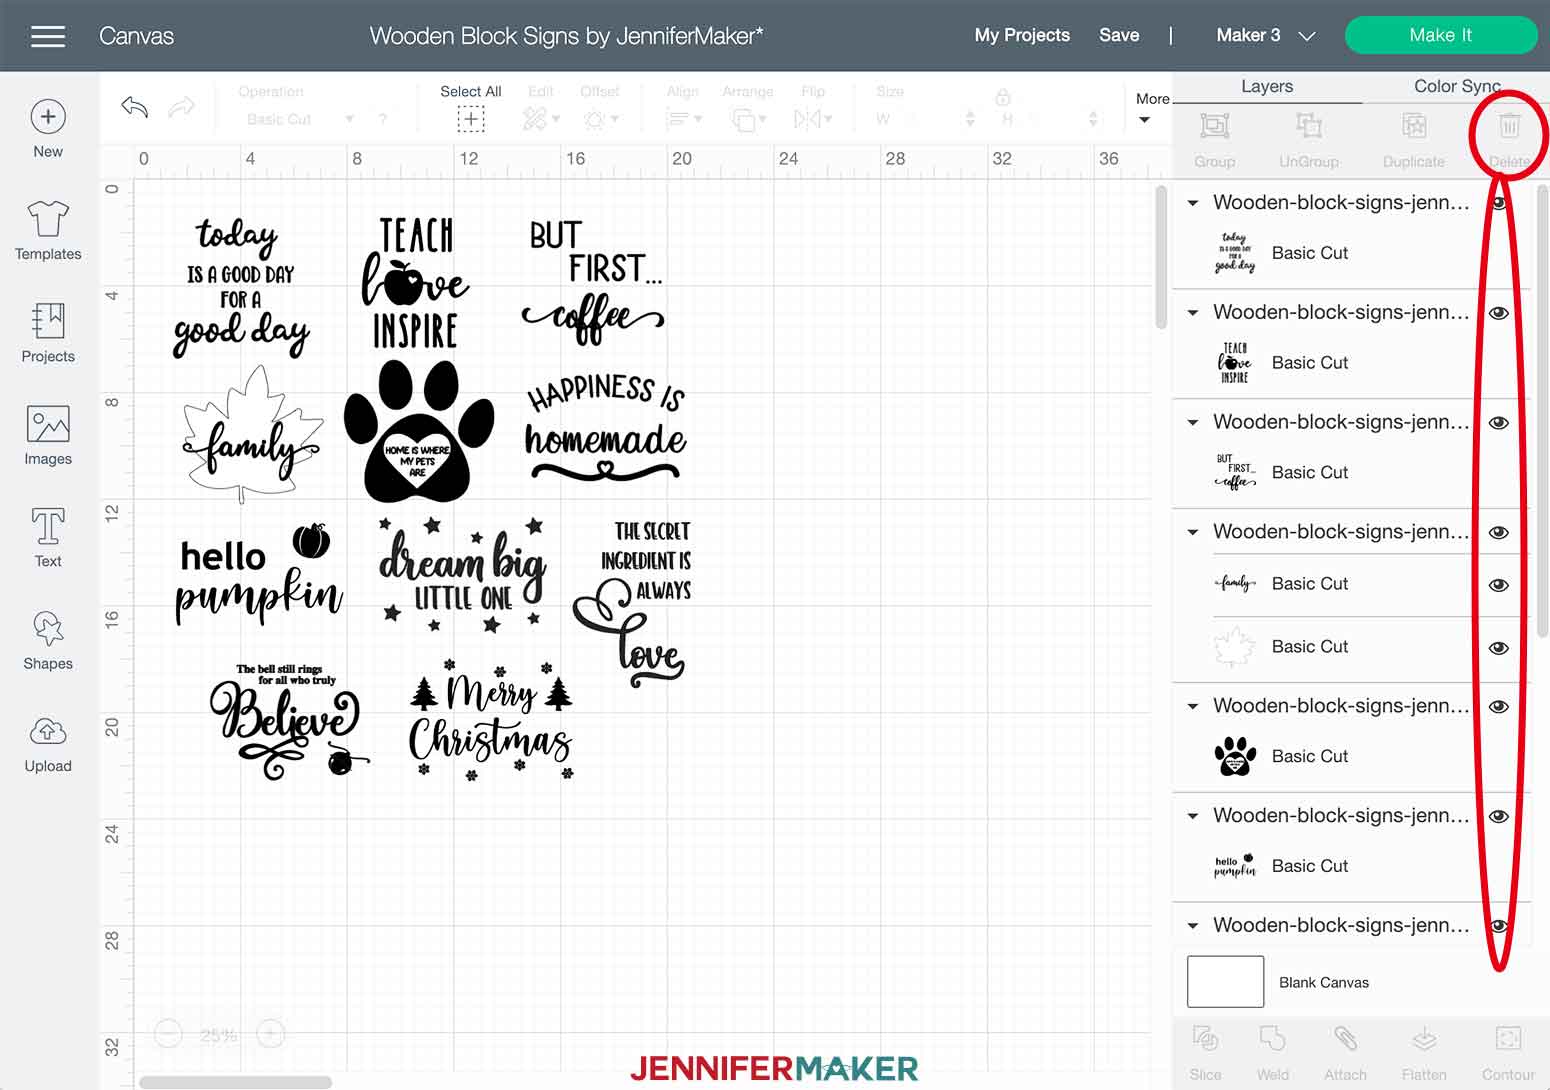
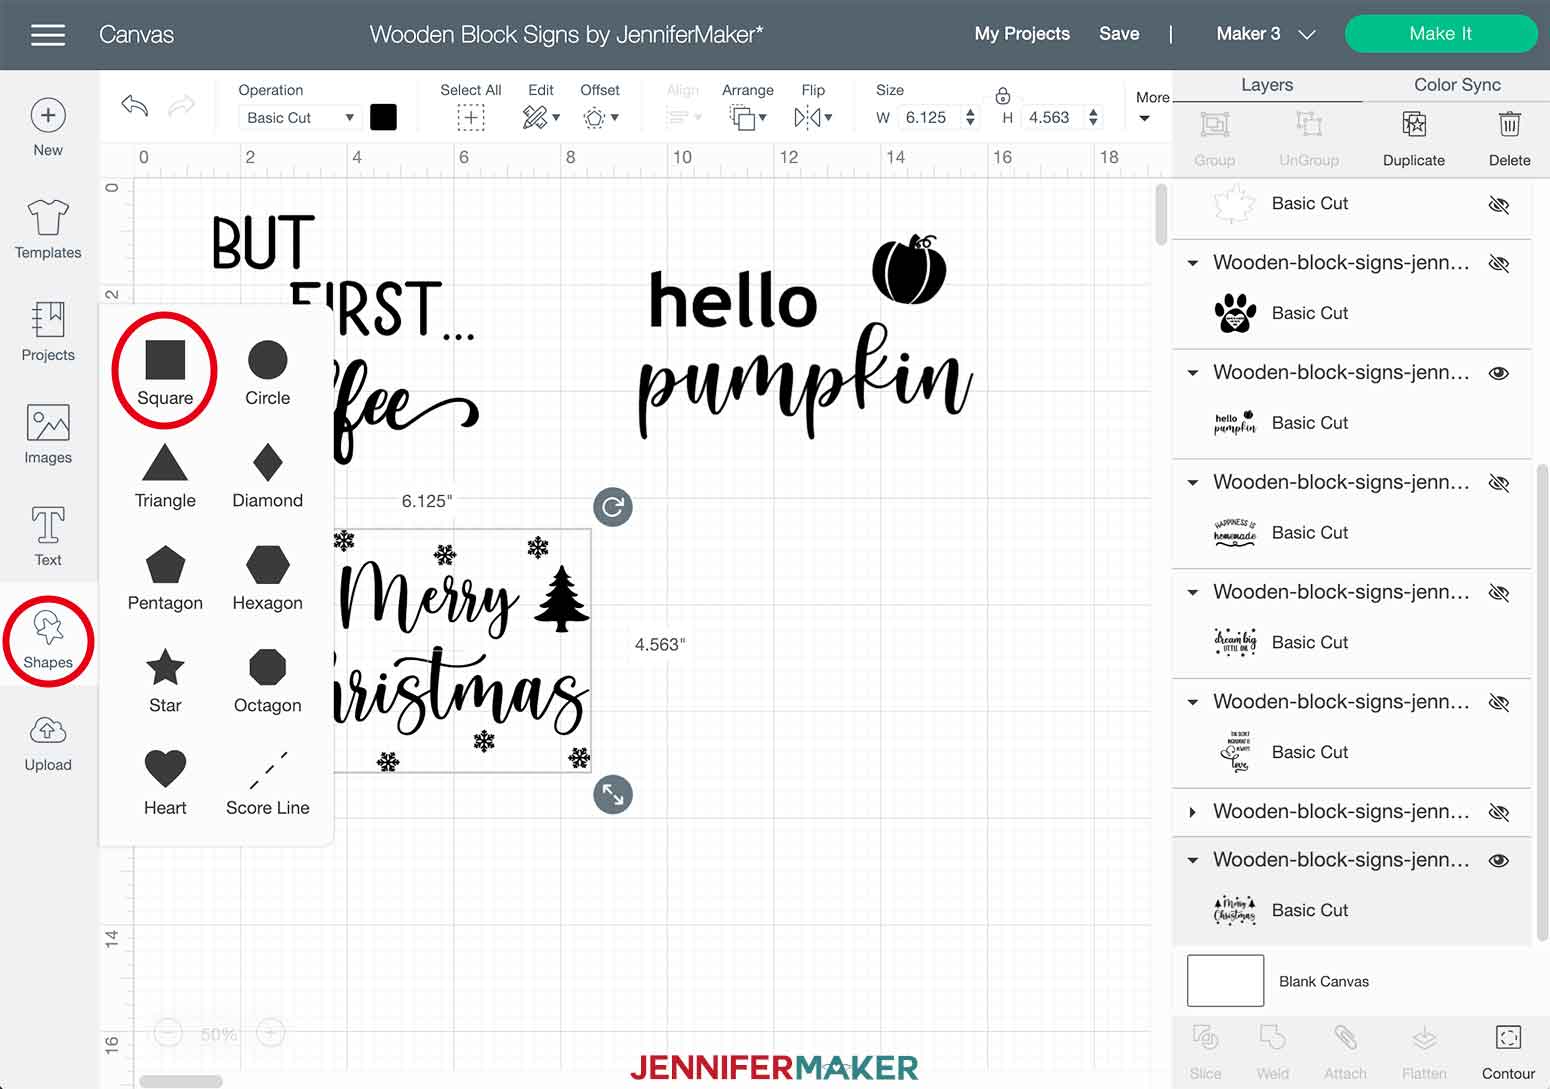
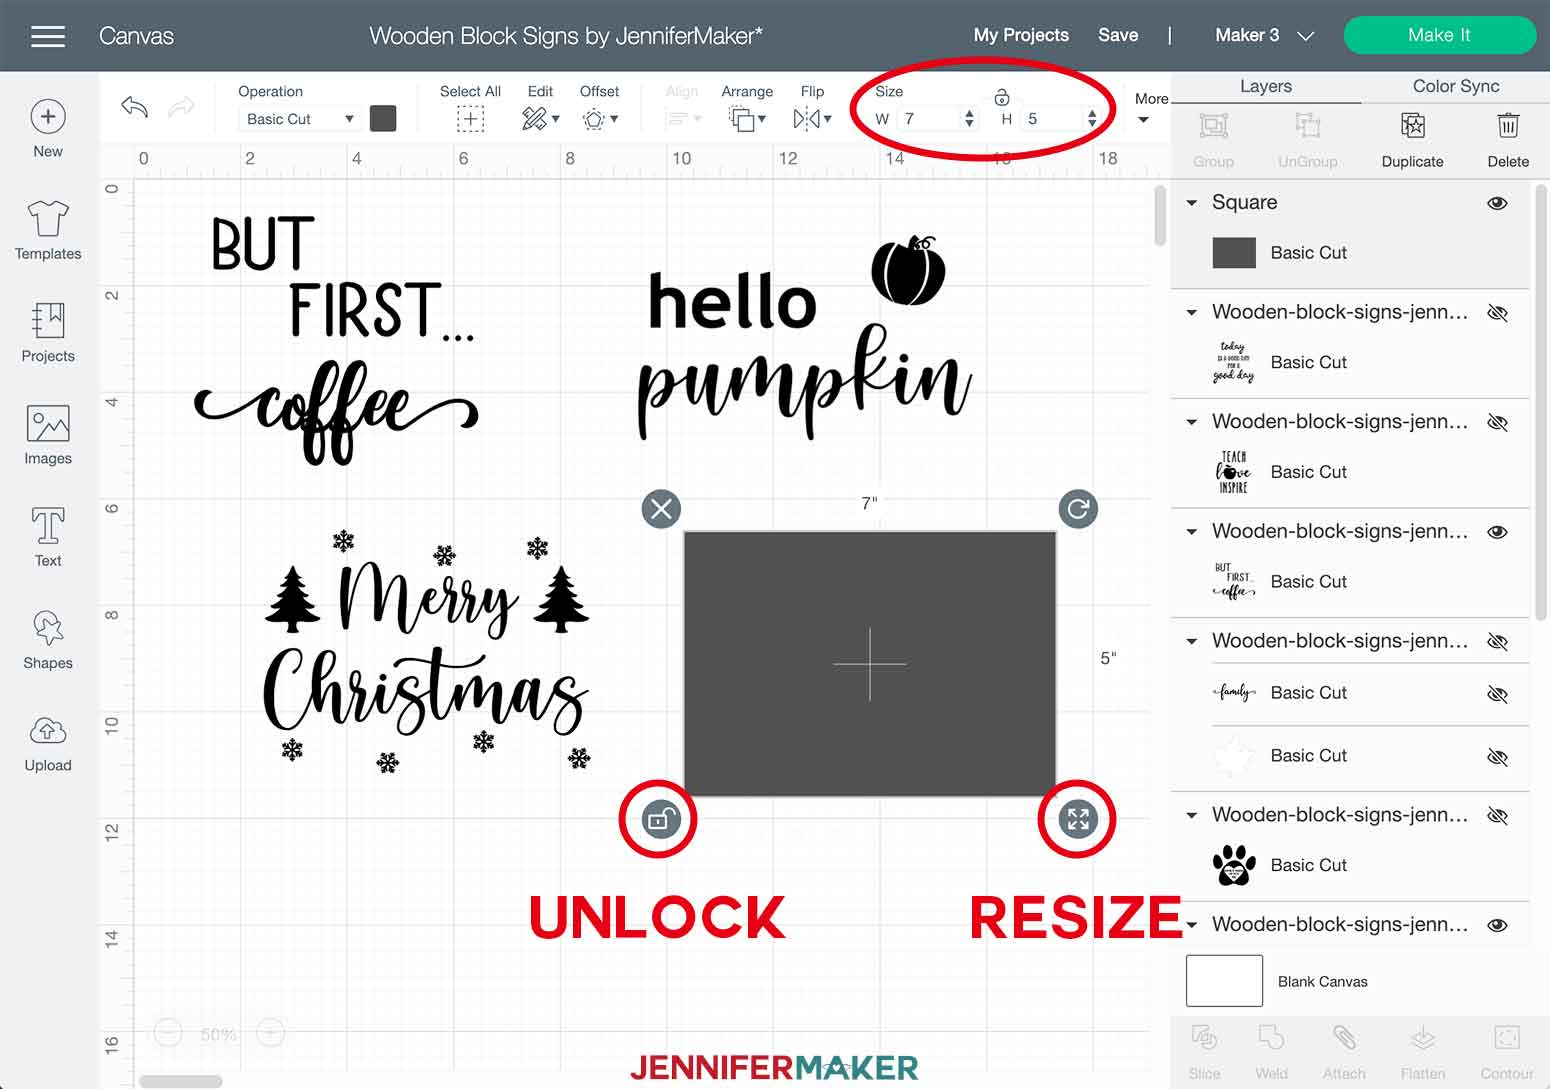
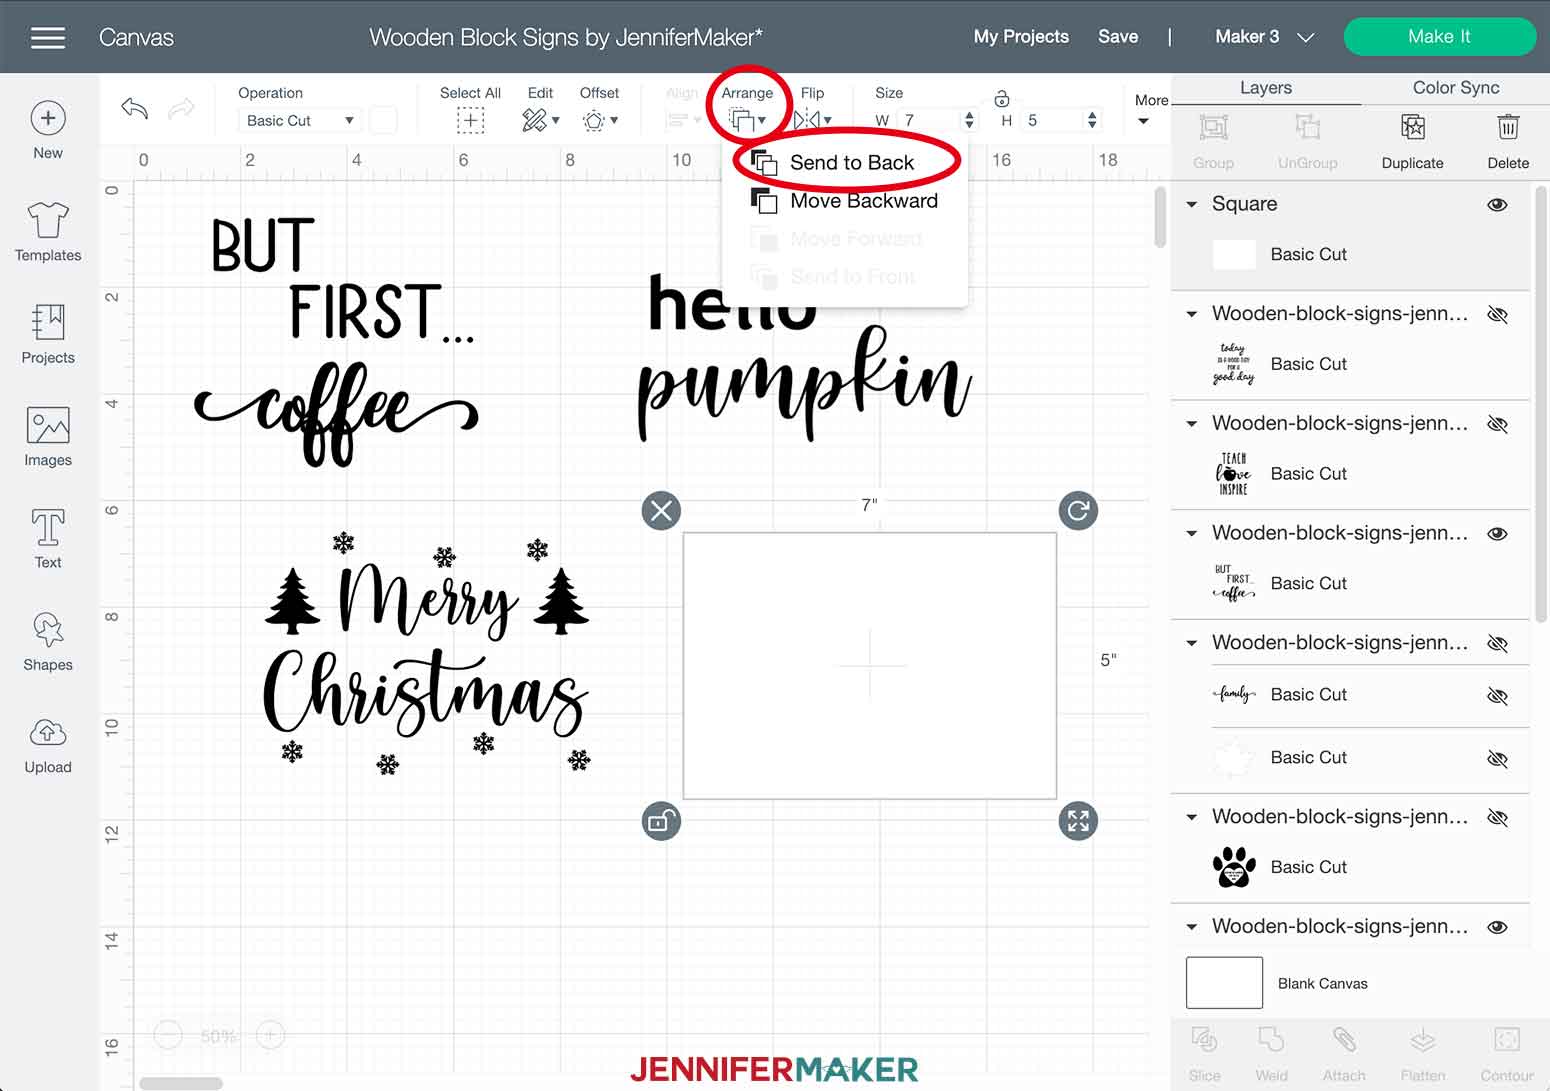
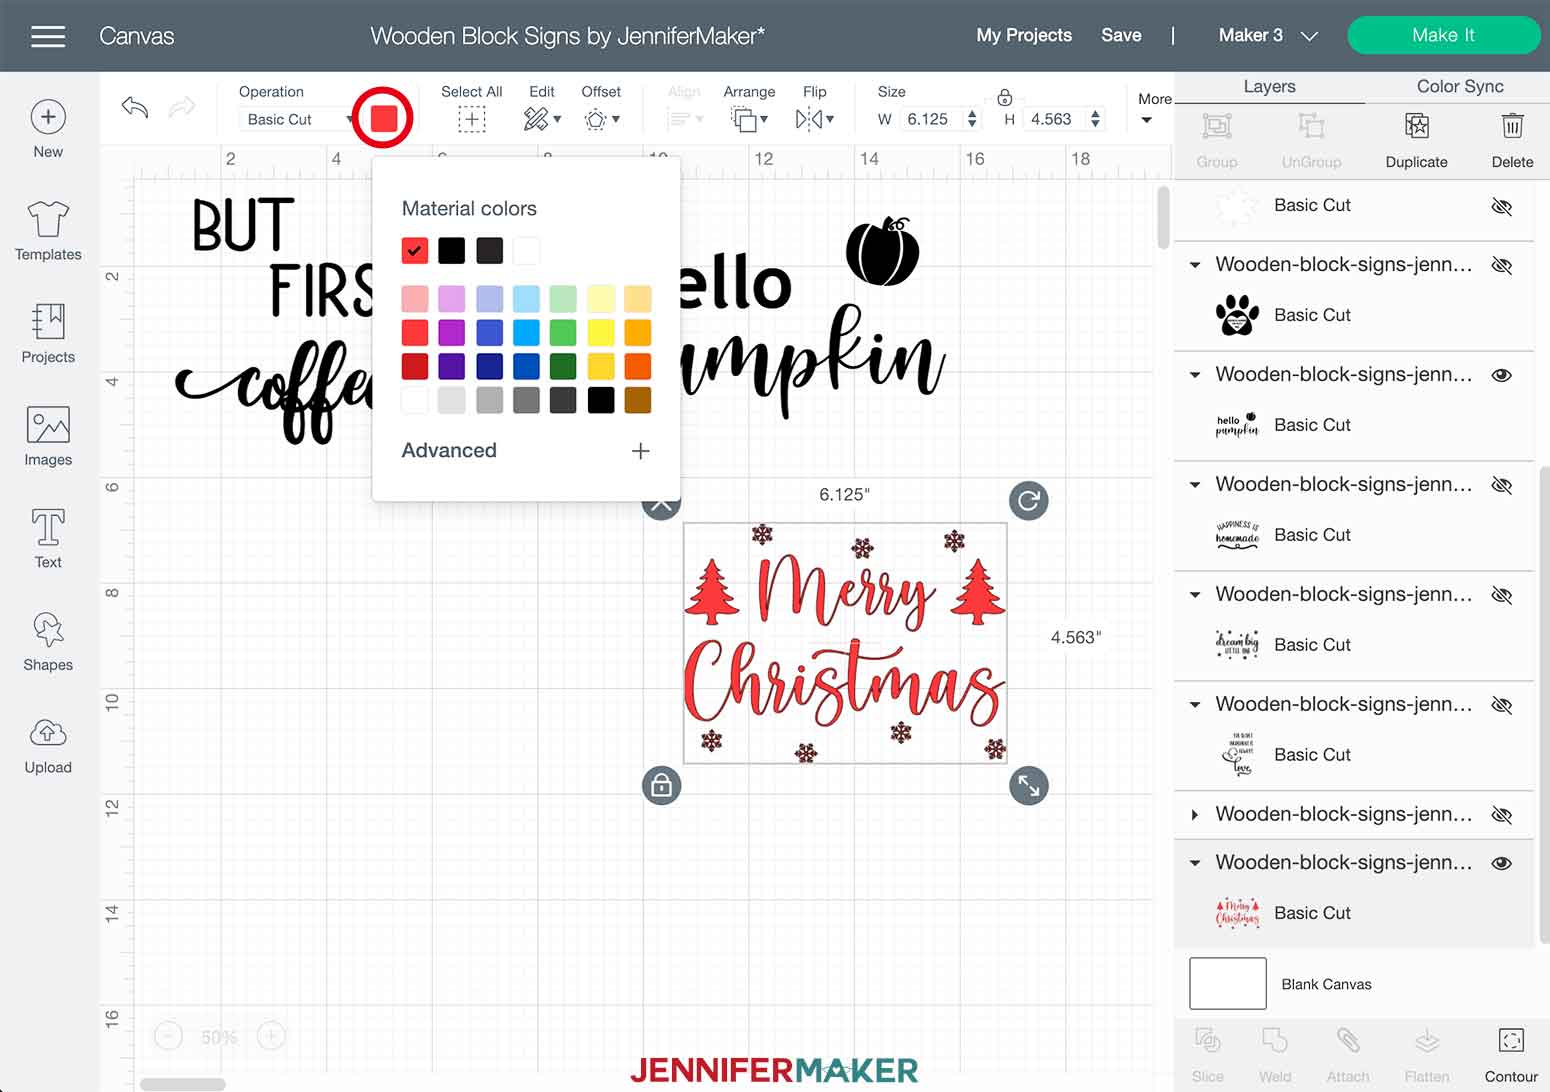
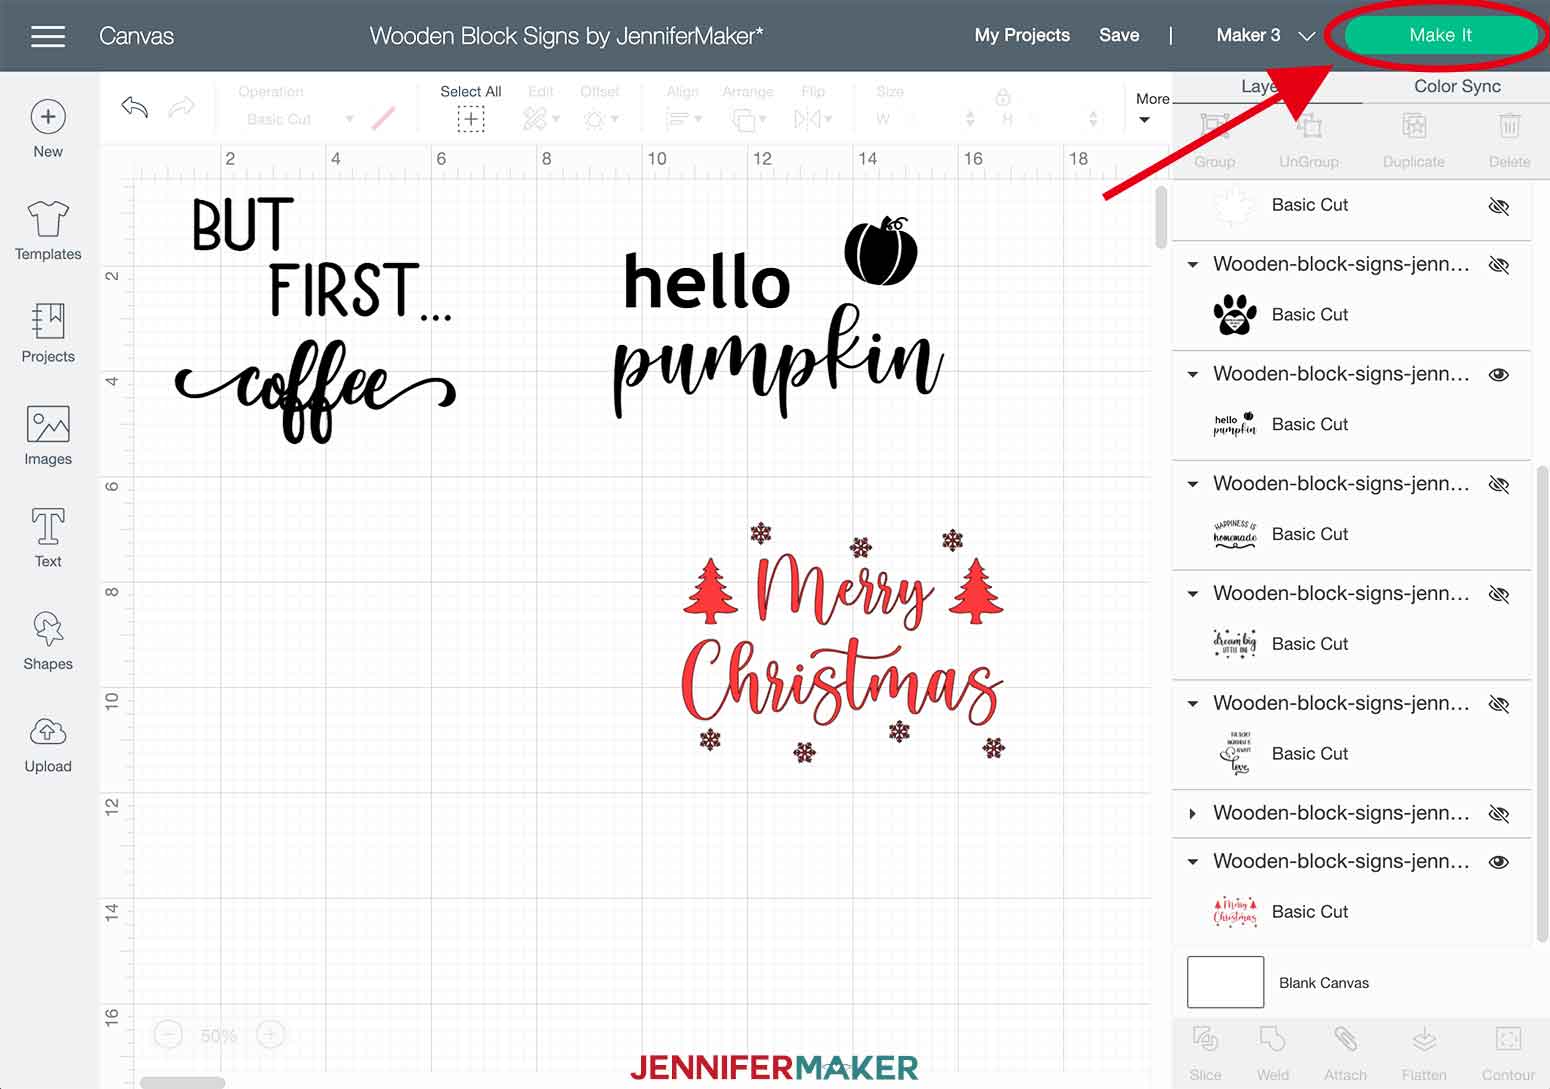
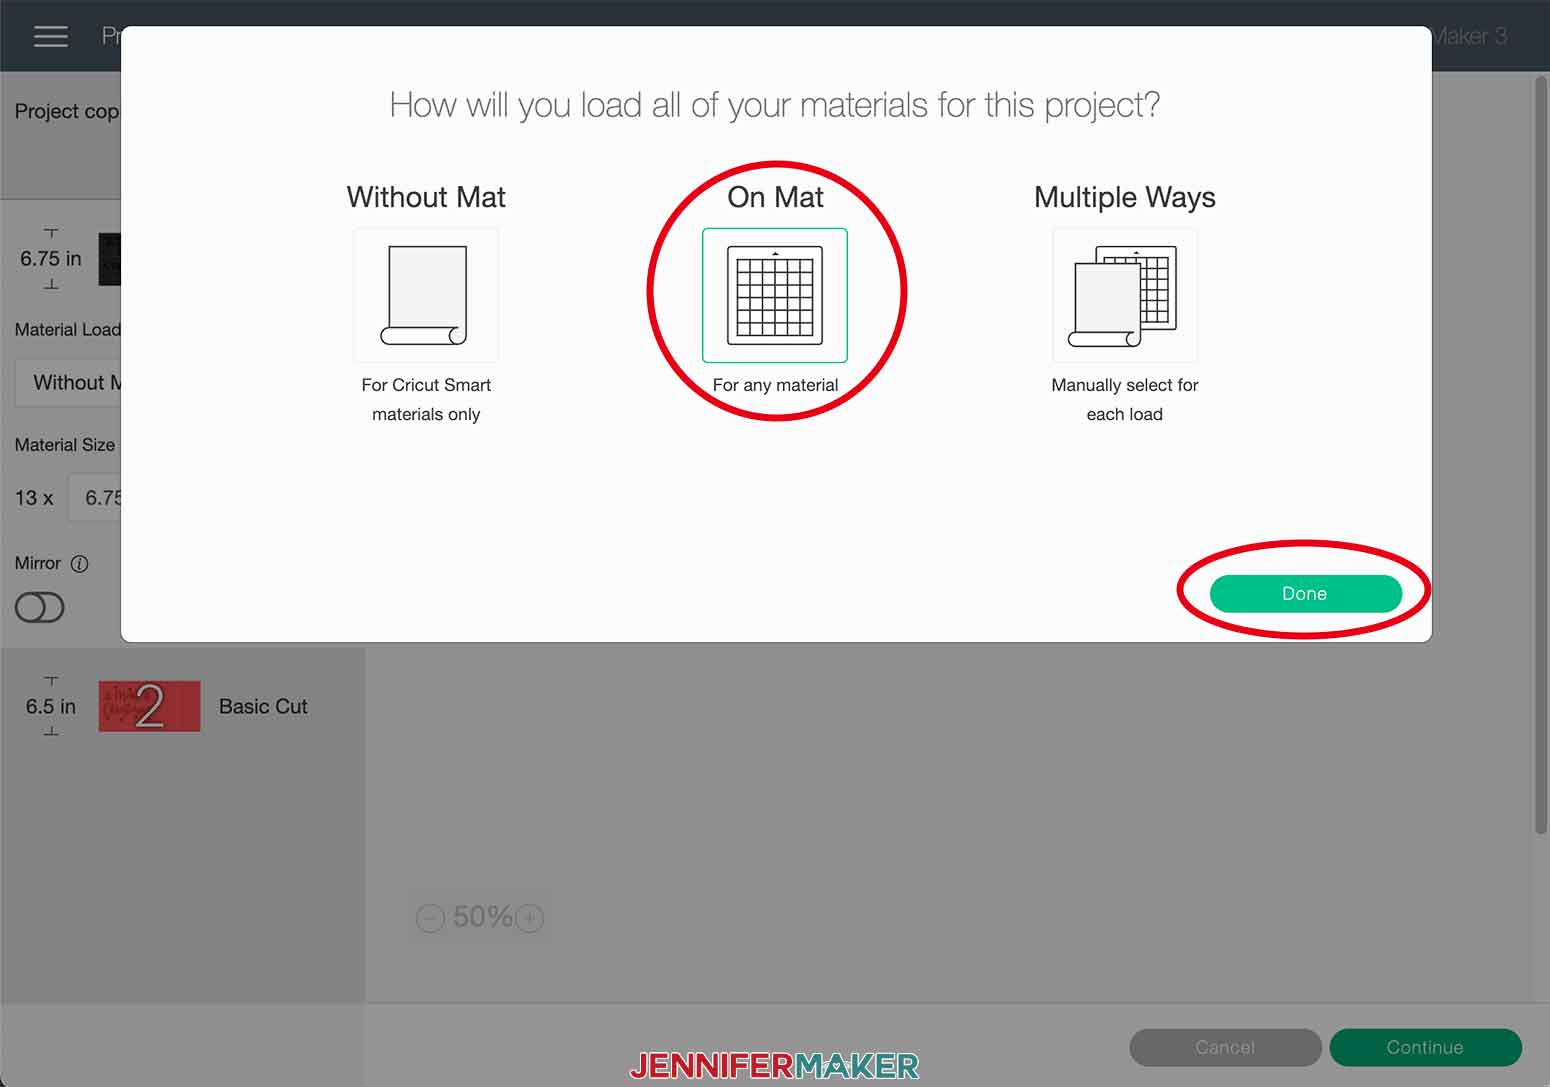
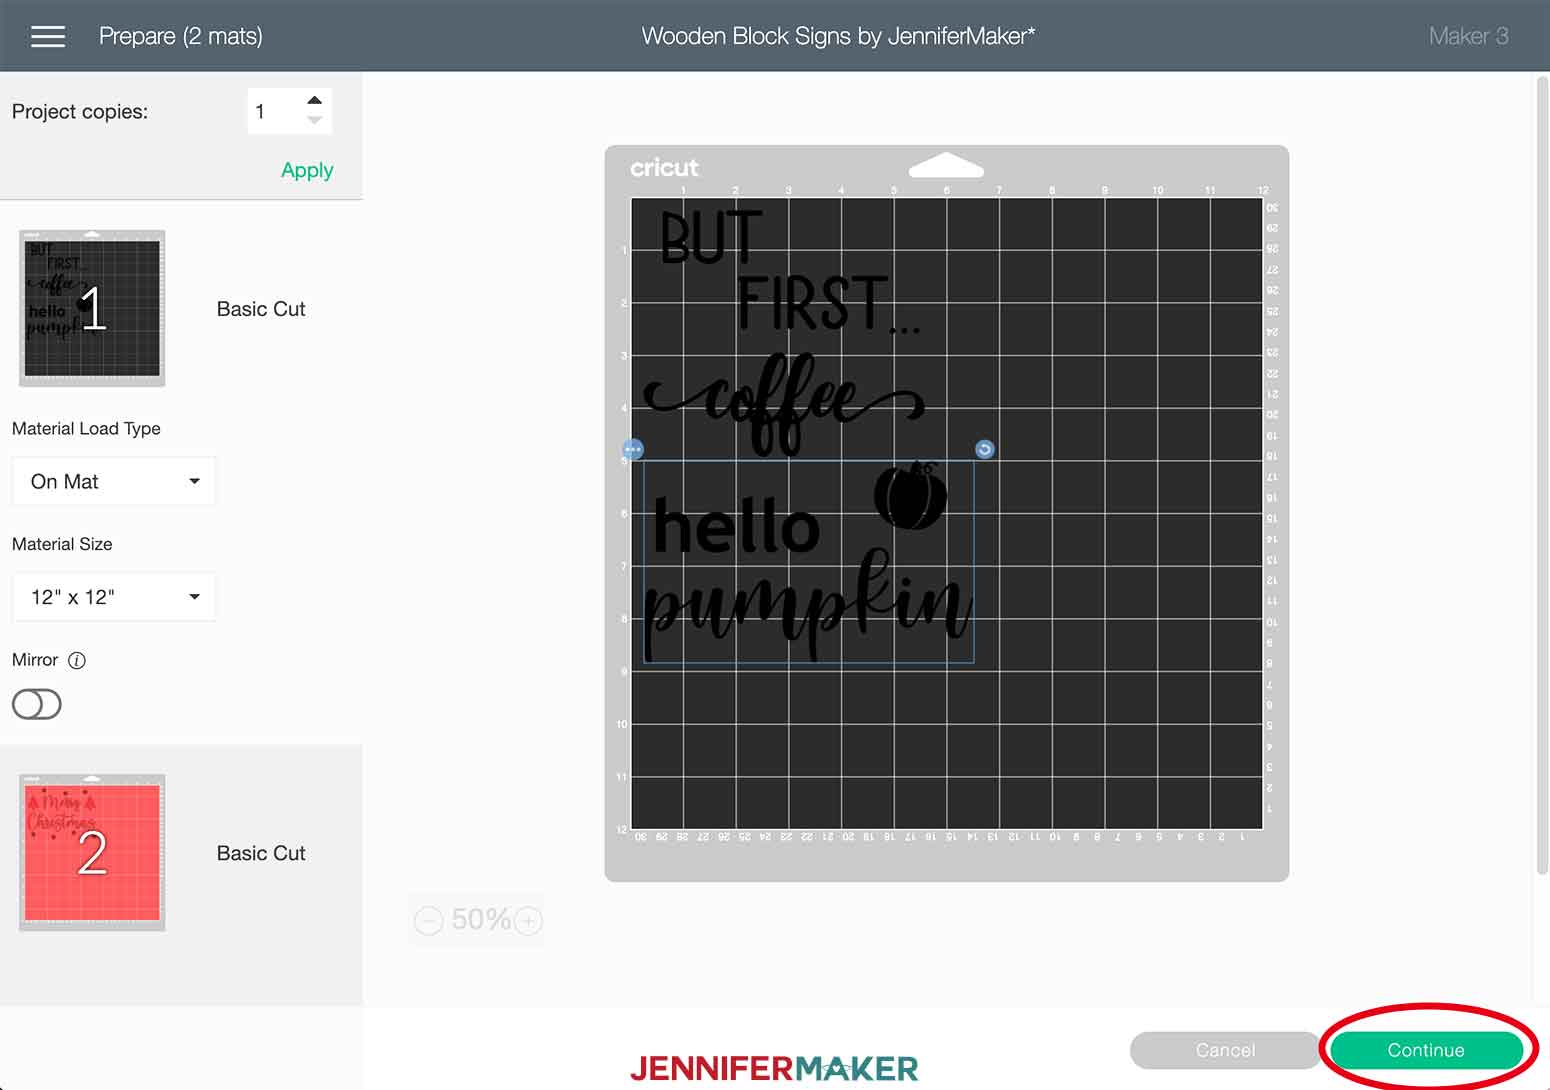
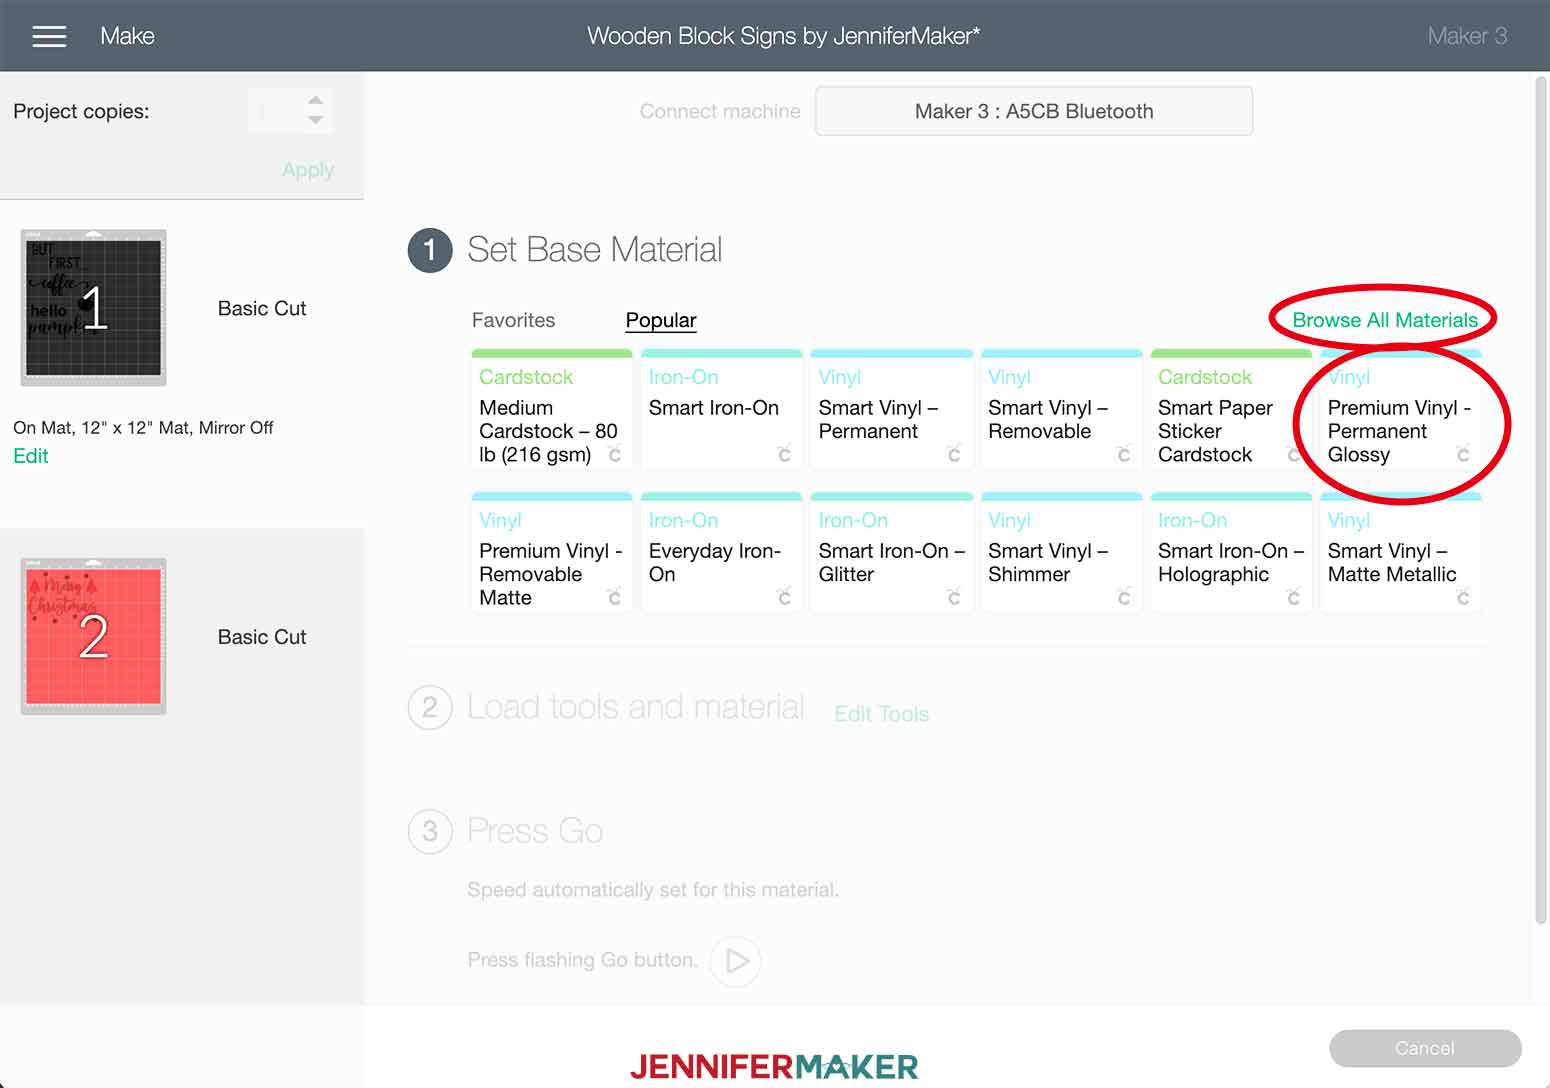
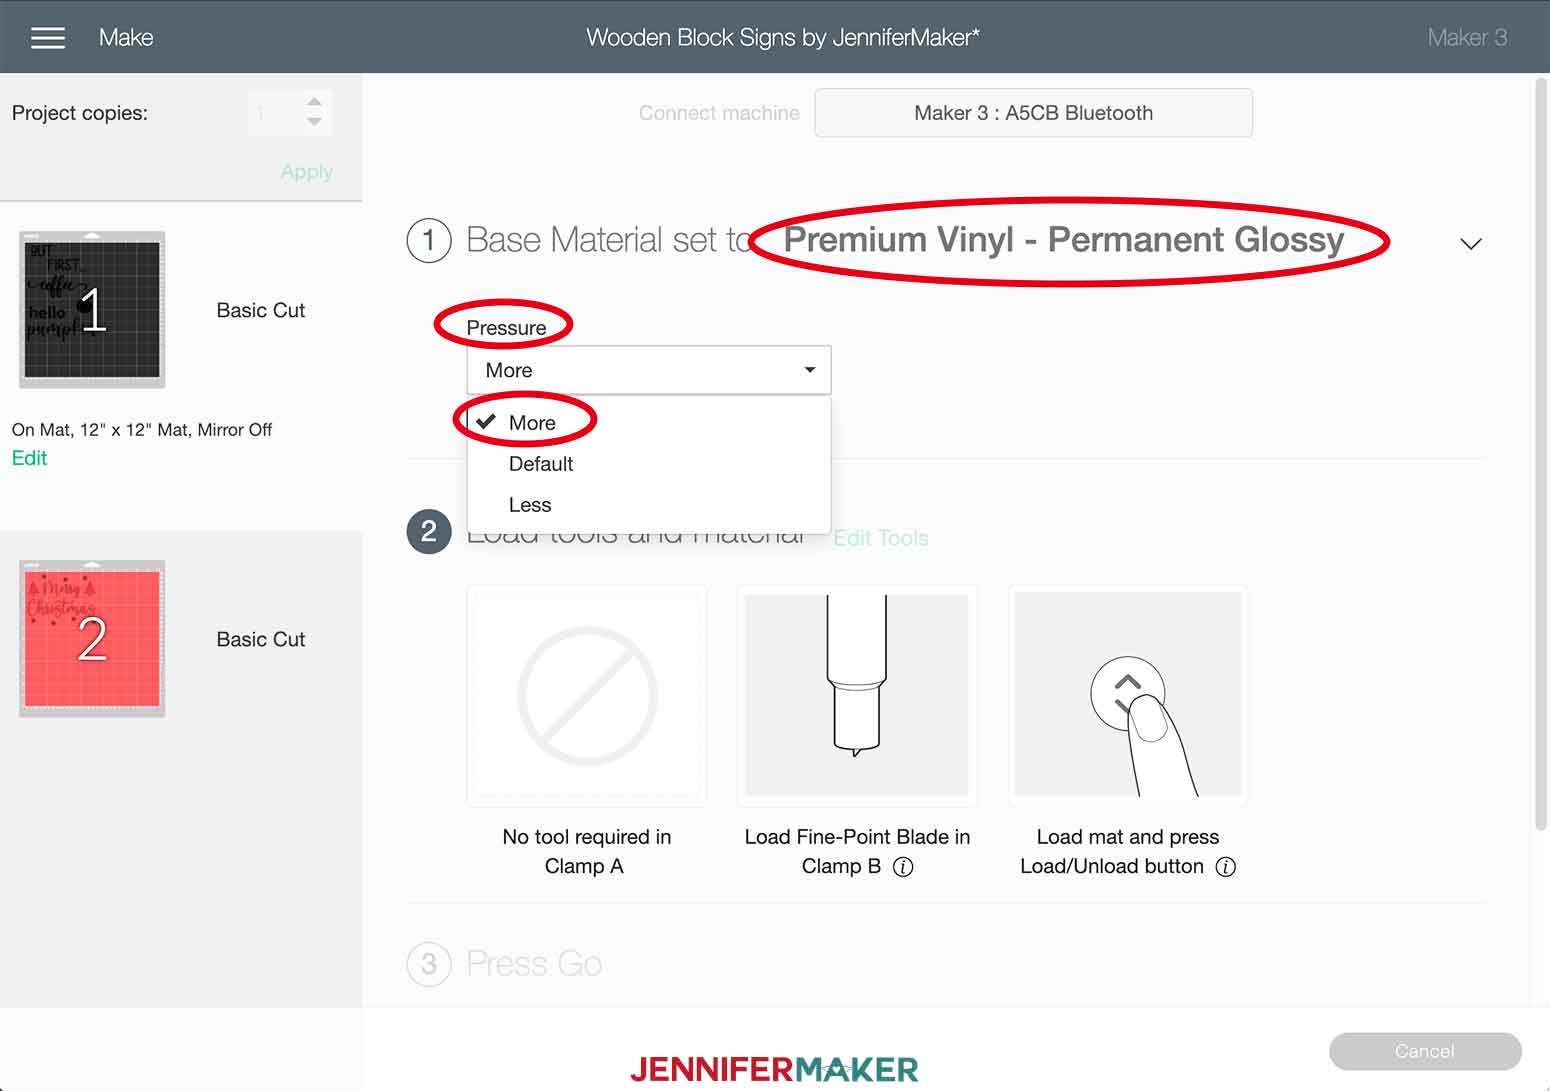
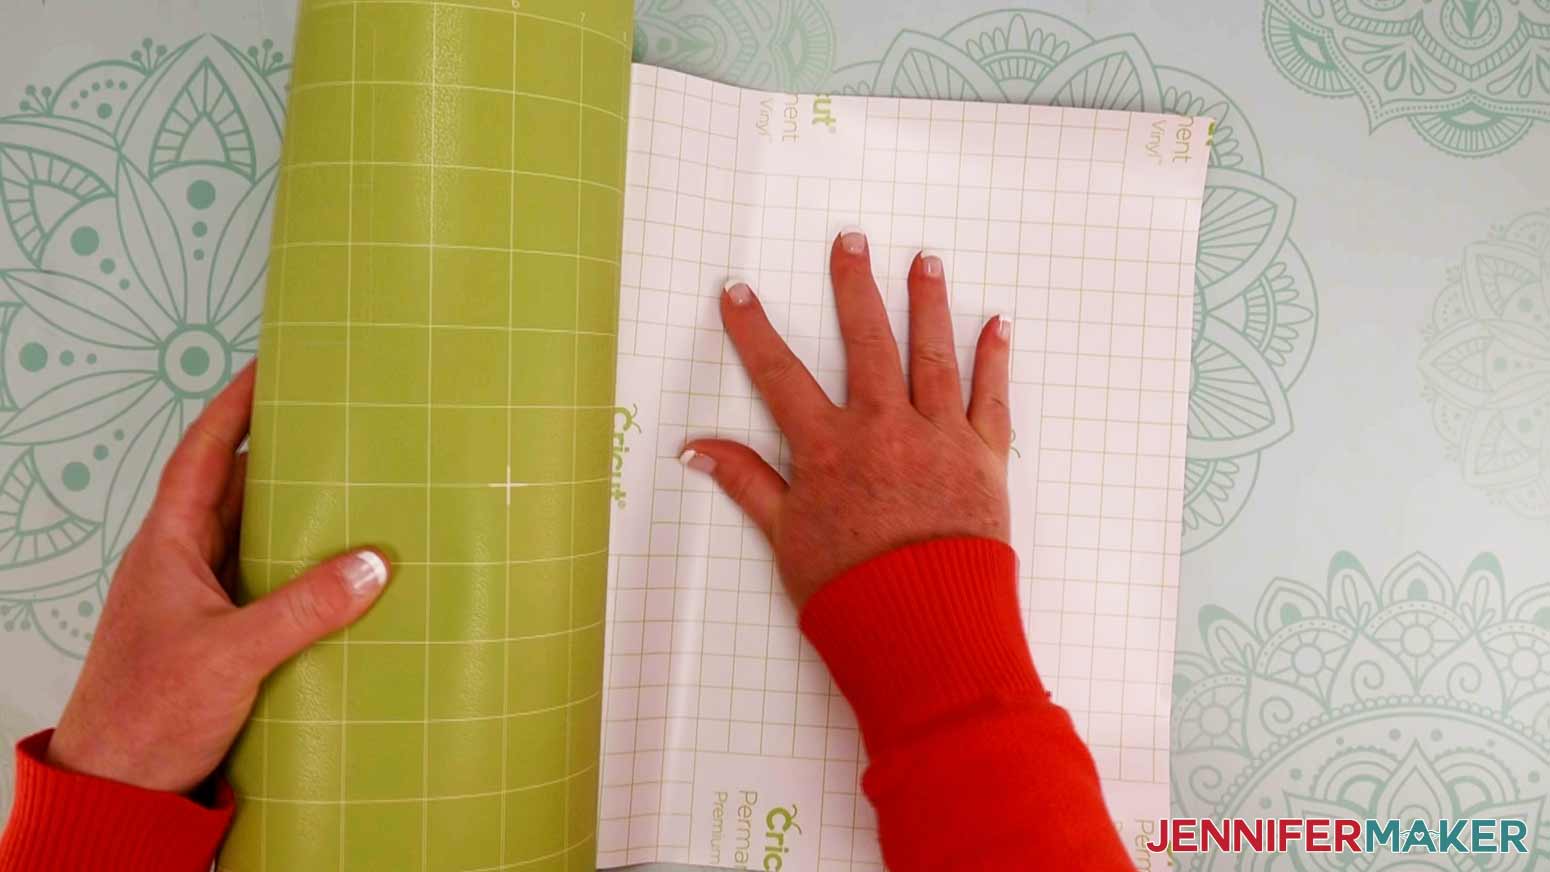
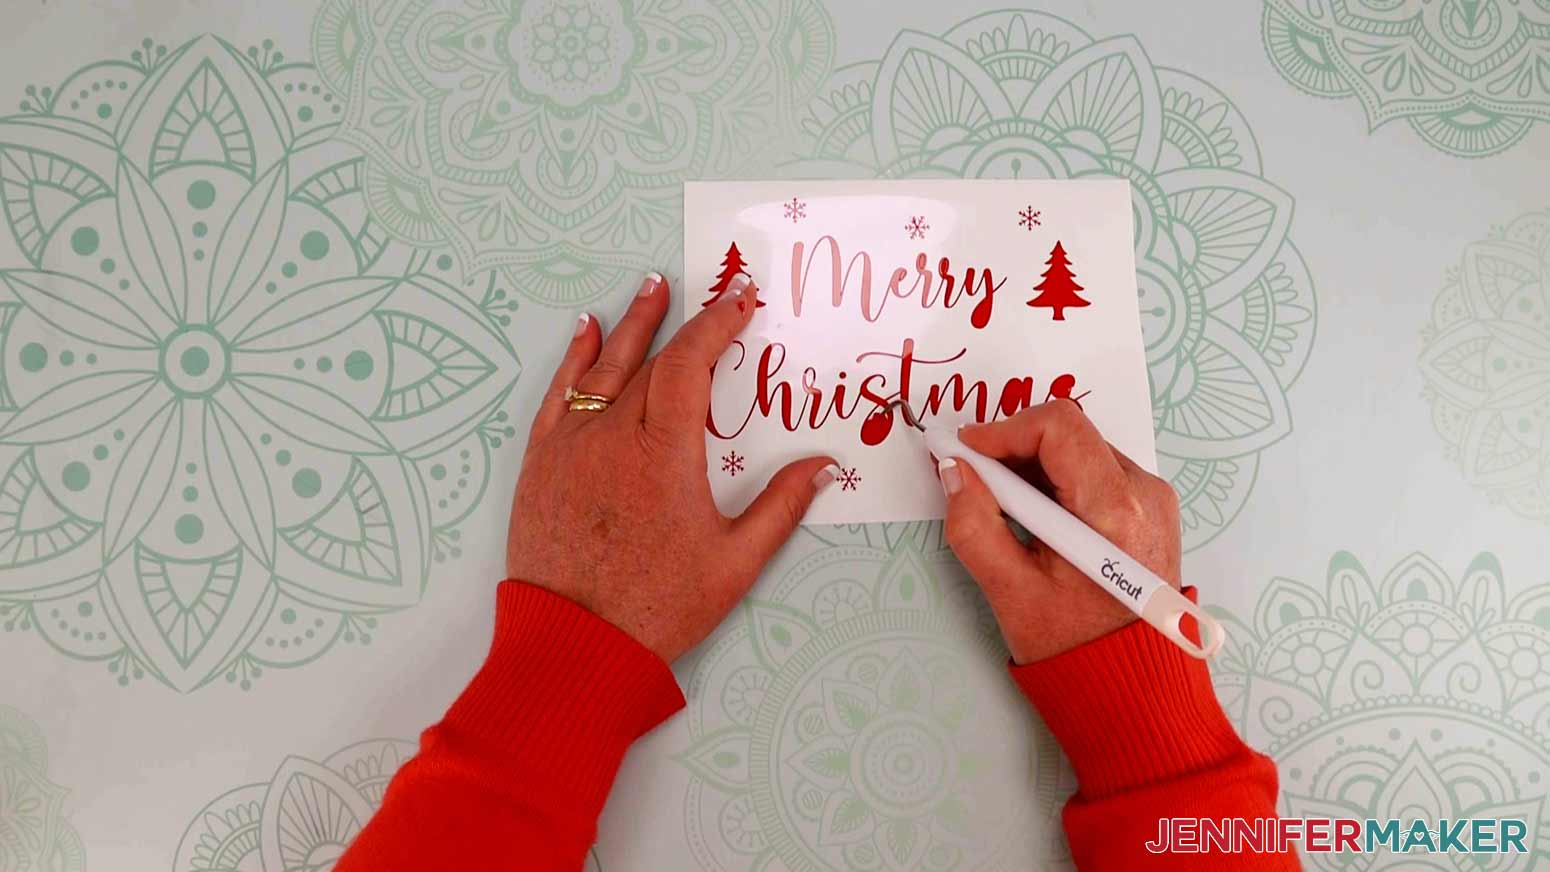
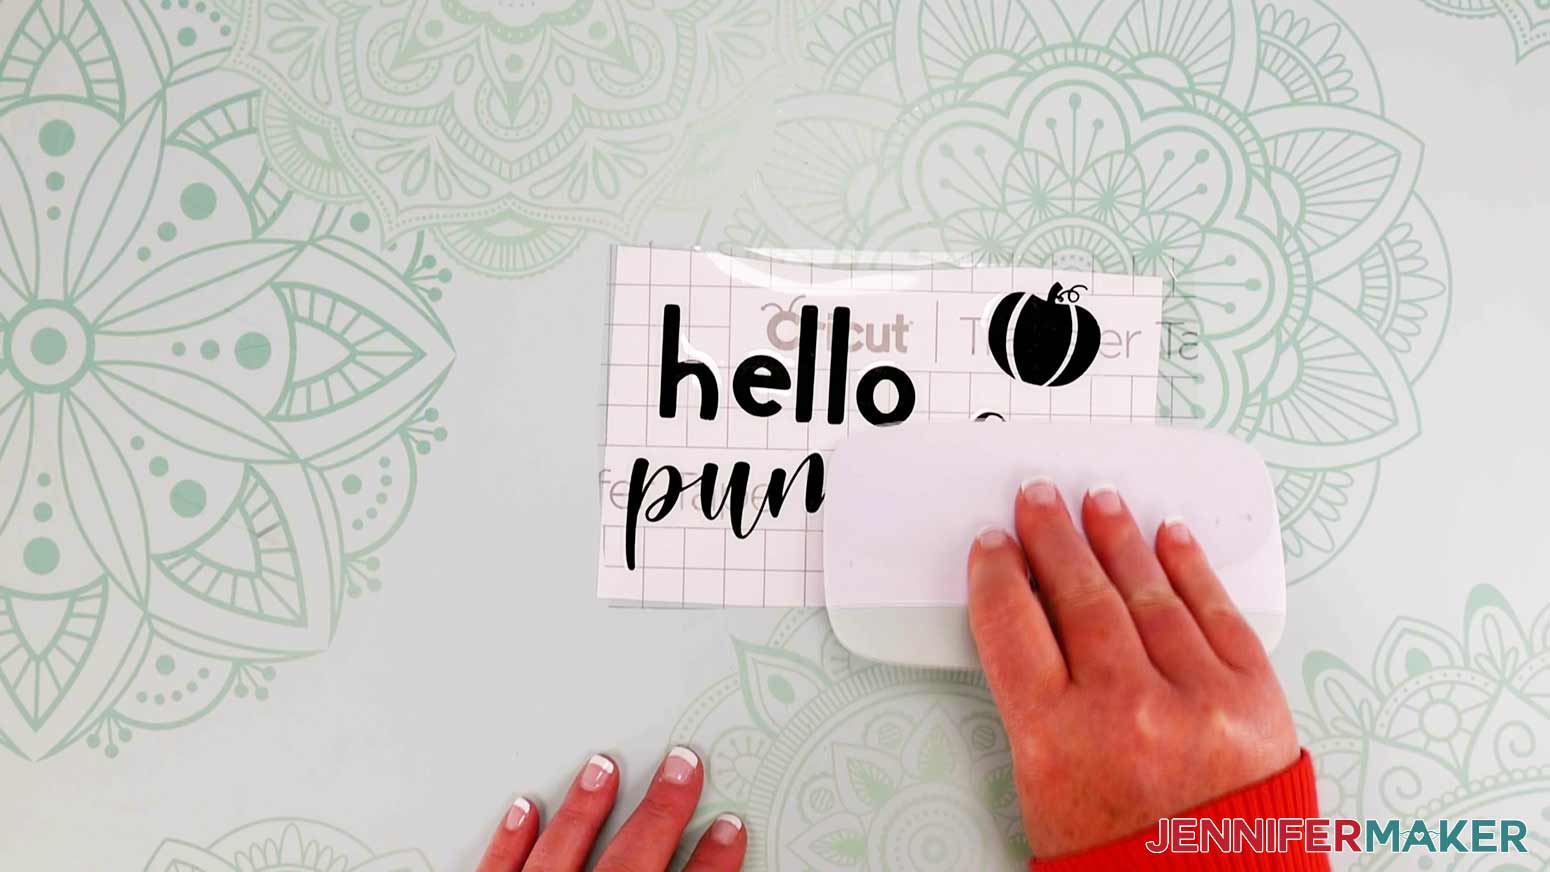
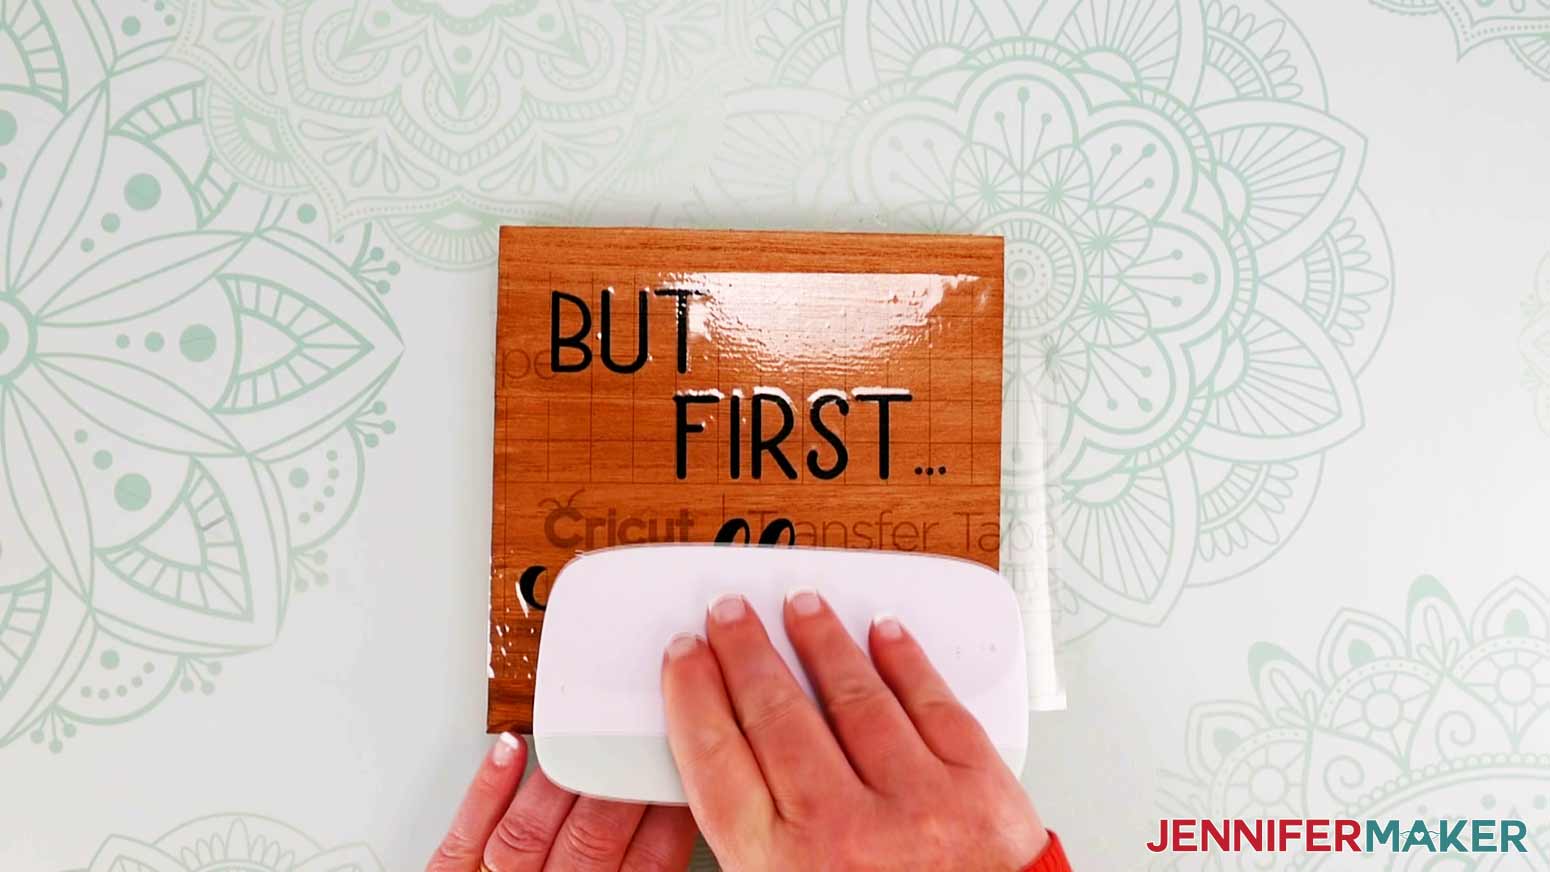
Learn how to make easy wooden block signs to decorate your home or give as gifts! First, download my Wooden Block Signs designs from my library – look for Design #333. This is what my Wooden Block Signs SVG file looks like when uploaded to Cricut Design Space. NOTE: In order to see all of the designs on my canvas, I zoomed out to 25%. The zoom in and out tool is in the lower left corner of your canvas. There are several different ways that you can prepare your wooden block signs! You can choose to paint, faux stain, or leave them natural. PAINT: I used both chalk paint and acrylic paint for my wooden block signs. Both work great! Cover your work area with butcher paper to protect it. With a foam brush, apply an even coat to the front and sides of the wooden blocks. I recommend painting the front section with the grain. Allow 1-2 hours for the paint to dry and apply a second coat. FAUX STAIN: Dab a pea-size amount of brown acrylic paint on a baby wipe (or damp paper towel) and rub it onto the wooden block. I recommend going with the grain on the front side of the sign. Apply a little at a time to make sure the paint isn't too thick. Allow about an hour for the paint to be dry. SEAL THE PAINT: Even if you choose to leave your wood block as natural wood, I recommend applying a coat of Mod Podge in Matte finish to help the permanent vinyl better adhere to your wood. With a foam brush, apply an even coat of Mod Podge to your wooden block. I recommend allowing your wooden block signs to dry for at least 24 hours before applying permanent vinyl. There are 11 wooden block sign designs to choose from. Some are sized to fit a 6" square wooden block and some are sized for a 5" x 7" rectangular wooden block. To make sure your design will fit your block, I will show you how to make a template. But first, let's start by clicking Ungroup to modify your design file. Now you can hide or delete any of the designs that you do not plan to make right now. Select the design and either click the eye icon next to it or the Delete button on the top of the layers panel. Before making the template, measure the dimensions of your wooden block sign. Some signs are slightly different than the size stated on the packaging. A small difference could pose a challenge later on. Once you have your measurements, click on Shapes and then Square. If you are making a square sign, you can click and drag the resize handle or enter your dimensions in the Size box at the top. If you are making a rectangle to match your block, you first need to click Unlock and then click and drag the resize handle or enter your dimensions in the Size box Once your template size is set, click on Arrange and Send to Back. TIP: It may help to change the color of your square/rectangle template to more easily see your design on top of it. Click the color menu and select a template color. I'm using white. Now you can click and drag any of the designs over your square or rectangle. Use the resize handle to resize the designs to appropriately fit on your wooden blocks. Make sure you allow enough margin around the edges of your designs to help with your vinyl placement. I left a margin of about .25" to .50" around my design. Once you have sized all of the designs, you can hide or delete your square or rectangle template. Now is the time to change the colors of your designs if you do not want them to all cut on the same color of vinyl. I am going to make my Christmas sign with red vinyl and the other two with black vinyl. You're ready to click on Make It in the upper right corner. If you are using a Cricut Maker 3, Explore 3, or Joy, you will be asked if you are cutting your designs without a mat, on a mat, or multiple ways. Remember that only Smart Materials may be used without a mat. I am not using Smart Materials with this project so I will select "On Mat" and click "Done." On the preview screen, we do not need to make any adjustments. Make sure the vinyl you put on your mat covers the area that you see on the canvas preview. At the bottom right, click Continue. For this project, I am using Cricut Premium Vinyl - Permanent Glossy. If you don't see that as an option, click on Browse All Materials to search for it. Once you've selected your material, I recommend adjusting your pressure to More to ensure a nice, clean cut. Apply your permanent vinyl to your mat. You want to place the pretty side up and the liner directly touching the mat. Time to load your mat into your Cricut and once your middle button is flashing, press it and watch it go. When your Cricut is done cutting, unload the mat, flip the mat over onto your work surface, and peel the mat away from the vinyl carefully. Grab your weeding tool and remove all of the excess vinyl from your design. Don't forget to get those bits inside the letters, too! Cut your transfer tape to the size of your design. Peel away the backing of the transfer tape and place the transfer tape on top of the vinyl using the taco method. To do this hold the transfer tape in the shape of a taco, then place the bottom of your “taco” onto the middle of your design. Smooth the transfer tape over the vinyl decal from the center outward using the scraper tool. Use your scraper to burnish the design to the transfer tape. REMINDER: Make sure you have allowed at least 24 hours for your Mod Podge to dry before applying vinyl to your wooden block. Gently peel away the backing of the vinyl. If any parts of vinyl stick to the backing, reburnish the area and try again. Once the backing is removed, fold your transfer tape in half with the non-sticky sides touching to crease your transfer tape in the center of your design. Once you have a center crease in your design, fold your transfer tape with vinyl into a "taco" shape. Align the center of the vinyl along the center of your wooden block. Gently apply your vinyl to your wooden block and use your scraper to adhere the vinyl to the wooden block. Gently peel away the transfer tape. If any part of the vinyl lifts with the transfer tape, use your scraper to reburnish the area. Wasn't that pretty simple? Imagine how many you could make at once by preparing them in bulk. These make great gifts too! "Today is a good day for a good day" - Beachwood "The secret ingredient is always love" - Amastery "Happiness is homemade" - Berson Dream, Breethy, iHeart It "Teach love learn" - Homework, Flamingalingo "But first, coffee" - Berson Dream "Hello pumpkin" - Black Mint, Cream Candy "Family" - Home "Dream big little one" - Amastery "Home is where my pets are" - Be Honest "Merry Christmas" - Cream Candy "The bell still rings for all who truly believe" - Gloria Ramsey Two Faced Serif, Amastery
Wooden Block Signs
Materials
Tools
Instructions
STEP 1: GET MY FREE DIY WOODEN BLOCK SIGN FILES
TIP: If you are not sure how to upload an SVG cut file to Cricut Design Space, watch this helpful video training series I made. If you are on an iPad or iPhone, here is how to download and upload SVG files to the Cricut Design Space app. 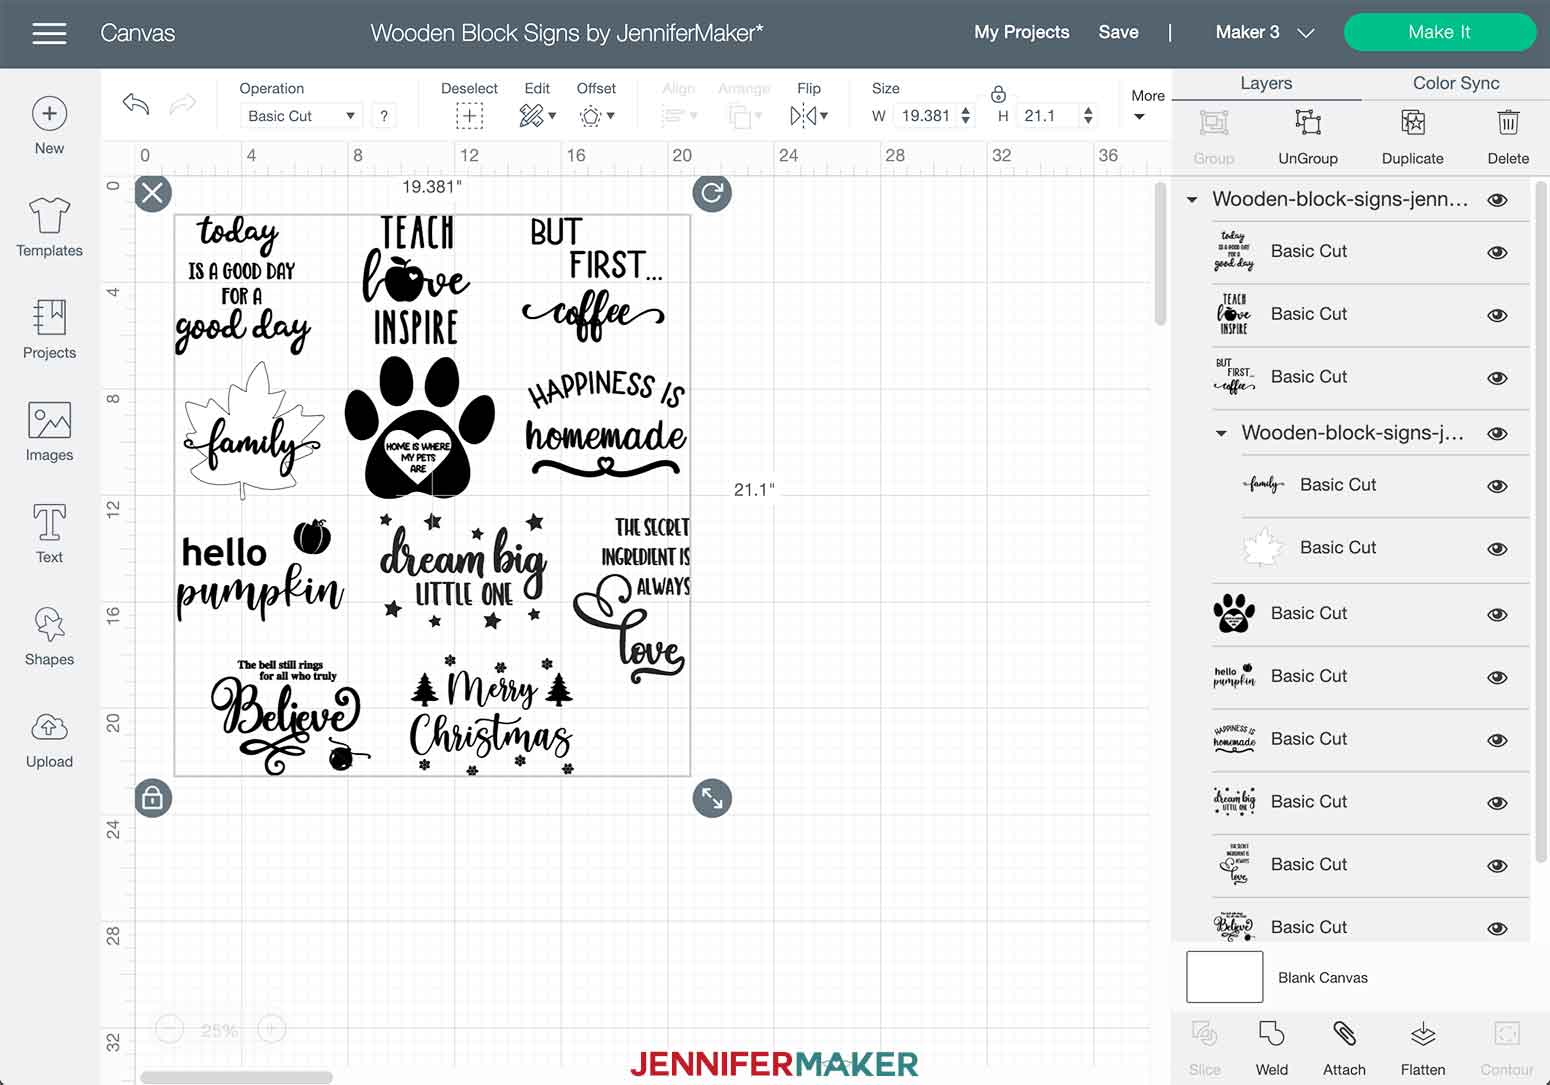
STEP 2: PAINT AND SEAL YOUR WOODEN BLOCK SIGNS
STEP 3: PREPARE YOUR DESIGN
STEP 4: WEED AND APPLY YOUR VINYL DESIGN
Notes
FONTS
The detailed step-by-step assembly video on how to create personalized round wood door hangers is part of Maker Academy Weekend 2021. Get a pass to watch all 20+ workshops, each with a printable handbook, transcript, audio files, design files, and support with a VIP pass below:

Answers to Your Questions About How to Make DIY Wood Block Signs
Q: Where is your tutorial for this project?
This is a special project we made for our free Maker Academy Weekend 2021 event! A complete and detailed step-by-step video premiered during the event November 4-7, 2021 — specifically, this tutorial video was available to watch for free for 24 hours beginning November 5 at 3:00 pm ET! Get access to the workshop and a 15-page printable handbook that details how to make this beautiful project with a VIP Pass to Maker Academy Weekend 2021, which comes with other perks and bonuses, too!
Get the free designs for my wood block signs!
I love seeing what you make with my designs and how you use them! Please share a photo of your wood block signs in our Facebook group or tag me on social media with #jennifermaker.
Love,

Want to remember this? Save this DIY Wood Block Signs Tutorial to your favorite Pinterest Board!