
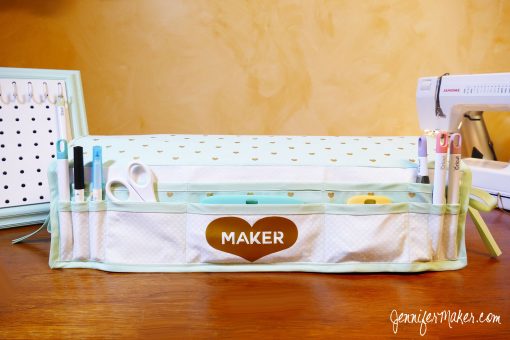
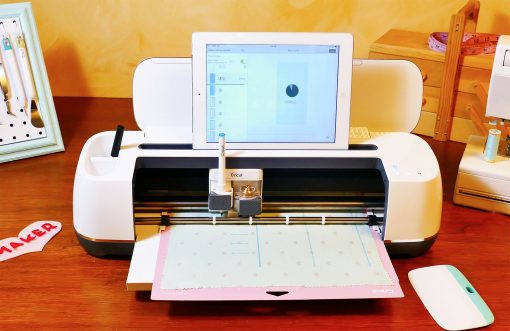
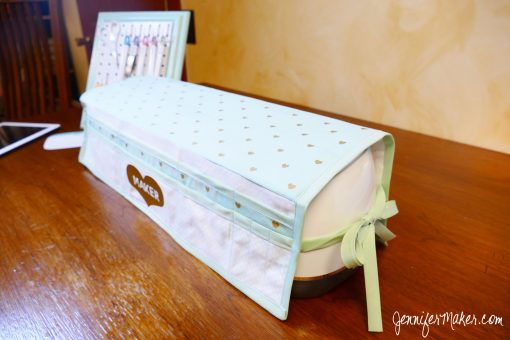
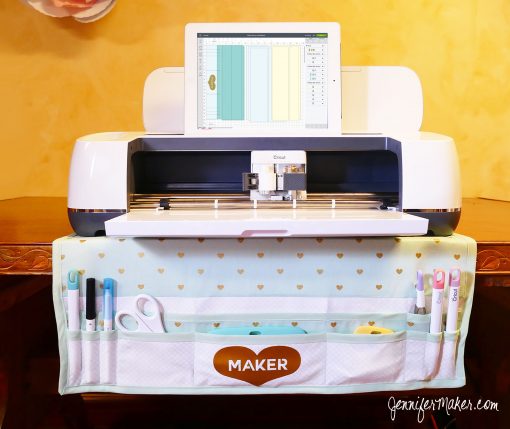
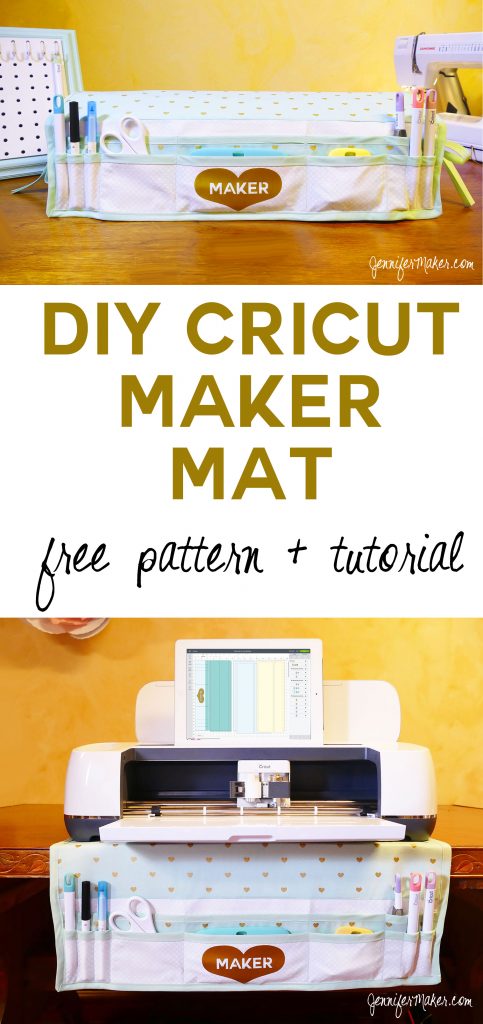
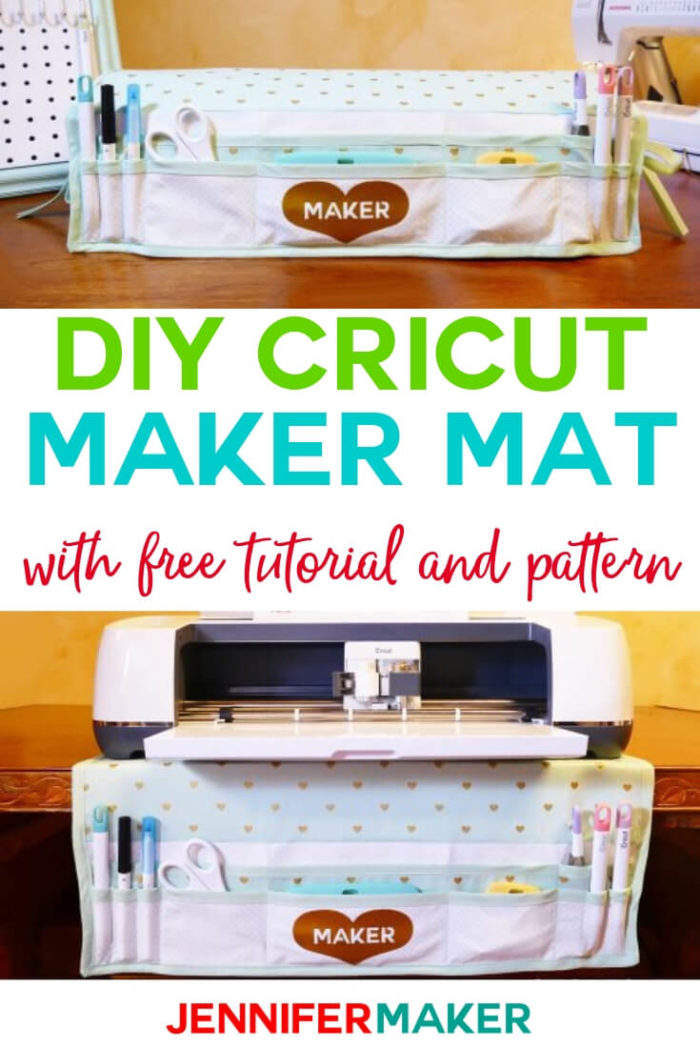
I got the new Cricut Maker machine! Woop woop! Naturally I had to make something for it. So I designed a special Cricut Maker Mat tool organizer that doubles as a dust cover. It is SO COOL. I used my new Cricut Maker cutting machine to cut out all the pieces for it, but you, of course, can cut it out by hand and use it as an organizer under another Cricut or a sewing machine, too. The free SVG, DXF, and PDF pattern files are provided for you to make this awesome accessory for your machine.
Skill Level: Beginner-intermediate — it’s really not very difficult.

Time: It took me about 1.5 hours to create this Maker Mat.
Finished Dimensions: 22″ wide by 17.5″ long
If you make the Maker Mat, snap a photo and hashtag it #jennifermaker — I’d love to see your creations on Instagram, Facebook, & Twitter! Or you can send me photos at [email protected] and I will include them here with your permission. I lovelovelove to see your photos!
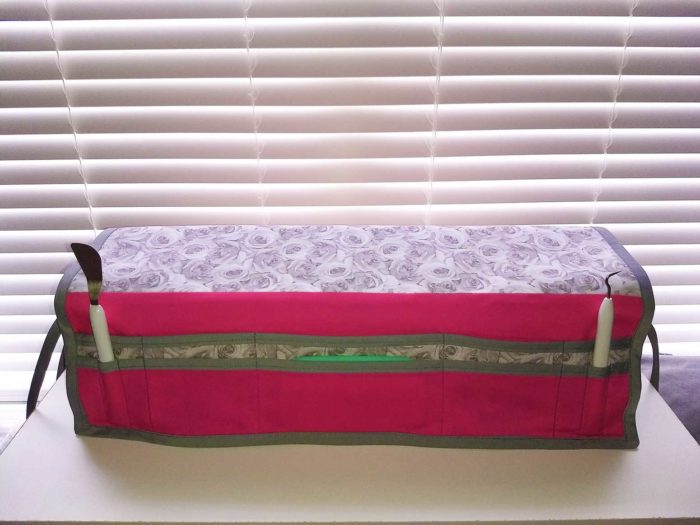
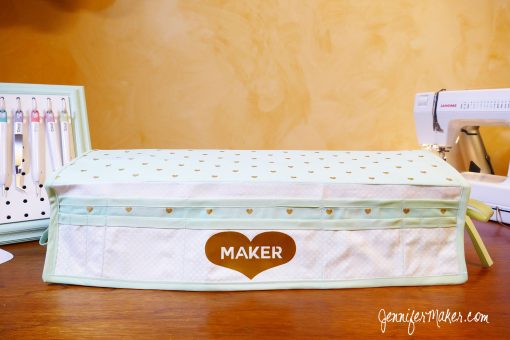
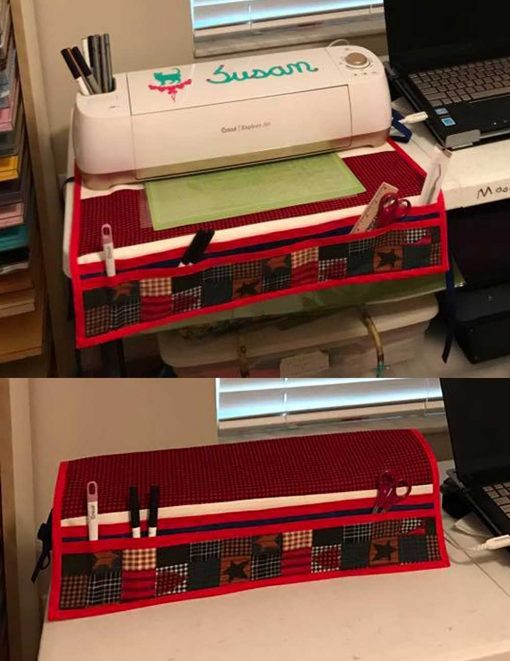
This pretty Maker Mat was made by Ruth — isn’t it cute?
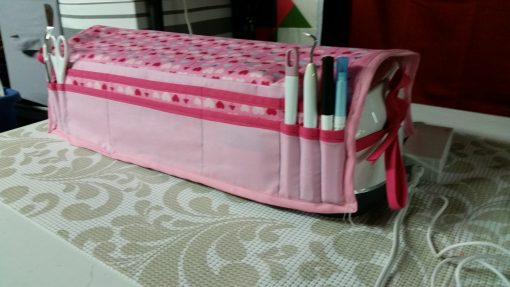
Here’s a gorgeous Maker Mat crafted by Wendy — love this fabric:
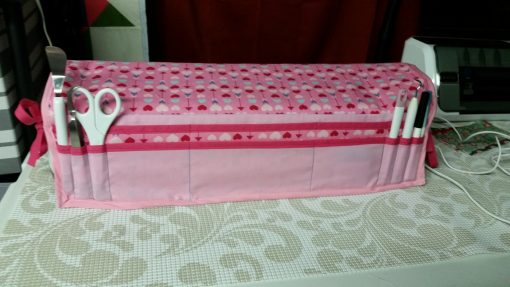
And check out this pretty in pink Maker Mat by reader Tracey Bradshaw:
This post contains some affiliate links for your convenience (which means if you make a purchase after clicking a link I will earn a small commission but it won’t cost you a penny more)! Read my full disclosure policy.
Maker Mat Materials
- Mint cotton fabric, 24″ x 24″ (the specific fabric I used is not available; here is a similar fabric or use whatever color/pattern you want!)
- White cotton fabric, 24″ x 36″
- Fusible (one-side) interfacing, 24″ x 24″ (this is the exact brand and style I used)
- Gold vinyl (iron-on or adhesive) – optional
- Matching double fold bias tape, two packages of 3 yards each (6 yards total)
- Matching thread
- Washable fabric marking pen (I used the one for my Cricut Maker)
- Pins
- Scissors
- Iron and/or Cricut Easy Press
- Design #50 – My Maker Mat pattern (free in my resource library — get the password to it by filling out the form at the bottom of this post)
- A way to cut out your material (I used the Cricut Maker with the rotary blade and the long 12″ x 24″ FabricGrip mat)
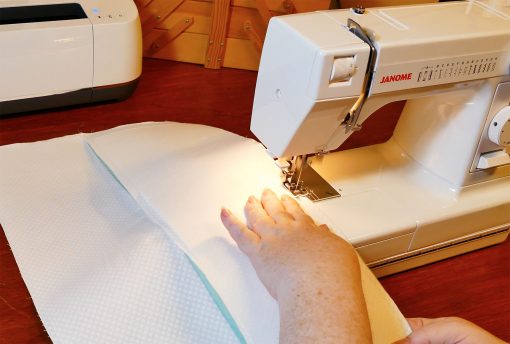
- A way to sew your material (I used my Janome sewing machine, but any sewing machine or even hand sewing would do — if you are a beginner and are looking for an entry-level sewing machine at a good price, I highly recommend this one)
Cricut Maker Mat Step-By-Step Tutorial
Download Design #50 which is my cut file/pattern for my Cricut Maker Mat, which is available as a SVG, DXF, and a PDF in my free resource library (get the password by filling out the form at the very bottom of this post). If you’re using Cricut Design Space, upload the SVG and place it on your canvas.
Tip: If you’re not sure how to upload an SVG cut file to Cricut Design Space, watch this helpful video training series I made. If you’re on an iPhone or iPad, here’s how to download and upload SVG files to the Cricut Design Space app.
UPDATES/CHANGES: Check for any updates, changes, or additional videos for this project at https://jennifermaker.com/updates
Ungroup everything, then change the two sets of lines (indicated by the red diagonal line icon) to Write (choose washable fabric marking pen). You also need to attach these two fabric marking pen lines to their respective fabric pieces so they stay together. Refer to the graphic below or the assembly video to see which layers get set to Write, and which layers get set to Attach.

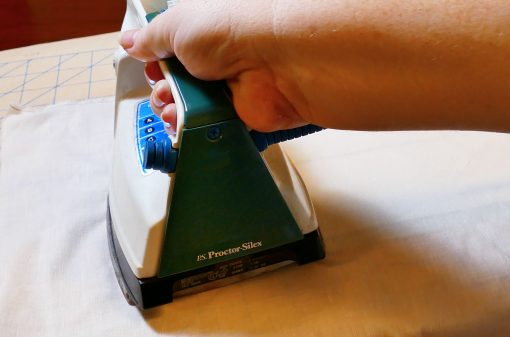
Iron your cotton fabric so it has no wrinkles. (Don’t iron your fusible interfacing!)

Watch my assembly video, which goes through the entire cutting and assembly process.
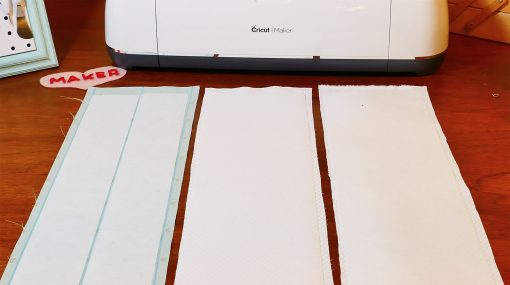
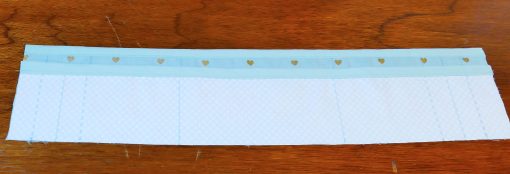
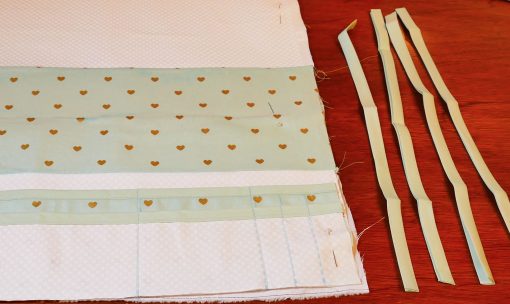
Cut out your materials (cotton fabric, interfacing, and the optional vinyl for the heart) using my pattern. Tip: If you’re cutting the pattern out on your Cricut Maker, put a full 12″ x 24″ piece of fabric on your FabricGrip cutting mat before you cut it to ensure you have a large enough piece. You can, of course, just cut the large pattern pieces by hand. You’ll get more precision if you use the Maker, however.
Tip #1: Don’t forget to put your Washable Fabric Marking Pen in the tool holder if you plan to mark your fabric!
Tip #2: Place your mint cotton material on the FabricGrip mat face down so that the fabric marking pen appears on the back, where you want to see it. The other layers of mint fabric and the white fabric can go on the mat face up.
Once all of your materials are cut, identify each piece using this diagram as I will refer to them by name from this point forward.
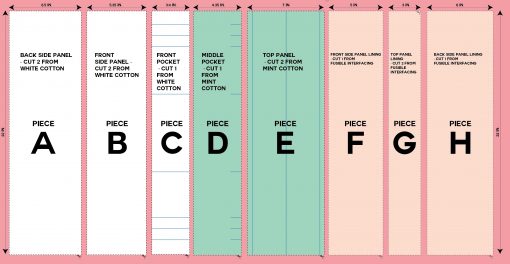
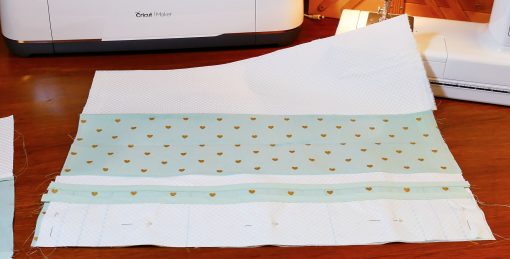
Lay one (1) of piece A (back panel), one (1) of piece B (front panel), and piece E (top panel) on your work surface, face down. Now lay one (1) of piece F, one (1) of piece H, and both pieces G on top of pieces A, B, and E. Note that both of pieces G (interfacing strips) go on piece E (top panel). Interfacing should be centered inside the edges of the fabric pieces. And in the case of pieces G, they should NOT overlap; they should just touch of even have a small gap in between.
Important note: Interfacing must go shiny side against the fabric — the shiny side is the fusible side.
Now, follow the directions on your fusible interfacing package to fuse them to the back side your front, top, and back panels. The directions for Craft-Fuse say to place shiny adhesive side of interfacing against wrong side of fabric, then cover with a damp press cloth. Using a hot, dry iron, apply slight pressure with a gliding action to fuse, allowing iron to stay on fabric for 8-10 seconds.
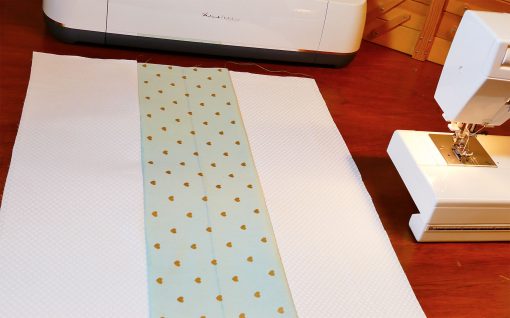
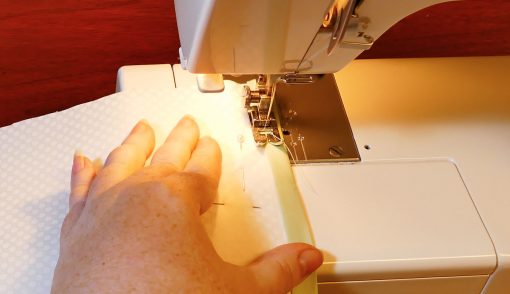
Once you have your interfacing fused on, you can sew these three layers together in this order: front fused layer (A/F) + top fused layer (E/G) + back fused layer (B/H). Place right sides together and sew 1/2″ from the edge (the 1/2″ seam allowance is built into the pattern).
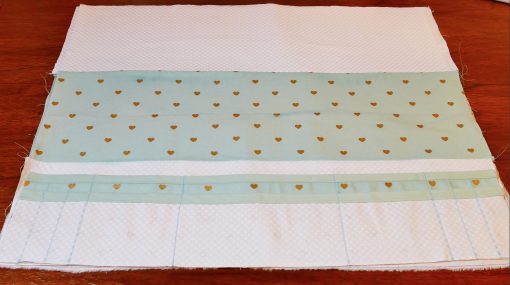
This is what it looks like when those pieces are sewn together.
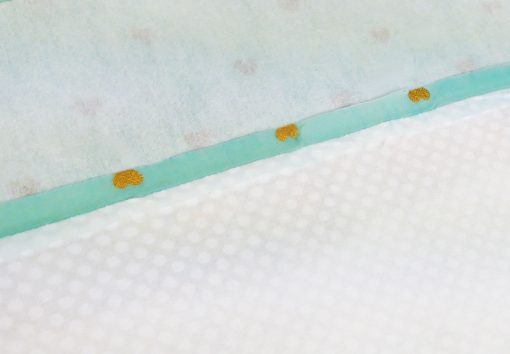
Now press the seams open for clean, crisp seams. (If you’re not familiar with what that means, a pressed seam is a seam that is opened on the back and pressed to lie flat.)
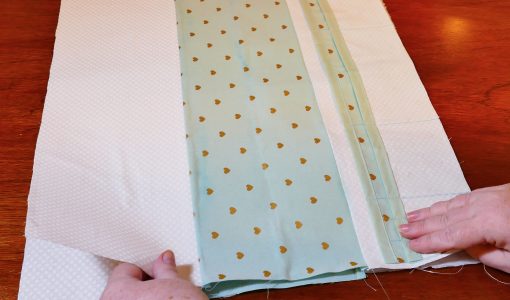
Now sew together the remaining Piece A (back panel), remaining Piece B (front panel), and remaining Piece E (top panel). Place right sides together and sew 1/2″ from the edge (the 1/2″ seam allowance is built into the pattern). These three pieces are the lining of your Maker Mat and will not be seen unless you turn it over.
If you want to iron-on the gold heart onto the front pocket (piece C), this is a good time to do it. Just be mindful to leave enough space at the bottom of the pocket for the bias tape (about 1/2″).
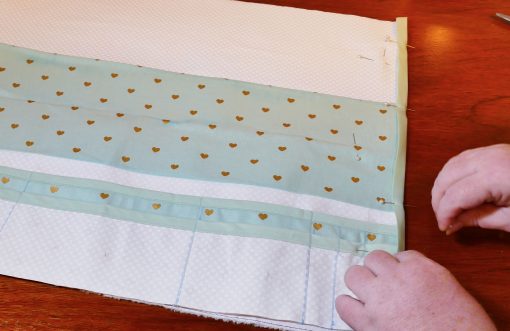
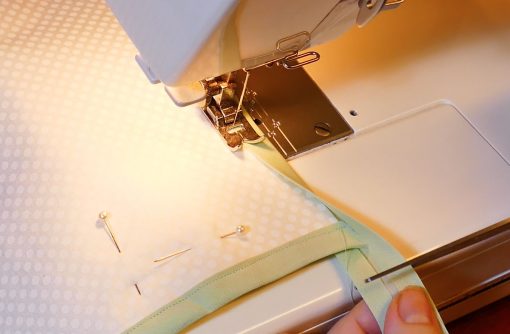
This is also the time to sew the bias tape onto the TOP edge of your two pocket pieces (C and D). The tape should extend all the way to the edge of each piece.
It’s now time to sew the pockets! Place piece C on top of piece D, both right side up. Line up the marking lines with one another. Pin in place.
Sew along in the spots marked with a yellow dotted line in the graphic below. Sew from the bottom all the way to the top of the bias tape on the front pocket, but do not sew beyond that first row of bias tape.

Tip: You can totally change the configuration of the pockets on your Cricut Maker Mat if you wish — feel free to customize this to your needs.
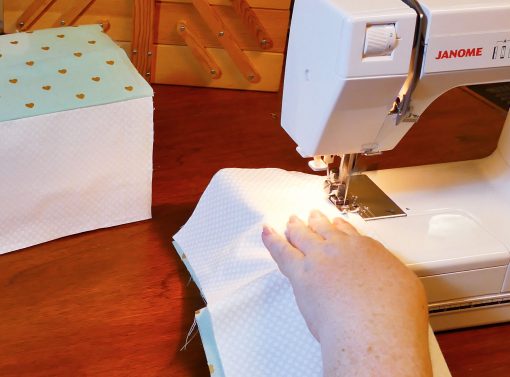
Once Pieces C and D (front and middle pockets) are sewn, place the pocket assembly on the fused layer assembly (the pockets go on the smaller white section, flush with the outer edge). Pin in place.
This time, sew along the spots marked with the orange dotted line in the graphic below.

This is what it looks like when the pocket assembly is sewn to the fused layer:
Place the fused layer on top of the lining layer, wrong sides together. Make sure all seams match up.
Pin in place.

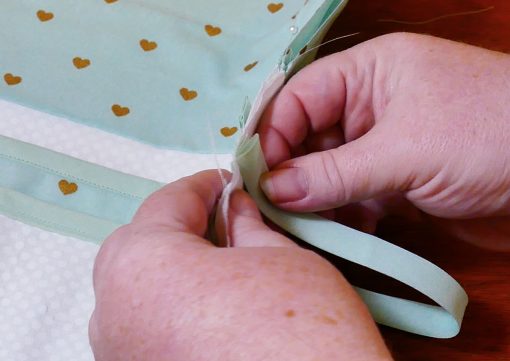
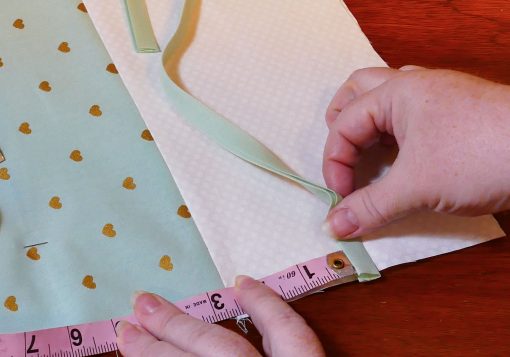
Cut out four ties from your bias tape, about 12″ long each. What I did was make sure I had enough bias tape to go around the four sides of my Cricut Maker Mat, then I cut the remaining tape into four strips.
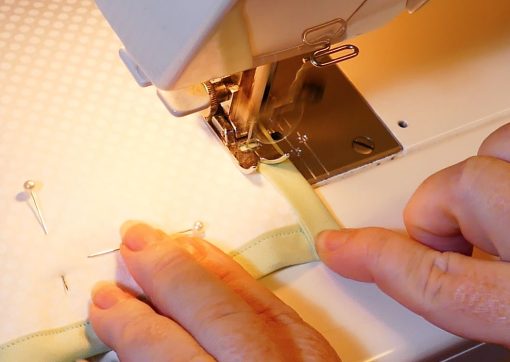
Begin pinning the bias tape onto the edge of your Maker Mat, beginning at the bottom back corner (as shown in the photo below). Make sure you’re getting the bias tape around all layers at the edge and as far over onto your fabric as possible. Pin the first 12″ inches into place.
Place a tie on the BACK of the front panel your Cricut Maker Mat, in line with the top of your front pocket, and tuck the edge under the bias tape. Repeat for the other side.
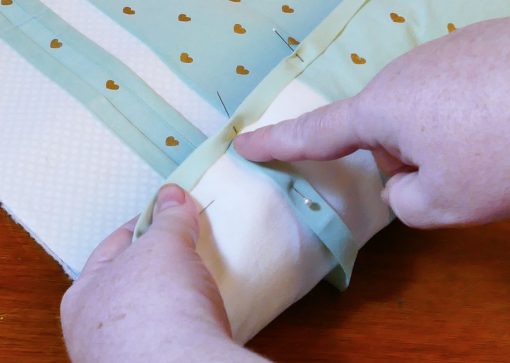
Pin the other two ties onto the back of the back panel of your Cricut Maker Mat, about 2.5″ from the top panel, and again tuck the edge under the bias tape.
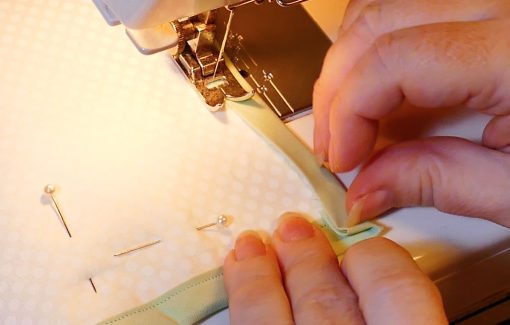
Sew down the edge of the bias tape, about 1/8″ from the edge. Make sure you’re getting all layers, including any ties and the other side of the bias tape, when you sew.
When you get to a corner, you’ll want to fold the bias tape into a right angle to form the corner.

Continue sewing all four sides of the Maker Mat. When you get to the end, cut off the bias tape with an extra 1/2″ to spare.
Now, fold the end up and under to be flush with the edge of your Cricut Maker Mat and finish sewing.
And that’s it! Trim off any hanging threads and put it on your Cricut!
Tip: To remove the washable fabric marking pen lines, just spray with water, rub a little with your finger, and allow to dry.
Get the free cut files/pattern for my Cricut Maker Mat
You’ll find the cut files (for the Maker) and PDF pattern (for cutting out by hand) in my free resource library — get the password to the library by filling out this form:
Get access to ALL of my free cut files!

Subscribe (free!) to my newsletter with updates and tips PLUS get instant access to my resource library with this file and all of my other free files, printables, and patterns! Once subscribed, I will send you a newsletter with details about my new free files each week.
Enter my free resource library for my latest files, printables, and patterns! Password is 'craftthelove' -- please copy and paste that in at the link above. Thanks for being a subscriber!!
I’d love to see your project! If you make one, please share a photo in our Facebook group or tag me on social media with #jennifermaker.
Here is a Maker Mat made by reader Sharon Moore — isn’t it cute?
Please let me know if you have any questions!
Love,

Like this tutorial? Please pin it to your favorite Pinterest craft board!


I can’t wait. I got mine this morning at Joanns too. I was going to make the tool caddy and the dust cover. Now you have my interest peaked on the matpritectir dust cover. Thank you
I working on it now! 🙂
HAHA Do you sell them? I would love one but I don’t sew yikes!
Alas, no, Regina — I don’t sell them. But I bet you could find someone local to you who does sew and is willing to make you one. It’s not hard! 🙂
I will have to try that :))
I’d love to see your Maker Mat if you make one. 🙂
BEAUTIFUL
I don’t have the Maker yet . But would love to make this now so when I do get it I have it. this wold be good for the other one too. THANKS Debbie
This is so clever! Thanks so much for the free pattern.
Great instructions! I did make the one from DS and it was a little small but like your idea, fiits all the machines. Will try it soon. Thank you!
Yay! Hope you make it!
Jennifer,
I am have been looking for this pattern in the resource library as you indicated above but have not seen it. I am subscribed and have the password to the resource library but this pattern is not in there. Please help.
Hi, Sara! The pattern is currently third from the top in the list, in between Paper Storage Tower Shelf Template and Easy Halloween Luminaries. 🙂
Could you tell me how much fabric you purchased for this project, also will this size work for the explore machine?
Thanks
I bought 24″ (two feet) of the mint cotton fabric and 24″ (two feet) of the white cotton fabric. I bought these off the bolt at my local fabric store, so the fabric pieces were 24″ wide by about 55″ long.
Just watched your Maker Mat video. I’m looking forward to making mine. I love watching you sew. Thanks for sharing your knowledge
Awesome, Julie! Feel free to share it with us at [email protected] when you have completed it! We would love to see how it turned out.
Hi Jennifer,
I’m making this as a gift for someone and I don’t have a Cricut so I am hand cutting. can you tell me at what intervals the pockets are sewn to hold the tools? maybe it is here somewhere and I missed it? Thank you = )
If you open the PDF file I include, it will show all the spacing! I hope this helps!
This is a nice pattern. I have a question and a comment:
1. I used the PDF (easier to cut rectangles the old fashioned way vs using the DS and the Cricut). On the PDF it says to cut 2 pieces of interfacing the size of the front and back panels. But in your instructions you only say to apply interfacing to the top pieces (1 piece on the back panel, 1 piece on the front panel and 2 pieces on the top panel). What are those other 2 pieces of interfacing for? I made mine with interfacing on the top pieces but not on the lining and it worked out just fine.
2. It would be helpful to explain why you instruct to put two pieces of interfacing with a small gap on the top piece. I assume its so that the mat bends nicely over the table when used as a mat and not as a cover? I’ve been sewing for a decade and have never seen anything like that before so it had me confused and second guessing that step. I left a gap, but had I understood what it was for i probably would have made it smaller.
Hi Valerie! Thank you for taking the time to make my organizer and dust cover in one! Yes, that is exactly why I did it with the additional interfacing, so you have those nice bends to go around your machine.