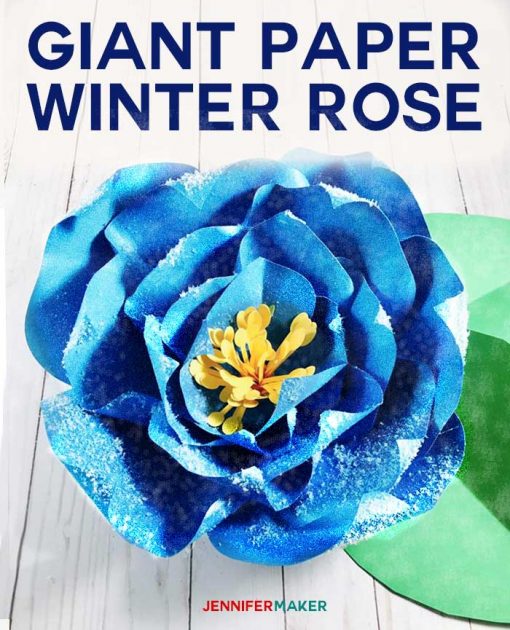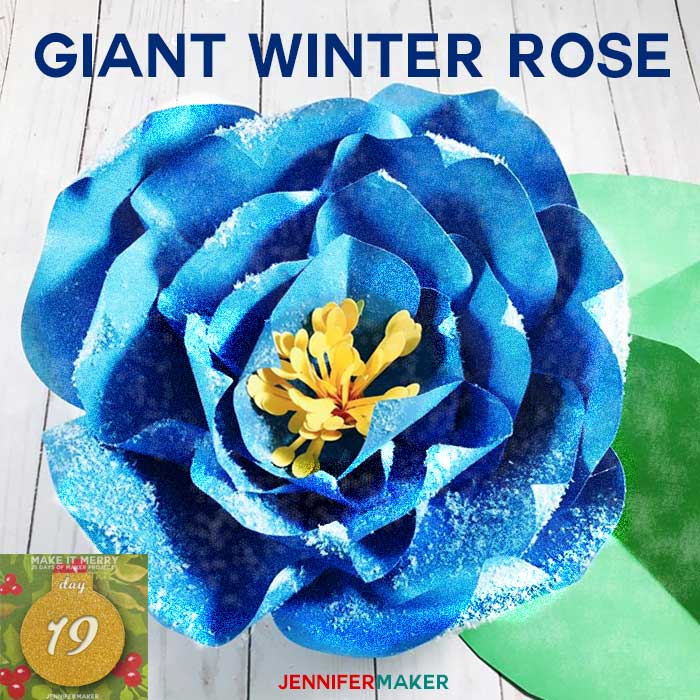
 Flowers in winter? I know, crazy, right? It certainly is a crazy idea here in Michigan. Very little is still green in our frozen tundra this time of year. But I did a little research and discovered a flower some folks called the “winter rose” because it blooms in winter. It’s really a hellebore, but it’s very pretty and would look lovely in my craft room after the holidays. So for Day 19 of the MAKE IT MERRY: 25 Days of Maker Projects Christmas, I’ve designed a pretty blue winter rose, complete with a dusting of snow.
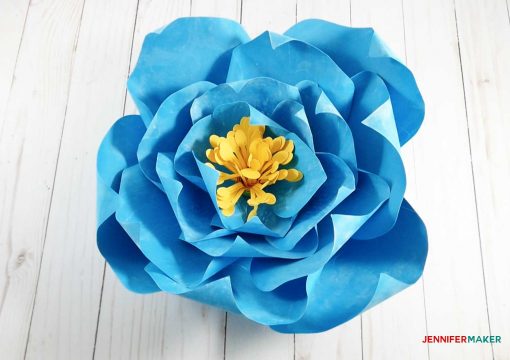
Like all of my other paper flowers (and I have quite a collection at this point), the petals were traced from real hellebore petals. The petals have points on the end and are usually ruffled. I’m using the double-flower version, as I like all the petals. That said, real hellebores don’t come in blue—normal colors range from white to red, and even some black. So I’m exercising some creativity in creating a blue hellebore.
Here’s a fun fact: One variation of the hellebore, the Helleborus niger, is sometimes called the Christmas rose. This name dates back to legend that the flower grew in the snow from the tears of a young child who had no gift to give the baby Jesus in Bethelehem.
I think this would be an amazing giant paper flower for a winter wedding, don’t you? All covered in glittery “ice crystals” and “snowflakes,” this flower would make a lovely photo backdrop!
Let me show you how to make this pretty winter rose! This post contains some affiliate links for your convenience (which means if you make a purchase after clicking a link I will earn a small commission but it won’t cost you a penny more)! Read my full disclosure policy.
Materials for the Giant Paper Winter Rose
- 65lb. letter-size cardstock (I used this cardstock in cyan and yellow)
- (Optional) Glitter spray (this is what I used)
- (Optional) Faux snow (I used this stuff, looks like real snow)
- Glue gun and hot glue
- A way to cut your cardstock (I used a Cricut)
- Design #82 – My free SVG cut files/patterns for the giant winter rose (available in my free resource library—get the password at the bottom of this post)
How to Make Your Giant Winter Rose
First, download Design #82 which are the patterns for my giant paper winter rose from my free resource library. If you’re going to cut them out on your cutting machine, upload the file to your design software. If you’re not sure how to upload an SVG cut file to Cricut Design Space, watch this helpful video training series I made.
Cut out all of your petals and flower parts. There are 15 individual petals, one three-petal array, a circle (the base), and three stamen parts (usually cut from yellow paper).

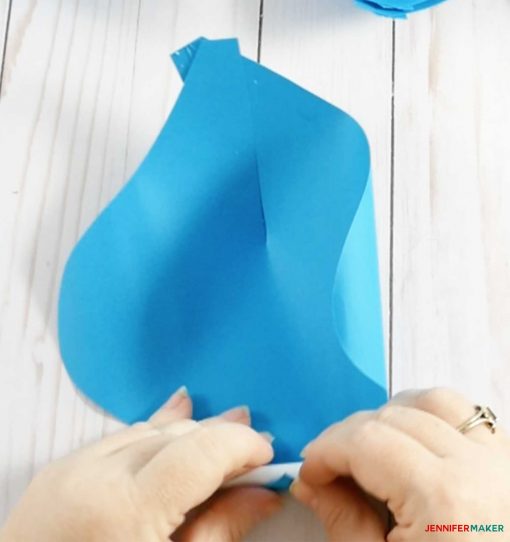
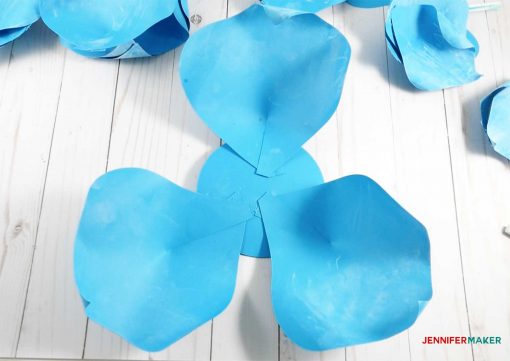
Glue the base of your individual petals so that they form a cup shape. This helps give your winter rose a three-dimensional look.

Note: I experimented with putting white chalk on my petals, but later covered it up with glitter spray and faux snow. If you want to color your petals individually, however, now’s the time to do it.
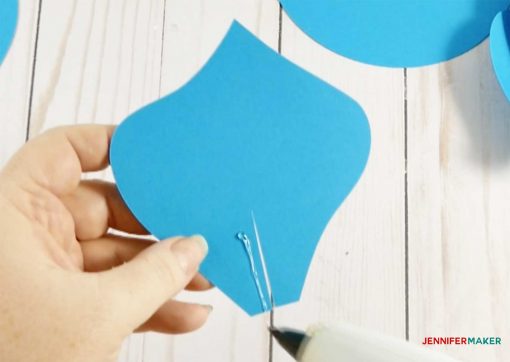
Curl the edges of your petals. I curled the two sides (on side up, the other side down), as well as the pointed tip of the petal (I curled this in).
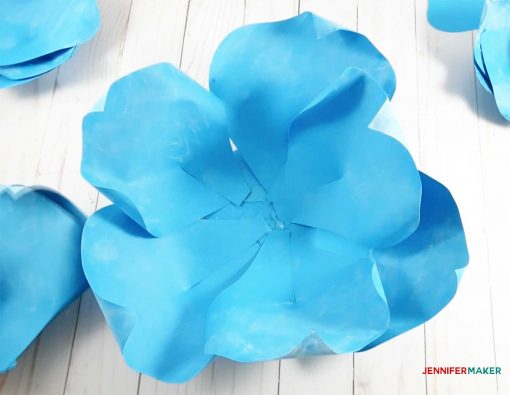
Begin gluing the petals onto the round base, one at a time. Put the three largest petals on first, then continue filling in the spots between petals with subsequently smaller petals. I recommend you keep your petals spaced at the edge of the circle, rather than moving in toward the center. The hellebore has plenty of space for its stamen in the middle of its blossom.

When you finish gluing on the individual petals, it’s time to prepare the stamen. Glue the three stamen parts end to end.

Put a long line of glue at the bottom of the stamen strip and roll it up into a loose spiral.


Glue the rolled stamen to the center of the three-petal array.
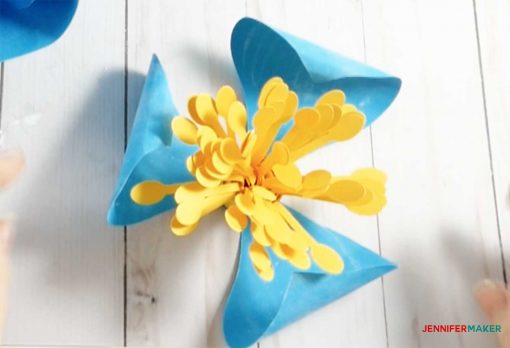
Now glue the stamen and three-petal array into the center of your paper winter rose.
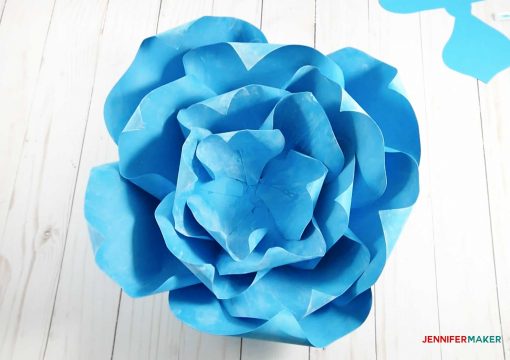
You can stop here, or go a little further as I did. I sprayed my winter rose (outside) with glitter spray. I put on two coats, and then immediately dusted it with faux snow. The wet glitter spray acted as glue for the snow. And spray it after I put the winter rose together meant the snow looked more natural.

I just love how it looks!! It would be pretty in a lot of different colors, but am partial to this blue, especially with the snow and ice on it.
Get my free cut files for the Giant Paper Winter Rose
I plan to put this giant winter rose up in my craft room after the holidays. What will you use yours for? If you make one, feel free to send a photo to me at [email protected] or tag me on social media with #jennifermaker.
See all of the tutorials and free designs in my MAKE IT MERRY: 25 Days of Maker Projects Christmas!
Love,

Want to remember this? Save the Giant Winter Rose to your favorite Pinterest board!