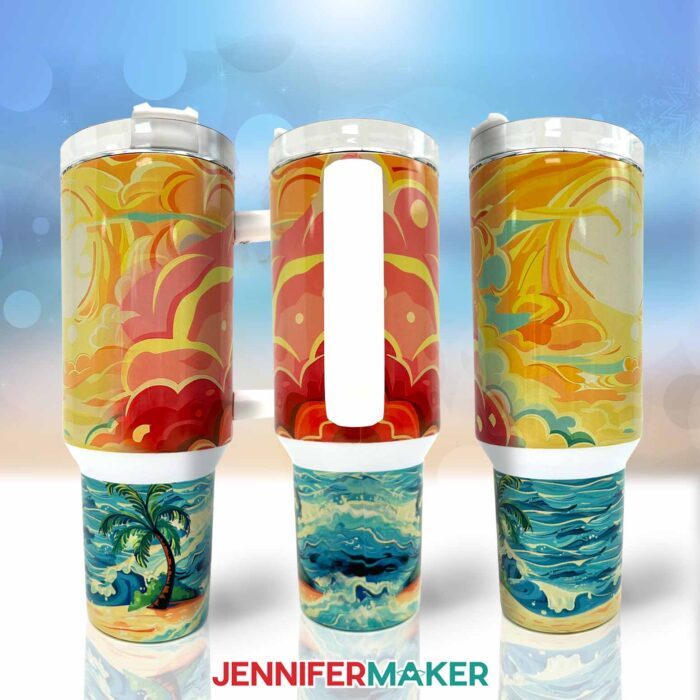
Learn how to sublimate a 40 oz tumbler with a handle!
Tumblers are some of my favorite sublimation projects, because they’re a fun, functional way to show off pretty designs! Together, we’ve made many skinny tumblers where creating an invisible seam is the main challenge. Plus, we’ve learned how to sublimate tapered tumblers with specially-shaped paper. But learning how to sublimate a 40 oz tumbler with a handle was an even bigger challenge! These cups have straight sections, tapered areas, plus brackets to sublimate around, AND they’re larger than many heat sources! I’ve combined parts of several tutorials (and learned a few new tricks along the way!) to learn how to sublimate a 40 oz tumbler with a handle. Now, I’m excited to share everything I’ve learned with you so you can make your own!
Watch the full step-by-step tutorial on how to sublimate a 40 oz tumbler on my Youtube channel!

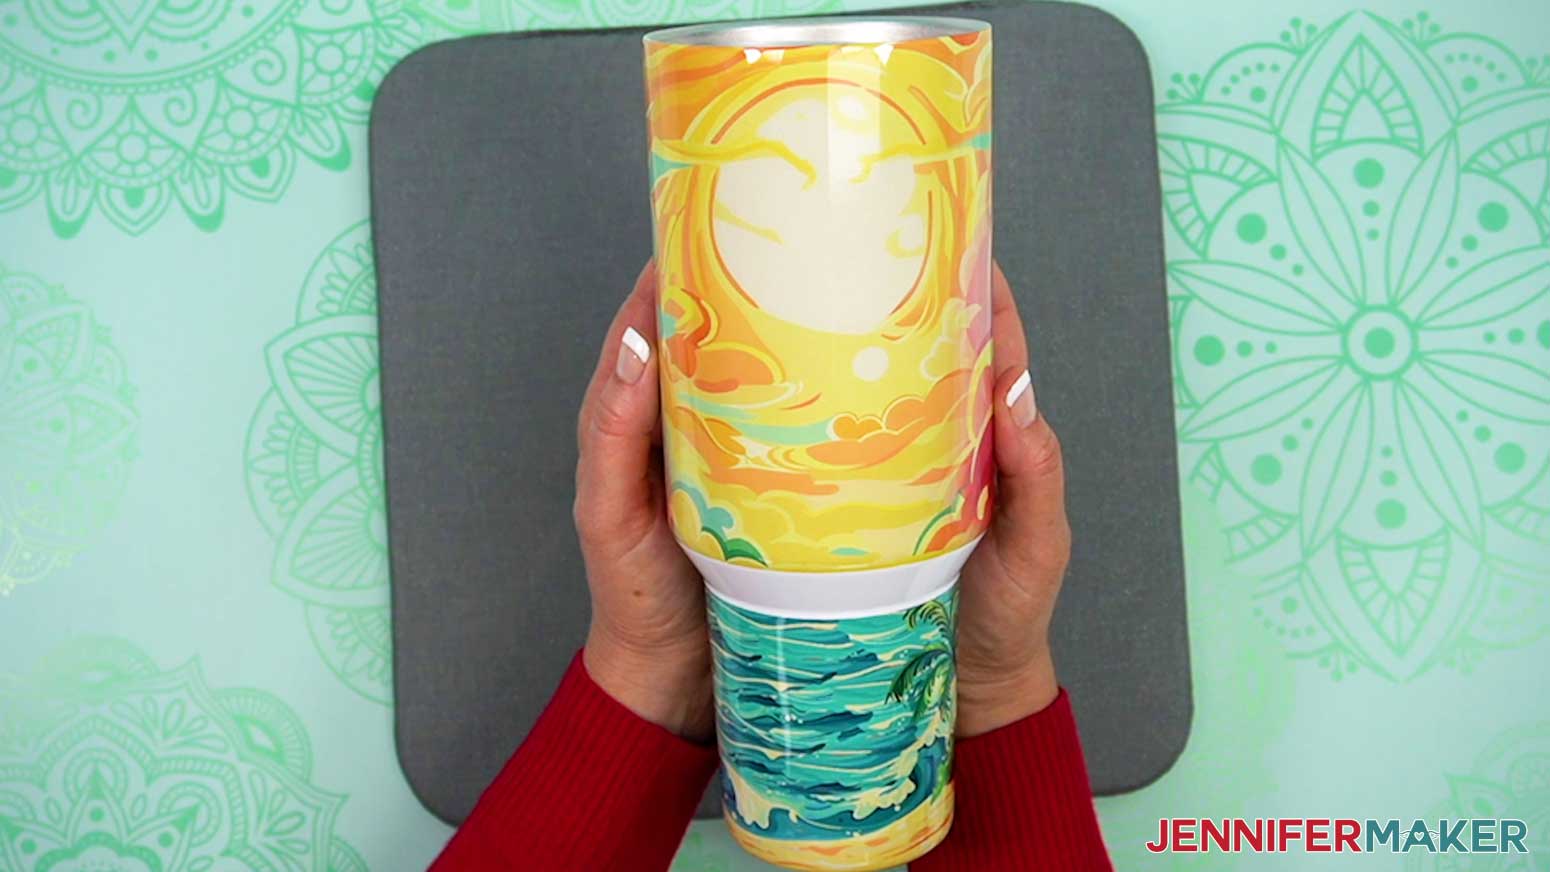
I found it easiest to work on my 40 oz tumbler in different sections. It’s almost like sublimating two tumblers instead of one!!
For the upper section, I prepared my design and cup like I was sublimating a skinny tumbler since it has the same straight sides with a few major differences: handle brackets!
The 40 oz sublimation tumbler I’m using ships with the handle detached, so I’ll share how I measured and cut matching notches on each side of my printed design to decorate right up to the brackets. Once you put the handle back on (after sublimating with the included screwdriver) the seam will be mostly hidden, especially when you’re holding the cup!
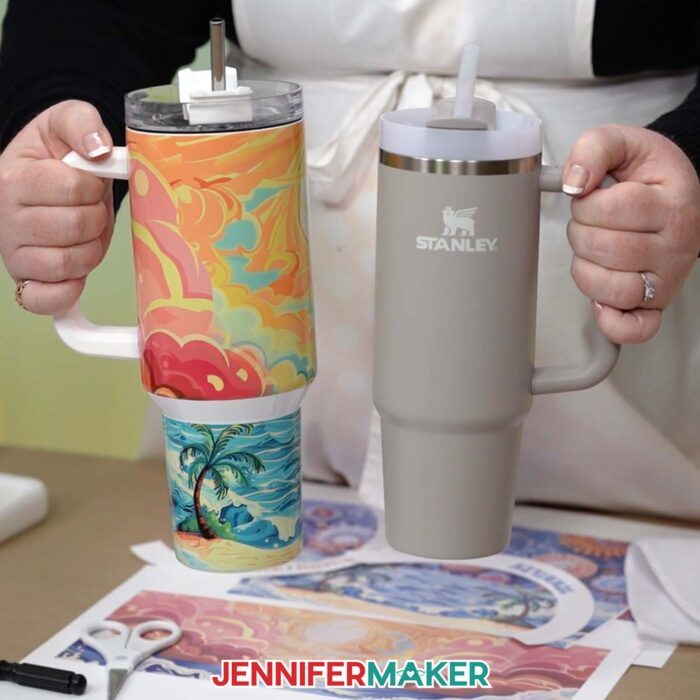
The bottom of my tumbler is slightly slanted (I found a cup that looks VERY similar to a Stanley model, but it’s ready for sublimation unlike the expensive trendy version!) so I approached it like a small tapered tumbler.
I took measurements and used a free online tool to print the design at the correct shape and proportions. If you’re using a different tumbler than the one I’ve listed, I have a link below so you can adjust your design to fit, too. The lower seam isn’t as hidden as the top one, but I’ll show you how to blend to really well for excellent results.
I’ll show you how to use free Google tools to print your designs perfectly! Since these tumblers are big, I used 8.5″ x 14″ or Legal Size sublimation printer paper to wrap all the way around the cup. The paper worked perfectly in my Epson printer converted for sublimation with compatible ink.
And when it was time to test how to sublimate a 40 oz tumbler, I tried a few processes to find the most reliable option. In the end, I combined shrink-wrap tubes, a heat gun, and a craft-specific convection oven to sublimate my designs with the best results. My supply list below has links to everything you’ll need for the perfect transfer.
Are you curious how I added design details to some of the big tumbler’s middle sections? That little spot was the most challenging from design sizing, to template proportions, and even taping, but I really like the result! I can teach you how I did it and more in my ADVANCE program. The design kit includes Canva templates to make your own top, middle, and bottom designs, and how to perfectly design and cut the middle using a Cricut.

Let me show you how to sublimate a 40 oz tumbler! This post contains some affiliate links for your convenience (which means if you make a purchase after clicking a link I will earn a small commission but it won’t cost you a penny more, there is no additional cost)! Read my full disclosure policy.
Materials to Sublimate A 40 oz Tumbler
View my Amazon shopping list to see exactly what I used!
- 40 oz Sublimation Tumbler with a detachable plastic handle
- 105g 8.5” x 14” (legal size) Sublimation Paper -OR-
- 125g 8.5” x 14” (legal size) Sublimation Paper (slightly thicker, so may need extra burnishing to make the seam invisible)
- Sublimation Printer – I used a converted Epson EcoTank ET-2800
- Convection Oven only for sublimation (make sure your tumbler will fit, likely on its side)
- Oven Thermometer
- Heat Resistant Gloves
- Heat Resistant Thin Blue Tape
- Heat Resistant Tape
- 8″ x 2″ Heat Shrink Wrap – I used a larger wrap than usual
- Heat gun
- Heat Resistant Pad
- Fan
- Looped Tape Measure
- Scraper
- Scissors -AND-
- Paper Trimmer
- Butcher Paper (to protect your work surface)
- Isopropyl Alcohol
- Lint Free Cloth
- Ruler (to check your handle bracket placement)
- Pencil
- Tumbler Clamp, optional to help hold the shoe tumbler wrap in place during taping

How to Sublimate a 40 oz Tumbler

How To Sublimate A 40 oz Tumbler
Learn how to sublimate a 40 oz tumbler with a handle!
Materials
Tools
- Sublimation Printer - I used a converted Epson EcoTank ET-2800 Inkjet Printer
- Sublimation Ink
- Sublimation-Specific Convection Oven
- Oven Thermometer
- Fan for Ventilation
- Heat Resistant Gloves
- Heat Resistant Thin Blue Tape
- 8” x 12” Heat Shrink Wrap Sleeves (if your tumblers don’t come with them)
- Heat Gun
- Scraper
- Looped Tape Measure
- Paper Trimmer
- Scissors
- Isopropyl Alcohol
- Lint Free Cloth
- Star Pincher (optional for the tapered bottom)
- Ruler
- Pencil
Instructions
STEP 1: GET MY 40 OZ TUMBLER WRAP DESIGNS
First, download my 40 oz Tumbler Wrap designs from my free library – look for Design #618. Alternatively, you can use the Save This Project form near the top of this post and the design link will be emailed to you.
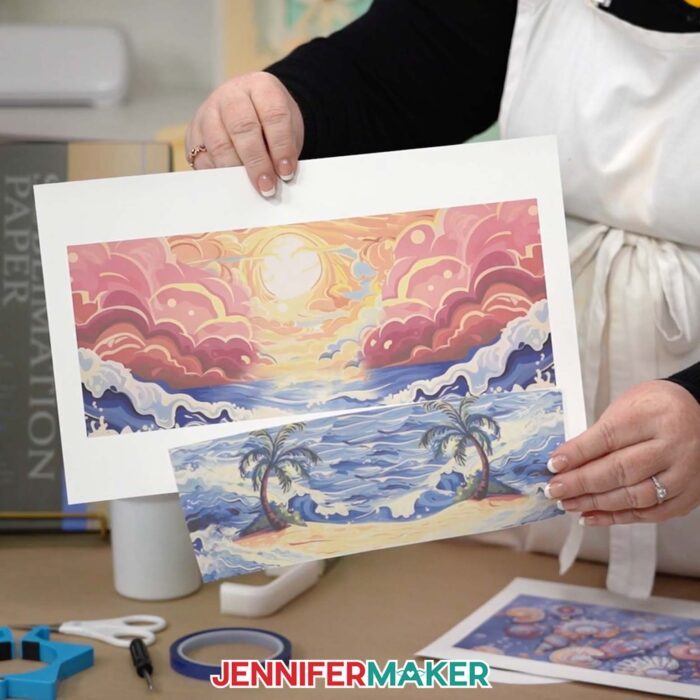
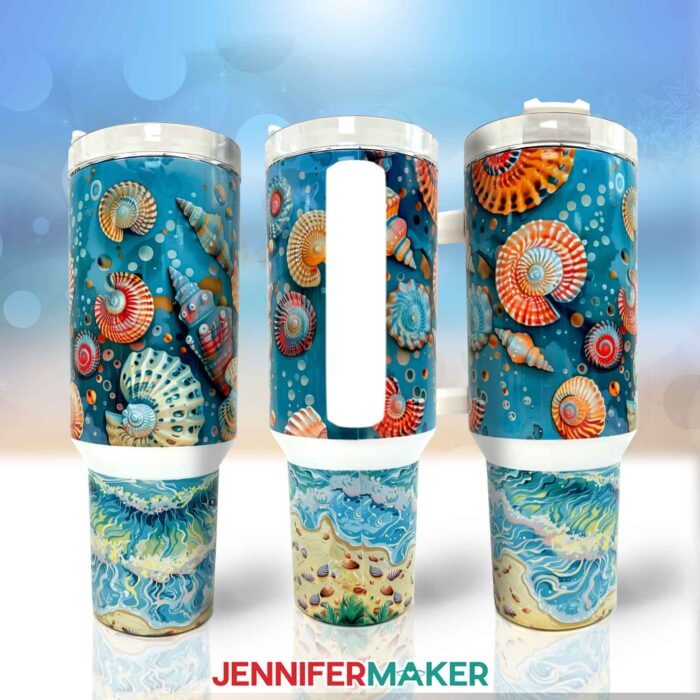
In the PNG folder, there are sublimation designs featuring beach and shell images for the top and bottom sections of the tumbler. The bottom files with "trim" in the names have been shaped to fit the tapered bottom of the tumblers in the materials list.
I’ll show you how to prepare and sublimate a tumbler that uses the beach designs.
TIP: If you’re not sure how to download Zip files, go to jennifermaker.com/svgs because the steps are similar for PNGs and Google Docs.
STEP 2: PREPARE YOUR 40 OZ TUMBLER WRAP DESIGN
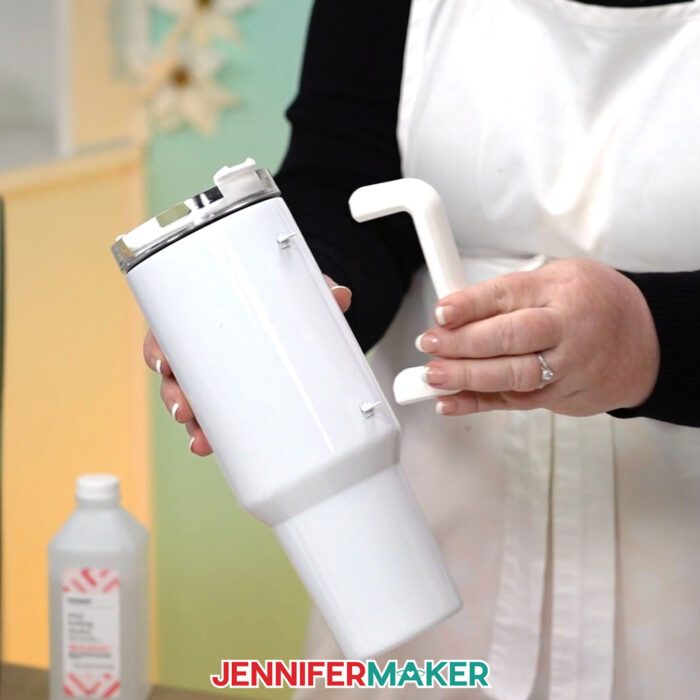
NOTE: These tumblers ship without the handles on. If yours have attached handles, check the packaging to learn how to remove them.
If you’re using a different tumbler, see the instructions in my Tapered Sublimation Tumbler tutorial for how to measure the cup’s top and bottom section dimensions and adjust each design file in Google Docs.
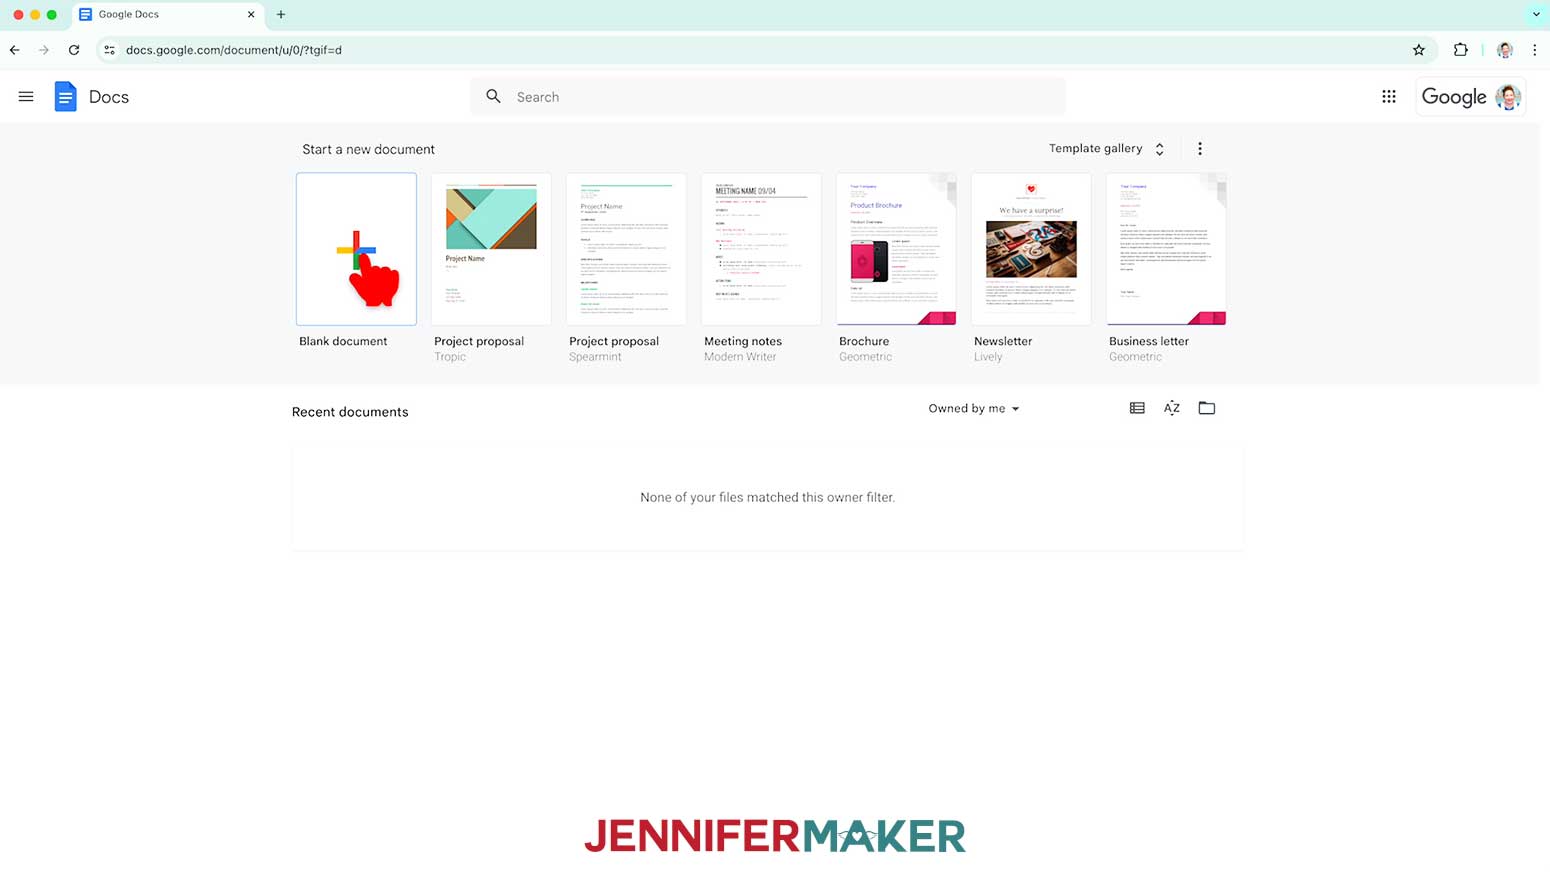
- Open Google Docs in the Google Chrome web browser on your computer.
NOTE: You will need a free Google account to use the free Google Docs software.
TIP: You can also download and open the Google Docs app, but be aware that you won’t be able to install or access any printer profiles from a mobile device, and you’re also limited in features, so I do not recommend it on a mobile device. - Click “Blank document” at the top left to open a new document.

- Go to the File menu and select “Page setup.”
- Check the box next to “Landscape” to better match the blank.
- Change your margins to “0” to use more of the page.
- Change your Paper Size to match your sublimation paper size. I’m using 8.5” x 14” or legal-size paper.
- Click “OK” to apply the settings.
- Go to the Insert menu, select “Image,” and select “Upload from Computer.”
- Select the sublimation design you want to use. I suggest starting with the top design.
TIP: It’s probably in your Downloads folder. - Click “Open.”
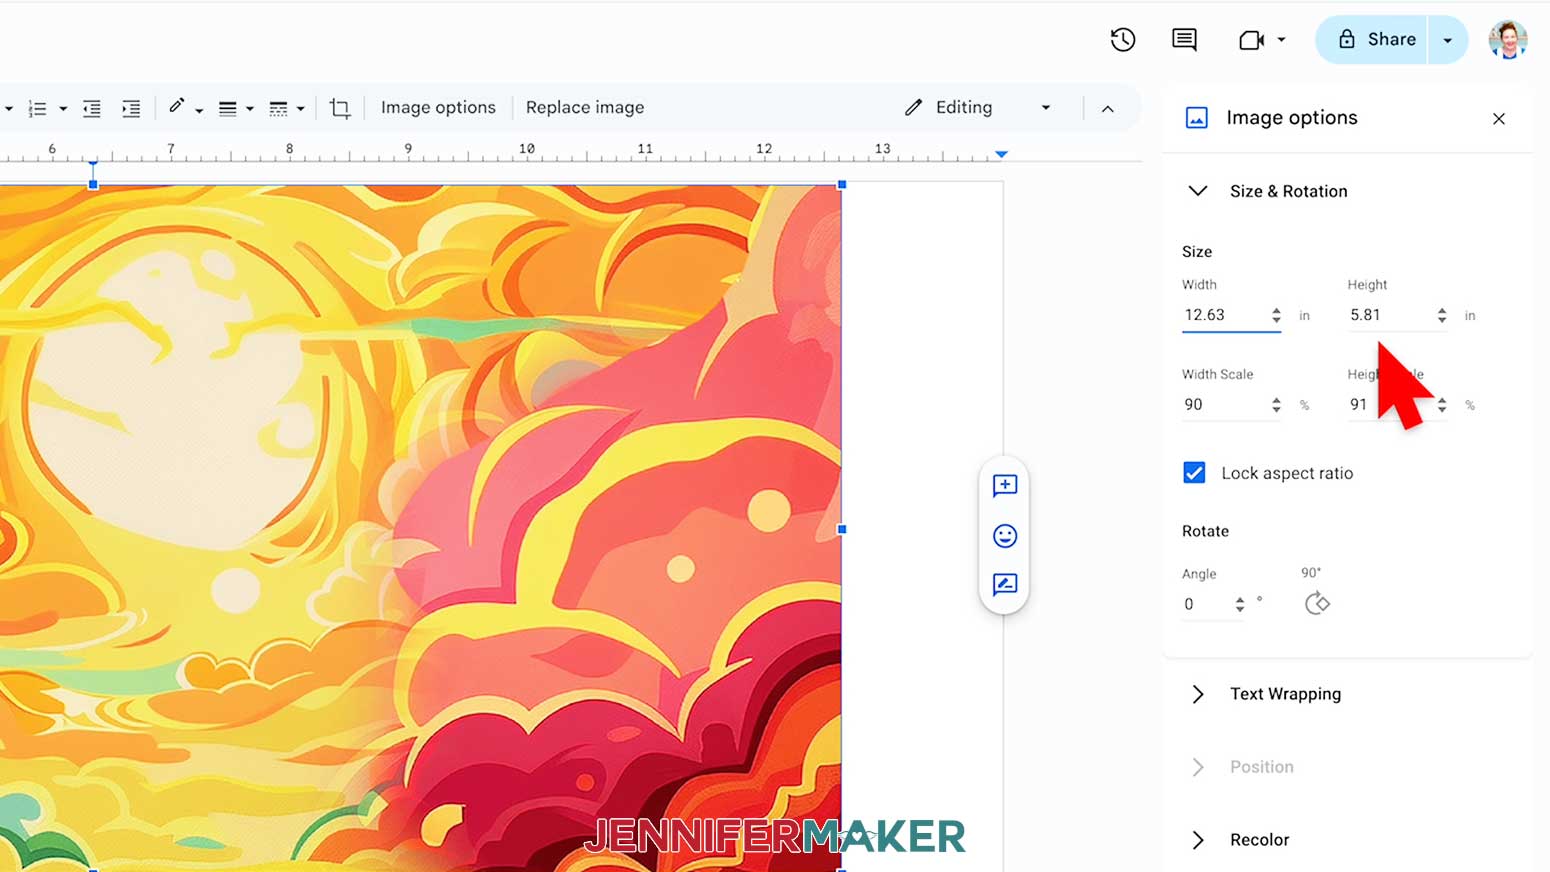
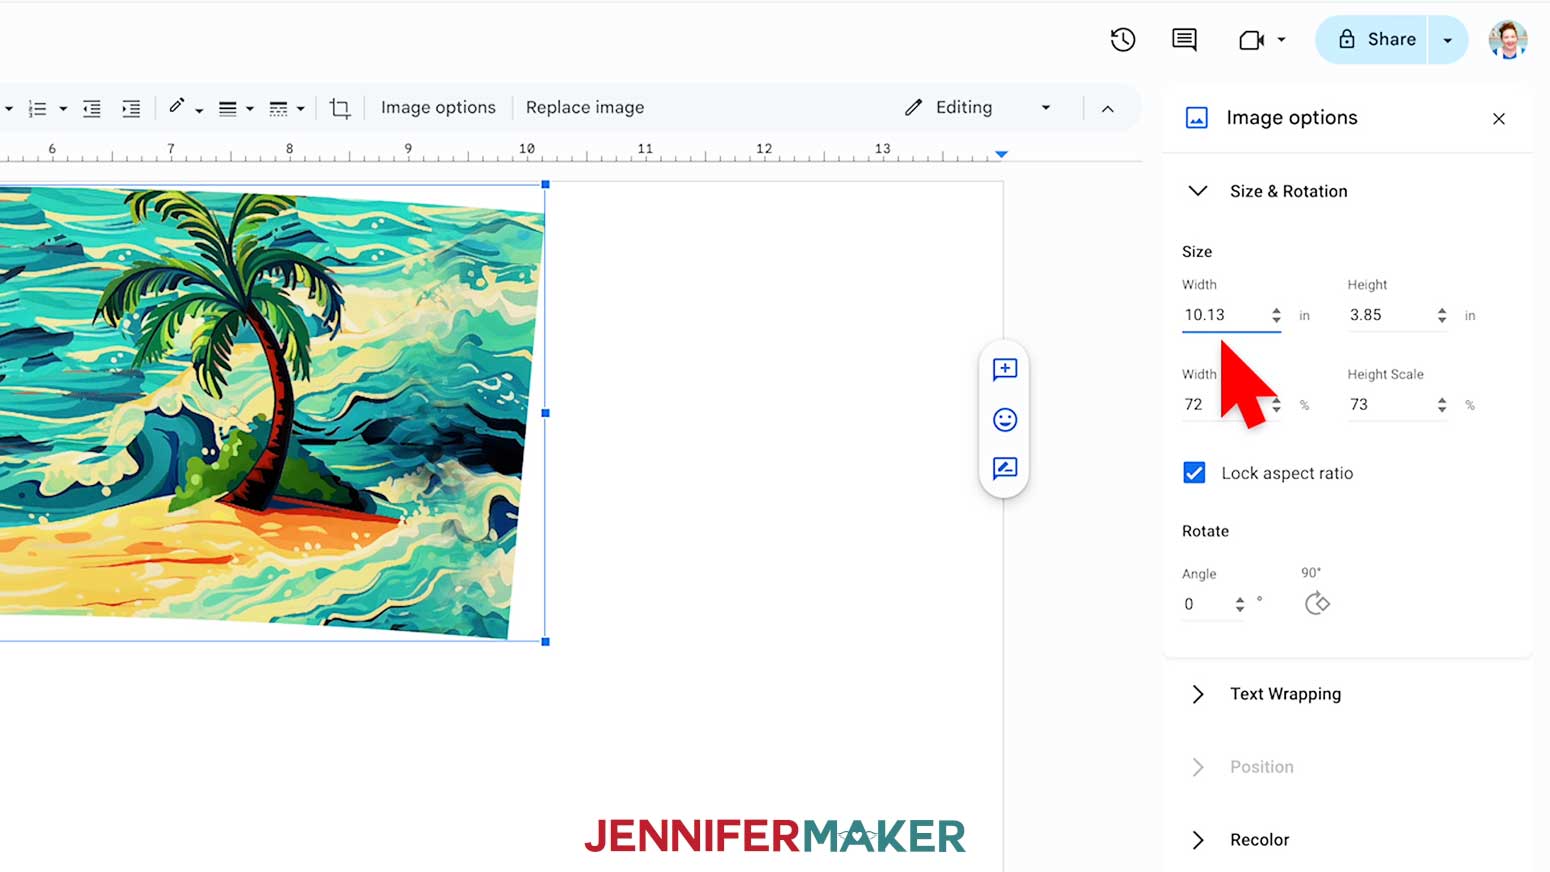
- To resize the design, right-click the image and select “Image Options.”
- Select “Size & Rotation.”
- Keep the “Lock aspect ratio” box checked to maintain the design’s proportions and change the “Width” field to the measurement you recorded when measuring the tumbler, including the addition for the seam overlap. The Height will automatically adjust proportionately.
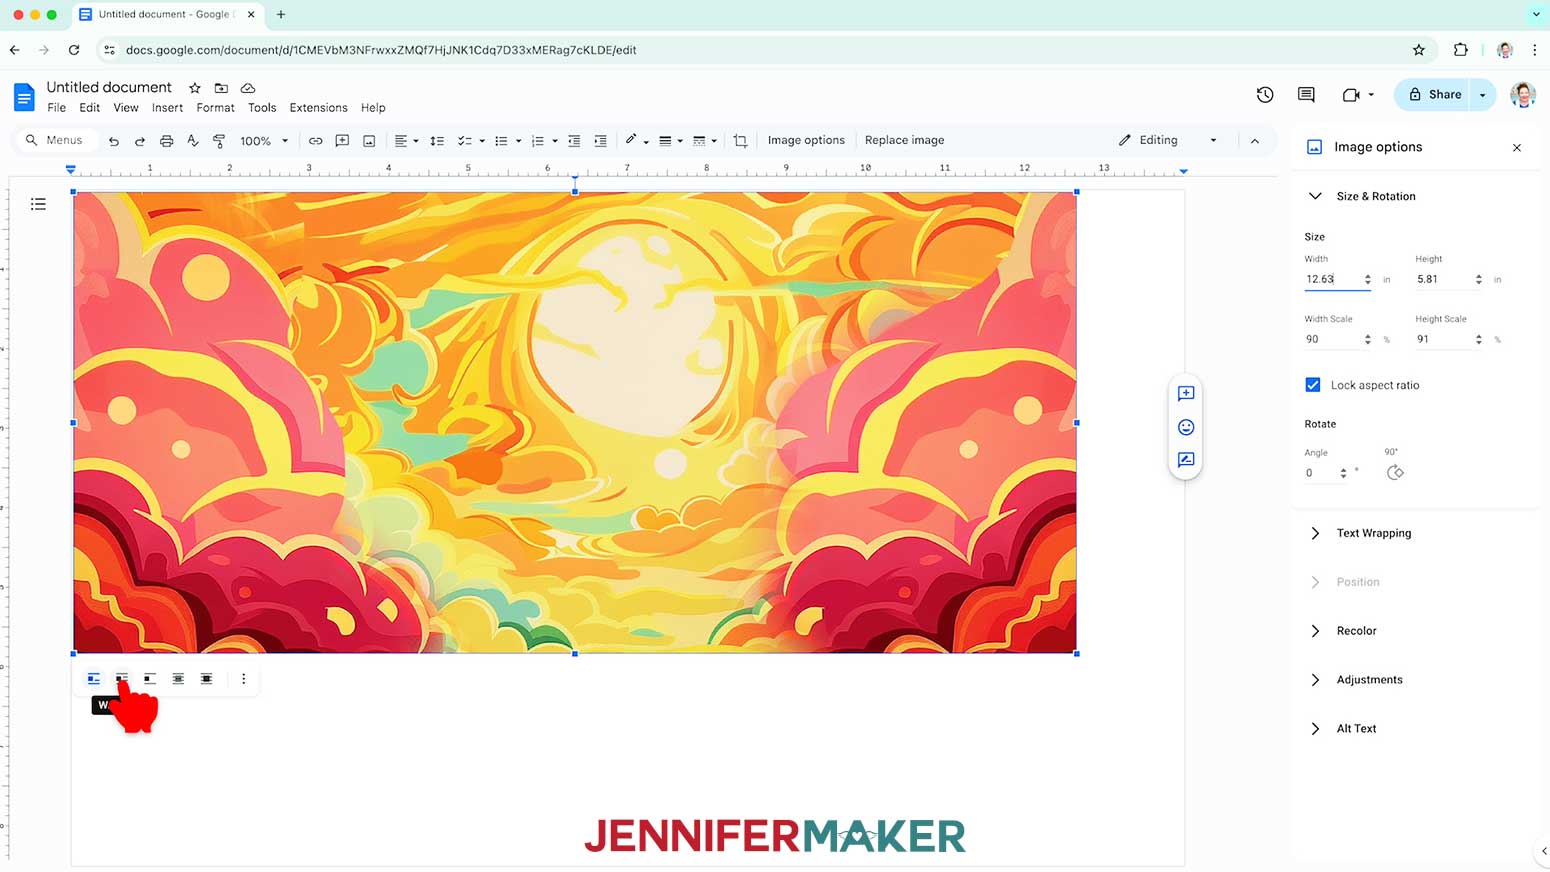
NOTE: For the top wrap, I made my design 12.63” x 5.81” tall. - Click the image and select the “Wrap text” icon from the menu that appears below it.
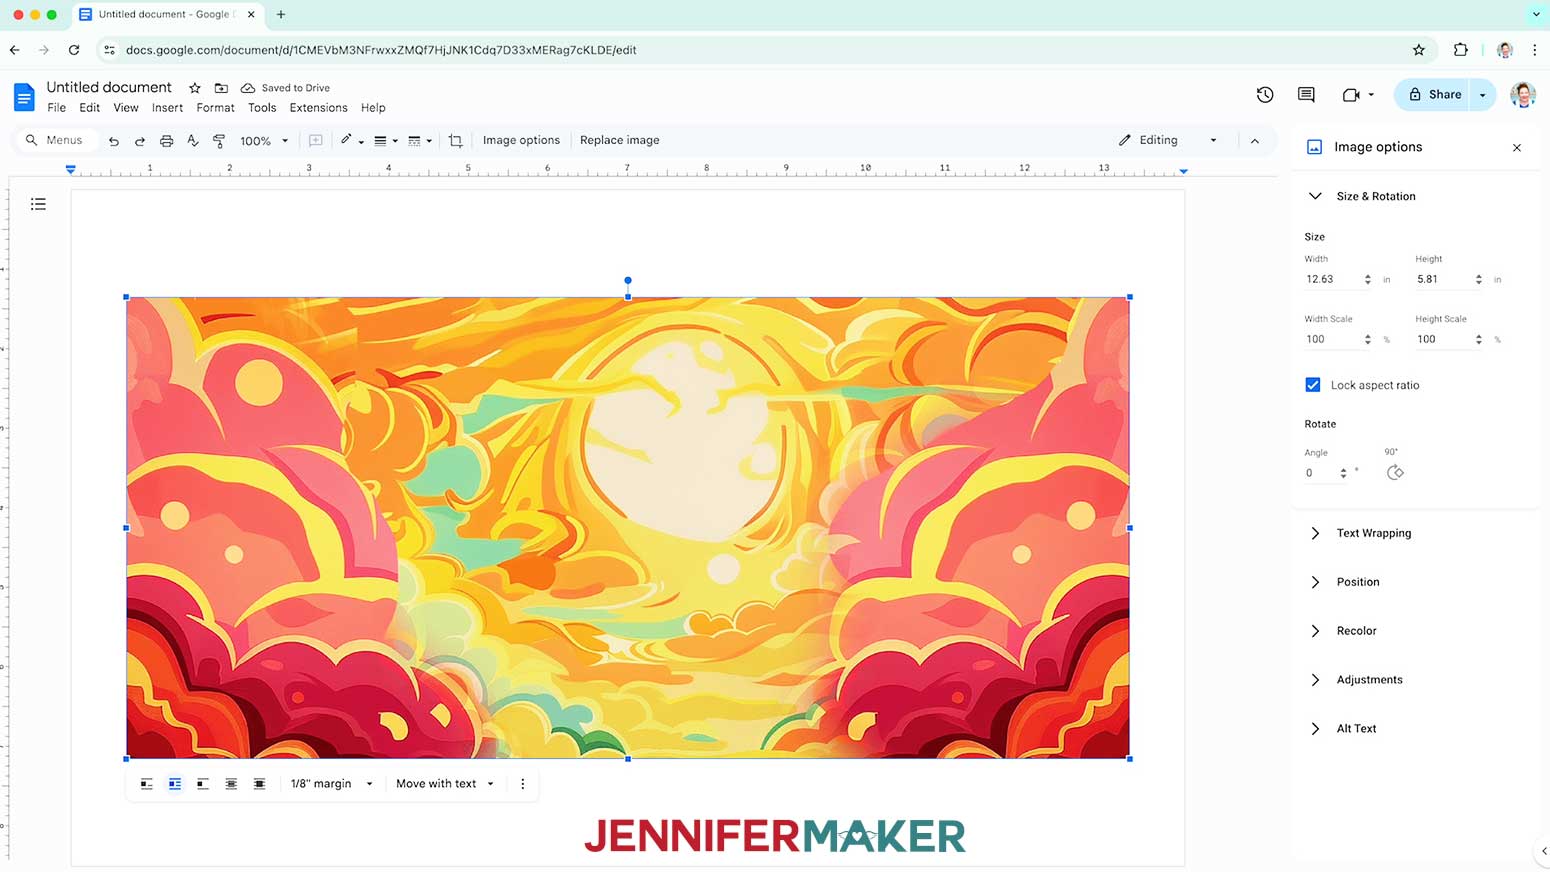
- Click and drag the image to the center of your page, as that ensures it won’t get cut off at the edges and you have plenty of space to trim the edges.
- Click the area that says “Untitled document” at the top and type a name for the file.
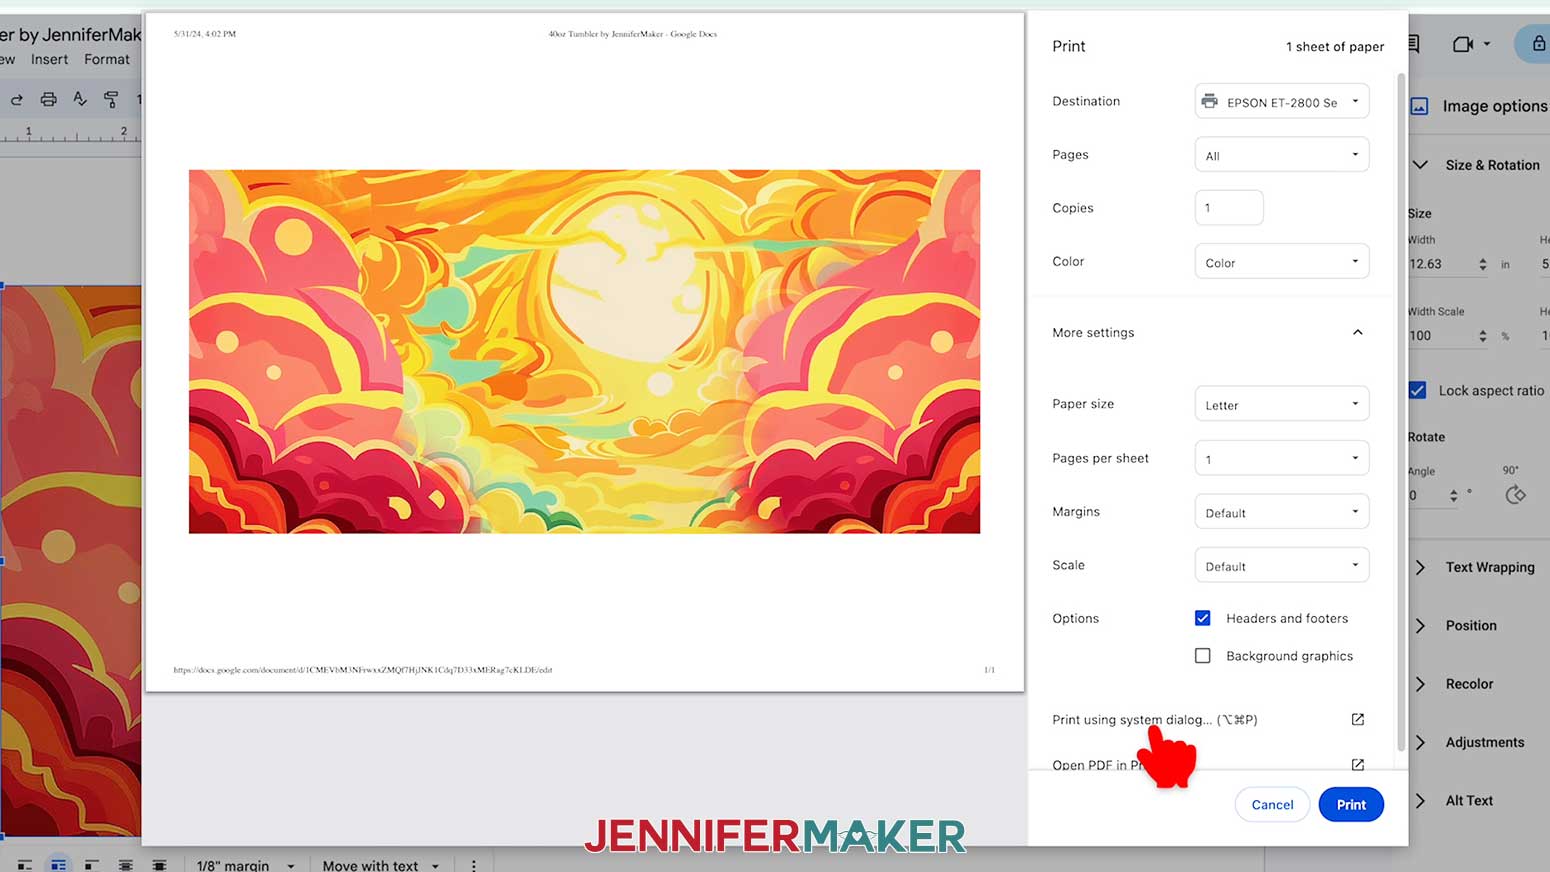
- Go to the File menu and choose “Print.”
- Select your sublimation printer under “Destination.”
- Click the arrow beside “More Settings” and select “Print Using System Dialog.”
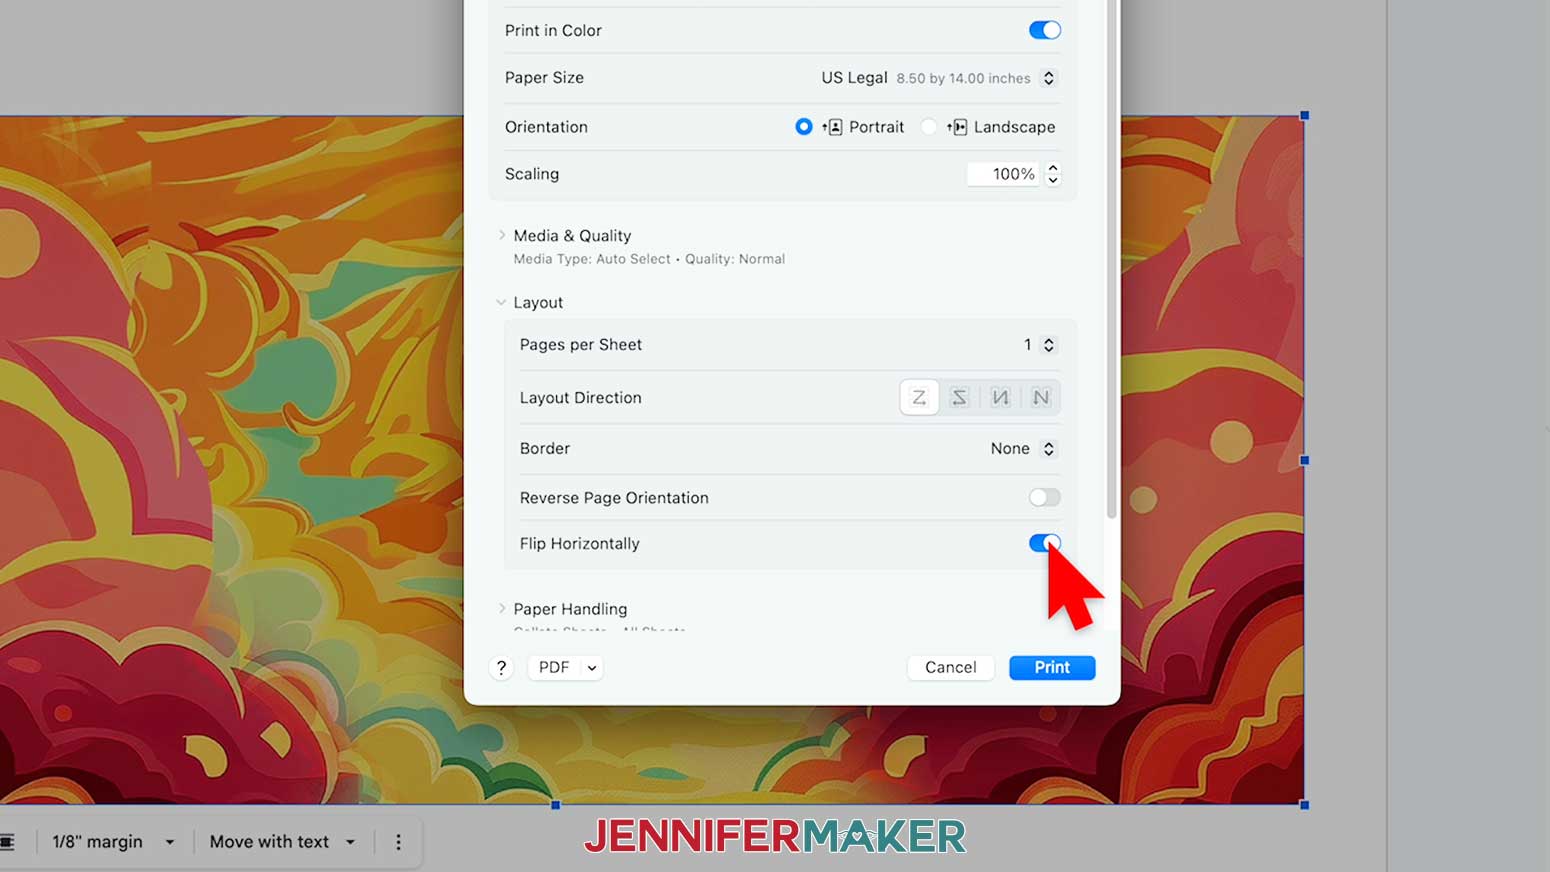
- Your print menu may look different - just make sure the sublimation printer is selected, that you “mirror” the print, and select the highest quality matte paper setting.
- Load sublimation paper correctly into your sublimation printer.
NOTE: Check the packaging for information on how to load the paper. - Click “Print.”
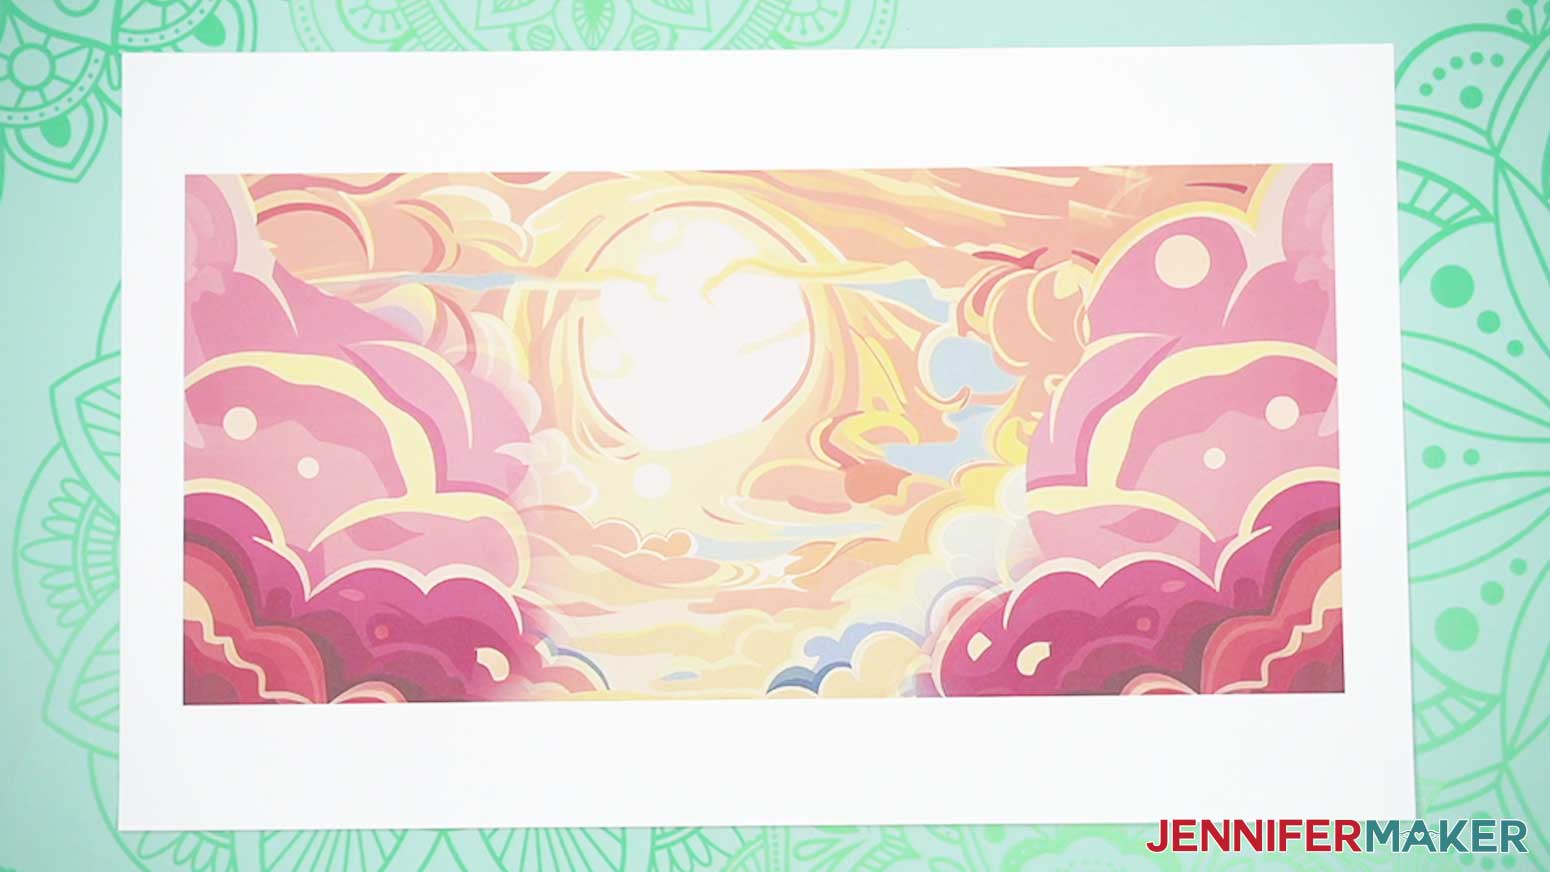
- Allow the print to dry before handling it, as the ink can smear.
NOTE: The printed design will appear lighter before pressing. - Repeat the process to print the bottom design, which for the tumblers in my shopping list should be 10.125” x 3.85” but Google Docs may round the width up to 10.13,” which is ok.


STEP 3: PREPARE YOUR 40 OZ TUMBLER
TOP DESIGN AREA
- Use a lint-free cloth or a coffee filter with some rubbing alcohol to clean the tumbler for a better transfer.
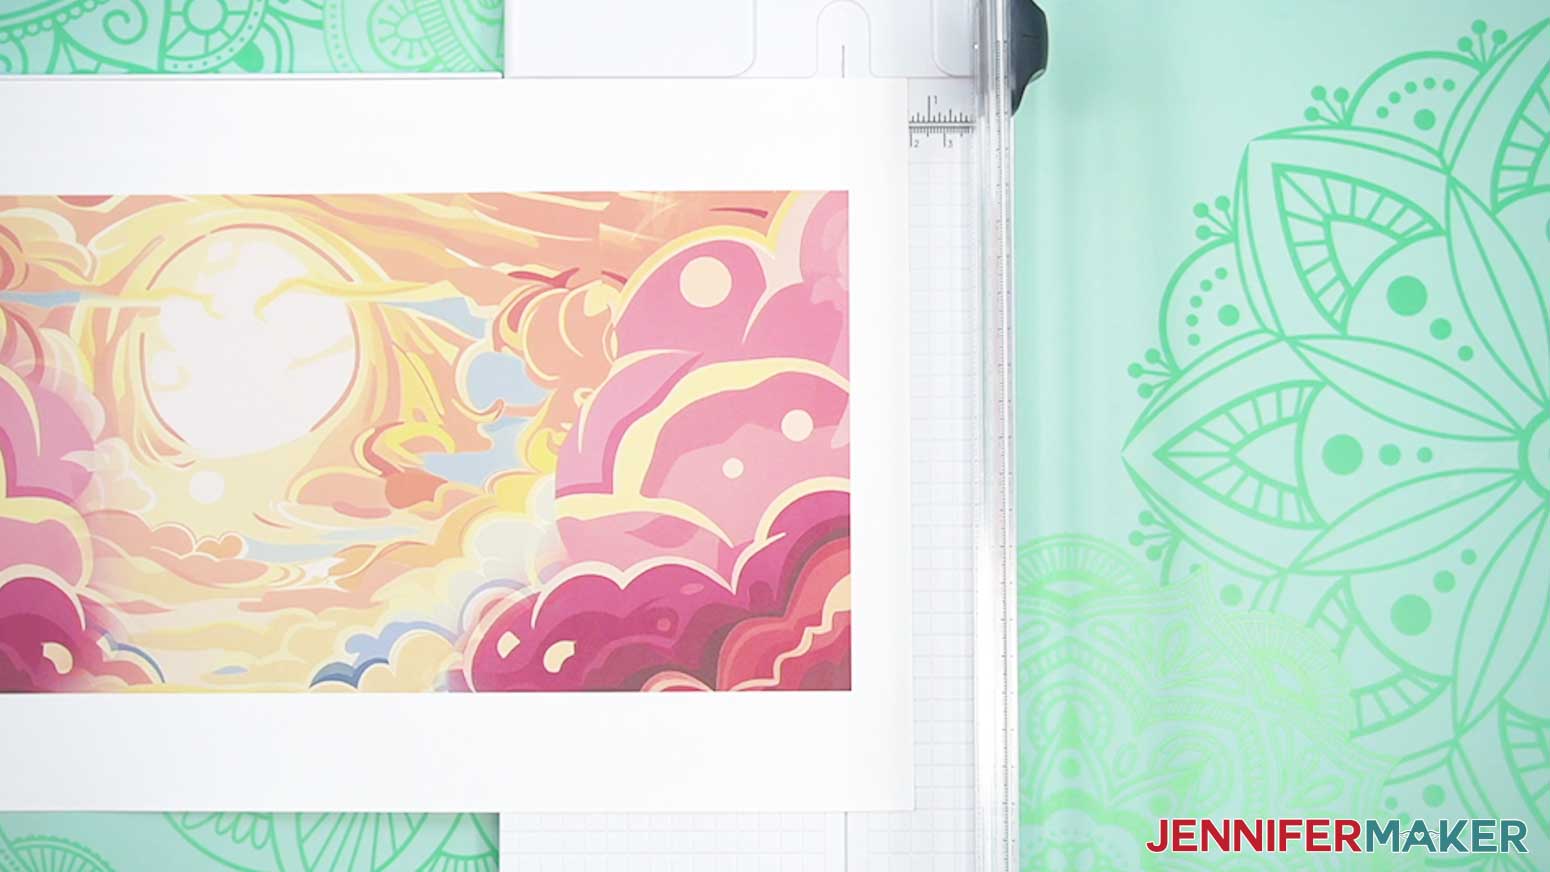
- Pull out the paper trimmer’s guide extension.
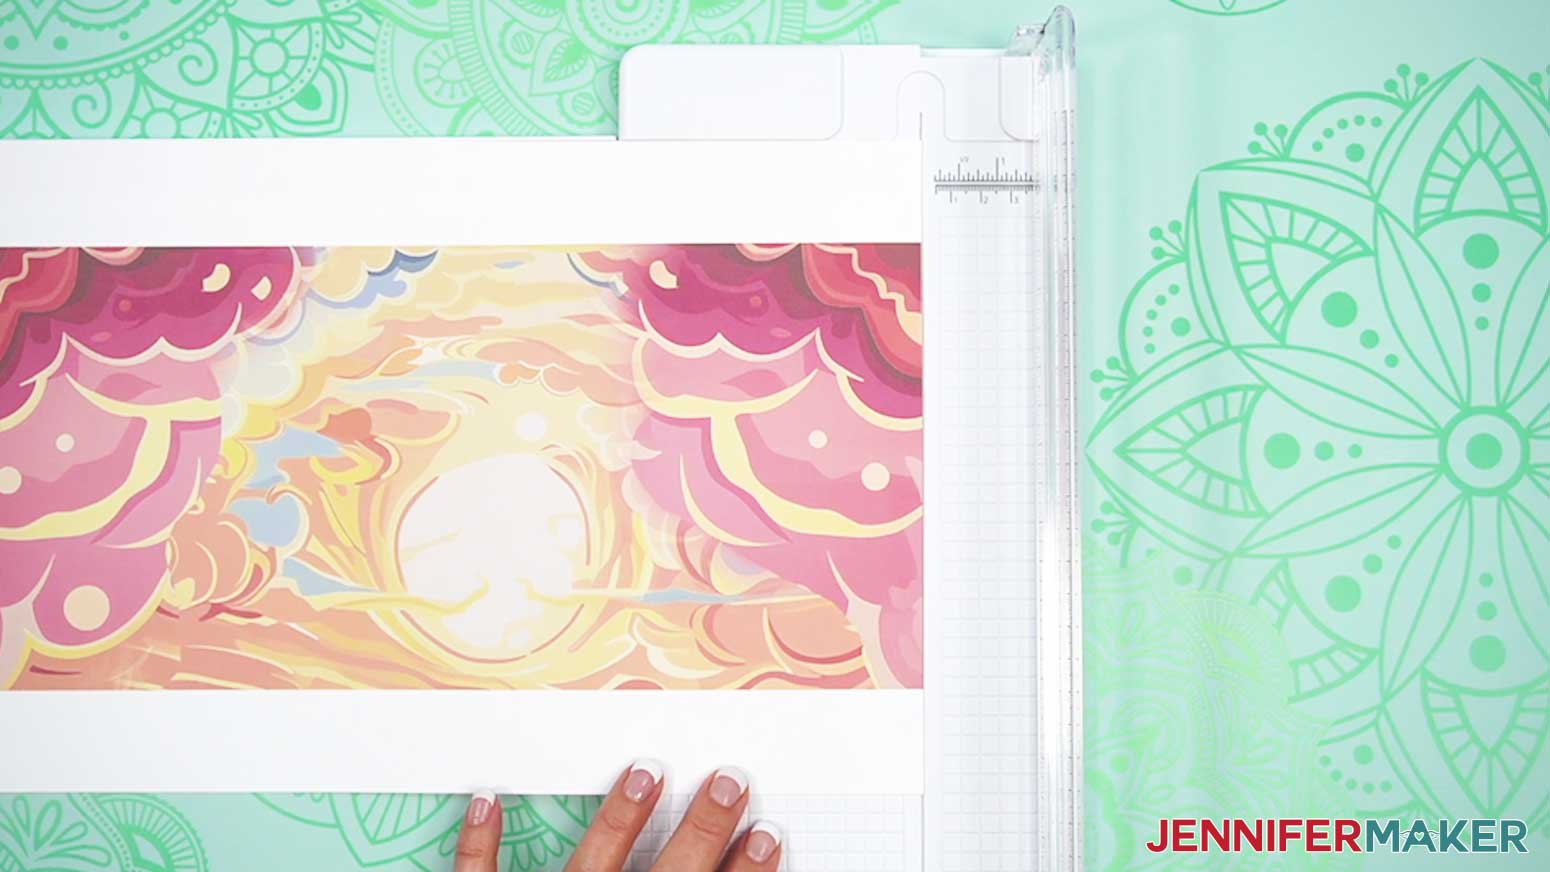
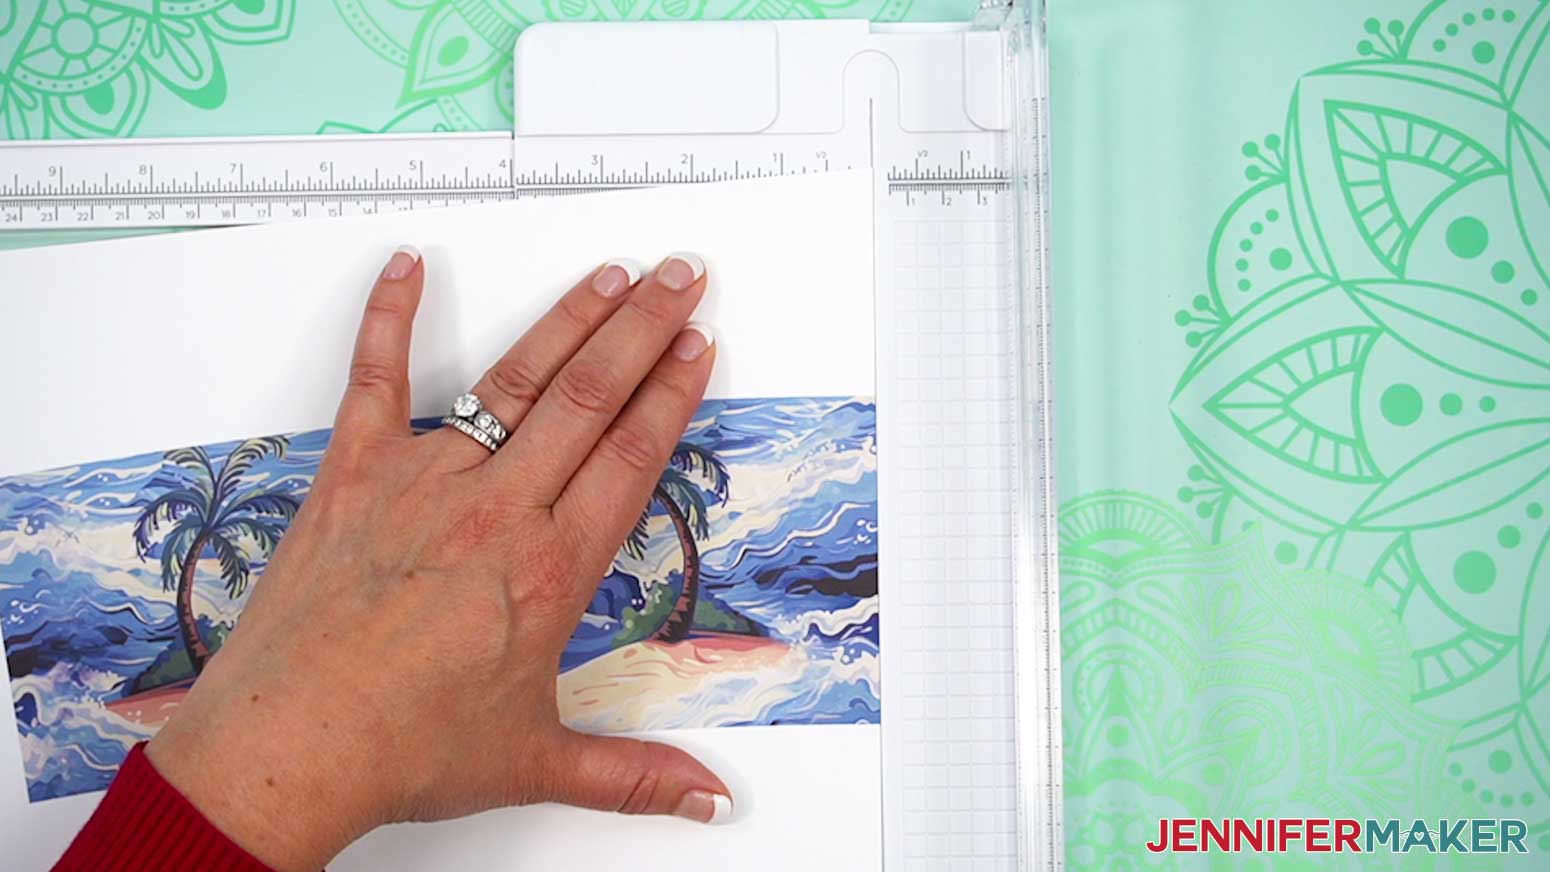
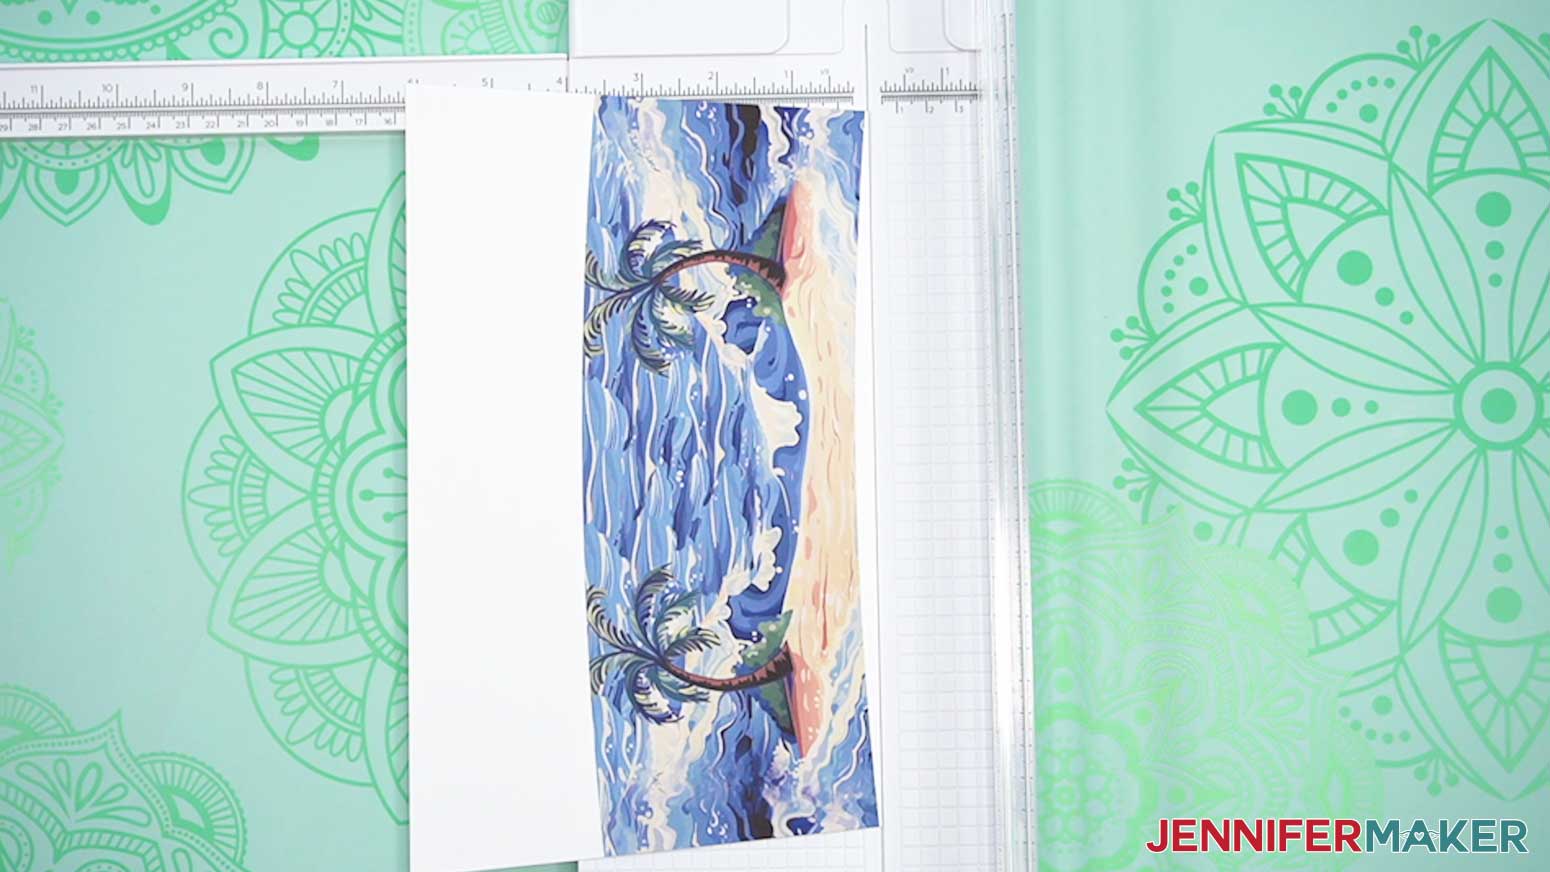
NOTE: Since we want to avoid a gap or distracting seam when we wrap the design around the tumbler, there's a special way to trim the design. You’ll use scissors for some parts, but a paper trimmer will make other areas easier. - Place the top printed image face up so the right edge of the ink is along the cutting line.
- Press the paper up against the top guide to make sure the cut will be straight.
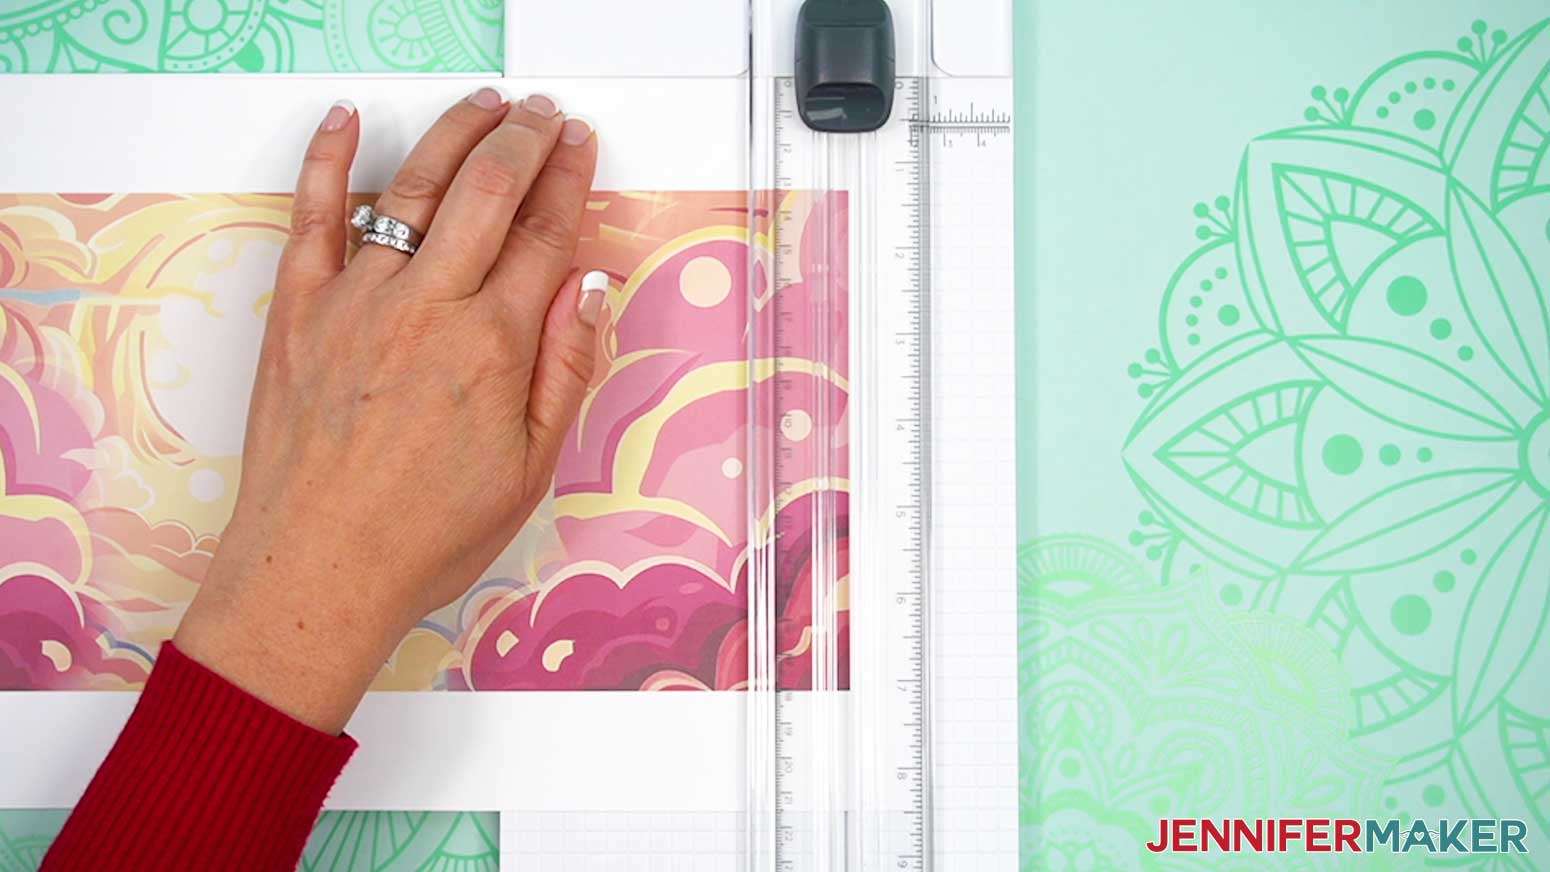
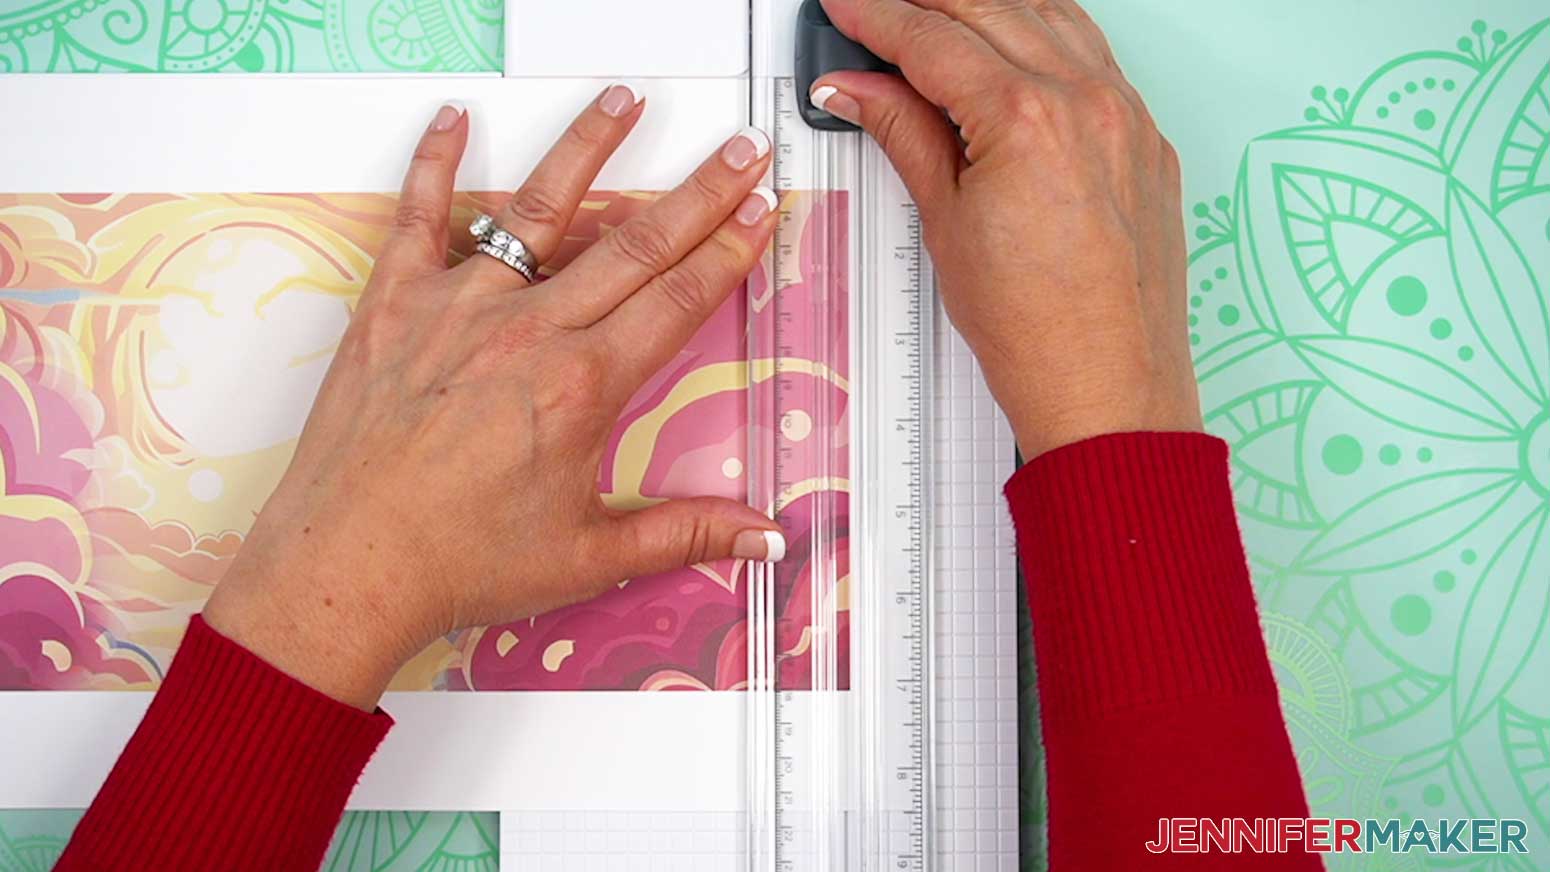
- Hold the paper in place and lower the fold-down ruler with the blade onto your design.
NOTE: You can press down on the ruler to keep the material in position, just don’t get close to the blade. - Use your other hand to press and drag down on the blade and draw it down the straight line in a smooth motion.
- Then, lift the ruler and remove the print.
- Place the print face down.
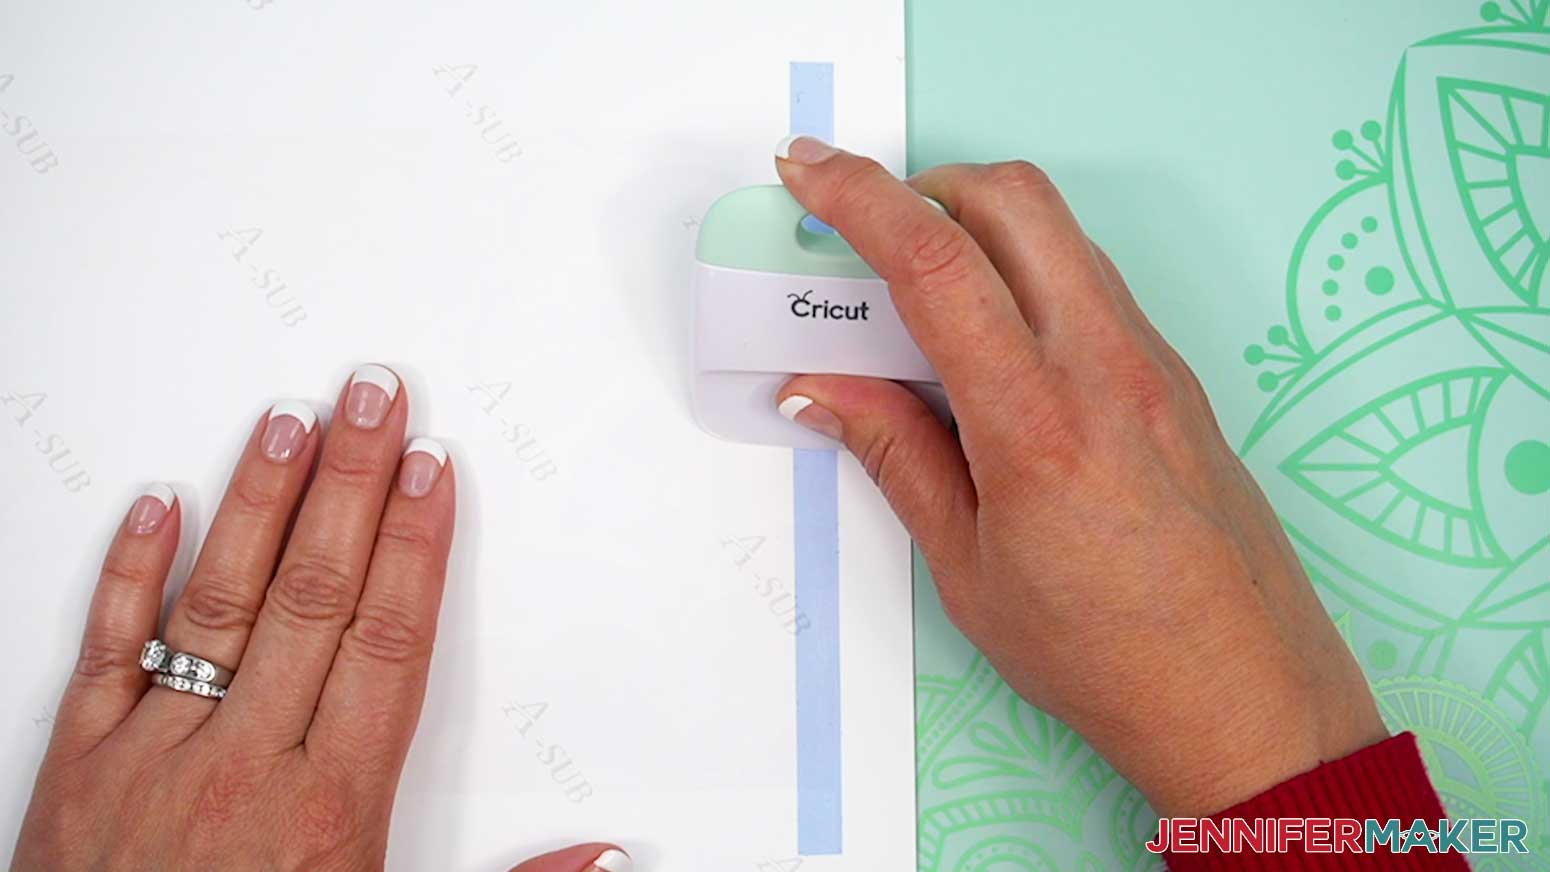
- We want a slight overlap at the seam, but doubling up the ink can create a dark section, so add a piece of heat-resistant tape straight along the other short edge so about .25” of the design’s ink is overlapped.
TIP: You should be able to see where the ink ends through the paper to help with placement. - Burnish the tape down with your scraper.
- Flip the paper face up and use Steps 3-7 to trim the white paper away from the second short edge (the one you just taped).
- Rotate the paper 90 degrees and use steps 3-7 to trim away the white paper above the design so the bottom section is ready to cut.
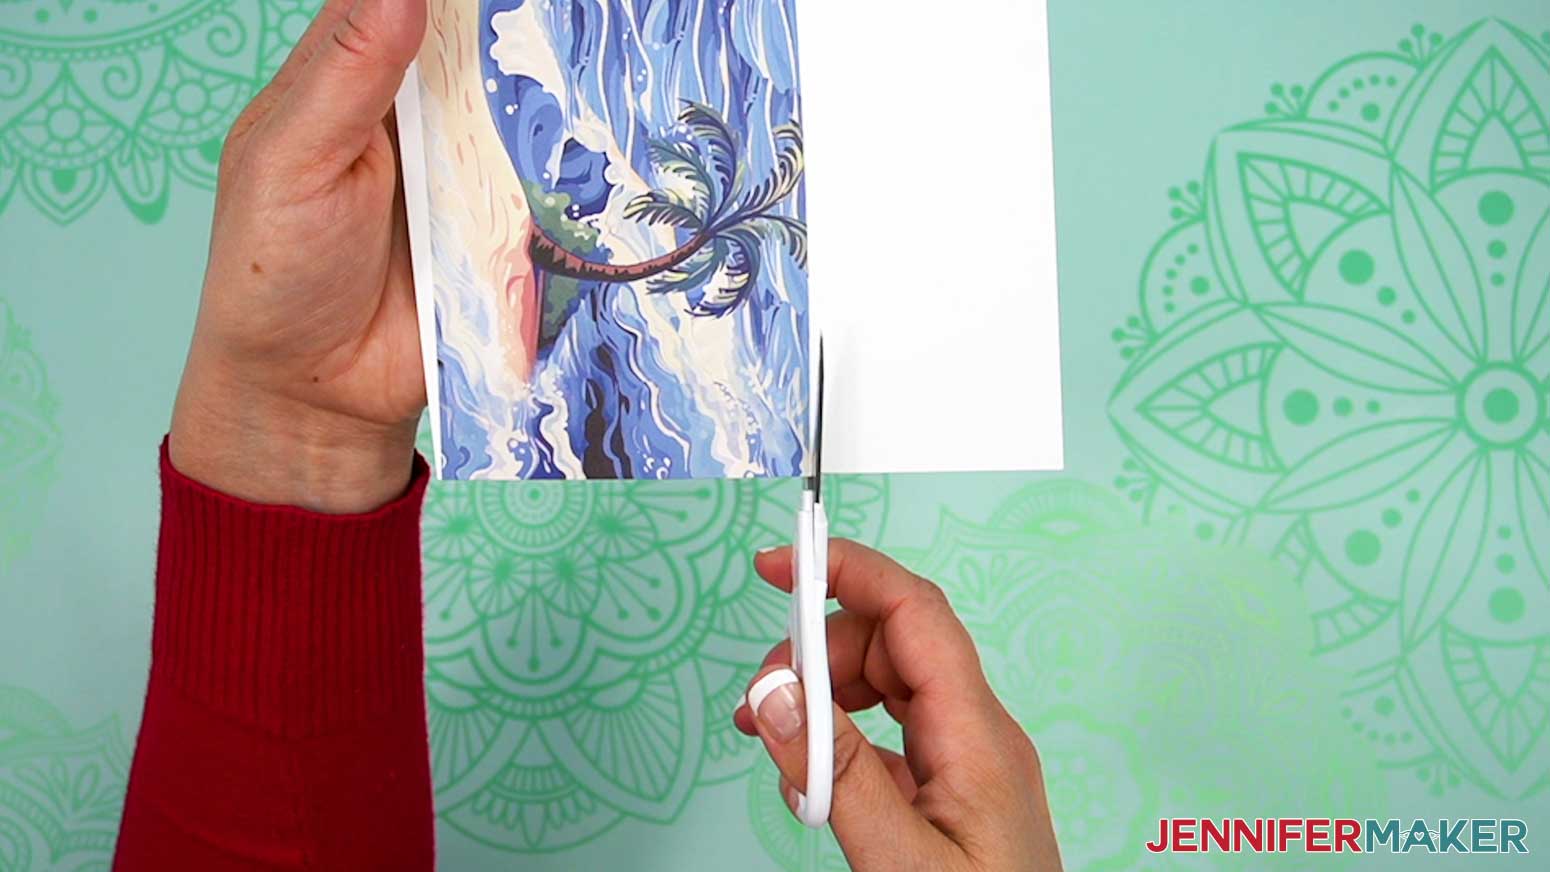
TIP: If the paper doesn’t fit in your trimmer, you can use scissors, just make sure the cut is very straight along the ink line because we’ll use the alignment of the paper against the tumbler’s top edge for perfect placement. - Line it up the same way and repeat the cut along the bottom.
- Place a clean item like a self-healing cutting mat on your work surface to keep the tumbler from picking up lint as you work.
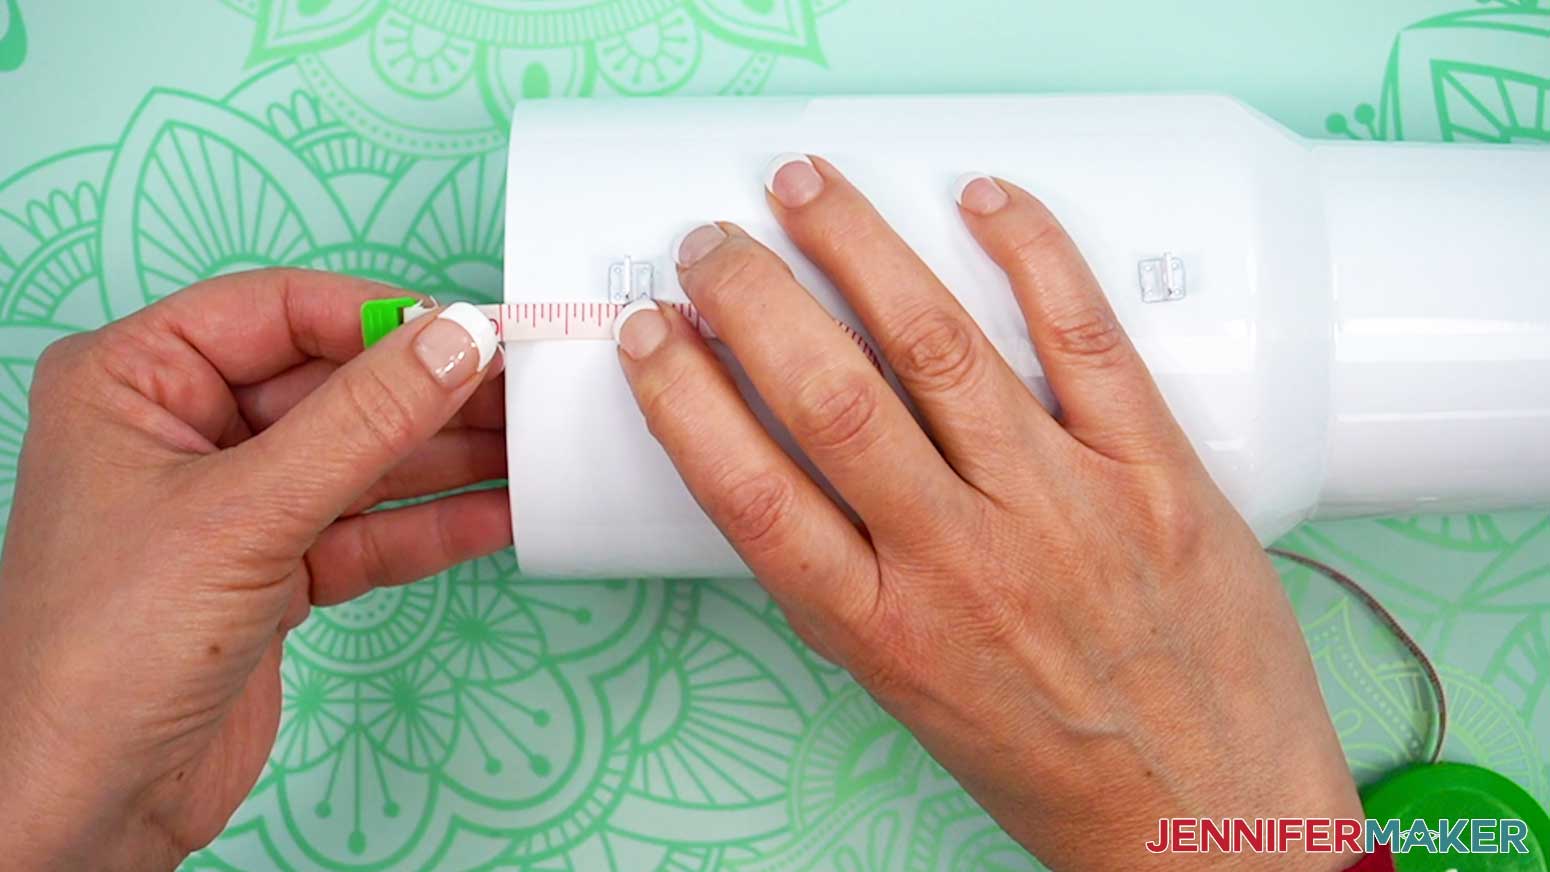
- To account for the handle brackets, grab your tumbler, tape measure, and a pencil.
- Set the tumbler on its side on the work surface with the brackets facing up. Place your top design face down so the image is oriented like it will be transferred to the tumbler.
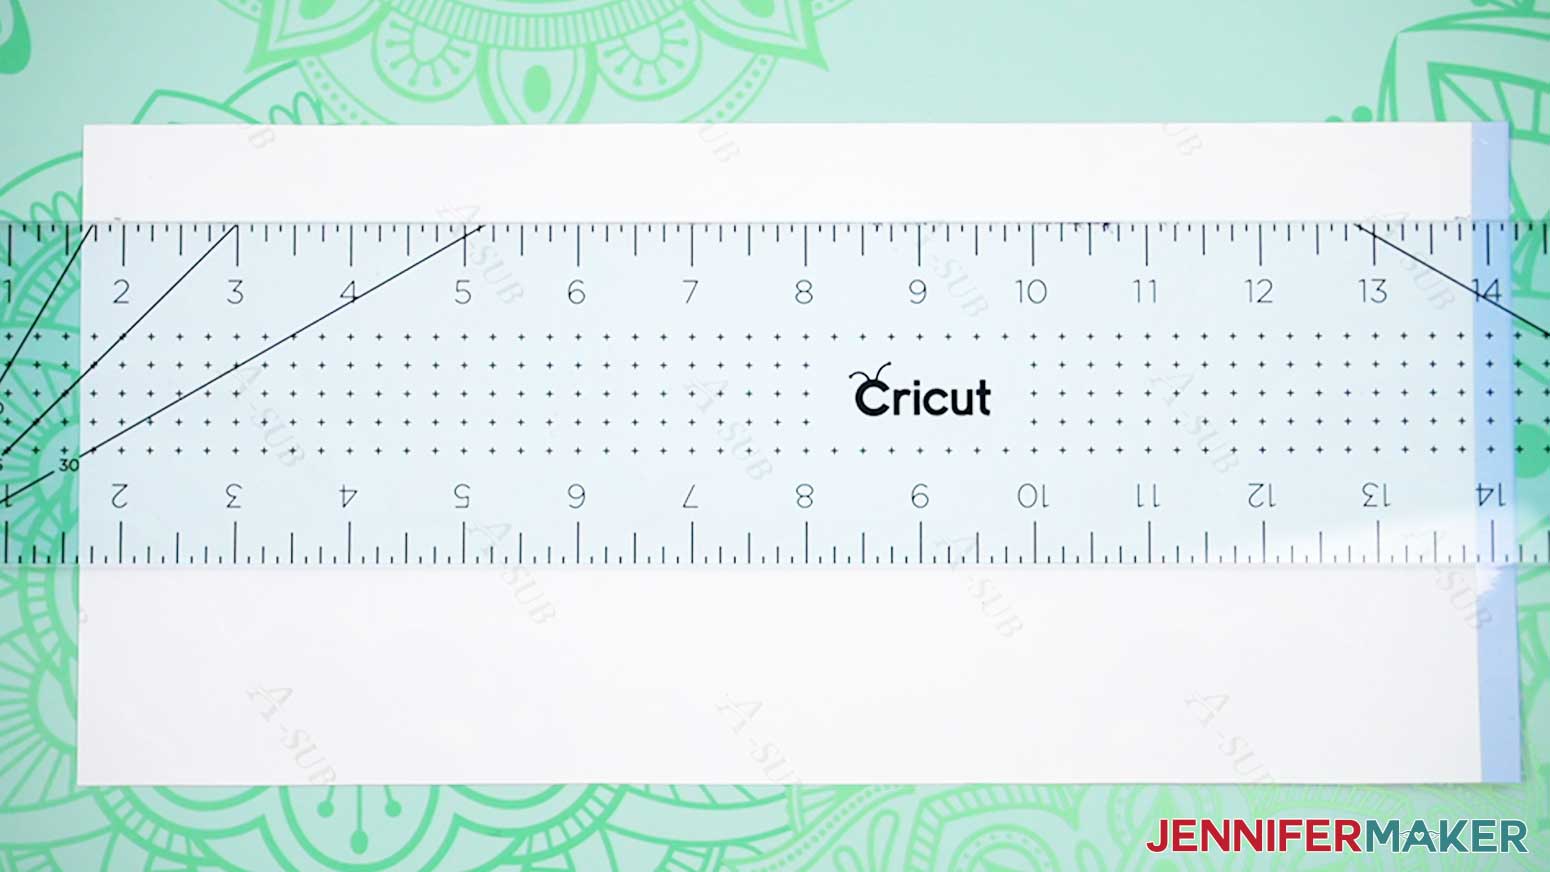
- Measure from the top of the tumbler’s upper edge straight down to the top of the first bracket.
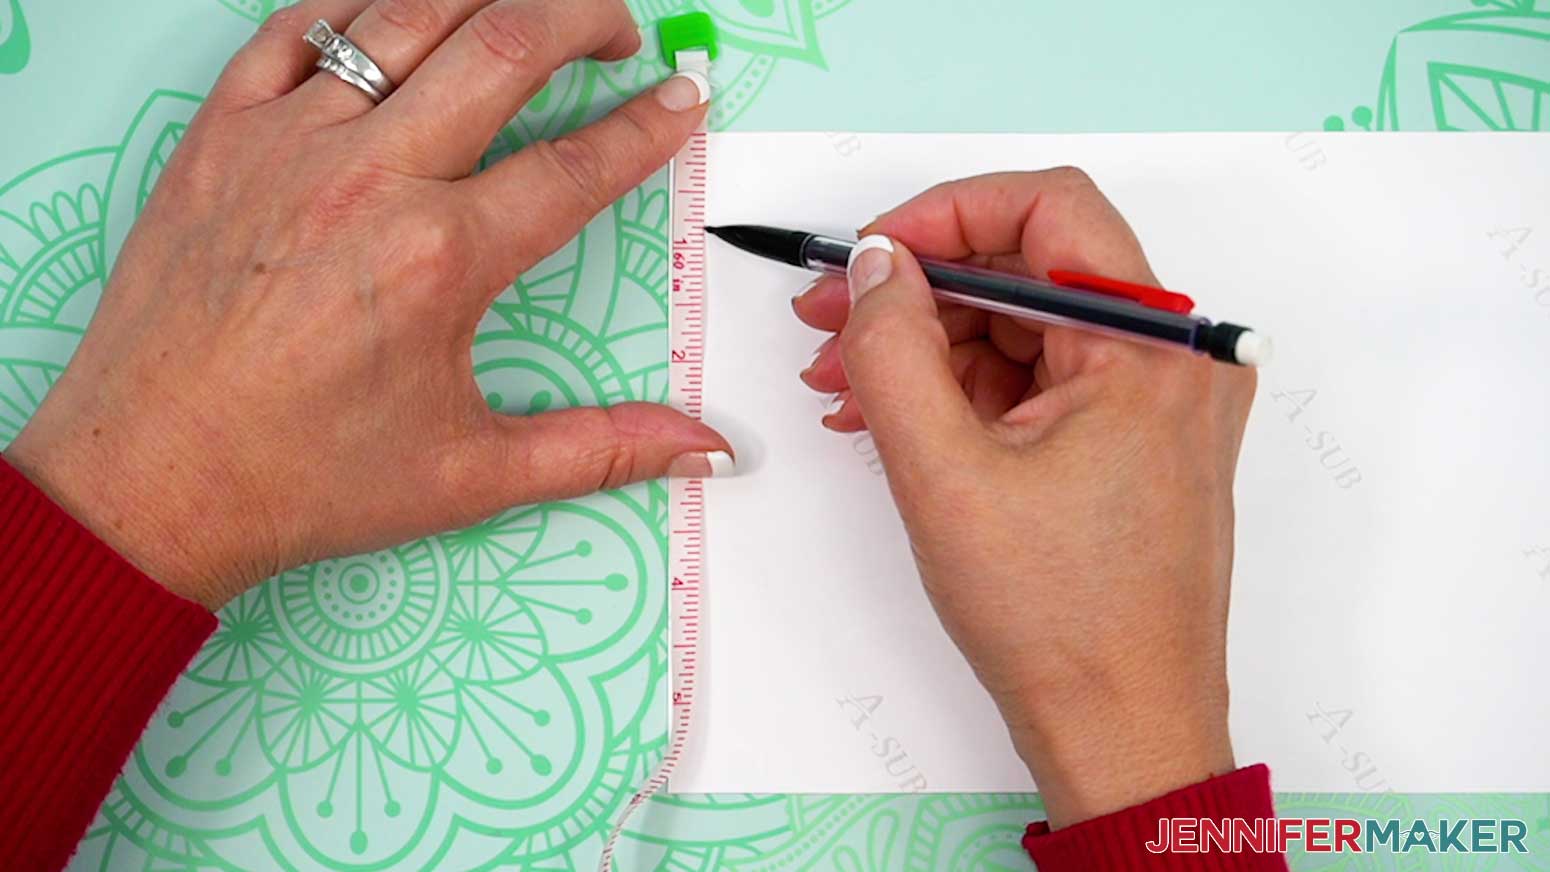
NOTE: For the tumbler in my list, the distance is 12/16” - On one side of the printed design, measure the same height down from the top and add a small pencil line to mark the top of the bracket’s location.
- Add the same mark on the other end of the design, making sure they line up.
- Then, measure the top bracket’s height and add a second set of pencil marks on either end of the paper to indicate where the hardware ends.
NOTE: For the tumbler in my list, the distance is 3/8.”
TIP: The height between these marks will become our top notch. - Repeat the steps to measure and mark the space between the brackets, and the second bracket’s height to position the second notch.
NOTE: For the tumbler in my list, the distance between the brackets is 3 5/8.” - Bring the design’s edges together with the top edges aligned to make sure the pencil marks match so the bracket notches won’t misalign the seam, adjusting them if necessary.
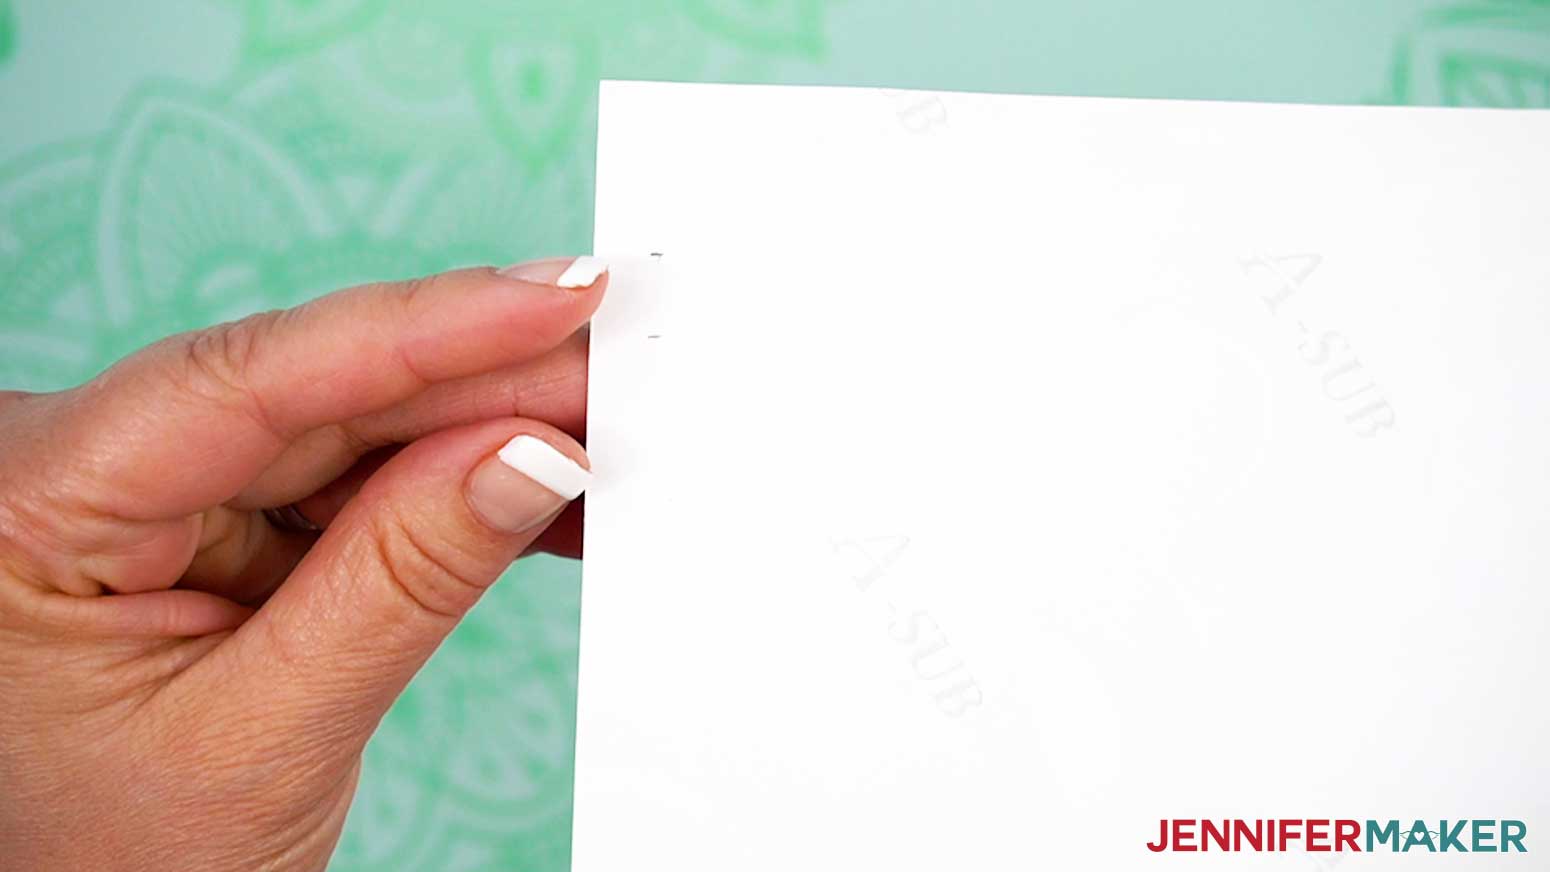
- Cut short horizontal lines about .25” long at each mark to make two tabs on each end of the design.
NOTE: The brackets on my tumblers are about .5” wide, so I divided the amount to cut half of the area needed on each side of the seam. You may need to adjust the amount depending on your tumbler, but start with a small amount and only cut deeper if the notches aren't wide enough for your brackets. - Fold the resulting tabs to the paper's back so they won’t interfere with the transfer.
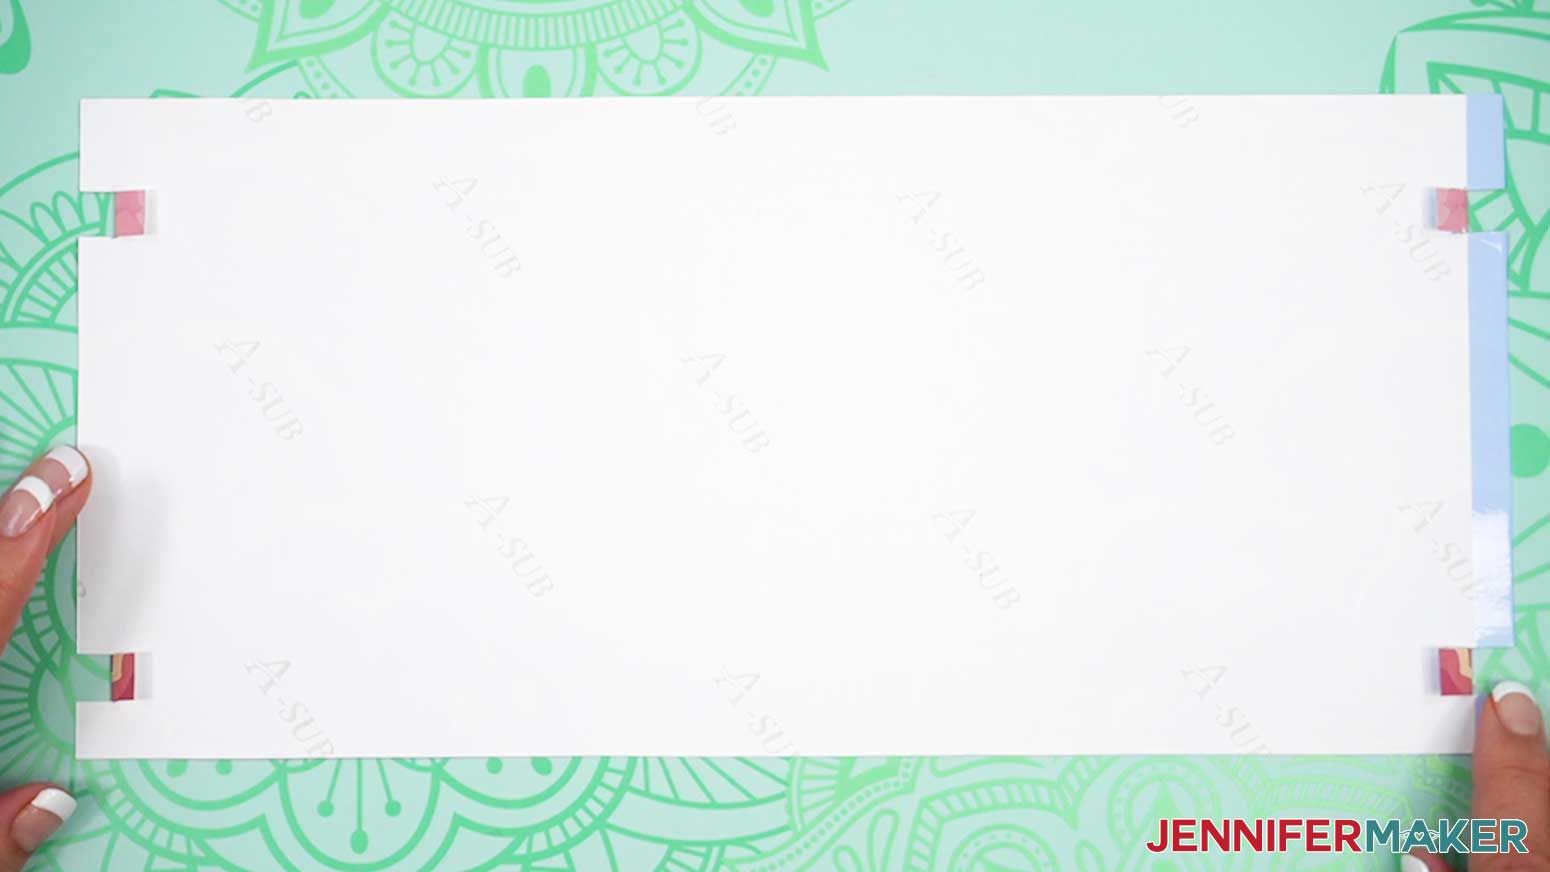
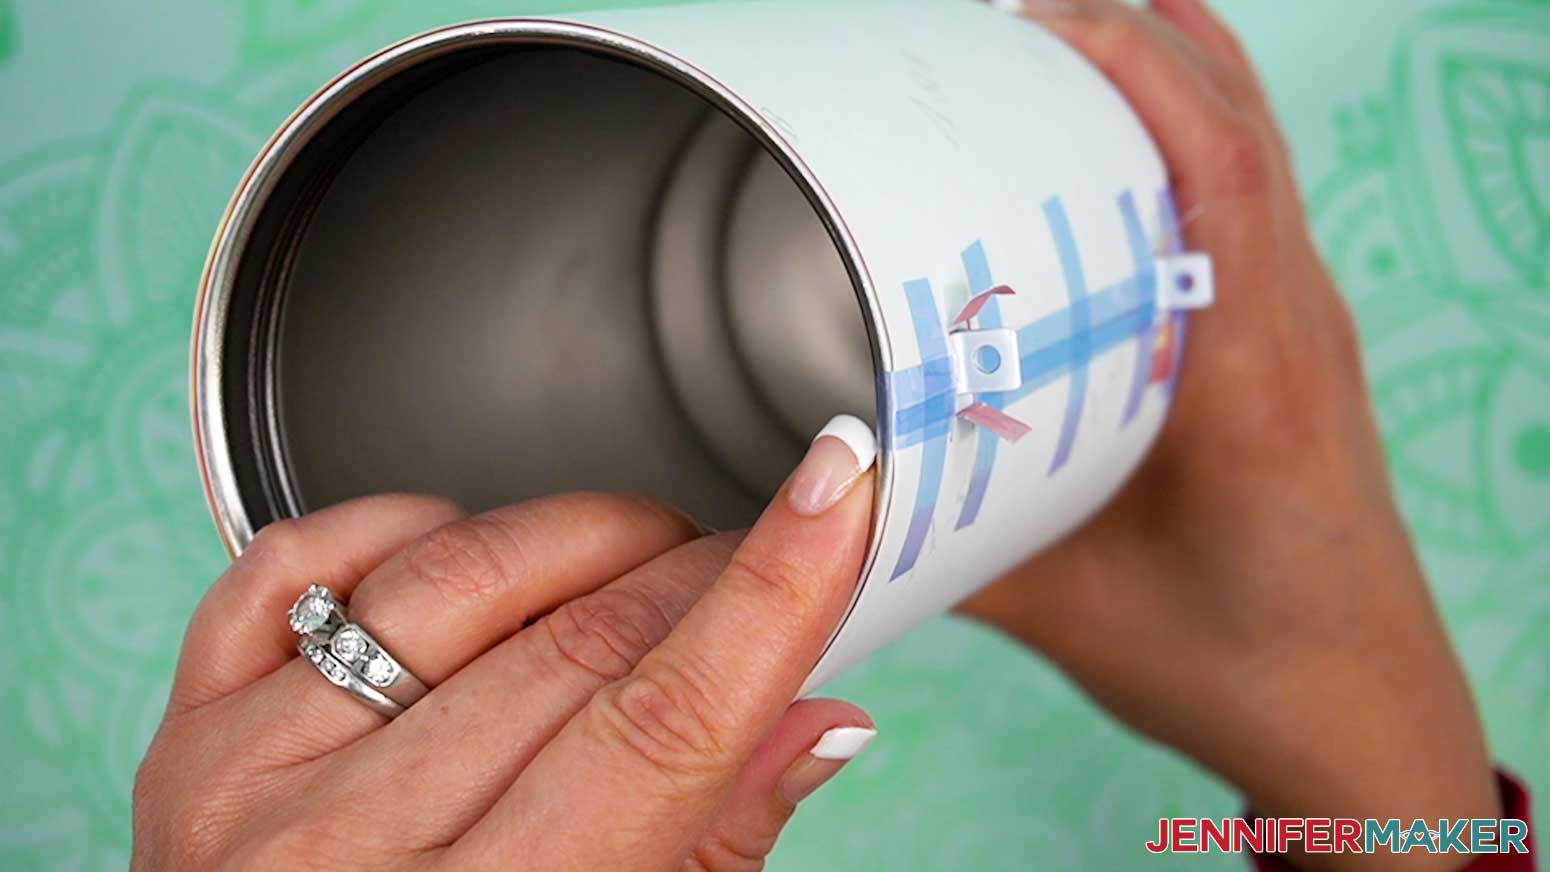
- Place the tumbler on your work surface with the open edge at the left.
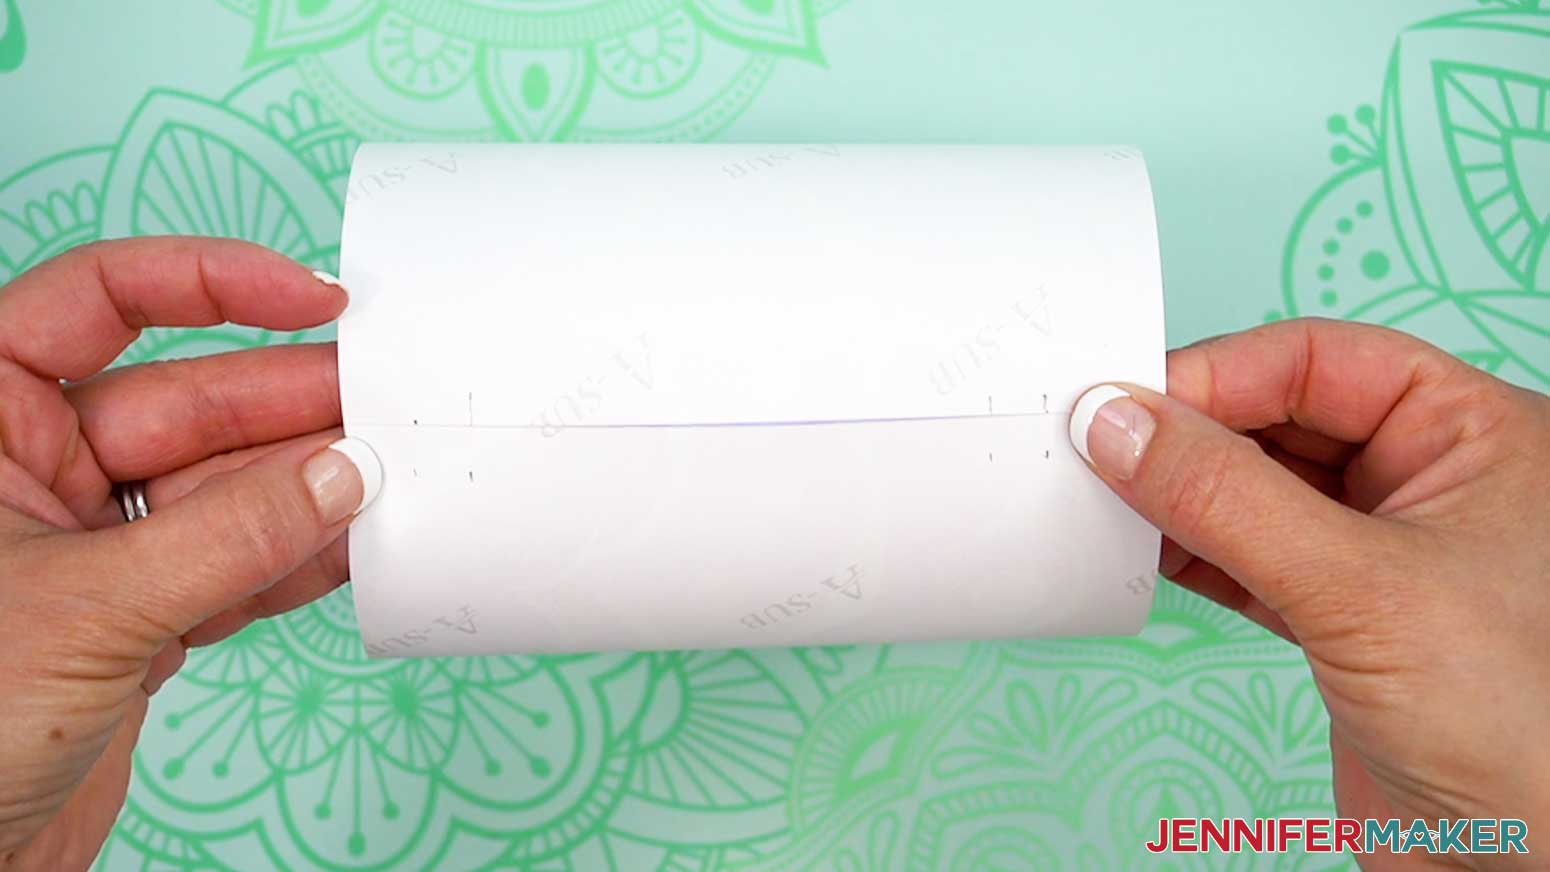
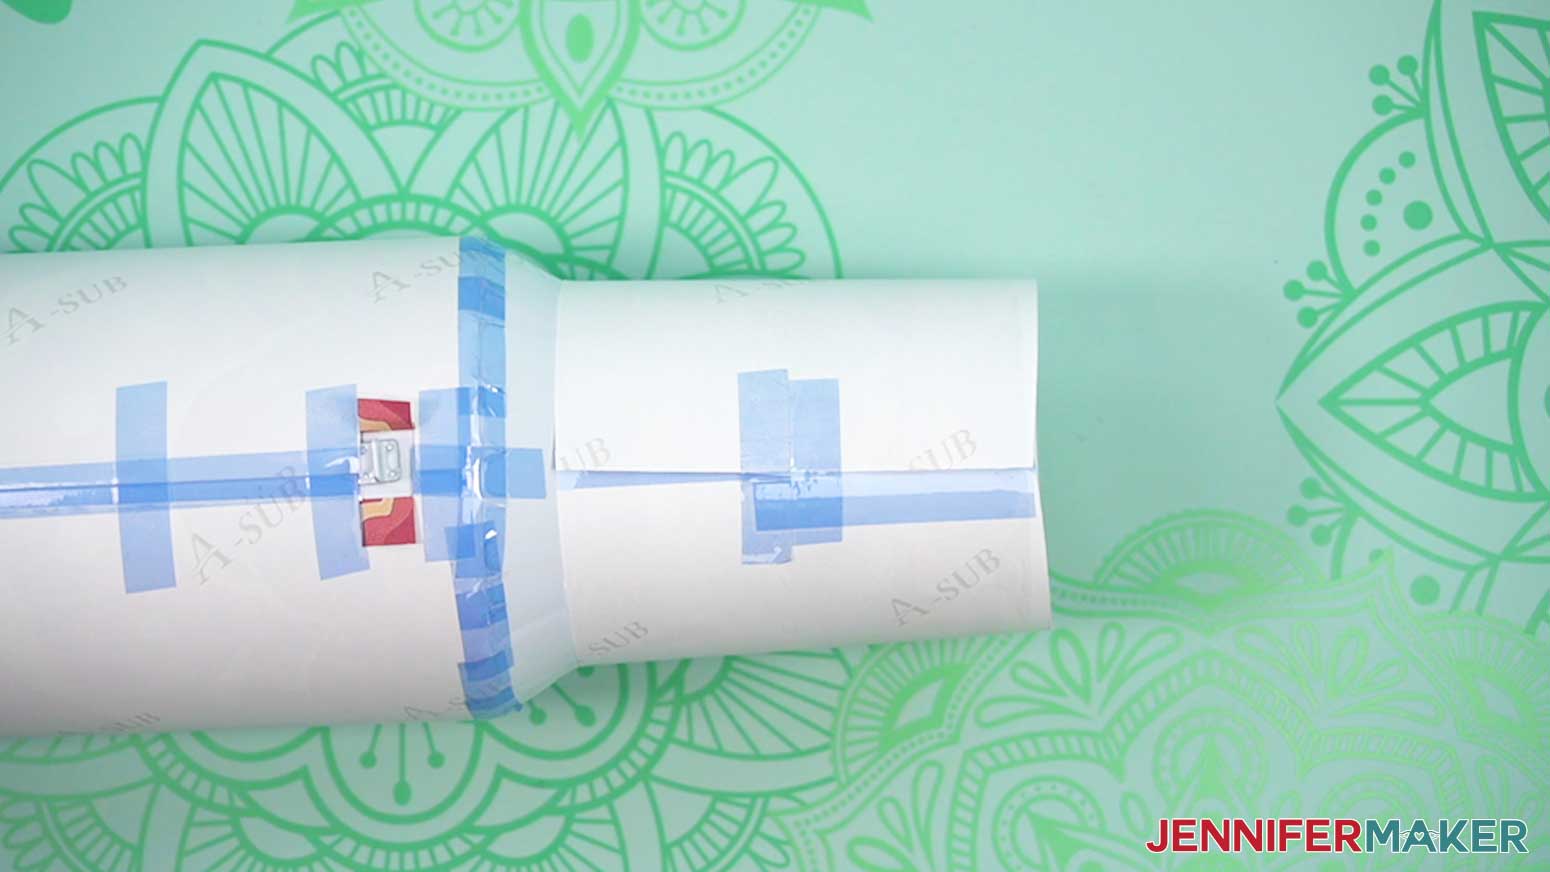
NOTE: Our next goal is to secure the print to the tumbler as tightly as possible. If there are gaps between the surface and design, you might get white spots or other defects in the final result. - Make sure the print is correctly oriented and wrap it around the cup so the ink touches the surface and the bracket notches meet at the hardware. The taped edge should be touching the tumbler with the other end overlapping it.
TIP: Center the brackets in the notches as much as possible so the seam will fall under the handle. - To test the fit, lightly hold the wrap in place and tap the tumbler’s open end on the table to bring the top of the print even with the lip.
- Check that the brackets are still centered in the notches, then lightly tape the seam between them to keep the correct alignment in place.
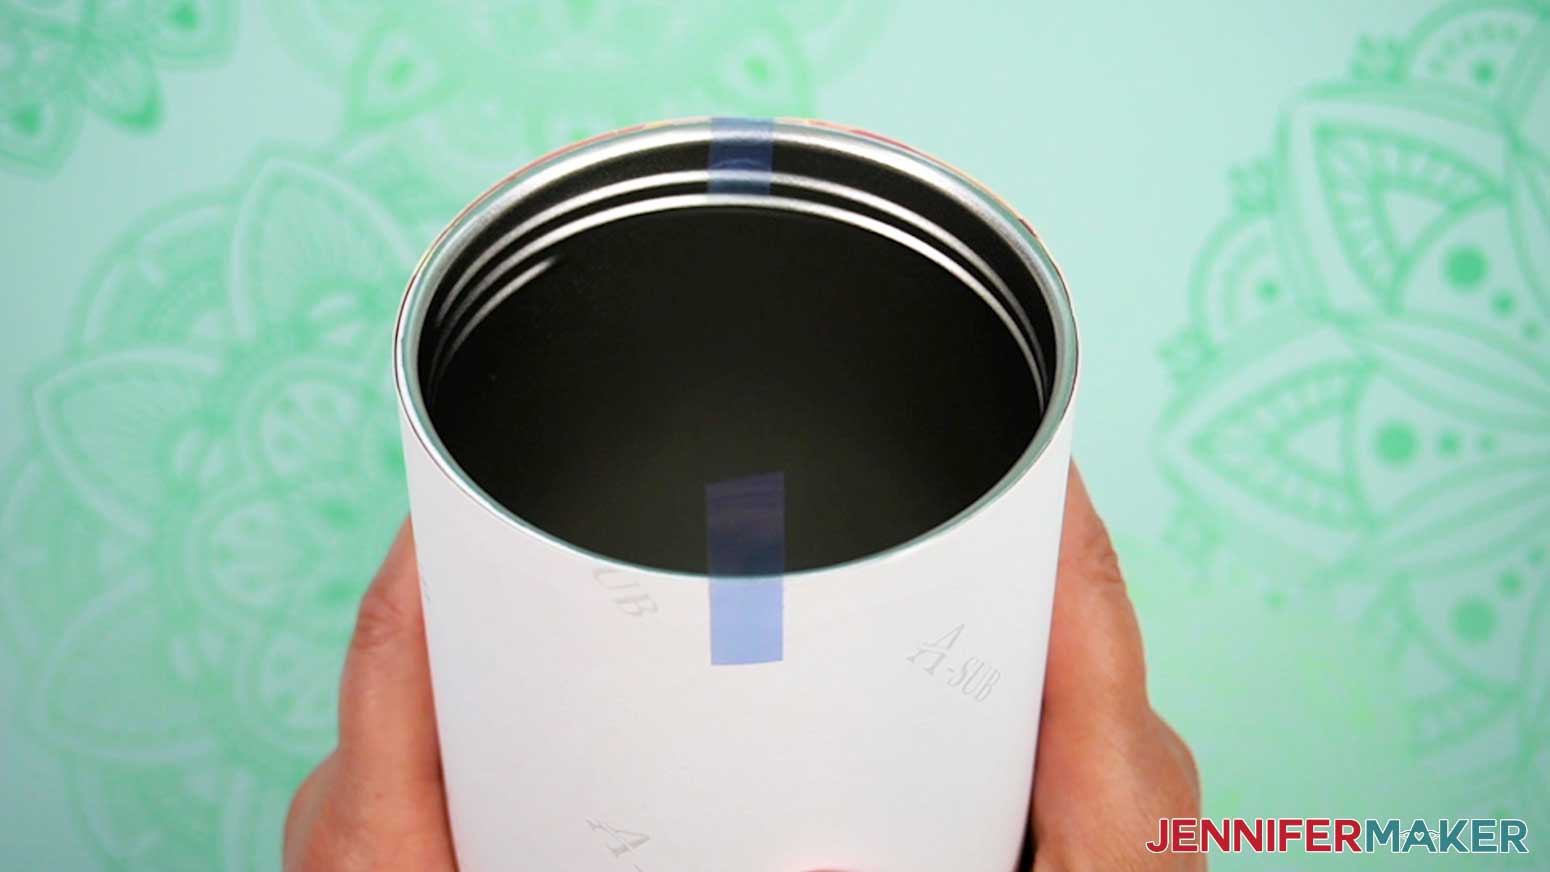
- Since the wrap can shift due to the light taping, make sure the tumbler’s top edge is covered by the design.
- Place a piece of heat-resistant tape securely on the outside edge, but don't let it touch the paper on the other side of the seam yet.
- Use one hand to hold the lower layer of the design tight against the tumbler and pull the loose section of tape as tight as possible, then press it in place on the lower layer.
- To check if the paper is tight enough, try to press hard on either edge of the paper and smooth them toward the taped seam. If anything ripples or comes away from the tumbler, remove your tape and try again.
- Remove the first light piece of tape and the wrap will be cinched in tight to the tumbler.
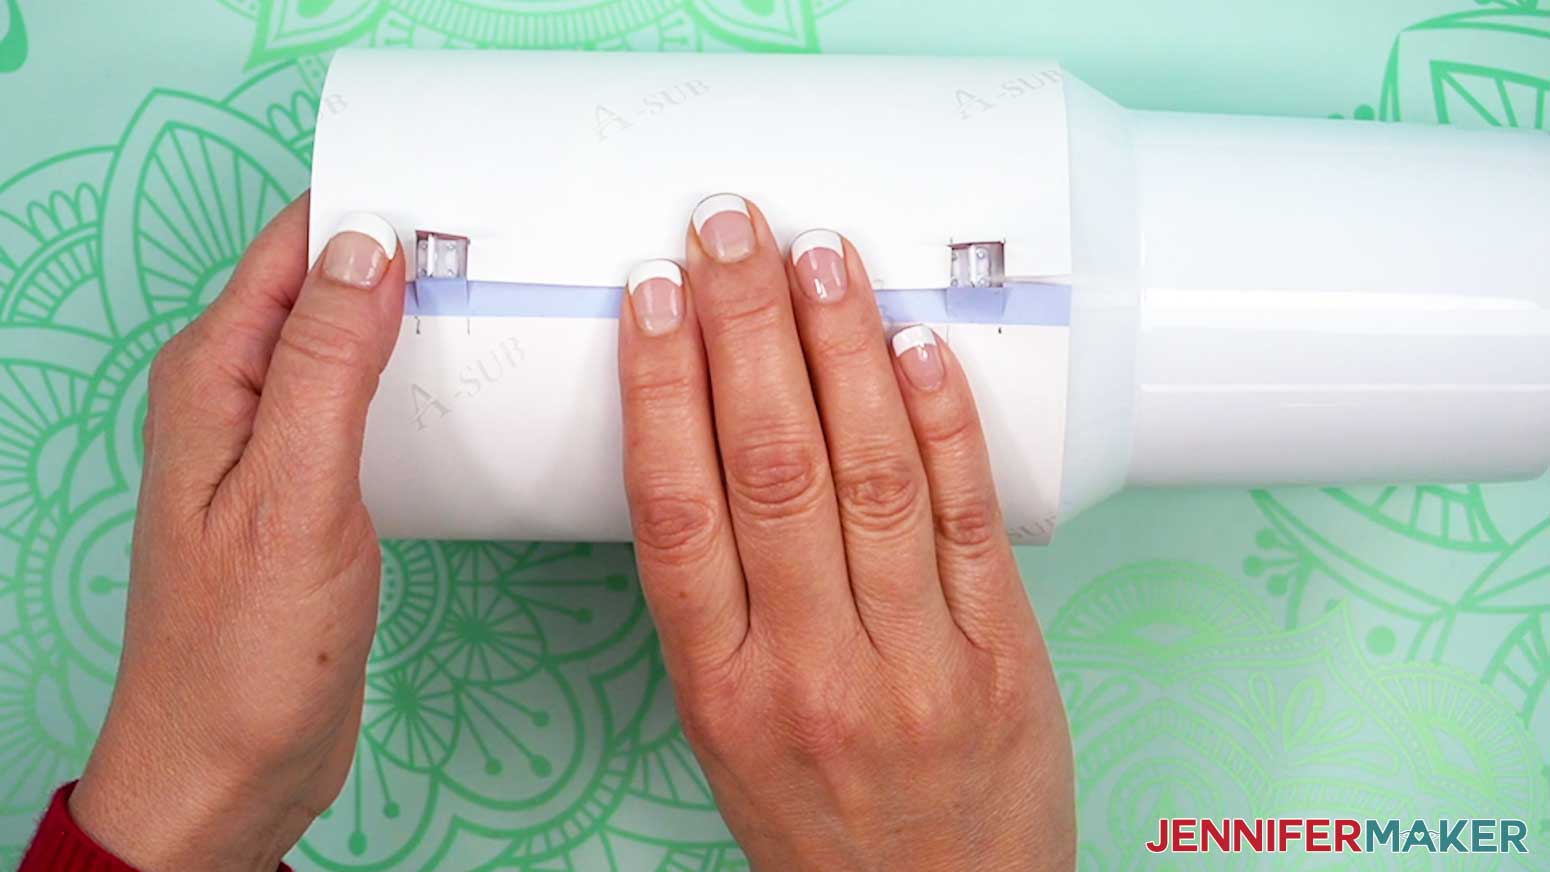
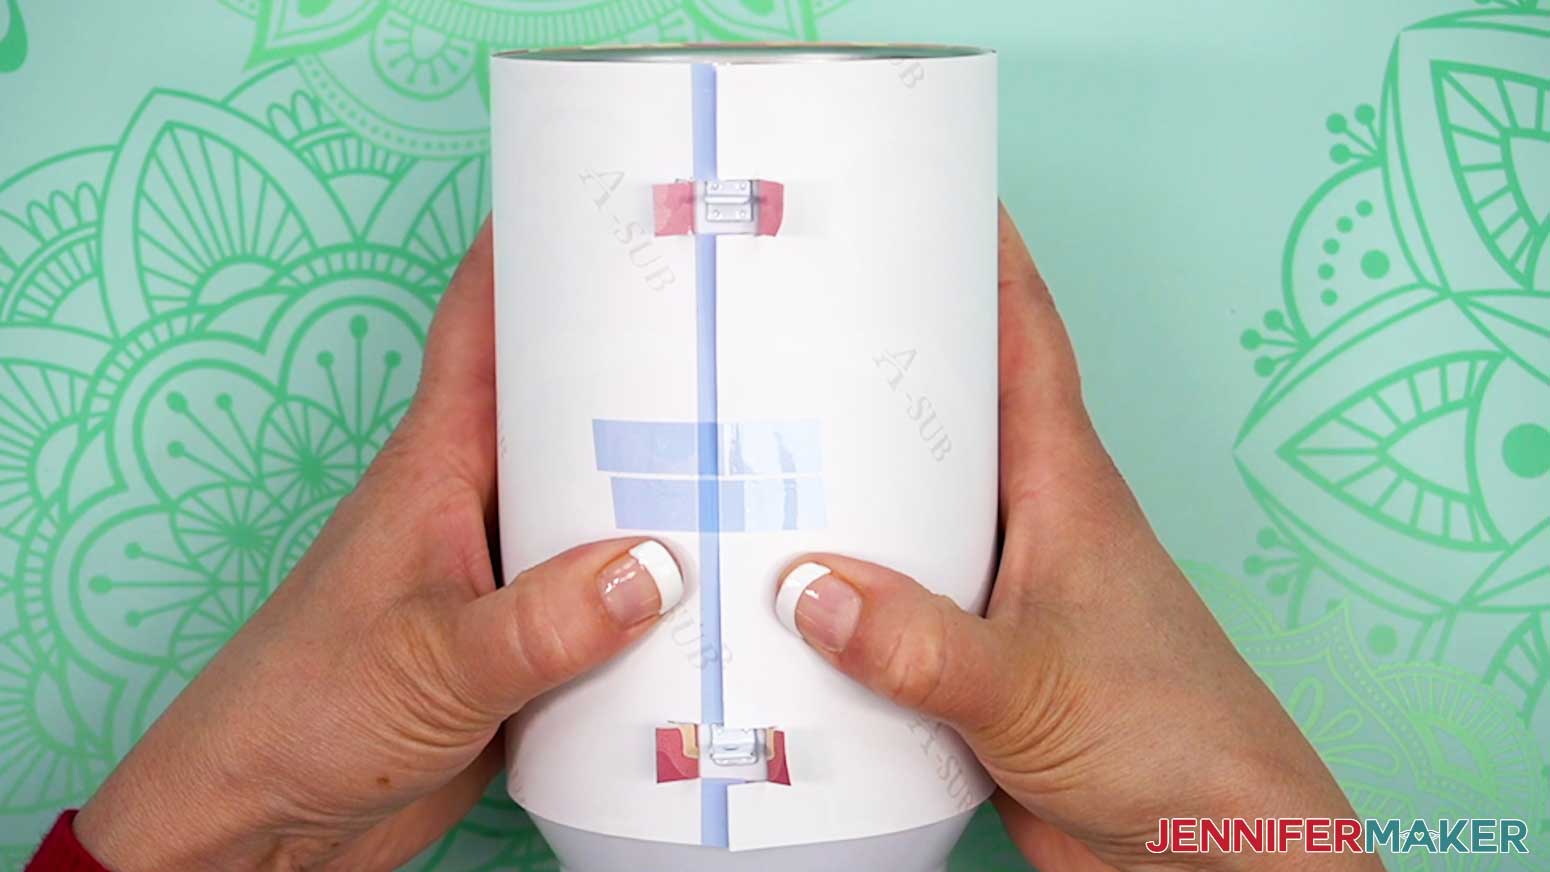
- Add more tape tightly across the seam above the lower bracket and below the upper one.
- Check that the design still aligns with the tumbler’s top edge, then tightly tape the seam right above the upper bracket.
- Finally, tape below the lower bracket so the tape goes slightly onto the tumbler’s surface to really secure the paper in place.
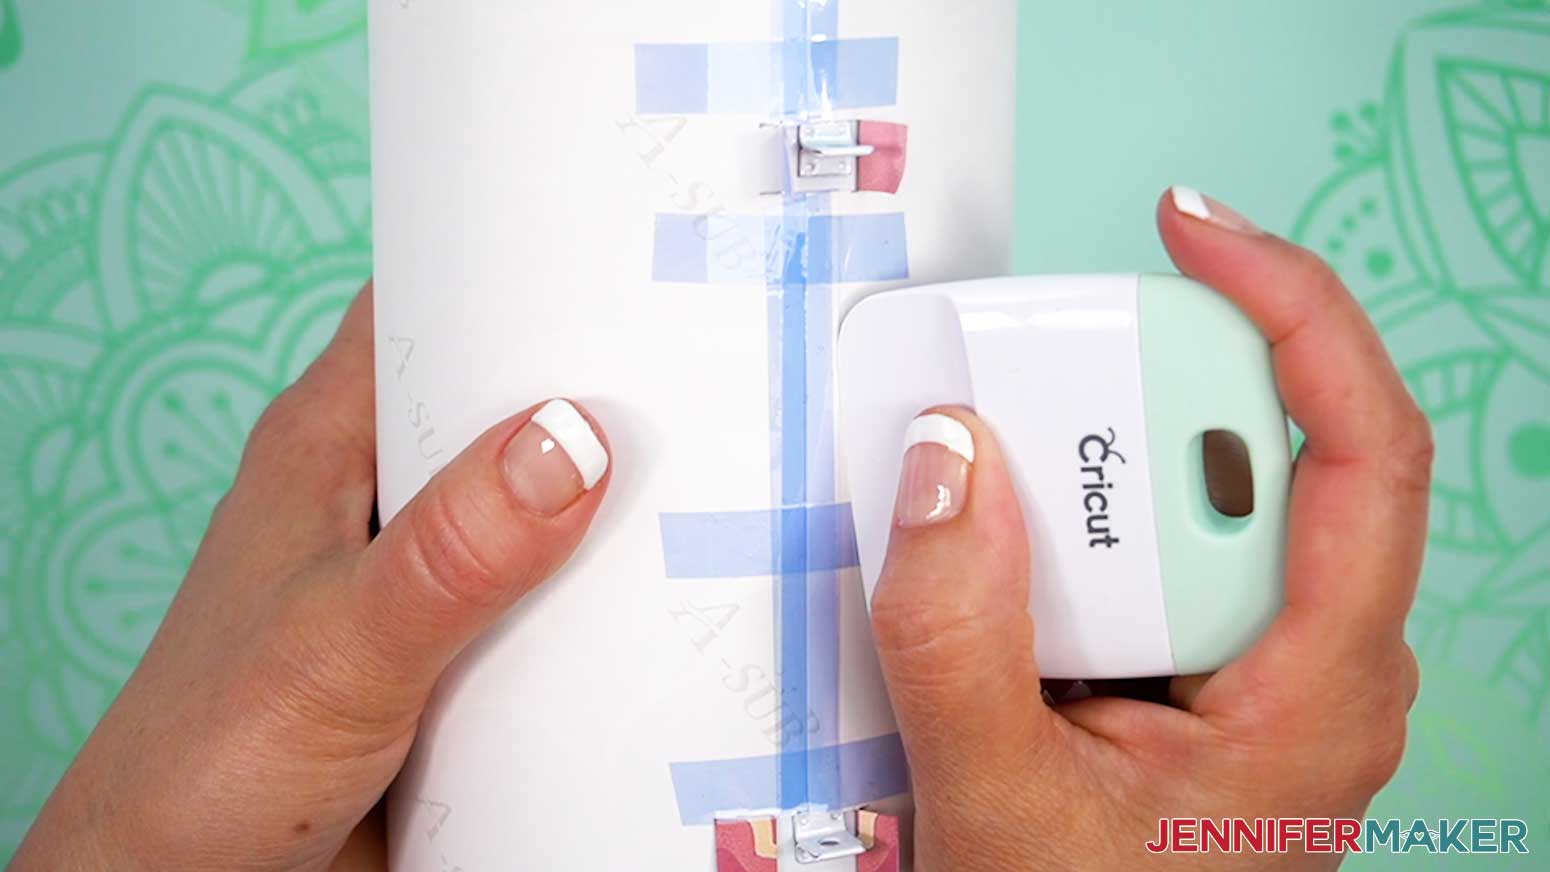
- Make sure the wrap is tight and smooth against the tumbler, then vertically tape the middle seam between the brackets and below the bottom one.
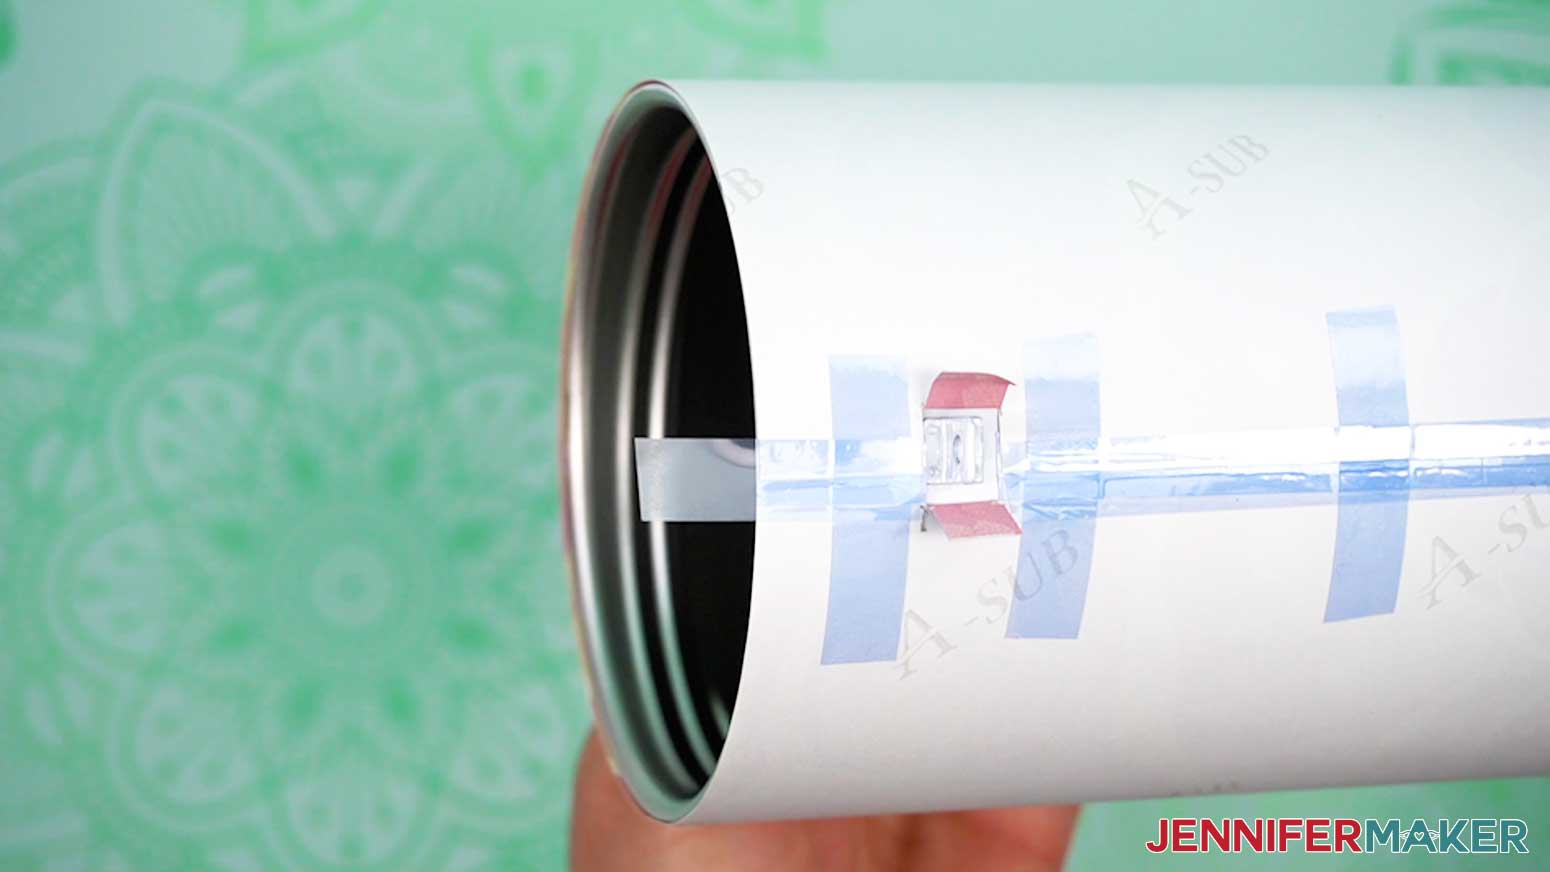
- Add tape vertically above the upper bracket so it extends about .5” beyond the tumbler’s edge.
- With your thumb on the adhered tape, pull the extra tape tightly over the edge and secure it inside the tumbler.
NOTE: You need to pull the tape to press the design tight against the tumbler, but don’t pull so hard that the rest of the wrap shifts on the cup. - Burnish the seam tape with your scraper.
- To make the seam even less visible, run the scraper’s edge along the seam where the paper’s edges overlap.
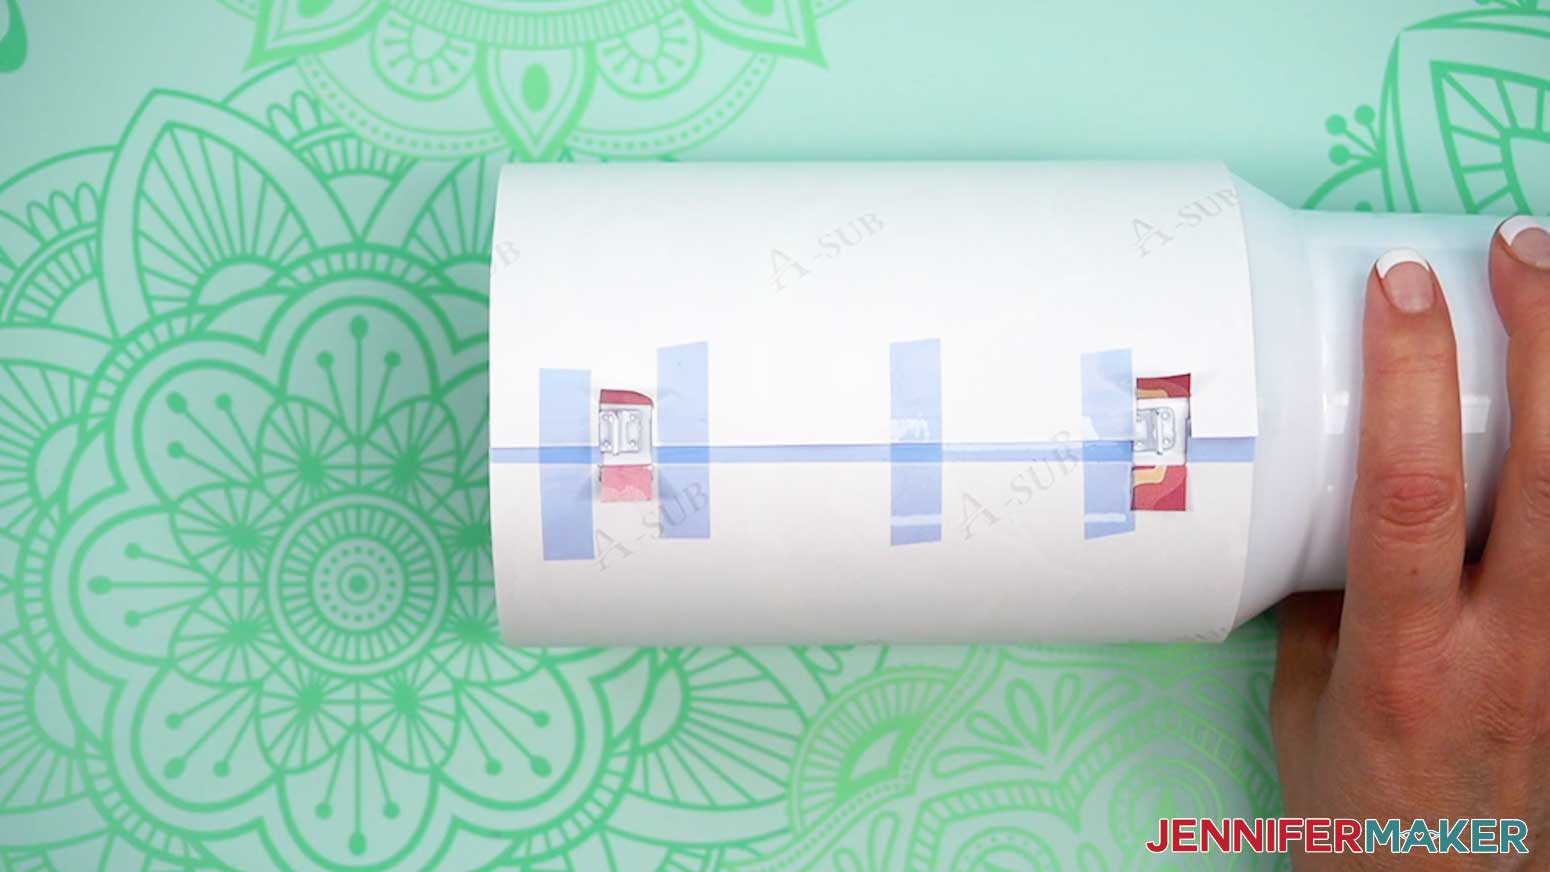
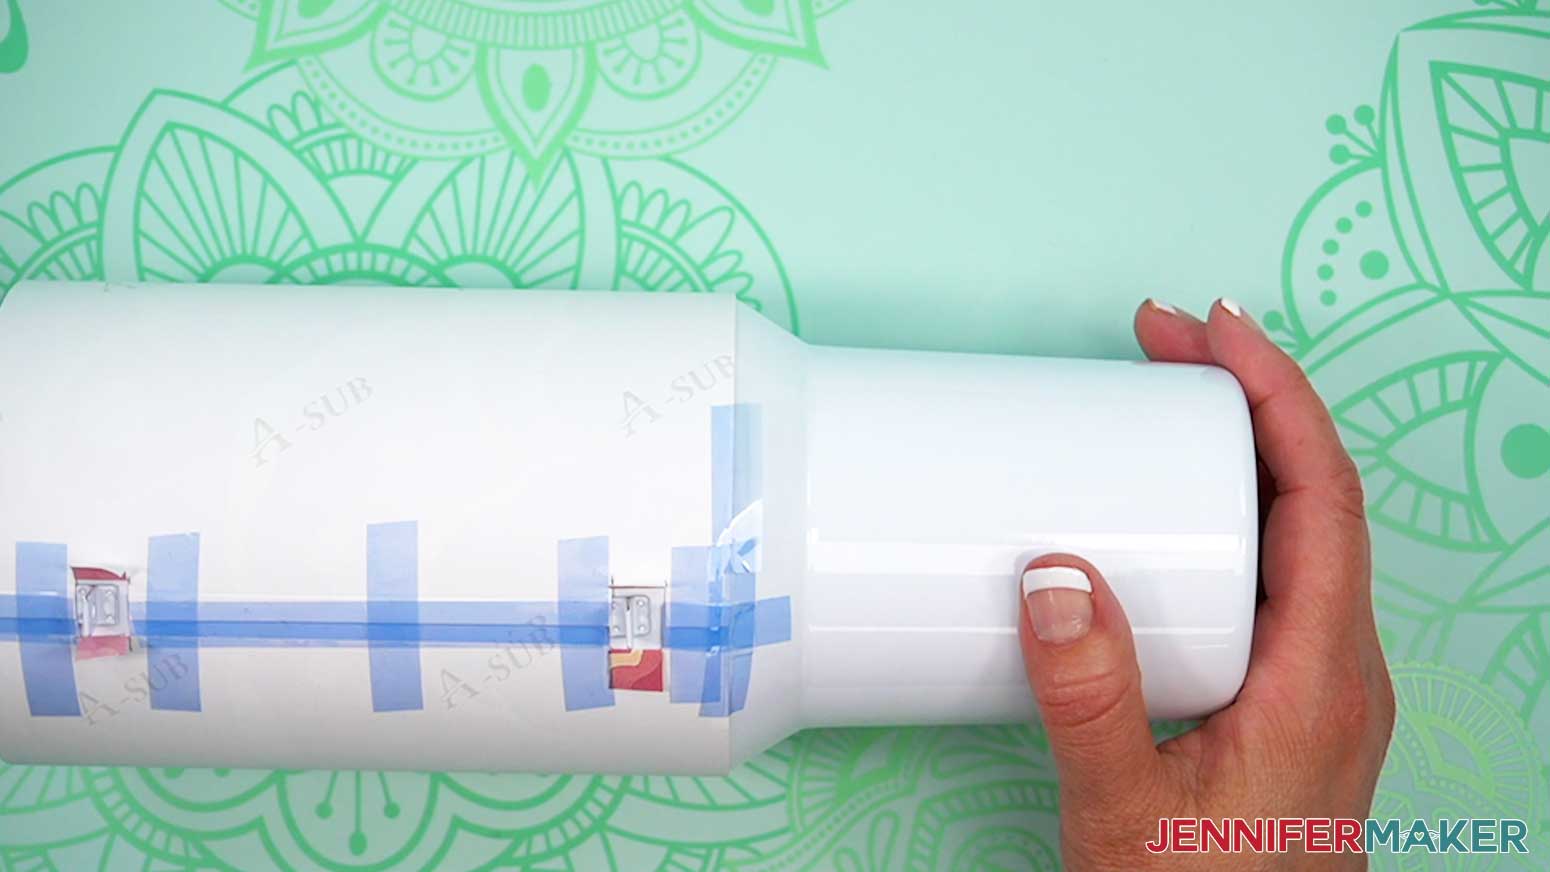
TIP: Make sure you burnish the visible seam on the top layer, but also the seam under the paper. You should be able to see it by the slight ridge the paper’s edge makes in the upper layer. - Since we’re not adding a design to the middle band, add pieces of heat-resistant tape horizontally along the paper’s lower edge.
TIP: Make sure the tape is smooth where it touches the paper. - Then use your thumb to press the paper’s bottom edge tight to the tumbler and bring the pressure down onto the tape, keeping the paper tight and smooth on the cut and securing it with the tape.
TIP: It’s ok if the tape has wrinkles where it’s just touching the cup, that’s natural since we’re shaping a flat item onto a curved surface. - Don’t let the tape extend beyond the middle band, because it will interfere when we add the bottom pattern.
- Secure the entire bottom edge with the tape.
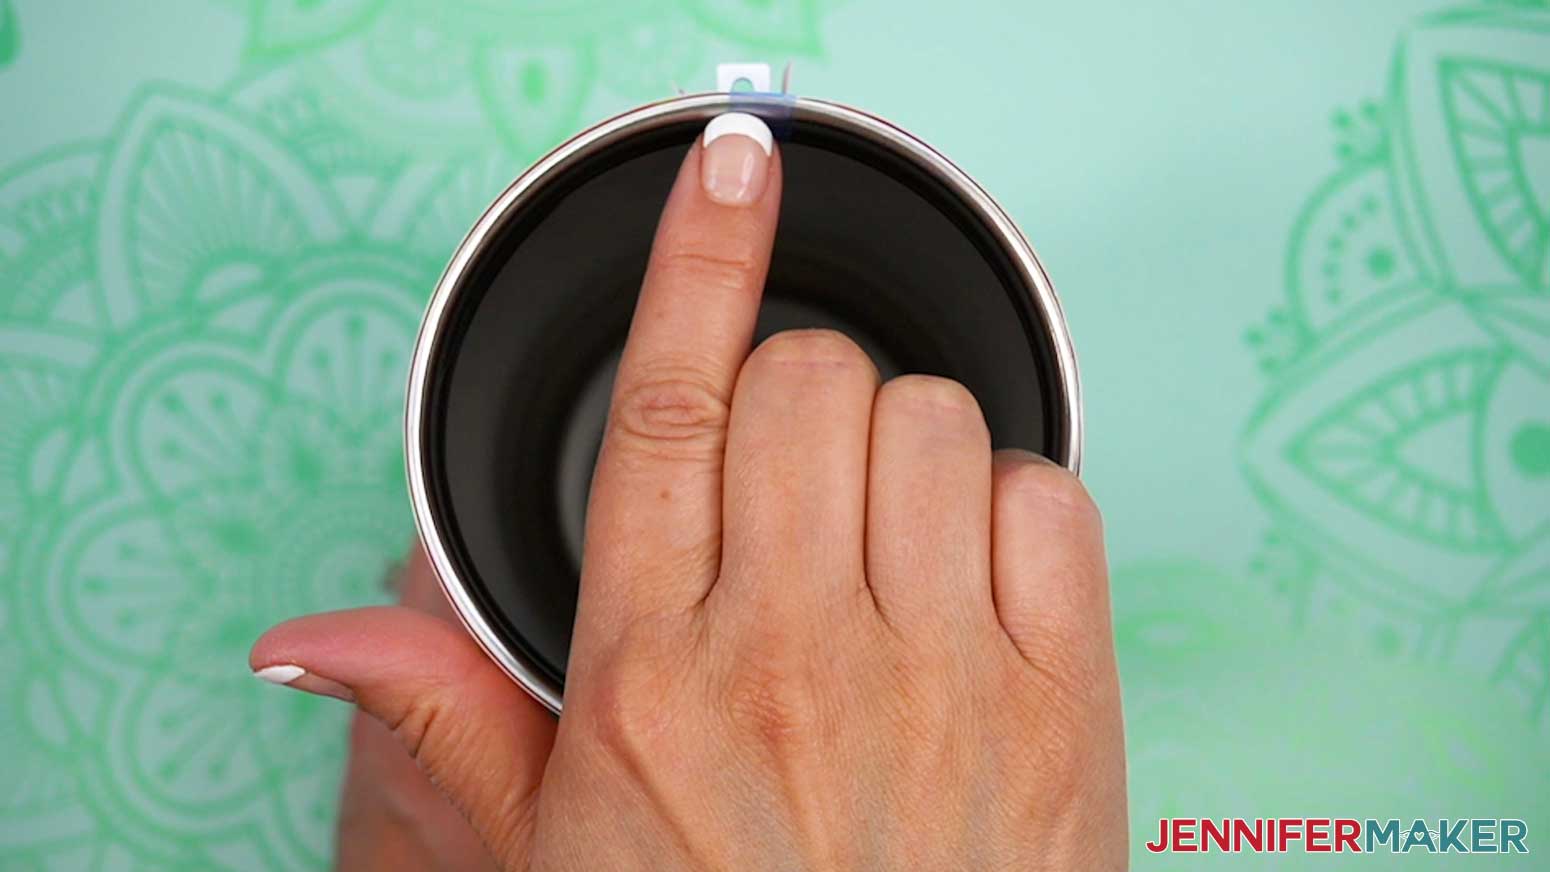
- Place the tumbler open end up and look down at it from the top. Think of it like a compass and place the original seam in the North direction.
- Just like we did for the top of the seam, place tape at the South location, letting it extend past the edge.
- Keep your thumb on the taped paper and pull the extra tape tightly, securing it to the tumbler's inner surface.
- Smooth the tape with the scraper to remove any air pockets.
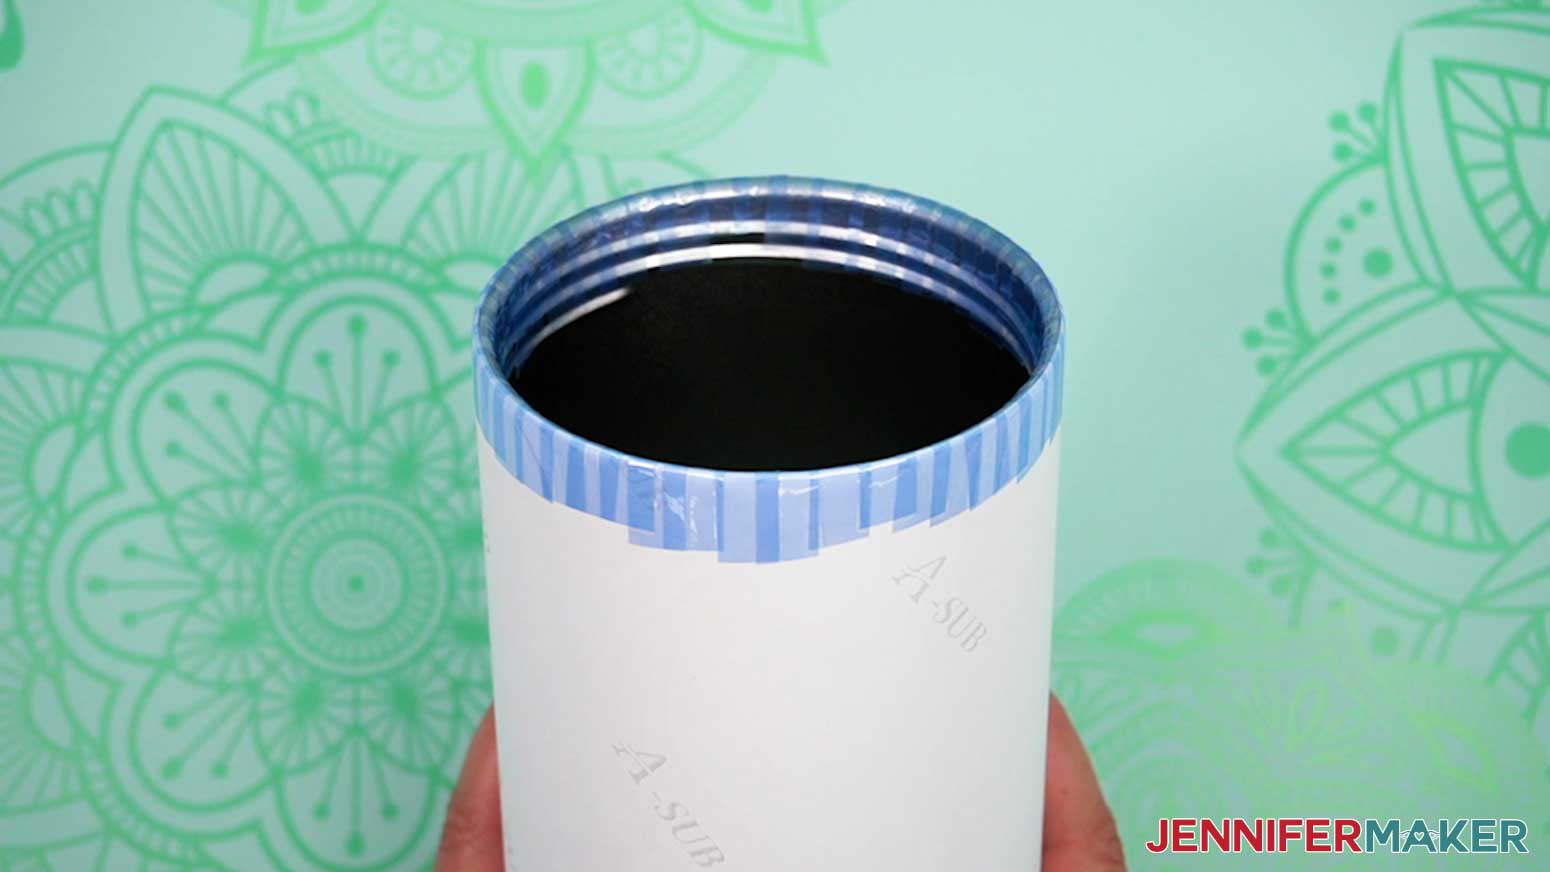
- Repeat for the East and West points.
- Then, fill in the intermediary directions like North East until the entire top rim is secured.


PREPARE YOUR BOTTOM DESIGN
- For the bottom design, place the paper face up in the trimmer so one tapered short edge lines up on the cutting line.
NOTE: Since this cut is at an angle, the other paper edge won’t meet the trimmer guide, so carefully hold the piece in place. - Add heat-resistant tape to the back of the other short edge using Steps 8-10 from the top section.
- Trim away the white paper by the second short edge using the same technique with the paper trimmer.
- The long edges are slightly curved up to match the tapered bottom shape. The bottom edge can have some white paper still attached, so place it face up in the trimmer so the lowest points at the ends are close to the cutting line.
- Use Steps 3-7 from the top section to make a straight cut along the bottom, leaving all of the ink in place with a little white where the design curves up.
- The top edge can also have a little white, but it’s easier to cut with scissors. Cut smoothly along the ink leaving as little white paper as possible.
TIP: The top edge will nestle into the curve where the bottom transitions into the middle band, so it won’t be as noticeable as other areas. - Since we’ve handled the tumbler a lot while applying the upper design, carefully clean the bottom section of the tumbler with a lint-free cloth and rubbing alcohol, then let it dry.
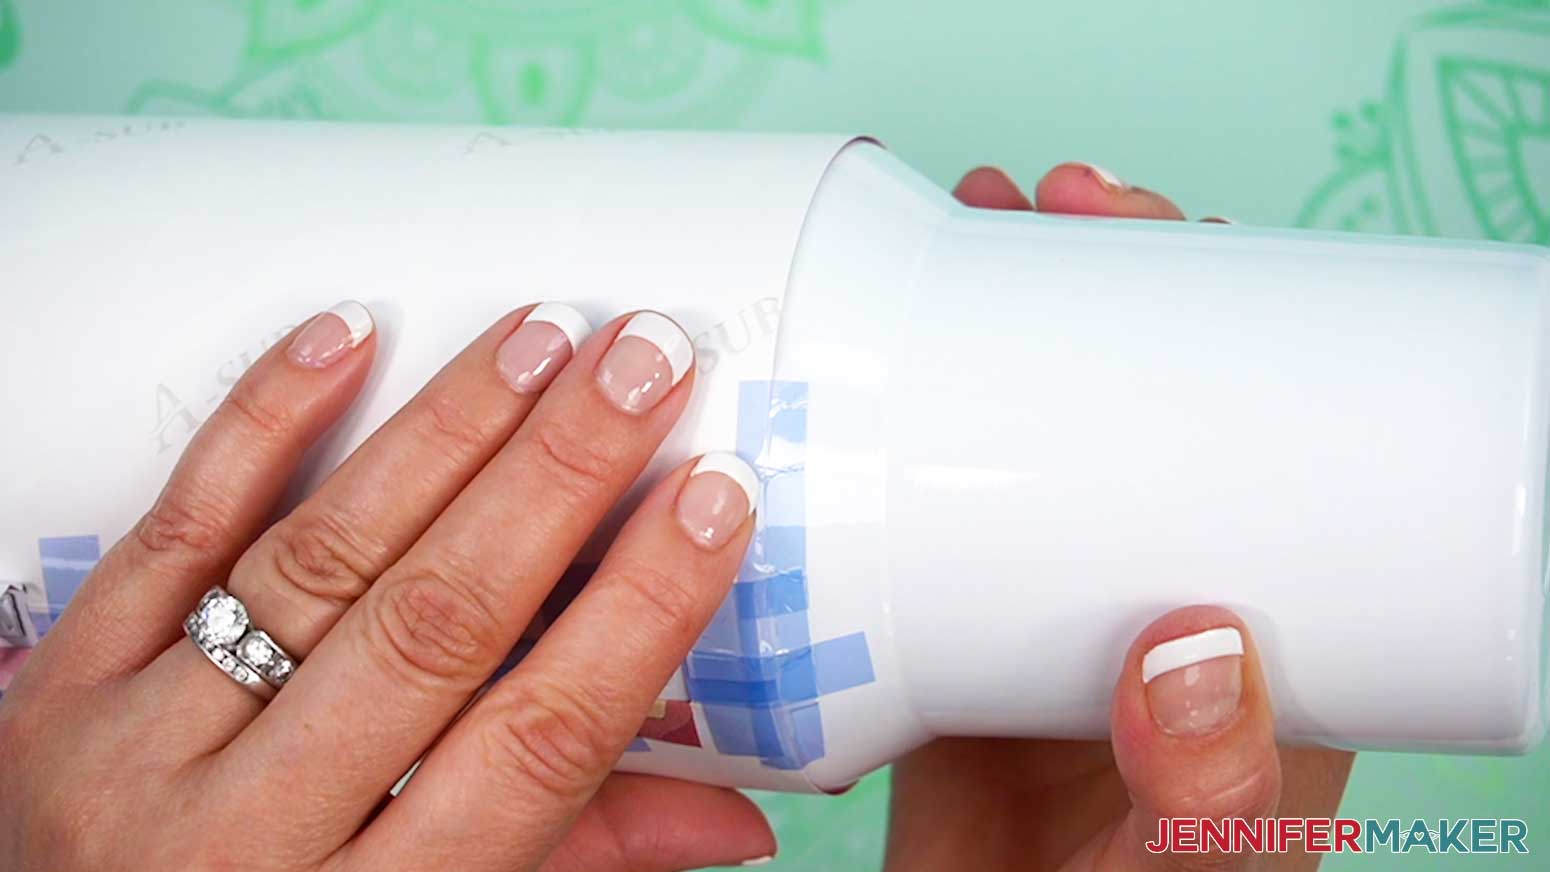
- Place the tumbler on its side with the upper seam on top and the opening facing away from you.
- Make sure the bottom design is oriented correctly, then slide it under the tumbler’s bottom section with the ink facing the cup.
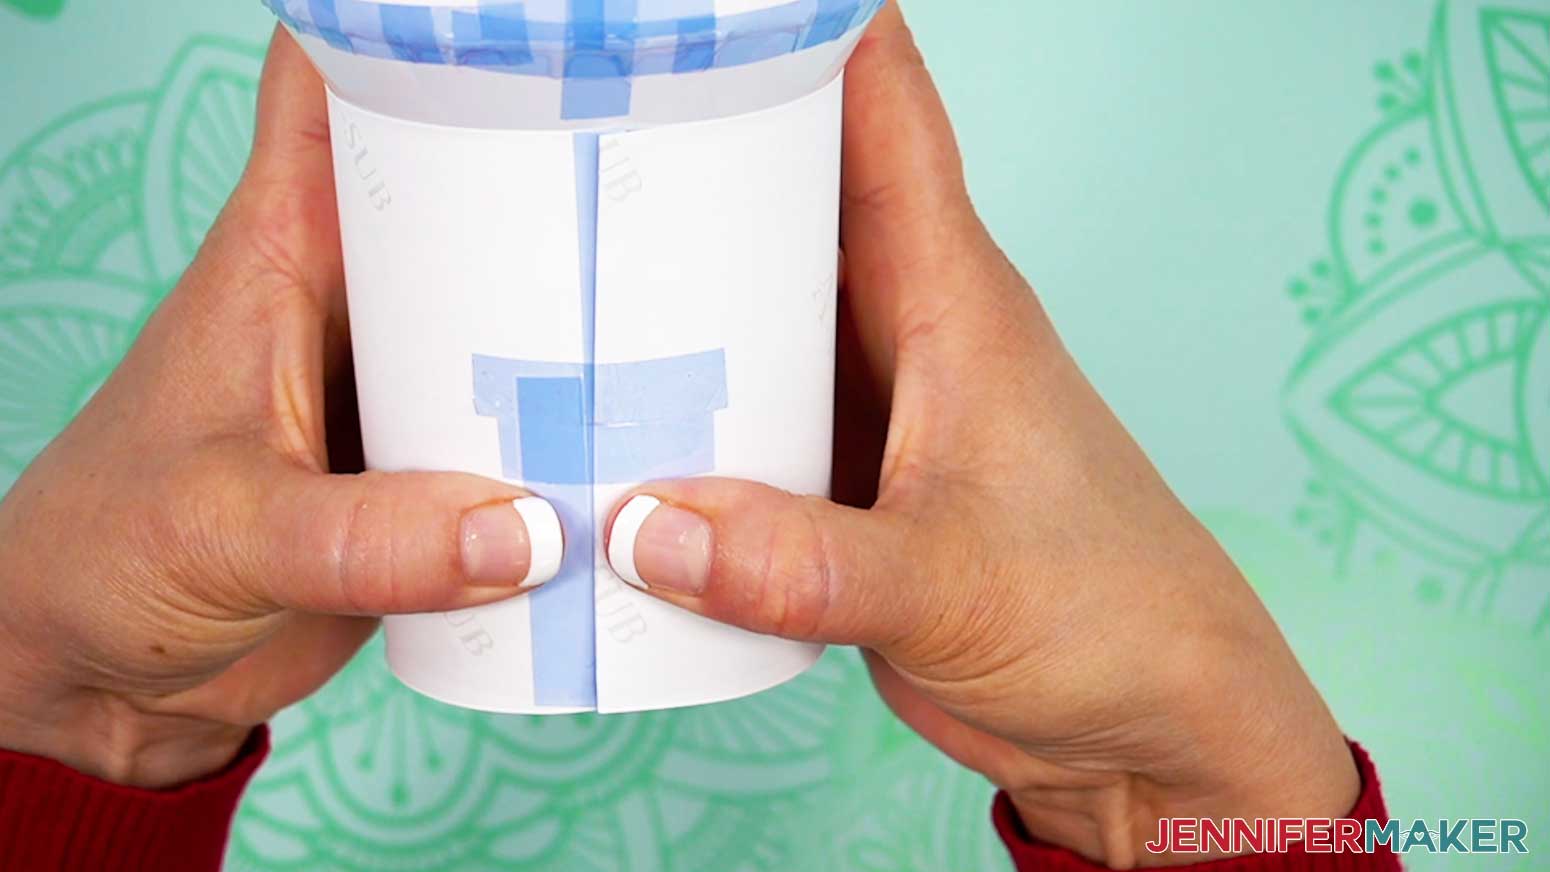
- Bring the short edges up to meet so the one with tape on it touches the tumbler and the other layer is on top.
NOTE: For the least noticeable seam, align the overlap with that of the top section, because this area will often be obscured by holding the tumbler’s handle. - Make sure the paper’s top edges align right before where the bottom section begins flaring out for the middle band.
- Check if any of the top layer extends past the tape on the lower layer due to the taper. If so, remove the wrap and add more heat-resistant tape to the existing section to avoid extra ink for transferring and making a discoloration. Remember to burnish the tape well.
- When your alignment is correct, lightly tape the seam’s center to maintain the alignment.
TIP: If you have a tumbler clamp large enough to fit the lower section, it will help keep the wrap in place during the initial taping. - Keeping the wrap in place, add a piece of heat-resistant tape securely on the outside edge, but don't let it touch the paper on the other side of the seam yet.
- Use one hand to hold the lower layer of the design tight against the tumbler and pull the loose section of tape as tight as possible, then press it in place on the lower layer.
- To check if the paper is tight enough, try to press hard on either edge of the paper and smooth them toward the taped seam. If anything ripples or comes away from the tumbler, remove your tape and try again.
- Remove the first light piece of tape and the wrap will be cinched in tight to the tumbler.
- Add more tape pieces tightly across the seam.
- Make sure the bottom design is evenly aligned with the spot where the tumbler flares out for the middle band.
- Then look at the bottom and make sure the ink slightly extends past the tumbler. Adjust if necessary.
- Add a piece of tape vertically down the lower seam.
- Burnish the seam tape with your scraper.
- To make the seam even less visible, run the scraper’s edge along the seam where the paper’s edges overlap.
TIP: Make sure you burnish the visible seam on the top layer, but also the seam under the paper. You should be able to see it by the slight ridge the paper’s edge makes in the upper layer. - In testing, I found that leaving the bottom edge un-taped gave me more consistent transfer results as long as the design was tightly secured to the tumbler.
NOTE: Since these tumblers are too tall to fit in most sublimation ovens sitting up, we’ll lay them on their side for sublimating, so any paper extending past the bottom won’t be an issue.
STEP 4: SUBLIMATE YOUR 40 OZ TUMBLER
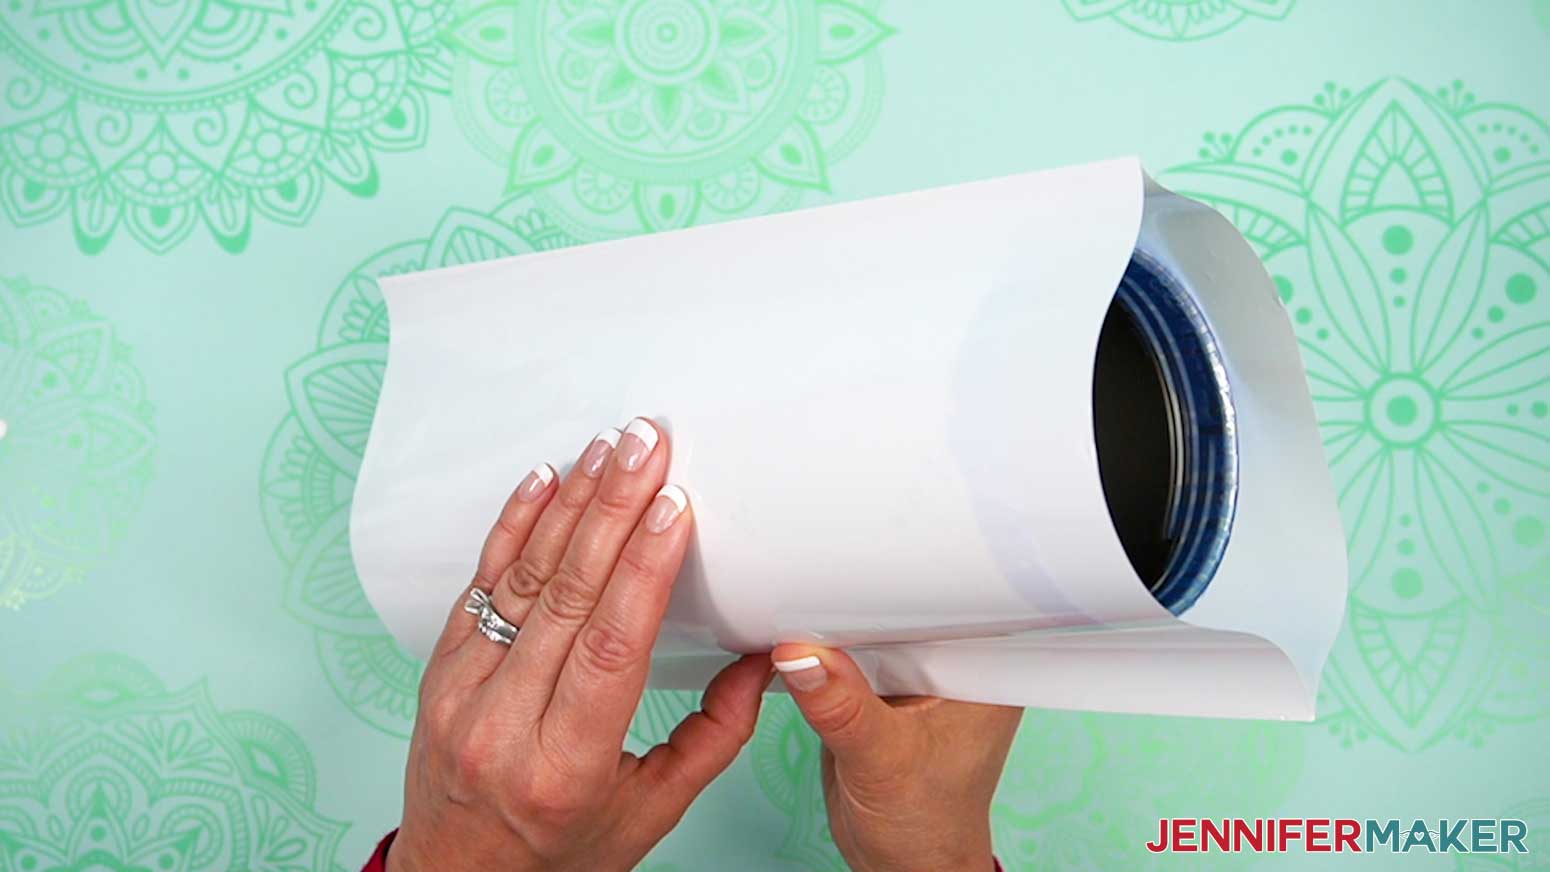
- Open up a shrink-wrap sleeve and pull it over your tumbler.
TIP: Some sublimation tumblers come with shrink-wrap sleeves, but not all do. If you order them separately, be sure they’re the right size to easily fit your tumbler’s width including the brackets. - Put on your heat-resistant gloves and set a heat-safe item like a pressing pad nearby.
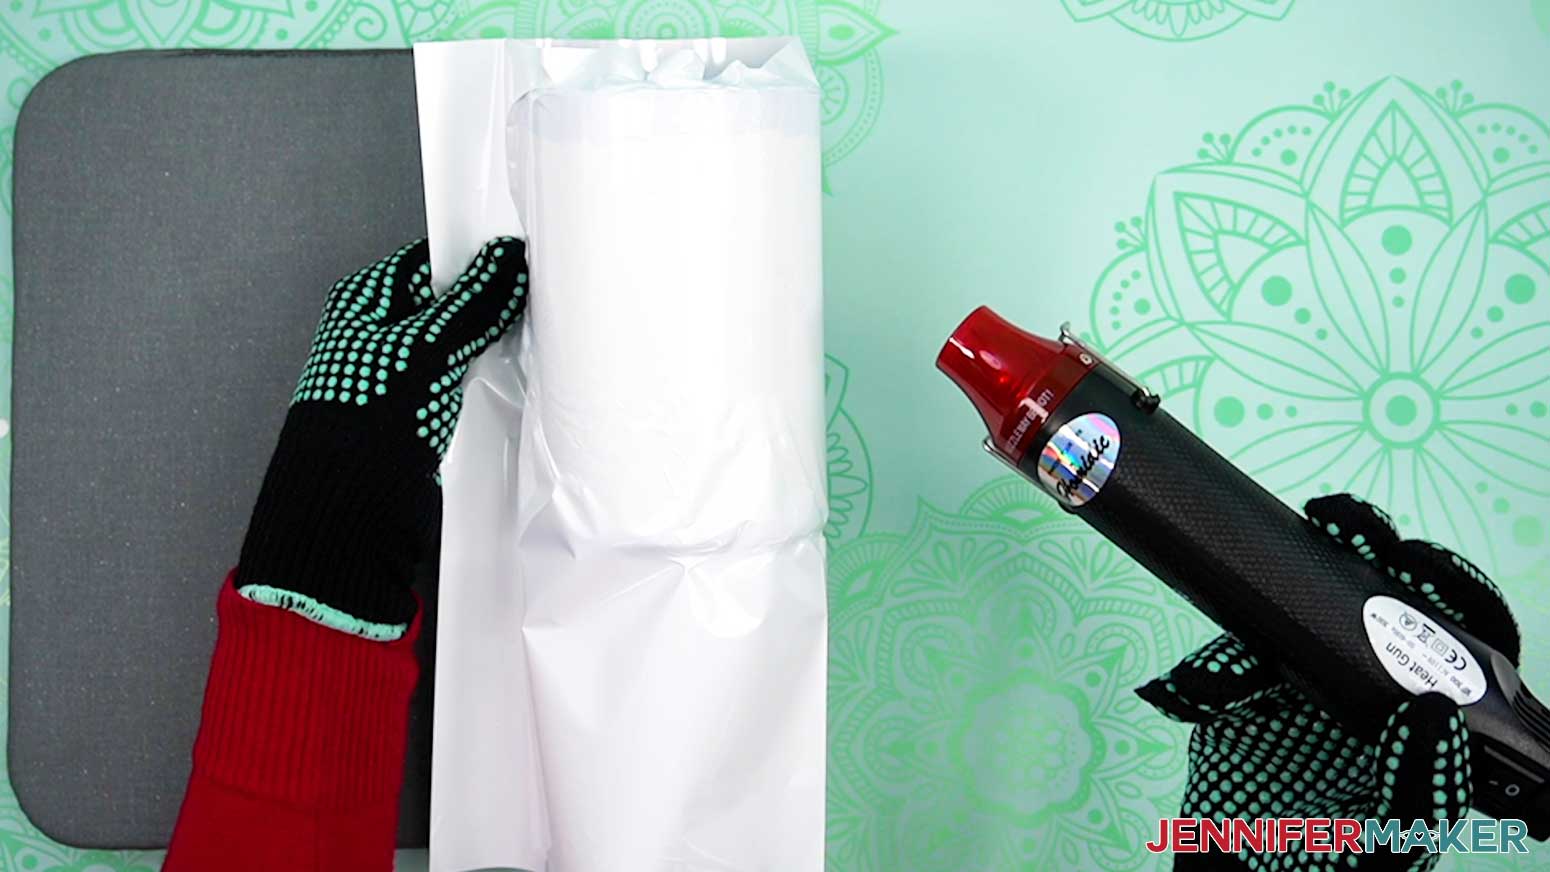
- Use your heat gun on a low setting to slowly heat the wrap so it conforms to the tumbler.
TIP: Start with the straight edges and then work on the brackets, curves and finally the bottom. - Make sure most of the wrinkles are smooth, but don’t make it too tight or it will pull apart in the oven.
NOTE: The handle brackets will poke the wrap out, but don’t make the wrap so tight that it rips over them now. - The tumbler will be warm, so set it on the pressing pad when you’re done.
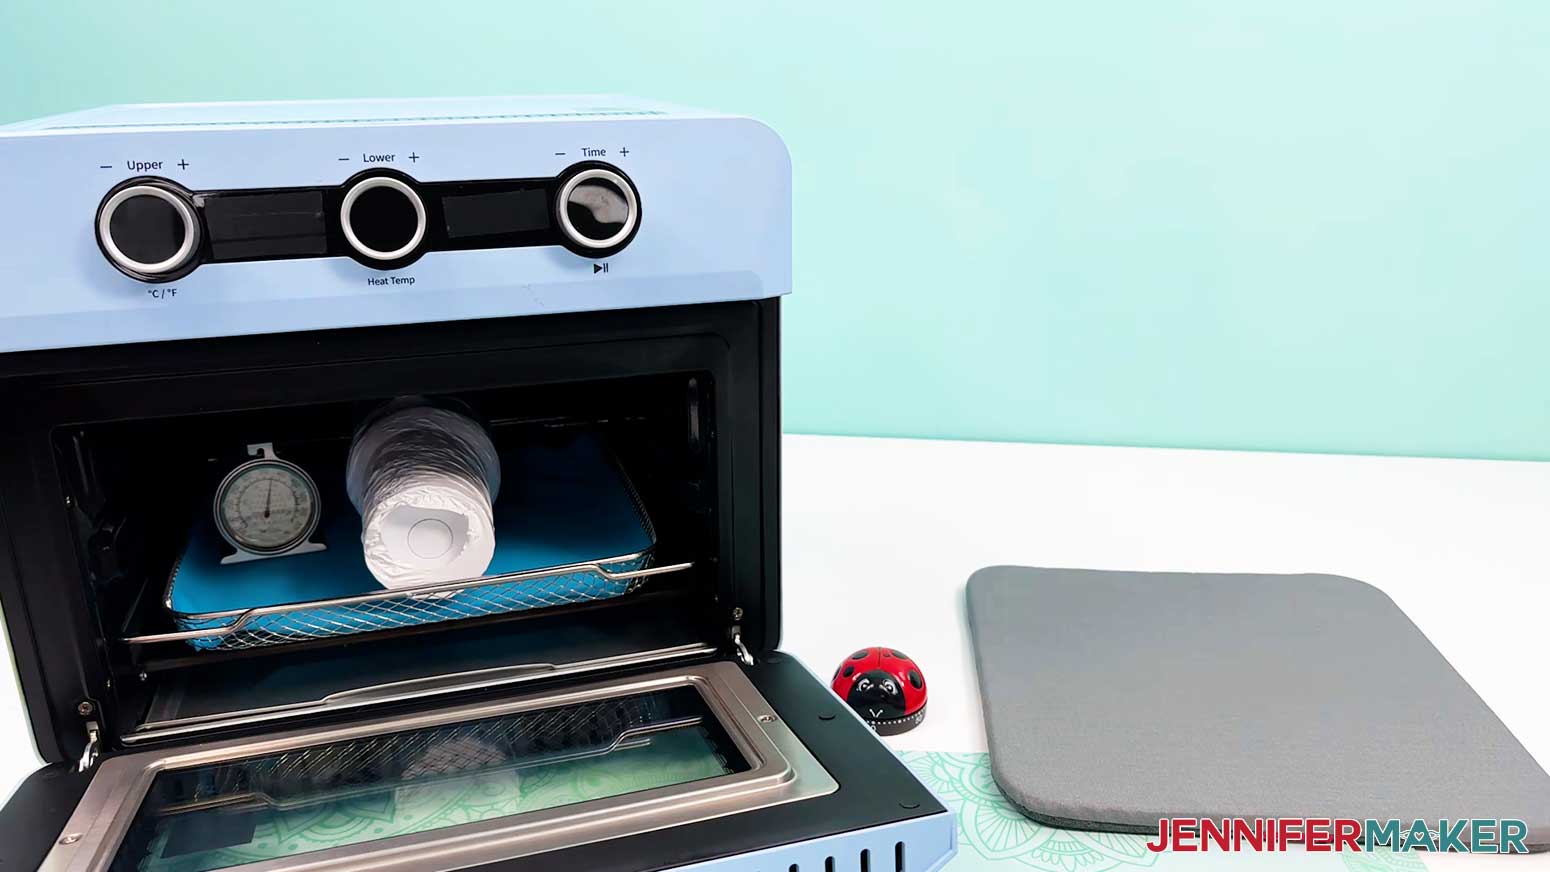
- Place a silicone baking mat onto the sublimation convection oven’s wire tray to keep the tumbler from rolling later.
- Put an oven thermometer right in the center to make sure the temperature is correct.
- Heat the convection oven to 375℉ (191℃).
- When the convection oven is at the right temperature, put on your heat-resistant gloves and place the tumbler on its side on the baking mat.
- Heat the prepared tumbler in the oven for six minutes, giving it a quarter turn every minute and a half to even out the heat.
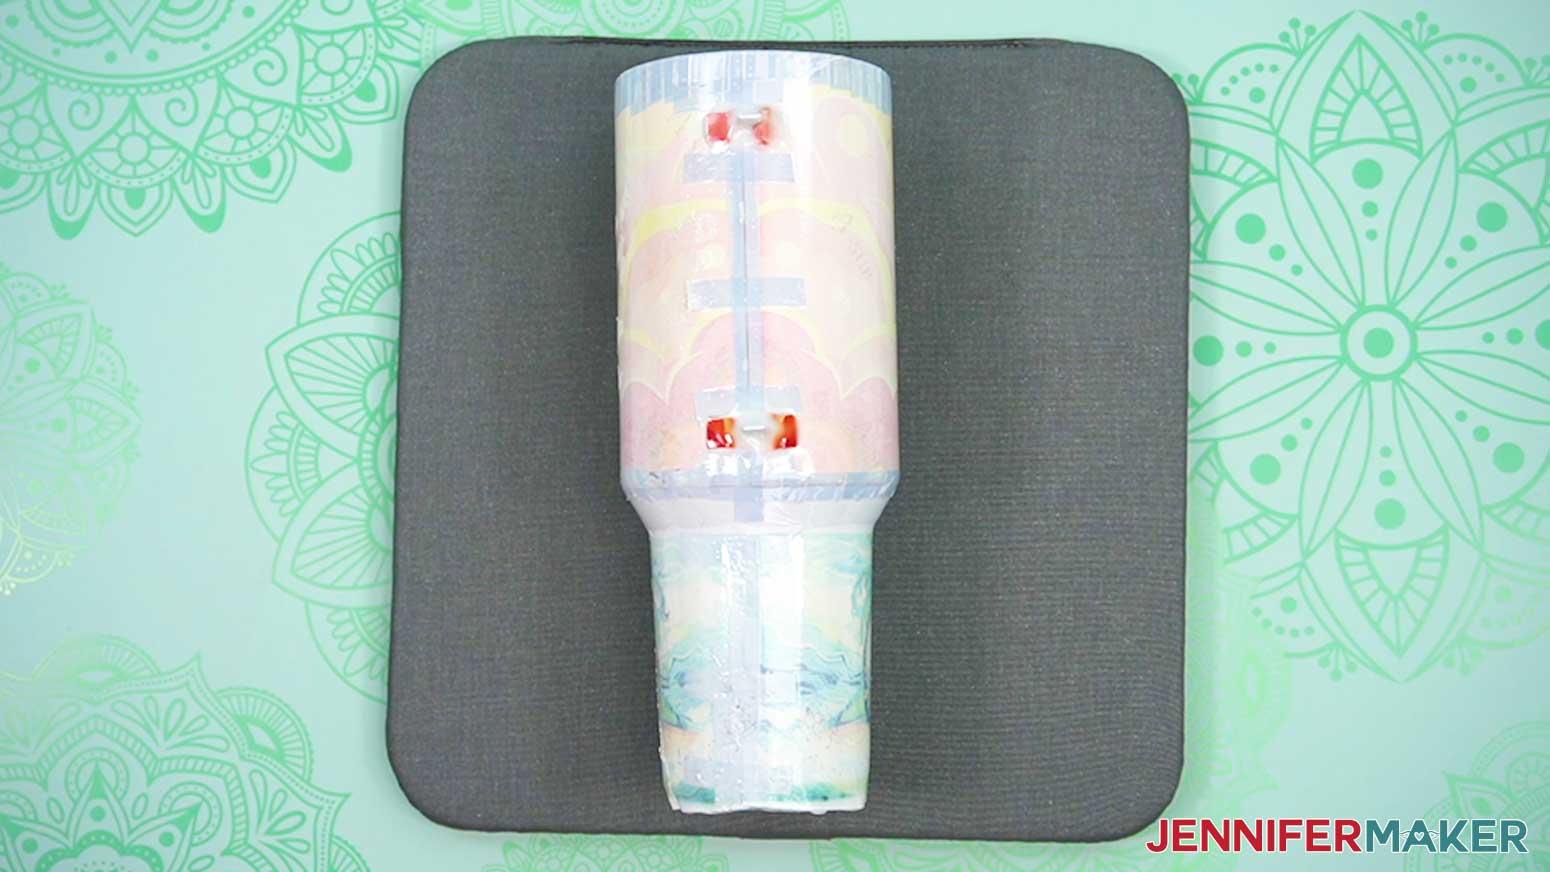
- When the time is up, keep your heat-safe gloves on and remove the tumbler from the oven, placing it on a heat-safe surface like the pressing mat to cool for a few minutes.
NOTE: The shrink wrap may have torn where it contracted over the brackets, but it will not impact the final result. - Remove the wrap, tape, and design while the tumbler is still slightly warm.
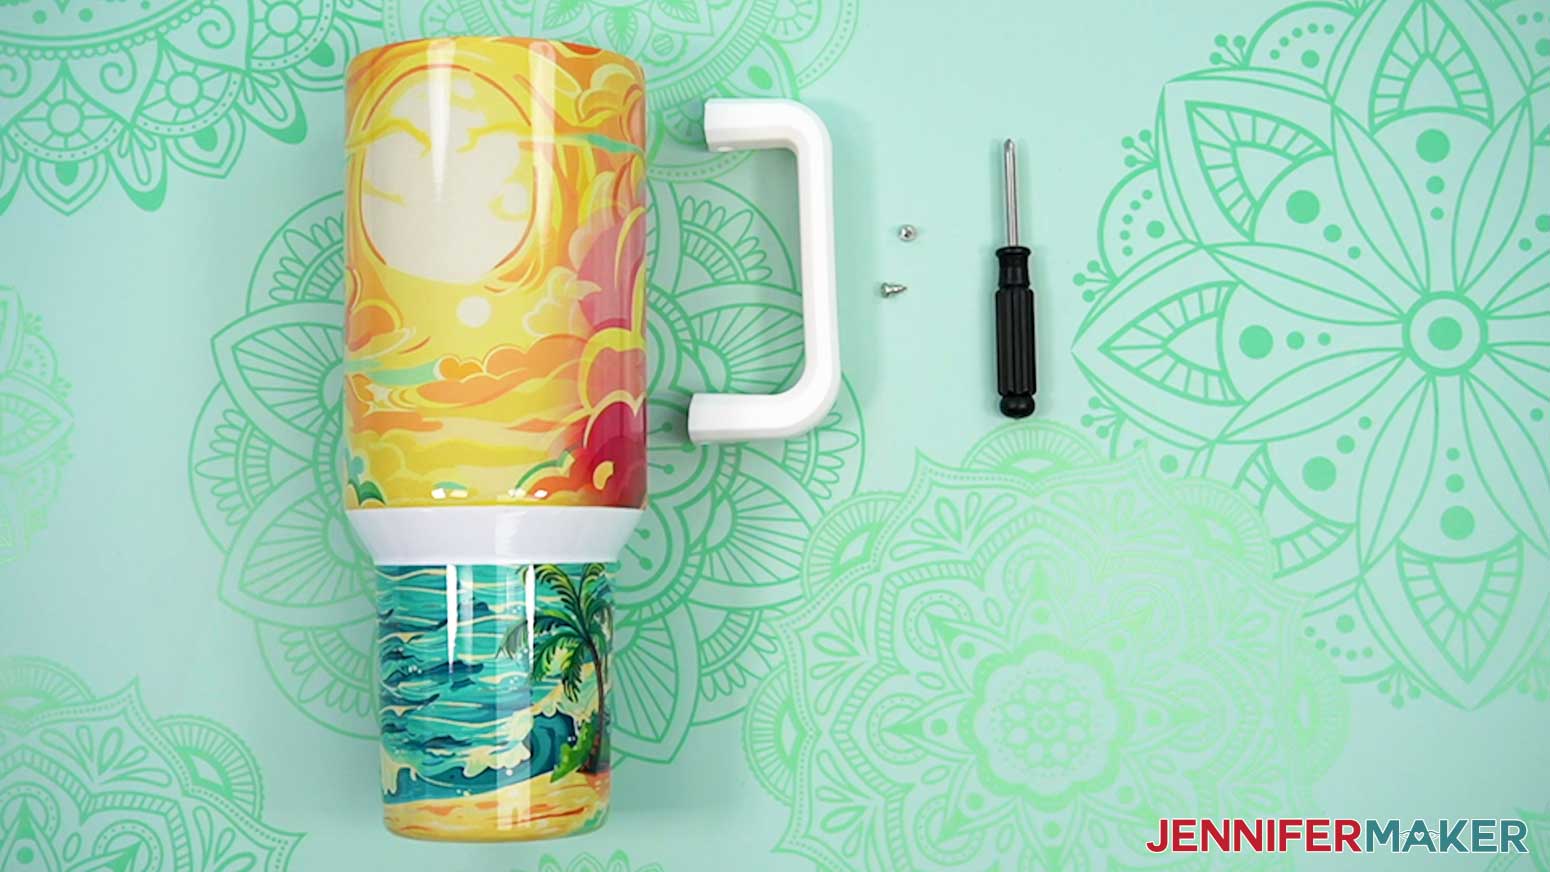
- If you’re using the same tumbler as me, you’ll need to secure the handle to the brackets using the included screws and screwdriver once it’s totally cooled.
NOTE: If you’re using a different tumbler, follow the instructions that came with your tumbler. - Fit the handle over the brackets.
NOTE: For my tumblers, the handles only fit in one orientation, so make sure the screw holes are on the bottom edges before trying to attach them.
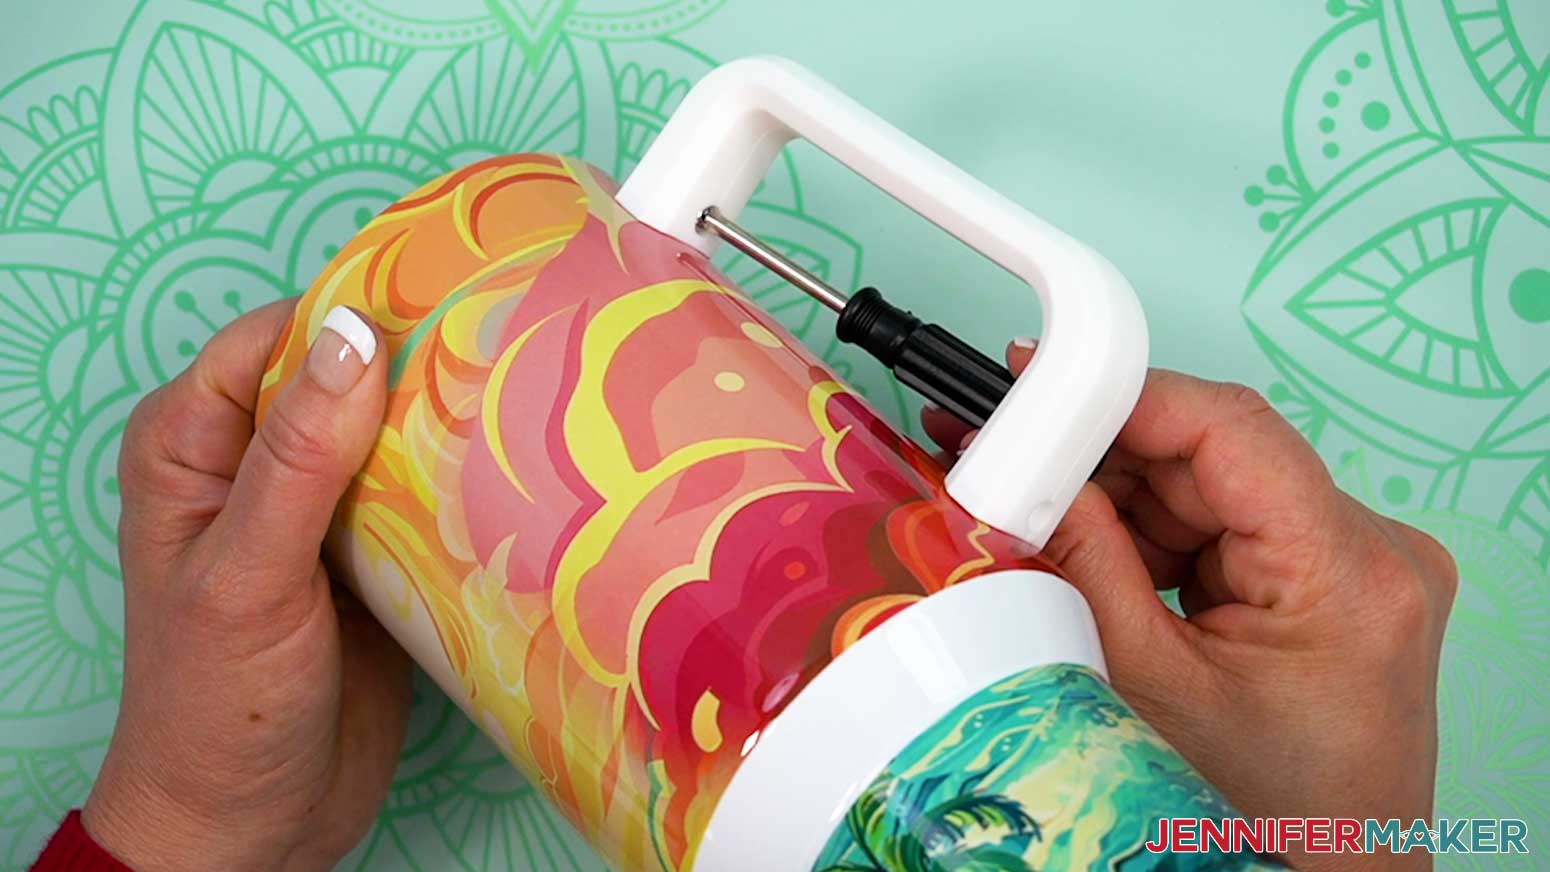
Insert a screw under the top of the handle into the hole for the upper bracket and use the screwdriver to secure it. - Repeat with the second screw for the lower bracket.
STEP 5: SHOW IT OFF
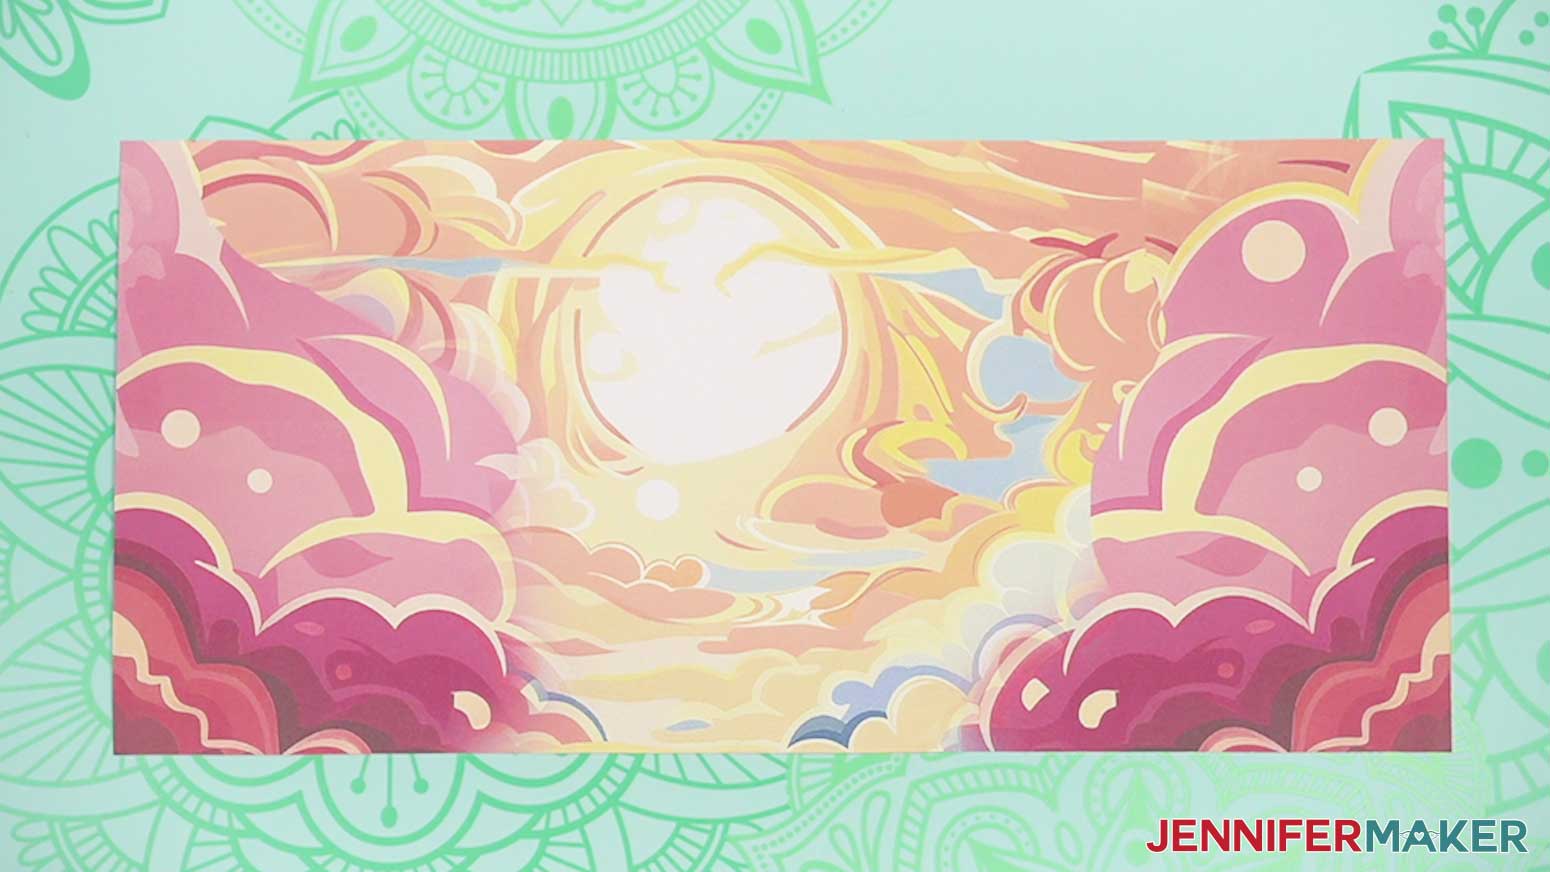
Here is my finished 40 oz tumbler!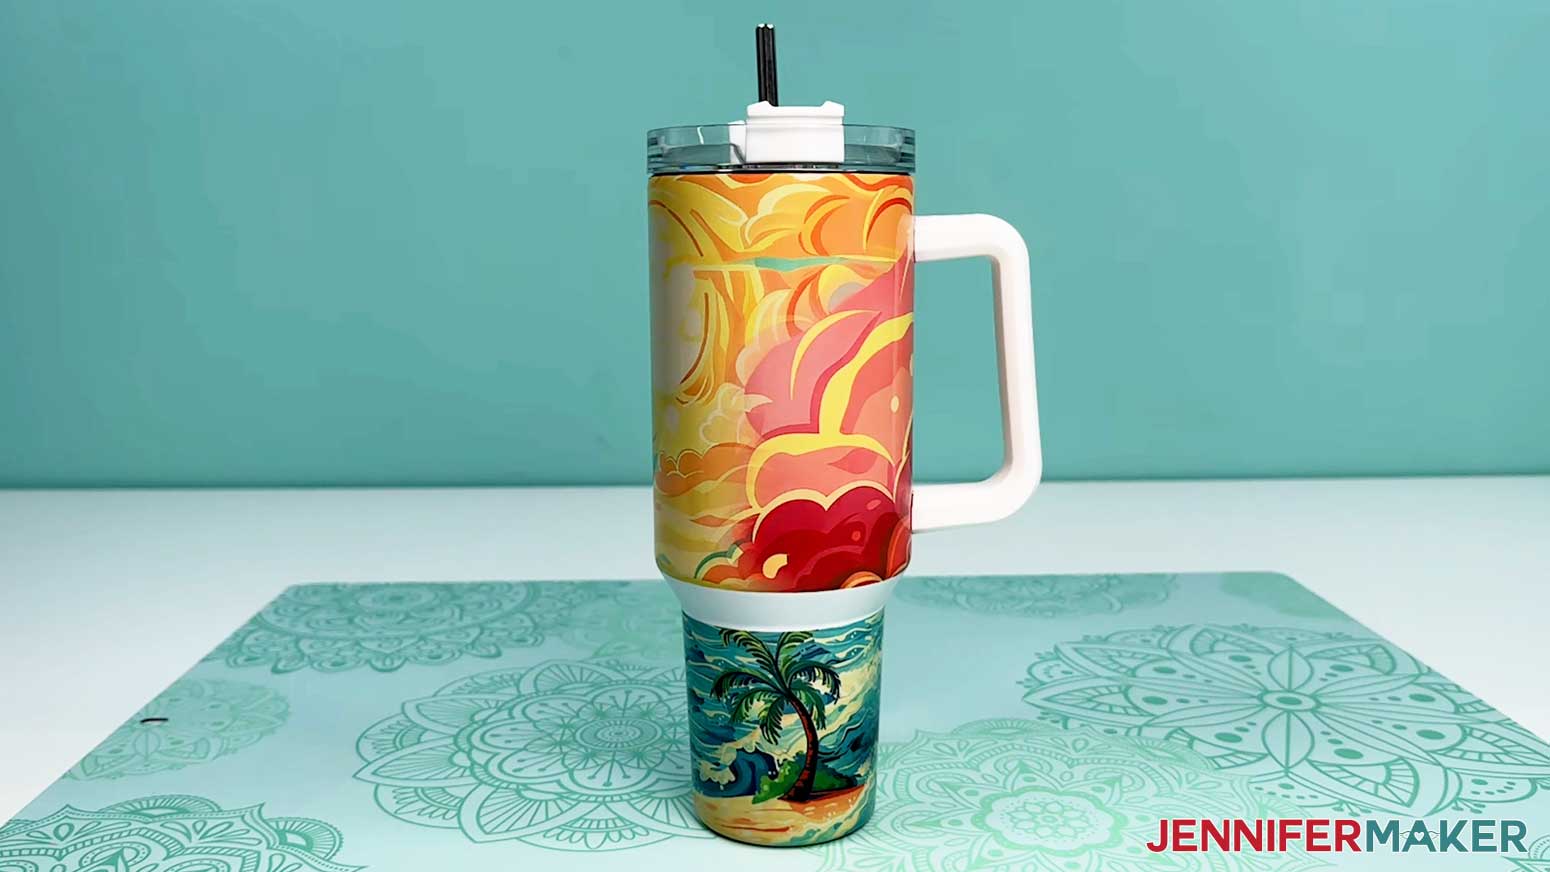
Notes
Sizes:
Top Design: 12.63" x 5.81"
Bottom Tapered Design: 10.13" x 3.85"
Care Instructions:
For maximum longevity, I recommend hand washing only with gentle soap, and allow to air dry.
Answers to Your Questions About How to Sublimate a 40 oz Tumbler
Q: How do I design my own middle band?

A: You can learn how to design your middle band and get access to Canva templates to create your own 40 oz tumbler sublimation wraps in my ADVANCE program. Learn more about ADVANCE here!
Q: Can you sublimate on any tumbler?
A: No, you must use a physical product made to work with sublimation transfers or ink. I used high quality 40 oz tumblers with a white, polymer-based sublimation coating. Plain stainless steel will not work correctly with sublimation ink or other sublimation craft supplies.
Q: How do I care for a sublimation tumbler?
A: Use mild soap and a soft cloth to avoid scratching the tumbler’s surface, which will damage the design. If you want to use a plastic straw or metal straw with your 40 oz travel tumblers, check their manufacturer’s notes for cleaning instructions.
Q: Why is my sublimation print color so dull?
A: Sublimation tumbler wraps look much duller on the paper than they do after they’re sublimated, so don’t worry if your printed PNG file looks faded or different colors than you expect. Light printing is normal. The vibrant colors will show when transferred to the sublimation blanks using your heat press!
Q: Why is my sublimation not transferring evenly?
A: You may need to tweak your settings if you’re using materials other than the ones in my materials list and have sublimation process issues. The sublimation printing process and transferring has a lot of variables, so it’s a good idea to have a backup tumbler in case of mistakes.
Q: What does ghosting mean in sublimation?
A: Ghosting can occur when a freshly sublimated object is moved around too much while it’s still hot. If the object and the sublimation transfer is still hot, the image is still sublimating. To avoid this, simply wait until your sublimated item has cooled off before handling or removing the paper, and don’t move it around more than you need to while it’s sublimating. It’s a natural effect of the sublimation process because the ink is in a gaseous state until it’s cooled.
Q: Where can I buy sublimation blanks?
A: If you order blanks online, look for sellers and items with 5-star reviews or a high average rating. A responsible company will have expert support from friendly representatives to answer any questions or provide requested information to interested buyers. If you’re in the United States, ordering from businesses that ship from within the country can be faster than shopping across the global marketplace. And when you open the package, make sure the physical item is in original condition and sublimation appropriate. You can often sign up for a seller’s mailing list to hear about sales and insider news like how to get free shipping!
Q: What else can I sublimate?
A: Good news! Depending on the high-quality materials, blanks, and digital designs you have available, the possibilities of sublimation are nearly endless! I’ve sublimated garden flags, mouse pads, mugs and more, but there are a whole host of items I’d like to try like license plates. If you have a physical end product in mind, check my free library for a downloadable file to fit it!
Q: Can I sell my tumblers or other designs I downloaded from your blog and made or are they just for personal use? Do you have a commercial use or small business use license?
A: Yes, you can sell handmade pieces or made-to-order items using these designs (with limitations) — please read about licenses here so you know what you can and cannot do. If you use them, please share photos with us! We love supporting small businesses and creative entrepreneurs!
Get my free PNG files to make your 40 oz sublimation tumbler!
(If you do not see the signup form above, click here.)
I love seeing what you make with my designs and how you use them! Please share a photo of your BIG sublimation tumblers in our Facebook group or tag me on social media with #jennifermaker.
Love,

Want to remember this? Save this Tutorial on How to Sublimate A 40 oz Tumbler to your favorite Pinterest Board!