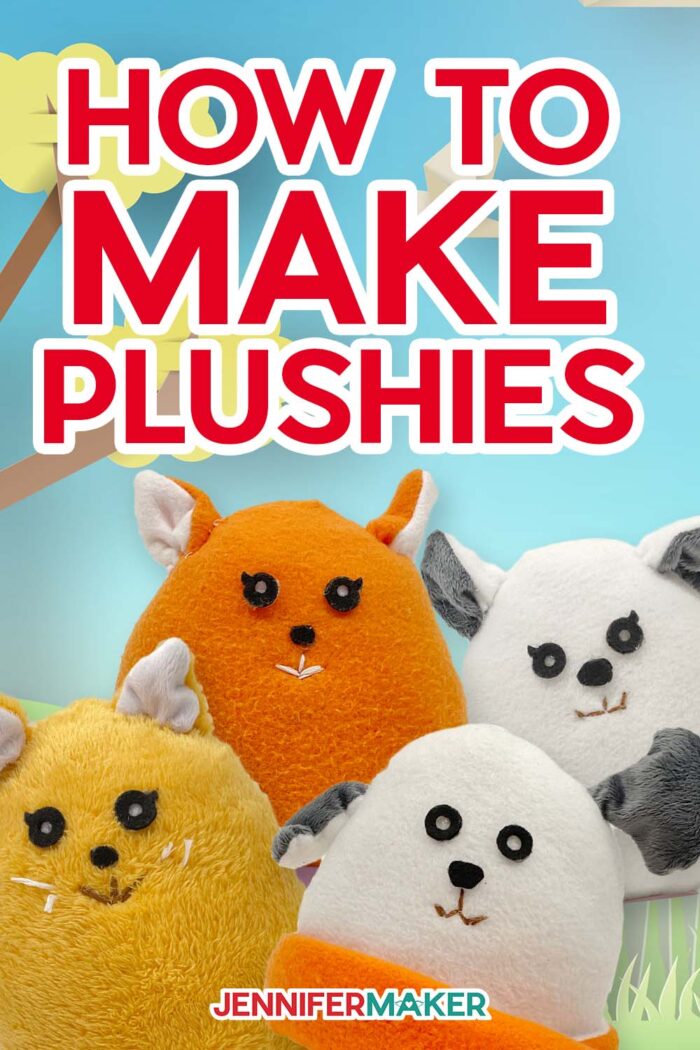
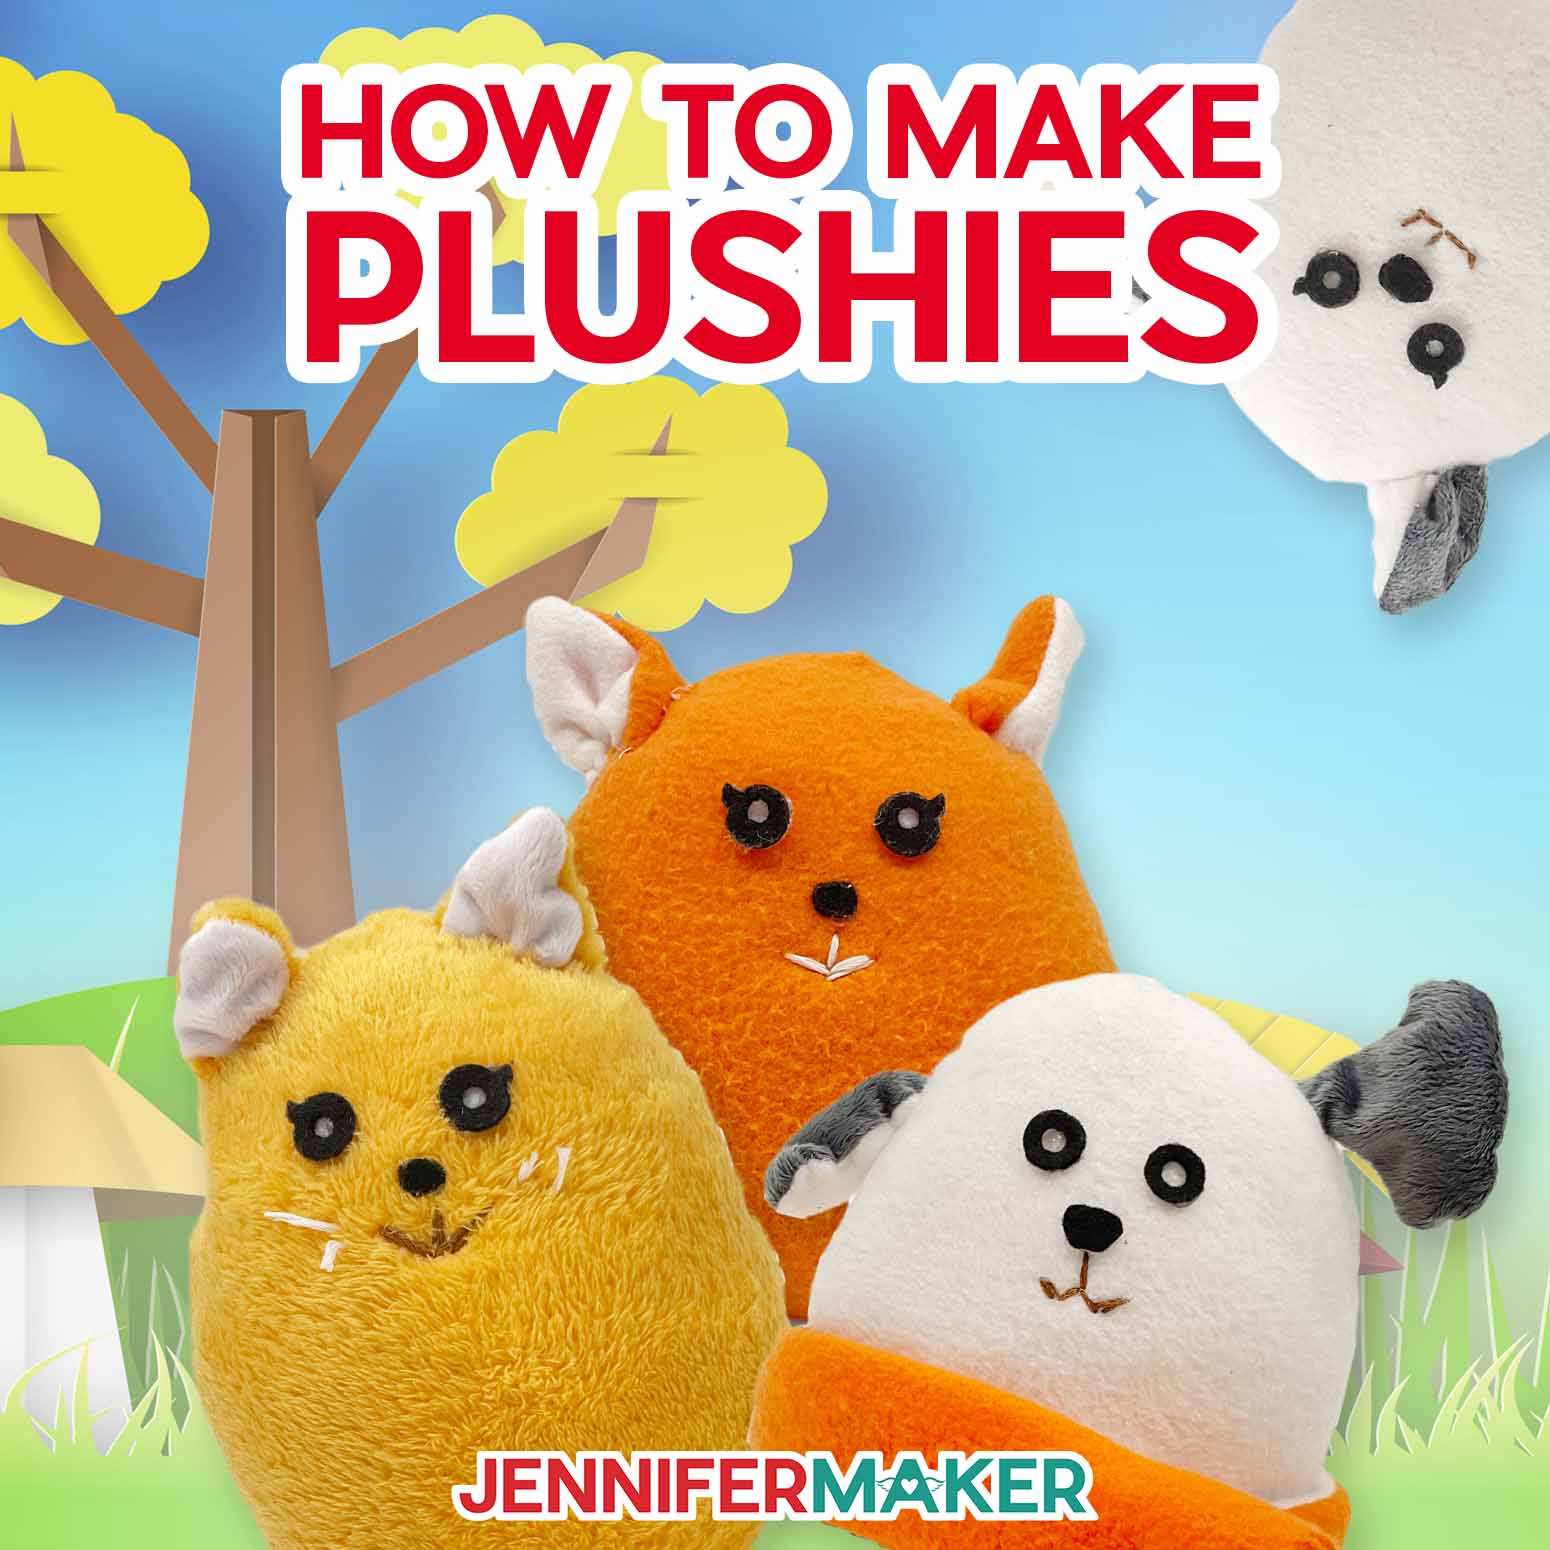
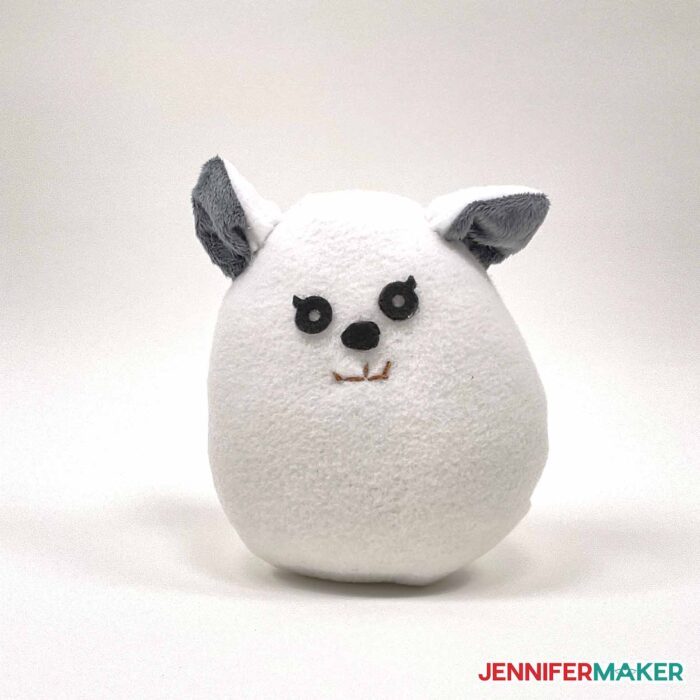
Learn how to make a plushie of your favorite animal with easy cutting by your Cricut!
I love when my interests combine and today they absolutely do as we learn how to make a plushie with or without a Cricut! I love sewing, Cricut crafting, and the kawaii-inspired characters that influenced our patterns. Alexa and I have sewn many plushies together over the years and, once we got a Cricut, we also figured out how to cut fabric with a Cricut! It does require some machine and hand sewing, so set up your couch caddy! I’ll share the materials you’ll need and everything I learned along the way about using fleece, minky, felt, and fur in a cutting machine!
Watch the full step-by-step tutorial on how to make a plushie with a Cricut:

 What is the Merry Maker Mingle? This is an annual tradition here at JenniferMaker! Every day for the first 25 days of December, we gift you with a brand new project, design, tutorial, and video for something YOU asked us to make. On top of that, we host a giveaway with 25 days of prizes. Some of the amazing prizes are Cricut cutting machines, sewing machines, gift cards, and beautiful print editions of our popular Cricut Coach Playbook. You can even earn bonus entries for sharing photos of the daily projects! Click here to learn more about the Merry Maker Mingle!
With their simple shapes and smooth lines, making plushies is fun and easy! And with my free, simple cut files, you can make your own plushie with a Cricut. No Cricut? No problem — follow my printable pattern to cut one by hand instead!

If you do have a Cricut, we’ll use Cricut Design Space to prepare each plushie pattern, including adding a line for the seam allowance using a washable fabric marker. Those lines are much easier to add to pattern pieces with the machine than by hand. Especially on stretchy fabric, like the fleece and minky we’ll use.
What’s the difference between fleece and minky?
Fleece is a knit polyester fabric, though the stitches are hidden by the texture. The right sides are fluffier and brighter, and it stretches more in one direction than the other. That’s surprisingly important when you’re learning how to make a plushie, so stay tuned for some tips.
Minky is thinner and the sides usually look different. It stretches some, but not as much as fleece. The smooth, soft texture makes minky perfect for soft toys like these, but it can be slippery during sewing. We’ll use lots of pins!
And yes, you can cut soft fabrics for plushies on a Cricut! I’ll share some important tips to prepare your fabric and tools so everything cuts perfectly. Taking the time will make the sewing much easier. If you are using an Explore machine, you can use my tips on cutting fabric with a Cricut to make the designs.
I’ll show you some basic machine sewing skills (just a straight stitch) to assemble the plush animals. And we’ll learn a helpful handsewn stitch to finish and add the ears: ladder stitch! I used embroidery stitches to add mouths and whiskers.

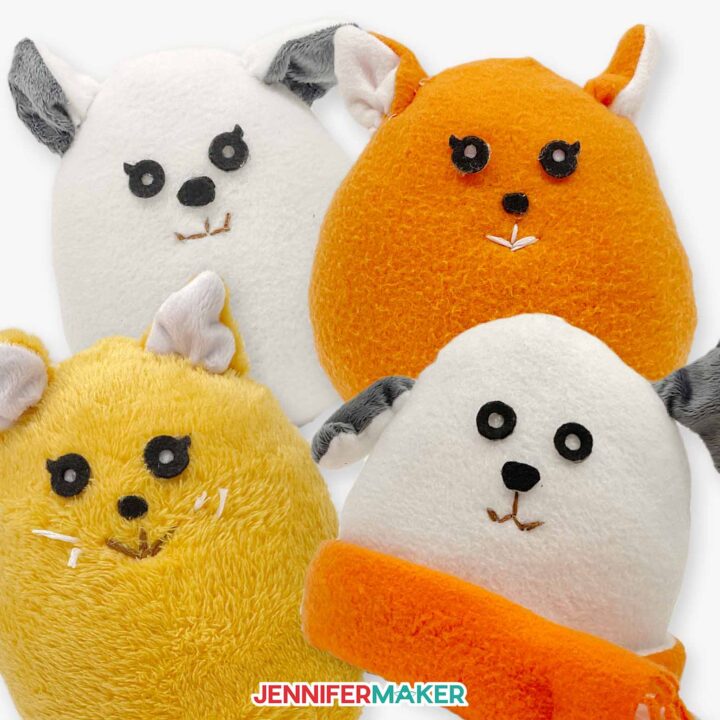
Once you’ve made a few, your own custom plushies will make great handmade gifts. With some experimentation, you can make custom plush toys like your pet’s breed, a favorite animal, or combination! Just using a different color fabric can totally change the cute dogs and cats. You can even sew more little accessories like hats to go with the simple scarf.
Important Safety Note: These plushies have sewn and glued pieces, and they’re not meant for young children or anyone else who might chew on or pull off pieces. If you want to make adorable plush toys for a child, please look for a sewing pattern meant for children’s toys. They’ll use more secure processes, like safety eyes (not button eyes!) and different sewing techniques. It’s the same thing with pets, these are not animal-friendly. These plushies are meant to keep you company and look cute, they’re not up for rough housing!
Let me show you how to make a plushie! This post contains some affiliate links for your convenience (which means if you make a purchase after clicking a link I will earn a small commission but it won’t cost you a penny more)! Read my full disclosure policy.
Materials to Make a Cute Plushie
View my Amazon shopping list with the exact items we used to make this project
- Fleece Fabric – I used a 1/2 yard for the body pieces and an 1/8 yard for the two outer ear pieces, and tail half. Get some extra for testing!
- Minky Fabric – I used an 1/8 yard for the two inner ear pieces, and other tail half
- Felt Fabric I used small pieces of black and white for the nose and eye pieces
- Premium Polyester Fiber to fill the plushies
- You can handsew the plushies, but a Sewing Machine – like the Janome Arctic Crystal Sewing Machine – with compatible Needles and Polyester Thread makes it easier
- A method to cut your materials — I used the amazing Cricut Maker 3, with the Rotary Blade with Housing
- Cricut Pink FabricGrip Mat, 12″ x 12″
- Cricut Washable Fabric Pen
- Brayer
- Scissors (ones for fabric are best) or a handheld rotary cutter and self-healing mat
- Sewing Pins
- Hand sewing needles to attach the ears
- Embroidery Needles and Embroidery Floss to add details
- Hot Glue Gun
- Lint Roller
- Pencil
- Design #451 — My free SVG/PDF/DXF plush pattern design files (available from my free resource library — get the password at the bottom of this post)
How to Make Your Own Cute Plushie
How to Make a Plushie
Learn to make a plushie with fleece or minky fabric!
Materials
- Felt Fabric I used a small piece for the black and white eye pieces
- Premium Polyester Fiber
- Fleece Fabric - I used a 1/2 yard for the body piece and an 1/8 yard for the two outer ear pieces, and tail half
- Minky Fabric - I used an 1/8 yard for the two inner ear pieces, and other tail half
- Embroidery Floss
- Polyester Thread
- Design #451 — My free design files (available from my free resource library — get the password at the bottom of this post)
Tools
- Sewing Machine - like the Janome Arctic Crystal Sewing Machine
- Sewing Machine Needles - for woven fabric that fit your sewing machine
- A method to cut your materials — I used the amazing Cricut Maker 3, with the Rotary Blade
- Cricut Rotary Blade with Housing
- Cricut Rotary Cutter
- Circut Scissors
- Sewing Pins for Fabric
- Embroidery Needles
- Brayer
- Cricut Pink Fabric Grip Mat, 12" x 12"
- Cricut Washable Fabric Pen
- Cricut Glue Gun
- Lint Roller
- Seam Ripper - just in case!
- Pencil
Instructions
STEP 1: Get my free Animal Plushies design files
Download my free Animal Plushies SVG/PDF/DXF collection from my resource library -- it's Design #451.
The download folder includes PDFs to cut by hand, and DXF or SVG files for use with a cutting machine. I'll show you how to use the SVGs with a Cricut.
There is a file for a:
- Cat
- Dog
- an optional scarf
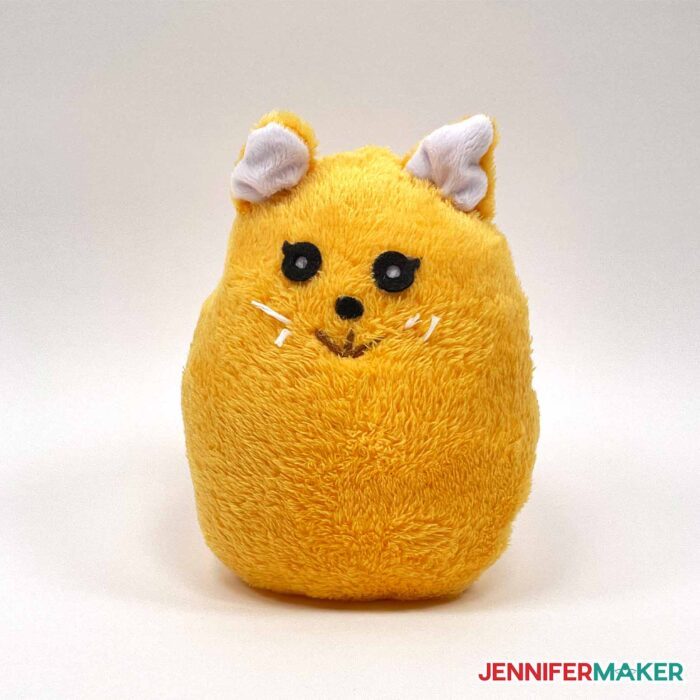
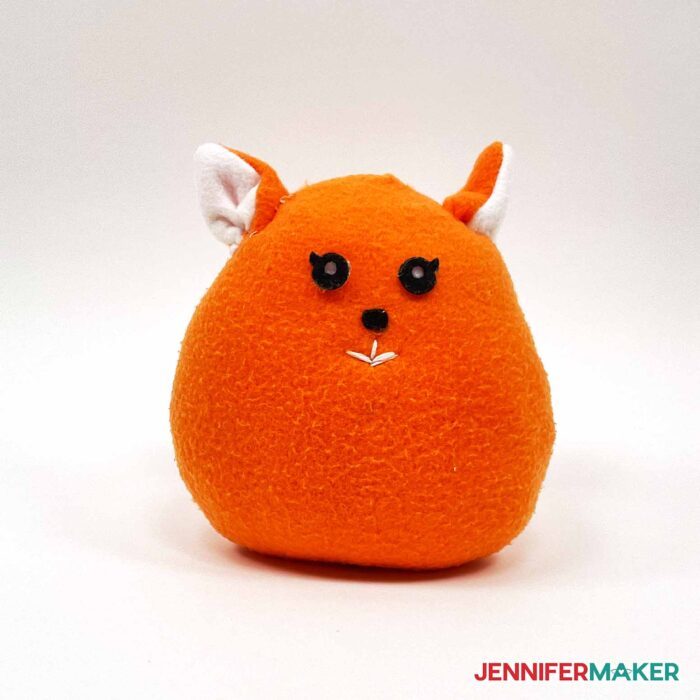
These designs are inspired by kawaii animal character cuteness and I love them! If you want to use a different shape for the features, you can just use the body shape, eyes, or whichever combination works for you. I'll show you how to use the full set to make a cat and a dog. With different colors and slight eye and ear modifications, you can also make a fox, or any animal or creature you can think of.
Upload the SVG file or files of your choice to Cricut Design Space and add them to your Canvas. I'll show you the cat and the scarf.
TIP: If you're not sure how to upload an SVG cut file to Cricut Design Space, watch this helpful video training series I made.
TIP: For more details on cutting fabric with a Cricut, check out my tutorial!
STEP 2: Prepare the design files
Here is how the plushie files to make a cute orange Tabby Cat and scarf look on my Canvas. You can zoom out to see all of the designs by clicking on the minus (-) sign on the lower left.
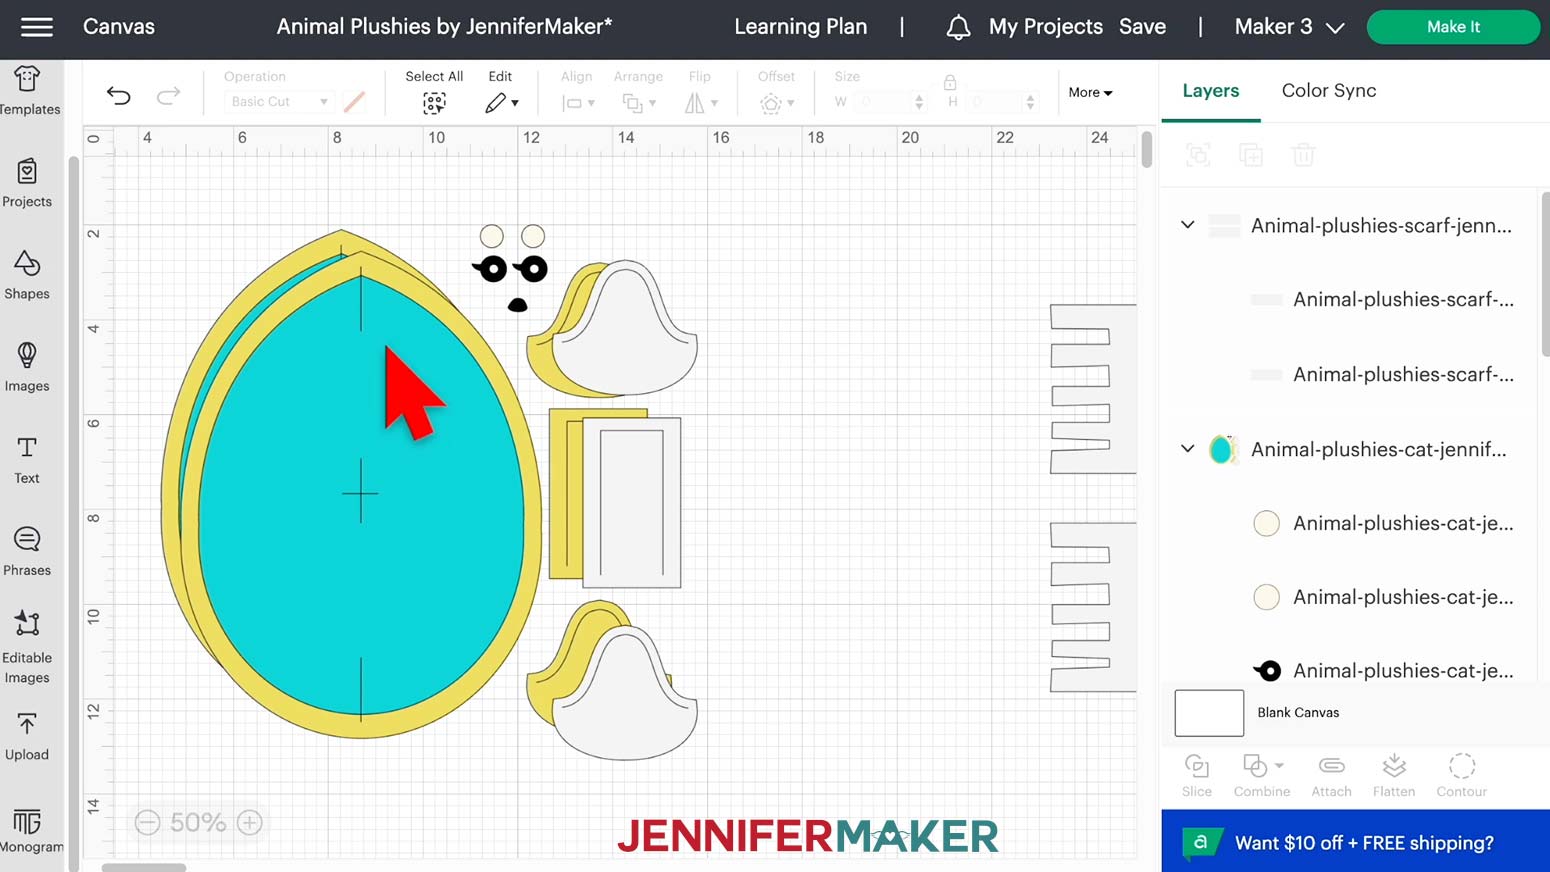
There are two large body pieces, which will make the front and back of the plushie. The two rectangles will become the tail. And the two sets of curved shapes will create the ears, with the lighter color in the front. If you're making the scarf, those are the two fringed rectangles.
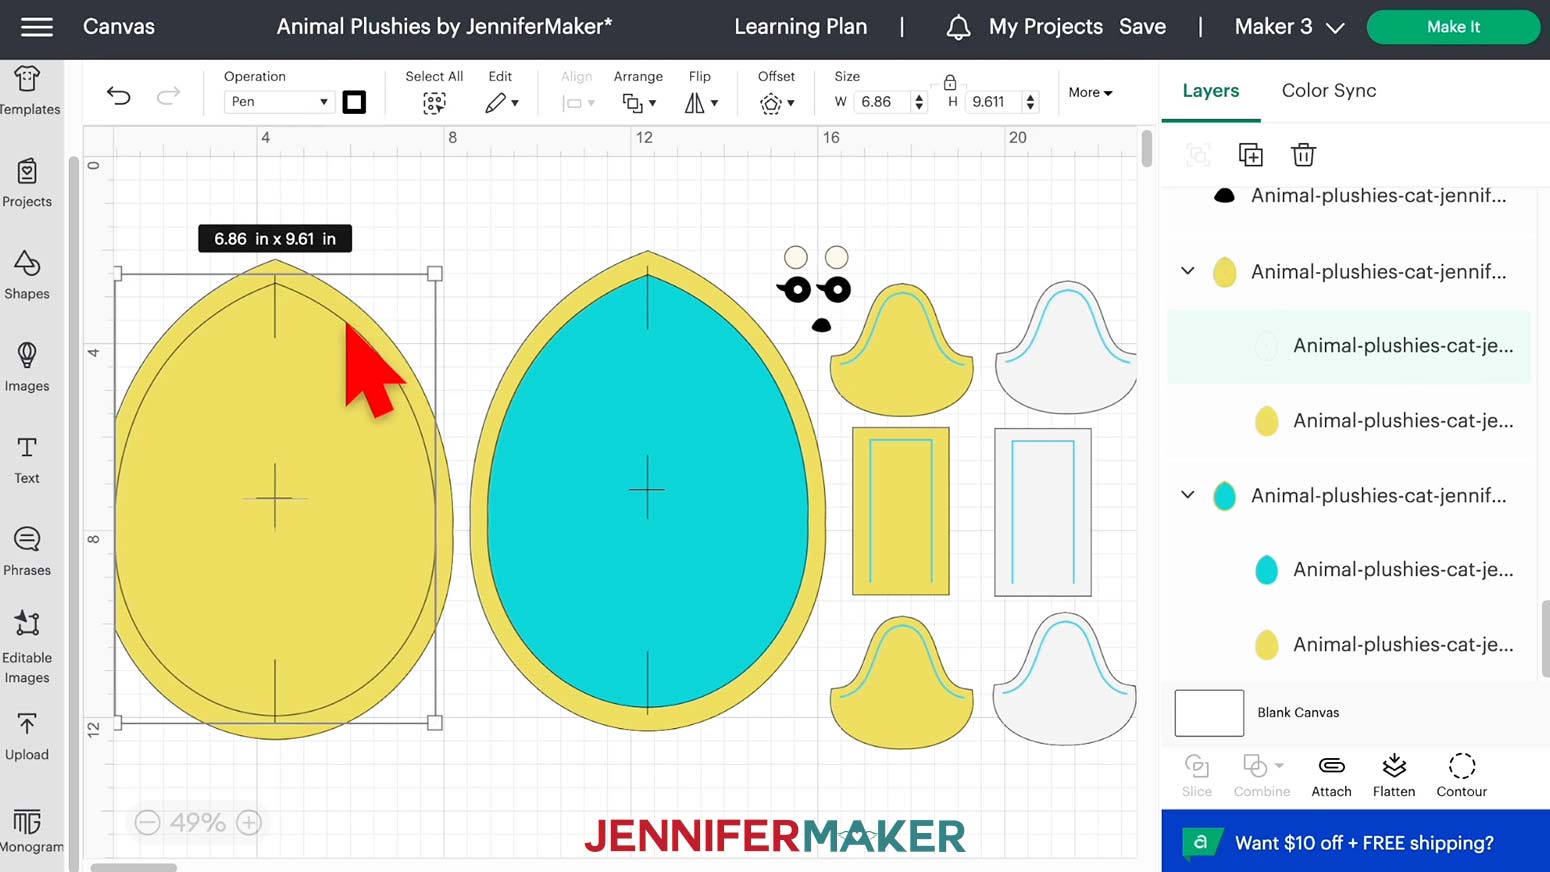
Let's convert the lines for the seam allowances to Draw lines. They are the blue lines on each pattern piece. These are the lines that you will follow to sew, and also pin and fold.
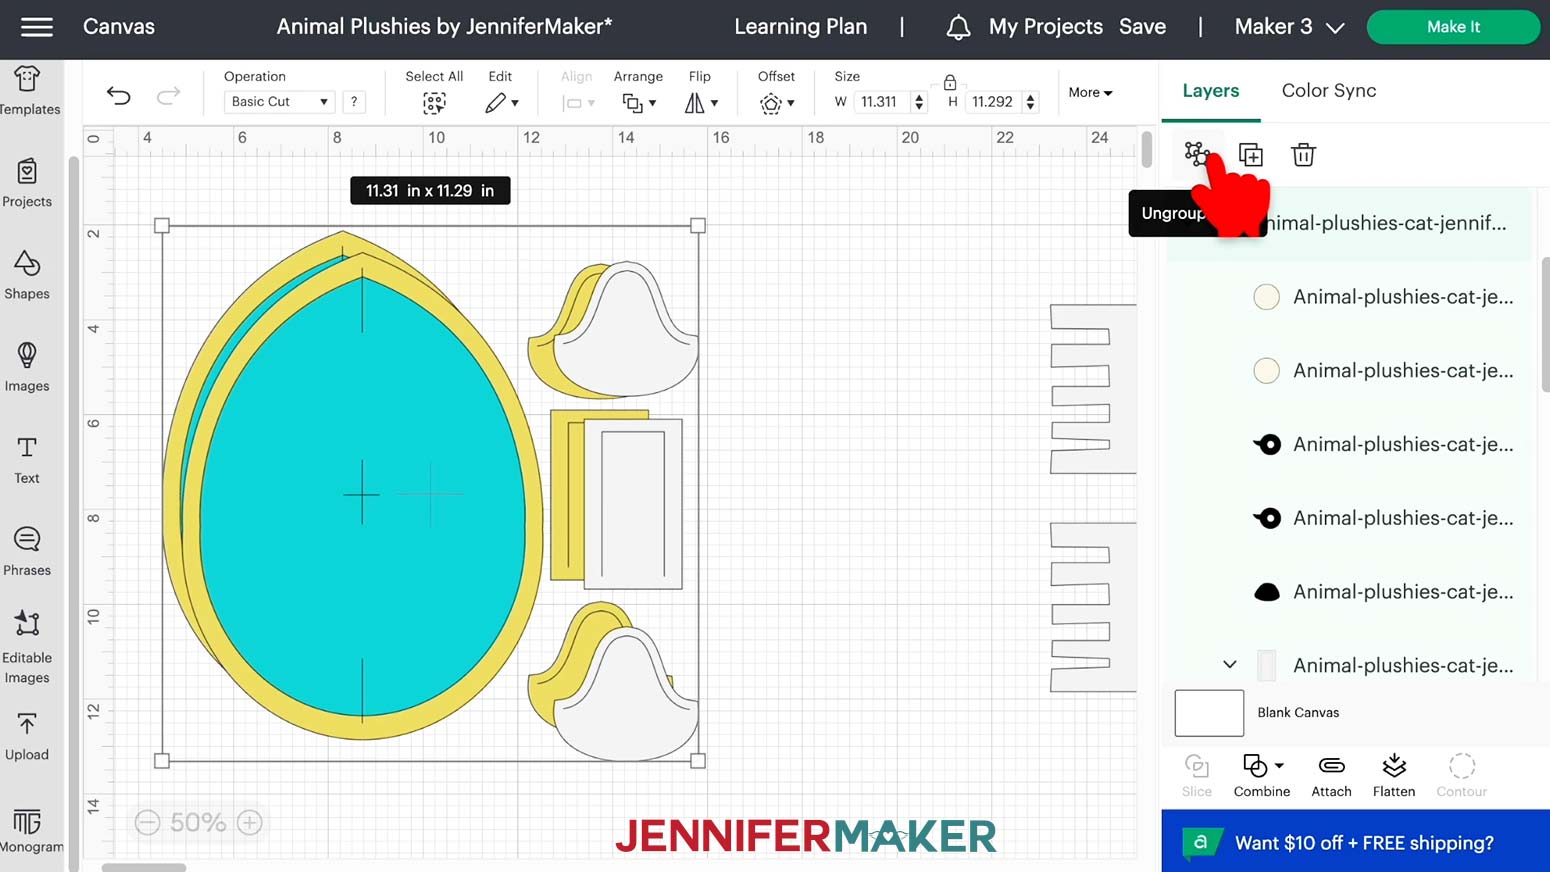
First, select the cat and click Ungroup.
Select a large body piece in the Layers Panel to see the cut shape and the other layer that it just a line. The line is what we need to convert. Click the line layer and change the Operation to Pen under Draw. Now the Cricut will know to draw the seam allowance, center registration marker, and lines for folds at the top and bottom before it cuts the shape.
Now use the color selection box to set the line to a marker and select "Blue (washable fabric)" so the machine can remind you which pen you'll need.
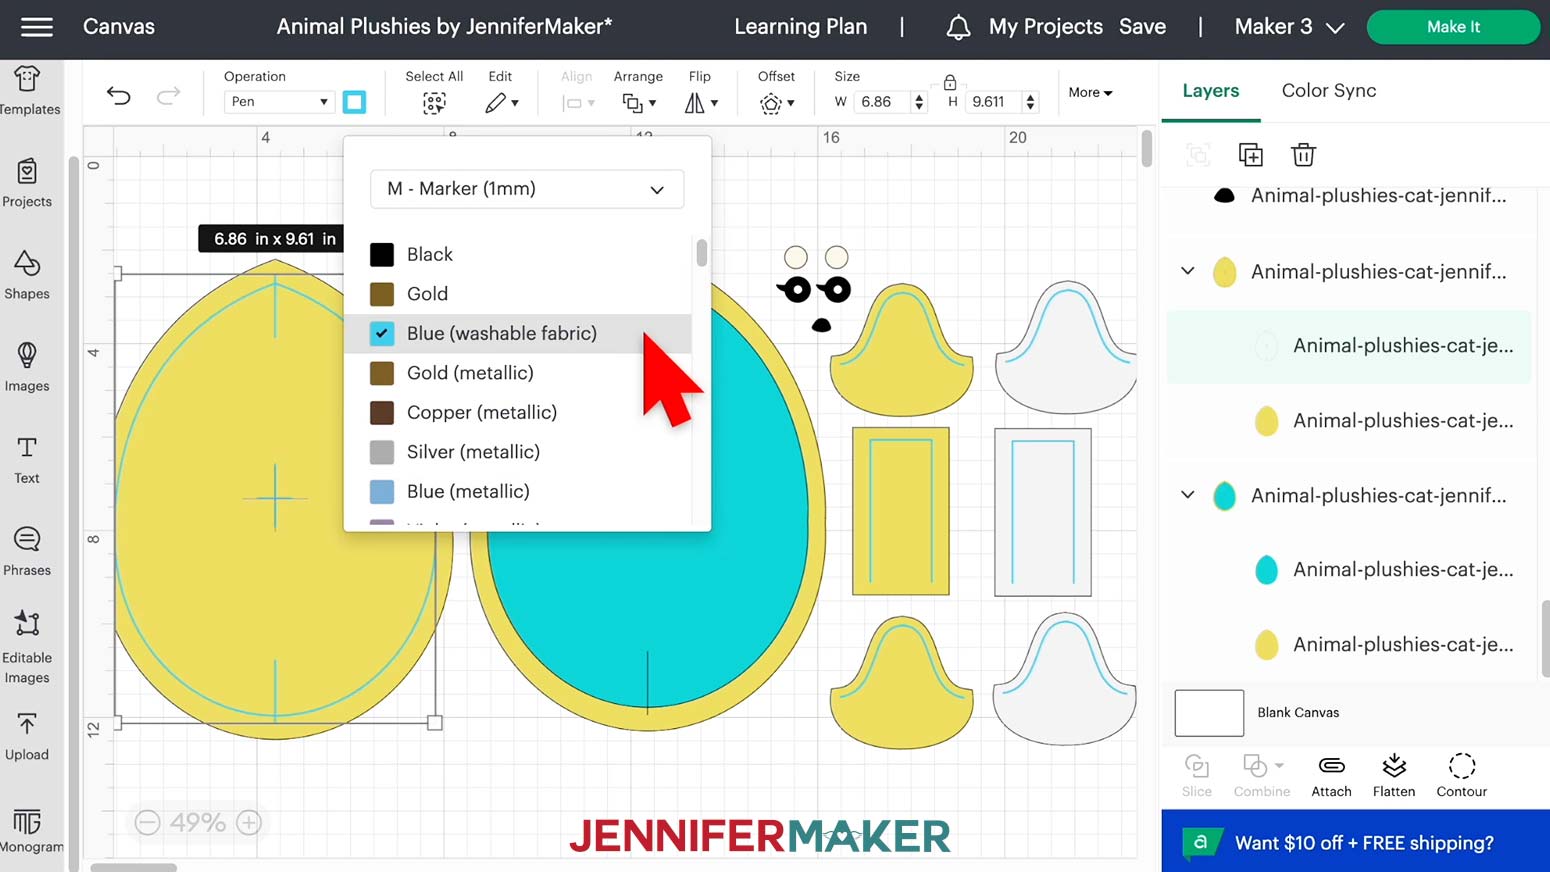
Repeat the process for the other cat pieces.
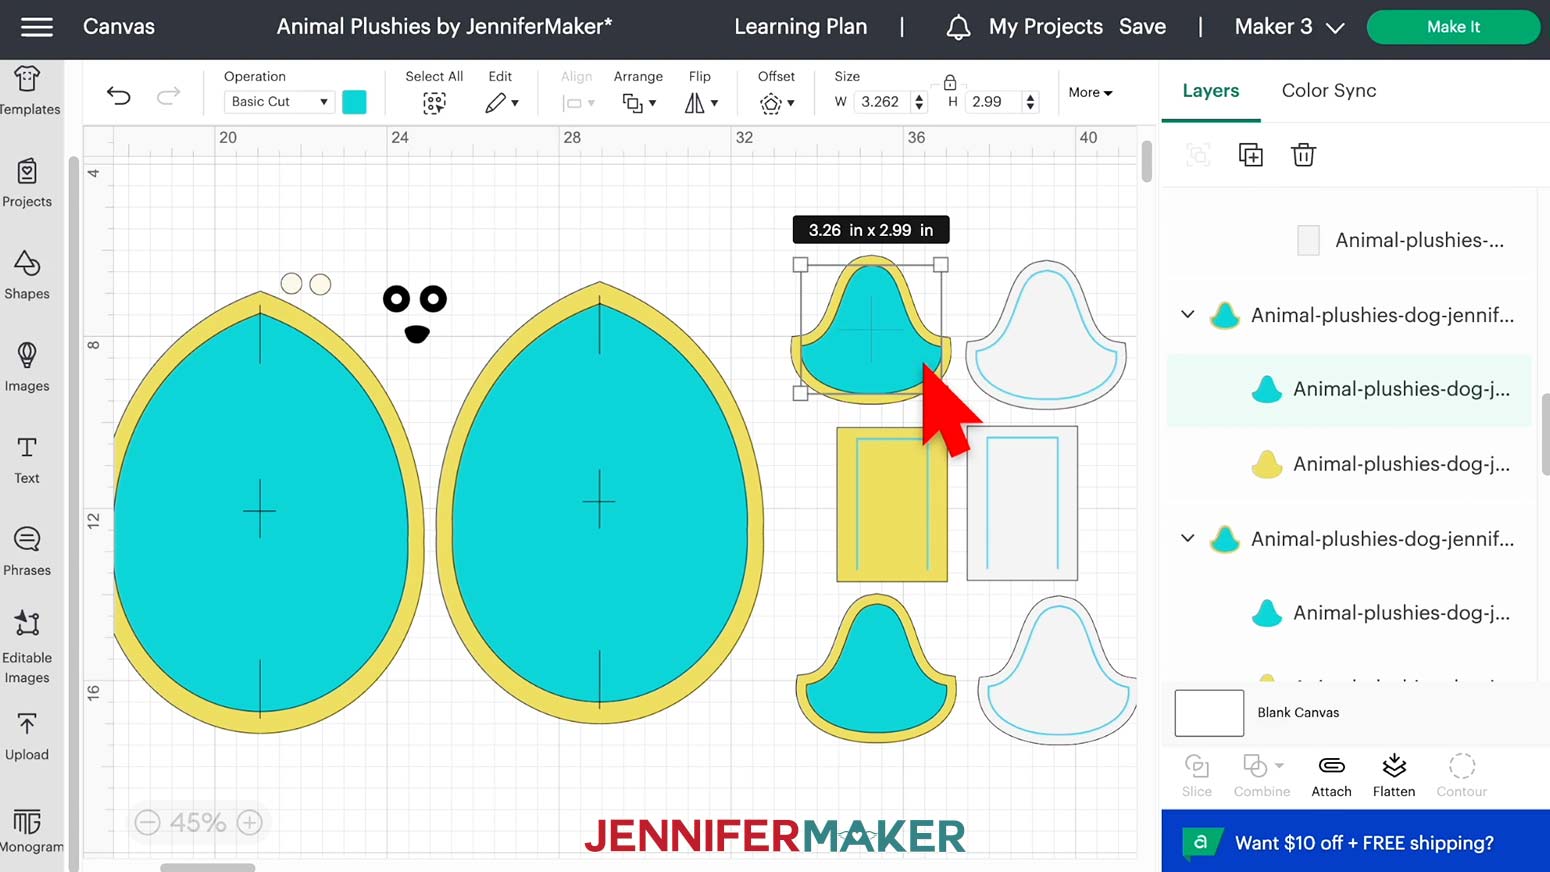
NOTE: When you change the lines for the dog ears, they will look slightly different since the marker will draw a closed shape instead of a line, that's ok!
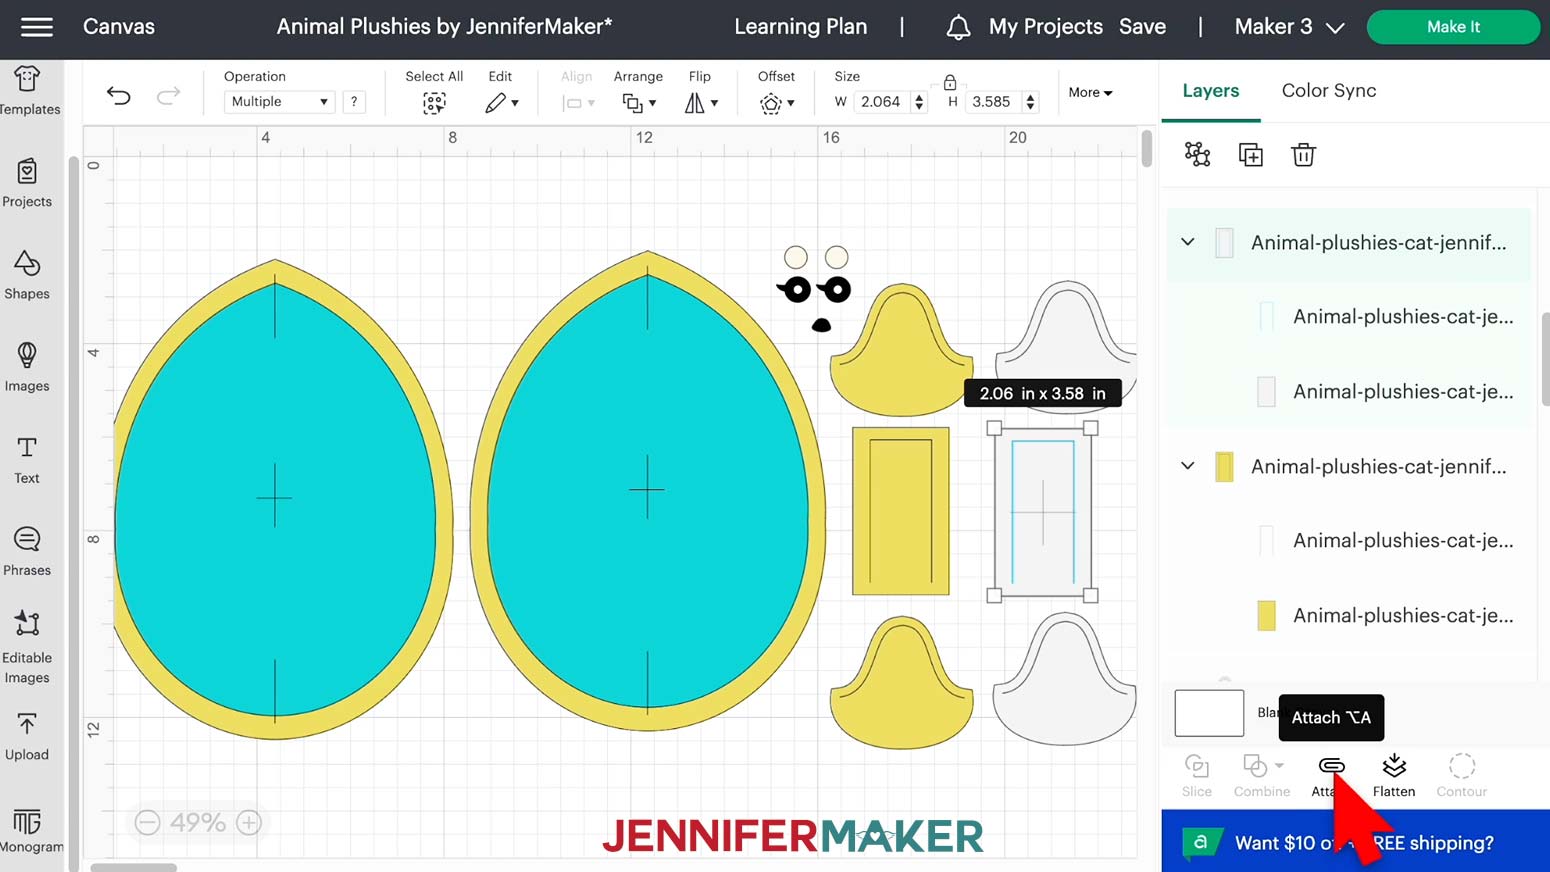
Once all of the design's seam allowances are ready, we need to tell the Cricut to keep each pair together.
Click the layer above the body's marker line to select it and the cut shape in the Layers Panel. Select "Attach" to keep the cut and draw pieces together during drawing and cutting.

Attach the other draw and cut pairs.
If you're making the scarf, you will need to pieces.
You're ready to cut, but we need to prepare the fabric.
STEP 3: PREPARE YOUR FABRIC
We need to see the mats to prepare our fabric, so make sure you have the right machine selected and click "Make It."
If prompted, click "On Mat," "12 in x 12 in," and "Confirm."
On the Prepare screen, make sure your pen and cut lines will come out correctly. They should appear on the same mats if they were attached correctly. Leave the Material Size at 12" x 12" even if you won't cover the mat with fabric.
Cut your fabric to fit your pink FabricGrip machine mat. You can use a rotary cutter on a self-healing mat or scissors to cut a 12" square for when you need to use the whole mat, or smaller pieces for small elements like the ears, tail, and face pieces.
If you're making a version like me, you will need two 12" X 12" squares in the darker color minky or fleece, one 12" x 12" square in the lighter minky or fleece, and a 3" x 3" square of both white and black felt. You can use a larger sheet of Felt, but I don't like to waste a bit of fabric. Darker colors may require a white fabric pen, but light fabrics show the seam lines great, even if the minky or plush fleece is fuzzy on both sides. I had great luck with orange anti-pill fleece or Polar fleece.
To make cutting the small felt pieces a bit easier, select those mats and drag the shapes into the center of the mat. I've found that cutting smaller designs in the center of the mat are less prone to problems than starting in the very top corner.
Take your first mat's fabric piece and make sure the stretch is going from side-to-side, NOT up and down. If you move any pieces on the screen, keep them facing the same direction, so the stretch and the nap (the fabric texture or the way the fibers go) are all running in the same directions to the cross-grain.
Place the fabric right side down on a pink FabricGrip Mat (a Green StandardGrip mat also work if that's what you have available or if your pink mat is getting worn) and smooth it out with a brayer.
Click back on the first mat and click Continue
STEP 4: CUT YOUR MATERIAL
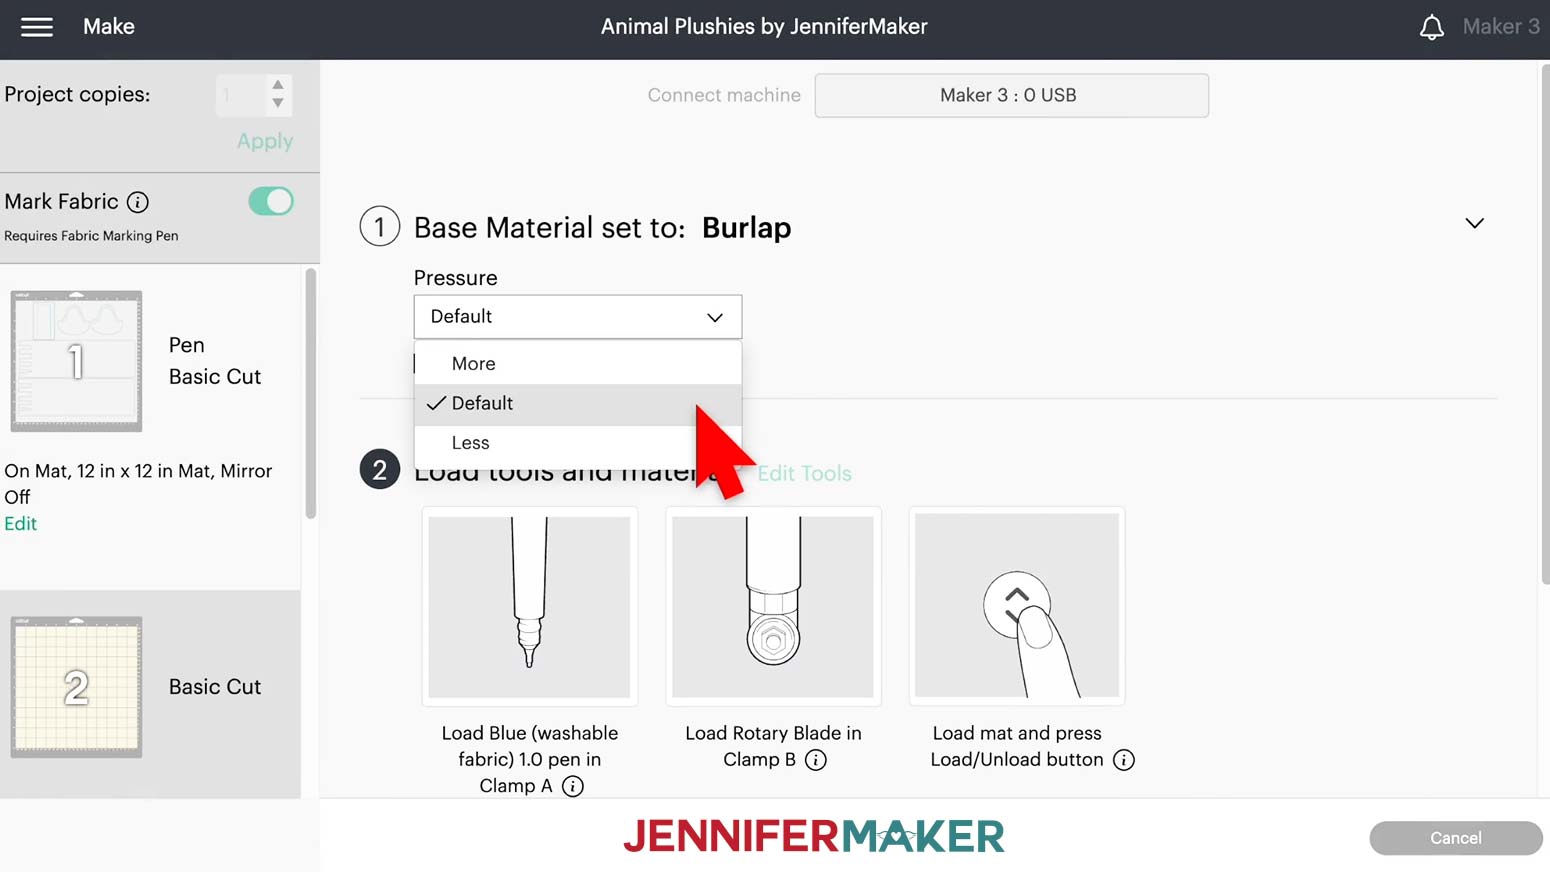
On the Make screen, check that the first mat is still the one you have prepared.
I got the best results for both felt, fleece, or minky using the "Burlap" material setting with "Default" Pressure.
For each mat, the Draw lines will start first, then the Cricut will pause before cutting the shapes using the Rotary Blade.
Put your Cricut Washable Fabric Pen into clamp A, and load your Rotary Blade into clamp B. Put the marker's cap on top so you don't lose it!
Load your first mat into your Cricut. Press the flashing button to begin. When the drawing is done, don’t unload the mat, as your Cricut will now cut the fabric!
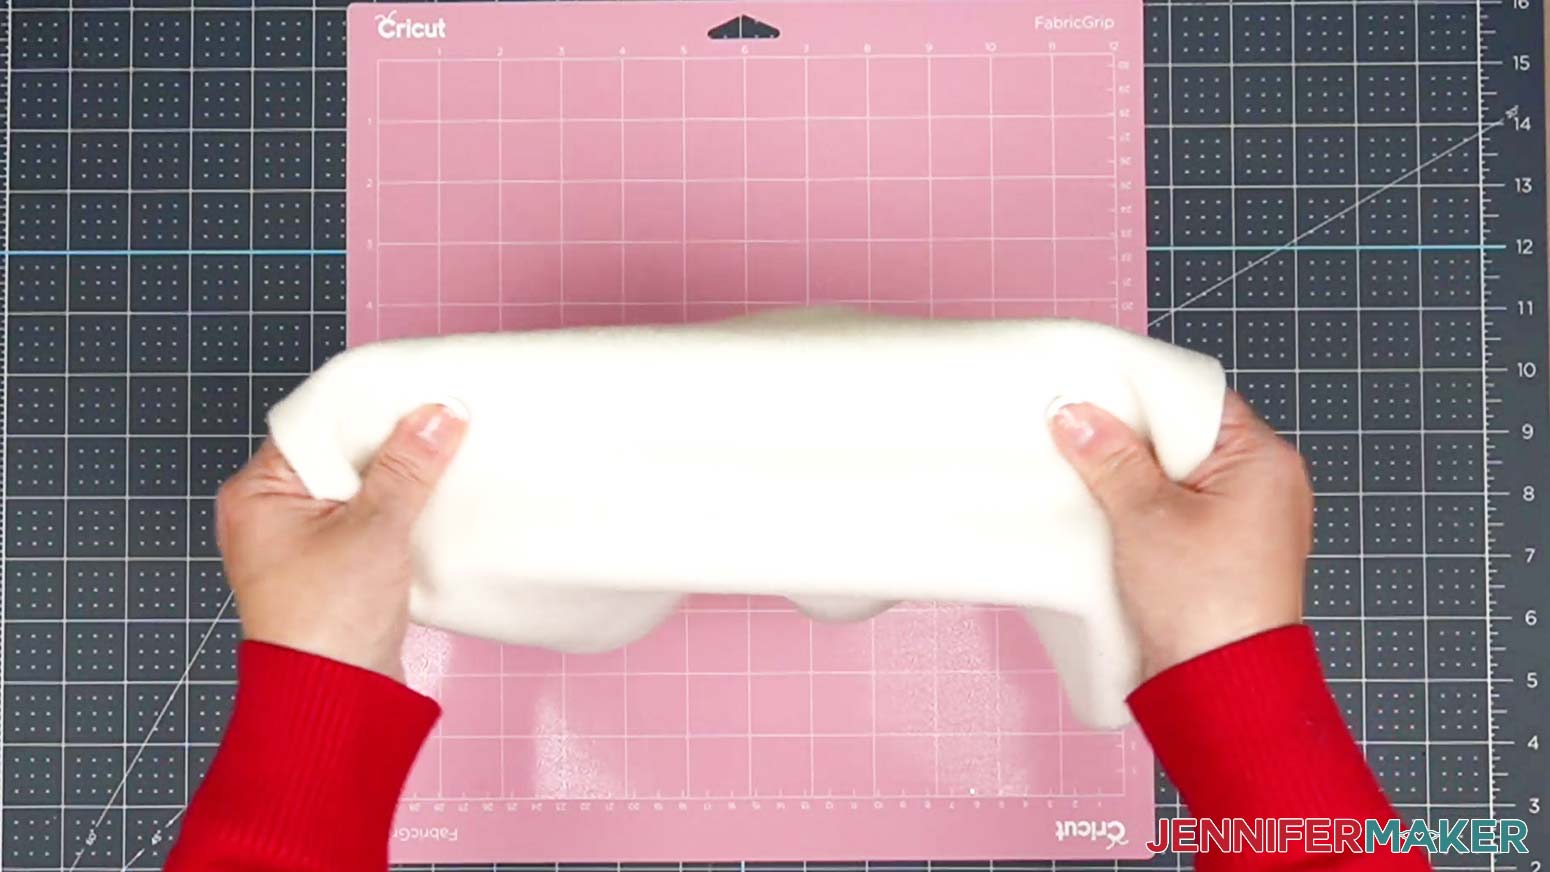
Once complete, press the Unload button to remove the mat. Remove the excess fabric, then gently release the plushie pieces, being careful not to stretch them out of shape. I've found the removing the mat from the material from top down makes it easier to not affect the shape, as this is the direction that is less stretchy.
Place the cut pieces to the side, draw-side up just as they are.
My white felt for the eyes is next. If you're using a small piece of felt, make sure to place it on the mat so it will cover the design area on the screen. The felt can be placed face up since we don't need seam allowances drawn, they'll be attached with hot glue. I used the settings just as with the other fabric, Burlap, with a Default pressure.

Repeat the steps for the rest of the mats. When you're done, remember to remove the fabric marker and put the cap back on so it doesn't dry out.
STEP 5: ASSEMBLE THE PLUSHIE
Pinning
Start by pining your two body pieces together with the exterior sides in. You can also use clips around the edges of your fabric, but I like to use lots of long pins. I start by placing a few in the registration marks (center, top split, and bottom split) to keep the pieces lined up.

I'll close the body at the side toward the bottom by hand, so I'll pin the edges around the sides leaving about an inch between two at that spot as a reminder to stop machine sewing.
The vertical lines at the top and bottom are folds, which create a slight 3D shape during sewing. You have to pin them a certain way before sewing.
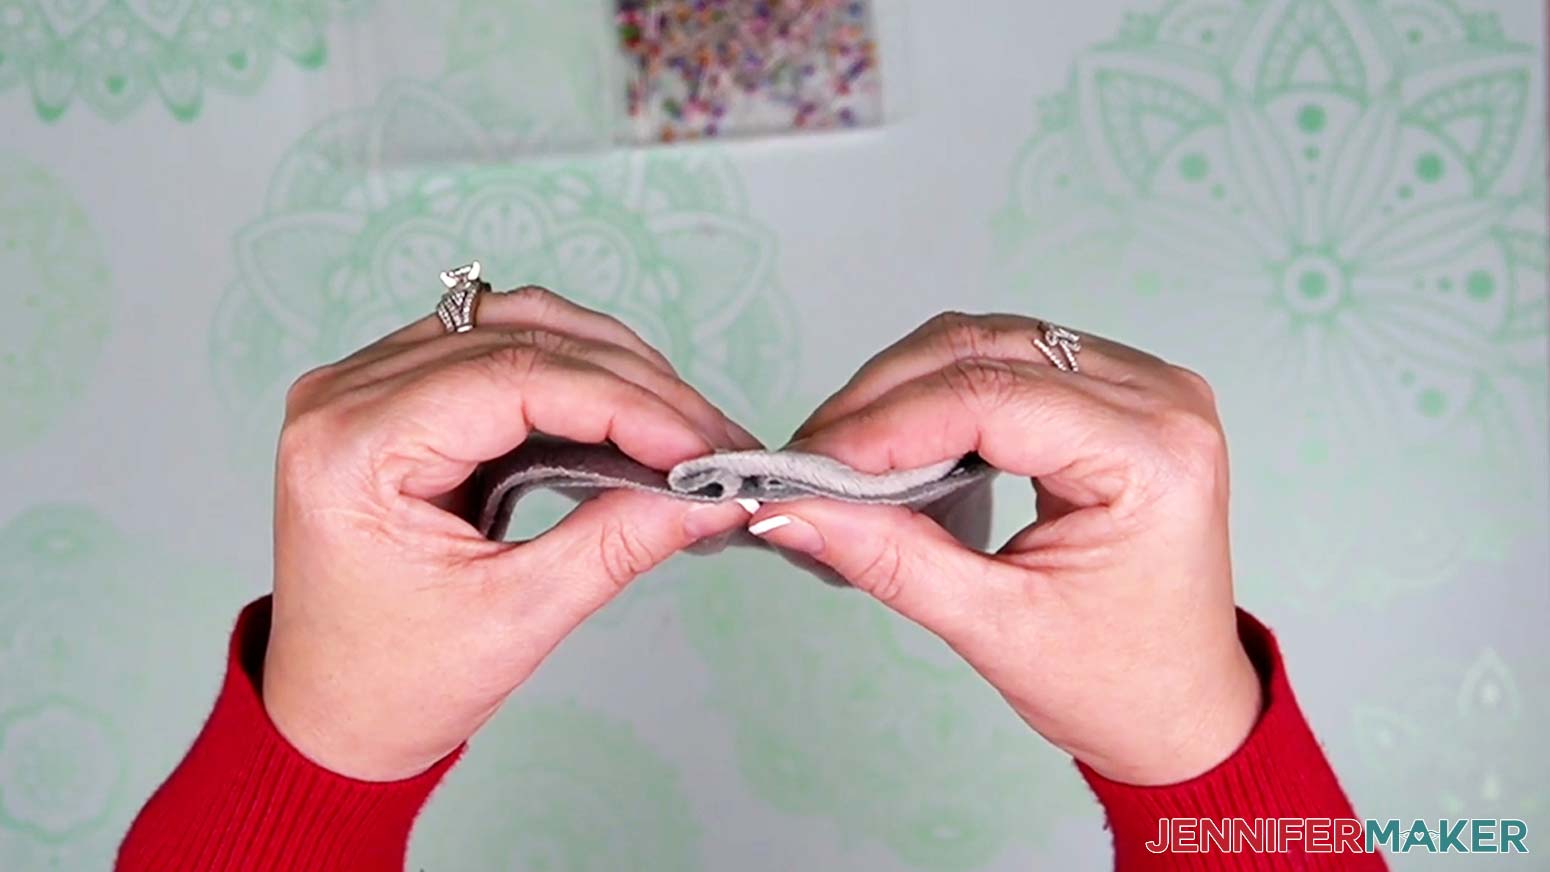
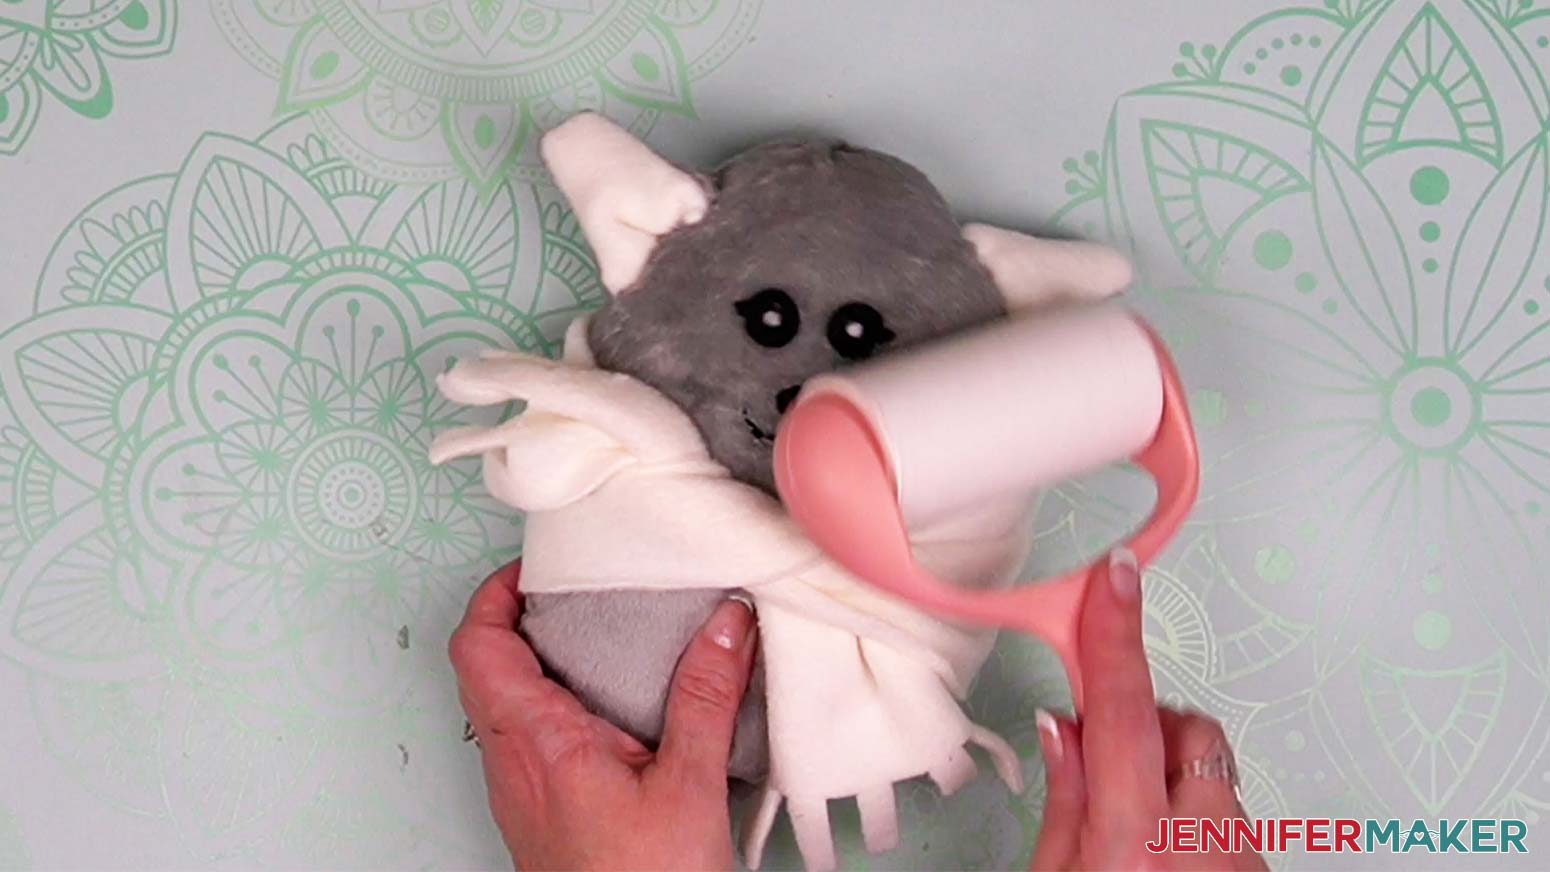
Hold the plushie in both hands with your fingers about an inch from either side of the drawn line. Move your hands together so your fingertips meet and the fabric layers curve up and down away from each other. Kind of life a fishy face. Make sure the drawn lines stay aligned at the bends so everything remains even.
Without letting the pinches go, fold the top curved fabric to the left and the bottom layer to the right. Use pins to keep the folded fabric in place. There will be four layers or fabric on either side of the line now.
The ears and tails are much simpler to pin, but always make sure to avoid the sew line, and place pins equally spaced. Constantly check that the fabric pieces are aligned perfectly. This really matters for the roundness, and cuteness of these stuffed animals.
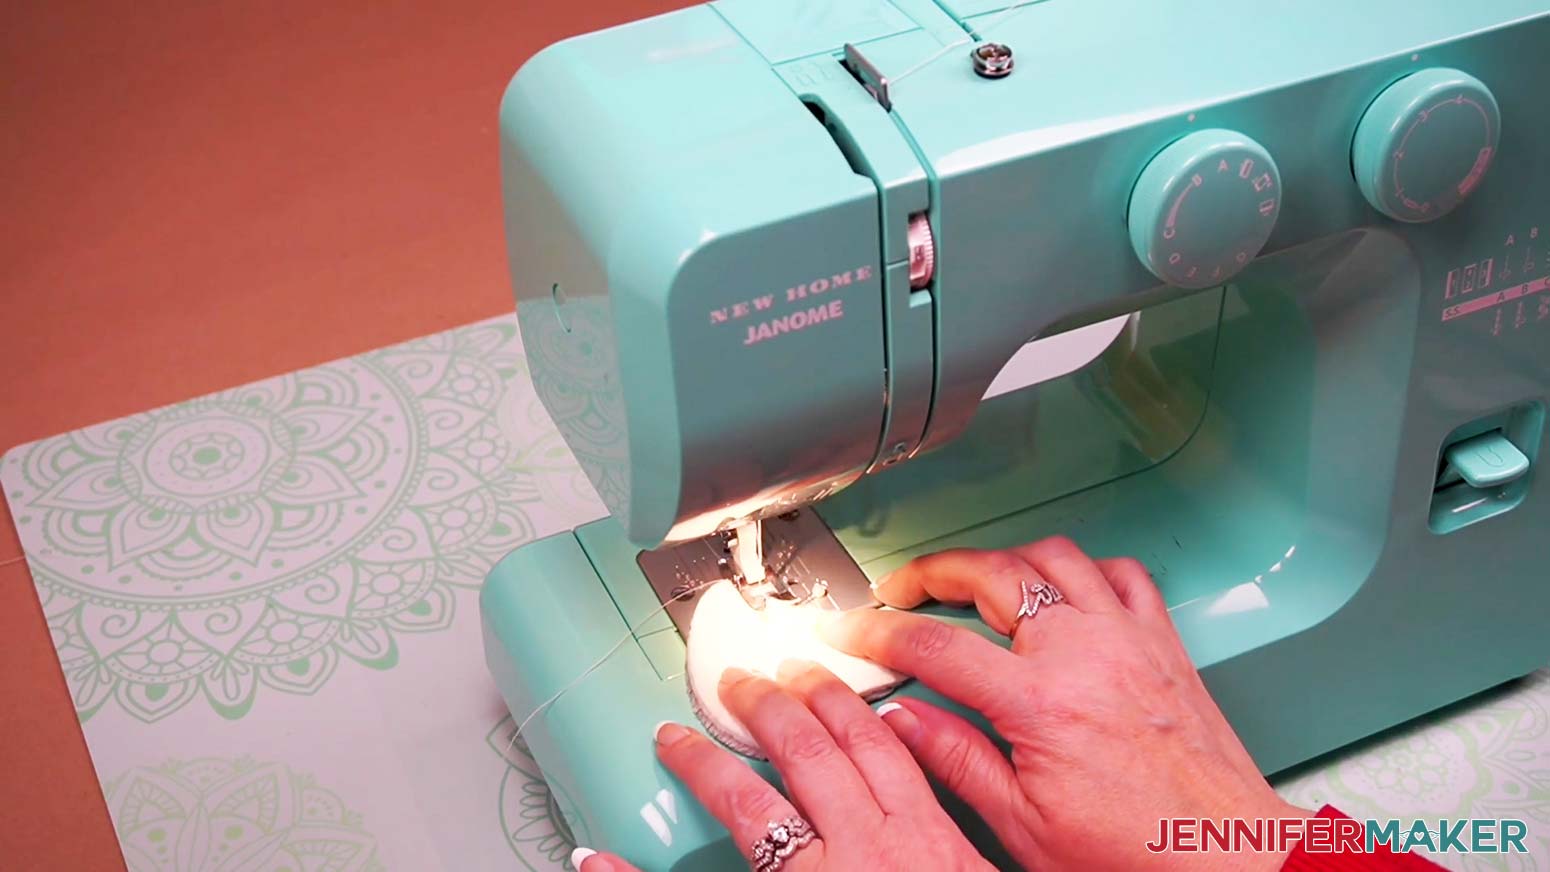
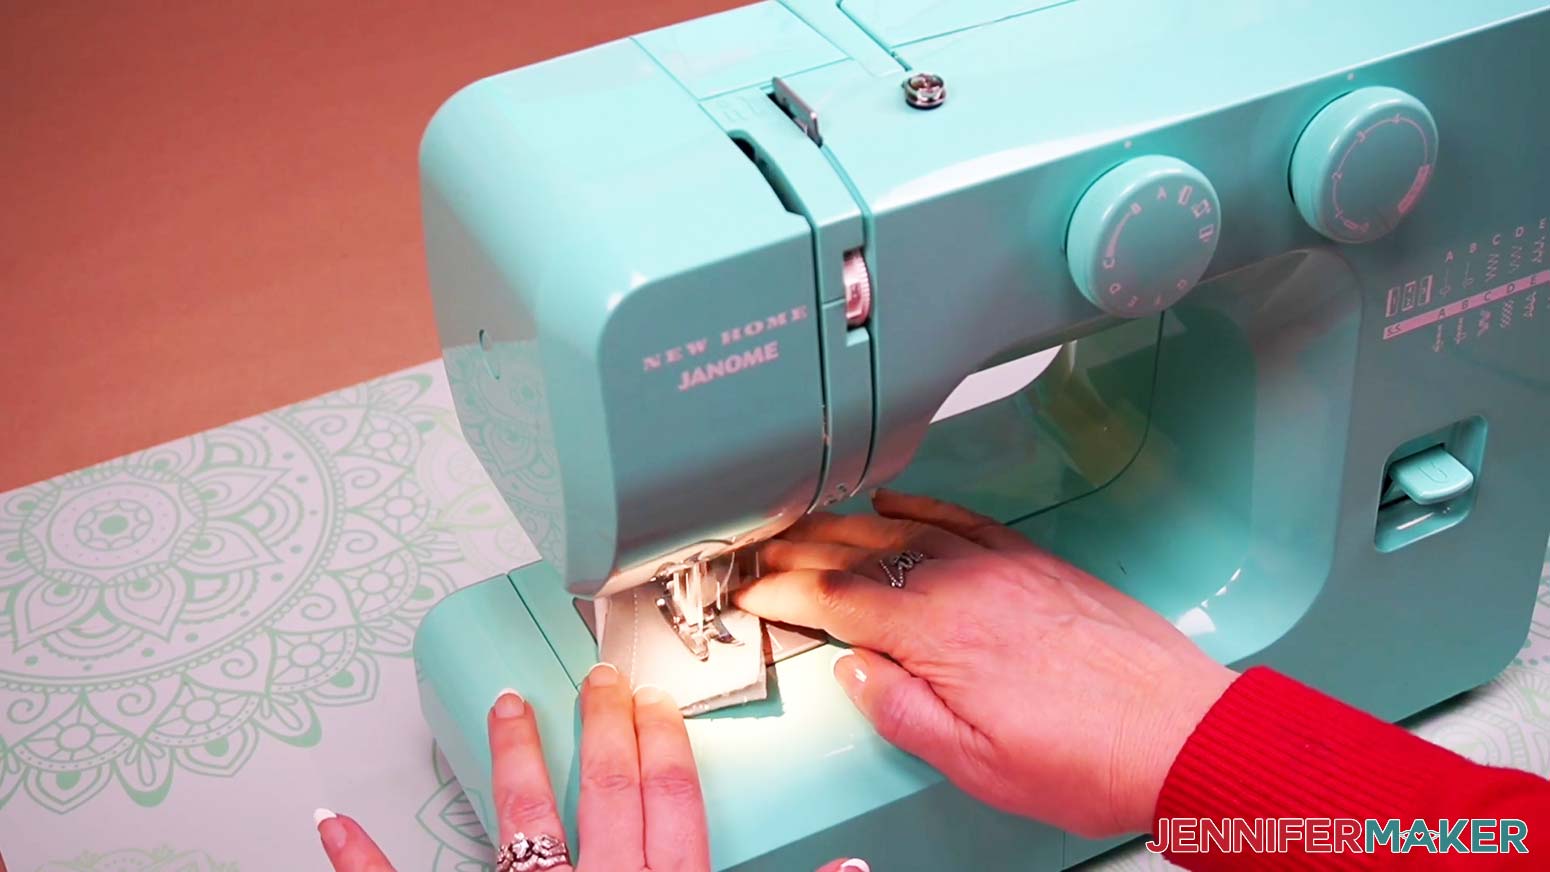
Now we are ready to sew. Start by threading your top thread and needle into your machine. Make sure your bottom bobbin is also wound correctly. Try and use a medium thread tension and a longer straight stitch (I used 3 – 4 mm), with center positioning. Ball point needles work best, but you can use sharp needles if you wish. If the sharp needles are small enough, I did not notice any extra hole size using fleece.
Sewing
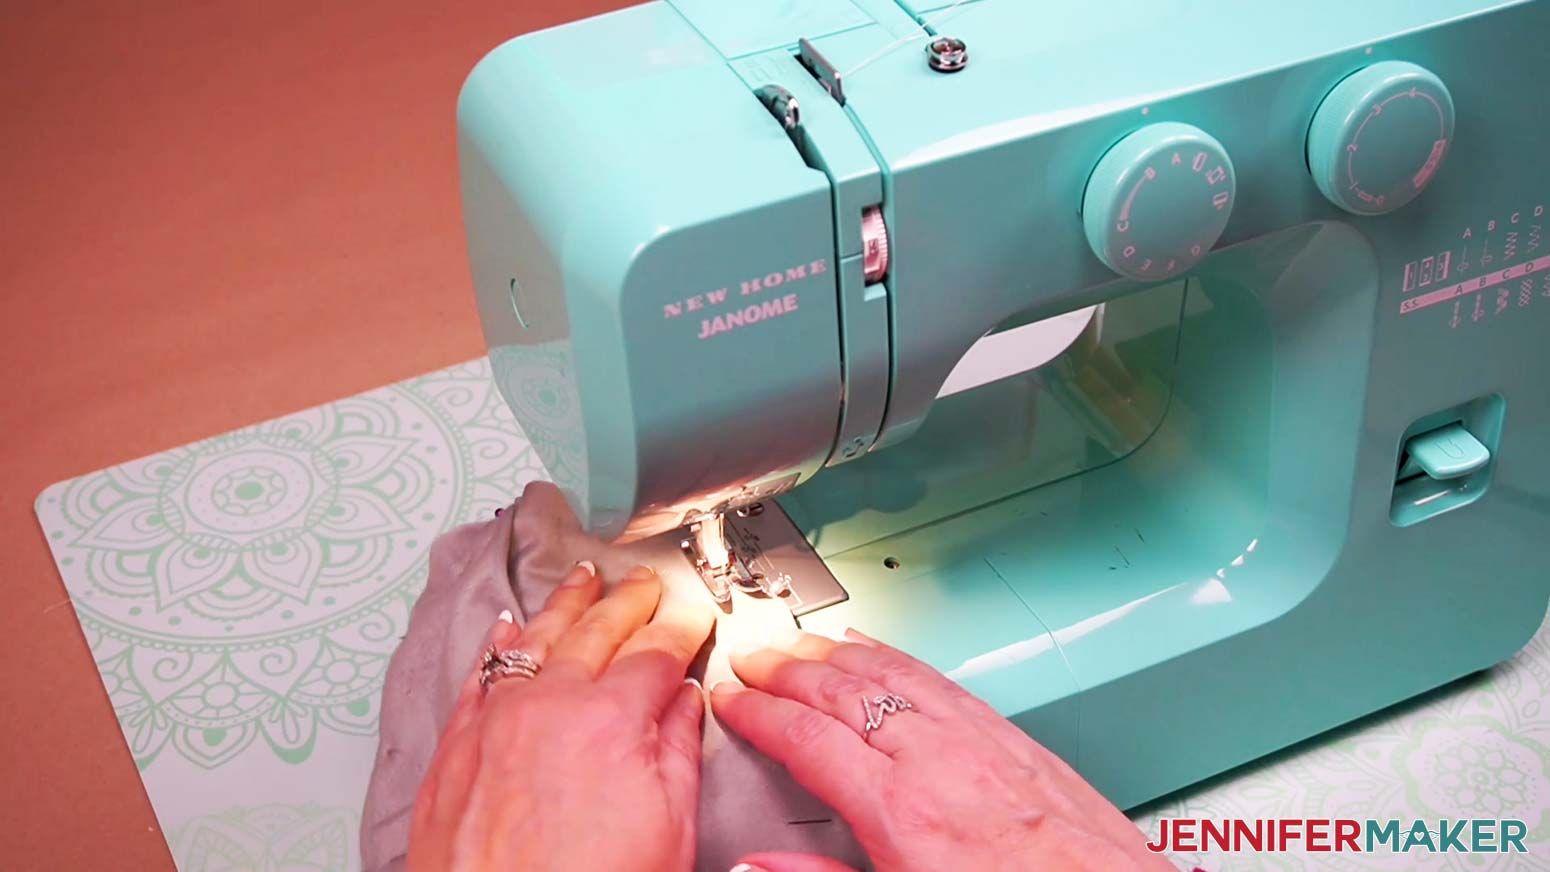
Raise your presser foot and place the fabric underneath, facing the direction in which you want to sew. I'm starting at the left side of the gap I'm leaving. Line up the seam allowance line with your needle and lower it then the presser foot in place.
Start with a few reverse stitches to lock the beginning, then sew forward along the seam allowance line. Curves are tough, so take your time! When you get close to a pin or clip, remove it instead of sewing over it. That's a fast way to break a needle or even jam or break your machine.
When you get close to the fold, slow down because sewing through more than two layers of thick fabric is harder on the needle, machine, and the sewist. If you are an entry-level sewist, stop and raise your foot and advance your materials manually a bit while not sewing to skip the folded bump, then lower it and continue.
Keep sewing until you reach the other end of the gap you'll leave. Add a few reverse stitches to lock the end.
Cut your thread and admire your stitching on both sides!
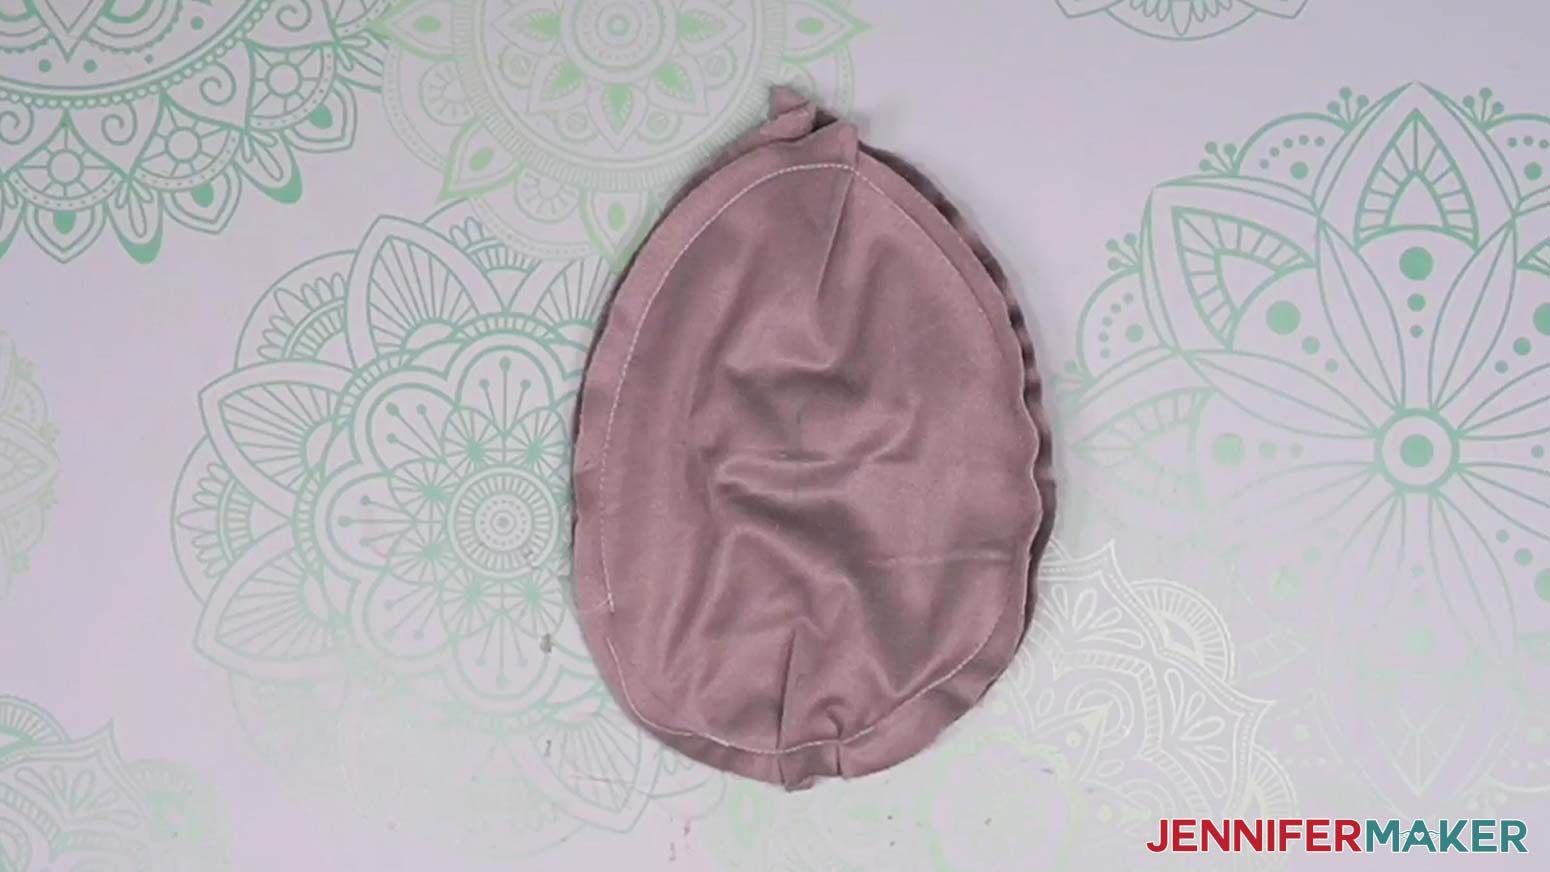
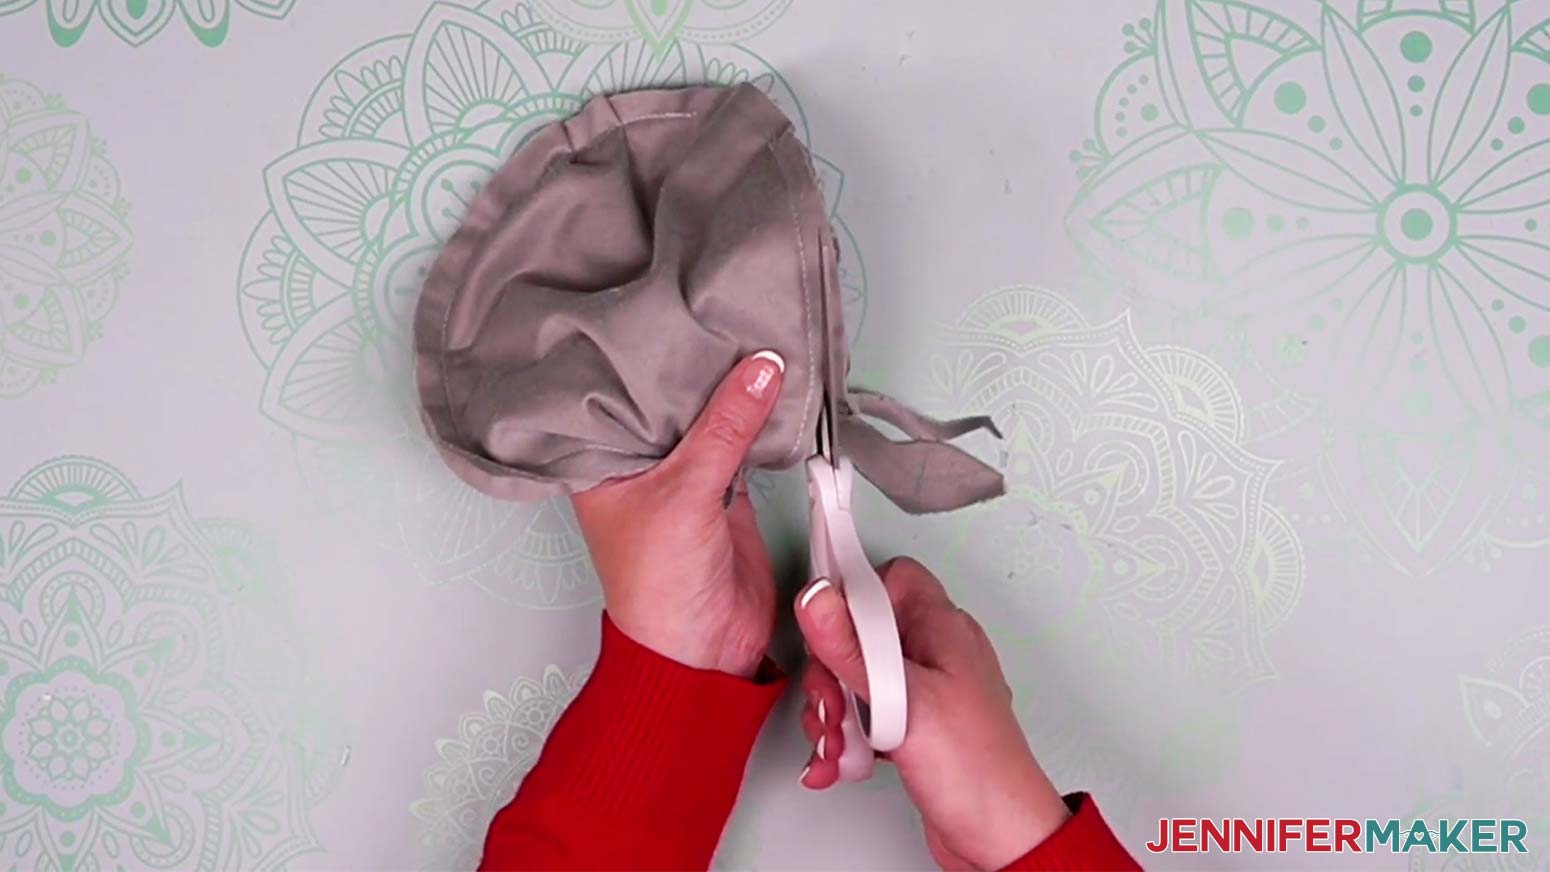
To make the curves smooth, trim the seam allowance, staying a bit away from the thread so that it doesn't break. This will keep the seam allowance from bunching once the plushie is turned right side out. The more round, the more cute.
Reach through the opening you left to grab some of the inner fabric and pull it out to invert the shape. You can use a chopstick, pencil - eraser side, or other blunt, long objects to help turn your plushie body right-side-out, if your opening is small. Then, poke your finger or the tool in through the opening and run it along the seam to smooth it out from the inside.
Now take some small torn off pieces of poly-fill and stuff your cute plushie body. The flexibility of the fabric allows it to stretch. Good thing we have the stretch going from side-to-side- diagonally mounted or cut templates do not work well. Vertical stretch works even worse. Think Theo's shirt on the Cosby Show :)!
The stuffing should be full, but not coming out of the opening too much.
Use a ladder or invisible stitch to hand sew the gap closed.
Thread your needle with about 18" of thread, then tie a few knots at the end so it's doubled.
At one side of the gap, pull the needle from the inside (so the knot will stay inside) to the outside a few stitches back. Put the needle back through from the front to create a stitch about .25" long, the same distance from the raw edge.
Directly across the gap, push the needle from the inside out through the other edge. Take another .25" stitch before moving back across the gap.
Once you've done a few stitches on either side, gently pull the thread to close the gap! Keep sewing until you overlap the machine stitches at the end. Then tie off.
Cat Ears
Pin your ear pieces just like you did for the body and sew along the seam line. For the cat ears, the bottom gap is already open.
Trim the seam allowances, then invert the ears. Add a little stuffing if you'd like. I'll add only a tiny bit of stuffing to that I can more easily fold my cat ears into a slight V shape.
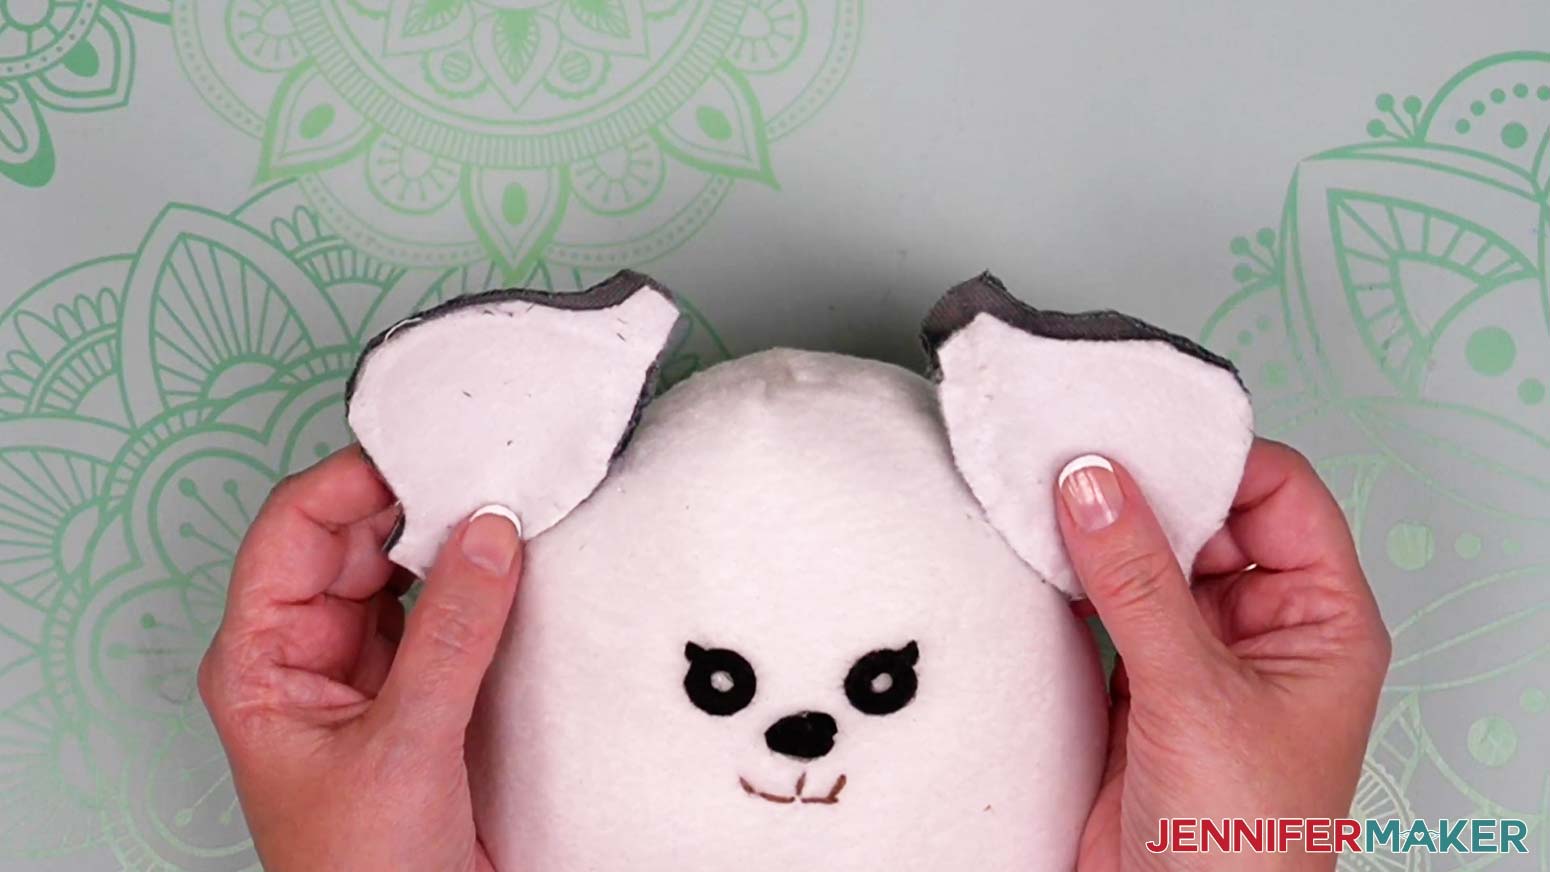
Ear placement is important for the cuteness and likenesses of these animals. Cats tend to have their ears pricked up sideways and higher on their bodies than dogs. You can use a ladder stitch to attach them to the body with some curves to get the look.
Pick a front for the body and place it facing you. Then, experiment with the ear placement. Make sure the lighter fabric faces forward since it's the inside of the ears. But you can always experiment with fabric color choices, or even prints. Imagine the possibilities.
When you're happy with the placement, use a ladder stitch to attach the first ear. Use the seem line to keep the ear centered while attaching.
You want to slightly fold the cats ears into a V shape, so keep that shape consistent while sewing. Start inside the ear to hide the knot, and then start stitching the back layer to the top of the head. The back line will curve.
Once you get to the front of the ear, make sure to keep thef abric slightly folded inward so it looks more realistic. Tie off once you feel the ear is secured to the head.
Repeat for the other side. You can mount them higher or lower on the body, but keep them the same. The distance each ear is from the center line needs to be the same as well.
Dog Ears
The dog ears are larger on the template, but are the same shape as the cat ears, just stitched and attached slightly different. You can sew all the way around if making the dog for those cute, floppy ears. But don't forget to stop to invert and stuff.
Again, placement is important. Some dogs ears are lower and floppier, but you can also sew the edges down if you want to keep them in place. You could also increase the size of the ears to more better depict the breed of dog.
Tail
Pin and sew the tail just like the other pieces.
Invert and lightly stuff it if you'd like. Then use a ladder stitch to attach it to the body.
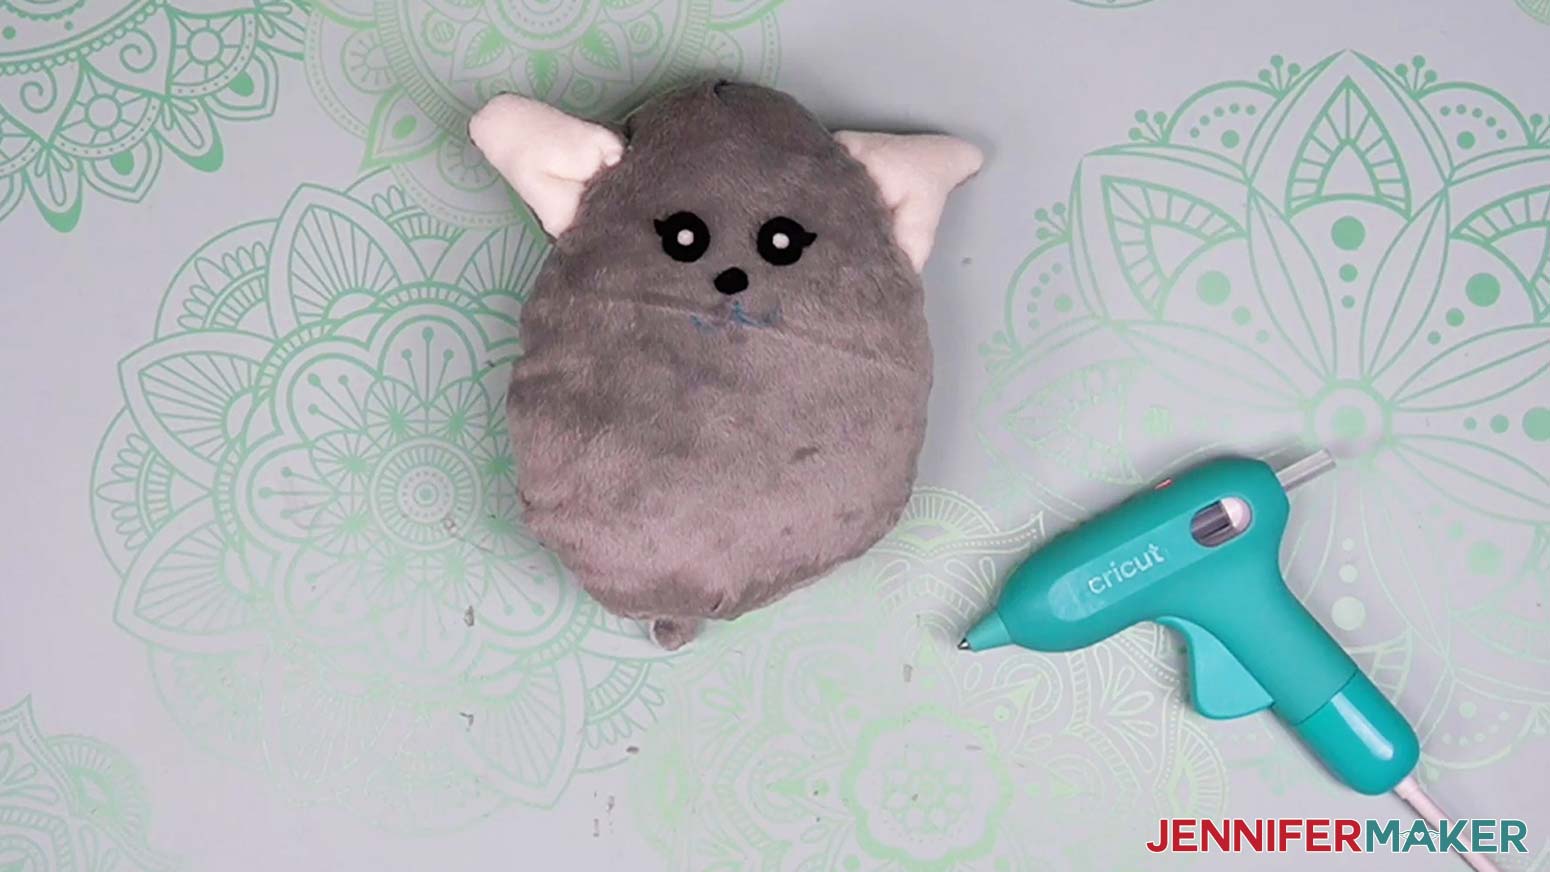
Face
Once all your pieces are on the body, and look straight and true, it is time to apply the face pieces. You can glue your faces pieces on prior to stitching up the animal's body, but I prefer to have more control of placement once the plushie is already stuffed. If you want consistency, glue before sewing 🙂
It is a good idea to plan out your eye and nose placements with a fabric marker or even by pressing in with your finger. Or mock up the face with embroidery floss and a needle. Hot glue is extremely hard to remove from fabric.
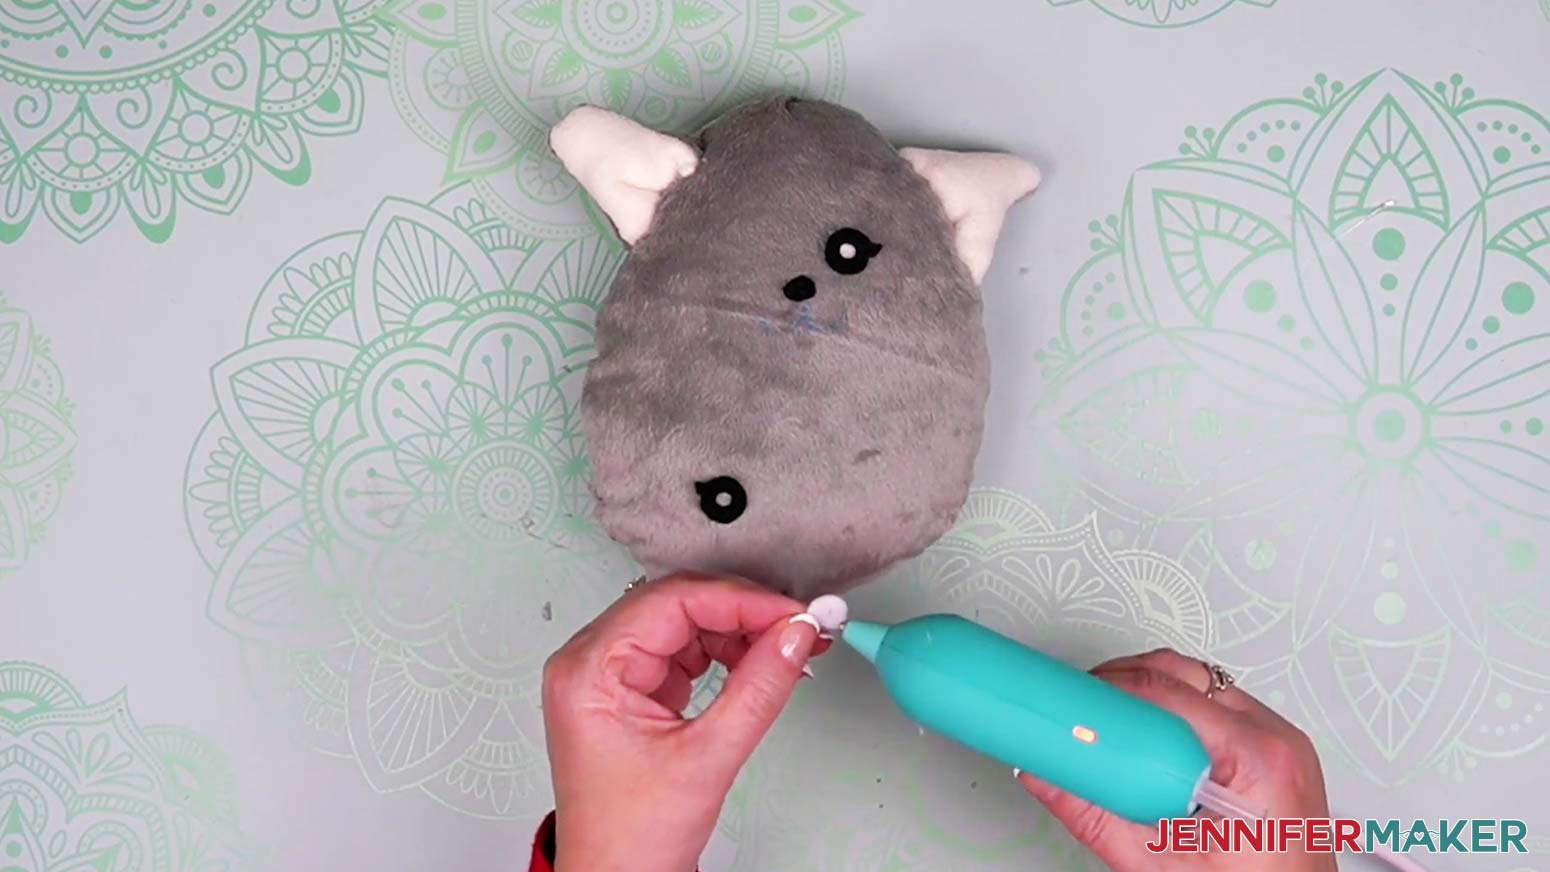
Use your hot glue gun to apply a small amount of hot glue on the back of one eye and apply it on the body. Tweezers help if you have trouble manipulating small pieces!
Hold it in place with your tweezers until it cools. Add the other eye and make sure the distance from the other eye is consistent.
Now apply the nose. Dog noses are usually slightly larger and lower than cat noses. Try flipping your noses around to see what looks best to you and the plush pet you have in your head, or already at home under your desk. The nose should be on the center line for this design, but you could always experiment with offset nose, mouth, or even eye placement.
Remember that small changes in the face piece sizes, and positioning are integral for these stuffed cuties to look their best. I have experimented a lot with the eye size and placement, and think these designs are just perfect.
Once the eyes and nose pieces are glued in place, remove any excess hot glue and get ready to hand embroider the mouth.
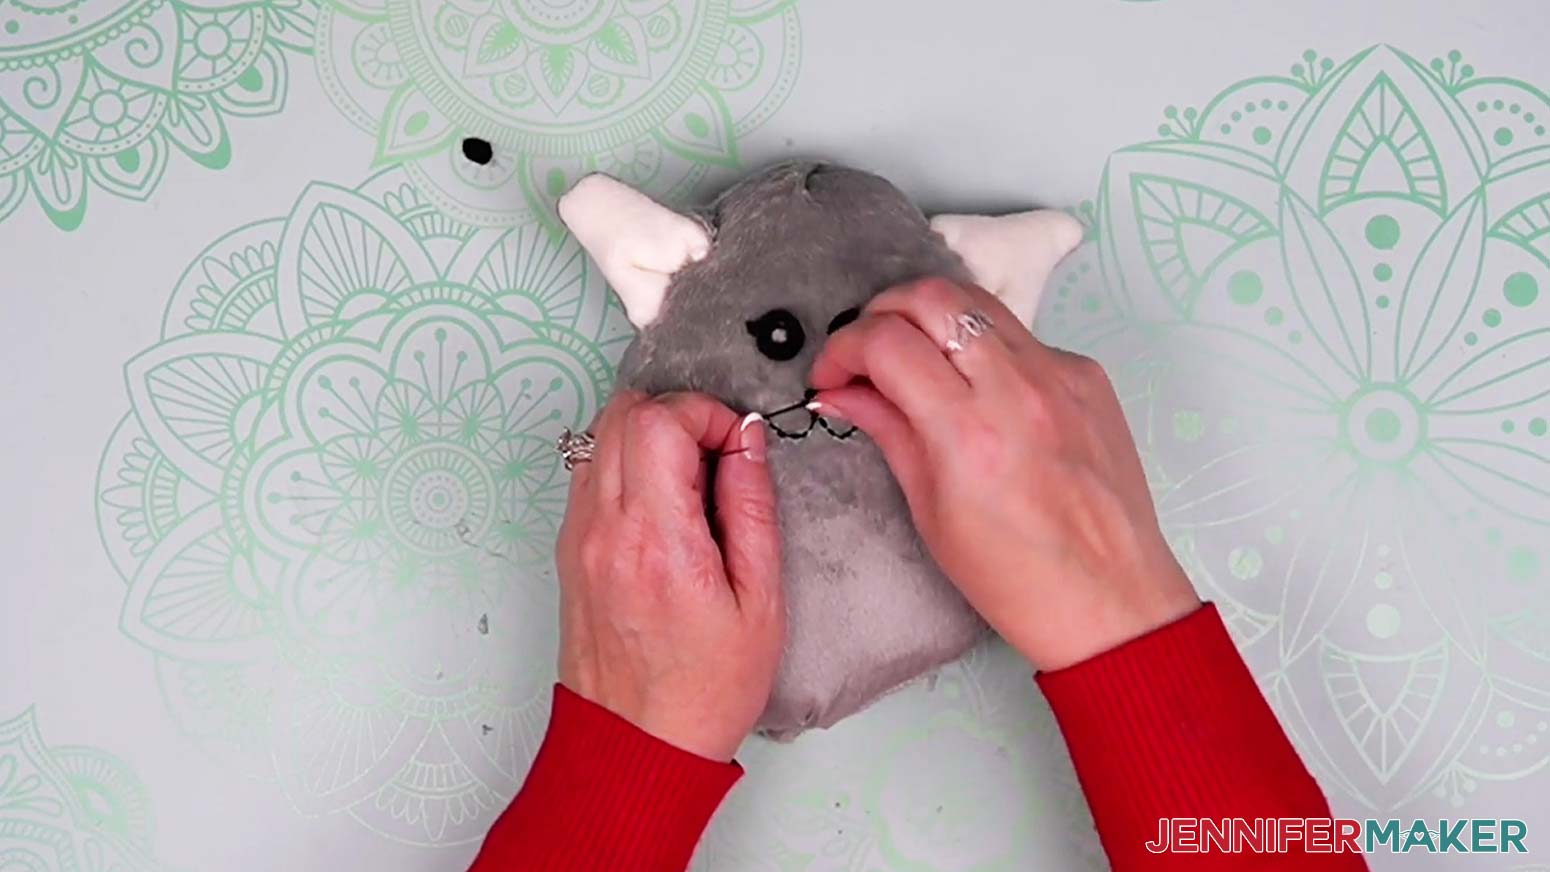
Thread some embroidery floss on a long embroidery needle and knot the ends. I like to use brown or black on lighter bodies, and white or a lighter color on darker bodies.
Insert the needle in the bottom of the plushie (the tail can help hide the knot) squish it so you can bring the needle out where you want the mouth to start. I like to start at the bottom of the nose.
Put the needle back in straight down from the nose and then back out to the side at the end of where you want a mouth corner to be. I angled mined up so the cat is smiling but you don't have to. They can be grumpy versions too.
Tip: Use another large needle to lightly pull the thread loop when you tighten stitches to keep the strands untangled.
Now insert the needle into the bottom of the mouth, and then out of the body where you want the other corner to be. Try and stay as close to the surface as possible without going through. Threading the floss deep into the body and stuffing makes everything look strange.
Bring the needle back into the body at the bottom of the mouth, then squish the plushie to bring the thread back out the bottom. Tie a knot and trim any ends.
Use a lint roller to keep things clean.
Optional Scarf
If you made the scarf like me, it's easy to finish! If you cut the scarf, place the pieces right sides together and pin just the short, smooth edge. Run a stitch a quarter inch in from the edge, making sure to lock the stitches at the start and finish. Trim the threads and it’s done! Now wrap these around each little warm and cozy plushie this holiday season. They can be removable or sewn in place. Imagine all the print options available in fleece!
STEP 6: SHOW THEM OFF!
Give any of these amazing plushies as a gift, and watch them fill the recipient's heart with joy. You can even customize to make your pet's breed, or your favorite animal, or combination of animals. You can even sew little accessories like hats for these little cute kawaii-inspired plush fleece animals.
Answers to Your Questions About Making a Cute Plushie
Q: How much does it cost to make plushies?
A: Plushies aren’t expensive to make, you just need a small amount of fleece and you can even stuff it with the scraps.
Q: Is making a plushie hard?
A: If you’ve sewn (by hand or with a machine) a plushie is a pretty easy project. The Cricut makes cutting very easy and I’m excited to teach you how to make a plushie!
Q: Do you need a sewing machine to make plushies?
A: You can hand sew cute plushies, but some parts are easier with a machine, like the areas with several layers.
Q: What fabric is used for plushies?
A: I used polar fleece and minky for the main plushie parts and felt for the eyes and noses.
Q: Can 10 year olds have plushies?
A: Yes! Plushies don’t have an age limit and are irresistibly cute! If you or a friend or family member likes plushies, that’s great and totally normal! These designs are not intended for young children or others who might chew on or rip off pieces.
Q: Is it OK to have plushies?
A: It’s WONDERFUL to have plushies! They are cute, comforting friends for whenever you need them.
Q: What are plushies made of inside?
A: There are lots of ways to stuff plushies, but I used Poly-fil, polyester fiber that helps them hold their shape while still being soft and squishy. You can even use your fabric scraps!
Q: What is the difference between a plushie and a stuffed animal?
A: While there isn’t a huge difference, plushies are like a category of stuffed animals. They often have very soft fabric and are extra squishy, but so is a teddy bear!
Q: What is Merry Maker Mingle?
A: Each day in December leading to Christmas, I present you with a brand new “gift” — a project to craft, make, or do. You can make these projects on a Cricut cutting machine or by hand if you don’t have one. Most of our Merry Maker Mingle projects will come with a fun video with yours truly, a step-by-step printable photo tutorial, and a free pattern/SVG cut file. Sign up with your email address to get daily updates and prizes!
Get my free printable pattern and SVG files to create a cute plushie!
I love seeing what you make with my designs and how you use them! Please share a photo of your cute plushie in our Facebook group or tag me on social media with #jennifermaker.
Love,

Want to remember this? Save this How to Make a Plushie Tutorial to your favorite Pinterest Board!