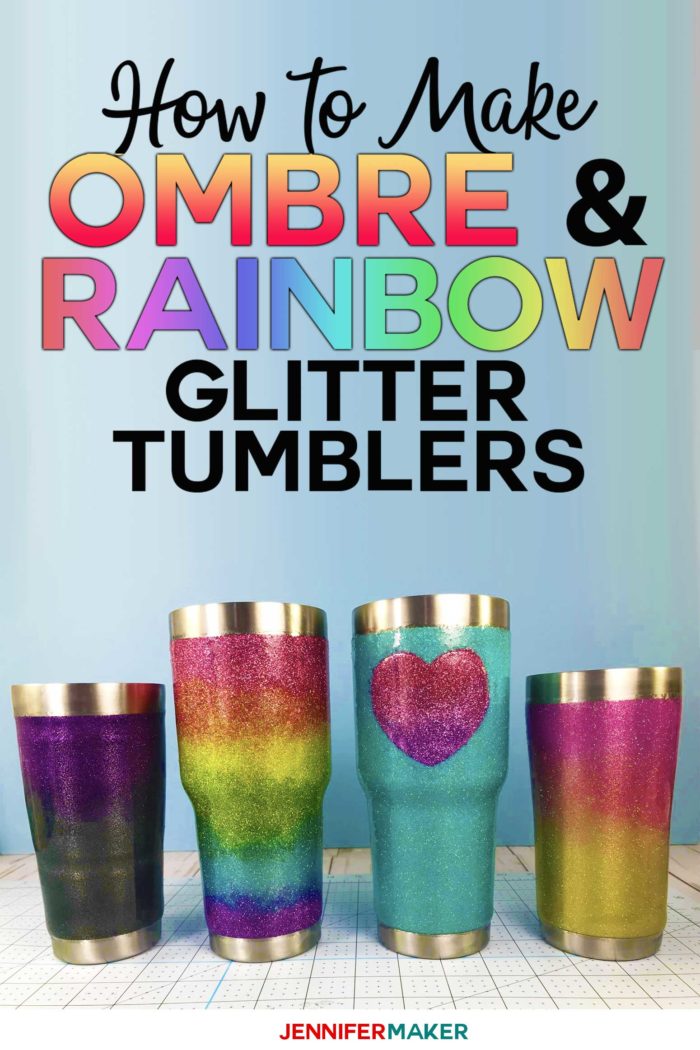
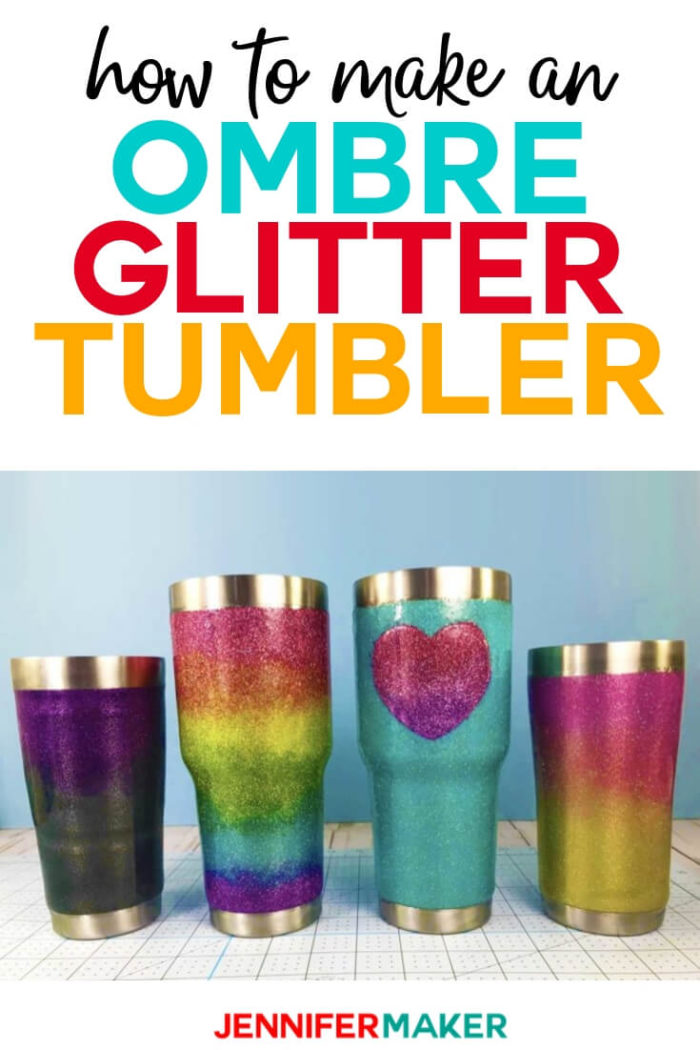
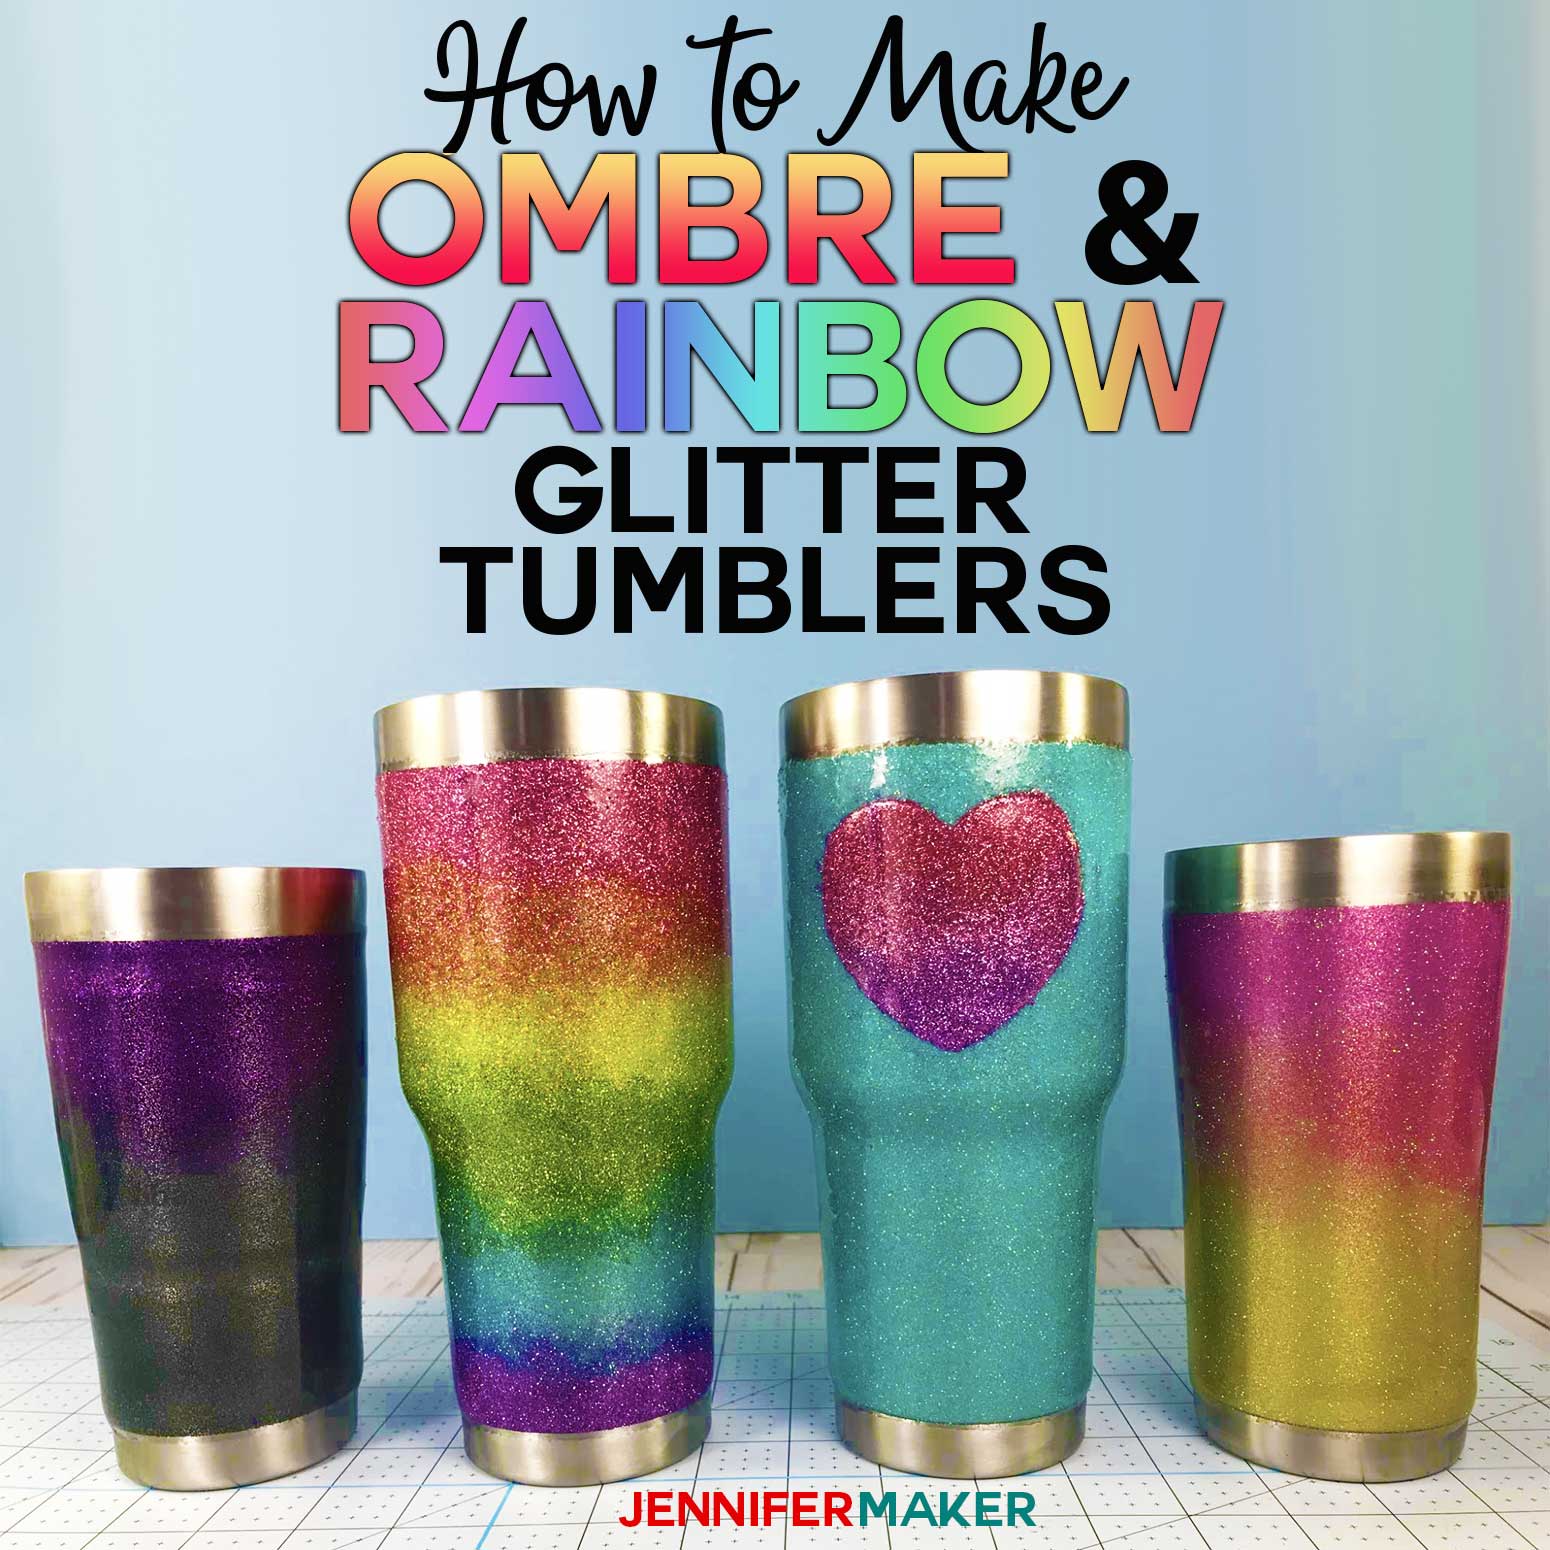
Learn two easy ways to create perfectly blended ombre or rainbow glitter tumblers!
I recently taught you how to make glitter tumblers from start to finish. Now it’s time to learn how to do some fun things with the glitter! In that last tutorial, I asked you to let me know if you’d like to learn how to make ombre glitter effects on your tumblers and the response was overwhelming! So let’s make ombre glitter tumblers, as well as rainbow glitter effects!
The good thing is that the ombre glitter effect really a lot easier than you might think to get a nice, smooth transition between your colors.
To show you how to do the ombre glitter effect, I’m going to show you two different ways you can do it. One way may work better than the other for you, depending on your experience and manual dexterity.
And in addition to a two-tone ombre effect, you can use this same technique with multiple colors, like a rainbow effect — I’ll show you how to do that, too!
The only special things you need for this, besides all of the other things you need for glitter tumblers, are some extra mixing cups and sheets of paper.
This step-by-step video tutorial shows you how to make pretty ombre glitter tumblers, as well as rainbow glitter tumblers:
So let me show you how to make ombre glitter tumblers! This post contains some affiliate links for your convenience (which means if you make a purchase after clicking a link I will earn a small commission but it won’t cost you a penny more)! Read my full disclosure policy.
Materials for Ombre Glitter Tumbler Tutorial
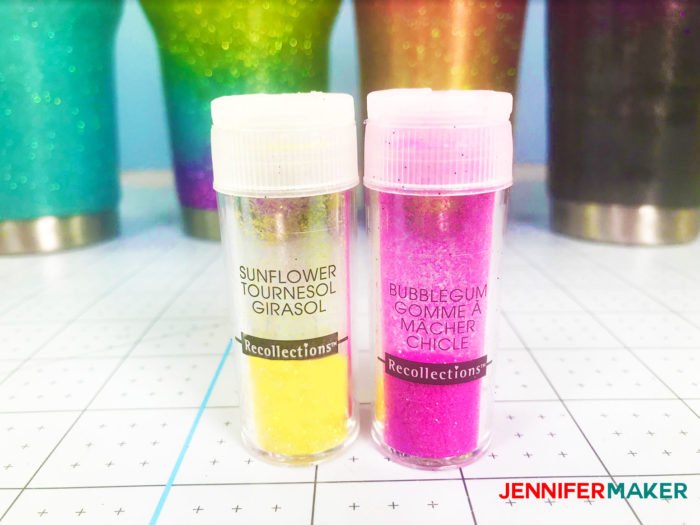
- Extra fine glitter (I used Sunflower Yellow and Bubblegum Pink)
- Loctite 100 Spray Adhesive
- Plastic cups
- Several sheets of clean paper
- Everything listed in my DIY Glitter Tumbler Tutorial
How to Create Ombre Glitter Tumblers
I create my blended ombre glitter tumbler in two different ways — pick the way that works best for you.
Both methods begin by positioning your tumbler on your hand so it is parallel to your surface with a clean sheet of paper underneath. Now sprinkle glitter all along the bottom edge, all the way around the tumbler, about 1 inch wide.
Method 1 (The Tilt Method)
Now, to do the first ombre glitter method, tilt your tumbler at a 45 degree angle with the bottom of the tumbler tipped up, just as I’m doing here.
Begin sprinkling the same color of glitter again in the same spot you already glittered and you’ll notice that the angle of the tumbler allows the glitter to run down the sides. Continue doing this all around the tumbler until you have your glitter gradually tapering off as it gets to the middle of the tumbler.
Reposition your tumbler so it is again parallel to your surface and shake off any excess glitter. Put the glitter on the paper into a cup and save It for later.
Get your second color of glitter and create another ring of glitter along the top edge of your tumbler, about 1” thick.
Tilt your tumbler so it as a 45 degree angle, this time with the bottom of the tumbler tipped down.
Sprinkle your glitter in the same spot you already glittered. This time the glitter will run down the tumbler toward your first color. Do this all around your tumbler until your glitter is tapering down to about halfway. The middle section of your tumbler should have only a little glitter on it, but be mostly bare.
Reposition your tumbler so it is parallel to your surface and shake off the excess glitter. Put the glitter into the same cup you put your first color of glitter into and mix them well.
With your tumbler at parallel to your surface, pour the cup of mixed glitter around the middle of your tumbler, filling in all bare spots. By doing this, we can create a nearly perfect blend between the two colors of glitter on our tumbler.
Method 2 (The Tap Method)
Love,

Want to remember this? Save the Ombre Glitter Tumbler Tutorial to Your Favorite DIY Pinterest Board!