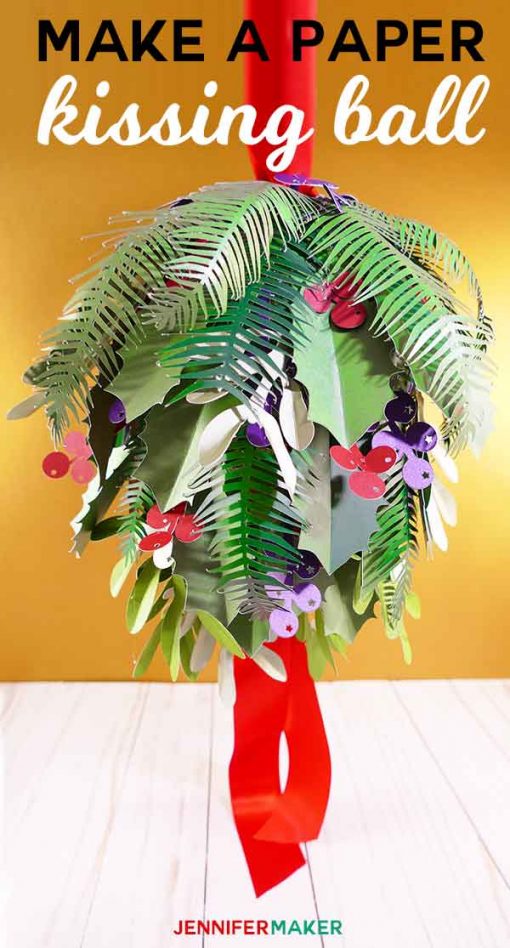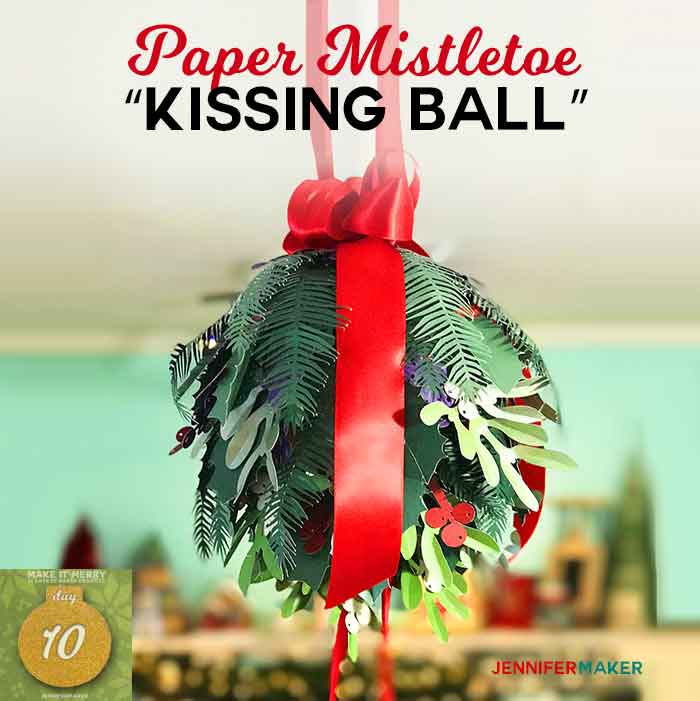
 Do you know why mistletoe is associated with kissing? Historians trace it back to an old Norse legend involving a mistletoe arrow, blessed tears that became white berries, and a life restored. Baldur, the man who came back to life thanks to the mistletoe, promised to kiss anyone who passed beneath it. I often buy fresh mistletoe and hang it in our entryway, but it only lasts one season. I have a better idea! For Day 10 of my MAKE IT MERRY: 25 Days of Maker Projects Christmas, I’m going to share my winter greenery and berry patterns and make a DIY holiday kissing ball with paper mistletoe, holly, and juniper!
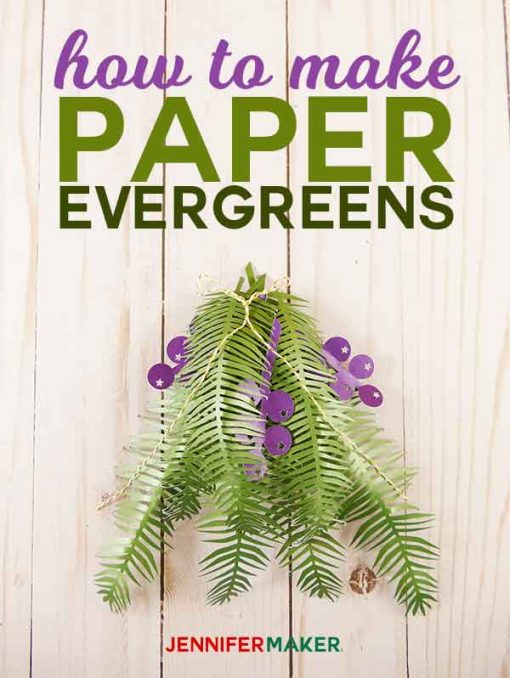
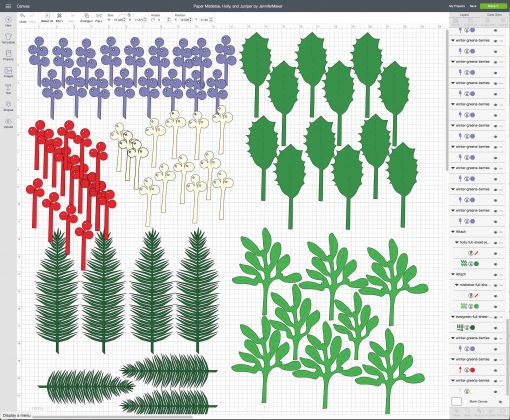
To create these winter greens, I traced real mistletoe, holly, and juniper branches along with their berries. You can use these for so many things, including wreaths, table centerpieces, cards, gift embellishments, and so on.
Here are the juniper branches and their berries all by themselves—aren’t they sweet?

Let me show you how to make this DIY Holiday Kissing Ball. This post contains some affiliate links for your convenience (which means if you make a purchase after clicking a link I will earn a small commission but it won’t cost you a penny more)! Read my full disclosure policy.
Materials for the Holiday Kissing Ball
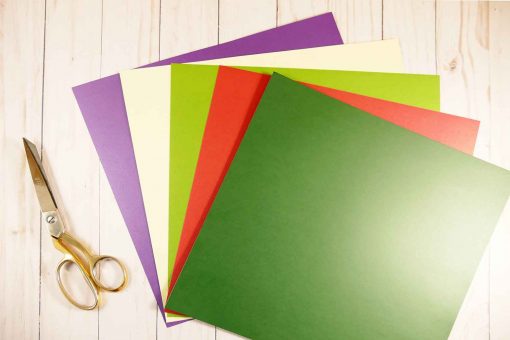
- 12 sheets of 12″ x 12″ metallic cardstock (I used this exact paper) — you’ll want one sheet of red for the holly berries, one sheet of purple for the juniper berries, one sheet of off-white for the mistletoe berries, plus nine sheets of various greens for the holly, juniper, and juniper (3 sheets each)
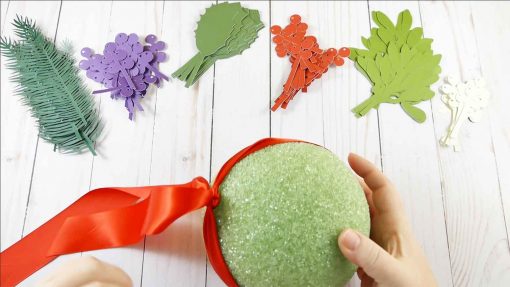
- 1 4″-6″ styrofoam ball
- 1.5-inch-wide red ribbon, about two yards
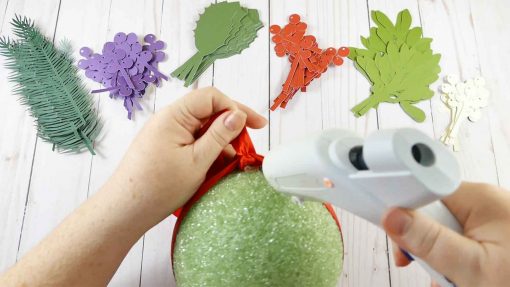
- Glue gun and hot glue
- A way to cut the leather (I used a Cricut )
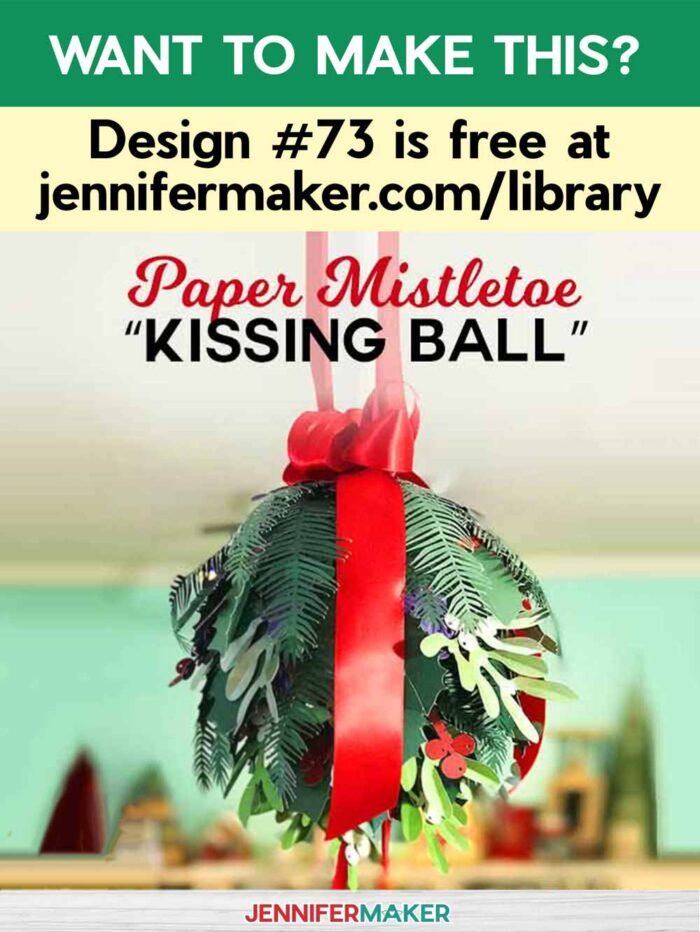
- Design #73 – My free SVG cut file (available in my free resource library—get the password at the bottom of this post)
How to Make Your DIY Holiday Kissing Ball
First, download Design #73 which are my free SVG cut files from my free resource library and upload the file to your design software. If you’re not sure how to upload an SVG cut file to Cricut Design Space, watch this helpful video training series I made.
If you use Cricut Design Space to cut out your holly, mistletoe, and juniper branches, please be aware that you must change the score line layers to Score, and then attach those to their respective branches. If you do not do this, they will cut through your branches and you don’t want that. You can also choose to hide or delete those score layers.
Tip: Included in the file are full sheets of the mistletoe, holly, and juniper so you can print more to one sheet. But you’ll want to make additional copies of the berries—however you might think you’ll use. I used about 16 of each berry.
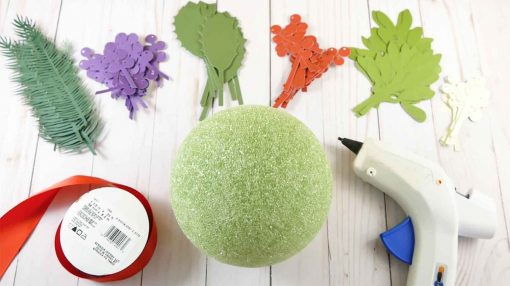
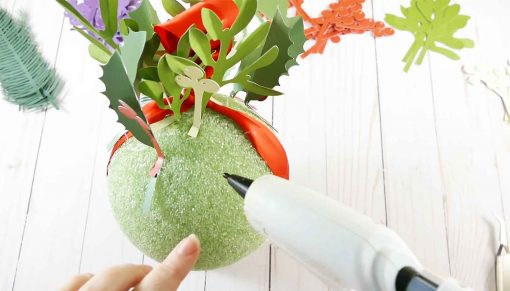
Cut off an 18″ piece of ribbon, glue it in the middle (underside of ribbon), and attach it to your styrofoam ball.

Now wrap it around the ball to the bottom, tie a knot in it, and glue the knot to the styrofoam base.
Cut a 12″ piece of ribbon, slide it under the ribbon at the top, tie the two ends together, then rotate it so the knot is under the ribbon. Glue the knot in place under the ribbon.
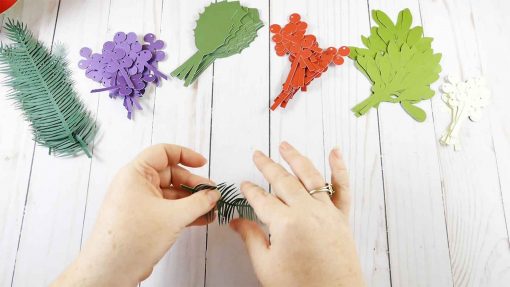
Set the ball aside and begin shaping your leaves and branches. Each leaf of the mistletoe and holly can be folded in half (use the score lines if you put them in). The evergreen branches get ruffled up and bent inward a bit.
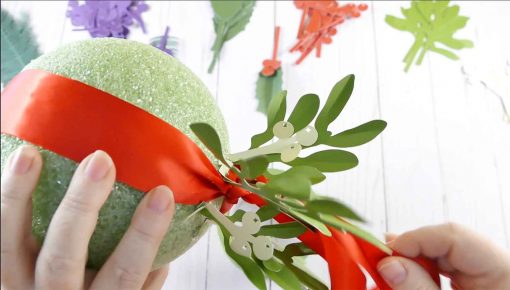
Now begin gluing your mistletoe to the very bottom of your ball. The stems should point toward the top of the ball while the branch hangs down. It might be easier to fold the tips of the mistletoe a bit before gluing it down.
Tip: Get a tuna can or roll of masking tape to rest your ball in while you work—it’ll be much easier if you can keep it steady as you glue.
Continue gluing half of your mistletoe at the base of your ball, putting it on at varying angles so it looks like a sprig of mistletoe is hanging from the bottom.
Now simply continue gluing various branches and berries onto your ball, work your way from the bottom of ball to the top of the ball. Remember, you want to orient all branches so they are “hanging down” toward the bottom of the ball.
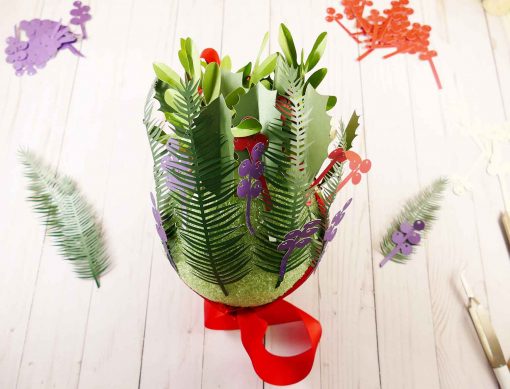
Fill in areas that are sparse with any leftover leaves and berries. Finish with some of the evergreens and juniper berries.
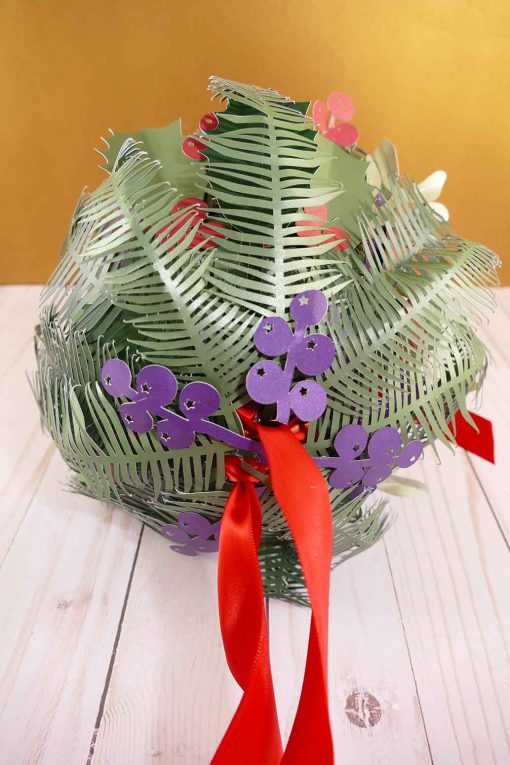
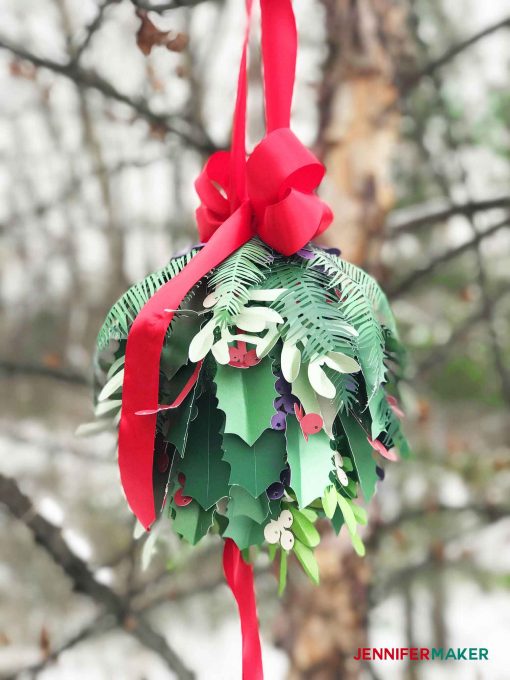
Glue on a big red bow to the top of your kissing ball.
Get my free template and cut files for the DIY Holiday Kissing Ball
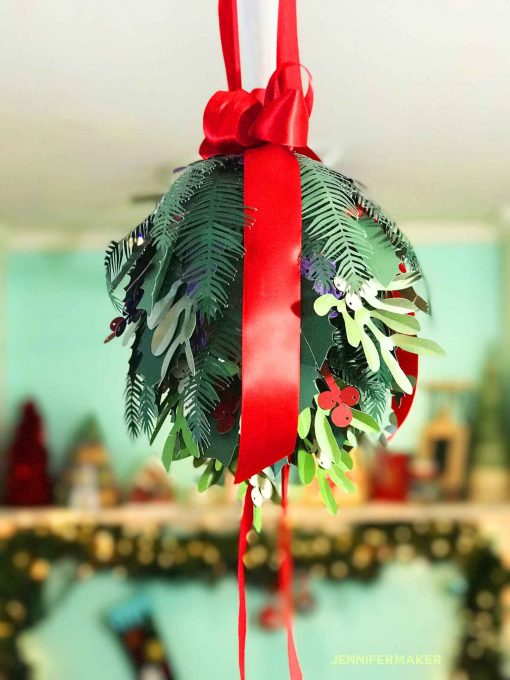
I’m hanging up this gorgeous holiday kissing ball in my entryway! Where will you put yours? Please share a photo with me at [email protected] or tag me on social media with #jennifermaker.
See more holiday projects ing the MAKE IT MERRY: 25 Days of Maker Projects Christmas!
Love,

Want to remember this? Save the DIY Holiday Kissing Ball to your favorite Pinterest board!