
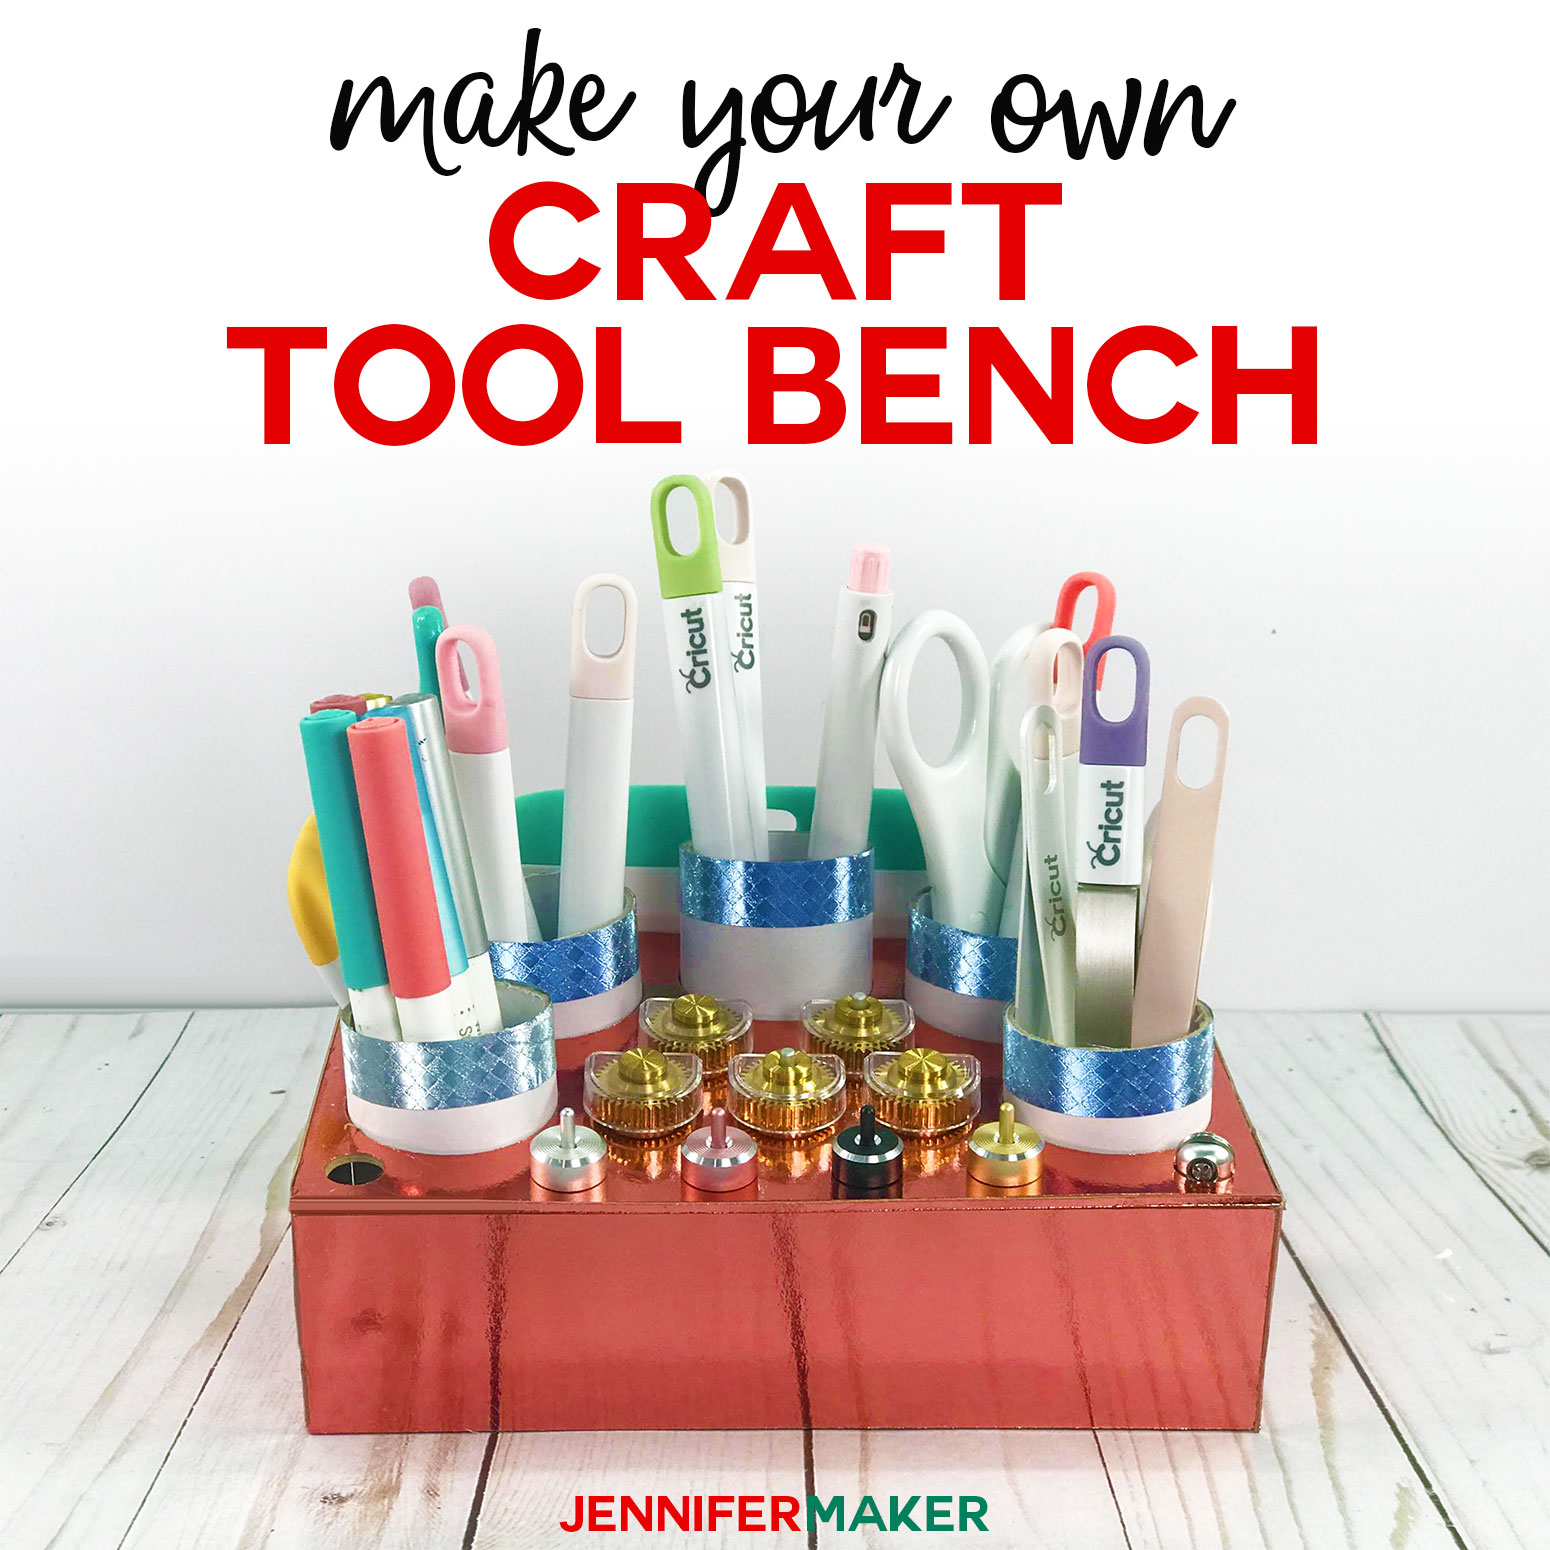
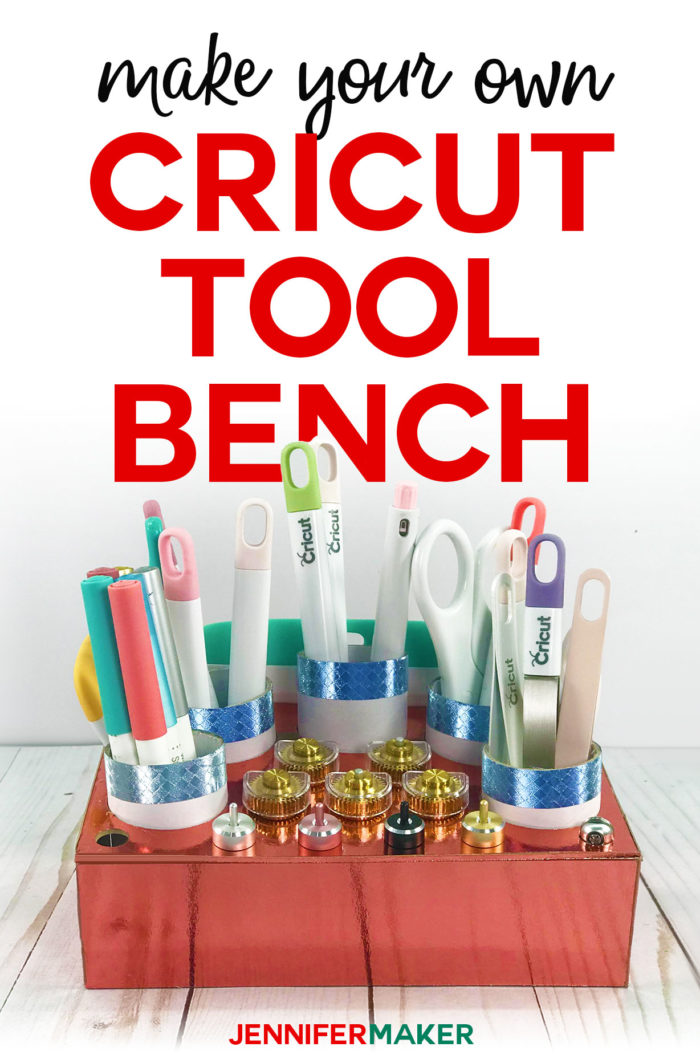
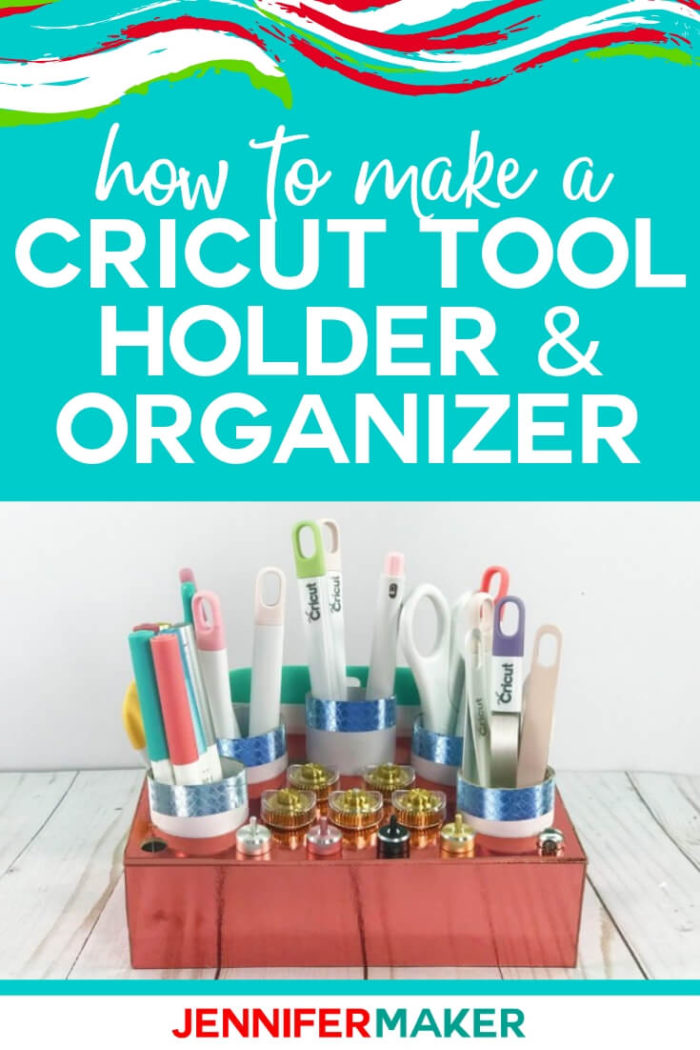
Learn how to make this sturdy craft tool bench to hold all of your Cricut tools, and then some! This Cricut tool holder can be made by those who have the Cricut Maker or the Cricut Explore cutting machine.
When I first began sharing my craft projects with you just over two years ago, I made this very sweet and simple craft organizer. It is nothing more than a cute little basket with some paper towel tubes cut to various lengths. It literally took me five minutes, and it’s been SO useful! Well, these days I have more craft tools, especially tools for my cutting machine. I have scoring tools, scrapers, weeding tools, Cricut pens, so much more! And with the Cricut Maker, I now have many different blade and tool housings, as well. I was using so many of them that they weren’t even fitting in the built-in storage compartment on my Cricut. That’s when I knew it was time to make a NEW craft tool organizer: a Cricut tool holder!
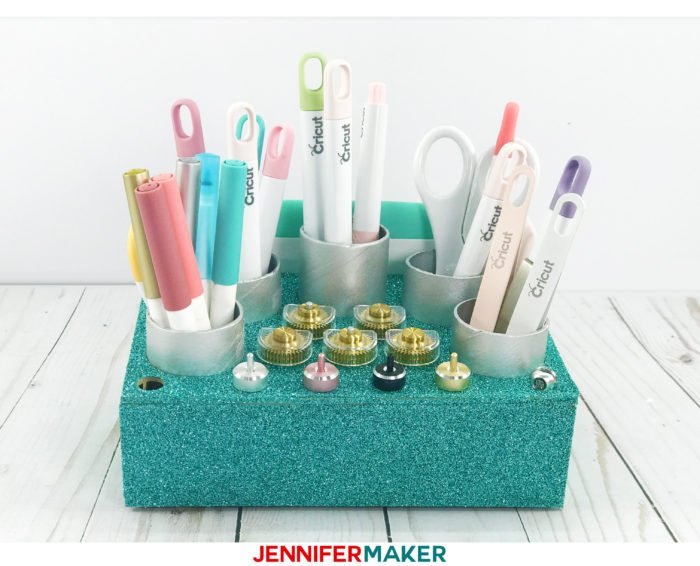
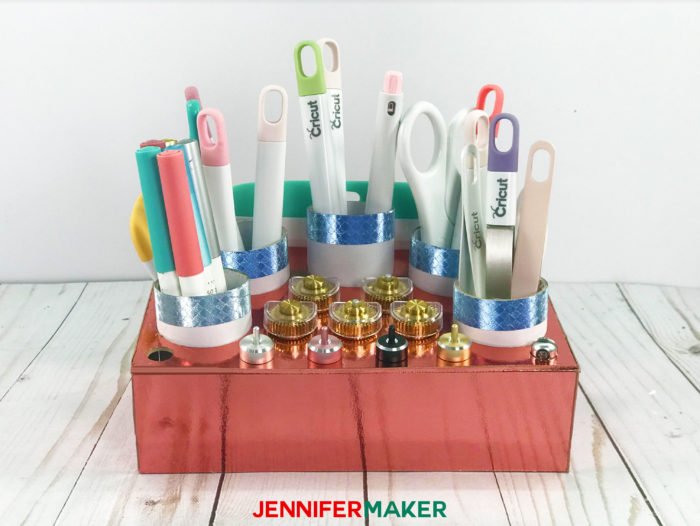
My Cricut Tool Bench has lots of room for all my Cricut tools and blades and plenty of room to grow! There are spots in the front for all of the blade and tool housings, with two spots in the back a wee bit bigger to fit the QuickSwap tools. There are even two smaller spots on the sides for the scoring and engraving heads, as you don’t want to lose those.
Along the sides of the Cricut tool holder I’ve put in slots for my Cricut scrapers and paper edge distressers. And nice strong tubes in the middle hold all of my long tools, like my weeding tool, quilling tool, spatula, TrueControl knife, scissors, tweezers, Cricut makers, and fabric marking pens.
And these tubes? They are nothing more than the leftover tubes you get when you use up a roll of Cricut vinyl! That’s right — finally a great use for those sturdy tubes. And if you haven’t used any vinyl yet, a paper towel roll tube will fit in there, too.
In fact, it’s these tubes that are the secret to the stability of this Cricut Tool Bench! You see, I wanted to make a tool organizer that could be made by those who had either a Cricut Maker OR a Cricut Explore, as so many of the other ones I’ve seen are just for those with a Maker.
So by using these nice strong tubes to help support our Cricut tool holder, we can make this on either cutting machine. The base material you use will differ a bit. On the Maker, we’ll use heavy chipboard 2mm thick. And on the Explore, we’ll use Kraft board — three layers of it. You might be able to use a thinner chipboard on your Explore as well, but it can get a little tricky and may require the deep-cut blade. But for the Kraft board, the deep-cut blade is NOT needed — just the fine-point blade that comes with your machine.
In addition to your base material, you’ll need some hot glue to assemble it. And decorating is up to you! Leave it plain and simple, or add an outer layer for a little pizzazz. This pink one was made on my Explore and it has an outer layer of pink foil Kraft board.
I made the blue one on my Maker and added a layer of iron-on glitter vinyl to dress it up! I’ll show you how I did both!
Key concepts taught in the video tutorial include what materials are best, how to upload SVG files, how to ungroup and attach, how to mirror iron-on vinyl, how to cut Kraft board and chipboard, how to put iron-on vinyl onto chipboard, and how to cover edges.
See exactly how to make my Cricut Tool Bench in this step-by-step video below:
Time to Make: 1 hour
Skill Level: Intermediate
Finished Size: 7.5” x 5.25” x 3”
Ok, let’s make a Cricut tool holder! This post contains some affiliate links for your convenience (which means if you make a purchase after clicking a link I will earn a small commission but it won’t cost you a penny more)! Read my full disclosure policy.
Materials for Cricut Tool Bench (Cricut Tool Holder)
- One sheet of 11″ x 11″ 2mm heavy chipboard
- Cardboard tubes (I re-used the tubes that come inside my rolls of Cricut vinyl — if you don’t have these, paper towel tubes work, too)
- Knife blade and housing (if you’re cutting heavy chipboard on the Maker)
- StrongGrip Mat
- Painter’s tape or masking tape
- Hot glue gun and sticks
- Tacky glue
- Spray adhesive glue (permanent)
- (Optional) Iron-on glitter vinyl (I used this vinyl)
- (Optional) Foil Kraft Board
- (Optional) Paint or washi tape to dress up your tubes
- (Optional) EasyPress or Mini-Iron to adhere iron-on vinyl to your pieces
- (Optional) Parchment paper for pressing the iron-on vinyl
- A way to cut your vinyl (I used the amazing Cricut)
- Design #136 – My free SVG/DXF/PDF cut files/patterns (available in my free resource library—get the password at the bottom of this post)

How to Make a Cricut Tool Bench
Step 1: Get my free Cricut Tool Bench pattern
Get the free tool bench design (Design #136) from my free resource library (get the password to the library in the form at the bottom of this post). Note that this pattern is available in SVG, DXF, and PDF formats.
Watch our video to see this step in detail.
Step 2: Cut out your materials
You can cut this craft tool bench out by hand with the PDF file or with a cutting machine like a Cricut. If you’re going to cut this tool bench on your cutting machine, upload the file to your design software.
Tip: If you’re not sure how to download and upload an SVG cut file to Cricut Design Space, watch this helpful video training series I made. If you’re on an iPhone or iPad, here’s how to download and upload SVG files to the Cricut Design Space app.
Attention Cricut Design Space Users: If you upload the SVG file and it appears too small, use the “stacked” version of the SVG to retain the proper sizing. Here’s what that will look like when you first upload it to Design Space:
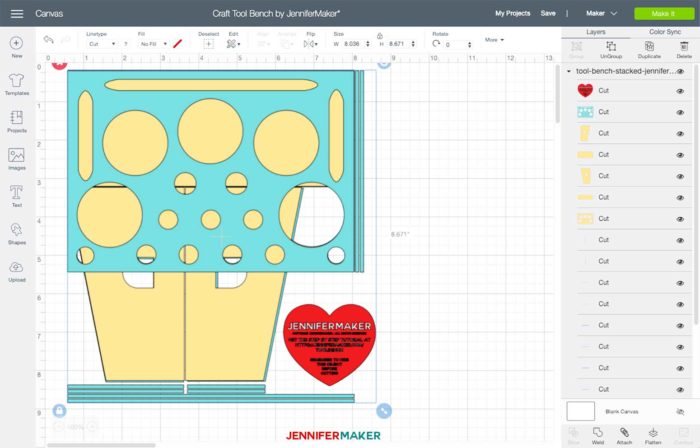
Here are the sizes of the major elements in this file:
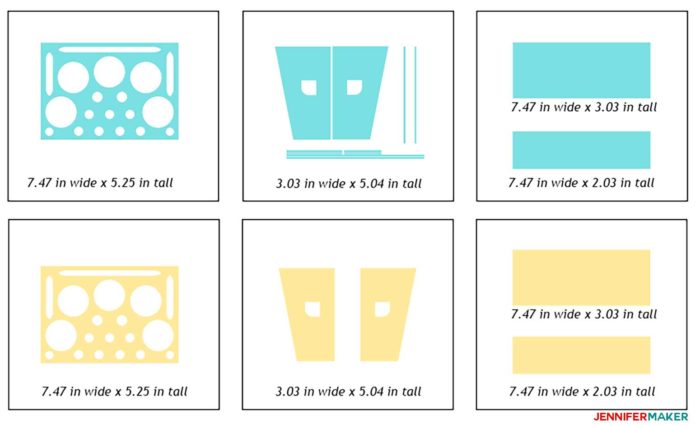
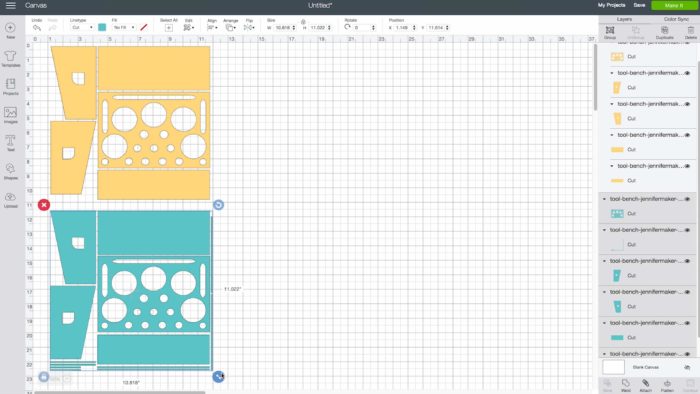
Tip: To get the pattern to fit efficiently on your materials and mats, ungroup everything, then attach all of the yellow layers together and then all of the blue layers together. The yellow layer is your base material (so your Heavy Chipboard or your plain Kraft board) and the blue layer is your decorative covering (so your iron-on glitter vinyl or your foil Kraft board).
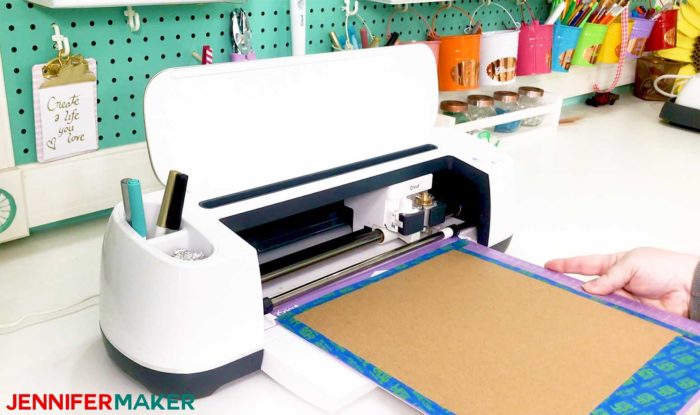
If you cut heavy chipboard on your Maker, be sure to tape your chipboard to your mat, put in your knife blade, and move your star wheels (those white wheels on your Maker) all the way over to the right side. It took about 45 minutes (20 passes) to cut my heavy chipboard for this Cricut Tool Bench pattern. I recommend you keep an eye on your Maker as it cuts, as it may be done in as little as 10 passes. To check, just pause your machine, lift up a corner, and see if it’s cut all the way through yet or not.
When you cut iron-on vinyl, remember to MIRROR your layer in Design Space and then put the glitter itself FACE DOWN (shiny side down) on your cutting mat.
Watch our video to see this step in detail.
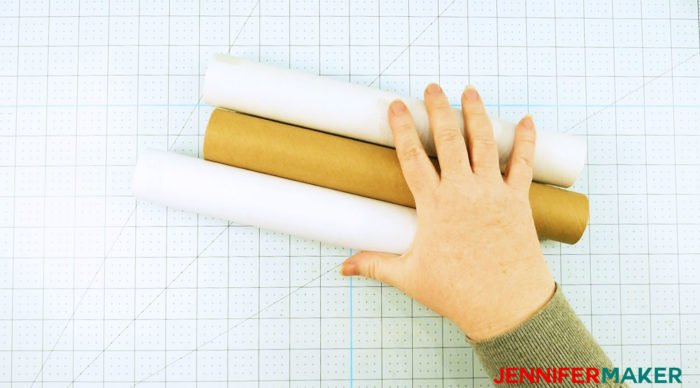
Step 3: Cut your tubes to the right lengths
Use a craft knife to cut sturdy cardboard tubes to these lengths:
- 1 tube at 4″ long
- 2 tubes at 3″ long
- 2 tubes at 3.5″ long
Watch our video to see this step in detail.
Step 4a: Assemble your Cricut Tool Holder (Kraft Board Version)
The Kraft board version of my Cricut Tool Bench cut on your Explore (or Maker!) is three layers of Kraft board. One of those layers (the top layer) can be the pretty foil Kraft board like I used for my pink one. Or you can use iron-on glitter vinyl over your three layers of regular Kraft board as I did with my blue one. Your choice!
Watch our video to see this step in detail.
Step 4b: Assemble your Cricut Tool Holder (Heavy Chipboard Version)
The Heavy Chipboard board version of my Cricut Tool Bench cut on the Maker is just one layer of heavy chipboard. One of those layers (the top layer) can be the pretty foil Kraft board like I used for my pink one. Or you can use iron-on glitter vinyl over your three layers of regular Kraft board as I did with my blue one. Your choice!
Watch our video to see this step in detail.
Get my free SVG cut files for the Cricut Tool Bench
Download my free Cricut Tool Bench pattern by subscribing (free) below to get the password to my resource library.
I’m hoping to see lots of people make these tool benches AND personalize the panel on the front! Put your name, some cute pictures, or even just “Cricut Tool Bench!” I’d love to see YOUR Cricut Tool Organizer! Please share a photo in our Facebook group or tag me on social media with #jennifermaker.
Love,

Want to remember this? Save the Cricut Tool Holder Step-by-Step Tutorial to Your Favorite DIY Pinterest Board!


As usual Jennifer has out done herself. Thanks for sharing your talents.
Would this work with 65lb cardstock in three layers? instead of kraft board? I have an Air 2
No, I don’t think so. You can cut Kraft board with an Explore.
I did it! I made a cool tool bench on my Maker. If I can figure out how, I’ll post a picture!
I forgot the password and don’t want to re sign up then will get duplicate emails the last emails I have from you are youtube and your password not in that email that I can find. can I get the password for your files?
This is super cool thank you!
Love this. Especially with the pink foil kraftboard. Thanks for your help in keeping me organized.
Thank you so much!
will this work with cardboard?
I have not tried this with cardboard. You can definitely test it out and see if it works. You’ll just want to be sure to use the appropriate settings and blade for your material.
thank a lot for this cute design – I’ve not yet my machine but I do this after
My daughter saw me cutting this out she is 3 btw and she says is it a cradle for my baby!! so excited so it got me thinking…can you help me create a cradle for my baby girl!!??
Love hearing this, Jennifer! I don’t currently have a crib, but you are welcome to suggest it here, https://jennifermaker.com/projectrequests/
Help, I’m new with Cricut just got maker last month and this my first attempt with chipboard I’ve made four attempts one with 1.5 mm and three with 2 mm cut is not clean and machine stops in middle longest it’s cut was 50 percent. I used heavy grip mat and taped sides. Used knife blade for first time on this project. Any ideas, is it the maker, knife blade, me? Didn’t have any problem with card stock or acetate and fine point blade. Is it a question of machine overheating? I’m at a loss.
Hi Noradeen! The best course of action when working with new material is to do a test cut by cutting out a 1-inch diameter circle on various settings till you get the setting that works for your machine. It could be that your blade is too dirty to continue, you might try taking it out when it pauses and carefully cleaning it, and then hit the Cricut button on your machine to see if that will resume the cut process.
I watched the video but after downloading the files, there are several options: Other files (has an .svg); SVGs stacked; SVGs Separated. Did not see all these option in your video so unsure which one I should bring into Cricut Design Space. Thanks.
You can bring either one, but the separated one will help you see all the layers and people usually prefer that one to work with when they are trying a project for the first time!